Results 1 to 20 of 84
-
07-30-2015 #1
 Registered User
- Join Date
- Mar 2010
- Location
- Brisbane, Australia
- Posts
- 138

Lexus IS620 - LS3, T56 - from Australia
This is a bit of a copy and paste of some posts Ive made about this on another forum. I am a serial project non-completer. Hence I had sold off everything from my last project and vowed to just buy a car that I could just drive and enjoy. The irony of the first post will quickly become apparent .
Apologies for the profanity and the use of local names and locations
An IS200 is just like an IS300 only with a **** 2L 6cyl engine
__________________________________________________ ______________________________
Getting out of the project game, I needed a nice set of wheels. I am a car guy afterall. Was thinking of trying to find an nice stock IS200 then add wheels/tyres, coilovers and exhaust and enjoy. I knew it'd be slow - I test drove one when they first came out.
Starting scouring the ads to find something worth looking at. Then this popped up on Facebook in Gympie. Messaged back and forth. Guy was coming to Brisbane yesterday and he bought it with him. Shifty and I went and had a look. I called him up a bit later on and met up again and struck a deal for $9k. Picked it up from Gympie and drove it back this evening.
Has all the bits I was looking for and some more besides. Pics tell the story.

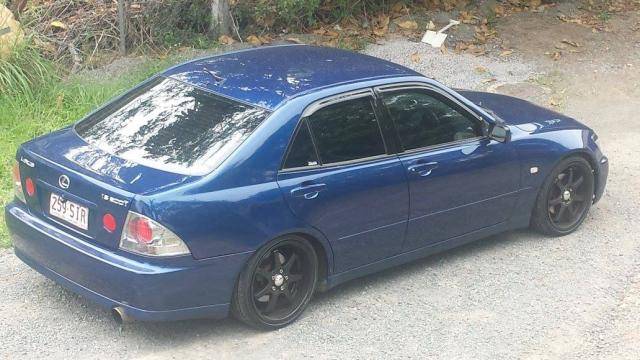


[IMG]http://i302.photobucket.com/albums/nn98/bahaimus/1602008_10203443934958367_1446005906_o.jpg[/IMG]
Other people have spent all the money on it.
Started out as a base spec IS200. Now it has:
- Freshened up 1GFE engine
- T28 on a modded 1JZ tubular manifold with front mount
- Greddy E-manage Ulitmate piggyback on with standard ECU
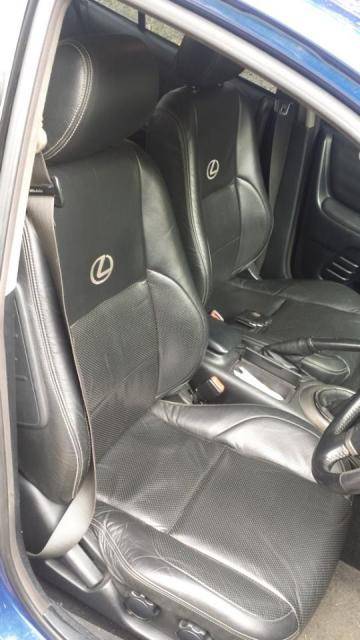
- Seats retrimmed in leather
- IS300 LSD diff (larger than IS200)
- Single mass flywheel
- Tein coilovers
- 18" Lenso something or others
- a medium loud exhaust
- Some stereo ****
Makes 170rwhp on 6psi. So power is adequate and more importantly, pretty safe for the stock engine. A stock one would have been challenging after driving this.
I drove 2 hours back from Gympie (with a couple of show stops on the way), showed the wife, then got back in and went out driving again.
Needs some bits tidying up. Nice discreet done in a weekend jobs that cost **** all money.
I have rediscovered the joy of having a nice car to just jump in and drive.
I. JUST. ****ING. LOVE. THIS. CAR.
:D
Clayton
-
07-30-2015 #2
Registered User
- Join Date
- Mar 2010
- Location
- Brisbane, Australia
- Posts
- 138
A few months passed and then all of a sudden………….
Whoops, I slipped and turned this into a proper upgrade conversion.

I wasn't going to post about this till it was done, but I pretty much have everything ordered to finish it over Xmas so low likelihood of project creep due to undue influences from you ****s.
And I was too ****ing excited!
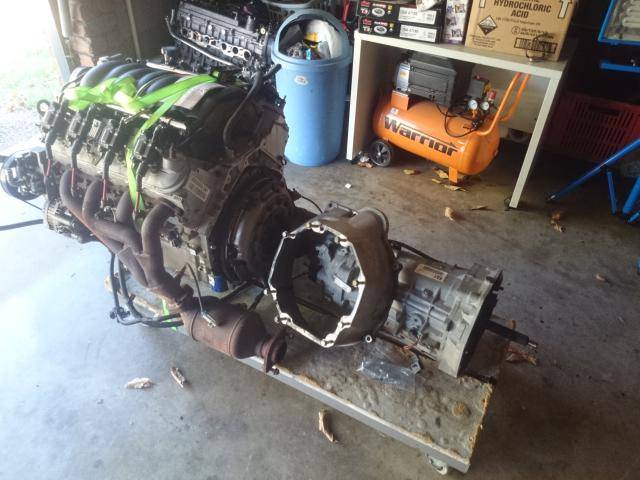
Turns out adapting a T56 to a 1UZ was just a pain in the arse so I bought a T56 with an LS3 attached instead.
/scope creepClayton
07-30-2015 #3
Registered User
- Join Date
- Mar 2010
- Location
- Brisbane, Australia
- Posts
- 138
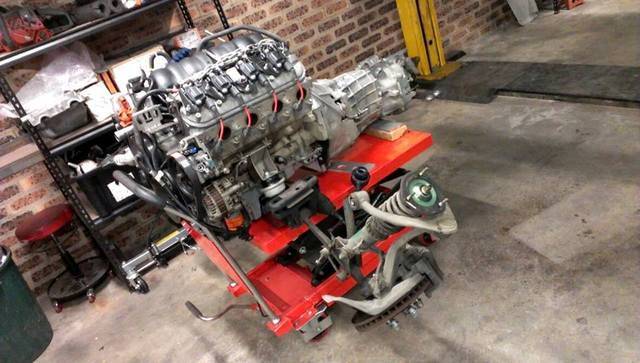
Ok, so where is this actually at?
I bought an LS3, TR6060 (actually it is a T56, I checked the build info with Holden, missed out on a TR6060 by two months - meh, whatever), ECU and loom package from a 2008 VE Clubsport R8 with 46,000kms from Dean at Salvage Auto Sales at Nerang. I was able to view the shell the engine came from, and the place seemed very legit, so no reason to doubt authenticity. great guy, would highly recommend.
I had to buy a front sump from a VT-VZ LS1 as the VE engine is rear sump. That is ordered and on it's way. Once I get it, it will still have to be notched for further clearance of the crossmember and I have RZ lined up for that job.
I have purchased an off the shelf LS into IS engine and gearbox mounting kit from Dedicated Motorsports in the US which is already in my garage.
The loom and ECU have been posted off this week to Dale's mate Justin at Ultimate Conversion Wiring in Sydney to be setup as a standalone harness. He'll send it back to me with a handful of wires to connect up to the car and the security removed from the ECU. Dale will also be furnishing the ECU with a mafless tune to liberate a few more ponies above and beyond the 317kw rating of the engine in factory form.
Fuel system will consist of an aftermarket billet dual fuel pump hanger to fit in the factory spot. This allows easy mounting of a single Walbro GSS342 255lph hour pump and is already plumbed for a return line so I can run a larger external regulator. I will be using a combined filter/regulator assembly from a 99-04 Corvette. The hanger allows me to upgrade to a dual pump setup down the track if I want to.
Tailshaft and shifter are still to be worked out once I get the engine trial mounted.
I'm hoping the HSV headers on the engine will fit well enough to be able to be used, maybe with a bit of cutting and shutting.
Larger clutch master kit has arrived and an adapter to suit has been ordered as well.
These cars a well known for axle tramp issues. So I've purchased a set of urethane diff mount bushes. This'll probably be the only urethane in the car, I'm getting old now. While speaking of diffs, when I bought this car I was told it had an IS300 diff already which is a bit larger and the same as that used in later model Chasers, so plenty strong enough. The car is too low to get under and check and it hadn't been on my mind until recently. On the weekend I finally jacked it up and checked. The IS300/Chaser diff has 6 bolt output flange and the IS200 diff is four bolt. To my dismay I could only count four. So a diff change needs to be budgeted for as well.
With the extra go, it probably needs to stop. So I bought a pair of Mk4 4 pot Supra front calipers which arrived yesterday. These will be installed with new braided lines and new rotors. Rear brakes will remain factory with maybe a set of new rotors.
And to make it turn I have a set of BC coilovers which a great group of PF and no PF ****s bought me for my 40th mid this year. These are equipped with rubber top mounts rather than pillowballs. IS runs a double wishbone suspension so no need for pillowballs and strut top camber adjustment.
At this stage I am planning to remove the IS engine on the last weekend in November. My goal is to have it all out and hopefully have the LS3 sitting in the bay by that Sunday afternoon so i can start looking at the shifter and tailshaft stuff before xmas.
I want to be able to have the car booked in to have the exhaust done as soon as the exhaust shop opens after new year. I'm planning to have a chat to Scott at Cleveland Exhaust to see if he is keen.
Ultimate goal is to have it back on the road by the end of school holidays at the end of January. May not be fully sorted, but should be properly driveable.
I'm certain I've got the recipe right here and have all the ingredients. This is a known conversion so I'm not blazing any new trails. And I've got some known OCD project finishers in my corner and lots of offers of help.
More than that, I need desperately need a car project win. A string of failures has been very demoralising. I've been chasing this quick car dream since I bought my first car. I can't fail again and with this combo and the help I have, I don't think I can
And breathe.............Clayton
07-30-2015 #4
Registered User
- Join Date
- Mar 2010
- Location
- Brisbane, Australia
- Posts
- 138
Just keeping things moving here with some small jobs.
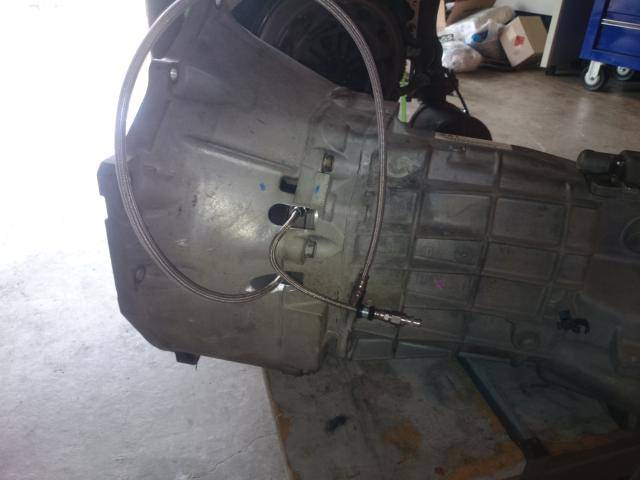
Wanted to fit a remote bleeder to the clutch slave. Once it is in the tunnel, access to the factory bleeder would be pretty hard. Thought I might as well replace the slave at the same time - so many stories of guys butting **** back together and having the slave leaking! So i split the gearbox and engine yesterday. New alloy concentric slave with billet piston is a different height though, so a spacer is required before reassembly.
I spent a bit of time stripping the brand new sump assembly apart so I could get it ready to be cut and shut.
IS200s have a common failure in the bonnet prop mechanism. I ordered a nice retrofit gas strut arrangement from FIGS Engineering in the US. Much nicer now.
Finally prepared a bit of badge engineering to suit once the conversion is completed.
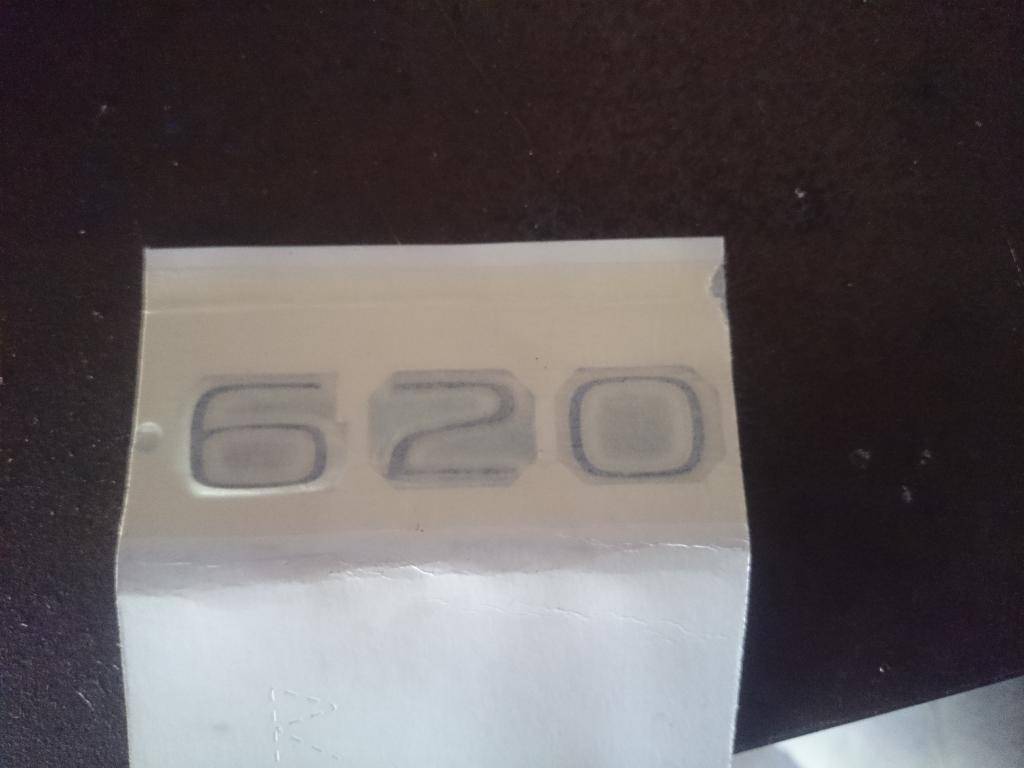
Finding a Lexus badge with a "6" in it is pretty hard, but I found one cheap here in Australia from a Lexus dealer on eBay for an LS600HL. But the numbers in the hybrid model badges are chrome with a blue stripe along the middle. So in order to get a matching "2" I had to buy a badge for a CT200H, again, fortunately found from Toyota dealer on eBay! It's the small touches that count LOL.Clayton
07-30-2015 #5
Registered User
- Join Date
- Mar 2010
- Location
- Brisbane, Australia
- Posts
- 138
Another little important bit arrived today. In order for the A/C to work, the factory IS200 ECU has to remain in place and needs to see a 36-2 signal so it thinks the engine is running. LS3 has a 58 tooth wheel so tapping into that wouldn't work.
Ray Hall sells this little signal generator that outputs a 2200rpm 36-2 signal to the ECU making for happy days. Ray was one of the very early guys to put a 2JZGTE into an IS200 and had the electronics side of it well sussed. He still has the car.

The other option might have been to adapt a trigger wheel to a pulley on the engine with another sensor but for $100 I think this solution will do nicely.Clayton
07-30-2015 #6
Registered User
- Join Date
- Mar 2010
- Location
- Brisbane, Australia
- Posts
- 138
This nifty little thing arrived today. It is a combined filter and pressure regulator that was OEM on 99-04 Corvette. Perfect setup for an LS conversion. Mounted at the back of the car, just a short return line and a few Speedflow adapters.

Now if only my pump hanger would be made and shipped out the fuel system stuff would be all ready to go.Clayton
07-30-2015 #7
Registered User
- Join Date
- Mar 2010
- Location
- Brisbane, Australia
- Posts
- 138
So RZ just sent me some pictures of having waved his magic TIG wand over my sump for a bit of extra clearance.

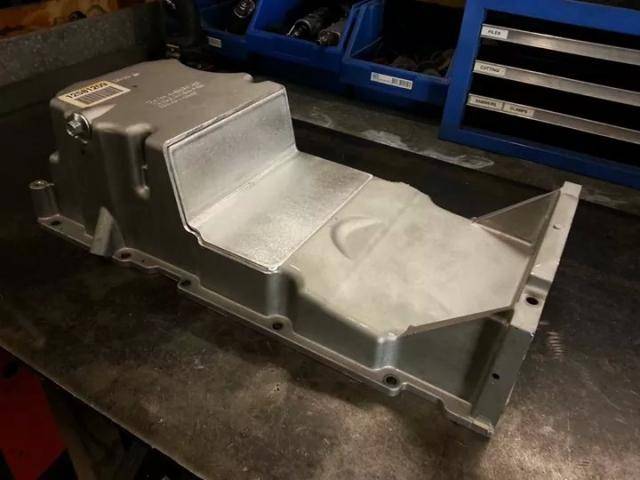


Looks awesome, thanks Pete!Clayton
07-30-2015 #8
Registered User
- Join Date
- Mar 2010
- Location
- Brisbane, Australia
- Posts
- 138
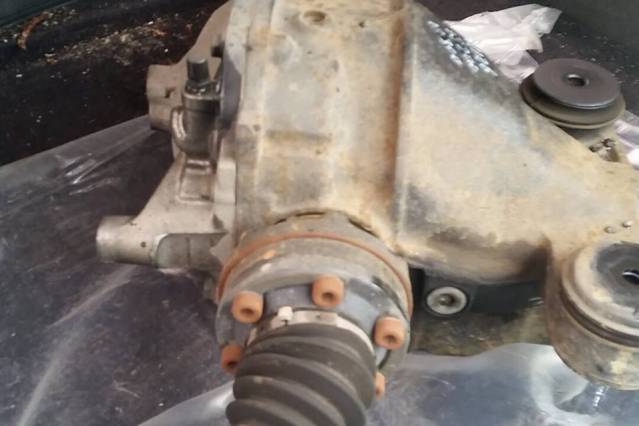
And for the sake of completeness, here is the IS300 diff that I drove a 1600km round trip to collect. Solo road trip was awesome.

Six bolt output flange of the larger diff. These bolts are proving to be a bit of a **** to loosen so the thing is travelling around in the back of the Passat as above
And the build plate from the donor car. The B04B axle indicates 3.9:1 ratio and LSD. Standard for all Aus delivered IS300s from what I can tell.
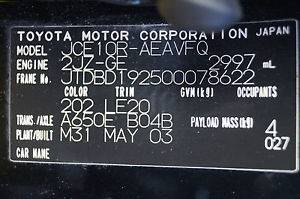
I've got some new urethane bushes to install with this. Apparently they tramp like a ******* but stiffer or solid bushes seems to really help. I've just gone with the stiffer option.Clayton
07-30-2015 #9
Registered User
- Join Date
- Mar 2010
- Location
- Brisbane, Australia
- Posts
- 138
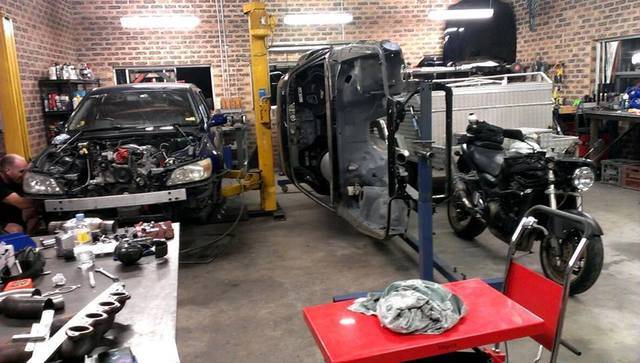
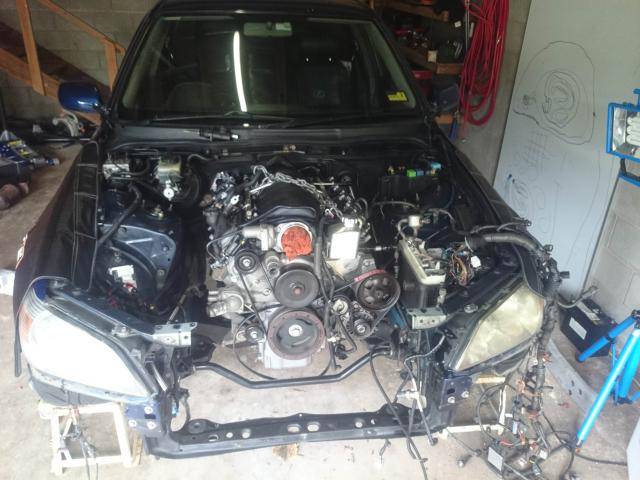
So on Friday last week I got made redundant from my job. Got a reasonable payout and its a crap time of year to be looking for a job so I started getting ready for the conversion work. Had to shuffle things around in the garage to get a bit more room. Thought I'd let the car and the engine get a little more acquainted.

Bought some more bits as well.Clayton
07-30-2015 #10
Registered User
- Join Date
- Mar 2010
- Location
- Brisbane, Australia
- Posts
- 138
Alright, this began in earnest. Just got back from getting my spare key. Ouch to that. At least the Lexus service dept took pity on me and didn't charge me for the coding!
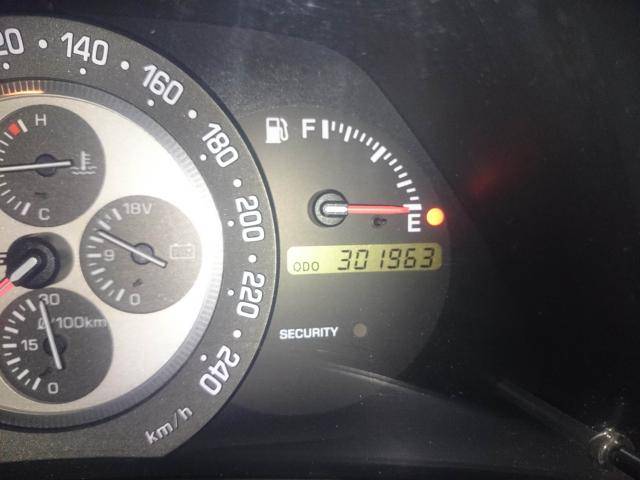
This is where your journey ends you 1GFE turd. Who knows how many engines this car has been through in its time of being turboed, but it kept me entertained for 9 months till the project bug took over again.
Oh I should mention, I conveniently took a deposit on this turbo engine setup last night! Should be getting picked up in Sunday afternoon all being well!
Been a busy first week of unemployment organising stuff and buying more stuff. More photos to come, but for now, I made my first speedflow hose of the project. Was a right ***** to make being so short and is an expensive concoction of adapters not mention the cost of the billet reservoir they connect to! Do it once, do it right...and maybe just a sprinkle of gold plating.....
 Clayton
07-30-2015 #11
Registered User
- Join Date
- Mar 2010
- Location
- Brisbane, Australia
- Posts
- 138
Tell your story walking


Not looking forward to the wiring job much!Clayton
07-30-2015 #12
Registered User
- Join Date
- Mar 2010
- Location
- Brisbane, Australia
- Posts
- 138
Got some more work done on this the last couple of days.
Degreased and scrubbed down the engine bay area. Bought a bunch of little things.
Expanded the holes in the bell housing (way too much) to accommodate the spacer behind the so centric slave. Then mounted the remote bleeder line and made the pressure line.

Swapped the sump, pickup and windage tray over to the modified front pan versions while the engine was swinging off the crane. Good times.
And finally managed to arse muscling the gearbox back on by myself. Not sure how I managed to get it all lines up to slide straight in, but I did!

Tomorrow going to start making the power steering lines to mount to the rack end at least. And I might get the engine mounted.
Have run into an interference problem between the dipstick tube and the a/c compressor bracket. Not sure what combo of bits I need to resolve that. I believe I have purchased a VT-VZ dipstick and tube. Maybe need a matching bracket, but not sure if I need a matching compressor as well instead of the VE unit?Clayton
07-30-2015 #13
Registered User
- Join Date
- Mar 2010
- Location
- Brisbane, Australia
- Posts
- 138
More work today. Sorted the interference issue from yesterday with some judicious cutting and grinding of the compressor bracket.

Thought while it was apart I'd slip to Repco and grab a couple of new belts.
Wanted to start making the power steering hoses but one of the adapter fittings was wrong. So moved on to removing the accelerator pedal as I need to install a GM pedal for the DBW of the engine. Also removed the old clutch master and hardliners. Have to make an adapter plate for the new Tilton master.
More work scheduled tomorrow and Tuesday.Clayton
07-30-2015 #14
Registered User
- Join Date
- Mar 2010
- Location
- Brisbane, Australia
- Posts
- 138
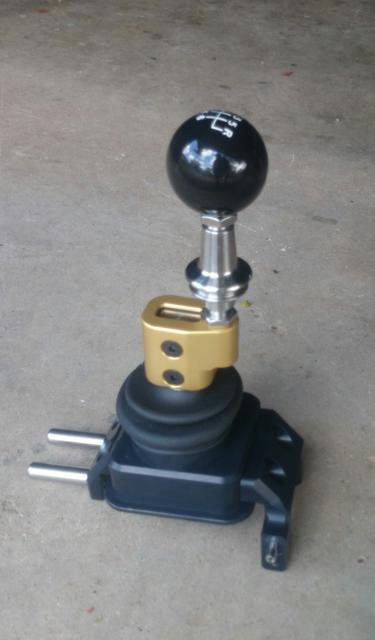
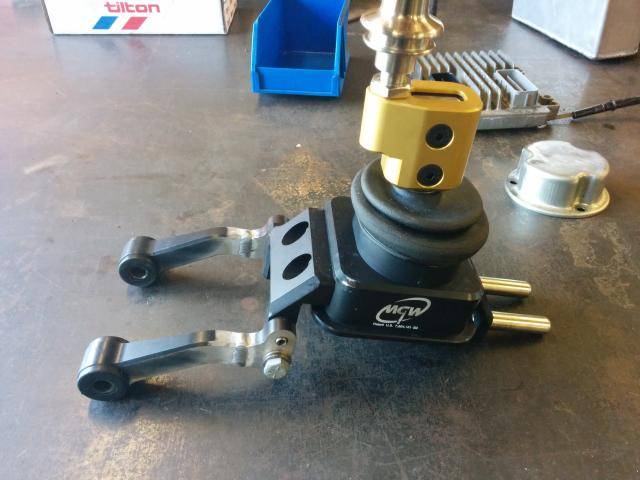
****, stupid couple of days just trying to find bits for adapters and whatnot. Barely spun a tool.
However the arrival of this brightened my day. Looks like it will actually work quite well so far though I won't know for sure till the box is in. Looks swxy though and fits straight up through the existing hole in the tunnel. Taking a bit of inspiration from yojimbo, it is from MGW in the US to suit a 2010+ Camaro SS.
 Clayton
07-30-2015 #15
Registered User
- Join Date
- Mar 2010
- Location
- Brisbane, Australia
- Posts
- 138
So random updates from the past few days with some dodgy photos.
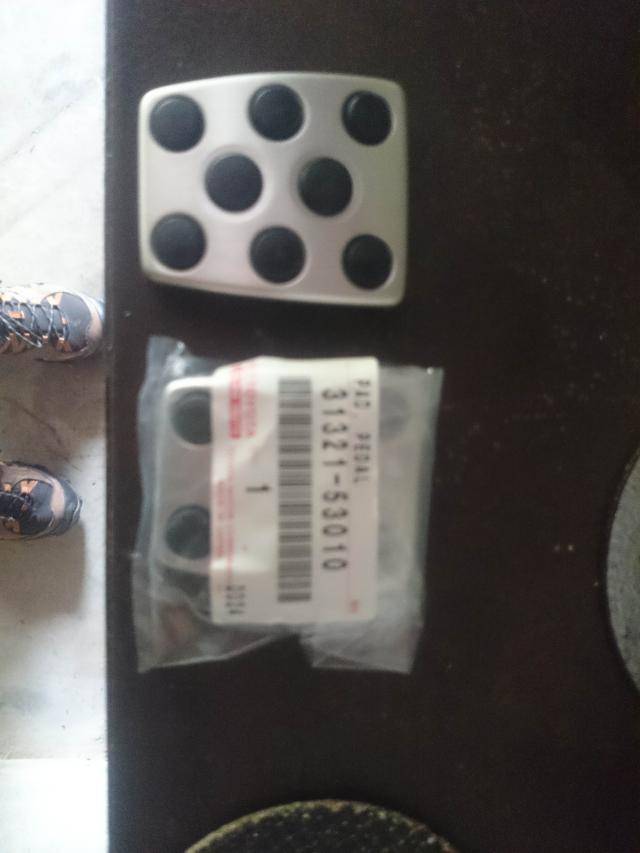
The new DBW GM accelerator pedal has an alloy plate with rubber strips. My car being the base model only came with normal rubber pads on the clutch and brake pedals. I went to a wrecker that had a couple of IS200s in the hope of nagging a pedal box from a sport luxury version so I could have a consistent appearance ( it's the little things remember), but they were both gone and the wrecker was a typical useless **** anyway. So I came home and jumped on eBay in the vain hope of finding something to suit. Fluke find was some brand new genuine Toyota pedal pads for an Altezza for about $40 each. Quantity: 2, BUY NOW. Much cheaper than a second hand worn set.
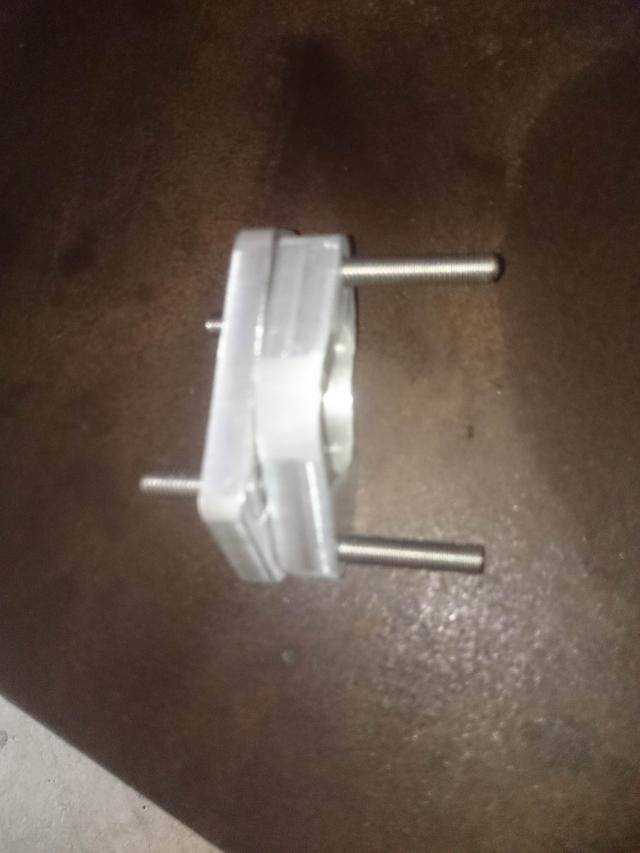
Next I had to make an adapter for the new clutch master. Spent most of the morning yesterday making this at a mates place. The countersunk bolts are screwed through the adapter and secured with permanent Loctite.
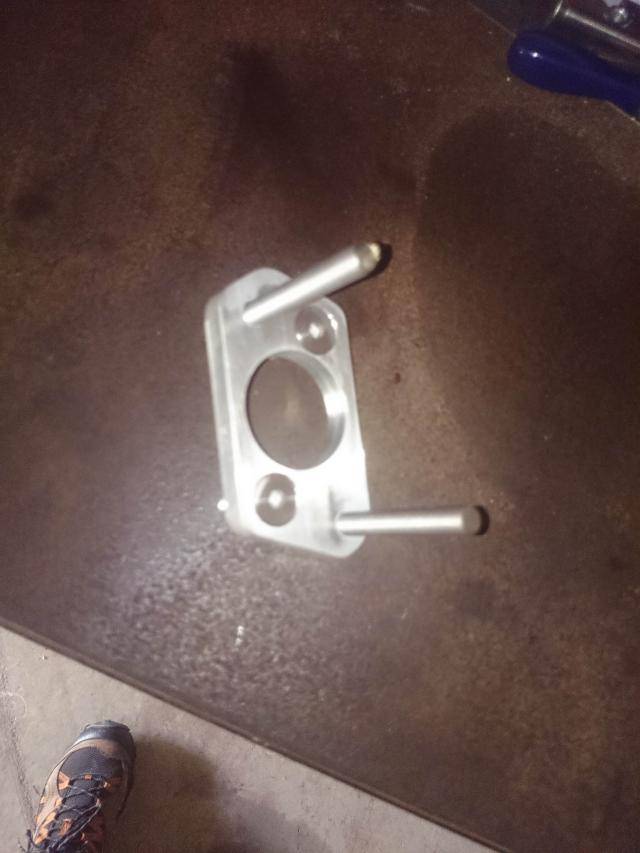

Took it home, offered it up to the firewall only to discover the old master sat in a pressed recess in the firewall and this didn't come close to fitting. Note to self, dont rush the design phase. Out to the bolt shop to buy longer bolts while I quietly raged about having to make an extra spacer. Then back home, roughly cut out the spacer then back to my mates place to dress it up on his mill.
It still didn't quite fit in the recess so I had to grind a couple of little reliefs:
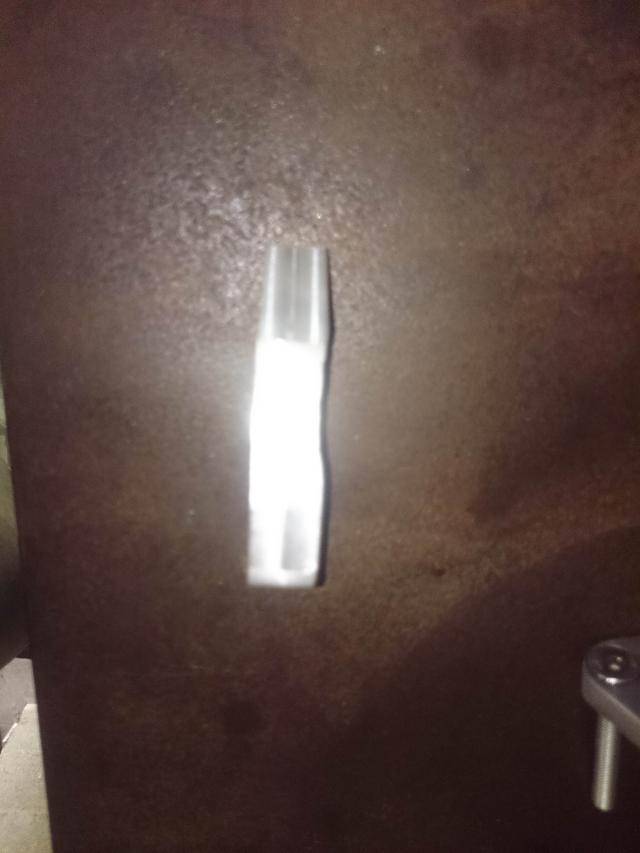
Goes together like this:
Of course, now that is all made, I'm extremely worried about clearance to the engine with the extra spacing as the master sits pretty much right behind the drivers side head.......
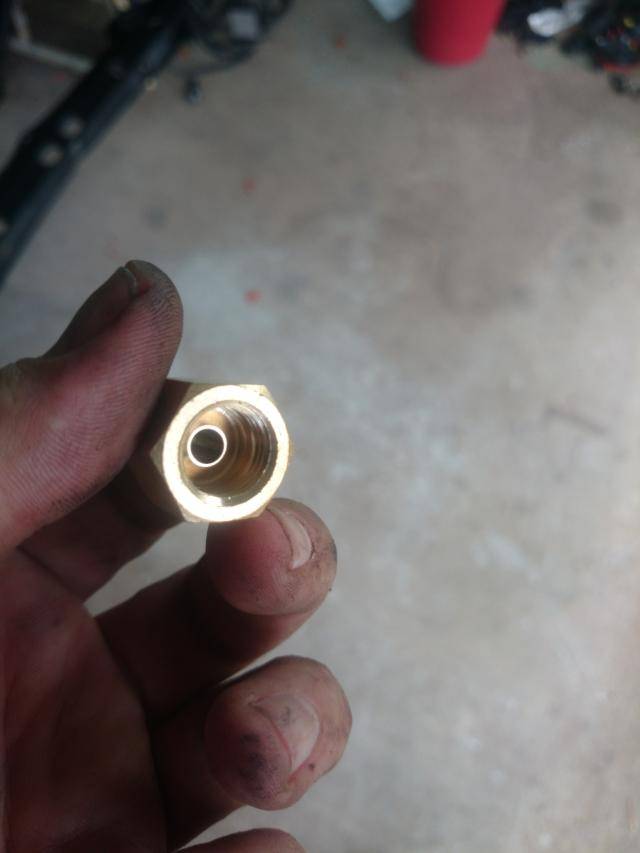
I wanted to make a Speedflow hose to go from the hardline in the car to the fuel rail. The fitting on the hardline necessitated a female M14 x 1.5 inverted flare to AN -6 adapter. It is quite a common fitting used on fuel lines in Japanese cars, but do you think anyone makes such a thing? Speedflow don't. Pirtek laughed at me. More late night internetting found a custom adapter out of the US with a reasonable express courier shipping option. So I ordered two and they arrived in less than a week.

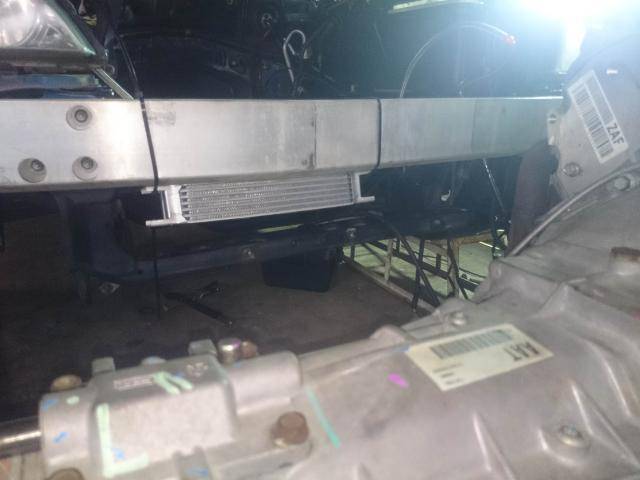
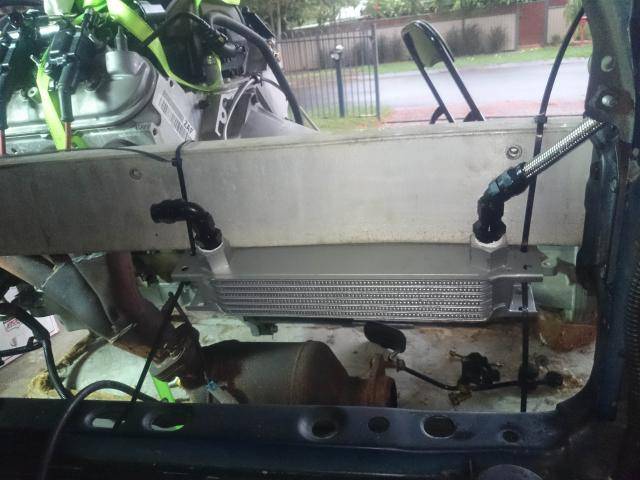
The whole time I'd been working in and around the engine bay, I'd never been planning to do anything about power steering cooling. Despite that fact that the rudimentary Lexus cooler was staring me in the face the whole time. Thought I better do something about it and since I was making Speedflow power steering hoses, I grabbed an oil cooler and started plumbing. Roughly mounted where I want it so I can at least make the hoses. Will get them properly mounted while exhaust is being made.
And finally, started making some of the hoses. Need to mount engine so they can be finished.
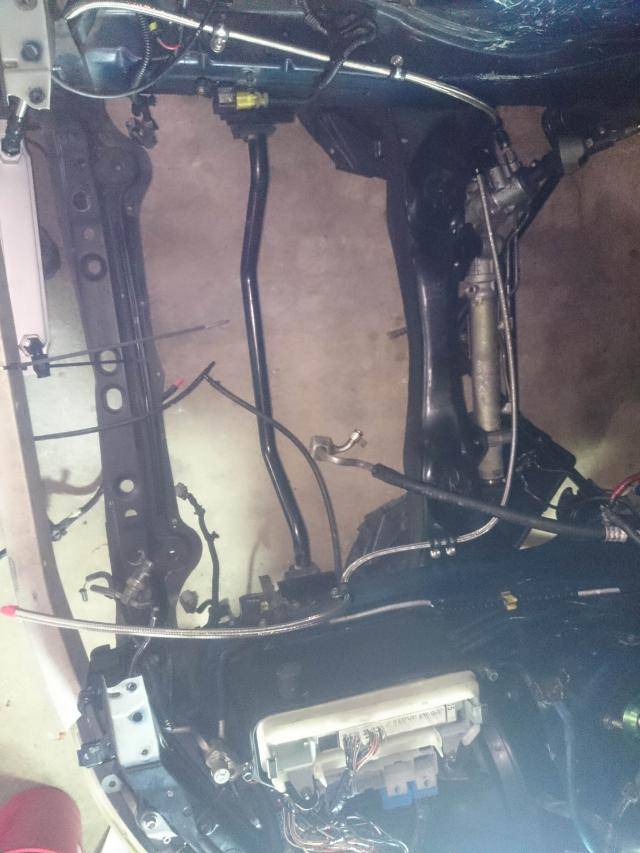
Oh, and the engine is still not mounted. But should be soon! Anyone in Brisbane want to come around this weekend and give me a hand to do that???Clayton
07-30-2015 #16
Registered User
- Join Date
- Mar 2010
- Location
- Brisbane, Australia
- Posts
- 138
IS620. With a few surmountable issues.
Thanks for your help today Nick and Damo!Clayton
07-30-2015 #17
Registered User
- Join Date
- Mar 2010
- Location
- Brisbane, Australia
- Posts
- 138
Update.
Got this back on the ground on Sunday afternoon. Yesterday morning a friendly Dave came over to load it onto his trailer and tow it down to Rz's cave of magic.
Big thanks to Dave for offering and delivering. Big thanks to Leigh as well and came for a sticky beak and did some heavy pushing on the car!
Pete is going to help sort out the clearance issues, mount the shifter, mount the power steering and engine oil coolers and finally after sone discussions he is going to make a full custom exhaust.
Plan is 1.75" long 4>1 headers into a twin 2.5" with a muffler and tailpipe on each side.
I'd been talking to a couple of people about the exhaust but delays in the supply of other bits meant I needed to bring it forward from the new year in order to keep up momentum so Pete drew the short straw LOL.
Leigh and I left about 1pm to head back to Brissie and let Pete start working on the jobs he had for others as well.
Sitting down later in the evening introducing the kids to Star Wars, I get a message from Leigh that he is back down there unbuilding my car for me! I'll let him take over the evening's story from here...
 Originally Posted by Leigh
Clayton
Originally Posted by Leigh
Clayton
07-30-2015 #18
Registered User
- Join Date
- Mar 2010
- Location
- Brisbane, Australia
- Posts
- 138
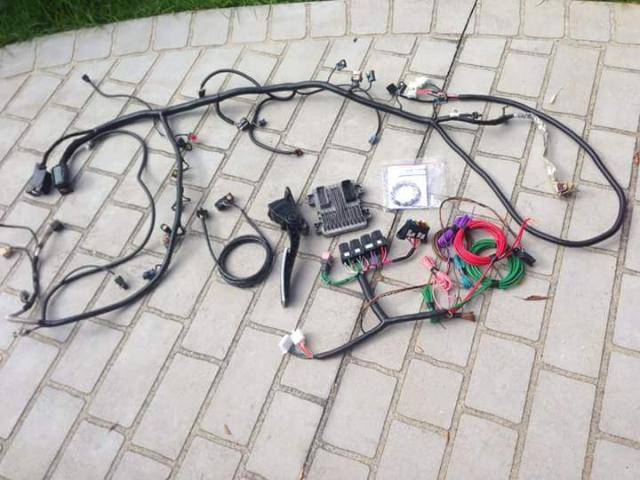
Just saw this pic on Facebook. My completed engine loom from Dale's mate Justin at Ultimate Conversion Wiring. ECU has had security removed and a mafless tune flashed to match some of the breathing mods I will have.
That's the GM loom though, not the Lexus one. I have the Lexus one out to do myself.
 Clayton
07-30-2015 #19
Registered User
- Join Date
- Mar 2010
- Location
- Brisbane, Australia
- Posts
- 138
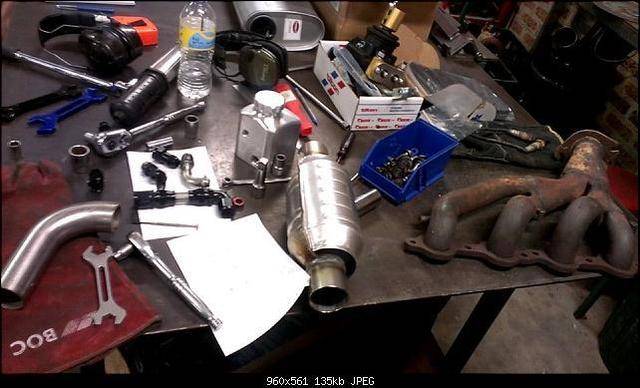
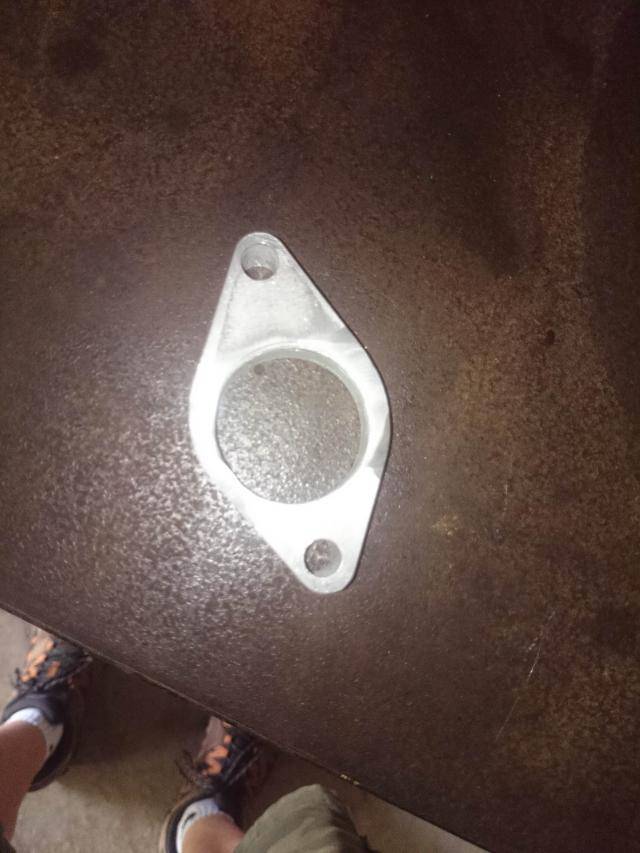
Everyone loves a little bit of flange

Some assembly required.....
 Clayton
07-30-2015 #20
Registered User
- Join Date
- Mar 2010
- Location
- Brisbane, Australia
- Posts
- 138
So, what exactly has been happening here?
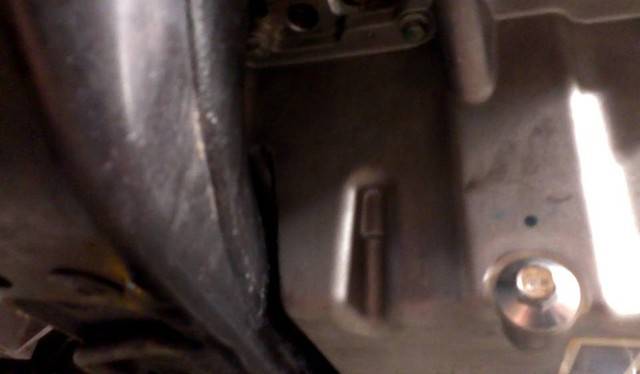
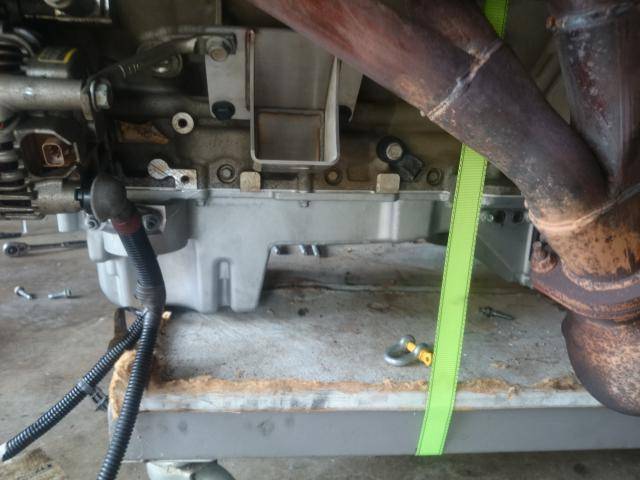
I don't have photos of all the details but I'll tell the story. I've been down to Pete's a few times over the last couple of weeks. The engine has been in and out a couple (or more) times addressing the clearance issues. Thank goodness for the hoist and hydraulic engine trolley. In and out from underneath is so much easier! Leigh posted a photo of the sump to crossmember tightness (not touching, but very close). At the top of the engine there were a couple of issues:
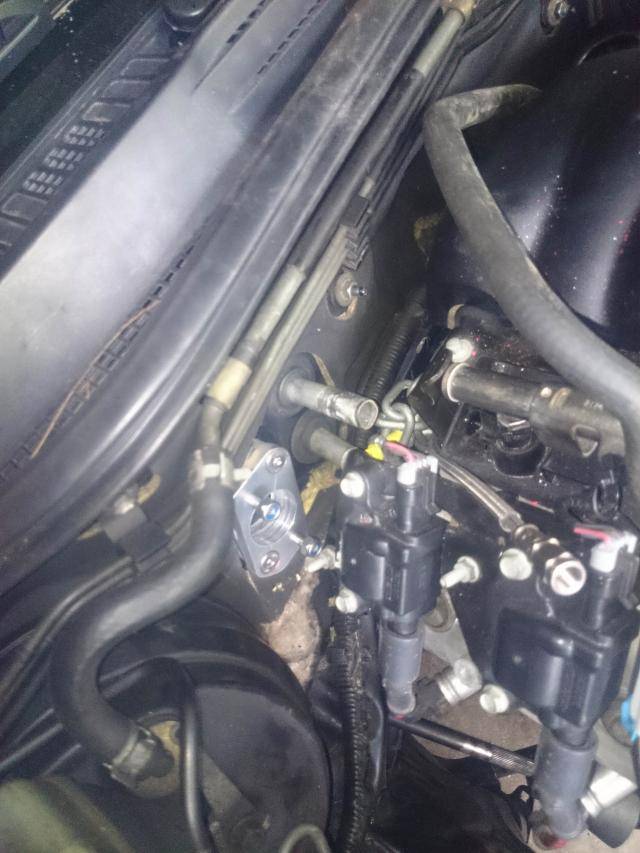
The bottom heater pipe was touching the rocker cover. The rearmost coilpack was preventing the clutch master from being fitted.
This was addressed in a couple of ways. The mounts were slotted to allow the whole engine and gearbox assembly to move forwards slightly. Only about 10mm, so the engine is still sitting way back which is good. The heater pipes were nice enough to be supplied with two separate beads rolled on them, so about 15-20mm was liberated from them leaving the rear bead still intact for good bite and seal once the hoses are installed.
I've also bought some aftermarket coil brackets to relocate the packs somewhere. Not sure where yet. This means I'll need custom length plug leads as well and maybe a loom extender. *sigh*
Anyway, plenty of room in the engine bay now:

The final clearance issue that still needs a little more work is the gearbox contacting the top of the tunnel. Because I'm using the later T56 with remote shifter arrangement, there is a small cover on the top of the box that sticks up more than the older style which the mounting kit I bought was designed for. A bit of beating with a hammer and maybe an ever so slight spacing down of the gearbox crossmember will sort that.
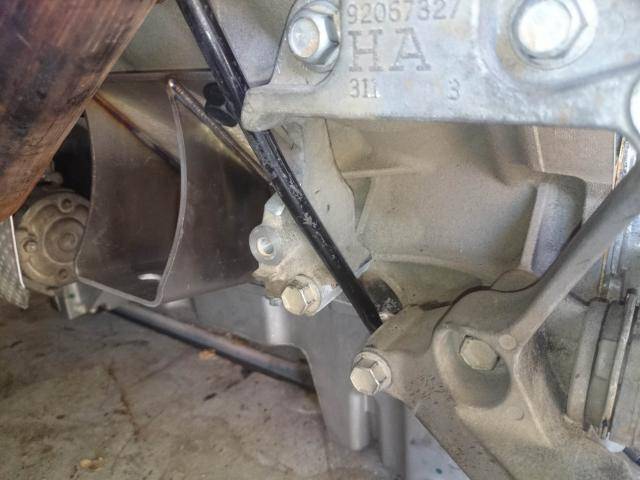
Bolting up the gearbox crossmember with the gearbox touching the floor highlighted a lack of strength in the kit crossmember. So Pete added a gusset to the rear and will also add one to the front.

The engine mount brackets are also going to cop a bit of extra gusseting.
With the fore/aft positioning sorted, Pete was able to cut down the shifter mounting arms.
The shifter now comes up perfectly through the factory hole in the tunnel and appears at this point to require no cutting which I'm very happy with as I can reuse the factory Lexus rubber boot to seal the hole up again. The rear support mount for the shifter goes bolts through the top of the tunnel and hopefully it'll also fit without cutting.
I visited again today and when I arrived, Pete was in the process of making the merge collectors. Why buy them when you can make them LOL!

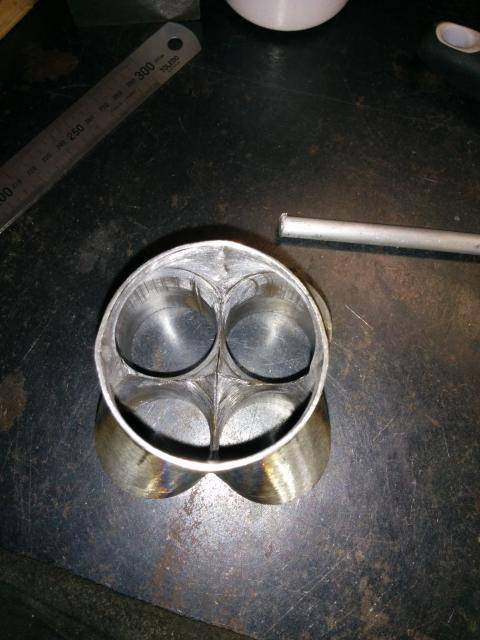
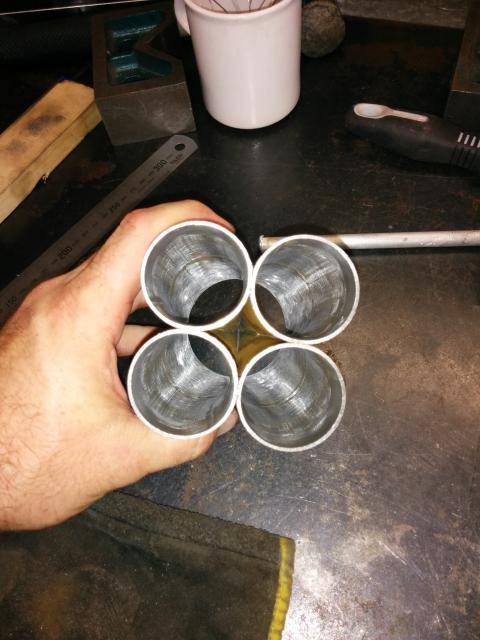
The next few days should be fun for him as he dives fully into the header fabrication!Clayton

 Reply With Quote