


Results 141 to 153 of 153
-
03-27-2023 #141

 Registered User
- Join Date
- Aug 2012
- Location
- Phoenix
- Posts
- 162

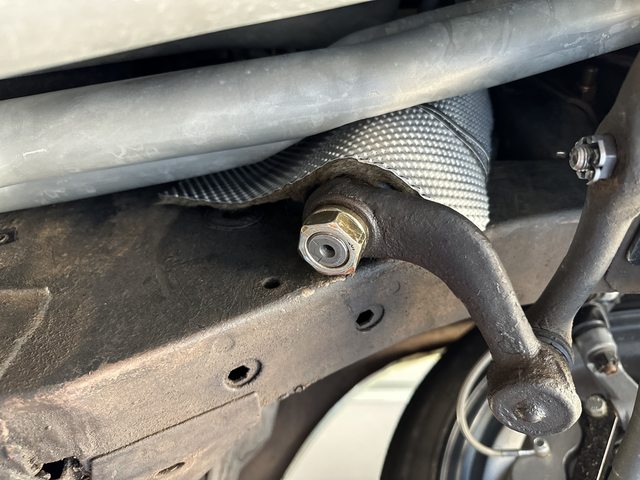
In the latest news, I've been out of the garage for a couple of weeks but I'm slowly getting back to it. I drove the car again a short distance and made note of the things that I wanted to address. First off, I wanted to add a catch can to the radiator. The main reason for this is because I have a shop cat and I don't want the car to burp or drool one day and the cat to find the green puddle interesting. It's more for peace of mind for me and safety for the fuzzy knucklehead. Second thing I wanted to address is the power steering pump. It was a little noisy after my short drive and I wanted to get ahead of any issues that may arise. I know the steering box is getting hot because the header is incredibly close. I opted to put a heat shield over the box as well as lower the pressure and flow from the pump since I found that the Borgeson box prefers both lower than what the pump is supplying. I will also be adding a ps cooler.
Not all of my parts have arrived yet. I'm waiting on the pressure and flow valves to arrive today. I'll likely knock that out by the weekend and post updates then.
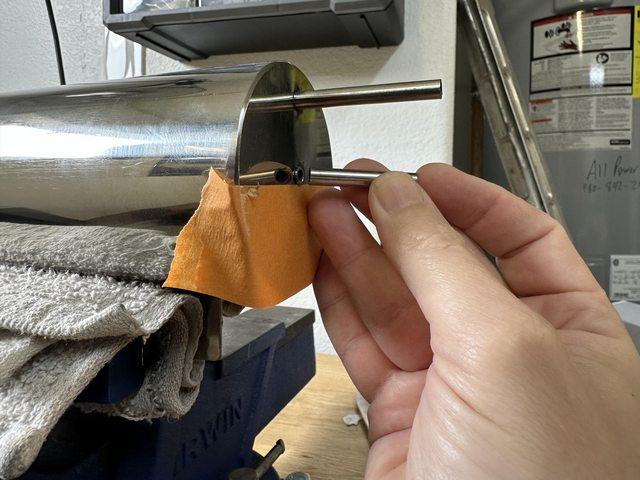
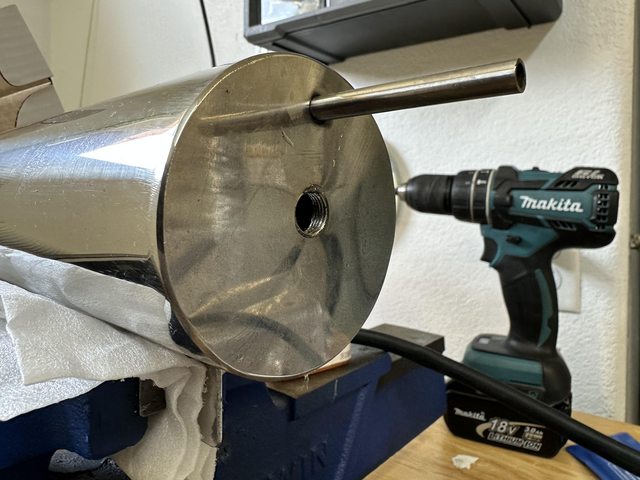
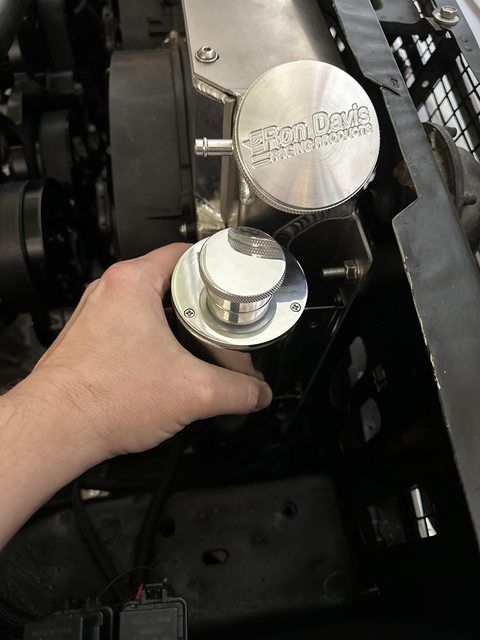
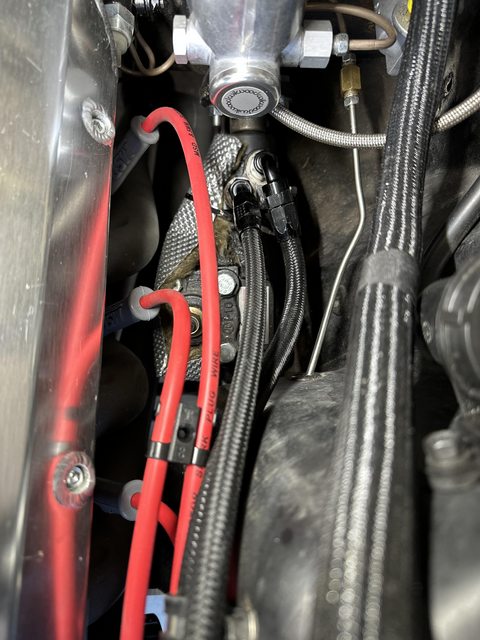
The catch can is from Summit. I wanted something better than the tiny inlet on it so I cut off the existing one and tapped it for a 1/8npt elbow. After that was done, I mounted it to the passenger's side of the radiation near the cap.
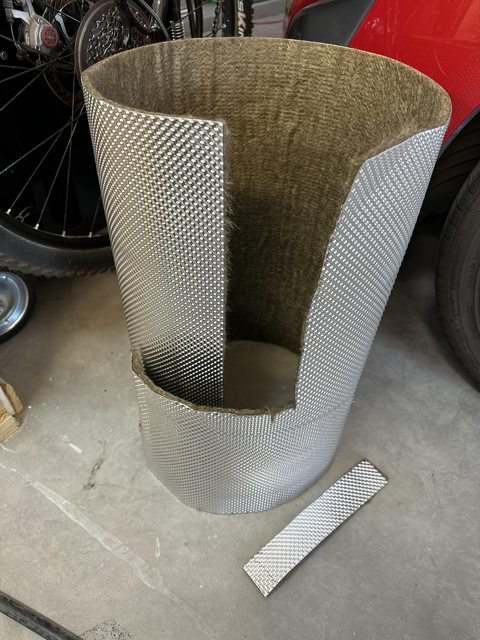
Here is the shielding material I got from DEI. It is good to 1400 degrees so should be fine for what I'm doing. I roughly attached it to the steering box with stainless zip ties.
 Kris - Building the poor man's '68 Mustang.
-
04-03-2023 #142
Registered User
- Join Date
- Aug 2012
- Location
- Phoenix
- Posts
- 162
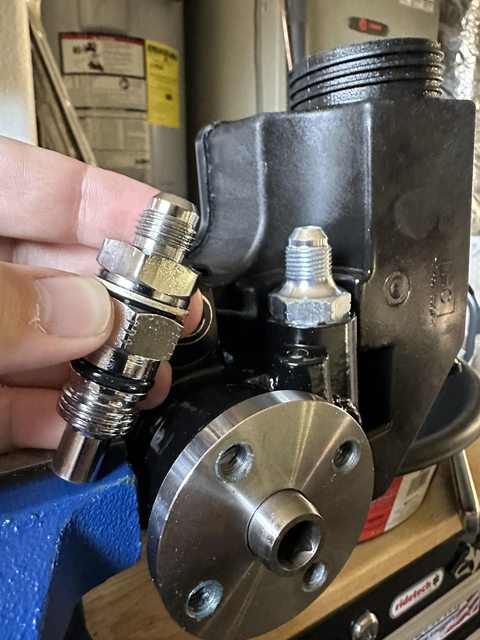
Last weekend I decided to replace the fitting and shim the flow valve in the PS pump. This will bring the output of the pump to the levels of pressure and flow that the Borgeson box prefers. The pump specs list 1400 psi @ 2.5 - 3 GPM and the box lists optimal specs at 1100-1250 psi and 1450 max @ 2 - 2.5 GPM. I may be overthinking all of this but that's what I do.
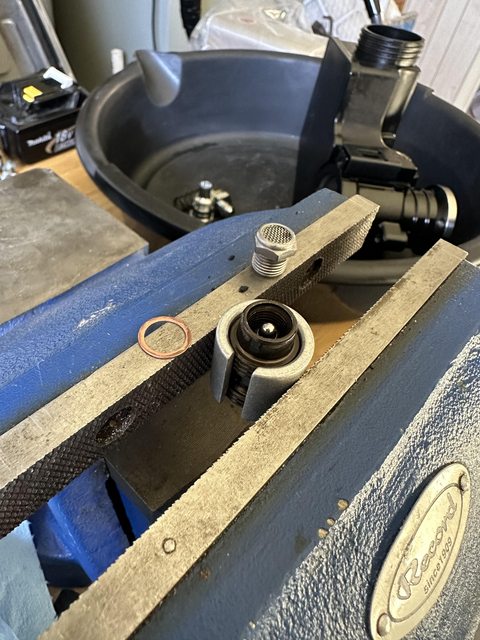
I pulled the fitting that came with the pump out and used the shim kit from borgeson to lower the pump pressure. I then reassembled the valve and replaced the fitting with a lower flow one that has a male -6 output. I didn't like having a fitting adapter in line that could introduce one more leak point, so the one-piece fitting was chosen. After all of that was done, I reinstalled the pump. Now I just have to reinstall my lines, mount and plumb the cooler and fill and bleed the system. In theory!
Borgeson's pressure kit includes the clamp for the pressure valve to prevent damage to the valve while holding it steady in a vice. It also has the shims needed to raise/lower the pressure. Just follow the instructions to choose the appropriate number of shims under the screened bolt to reach your target pressure.
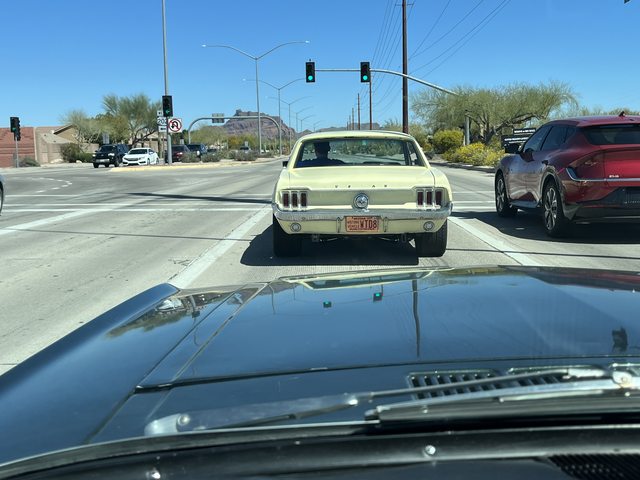
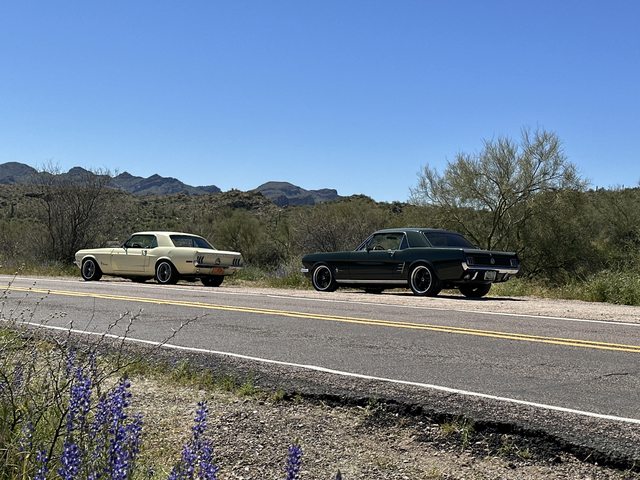
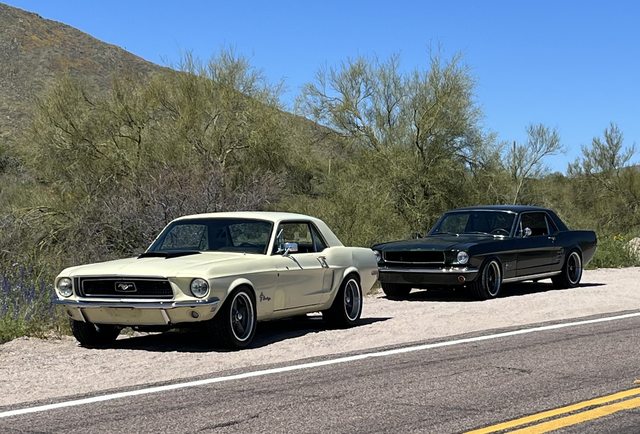
This weekend I finished adding my power steering cooler and hooking all the lines back up and everything seems to be all good again. A buddy (66 coyote-swapped mustang) kept pushing me to go out and get some shakedown miles with him so Sunday was shakedown day.
He drive about 30 miles to my place and then we drove out to a nearby lake to put a few miles on my junk. Neither of us thought about how crazy the traffic would be. It was still a nice drive and neither car had any issues. We poked around on the crowded twisty roads before heading back to my house to give both cars the once-over. Progress!
 Kris - Building the poor man's '68 Mustang.
04-03-2023 #143 Registered User
- Join Date
- Dec 2006
- Location
- SF Bay Area
- Posts
- 463
Nicely done. Progress is progress.
chunger
'68 Ranchero 500
'70 Cougar XR-7 Convertible
'98 Mustang GT Convertible
10-27-2023 #144
Registered User
- Join Date
- Aug 2012
- Location
- Phoenix
- Posts
- 162
It's been a minute!
Let's see. A quick recap of the past 6 months: For the sake of making this easier, I'll copy/paste from my build thread from the VMF.
April 2023:
I messed with the alignment a bit. Ordered turn plates and a hub adapter to help dial everything in. Got confirmation this morning that my Dyno-day will be May 1st at 9am. I guess I need to get about 400 more shakedown miles on this pile before then!
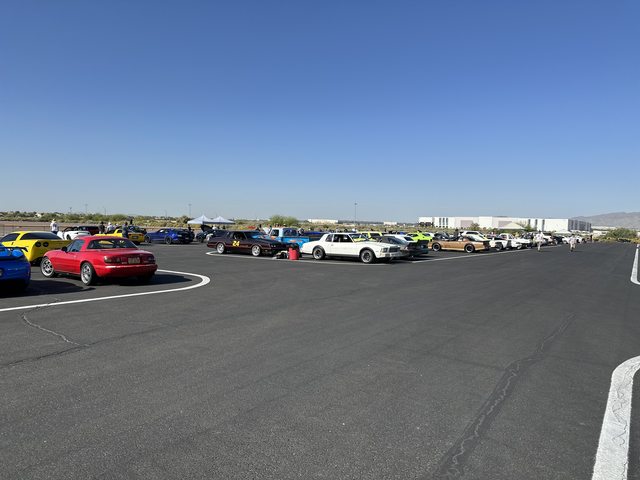
I was out at AMP saturday to watch the SCCA guys fling cars around. I left my place early-ish and stopped by to wake up a buddy and we drove out. No real issues to speak of with the trip. I was able to get out there and back and add around 100+ miles to the clock. I spent Sunday messing with the alignment more and ordering parts to start sealing up my interior and prep for dyno day.
Pre-Saturday drive: I checked the Tefba filter and found some junk in it. Looks like edges of gaskets that were in the flow path and got softened up and broke free. I've seen no coolant leaks aside from a tiny bit of seeping around the thermostat housing. I'll keep an eye on it.
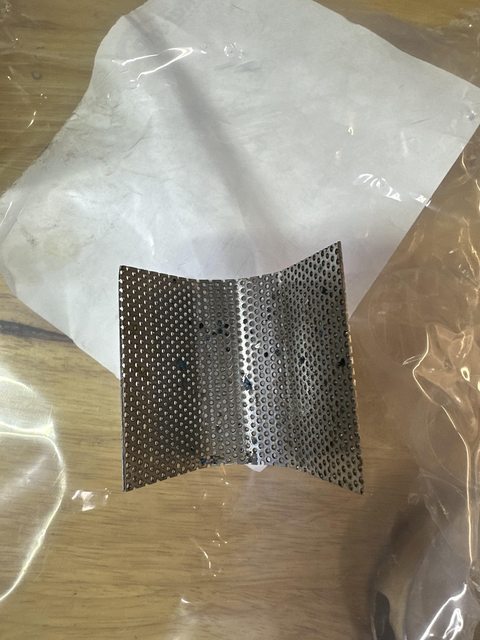
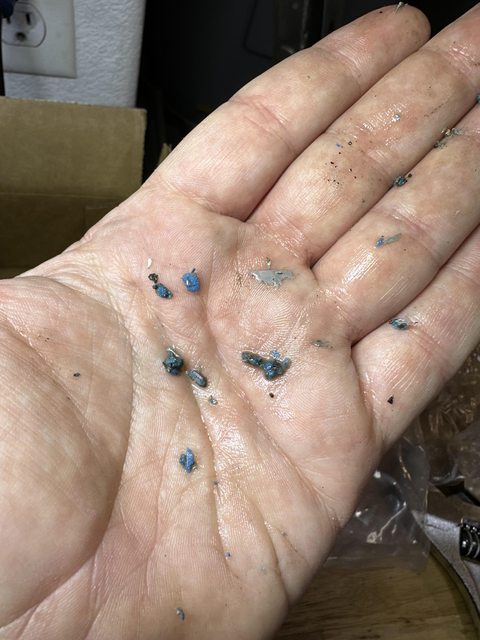
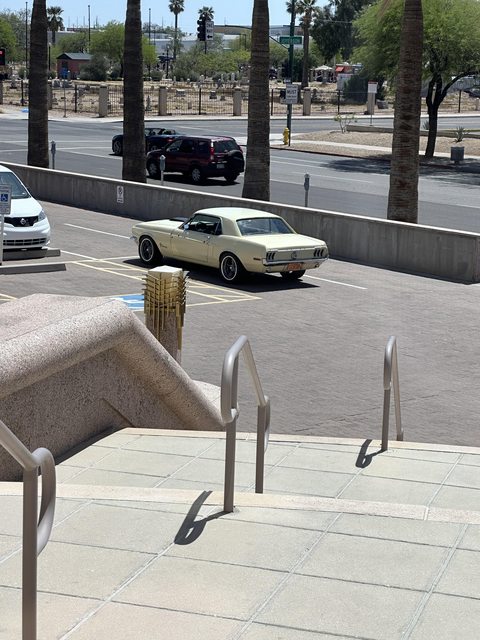
Saturday on the way home, the I-10 and 202 split was a mess. I stopped off at work to refill my water bottle and stretch my legs for a minute.
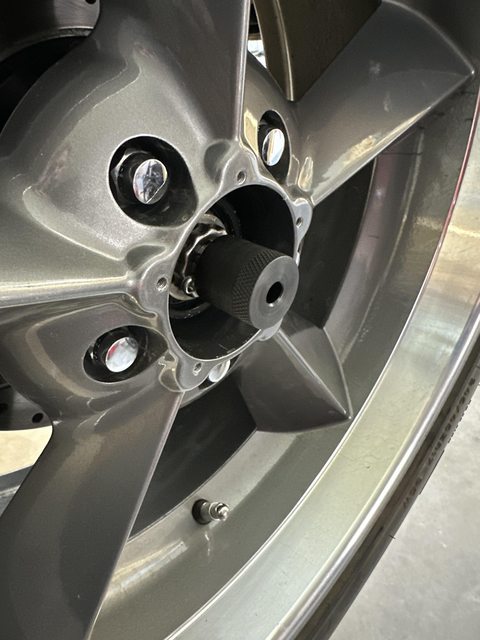
Sunday, I got to work trying to dial in the alignment. I'm using a digital Intercomp caster/camber gauge that a friend brought over. I picked up one of their hub adapters to mount it directly to my spindle.
Test fit. I took all of the measurements with the cotter pin and nut retainer off.
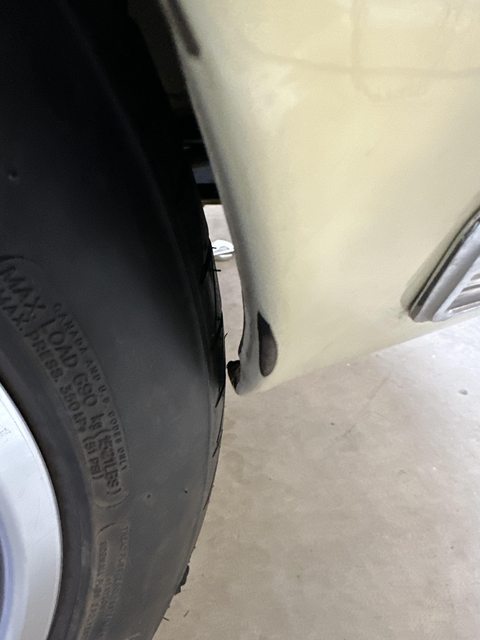
I'll end up having to shim the UCA to get caster where I want it. I was only able to get +2* caster before i ran out of room with the front of the tire and the fender on turns. I have shims ordered and they should get here Tuesday.
I buckled to peer pressure. I blame my friend, Dan.
This was a dyno day at a friend of a friend's place on sunday. Aside from our two classics, there were 5 foxbody ltd wagons, and the homeowner's 800 hp lx coupe, his early bronco, his wife's yellow gt seen behind mine, etc, etc. The guy in the vid on the right has one of the wagons. It's green with qcumber on the tag and powered by a turbo'd 5.0. There was quite a showing of people. The neighbors probably loved it.
With no tuning at all, and the EFI still in learning mode: 375hp @ 5400 and 410 ft lb @ 4200. It'll be fun to see what next week's tuning session will bring.
https://youtu.be/_rO49RyDi_Q
May 2023:
Bleh. Tune day was yesterday. I spent the weekend going over a few things and whatnot. I changed the oil and plugs. While changing the oil, I found that my pan gasket is drooling. Decided to put that on the list to replace. In the process of changing the plugs, I managed to rip the plug boot on the number 2 cylinder. I had to rummage around in Autozone trying to find a single wire that would work well enough to get to the tuner and make it through the day. Got that sorted out and chose to try to find something that would be a bit more relaxing, so I decided to install my shift boot and bezel. I also started to line the inside of the firewall with 1/2" Dynaliner as well as plug the unused holes.
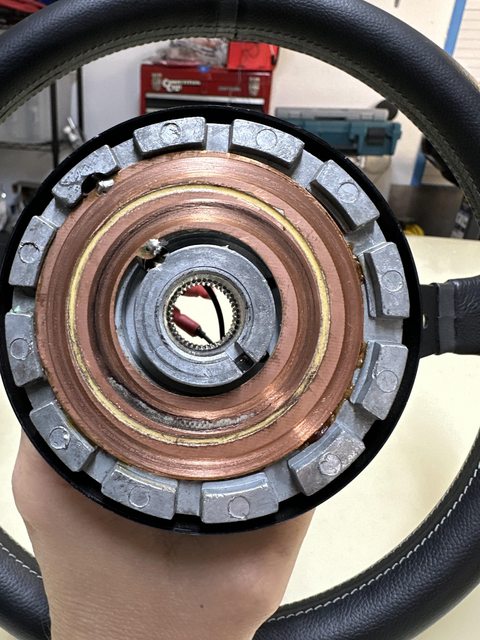
Got ready to crank the car after the oil and plug change and noticed my courtesy lights weren't on. In trying to figure that out, I found blown fuses for the hazards/stop/courtesy lights. Great. I pulled the steering wheel to make sure there wasn't anything going on with the signal switch. I found that the horn contact rings on my pricey grant hub weren't centered correctly and one had started to peel off. More great news. Problem to address later. In the end, I found that my third brake light wire had been pinched in the trunk and was causing the short. Easy fix.
I get to the tuner on time, drop off the car and head home. The slot was from 9 to 1. I get a call a bit after 12 with 'good news or bad news first?'........
Good News: The tune is completed. The engine is dialed in and healthy but I was a little disappointed with the final numbers. After running hard all day getting tuned: 365hp @ 5200 and 406lbft @ 4000.
Bad News: the engine spit out another freeze plug on the last pull......That's 2nd of 6 to let go. I called the builder, raising the question to him as to 'why?' and maybe a little bit of hell during the call.
The long and short. The car is home. Sitting ignored in the garage until I feel like pulling the engine. I don't trust the other plugs, so I will replace them all. I'll replace the pan gasket while it's out.
At least this looks nice.
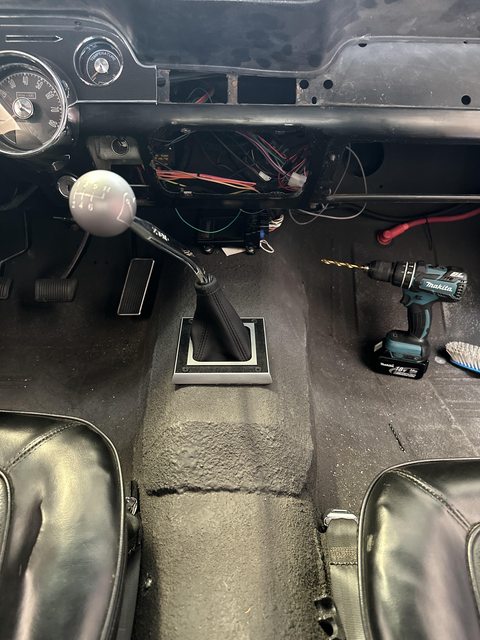
This was more than a bit irritating to find.
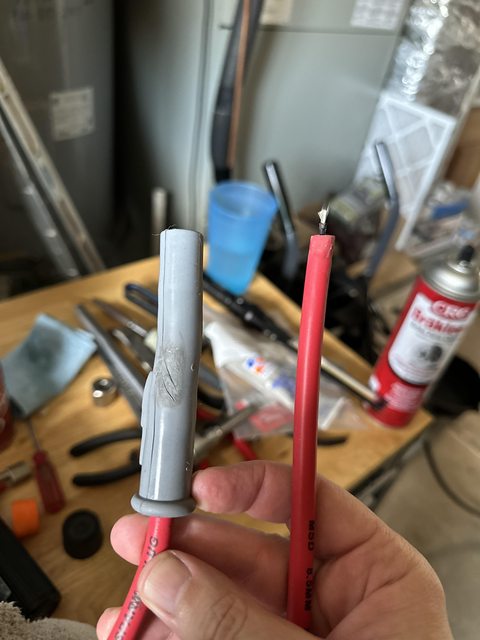
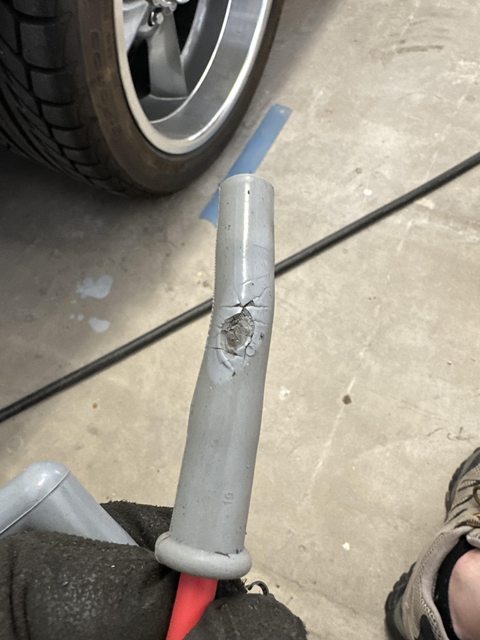
Not at all pleased about this. The dirty spot on the boot is from my grubby finger admiring the split. The missing boot was used on the temp replacement wire from autozone. I have replacement ends arriving today. I'm sure I'll get right on that.....
There isn't enough profanity to describe my displeasure.
And here's an expensive piece of paper with a visual representation of my efforts.
Technically, it's close to what the builder estimated when we were going over the build. He was estimating 425ish hp and 450ish lbft torque at the flywheel. That would roughly equate to the numbers I got if you subscribe to the 15% loss from flywheel to rear wheels theorycrafting.
I've decided to go ahead and pull the engine and replace them all. I don't want it to strand me. I'll also do a combustion gas test when it's all back together for added piece of mind. And it's still a riot to drive when you stomp on the gas, so I'll be ok with my numbers....for now!Kris - Building the poor man's '68 Mustang.
10-27-2023 #145
Registered User
- Join Date
- Aug 2012
- Location
- Phoenix
- Posts
- 162
May 2023:
Yesterday, the 66 coyote friend offered me his truck, hoist and engine stand. He only lives about 10 minutes from the office, so I had my boss drop me off in the work car and I picked everything up and headed back to work. I convinced my boss that it was an incredibly slow friday and that I'd be happy to drop him off on my way home (it wasn't hard to do since his grandkids where in town) He agreed and we got out of work at 1. I got home and started prepping to pull the engine.
Saturday morning! Took my time getting everything ready. Stopped for lunch and then got back to it. The engine is out and ready to go on the stand. I had to run out and pick up a socket for the flywheel bolts. Apparently, I no longer have the 1/2 drive 3/4 12 point socket that I thought I did. Anyway, I'm starting a list of things I'd like to address while the engine is (back) out. Wiring cleanup, shock tower reinforcements, extra heat control under the floor, and some plug boot protectors. Anyway, progress! I'm trying to stay positive about having to pull out the engine.
This happened while on the dyno. I'll be investing in boot protectors.
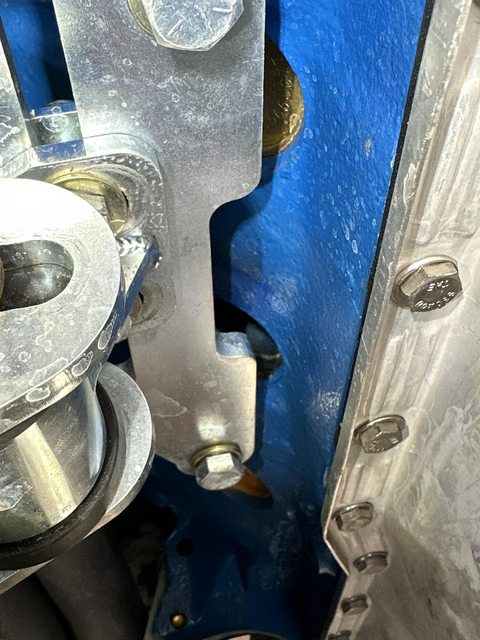
I went back and forth about the pricey Mac's pivot plate. I ended up getting one and I'm pleased with it. It made getting the engine out easier. We'll have to see how well it does going back in.
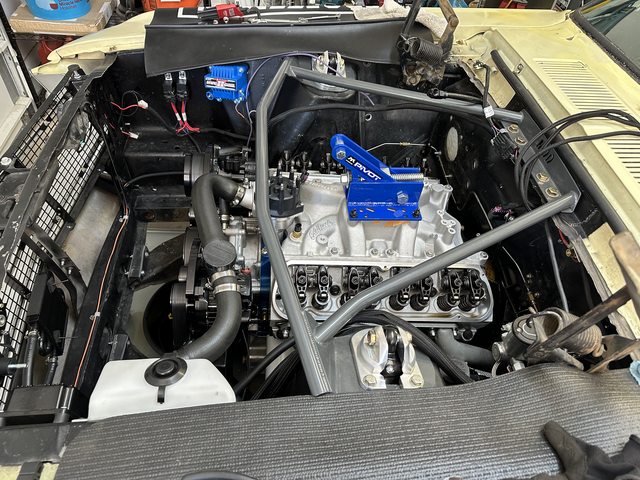
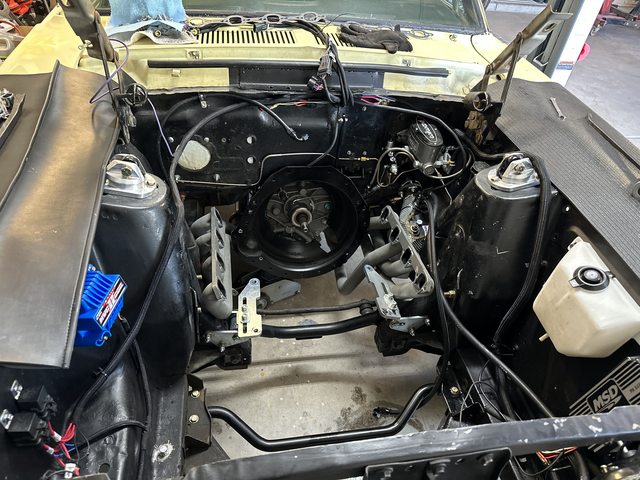
I plan on reinforcing the shock towers. I'm not sure how much of a gap is normal, but I'll adjust mine with a hammer to close them up before welding.
Passenger side:
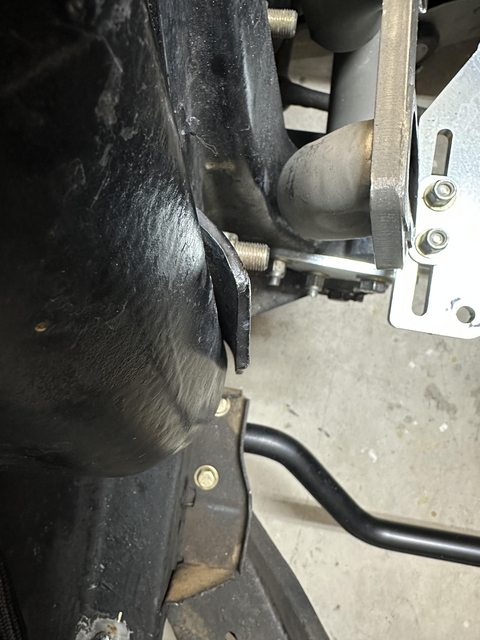
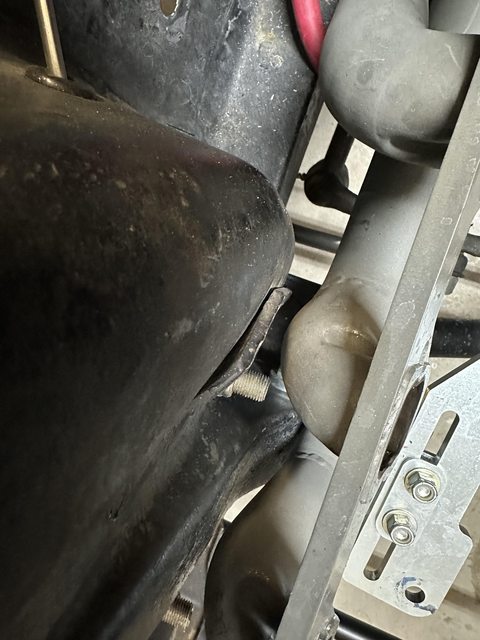
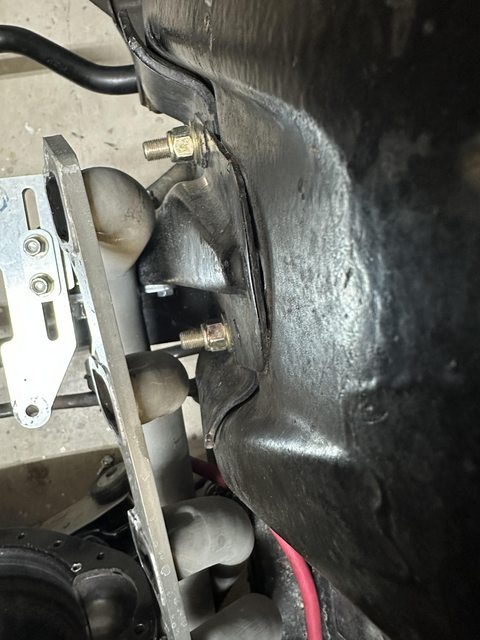
Driver side:
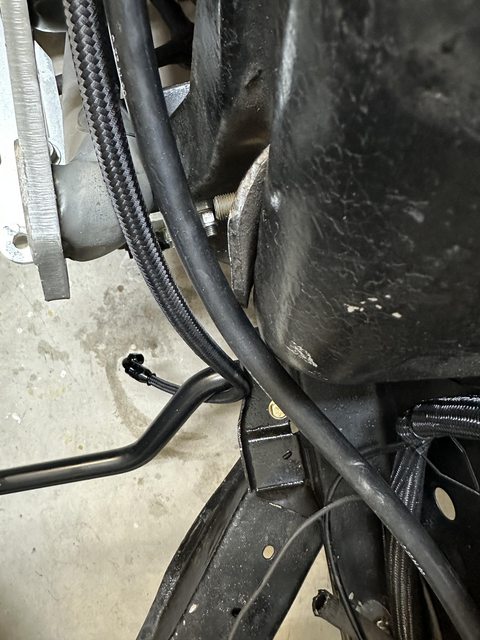
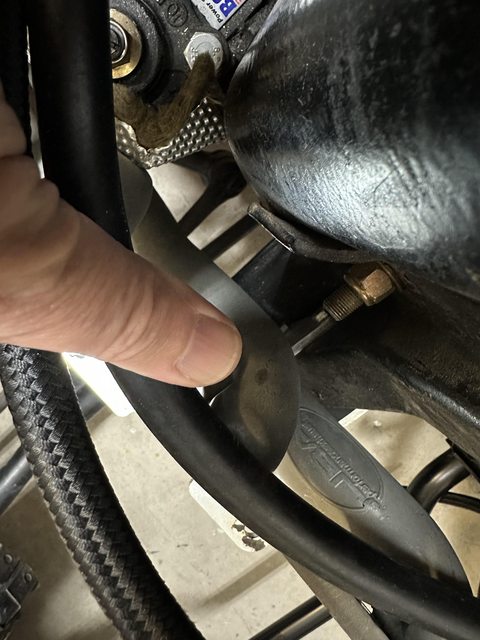
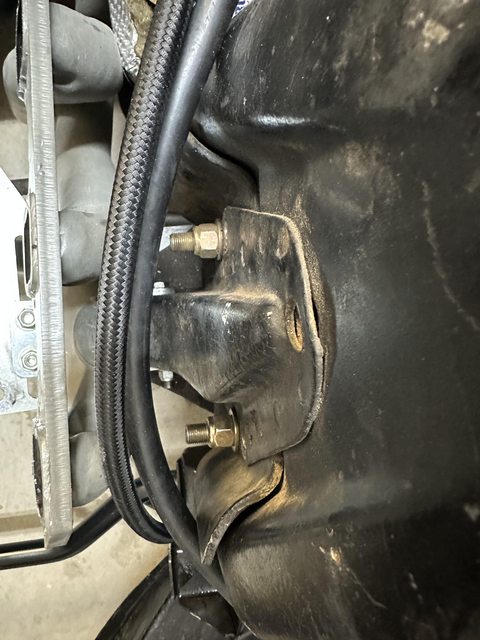
I'm going to rename this project: "While I'm here...."
I was working on replacing the freeze plugs and cleaning up old oil pan gasket material from the block surface this Sunday. As I was scraping gasket off, I thought I caught a glimpse of a piece of gasket fall into the timing cover. Great. Get the flashlight and look around, don't see anything. Look around on the floor under the engine, don't see anything. Look in the block, don't see anything. Get my inspection camera and laptop out, don't see anything. I stop for lunch and it kept nagging at me. So I place an order for a timing cover set and pull the cover. No gasket piece behind the cover....oh well, I've got timing cover and water pump gaskets on the way. I also remembered that I wanted to replace the thermostat gasket. That stuff will arrive Tuesday. Once it all gets here, I'll try to finish buttoning up the engine. I still haven't reinforced the shock towers or done anything in the engine bay yet. I'll get there.
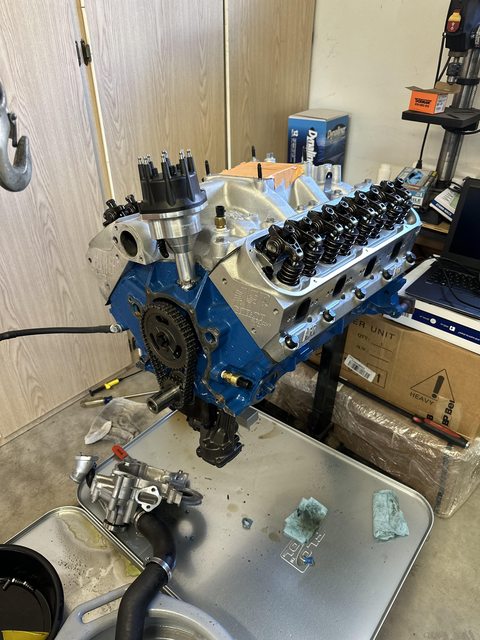
Spent a bit of time over the weekend making progress. The engine is buttoned back up. I'm waiting on the AC kit to arrive so I can get started on that.
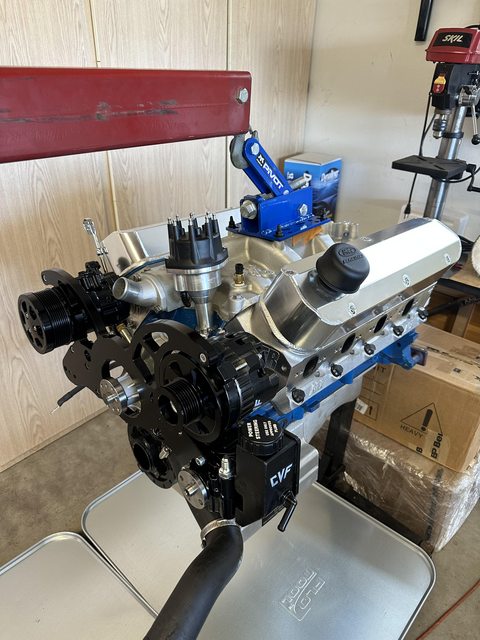
Deep freeze plugs and Ford Motorsports oil pan rails were added.
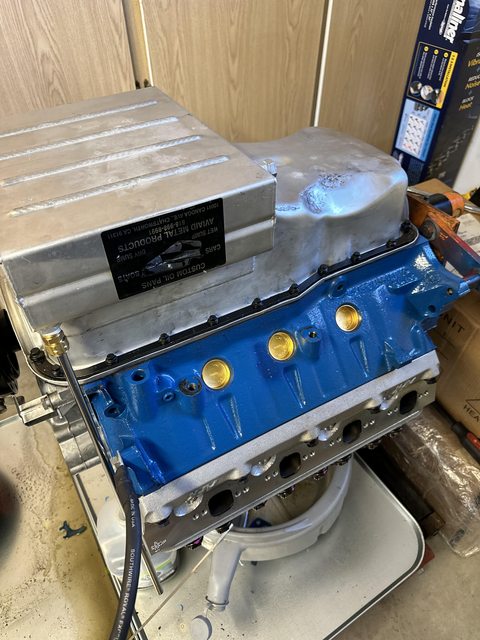
Engine flipped back over and ready to go back in when the time comes. I'm gonna be so disappointed if this thing leaks again. (foreshadowing)
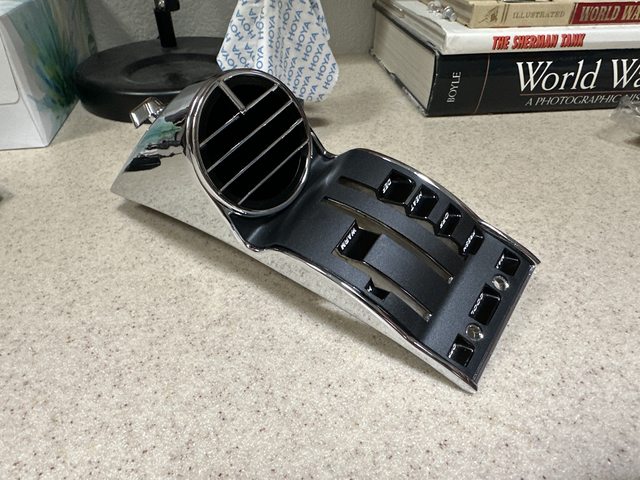
The latest news. Not a whole lot going on, really. I called Desert Classic Parts to pick up the factory-style ac vents for my vintage air setup that I have coming. Bill was super helpful and accommodating. I opted for the factory-style vents because I really prefer the look over the 'below the dash' vents that come with the VA kit. I got a killer deal on the vents and they look fantastic.
I also called Vintage Air this morning to switch out the controls to make sure that everything works well together when the kit arrives. The change will delay my order for a few days, but it'll be worth it.
I finally stitched-welded the shock towers because I figured it was the best time to do it since the engine was out of the way. I scuffed everything up, zipped it together, and then squirted some black paint on it.
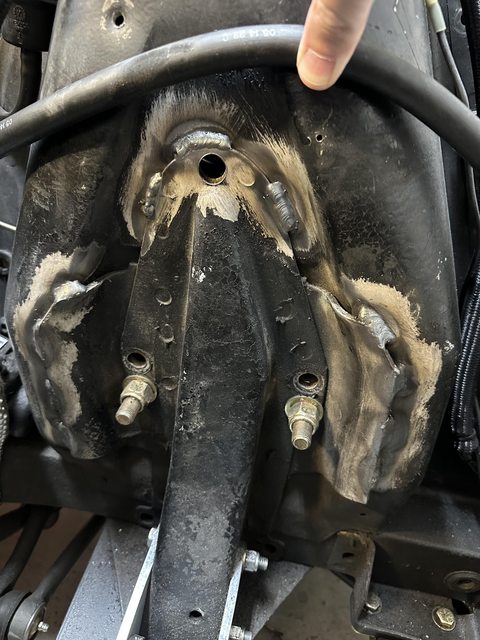
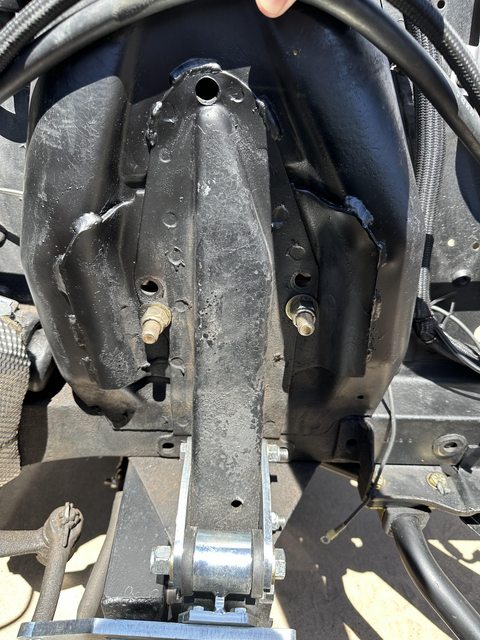
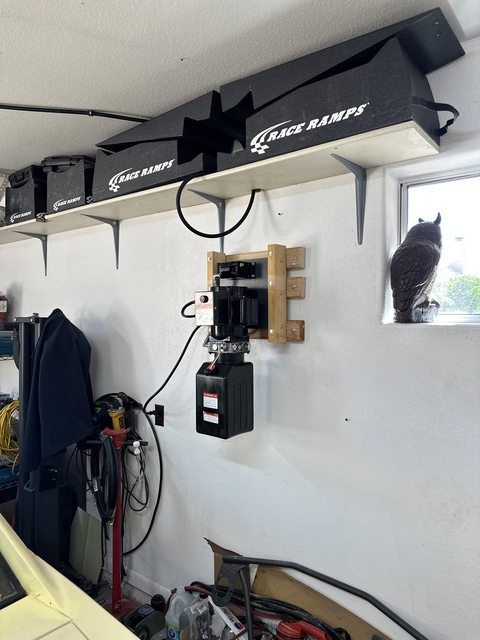
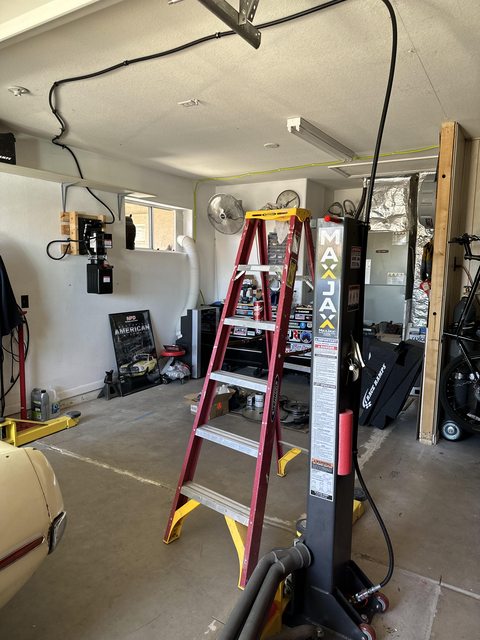
Aside from that, I've picked up longer hoses for my lift. I got tired of tripping over the hoses and will be mounting the controls on the wall next so it's not on the floor and then running the hoses overhead so they're out of the way. I'll probably work on that this coming weekend unless my ac kit shows up earlier than expected. Maybe Dan will stop by to hang out if he's not wasting his weekend playing golf!
Oh, and I put new tires on my daily.....because I'm a responsible adult.
June 2023:
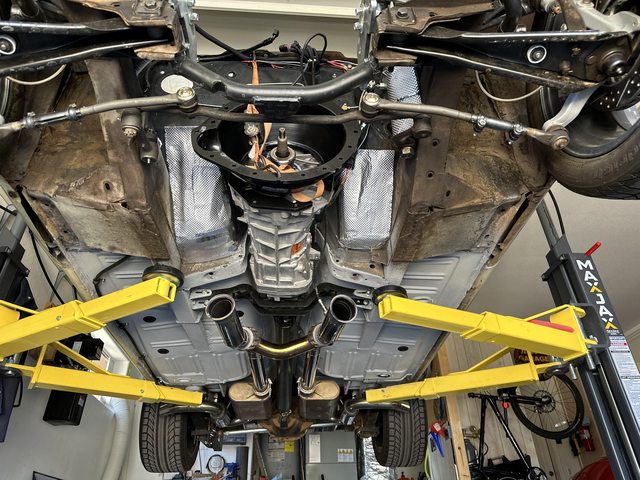
Still waiting on the AC kit to arrive. I did finally get around to wall-mounting the lift controls. I went overboard but I'd rather overdo it than have it fall and break something. Everything is back to working order. I will need to re-grease the lift blocks to address the jumpiness of the lift when it's on the up-travel. I'll get to that this weekend. I tested it by lifting the car and promptly used that opportunity to apply some heat shielding to the floor above the area that the headers are. Back to waiting on parts.....
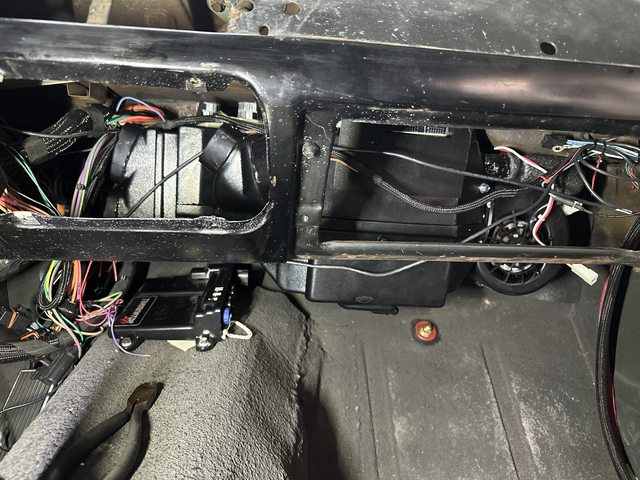
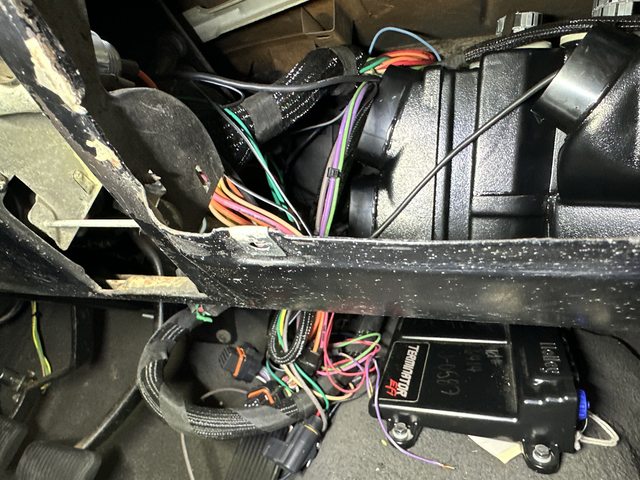
Made progress on getting AC all mounted up in the car. Hanging upside down in the floorboard while holding up an evaporator is so much fun!
I believe that I'm ready to stab the engine back in now. Once that's done, I'll start sorting out lines for the AC.
I will have to reroute and clean up a lot of my wiring since I no longer have a big empty space under the dash to leave it all.
 Kris - Building the poor man's '68 Mustang.
10-27-2023 #146
Registered User
- Join Date
- Aug 2012
- Location
- Phoenix
- Posts
- 162
July 2023:
I'm on vacation!
Made a run up to Las Vegas for a couple of days to reconfirm that I am not that city's target audience. Living in New Orleans for my younger years filled my social meter for a lifetime.
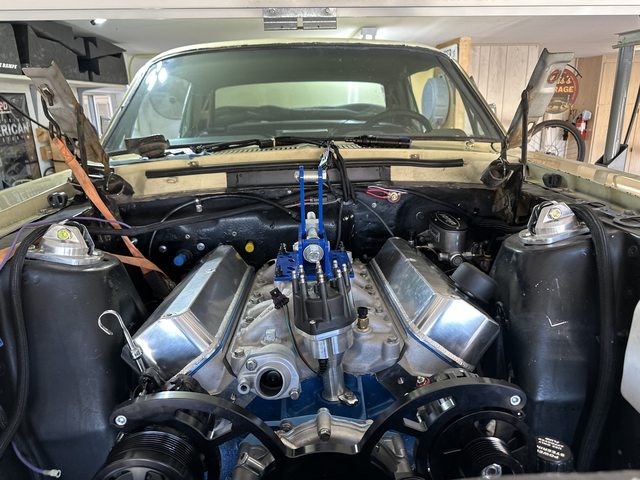
I did get the engine back in the car before leaving!
While in Vegas, we stopped by the Shelby American shop to poke around.
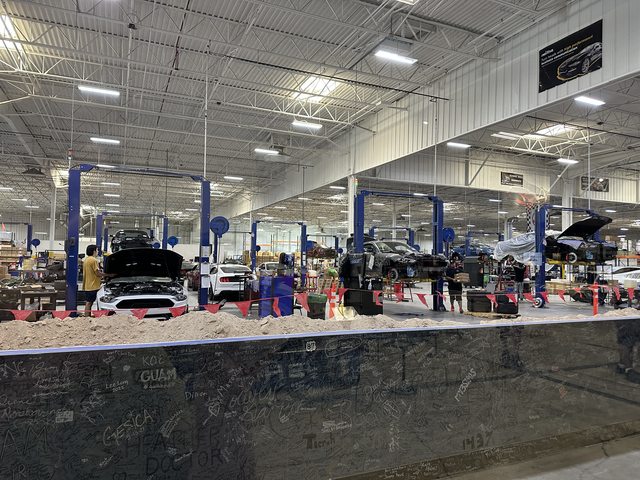
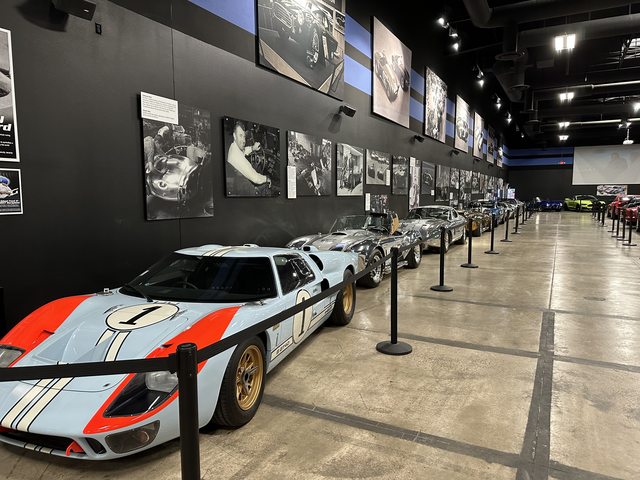
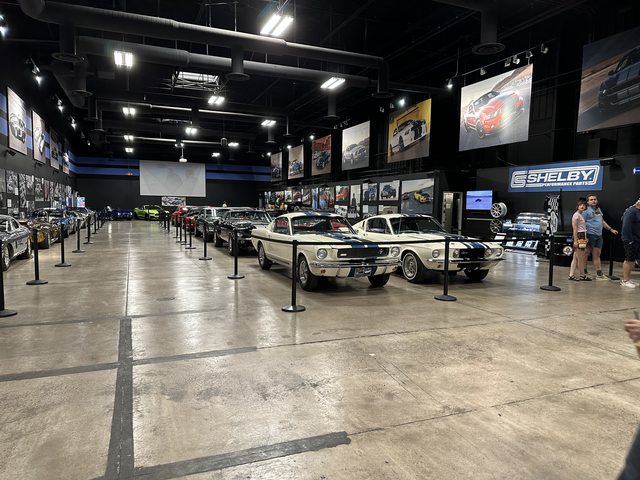
But, we're back home and all is well. I've got parts over at a friend's that will get dropped off at work when he's free. I also ordered a replacement fresh air vent since mine was trashed and had a hole in it (from the bullet that went through the A pillar and under the dash). It is currently sitting in the garage completely disassembled and soaking in evaporust since it looked to have been holding lots of dirt and leaves in it for quite some time. I'll get back to work this weekend putting everything under the dash back together so I can start getting this pile back on the road.
Made some progress today. I didn't get pics of it, but I put in a retrosound 5x7 in the dash. I also added some speaker grill material over the actual speaker to try and help cut down on the dust (because everything is dusty in the desert) that collected in the speaker.
I also started running ductwork for the ac.....it's a snake's nest under there. To make it worse, I also added the fresh air vent back in on the driver's side. Tomorrow will be spent running the wiring for the AC and cleaning up the existing wiring since I moved everything out of the way to make the duct work easier. I also ordered a headliner from MTF. It's sitting over at Dan's place. I will work on getting that installed sooner or later.
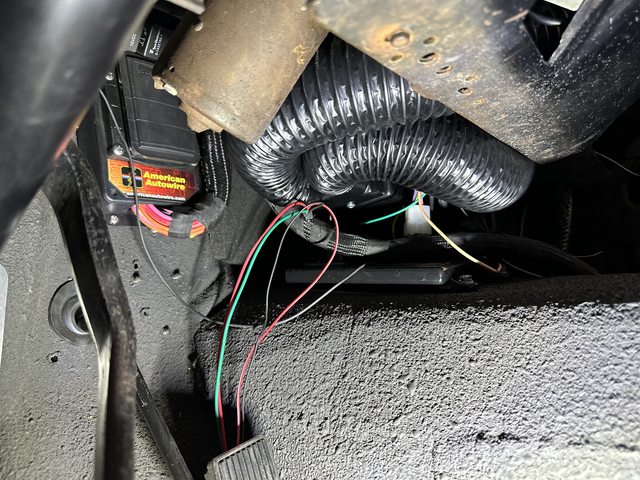
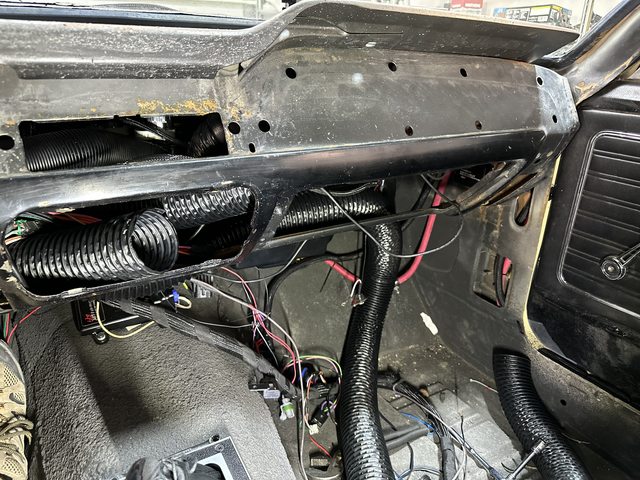
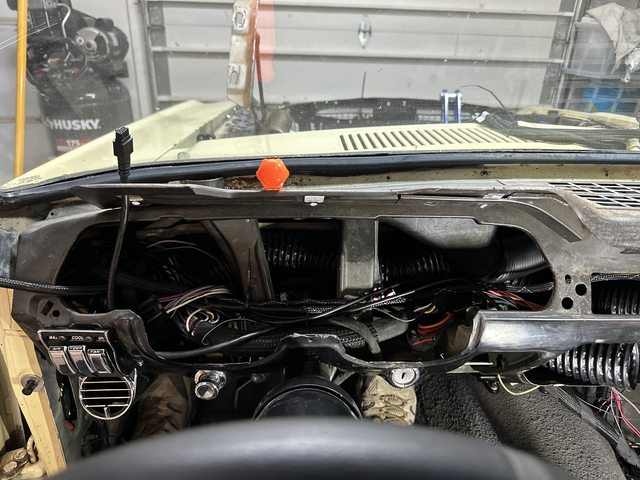
Spent some time in my garage this weekend. I was putting my portable AC through its paces. I had a goal of getting the duct work and wiring sorted out and the dash completely assembled.
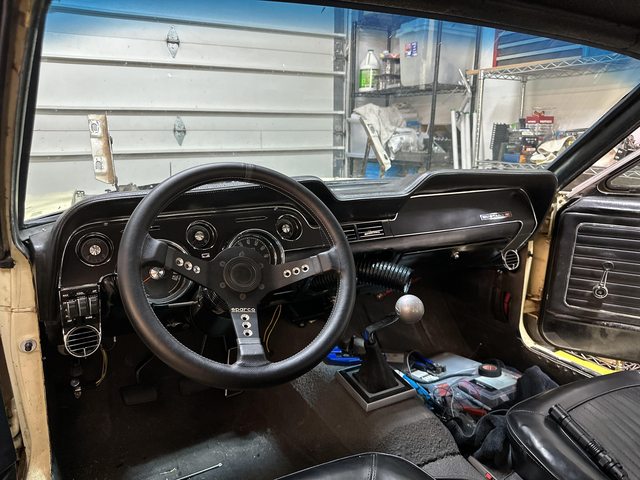
By 4 on saturday, I had everything routed under the dash before calling it a day. Sunday, I had to reroute some of the ducts to prevent them from rubbing against the wiper mechanism (not an easy task) and finish running the main power wires. I was able to get most of that all wrapped up and now my dash is more complete than it has been since January 2020!
 Kris - Building the poor man's '68 Mustang.
10-27-2023 #147
Registered User
- Join Date
- Aug 2012
- Location
- Phoenix
- Posts
- 162
August 2023:
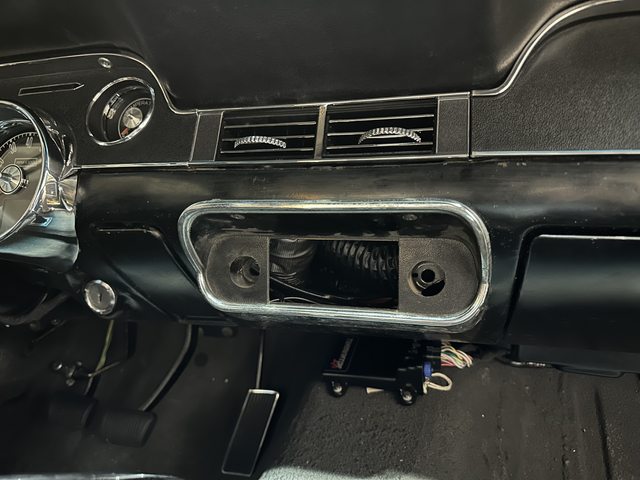
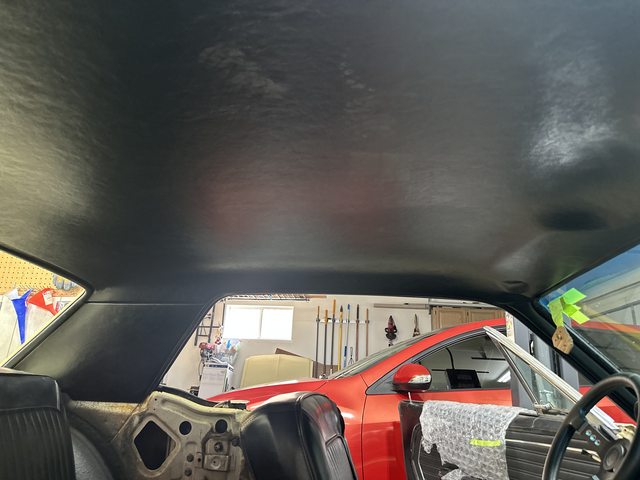
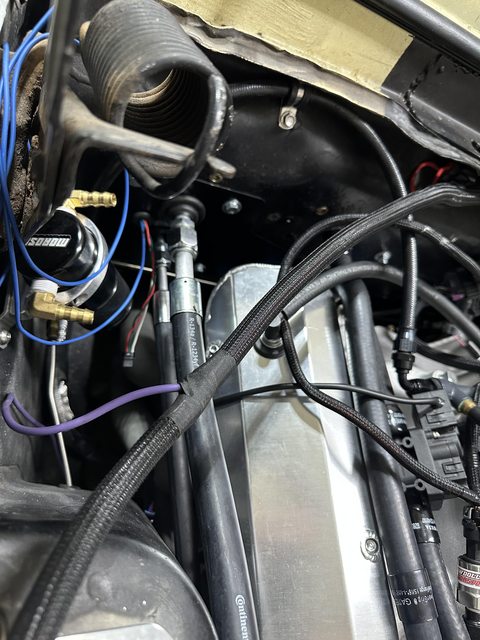
I've made progress on the ac. I have the dash completely reassembled for the first time in many years. I'll have to be creative for the radio bezel because the ac ducts take up the majority of the space behind the dash. I've considered finding a non-working factory AM radio and taking it apart and just using the face to fill the space. I'll sort that out later. Dan dropped off my Mustangs to Fear ABS headliner and I got that installed. It's in place right now and I'm leaving it alone for a few days to let it 'settle' before doing a final fitting. I also got the heater hoses and routing done. I had to chase down a fitting at a local shop because the one I had is buried in one of my boxes. I'll find it later. I also reinstalled the windshield and back glass trim.
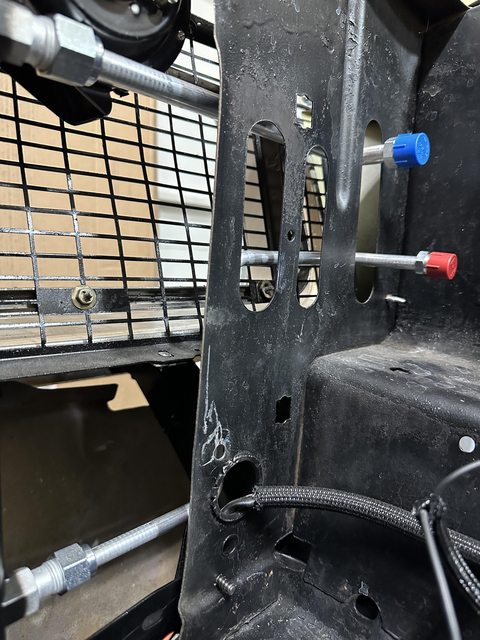
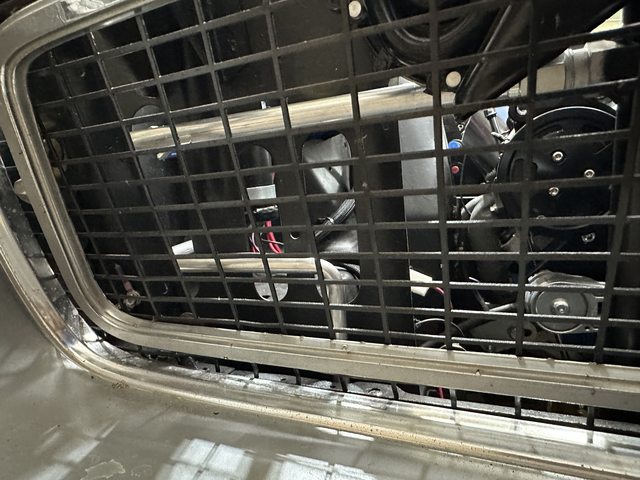
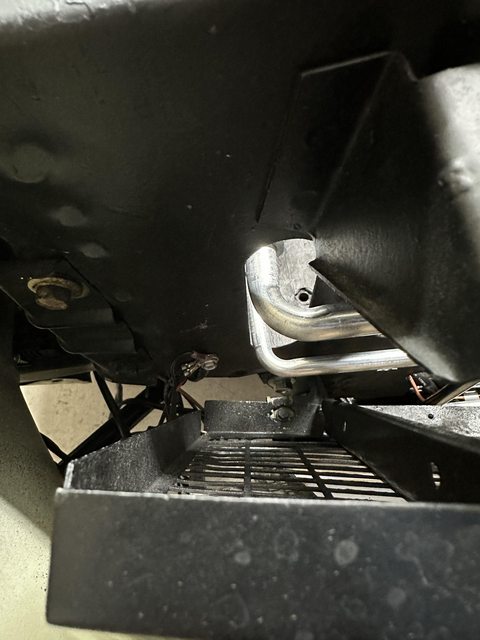
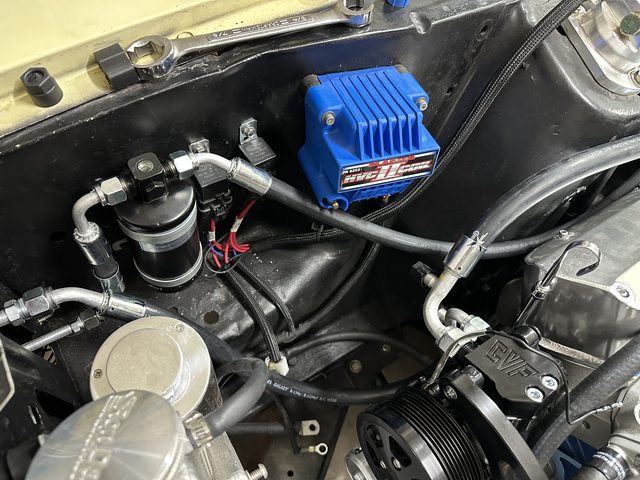
I've been working on the interior stuff because I'm waiting on some hard lines from Vintage Air to arrive. I bent some templates up to run from the condenser into the engine bay. I figured that would be cleaner than trying to do rubber hoses. Once those arrive (2 weeks-ish?) I'll get back to wrapping up the AC install and getting the car back on the road!
As you can see, there's little to no room for the massive factory head unit. That's why I had considered making a facade with a broken factory AM setup to clean up the look.
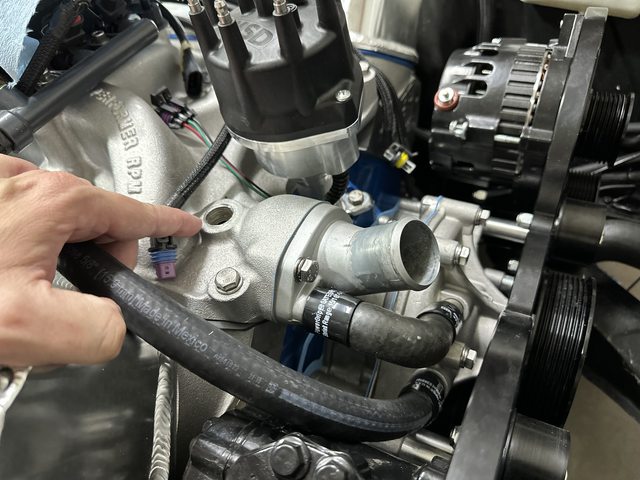
Heater hose routing. Since my engine sits down, back, and to the passenger side, I opted to use a preformed hose (Gates 18774) to help clear the block. It worked out well enough, I think. The first pic is the fitting I had to chase down because the one I had is sitting somewhere in a box laughing at me.
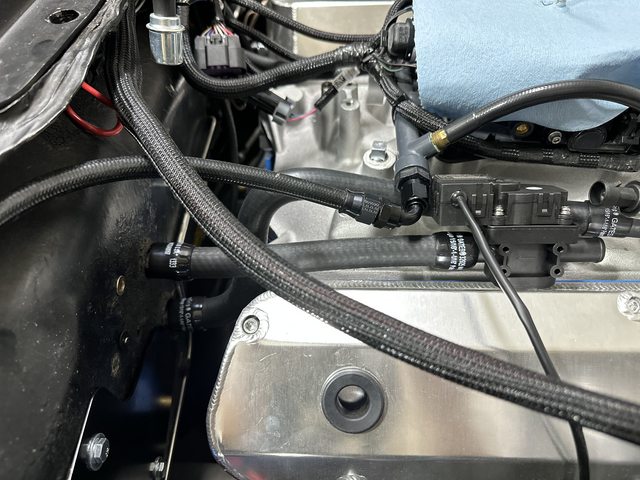
Windshield trim and wipers back on!
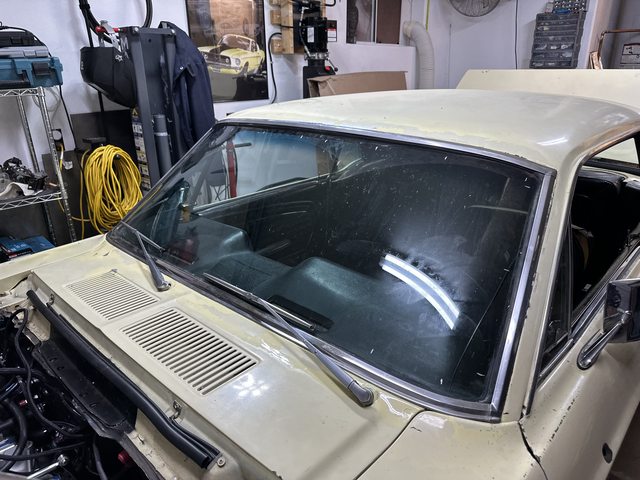
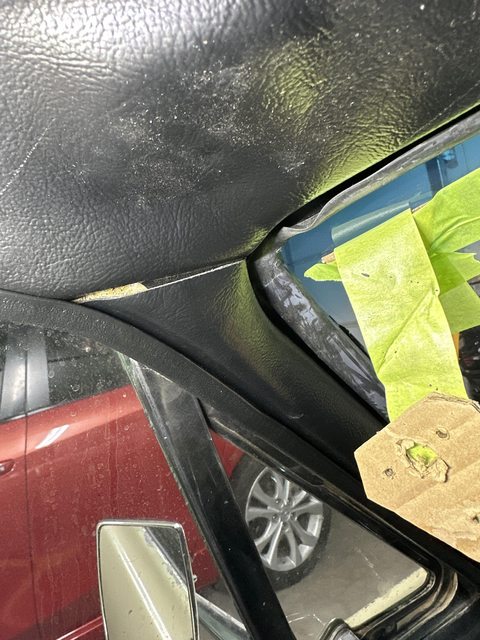
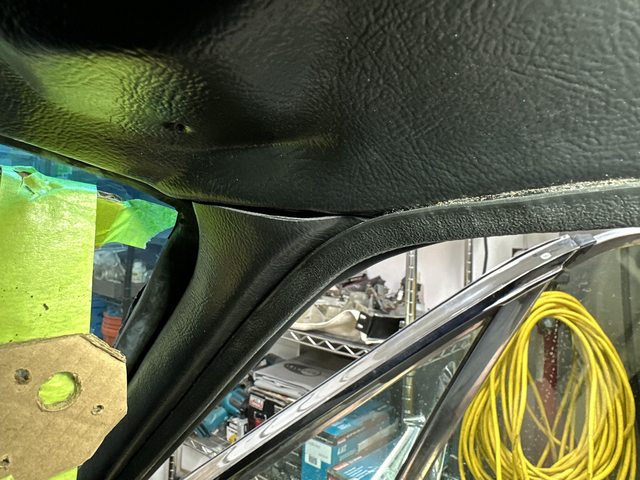
Mustangs to fear headliner in. Yes, those are footprints. I was in the car and on my back installing it solo since I am stubborn and didn't want to pester the missus to assist. The fit at the a pillar covers isn't ideal but that's why I was going to leave everything in place to let it settle before I started to trim anything or drill holes.
My hard lines from Vintage Air arrived yesterday. They turned out great. I spent this morning mocking up my soft lines and getting all of that ready. I'll take them to work and @Anangryford knows a guy that will crimp them for me. Once I get those back, I'll be ready to button this pile up and get it back on the road.
When I made the line templates, I wanted to be sure that the lines cleared the fasteners for the radiator and went through an existing core support hole. I was pleased with the fit. The only thing I had to do was move the condenser over just a bit to give me room between the lines and the edge of the hole in the core support. That was as simple as loosening the screws and sliding it over since the mounting holes are slotted.
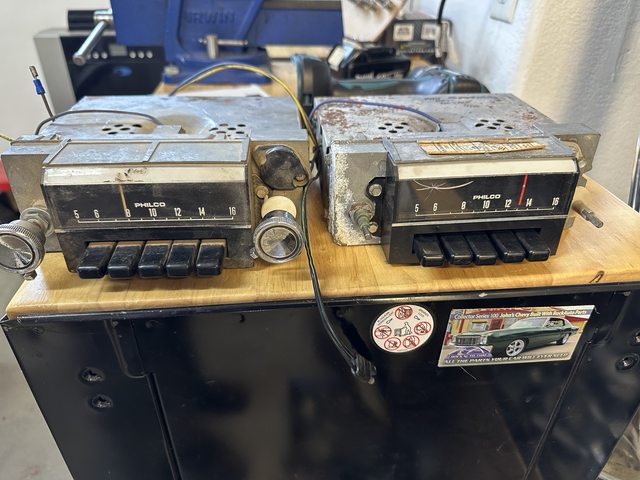
I also took the old radio apart that I picked up on ebay and got it mounted in the dash. I'll still need to move some ductwork around because it's still pushing a duct up high enough to hit the wiper arm. I'll get some pics of the radio as it sits now when I'm back outside.
This is where I started. My original working one is on the left.
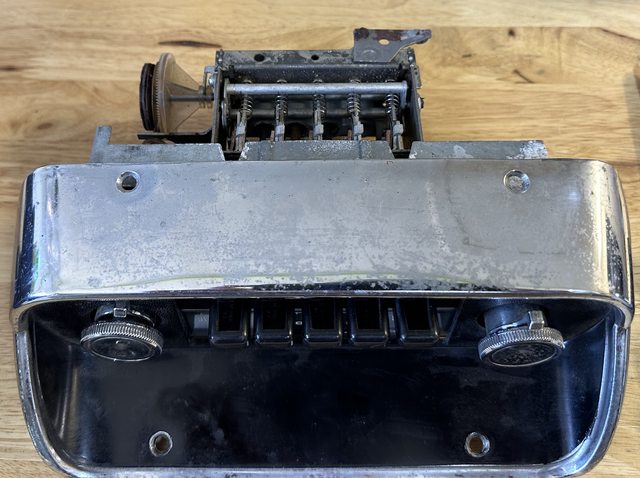
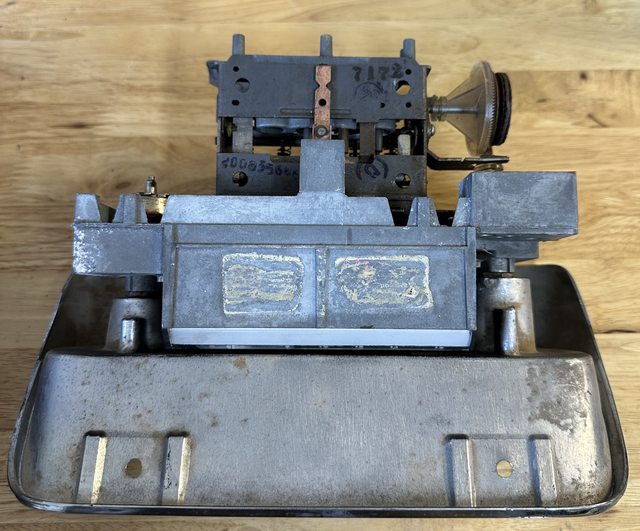
Radio pics after removing the majority of the body. I wanted to retain the buttons and knobs as well as the light. The tuning knob and station buttons still work but the power/volume button was sketchy at best when I took it apart and just free spins. No big deal. Everything is back in the car now and I'm looking forward to getting the AC lines crimped and getting this pile put back on the road!
 Kris - Building the poor man's '68 Mustang.
10-27-2023 #148
Registered User
- Join Date
- Aug 2012
- Location
- Phoenix
- Posts
- 162
September 2023:
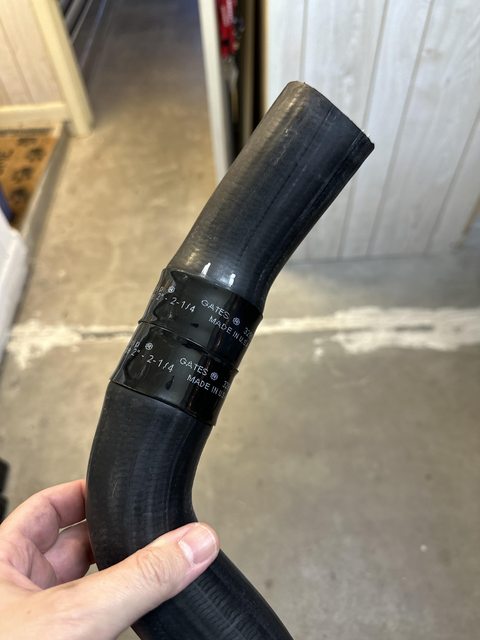
I've been on a self-imposed break from the car. Several posts back I stated that I would be very disappointed if this thing leaked. Well, it leaked and I addressed the leaks. And then things I haven't touched before that -weren't- leaking, leaked..... Anyway, still haven't drawn down the ac system or charged it yet. I've been fighting with a drooling cooling system. I will say that the Gates Powergrip shrink clamps are great, if you don't have to keep taking stuff apart.
Anyway, the ac lines are crimped and in place. I filled everything and pressure tested the car only to find a drooling water pump. Apparently, I had failed to properly seal the pump against the timing cover. I commence to tear everything back down, replace the pump gaskets and reseal them, reassemble everything, fill it, and pressure test again.....and the lower radiator hose starts peeing. So many profanities in such a short amount of time. I went ahead and started the car so I could do a combustion gas test. After the second core plug popped out, I wanted to be sure that I wasn't having those issues because of a head gasket or block leak. That test came out fine.
So I order another lower hose and wait for it to arrive. It shows up and is just different enough that it doesn't fit (the downside of using non bolt-in stuff). So I proceed to cut/trim it to fit. I place an order for the stuff I'll need to button that up and give the car the middle finger and walk away from it. The radiator hose parts arrive today. I will likely assemble that tonight and wait until this weekend to fill and test the system again. I've turned wrenches for many, many years and for whatever reason, this pump vexes me. I won't be a bit surprised if I get it all back together and it leaks from somewhere new. That's about as positive as I'll get for the moment.
Lines crimped and in place.
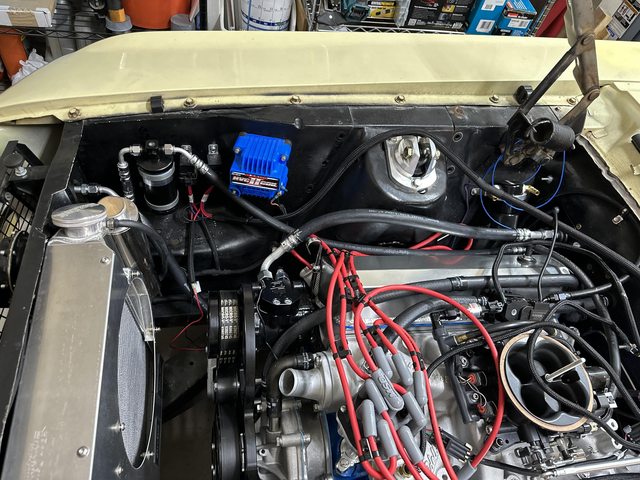
Front and rear of the pump to cover gasket. I'll own this as my own fault. I let it skim and then assembled it all. It would seem that I didn't tighten everything down enough around the ports and caused a poor seal maybe?
Front
Rear
And the new hose after cutting and trimming. I'll be putting in a 3" aluminum tube section at the tape mark and shrink sealing it to create my new lower hose. Then it'll be time to fill and leak test it.....again.
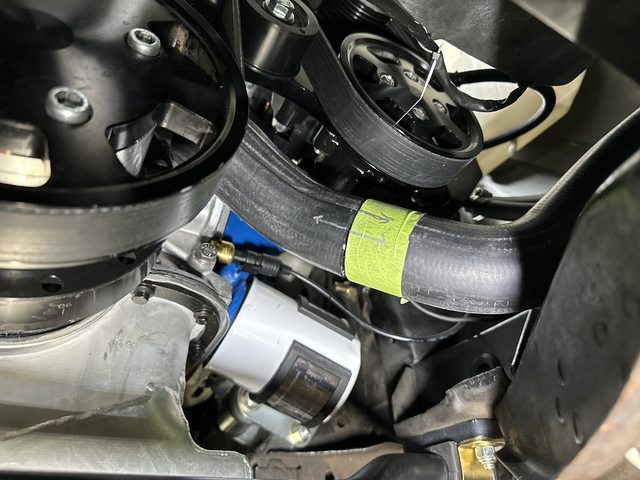
Productive weekend. I got the lower hose assembled and back on the car. Pressure tested everything again and found no coolant leaks. Drove the car a short while to circulate everything and came home. Still no coolant leaks anywhere but I did find oil dripping from 3 of the bolt heads on the driver side of the oil pan. I tightened all of the pan bolts a bit and reinstalled my strut tower brace and hood. Now it's finally time to pull a vacuum on and then fill the AC system.
Lower hose parts all assembled:
Getting closer...
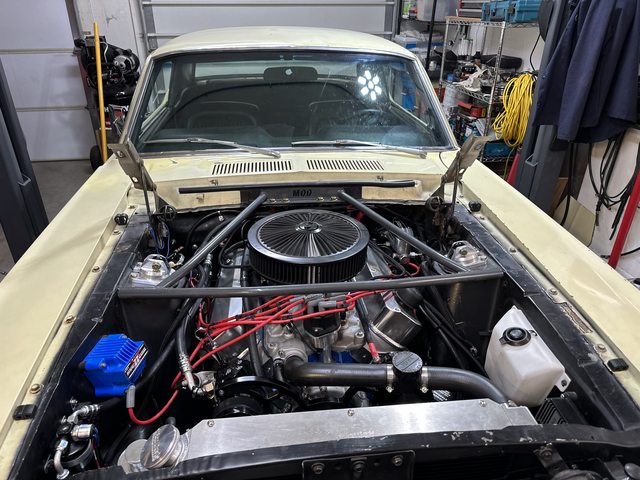
I feel accomplished!
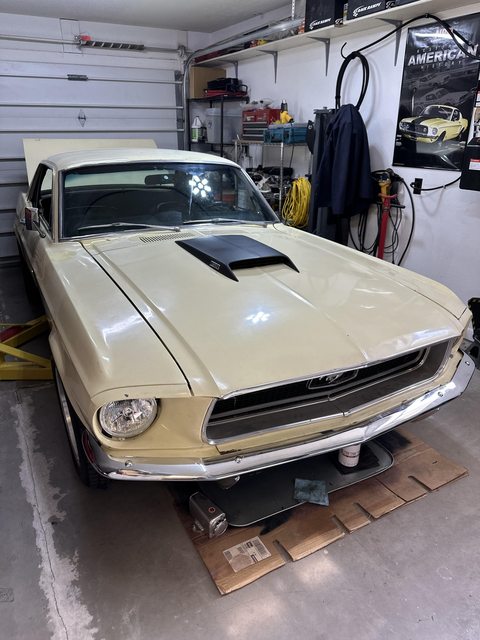
October 2023:
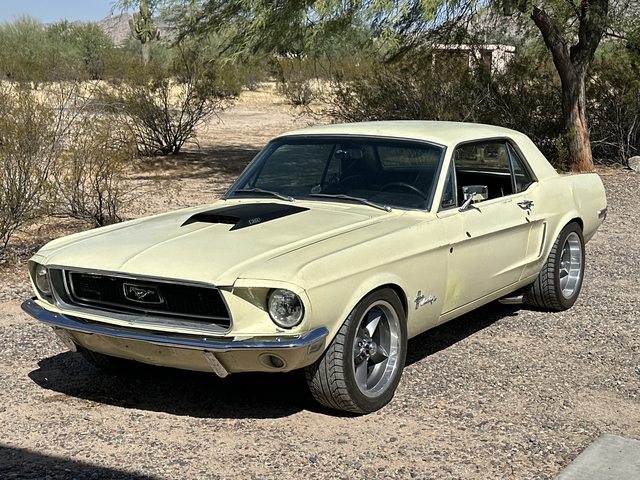
I drove my pile down to Casa Grande to a friend's place over the weekend. Why is that a big deal? Because it's roughly a two-hour round trip. And it's hot. I could manage it because 1) I have working AC! and 2) because my pile is trustworthy enough to handle it finally!
I borrowed some gauges and vacuum pump to pull down the system and check for leaks. When I didn't see any issues, I made plans to charge the system. On a whim, I called a local shop (Charly's Garage) to ask what they'd charge me to fill the system. He said he could knock it out for around $100 and had a spot open that afternoon if I could get it to him quickly enough. I dropped it off at noon and he called me around 3 to pick it up. No issues to speak of and the ac was nice and cold on my drive back to the house in 100* weather.
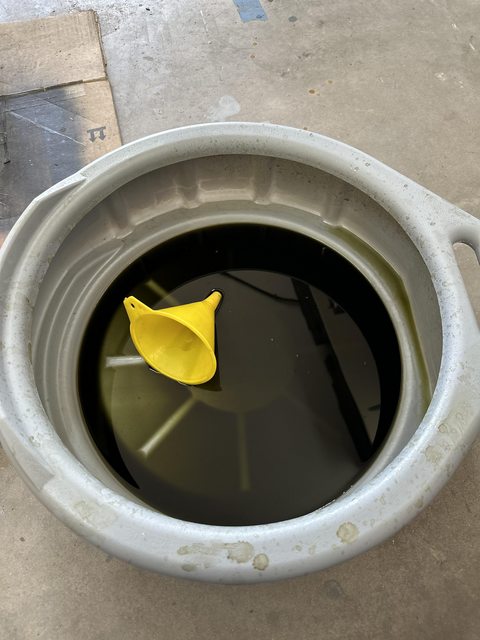
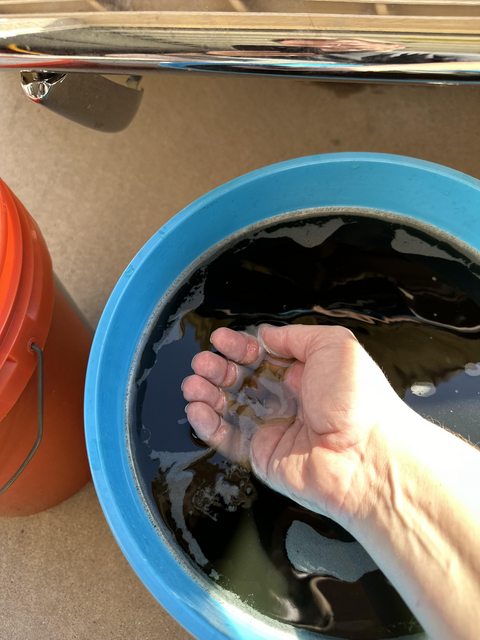
I had decided to run some of evaporust's thermocure through the system to get rid of some of the heavy rust inside the block that i found when I had the core plugs out. That stuff stinks when drained. After filling the system with distilled water and adding the rust stuff you're supposed to drive for around 3-4 hours before flushing it out. I drove out to central Phoenix to drop off his pump and gauges and then came back home. After getting back from Casa Grande I had covered enough time to drain and flush the system. Yesterday was spent doing several flushes and refills. I had stocked up on distilled water so I could get all of this done. It's sitting outside right now with coolant in it and everything seems to be good to go.
While I was at Mike's place, we talked about changes/upgrades to the car. I need to revisit my alignment soon. After having everything pulled apart and stuffed back in, i never went back to check it all. I'm also going to have to sort out the exhaust. I was getting a 90db reading in the car with the windows up and cruising down the highway. That's a bit excessive. I plan to run tailpipes out the back and ditch the side exits. They were never meant to be permanent anyway. I may also switch mufflers. That's all to be decided later.
Another discussion was wheels and tires. I'm leaning real hard towards picking up the SoT spindles and getting a different wheel/tire combo. I'll contact Street or Track when it gets closer to doing that. Mike tells me that if I decide to run a 275 squared setup, he'll give me more grief to autocross it. And if I run a 295 squared, he'll just take my car and run it himself.
Anyway, there's the news. I only have a pic or two to share.
Sitting at Mike's after the drive down. The cooling system burped because I had it overfull a little.
Here is the first drain of the thermocure stuff....it stinks a bit..ok, A Lot!
And here are a couple of shots of the Holley tuning software. Hitt and I were looking at why the car wants to stumble when you press in the clutch coming to a stop and what is causing a flat spot around the 2-3k ish range when accelerating 'calmly'.
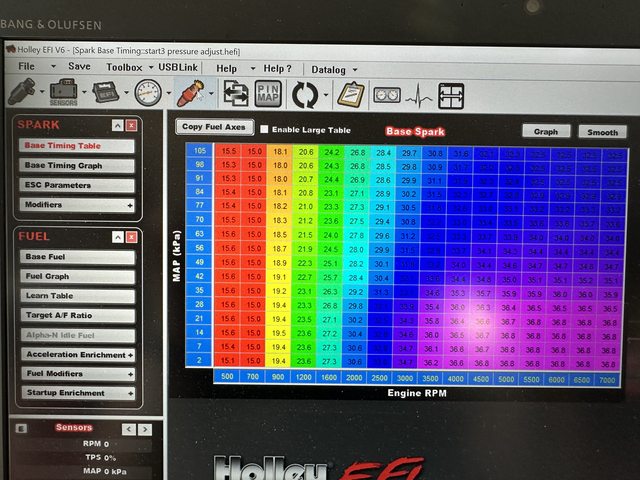
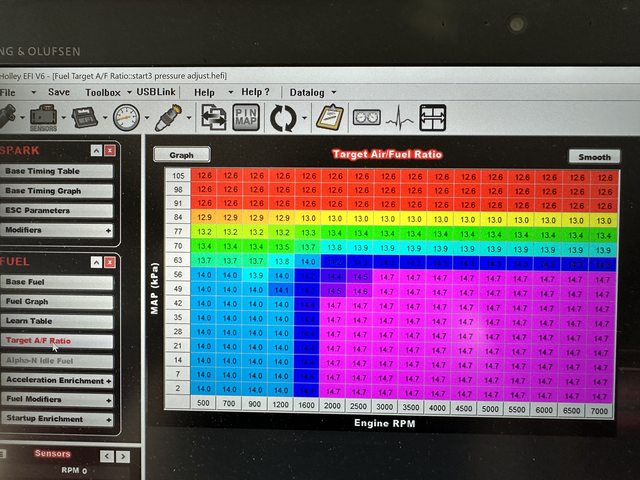
Here's the latest. I am generally a patient man. But I hate leaks. And this pile has decided to leak....again.....from the oil pan and water pump. Follow along as I throw money in anger.
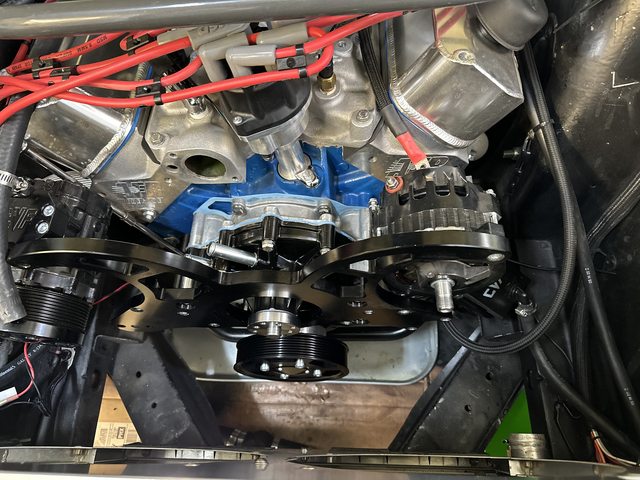
I'm running the ford shorty style water pump:
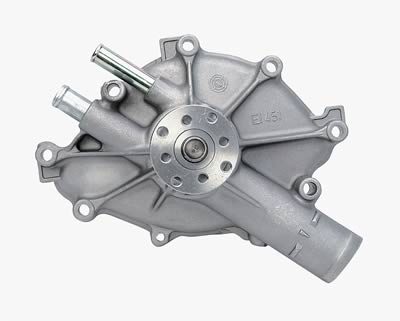
It continues to develop a leak between the backing plate and timing cover. This will be the 4th time I've pulled off the pump. I've tried Permatex 22071, Permatex #3, and straight gasket. I've even replaced the timing cover. Each time I've had the pump off, I've run a straight edge over it to be sure nothing is wavy or warped.
I may be right or wrong, but I feel that the shorty pump has an excellent opportunity to leak from the ports into the timing cover.
The reason I feel this way is because the standard pump has these two bolts:
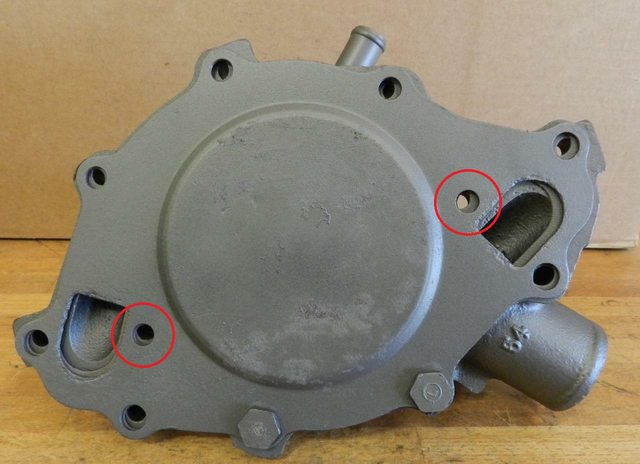
The shorty, does not:
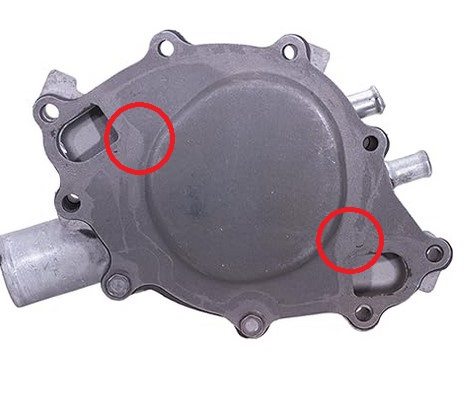
I called to speak to CVF about their thoughts on this and other things and I have a new shorty pump arriving today along with new hardware. They're also sending me a new crank pulley because I mentioned a constructive criticism of the one in my kit that didn't have an access hole to be able to spin the engine by hand unless the pulley came off. The tech responded with: "Oh, we've since changed that. I'll send you the new style, no charge. Just keep the old one in case you need it for something". They're awesome people. After some discussion back and forth and him stating that they see tons of that pump without issue and I've tried several methods to address it, he would send me a replacement. Again, no charge. His only thought is that the backing plate could be just wavy or bent just enough to allow seeping. So here's the can of worms. What can I do to better my chances of preventing this blasted thing from ever leaking again??? I'm tired of the coolant puddle on my catch pan.
Along those lines: the oil pan still drools. Not as bad as before but slighty so on the driver's side. When I spoke to Woody at FordStrokers.com, he mentioned that he's not a fan of most modern stamped pans and prefers the Moroso billet end pans. They are pricey....but I happened to find a return on Amazon for $400 off of retail price!!! For that price, I was willing to give it a shot. I could return it if it turned out to be a nightmare. The pan arrived Wednesday. It was unmolested. No hint of gasket material or oil ever touching it. There was a handprint on the base of the pan so I can only assume that a test fit happened and didn't turn out to be what that person needed.
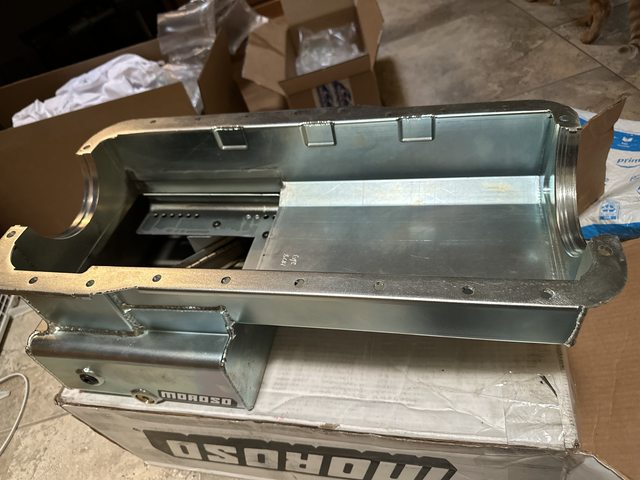
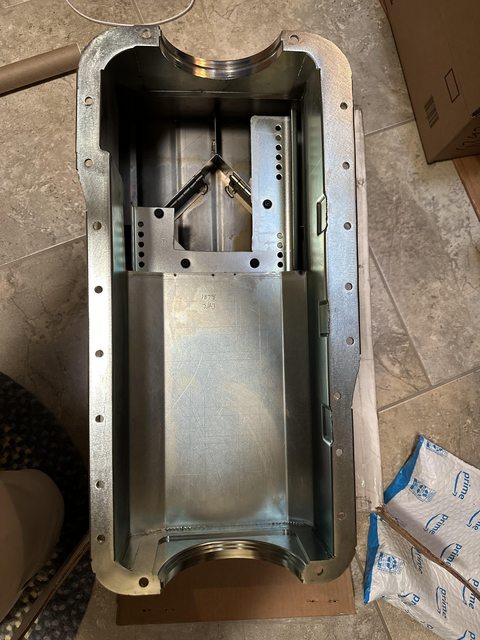
So that's where I'm at. My weekend will likely consist of putting this pile in the air and draining the oil and water and replacing the pan and pump in the hopes that I can keep the vital fluids IN the car. Along with that, I'm planning on attempting to change the side exits out in favor of tailpipes in the near future. We'll see how that pans out.
Last pic....I may have over-prepared:
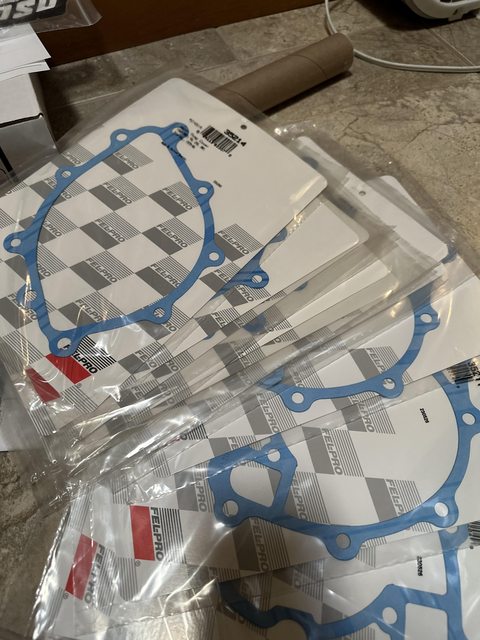
The replacement pump arrived Friday and is in. I wasn't expecting the blacked out version, though. Doesn't matter to me either way. As long as it doesn't leak. I did a thin layer of RTV on both sides of the pump gasket and the same around the ports on the backing plate gasket. I followed the instructions and let it set for an hour before doing a final tighten on it all. We'll see how it goes.
I also put a small amount of black RTV around the drooling oil pan bolts. I still plan to replace the pan but I'll wait until it's time to change the oil before I do that.
I've ordered a few extra bolts that should arrive this week. The socket head screws that come with the front drive kit have taken a beating with all of the remove/install that I've been doing and there were a couple that were feeling a bit sloppy. I'd rather replace those now before getting it all back together only to have them fight me further down the road.
If this monster stops drooling, the next adventure will be exhaust. I know muffler tone/sound is subjective but I need to make mine more tolerable. I'm considering adding v-bands behind the mufflers when I have the tailpipes added so I can try swapping out mufflers easier. I already have them on the front. I currently have black widows with resonators on it. It was described as 'blappy' with the side exits. I've considered the 50 series flowmaster deltaflow, magnaflows, flowmaster dBX, Borla, etc. I'll have to see which direction this goes.
It doesn't leak if there's no coolant in it!
 Kris - Building the poor man's '68 Mustang.
10-27-2023 #149 Registered User
- Join Date
- Mar 2022
- Location
- Florida
- Posts
- 224
Wow, great thread. I have similar situations with my car. Always chasing something. Currently it's a rear main seal, which when I purchased the car, the previous owner told me was not a rear main seal, just a oil pan gasket. But I digress...
Unless I am reading it wrong, it looks like the motor is producing more torque than HP. In that situation, typically it's under cammed. You may know this already, just thought I would mention it. Also the engines never make the power you think they should. I am trying to find out where the 30 to 40 hp is on my motor that I am convinced should be there. The truth is, it probably just isn't there. lol. Love the progress, keep it up.
10-27-2023 #150
Registered User
- Join Date
- Aug 2012
- Location
- Phoenix
- Posts
- 162
Always something, right?? Originally Posted by Pedigry

And you are correct. It is building more torque than HP. It is a stroked 351 Windsor (408) and all of the early plans where pointing to this being the case. It is a riot to drive. Easily breaks loose on a smooth second gear shift into liberal throttle application. I haven't considered changing anything engine-related though. I won't say that I wouldn't in the future. We can all use that few more HP, right?Kris - Building the poor man's '68 Mustang.
10-29-2023 #151
Registered User
- Join Date
- Aug 2012
- Location
- Phoenix
- Posts
- 162
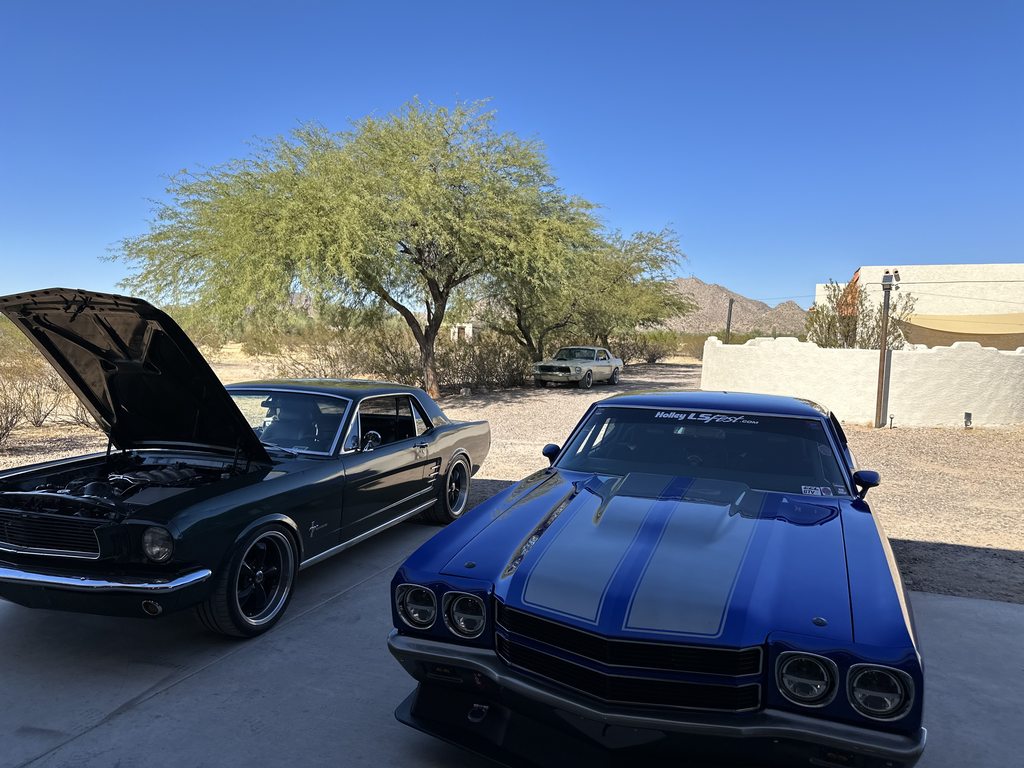
Got everything reassembled yesterday and took it for a short test drive. No leaking coolant. Met up with Dan and we drove down to our friend Mike's place to talk shop and spend each other's money with future upgrades talk and plan for the SCCA race next weekend. Got home....no coolant leaks. I'll be talking to the exhaust shop this week to see about making some changes soon. I'm just shy of 800 miles on the fresh engine. I think it's almost time to change the oil, swap the pan, and begin the drive-it, flog-it, upgrade-it process!
Mine is hiding in the shade in the background. Dan is the coyote powered 66 and Mike's is the Chevelle.
 Kris - Building the poor man's '68 Mustang.
01-15-2024 #152
Registered User
- Join Date
- Aug 2012
- Location
- Phoenix
- Posts
- 162
Not much has been going on lately. I was supposed to go on a vacation to see family during the first week of December but ended up getting Covid from a knucklehead at work that didn't bother to stay home while he was sick. That ate up $600 in non-refundable plane tickets and a week's worth of vacation. Yeah....do the world a favor and stay at home when you're sick....regardless of what you've got.
I've got a short list (not really that short) of things that I want to address in the near future on the car. But as things go, there is talk of having the roof on the house redone this spring. That could slow progress down a little on the car. I'll have to see much juggling I'll need to do.
The list:
Header swap - remove JBAs and add FPAs.
redo/finish exhaust - add tailpipes at the very least. possibly switch to borla mufflers.
Swap intake back to Vic jr. from Performer RPM
Swap moroso billet oil pan on to replace Aviaid stamped pan.
Swap integrated PS pump reservoir for remote mounted setup.
Add parking brake setup of some sort.
sort out fine details in the tune.
Maybe list:
swap out valve covers. The fabricated ones aren't bad but they are difficult to work around.
swap out plug wires. currently running msd sbf universal set and not satisfied with the fitment/clearance.
ONE MONTH LATER:
It's been a bit. I've been keeping myself busy doing maintenance on the dailies and relaxing a bit. I have also been gathering funds and parts preparation to begin the list of stuff.
This weekend I got started on the list.
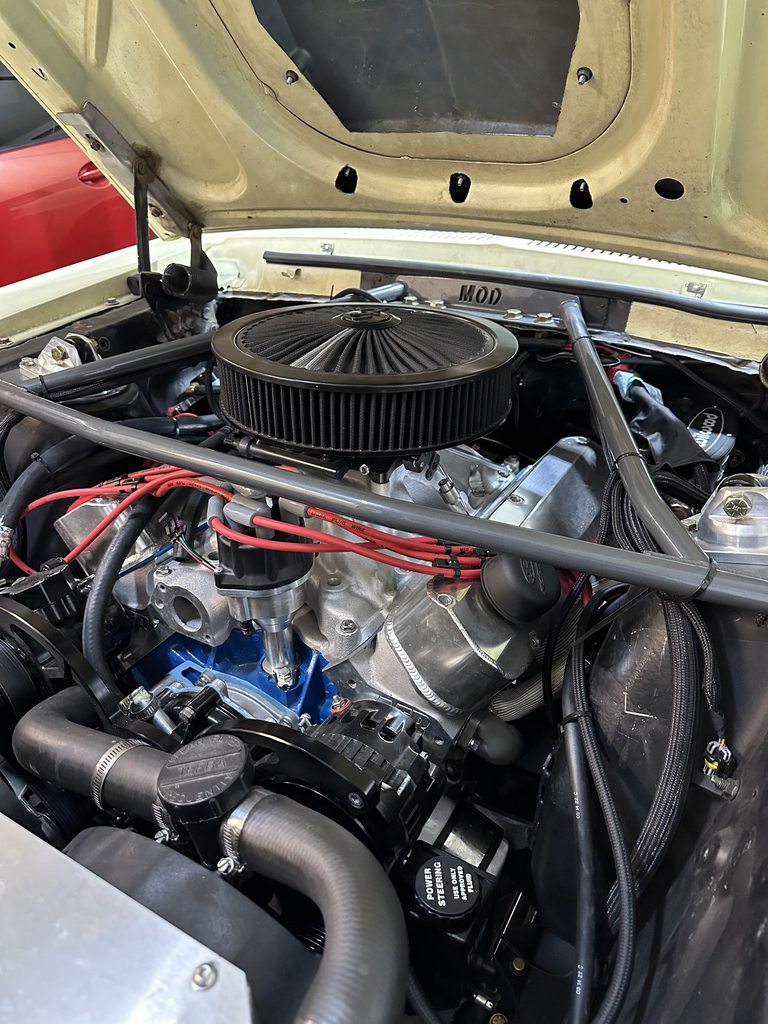
I swapped out the Performer RPM intake and went back to the Vic Jr. I'll either need to get a drop base for my air cleaner or trim one of the studs for the hood scoop.
This is everything just set on top of the intake for test fitting.
Next up was taking the crossmember off and taking the steering link apart to make getting the oil pan easier to work on.
A couple of weekends ago I was at a friend's place sorting out the alignment....the one with the chevelle.
I am holding the wrench on the passenger side and realize he's prepping to tighten the LCA bolt with his 1/2 drive dewalt impact.
I calmly explain there's no need to go gorilla-mode on it and get a 'got it' in reply......
I had to order replacement hardware for that side.....
This was after grinding off the head so I could get the bolt out and crossmember off.
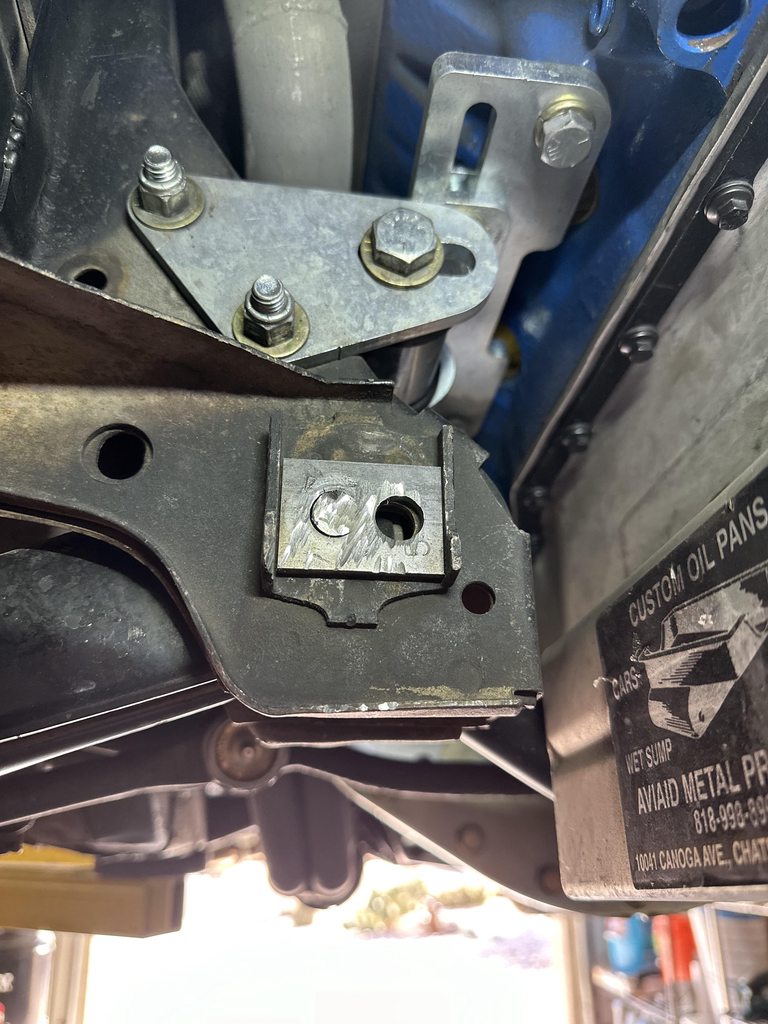
Anyway....I got the Aviaid pan off and the Moroso on for test fitting. There is so much room now. No clearance issues with the crossmember or steering at all!
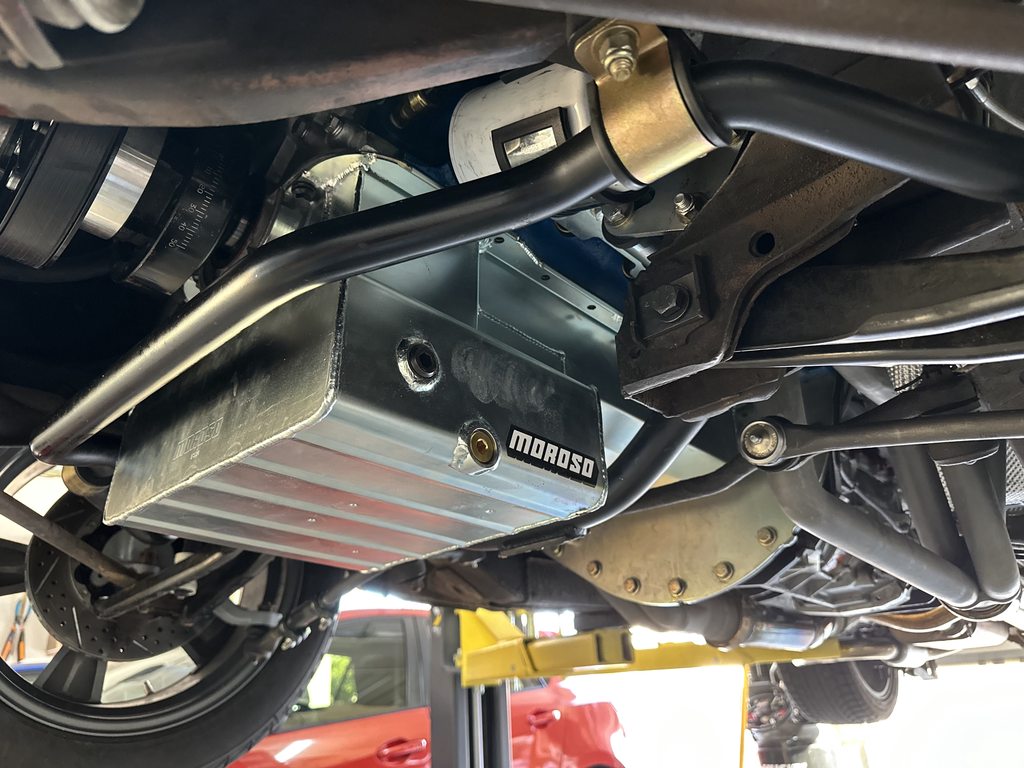
I also ordered a Motorcraft sending unit gasket from amazon. Mine had been drooling a bit and I wanted to get ahead of it getting worse. No pics of that, but I was pleasantly surprised when a pack of 10! gaskets arrived instead of the 1 that I had ordered.....I now have plenty of spares...
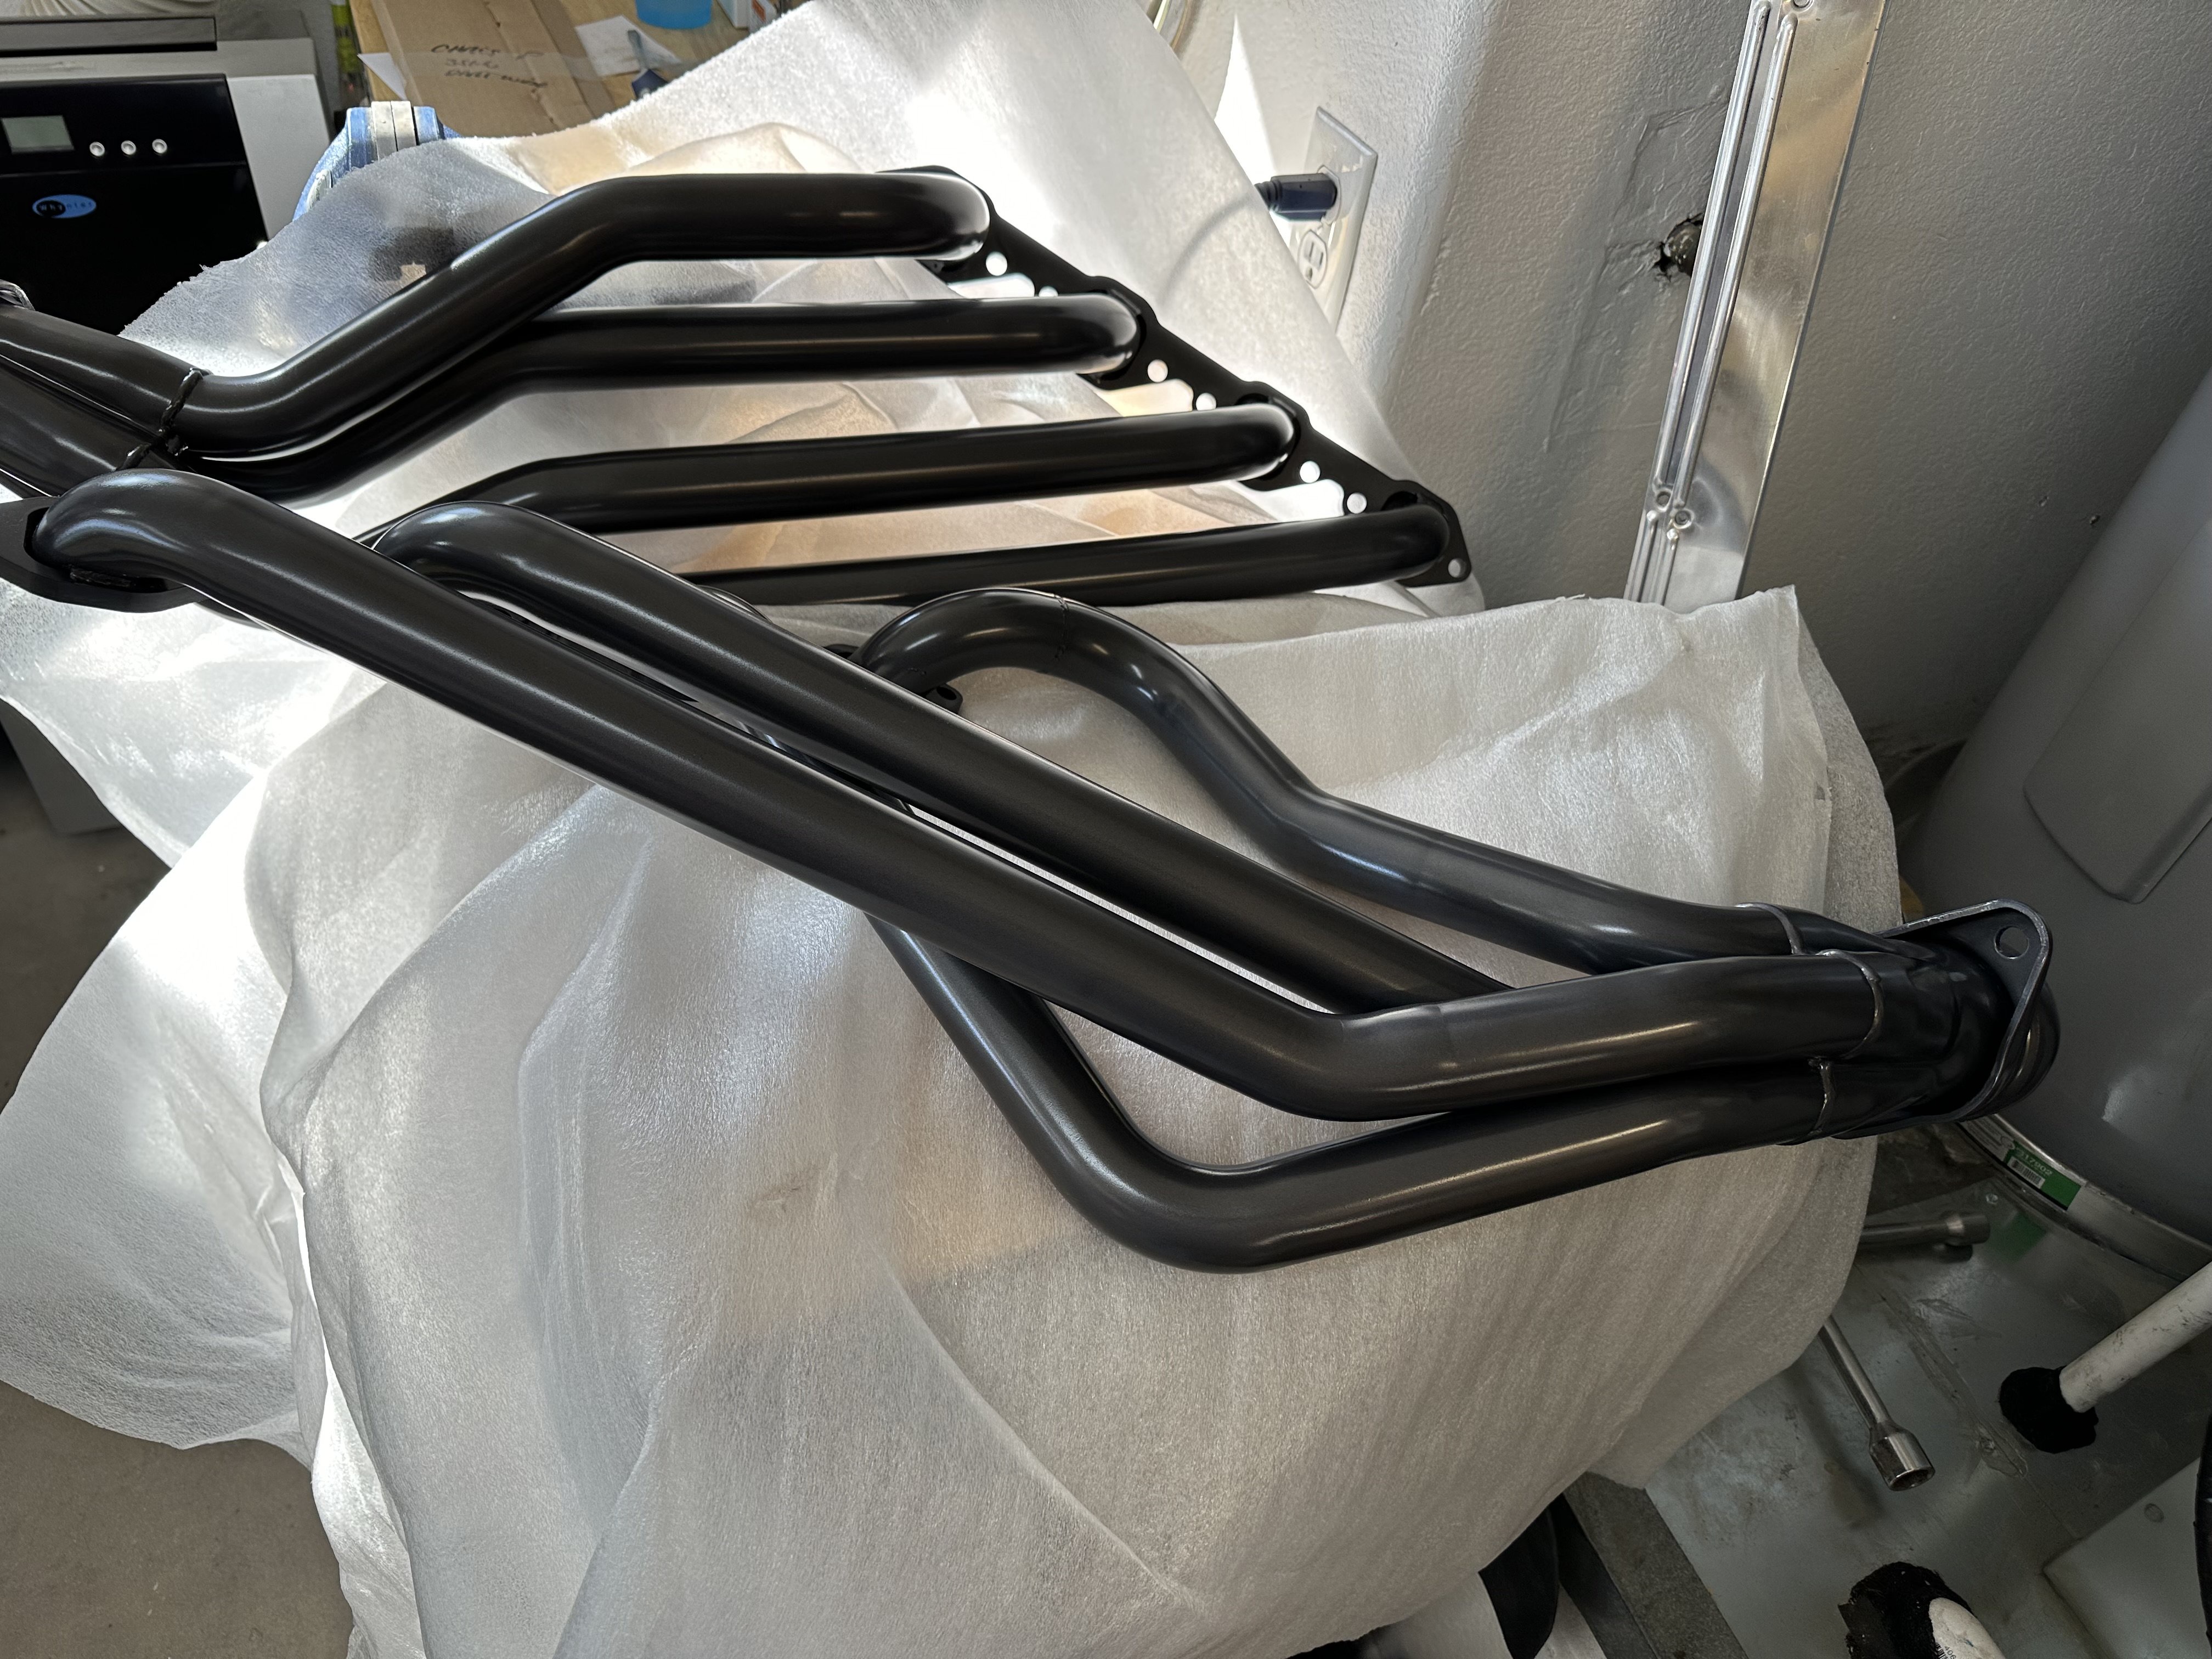
I'm hoping that my FPA headers will arrive soon. This will soon be all buttoned up and then it'll be time to sort out the tune and maybe then I'll have it ready-ish to go fling it around.Kris - Building the poor man's '68 Mustang.
04-03-2025 #153
Registered User
- Join Date
- Aug 2012
- Location
- Phoenix
- Posts
- 162
One year's worth of updates - go!
In the latest good news: FPA headers have arrived!!!
In the latest bad news: Car stuff is on hold while we put a roof on the house! :cautious:
Being a responsible adult is less fun than people make it out to be.
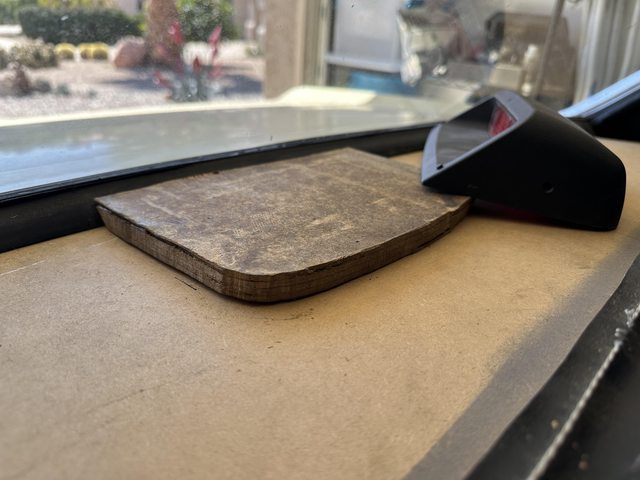
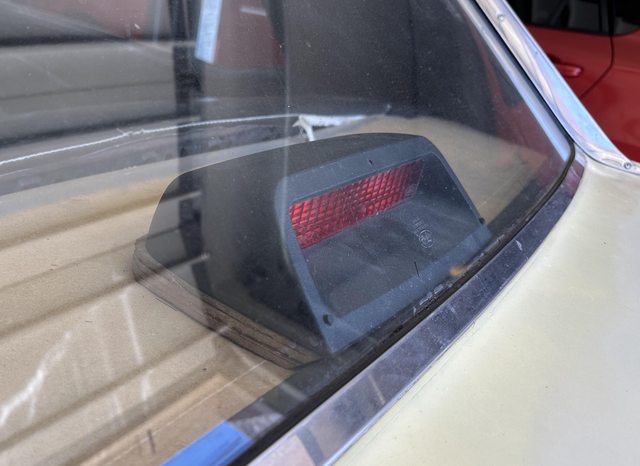
Since I've been in 'save money' mode, I was looking at free/cheap things that I could do. I've been toying with the idea of adding a third brake light for a while. I'd even collected one from a friend's Crown Vic donor car.
I messed around today with building a riser and placing it in the back window to get a better idea of how it would look. I don't think I'm sold on the idea.
June 2024:
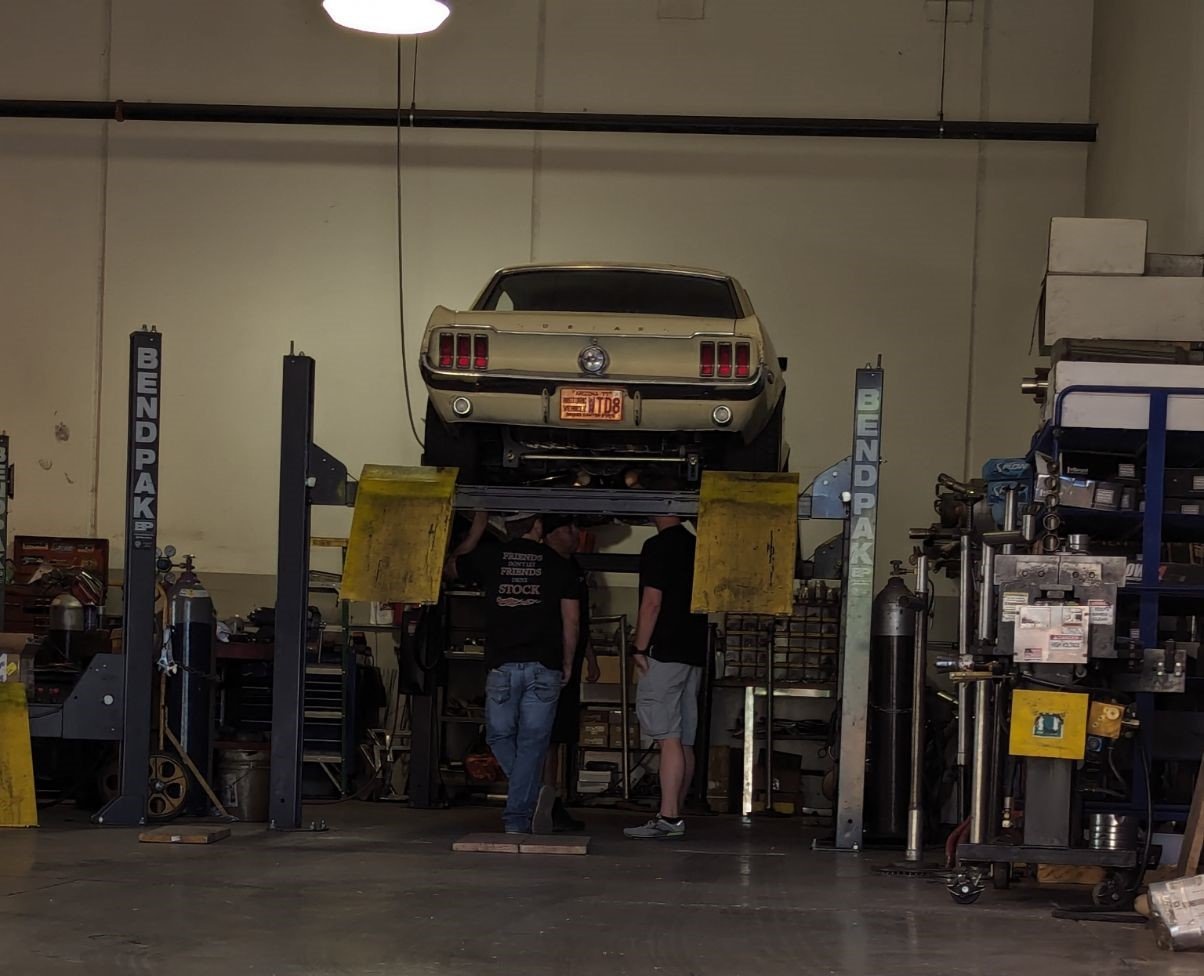
Nothing exciting has been going on lately. I had the past week off of work mainly to burn some vacation time. I decided to go over to a local exhaust shop that was recommended by a few nearby hot rodders. I had called to ask about getting tailpipes on the car and explained what they'd be up against and was given a rough estimate. When I mentioned that it was a tight fit, the owner said "We work with tight spaces all the time. It should be no problem."
I get there and the car goes in the air and I get compliments on the existing setup. They asked if it was a kit and I explained that it was just a quick and dirty setup made from a box of bends.
The conversation moves to tailpipes and the owner walks over and then another guy...and another. Soon, there are 4 of us under the car. The 3 exhaust guys are trying to get creative about ways to run tailpipes and coming up short. After a few minutes of suggestions that sounded more and more like they didn't have a good way to run what I wanted and the price was twice what the original estimate was, I thanked them for their time and headed home.
Sooner or later, I'll get back into the car. For now, it's still recover-mode as far as finances go. It's not so bad since we've been sitting in triple digit temps in AZ. Hopefully I'll have some plans laid out and ready to get back to it by the time it cools off around here.
November 2024:
It's been a minute. Things are better but still not 100%. Roof is all sorted and paid. Salary negotiations are going on at work. Plans are starting to form in the background if the negotiations don't prove fruitful. But enough of boring life crap!
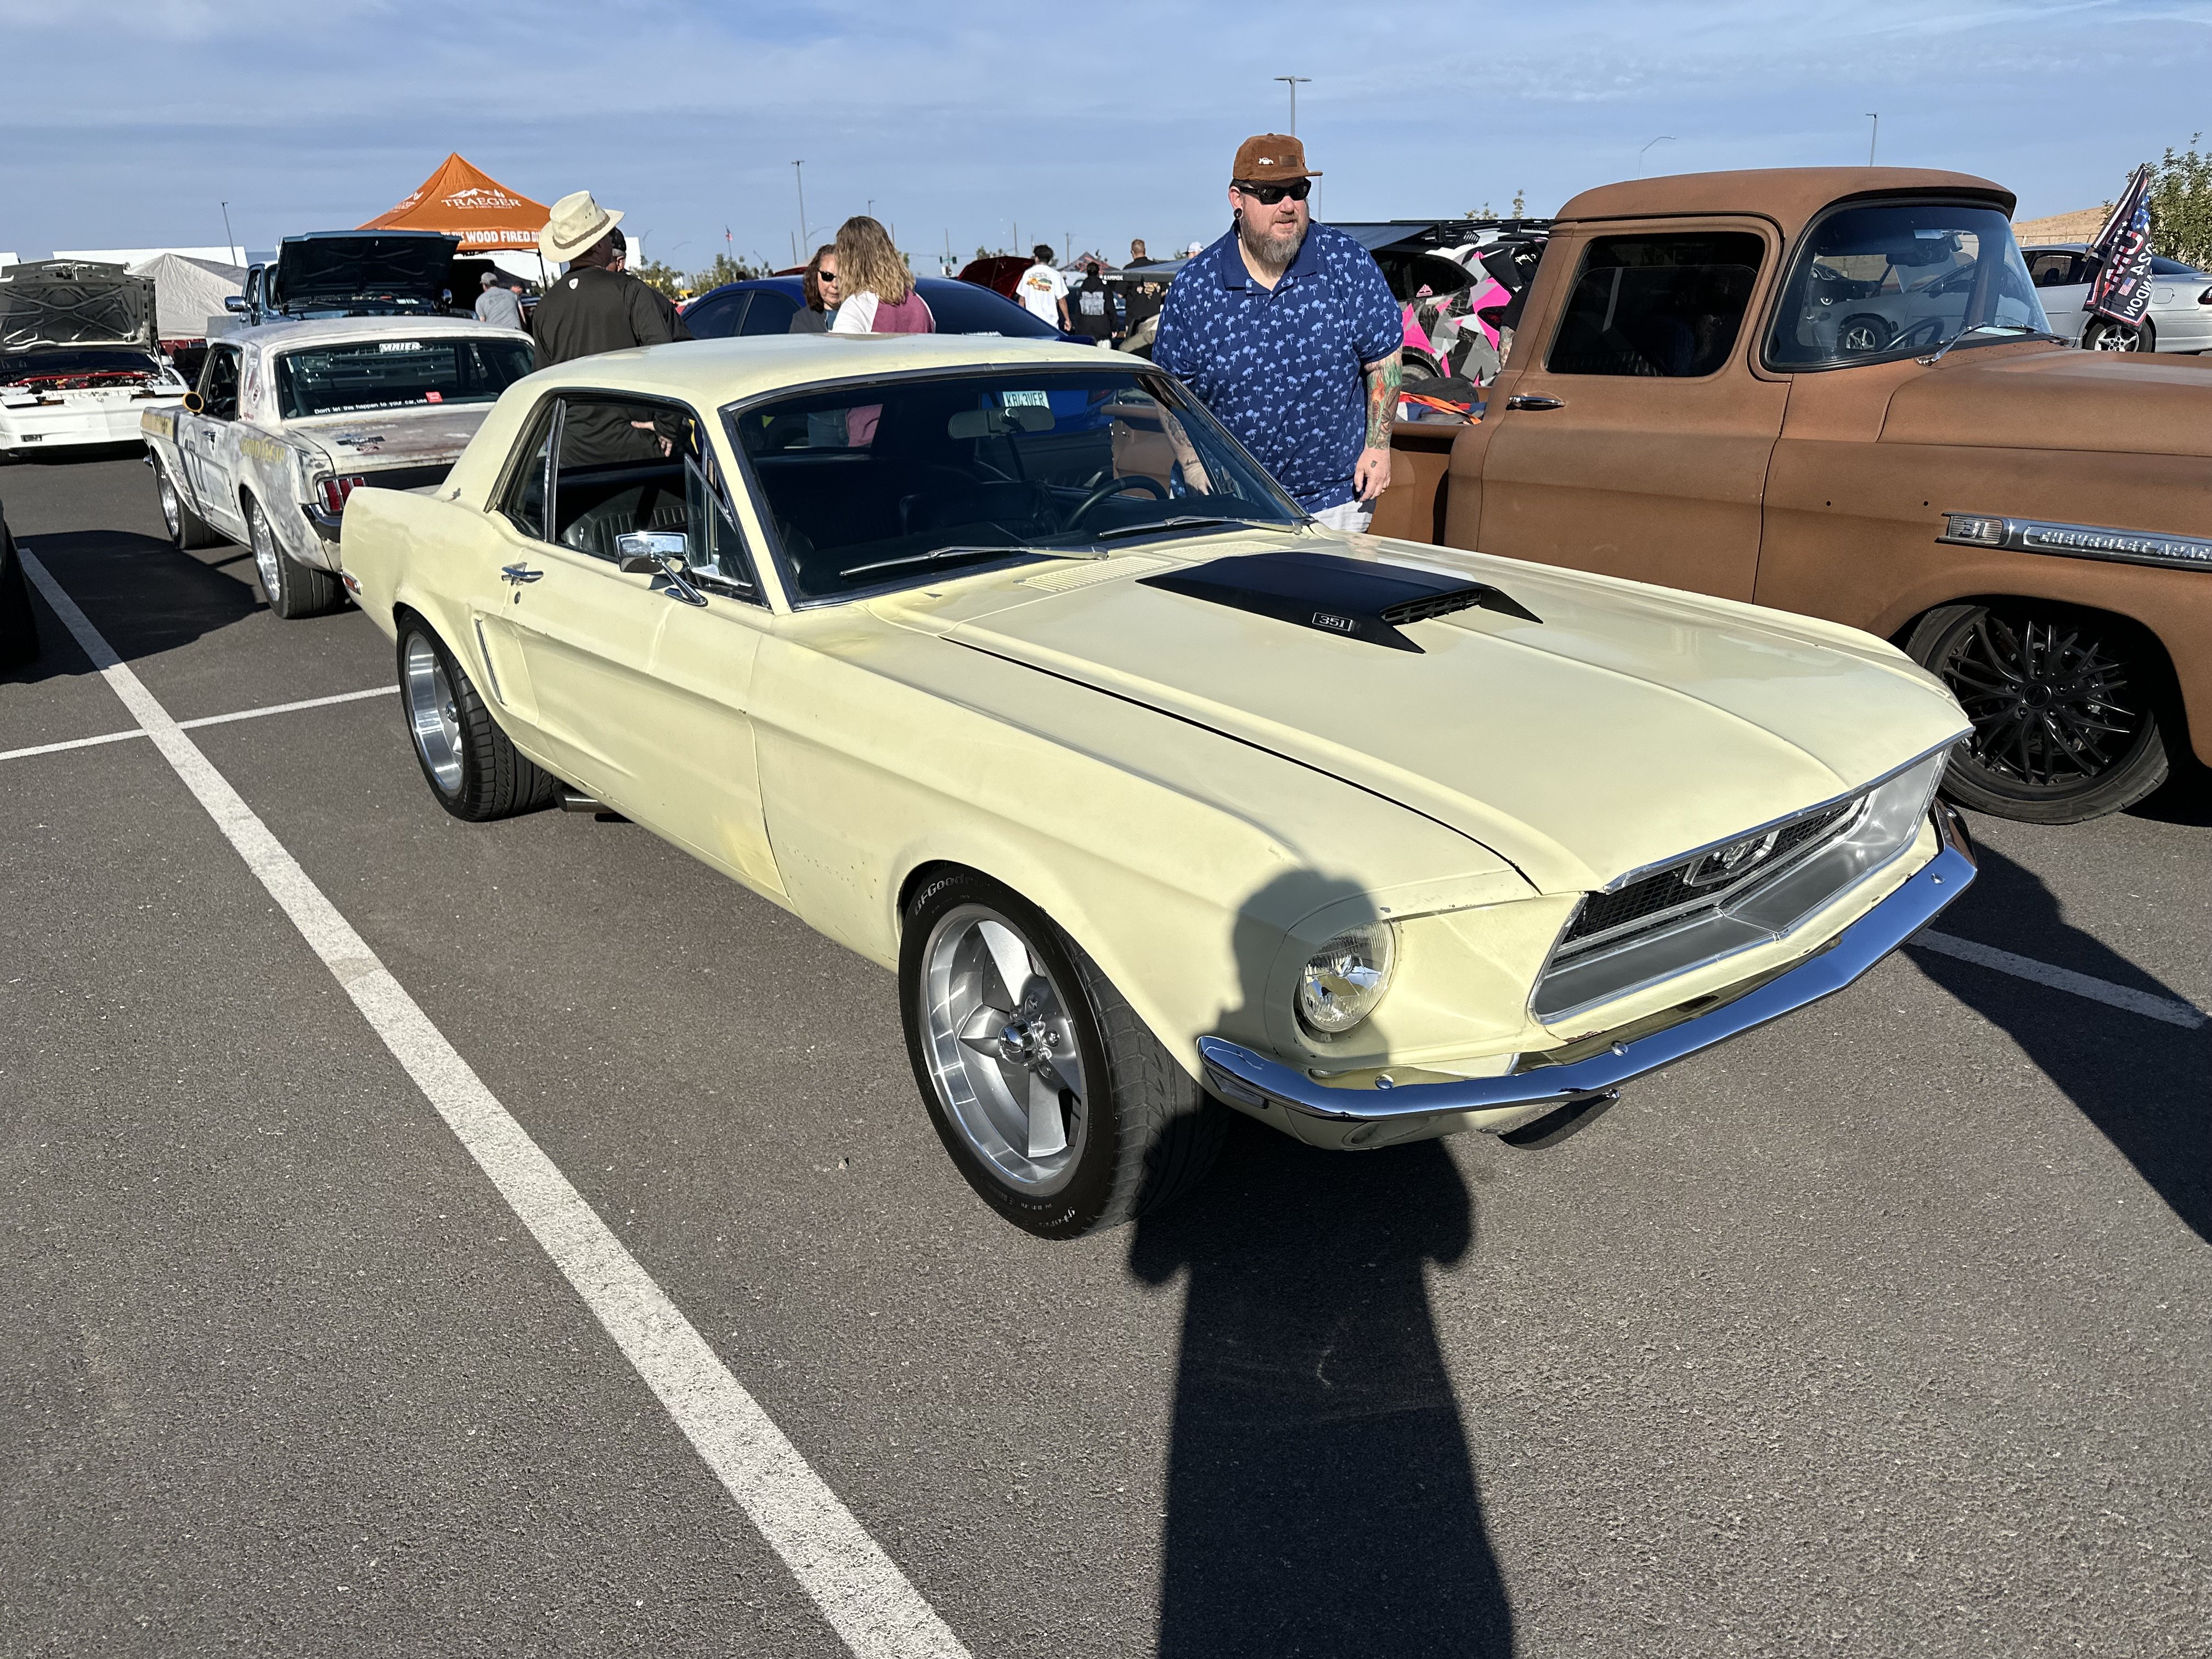
I entered a car show today! A local vo-tech school had their annual car show and a lot of the CAM-T guys went and talked me into going. I washed my junk in a pitiful attempt to make it presentable and headed out. The missus and I got there a little before 9 and hung out until the show wrapped up around 1. I'm a terrible person and didn't get pics aside from the two below. The pic of my junk (with my shadow in the way) was to show my dad that I actually got up on time and made it. And the other was to show him my buddy Mike and his wife made it out as well. Maybe the next post will be of exhaust updates or something fun.
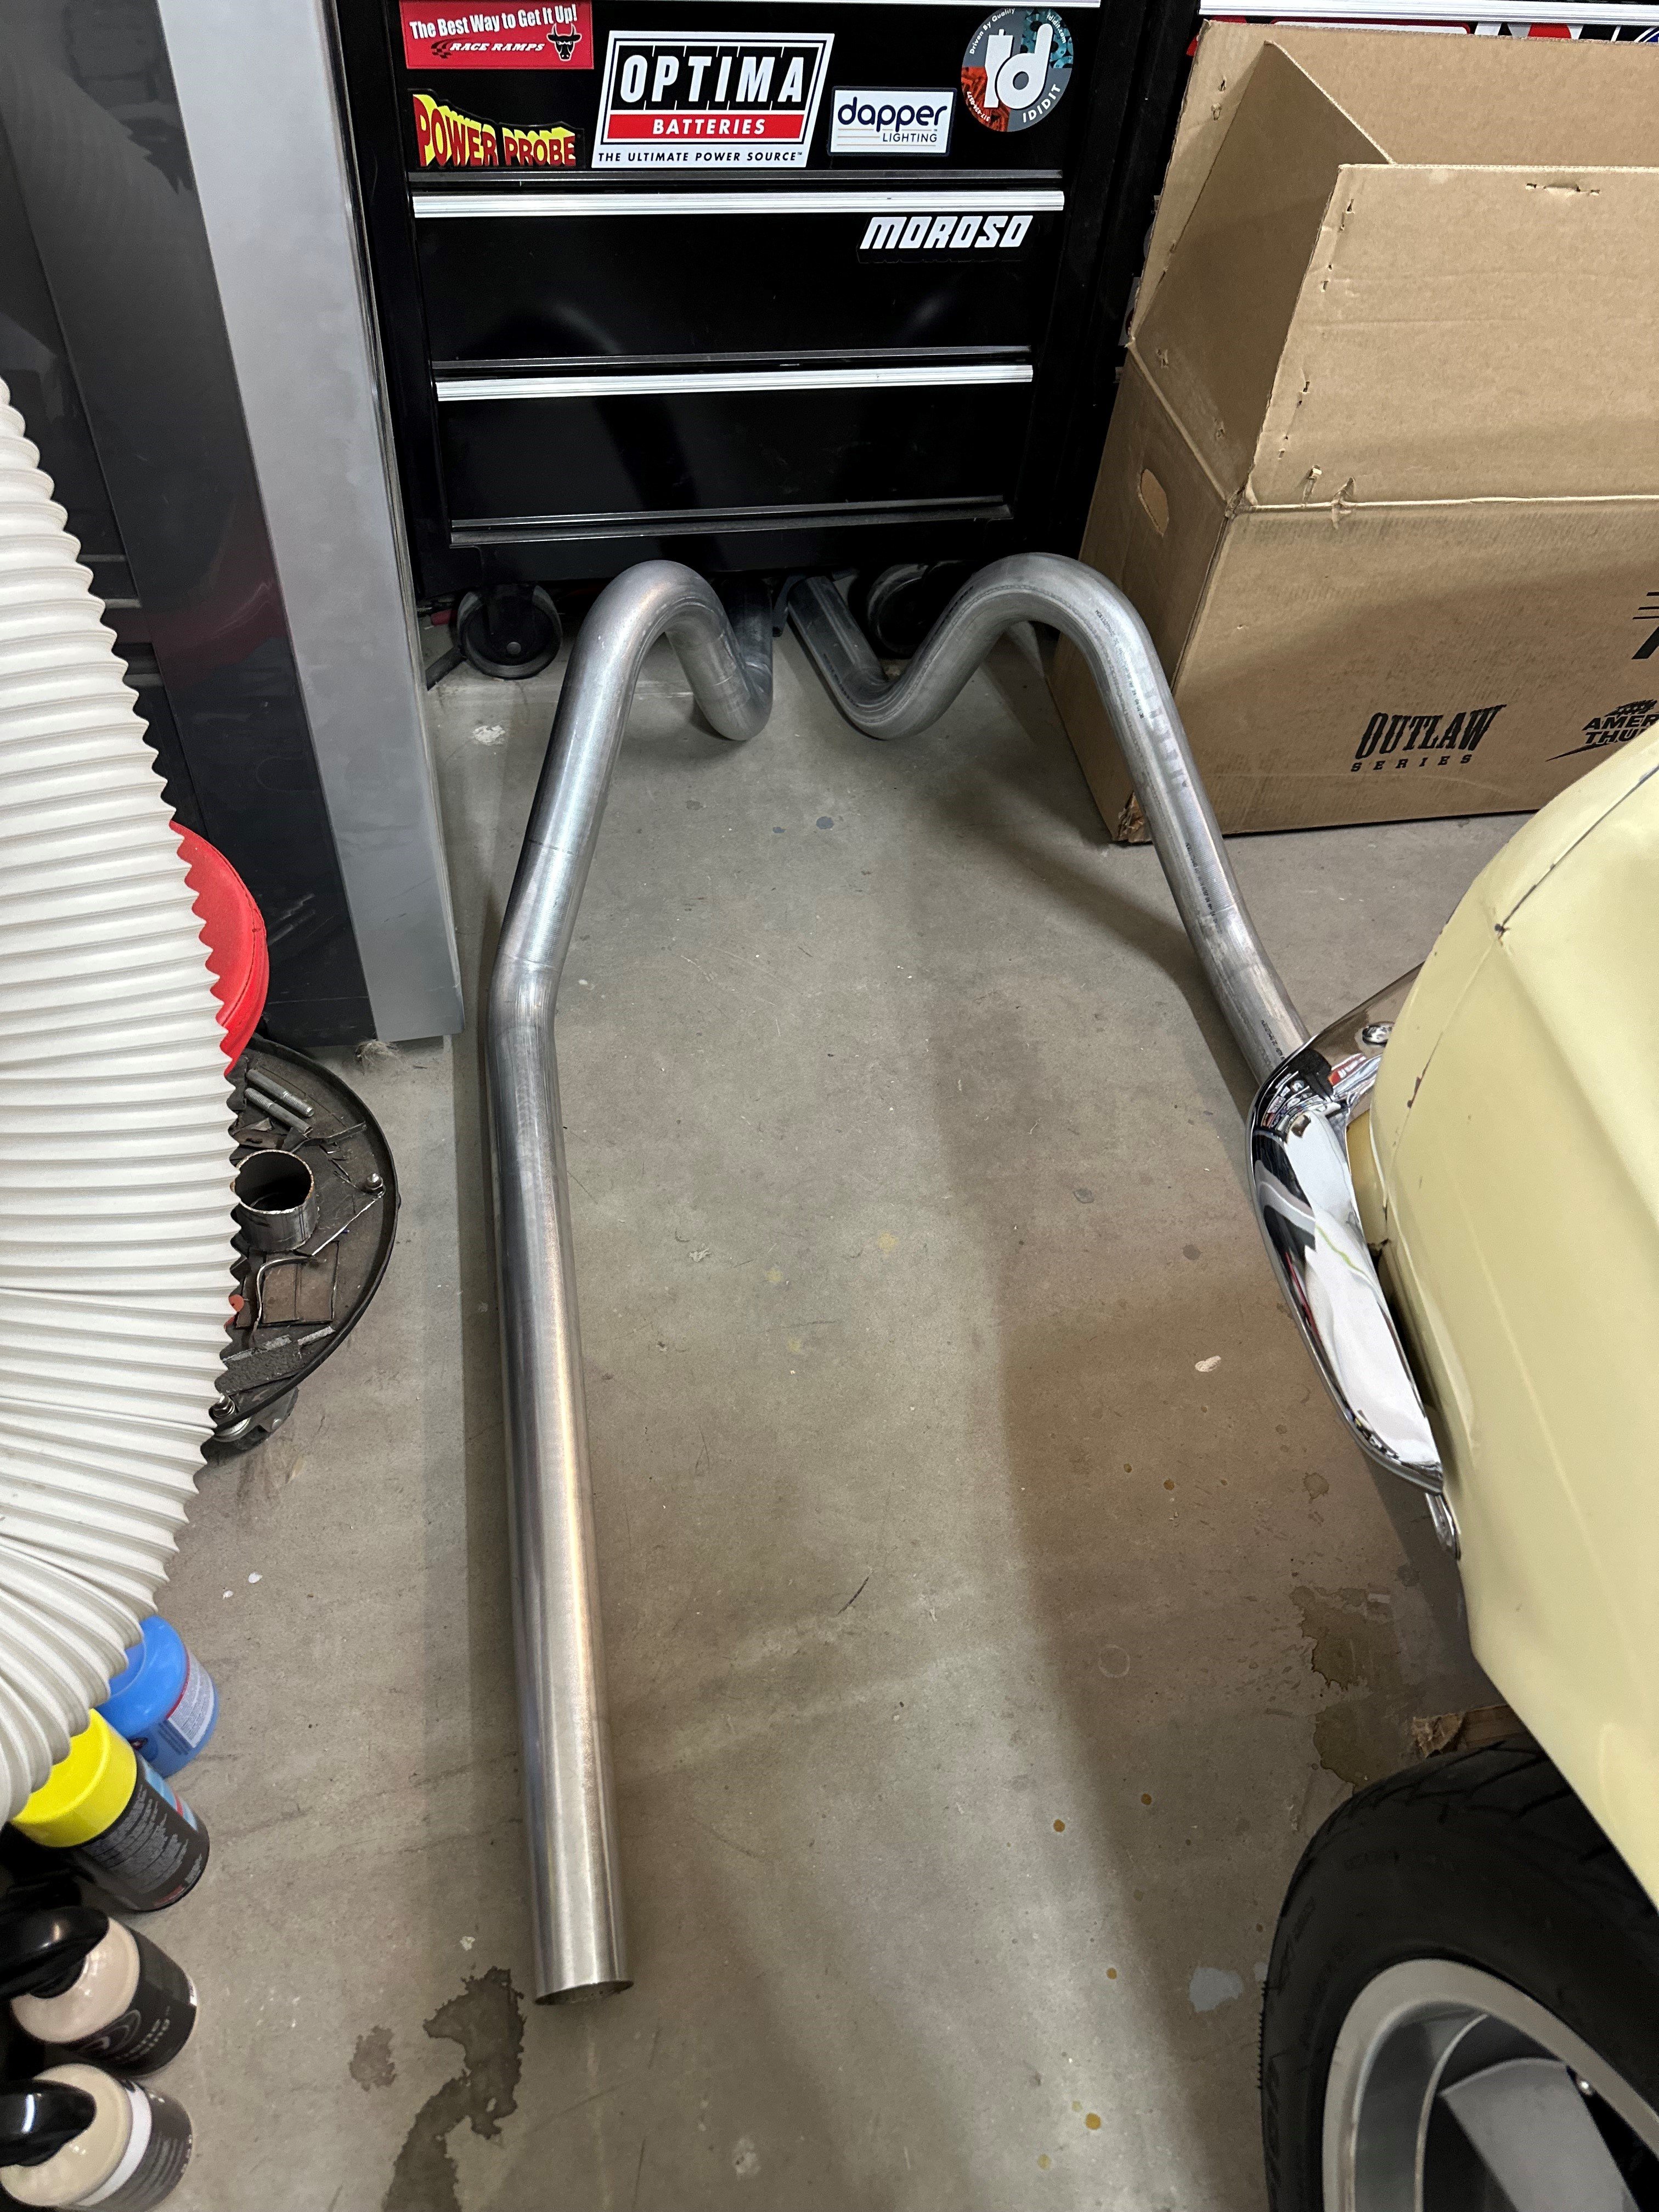
I'm a visual sort. I need to physically 'see' parts of the plan that forms in my head to help me better sort out the remaining plan....if that makes sense. To that end, I purchased a set of Flowmaster's prebent tailpipes for my pile. This should allow me to cram the pipes under the car to see where I'll need to trim the panhard mount and move brake lines, etc. Once I get the clearance for the pipes, I'll work on chasing down my buddy Mike and work on getting everything zapped in permanently. That will include adding the hangars, v-band clamps, and adding turndowns before the rear valance.
Got outside today and got the car in the air to poke around to see what I need to do. I've got enough workable room I believe. I will need to move the feed line for the rear brake junction. I'll likely start on cleaning up the rear end and freshening the rear brakes while i'm there.
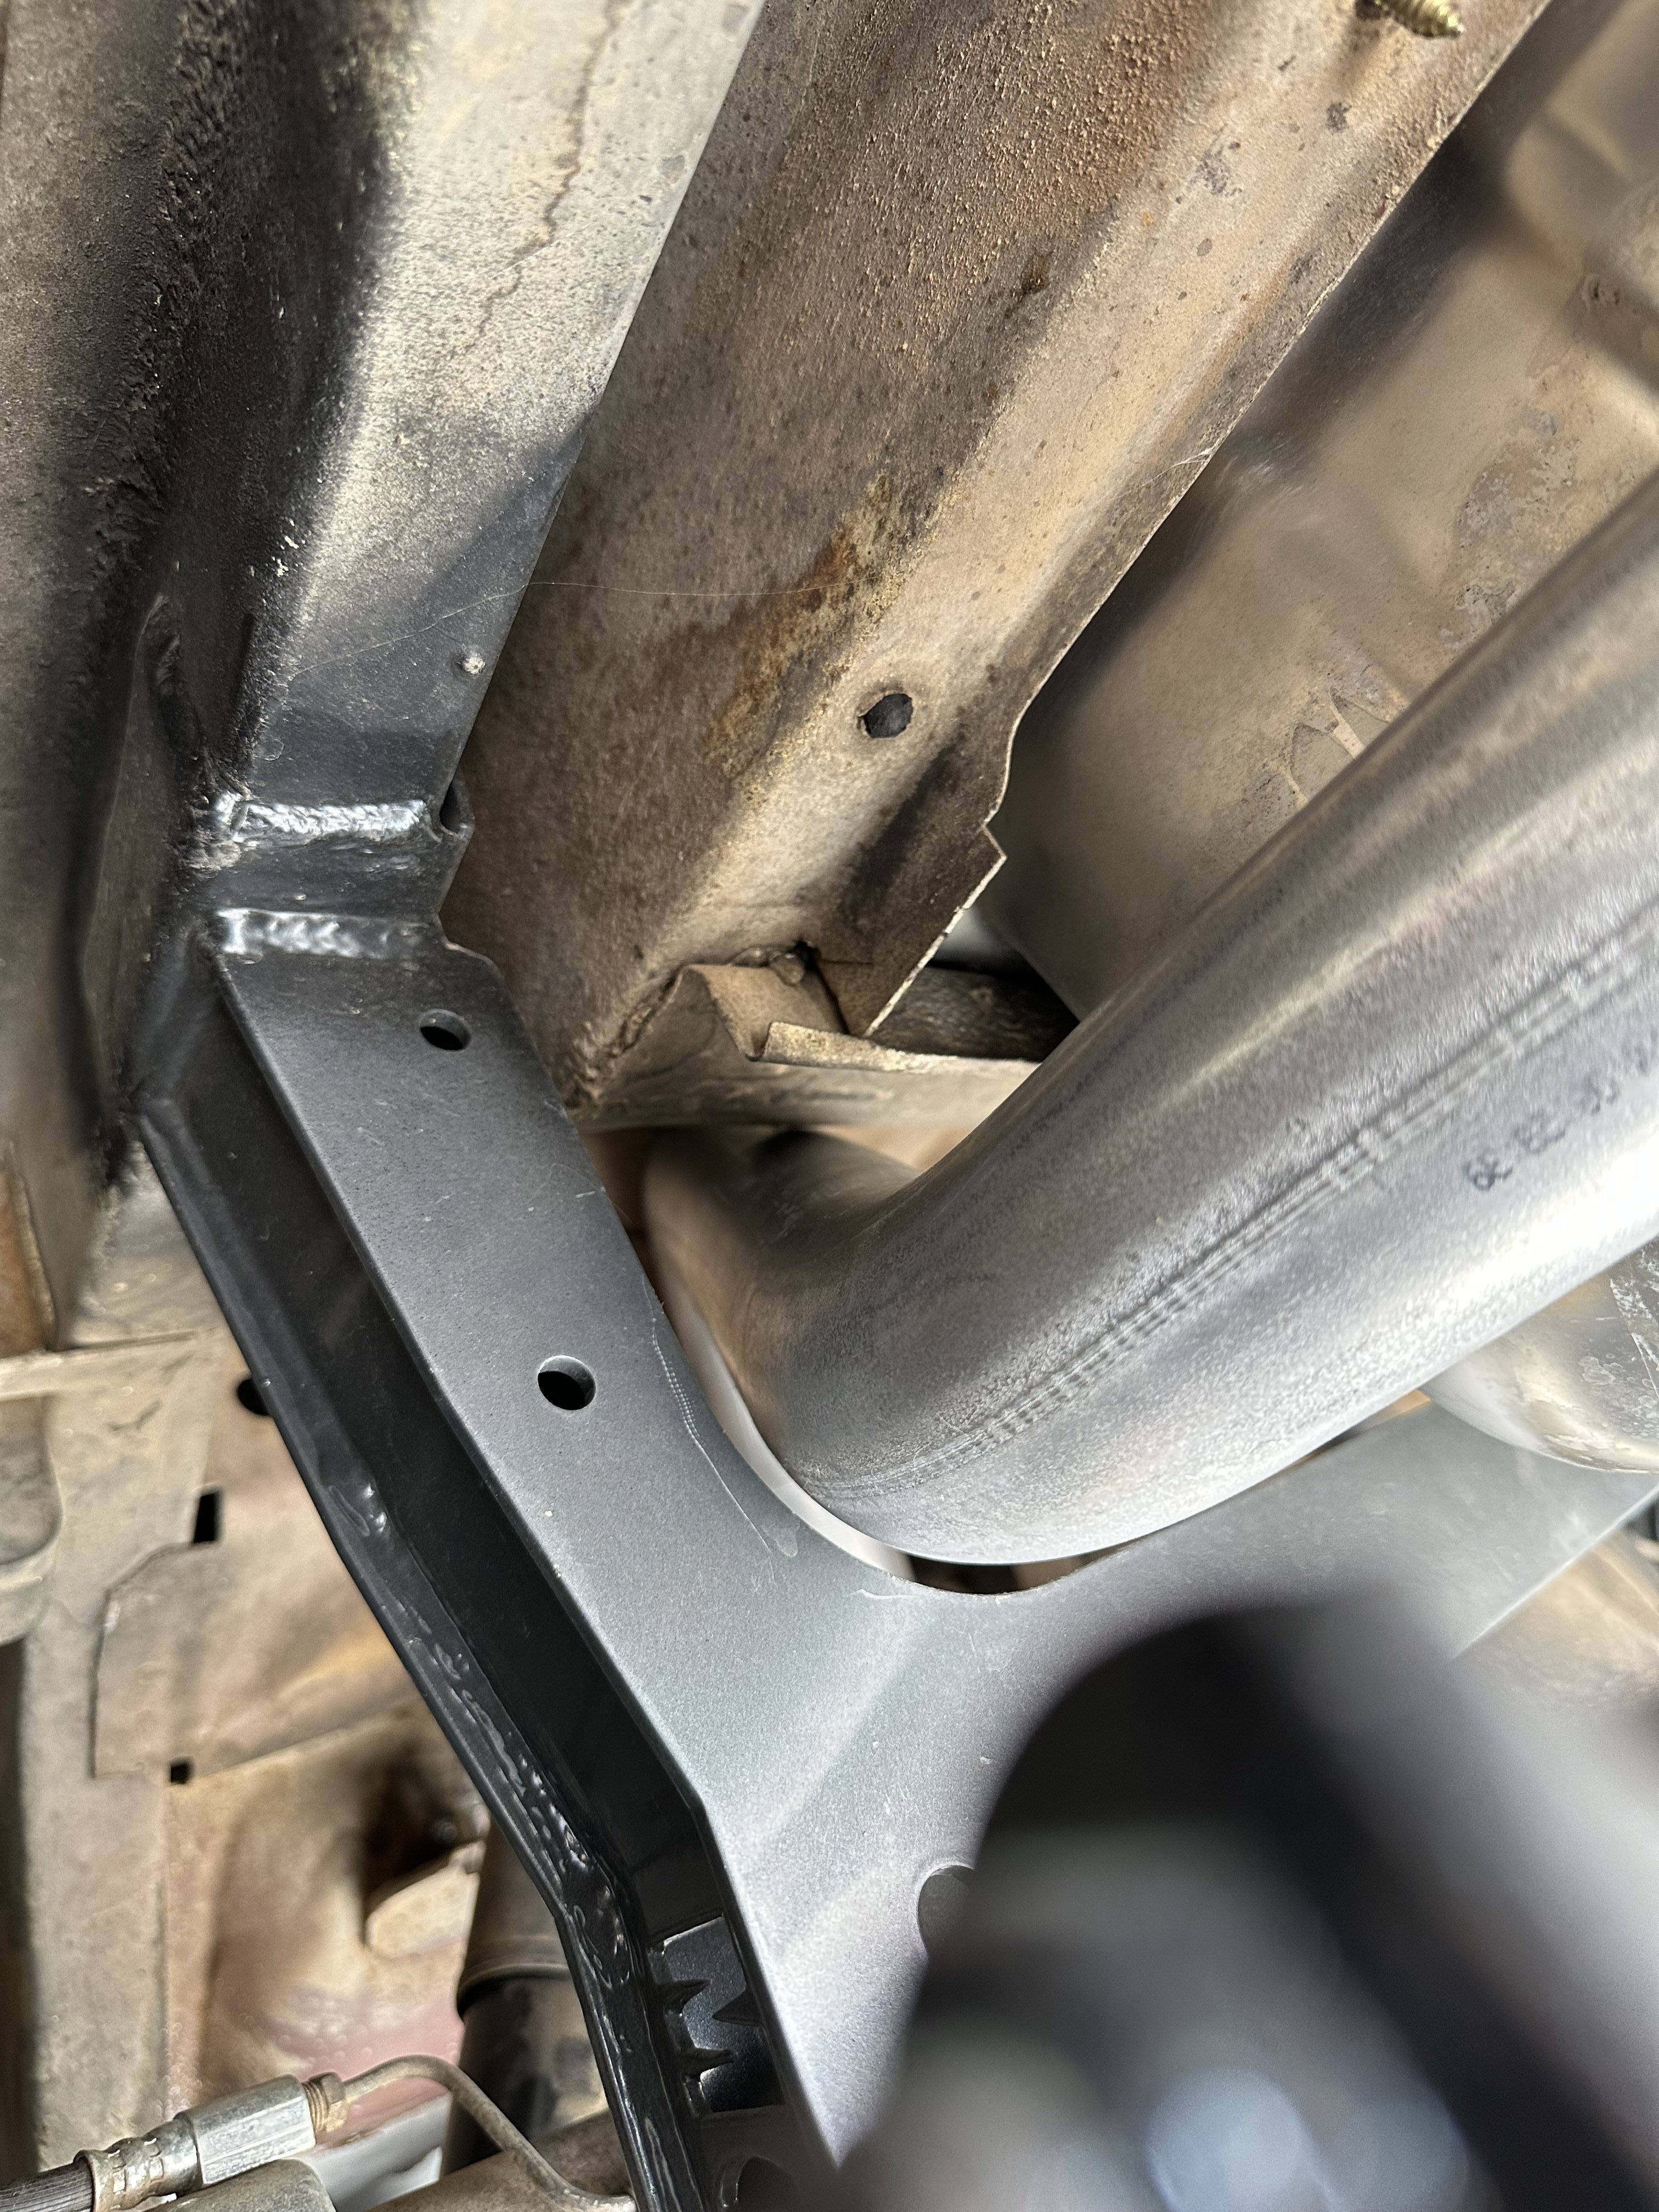
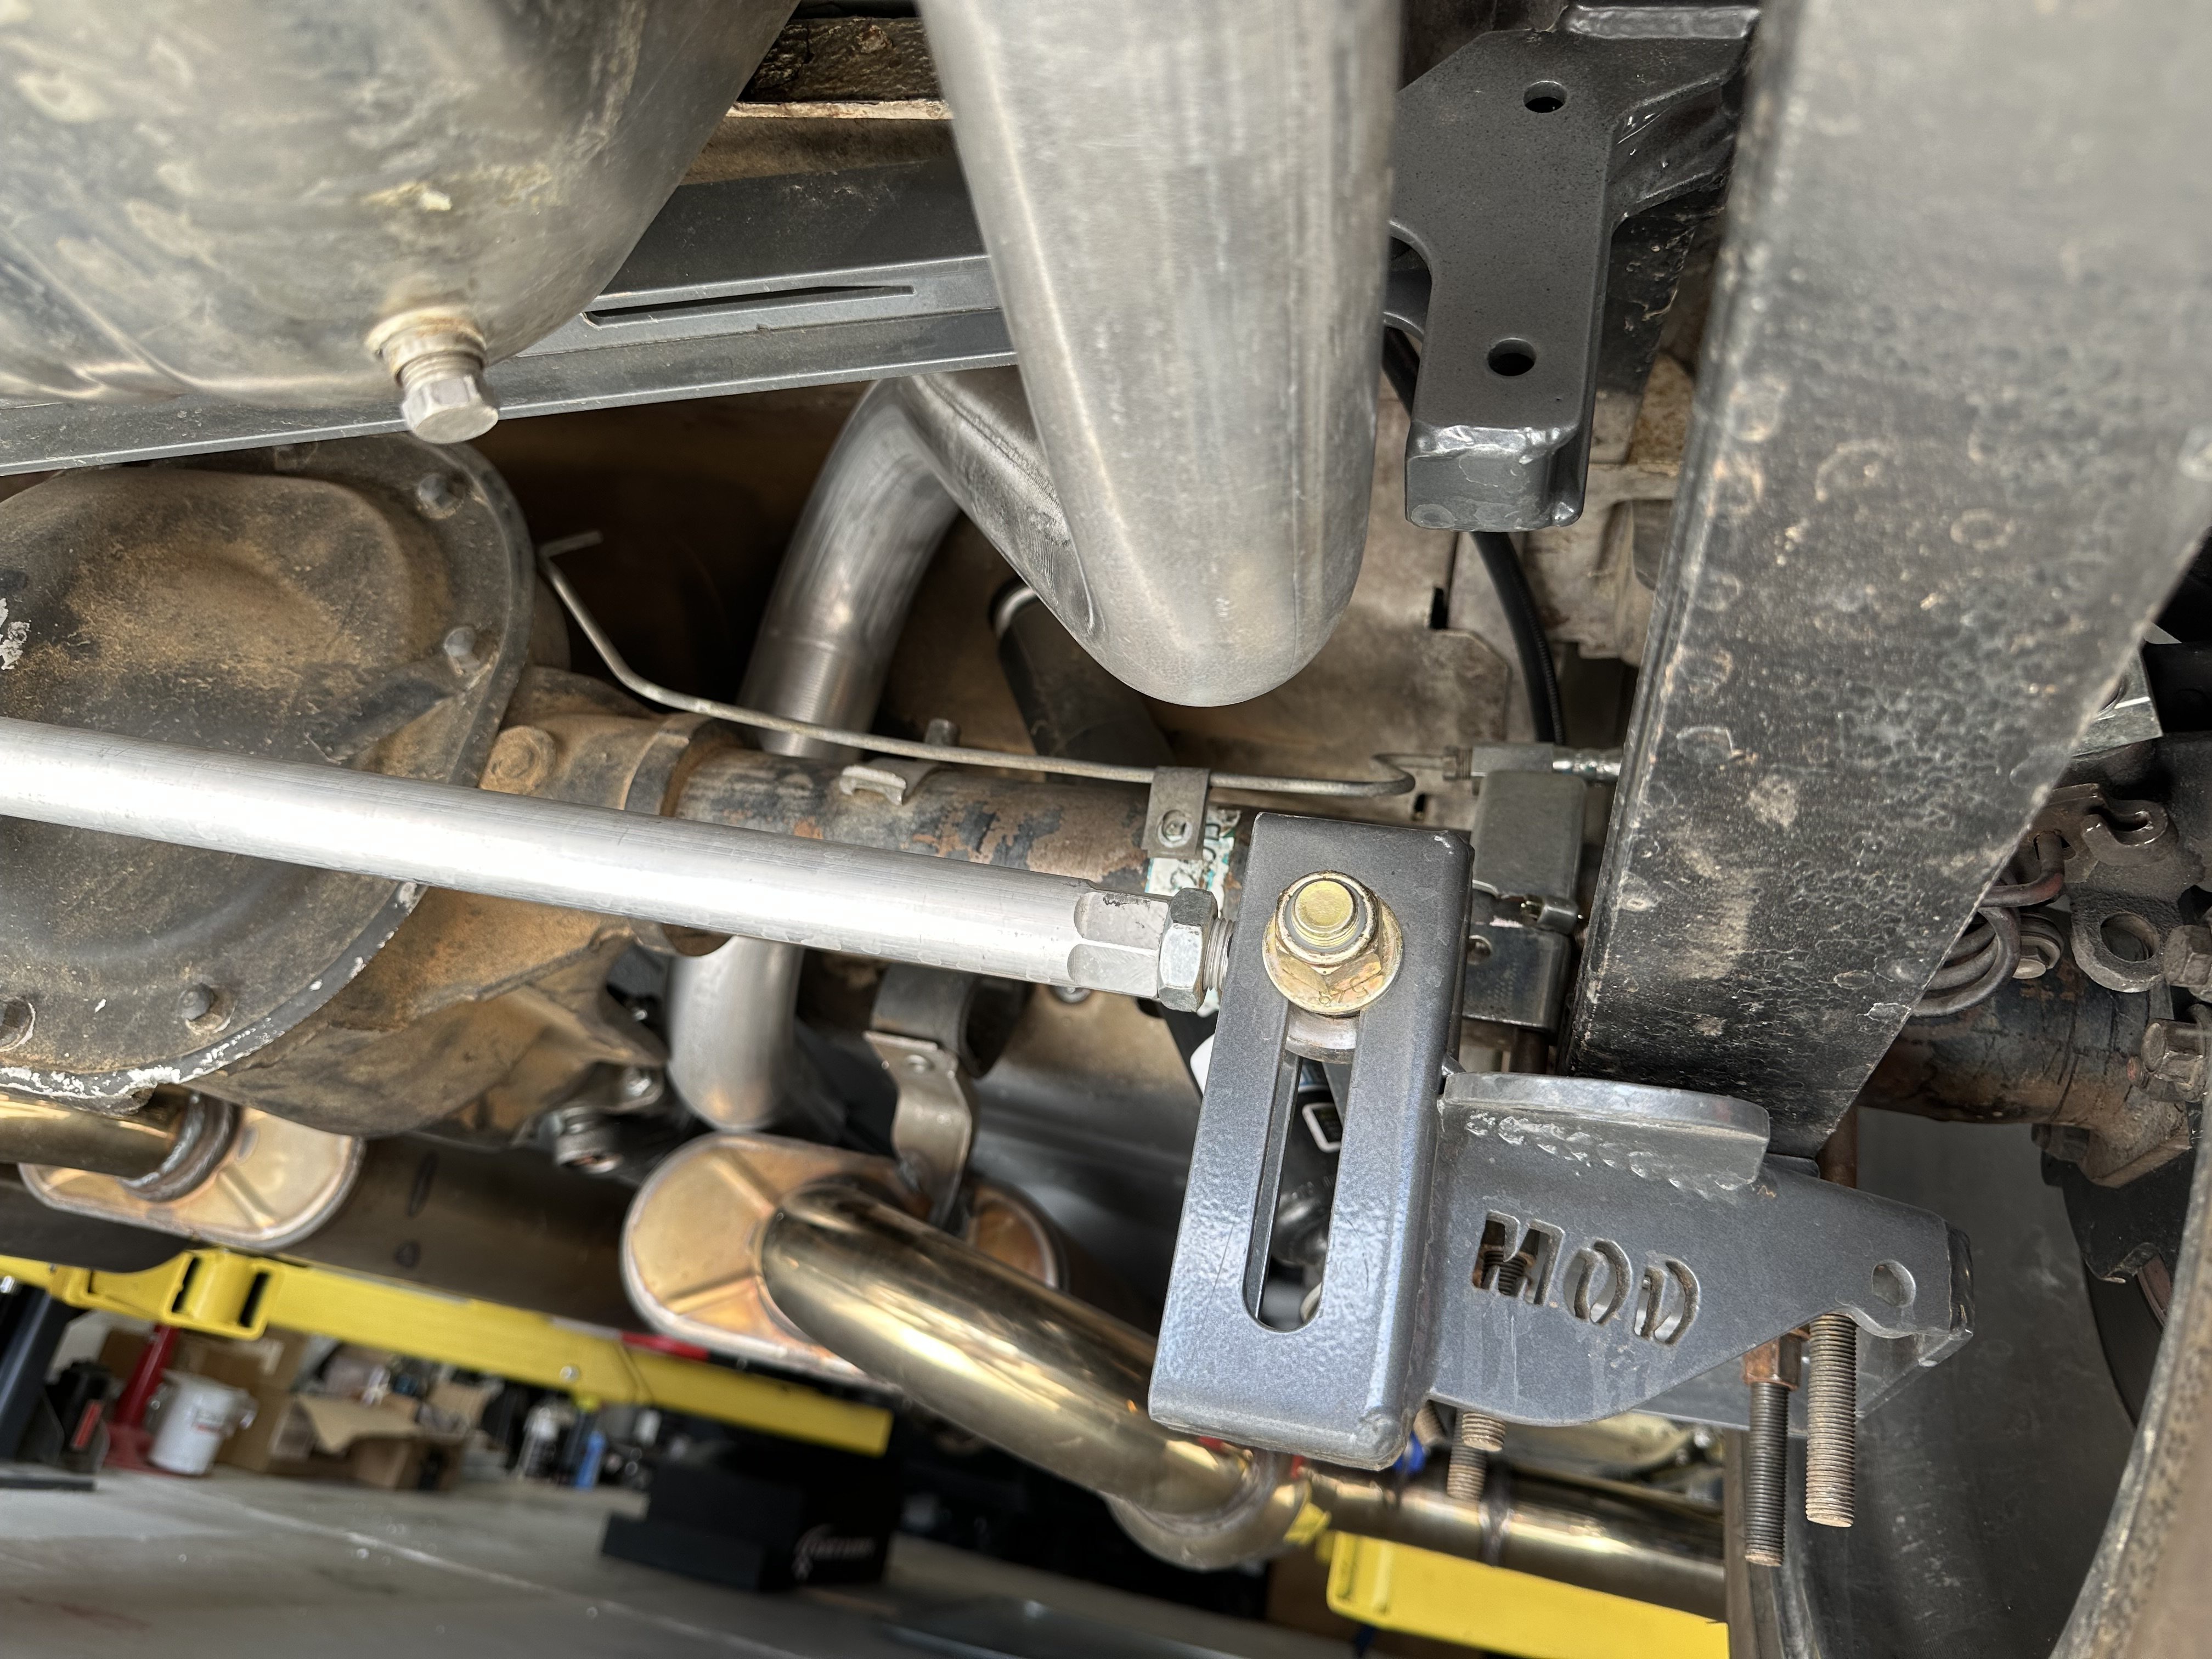
I decided to pull the rear this weekend and start working on getting the brake line moved to make room for the eventual tailpipes. In typical 'me' fashion, it turned into a long list of 'while I'm here'.
The simple plan: clean up and make sure the rear is set to go back under the car so I don't have to revisit anything later.
The 'while i'm here" plan: address any issues I find and 'upgrade/futureproof' the 8.8 as I go.
I have braided lines to replace both the body to axle line as well as the caliper lines. I have had the hard to rubber line brackets rigged/temp fitted ever since I swapped the rear end in December of 2016. 8 years is still safely within the 'temporary' range, right? I will be welding on a more permanent solution and running new hard lines.
While I was pulling the rear end out, I remembered a drooling axle seal and decided to replace both....even though they were both reportedly replaced with the bearing & seal set I supplied to the rear end shop when I had the gear set done.
I also dug out my anti-moan brackets and modified them both to clear the added spring pads. I didn't reinstall them originally since I didn't have immediate access to a welder. I will also be running a couple of small welds around the housing to tubes flange to help prevent twisting. Not that I expect it to happen, just another step on the list.
I'll need to drop my rotors off this afternoon to get turned and decide what I want to do about brake pads.
Once ALL of that is done, I'll refresh the oil in it and scuff it and squirt some paint on it. Then, hopefully, I'll be able to get started on tailpipes.
December 2024:
With Thanksgiving going on and spending that time relaxing with the wife, very little happened with the car. I did manage to get a few things done to make the 'while i'm here' list move along easier.
I replaced the axle seals and oil in the rear end yesterday. The rear end is buttoned back up and ready for the next steps. I also decided to go with Baer for new rear rotors and pads to better match their front system I'm running.
Next up is waiting on parts and warming up the welder. I picked up a handbrake lever from a 93 mustang along with a few other odds and ends to see if I can make that work. I'll be doing something similar to what Daze Cars did but with a few variations. The idea I have in my head should work. I'll basically be using the 93 lever with my stock 95 e-brake cables and a few other pieces to tie it all together. That stuff should arrive this week.
This weekend I plan to zip the brake tabs on the axle as well as run some stitch welds around the tubes to the center section. That reminds me that I need to find the measurement of the distribution block to outer flange on the 67-8 dual exhaust cars so I know where to mount mine.
After that's all done, I can squirt some paint on the rear to make it look a little more presentable and then stab it back into the car and work on sorting out the hand brake. Once that's all done, I should be able to get Mike nailed down so we can start futzing around with running tailpipes on this pile...
Spent part of yesterday and today mucking about with the rear again. Found out after spending too much time trying to clean up the calipers that one acts like it's seized. I tried several times to get the piston to rotate in either direction with no luck, so I ordered both. They'll be here in a few days.
Meanwhile, I used them to mock up my new braided lines and mark the spot for the caliper feed line tabs and the body to rear line bracket bolt. While I had the welder out, I zipped the anti-moan brackets back together after trimming a bit off of the end to clear the u-bolts and ran stitch welds between the axle tubes and housing. All in all, a semi-productive weekend. I ended the day by squirting some black paint on the rear to hide my ugly welding. Now back to waiting on parts.
Line tab and anti-moan brackets zipped up.
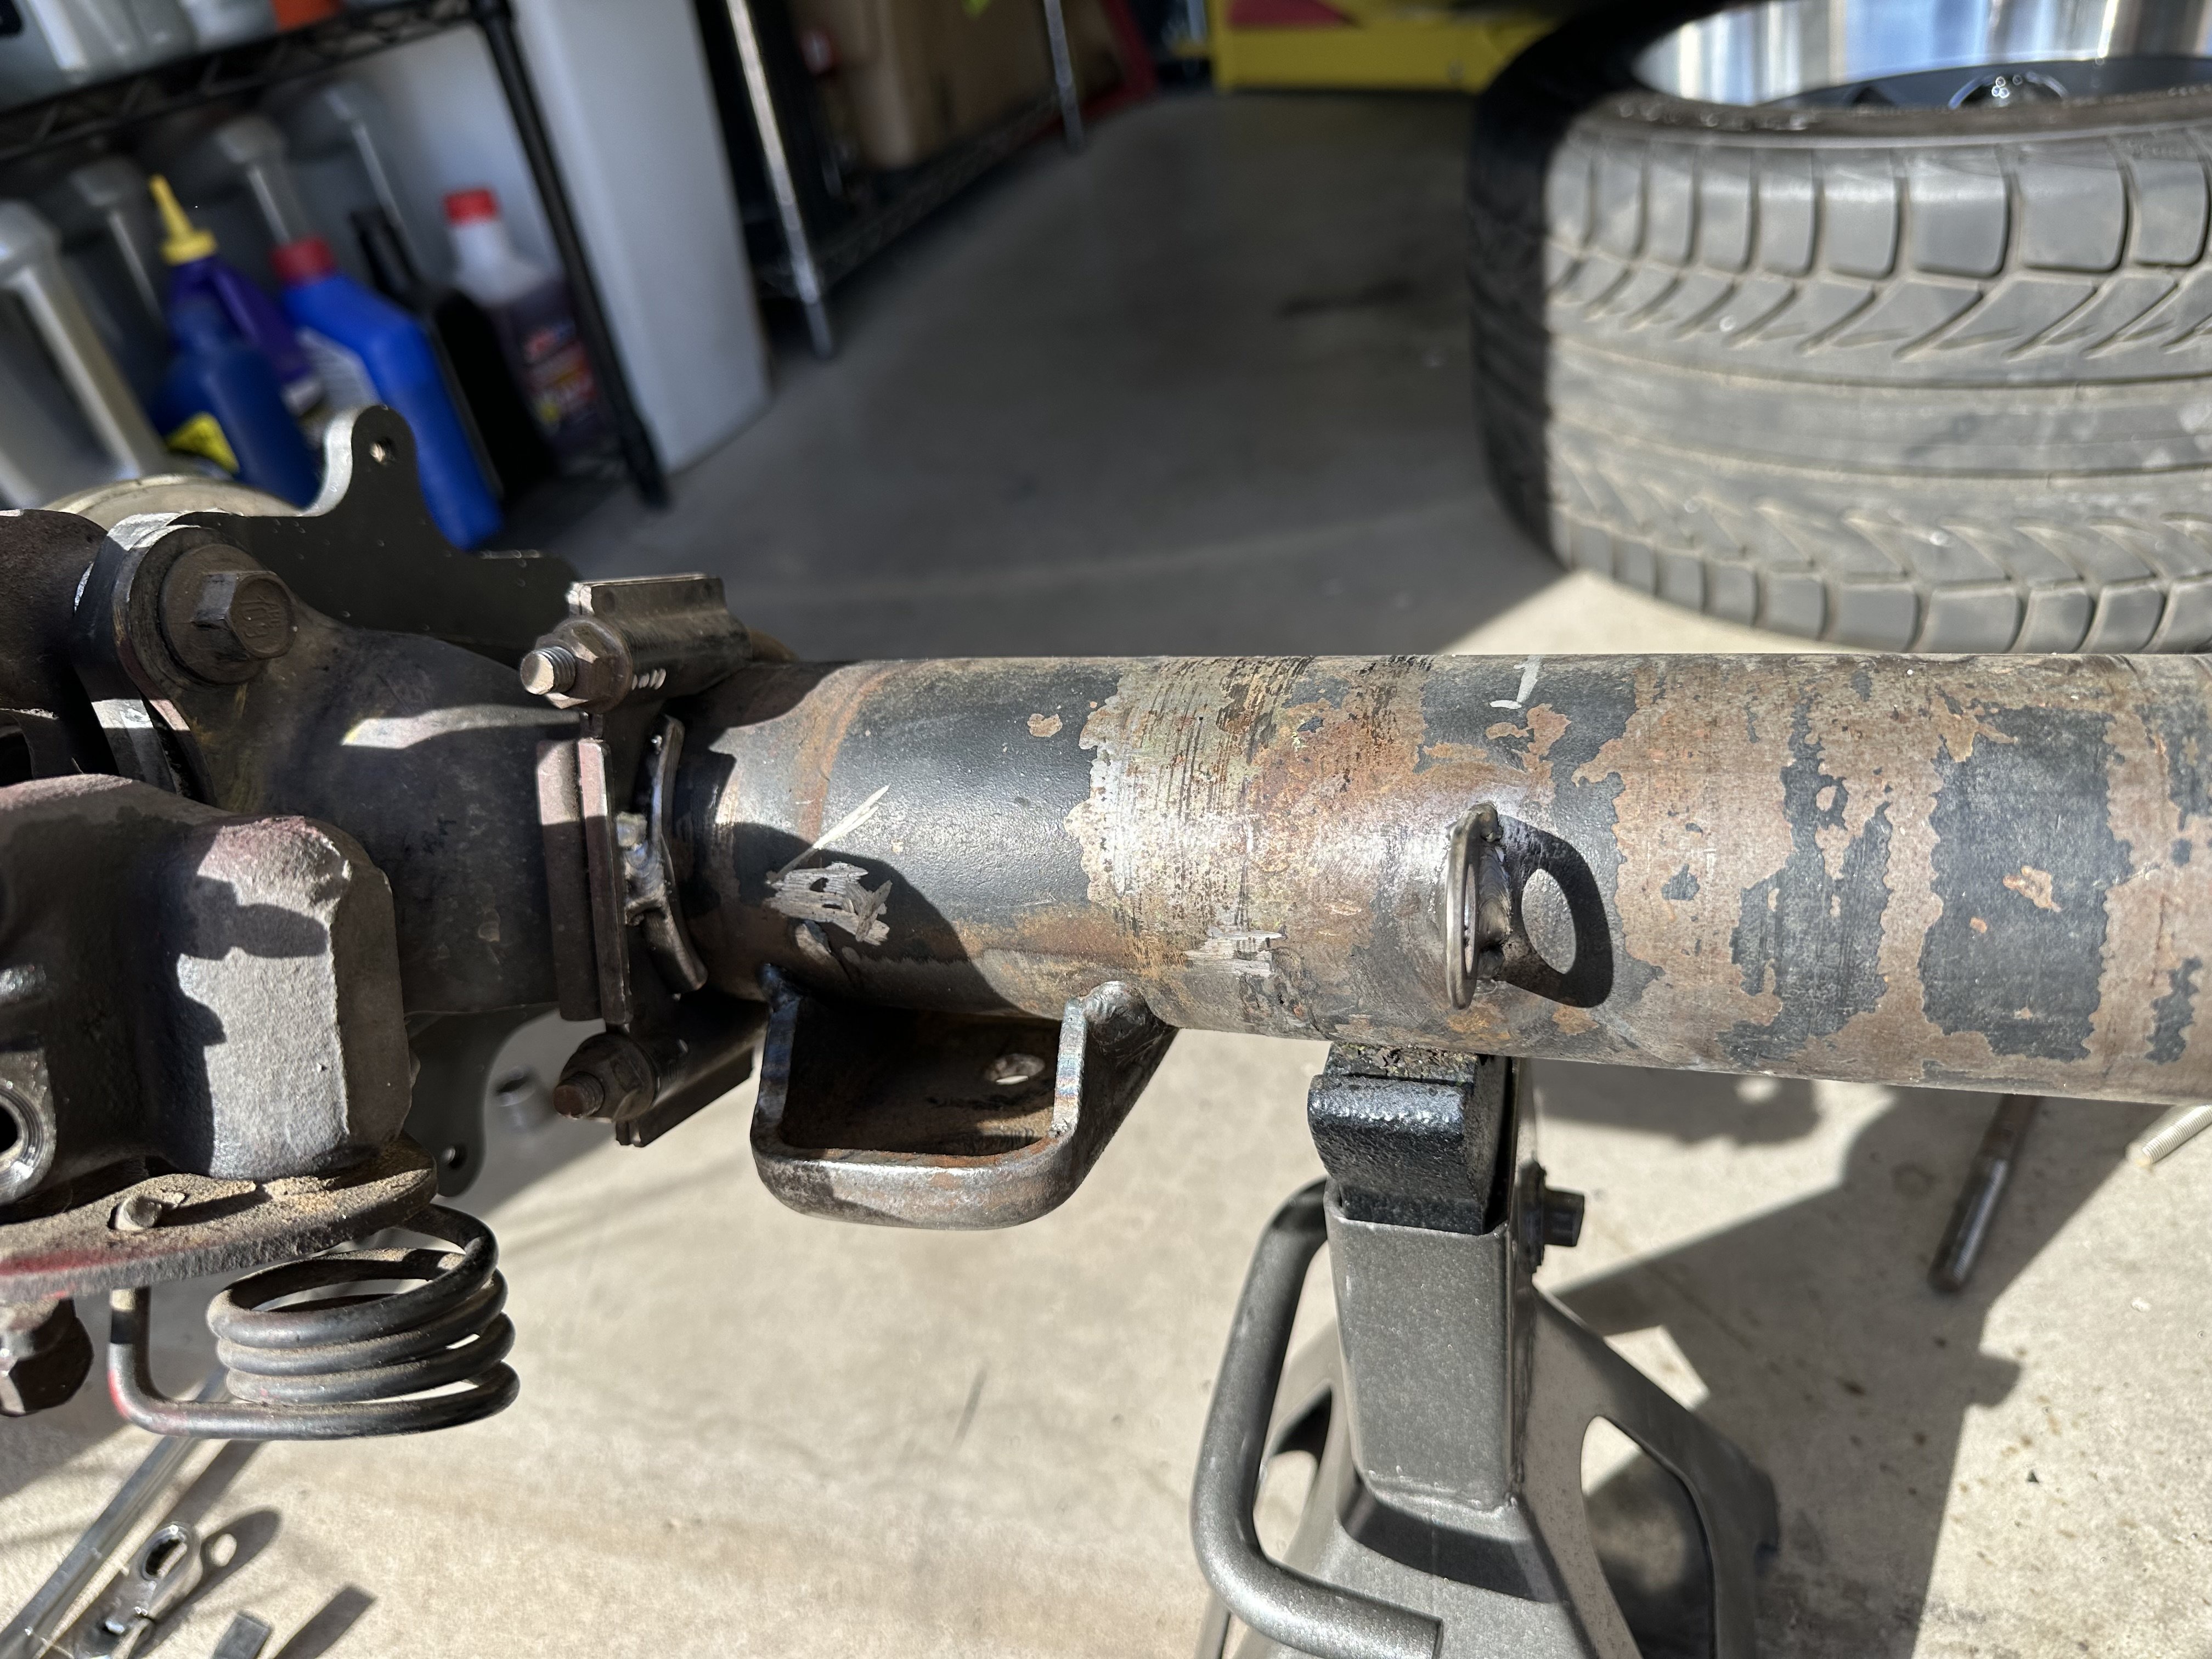
More minor stuff today. I had ordered new calipers from Rock Auto. Rebuilt units from Raybestos and they're getting sent back. One had a seal half-installed around the e-brake lever and the other had a rusty guide pin that didn't want to come out of the guide. I'm not going to spend money on crap like that. Anyway, I put mine back on so I could mock up everything and make the hard lines. A friend may come over next weekend and I'll test brake pressure and would like to button everything back up. I'll just need to decide on what I'm doing with the calipers before then.
Lines done and in place. Nothing is tightened, just laid out to see where it is all going to live. I ended up using the line brackets from the original 8.8 lines to hold the hard line in place over the center section. I just trimmed the excess off and welded them on.
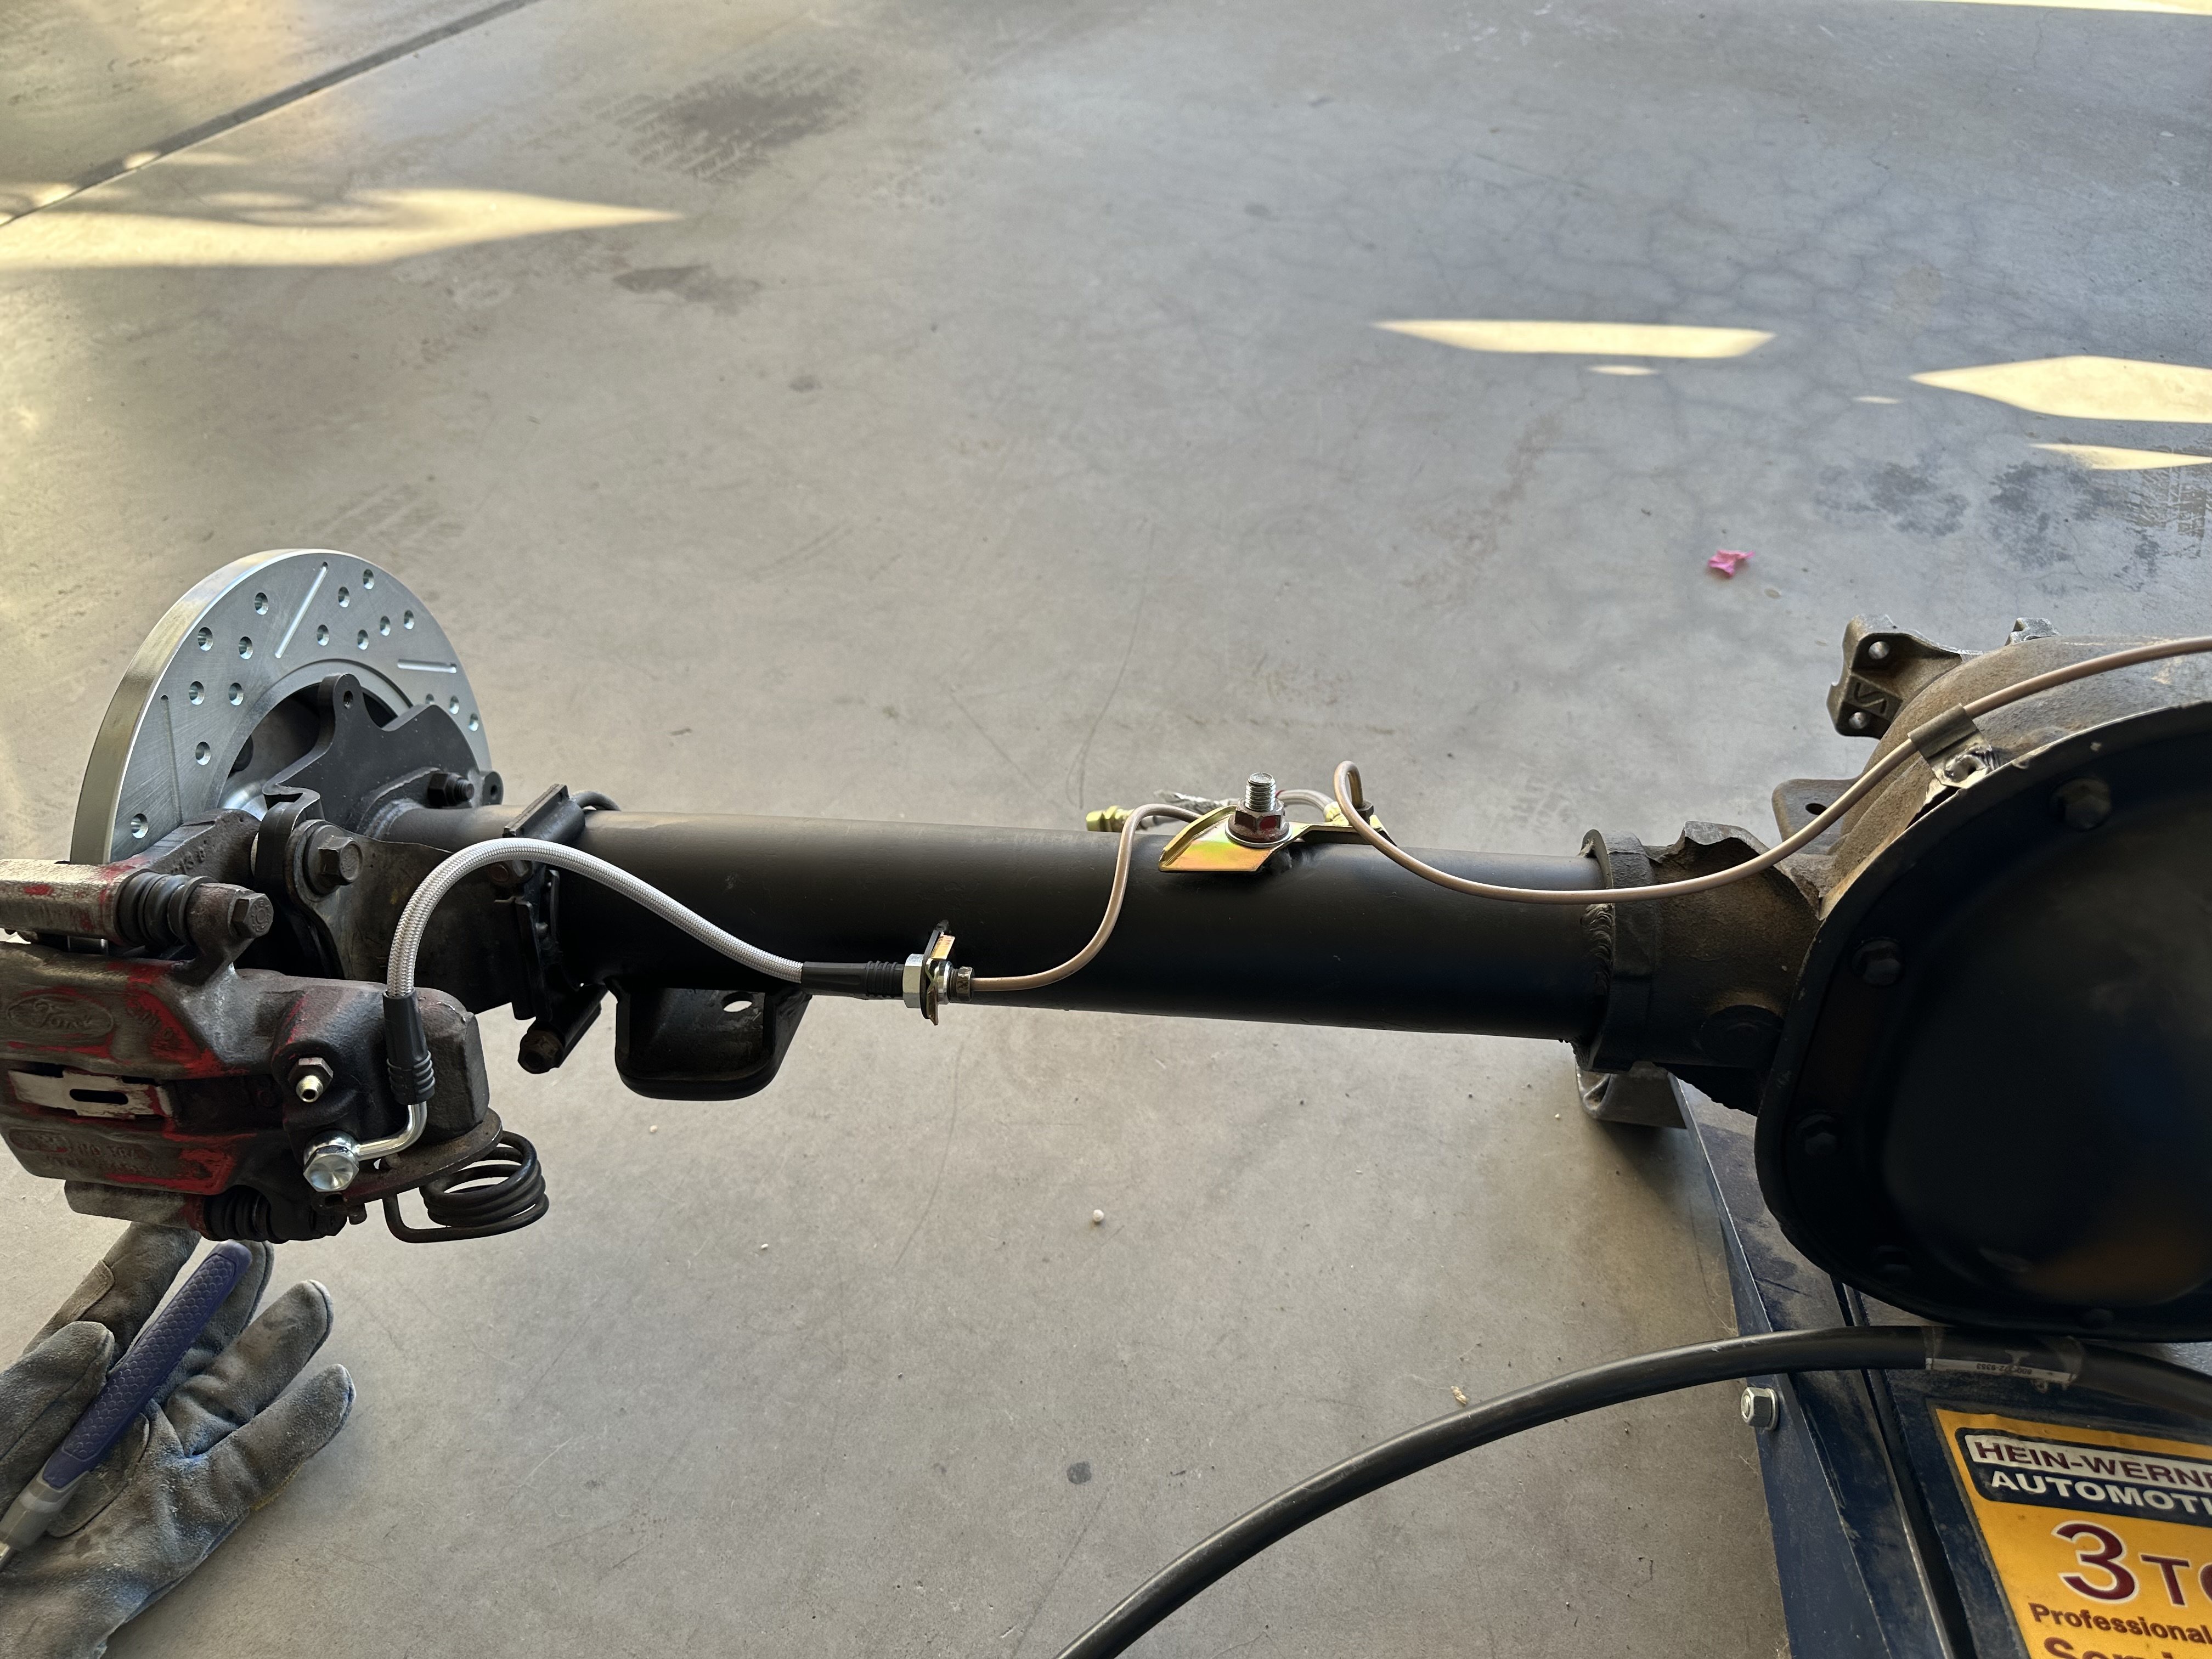
Had the whole week off and didn't do a lot with the car. Spent it relaxing with the Missus and enjoying time away from work. What I did manage to get done was tighten everything back up and get the wheels back on the car so I could set it back down and play with the hand brake some.
Everything is back on and tightened. Well, not the wheels because I put them on the wrong side. Saw that after I put the car down. No matter. I'll get them back on the correct side when take them off to bleed everything.
I think this is where the hand brake lever will live. I've just come in from bolting it into place and like the feel and location. Tomorrow I will likely be messing around with the rear cable routing.
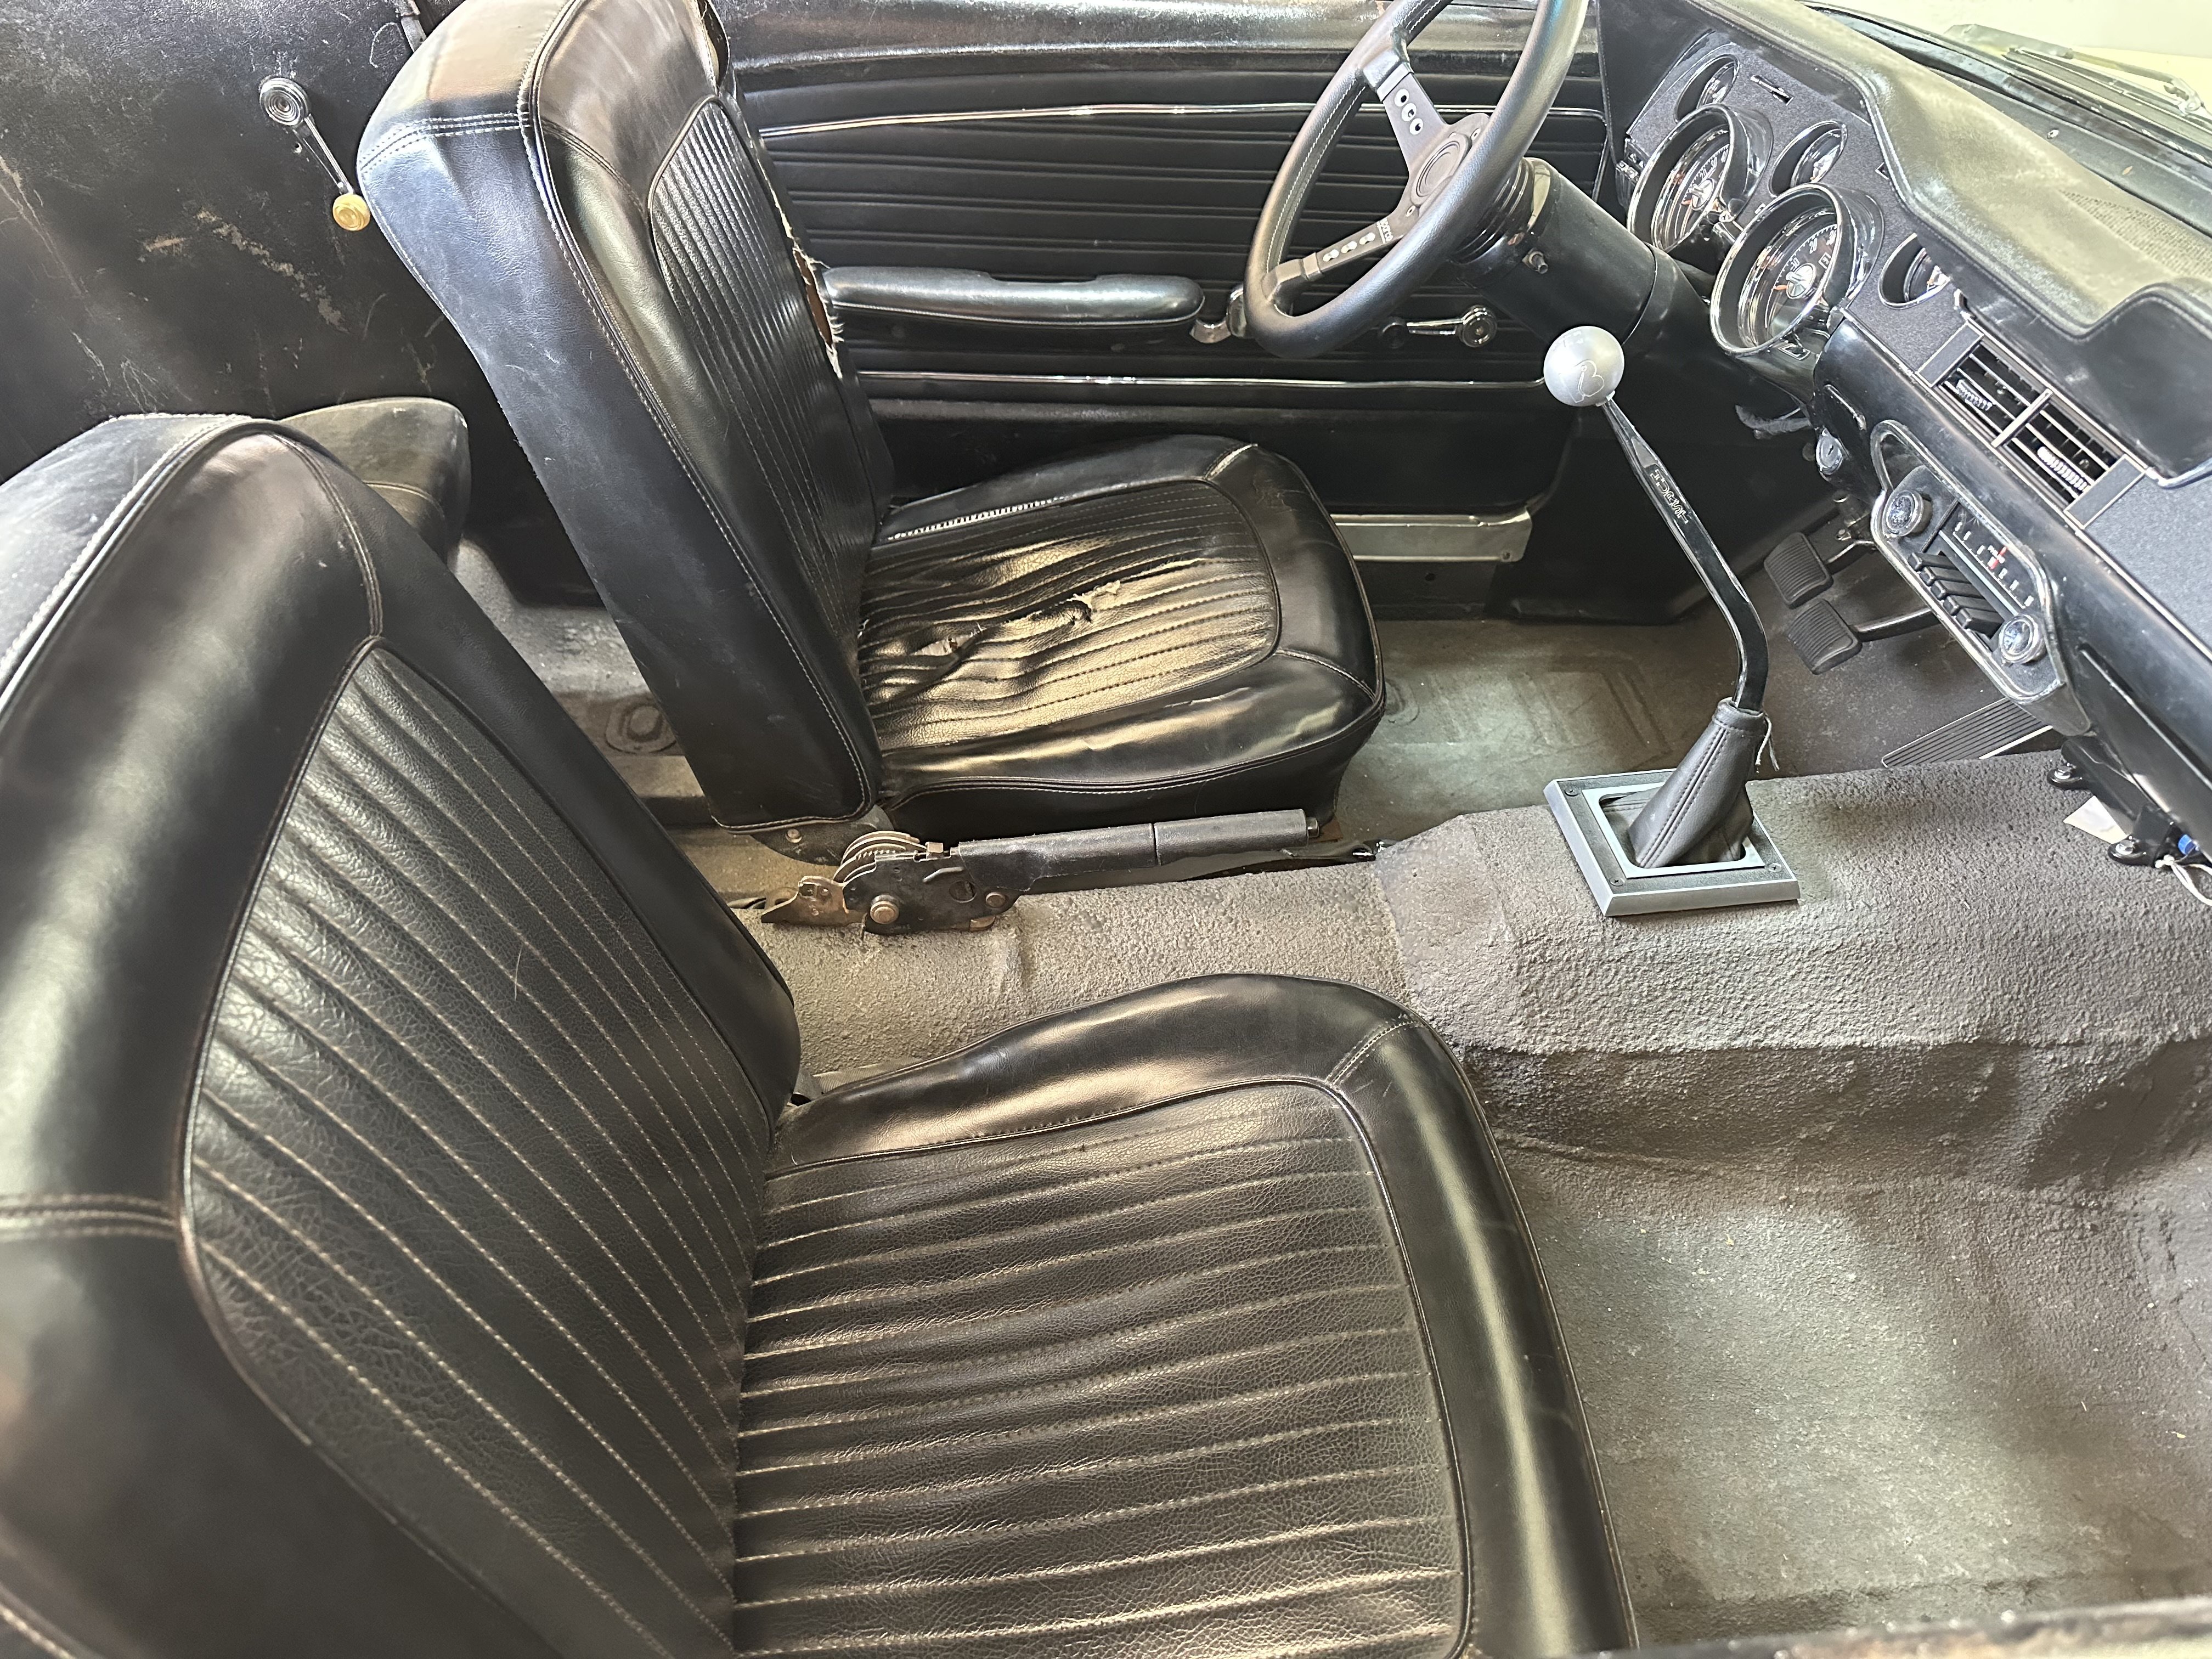
More work on parking brake. All that's left is some clean up and fine tuning. The original 8.8 cables were too long for what I planned to do. I ordered Wilwood's universal cable set and spent time today getting those routed and installed.
To use the fox-style parking brake, I opted to notch the floor to allow the cable 'wheel' to sit below the surface of the tunnel so I could prevent any binding of the cable against the sheet metal.
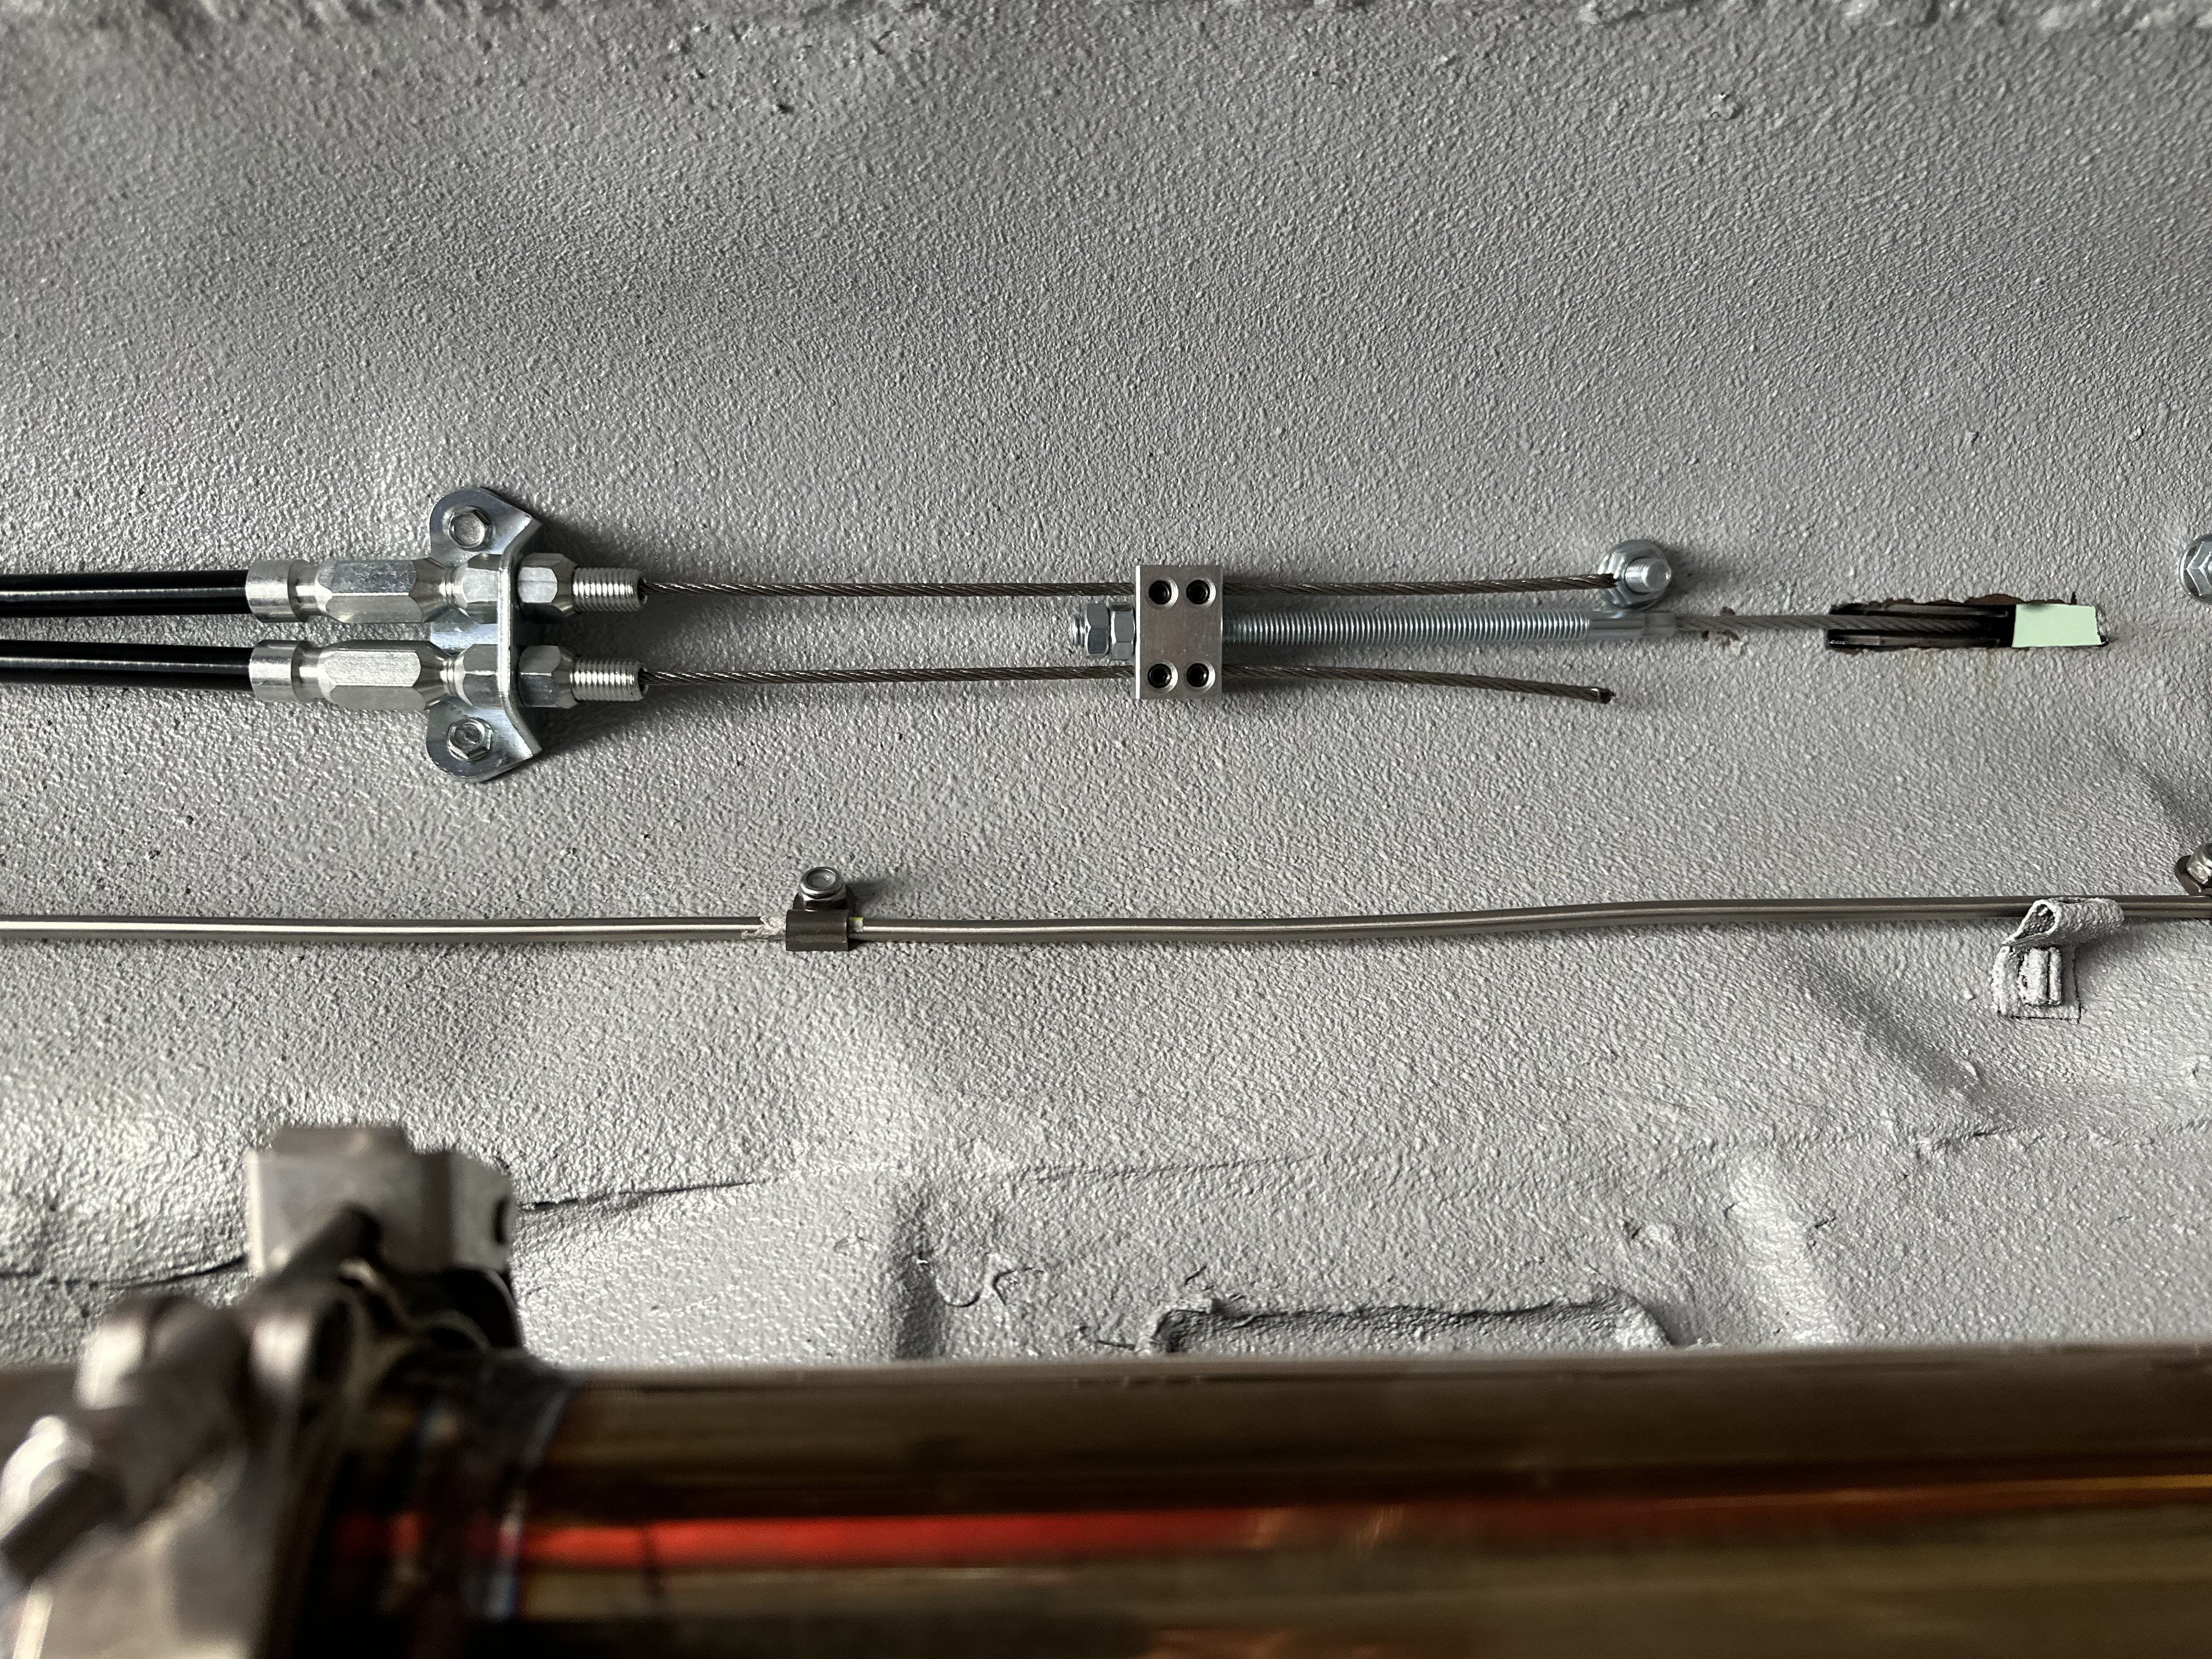
I've got some 3/8" double clamps on the way to finish cleaning up the routing along the back of the tunnel. I've also got some mass backed vinyl sheet that I'll use to fill in the opening in the floor to prevent any excess dust and whatnot getting in. Once the clamps show up, I'll get those mounted, change out the tek-screws with regular fasteners, and final tighten everything. Then...maybe....I'll get this pile down to Mike's for tailpipes....
January 2025:
I have a bunch of stuff in my car and a few more boxes to throw in tomorrow morning. I'll be headed down to my buddy's house to revisit exhaust finally. The FPA headers are in the box in the back seat, the tailpipes are in the passenger side. I'll throw the new mufflers and other stuff in the floor tomorrow morning before i head out. I chose to go with the 50 series delta flow flowmasters. I know there are lots that don't care for the sound but I didn't see any offers for free mufflers anywhere, so.....
I'll be sure to give another update once all this gets sorted.
I'm still not sure why my dad keeps telling me to worry about seats...
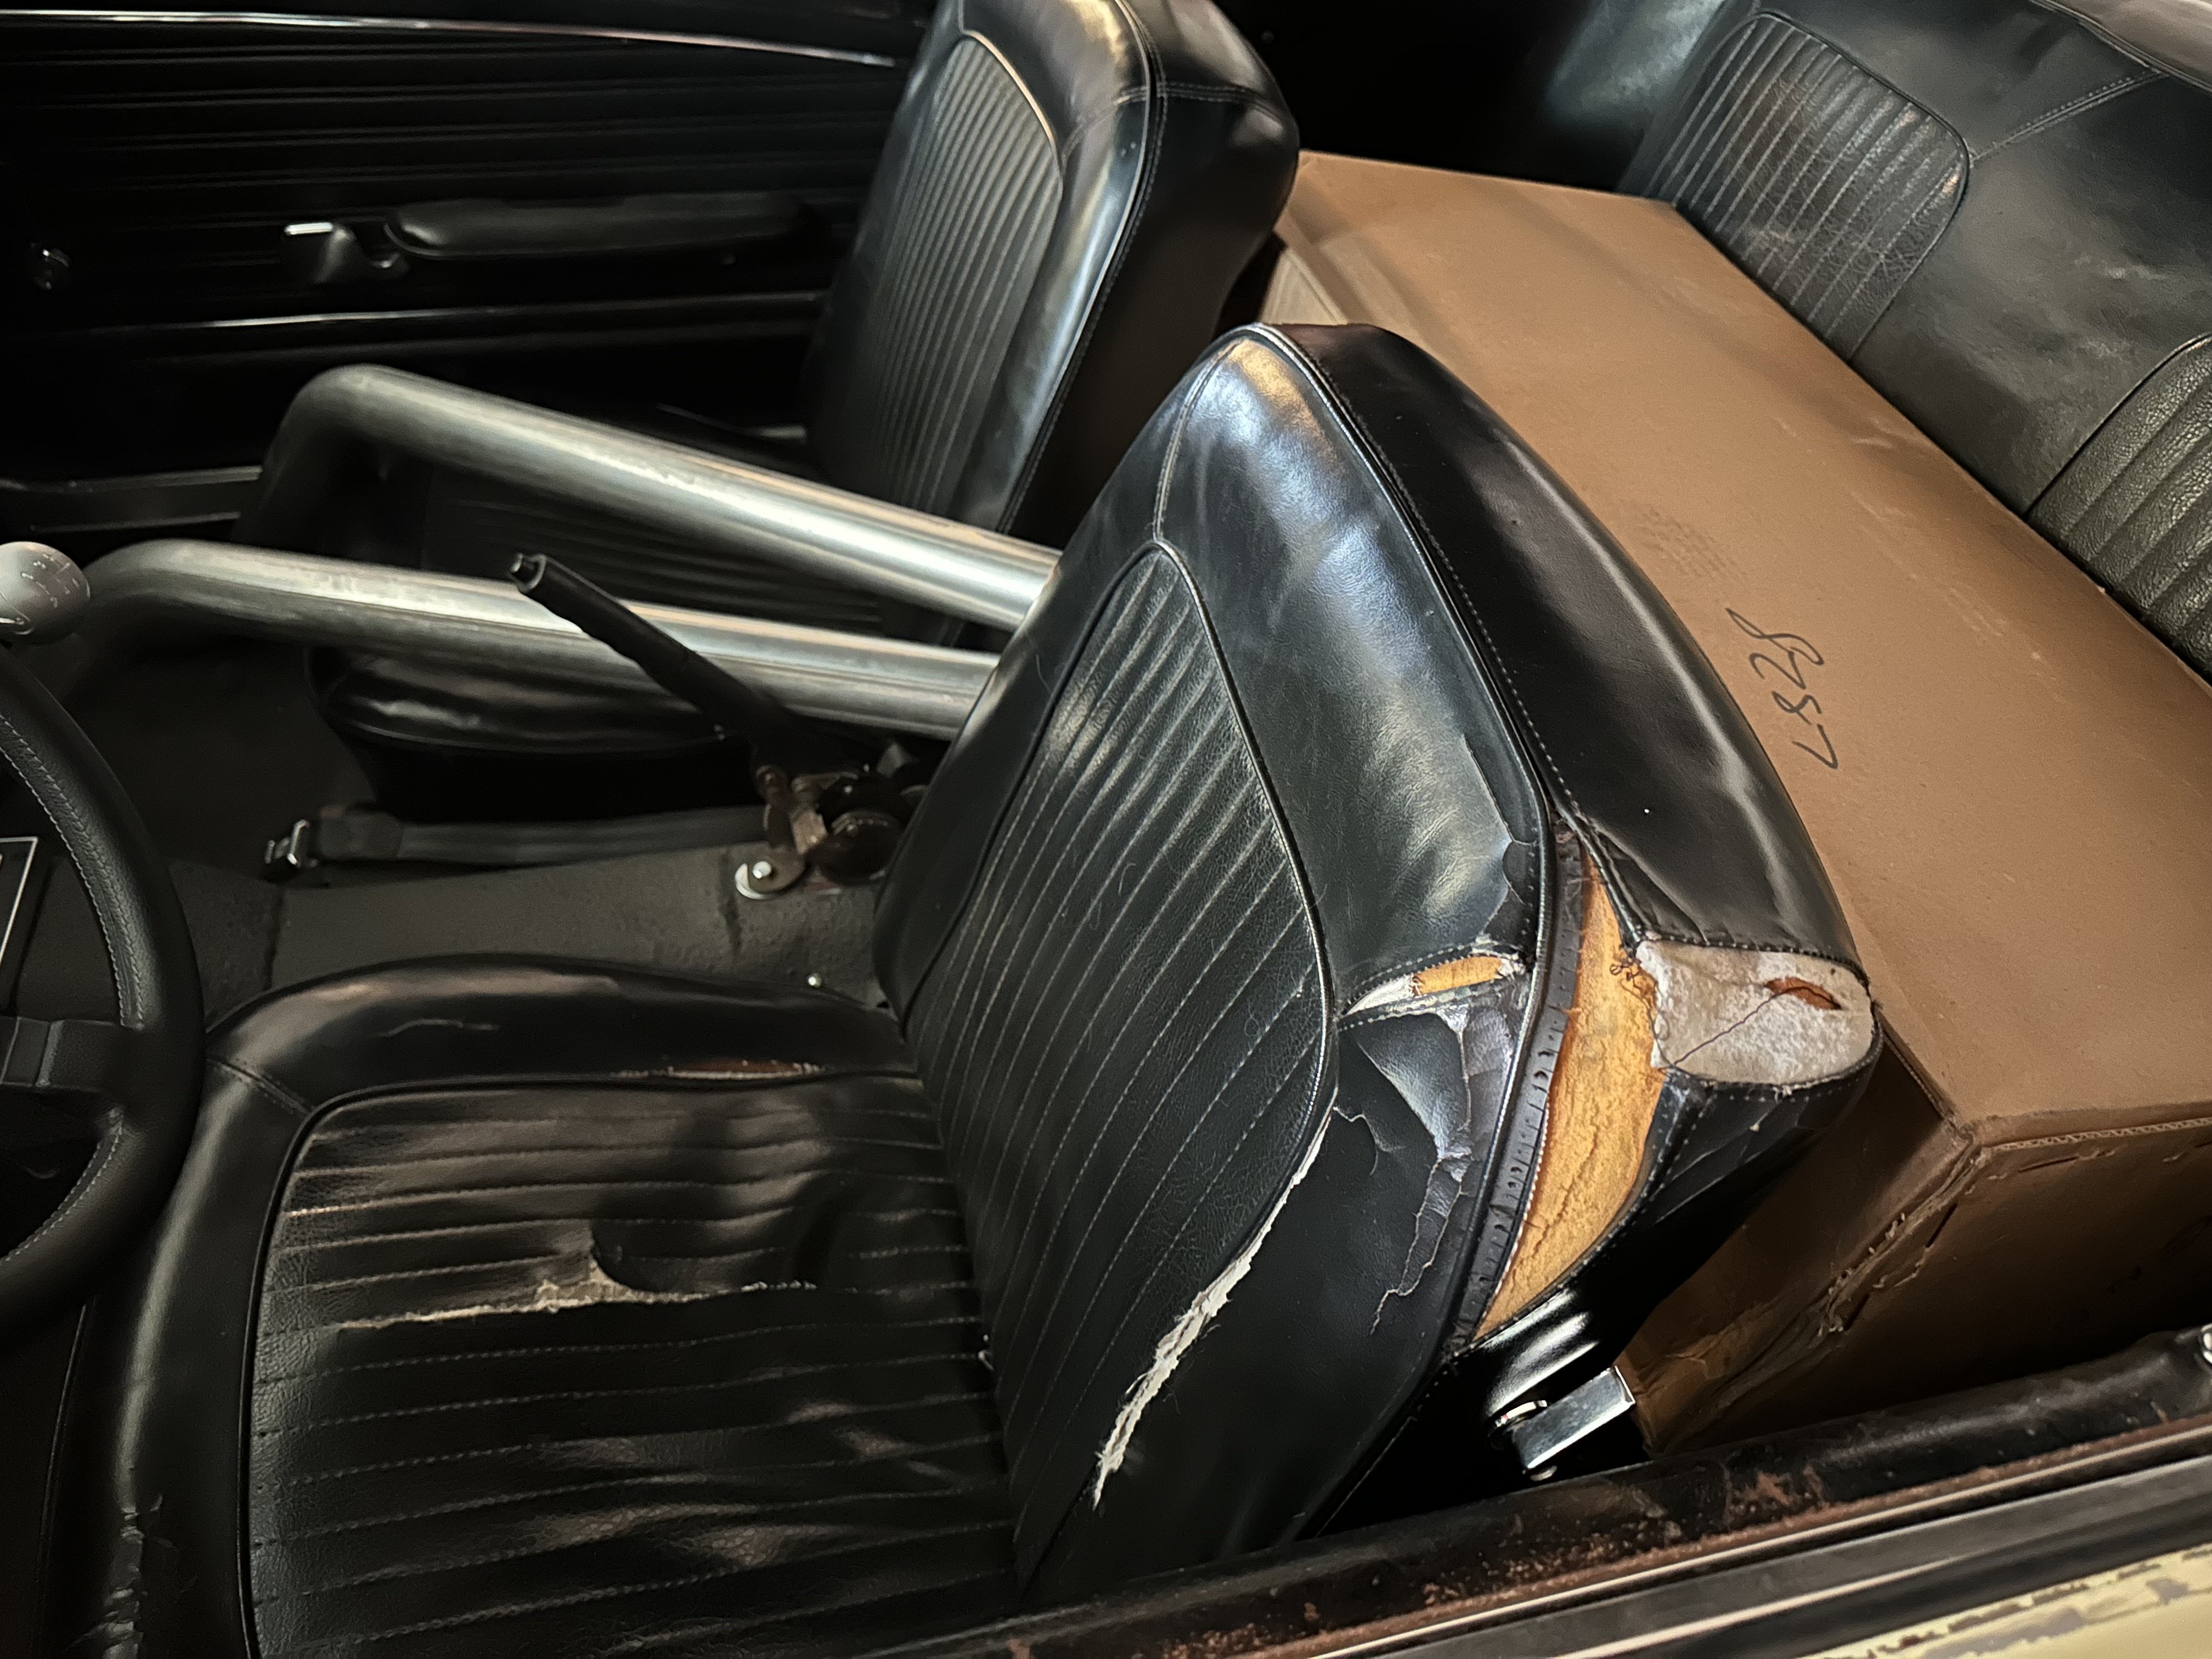
February 2025:
It's late and I'm beat. A quick update before bed so I can get back to it tomorrow.
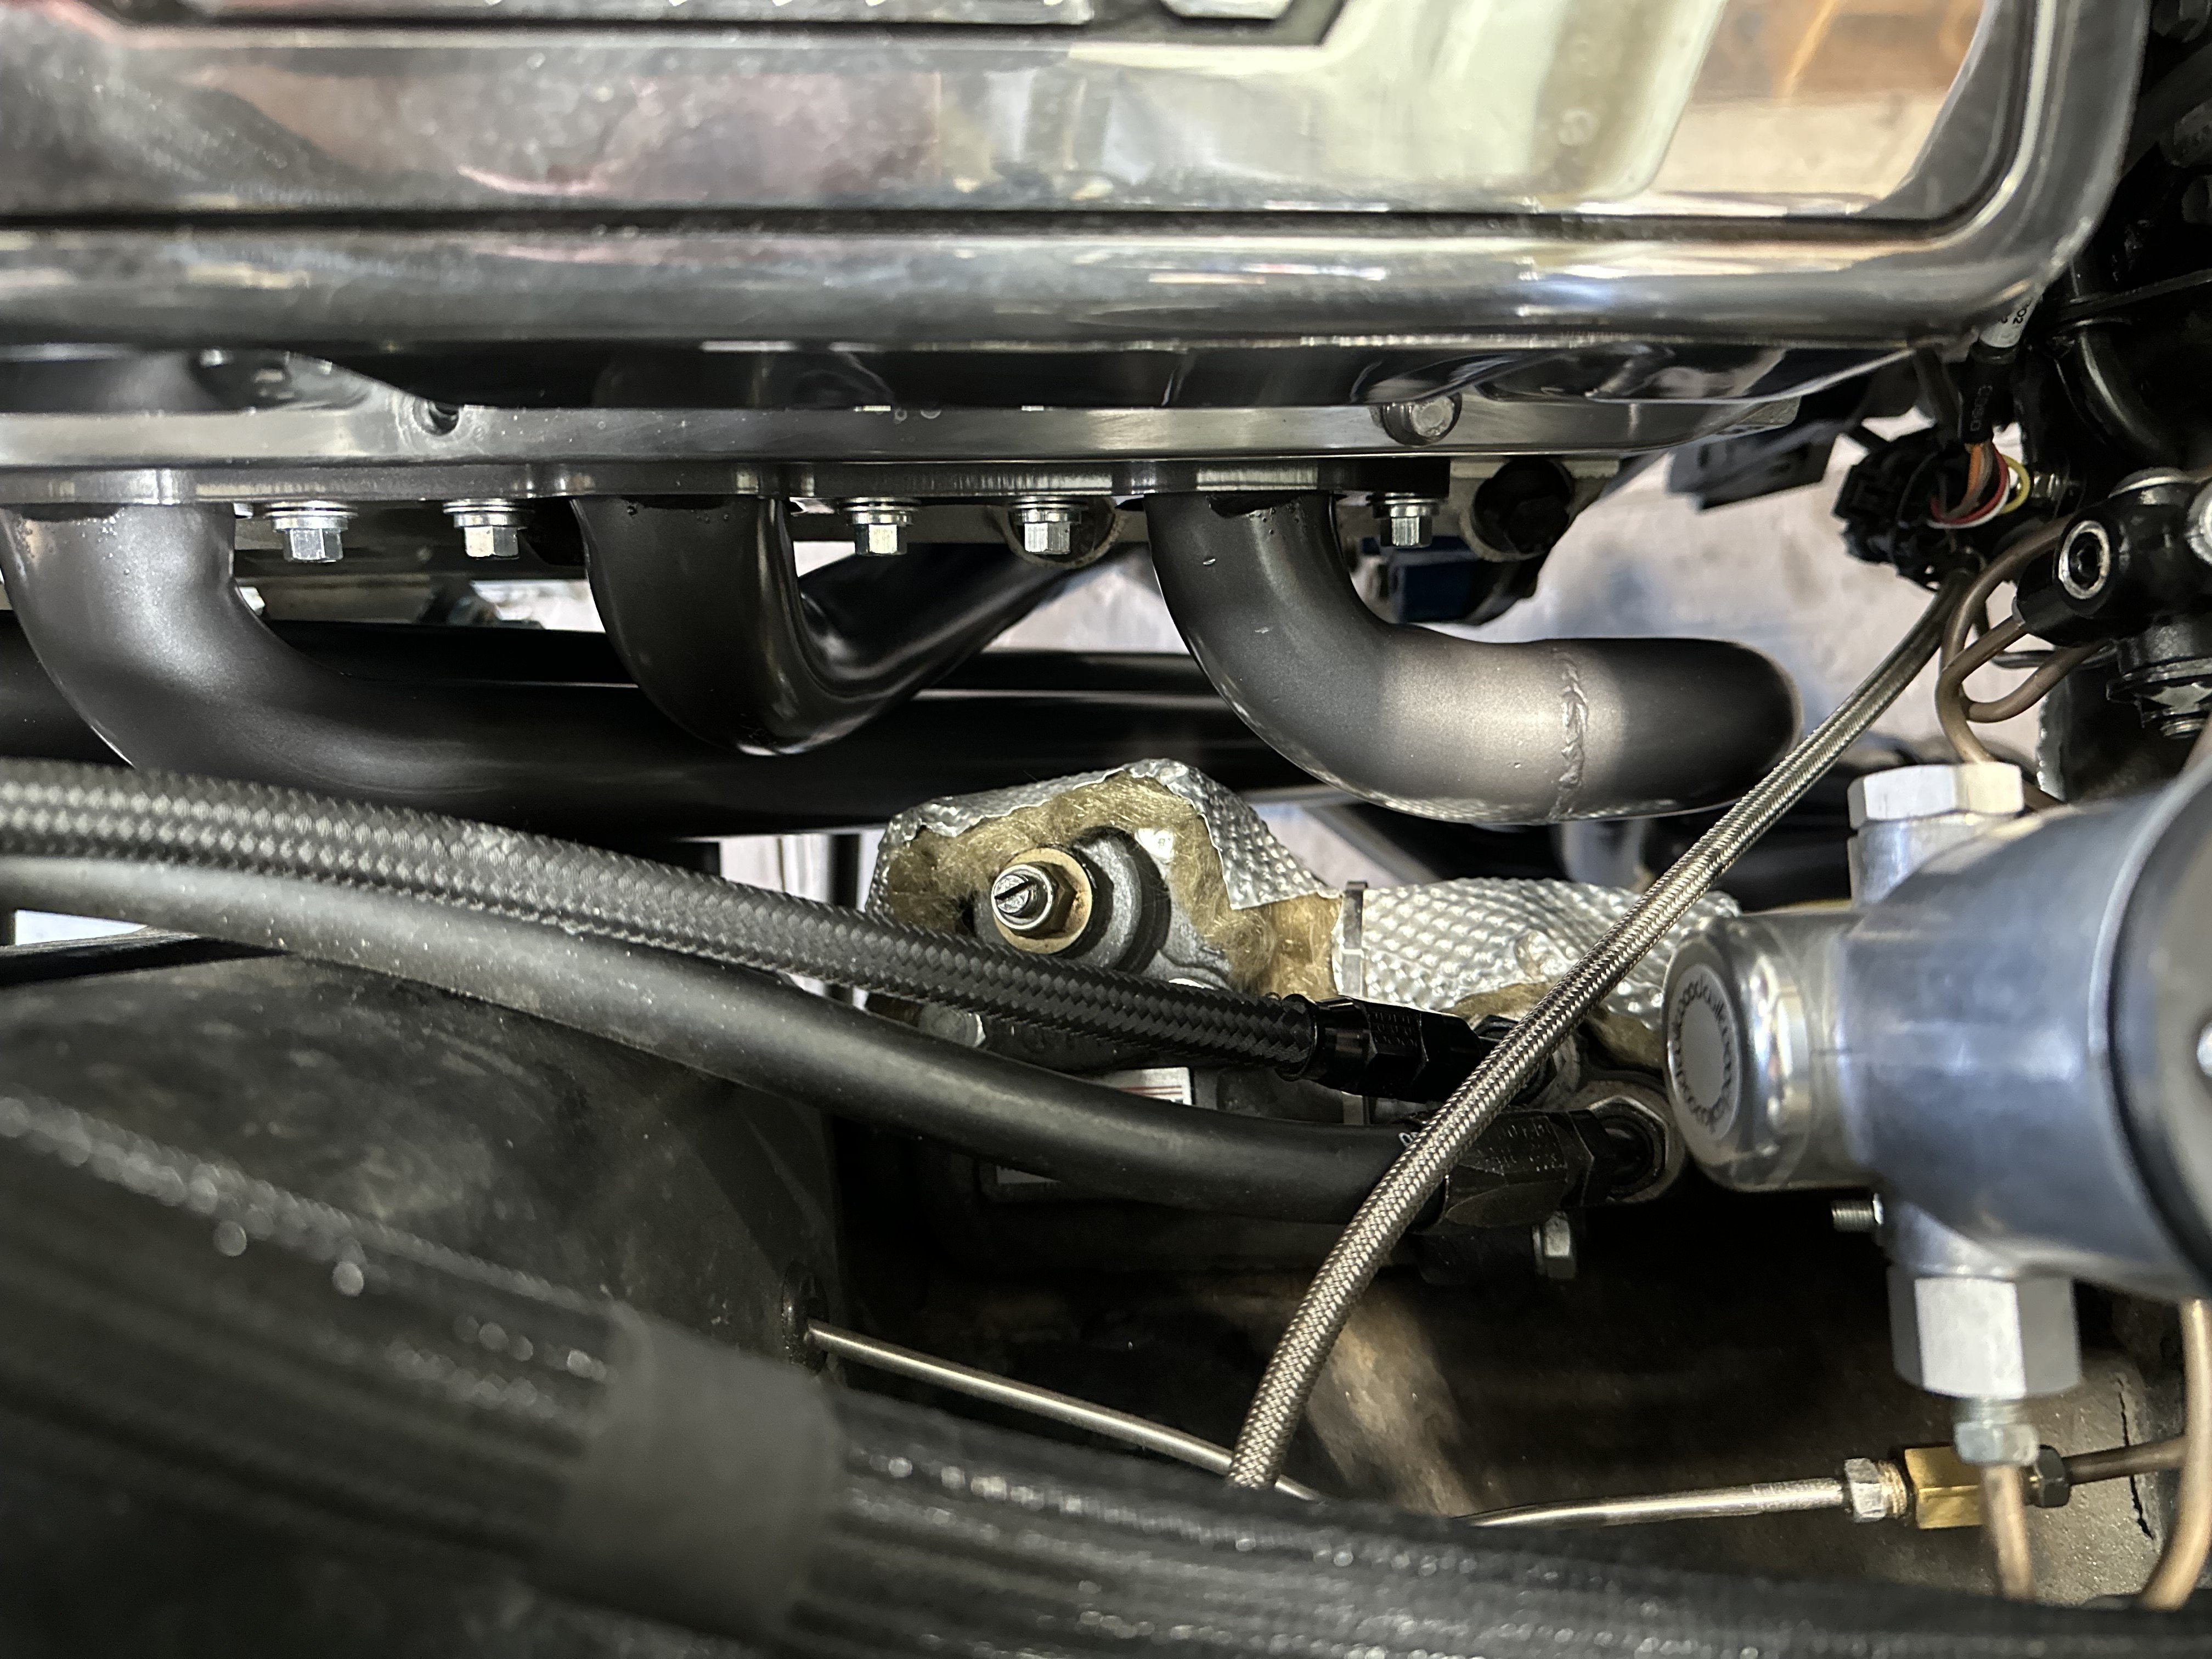
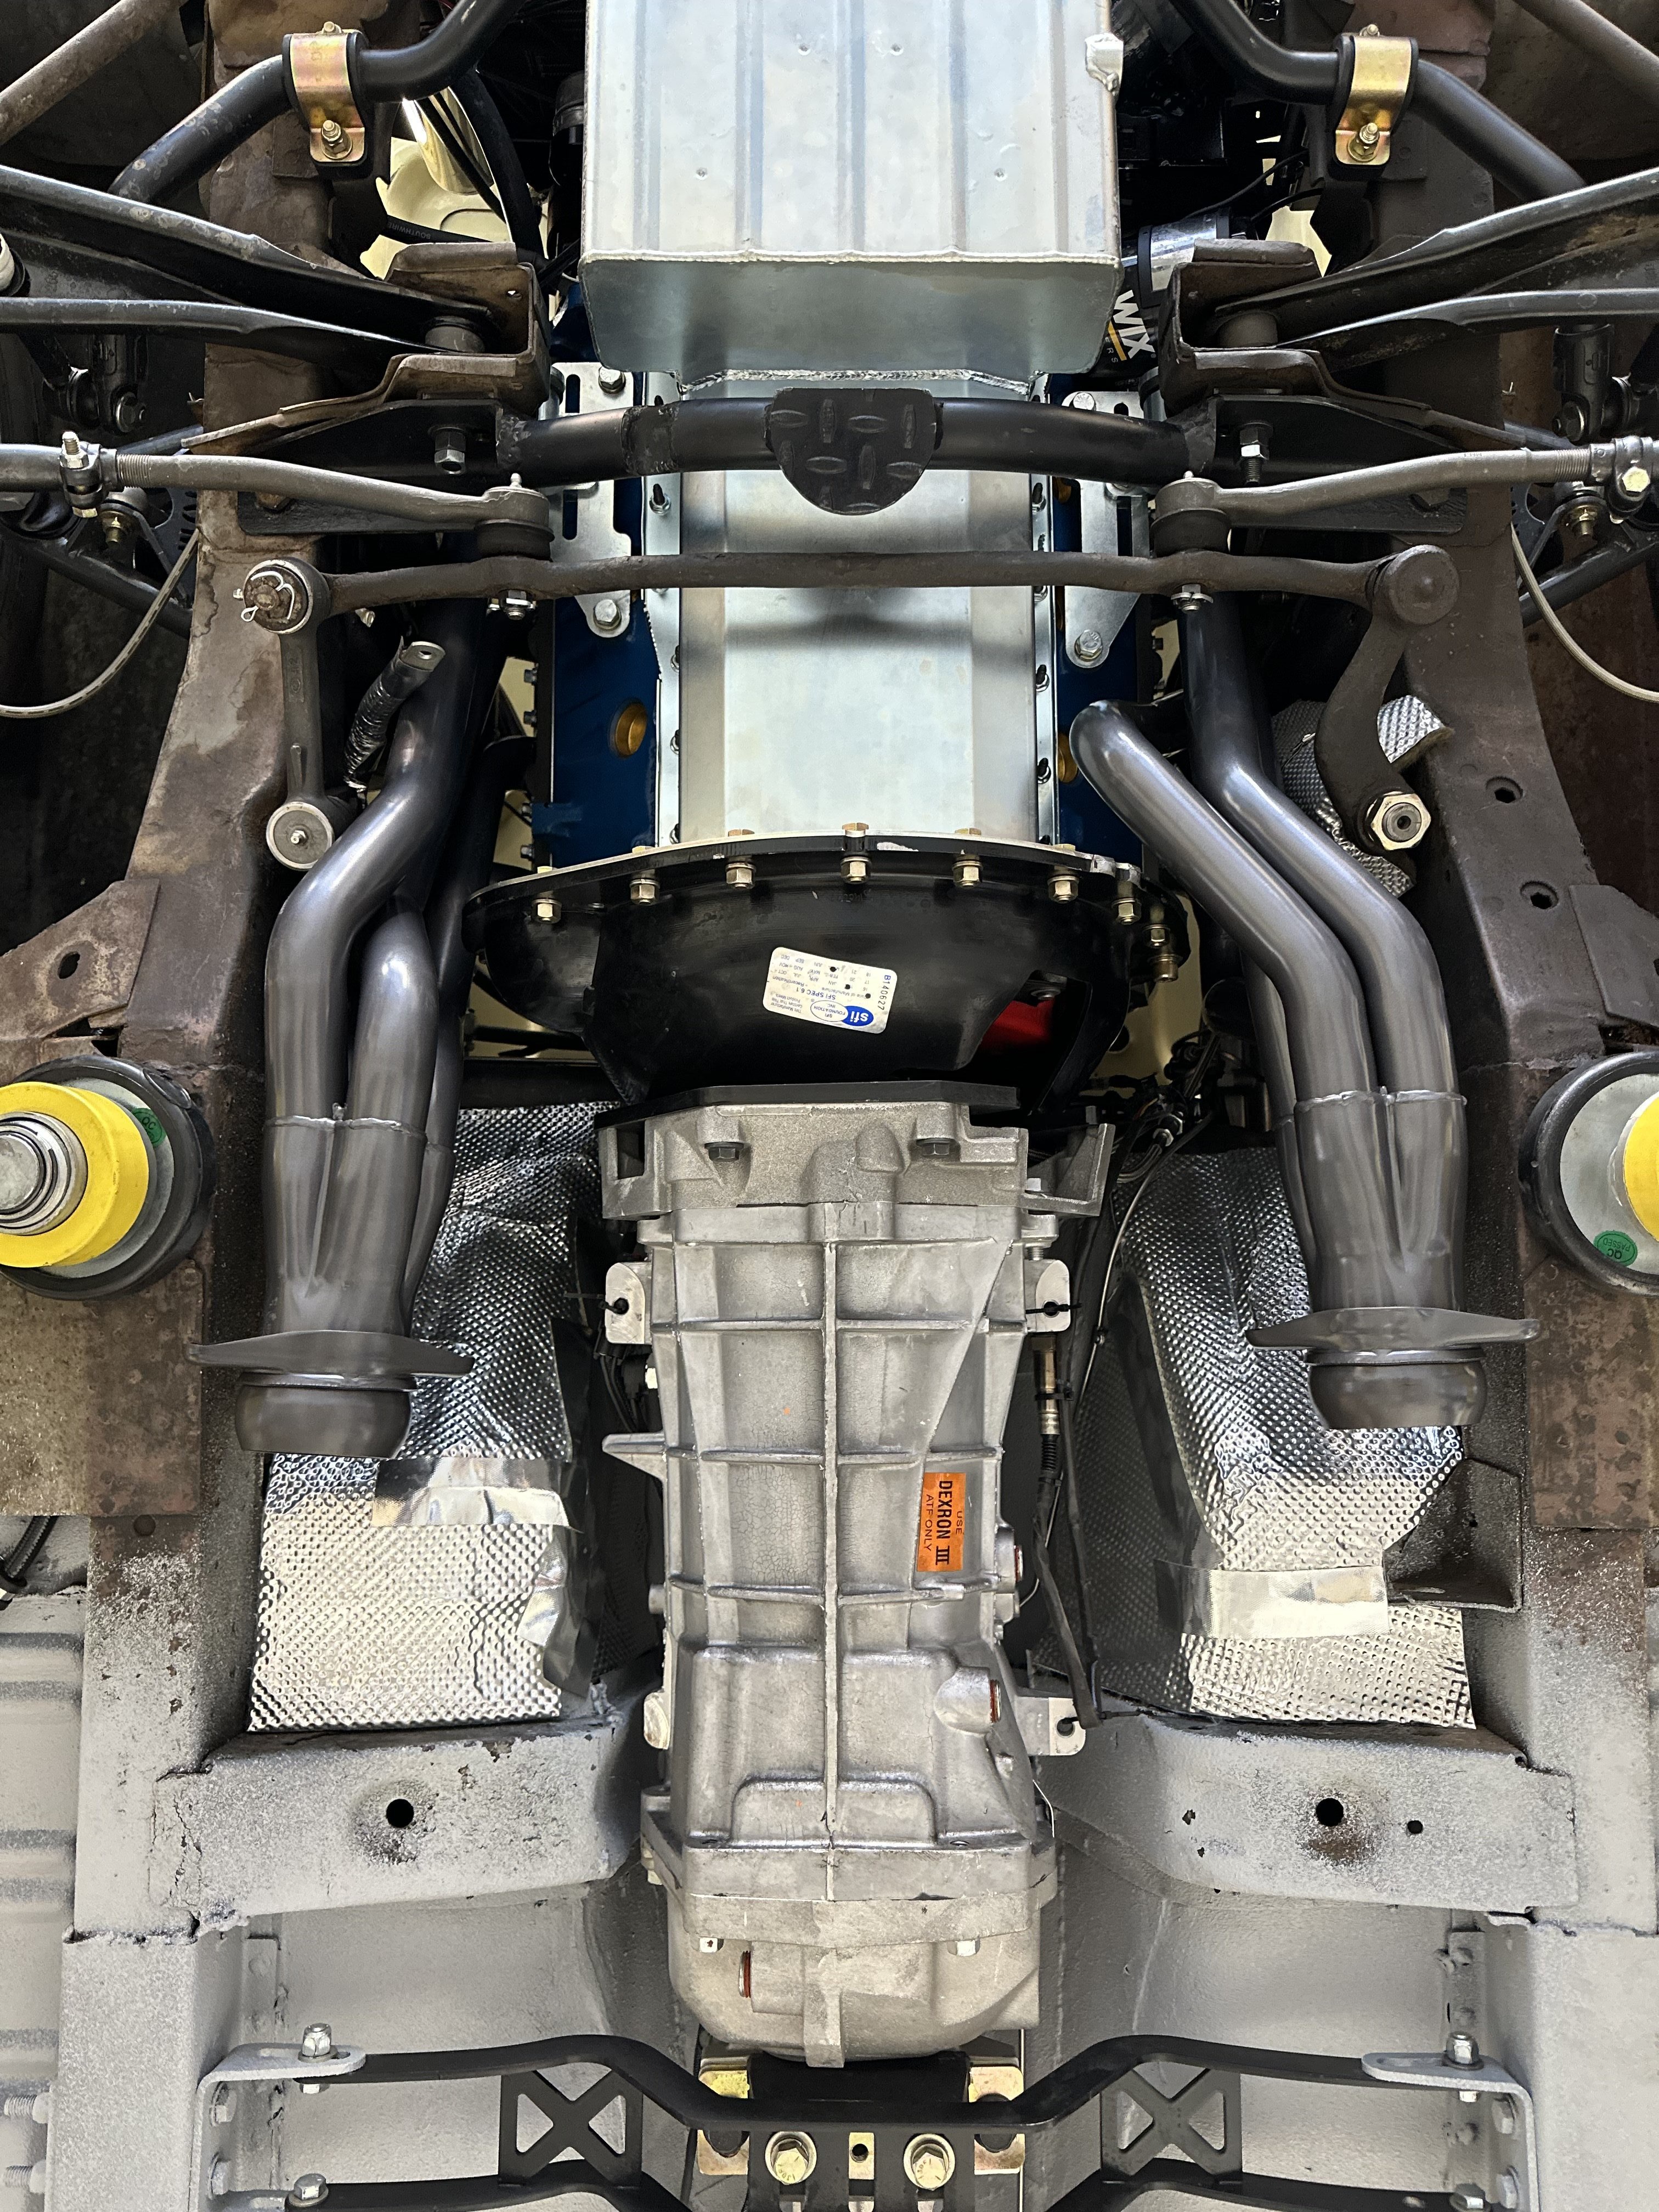
Stan at FPA is a magician. The headers fit well enough that I had enough room on the driver side to shove my engine back to center and still have room. The new mufflers are on and the car is quieter. We ran out of time so mike decided to help me revisit our late teens and put turndowns as a temp setup. I'll be going back tomorrow to finish up the tailpipes. The only "issues" i ran into was the starter had to be clocked differently to give the solenoid clearance, the engine needed to be re-centered for better space on the passenger side for the headers and I'll be revisiting plug wires in the future. The MSD wires I have have their long 'multi-angle' boot and there's a couple of tubes that don't have lots of room for the long boot. I'm considering Ford's build-your-own set with angled short boots.
So much more clearance now. Didn't have to bash a single tube.
He wanted me to relive my 66 that I had in high school.....Tailpipes go on tomorrow.....
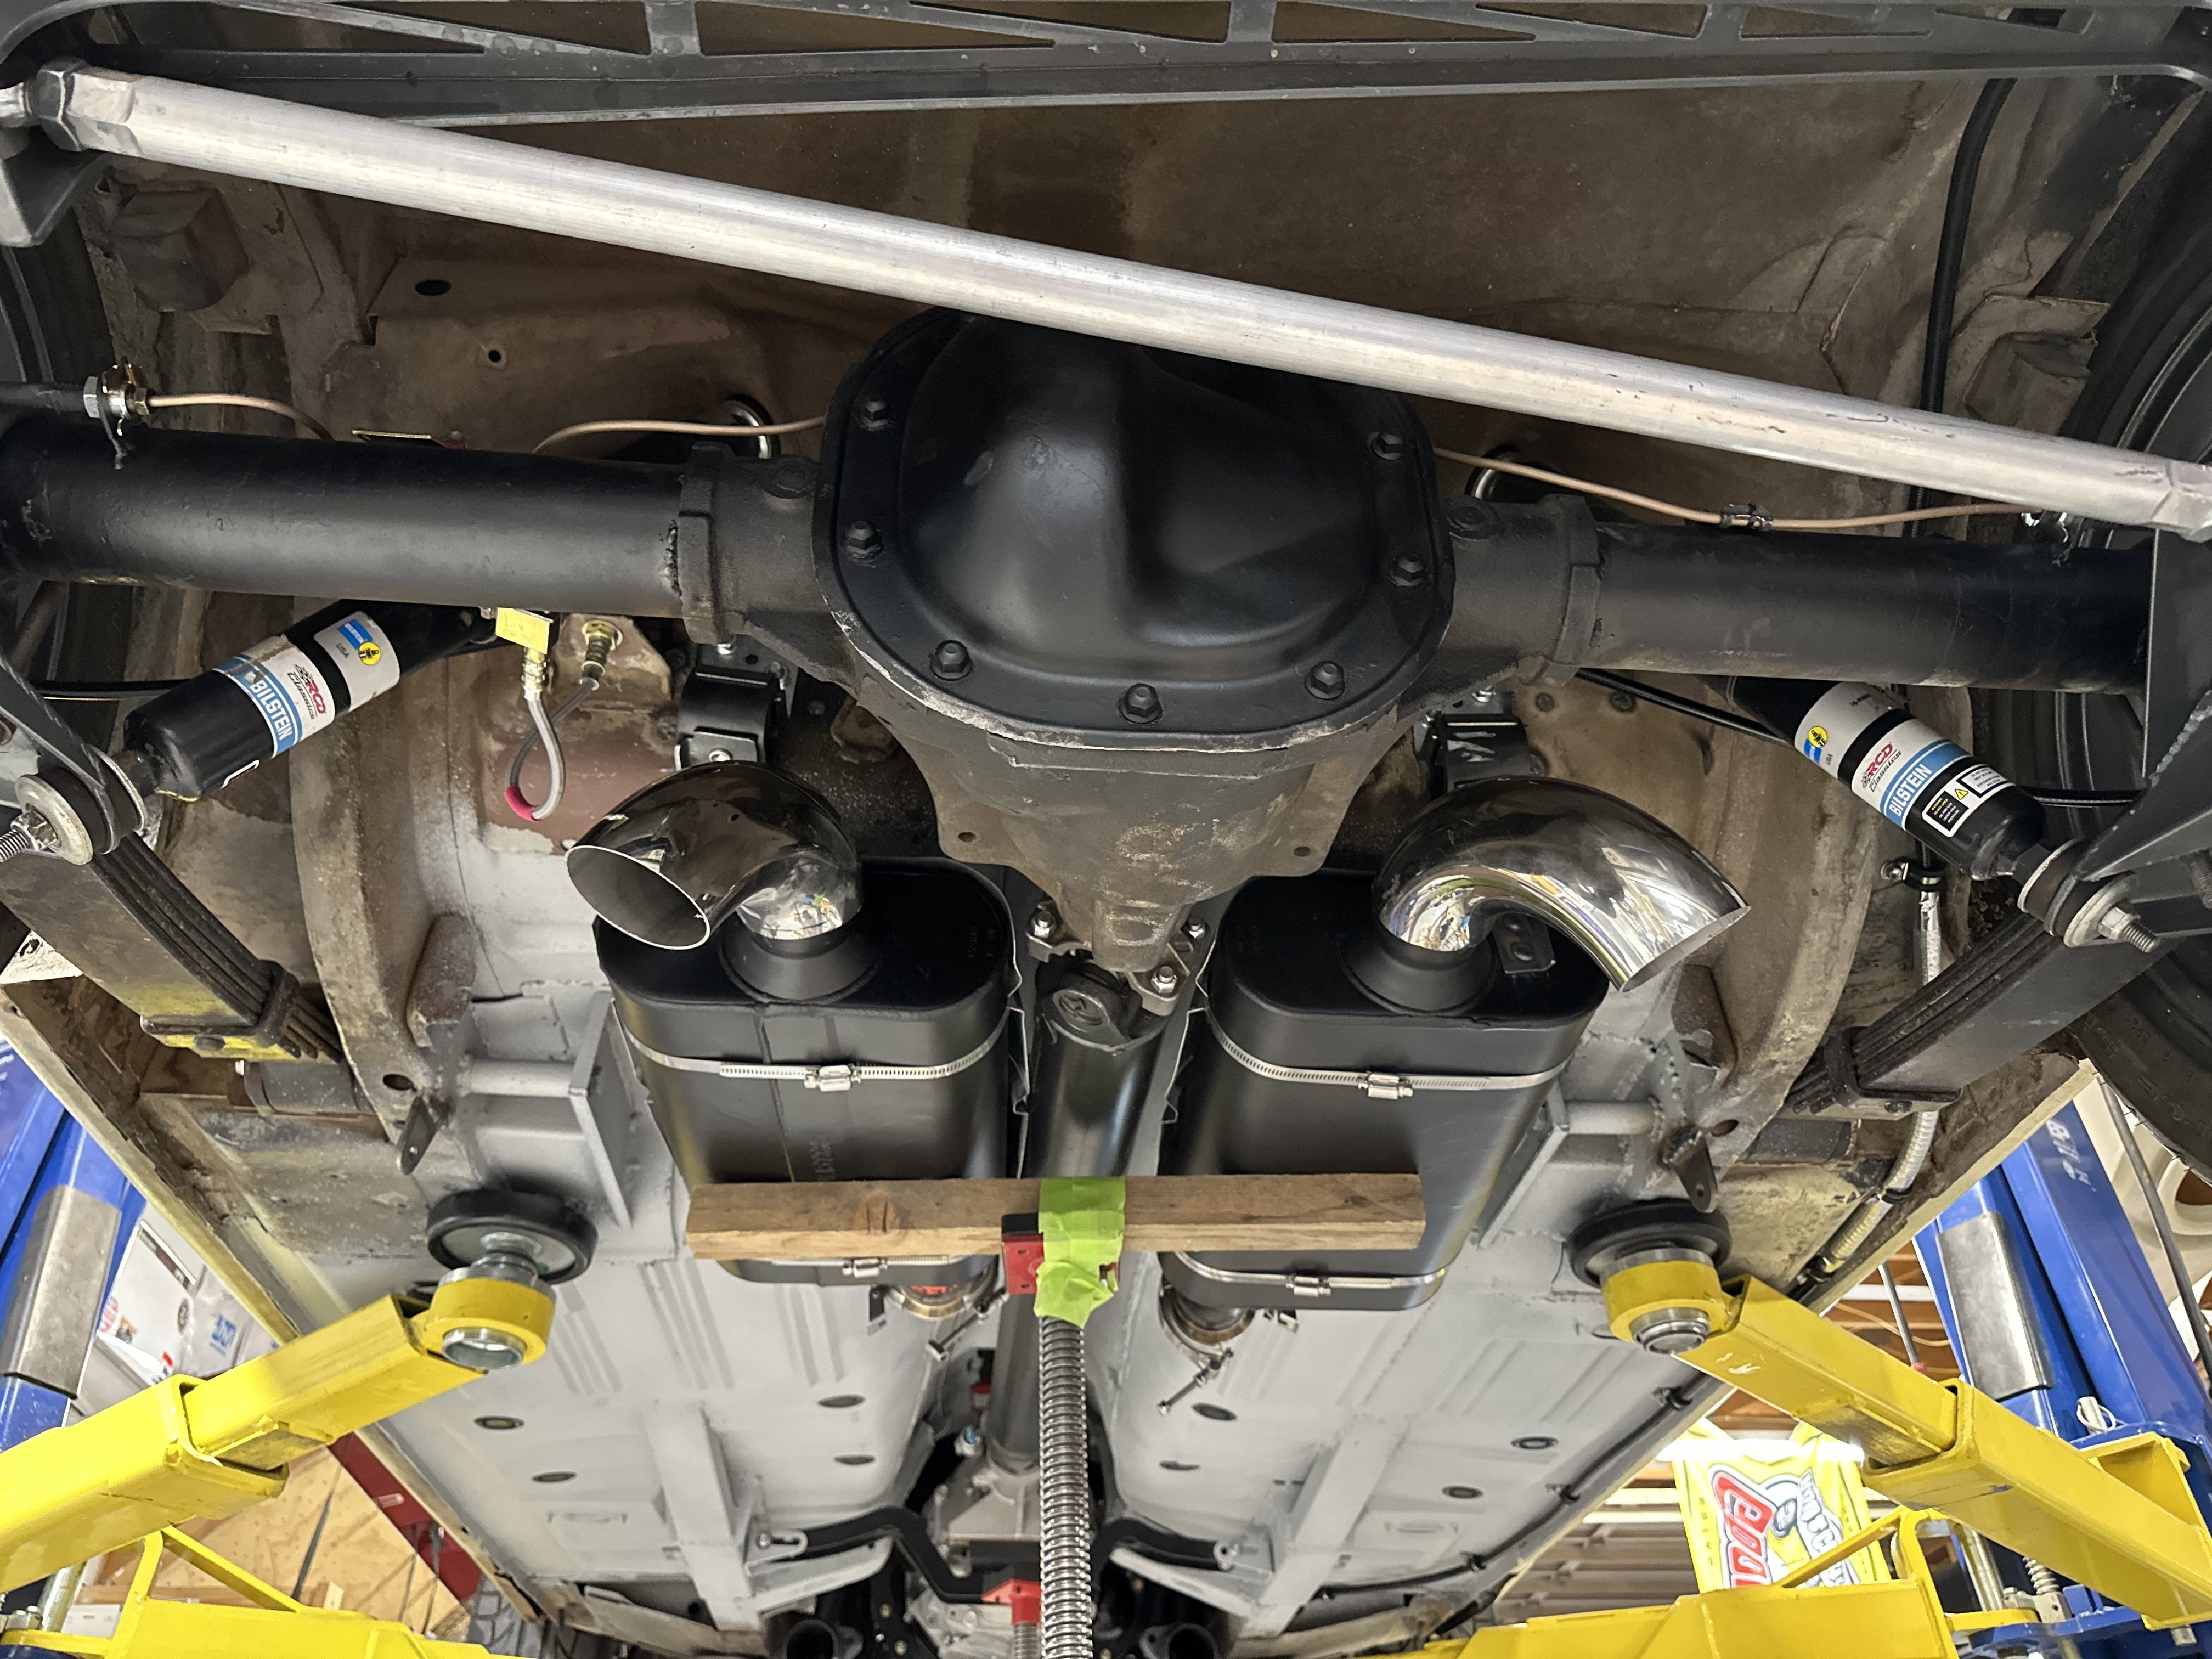
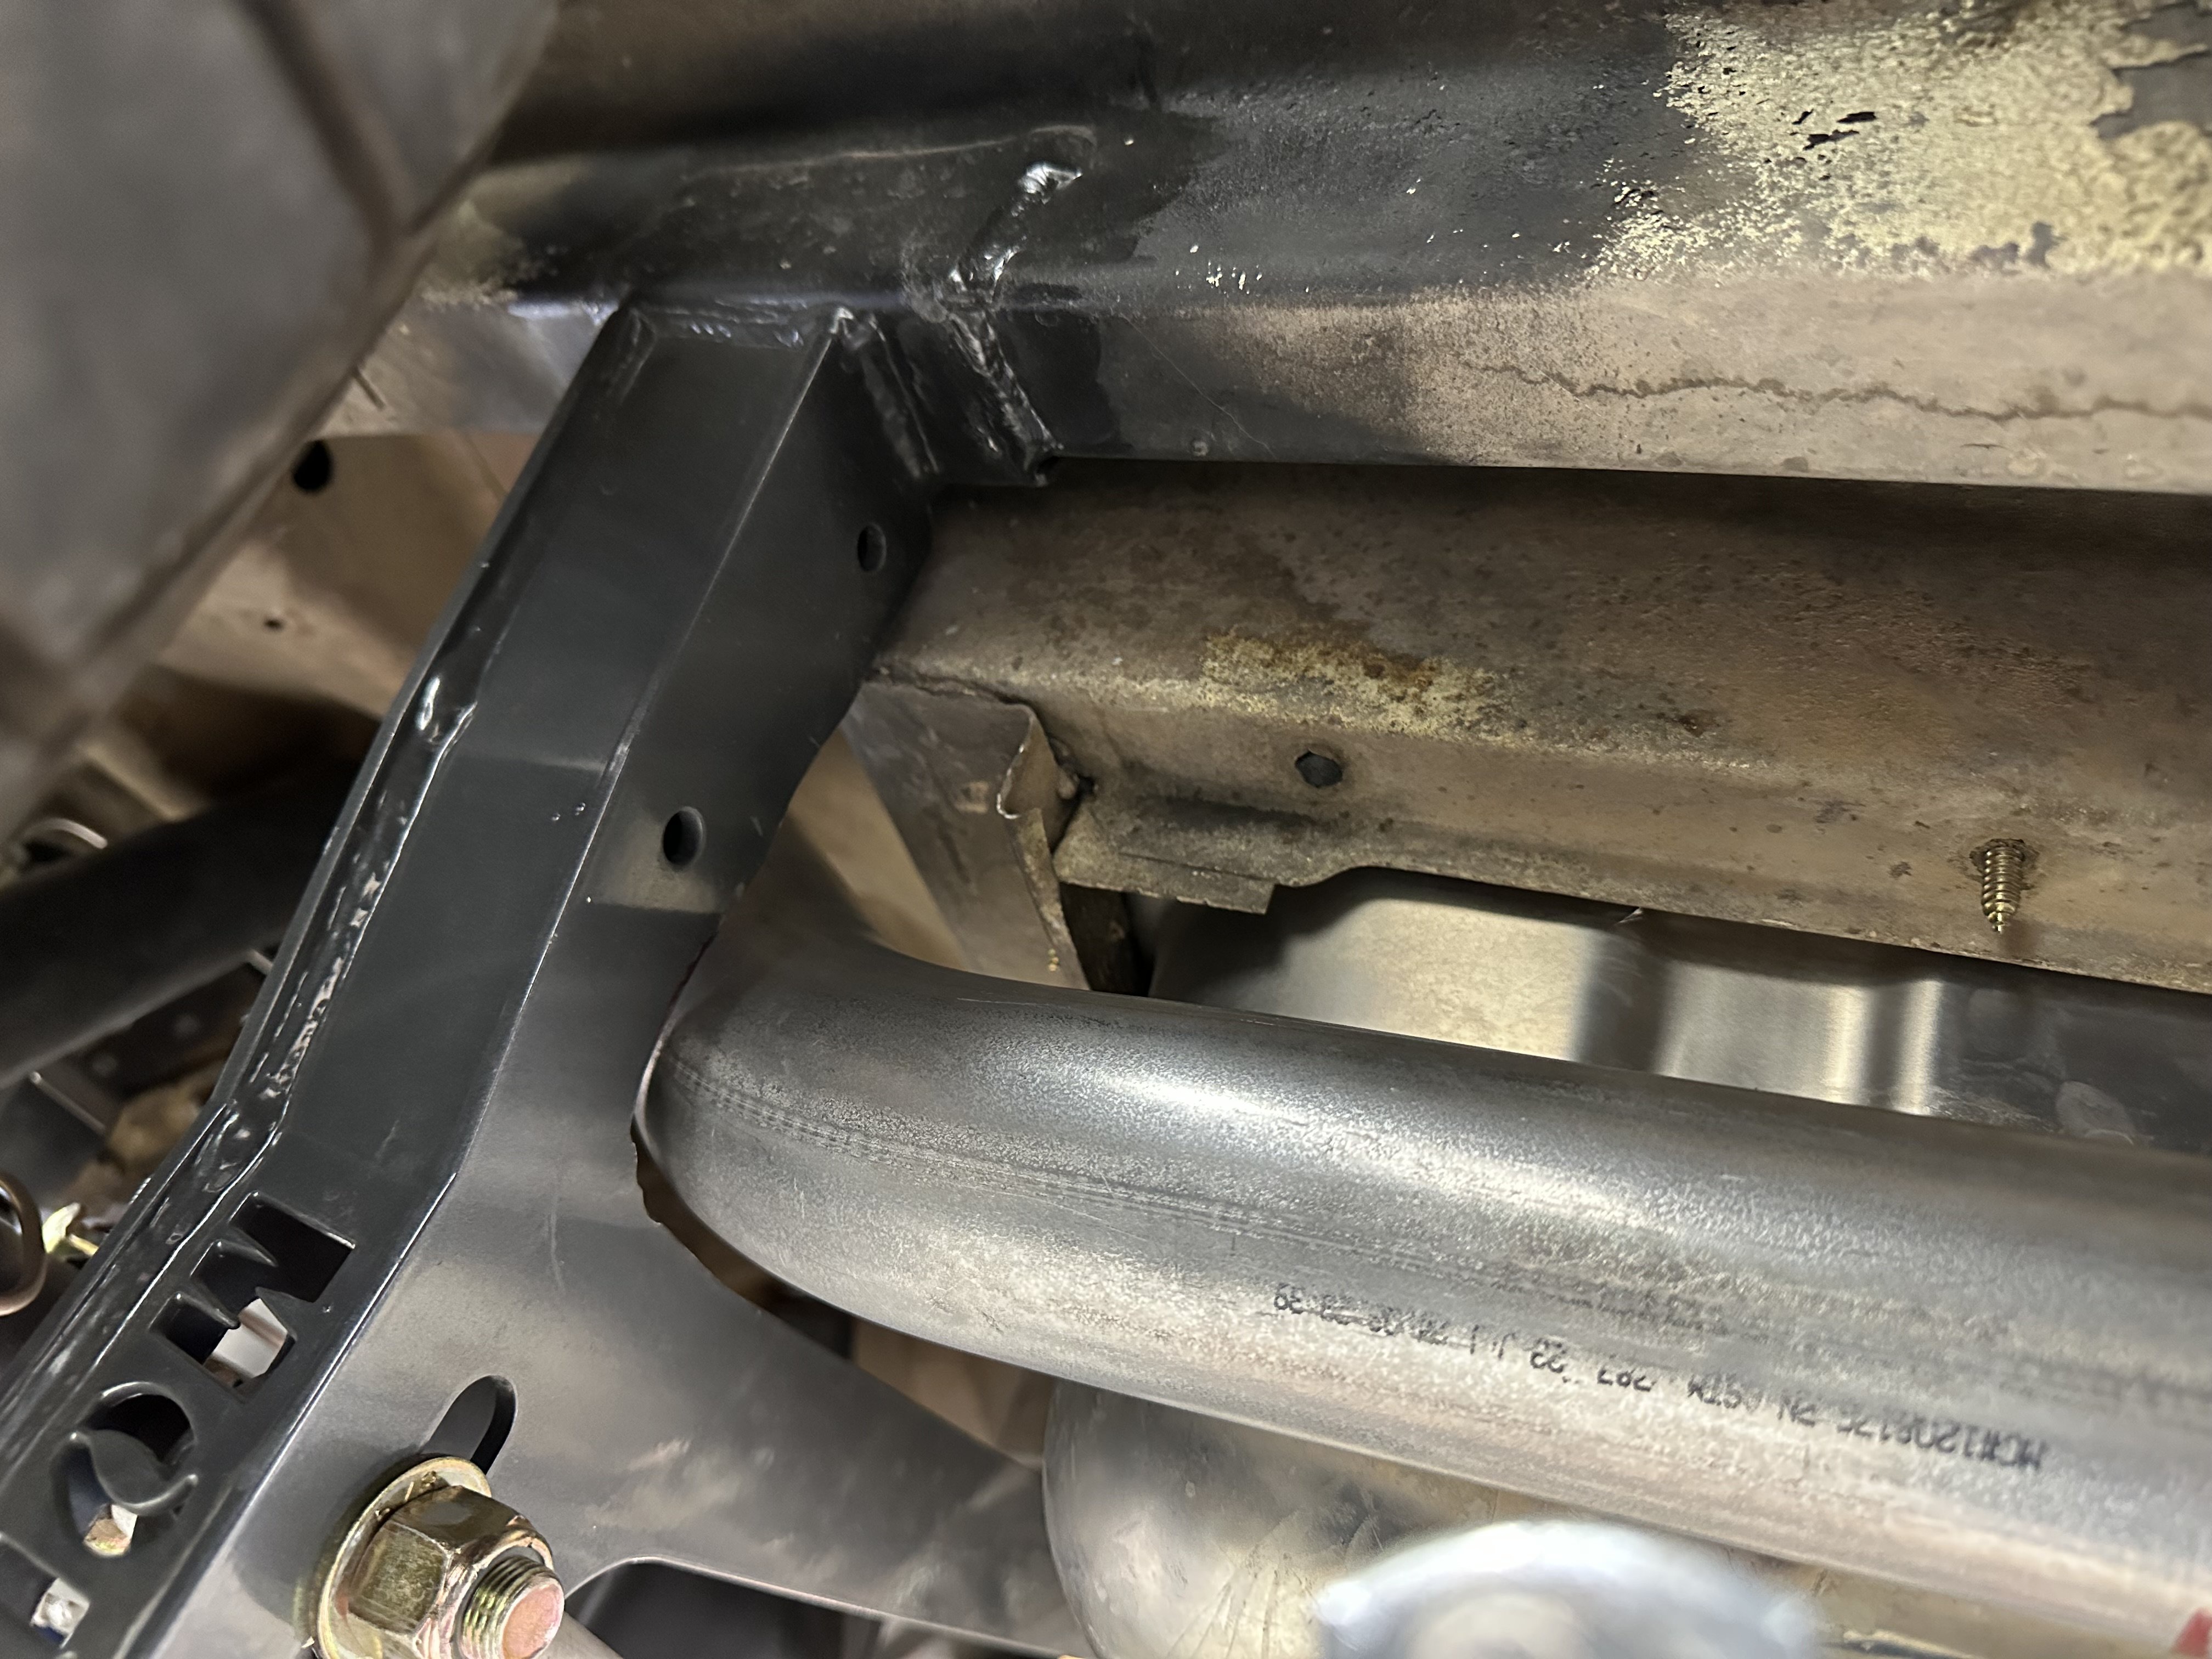
The latest: I'm done with exhaust for now. Went back to mike's today and started fitting the tailpipes. The only really tight spot was on the driver's side through the panhard bracket, which I expected. I trimmed it back a little and everything else went together pretty well. Now that I've got that done, I'll let my car fund build back up a little and figure out what I want to mess with next.
Here is the spot in question after I'd trimmed a little off.
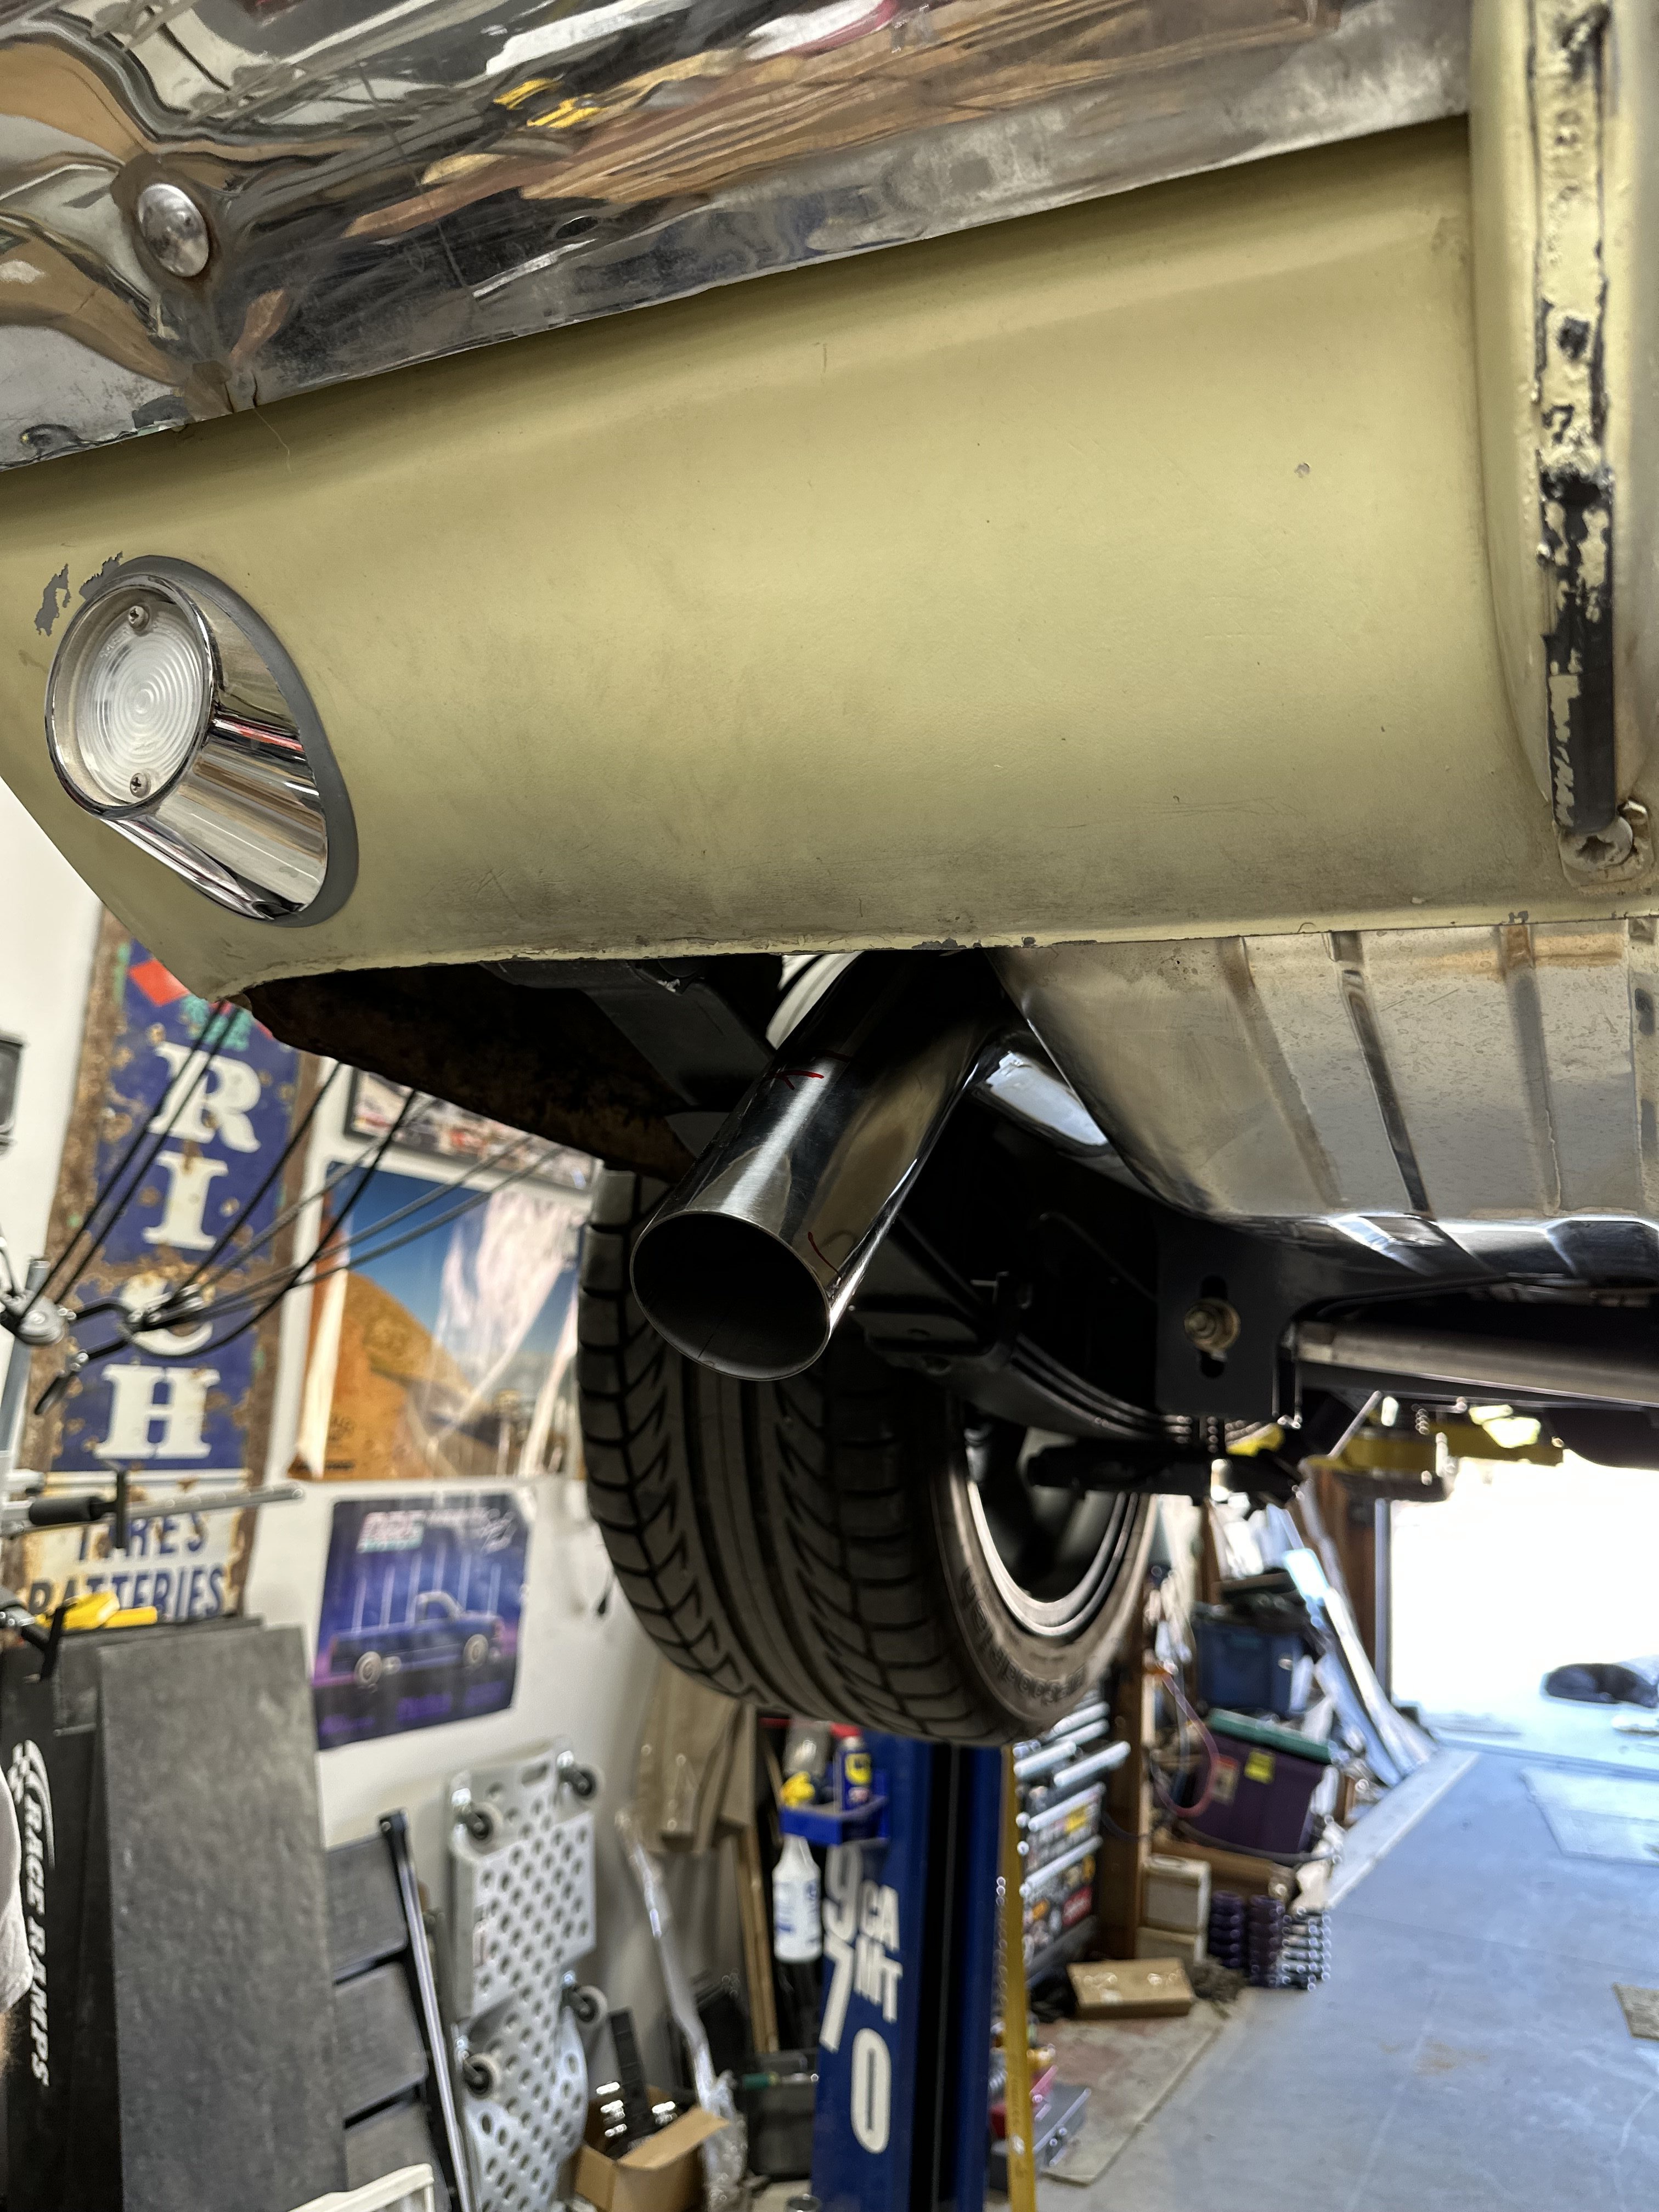
Here is the exit. I went back and trimmed the end of the pipe off to make it stick out just a little past the valance.
Latest news - Heat shield material for the tank has arrived. I'll get that on this weekend. Last weekend I puttered around and adjusted the passenger side tailpipe hanger to level it out and make it more even with the other side. I also finally decided to add additional hardware to my license plate so it wasn't so floppy. While i was farting around in the garage, I was looking at the list of what I wanted to tackle next.
This morning I called Andrew to talk details on getting the tune sorted/smoothed out. I'm done with any real changes to engine parts and from here forward I'll be addressing other stuff on my build so it seemed like a good time to get the tune looked at and finalized. For those that don't remember, the local shop that handled the initial tune said they were done with tuning but the car spit out a freeze plug (again) on the last power pull.
Since then, I've gone through pulling the engine, replacing the core plugs, checking for leaks, etc to make sure that the "rapid unscheduled disassembly" of those two plugs was due to poor installation and not a deeper engine issue. With all of that done, I still felt like the tune could be cleaner and have better driveability (less cold start stalls, acceleration stumbles, etc) so I contacted Andrew because he has had in hands in several of the local SCCA guys' tunes and has sorted many cool cars out on the Pro-Touring forums in addition to his own builds.
Once all of that is sorted out, I'll get back to the other stuff on my list.
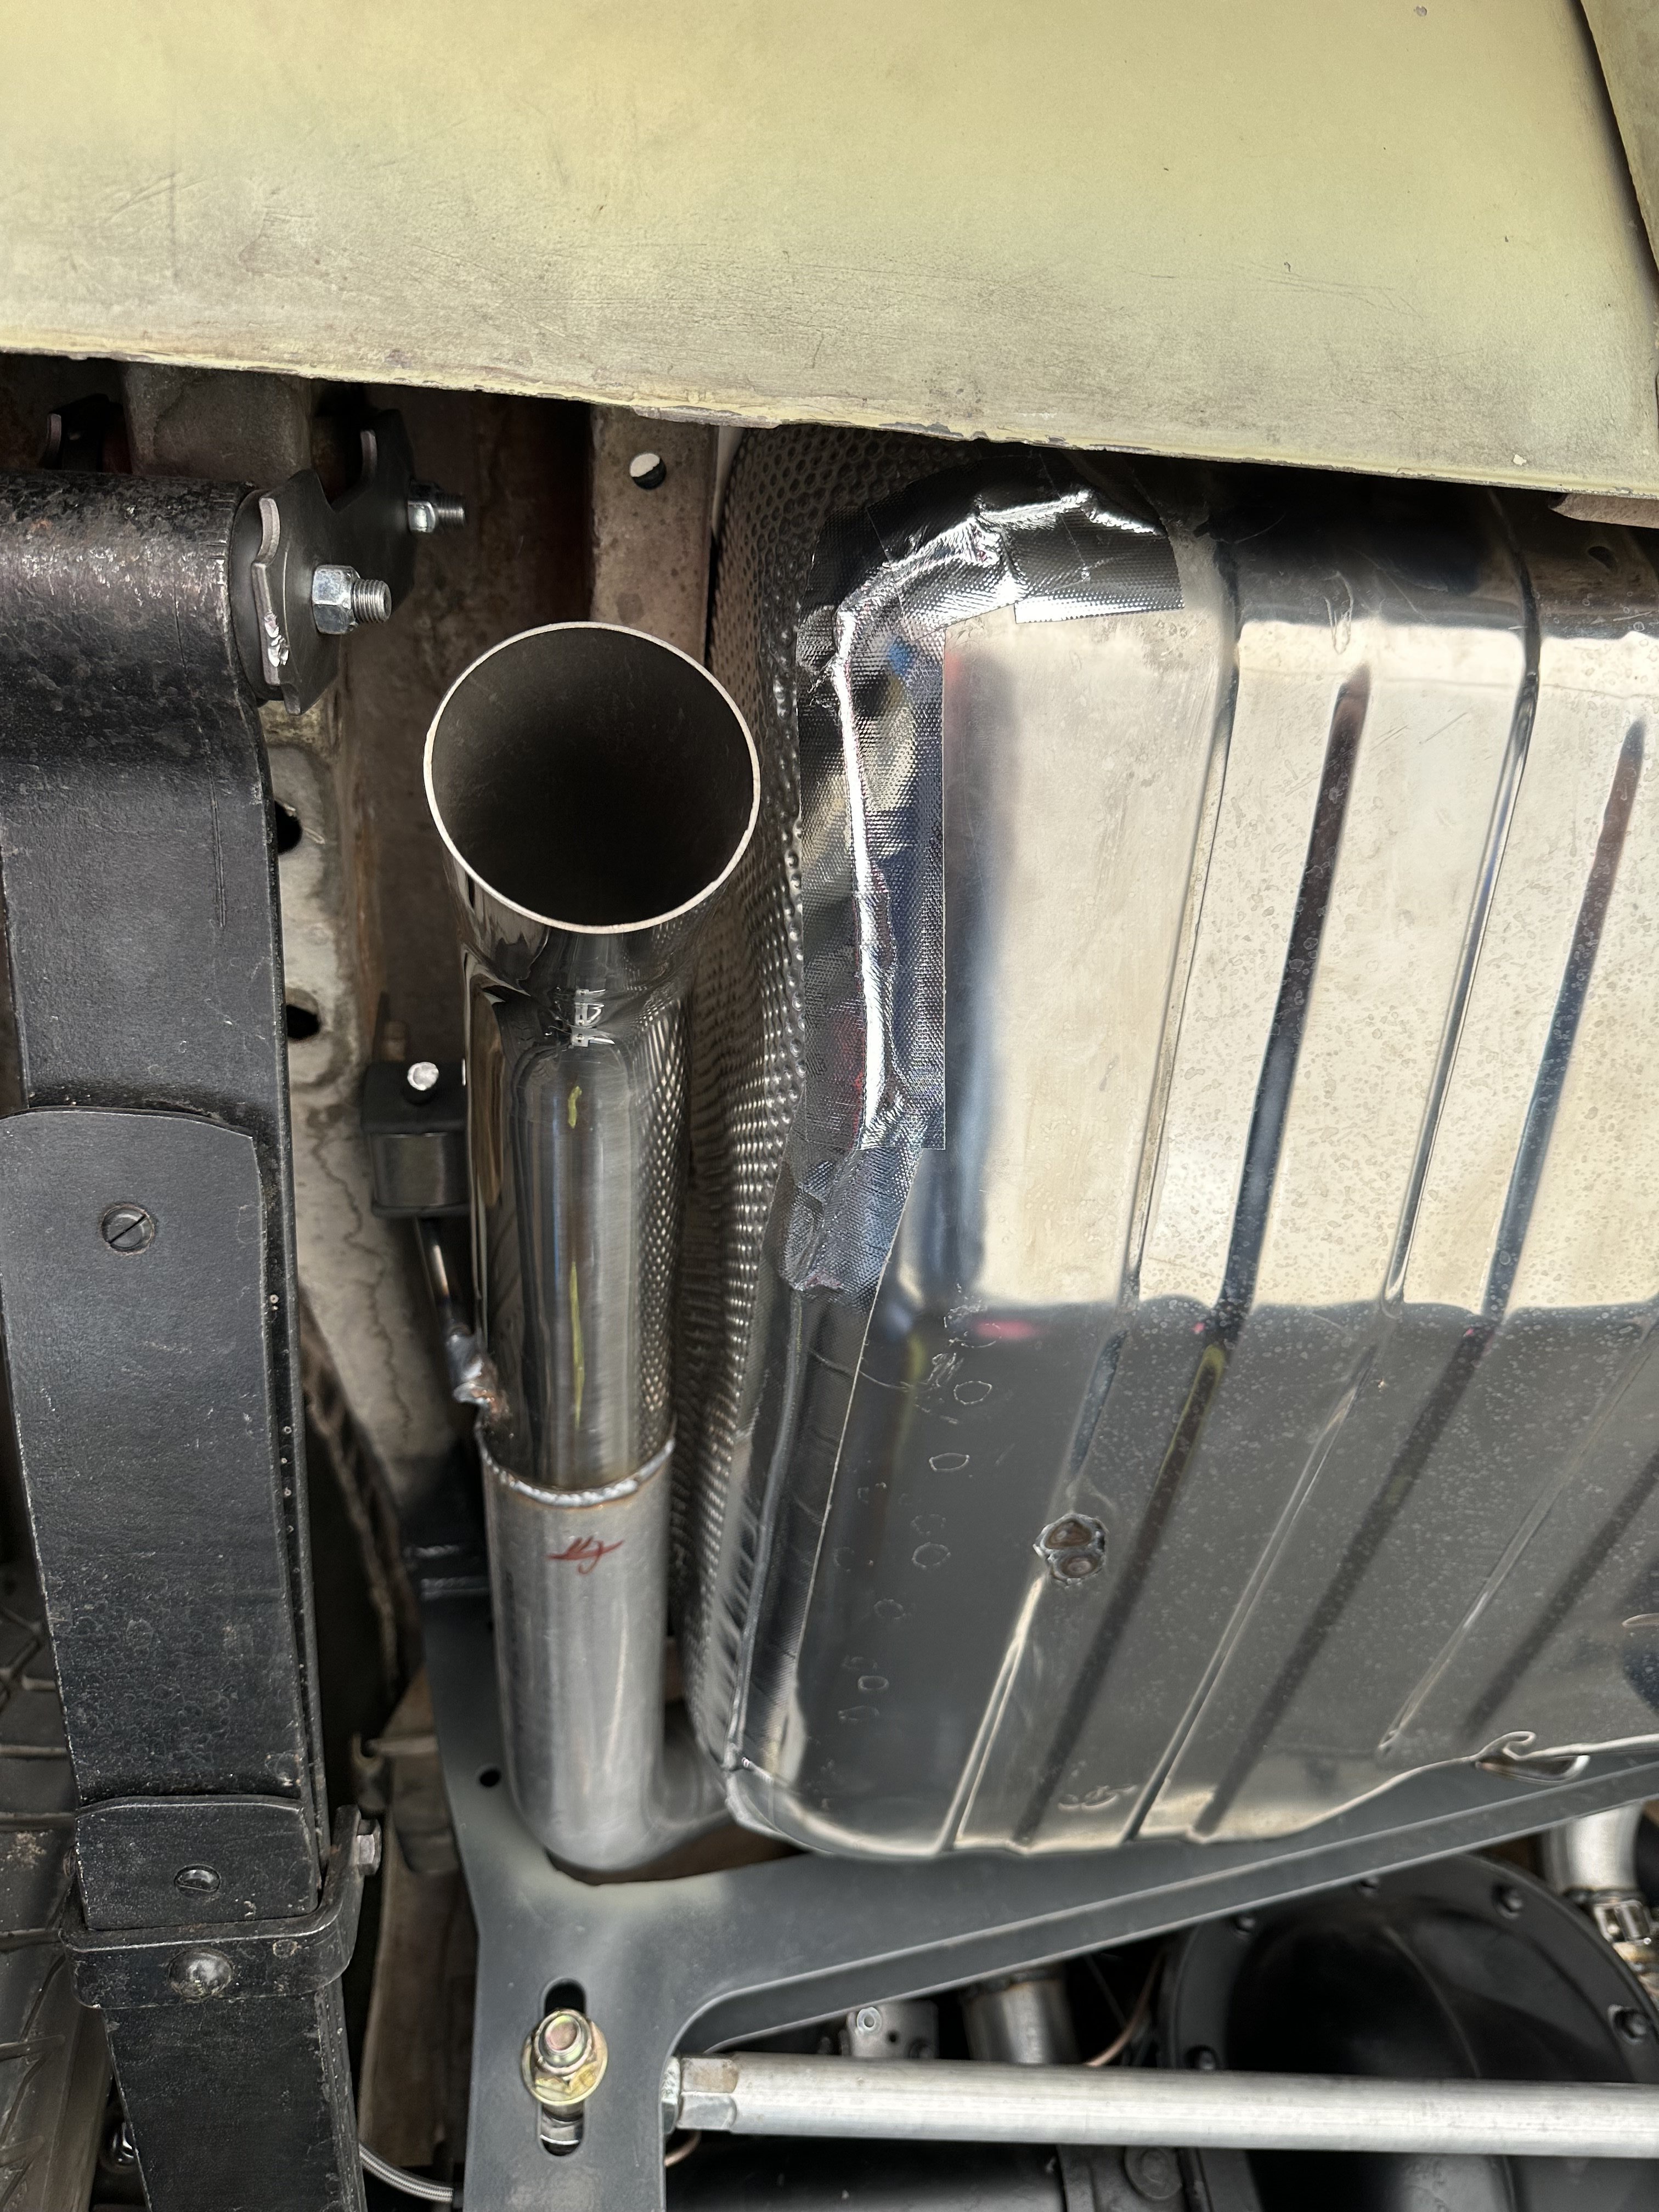
I spent some time today putting the heat shield on either side of the tank. Again, it may not be necessary, but I did it nonetheless.
Distance between pipe and tank on passenger side:
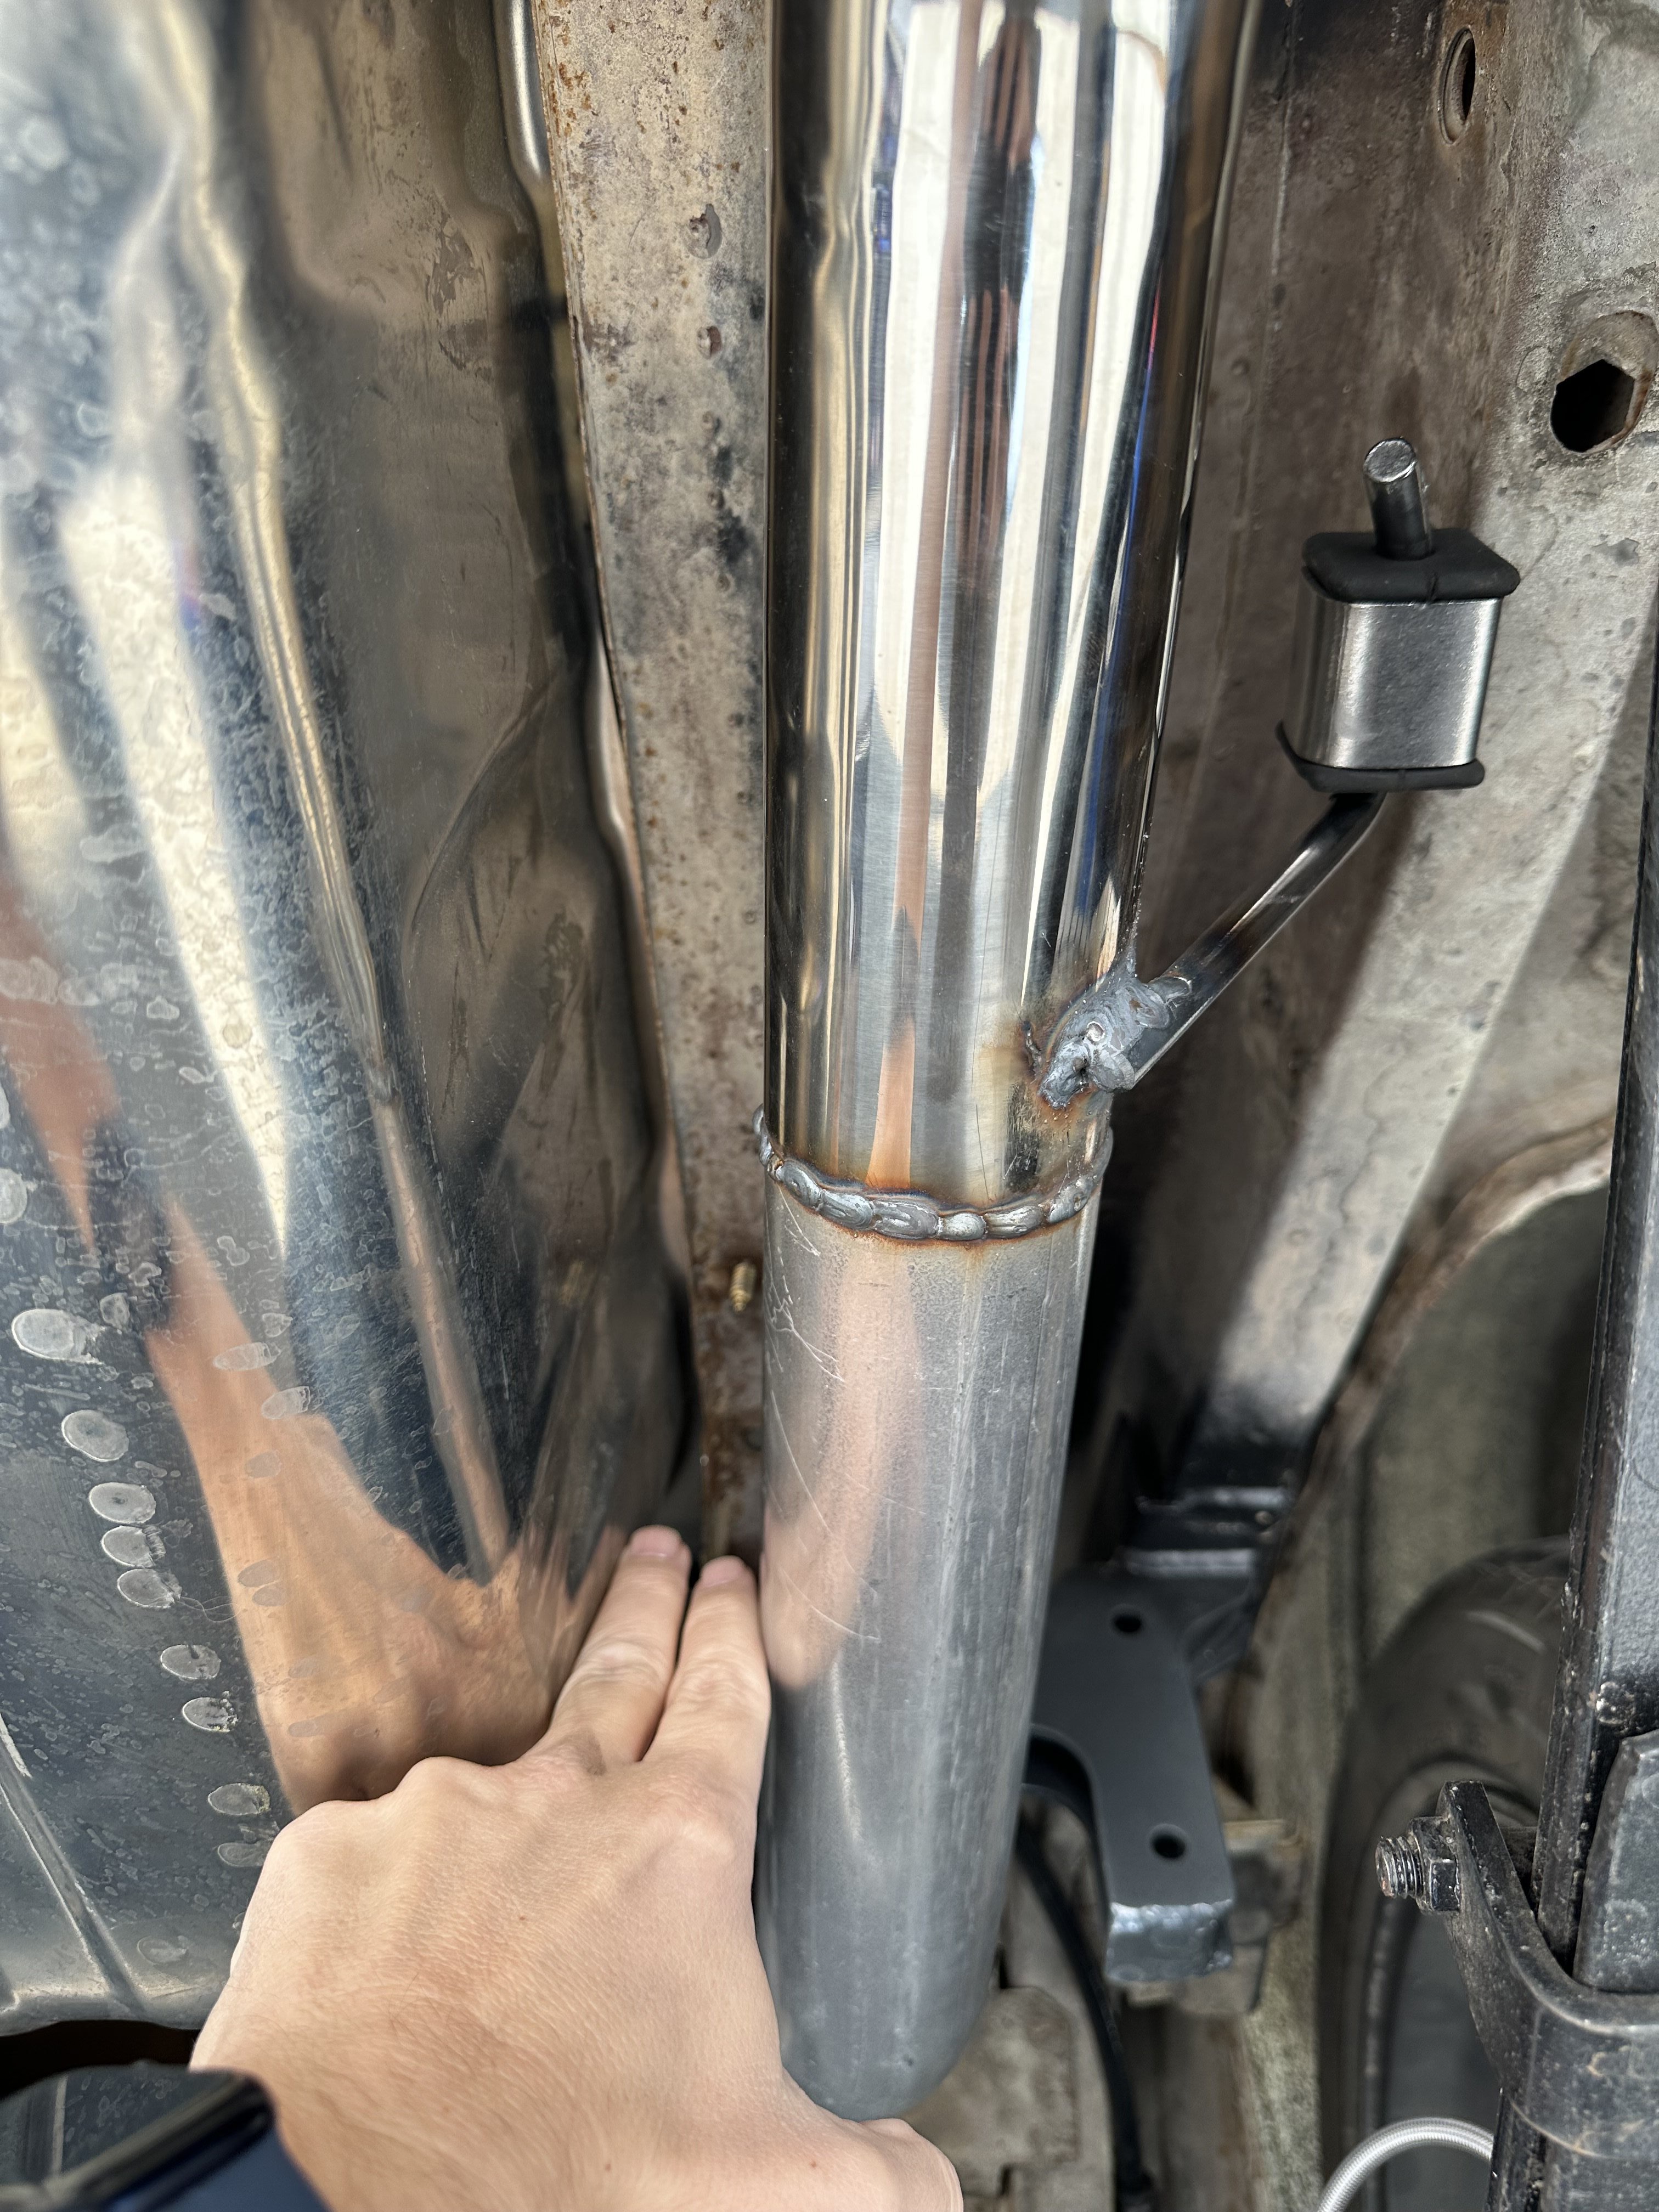
Distance on driver side:
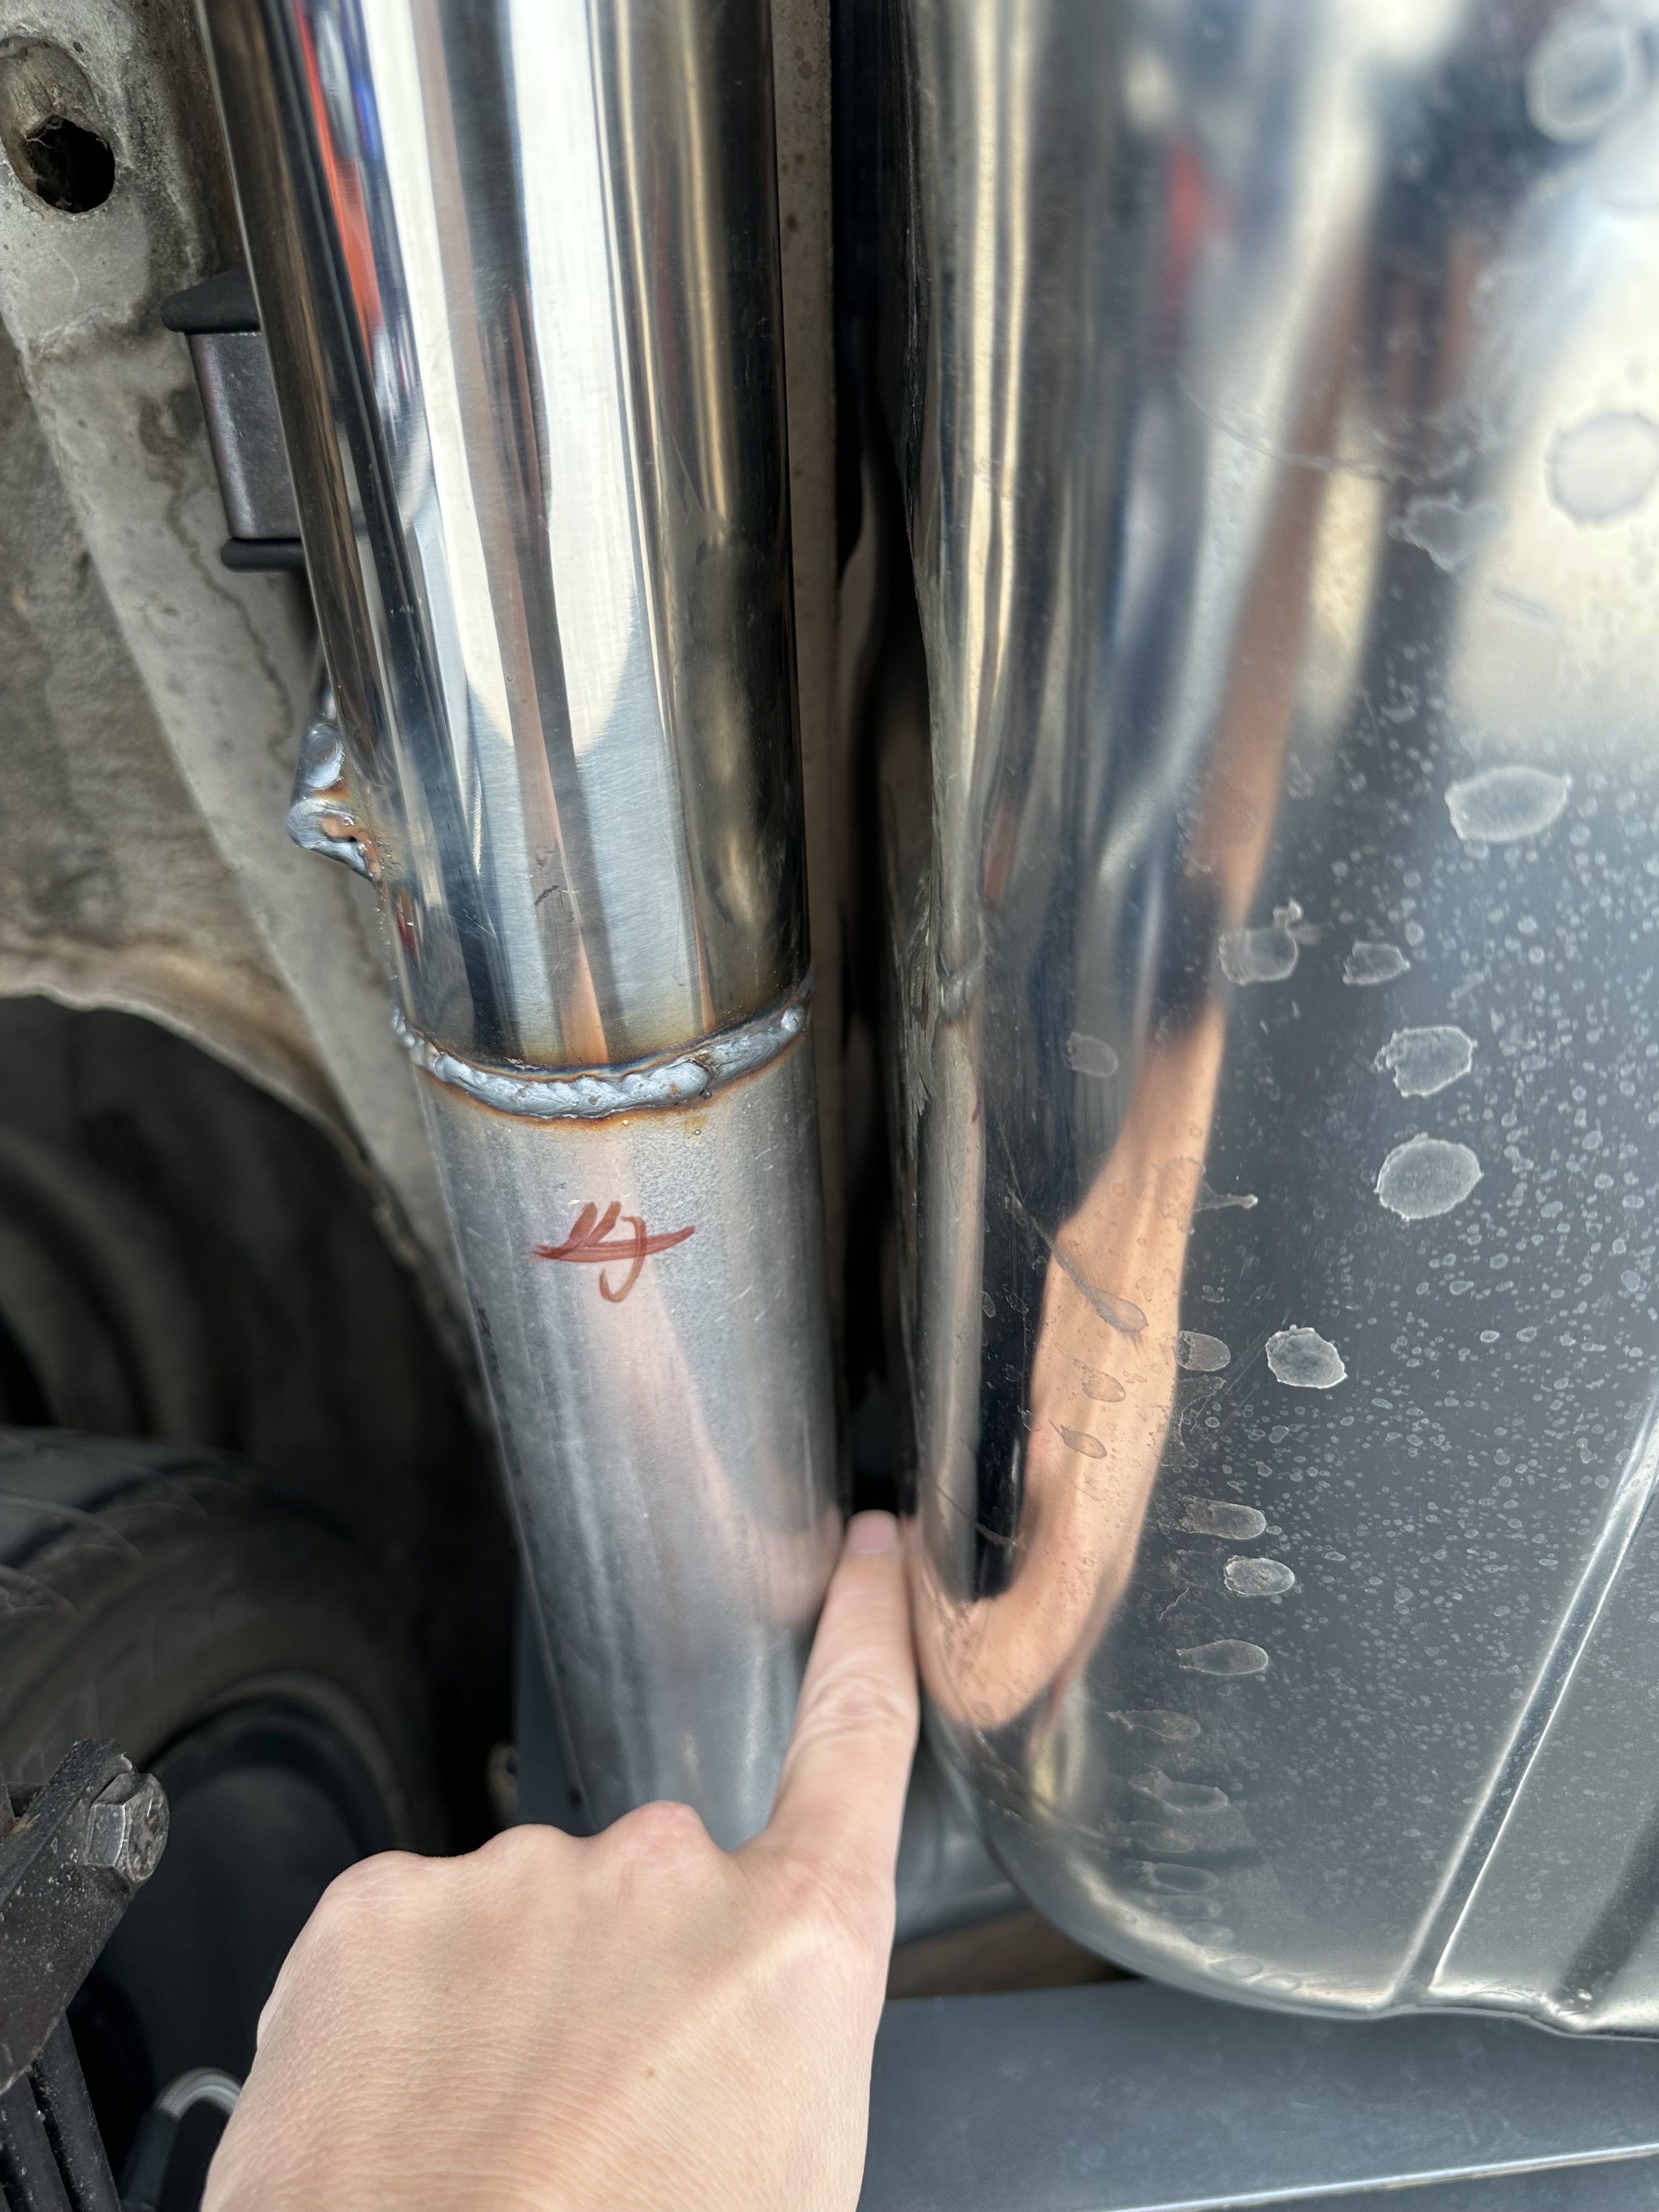
Tank wiped clean and heat shield applied and pipe back on and ready to go:
No interesting pics for today's efforts. Andrew got me pretty close to being squared away. I still had occasional hiccup at partial throttle when shifting. I couldn't reliably reproduce it, so he enabled the data logging and I'll add a switch to turn it on. Then, go drive around and have it grab 30 second logs when I leave lights or whatnot to see if we can pinpoint what it was.
In the meantime, I've confirmed that my intake is drooling oil on the backside. That very well could be what I had noticed collecting on the bellhousing.
I also decided to redo my plug wires, so I have a set of the Ford Racing cut-to-length wires and wire separators on the way as well as intake gaskets.
While it's true that I have a box of parts in the garage waiting on me to get started on the intake gasket replacement, plug wire clean up, etc. This was by far the most interesting arrival:
March 2025:
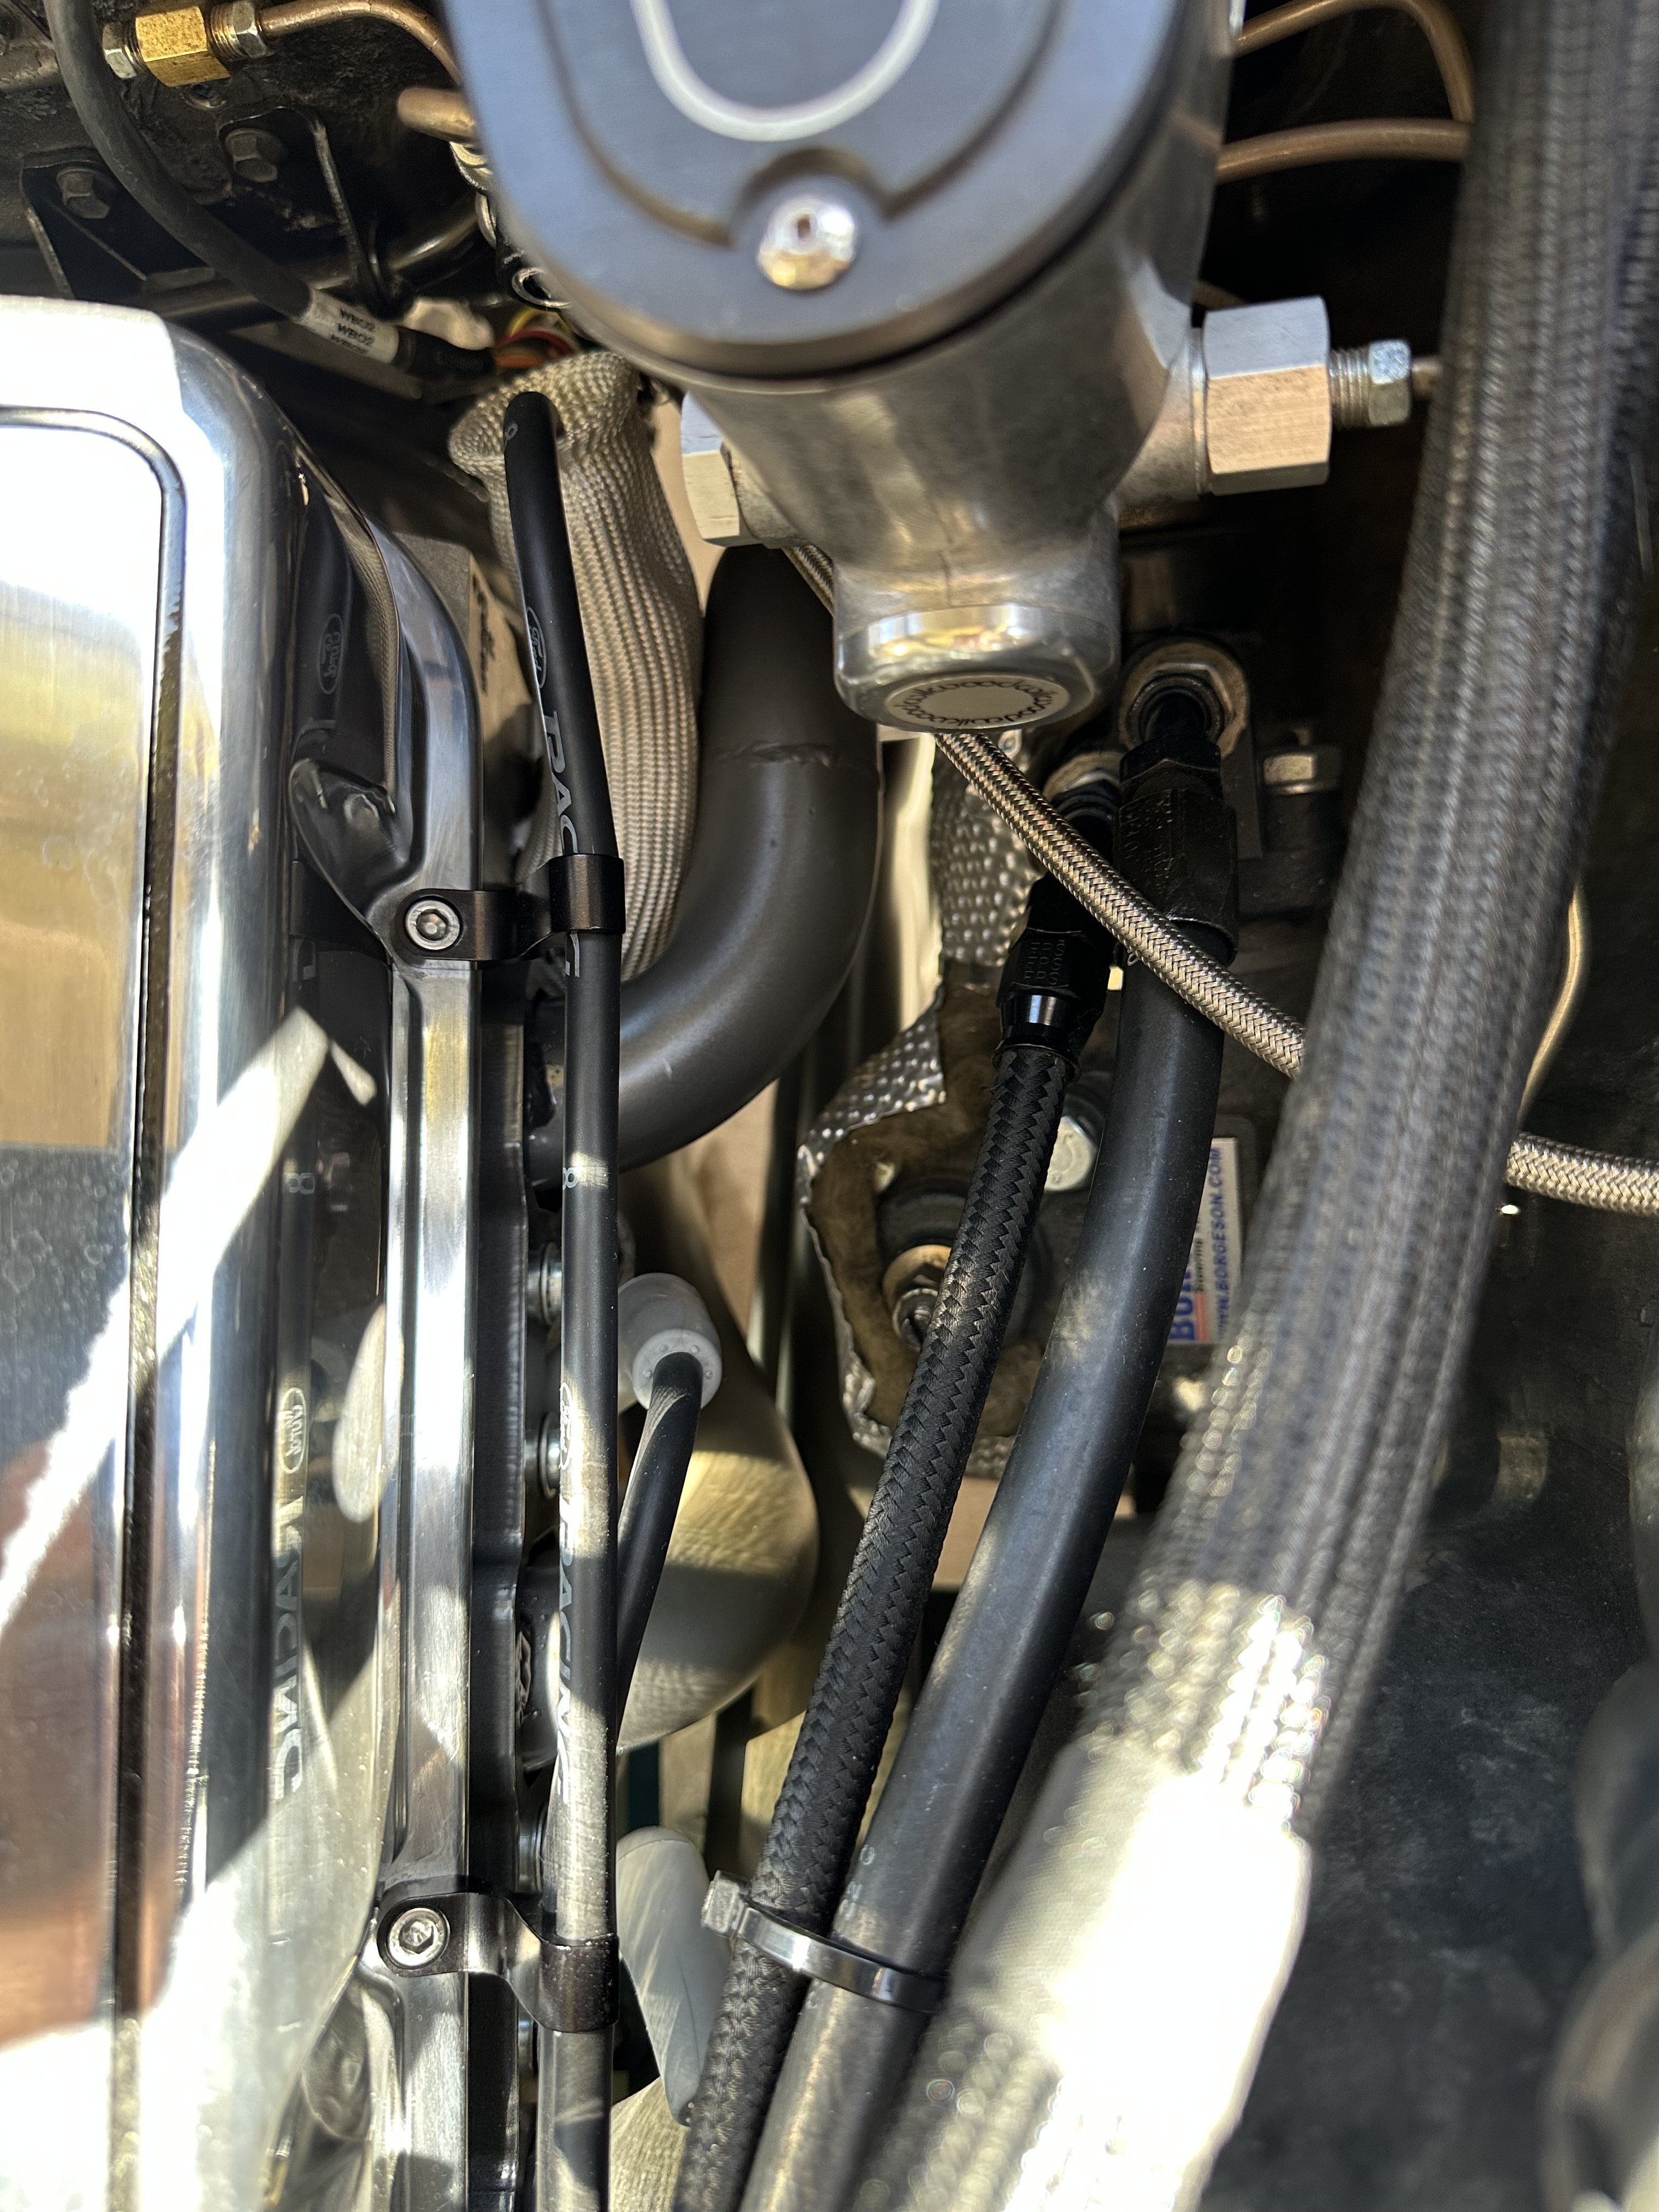
Intake gaskets replaced and the "while I'm here" job: plug wire and heater hose changes complete. I will work on making the seat brackets next weekend most likely.
The Ford plug wires worked out well except for number 8. I had to swap the 45* boot with one of my spare 'Multi-Angle" MSD boots because the 45* sat against the header tube. I mimicked the wire separators that Prestige used on Shaun's Wife 3 build. I also swapped out one heater hose for something to give me a cleaner look (Gates 28471). It comes up from the water pump and then has a 90* bend and goes back across the intake to the heater core. After I got the hose replaced, I cut a section of radiator hose to protect the valve cover from the heater valve.
I still haven't taken the time to wire up and install the switch for the data logging. I'll be sure to get that in before the seats are mounted.
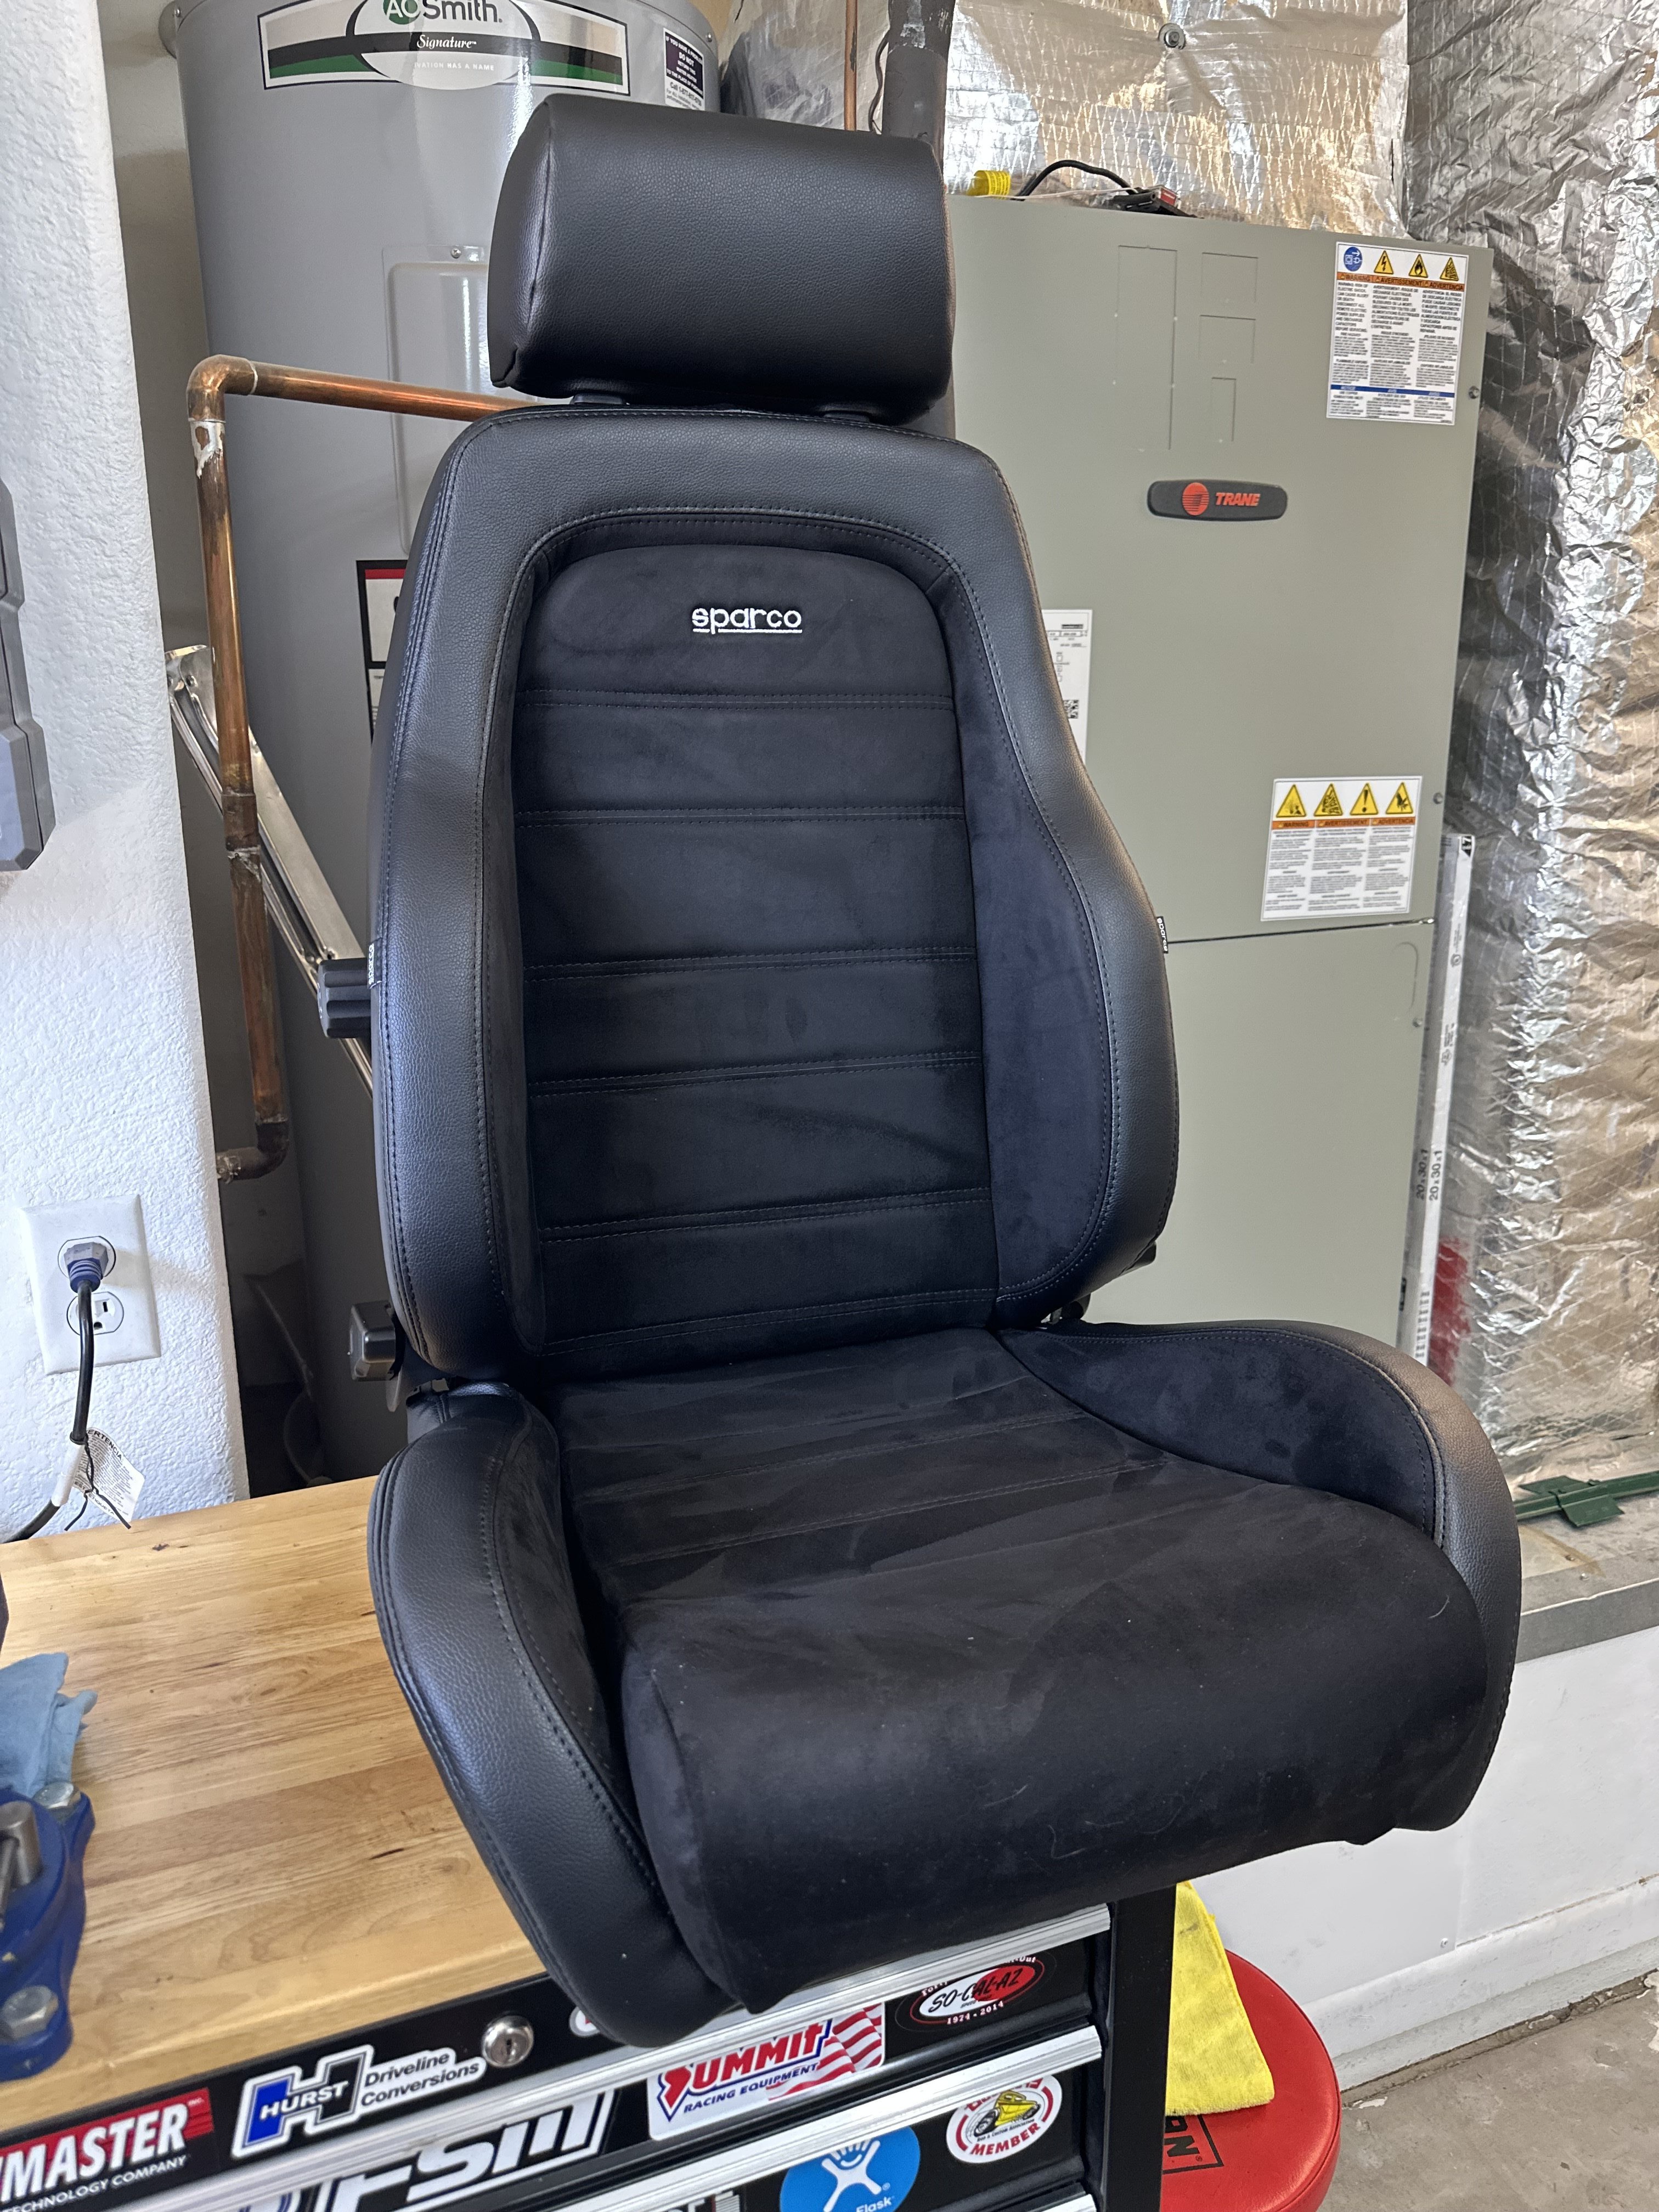
I did a thing!
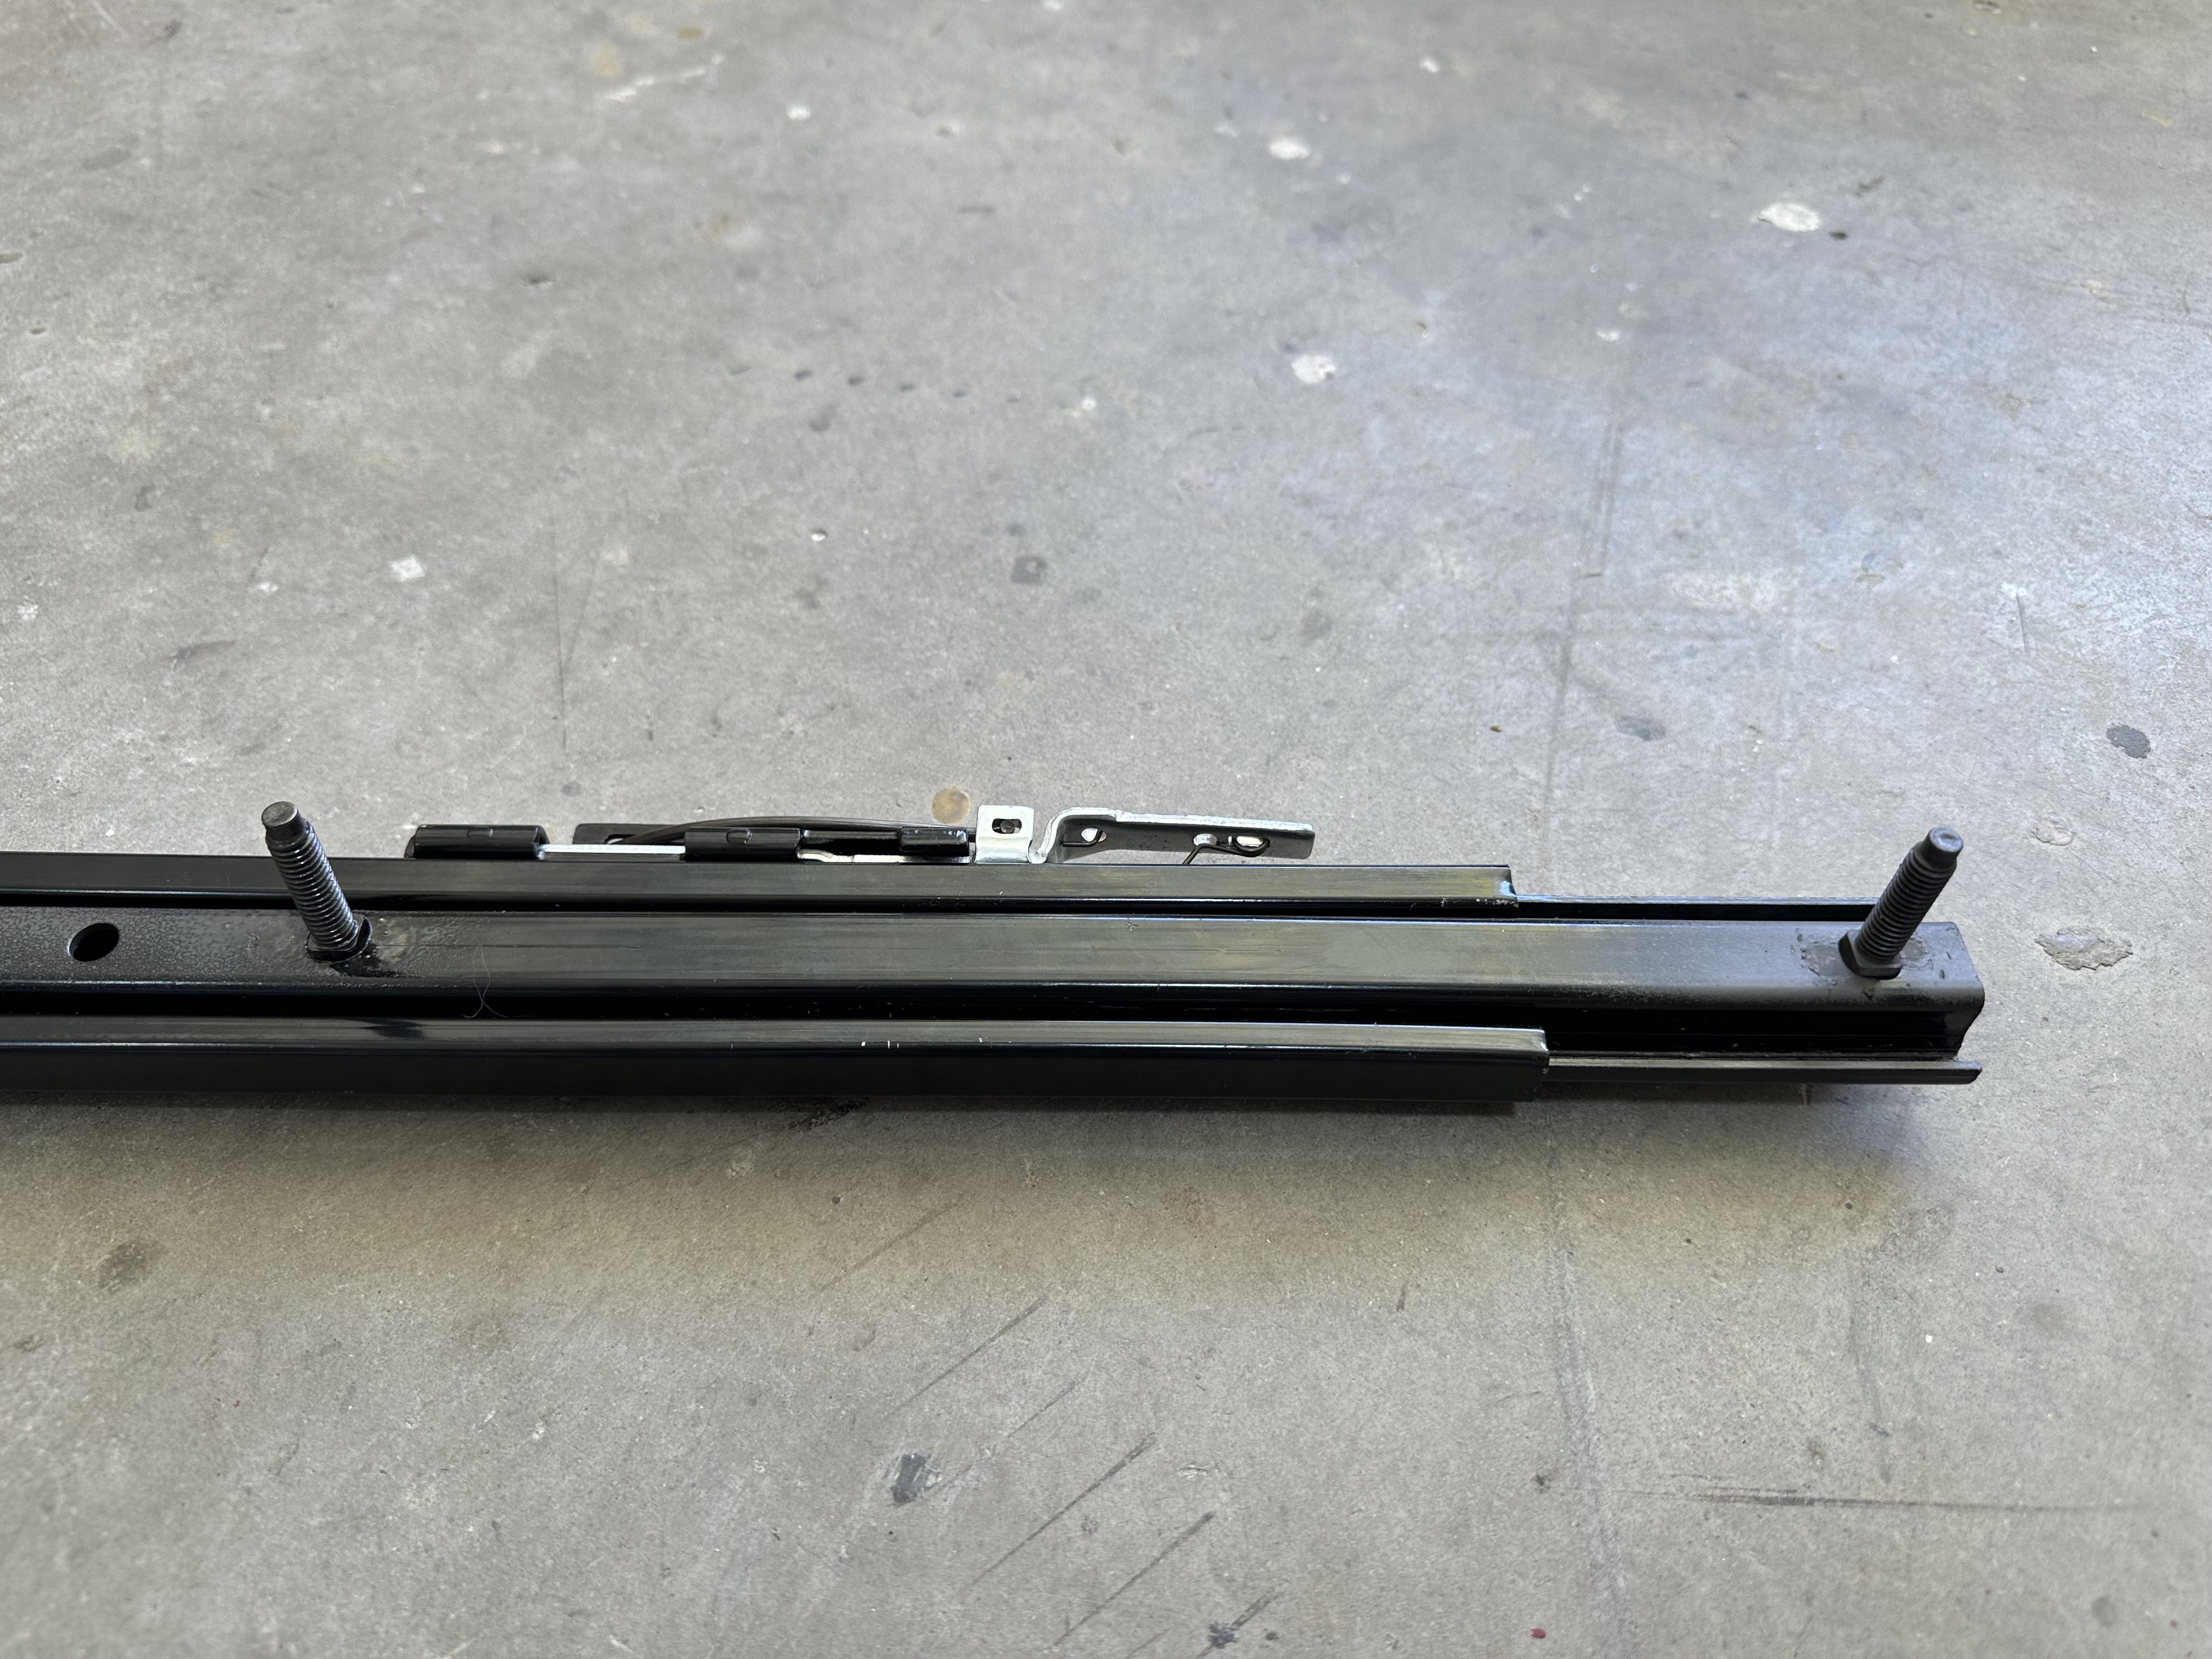
After checking a few measurements and doing some test fitting, I determined that the width of the sparco tracks wasn't very far off from the factory tracks. With that in mind, I measured the front/aft and left/right of the factory holes in the seat pan and chose to make the sparco track mounts match those. The factory seat holes are roughly 14" x 11". I had ordered the factory style studs and nuts to use in mounting the new seats mostly because I wanted the same ease of getting the nuts started when installing or removing them.
I used my die grinder to open the holes in the sparco tracks to allow use of the oem style studs in the front holes and had to drill a new hole for the rears. Once all of that was correct, I placed tack welds to prevent the studs from moving around and then mounted the tracks to the seats. I used the die grinder again to massage the holes in the floor pans to give myself enough clearance since the studs were making contact just a touch on the inner edges of the mounting holes.
Seats went in, got bolted down, and a test drive was performed. They are far more comfortable than the worn out factory seats. I'm 5'11" and 175lbs and have an inch or more head room. I opted not to move the mounting points back since I don't feel I needed the leg room with the tilt steering column.
On to the next thing....whatever that may be.
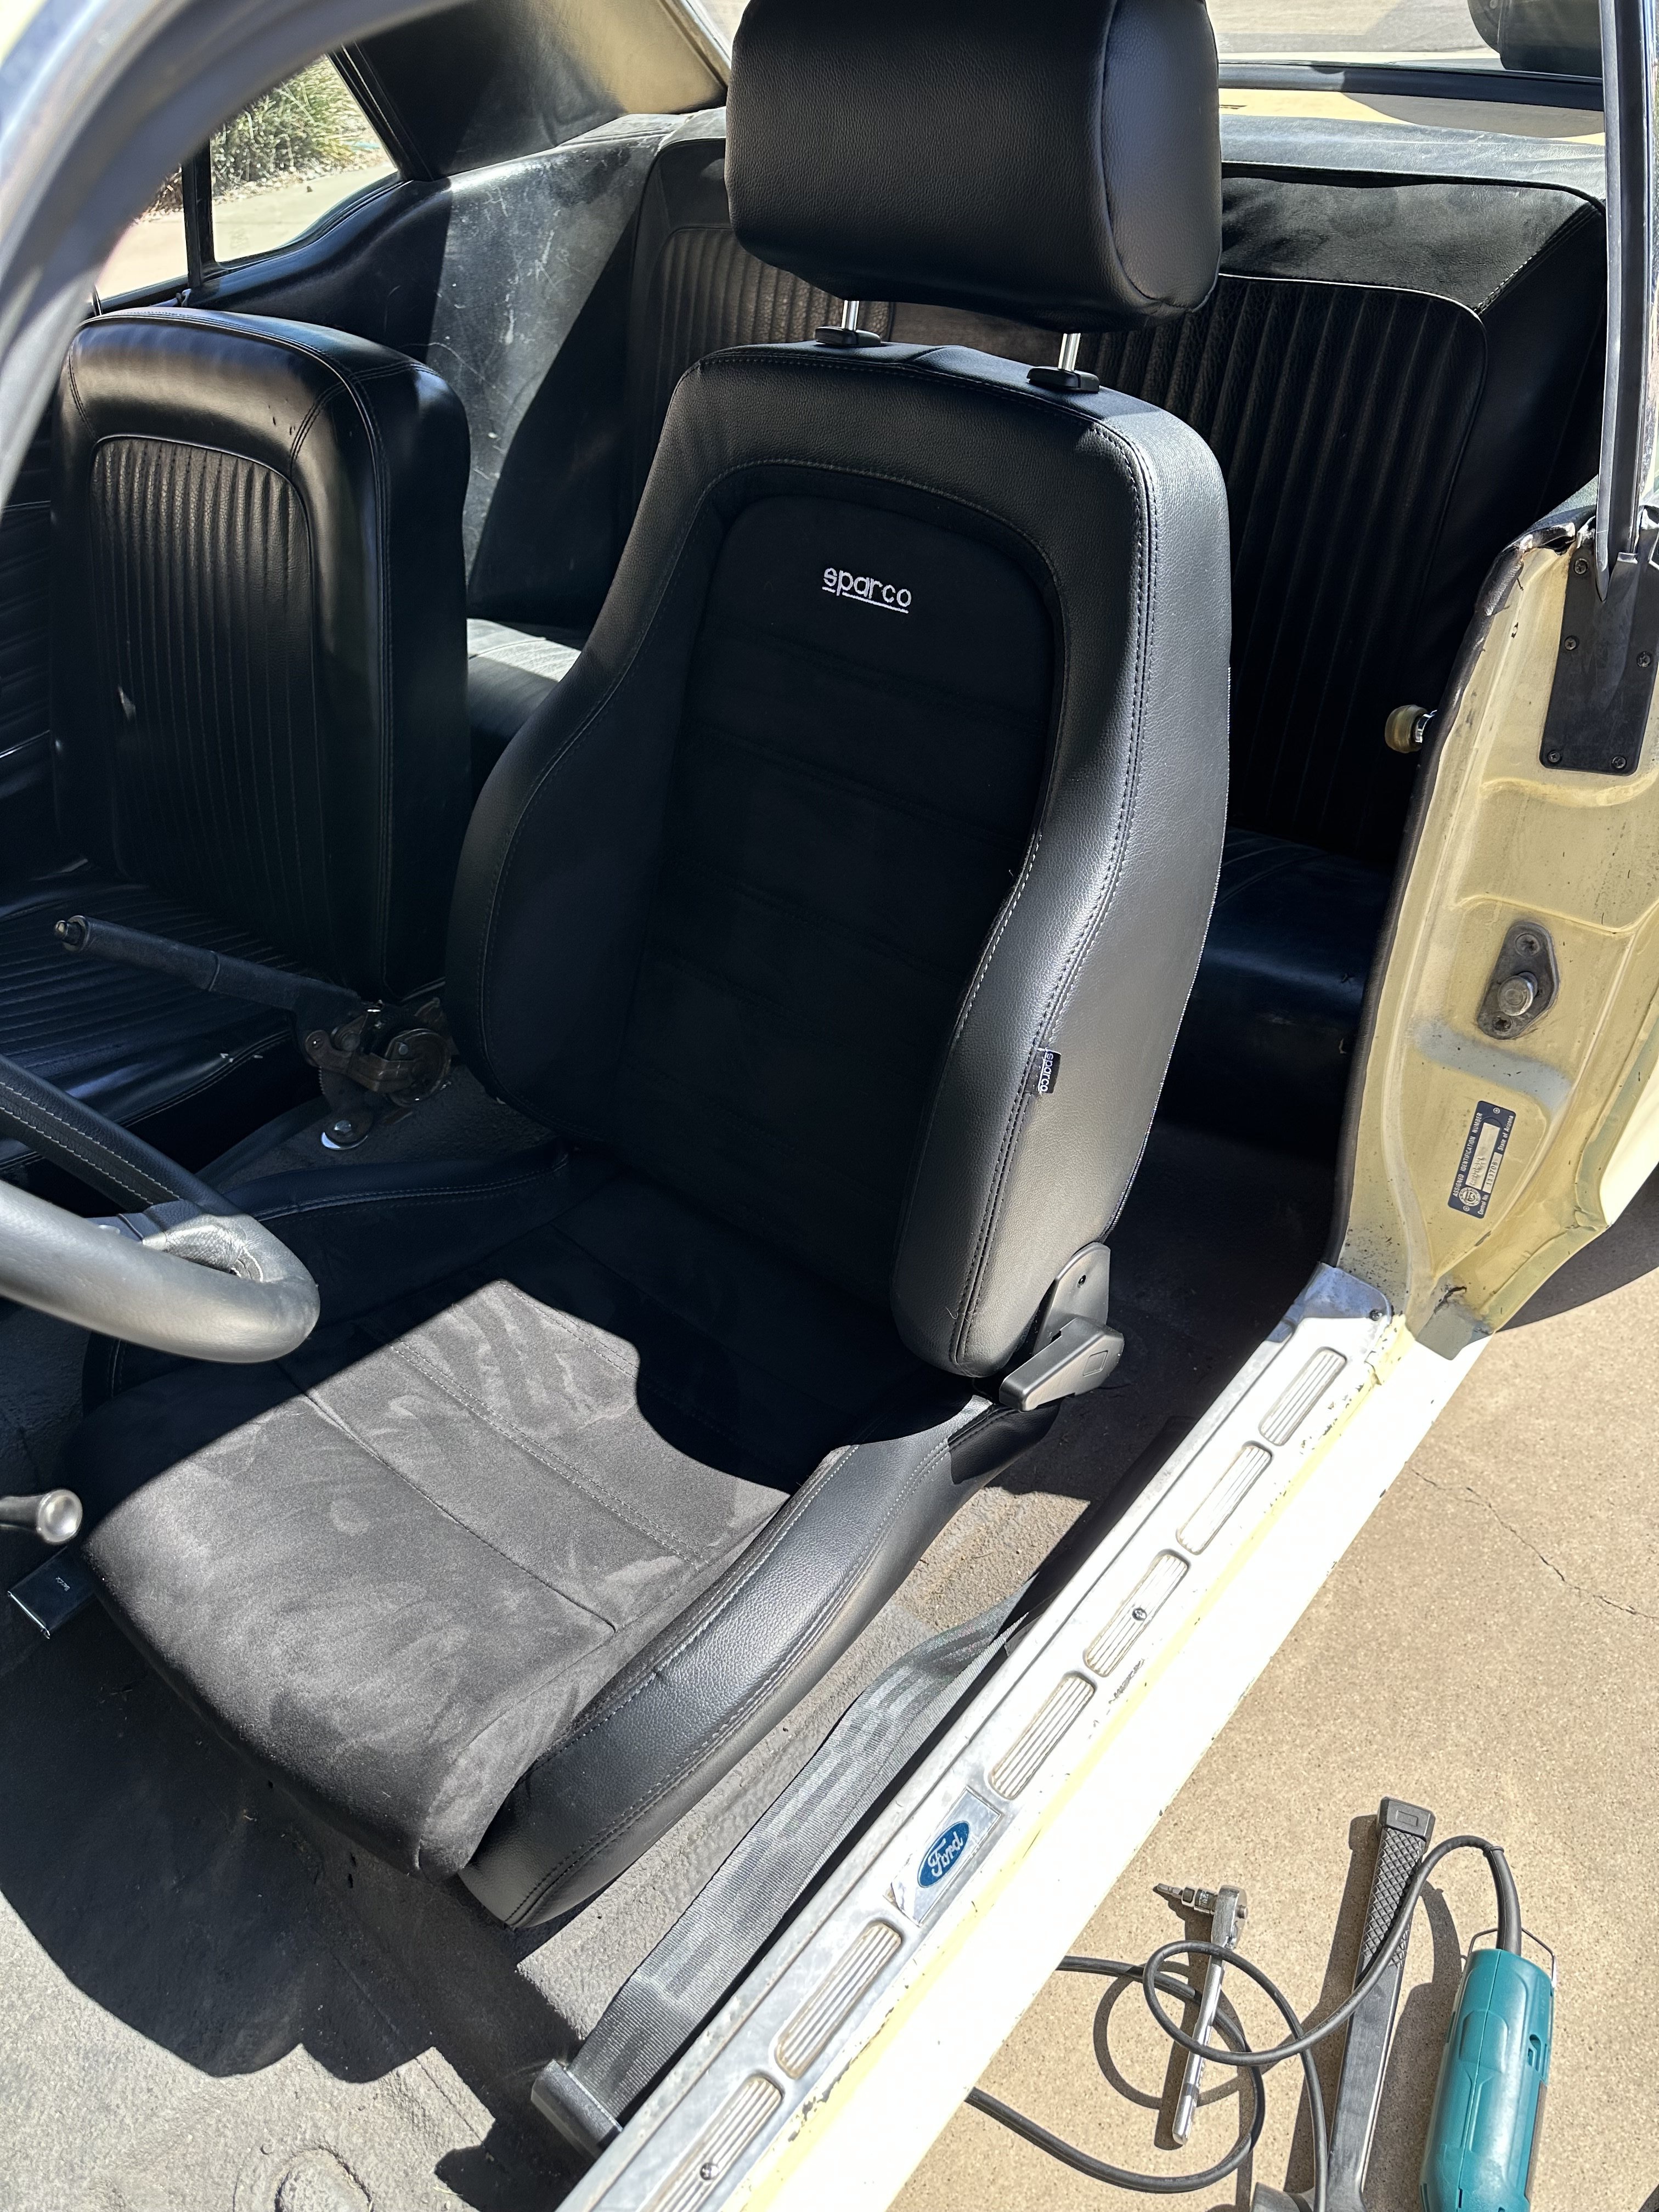
Nothing too exciting lately. I worked with Andrew to get my data logging set up. I added a temp switch under the dash so I can activate the logging and have the center of the button light up to let me know it's active. After I got it where it would live for now, I cleaned up the wiring and tucked it all away.
In other news, I asked the wife and resident fabric nerd about doing something about the bright white 'sparco' script in the seats. After fussing about looking for a suitable grey fabric pen and not finding one I liked, she suggested I do the 'sharpie tie dye' trick. You take a sharpie color of your choice (in this case, grey) and color the fabric then dab over that with rubbing alcohol to cause it to bleed and set. I did the passenger seat first and like how it turned out.
This is testing the process on the S in the script. It seemed to cut the white just enough even though it is hard to tell in this photo.
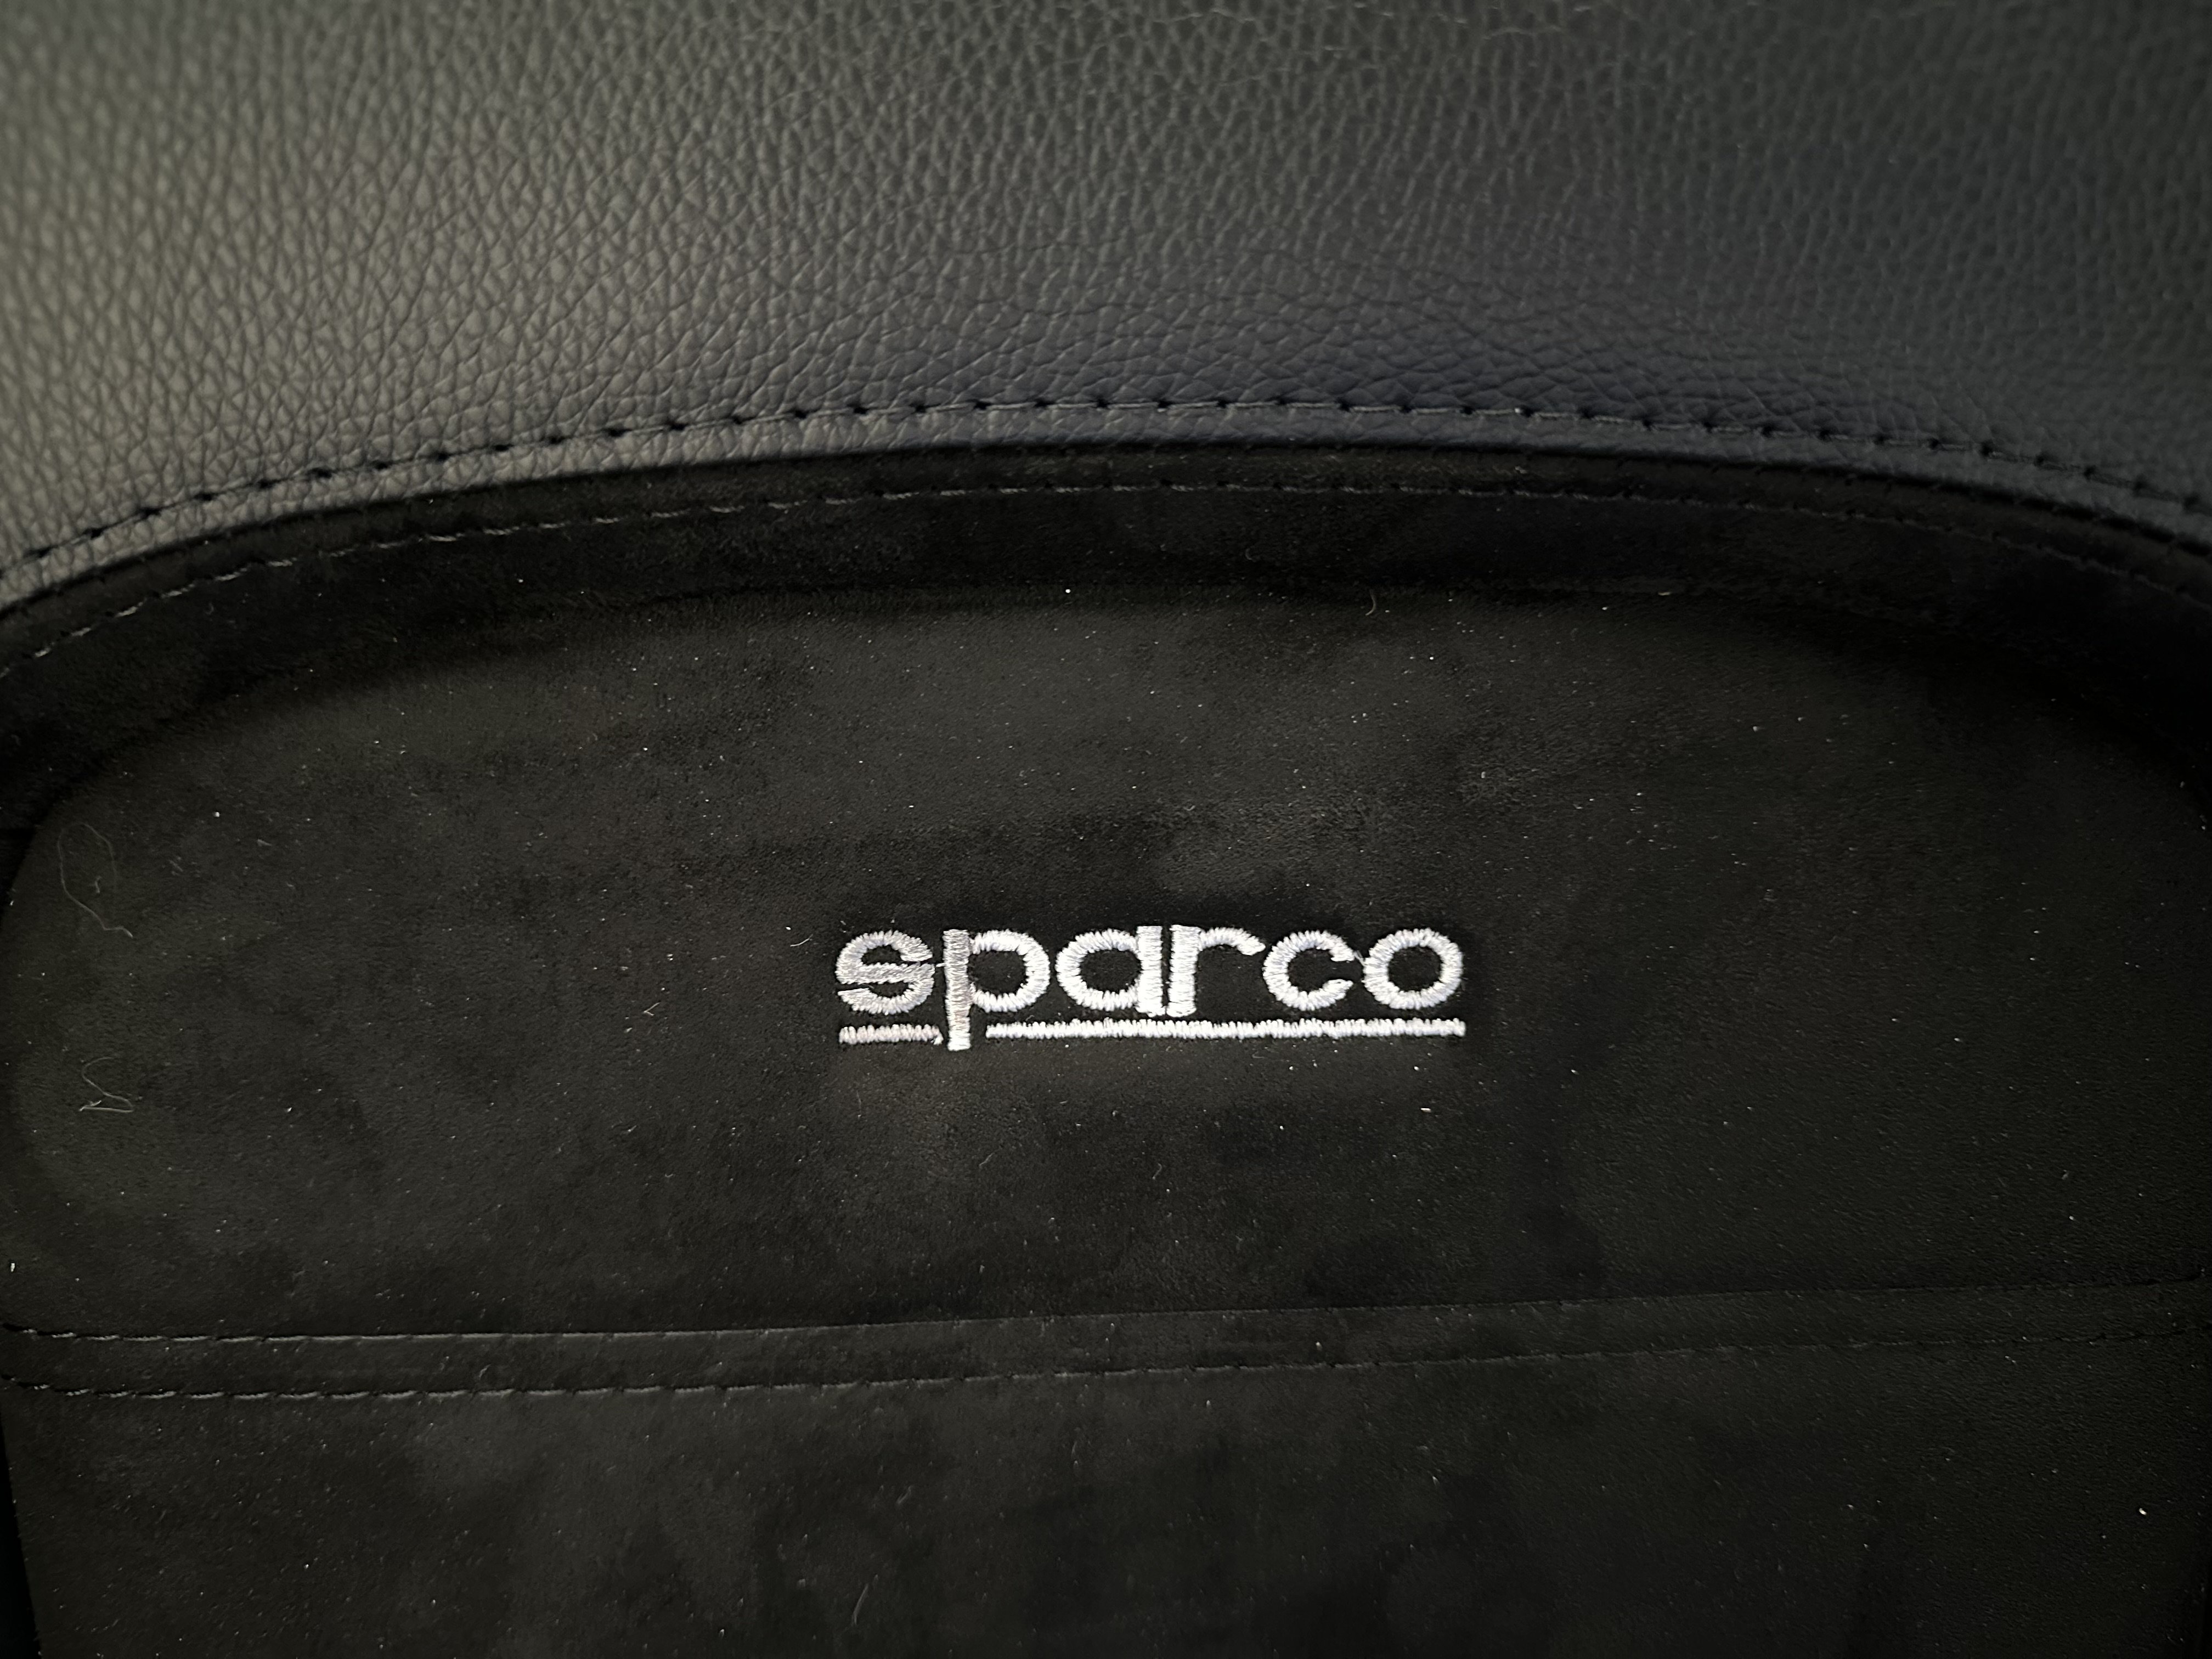
And this is after doing the entire script on the passenger side. I like how it turned out. Just subtle enough.
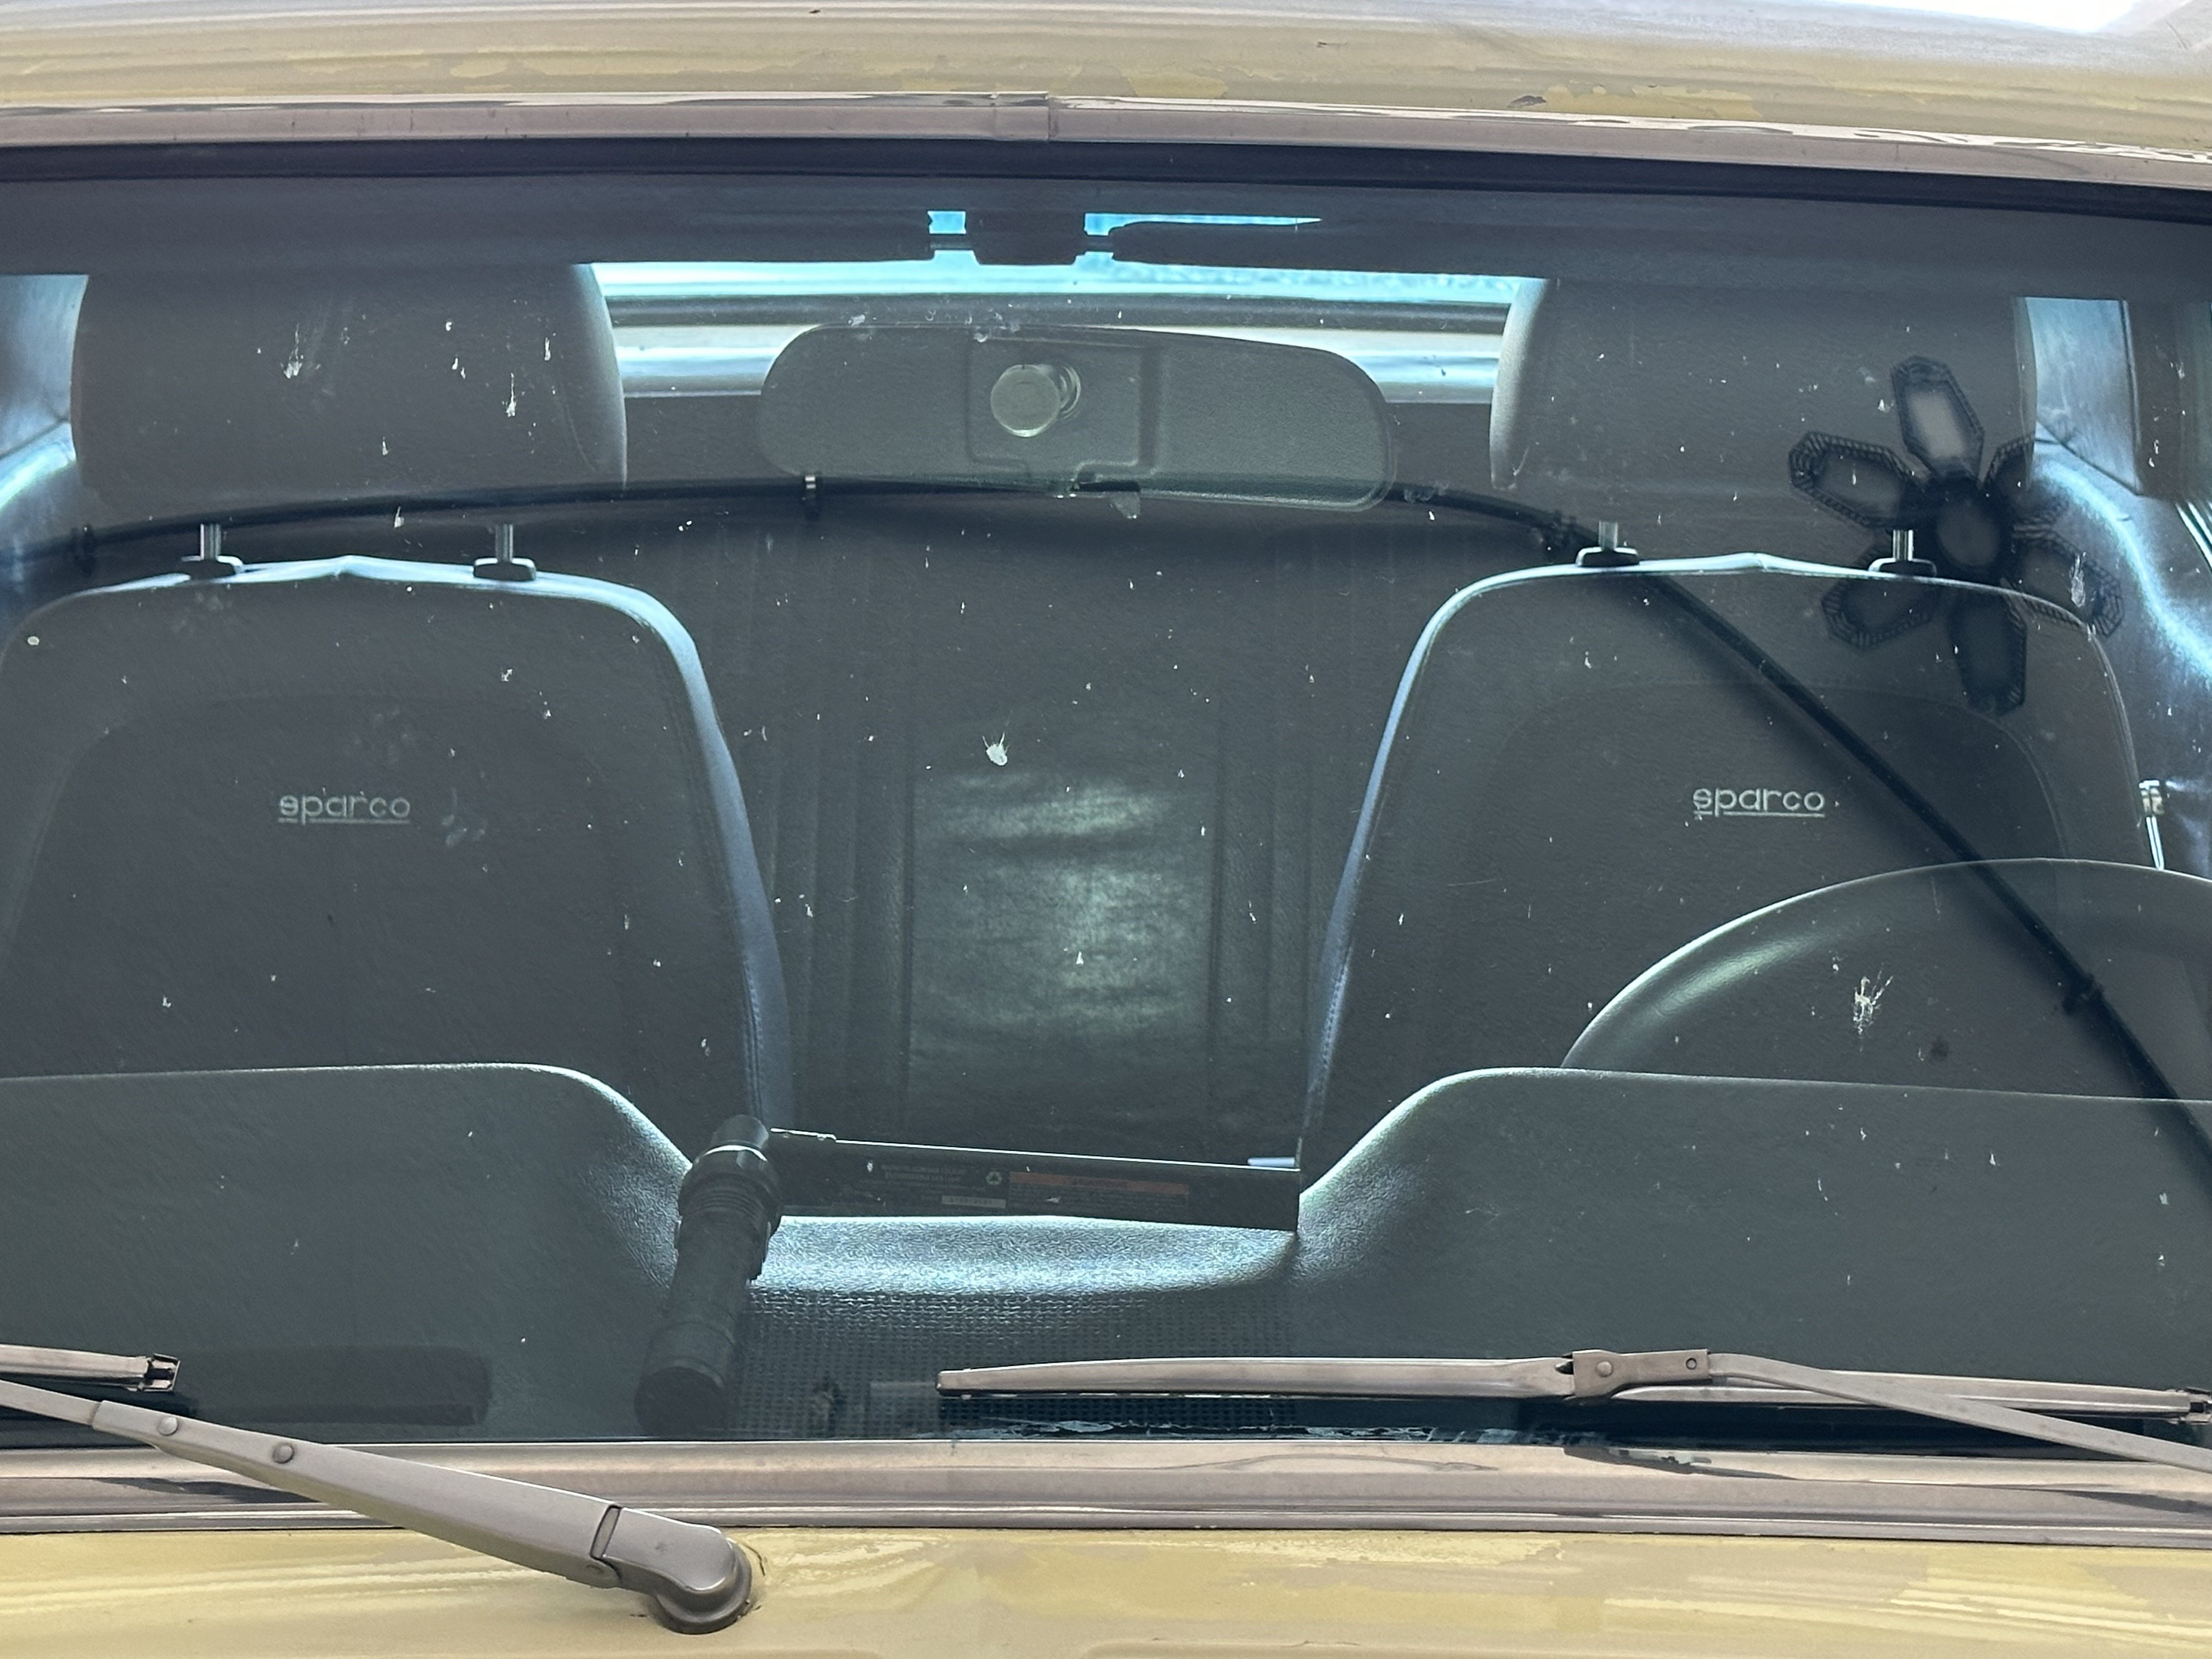
My next adventure will be alignment and tire scrub work. When I set my alignment up, I added caster by shortening the strut rod adjustments. I got the numbers I wanted but now the leading edge of the tires is making contact with the front lower lip of the fender while turning. Looks like what I'll need to do is center the wheel in the opening again and maybe add shims to the front bolt on the UCA to get me back where i want and use the strut rod for minor adjustments. That means I'll have to revisit camber and toe again. I'm running the lower crossmember and camber plates from Opentracker/Zray I have an older set of plates and changing the adjustments can be time consuming. The plates in this older kit are not slotted so I either need to slot them so I can swap them out without having to completely remove the bolt, or remove and replace the bolt each time during my adjusting.
Not a big deal....as a matter of fact....this would be the perfect excuse to buy a milling machine to notch my current plates....right?Kris - Building the poor man's '68 Mustang.

 Reply With Quote


