


Results 1 to 19 of 19
-
01-22-2014 #1
 Registered User
- Join Date
- Aug 2009
- Location
- Houston TX
- Posts
- 111
Project Double Trouble - 2009 Z06 - KP Racing ang GAP Racing
So last year we were given the opportunity to work with the crew over at KP Racing on the Worlds Fastest Camaro. Unfortunately there was a product malfunction that caused the car to roll many times but luckily our good friend Joe Huneycutt was able to escape with only minimal injury. Owner of the Camaro, Kelly Bise, decided to build a new car this year and once again we have team up with KP Racing to go out and set some records this year. This is a Land Speed car. So building the cage is different than drag racing or other motorsport events. The cage was built by Bonneville standards and we also learned a lot after the Camaro was taken apart after the crash. The new project titled " Double Trouble " that will documented in GM Hightech Magazine, is a 2009 Z06 Corvette. Having an aluminum frame makes it challenging to build the cage but we were up for the challenge. The car wil have a Late Model Engines built 427 with an RHS block along with a list of other goodies including twin 88 mm turbos and a Nitrous system. Mr. Bise requested the cage be safe for one, but he wanted to retain all the comforts of a street car. That meant keeping the A/C, Navigation, heads up display, etc.

Here is video of the crash ***** Caution NSFW ***** due to language
http://youtu.be/v9ytQ1hbNUg
here is another view from the end of the track
http://youtu.be/MIU5sZJ81qQ
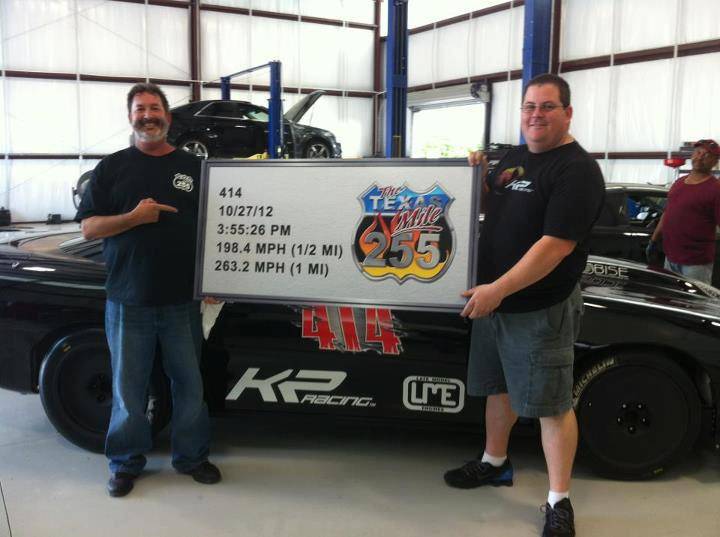
I will update as much as I can and will have the crew from KP try to update also as we chase records all over the country !!!!
-
01-22-2014 #2
Registered User
- Join Date
- Aug 2009
- Location
- Houston TX
- Posts
- 111
Once KP stripped the interior out, they shipped the car over so we could start bending up tubing

-
01-22-2014 #3
Registered User
- Join Date
- Aug 2009
- Location
- Houston TX
- Posts
- 111
-
01-22-2014 #4
Registered User
- Join Date
- Aug 2009
- Location
- Houston TX
- Posts
- 111
It was time to pull the engine to make some changes and the windshield had to go for now
-
01-22-2014 #5
Registered User
- Join Date
- Aug 2009
- Location
- Houston TX
- Posts
- 111
More tubing
-
01-22-2014 #6
Registered User
- Join Date
- Aug 2009
- Location
- Houston TX
- Posts
- 111
Time for those tricky door bars and other bracing
-
01-22-2014 #7
Registered User
- Join Date
- Aug 2009
- Location
- Houston TX
- Posts
- 111
More bars for safety
-
01-22-2014 #8
Registered User
- Join Date
- Aug 2009
- Location
- Houston TX
- Posts
- 111
We ended up putting a tube all the way through the frame and attaching it to a plate that wrapped the frame
Also started building the parachute mount
You can see the plate around the frame and it all ties into the parachute mount
Also plated the rear bumper area for more support
-
01-22-2014 #9
Registered User
- Join Date
- Aug 2009
- Location
- Houston TX
- Posts
- 111
-
01-22-2014 #10
Registered User
- Join Date
- Aug 2009
- Location
- Houston TX
- Posts
- 111
Installed an air actuated parachute release
-
01-22-2014 #11
Registered User
- Join Date
- Aug 2009
- Location
- Houston TX
- Posts
- 111
Once it was all welded up, we sent it over to our friends at Painthouse to put some color on it
-
01-22-2014 #12
Registered User
- Join Date
- Aug 2009
- Location
- Houston TX
- Posts
- 111
The guys at Painthouse sprayed the cage Cyber Grey to match the car, but use a satin clear. It came out great
-
01-22-2014 #13
Registered User
- Join Date
- Aug 2009
- Location
- Houston TX
- Posts
- 111
The upholstery guys finished up the carpet install. It is starting to go back together
-
01-23-2014 #14
Registered User
- Join Date
- Aug 2009
- Location
- KCMO
- Posts
- 54

Fantastic work!
-
01-23-2014 #15
Registered User
- Join Date
- Mar 2010
- Location
- Orange County, CA
- Posts
- 31

Always awesome to see such a high level of detail coming together in all of those pics. Thanks for posting.
Are the attachment points with the through bolts just bolted or is there adhesive used underneath as well?
-
01-24-2014 #16
Registered User
- Join Date
- Aug 2009
- Location
- Houston TX
- Posts
- 111
All the bolts going through the chassis are sleeved and plated on both sides. No adhesive was used. Originally Posted by Oldskool442

-
01-25-2014 #17
Registered User
- Join Date
- Jul 2011
- Location
- Gallatin Tn
- Posts
- 4
Nice work ! Love what you have done ! The bolts you used do not have the normal marking like grade 8 bolts are they grade 8 or better ? Just wondering good luck !
-
01-26-2014 #18
Registered User
- Join Date
- Aug 2009
- Location
- Houston TX
- Posts
- 111
Good eye. All the bolts except the rear ones are grade 8. We are still waiting on the Grade 8 ones in that size to show up. We had trouble finding some that were the correct length. We used Grade 5 to get it to paint and will change them out as soon as they arrive. Thank you for the compliment Originally Posted by Bob Glenn
-
03-11-2014 #19
 Registered User
- Join Date
- Oct 2011
- Location
- Katy, Tx
- Posts
- 309
Fantastic Vette...
-


 Reply With Quote





