


Results 61 to 80 of 637
Thread: 51 Ford pickup
-
03-15-2014 #61
 Registered User
- Join Date
- Sep 2013
- Location
- sw Kansas
- Posts
- 1,662

Back on the job. Self explanatory.
-
03-15-2014 #62 Registered User
- Join Date
- Sep 2012
- Location
- London, Ontario
- Posts
- 294
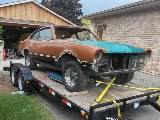
Lots of fun, filling holes.
73 Maverick Grabber Project
My never ending project:
https://www.pro-touring.com/threads/...hlight=grabber
03-16-2014 #63
Registered User
- Join Date
- Sep 2013
- Location
- sw Kansas
- Posts
- 1,662
So far, I filled or patched 71 places. The remainder will have to wait until the column, hydroboost, clutch and throttle mounts are located and finished. The section of the mustang firewall that has all of those has been trimmed and is ready whenever I figure out where it needs to be.
03-30-2014 #64
Registered User
- Join Date
- Sep 2013
- Location
- sw Kansas
- Posts
- 1,662
This is a really small update. The last 2 weekends have been poor weather so I didn't accomplish anything in the shop. Yesterday I added some risers to my trailer so the cab sits solidly instead of having blocks stuck under it. The roll around cart I use for cabs got redone so now the wheels are 4'x 4'. It was 2 x 2. Yesterday I sanded and painted the silver wheels. I used Duplicolor wheel paint. It appears to be regular enamel in a can. It went on good and the color will be fine for my plan. I don't expect it to be long lived.
04-06-2014 #65
Registered User
- Join Date
- Sep 2013
- Location
- sw Kansas
- Posts
- 1,662
Another small update. The weather hasn't been conducive to me working alot. I have to move alot of items to put the cab on the chassis so this is a weekend only deal for a while.
04-06-2014 #66
Registered User
- Join Date
- Mar 2014
- Location
- Elizabethtown KY
- Posts
- 16
I love your use of the donor car. Most people don't use that many of the parts.
~Lee
04-06-2014 #67 Registered User
- Join Date
- Apr 2010
- Location
- STUDIO CITY, CA
- Posts
- 139
looking good...real good!
04-10-2014 #68
Registered User
- Join Date
- Sep 2013
- Location
- sw Kansas
- Posts
- 1,662
There isn't a tire shop in my town that I trust with my stuff. Pic is self explanatory.
04-13-2014 #69
Registered User
- Join Date
- Sep 2013
- Location
- sw Kansas
- Posts
- 1,662
Over at the slow progress shop, I got 1 more thing crossed off the list today. Most of yesterday was a yard day getting ready for spring. One of the compromises in putting the engine back as far as I did was lack of clearance for a steering u-joint on the r-p. I used 1.5" 6061 alum shaft to make offset bushings to change the angle of the unit where it's mounted to the crossmember. I did a little measuring and found that a 10 degree angle would give lots of clearance for the u-joint and the oil filter outlet housing. I angle drilled the holes for the 5/8" bolts and then angle cut the ends. After making sure the angles were correct, I used a reciprocating saw to cut the bushings in half. They have a slight compression on the flanges to hold the steering unit snug when the fasteners are tight. The steering shaft will clear everything now to the column. I tried to get a pic but it was too dark to show the clearance.
04-19-2014 #70
Registered User
- Join Date
- Sep 2013
- Location
- sw Kansas
- Posts
- 1,662
Yesterday, the 2004 crown vic exhaust manifolds I purchased arrived. The outlets are at a different angle than the Mustangs. It will make running exhaust easier. I got started mounting the Mustang column and connecting the steering shaft. The pics are of the adapter I machined to connect the dissimilar shafts and the clearance I have. The heat riser tube is loose and about an inch away from the shaft. The pic of the Mustang floor plate is the part that will be adapted to the floor panel to fill the hole.
04-20-2014 #71
Registered User
- Join Date
- Sep 2013
- Location
- sw Kansas
- Posts
- 1,662
Made a plate to cover the factory steering - pedal hole. I adapted the Mustang lower column bearing support to it. That is welded to the plate. If the weather will cooperate this week, after work some evening I'll bring the cab in and weld the plate to the floor. I replaced 2 of the column braces I made yesterday. I didn't like what I had done. Today's are better but I'd like a better idea still. I may wait until the wiring and ac plumbing is run to see how much space I'll have left.
04-21-2014 #72
Registered User
- Join Date
- Sep 2013
- Location
- sw Kansas
- Posts
- 1,662
For those of you that think I've sunk to a new level of show and tell, here's the latest story. I purchased 2004 crown vic exhaust manifolds because they both have belled flanges and the angles of the outlets are going to be way easier to run pipes to. The used parts were missing 2 studs. I see that there is 1 part number listed with Dorman for almost all 4.6 2 valve engines. I order a set and the next morning go pick them up at the parts store. When I get home and look things over, I see that the new ones are 12 mm. The crown vics are 10mm. The Mustang and early crown vics are all 10mm. That's all I could find to buy short of OEM. So, the pic is the manifold drilled and tapped. Just one more thing.

04-21-2014 #73
Registered User
- Join Date
- Sep 2012
- Location
- London, Ontario
- Posts
- 294
I like show n tell, gives me motovation !
73 Maverick Grabber Project
My never ending project:
https://www.pro-touring.com/threads/...hlight=grabber
04-21-2014 #74 Registered User
- Join Date
- Aug 2010
- Location
- now In Dandridge, Tn.
- Posts
- 1,301
You Sir, are a true Hot Rodder. I like it, no big deal, just find solutions. Nice going.
04-26-2014 #75
Registered User
- Join Date
- Sep 2013
- Location
- sw Kansas
- Posts
- 1,662
Thanks for the compliments, guys.
I worked on header pipes today. Had to make or modify most everything from the header back. I removed the downstream O2 sensor bungs from the original pipes and made a mandrel to hold them in the lathe. They're ready to be welded in. The Mustang trans crossmember is non-symmetrical. I don't think I'll be able to match the location of the mufflers because of that. I'm not going to do tail pipes until the rear is in and it's sitting on the ground at ride height.
04-27-2014 #76
Registered User
- Join Date
- Sep 2013
- Location
- sw Kansas
- Posts
- 1,662
I went to bed last night unhappy with where the mufflers were. Now that I'm old and senile, the idea god doesn't always know my address. This morning it was apparent that I would have to recut the notches in the crossmember and move the mufflers rearward. I have enough room to run tailpipes over or in front of the rear axle. I'm feeling better now.
04-27-2014 #77
Registered User
- Join Date
- Sep 2013
- Location
- sw Kansas
- Posts
- 1,662
O2 bungs in. The wind is blowing like crazy and we're about to have a brown out!
05-03-2014 #78
Registered User
- Join Date
- Sep 2013
- Location
- sw Kansas
- Posts
- 1,662
Underfloor bracing today. One part on the top will have to be removed for trans removal, hence on the top. I used the square tube dies I have. I'm not real pleased with how it works but I haven't bought anything better yet. I believe it's more rigid than before I cut it for clearance.
05-04-2014 #79
Registered User
- Join Date
- Sep 2013
- Location
- sw Kansas
- Posts
- 1,662
I only got a few things done today. Not from lack of trying.One pic is the driveshaft loop. The other is an under the tunnel brace. I tried to make the tunnel out of 16 gauge and one piece. I have a pan brake but alot of what I tried to do wasn't going to work well. I then tried splitting it into 3 parts. The first was simple and finished. I redid the rear most part twice and still didn't like it. Back to the drawing board later.
05-08-2014 #80
Registered User
- Join Date
- Sep 2013
- Location
- sw Kansas
- Posts
- 1,662
I now have a complete 48 front end. It has rust and dents but this is the front I wanted. Just more work.

 Reply With Quote


