


Results 1 to 20 of 25
Thread: 67 Camaro garage interior
-
09-26-2012 #1

 Registered User
- Join Date
- Jun 2009
- Location
- Simi Valley, Ca
- Posts
- 126
67 Camaro garage interior
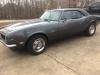
Well, I have been posting my progress on the sub box in the audio thread but I have moved onto the interior a few days ago. So here it is, I am working on a 67 modified Camaro, When I say modified I mean I took it and made the body, interior and suspension the way I like it. I did not think it would take me so long to do it myself but with time I figured Id get there at some point. My first time building a ground up restoration and so far I have learned a ton from this forum in many areas. As for the interior I am making my own center console, panels and a bunch of other things on my list. I have changed the dash nad added vintage air to the list, took the center console and wraped it around the rear fold down bucket seats. I am using 92 Iroc-Z seats in the front and rear and will be changing the padding pattern to make them look and feel better. I pretty much made everything else from scratch, it has been a learning experience for me. Now Im geting ready to start the fiberglass in my trunk, I will also be making my own kick panels with some 5" speakers. Anyways, here are some progress pictures of the interior and trunk and a few older pics on how I started the build.
67 Camaro
-
10-18-2012 #2
Registered User
- Join Date
- Jun 2009
- Location
- Simi Valley, Ca
- Posts
- 126
Custom Headliner or stock??
I am debating wether or not to install a custom headliner in my 67 Camaro.... I have mocked up the center section for a double courtesy light up front and one down the middle. I dont know where to start though, how to build the entire thing or in sections???
67 Camaro
10-18-2012 #3 Registered User
- Join Date
- May 2008
- Location
- Chicago
- Posts
- 609

Looks good but aren't you afraid of the VA pieces getting wet under the cowl?
10-18-2012 #4
Registered User
- Join Date
- Jun 2009
- Location
- Simi Valley, Ca
- Posts
- 126
Thanx. I put stainless steel block out covers in the openings with glazing sealant to keep the water out and away from VA stuff. Ill post some pics later. Reason why I cut out the inner cowl was too tuck the VA out of sight under the dash.
67 Camaro
10-18-2012 #5
Registered User
- Join Date
- Jun 2009
- Location
- Simi Valley, Ca
- Posts
- 126
headliner started
Some progress
67 Camaro
10-27-2013 #6
Registered User
- Join Date
- Jun 2009
- Location
- Simi Valley, Ca
- Posts
- 126
Well, its been a while since I've updated anything on here. A new member to the family arrived 9 months ago and has been my priority since. I have managed to put a few hours into my ride but like I said. I've been pretty occupied. The latest was bondo and primer of my interior pieces, I didn't want to have the metal exposed for too long so I put some work in.
67 Camaro
10-28-2013 #7 Registered User
- Join Date
- Oct 2013
- Location
- Ct
- Posts
- 136
That's looking good
10-28-2013 #8 Registered User
- Join Date
- Nov 2011
- Location
- Livermore, CA
- Posts
- 668
that's coming together nicely. Congrats on the new addition, but can't wait to see this progress!

Livermore, CA
American:
1966 Chevelle SS "Tribute" Retro / Pro-Tour
For Sale
10-30-2013 #9
Registered User
- Join Date
- Jun 2009
- Location
- Simi Valley, Ca
- Posts
- 126
Thanks for props guys.
 I'm trying to do as much as possible with the little time I have. I will post progress as I get more done.
67 Camaro
10-30-2013 #10
Registered User
- Join Date
- Jul 2012
- Location
- Lake Mary, FL
- Posts
- 158
Looks REALLY good.. keep up the good work!
Jack~
1969 Camaro Convertible - In Progress.
Body Mods, LSx TT Setup, T56, 4 Link, Lowered, the works.
11-01-2013 #11
Registered User
- Join Date
- Jun 2009
- Location
- Simi Valley, Ca
- Posts
- 126
So here's the reason I've been so busy, so far its taken up 8 months of my free tim. I know I can never get that time back again so its well worth it. My car can wait for now. Heres my new project in his new car. Anyways, more project updates to come soon.
67 Camaro
11-13-2013 #12 Registered User
- Join Date
- Nov 2006
- Location
- Ma.
- Posts
- 5,560
Congrat's Good looking boy! The interior is looking good, nice work.
Wayne
Car FINALLY home !!!!!! lol
Project FNQUIK https://www.pro-touring.com/showthre...ghlight=FNQUIK
11-22-2013 #13
Registered User
- Join Date
- Jun 2009
- Location
- Simi Valley, Ca
- Posts
- 126
Thanks bro. Ill post some updates in a few days, if I don't hurry up he's going to be the one building this ...
67 Camaro
11-23-2013 #14 Registered User
- Join Date
- Dec 2011
- Location
- Planit Oahu, Hawaii if you don't belive me check shipping prices
- Posts
- 255
I like what you are doing!
does the console, and rear seat surround come out?
11-24-2013 #15
Registered User
- Join Date
- Jun 2009
- Location
- Simi Valley, Ca
- Posts
- 126
No, only the shifter surround and both center compartment bottoms just in case I run wires or install a 5speed.
67 Camaro
03-24-2014 #16
Registered User
- Join Date
- Jun 2009
- Location
- Simi Valley, Ca
- Posts
- 126
headliner update
Well fellas, what can I say... I had to shift gears for a bit and re-arrange my priorities which was looking after our new family member my son "Cruz". I finally had a little left over time here and there to continue work on my Camaro. So I finished up my one piece headliner last week. I used foam, fleece, fiberglass and some body filler. I will post some pictures later after I figure out how to delete some out of my uploaded pictures, I guess im over the limit.
67 Camaro
03-27-2014 #17
Registered User
- Join Date
- Jun 2009
- Location
- Simi Valley, Ca
- Posts
- 126
I tried uploading pictures from photobucket, here is what I was able to attach, hopefully you can see the pictures. First try so forgive me if I screw up the thread....

http://i101.photobucket.com/albums/m...ps7c7eac88.jpg
http://i101.photobucket.com/albums/m...ps30c73330.jpg
http://i101.photobucket.com/albums/m...ps1457d4e9.jpg
http://i101.photobucket.com/albums/m...psfe357ce6.jpg67 Camaro
03-27-2014 #18 Registered User
- Join Date
- Aug 2007
- Location
- Jonesboro, Arkansas
- Posts
- 2,506
You can upload pics from Photobucket by using the img function on the right of the picture while in Photobucket. you click on the space beside the "img" and it will say copied. Then come back to our thread and Paste the url link in your post. that way the pic will be in your post but will be a link to your photobucket account.
Carl Wilson
1968 Camaro - T-56 6 speed - 383 Stroker, 2014 Mustang GT seats. FiTech EFI, Tanks Inc. Tank with Deutschwerks fuel pump.
03-27-2014 #19
Registered User
- Join Date
- Aug 2008
- Location
- Iowa
- Posts
- 304
Outstanding! I love this thread
03-28-2014 #20
Registered User
- Join Date
- Jun 2009
- Location
- Simi Valley, Ca
- Posts
- 126
Thanks Carl, It looks like the url link copied to the post. Im used to seeing the pictures in my post, it makes it more interesting when you are scrolling down the thread and you see a picture instead of a link which requires you to click and wait for another page to open. I would actually like to keep posting pictures the way I did before but my space is full. I need to figure out a way to free up space to add more pictures without deleting pictures from my old threads. Not sure how to do that yet???
67 Camaro
Tags for this Thread

 Reply With Quote




