


Results 1 to 20 of 26
Hybrid View


-
08-22-2012 #1

 Registered User
- Join Date
- Dec 2006
- Location
- polk county,FL
- Posts
- 163
The art of purge welding( back purging)
Me (most people call me Eric) parsonsj(most people call him John I believe) got into a discussion on another thread about purge welding stainless tube and came to the conclusion that I share my knowledge.
A little backround first. I've been doing fabrication and welding for about 20 years. Have done sheet metal fab and tube, pipe work for most of those years and have learned quite a bit. Have been doing sanitary stainless tube for about 9 years now. I get to make some neat and nice stuff sometimes.
I'll start this with my welder I'll be using.

It's a miller Econotig I picked up used. Good welder for what I use it for.
I run an air cooled torch with a gas lens and 3/32 2% thoriated tungsten for most of the welding I do. And pure argon gas
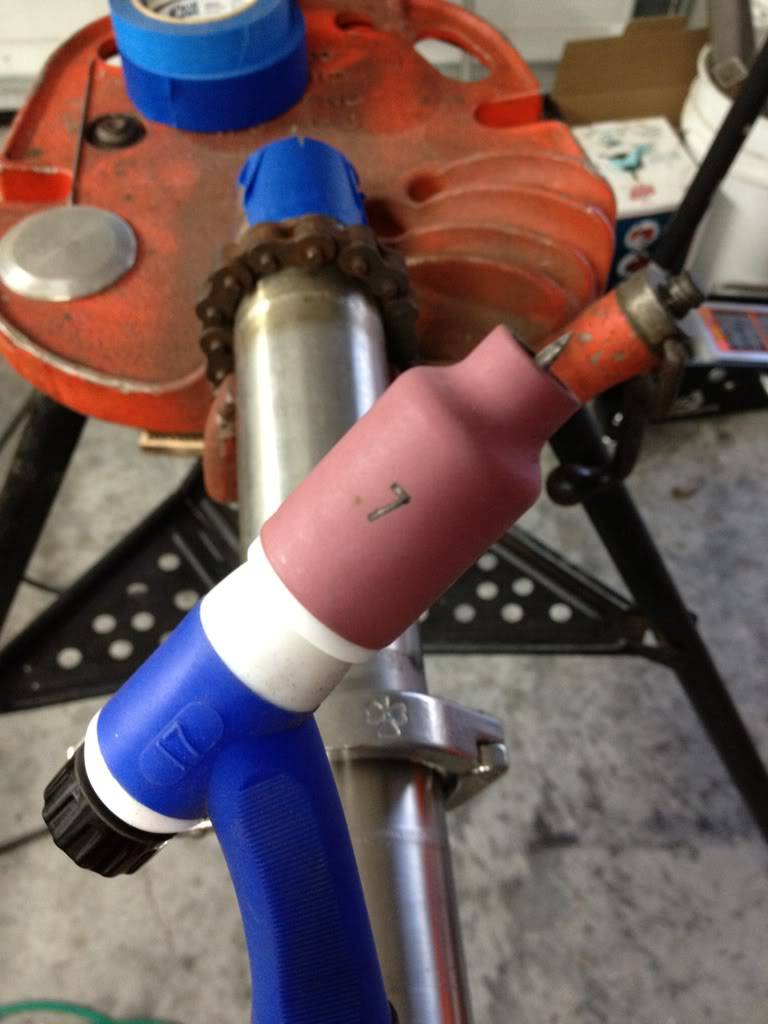
I'll be using a piece of 2.5" 304L SS sanitary tube for this, with a ferrule on each side.
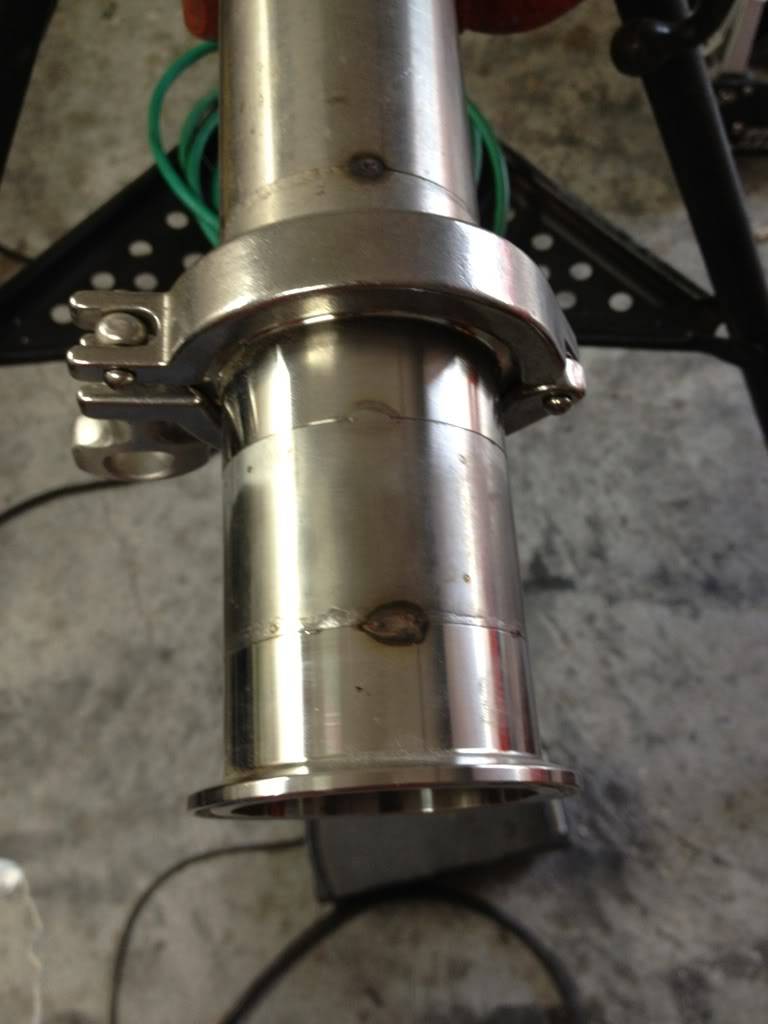
I'll purge weld one joint and just weld the other joint without a purge. The particular piece was an old product line and has a calcium build up that needs to be cleaned out in order for it to properly be purge welded
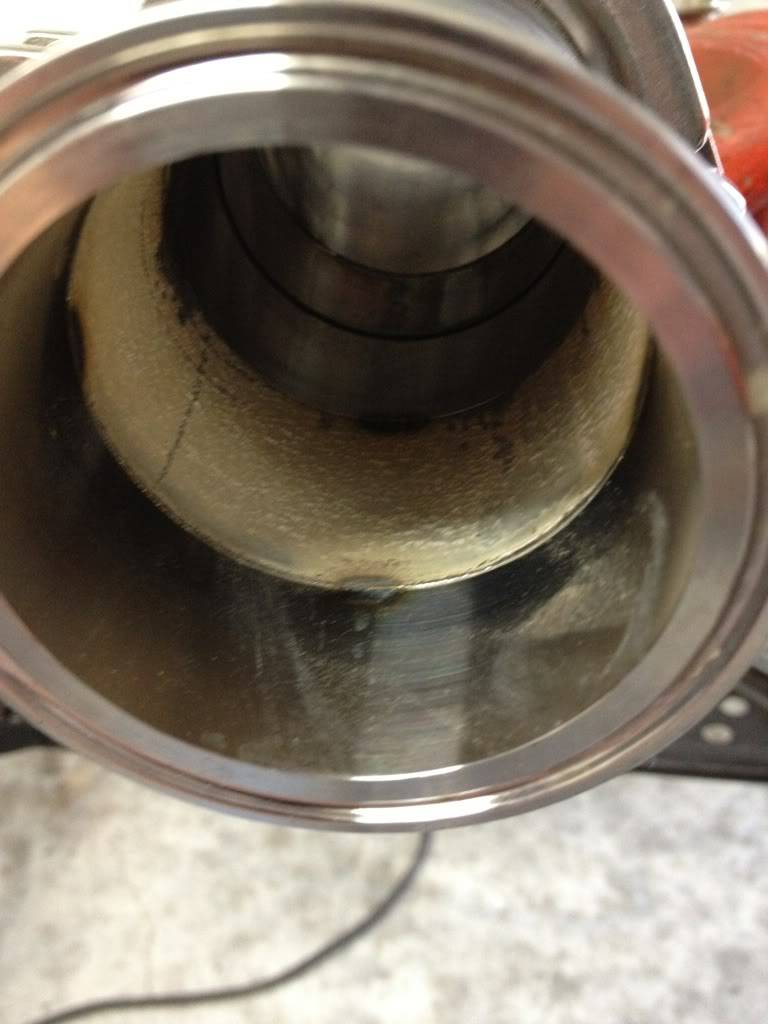
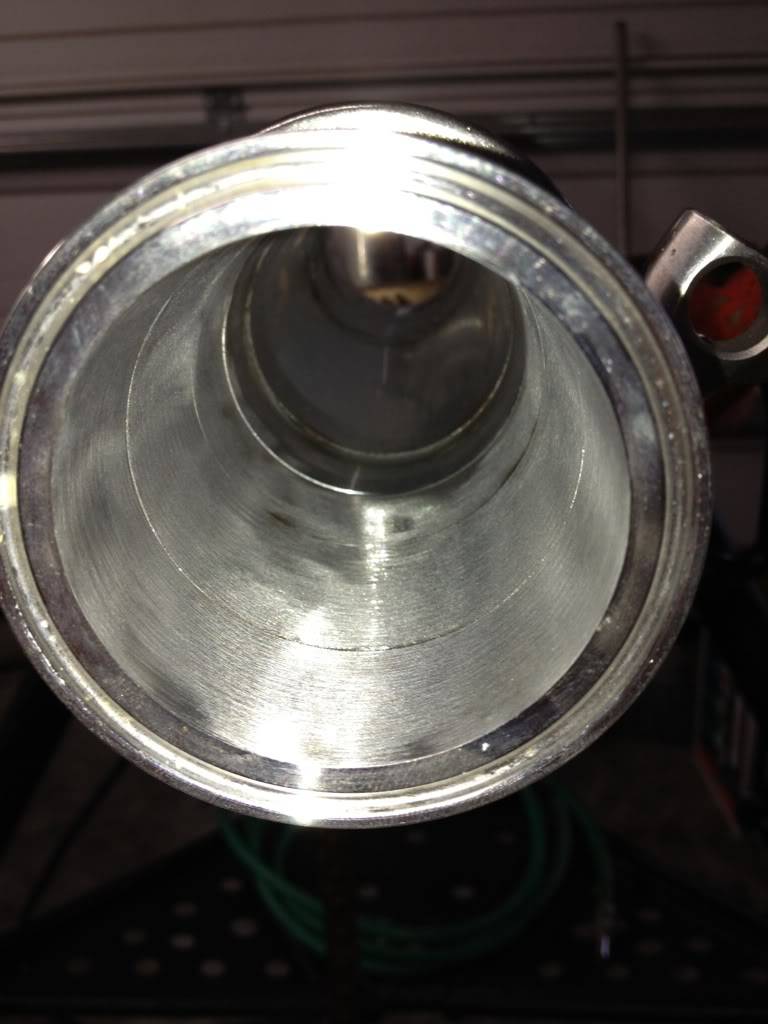
This is welded using a method called walking the cup. Where as you rest your TIG cup on the tube and literally "walk" it around the tube while welding. This does two things. Allows you to make a much longer weld before you need to reposition and will make a much more uniform weld. The less starts and stops you have, the better.
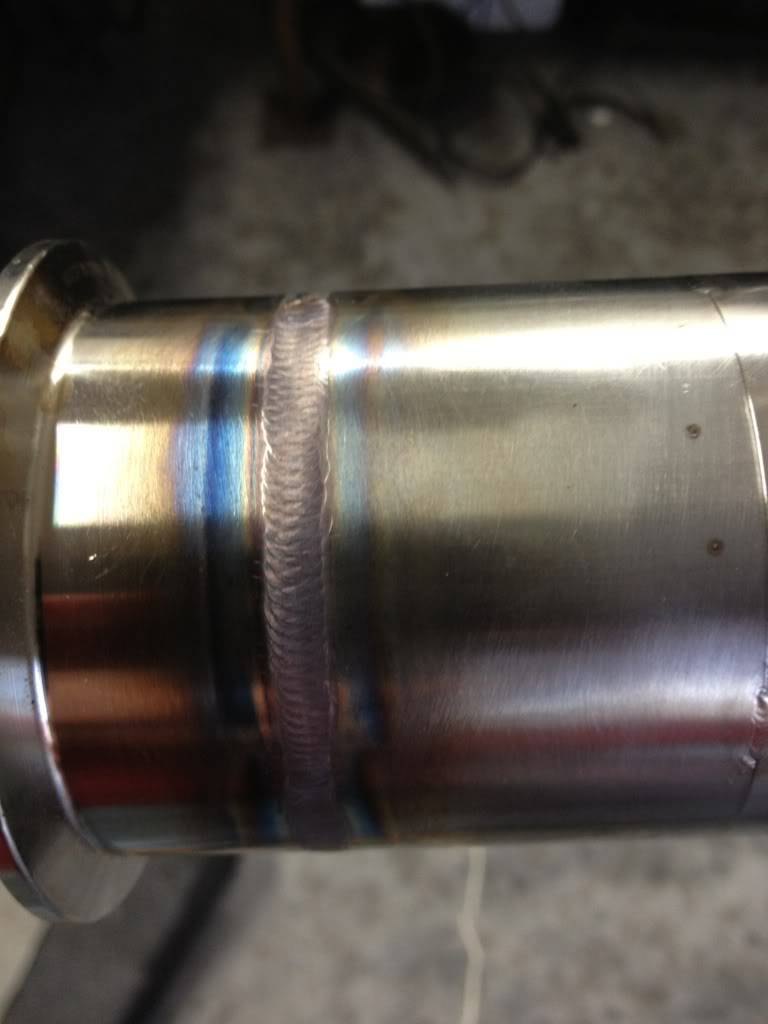
I like my welds nice and clean.
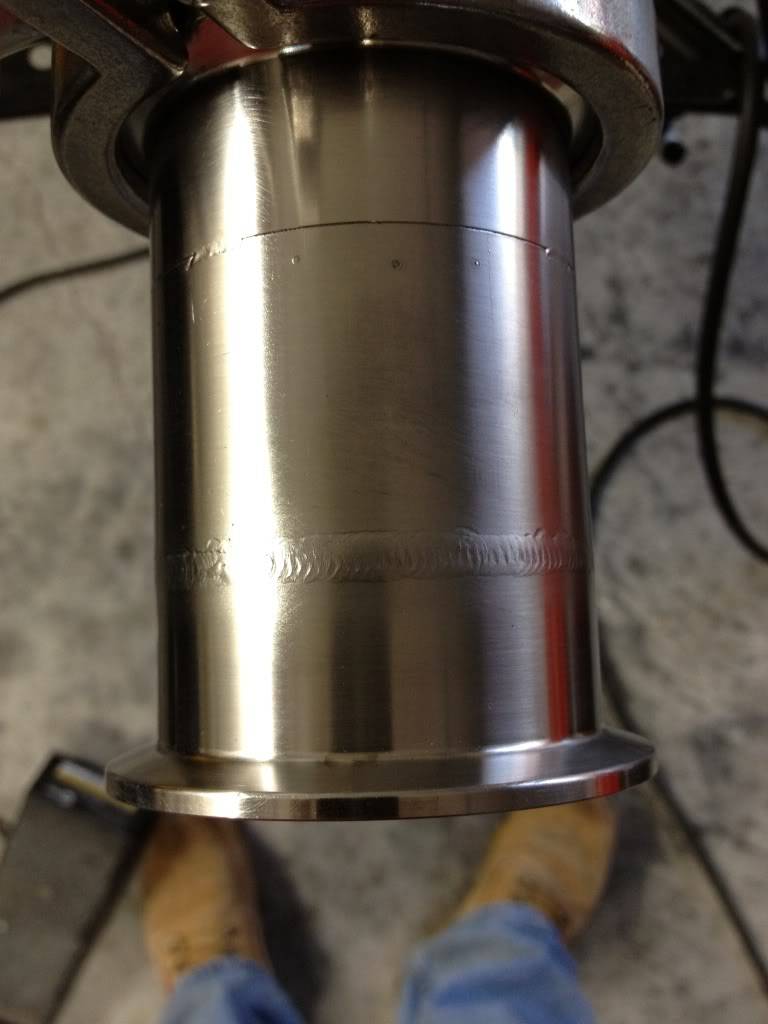
Here's the inside. Could have been less heat and there wouldn't be no sugaring.
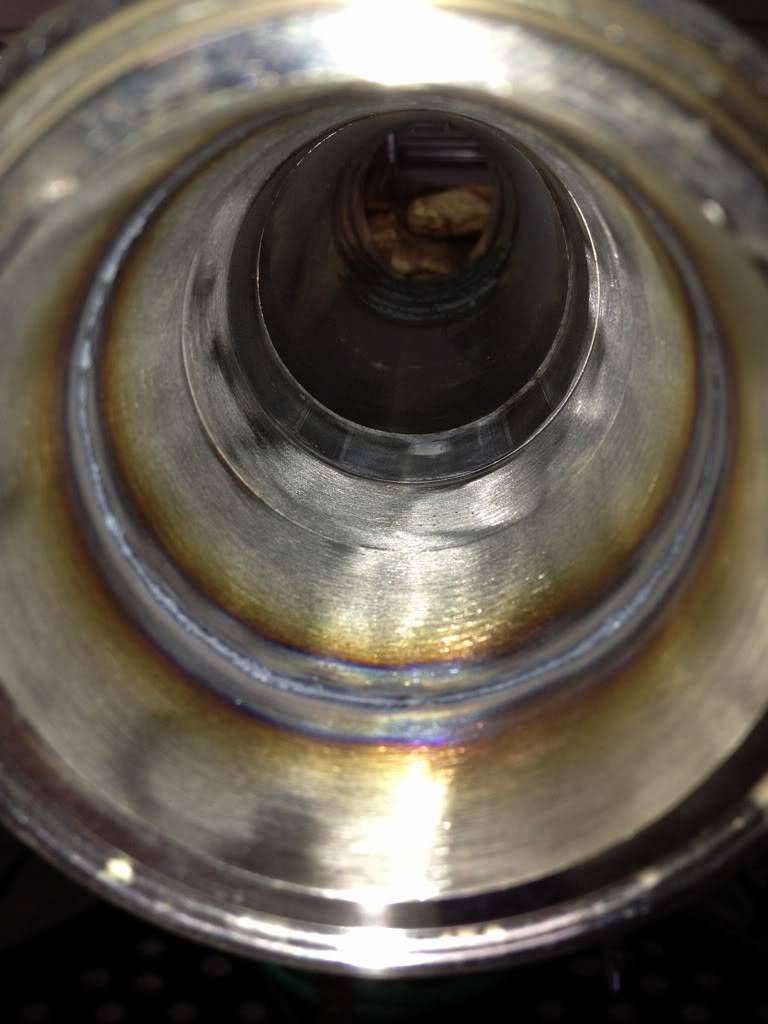
Spin my piece and prep the other side for a purge weld. I keep a variety of different adapters for various tube sizes and different applications.
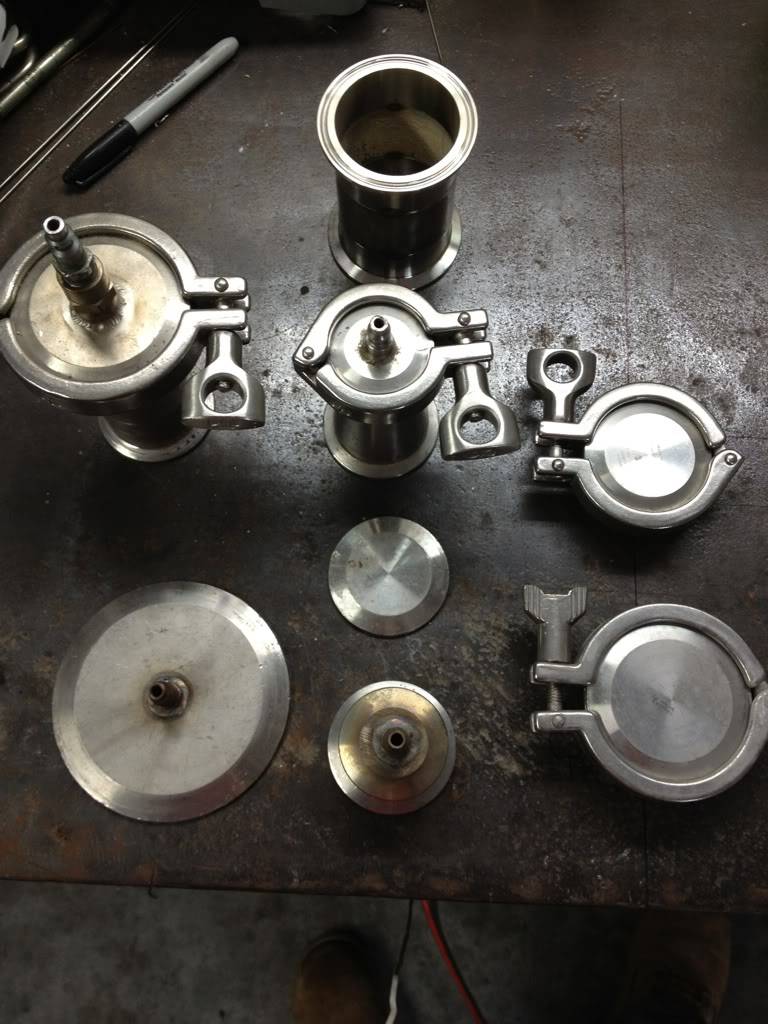
Most of my adapters have a quick connect for easy changes to other purge cap sizes.
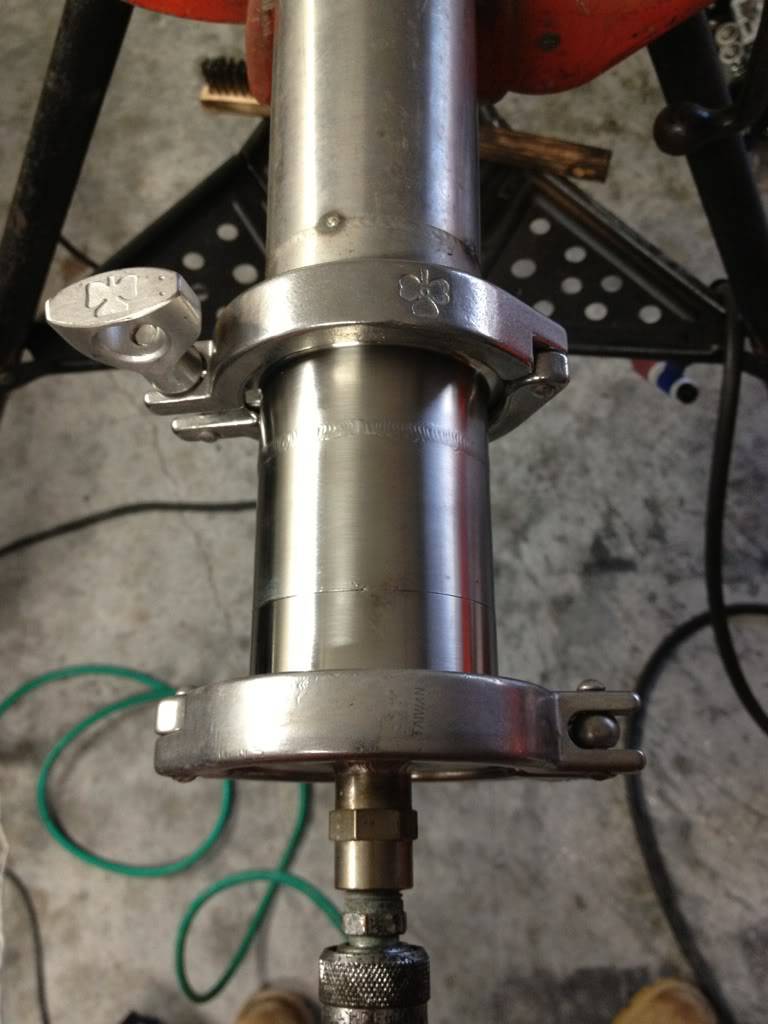
When purging, you're removing all the atmosphere gases from the tube and replacing in with argon. You want to close off all other openings. I use tape or sometimes aluminum foil. Unfortunately I forgot my purge hose on a job so I'll continue this tomorrow and get a little more in depth on it.
Hope you enjoy.
-
08-22-2012 #2 Registered User
- Join Date
- Dec 2006
- Location
- Out of the Burbs of Detroit to SoCal, then onto my ancestral homeland, the woods of Cascadia
- Posts
- 1,753

How do you bleed argon in to the back volume? A second regulator, a T off the torch line, or? Do you purge for a given period of time prior to striking an arc? If so, how do you determine the time value?
Greg Fast
(yes, the last name is spelled correctly)
1970 Camaro RS Clone
1984 el Camino
1973 MGB vintage E/Prod race car
(Soon to be an SCCA H/Prod limited prep)
08-22-2012 #3 -Moderator/Sponsor-
- Join Date
- Jun 2001
- Location
- Orlando, FL
- Posts
- 10,604
Eric, nice stuff. Looking forward to the "rest of the story".
John Parsons
UnRivaled Rides -- Modern upgrades for your ride.
UnRivaled Rides recent project -- LS9-powered 69 Camaro
08-23-2012 #4 Registered User
- Join Date
- Sep 2010
- Location
- Beach Park IL
- Posts
- 3,051
Thanks for posting that Eric.
3/32 tungsten? I guess when you are walking it helps spread out the arc. Can't wait the see the rest.Donny
Support your local hot rod shop!
08-23-2012 #5
Registered User
- Join Date
- Aug 2004
- Location
- Dunwoody, GA
- Posts
- 4,983
By walking do you mean you kind of rock side to side and pull back at the same time? Like you'd do with a heavy box or something you don't want to slide but can't lift either?
Good stuff. Thanks for posting.Trey
"The early bird may get the worm, but the second mouse gets the cheese."
~ Jon Hammond
1979 WS6 Trans Am stock LT1/T56 drive train out of my Formula. BMW M-parallel rims. C5/C6 brakes
build thread https://www.pro-touring.com/showthre...ghlight=begins
08-23-2012 #6
Registered User
- Join Date
- Dec 2006
- Location
- polk county,FL
- Posts
- 163
The art of purge welding( back purging)
Twenty I use a Y fitting on my flow meter. Better way would be a dual flow meter and best would be running off of another bottle.
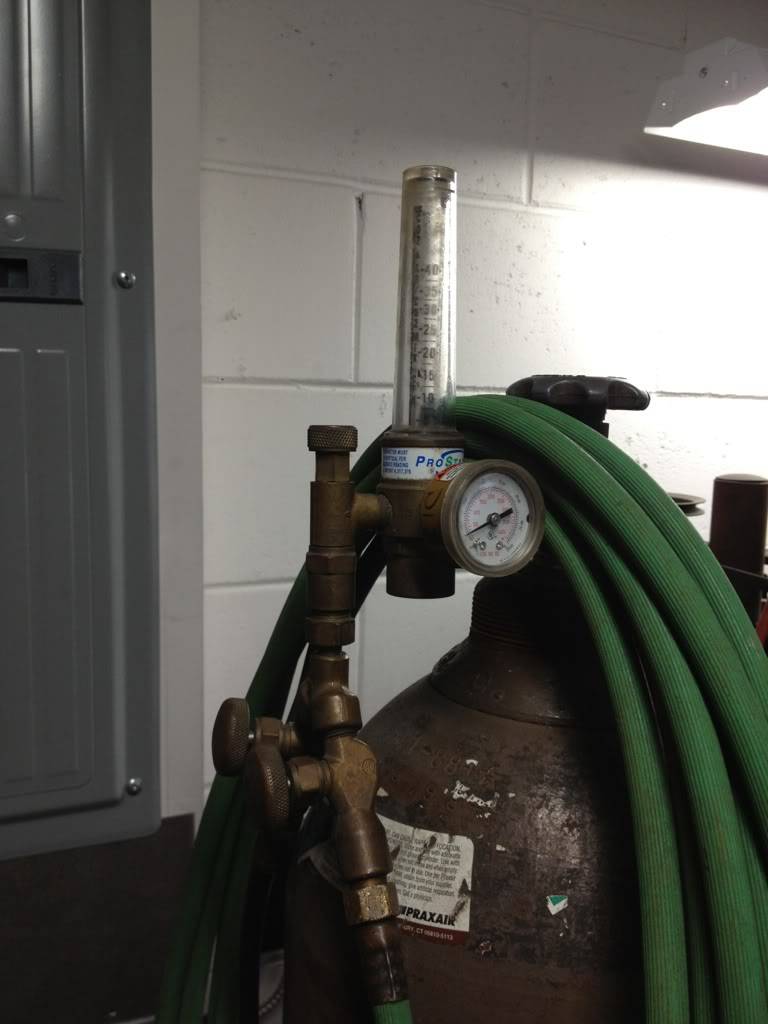
Purge time will depend on tube size and the actual size of your part. I failed to mention that when you're closing off all other openings, you'll need a relief hole somewhere. Usually at the highest point of your part as argon is heavier than air. This will allow it to vent and fill with argon. All in all this piece took about 5 to 7 minutes to complete. About 2 minutes to purge and the rest on the welding and clean up.
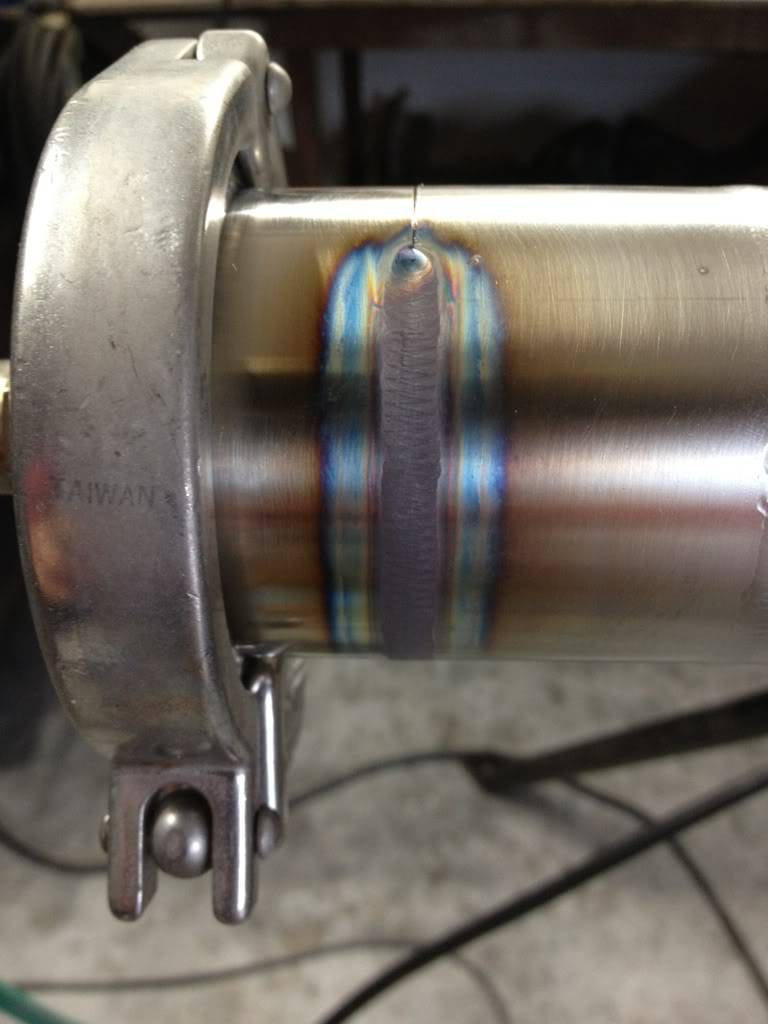
One half welded. Started at the very bottom and worked my way to the top and a little beyond.
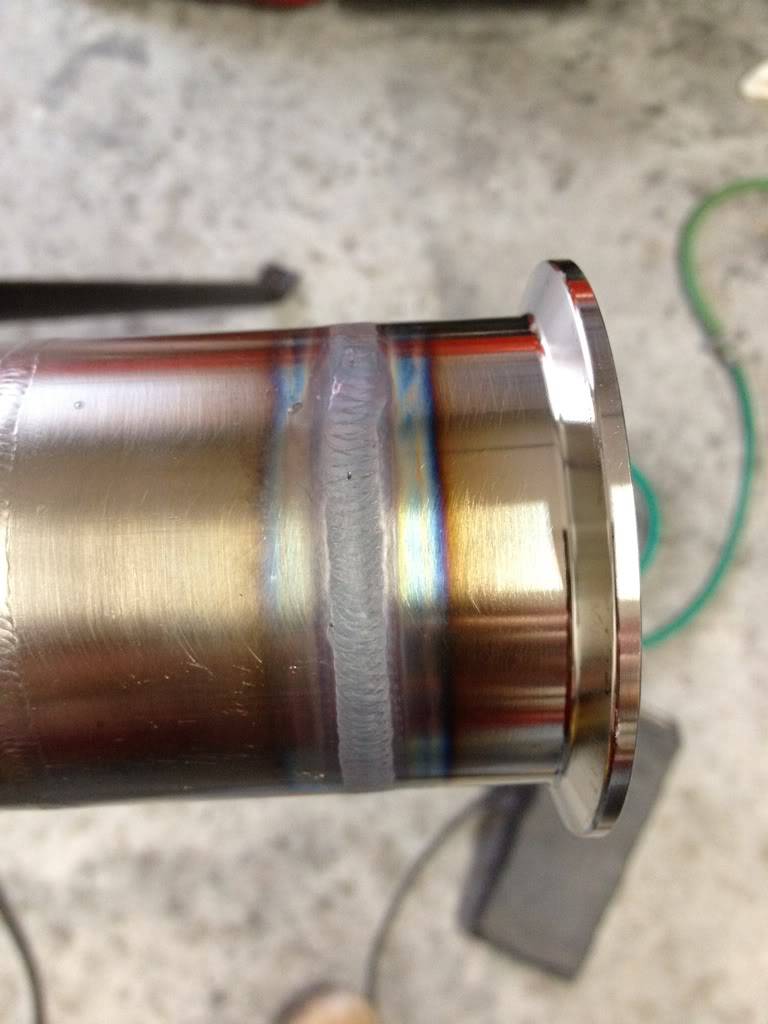
Fully welded. When you start on your previous start, always move back about a 1/4". This will ensure your purge at your start. And go past your previous stop about the same. This is where most people fail a sanitary tube test. The starts and stops.
Also notice the color of the weld is much darker than what most people look for. Now look at the inside
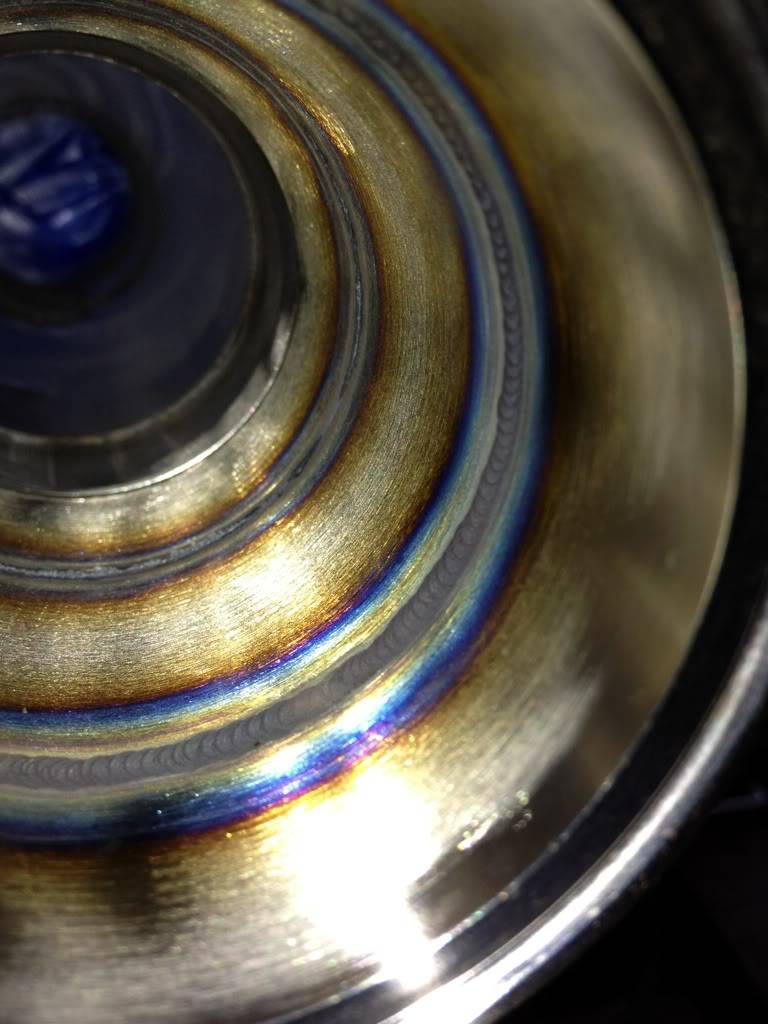

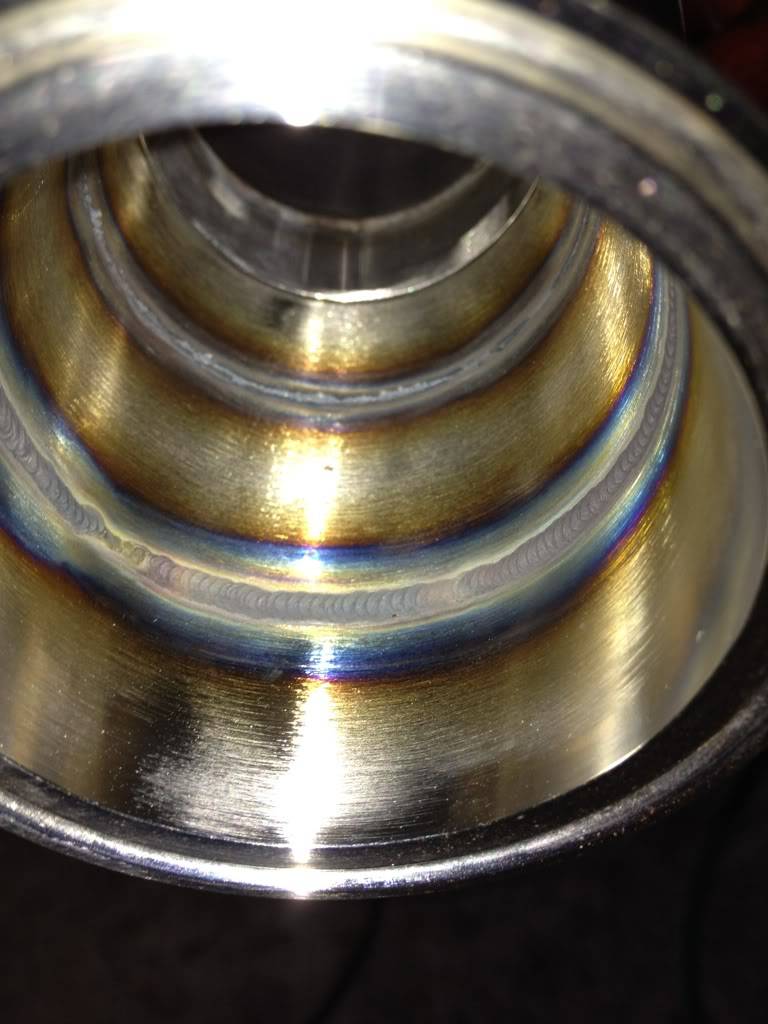
That's a good purge weld. Very nice color on the inside( good purge). You can see a little hiccup in the last photo, which is a start. But it's still good.
3/32 tungsten is just a preference.
Now I will say this. I wouldn't waste my time purge welding an exhaust system but I would do it with headers and any turbo parts. It is a stronger weld than an non purged weld and will hold up way longer to heat cycling. I've never had a failure. Here's a quick pic of the exhaust I did for my camaro. Totally free and built by me. X pipe is 2 90s with the heels cut out. Don't have any of it finished but it's been under my car for about 3 years without a problem. Non of it is purge welded. But it is TIGed!

Thanks for looking.
08-23-2012 #7
Registered User
- Join Date
- Dec 2006
- Location
- polk county,FL
- Posts
- 163
The art of purge welding( back purging)
Yes WS6. Except you go forward. If you look close at the pic of the first half weld, you can see the cup tracks.
08-23-2012 #8 Registered User
- Join Date
- Jul 2011
- Location
- NC
- Posts
- 461
The art of purge welding( back purging)
Eric- first off- you are a bad ass welder! Thanks for sharing your knowledge! I'm getting ready to weld up my SS 3" exhaust with trimix, SS wire & MIG- any recommendations? Only tools available...
08-23-2012 #9
-Moderator/Sponsor-
- Join Date
- Jun 2001
- Location
- Orlando, FL
- Posts
- 10,604
Yep, outstanding. Can you tell us more about "cup-walking"? Angles? "Drag" the tungsten (forwards? backwards?)
Backing up and rolling over on stops and starts is crucial for aluminum tank welding too. Otherwise you end up with tiny pinhole leaks that show up at around 3-4 psi.John Parsons
UnRivaled Rides -- Modern upgrades for your ride.
UnRivaled Rides recent project -- LS9-powered 69 Camaro
08-24-2012 #10
Registered User
- Join Date
- Dec 2006
- Location
- polk county,FL
- Posts
- 163
The art of purge welding( back purging)
Thanks guys. Diesel , make sure you make some practice runs on some scrap. I personally would pull when mig welding tube. Some people would argue the penetration factor of push vs pull but on tube it's really irrelevant. Being comfy when your making the weld is more important. It will allow you to make a way better weld regardless of which direction you're welding in.
About cup walking. It's a skill for sure. The basics of it are to rest your cup on the piece at roughly a 45, the angle could vary according to the weldor, and once your arc is started rock the cup to and fro to allow forward movement. Kinda like your opening a door. You could do a YouTube search to see it in action.
Generally tube doesn't require filler wire but once you start to get into schedule pipe, you'll be running filler wire. Which is a whole other game. Even more trickier. I'll post a picture of some welds using filler later this evening.
John I know a little bit about aluminum tank building too. Here's one I built for my Malibu for an overflow tank.
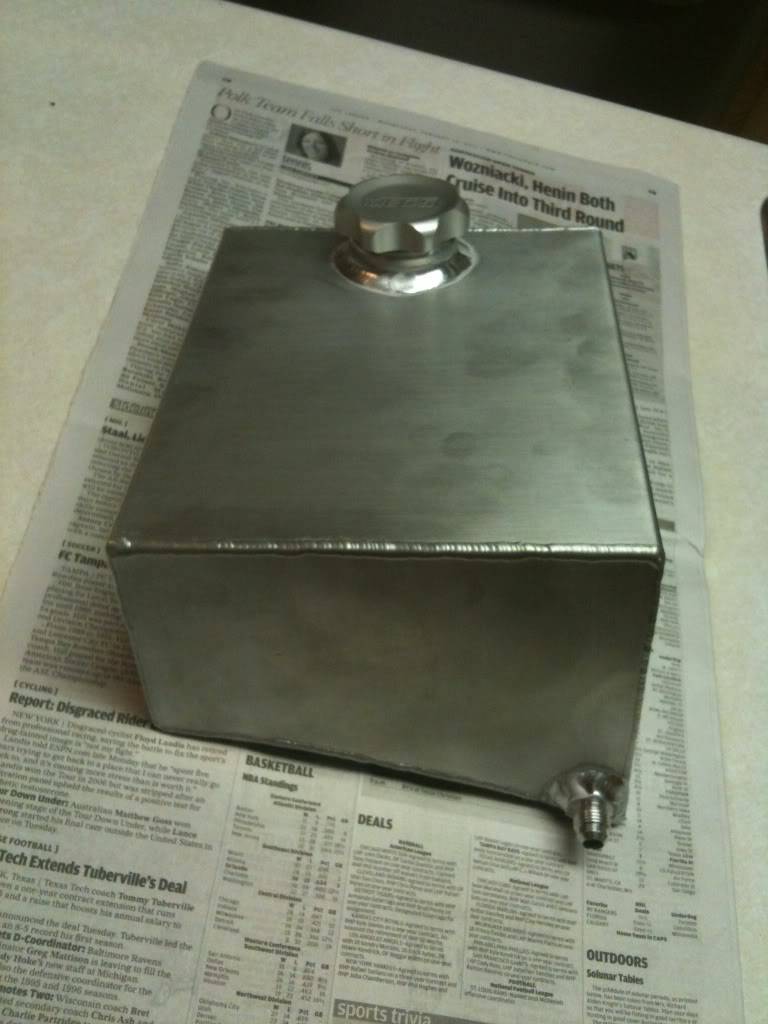
Once again thanks guys.
08-24-2012 #11 -Moderator-
- Join Date
- Apr 2005
- Location
- USA
- Posts
- 4,462
Good welding , I wish I could do that ...
Maybe some day .Jeff Tate
U.S.A.
"The best thing about participating in these events is that you get to hang out with a group of intelligent like minded people who live to achieve things in their lives. You won't find a lazy, mean, or dumb bone in their bodies." Bret Voelkel, RideTech
08-24-2012 #12
Registered User
- Join Date
- Dec 2006
- Location
- Out of the Burbs of Detroit to SoCal, then onto my ancestral homeland, the woods of Cascadia
- Posts
- 1,753
Good information. Great input. Thanks for sharing your experience
Greg Fast
(yes, the last name is spelled correctly)
1970 Camaro RS Clone
1984 el Camino
1973 MGB vintage E/Prod race car
(Soon to be an SCCA H/Prod limited prep)
08-24-2012 #13
Registered User
- Join Date
- Dec 2006
- Location
- polk county,FL
- Posts
- 163
The art of purge welding( back purging)
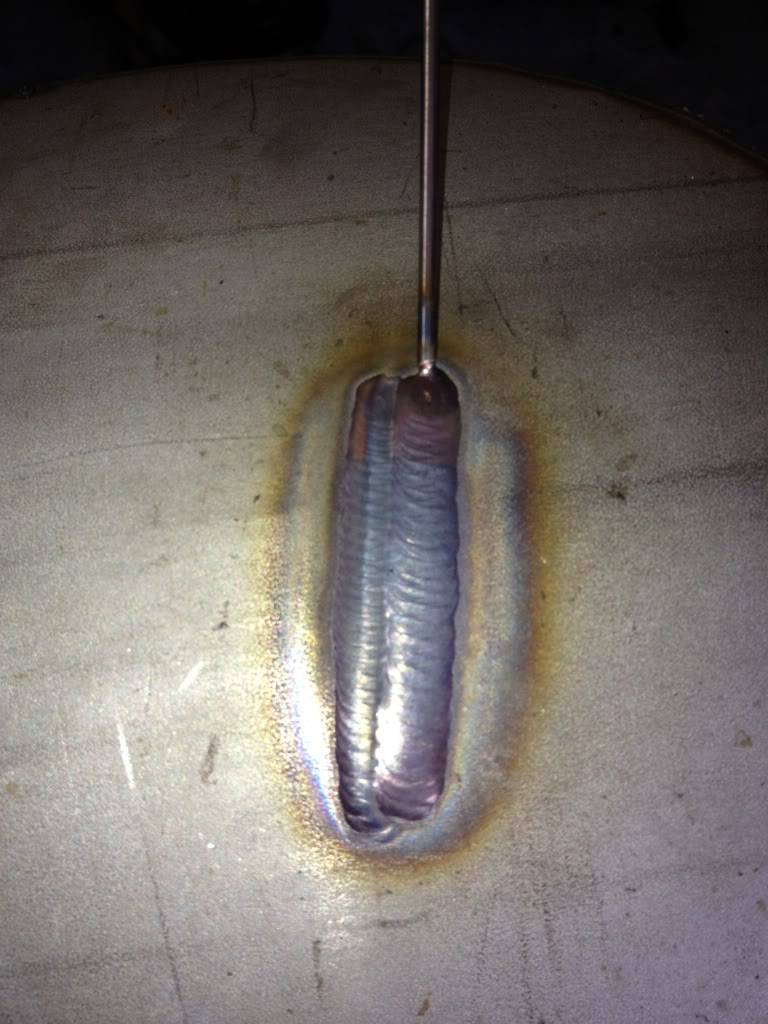
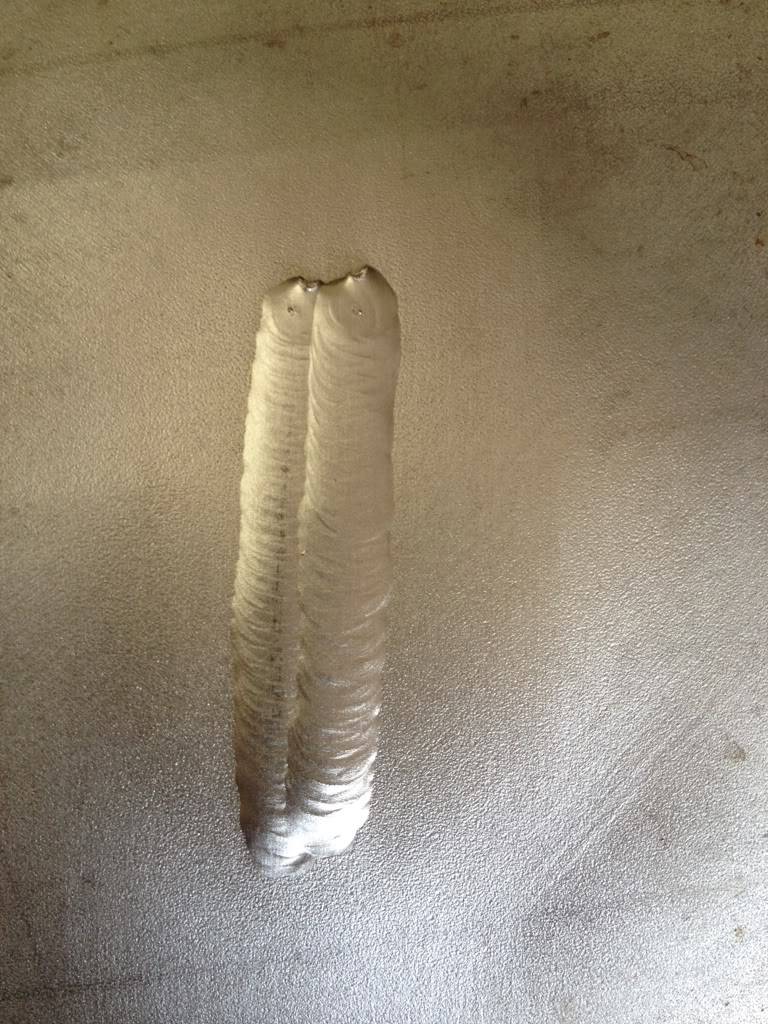
Here's a couple passes I did with filler on a piece of 3/16 SS. Just some scrap.
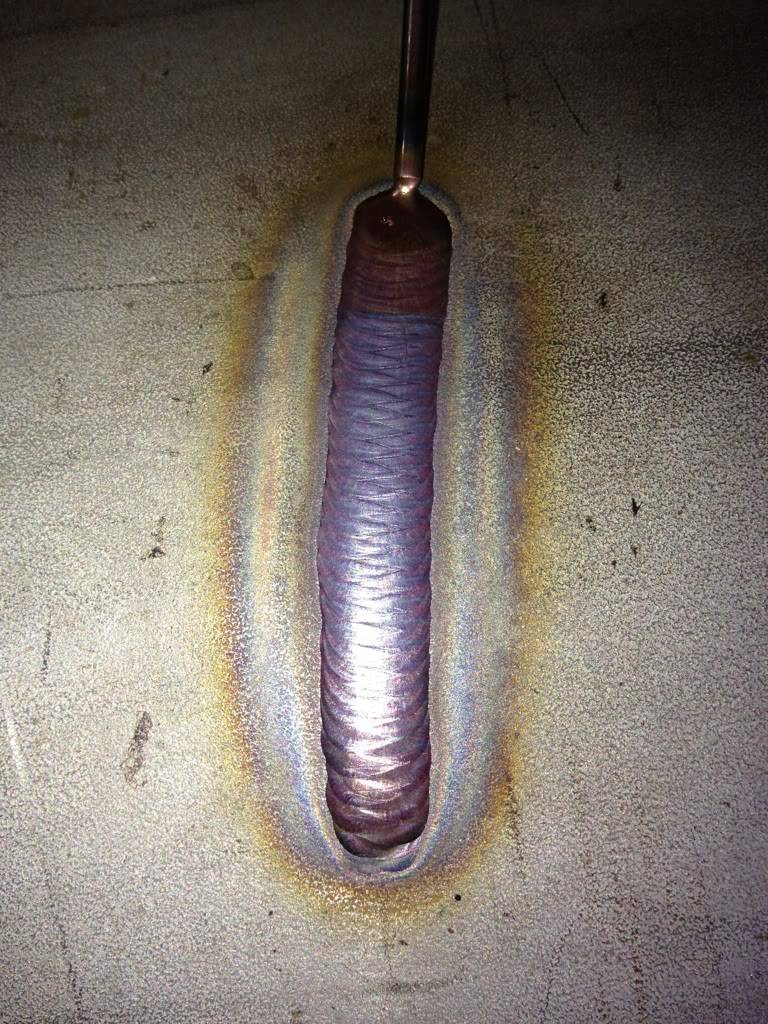
First pass. I left the wire at the end for no particular reason really!!
Here's a second pass
And here they are with all the color brushed out.
Let's see if this works. I had my youngest son help me make a short little video clip.
http://i1060.photobucket.com/albums/...r/3d564602.mp4Last edited by David Pozzi; 03-02-2013 at 08:40 AM.
08-28-2012 #14 Registered User
- Join Date
- Feb 2010
- Location
- ARIZONA
- Posts
- 139
Thanks for the video. I had to copy and paste it in a new window (link didn't work). This gets me motivated to get out in the garage and try this!
Larry
67 Camaro, 350 SB, Custom A-Arms & 3-Link
My Build https://www.pro-touring.com/showthre...LOVE-67-Camaro
09-29-2012 #15 Registered User
- Join Date
- May 2002
- Location
- Northern California
- Posts
- 10,716
bumping for more demo's,
Thanks for the vid....I still can't tig without resting my arms on a base of some sort.MrQuick ΜΟΛ'ΩΝ ΛΑΒ'Ε
09-30-2012 #16
Registered User
- Join Date
- Sep 2011
- Location
- Southern Ontario
- Posts
- 640

Fantastic. Any chance of showing some of us basics in mig welding an exhaust [ one of my next projects ] Thanks!
10-02-2012 #17
Registered User
- Join Date
- Dec 2006
- Location
- polk county,FL
- Posts
- 163
The art of purge welding( back purging)
I'll see what I can whip up for you guys!
10-02-2012 #18 Registered User
- Join Date
- Sep 2012
- Location
- Hartland MI
- Posts
- 5
Thanks for the post!
10-10-2012 #19 Registered User
- Join Date
- Jul 2010
- Location
- south gate
- Posts
- 208
Thanks for taking the time, i'm also at that point on my build, 3" exhaust SS will attempt to weld with mig, cause of tools available or get outside help for tig. got Practice on a few scraps and I don't Like it especially the interior ( sugar, bulky ) I will try purging and play with settings.
Question which shielding gas is best I'm using mig .035" 308 wire / stain mix , I'm getting excessive spatter , thinking of trying cO2.
Wow that is the some of the best I have ever seem. DAMM IT !
10-11-2012 #20
Registered User
- Join Date
- Jul 2011
- Location
- NC
- Posts
- 461
Update-Eric thanks for the tips- comfort is definitely key~ I got my exhaust welded up and looks good enough for government work! With this being my first time welding SS tubing, I found that as it quickly heated up after a couple passes I always had to adjust the wire and heat settings.
Frank- What mix are you running? I went with the Higher Helium mix as he told me it would reduce the splatter and it did! I hardly had any- of course you can make it splatter depending on the distance your holding your gun away from weld- just some thoughts.
 Originally Posted by frankv11


 Reply With Quote