


Results 1 to 20 of 66
-
07-09-2011 #1
 Registered User
- Join Date
- Dec 2008
- Location
- Idaho
- Posts
- 51

New audio install in our '72 Chevelle
I'll start by saying thanks for the great ideas from this forum. I've been going through all the installs for the past few weeks and pick up ideas for our project.
Let me introduce our project. We have a '72 Malibu my parents bought new. I've had it since i was 15 (~28 years). The car sat in storage 9-years and it was time to get rid of it or start a restoration project. My wife professed 'that' car was one of the reasons she went out with me in High School and we were not getting rid of it. After a major reorg of the garage, home it came.
The car is in the middle of a full frame-off treatment. The details are on our webpage, but a fair amount of metal, an OEM cowl hood, mild 383 from our original block at ~392hp/454lb-ft, 700R4, column to console conversion, bench to bucket conversion, sweep to round gauge conversion, stock to Vintage Air conversion, powder coated frame, M&H modified harnesses, coil-overs up front, UMI tubes all the way around, and a fresh posi for the rear end, and Rushforth Superspokes (18x8/18x10) were ordered last week. Nothing too extravagant but it should be a nice cruiser...
For the audio, we are going for clean sound and simple looking install.
Retrosound Model One HU (Hoping for the best, but prepared to changeout - I us couldn't cut the new dash out of the box - May put a HU in the glovebox)
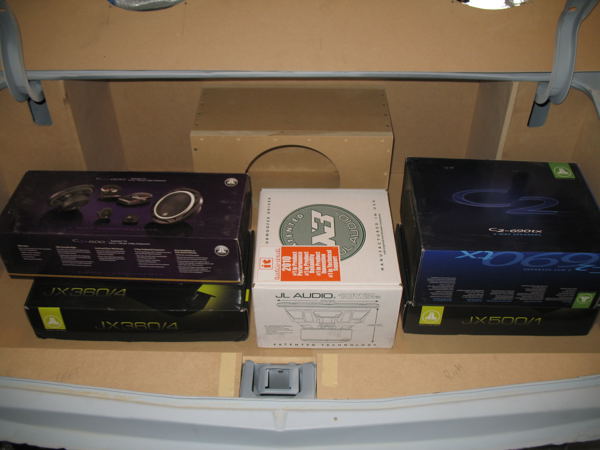
JL Audio C2-600 Separates in the kick panels (Building custom panels)
JL Audio C2-690tx in the rear deck
JL Audio 10W3v3 (Sealed enclosure)
JL Audio JX250 Mono for the Sub
JL Audio JX360/4 for the front and rear
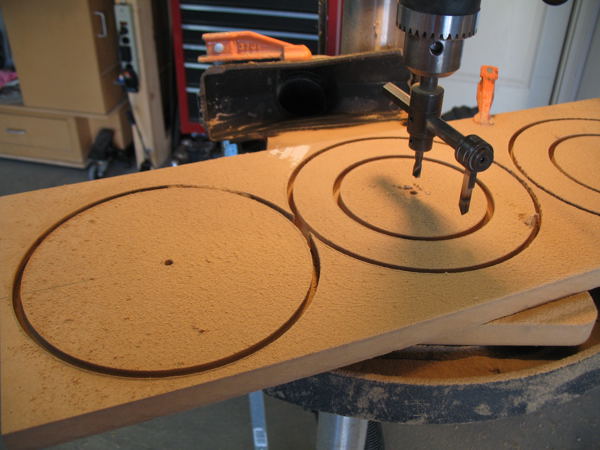
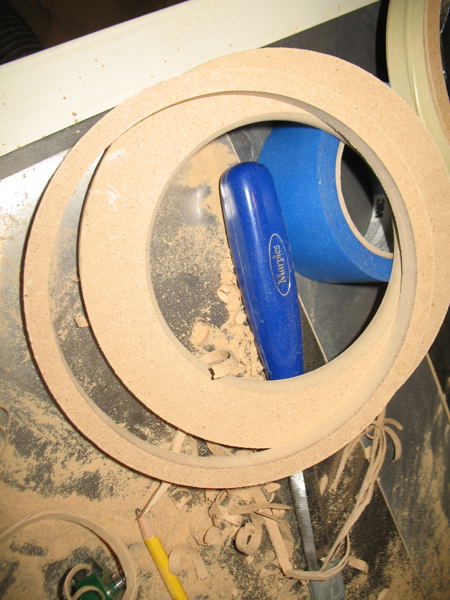
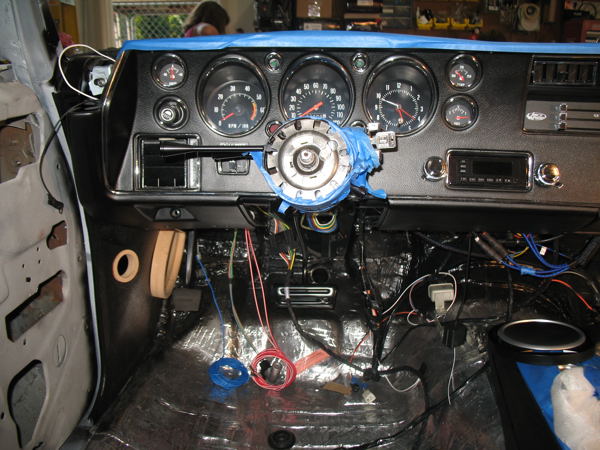
This week we started on the kick pods. I ordered a set of repops so I did't have to cut-up our stock panels that are still in good shape. The rings are typical 3/4" MDF and admittedly, I made it more difficult than it needed to be, but it's my first attempt.
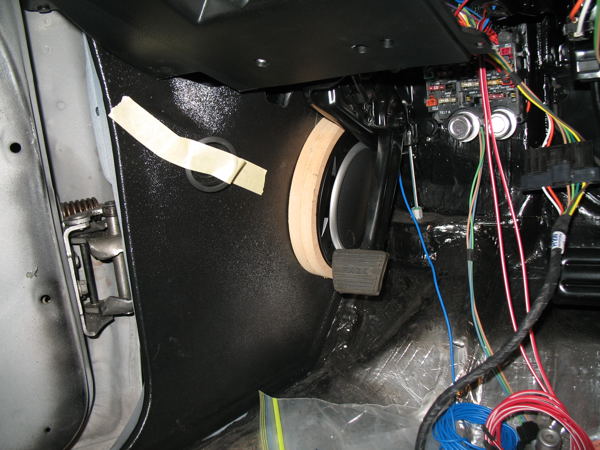
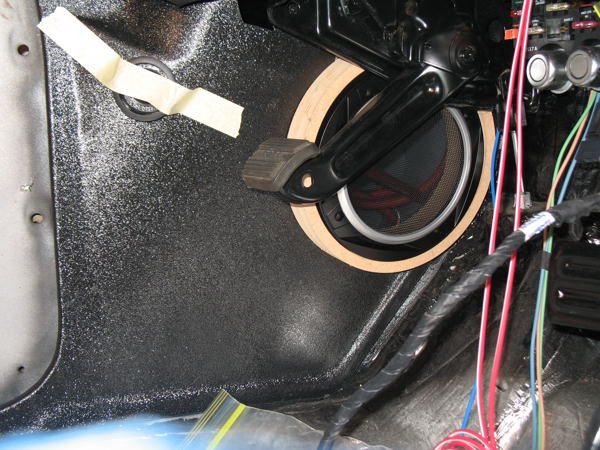
With the driver pod and ring in-place, everything clears the e-brake without moving the mounts and the magnet tucks up nice in the fender well. I'll put a 6x9 speaker baffle in the hole to keep moisture out of the speaker and interior. The passenger side is going to be a little more difficult to frame up because the large hump for what would have been stock AC. I plan to cut the hump off and match the placement we did for the driver side. Before we put down the fabric, resin and vinyl, I'll create a small angled mounting stage for the tweeters.
Here are some shots. I'm open to suggestions...

-
07-09-2011 #2
Registered User
- Join Date
- Dec 2008
- Location
- Idaho
- Posts
- 51
These are still my favorites...
07-10-2011 #3
Registered User
- Join Date
- Dec 2008
- Location
- Idaho
- Posts
- 51
Not as much time to spend on the project this weekend, but we got the passenger pod roughed out. I'll pick up resin, glass, and fleece this week and see how it looks.


08-04-2011 #4
Registered User
- Join Date
- Dec 2008
- Location
- Idaho
- Posts
- 51
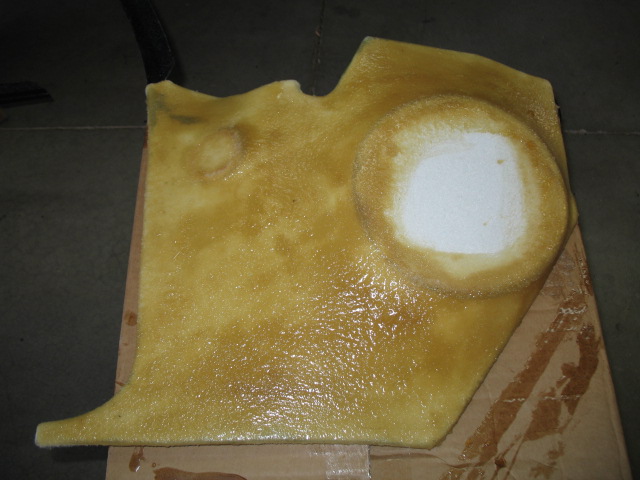
Just a little update. Everything had been going well, but I didn't account for the amount of build up the fleece and glass would add. With both pods ready to cover, we ended up having to trim back the top on the driver side to get the brake lever to fit up. Frustrating, but after another layer of glass, fill, and filler, I think they turned out pretty good. Especially for a first attempt...


09-05-2011 #5
Registered User
- Join Date
- Dec 2008
- Location
- Idaho
- Posts
- 51
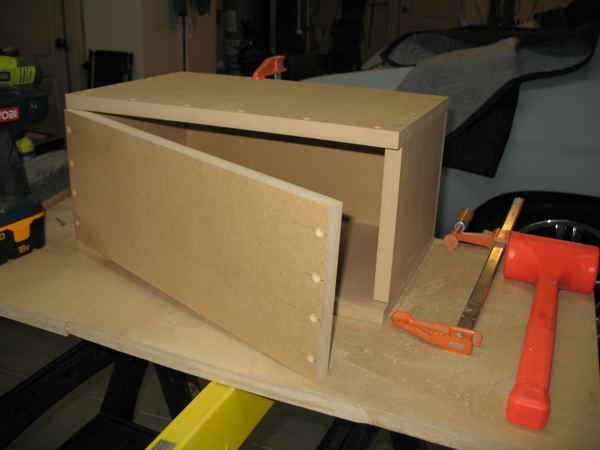
Time to start in the rear. This weekend we built a new 1/4" MDF package tray for the 6x9's. I'll seal it up and put down a couple layers of floss or batting and cover it with the same black vinyl as the kick pods.
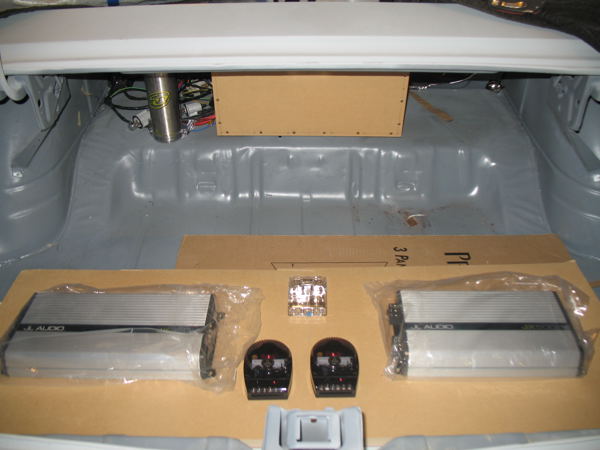
After mocking everything up multiple times, I decided to build the amp rack on the floor of the trunk. There just wasn't enough room on the vertical divider that will hold the sub to place the amps the way I wanted. Once the amps are located, I'll build a false floor with inserts to hide the wiring and protect amps when we put things in the trunk. The goal was to have enough room for a ~27" donut spare for long trips.
The sub box is pretty small, but matches the JL-Audio recommended size exactly. I could have put 2-10's back there without any trouble.

09-11-2011 #6
Registered User
- Join Date
- Dec 2008
- Location
- Idaho
- Posts
- 51
A little more time in the shop today with some success. First order of business was to build a circle cutter template for the router. Turned out well and sure beats the jig saw method.
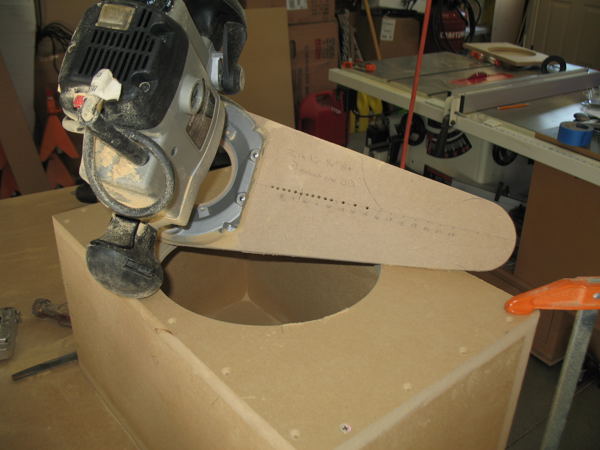
More construction.
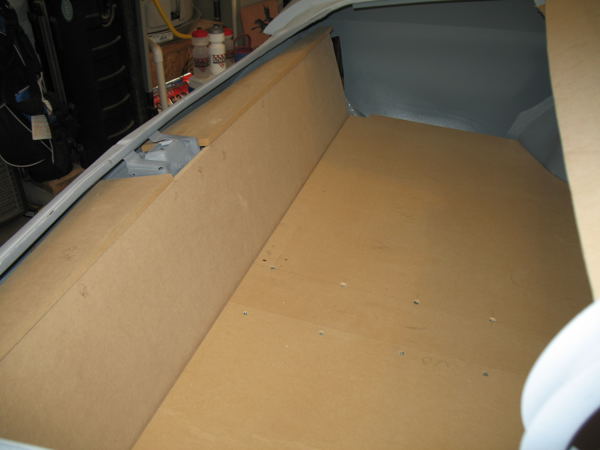
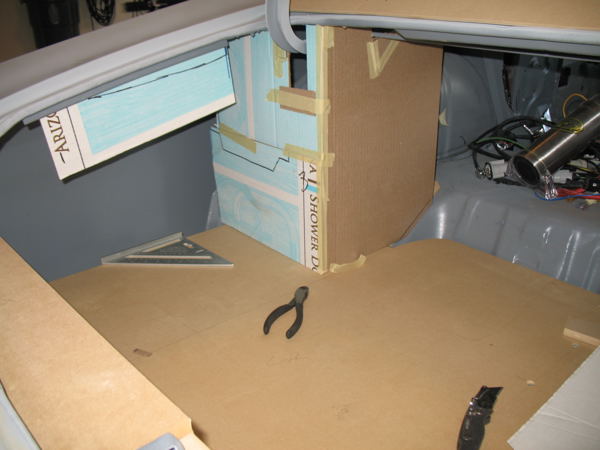
The sub will be behind the false wall in the back.
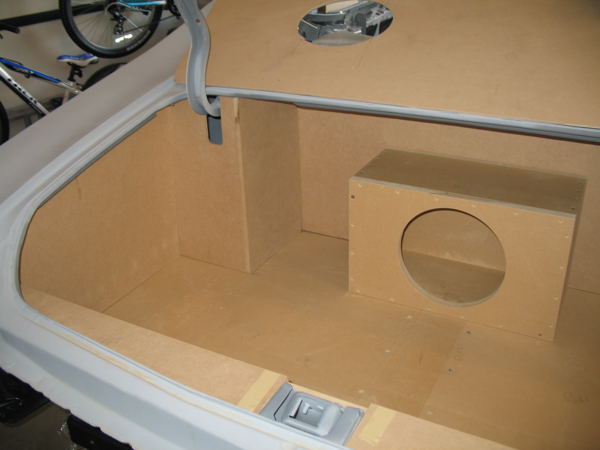
Next step is to install some mounts and brackets to be hidden behind the panels for securing everything. Still considering moving the amps to side panels to maximize the remaining trunk space, but even with a false floor to cover the amps, we should have enough room for a 27" dia emergency tire on road trips. Not much else, but at least a tire a cooler and chairs. Still a lot of wasted space under the package tray. Perhaps a door and access to a tool kit...
-Doug
09-12-2011 #7 Registered User
- Join Date
- Feb 2010
- Location
- ARIZONA
- Posts
- 139
Nice work! What's with the "Arizona" on your mock-up material if you are in Idaho? Your woodworking skills are great. I'll check out the build.
Larry
67 Camaro, 350 SB, Custom A-Arms & 3-Link
My Build https://www.pro-touring.com/showthre...LOVE-67-Camaro
09-12-2011 #8 Registered User
- Join Date
- Dec 2009
- Location
- Carson City, NV
- Posts
- 861
looking good, cant wait to see how this turns out. got me a 72 and will need some inspiration/ideas
09-12-2011 #9
Registered User
- Join Date
- Dec 2008
- Location
- Idaho
- Posts
- 51
Too funny... Definitely in Idaho, but we recently installed a new Arizona Shower Door in the guest bath so I kept the box. I knew we could use the large pieces of cardboard for something... Originally Posted by MIKE67

09-12-2011 #10
Registered User
- Join Date
- Dec 2008
- Location
- Idaho
- Posts
- 51
Greg, I just checked your thread and it's I that should be looking at your thread for inspiration and ideas. Darn! What a great build. We are no where near your caliber of build on our '72... I need to go back into the garage and try to build something know. Originally Posted by ChevelleNV
-Doug
09-16-2011 #11
Registered User
- Join Date
- Jul 2011
- Posts
- 239
Wow nice job
09-17-2011 #12
Pro-Touring Veteran
- Join Date
- Nov 2006
- Location
- Washington, MO
- Posts
- 2,363
Nice work.... but how much weight are you adding there in the trunk? Looks like a good 200 lbs...
09-17-2011 #13
Registered User
- Join Date
- Jul 2011
- Location
- Nashville/ Tampa
- Posts
- 730
Did you keep your templates? You could replicate and sell them. It would save a lot of people a lot of time playing with cardboard (people like me).
https://www.instagram.com/gen_v_lt1_chevelle/
Do not buy anything from Frankie's Used Auto Parts. Ever.
Chevelle ̶a̶l̶m̶o̶s̶t̶ ̶f̶i̶n̶i̶s̶h̶e̶d̶ L92/200-4r now Gen V LT1 and T56- https://ls1tech.com/forums/conversio...nvertible.html
09-18-2011 #14
Registered User
- Join Date
- Dec 2008
- Location
- Idaho
- Posts
- 51
Could be close. While I don't want to add too much weight, the car will be a cruiser. The engine dyno came back at 396hp/454ft-lb in front of a 700R4 with custom torque converter and 3:55 gears out back. Should be great off the line with the torque curve and overdrive on the highway will be comfortable. Originally Posted by Tony_SS
I'll weigh everything out after I cover the panels. I actually needed to set the rear down on the springs a little to get the wheel/tire reveal I wanted. This should do it...
09-18-2011 #15
Registered User
- Join Date
- Dec 2008
- Location
- Idaho
- Posts
- 51
Templates were pretty rough, but the finished panels are clean and true off the table saw. If I get the time, I'll throw them in AutoCad and dimension them out. I'm still working on the attachment process, but I need to get the covering done first. Originally Posted by chuckd71
09-20-2011 #16 Registered User
- Join Date
- Dec 2007
- Location
- Carlsbad, Ca
- Posts
- 1,213
how did you run your vintage air lines. it looks like they would clear even a stock kick panel. i plan to do the same and dont want to run them through the vent as VA suggests.
good job on the setup. a 3/4" full mdf sheet weighs ~90 lbs. i dont think youre quite there. you could always route an area of the back out if you were really concerned. i dont think you are though.Tim
The WidowMaker: Garage Built 70 Chevelle
Special Thanks To: Rushforth Wheels, MuscleRodz, Kore3 & SC&C
Build Thread Link
09-20-2011 #17
Registered User
- Join Date
- Dec 2008
- Location
- Idaho
- Posts
- 51
Tim - We ran the VA lines through the firewall up high and tight so they are hidden behind the fender. We shaved the firewall so we punched four holes with grommets. We started with a stock style kick panel, but it needed a slight modification to clear the blower on the VA unit. With a little work, we got the hoses through the opening and still had room for the magnet on the JL to nestle in the hole. We will use a set of 6x9 baffles to block off any moisture from the speakers. Originally Posted by The WidowMaker
I can shoot you some images when I pull the car out this weekend. The car is flipped the wrong way in the garage to get access right now.
As for the MDF, the bottom is made from 3/4", the speaker box is 3/4", the vertical pieces are all 1/2" MDF and the package tray is 1/4" MDF. I ordered samples of speaker and trunk carpet Sunday so hopefully I can get it ordered lat this week or early next.
The ratchet shifter detent plate arrived for our horseshoe shifter and works well. If all goes well, we will be able to make the first drive around the block this weekend. No fenders or windshield, but I should be able to take it off the dolleys and pull it in and out of the garage under it's own power. Color is next!
Let me know if the pictures would help.
Doug
09-22-2011 #18
Registered User
- Join Date
- Dec 2007
- Location
- Carlsbad, Ca
- Posts
- 1,213
id love to see some pics. i think im going to go with a bulkhead and try and get it up as high as possible. i didnt see a reason to go throught the air vent like va suggests. you proved that its possible. thanks.
Tim
The WidowMaker: Garage Built 70 Chevelle
Special Thanks To: Rushforth Wheels, MuscleRodz, Kore3 & SC&C
Build Thread Link
09-22-2011 #19
Registered User
- Join Date
- Dec 2008
- Location
- Idaho
- Posts
- 51
Tim - I'll get you some pictures this weekend to see if they can help you out. We originally planned on a 4-port bulkhead pass-thru, but we ended up doing things a little differently to reduce the number of connections and access to the fittings.
-Doug
09-22-2011 #20
Registered User
- Join Date
- Jul 2011
- Location
- Nashville/ Tampa
- Posts
- 730
That would be awesome. The way you have done the sides looks like it would be ideal for the way I was planning to mount my air ride tanks, but I've been too wrapped up with other things to really mess with it. Originally Posted by 1972malibu
And you can never have too many pictures, even of trivial things. Never know what someone might find useful.https://www.instagram.com/gen_v_lt1_chevelle/
Do not buy anything from Frankie's Used Auto Parts. Ever.
Chevelle ̶a̶l̶m̶o̶s̶t̶ ̶f̶i̶n̶i̶s̶h̶e̶d̶ L92/200-4r now Gen V LT1 and T56- https://ls1tech.com/forums/conversio...nvertible.html
Tags for this Thread

 Reply With Quote




