


Results 1 to 16 of 16
Thread: My rotisserie build
-
10-07-2008 #1

 Registered User
- Join Date
- Dec 2007
- Location
- British Columbia, Canada
- Posts
- 723

My rotisserie build
I know some guys have asked about the rotisserie I built, so I thought I'd take some more pics of it and post them. Unfortunately, unlike the car, I didn't take any pics of the build process. But here are several photos of it and comments including some measurements.
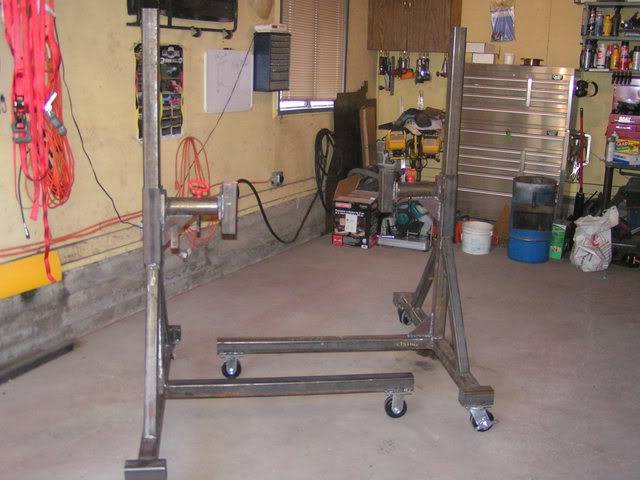
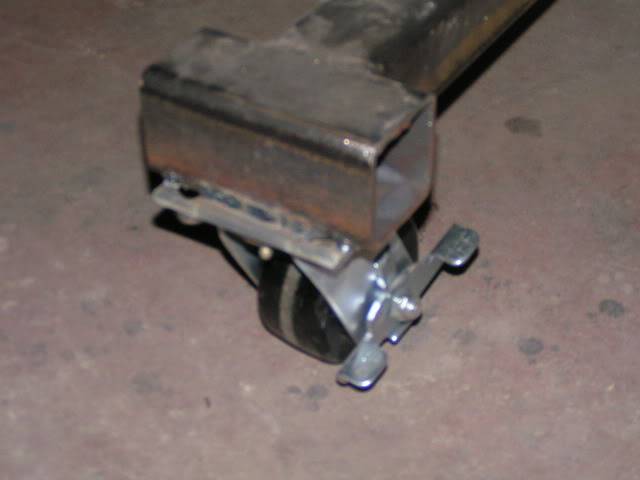
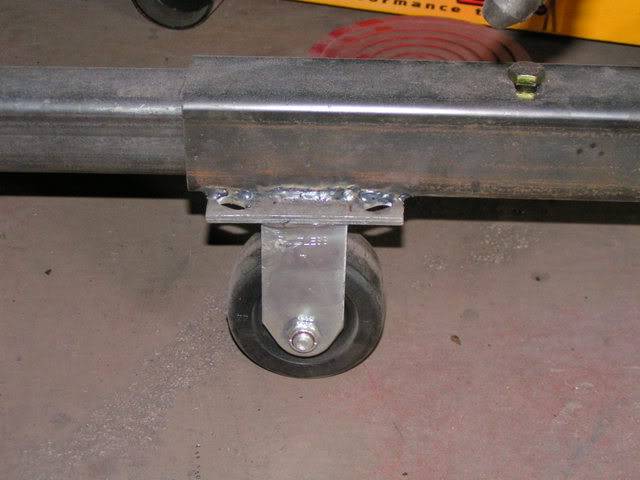
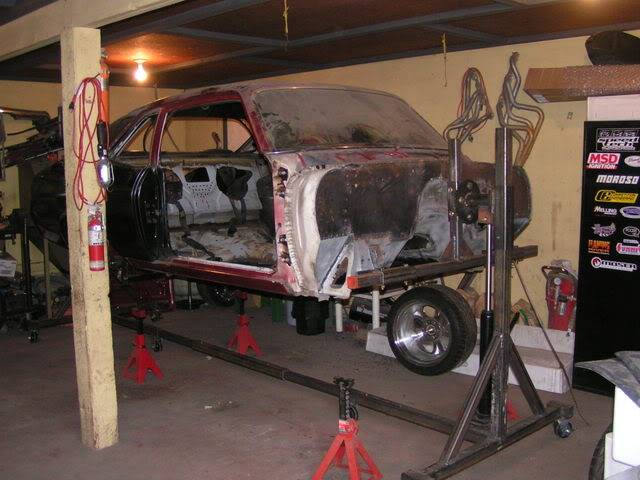
Here's the basic design of the rotisserie. In the end, I made some changes, but this is the main structure. All the main tubing is 2 1/2" square tubing. The gussets that connect the bottom frame to the post going up are 2". The square tube around the post going up is 3" seamless. The post going up is five feet high and the two lengths on the bottom frame are four feet long each. I used a 4" castors. The 2 castors in the middle do not swivel or have brakes where all the others do.
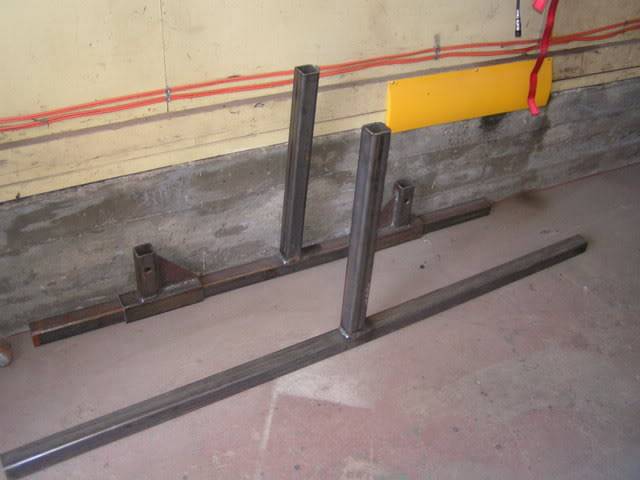
These are the parts where all the adjustments can be made. For the ease of this thread, I'll just call these T-bars. They are made of 2" tubing. The one in the front was eventually cut to the same length as the back one - 5 feet. The piece coming up is 2 feet long. I eventually put gussets on these to support them also. You might not have to put as many gussets as I did, but I figured better be safer than sorry.
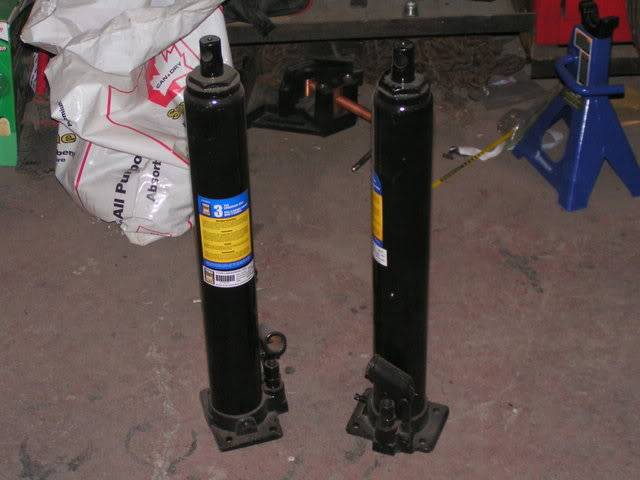
These are the bottle jacks I used to lift the car. I got them from Princess Auto for $40 each.
Here's a close up of where the one piece bolts to the car and how it attachs to the base of the rotisserie.
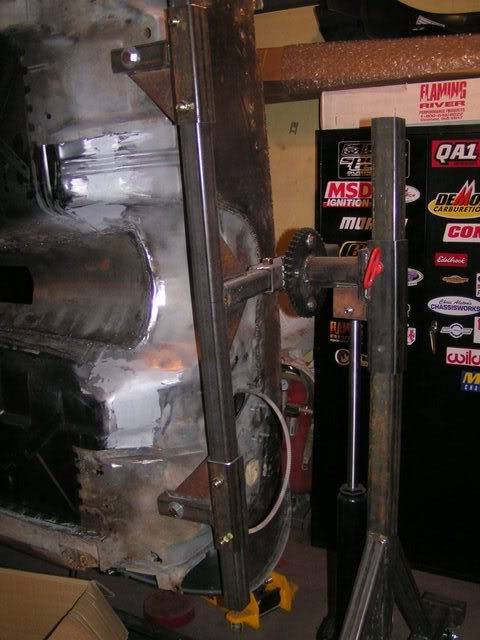
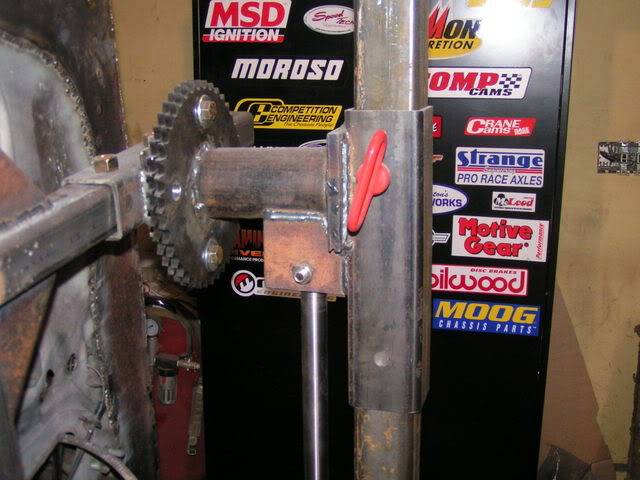
For this part, I used round tubing. The round tube that you can see is 3". Inside the 3" tube is a piece of 2 1/2" tube. I welded it to the 3" piece of seamless tube and added some gussets which also were used to mount the top of the jack as you can see. I then used 8" sprockets from Princess Auto and welded one of them to the end of the 3" tube. I then drilled 4 holes in that sprocket that would allow 5/8" bolts to go through. When the bolts are not in place, the 2 1/2" piece will rotate inside the 3" piece.
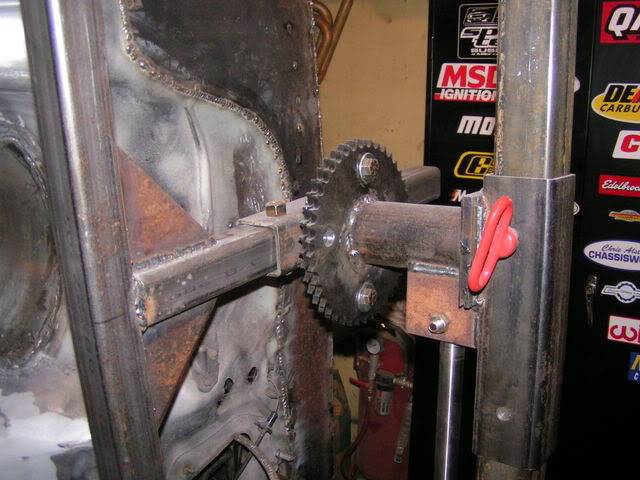
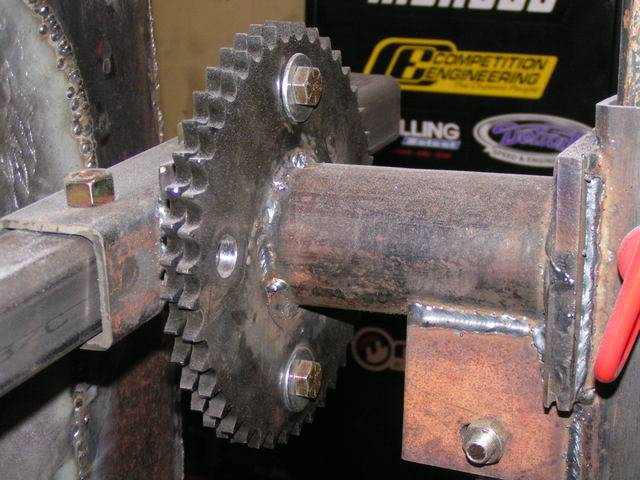
On the other side, I used 2 1/2" round tube and welded it to a piece of 2 1/2" tubing that would slide over the 2 foot part of the T-bar. I then welded the sprocket to the round tube and inserted the 2 1/2" piece into the 3" piece. I then welded on 8 nuts so that I wouldn't have to fight with them when locking into place.
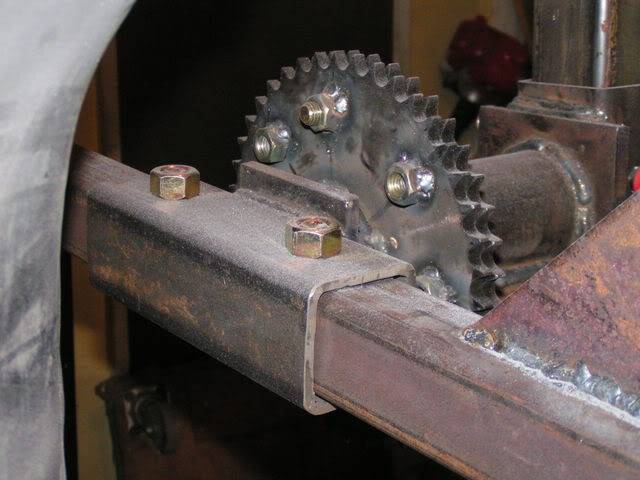
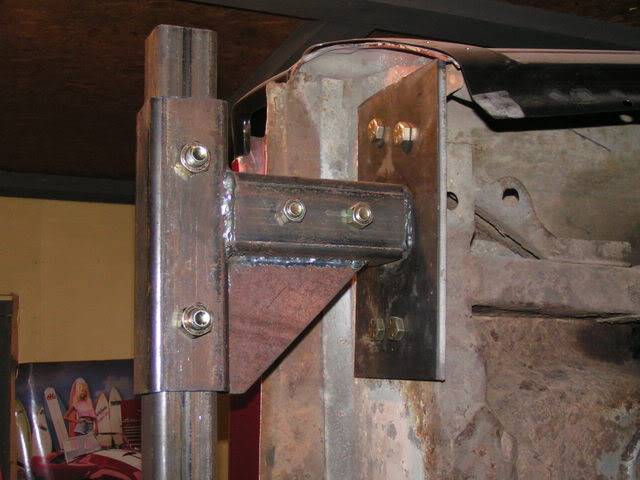
I made some pretty simple brackets to mount to the car. I used a 9" long piece of 2 1/2" tube to slide over the T-bar. I then welded a 6" piece of 2" 90 degrees to the other piece and put in some gussets. I drilled a 5/8" hole so I could use the body mount holes and bolts. The nice thing about this is the brackets will slide along the T-bar for easy adjusment to fit any car. All you need to do is figure out where it needs to go, drill some holes and bolt it into place.
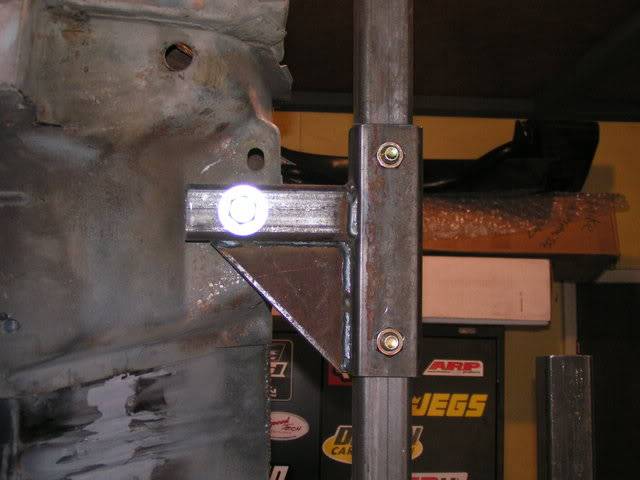
For the back, I mounted it to the bumper mount. I used the same design as the front, except I used 2 1/2" tube for both pieces. This way I could weld a piece of 2" to a steel plate with some holes in it and attach it to the bumper mounts. Again this is so I can use it on any car. This picture actually has three seperate parts that come apart.
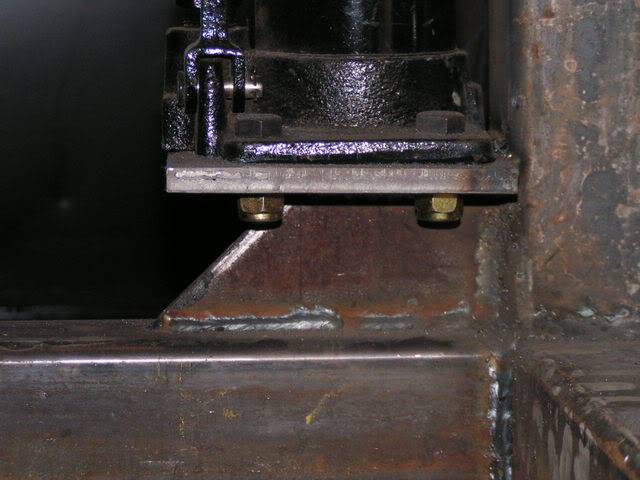
As for mounting the jacks, I put a gusset in place, cut the top off it and then welded on another flat piece of steel. I drilled 4 holes in the piece of steel and then bolted the jack on. This way if the jack goes on me, I can easily replace it. This is where the 5 foot piece on the base meets the bottom parts. There's also a picture of where the jack mounts to the top.
-
10-07-2008 #2
Registered User
- Join Date
- Dec 2007
- Location
- British Columbia, Canada
- Posts
- 723
I welded all the castors into place. I was going to bolt them on, but decided to weld them.
Here's a bunch of pics with the car on the rotisserie.
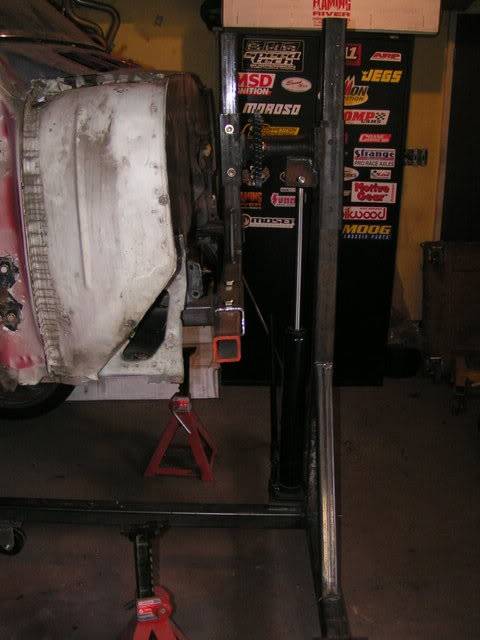
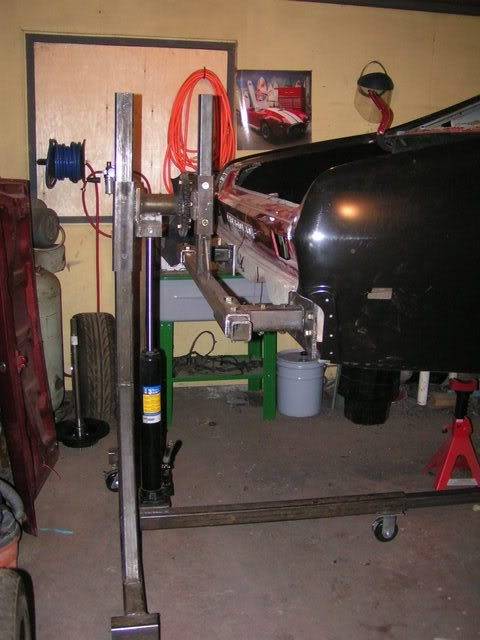
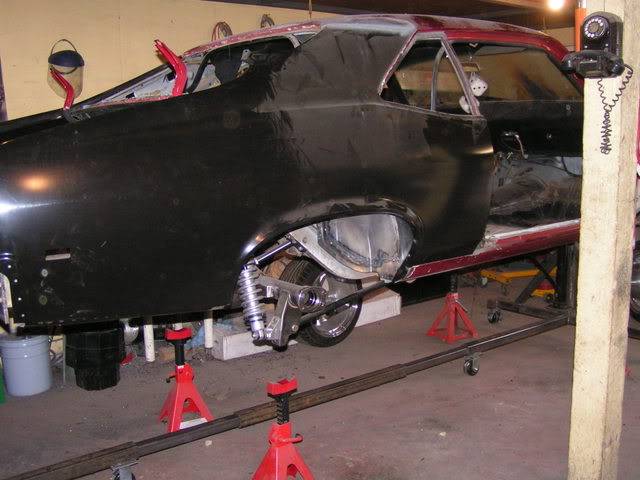
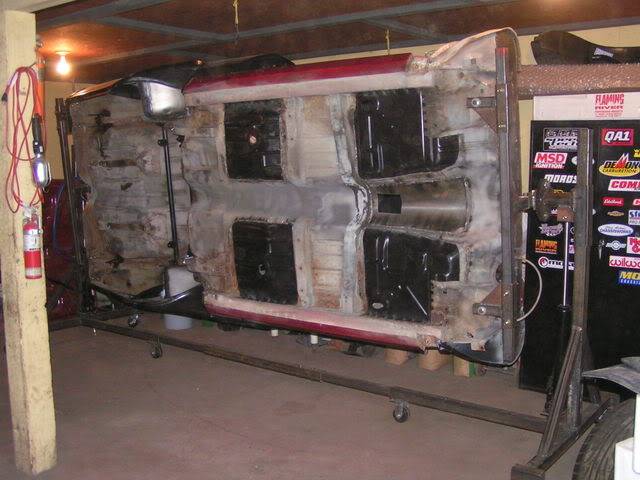
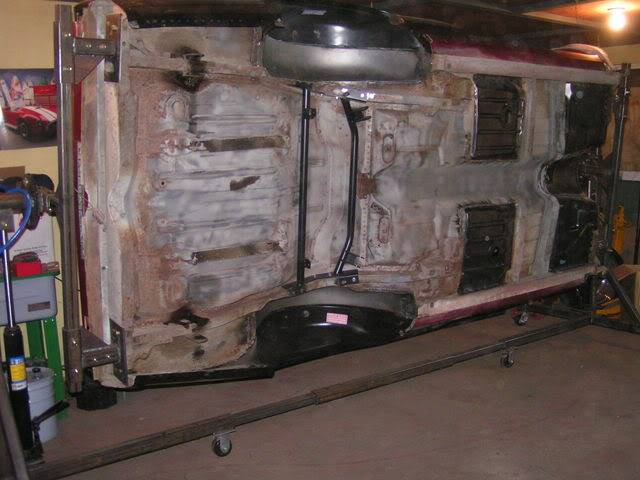
If any of you have any questions, feel free to ask or pm me. Unfortunately I won't be able to take any more pics of some of the pieces taken apart until I'm done with it. Hope this all makes sense and helps some of you that are wanting to build a rotisserie.
10-07-2008 #3 Registered User
- Join Date
- Mar 2005
- Location
- NY
- Posts
- 1,097
Nice design, and good fabricating. But, one question. Have you tried to move the rotisserie with a car on it? The fixed casters in the middle might give you a problem when you try to turn it.
The needs of the many outweigh the needs of the few.
10-07-2008 #4
Registered User
- Join Date
- Dec 2007
- Location
- British Columbia, Canada
- Posts
- 723
Yeah I have moved it around a little, mostly in the opposite direction that the fixed castors are facing and I didn't any issues at all. The only reason that I put two fixed castors is I wanted some type of control on it. I didn't want 6 swivel castors that may try and take it in any direction and fight me when I'm trying to move it. So far so good though.
10-07-2008 #5
Registered User
- Join Date
- Mar 2005
- Location
- NY
- Posts
- 1,097
Gotcha!
The needs of the many outweigh the needs of the few.
10-07-2008 #6 Registered User
- Join Date
- Aug 2007
- Location
- Jonesboro, Arkansas
- Posts
- 2,506

Not nit picking or anything. Just a suggestion, but have you thought about putting a safety device on the upright that the jack moves up and down? This could be as simple as drilling a 1/2" hole in the upright and putting a grade 8 bolt in it. This would stop the car from hitting the floor in the unlikelyhood of the seal in the jacks blowing. you know the ounce of prevention and pound of cure thing...This is just my 2 cents worth anyway...
10-07-2008 #7
Registered User
- Join Date
- Dec 2007
- Location
- British Columbia, Canada
- Posts
- 723
Good point and already thought of that. I was going to use two grade 8 bolts but got tired of drilling holes so I drilled one 11/16" inch hole and have a 5/8" pin that goes into place. You can see it in this pic. It's the red handle. It just wasn't showing in the pics with the car in the air as I didn't have it set in place yet. You can also see a second hole near the bottom to add a second pin or bolt if I want to take all the pressure off the jack which I may end up doing depending on how long the car's on the rotisserie.
10-08-2008 #8 Registered User
- Join Date
- Apr 2005
- Location
- dayton, oh
- Posts
- 952
do you have an idea of how much all the materials cost?
nice work. just needs a coat o' paint. :
:
10-08-2008 #9
Registered User
- Join Date
- Dec 2007
- Location
- British Columbia, Canada
- Posts
- 723
I'm not sure what steel prices are like in the US, but I know in Canada they are stupid high. I went with all grade 8 bolts and really good castors, I think for everything it cost me around $600 - $650. For me to have one shipped, it would have cost me close to $2000 to get the auto twiller so it still saved me a ton of money. I also went overkill with some of the stuff just to be safe. You could likely do it cheaper.
10-13-2008 #10 Registered User
- Join Date
- Aug 2007
- Posts
- 156
Hi I am designing a Rot for my car and I am basicly using the same size tubing you are but I was wondering what thickness you are useing. I was thinking of using 1/8" wall would be good.
10-24-2008 #11
Registered User
- Join Date
- Dec 2007
- Location
- British Columbia, Canada
- Posts
- 723
I used 1/8" for most of it. Some of the places I used 3/16", but 1/8" will be plenty strong.
10-24-2008 #12
Registered User
- Join Date
- Sep 2007
- Location
- Two Rivers, Wi.
- Posts
- 95
Heres another home made one.
http://www.1969supersport.com/roto.html
The way to test them is to sandblast the floors and firewall on a body, the weight of the sand will let you know how well its built.
Rob"There are questions to be answered, and answers to be questioned"
Jigs, sandblasting, shop, paintroom, rotisserie, pictures, little bit of everything.
http://www.1969supersport.com
12-08-2008 #13
Registered User
- Join Date
- Feb 2008
- Location
- Detroit
- Posts
- 206
I picked up plans off of E-Bay, they are very complete with full details and a material list:
http://cgi.ebay.com/ebaymotors/ws/eB...m=250315496505
12-19-2008 #14 Registered User
- Join Date
- Mar 2006
- Location
- California City Ca.
- Posts
- 398
what is the purpose of the sprockets? i didnt see anything used to rotate them, coulda missed it thou let my specs at work
Dale Hayes
87 turbo t
turbonetics t60, pet stock location intercooler, ride tech coilovers, rjc exhaust, 60lb injectors with tt chip, ported heads and intake, ported tb, baer brakes, roh 17 inch wheels....now need to finish paint and get it put back together.
12-25-2008 #15
Registered User
- Join Date
- Dec 2007
- Location
- British Columbia, Canada
- Posts
- 723
It doesn't have to be sprockets. I was just in a store one day and found them and thought it would be easier than buying steel and cutting out circles. With the bolts, they help keep the car in place whereever I want to put it: upside down, rightside up, sideways, etc. The bolts also help the two sprockets from coming apart, although there is about 6" of 2 1/2" steel inside the 3" round piece so it would have to come apart quite a bit.
01-22-2009 #16
Registered User
- Join Date
- Sep 2004
- Location
- Near Dayton, OH
- Posts
- 547
Looks really nice. I thought about making my own as well but didn't need another project on top of the car project. Seems like I have a habit of making tools to help with my car build and they end up taking longer to complete than expect which put the car even further behind. :(
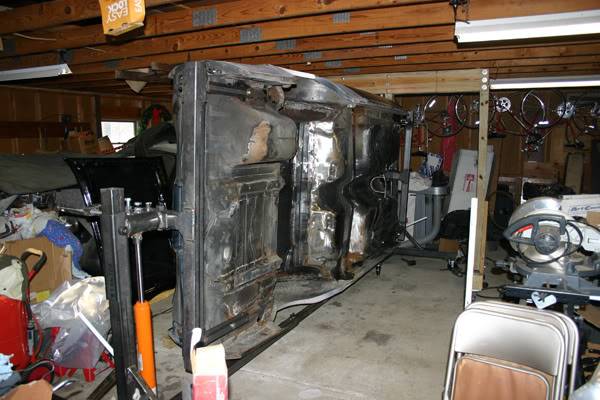
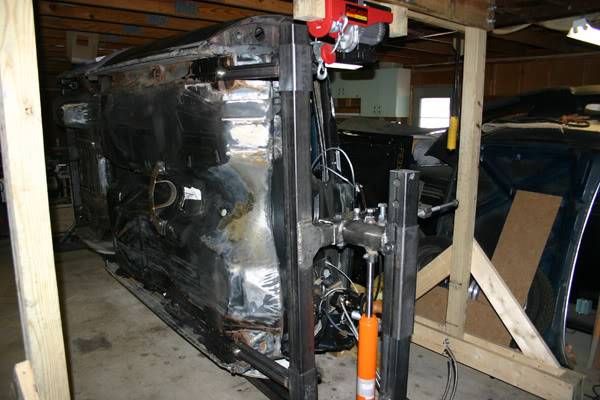
I just picked up a rotisserie from a guy on Ebay that goes by xfc-distrubuting. Total cost was a little over $800 and its been great so far. I had originally priced the steel if I was going to build my own and it was over $1000. :( But this one works pretty well so far:
 Andrew
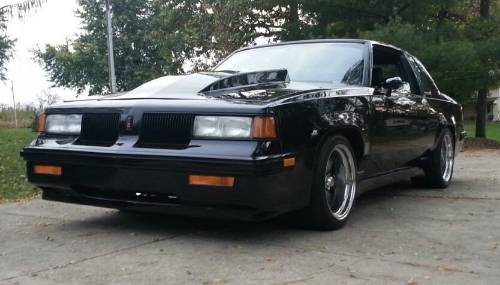
1987 Olds Cutlass Supreme FE3X Clone
EFI455/T56/9" w/ 4.30 gears
__________________________________________________ __


 Reply With Quote


