

Results 1 to 20 of 84
Thread: Project Obsession
-
10-02-2012 #1

 Registered User
- Join Date
- Oct 2012
- Location
- British Columbia
- Posts
- 614

Project Obsession
This all started for me when I found this site and I was looking for some direction on how I could flatten the firewall and jazz up the build on my Camaro. I already had an idea of what I wanted out of this car but once I saw what some of you guys are building and the fact that some of you guys are doing these build right in your own garage I thought, "what the hell I can do it too".
I've decided to call this project Obsession because when I looked up the definition it fit exactly how I feel about this build. The definition is "the domination of one's thoughts or feelings by a persistent idea, image, desire, etc." and since starting to use this site and think about what I am going to do with this build it is on my mind 24/7 and keeps me awake at night thinking how I can proceed and what I should do next.
So here is a few pics and a "re-do" of what I had in my previous thread;
I bought a '67 camaro right in the middle of building a V8 S-10.
The engine is already built and ready to go;
355 SBC
10.8:1 compression
Steel crank, Eagle rods, forged pistons all balanced
Edelbrock RPM Performer heads
Crane roller rockers, chrome molley P/rods
Voodoo Solid roller cam
Stealth Ram MPI fuel injection
Mated to this is a is a TKO600 trans to a 12 bolt rear diff.
I've started collecting parts and pieces for the car like a complete TCI front clip set-up
I've started dismantling the car and getting ready to flatten the firewall. The whole reason I came accross this website;
I've stripped down the firewall and get ready start some welding;
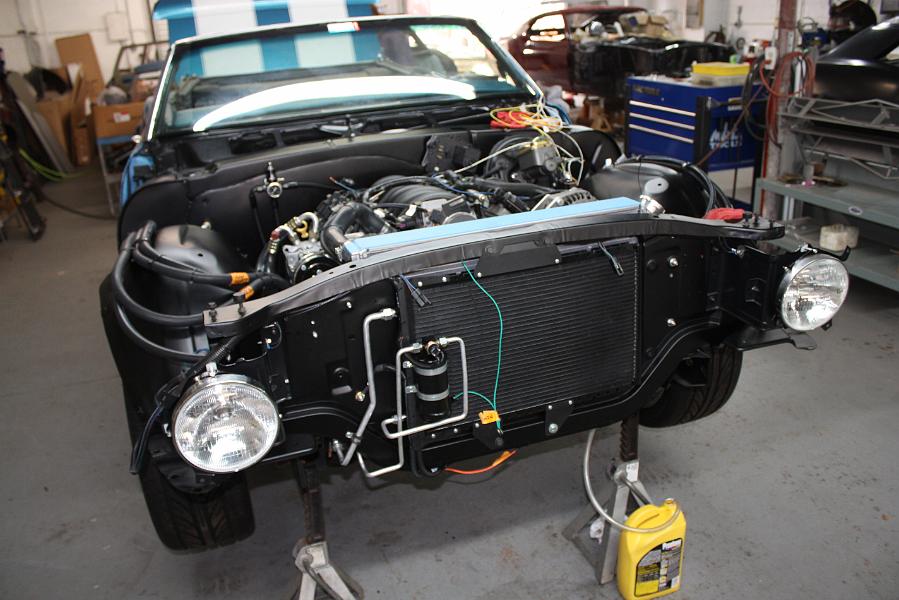
Time to test fit the TCI front clip and make sure it lines up before it goes out for powder coating;
Last edited by Todd in Vancouver; 04-19-2014 at 09:22 PM.
Todd
'14 ZL1, 6 speed and 6.2L of Super Charged Awesome!
'67 Camaro SS in process. A long, slow, expensive trip...
How hard can it be...
Project Obsession
https://www.pro-touring.com/showthre...ject-Obsession
-
10-02-2012 #2
Registered User
- Join Date
- Oct 2012
- Location
- British Columbia
- Posts
- 614
The first thread was a re-do to where I was on the earlier thread. Today I picked up a few tools I needed to proceed with Project Obsession.
A few basic hand tools that I somehow have managed without my whole life;
and, the piece de resistance I have seen numerous times so fanally brokedown and bought a rotisserie;
I finally start cutting out the firewall making the next step to start welding in new metal;
Todd
'14 ZL1, 6 speed and 6.2L of Super Charged Awesome!
'67 Camaro SS in process. A long, slow, expensive trip...
How hard can it be...
Project Obsession
https://www.pro-touring.com/showthre...ject-Obsession
10-03-2012 #3 Registered User
- Join Date
- Dec 2007
- Location
- British Columbia, Canada
- Posts
- 723
Looking good Todd...keep the pics coming.
10-03-2012 #4 Registered User
- Join Date
- Aug 2004
- Location
- Burnaby, BC, Canada
- Posts
- 1,388
Looking good, from another local guy.
1969 CAMARO RS
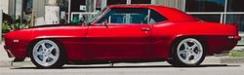
2002 LS1-T56 Dyno results: 452 rwhp, 425 rwtq
Project pics of my '69
Lateral-G Feature Page
Camaro Performers Magazine Feature
10-04-2012 #5
Registered User
- Join Date
- Oct 2012
- Location
- British Columbia
- Posts
- 614
Nice ride it looks really awesome. Maybe we need to have a BC get together of the locals and talk some car stuff. I'm in Burnably weekly for work and I'd love to pick you brain on your build as I am just getting started. Originally Posted by Rybar
 Todd
Todd
'14 ZL1, 6 speed and 6.2L of Super Charged Awesome!
'67 Camaro SS in process. A long, slow, expensive trip...
How hard can it be...
Project Obsession
https://www.pro-touring.com/showthre...ject-Obsession
10-04-2012 #6
Registered User
- Join Date
- Aug 2004
- Location
- Burnaby, BC, Canada
- Posts
- 1,388
I actually did organize a few cruises this past summer. Shoot me your contact info. - Ryan Originally Posted by Todd in Vancouver
1969 CAMARO RS
2002 LS1-T56 Dyno results: 452 rwhp, 425 rwtq
Project pics of my '69
Lateral-G Feature Page
Camaro Performers Magazine Feature
10-04-2012 #7 Registered User
- Join Date
- Mar 2004
- Location
- Mid-Michigan
- Posts
- 2,764

Nice job. I'm glad to see the site inspired you. I think that is very cool. What do you have planned for the rest of the build?
I was in Vancouver for a week last year visiting my son. He got his Masters @ UBC and is now working out there. Doesn't plan to move back to the States any time soon.
MarkMark:
"Bad Ast" Astro Van. Just because I did it... Doesn't mean it's possible...
This my Bad Ast thread...
https://www.pro-touring.com/showthre...roject-Faze-II
This is my Fotki album...
http://astroracer.fotki.com/
10-04-2012 #8
Registered User
- Join Date
- Oct 2012
- Location
- British Columbia
- Posts
- 614
Thanks Mark my goal in the end is to have a car that at first look will appear to be a stock '67 SS with different wheels on it. But I plan on lots of subtle changes and that the car drives and handles with all the comforts of a new car. I basically want my cake and to eat it too. UBC is an awesome school and glad your son was able to find work here because Vancouver is a great place to be. Unless you are trying to buy a house. Originally Posted by astroracer
PM sent and please do let me know next time you are arrranging anything Originally Posted by Rybar
Thanks for the feedback and it's nice to hear from some other locals. That Camaro of yours is killer and I would love to see it sometime. Originally Posted by Rybar
Thanks and I really appreciate the comments and it is amazing how motivating they are. Also have to say I really like your Acadian build and I keep referencing it as I go along on my build. Originally Posted by scherp69
So I continue my quest to flatten the firewall so I picked up some 18 gauge to start making my own template and weld in piece.
After looking at a bunch of other builds on Pro-Tour I took the jig saw to my firewall and swiss cheesed it.
Starting with some cardboard I built a template for the tin so it would match the firewall how I wanted it
Traced out the cardboard template onto the tin
Voilà I have a rough metal firewall layout
A little trimming to get it to fit how I wanted and drilled a couple holes for the fender mount bolts and it is ready to weld in
Family coming for the Thanksgiving weekend so all comes to a grinding halt for a bit, pun intended. Next week I will get the fasteners into the new firewall tin, do a little custom bending where the tin meets the bottom of the firewall where it bends and then start welding. Todd
Todd
'14 ZL1, 6 speed and 6.2L of Super Charged Awesome!
'67 Camaro SS in process. A long, slow, expensive trip...
How hard can it be...
Project Obsession
https://www.pro-touring.com/showthre...ject-Obsession
10-10-2012 #9
Registered User
- Join Date
- Oct 2012
- Location
- British Columbia
- Posts
- 614
The firewall is ready to be installed and it's time to start welding it in. As I haven't done any welding in a long time I thought it best to take some of the sheet metal cut offs and do some practice welds before I start on the car.
Once I was warmed up I started small stitch welds around the new firewall;
I am looking at purchasing a used Vintage Air set up from another member here on Pro-Touring. What I am not sure of is how it connects into the factory heater controls and how other builds have managed to hide the underhood connections while having a flattened firewall in the engine compartment? Anyone have pictures on how they did this or a link to some websites showing this? Thanks in advance Todd
Todd
'14 ZL1, 6 speed and 6.2L of Super Charged Awesome!
'67 Camaro SS in process. A long, slow, expensive trip...
How hard can it be...
Project Obsession
https://www.pro-touring.com/showthre...ject-Obsession
10-14-2012 #10
Registered User
- Join Date
- Oct 2012
- Location
- British Columbia
- Posts
- 614
Over the weekend did some more welding on the firewall. As someone else stated on their build this is great practice for the parts that are more obvious.[/SIZE]
Started laying on the mud
Next step is to shoot some primer after a couple more rounds to straighten out the sheetmetal and then one more test fit of the TCI front frame before it goes out for powder coating.Todd
'14 ZL1, 6 speed and 6.2L of Super Charged Awesome!
'67 Camaro SS in process. A long, slow, expensive trip...
How hard can it be...
Project Obsession
https://www.pro-touring.com/showthre...ject-Obsession
10-16-2012 #11
Registered User
- Join Date
- Oct 2012
- Location
- British Columbia
- Posts
- 614
Milestone
Today I hit a bit of a milestone in my build. The firewall is nearing completion and the TCI front end did it's final test fit before it goes out for powder coating. I wanted to get the firewall near completion and do one more test fit to make sure nothing has shifted during all the welding that I did on the firewall. To my surprise nothing has moved and the TCI frame fit and was in place in just moments once I got the procedure right in putting the bolts through the frame into the car.
After my last sanding I am overall pretty happy with how flat it looks.
Here the TCI front is going in
HINT : When installing the new TCI frame start with the rear bolts under the seats and move forward
This is the best stuff I've ever come accross and all the in body nuts got a good dose of Gibbs before I put the frame in. I used this stuff when I took the everything apart and didn't break a single bolt. Amazing stuff.
The final holes will get drilled and secured when the frame goes in for the last time as I still have a bit of finishing work to do. I am amazed how well put together this TCI front frame is. Someday I will weld this well.
Little more sanding to do when I take the frame out and send it off then I'll shoot some primer on it.Todd
'14 ZL1, 6 speed and 6.2L of Super Charged Awesome!
'67 Camaro SS in process. A long, slow, expensive trip...
How hard can it be...
Project Obsession
https://www.pro-touring.com/showthre...ject-Obsession
10-16-2012 #12 Registered User
- Join Date
- Apr 2011
- Location
- mass
- Posts
- 493
looking good and glad to see you building it yourself. It is a great feeling to complete one of the things on the "LIST" of things to get done. Keep up the work and keep the pictures comming..
Paul
1966 Buick Skylark GS
Turbo 401 Buick Nailhead
Build Thread
https://www.pro-touring.com/showthre...uild&highlight=
http://s917.photobucket.com/user/66l...rbo%20nailhead
10-25-2012 #13
Registered User
- Join Date
- Oct 2012
- Location
- British Columbia
- Posts
- 614
Made some progress on the firewall and decided to shoot some primer on it. For my first time doing a firewall and doing it in my garage with a cheap-ass 120 volt MIG, over all I think it looks OK. I'm not toally happy with the crispness of the line where the firewall meets the cowl and makes the 90 degree corner. I have applied a thin layer of bondo and sanded the top and side at a 45 degree angle with a long block numerous times trying to make a clean, crisp line accross the top and although it is close when I paint it I'm afraid it will look crappy. Anyone have any thoughts on how to make this line??
Todd
'14 ZL1, 6 speed and 6.2L of Super Charged Awesome!
'67 Camaro SS in process. A long, slow, expensive trip...
How hard can it be...
Project Obsession
https://www.pro-touring.com/showthre...ject-Obsession
10-25-2012 #14 Registered User
- Join Date
- Sep 2012
- Location
- San Mateo, Ca.
- Posts
- 41
Very nice, great job! Keep up the good work! I filled and welded my openings then floated with filler...I like it better with one sheet of metal like you did. It will be nice and smooth.
10-27-2012 #15 Registered User
- Join Date
- Aug 2008
- Location
- jacksonville,fl
- Posts
- 972
Todd, just posted on the bodyfiller thread again & viewed your link. The usc all metal filler is superior for an initial coat of filler in welded/ less than perfect areas, such as the top line you want crisp. You could have to stiff wire brush back to bare metal near the needed area to use it. It's basically a fiberglass/ ground aluminum formula, requires a bare metal base , does not apply or sand as easy as some finishing product & will need a skim coat of quality filler/ glazing for a final coat.
As far as sanding &shaping the upper edge , you just have to apply extra filler to the edge, block from 1 direction, then the other keeping your sanding stick flat near the edge till you achieve a square edge. then you have to carefully remove some of the squareness, which is the most artistic part of the job. A basic paint stirring stick can be a good basic sandpaper holder if you don,t have a fancy selection of stuff. At the end of the day , your skill itself is the most important tool.
You may be just fine continuing with the filler you're using, especially if you welds are continuous & solid. It just won't be as solid in a thicker area, especially if if gets hit with a falling wrench or something,your call there.
Hope this helps you some .You can pm me if you need to.
10-28-2012 #16
Registered User
- Join Date
- Nov 2011
- Posts
- 126
good info jlcustomz!
Doug
1970 chevelle, carb'd, turbo'd 383ci with a tremec tko.
10-28-2012 #17
Registered User
- Join Date
- Oct 2012
- Location
- British Columbia
- Posts
- 614
Thanks jlcustomz for the great information Originally Posted by jlcustomz
 . I've decided to take a break from the firewall and then go at it again later on to finish it off. Here is the body stuff that I used on the car so far.
And here is the primer that I used;
My only other thought is to use a filler primer when I get close to painting it but that will not be until Spring, I also watched some YouTube videos of guys shooting some black guide coat and blocksanding to find the low spots. I am now getting the car on the rotisserie and will start working on the bottom;
Last week I sent my TCI frame to the powder coat shop and should have it back in a couple weeks. After that my 350 goes to Richmond Engine in Langley to get broken-in and Dyno tested and then I can start the assembly on the drivetrain. Updates will now start coming much more slowly as it really isn't very interesting to see me cleaning and scraping the bottom of the car. In the Spring I'll order the TCI rear suspension and hopefully get the car back into rolling status.Todd
'14 ZL1, 6 speed and 6.2L of Super Charged Awesome!
'67 Camaro SS in process. A long, slow, expensive trip...
How hard can it be...
Project Obsession
https://www.pro-touring.com/showthre...ject-Obsession
10-28-2012 #18
Registered User
- Join Date
- Aug 2008
- Location
- jacksonville,fl
- Posts
- 972
Sometimes a break from a certain item is the best thing to do.
As far as the Body supplies you have , the one part glazing putty is one item to stay away from if you're trying for quality work, ok for rush insurance type jobs , not for longterm quality show work.
Another option for rounding off most of the upper fire wall area is to make a short mostly 90 degree sanding block with the radius (approx 1/8" ) that you need. The only problem with that method is putting a line in your flat sections from the tool.
Ps, i have stick on sandpaper rolls in 80, 120, & 220 grit from the local Woodcrafters store, which is nice for certain sanding block tasks.
10-28-2012 #19 Registered User
- Join Date
- Jan 2006
- Location
- Melbourne, Fla
- Posts
- 216
Originally Posted by Todd in Vancouver
Todd,
You can use the VintageAir reroute kit. It brings all four outlets thru the firewall, then turns them 90degrees so you can route the lines under the fender....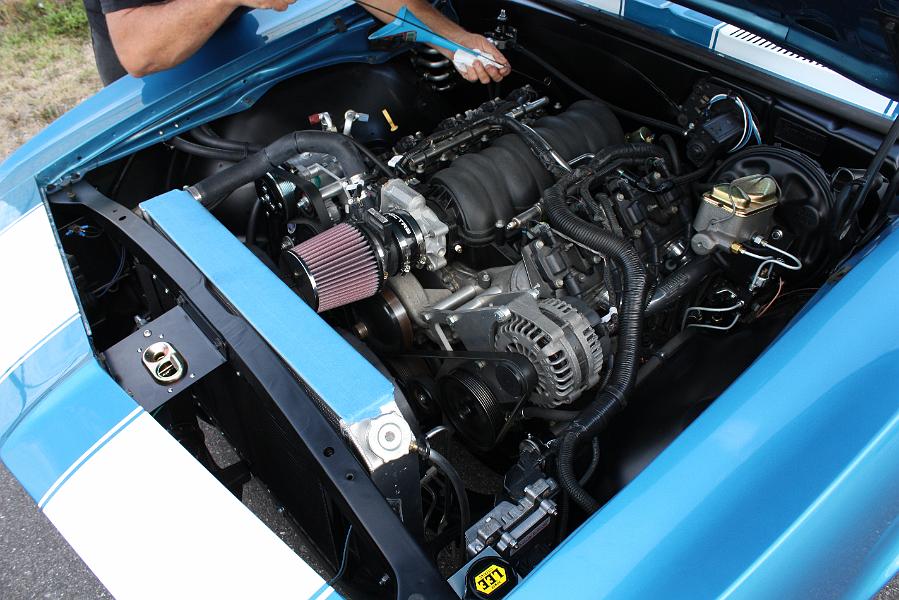
11-18-2012 #20
Registered User
- Join Date
- Oct 2012
- Location
- British Columbia
- Posts
- 614
Bit of an update. The TCI frame is back from powder coating and Kevin at Mayfair Signs and Powder Coating here in Chilliwack did an awesome job at a really reasonable price. I will be getting together some more parts to take over to him for powder coating.
I did a bit of welding and made some rear mounts for the rotisserie that bolt to the original rear spring mounts and to the original arms of the rotisserie. Hint; ALWAYS check fit before you do your final weld, I spent over an hour undoing some welds from some bad measuring.
The Camaro is now hung on the rotisserie and I've started removing the final few parts of the interior and will remove all the glass. The final cleanup on the body is getting near and then the mini-tubs and new quarter panels. I'll also start assembling the front suspension on the TCI frame and the plan will be to assemble the complete front and mount the engine and trans after the SBC gets back from the machine shop for it's break-in and dyno test. It may be coming slow but atleast I'm making progress.
Todd
'14 ZL1, 6 speed and 6.2L of Super Charged Awesome!
'67 Camaro SS in process. A long, slow, expensive trip...
How hard can it be...
Project Obsession
https://www.pro-touring.com/showthre...ject-Obsession

 Reply With Quote
 Tango Charlie


