

Results 1 to 20 of 92
Thread: Mark D's 71 Camaro TT LS2
-
09-24-2012 #1
 Registered User
- Join Date
- Oct 2007
- Location
- New Westminster, B.C., Canada
- Posts
- 88

Mark D's 71 Camaro TT LS2
I've met a bunch of guys in the Vancouver area who suggested I put my build on this board. Problem is, it's essentially allready built. Then again, they never are finished, are they?
I've cut the first post from my build thread on LS1tech.com and put it below. If you want to see how it got to where it is today, check that thread out. I'll post the current stuff and where I'm going from there in a bit.
Well, it took me a couple of years to find the car for my build. Then it took me 3 months to find a house with a garage so that we could be together! Now I am putting it together.
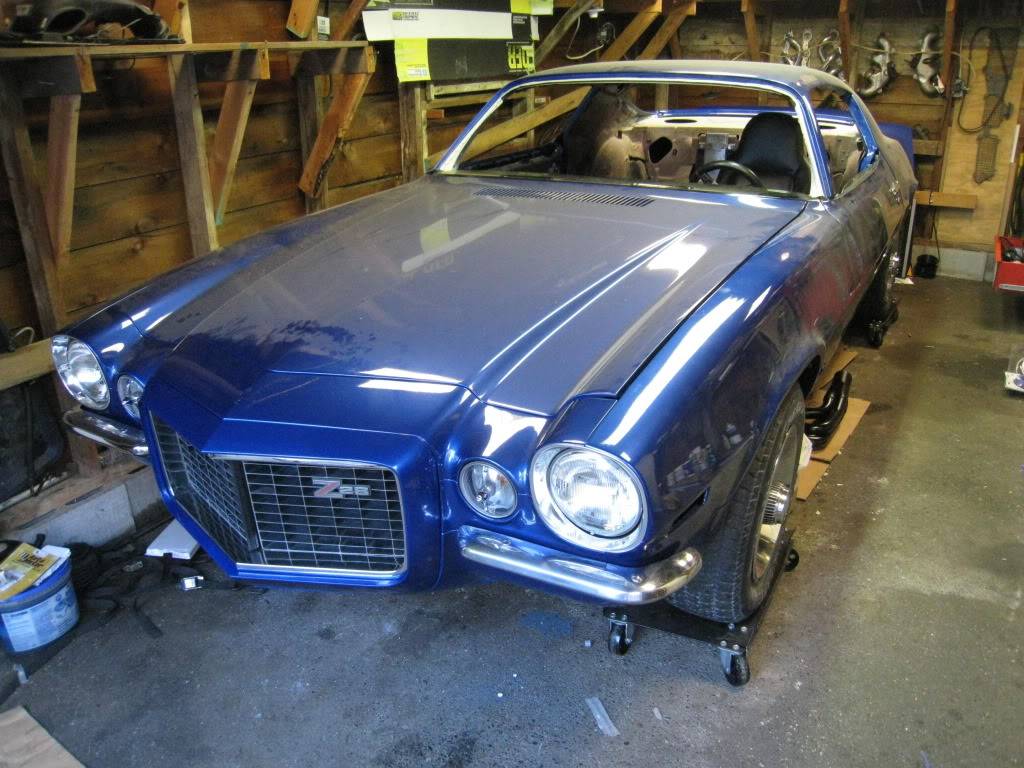
The Car: 1971 Camaro RS Z28
After bidding and missing out on numerous cars on ebay, then driving miles and miles to see 'rust free' cars that turn out to be 'metal free', I find an abandoned project on craigslist just 5 blocks from my house. The previous owner had owned it since 1977, and his brother owned it before that.
What I got with it: new 327 with a muncie m21 4 speed, all the parts to reassemble it, shy of seats. Car was completely stripped down, blasted, and reassemble with lots of new parts and powdercoating. There is no rust and I got pics of the bodywork in multiple stages to prove it...Nice.
The guy even stored the car for me for 3 months while i looked for a place to put it. Ended up moving to a new house with a garage.
So the first thing I did was pull out the 327/4speed and checked out what was inside it. Turns out the seller was very honest and it was as he said it was. NEW. So I went down to my local hotrod shop, KMS C.A.R. Parts, and did some wheeling and dealing and worked a trade for a complete LS1/6speed out of a 99 TA for my 327/4speed and a core 454/4speed auto that I had from a mid 90's pickup that I parted out.
I figured I would document the build here and I welcome any advice that any of you that have done this or something similar to it have. I will post as many pics as I can, and I am taking pics everyday that I work on it.
Stay Tuned!!!
http://ls1tech.com/forums/conversion...aro-build.html
-
09-25-2012 #2
 Registered User
- Join Date
- Apr 2001
- Location
- The Netherlands
- Posts
- 1,509

welcome, looks like it's going to be a nice car....but you can't go wrong with a 71RS ;-)
-
09-25-2012 #3
 Registered User
- Join Date
- Feb 2009
- Location
- N.J.
- Posts
- 690

Looking forward to checking out the rest of the pictures.
- Paul
70 Camaro RS Project Build
https://www.pro-touring.com/showthre...-Project-70-RS
90 Mustang GT Project Build
https://www.pro-touring.com/threads/...ang-Gt-Project
My Garage Project
http://garagejournal.com/forum/showthread.php?t=189511
-
09-26-2012 #4
Registered User
- Join Date
- Oct 2007
- Location
- New Westminster, B.C., Canada
- Posts
- 88
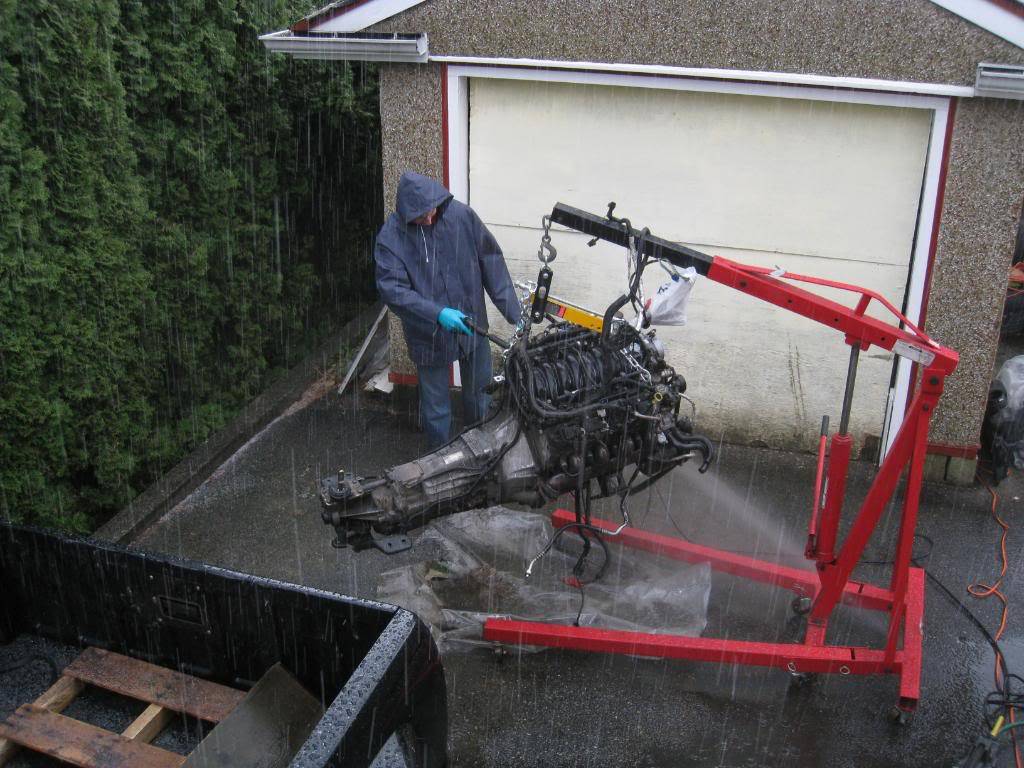
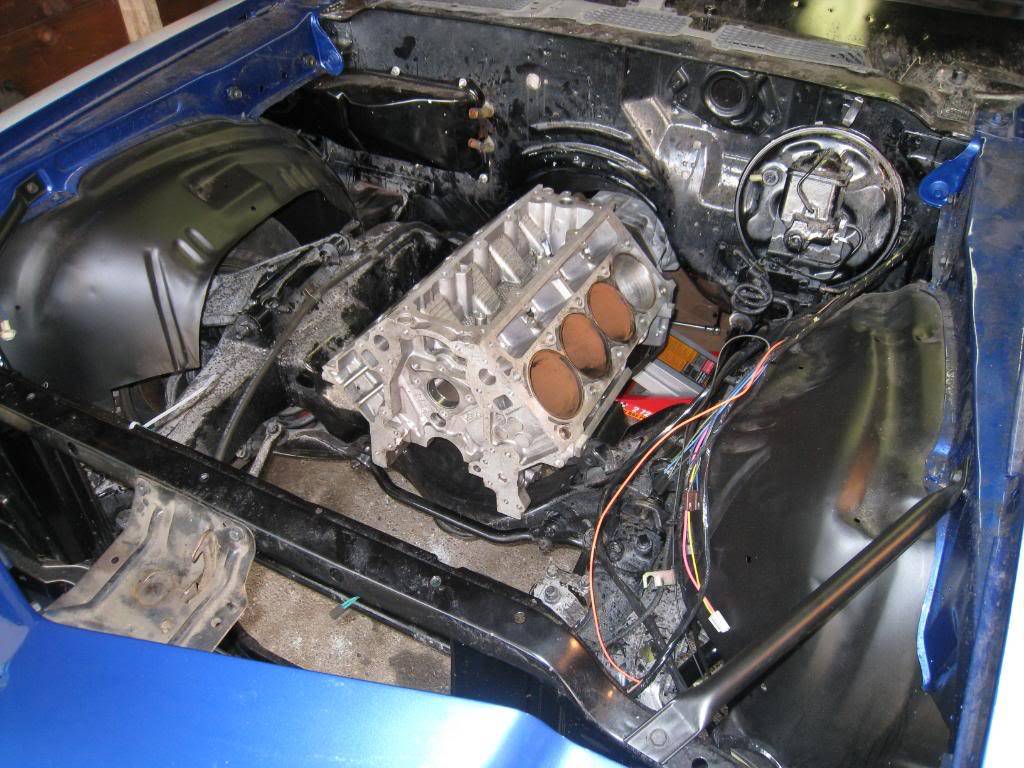
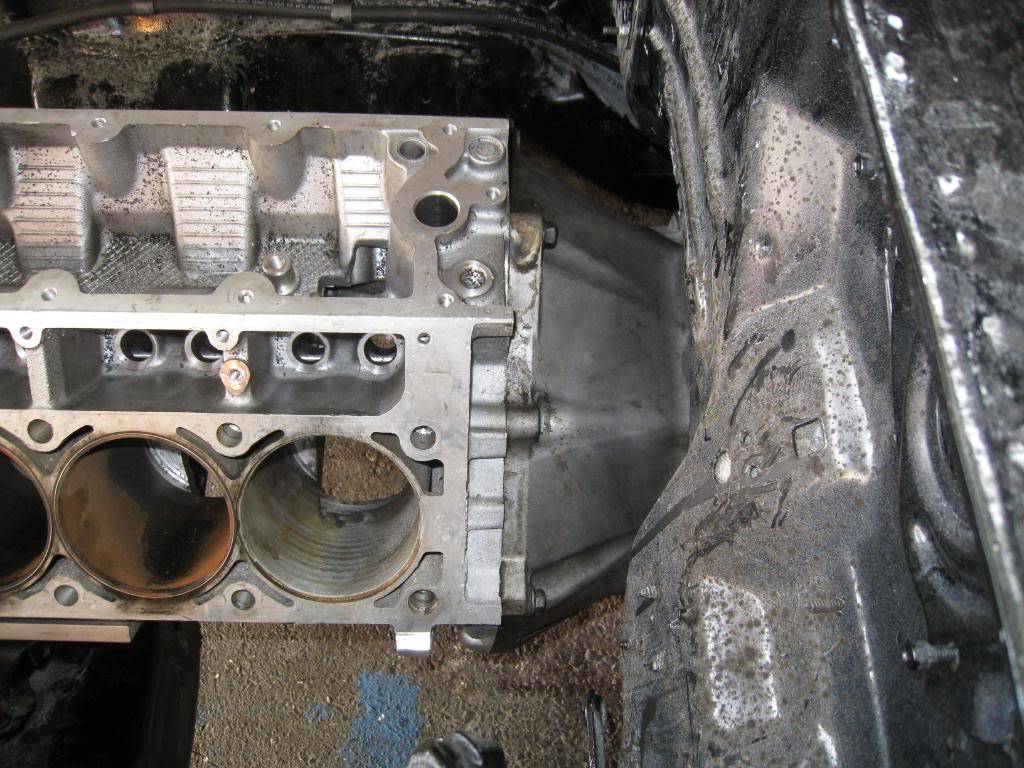
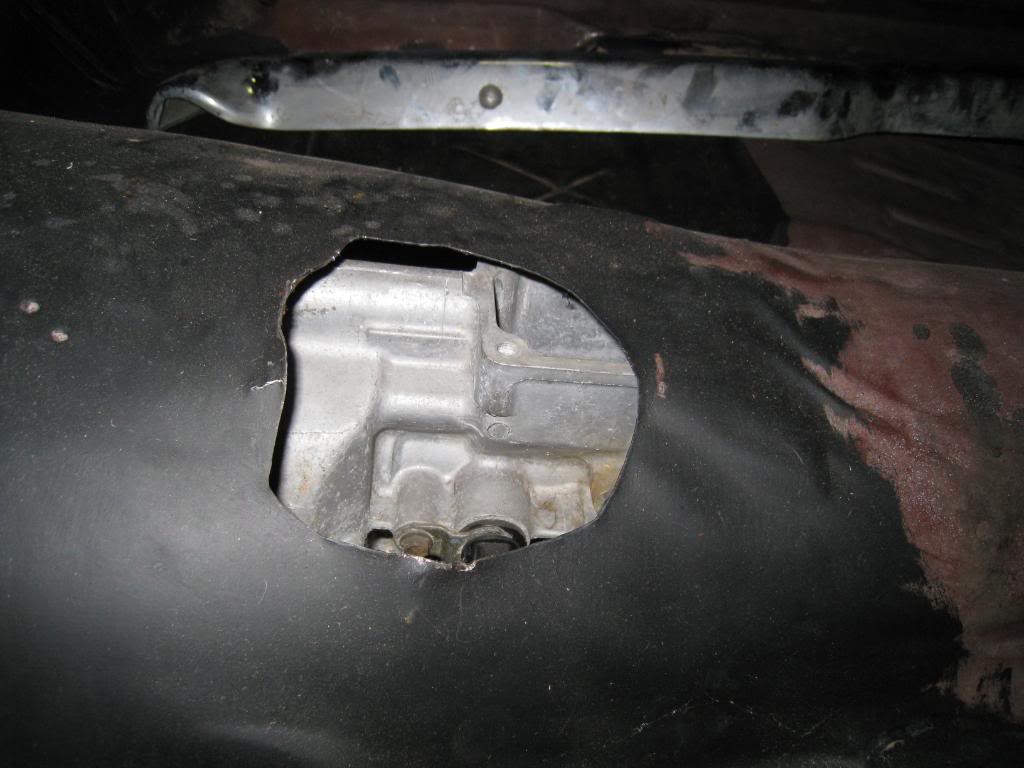
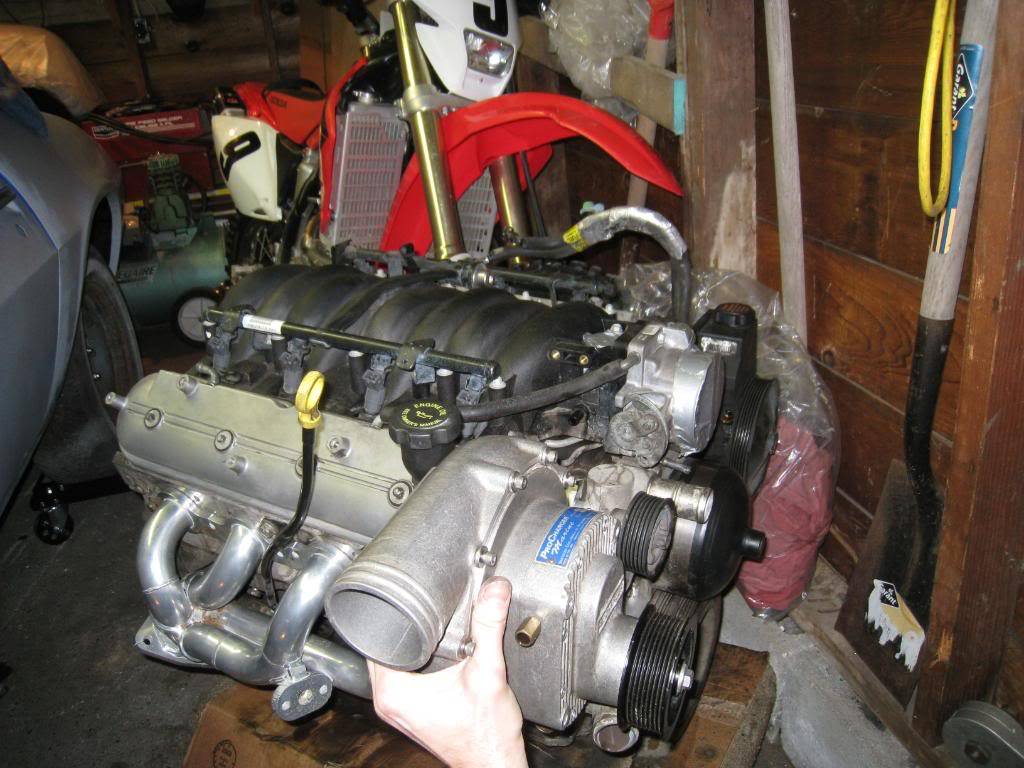
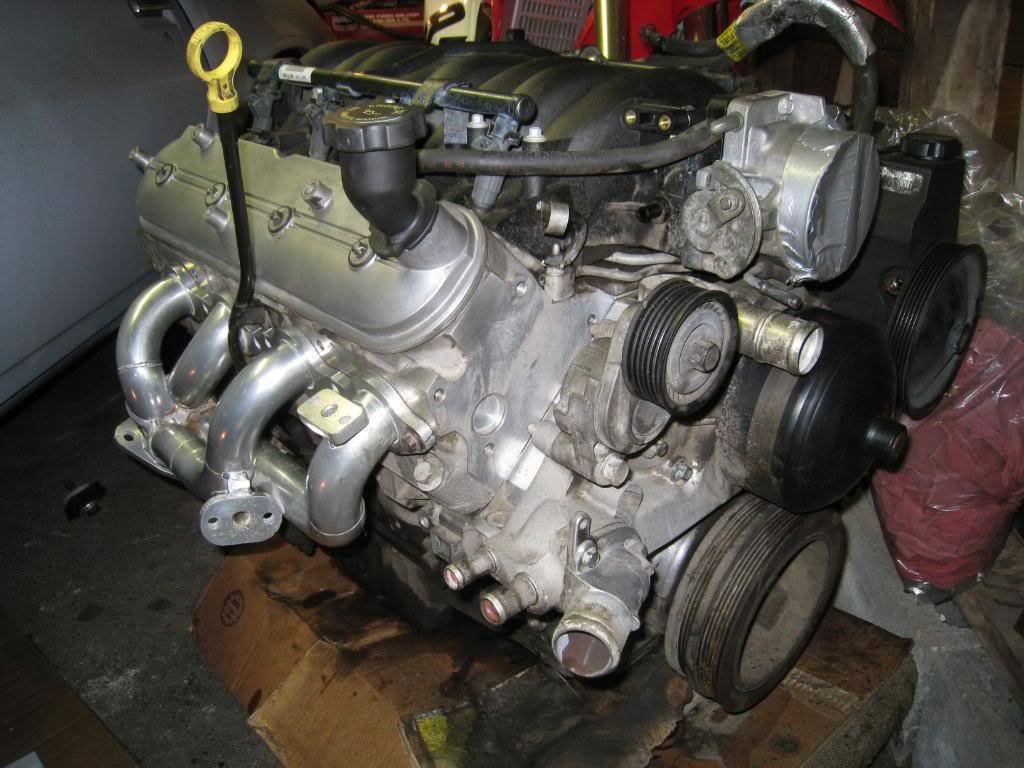
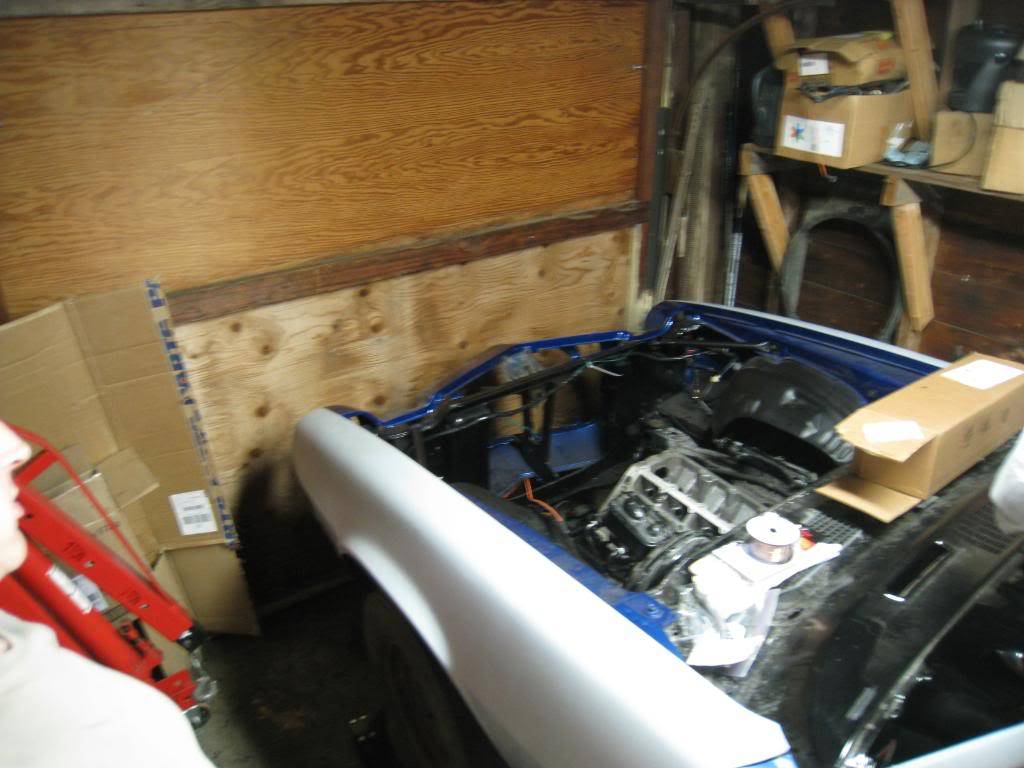
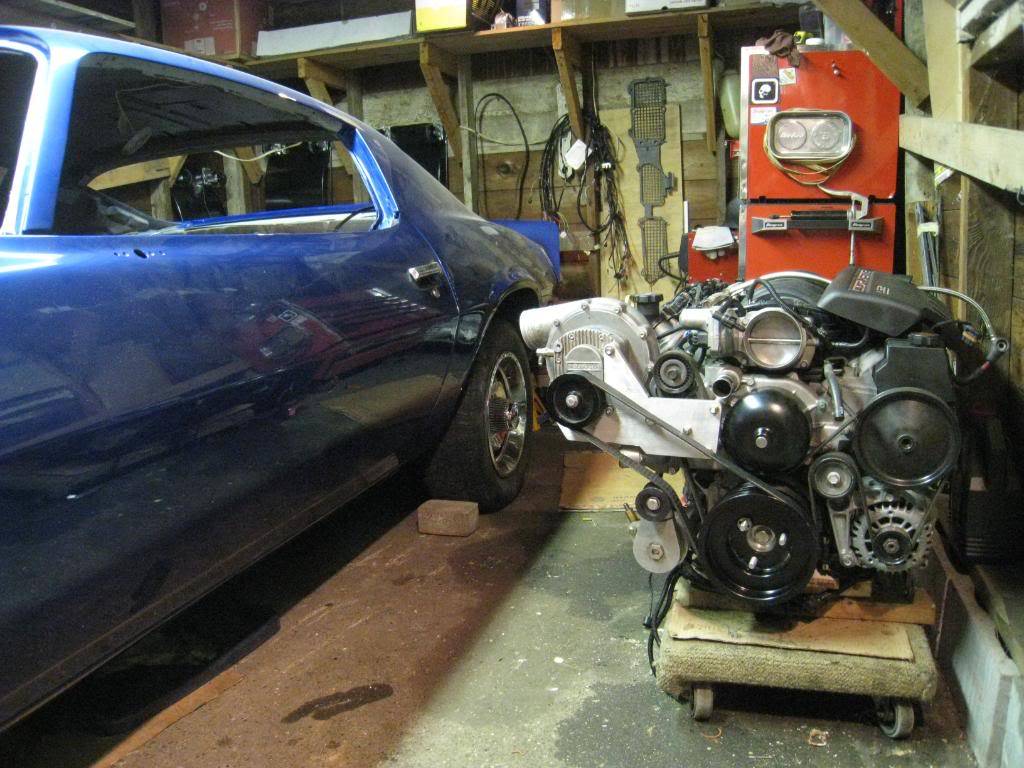
Catching up with my progress. Here's a bunch of pics... got an old LS1 block and trans housing for some mock up. I built my own motor mount plates from a blueprint off of this site, seems to work, although the hole size on the blueprints said 9/16 where they should have been 7/16. I figured that out before I drilled luckily. So here's how it sits, you can see the variance between stock 4 speed shifter hole and where the 6 speed shifter box sits. Will trim that soon. Heres a shot of the motor as it gets cleaner and cleaner. Got these shorty headers out of the local classifieds for 200 bucks, and am considering my own custom install of a Procharger that I removed from a boat I used to own. Thats it for today...

-
09-26-2012 #5
Registered User
- Join Date
- Oct 2007
- Location
- New Westminster, B.C., Canada
- Posts
- 88
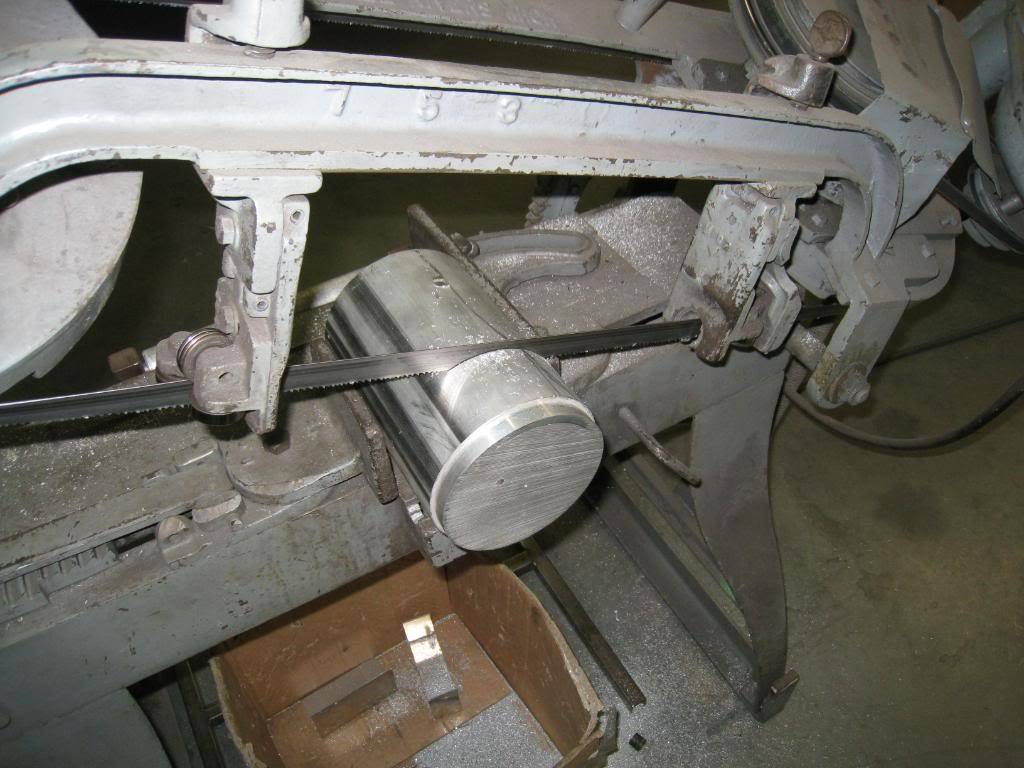
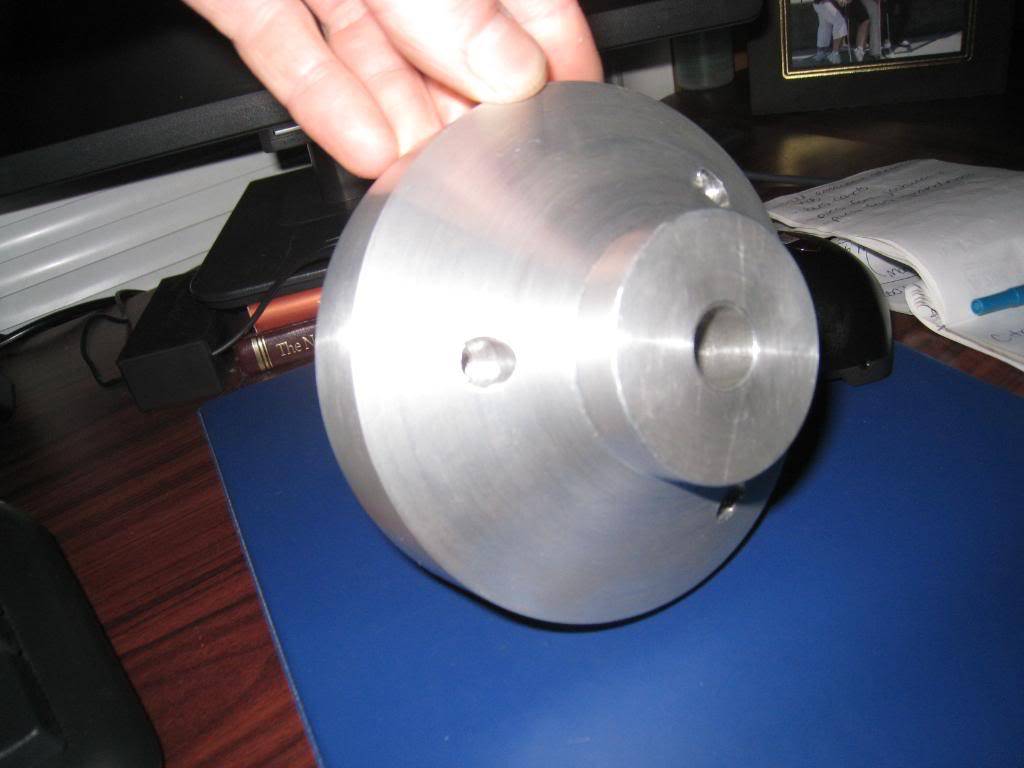
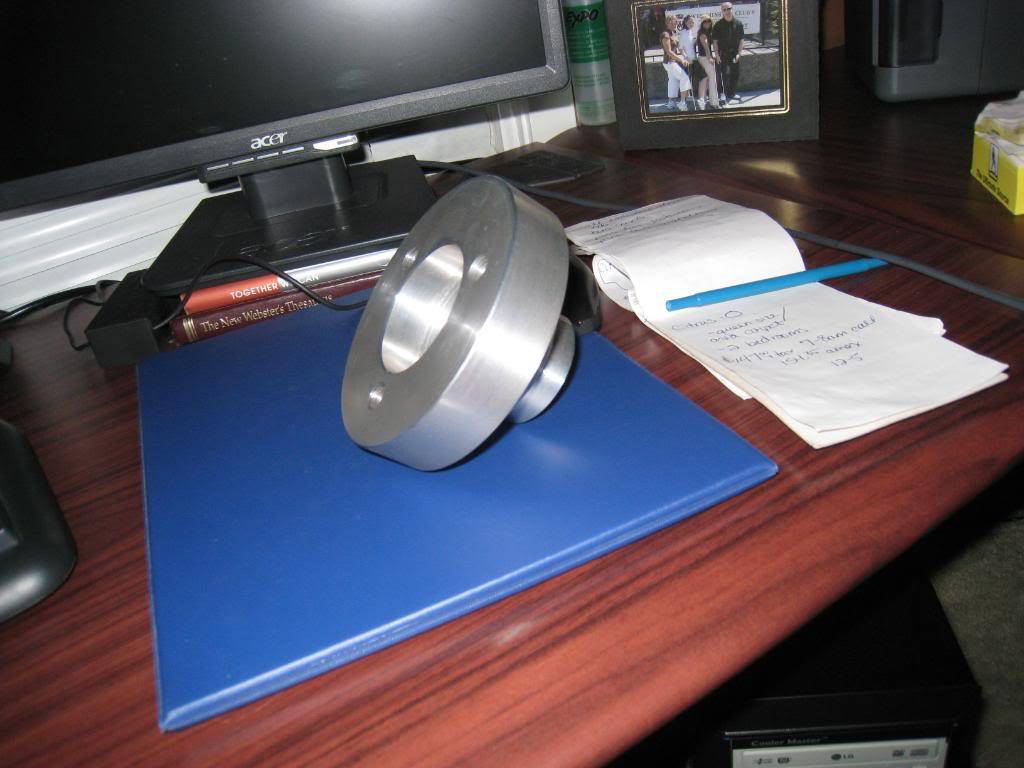
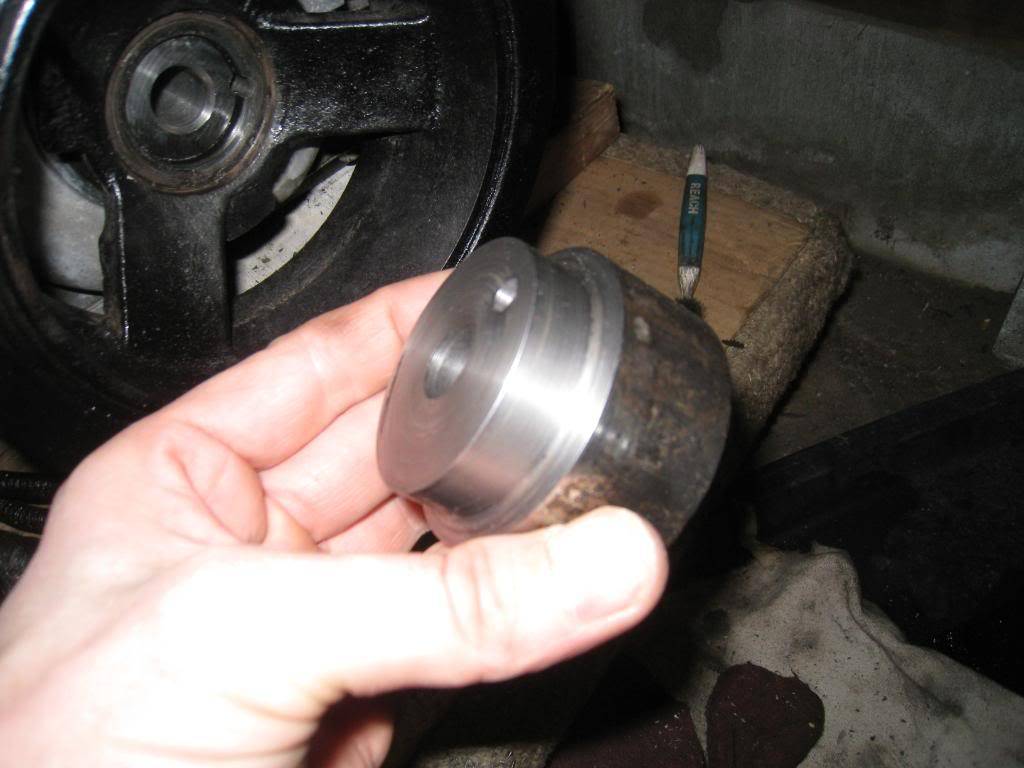
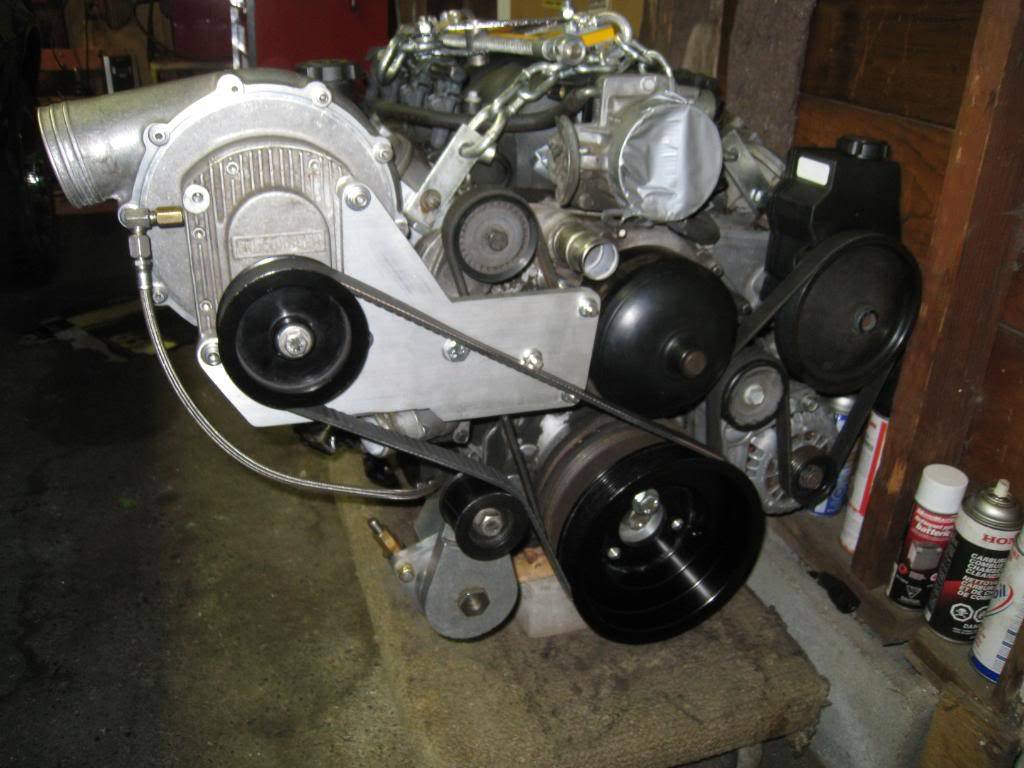
Took the day off of work and went over to a friends shop, Momentum Auto Parts, to use the lathe! Since I am doing a fully custom Procharging on this motor I have to fabricate everything. So I started with this 5 inch chunk of 6061 and made this crank pulley adapter. The plan is to mount the charger on the passenger side of the engine, just over the stock serpentine belt tensioner and a little outboard.
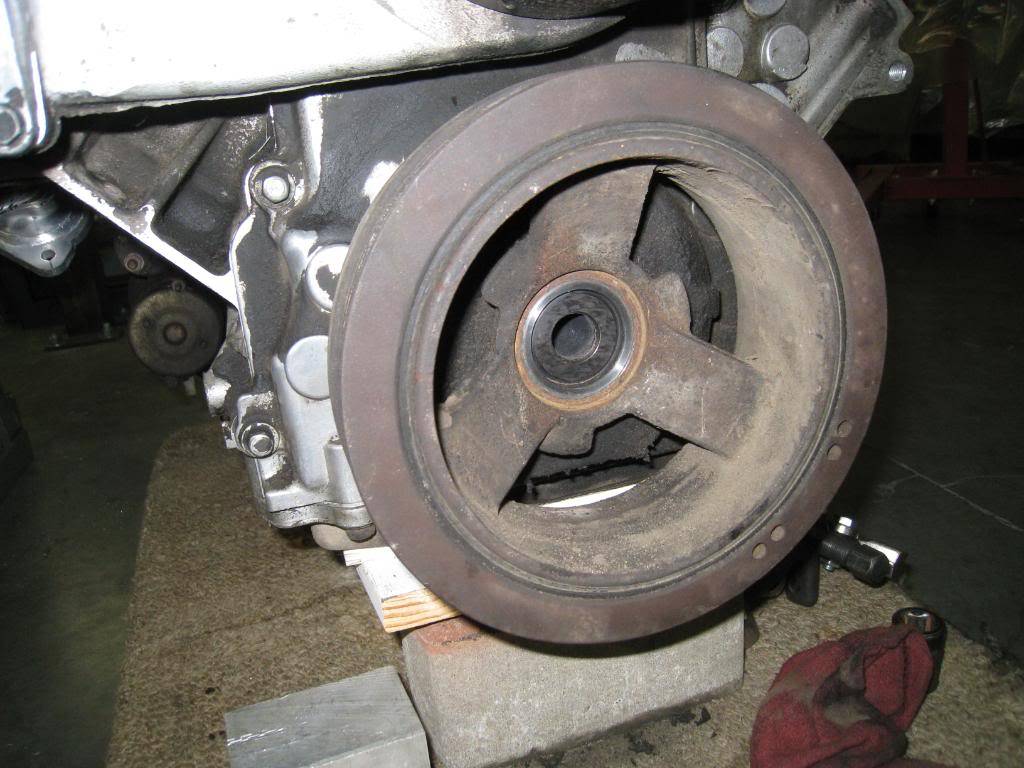
I took a boroscope to the LS1 I got and checked out the cylinders and found that this motor needs a rebuild. No big deal, as Richard from the shop I got it from, KMS C.A.R Parts, told me to feel free to tear it down and if it needed work to bring it back and they would get me another one. Almost thought service like that was dead...
That was a full days work....whew... only 28,000 more parts to fab, assemble, etc., till I'm done!
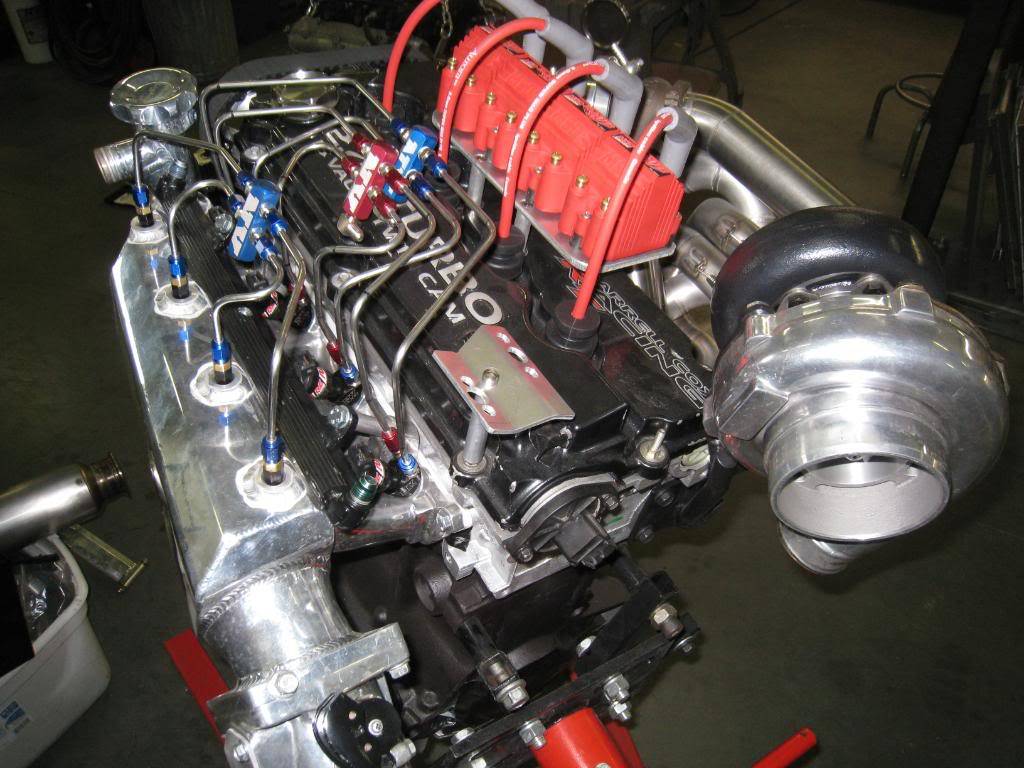
Here's a cool motor thats for a buddy's PT Cruiser...I know,I know,...anyway, rumored to be 750hp...


-
09-26-2012 #6
Registered User
- Join Date
- Oct 2007
- Location
- New Westminster, B.C., Canada
- Posts
- 88
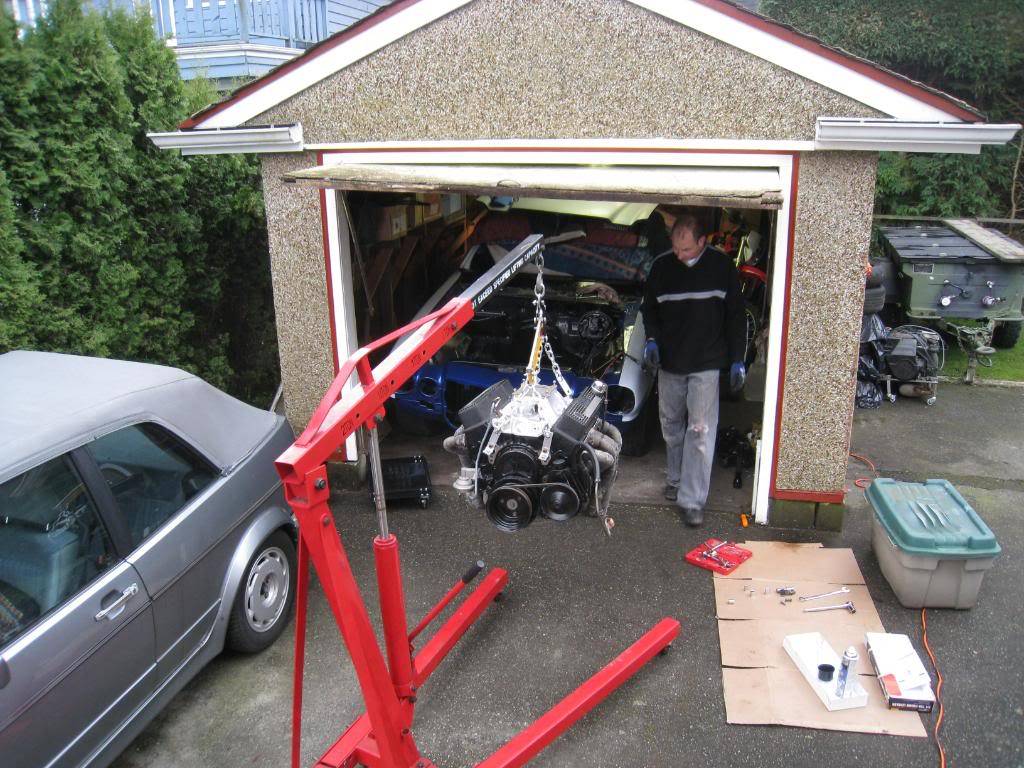
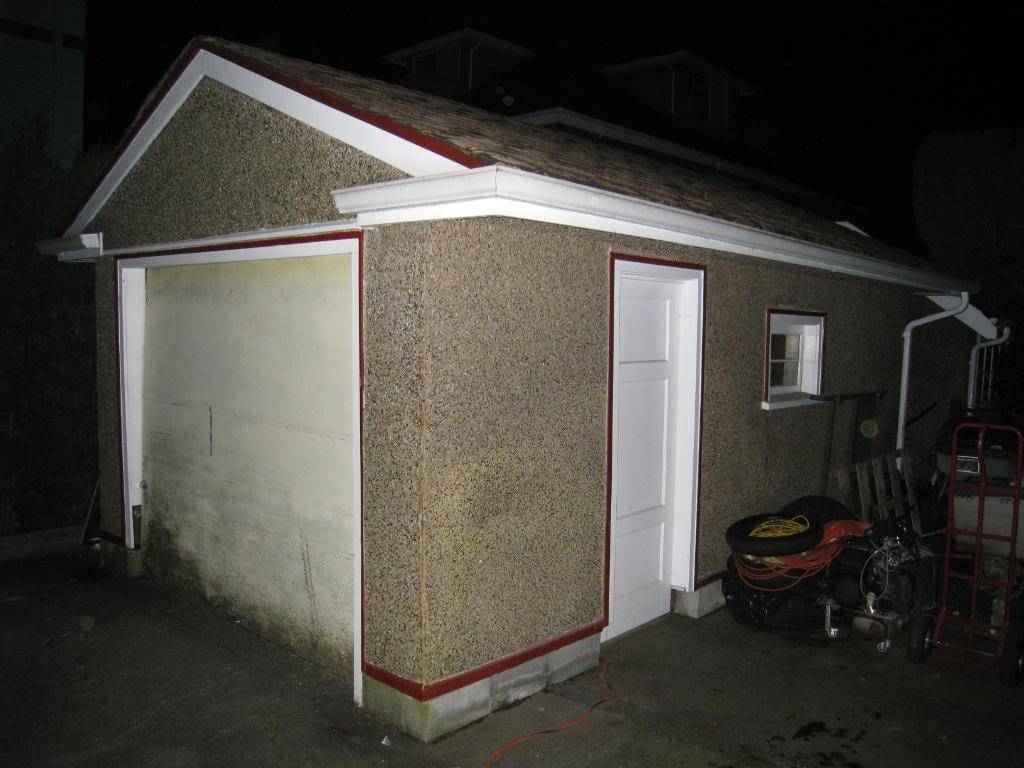
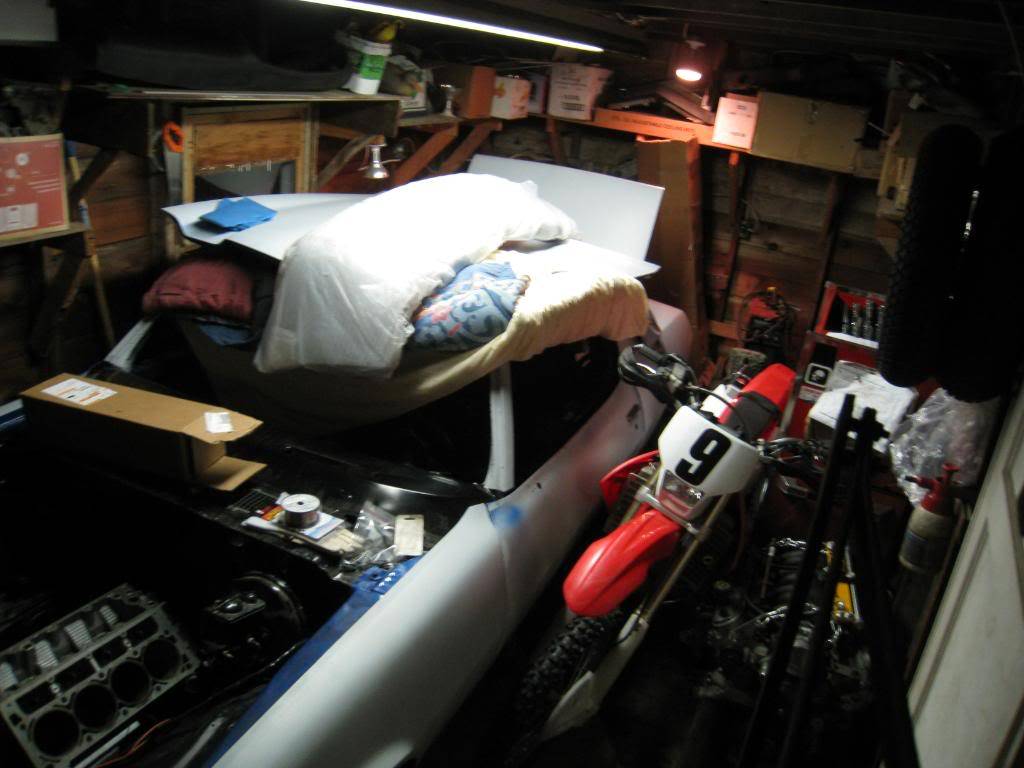
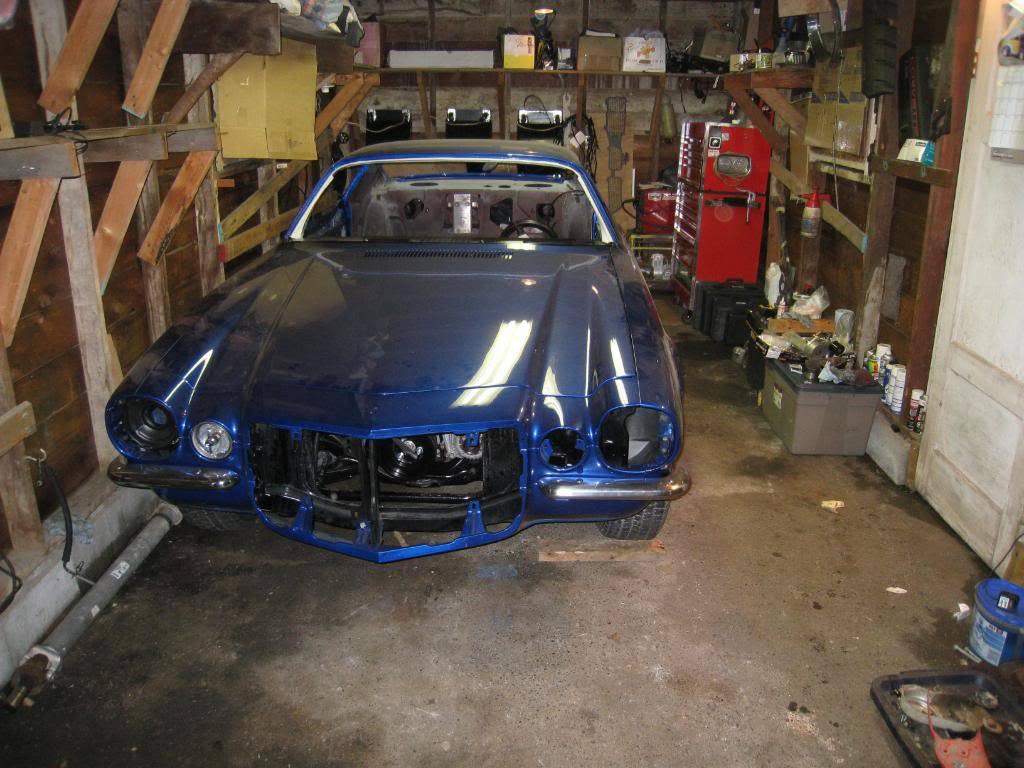
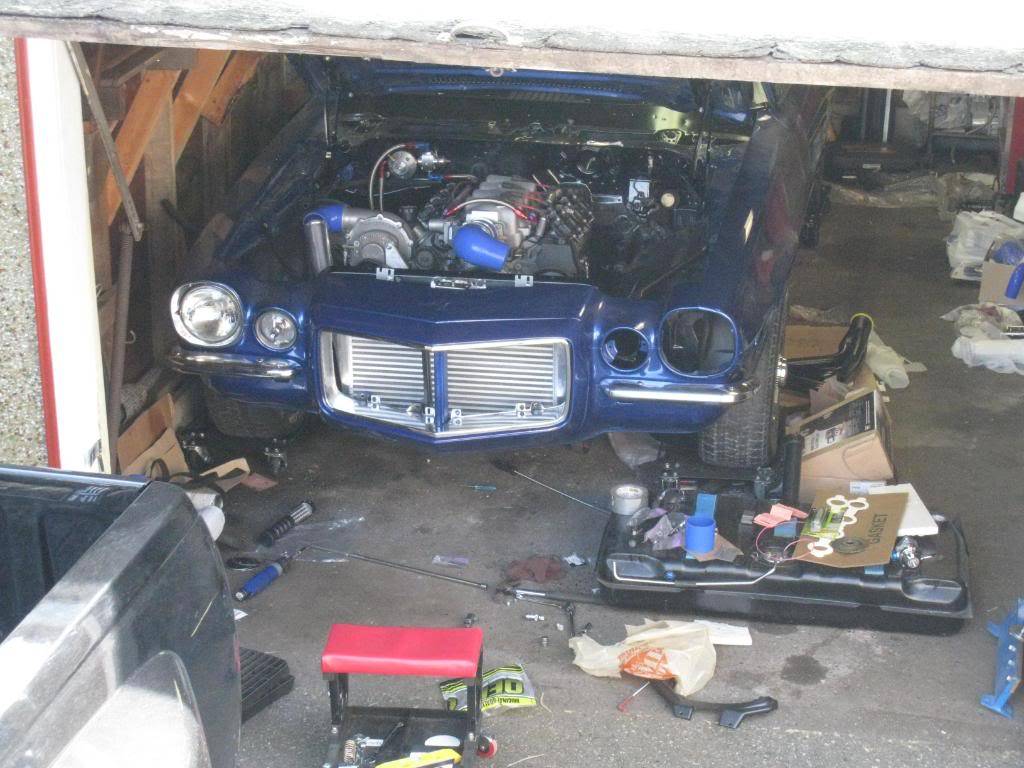
How big is my garage???
Well, lets put it this way, I may qualify for the smallest garage ever for a project of this size to be done in.
My garage is 10' x 19'. In order to work in it I have to drag out the engine, 2 motorcycles, my tool box (recently brought home, quit my job as a motorcycle tech as it was cutting into my time to build this car...jk), and an engine hoist. The car is on 4 wheel dollies so I can move it around...Yes, I am dedicated and patient.
Ryan, who did your paint? I am in need of a trustworthy bodyman / painter. I'd love to check out your car sometime, PM me when you get a chance.
Here's a few pics of my MASSIVE GARAGE...
-
09-26-2012 #7
Registered User
- Join Date
- Oct 2007
- Location
- New Westminster, B.C., Canada
- Posts
- 88
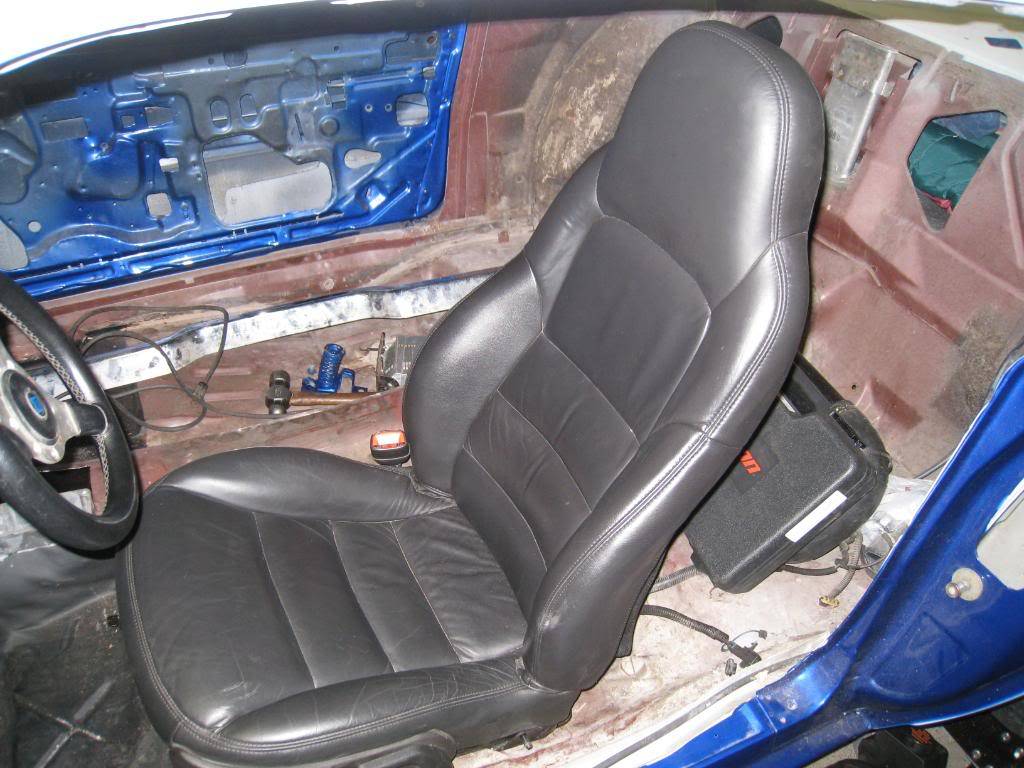
Here's a couple of pics... '07 Corvette seat, note the hood to throttle body clearance, thats with the motor jacked up to the height it needs to be.

-
09-26-2012 #8
Registered User
- Join Date
- Oct 2007
- Location
- New Westminster, B.C., Canada
- Posts
- 88
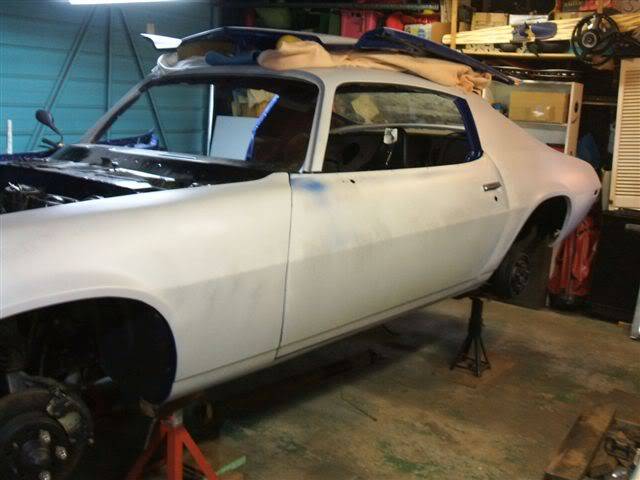
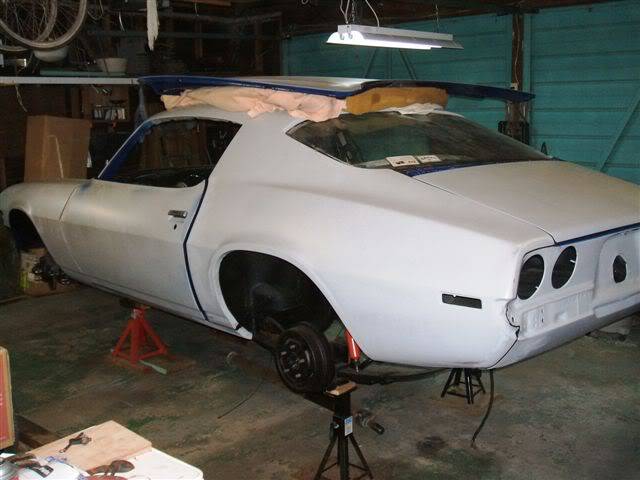
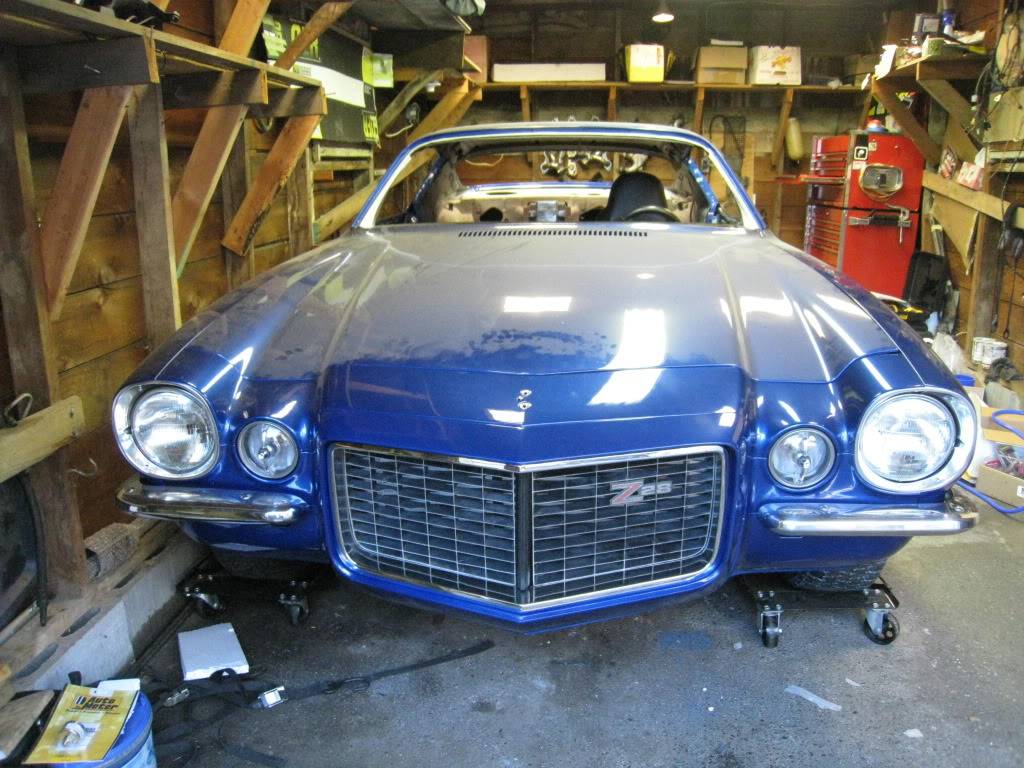
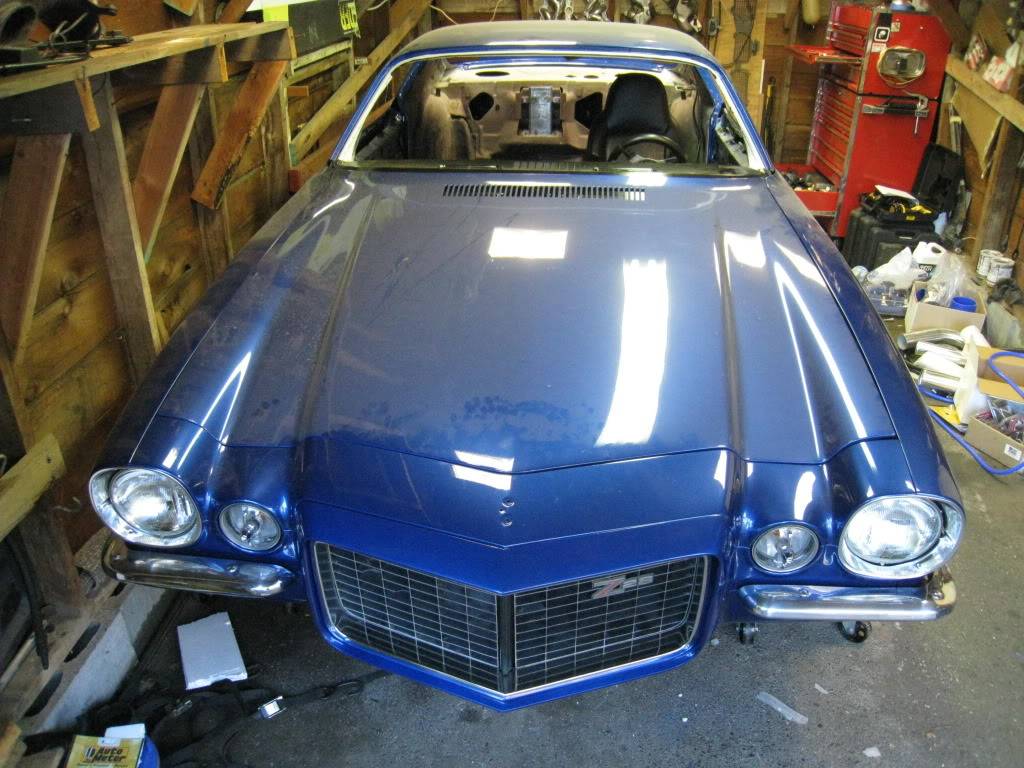
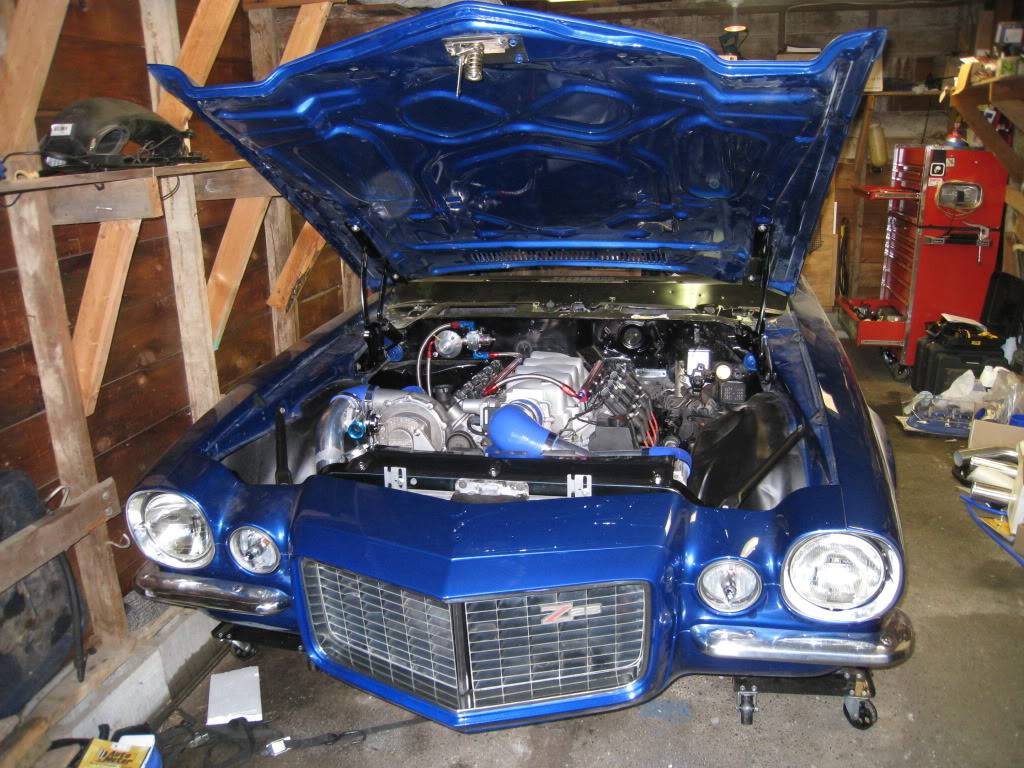
things are coming together ever so slowly.... anyway, here's a pic! built my own procharger mount kit, and as you can see the car is fully painted!
-
09-26-2012 #9
Registered User
- Join Date
- Oct 2007
- Location
- New Westminster, B.C., Canada
- Posts
- 88
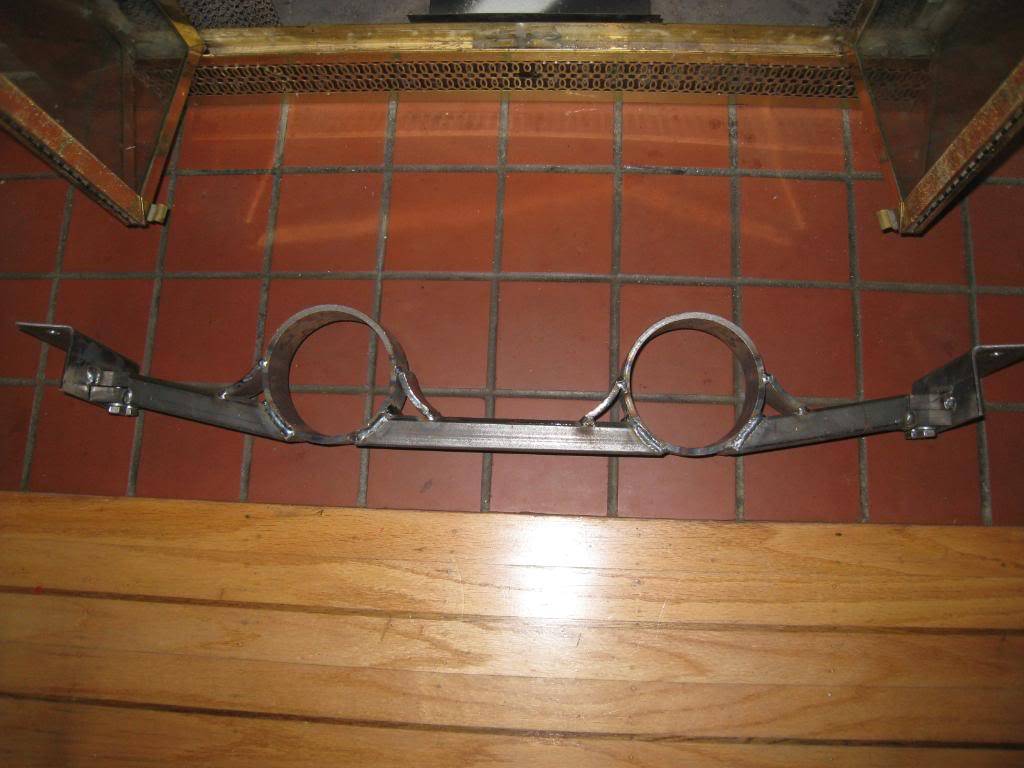
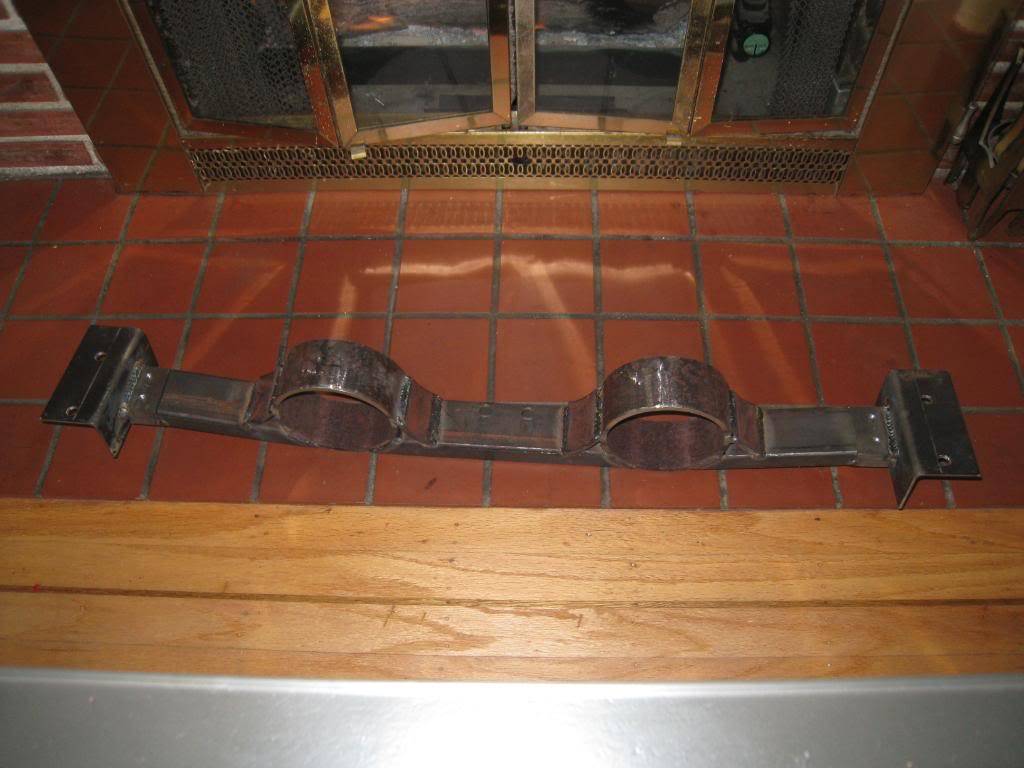
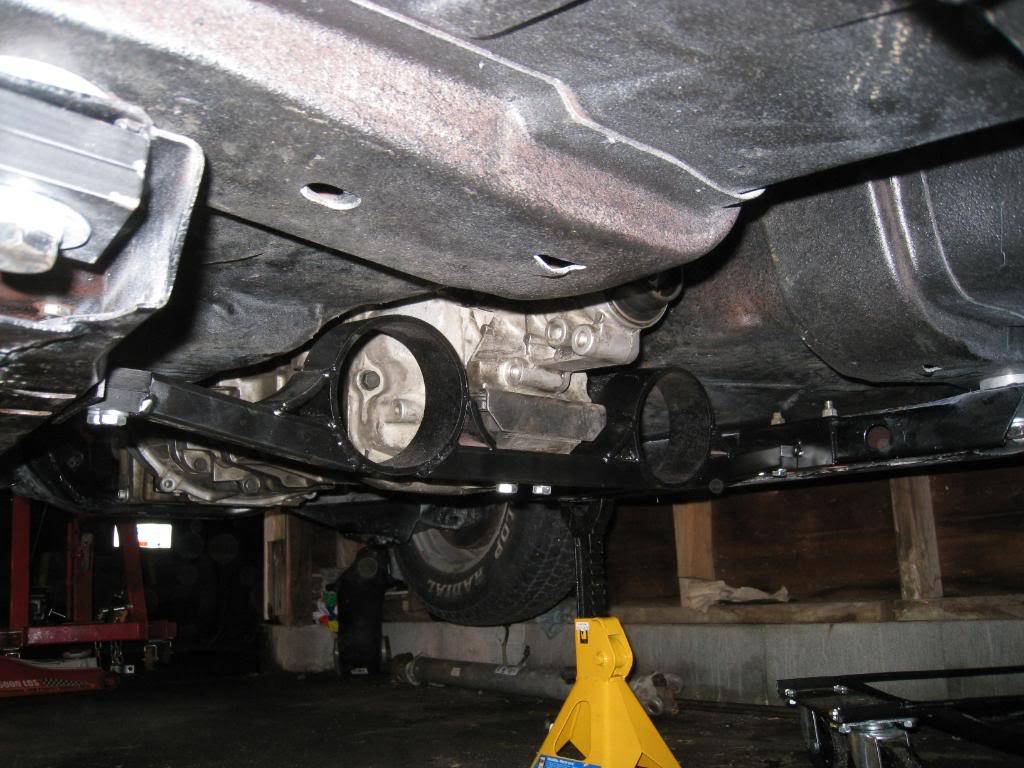
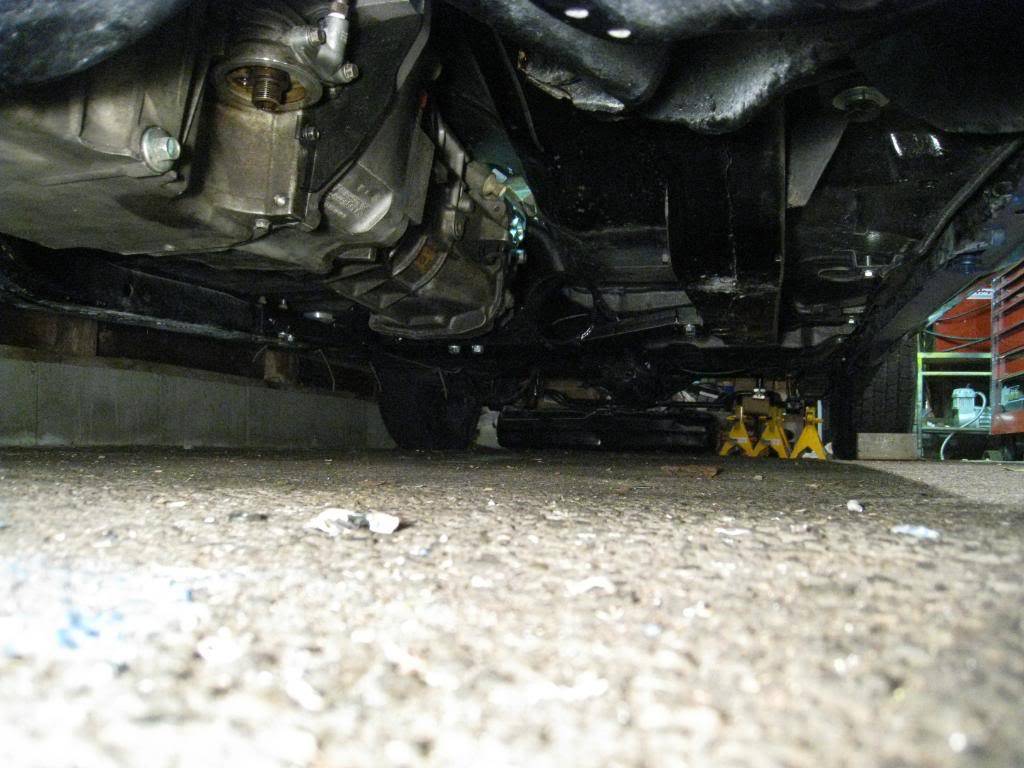
Here'e my transmission crossmember. it's a 3 piece deal, took way too long to build, but thats the fun part, right?
-
09-26-2012 #10
Registered User
- Join Date
- Oct 2007
- Location
- New Westminster, B.C., Canada
- Posts
- 88
Since I am supercharging I had to 'pin' my harmonic balancer. Here's how that went.
1. Took a chunk of tool steel and 'spun up' a guide tool on a friends lathe.
2. Bolted it to the balancer.
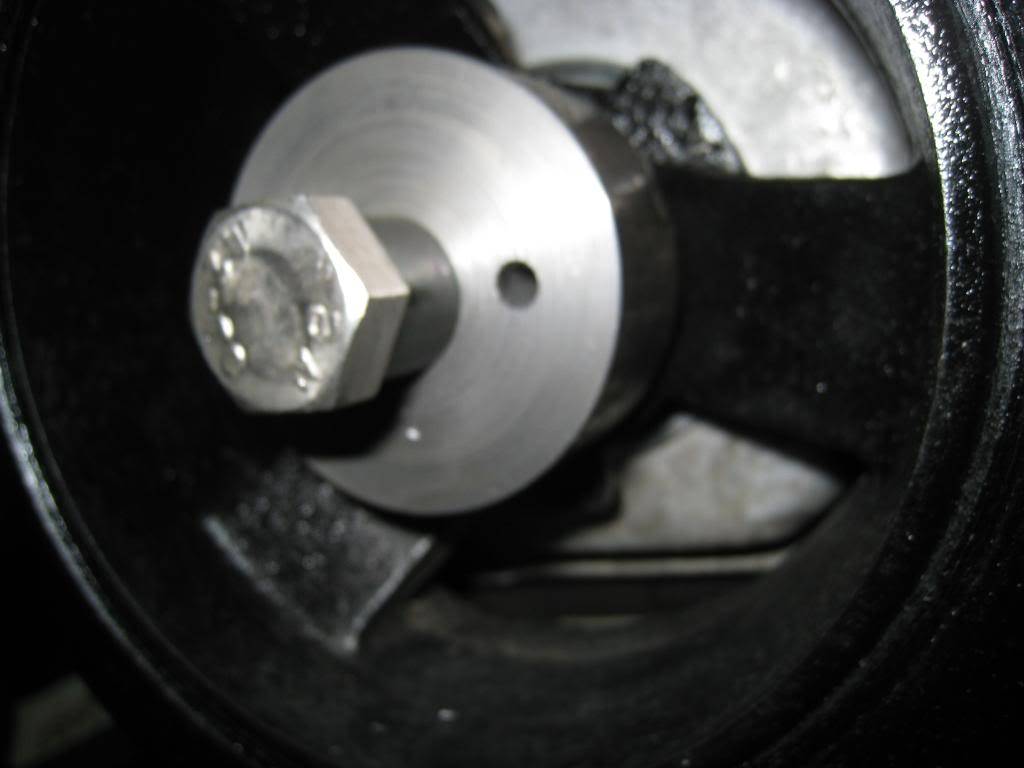
3. Took a brand new 1/4" drill bit and marked off with tape 5/8" depth.
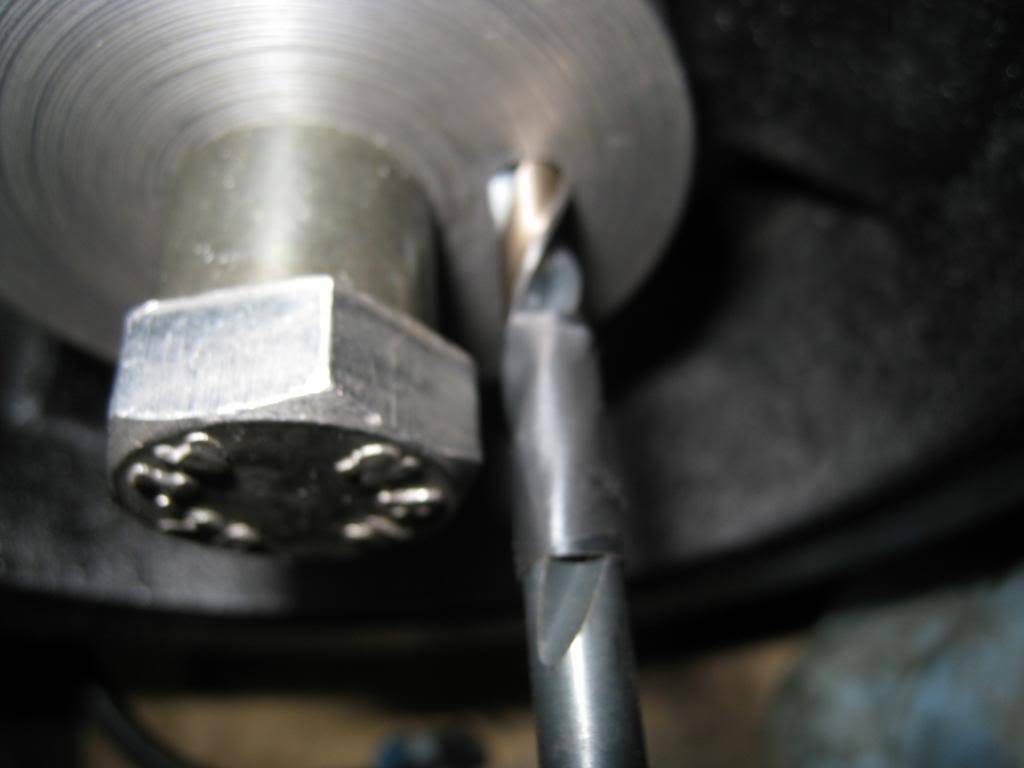
4. Drilled to depth, then removed Tool.
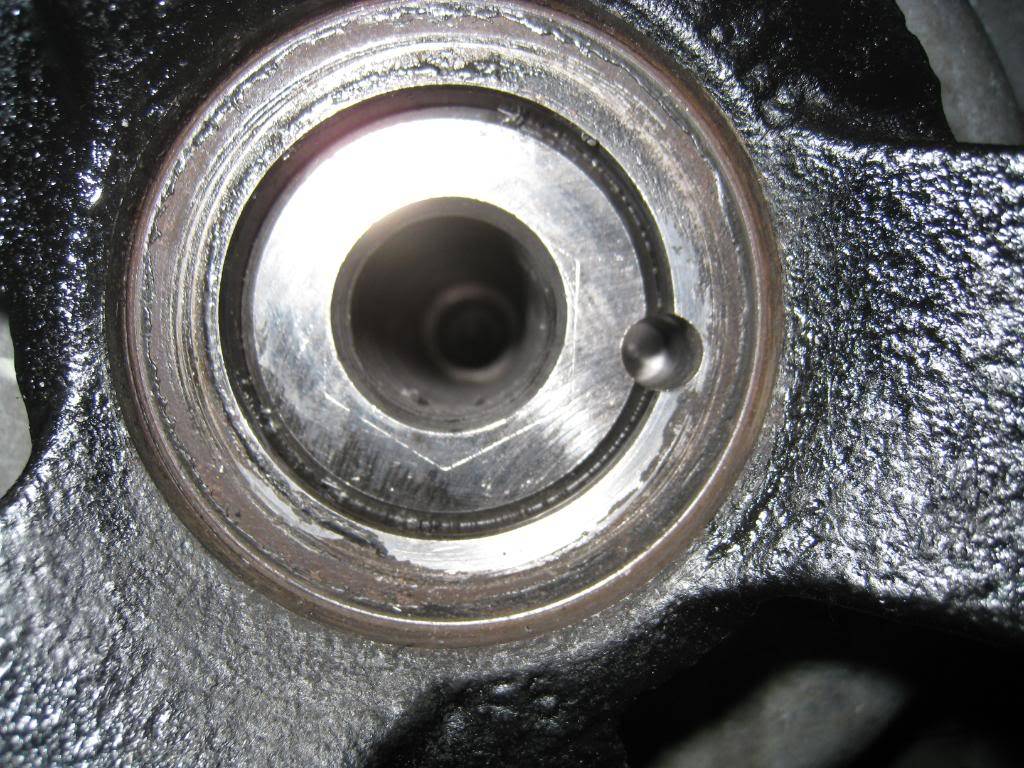
5. Cut 1/2" off of the chuck end of the 1/4" drill bit.
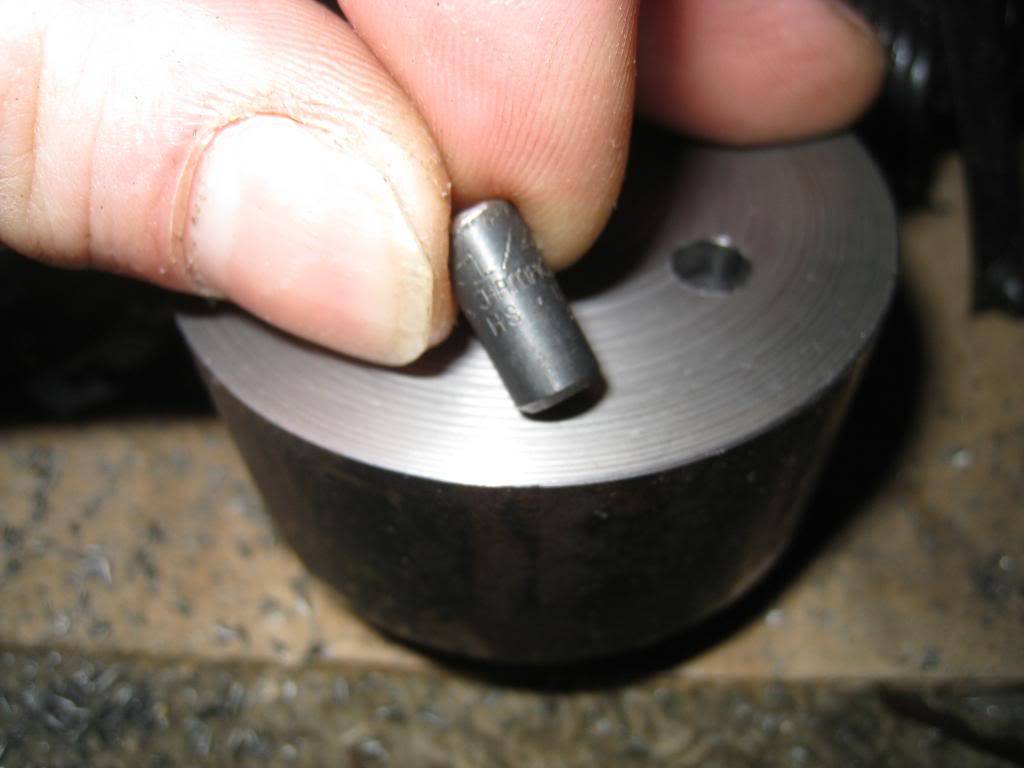
6. Inserted 1/2" drill bit piece into crank pin hole.
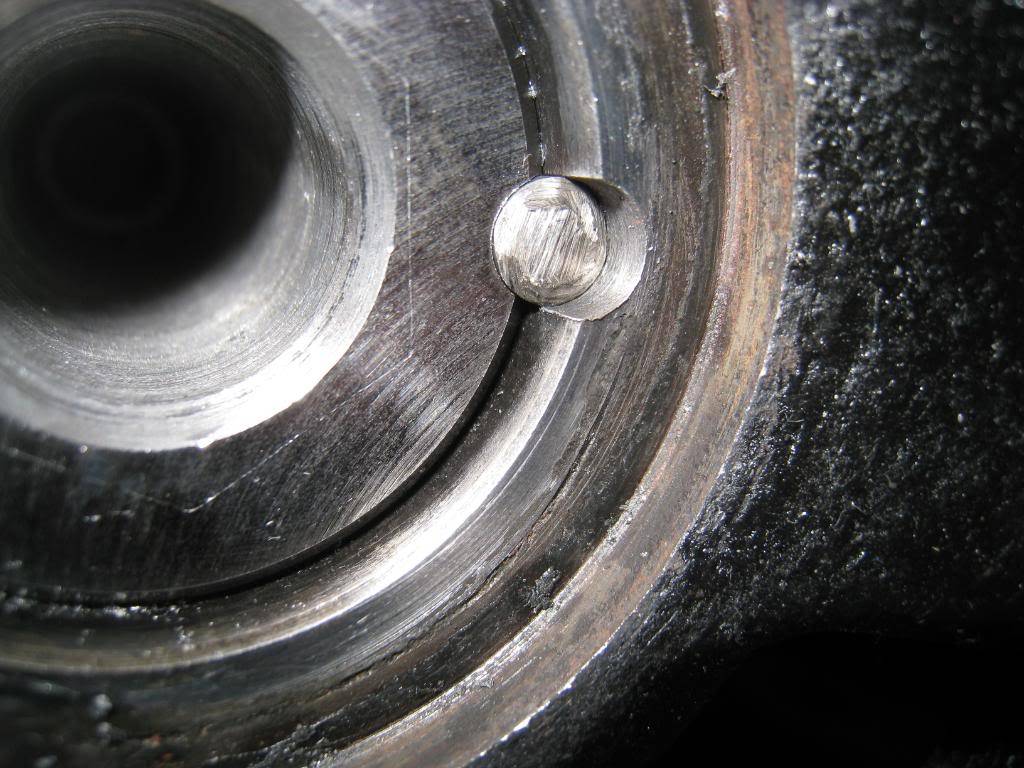
7. Re-assemble and enjoy!
-
09-26-2012 #11
Registered User
- Join Date
- Oct 2007
- Location
- New Westminster, B.C., Canada
- Posts
- 88
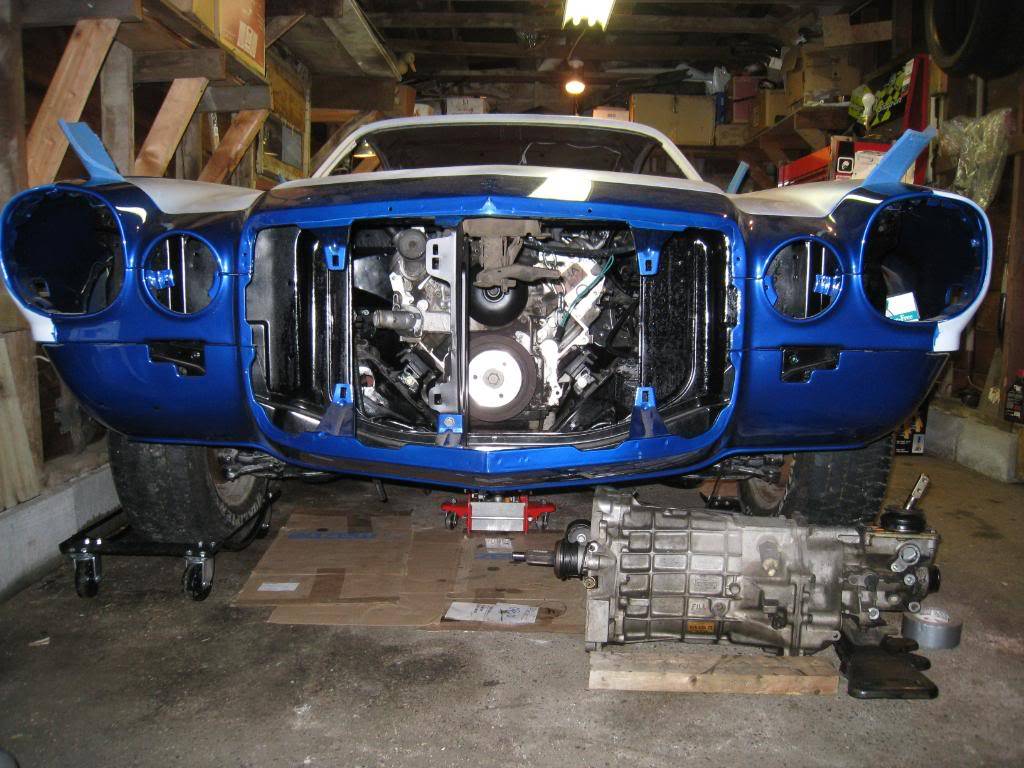
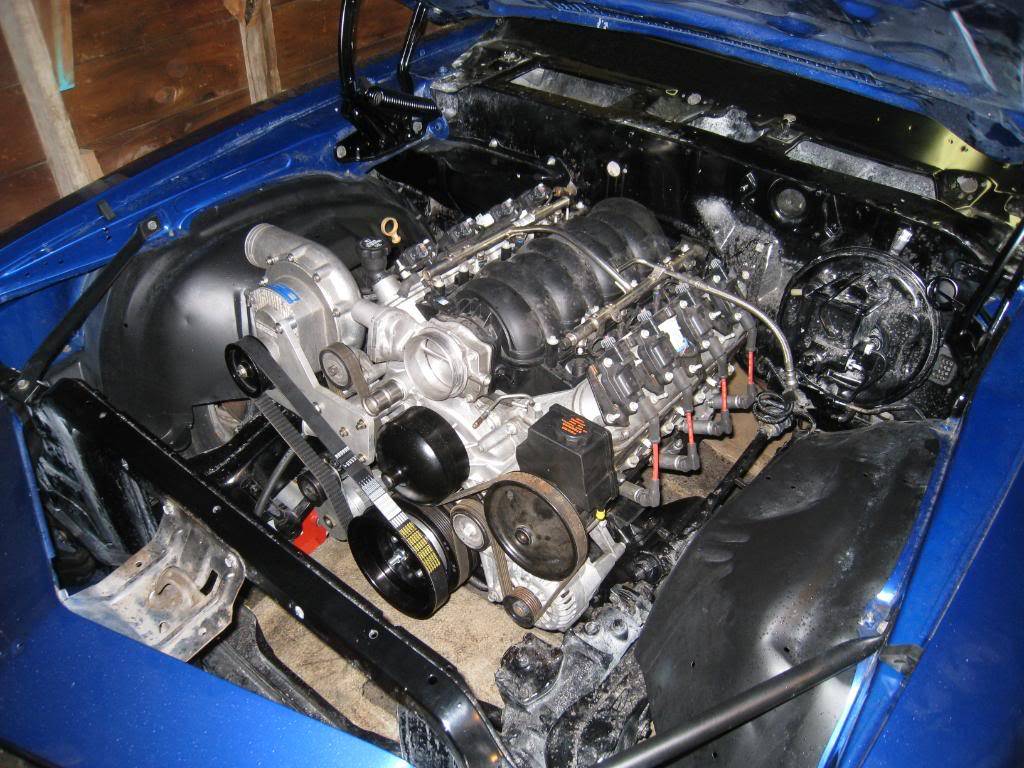
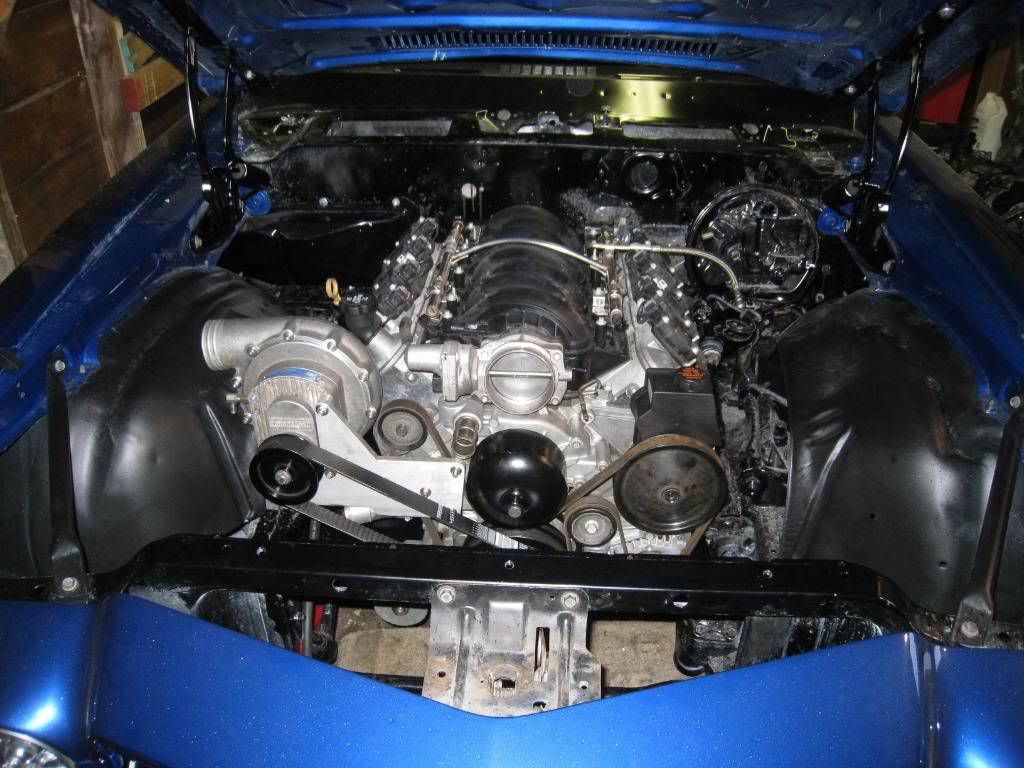
GOT IT IN!
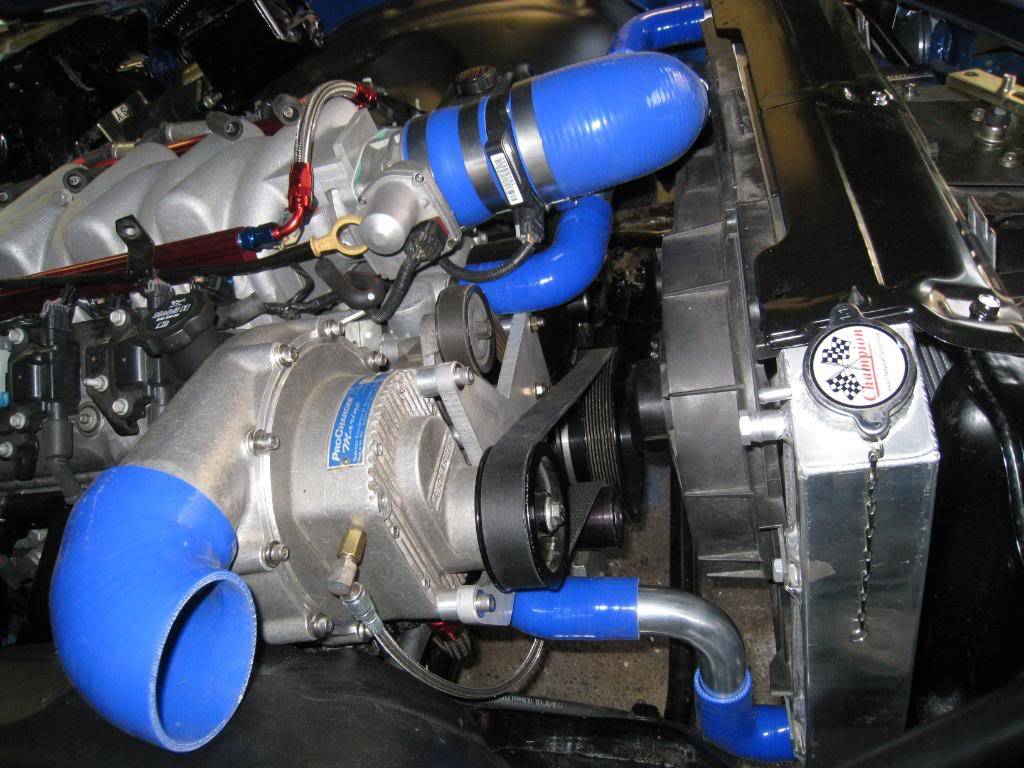
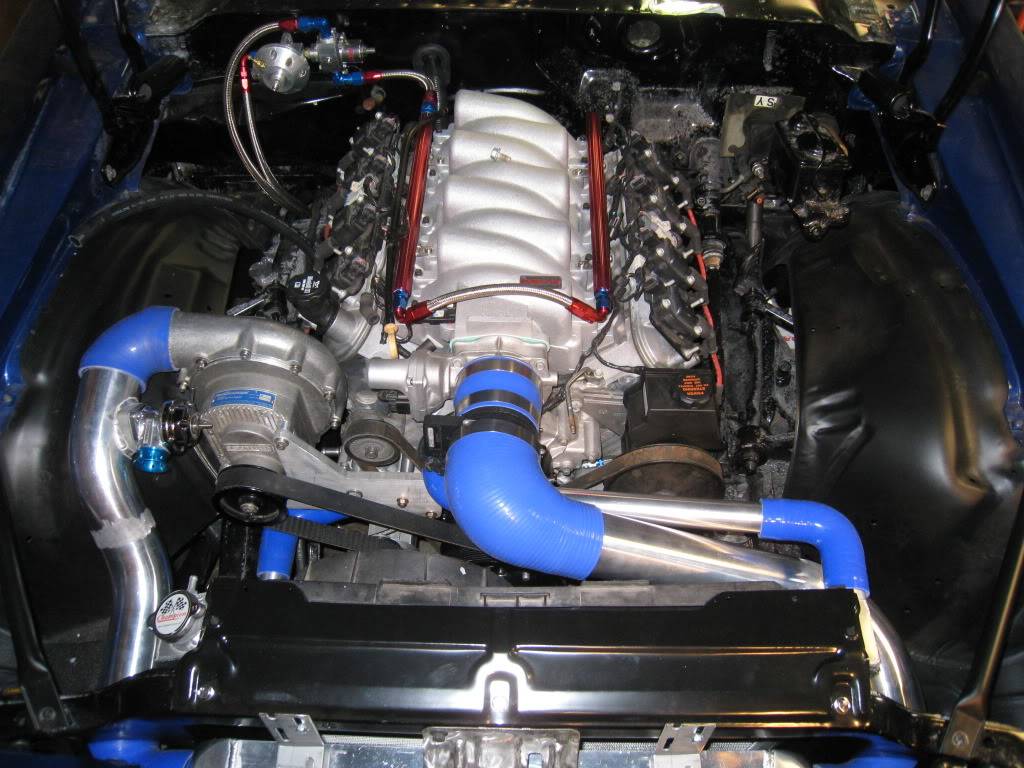
Hopefully this isn't another test fitting! Got the LS2 into it's mount and all bolted up. It's a tight fit, especially between the 'charger and the upper control arm. But there is space. Time to start the plumbing.

-
09-26-2012 #12
Registered User
- Join Date
- Oct 2007
- Location
- New Westminster, B.C., Canada
- Posts
- 88
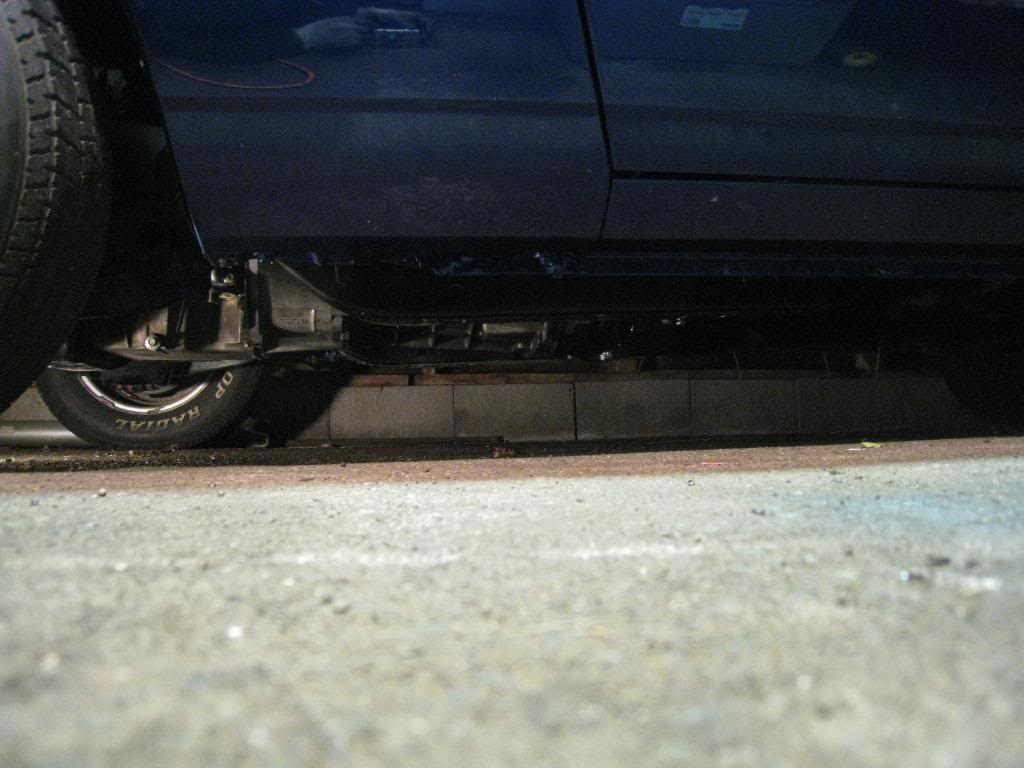
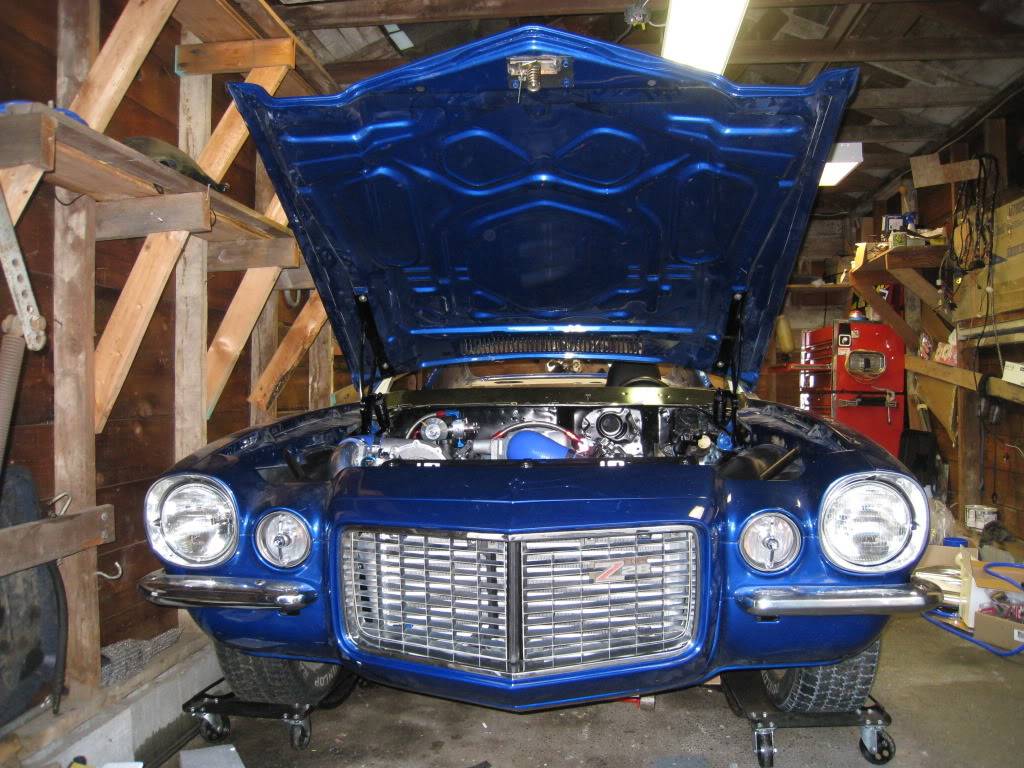
Cleaned up the tranny a bit and installed it tonight. The new crossmember worked perfectly, really happy about that! Here's a few pics. Note the clearance between the hood and intake, that shot is with the hood closed!
- all this is being done in a 10 x 20 garage too!!!

-
09-26-2012 #13
Registered User
- Join Date
- Oct 2007
- Location
- New Westminster, B.C., Canada
- Posts
- 88
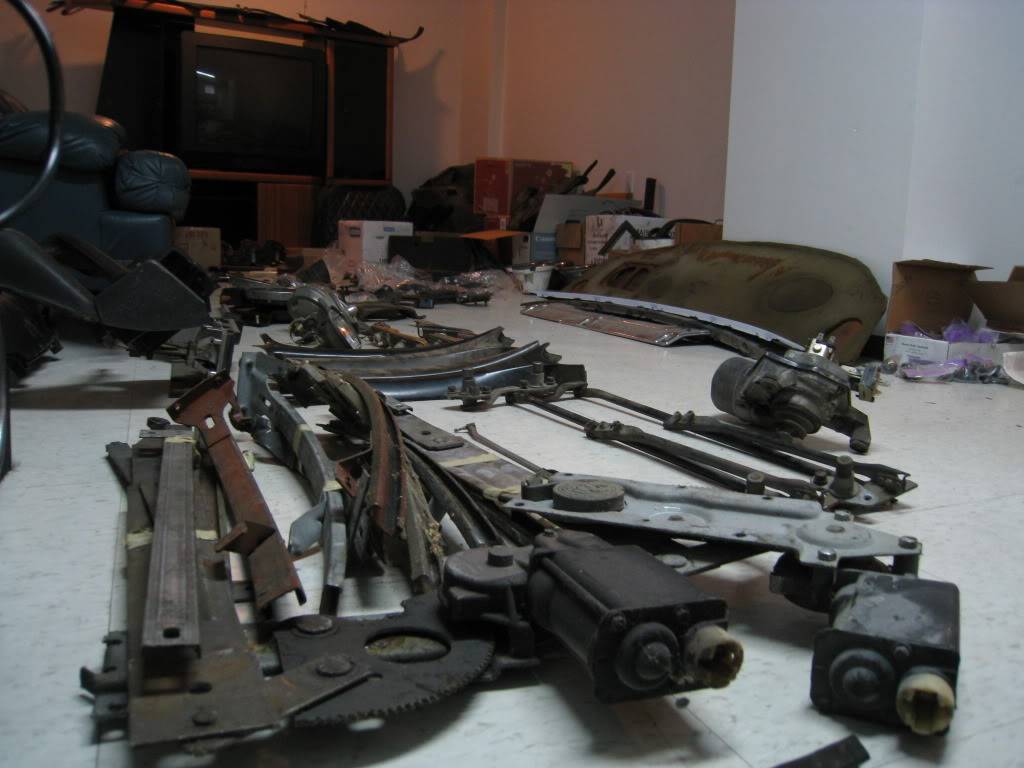
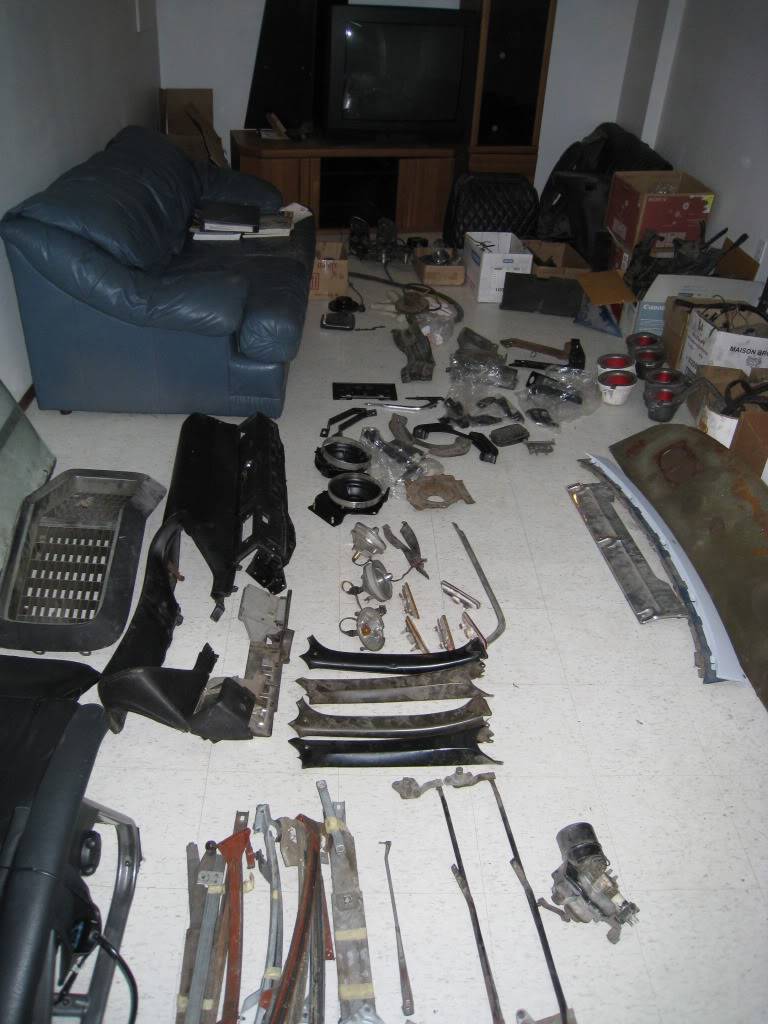
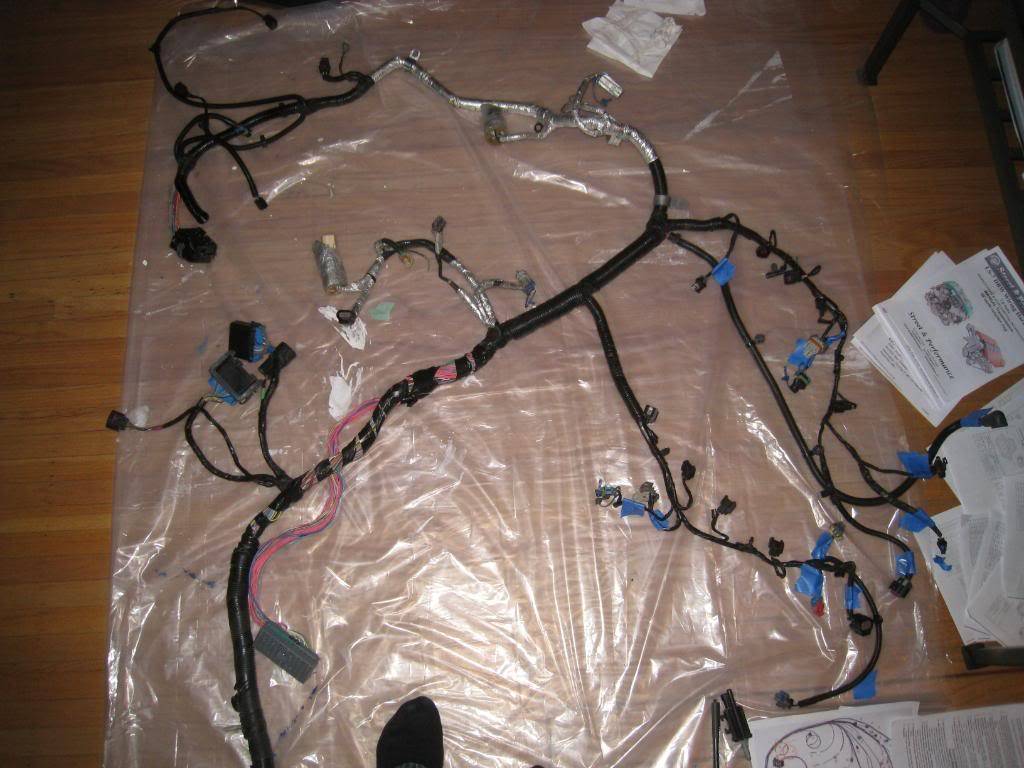
Ok, I've been putting this daunting task off as long as I could. Time to convert my engine harness so that I can get this thing running.
Step 1. Collect as much information as possible. I found a wiring diagram/manual online and downloaded and printed as much of it off as I thought neccessary. Also found a manual for an aftermarket harness so that I could see what is used after all is said and done.
http://www.ls2.com/forums/showthread...hreadid=405808
http://www.hotrodlane.cc/PDFFILES/squireLS7.pdf
Step 2. Lay out the harness on the livingroom floor (sorry Jenn)
Step 3. Label as much of it as possible. I went as far as to use the aftermarket instruction sheet and use their item numbers on the labels, thinking that at the end of this it will make more sense.
-
09-26-2012 #14
Registered User
- Join Date
- Oct 2007
- Location
- New Westminster, B.C., Canada
- Posts
- 88
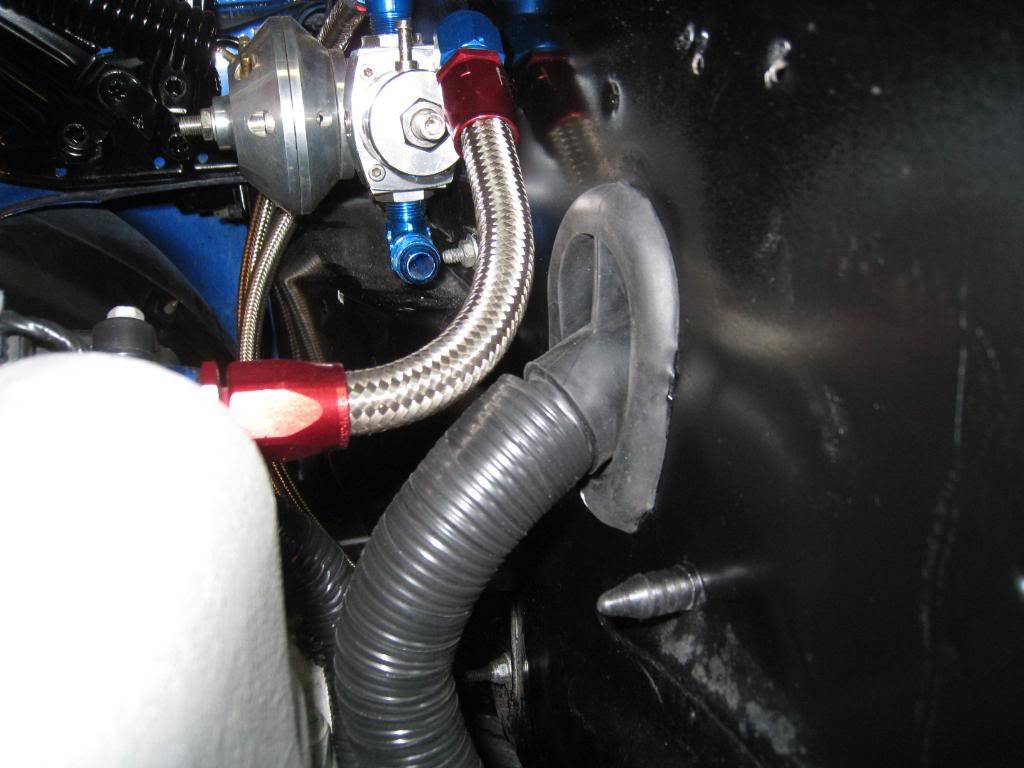
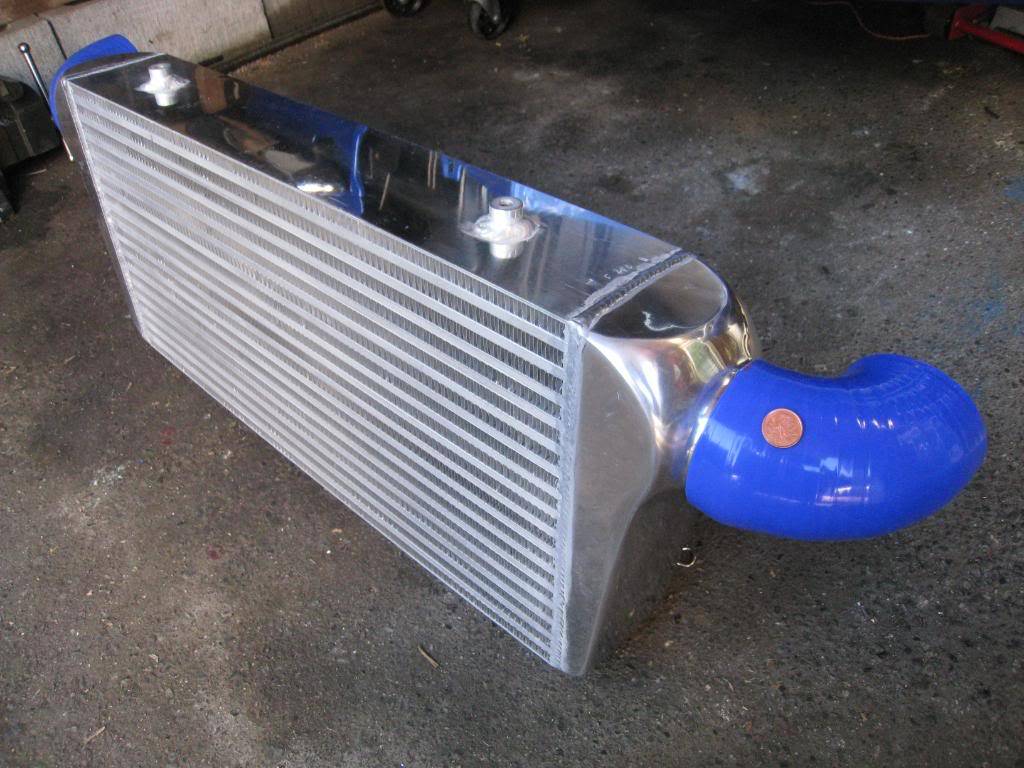
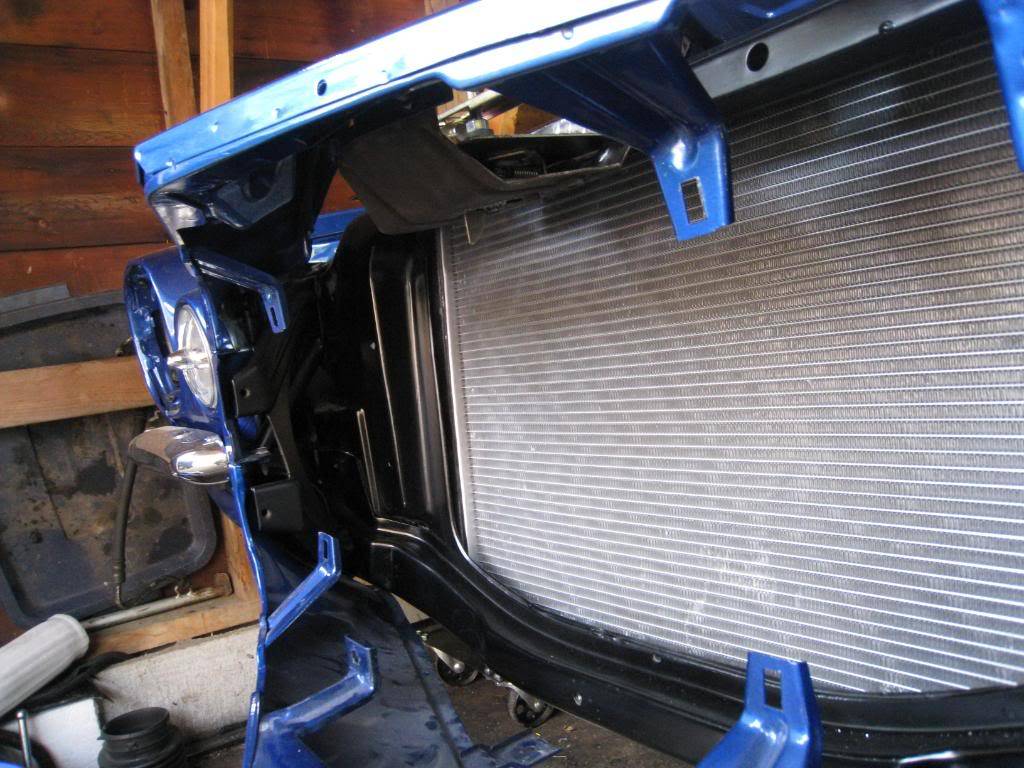
Haven't been making that much progress, things are busy at work! I got a driveshaft made, and installed it. Got an aluminum 3 core radiator, need some rubber saddles for it and I'm looking for a non-chrome heavy duty upper rad support bracket. Ordered a 4" thick x 12 x 24 intercooler. Found a wiring harness grommet at a wrecker so that I can pass my PCM harness into the car. It came off of a 1998 mustang
 (at the firewall behind the right fender if anyone wants one) I de-pinned every wire from my PCM plugs, ran them through the grommet, and re-attatched them. TEDIOUS!!!! I could have put a slice in the grommet I guess, but didn't. Funny, it didn't take that long to remove from the mustang!!!! (thankyou SNAP-ON side cutters)
-
09-26-2012 #15
Registered User
- Join Date
- Oct 2007
- Location
- New Westminster, B.C., Canada
- Posts
- 88
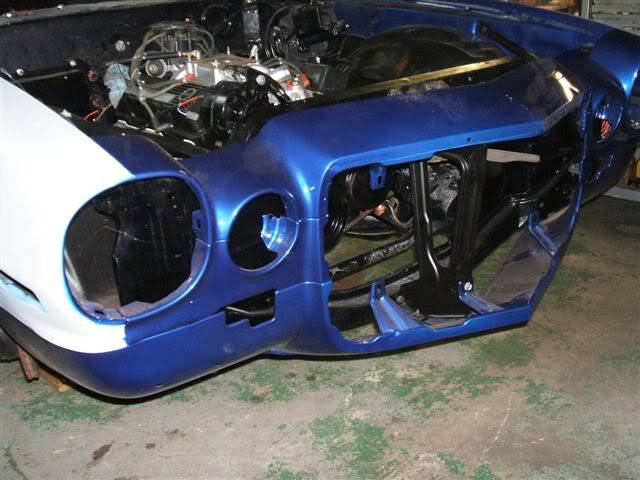
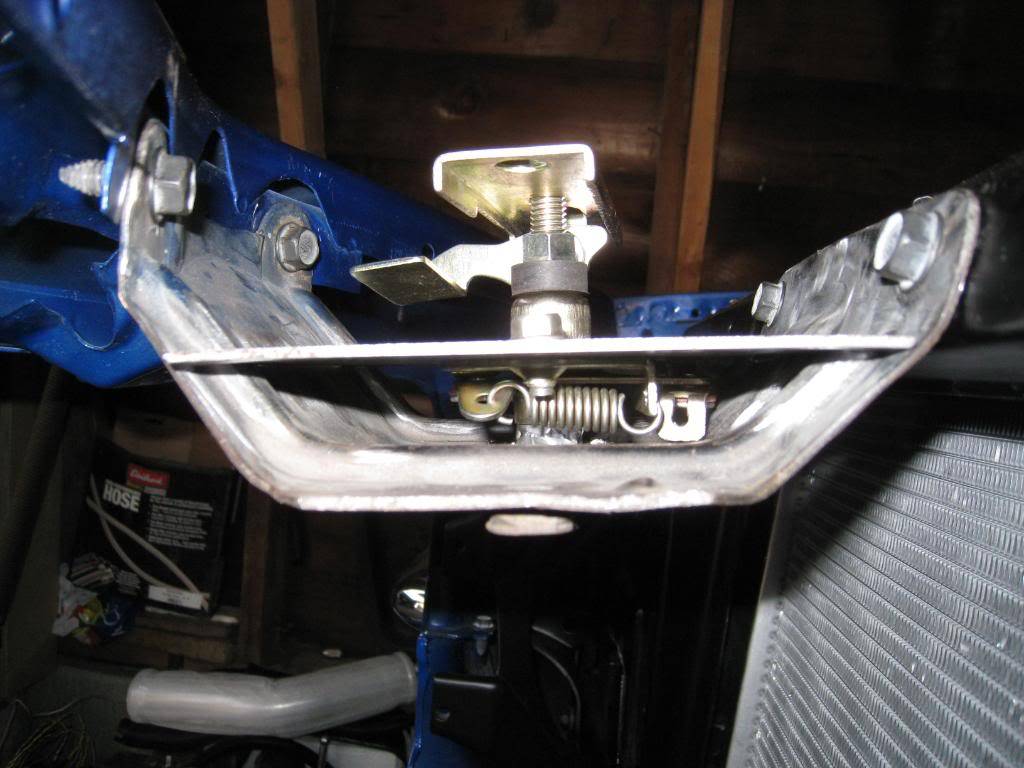
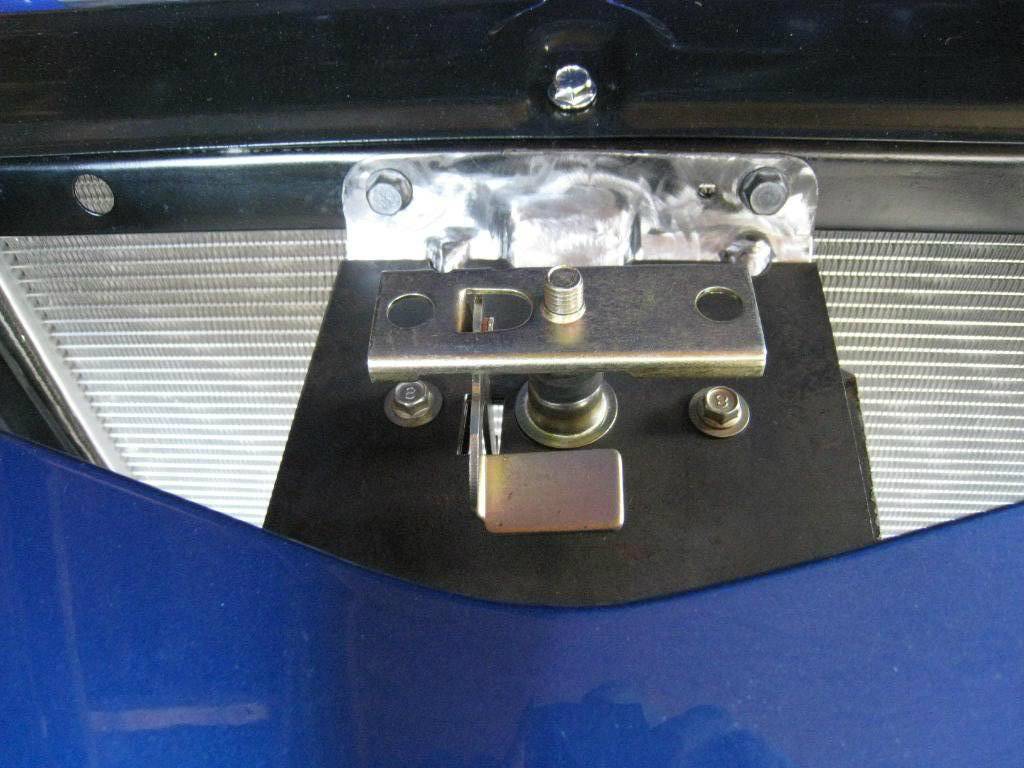
Got some goodies delivered today! Nothing ever simple. Going to have to remove the stock hood latch to provide more clearance for my intercooler.
-
09-26-2012 #16
Registered User
- Join Date
- Oct 2007
- Location
- New Westminster, B.C., Canada
- Posts
- 88
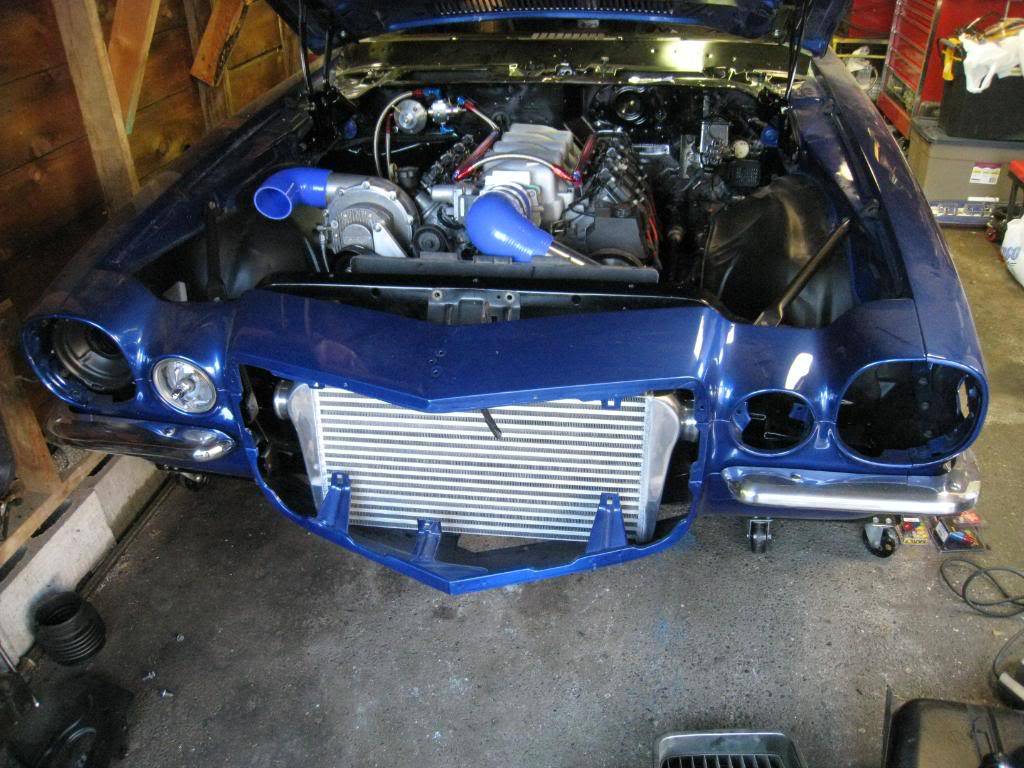
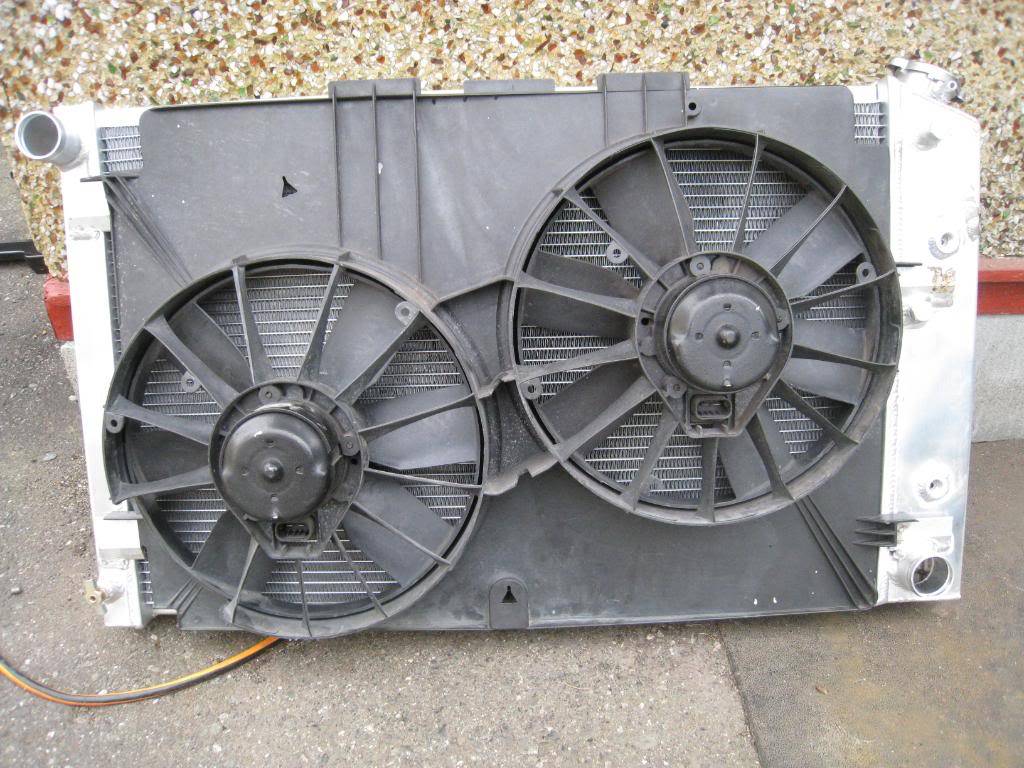
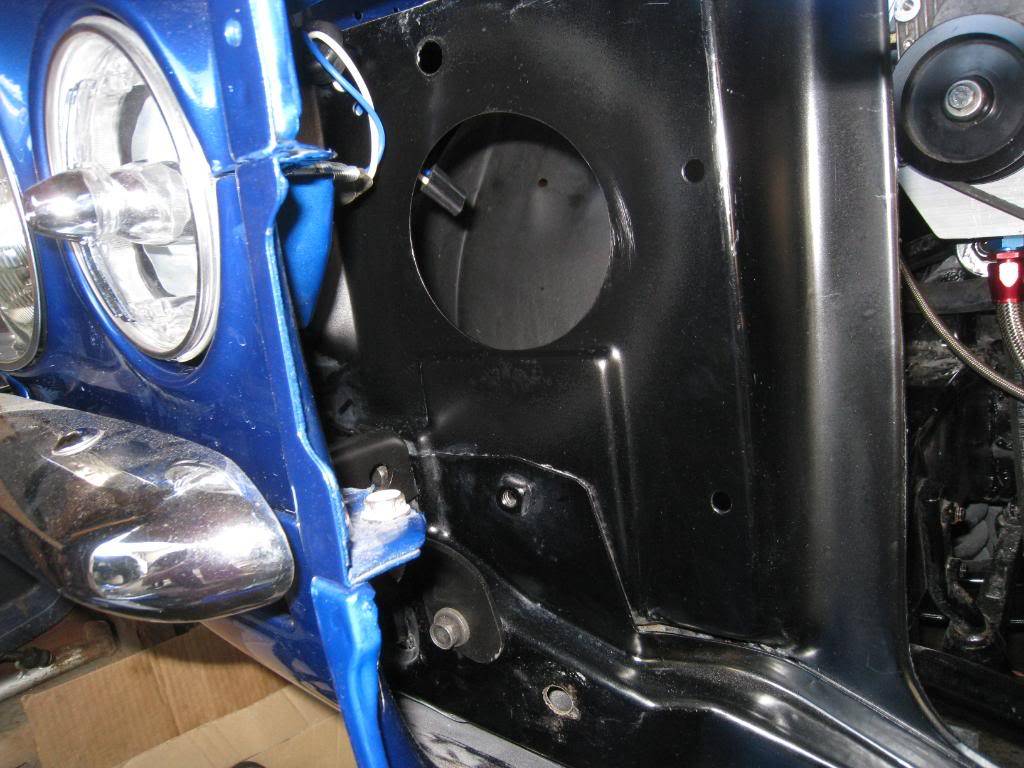
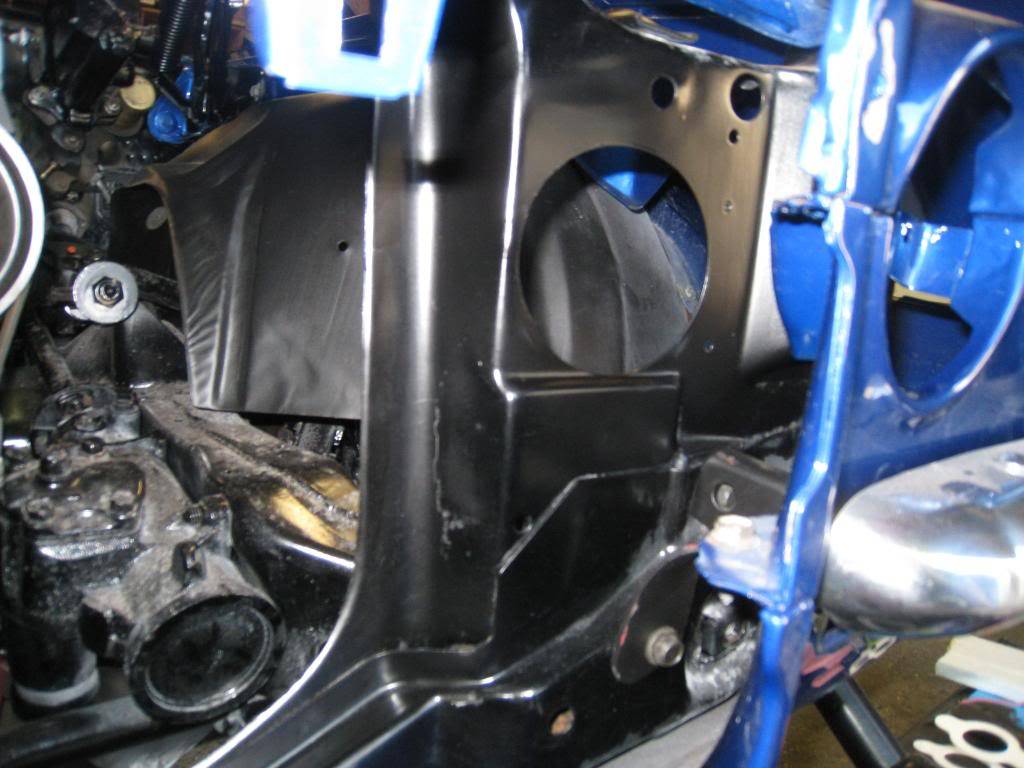
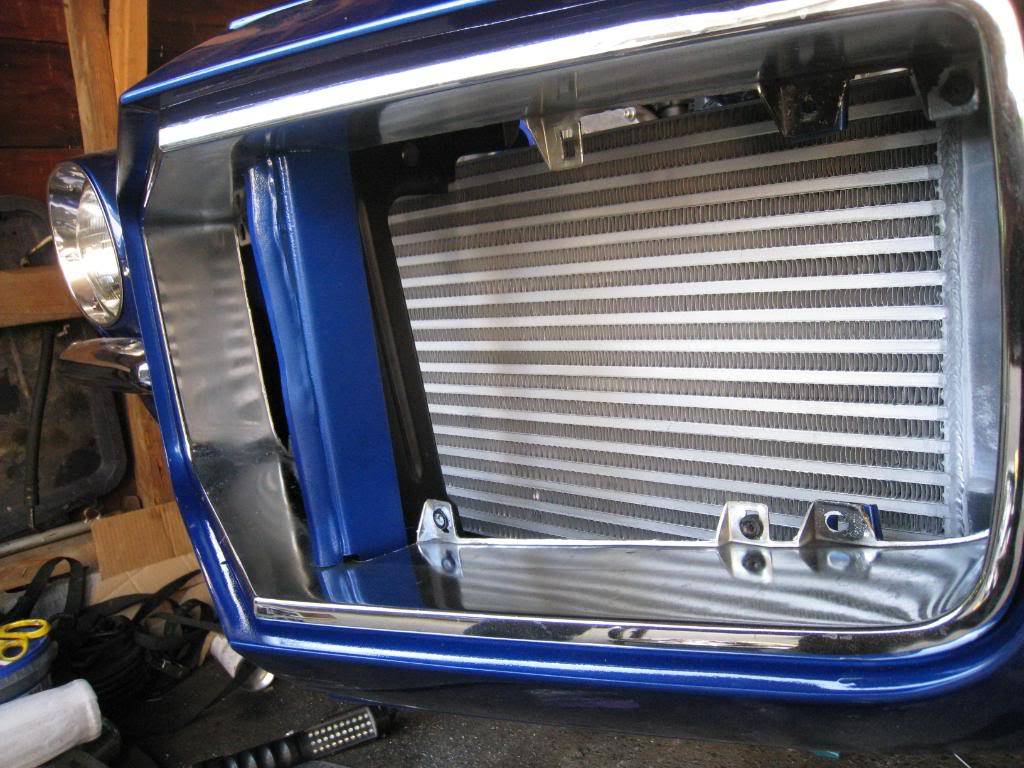
updates? hows your car??? (brother) here's a few pics... made a lower profile hood latch to give me more clearance for my intercooler. Here's the intercooler mocked up with the hose through the hole, here's how the 99 camaro fans went onto the 71 camaro rad. I'll go into more detail later this week. doing overtime again. tired...
-
09-26-2012 #17
Registered User
- Join Date
- Oct 2007
- Location
- New Westminster, B.C., Canada
- Posts
- 88
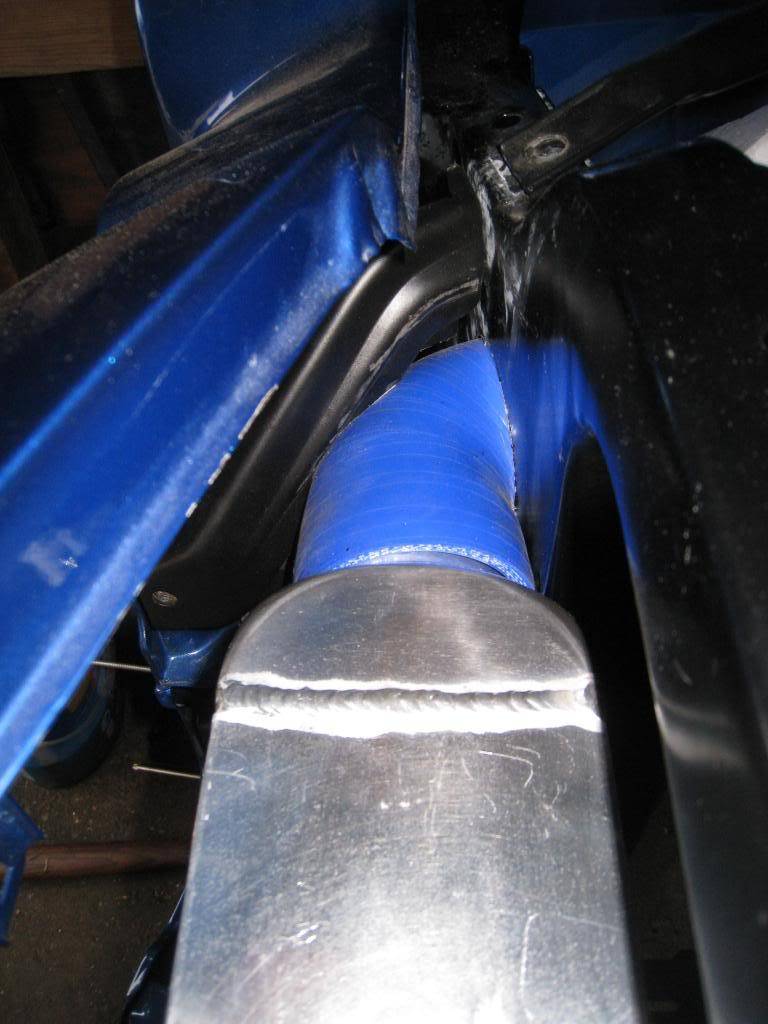
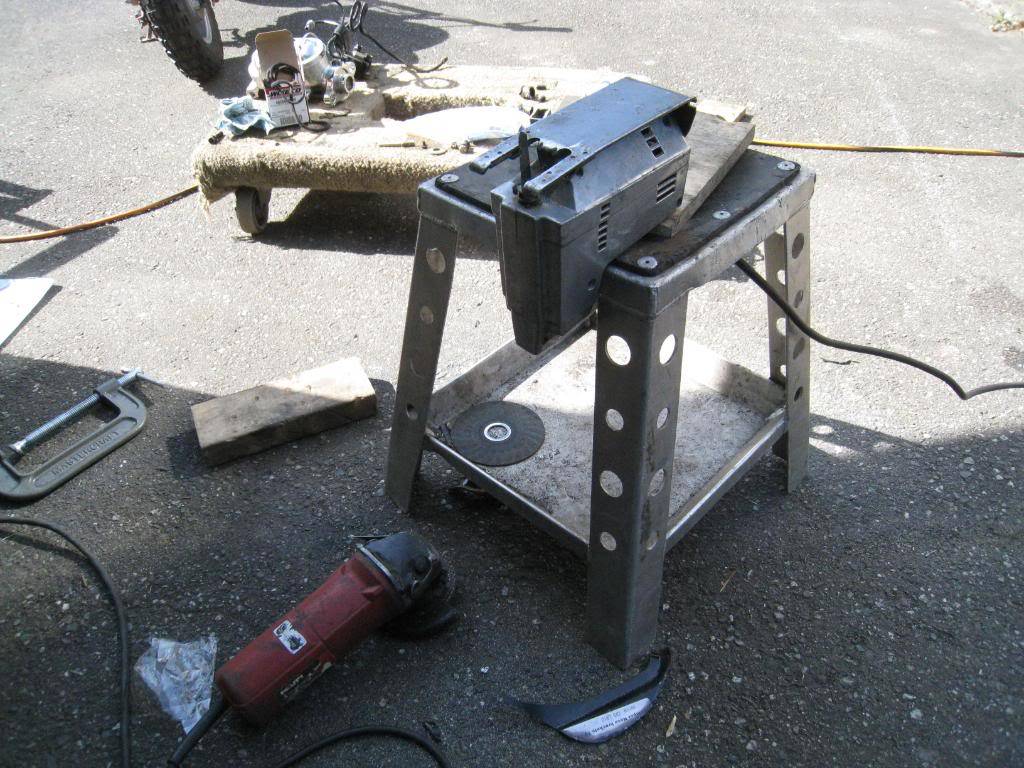
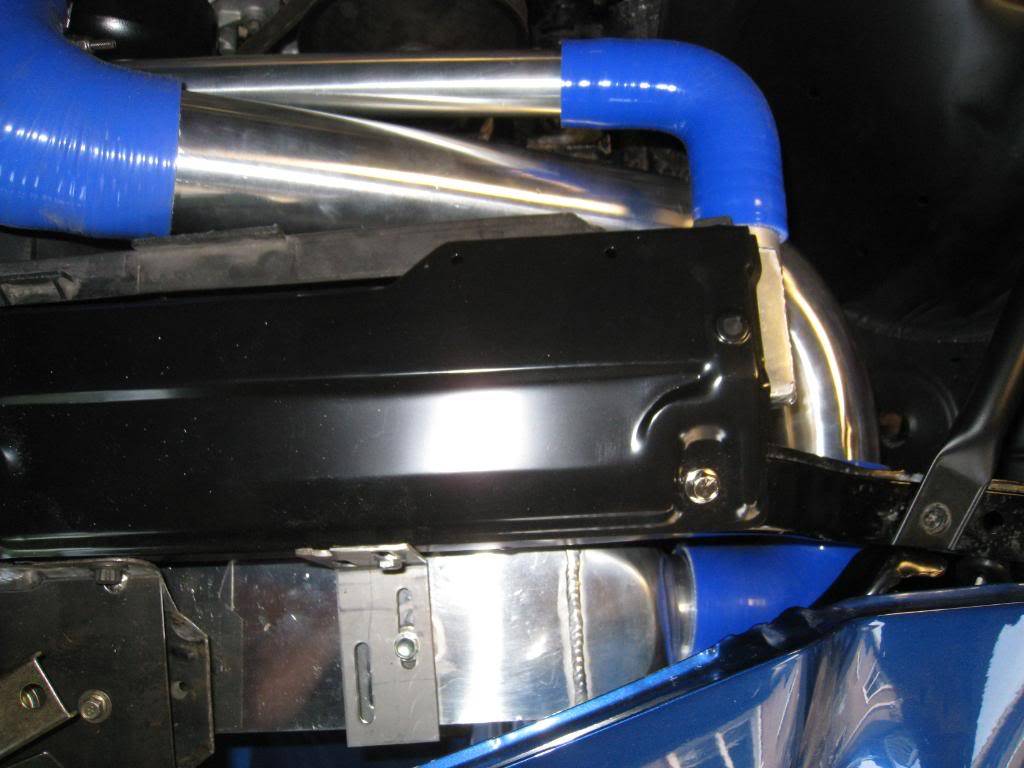
Spent the entire day mounting and unmounting the intercooler. Trying to get the correct spacing for the intercooler hoses and not have them touch anything. Had to remove one of the bumper braces entirely, but it is only the one that goes from the top of the radiator support to the inner bumper brace. Then had to cut a good chunk out of the eurothane bumper bracket so the silicone elbow would clear. I allready modified the hood latch from stock to an aftermarket hotrod type unit to allow more room under the latch. It was all getting very annoying, in, out, in, out, in, out, in...you get the idea!?!?! The brackets you may or may not see in these pics are temporary. I use simple L brackets to mount the cooler, 4 of them, then when I am happy with the fit I pull off 1 at a time and make a replacement bracket. You'll see those later...
(check out my superfly steel bandsaw table thingy!)

-
09-26-2012 #18
Registered User
- Join Date
- Oct 2007
- Location
- New Westminster, B.C., Canada
- Posts
- 88
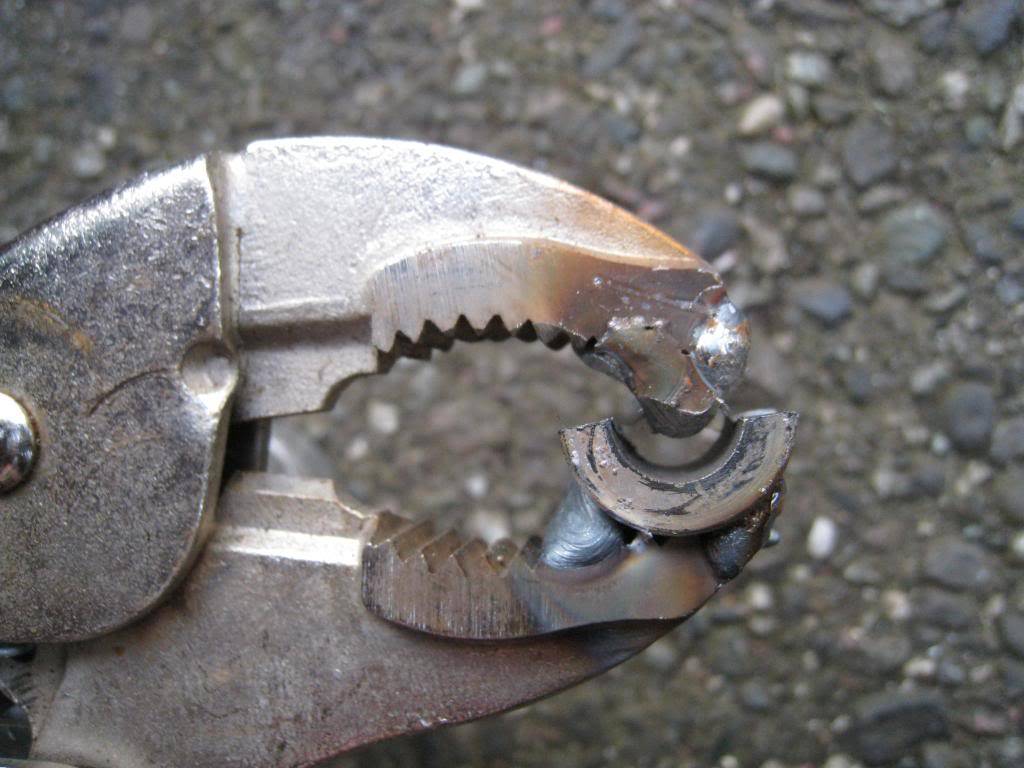
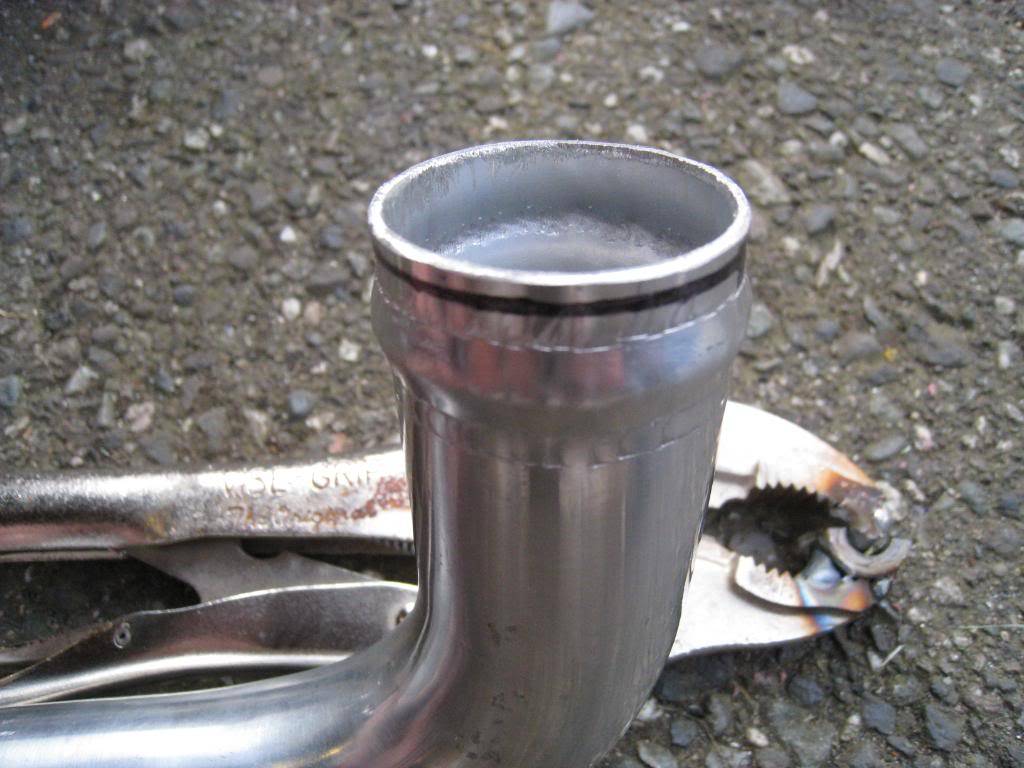
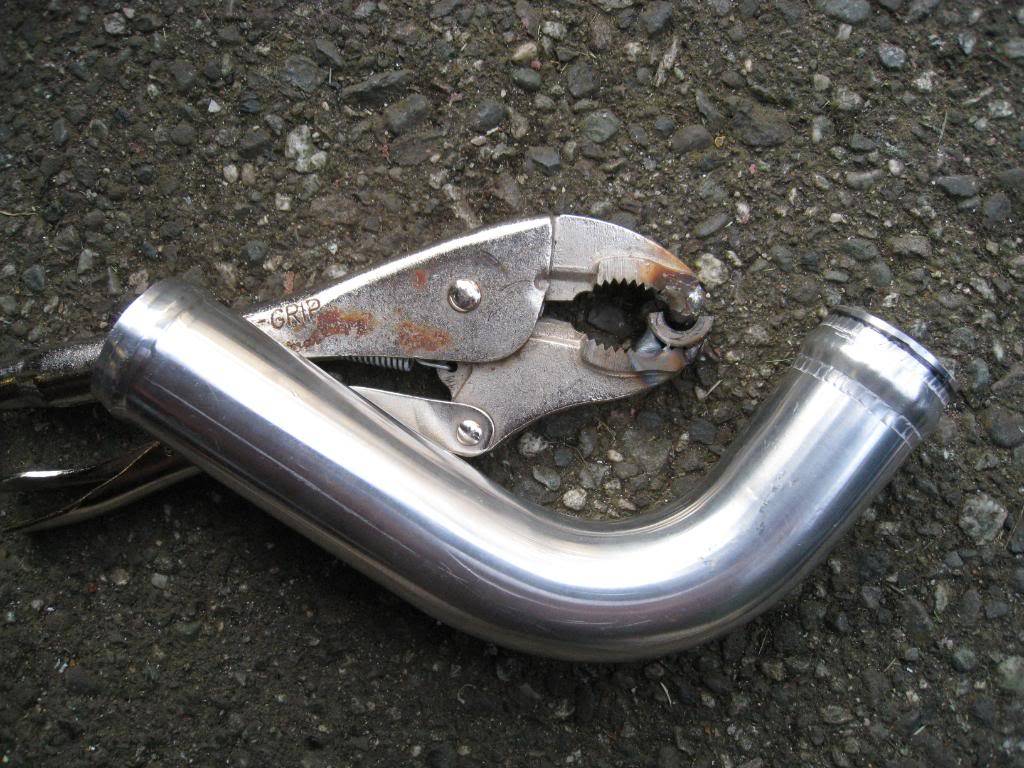
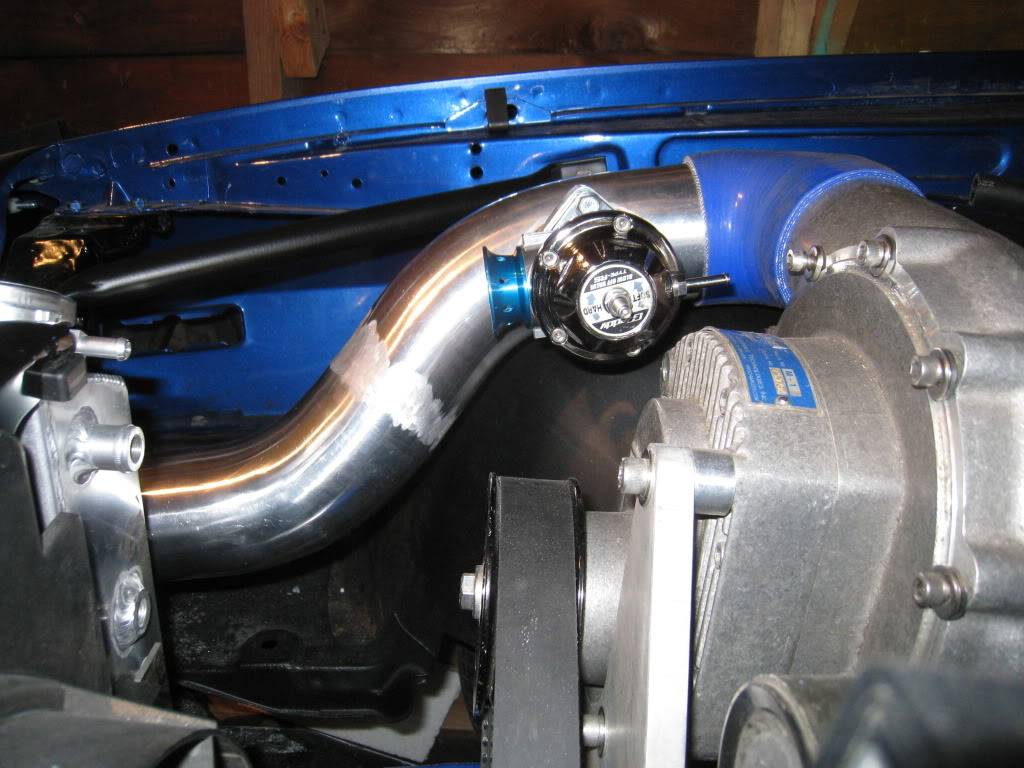
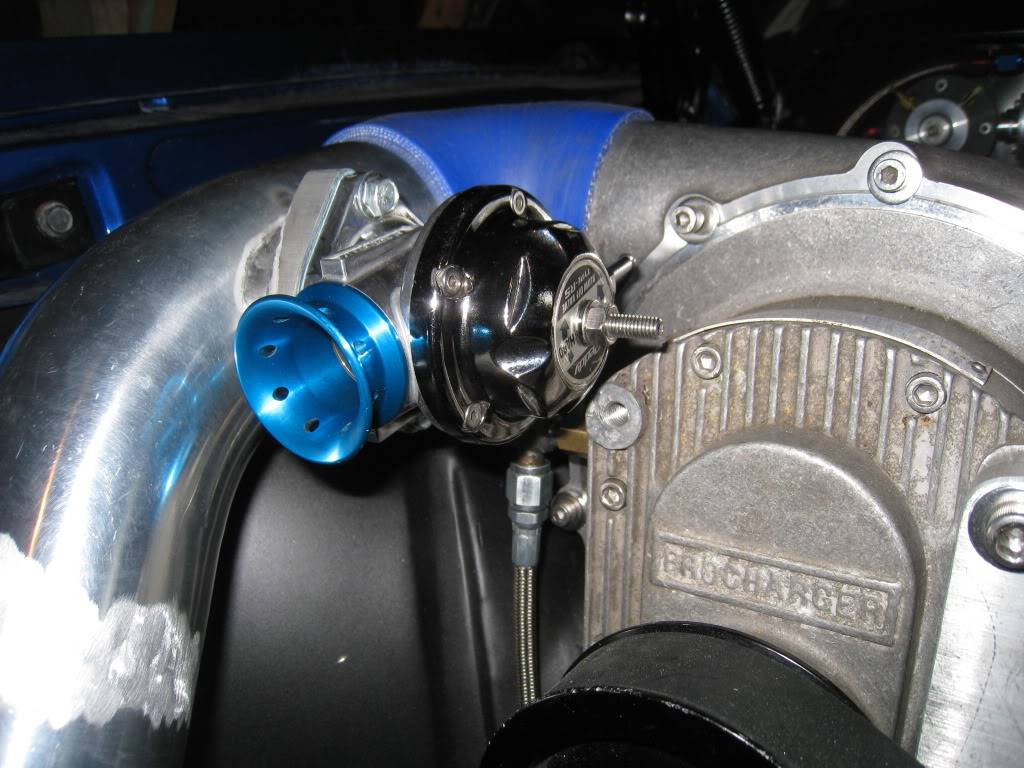
Did some work on the plumbing tonight. Needed to roll the edges of my coolant pipes so came up with this "special tool" had to sacrifice a pair of vice grips but in the end it was worth it. I'm going to change the pipe from the charger to the intercooler, I don't like the sharp bend.

09-26-2012 #19
Registered User
- Join Date
- Oct 2007
- Location
- New Westminster, B.C., Canada
- Posts
- 88
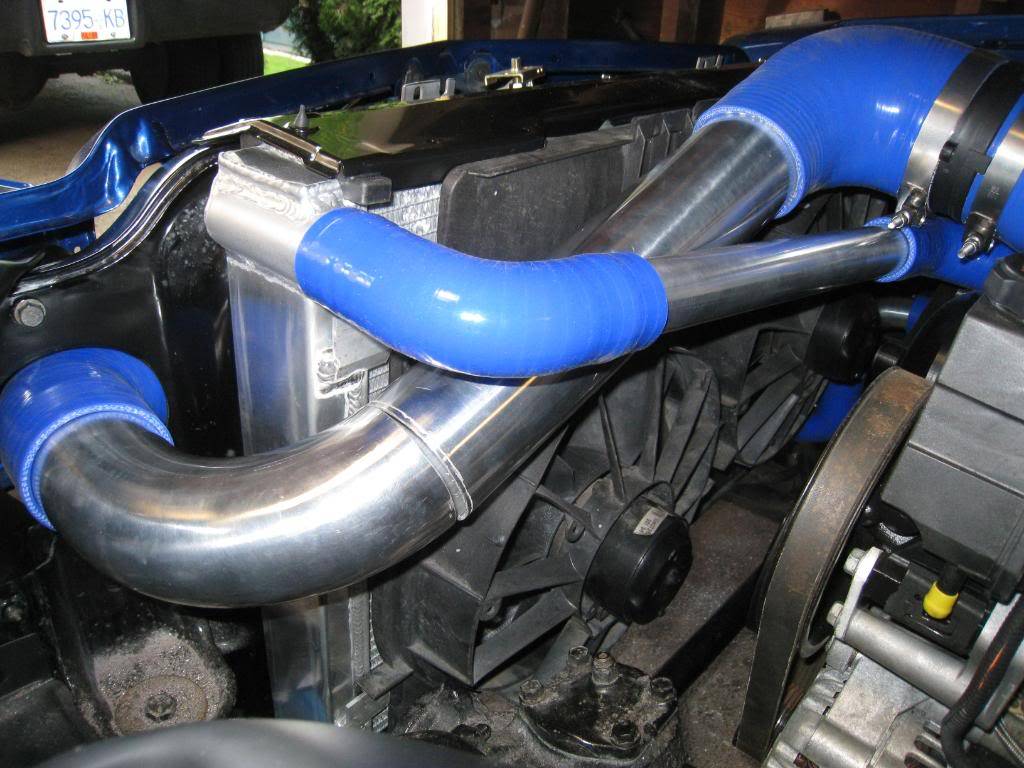
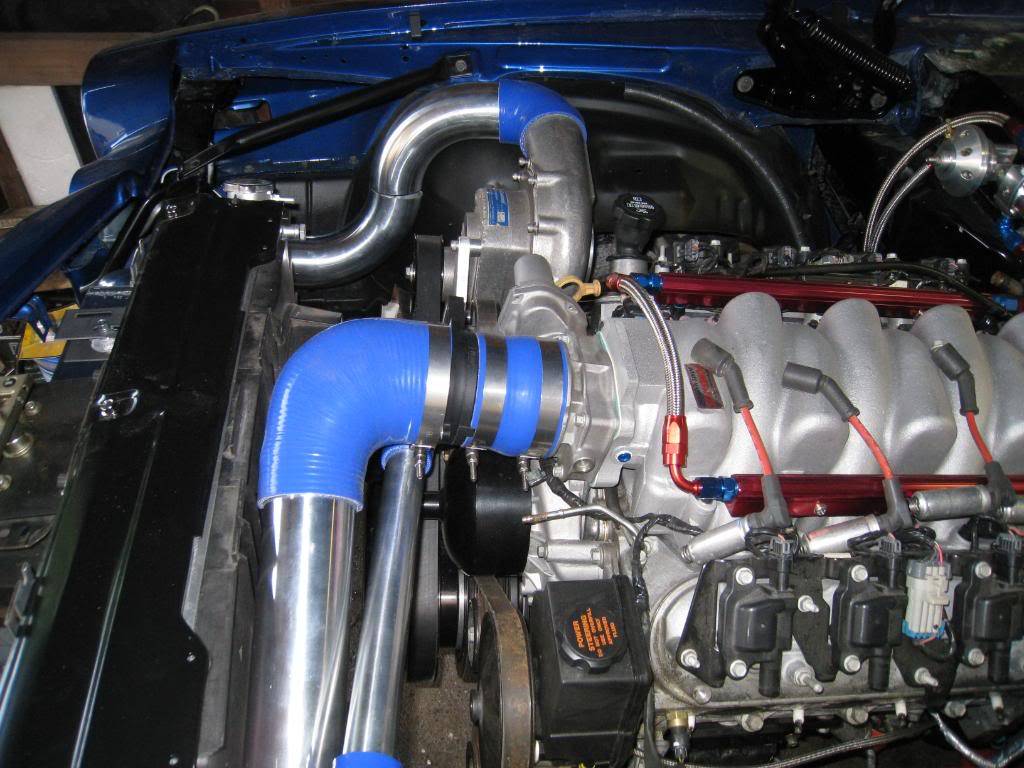
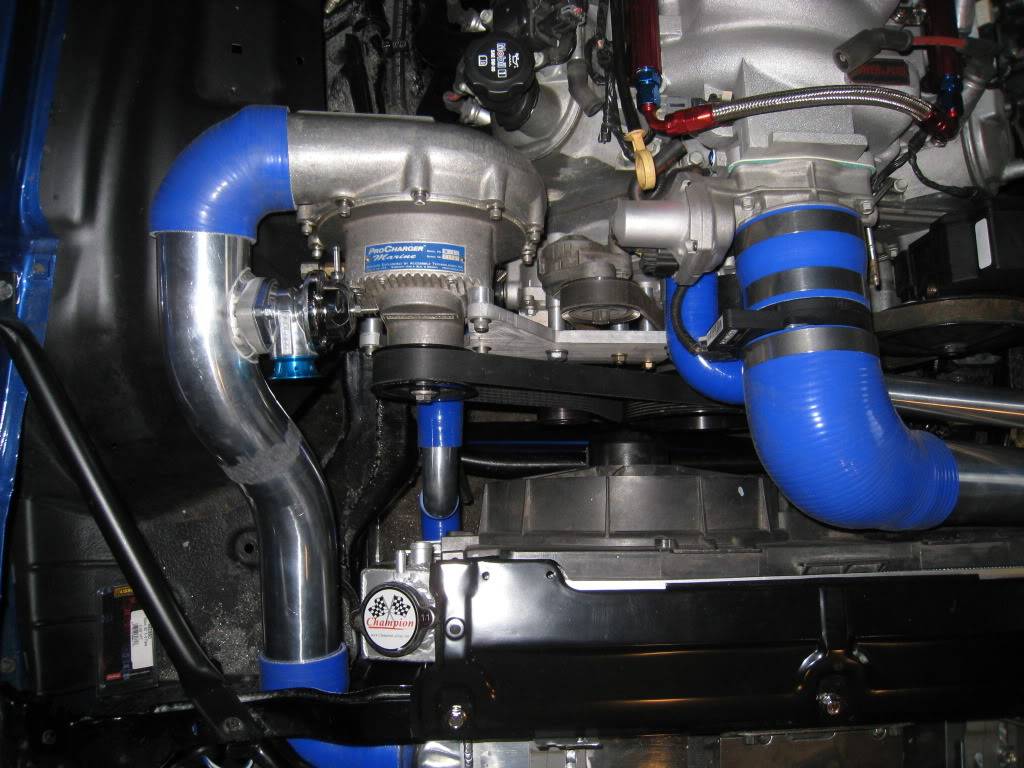
Got the last intercooler pipe finished today, or at least fabricated. Haven't decided on the actual finish for all this stuff yet... I think I may paint it all black with a heat blocking paint to try and keep the intake temps down. This build has been a rollercoaster of emotions. Some days it's just way too much, then others it seems like I just might make it!
09-26-2012 #20
Registered User
- Join Date
- Oct 2007
- Location
- New Westminster, B.C., Canada
- Posts
- 88
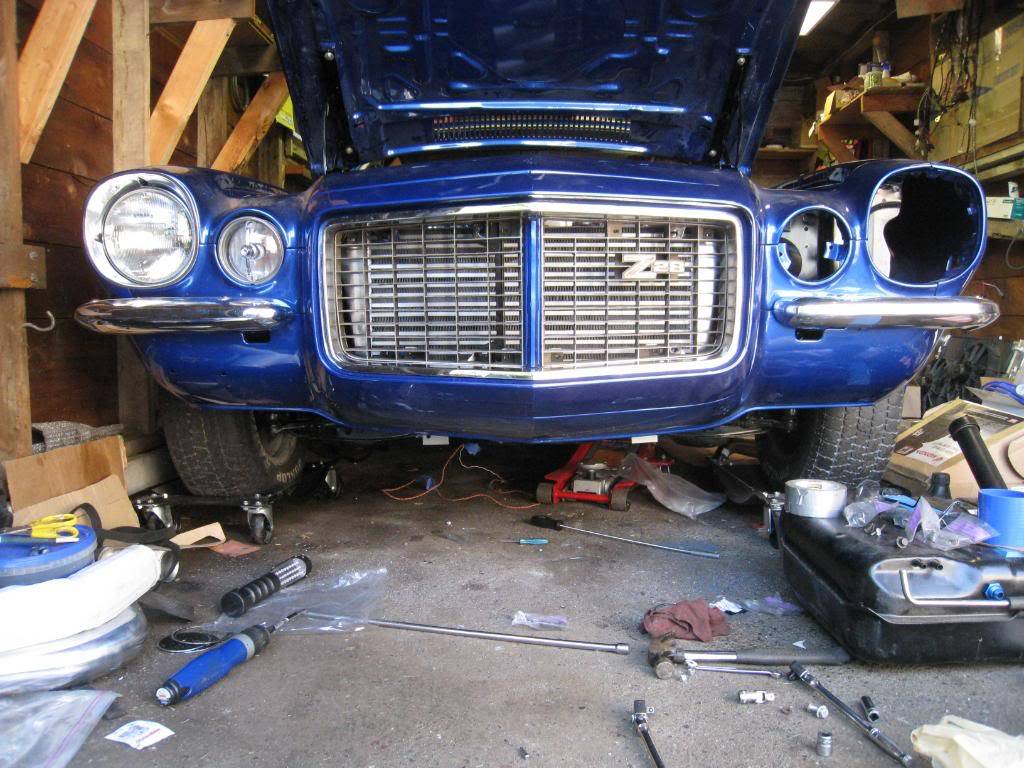
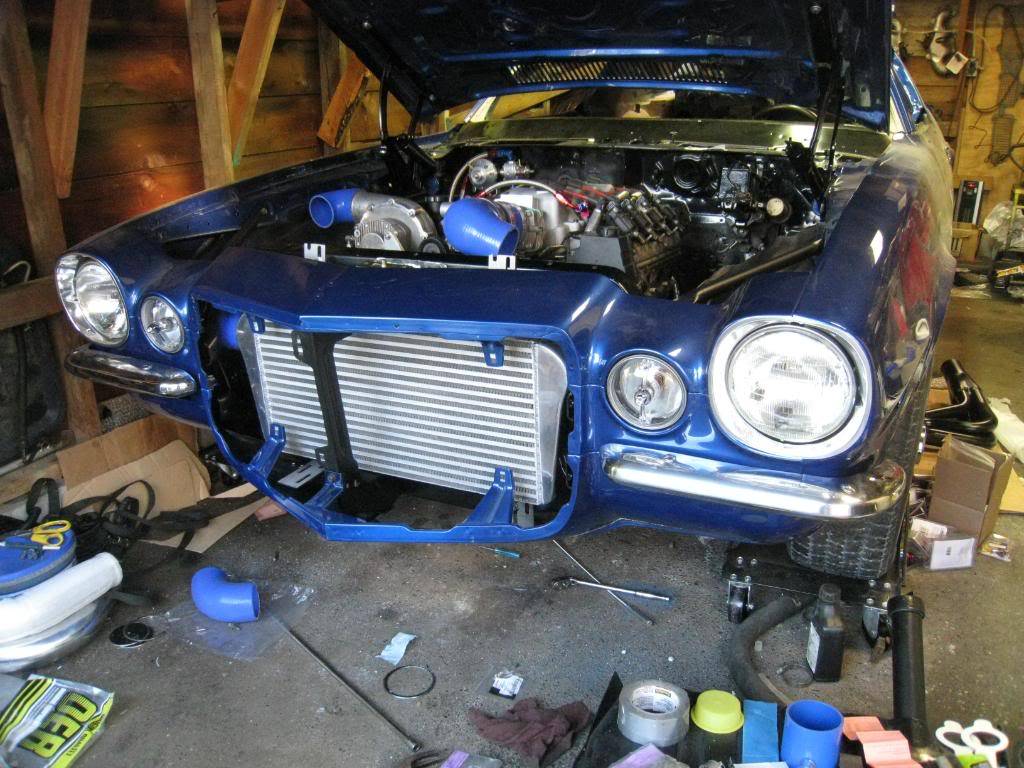
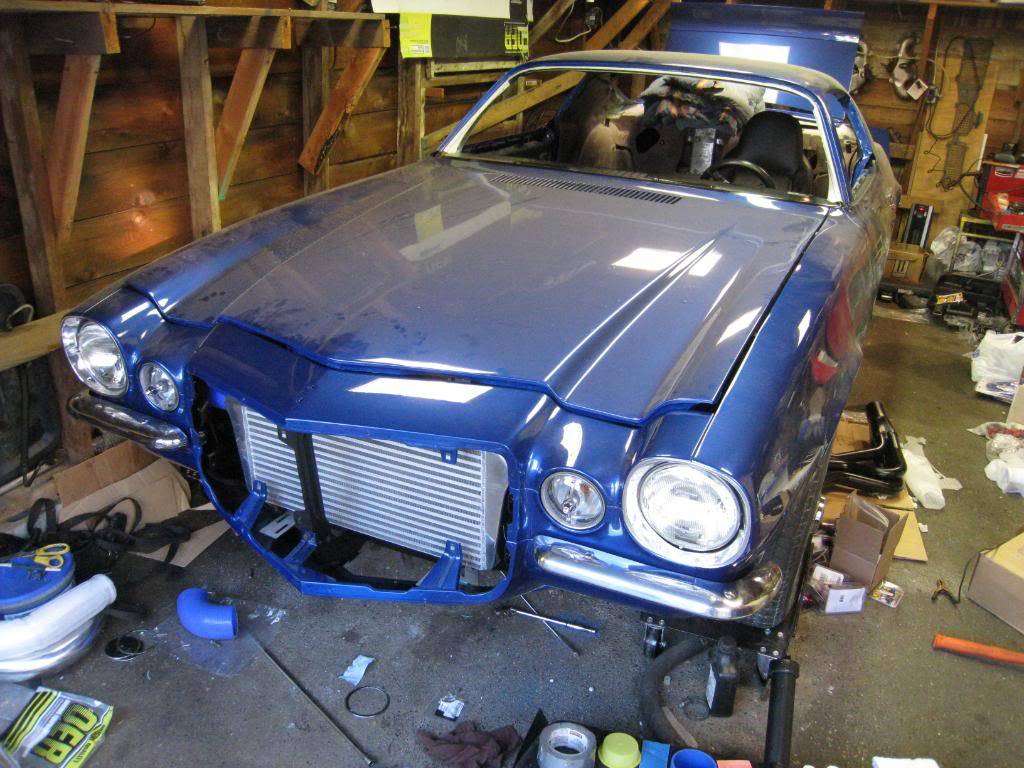
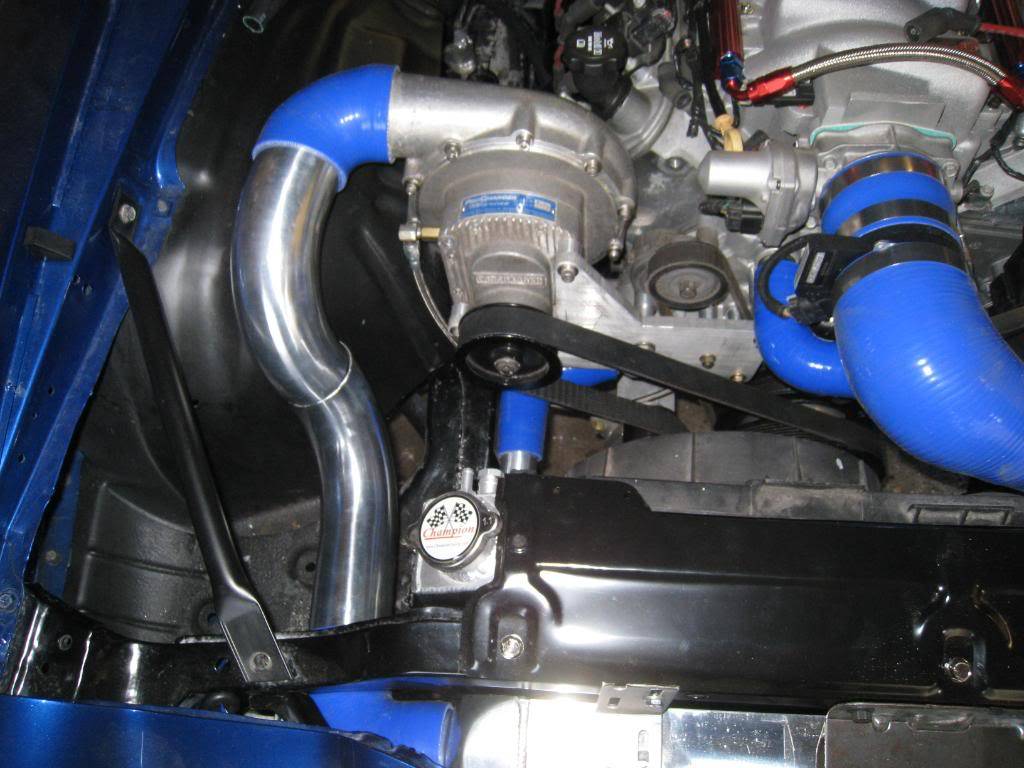
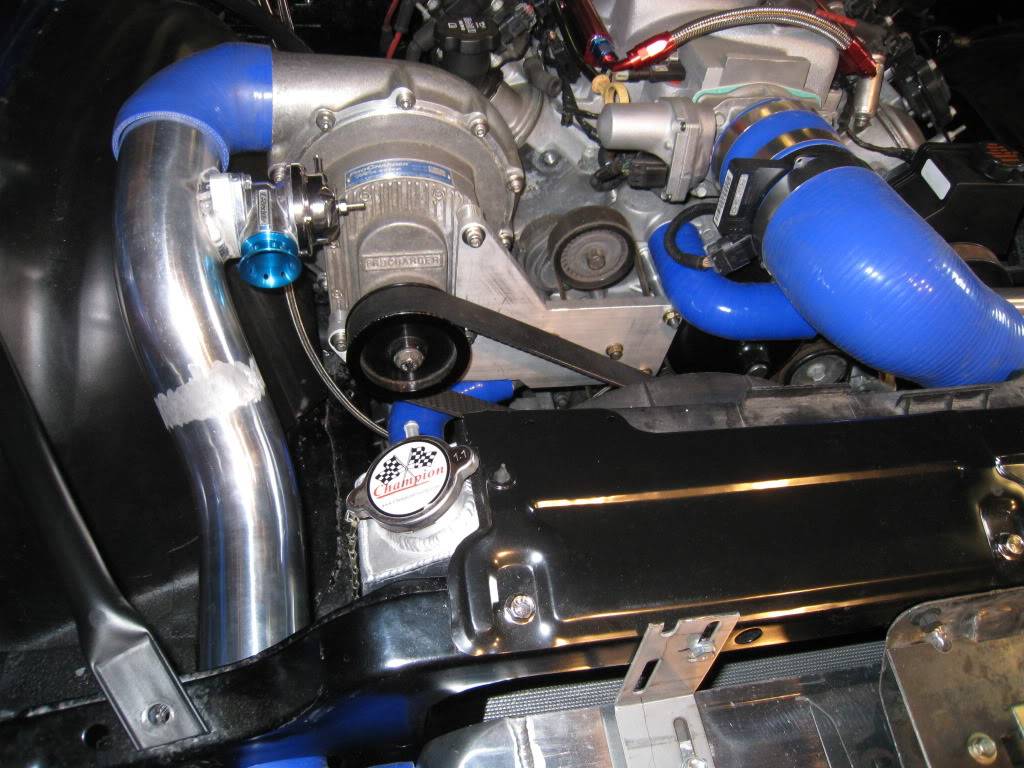
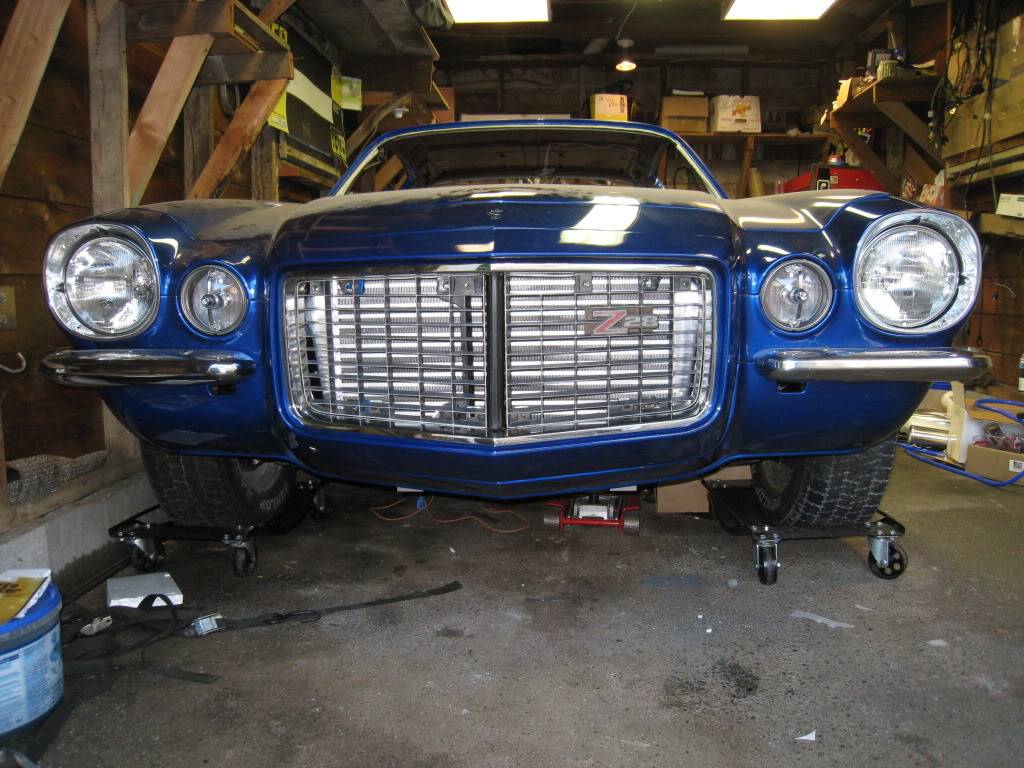
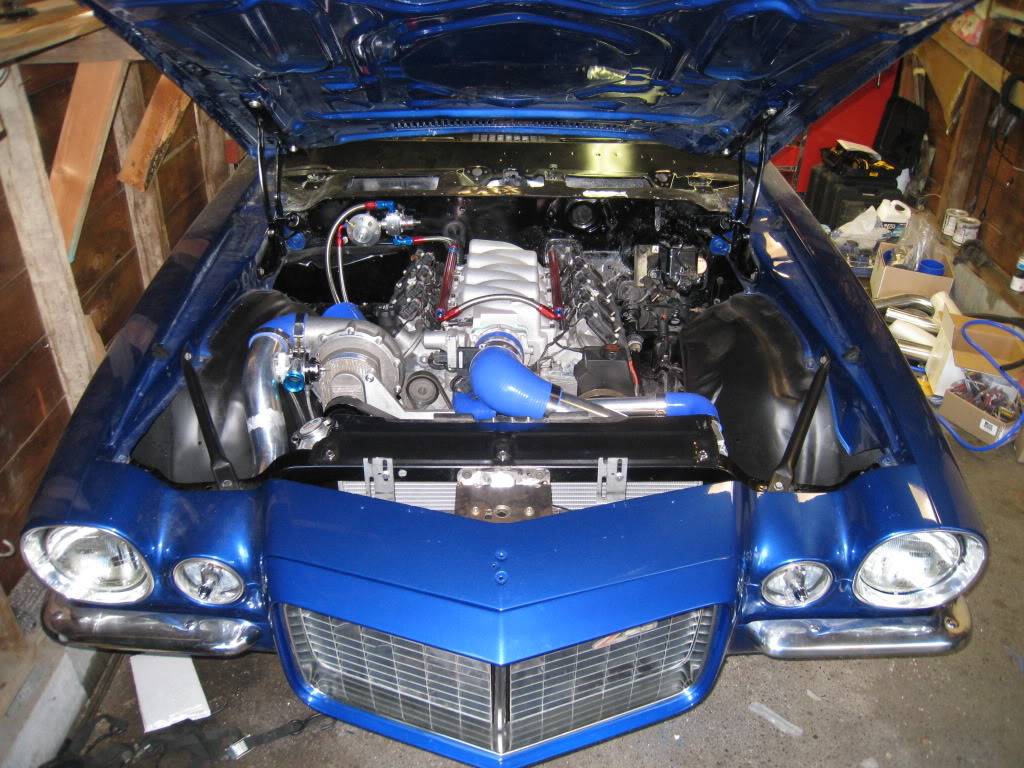
A little more progress over the last 2 nights. Plumbing all clamped down, hood latch tack welded and adjusted, eurathane bumper mounted and grille test fit. Still need to adjust the bumper part. (tricky)

 Reply With Quote


