

Results 201 to 220 of 443
-
05-01-2014 #201

 Registered User
- Join Date
- Jan 2008
- Location
- Charlotte
- Posts
- 1,295
Long time no update...
Truck update!
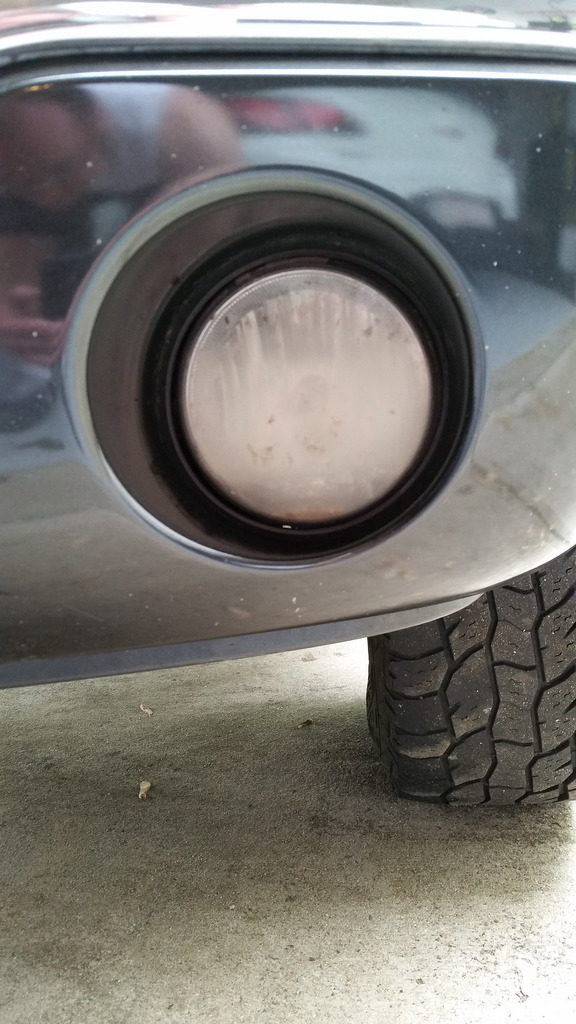
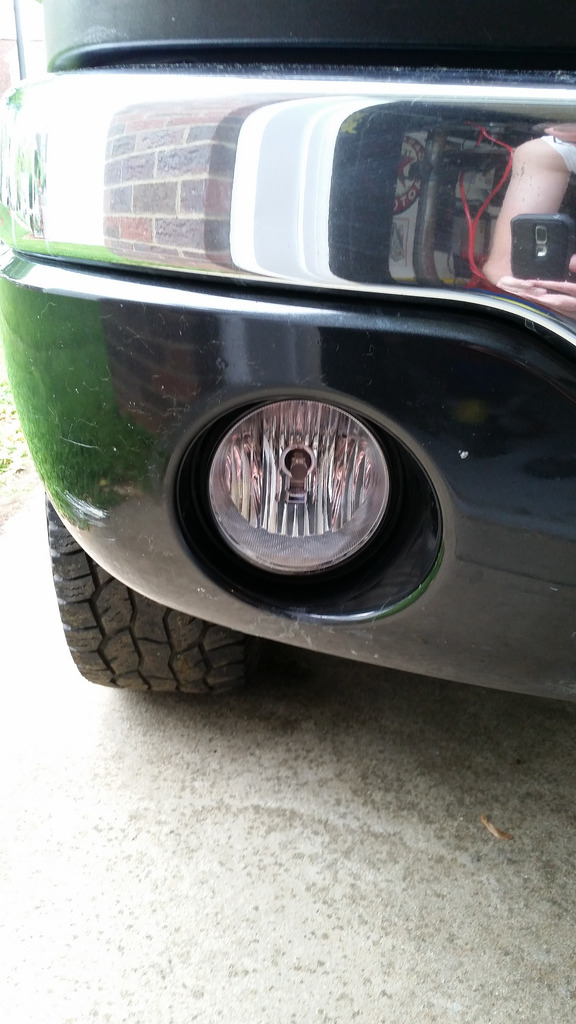
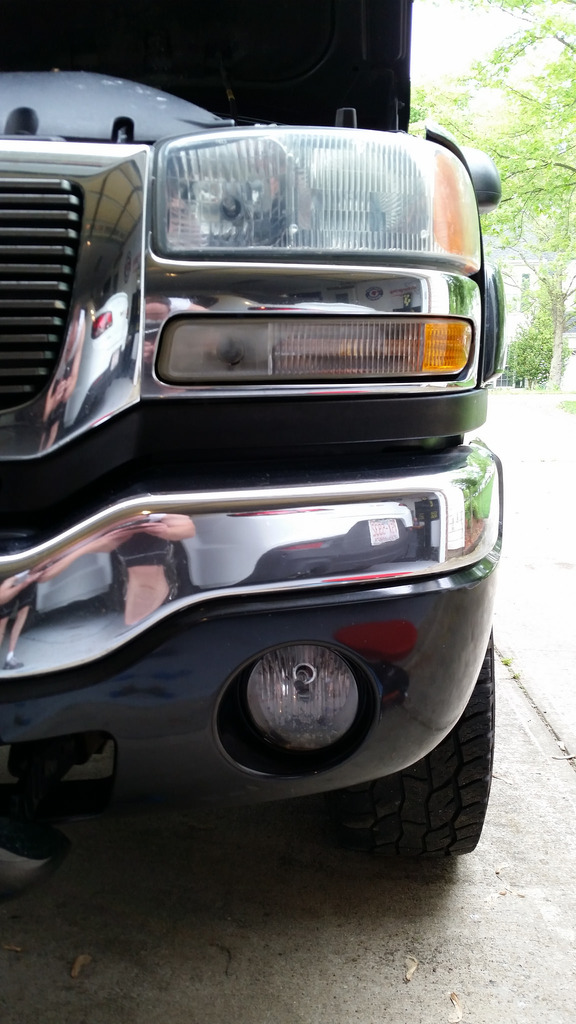
I got one of those Meguiars Heavy Duty Headlight polishing kits for Christmas - I finally had the time to use it.
The kit comes with a buffing wheel, Plastix polishing compound, and a UV protectant sealant - and 2 sanding disks - 1000 grit and 3000 grit.
Since I had 7 lights to do on my truck - I quickly blew through the 1000 grit sanding disk - luckily I had a sheet of 1000 grit sand paper in my shop - and ended up using that for the rest of the lights.
I think its a decent kit - just wish it had more sanding disks with it.
The best part I noticed that it helped was on the fog lights - the headlights had some hazing and yellowing - and it took care of that as well.
Now for teh pics:


 2005 LeMans Blue Corvette w/ T56 & Z51 & C6Z06 Brakes, Build Thread: https://www.pro-touring.com/showthread.php?64496
2005 GMC Sierra 2500HD LLY / Allison
2014 Chevy SS LS3 / 4 Door
-
05-04-2014 #202
Registered User
- Join Date
- Jan 2008
- Location
- Charlotte
- Posts
- 1,295
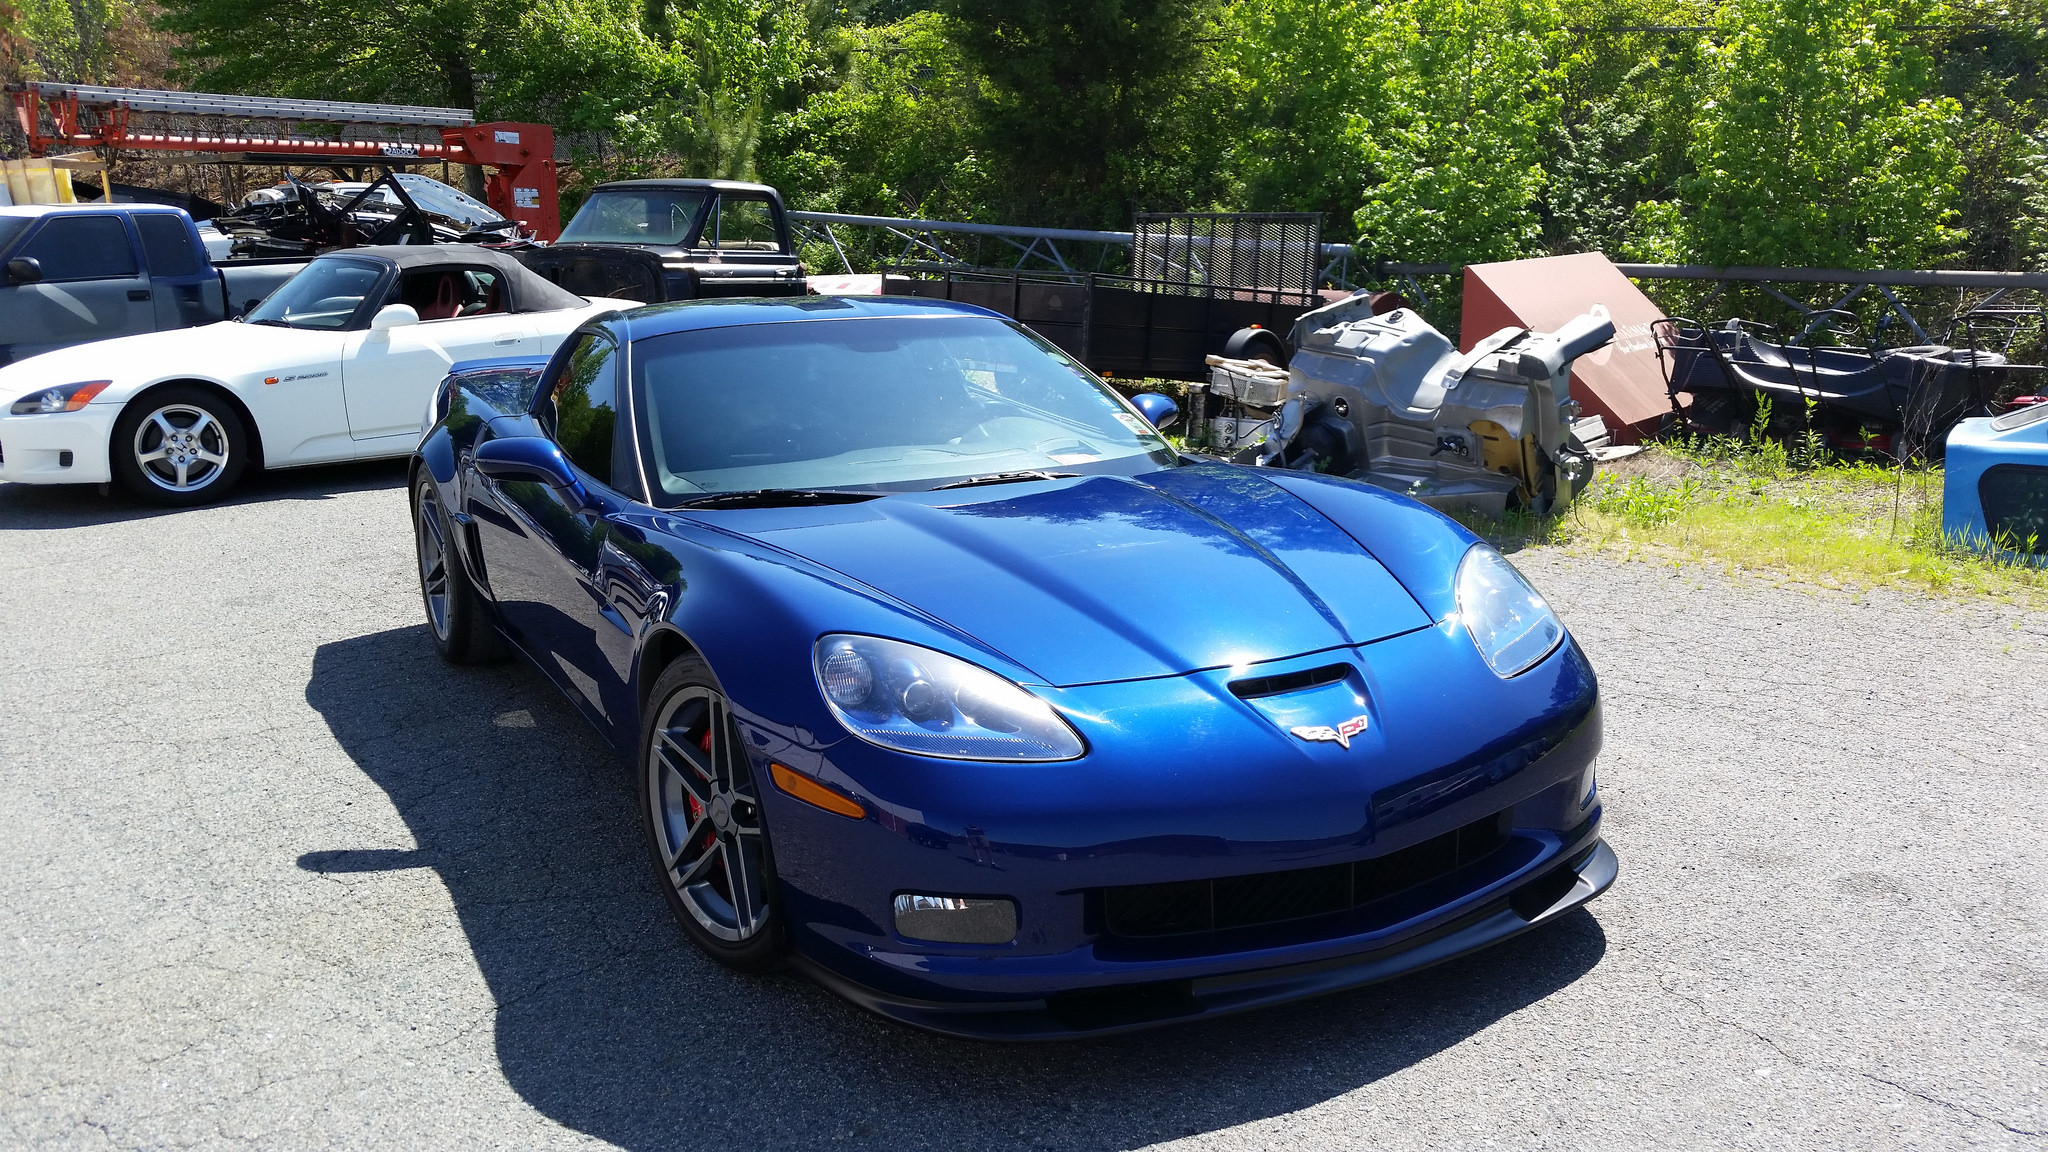
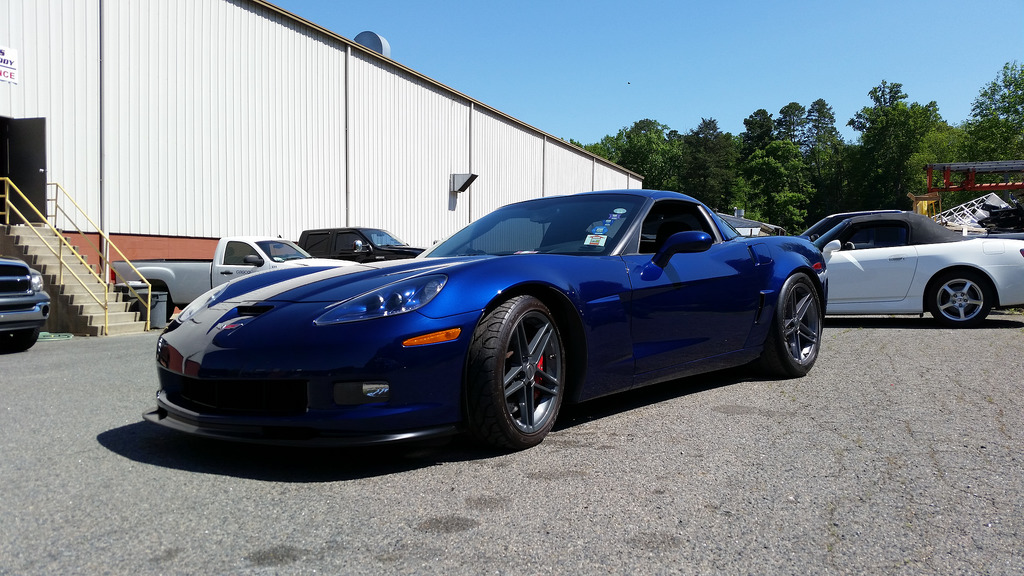
Vette update!
Finally after hoarding car parts for 4 years - I finally got all of the bits and pieces for the Z06 front fender swap!
If you look back I think I got the first z06 fender back in like 2009.
I ordered the hardware and all the plastic crap for front end swap from Gmpartshouse - they worked with me on all the pieces that needed to be ordered and everything came in 4 big boxes.
I took the fenders and bumper to my body guy - and he painted everything and put it all together.
I also had a decision to make for the front splitter - either go with the GM plastic piece for the z06 - or go with a set of aftermarket RPI ZR1 style front and side skirts.
I went with the RPI pieces as they are way cheaper then GM's - and if I ever smack the front end up - it wont be that expensive to replace compared to a $1400 CF splitter from GM.
Also - to not piss off the purist - I had my body guy shave the Z06 fender badge holes in the CF fenders.
I got the car back last night - and I installed the zr1 side skirts.
Now for teh pics:

 2005 LeMans Blue Corvette w/ T56 & Z51 & C6Z06 Brakes, Build Thread: https://www.pro-touring.com/showthread.php?64496
2005 GMC Sierra 2500HD LLY / Allison
2014 Chevy SS LS3 / 4 Door
05-06-2014 #203
Registered User
- Join Date
- Dec 2009
- Posts
- 34
Man I love it, good work!
05-06-2014 #204 Registered User
- Join Date
- Dec 2005
- Location
- Birmingham, AL
- Posts
- 3,356

The Corvette looks awesome. I think the C6 Z06/Gran Sport is one of the prettiest Corvettes ever built so adding the Z06 panels really takes yours to the next level.
Stephen
05-06-2014 #205
Registered User
- Join Date
- Jan 2008
- Location
- Charlotte
- Posts
- 1,295
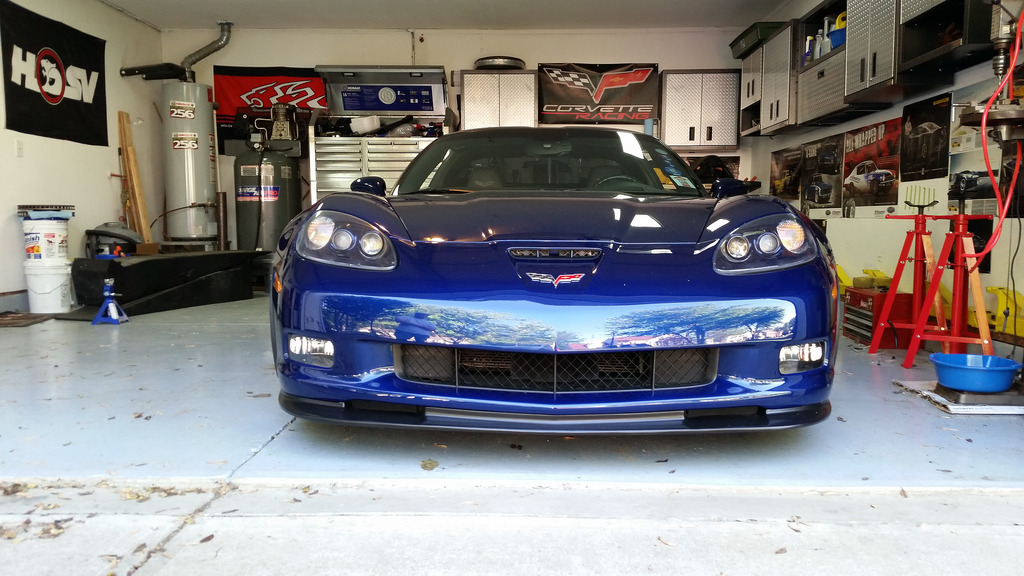
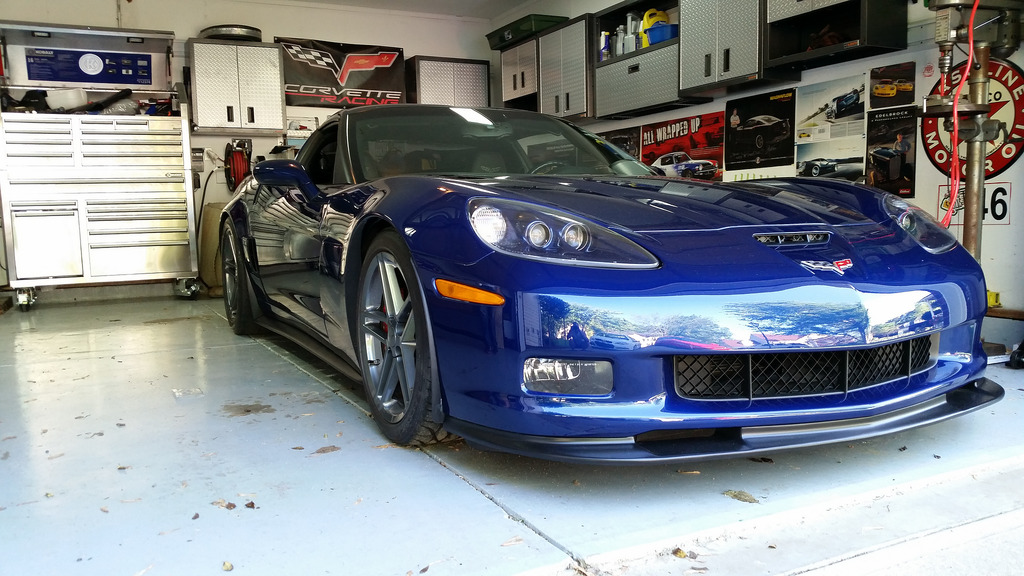
Thanks everyone!
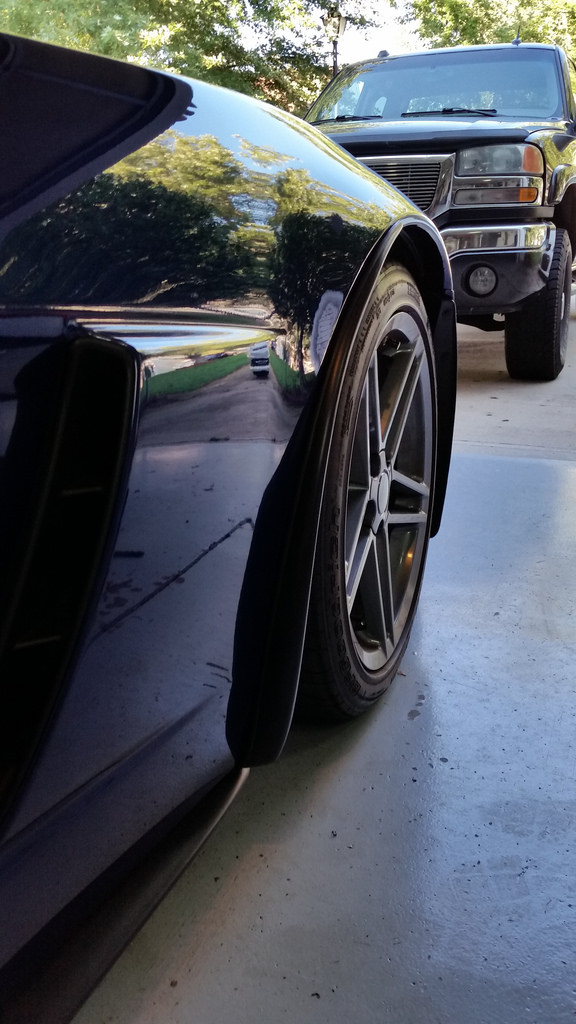
I got some daytime shots outside:

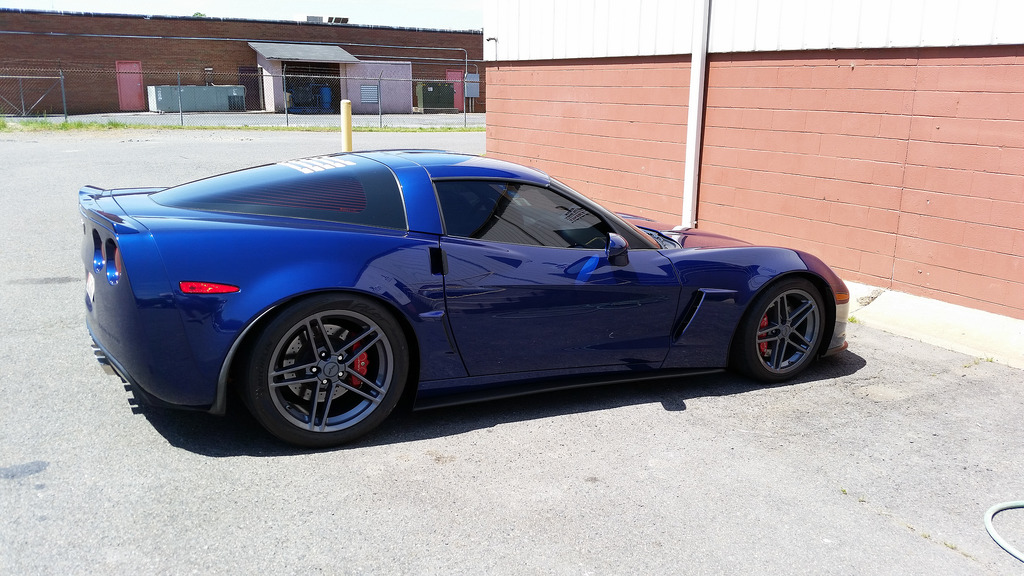
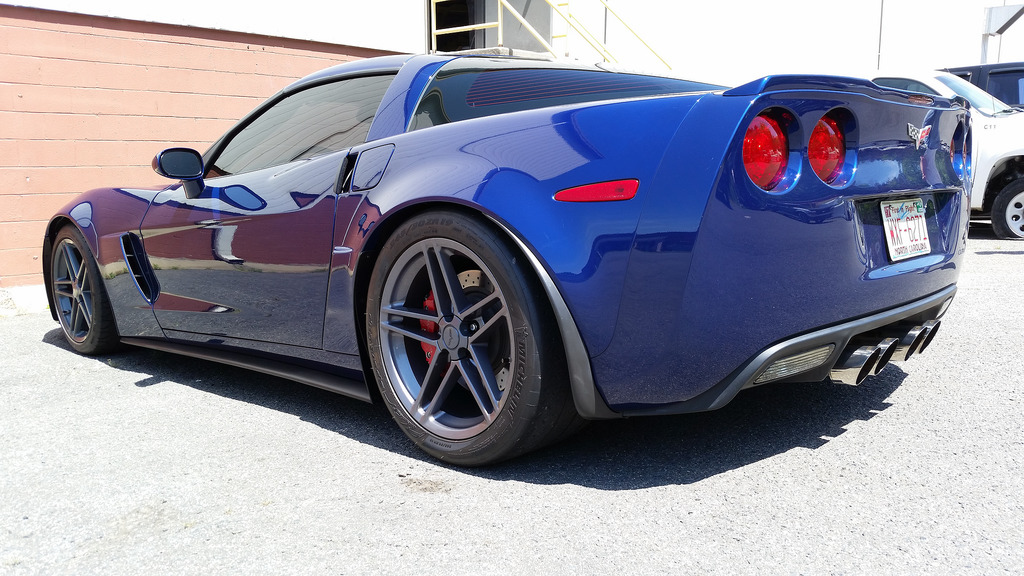
As you can see the ZR1 splitter is stupid low - I put some boards out in my gutter/curb - and I actually ended up hitting the board with the side skirt - so in trying to prevent the car from hitting - I hit my board.
So needless to say I got ride of the boards and pulled out of my driveway with no problem.
I guess thats what I get for trying to prevent some damage!
Thankfully I was going slowly and the side skirt is fine.2005 LeMans Blue Corvette w/ T56 & Z51 & C6Z06 Brakes, Build Thread: https://www.pro-touring.com/showthread.php?64496
2005 GMC Sierra 2500HD LLY / Allison
2014 Chevy SS LS3 / 4 Door
06-04-2014 #206
Registered User
- Join Date
- Jan 2008
- Location
- Charlotte
- Posts
- 1,295
Time for a truck update:
So I have been stupid busy working on my truck over the last month or so.
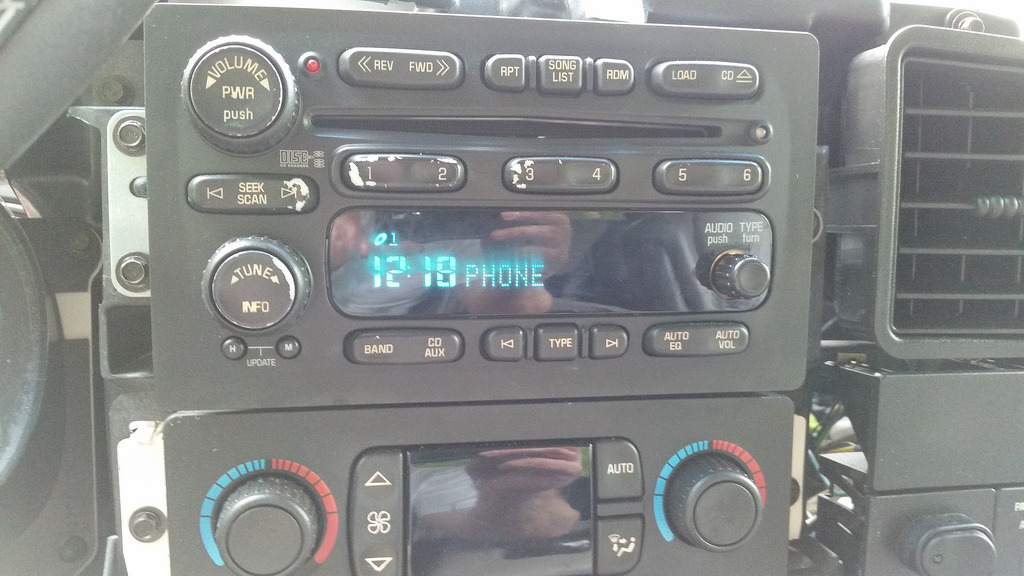
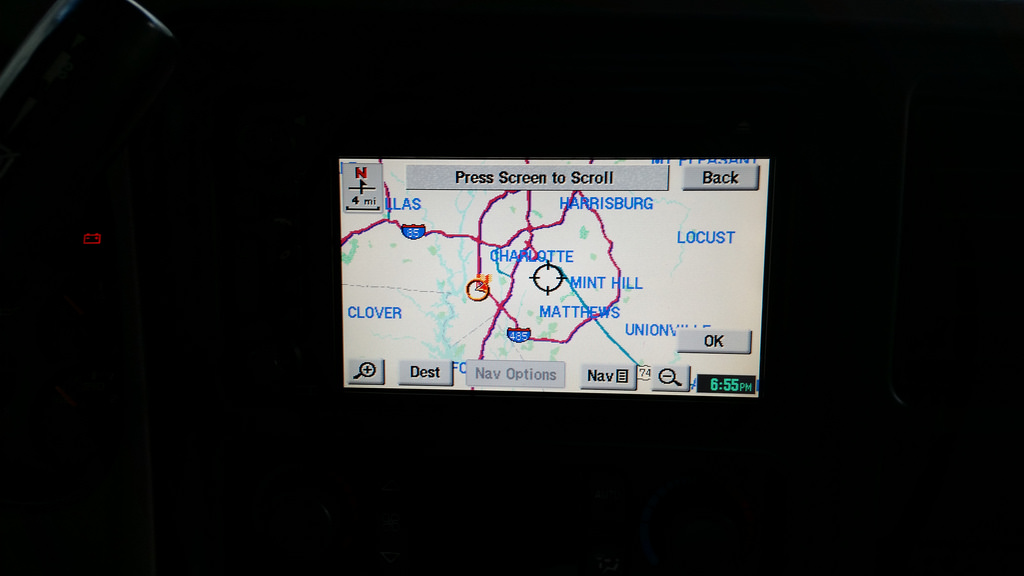
First I really wanted an OEM bluetooth to work - I have it in my SS and I love that feature.
So I found a VCIM out of a Trailblazer - put it in - and it works with the steering wheel controls.
Pic of it showing up on the radio:
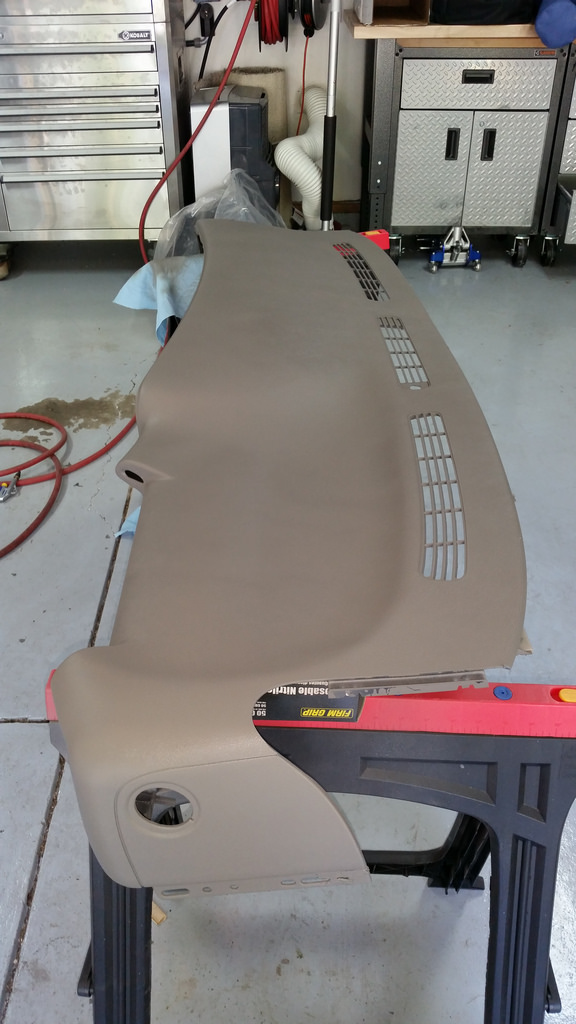
Second - I also had ordered a replacement HVAC door actuator to replace the one that has been acting up on my truck - well the one I ordered has only 3 pins in - and all of the actuator doors on my truck are 5 pins - and verified this by pulling the dash apart enough to get to all of them. I couldn't return the one that I had ordered as it was opened, and I had ordered it more then 30 days ago.
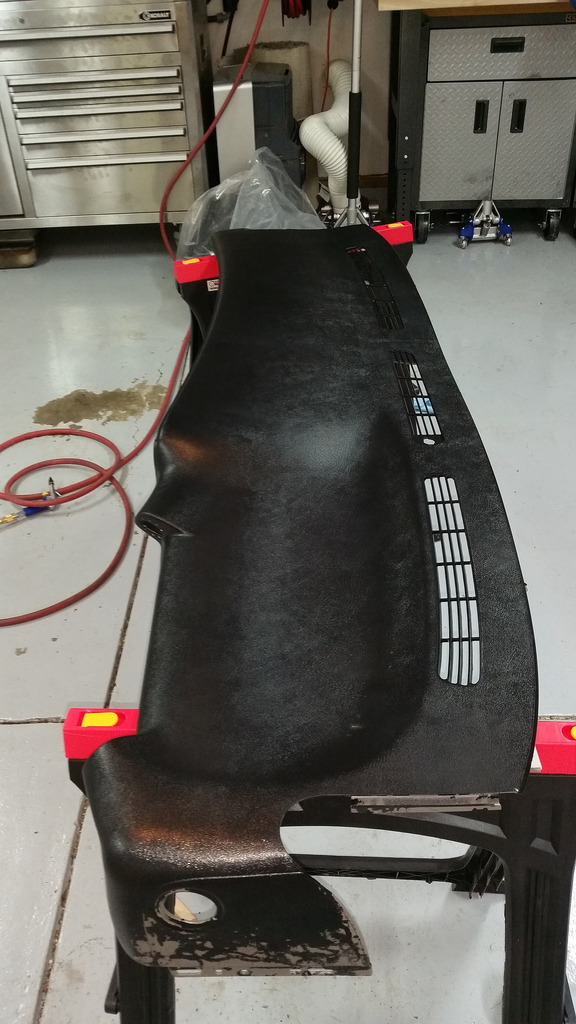
Third - since I had the dashboard out - and the paint was chipping up - I asked my neighbor to borrow his power washer. I used his power washer to blow all of the paint off the dash. It did a great job at removing the paint.
So I had to find some paint to match the interior - after taking a gamble I had ordered the SEM paint code that matched the Very Dark Grey Pewter interior - but when I brought in my fuse panel cover - it didnt match at all.
Turns out that I have the Medium Dark Grey Pewter Interior.
So I ordered SEM 17163 from my local O'reillys. They where able to get it next day.
I used SEM's cleaining and prep system steps.
So I ordered there SEM Soap, SEM plastic and leather prep spray, and finally there SEM Adhesion Promoter.
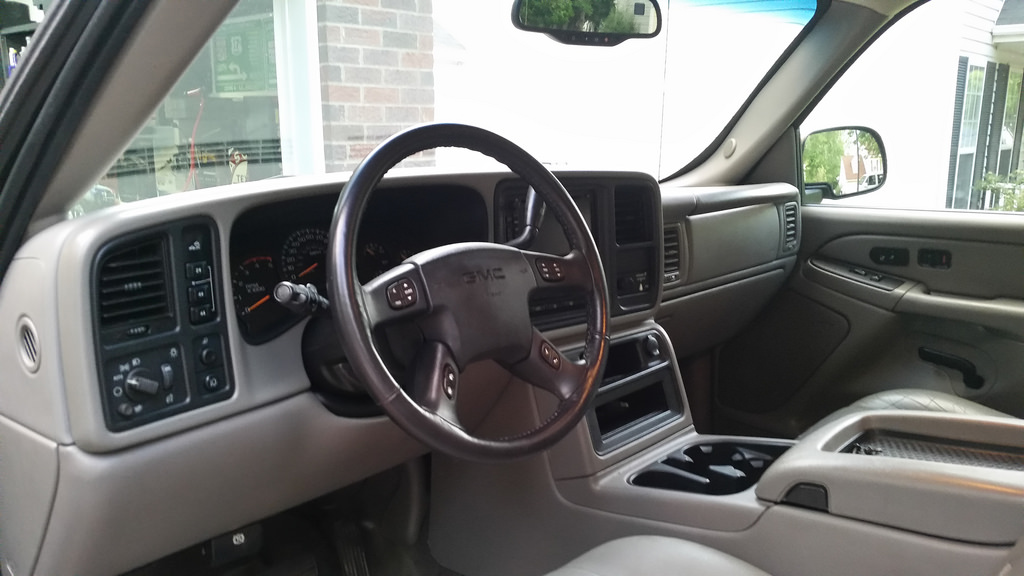
The paint went easily - and I am pretty impressed with the final product.


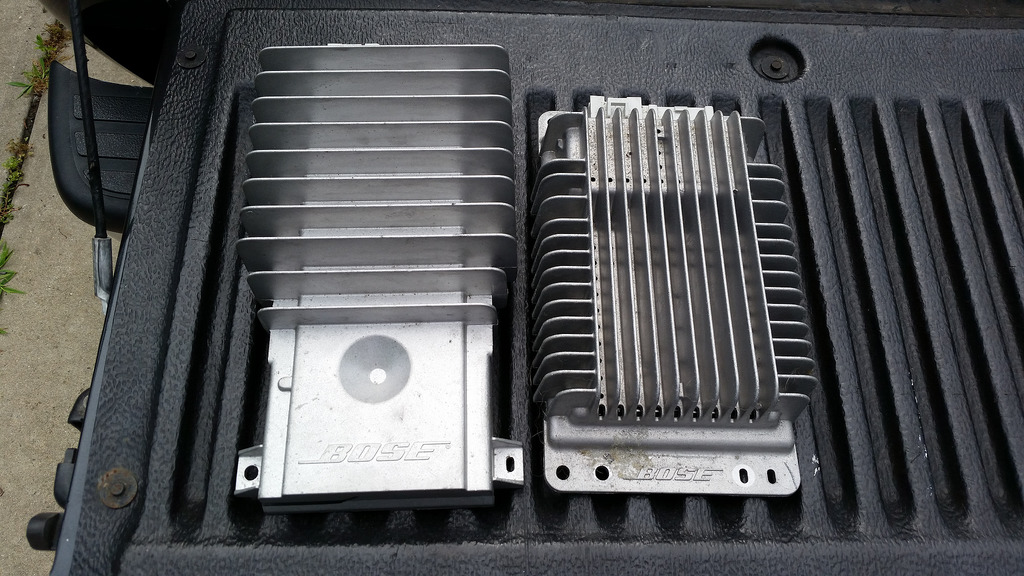
Fourth - since I had everything torn apart - I decided to improve the factory radio - looking on Ebay - the price for the upgraded Bose amp and the factory touch screen navigation has fallen a bunch - I got both the amp and the Nav radio for less then $300 - and they are factory pieces not to this truck but within the GM Truck/SUV family.
So after repinning the Bose harness - I got everything put back together and finally finished up my interior mods/upgrades!

 2005 LeMans Blue Corvette w/ T56 & Z51 & C6Z06 Brakes, Build Thread: https://www.pro-touring.com/showthread.php?64496
2005 GMC Sierra 2500HD LLY / Allison
2014 Chevy SS LS3 / 4 Door
06-12-2014 #207
Registered User
- Join Date
- Jan 2008
- Location
- Charlotte
- Posts
- 1,295
So I had a new clear bra on the Vette last week right before the Power Tour - went with a different installer this time and they did a really good job.
The PT had an event at Hotchkis Performance East. Lou Santiago was there and I got to meet him - hes pretty cool. The shop they have up there is pretty nice.
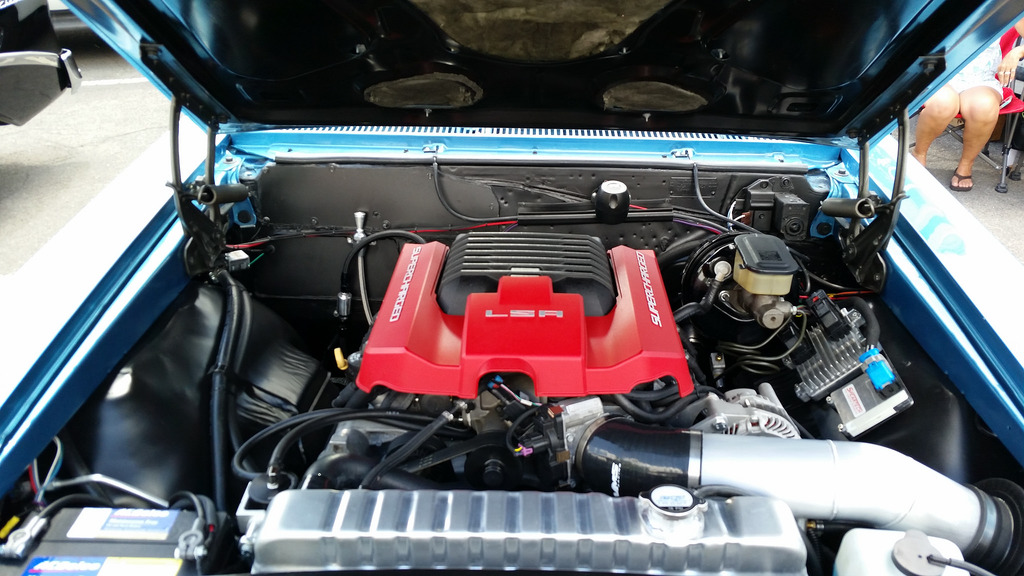
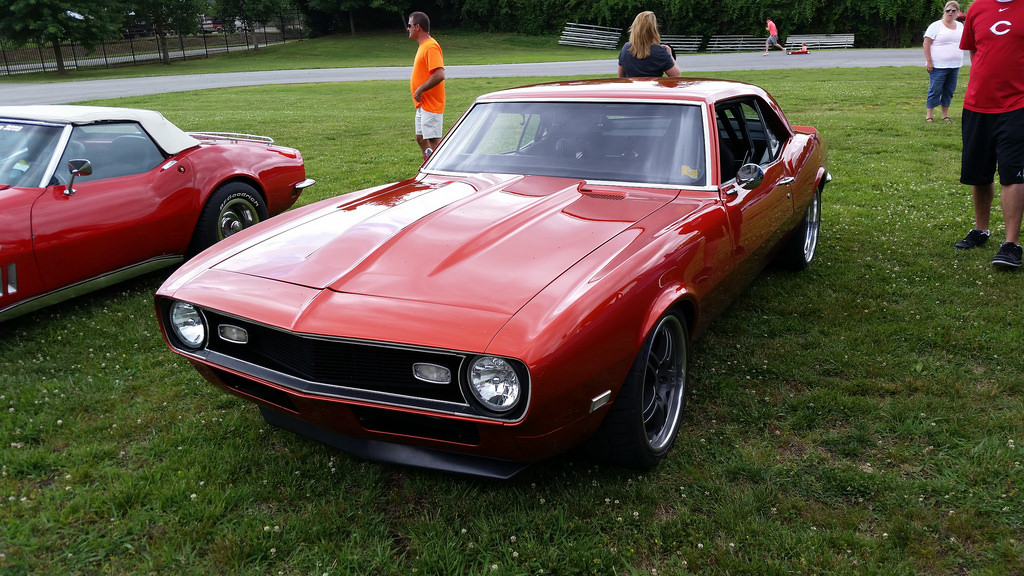
We then went to Zmax Dragway in Concord, NC - and saw some cool cars there. Saw Ken's LSA powered Chevelle and Mark Stielow's old project car that he built a year or two ago.
My last day of the Power Tour was driving up to Knoxville TN and got to meet Rutledge Wood again, and also saw Bad Penny - such a cool car.
Here are a few select pics:

Here is my gas Mileage average - not bad for 500+ hp:

The rest of my pics:
https://www.flickr.com/photos/979034...7645127595831/2005 LeMans Blue Corvette w/ T56 & Z51 & C6Z06 Brakes, Build Thread: https://www.pro-touring.com/showthread.php?64496
2005 GMC Sierra 2500HD LLY / Allison
2014 Chevy SS LS3 / 4 Door
06-23-2014 #208
Registered User
- Join Date
- Jan 2008
- Location
- Charlotte
- Posts
- 1,295
This was the first extended road trip for my built up LSx motor in the Vette - the car got over 32 mpg on the highway when I was easy on it.
The car drove fine except for that after driving 500+ miles this weekend - and 5 mins from home the Check Engine Light came on.
The car threw a P0430 code - complaining about the exhaust catalyst being to low efficiency - its weird because it only happens when I'm idling.
Talked it over with friends, the CF, and all said to take it back to the tuner.
So I contacted PCM of NC - and they are going to take a look at it.
Also - the alignment is out of whack on the front end - I took the car to the clear bra shop and the wheel was off a bit - got back in the car after they where done with it and it was really off.
I need to checkout the coilovers on the front/rack to see what's going on.
I just had an alignment done right after I got the engine all back together.
So either the lift needs to go back up - or I get to figure out how to raise the front end of my car with the ZR1 splitters there in the way, ugh!2005 LeMans Blue Corvette w/ T56 & Z51 & C6Z06 Brakes, Build Thread: https://www.pro-touring.com/showthread.php?64496
2005 GMC Sierra 2500HD LLY / Allison
2014 Chevy SS LS3 / 4 Door
06-23-2014 #209
Registered User
- Join Date
- Jan 2008
- Location
- Charlotte
- Posts
- 1,295
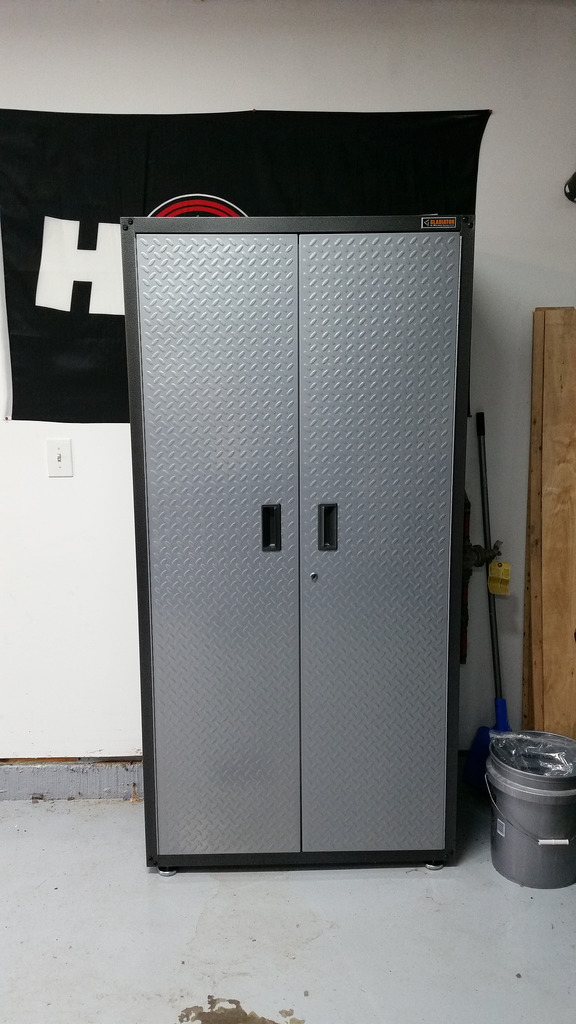
First off - shop update:
I picked up a Gladiator stand up cabinet that is 36x72x18. It is there RTA series and was pretty easy to put together.
I got this on sale for Fathers Day - put it together, and got some tools, and other junk up off of the floor/my work bench!
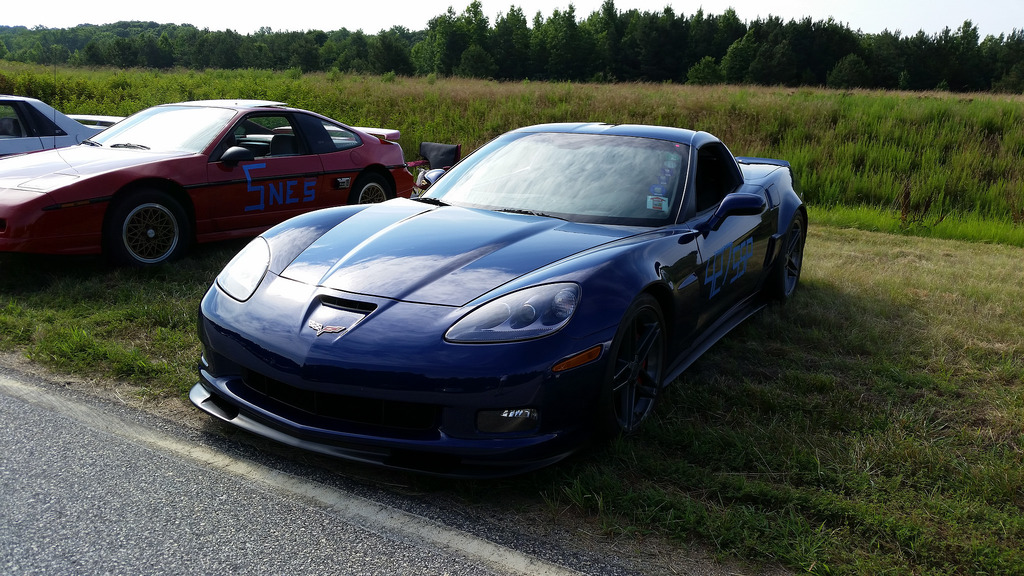
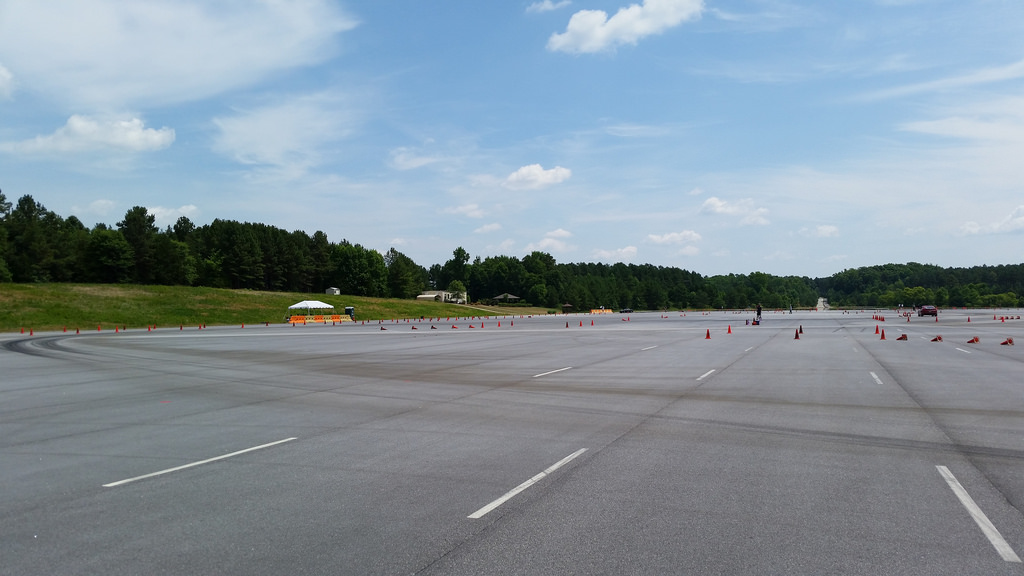
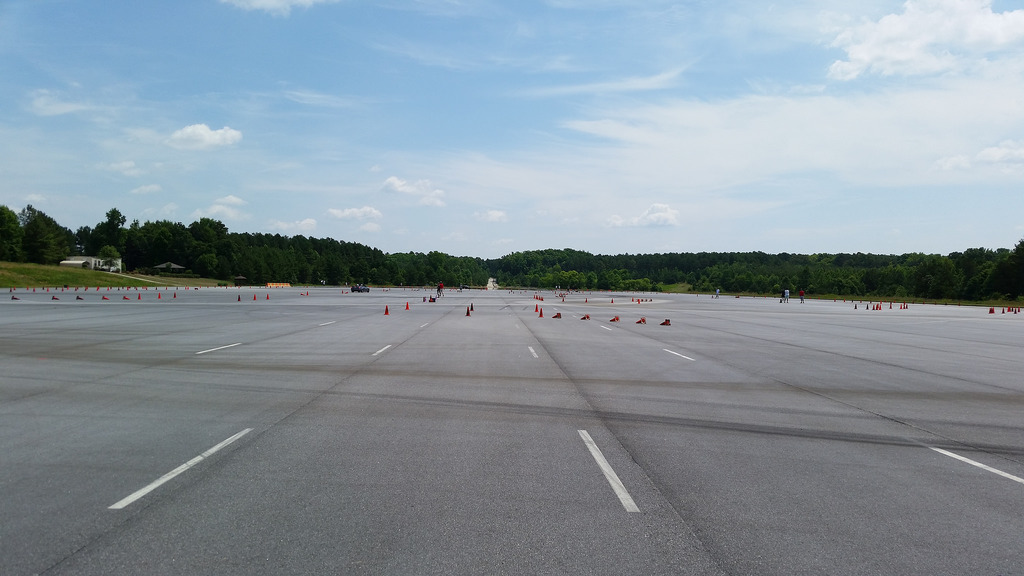
Second - I went autocrossing with the local SCCA chapter down at the Michelin Tire Proving Grounds in Laurens SC.
It kind of sucked getting up at 5am for the 2 hour drive to get out there - there proving grounds are in the middle of no where, but it was well worth it and had a ton of fun.
We autocrossed on there "Black Lake" - its a flat perfectly paved facility that had very little elevation change.
Here where my runs:
Run 1 - I DNF'd and got lost - I somehow convienetly lost the footage :p
Run 2
Run 3
Run 4
Overall I had a fun time - and dropped times on each run.
Here are some pics that I snapped:


 2005 LeMans Blue Corvette w/ T56 & Z51 & C6Z06 Brakes, Build Thread: https://www.pro-touring.com/showthread.php?64496
2005 GMC Sierra 2500HD LLY / Allison
2014 Chevy SS LS3 / 4 Door
07-15-2014 #210
Registered User
- Join Date
- Jan 2008
- Location
- Charlotte
- Posts
- 1,295
I've been having some trans overheating / running warm issues with the Allison in my truck.
So I ordered an aftermarket transmission cooler that bolts to the OEM lines - its a Setrab unit from Ingleside Transmissions in CA. I got it today (one week shipping from CA to NC) - and got it installed.
I got everything buttoned up and went for a quick 15 mile drive and it never went over 175*.
I need to drive it more to see how much it cools it down.
Now for the pics:


 2005 LeMans Blue Corvette w/ T56 & Z51 & C6Z06 Brakes, Build Thread: https://www.pro-touring.com/showthread.php?64496
2005 GMC Sierra 2500HD LLY / Allison
2014 Chevy SS LS3 / 4 Door
07-15-2014 #211
Registered User
- Join Date
- Feb 2013
- Location
- Ft Worth, TX
- Posts
- 186
Did the upgraded Bose amp make any difference?
1970 Chevelle: 6.0 L96, T56, Strange 9 Inch, Ridetech Coilovers, Wilwood brakes
1978 Firebird: 6.0 LQ4, T56
2007 Sierra 2500HD LBZ
07-24-2014 #212
Registered User
- Join Date
- Jan 2008
- Location
- Charlotte
- Posts
- 1,295
The Bose amp is required with the particular nav unit that I have - they did sell a Non Lux TNR.
As for sound - it does sound a lot better as the speakers are the same in the Denali as the the trucks.
Back to the Vette - So I lowered my C6 on a set of a coilovers - and then added a set of ZR1 side skirts and front splitter - so this made ground clearance even more of a problem to deal with.
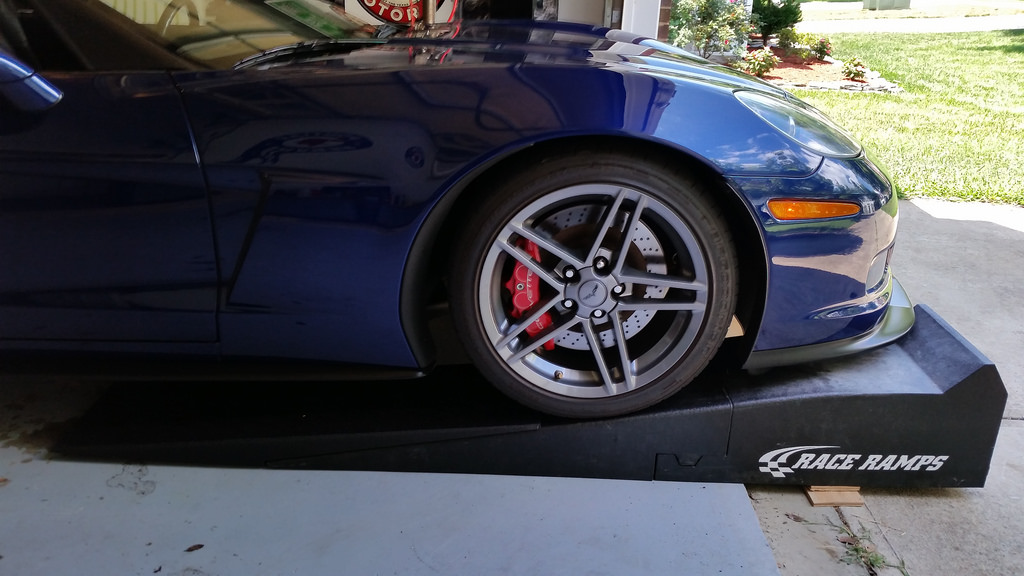
I have had a set of Race Ramps for a long time - and still use them to do oil changes, tightening down swaybars, etc - and with the lowered Vette - I couldn't use them anymore as the front splitter would beach itself on the front part of the ramp and wouldn't let you pull the car up.
I did some research and found that they sell a set of extenders that decreases the angle of approach and allows you to get up on the ramps.
Yes - the front lip hits the wheel stoppers at the end - but now I can at least drive up on them - and then get a jack under the car and lift it up a ton easier then having to jack up one side of the car, jack up the front, move the other jack - just making a huge PITA.

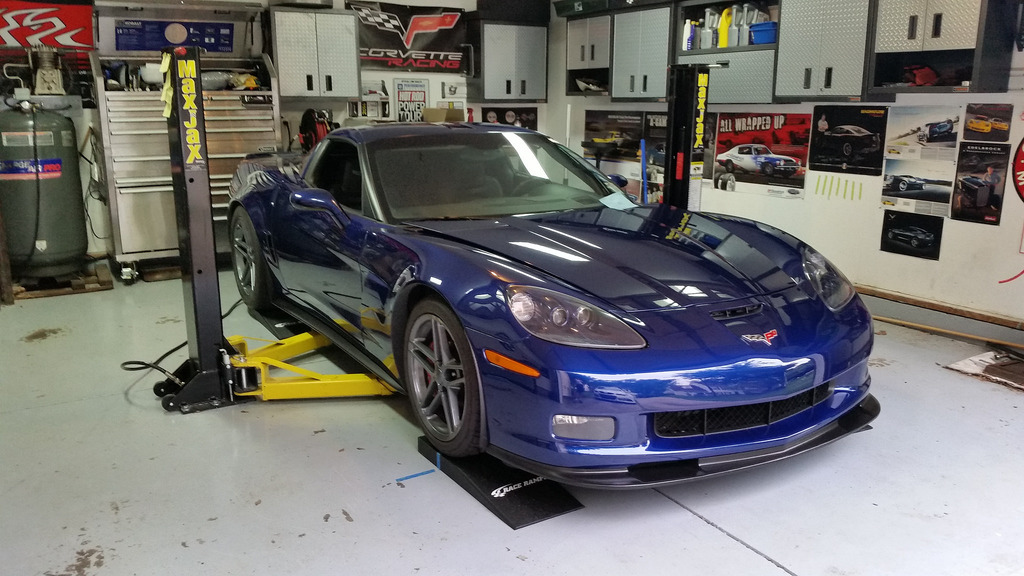
Also - with lowering the car - I couldn't get the arms for the Maxjax lift under the car - so I ordered 2 pairs of the Race Ramps scale ramps - and it provides the perfect height of getting the car up in the air to get the arms under the car with no issue.


Some of you might say why don't i just use some 2x4's, etc - I tried that with the race ramps and all I did was pushed the 2x4s against the floor and scuffed up the epoxy - so after doing that once I said never again. I got these from Summit Racing - with free shipping, a $20 mail in rebate, and I used some Summit Bucks that I had saved up.2005 LeMans Blue Corvette w/ T56 & Z51 & C6Z06 Brakes, Build Thread: https://www.pro-touring.com/showthread.php?64496
2005 GMC Sierra 2500HD LLY / Allison
2014 Chevy SS LS3 / 4 Door
08-01-2014 #213
Registered User
- Join Date
- Jan 2008
- Location
- Charlotte
- Posts
- 1,295
As you know - I bought those small race ramps to get the car up on the lift.
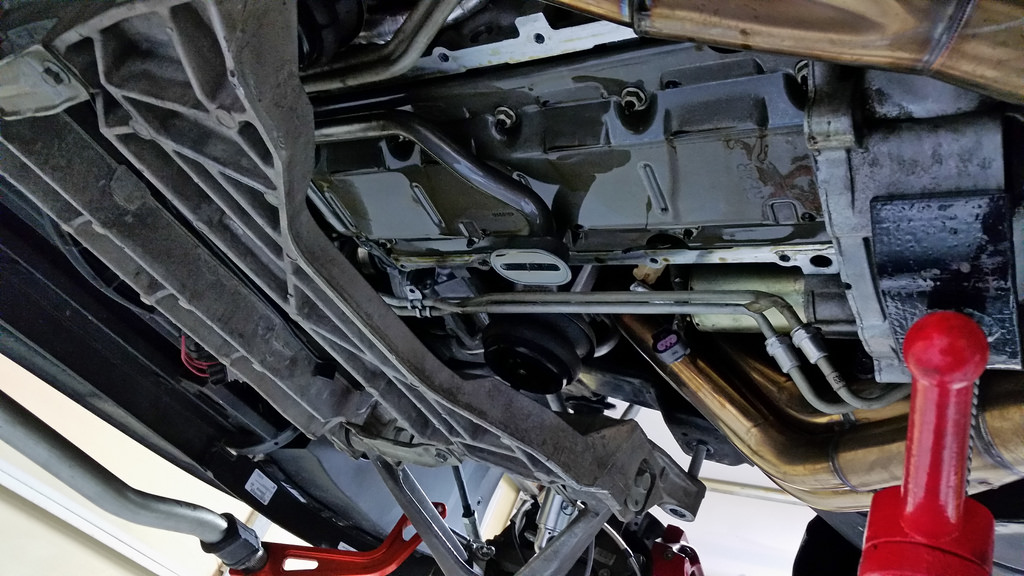
Well the oil pan gasket has been leaking on my LS2 - seeping from the bolts - and been covering the bottom of the pan in a mist of oil.
Previously - I took out the bolts that I could reach and put some RTV on the end of the bolt and torqued them back down - this didn't really fix the problem, so I ordered a new oil pan from GM.
The old felpro gasket that I used I had to take the oil pan off 3x when I was building the the motor back in Jan/Feb - I am not sure if taking it off those times screwed up the gasket or what - so this weekend I am going to drop the front suspension, raise the motor up, and replace the gasket. I went with a GM gasket this time - hopefully it seals up!
Those ramps worked exactly as planned and gave me the height that I needed to get under the lowered car:

 2005 LeMans Blue Corvette w/ T56 & Z51 & C6Z06 Brakes, Build Thread: https://www.pro-touring.com/showthread.php?64496
2005 GMC Sierra 2500HD LLY / Allison
2014 Chevy SS LS3 / 4 Door
08-04-2014 #214
Registered User
- Join Date
- Jan 2008
- Location
- Charlotte
- Posts
- 1,295
Not sure if this is appropriate here - but here goes:
I entered into a Gladiator GarageWorks Makeover contest - and I have made it to the second round.
If you could please help me out - click on the link below - and comment on the Gladiator Page with "A" as your comment - it would greatly be appreciated.
Again - please click the link and comment on that page - not mine.
Please share/vote - and thanks for all of your help!
https://www.facebook.com/GladiatorGW...453972/?type=1
-Craig2005 LeMans Blue Corvette w/ T56 & Z51 & C6Z06 Brakes, Build Thread: https://www.pro-touring.com/showthread.php?64496
2005 GMC Sierra 2500HD LLY / Allison
2014 Chevy SS LS3 / 4 Door
08-05-2014 #215
Registered User
- Join Date
- Jan 2008
- Location
- Charlotte
- Posts
- 1,295
So I dropped the oil pan this weekend - and got a new GM gasket in it. Wasn't to terrible of a job - I used the low rise jack stands that I got and it made the job a lot easier.
This sealed up the oil pan - but now the front timing cover is seeping a bit - to get to that timing cover, I have to pull a lot of crap out of the motor bay - and well this isn't that bad - I'll just deal with it for now.
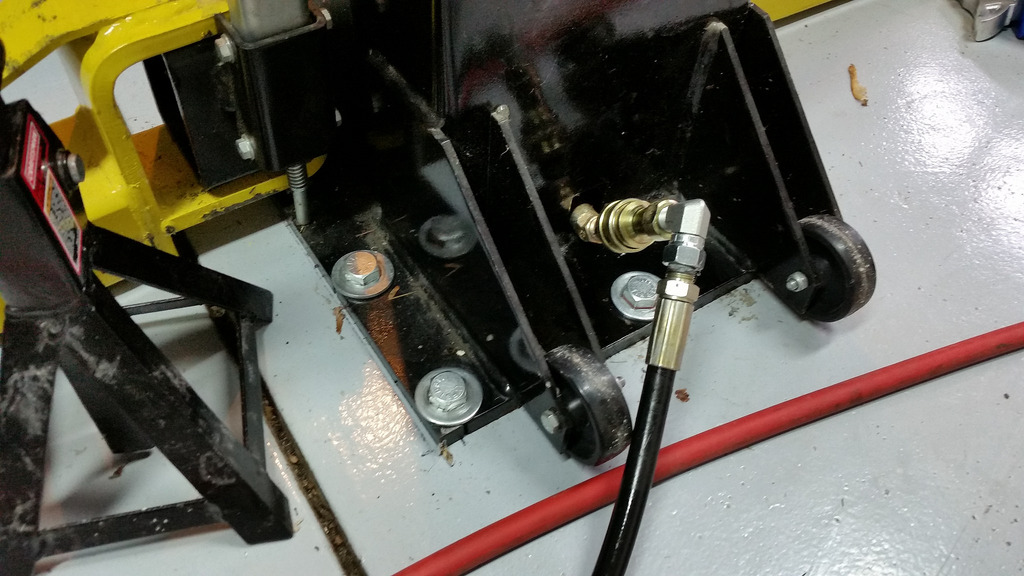
I also modified my MaxJax - I added 90* fittings to all quick disconnect fittings to get the hoses pointed more toward the ground - and reduces the chances of tripping over the hoses - which has happened in the past.
Now for the pics:


 2005 LeMans Blue Corvette w/ T56 & Z51 & C6Z06 Brakes, Build Thread: https://www.pro-touring.com/showthread.php?64496
2005 GMC Sierra 2500HD LLY / Allison
2014 Chevy SS LS3 / 4 Door
08-15-2014 #216
Registered User
- Join Date
- Jan 2008
- Location
- Charlotte
- Posts
- 1,295
Quick update - picked up a transmission jack for the MaxJax.
This is a Torin Big Red transmission jack that I got at Northern Tool.
I will have to modify the the base that bolts to the hydraulic pump - basically cut it down - redrill the 3 holes for the legs and move it closer to the ground.

I'll take measurements next time I get the lift out and modify it then. Oh and this trans jack was only $120 on sale/with extra coupon - so no I have no problem taking an angle grinder it to make it work for my application.
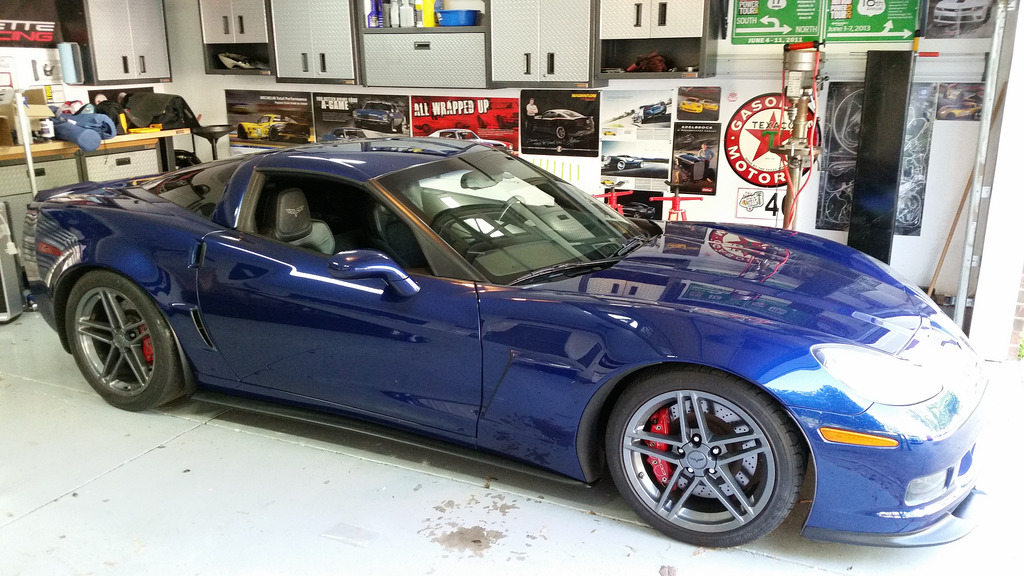
Corvette update:
I've had the z06 front clip on the car for a while now - and I've noticed a few extra rock chips in the rear fenders as I lost the front splash guards that I had with the old front end.
GM doesn't sell a front set as an accessory - so I picked up a set from RPI - same company I got the ZR1 spoiler, splitter, and side skirts from.
I got the passenger side installed with no huge issue - doing the drivers side today:
 2005 LeMans Blue Corvette w/ T56 & Z51 & C6Z06 Brakes, Build Thread: https://www.pro-touring.com/showthread.php?64496
2005 GMC Sierra 2500HD LLY / Allison
2014 Chevy SS LS3 / 4 Door
10-17-2014 #217
Registered User
- Join Date
- Jan 2008
- Location
- Charlotte
- Posts
- 1,295
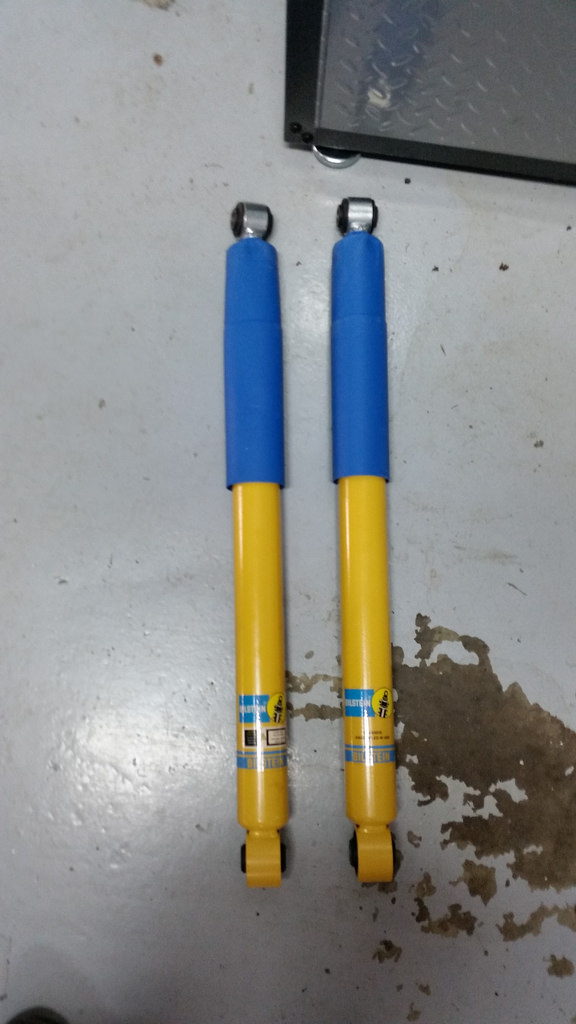
Long time no update - been working alot, getting my house ready to sell, and been replacing the suspension on my truck.
I got under the front end and found both upper balljoints have torn boots, one of the outer tie rod ends has a born boot, and both of the inner tie rods are missing the clamp around the dust boot that looks like a CV joint.
So I ordered all new Moog front end pieces, as well as Bilstein shocks all around.
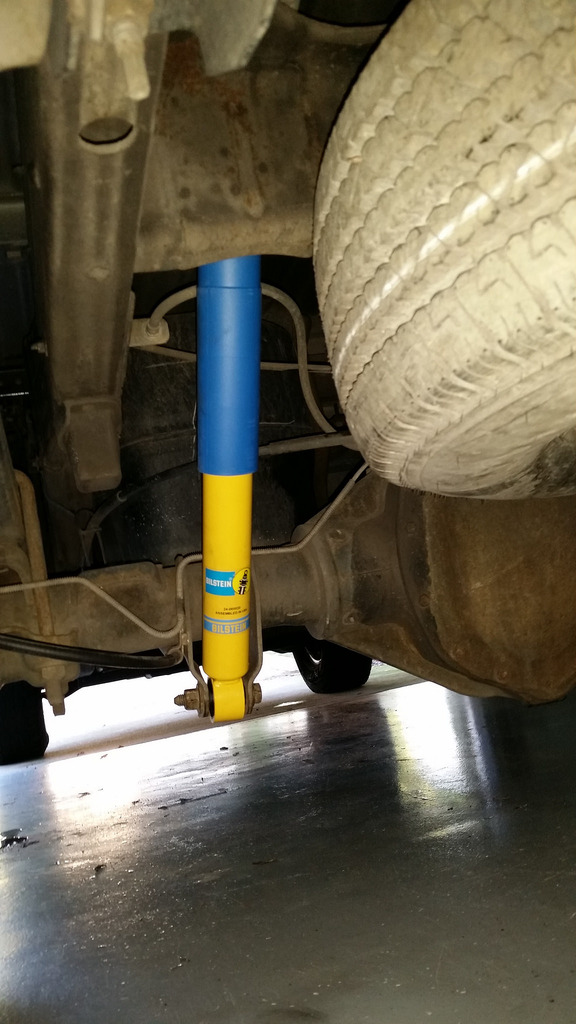
I did the easiest project first - I installed the rear shocks:

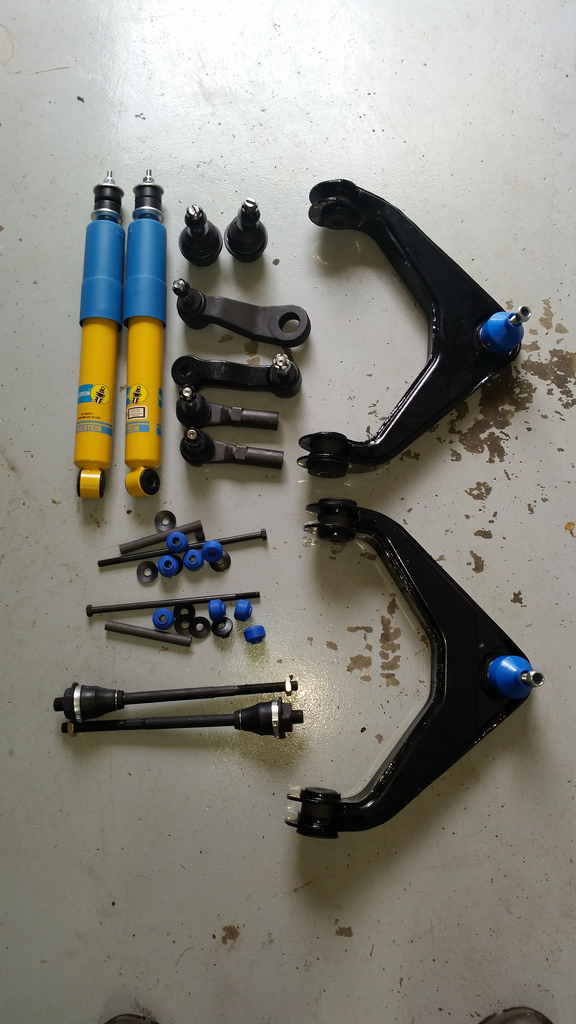
I decided just to replace the entire upper control arms as the prices weren't that much more then the pressed in balljoint - plus I installed a set of Bilsteins up front.
Overall the front end replacement was too terrible - it just took freaking forever.
Pressing out and pressing in the lower balljoints really is what took the longest as I've never had to press them out before. I usually just have to unbolt them/cut the rivets for them.
So I took it for a very quick test drive - everything seemed okay - going over bumps there is no more squishy sounds. As the stock shocks with 194k on them where completely shot!
Now for some pics:


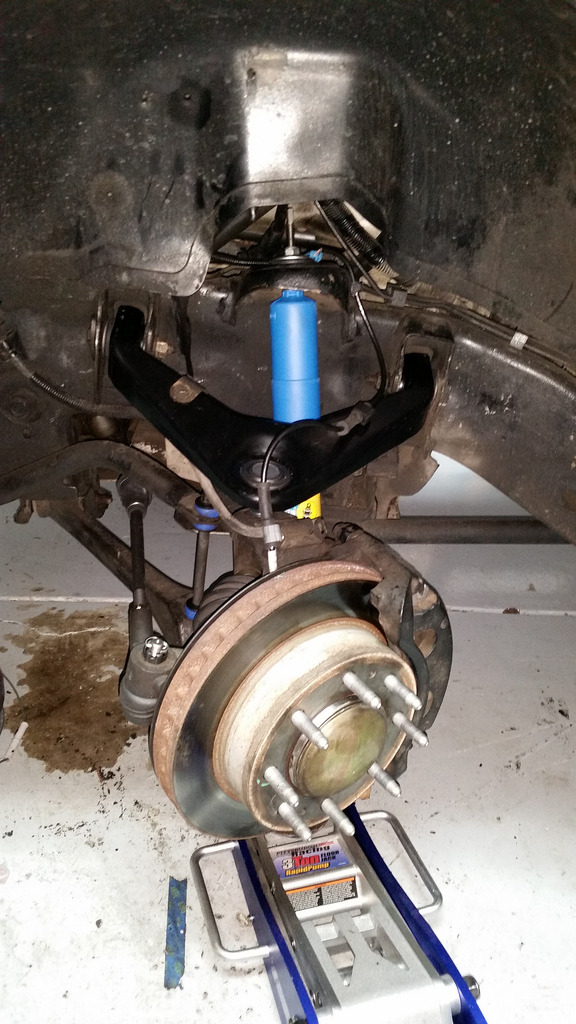
When I finished up installing the front end - I was really tired and lowered the truck down.
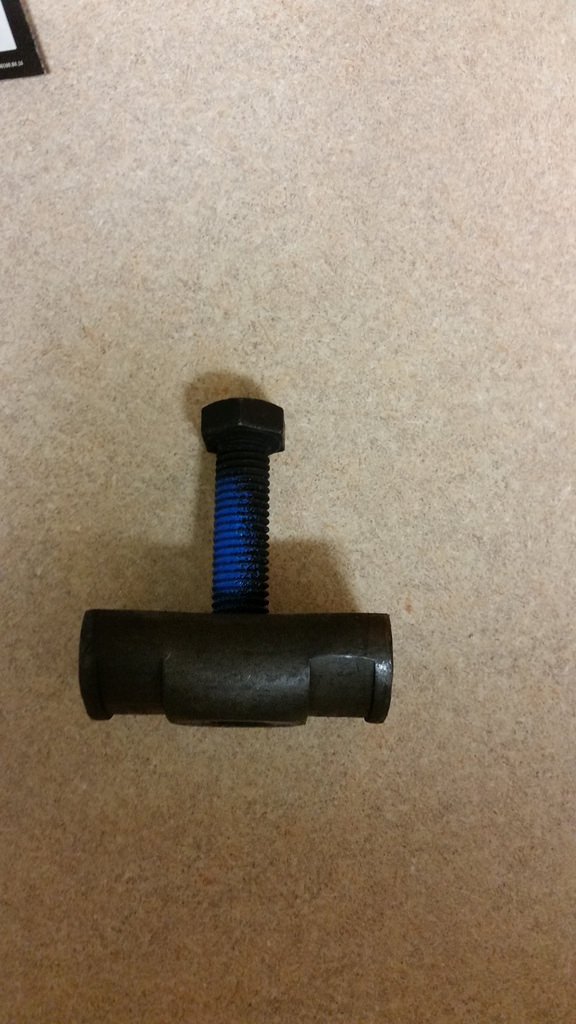
I ended up snapping one of the adjuster screws on the torsion keys clean off the thread.
So I ended up ordering a new screw and the retaining nut as well.
Since I don't have a welder - I ended up ordering the OEM tool brand Torsion arm loading/unloading tool - I got it for $62 off ebay - so I can't really complain about that.
I spent last Friday under the truck. I used the tool to compress the Torsion arm key upward and got the snapped bolt assembly loosened up enough to use a dremel to try and cut through the bolt.
I got half way through it before I ran out of room for the dremel - I then used a jig saw with metal cutting blades and got another 1/3rd of the way though it - but then snapped both blades that I had.
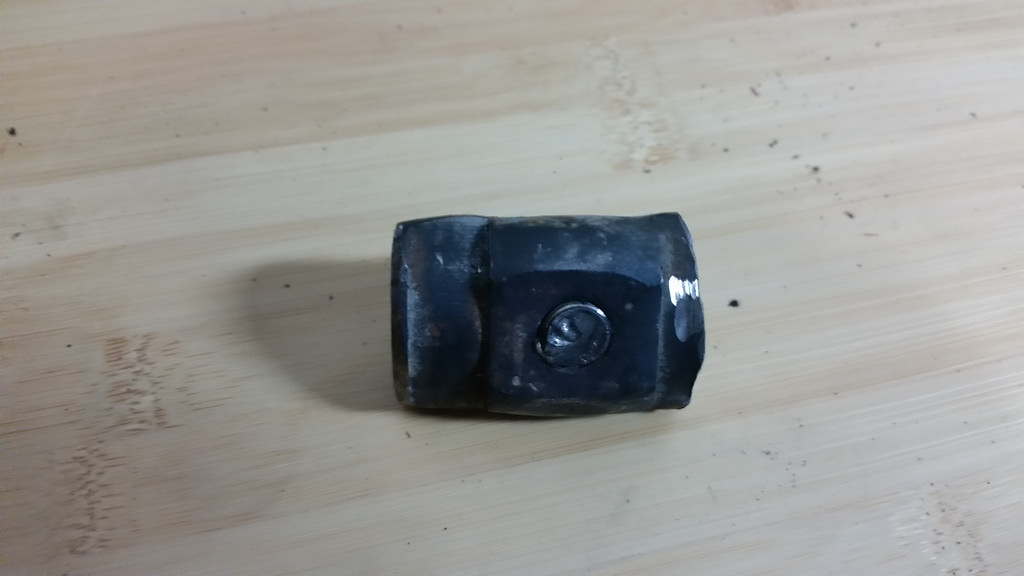
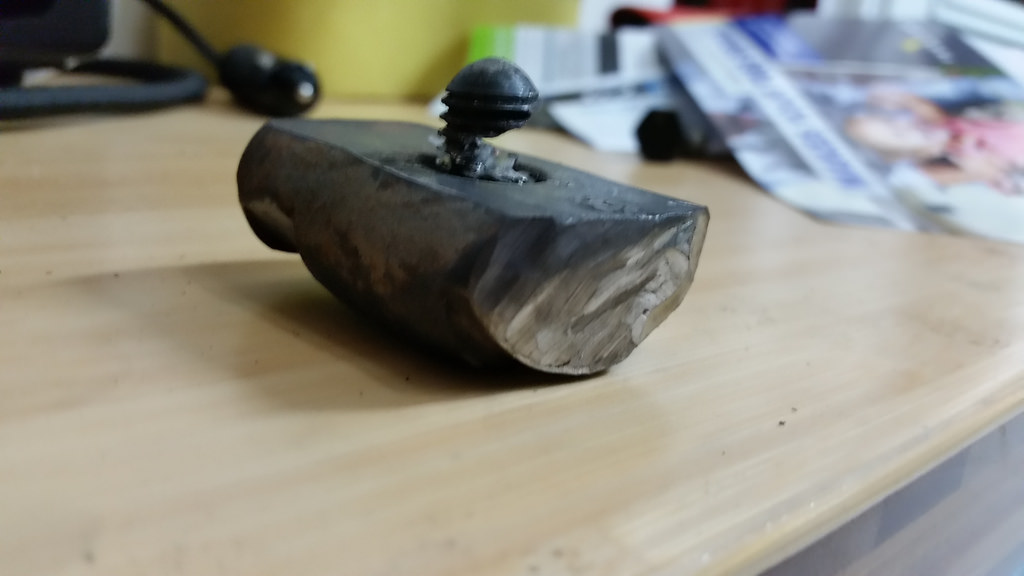
At that point I decided to get out the big gun - my angle grinder with a grinding wheel and decided to cut the end off of the retaining nut assembly and almost got it out - I ended up having to round off 2 of the edges of the retaining nut and finally it dropped out of the frame - I got the new nut/bolt installed.
Some pics of the carnage:
 2005 LeMans Blue Corvette w/ T56 & Z51 & C6Z06 Brakes, Build Thread: https://www.pro-touring.com/showthread.php?64496
2005 GMC Sierra 2500HD LLY / Allison
2014 Chevy SS LS3 / 4 Door
12-03-2014 #218
Registered User
- Join Date
- Jan 2008
- Location
- Charlotte
- Posts
- 1,295
I am still around - just been a long time for an update.
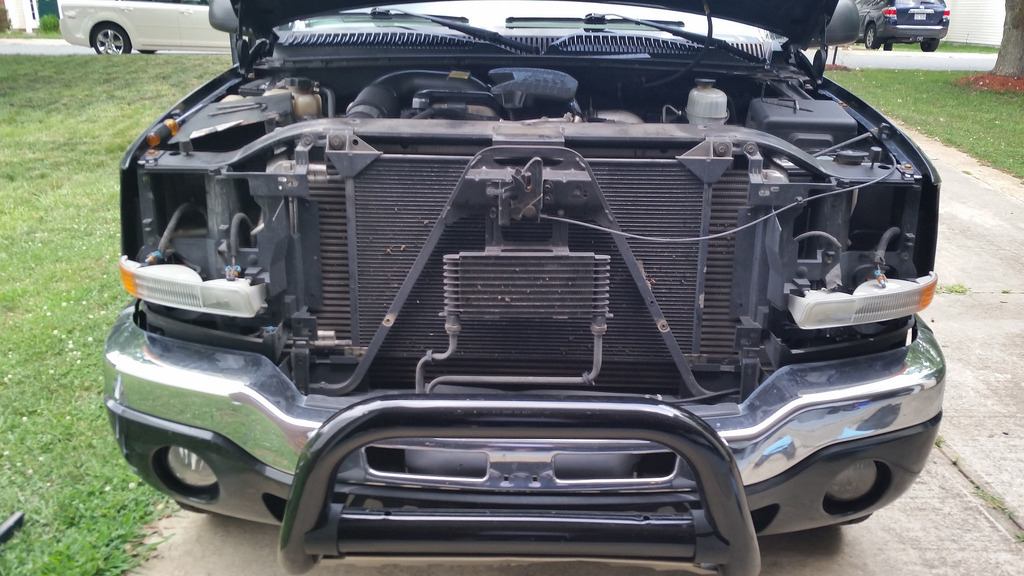
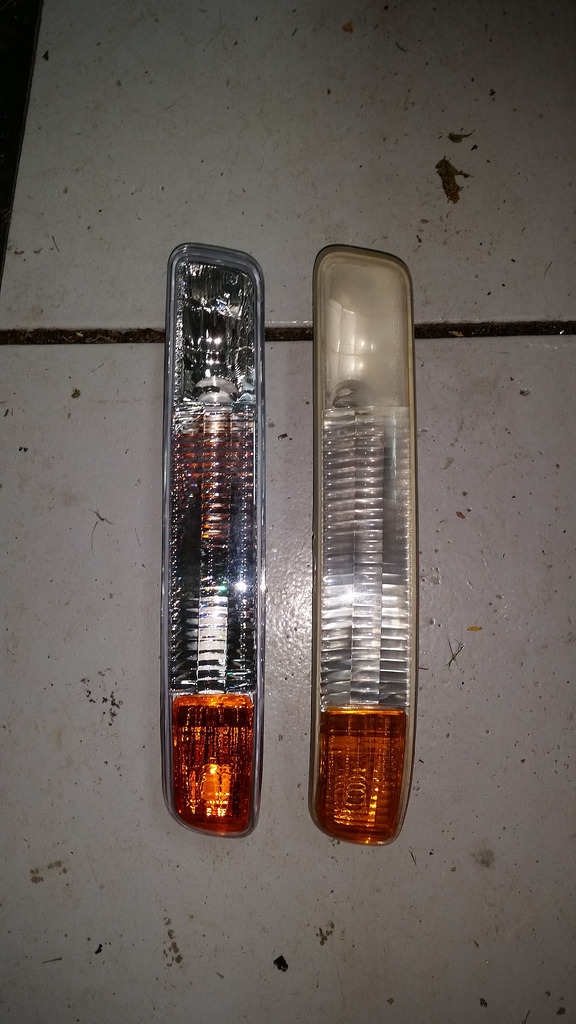
A bit of an update on the truck - after finishing up the suspension project and getting everything fixed up - I wanted to replace the front headlights.
I had polished them up earlier this year - but they yellowed and started to look like crap again.
So I ordered a set of Denali headlights, as well as new turn signal housings. I also ordered a set of DDM Tuning HID's to throw in as well.
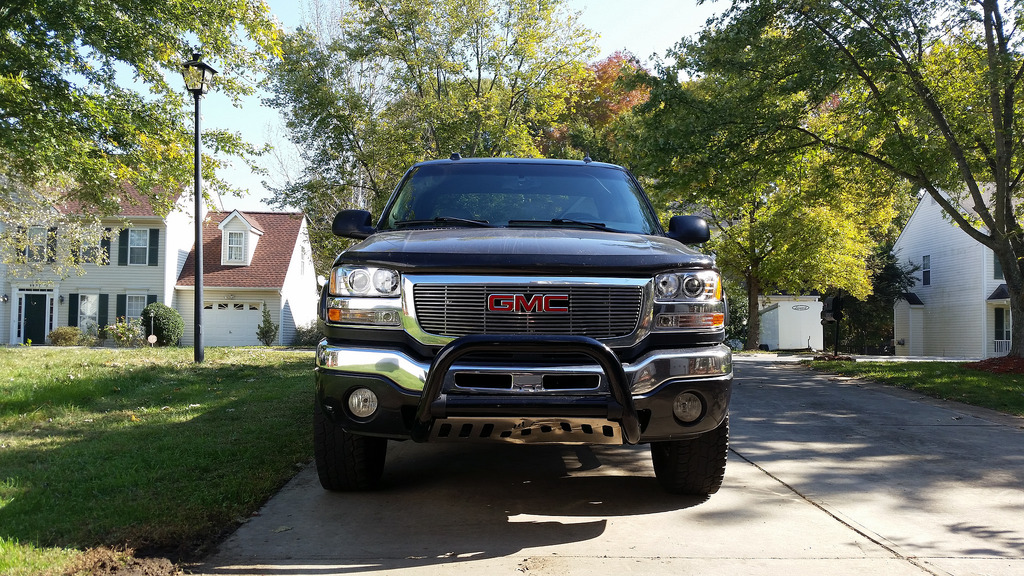
The lights all snapped right into place - the DDM kit required some wire removal from the kit - otherwise those where plug and play as well.
Install took about 2 hours - but not too bad. I still need to adjust the headlights - I plan on doing that tonight.
Now for teh pics:

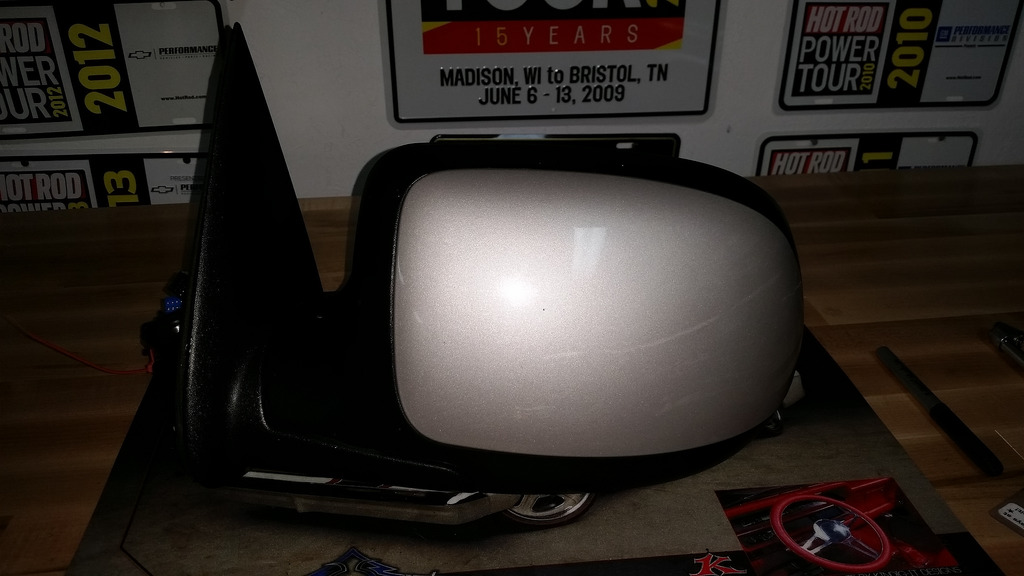
Also - I took apart my drivers side mirror because it was flopping around on the highway - and was driving me nuts. Come to find out that someone had broken the original glass and replaced it with the wrong glass/element! My truck has the DL3 - heated/auto dimming/power fold in option - and the glass that was in it wasn't heated or auto dimming.
So after pricing out the correct replacement glass - it was going to be cheaper to get an entire replacement used mirror. So I found an Escalade mirror with the bottom light on it cheaper then a DL3 Sierra/Silverado mirror. I found another lighted DL3 mirror for the passenger side and ordered that as well.
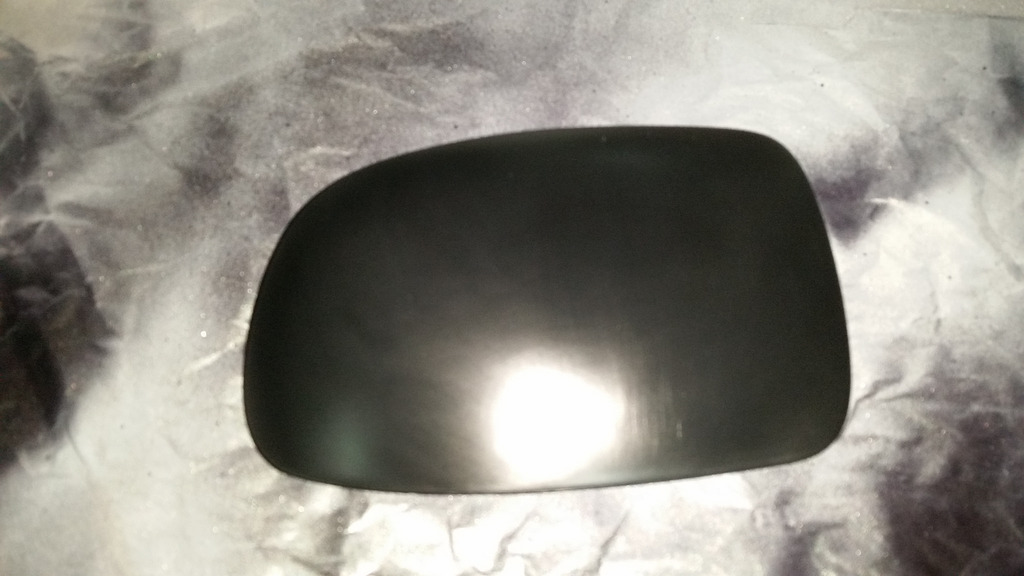
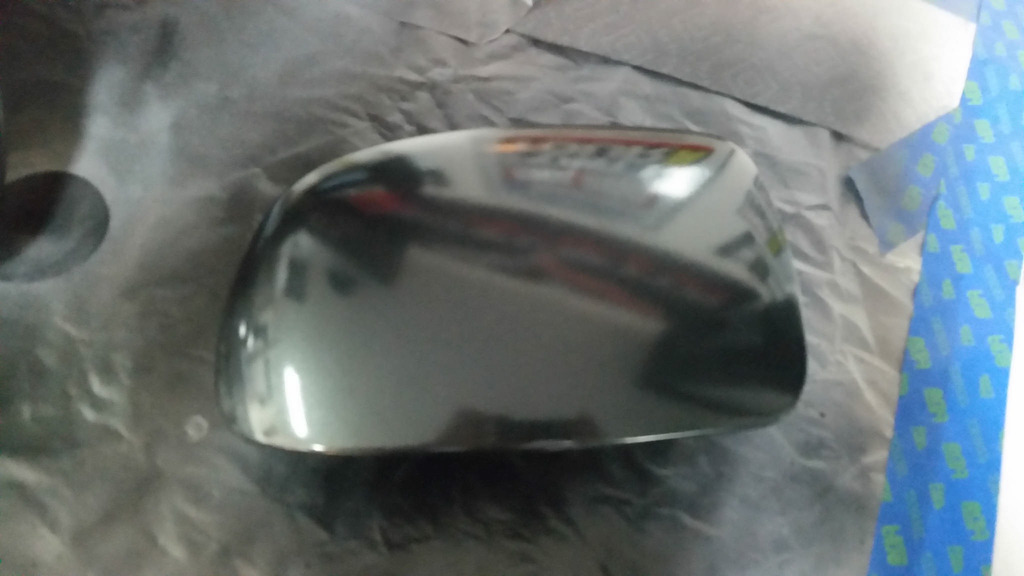
The drivers side color didnt match my truck, and the passenger side was the black textured plastic - so I was going to have to do some painting.
So I picked up some Duplicolor perfect match rattle can primer, base coat, and clear coat and got to work.
The pre-painted mirror was easy to wet sand and prep - the black plastic cap I ended up sanding with 220, 320, 400, then 600 to get it smooth enough for primer.
I have finished painting both mirror caps - I am waiting for the clear coat to harden up. I am going to wet sand it and buff it before I install them.
I have already installed the mirrors themselves - and confirm everything is working correctly.
Here are my pics with the finished clear coat - I will get installed pics after I wet sand and buff everything next week.


 2005 LeMans Blue Corvette w/ T56 & Z51 & C6Z06 Brakes, Build Thread: https://www.pro-touring.com/showthread.php?64496
2005 GMC Sierra 2500HD LLY / Allison
2014 Chevy SS LS3 / 4 Door
12-03-2014 #219
Registered User
- Join Date
- Jan 2008
- Location
- Charlotte
- Posts
- 1,295
I gave the Duplicolor clear a week to dry - today I sanded it with 1000, 1500, 2000, and 2500 grit.
I then used Meguiars Ultimate compound, Scatch X 2.0, Meguiars Cleaner Wax, Polish, and then some Carnuba wax.
I finally attached the caps to the mirrors with some 3M double sided tape - here are the results:

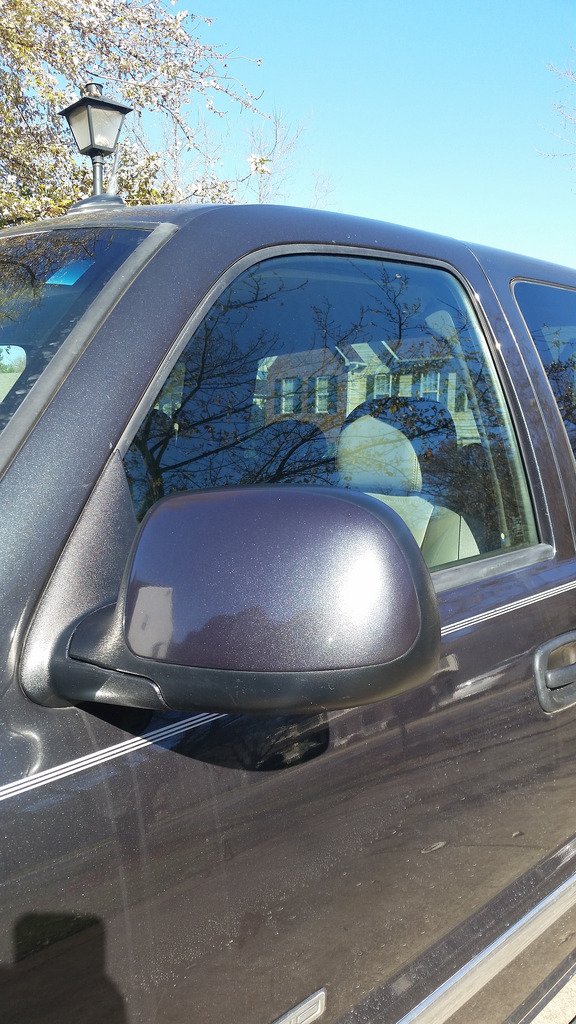
Overall - I am pretty happy with the results, I wish I could have buffed it with my DA Porter Cable - but I really couldn't put much pressure on the caps not being attached to the truck. I'll probably buff in a few months with the PC, and use my much better quality Adam's Polishes and Sealants next time. The color match is spot on with the rest of the truck and look way better then the crappy black plastic that was there before on the old mirrors.
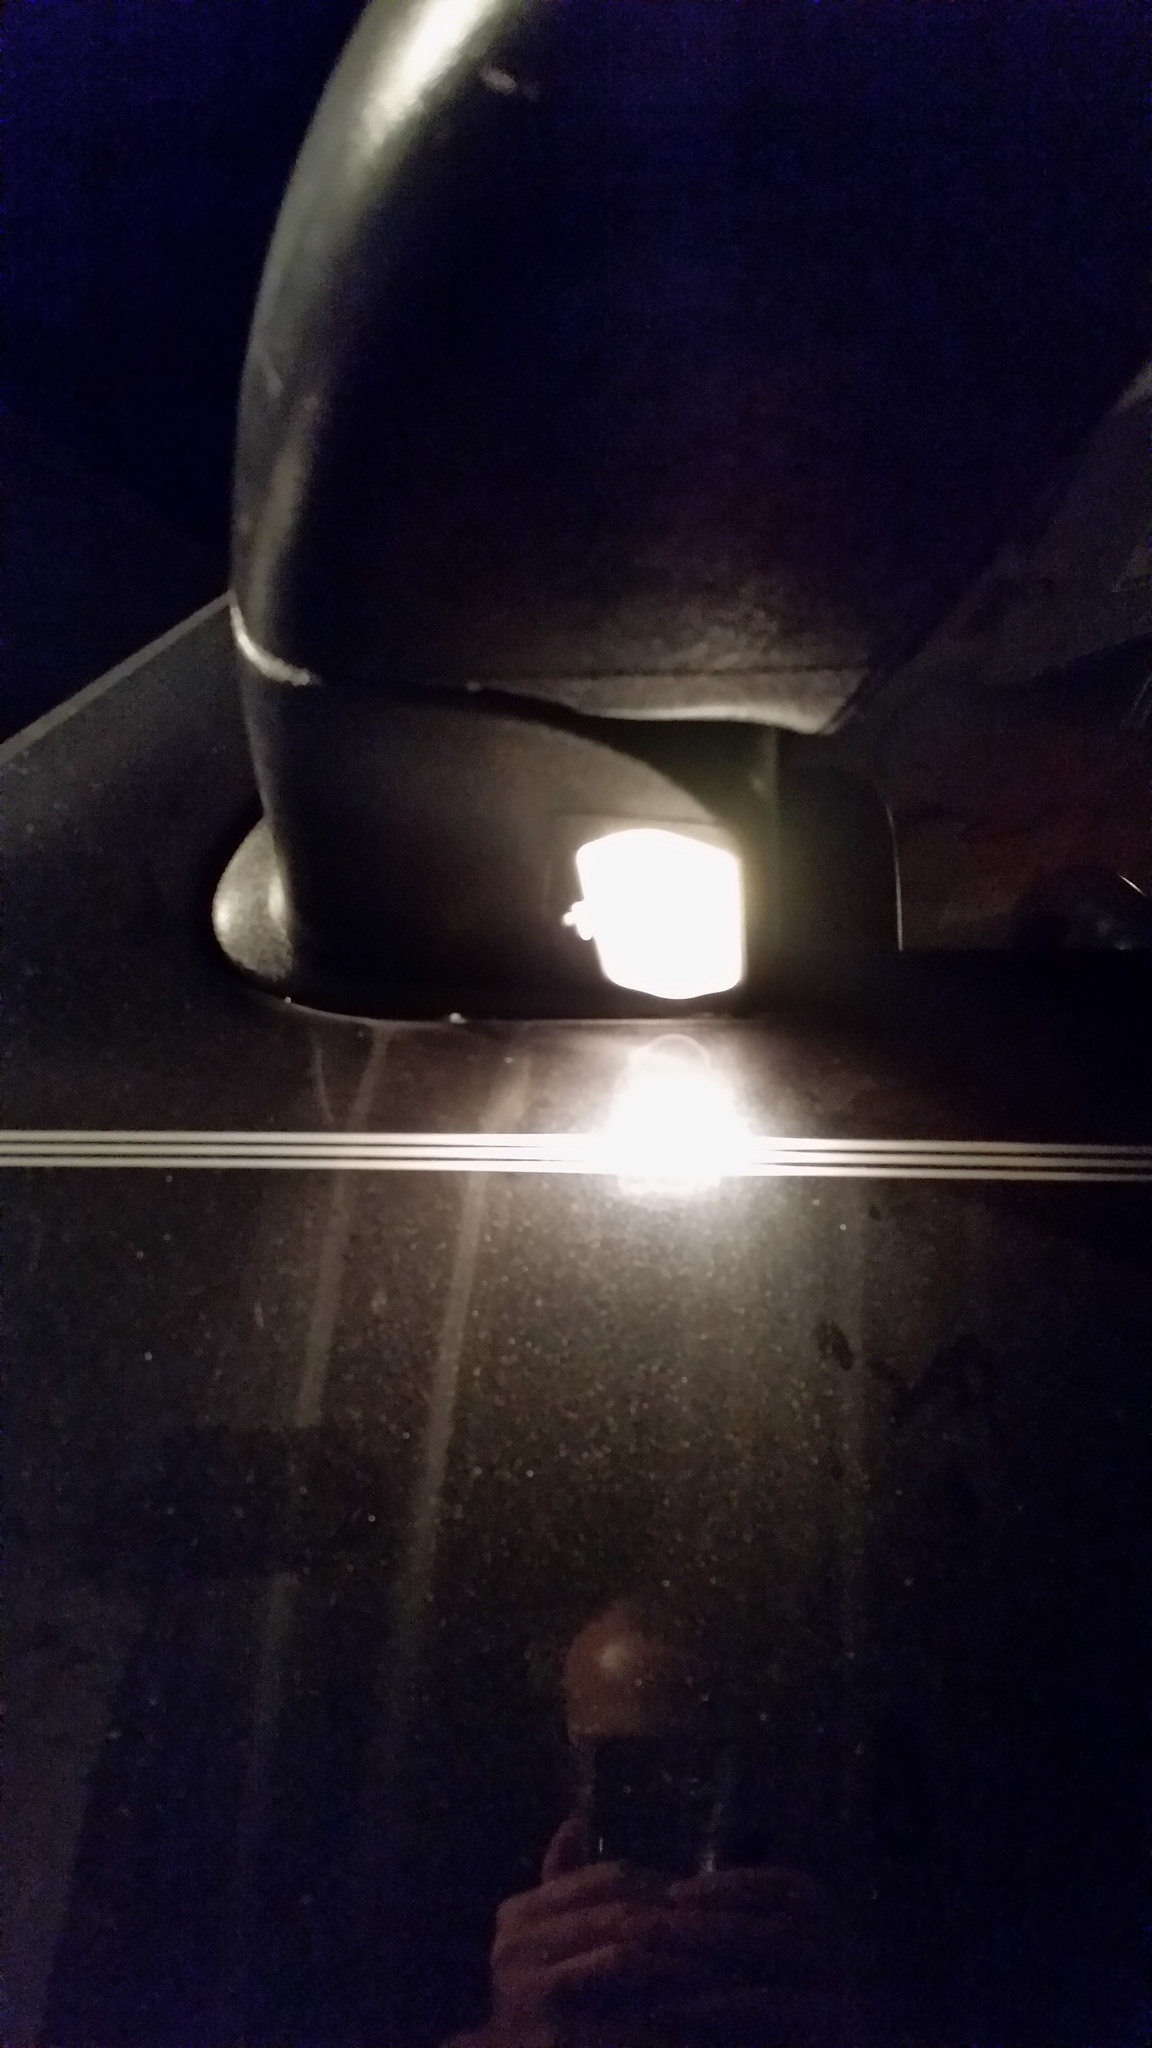
I forgot to post about puddle mirror from the Escalade mirrors - plugged right in and gained an extra light at night:
 2005 LeMans Blue Corvette w/ T56 & Z51 & C6Z06 Brakes, Build Thread: https://www.pro-touring.com/showthread.php?64496
2005 GMC Sierra 2500HD LLY / Allison
2014 Chevy SS LS3 / 4 Door
12-27-2014 #220
Registered User
- Join Date
- Jan 2008
- Location
- Charlotte
- Posts
- 1,295
Another truck update:
So I found a thread on here about a backup camera that tied into an edge tuner, well since I had already swapped to an Escalade Lux touch screen nav, I figured that I would tie into the nav screen that I had.
So I picked up a PAC-VCI-X adapter, a backup camera, and 25' of RCA cable.
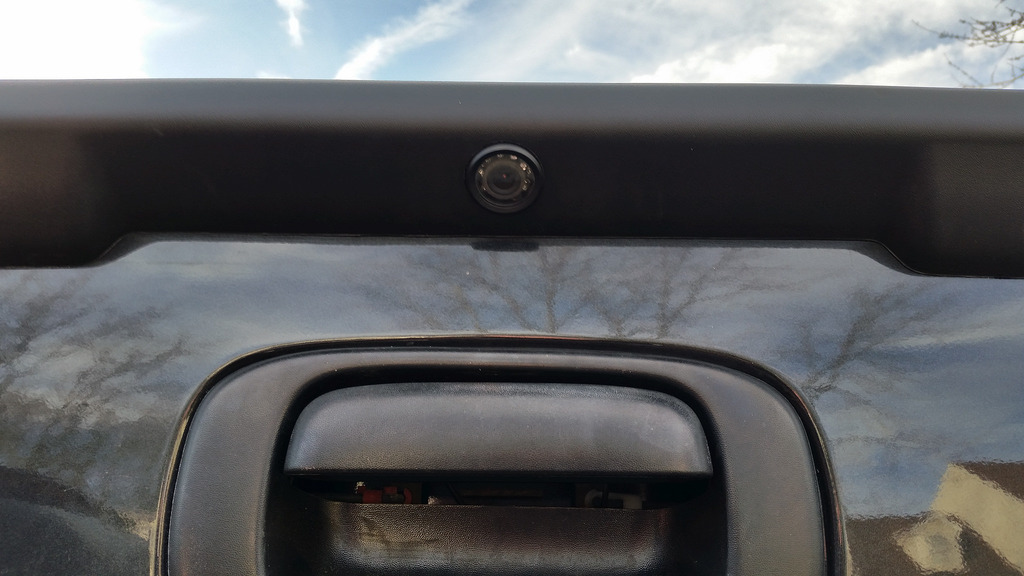
I also picked up the 1500 style spoiler to put the backup camera in.
I split the nave unit open, installed the screen ribbon adapter, and ran the VGA cable out the bottom of the Nav unit.
I then tied into the light green harness wire in the trailer plugin box in the interior under the dash for the backup signal for the PAC unit.
I then removed the factory rear tail gate lid, put on the 1500 lid and drilled a hole for the camera. I ran the power supply for the camera to the reverse light harness under the bed.
I then ran the 25' of RCA cable and accessed the interior by the grommit holding the e-brake cable.
I plugged everything in, adjusted the camera, and boom - here is a pic of the camera working, the spoiler, and how I installed the camera.

 2005 LeMans Blue Corvette w/ T56 & Z51 & C6Z06 Brakes, Build Thread: https://www.pro-touring.com/showthread.php?64496
2005 GMC Sierra 2500HD LLY / Allison
2014 Chevy SS LS3 / 4 Door

 Reply With Quote


