

Results 1 to 20 of 27
Thread: Project Getaway
-
01-25-2011 #1
 Registered User
- Join Date
- Dec 2007
- Posts
- 14
Project Getaway
Hello All
After being a member and constantly checking out the site for the last 4 years I feel now it is my time to contribute.
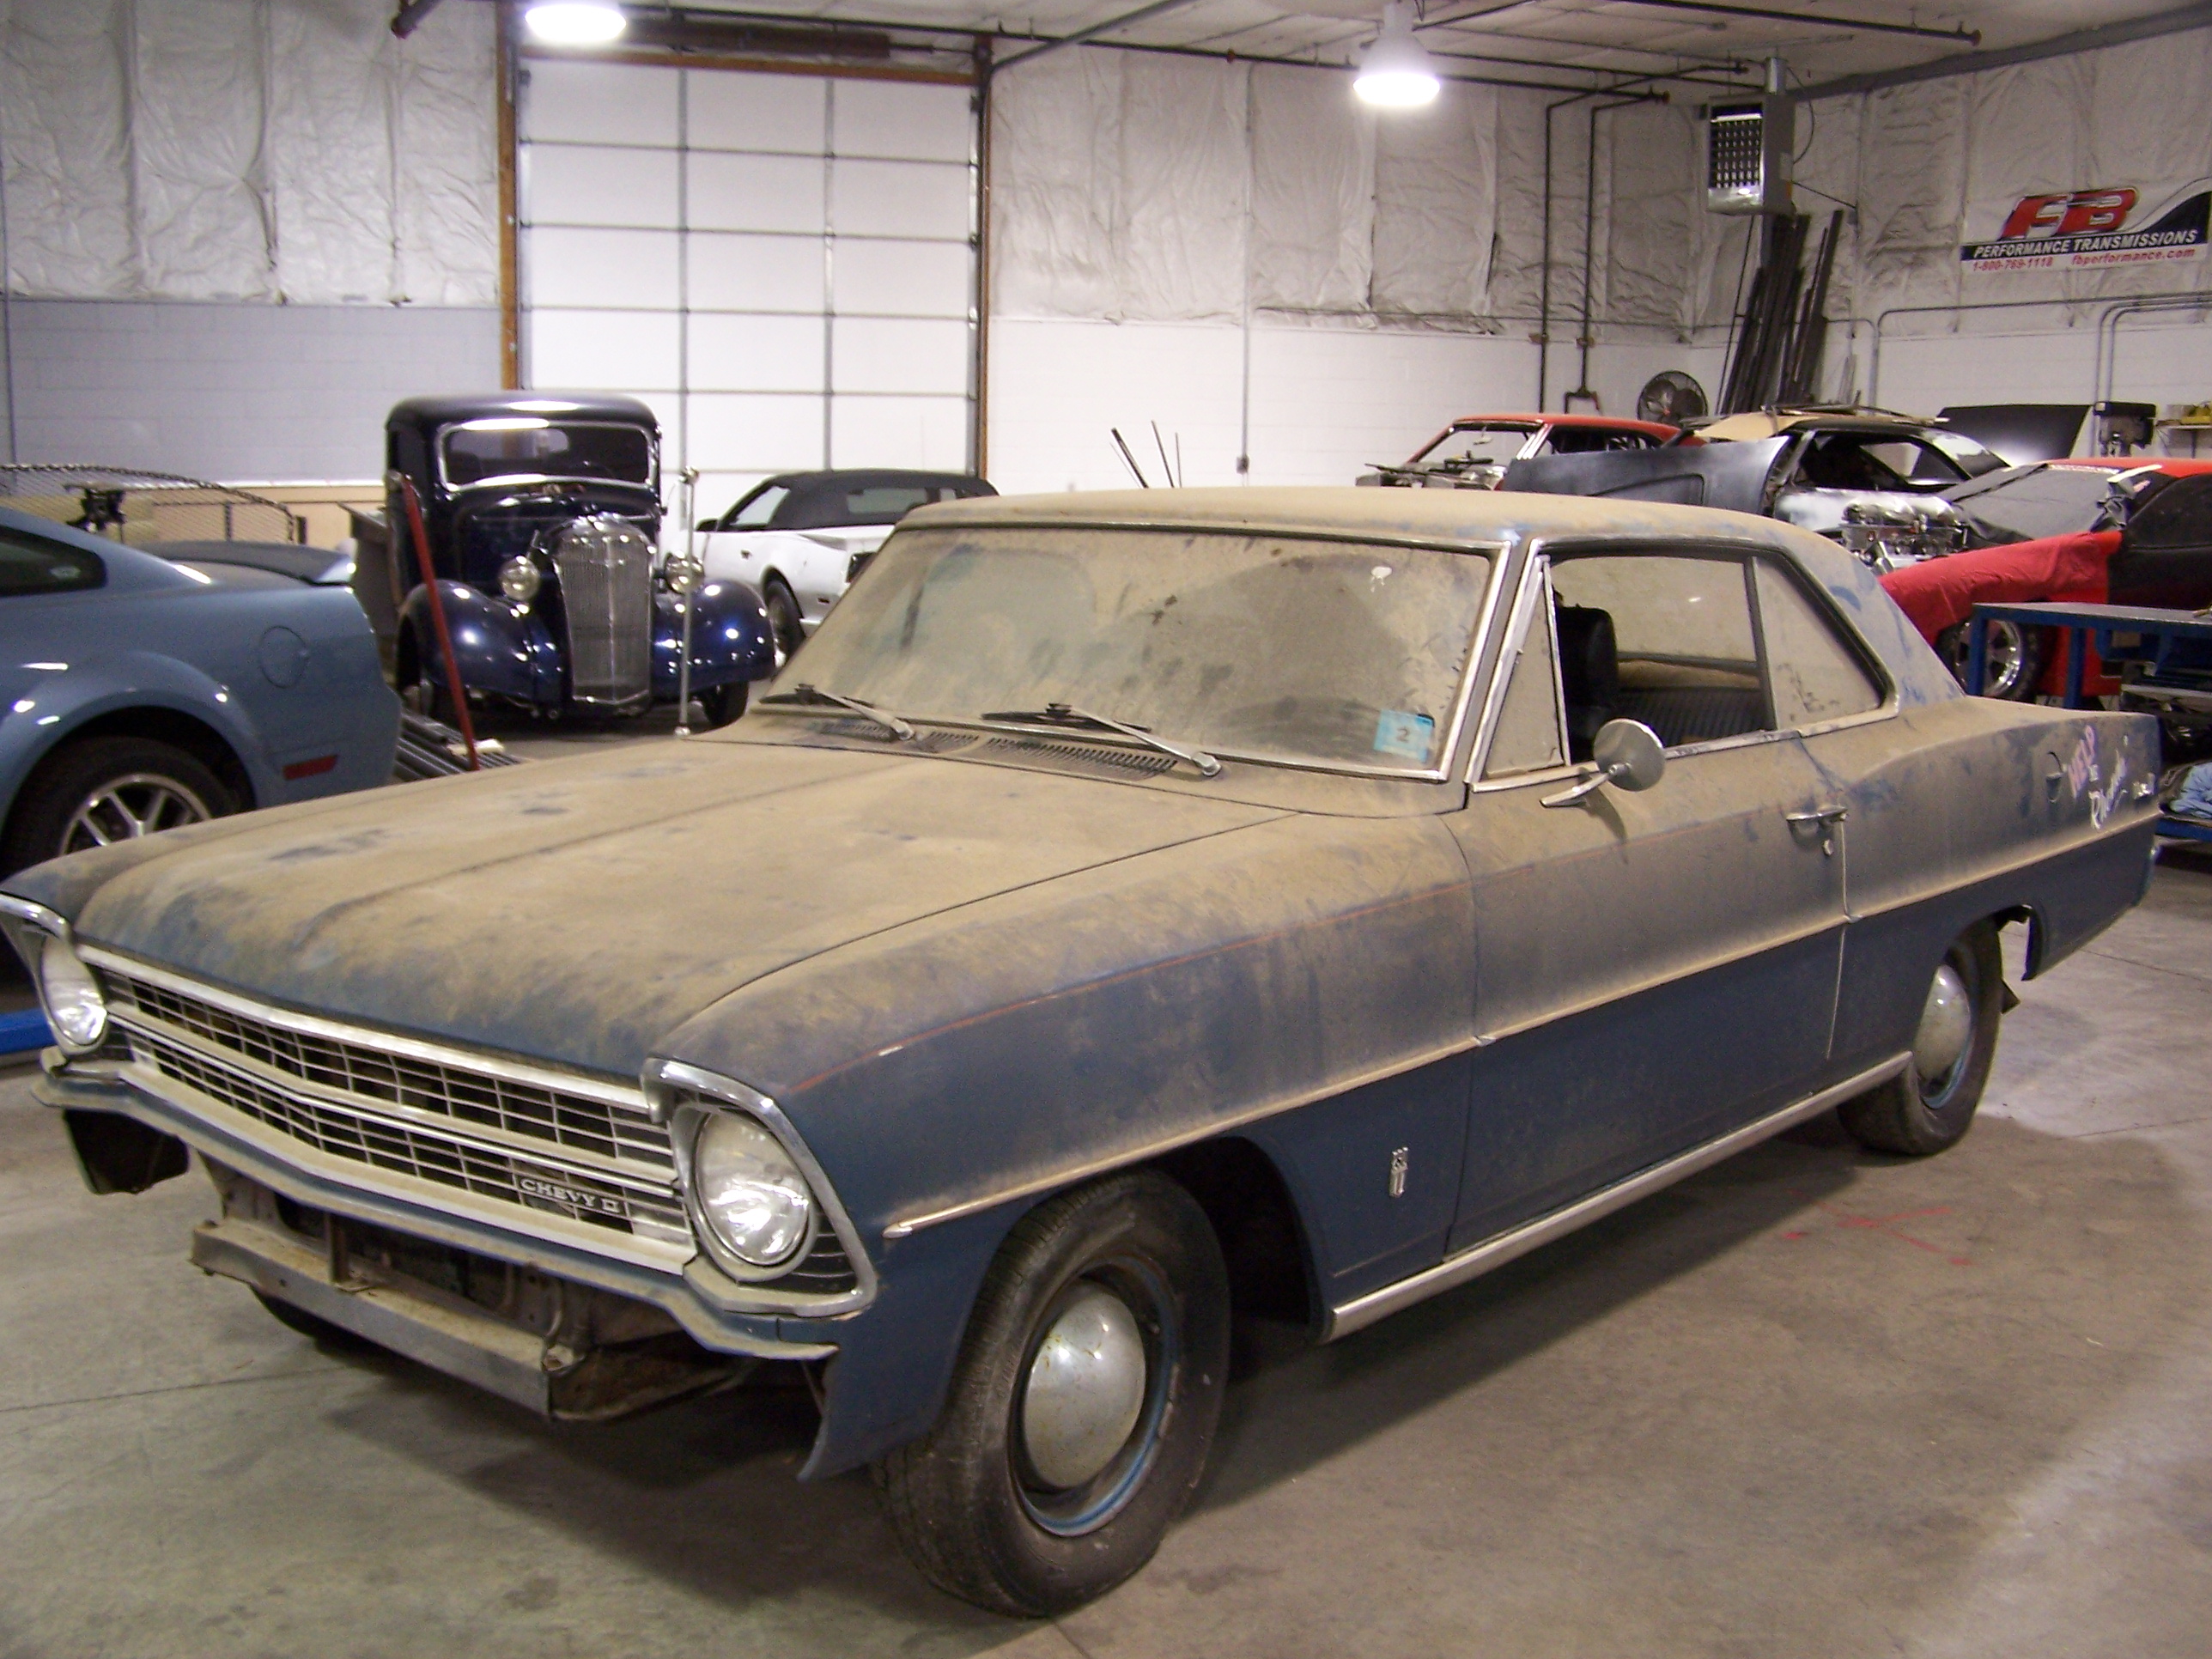
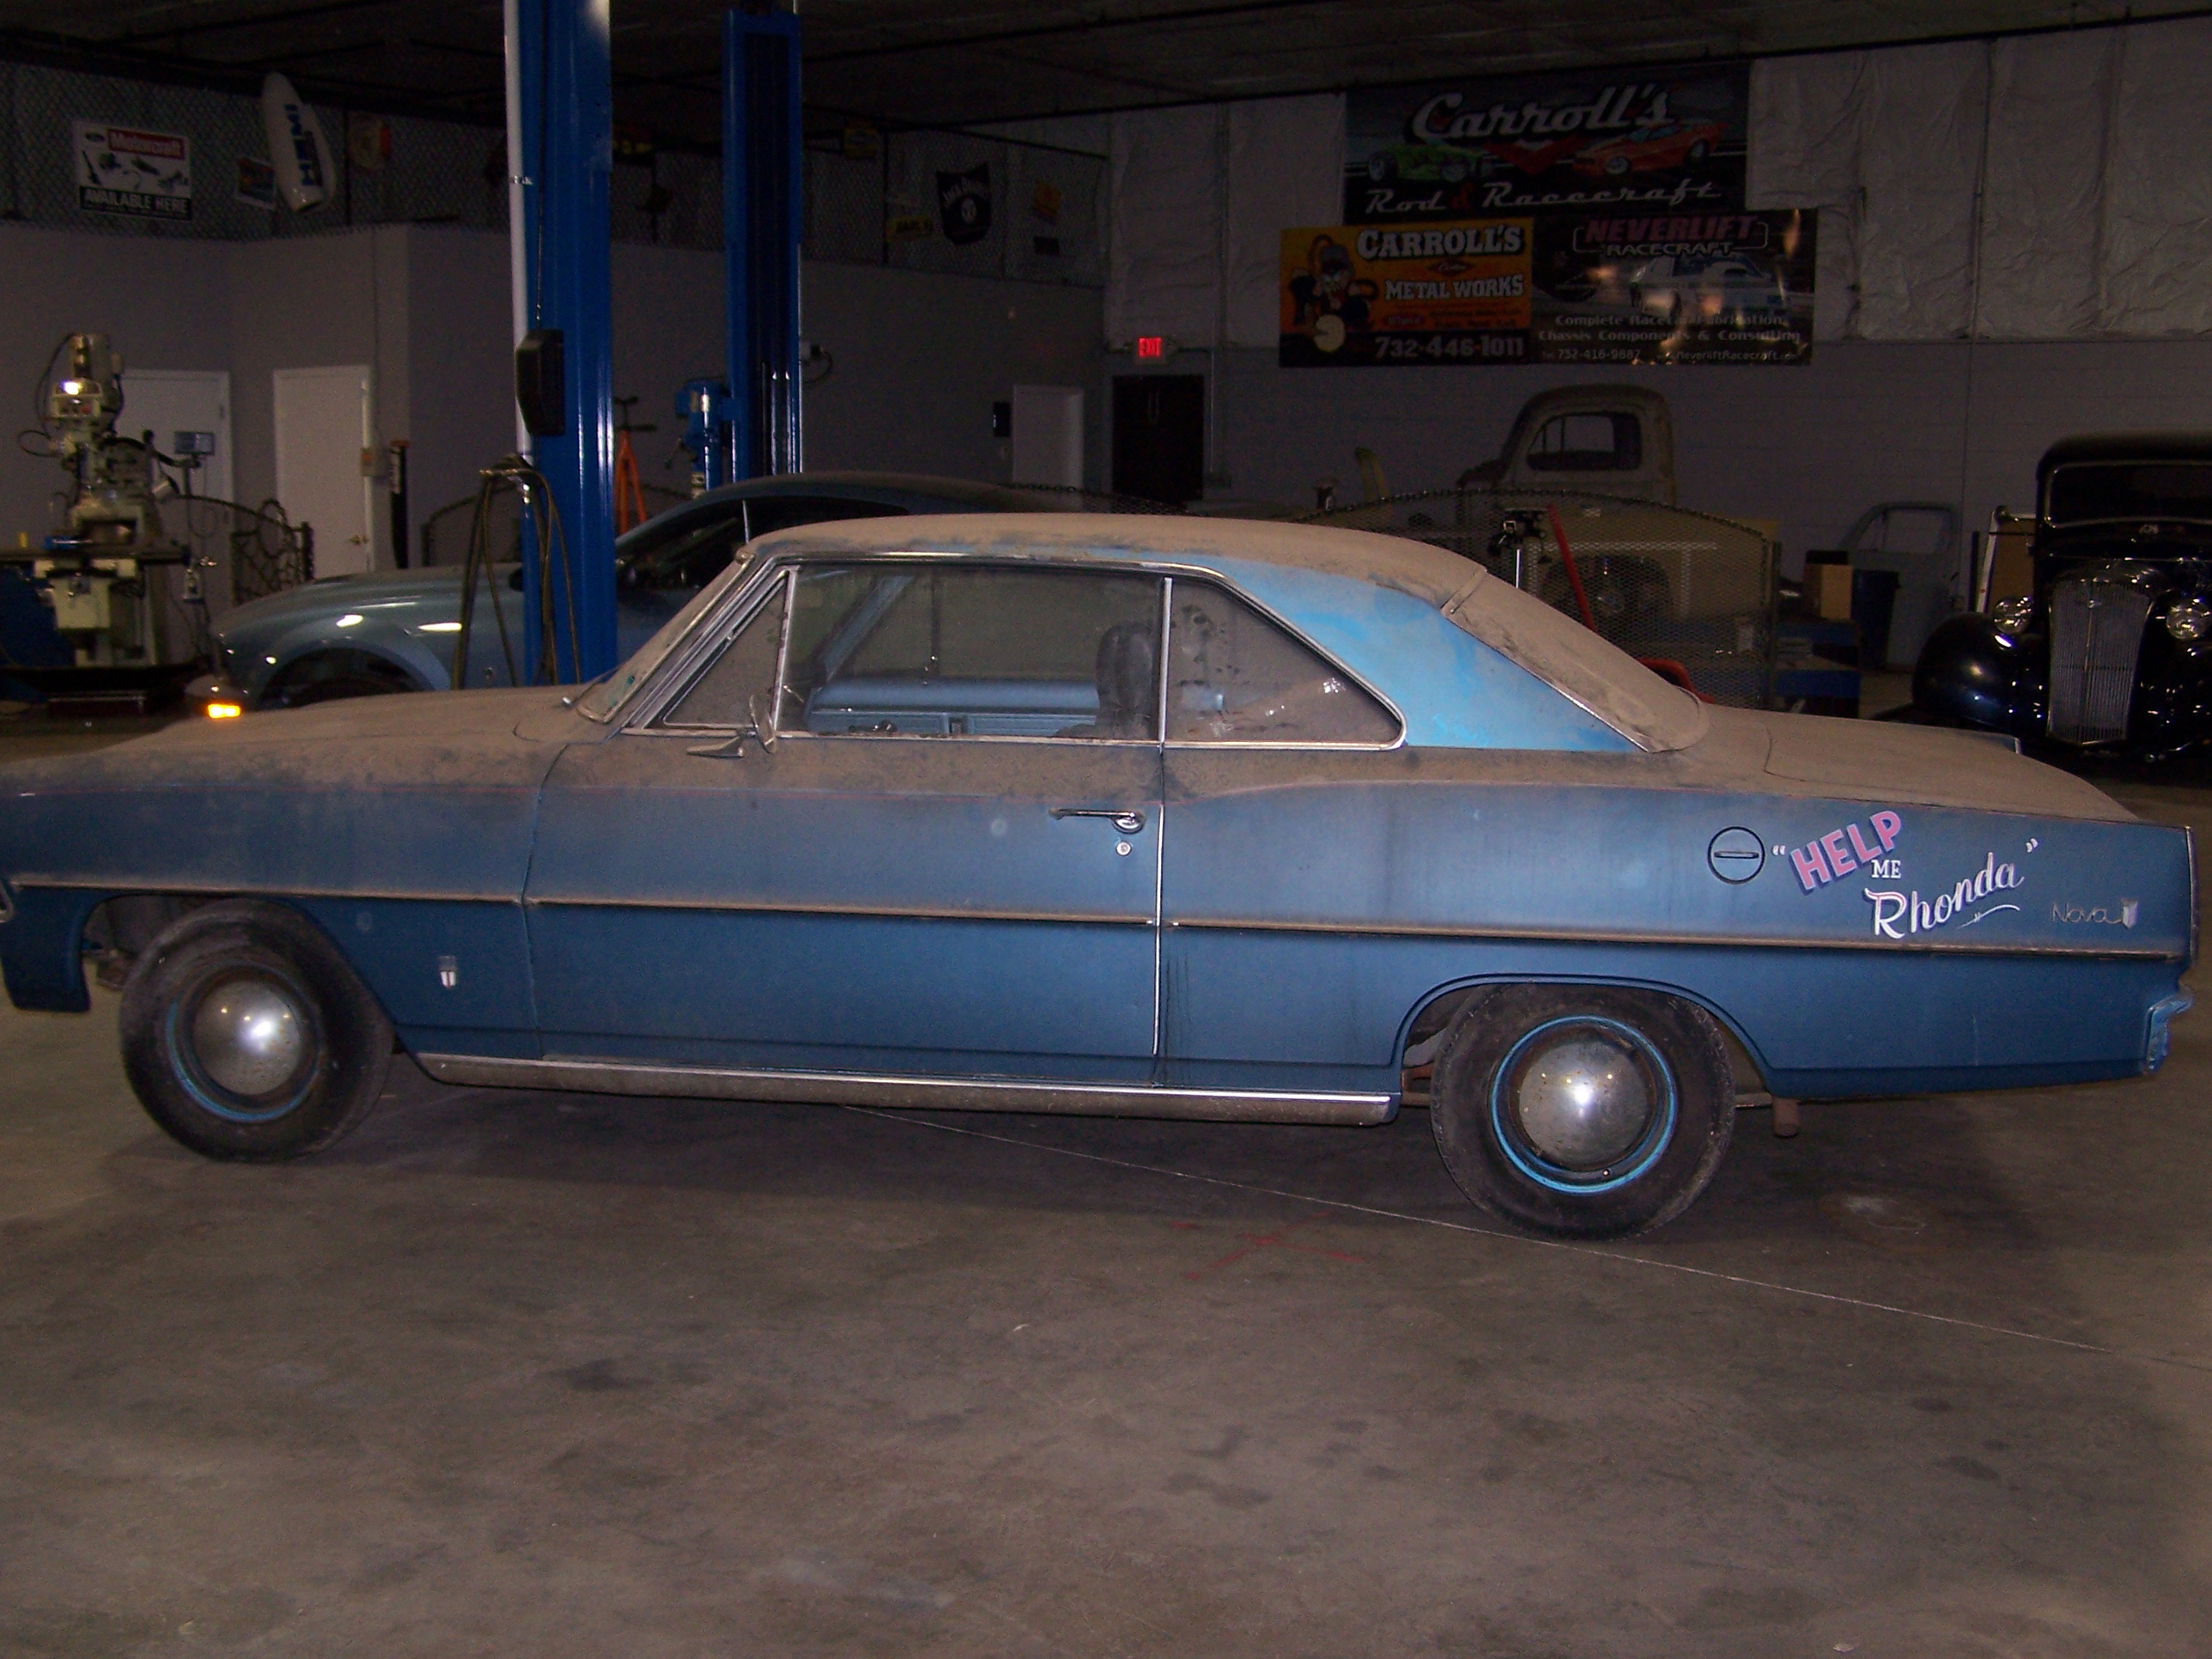
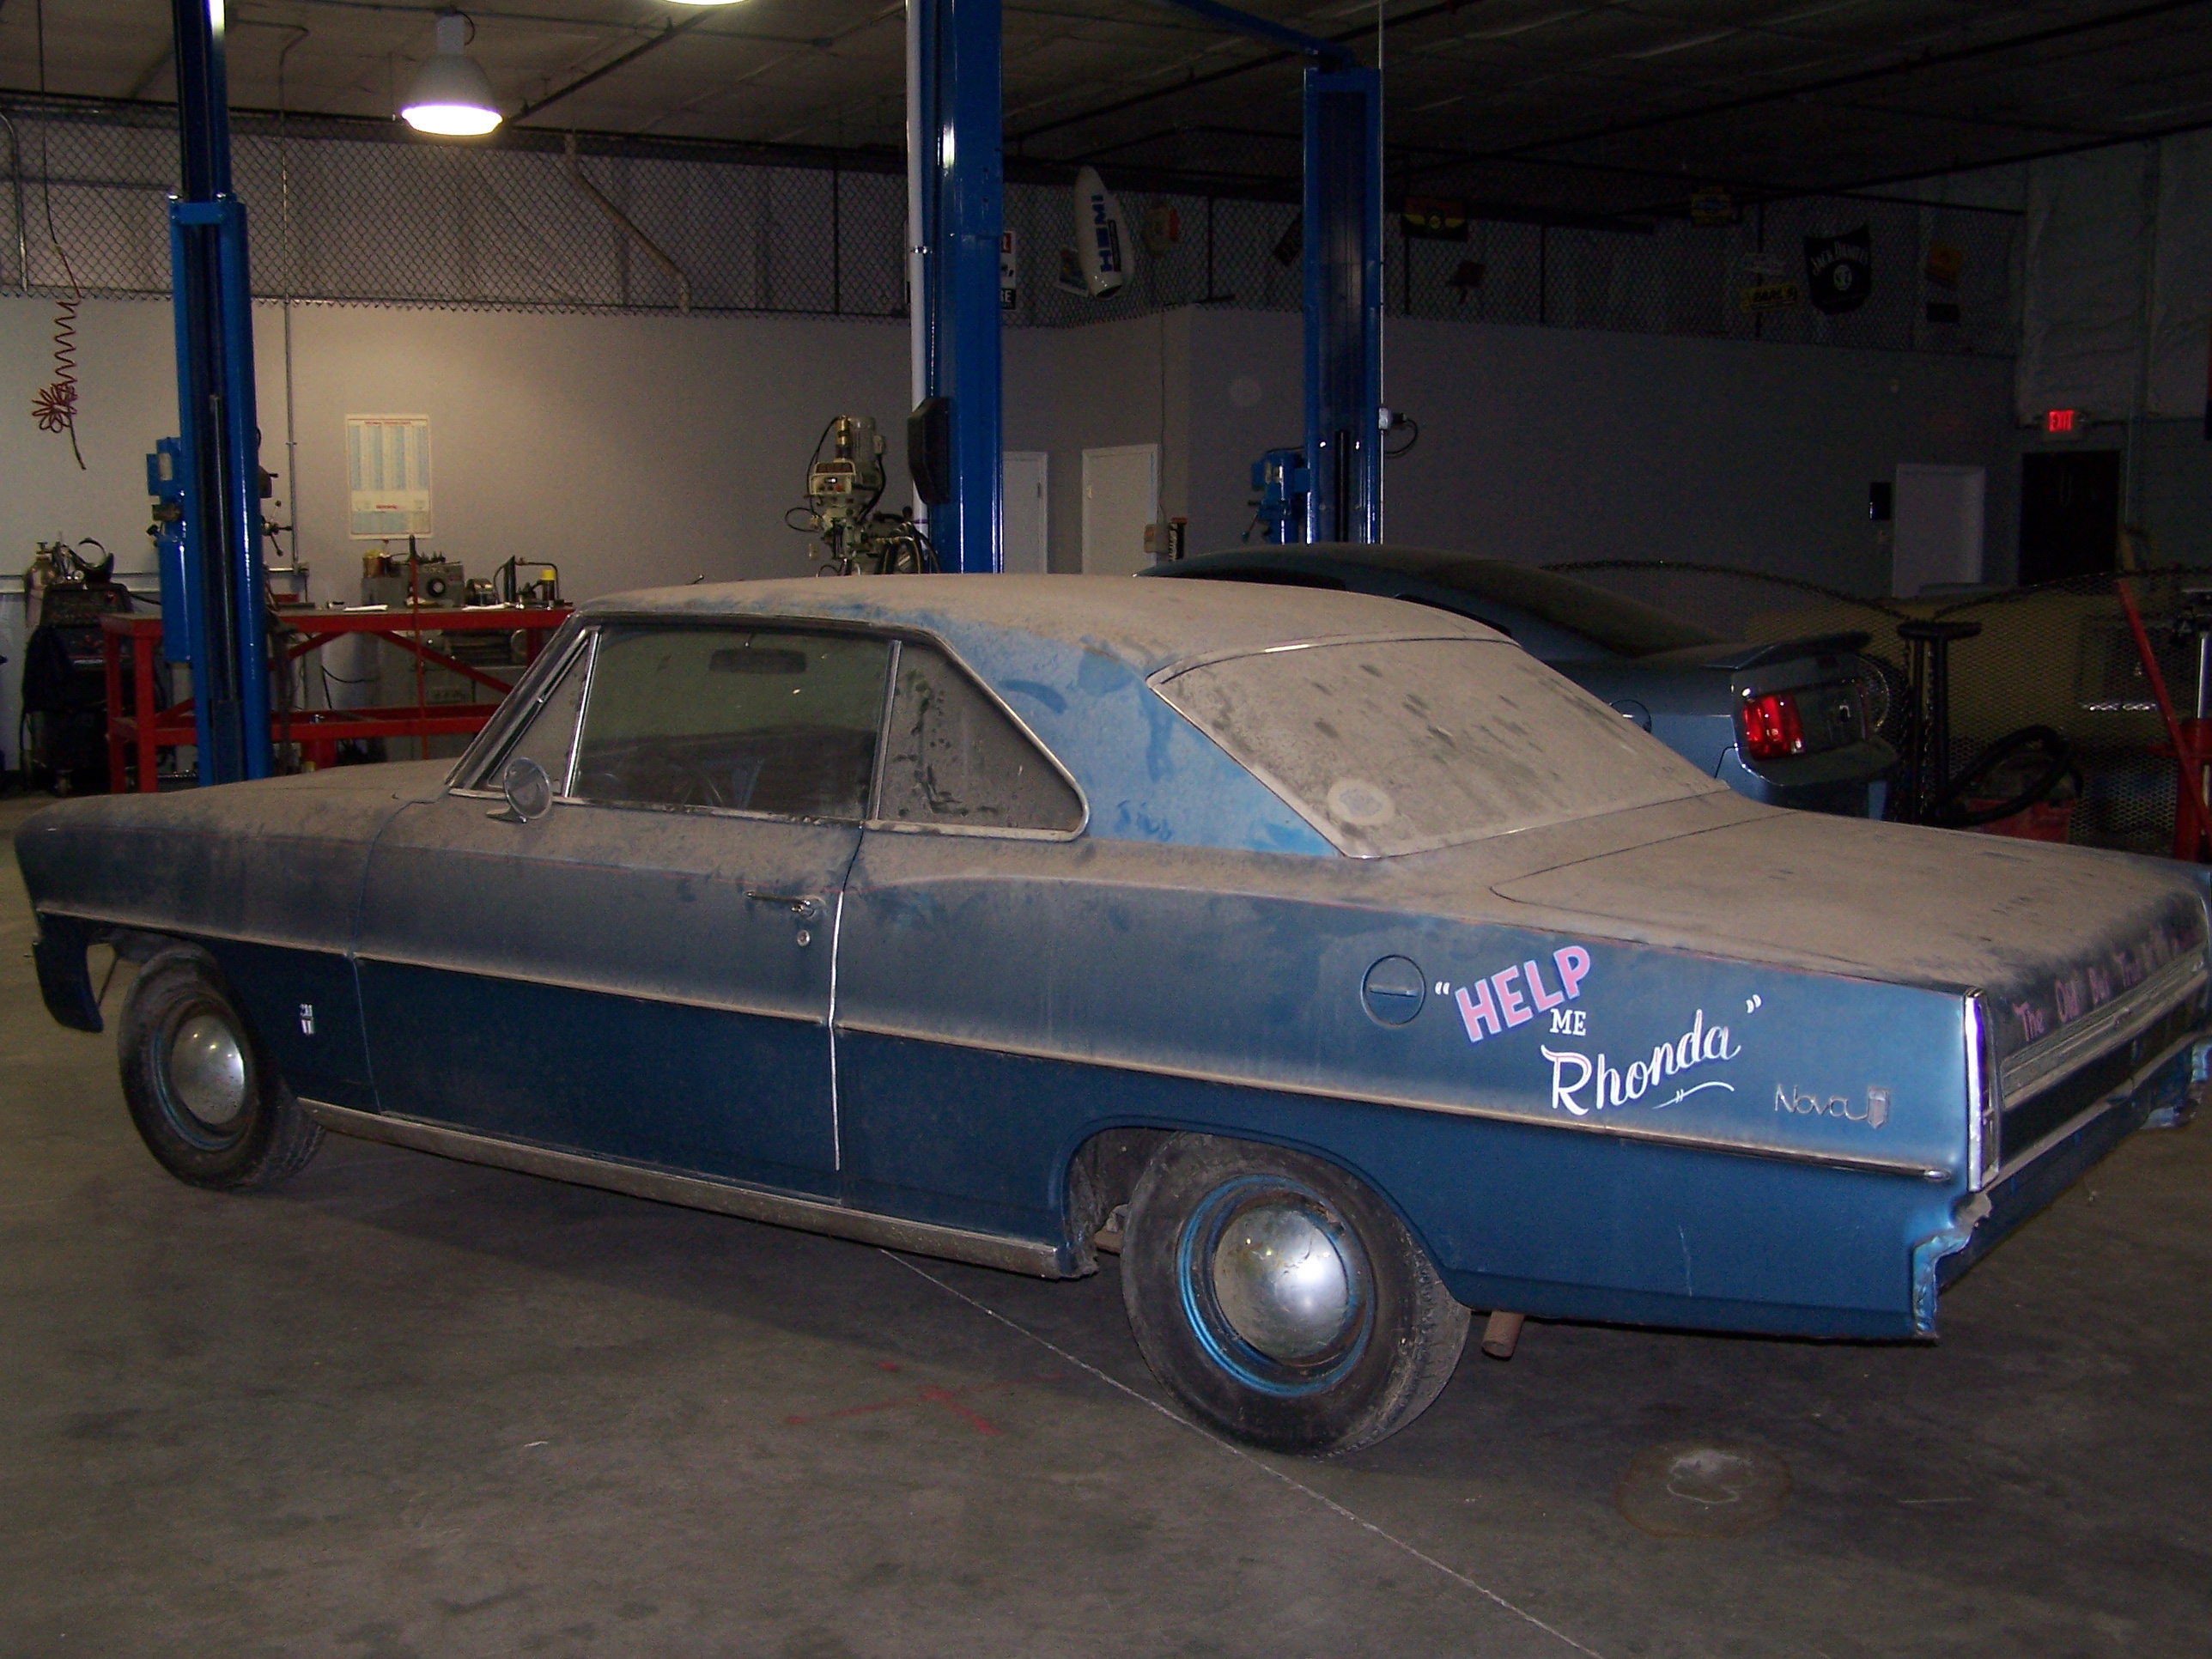
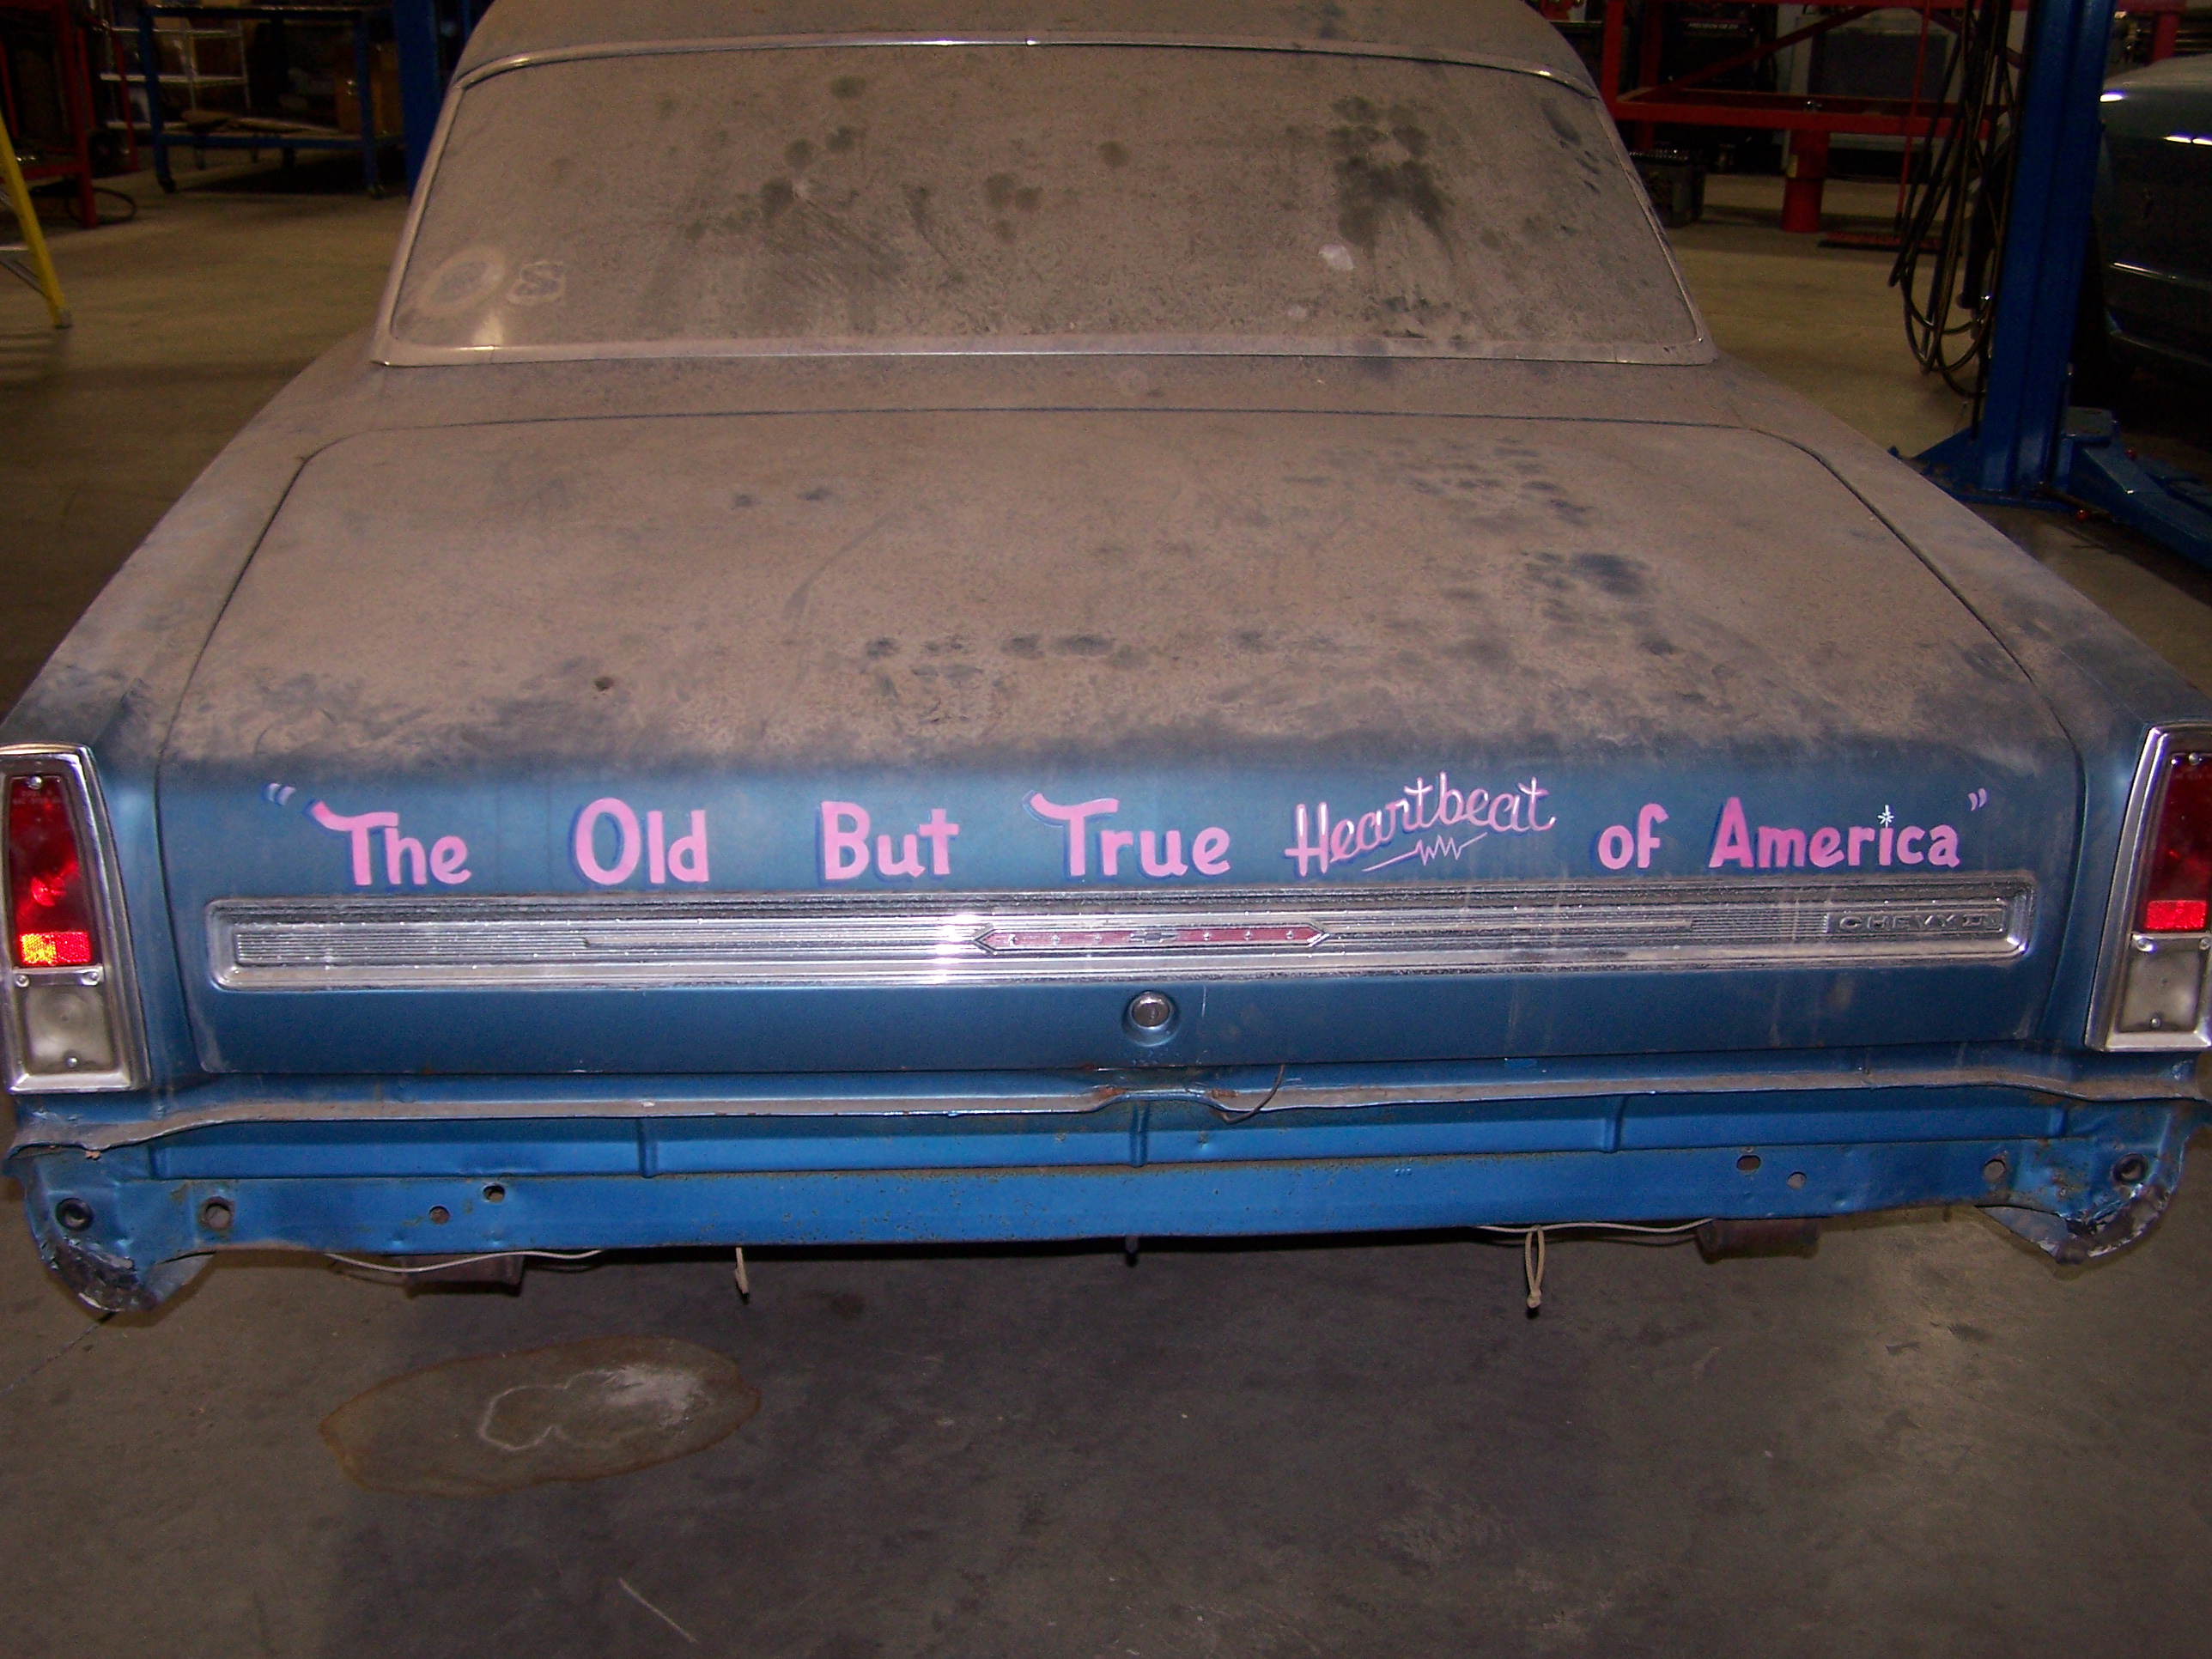
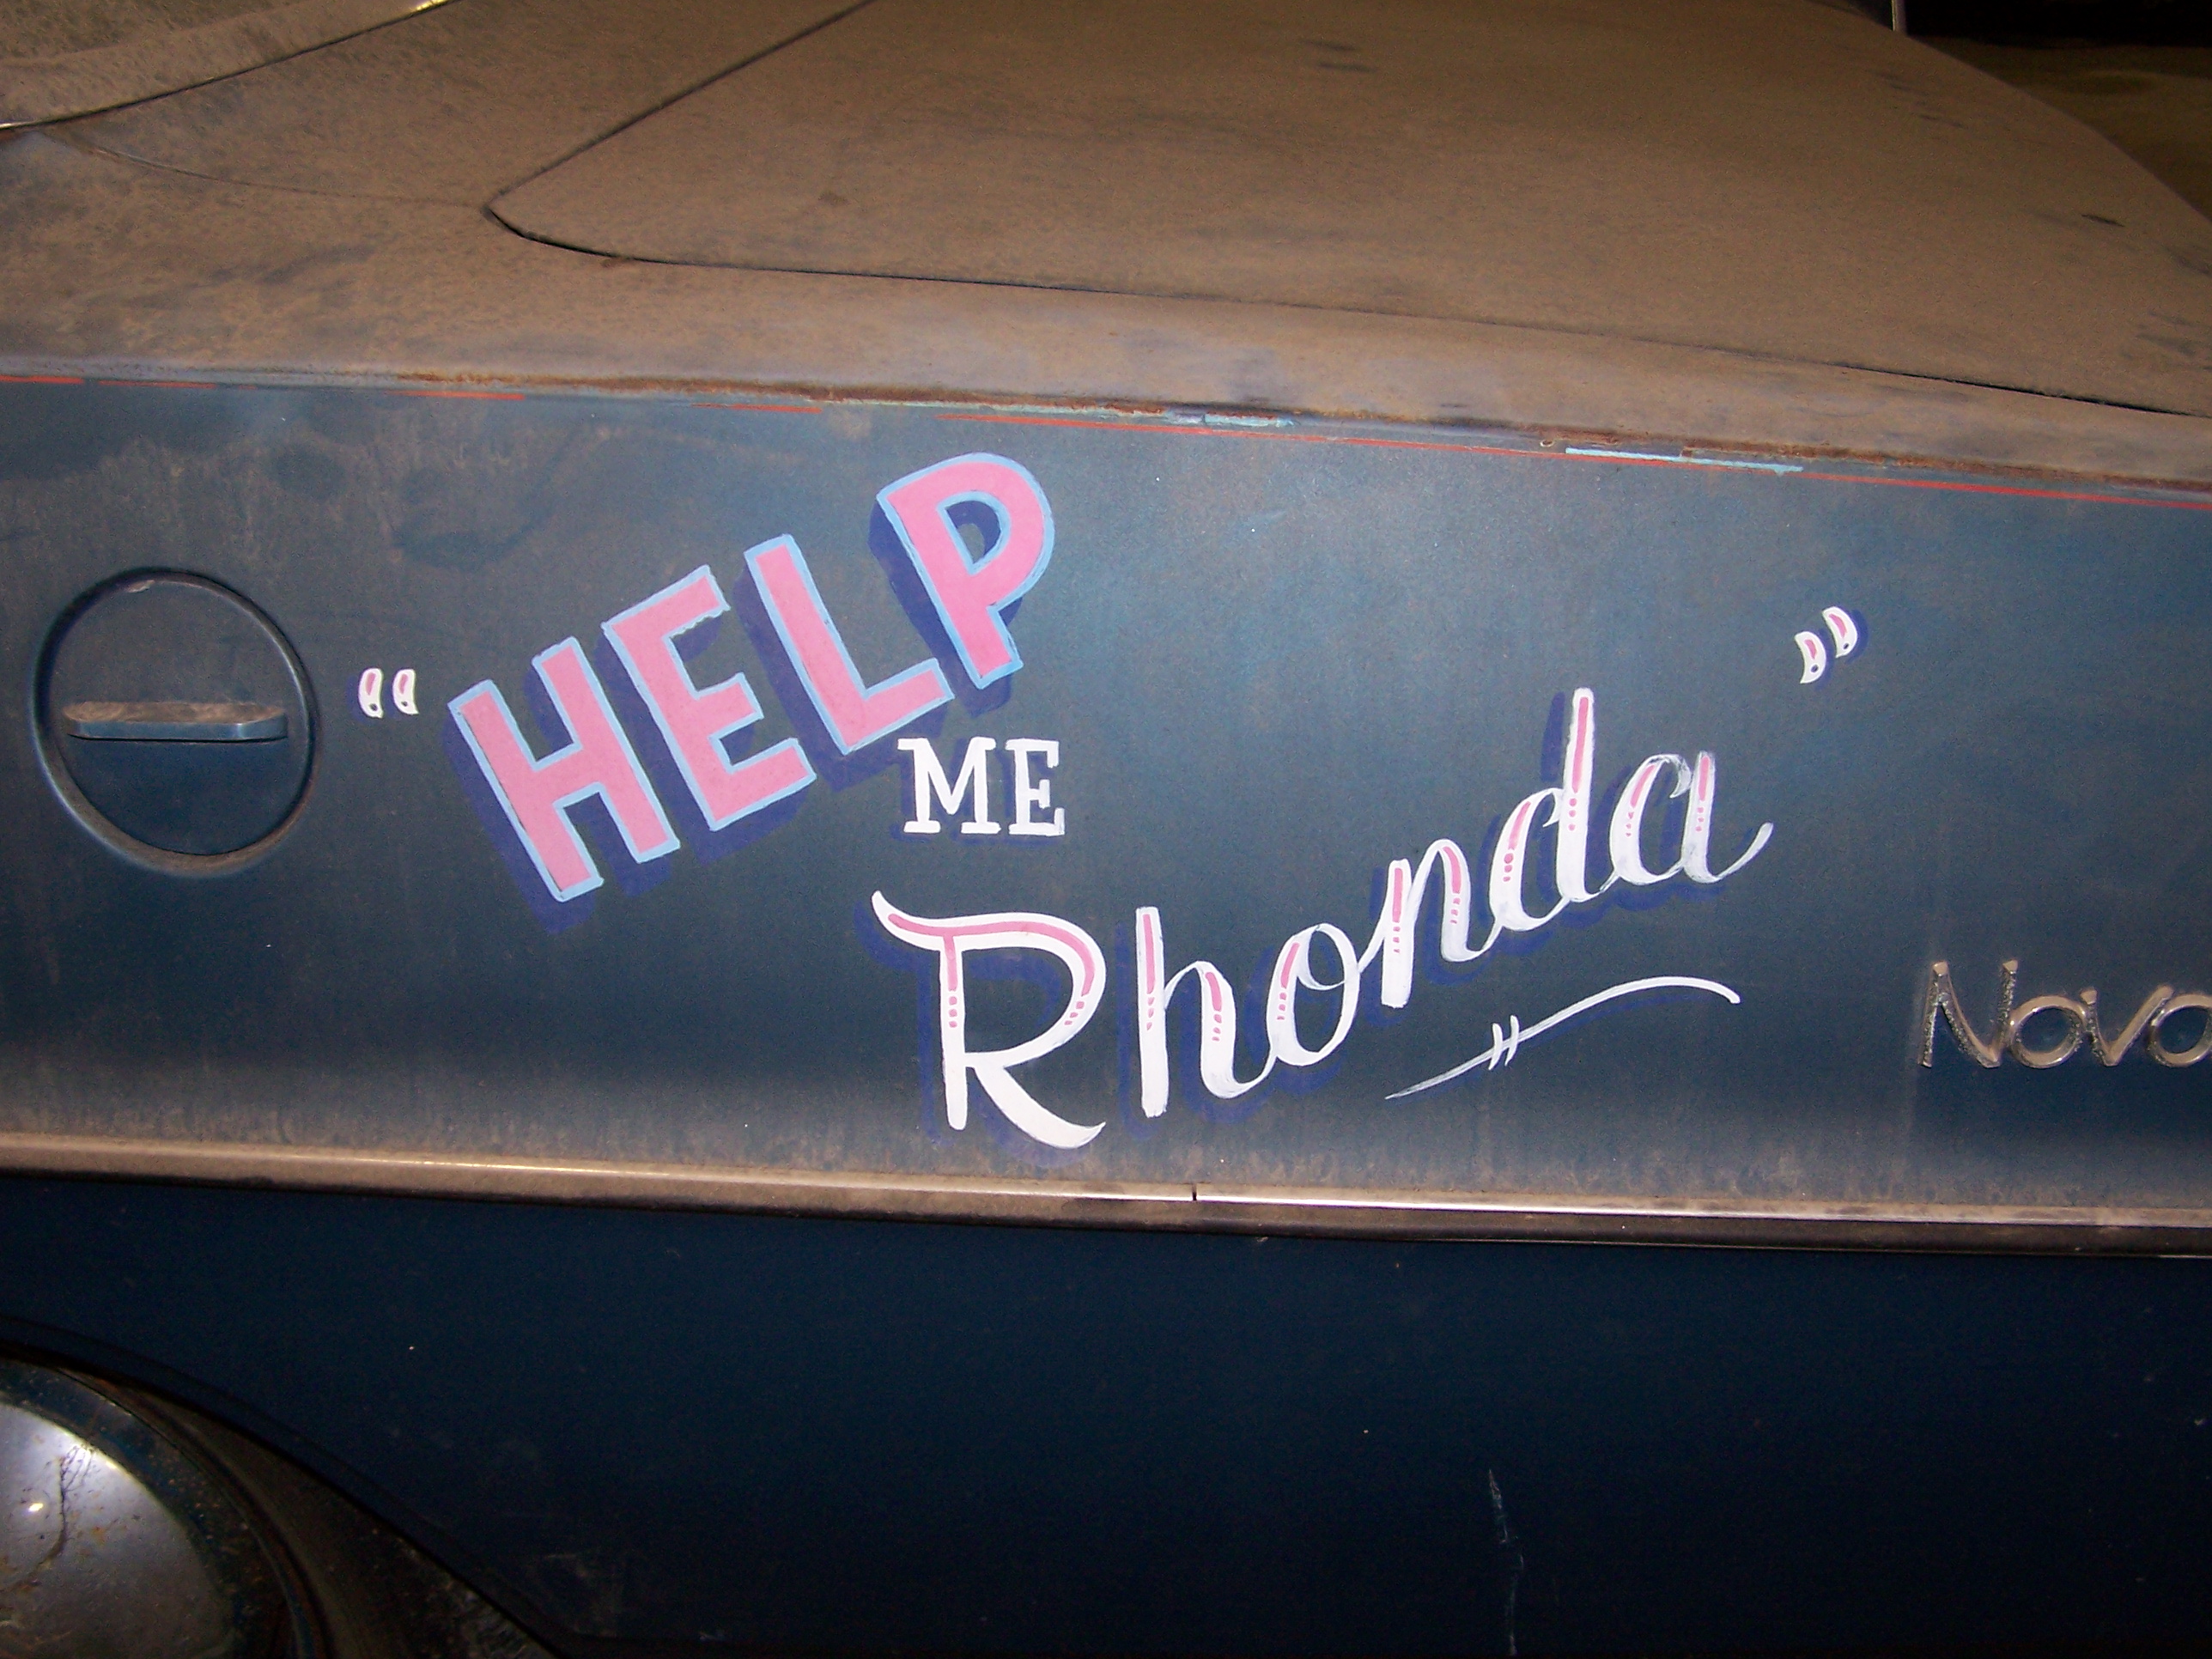
I have been involved in Drag Racing my whole life and in early 2007 I came to conclusion that sometimes you just need to getaway ( hence the name Project Getaway ). So what does a car guy do to getaway, build a car. But this time it was not going to be a drag car. I have always loved the low profile corner burner look so when I started to think about what style of car I wanted to build a Pro Touring car became a easy pick. The next part was now what body style. Since I already had a 69 & 79 Camaro Drag Car I wanted to go a little bit of a different route but I just couldn't make up my mind. So I started to search the forums to get ideas on body styles and the one that stuck out the most to me were the early body Nova's. Now that I knew the theme and body style I wanted I had to now find the car I wanted and lucky me I knew where it was. Now my issue was to get my boss to sell me it. Well after a little bit of begging and promising to build it right he sold it to me.
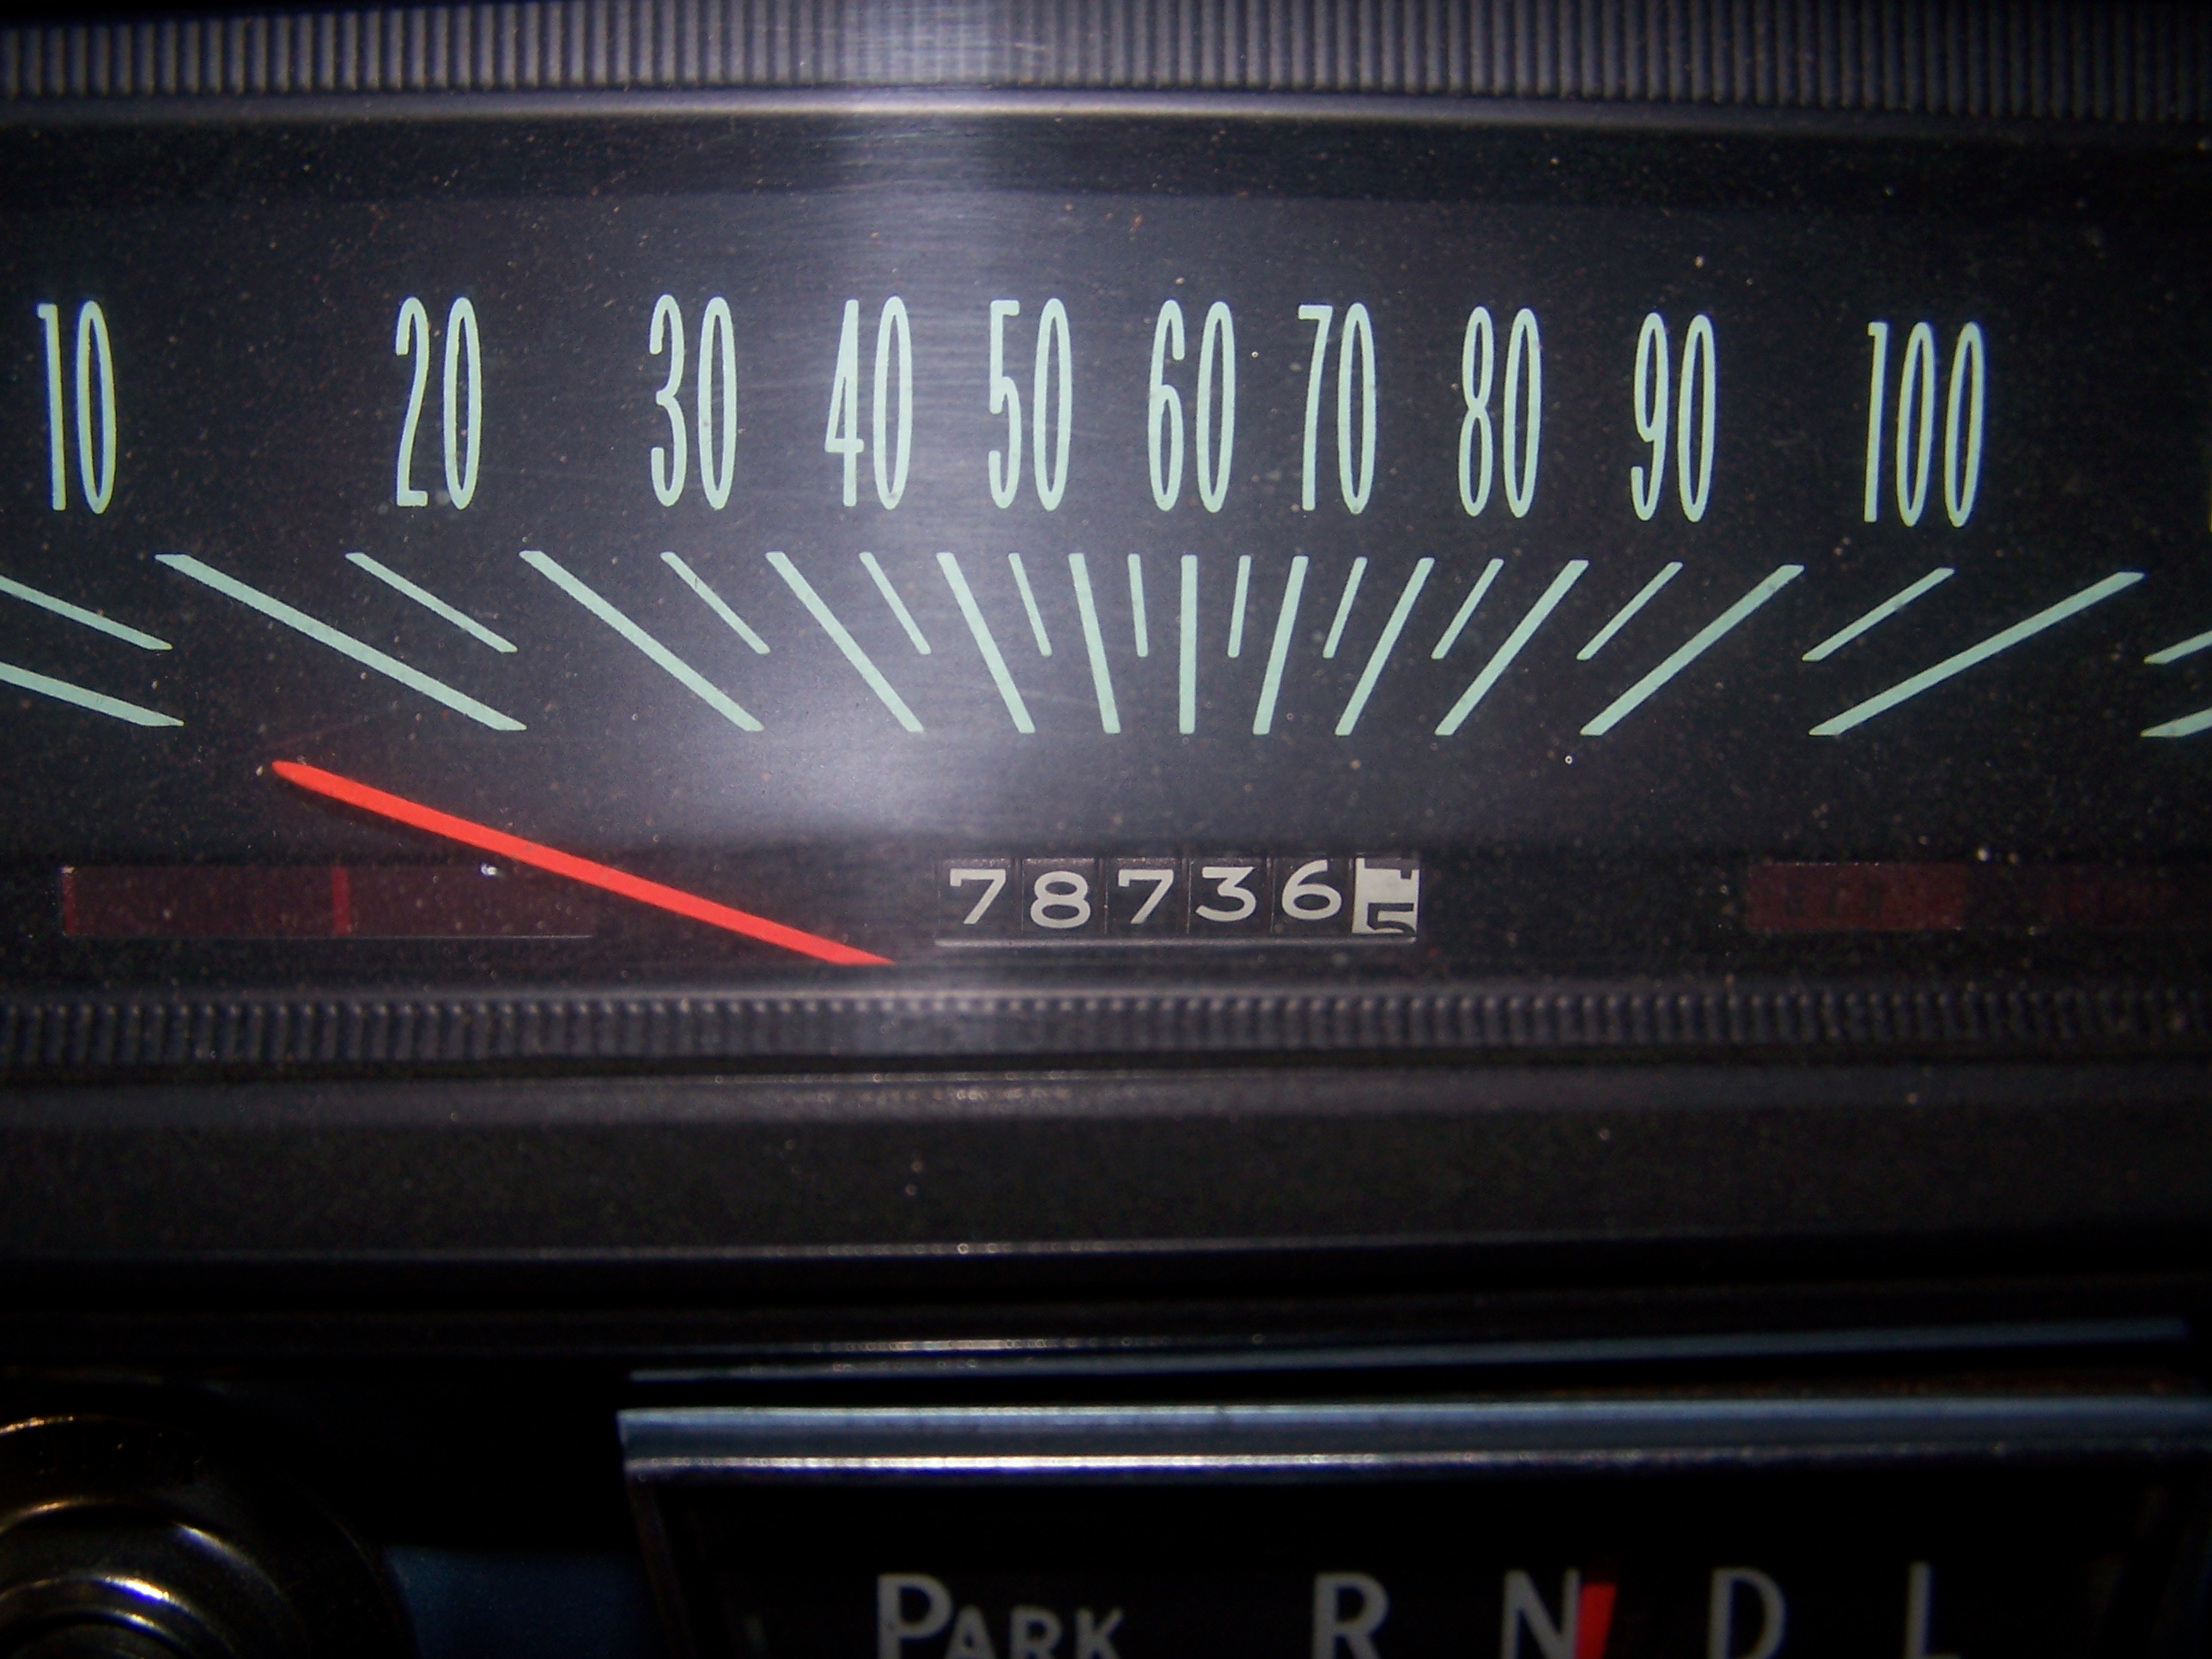
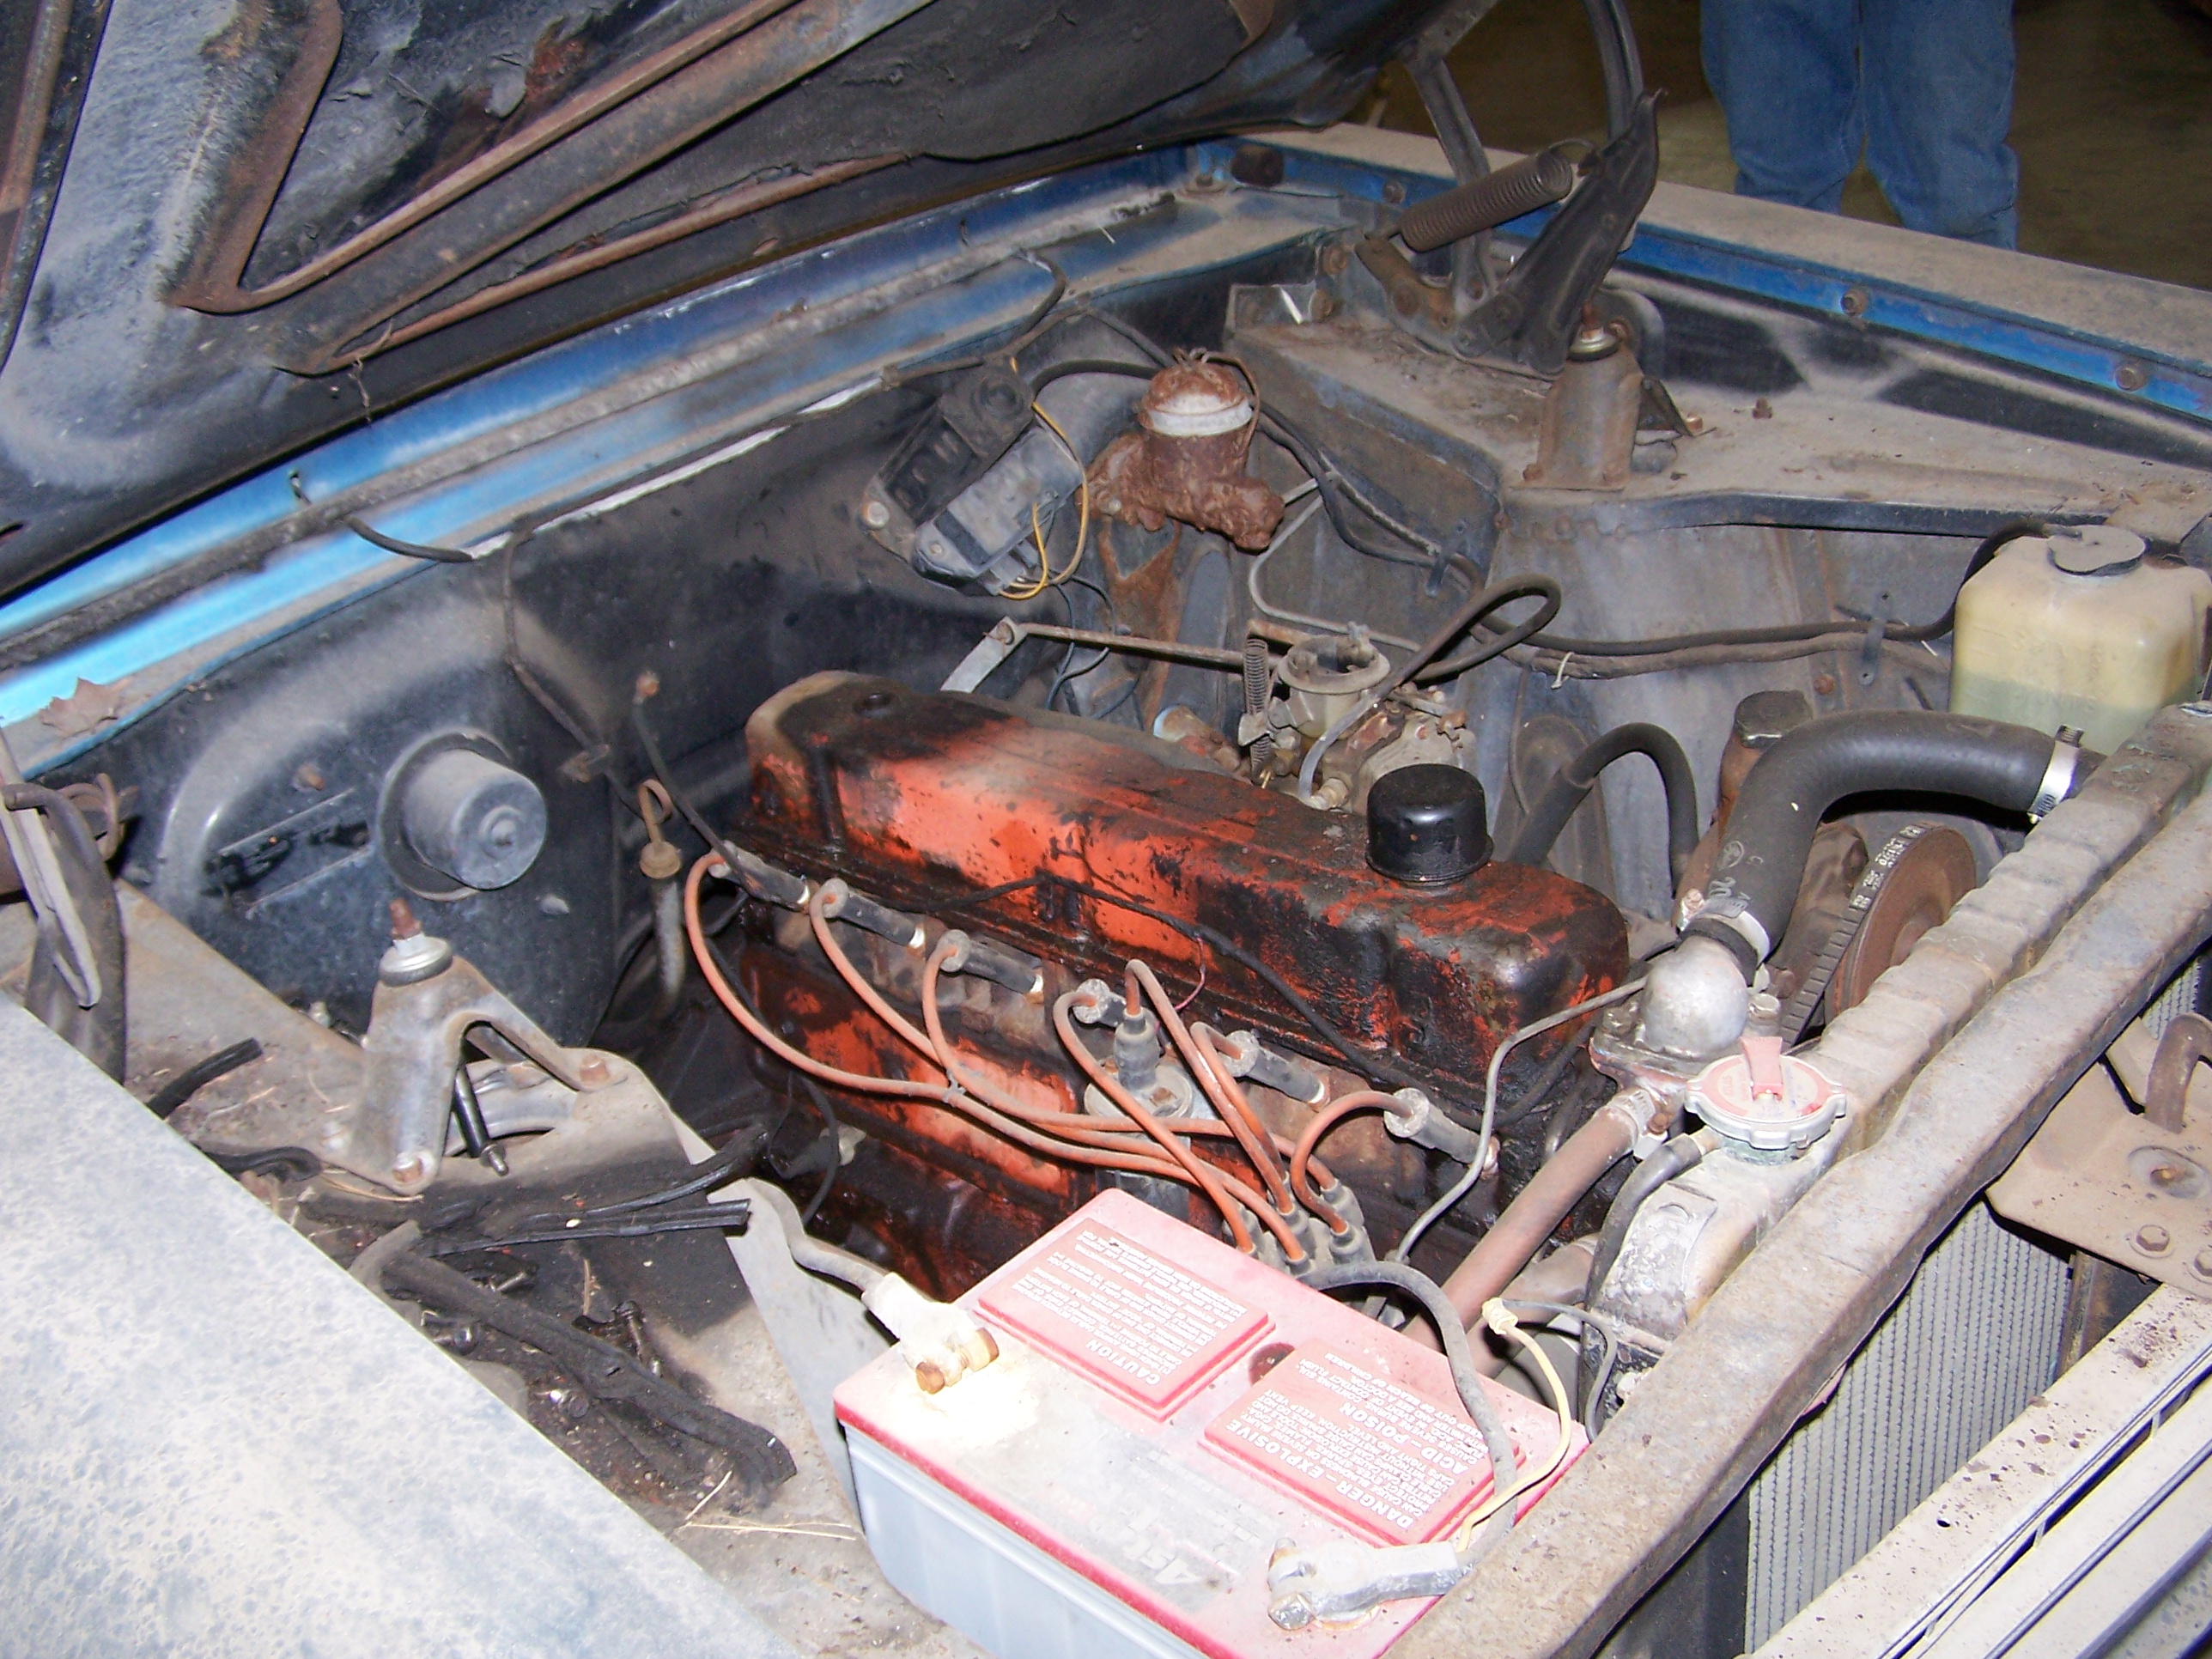
The car was a 66 Nova that had a straight 6 and a glide in it but it was as clean as you could get. It was put in airport hanger in 1995 and wasn't pulled out until 2007. Under the 1/4 inch of dust on it I knew the car still had most of the original paint but was not sure on how the body held up. Once we got it out and cleaned up we saw that the body had almost no rust at all on it and no body work what so ever was ever done to it. The next step was to get the car over to my good friend Bob Carroll that owns Carroll's Rod and Race. We got together made a game plan and got the car into his shop. Now that I had the car, a plan and the shop next was to start stripping it apart to get it ready for a second chance at life as one bad ass Pro Touring car.
Once we started the planing process I had the idea of trying to get some media coverage for the build. So I contacted my friend Jim Campisano of Super Chevy Magazine pitched him the idea and my plan and I was lucky enough that Super Chevy was going to pick up and follow the build process. The final step was the name and since the theme of the project was to be able to use the car to getaway from drag racing so the Project Getaway was a perfect match for it. My first issue was May 2008 and the building process began.
Lead Story - http://www.superchevy.com/technical/...ild/index.html
Since then it has appeared in 11 issues to date. When I started the build I had a 2 year plan for it to be completed and as we all know sometimes it takes a lot longer to complete a then we think. This May will mark 3 years in the build process and since we are starting to see light at the end of the tunnel I felt now is the time to hit the Internet to show the build process. In the next few months I will get everyone up to speed on the past and update the forum as much as I can without getting ahead of the Super Chevy stories that will be coming out in the next few months. Our target date at this point is to hopefully have it at SEMA 2011. I want to thank whoever took the time to read through all the BS I just wrote and now enjoy the build process of Project Getaway.
Project Getaway wouldn't be possible without the support of all the following :
Carroll's Rod & Race - http://www.rodandracecraft.com/
Chris Alston's Chassisworks - http://www.cachassisworks.com/
Turn Key Engine Supply - http://www.turnkeyenginesupply.com/
Burns Stainless - http://www.burnsstainless.com/
Strange Engineering - http://www.strangeengineering.net/
Summit Racing - http://www.summitracing.com/
Fesler Built - http://www.feslerbuilt.com/
TCI Transmissions - http://www.tciauto.com/
Aeromotive - http://aeromotiveinc.com/
Wilwood Engineering - http://www.wilwood.com/
Nitto Tires - http://www.nittotire.com/index.html
Intro Wheels - http://www.introwheels.com/
Vintage Air - http://www.vintageair.com/
Painless Performance - http://www.painlessperformance.com/
Ground Up Restoration Parts - http://www.ss396.com/
Kenne Bell - http://www.kennebell.net/
Dart Heads - http://www.dartheads.com/
ARP Bolts - http://www.arp-bolts.com/
Lunati - http://www.lunatipower.com/
Moroso - http://www.moroso.com/
Westech Performance Group - http://www.westechperformance.com/
Anyone that may be interested in becoming involved in Project Getaway please contact me through my email: [email protected]
Thanks Eddie
Here is the first set and I will post more in the next few days.

-
01-26-2011 #2
 Registered User
- Join Date
- Feb 2010
- Location
- Central NJ
- Posts
- 792
Cool Build... I see its being built in NJ... are you from that area? I would be cool to see it at some local shows/cruises...
-SeanMy 1973 Chevelle "Bad Buzz" build: https://www.pro-touring.com/showthre...velle-PT-Build
-
01-28-2011 #3
Registered User
- Join Date
- Dec 2007
- Posts
- 14
I lived in Englishtown when we started on the project but have since moved to Indy. I had to for the travel end of my job and to be close to our shop. I do plan on having it in NJ once it is done for a little bit so I'm sure it will be seen at some places. Originally Posted by sr73bu

-
01-28-2011 #4
Registered User
- Join Date
- Dec 2007
- Posts
- 14
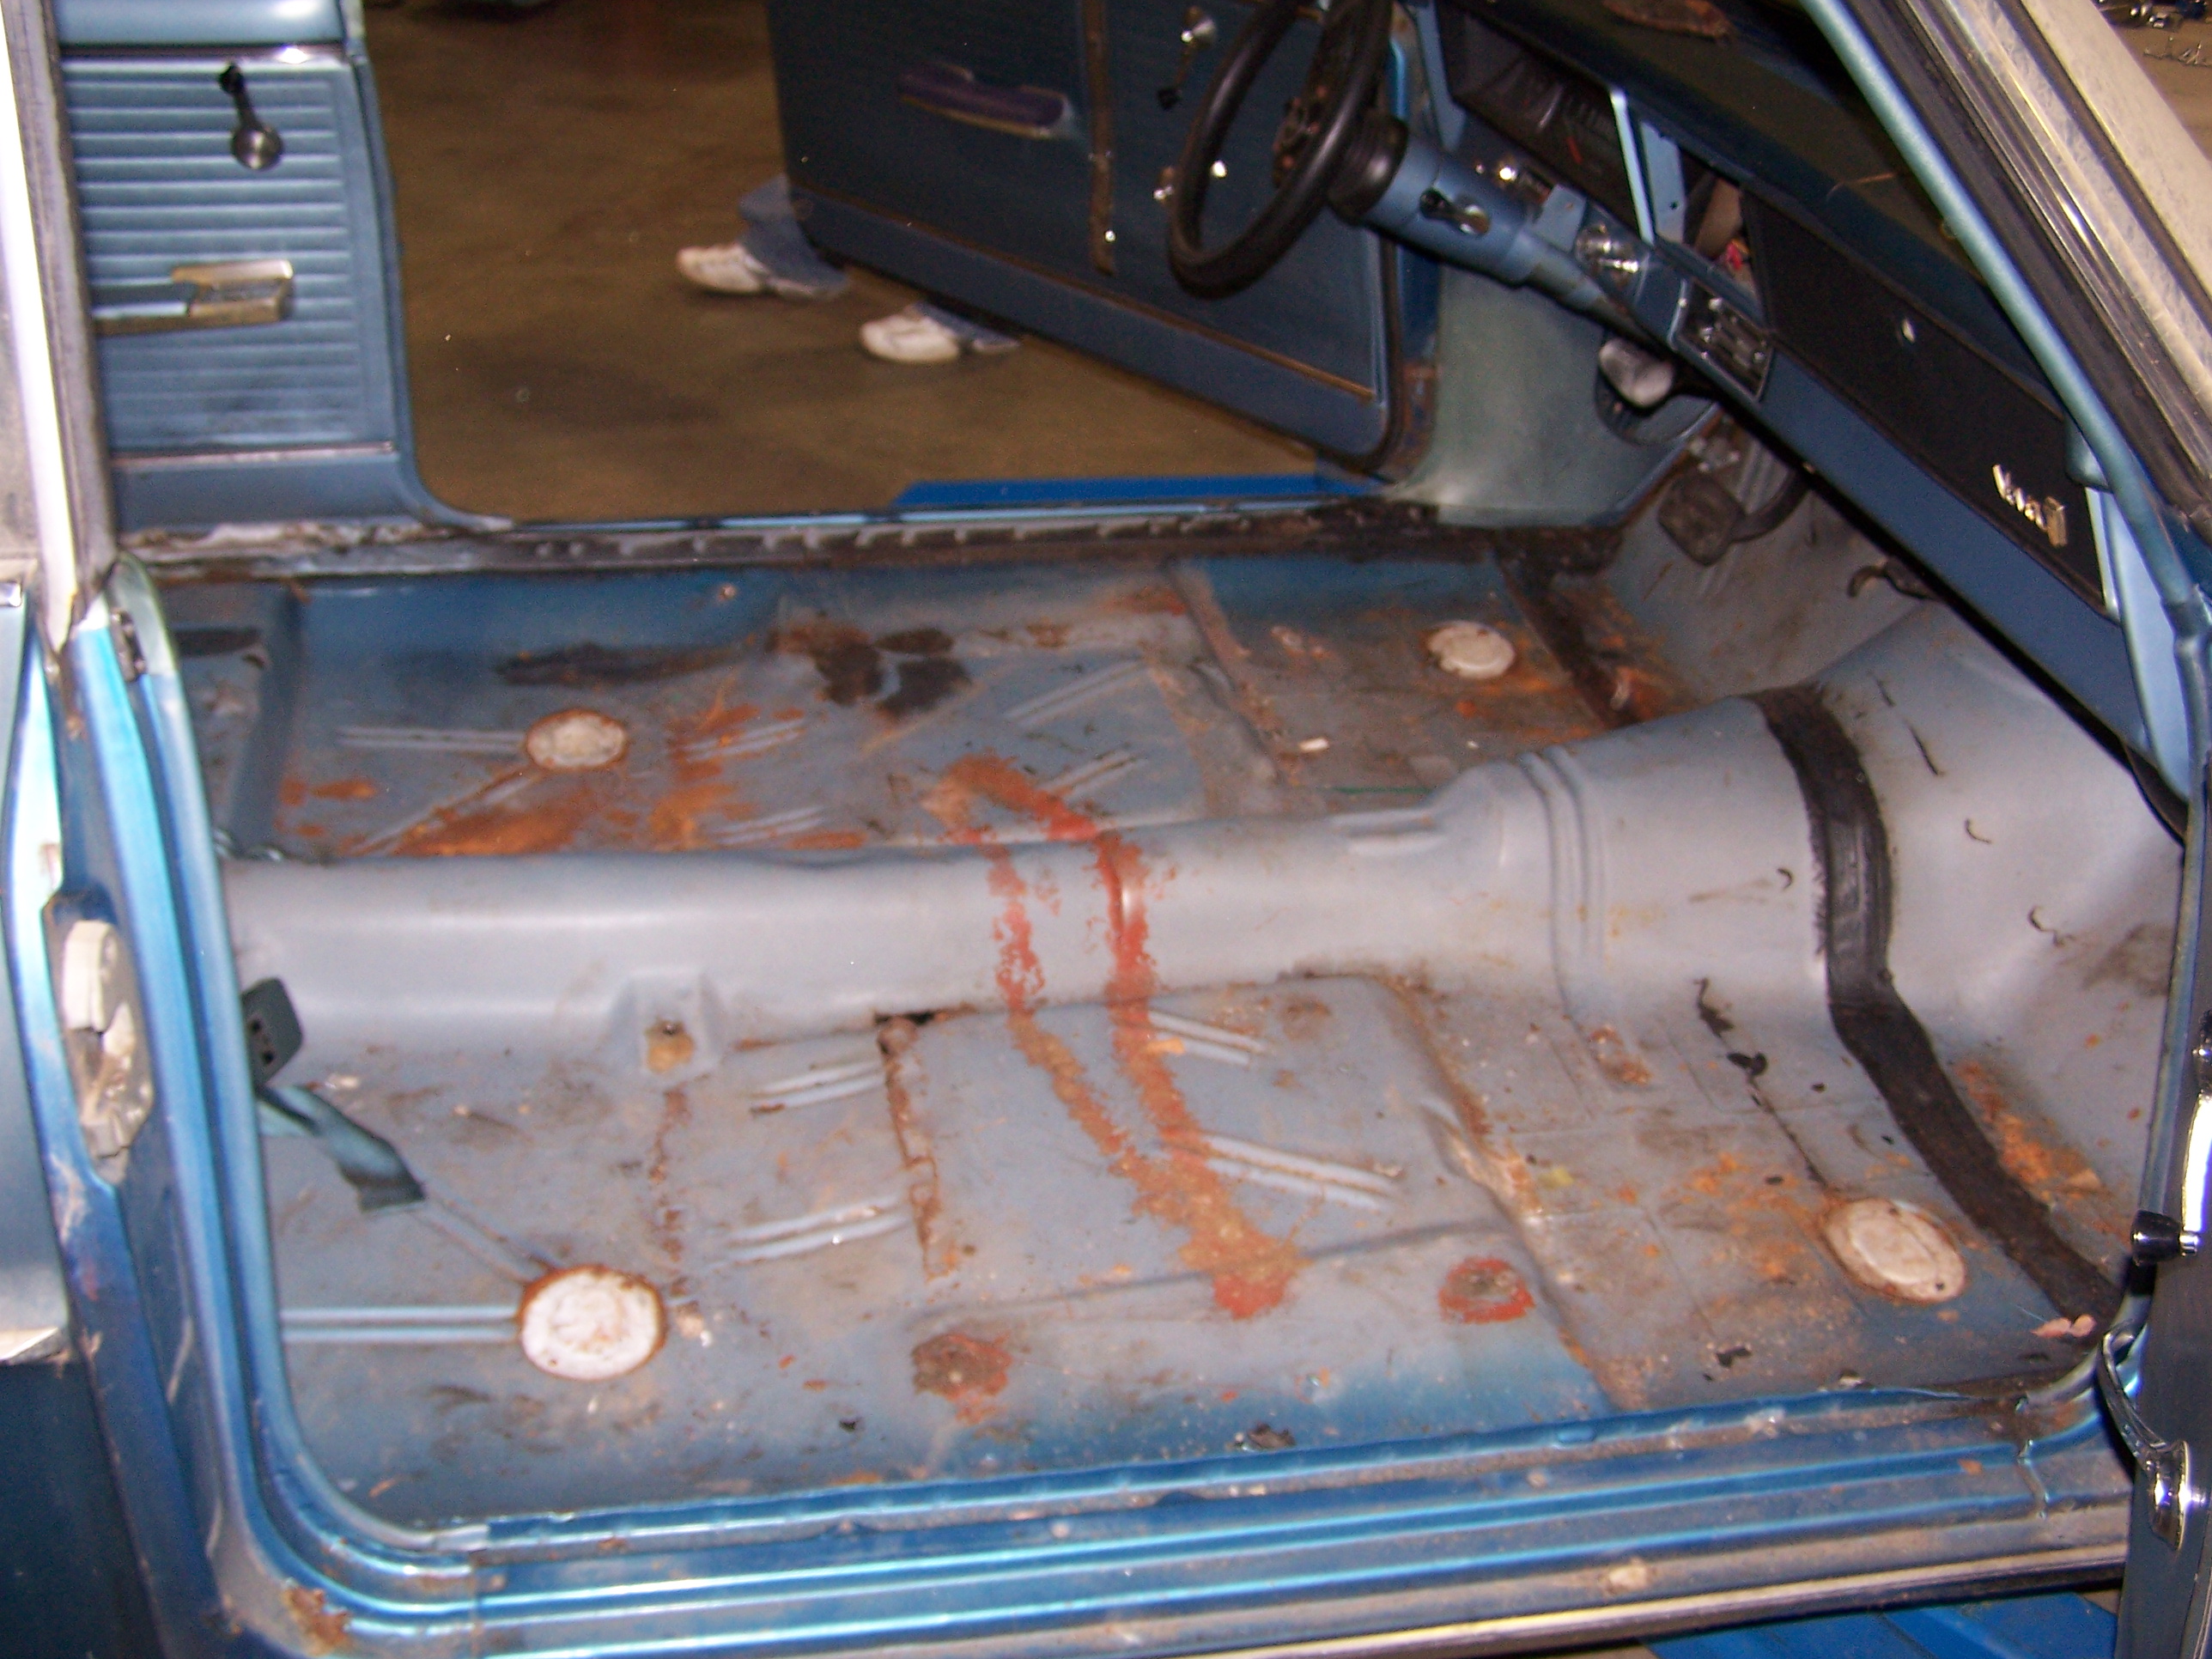
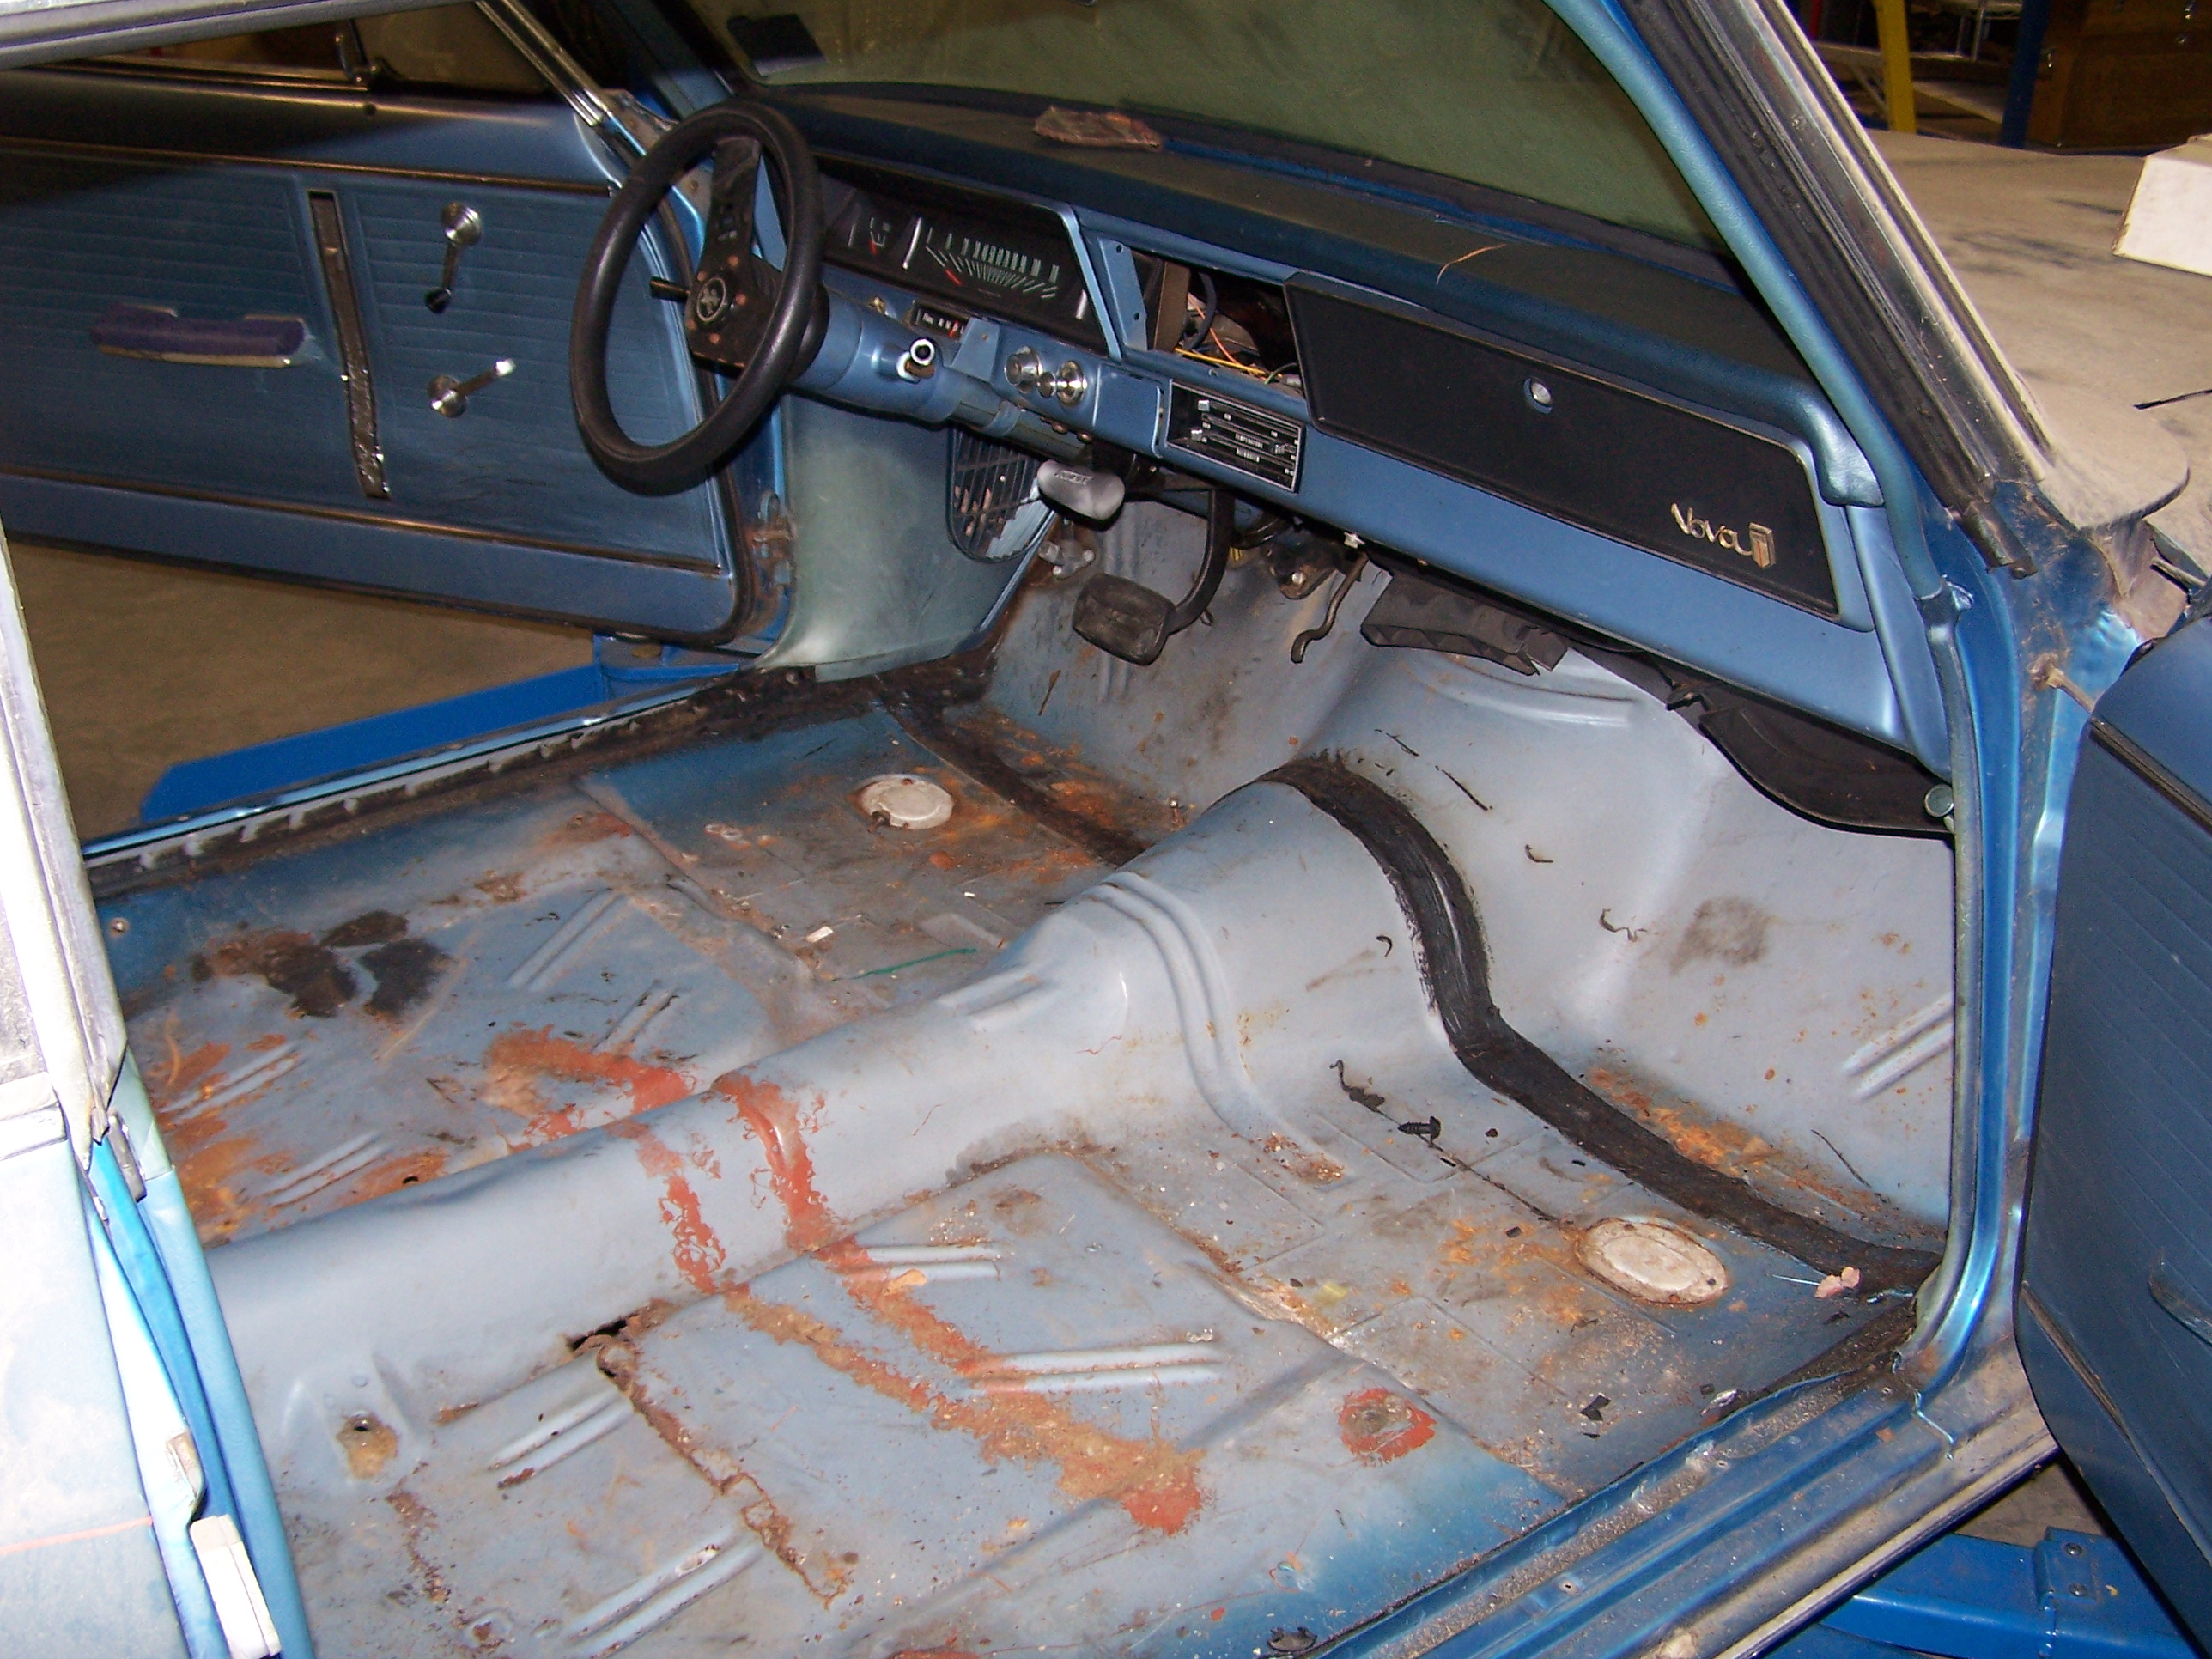
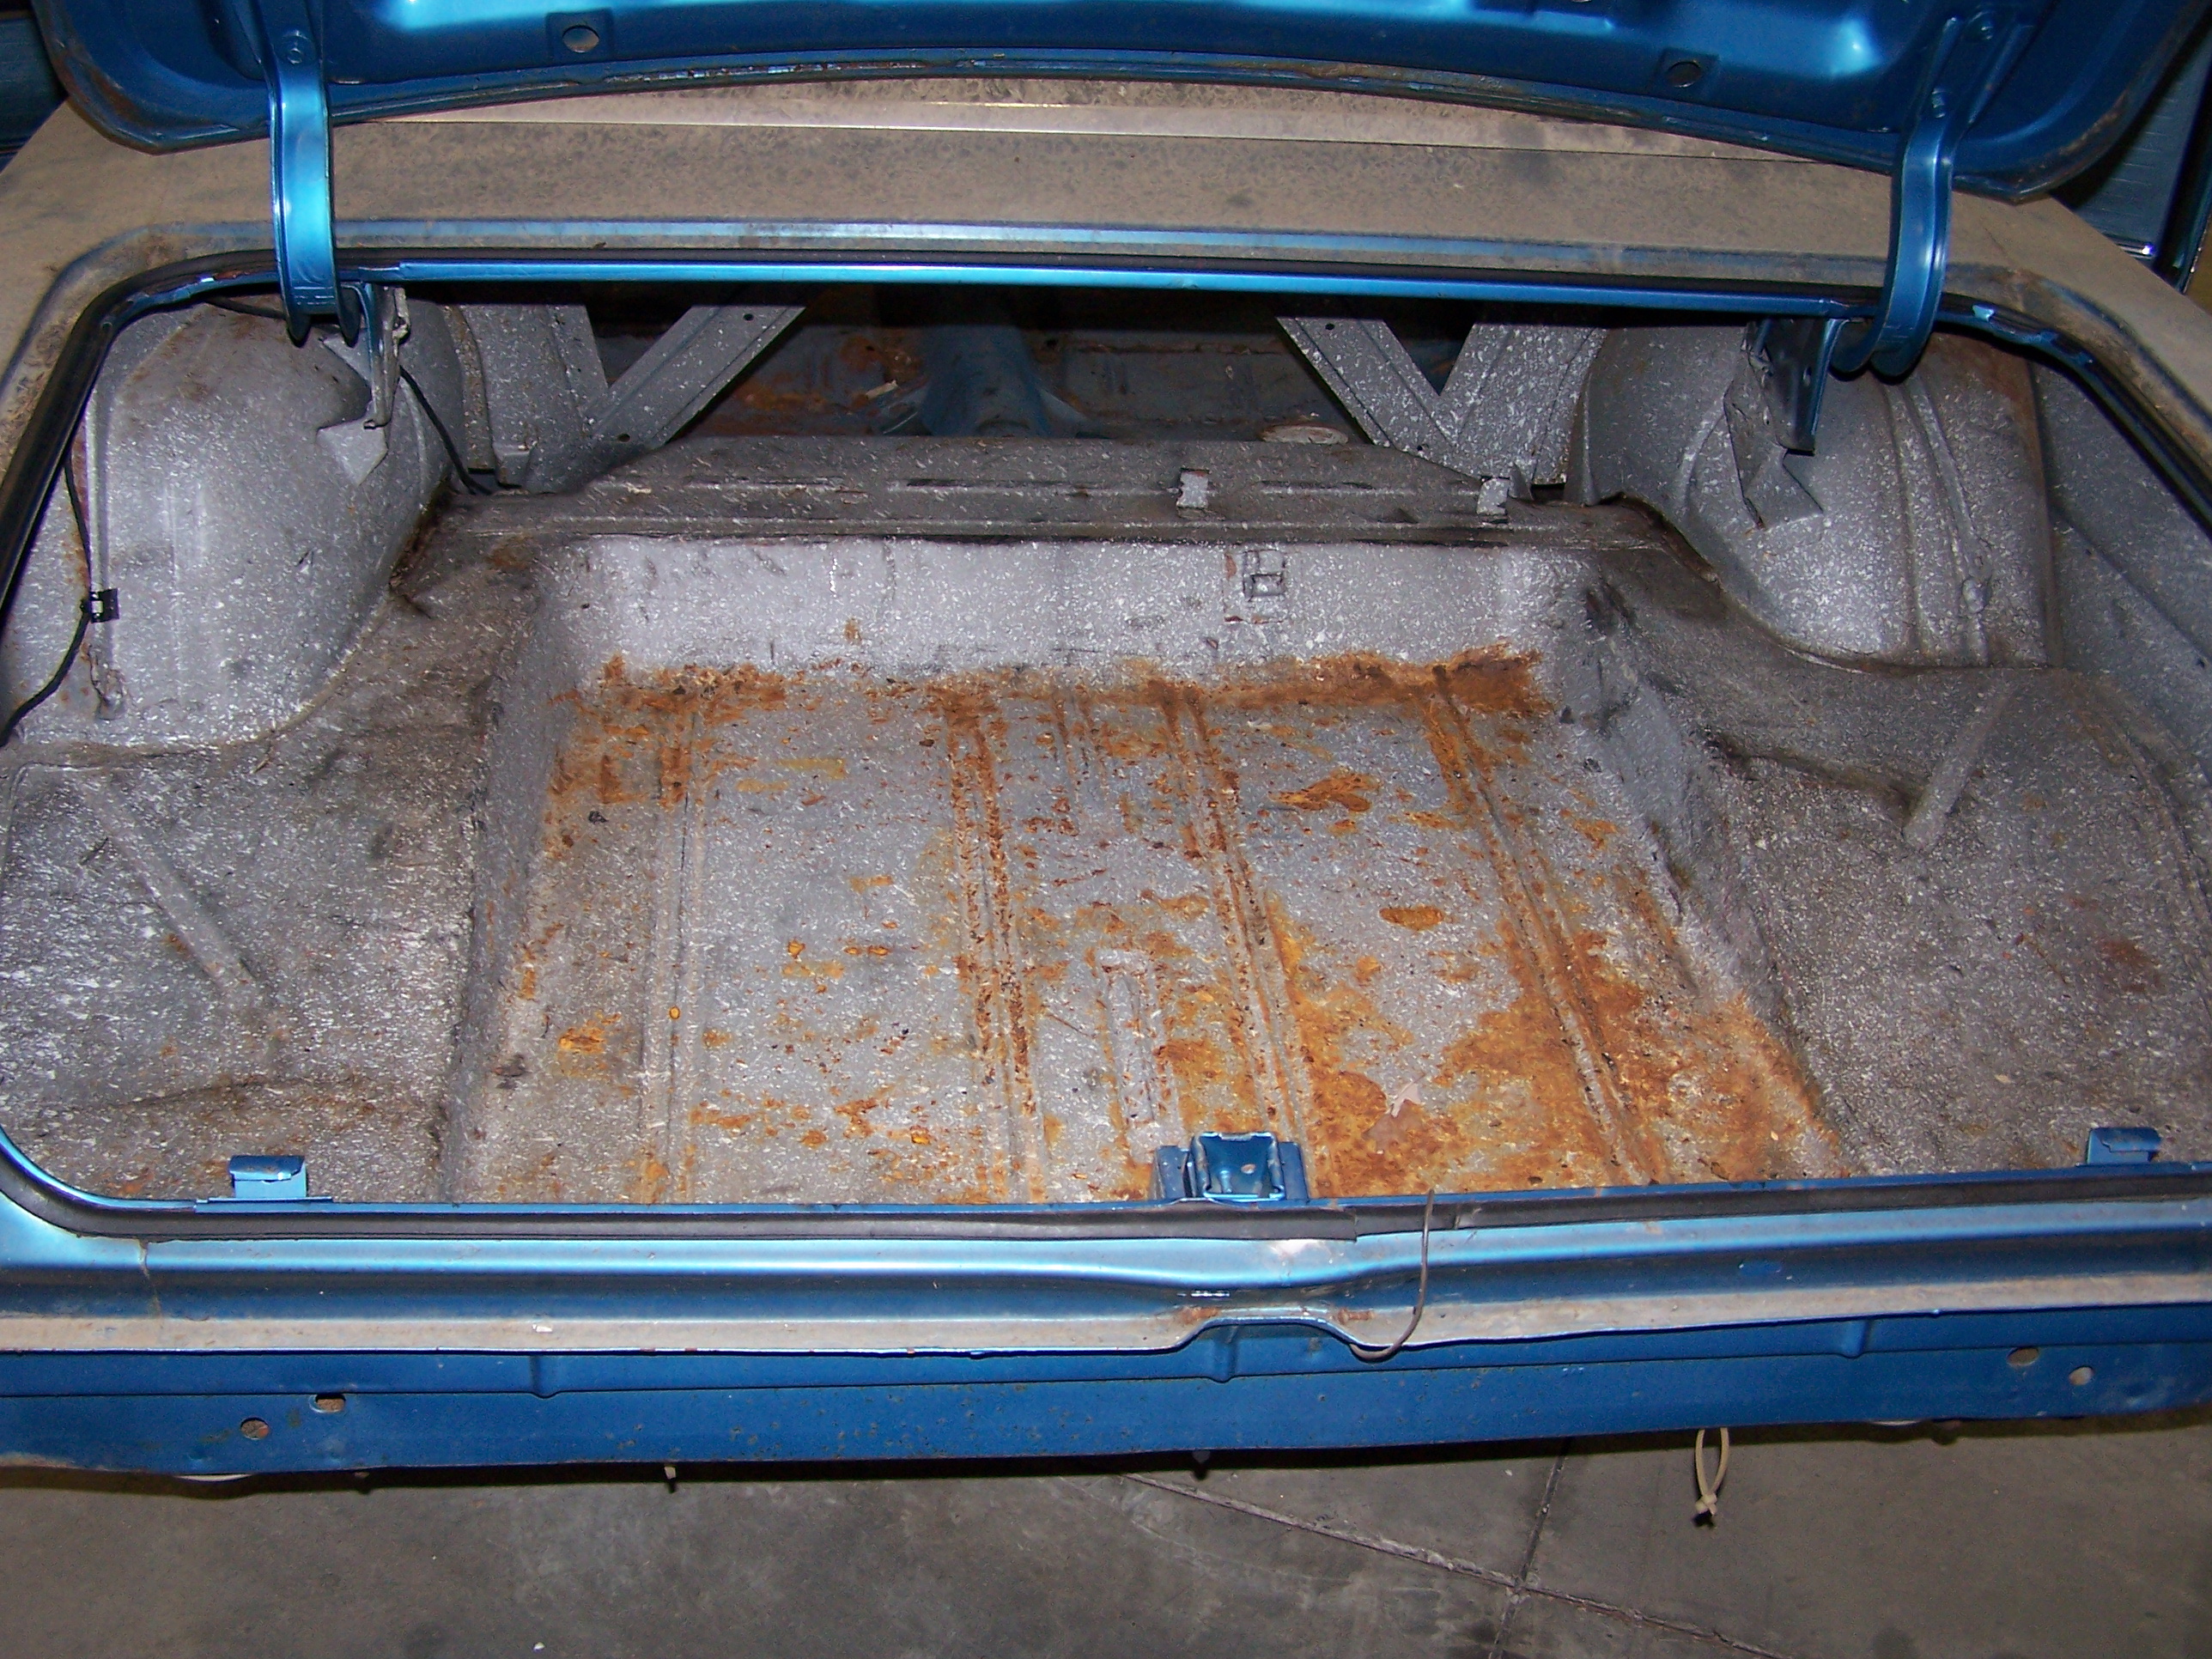
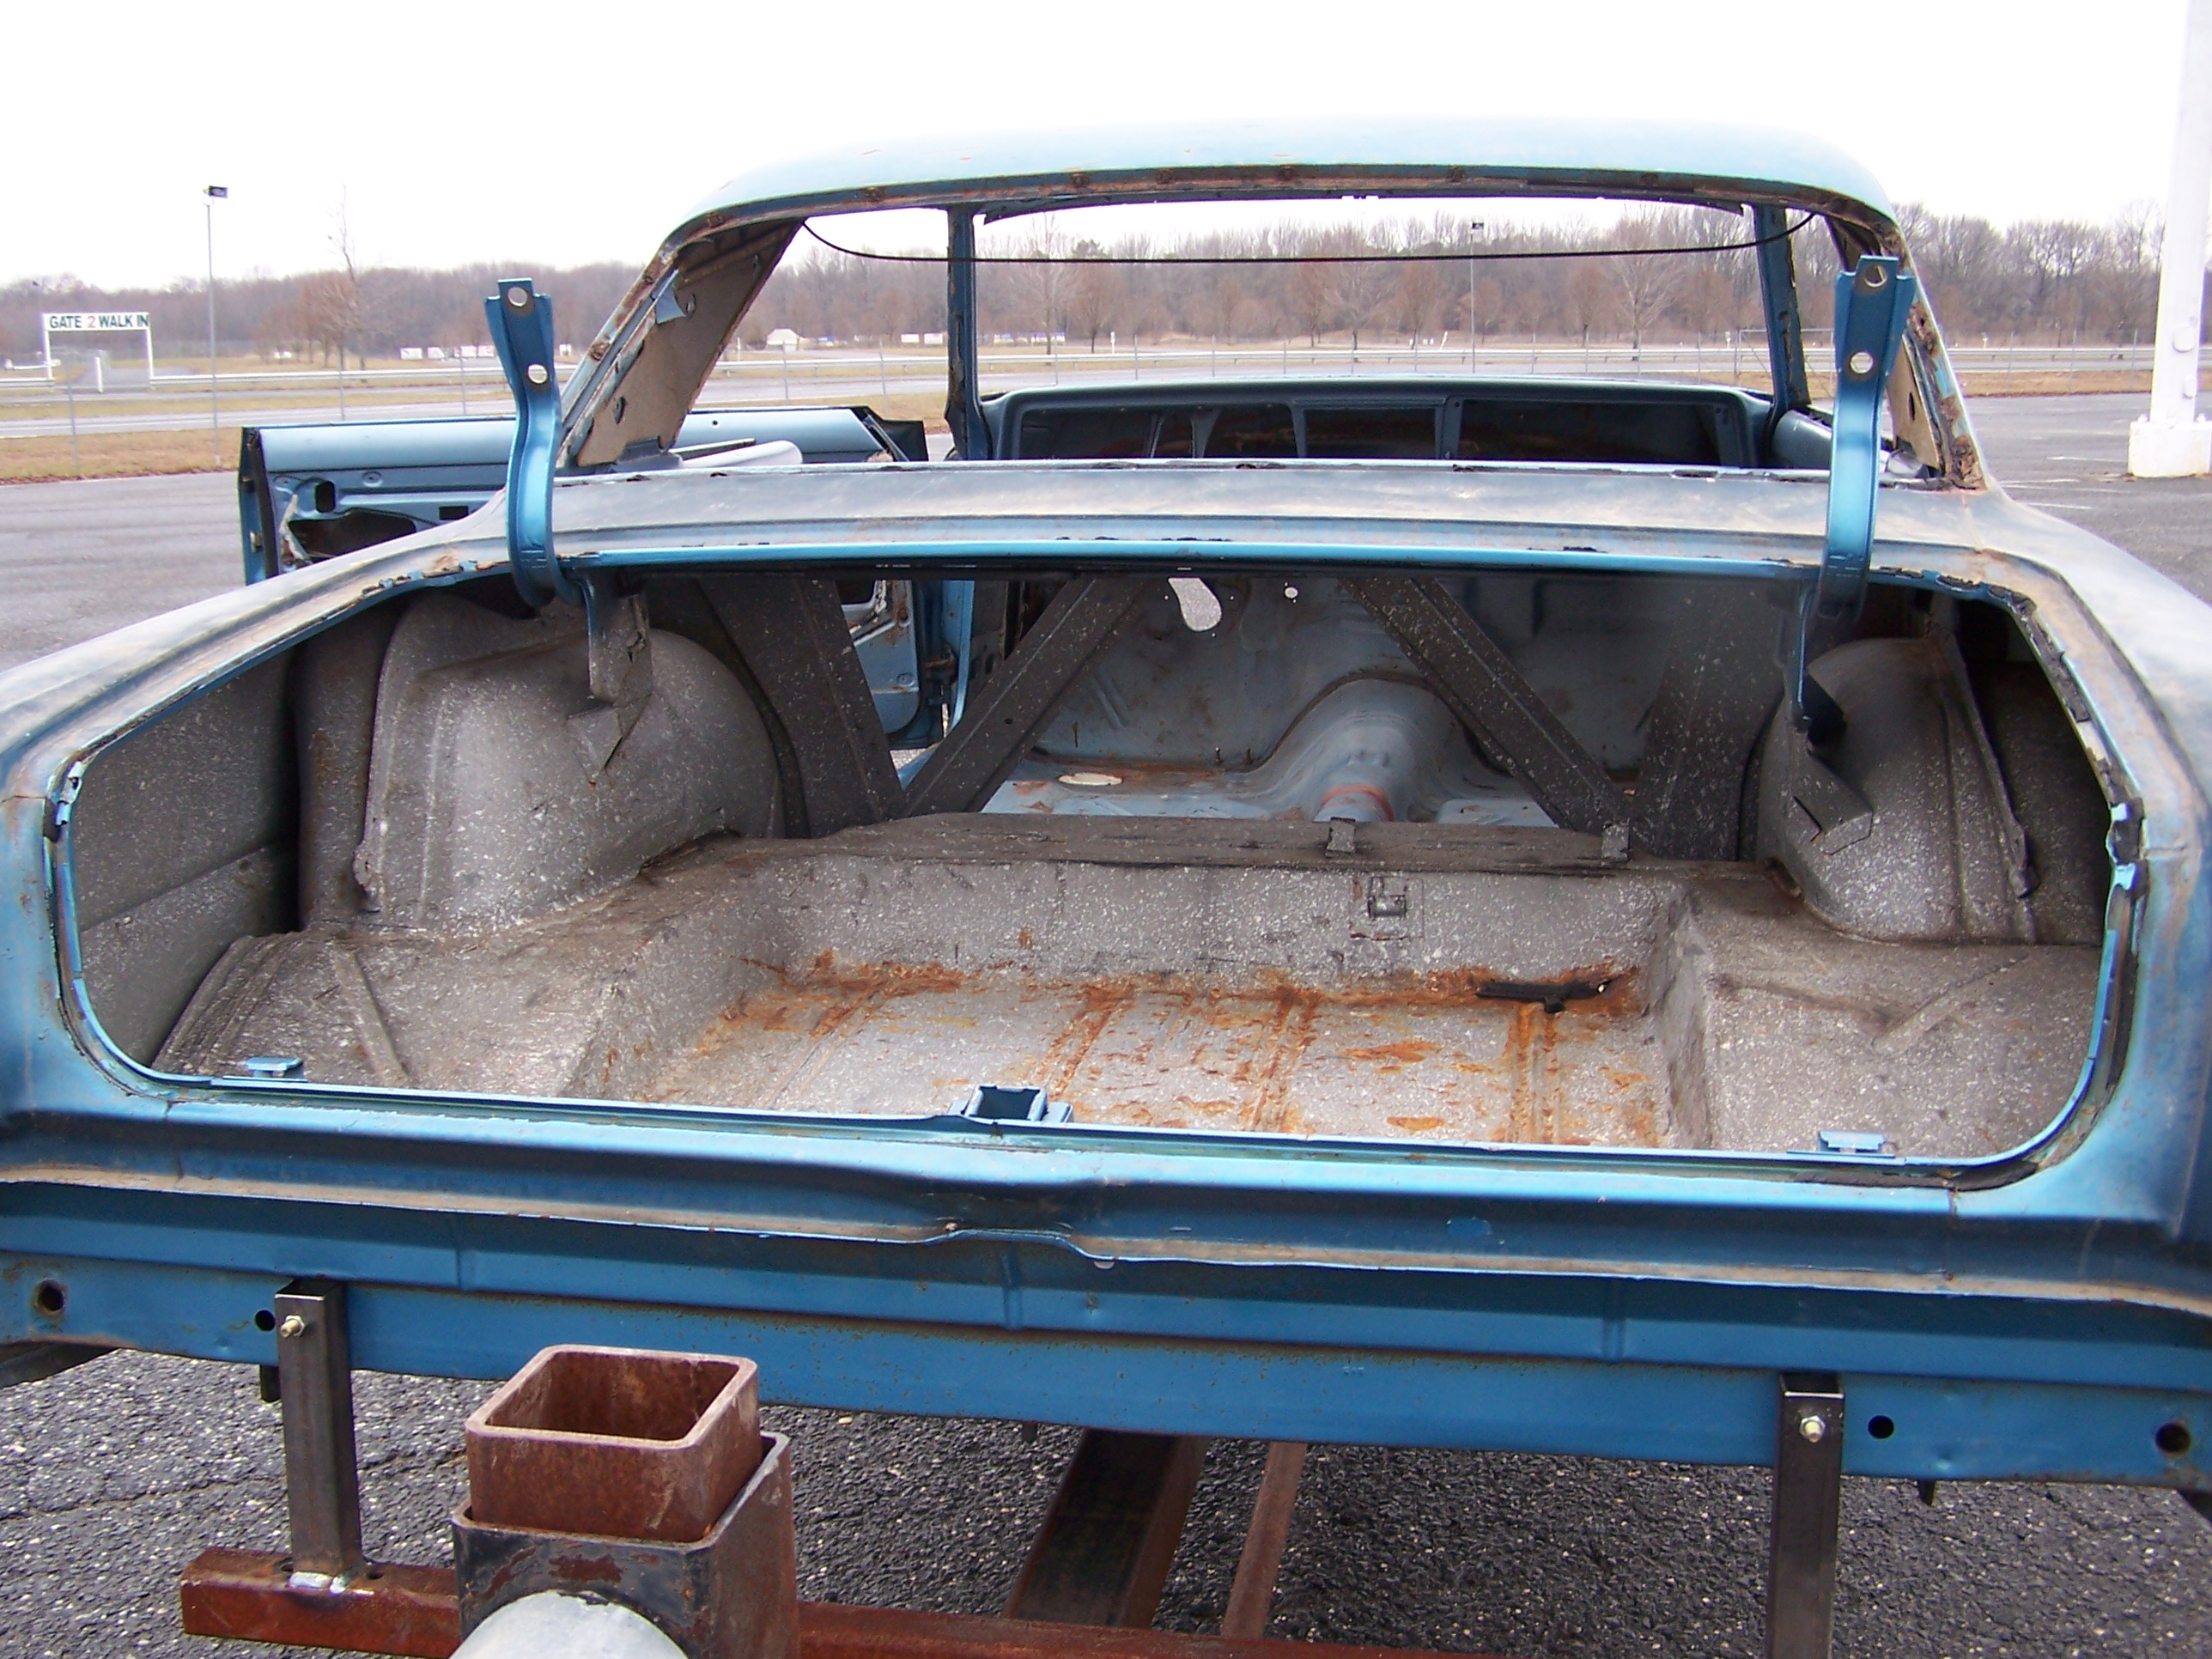
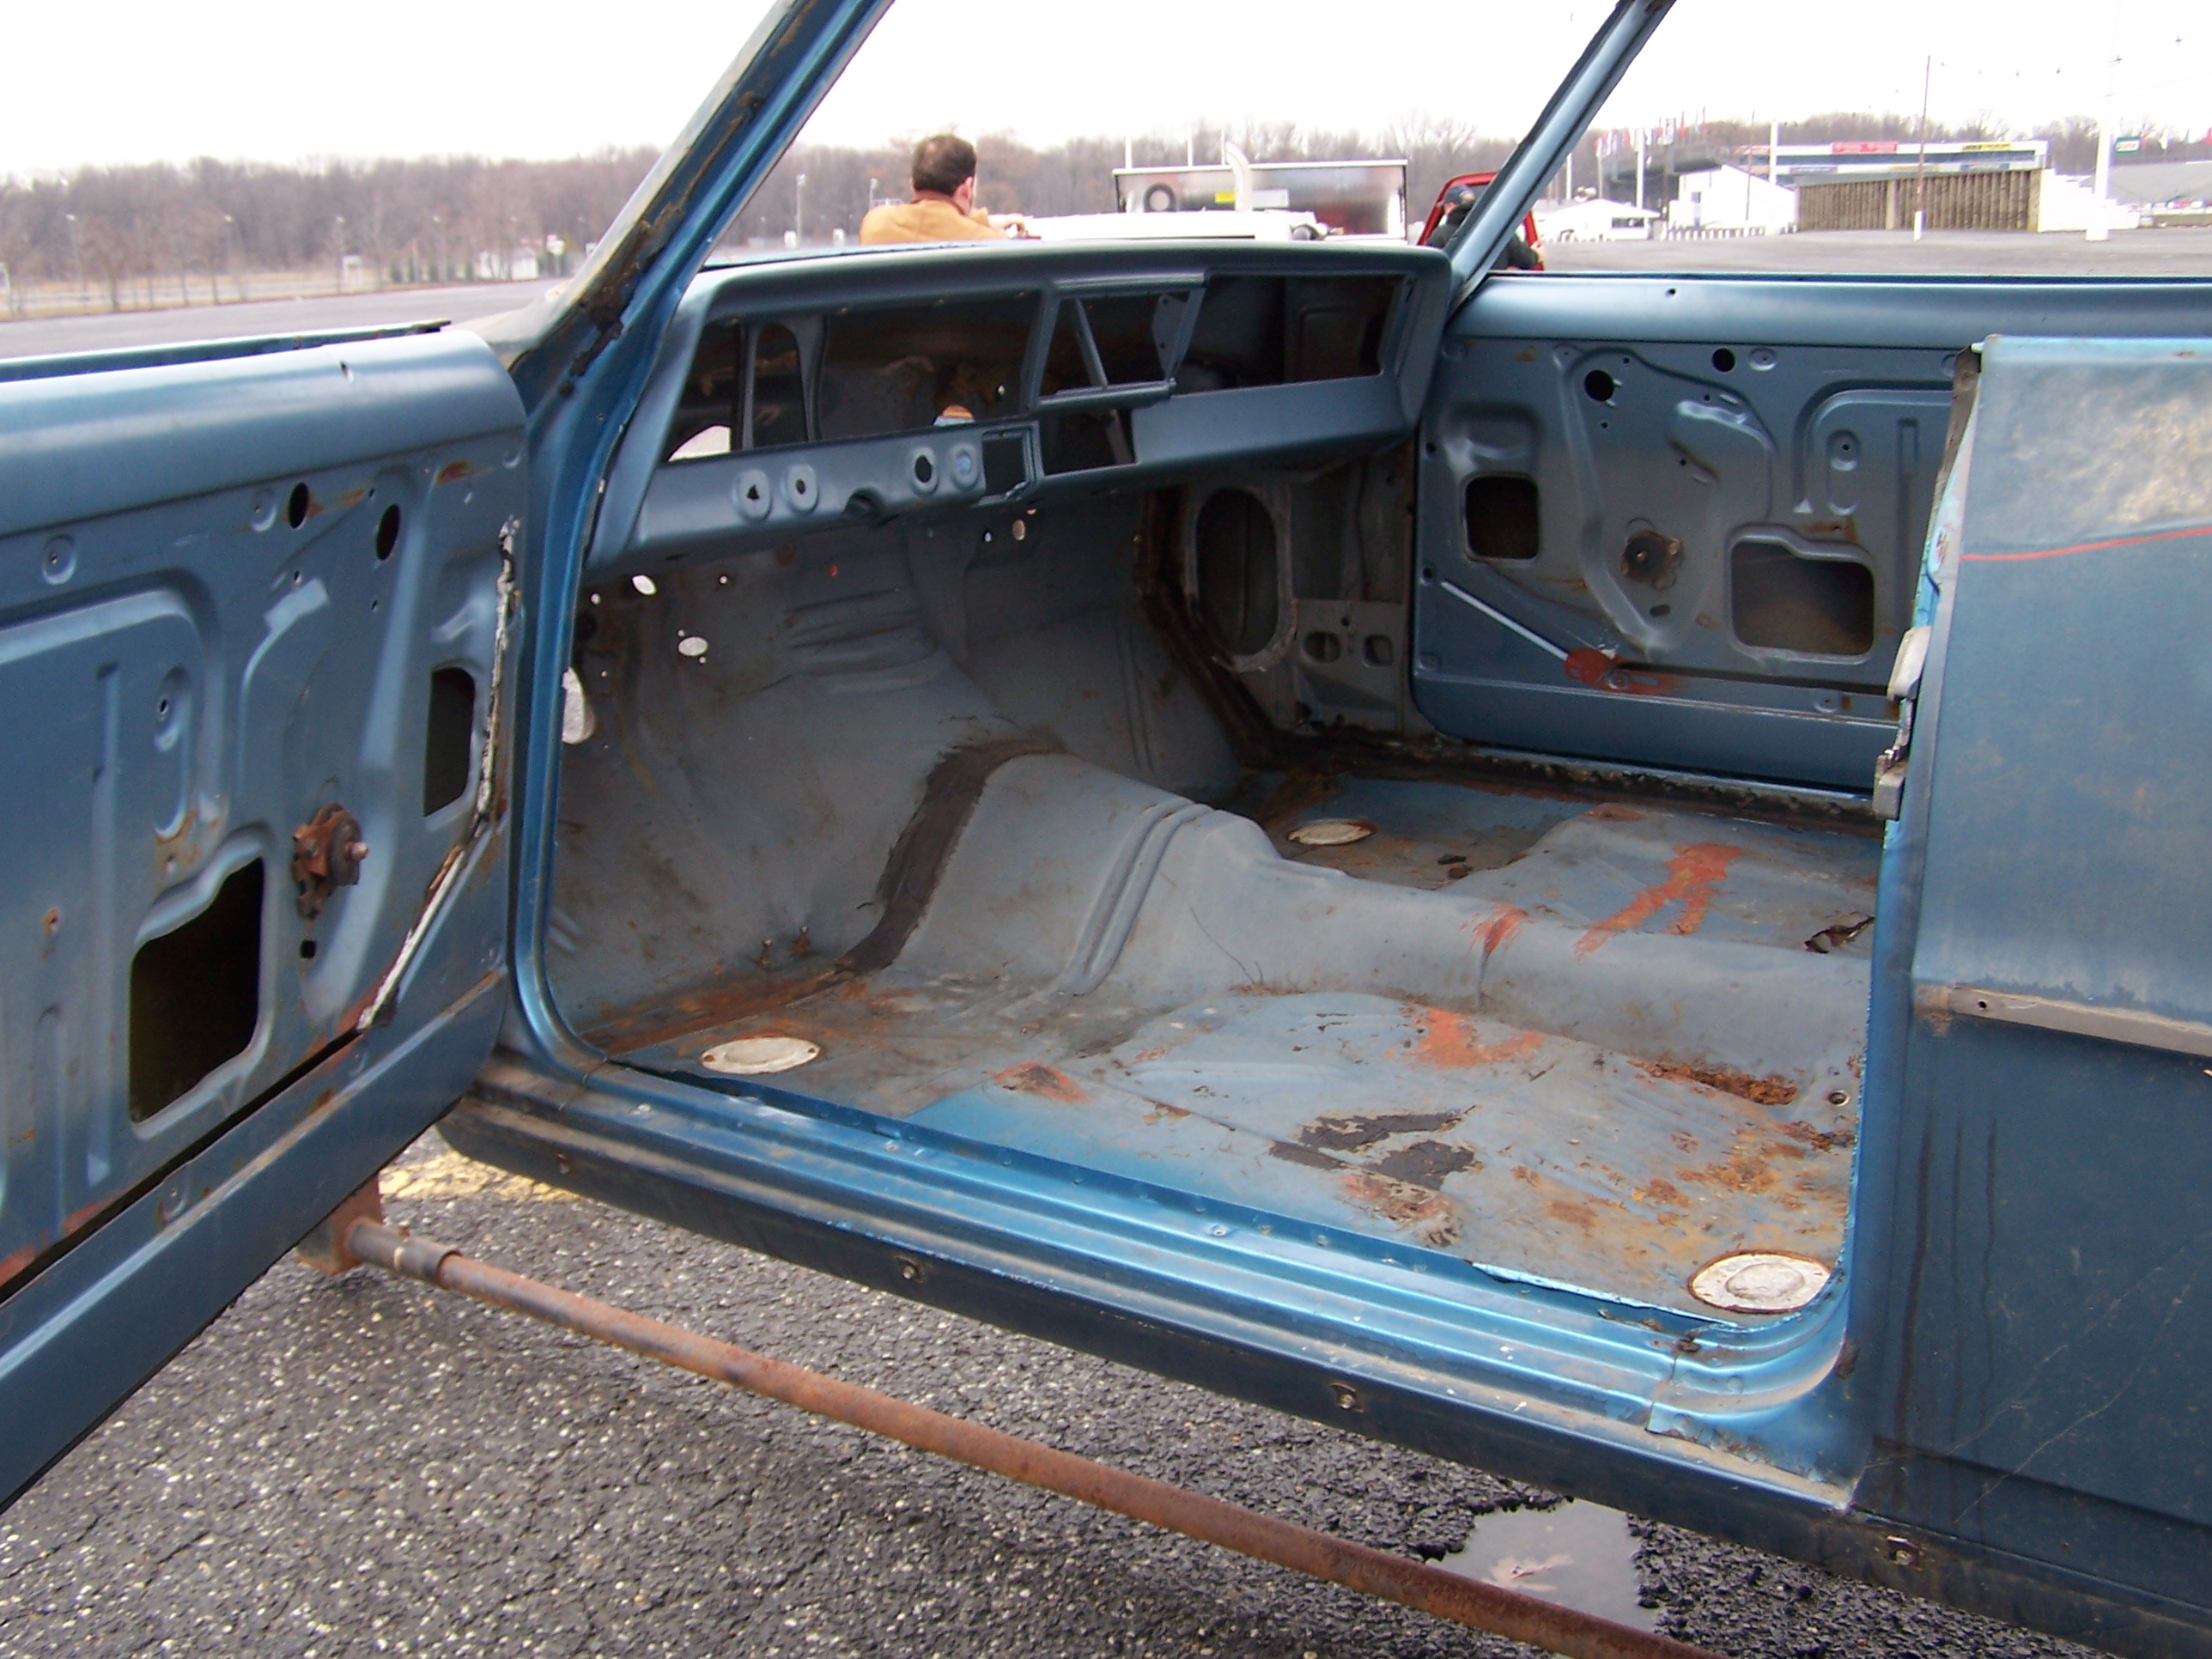
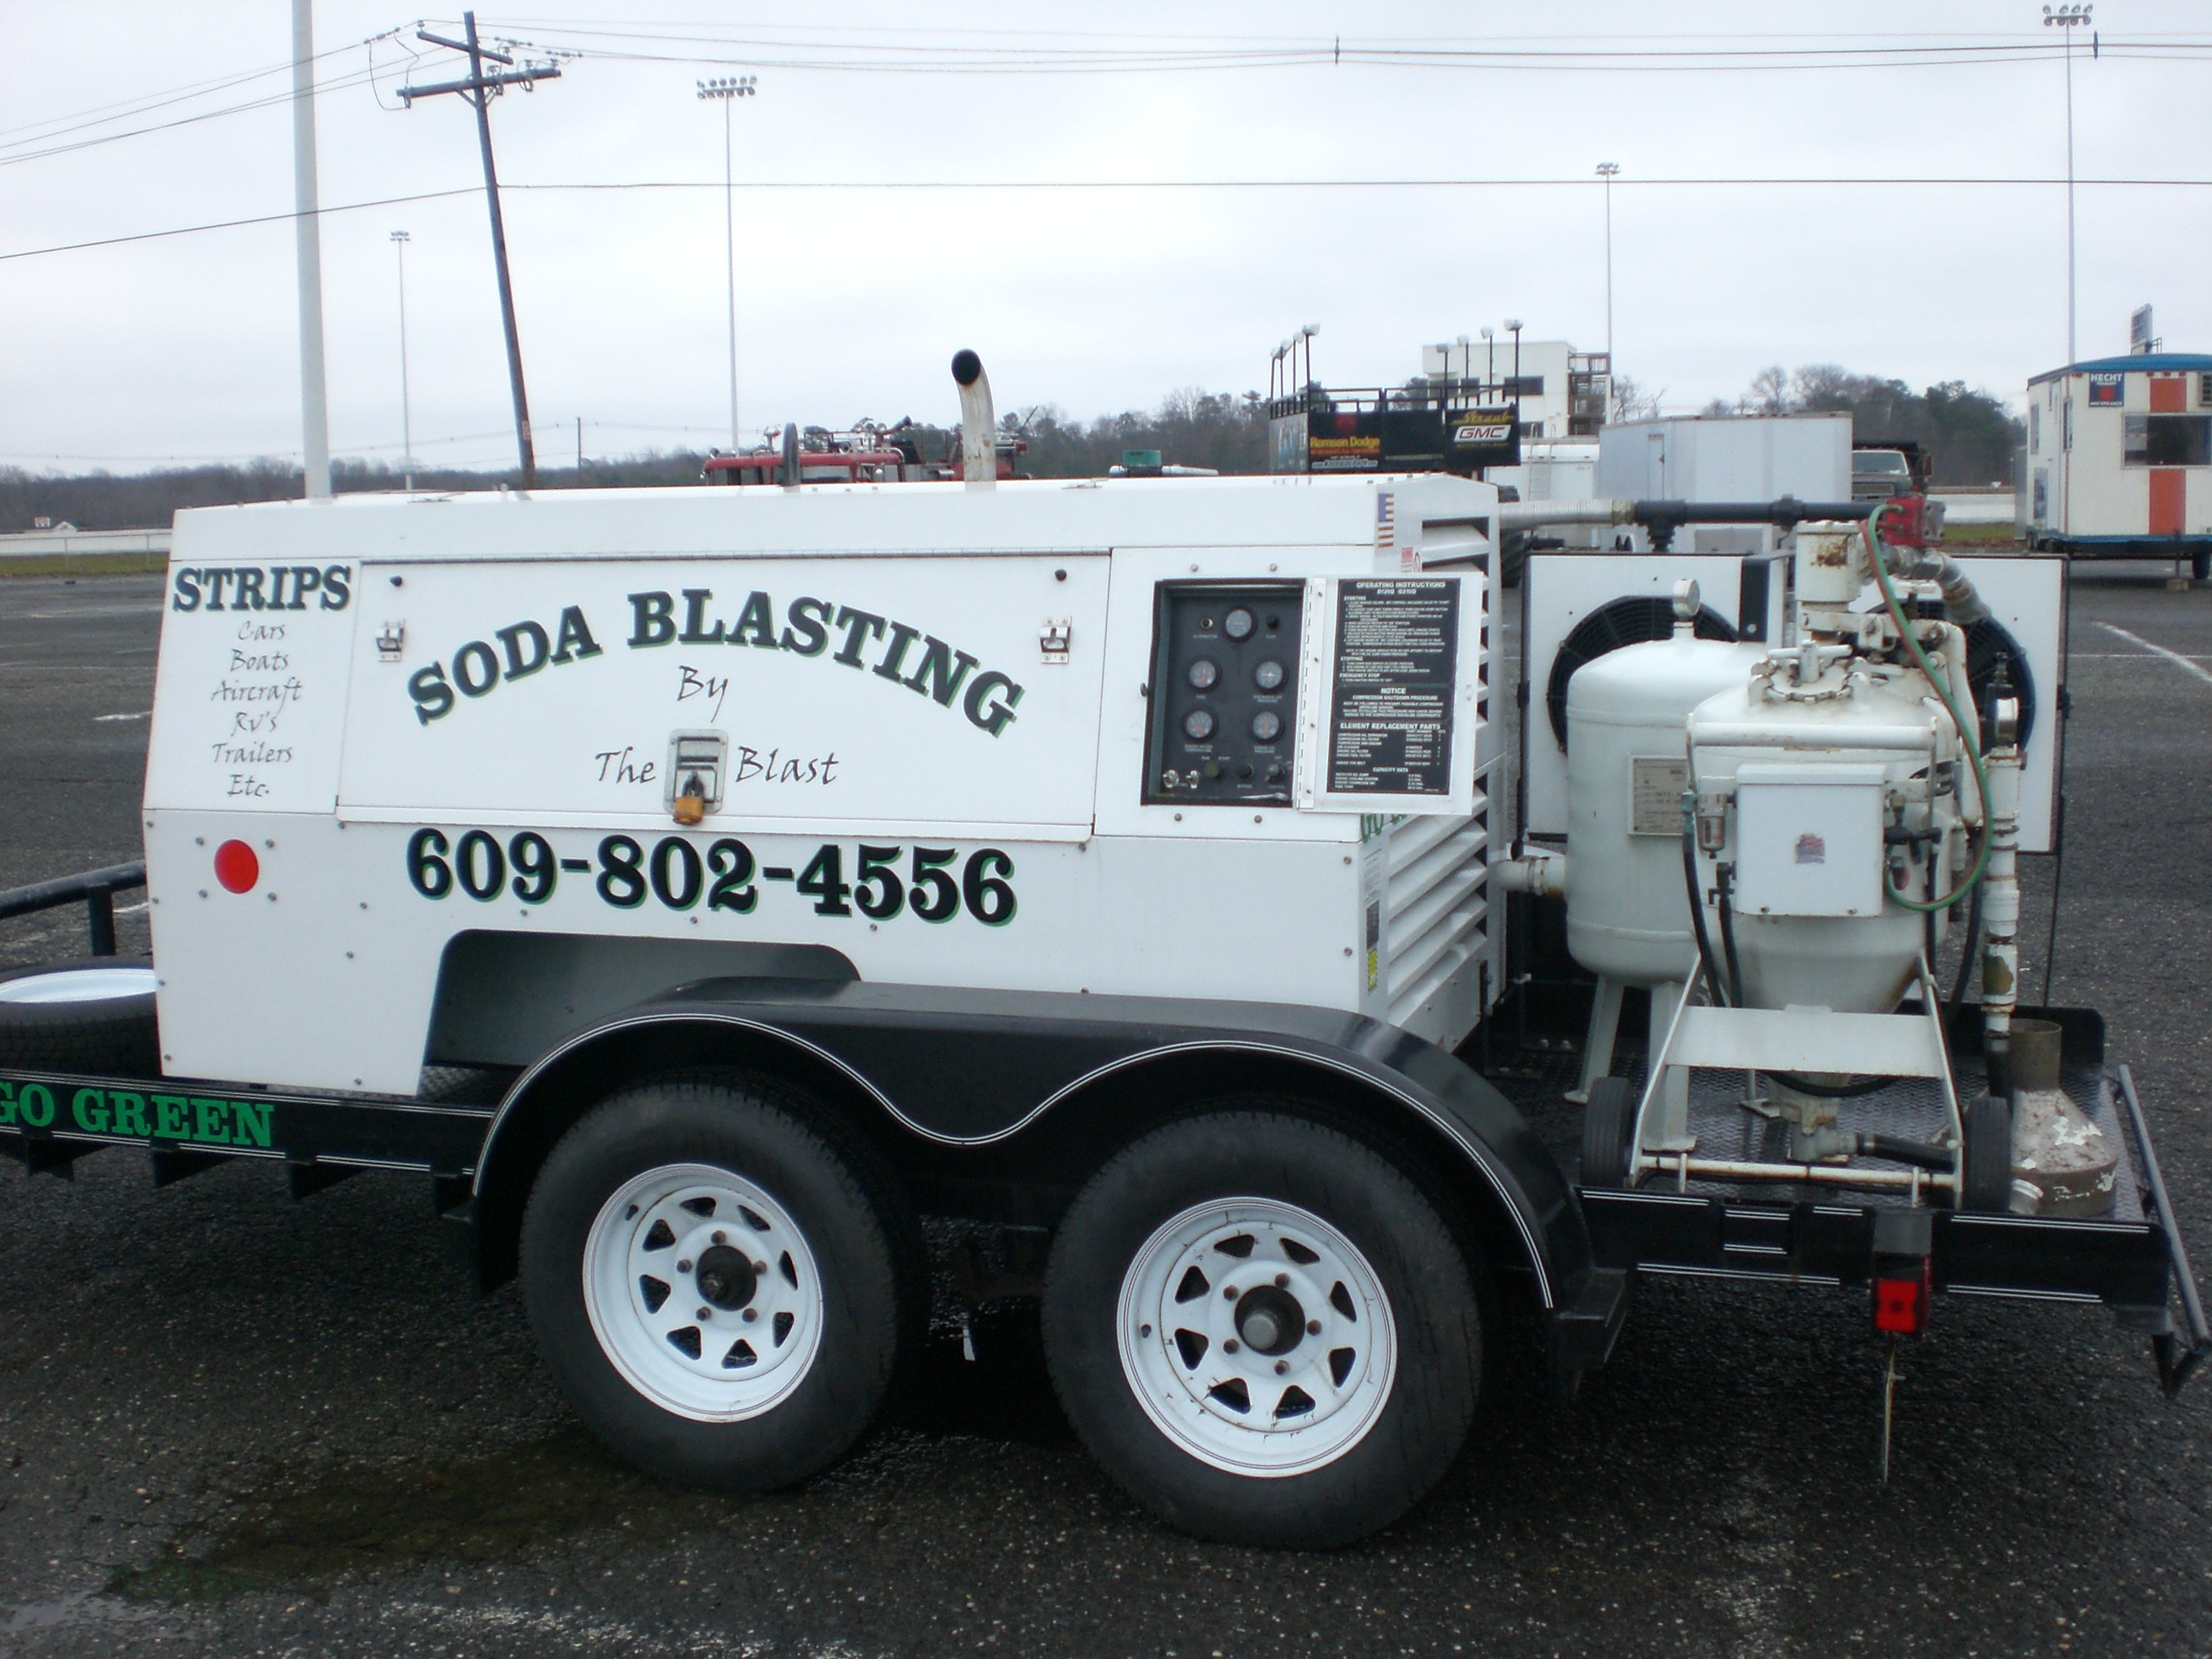
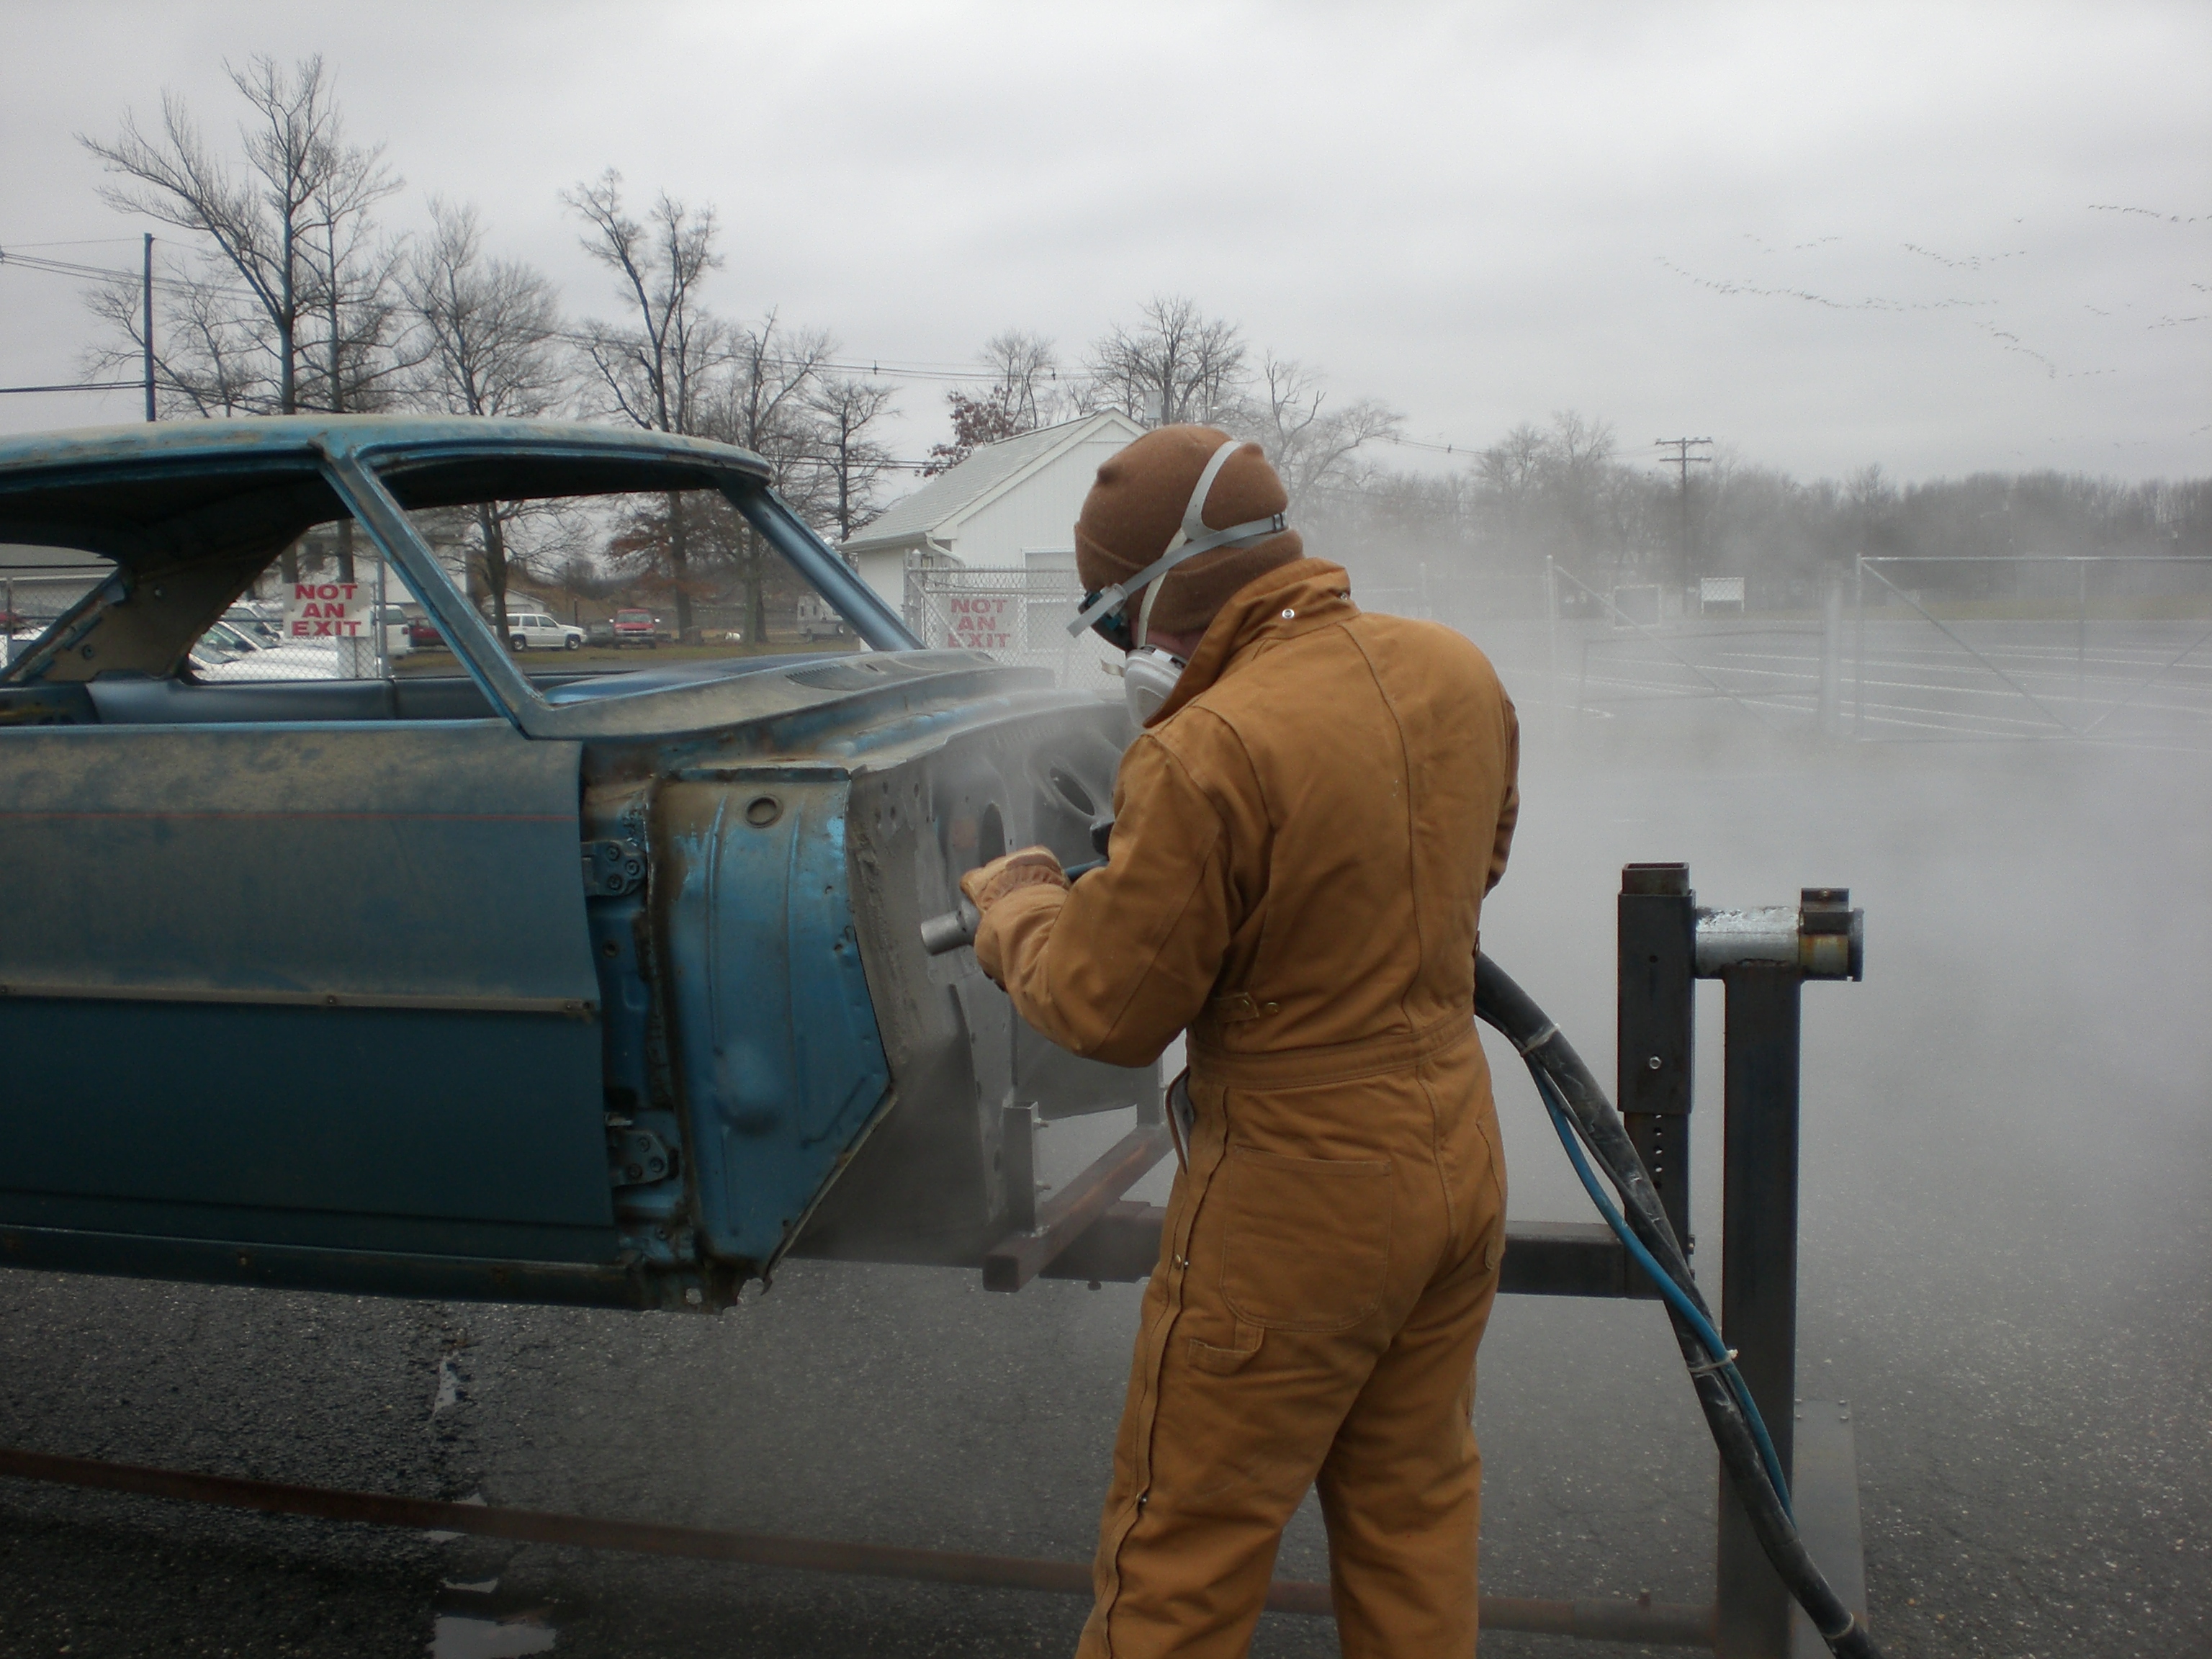
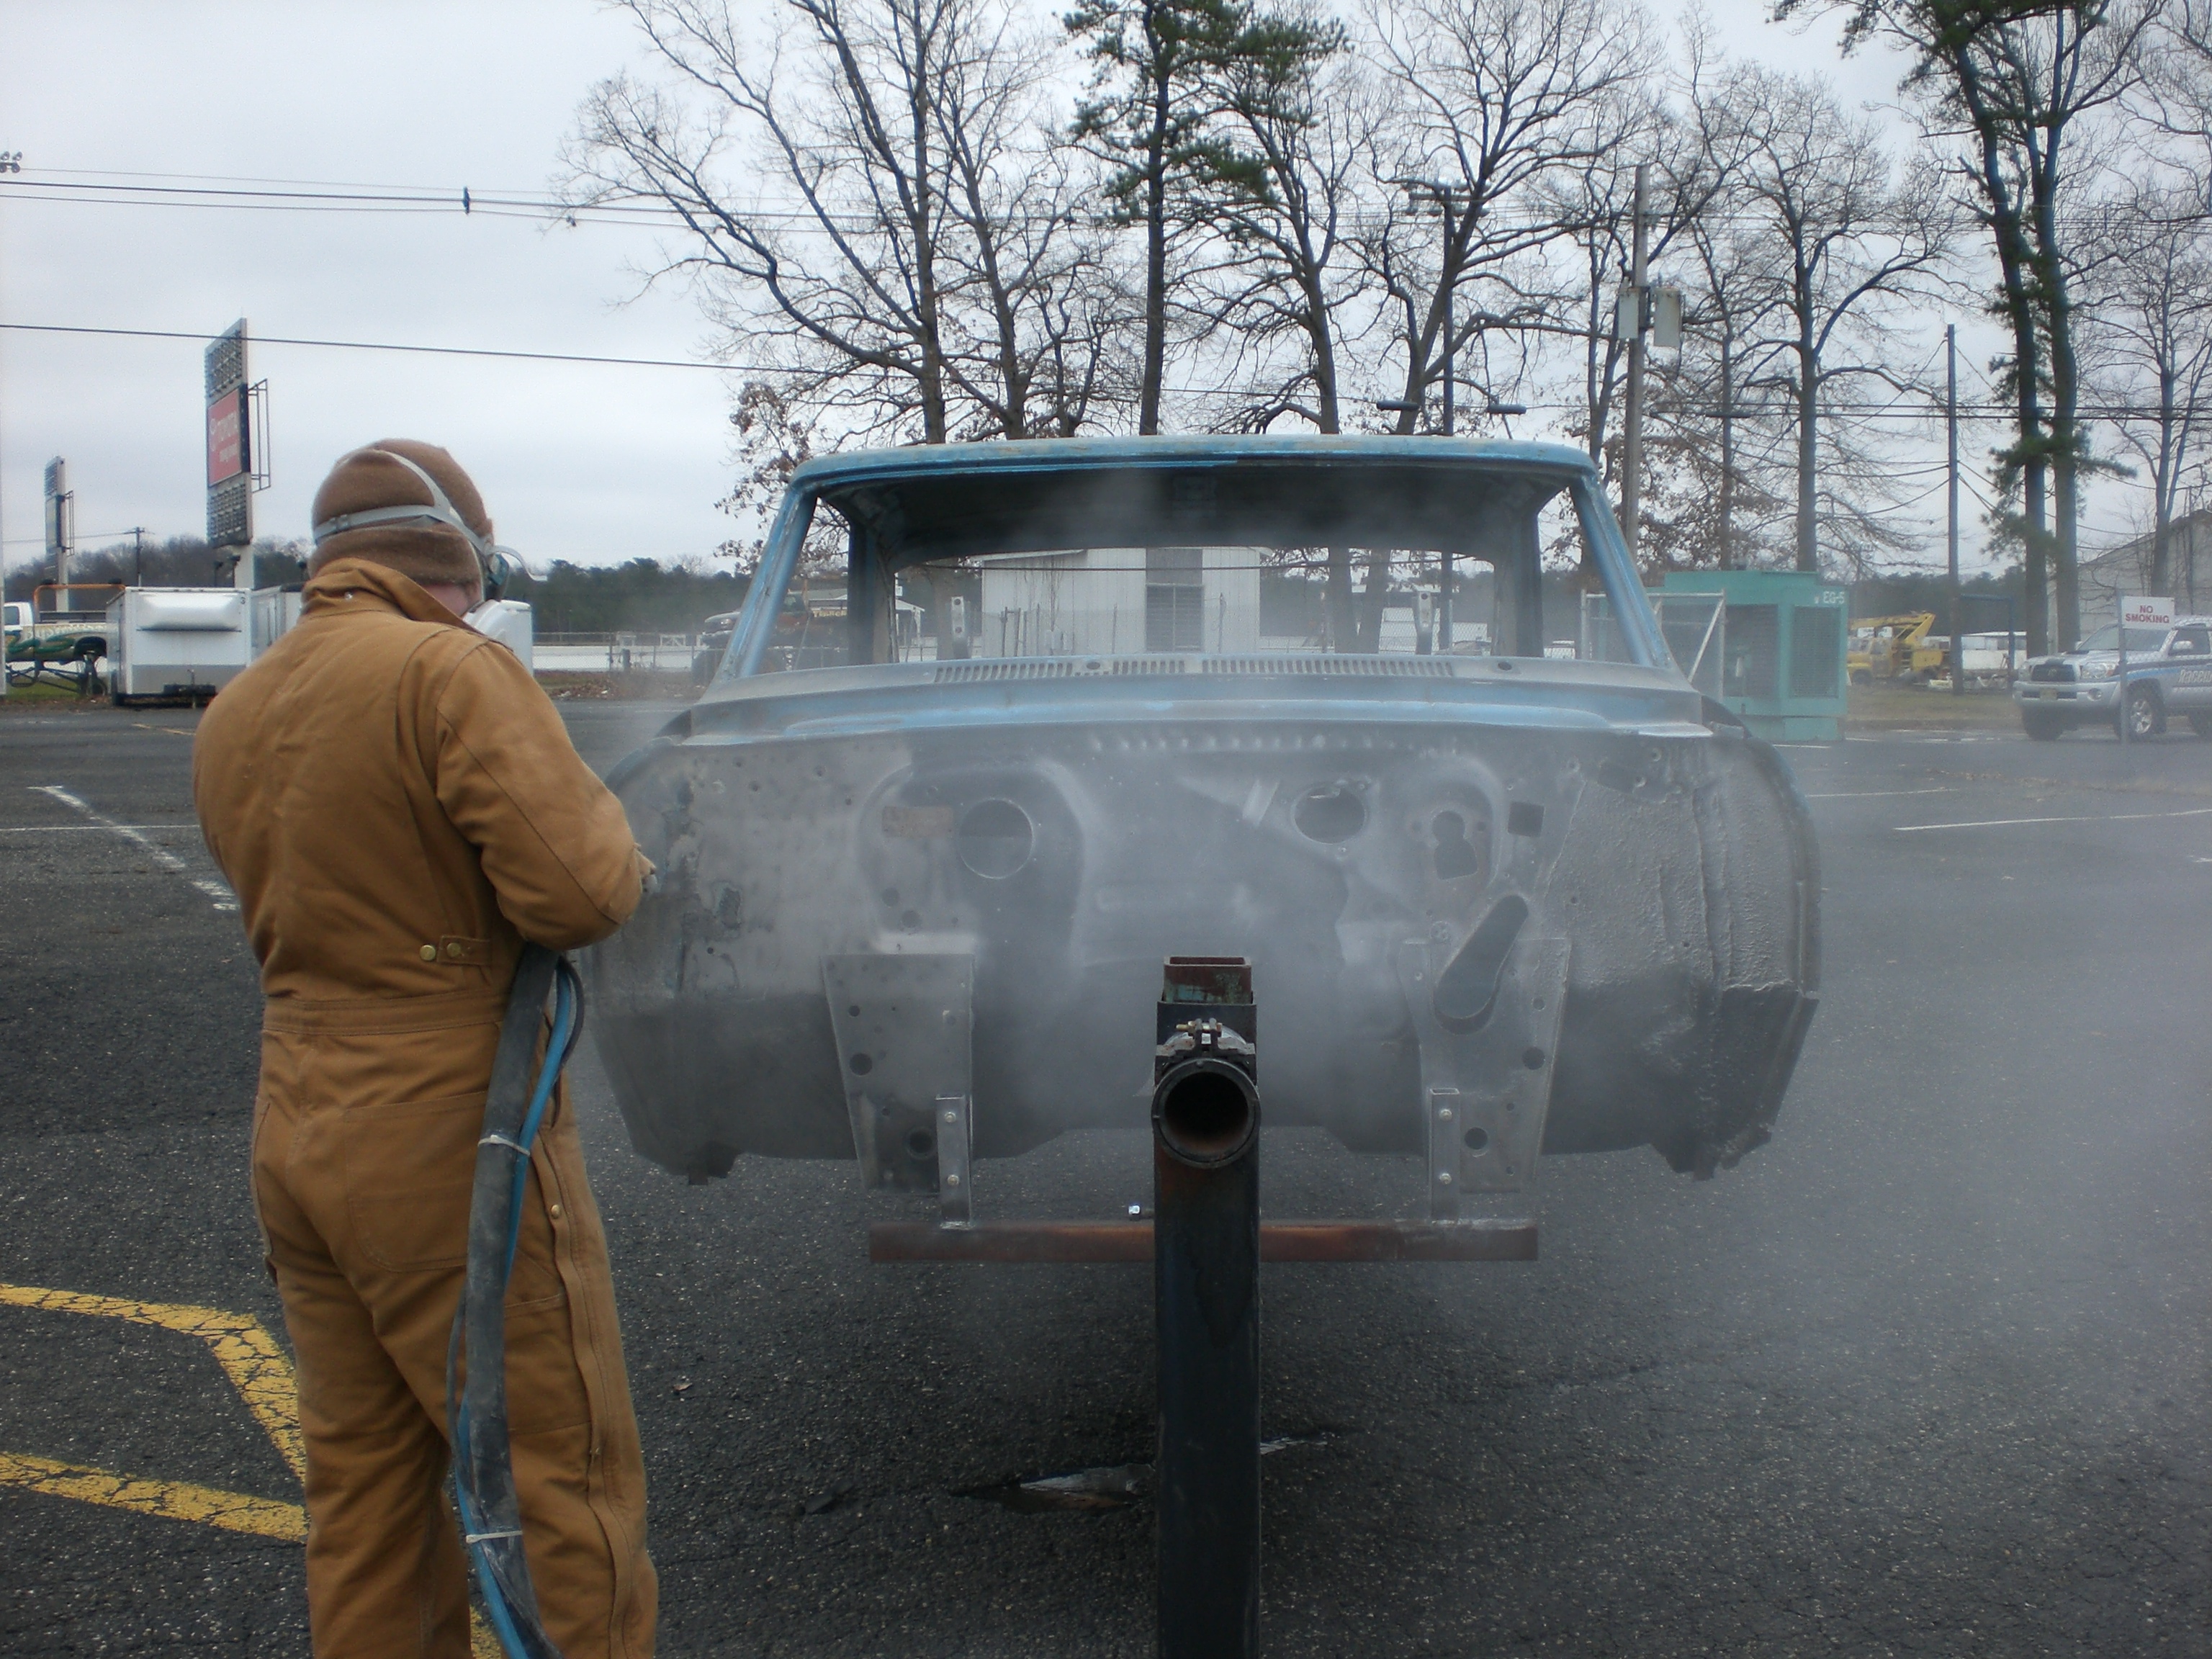
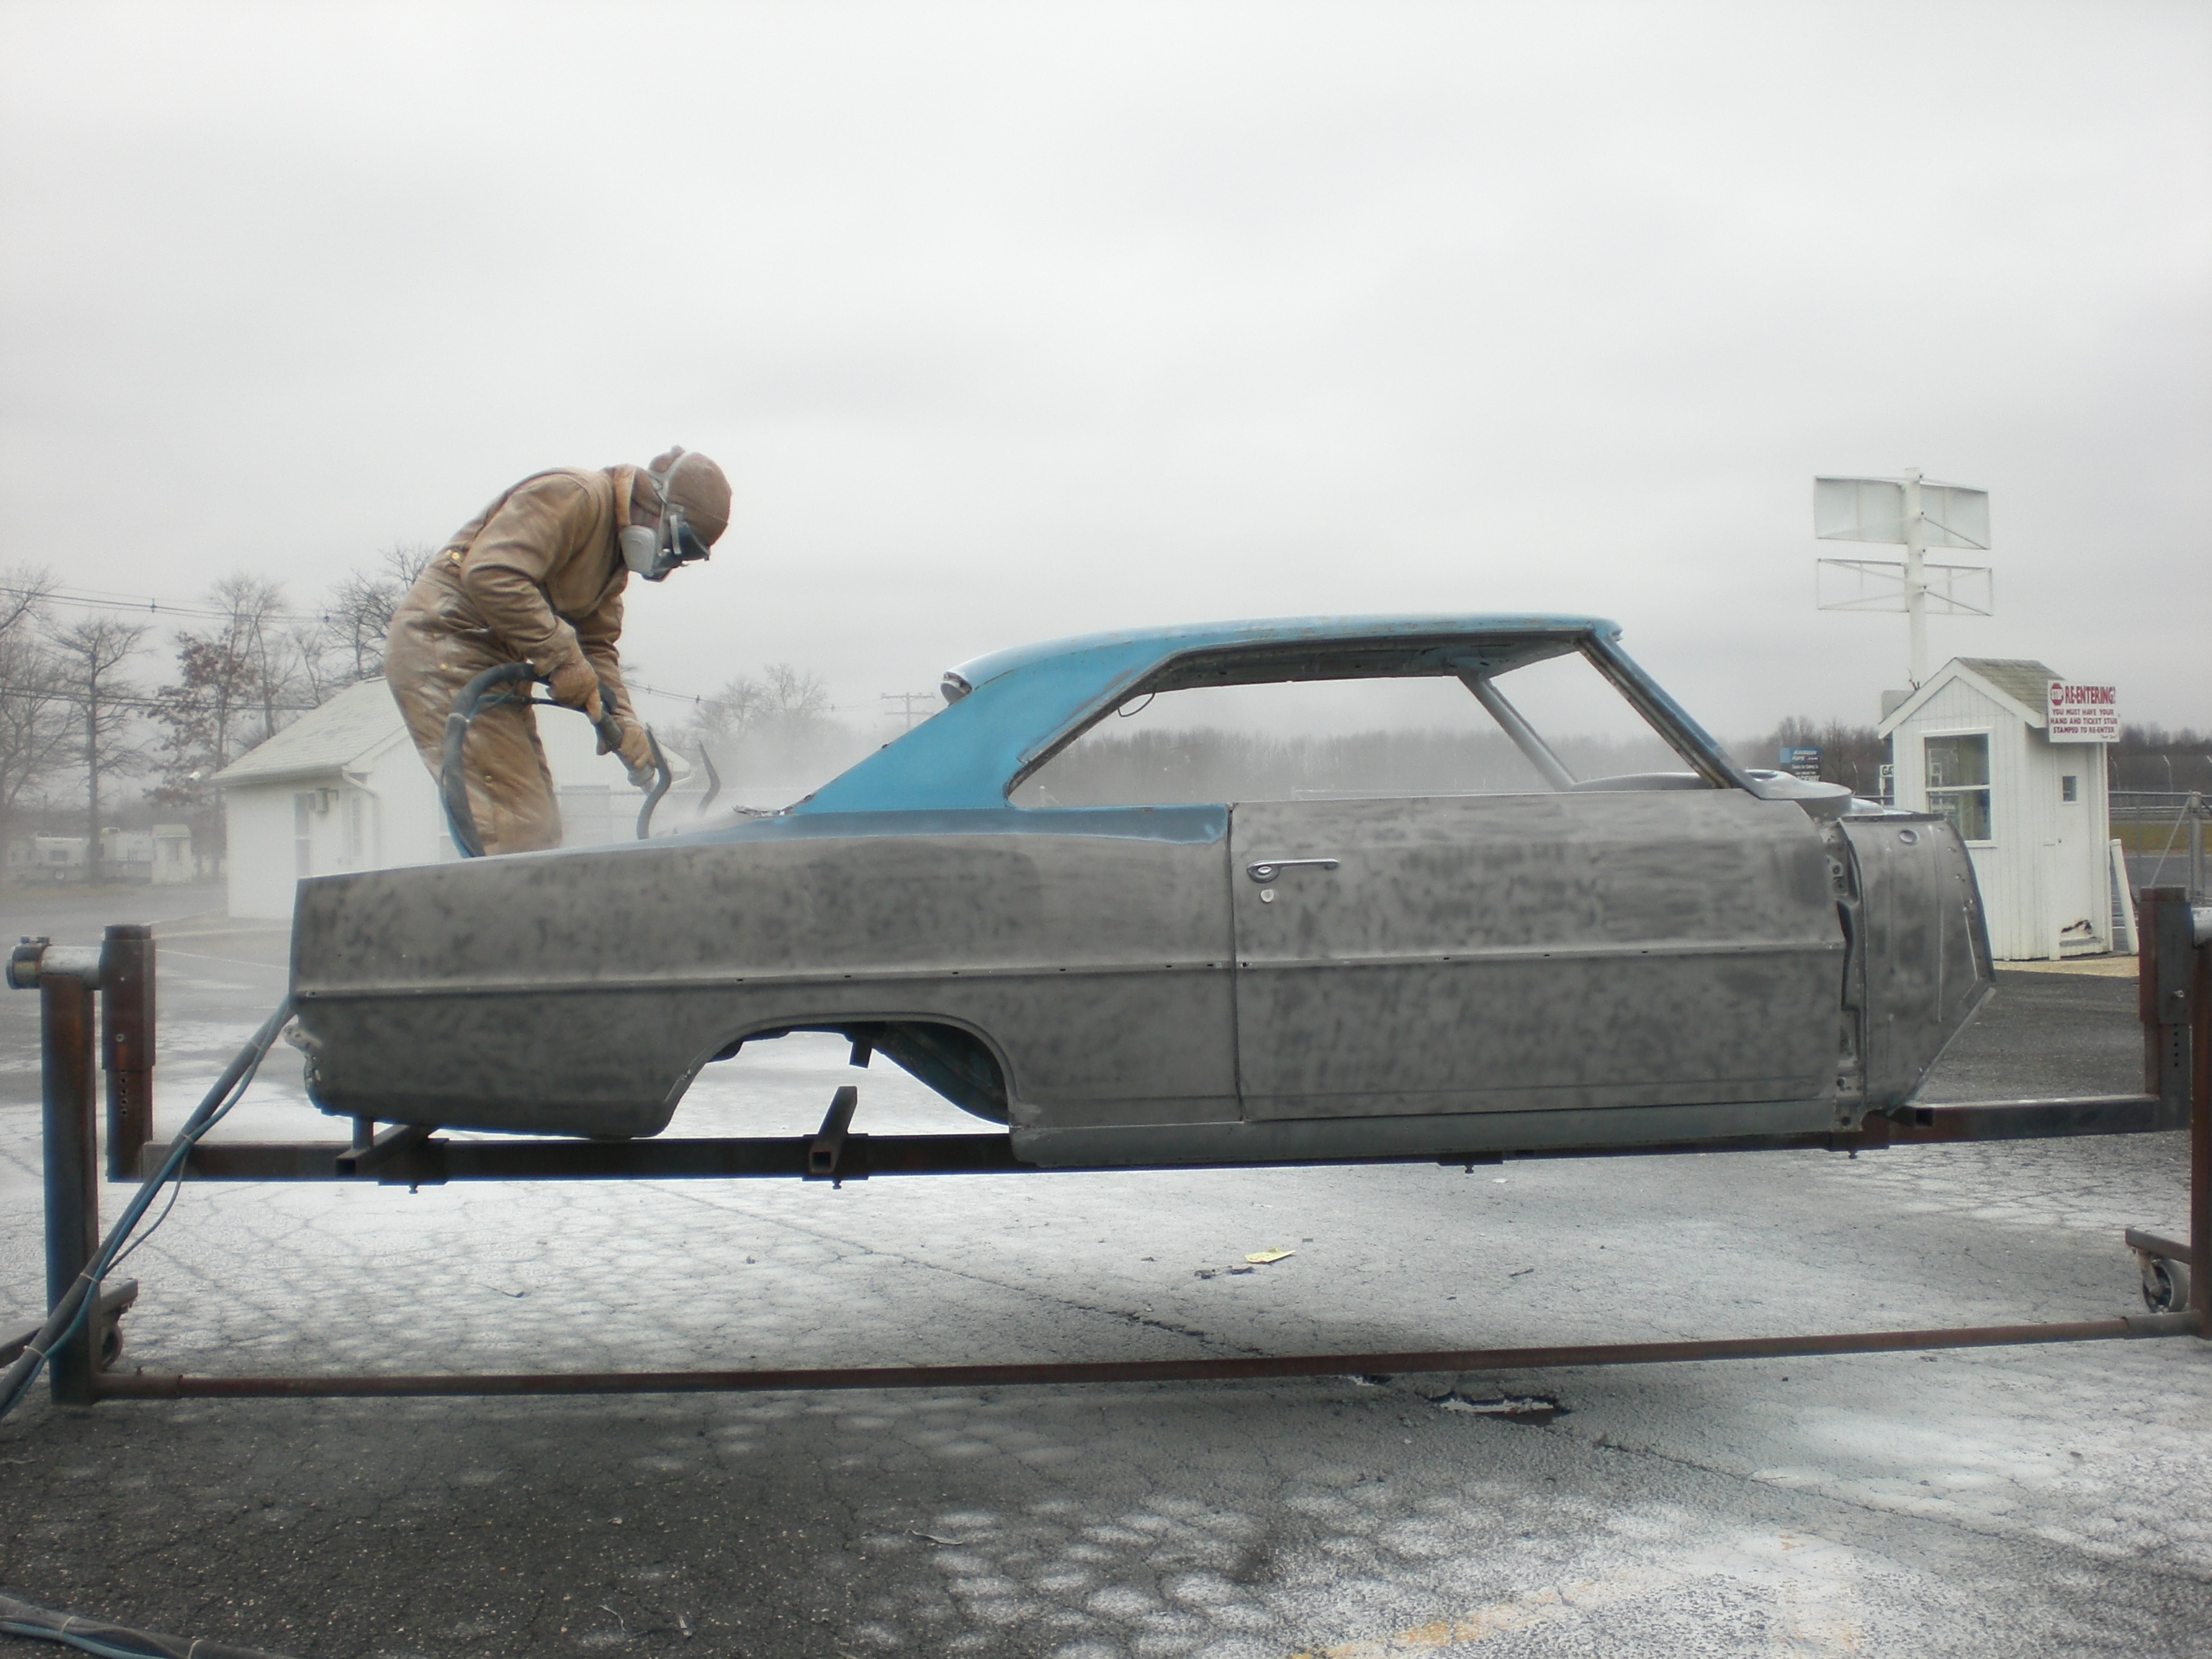
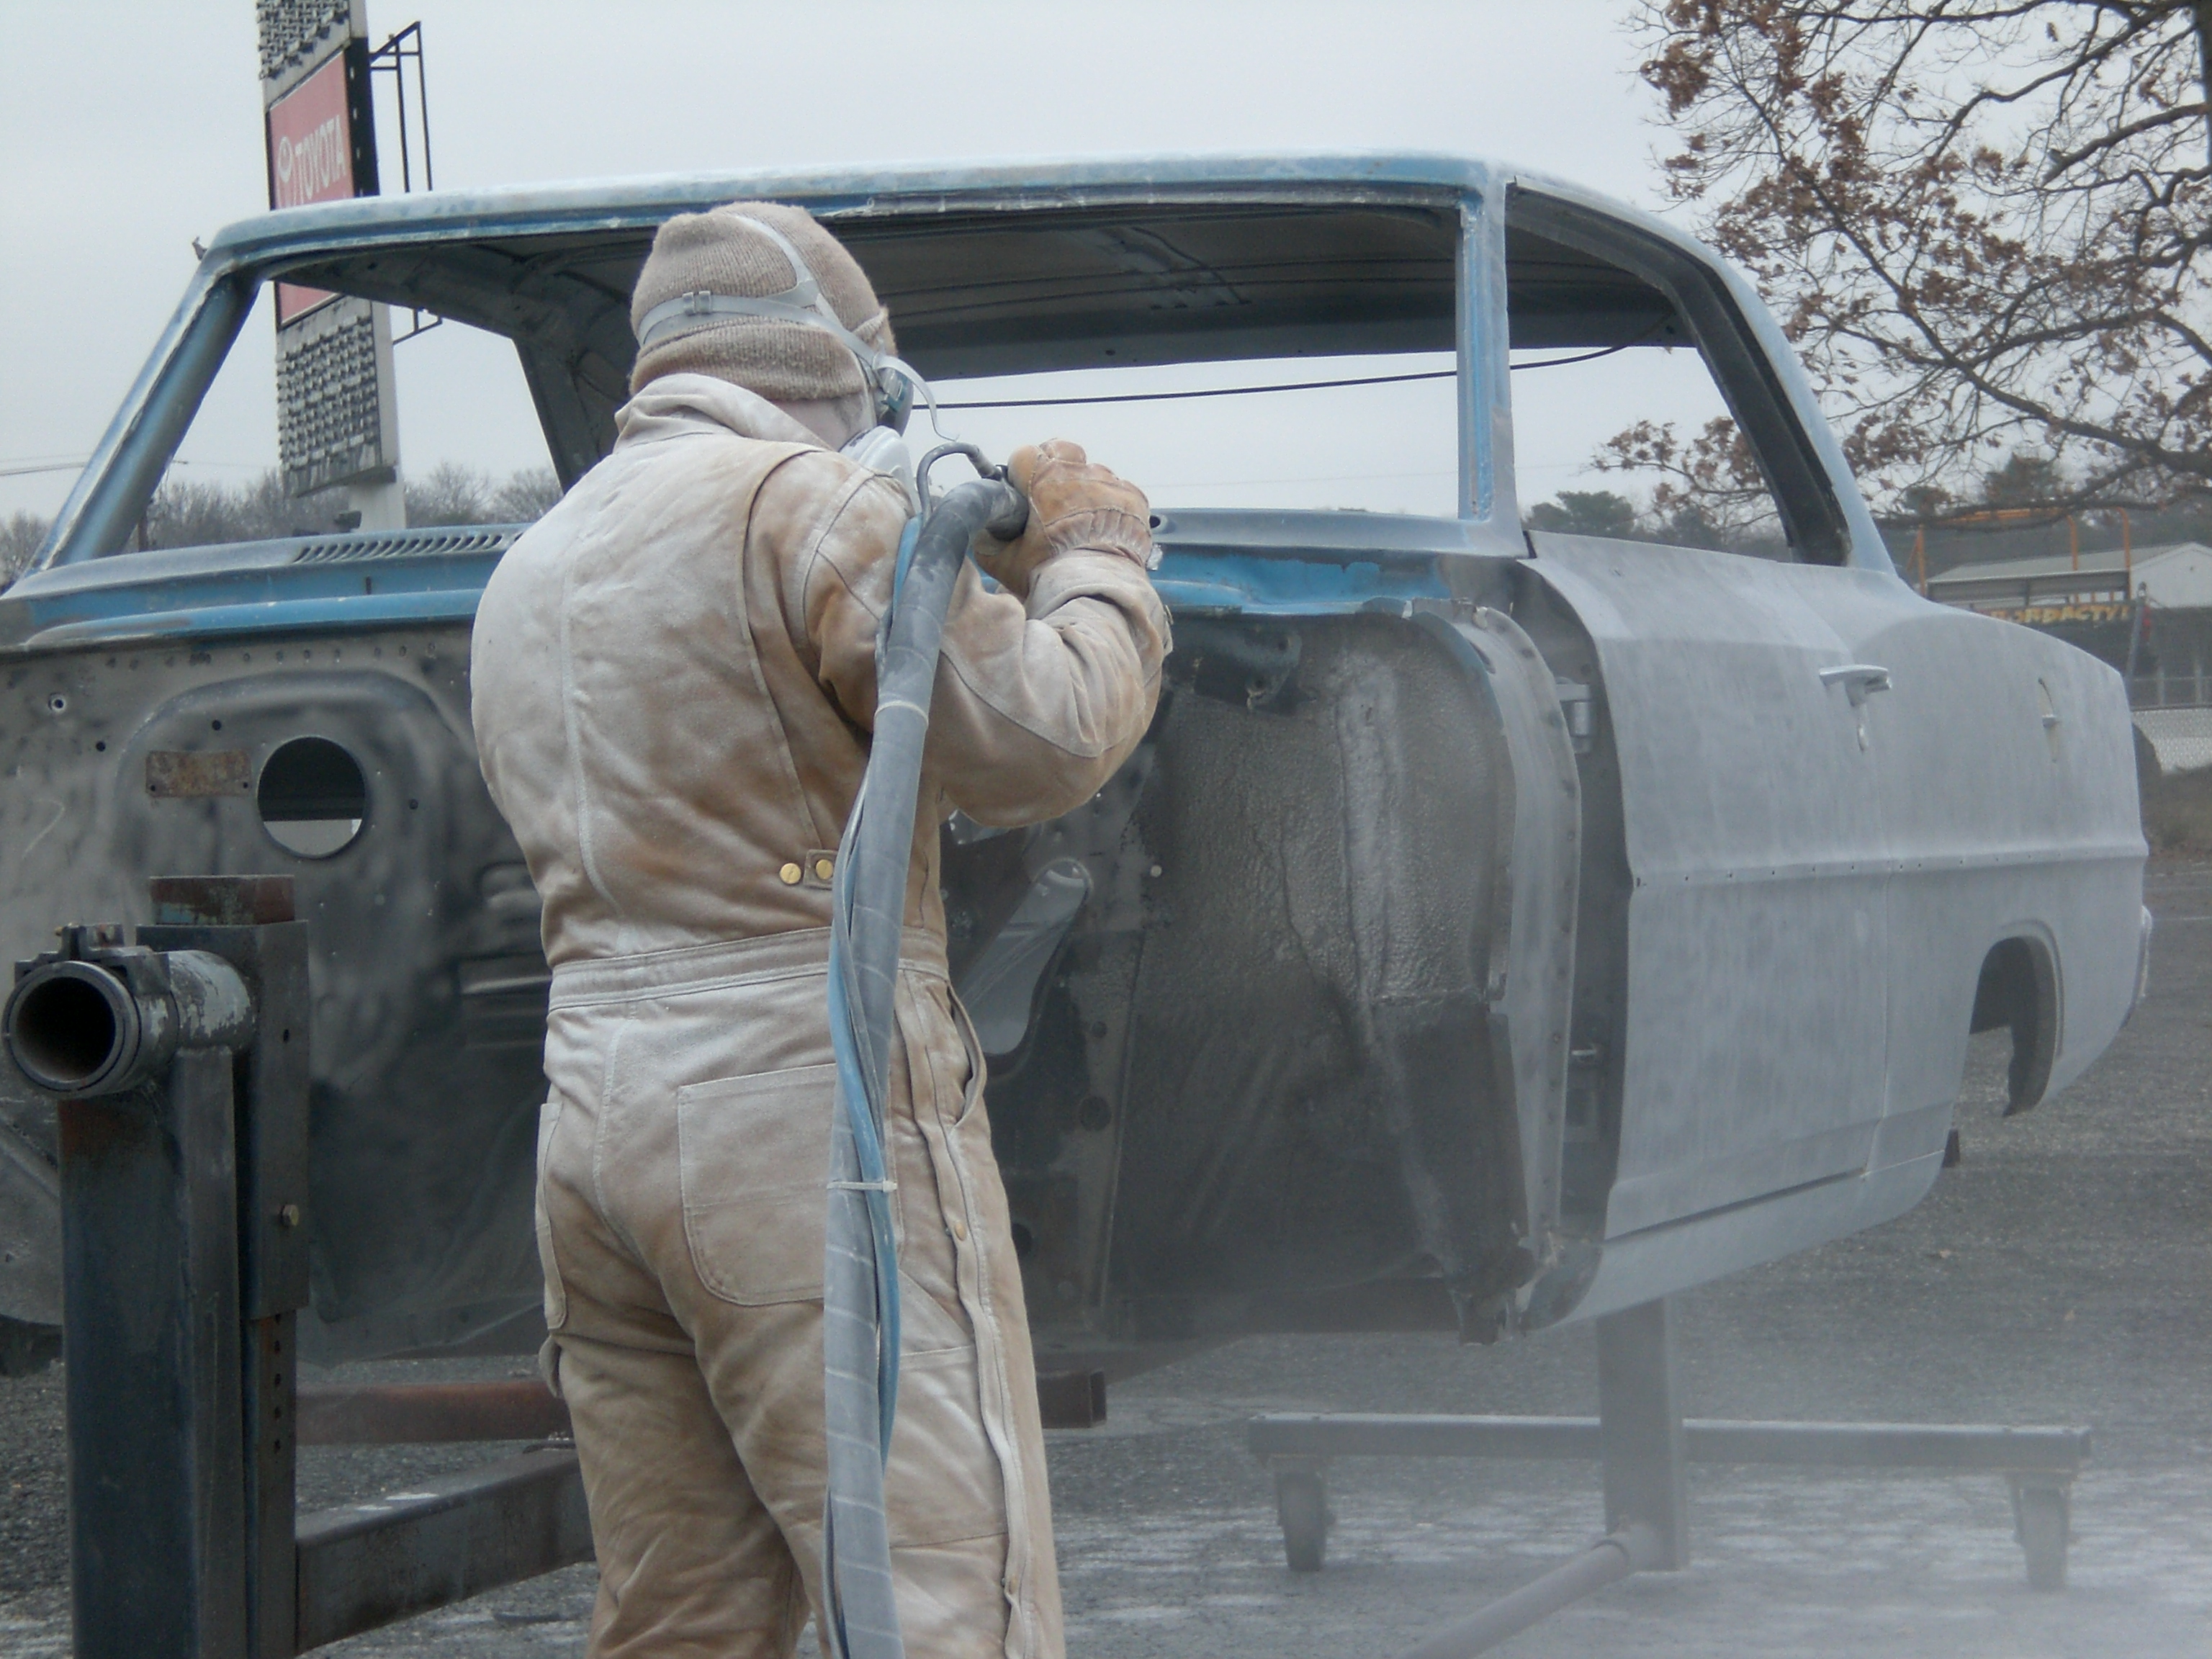
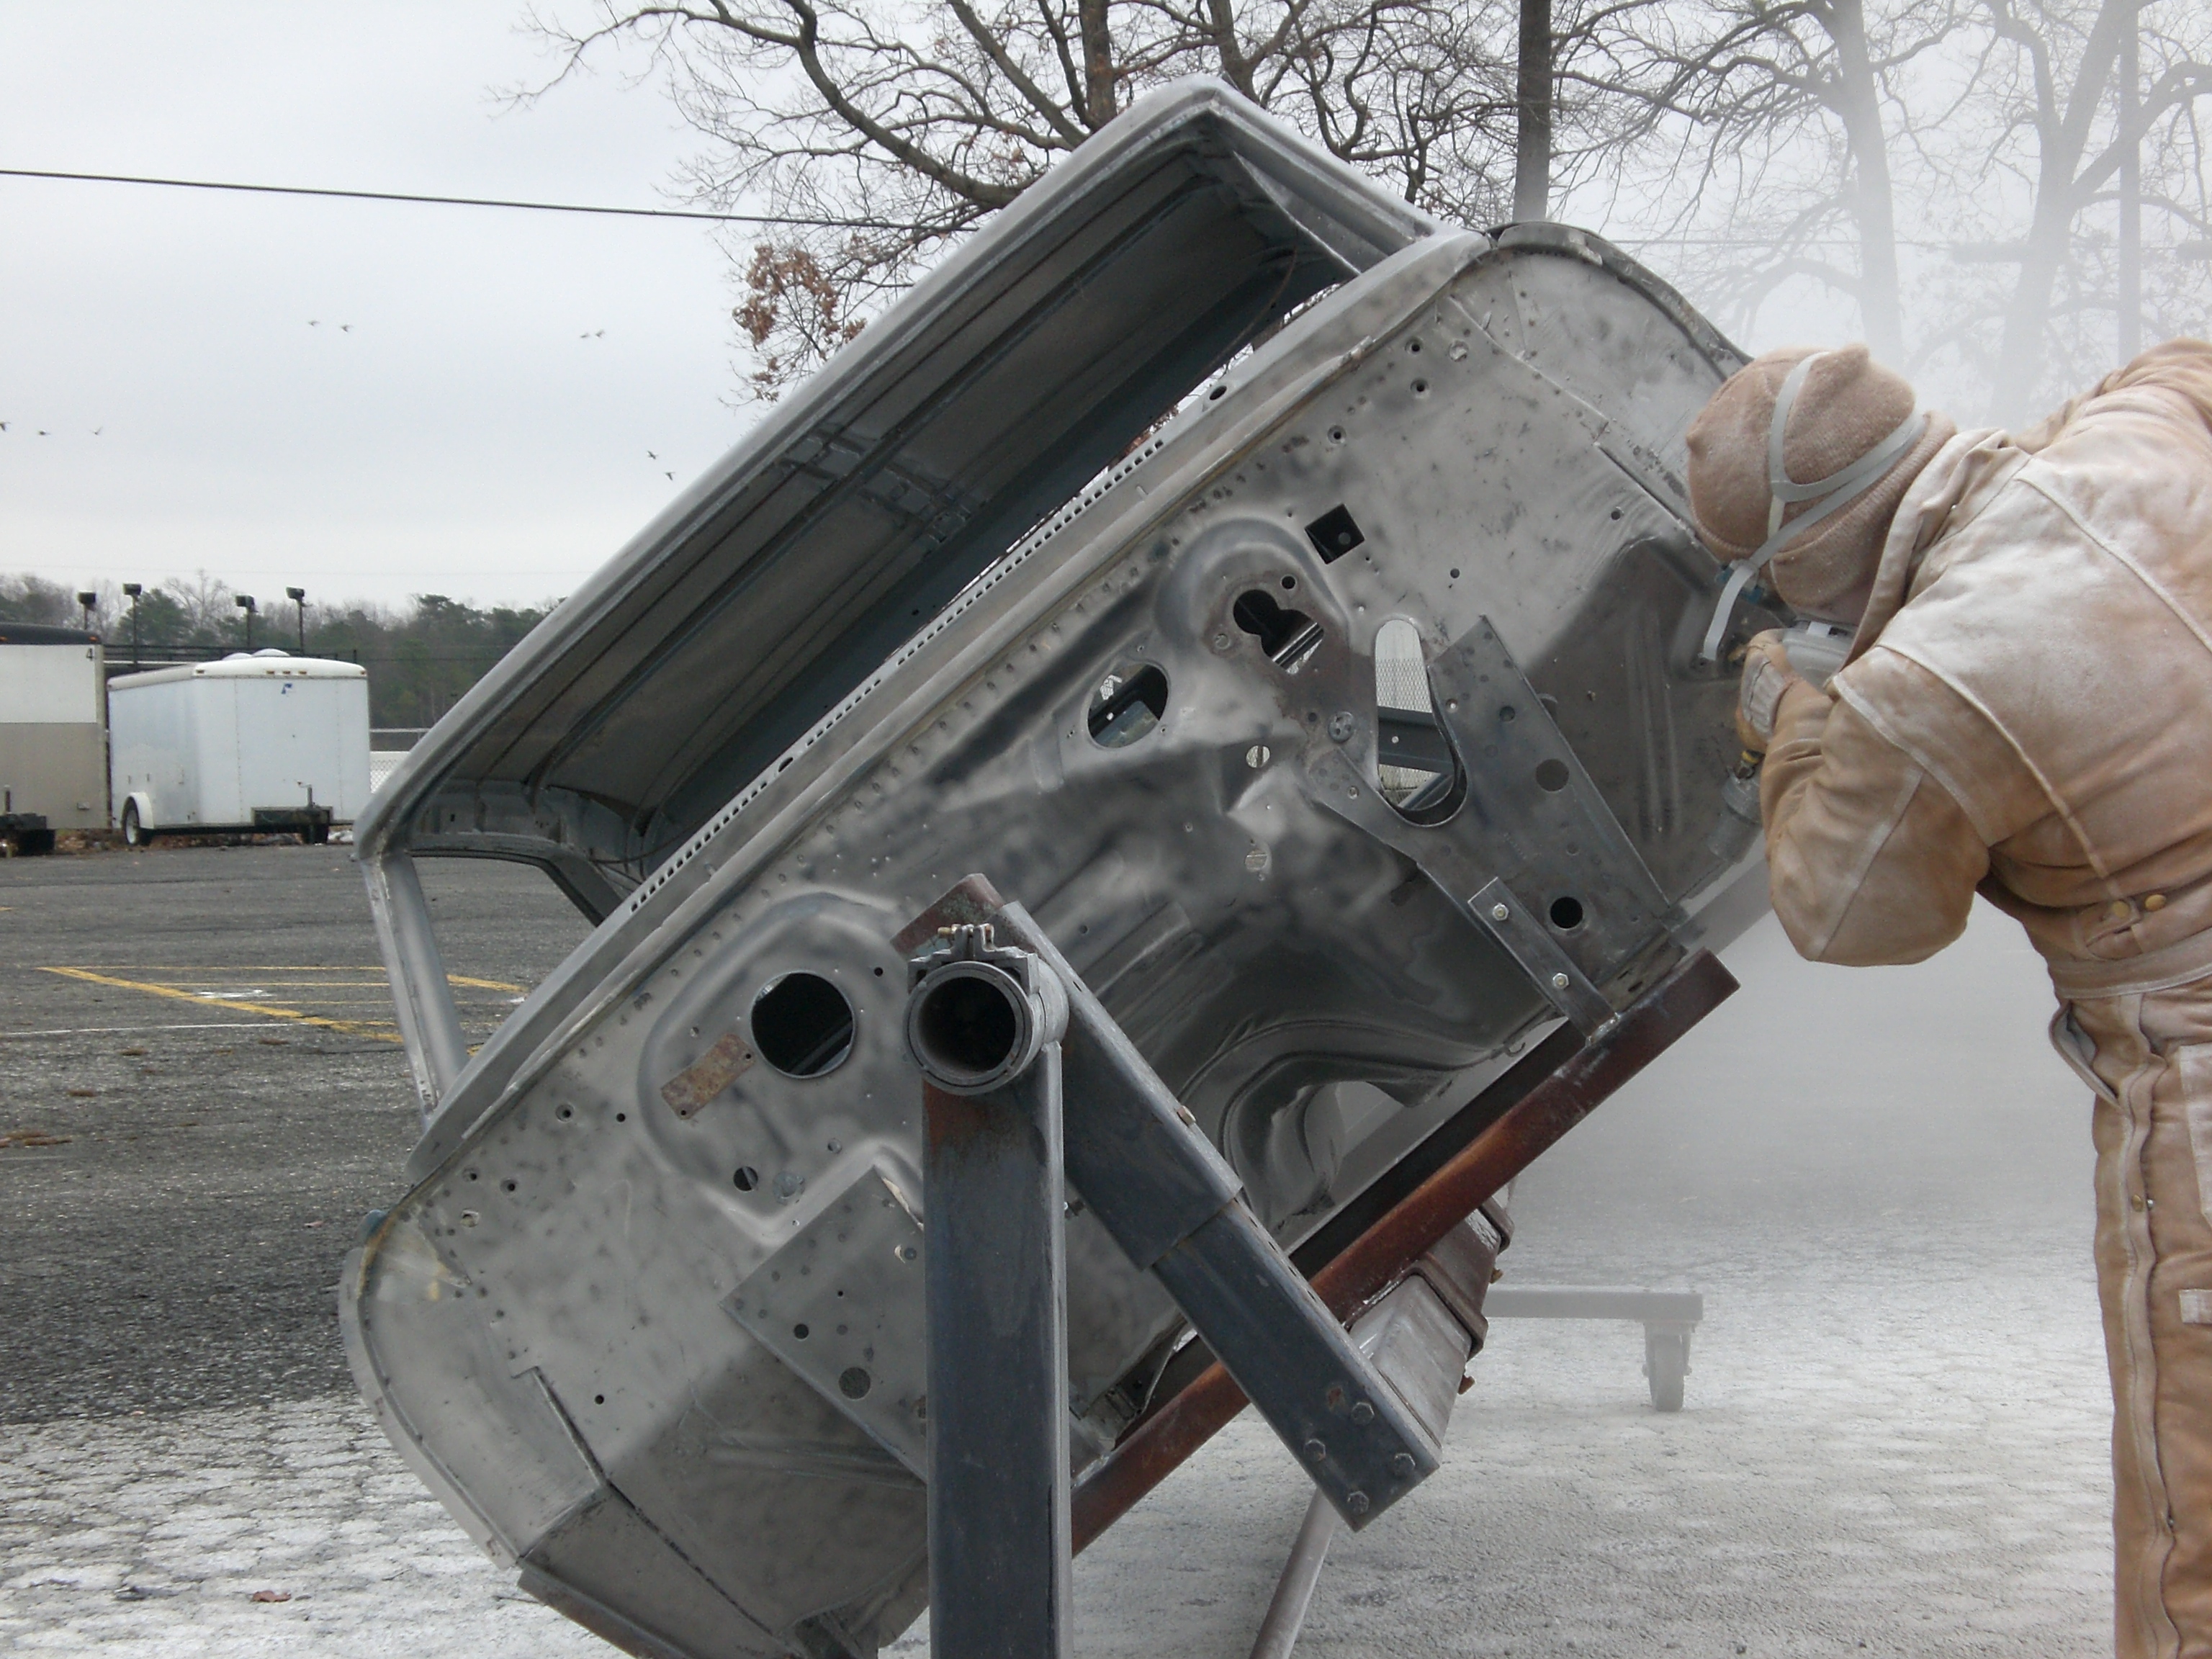
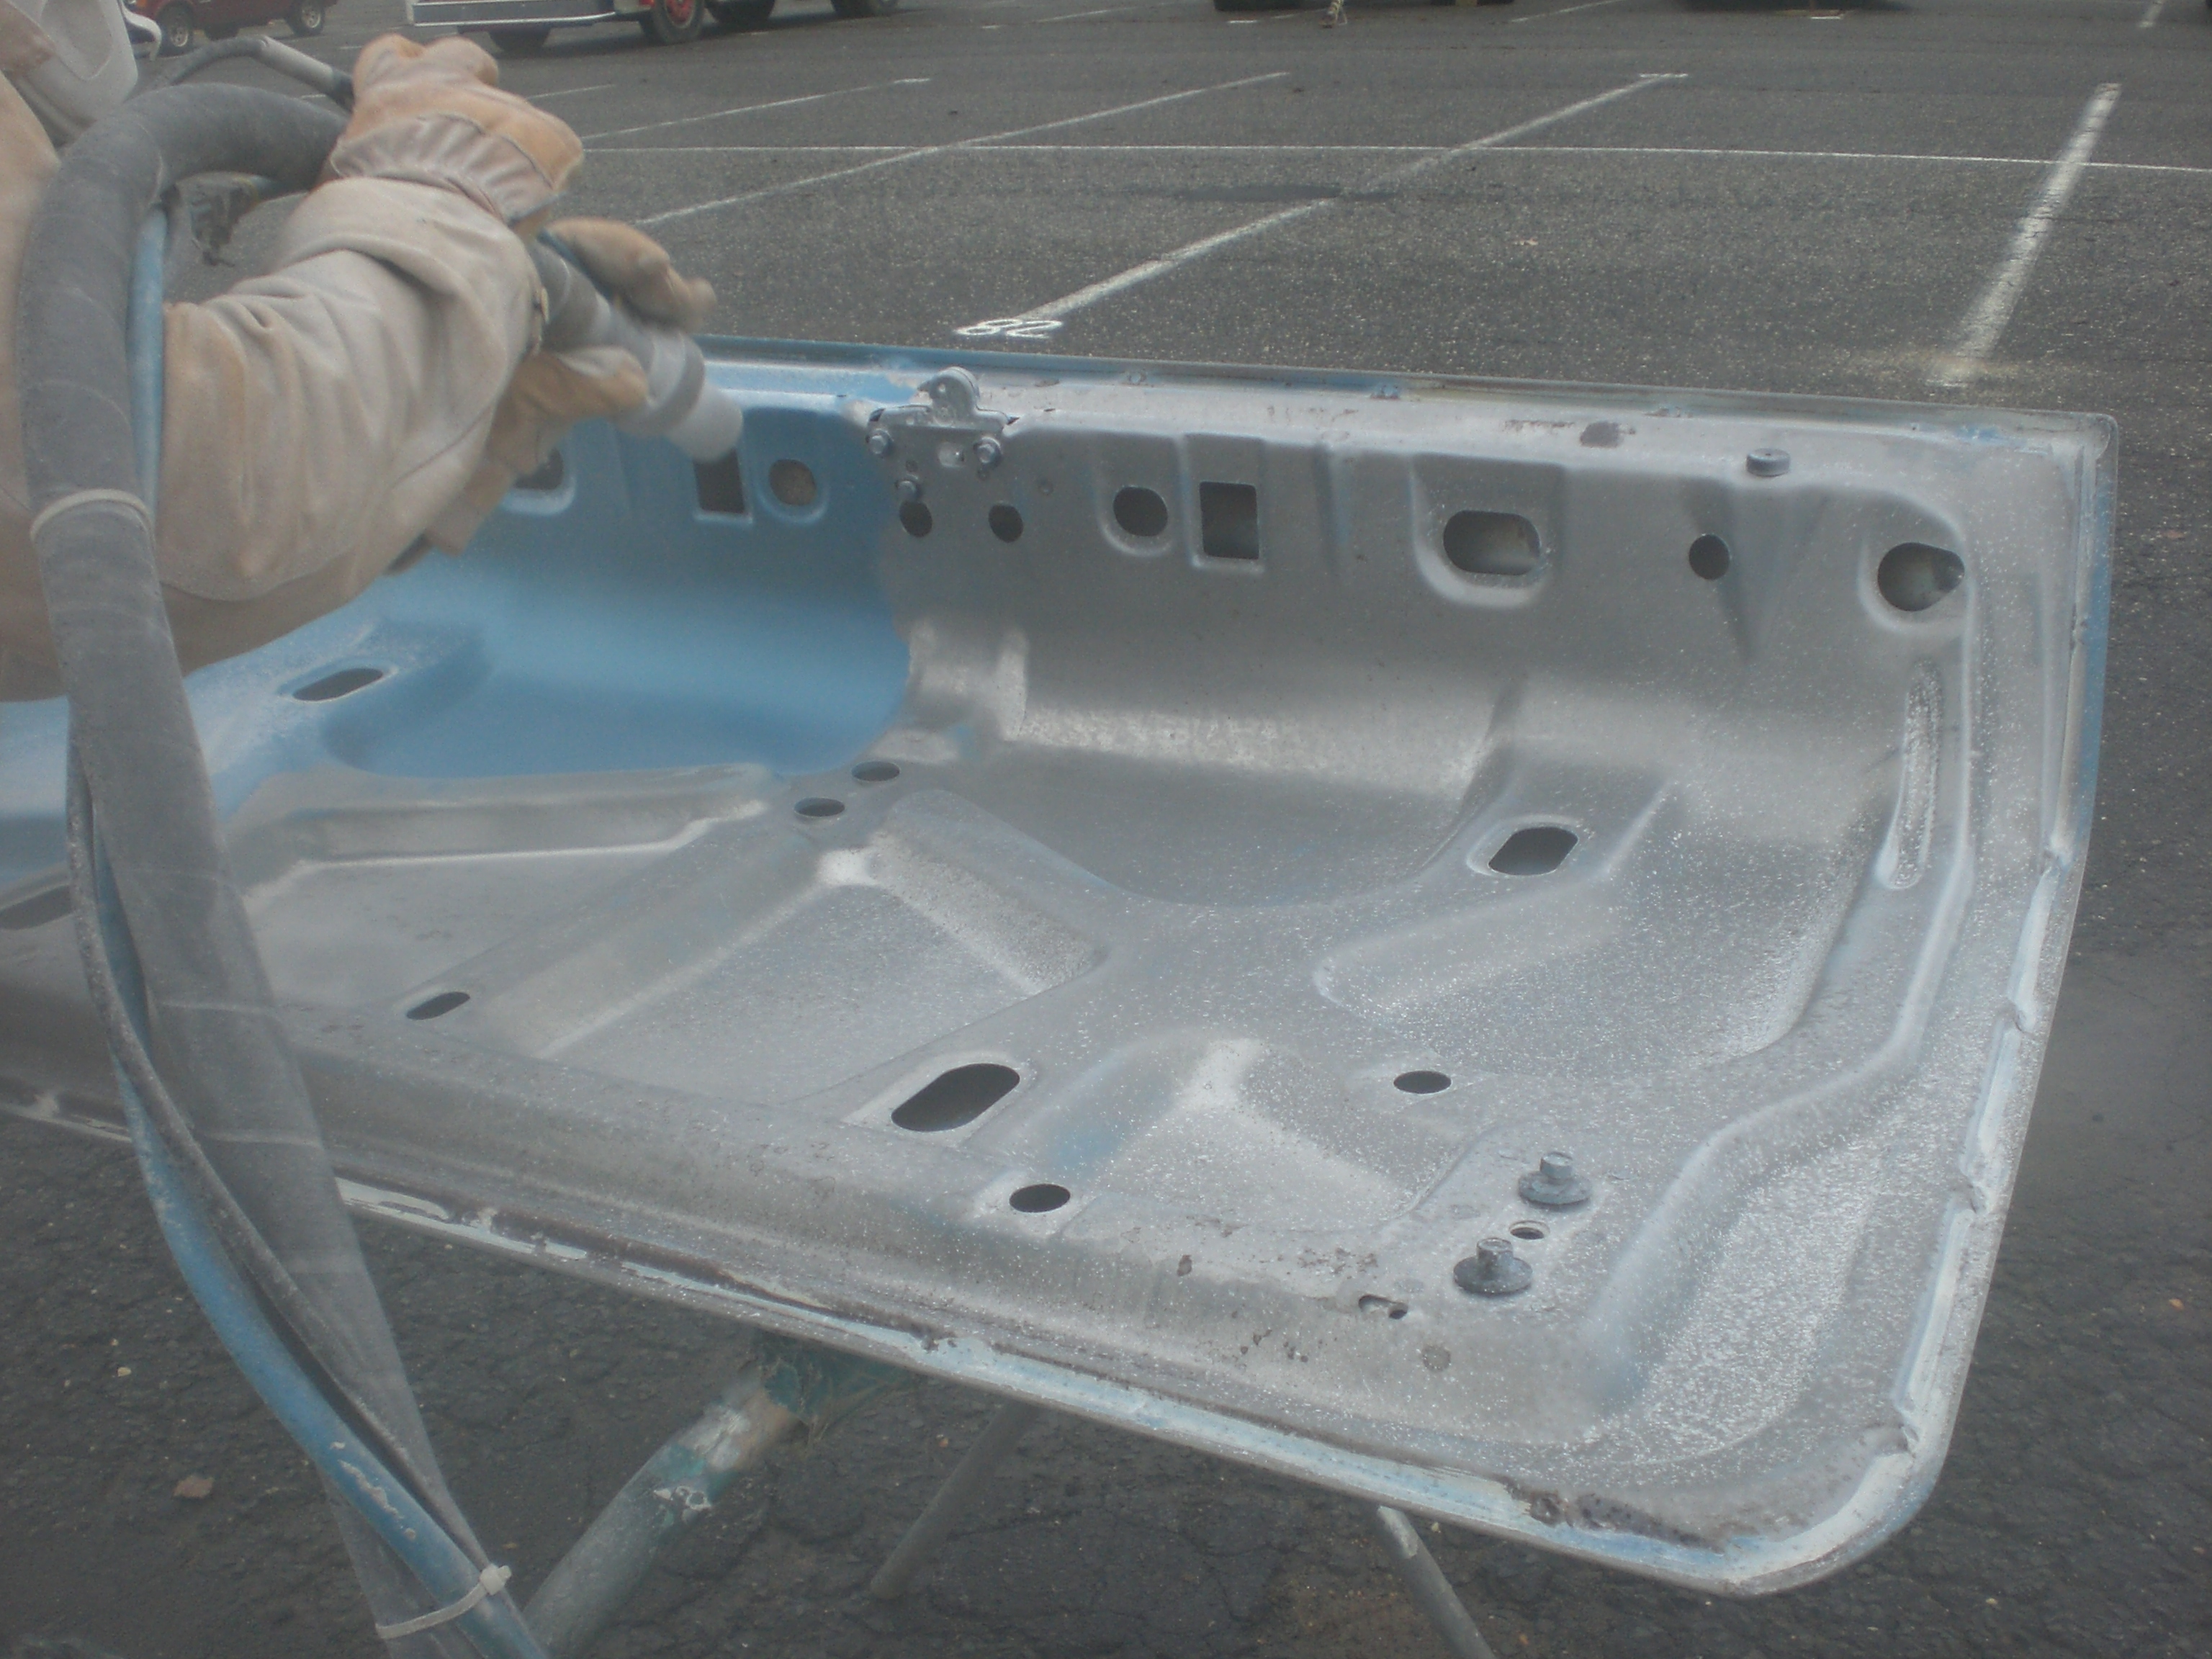
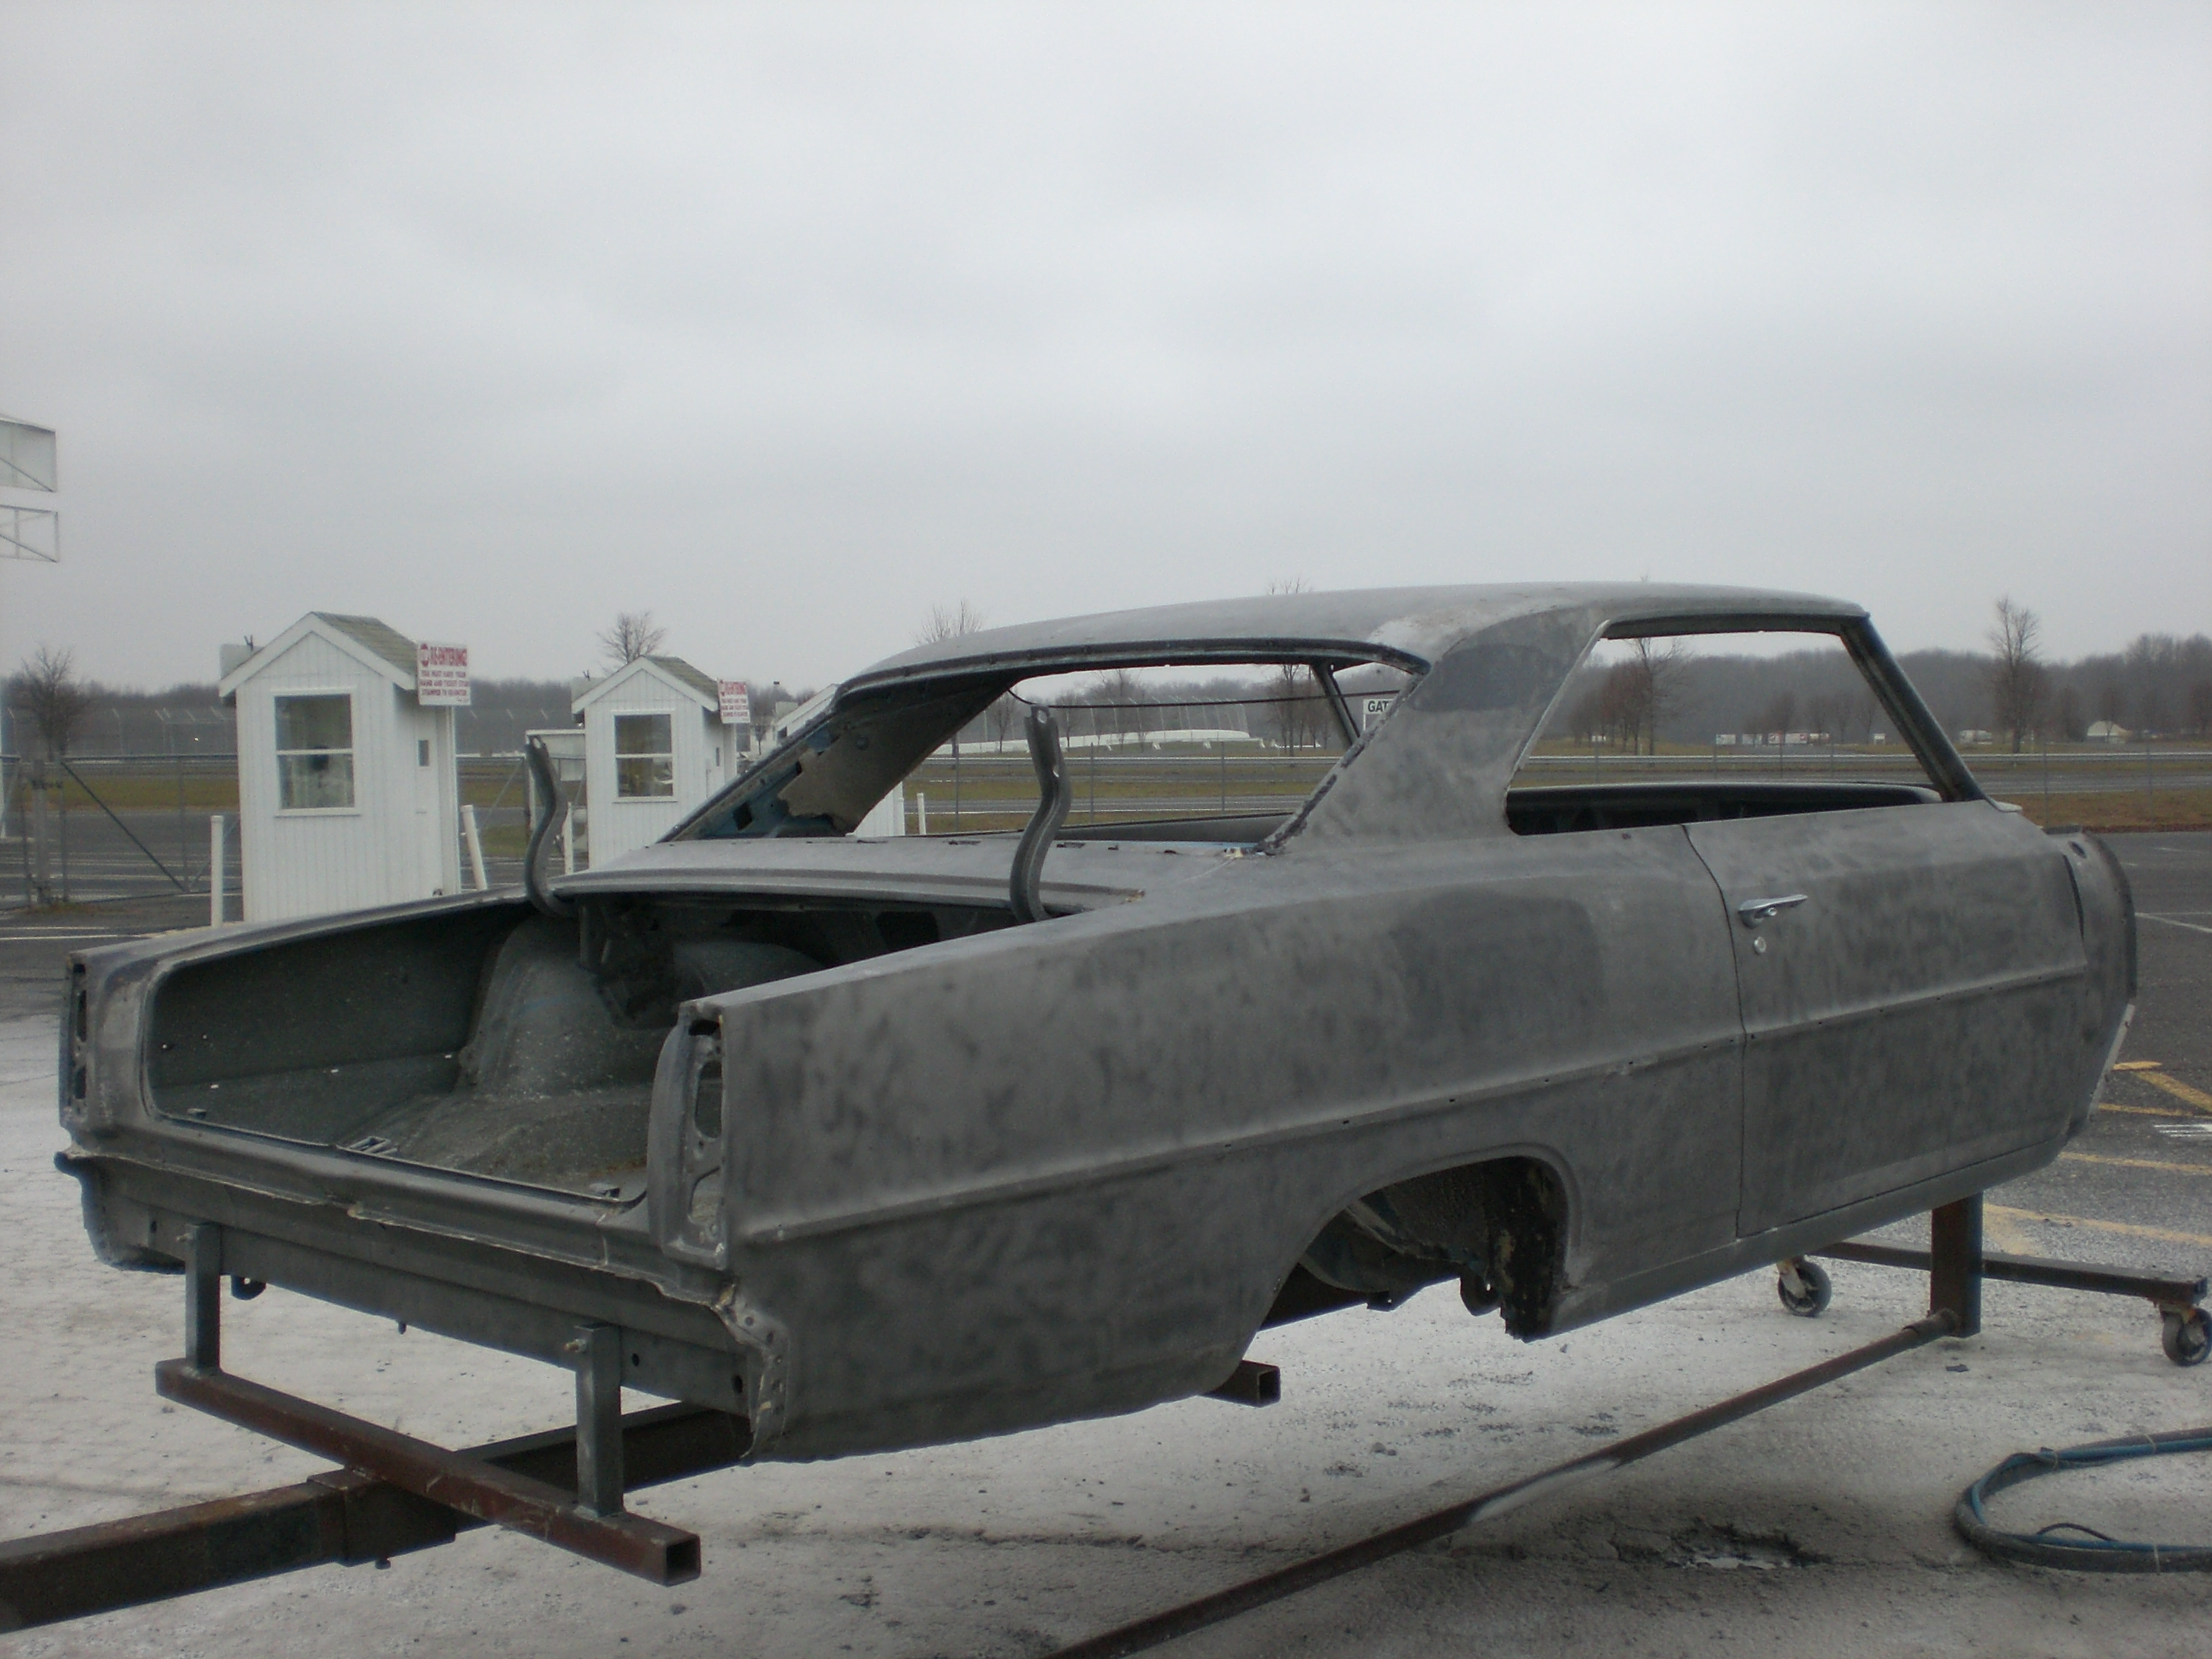
Here are some pictures of the bare shell taken all a part and put on a rotisserie. I used a local guy that had a mobile soda blasted unit that came out to a parking lot and blasted it. It was a really cool process to watch. The process was very messy but did a great job and didn't hurt a panel. Check it out.
Before
Soda Blasting Trailer. Nice and compact

Strating the process
-
01-28-2011 #5
Registered User
- Join Date
- Dec 2007
- Posts
- 14
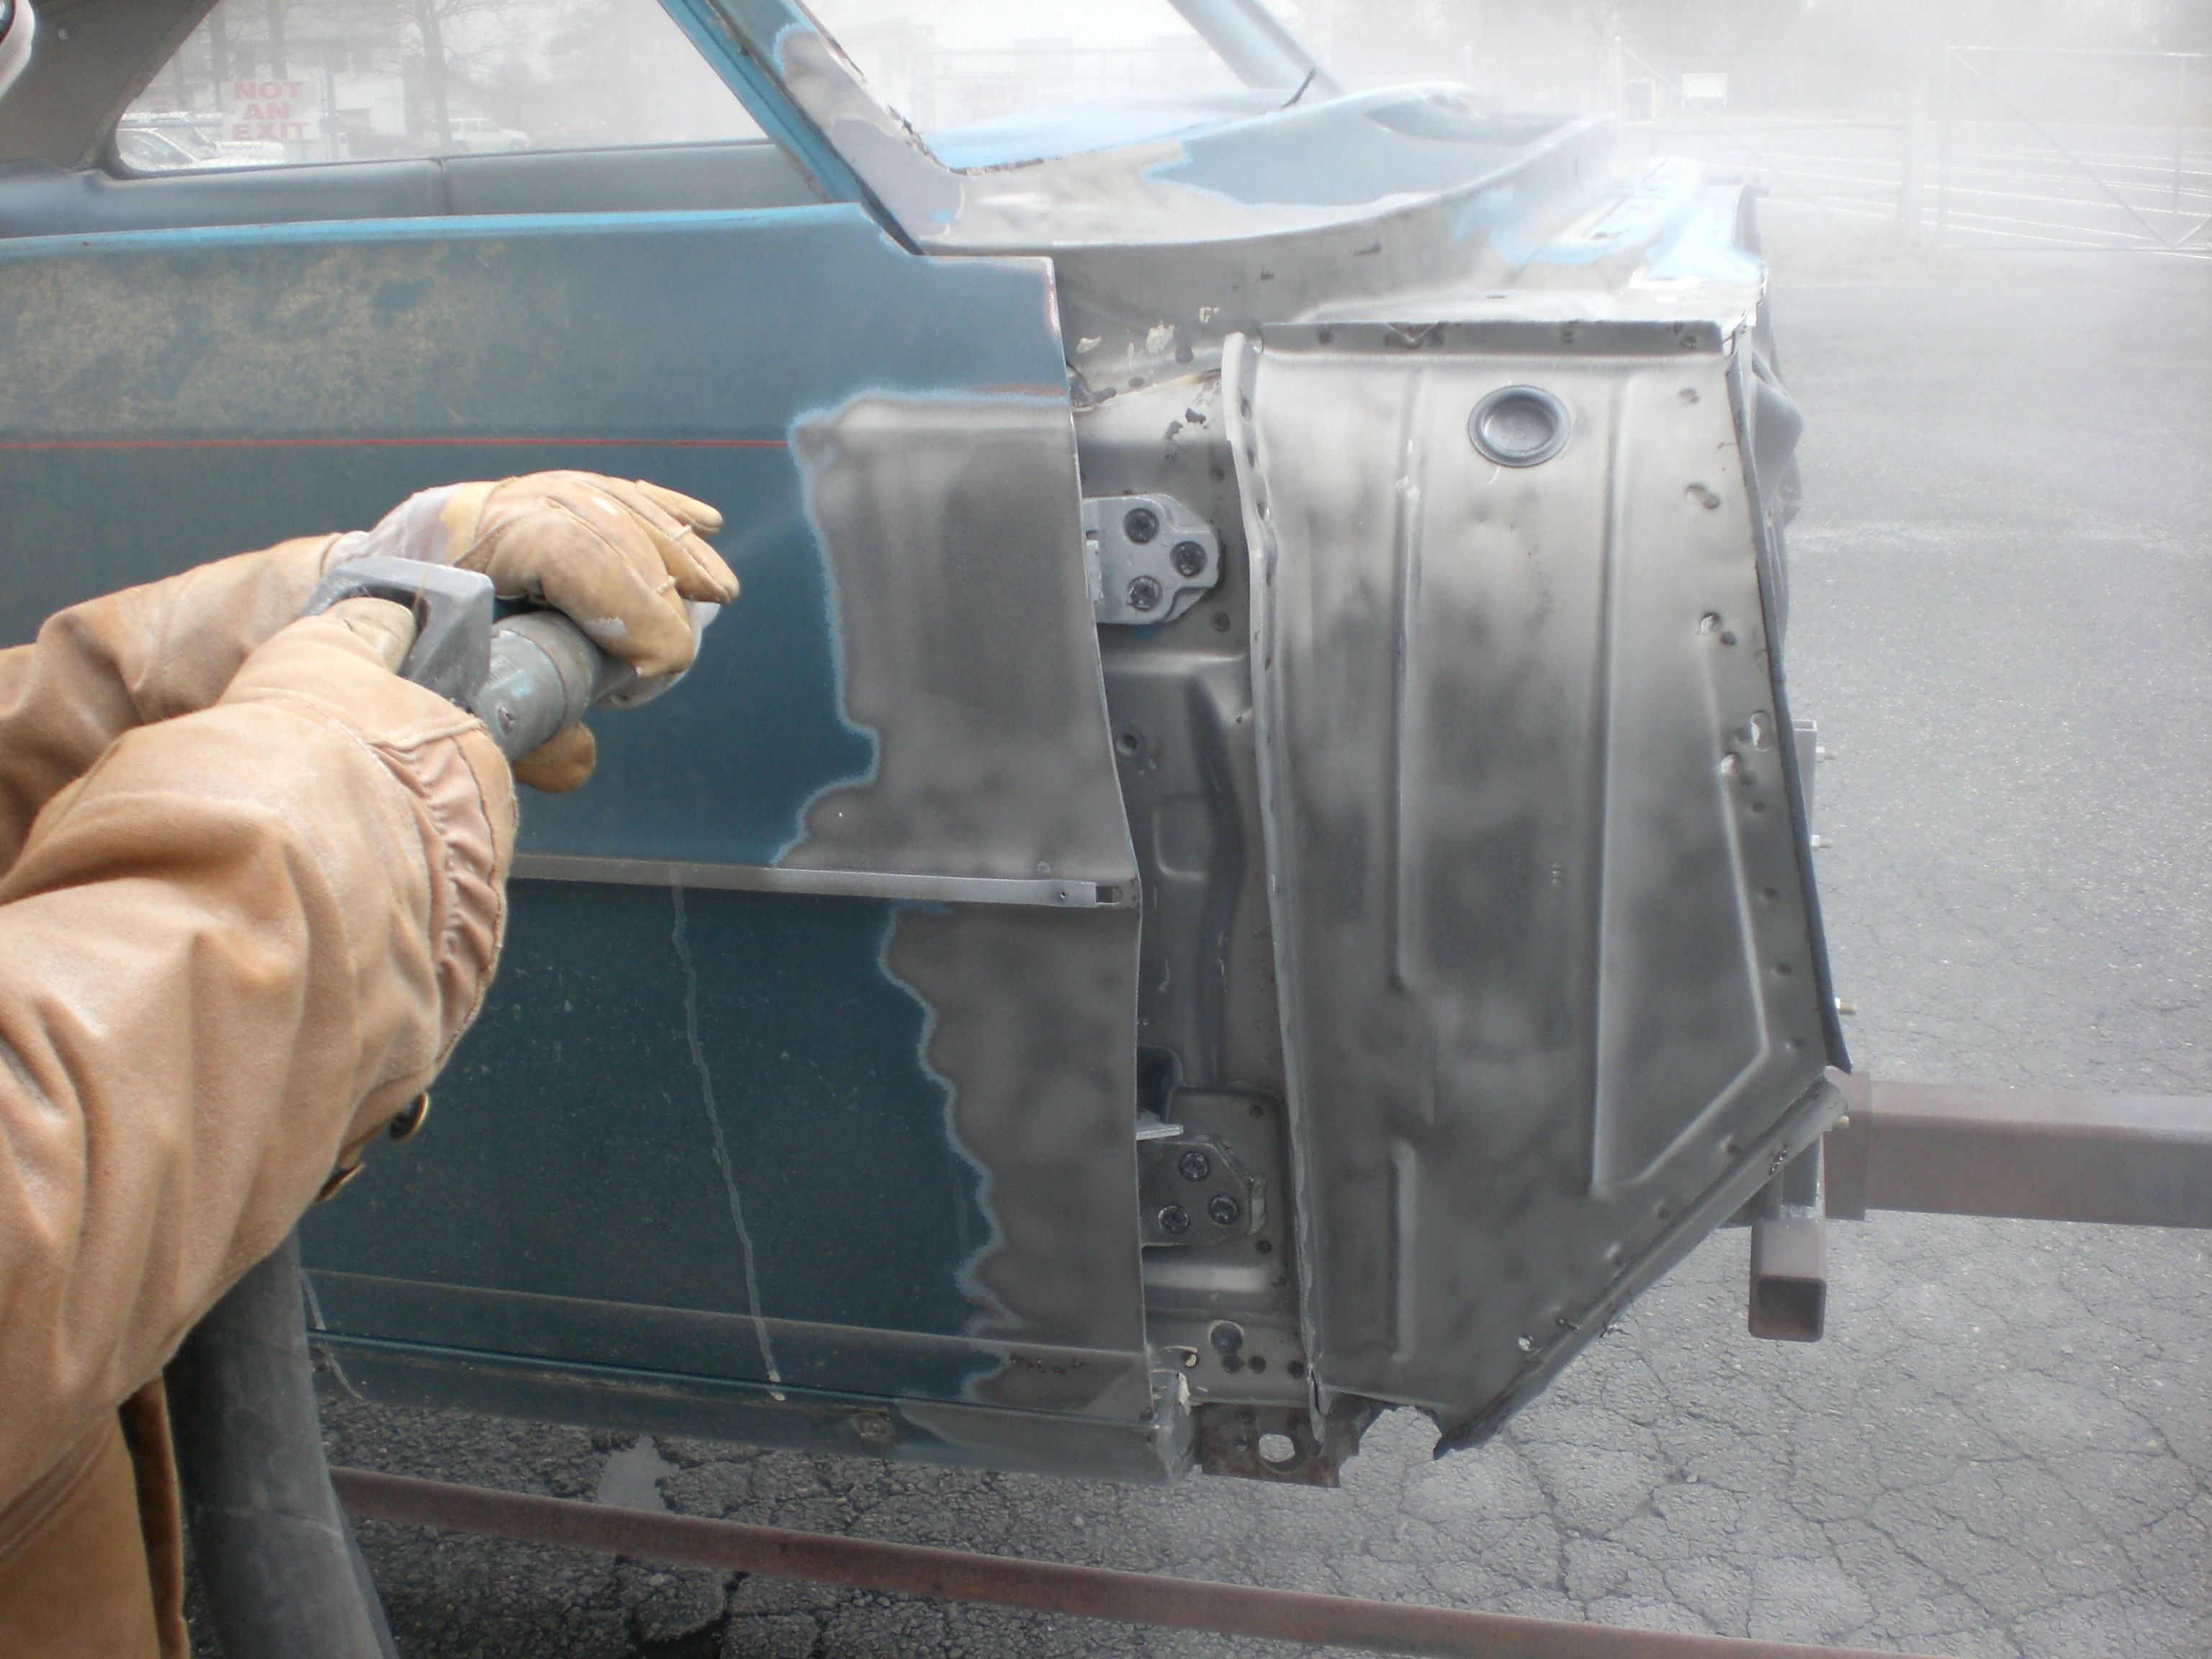
Another really cool part about Soda Blasting is it doesn't hurt the chrome. We did the handles just to show.

We did the whole inside includeing under the dash and all those hard to get spots that really were made easy with this.
Once I get a little bit of time tomorrow I will post up more. Thanks
-
01-29-2011 #6
New to Pro-Touring
- Join Date
- Jan 2007
- Location
- NJ
- Posts
- 17

Hey Eddie...
Cant wait to see this done along with the drag radial car. I am not going to say who you are<g>>
Swervin
-
01-31-2011 #7
Registered User
- Join Date
- Dec 2007
- Posts
- 14
Thanks Bob Originally Posted by robert irvin
We are moving forward on it. I will post some more pictures of it up very soon. I need to find about 1 hour in my 28 hour days right now. This time of the year just get's so busy.
-
02-06-2011 #8
Registered User
- Join Date
- Dec 2007
- Posts
- 14
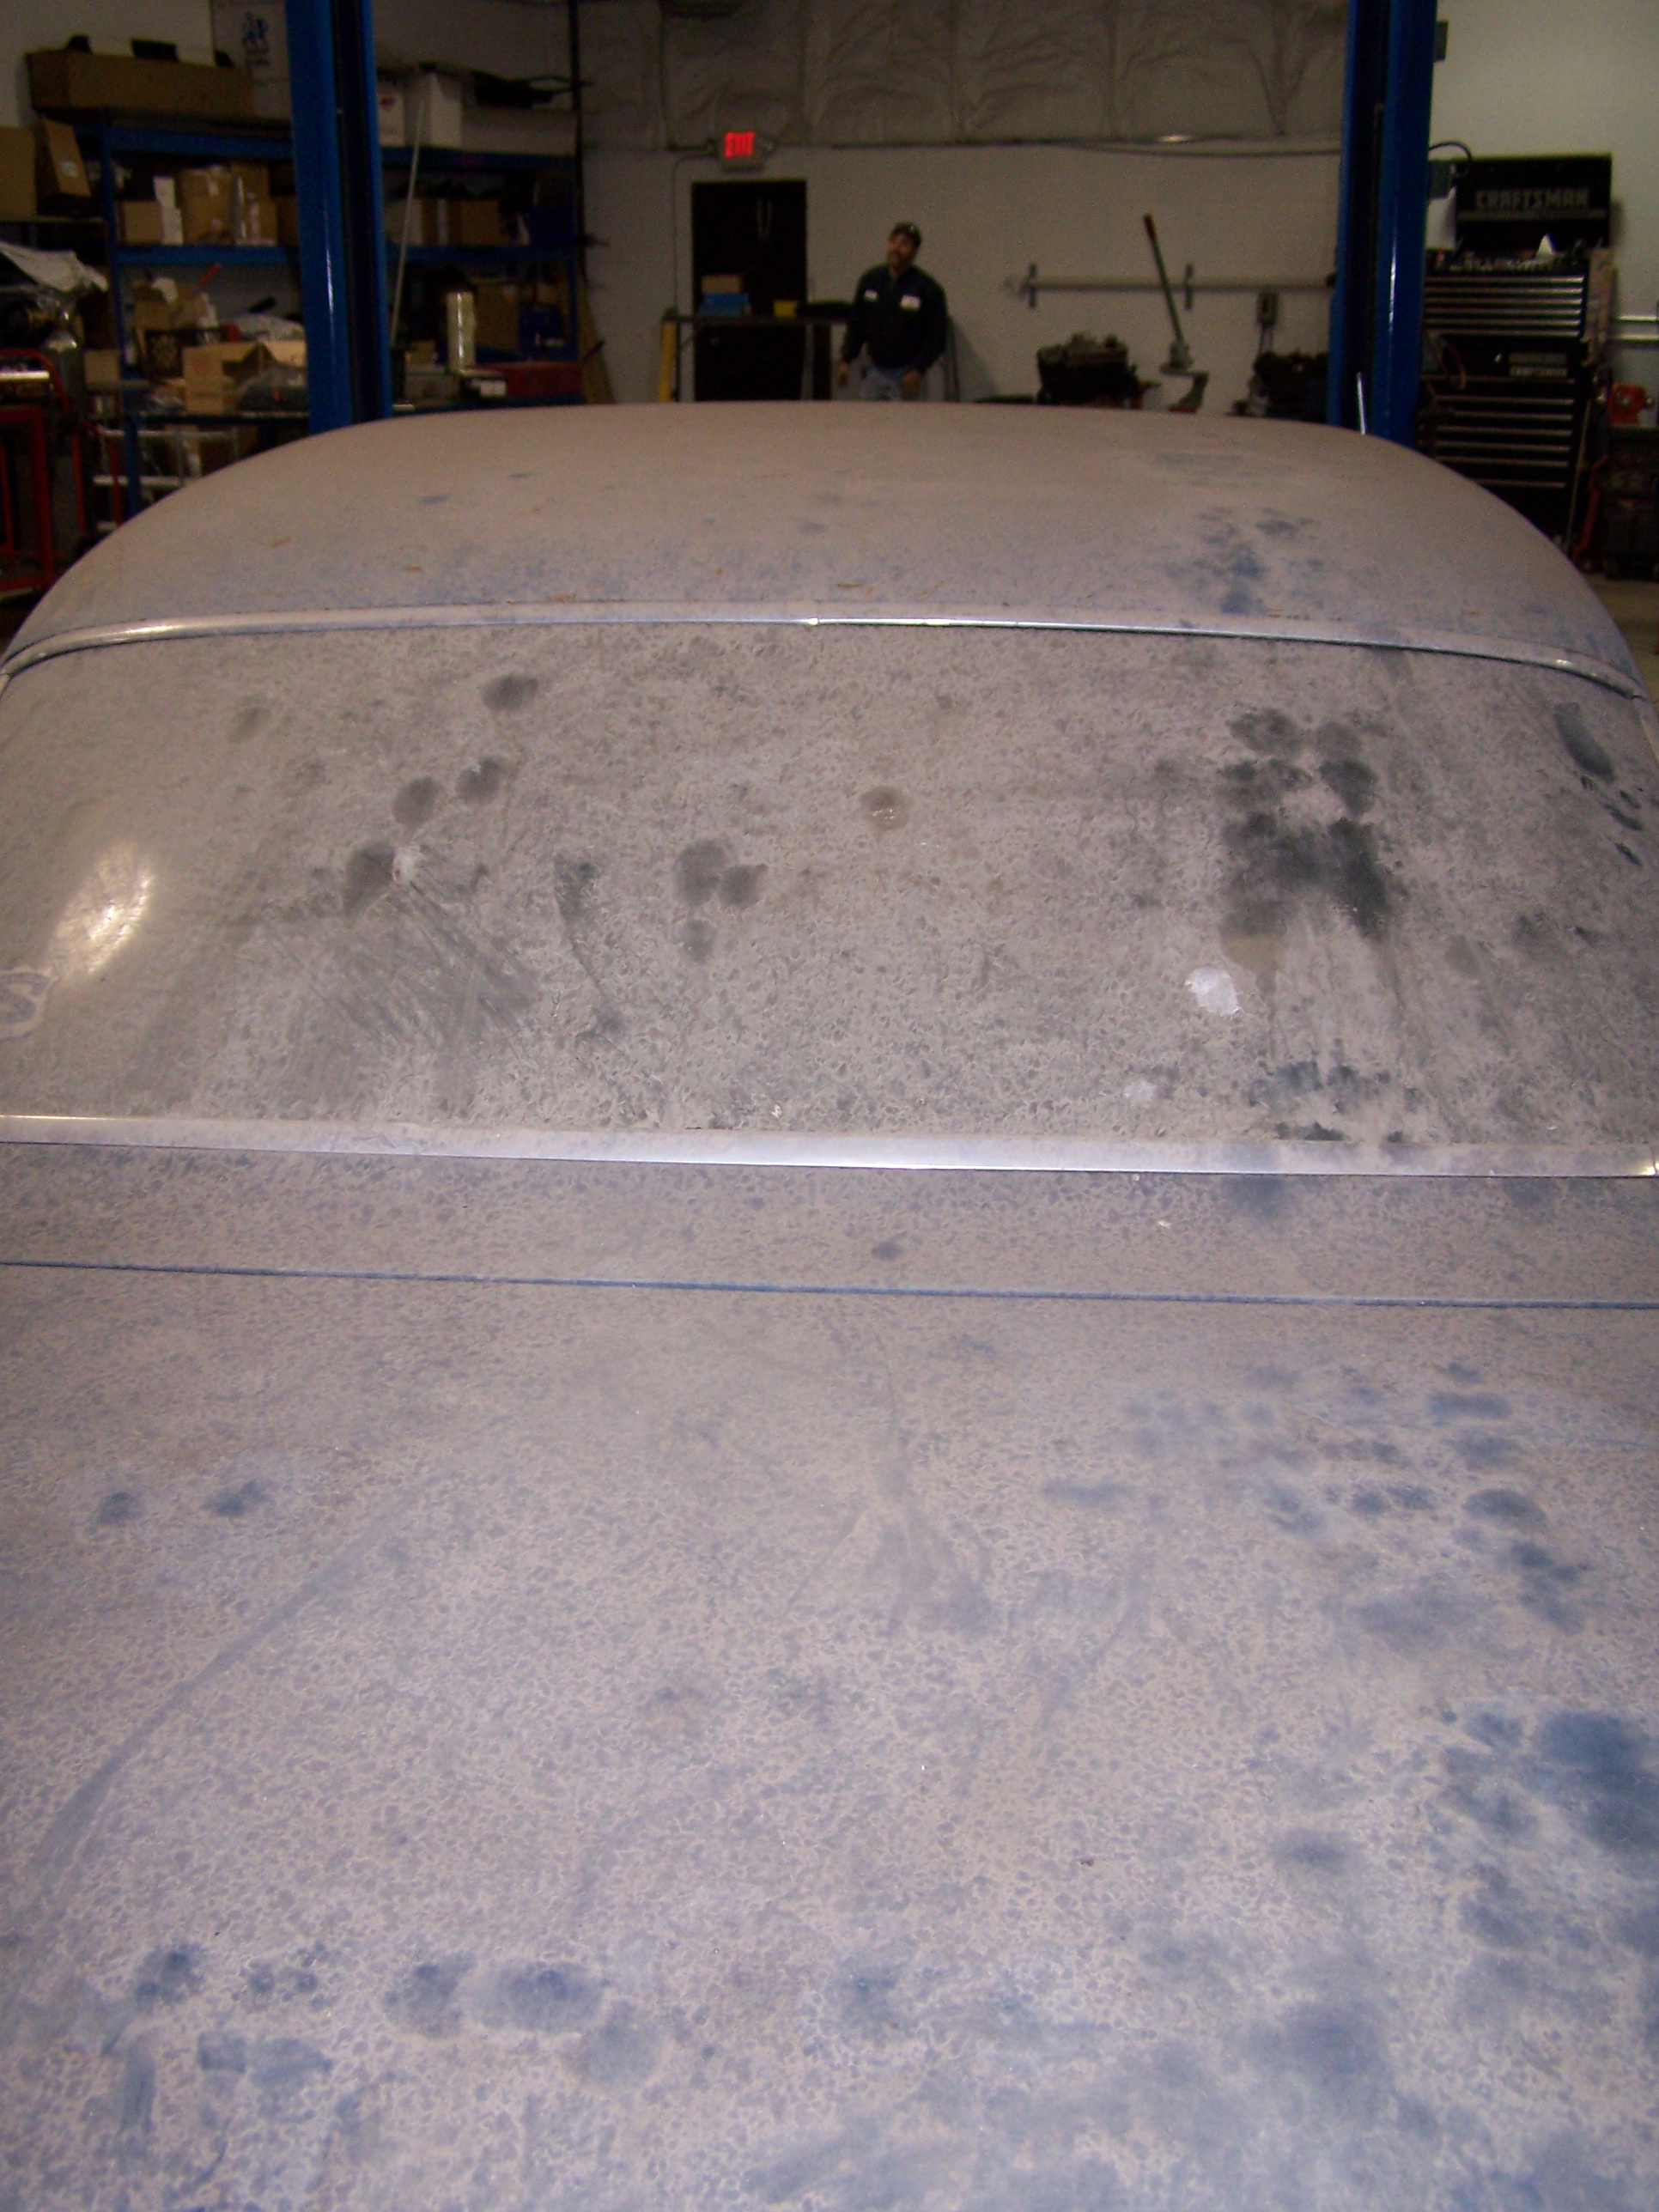
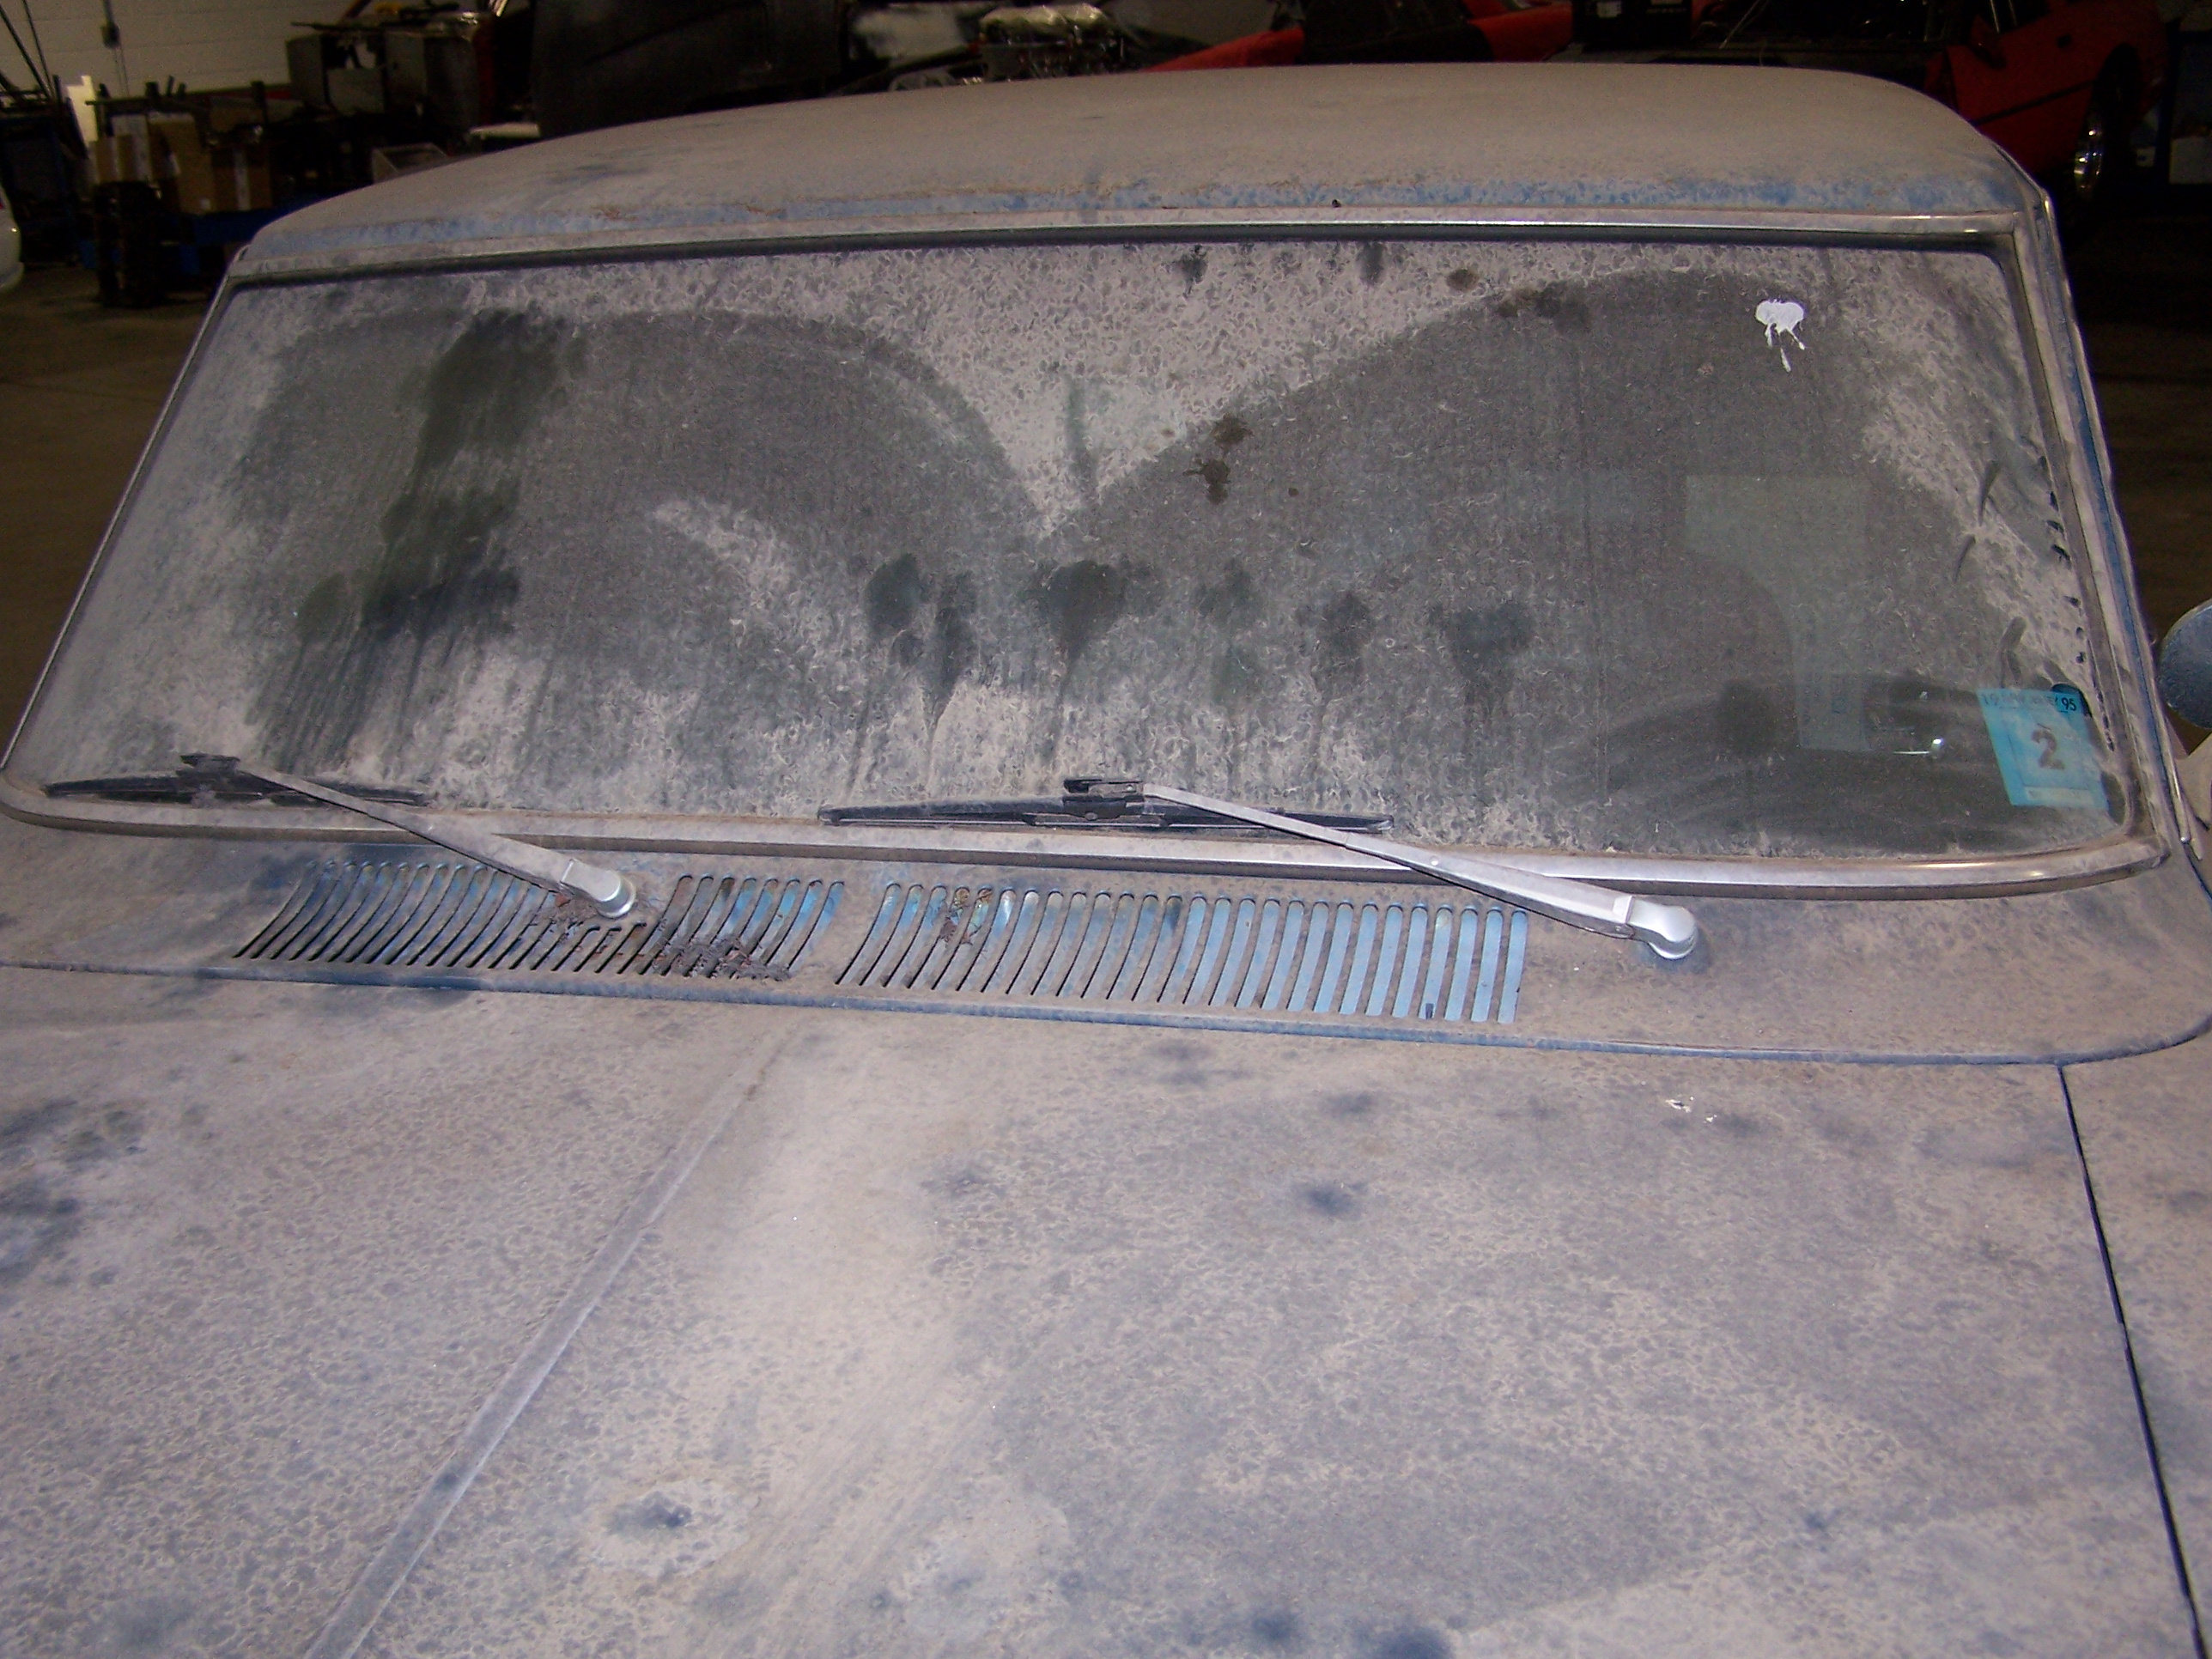
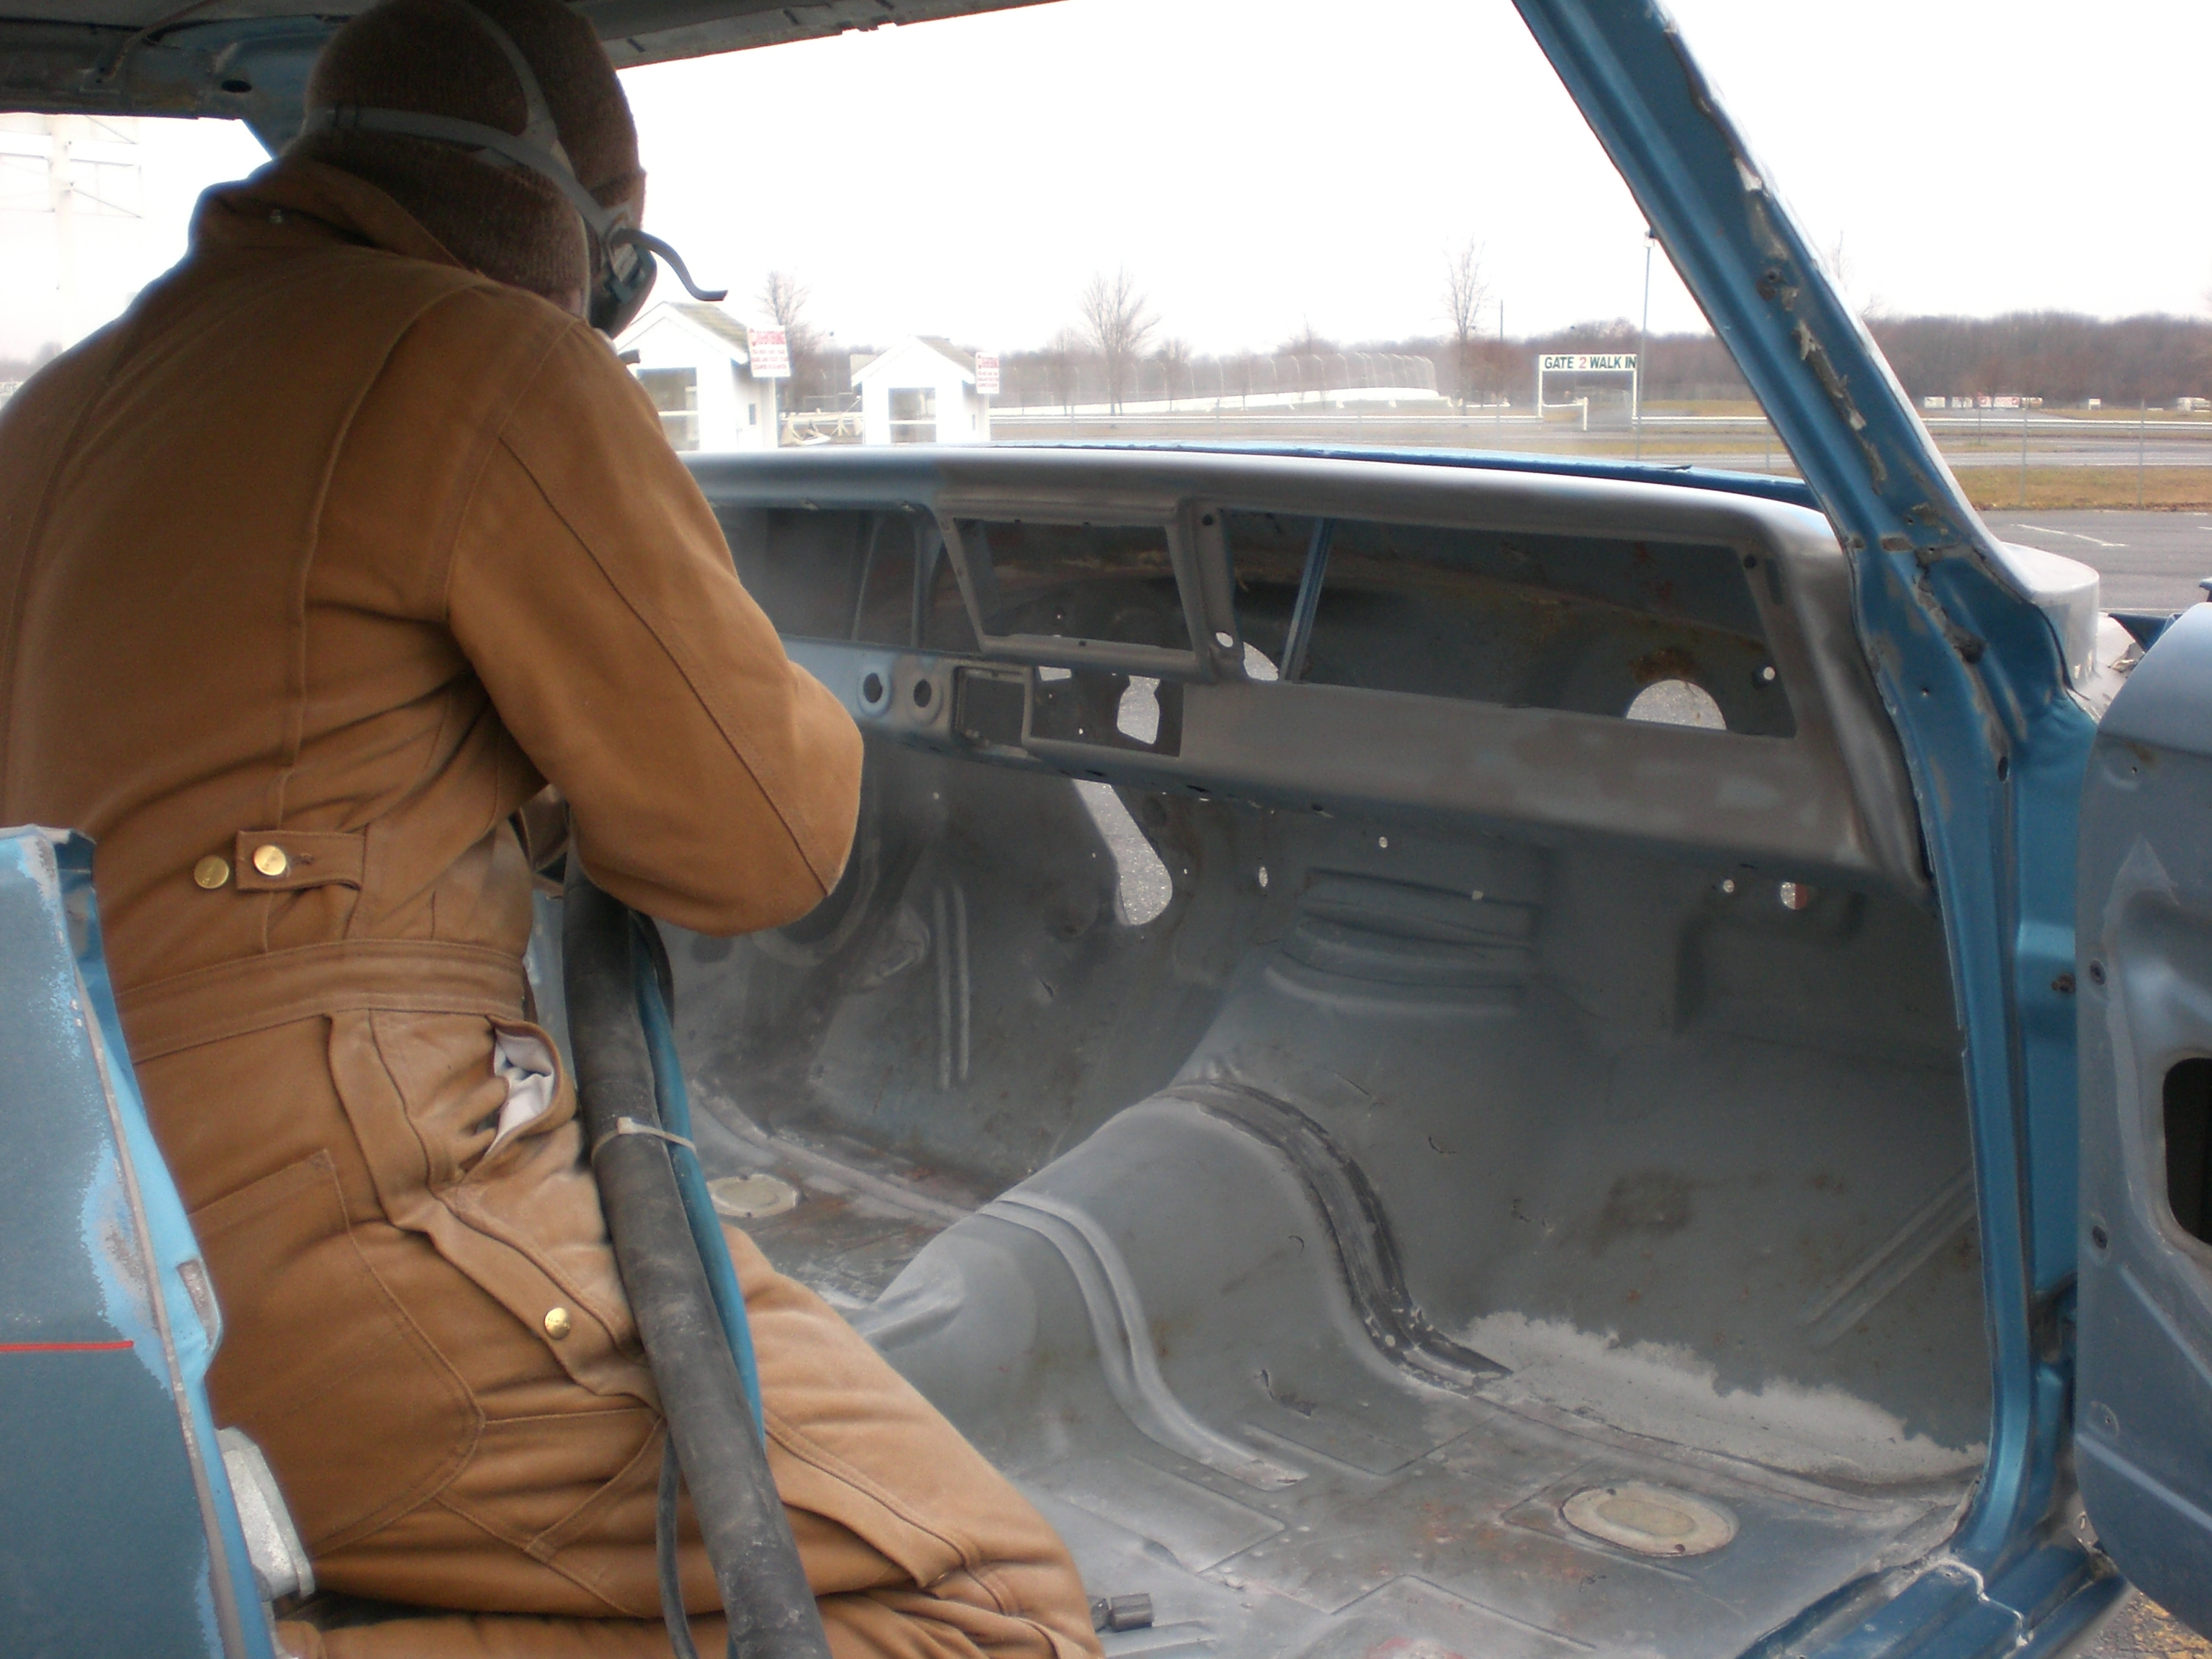
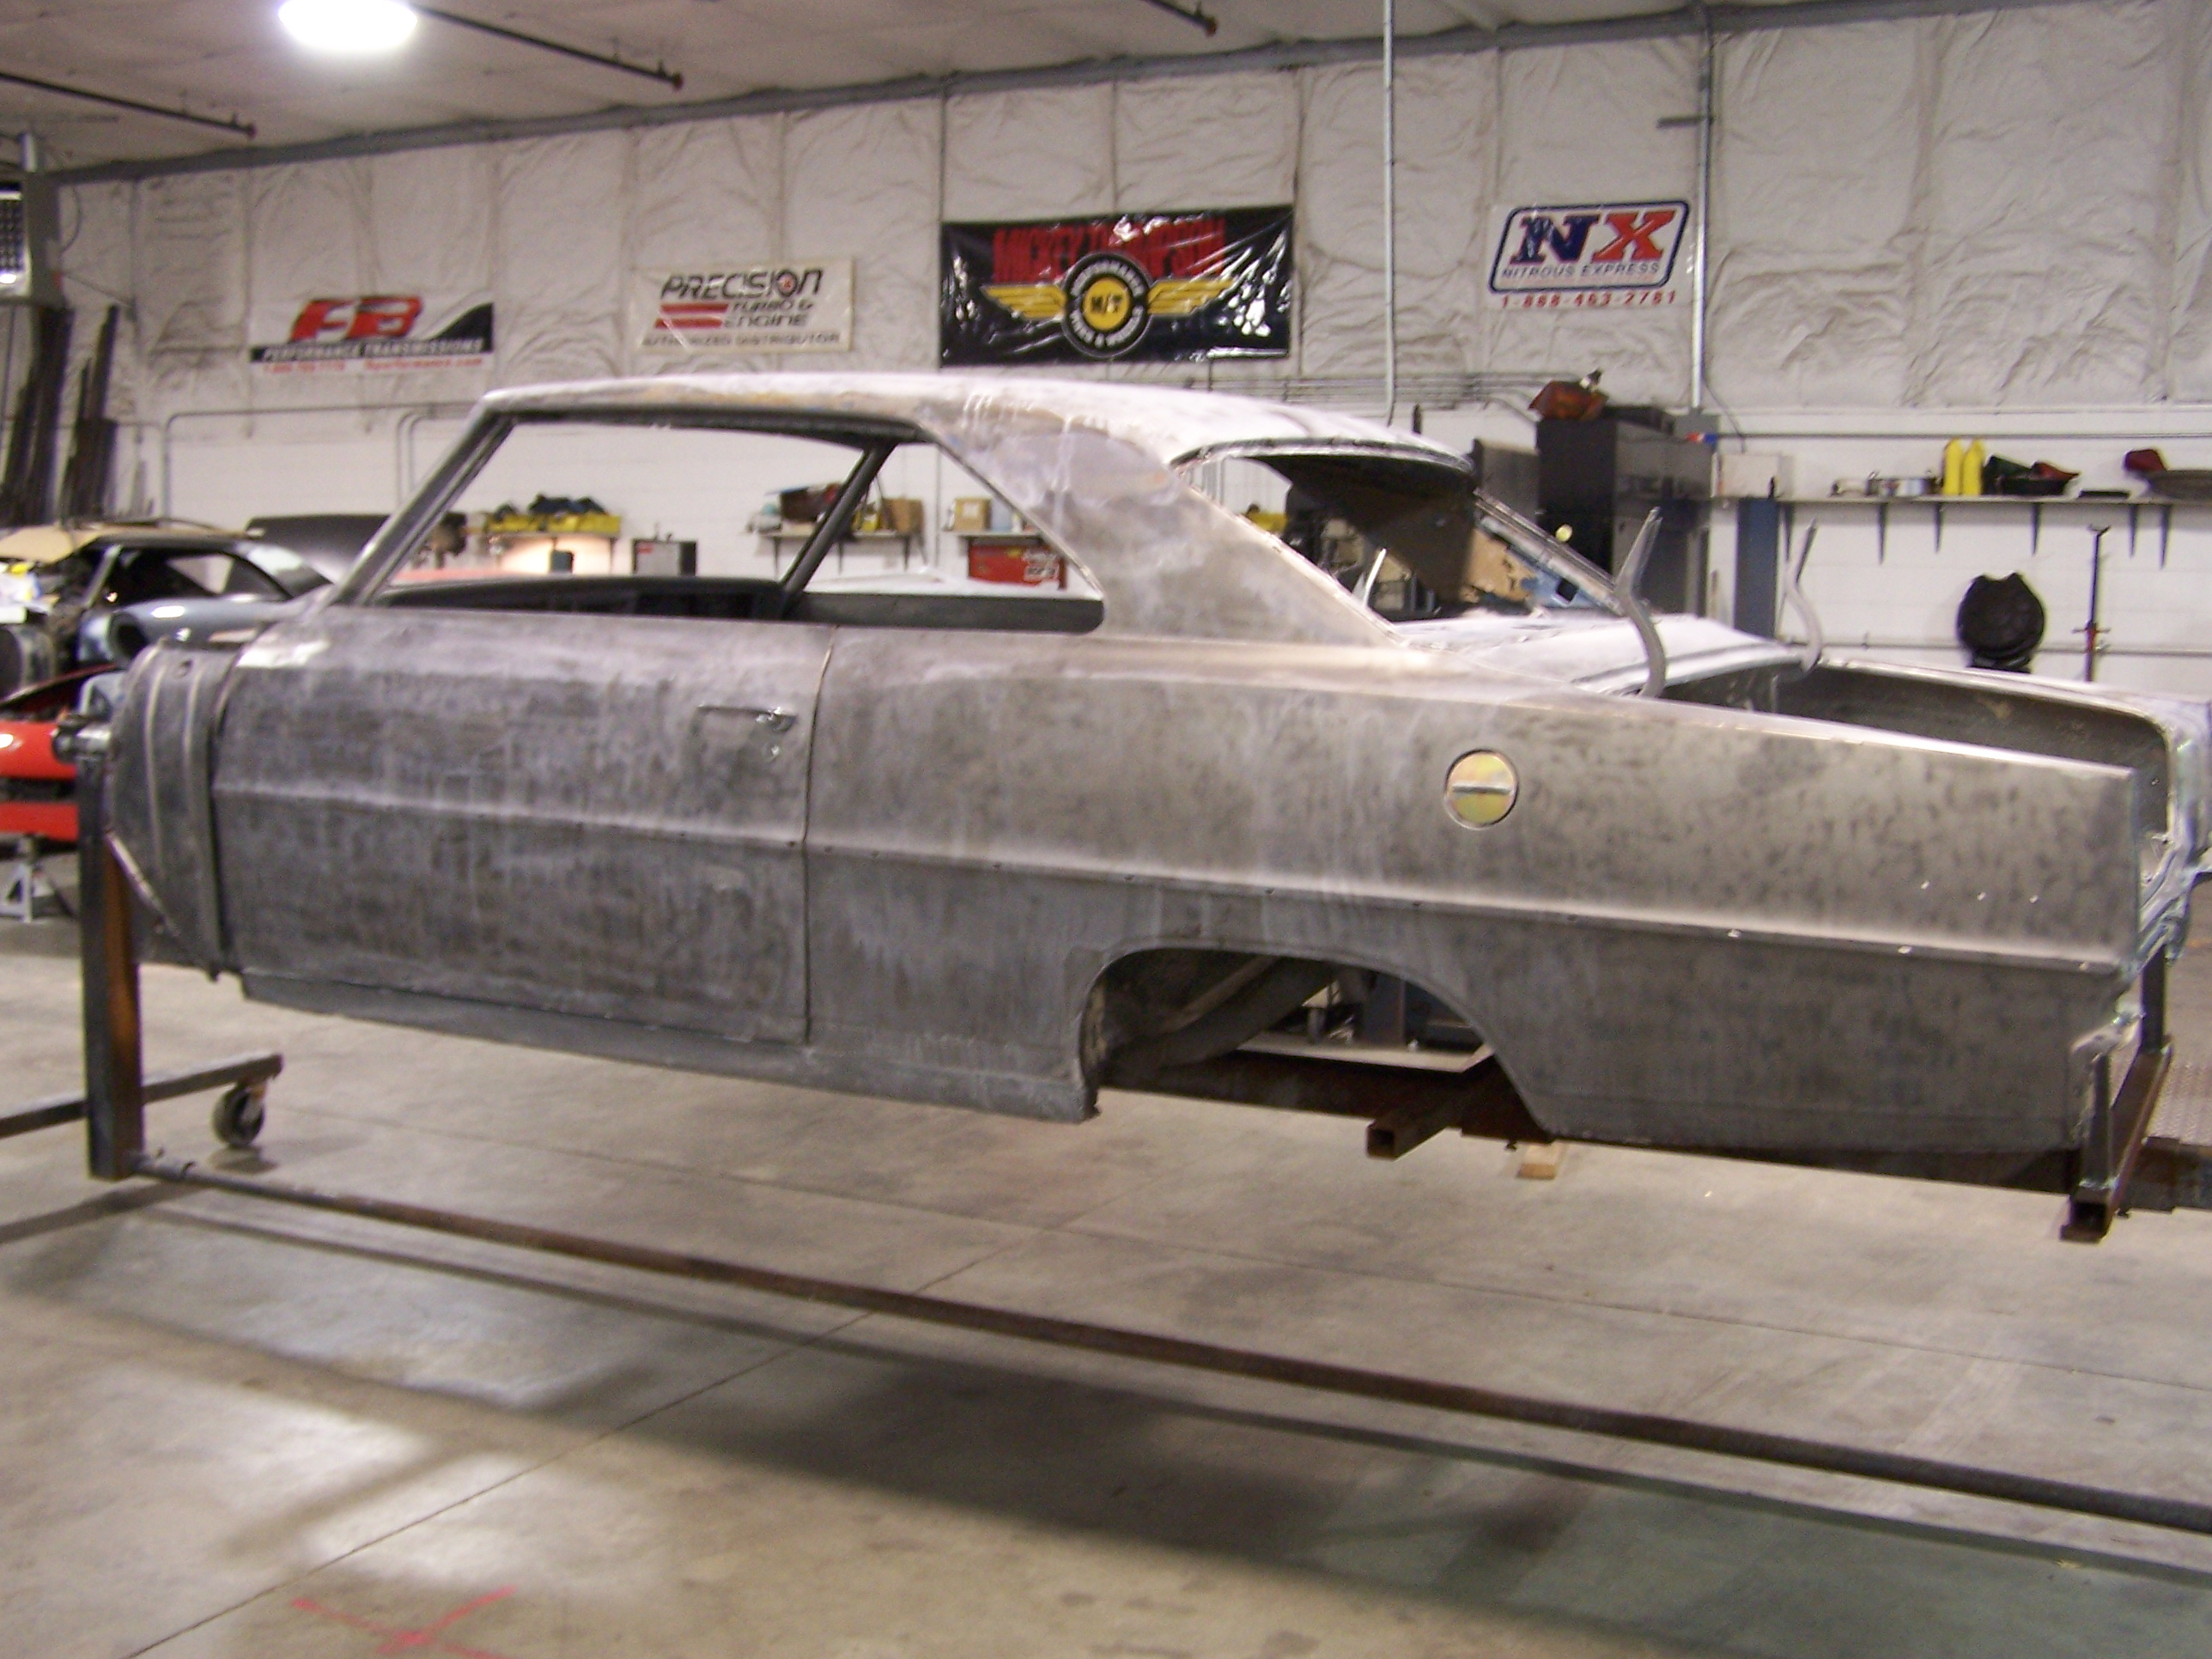
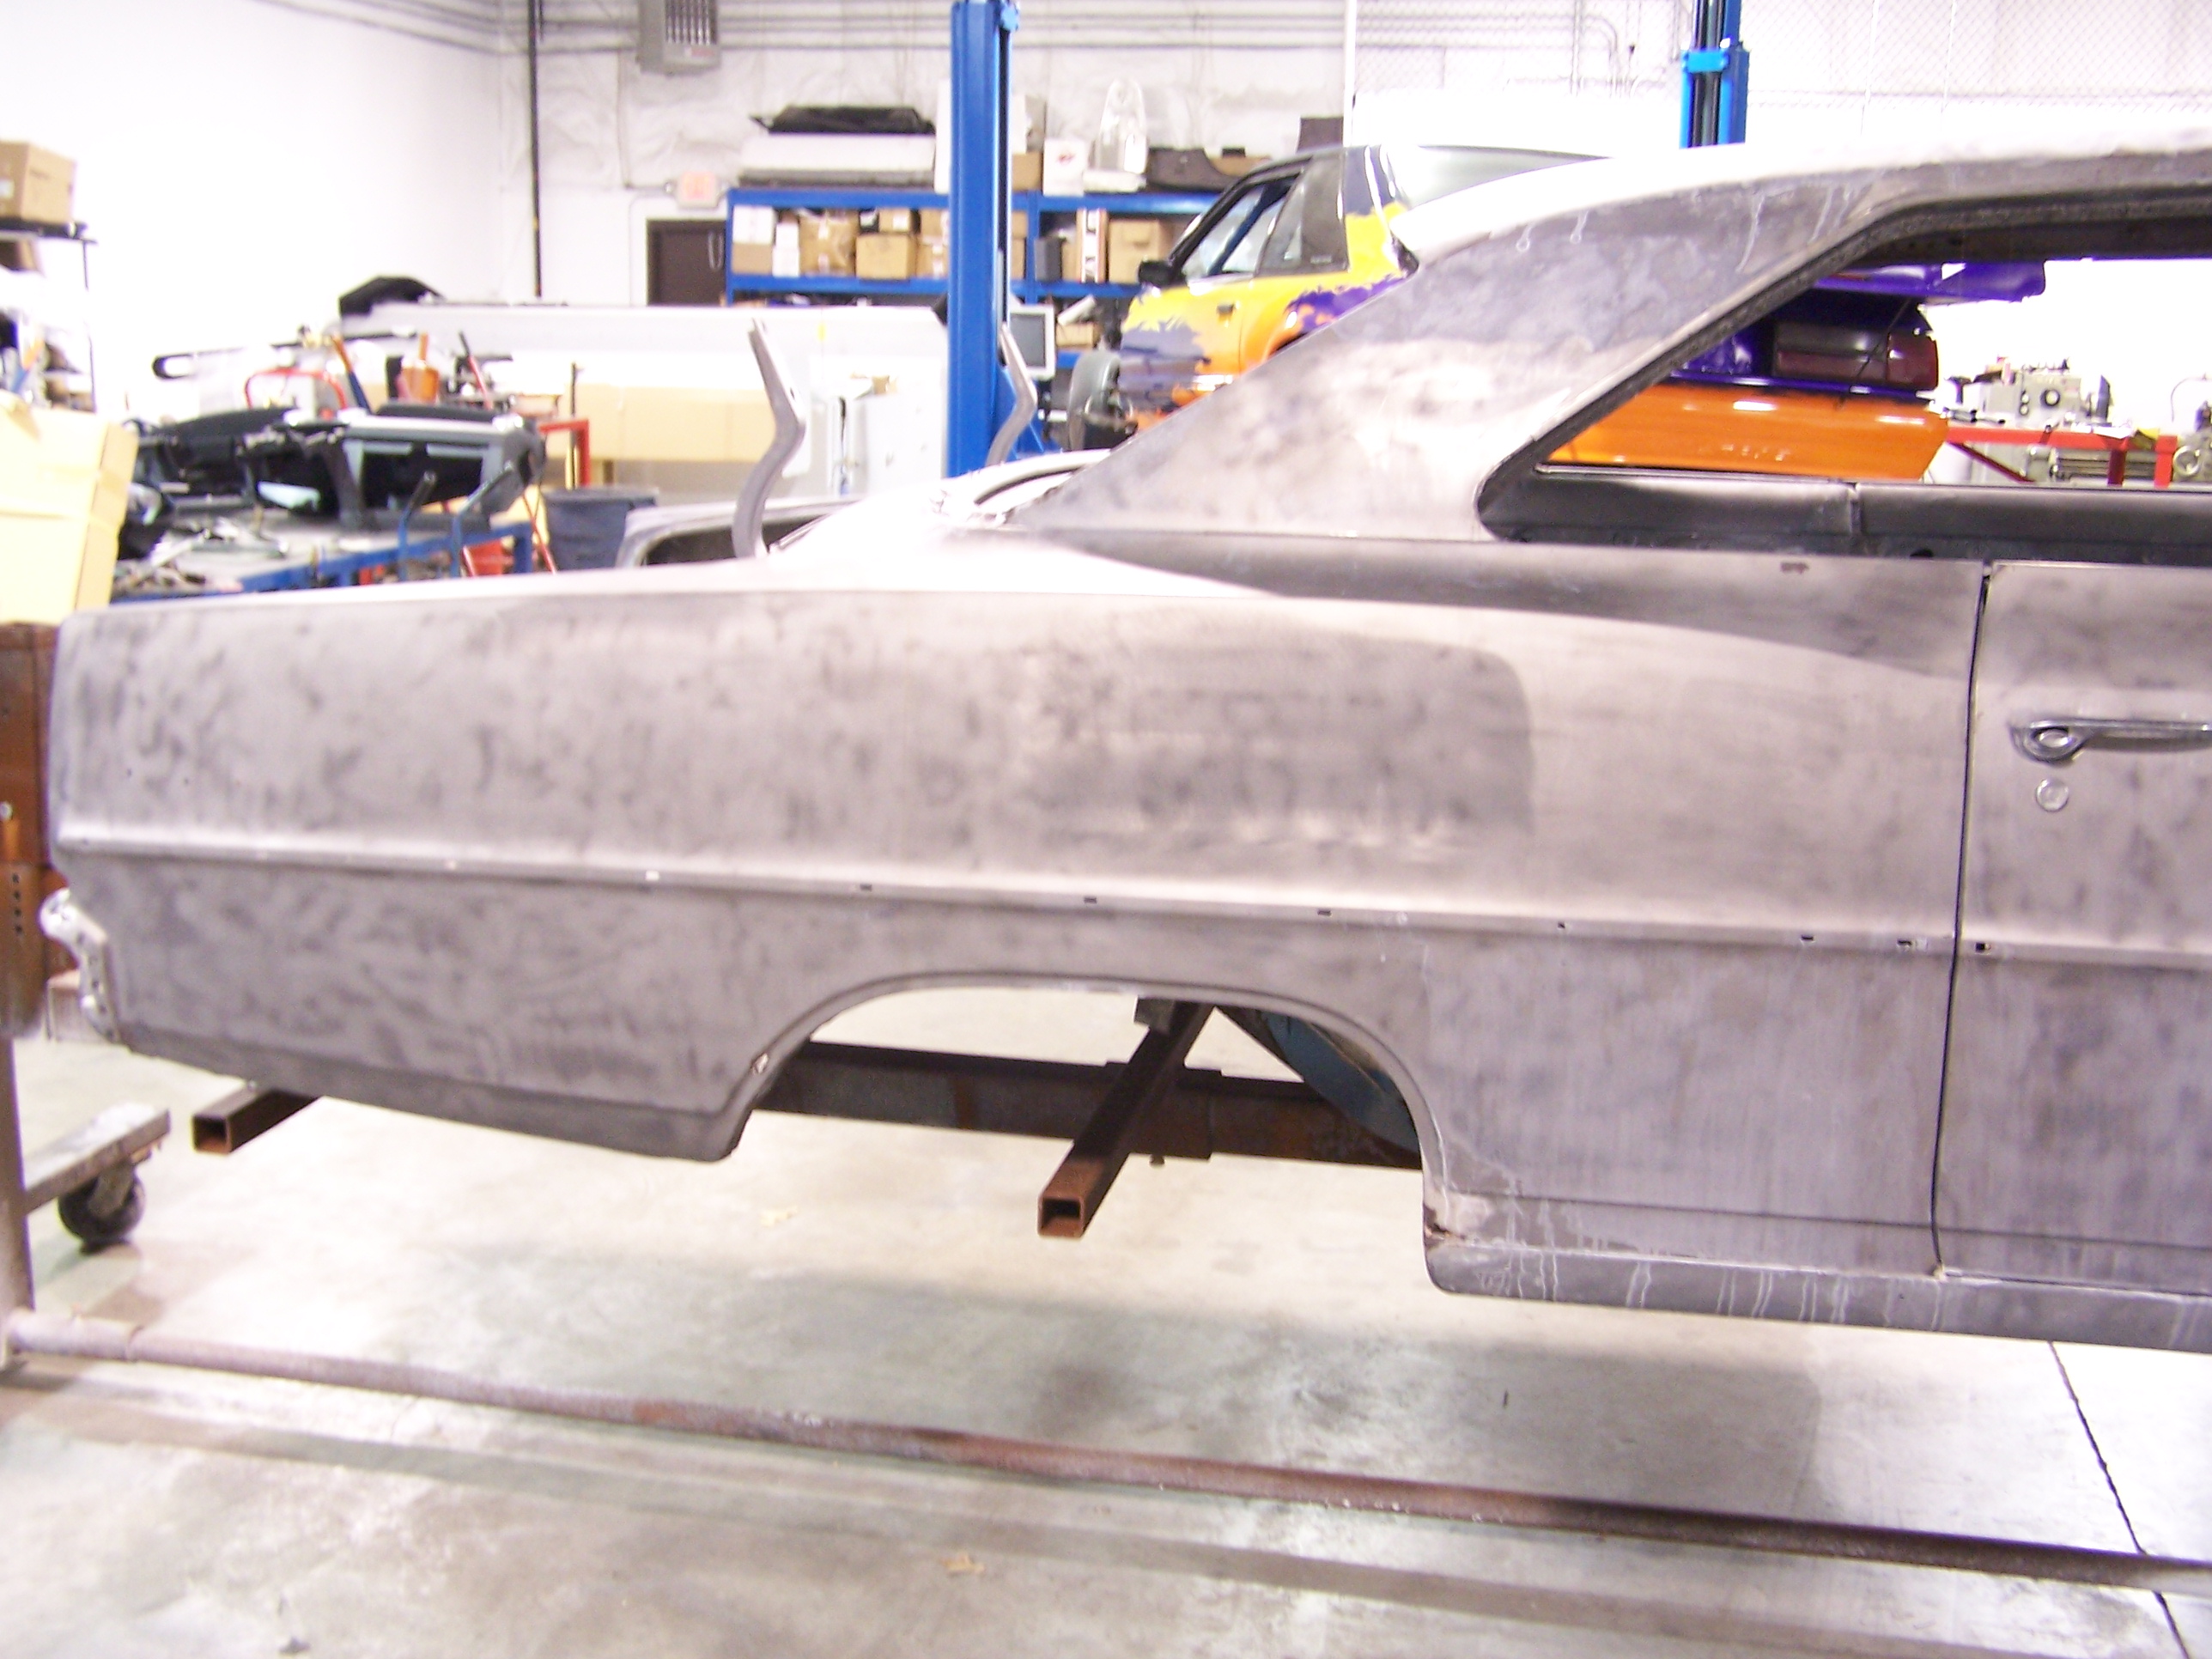
Since I have a little bit before the Super Bowl I wanted to get a few pictures up. Here are some pictures of the car back in the shop after soda blasting the parts. We found a few little sports that were rusted but all in all the base of the car was really clean.
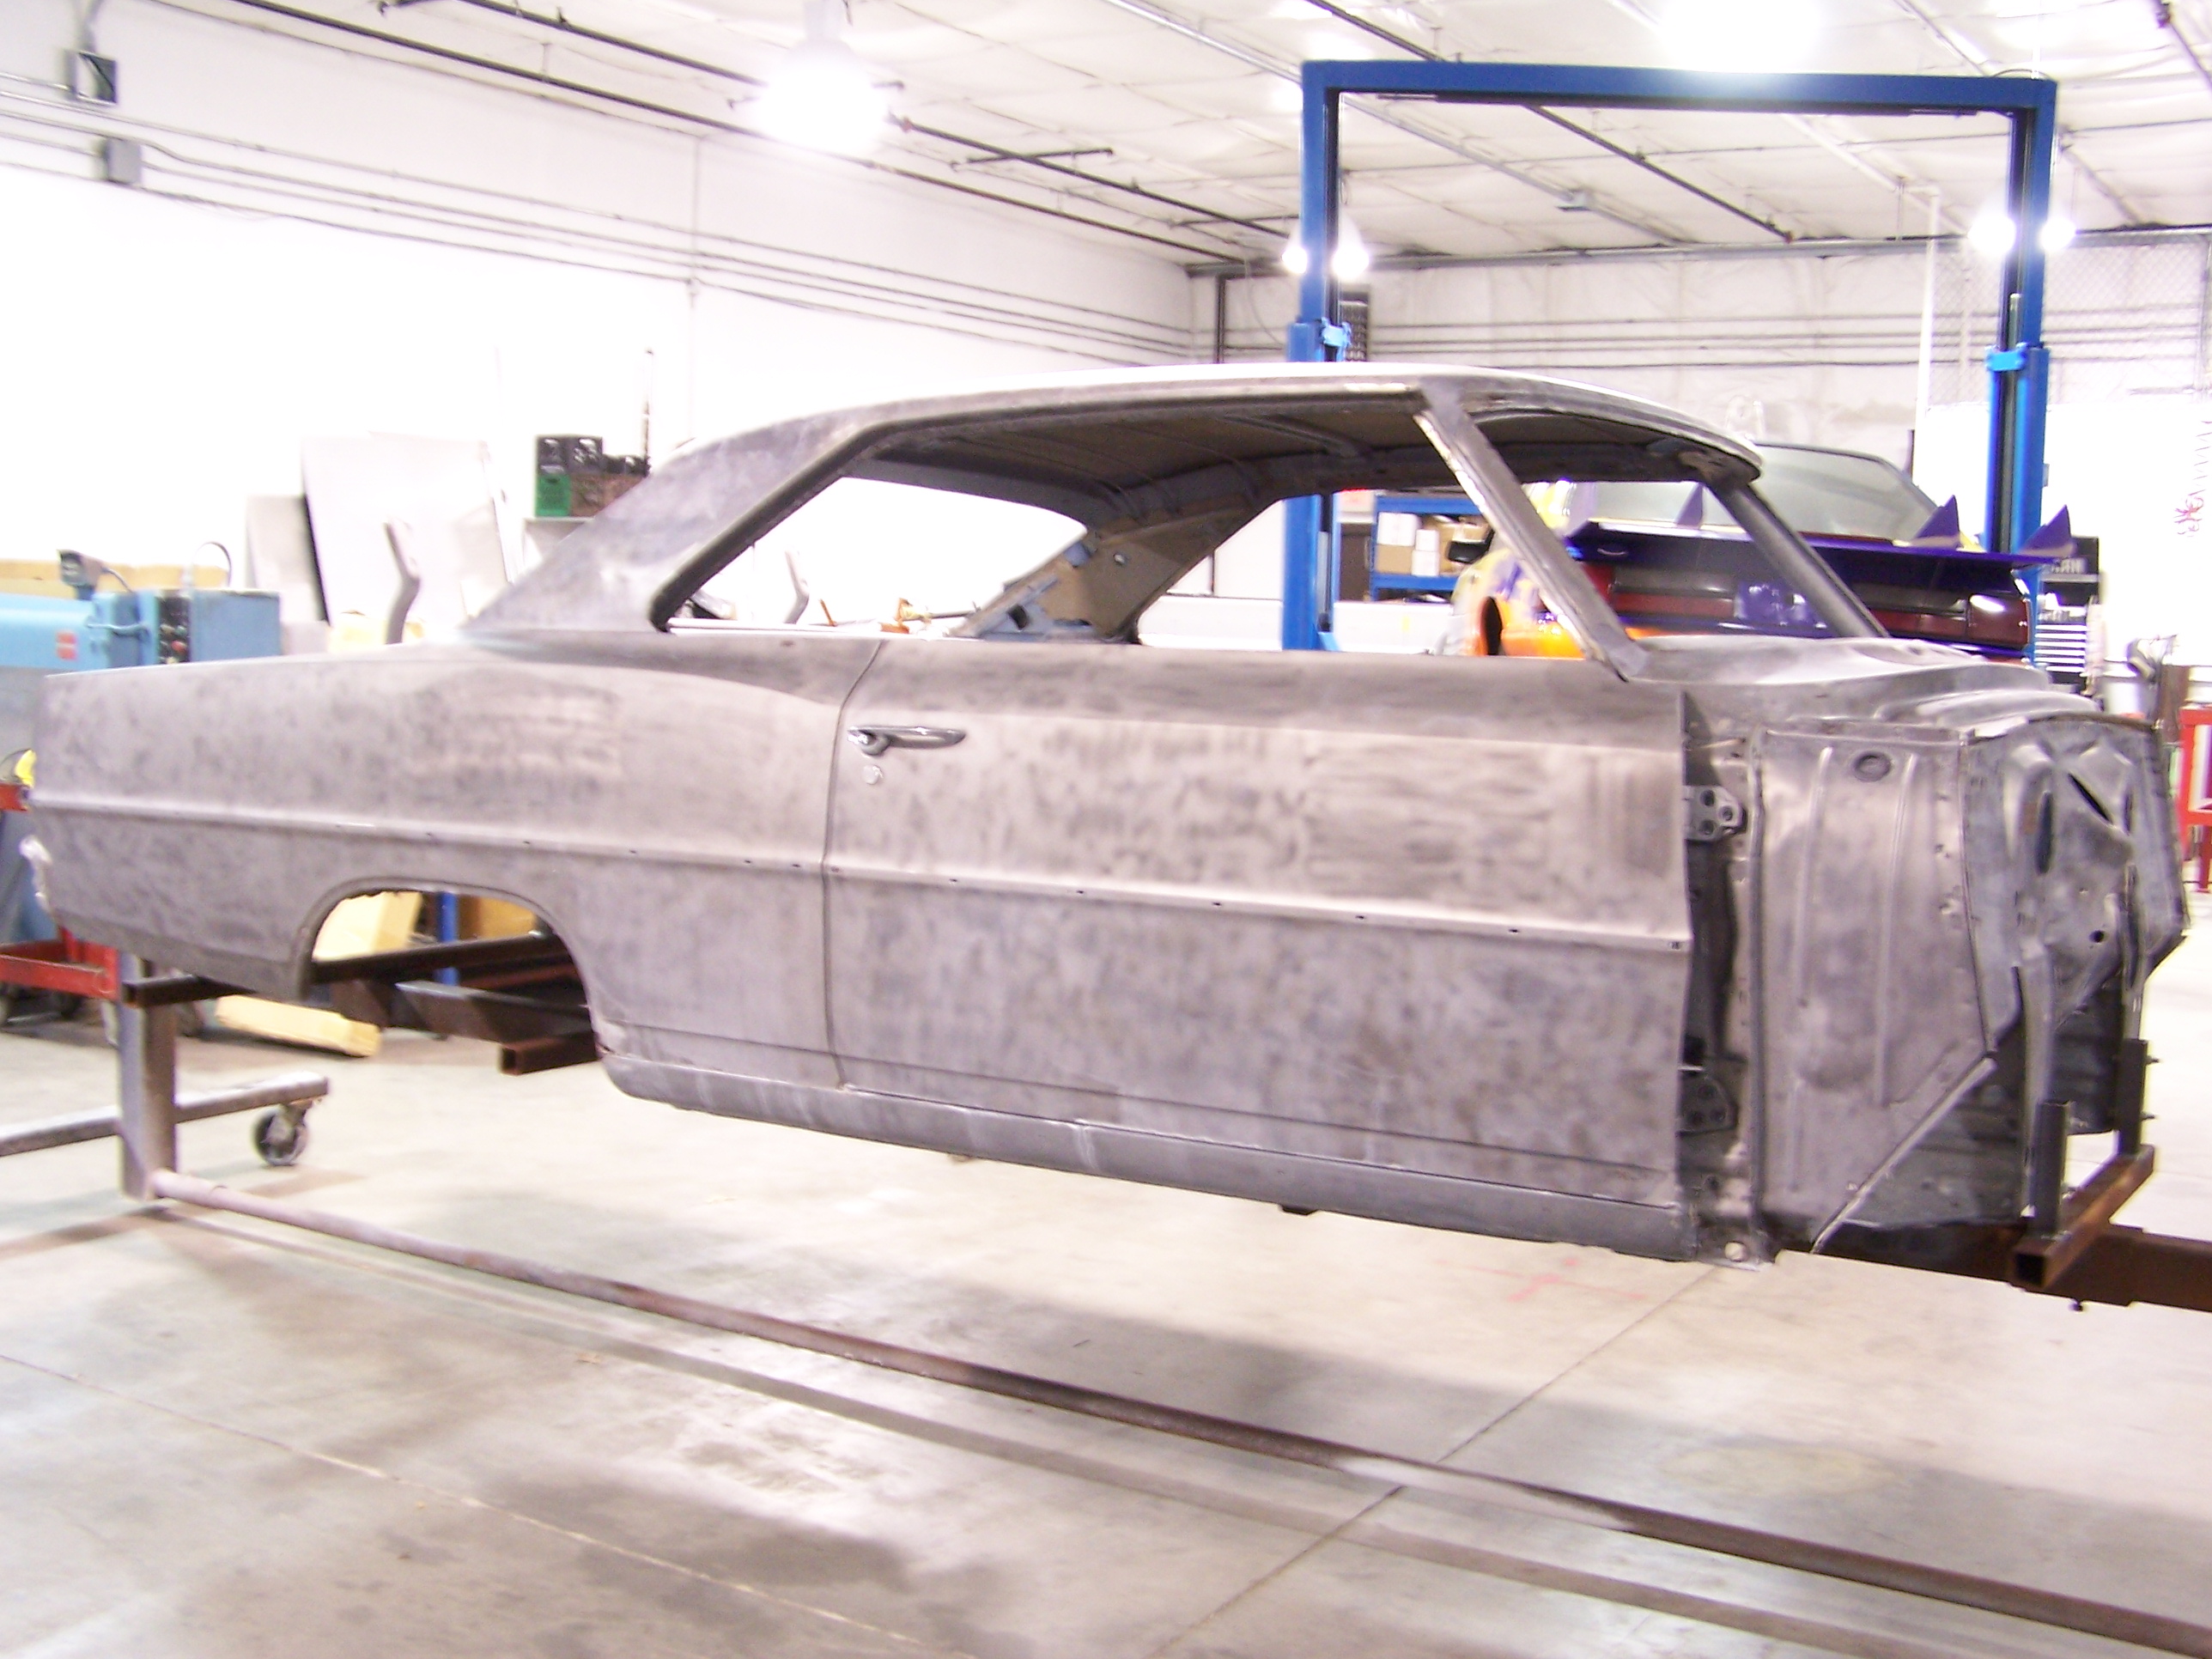
Also here are 2 renderings that I had done about 2 years ago. They are both the same with a different color backgrounds to them. I just wanted to post them up and get some thoughts from anyone willing to comment on them.
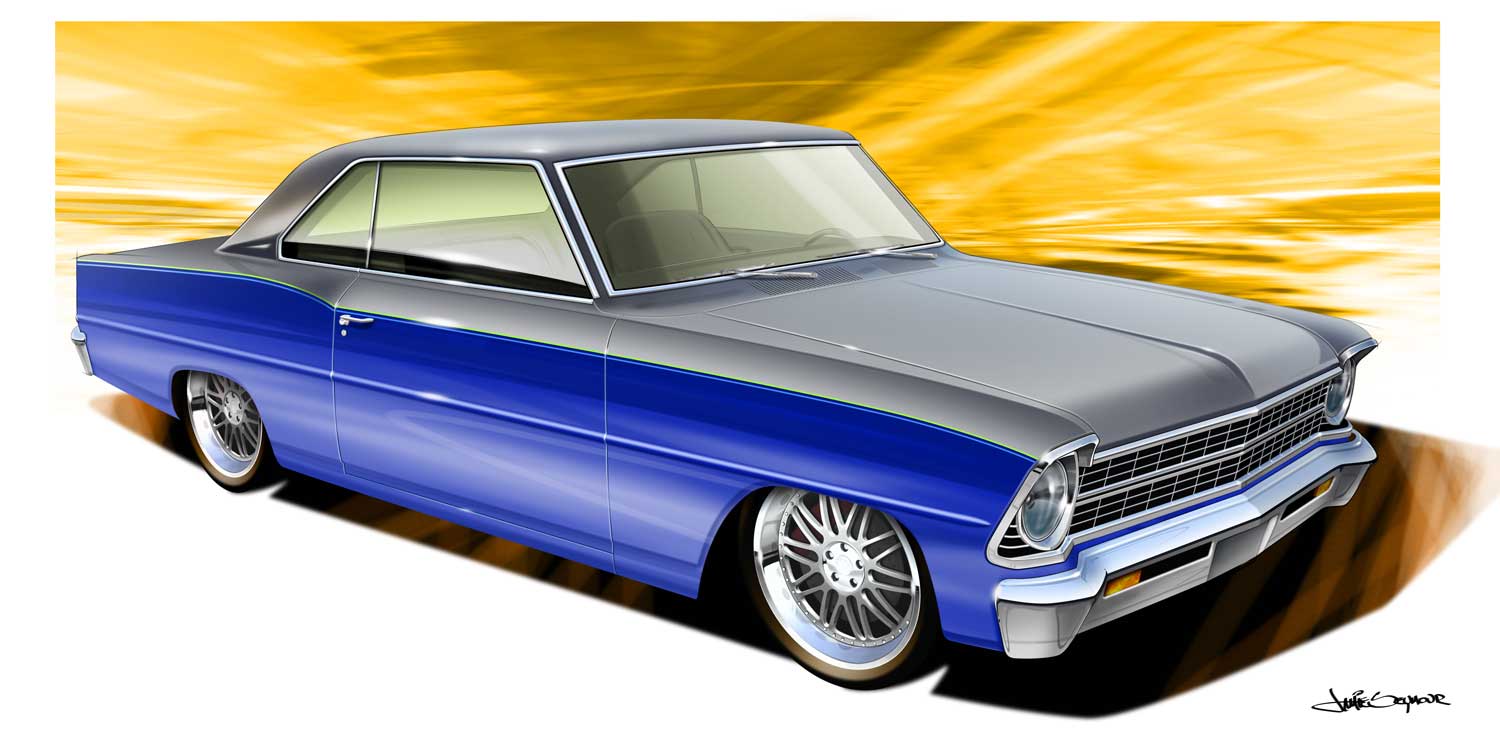
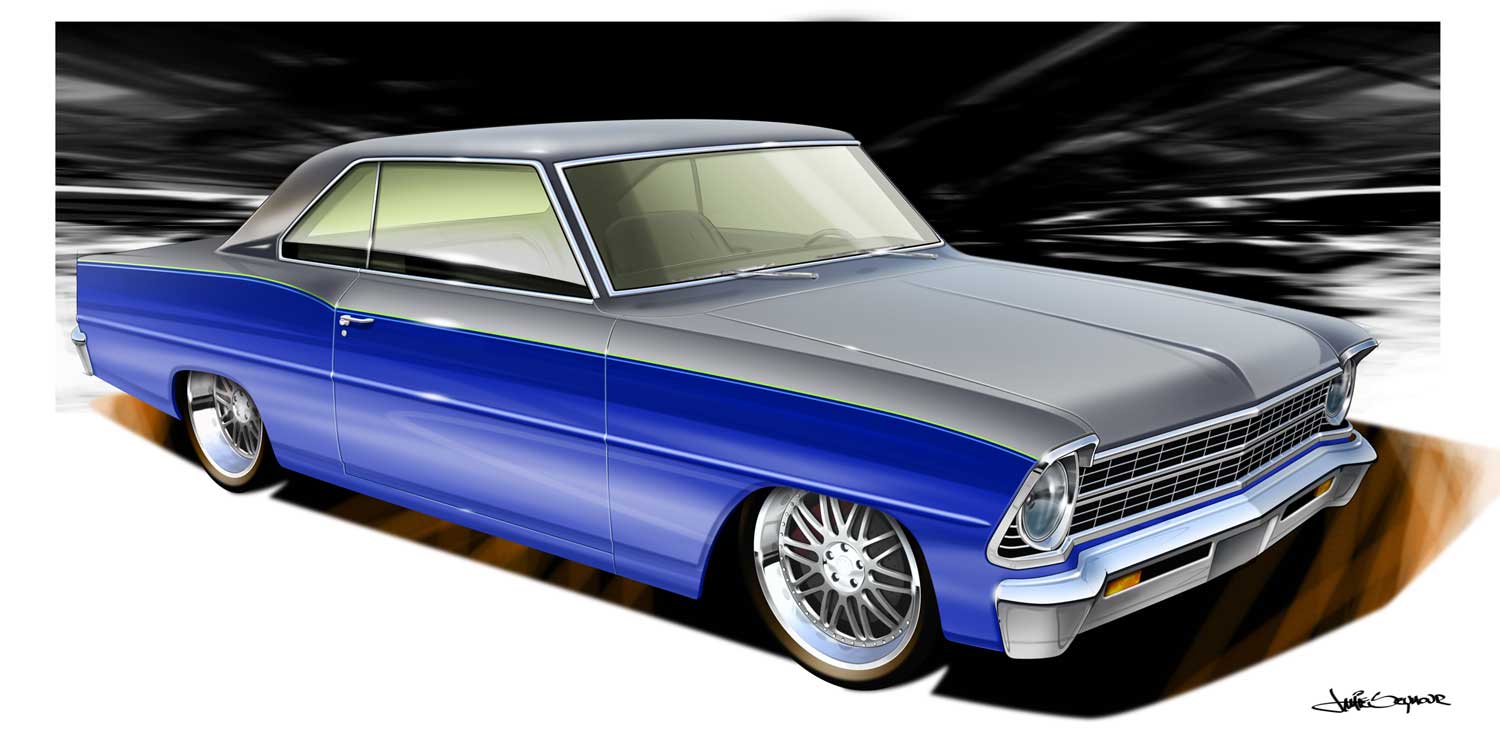
I was thinking about changing the bottom color blue to a darker silver something a long the lines of the GM Cyber Gray that is on the Corvette etc... The car would end up being 2 tone silver. Something like a gun metal on the top and cyber gray on the bottom. I'm going to look into getting a rendering done that way just to get a better idea. I will take any one's thoughts since we all know the paint can make or break a car and it is the hardest thing to make up your mind on. So feel free to tell me what you think.
Thanks Ed
-
02-06-2011 #9
Registered User
- Join Date
- Apr 2009
- Posts
- 14
If youre looking for opinions, I think the blue will grab more attention than the gray/silver, there are a ton of silver cars on the road so the blue would really catch the eye. Just my two cents, hope the build goes well, looks great so far.
-
02-06-2011 #10
 Registered User
- Join Date
- Nov 2006
- Location
- Ma.
- Posts
- 5,567
I love this body style it will be a sweet ride when your done. you have a beautiful car to start with ( no rust ). Time 2 on the blue it looks great.
Wayne
Car FINALLY home !!!!!! lol
Project FNQUIK https://www.pro-touring.com/showthre...ghlight=FNQUIK
-
02-07-2011 #11
 Registered User
- Join Date
- Mar 2010
- Location
- Orlando, FL
- Posts
- 266
someone had football on the brain, lol. Originally Posted by eddiek
-
02-08-2011 #12
Registered User
- Join Date
- Dec 2007
- Posts
- 14
That's to funny. I guess I was thinking other things. LOL Originally Posted by LV42DAY
Thanks for the in put guys. I'm really up in the air on the paint. I like the color combo now but just think it can have the dated look in time and I want to avoid that. I'll post up a few more pics asap.
Ed
02-08-2011 #13 Starting The Transformation
- Join Date
- Apr 2010
- Location
- Littleton, CO
- Posts
- 170
The rendering looks awesome. What's gonna go underneath the hood?
1969 Chevy Nova - complete rebuild
02-11-2011 #14
Registered User
- Join Date
- Dec 2007
- Posts
- 14
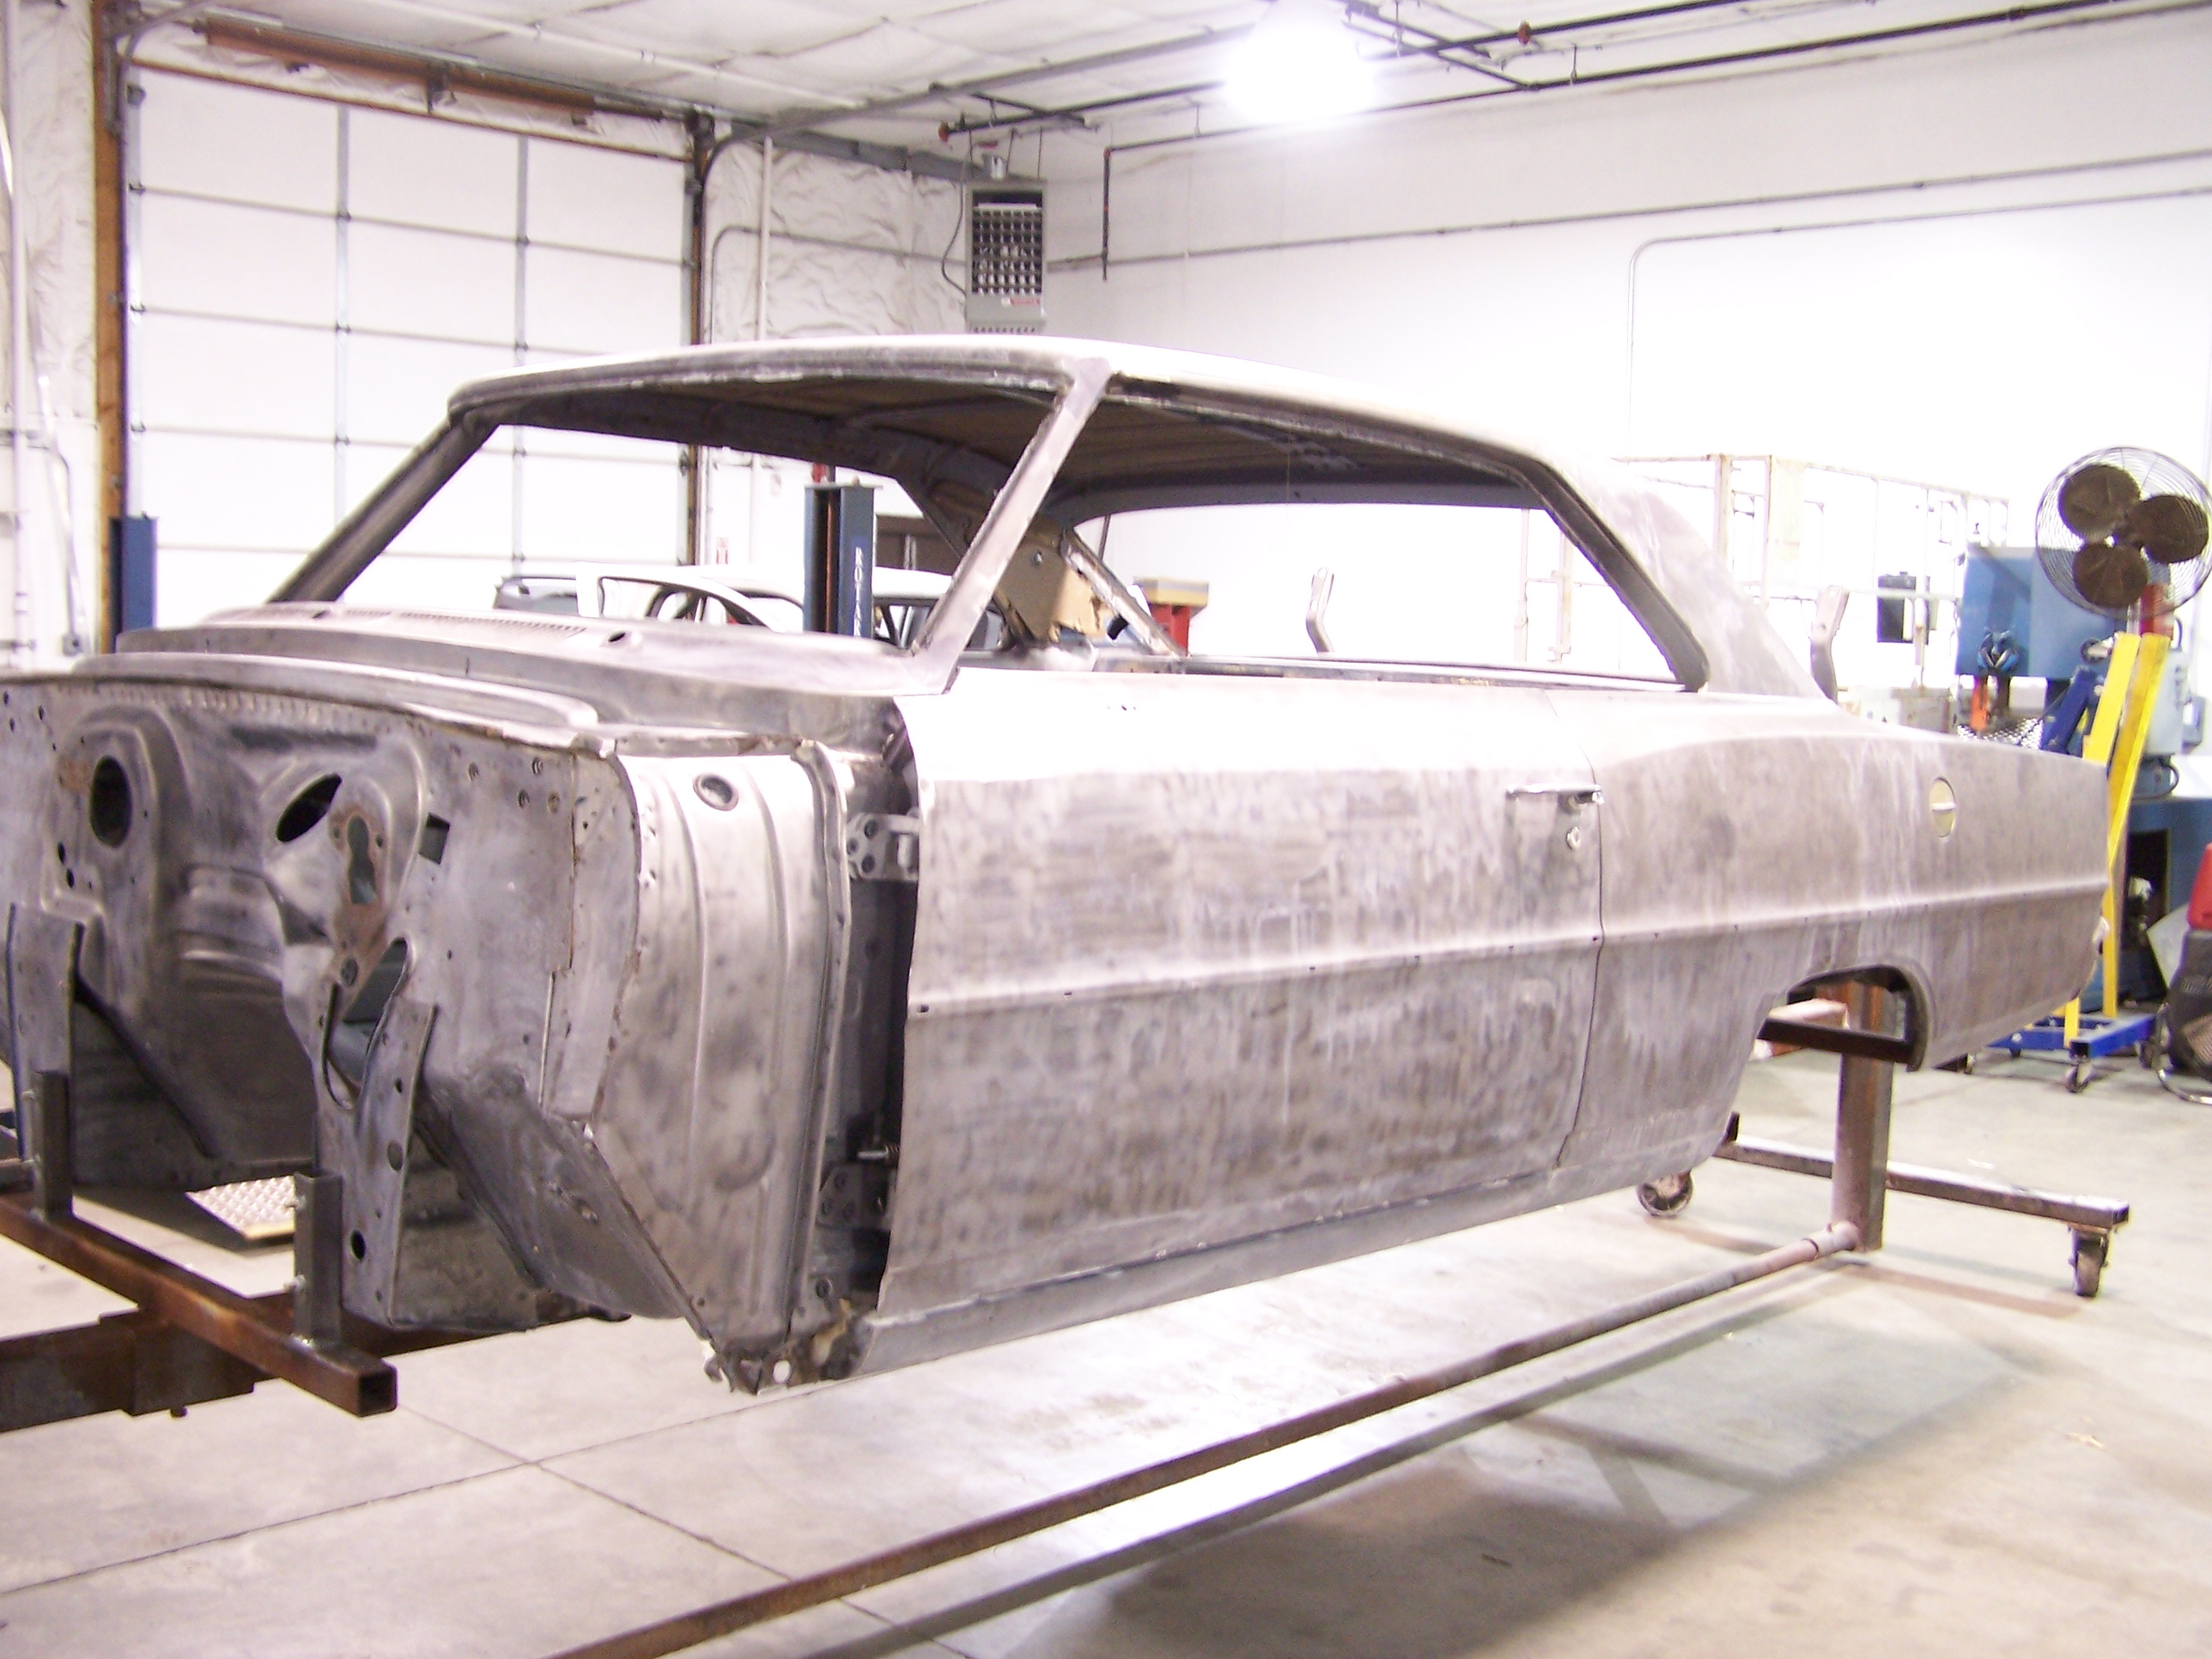
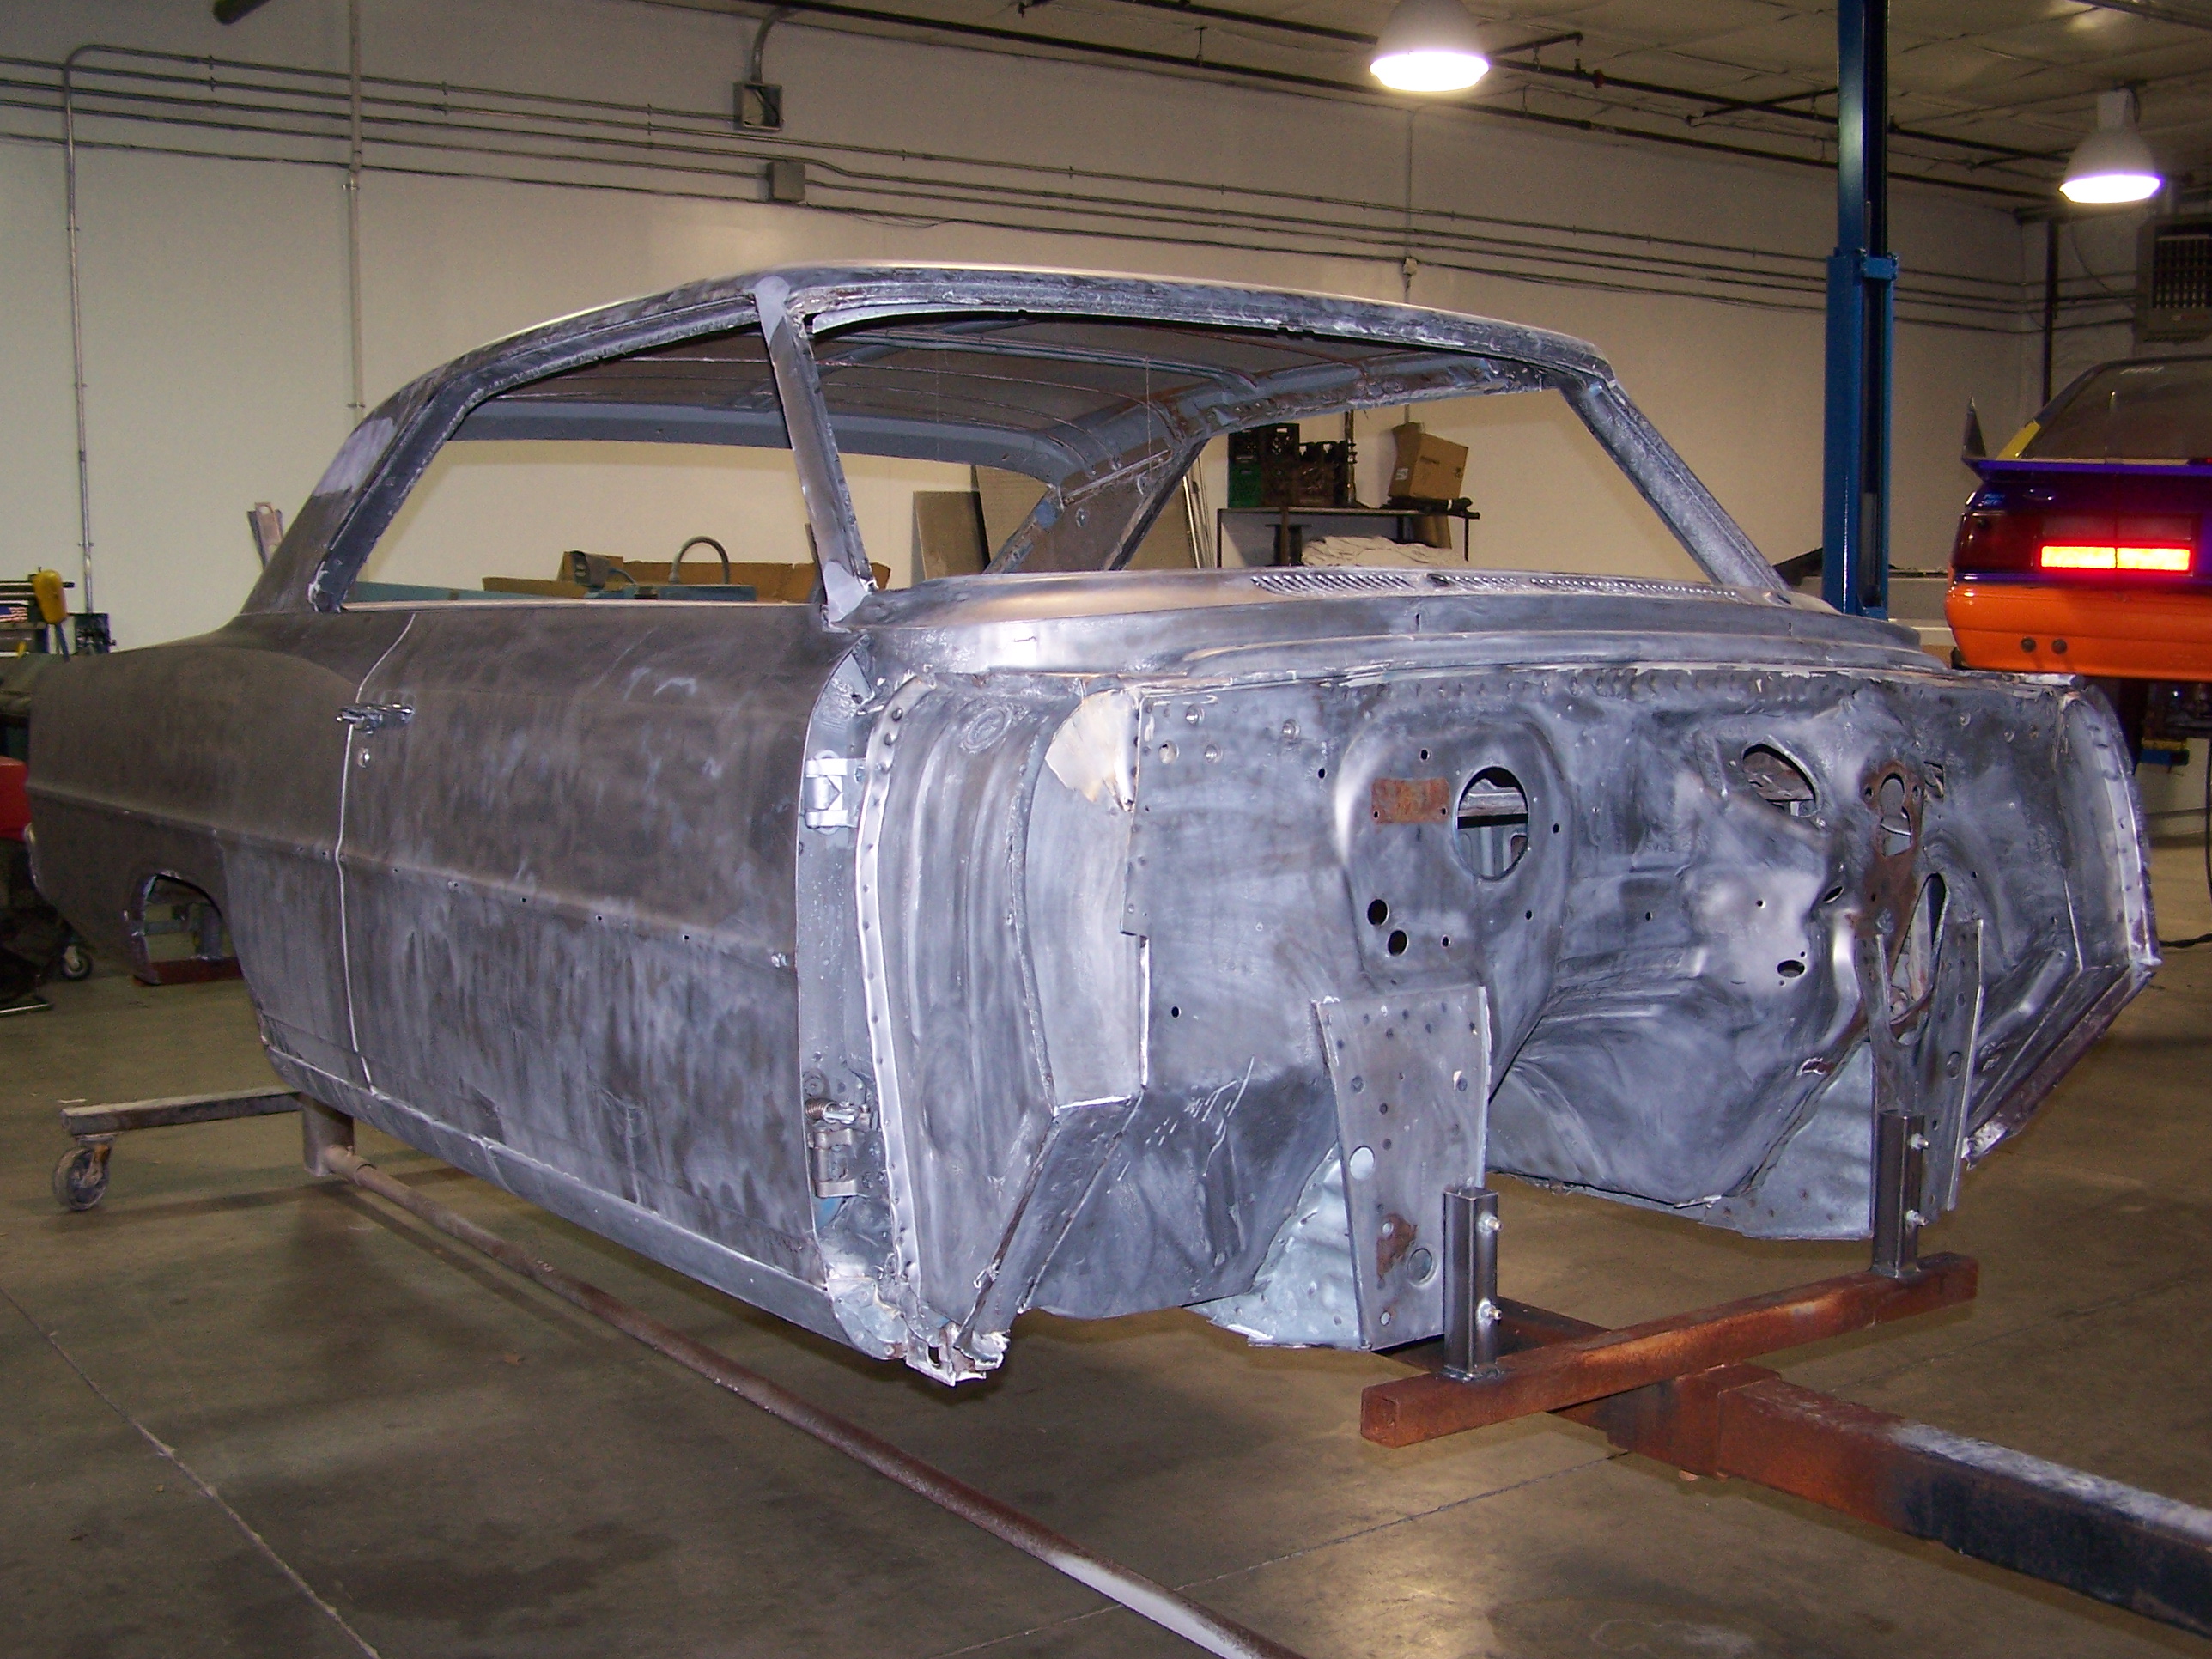
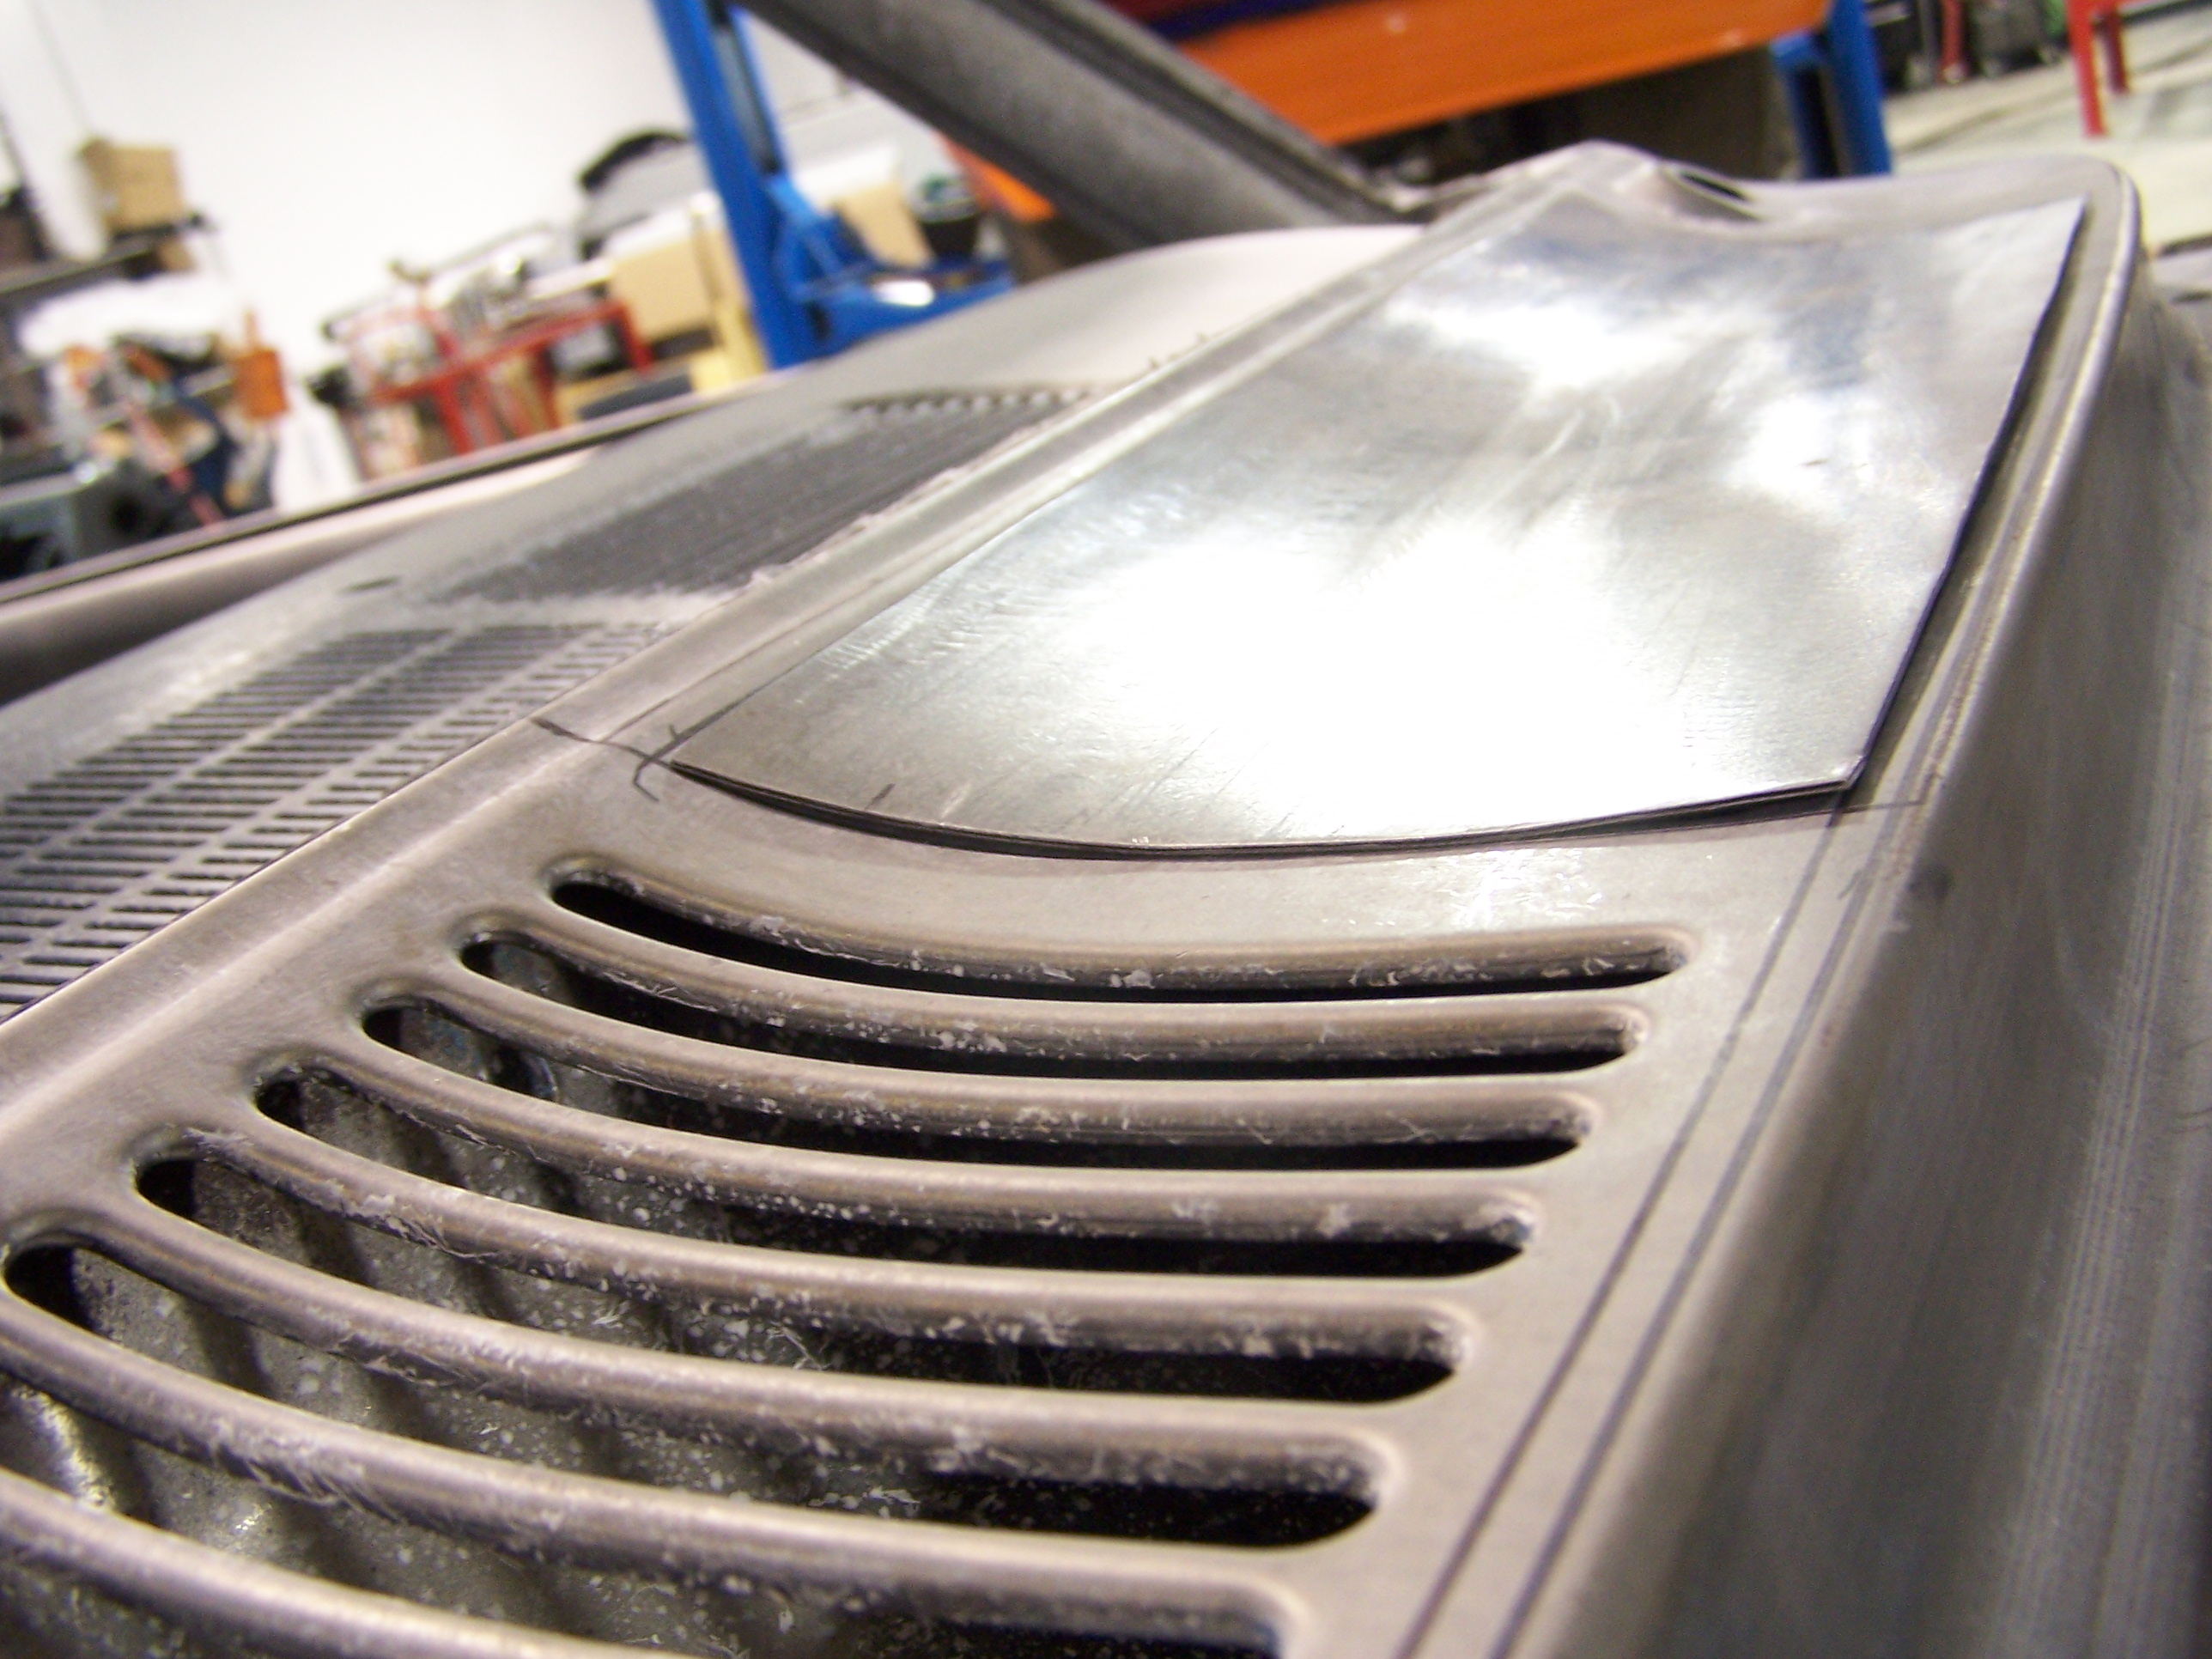
Once I got the shell into the shop the one thing that stuck out like a sore thumb were the cowl vents. So the only option to me was cover them up. Here is the process of the way we did it.
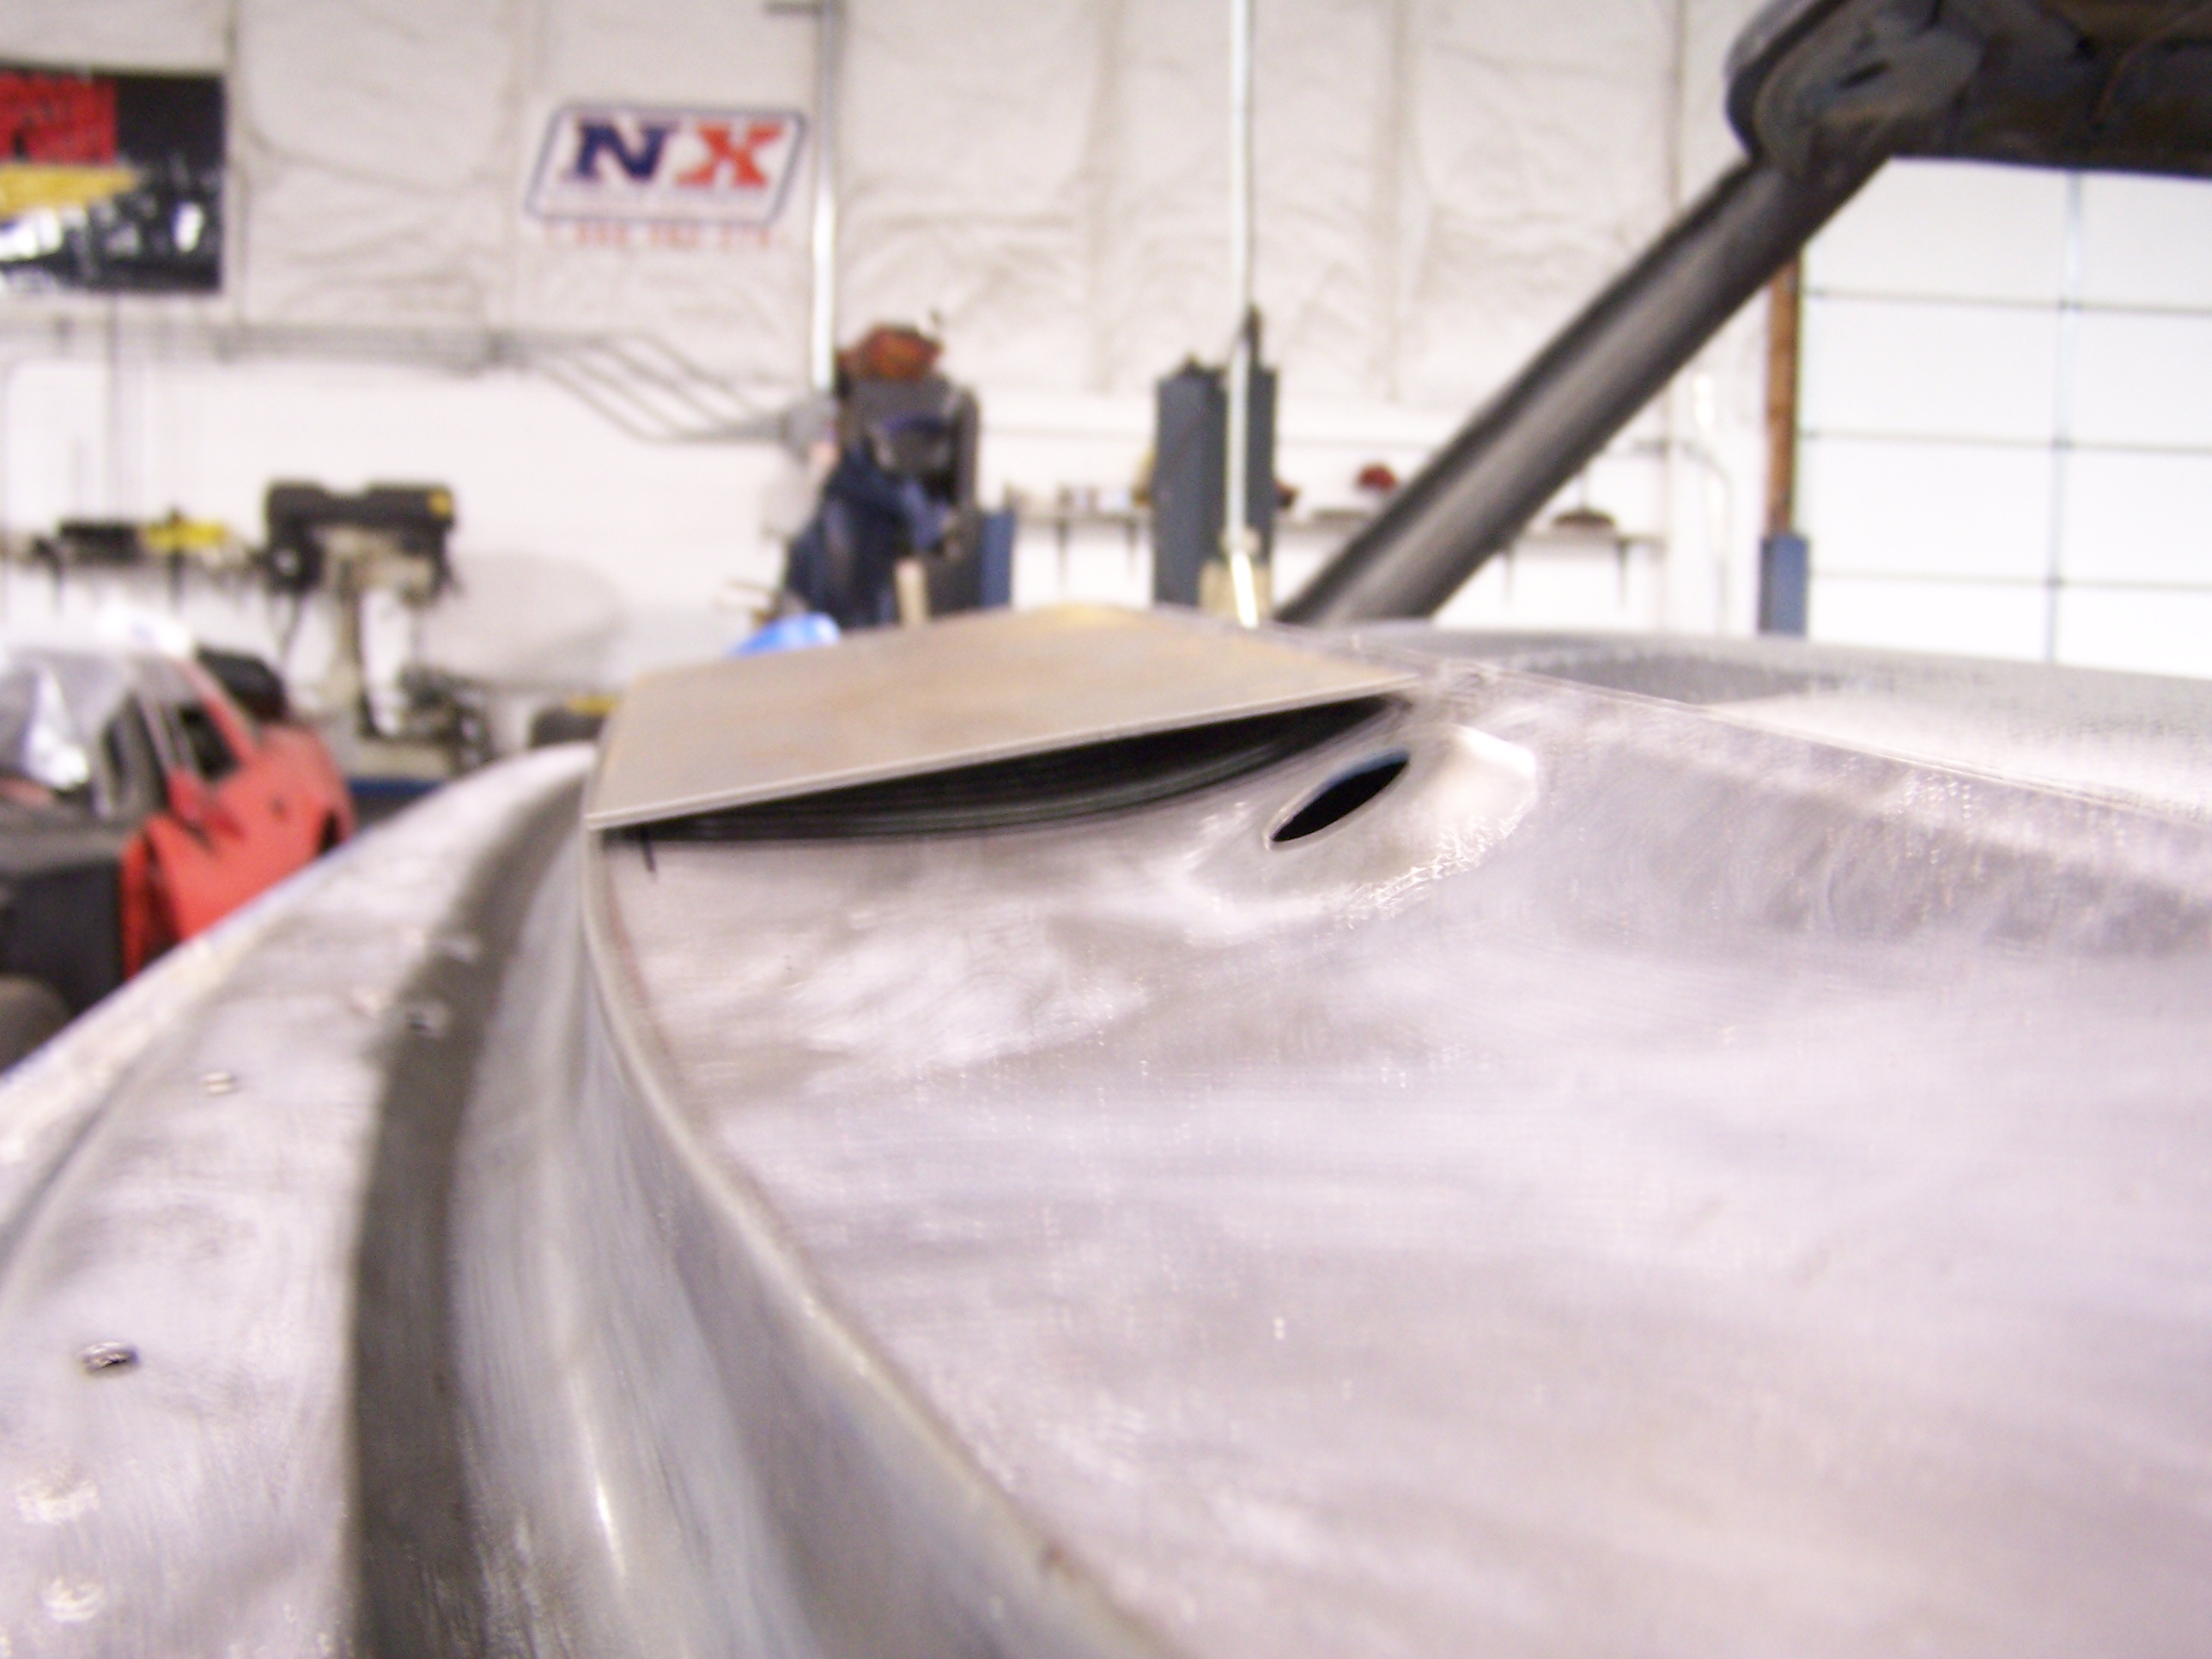
This was a little tough to make fit and follow the lines 100% but after a little bit of time on the english wheel this is what we got.
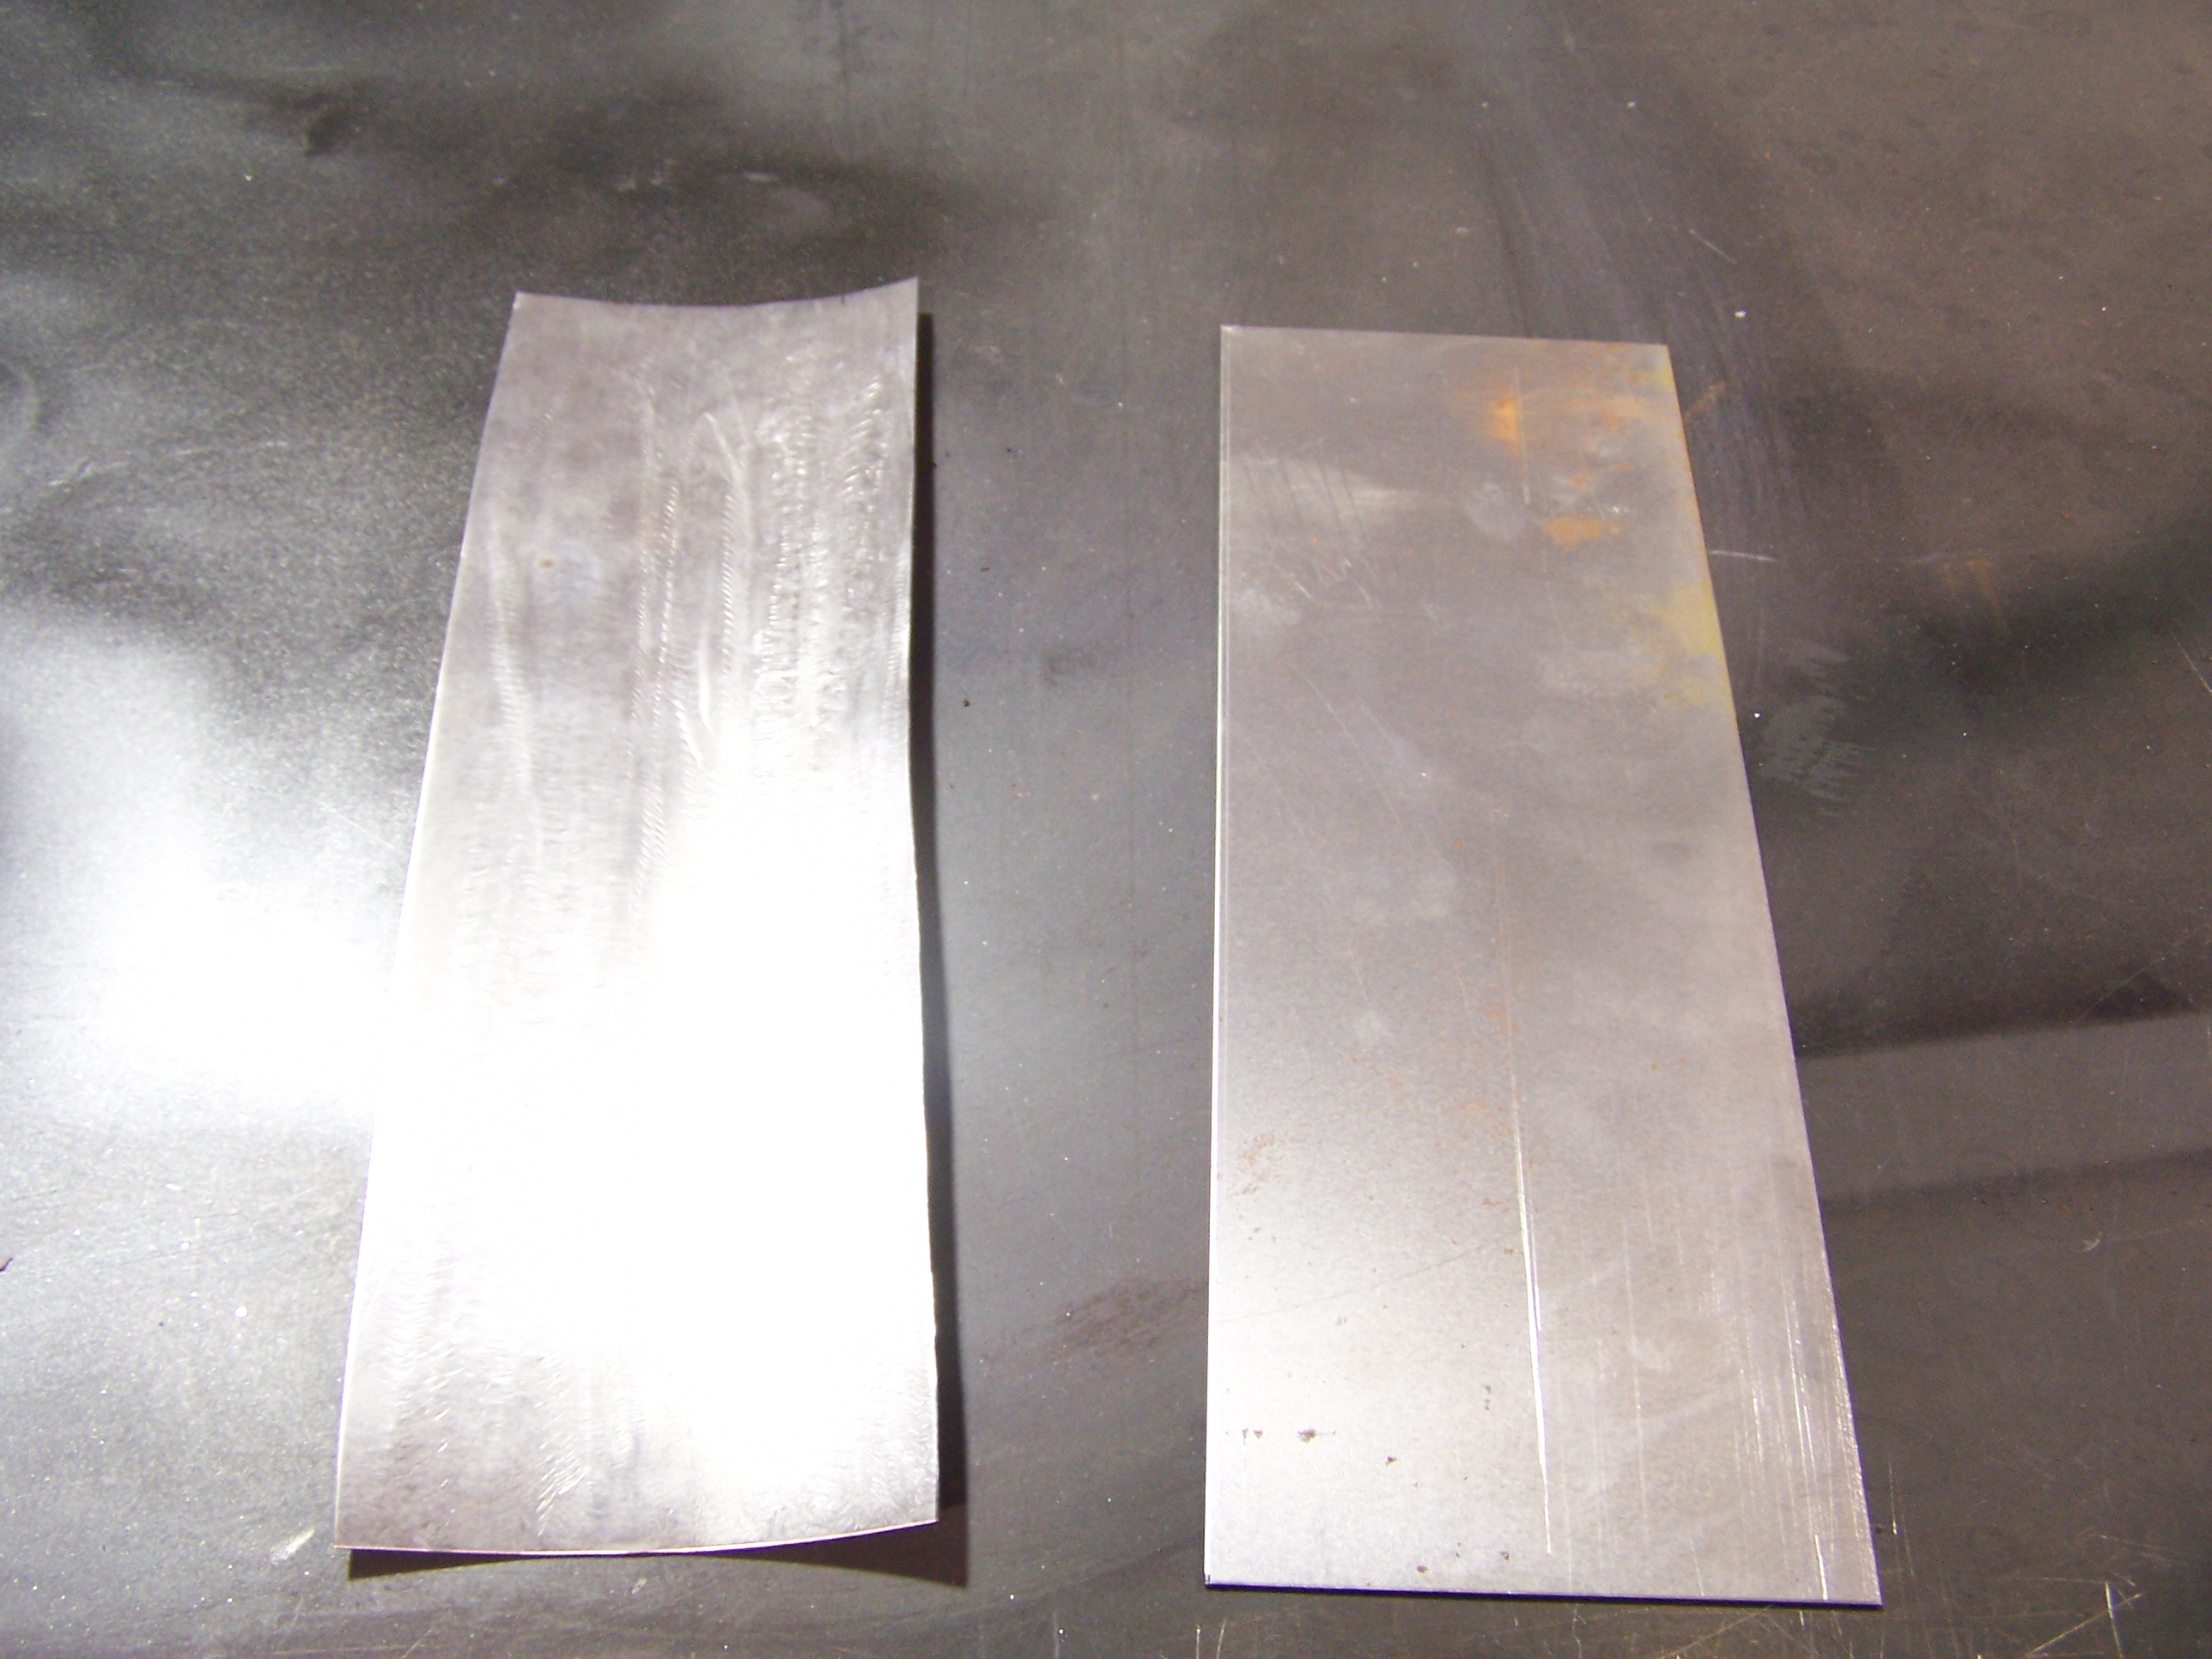
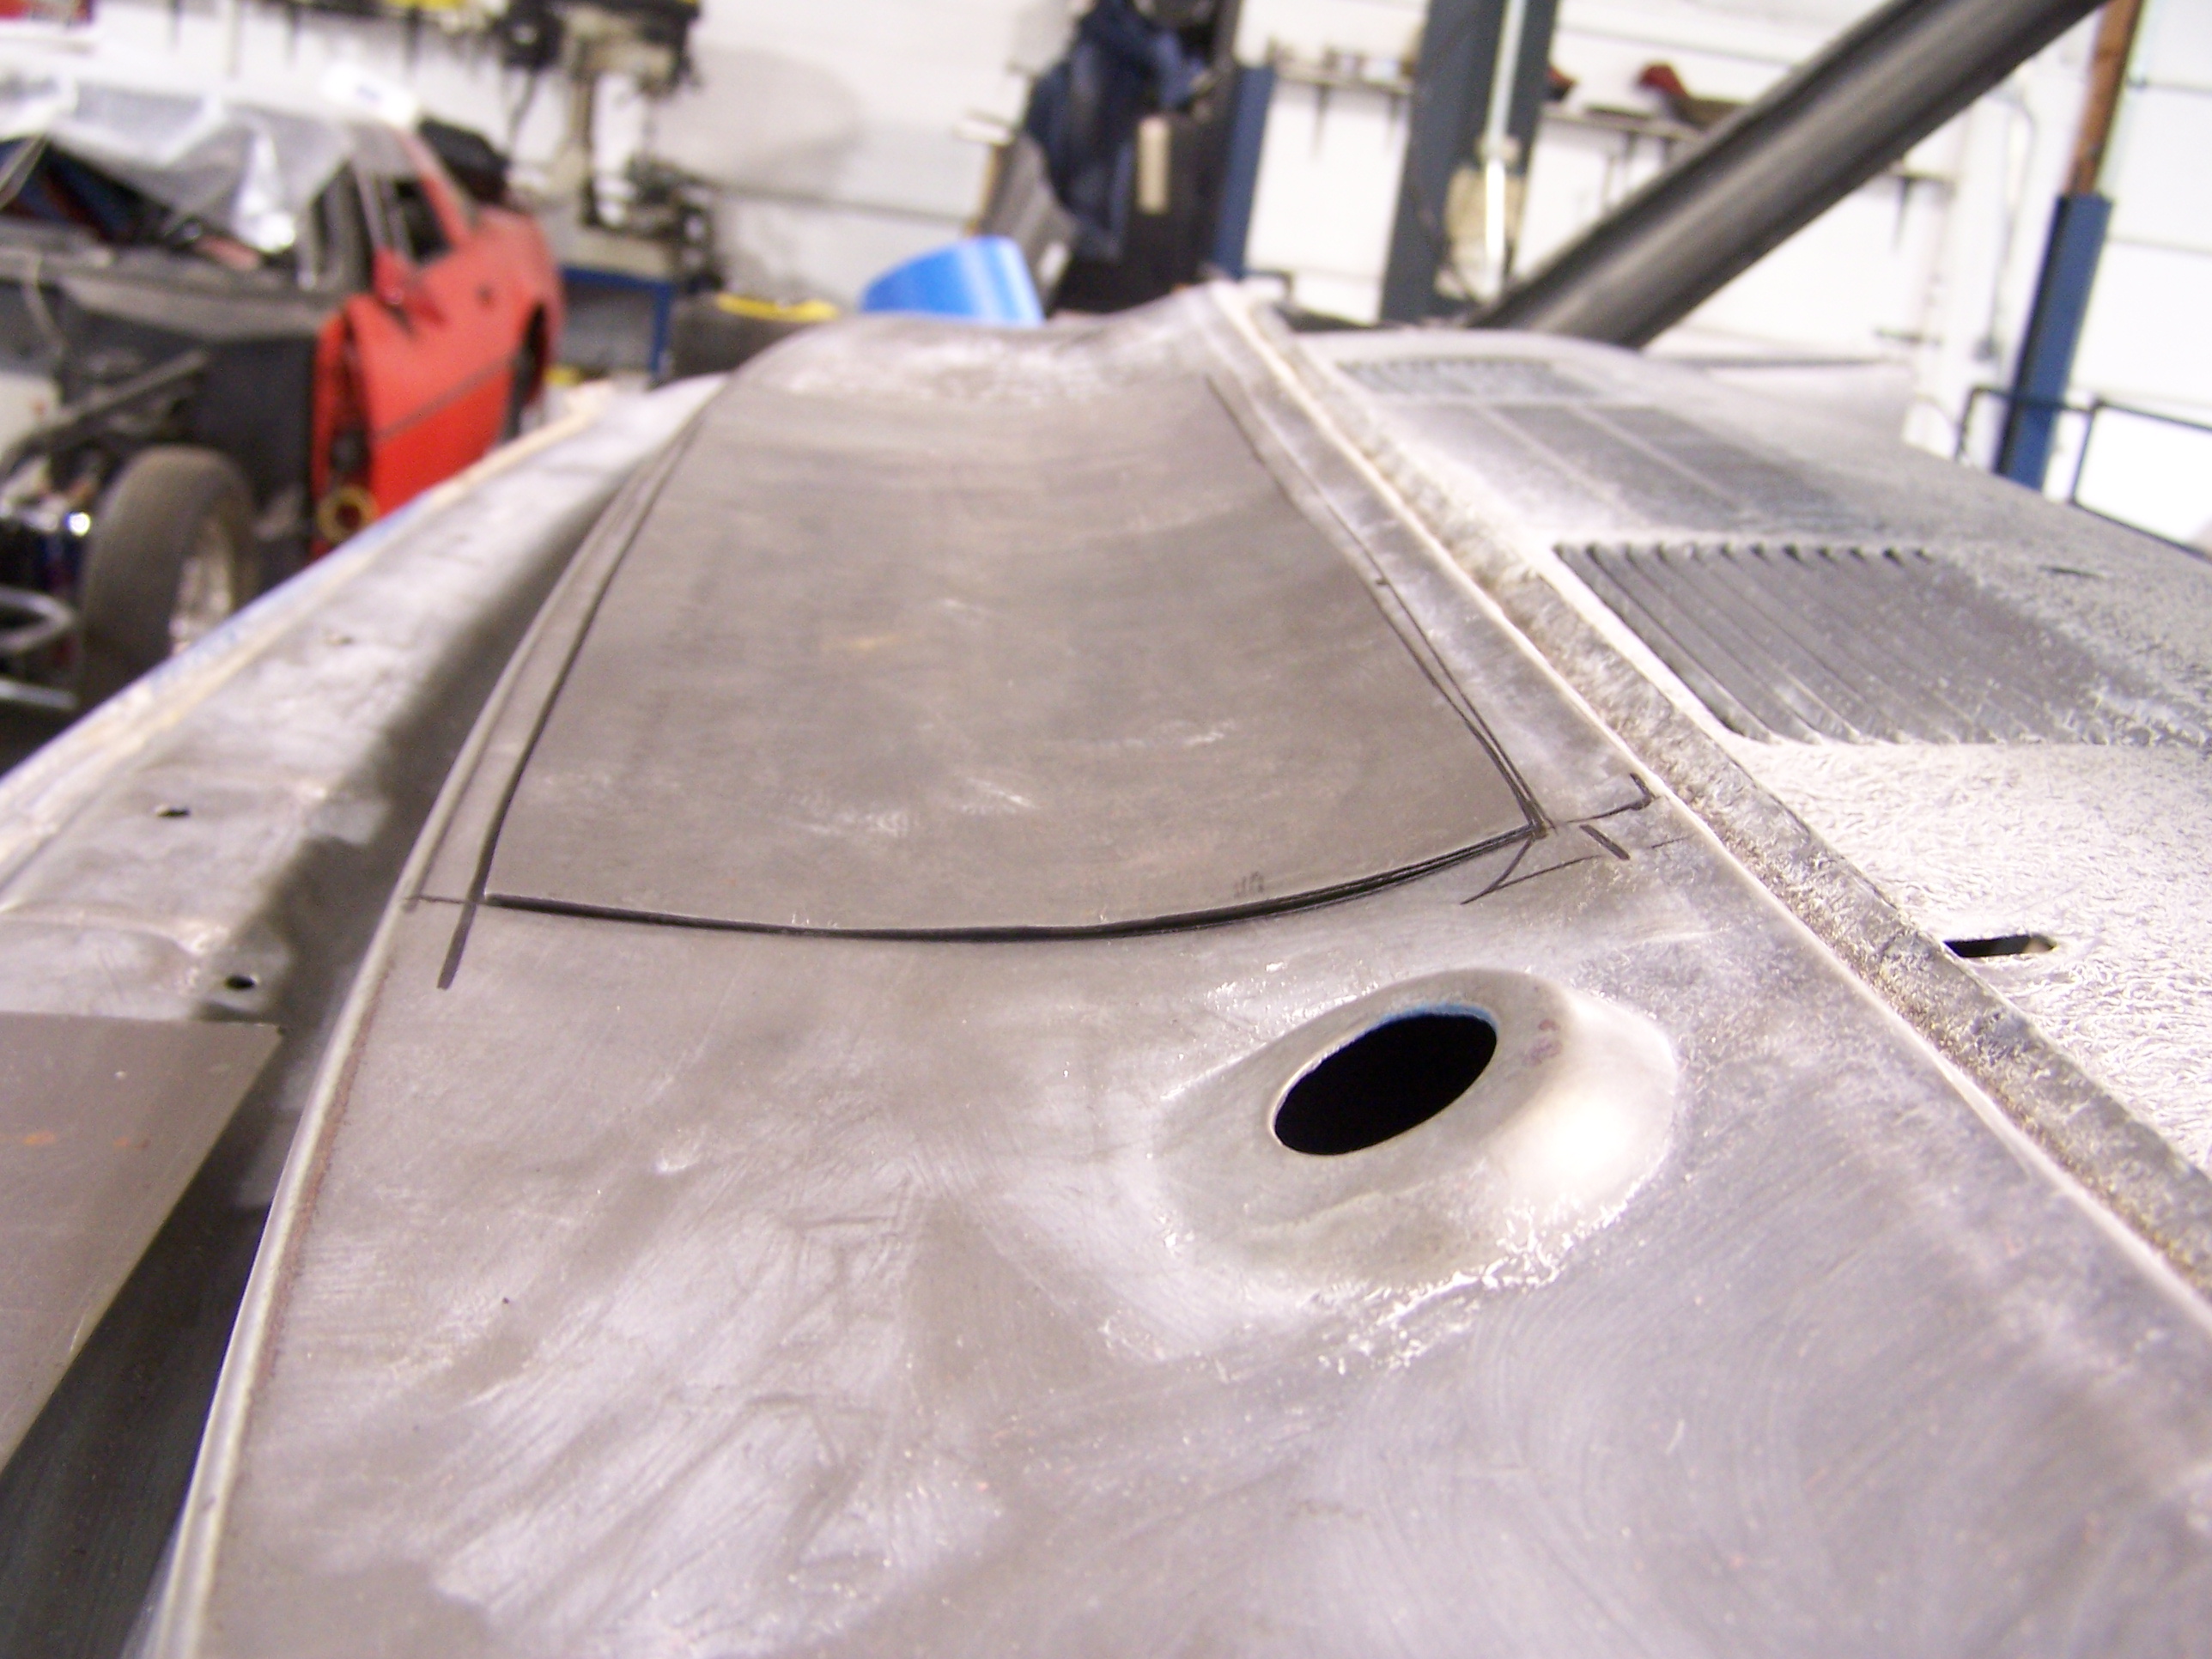
We did one side at a time to keep the metal from twisting and doing wacky things once we cut the area out and put the new part in.
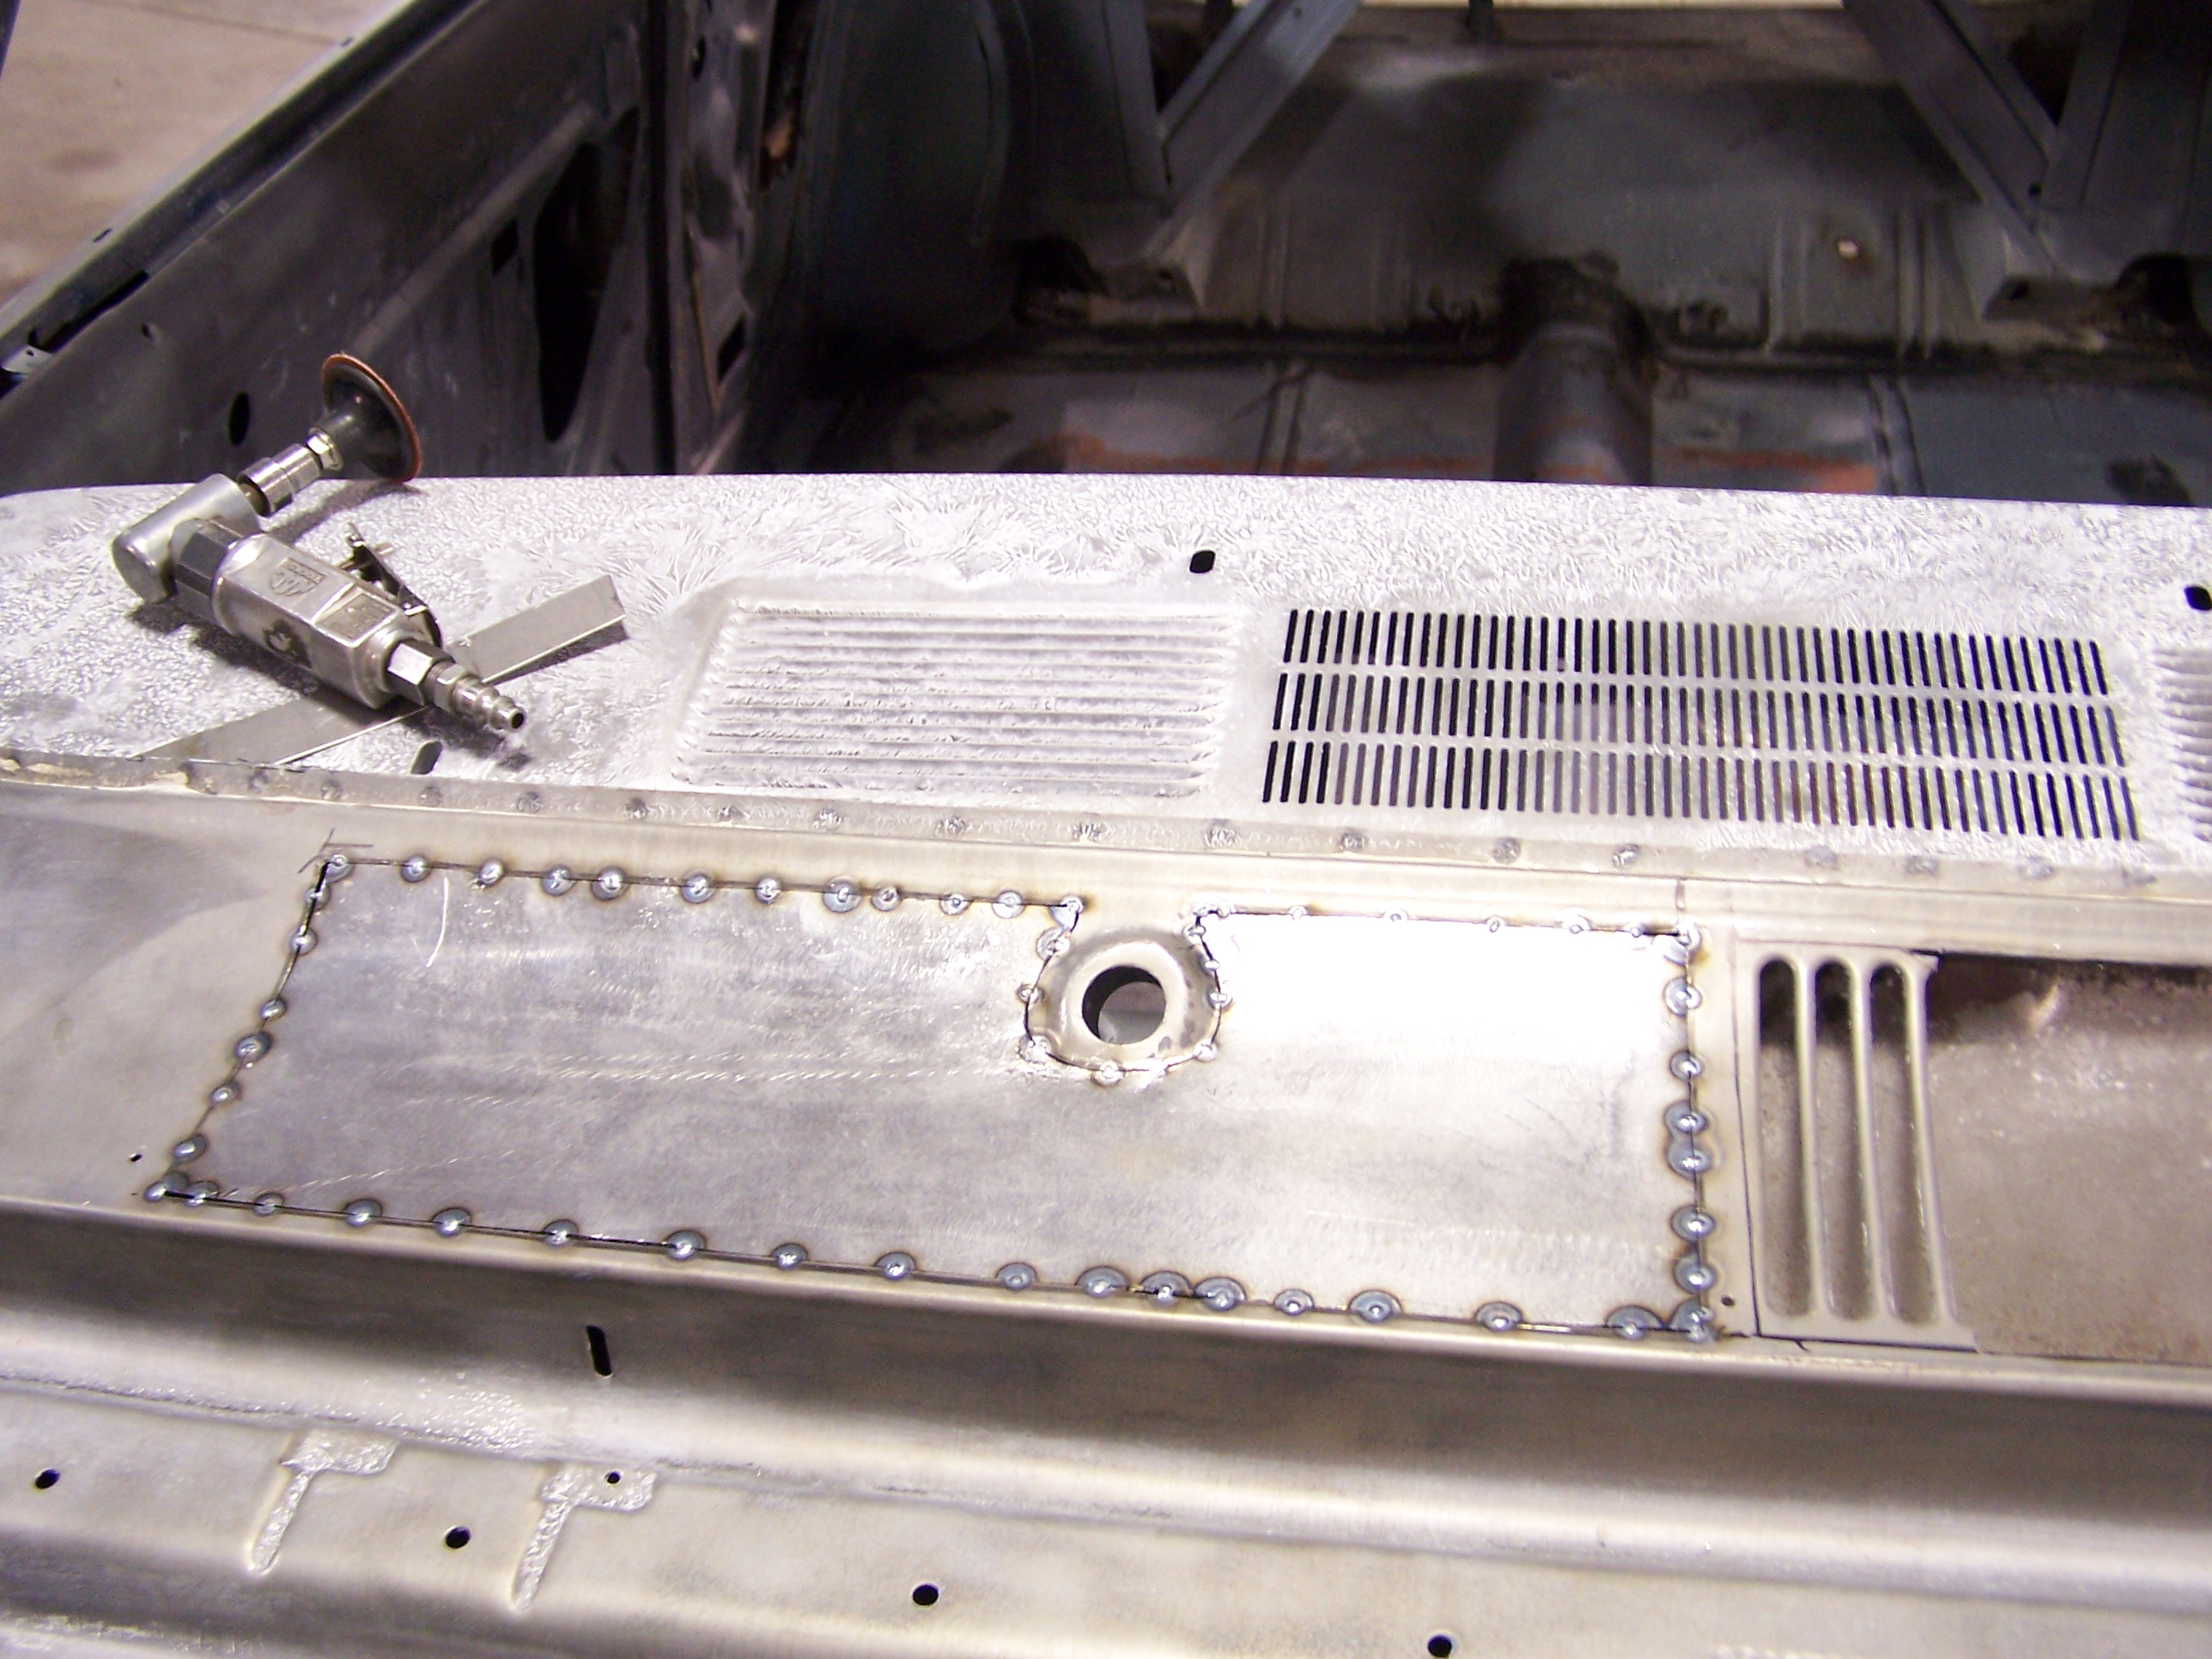

Once we did that I think it just cleaned up the whole area and now it has a smooth look.
02-11-2011 #15
Registered User
- Join Date
- Dec 2007
- Posts
- 14
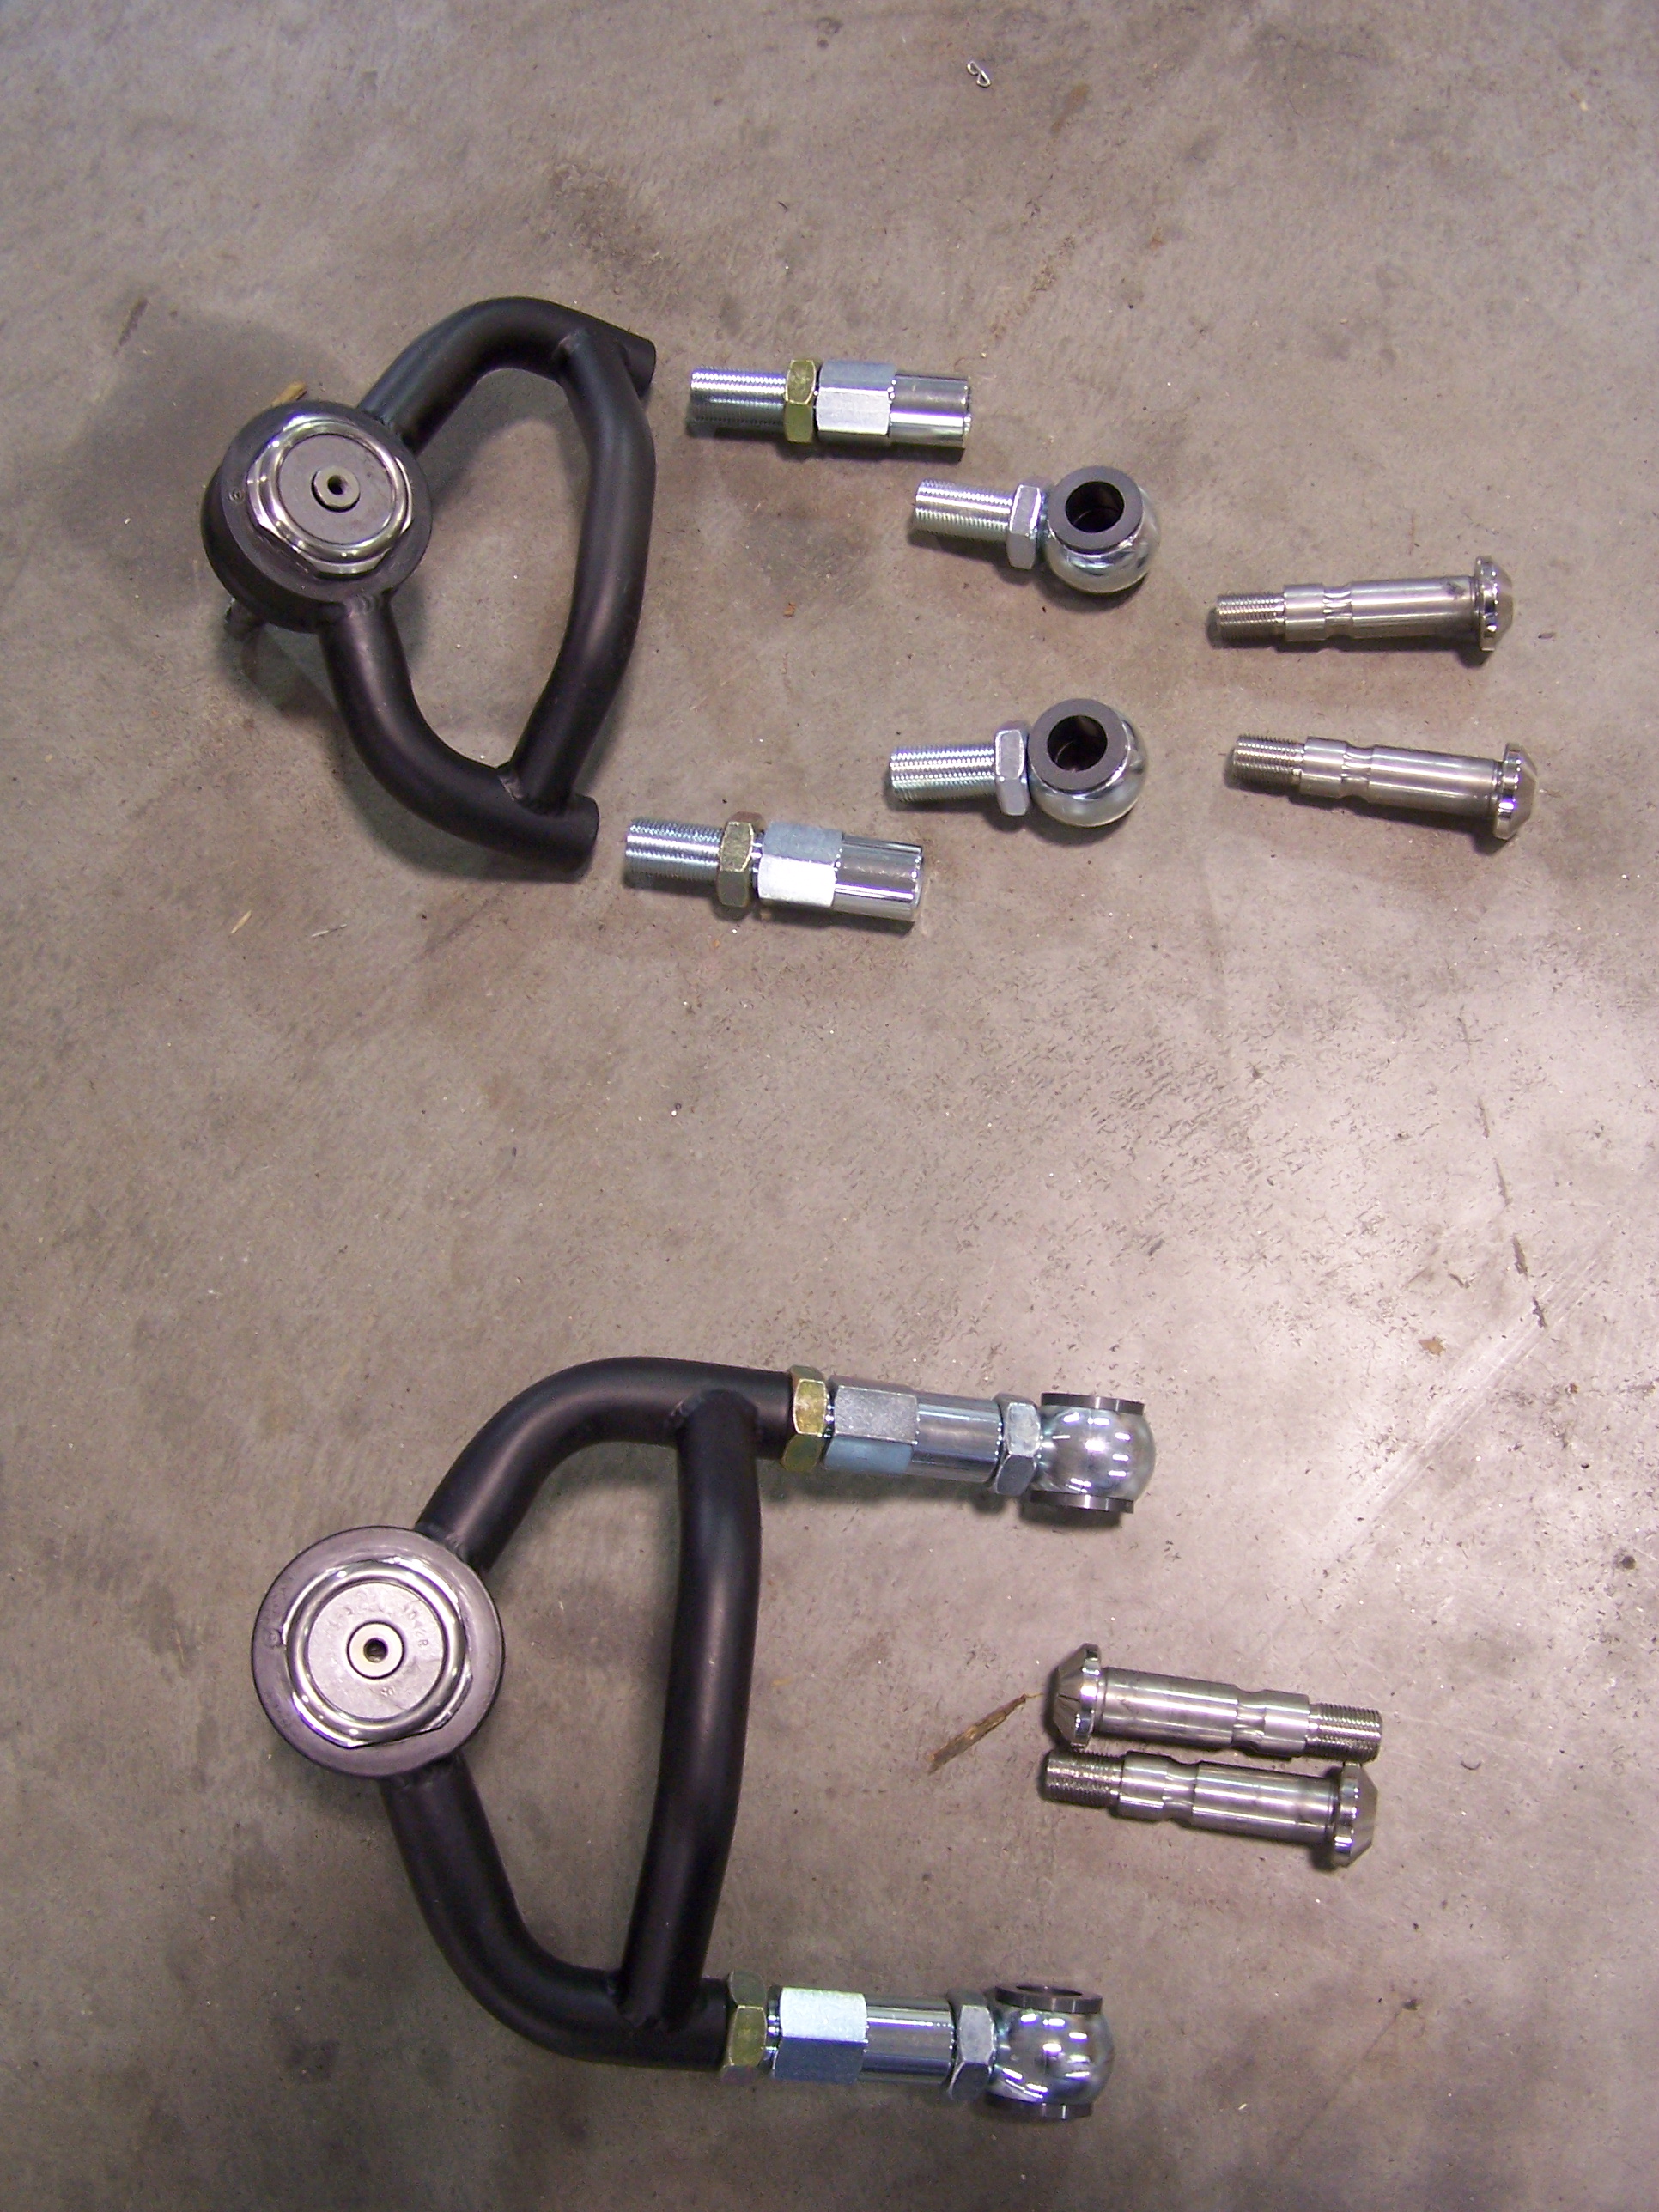
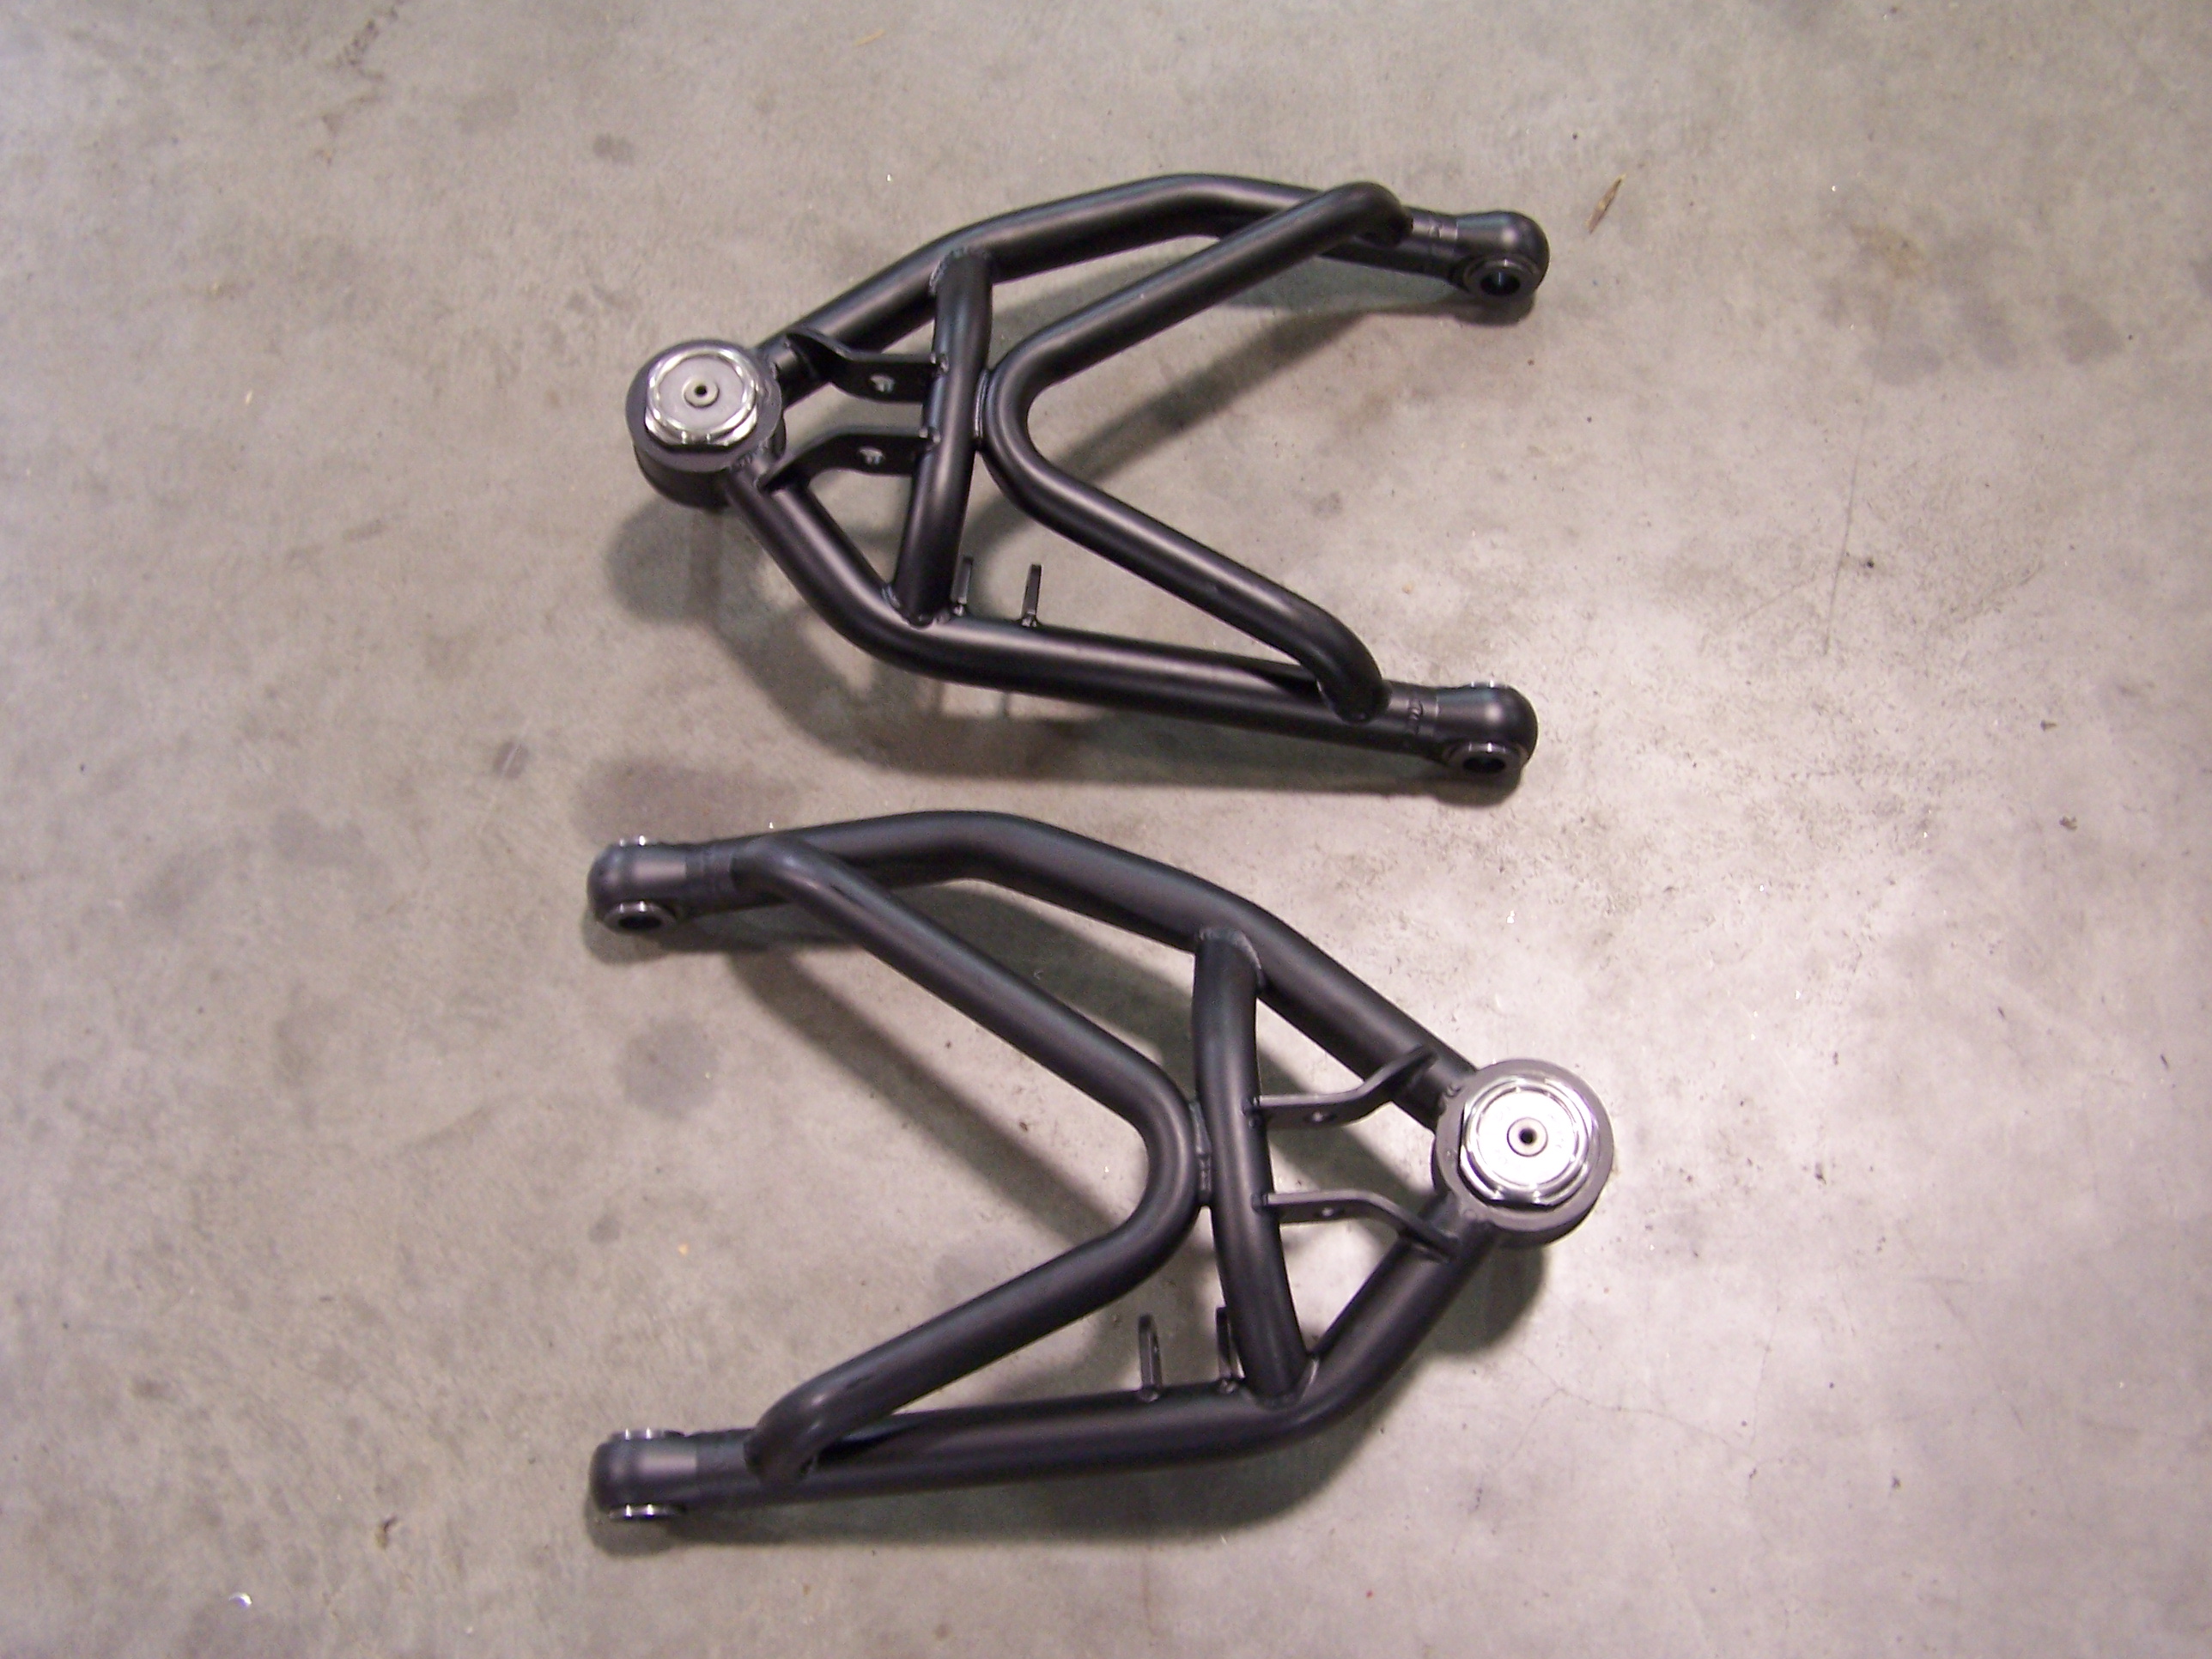
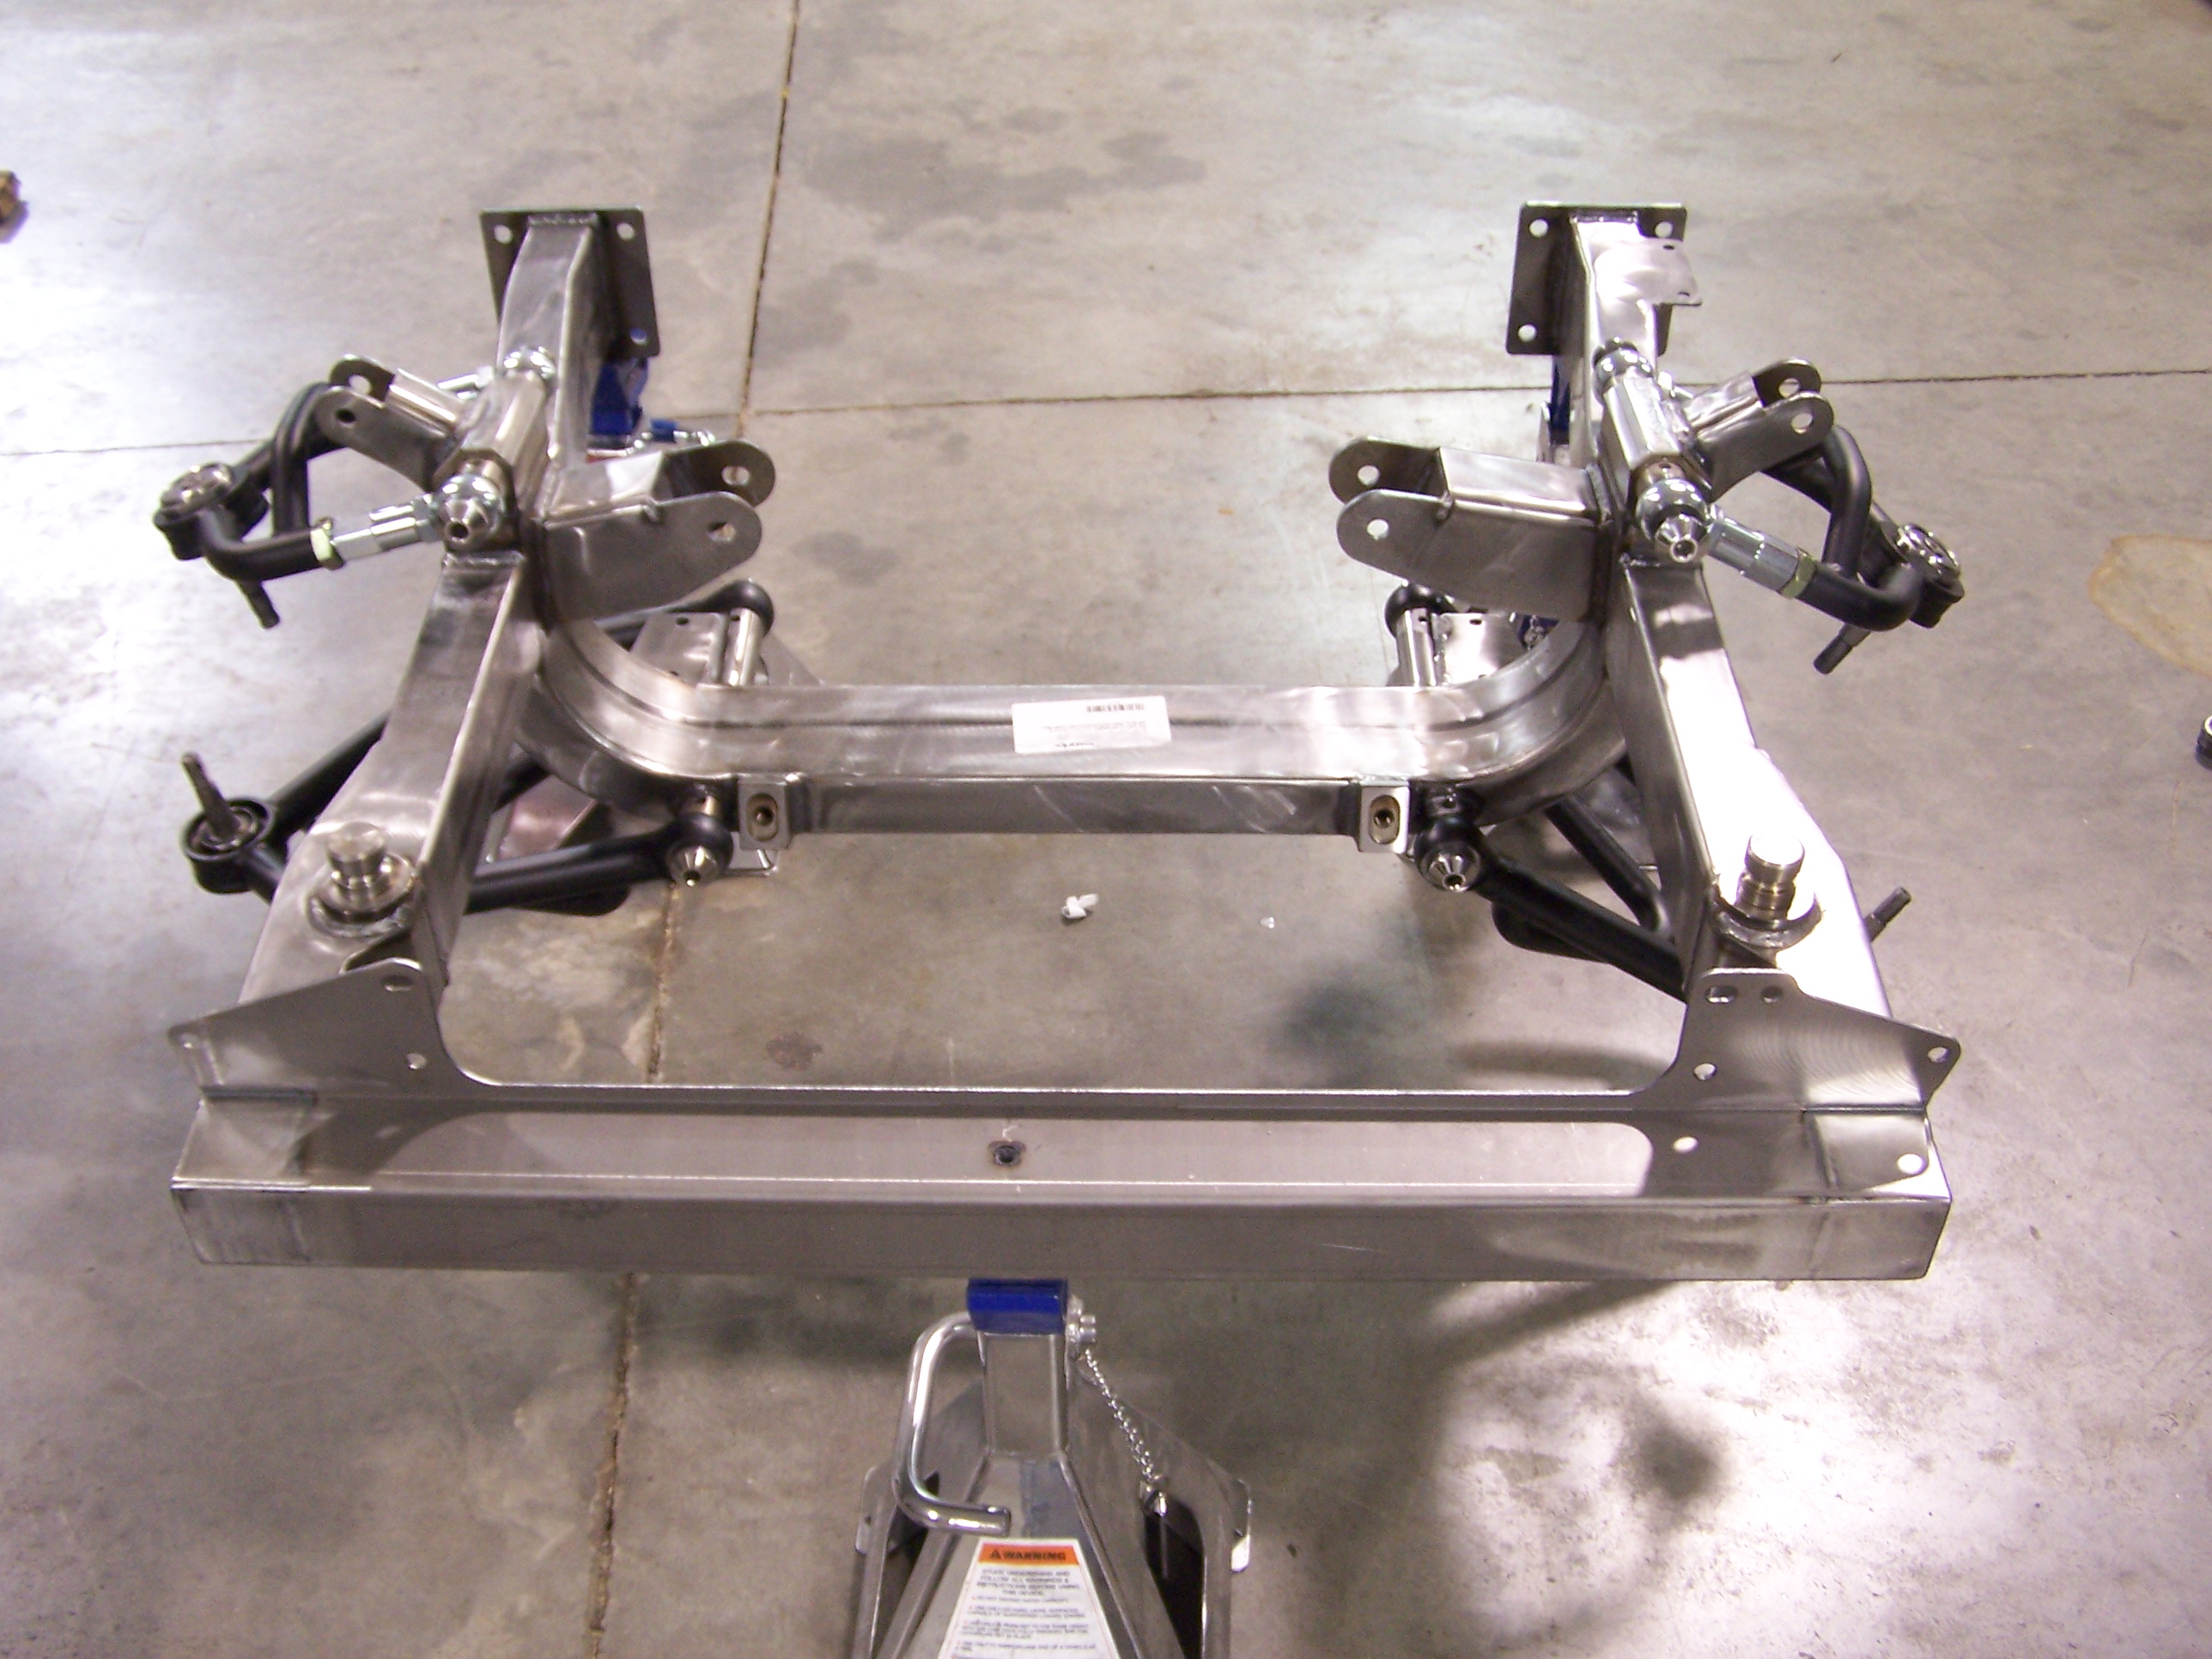
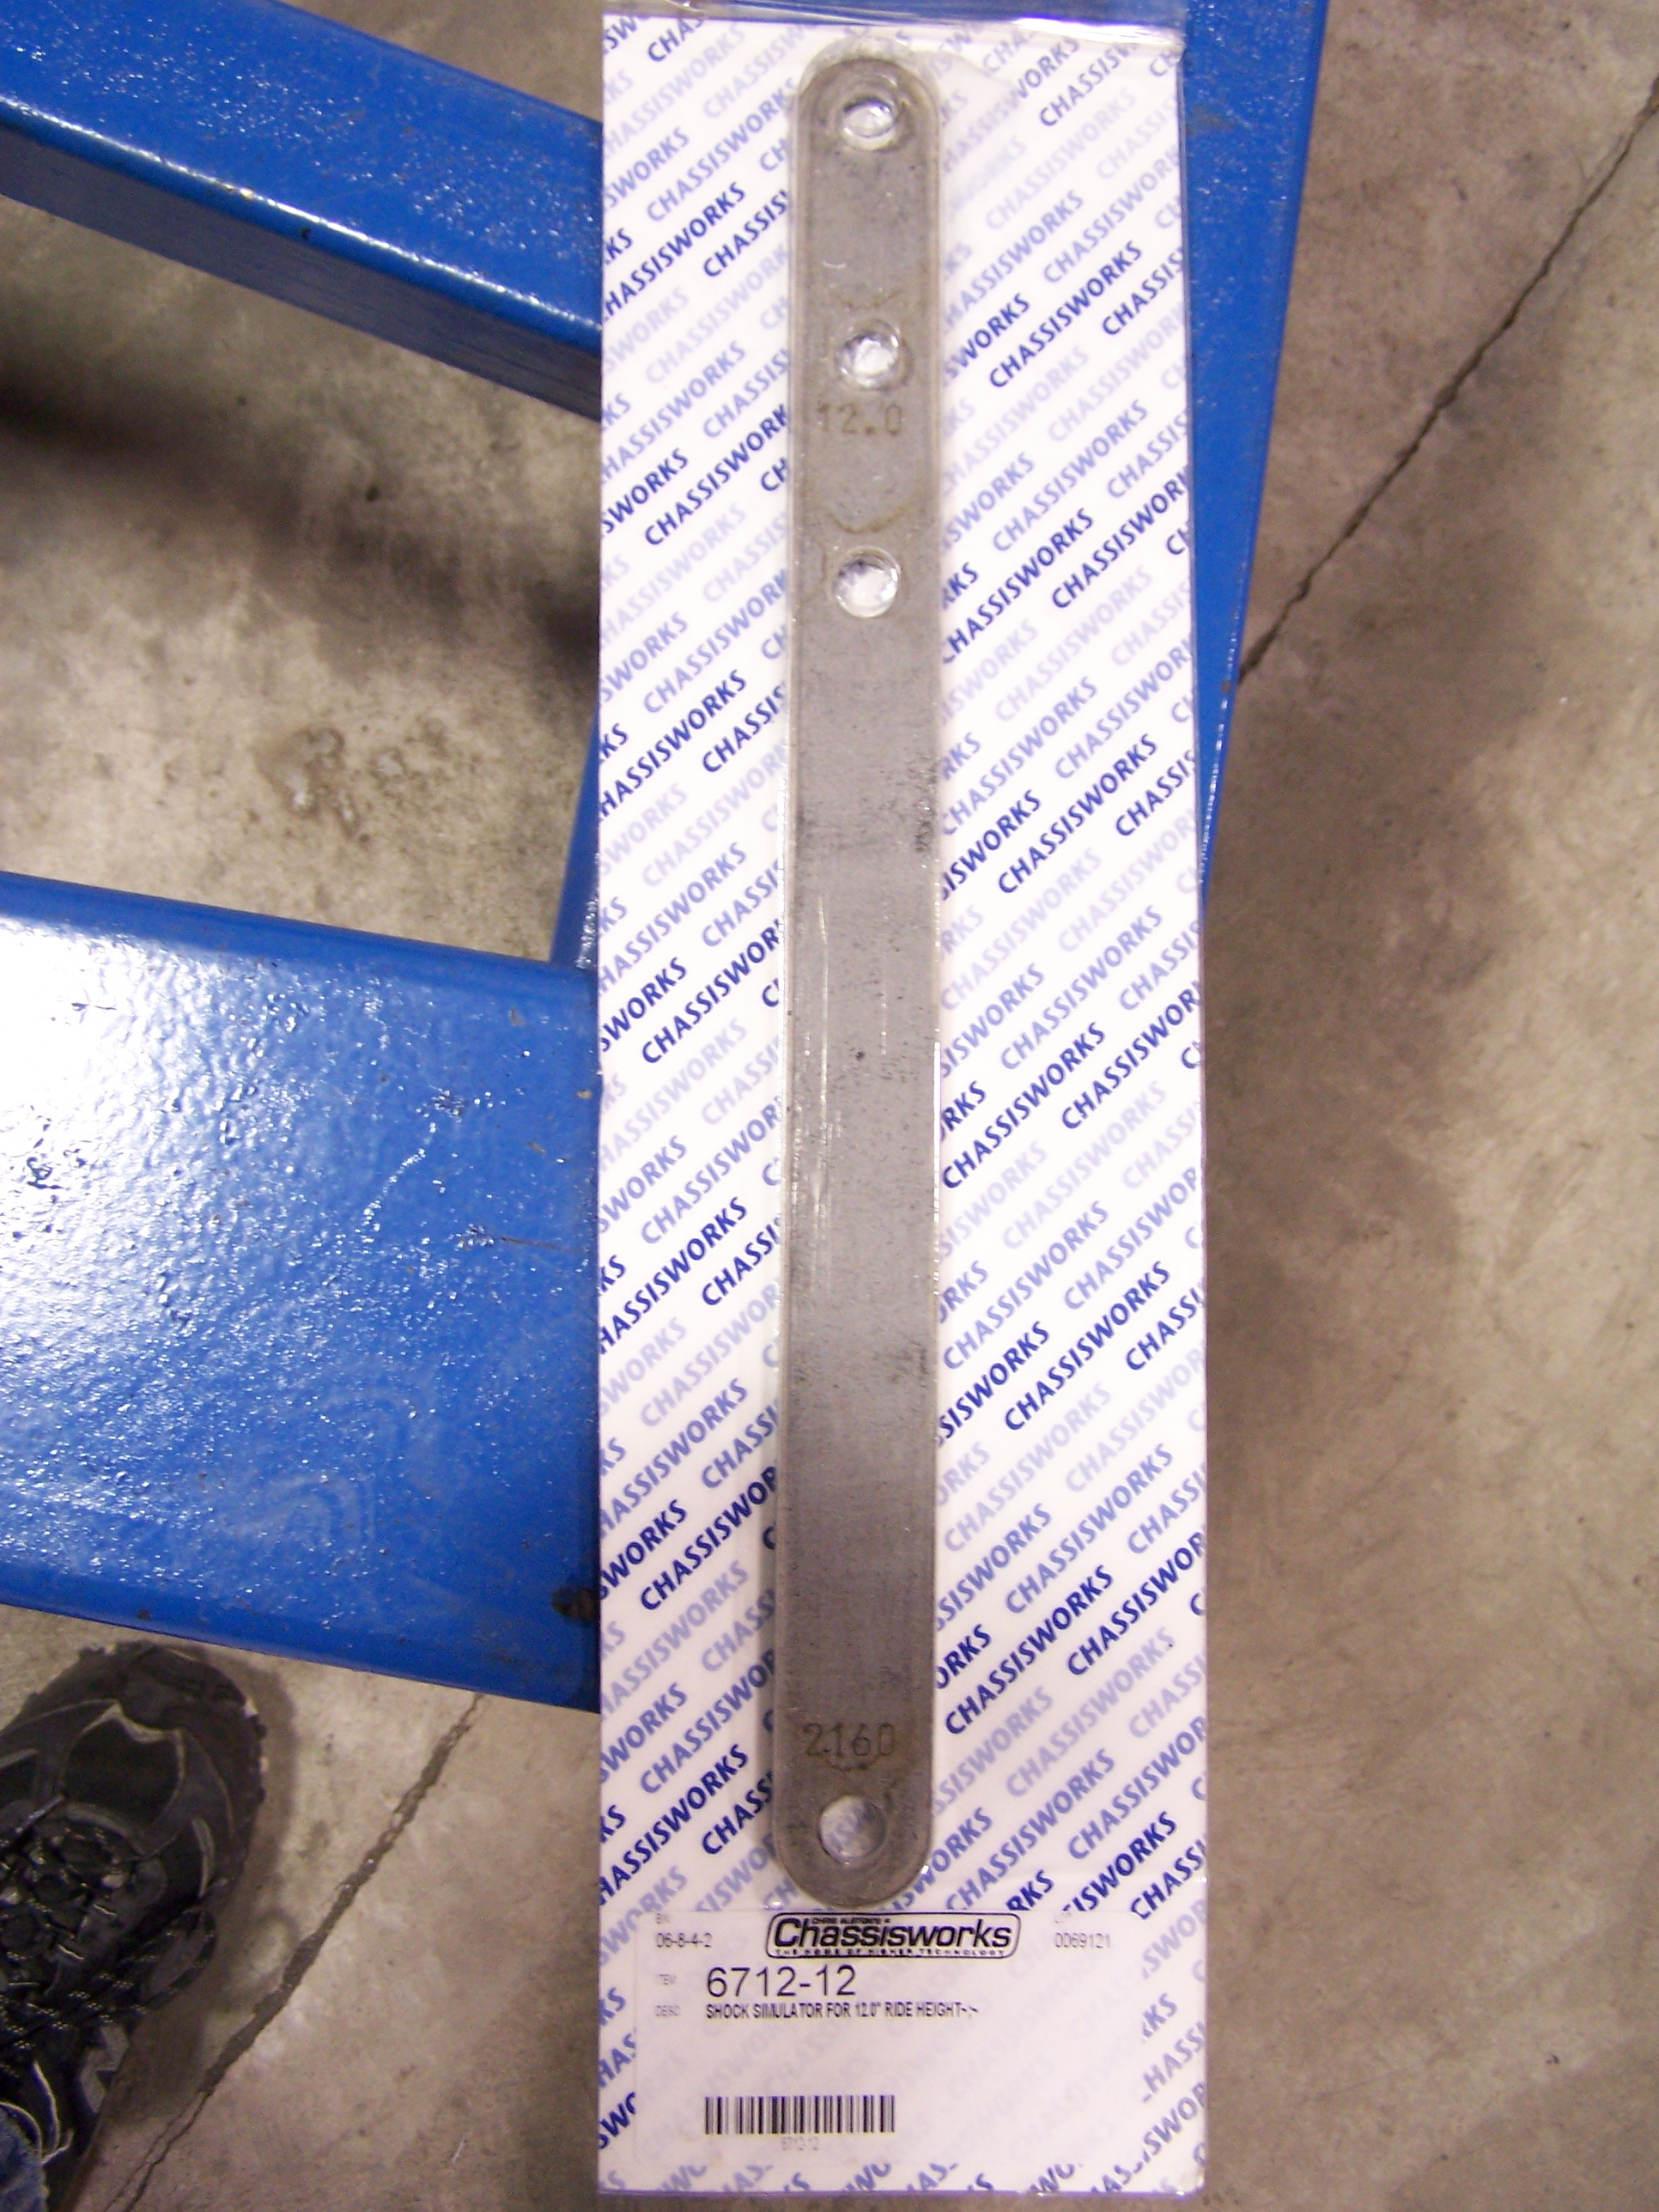
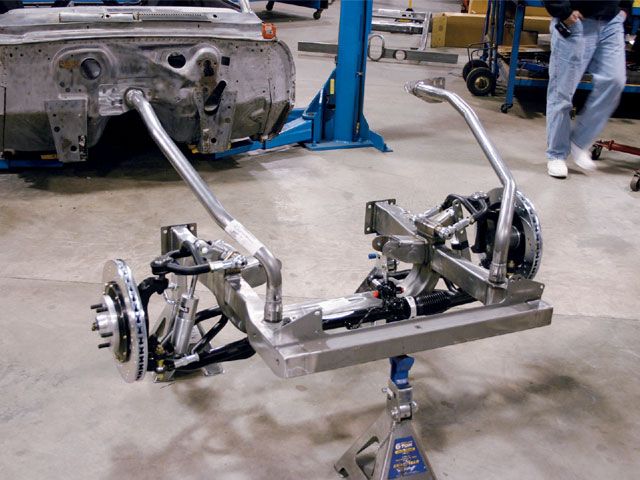
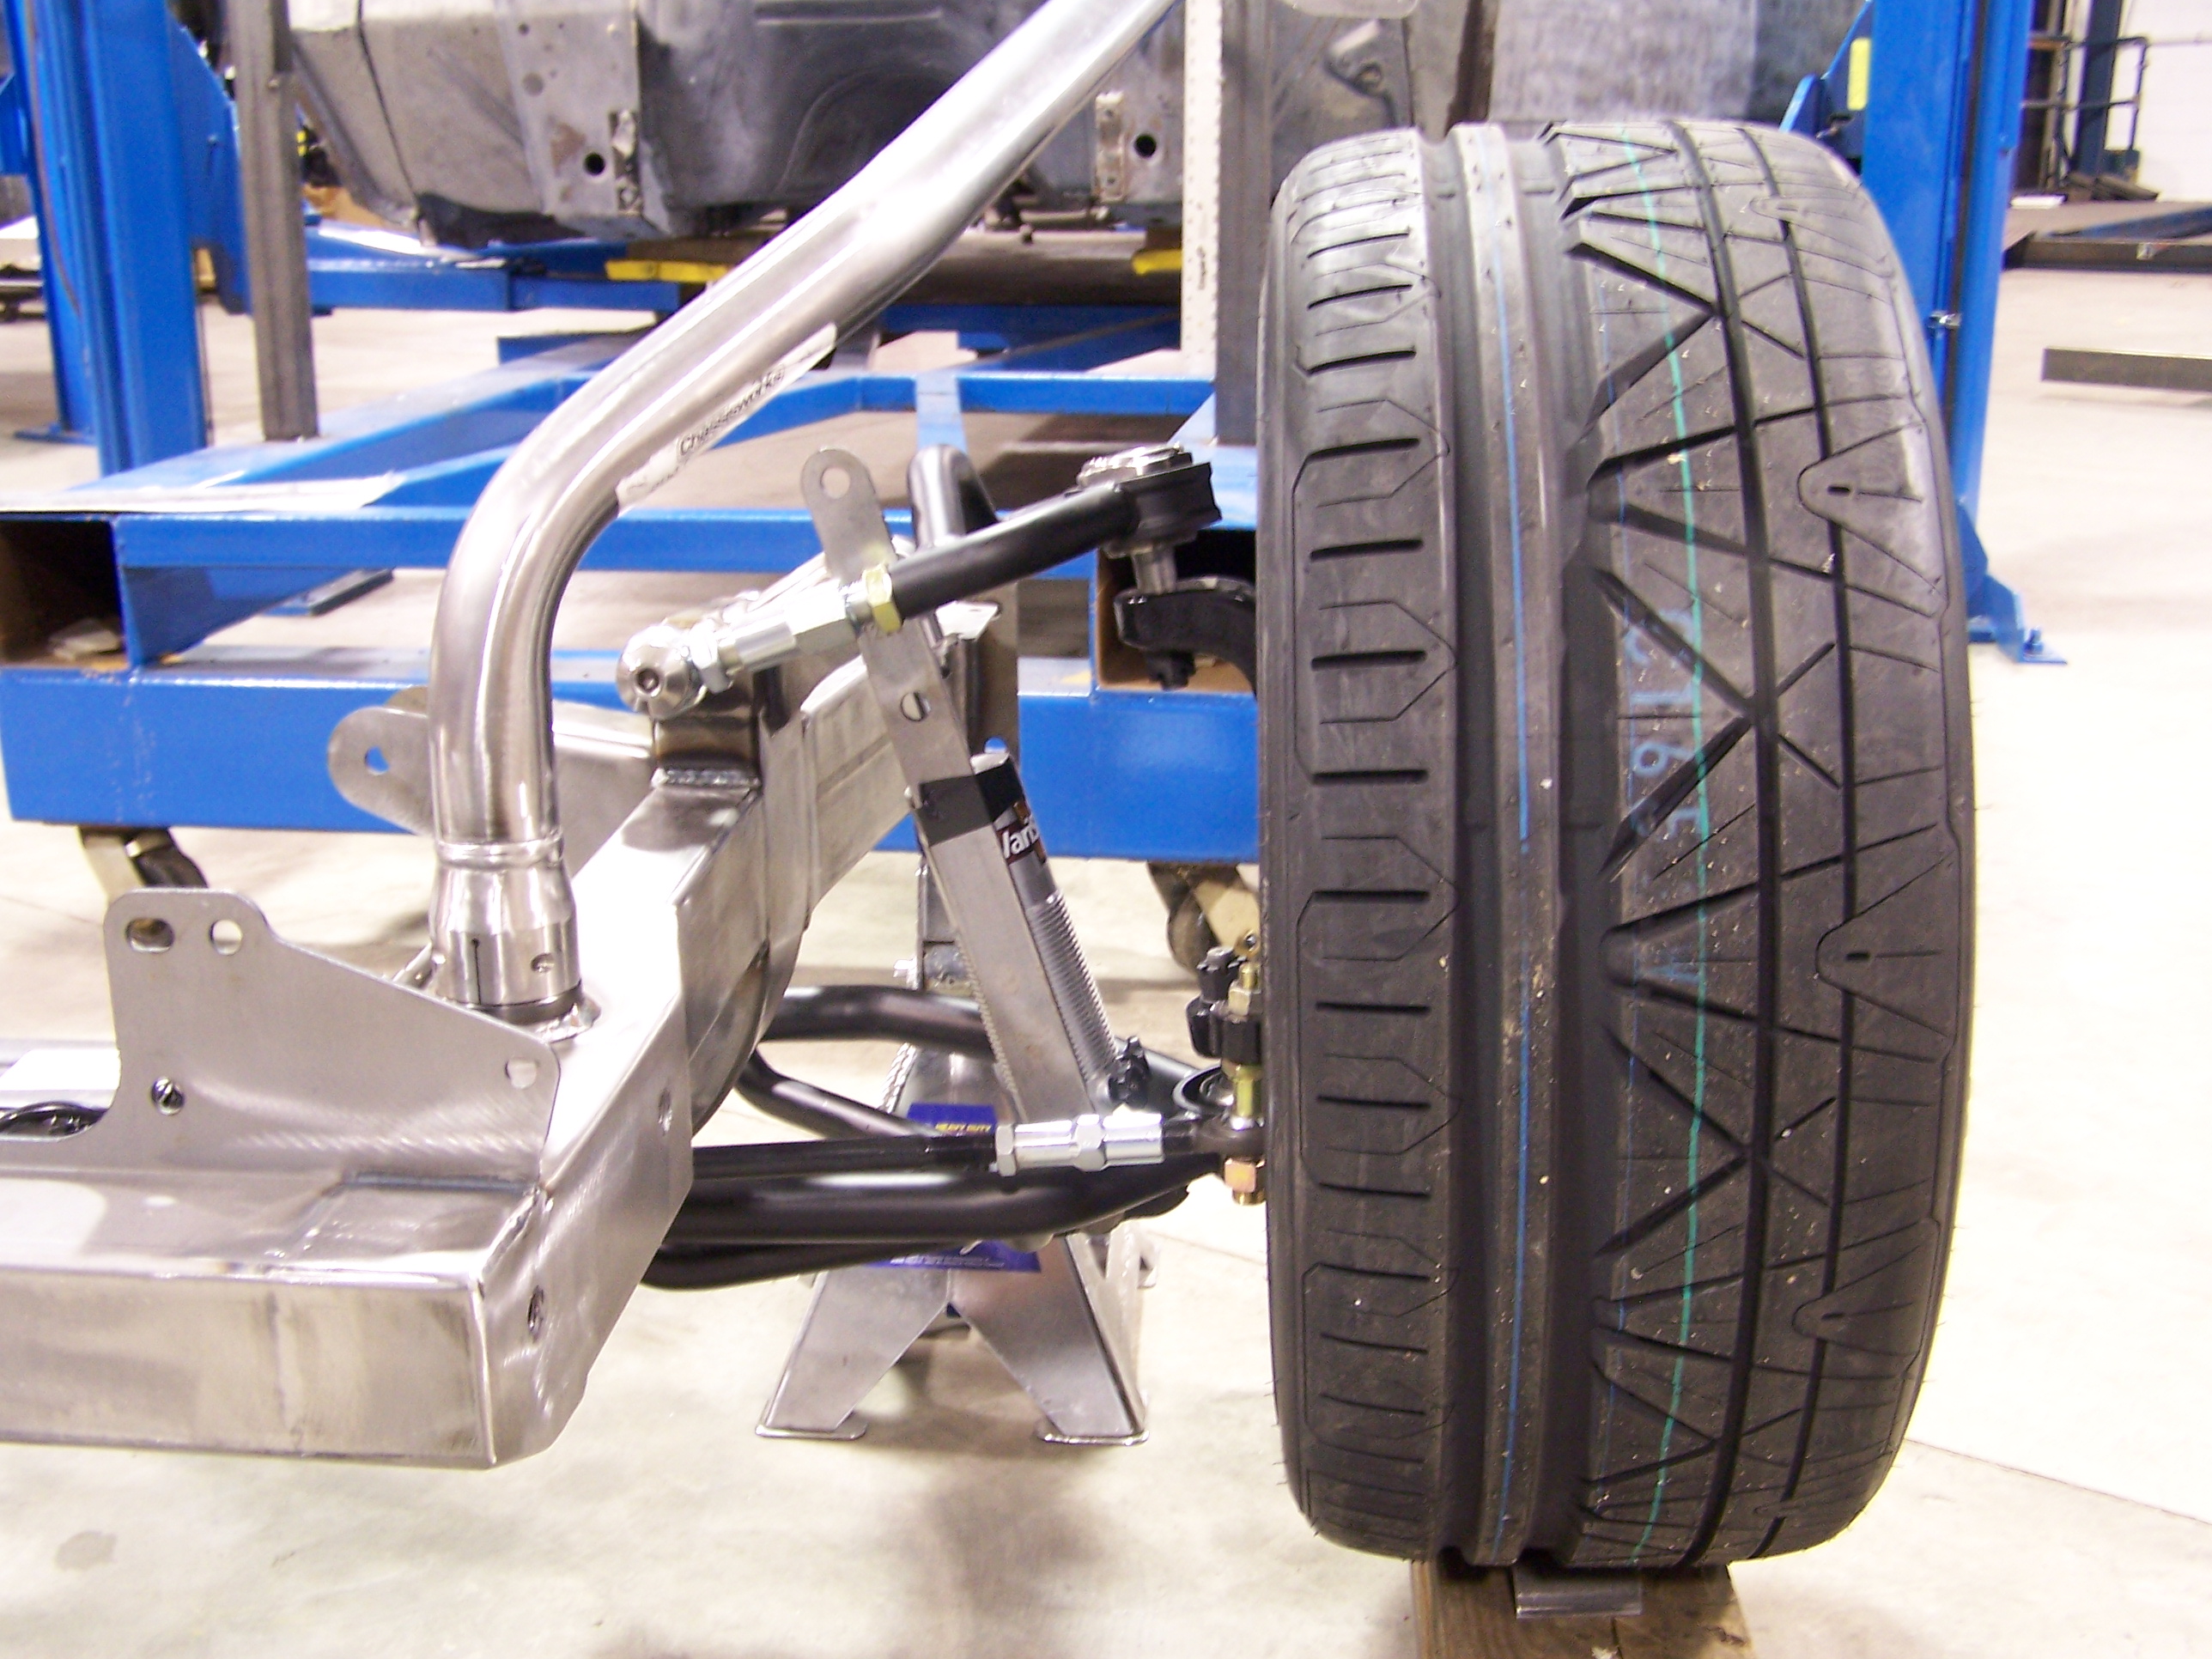
Once we got the metal work all done on the cowl area next was to put together the front clip. For that I choose the Chris Alston's Chassisworks G-Machine stuff. It is very high quality and was just what we needed. You can tell a lot of thought went into building the parts. Here are some pictures.
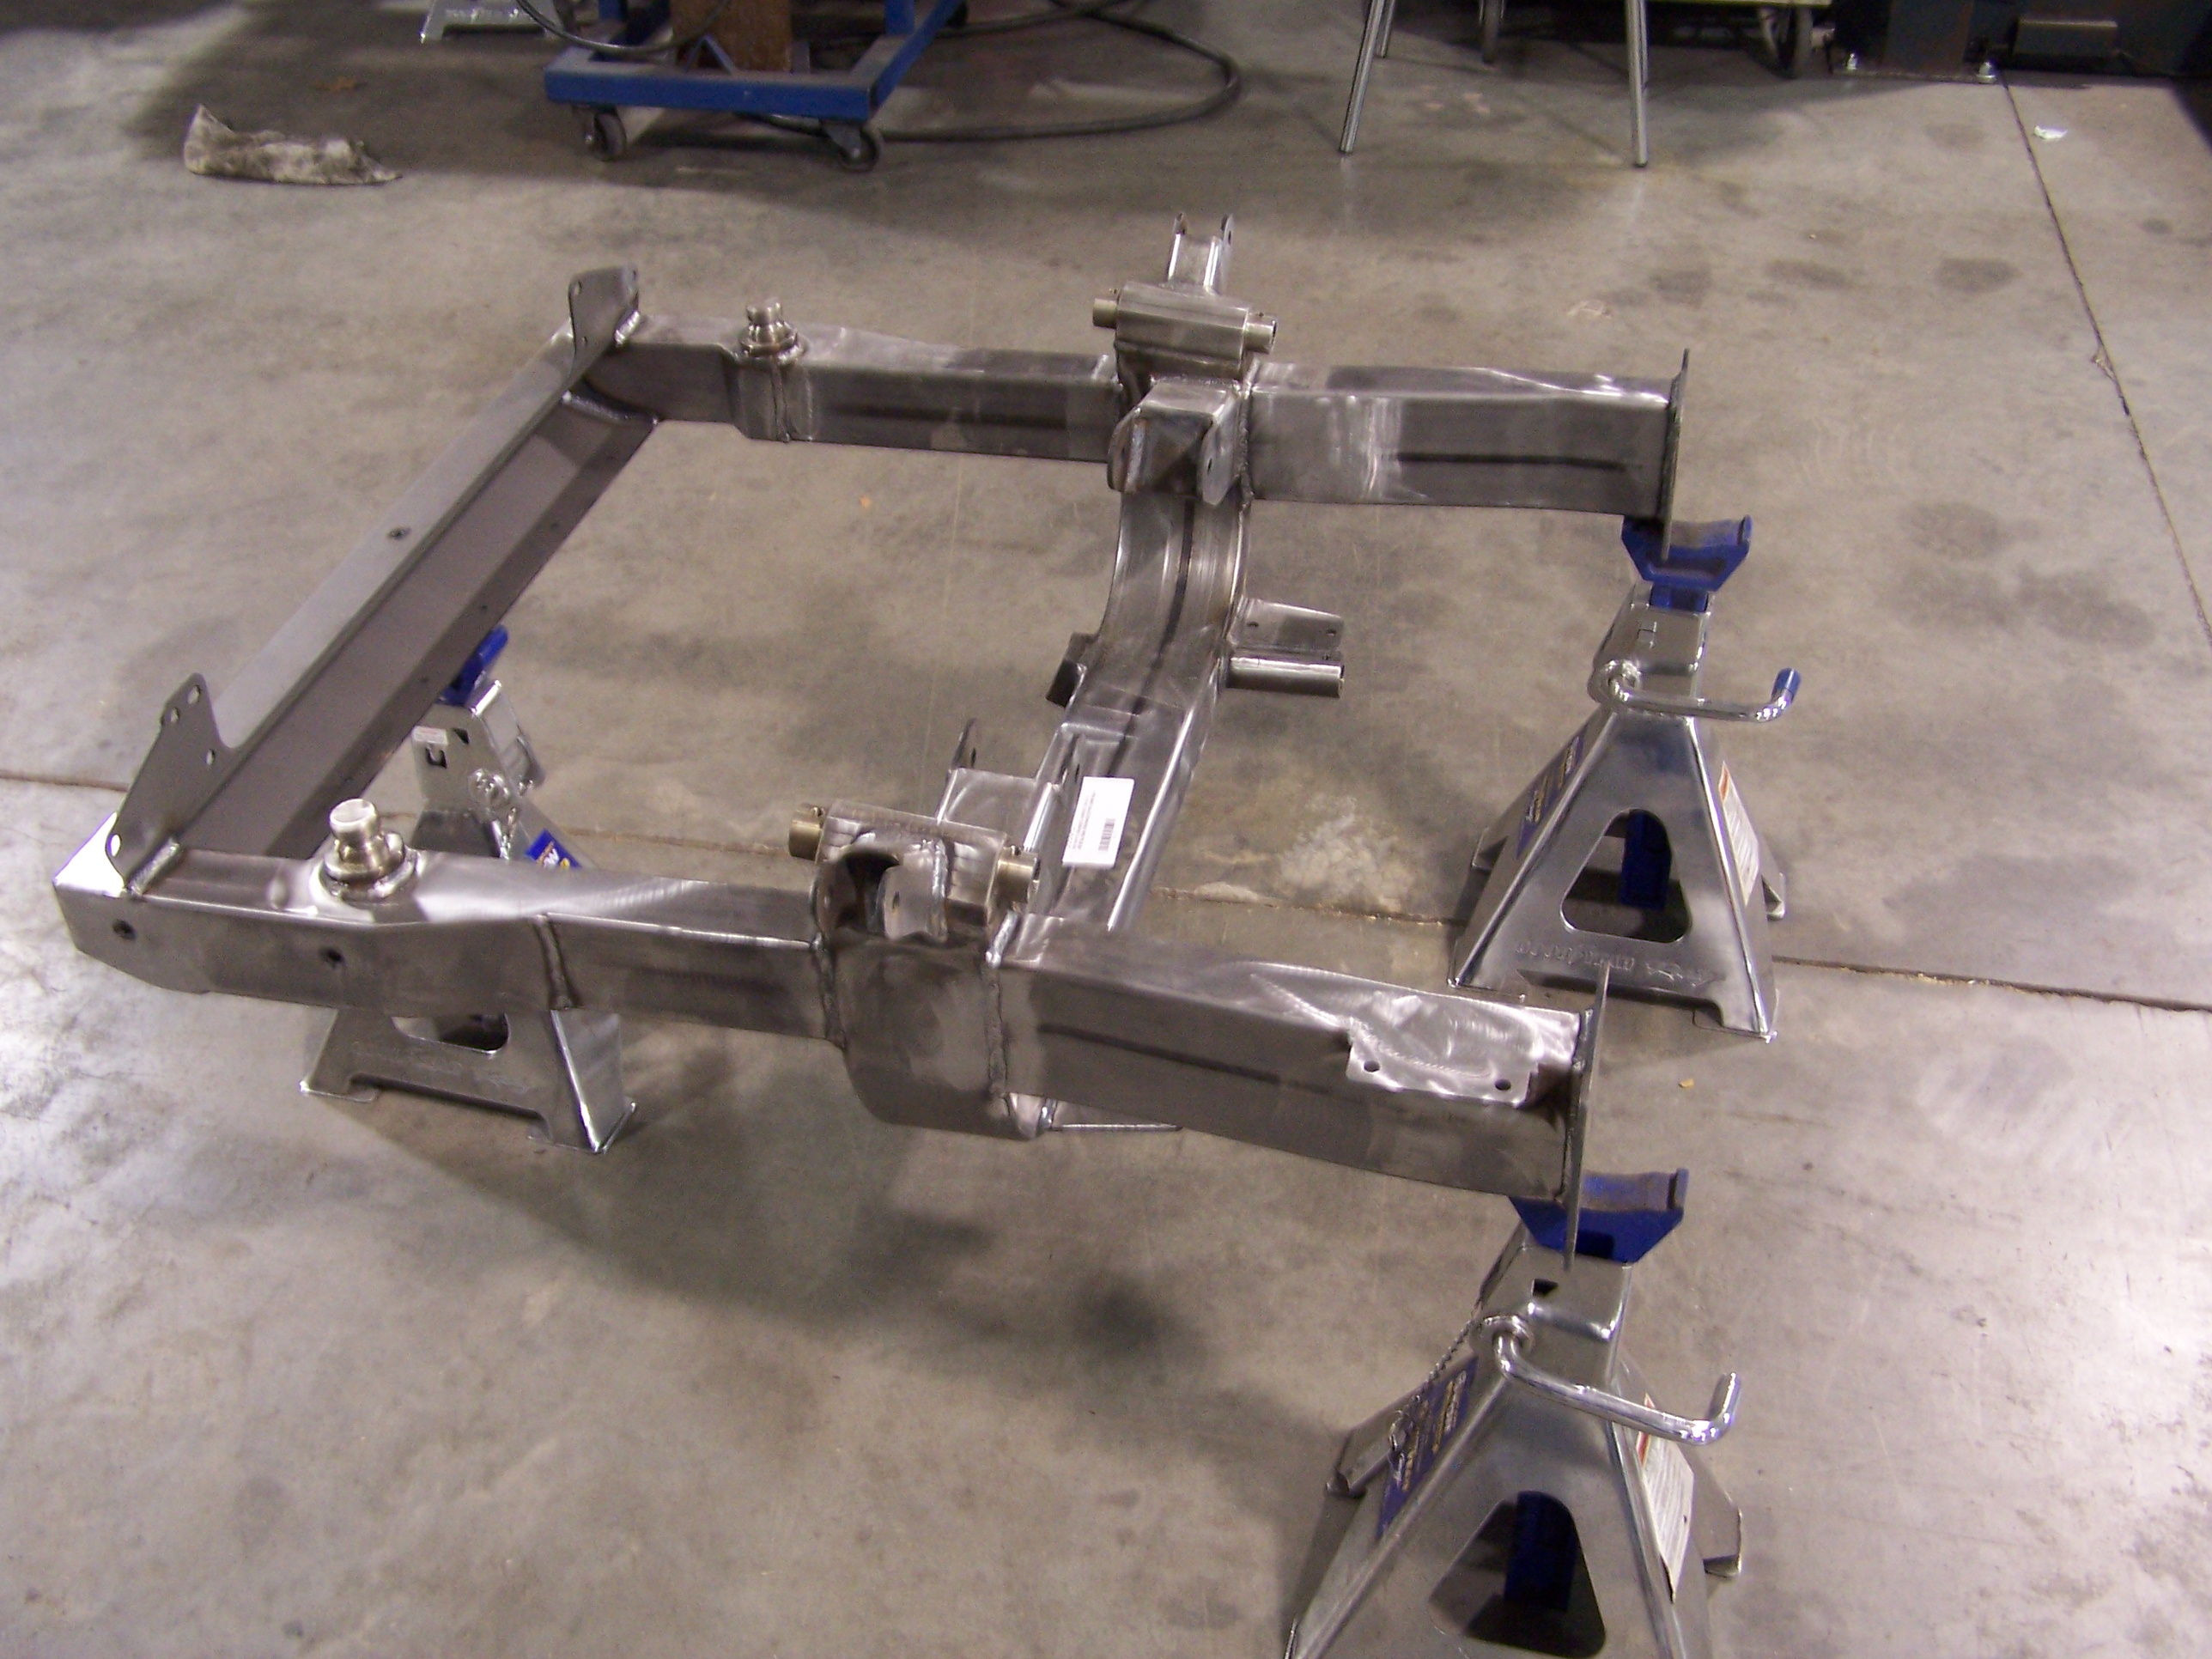
Upper A-Arms
Lower A-Arms
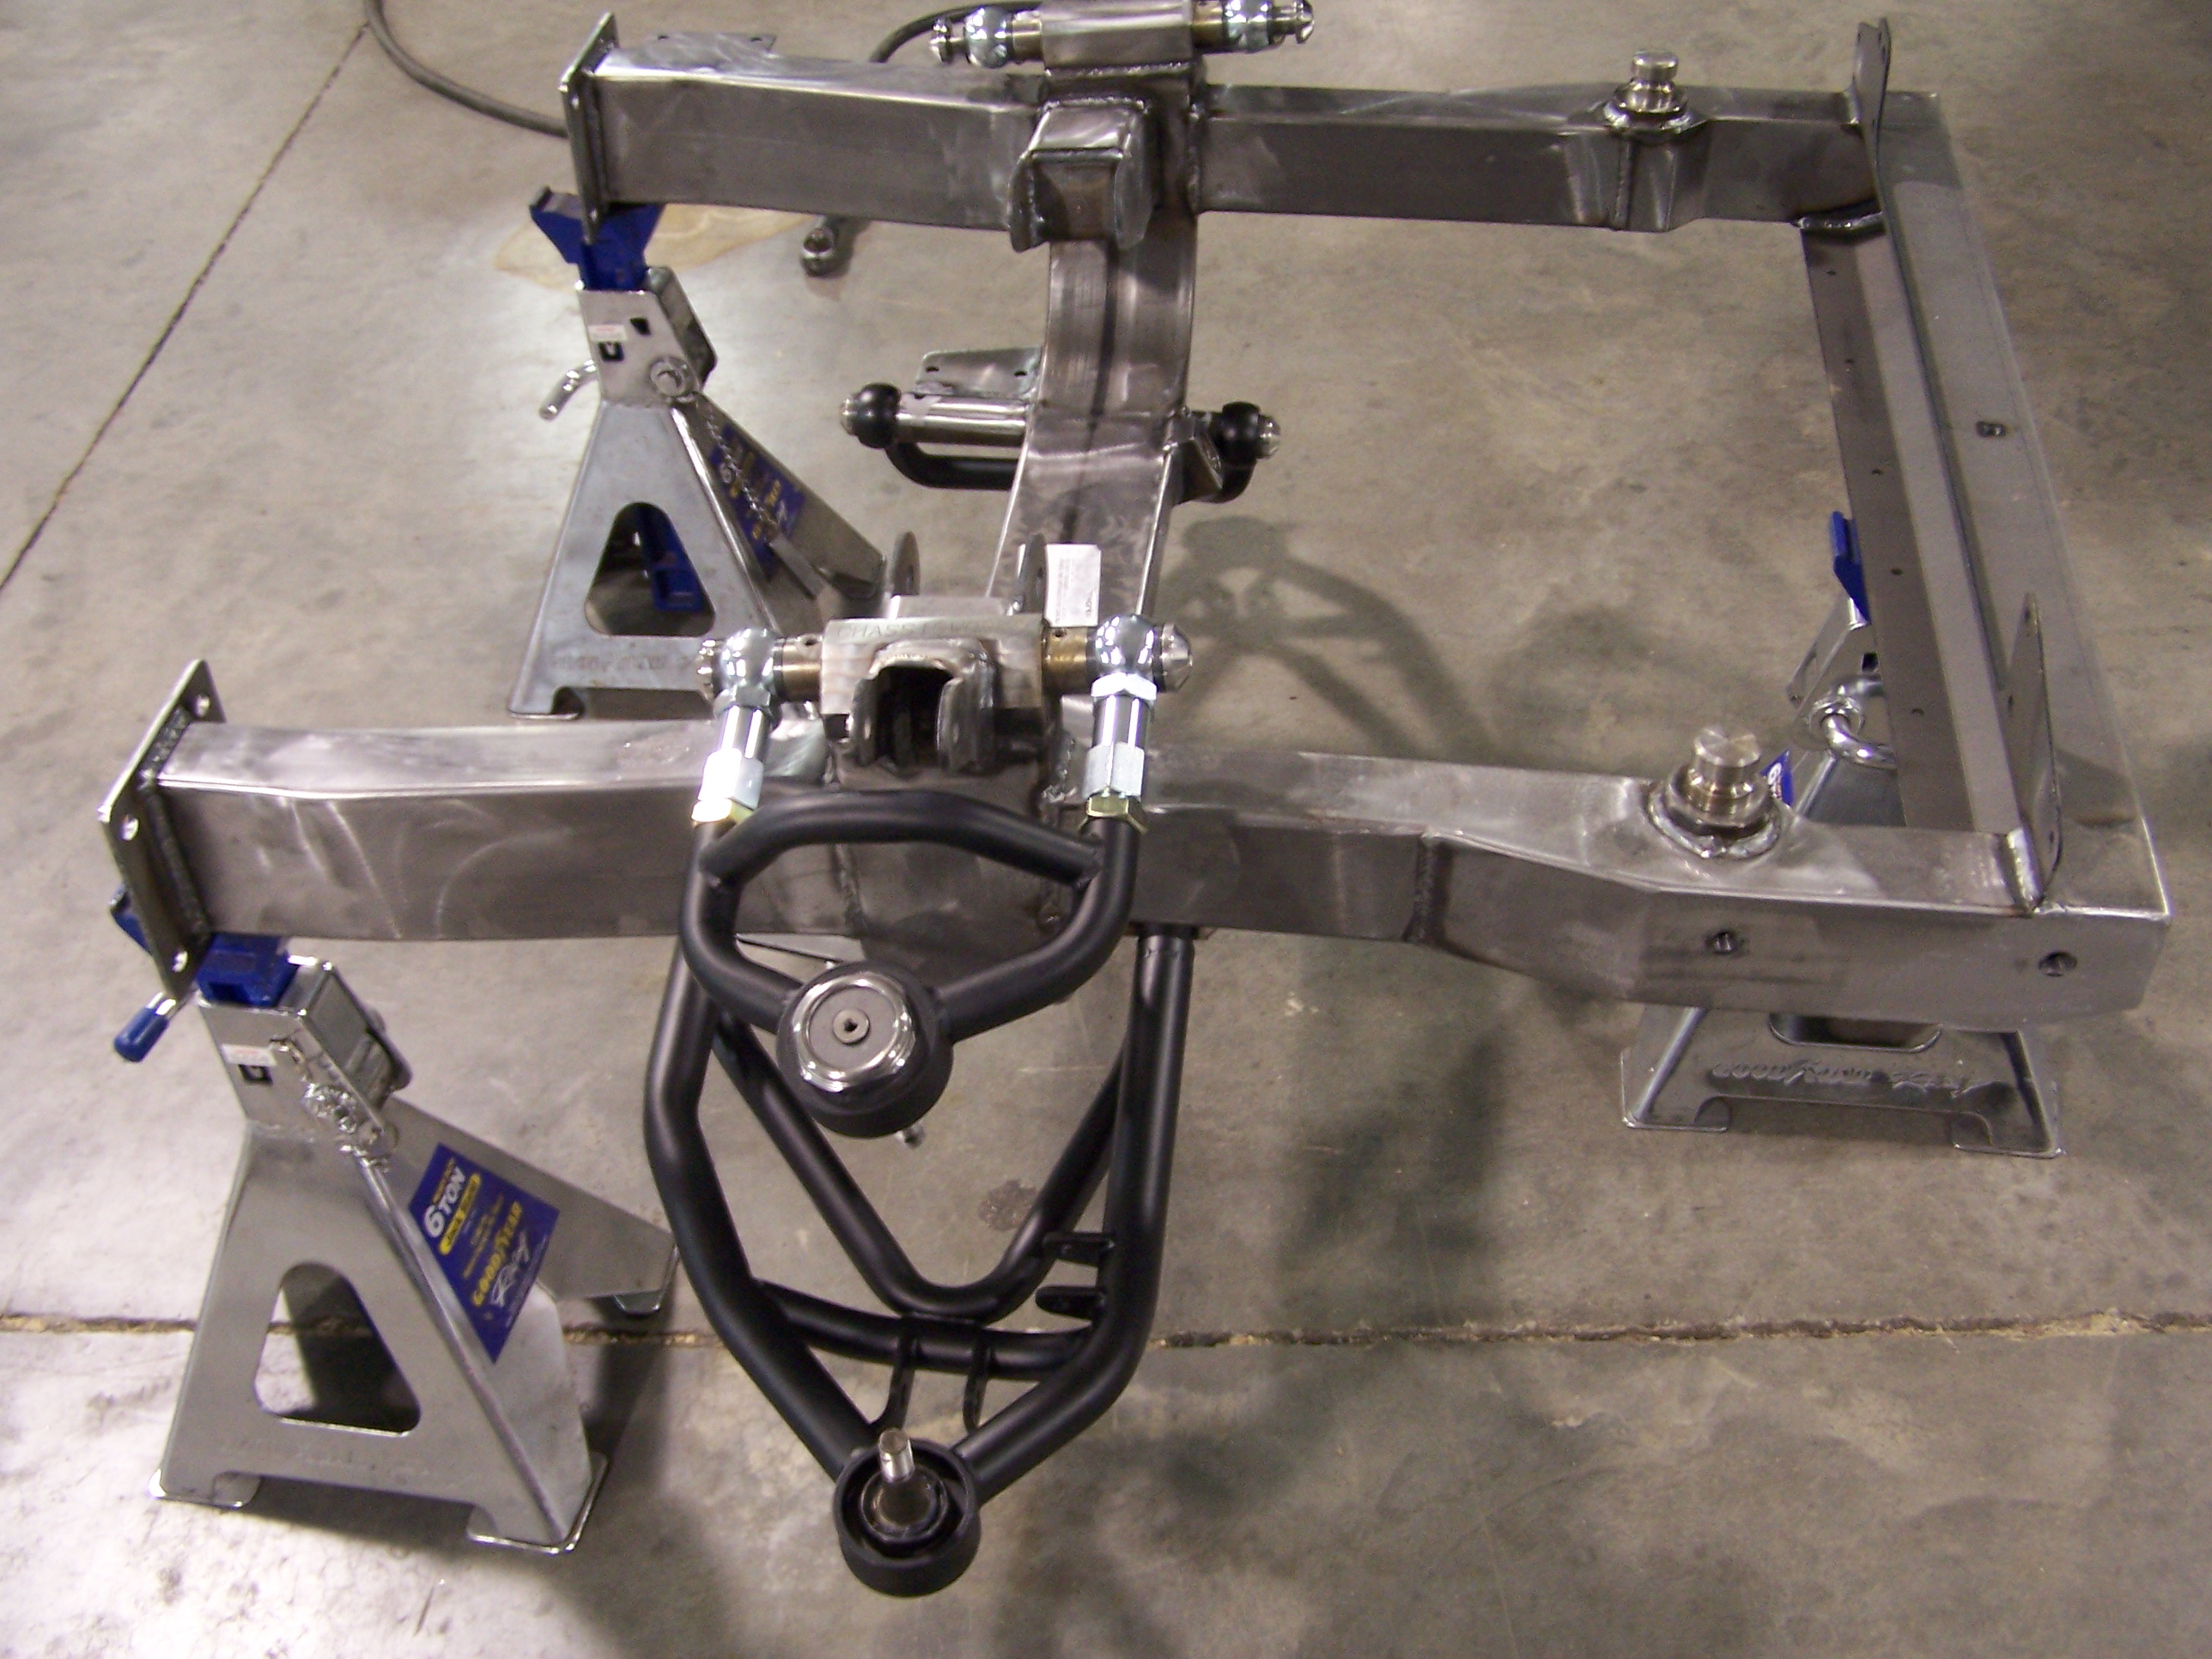

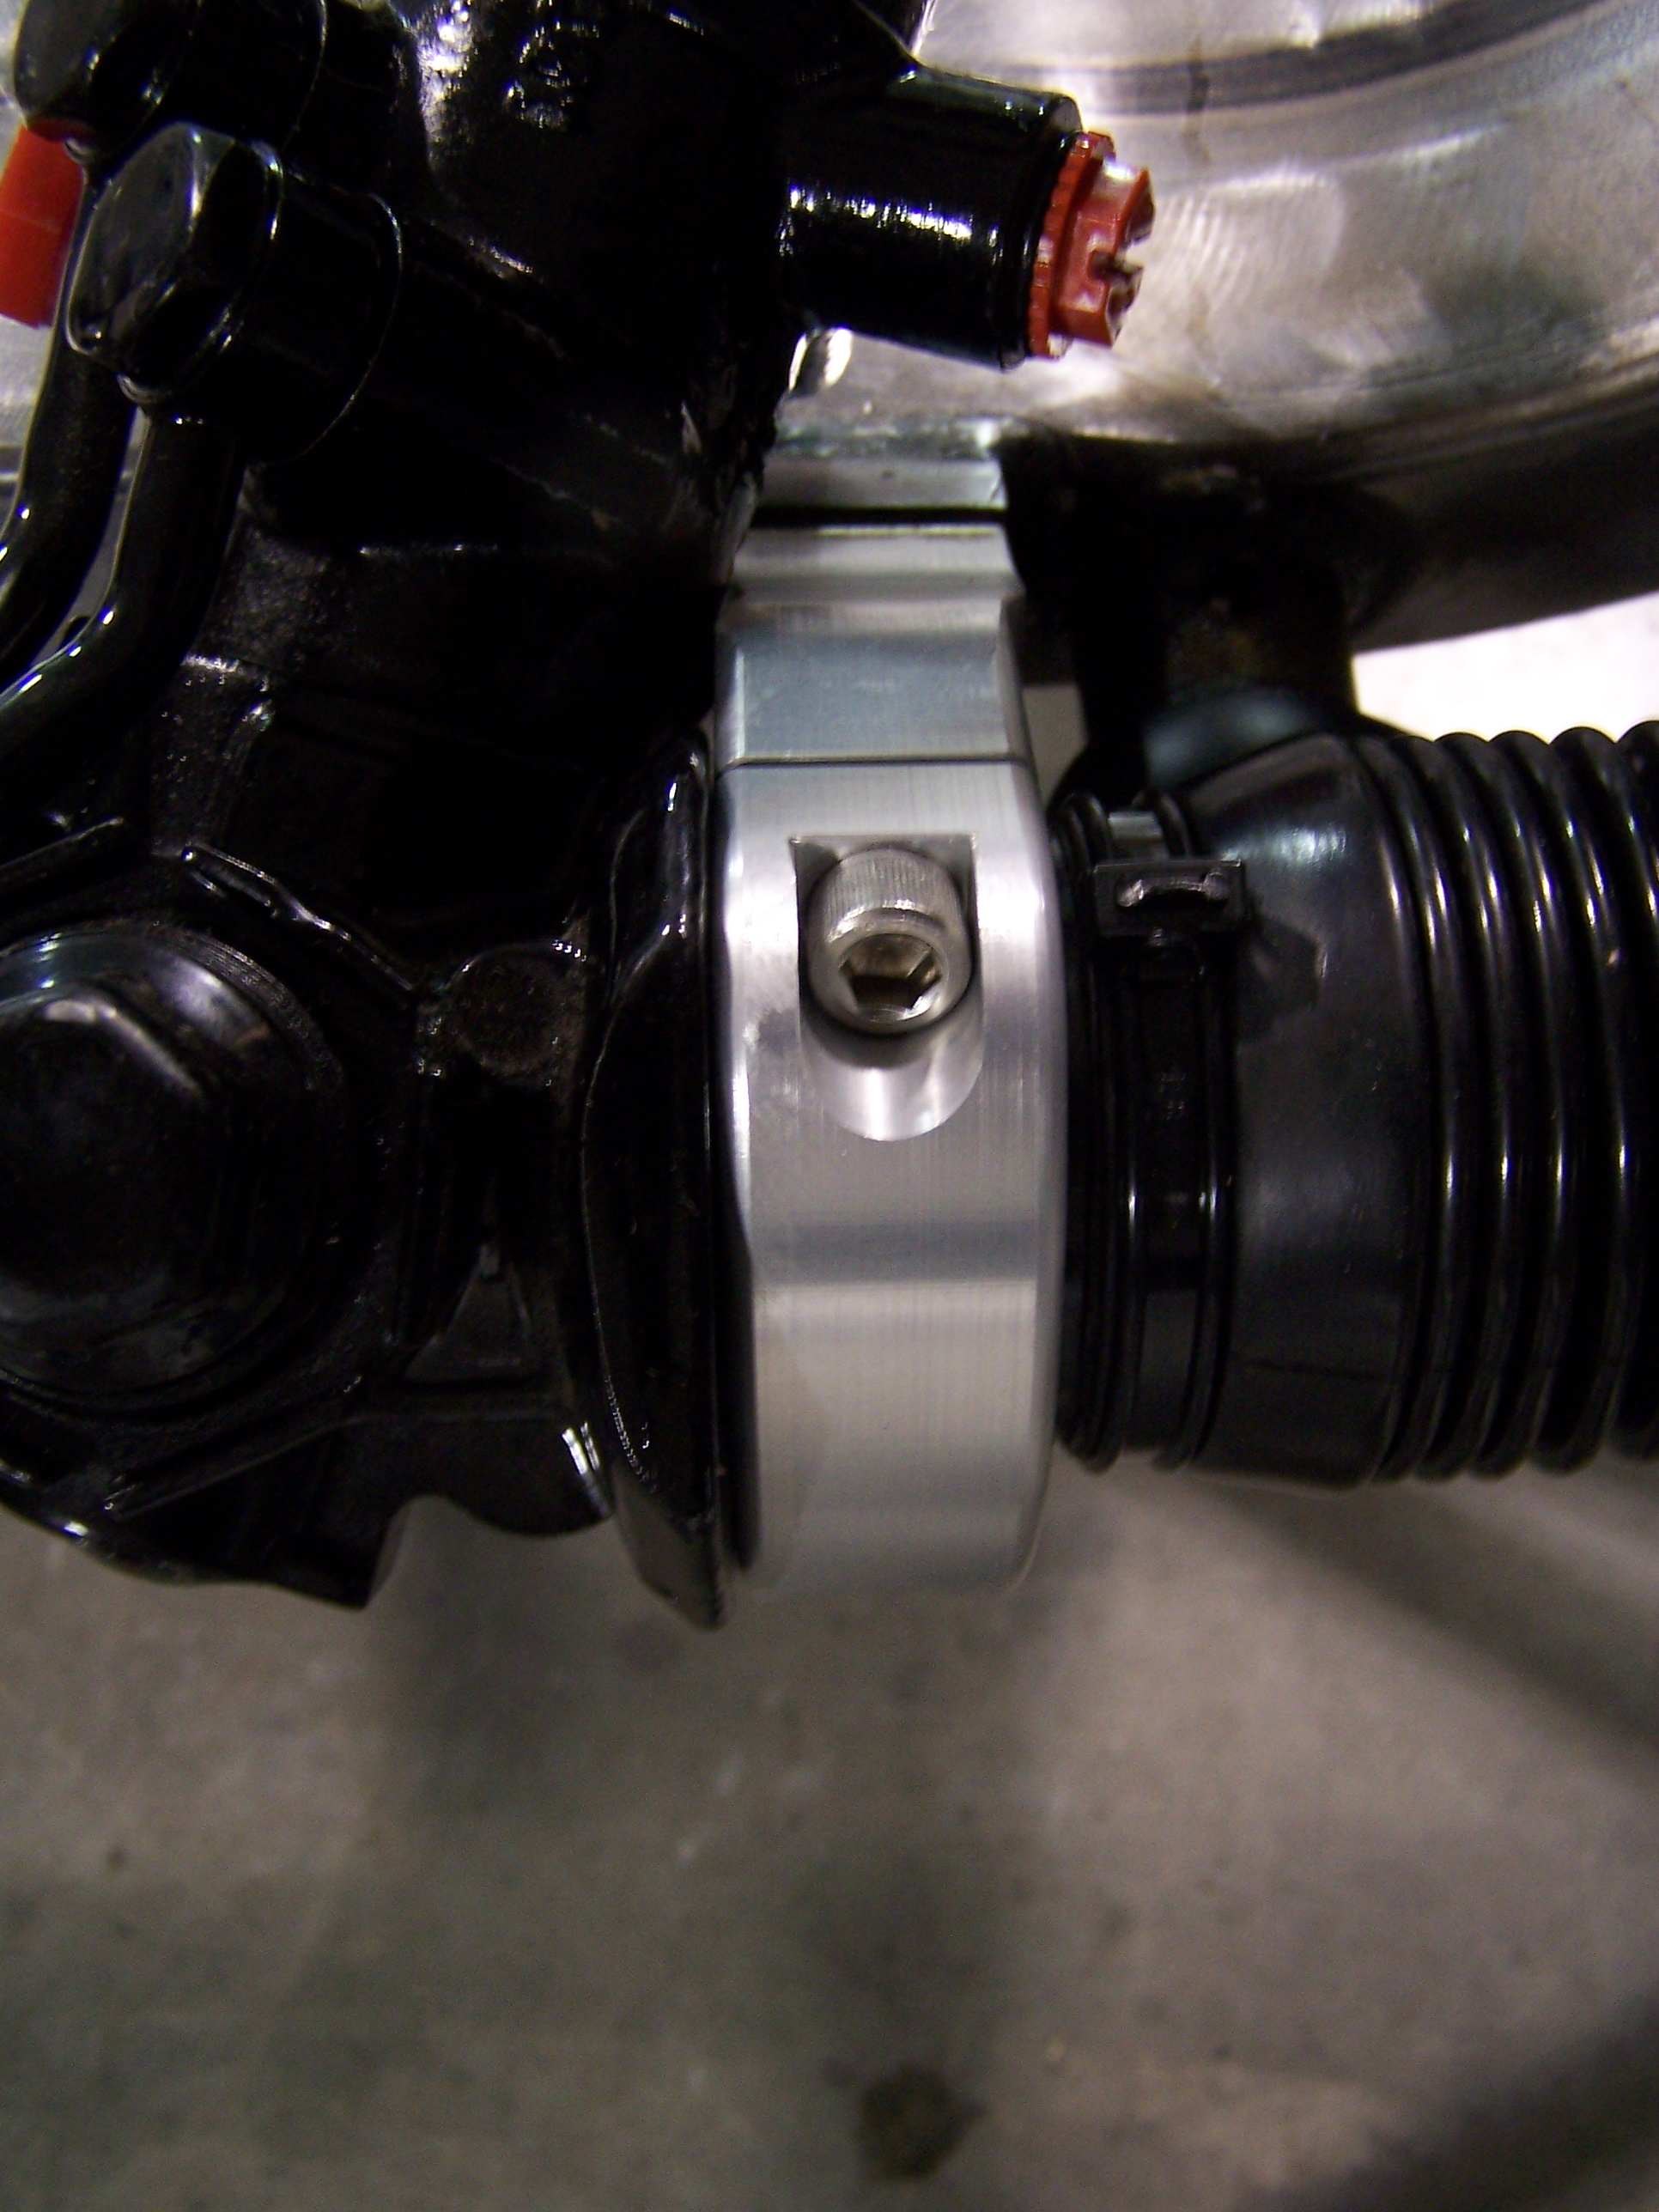
The Power Rack set up. This bolted in really nice and uses some really cool billet clamps to hold the rack on.
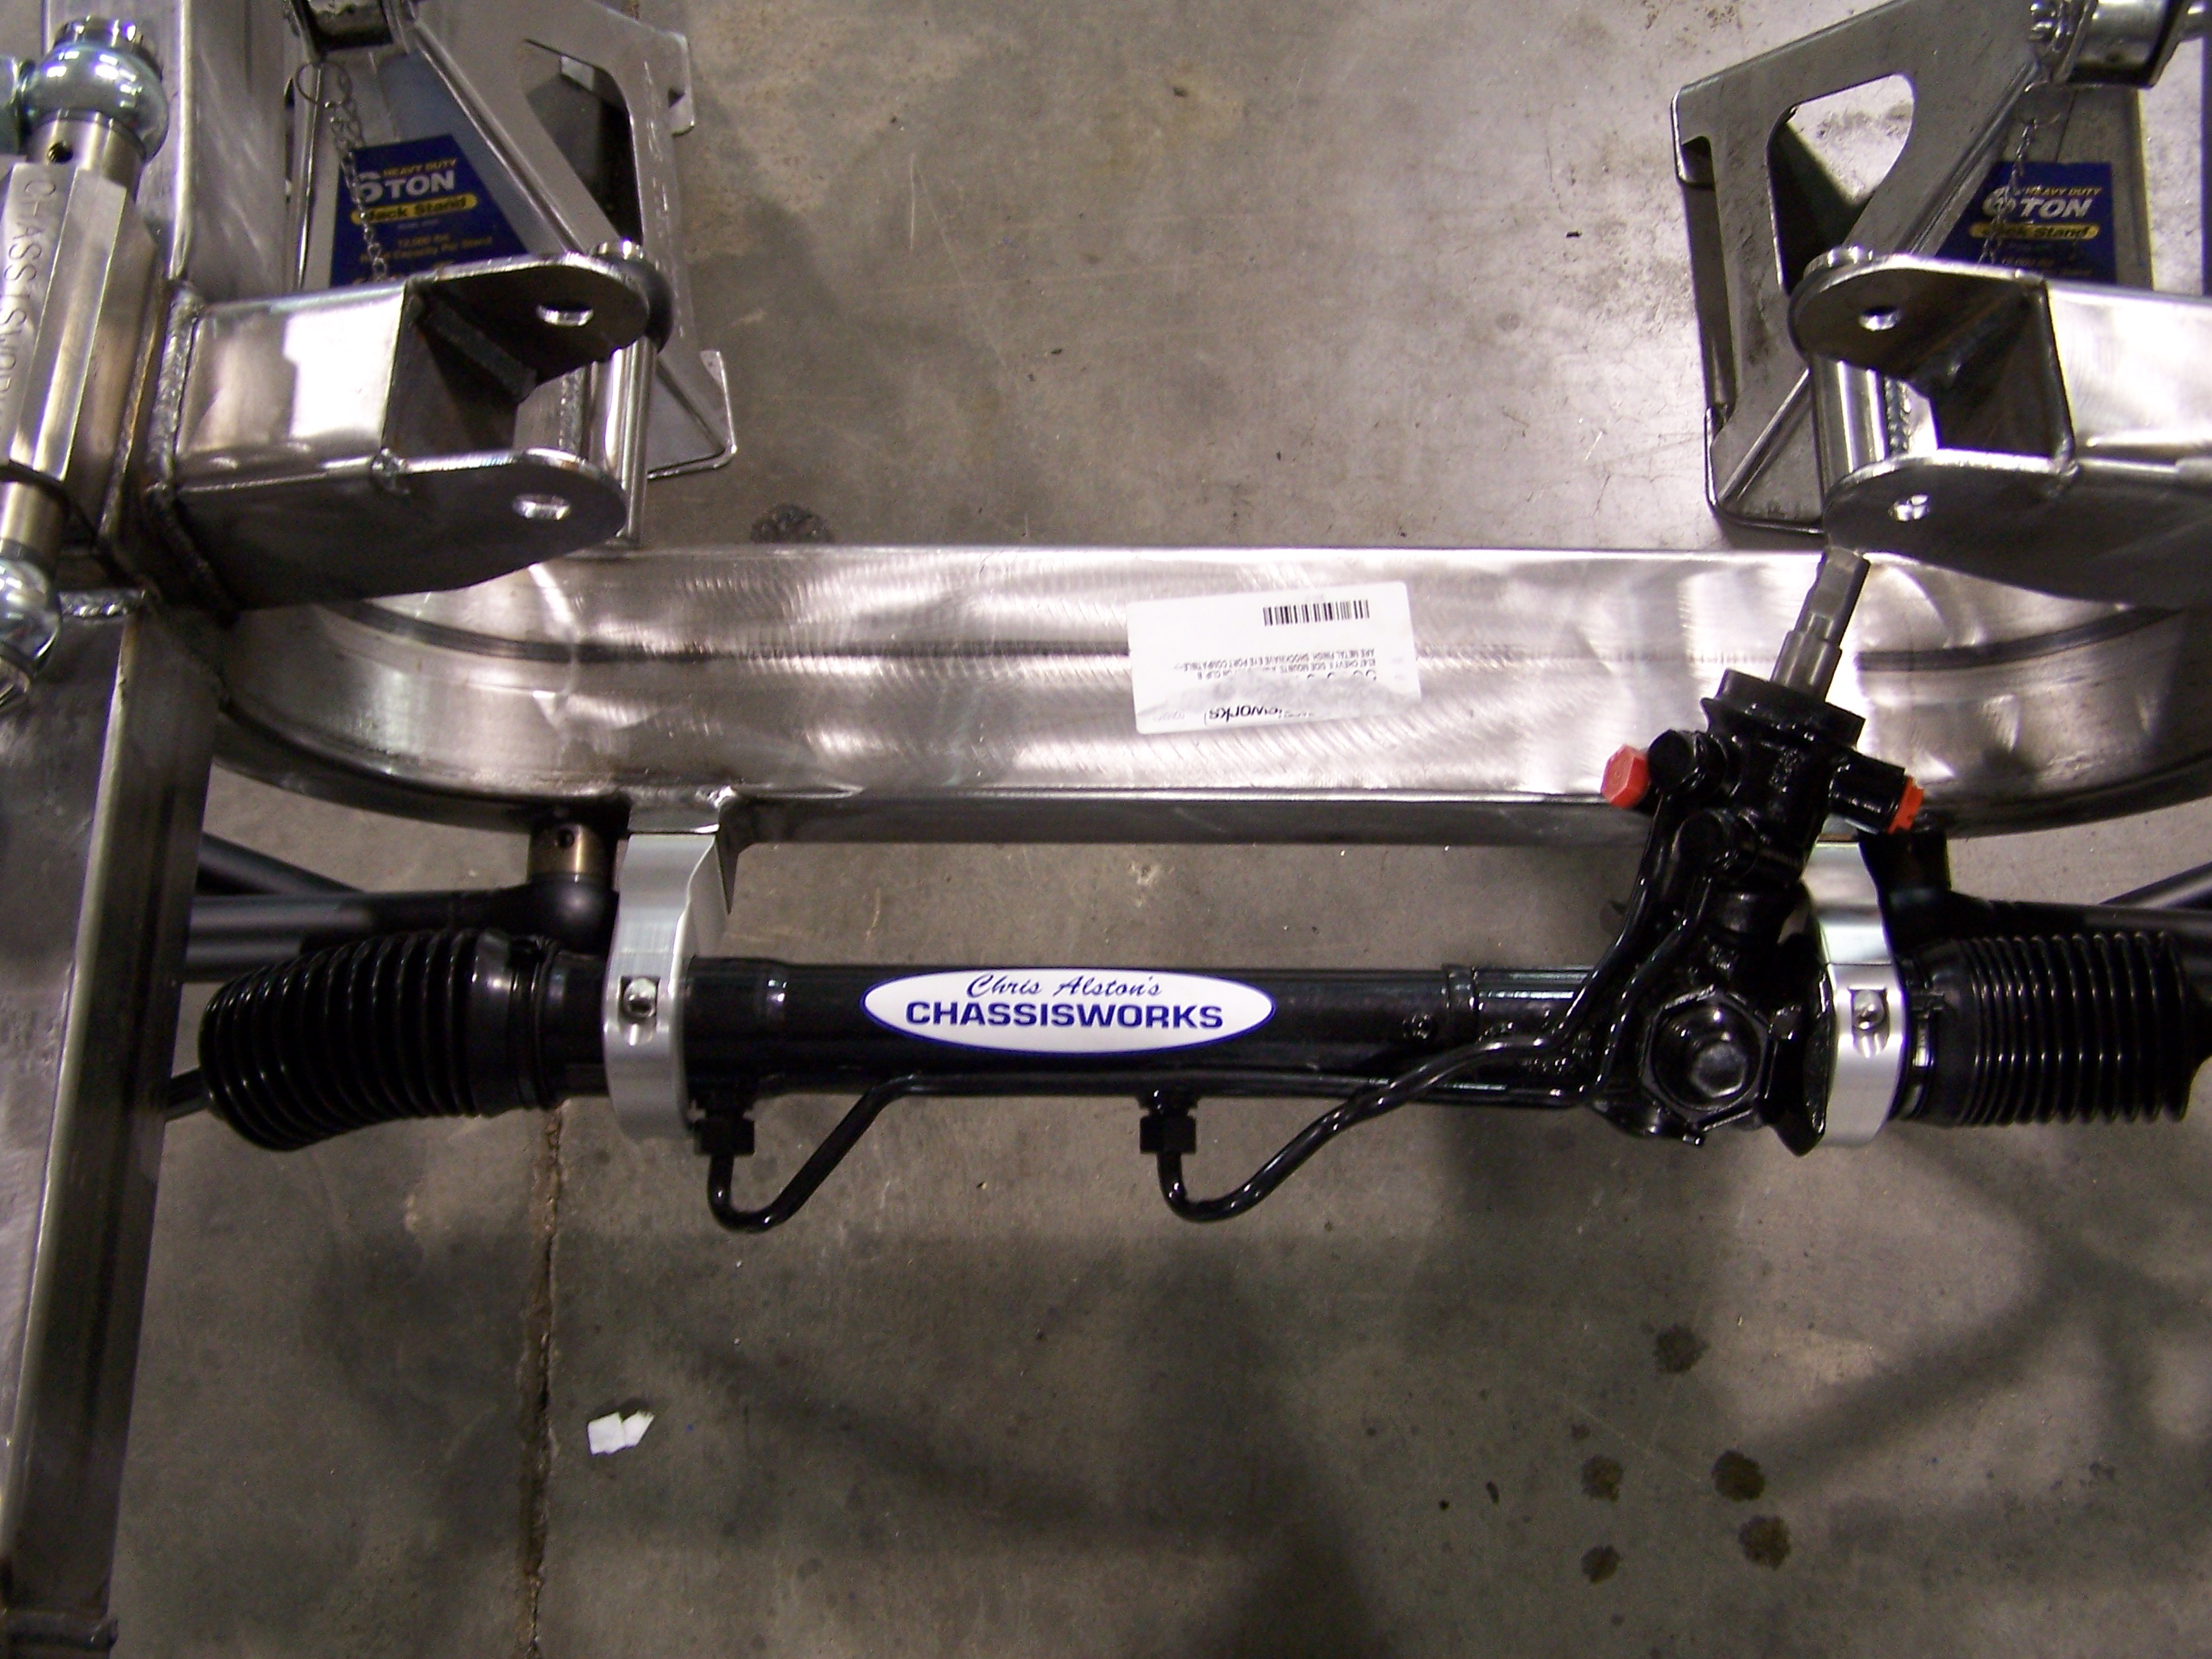
Close Up
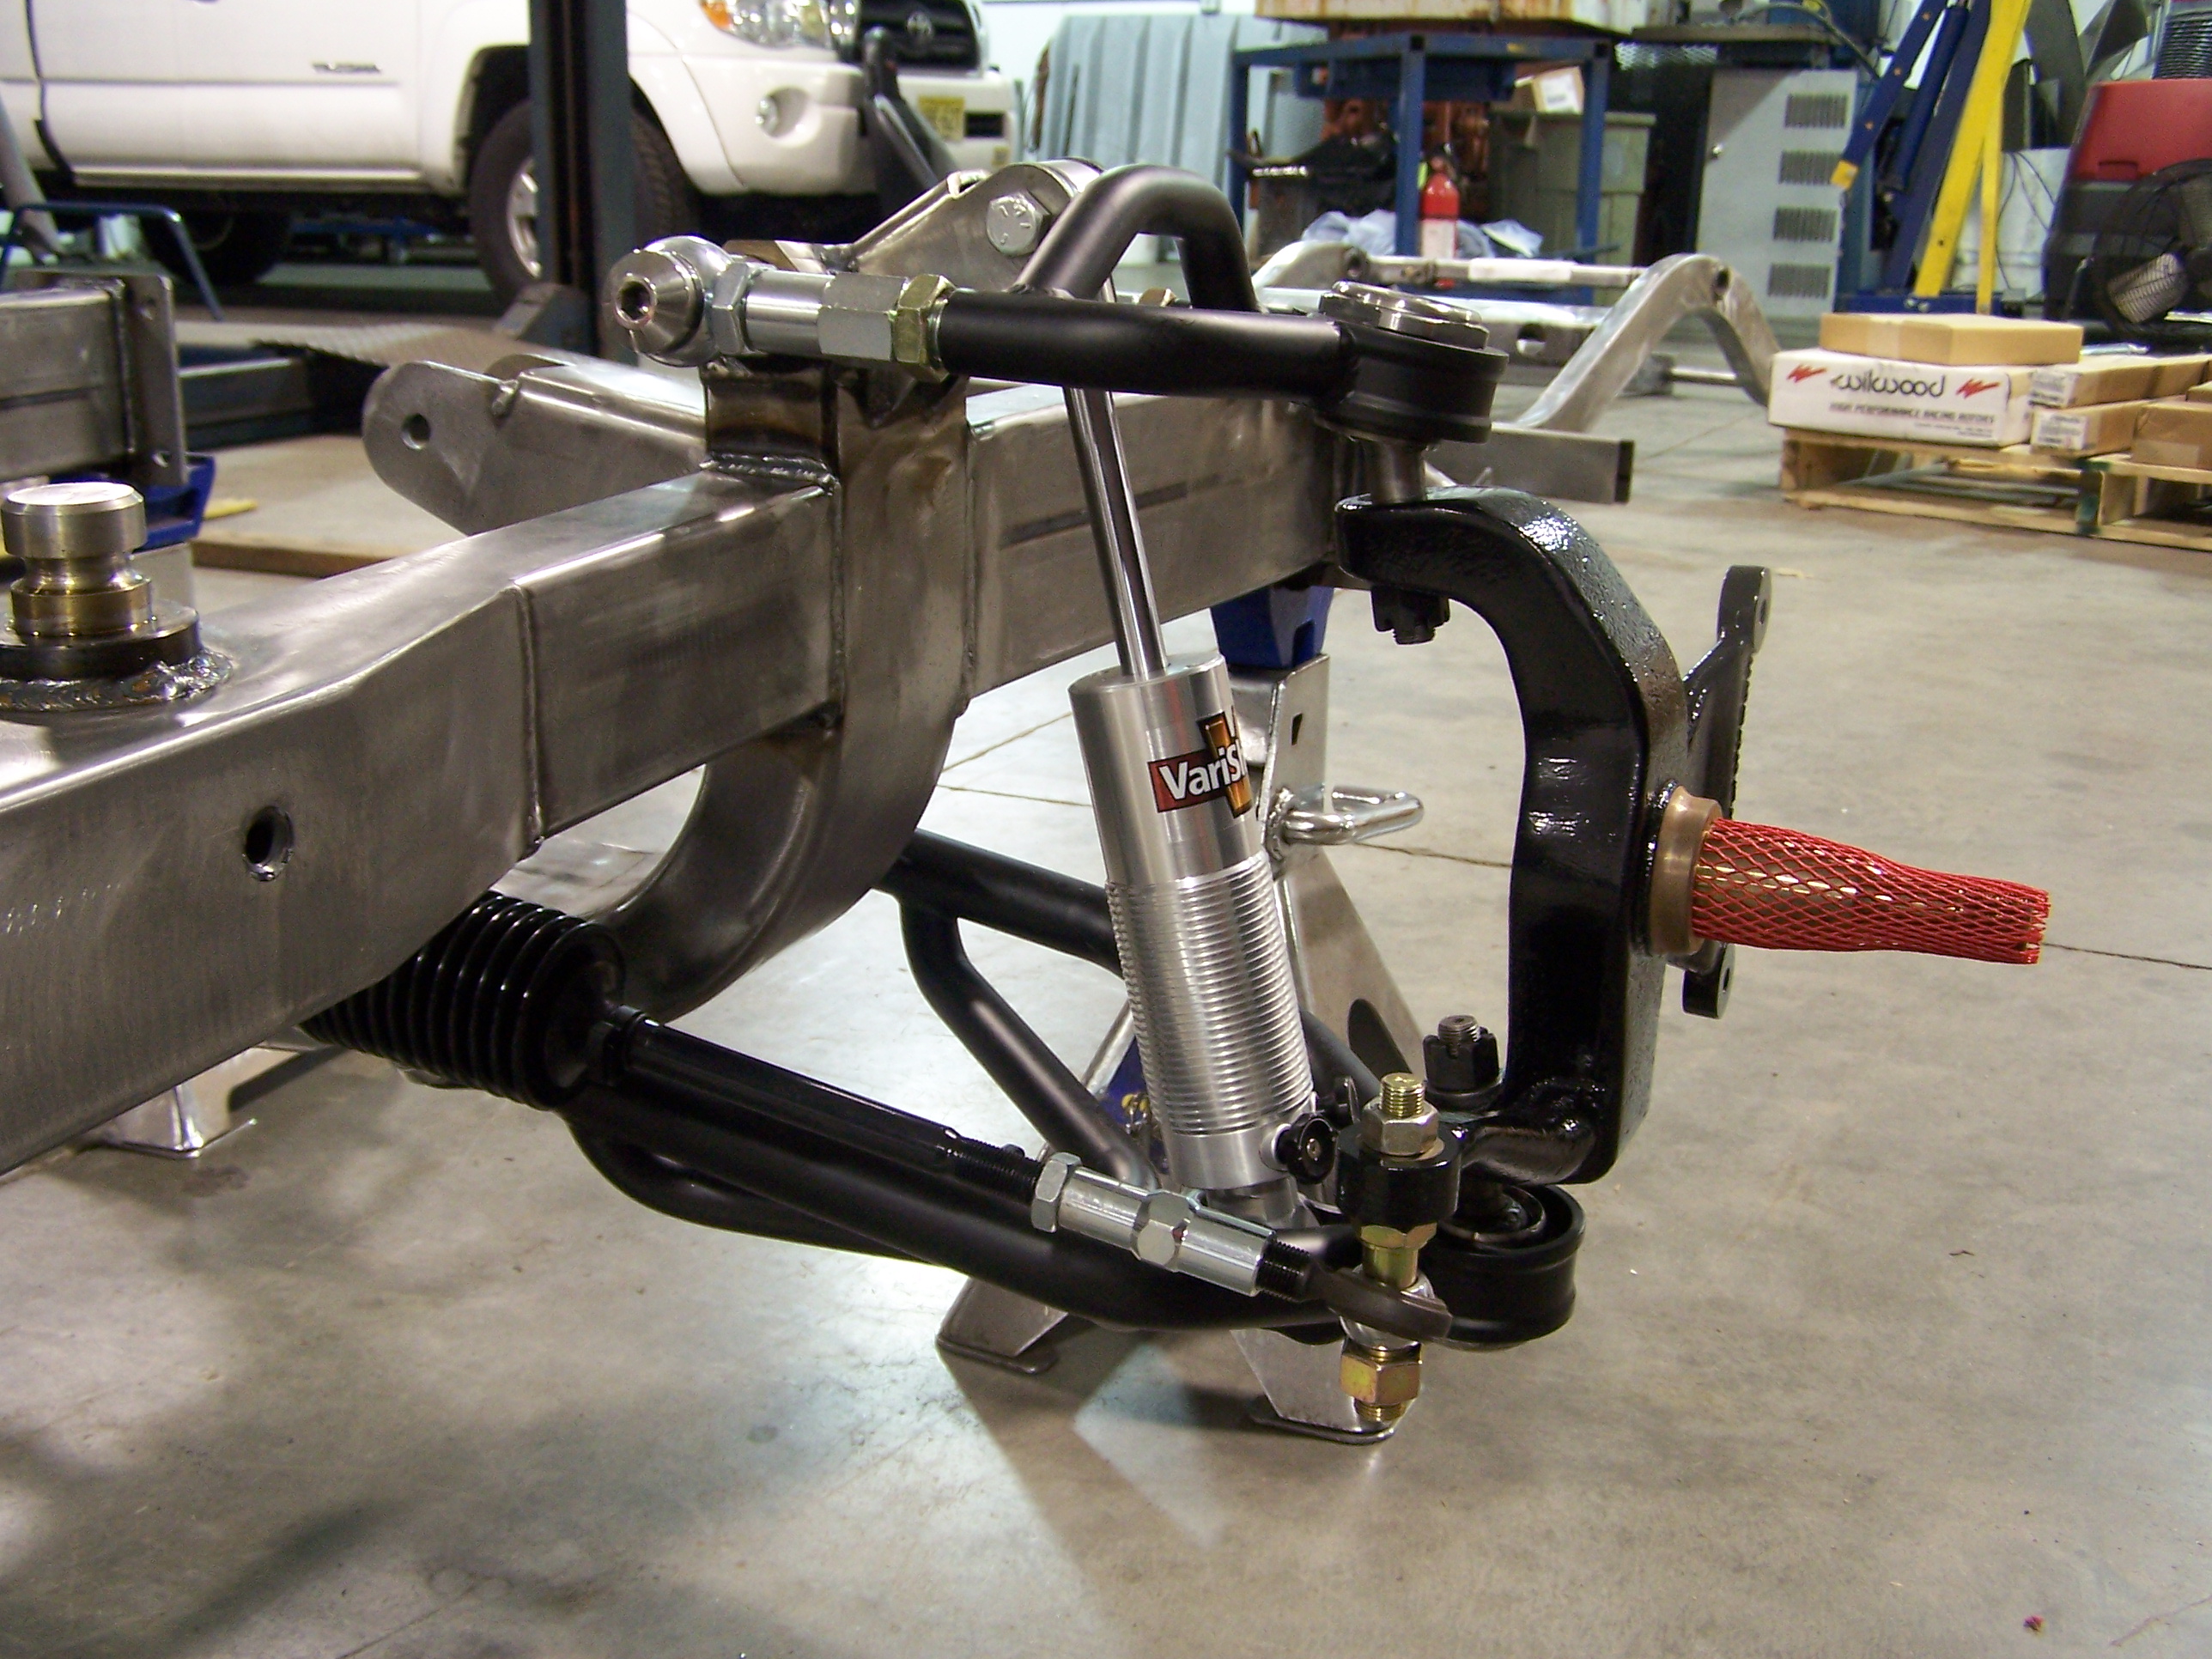
I wanted to have a coil over in the car so I didn't have to worry about the air side of things. I got the double adjustable Vari-Shock.
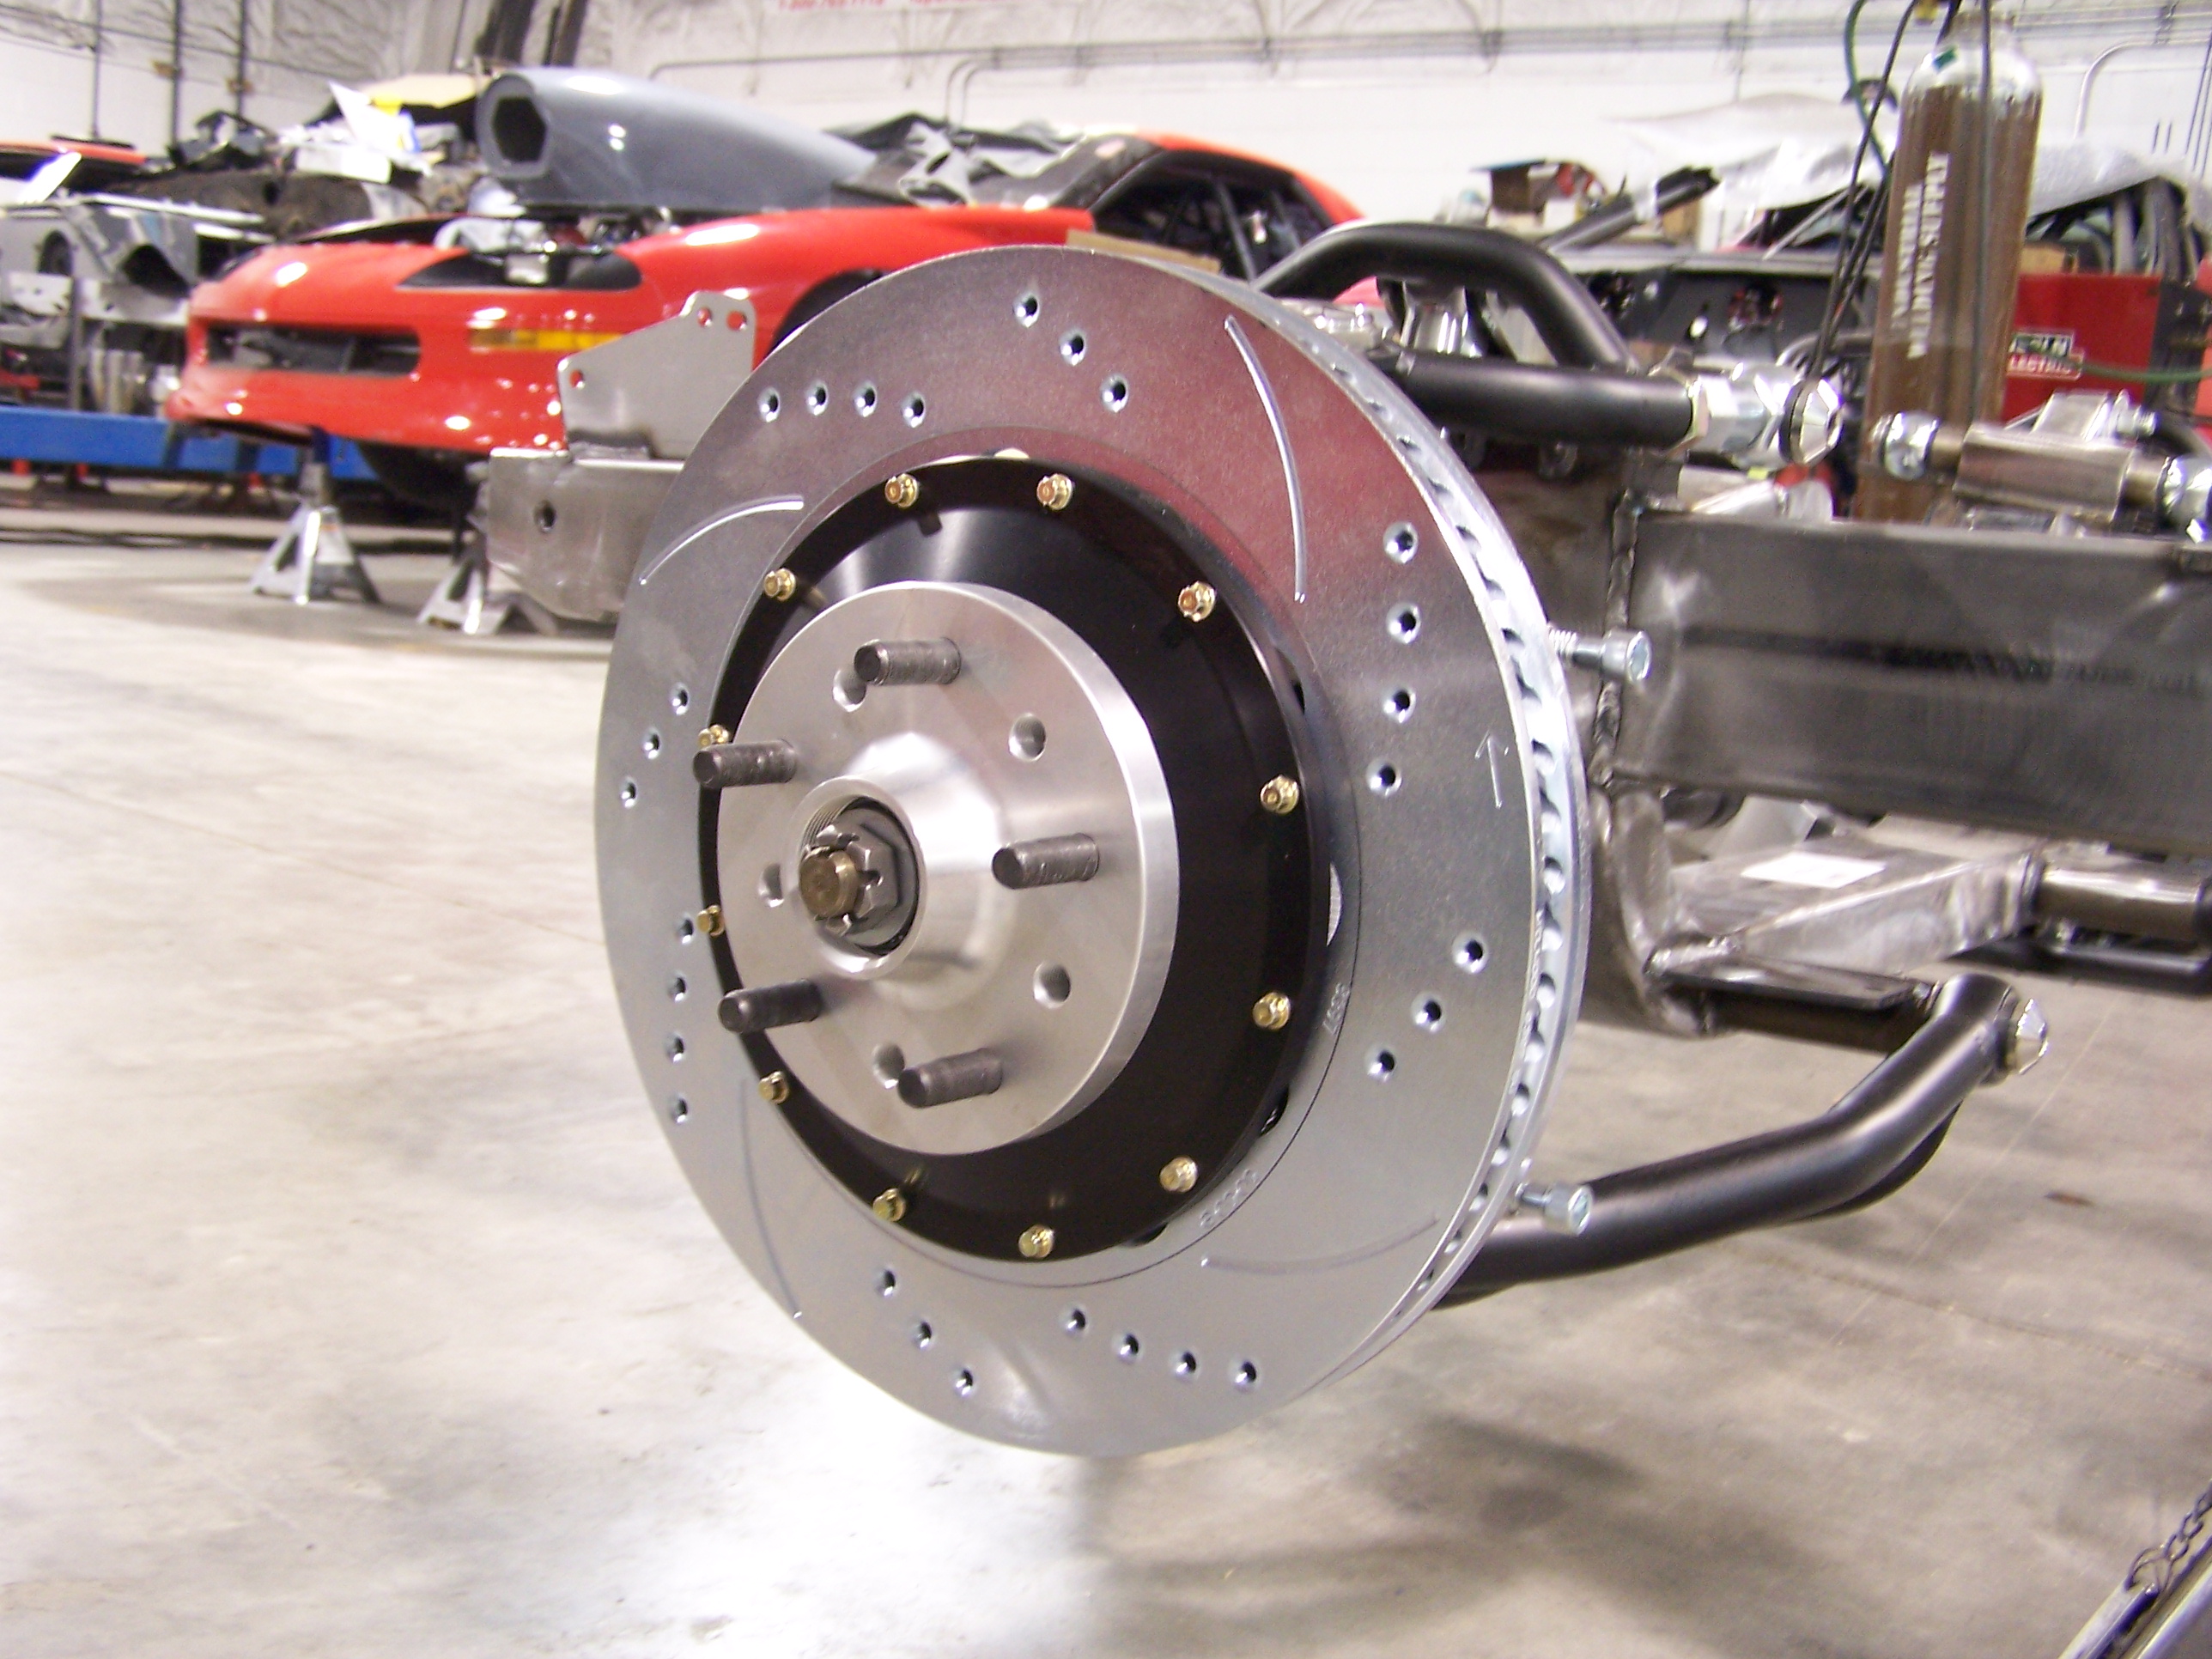
Also to make sure the car has no problems stopping I got the 14 inch Wilwood 6 piston brake set-up also made by Chassisworks.
Here is the whole clip built and ready to be bolted to the main body.
02-11-2011 #16
Registered User
- Join Date
- Mar 2010
- Location
- Orlando, FL
- Posts
- 266
agreed. those cowl vents are horrible, i plan on getting rid of mine as soon as i make my mind up about going carbon fiber or not on my camaro. if i keep it steel, they are getting shaved next time i do any body modifications that require me to fire up the ol spray gun and welder. love this build, its already noticeable that its going to be a quality machine. keep us posted. Originally Posted by eddiek
Live for today, tomorrow is never promised.
Project Eternity: https://www.pro-touring.com/showthre...rs-convertible
02-12-2011 #17
Registered User
- Join Date
- Nov 2006
- Location
- Ma.
- Posts
- 5,567
Nice job it came out nice.
Wayne
Car FINALLY home !!!!!! lol
Project FNQUIK https://www.pro-touring.com/showthre...ghlight=FNQUIK
02-13-2011 #18 Registered User
- Join Date
- Mar 2009
- Location
- overseas
- Posts
- 3,434
yeah cool project!
Kevin S. (overseas in Germany)
1963 Chevrolet Impala 2d ht Coupe
www.CruznArt.com
CRUZN - Automotive Artworks
02-16-2011 #19
Registered User
- Join Date
- Dec 2007
- Posts
- 14
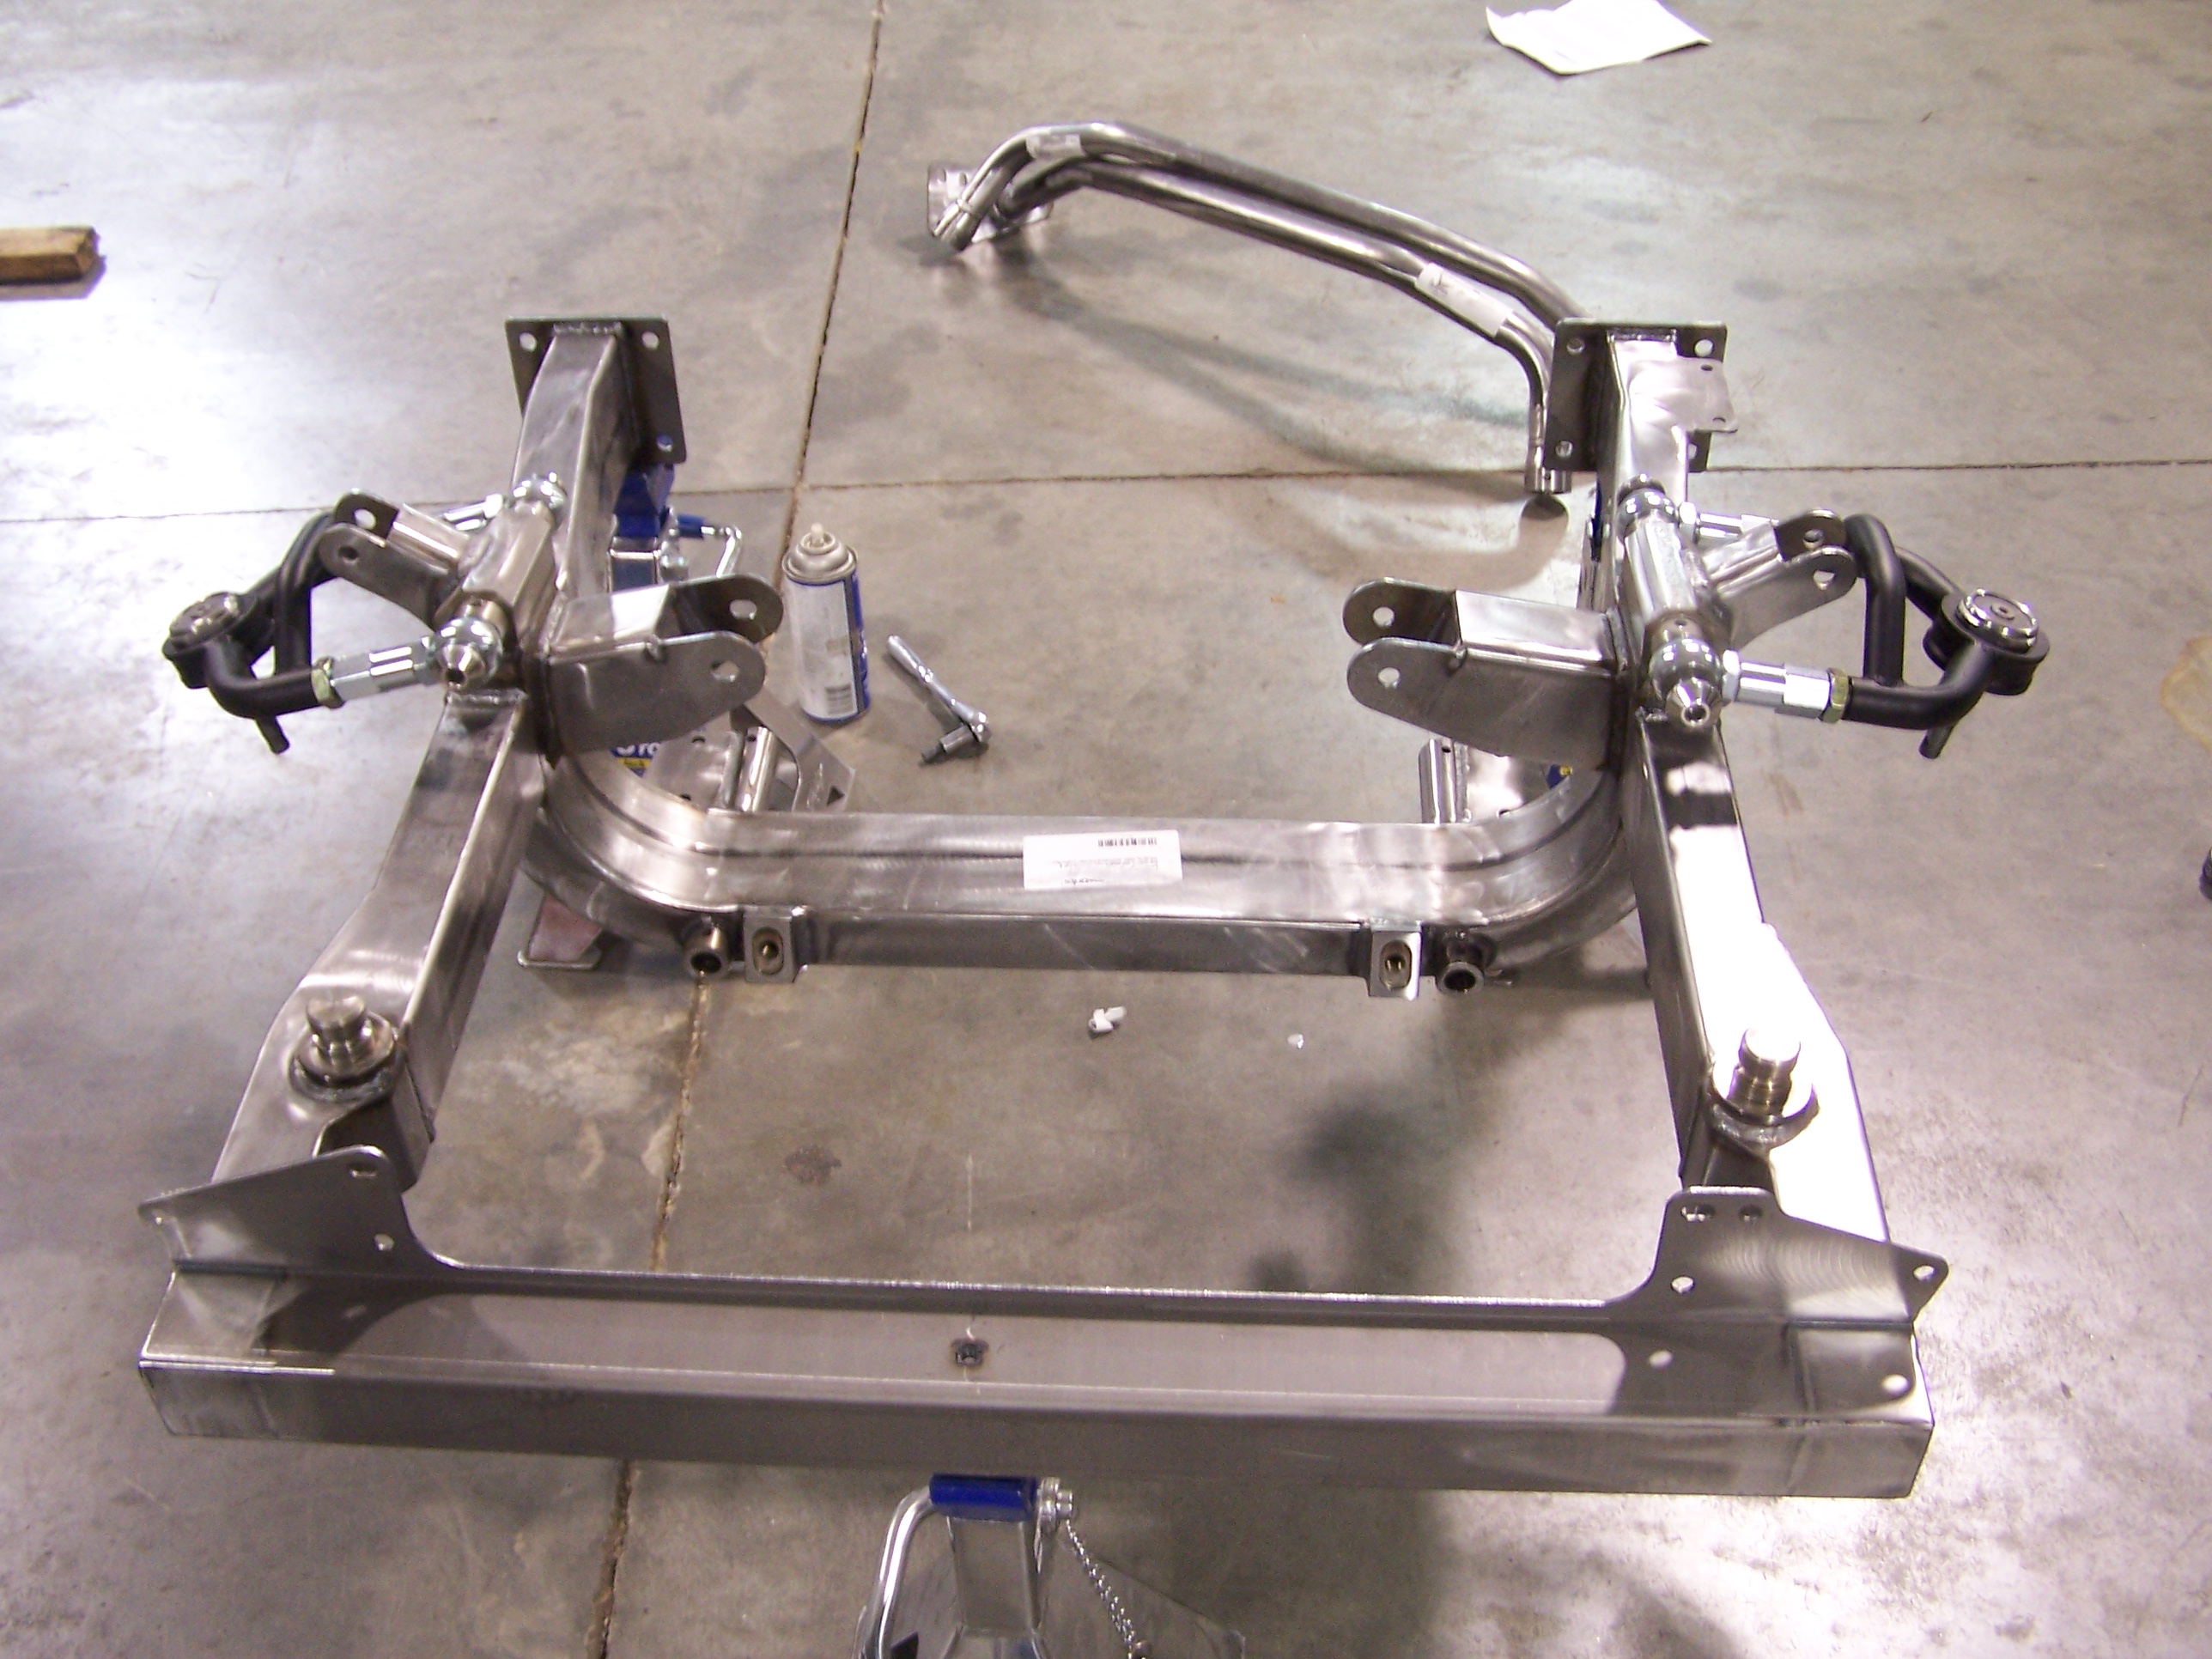
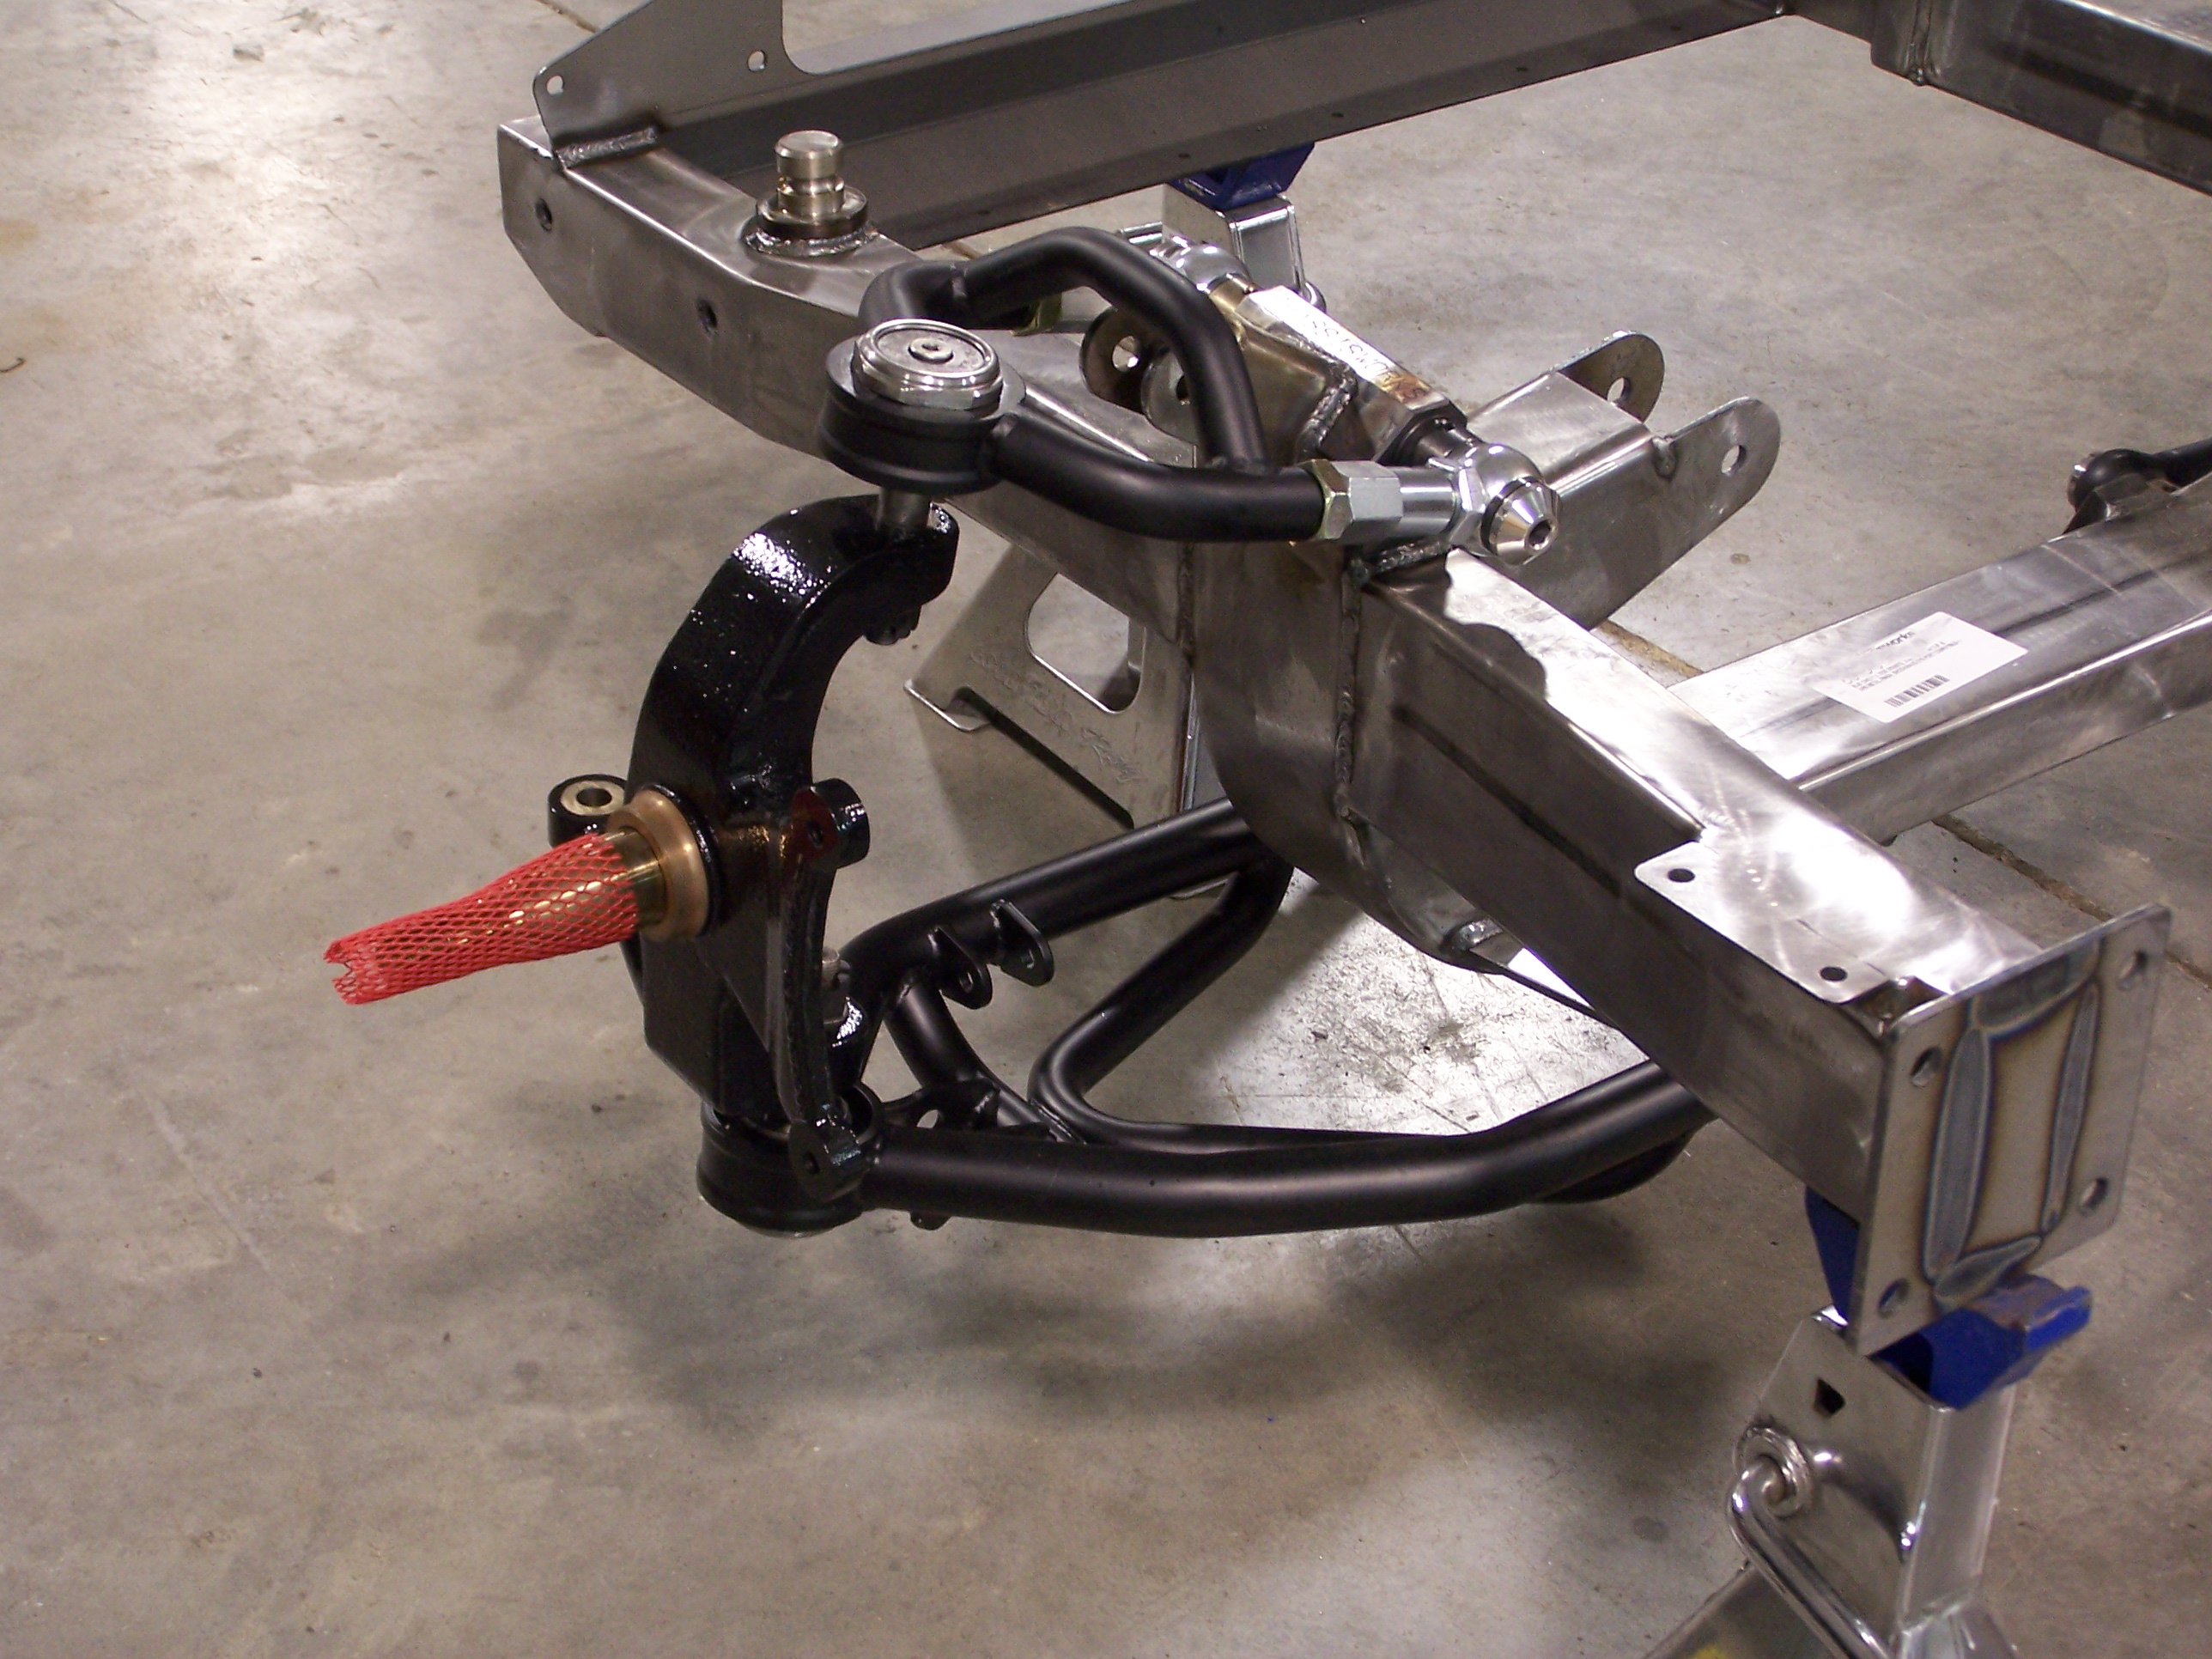
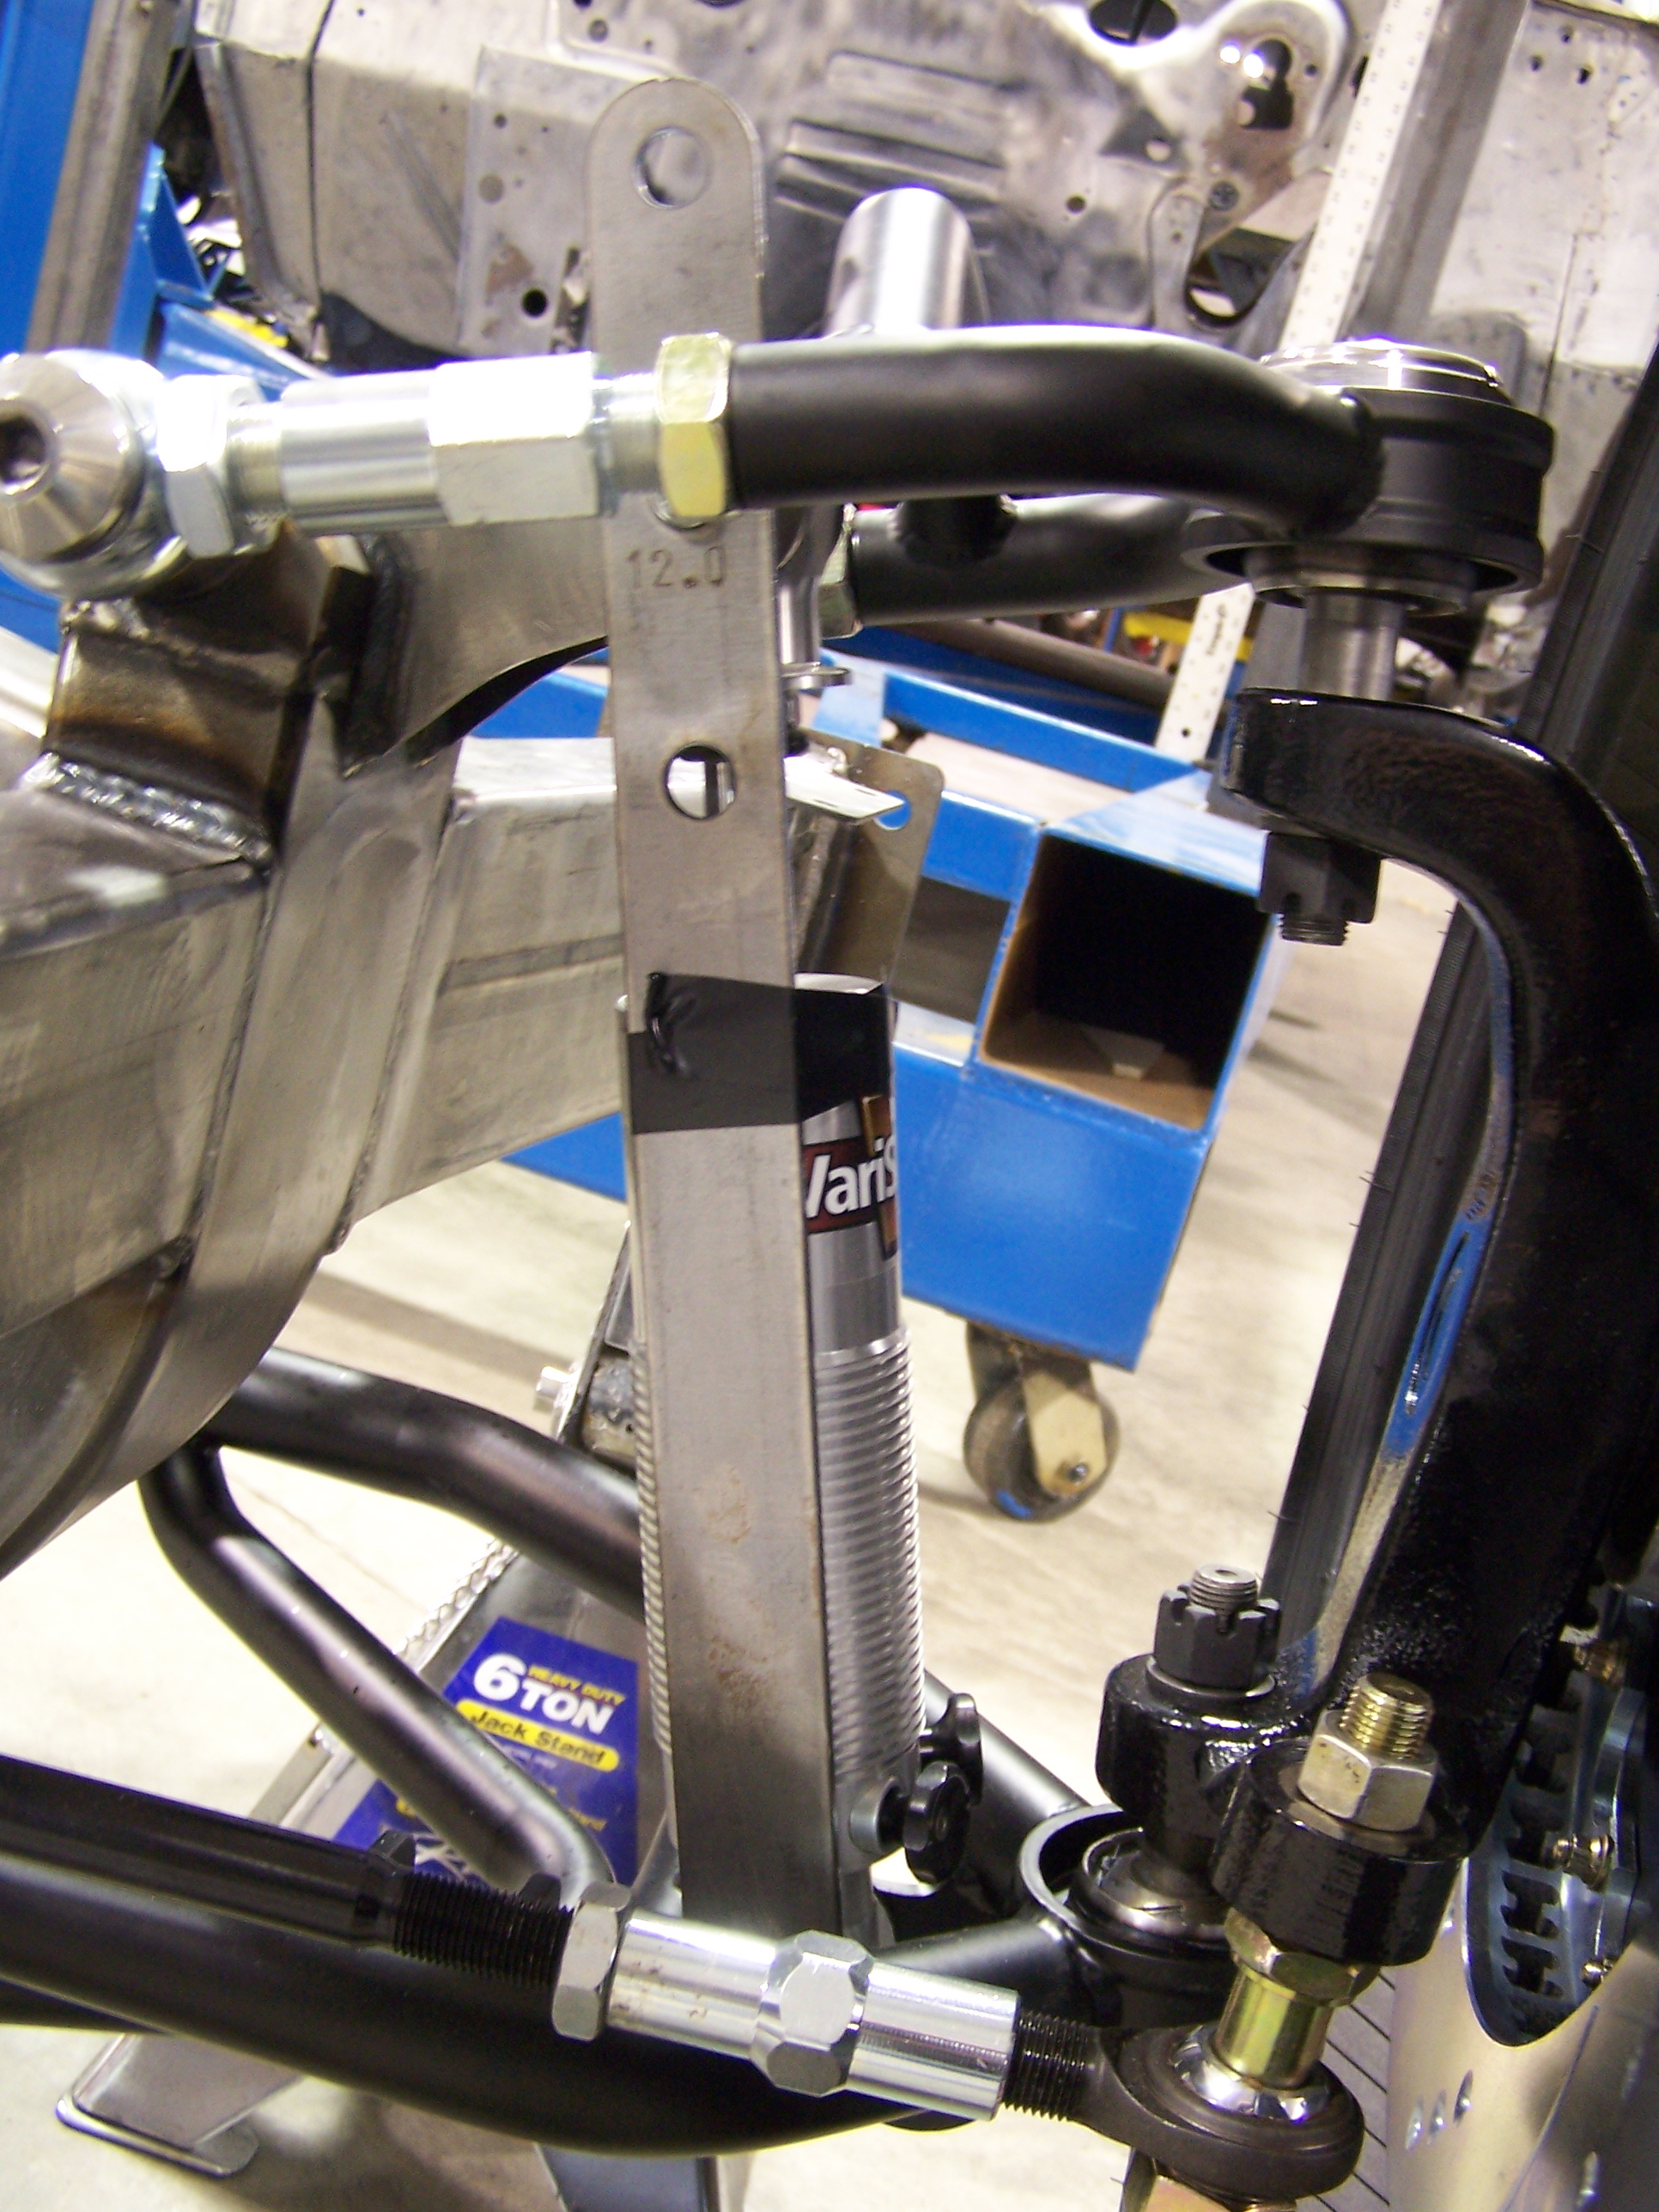
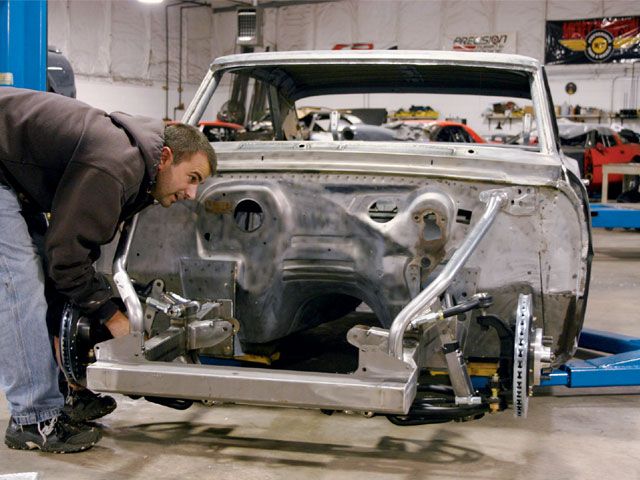
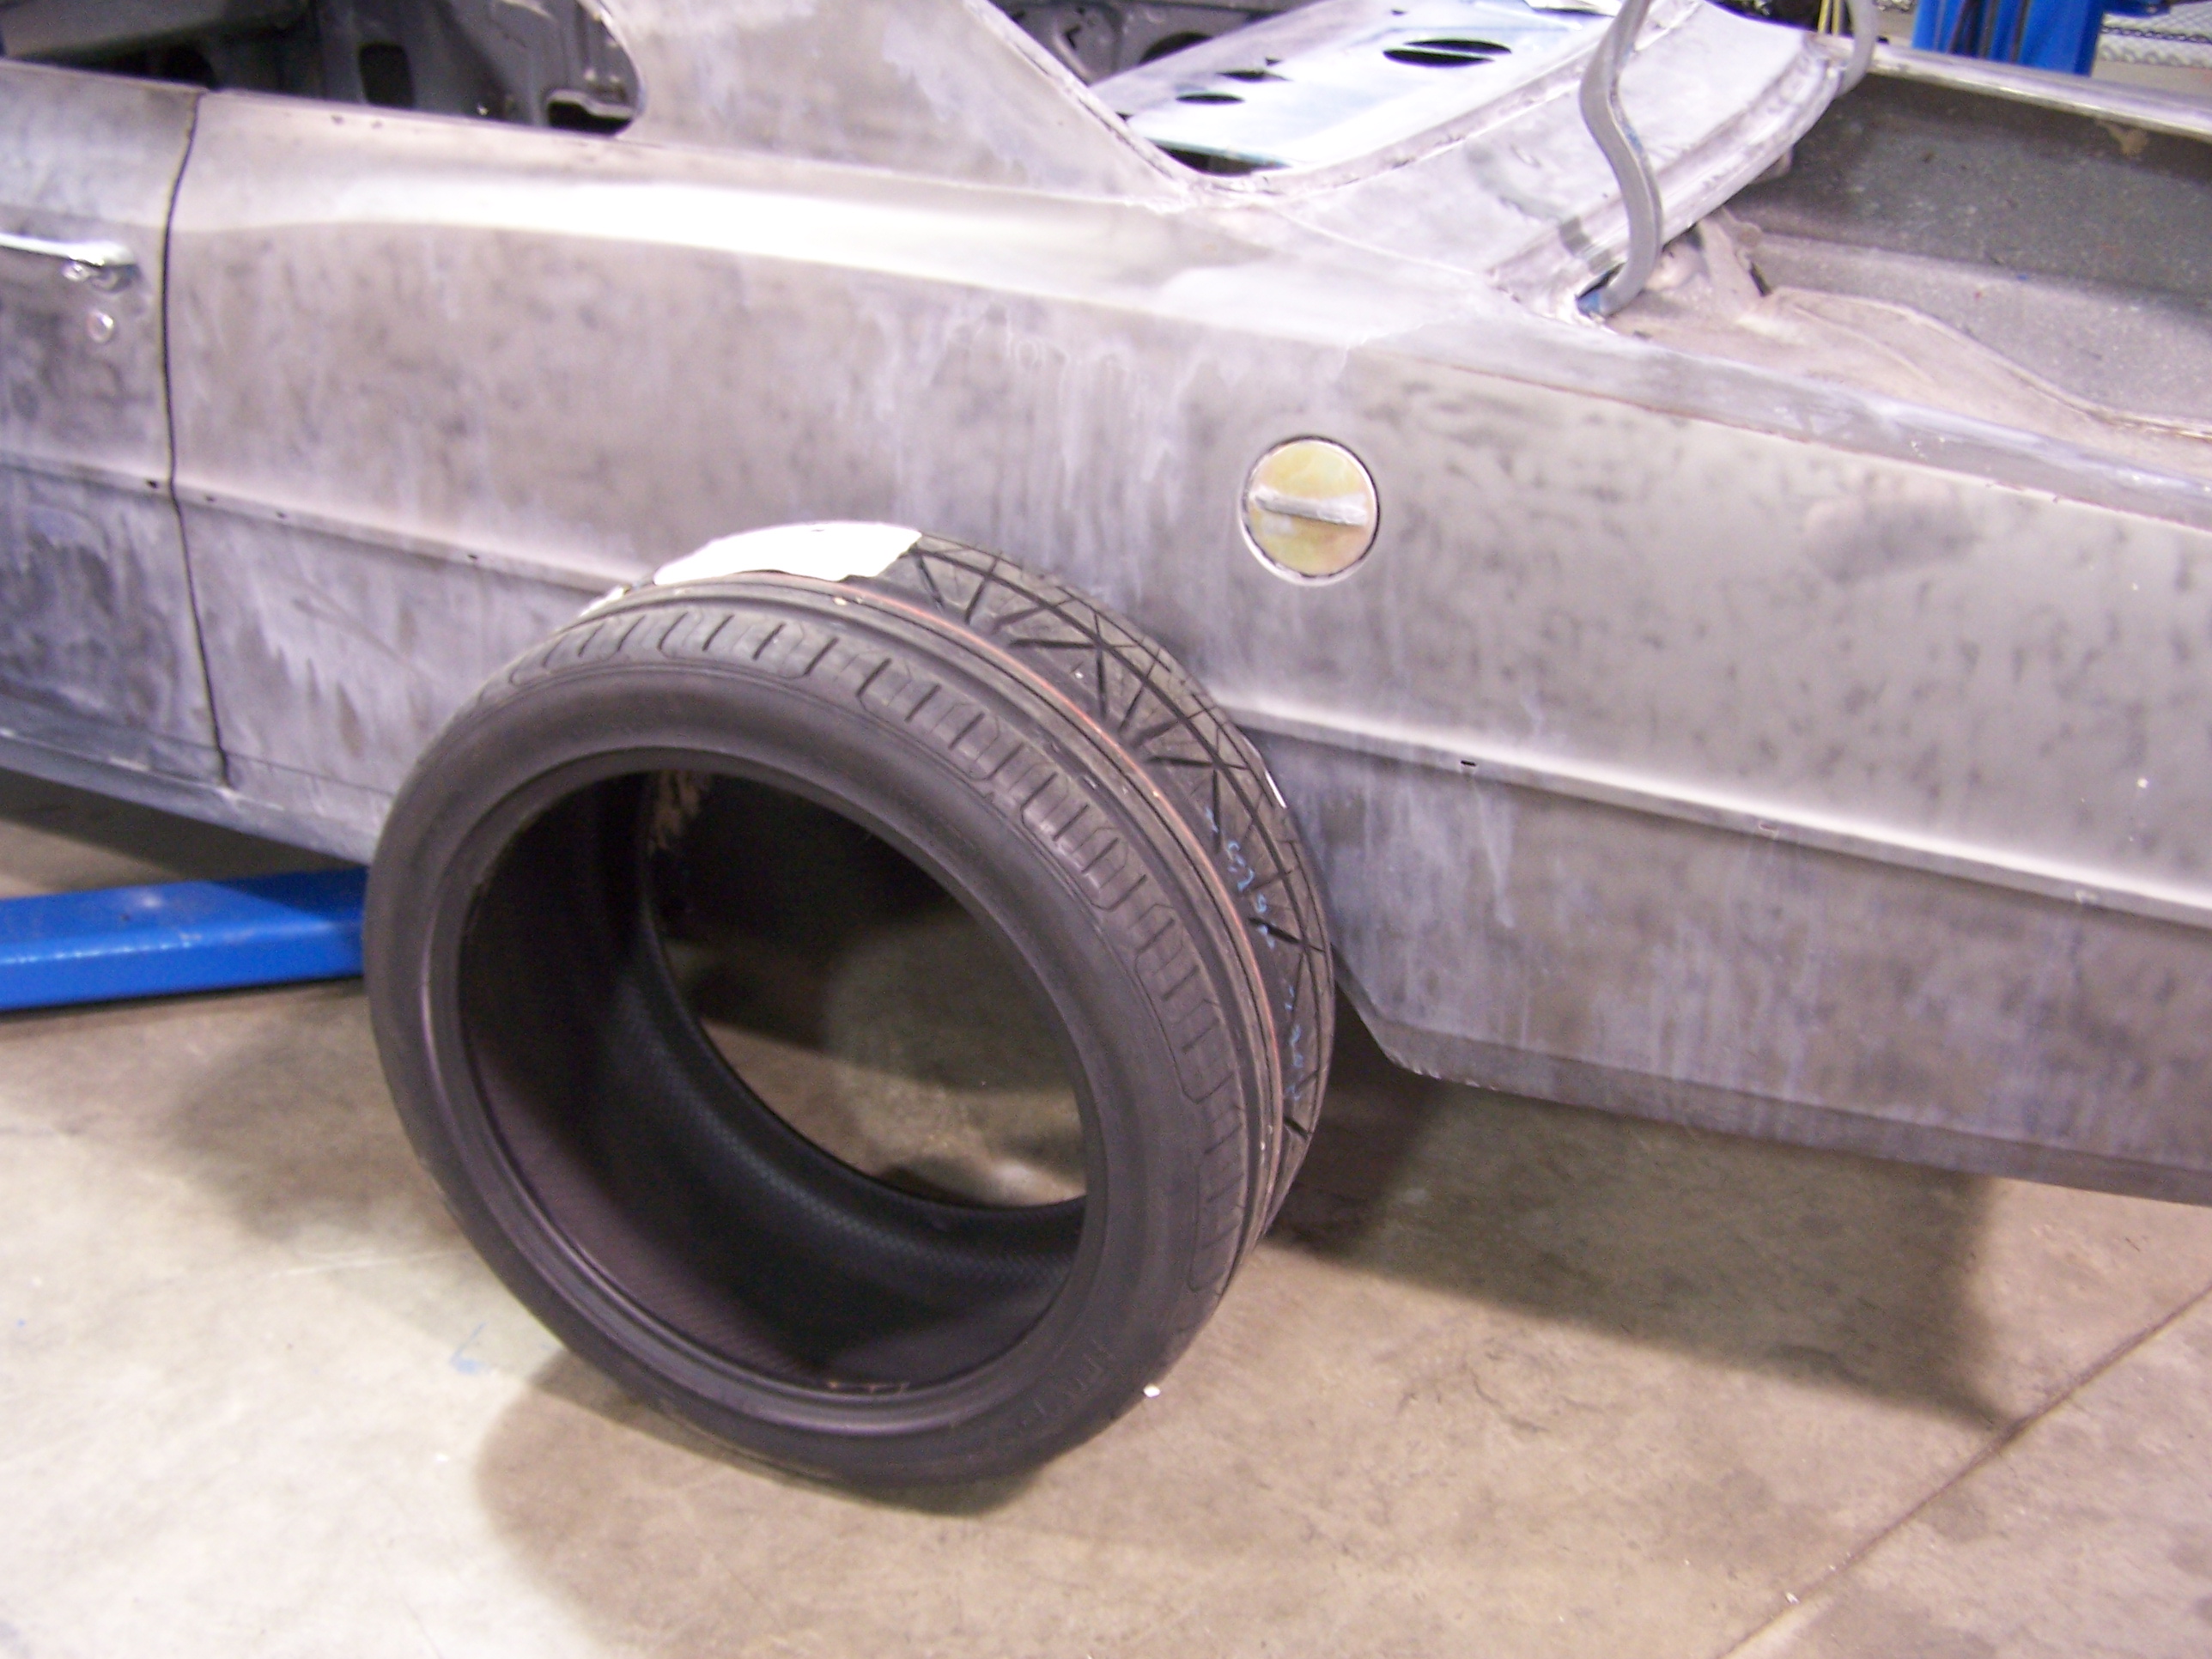
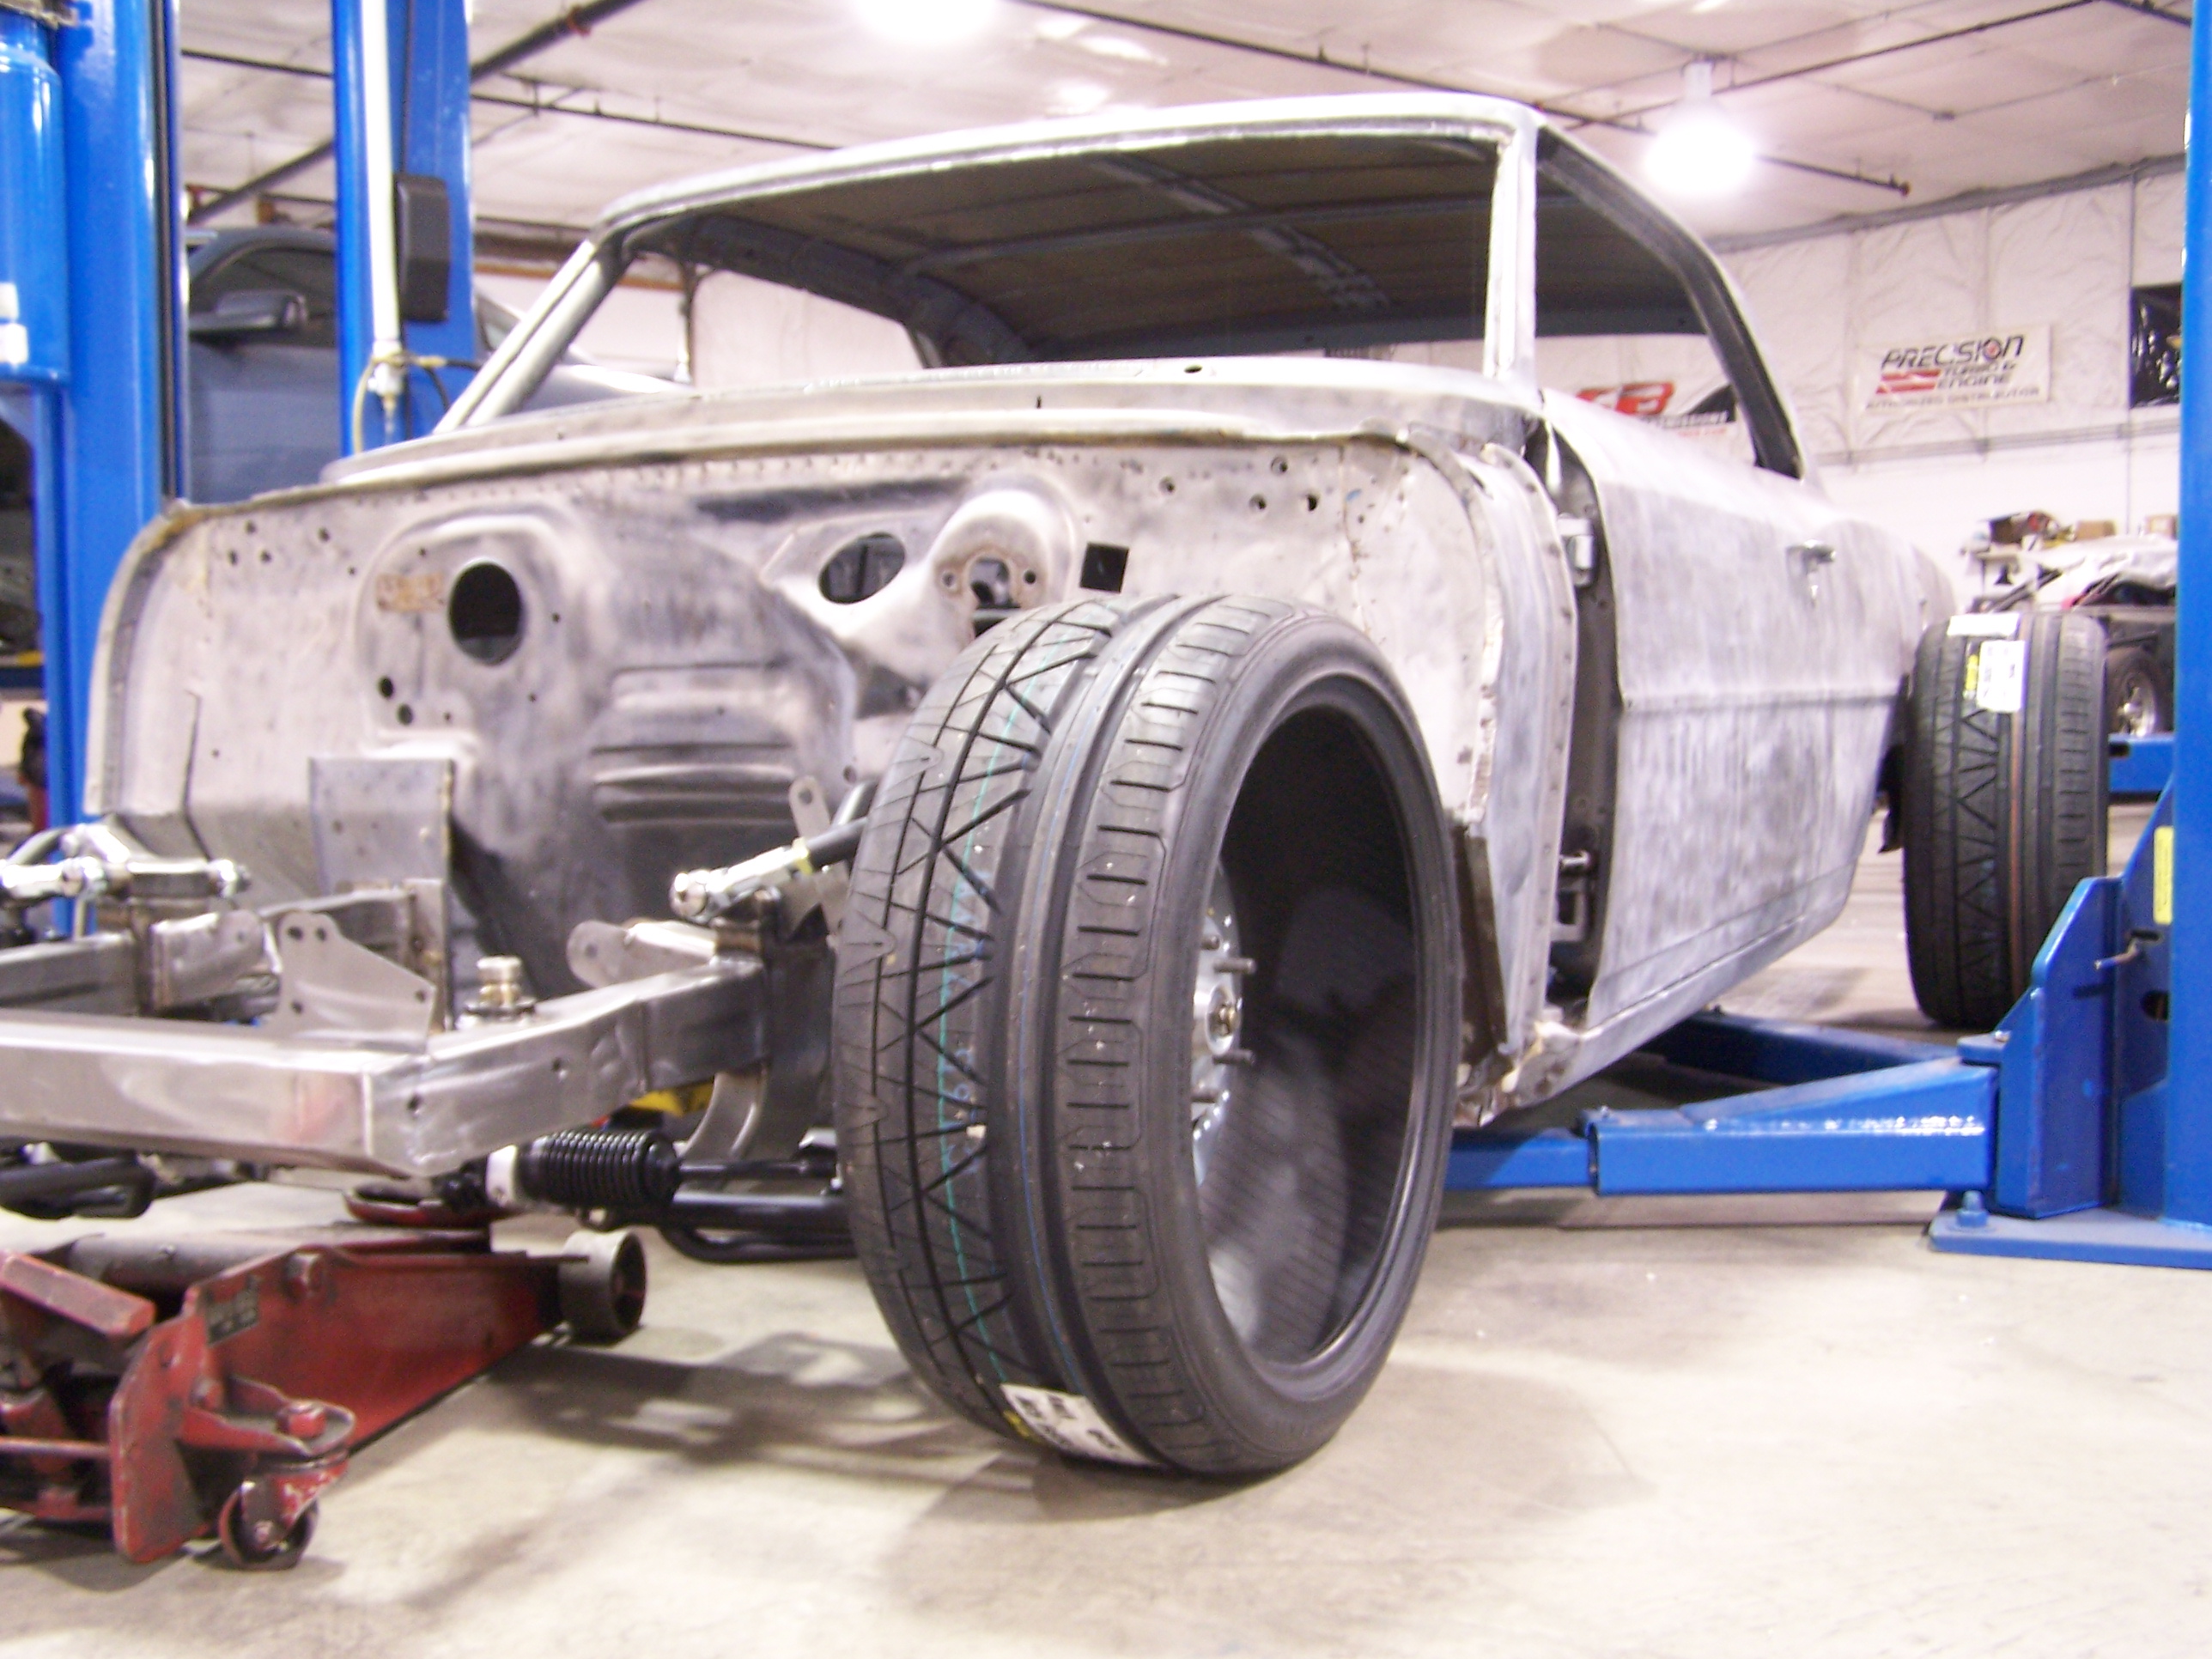
So with the front clip built we needed to get it bolted onto the shell and set the ride height. For that we used a really cool tool that Chris Alston Chassisworks makes. This set-up is very simple but very affective. It goes on the bolts that hold the shock on and basically makes it a strut for setting it up. We just put a little tape to hold ours for a little trial fit and bolted front clip on.
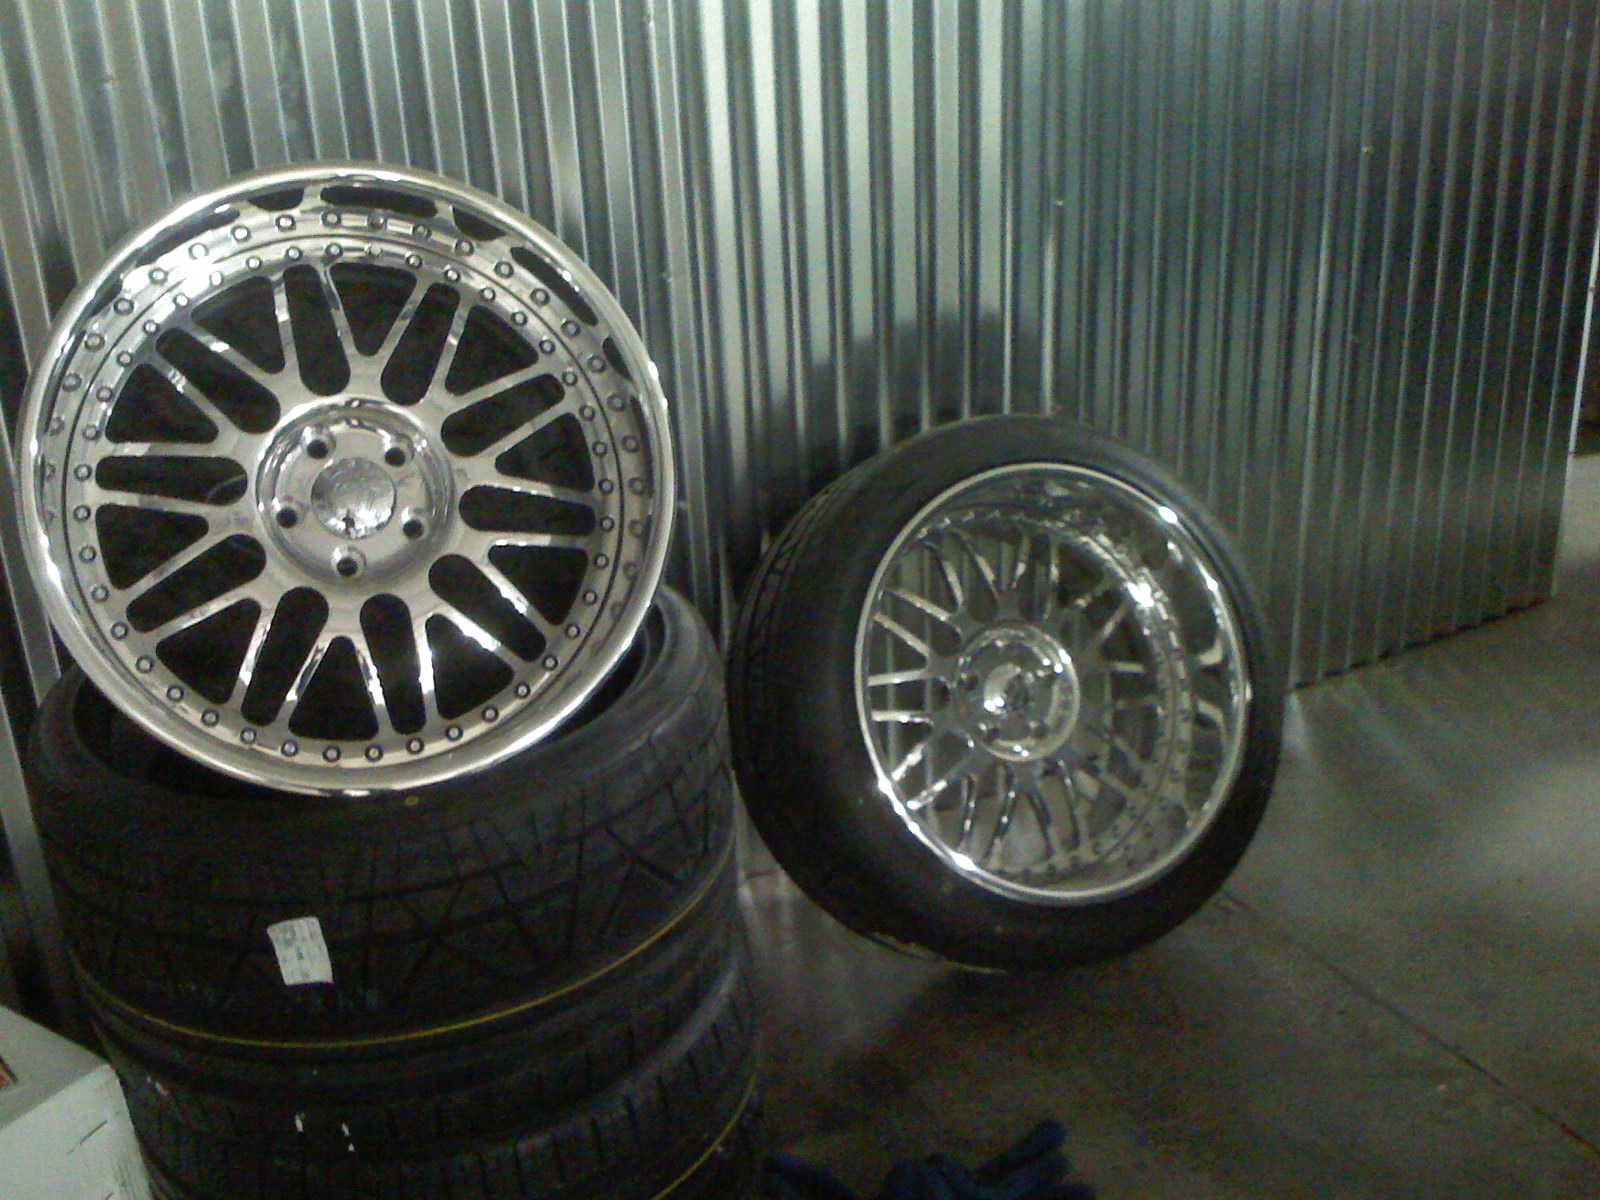
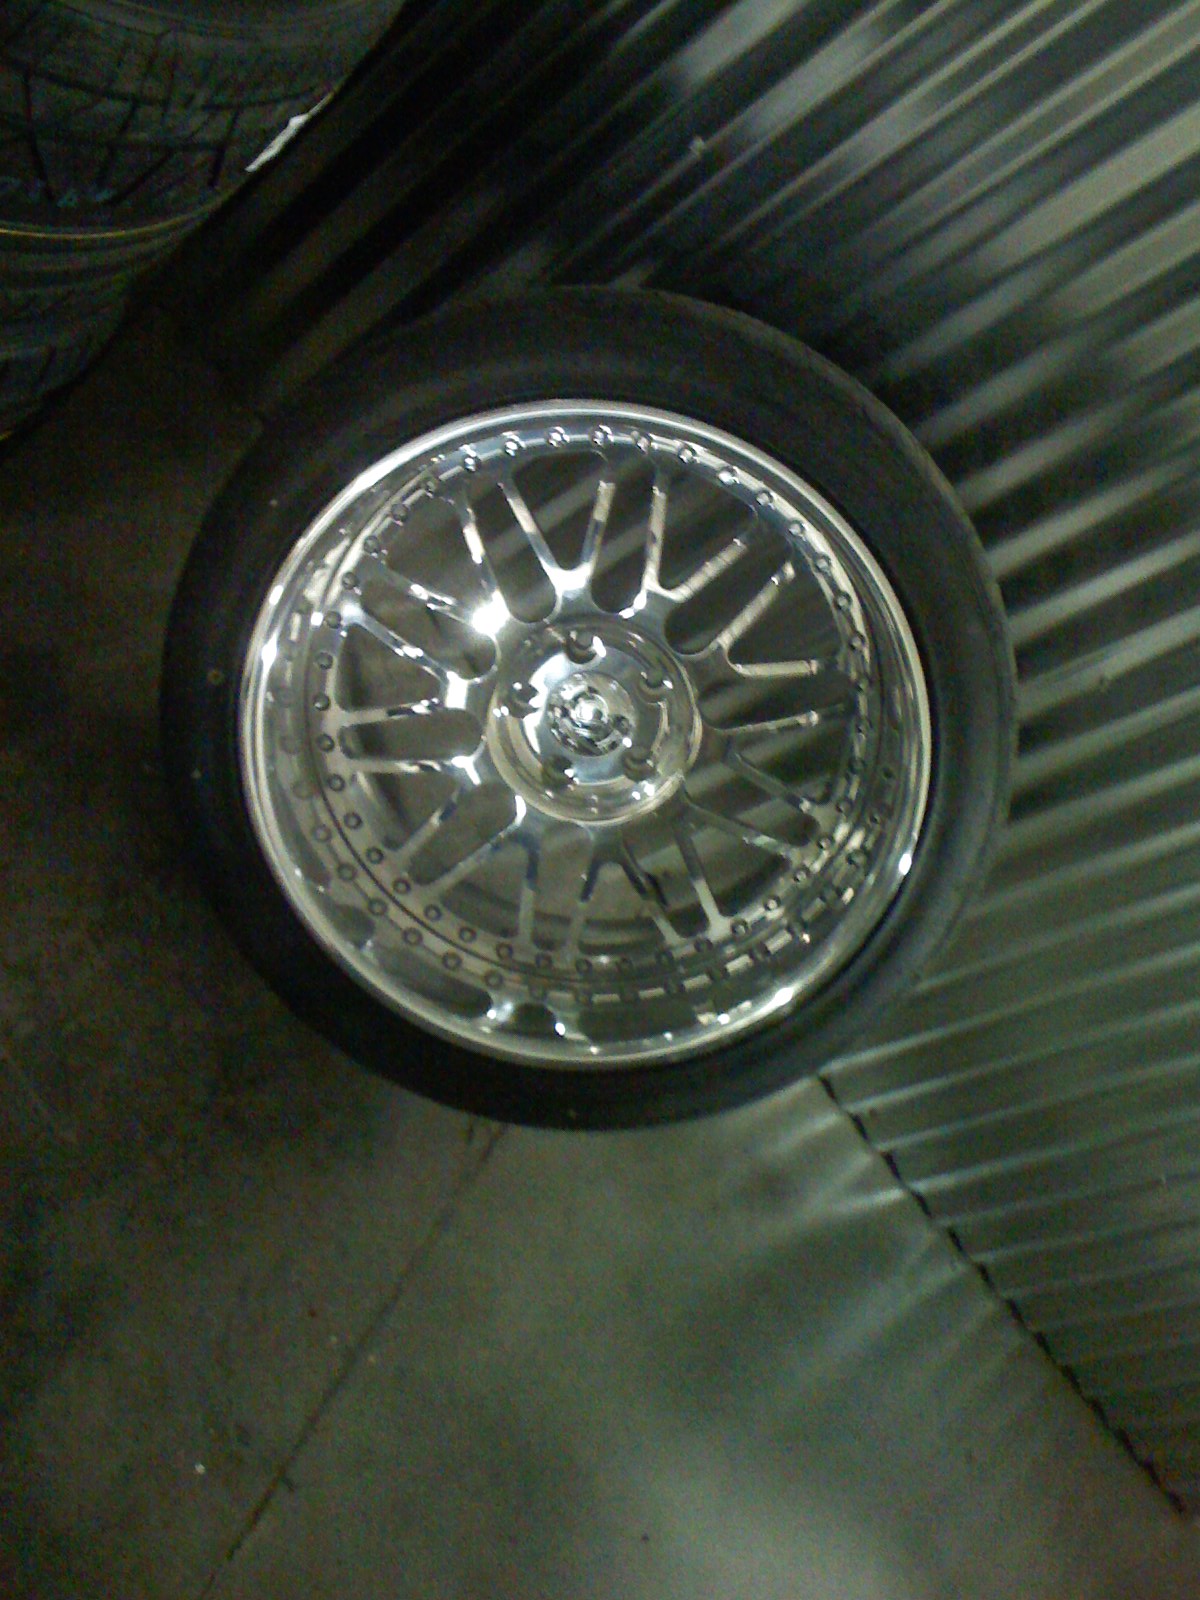
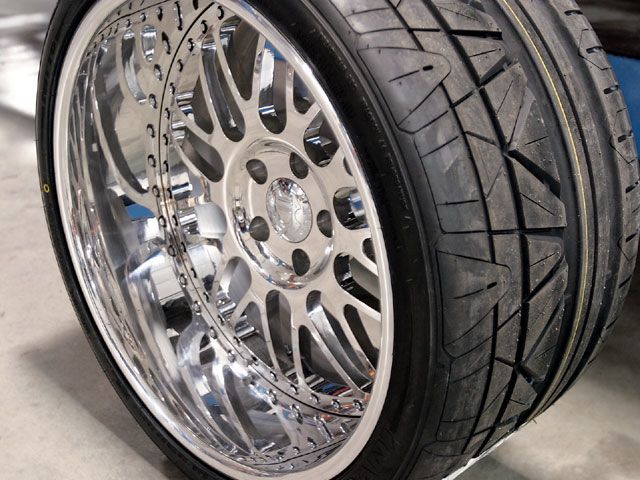
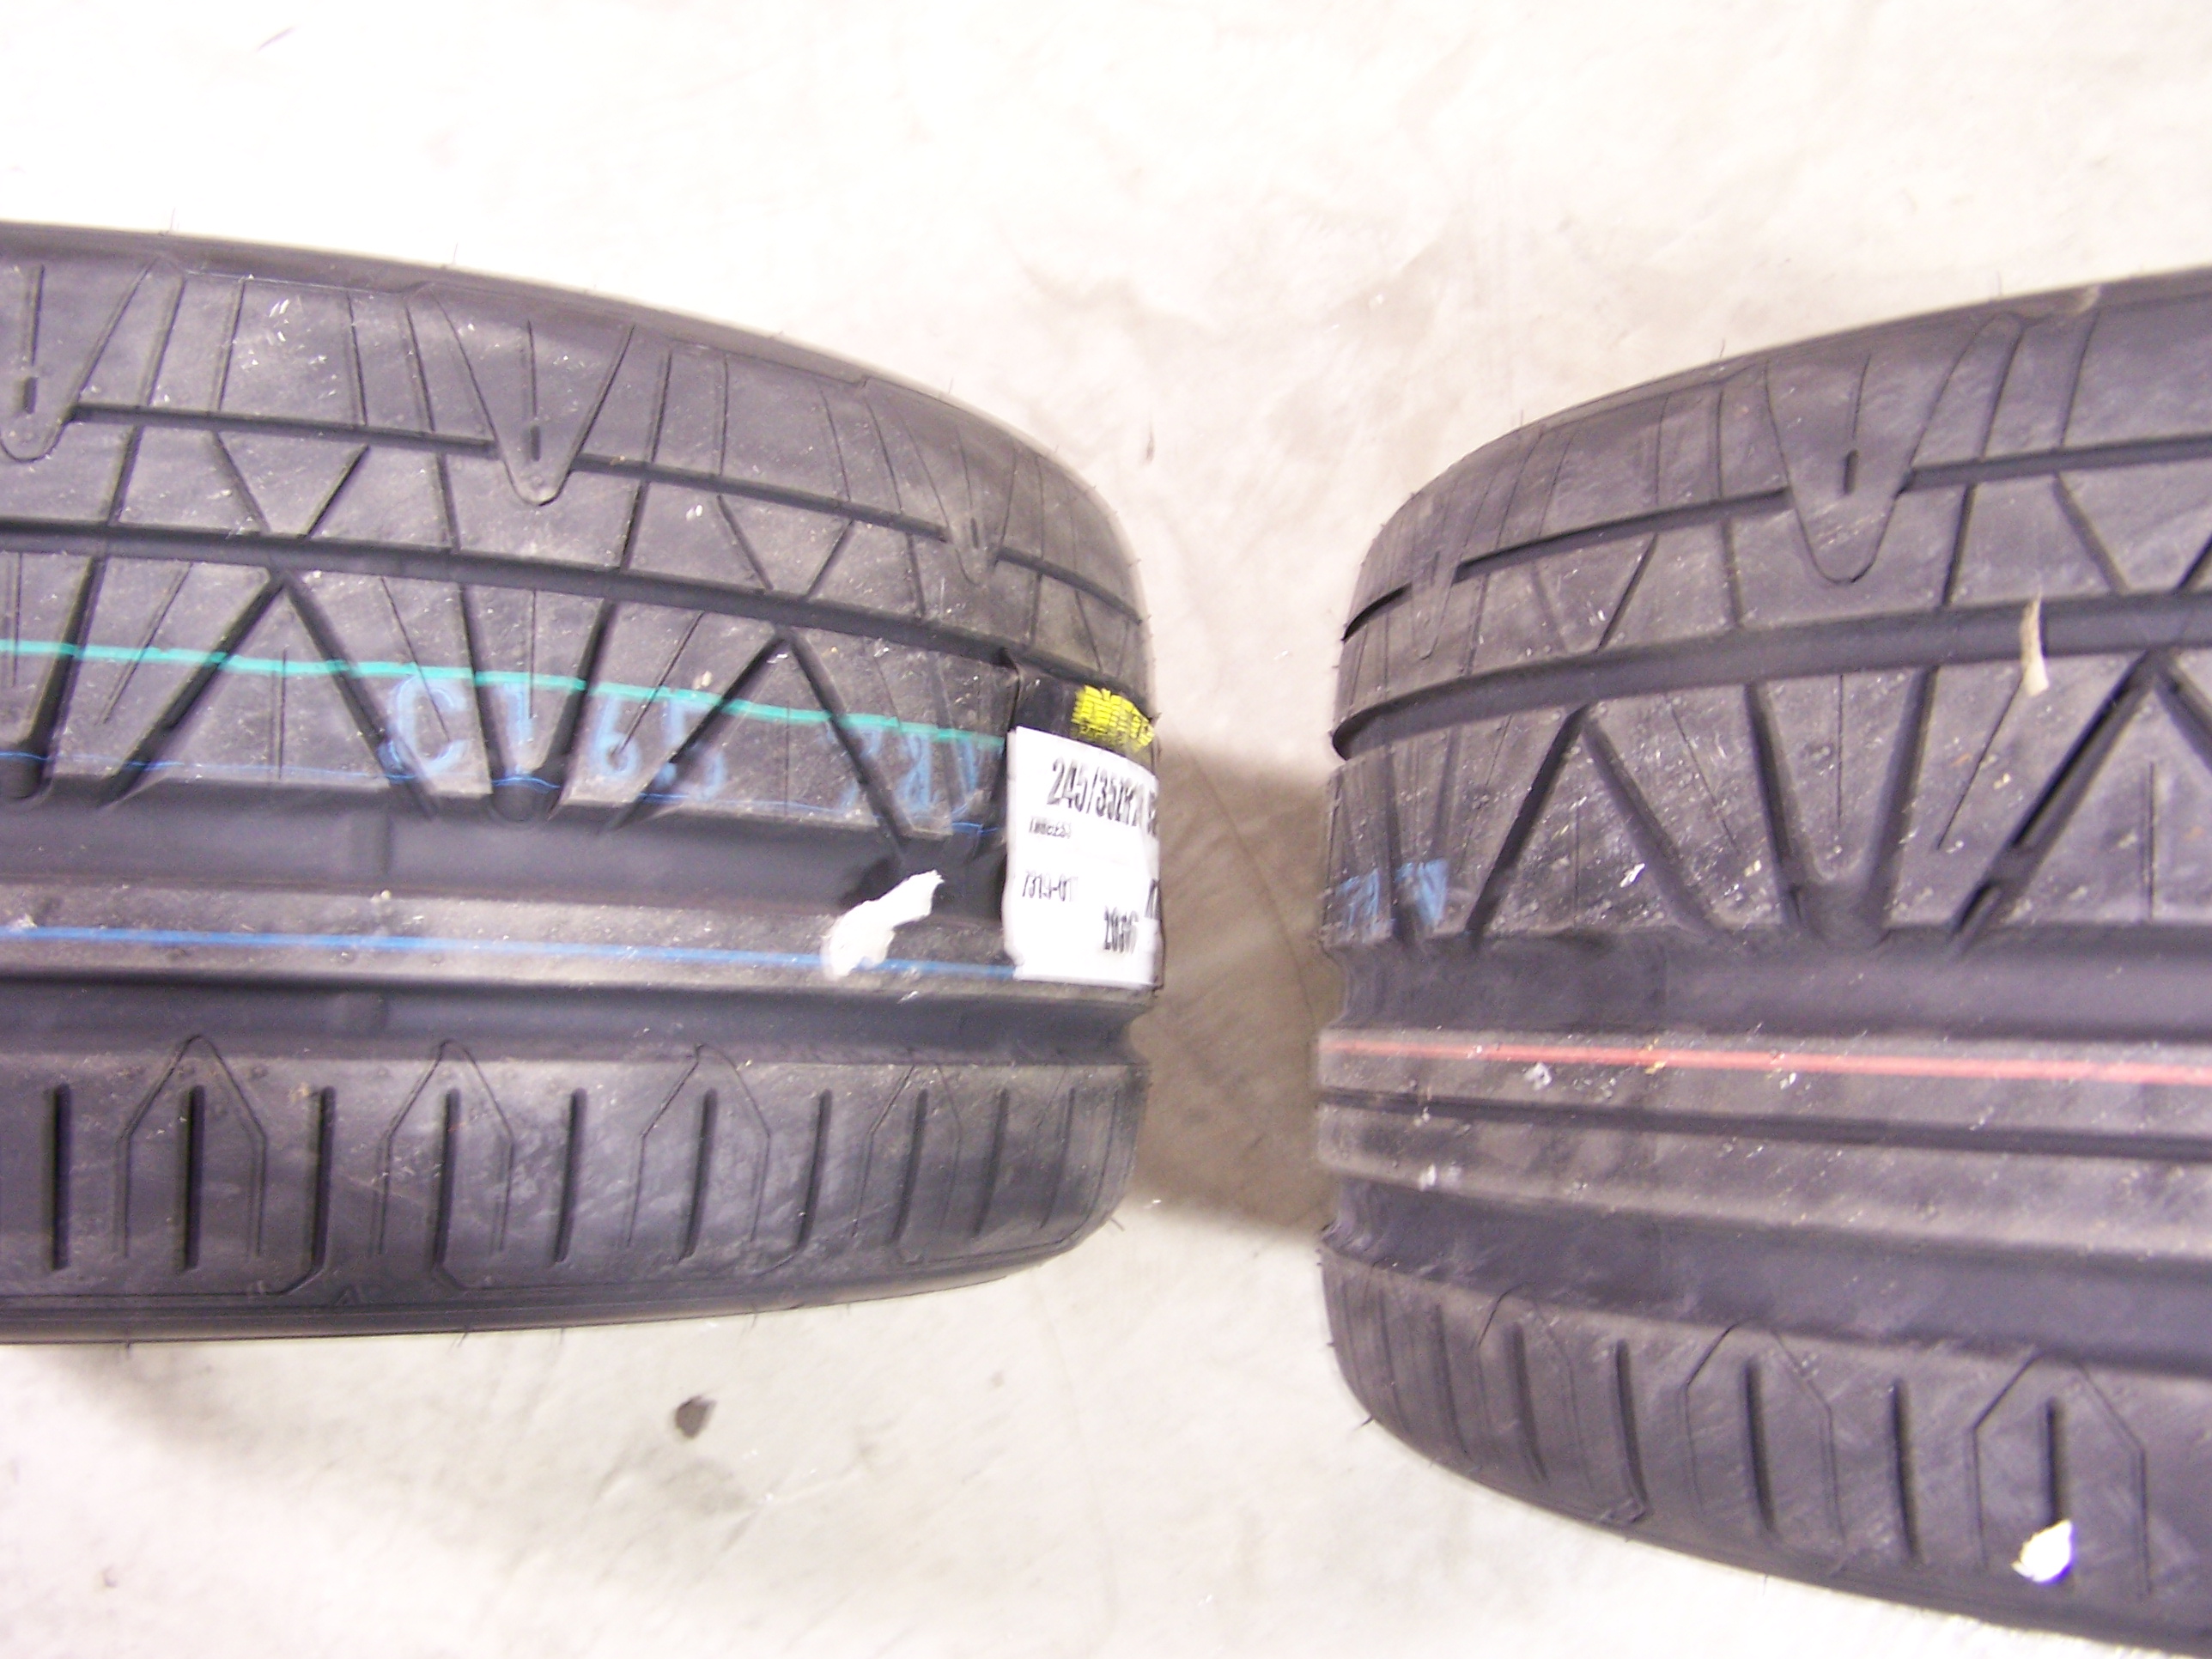
We all know how the wheels can make or break the whole look of a car so when choosing them you really need to do your research. The wheels that caught my eye were the ID311's made by Intro Wheels and they are part of their line called I.D Luxury. They are a true 3 piece wheel and I just think they have the right look for a G-Machine type of car. The front is a 19 x 8 1/2 and the rear are 20 x 12. For the tires I used the Nitto Invo. I spent a lot of time making sure the aspect ratio of them were not to far off to make sure they have a smiler sidewall to them and look proportionate on the car. The front size ended up being a 245-35-19 and the rear is 342-25-20. Thanks to the guys at Jerry Noonan's Auto Center in Monroe NJ for getting them all mounted without getting a spec on the wheel.
Now that I had some parts it was time to get them all onto the shell and make this thing start looking like a car.
02-17-2011 #20 Registered User
- Join Date
- Sep 2007
- Location
- Thehoodstock,GA
- Posts
- 793
Great project Eddie.
I had forgotten this car. Glad you're back on it.
Those 245's are gonna look really tuff under the front fenders.
Best of luck.MarkK

 Reply With Quote


