

Results 61 to 80 of 261
Thread: First-Gen S10 Corner Carver
-
06-05-2008 #61

 Registered User
- Join Date
- Sep 2006
- Location
- New York, NY
- Posts
- 458

Biased Ford videos:
http://youtube.com/watch?v=zRfE_XAk2mE
http://www.autoblog.com/2007/06/25/v...re-test-track/
first test could have easily been rigged by tare-ing the deflection meter when the frame wasn't exactly vertical, but point still stands
clearly boxing it would help stiffness, but theres so many things that could go wrong:
I don't like the idea of boxing it, because those welds would be highly stressed and prone to cracking. I'm also not sure how the frames are made, but if they are cold-worked, welding on them takes all the hardness out. I'm just gonna not think about it, insert the plate about .75in into the channel and then weld short sections(so that I can't get one continuous crack).
Any thoughts on how to exactly level the frame in a garage? This part makes me uneasy too, because as you see in the first video, the frame easily be off by an inch at the end, and you box it and you have a permanently twisted frame.
I'm still not completely sold on boxing the frame as I think a well-installed cage would take care of these problems...I've tried pretty hard to level the frame too, but the left rail probably takes 30lbs to pick up while the right is 150lbs at least (at the back). Keep in mind, this is after I leveld the frame to get all the measurements for suspension...it's impossible to get the frame to be neutral.
having bare metal in a boxed-off section also bothers me
As you can see, I like the idea of boxing it, but not how wrong it could go.
Jerome
-
06-05-2008 #62 Starting The Transformation
- Join Date
- Nov 2005
- Location
- montgomery, IL
- Posts
- 396
thats pretty sweet.... there is a guy running around here with a blazer like that but he has the stock motor....
"Too bad Dare to Be Different these days could mean Dare to Be Fast. What ever happened to the Cars that Scared people?" John Pearley Huffman
06-08-2008 #63
Registered User
- Join Date
- Sep 2006
- Location
- New York, NY
- Posts
- 458
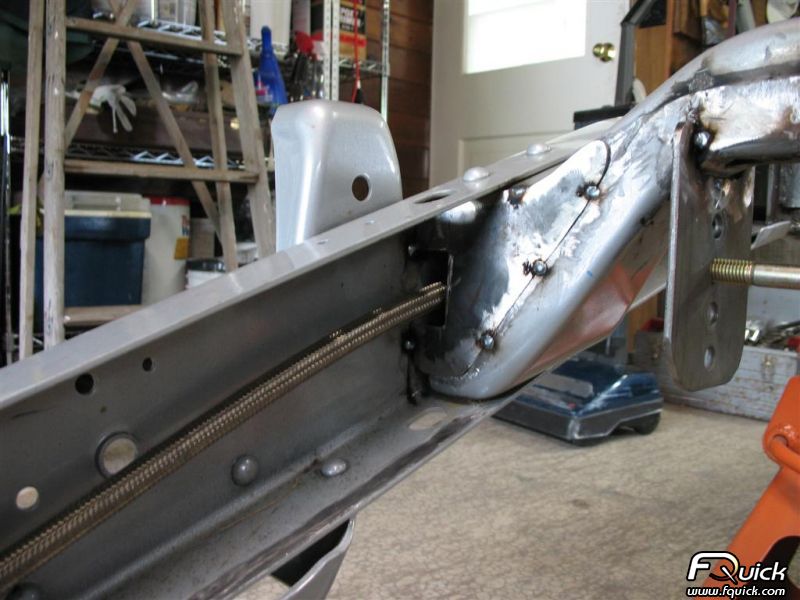
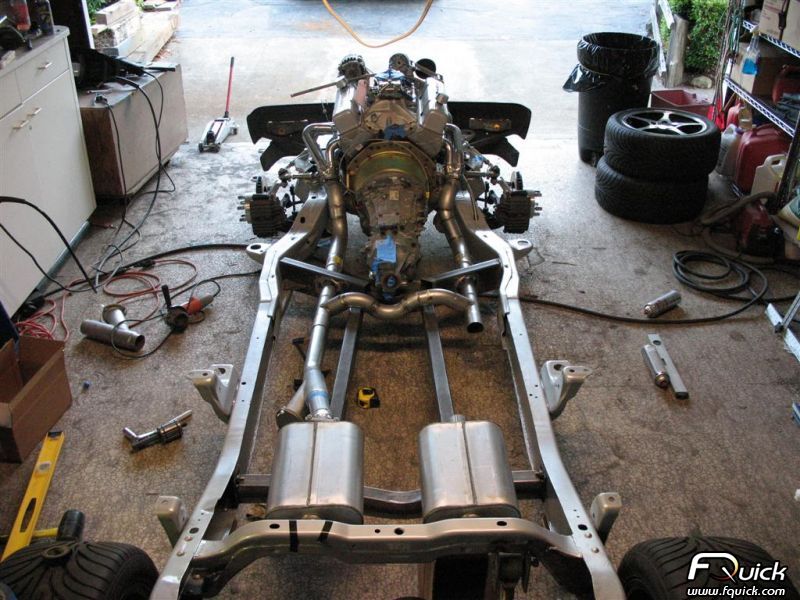
made plates to close off stock gas tank crossmember. It is now being used to mount upper link and swaybar
thanks for the motivation guys, would probably have just left the frame open if it weren't for the constant prodding
that's why I had to make those close-off plates
yeah, it's pretty frickin tight in there...
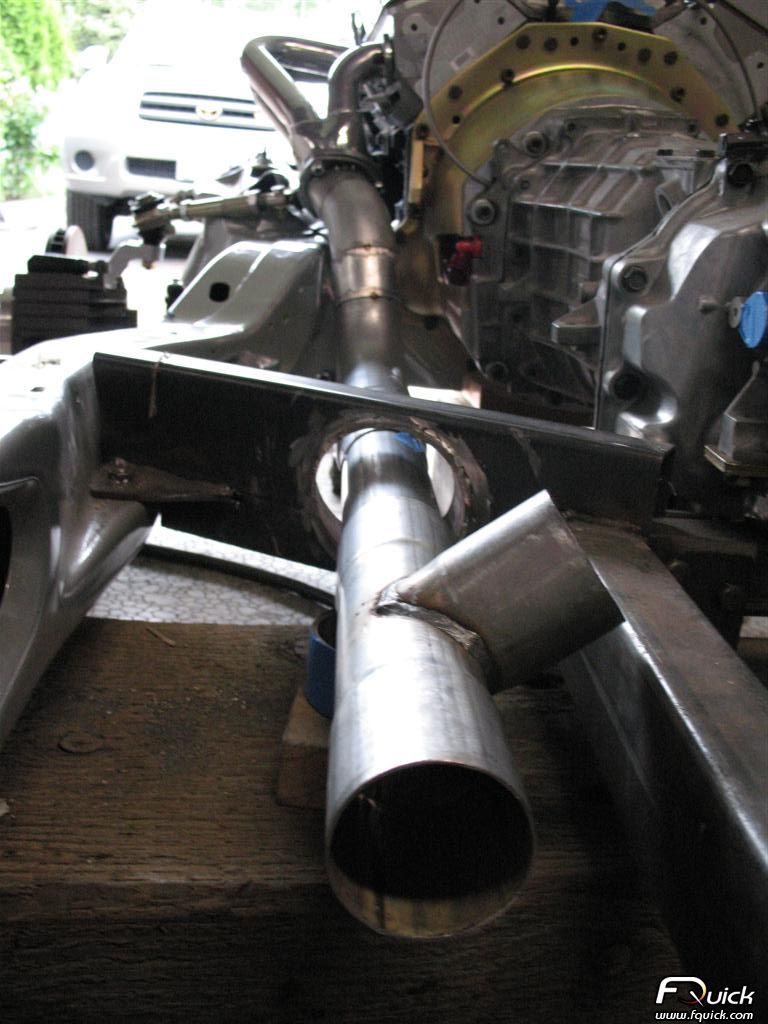
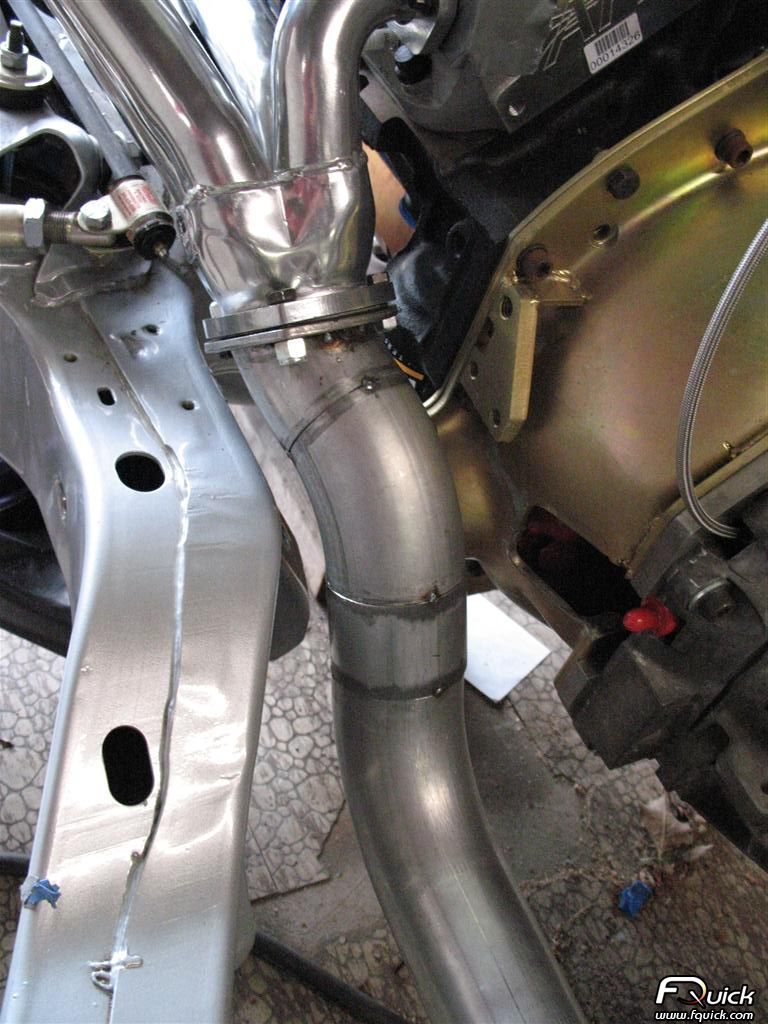
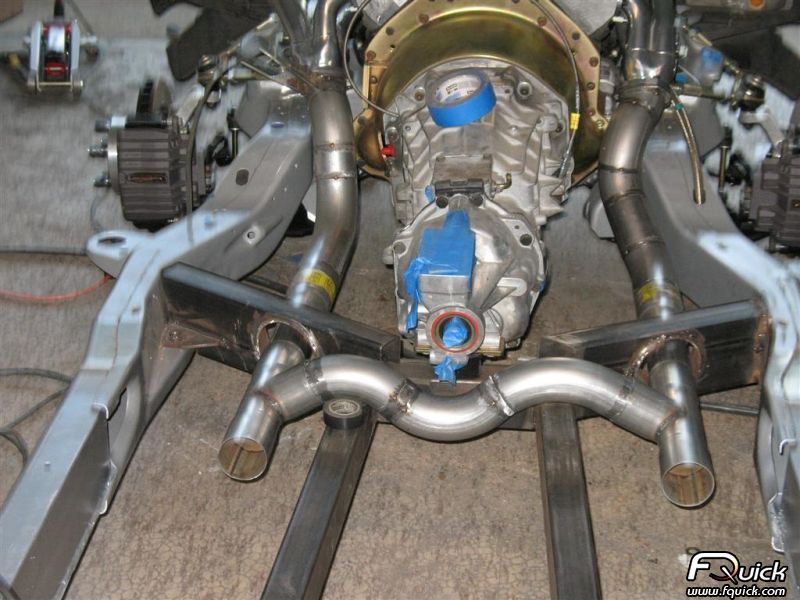
h-pipe will bend under the driveshaft
need to order another 3" mandrel bend for the other side. Didn't expect that 1 side to use up a full 180 degree u-bend save for about 15 degrees of it. Is it just cause I have cheap bends, or are all mandrel bends oval on the bend (yes, I cut it right, it's just not round)?
mufflers are dynomax ultra flo
Rearend is powdercoated, PHB powdercoated and done, gonna go pick 'em up tomorrow and take them to be assembled. Pics after assembly.
Waiting on tube inserts for link bars. Hopefully I'll have the bars done by next week and WE'LL BE ROLLIN'
Pushing to get everything underneath the cab done so that I can put it on and start fitting seats, pedals, column, etc. (everything I need to drive it)
06-17-2008 #64
Registered User
- Join Date
- Sep 2006
- Location
- New York, NY
- Posts
- 458
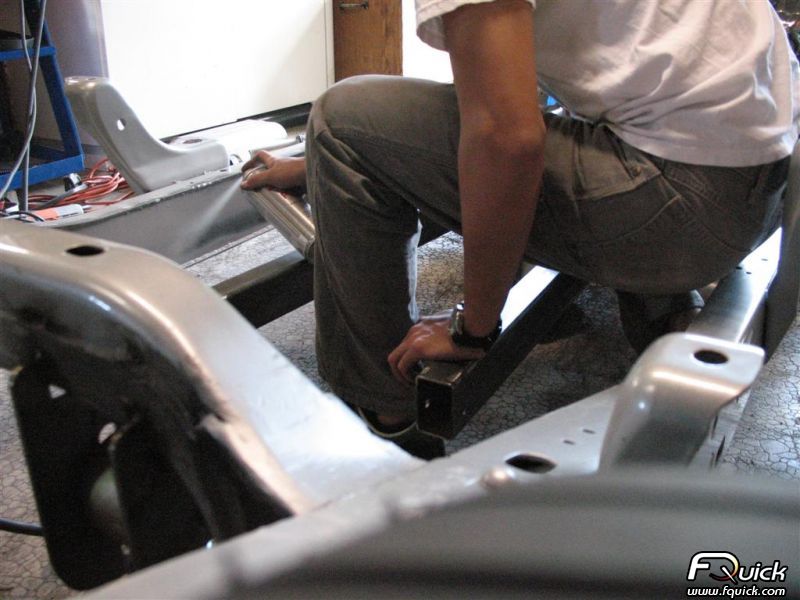
box section fully welded in
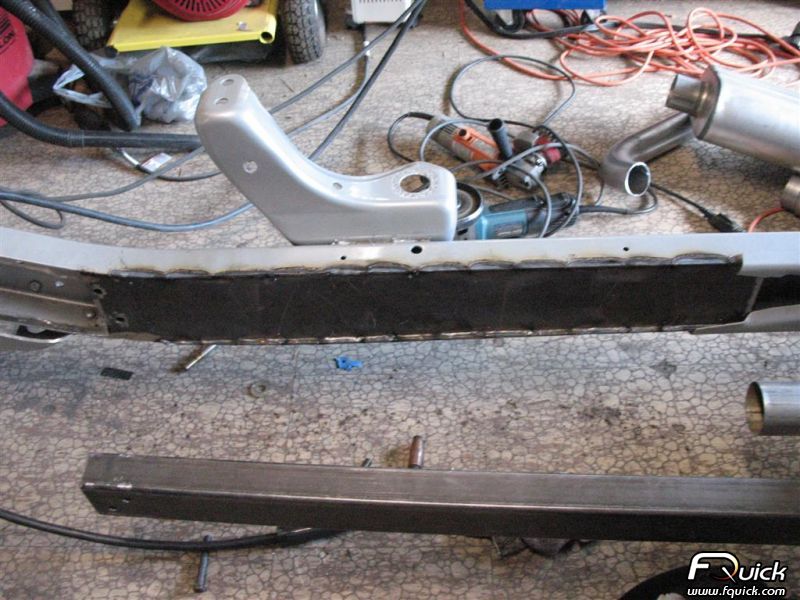
skipping around so that it doesn't get too hot, also so that a weld cannot crack along the whole rail continuously
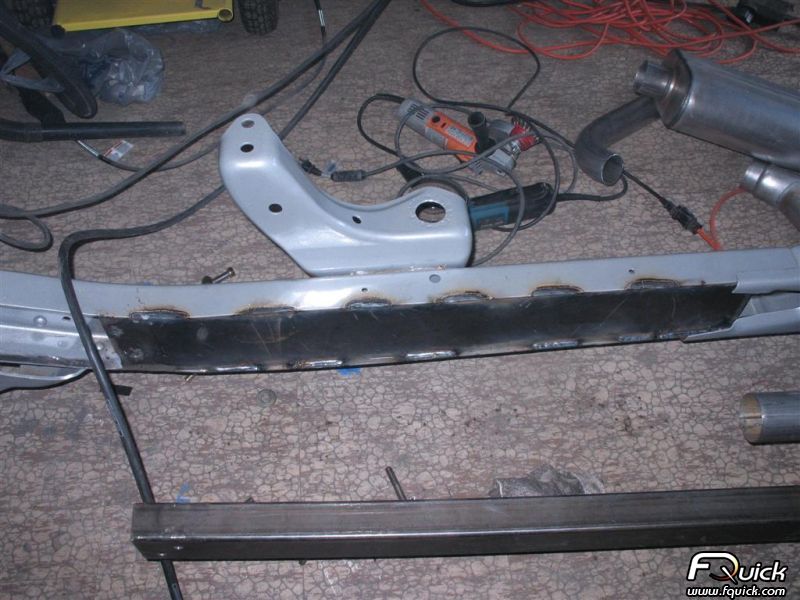
this is what happens when powdercoat gets welded on:

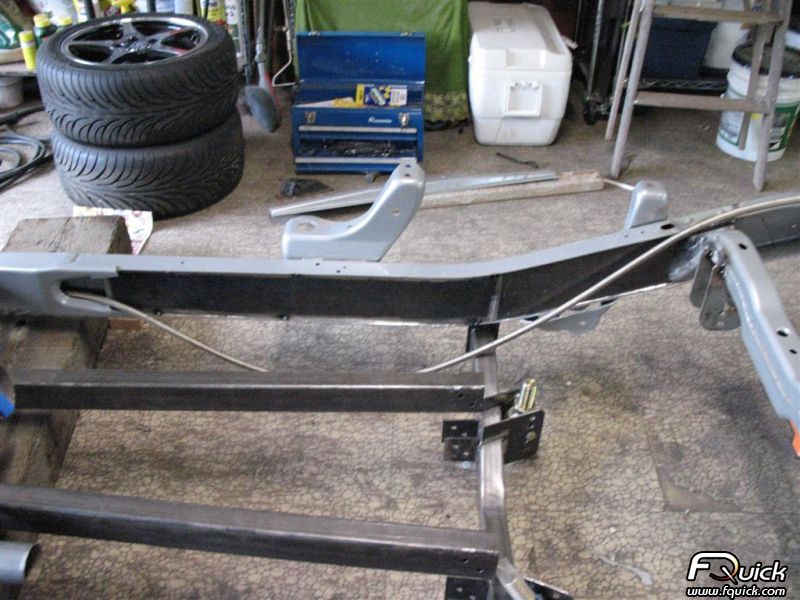
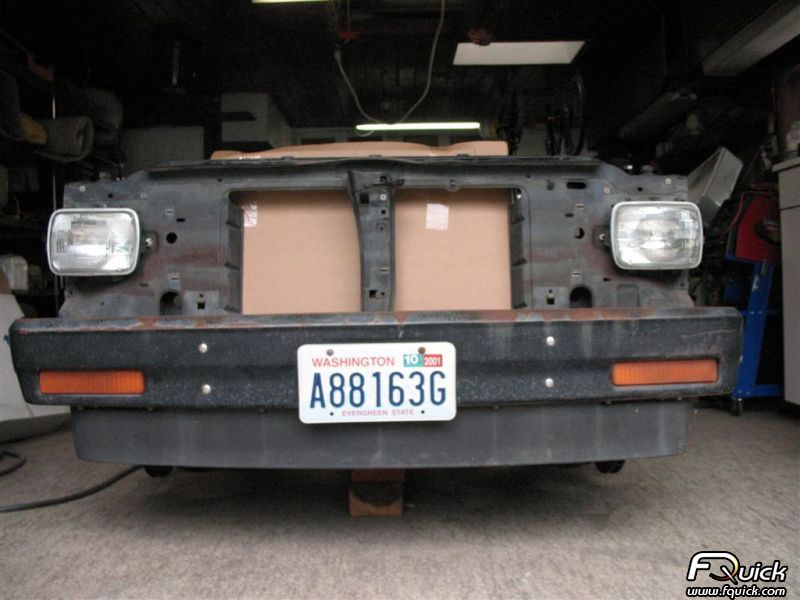
bumper mounted:
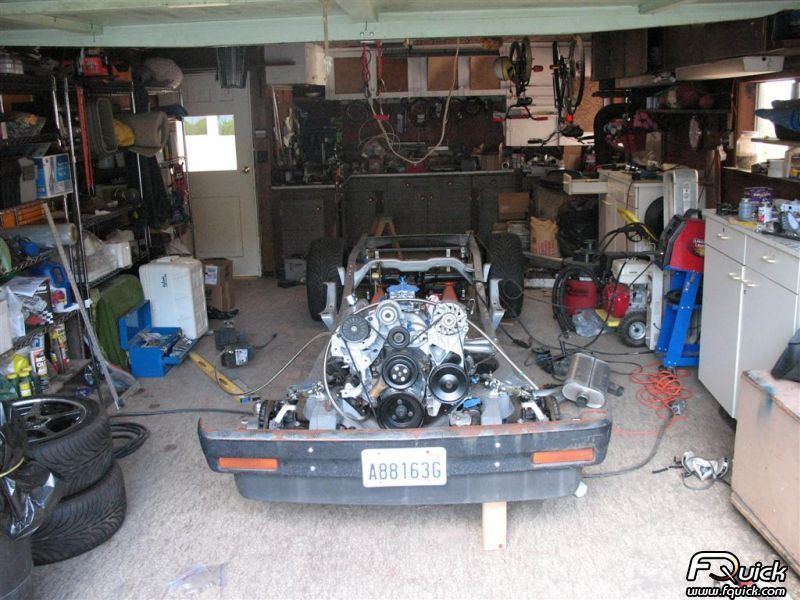
not as low as I thought is was gonna be, this is final ride height
me welding:
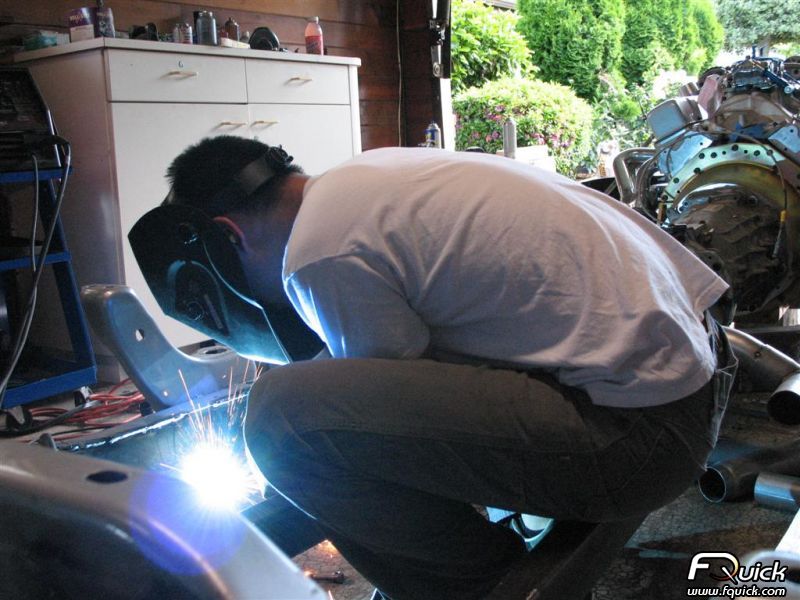
painting:
all painted up:

h-pipe craziness:
06-17-2008 #65
Registered User
- Join Date
- Sep 2006
- Location
- New York, NY
- Posts
- 458
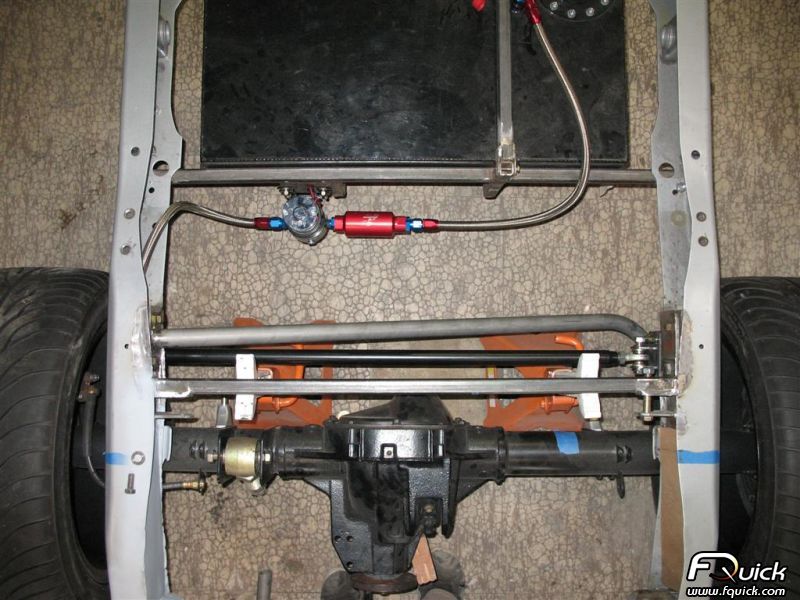
rear suspension waiting for link bars, tube inserts come in tomorrow, hopefully done by the end of the week.
rearend is powdercoated and assembled, brake brackets still need to be coated, will probably buy new calipers
I think I'm gonna wait until I drive this thing to put on a swaybar, because there is no way I can know how big a bar I need right now. I did however, get tabs on the axle for heims, and I will probably weld up some bushing mounts for the bar bushings.
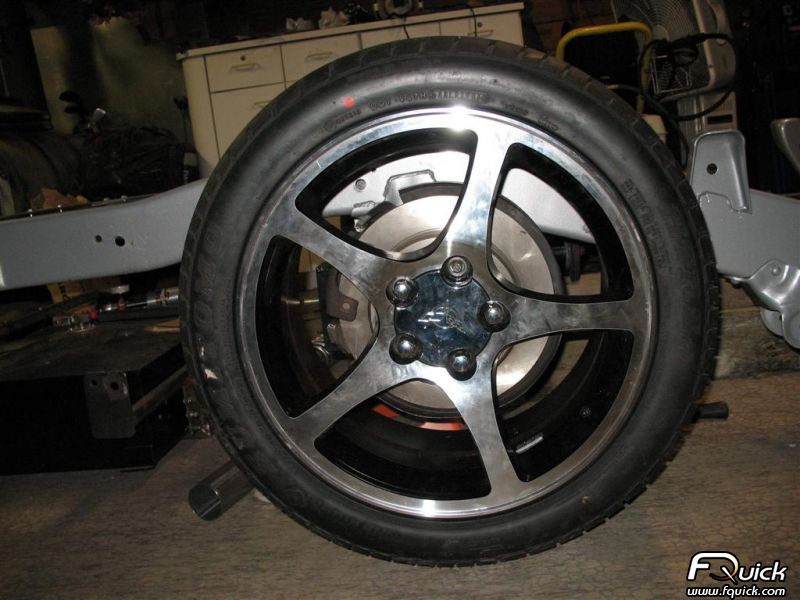
rear brakes look really small, they are stock explorer discs at about 11 inches diameter...I'll probably paint that section of frame black so it doesn't stand out so much. I have about 2.5 inches clearance from frame to axle tube, no room to run a bumpstop, so I bought some that slip over the shock rod.
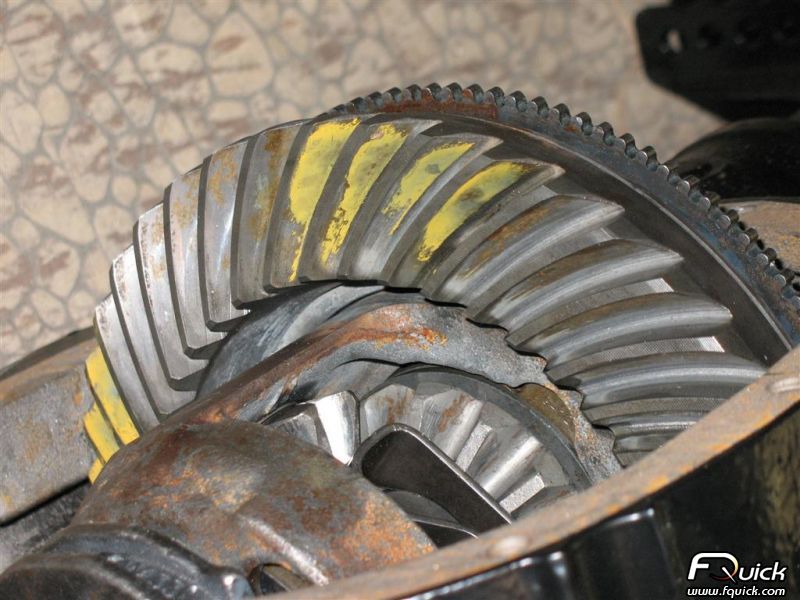
gear marking compound, I had someone assemble it, I assume the wear pattern is right
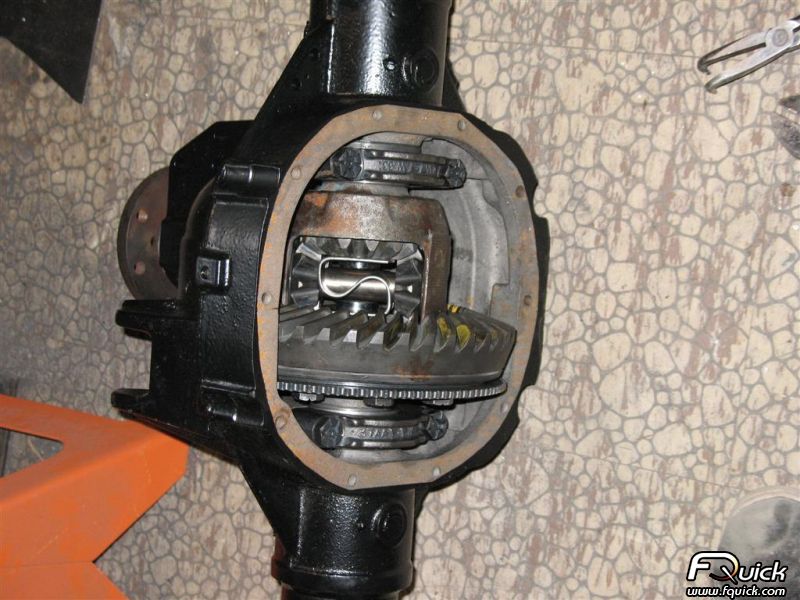
stock traction-lok posi rebuilt with carbon fiber clutches, 4.10 gears
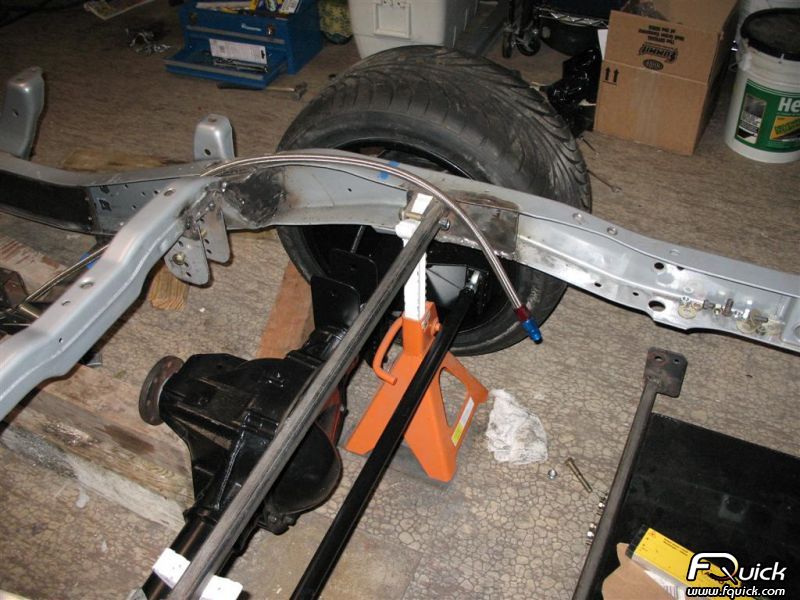
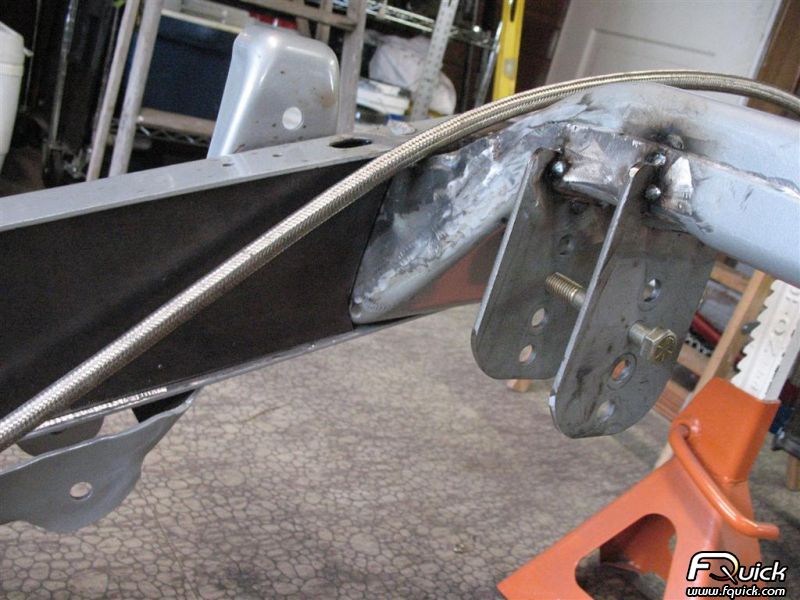
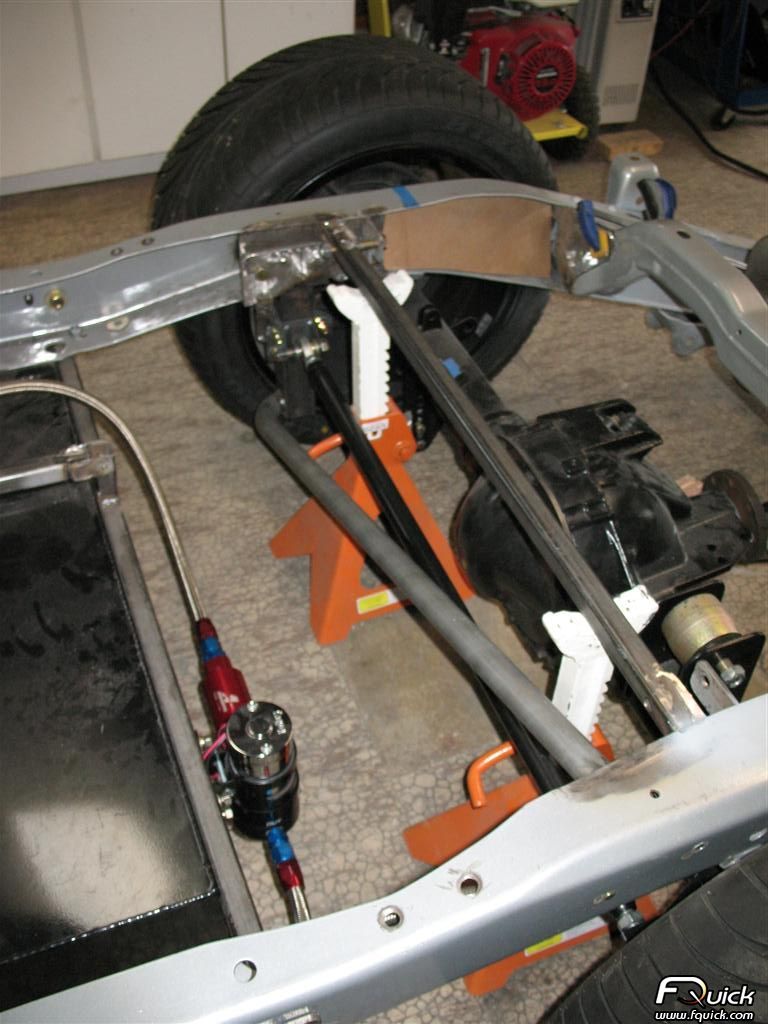
panhard bar
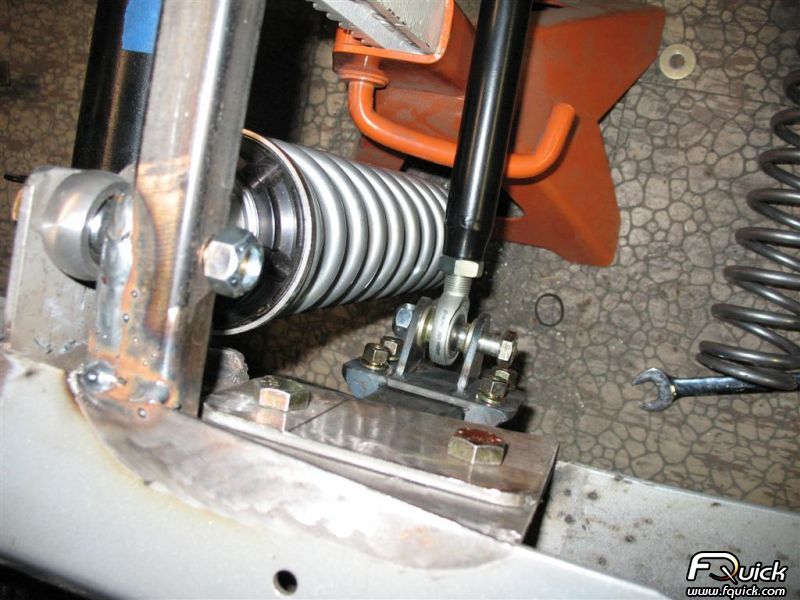
about 1/2 inch clearance to coilover
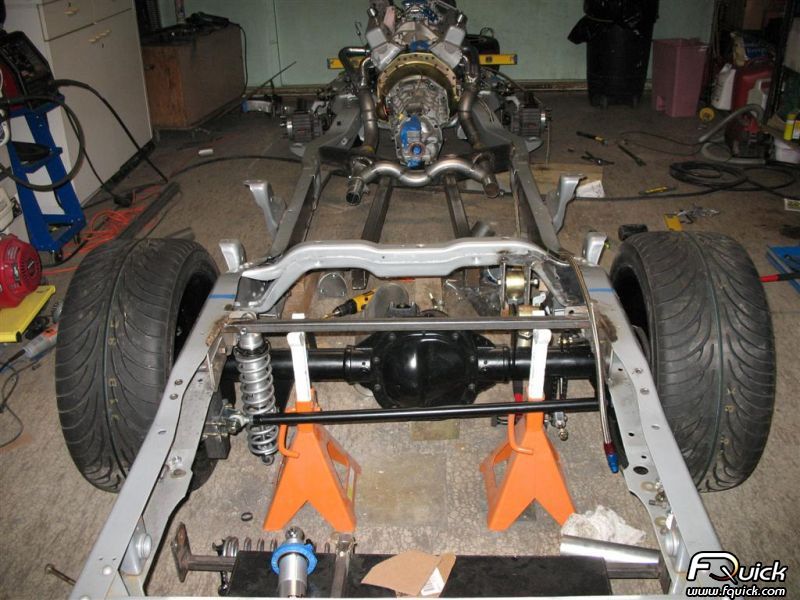
you can see the adjustable panhard mount on the left. I'm trying to figure out a way to brace that vertical tube to the passenger frame rail, anybody got ideas?
better pic of it below:

Jerome
06-17-2008 #66 Registered User
- Join Date
- Feb 2006
- Location
- s.f. east bay california
- Posts
- 209
If u have access to a tubing bender or have a shop that u like to deal with that can bend up a tube for u. Just us a pieces of 1" or 1-1/4" .120 wall with a bend in it to clear the panhard rod itself and run it from the bottom of your adjuster tube to the passenger side of the frame.
Really like what u did for an adjuster. simple yet effective.Dog will Hunt
06-18-2008 #67 Registered User
- Join Date
- Jul 2005
- Location
- Eastern Virginia
- Posts
- 3,960
Wouldn't that be an "M" Pipe? LOL Originally Posted by jerome
Scot
Originally Posted by jerome
Scot
86 Monte SS

06-18-2008 #68
Registered User
- Join Date
- Jun 2008
- Location
- Carol Stream, IL
- Posts
- 586
Chassis is coming along nicely! I like the creativity with the "M" H pipe there, but hey, it works!
Any plans to re-powder coat the frame?
06-18-2008 #69 Registered User
- Join Date
- Sep 2007
- Location
- Buford, GA
- Posts
- 923
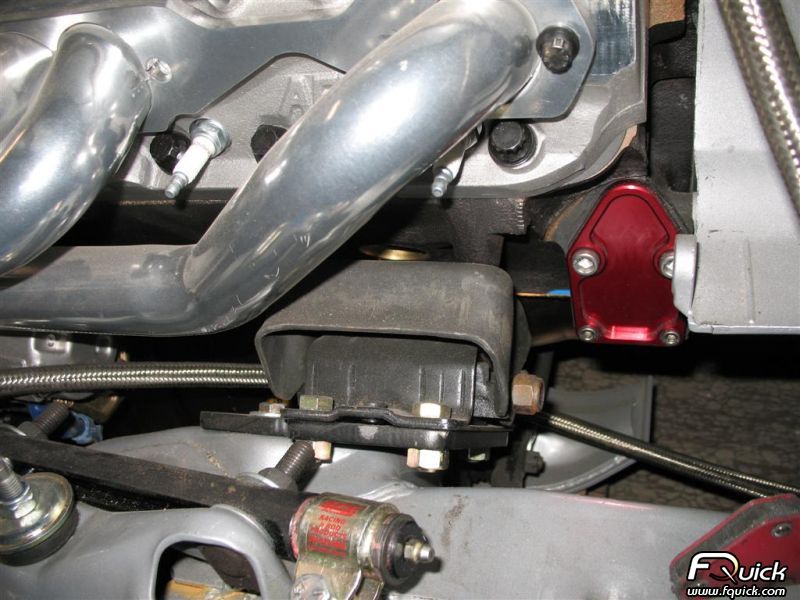
I love the "beefy" crossmember that you've got your exhaust running through.
HOWEVER, I would suggest making some sort of "removable access notch" or "access panel" or something that will allow you to remove your exhaust pipes without cutting them. At some point SOMETHING is gonna happen where you need to move something or do something and you're gonna have to cut stuff up.
So since you're still in bare metal, you could just go ahead and make this "notch" which essentially just cuts the bottom half of the tube-steel off. Then you box in that cut so the "top half" of the tube steel is still structural enough to be the crossmember. Then you "box" your notch with a hole going through there for two bolts, one on each side of the exhaust pipe. Then you weld two nuts up in the crossmember which will accept those bolts in the notches. So essentially you have a bolt on "loop" or "notch" or "access door" or whatever you wanna call it.
So when that time comes all you have to do is unscrew four bolts and you've got complete access to your exhaust system.
Then you can powdercoat both the x-member and the notches and all is well - no cutting or torching or welding in the future. All is safe.Adam
1985 S10 - LT1 + T56
1964 Chevy II 4-Door - LS1 + T56
06-18-2008 #70
Registered User
- Join Date
- Sep 2006
- Location
- New York, NY
- Posts
- 458
Thanks for the tips hector, the exhaust will unclamp before the crossmember, and I just slide the h-pipe back about 3 inches, the whole exhaust will drop out. If I need to access the front exhaust, then I unbolt at the collector. Even if I had an access notch in the crossmember, I'd have to unbolt at the collector anyways. With the junctions so close to the crossmember, I can just slide exhaust either direction and pull it out.
I'll see if art morrison will bend me up a brace for the panhard bar. Since that mount will unbolt from the frame, I'd like to keep the brace unmountable too. I think i'll weld the brace to the mount, and then bolt it to the other frame rail. How do you usually bolt in a round tube...just a single bolt with tabs?
Also, does anybody know what I can paint exhaust pipes with? Ceramic coating would be too much money I think. Maybe some bbq grill spray paint, says it works up to 1200F?
Jerome
06-18-2008 #71
Registered User
- Join Date
- Feb 2006
- Location
- s.f. east bay california
- Posts
- 209
Just us a pieace of angle as big or a little biger than the tube u use and about 3" in length and run at least 2 bolts, but I would try and do 4. 2 up from the bottom and 2 from the side.
heres a couple pics to illistrate

Dog will Hunt
06-18-2008 #72
Registered User
- Join Date
- Sep 2006
- Location
- New York, NY
- Posts
- 458
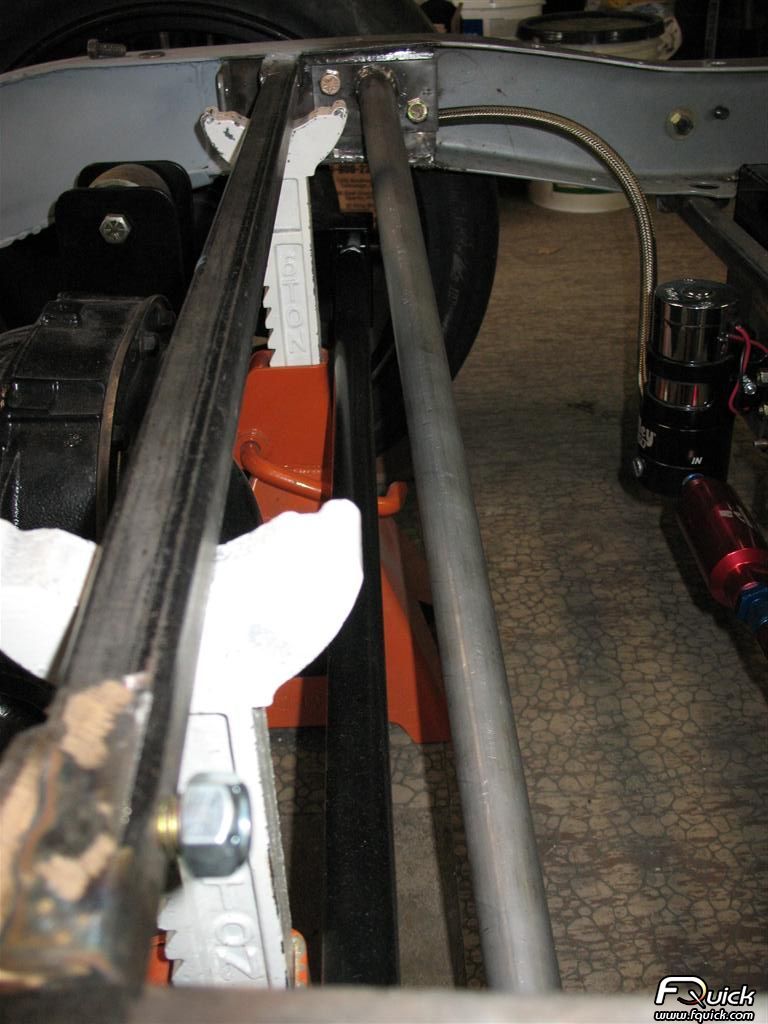
got one side done up to the muffler:
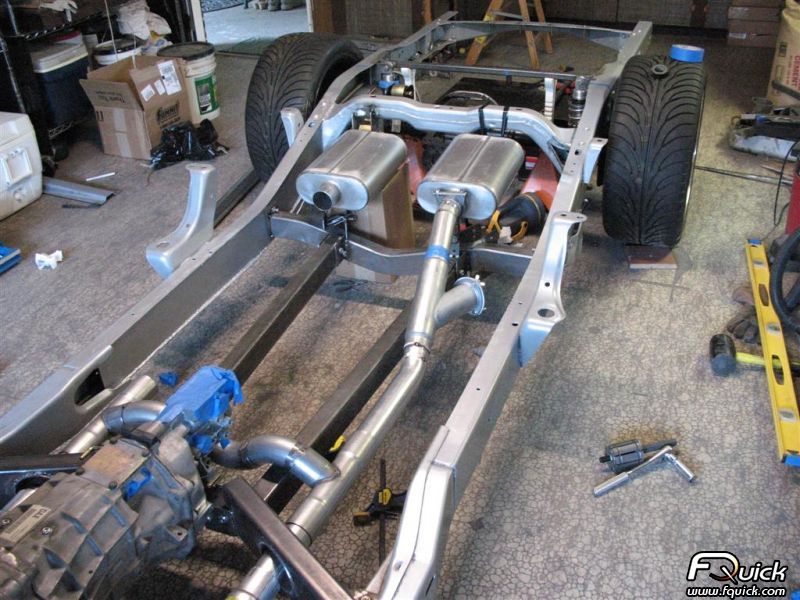
clearly the wrong way to use a hanger:
Anybody got a good way to support exhaust pipe from the side or the bottom? I also need a way to support it from a crossmember that is about 1/2" above the pipe.
trackrat, thanks for the pics...the maeir panhard for early mustang was the original inspiration for my design, I can't believe I had such a brain fart. I was trying to think of a way to bolt the tube in, when in reality, I can just weld a flange to the tube and bolt the flange.
Anybody have experience with Inland Empire? They are cheaper than Denny's but Denny's knew what they were talking about on the phone whereas IE had no clue. I asked what the critical rpm on a 4" aluminum was for 59" center to center...the "tech rep" tells me they spin balance everything at 9000+ rpm, it'll be fine. Fine my ass. As long as they build a good driveshaft I'll use them, but they have no clue what they're talking about.
Jerome
06-19-2008 #73
Registered User
- Join Date
- Jun 2008
- Location
- Carol Stream, IL
- Posts
- 586
Took me a few good minutes to figure out what you meant by using the hanger wrong. Nice one! I am really liking the frame so far. Is that a cutout I see there?
06-19-2008 #74 Registered User
- Join Date
- Feb 2006
- Location
- SoCal
- Posts
- 1,622
Looking good! Originally Posted by jerome
IE has a pretty good rep so I'm surprised they were clueless to your issue!
Maybe you can make a cradle for the exhaust?
John'66 Chevy II - The "NEW" '69 Camaro!
***Under Construction***
Build Update Link:
https://www.pro-touring.com/forum/sh...ad.php?t=17108
06-19-2008 #75
Registered User
- Join Date
- Aug 2007
- Location
- Albemarle, NC
- Posts
- 1,149
if i rememeber the underside of the bed on mine right, somewhere near the gas tank crossmember is a channel on the inderside of the bed. why not weld a stud to that and use a standard hanger?
your other option is to weld a pair of L brackets on. on on the pipe, the other on our crossmember. then use a shock bushing on the bolt as an isolator. i did that on a set of sidepipes once. no extra noise into the interior from it. just make sure to use a vibration proof nut.
MichaelMichael Crawford
1970 plymouth Duster back under construction:
https://www.pro-touring.com/showthre...uring-makeover
1987 GMC S15 https://www.pro-touring.com/showthre...ct-drivabeater
06-19-2008 #76
Registered User
- Join Date
- Sep 2007
- Location
- Buford, GA
- Posts
- 923
FYI the pipes should be strong enough to support themselves between each of the crossmembers. Why do you need a support there if you have supports other places?
Adam
1985 S10 - LT1 + T56
1964 Chevy II 4-Door - LS1 + T56
06-21-2008 #77
Registered User
- Join Date
- Sep 2006
- Location
- New York, NY
- Posts
- 458
Hector, you're right about the supports, I'll find a way to hang the pipe from above a little further back, probably at the stock gas tank x-member, and one up front somehow.
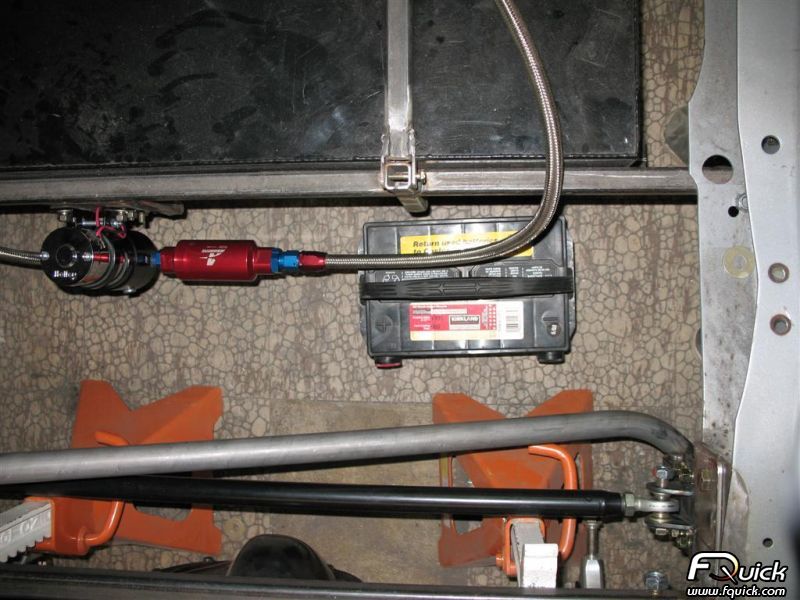
This is approximate location I want for the battery. Is there a more elegant solution than welding up a frame for it off of the gas tank cradle? I also can't decide yet whether to make the battery drop out the bottom or the side, or just bolt a "battery cradle" to the gas tank cradle.
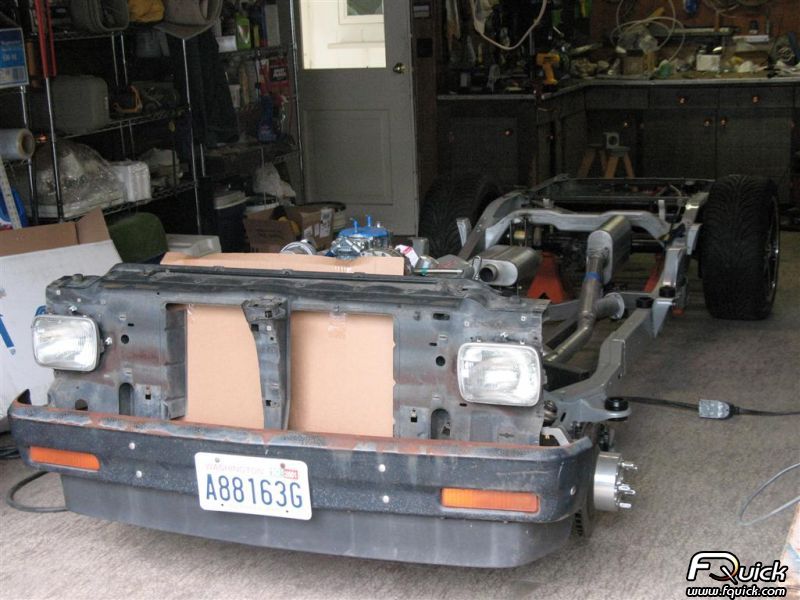
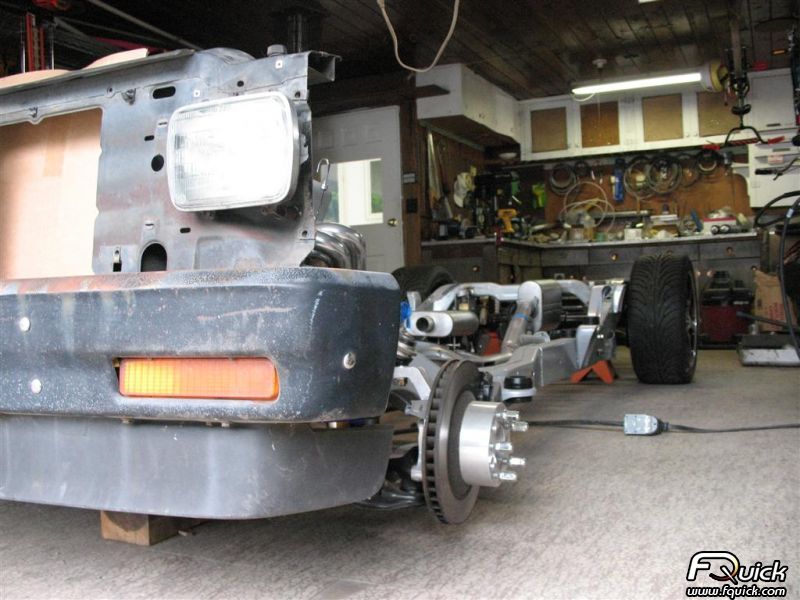
put core support and bumper on...not quite as low as I thought. That is the original core support, I ordered a 91-93 support so I could use the 91-93 grille, I think the older grilles look well...old, and not in a good way. Haven't decided GMC or Chevy yet.
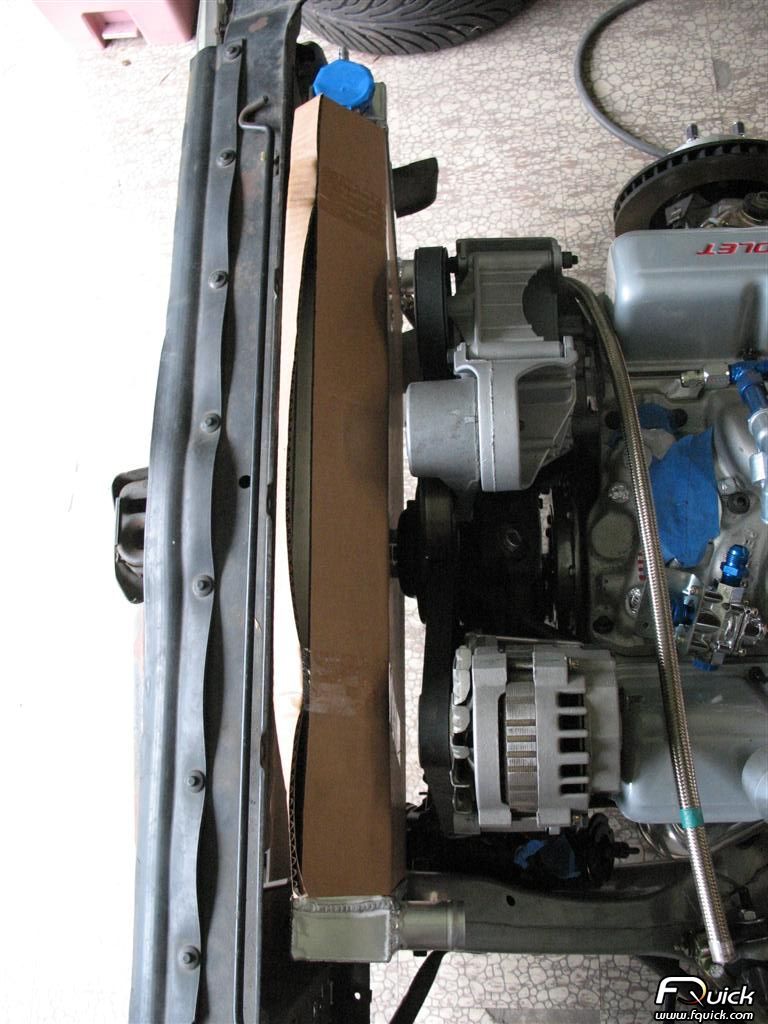
Afco S10 V8 radiator doesn't work. It mounts exactly where the stock one mounts, hits the waterpump. I have a Mark VIII fan on the way, so that's not gonna work. Most people recess the radiator into the core support. I'm gonna custom order a radiator a little smaller so that I don't have to do heavy cutting. We'll see after the Mark VIII fan gets here, cause there's a chance the radiator will have to "go through" the core support (front of rad is further forward than front of core support)
shot from behind, moved up the fuel pump an inch or so, everything is above the fuel cell, I'm thinking about doing a rear undertray type thing to make it smooth, and protect battery, fuel pump, fuel filter, and cell. Exhaust will come to either side of fuel cell and probably turn down right before roll pan
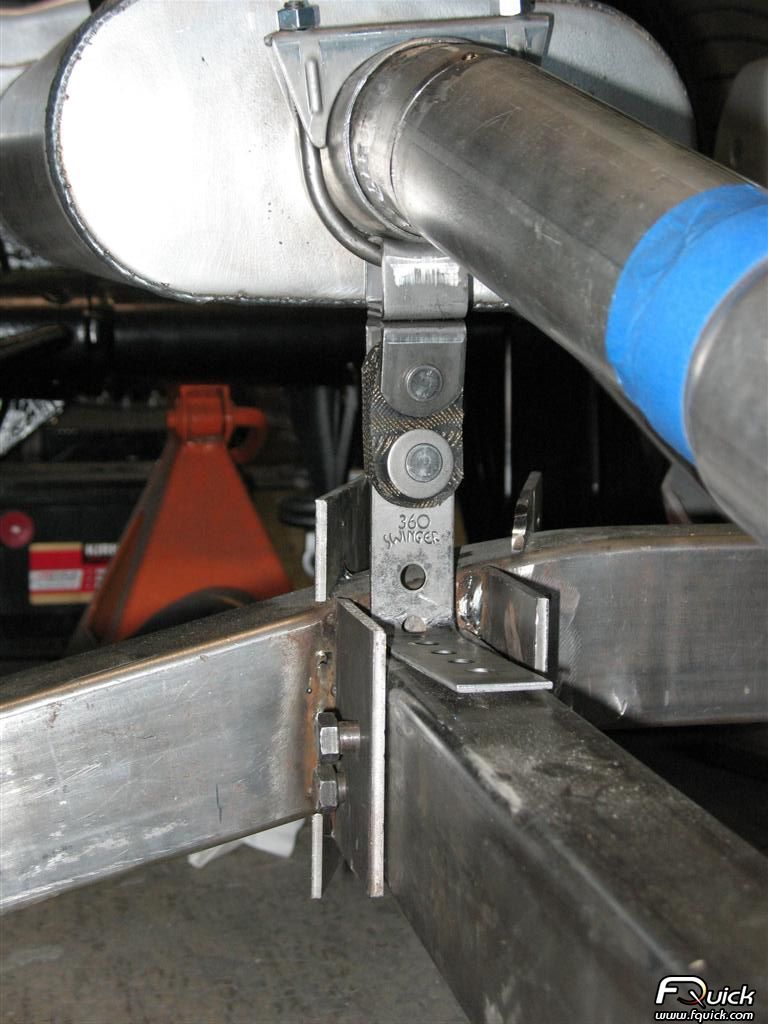
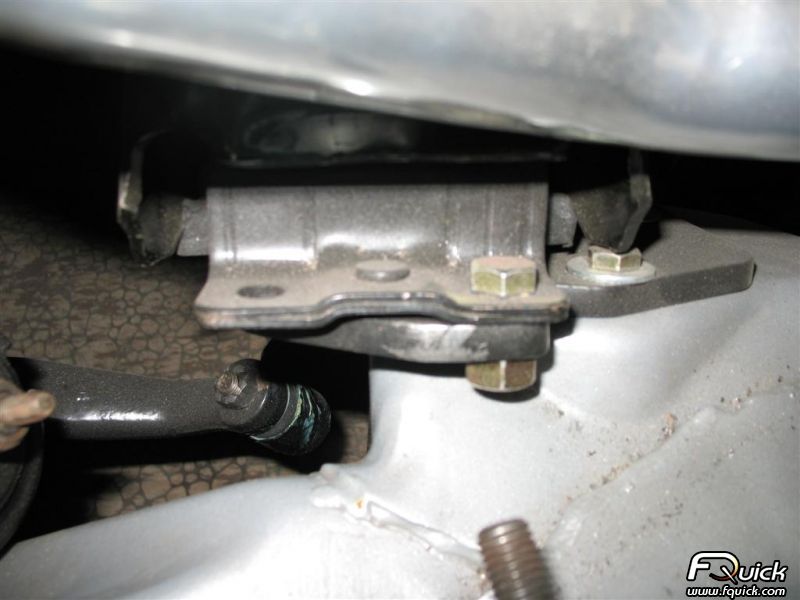
top view of new panhard bracket brace
new bumpstops:
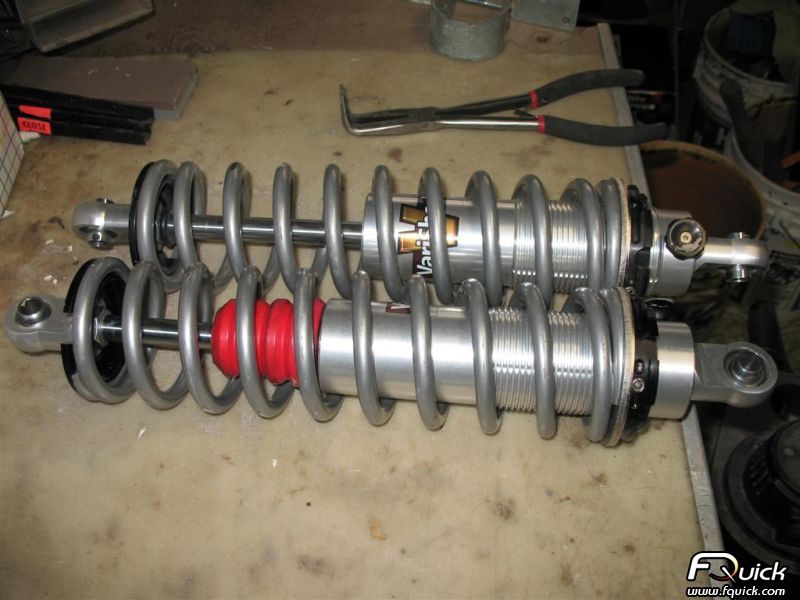
It's soft foam rubber from Daystar. Had to use this style because clearance between frame and axle tubes is about 3 inches only.
for anyone struggling to assemble the spring onto the varishocks with a spring/strut compressor (it took forever for the first set), you can hold the nut under the top eye and unscrew the eye. Then, you can just put the spring on and screw in the top eye.
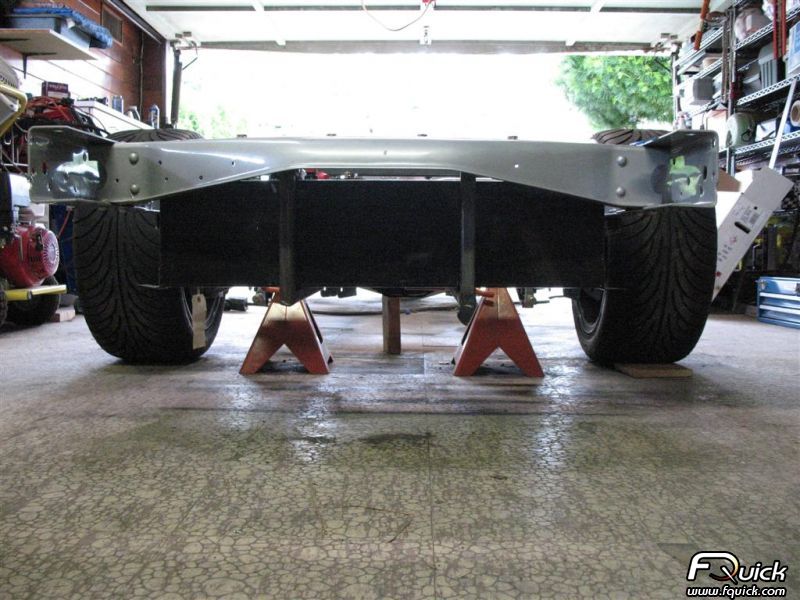
overall shot:
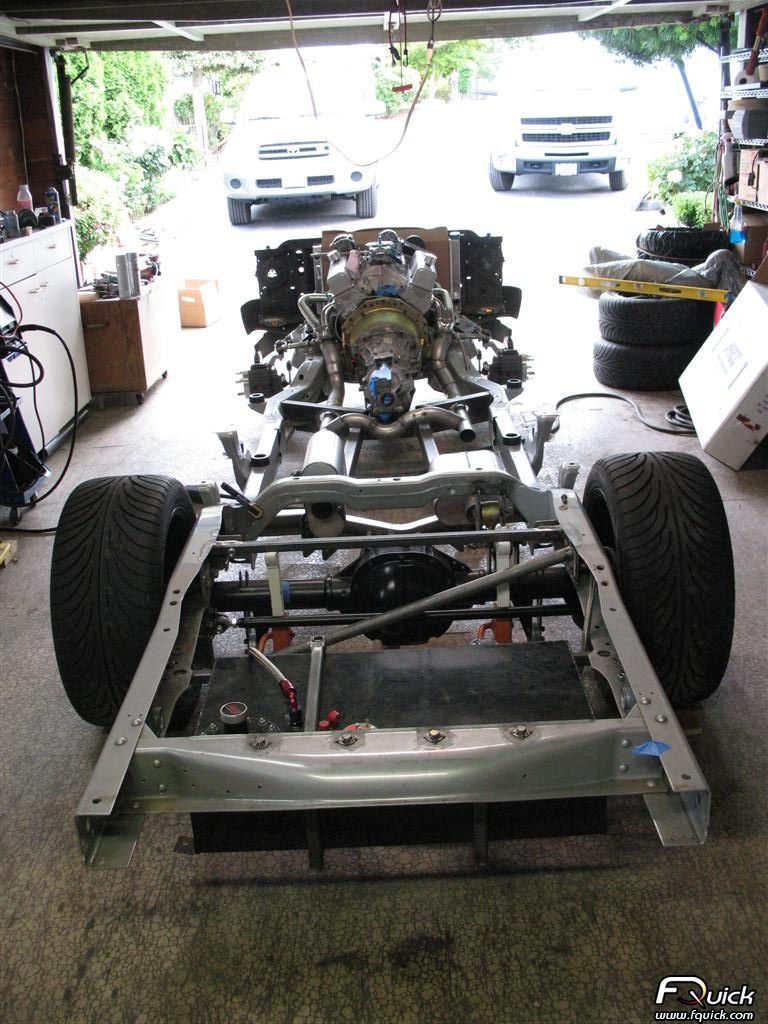
love this picture, it's starting to come together...can't wait for link bars to be finished and see this puppy without jackstands.
Jerome
06-21-2008 #78
Registered User
- Join Date
- Sep 2007
- Location
- Buford, GA
- Posts
- 923
Okay, here's a question I don't know if you've been asked before...
Have you mocked up fitment of motor vs. cab yet? Meaning do you have any more room that the motor could slide back? If so, do it now. Before you mock up your driveshaft and "finalize" your exhaust.
Keep in mind you'll want to make sure you have your steering shaft completed, all brake lines hooked up, clutch lines hooked up, fuel lines in their final position, a/c box installed, headers on, inner fenders installed, etc... Are you following me?
Essentially, you can't get a good idea of what it's going to be like under there if you don't try to mock it up once... Trust me, stuff will interfere that you never imagined...
So I'd suggest one round of mock-up before you finalized all that welding and custom work up front.
In my opinion the motor placement is one of the most important pieces of your puzzle!!! Get it as far back as you can!!! You can help the all important weight-bias as well as buy yourself more room for COOLING up front. Which, by the way, is hard to come by as you've seen with your big rad!!
Anyway, more stuff to think about... Have fun.Adam
1985 S10 - LT1 + T56
1964 Chevy II 4-Door - LS1 + T56
06-21-2008 #79
Registered User
- Join Date
- Sep 2006
- Location
- New York, NY
- Posts
- 458
That's some good advice, I haven't mocked it up at all...I didn't think of it, since the motor is mounted on plates that aren't adjustable. However, I'll put the cab on and see what the clearance is. I've just been avoiding it because I need 3 people to do it, and it is a huuugggeee pain in the ass. I set the cab up on blocks and a wood "crossmember" by jacking each side a few inches at a time, get the frame under, and remove block at a time.
Jerome
06-25-2008 #80
Registered User
- Join Date
- Sep 2006
- Location
- New York, NY
- Posts
- 458
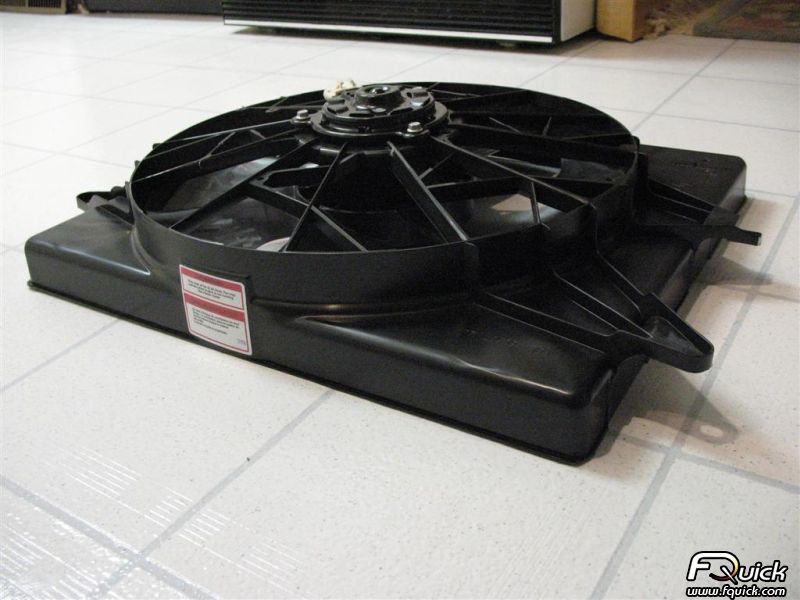
the fan is like 6" thick...no idea how to fit it in, gonna be alot of core support cutting or alot of engine setback
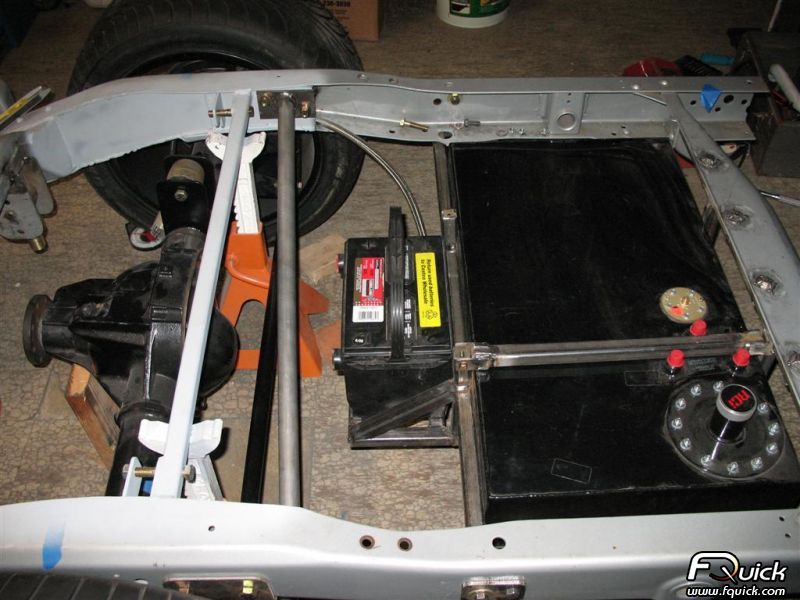
battery mounted, still need to make the bottom piece removable with tabs so battery can drop out bottom. Also need to make hold-downs.
Currie sent me 2 tube inserts only...****.
Jerome

 Reply With Quote


