

Results 201 to 220 of 258
-
03-25-2019 #201
 Registered User
- Join Date
- Feb 2007
- Location
- Hawaii
- Posts
- 225
Fabbed another 1/4" plate for the inside, with the 3/8" bolts
welded on to stuff through and bolt up from the front side....
-
03-25-2019 #202
Registered User
- Join Date
- Feb 2007
- Location
- Hawaii
- Posts
- 225
Everything bolted up quite nicely....
My spacer worked perfectly....
The inside plate with bolts also seems good to go....
Now to take it all apart and paint the parts.
-
03-31-2019 #203
Registered User
- Join Date
- Feb 2007
- Location
- Hawaii
- Posts
- 225
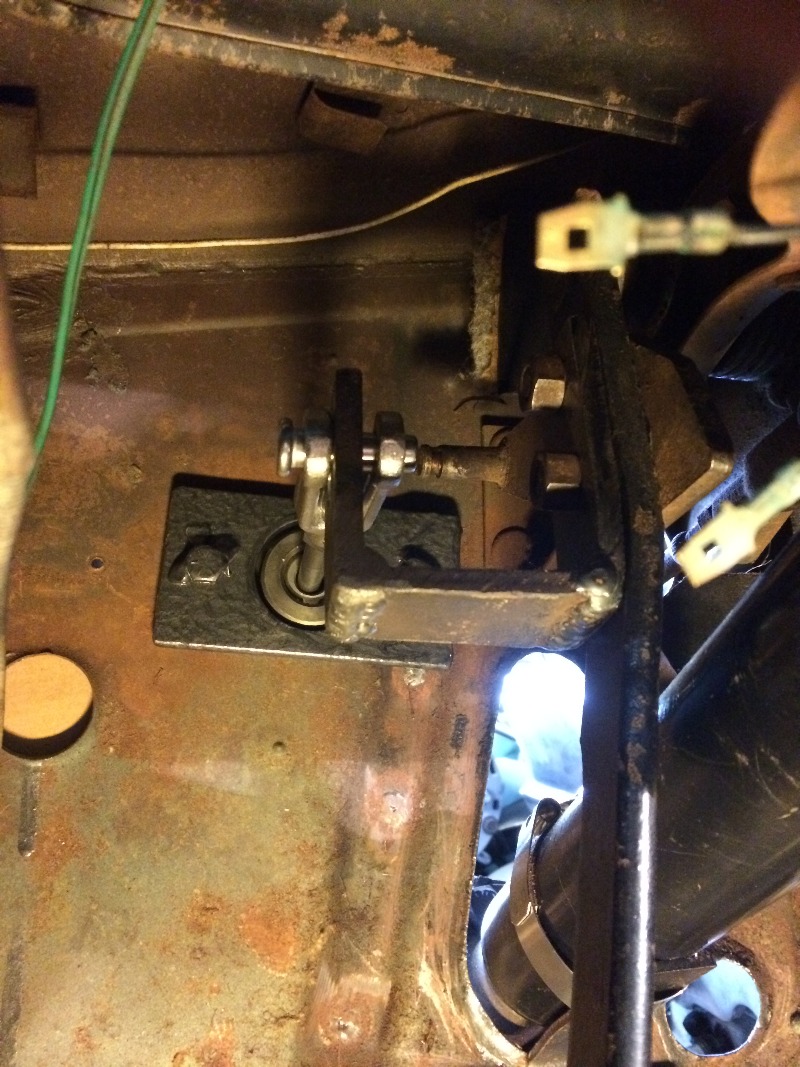
OK, the plan is to have two small square access holes in the floor pan,
on that piece I made, two smaller holes, looking at 4" x 4", up on top
and directly over two 1" threaded holes right over the clutch gap, so
unscrew the two floor covers, unscrew the plugs, and check the gap
with a couple feeler gages, on the end of a metal rod, so I can probe
the air gap on the clutch and watch, looking for the .035" setting and
see how I like that out on the street. Am thinking I can probably
reset the master cylinder clutch action up or down under the dash
if I need more or less pump action and how the pedal feels....
Driving a solid stick behind a solid motor is always just so much fun!
-
04-07-2019 #204
Registered User
- Join Date
- Feb 2007
- Location
- Hawaii
- Posts
- 225
I did get a few hours to work on that clutch setup some more...
Finally located a clevis the right size to attach to a 3/8" rod and the clutch pedal...
Ran down about 3" of 3/8" fine thread so I'll have lots of adjustment available...
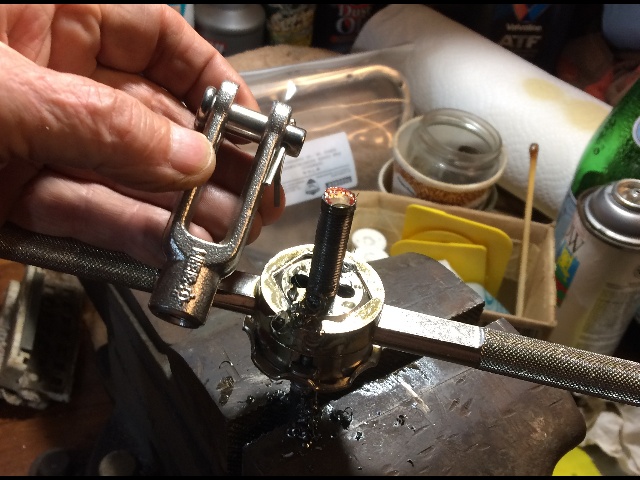
Looks good to me, will add another hex nut weded to the rod below the thread for a wrench...
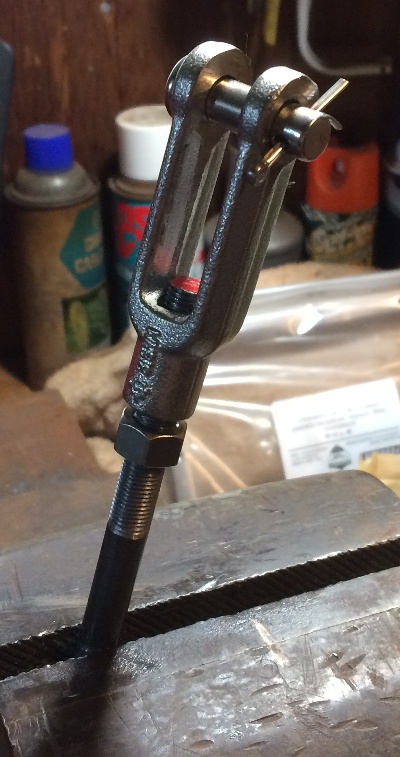
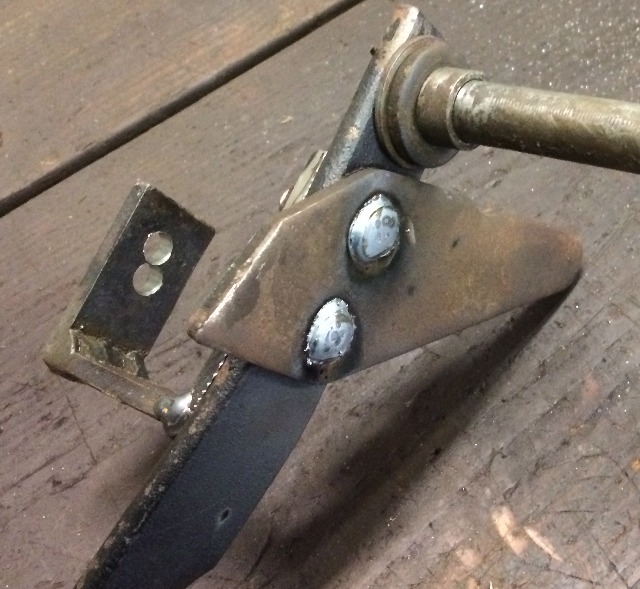
Cut and welded an offset from 1/4" scrap to set the "push" point 2-3/4" down
from the pedal pivot, and 2-1/4" over to the left to center on the clutch MC...

Now I need to cut the rod to the correct length and round off the end to match the MC piston...
And I need to learn how to use that bore scope I just bought to check clutch gap, and figure out just where I want to put the access holes...
-
05-12-2019 #205
Registered User
- Join Date
- Feb 2007
- Location
- Hawaii
- Posts
- 225
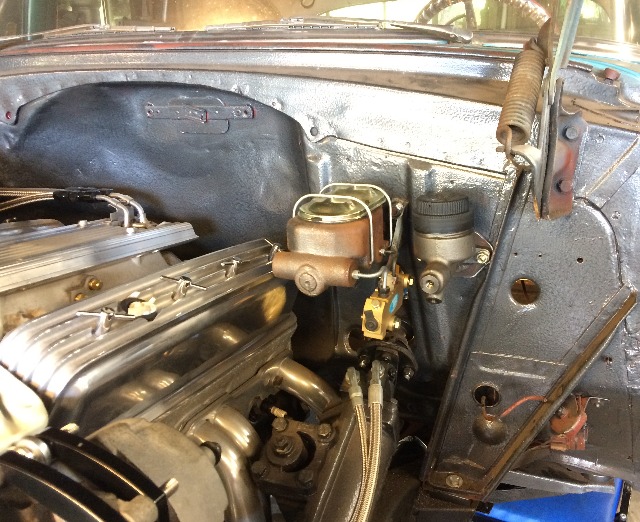
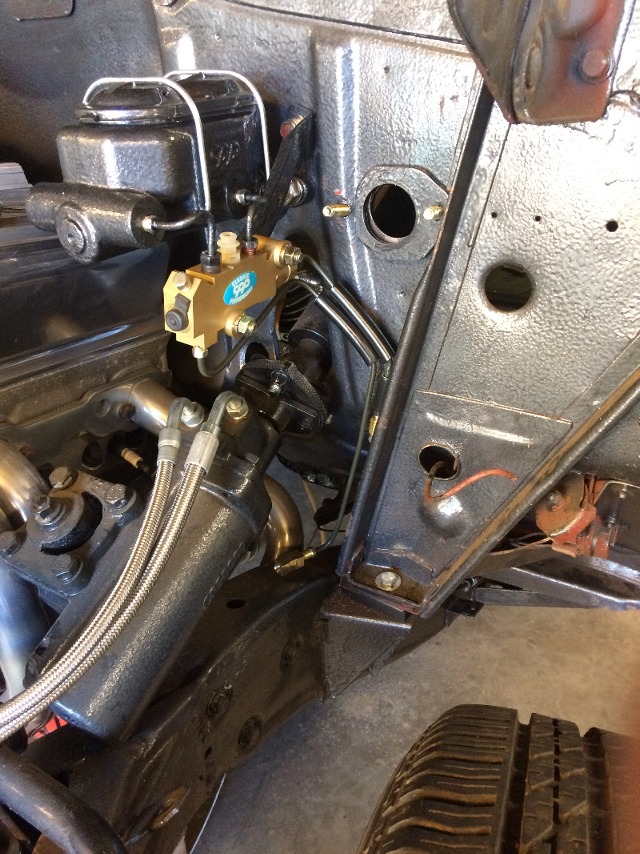
Been busy on other projects, but did get some work done on the brakes and the hydraulic clutch setup, here's a few pix:
Got the clutch pedal, clutch mc pushrod dialed in pretty well, now to see how well it really will work with this mc to activate the clutch....
The two bolts holding the offset for the pushrod on the clutch pedal was rubbing on the steering column, so I cut the heads off and welded the bolts in place, works just fine....
Also the upper hole centers the pushrod on the mc piston pretty well, so using that one...
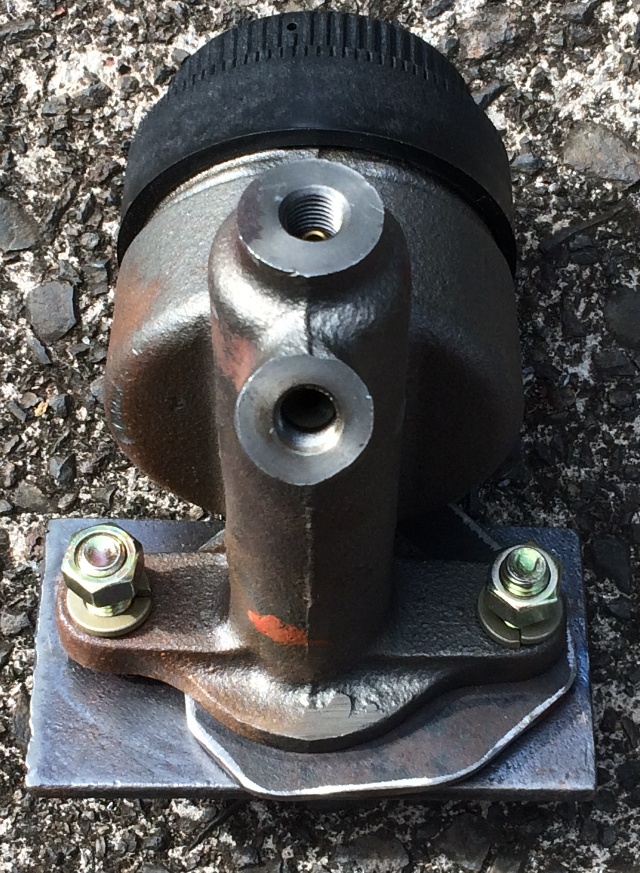
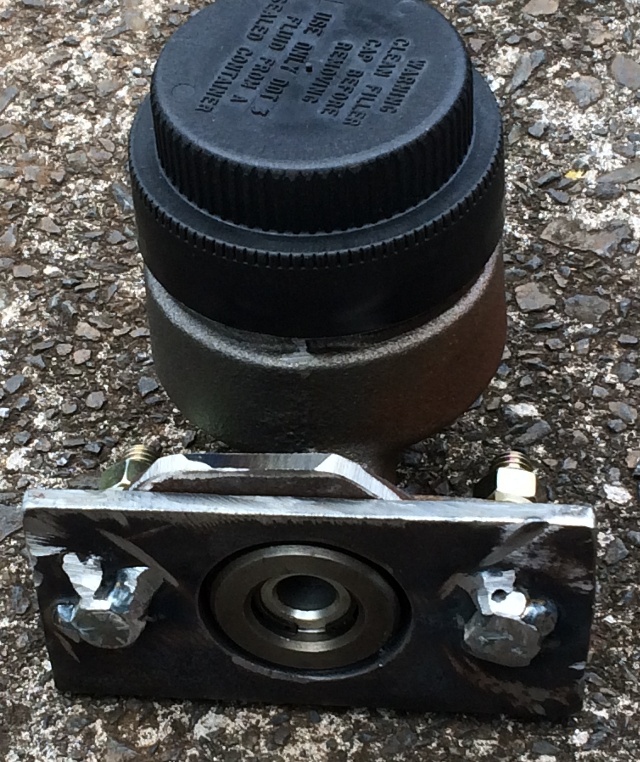
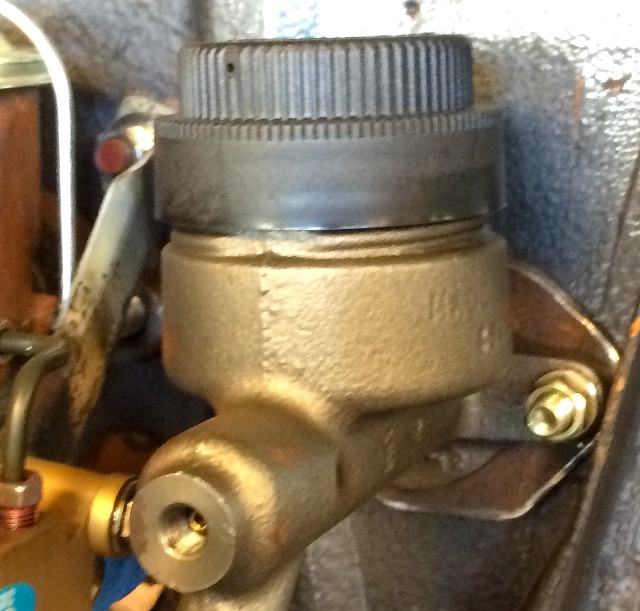
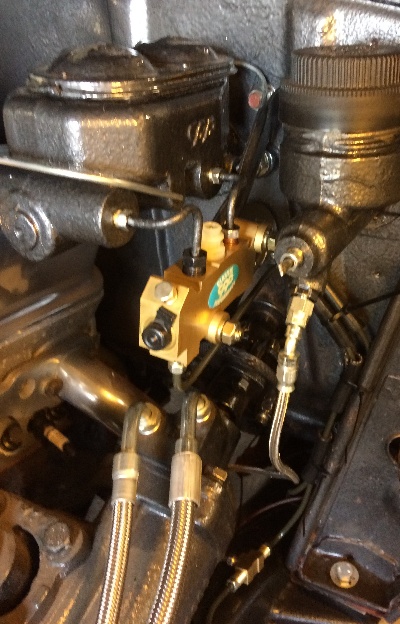
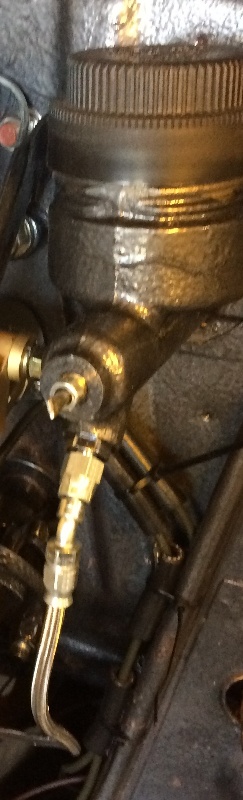
Had to find some an-3 braided brake hose and fittings to extend the short piece I had on the slave cylinder. It ended up too long, so shortened it and changed the 90 at the mc to a 45....
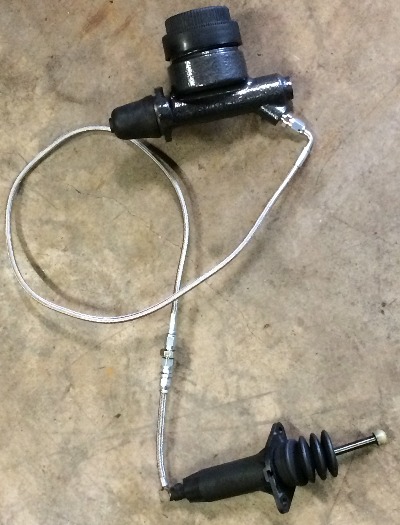
Decided that before I go mounting the clutch mc in place I'd better get the brake lines installed at that mc...
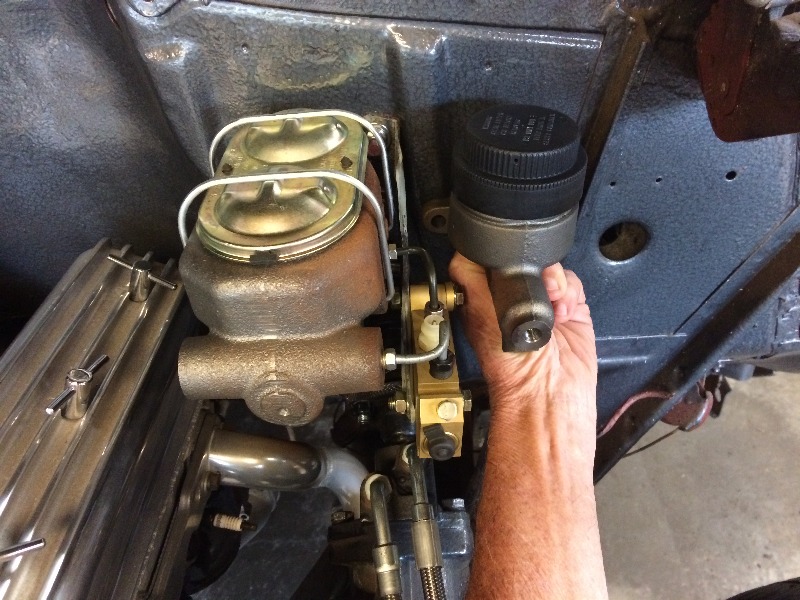
The rear outlet on the proportioning valve had a weird, large thread, but one of my local auto supply houses was able to find a fitting that matched it....
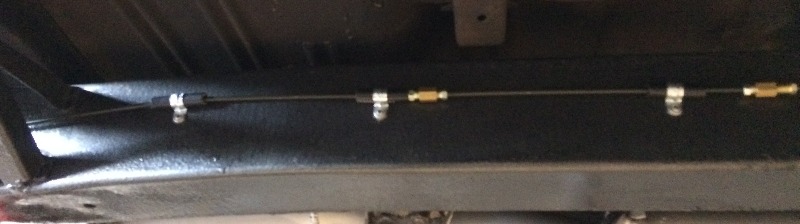
Bought a few 3/16" by 60" hard lines and started fitting them to the chassis, shortening and reflaring with a double flare where necessary...
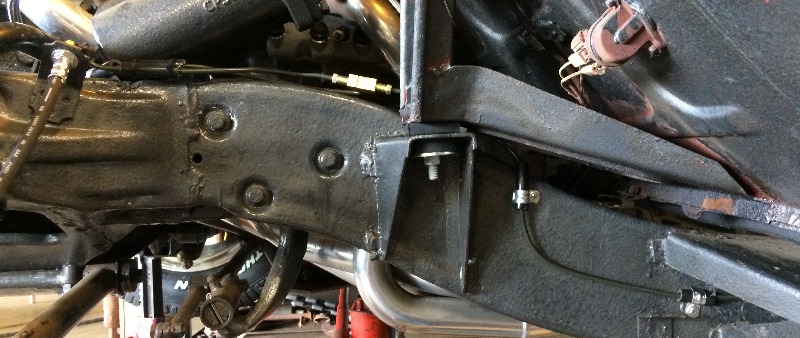
Attached the brake lines to the frame using pieces of rubber hose and clamps...
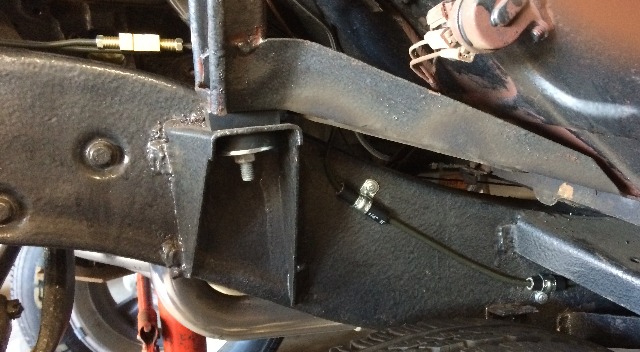
The rubber hoses at the brakes are 1980 Camaro, fit perfectly, after I moved the calipers from the rear mounting holes of the spindle mount to the front...
I think they'll be fine that way....
The passenger's side...
I still need to add some more mounting points using the rubber hose and clamps, and still need to put the rear axle hose in, again using one for a 1980 Camaro....
-Willy
More pix here
-
06-09-2019 #206
Registered User
- Join Date
- Feb 2007
- Location
- Hawaii
- Posts
- 225
Visiting family, house and yard projects, have slowed down
my progress on the '55, but did get some work done
on the brakes and clutch systems...
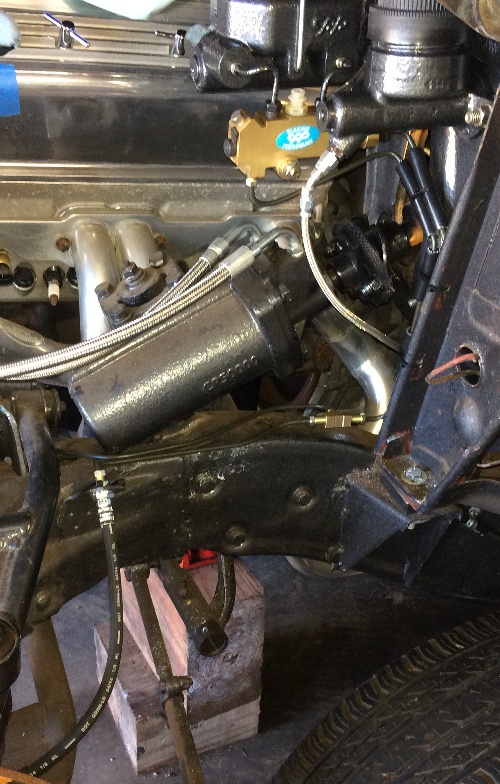
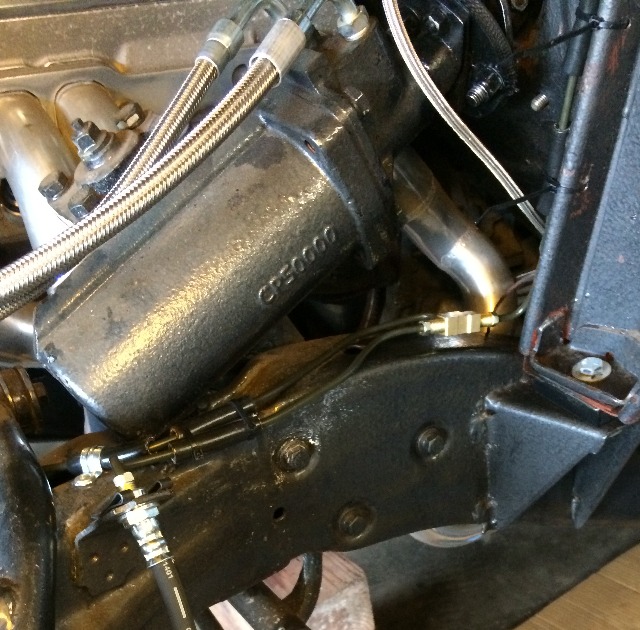
Still getting way too many leaks, have had to pull off
just about every one of these steel brake lines and
redo the flares, and try different connectors....
These are various length steel brake lines from NAPA,
but I am getting leaks from just about every one
of their flared ends, it's been a nightmare !!
I've had to reflare and refit every connection at the MC
and proportioning valve....
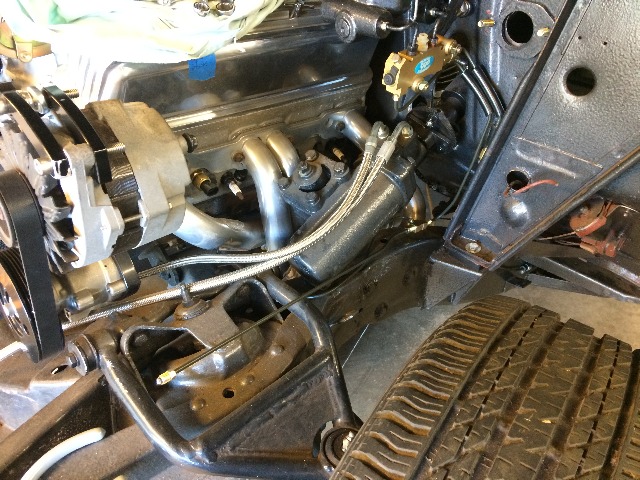
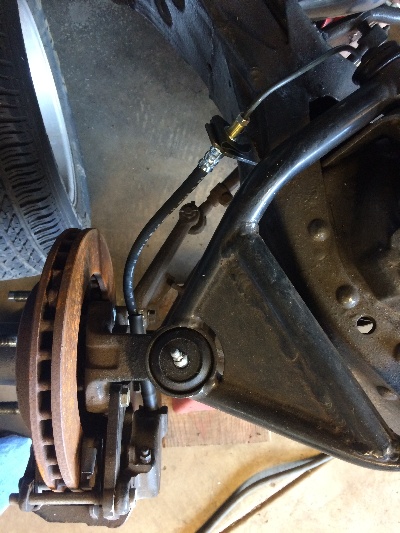
Front line from the proportioning valve down to a tee,
then off to both front calipers, used hoses for an '80 Camaro,
they fit nicely...
Got the front brakes hooked up and bled, looks good...
Ran two 60" lines along the frame to the rear, had to cut and fit
a short piece in the middle to get it exact...
Got it bled and the pedal feels good, but still chasing a couple of leaks !!
Got the hydraulic clutch bled and working, but the pedal feel is much
heavier than I think it should be, need to check that out...
Lots more pix HERE and HERE
More later....
Willy
-
06-15-2019 #207
Registered User
- Join Date
- Feb 2007
- Location
- Hawaii
- Posts
- 225
Dug out my valve spring compression gage....
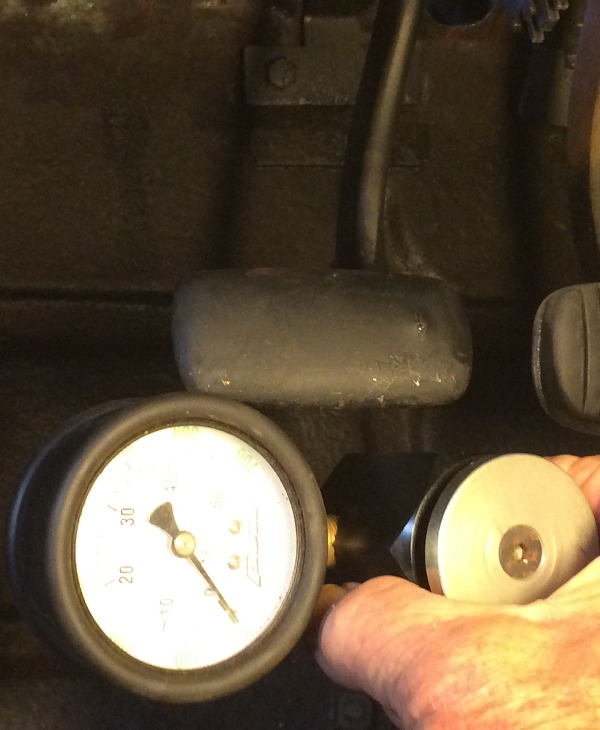
....And used it to press against the clutch pedal,
it's running between 35 and 45 lbs pressure, so I'll use 40 average,
with this system I designed the mechanical leverage factor
is 5.5 to 1, so with 40 lbs at the pedal I'm putting 220 lbs
on the clutch release lever at the slave cylinder...
For this aftermarket '93 LT1 T56 clutch setup I
don know if that is excessive or not. It sure feels like
a lot though....
But I've decided to just leave it and drive it this way and see how it feels...
I still need to setup an adjustable "stop" and install the over-center return
spring on the clutch pedal, and then see how that feels....
More later,
Willy
-
07-03-2019 #208
Registered User
- Join Date
- Feb 2007
- Location
- Hawaii
- Posts
- 225
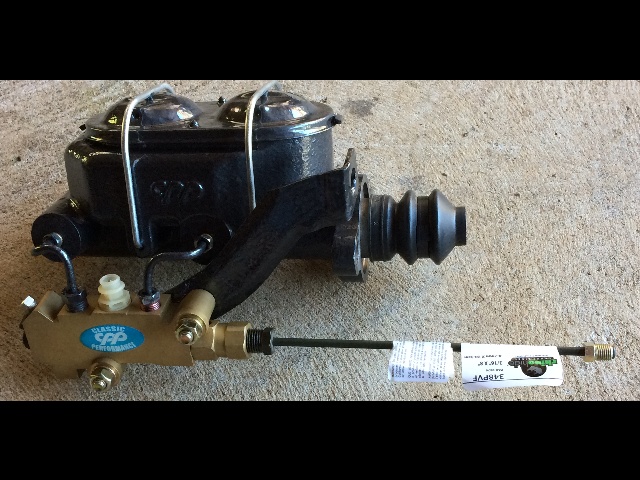
Figured out a way to put overnight pressure on the brake pedal, it goes down to the floor overnight, but I can't find any leaks, maybe the master cylinder is leaking back around the pistons internally? It's a dual chamber unit.
Hmmmm....
Tried to hook up the over-center/return spring on the clutch pedal, but can't find the usual anchor up under the dash, as this car was originally an automatic, and was always one until I got it, do ya suppose that anchor for a clutch pedal return spring never got installed at the factory? So I'm going to have to fab something? Once again....
Hmmmm....
Also need to fab an adjustable stop for the up stroke of the clutch pedal....
My fuel tank came supposedly drilled for the fuel gage sender to be mounted on the front side, and was drilled supposedly for a stock '55 sending unit, and the unit I ordered was was supposed to be a stock '55 sending unit, and it doesn't match up to the hole in the tank, more fab work to get it to fit right.....
Am traveling right now so it will be awhile for me to get back to it, but am thinking about how to do these while traveling....
Happy 4th to all....
Willy
-
07-26-2019 #209
Registered User
- Join Date
- Feb 2007
- Location
- Hawaii
- Posts
- 225
I got to spend time with 3 of my 4 kids who are up in the Seattle area, 6 grandkids, man they wore me out !!!
Good to be back home and working on the project again, a new fuel filler tube arrived while I was gone, 2" ss supposed to fit right in place on my '55 hardtop, right into the inlet tube on the new fuel tank I had installed before I put the body back on the frame...
Ha, wouldn't fit, too short and some interference from the frame rail....
So tried cutting off a piece that goes into the tank and extending it with some 2" fuel hose I had on hand....
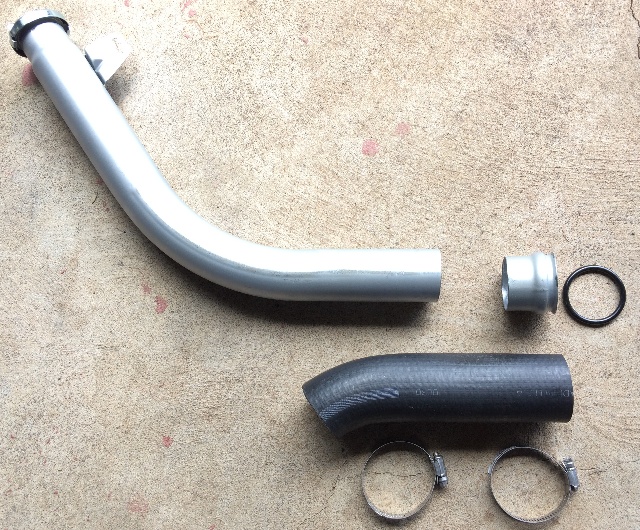
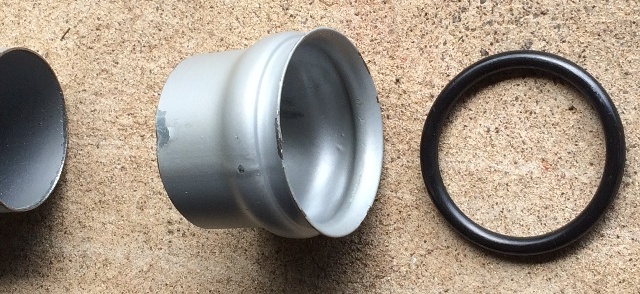
It needs to be about 3" longer at the fuel tank,
so I cut off the O-ring portion and did a trial fit....
It didn't work, the tank inlet is partially below the frame,
I couldn't get the rubber hose to bend that much,
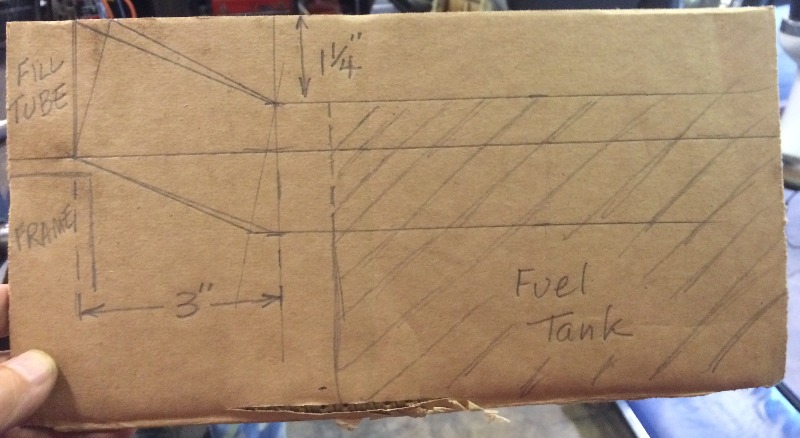
so I bought a 45 deg bend piece of ss 2" pipe
and drew up as accurate a sketch of what needed
to fit where as I could....
......and started cutting to fit....
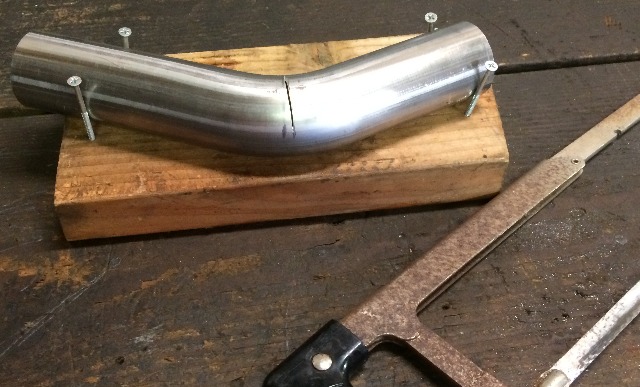
Cutting by hand with a hack saw gives me the thinnest
cuts when I want precision fitting of the pieces...
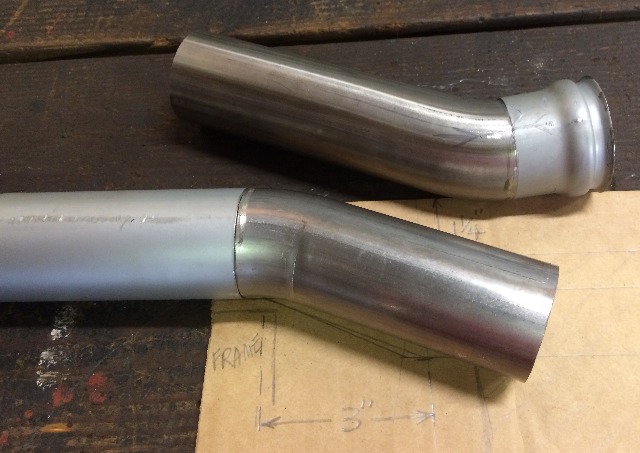
Now to cut each piece to get the correct length
in the middle....

This matched my drawing pretty well,
now to tack it together and see how well it fits
in the car and into the fuel tank
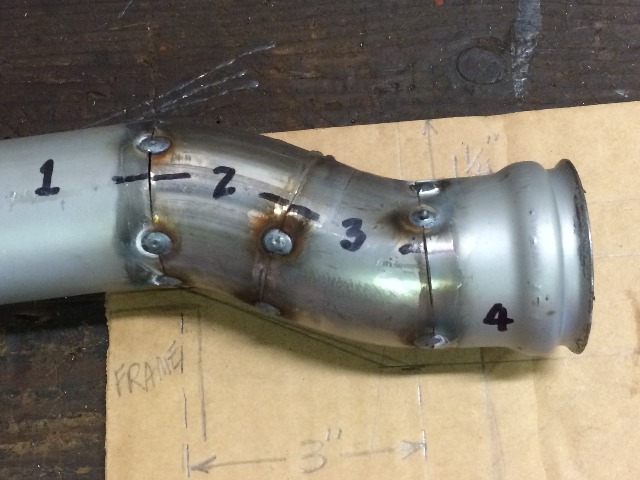
It fits quite well, now to weld it up, test for leaks
and paint it...
-
08-03-2019 #210
Registered User
- Join Date
- Feb 2007
- Location
- Hawaii
- Posts
- 225
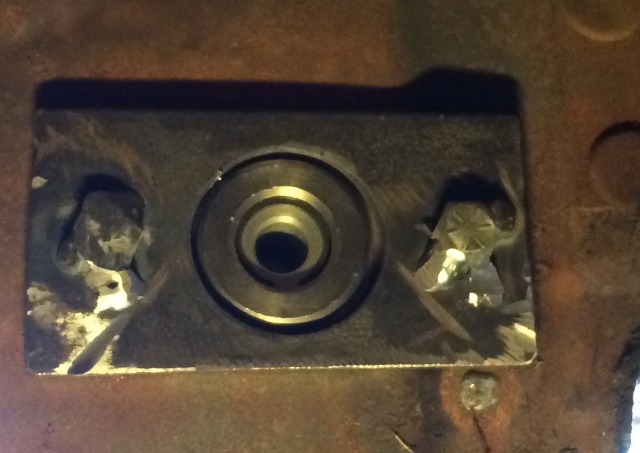
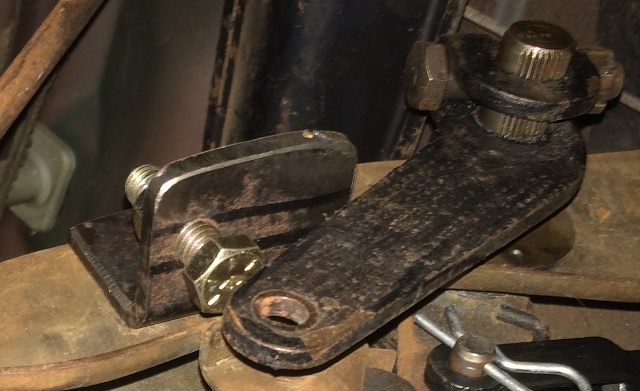
Back on the clutch again....
Tried to install the clutch pedal "over center/return spring" but it was too loose
with the oem anchor, the lower one, so I made up a shorter/adjustable one....
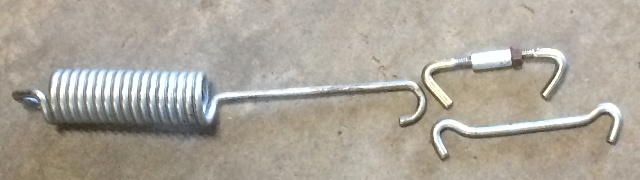
It fits like this (below) with the front hook located so that the pedal pivot
passes through the plane of the springs pull in such a way that
when the pedal is up the spring holds it up, and when the pedal
is depresses the spring assists in pushing against the
mastercylinder. I got it installed and adjusted so that it
feels pretty good....
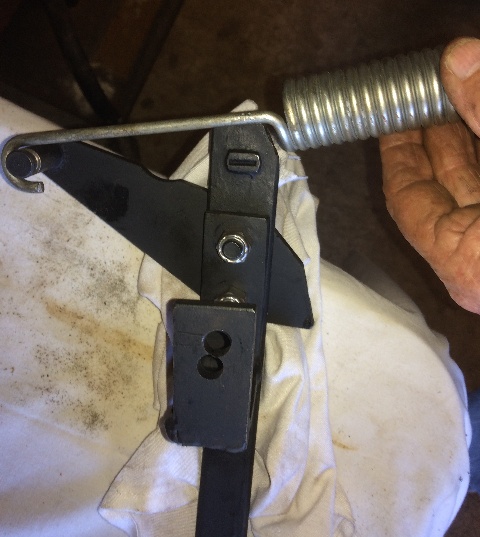
The clutch pedal needed a stop for when I took my foot
off of it, as the original lever on the right side of the
pedal pivot was not being used, I fabbed an adjustable
stop and put it in there....

A close up....
After aedjusting the push rod for the master cylinder, I had about
a 1/4" of "free play" before the push rod touched anything in the MC,
the over center / return spring is working perfectly to hold the pedal
up against the stop and sitting at the same level as the brake pedal
right next to it.
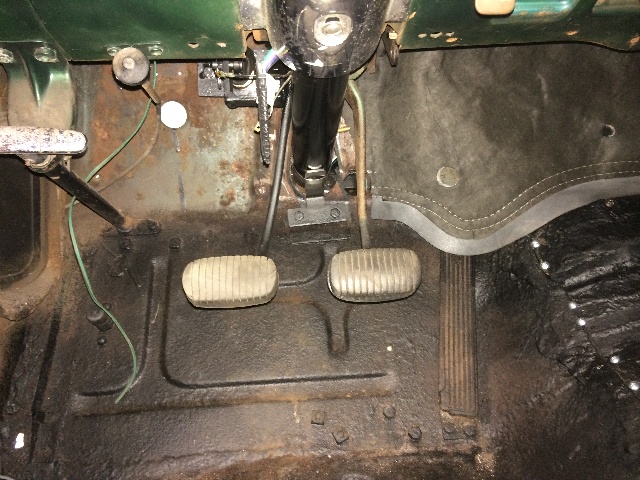
The brake pedal feels good, and the clutch pedal feels pretty good also,
a slightly heavier clutch pedal feel than the mechanical one in my
'55 gasser, and I think it will be ok....
-
08-10-2019 #211
Registered User
- Join Date
- Feb 2007
- Location
- Hawaii
- Posts
- 225
Using American Autowire's '55 kit with lots of extra options....
Got the fuse panel mounted and got lost in the directions....
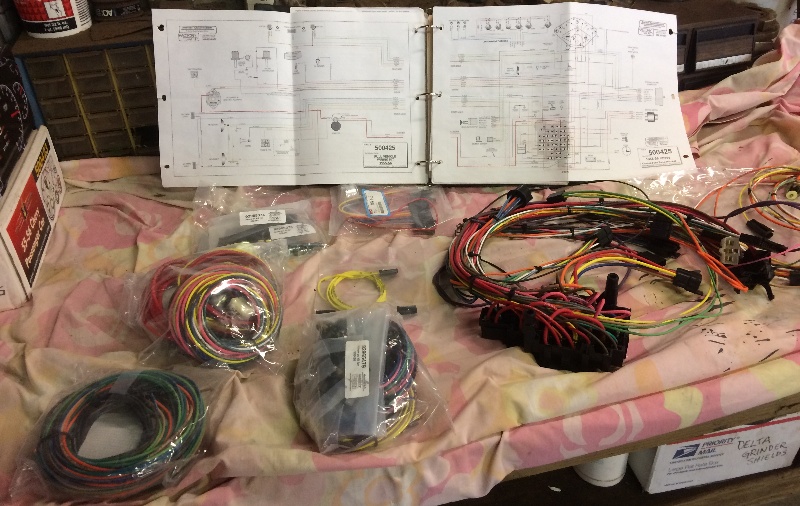
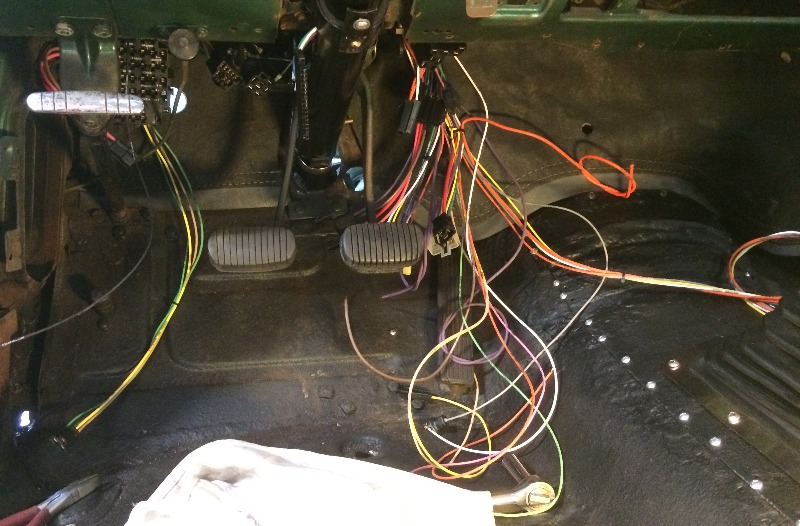
More pix here....
-
08-15-2019 #212
Registered User
- Join Date
- Feb 2007
- Location
- Hawaii
- Posts
- 225
My new gage system has a computer to operate it that has to be mounted up under the dash somewhere, also the FAST engine computer has to be mounted somewhere up there, was under there looking at possibilities when it dawned on me that I needed to probably install the AC / heating system, and the new under dash windshield wiper system first, and I have not purchased those as yet. So been online looking at possibilities, want to use the AC compressor that came with the motor out of a '93 Camaro, but need the rest of it.
-
09-04-2019 #213
Registered User
- Join Date
- Feb 2007
- Location
- Hawaii
- Posts
- 225
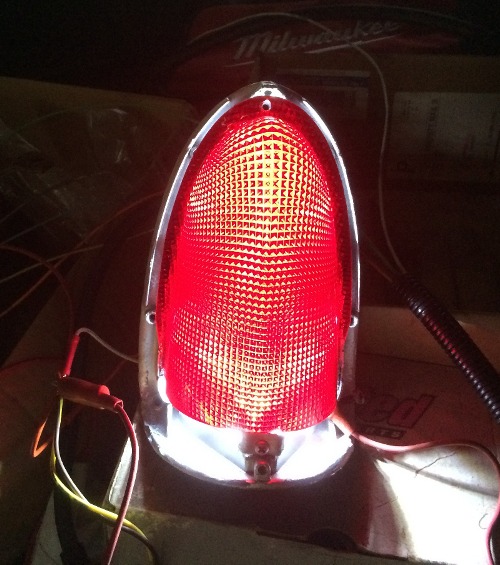
Waiting for hardware for under dash install, like AC and wiper hardware, so pulled wire to the rear end, and found the taillight assemblies needed work...
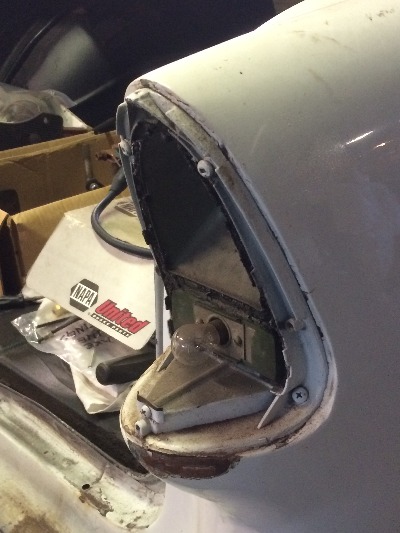
I am going to run these full coverage rear lenses, sort of a '49 Buick taillight replica, or so I'm told...
I'll have to replace the backup light socket with a new socket that will handle both taillight and brake light bulbs...

It shouldn't be a big issue and I think the taillights will look great like this...
-
09-05-2019 #214
Registered User
- Join Date
- Feb 2007
- Location
- Hawaii
- Posts
- 225
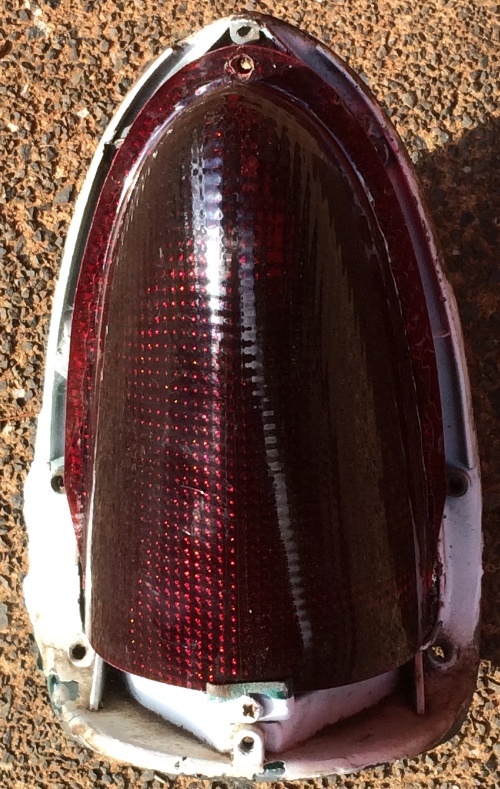
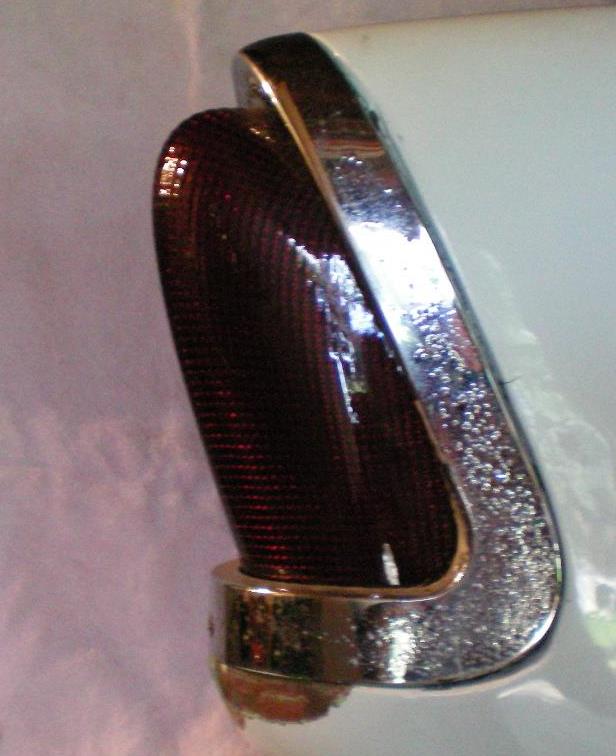
Here's what that lens looks like on the car...
-
09-07-2019 #215
 Registered User
- Join Date
- Jan 2011
- Location
- Jefferson City, MO
- Posts
- 240
I believe those are modified '56 Buick lenses. It's a common trick in the kustom world.
-
09-09-2019 #216
Registered User
- Join Date
- Feb 2007
- Location
- Hawaii
- Posts
- 225
Cool pic, thanks !
-
09-12-2019 #217
Registered User
- Join Date
- Feb 2007
- Location
- Hawaii
- Posts
- 225
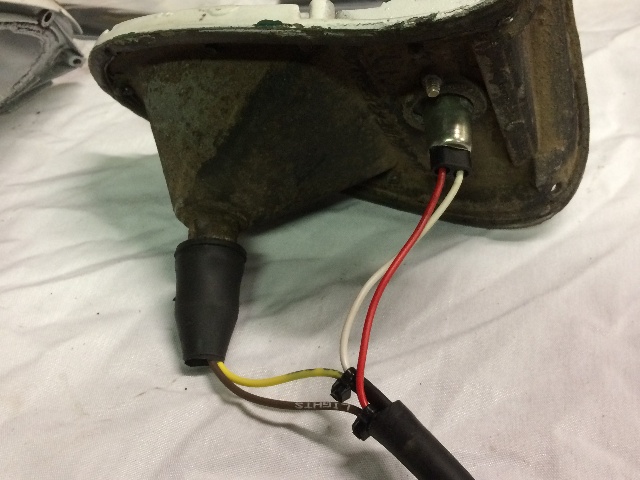
Cleaned up the housings, drilled, tapped, and mounted the lower
sockets to take the 1157 dual circuit LED bulbs....
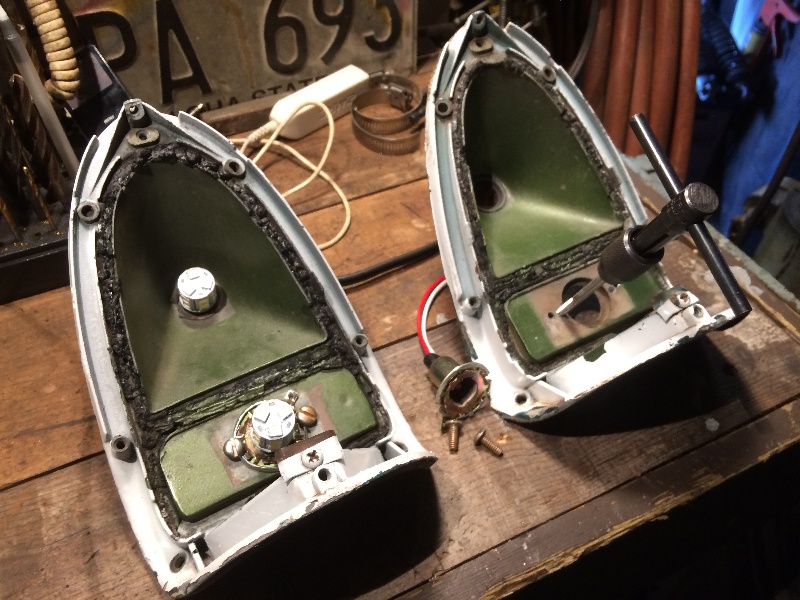
Have used both white paint and silver paint in the past with good results...
Chose silver for this build....
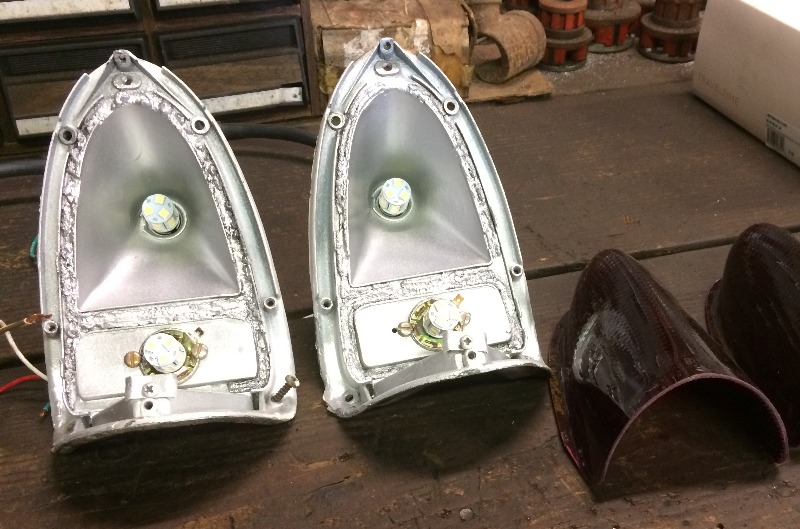
Hooked up all four circuits, a brake and a running light both
on top and below, flipped off the shop lights, it's bright !!!
-
09-13-2019 #218
Registered User
- Join Date
- Feb 2007
- Location
- Hawaii
- Posts
- 225
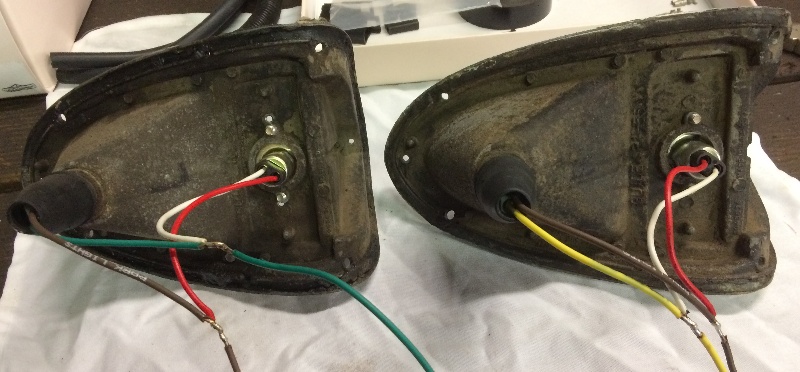
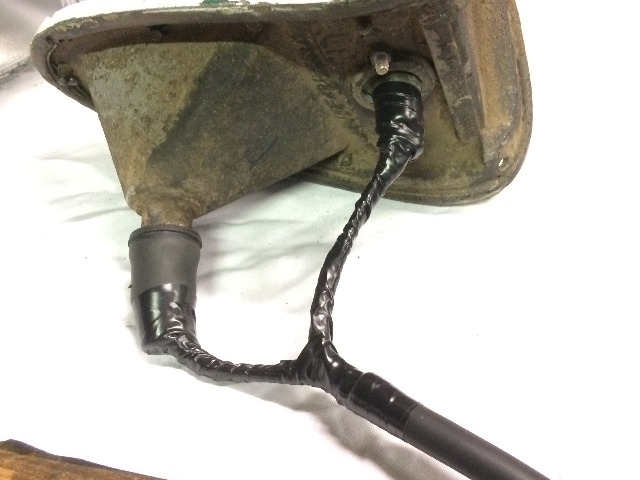
Decided to just solder the wires at a lot of the connections
and cover the connections with shrink tubing...
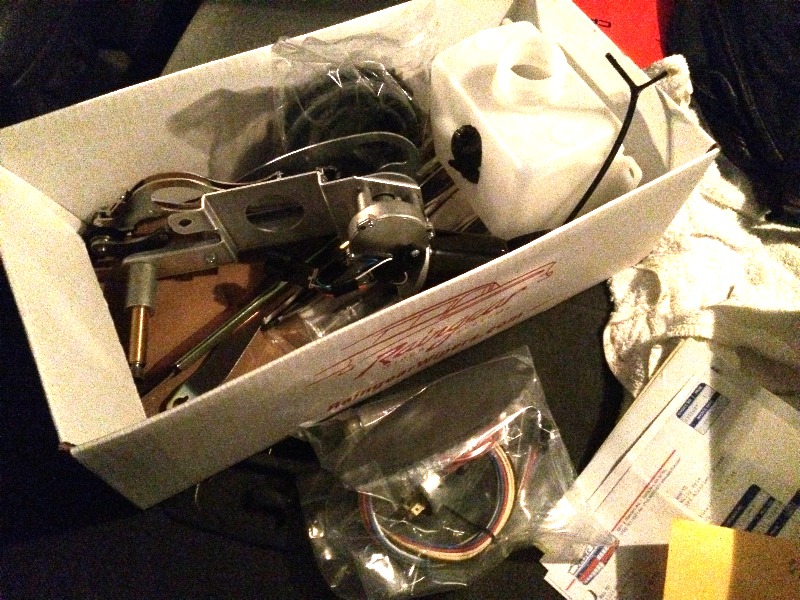
And a box of goodies from Rain Gear for my wipers arrived....
-
09-15-2019 #219
Registered User
- Join Date
- Feb 2007
- Location
- Hawaii
- Posts
- 225
Finishing up the tail lights....
Put shrink tubing on the connections,
Pulled the wires through some rubber tubing up to the connections....
And wrapped everythng left exposed with elec. tape....
Now to mount 'em back on and hook up to the harness....
-
09-21-2019 #220
Registered User
- Join Date
- Feb 2007
- Location
- Hawaii
- Posts
- 225
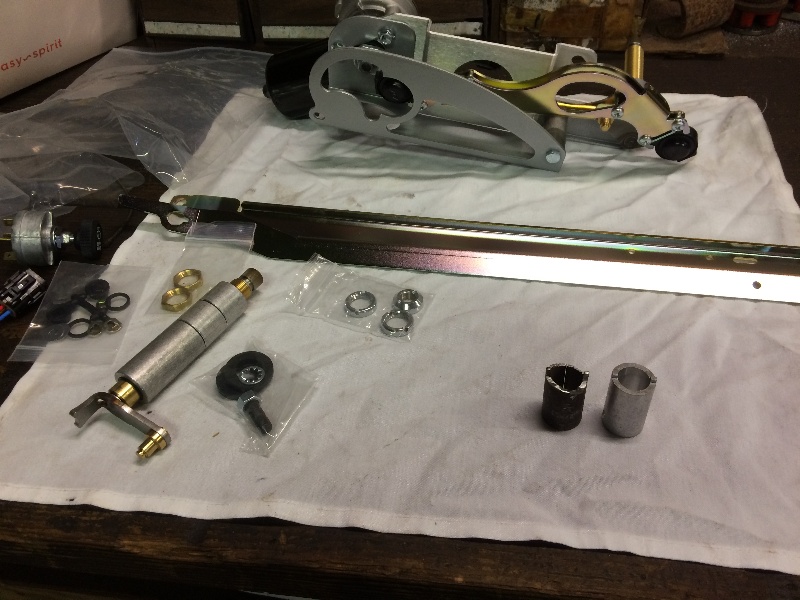
I started work installing the new wiper system....
Pulled the old wiper system out of the cowl and out from
under the dash, and started laying out the new parts....
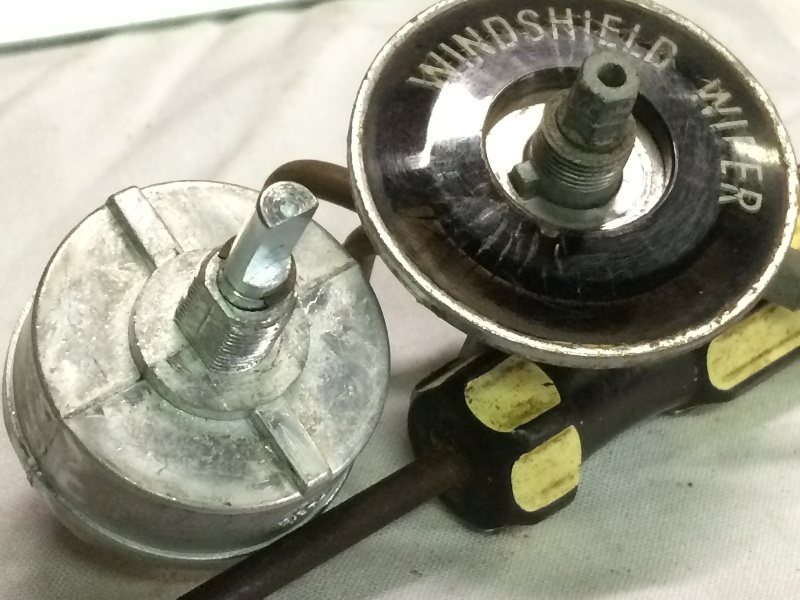
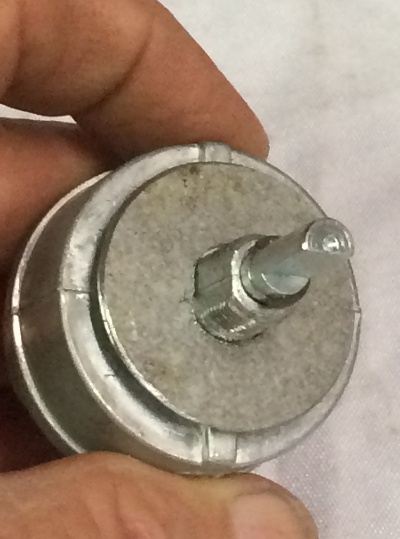
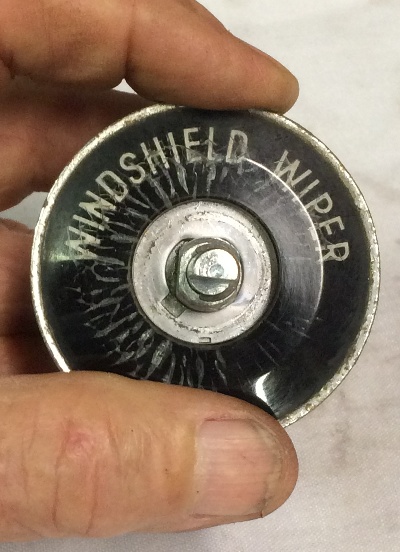
Tried to install the switch, but it spins in the dash,
the original switch is keyed to a slotted hole in the dash
so it won't spin, but the switch provided by RainGear has
flats that do not match up with the hole in the dash,
so it spins easily when I turn the switch on and off....
Not good....
RainGear should have done a much better job providing
a switch that would fit properly in the original '55 dash hole....
Another view
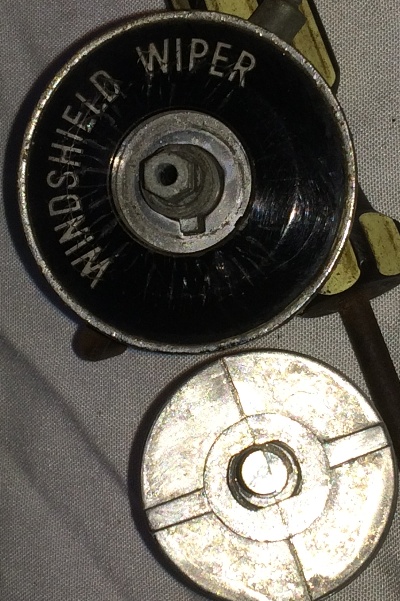
So I cut a disk of 16 ga. galv. and drilled/filed
a hole that fits the new switch nicely....
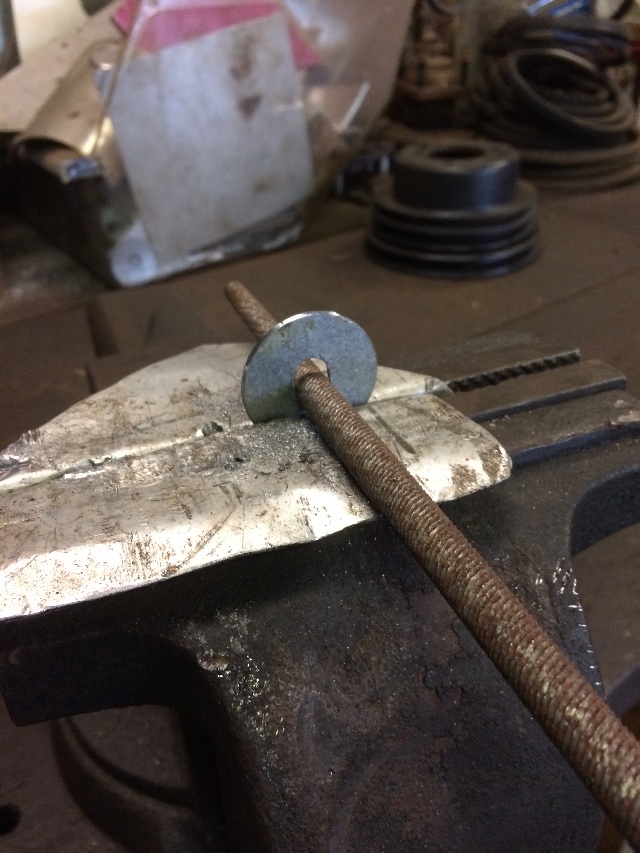
Now to figure out how to add a tab to that disk
that will key into the slotted hole in the dash,
that will prevent the switch from spinning....
Or maybe I can just glue that disk to the back side of the
dash where the switch fits, will think about that....

 Reply With Quote


