

Results 101 to 120 of 258
-
11-09-2017 #101

 Administrator
- Join Date
- Jan 2000
- Location
- Thousand Oaks California
- Posts
- 10,031

Nice progress! I'm so following this!
Larry Callahan
Founder/Administrator of Pro-Touring.com, G-Machines.com and HostMyJunk.com
To advertise on Pro-Touring.com click here
-
11-13-2017 #102
Registered User
- Join Date
- Feb 2007
- Location
- Hawaii
- Posts
- 225
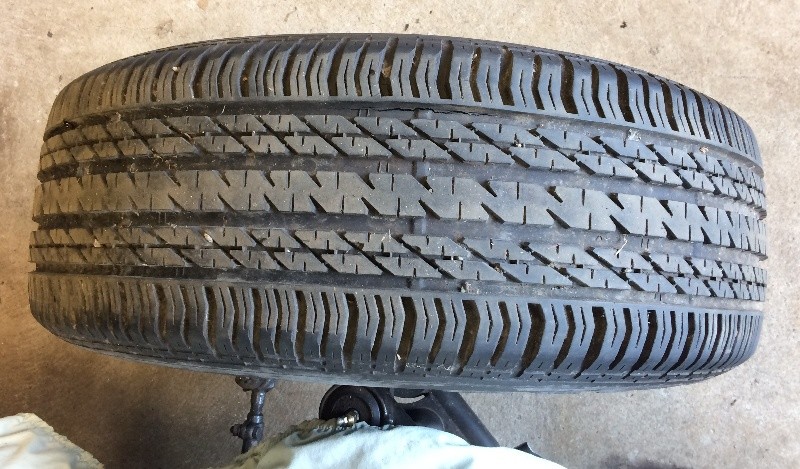
Looking at the tires, and not happy....
They've been in storage for, what, 5 years or more??
The front left tire....
Do you see anything??
Here, I marked it with tape...
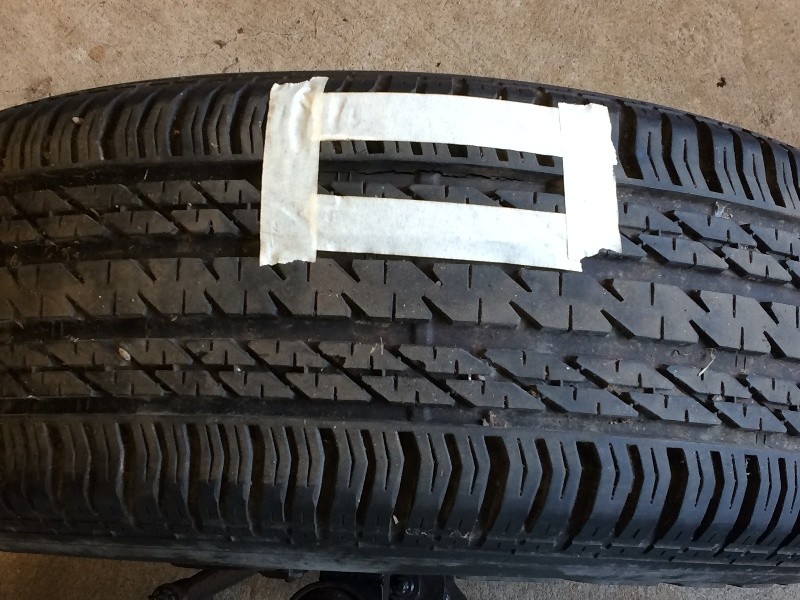
A close up....

I sure don't want to drive around on a tire like this....
Had some glaspaks from some past project,
stuck 'em in there to see how they looked...
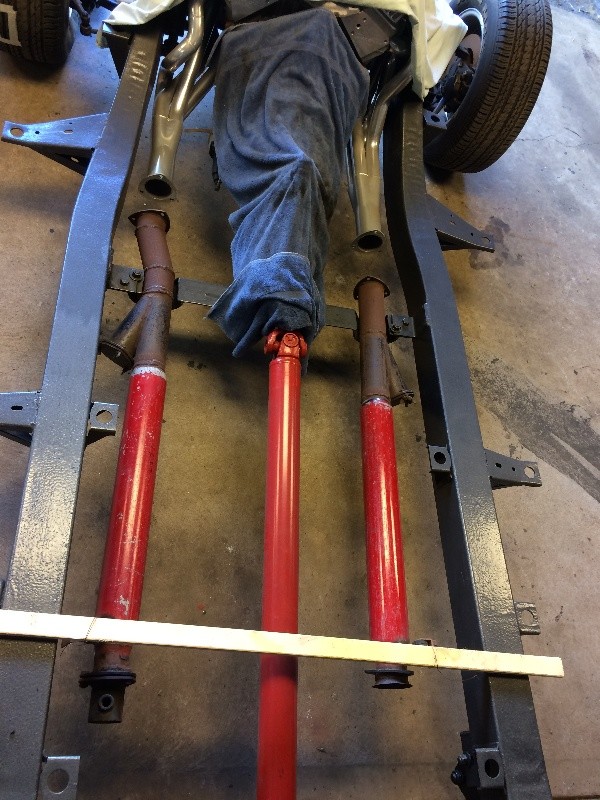
More Later....
01-20-2018 #103
Registered User
- Join Date
- Feb 2007
- Location
- Hawaii
- Posts
- 225
I've been traveling over the holidays, it sure is nice to get back home and back out in the shop....
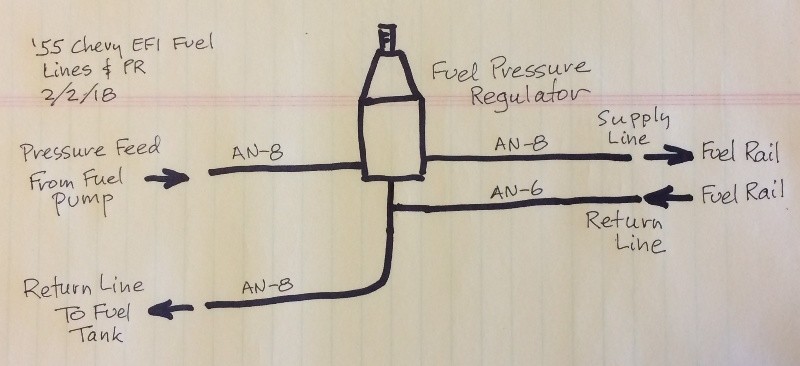
I need to figure out my fuel system for this '55 Chevy Sport Coupe project...
I'm not familiar with these early 90's LT-1 efi systems,
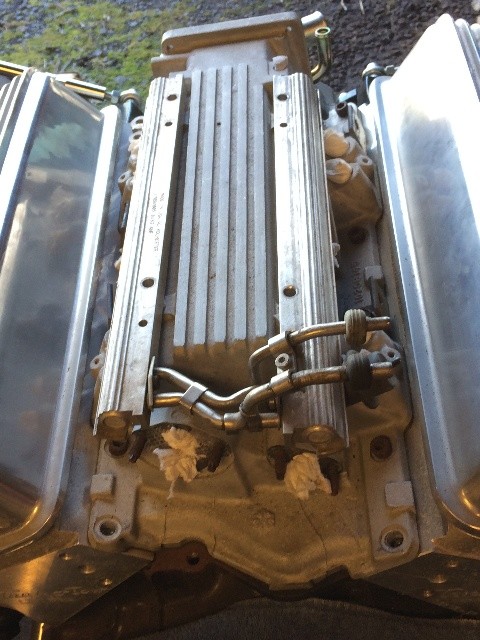
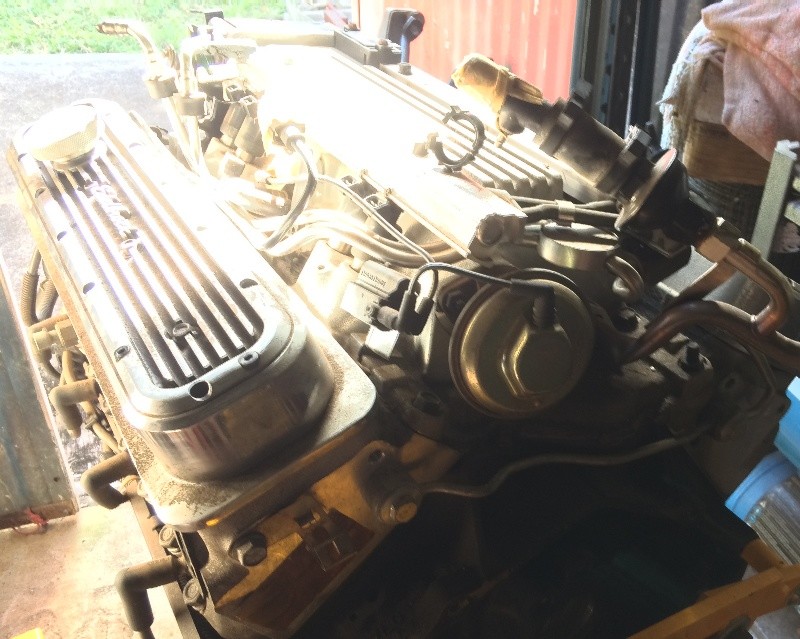
Here's what I have to start with....
The motor is built up, 396 ci, ported heads, the plenum has been
port matched to the heads, and the throttle body end
of the plenum has been bored out to match a larger throttle body....
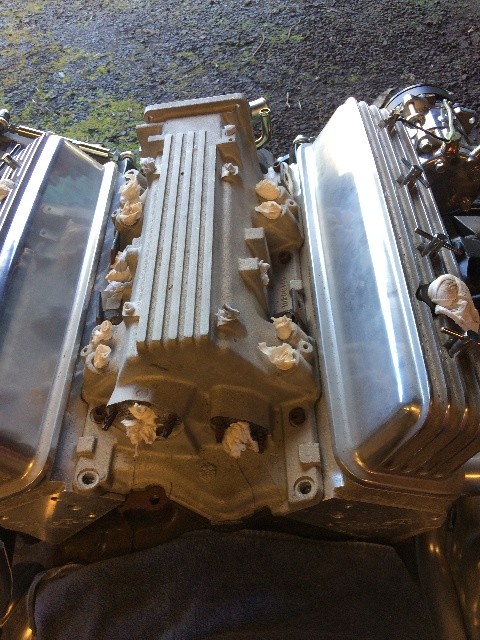
Some stock fuel rails, a 10 micron filter, a pressure regulator....

There's also a box of high flow injectors that are supposed to work with this motor....
The fuel rails match up to the plenum, don't see a problem there....
Here's a complete stock '93 LT-1 Camaro Z28 motor I can pull parts off of if needed....
But I'd rather leave it complete if I can....
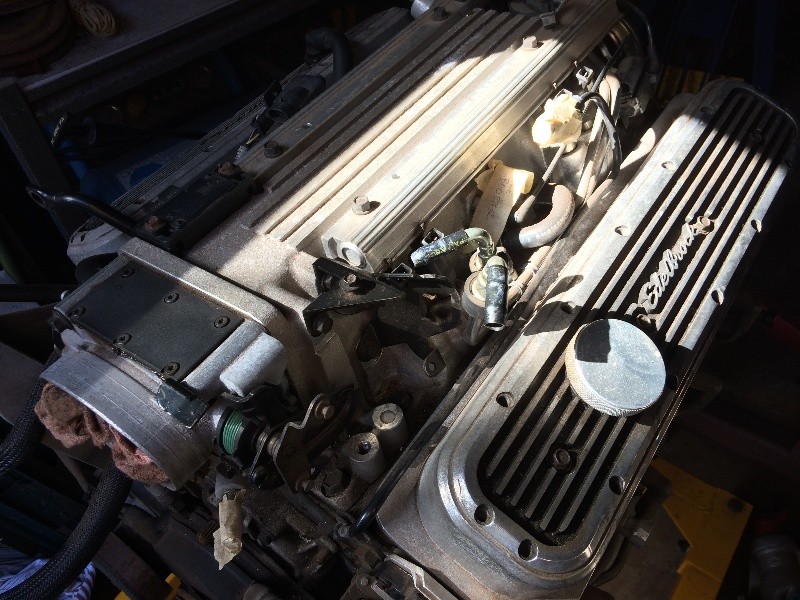
Another view....
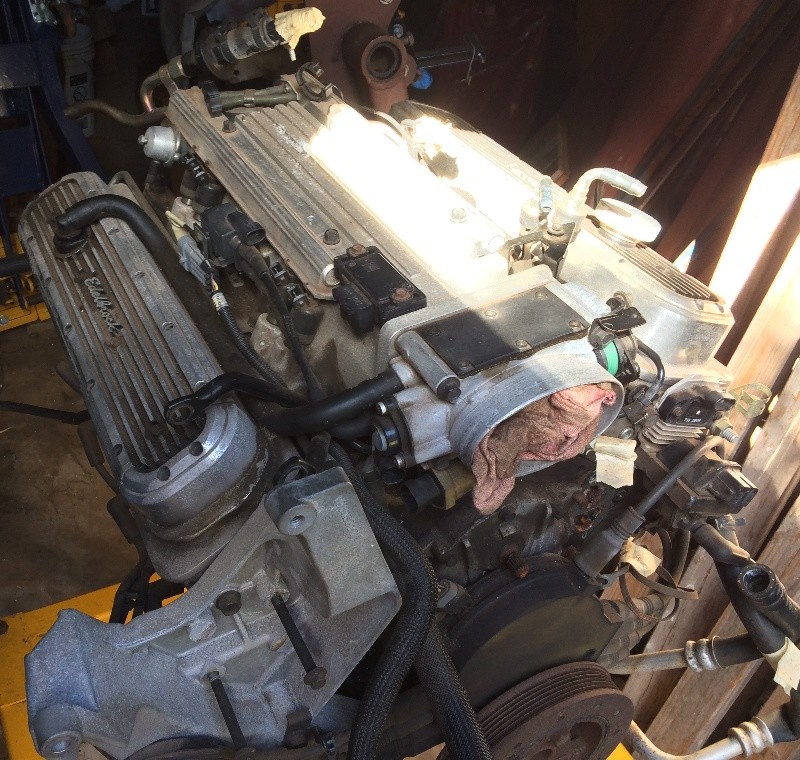
View #3....
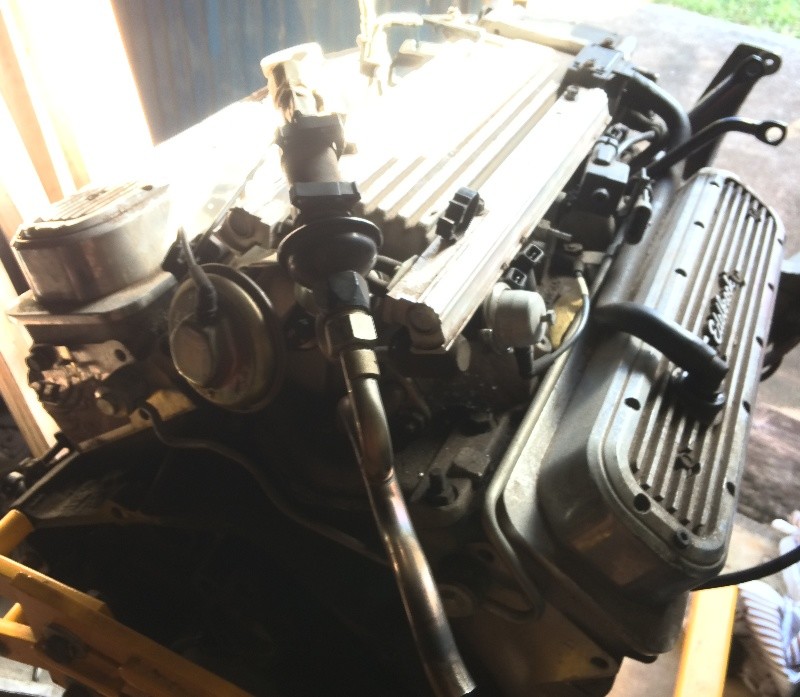
One more....
I need to find instructions on how these systems worked,
and figure out what I need to do with mine....
In the meantime, I'll plumb in the fuel lines....
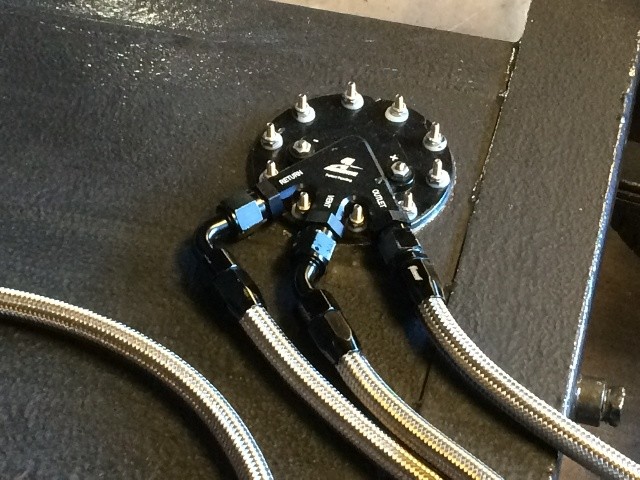
The Aeromotive fuel pump I mounted in the tank came with AN-6 fittings...
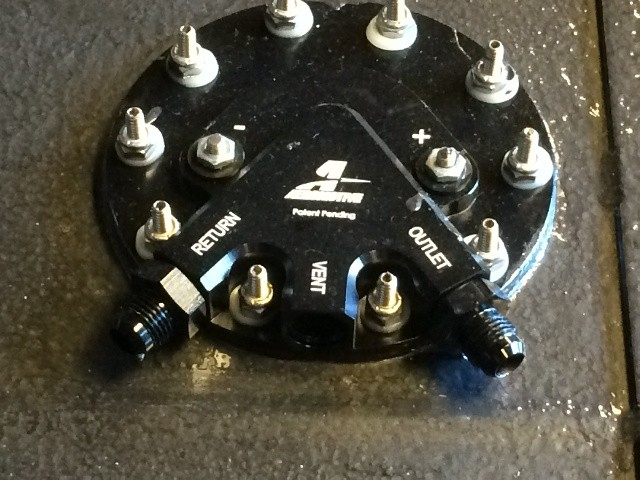
Changed 'em out for AN-8 fittings and put on the hose ends
I want to use to see how well they fit...
That ridge just under the hose ends was a very tight fit...
But I got them on....
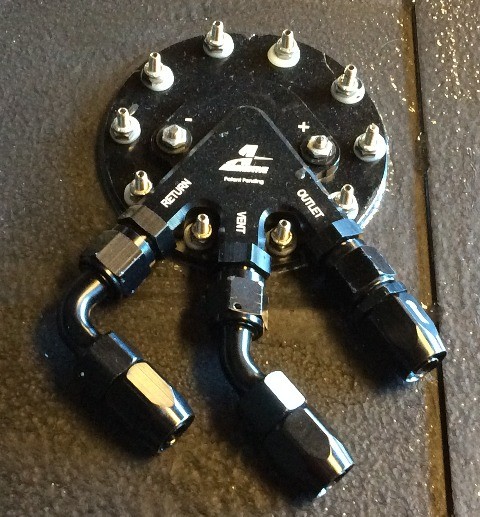
Time for some hose....
I think this will work quite nicely....
Had some clamps and some old rubber hose around, so check out the fit...

Yeah, this will work....
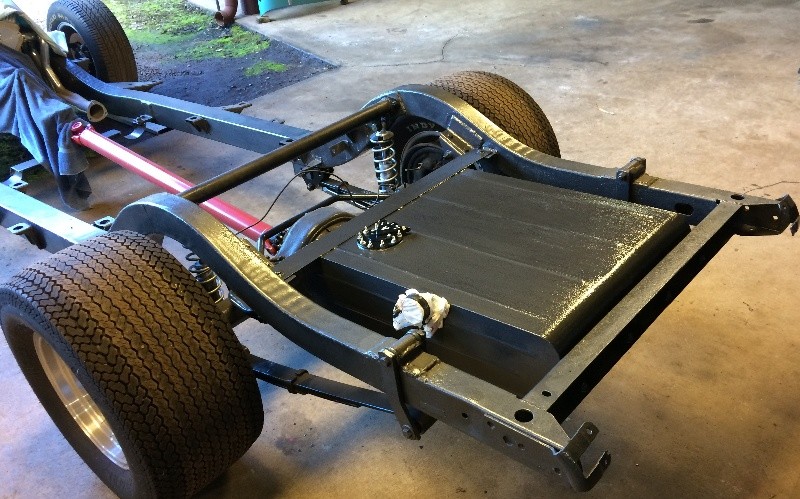
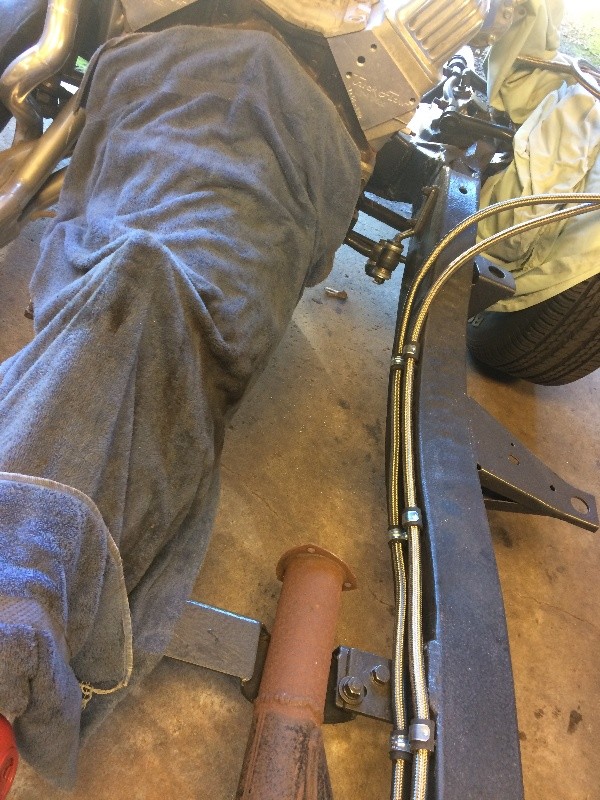
Hung the hoses (a feed hose and a return) on the inside
of the right frame rail with clamps about every foot...
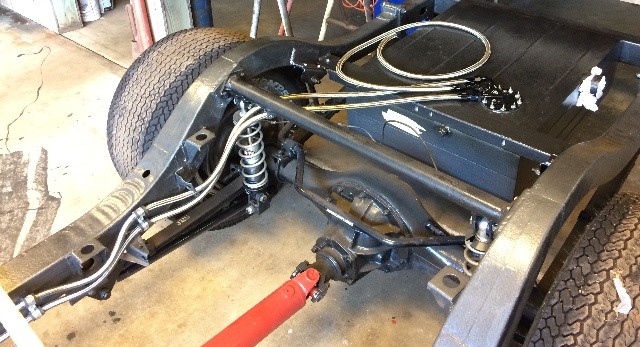
Had to route them around the body mount brackets,
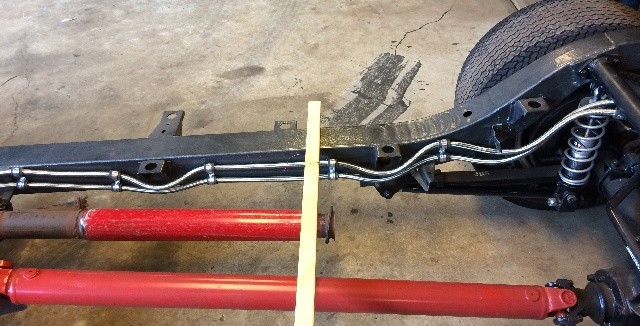
Will put some protective hose on the fuel lines anywhere
they might rub on a metal bracket...
I need to pull off the right side header to drill and mount the last two
sets of mounting clamps...
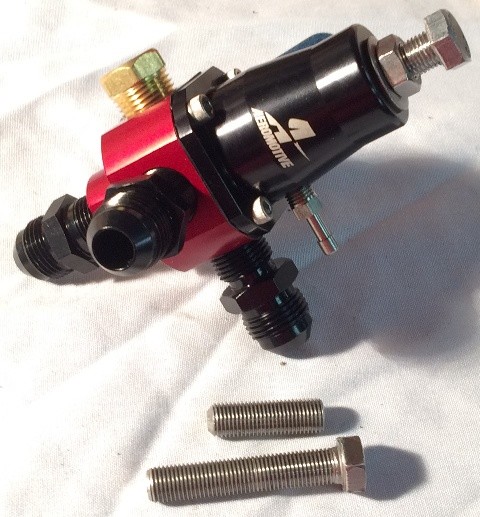
Installing AN-8 fittings and plugs in the pressure regulator...
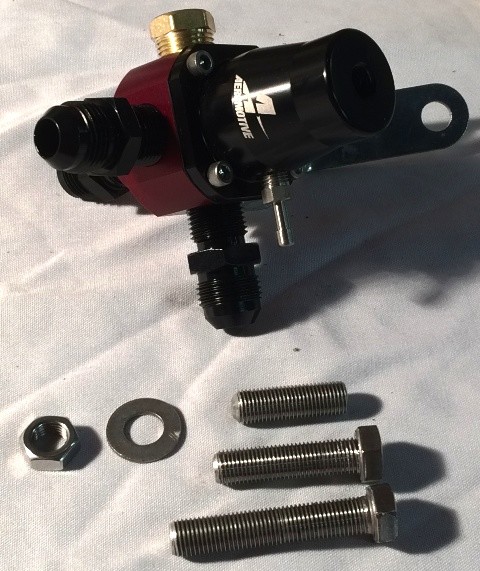
I had to change out the spring in this regulator,
it came with a low pressure spring for a carb setup,
and I needed the high pressure spring for the efi setup,
but that spring was much shorter then the carb spring,
and that short adjusting bolt was too short to use with
the high pressure spring, so I got two more bolts, the one
in the middle looked the best, so will use it....
More Later....
01-24-2018 #104
Registered User
- Join Date
- Feb 2007
- Location
- Hawaii
- Posts
- 225
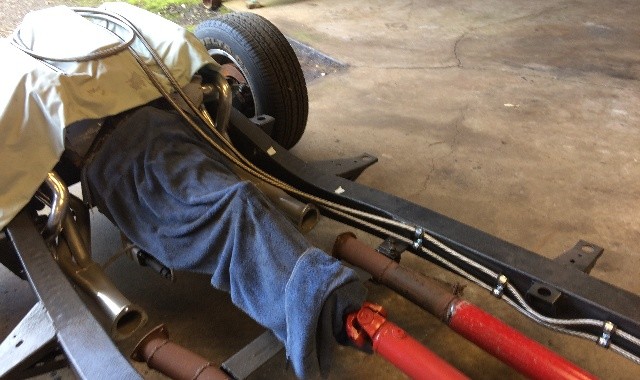
Fitting together the fuel and exhaust systems
Had to pull off this right side header to get a drill in
for the last two fuel line mounts....
The header is going to be close...
Yes, I'm going to need some insulation for those fuel lines
to protect them from the exhaust heat
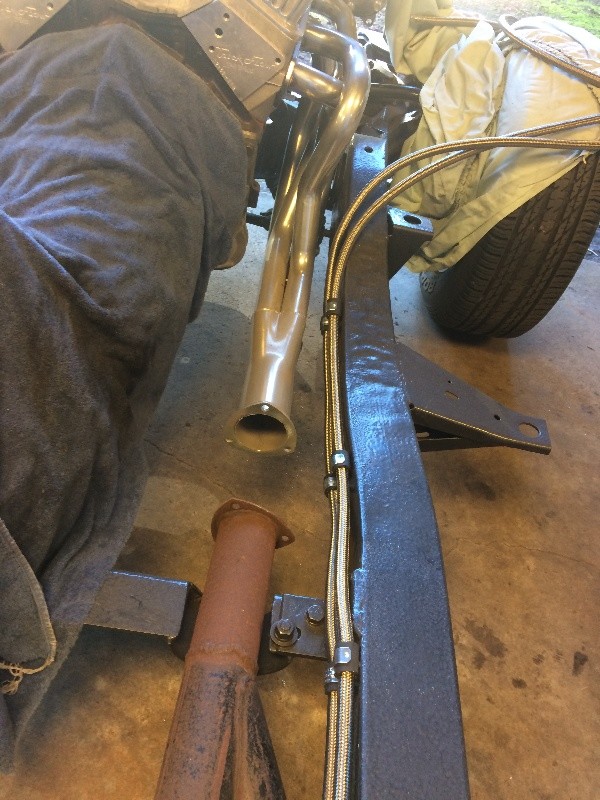
Or, wrap the exhaust system to keep the heat away from the fuel lines...
More Later....
01-25-2018 #105
Registered User
- Join Date
- Feb 2007
- Location
- Hawaii
- Posts
- 225
I need to learn about how this efi system works....
Think: '93 Camaro Z28, LT1 system, stick shift....
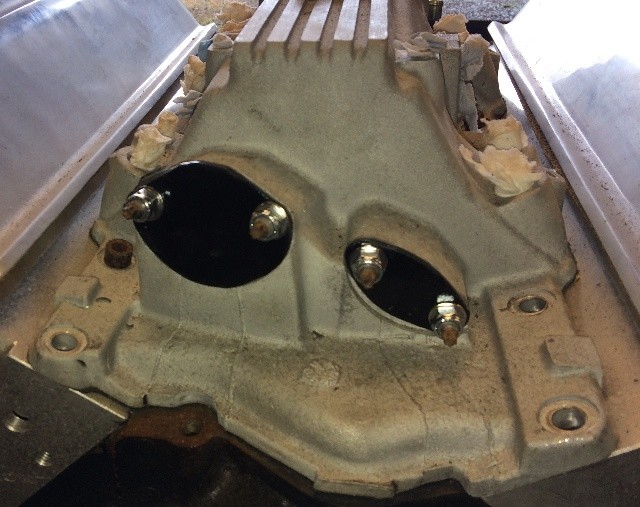
What are these ports on the rear of the plenum for?
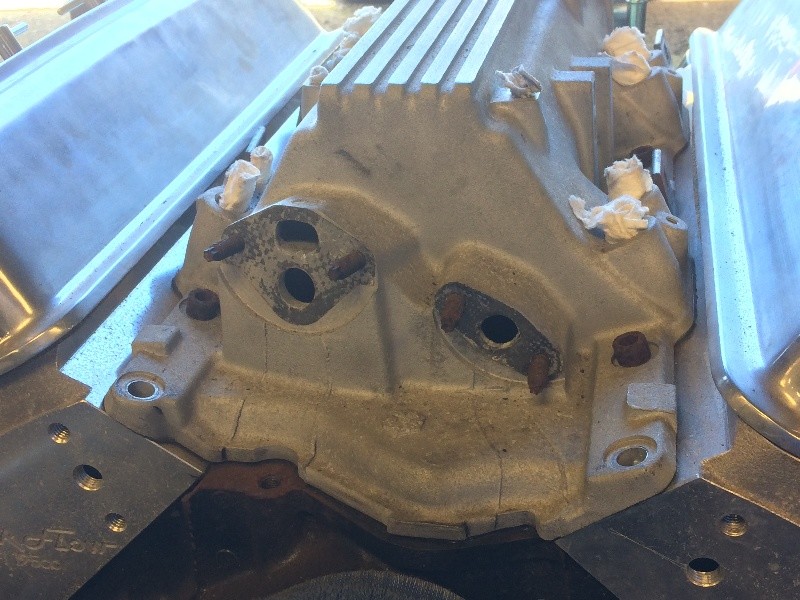
Also on the left side....
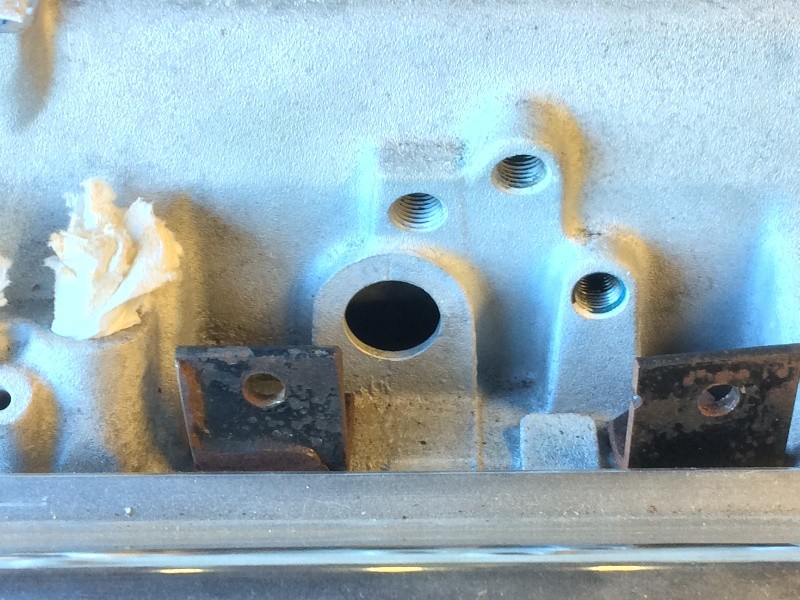
And on the right side....
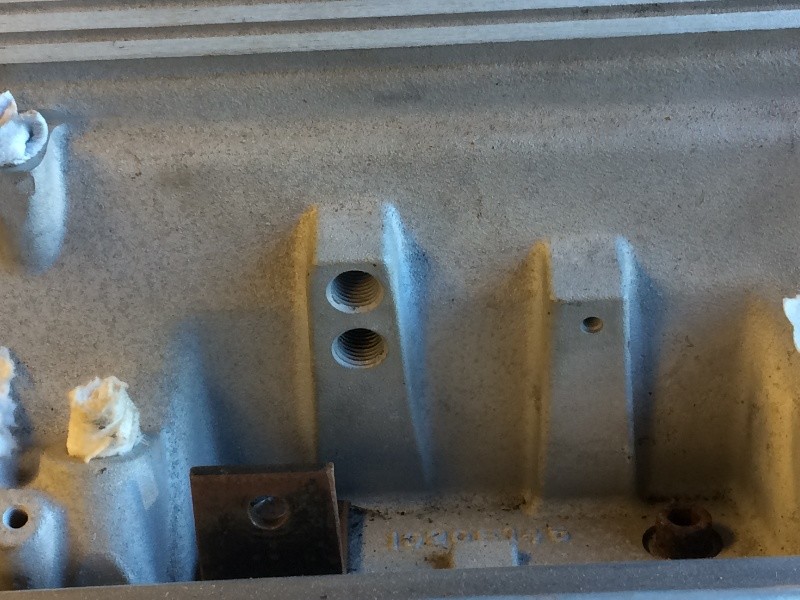
More Later....
01-29-2018 #106
Registered User
- Join Date
- Feb 2007
- Location
- Hawaii
- Posts
- 225
Decided to block off the EGR (Exhaust Gas Recirculation) Ports...
A ball peen hammer and sharp edges make cutting templates easy....

Gotta transfer that to some 1/8" plate....
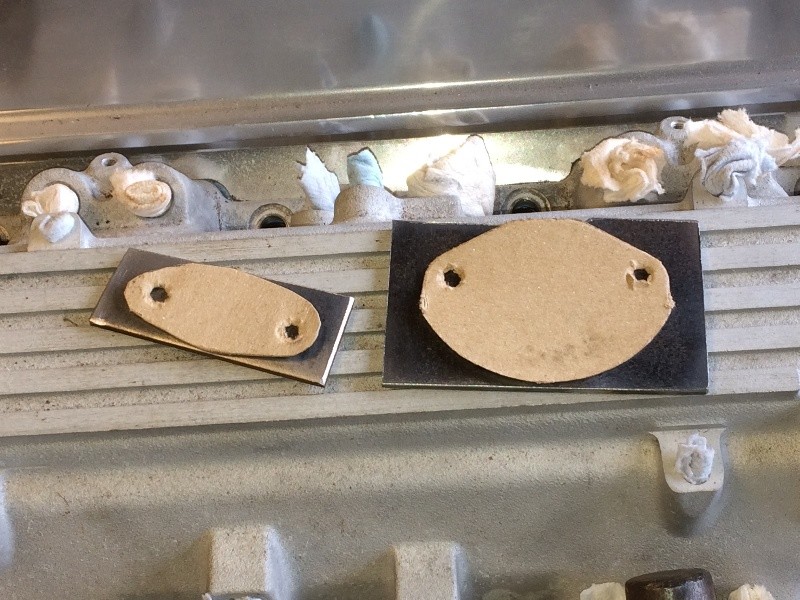
Get the holes drilled accurately first....

And finish shaping them to fit the templates....
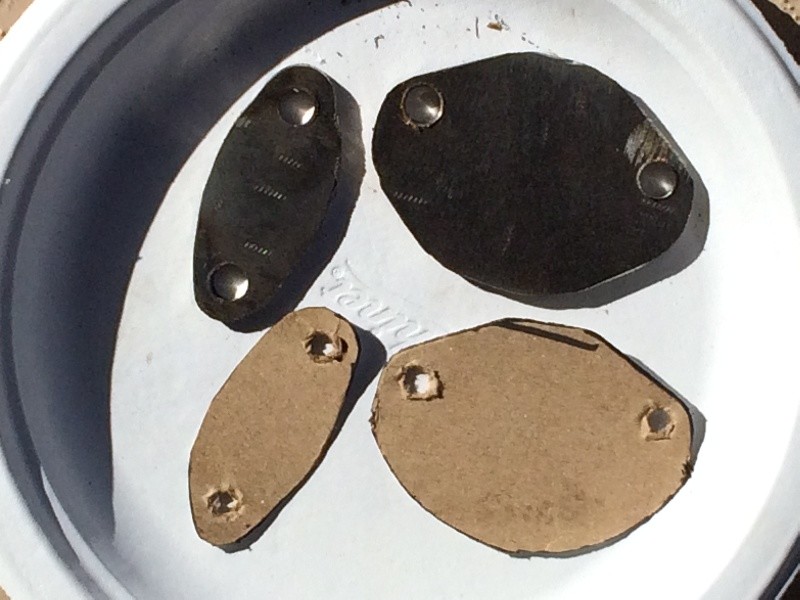
Paint next....
02-03-2018 #107
Registered User
- Join Date
- Feb 2007
- Location
- Hawaii
- Posts
- 225
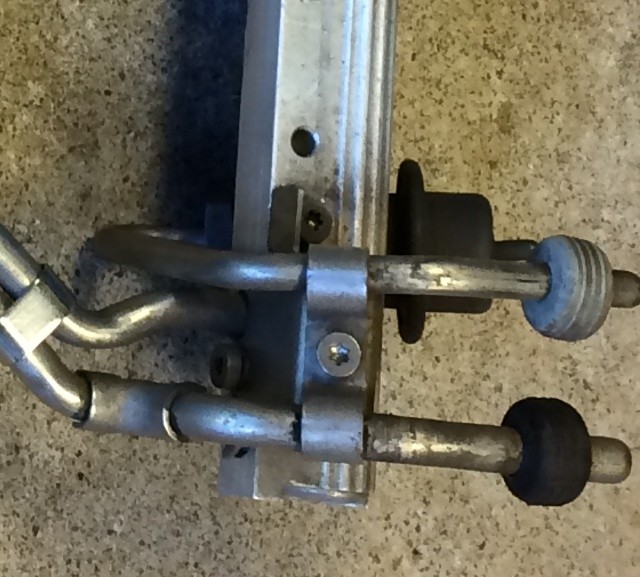
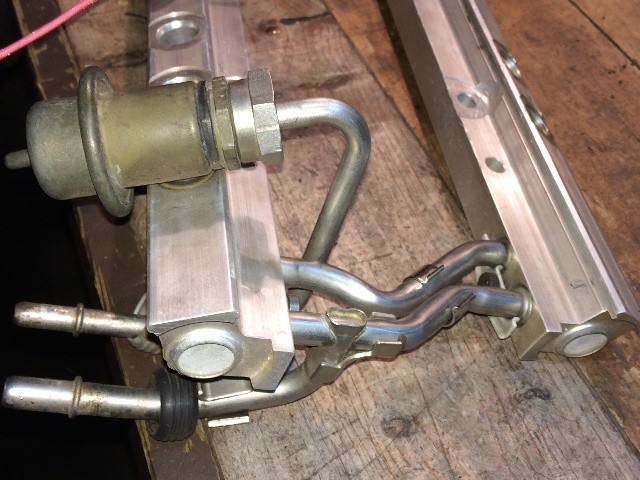
Trying to figure out how to connect these fuel lines on the fuel rails....
The rear tube is 3/8" and I'm told is the fuel in connection...
The front tube is 5/16" and I'm told is the fuel return line...
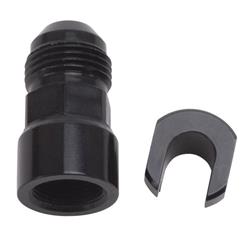
I've ordered an AN-8 connector for the 3/8" line,
and an AN-6 connector for the 5/16" line.
And a tee with both AN-6 and AN-8 connections for the fuel
return connections at the fuel PR valve...
The upper tube in this pic is the 5/16" fuel return line.
Under the fuel rail it is connected to that black device....
I'm guessing that device connects to engine vacuum??
This one is pretty old and gnarly, think I need to get a new one...
Any Comments?
More Later....
02-03-2018 #108 Registered User
- Join Date
- Aug 2007
- Location
- Jonesboro, Arkansas
- Posts
- 2,506
Man, sure brings back memories.. I've had two '55 hardtops, and one sedan in my life time. Always wanted a '56 but it never happened. Nice job so far.
Carl Wilson
1968 Camaro - T-56 6 speed - 383 Stroker, 2014 Mustang GT seats. FiTech EFI, Tanks Inc. Tank with Deutschwerks fuel pump.
02-07-2018 #109
Registered User
- Join Date
- Feb 2007
- Location
- Hawaii
- Posts
- 225
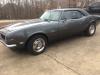
This is my second '55, (my third if you count my stepside pickup '55), the other one is my 4 dr blown olds powered gasser, a stick shift, solid front axle, ladder bar street racer. Much fun.
(some pix of the '55 gasser)
It's been rainy here, humid, it took these block off plates for the EGR openings in the plenum forever to stop being "sticky" so I could install them...
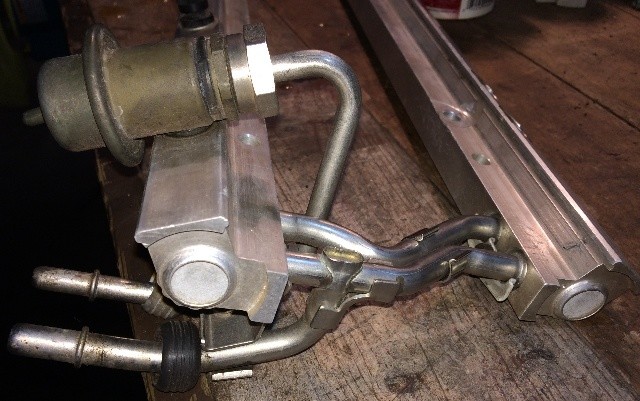
More pix of this fuel return setup at the fuel rail....
I'm trying to find info on exactly what this device is, it looks like a manifold vacuum
operated device to control fuel pressure in the fuel rails....
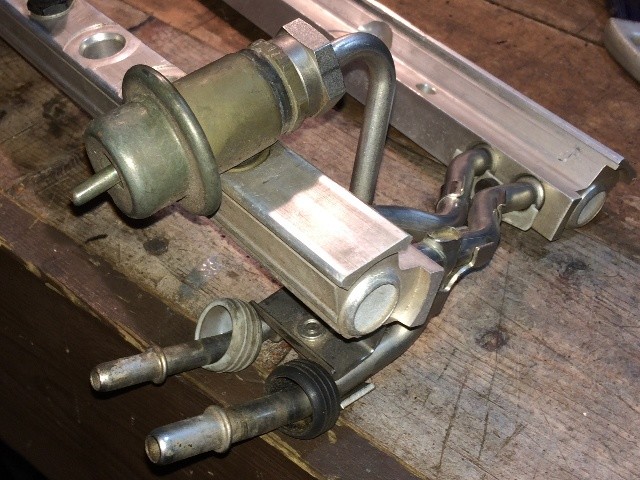
It's obviously not adjustable, and I'm trying to find out how it operates,
and what the specific parameters are, and if I can just dump it and
plug the hole in the rail? Or find another one that is adjustable so
I can tune it to my particular requirements?
After all my fuel pressure regulator is a constant flow return type, and is mounted right next to the motor, and feeds directly into those fuel rails, so I am trying to figure out just what this device does in addition to my PR, like maybe it adds additional pressure when the manifold vacuum drops??
Hmmmmm.....
These are the fittings I found to attach AN hoses to these fuel lines at the fuel rails....
More Later....
02-07-2018 #110
Registered User
- Join Date
- Feb 2007
- Location
- Hawaii
- Posts
- 225

I would think this Aeromotive fuel PR valve mounted right next to the motor would provice all the fuel control I need, and I think I can remove the stock, non-adjustable unit on those '93 fuel rails, and eliminate the fuel return directly from the fuel rails, but I am only guessing!
Aeromotive also suggests running two inlets to the fuel rails from a tee, and at the other end of the fuel rails, combine the outlets into the Aeromotive PR and then return to the fuel tank. That seems excessive to me for this particular application, the most likely setup from what I can see now, is to eliminate that stock unit on the fuel rail, plug that hole, and feed the fuel rails inlet directly from the Aeromotive PR unit.
The Aeromotive unit has a vacuum tap available, but I'm thinking I probably won't need to use it. Leave it at atmospheric sensing.
02-07-2018 #111 Registered User
- Join Date
- Oct 2011
- Location
- Cincinnati Ohio
- Posts
- 65
It is a fuel pressure regulator. It is required. It will maintain fuel pressure in the fuel rail. Your regulator you have will maintain pressure in the supply line but not the rail. You would have to mount a regulator in the return line after the fuel rail to maintain pressure in the rail at the injectors. It holds pressure to a preset level with vacuum as vac drops under accel or full throttle fuel pressure will go up for demand.
02-08-2018 #112
Registered User
- Join Date
- Feb 2007
- Location
- Hawaii
- Posts
- 225
That's what I was afraid of, and as this motor is heavily modified, with aftermarket 30# injectors, the pressure requirements in the fuel rails will probably not be met by this fixed unit. I probably have to find an updated unit to use that is adjustable in order to allow proper tuning for this system.
Hmmmm.....
06-21-2018 #113
Registered User
- Join Date
- Feb 2007
- Location
- Hawaii
- Posts
- 225
Too many delays in my life right now, but am getting back on the '55 HT project.......
Willy
UPDATE:
Finished fitting and hanging the mufflers, a pair of long body 2-1/2" glasspaks, will probably be loud !!!
MORE pix here
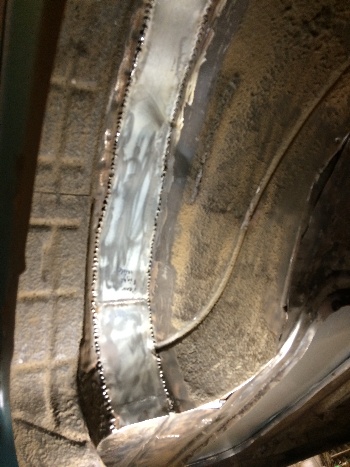
As I rebuilt the floors in the '55 HT as piece work, using galv. 20 ga, there's a lot of welding slag, etc underneath needed cleaning up...
So I have been laying under the body on a creeper, grinding, smoothing, seam sealing, and will do a fresh undercoat. Nasty work, head all covered, breathing protection, am covered head to toe with dirt when I scuttle back out from under there...
One of the rear wheel tubs cleaned and ready for seam sealer, then undercoating...
06-22-2018 #114 Registered User
- Join Date
- May 2008
- Location
- Luling TX In the Hot Rod Shop
- Posts
- 391
Foot note, those OEM fuel pressure regulators can also be harmonic fuel dampeners on cars as well. The NB Miatas have one up front that is just a dampener and not a regulator but it looks like one. They look exactly the same normally and take care of the fuel pressure fluctuation as individual injectors open and close to prevent harmonic resonance in the fuel system and thus a slight surge in fuel pressure from injector pulse to pulse. Think about the old live axle death wobble. One little vibration on one wheel vibrates through the axle to the other side. Its at just the right frequency that instead of dying, it bounces back with a little additional energy of its own. This repeats at the speed of sound gaining energy and becoming progressively more violent till the truck feels like its going to throw you into the ditch. Same thing inside of the fuel rail as the injectors open and close making tiny vibrations in the fuel. So it gets a dampener to keep it in check.
Keep up the cool work, I like seeing TriFive projects on here.
Later
-Russell
06-22-2018 #115
Registered User
- Join Date
- Aug 2011
- Location
- Granite City
- Posts
- 114
 Originally Posted by 2Loose

I have to ask why on earth would you use galvanized? It puts off deadly fumes when welded, and ive never seen produce a nice product in end.
Plain 22/20/18ga steel is typically not hard to come by to do it right.
06-24-2018 #116
Registered User
- Join Date
- Feb 2007
- Location
- Hawaii
- Posts
- 225
Thanks Russell, Good comment, I understand completely, Thanks !
Beater65, yes, I've worked with galv. sheet metal for over 50 years, and understand the problems. It's what I had on hand, so went ahead and used it. With care it can be successfully used, and I've never had any problems with it in situations like this, the extension for the minitubs when they were widened, the rebuilding the floors and trunk, which are covered with top and bottom coatings and interior carpeting. I use a fan and am quite careful when welding this, and have never had any problems.
I can't get these pix to post for some reason, but the url's seem to work:
Repairing the trunk:
http://2loose.chevytalk.org/55hardto...Apr%202013.JPG
After coating:
http://2loose.chevytalk.org/55%20har...une%202013.JPG
But you're right, I don't advise folks to use galv. like this unless they are prepared to be quite careful about it...
The other thing I do with galv. is to take off the zinc along the edges where i'm going to be welding, and I weld with little spots, jumping around to prevent distortion in the sheet metal, then seam seal it, then paint or "undercoat" over that, it has always worked well for me...Last edited by 2Loose; 06-24-2018 at 04:56 PM. Reason: pix won't post....
07-30-2018 #117
Registered User
- Join Date
- Feb 2007
- Location
- Hawaii
- Posts
- 225
Spent most of the last month under the body, seam sealing and undercoating, a messy job, so didn't take any pix, just got 'er done....
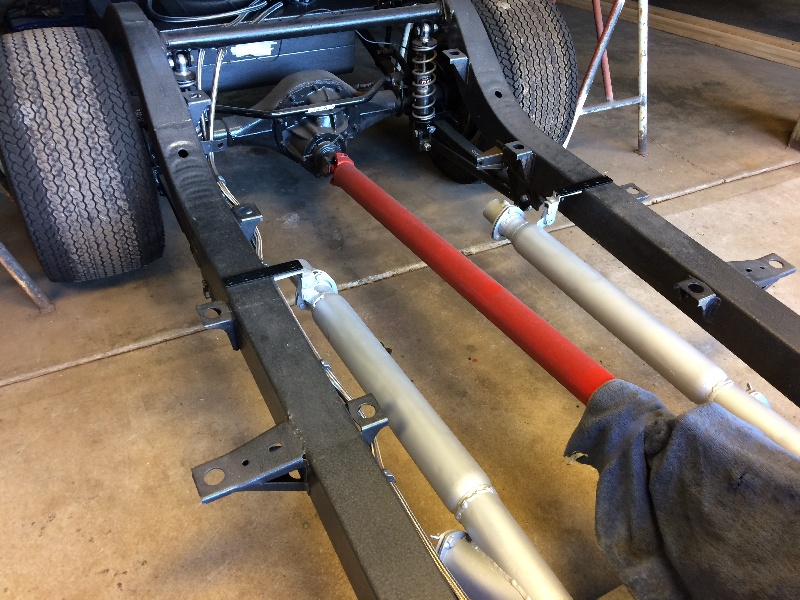
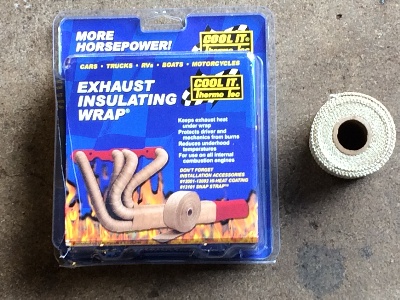
In the meantime I bought some hi temp exhaust wrap to wrap on the fuel lines to protect them from the exhaust heat....
These fuel lines are inside the frame to protect them from any side collisions
in the event of a severe accident. With the fuel pump in the tank, these lines
would probably be pressurized in an accident, so I want them protected...
I've used this stuff before with good results....
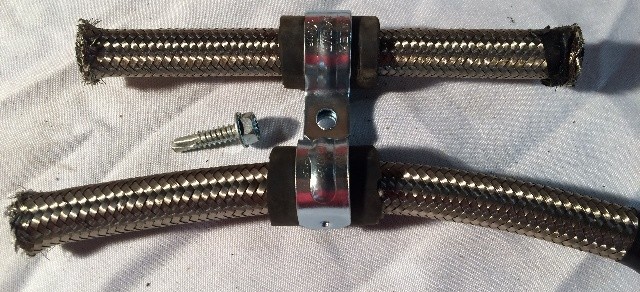
Pulled the fuel lines off the frame and started wrapping....
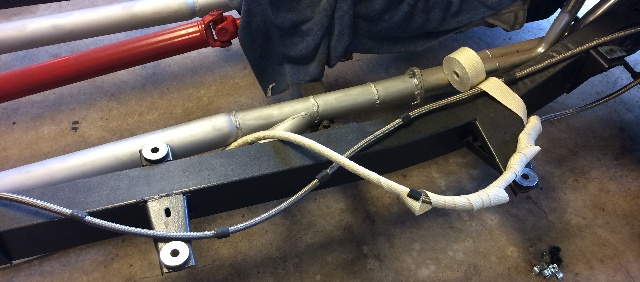
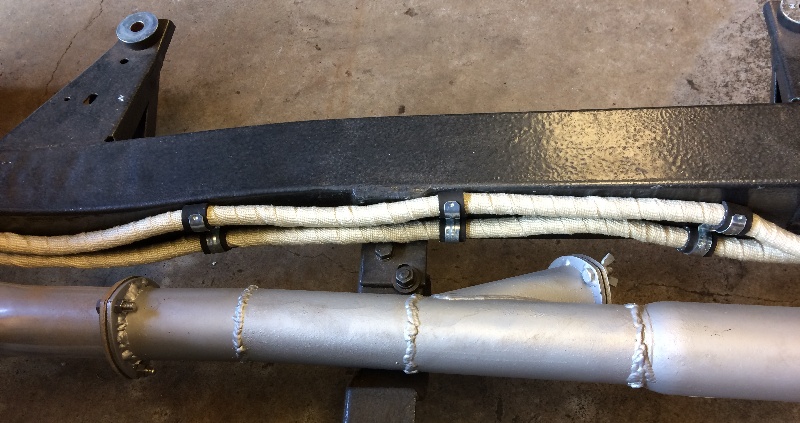
Got a good tight 50/50 overlap wrap so I would have a double layer,
and used ss tie wire at the start and end, the frame clamps will work
just fine in between....
And I wrapped from the rear to the front so the overlap faces the rear,
less chance of anything catching a wrap edge and trying to pull it loose...
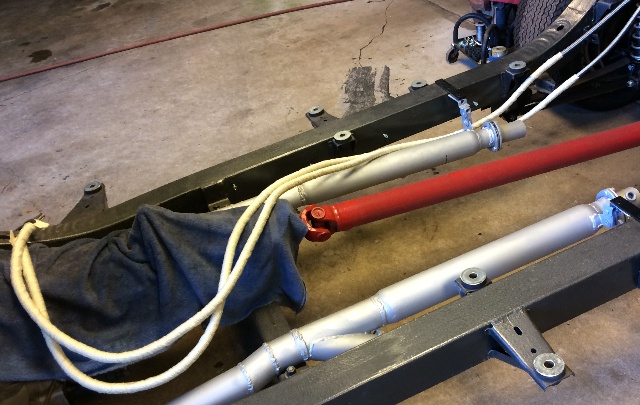
I had to 'adjust' the size of the hangers openings to fit the larger size,
still used some rubber hose under each clamp....

I did this also on my '55 gasser project, "Patches", it worked out just fine....
I also fitted new polyurethane body mounts, getting ready to put the body
back on the frame....
More later....
Aloha,
Willy
10-07-2018 #118
Registered User
- Join Date
- Feb 2007
- Location
- Hawaii
- Posts
- 225
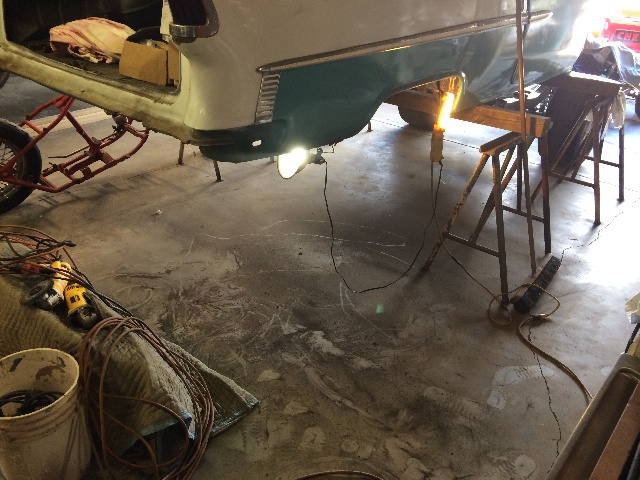
Well, health, family, and travel have taken it's toll on my time, but I'm back at it...
Time to mount the body back on the chassis, and I chose to do it by lifting the chassis up to the body, starting at the rear, and bolting the back end on at the rear most body mounts, then lifting the front, bolting that, then putting in the rest of the bolts. It went pretty smoothly....
It's been sitting like this for some time now, while I completely went through the chassis, and rebuilt the floors, trunk and did the "mini-tubs"....
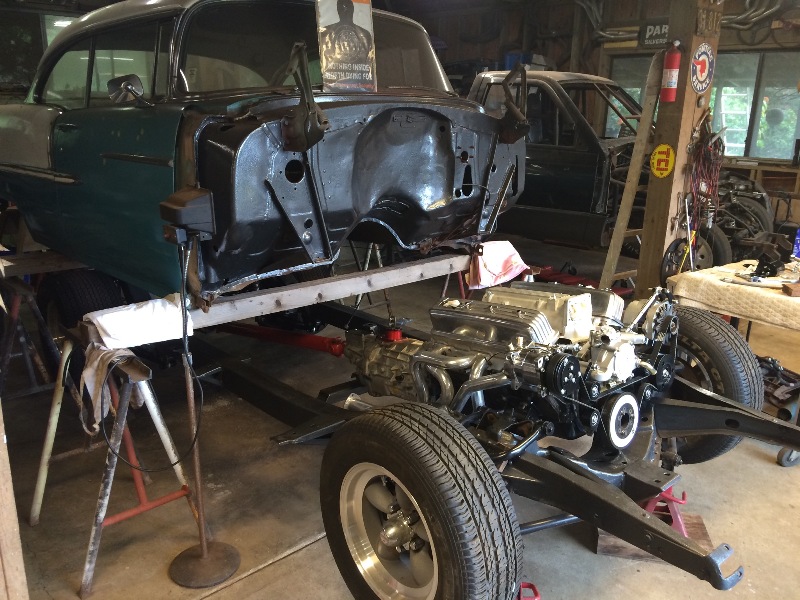
With jacks under the front of the chassis as well, I was able to pinch the 4x4, lift it up off the steel sawhorses, set the edges of the rear of the body on sawhorses, and remove the 4x4. Then lift the rear of the chassis, aligning the two rear mounting bolts, it all clicked together like magic....
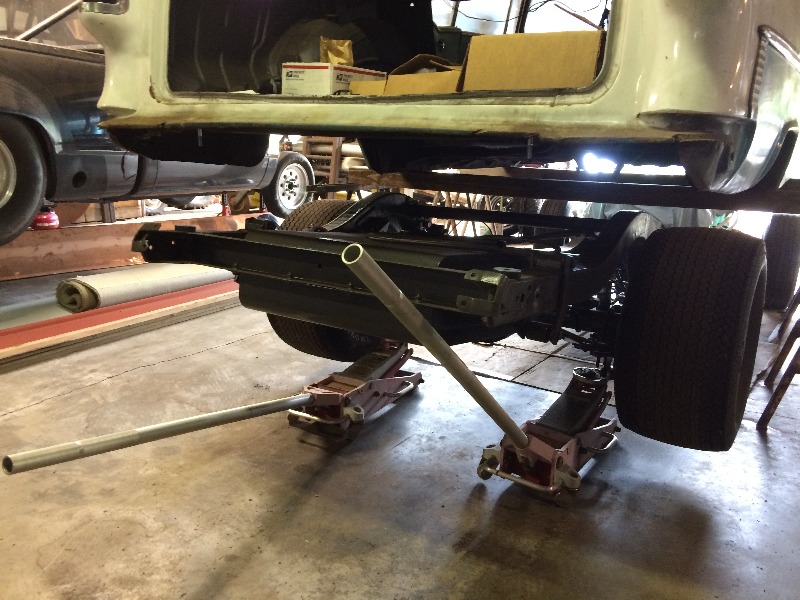
If you look carefully you can see the left rear body mount bolt above, I was able to guide the rear of the chassis so those two rear bolts dropped right into the mounts...

The rear is fitting up just like it's supposed to, somethings gotta be going wrong here, it can't be that easy ???
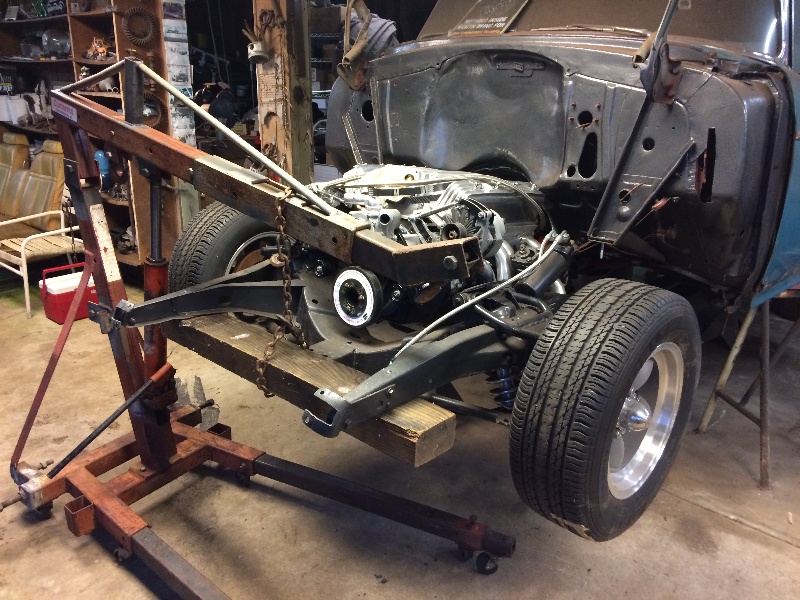
Used an engine hoist to lift the front of the chassis up as it needed to go higher than my floor jacks would handle, it all went smooth...
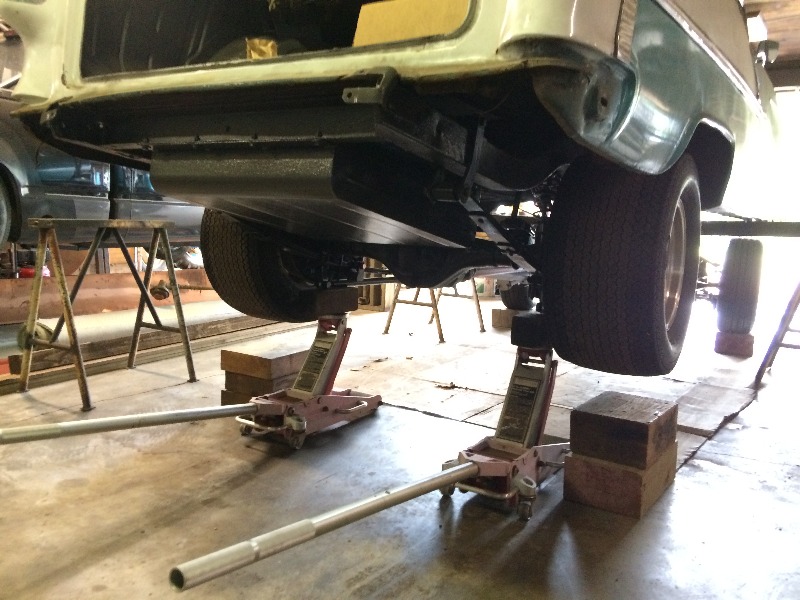
Stuck the front body mount bolts in loosely with nuts, and put it all on jack stands to install the rest of the body mount bolts...
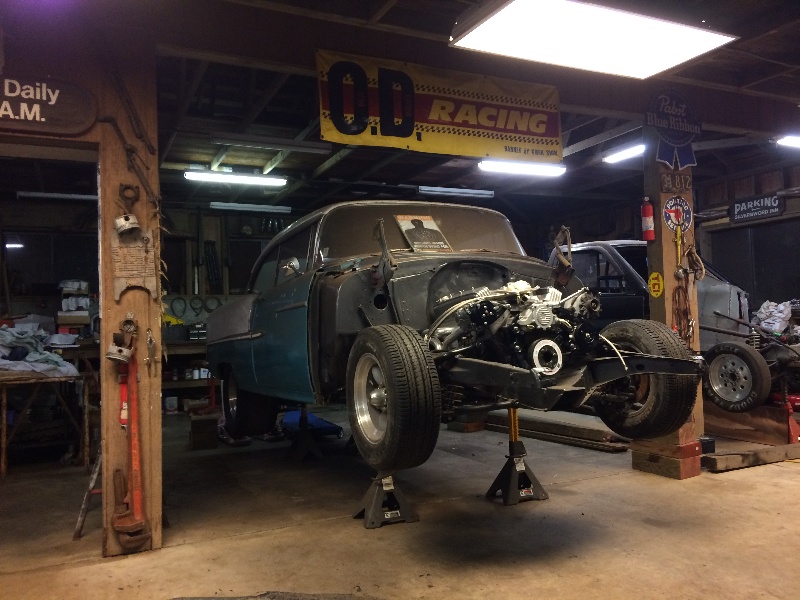
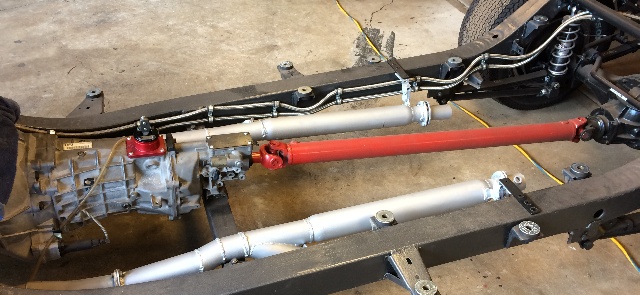
It all went together surprisingly easy and I 'm quite happy with the fit of the rear axle, wheels and tubs...

More later,
Aloha,
Willy
More pix here...
10-08-2018 #119
Administrator
- Join Date
- Jan 2000
- Location
- Thousand Oaks California
- Posts
- 10,031
Nice to see you back at it. Thanks for sharing!
Larry Callahan
Founder/Administrator of Pro-Touring.com, G-Machines.com and HostMyJunk.com
To advertise on Pro-Touring.com click here
10-10-2018 #120
Registered User
- Join Date
- Feb 2007
- Location
- Hawaii
- Posts
- 225
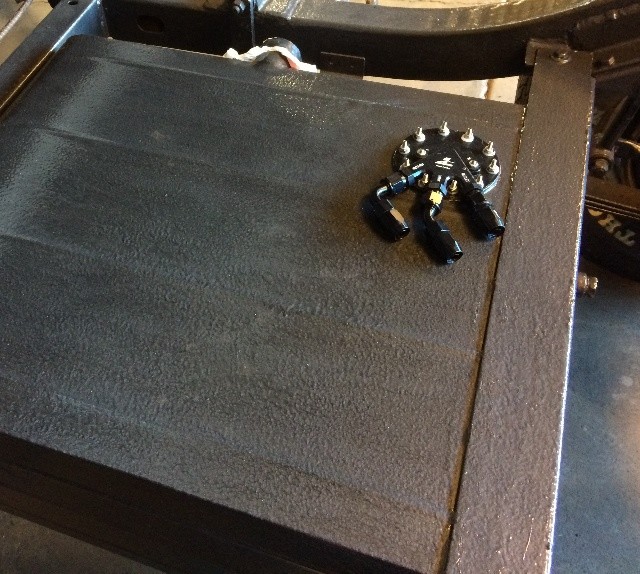
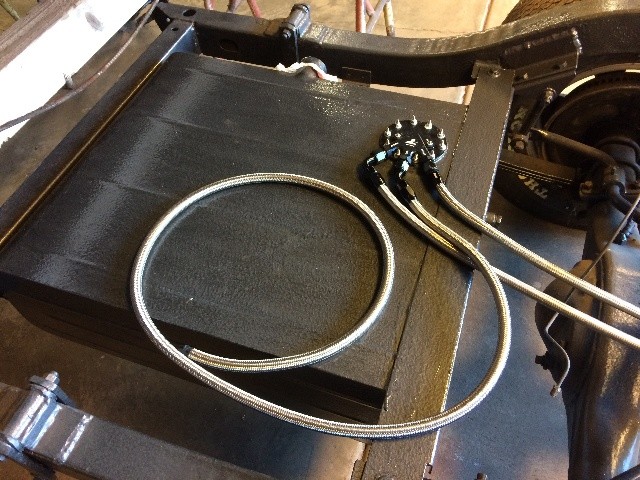
Realized I forgot to cut an access hole in the floor of the trunk for the "in tank" fuel pump and fuel hose attachments....
Crawled under and took some measurements and taped off the future "hole"...
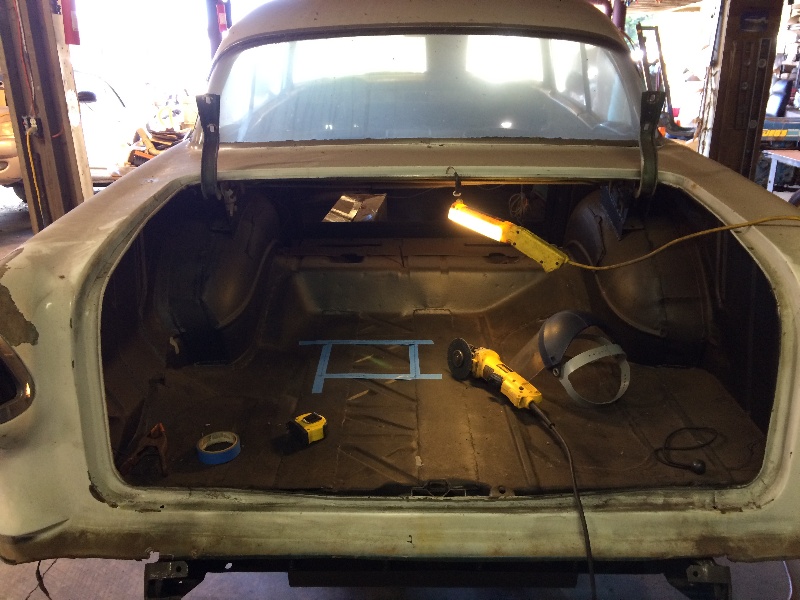
I was able to slide that 14" carbide cut off blade in on top of the fuel pump, also a wet towel to absorb any sparks, pieces of metal...
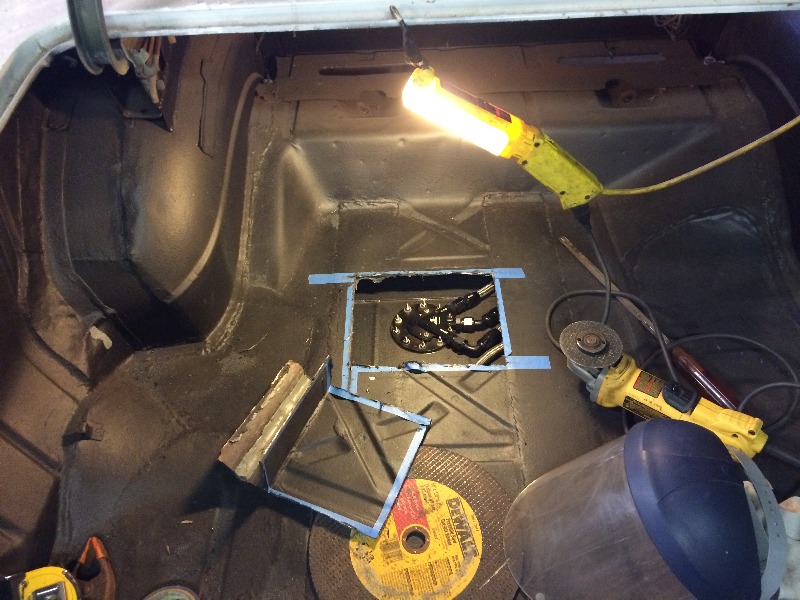
This should give me plenty of access....
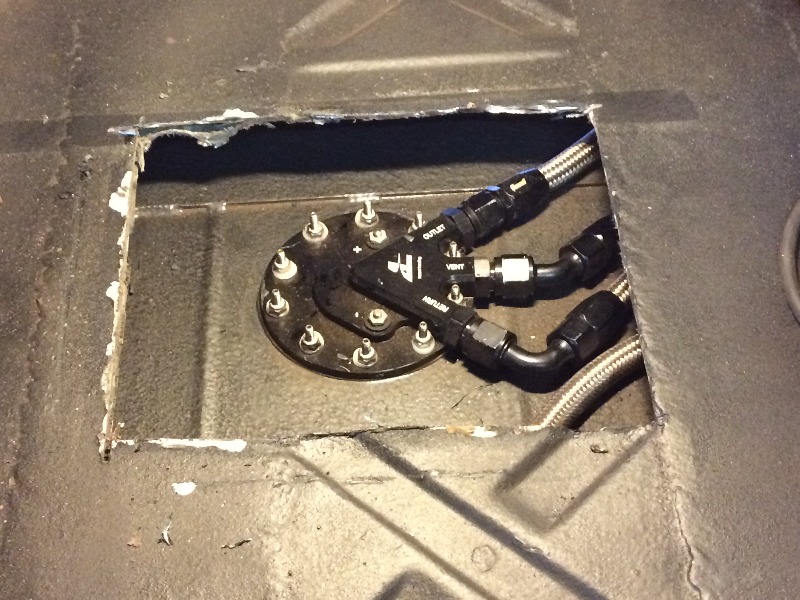
Smoothed the sharp edges off and put seam sealer in a couple of open spots...
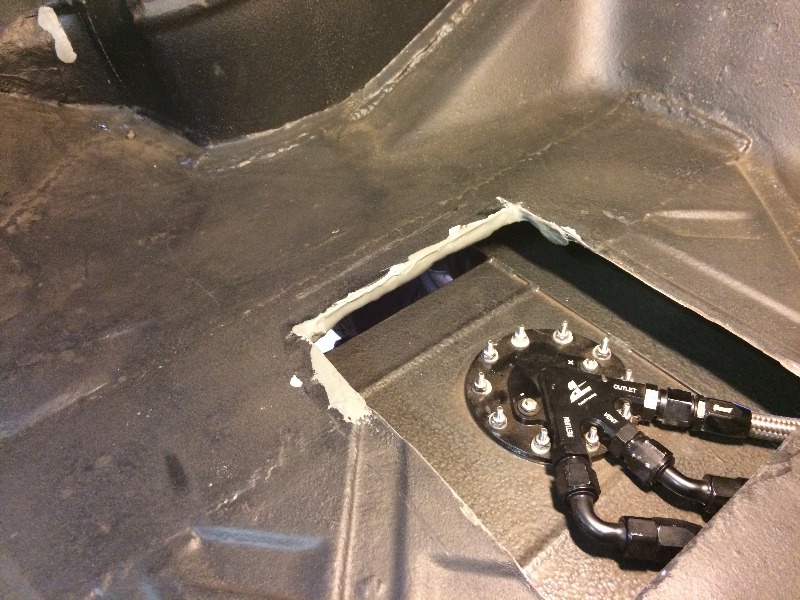
Now to fab a cover....

 Reply With Quote


