

Results 61 to 80 of 258
-
06-11-2015 #61
 Registered User
- Join Date
- Feb 2007
- Location
- Hawaii
- Posts
- 225
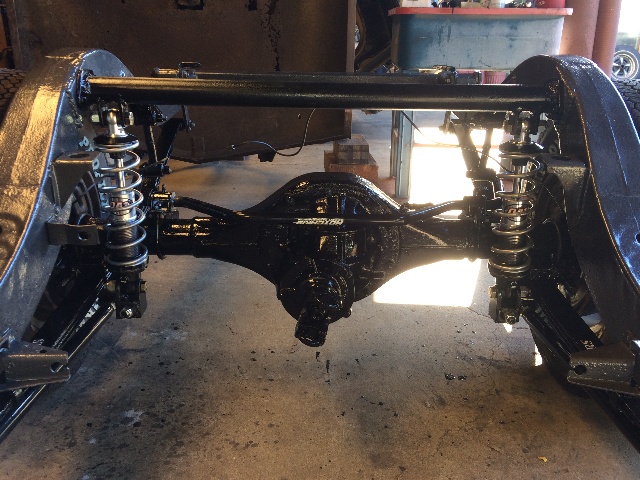
Have been on the run, two other projects, a 58 chevy pro street truck exhaust rebuild after 17 years, and lotsa minor stuff on the 55 chevy gasser. But did pull the rear parts off the 55 hardtop axle, painted and put back, here's one pix, others at the usual place, scroll down for latest.
Aloha,
Willy
here
-
06-12-2015 #62 Starting The Transformation
- Join Date
- Jan 2015
- Location
- Charlotte, NC
- Posts
- 309

Love those tri-5's
Justin Novick
Sales/Support
Entropy Radiator / Engineered Cooling Products
"The Sexiest Radiators For The Sexiest Hot Rods"
www.EntropyRad.com www.SpeedCooling.com
773.303.8251
06-12-2015 #63
Registered User
- Join Date
- Feb 2007
- Location
- Hawaii
- Posts
- 225
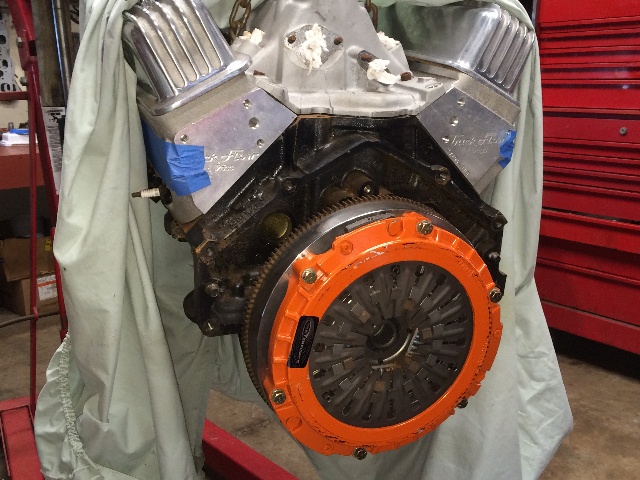
Started setting up the clutch and tranny to the motor, then will install in the frame, pretty routine stuff....
Found I was missing the flywheel/crank bolts,
and the clutch/flywheel bolts, so have some new ones coming....
Meantime, used some old bolts I had on hand to set it up, also want to put some long style dowel pins in the block, and need to find my clutch alignment tool, it's stashed away somewhere around here....
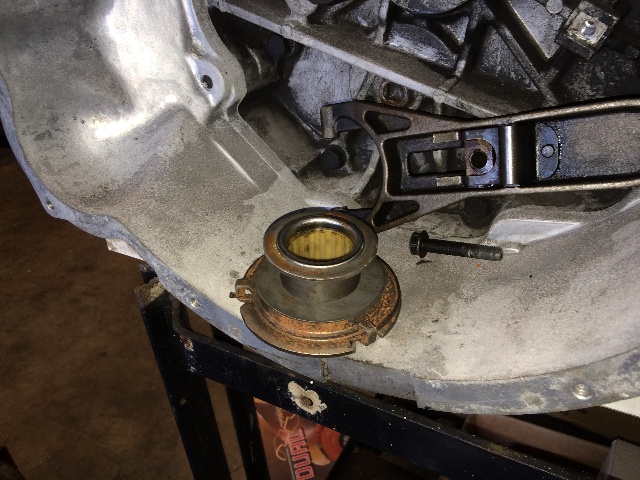
The original LT1/T56 clutch setup was an external hydraulic slave cylinder with a standard clutch arm and release bearing, I dug around in my storage shed and found the original stuff, the slave cylinder looks pretty messy, I might go check out what a new one would cost....

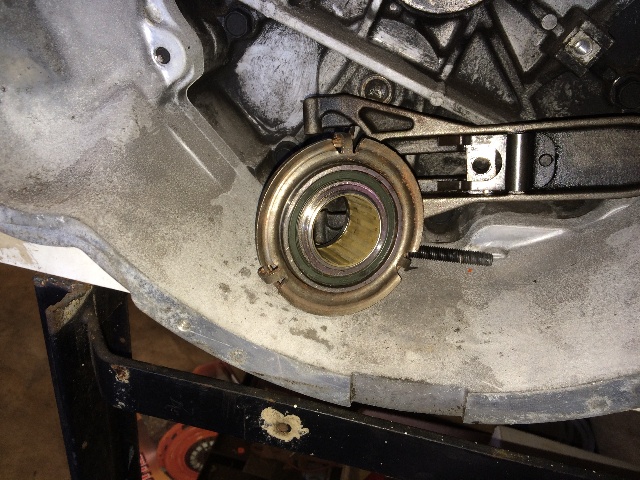
I also found in my storage shed, this Tilton brand hydraulic release bearing,
but it doesn't fit over the sleeve for the old style release bearing, and it looks like it needs to be mounted some way (see the four mounting holes), and I don't see any easy way to do that....
I'd probably have to take the transmission apart and drill and tap into the front of the tranny case to make it work, and remove that sleeve that is pressed into the front of the case....
More later....
Willy
06-14-2015 #64
Registered User
- Join Date
- Feb 2007
- Location
- Hawaii
- Posts
- 225
Decided to stay with the original '93 Camaro hydraulic clutch setup, too much fabrication required with the Tilton, although it would be nice to have a completely internal slave cylinder on this tranny.
Looking through my parts bins, found a brass pilot bushing for a big block Olds (425/455), checked the dimensions, it's the same for a Chevy both sbc and bbc. Got a bolt out of the bolt box the right size, adjusted the nut to put some bolt inside the bushing, put a small amount of silicone grease inside the crankshaft hole, and tapped the bushing in, just enough so it is flush with the crank surface surrounding the hole....

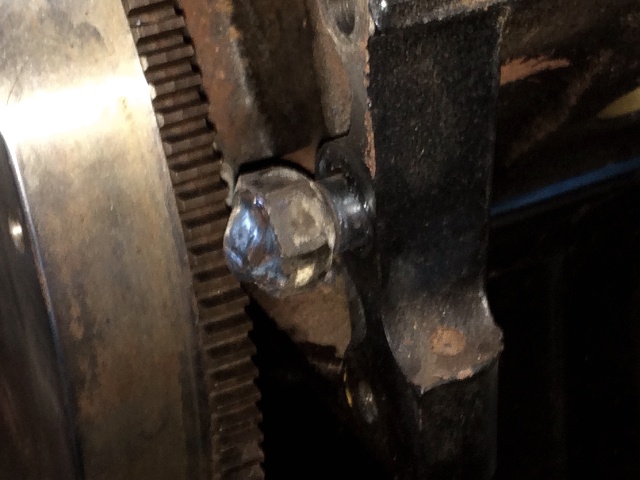
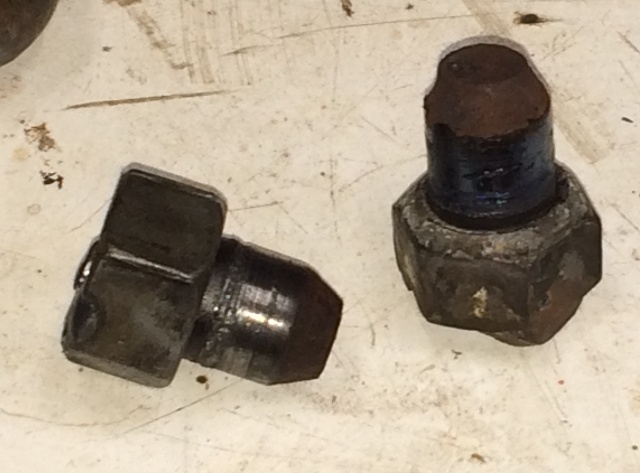
I also had a pair of the longer dowel pins for locating the bell housing, I like those, as they give more room to begin the alignment when bolting up the tranny to the motor. But the original dowel pins are refusing to come out easily, so will get more aggressive in removing them, like welding nuts onto them and with a helper, twisting them and tapping hard on them, luckily this block has access holes behind the pins where I can get a punch in there to pound on the pins. So far this has been met with total resistance....
Pix later....
Willy
06-17-2015 #65
Registered User
- Join Date
- Feb 2007
- Location
- Hawaii
- Posts
- 225
With a buddy helping me, we welded large nuts on the old dowel pins, and while they were hot, put an impact gun on them, and twisted them while a buddy pounded on them through a hole in front of them with a long, heavy duty punch. They slowly began to turn and eventually came out. This one was almost all the way out. I do this right after welding, while they are still hot.
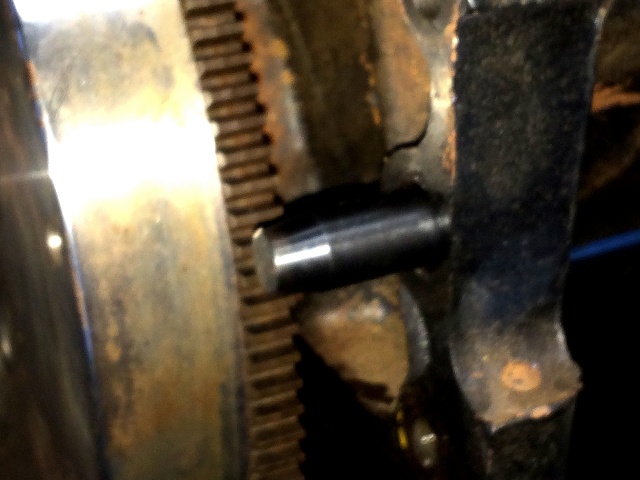
Then I cleaned out the holes, applied a small amount of silicone grease to the inside of the holes, and tapped the long dowel pins in all the way....
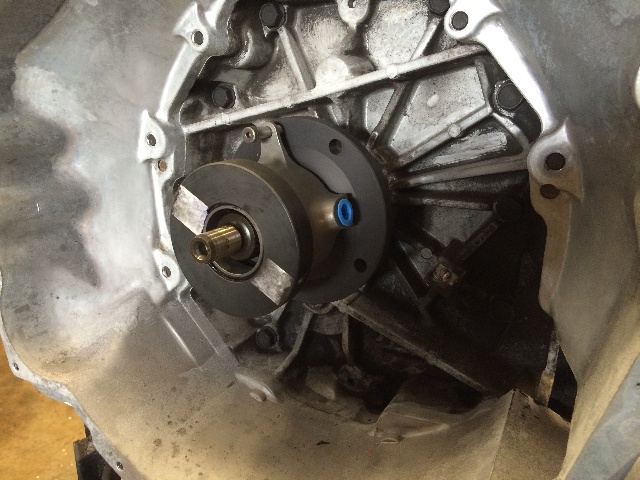
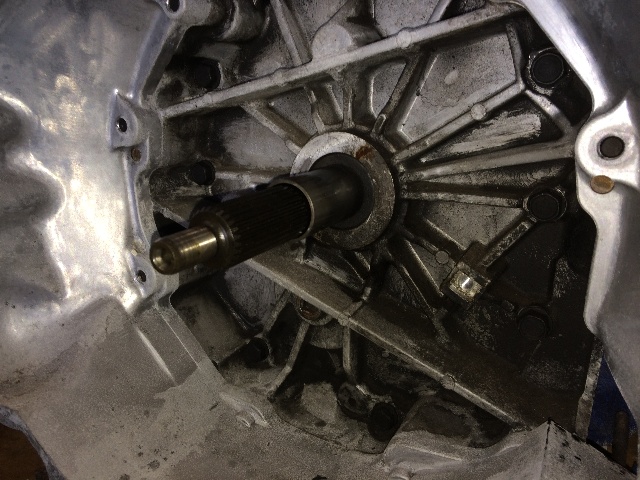
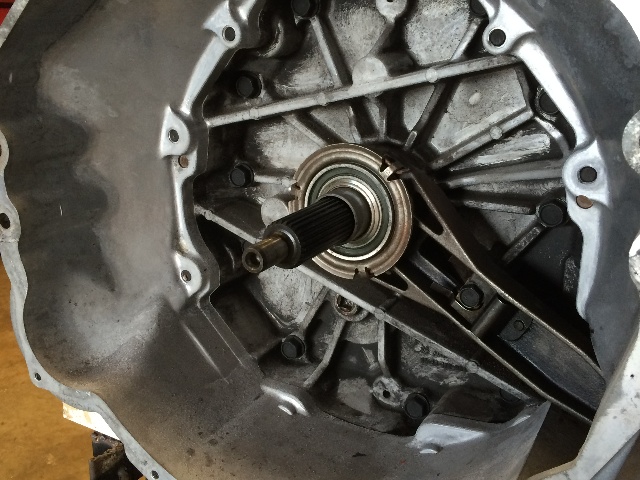
I recently had to rebuild the Doug Nash 5 speed in my other '55 (a gasser style build), after I destroyed the input shaft gear, so I have a nice Chevy input shaft to use to align clutches...
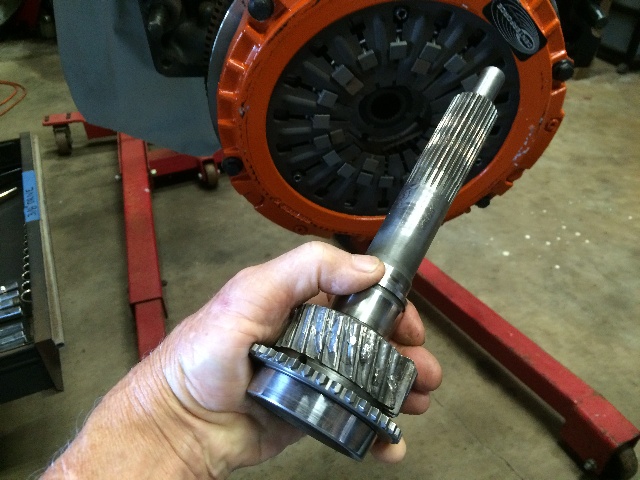
It does a very nice job aligning the clutch plate with the pilot bushing...

The clutch release bearing (throw-out bearing) for this '93 LT1 (5.7 liter) is a bit unusual, and I am having a difficult time finding a replacement, as this one is noisy and I don't want to use it. My local NAPA dealer doesn't even list it. I can't go any further with this until I can find a replacement. Even online, I'm told they just are not available.
It's a hydraulically operated clutch with an external slave cylinder. The original slave cylinder seems to be ok, we shall see.
More Later....
Willy
06-21-2015 #66
Registered User
- Join Date
- Feb 2007
- Location
- Hawaii
- Posts
- 225
I spent a lot of time online looking for a new throwout bearing, and finally found one at ebay. It came in 3 days, on Friday, and my buddies and I bolted everything together and put it in the frame on "Fender Friday" (our weekly get together with beer and BBQ). But now the drive shaft I ordered from Strange Engineering is too long. I still have a copy of the order sheet, it clearly states 53-1/2", the one they sent me is 56" long. I'll call them on Monday.
I had sent them a damaged drive shaft from my '55 Chevy gasser, it has a shorter gearbox and that drive shaft was 56". The rear u-joint yoke was damaged on that one, (I blew it up drag racing) and I had asked them to shorten it to 53-1/2" and put a new yoke on it. They called after receiving the damaged drive shaft and said it was also slightly bent, and was not repairable, so I had told them to just make me a new one. But obviously they ignored the order sheet and made a replacement for the damaged driveshaft. It's their mistake, let's see how they handle it.
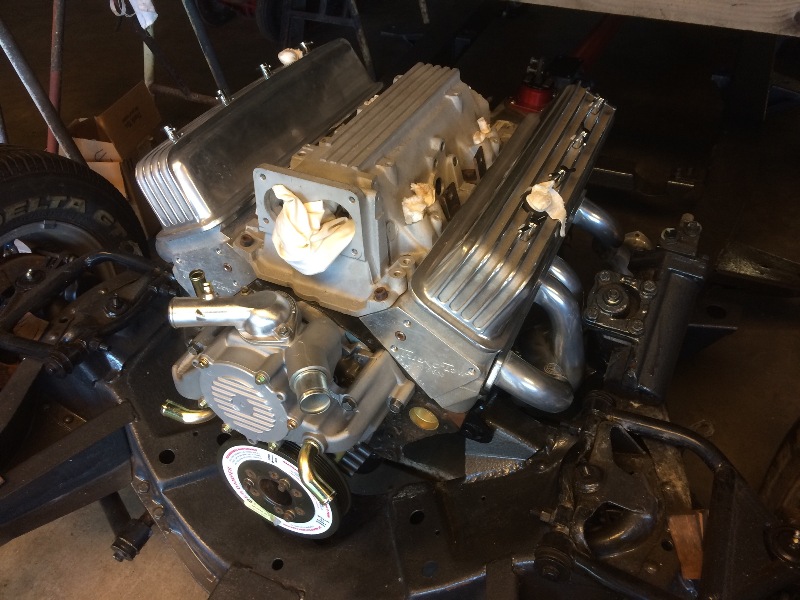
Here's how it sits now...

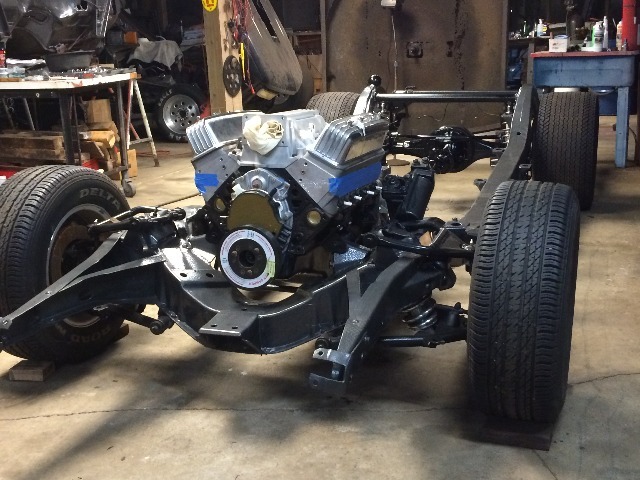
Now to finish the motor (starter, water pump, ignition, efi, alternator, PS pump, pulleys and belts) and add the exhaust system and fuel system, and as much else as I can think of before putting the body back on.
Am I having fun? You bet! I've never had the time before to do this much detail on a car, and on my favorite, a '55 Sport Coupe, I'm a lucky guy...
Aloha,
Willy
06-22-2015 #67
Registered User
- Join Date
- Feb 2007
- Location
- Hawaii
- Posts
- 225
Just got off the phone with Strange Engin. They are working with me to correct the problem, they're a bunch of good guys!
06-25-2015 #68
Registered User
- Join Date
- Feb 2007
- Location
- Hawaii
- Posts
- 225
I'm going to be away from this project for awhile, I sliced the back of my hand pretty badly, severed some finger tendons, having surgery tomorrow to try and fix that, but will not be using my left hand for quite awhile until it heals up!
And I don't think I'll be driving my gasser during this time either, unless I can figure out a way to steer with my left when shifting, without disturbing the healing process!
But my '55 Chevy truck is an automatic, I can still drive that....
At least it wasn't my right hand!
Willy
06-25-2015 #69 Registered User
- Join Date
- Nov 2006
- Location
- Ma.
- Posts
- 5,567
Sorry to hear this, I hope you heal up quick and with no lasting problems.
Wayne
Car FINALLY home !!!!!! lol
Project FNQUIK https://www.pro-touring.com/showthre...ghlight=FNQUIK
01-31-2016 #70
Registered User
- Join Date
- Feb 2007
- Location
- Hawaii
- Posts
- 225
...
Last edited by 2Loose; 01-31-2016 at 09:38 AM. Reason: error
01-31-2016 #71
Registered User
- Join Date
- Feb 2007
- Location
- Hawaii
- Posts
- 225
The injured left hand is still not working too well, about 50% I'd guess, but I'm doing things, just a little slower...
And of course two of the other rigs developed issues that needed attention, like blowing 3rd gear (again) in the '55 gasser, and having brake problems in the '58 pickup, so been working on those...
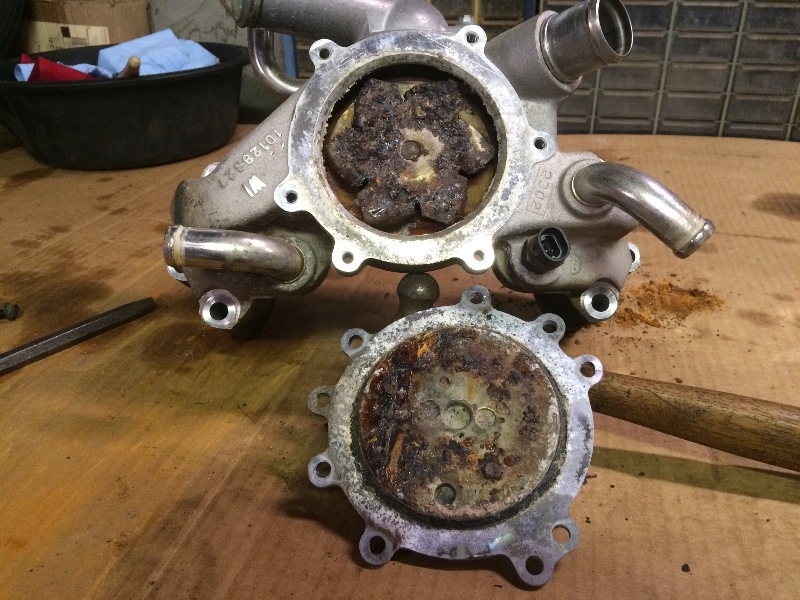
But I pulled out the accessories, still on an old LT1 block, and looked as how to fit them on the new LT1 motor in the '55. I do see problems.
The first thing I tried to work with was the water pump, but it turned out to be badly rusted inside, so am looking for a new one.
Brackets to fit AC compressor, Alternator, and PS pump on this LT1 in a '55 Chevy seem to be seriously lacking. March Performance seems to have the best looking setup, but they are really expen$ive.
Am looking around...
Any ideas out there?
Aloha,
Willy
More HERE
02-01-2016 #72 Registered User
- Join Date
- May 2008
- Location
- Luling TX In the Hot Rod Shop
- Posts
- 391
Sorry to hear the hand is giving you trouble but at least its not dead. Probably just need more time to relearn the healed nerves and rebuild muscle. My father broke his leg and ended up in a nursing home for rehab for a few weeks. It took him months to rebuild the muscle he lost in that short time frame. Good to see you tackling the work that you can do. Keep at it!
-Russell
02-02-2016 #73
Registered User
- Join Date
- Feb 2007
- Location
- Hawaii
- Posts
- 225
At least I'm back to work on this...
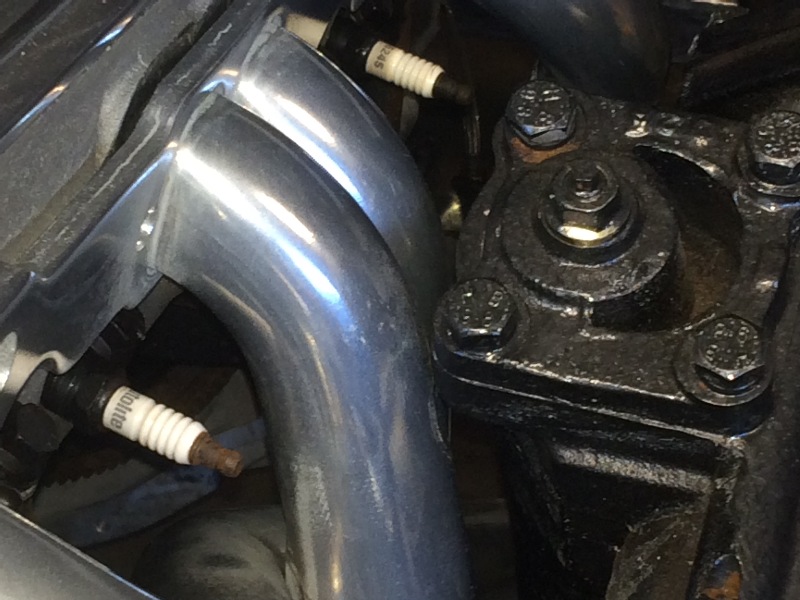
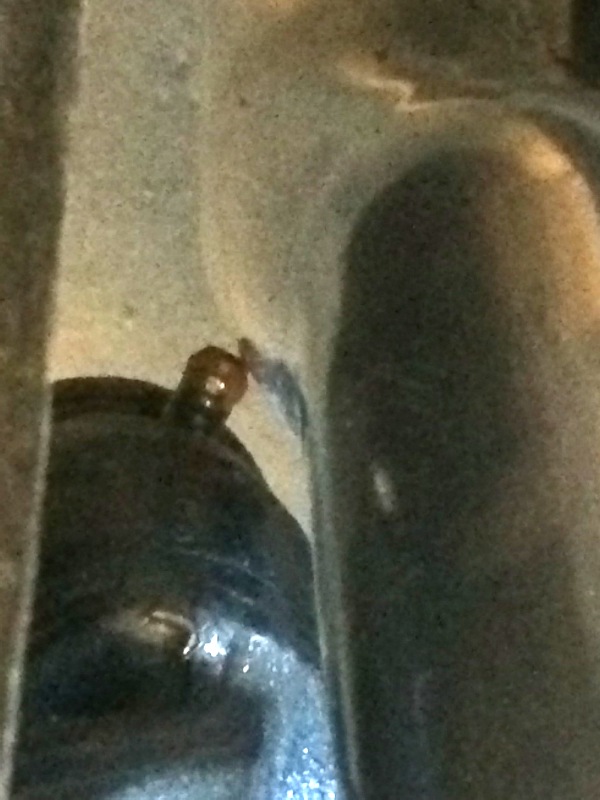
Got a new water pump installed, and put the headers on, a few small problems with the headers, like touching the steering box on the left side, and the grease nipple on the right side steering idler arm:
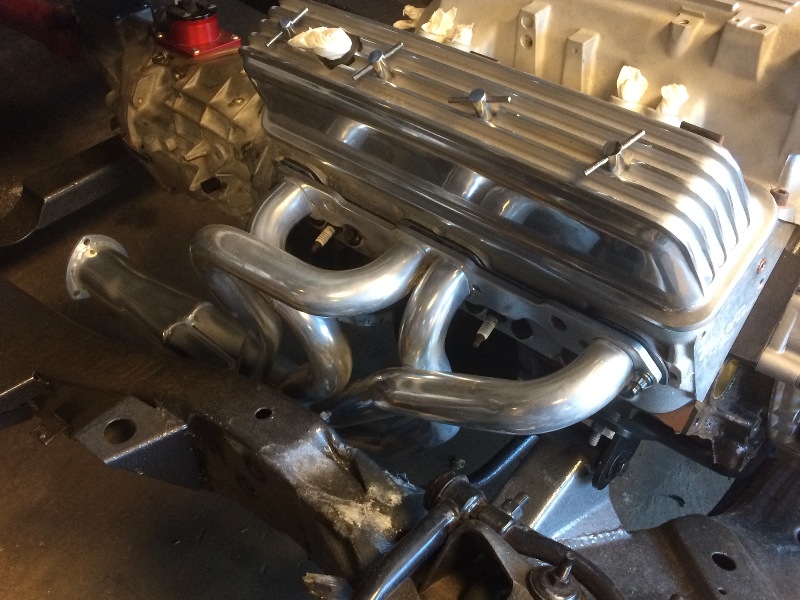
I'm working on it...
Willy
More HERE
02-02-2016 #74
Registered User
- Join Date
- Feb 2007
- Location
- Hawaii
- Posts
- 225
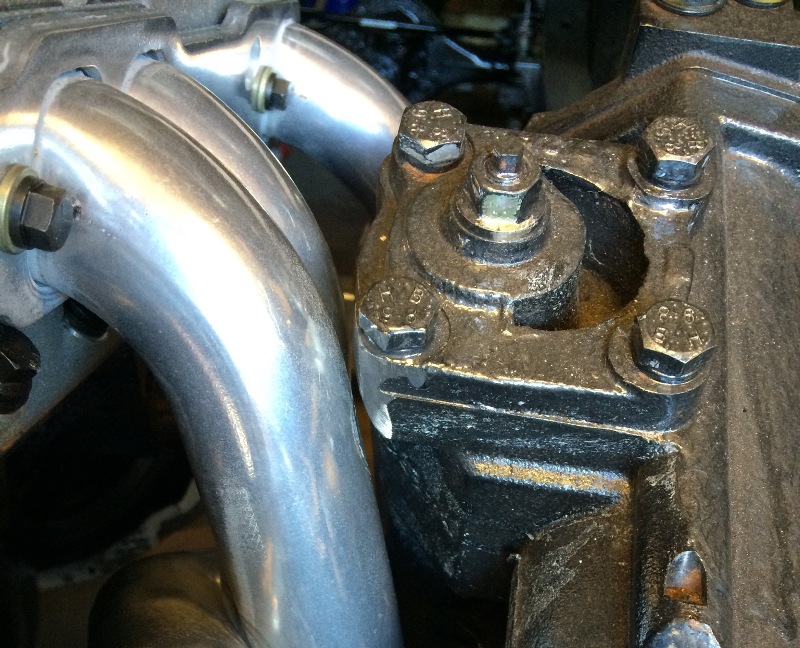
By rotating that steering idler arm, you can see how much clearance I have. I'll drill, tap and relocate that grease zerk.
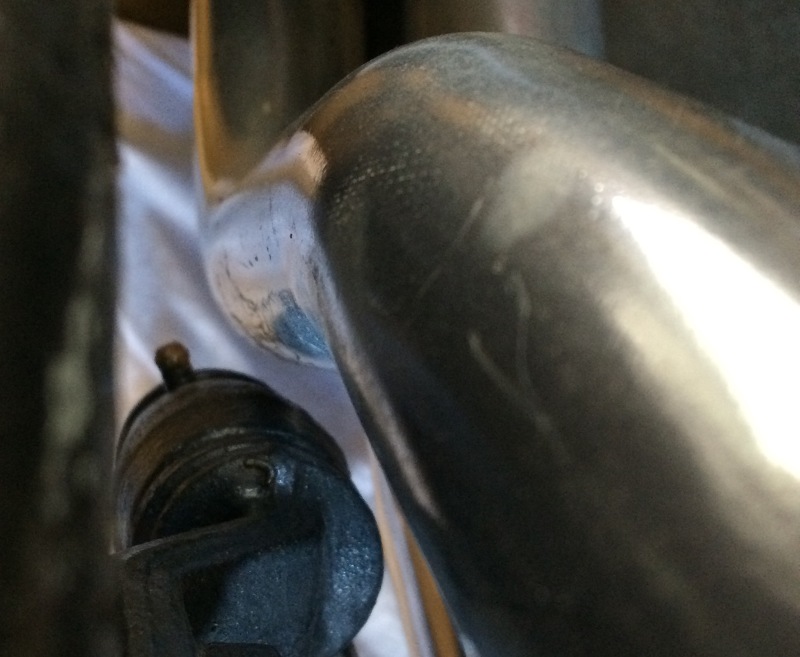
And ground off the corner of the steering box for clearance. May need a bit more, we'll see...
Aloha,
Willy
More HERE, scroll down
02-17-2016 #75
Registered User
- Join Date
- Feb 2007
- Location
- Hawaii
- Posts
- 225
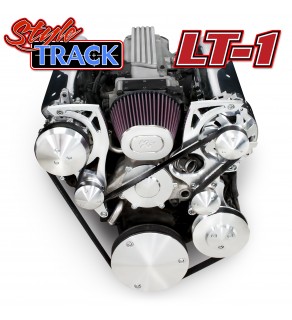
These are the accessories I have, but they do not fit on the new motor...
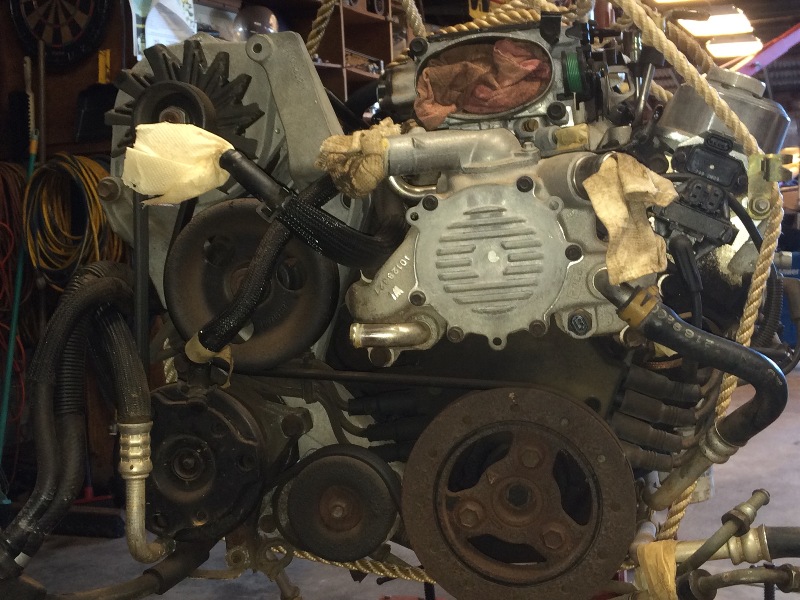
The AC compressor hits the new motor mount on the right side, and the alternator hits the right side valve cover. Looking at alternatives, this setup from March Performance (MP) looks like the best fit...
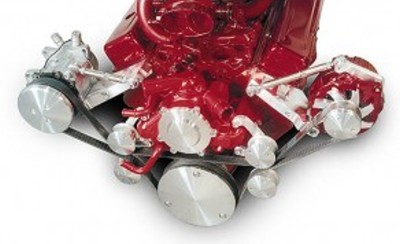
I have a discussion going with MP to try to get a good fit for my setup.
Aloha,
Willy
02-21-2016 #76
Registered User
- Join Date
- Feb 2007
- Location
- Hawaii
- Posts
- 225
The March "Outward Mount" setup shown above, for the LT1 motor, uses the Corvette version of the crank balancer (or damper), as it is mounted further forward than the Camaro version is. Mine is the ATI Super Damper Camaro version, but I've learned from ATI that the only difference is the flanged hub itself, as shown below, so I have a Corvette version of the flanged hub on order to replace my Camaro version:
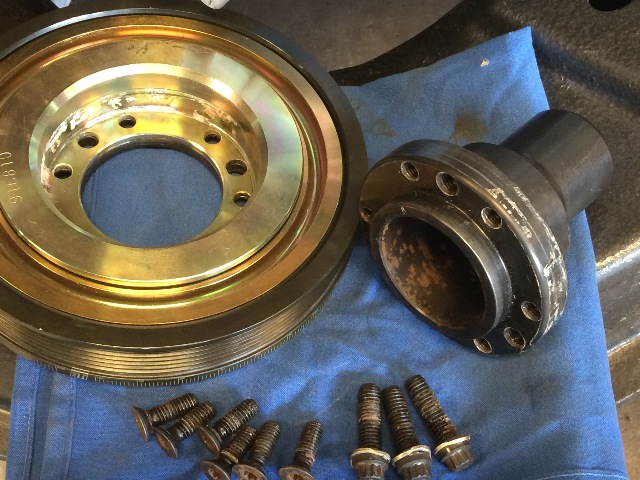
So I need to swap out that flanged hub for this longer Corvette version when I get it:
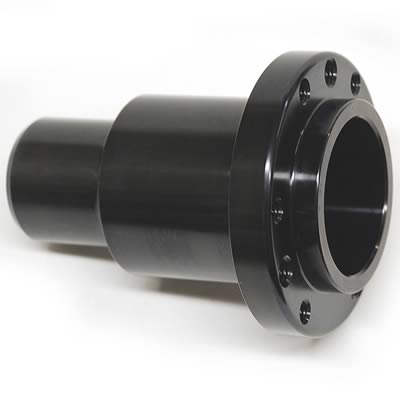
And according to both March Performance and ATI Racing the balancer will work with the new March accessories system.
Aloha,
Willy
More here...
scroll down
02-25-2016 #77
Registered User
- Join Date
- Feb 2007
- Location
- Hawaii
- Posts
- 225
March Performance not helping me much with this order. Just want brackets and adjusters and idlers, they want to sell me new accessories when mine will work just great! They want to sell me pulleys when I have the right pulleys on all the accessories. I just need brackets and tension adjustors and idlers and am having a difficult time getting them to specify just that.
Let's see what happens. My opinion of their customer service at this point is pretty bad!
Aloha,
Willy
03-02-2016 #78
Registered User
- Join Date
- Feb 2007
- Location
- Hawaii
- Posts
- 225
Kept working with March Performance, got the order pared down to the essentials, no pulley covers, no water pump cover, just functioning parts only. Choices on finish were clear over brushed aluminum, chrome, and black. I went for black, as the final color scheme for this car is red/black. Anything shiny will get color sprayed over it. Anyone know anything about these plastic sheets they put over metal? Seen them do whole cars? Maybe do my alternator and any shiny parts? Red or Black, of course. My favorite colors.
Here's what I have coming:
20931-08 alternator bracket
20932-08 ac bracket
20933-08 ps bracket
20934-08 idler bracket
20140-08 alternator relocator bracket
208a-08 alternator pulley
618-08 ps pulley
P410 polished ac compressor
P315 ps pump
420-08 reservoir
P3222 hose kit
The hose kit should attach to the reverse flair connections on the 500 steering box, and cut and fit fittings on the other end to the pump, and the reservoir of PS oil.
I'll use my '93 Camaro alternator, and will find out how well their PS pump and their AC compressor work. I like to use Vintage Air, have had good luck with them in the past, so will check how their stuff matches up with the AC compressor I'm getting from MP.
Challenges, ahh yes, I love 'em...
Willy
03-05-2016 #79 Registered User
- Join Date
- Sep 2006
- Location
- Southern Indiana
- Posts
- 4,699
Hey 2Loose, after going back to my GM tech days I believe the TO bearing is part of clutch as its a pull unit not push. My old brain seems to remember this Napa number NCF 1104134.
By the way you say you have shorter LT 1 hub, would you want to sell it? I have an idea on using LT 1 hub on my 283, but haven't found one cheap enough, should fit in USPS shipping box easy enough. I have a Google wallet right no or my buddy has PP, me and PP are arguing over a transaction right now!
Car looks great so far, after several years of doing nothing I am getting off my Duff and starting in on my projects, and starting while out of work! But future looks good, old friend might have place for me. Fixing up his used cars for his lot. He has great philosophy repair what needs repaired and be honest about what he does. Make little less but sleep at night!
Let me know if you want to sell hub, and see if we can agree on price.
LeeLee Abel
AFTERMARKET PERFORMANCE
1977 Chevy Monza 2+2:Project "Cheap Trick"
1978 C10 Long bed , On air and trailer puller
2006 Buell Blast ,Just a bike to ride and for mileage
1966 Caprice 4dr Sports Roof fact.327/now 350/SOON 454???? Project "II Old,,,ZERO BUDGET OR LESS CAPRICE!"
03-05-2016 #80
Registered User
- Join Date
- Feb 2007
- Location
- Hawaii
- Posts
- 225
If you mean the external slave cylinder for the clutch, yes, I believe it is a "pull" unit, and I'll check out that number with my local Napa guys...
PM to you.
Willy

 Reply With Quote


