Results 341 to 360 of 902
-
04-17-2017 #341
 Registered User
- Join Date
- Oct 2007
- Location
- Camas, WA
- Posts
- 640

-
04-17-2017 #342
Registered User
- Join Date
- Nov 2012
- Posts
- 346
That's just pure, unadulterated awesomeness.
Last edited by Zoomin; 04-17-2017 at 05:31 PM. Reason: Forget the yet advice, doesn't work
_______________
1969 Camaro
1966 Skylark
1964 Lemans
1960 Biscayne
Steve
04-18-2017 #343
Registered User
- Join Date
- Feb 2014
- Posts
- 767
Awesome video, thank you.
LOVE that spoiler, very classy, very tactful.
Some Tesla door handles would top things off nicely.
Would go right along with that motorised rear wing.
(I love spending other peoples money) ;)
04-18-2017 #344
Registered User
- Join Date
- Oct 2007
- Location
- Camas, WA
- Posts
- 640
Thanks for the compliments guys. The Tesla handles would likely be cheaper than what the current plan is. We plan on modifying the original handles so that they flow with the shape of the new trim that will run along the fins. It should be really cool when it is done. Originally Posted by Bob in St. Louis

05-11-2017 #345
Registered User
- Join Date
- Oct 2007
- Location
- Camas, WA
- Posts
- 640
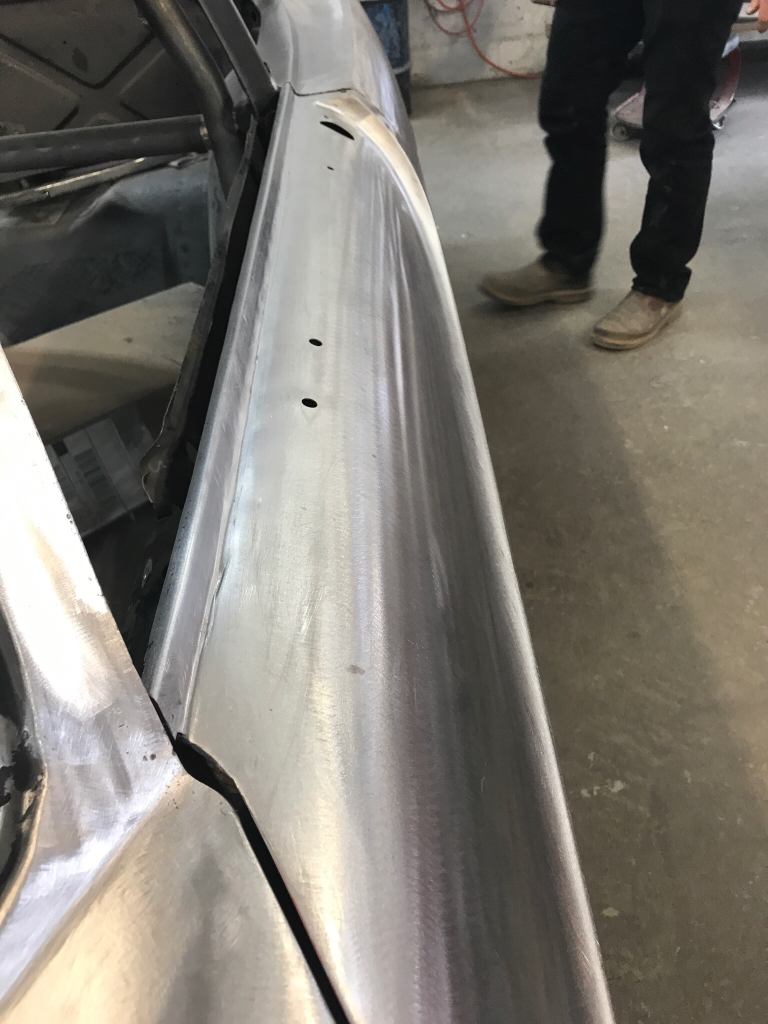
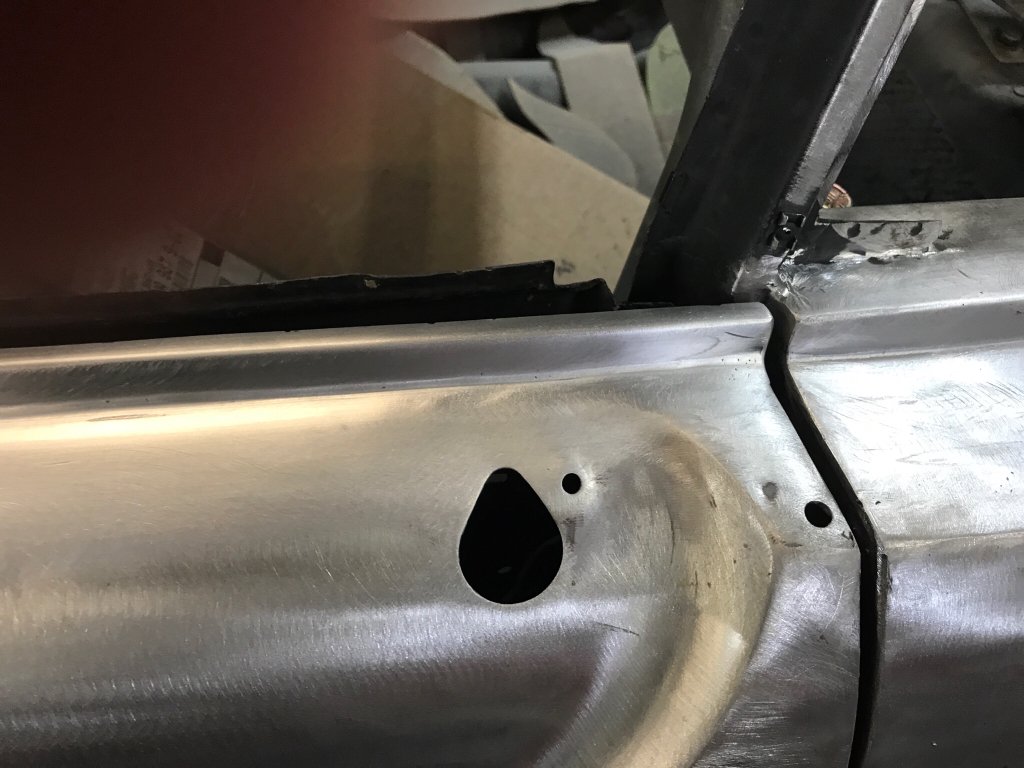
The Chassis shop finally has some time to work on the car. It will head over there on Monday to have the front clip and rear torque arm installed. After that the front wheel wells will need some work and then off to mud and paint work. Progress has been really slow in the past month as I was waiting for the chassis shop. The only real item that was done last month was mounting the trunk release solenoid. Pretty boring stuff but nicely executed.
I have decided to make some changes to the e-brake setup. When the new suspension is installed it will cause interference issues with the factory e-brake so I have decided to go with an electric emergency brake. I will mount it on the panel separating the trunk from the cabin. I should work pretty well and I will post pictures of the setup as I get all the parts in. I took the idea from a tread over on Lateral-G. I picked up a new E-Stopp (https://www.estopp.com/) on eBay for $300. The guy won it as a prize and did not want to use it. SCORE!
06-07-2017 #346 Registered User
- Join Date
- May 2017
- Location
- Los Angeles, CA
- Posts
- 53
Diggin' the "Prancing Moose" grill badge!
06-09-2017 #347
Registered User
- Join Date
- Oct 2007
- Location
- Camas, WA
- Posts
- 640
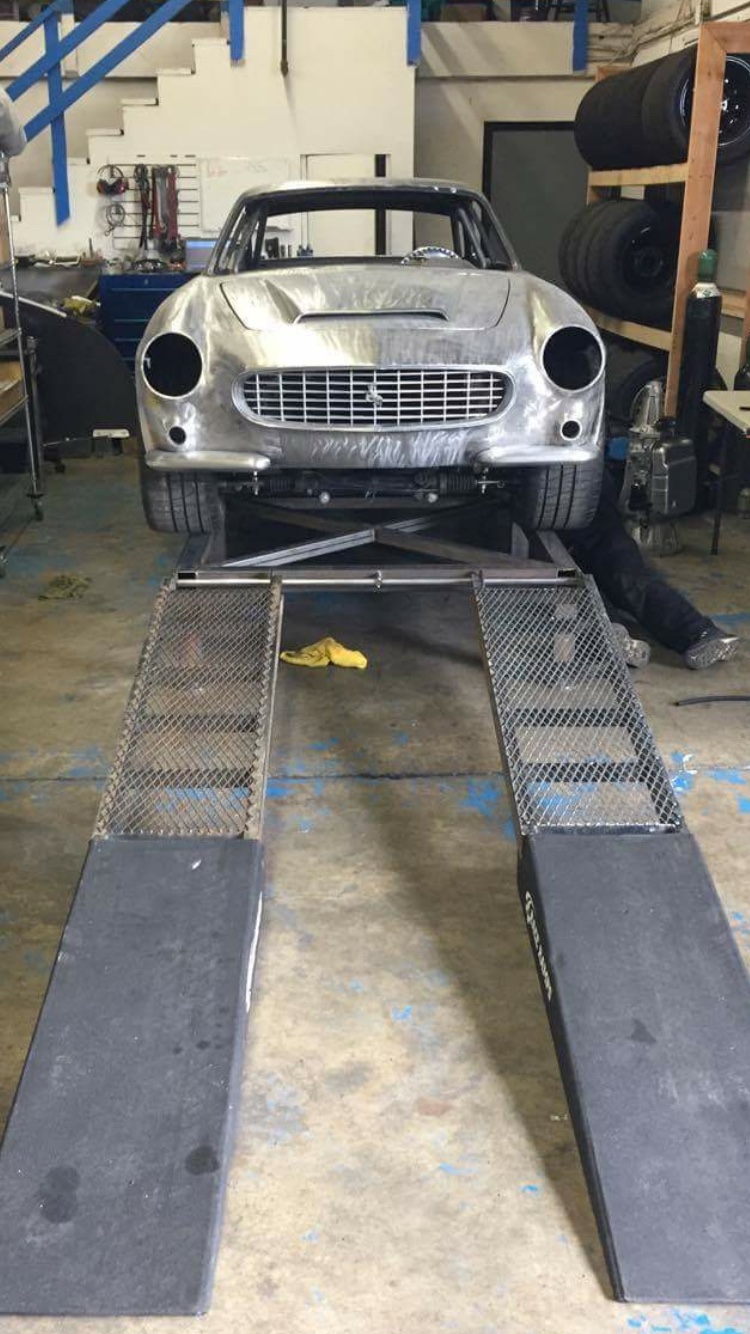
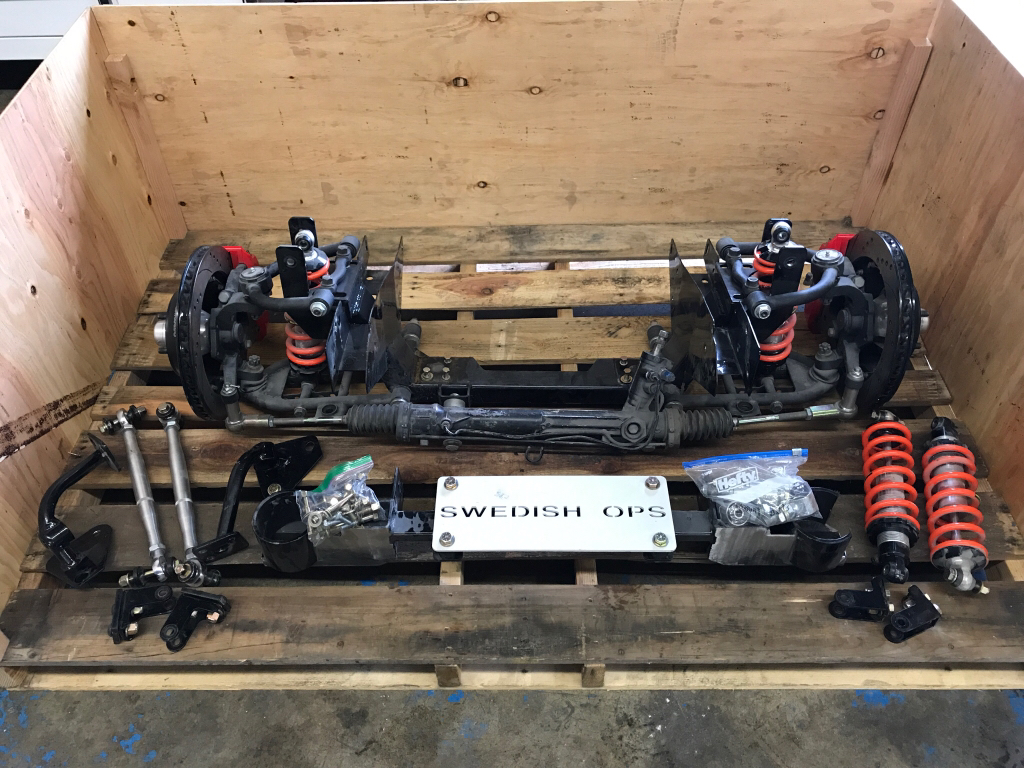
The car is finally up on the frame jig at the suspension shop. Now the fun part will begin! The more I have looked at the new suspension from Ron Sutton Race Technologies the more I am impressed with it. It has very similar design characteristics as the road race cars at the chassis shop. Everything is heavy duty from the steering rack to tie rods to control arms to spindles. Everything!
If you are looking for the absolute best suspension for these cars look no further. It is not a simple bolt in but it should be unsurpassed when it is together. I will post specifics about the handling once the car is on the road.
http://shop.ronsuttonracetechnology.com
On a side note. The front valance has been removed from the car in this picture to make the suspension work easier.
06-09-2017 #348
Registered User
- Join Date
- Nov 2012
- Location
- Sacramento, CA
- Posts
- 1,918
Originally Posted by 68EFIvert
Thanks for the kind words Darreld. I can't wait until your readers see the front clip, suspension & steering. Post photos along the way. I'm sure they enjoy seeing them.

06-16-2017 #349
Registered User
- Join Date
- Oct 2007
- Location
- Camas, WA
- Posts
- 640
Out with the old......

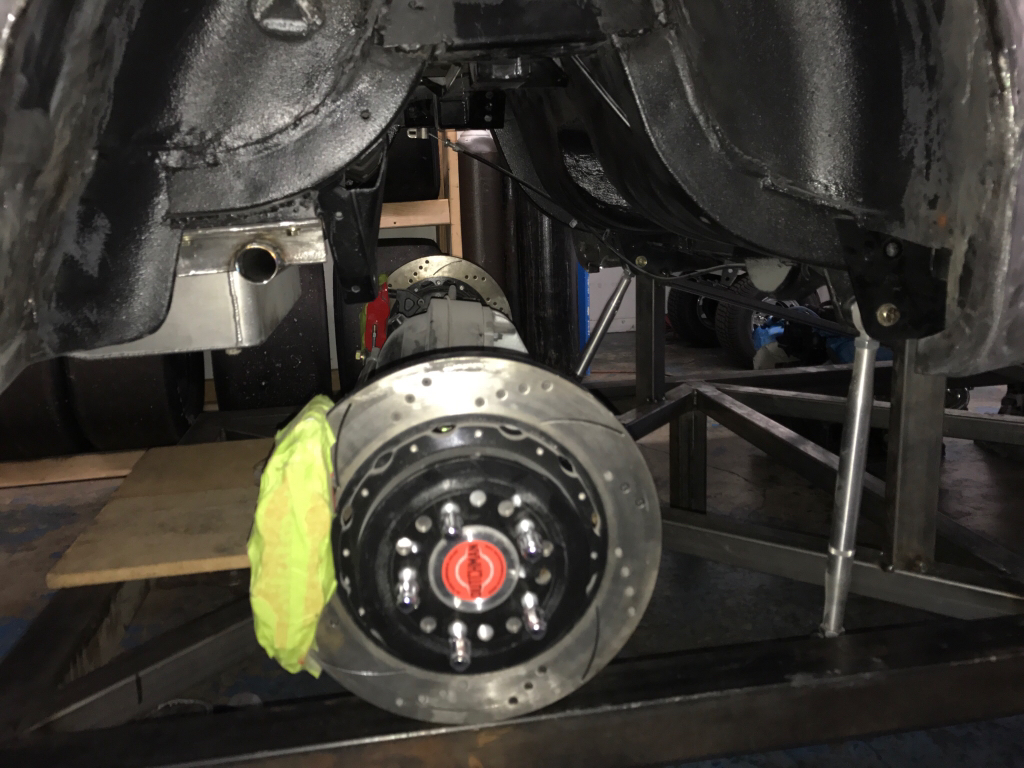
Time for the new to go in......
06-16-2017 #350
Registered User
- Join Date
- Apr 2016
- Location
- VA
- Posts
- 2
Just finished reading from the start - Great work! Love to see "different" builds.
08-03-2017 #351 -Moderator/Sponsor-
- Join Date
- Apr 2001
- Location
- The City of Fountains
- Posts
- 15,975
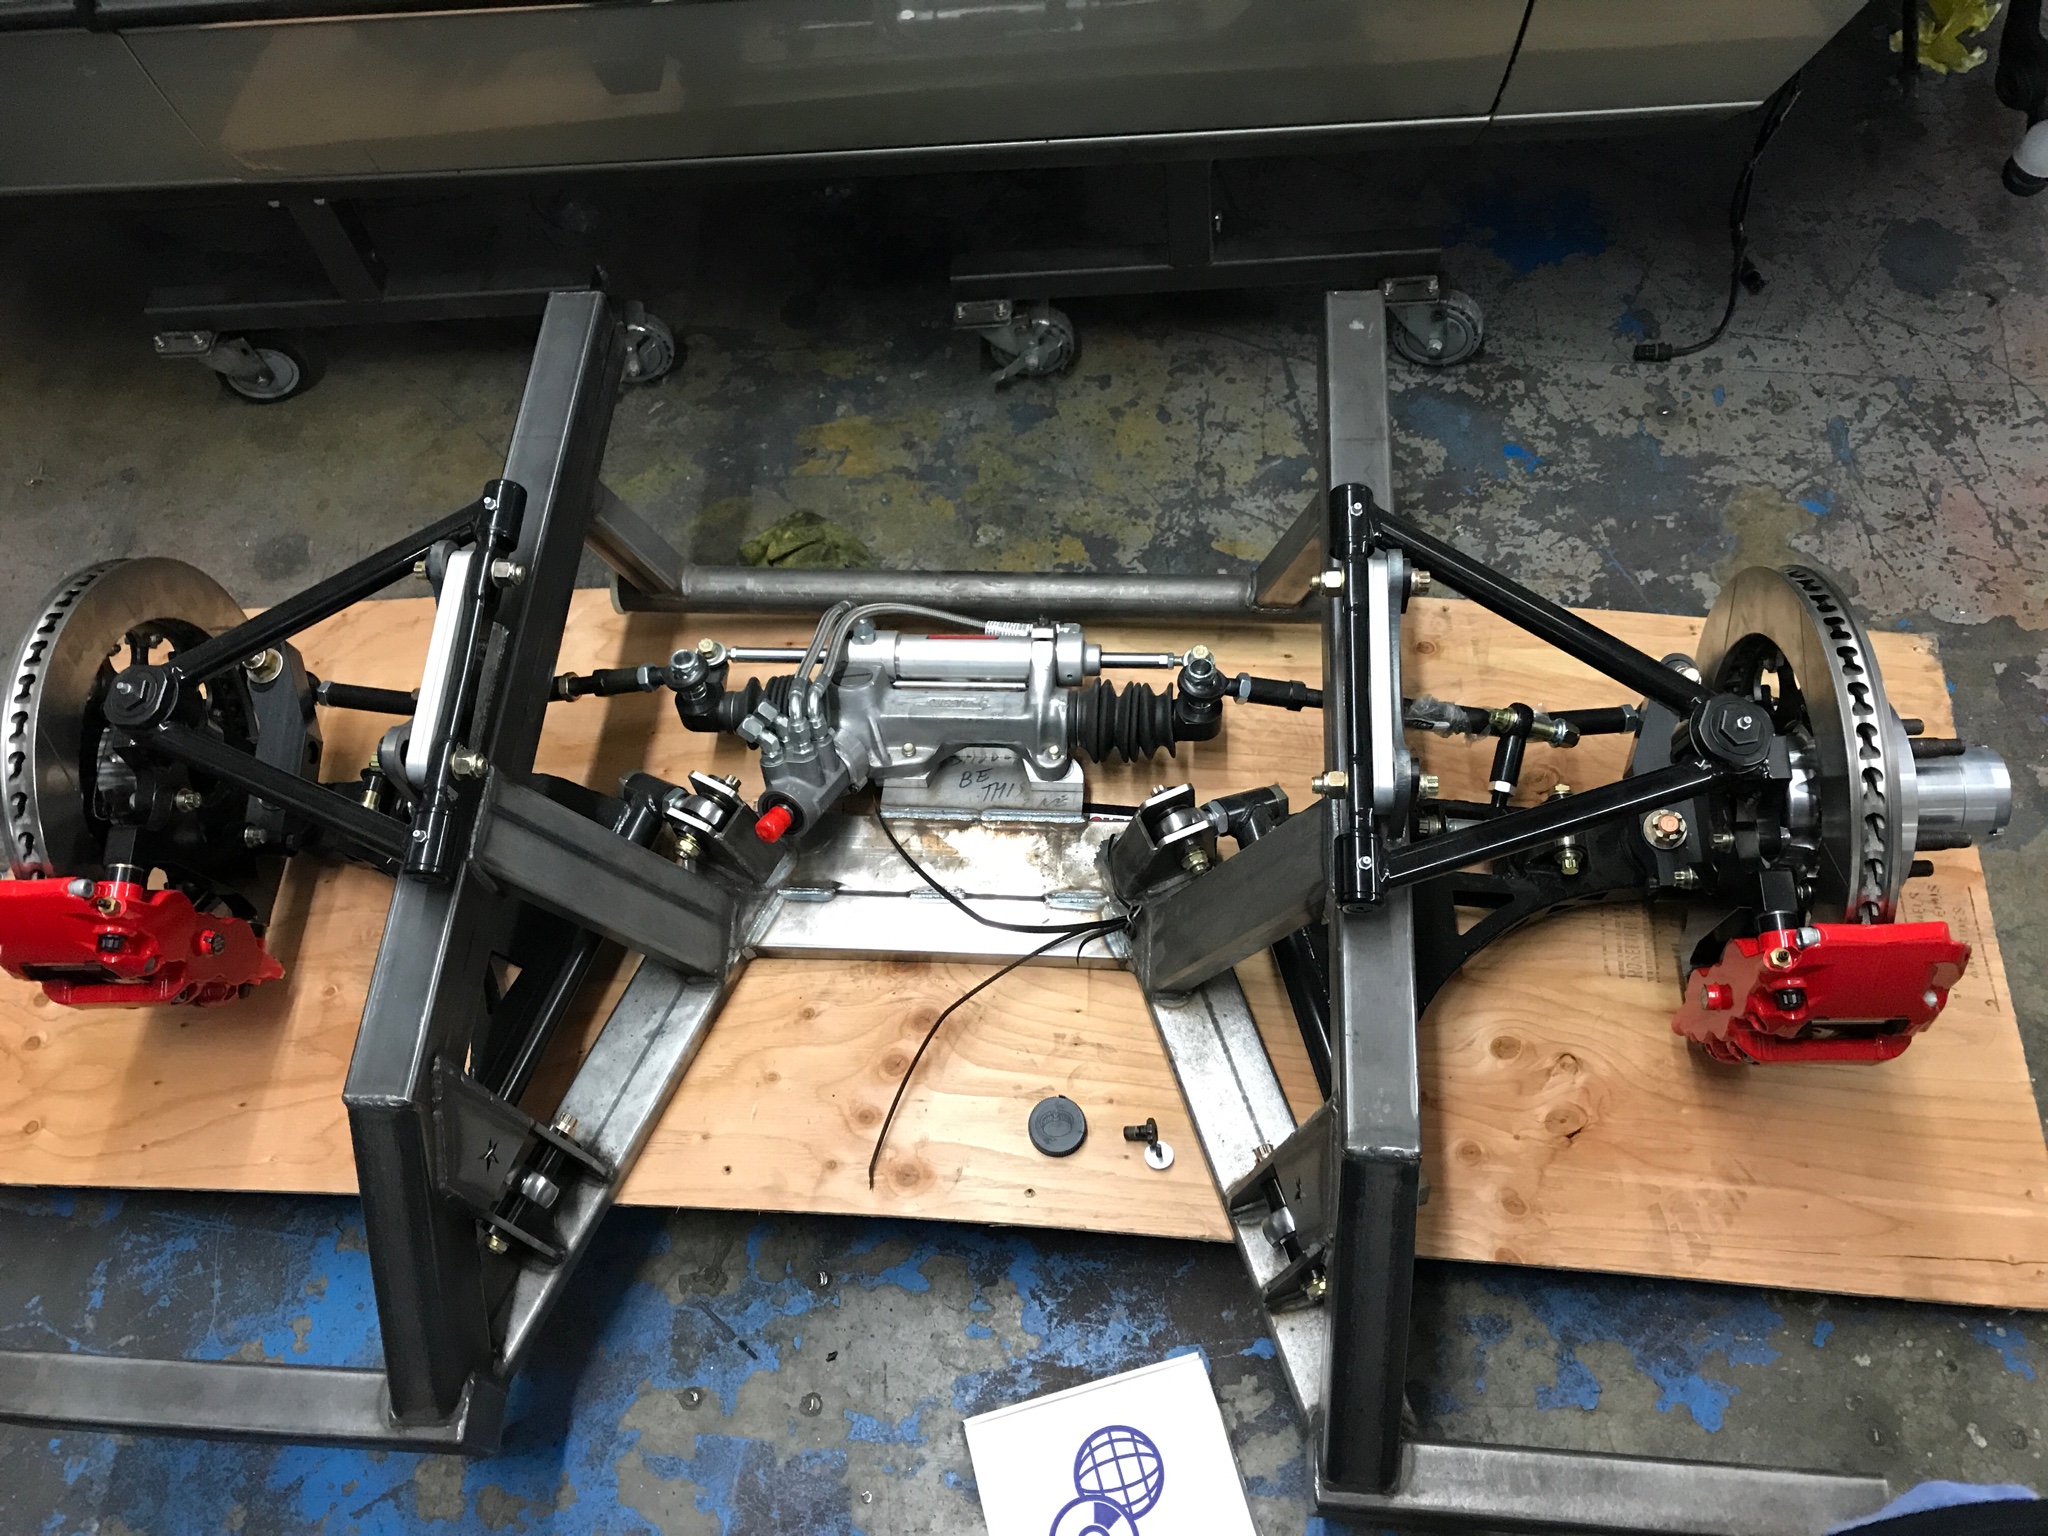
The long control arms sure make for tight engine packaging!!!
Ron,
Can you elaborate a little on why the lower arms are angled like that?
Andrew1970 GTO Version 3.0
1967 Cougar build
GM High-Tech Performance feature
My YouTube Channel Please Subscribe!
Instagram @projectgattago
Dr. EFI
I deliver what EFI promises.
Remote Holley EFI tuning.
Please get in touch if I can be of service.
"You were the gun, your voice was the trigger, your bravery was the barrel, your eyes were the bullets." ~ Her
08-03-2017 #352
Registered User
- Join Date
- Nov 2012
- Location
- Sacramento, CA
- Posts
- 1,918
I'd be glad to answer Andrew, but I'm not 100% clear on the question. Are you asking why the LCA are angled ... in general ... or something specific you notice here? Originally Posted by andrewb70
08-03-2017 #353
-Moderator/Sponsor-
- Join Date
- Apr 2001
- Location
- The City of Fountains
- Posts
- 15,975
Looking from the top the UCA appear parallel...the lower arms have the front pivot point inboard quite a ways...hope that explains it...
Andrew1970 GTO Version 3.0
1967 Cougar build
GM High-Tech Performance feature
My YouTube Channel Please Subscribe!
Instagram @projectgattago
Dr. EFI
I deliver what EFI promises.
Remote Holley EFI tuning.
Please get in touch if I can be of service.
"You were the gun, your voice was the trigger, your bravery was the barrel, your eyes were the bullets." ~ Her
08-03-2017 #354
Registered User
- Join Date
- Feb 2014
- Posts
- 767
That is unusual (to me).
08-03-2017 #355
Registered User
- Join Date
- Nov 2012
- Location
- Sacramento, CA
- Posts
- 1,918
Interesting question. I think C5/C6 Corvettes have spoiled you. LOL Originally Posted by andrewb70
Most car front suspensions have the UCAs parallel with the centerline of the chassis (or close to it) & the LCAs at an angle ... the same angle the LCAs are in this photo. The reason they are that way, is we want the LCA to be as long as possible to tame geometry changes as the suspension goes through its travel. (Short control arms cause extreme geometry changes with small amounts of suspension travel. Not good.)
Ideally both the front & rear LCA pickup points would the same distance from the chassis center line ... and therefore parallel with the chassis. The problem is ... where the rear of the LCA mounts would be to achieve that ... is where the engine oil pan sump is ... on "most" cars. Because on most cars ... all our 60's to 80's muscle cars for sure ... have the engine over the FACL (Front Axle Center Line) and the sump is behind the crossmember. Go look at your car & you'll see what I mean. The oil pan is over the crossmember ... and the front of the engine is several inches ahead of the FACL. In Corvettes, the engine is set back ... a lot.
The LCAs in the C5/C6 are parallel. They can be because of the design to set the engine back so far the front of the engine is behind the FACL. It's a really good design. Aftermarket manufactures that have designed new clips using the C5/C6 arms can not get the geometry optimum. They have to lower the LCA mounting points to get the engine in there. And they have to narrow the mounting points up because the muslce car is so much narrower than the C5/C6 Corvettes.
So after that it's a game of compromises. When someone mounts the C5/C6 LCAs lower & closer together you can not get all 3 key items optimized. Pick 2.
* Camber gain
* Bump Steer
* Roll center location
I've processed the measurements on all those clips & chassis. They chose Camber Gain & Bump Steer. The roll center is out to lunch. So ... back at the ranch ...
you asked why we place the LCA pivots at an angle ... it's to get the roll center location, bump steer & camber gain all to be optimum ... along with the optimization of Ackerman, Anti-Dive, caster gain, turning radius, etc, etc ... with some relatively long lower control arms ... and still fit the engine in the somewhat factory location where the engine is over the FACL. We can achieve optimum everything ... with the LCA pivots angled. Of course, not as optimum as we can with the engine moved back significantly.
Whew! Simple question. Long, involved answer. Hope that made some sense.Last edited by Ron Sutton; 08-07-2017 at 09:09 AM.
08-03-2017 #356
Registered User
- Join Date
- Nov 2012
- Location
- Sacramento, CA
- Posts
- 1,918
P.S. Most GM cars have the the LCAs at a 22° angle to the chassis center line. This one here ... which is a completely custom clip for Darreld's Volvo ... is 20°.
08-04-2017 #357
Registered User
- Join Date
- Oct 2007
- Location
- Camas, WA
- Posts
- 640
Wow! Thanks for the insight to the design to my suspension. The chassis should have the time to start working on it now that the Trans Am season has a couple month break. I hope they have the suspension done in the next couple weeks. I will post more pictures when I have some.
In the meantime I have been doing some upgrades to my engine. I added Brian Tooley double springs with titanium retainers, Straub Trunnion upgrade and a Fast intake. I hope this gets me a little more stable valvetrain at higher rpm's and maybe a few more HP. I thought about porting the heads but I am not sure I want to go through all that. If this engine ever blows up I will do it then as well as put in a stroker kit.
08-04-2017 #358 Registered User
- Join Date
- Sep 2013
- Location
- Chicago suburbia
- Posts
- 228
Originally Posted by 68EFIvert
Tell us about the mechanism you've built here for your spoiler! What kind of power strut is that? How long does it take to motor up? How much force can it take? Are you doing something speed activated or it'll be switched manually? Originally Posted by 68EFIvert
You've done some amazing work here. You are building a car in your shop that the factory could not have built. Great work!'69 Charger TT Viper project - SOLD
'65 Mustang Shelby clone project "almost done"
08-04-2017 #359
-Moderator/Sponsor-
- Join Date
- Apr 2001
- Location
- The City of Fountains
- Posts
- 15,975
Thanks Ron!!!
Andrew1970 GTO Version 3.0
1967 Cougar build
GM High-Tech Performance feature
My YouTube Channel Please Subscribe!
Instagram @projectgattago
Dr. EFI
I deliver what EFI promises.
Remote Holley EFI tuning.
Please get in touch if I can be of service.
"You were the gun, your voice was the trigger, your bravery was the barrel, your eyes were the bullets." ~ Her
08-04-2017 #360
Registered User
- Join Date
- Oct 2007
- Location
- Camas, WA
- Posts
- 640
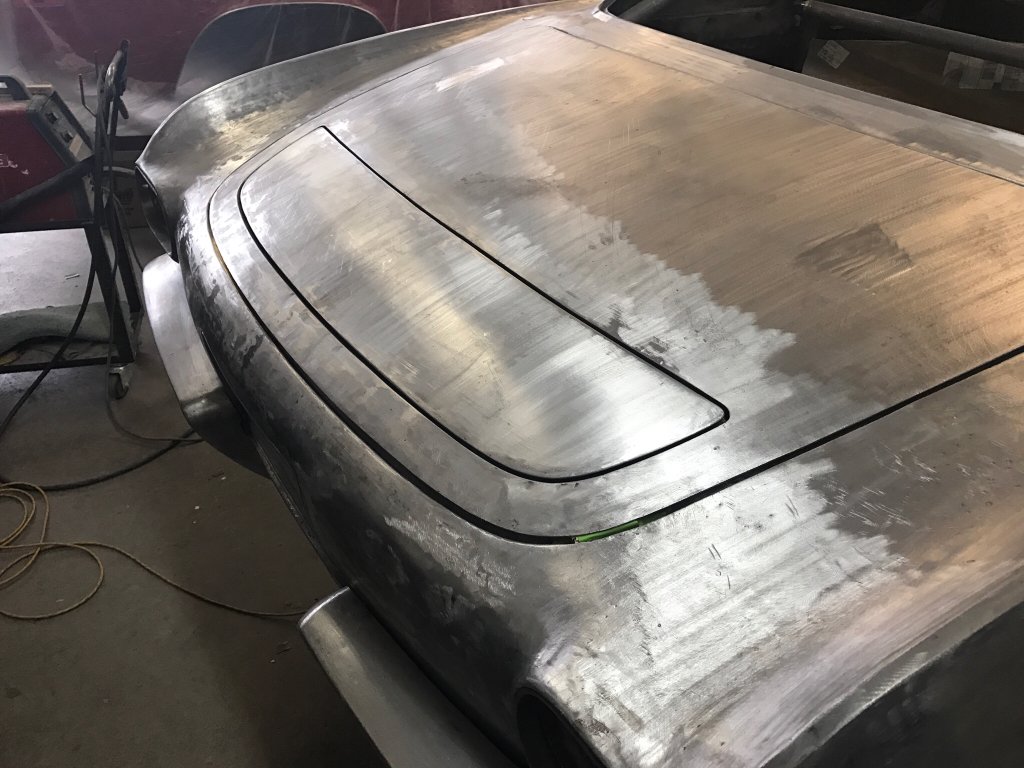
I had been thinking the car will need more downforce than it was going to get from the factory design but I did not want to ruin the look of the car. When I was driving home from work one afternoon I pull up next to a Chrysler Crossfire and I knew that was it. I purchased the guts of a Crossfire off eBay for under $150. I told my body guy what I wanted done and he looked at me like I was crazy. He now thinks it is one of the coolest parts of the build. �� Originally Posted by Cop Magnet
It only takes about 3 seconds to fully lift and is really a pretty stout piece. I plan on using a Lingenfelter switch that is tied into the VSS. It will also have a switch for manual override. Here is a video of it working.
https://youtu.be/KCKkLgiAfoo

 Reply With Quote