
Results 381 to 400 of 721
Thread: My 1985 Monte Carlo SS Barney...
-
07-07-2018 #381

 Registered User
- Join Date
- Aug 2012
- Location
- Peoria, AZ
- Posts
- 1,758

Ut oh... What's going on here?
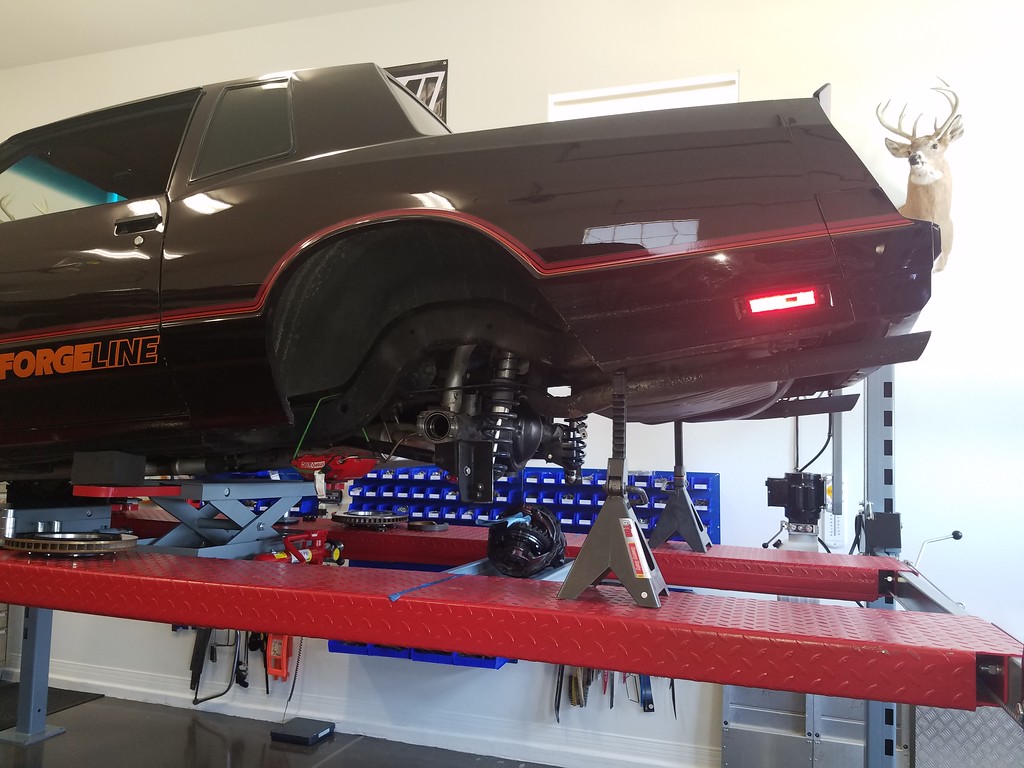
Finally getting a chance to do some overdue repair and maintenance on Barney. When I installed the new brakes last fall I noticed a fair amount of metal in the rear diff gear oil. I didn't have time to mess with it then so I just drained and refilled with fresh. This is what has kept me from running it on any road courses since then. Today was the day to find out what was going on.
Here is just what came off the drain plug...
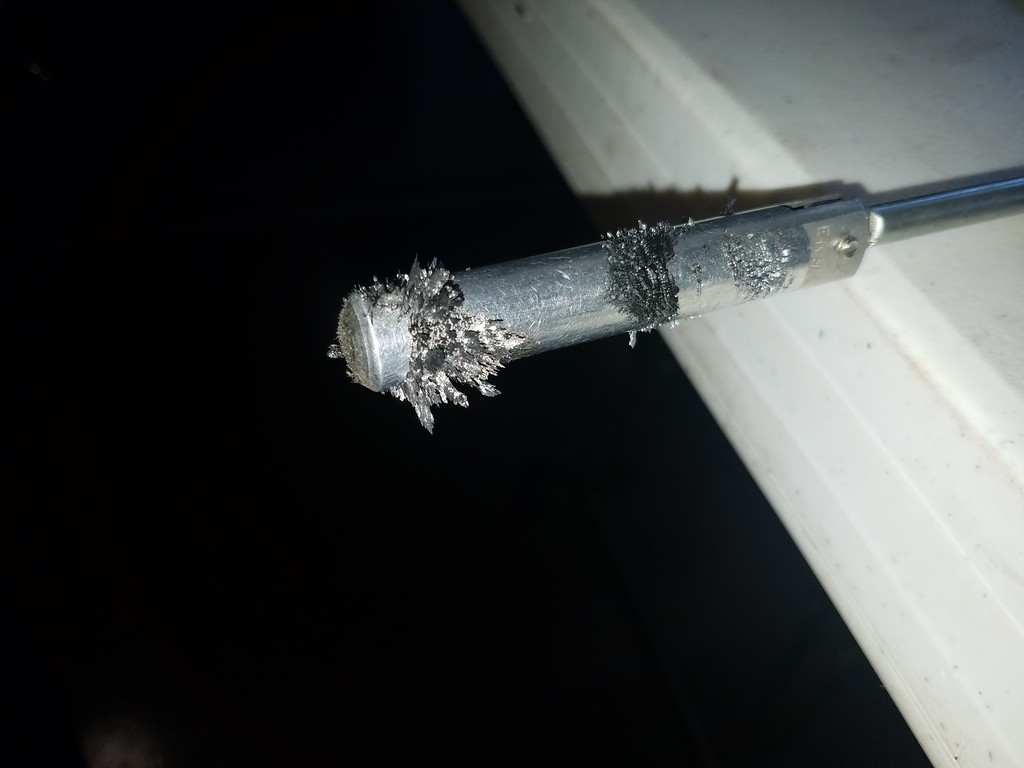
Thankfully, I'm pretty certain it is pinion shaft, crush collar or bearing related and not the locker or gears. You can feel the pinion bind up randomly when spinning it by hand, sometimes bad enough it's hard to turn by hand. The ring gear looks fine to me and there is no extra play anywhere I can find.
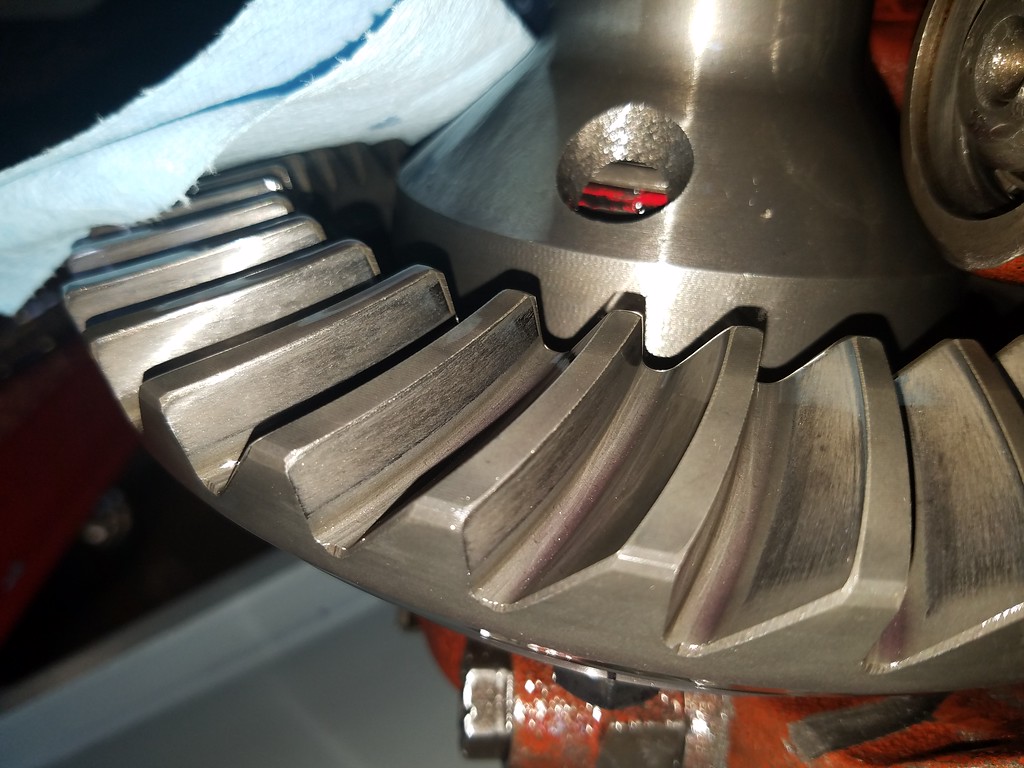
This bearing on this end of the pinion looks fine, must be something further inside...

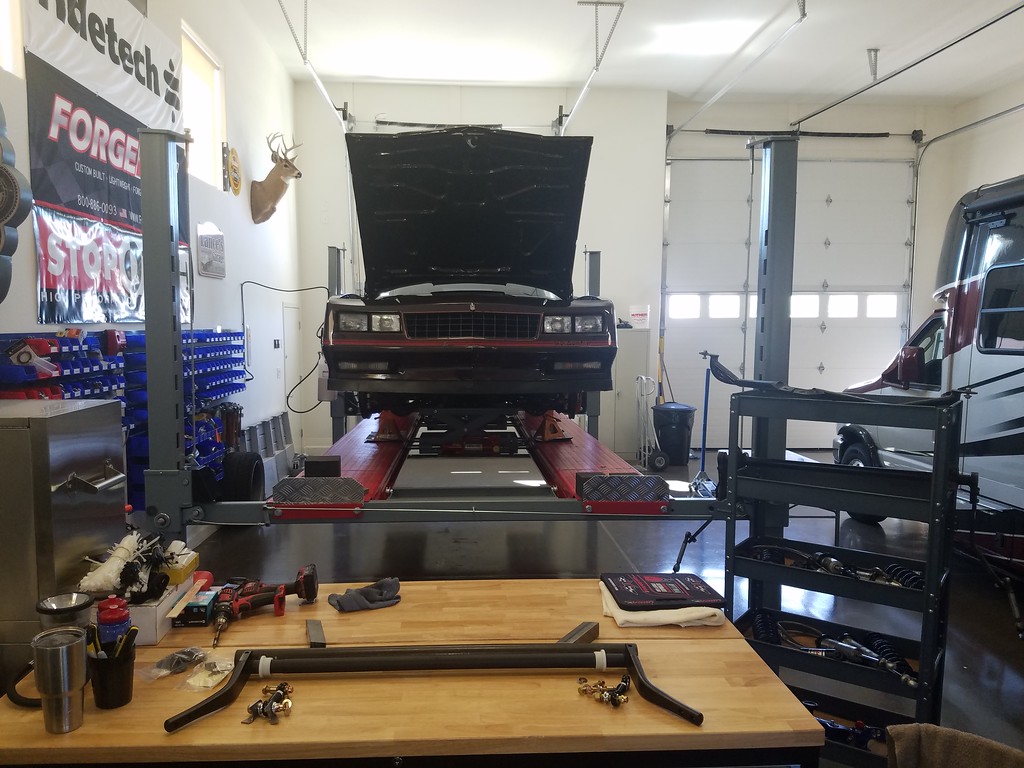
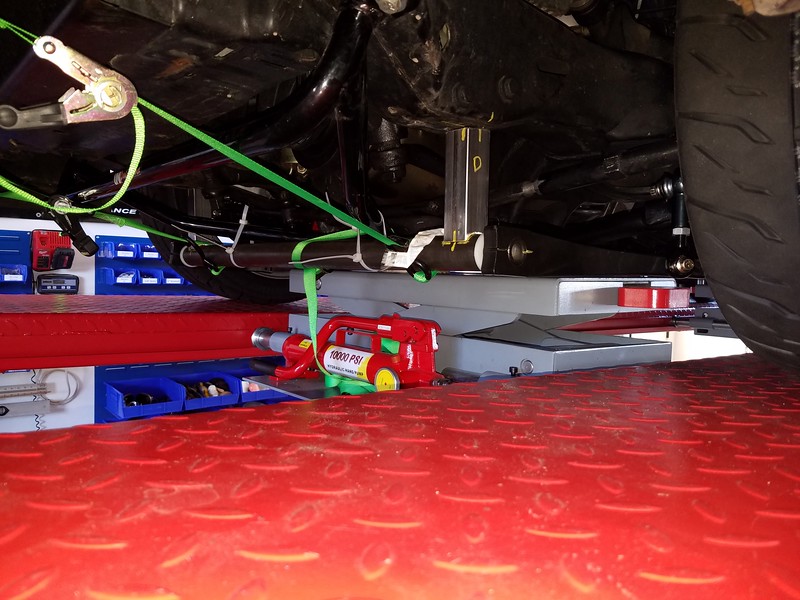
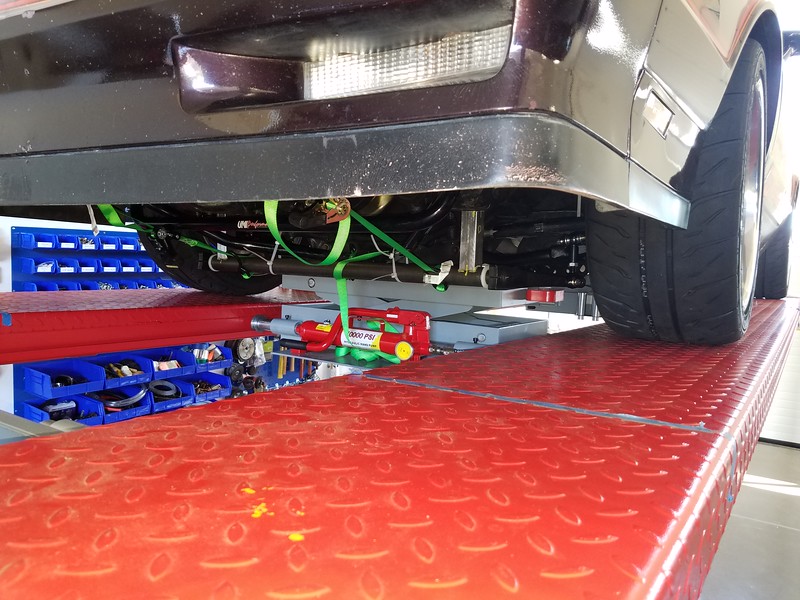
This also gave me the chance to get used to doing work on my drive on lift. It's gone okay but I need a few short jack stands with pads on top to really help make it better. These rolling jacks don't have enough throw to fit under my frame and lift the car high enough in one shot and my jack stands are too tall to get under the frame with rolling jack all the way up. I made it work today but it could be much easier with shorter jack stands. Didn't hit my head on a ramp once either...Lance
1985 Monte Carlo SS Street Car
-
07-21-2018 #382
Registered User
- Join Date
- Aug 2012
- Location
- Peoria, AZ
- Posts
- 1,758
It is amazing how much better a car drives when it's ring gear is firmly attached to the carrier!! :D YUGE difference... Guess i hadn't realized just how sloppy the drive train had gotten over time. It's been bad for a while now. Can't believe all of the races I've run with it like that as well.
Also spent some quality time given so love to a few other things back there while it was on the rack. Felt some looseness in the lower control arm joints so I pulled them all and gave them a refresh. Beautiful thing about UMI Roto-Joints, 100% servicable... Each one was a 1/4 - 1/2 turn loose on the adjuster but each delrin piece looked perfect so I cleaned them up, put a layer of grease on the center piece and put them back in the arms. Pretty sure the looseness I felt was the actual control arms bolts themselves backing out just a bit. I haven't touched ANY of that stuff since I put them in almost 5 years ago now...they should be good to go for another 5 years of abuse now.
The parking brake setup needed a bit of love as well. The Stoptech setup uses an internal parking brake shoe (C6 I believe with some other GM parts thrown in) and when I put it all in I just set them up super loose. They worked but at some point one of the cables came out of the connector and a clip that holds the top of one of the shoes in place also broke. Since I was in there anyway and had a bit more time I replaced the broken clip and made sure it all went together properly. I then spent a bunch of time adjusting them and making sure each side rotated freely and tightened up with the same amount of pull on the cables. They should be good to go now as well.
Lastly, the last time I raced the car, when I put it on the trailer to bring it home, I wrapped the tie down strap around the RR flex line to the caliper. When I got home I noticed brake fluid everywhere... **eek** Thankfully, all it did was loosen the banjo bolt up when it pulled the cable back and I was able to snug the bolt back up and stop the leak. The Master cylinder was very close to being out of fluid but I put more in before ever pressing the pedal so I didn't need to bleed it again...but we did re-bleed the rear calipers to make sure all of the air was out and checked all the lines and fittings one more time for leaks. That's all good now too...
Lastly was a road trip around town in the 110 degree afternoon heat with the AC on to see how the cooling system would handle it. After figuring out the diff was MUCH better I rolled the windows up, cranked the AC and cruised around for a bit. It stayed near 180 where the stat opens up for a while but several waits at stop lights in a row got it to creeping up. A little break in traffic stopped it from climbing but the next set of stop lights had it creeping up again so I turned the AC off to see if that helped. It leveled off about 210-215 degrees, warmer than I like but not bad really...then I noticed that I hadn't turned the fans on high with my manual switch. Pretty sure the auto switch turns them on high at 215 degrees. So I hit the switch then turned the AC back on and cruised around a bit some more. It dropped back down to around 200 and stayed there...stoplights, slow speed cruising, even idling around the neighborhood a few times. I think that'll do...
The AC cooled the car right down and worked like a champ. It's had a slow oil leak for over 4 years now, every now and then I'll find green fluid under the hose where it comes out of the accumulator...I have NO IDEA how it keeps running and cooling like it does. The fan switch only works on high though... Isn't there a fix for that? Seems like I've seen others with that issue. High is fine but frankly, it could use to run a speed or two lower once the car is cooled down, even when it's 110 degrees outside.
Anyway, good to get a bunch of little things down to it, maybe now I can drive it a bit more regularly and who knows...maybe even hit a track day or two soon... :DLance
1985 Monte Carlo SS Street Car
07-22-2018 #383 Registered User
- Join Date
- Feb 2012
- Location
- Central NY
- Posts
- 240
Blower motor resistor sounds like it failed Lance. Simple fix and only costs $10
09-04-2018 #384
Registered User
- Join Date
- Aug 2012
- Location
- Peoria, AZ
- Posts
- 1,758
So this video is kind of long, some will like to watch it all, others will either want to FF to the 6:10 mark to watch some drama or the 10:50 mark to watch my fastest two laps of the day.
Had a blast running at Inde, what a great track. Loved how technical it was and especially how little there was to run into if you did happen to have an off. It is pretty easy to navigate around yet can be very difficult to really put a fast lap down, lot in the driver's hands there.
The car did fantastic, I really love the new brakes. I didn't really start testing them deep into braking zones until later on Sunday, I kind of snuck up on that as I've never driven a car on course before with this kind of stopping power. Once you realize that yes...it is going to whoa down in a hurry from just about any speed, you can REALLY drive deep into corners and make up a lot of ground on others that can't brake quite like that. It is exhilarating!!!
One other thing that has changed on the car since the brake\spindle upgrade is the front is stuck like glue with the additional ackerman and camber gain...so much so that there is little to none front tire wear even with the high speed sweepers on this course. I wish I had figured this out sooner as I left my worst tires on the rear (hurt them at Good Guys) and my good pair up front and after day one my left rear was toast...almost zero tread left on it while the front tires still looked fantastic. I put the bald rears on the front for Sunday and the one hurt the most on the left front where it would take the least amount of work since we were running backwards that day. Even after 3 hard sessions, the front with zero tread on it still stuck like glue and showed no more wear.
BTW, be sure to notice how my little truck engine kept up with all the LS powered cars down the straights (and even coming out of the corners)...even though I was down probably 50-75 hp running at 4100 feet with a carb tuned to run at 850 feet. ;) If you listen close you can hear it gurgling coming out of just about every corner. It did fine on the big straights once cleaned, out but it really did load up on slower corners.
Now it's time to clean Barney up, assess the wear items...and prep it for another day...Lance
1985 Monte Carlo SS Street Car
09-04-2018 #385
Registered User
- Join Date
- Aug 2012
- Location
- Peoria, AZ
- Posts
- 1,758
This was my last session on Sunday. We ran the course in reverse with one small change...
I was leery of my tire wear and the car didn't quite feel right so I quit pretty early in the session after a few good clean hot laps. After the car sat in paddock for a while, I noticed the left rear going flat. Good thing I quit early and this finished my day.
Still haven't investigated what it picked up and don't really care...as all tires are shot now.Lance
1985 Monte Carlo SS Street Car
09-08-2018 #386
Registered User
- Join Date
- Aug 2012
- Location
- Peoria, AZ
- Posts
- 1,758
Sometimes when you make an upgrade to a car, you make other weaknesses appear and become prevalent. Such was the case after we added the ATS spindles and new brakes to Barney. The increased Ackerman and better camber gain created a bunch more front grip which made the front of the car roll way more in turns. This increased roll released the inside rear tire more than before causing both a loose in condition because the brakes would lock up and slide the inside rear tire as well as a free post apex condition. This became ever so apparent when we reviewed the pictures from the Good Guys event last March.

The grip was great and the car was fast...but if we could tame the roll down and get the inside rear tire back into the track again, it will be even better. So a plan for a new front sway bar was put into place. Since I already had a few steps stiffer than the stiffest bolt in sway bar available for a G-Body, we decided to step up to a weld in tube style mount for a 3 piece splined end front bar. This will give us a ton of more options for front bar specs...
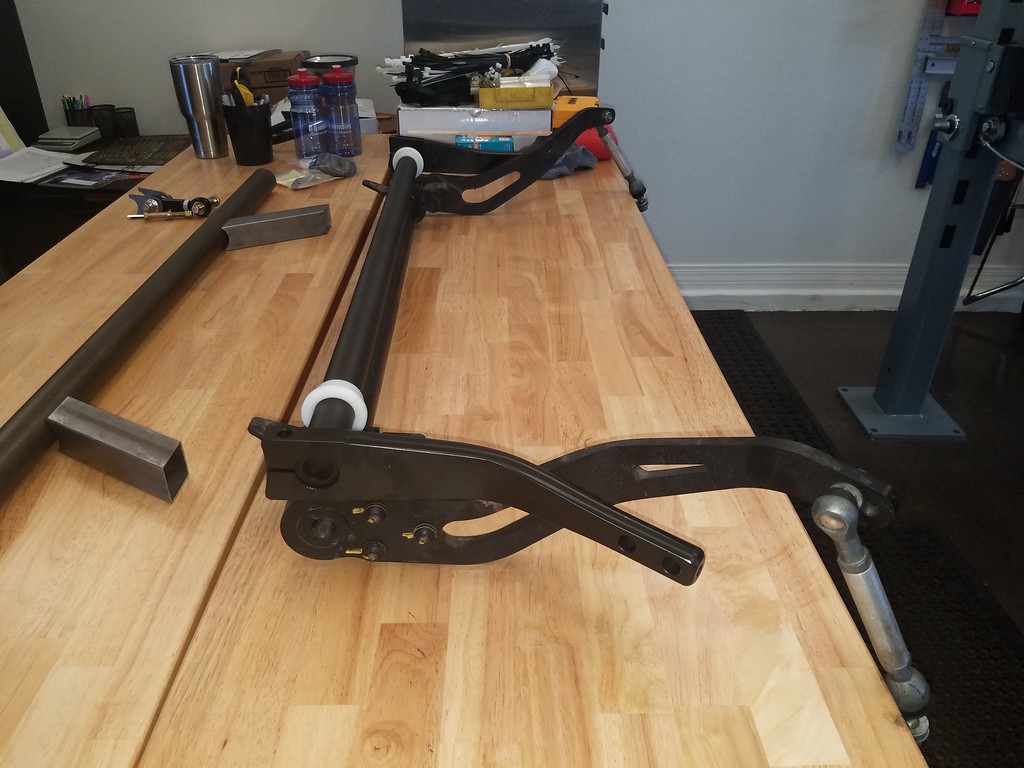
Now that the parts are here, I can take things apart and see just how and where it is all going to fit. I know the UMI front triangulation brace will either need to be cut up or replaced with something custom made as well as it is directly in the way of where this tube needs to go. I love that part...it is awesome!! I kind of hate to cut it up but that may be the best option rather than just starting from scratch.
The tube, bar, and swing arms will all hang under the frame and I'll weld double shear tabs on the front of my control arms for the end links to bolt to. It looks like these swing arms will end up 4-5 inches shorter than the ones on the the current MuscleBar which means the bar will need to be about directly under the pitman and idler arms instead of up in front of them where the current bar rides. The shorter arms help with way less leverage on the bar which means a stiffer overall rate (less roll).
I have new tires being mounted up Tuesday and have a local SCCA Autocross Next Sunday the 16th, so I'll probably wait until after the 16th to start taking things apart. The goal is to have the new bar in place and tuning done at an SCCA event before the Good Guys Fall show the 2nd weekend in November. Wish me luck!!!Lance
1985 Monte Carlo SS Street Car
09-08-2018 #387 Registered User
- Join Date
- Sep 2010
- Location
- Beach Park IL
- Posts
- 2,848
Lance, be sure to pull the coil overs and run everything through travel before welding everything. Even a 1/4" one way or the other with either the bar or the links can make the difference between perfect operation and bound up and busted heim joints. That becomes more critical the shorter the endlinks get......and those are pretty short.
Donny
Support your local hot rod shop!
09-09-2018 #388
Registered User
- Join Date
- Aug 2012
- Location
- Peoria, AZ
- Posts
- 1,758
For sure Donny, that's part of the plan. Things are very congested in that area so lots of planning and testing will be done before final welding.
Those links can go about 2" longer than shown there but since I think they will hang down from the control arm I'd like to keep them as short as I can.Lance
1985 Monte Carlo SS Street Car
09-11-2018 #389
Registered User
- Join Date
- Aug 2012
- Location
- Peoria, AZ
- Posts
- 1,758
Added my Solostorm data overlay to my fast lap from Saturday's session.
And here was Sunday's lap running counter clockwise.
Lance
1985 Monte Carlo SS Street Car
09-11-2018 #390
Registered User
- Join Date
- Feb 2012
- Location
- Central NY
- Posts
- 240
Wow, looking good Lance! LMK if you want to make a package deal on the UMI brace and Musclebar
09-17-2018 #391
Registered User
- Join Date
- Aug 2012
- Location
- Peoria, AZ
- Posts
- 1,758
Raced with AZSOLO SCCA yesterday. Put brand new tires on a couple days before so it took a run or two to get the mold release off them...then it stuck pretty darn good. Didn't hear any fender\tire contact anywhere even with a 270# passenger in the right seat on my last and fastest run so the work with the Fender roller might have been enough to fix the issue at autocross speeds.
Here was the fastest run of the day.
Got about a month before the next local SCCA race and have the opportunities to do some road course stuff soon as well...but thinking about pulling the shocks to do some work on them and working on the sway bar install instead. Would love to have the sway bar installed and tested BEFORE Good Guys in early November.Lance
1985 Monte Carlo SS Street Car
09-22-2018 #392
Registered User
- Join Date
- Aug 2012
- Location
- Peoria, AZ
- Posts
- 1,758
Sometimes you have to go back a few steps before you can move forward...
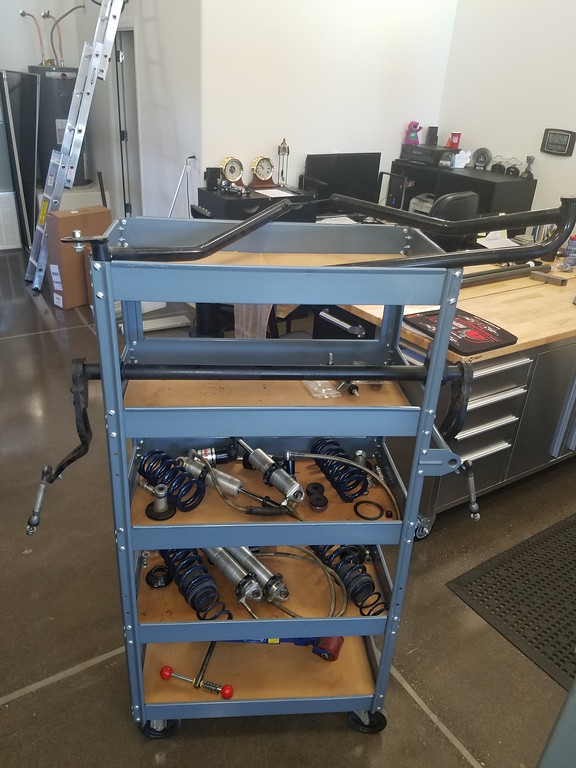
The shocks needed to go back to ridetech for some updates and I had to pull the fronts anyway so I could cycle the suspension to check for bind on the new sway bar end links, so I decided now was a good time to kill two birds at once. Also pulled the MuscleBar and UMI Triangulation brace to get it out of the way for now.
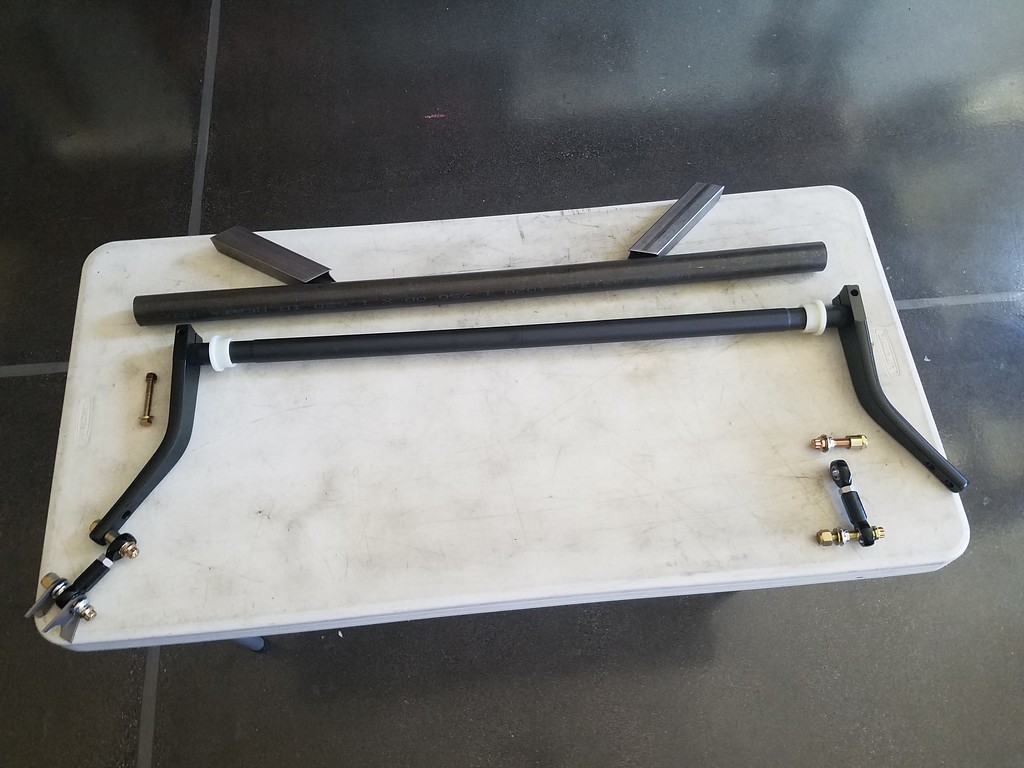
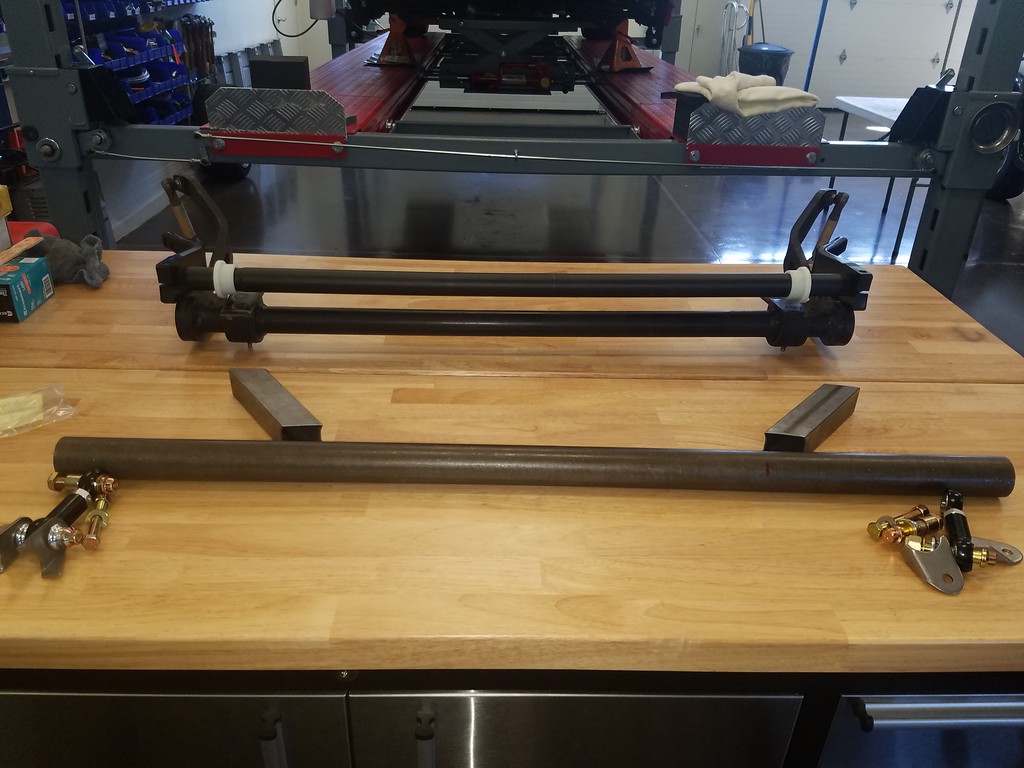
Here is a good shot showing the difference between the MuscleBar and the new MMF front bar that will replace it. The main glaring difference is the swing arms that are about 4-5" shorter on the new bar. This greatly reduces the lever pulling on the bar which helps increase the overall roll stiffness.

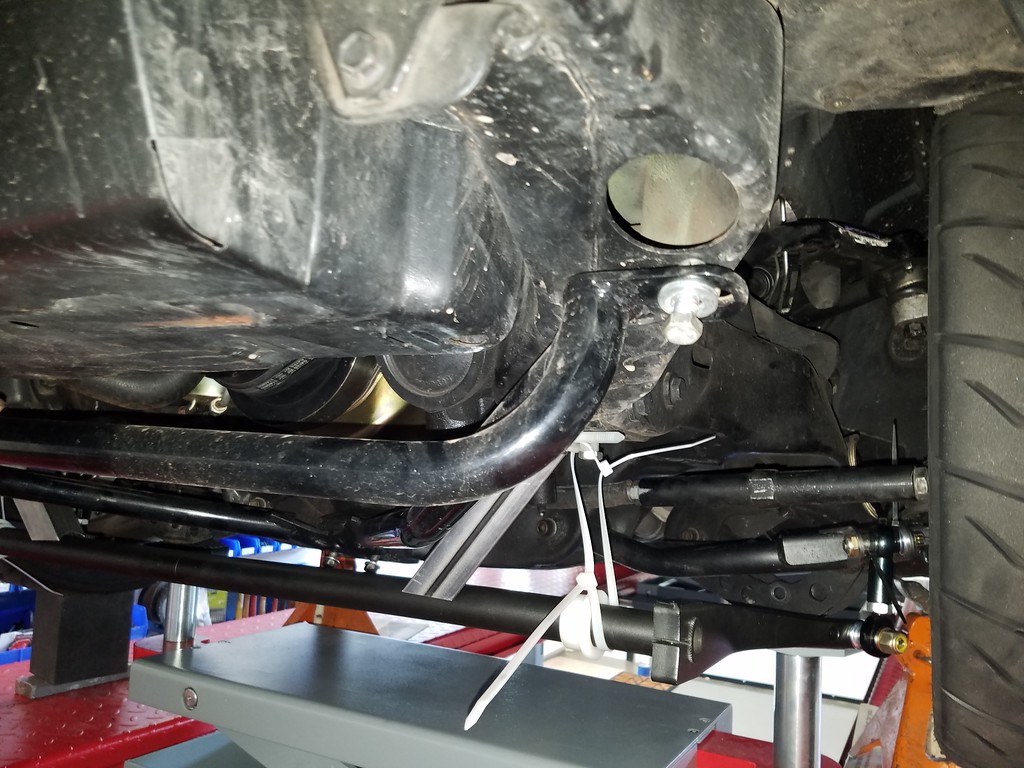
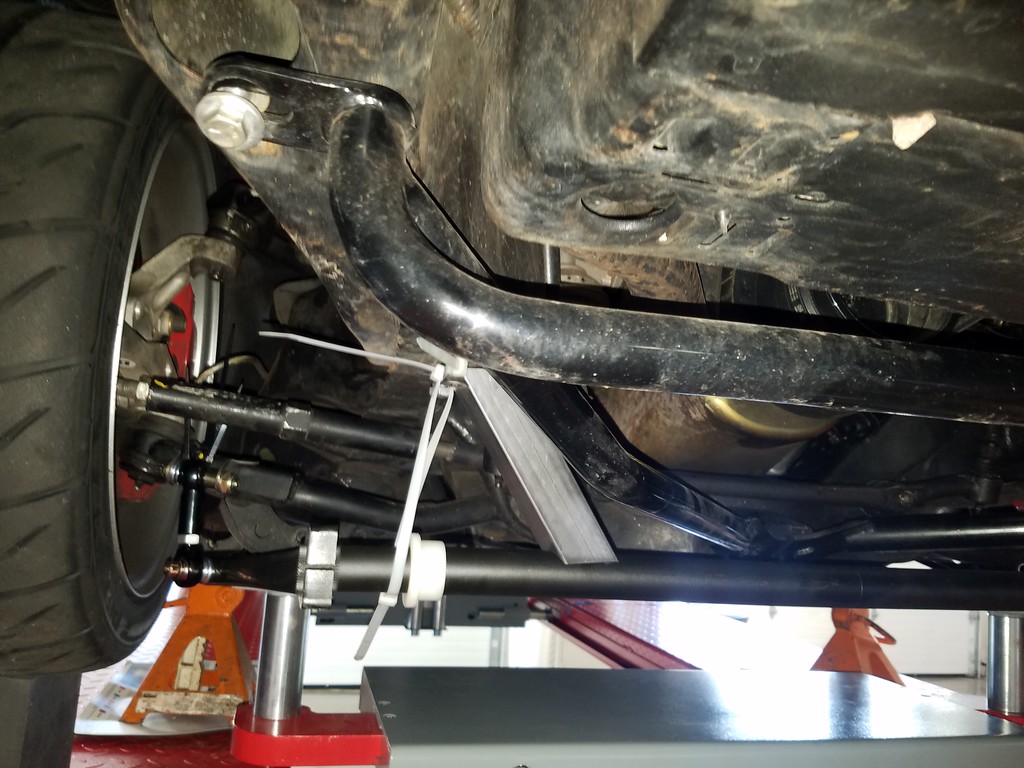
At the moment my welder can't reach my car so zip ties are holding everything in place. It's close to where it needs to be but will get tweaked once I can hold things exactly in place better. This is at pretty close to ride height.


And bad news for those lusting for leftover parts...it appears the UMI Triangulation brace will still work which I'm VERY happy about.
I need to pick up some hardware, get some smaller welding wire and some electrical material to make an extension cord.....then I'll be ready to start tacking things in place. Pretty sure the sway bar stands will land right on the frame under where the factory sway bar bushings mounted. The frame is large and beefy there and welding it up shouldn't be that big of a deal.
Plan is to start with the swing arms pointed down to the control arms about an inch at ride height with the endlinks straight up and down then cycle everything to check for interference or bind.
I have to add as well...I'm very much enjoying having a put together shop once again to work in. I'm getting more and more used to working on the drive on lift...it hasn't fought me at all on this project yet and in fact has made some things just a bit easier than it would be on a two post lift.Lance
1985 Monte Carlo SS Street Car
10-03-2018 #393
Registered User
- Join Date
- Aug 2012
- Location
- Peoria, AZ
- Posts
- 1,758
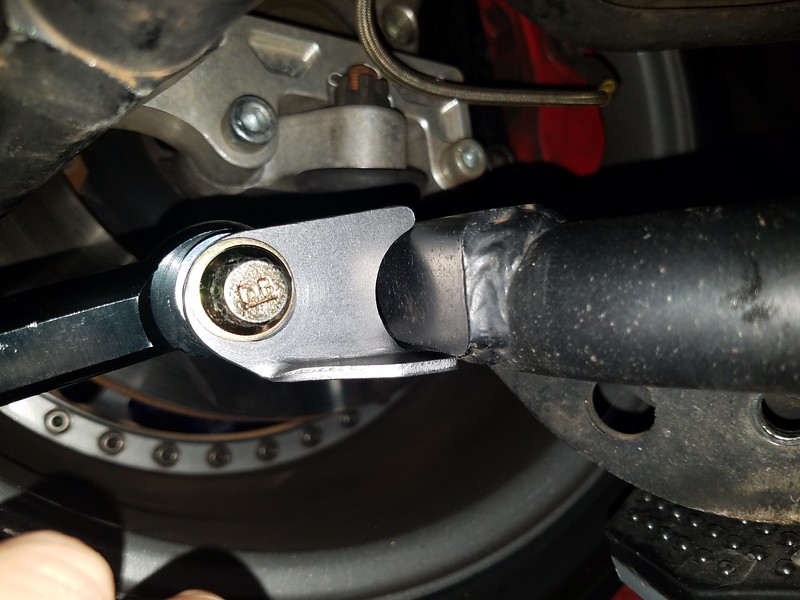
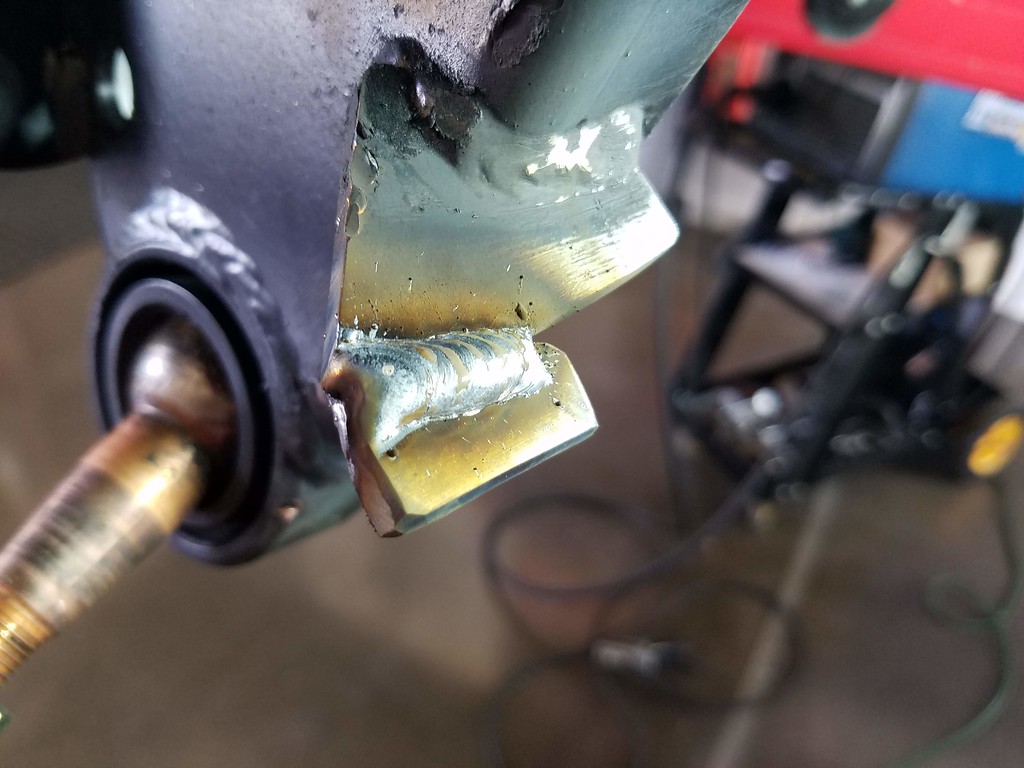
So the sway bar end link tabs are now secured to the lower control arms.
Remember...I am NOT an accomplished welder...
I spent way more time making sure that these welds were strong than making them look pretty. :D Hindsight, I should have busted the lower ball joints loose and dropped the arms down for the final welding, this would have made getting into the tight spots a WHOLE lot easier.
These are the tabs that came with the sway bar kit.
As you can see they are designed to weld onto a round tube. My ridetech True Turn arms are square out toward the ends where the tabs needed to go and I also wanted to get the tabs as high as I could to keep the endlinks from being lower than the dropped shock mounts.
So I picked up some pre-fab tabs from a local shop that were not only meant to weld onto a flat piece but also just a bit longer to give me a bit more room to work. I notched the tabs to put them higher on the arm as well as move the inside tab back to help with overall alignment. This placement lets the rod ends on the end links travel without bind full bump to full extension.

I cut a plate for the back side of the tabs that were above the lower control arm and welded it to the tabs as well as the arms for additional support.
I'm fully confident these are plenty strong to support and effort the wway bar puts on them.
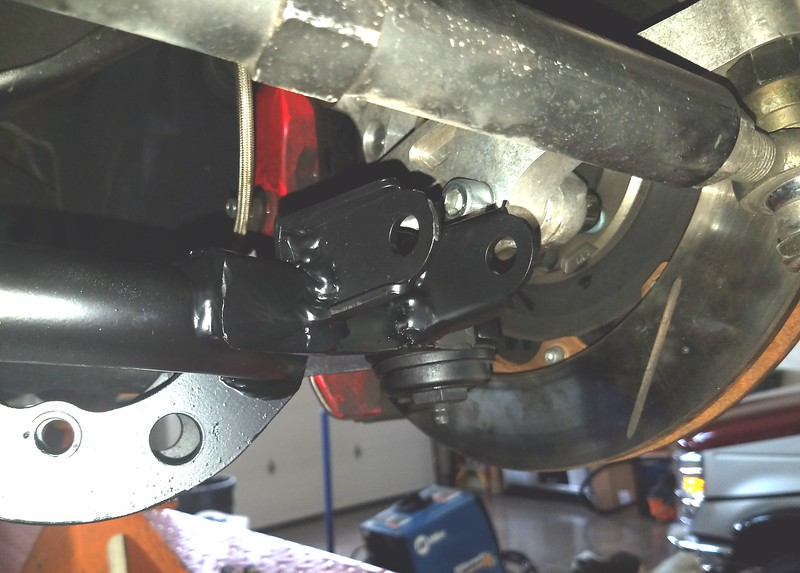
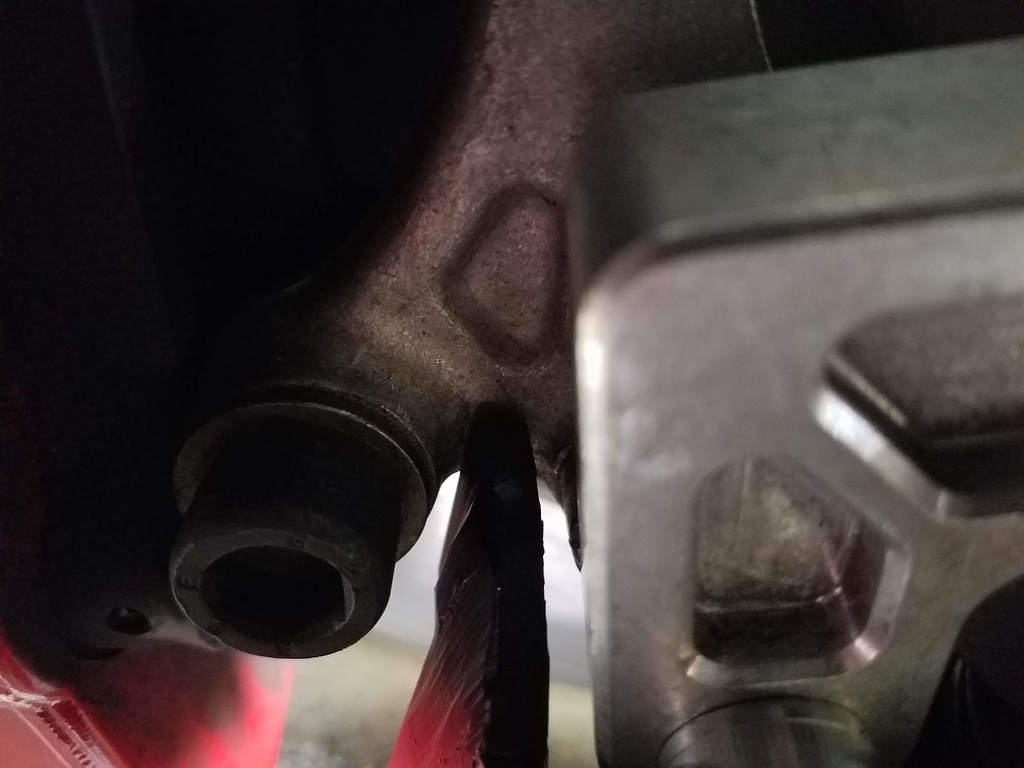
While I have the lower arms exposed, I decided to try to fix up the steering stop. The arms have a stop designed to work with the stock G-Body spindles but the ATS spindle misses it.
This picture is pretty close to where I need the spindle to stop.
All of the extra Ackerman that came with these spindles puts the back of the inside front tire into the frame pretty significantly at about 27 degrees steering angle. It isn't noticeable under most circumstances but did come into play pretty harshly at the Good Guys autocross event.
I was hoping to be able to just modify the stop already there but it looks like my only option is to just weld a new stop onto the arm closer to the ball joint and further in on the arm. That is today's project.
Then I'll move forward with attaching the tube to the frame and final placement of the rest of the sway bar. The shocks are away getting tweaked so I'm not really in a hurry. They should be back sometime next week and I'll be ready for them by then I hope.Lance
1985 Monte Carlo SS Street Car
10-07-2018 #394
Registered User
- Join Date
- Aug 2012
- Location
- Peoria, AZ
- Posts
- 1,758
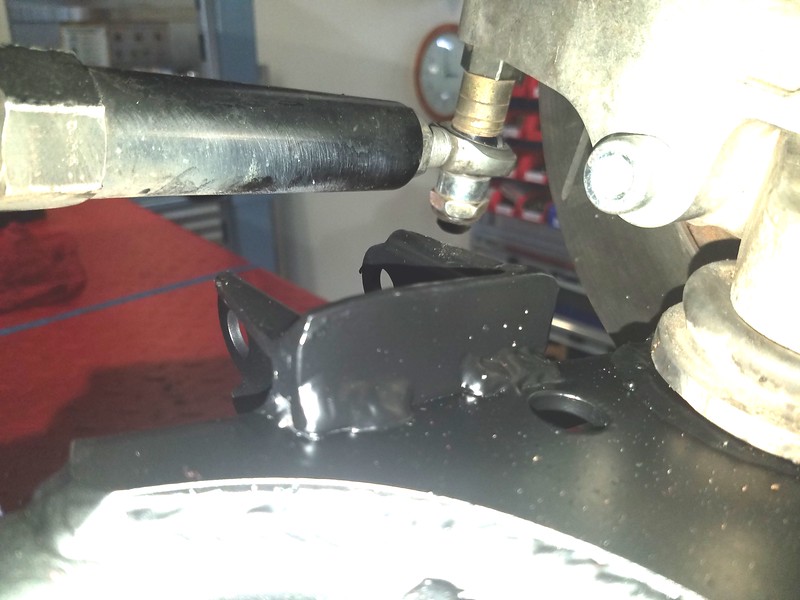
Well, that worked out pretty good actually...
Found some scrap steel just a touch thinner than the stop on the A arm, cut it to size and butt welded it onto the end extending the stop about the thickness of my finger.

Can just fit my finger between the edge of the tire and the frame at full lock now.
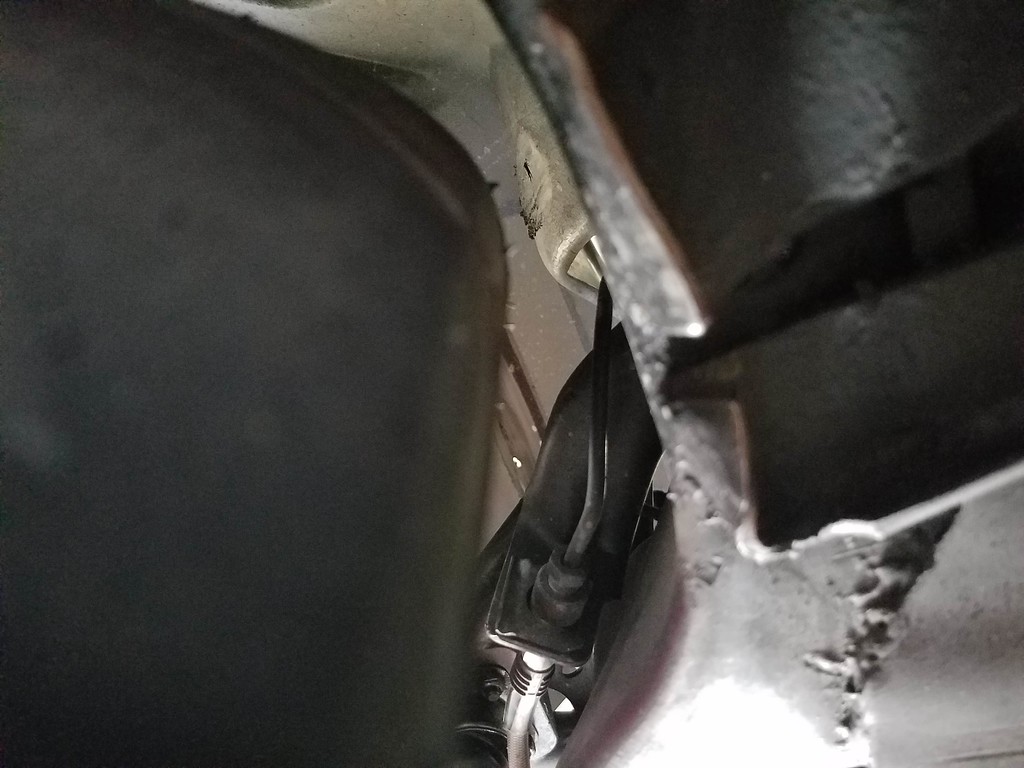
Left a little wiggle room for tire deflection just in case. I must say, it is going to be nice being able to turn to the stop without having the tire dig into the frame once again...been YEARS since I could do that.
Now onto mounting up the tube portion of the sway bar...Lance
1985 Monte Carlo SS Street Car
10-07-2018 #395
Registered User
- Join Date
- Feb 2012
- Location
- Central NY
- Posts
- 240
Lance what size tires are you running again? 275/35/18?
10-07-2018 #396
Registered User
- Join Date
- Aug 2012
- Location
- Peoria, AZ
- Posts
- 1,758
 Originally Posted by Streetbu

Yessir....Lance
1985 Monte Carlo SS Street Car
10-08-2018 #397
Registered User
- Join Date
- Aug 2012
- Location
- Peoria, AZ
- Posts
- 1,758
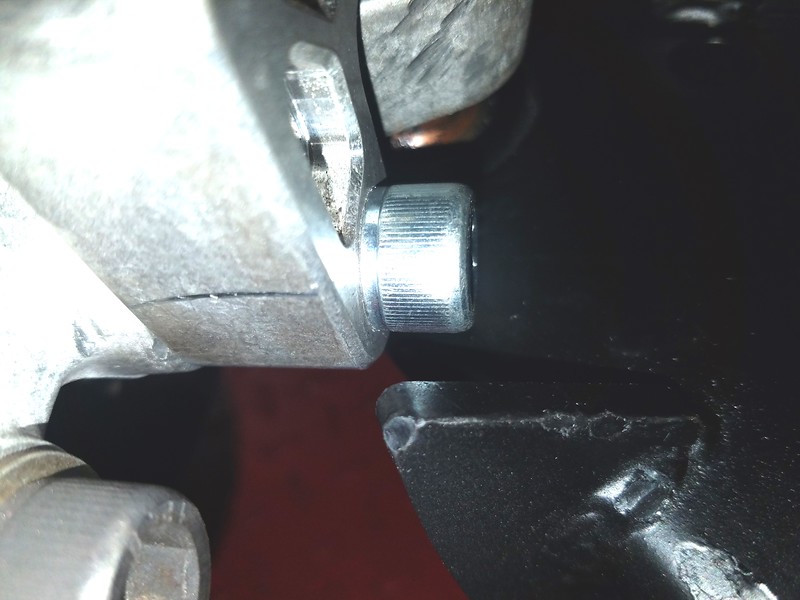
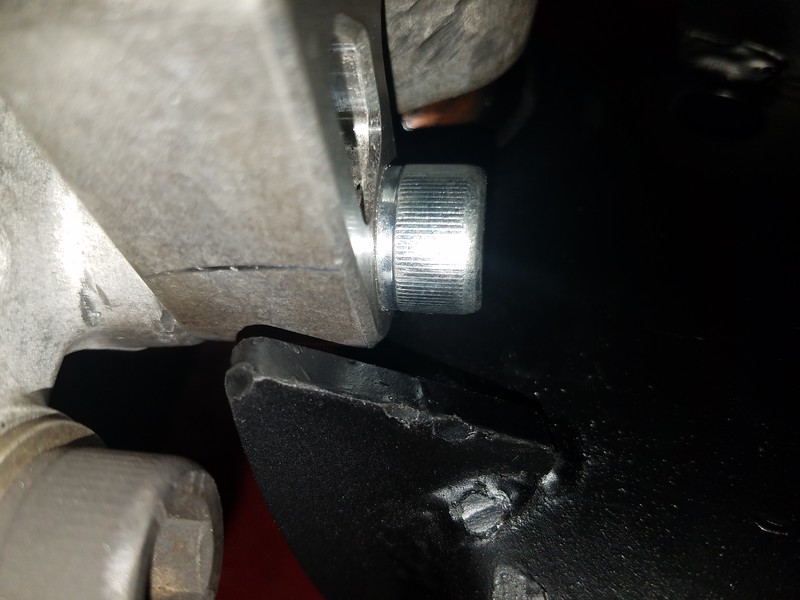
I also found something else during this project. The steering stop on the pass LCA was "bent" a little bit and the side of it hit the steering arm before the end of it hit the spindle. This was limiting the right hand turn enough to keep the tire off of the frame (also limiting how sharp it would turn to the right).
Since I did all of my measuring and mockup for the stop extension on the driver side, and then just duplicated for the passenger side, you can imagine my surprise when after paint was dry...I put it all back together, put the wheel on and could put my arm between the tire and frame at full lock.
It took me a bit to figure out was going on...tried to make it turn more by grinding down the end of the stop with no success. Finally took a BFH and bent the stop toward the caliper bolt just a bit and BAM...tire is back to just a finger's width away from the frame.
All of this should have been done a year ago when I put the new spindles on but I just didn't have the time then. The new ATS spindles changed just about everything in regard to suspension travel and tire placement and things just haven't been playing nice together ever since. Finally got the contact patch geometry back to where it needed to be (actually WAY better than before) now I've finally got the suspension travel and tire placement to where it'll all play nice together once again. This is why I waited so long to do the brake upgrade...I knew I'd have to redo everything that I had worked so hard on getting right with the old spindles.Lance
1985 Monte Carlo SS Street Car
10-09-2018 #398
Registered User
- Join Date
- Aug 2012
- Location
- Peoria, AZ
- Posts
- 1,758
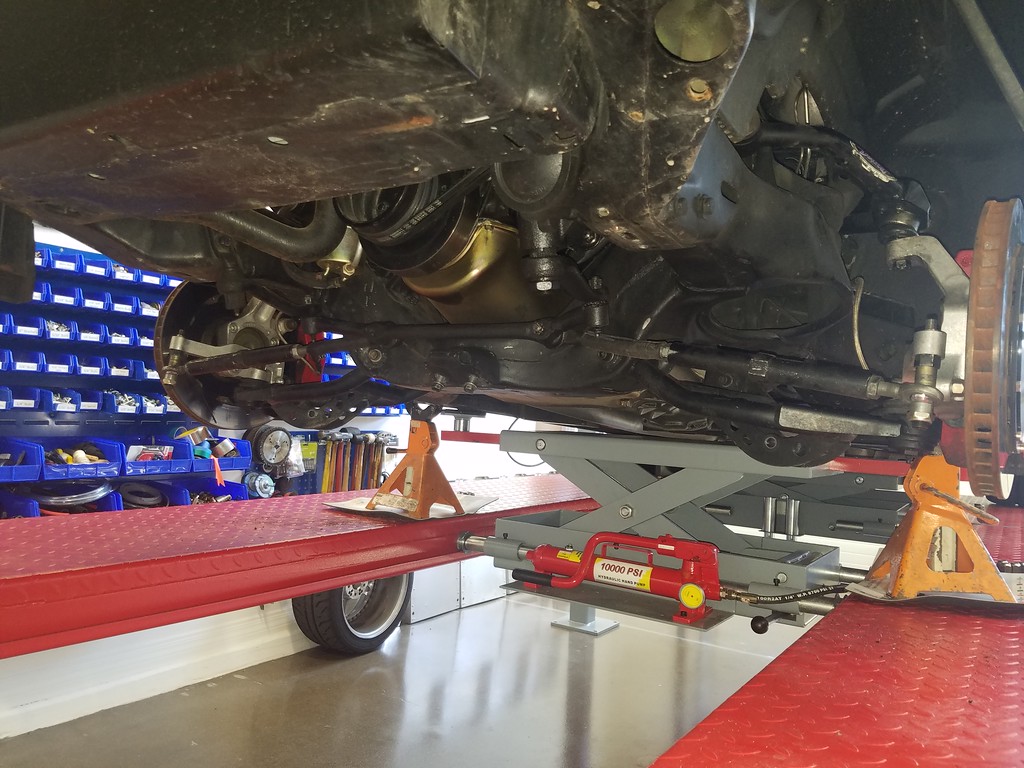
Got a little metal work and mock up done today... I must say it is pretty nice to be able to raise and lower the ride height with the tires on the ramps and the jack under the cross member. Sure helped when trying to make sure nothing is binding anywhere.
Modded the angled stands to make them straight stands and cut the tube to length and have it set where I think it needs to be.
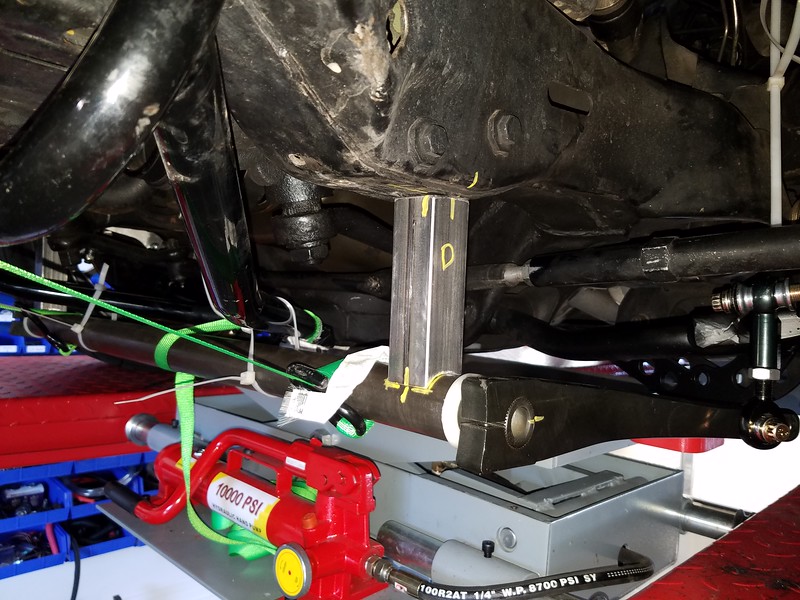
These show that it really doesn't hang very low at all and I think looks pretty dang racey.
 Lance
Lance
1985 Monte Carlo SS Street Car
10-09-2018 #399 Registered User
- Join Date
- Aug 2008
- Location
- jacksonville,fl
- Posts
- 970
Oh yea.
whenever I grow up, I wanna build me a splined front sway bar for the el camaro. Don't see myself paying $500 or whatever they are now to ridetech when I can fabricate.
10-09-2018 #400 -Moderator/Sponsor-
- Join Date
- Apr 2001
- Location
- The City of Fountains
- Posts
- 15,975
What's the logic of mounting the sway bar so low?
Andrew1970 GTO Version 3.0
1967 Cougar build
GM High-Tech Performance feature
My YouTube Channel Please Subscribe!
Instagram @projectgattago
Dr. EFI
I deliver what EFI promises.
Remote Holley EFI tuning.
Please get in touch if I can be of service.
"You were the gun, your voice was the trigger, your bravery was the barrel, your eyes were the bullets." ~ Her

 Reply With Quote


