Results 41 to 60 of 162
Thread: 69 Camaro Project "I Cost Money"
-
12-08-2012 #41

 Registered User
- Join Date
- Mar 2008
- Location
- The Piedmont Triad, NC
- Posts
- 373

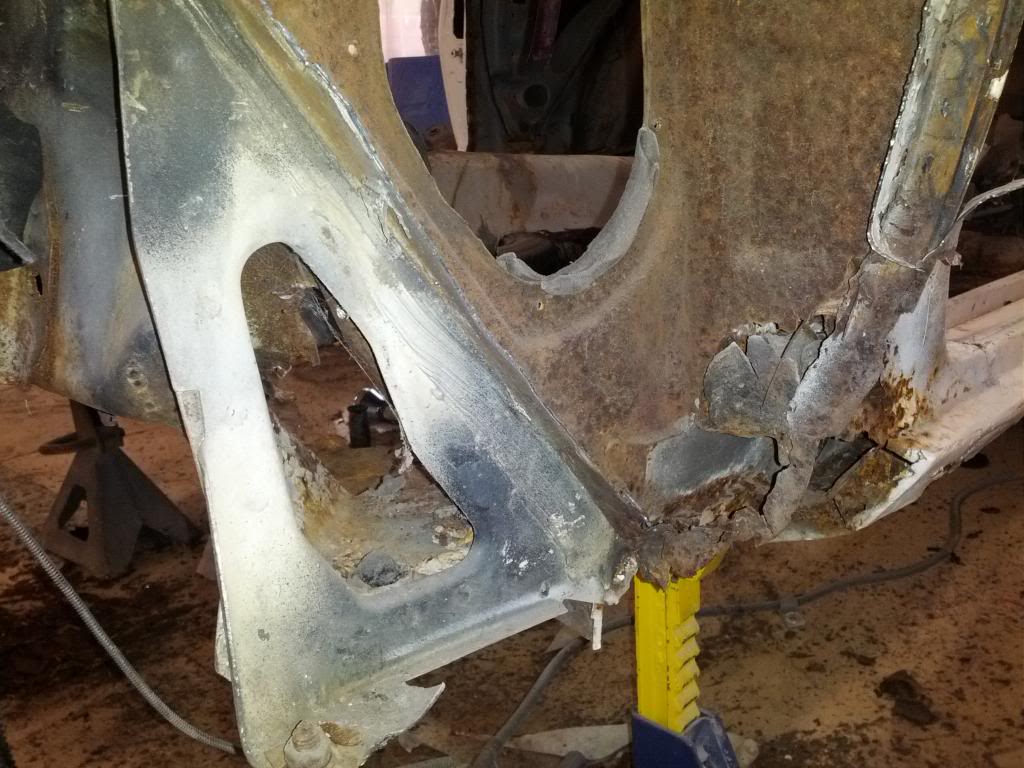
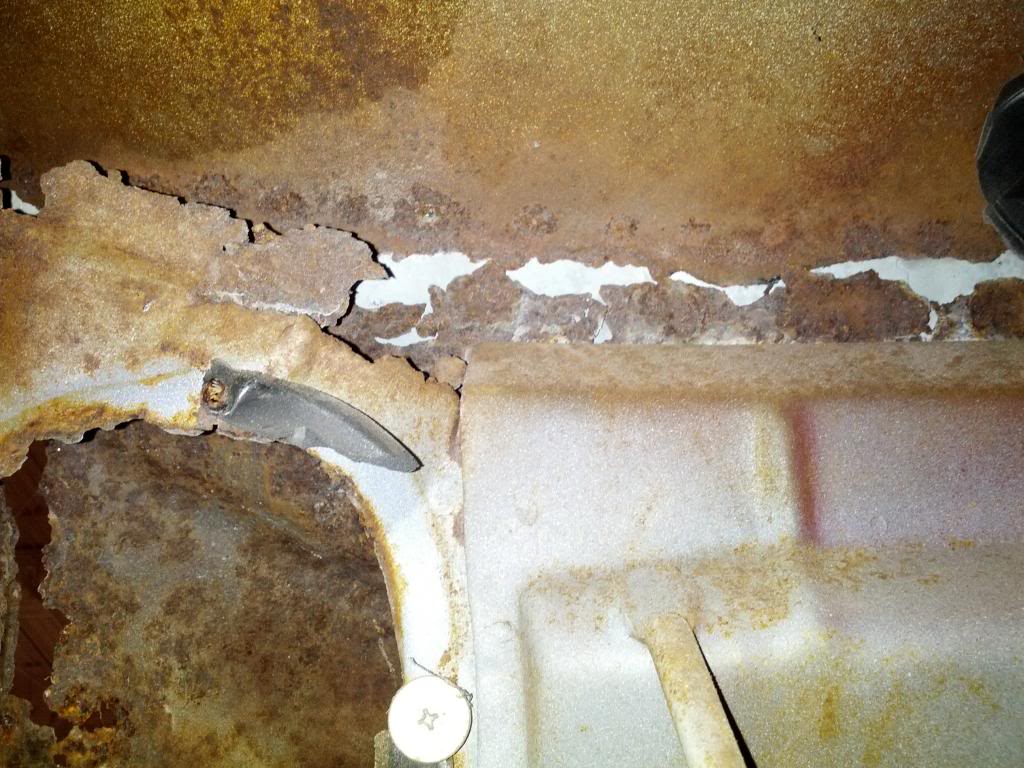
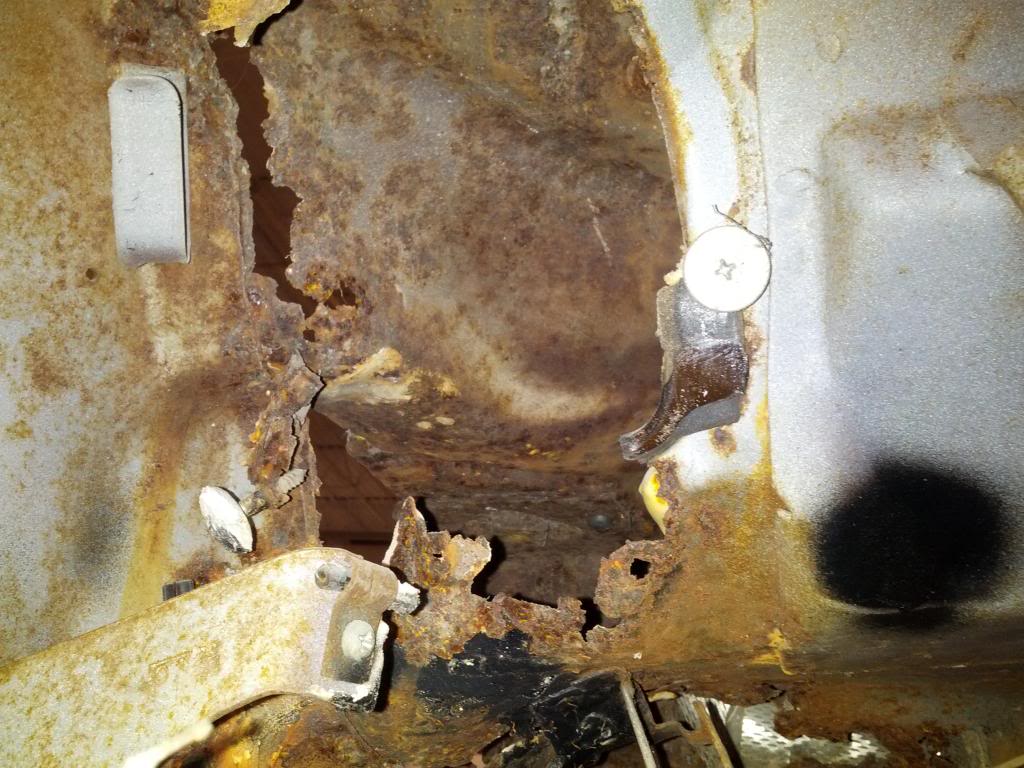
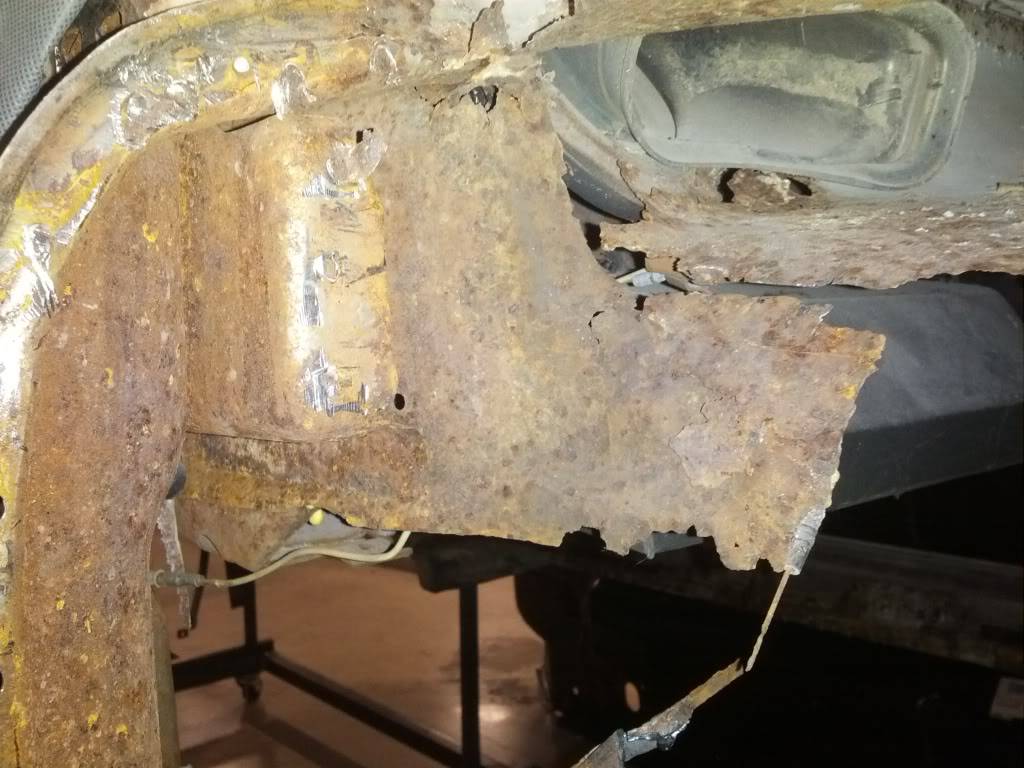
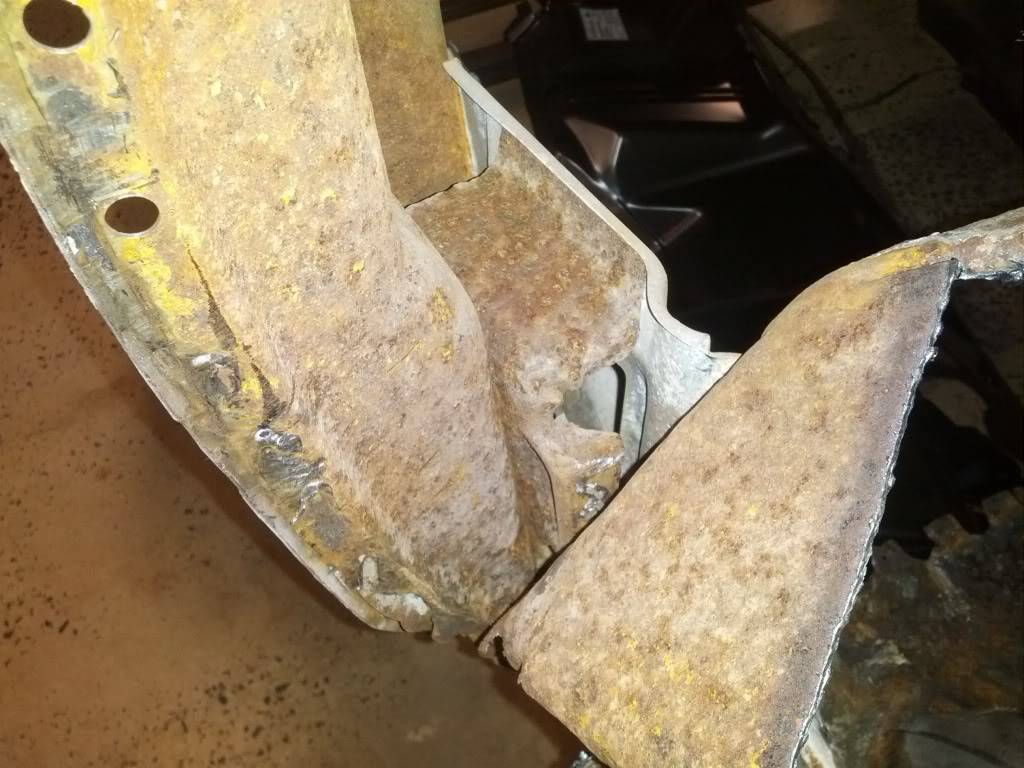
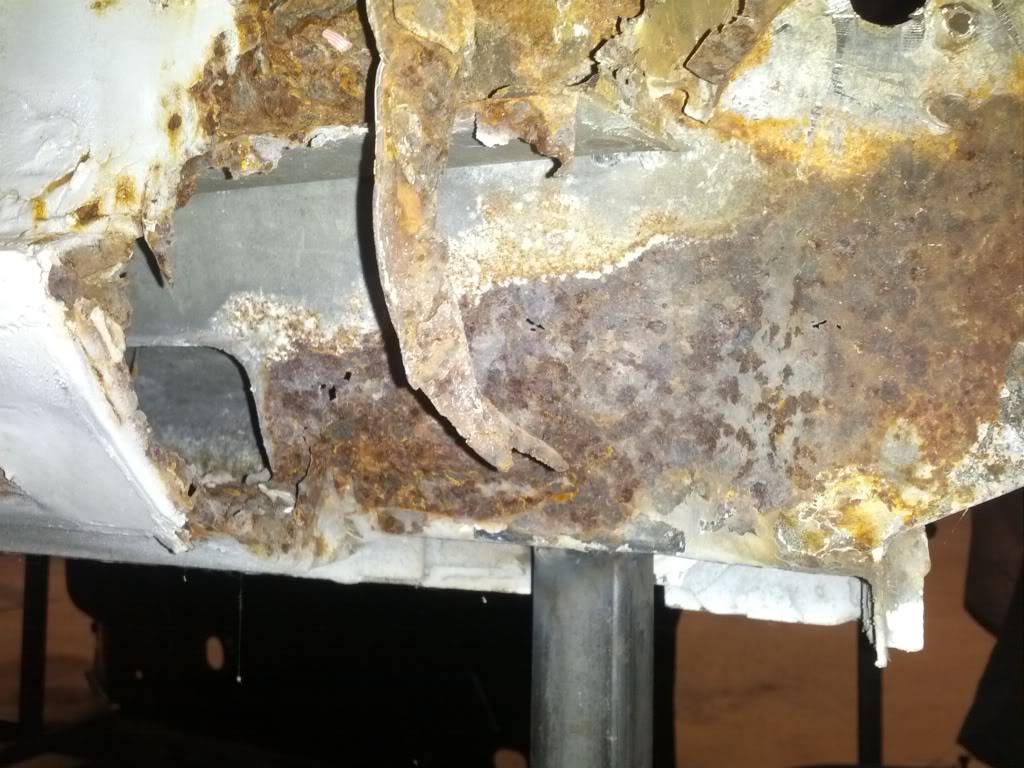
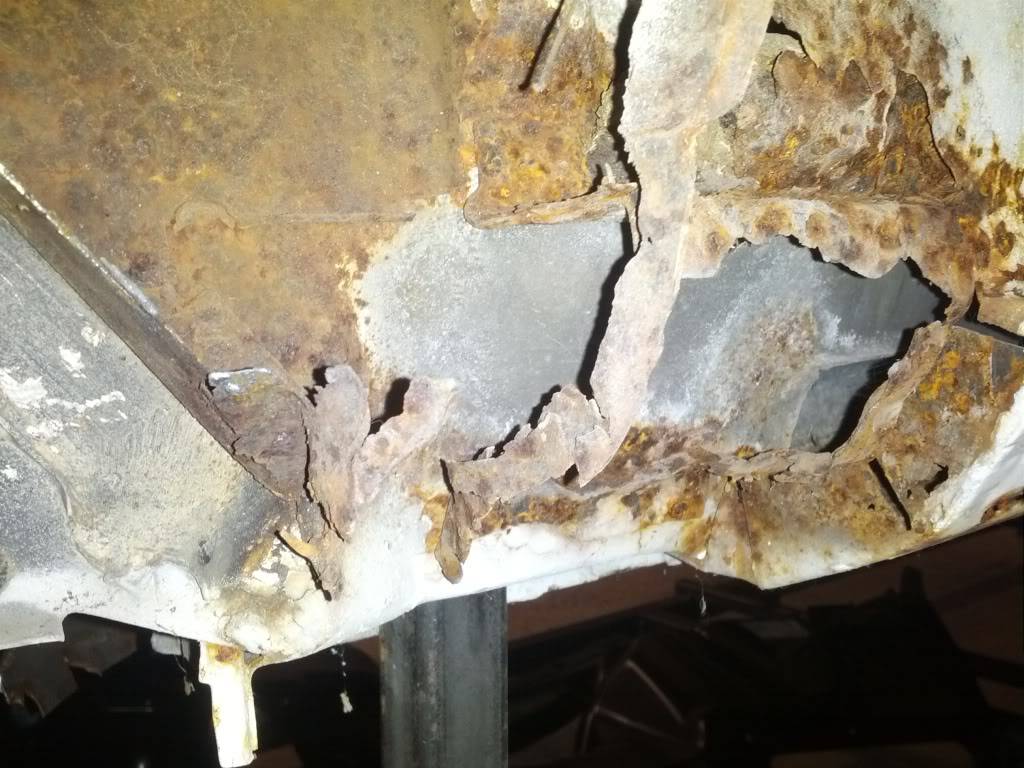
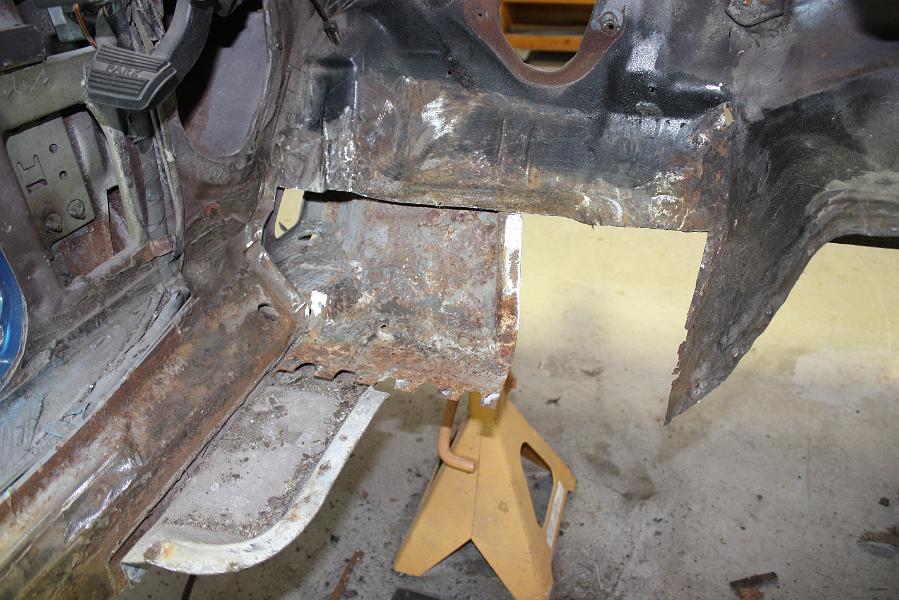
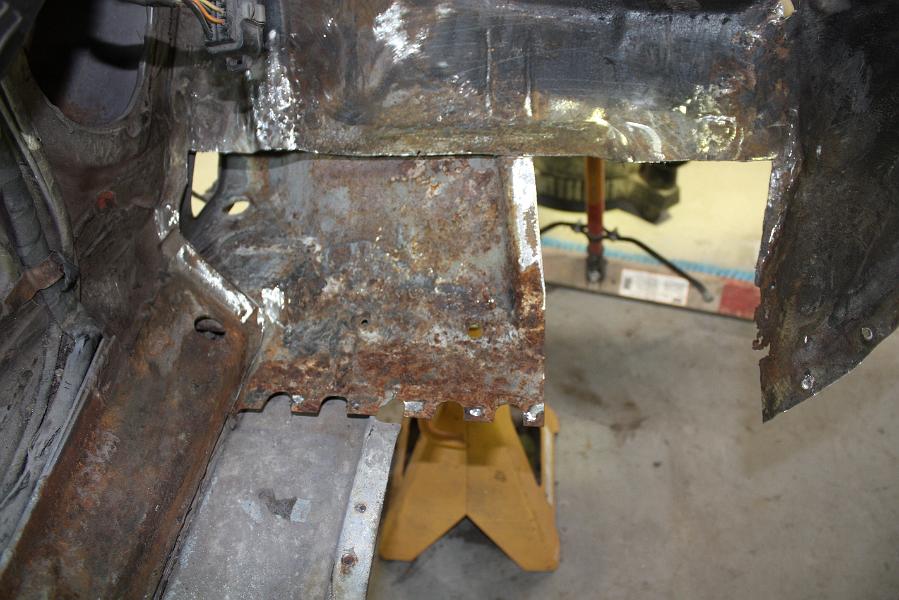
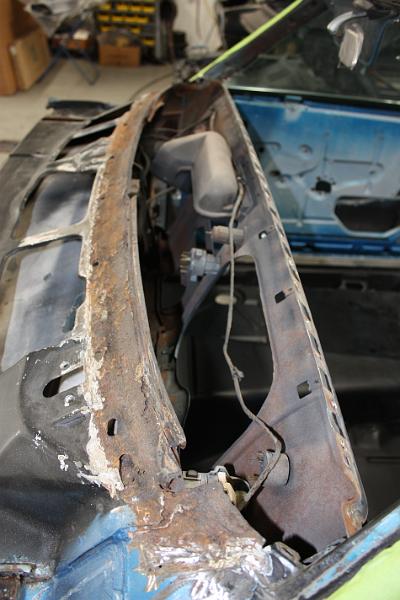
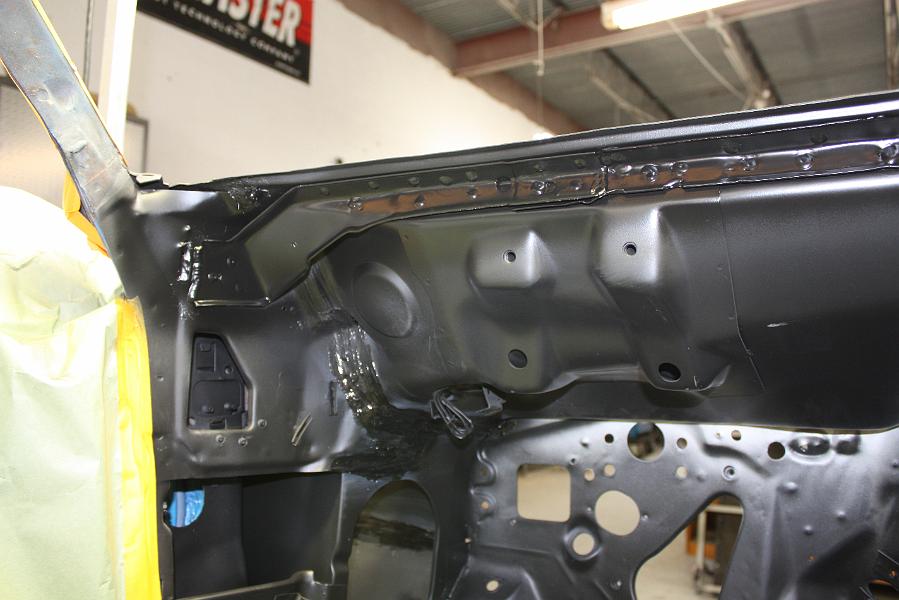
Here's more damage
Side cowl and lower door jamb area
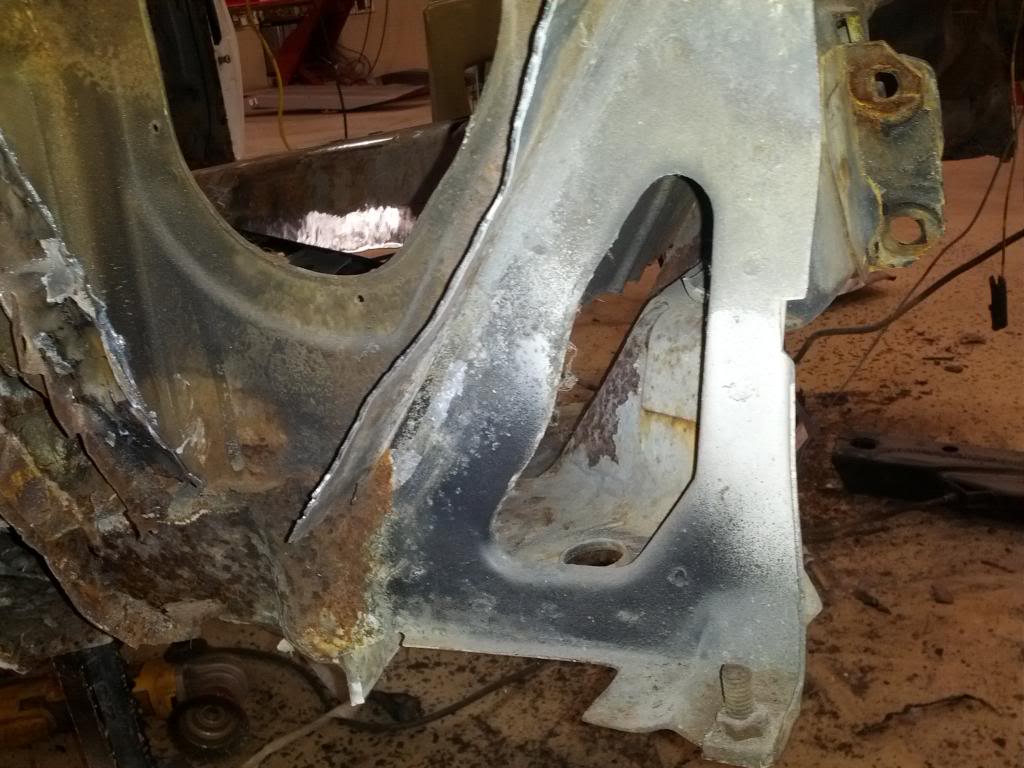
Heater box area
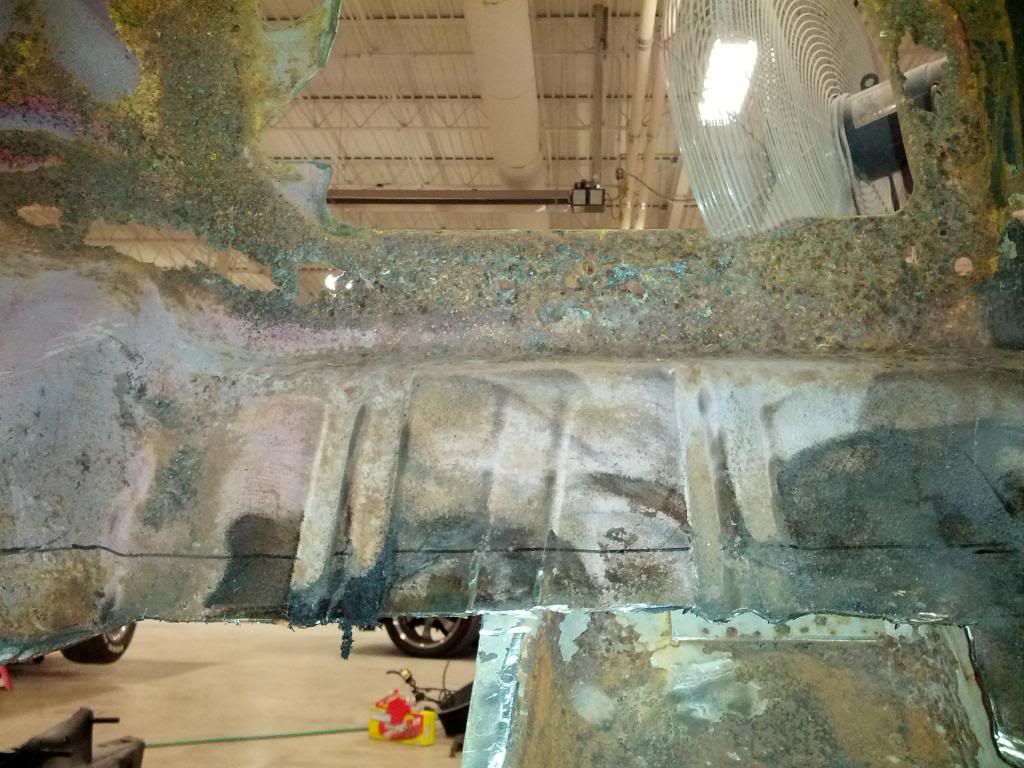
Under the dash. This is the area where the dash meets the cowl. Now there is new metal riveted on top of the rust
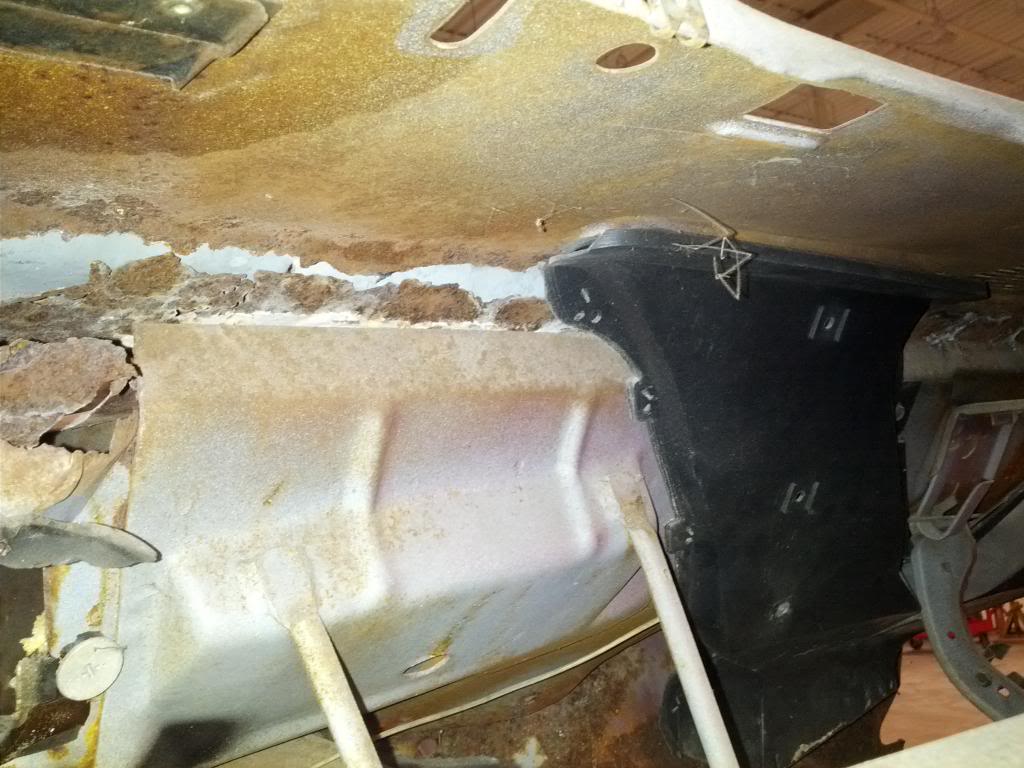
Where the cowl panel vent is under the dash
67 LeMans Convertible
67 GTO
69 Camaro Build Thread https://www.pro-touring.com/showthre...ost-Money-quot
70 Chevelle 400 4spd
70 Chevelle

-
12-11-2012 #42
Registered User
- Join Date
- Oct 2012
- Posts
- 11

wow ..mate this car is really rusty, it needs a firewall and two turlip panels......i hope you can avoid welding new panels to rusty ones,you have really cheap panels over there
12-11-2012 #43
Registered User
- Join Date
- Mar 2008
- Location
- The Piedmont Triad, NC
- Posts
- 373
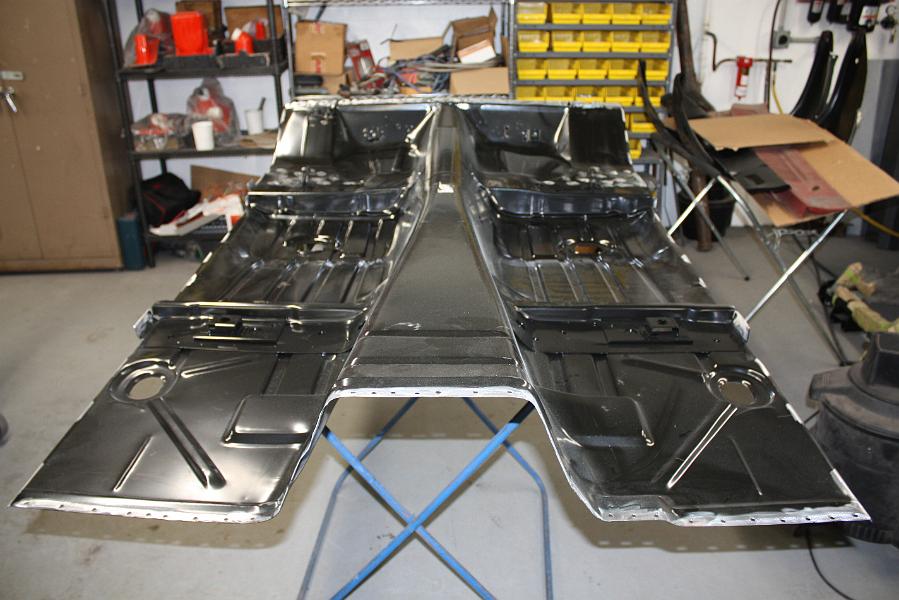
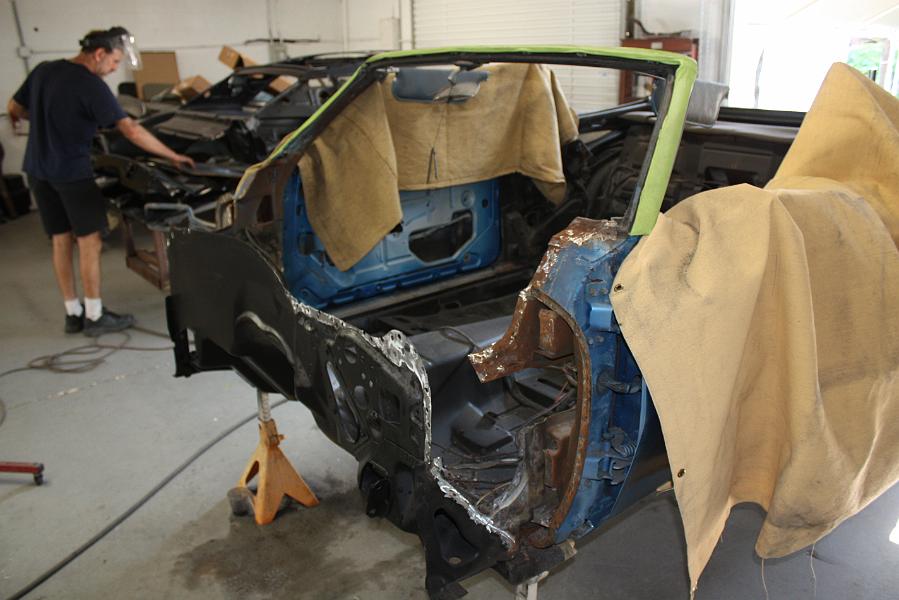
I've taken back the floor pans and toe boards and going the route of a full floor pan, firewall, and cowl panel. I've spend the last two days assembling and putting the car on the jig. Classic muscle is starting to get on my nerves with the hold of up of my cowl panel. I ordered it two weeks ago and they have it but its taken them almost another week to dig it out of their shipping department.
My game plan now is that I'm thinking of cutting the firewall panel out, get the rest of the floor out, out the firewall panel in, the full floor in, and then put the new cowl panel in. Or I may just reverse that and cut the firewall out, slide the full floor pan in, and then well in the firewall and floor, and finally put the cowl panel in. If anyone has any suggestions to make my life easier I'm all ears67 LeMans Convertible
67 GTO
69 Camaro Build Thread https://www.pro-touring.com/showthre...ost-Money-quot
70 Chevelle 400 4spd
70 Chevelle
12-11-2012 #44
Registered User
- Join Date
- Oct 2012
- Posts
- 11
Hi I would wait untill you had the parts, ive run into trouble when ive rushed ahead, this is only what i would do ........once i had the parts i would (BY THE WAY THE GIG IS AN EXCELLENT IDEA YOU DON'T WANT NOTHING TO MOVE) cut the floor out and the fire wall and then fit the firewall and floor together as the fire wall sits on top of the floor pan to make that bottom join(is your firewall complete top and bottom) mate it will all fall into place,just dont weld anything untill it all fits, a cheap way of holding it together is a few self tapers
12-12-2012 #45
Registered User
- Join Date
- Aug 2003
- Location
- Byhalia, MS
- Posts
- 656
In addition to what skyper just posted, I would start at the floor pan. I would not cut out the firewall or the cowl panel until I had installed the new floor pan. You want to fit the floor pan to the original structure of the car. Once you have installed the pan, then you can cut out the firewall and cowl. You can get by without doing any bracing when you cut out the firewall, but when you cut out the cowl, you better have it braced first. Take plenty of measurements before cutting as well.
12-12-2012 #46
Registered User
- Join Date
- Mar 2008
- Location
- The Piedmont Triad, NC
- Posts
- 373
Thanks for the tips guys. I appreciate it. I'm going to pick up the full floor today and hopefully they have my dang cowl panel dug out today. Lucky for me if they can't get my cowl panel, I'll just get a refund, and run down to Charlotte and pick one up from NPD and I've already talked to them and they have it in stock ready to go.
I'm not going to be putting the panels in today but Im going to finish getting out the rear part of the floor and hopefully start tomorrow getting it in place. The plasma and air chisel are going to put some work in tonight.67 LeMans Convertible
67 GTO
69 Camaro Build Thread https://www.pro-touring.com/showthre...ost-Money-quot
70 Chevelle 400 4spd
70 Chevelle
12-13-2012 #47
Registered User
- Join Date
- Mar 2008
- Location
- The Piedmont Triad, NC
- Posts
- 373
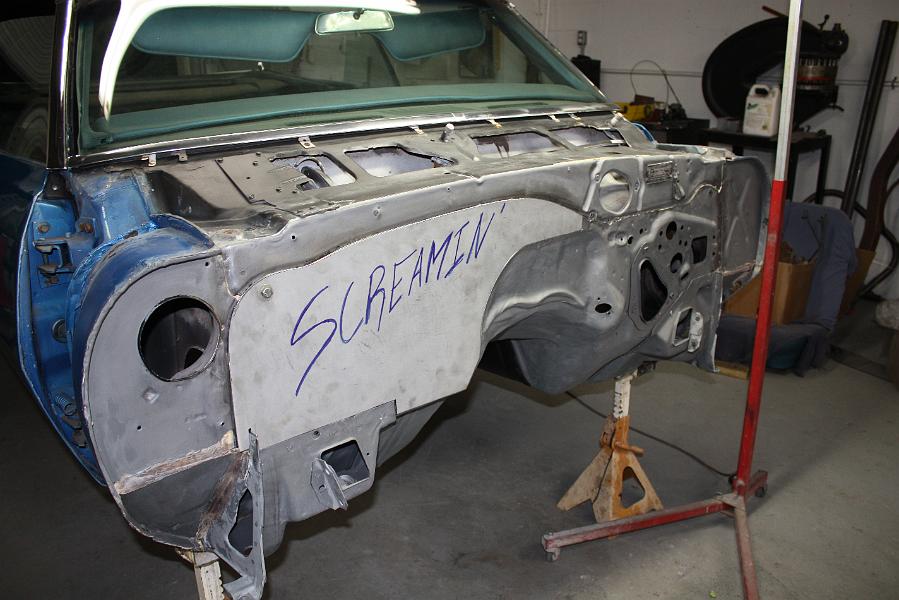
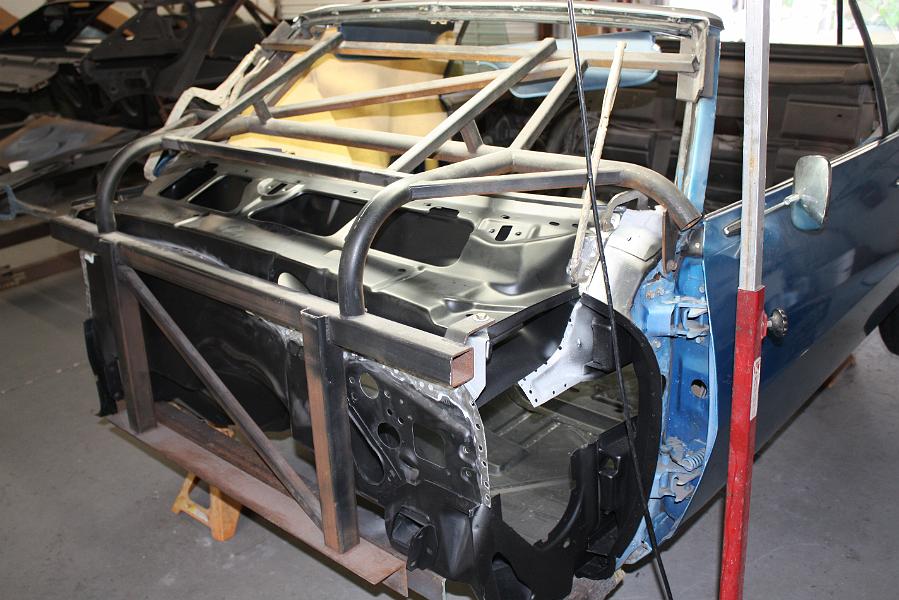
Went to work last night with the air chisel and plasma and got most of the floor out. I am so relieved that the frame rails are so clean.
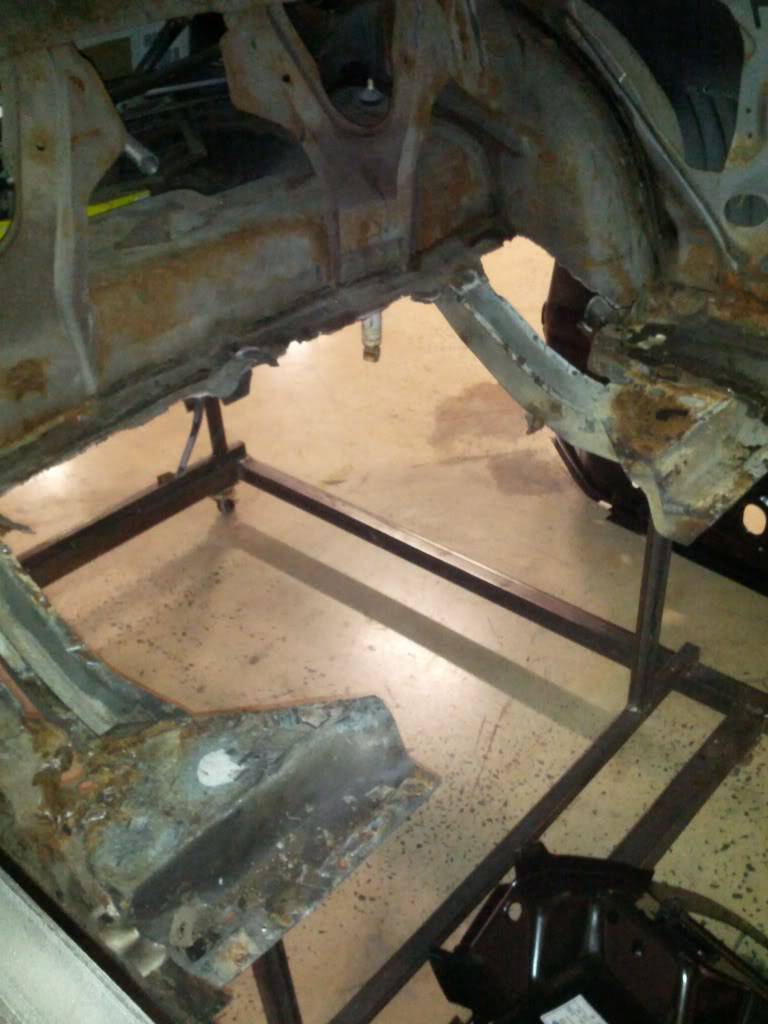
But my new dilemma is this area
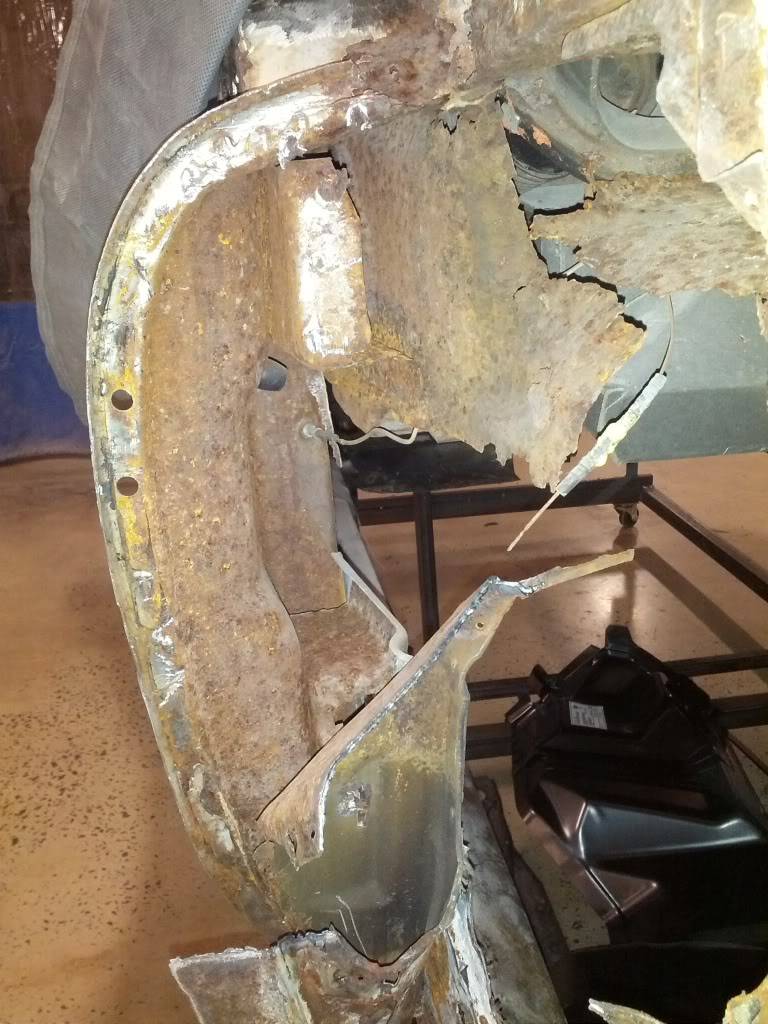
It seems like everything attached to the inner rocker is rusted to hell. The only part of the inner rocker I've found bad was part of the rears connected to the wheelhouse and this on the passenger side
Drivers inner rocker looks solid. I'll get some pictures of the rear tonight.
Anyone got suggestions about the these areas, I'm all ears67 LeMans Convertible
67 GTO
69 Camaro Build Thread https://www.pro-touring.com/showthre...ost-Money-quot
70 Chevelle 400 4spd
70 Chevelle
12-13-2012 #48
Registered User
- Join Date
- Aug 2003
- Location
- Byhalia, MS
- Posts
- 656
The amount of rot this car has makes it a candidate for replacing those affected areas rather than just try to patch them. I certainly hope you have taken reference measurements and properly braced the windshield area, as well as, door jambs and cross bracing from side to side from removal of the floor. If you have not, then you are in for a world of trouble already with what you have removed thus far
12-15-2012 #49
Registered User
- Join Date
- Oct 2012
- Posts
- 11
thats why i asked you did you get the whole fire wall, i would call what is pictured a bulkhead,thats part fo a whole fire wall, just slow down, grind off all them old spot welds......... and unpick where you need to neatly....... and spray all the areas to be welded with a very light coat of primer, mate where ever their is rust get rid of it, make peices and weld them in, DO NOT cut the sill out yet , they are holding your door gaps,..... when you get it all fitted, swing the doors and make sure every thing fits excellent ,not ok .......the front guards swing off the bulkhead thats why this has to fit perfect..............like mako said measurements would have been a major bonus here..... this job should take you weeks to do not days....good luck Allan
12-16-2012 #50
Registered User
- Join Date
- Mar 2008
- Location
- The Piedmont Triad, NC
- Posts
- 373
Yeah I've got plenty of measurements, there is spare camaro at the school thats only had patches I've gotten measurements from. I have bracing in the door jambs and cross bracing, I just haven't posted a picture of it.
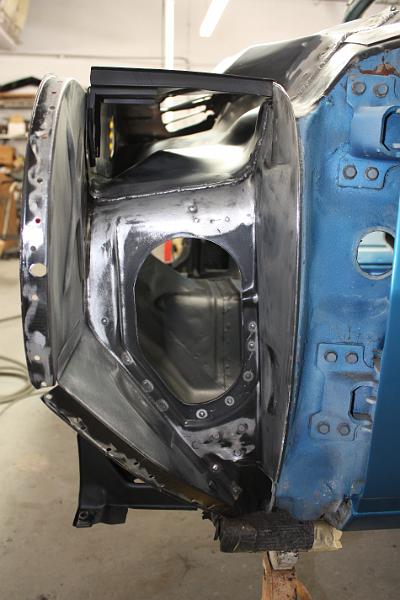
I'm going to be out of school for a few weeks because of winter break but when I get back I'm 90% ready to put the floor in. On Friday, I added more bracing to the rockers to keep them in place when I remove the rest of the floor brace that ties the rocker and rear frame rail together. I'm going the route of replacing everything on the front end, firewall, cowl, pillar/door jamb area. I'm going to put the floor in first, the firewall is next and then from what I can tell I'll need to get the door jambs out. I can't get the cowl side panels or the upper cowl panel in without replacing the jamb panel replaced. I'll have to move my door bracing around so I can mount the doors back on the car to make sure I get the jamb panel back in right.
The only thing I'm going to patch is the passenger side inner rocker. It's only like a 4x2 inch rust area in the front and is solid everywhere else.67 LeMans Convertible
67 GTO
69 Camaro Build Thread https://www.pro-touring.com/showthre...ost-Money-quot
70 Chevelle 400 4spd
70 Chevelle
12-16-2012 #51
Registered User
- Join Date
- Aug 2003
- Location
- Byhalia, MS
- Posts
- 656
Good luck on your build
12-16-2012 #52 Registered User
- Join Date
- Jan 2006
- Location
- Melbourne, Fla
- Posts
- 216
Yeah Knightmare, do it all at the same time! I learned the hard way... did the floor first, worked up towards the toe panels and saw rot... had the firewall smoothed, then noted rot under the dash as well as the tulip panels.... wound up redoing them as well...
Hindsight being 20/20, I would have listened to my guy and started with the dash and worked our way back... I thought I could get away with "40 + years of 'vert rust... to no avail!!
Definitely learned the hard way...
These pics are in chronological order!! Boy, I do love your choice for name of your project! That is the truth amigo!!
Keep up the great work; read a lot from this web forum; continue to ask the questions; "learn" from others mistakes; and most of all, have a good sense of humor and DEEP POCKETS!!
TC
12-16-2012 #53 Registered User
- Join Date
- Oct 2009
- Posts
- 220
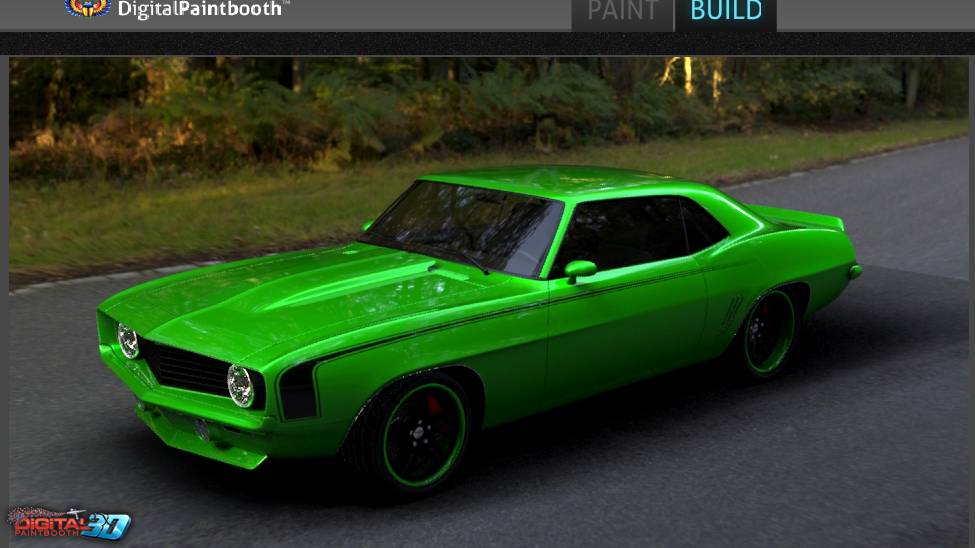
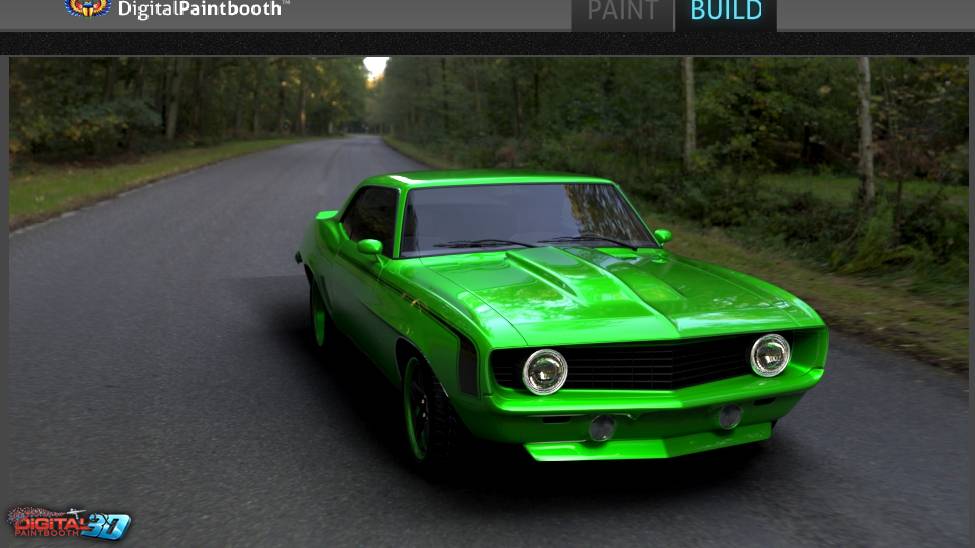
I like the renderings of your car. one thing i may suggest is maybe smoking out the headlights a little because everytime i look at the rendering the headlights are too bright and its taking the rest of the car away from my eyes. again i know this is just a rendering Originally Posted by KnightMare
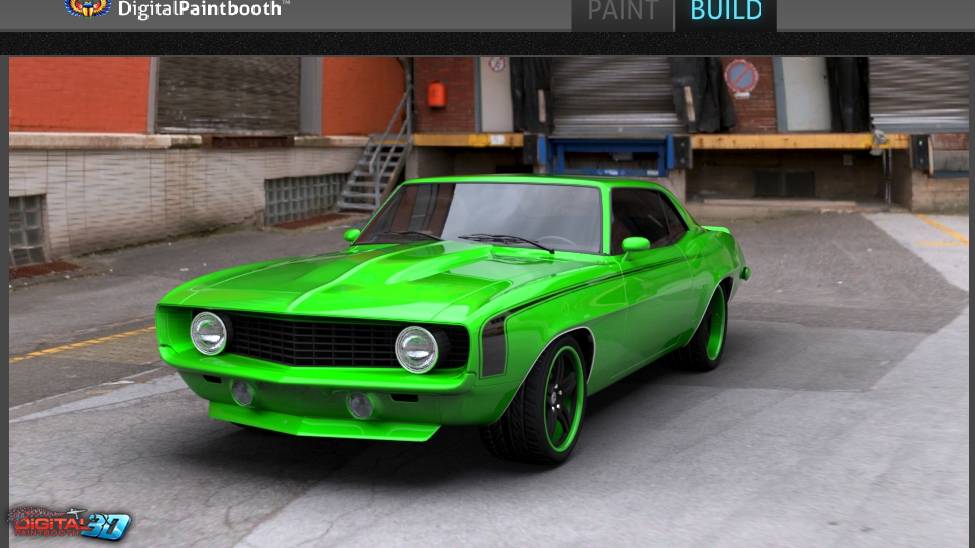
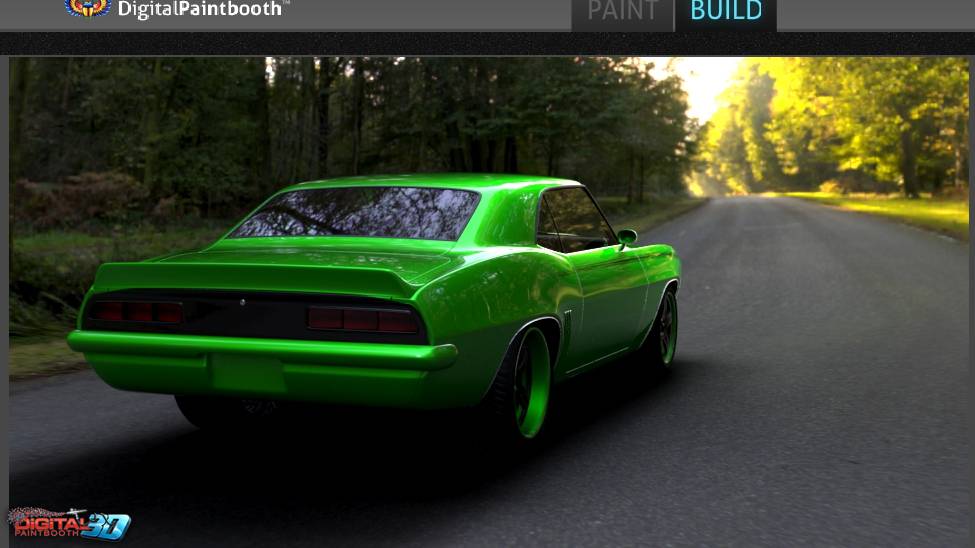
 1969 frost green camaro
LS3
Speedtech pro touring front subframe
ridetech rear 4-link
moser 12 bolt eaton tru trac 3.73
12-16-2012 #54 Registered User
- Join Date
- Jul 2011
- Location
- NC
- Posts
- 461
All I can say is "WOW".... Good luck man! Can't wait to see that one cruising around Raleigh!
12-16-2012 #55
Registered User
- Join Date
- Oct 2012
- Posts
- 11
Hi .......are you doing this at what we call in Australia a tech college(A PLACE WHERE YOU LEARN A TRADE), you sound like you have a plain and all the gear, i would not touch the hinge pillar if i could avoid it, car't you unpick new peices to weld to the old, or is the pillar rusted,..... i don't fill good about that at all unless you have a teacher with you that knows what their doing...... or are you a very skilled man yourself , any way keep keen... Allan
12-16-2012 #56 Registered User
- Join Date
- Oct 2012
- Posts
- 132

So much work but what you have done so far looks so good!!
Gordon in Calgary
12-30-2012 #57 Registered User
- Join Date
- Jul 2010
- Location
- OREGON
- Posts
- 365
Holy rust bucket batman... I sure hope you get her back together but damn I am spoiled being able to get cars from cali...
12-30-2012 #58 Registered User
- Join Date
- Dec 2012
- Location
- Las Vegas, Nevada
- Posts
- 109
Wow that is really messed up that people make such crappy halfazzed repairs to hide that much damage ... i'd have ended up in jail for beating the guy who did all that and then had the nerve to sell it to anyone . at least you have the right place and tools to do the work correctly so that it will be safe to drive once again. keep up the good work you will be glad you did when its finally finished .....
01-07-2013 #59
Registered User
- Join Date
- May 2009
- Location
- Minnesota
- Posts
- 615
Any updates? I would like to see how it is coming along.
01-10-2013 #60
Registered User
- Join Date
- Mar 2008
- Location
- The Piedmont Triad, NC
- Posts
- 373
I'm loaded up ready to get to work on the car tonight.
I haven't been able to work on the car only because it was winter break these last few weeks. Last night was the first day back and now tonight I'm going jump right into it. I just got off the phone and ordered another batch of parts. I got an idea of how I'm going to start replacing all these parts. Here's my order I was thinking about:
1. Replace inner rockers
2. Put in the full floor
3. Replace lower firewall
4. Replace upper cowl panel
5. Replace side cowl panels
6. Replace door jamb/pillar panels
7. Replace Outer rocker panels
That should everything for the front of the shell, then I'll move to the rear67 LeMans Convertible
67 GTO
69 Camaro Build Thread https://www.pro-touring.com/showthre...ost-Money-quot
70 Chevelle 400 4spd
70 Chevelle

 Reply With Quote
 Tango Charlie