Results 41 to 60 of 186
Thread: camaro nose el camino update
-
10-12-2012 #41

 Registered User
- Join Date
- Aug 2008
- Posts
- 189

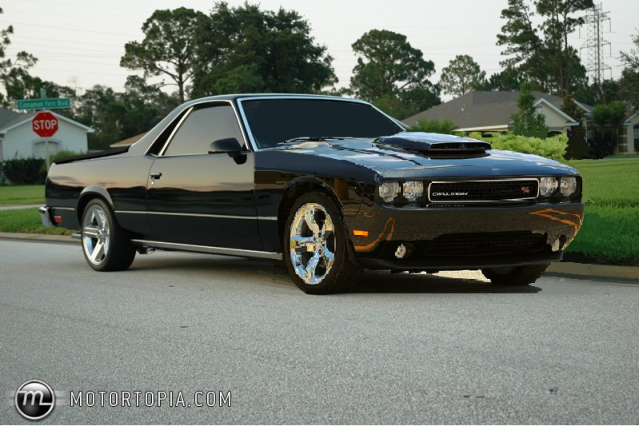
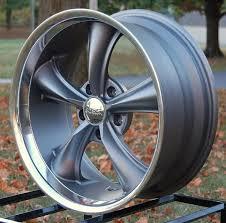
Even if you can't afford a set of new Camaro wheels, you can't go wrong with Boss 338's in grey.
-
10-12-2012 #42 Registered User
- Join Date
- Apr 2008
- Location
- Slaughter,LA
- Posts
- 68
Here u go JL I got ur back!!!
10-12-2012 #43 Registered User
- Join Date
- Jun 2012
- Location
- South Lyon, MI
- Posts
- 1,217
Are you sure it's legal to mix Chevy and Dodge body parts like that? I think it may break some laws of nature. Originally Posted by Trans
 Bill Harvey
Scope Creep - 1974 Nova - https://www.pro-touring.com/showthre...rit-of-America
Family Fun - 1955 Belair - https://www.pro-touring.com/showthre...hter-55-Belair
10-13-2012 #44 Registered User
- Join Date
- May 2006
- Location
- Rhode Island
- Posts
- 676
Originally Posted by cornfedbill
But the lines sure do fit nicely!!!!!
10-13-2012 #45
Banned
- Join Date
- Aug 2012
- Posts
- 82
biter Originally Posted by whayden2003
10-15-2012 #46
Registered User
- Join Date
- Oct 2012
- Location
- Toledo,OH
- Posts
- 10
I love the out of the box idea and I know first hand how much work that is. I did a gen 3 camaro nose, camaro tail on my nova. One option you may consider 2012 camaro tail lights into the tailgate?

10-15-2012 #47 Registered User
- Join Date
- Aug 2008
- Location
- jacksonville,fl
- Posts
- 970
Chad that thing looks like something you 'd see in austrailia built by GM's holden division. Take it as a compliment, they have some pretty cool road race cars down there.
As far as camaro tailights in an el camino tailgate, I'd probably have to give the tailgate a bunch of shape to blend with that look & cut off most of the inside housing depth & make something with led's. Just don't see it looking right. Now in the bumper, they look very similar to the 73-77 ' el camino bumper lites. That could be a later possibility.
By the way, most of my rear bumper is from a Nova. It was a first try at a custom bumper. I have a tucked steel el camino bumper I may modify for the rear.
10-15-2012 #48
Registered User
- Join Date
- Aug 2008
- Location
- jacksonville,fl
- Posts
- 970
If you're seriously considering doing something that looks like this, I,d start with a fiberglass tucked bumper. Someone if south Fl makes one that has a rolled skirt look similar to the challenger. Then you could cut open the g- body fiberglass front fascia & retrofit headlights to get the look you want. Adjust the front upper edge to look similar to the challenger's, remove the v-shaped peak from the fascia'a leading edge. & make something for a grille. Originally Posted by Trans
This would give you a custom look that I,d think would look awesome,but without directly looking like you fit an actual challenger nose to it, you'd just be borrowing some of the coolness from it.
By the way,Approx $300 was justnew camaro parts only . buying a hot air welder& supplies, misc material to make headlights, materials to connect everything,etc,etc, body shop supplies probably put the entire project closer to $1,000. the little crap adds up.
And Mr vengance dude, If you can't tell from the small picture that was a plus size girl, maybe you need to spend more time in closer proximity to women. Just sayin.
10-15-2012 #49
Registered User
- Join Date
- Nov 2010
- Location
- Wharton, Tx
- Posts
- 113
Can't view pics on phtobucket where I am right now, and connection is too slow for vids, so subbing in to check this out when I get back home.
10-15-2012 #50
Banned
- Join Date
- Aug 2012
- Posts
- 82
Originally Posted by jlcustomz
I think that you need to elaborate on how you molded the fenders and hood if its the stock hood.Post pics of the fabrication work you did to make the front fit. As far as a chellenger front end,the easiest thing to do would be to probably get the complete front clip and making mounts to mount it then just modify the fenders and hood to match the front clip"s profile.
10-16-2012 #51
Registered User
- Join Date
- Aug 2008
- Location
- jacksonville,fl
- Posts
- 970
Didn't take many pictures during construction, most of this nose construction was done by dec, 09'. This was before my posting online days started.
The factory fenders kept the same up & down profile as original, they were spaced out 3/4" at the battery box mount location, the lower flange was cut off to straighten the lower curvature, then re-flanged
3" approx was cut from center of camaro nose & grilles, then welded back together with a hot air gun & plastic ribbon. On the top, I originally cut around the mailslot to filly retain it. The fender edge of the camaro nose was repeatedly trimmed in spots, while others were filled & extended.. I cut wood forms for each side to heat & reprofile the side curvature of the new nose.These wood forms were then needed to retain the shape while attaching & reinforcing flanges were welded in.
Grilles had to be rewelded in centers. Took the rear section of a regal g-body bumper & attached new metal to the front to hold the crash protection part that supports the new nose.
I decidedto make a rough mold of the upper fascia & make it into the fiberglass hood with a real scoop opening instead of the mail slot. then came about the creation of the lifting hood mechanism after not wanting to use my previous forward tilt hood setup with the pointy nose.
This was a small description of what was involved, it can take a lot of subtle changes to make such a project look right. A nose meant to just bolt up to the exact stock el camino dimensions would never look just right.
If anyone thinks they can get a totally different front & JUST modify a few things to fit, have at it. Show me when you're done.
This is the only other new camaro nose conversion I know of to date.
http://www.youtube.com/watch?v=5gI8g...eature=related
10-30-2012 #52
Registered User
- Join Date
- Aug 2008
- Location
- jacksonville,fl
- Posts
- 970
Got one side of new steel rocker extensions mostly mocked up.Changed wheelwell openings, tightened upappearance of lower door gap, also engineered out the need to have the door panel extension angled in to clear the fender when opening.
BEFORE
10-31-2012 #53
Banned
- Join Date
- Oct 2012
- Location
- USA BABY!
- Posts
- 9
Nice project,those sideskirts are huge! Originally Posted by jlcustomz
11-08-2012 #54
Registered User
- Join Date
- Aug 2008
- Location
- jacksonville,fl
- Posts
- 970
Here'a a pic of the rear quarter mock up.
They are partly to widen the body & make it look lower without the rockers themselver looking tall. Should look much less obvious after a little black paint.
11-09-2012 #55 Registered User
- Join Date
- Apr 2006
- Location
- Atlanta GA
- Posts
- 7,477
i cant quite tell from the pics cause lack of angle and relation to the front bumper BUT i think you are headed in the right direction..
the new camaros bumper has a few geometric angles at the bottoms so it could work... just make sure you finish them out, paint them temporary primer black(if you show us sooner than later) then paint it gloss.
gammbattene.
11-09-2012 #56 Registered User
- Join Date
- Jan 2005
- Location
- Boonville, Missouri
- Posts
- 924
I like the new sides - I think you nailed it in terms of design. You need to "Chunk" up the bottom to gain the width of the front. Keep it up!
11-09-2012 #57
Pro-Touring Veteran
- Join Date
- Nov 2006
- Location
- Washington, MO
- Posts
- 2,363
Those look great... Originally Posted by whayden2003
11-09-2012 #58 Registered User
- Join Date
- Jan 2006
- Location
- McKinney, TX
- Posts
- 1,625
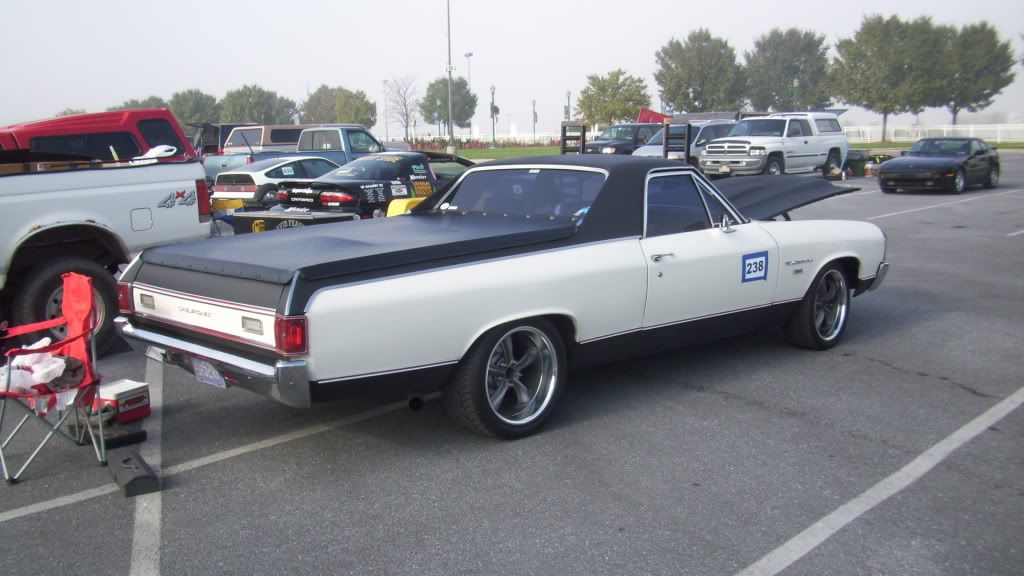
Neat idea, but that bed cover is killing the whole look of the car. I like where your going with it and the fab skills are nice.
66 Mustang "Project: Ballin on a budget"
89 Mustang "Box Wine"
11-10-2012 #59 Registered User
- Join Date
- Jul 2005
- Location
- Bay Area
- Posts
- 1,085
Wow after seeing this rendering
I would love to add that front end to my wagon. Heres a photochop of what I would eventually like to achieve.
Can someone add the stock Camaro wheels for me.Jose (Joe)
1963 Nova SS Convertible
1978 Malibu LT1/4L60E
1978 Malibu Stock
1983 Malibu Estate Woodie Wagon
2007 Harley Dyna SB
11-10-2012 #60 Registered User
- Join Date
- Aug 2011
- Location
- Clearwater/FL
- Posts
- 512
I think a 69 rs nose could look sweet on there Originally Posted by CRCRFT78
 85 monte, drift project- small block t5 and 8.8
88 Blazer sbc
05 300c

 Reply With Quote