Results 101 to 114 of 114
-
04-17-2016 #101

 Registered User
- Join Date
- Mar 2008
- Location
- Indiana
- Posts
- 250

Project Goldilocks '66 Chevy C10 Resto-Mod/Mild Pro-Touring Build
I am going to run 11" wide front wheels and 315's on my 66, what are you going to do about a swaybar? I don't think the ridetech bar is going to work. Just curious if you got that far. Thanks
Aarik
68 Camaro LS2/T56, Jake's Rod Shop C6 Subframe, JRS torque arm. Ridetech TQ Shocks
-
04-17-2016 #102 Registered User
- Join Date
- Jun 2012
- Location
- Upstate SC
- Posts
- 95
The sway bar tabs on the Porterbuilt arms wouldn't clear with the 12's I test fit, and they're close with the 9.5's are close at full lock. I was going to run a splined bar so I could shape my own ends to fit everything after relocating the sway mounts on the LCA. I might not even run away bars, or maybe use very light bars. I'd like to try to increase the roll resistance using different height and stiffness bump stops. Both the Miata and Festiva use progressive rate bump stops to control body roll. Originally Posted by Hugger67RSSS

05-23-2016 #103 Registered User
- Join Date
- Dec 2012
- Location
- Las Vegas, Nevada
- Posts
- 109
great build your doing , your attention to detail is spectacular i might add... I have a 94 C 1500 that i am running 335/35/19 on
19 x 12 Z06 wheels on all 4 corners with no rubbing. looking at how big those BFG's look on the front makes me smile! square
set-up is the only way to go for autocrossing! Hope you get your building done soon so we can see you out enjoying your truck soon
GREAT BUILD!
12-17-2016 #104 Registered User
- Join Date
- Oct 2012
- Location
- Alton, IL
- Posts
- 8
I would like some info about caliper brackets. I even already have the calipers Originally Posted by theastronaut
12-30-2016 #105
Registered User
- Join Date
- Apr 2010
- Posts
- 96
WOW. Great build. Your vision AND fab skills are awesome!!! I caint wait to see this finished. so...... HURRY UP !
LOL
01-02-2017 #106
Registered User
- Join Date
- Jun 2012
- Location
- Upstate SC
- Posts
- 95
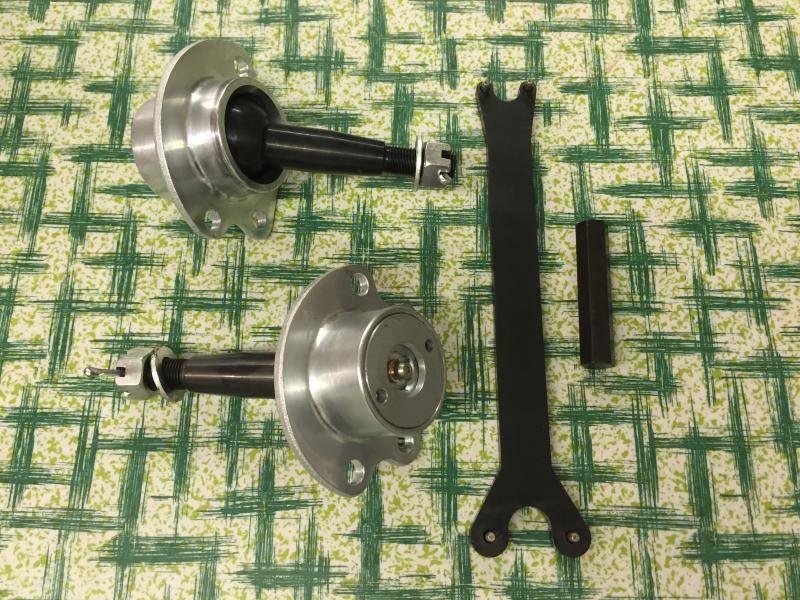
The truck has been pushed over in the corner for over a year now, and I never got around to having a set of brackets made. I may end up swapping to Wilwood's new ProSpindles instead since they're a lot lighter. Originally Posted by Rexarmy
Thanks!! Expect to see some updates this year. I have one of my other bigger projects done and sold as of last week so this one is getting closer to the top of the "to-do" list. Originally Posted by Jimbo1367
01-04-2017 #107
Registered User
- Join Date
- Dec 2012
- Location
- Las Vegas, Nevada
- Posts
- 109
Has it been that long WOW ... Looking forward to some updates soon.. for your brake caliper brackets try calling tobin at KORE3 ..i have number if you need it (541)924 5673 good luck Originally Posted by theastronaut
07-01-2019 #108
Registered User
- Join Date
- Jun 2012
- Location
- Upstate SC
- Posts
- 95
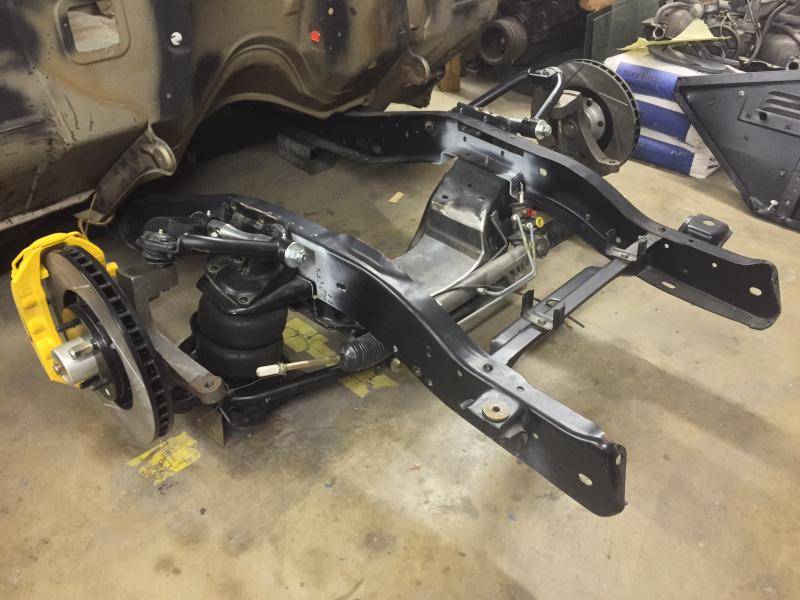
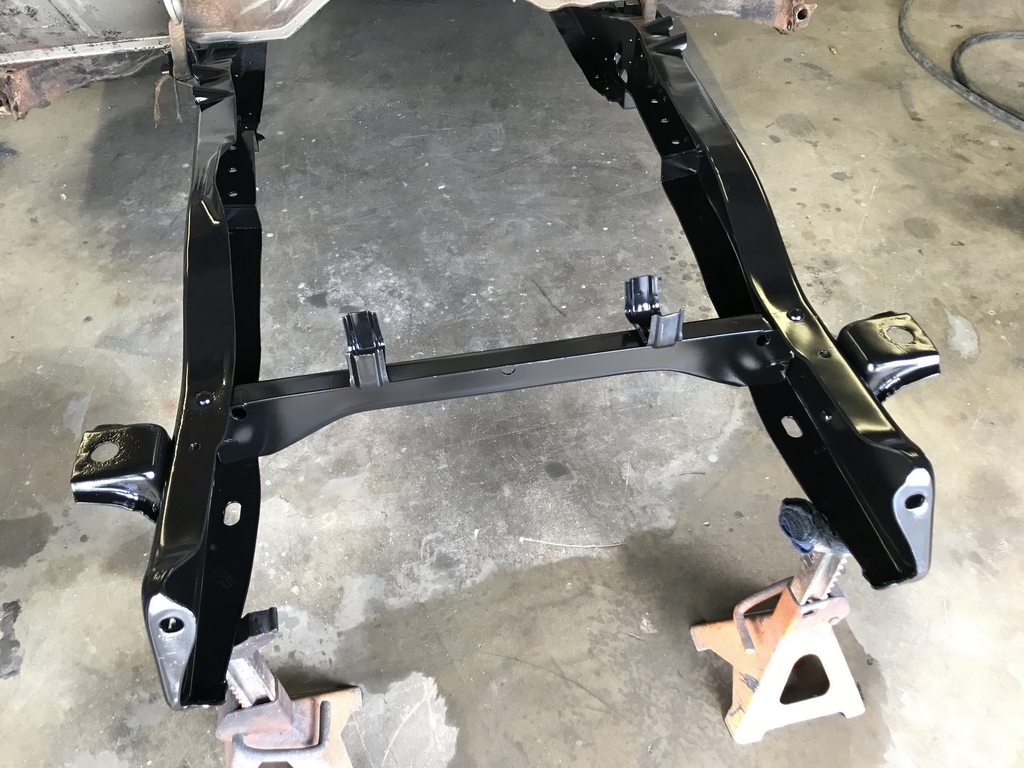
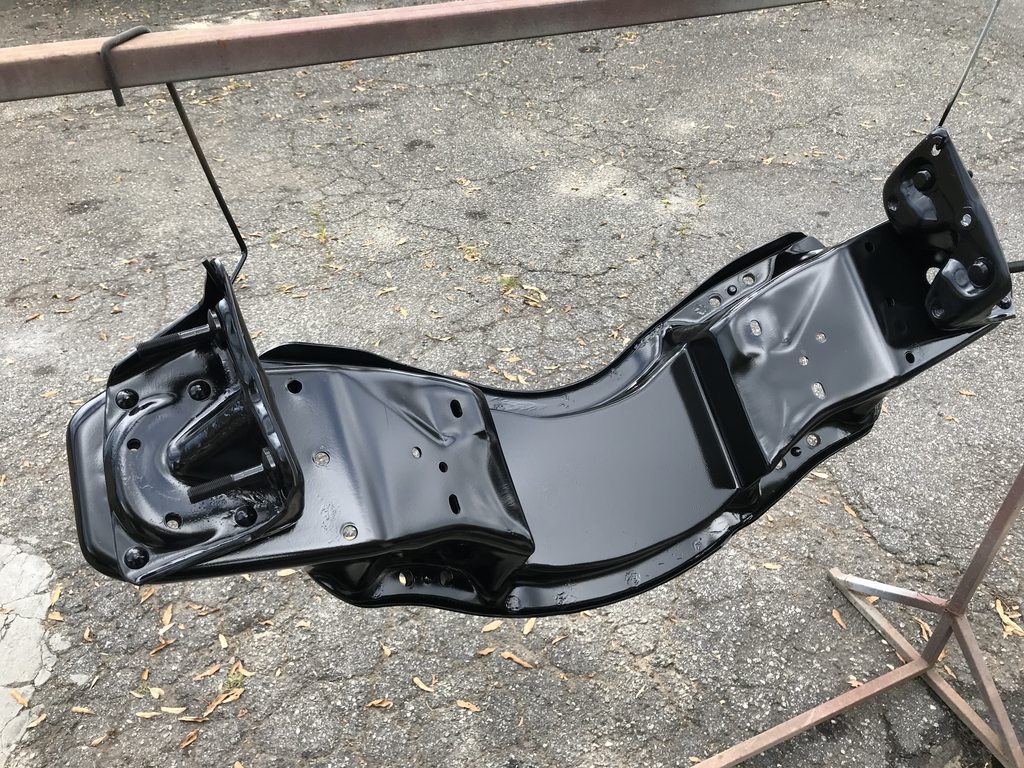
Back from the dead... I cleaned out the corner of the shop the truck is parked in a few months ago to get ready to start back on it. I've got all week off so I wanted to get the front crossmember finished and make a plan for the rear suspension.
I pulled the engine and trans back in May to sell the T56- I decided to go with an AR5 5 speed from a Colorado instead. They're reportedly just as strong, don't take up as much tunnel space, the shifter location is better for a bench seat, and they're only around $300. Fabbot makes an adapter that uses a 4l60e bellhousing to bolt the AR5 up to a LSx. I can buy the adapter setup from Fabbot, an LS7 clutch kit, the trans, T/O bearing, and lines for around $1200 bucks. The T56 sold for $2k by itself so I'm money ahead now, and especially money ahead if I ever blow up the trans from beating on it. I'd much rather replace a $300 buck trans than a $2k trans!
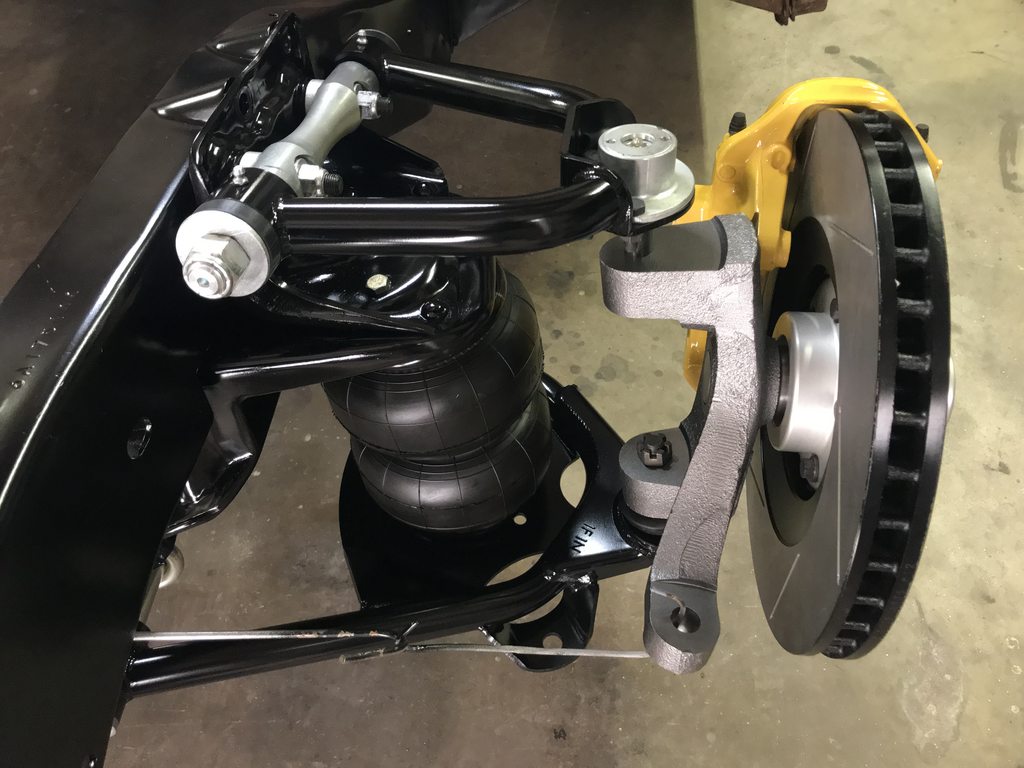
Saturday I blocked the truck up at ride height (4.5" at bottom of the rails under the cab) and took measurements of the bag height, then I dissasembled everything to make patterns for the upper bag mounts.


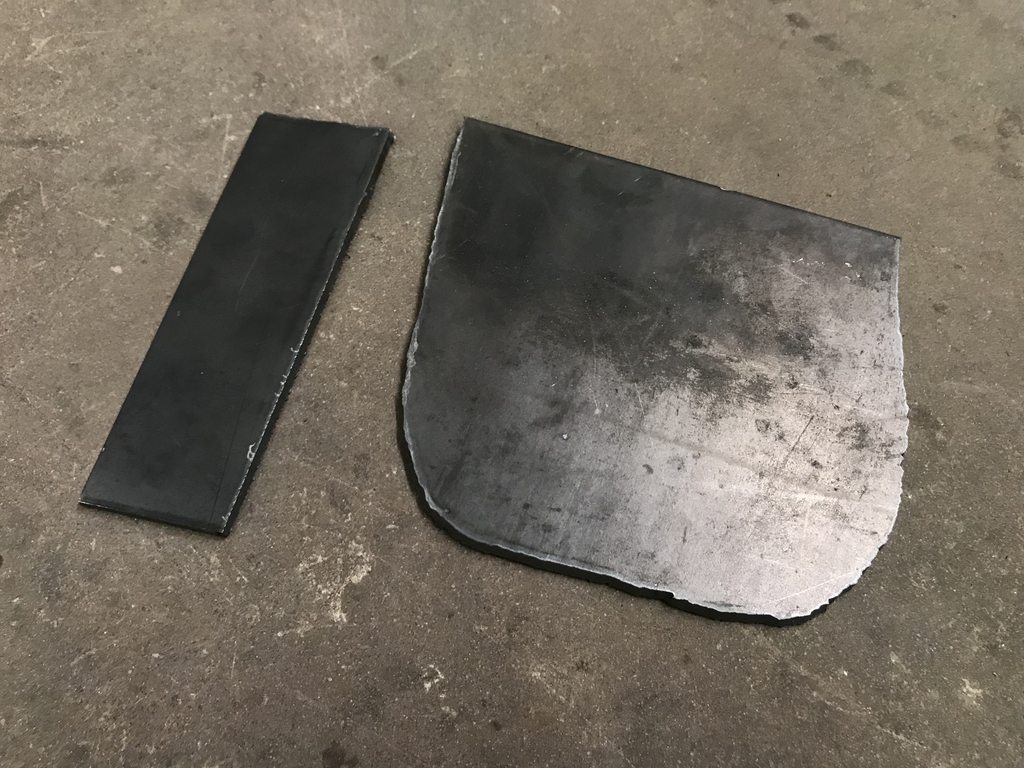
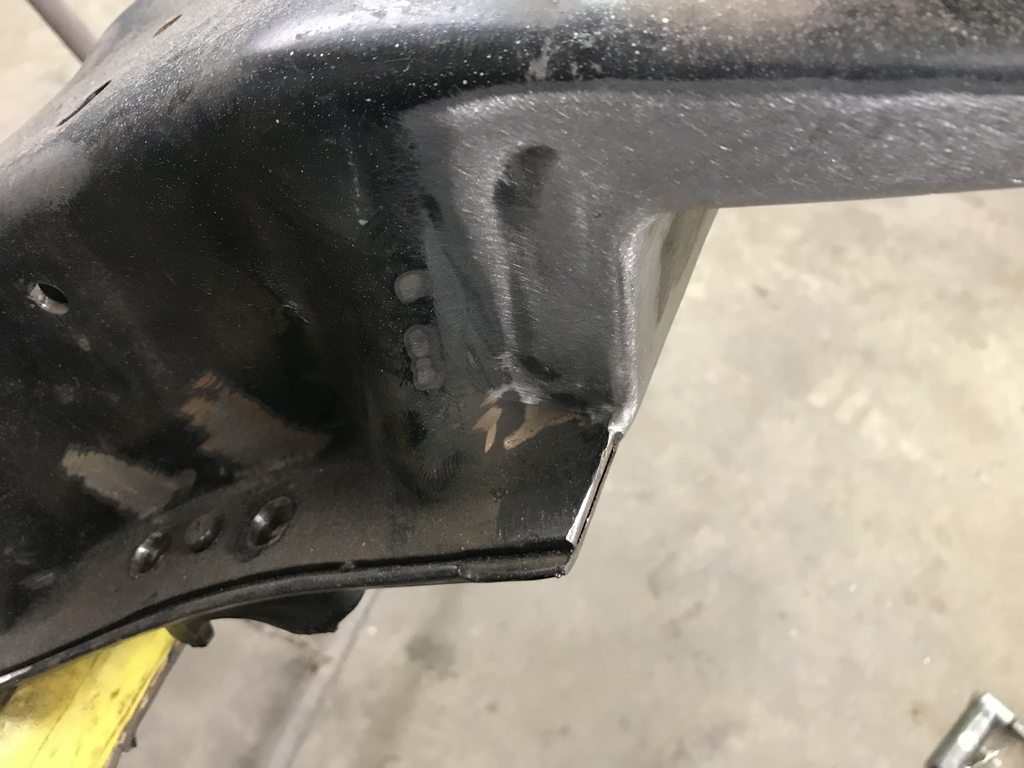
I opened up the hole that's in the coil spring retainer for the air line and fittings to pass through, then welded in the plates.
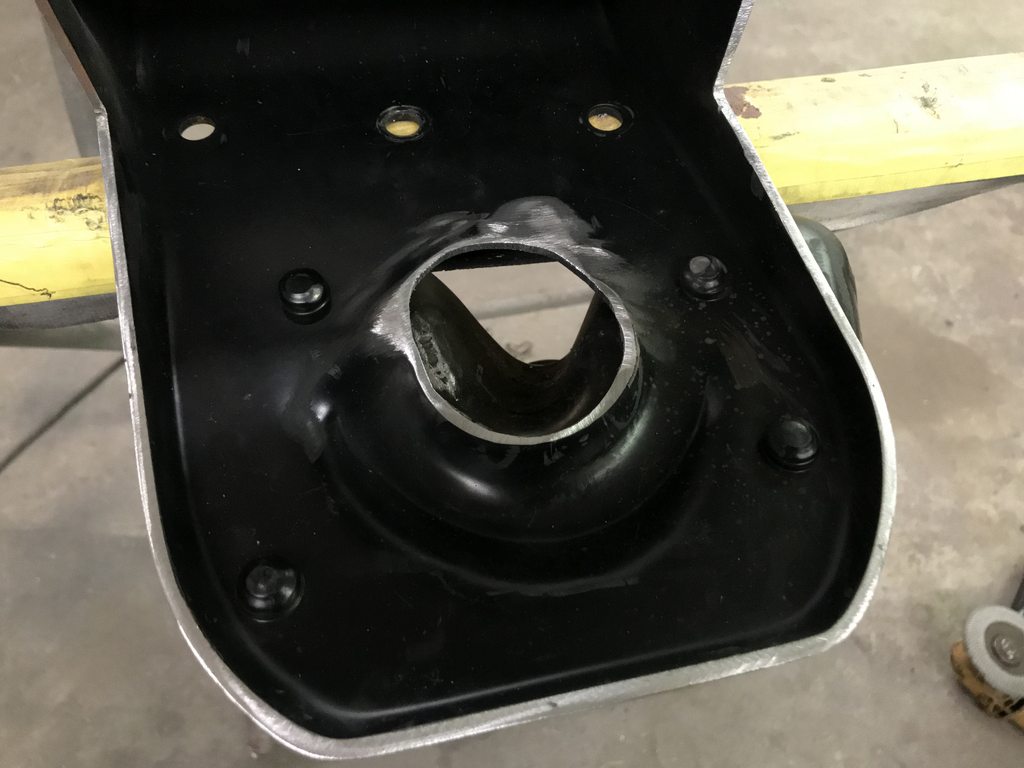
Bag bolted in, its about 7.75" tall at ride height, a little over 2" taller than just bolting in bag mounts to the stock crossmember. This should let me run more pressure at the same ride height to increase the spring rate. If it's too stiff I can add spacers between the bag and LCA to drop the pressure/spring rate. I'll finish the other side tomorrow, then weld up any extra holes and prep it for paint.
07-01-2019 #109
Registered User
- Join Date
- Jun 2012
- Location
- Upstate SC
- Posts
- 95
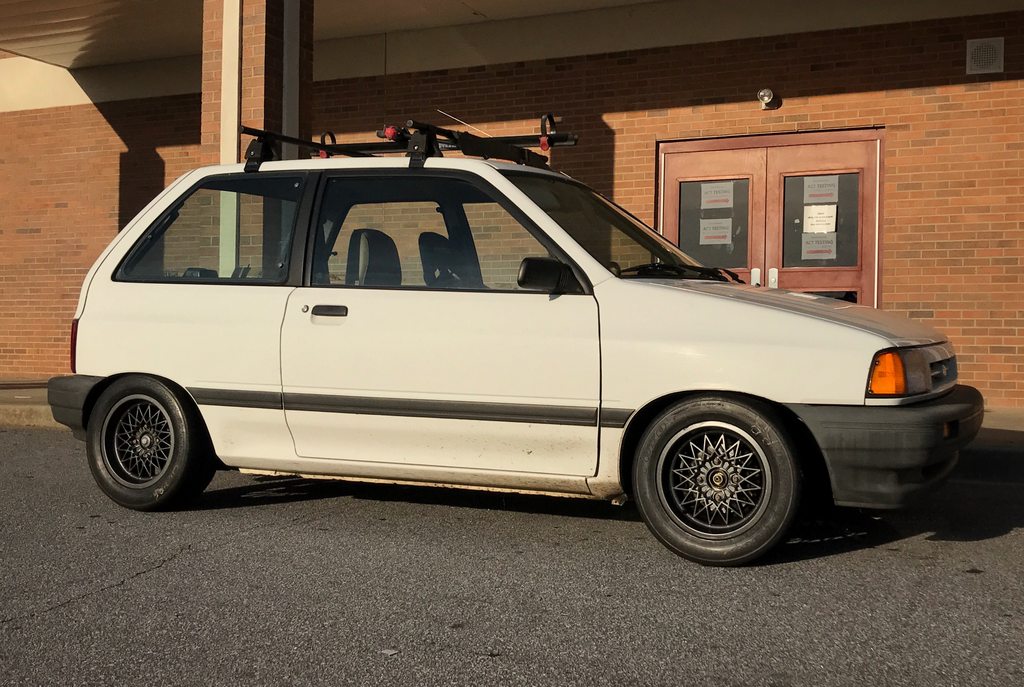
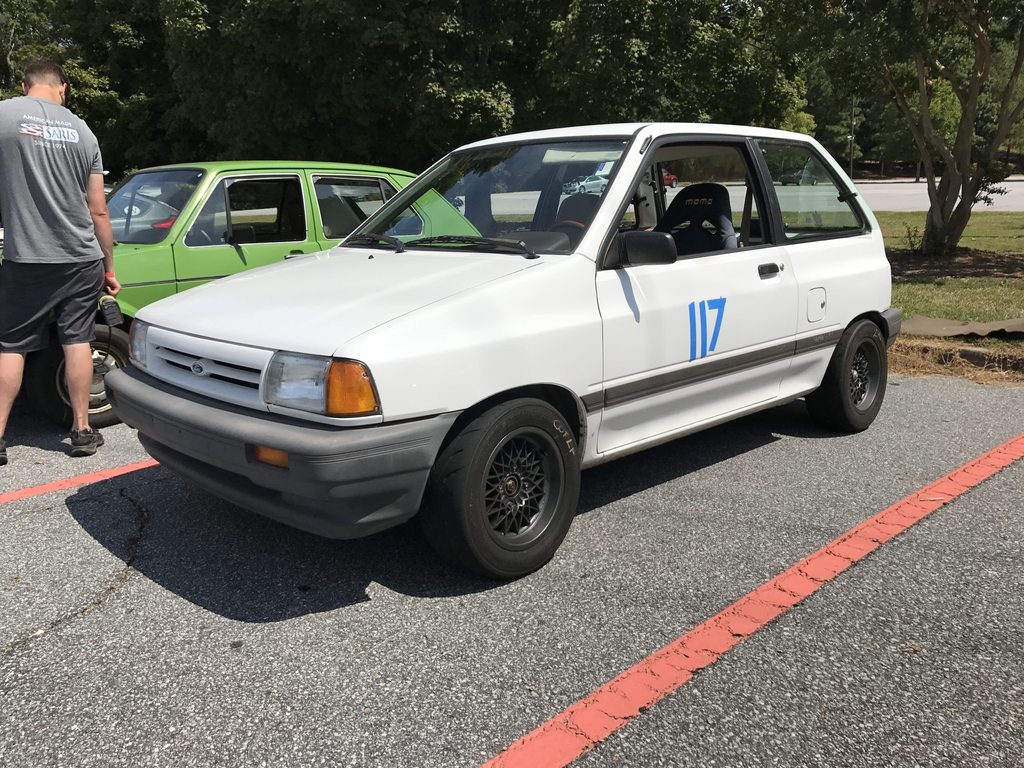
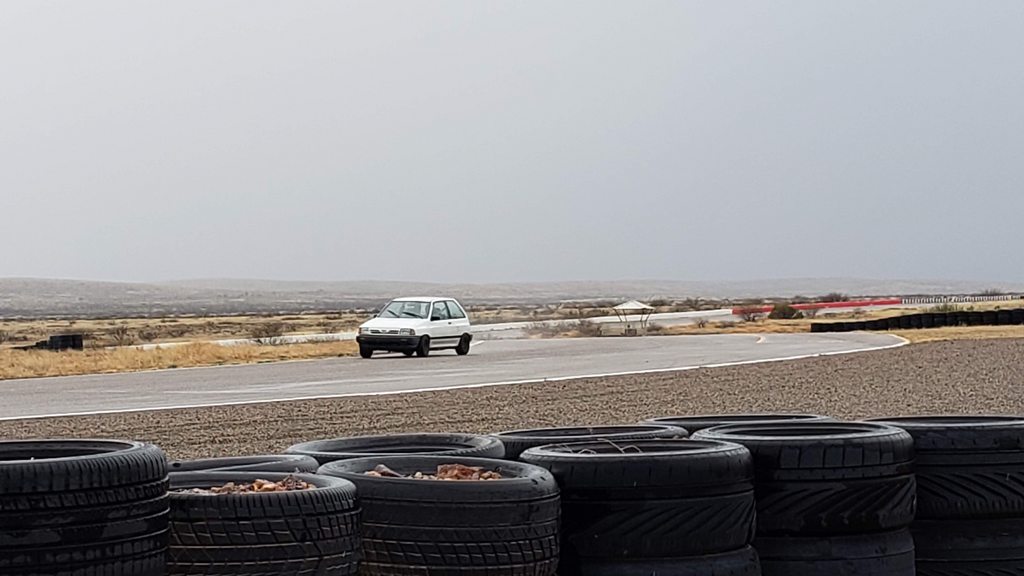
So a lot has happened in the 4-5 year break on Goldilocks. My plan was to build this thing for autocross and track events... that's probably not going to happen now. I posted about the Festiva earlier in the thread... it just doesn't make sense risking an accident on the track with the truck now that I have a car that is track capable and cheap/easy to repair/replace if it gets busted up on the track. I'll still autocross the C10, but probably won't do any big track events with it. I started a build thread for the Festiva and if you read it you'll be amazed at how ridiculously well it handles- 1.3+g on $500 buck tires. I know the C10 will never do that well so there's no point in trying to go slower than a Festiva on a road course in a truck that would be impossible to replace if something happened to it. I've learned a ton about chassis setup, track prepping a car, and what to look for to make a car handle well by building and thrashing on the Festiva. A lot of that info can be used to make the C10 handle better.
Build thread:
http://67-72chevytrucks.com/vboard/s...d.php?t=727205
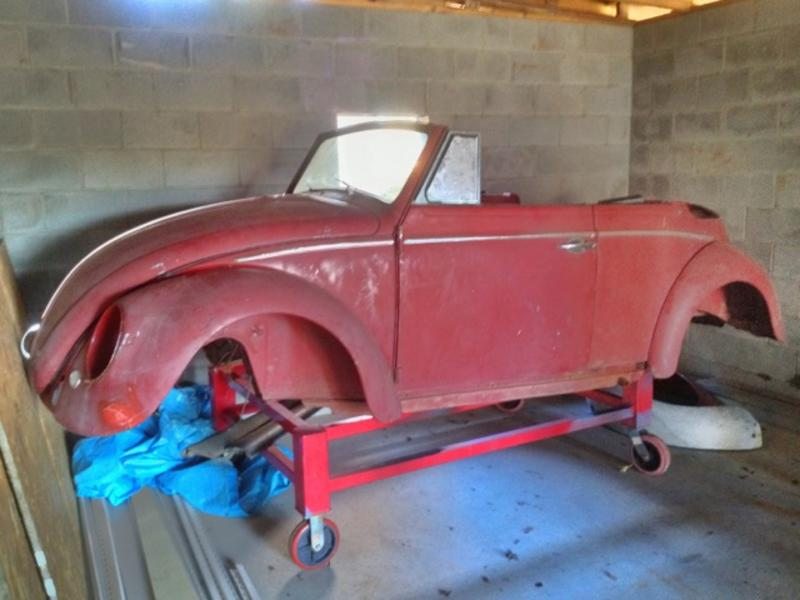
I did a frame-off resto on my '63 VW two years ago. I've had fun with it but want to focus on my '64 VW instead so it will probably be posted on Bring A Trailer soon.
I also was able to acquire my granddad's '64 C10. I'd like to have it back on the road this fall.

07-03-2019 #110
Registered User
- Join Date
- Jun 2017
- Location
- Edgewater Co.
- Posts
- 150
Thanks for bringing this thread back, I hadn't seen it before, love the build. In the late 70's early 80's I had a '63 panel, I did something similar in the front, instead of notching the frame, I notched the crossmember, everyone that rode in the truck were amazed at how well it rode. after a couple of years, I set the body on a '77 Elcamino frame.
"Life is what happens while your making plans for the future" Joe
07-05-2019 #111
Registered User
- Join Date
- Jun 2012
- Location
- Upstate SC
- Posts
- 95
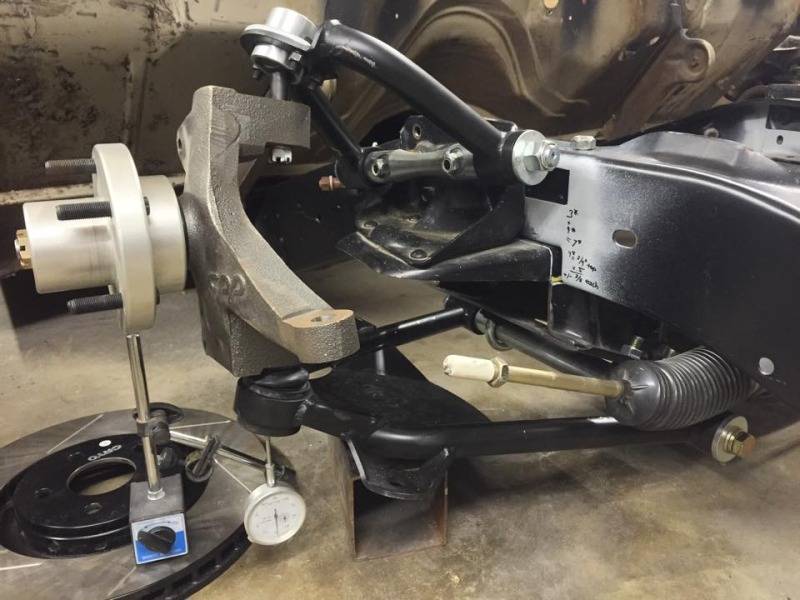
Thanks! I had another '66 that had a the stock crossmember with 2.5" spindles and 1.5 coils cut off the original springs. With relocated shocks and the bump stop brackets removed it rode and drove great but ran out of travel too soon at the height it was at. So this way I have room to mount the rack and pinion and get the bottom of the crossmember level with the bottom of the frame rails under the cab. Originally Posted by Motoracer838
- - - Updated - - -
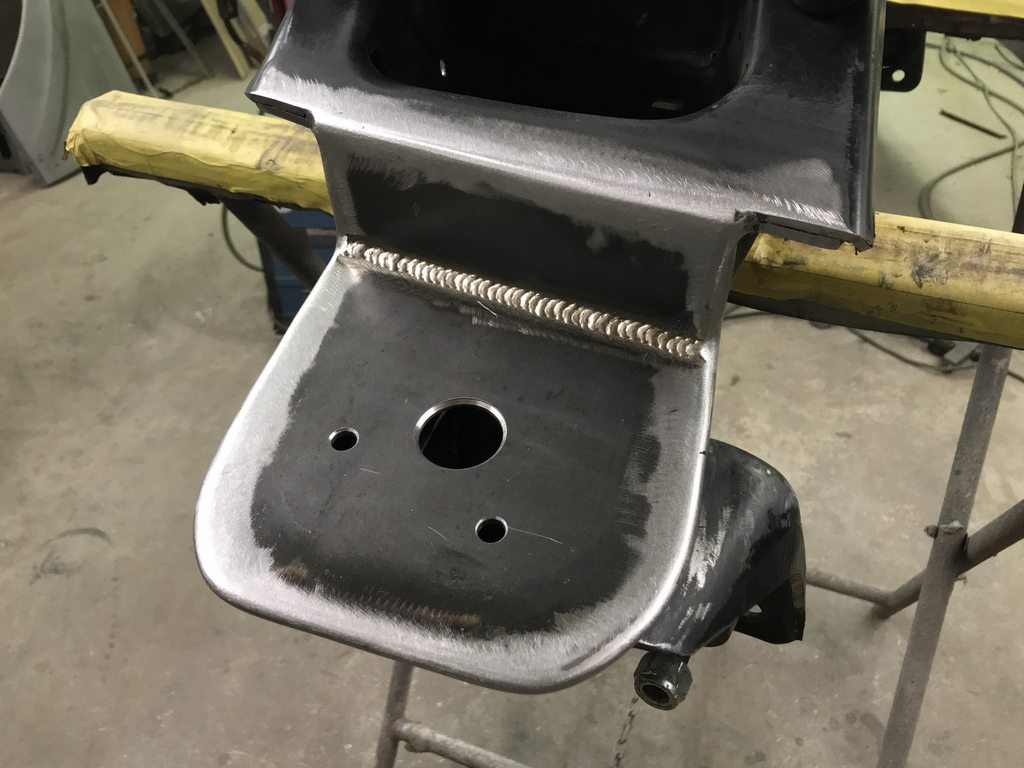
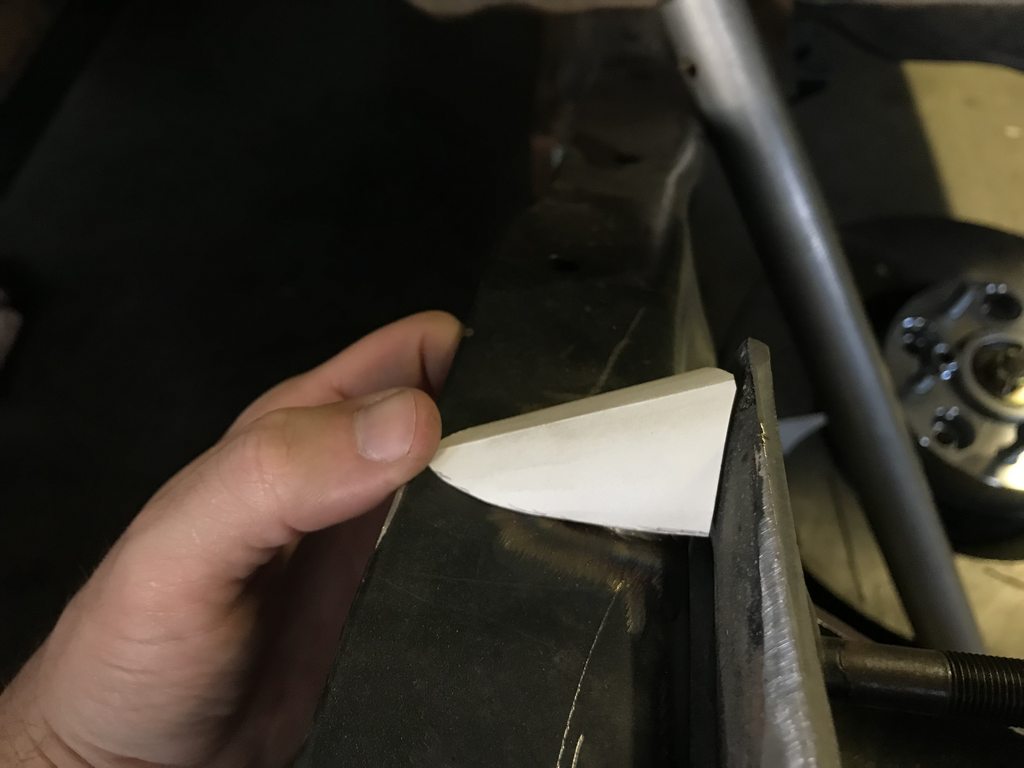
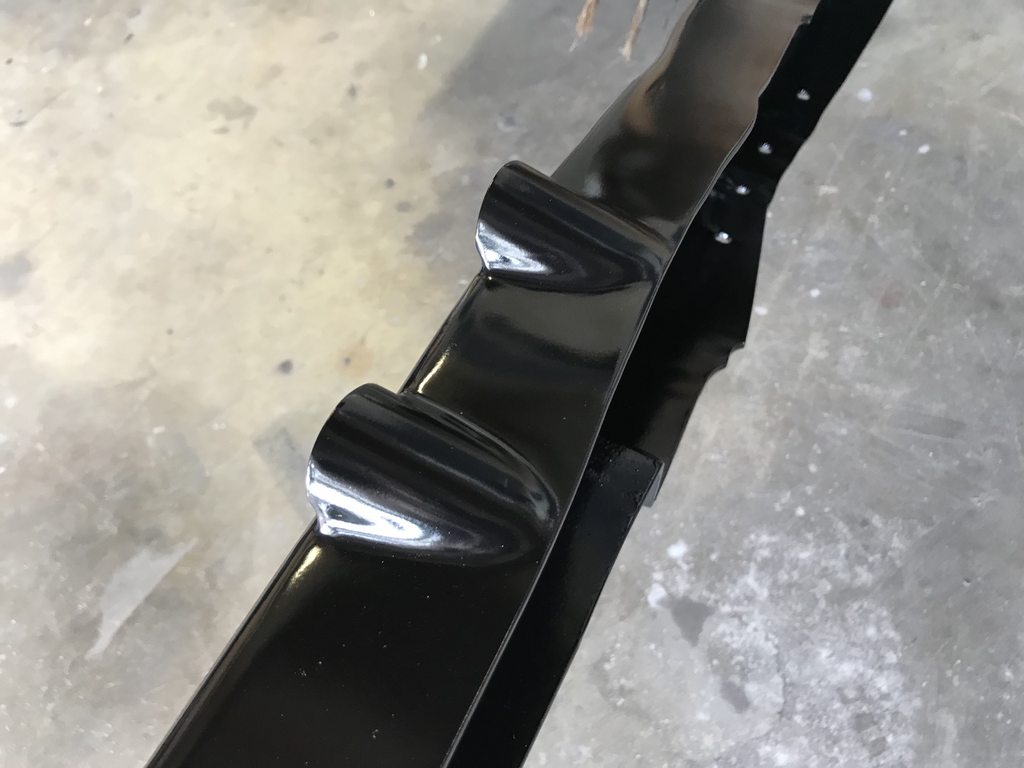
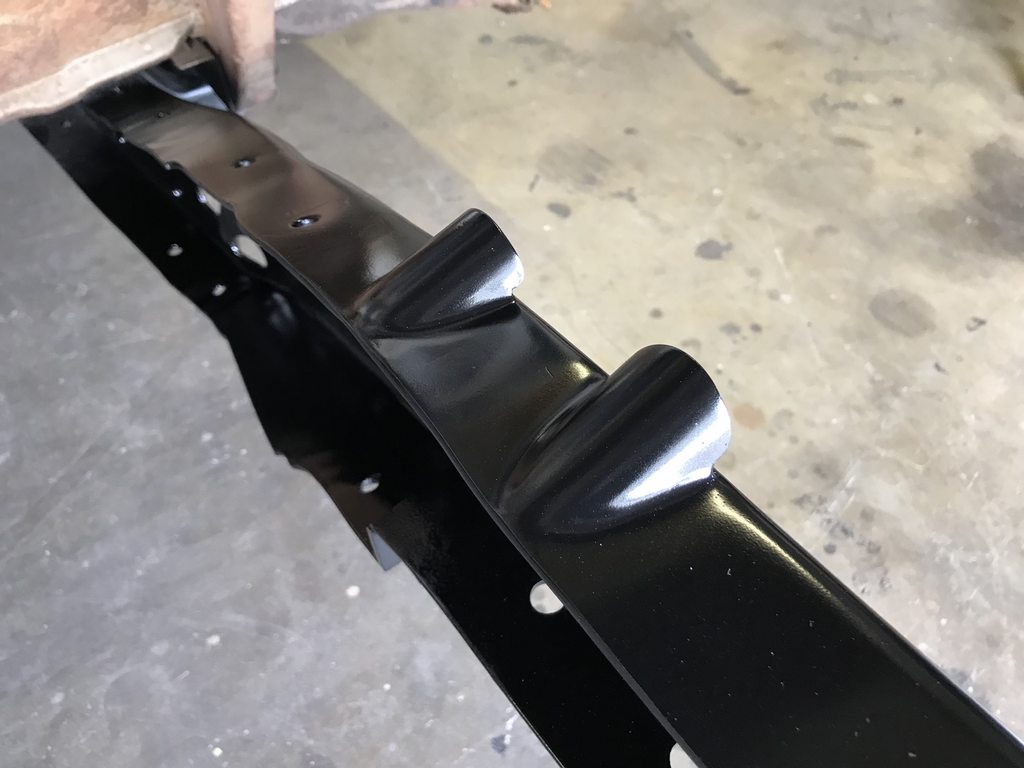
There were raw corners left from cutting back the spring cup area, so I rounded them and welded the two layers together, then smoothed up the edges.
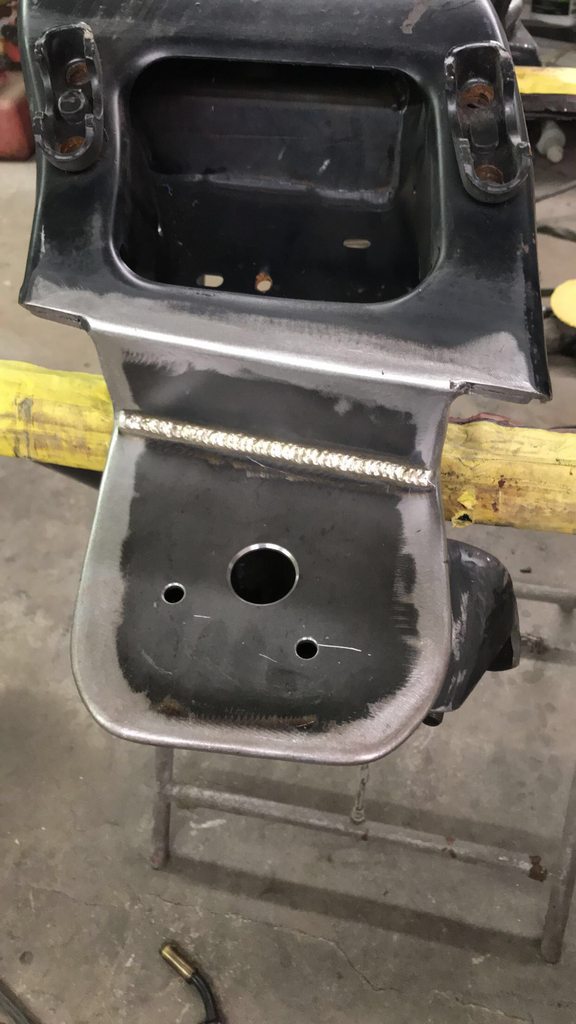
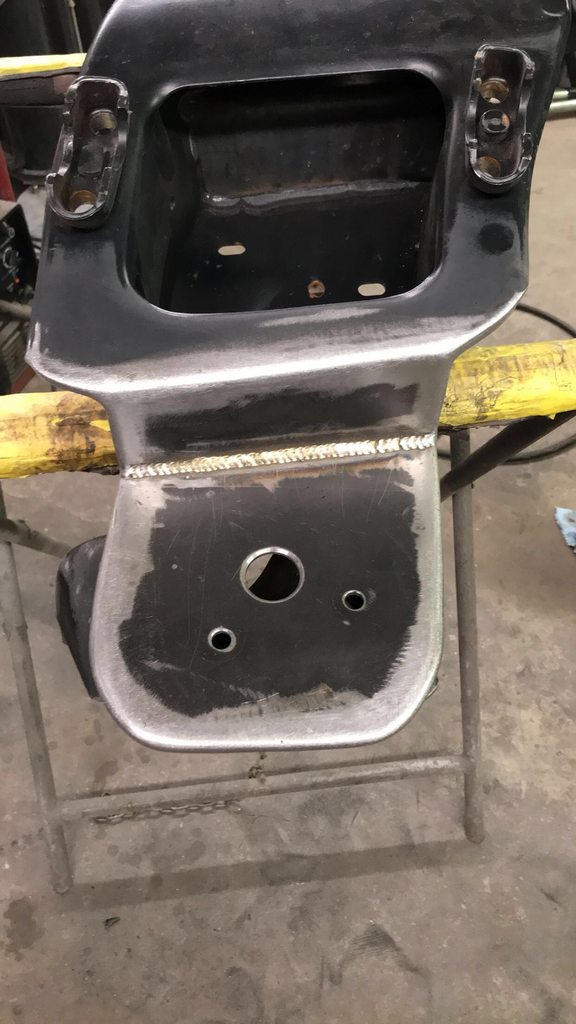

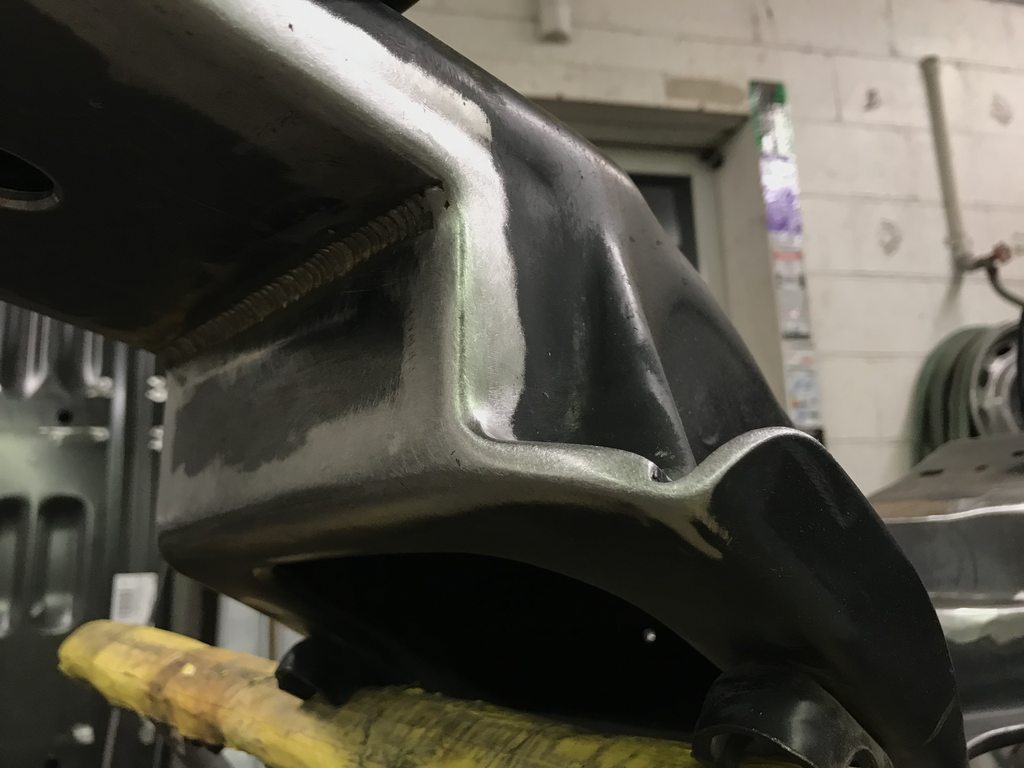
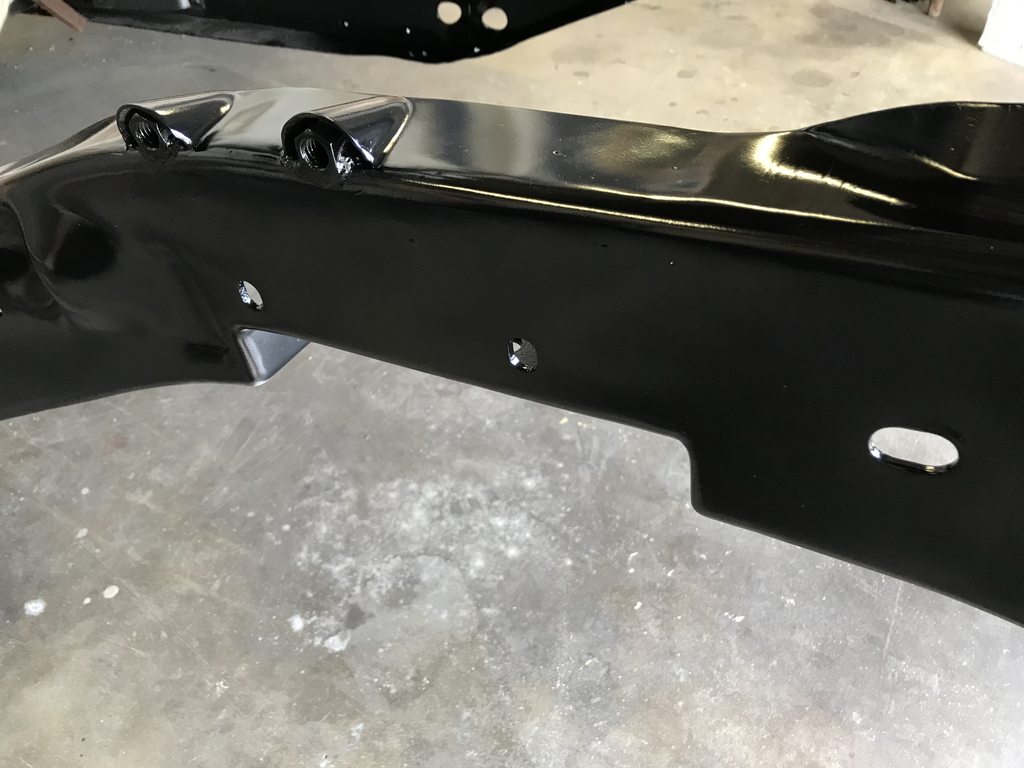
Since the crossmember is moved up the top two mounting points were just above the frame rail. I slightly recessed and welded in 1/2" threaded bosses, made rounded covers to hide them, then welded them in and blended the welds.

Since this mostly finishes up the front (besides shock, sway bar, and engine mounts) I went ahead and shot a coat of semi gloss rattle can to get it all one color and keep the bare areas from rusting.
07-06-2019 #112
Registered User
- Join Date
- Jun 2012
- Location
- Upstate SC
- Posts
- 95
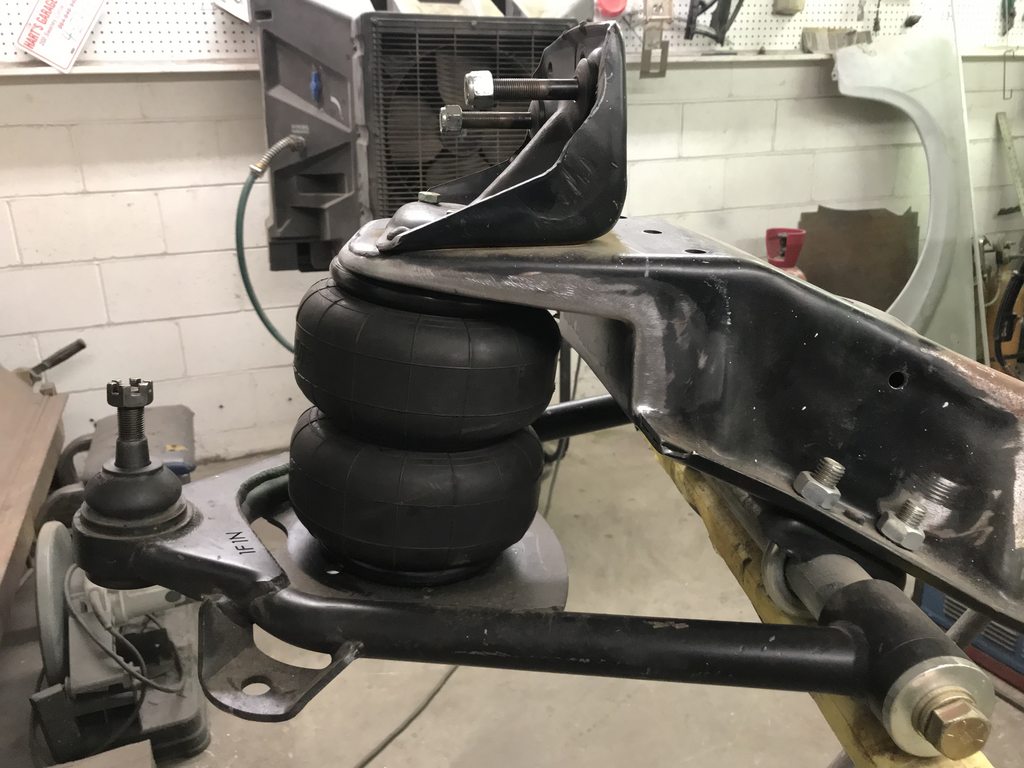
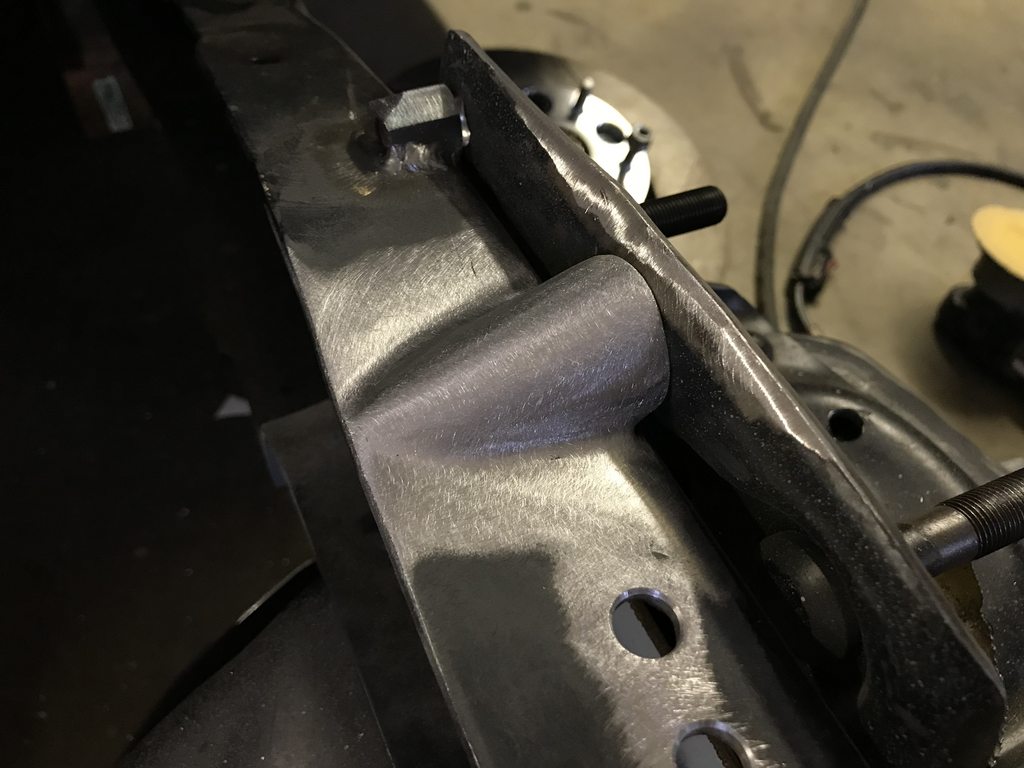
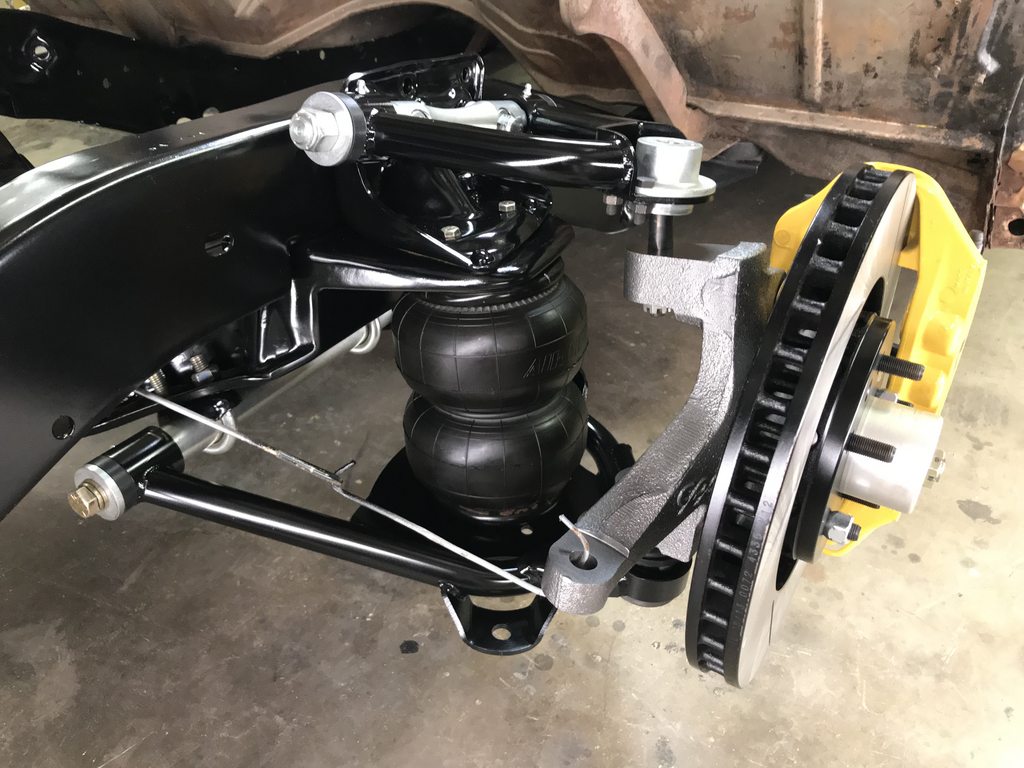
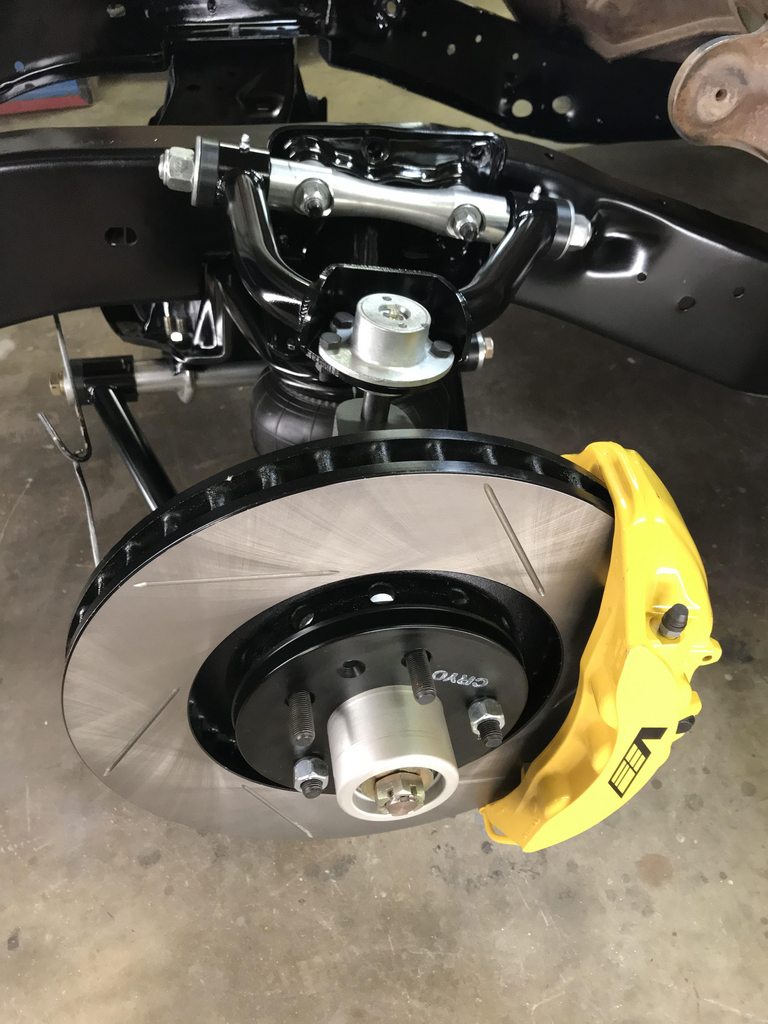
I started detailing and assembling the driver side, this was as far as I got. I'm really happy with the new installed height of the bag with the raised mounting points! It may be too tall as-is but that leaves room to add shims to adjust the installed height which should allow me to tune the pressure and effective spring rate without changing the ride height.
I may also swap to smaller bags since they'll have a steeper rate of spring rate rise as they compress compared to a larger bag. From setting up the Festiva I've learned that a soft initial rate works best to absorb bumps and maintain ride quality, but is mostly important for soaking up mid-corner bumps without upsetting the chassis and causing the car to skip around and lose your line. This was a huge difference I noticed between my softly sprung Festiva and my much stiffer Miata. I could go over curbing and bumps in the Festiva and it soaked it up like it wasn't there, and the same lines in the Miata would make it side-step and skip around... not very confidence inspiring.
A stiff sway bar to reduce body roll negatively reduces the independence and free movement of the suspension, so on the Festiva we use the small stock sway bar and add progressive rate bump stops that engage after ~1" of free travel. These aren't hard stops; they're soft enough to seamlessly engage and compress but stiff enough add to the overall spring rate the more they're compressed- that reduces body roll without the negative aspects of a stiff sway bar. I'll look into some way to incorporate progressive rate bump stops on the truck if the natural progressive rate of the bag isn't enough.
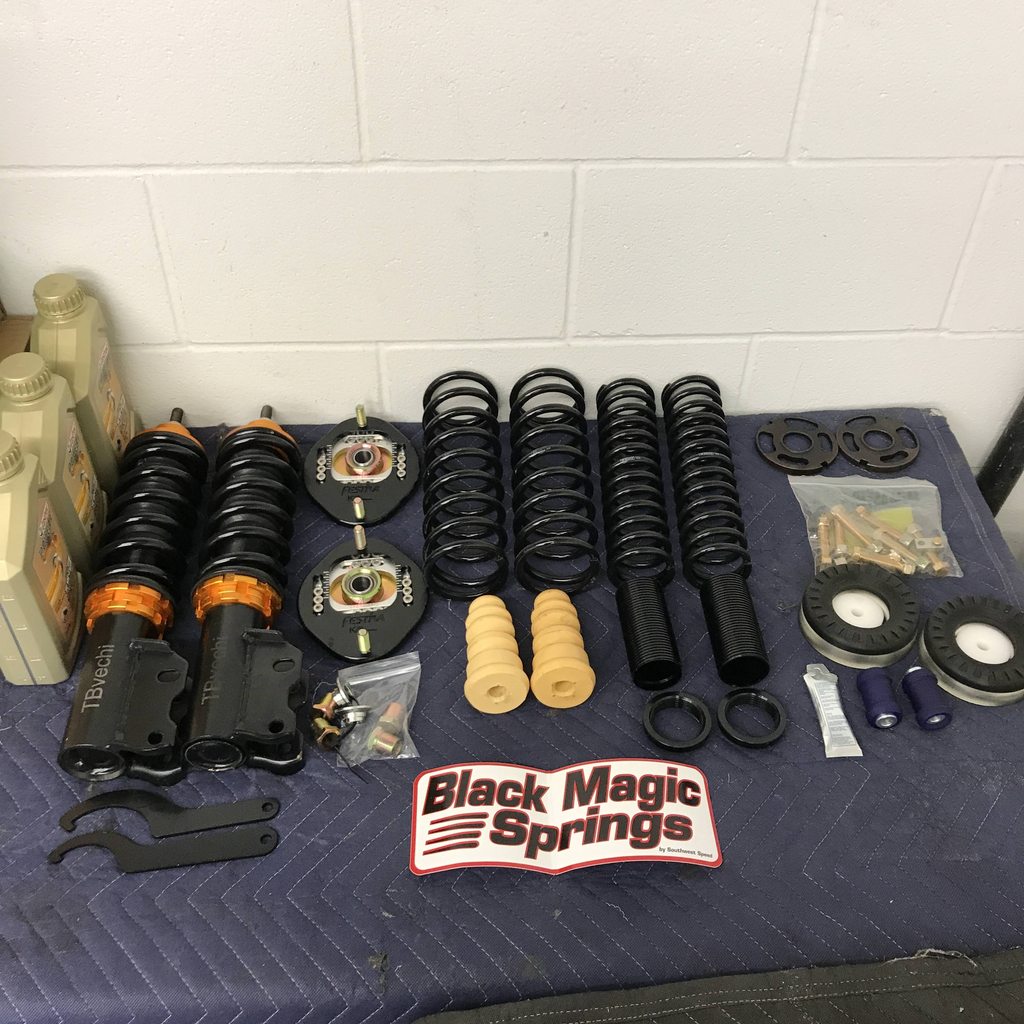
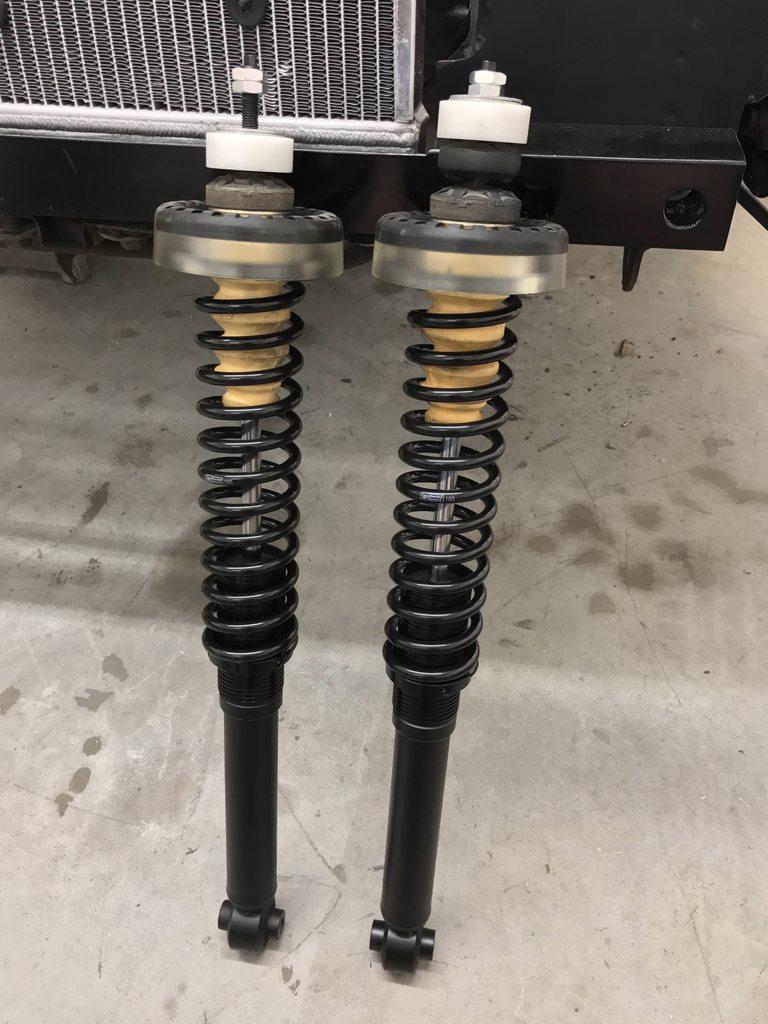
Pics of the Festiva's coilovers with the bump stops installed over the shock shaft. The rear spring rate is only 105# so it's very soft and compliant but after the first inch of travel/body roll it seamlessly firms up in corners while maintaining full L/R independence without a rear sway bar.
I'll wait to reassemble the other side so I can take the spindle/brake assembly to have caliper brackets made. Neither of the first two shops I've taken them to ever got around to making them after waiting for months in each shop.

10-08-2020 #113
Registered User
- Join Date
- Jun 2012
- Location
- Upstate SC
- Posts
- 95
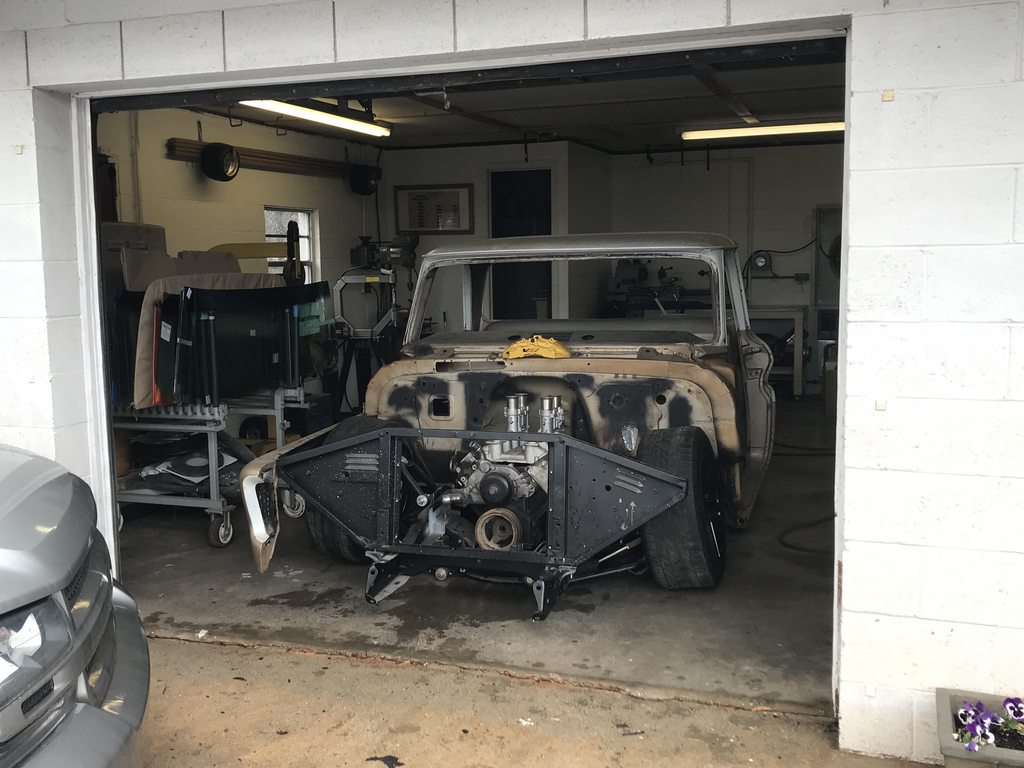
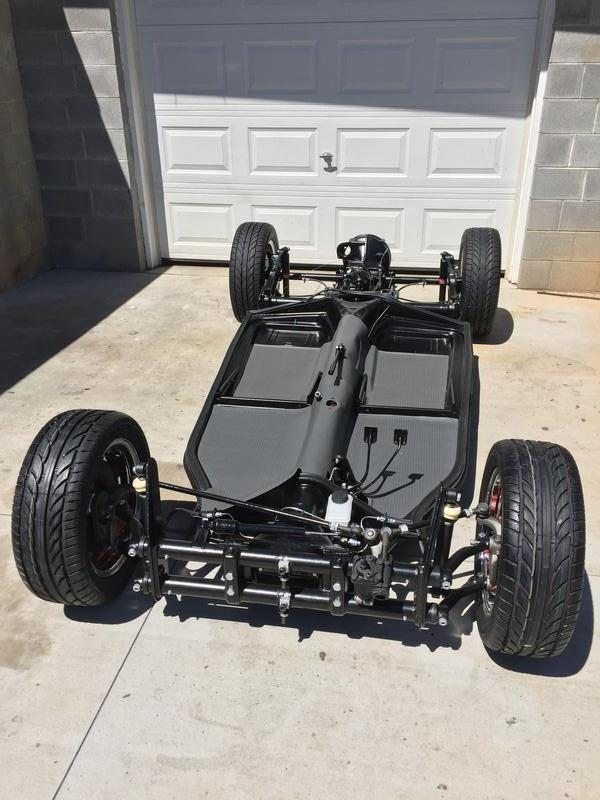
No real progress made, but I did loosely assemble most of the sheetmetal. I can measure for wheel offset and axle width now.


10-29-2020 #114
Registered User
- Join Date
- Sep 2019
- Posts
- 13
Wow! Nice build. This is a true survivor, the sheet metal looks very nice. I am on 67-72 truck forum as well, it has slowed down over there it seems. This is gonna be a sweet ride.

 Reply With Quote