

Results 41 to 60 of 114
-
09-18-2013 #41

 Registered User
- Join Date
- Jun 2012
- Location
- Upstate SC
- Posts
- 95

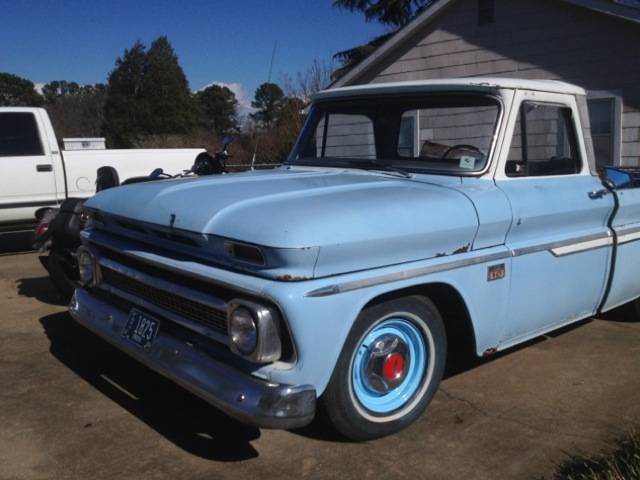
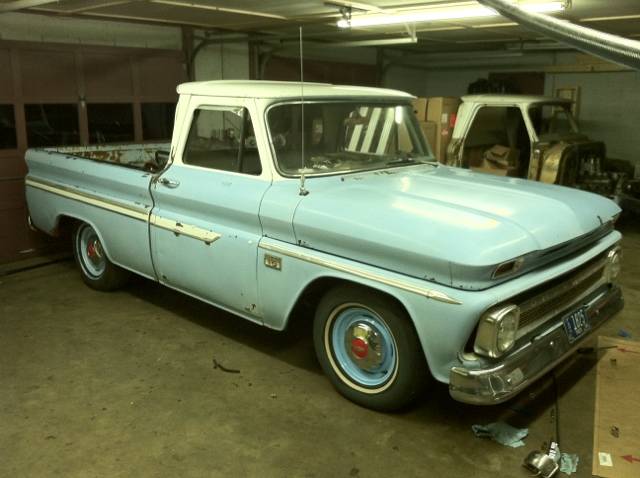
Project Goldilocks '66 Chevy C10 Resto-Mod/Mild Pro-Touring Build
Thanks for the compliments on the blue truck, and the work on Goldilocks!
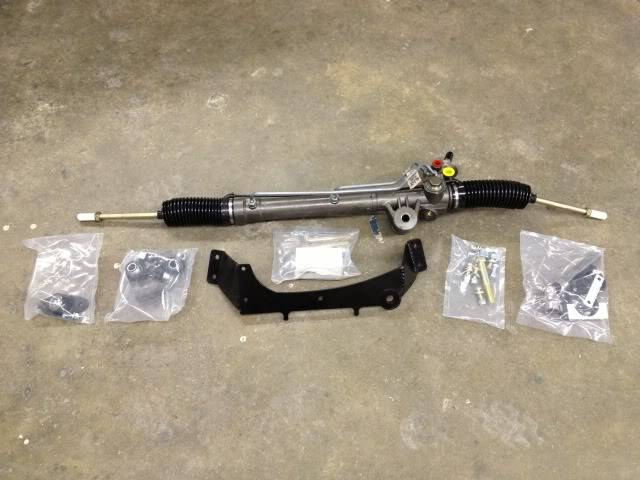
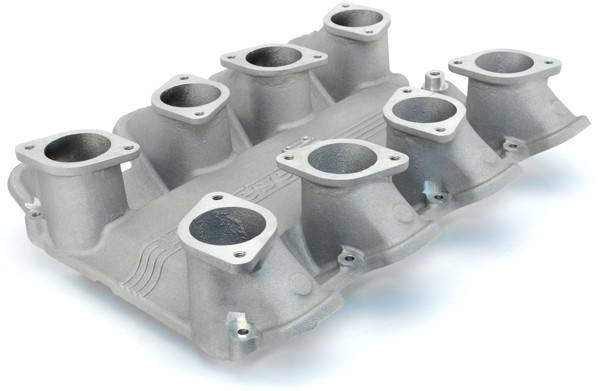
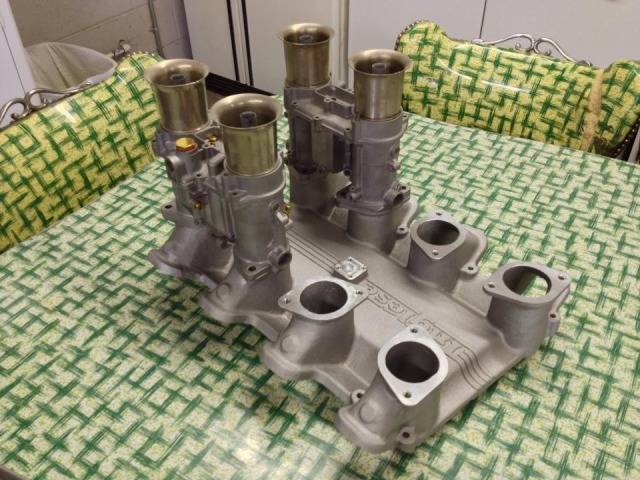
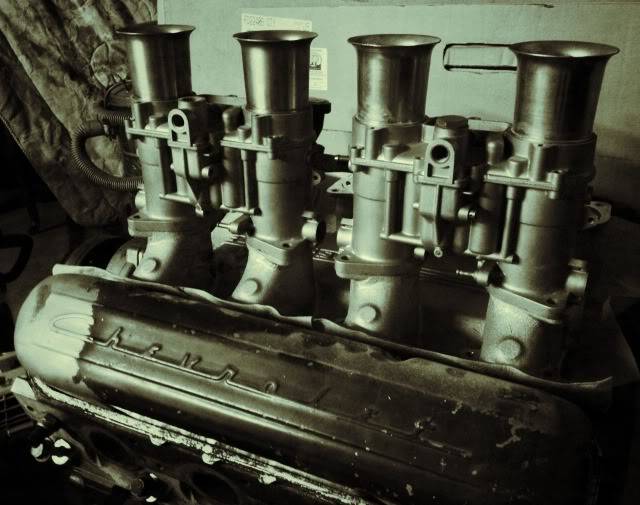
My rack & pinion kit from No Limit came in yesterday, can't wait to get it bolted on. Also found the intake I'll be using, Inglese started making sand cast IR intakes for LS3 heads recently. This saves me the trouble of fabricating an intake, the only other option was a $1600 buck billet intake.
-
09-24-2013 #42
Registered User
- Join Date
- Jun 2012
- Location
- Upstate SC
- Posts
- 95
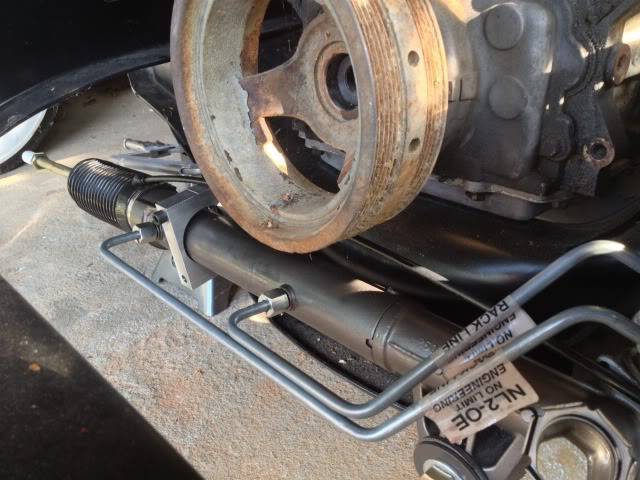
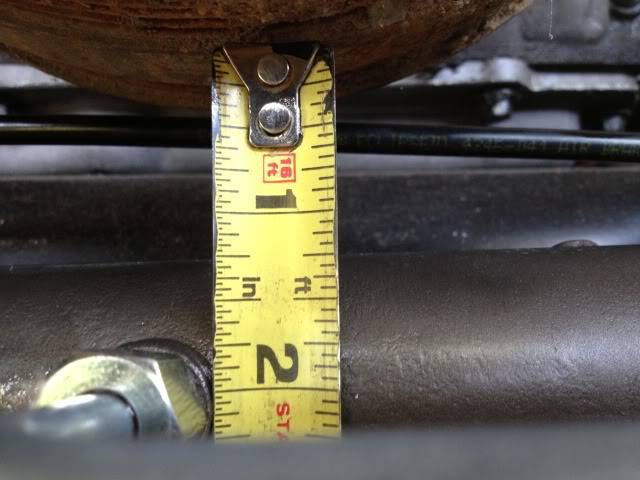
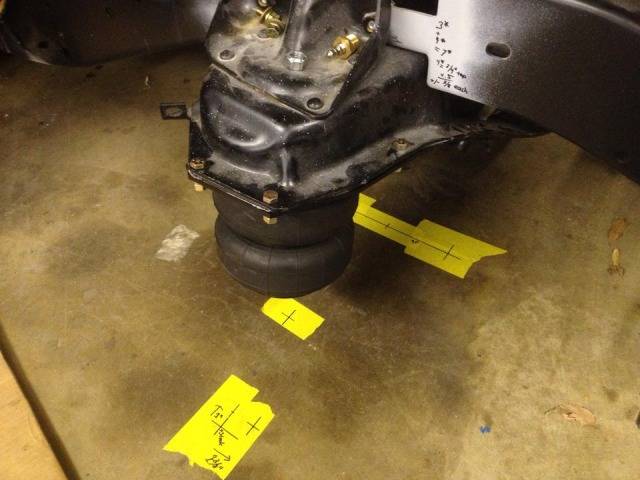
Clamped the r&p bracket to the crossmember to check for clearance issues with the dropped engine. Did this Friday around 5 so that explains why it's missing the insulator donut, and therefore the crooked rack...
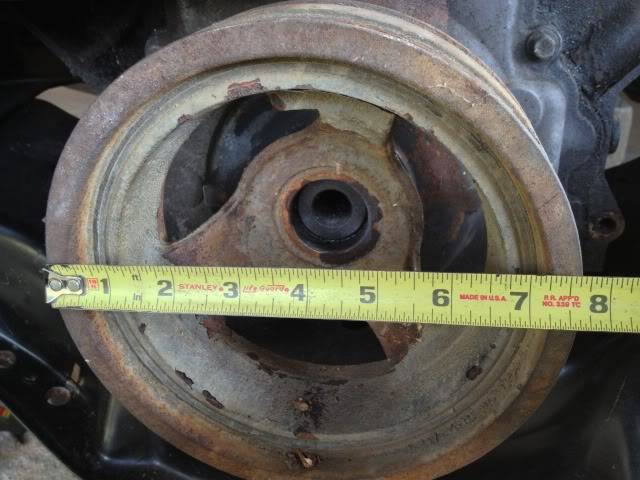
 I'll need a smaller balancer since I'll be notching the frame 1.5" to raise the crossmember. I've found a 6.2" SFI balancer that'll leave enough room, and will work to slow down the accessories since the engine will rev to 8K+. I pulled the engine, trans, and crossmember this week so I can start the frame notch.


Also found a vid of a LS3 with ITB's. They don't have it tuned yet so it won't idle but the throttle response and sound is incredible!!
http://www.youtube.com/watch?v=m-9cT0bDsaM
10-19-2013 #43
Registered User
- Join Date
- Jun 2012
- Location
- Upstate SC
- Posts
- 95
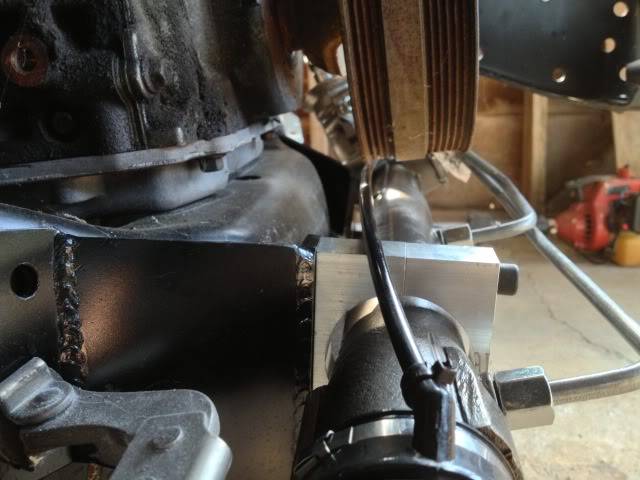
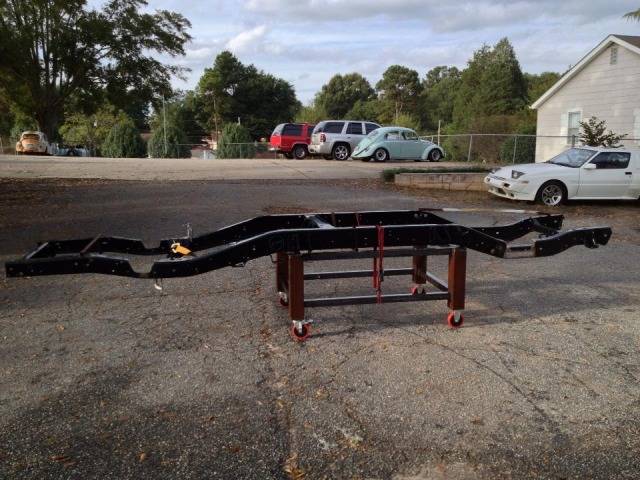
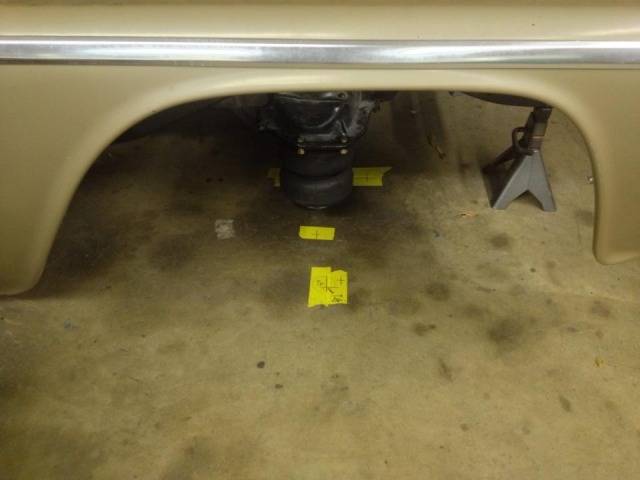
I pulled the engine/trans, and took the cab off so I could start the notch for the front cross member. I'm moving the crossmember mounting area up 1.5" to get the A-arms closer to level, and it'll help with ground clearance at the LCA shafts.
Cut lines laid out.
Section removed. I cut the whole side out so I can add flat plate back in to smooth the rails. I'd have to redrill the mounting points anyways.
Relocated 1.5" higher (frame is upside down).
Ends boxed in with 1/4" plate.
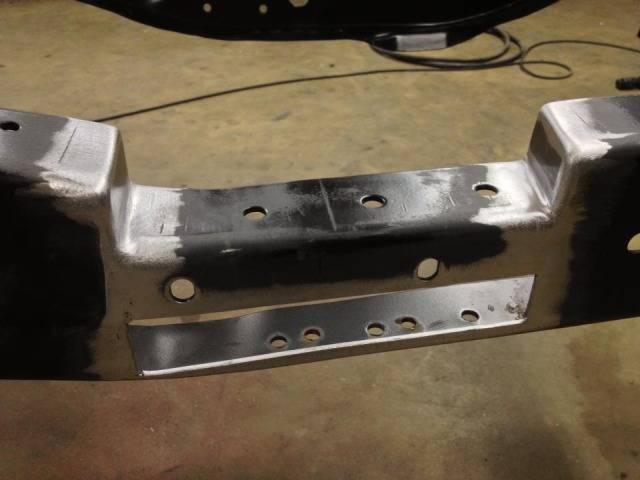
Bottom of crossmember is even with the bottom of the frame rails now. No more scraping the LCA shafts.
10-20-2013 #44 Registered User
- Join Date
- Oct 2004
- Posts
- 419
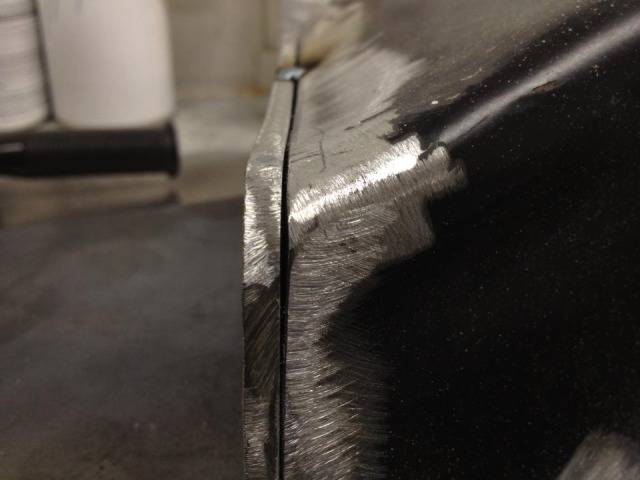
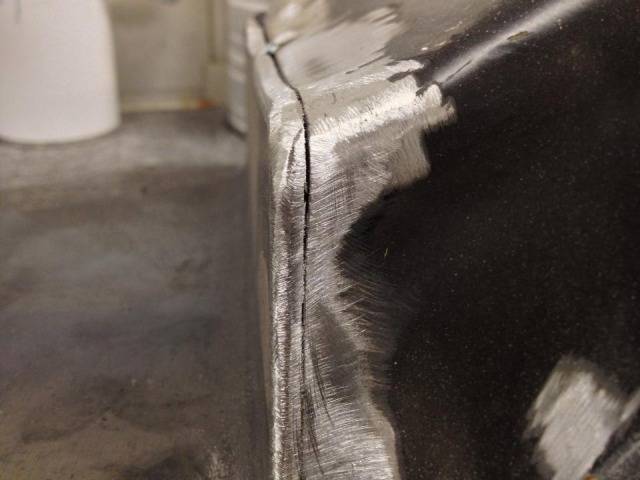
Any way you could quickly explain the steps in dressing welds like you have done above. I'm curious as to what tool/abrasive steps are taken to get them to look like that.
10-20-2013 #45 Registered User
- Join Date
- Dec 2007
- Location
- Lombard, IL
- Posts
- 545
Great attention to details!! I'm a big VW fan, too!
I'm new to these early C10s .... I'm helping my buddy with a 66 C-10 build.
Did you move the crossmember forward or just up 1.5?Dan
1971 Chevelle Maliboo Convertible 496/4L80E
1956 210 2 door Sedan 8-71 blown 468/T400
10-20-2013 #46
Registered User
- Join Date
- Jun 2012
- Location
- Upstate SC
- Posts
- 95
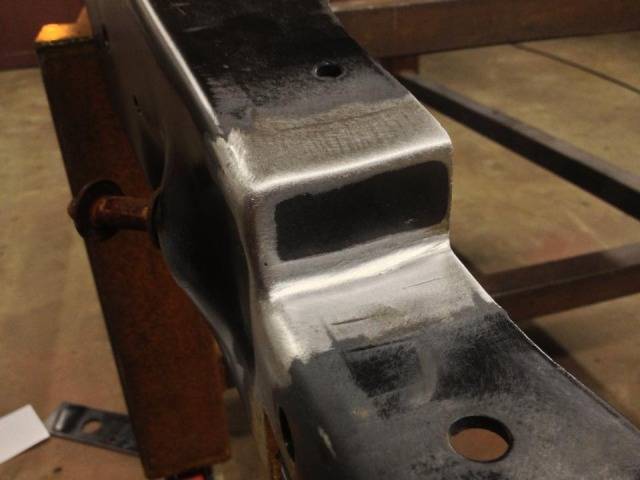
I use a 36 grit disc on a Matco 1HP 3" 90* grinder to smooth out the outside corners. I get the edges of the welds flat/flush first, then round the edge over evenly. For the inside corner I have a cheap HF 3" extended straight grinder with a oval shape carbide burr. Then finish up 60 grit on a jitterbug sander (not pictured) that has a tall foam backing pad, and wrap the paper around the edges so it'll reach into the inside corner. Originally Posted by alocker

This is an old pic before I bought the Matco. The 3" DA is for Mirka Abralon 2000 and 4000 grit pads if I'm polishing metal.
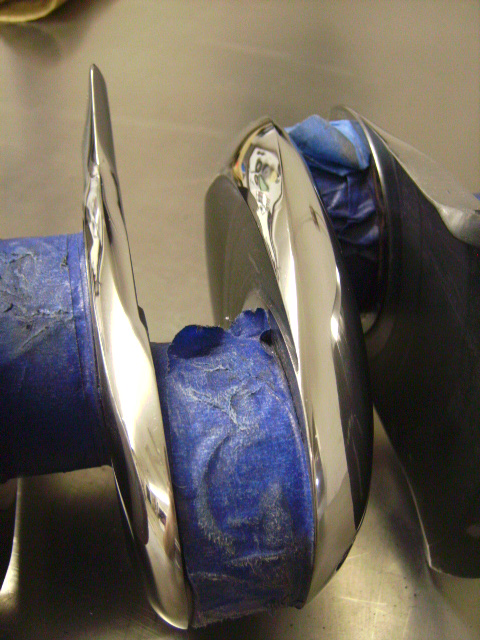
I lightened/smoothed the crank for my stroker VW engine so I have a little bit of experience grinding.
Before/after.
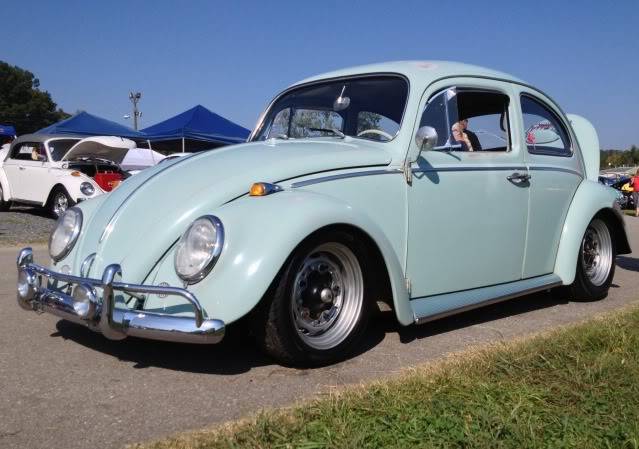
Thanks! The VW is my daily driver, its a '64 sunroof with OG paint and a 90hp 1679cc. The local ricers hate it! Originally Posted by Zanie
 The pro-touring style hasn't left the bug alone either; I'm starting to do some suspension mods to it too. It'll pull right at .80g now with mismatched tires, air shocks on the back, and only a front sway bar. I'm adding wider wheels (5.5's and 7's), a rear sway bar, better shocks, and adjustable rear spring plates soon so I can autocross it too. Was hoping to have it together for Goodguys Charlotte but the wheels aren't finished yet.
On the truck, I only moved it up 1.5", I'll move the wheels forward 1" by relocating the ball joints when I make the A-arms. Have to relocate the ball joints for added caster anyways.
10-30-2013 #47
Registered User
- Join Date
- Jun 2012
- Location
- Upstate SC
- Posts
- 95
Stopped by the Inglese booth at Goodguys this past weekend and ordered the intake, was hoping that by waiting I could get a show discount. $70 bucks off and free shipping.
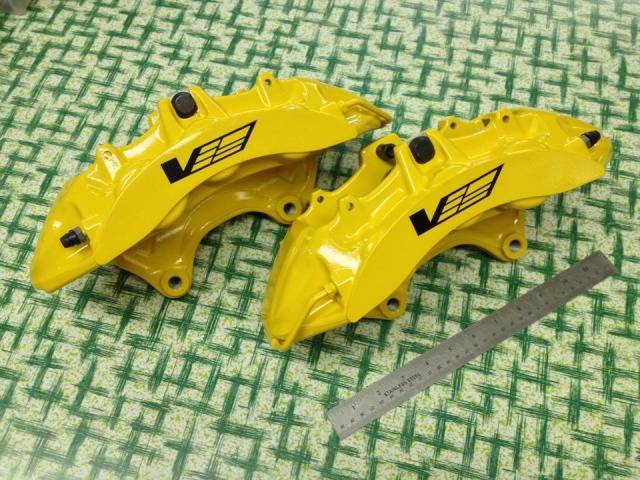
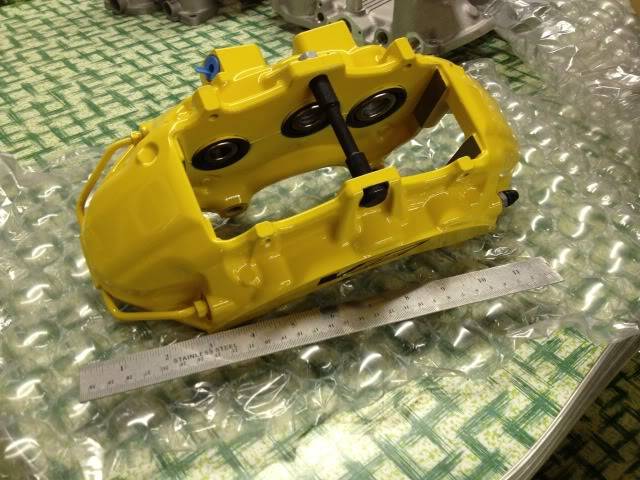
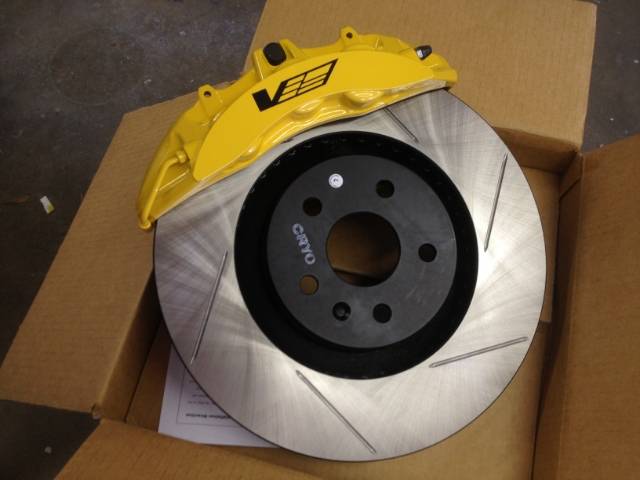
 Also ordered a pair of front CTS-V/Brembo 6 piston calipers. Both should be here by Friday.
Last night I bought a boom for my granddad's old 8N, and tonight I finished building a cab mount so I can move the cab by myself.
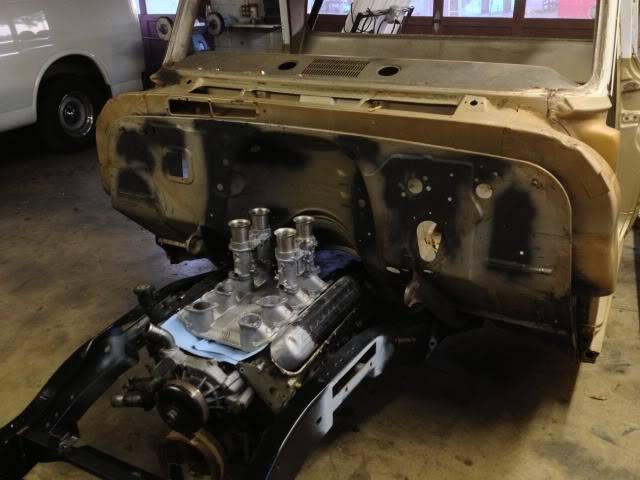
Next up is notching the crossmember to clear the oil pan, then reassembling the cab on the frame to check for carb clearance with the new manifold. I'm not worried too much about the carbs but I've got an idea for an air cleaner that might need more room than what's available.

11-01-2013 #48
Registered User
- Join Date
- Jun 2012
- Location
- Upstate SC
- Posts
- 95
The manifold and calipers came today. Moved the frame into it's permanent spot for the winter, so I'll level it and move on to building the A-arms. Still haven't found a source for bare 73-87 LCA shafts at a reasonable price so I'm going to LKQ tomorrow to dig around.
The calipers are huge. I've seen them on a CTS-V before but their size can't be fully appreciated until they're off the car. Over a foot long!
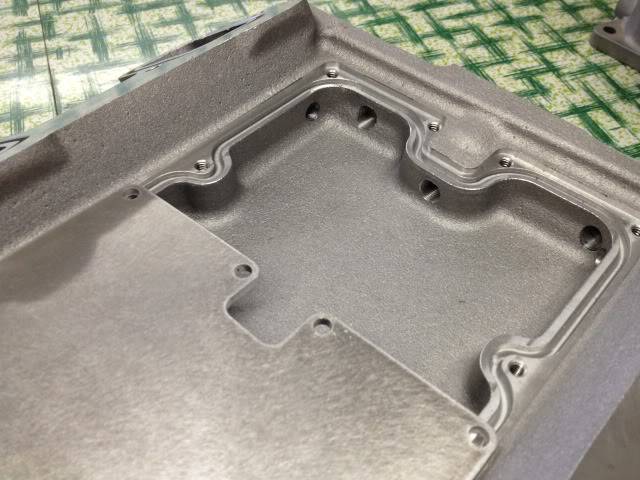
The intake, has a plenum built into the bottom to even out vacuum pulses to the distributor, or MAP sensor in this case.
Moved the cab using the boom lift, needs a couple kinks worked out (center pivot and stops to keep the cab from sliding off) but it works.
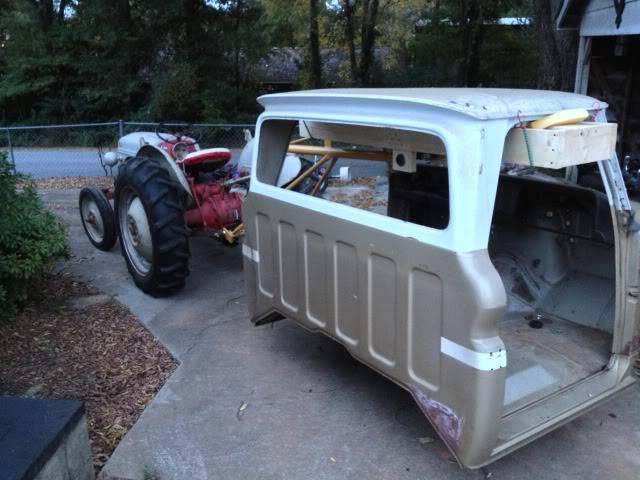
And a teaser shot.
11-07-2013 #49
Registered User
- Join Date
- Jun 2012
- Location
- Upstate SC
- Posts
- 95
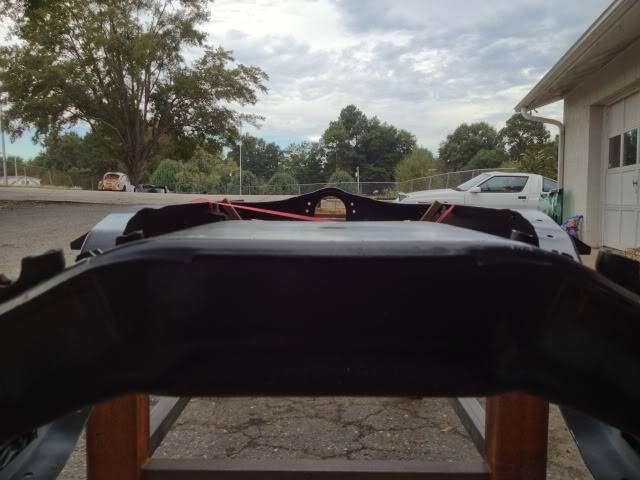
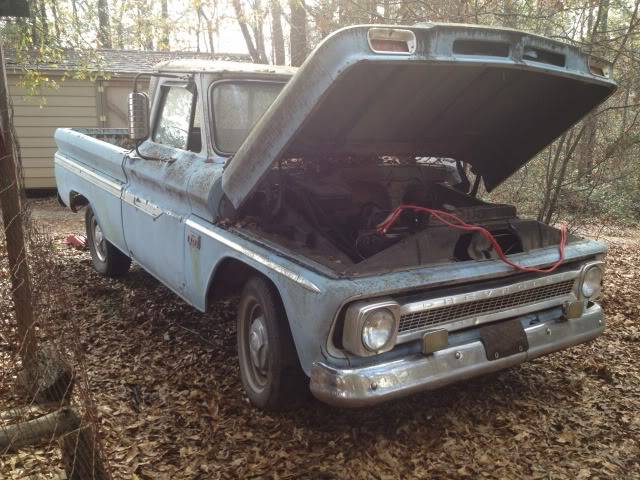
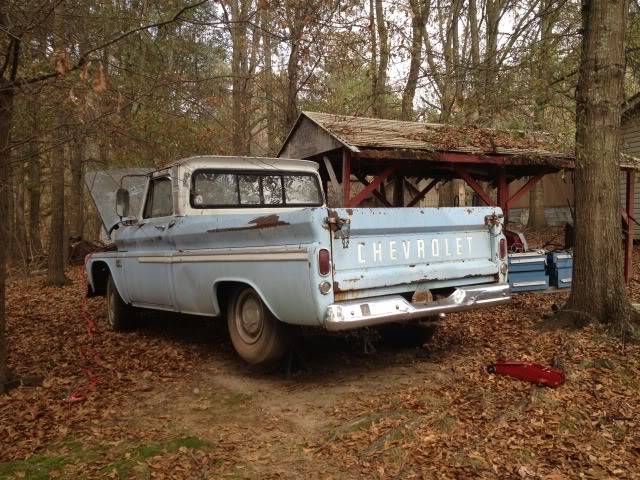
Cab is back on the frame and engine is dropped in. Will pick up some plate steel to notch the crossmember this week.
11-07-2013 #50
Registered User
- Join Date
- Jun 2012
- Location
- Upstate SC
- Posts
- 95
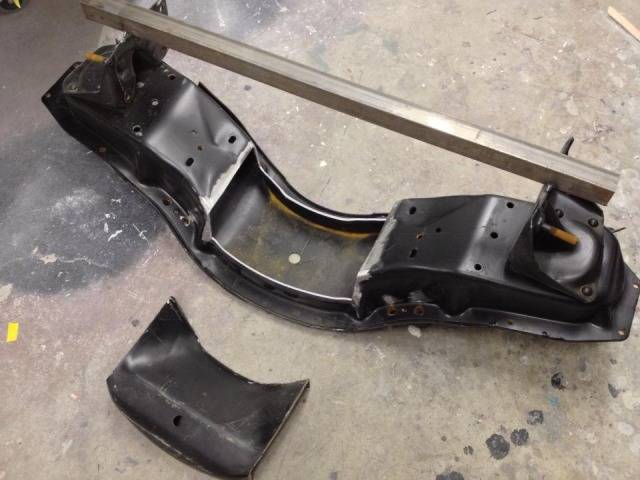
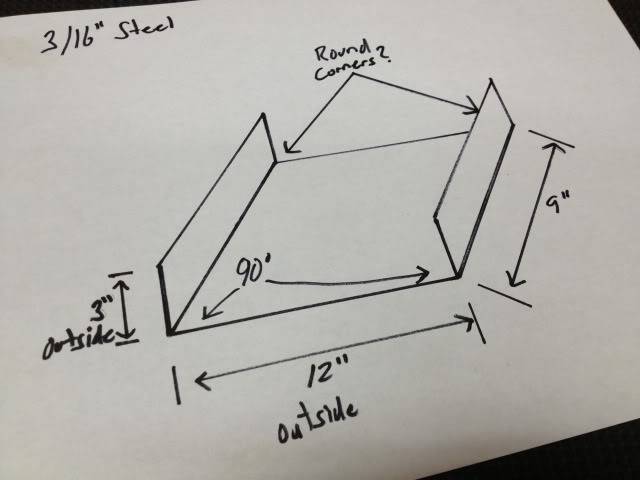
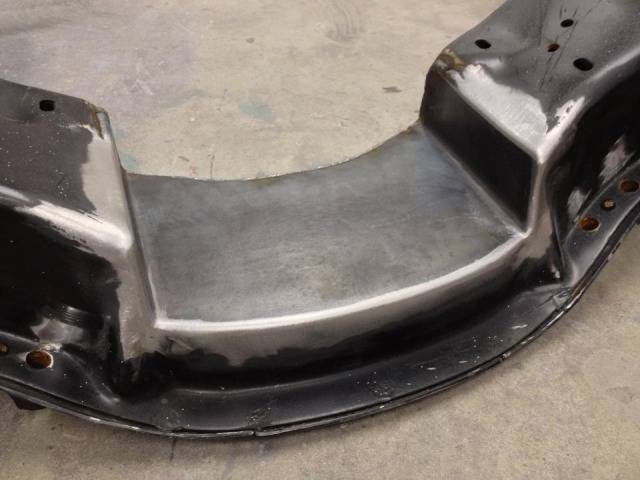
Cut the crossmember tonight, and with my amazing blueprint drafting skills I drew up plans for the filler piece. Drawn to exact scale, of course...
 I'll have a fab shop bend a single piece of 3/16" steel instead of welding separate pieces together. Hopefully they can read my handwriting and get it done this week.
11-07-2013 #51
Registered User
- Join Date
- Jun 2012
- Location
- Upstate SC
- Posts
- 95
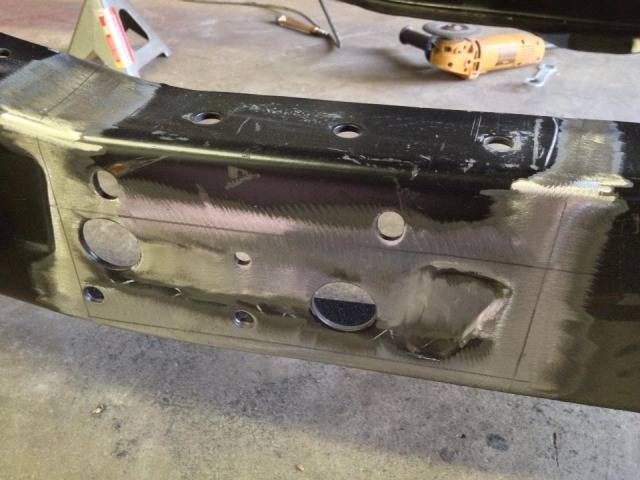
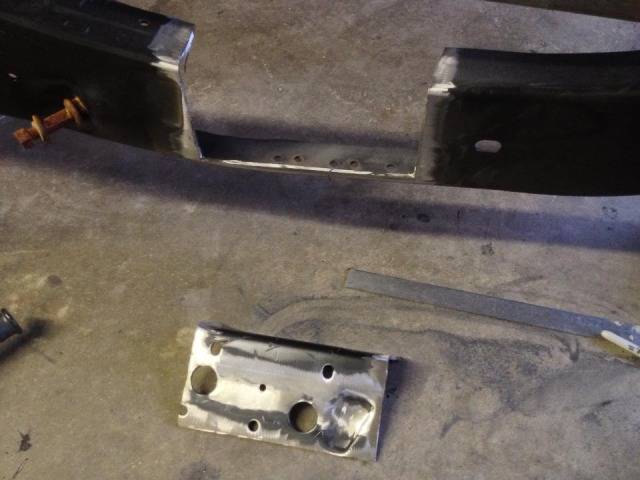
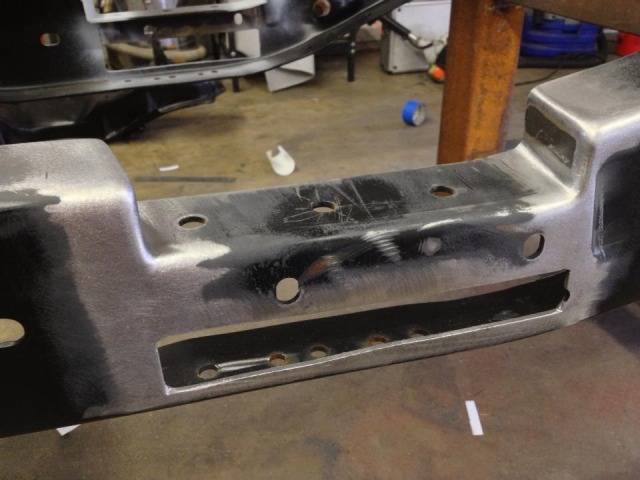
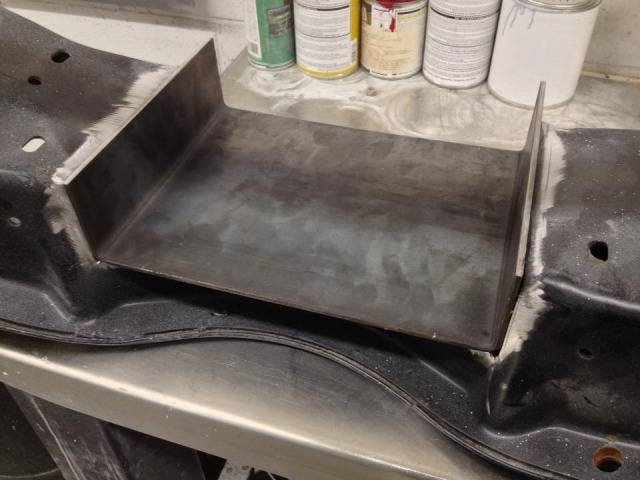
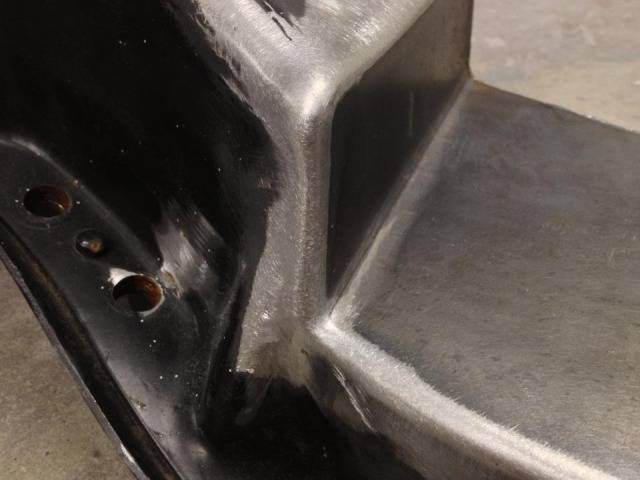
Picked up the filler plate from the fab shop today and welded it in tonight.
Fitting it in the notch, had to slightly open up the opening in a few places to get it to drop in.
Cut lines scribed.
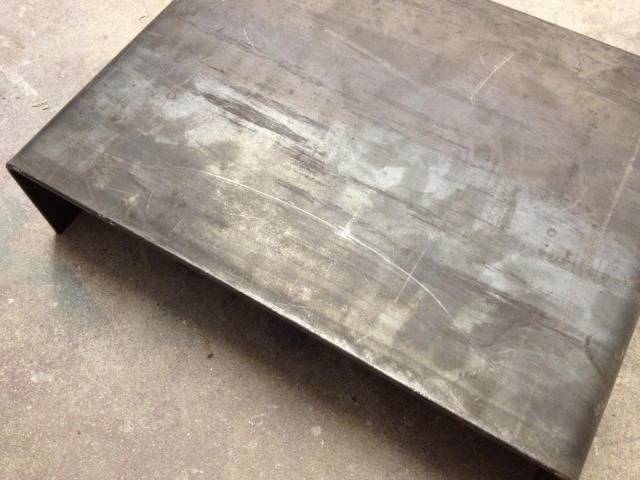
Roughly trimmed to shape, edges still need work.
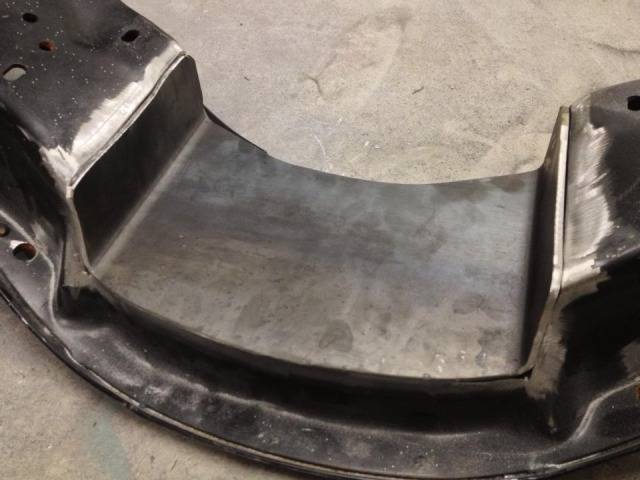
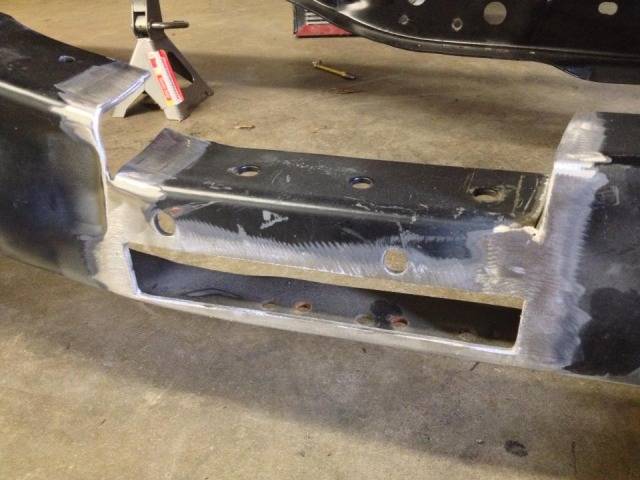
After smoothing out the edges and matching their shape to the crossmember's shape.

Then I removed the plate, beveled the edges for better penetration, welded it in, and started smoothing the welds. Still have to do the back half, ran out of time tonight. I've got a get together at church tomorrow night so it'll have to wait til Saturday.
11-07-2013 #52 Registered User
- Join Date
- Dec 2005
- Location
- Birmingham, AL
- Posts
- 3,356
That VW crank is a piece of art. I like the truck too, one day, I want one of each of the C10's. I am thinking a shop truck style mid 60's, a nice 68-72 with a GMC grill and for the square body, I may go with a 4x4 K5 Blazer. I should get to those in the next 50 years at the rate I am going.
Stephen
02-20-2014 #53
Registered User
- Join Date
- Jun 2012
- Location
- Upstate SC
- Posts
- 95
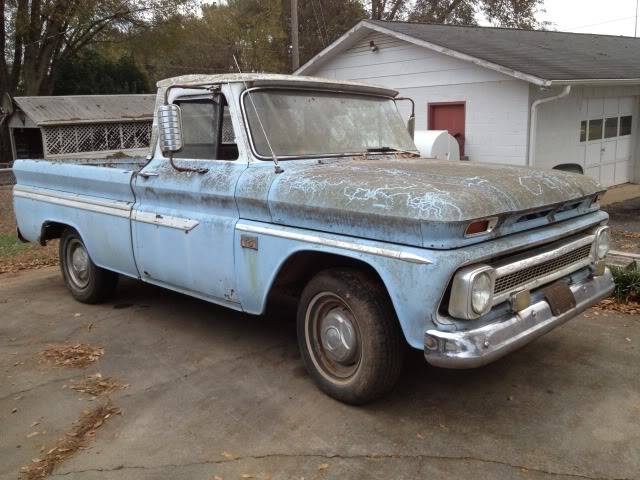
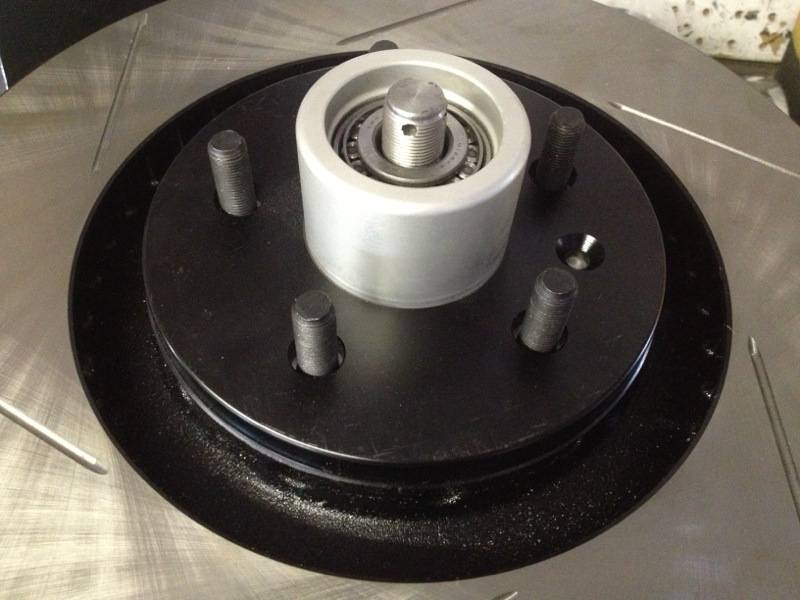
More parts collecting. Waiting on rotors, other than that I've got everything for the front suspension. Also got sidetracked by another '66 we bought. Working on cleaning it up and making it driveable.
Back to the parts pile. Once I get the rotors in I can mock up the spindles/hubs/rotors and make caliper brackets.
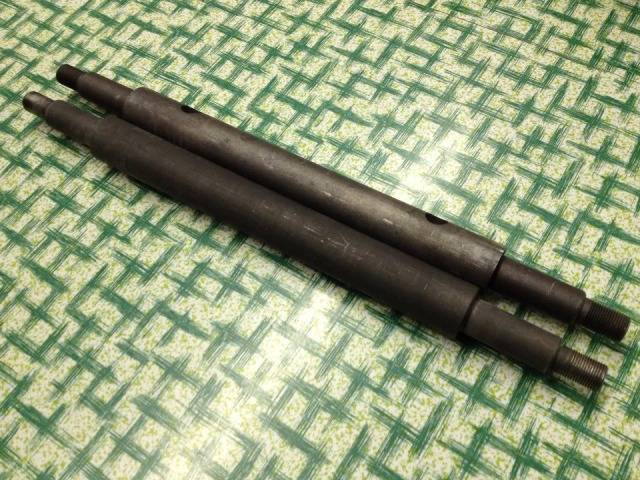
New 73-87 LCA shafts.
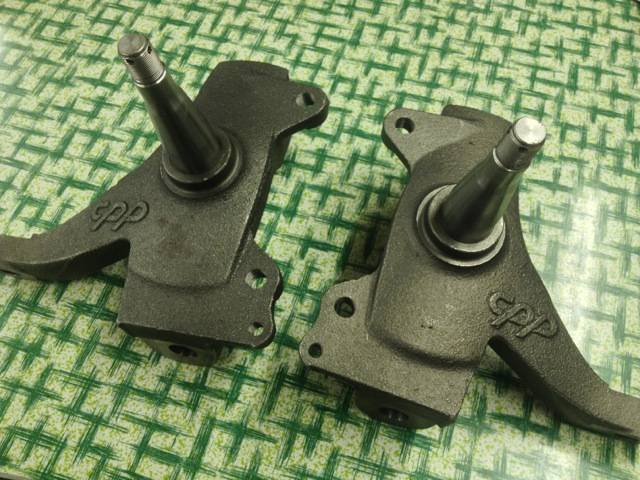
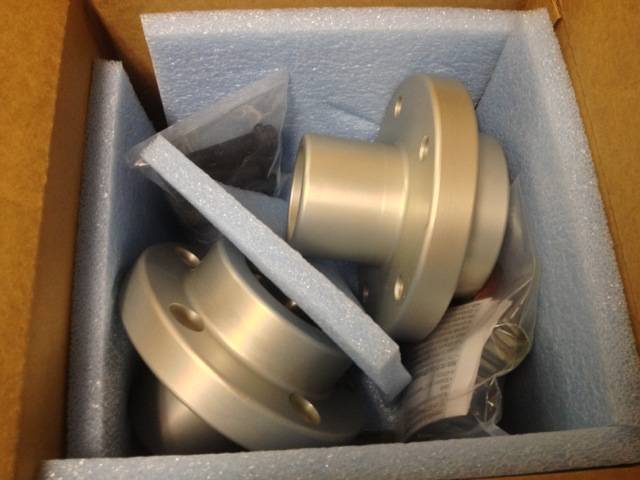
CPP modular spindles.
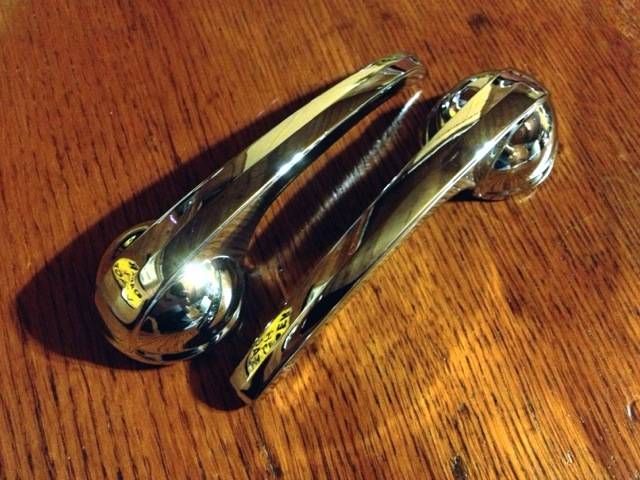
NOS inside door handles.
CPP forged hubs.
Mapped out the lower A-arms. Will be moving the wheel forward one inch, and inward one inch, tilting the spindle an extra four degrees for more caster, and setting the bag mount at the right height for the ride height I'm shooting for. I'll actually drop the bag mount a little lower, then use aluminum shims to fine tune the bag height, kinda like threaded spring cups.
03-11-2014 #54
Registered User
- Join Date
- Jun 2012
- Location
- Upstate SC
- Posts
- 95
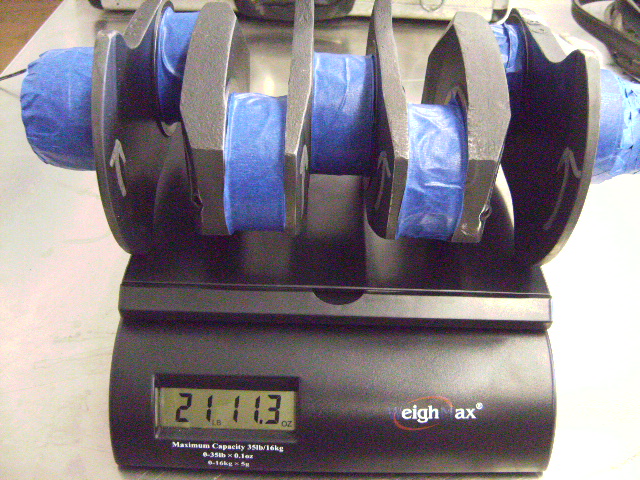
Rotors came in today, bought StopTech cryo treated/slotted. I weighed everything except the pads and caliper brackets (don't have those yet) to compare to the old disc conversion stuff. Wasn't expecting the bigger brakes to be lighter, but they'll shave about five pounds off each side. Not much overall, but it's all unsprung weight so it makes a bigger difference.
12" Disc Conversion Parts:
- Spindle/Rotor Assembly- 55 pounds
- Caliper.- 10 pounds, 3.7 oz
65 Pounds, 3.7 oz each side.
New parts:
- Rotor 28 pounds, 4.0 oz
- Caliper 8 pounds 14.9 oz
- Hub 5 pounds, 2.0 oz
- Spindle 18 pounds, 0.9 oz
60 pounds, 5.8 oz
03-12-2014 #55 Registered User
- Join Date
- Dec 2010
- Location
- Charlestown NH
- Posts
- 352
looking good! i like the ITB set up for the LS with the old style valvecovers
https://www.pro-touring.com/showthre...-Touring-Truck
DMP Fabrication LLC
Follow me on Instagram for welding and truck progress! - Americangraffiti
03-15-2014 #56 Registered User
- Join Date
- Jan 2008
- Location
- Houston, TX
- Posts
- 192
This project is nasty! love it
Asa Walker
Houston, TX
03-16-2014 #57 Registered User
- Join Date
- Nov 2008
- Location
- NC
- Posts
- 583
Awesome build.
ITBs on an LS sound amazing
03-16-2014 #58
Registered User
- Join Date
- Jun 2012
- Location
- Upstate SC
- Posts
- 95
Originally Posted by the dan
Originally Posted by acegto
Originally Posted by Tig
Thanks dudes!!
Here's a vid of a cammed LS3 with ITB's... sounds wicked!
http://www.youtube.com/watch?v=ddXi_T80PhE
04-09-2014 #59
Registered User
- Join Date
- Dec 2009
- Location
- Pocahontas, AR
- Posts
- 77
I agree that crank is a piece of art!! Would look awesome on an end table in the office. I've been following your build over on the truck forum. Awesome work!
Chris1966 Chevrolet C-10
04-13-2014 #60
Registered User
- Join Date
- Jun 2012
- Location
- Upstate SC
- Posts
- 95
Thanks Chris!! Crank is at the machine shop for balancing now, told him he better not scratch it lol! Originally Posted by CHRIZ28
Not much to report on the truck, I did get the rotors machined to fit the CPP hubs. Caliper brackets will be the next thing to do.

 Reply With Quote


