Results 101 to 120 of 252
-
07-20-2014 #101

 Registered User
- Join Date
- Mar 2007
- Location
- Florida
- Posts
- 2,391

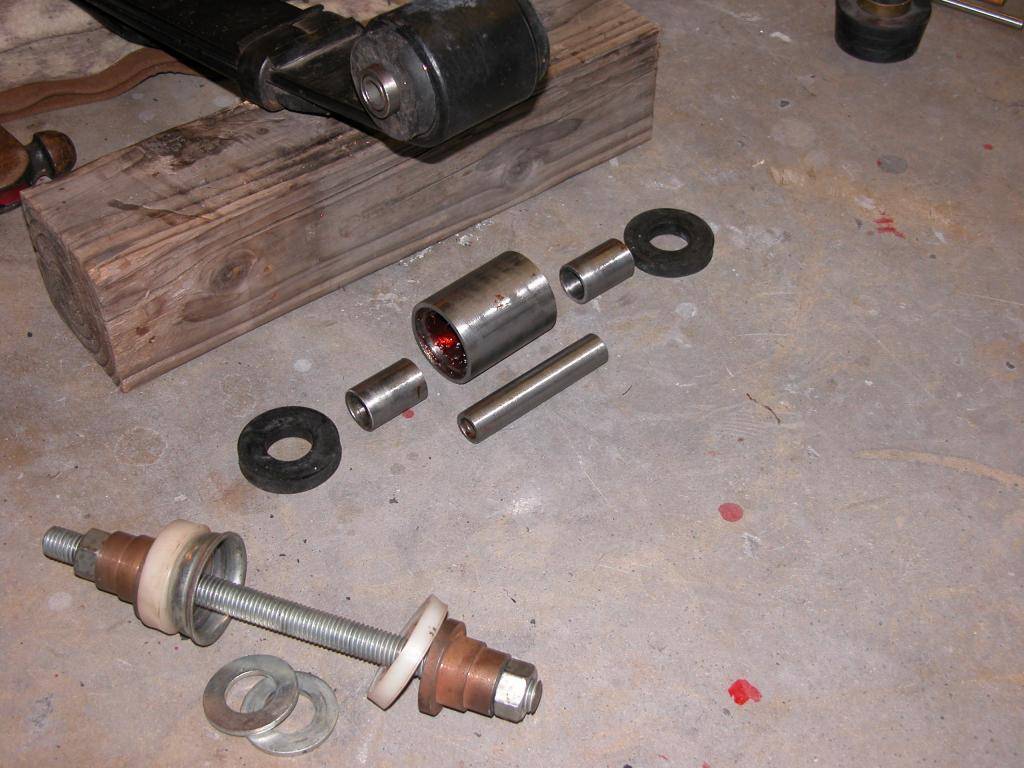
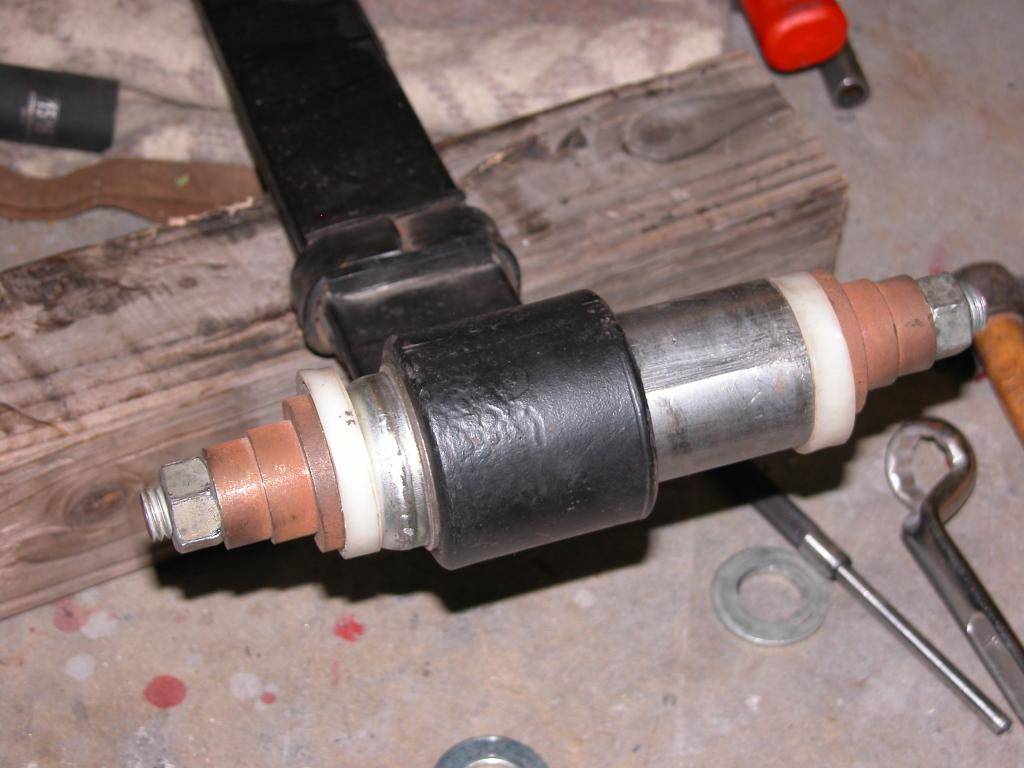
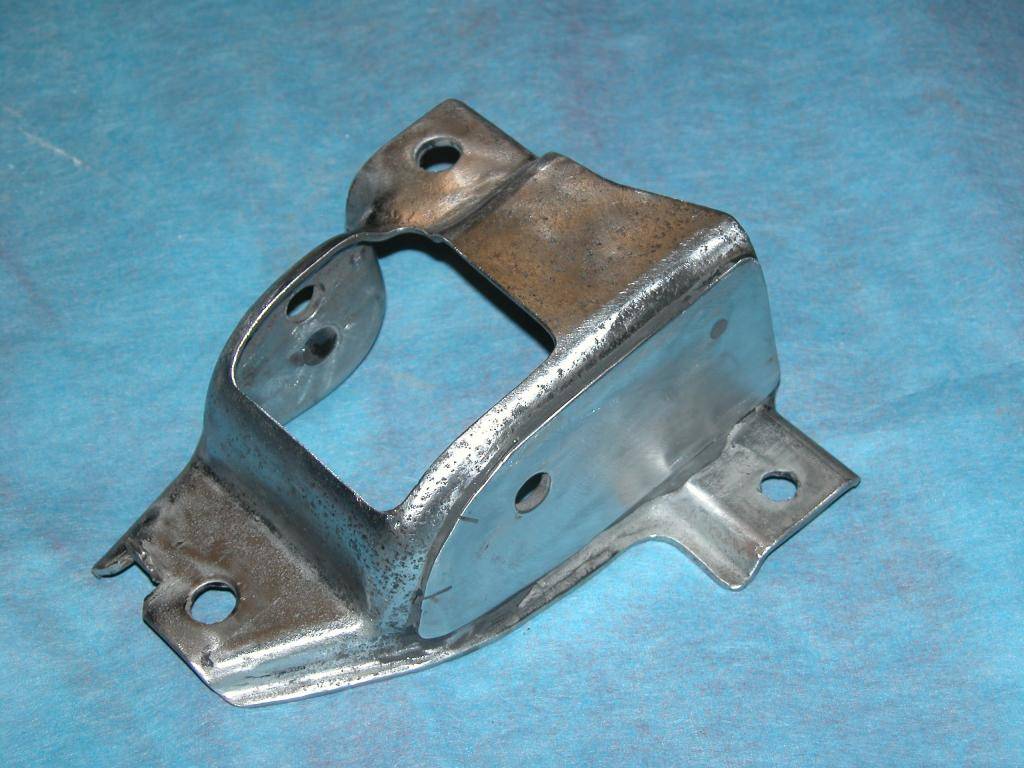
While I was waiting for the paint to fully cure so I could mask it off to keep the daily dust from other projects off it I did the Adams Mod by modifying the front rear spring mounting pockets and installed spherical spring eye bushings.
A while back I had the opportunity to chat with Harry Quackenboss. While the name may not be familiar to many, he was one of the young engineers who worked with Herb Adams building the SCCA 64 Tempest Grey Ghost car and continued as Adams SCCA chassis engineer through the Firebird days then as chassis engineer on the Adams NASCAR team when they fielded a Pontiac Grand Am at Daytona. Harry then became Chief engineer at Delorean when John left GM and started the Delorean Motor Company. Anyway, I've digressed. I told Harry about my car sent pics and explained my plans for it. Including, (as some of you may have guessed) the Adams Mod (raising the front mounting hole for the of F body leaf springs) which he was involved in coming up with back in the day during the SCCA Trans Am series. I wanted to know if this was still considered a good idea and would it work well with a spherical front leaf spring which I'd considered. His answer was yes both work and they will work well together for my use of the car. So I thought what better recommendation could I possibly get? So that was my project this past week.
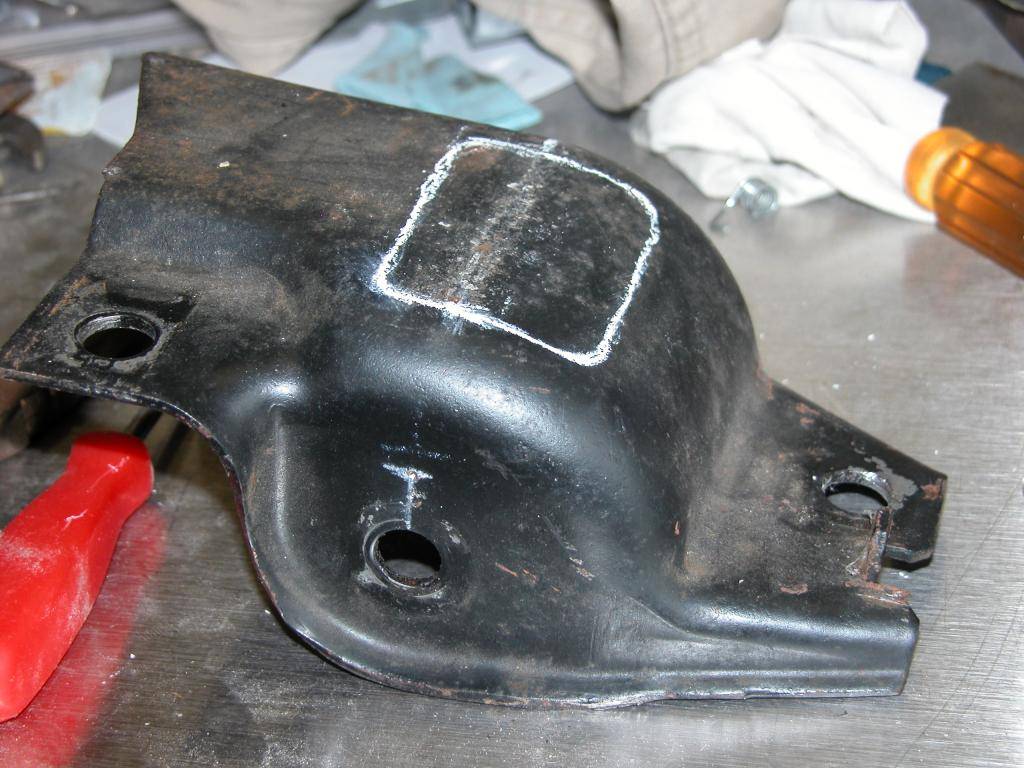
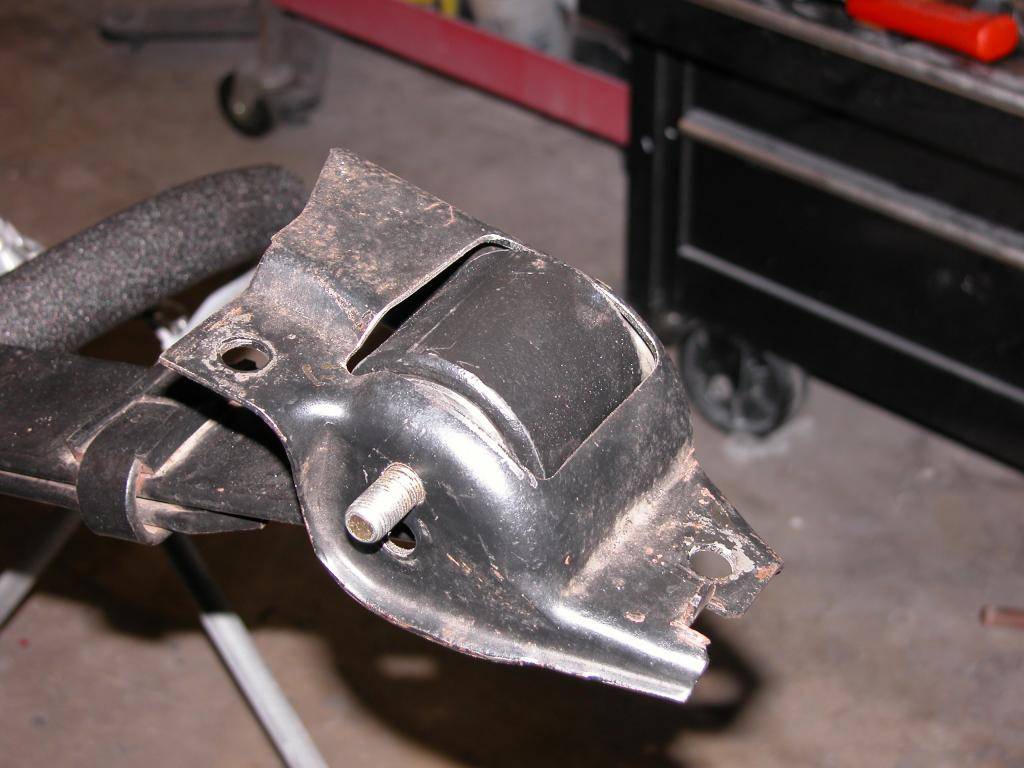
The Adams mod required windowing the spring pocket and the spherical bushing requires a little bigger window because the spring eye can pivot. I decided to reinforce the spring pocket by doubling/tripling up the sheet metal on the sides and across the rear by making some pieces I panel bonded to the pocket. I'll epoxy prime the pockets and paint red before installing in the car.


-
07-30-2014 #102
Registered User
- Join Date
- Mar 2007
- Location
- Florida
- Posts
- 2,391
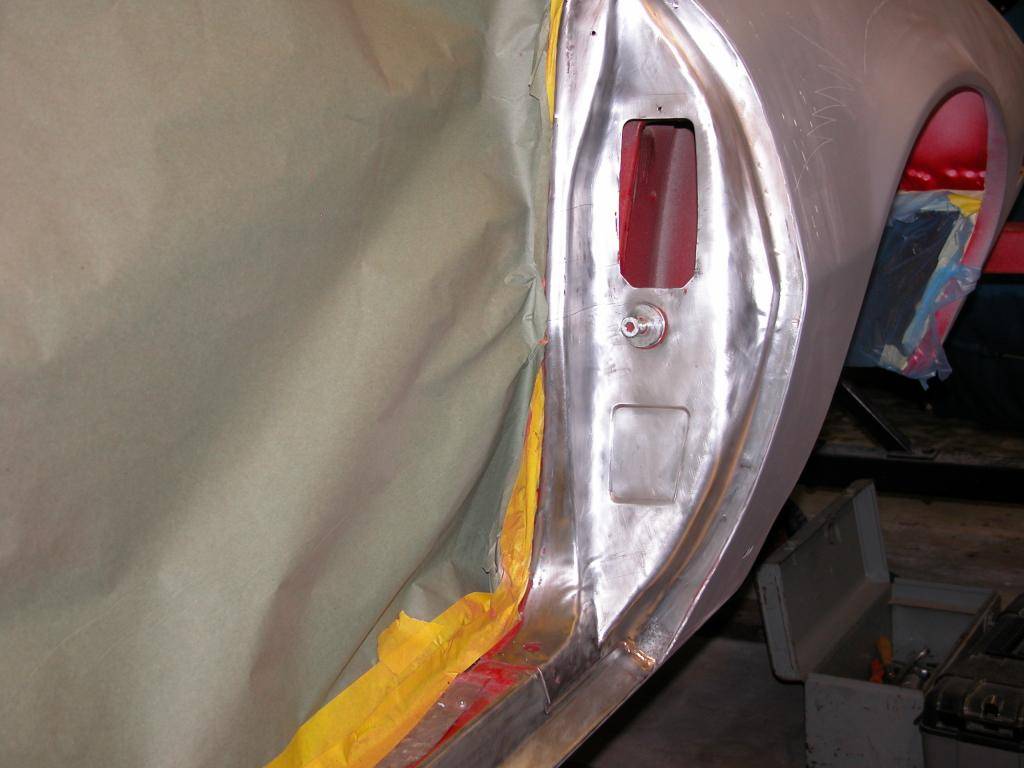
I took the drivers door off a couple weeks ago and it's been raining so frequently here during our south FL rainy season that I haven't had time to set up my makeshift outdoor sandblast booth which usually allows me to reclaim about 1/2 the blast media. I really wanted to get the drivers door edges done and in primer so I just blasted it with some previously reclaimed media and accepted the loss to keep things moving along. Outside of door was sanded to bare metal previously like the rest of the body exterior. I don't use the blaster on large sheetmetal that might warp. Then I did some rust pit repair on the bottom of the door, stripped the door jambs, got both in primer & rehung the door just to get it out of my way.


07-30-2014 #103
Registered User
- Join Date
- Aug 2011
- Posts
- 130
It's good to see the Firebird getting closer to the Camaro, John. If you need blast media, you know where to get it! ;^) My new wheels are coming tomorrow. I'll come over when I can get them on!
07-30-2014 #104
Registered User
- Join Date
- Mar 2007
- Location
- Florida
- Posts
- 2,391
I'm finally getting to the fun part since I'm almost done with stripping/rust repair and I've been painting things so they're ready for reassembly.
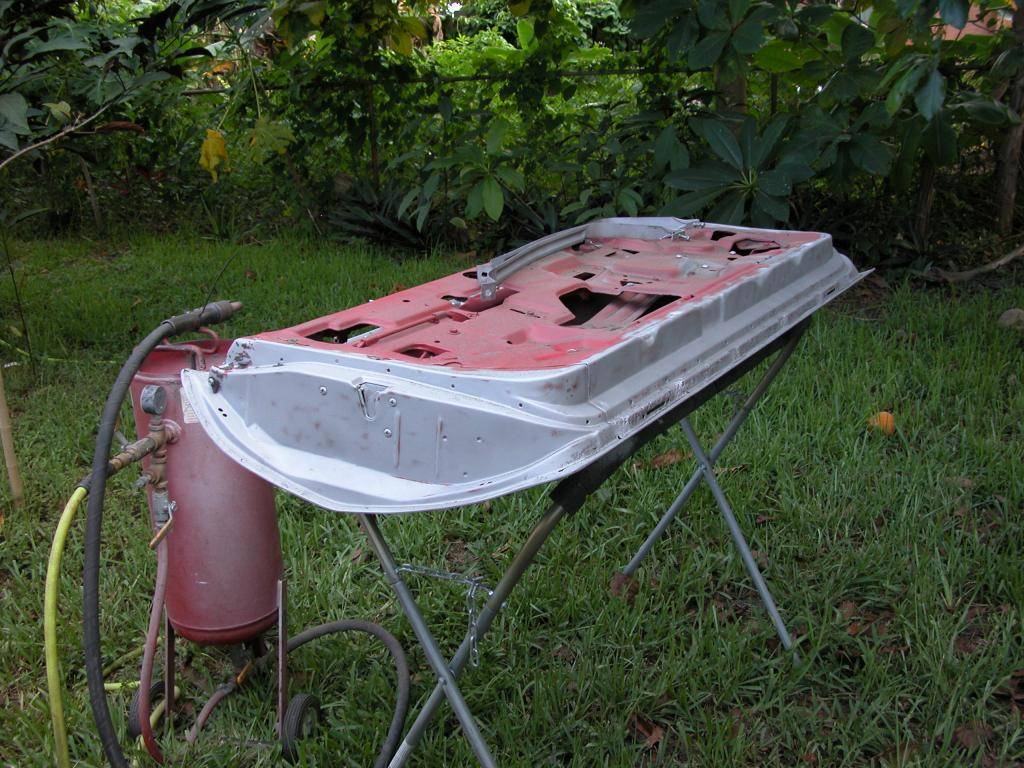
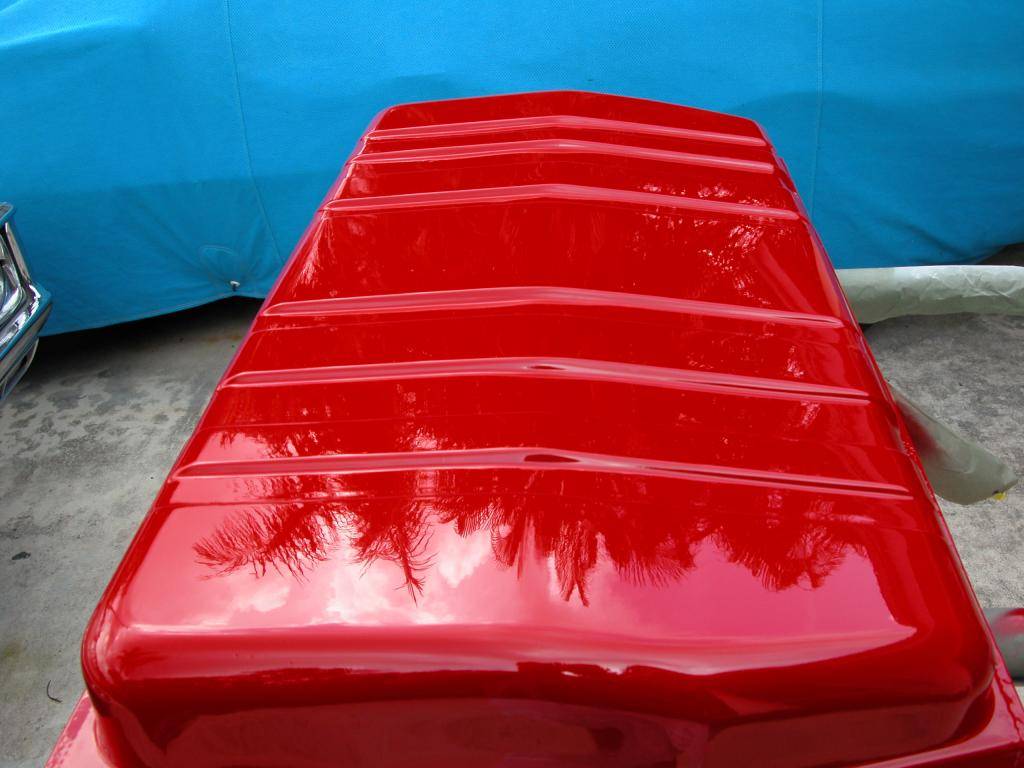
A while back I straightened & smoothed the fuel tank and once in epoxy primer I tucked it away. Normally I'm not a body color fuel tank kind of guy but I have a plan of using the fuel tank as the roof of the diffuser and if my plan works out hopefully it'll look pretty cool, if not I'll paint it black or tank tone. So I gave it a coat of high build primer, sanded smooth and shot it.
Since I've gotten carried away with the underside I figured I might as well make the rear spring pockets I modified look pretty too!


07-30-2014 #105
Registered User
- Join Date
- Aug 2011
- Posts
- 130
Well, that's ok, short dudes like me might actually SEE the tank... ;^)
09-25-2014 #106
Registered User
- Join Date
- Mar 2007
- Location
- Florida
- Posts
- 2,391
I've been working on stripping a lot of the small body parts that have to be painted. Some get media blasted and some sanded bare. When I get sick of stripping I recondition a part I can install or have ready for install when the time is right.
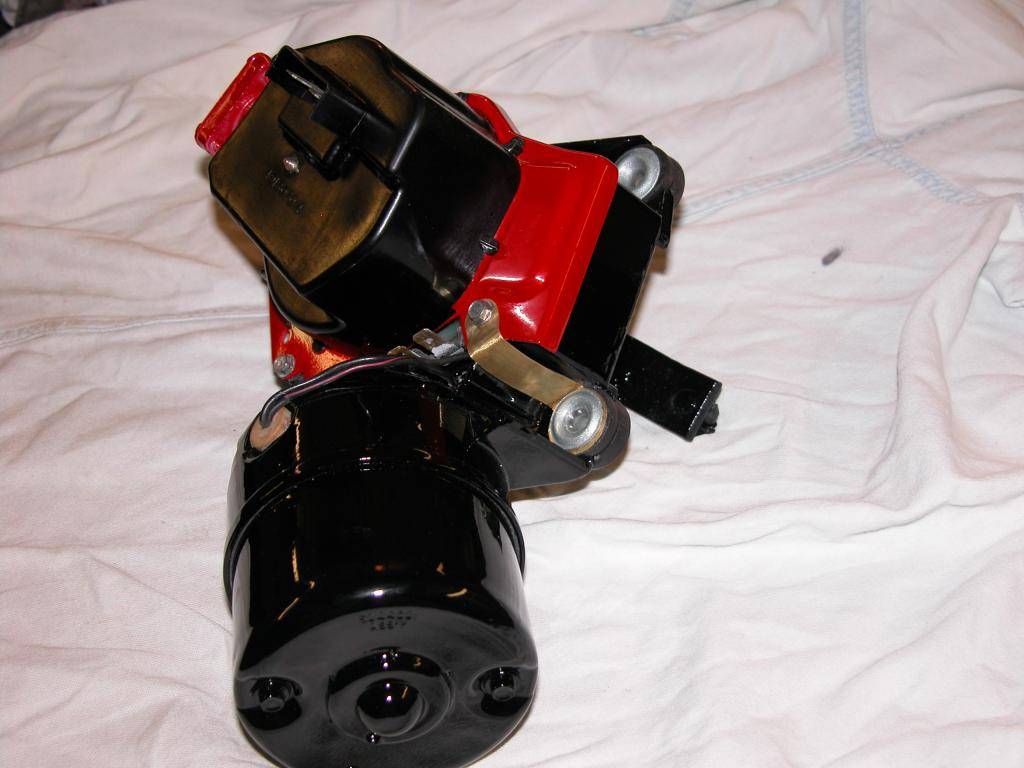
With the cowl painted I removed the windshield and reconditioned the inner cowl, wiper motor, and wiper transmission. Since I didn't relocate the wiper motor to make a fully smoothed firewall I decided to jazz it up a bit with custom paint and made a flat cap for the washer pump since I don't need windshield squirters and I really don't like the look of the white plastic (usually yellowed) piece with the hose nipples.
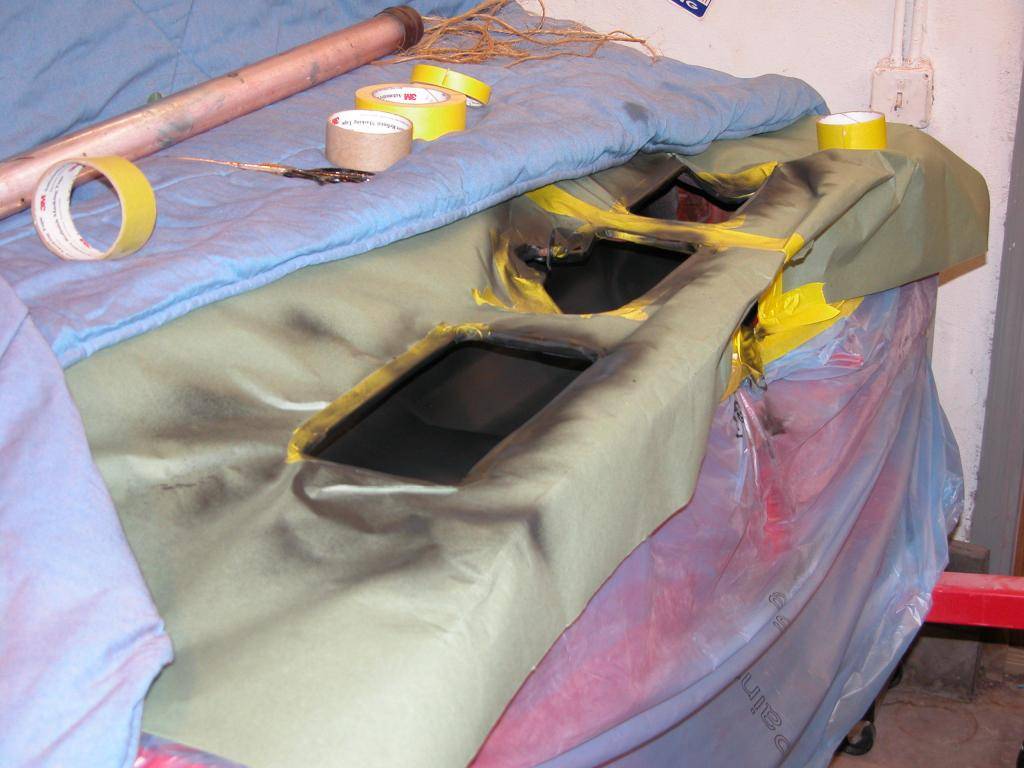

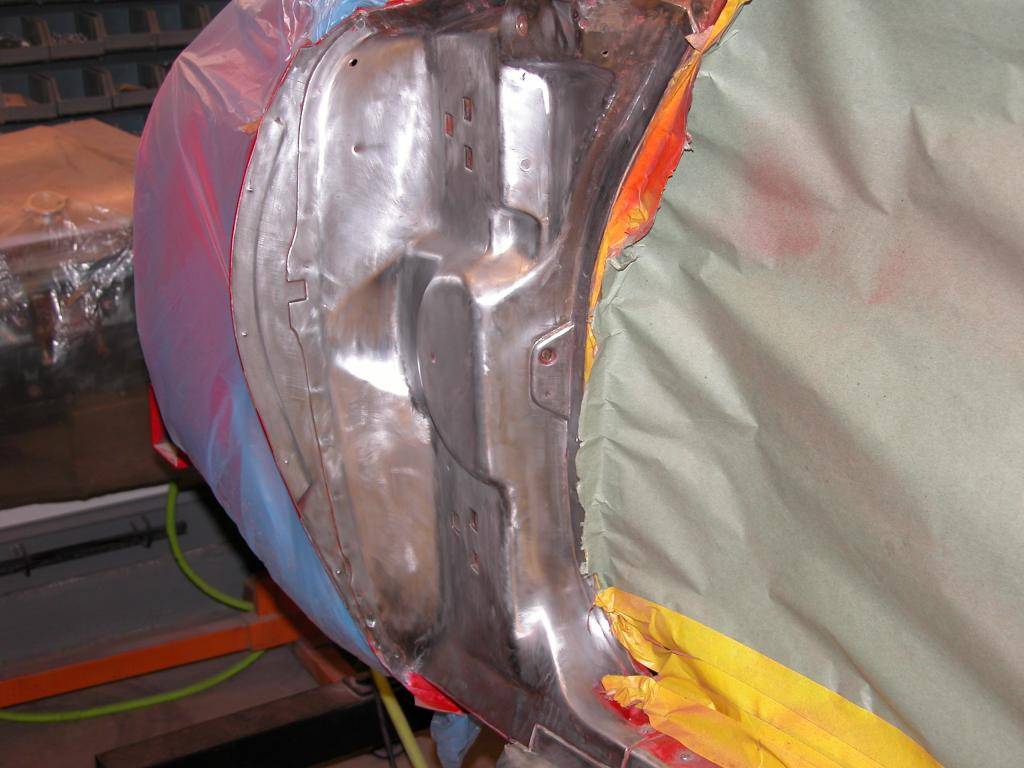
One of the things I'd wanted to do while doing the safety upgrade project several years ago was to block off the trunk area from the back seat in case of fire. These cars were designed with several large holes in the seat support and package tray and a back seat made with burlap. So I made some panels for the large openings and spot welded them in, the smaller openings are also being covered with metal. The idea here is to slow a fire down as much as possible without getting carried away fabricating a new rear firewall. I will retain rear shelf speakers but will make them removable to be replaced with steel plates for track days, races, etc.

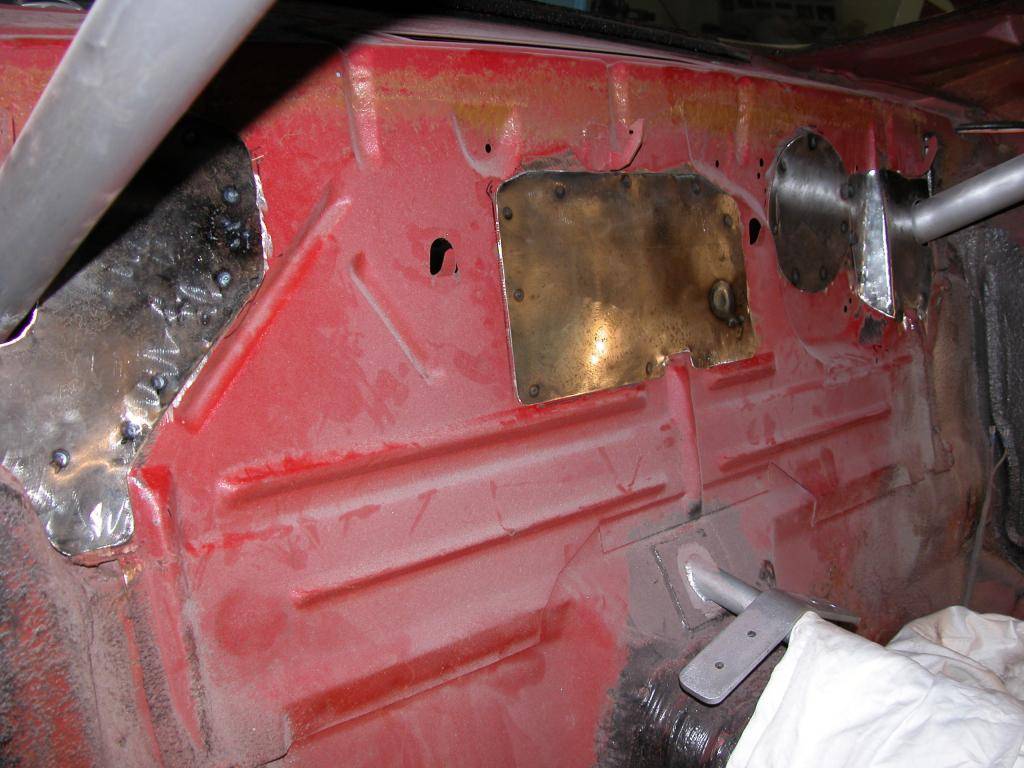
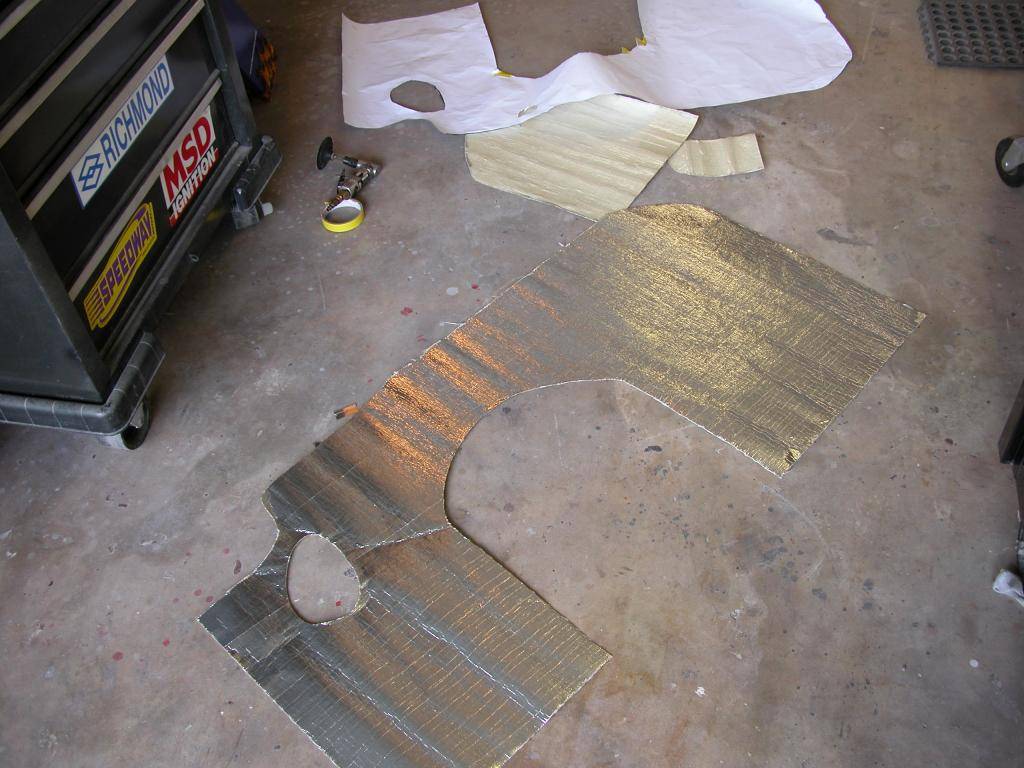
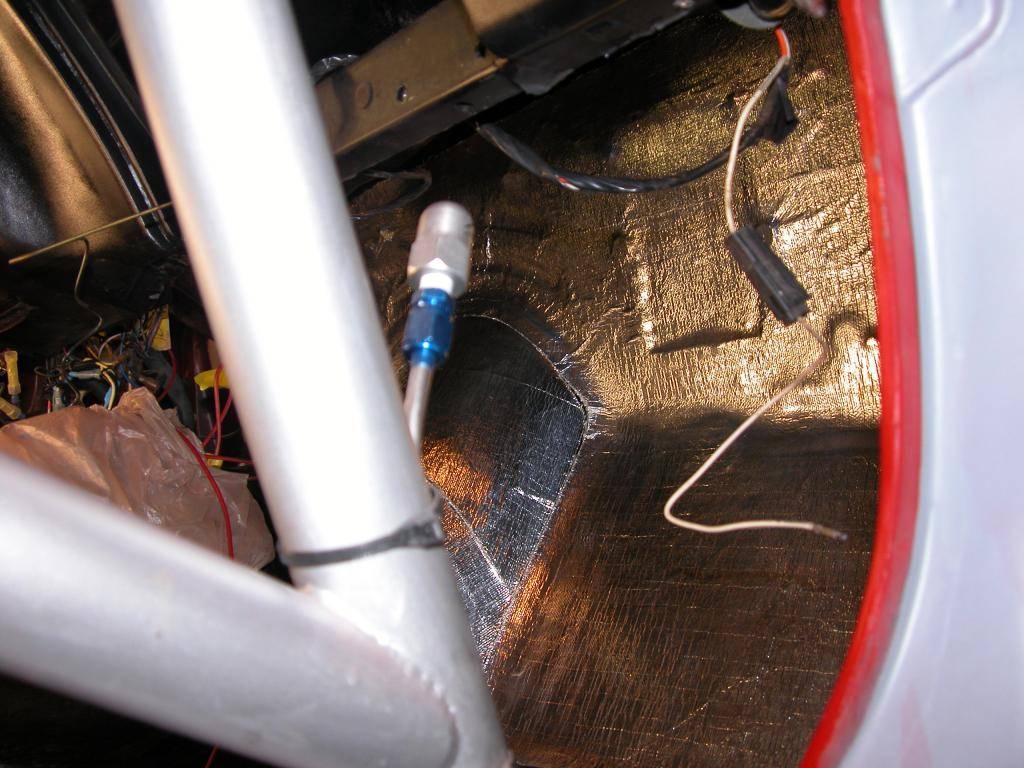
I'd removed the stock padding/sound deadener on the firewall behind the dash when I was closing off the AC opening and blower opening and I wanted something to provide a heat barrier that isn't easily flamable. I decided to cover the firewall with Thermo Tec Cool It aluminized heat barrier and ordered it from Ron Sutton Race Technology. It's a thin adhesive backed lightweight material designed for radiant heat applications. http://www.thermotec.com/products/13...t-barrier.html When it arrived I tested pieces of it for flamability and heat resistance when stuck to sheet metal and it seemed to work well so I installed it on the firewall, toe panels, and front of the transmission tunnel.
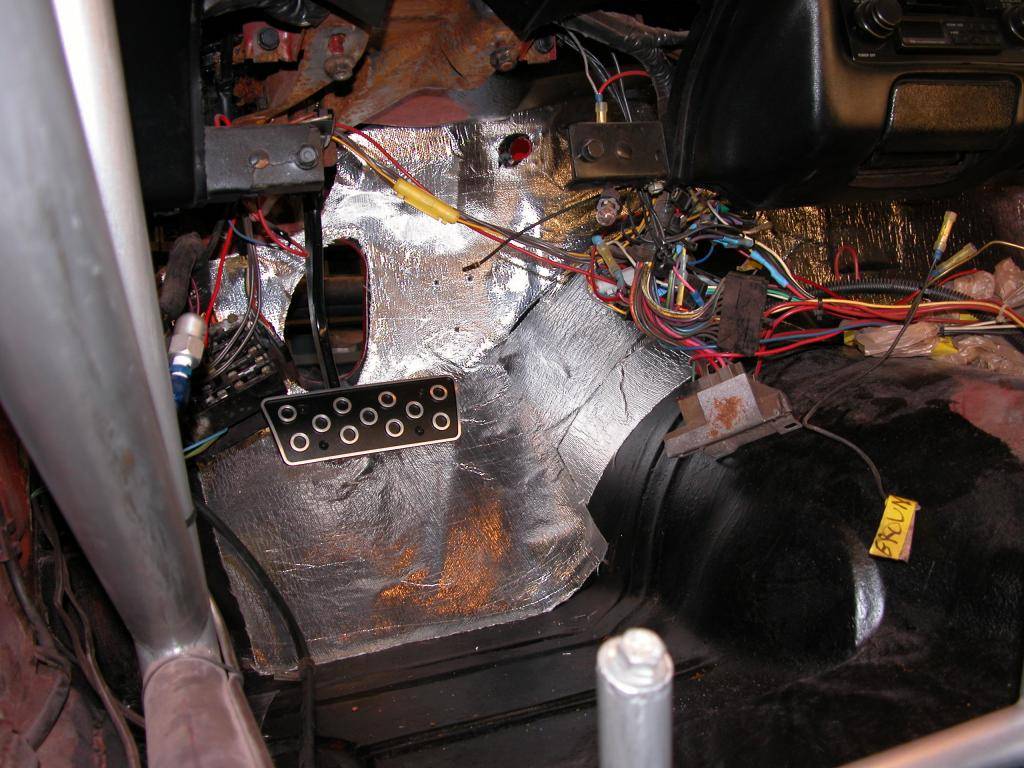
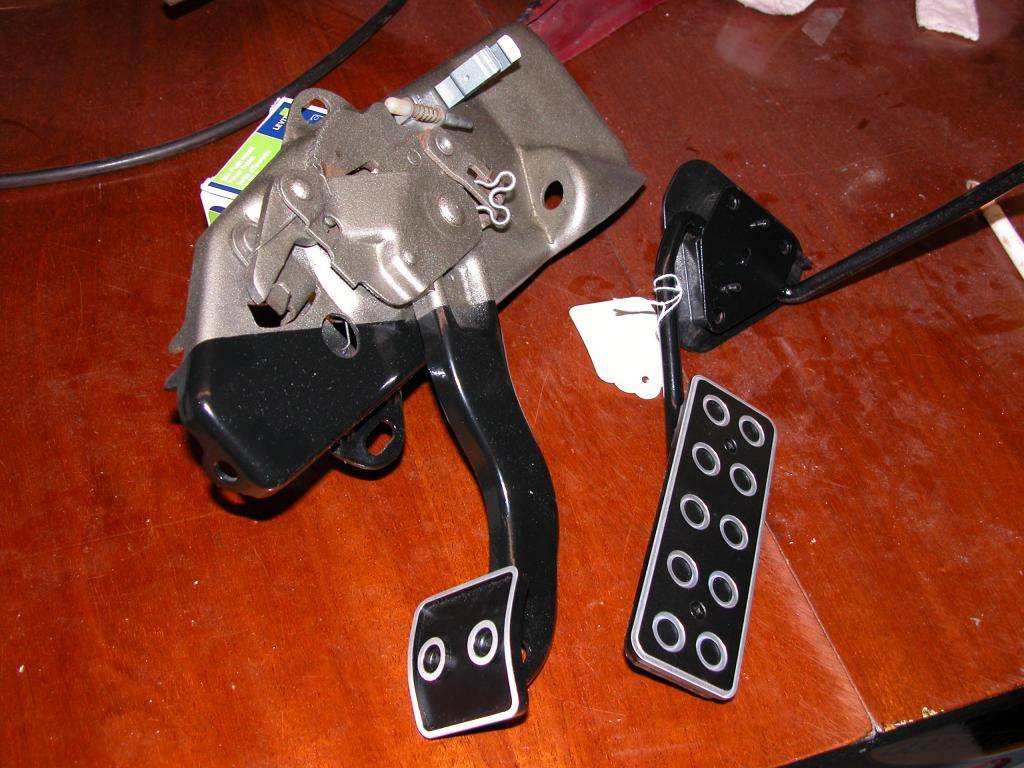
I media blasted the park brake mechanism and gas pedal then installed Modo Innovations pedal pads.
09-25-2014 #107 Registered User
- Join Date
- Apr 2006
- Location
- Atlanta GA
- Posts
- 7,477
I was wondering what you been up to John!
matter of fact im thinking to get a 2nd gen bird(of my birthyear) with a 70 nose and widebody it.. streetfight it if you will.
looks like you are coming along nicely!
09-26-2014 #108 Registered User
- Join Date
- Mar 2013
- Posts
- 308
Looks awesome so far. Can't wait to see more.
10-02-2014 #109
Registered User
- Join Date
- Mar 2007
- Location
- Florida
- Posts
- 2,391
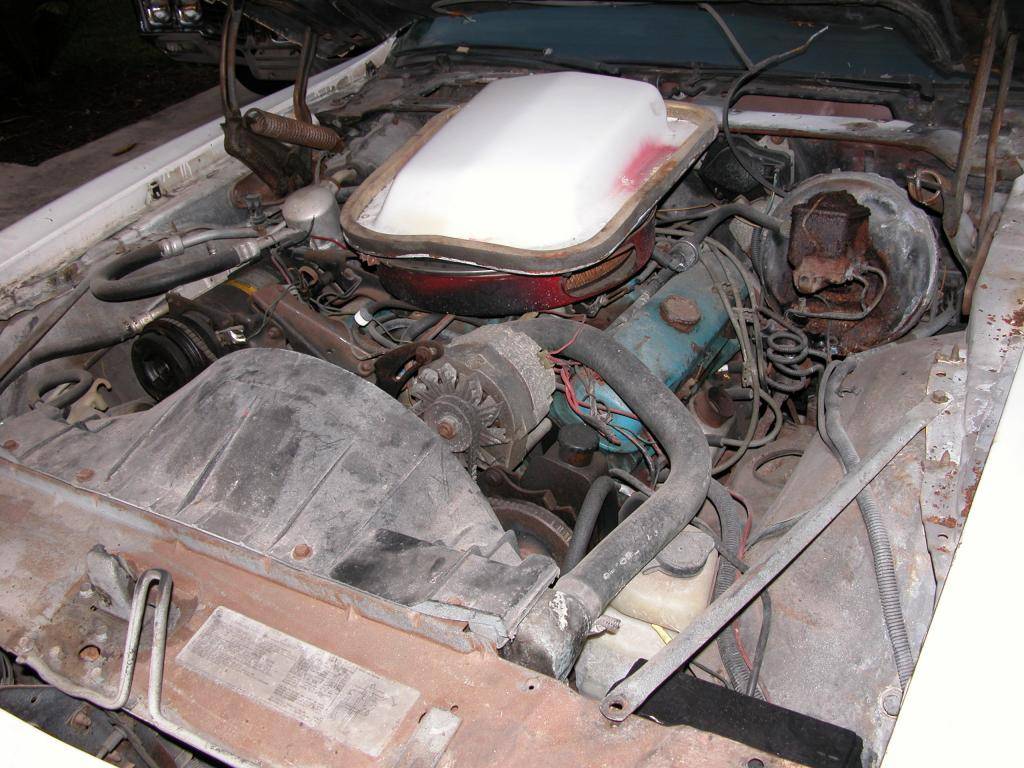
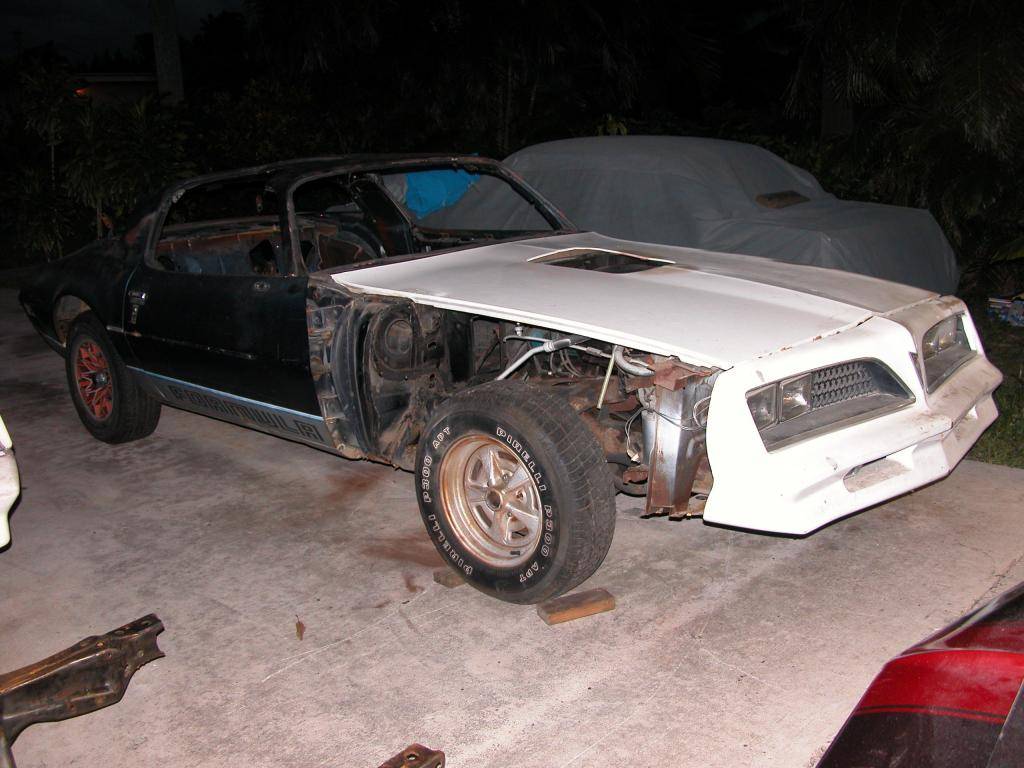
I've been busy working on several builds, nevermind trying to get some work done on my own cars! Will give more details when I have some time to write a post about them. Originally Posted by Mr.VENGEANCE

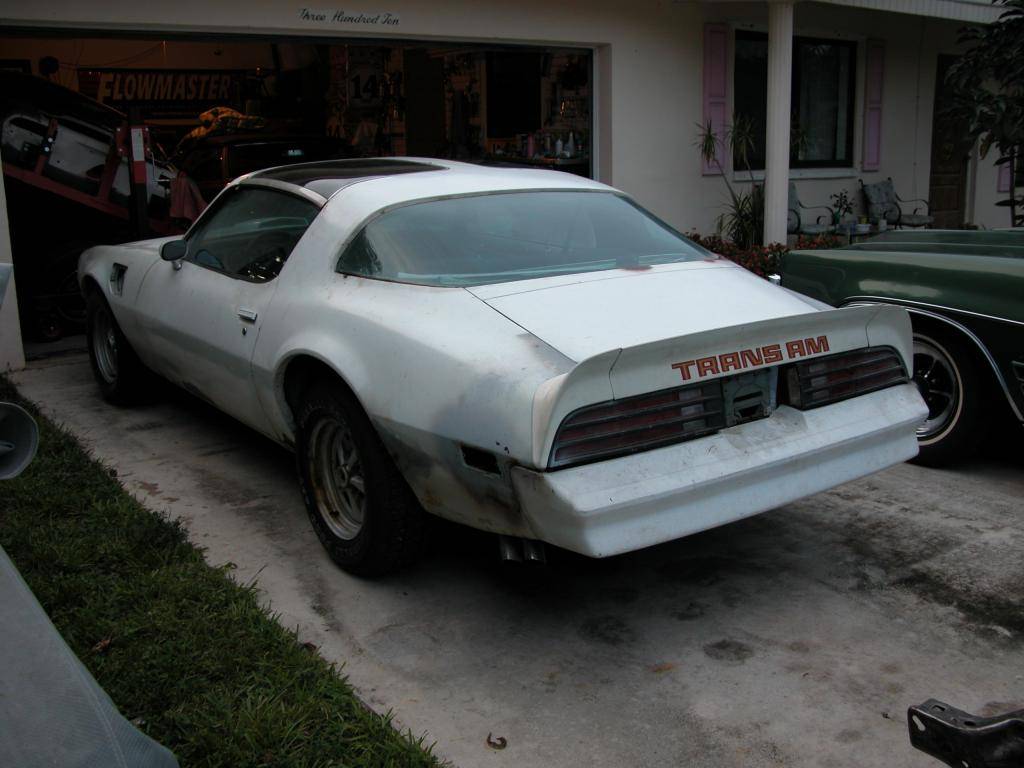
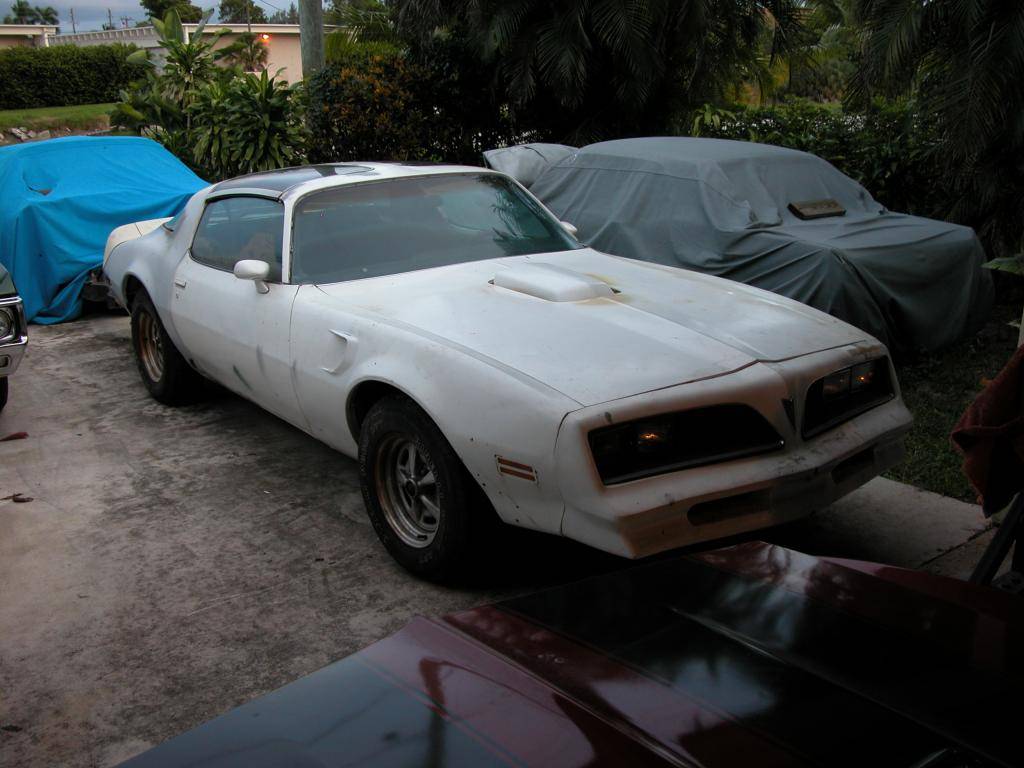
My donor car arrived today. If all goes well I'll be using the subframe out of it for my car.
10-02-2014 #110
Registered User
- Join Date
- Aug 2011
- Posts
- 130
Aw, man! You should have built the donor car! T-tops at 200 MPH! Bummer... BTW, how many cut and buffs did you do on that tank? I've got mirrors that aren't that buffed! Originally Posted by NOT A TA
10-02-2014 #111
Registered User
- Join Date
- Mar 2007
- Location
- Florida
- Posts
- 2,391
T Tops would probably eject themselves! I've gotta swap a front from another bird onto this tub. Originally Posted by rlodad
No cut & buff on the gas tank, thats as shot when I put it out to bake in the sun the next day. I gotz the mad skilz yo! ahahaha And no, the expert wasn't even around when I shot it. I told ya I liked doing body & paint and you didn't believe me.
10-02-2014 #112
Registered User
- Join Date
- Aug 2011
- Posts
- 130
Since when does liking something prove a person is good at it? Both true in your case and painting though. Originally Posted by NOT A TA
And the t-top at speed problem? panel bond!
YO!
;^)
10-09-2014 #113
Registered User
- Join Date
- Mar 2007
- Location
- Florida
- Posts
- 2,391
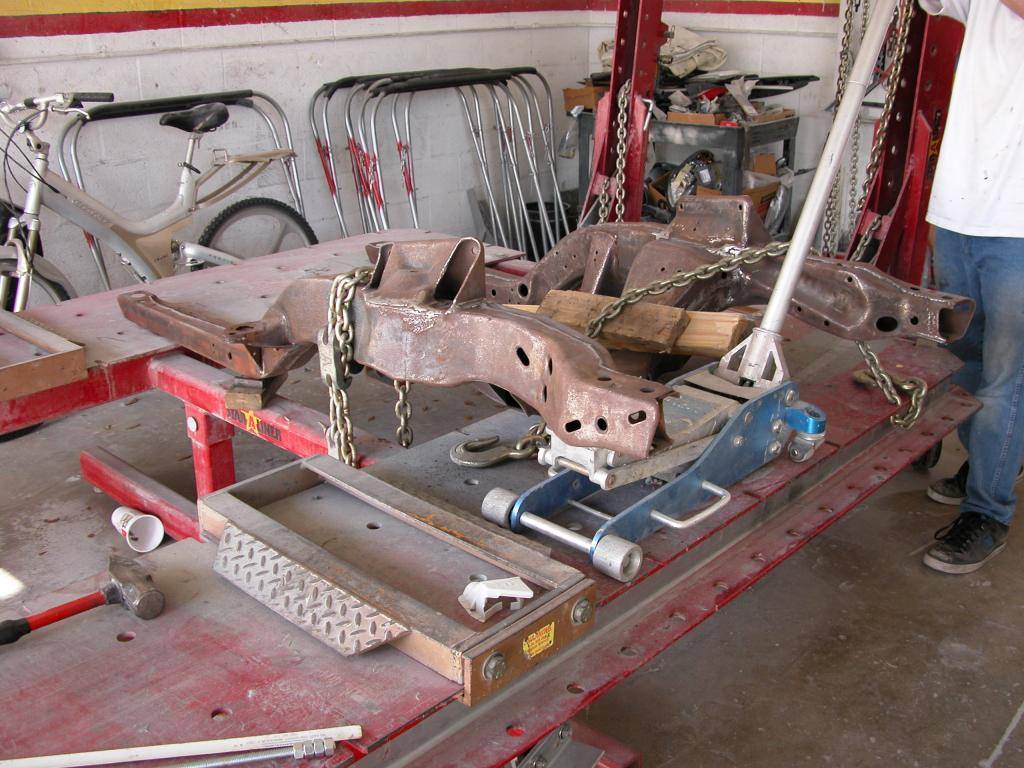
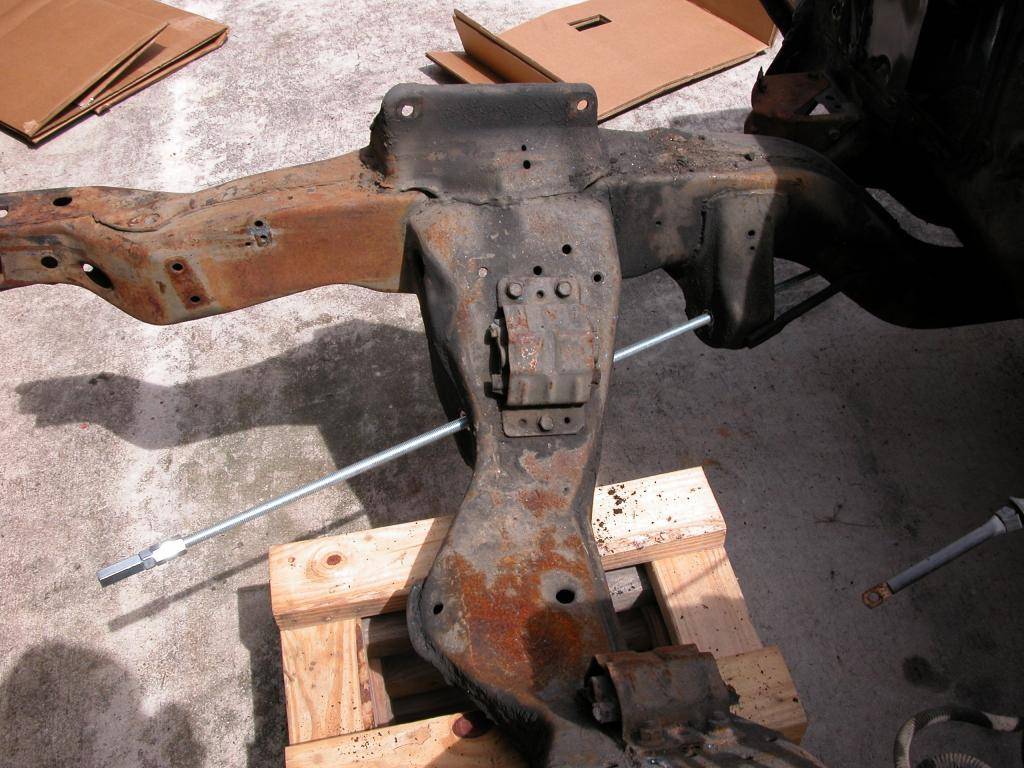
A while back I cleaned the subframe I took out of my car. Then I started checking alignment of the mounting points and found that the lower control mounting points on one side didn't line up as well as I would have liked. Soooo, I brought the subframe to a buddys body shop and mounted it up on a frame rack to tweak it a little with help and guidance from an experienced bodyman who straightens frames damaged in collisions in a production shop. We chained down the frame and started bending things a little at a time getting the LCA mounting holes lined up better until..... Oooooops! We kinked a rail. So after searching around and not finding a good used subframe for sale locally (new aftermarket out of my budget) I made a deal with a buddy of mine.
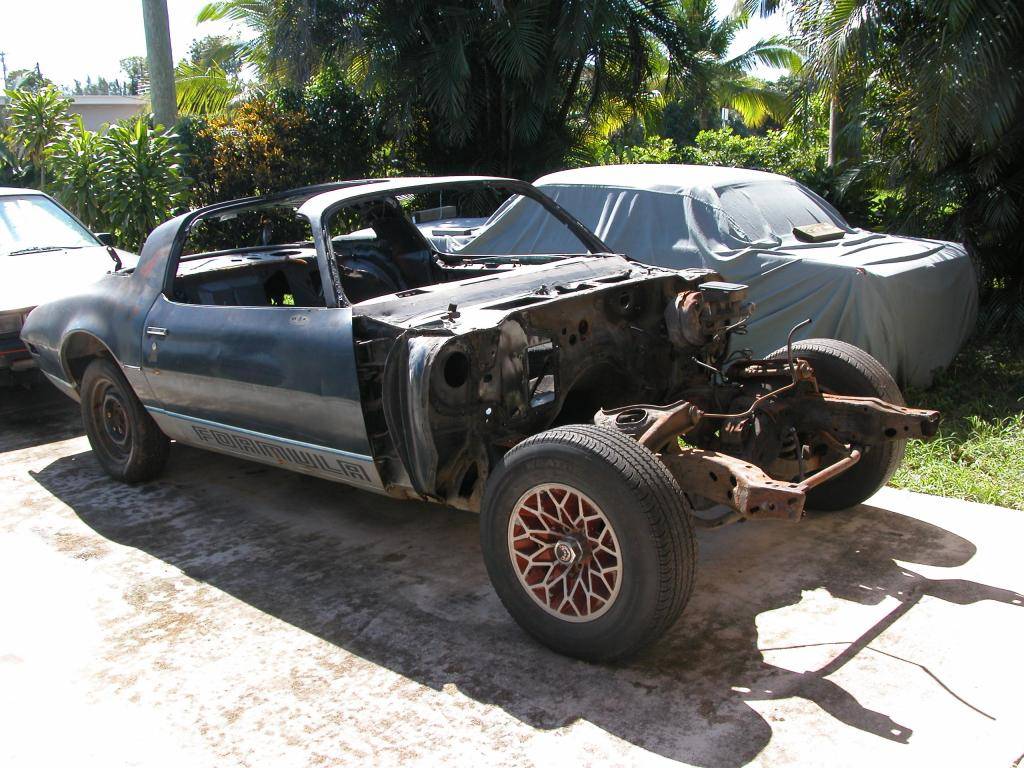
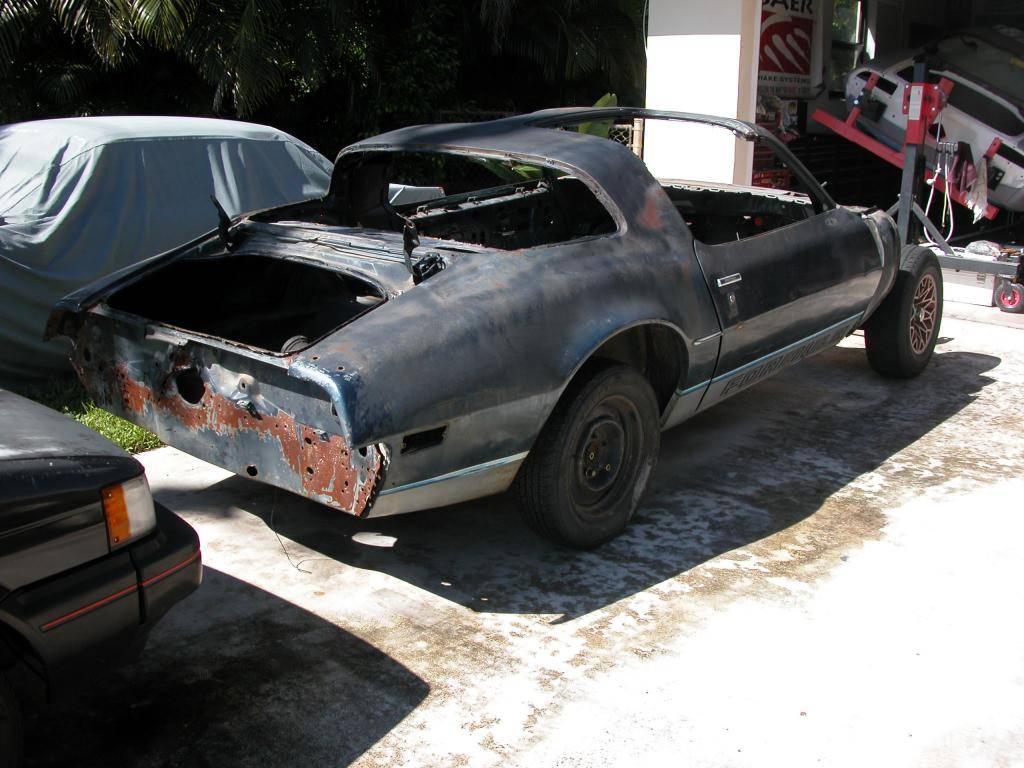
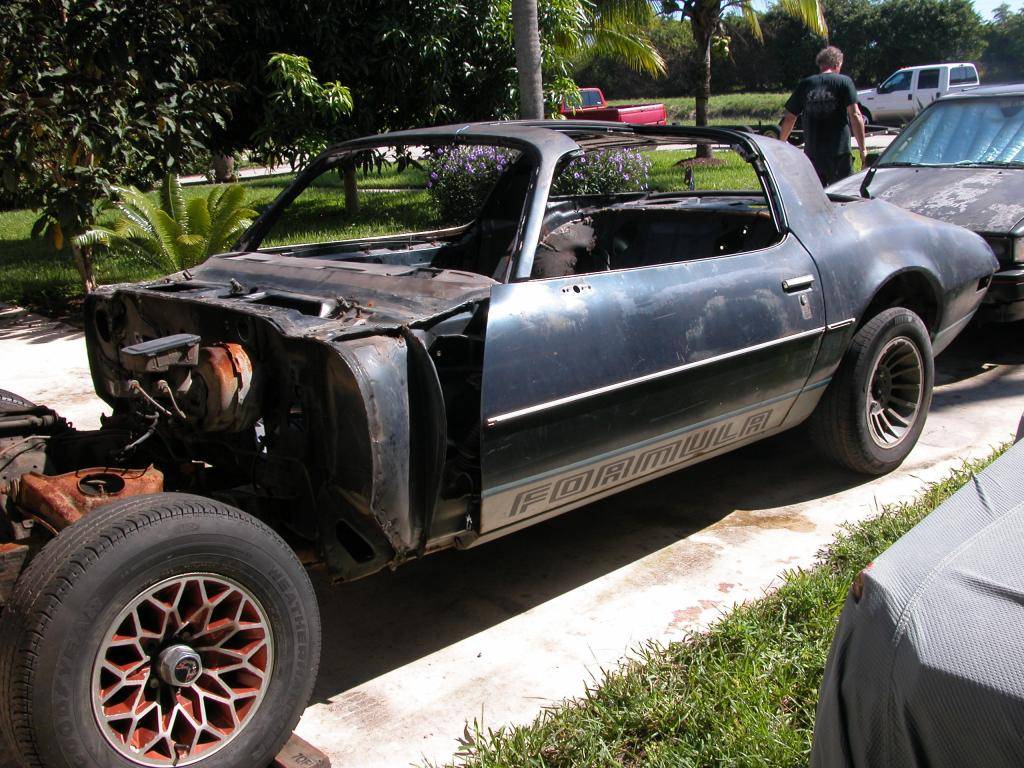
My bud wants to build a 78 TA for his wife and has a 81 Formula with a good unibody and a 78 TA with rusty back half from being in the Northeast early in it's life. I made a deal with him to take his cars and swap the front of his 78 to the rear of the 81 and he'll finish the tail panel swap later himself so it will look like a 78 TA. I get the leftover front subframe in exchange for the work swapping things enough for it to roll away (on a trailer) in one piece. This will save him a lot of work trying to do rust repair on the 78 unibody.
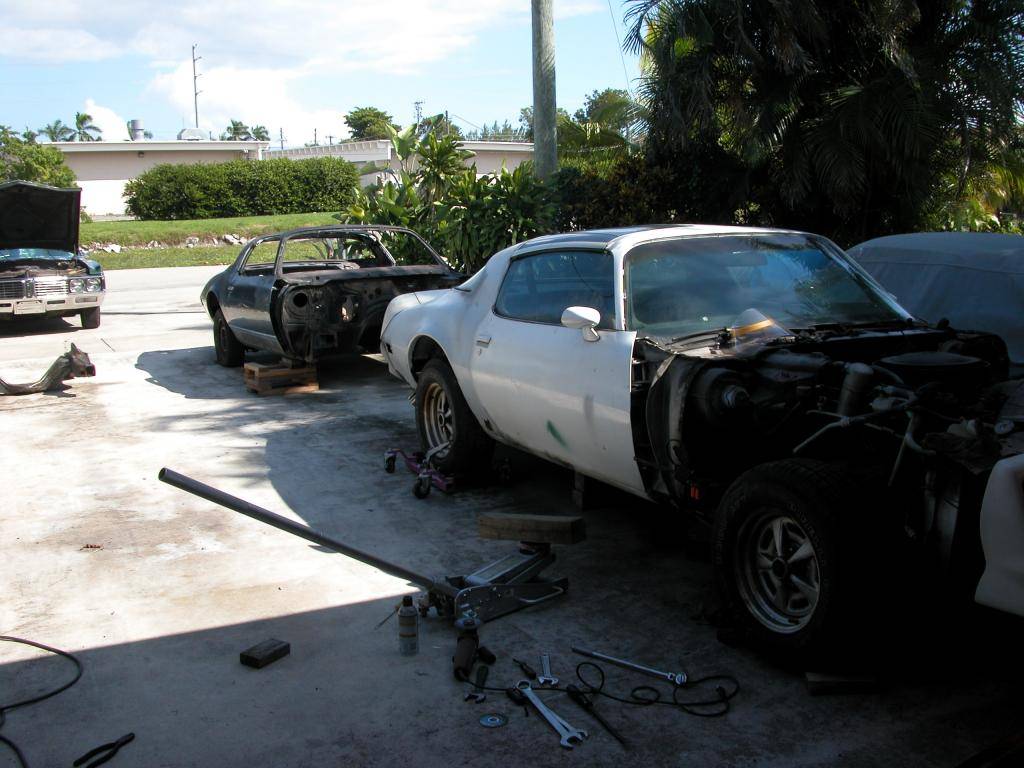
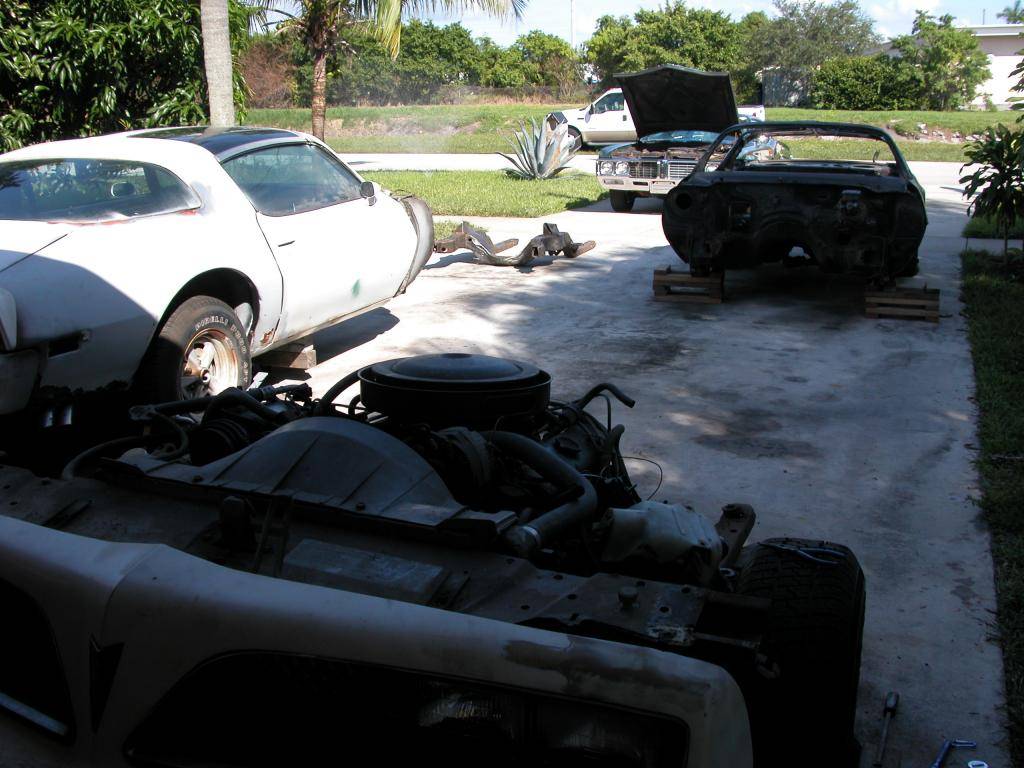
I began by having the 81 Formula dropped off to strip to the unibody. Stripped it, checked the subframe I'll be keeping then started cleaning the frame while waiting for the 78 to arrive. The 81 was a rear disc car so I'll be selling off the rear end and disc/disc specific components as a package.
Once the 78 arrived I started taking it apart enough to roll the unibody away from the subframe. Once it's separated I'll join the two halves. I plan on leaving the front of the 78 as complete as possible with the engine, trans etc. all in place. I've disconnected the driveshaft, shift cable, backdrive, speedometer cable and am working on the steering column now. I only have a couple hours a day after regular work so it'll take a few days to complete the swap.
10-10-2014 #114 Registered User
- Join Date
- Oct 2011
- Location
- Katy, Tx
- Posts
- 309
Very nice build...
10-15-2014 #115
Registered User
- Join Date
- Mar 2007
- Location
- Florida
- Posts
- 2,391
Although the LCA mounts were off a bit on my original subframe they certainly weren't out enough to be worth going through all the effort moving cars and labor swapping to get another frame! The LCA alignment was only off roughly 3/8". If I'd known we'd damage the frame I would have left it alone and used it as it was ( car drove fine and no binding of control arm) OR I would have stopped trying to make it perfect when we were within 1/8-1/4". Hindsight is 20/20 ahahaha.... live and learn!
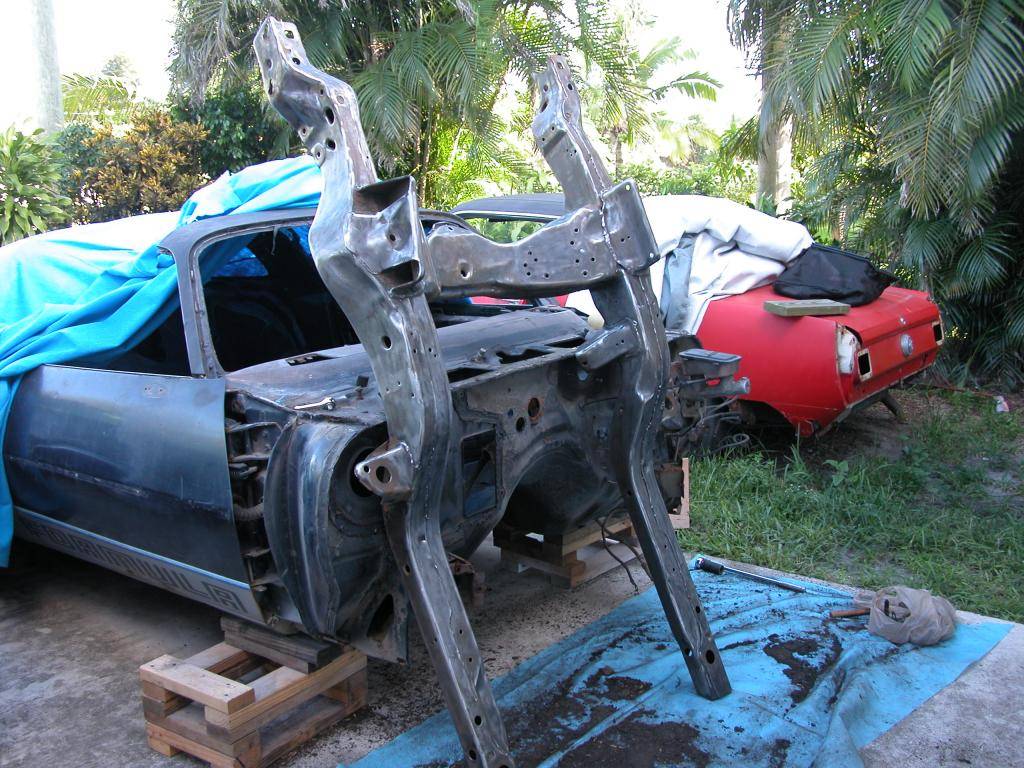
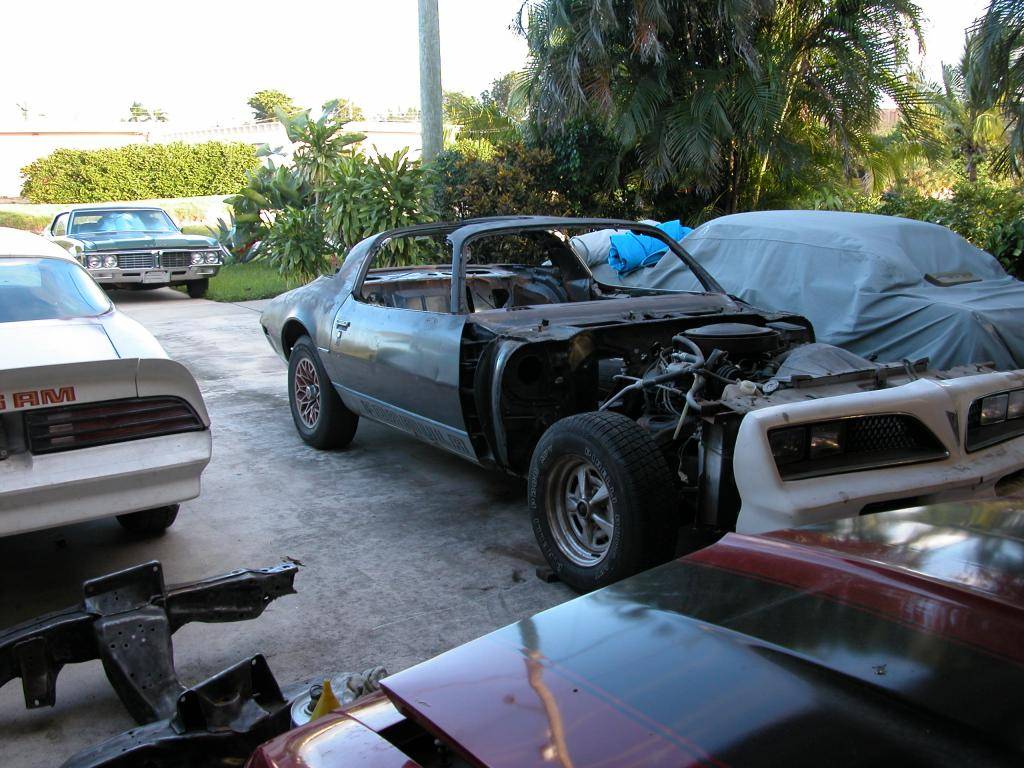
I finished up the body swap over the weekend and the owner picked up the car with his trailer while the white shell met up with it at the owners shop via a rollback flatbed. Then (maybe eventually) the owner will swap the interior etc. from the white shell to the new car. Also he wanted the fenders left off for bodywork.
Whenever possible I have someone watch when I do weird stuff just in case something goes wrong or I need a hand. I had my bud Jeff hang out a few minutes while I moved the body into position and bolted the subframe to the new body. People ask how I do these kinds of swaps by myself so I had him shoot a quick video of moving the body onto the frame. Body was within 1/4 " alignment with the subframe at the end of the video and all bolted up in about 15 minutes.
Very short video. No it's not speeded up or edited video, thats real time. Just over a minute up the driveway and ready to bolt. https://www.youtube.com/watch?v=H-XA...ature=youtu.be

Last edited by NOT A TA; 10-15-2014 at 06:24 PM.
10-16-2014 #116
Registered User
- Join Date
- Aug 2011
- Posts
- 130
Whenever possible I have someone watch when I do weird stuff just in case something goes wrong or I need a hand. I had my bud Jeff hang out a few minutes while I moved the body into position and bolted the subframe to the new body. People ask how I do these kinds of swaps by myself so I had him shoot a quick video of moving the body onto the frame. Body was within 1/4 " alignment with the subframe at the end of the video and all bolted up in about 15 minutes.
Now, John,
The problem here as I see it is that our wonderful sponsors here at ProTouring.com have lost the insight they need to market their products to us. Here we have an old man pushing cars around and working subframes over and over until he is close to death. As I see it DSE, TCI, Chassisworks, BMI, Art Morrison, Schwartz or others could save an old, frail, hard working American man from certain doom by simply packing up a performance subframe (with A-arms, 14" ceramic brakes and steering box/rack) and sending it to Delray Beach. People are sending millions for Ebola eradication and it doesn't help! Here we have an old man near death and any of these companies could make a donation and certainly prolong the life of this frail old guy with poor vision and a bad back. (See shirt in video). What is the world coming to?
Your devoted former part time employer...
;^)
Brad
12-07-2014 #117
Registered User
- Join Date
- Mar 2007
- Location
- Florida
- Posts
- 2,391
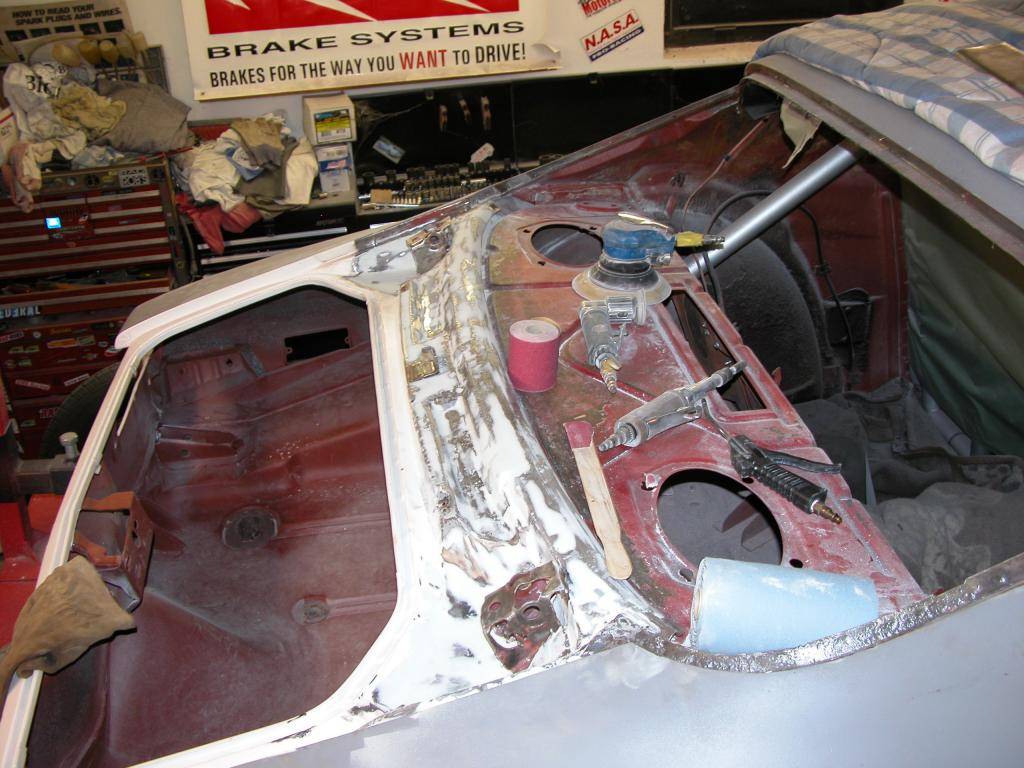
I've been working on figuring out the differences between the early and late 2nd gen frames so hopefully I'll be able to modify the 81 frame so it's suitable for the 70. It's better to use a 70-74 frame for cars built during those years or a 75 - 81 frame for cars built 75 and later. I looked for an early frame for quite a while locally without finding one so I'm trying the later style with mods. Meanwhile I've been prepping the top and bottom of the rear shelf area for paint. The inner filler panel between the rear window and deck lid on 2nd gens usually get rusty and need replacement. This one had surface rust but was only rusted through in one small area so I cleaned the whole area, used some panel bond to fill pits, put in some new metal where it was rusted through, and skim coated the whole area with filler. Will seal it up with epoxy primer.
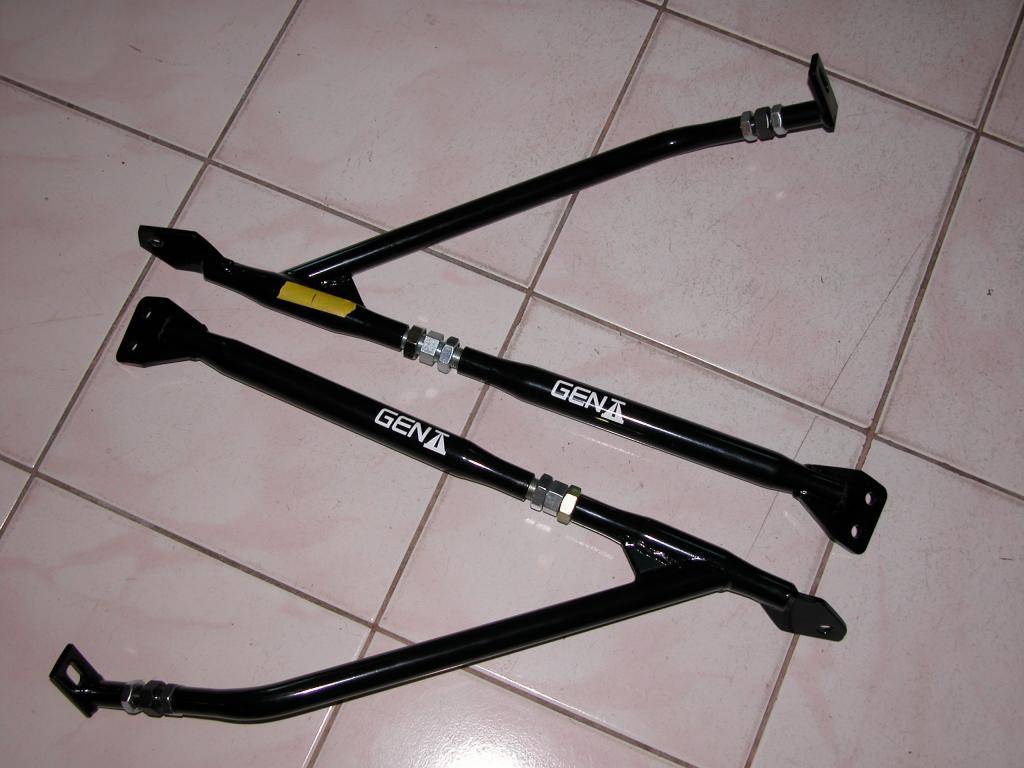
My adjustable G-braces made by PRO-TOURING F-BODY under the Gen-II Racing Products label arrived. I got them from a member on a forum that purchased them and decided against the install. The spherical front spring eye bushings I showed in previous posts were from the same company and I also purchased them from a member on a forum. I'm planning on using PTFB solid body mounts. I was running Poly body mount bushings previously with bolt in frame connectors because thats what was available many years ago when I first built the car but now I'll use the PTFB solid mounts and weld in connectors.
These G-braces triangulate the firewall with the subframe attaching at the upper control arm. I'll be making additional braces to work with these to stiffen them up more.
12-11-2014 #118
Registered User
- Join Date
- Mar 2007
- Location
- Florida
- Posts
- 2,391
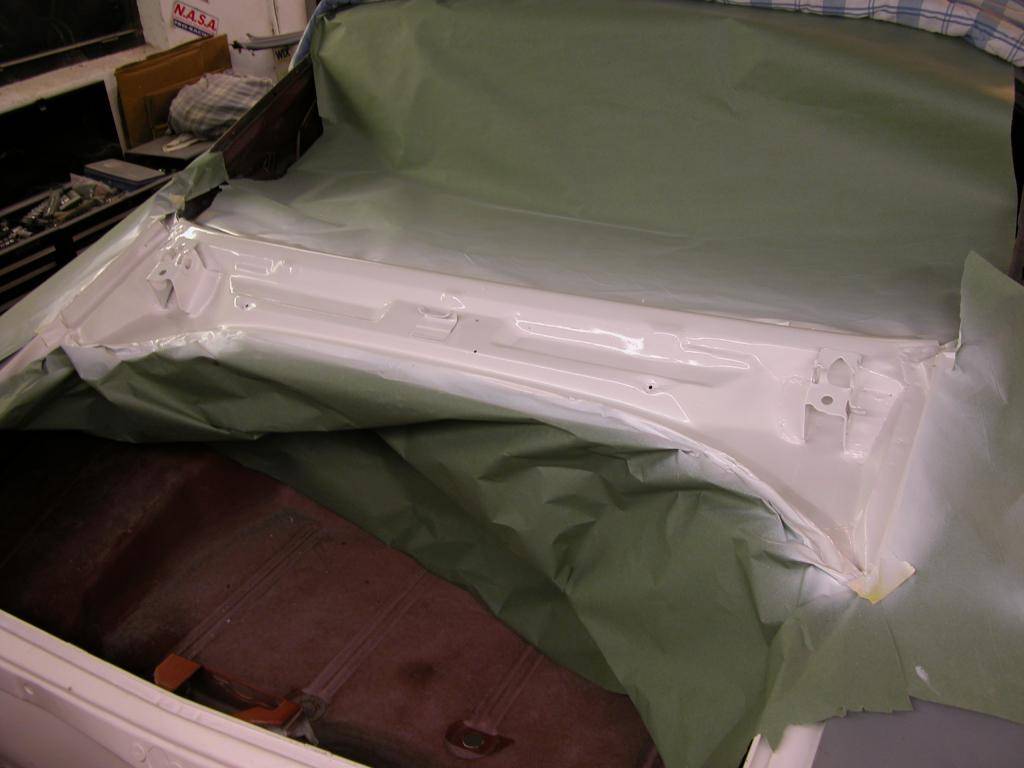
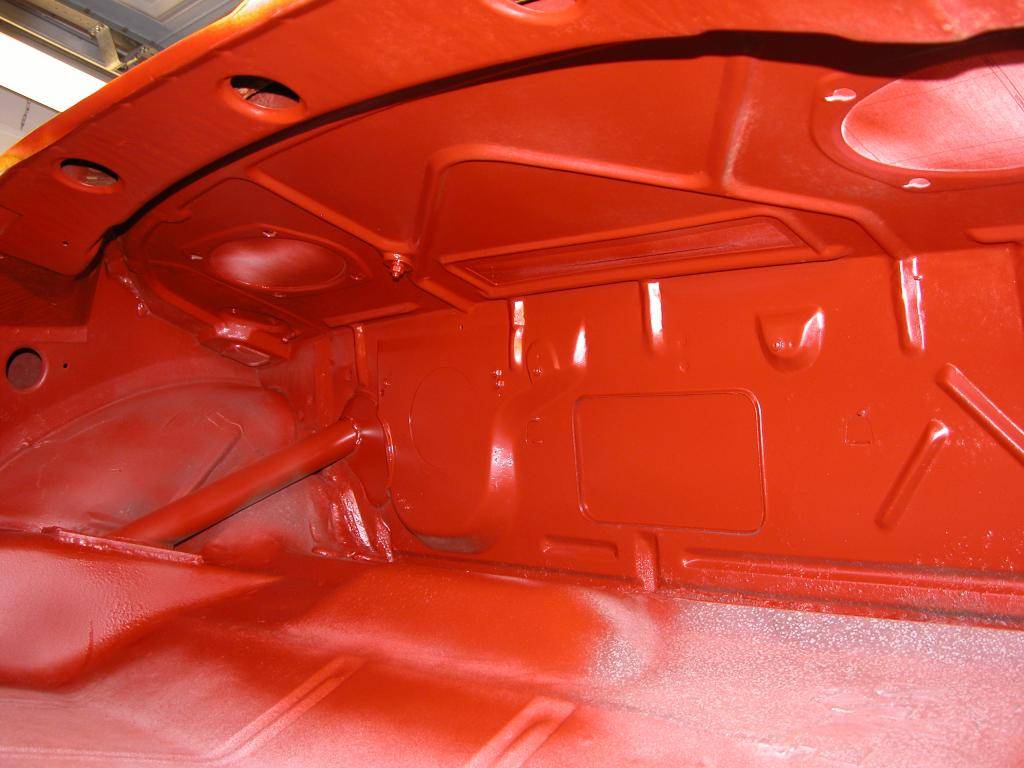
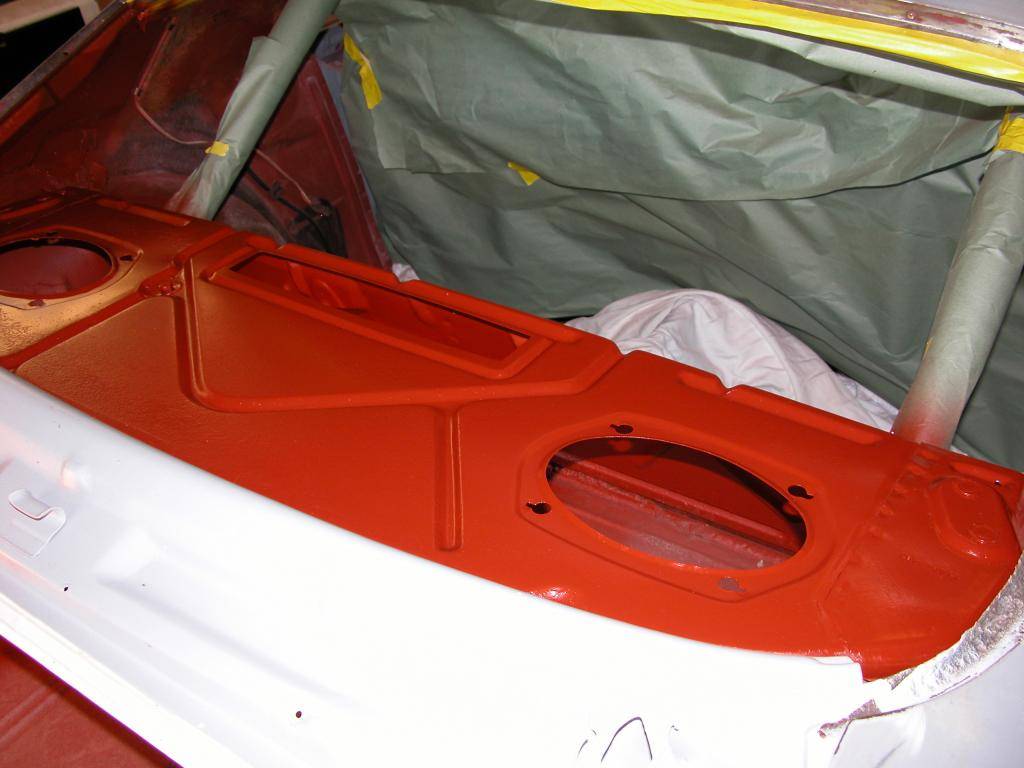
I shot some epoxy primer and then some high build primer on the inner filler panel and then did some prep work on the underside of the filler panel as well as the rear seat firewall I'd welded the panels in. Then I shot them with some red epoxy primer that kinda resembles the original primer which will show in the trunk in some areas after splatter paint gets applied giving the trunk a somewhat stock appearance. I know it seems silly "restoring" the trunk area appearance of such a modified car but it's what I want. I even have a reproduction trunk mat I use unless the cars getting raced or tracked.
I made a panel to cover the rectangular opening in the package tray I haven't installed yet and am still considering options to cover the speaker holes during track/race events to complete the firewall between trunk and passenger compartment.

12-12-2014 #119 Registered User
- Join Date
- Dec 2012
- Location
- Boise, Idaho
- Posts
- 84
Beautiful work John
Toby D.
IronDougal racing
I race Me, Myself, and Iron.
https://www.pro-touring.com/showthre...-1973-Trans-Am
FaceBookME
12-13-2014 #120 Registered User
- Join Date
- Oct 2012
- Posts
- 132

Learning lots from your build!! Thanks and looks great!
Gordon in Calgary


 Reply With Quote