

Results 61 to 80 of 174
-
11-13-2011 #61

 Registered User
- Join Date
- May 2011
- Posts
- 311
I have decided to take my croosmember brackets out and try and fab some new ones and weld them in like yours. I have some 1/8 inch plate laying around from boxing the frame. Is that good enough or thicker gauge. I'm off for 10 day during Thanksgiving I will keep you posted.
64 F-85 post car Resto-Mod project-my RV when I retire
-
11-14-2011 #62 Registered User
- Join Date
- Aug 2011
- Location
- Burleson, TX
- Posts
- 130
 therobki-1/8" should be more than adequate.
 Originally Posted by therobski

11-14-2011 #63
Registered User
- Join Date
- Aug 2011
- Location
- Burleson, TX
- Posts
- 130
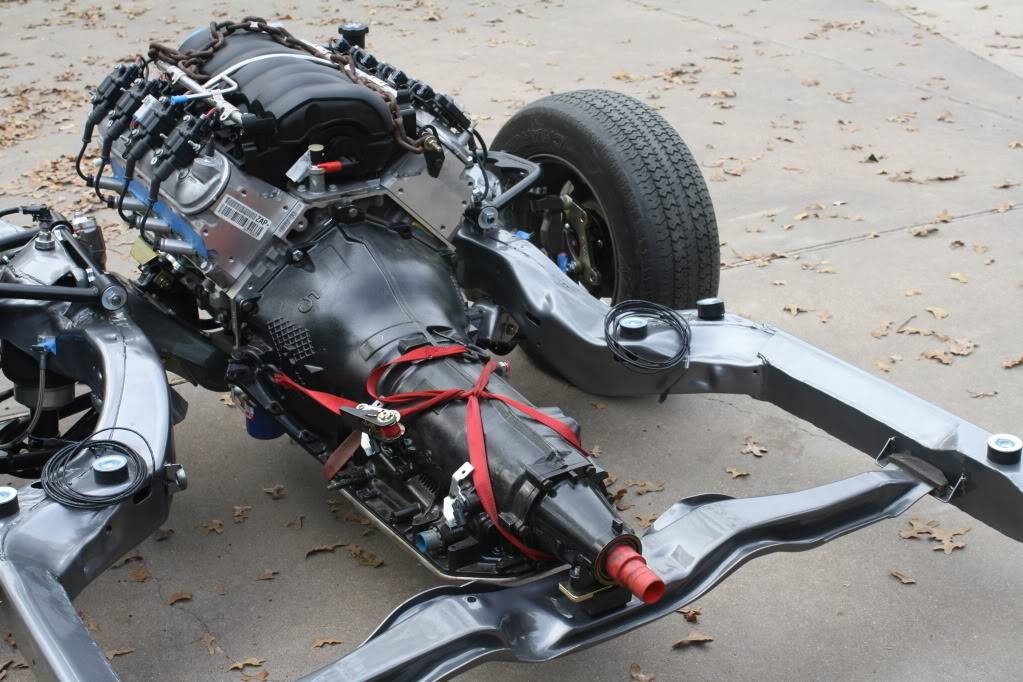
Motor and Trans back in
The weekend was very busy-Just not for the LeMans. With the help of my oldest son and my new "Bubbafied" Pastor we did get the motor and trans put in place:

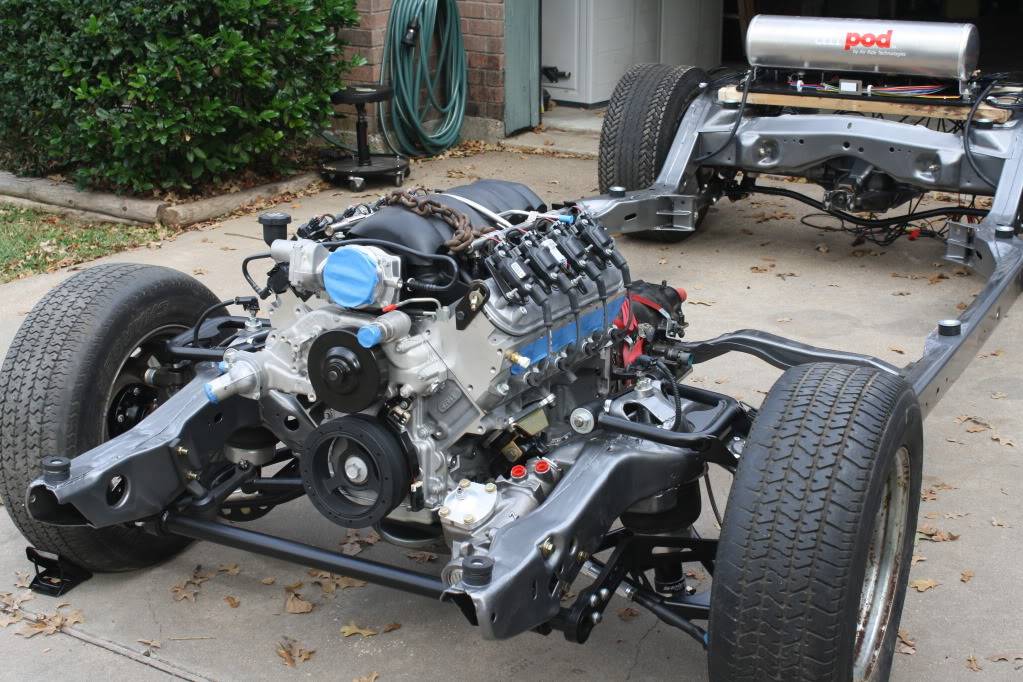
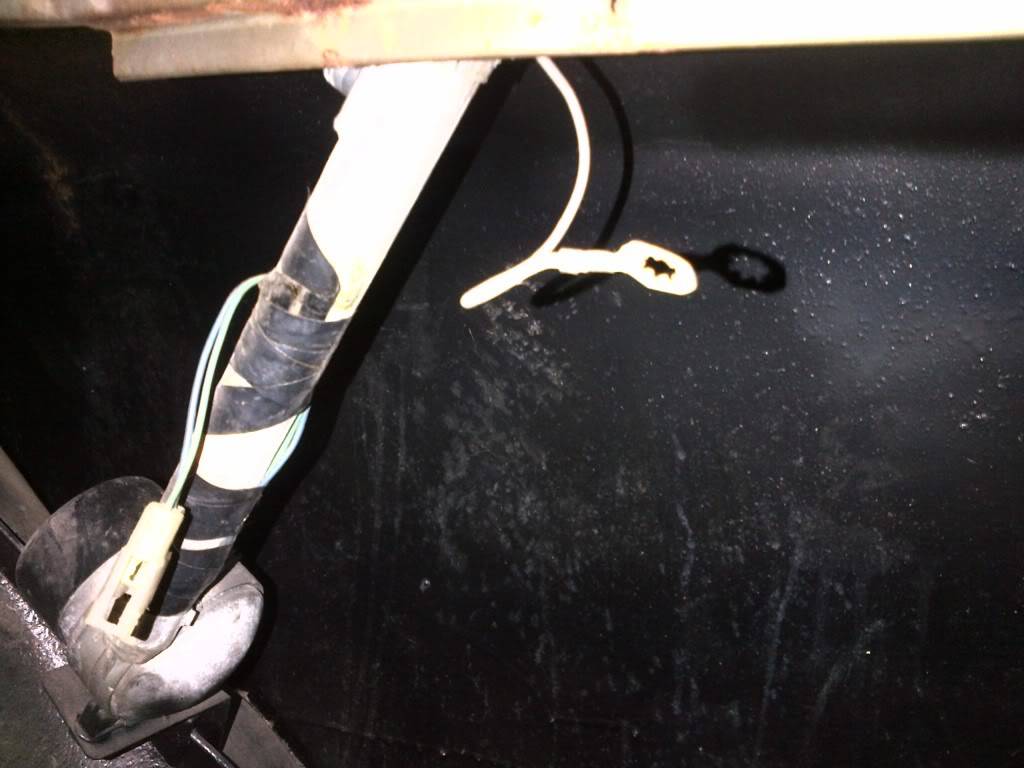
I sure am glad that I spent the time to loom the suspension wiring and air lines then run them thru the chassis rails. It sure is going to clean things up with only having to have a single brake line running exposed down the chassis on one side and a single fuel line down the other.
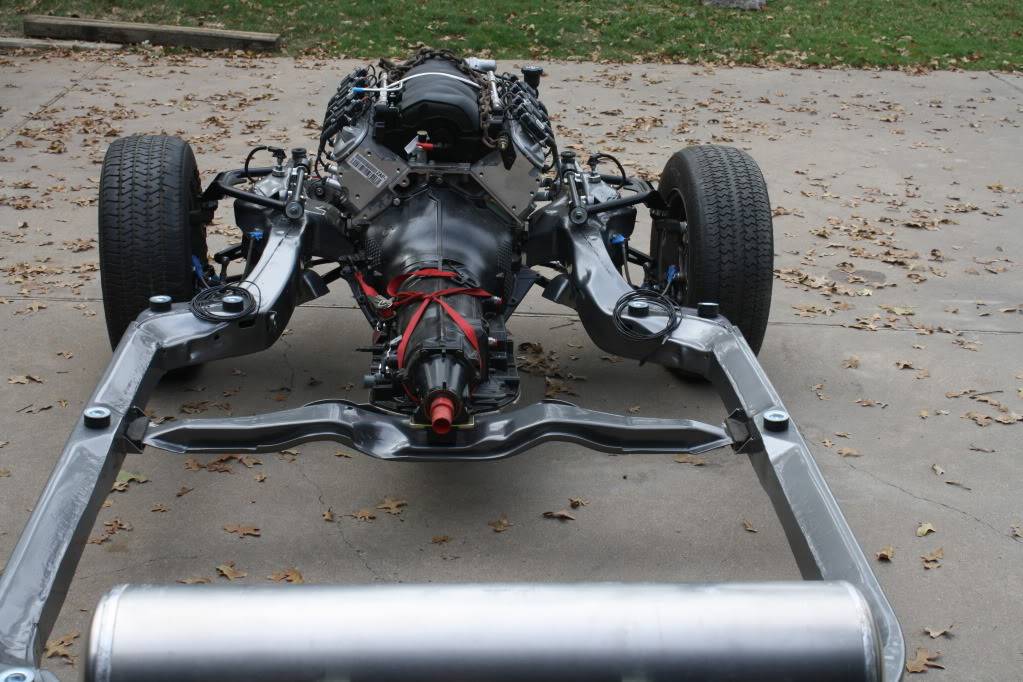
I did not have the time to finalize how I will secure the trans xmember to the perches yet.
Time is already getting to be a premium and I am sure that will continue until the New Year.
11-14-2011 #64 Registered User
- Join Date
- Mar 2009
- Location
- overseas
- Posts
- 3,434
oh saweet!!! it looks great!!
 Kevin S. (overseas in Germany)
1963 Chevrolet Impala 2d ht Coupe
www.CruznArt.com
CRUZN - Automotive Artworks
11-22-2011 #65
Registered User
- Join Date
- Jan 2005
- Location
- Enfield, CT
- Posts
- 423
Fantastic Ken! Almost looks too good to cover up with a body!
'67 GTO - LS3, 4L60E, SC&C AFX Package, KORE3 C6 Z06, Boyds PT-09s
https://www.pro-touring.com/showthre...7-GTO-LS3-Swap

11-23-2011 #66
Registered User
- Join Date
- Aug 2011
- Location
- Burleson, TX
- Posts
- 130
Yea, I hope the body comes out well enough to do the chassis justice. Ken Originally Posted by CFster
01-19-2012 #67
Registered User
- Join Date
- Aug 2011
- Location
- Burleson, TX
- Posts
- 130
Getting back to it
Holidays are past and a couple of days of nice weather and with the help of good friends and low and behold some work got done!
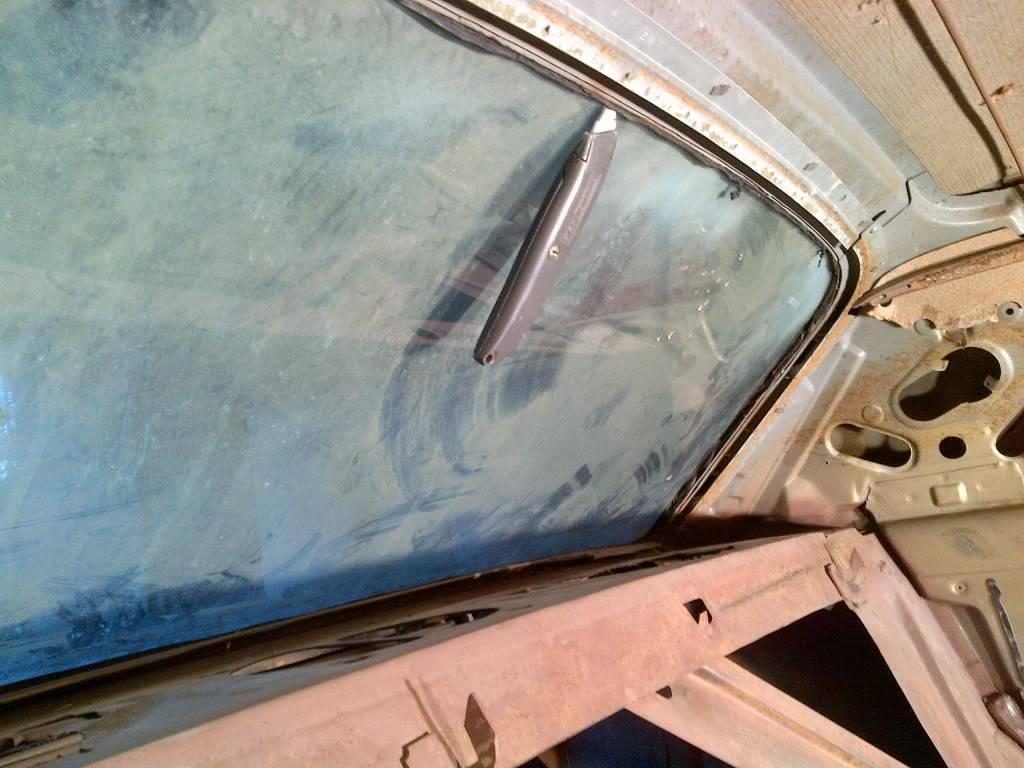
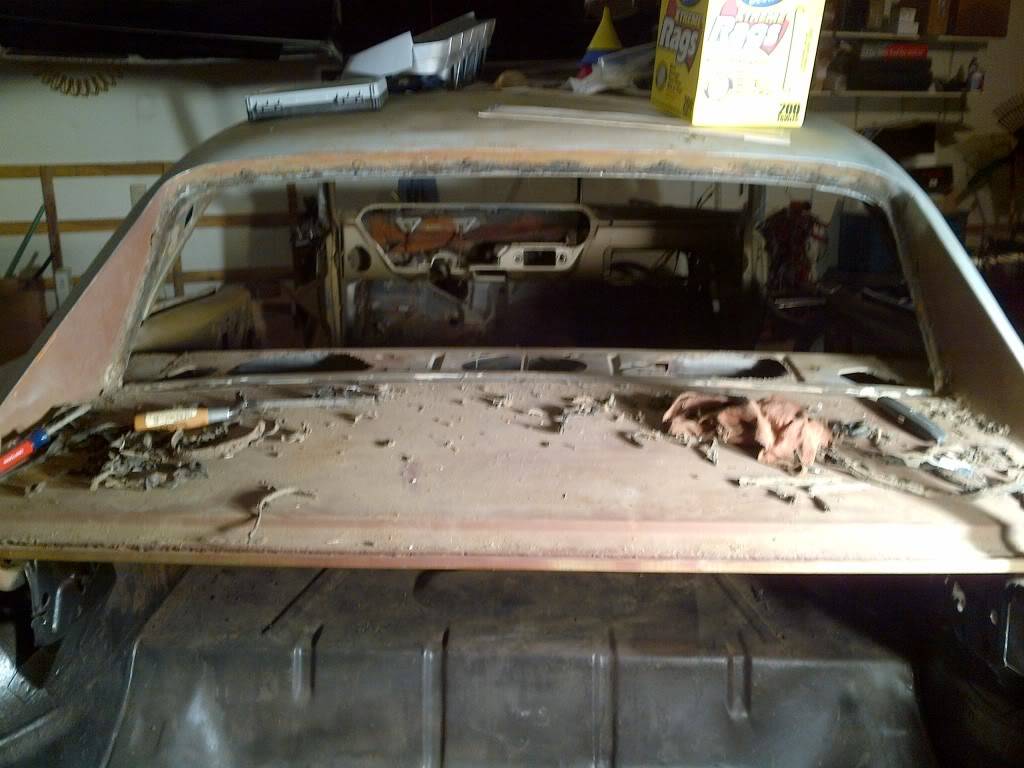
Finished removing the remaining dash, sterring column, accelerator & brake pedals, ac/heat system, doors, all wiring and glass with the exception of the rear windshield.
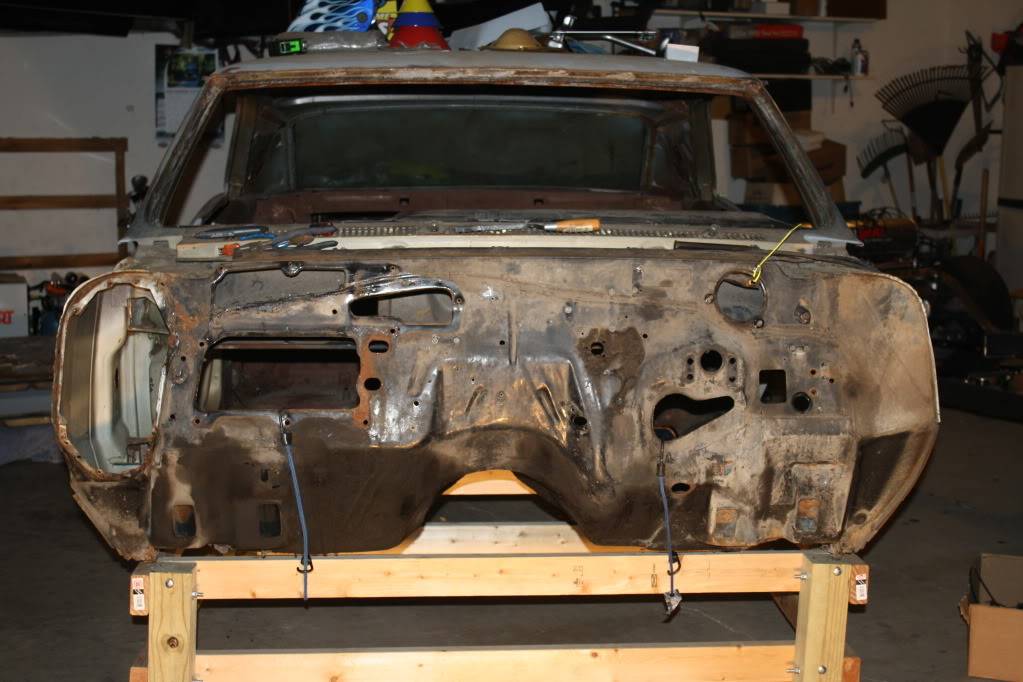
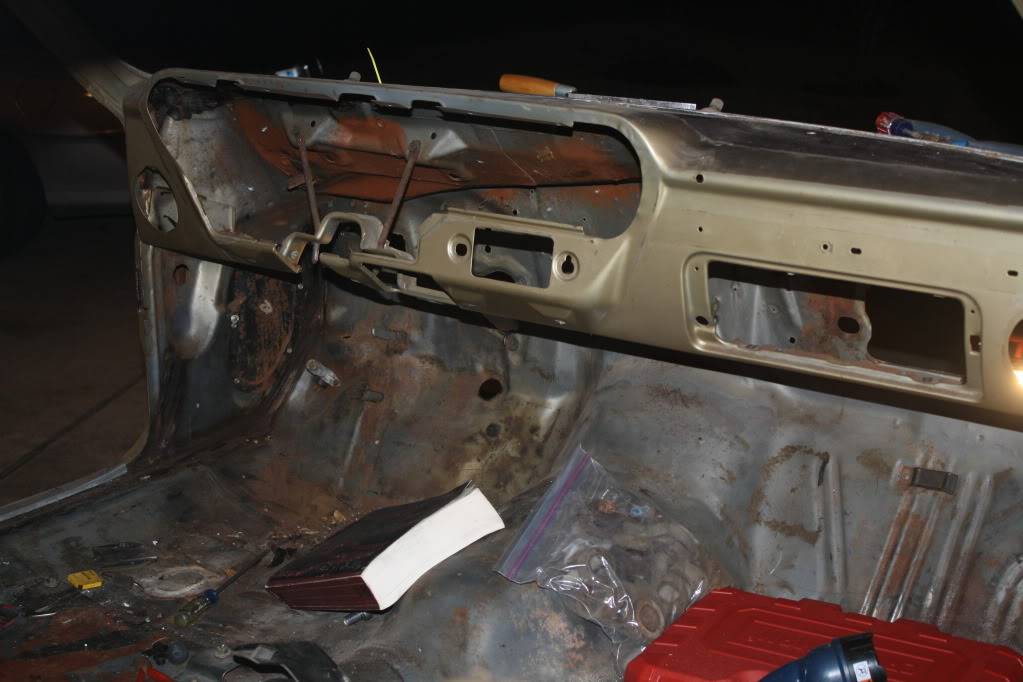
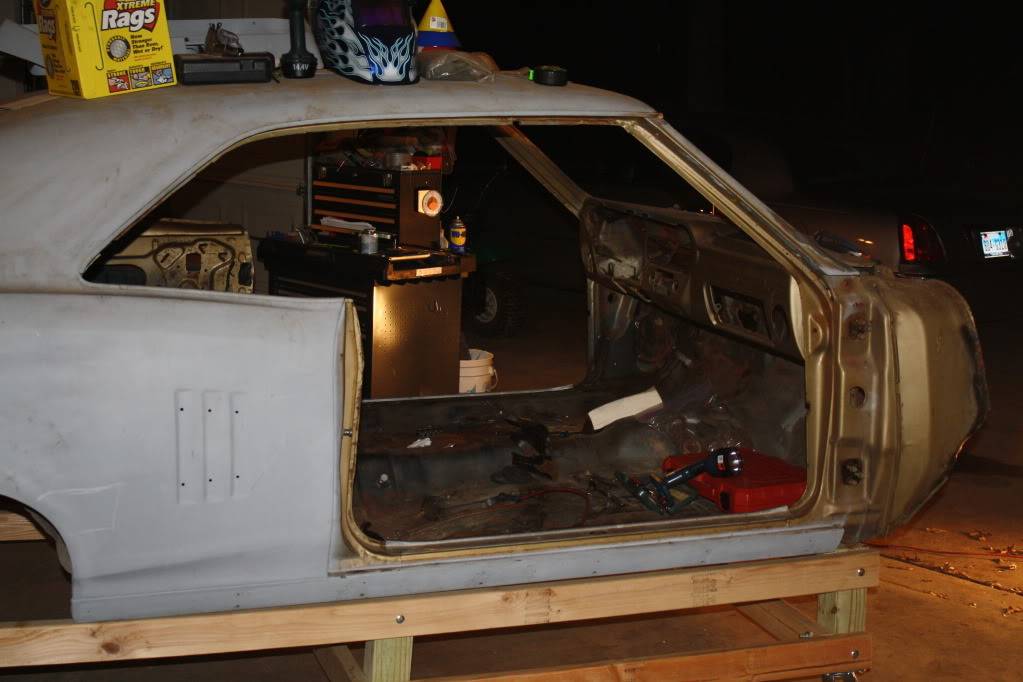
Removal of the rear windshield and then it will be time to put the body shell back on the chassis for transmission tunnel modifications.
01-20-2012 #68
Registered User
- Join Date
- May 2011
- Posts
- 311
Very Very nice I'm taking notes Brother!!
64 F-85 post car Resto-Mod project-my RV when I retire
01-21-2012 #69
Registered User
- Join Date
- Aug 2011
- Location
- Burleson, TX
- Posts
- 130
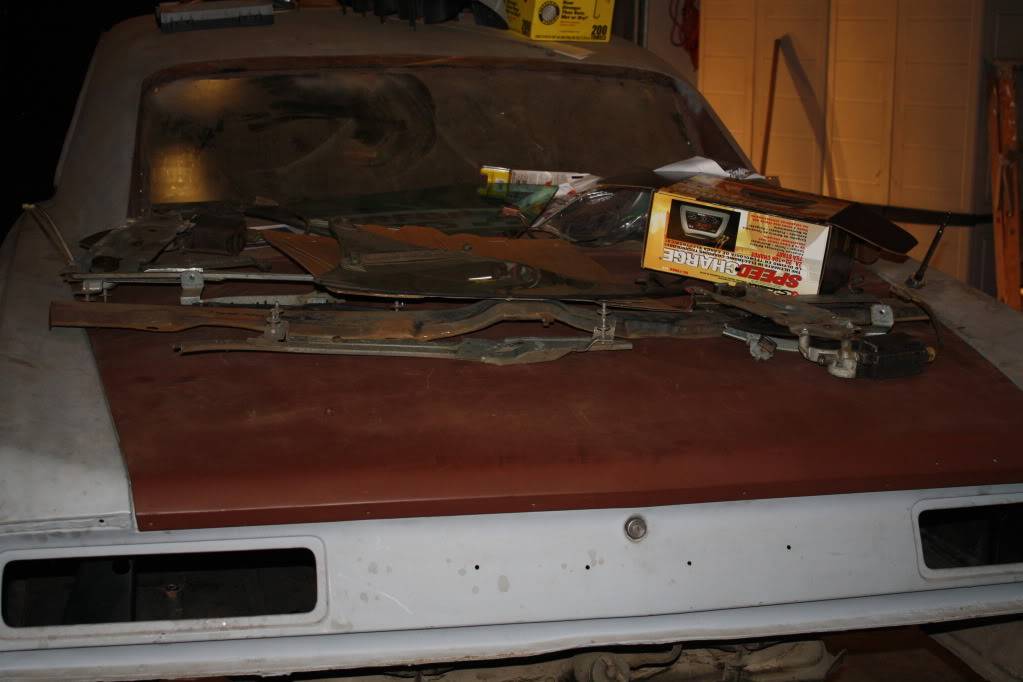
Almost there with the body shell
A bit cooler today but 600 watts of light will keep you warm!
Removed the trunk lid for the last time
Then finally dropped the gas tank
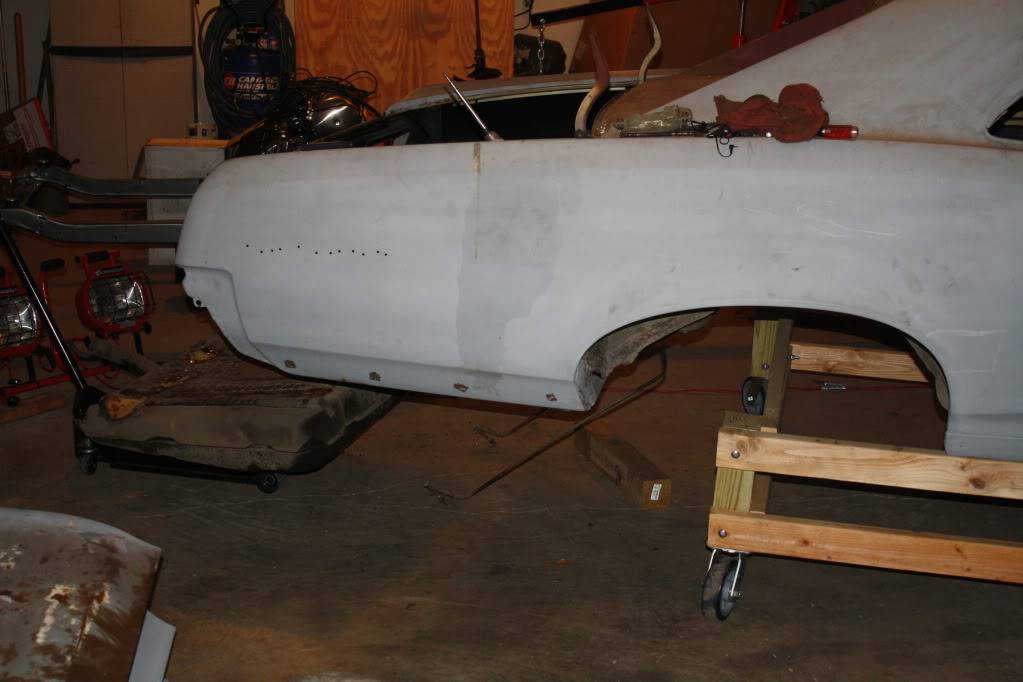
Just have the rear windshield and radio antenna and back on the frame the shell goes.
01-22-2012 #70 Registered User
- Join Date
- Sep 2009
- Location
- Corpus Christi, TX
- Posts
- 183
Any idea how much you will have to remove from Trans. Tunnel??

1967 Pontiac LeMans in the works
01-23-2012 #71
Registered User
- Join Date
- Aug 2011
- Location
- Burleson, TX
- Posts
- 130
Capown-For every other forum project that I've seen do this same trans swap they have been able to beat out the trans tunnel enough without having to cut away any part of it. So, we shall see how it goes! Ken Originally Posted by Capown
01-23-2012 #72
Registered User
- Join Date
- Sep 2009
- Location
- Corpus Christi, TX
- Posts
- 183
Sweet I've read a few builds maybe I just over looked it. Thanks for the fast reply, hope to see this beast going, and wish I lived closer to see this, 7-8hr drive not so fun..
1967 Pontiac LeMans in the works
01-23-2012 #73
Registered User
- Join Date
- Sep 2009
- Location
- Corpus Christi, TX
- Posts
- 183
Also what headers and adapter/mounts are you using? I seen where you were talking about them on page one just didn't see names...
Thanks
1967 Pontiac LeMans in the works
01-23-2012 #74
Registered User
- Join Date
- Aug 2011
- Location
- Burleson, TX
- Posts
- 130
Capown here is a link to a build using the 4L80E in a '67 Chevelle. John did a great job!-Ken Originally Posted by Capown
http://ls1tech.com/forums/conversion...ed-pics-2.html
01-23-2012 #75
Registered User
- Join Date
- Aug 2011
- Location
- Burleson, TX
- Posts
- 130
Headers I am still undecided. Mounts are from AutoKraft. Same place I got the oil pan. If you read far enough down you will see the adjustment I had to make with the engine stands. I also had to put the mounts on the opposite sides as to what AutoKraft had them labeled. One word of warning when moving the stands back - getting the lock washers and nuts on the back lower bolts took a lot of time, patience and flexability with the fingers as well as some extra lithium grease so they would stay on the end of my finger when installing. Not easy but worth it when your done. Get a skinny open end wrench too! Ken Originally Posted by Capown
01-23-2012 #76
Registered User
- Join Date
- Sep 2009
- Location
- Corpus Christi, TX
- Posts
- 183
Thanks Ken for the helpful info I reread the first 3 pages again, and as soon as I read where you got the mounts I was like DOH!!(Homer Simpson voice) I just had a brain fart. I knew I read, that just over looked it when I went thru it today. I need to write this stuff down lol!!
1967 Pontiac LeMans in the works
01-24-2012 #77
Registered User
- Join Date
- Aug 2011
- Location
- Burleson, TX
- Posts
- 130
No problem. You have some pics of your car or a thread somewhere?-Ken Originally Posted by Capown
01-24-2012 #78
Registered User
- Join Date
- Aug 2011
- Location
- Burleson, TX
- Posts
- 130
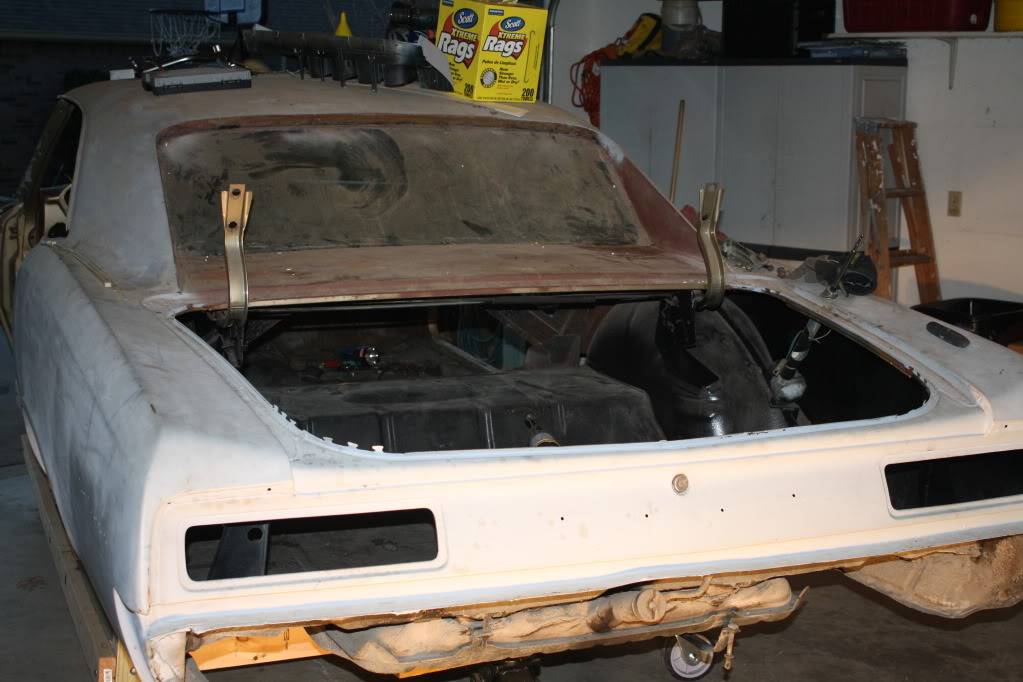
Update
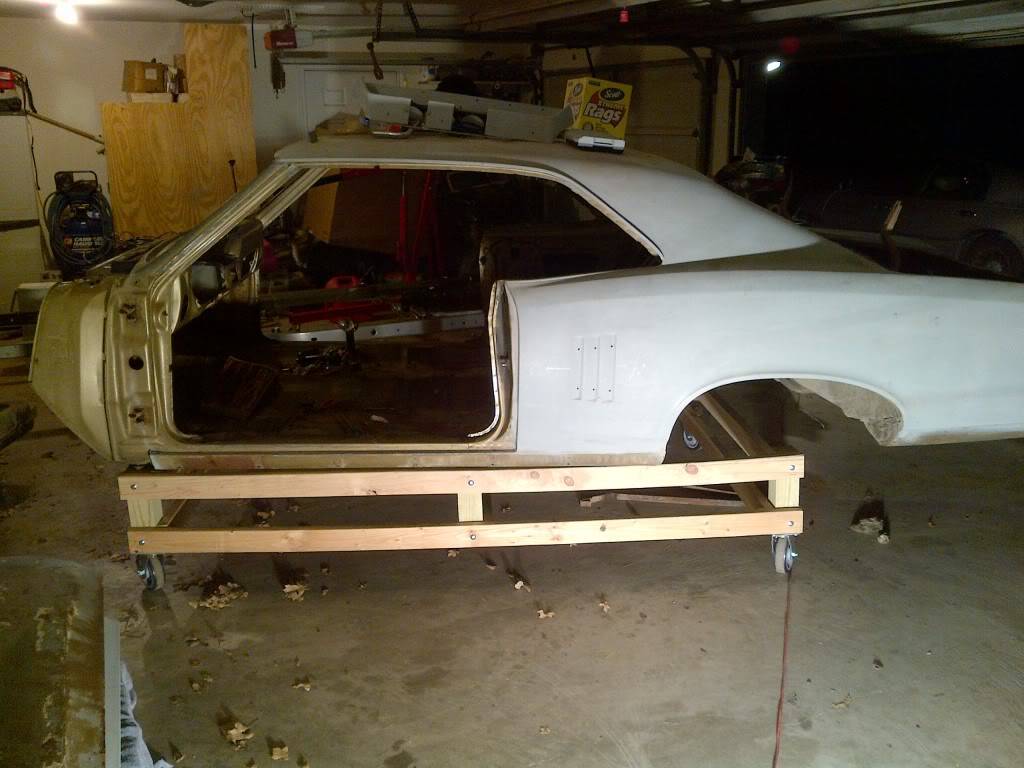
I was able to remove the rear windshield, power antenna, windshield washer hoses and outlets, door seel plates and the like last night. I still have to find someone who will loan me there engine hoist and I'll be able to put the body shell back on the frame. Once I have made the modifications for the transmission then hopefully off to the body shop it goes.
01-25-2012 #79
Registered User
- Join Date
- Sep 2009
- Location
- Corpus Christi, TX
- Posts
- 183
Originally Posted by Pontiacken
I haven't updated in awhile, car is at the body shop should be another week.
https://www.pro-touring.com/showthre...ess&highlight=
1967 Pontiac LeMans in the works
02-01-2012 #80
Registered User
- Join Date
- Aug 2011
- Location
- Burleson, TX
- Posts
- 130
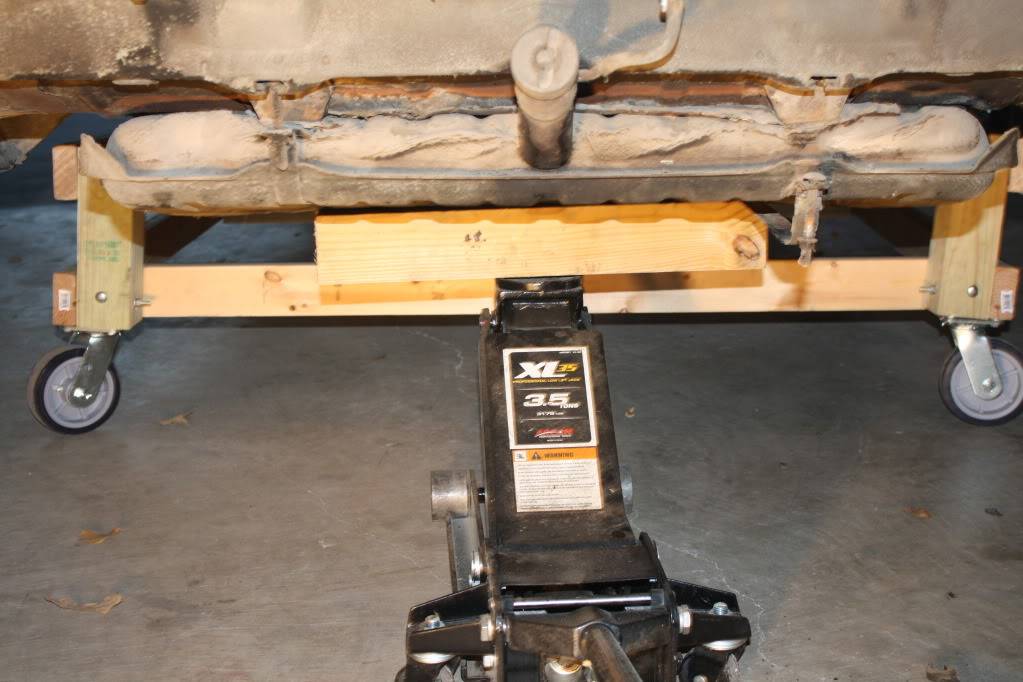
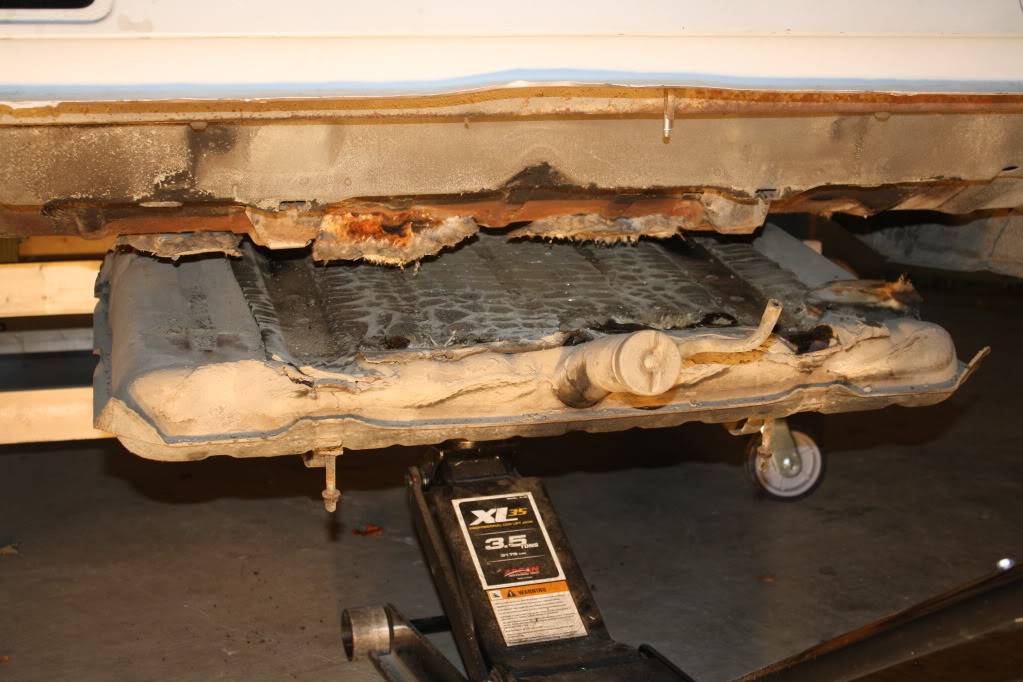
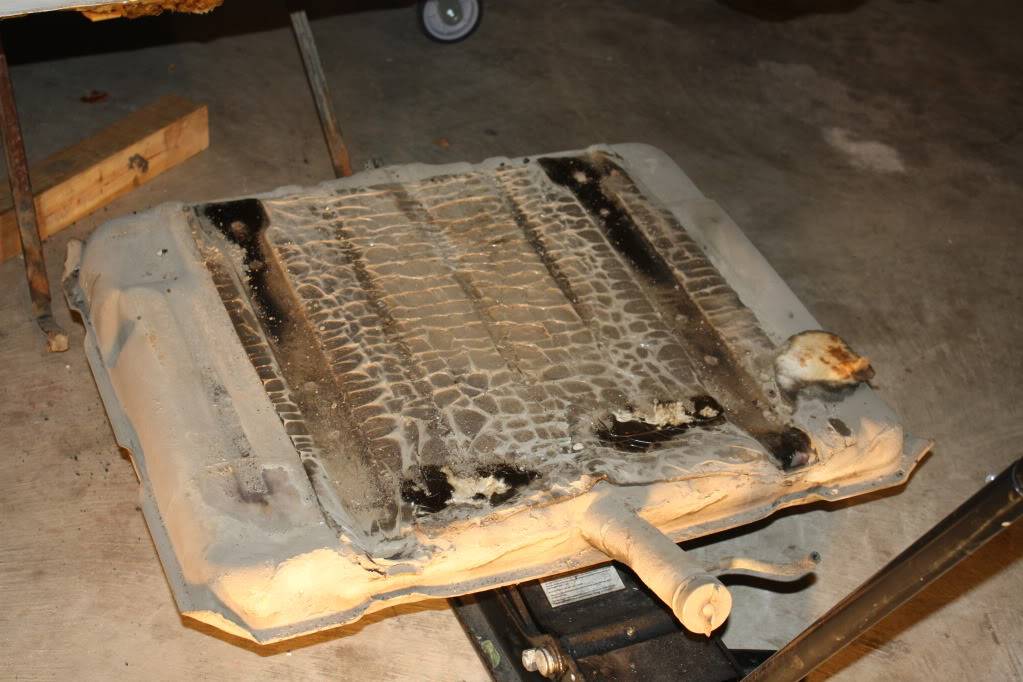
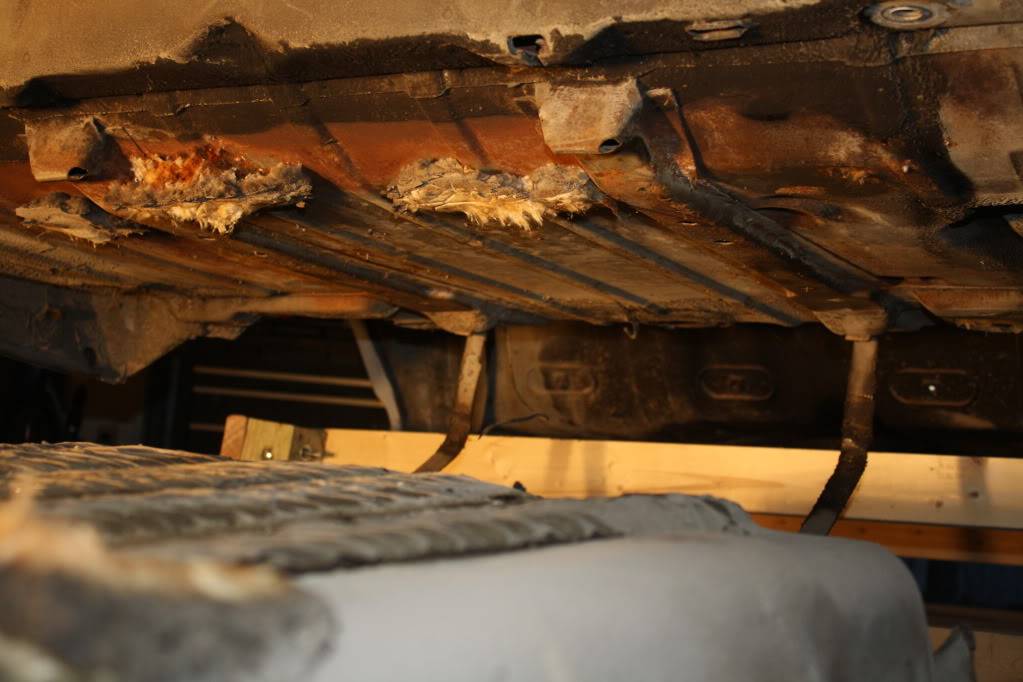
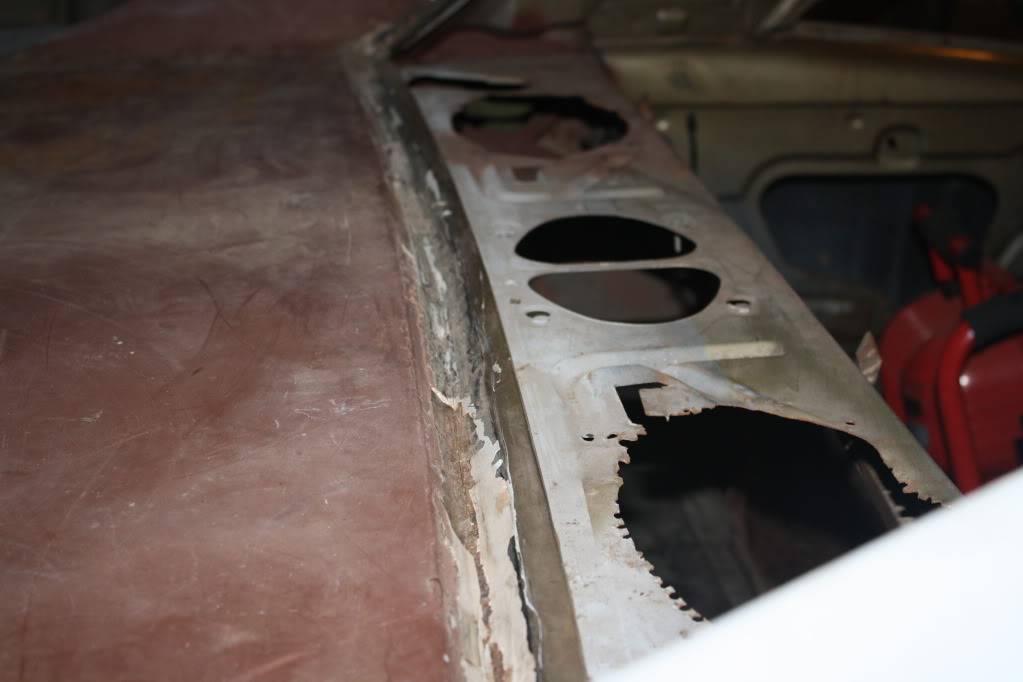
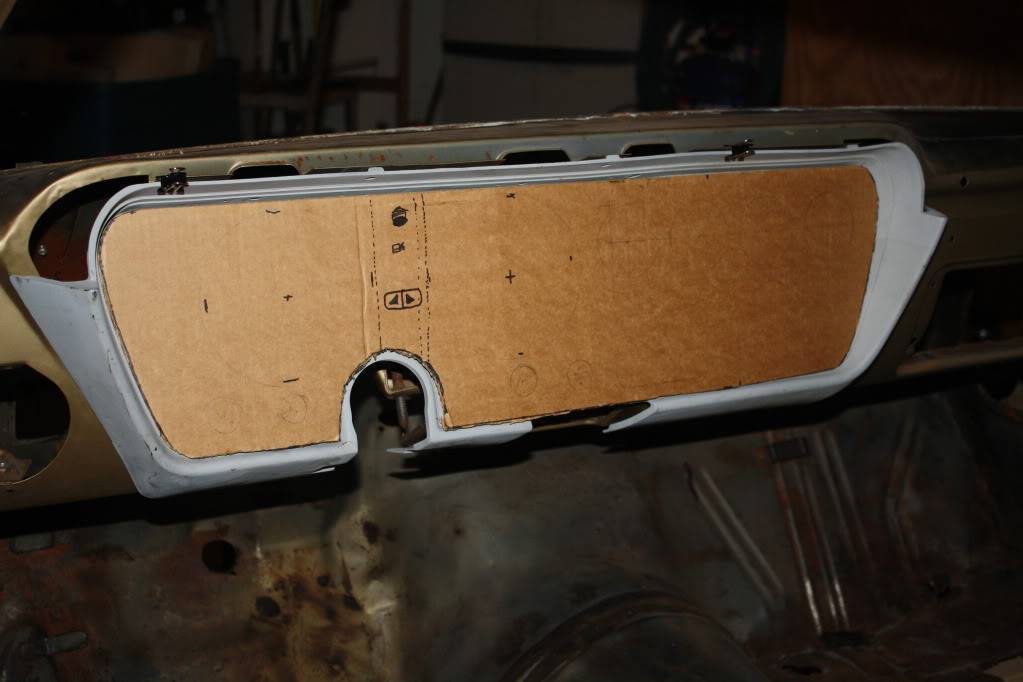
Interior planning and floor inspection
Inspected the floor pans and gave them the screwdriver and awl puncture test with the following results:
Driver side front-not to bad

Driver side rear-not to bad either

Passanger side front-as expected with the heater core on that side it is bad.
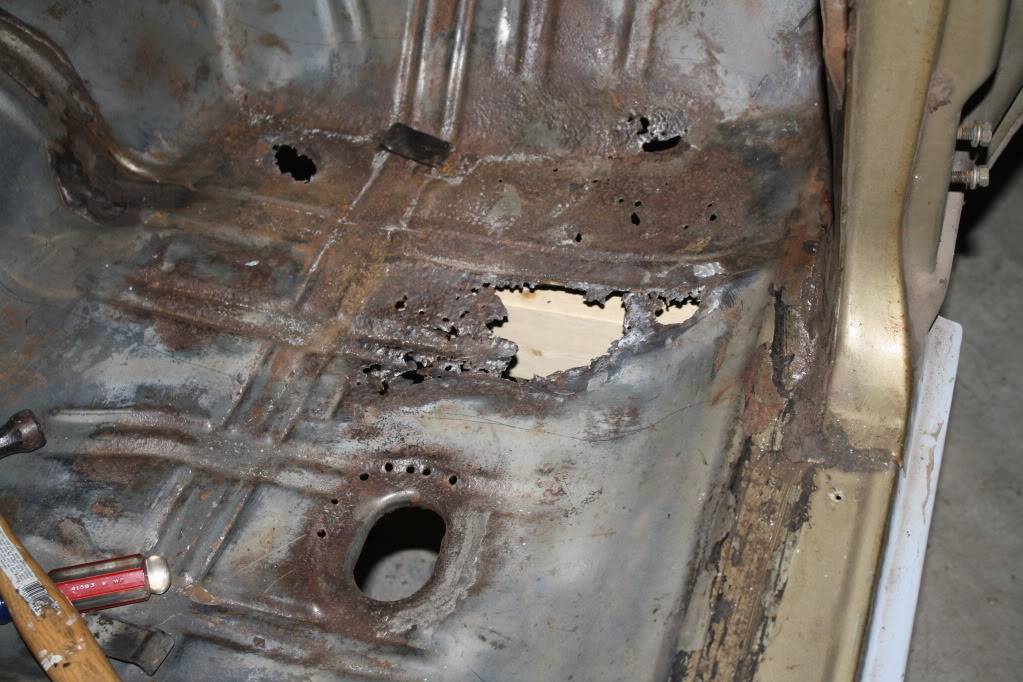
Fortunatly there is no damage in the passanger rear floor pan. YEAH!!!
Front winshield channel-top is bad
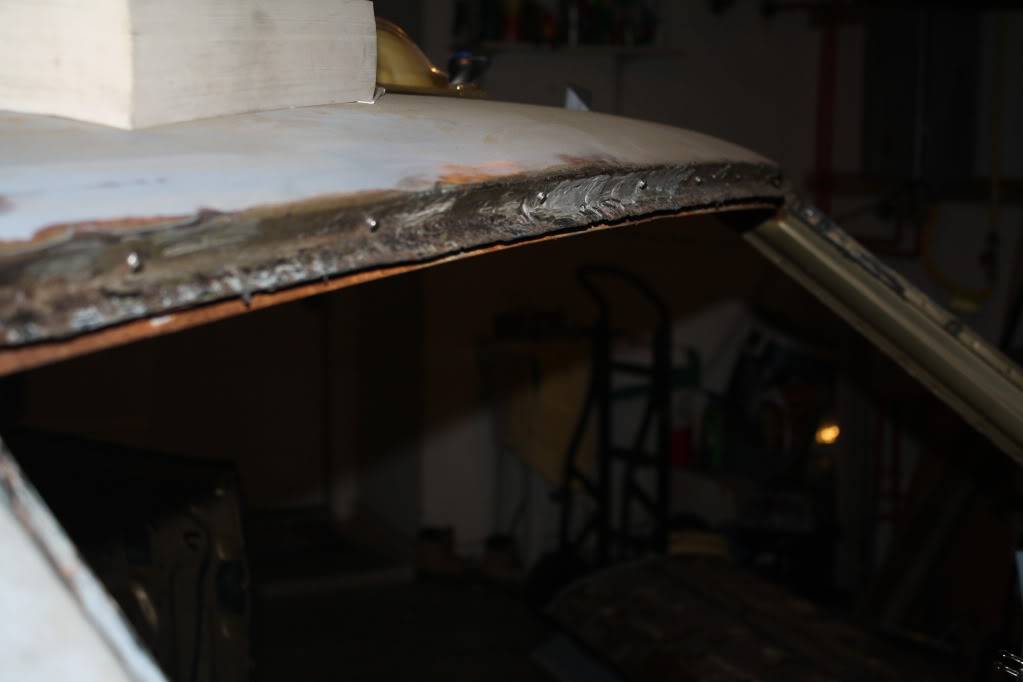
Rear winshield channel-the filler plate between windshield and trunk had been replaced before and there is alot of bono in here. I have a new filler panel to replace this one due to the last repair is not very good.
Started planning out the interior mods.
Dash cluster planning
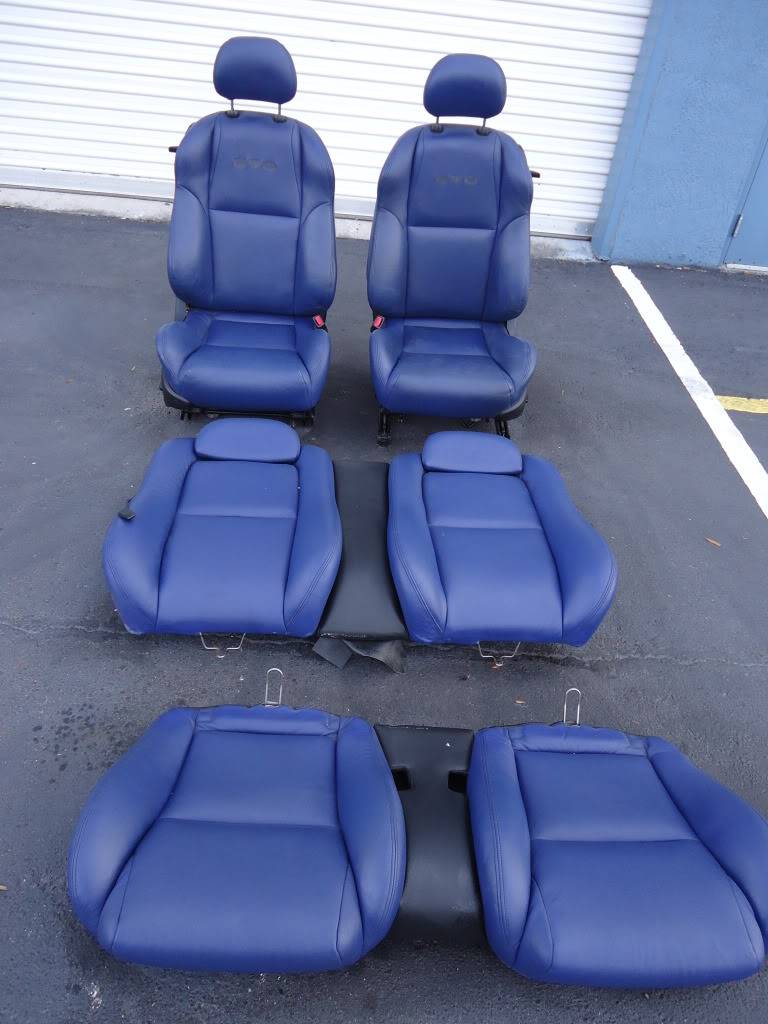
Also I purchased some seats from a '06 GTO to update the interior:
OK I got to get back to work. Will update more later.

 Reply With Quote


