

Results 21 to 40 of 174
-
09-09-2011 #21

 Registered User
- Join Date
- Aug 2011
- Location
- Burleson, TX
- Posts
- 130

Getting Closer
Borrowed a trailer from my good friend Shane, a mighty man of God, and loaded the frame into it last night for delivery to the sand blaster this morning.
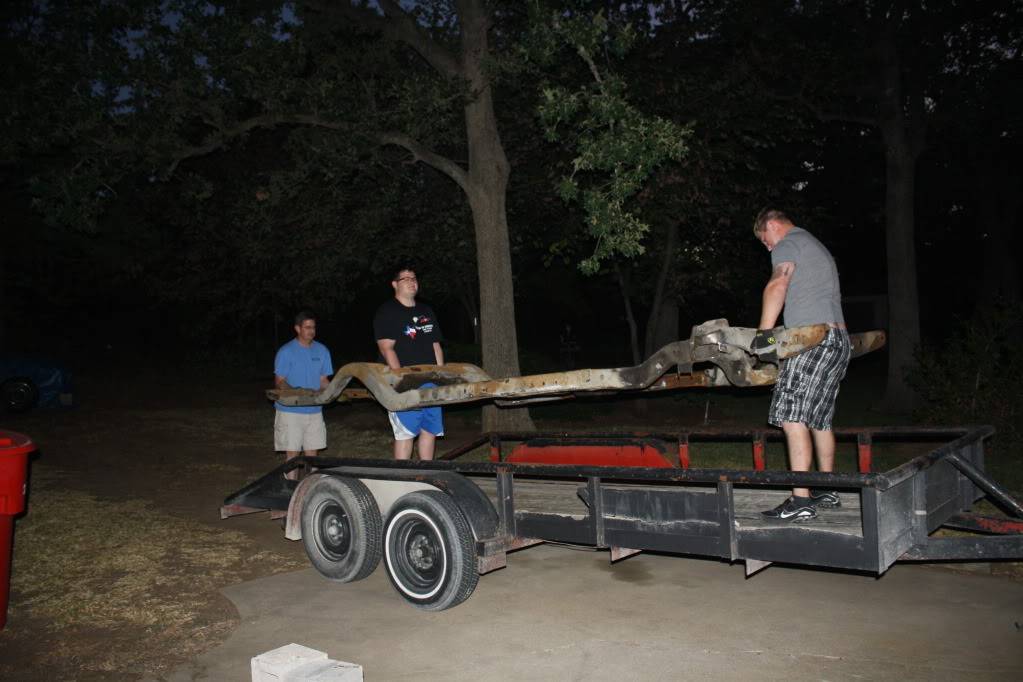
Back Saver: 2 grown but young sons come in very handy here. I didn't do much else other than help guide them. Easiest part of this build so far. Thank you boys!
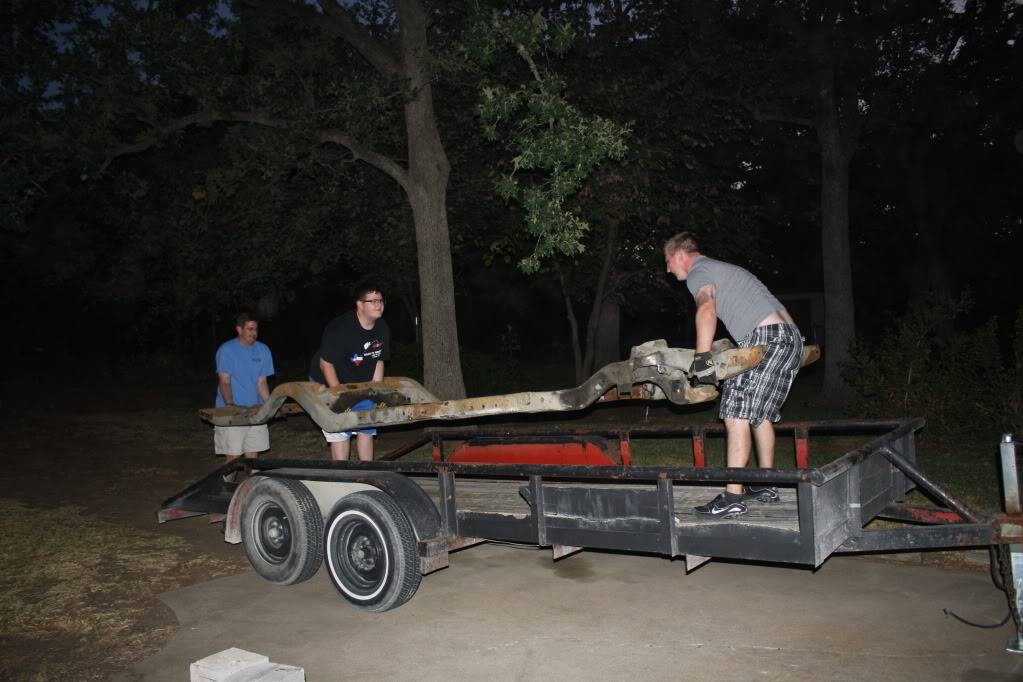
I should be able to pick this up again early next week and get it to the powder coater then back home for some assembly.
-
09-09-2011 #22
Registered User
- Join Date
- Mar 2008
- Location
- Mansfield Texas
- Posts
- 188
Hey neighbor. Great project. Keep the pics coming.
RacerX
09-09-2011 #23
Registered User
- Join Date
- Aug 2011
- Location
- Burleson, TX
- Posts
- 130
Hey back at you. What's with the Alabama jacket in your pics? Most people here in the Republic of Texas may take offense. How is your Camero comming along? Ken Originally Posted by tmadden

09-13-2011 #24
Registered User
- Join Date
- Jan 2005
- Location
- Enfield, CT
- Posts
- 423
Nice job Ken! Moving right along. Can't wait to see the frame back.
'67 GTO - LS3, 4L60E, SC&C AFX Package, KORE3 C6 Z06, Boyds PT-09s
https://www.pro-touring.com/showthre...7-GTO-LS3-Swap

09-13-2011 #25
Registered User
- Join Date
- Aug 2011
- Location
- Burleson, TX
- Posts
- 130
Moving right along
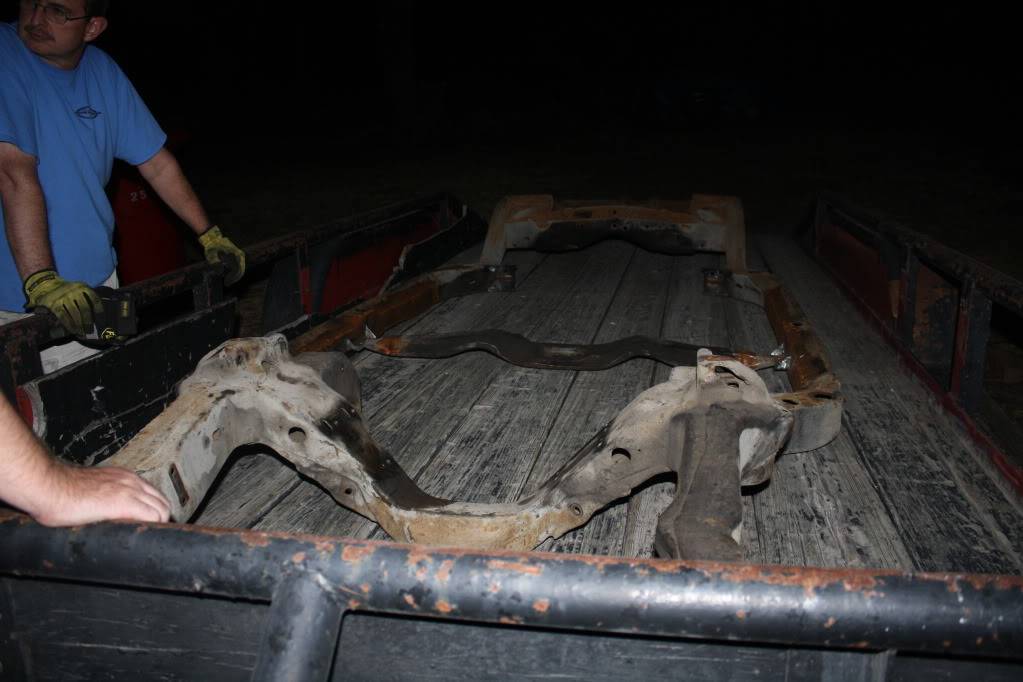
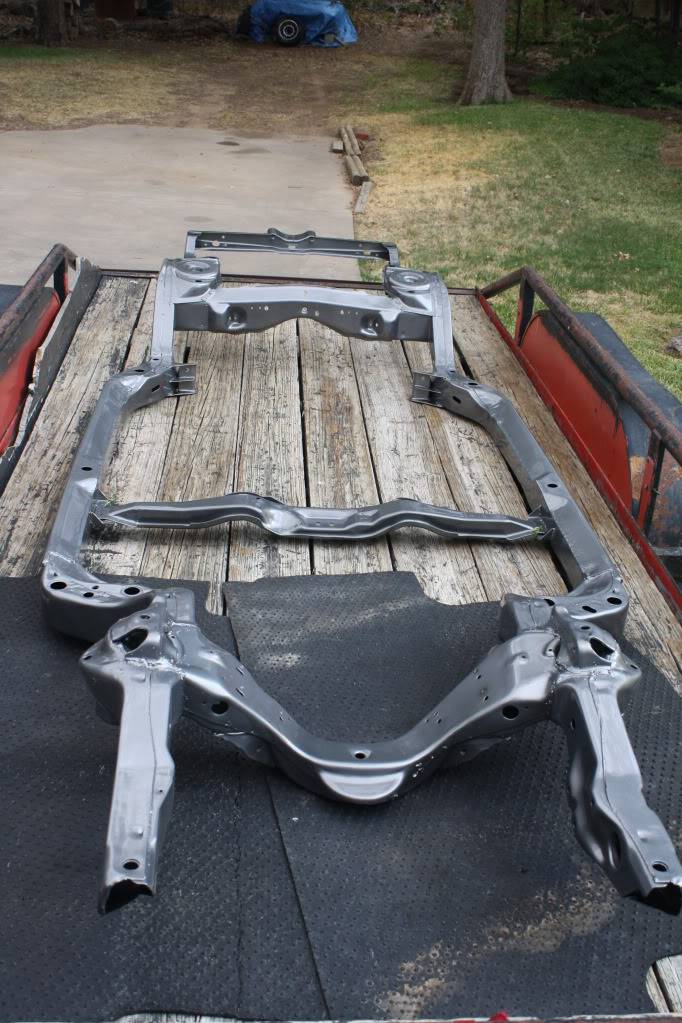
Picked up the frame from the powder coater this afternoon. Now if you have ever wondered if powder coating is better than regular chassis paint-well in my case it was. I took it in on Friday morning to the sandblaster picked it up Friday afternoon and delivered it to the powder coater and had a 2 stage job done and it was ready Tuesday. Pretty quick and look at the difference.
Before
After
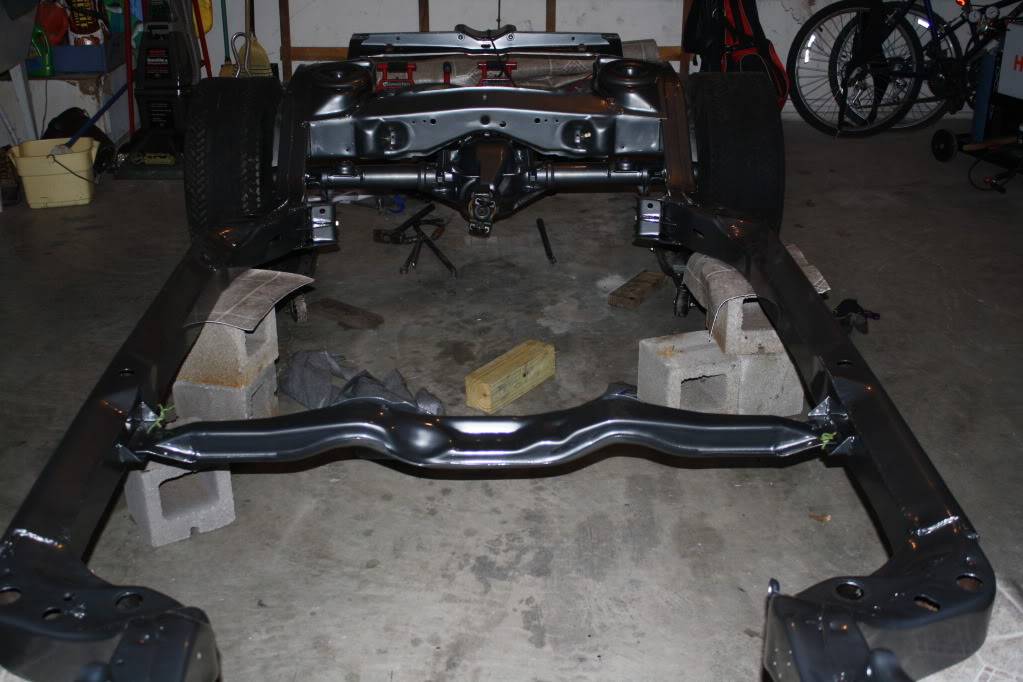
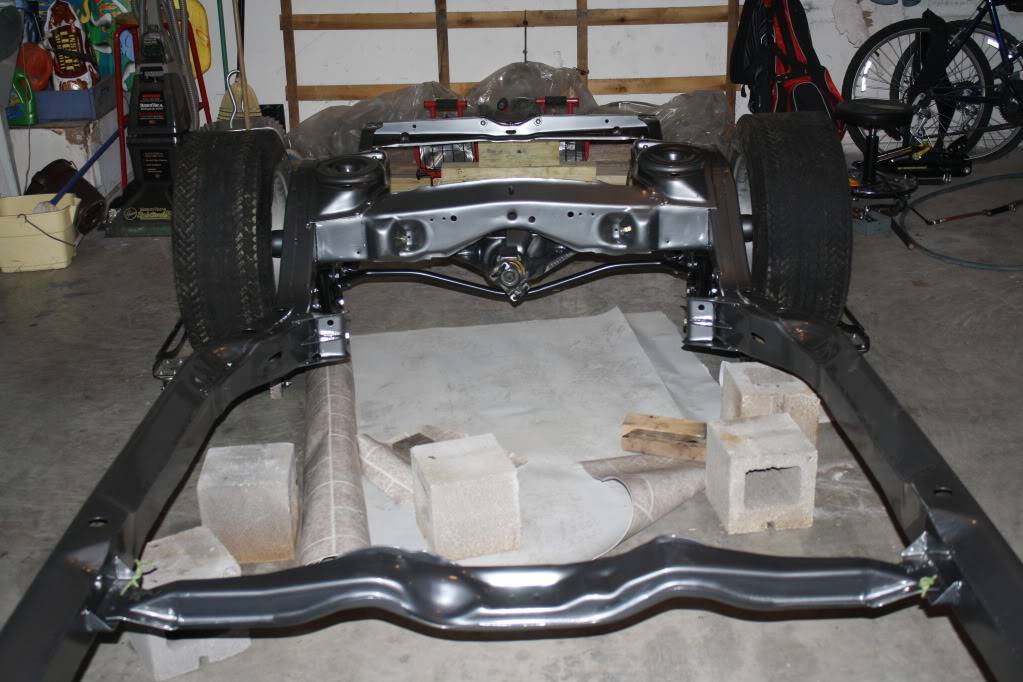
I got so excited I had to do some work on the absolute cleanest chassis I have ever worked on so I put the upper and lower control arms on and put the rear end back under it tonight

All went smooth except for the driver side upper control arm. I had to clearance the inside lower part of the mounting bracket. It interfered with the differential housing and would not line up to get the bolt through. So Mr. Grinder had to be used.
Here is where the chassis is now.

I hope to get back on it Thursday night!
09-16-2011 #26
Registered User
- Join Date
- Aug 2011
- Location
- Burleson, TX
- Posts
- 130
Back at it Thursday night.......
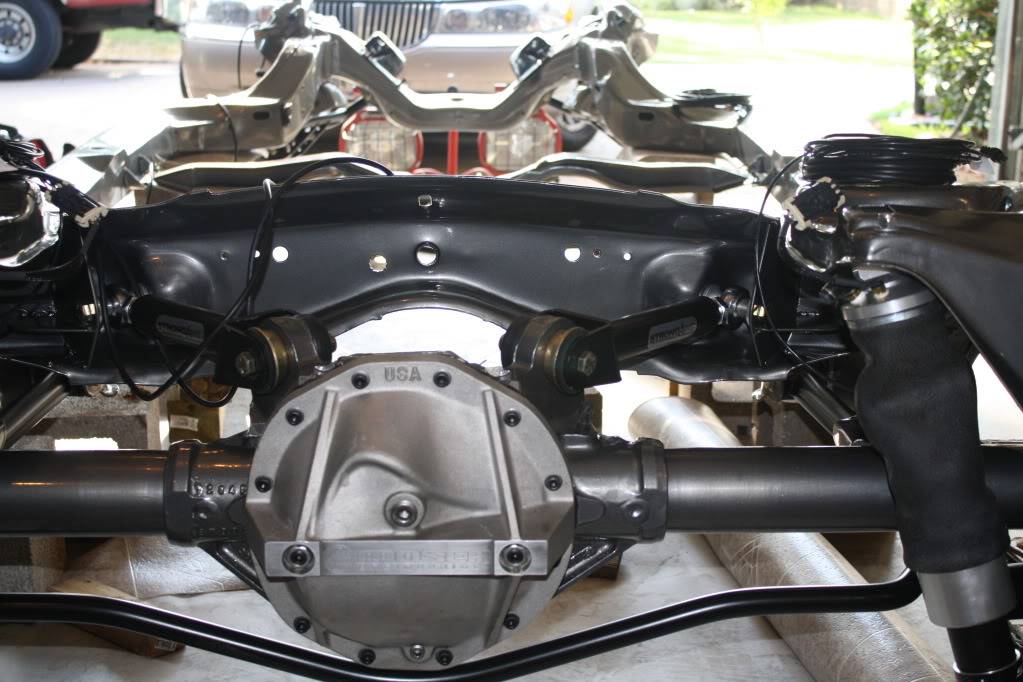
......and I was able to finish up the rear suspension.
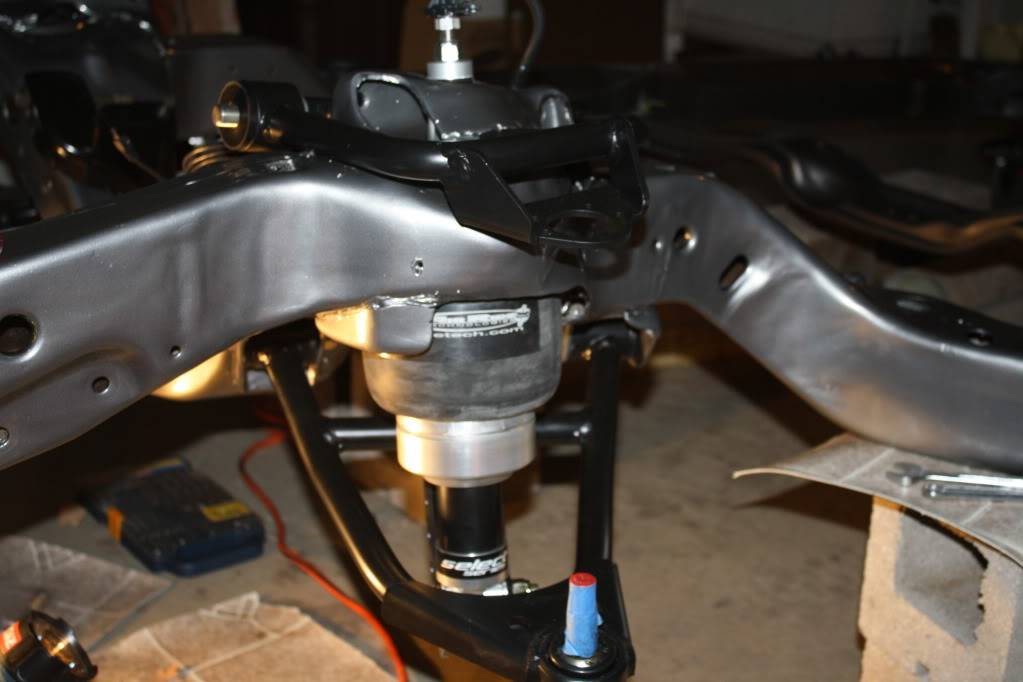
Passenger side shockwave bracket installed:
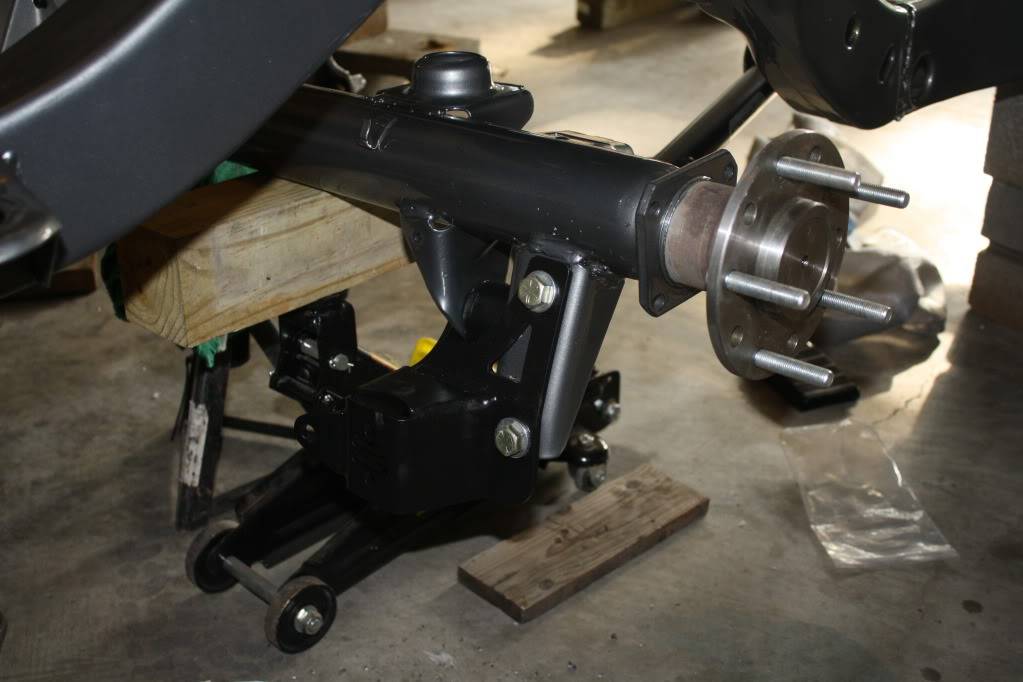
Driver side bracket with shockwave installed:
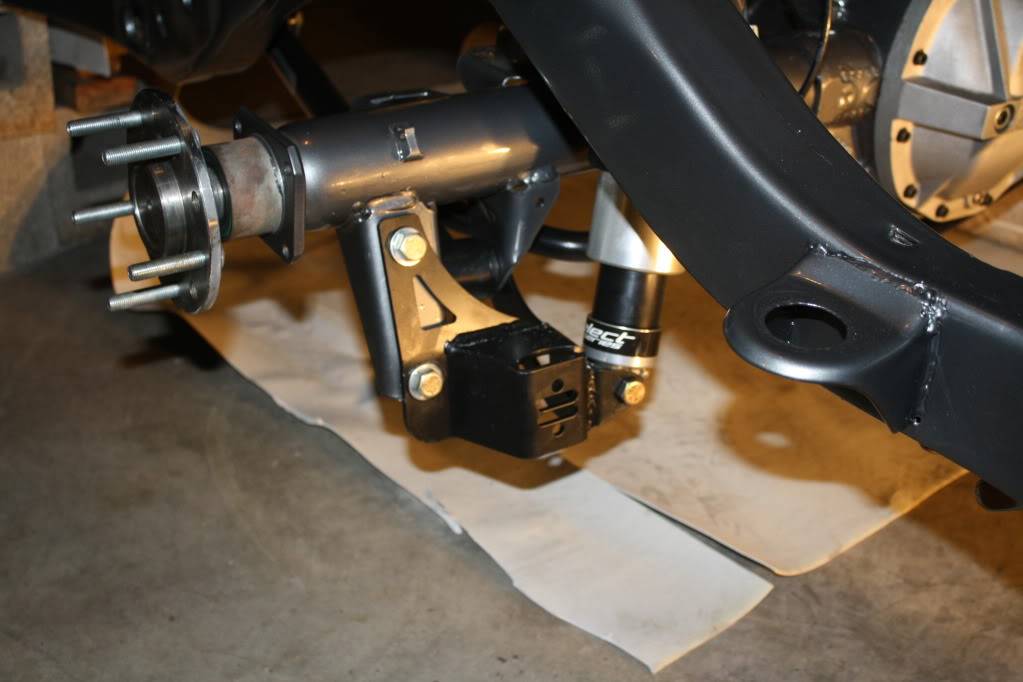
I pressurized the Shockwaves to check for travel and any conficts.
Driver side:
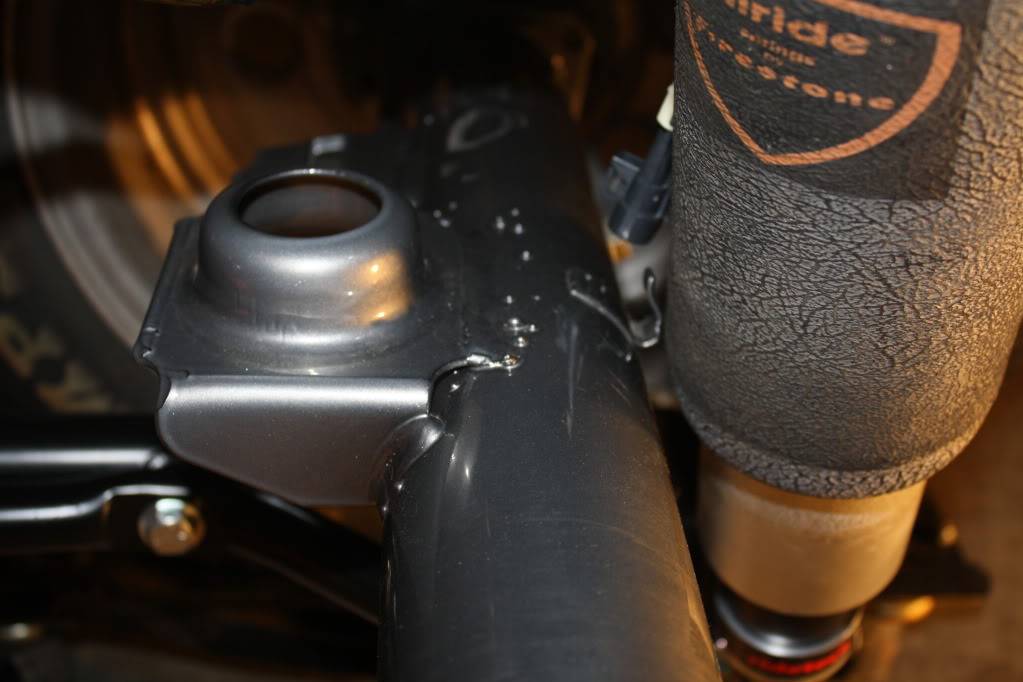
Passanger side-Looks like I have a conflict here with a brakeline clamp. Good to see this now that way when I install the disk brakes I will know to run my lines on top of the axle tubes:
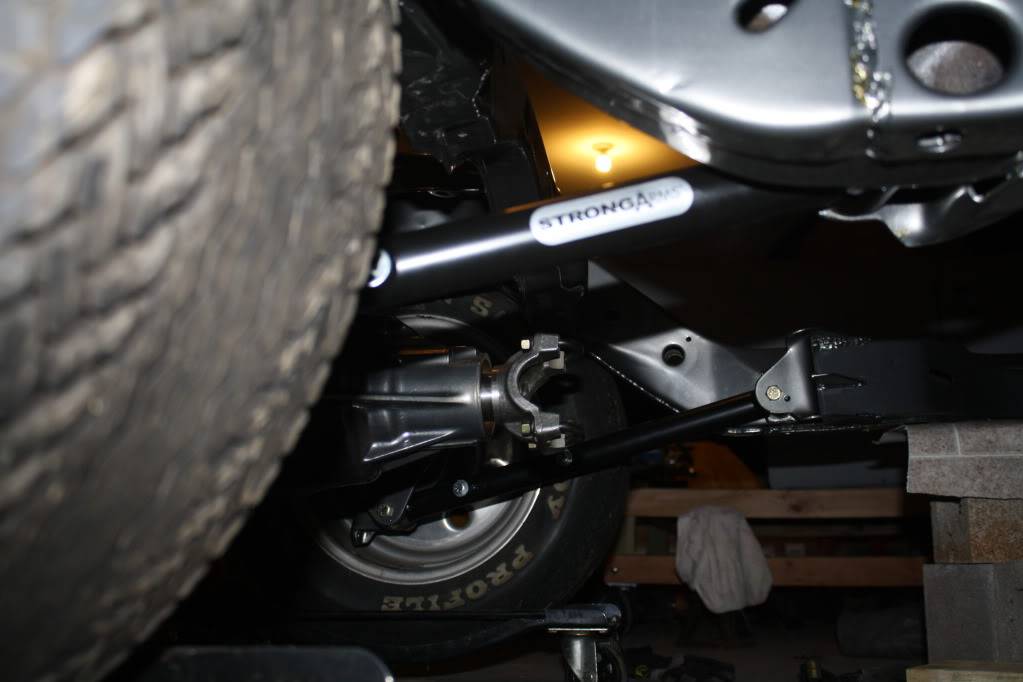
Rear Muscle Bar installed:
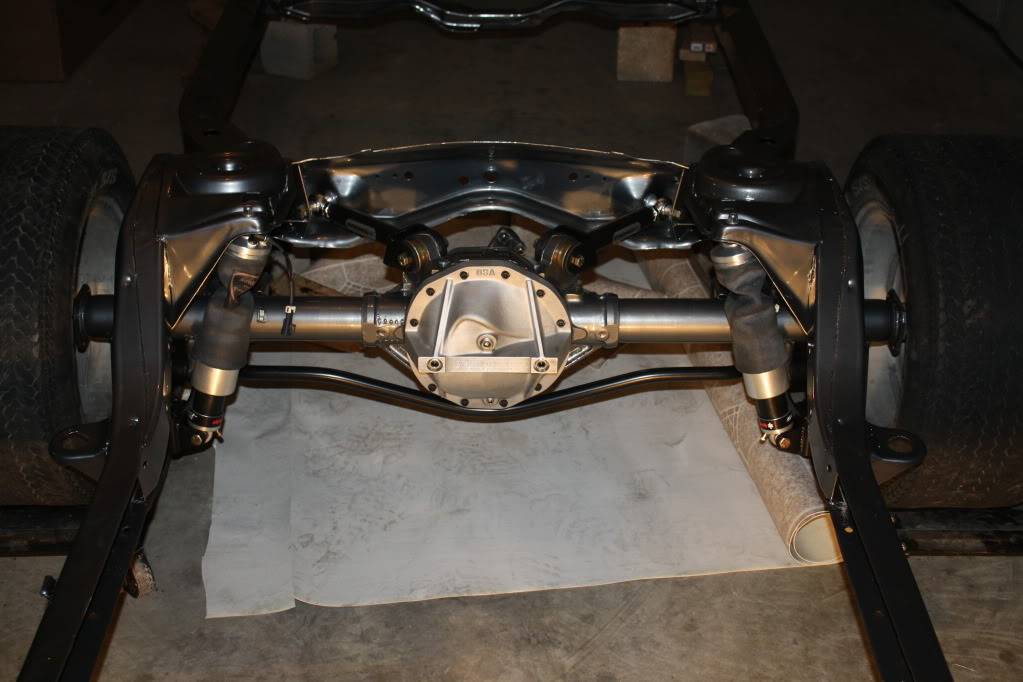
Front view of project as it sits now.
Will start on the front suspension this weekend!
09-16-2011 #27 Registered User
- Join Date
- Oct 2005
- Location
- Jasper,IN
- Posts
- 540
Looking good Ken!
09-16-2011 #28 Registered User
- Join Date
- Apr 2005
- Location
- Cartersville, GA
- Posts
- 1,300
Very nice! Keep up the good work!
Joe Hinds
09-16-2011 #29 Registered User
- Join Date
- Nov 2006
- Location
- Ma.
- Posts
- 5,567
That sure looks pretty. They did a very nice job on it, and you made some nice progress.
Wayne
Car FINALLY home !!!!!! lol
Project FNQUIK https://www.pro-touring.com/showthre...ghlight=FNQUIK
09-16-2011 #30 Registered User
- Join Date
- Sep 2011
- Location
- Macomb, Mich.
- Posts
- 228
Looking good!
09-17-2011 #31 Registered User
- Join Date
- Feb 2005
- Location
- Sydney, Australia
- Posts
- 1,798

Very nice...I went with powdercoat on my subframe and various other front parts like the inner fenders etc....great finish, and it really looks nice.
Regards,
Leigh
Sydney, Australia
1971 Firebird 455
https://www.pro-touring.com/showthre...Project/page27
09-19-2011 #32
Registered User
- Join Date
- Aug 2011
- Location
- Burleson, TX
- Posts
- 130
Slow weekend for the LeMans
The weekend ended up being very busy with Mission House and Church related obligations so I did not get to much done this weekend.
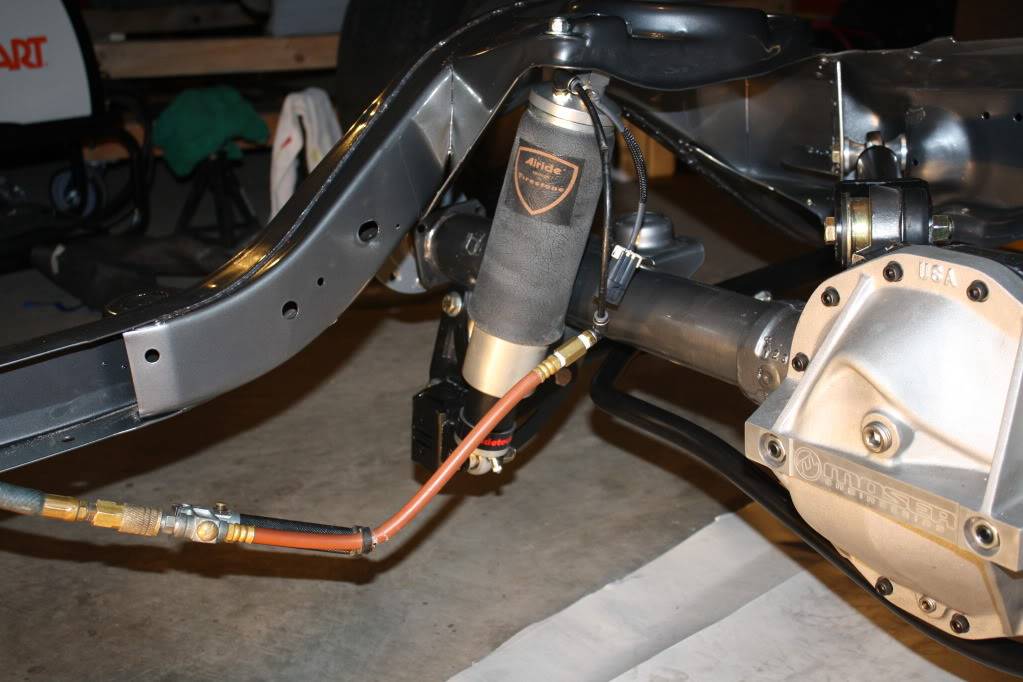
I did get the rear Shockwaves air ports and cable ends lined up and the cables connected:
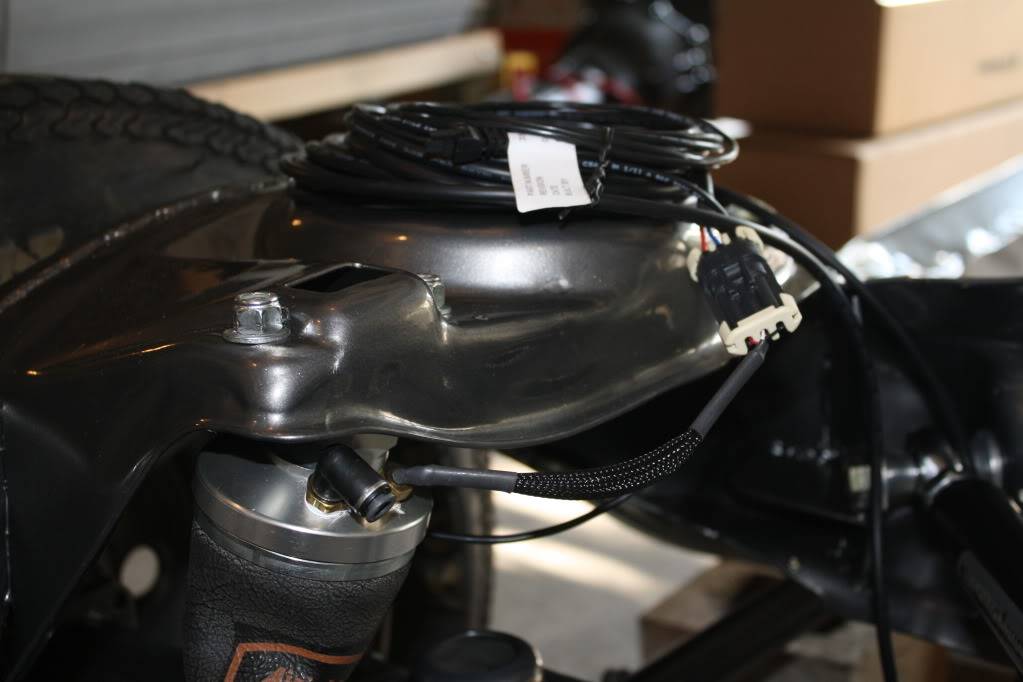
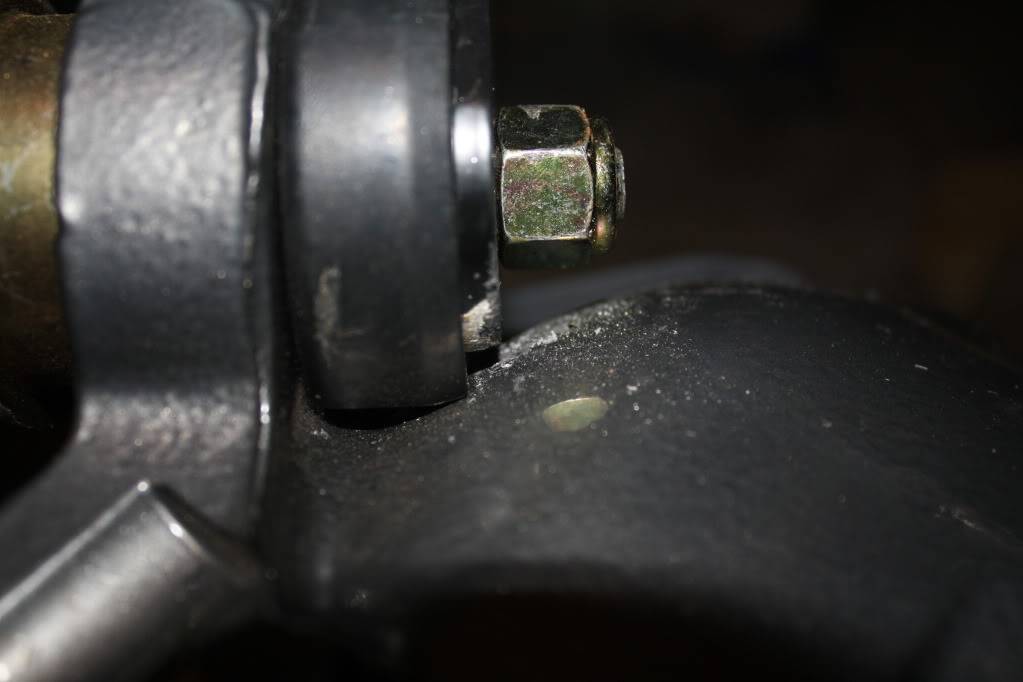
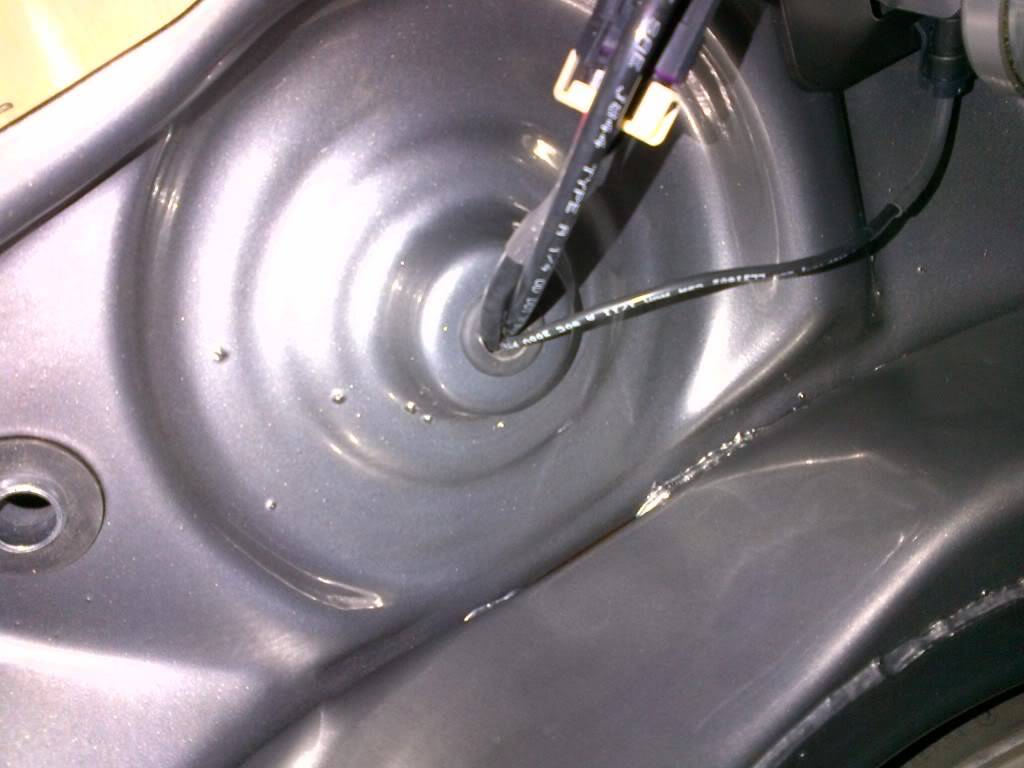
I began working to figure out how big a hole I would need for the front shockwave ride hight sensor cable to feed out of the spring pocket into the frame rail. The existing hole in the top outside answered the question-7/16. Now to come up with a way to drill that size a hole in the back of the spring pocket:
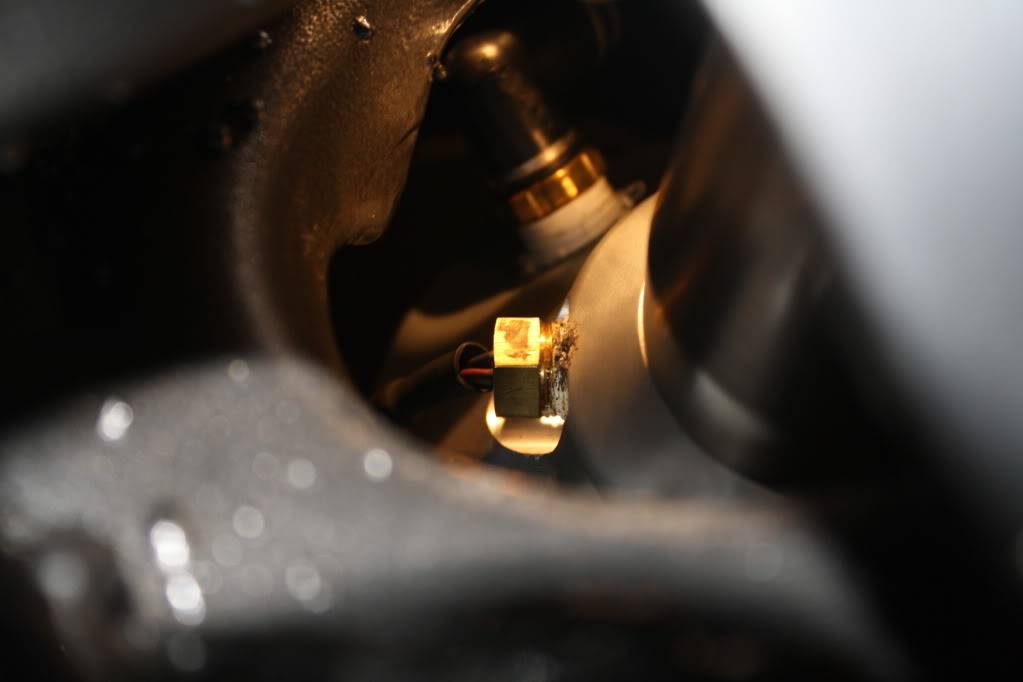
Next I was, and still am, concerned about the pig tail for the ride hight sensors comming out of the top of all four Shockwaves. These wires only appear to be 20-22 AWG and they come out though a brass nut. I want to provide a stress relief so those small wires can stay suspended and not be loaded down by these heavy connectors.
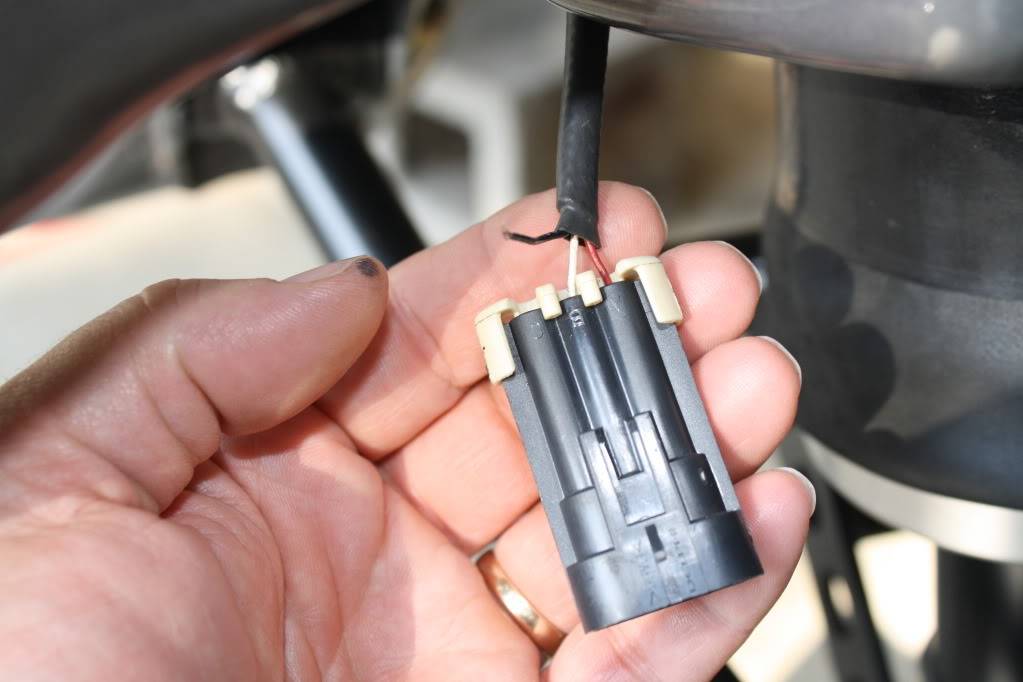
While doing this I noticed one of the 3 wires had come out of the weather pack connector. Funny, that's not the end of the pig tail I was concerned about! So, I am working with Darren at ridetech for a resolution.
Thanks for all the kind comments and encouragement. Please keep coming back.
Ken
09-19-2011 #33 Registered User
- Join Date
- Jan 2008
- Location
- Houston, TX
- Posts
- 192
Nice work on the chassis so far. Starting clean helps you finish clean. Thats what i tell myself to justify my OCD!!!
Asa Walker
Houston, TX
09-20-2011 #34
Registered User
- Join Date
- Aug 2011
- Location
- Burleson, TX
- Posts
- 130
Got a little more done....
And I mean a little more. The front is taking alot more time than I thought it would even with all of the preperation work that I did before sending the frame out.
First on the list was to repair the connector on the shockwave. Once I found a youtube video to see how the pins worked in this connector then it was no problem. Mini pick, soldering iron and a pair of needle nose pliers and I was back in business.
Sorry I forgot to take a picture of the finished connector by itself
Second was to figure out the stress relief for the other end of this same pigtail comming out of the shockwave.
After playing around with different ideas for a little while longer I found that I could use a zip tie to attach the cable to the air port and that would keep the end of the cable suspended and put the connector right in line with were it was to exit the spring pocket.
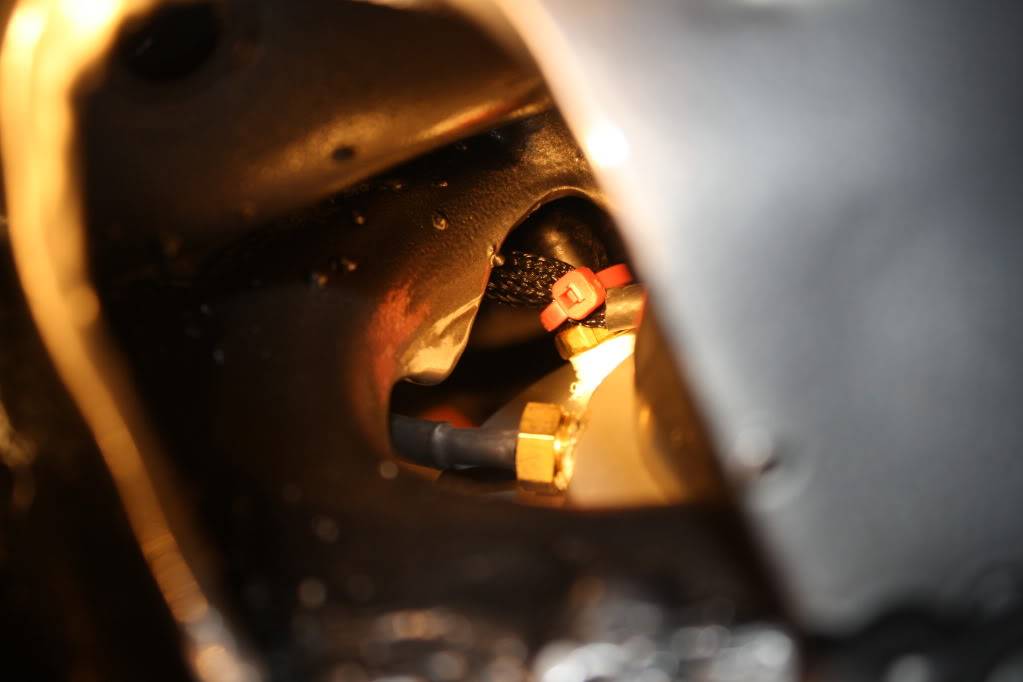

Here is a pic of both the air line and the ride height cable exiting the spring pocket.
Shockwave now installed and inflated. This is where I finished last night.
More later this week!!
09-20-2011 #35 Registered User
- Join Date
- Apr 2006
- Location
- Des Moines, IA
- Posts
- 589
As the top of the shockwave stays with the vehicle body (does not move up and down with suspension) you don't need much strain relief on the wires.
I typically use an aluminum "Adel" clamp at the connector to hold it to the chassis or body. This ensures the wires cannot move, thereby mitigating the need for strain relief.
That all said, what you have done looks good! No reason not to have a little extra insurance.
09-20-2011 #36
Registered User
- Join Date
- Aug 2011
- Location
- Burleson, TX
- Posts
- 130
Extra insurance is correct Britt! Not having done this before and not wanting to "re-do" it is why I choose to try and add some relief to that paticular part of the cable especially due to the small size of the wires. Thanks for the comment and please keep watching and reading. Any pointers are always wanted and welcomed! Ken Originally Posted by marolf101x
09-28-2011 #37
Registered User
- Join Date
- Aug 2011
- Location
- Burleson, TX
- Posts
- 130
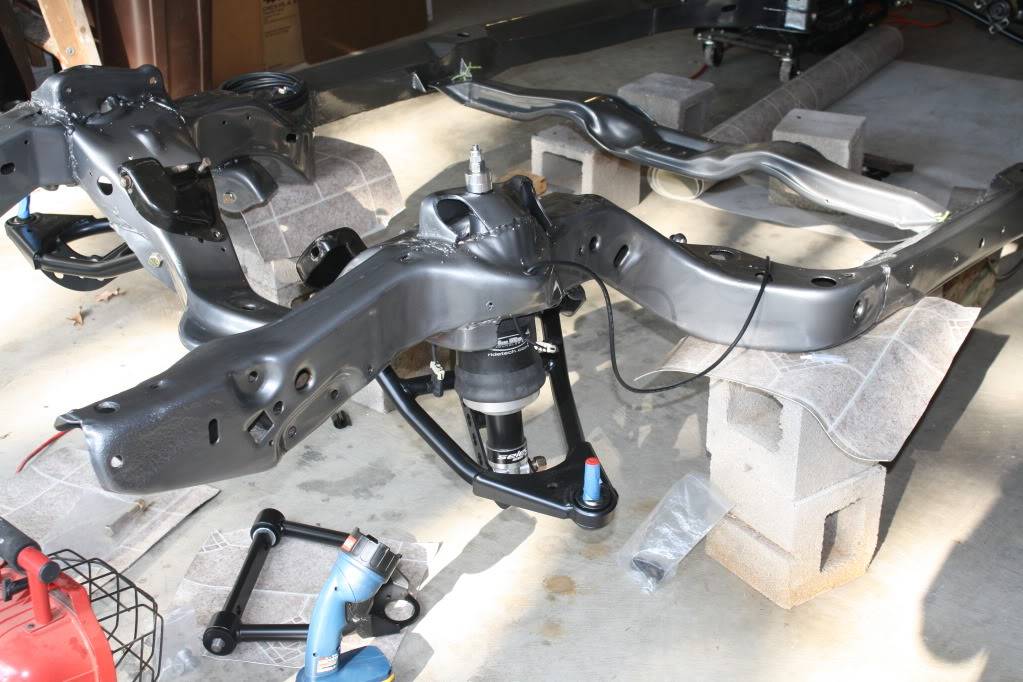
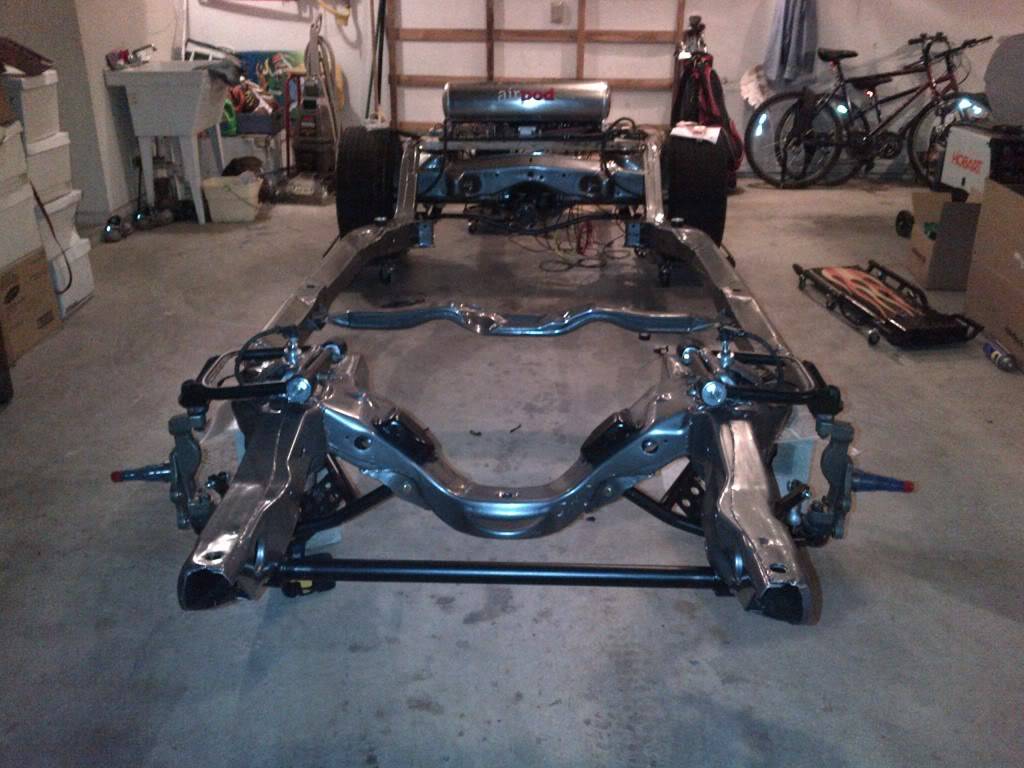
Finished install of Ride Tech front suspension....
...last night so these pics are not the best.
First, I had to figure out how and where to run the shock valving control cable from the top of the shock and eventually to the inside of the body and under the dash. I wanted to keep it out of the way of brake lines, transmission cooling lines, hot headers, etc. I ended up drilling and tapping a hole for an Adel clamp to route the cable back into the spring pocket and exit with the height control cable. It rus with a big enough loop to not be in the way when it comes time to do a front end alignment. Once that was figured out and done then I installed the upper ball joints and the tall spindles. Then came the very unforgiving but AWSOME looking front Muscle Bar installation.
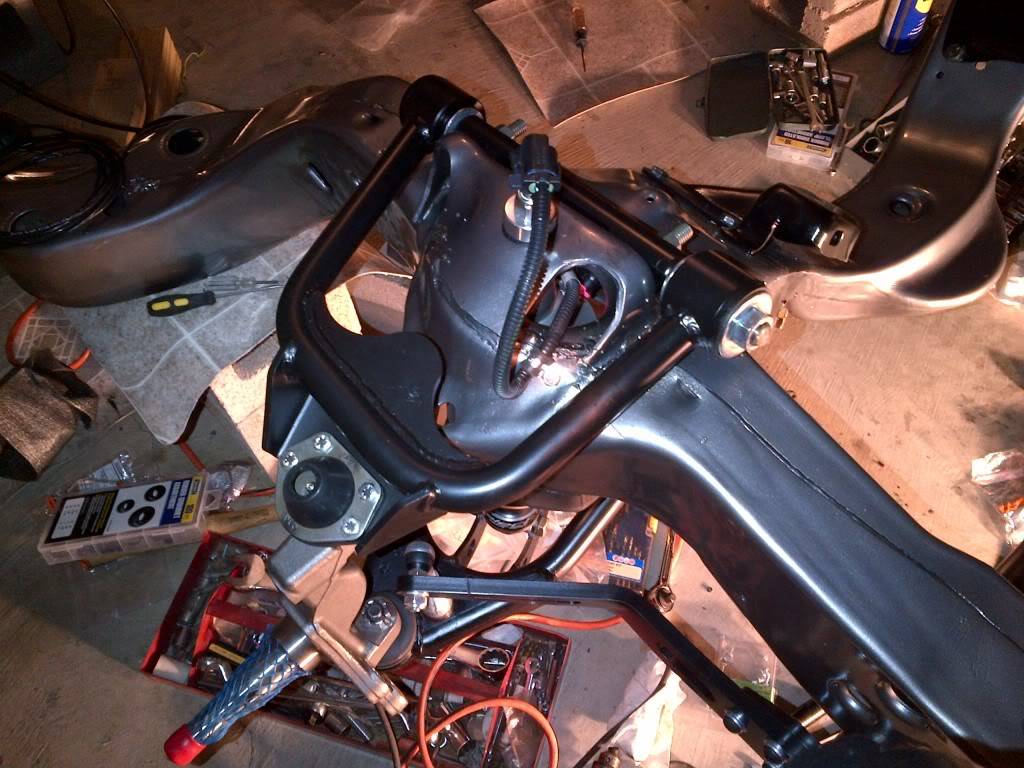
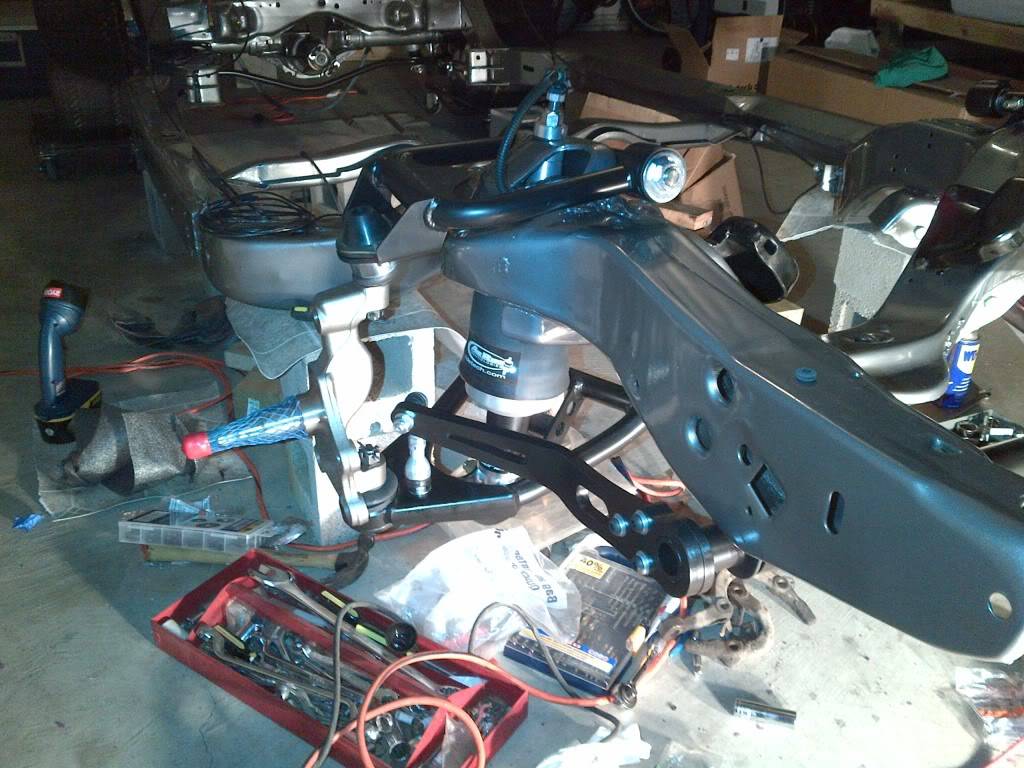

So here is where it sits now.
I have not found any after market steering arms any better than the originals so I will have them blasted and powdercoated before installation. Will be ordering a KORE 3 Brake Kit to install in the front and back along with a new steering box and some other steering linkage parts I have decided to replace.
09-28-2011 #38
Registered User
- Join Date
- Oct 2005
- Location
- Jasper,IN
- Posts
- 540
Ken, What was "unforgiving" about the front sway bar install? Anything we could do better?
09-28-2011 #39
Registered User
- Join Date
- Aug 2011
- Location
- Burleson, TX
- Posts
- 130
Darren-unforgiving is not all bad. It should do it's job very well. I did have some alignment issues that I will call you about. But overall, it looks Awsome and I am expecting it to perform very well. Ken
10-04-2011 #40
Registered User
- Join Date
- Aug 2011
- Location
- Burleson, TX
- Posts
- 130
Late night!
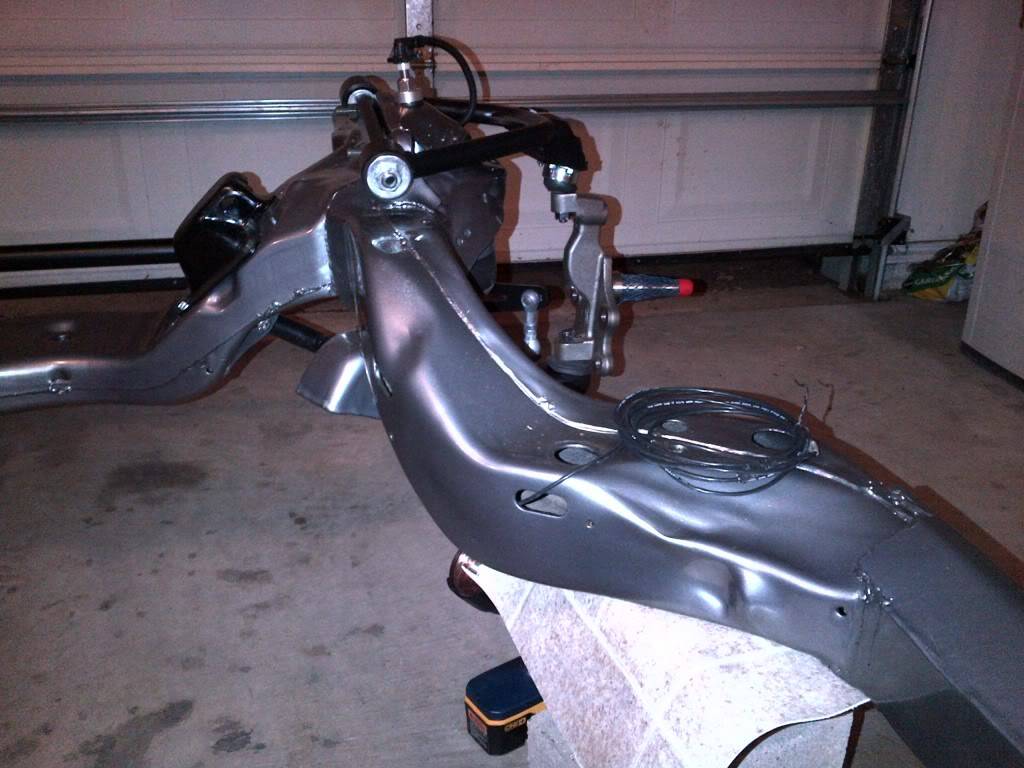
I will be obligated the next 2 nights so I wanted to get some work done - stayed up to 2am. Boy today is going to last forever. Anyway I mocked up the AirPod and routed all the cables and airlines from the Shockwaves.
Here is almost exactly where the AirPod will sit on the trunk "shelf" area in relation to the frame so I put a couple a boards under it for stability and got after it.
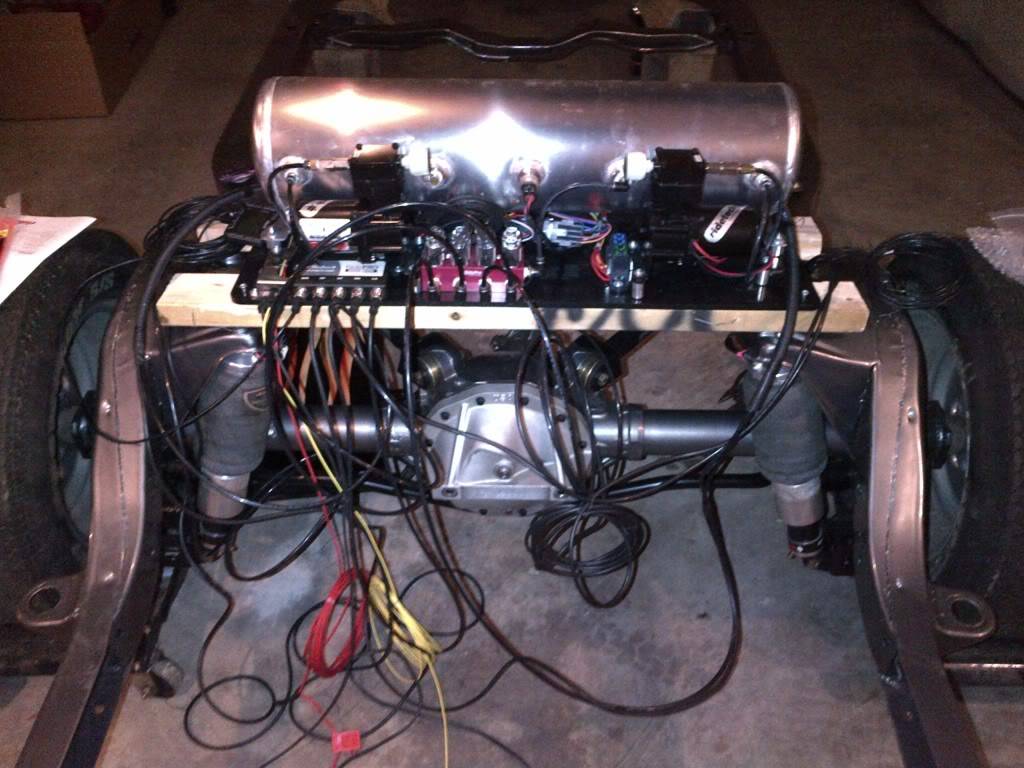
After connecting every wire, cable and airline I connected the system to a battery and let the tank fill. Once it filled up to 150 psi I aired up each shockwave. I let them sit for awhile to see if I had any bad leaks. Only leak was at the primary compressor on the AirPod at the outlet. A quick trim on the line and reseating it into the connector took care of the problem.
Next, I started routing all the shockwave cables and airlines to clean things up a bit and get them closer to where they will be in (hopefully) their final location.
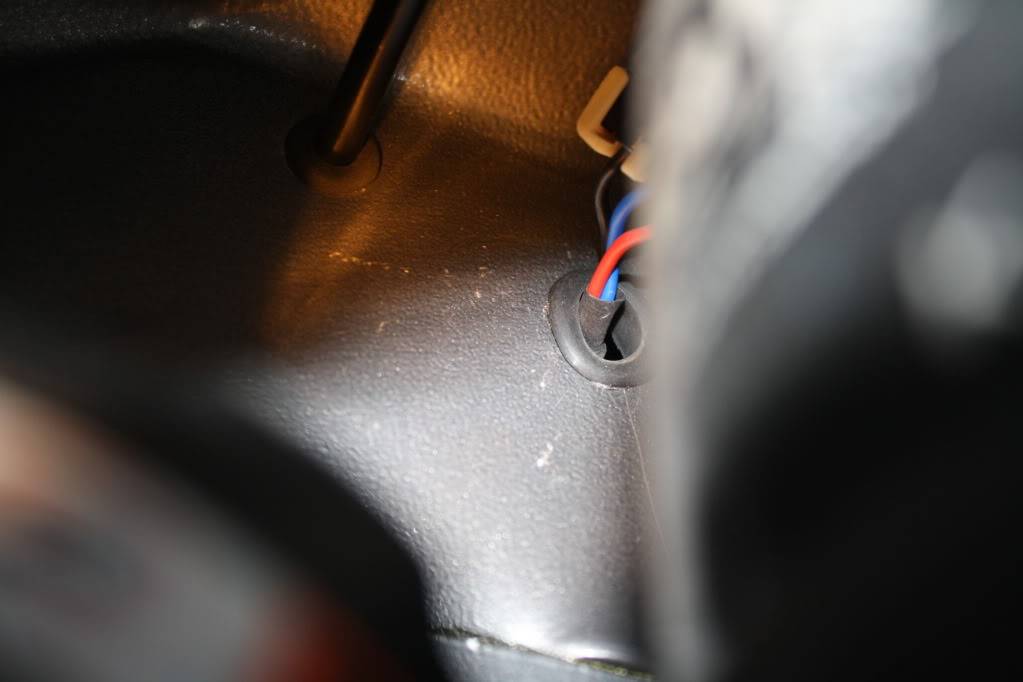
I have this thing about not wanting to drill holes if I do not have to. I am always looking at what the factory has already provided and work with that as much as possible. So on the rear I ran the cables and airlines though the holes at the top of the spring pockets using a grommet
Added a little stress relief and guide to the height control cable with a zip tie. The shock valving control cable dressed and aligned itself nicely without any outside influence other than the snugness of the grommet.

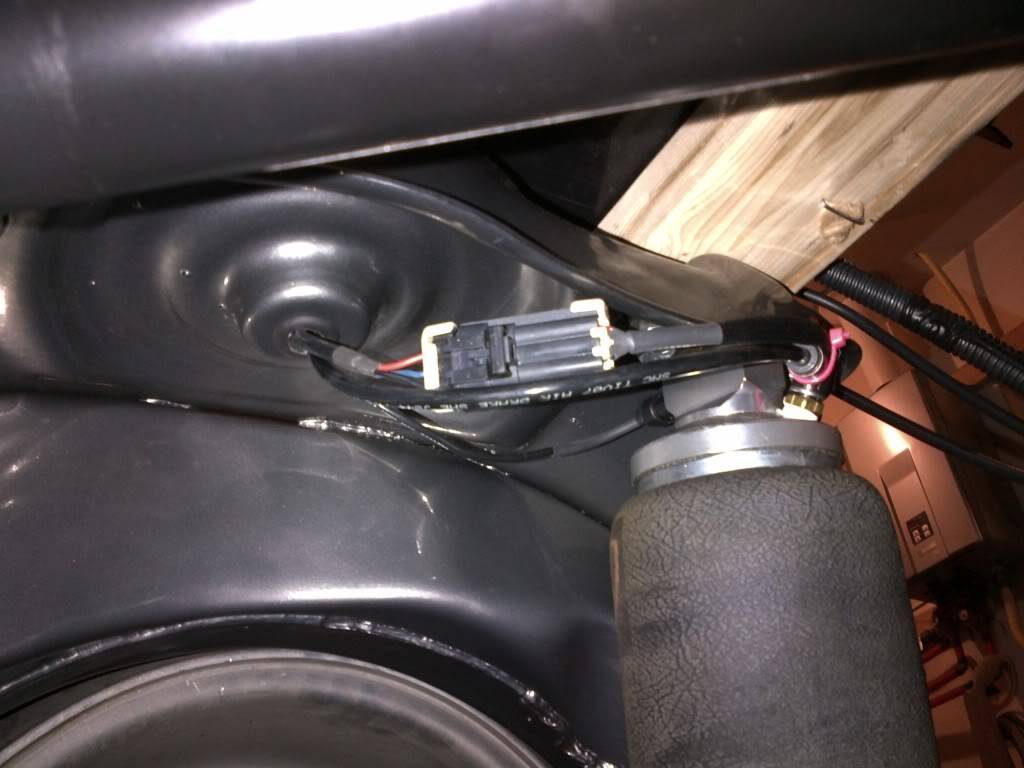
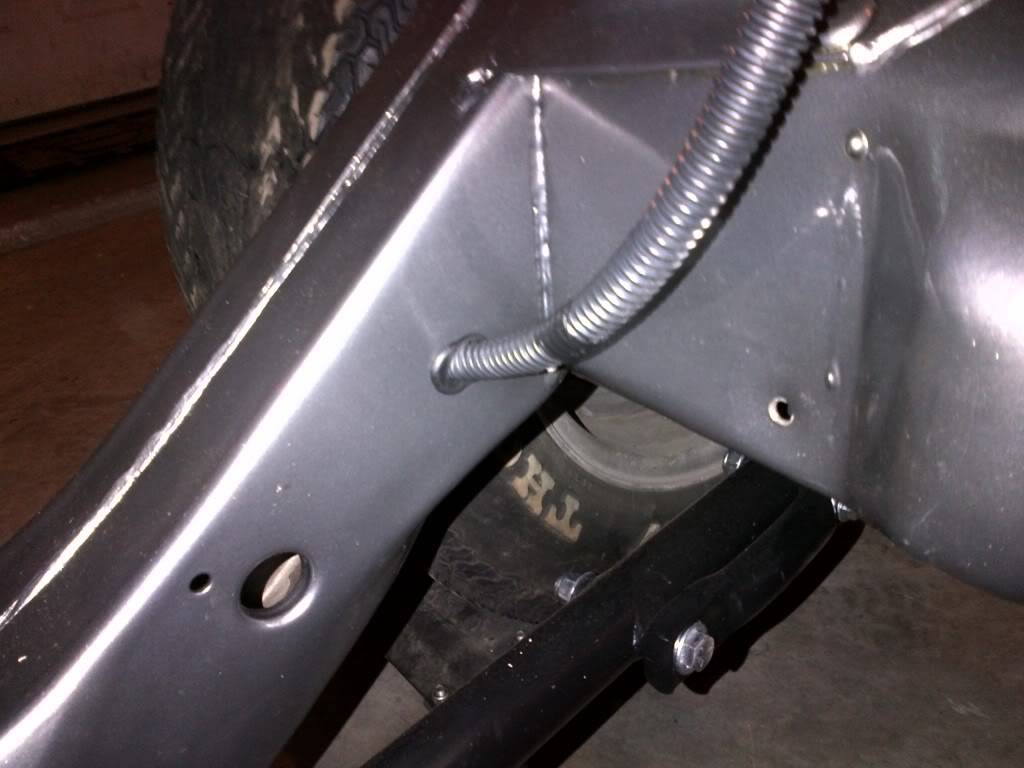
When the cables and lines come out on the other side they will enter the trunk area directly above and as this pic shows they should enter right next to each side of the Air Pod. This should be an easy route and dress once the body is back on the frame.
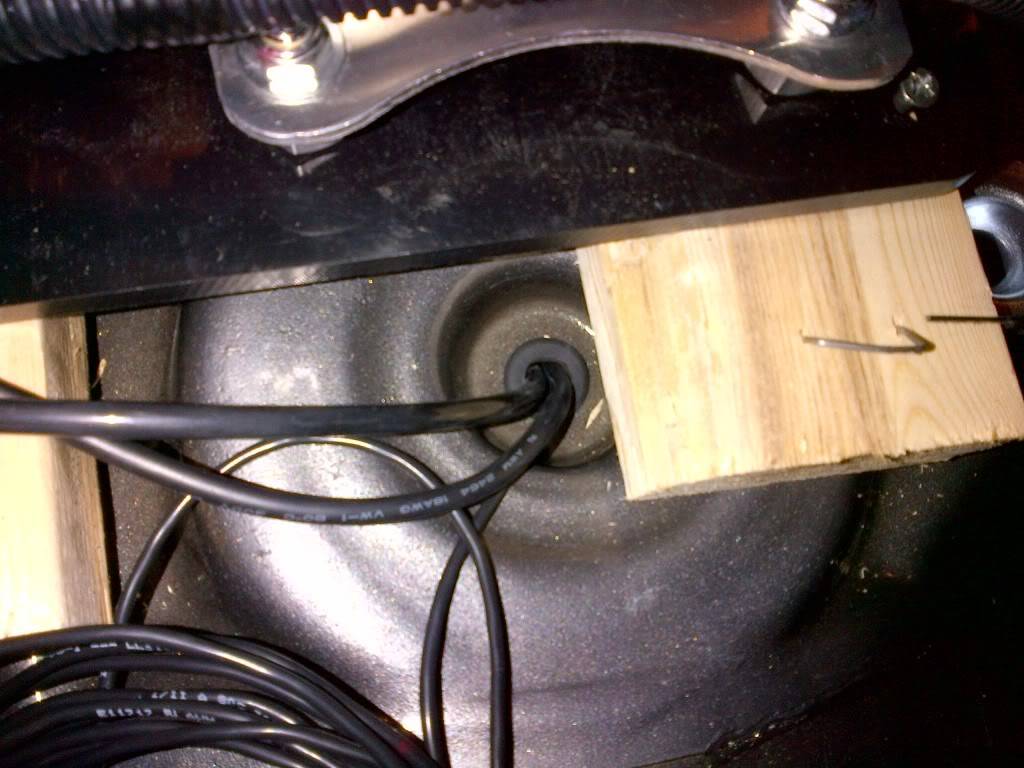
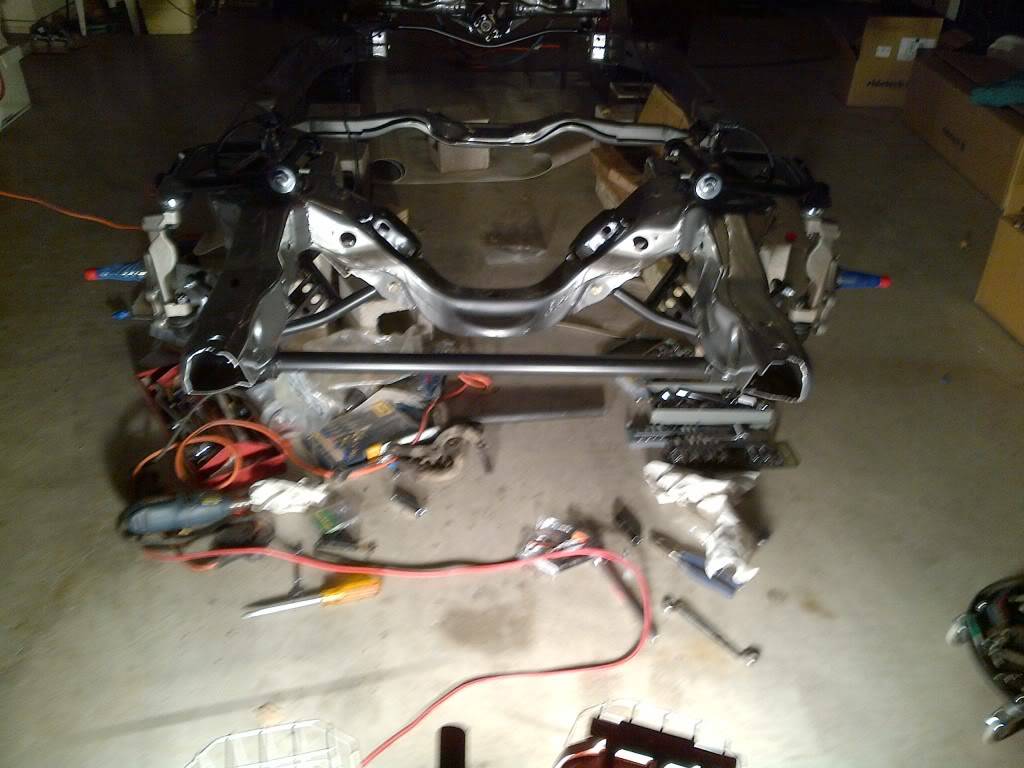
Next came the airlines and cables from the front Shockwaves. I ended up putting a wire loom over each set of airline/cable and ran them through the frame rails to an existing ovalish hole in the rail just before the rear crossmember. I left the shock valving control cable exiting the frame in the front as these cables plug into a box that will be under the dash. I will run the rear ones through the body to the front.
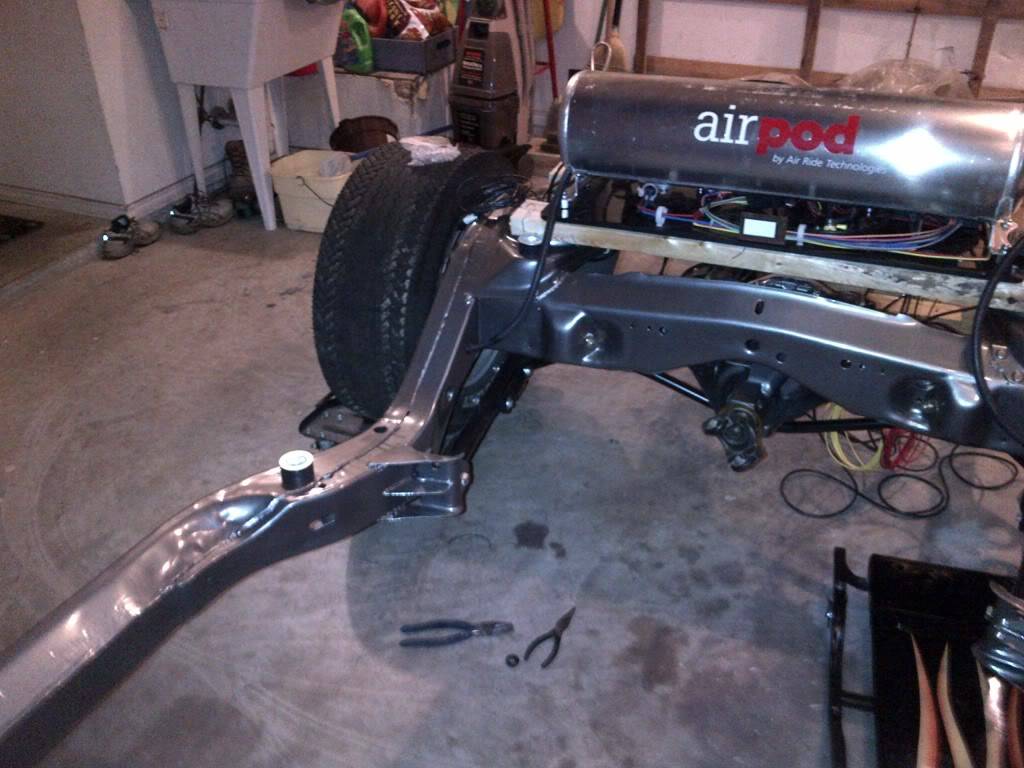
Believe it or not that and a few little clean up jobs took 5 hours to complete. Here is where it sits now.
There is not much else I can do with the AirRide until I get some wheels on the front. Hope to have my brakes ordered by next week. Until then I will continue planning out the fuel and brake lines as well as giving more thought to the interior. - Ken


 Reply With Quote


