Results 41 to 60 of 130
Thread: Popping my PT Cherry
-
06-12-2011 #41

 Registered User
- Join Date
- Oct 2006
- Location
- McKinney, TX
- Posts
- 899

Well, its not really a big update, but I got something to show. I messed up my hands last week and couldn't get anything done until today. I had a few hours to smooth out the other side and start shaping the banks and start the area around the center vent. It looks like crap, but at least now the banks are a bit visible.
In my normal fashion, I put the cart before the horse and spayed some primer so I could get a better visual of it. I emphasise the roughness of how it looks, but this is just a step in the process towards completion. The back looks like crap because it will connect with a second piece that will run through and between the rear seats.
 Confucius says, "Choose a job you love, and you will never have to work a day in your life"
My build Beast
-
06-13-2011 #42 Registered User
- Join Date
- Apr 2010
- Location
- Sunny Flordida
- Posts
- 345
It's a work in progress, but I can see where you are going with it. Like I said, make sure you are making 2 (LOL!) because I love it!!!!

[/URL]
08-25-2011 #43
Registered User
- Join Date
- Oct 2006
- Location
- McKinney, TX
- Posts
- 899
So, two months later and I finally have an update! If you haven't heard, the weather in Texas (DFW) right now is flat out miserable. We had 40 consecutive days of 100+, a day off (97) and it has been 100+ ever since. I think we are on day 56 now. The average high AVERAGE has been around 105. Combine that with the fact that I have work keeping me completely swamped, and I just haven't had time to touch it.
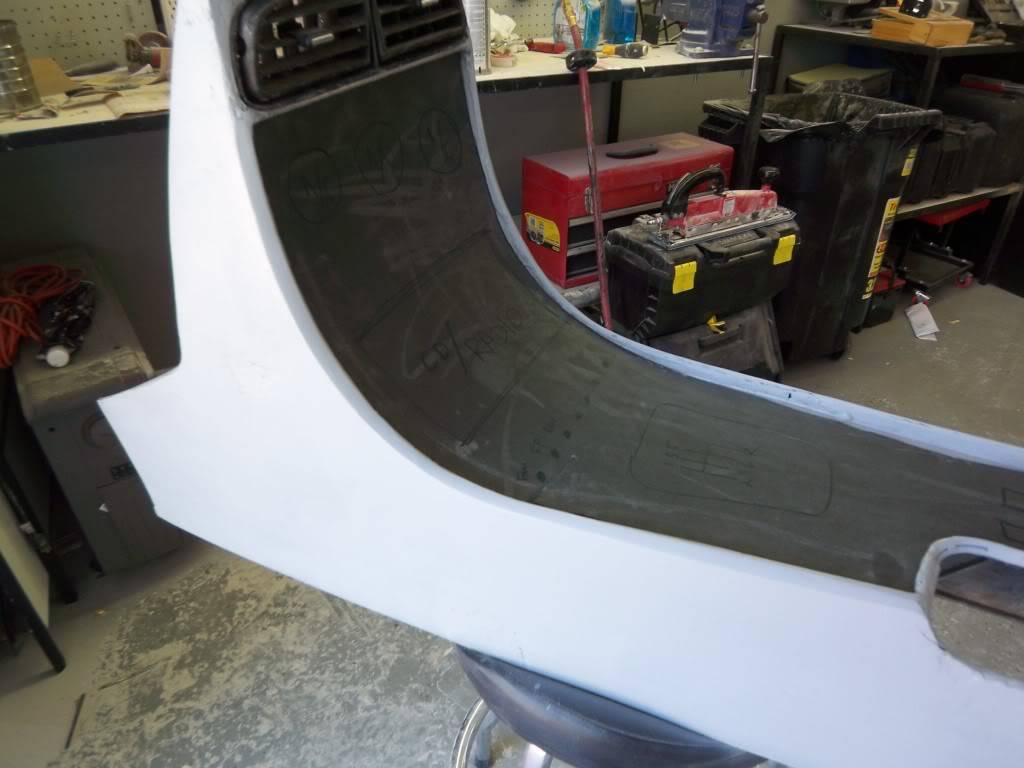
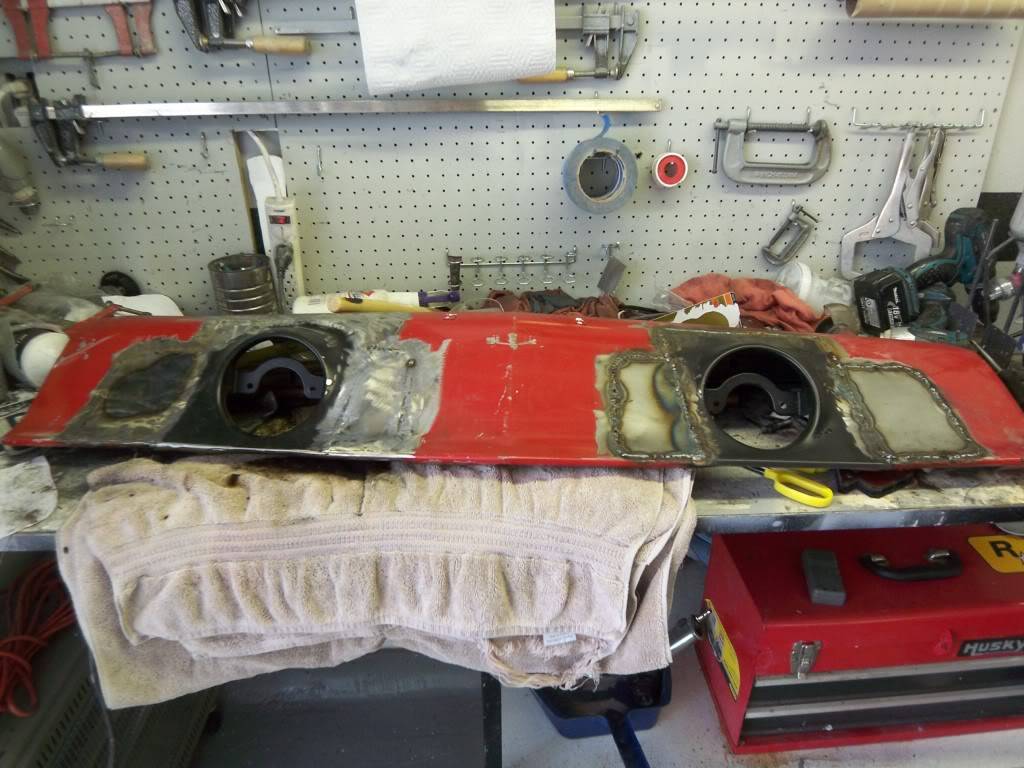
Today I finally got a day off, and it was pretty cool this morning so I got some work done. My chronic ADD got me interested in another piece that has been sitting in my garage for a while:
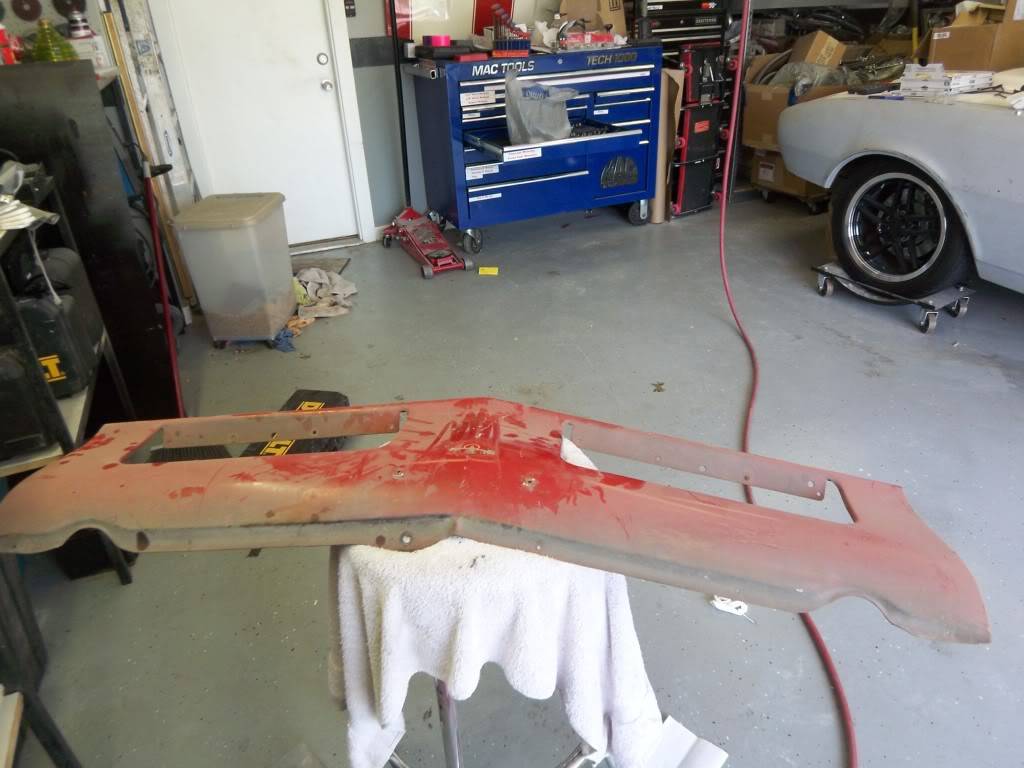
I want to incorporate the 69 parking lights, so here i go:
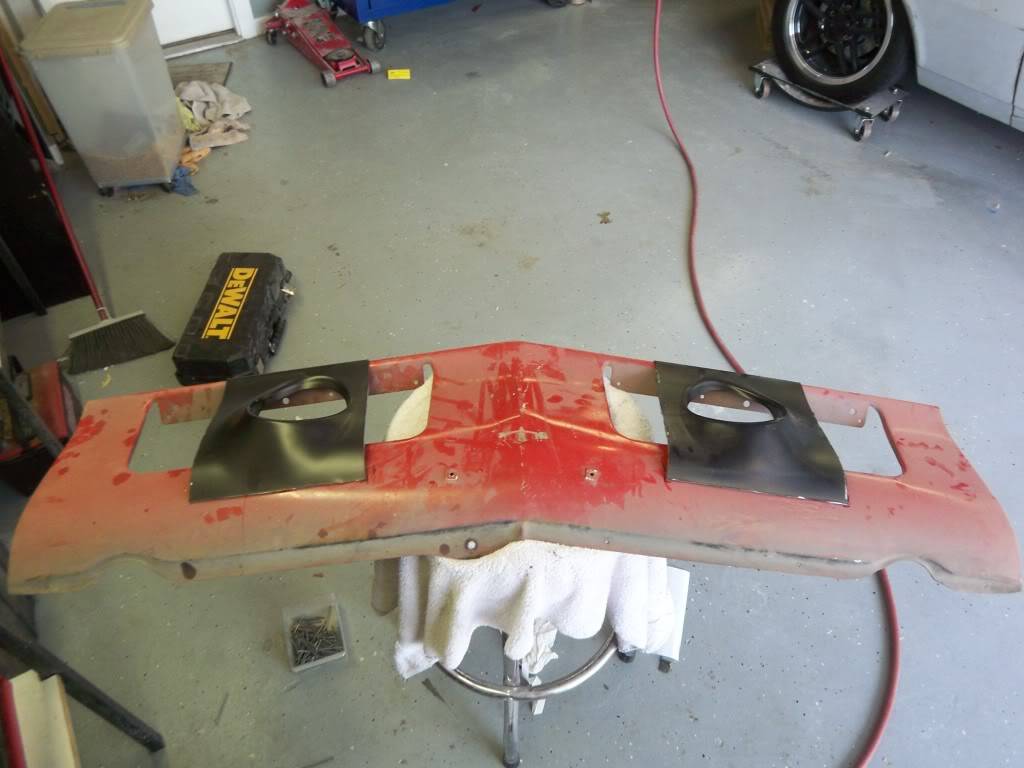
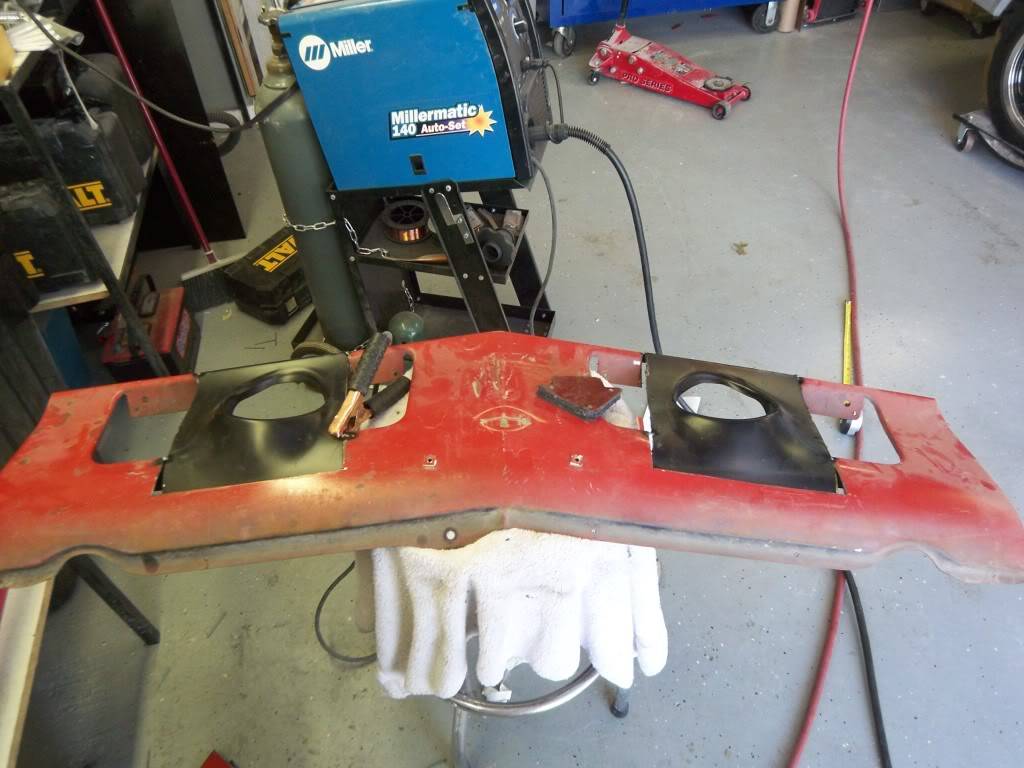
I've seen several different iterations of this...some real close together, some farther apart...I think GM did a pretty good job of spacing, so I did my very best to keep it exactly as it is on the 69 (see my template on a paper towel above the piece.

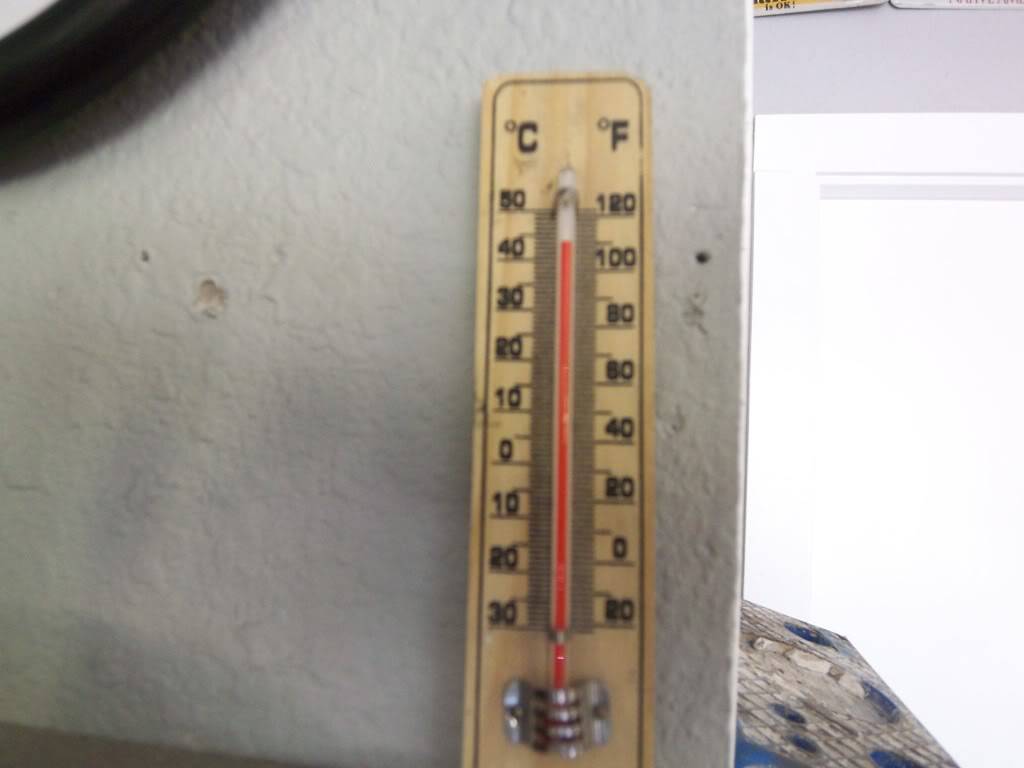
And at 3:00, I called it. The good 'ol Texas weather caught up to me...this is what the thermometer said in my garage. Good God I'm ready for October!
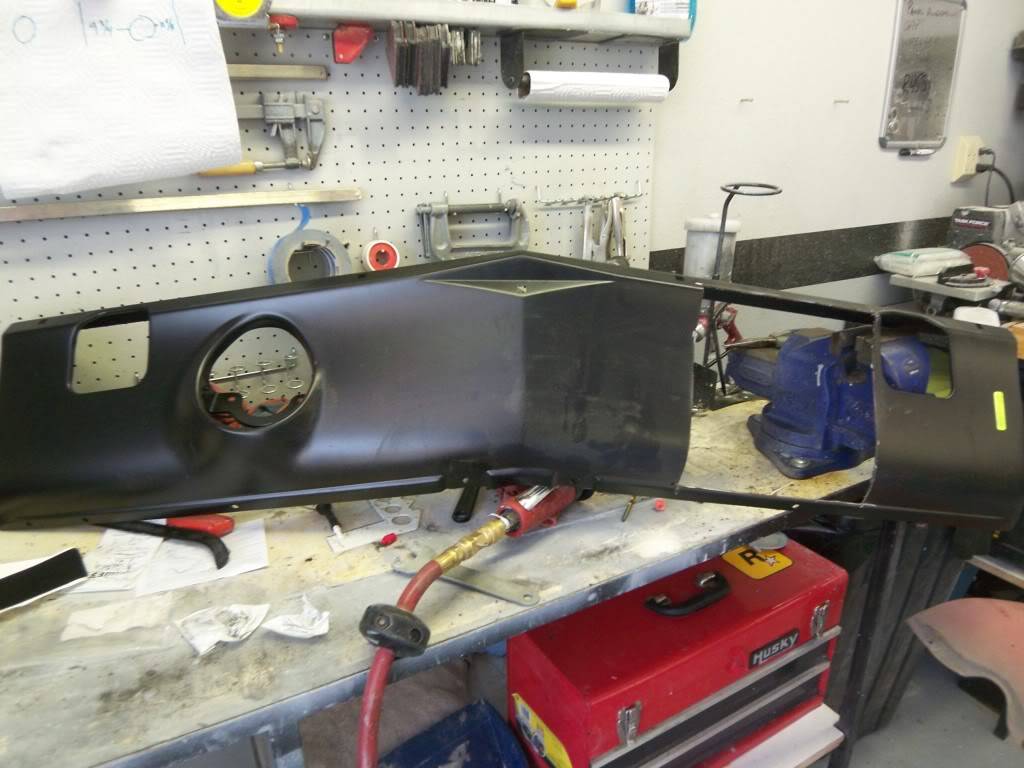
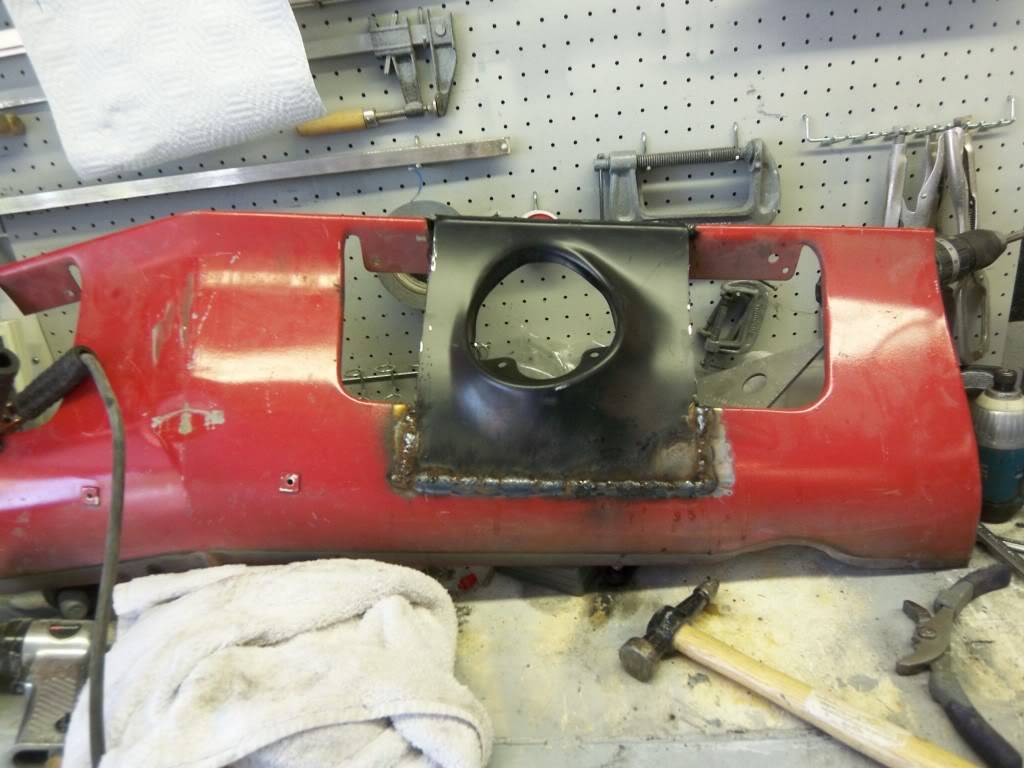
I have to say, I really underestimated the amount of work that this would take. I didn't realize just how different the arches are between the different years. Lots of hammering and heating and shrinking...Confucius says, "Choose a job you love, and you will never have to work a day in your life"
My build Beast
08-28-2011 #44
Registered User
- Join Date
- Oct 2006
- Location
- McKinney, TX
- Posts
- 899
Got another day to work on her...
I got out to the garage a little too early to be hammering and grinding, so I took the opportunity to install my fuel rails:

It is kind of amazing how much difference aftermarket rails make compared to the stock ones.
I used this kit from pro-products. The name doesn't carry the same clout as some of the other big names, but at 1/3 of the cost, it is really hard to argue with!

All in all, it fit together great, and was a joke to install. I'm not really sure why, but they included instructions The only complaint I have is how insanely long the crossover is. I'll get it shortened before too long though and make it look a little better.
After that it was about 9, so I decided it was time to bang away at the other side..
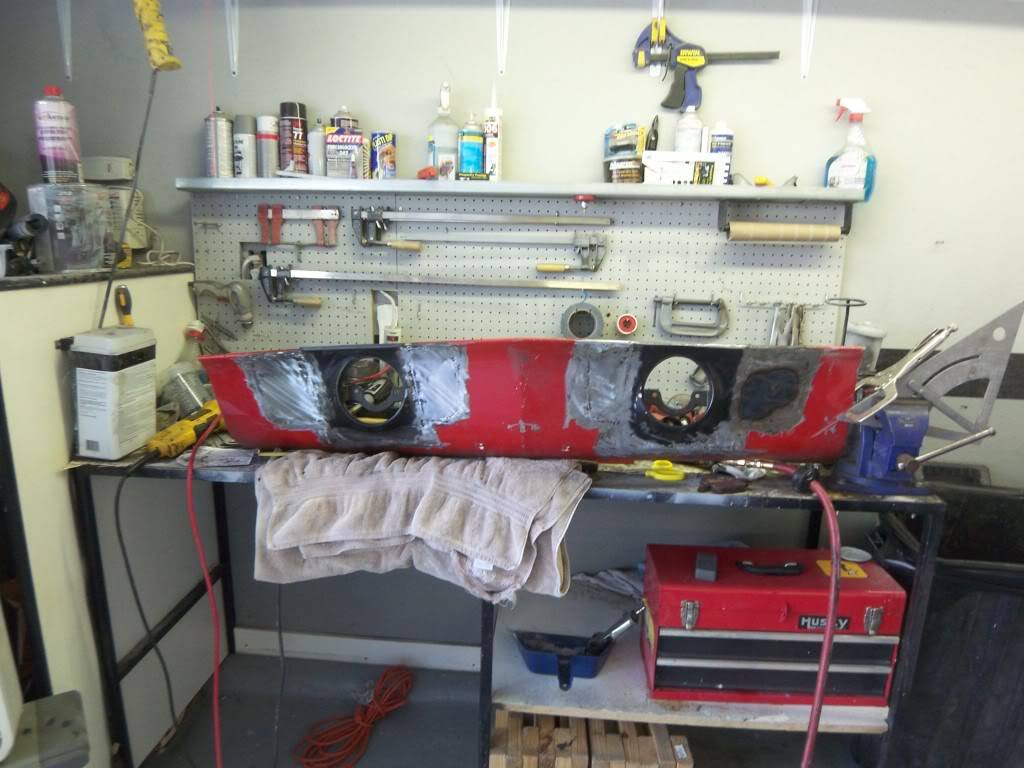
I had a little tin-can effect on the one side, so I used the rapid heat rapid cool technique to shrink it a bit. That is why there is a "blued" circle...Confucius says, "Choose a job you love, and you will never have to work a day in your life"
My build Beast
08-28-2011 #45 Registered User
- Join Date
- Jul 2010
- Location
- OREGON
- Posts
- 365
Keep up the good work.. Thanks for the ideas on building a center counsel from scratch as thats where I am at with my project...
11-20-2011 #46
Registered User
- Join Date
- Oct 2006
- Location
- McKinney, TX
- Posts
- 899
Been awhile since an update--haven't really had much time to work on her, so there really hasn't been much to show...
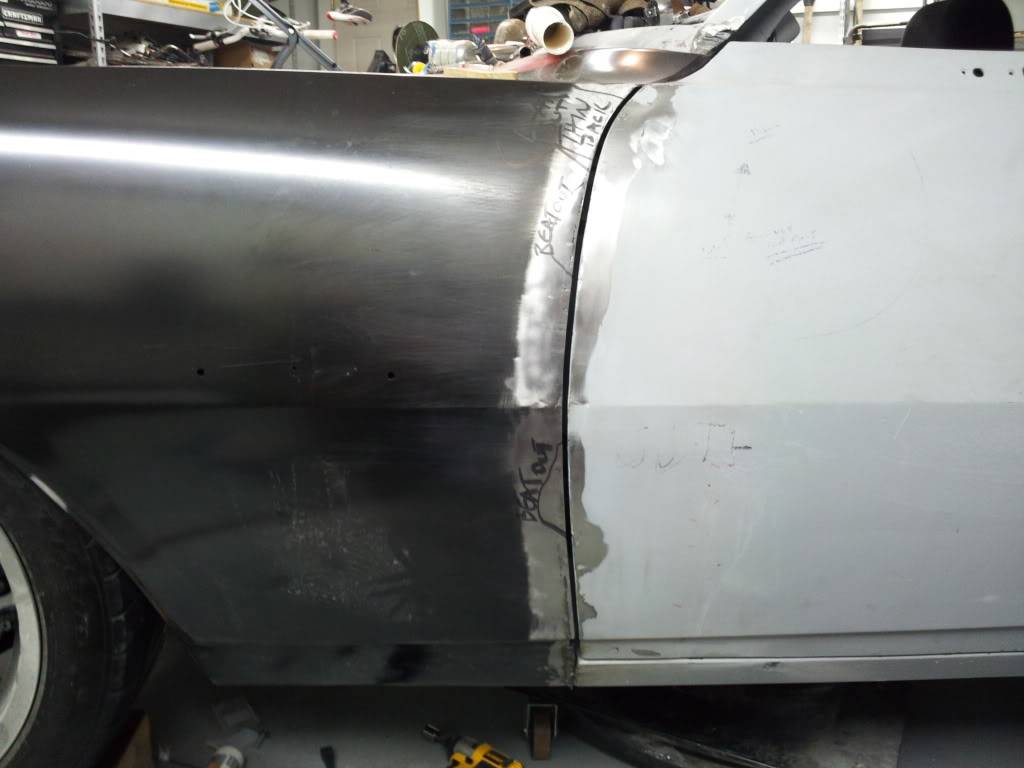
I've backed off of the console-going to have to go back to the drawing board. The area where the fiberglass meets the dash is too thin and simply crumbles and flakes when it is bumped so I'm going to have to come up with something else. Given the frustration on that, I've decided to tackle my gaps. I've got the driver's side door complete, and I have the driver's fender roughed in. With the holidays approaching, I'm not going to have much time to work on her again until Sunday, so hopefully I'll have a good update then. Until now, here are some pics:
Door completed:
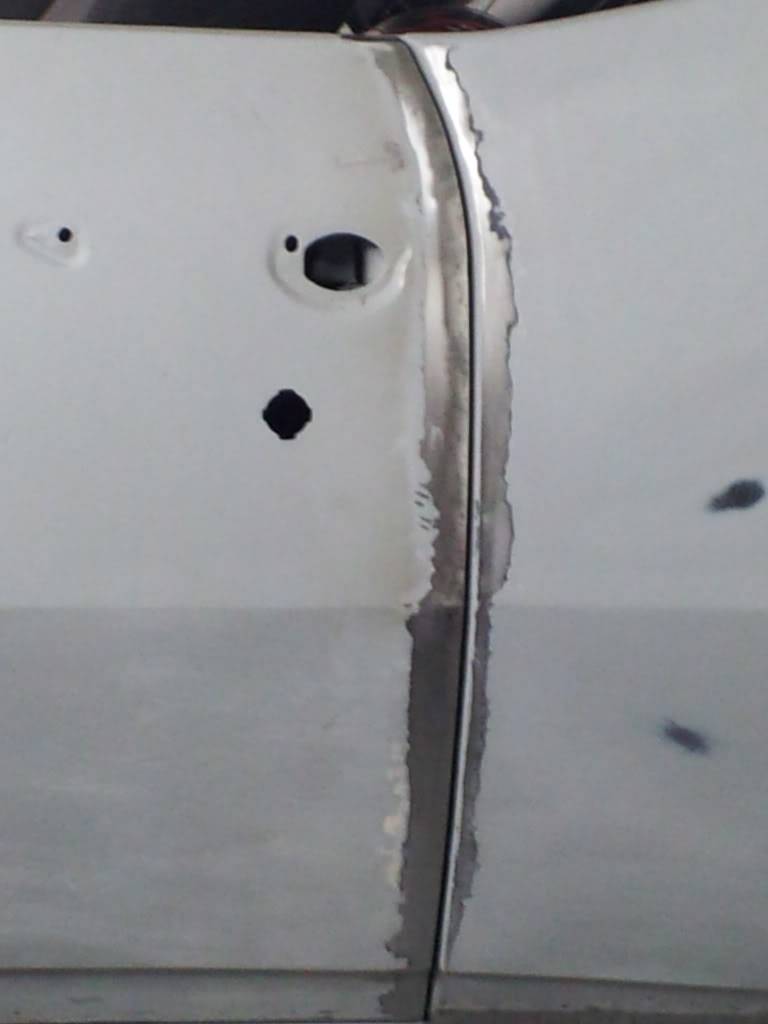
Start of the fender. The top crease was a little low, relative to the door so I had to put in a relief cut to raise it just a bit--maybe a millimeter.
The top wasn't too bad, but the bottom gap was horrendous! I built the top up with straight weld, but used a rod on the bottom, and still had to add to it!
It is just roughed in for now, have some hammering and more welding and grinding to do. My phone is not uploading to my PB account, so this'll have to do for now...Confucius says, "Choose a job you love, and you will never have to work a day in your life"
My build Beast
11-20-2011 #47 Registered User
- Join Date
- Sep 2010
- Location
- Huntington Beach CA.
- Posts
- 82
Killer thread!!! I'm digging this build!
-Louis
1967 RS/SS (driver)
1968 RS/SS (project)
11-20-2011 #48
Registered User
- Join Date
- Aug 2011
- Posts
- 165
Lookin' good! Now I don't feel so bad about my firewall panel. I've been stressing out because I did nearly the exact same thing as you. In hindsight, I wish I would have first used primer on the back side of the smooth panel instead of just the adhesive before welding. Oh well, I doubt water or moisture will get back there enough to cause a problem. At least I'm not the only one who didn't primer the back first.
Project High School Sweetheart
65 Chevelle 300 2dr Sedan = "CURSD65"
11-21-2011 #49 Registered User
- Join Date
- Feb 2005
- Location
- Sydney, Australia
- Posts
- 1,798

Nice work...I really like what you did with the valance panel and the lights.
Regards,
Leigh
Sydney, Australia
1971 Firebird 455
https://www.pro-touring.com/showthre...Project/page27
11-27-2011 #50
Registered User
- Join Date
- Oct 2006
- Location
- McKinney, TX
- Posts
- 899
Not a whole lot done today :( My best friend from when I was growing up rolled through town last night, and we stayed up all night drinking and catching up...needless to say, grinding, hammering and welding doesn't really do wonders for a hangover!
The work today is rough because of the headache, but I'll have it all cleaned up later this week, and will have it done!
Here is where I started this morning:
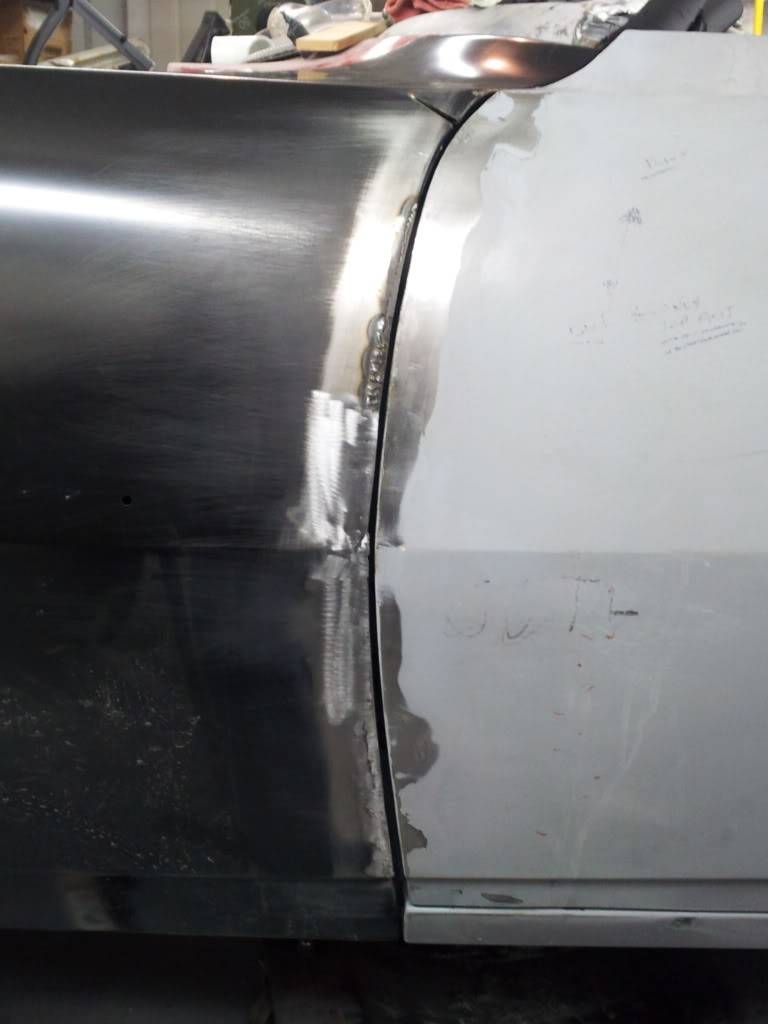
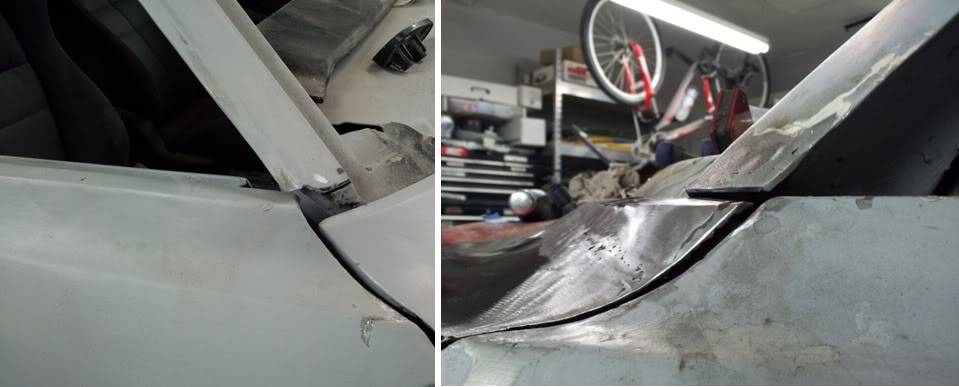
I didn't really have it in me to do a whole lot of gap work, so I decided to move to the A-Pillar and top of the fender. My goal is to add flush glass, so without the lower molding from the factory, the A-pillar looks awkward.
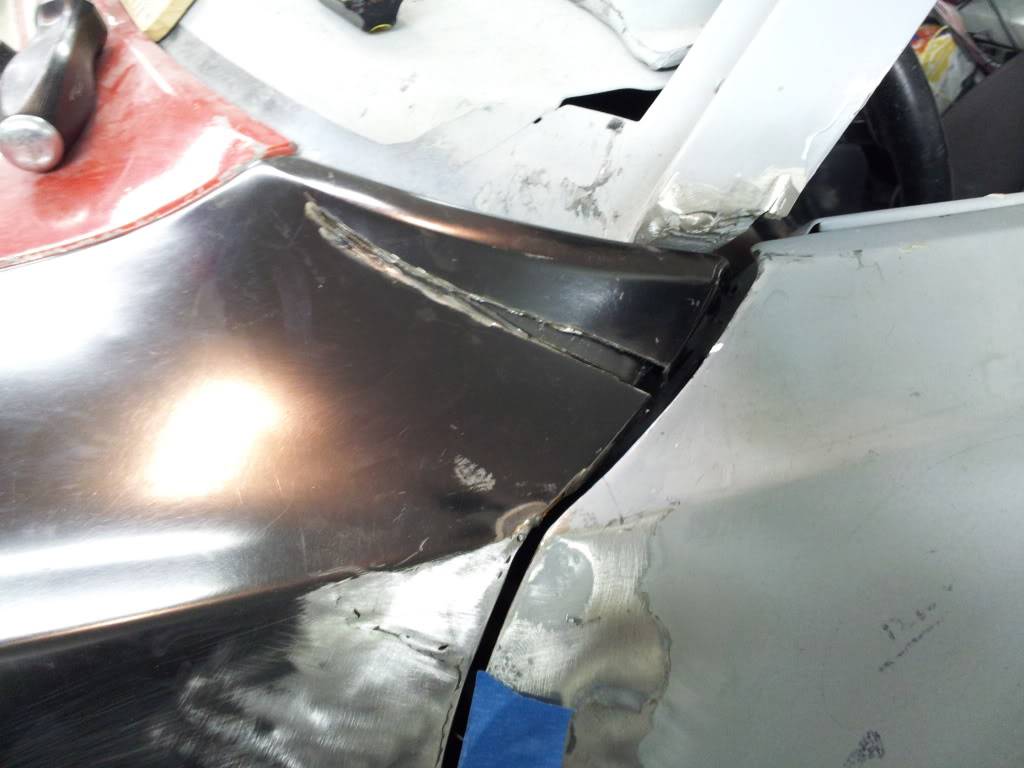
Added a bunch of metal to the bottom of the A-pillar to lengthen and finish it flush to the newly extended fender.
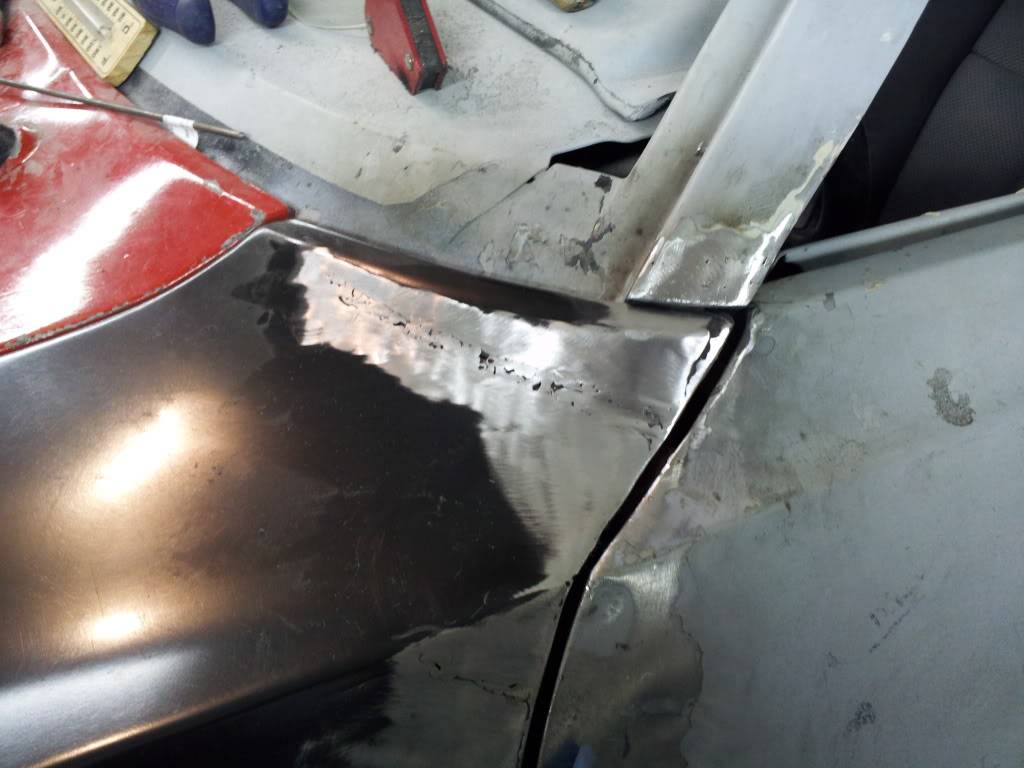
For reference, here is what the untouched passenger side looks like alongside the roughed in driver's side:
 Confucius says, "Choose a job you love, and you will never have to work a day in your life"
My build Beast
11-27-2011 #51
Registered User
- Join Date
- Oct 2006
- Location
- McKinney, TX
- Posts
- 899
The panel bond that I used required metal to metal. If there was primer, it is possible that it wouldn't have bonded well and bonding primer to primer could have led to the primer pulling away from the metal. Besides, after bonding it the complete peremeter was welded and sealed...any moisture getting between the panels would be pretty much impossible. Originally Posted by sixfivepost
 Confucius says, "Choose a job you love, and you will never have to work a day in your life"
My build Beast
11-27-2011 #52
Registered User
- Join Date
- Aug 2011
- Location
- Bay Area CA.
- Posts
- 136
Cool build cant wait to see more....
12-01-2011 #53
Registered User
- Join Date
- Oct 2006
- Location
- McKinney, TX
- Posts
- 899
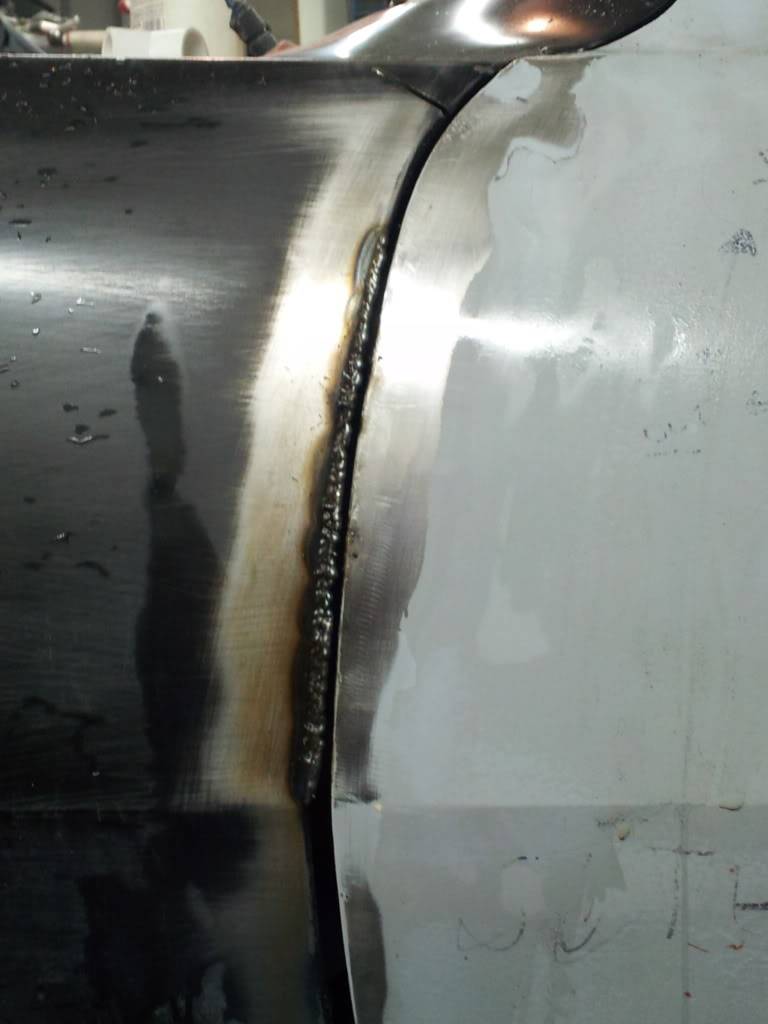
Made some progress today. I'll hopefully be done with the fender gap tomorrow, and on to the other side.
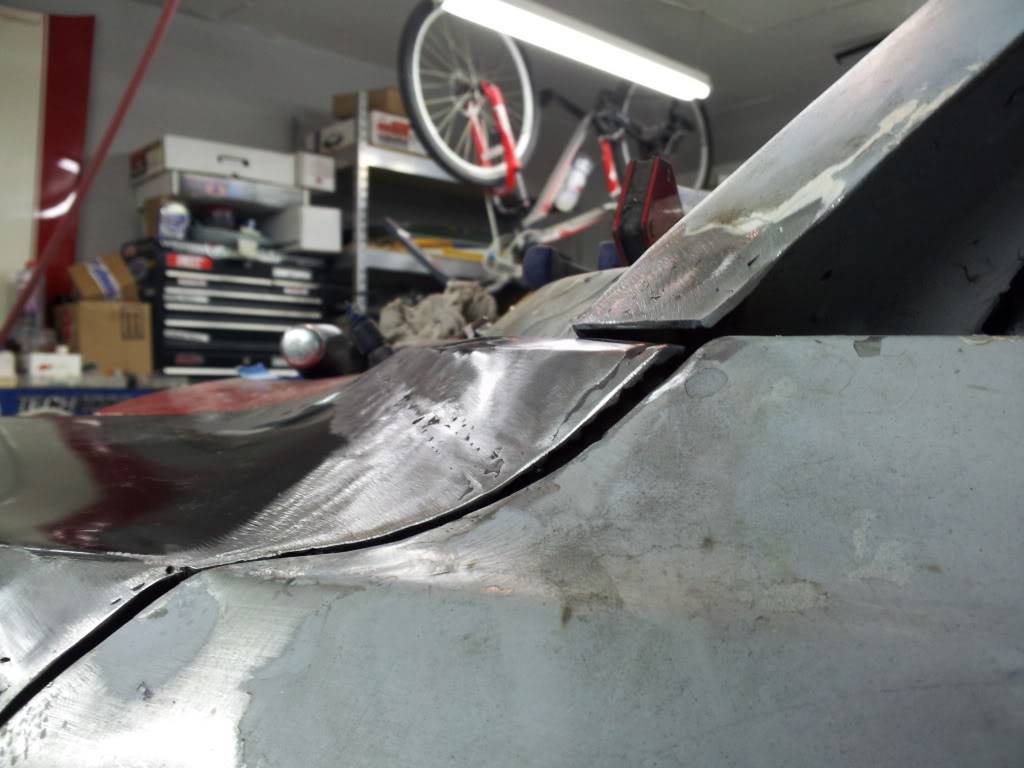
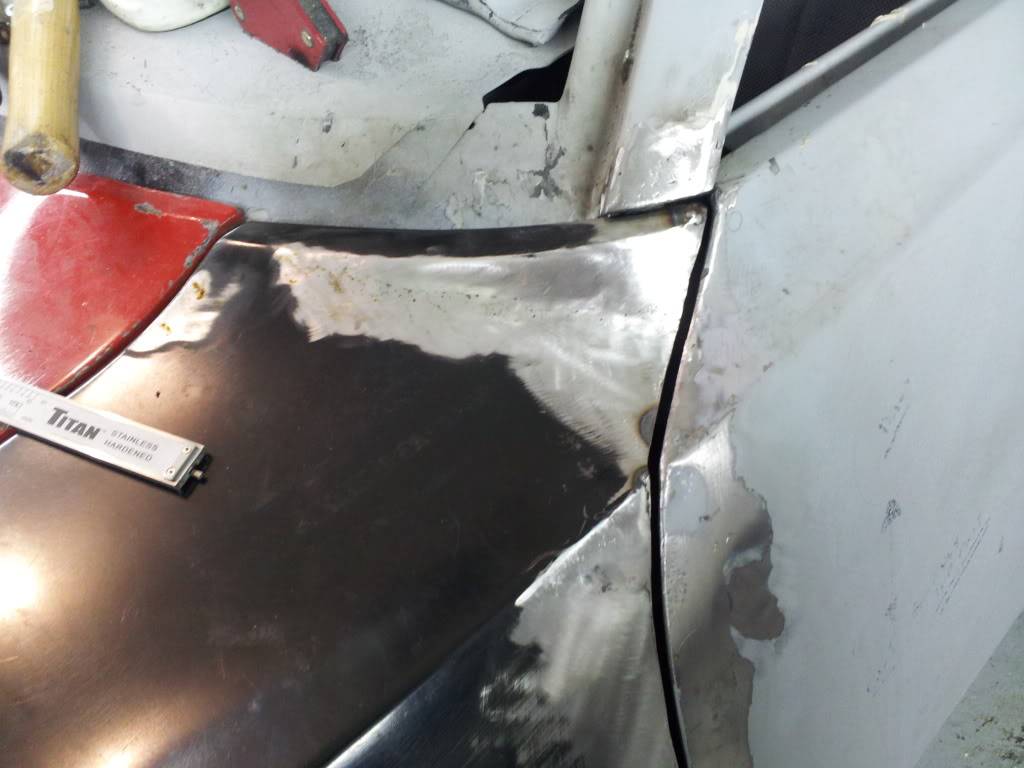
I added weld bead up the entire fender and cleaned up and rewelded the fender stretch to the A-pillar.
After grinding down the surface smooth, I added tape to set the gap at 0.1550". This gives some wiggle room to use a file and get it to 0.1660 (A little tighter than 1/8", but the goal for all gaps on the car).
Here it is with the tape set up:
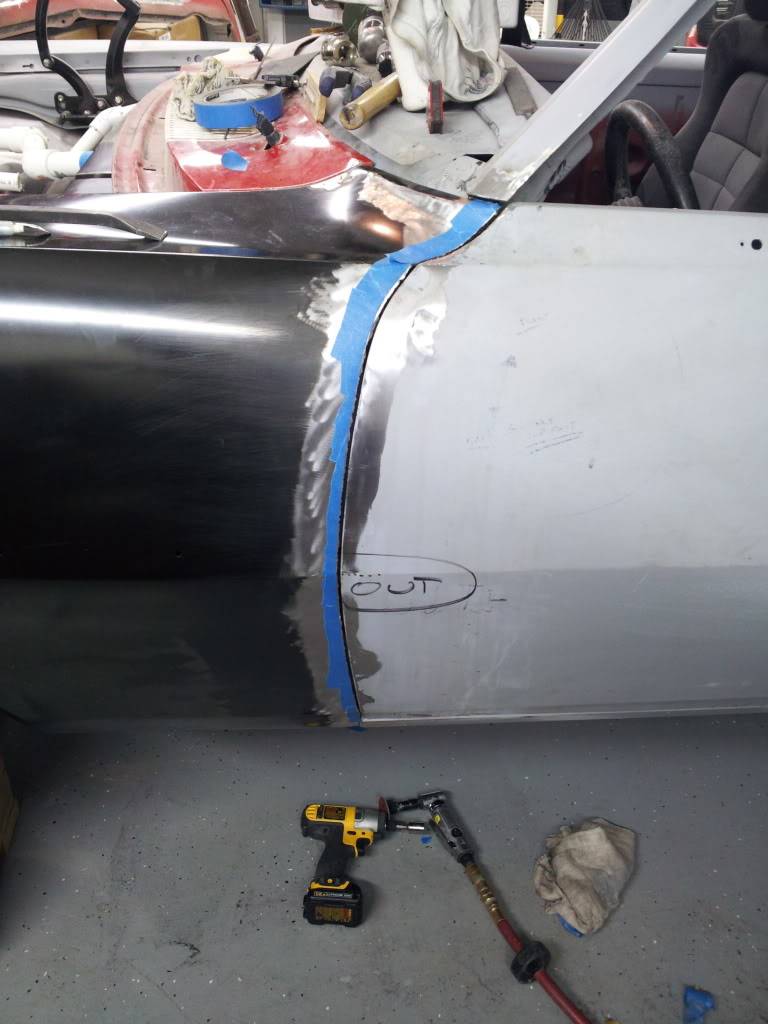
Here it is after initial grinding: (picture looks distorted a little, but it is perfect .155 from top to bottom.
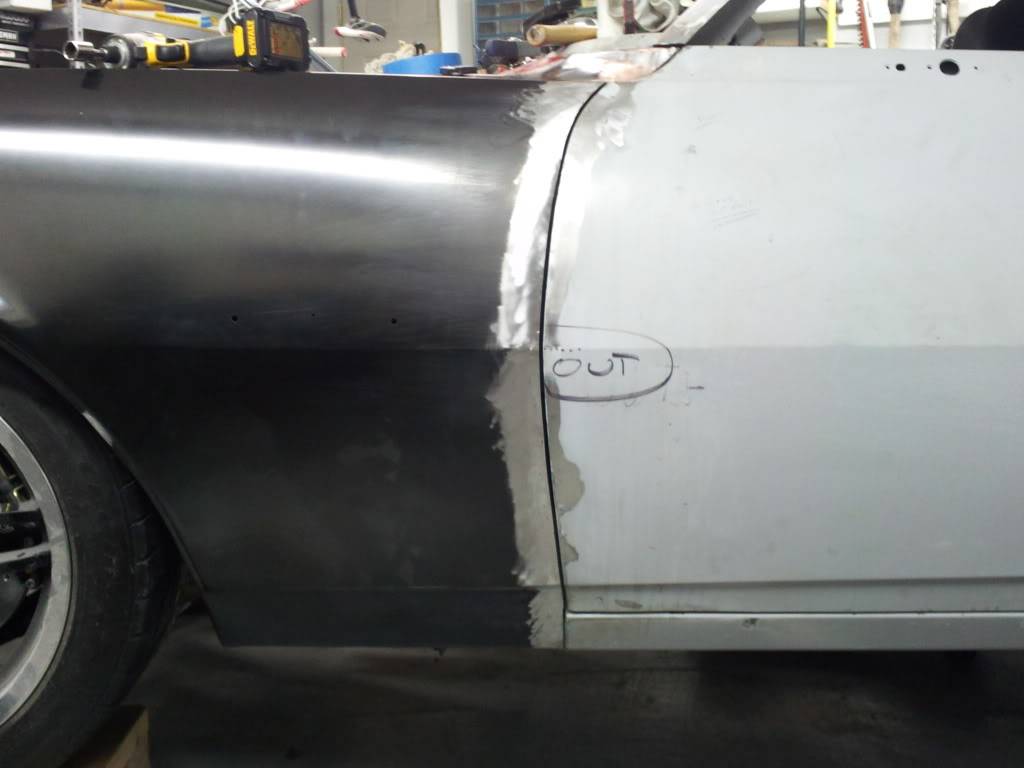
A closer shot of the fender stretch and A-pillar extension:
 Confucius says, "Choose a job you love, and you will never have to work a day in your life"
My build Beast
12-02-2011 #54 Registered User
- Join Date
- Nov 2009
- Location
- New York
- Posts
- 366
Really nice work!!! I was also thing of taking the drip rails off..
John
12-03-2011 #55 Registered User
- Join Date
- Jun 2011
- Location
- St. George, Utah
- Posts
- 1,629
Lookin good, I admire your get in there and fabricate attitude! Keep it rollin'!
12-04-2011 #56
Registered User
- Join Date
- Oct 2006
- Location
- McKinney, TX
- Posts
- 899
My wife has had a monster cold for the past two weeks, and somehow I have managed to avoid catching it....until now. I didn't really feel up to working on her today, but I felt that I HAD to do something...anything to be able to mark something off of the checklist...
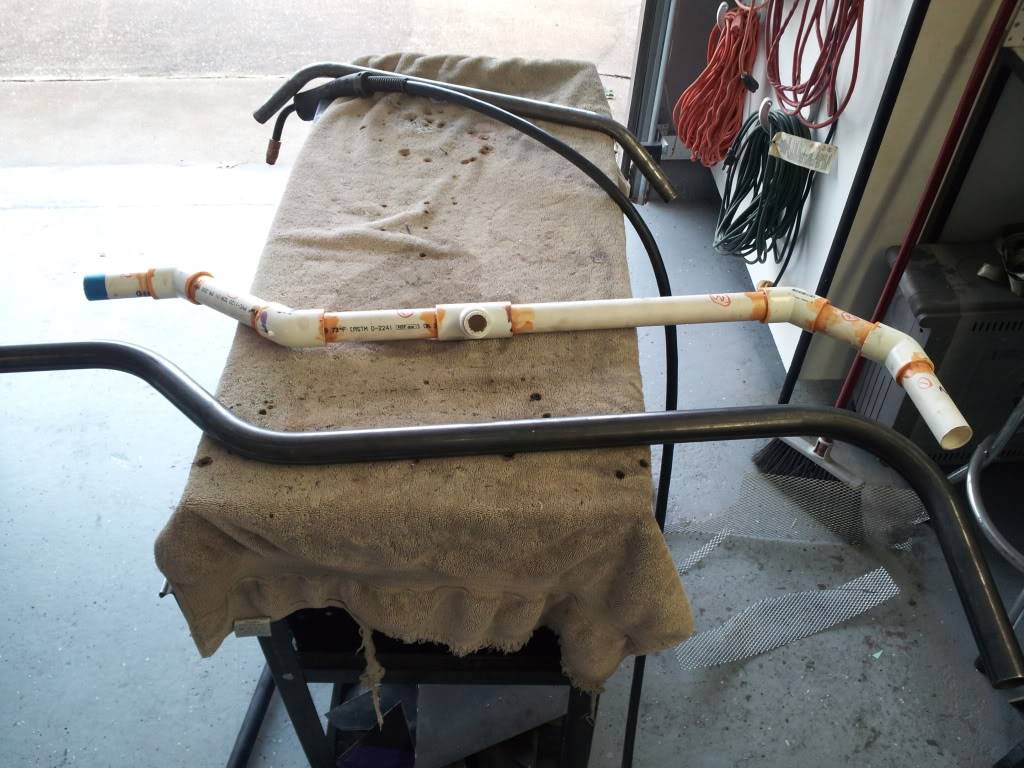
Some of you may remember some odd blue triangles on my wheel wells and if you wondered what they were there for, here you go:

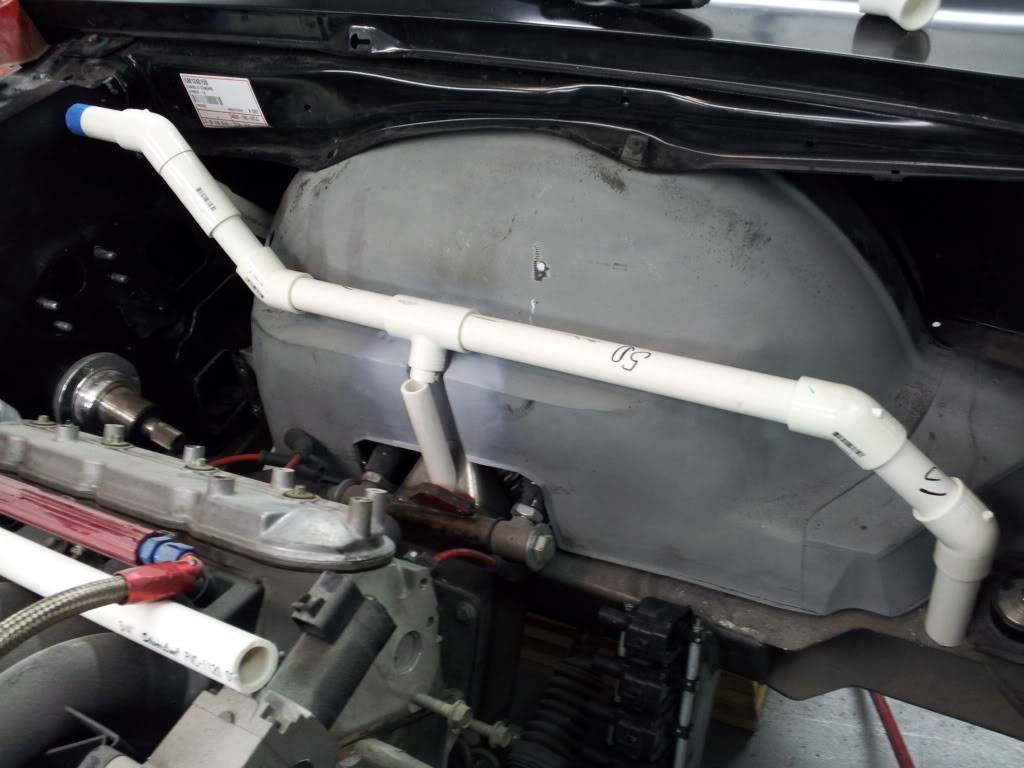
I didn't think it would be that much work to do, but man it was extremely time consuming and it still looks pretty rough. I just ran out of steam and had to call it for the day.
I'm talking with a cage builder about making the bends in steel tubing based off of the PVC templates.
I plan on welding bolt-through plates on the 4 ends of the tubes and making them removable and reinforce the front ends. I wanted to add some chassis stiffening to the front end and be able to tie it to the cage I'll have in the car.Confucius says, "Choose a job you love, and you will never have to work a day in your life"
My build Beast
01-16-2012 #57 Full Blown G-Machiner
- Join Date
- Nov 2008
- Location
- Central Indiana
- Posts
- 723
WOW!! You have been busy! Looking good bro.... keep at it, you will get there!

01-16-2012 #58 Registered User
- Join Date
- Jul 2008
- Location
- ohio
- Posts
- 1,135
it looking good
 keep the wheels a spinning and the Beavers a grinning
 (burt reynolds-smokey and the bandit)
01-16-2012 #59
Registered User
- Join Date
- Oct 2006
- Location
- McKinney, TX
- Posts
- 899
My compressor died about a month ago..it was a crappy 29 gal single stage hf special so I knew its days were numbered...I made a serious upgrade and got a Quincy 60 gallon. From TOD to delivery of my new compressor was nearly a full month! Needless to say, all work pretty much stopped :-( I'll have a good update on Thursday :-)
Been working on a couple of really cool things I can't wait to show offConfucius says, "Choose a job you love, and you will never have to work a day in your life"
My build Beast
01-26-2012 #60
Registered User
- Join Date
- Oct 2006
- Location
- McKinney, TX
- Posts
- 899
I've been busy as hell and haven't had much time at all to work on the Camaro, but I think I have enough to show-and-tell for now.
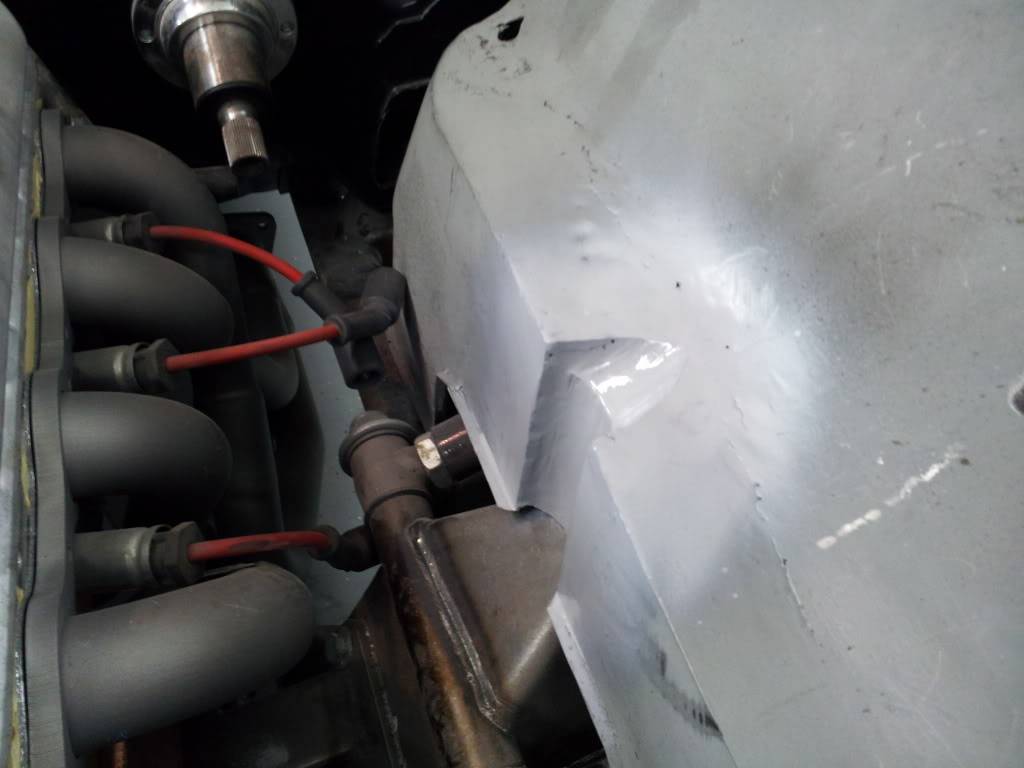
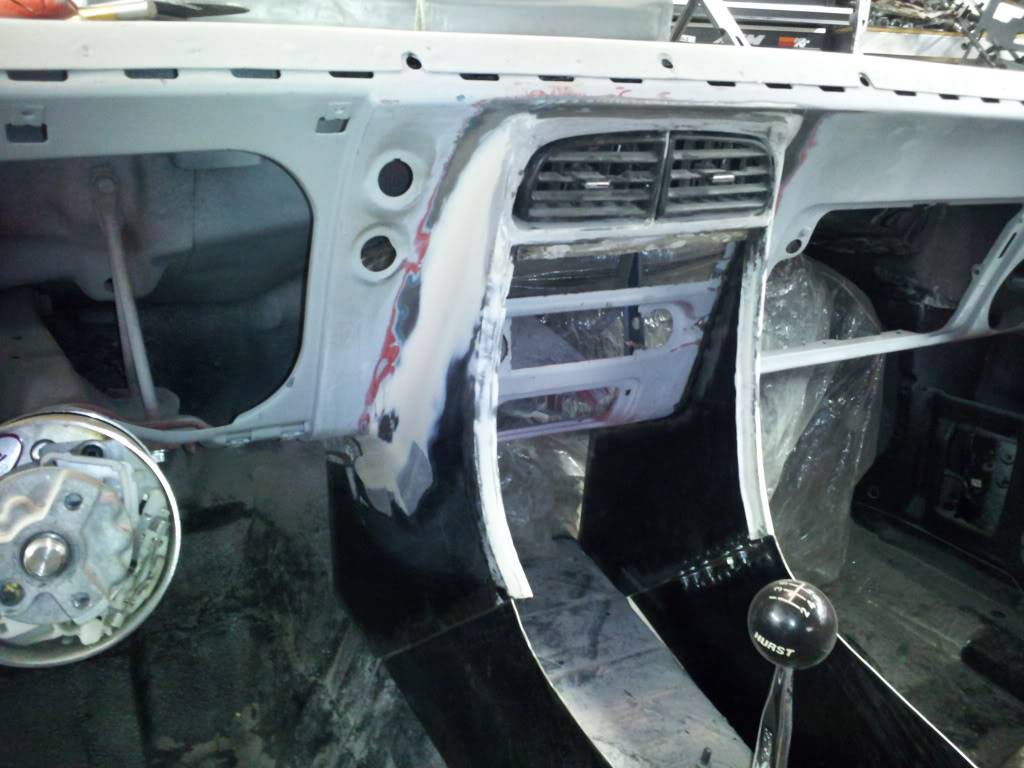
Center Console - - - Take THREE!
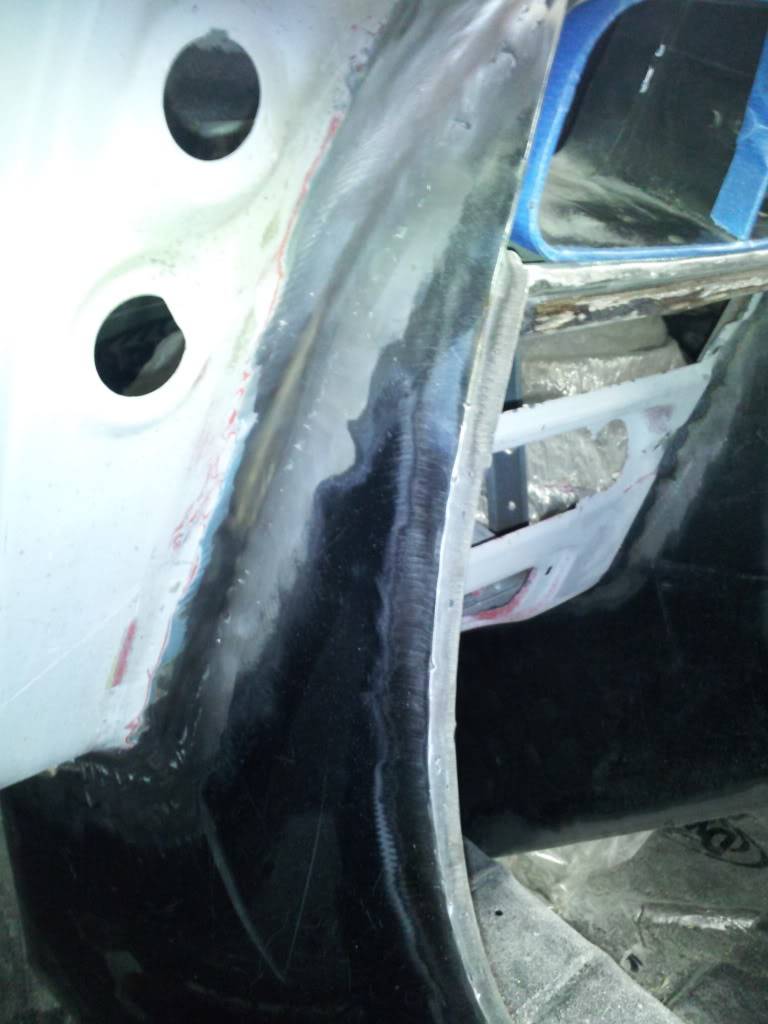
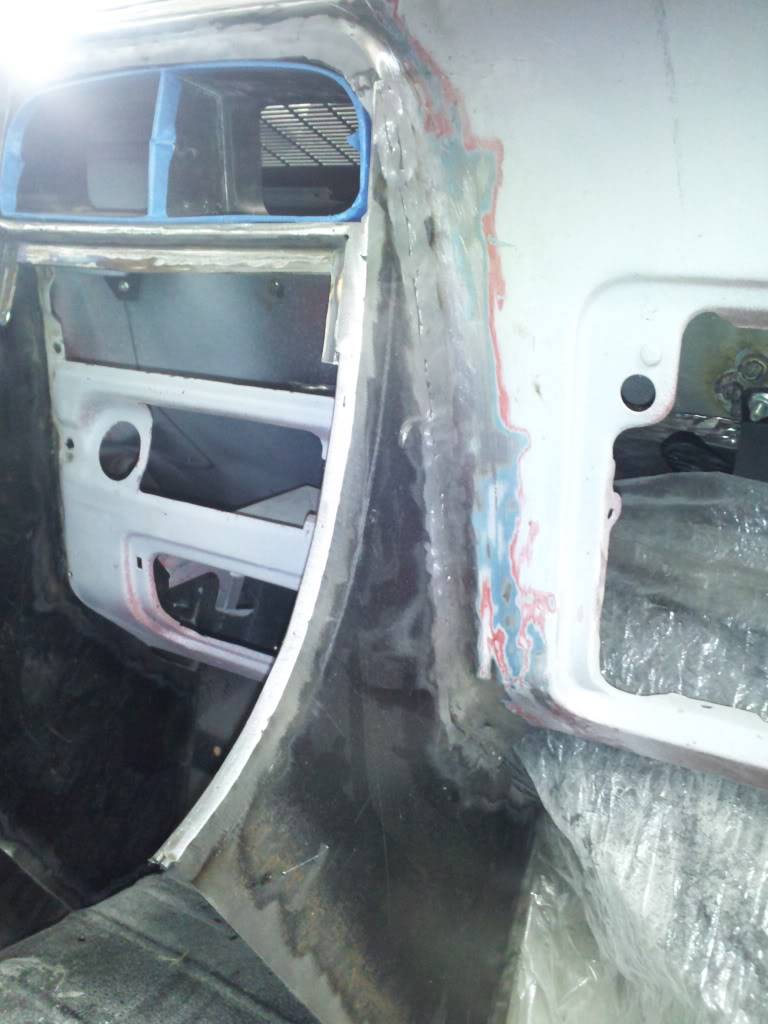
I've scrapped the last rendention of my console-I didn't really like the amount of space above the center vent, and the fiberglass edge where it mated to the factory dash was so thin that any slight "oops" would chip it. I didn't want to deal with the extreme fragility of it, so this time I've decided to go direct and weld it to the factory dash. I kept the same shape, and used 14 gauge steel, so it could withstand some abuse without bending, and went to town:
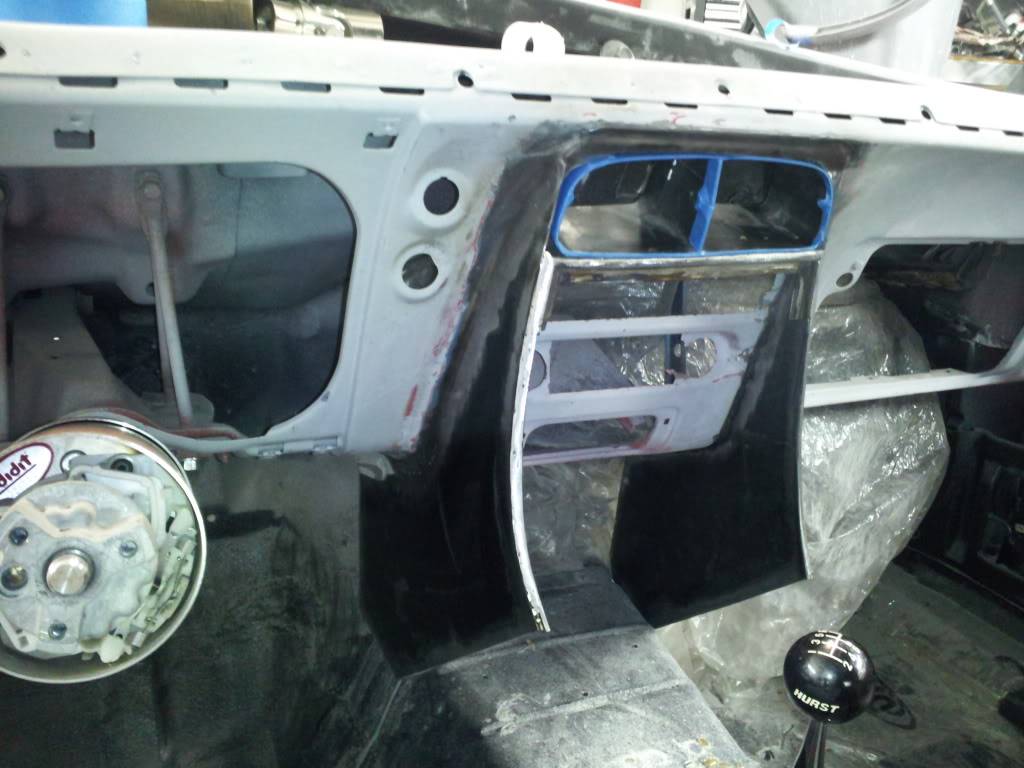
hope this one turns out right, because I have a feeling it is going to be REAL hard to get back to original!
At this time the sides are bolted to the upper portion, but I may just weld it in....at this point I'm keeping my options open. I like the removabe idea, but I don't have a good reason-I don't plan on taking it apart once it is finished!
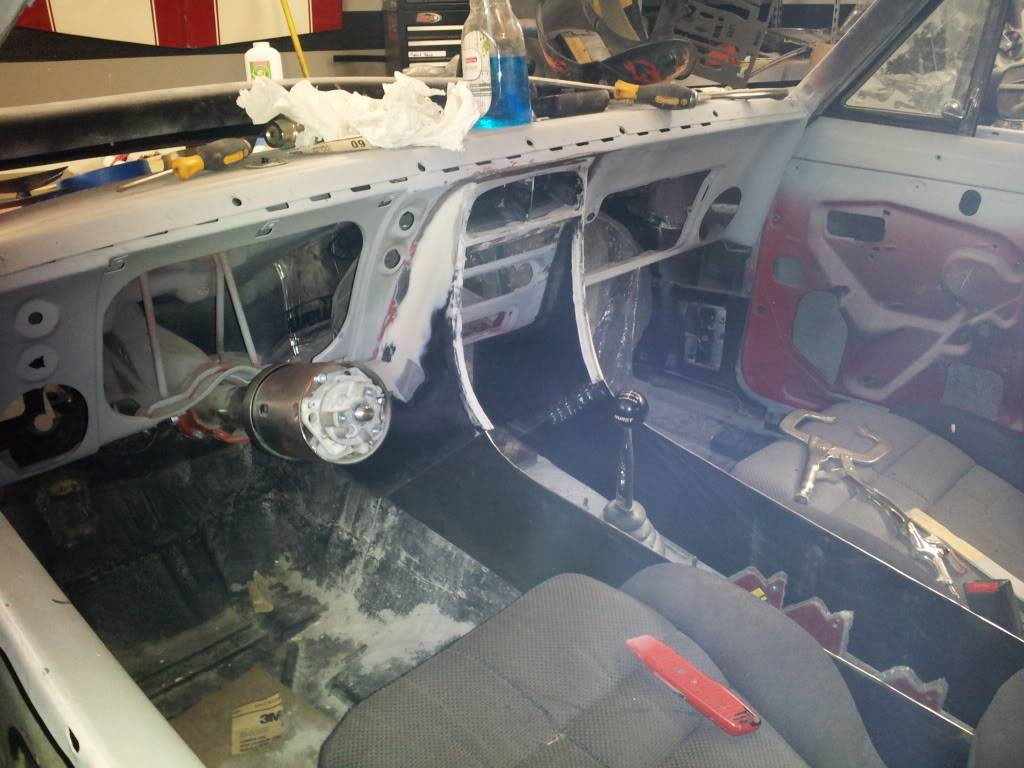
On to the other project that has been keeping me:
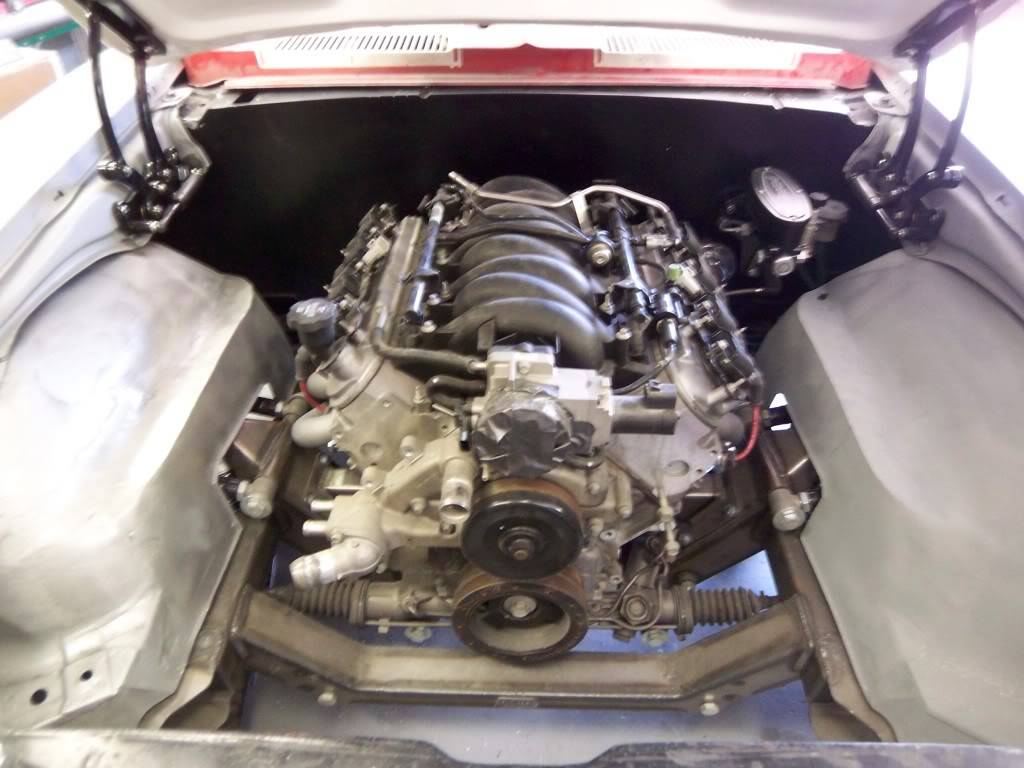
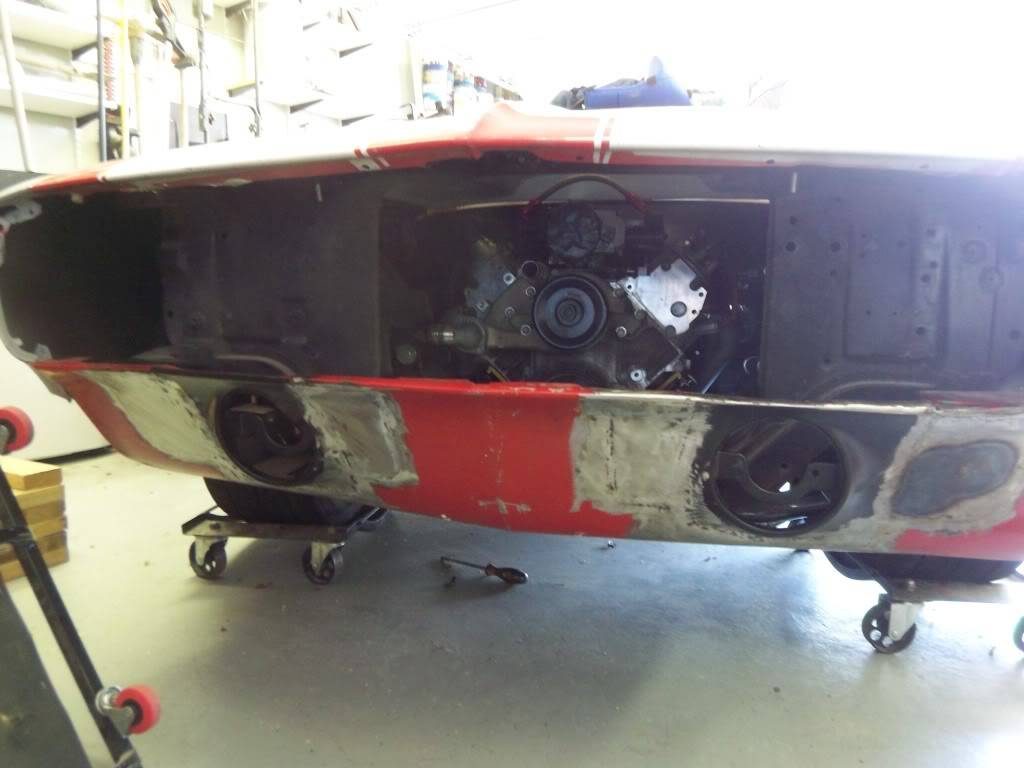
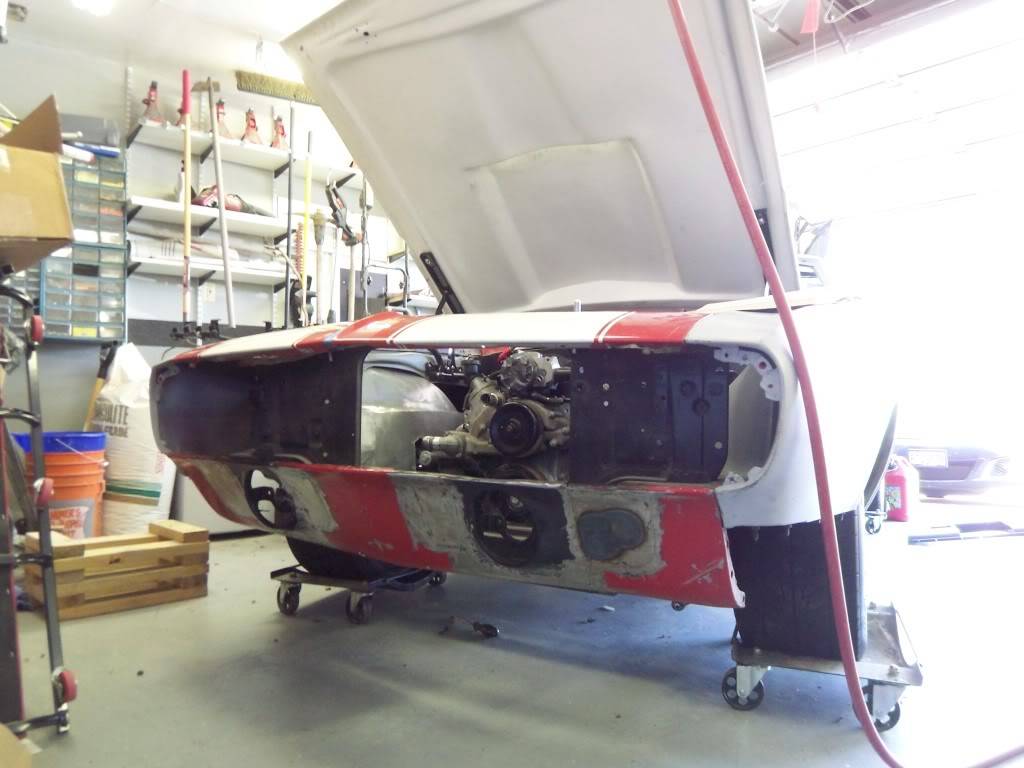
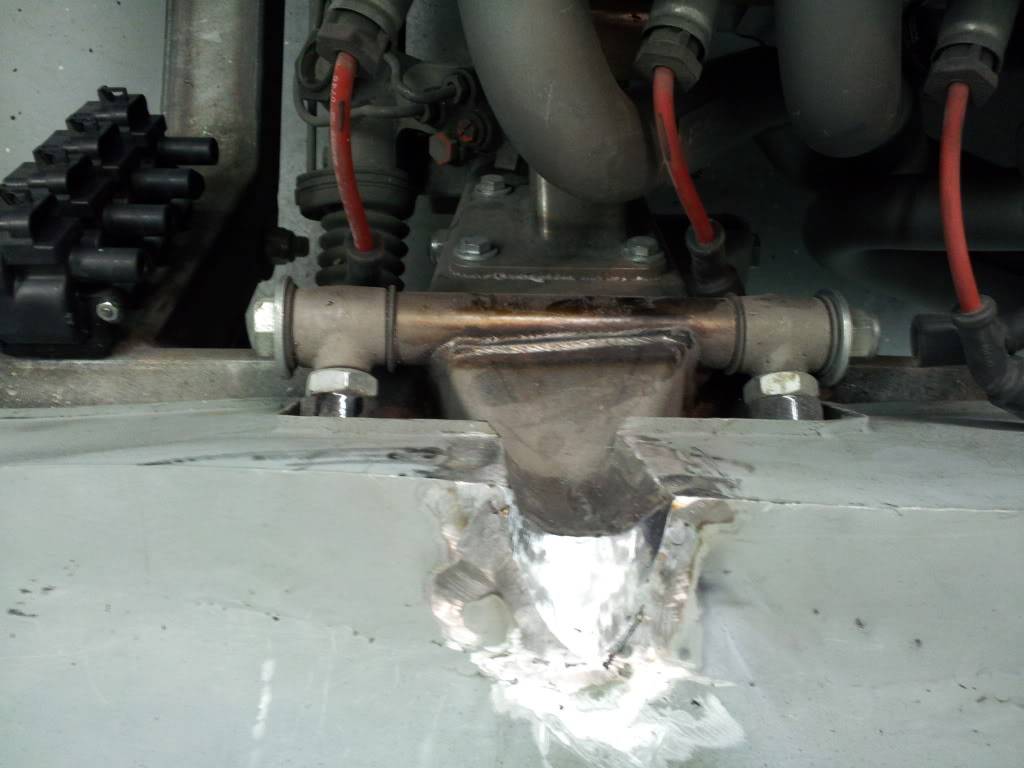
Front frame support-
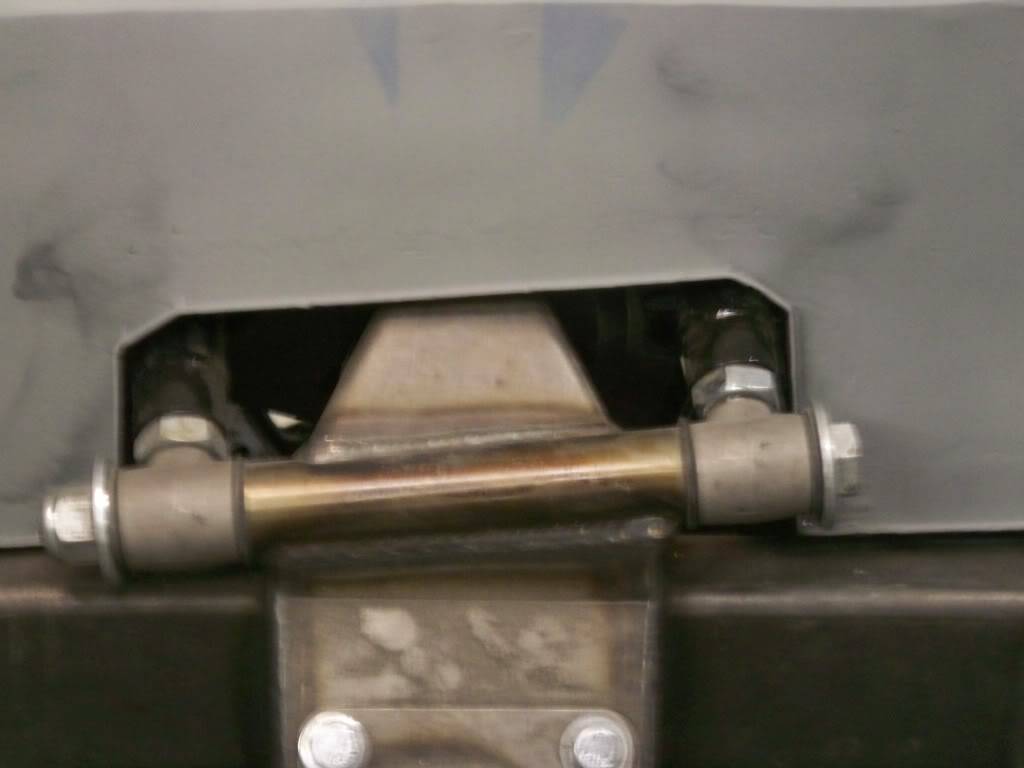
I finally found a guy locally that could bend cagework and he and his son did a kick-a$$ job using my templates as a guide:
LIKE A GLOVE
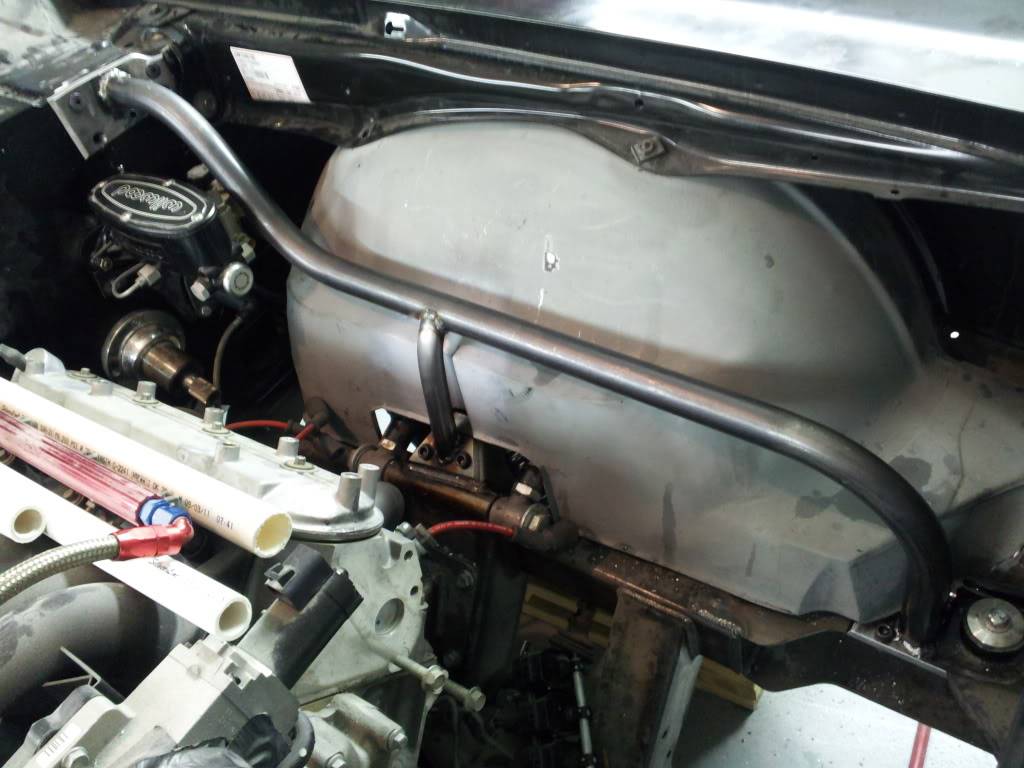
room for the brake and clutch master, prop valve and now my inner fender wells can show off why they are shaped the way they are! I've picked up a few different types of bolts and have settled on the tapered head for more of a flush appearance, but only picked up three of each type (little $%^&* are expensive!)
Thats it for now-Not a whole lot, given the time since the last update, but with only about 5 hours a week to work on it, I think i'm using my time wisely! I am going to start on the other side of the frame next week and hopefully be able to go back and finish the console. My front pulley system shoud be here by the end of february and my Radiator and condenser arrived yesterday...maybe mid-march first start? maybe? Confucius says, "Choose a job you love, and you will never have to work a day in your life"
My build Beast

 Reply With Quote