

Results 1 to 20 of 114
-
04-14-2013 #1

 Registered User
- Join Date
- Jul 2010
- Location
- Pittsburgh, PA
- Posts
- 114

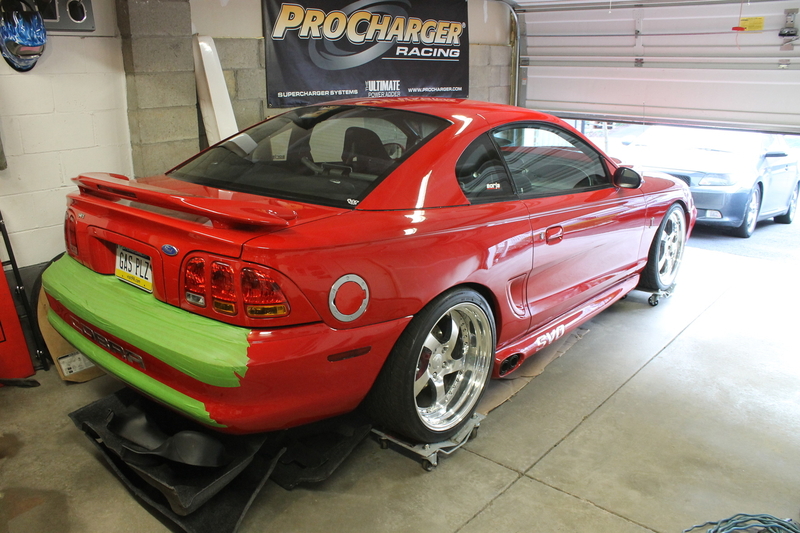
The Chronicles of my 95 Cobra OCD Machine
Hello all, I've been following all your projects on here for almost 3 years now, led here to follow the Syborg build thread. I figured it was time I throw my hat in the ring and share my project with you guys. It seems that the majority of the projects on here center around classic muscle, but maybe my car can fit in, haha.
A little background... bought this car back in July 2003 while in college. It stayed mostly stock with some bolt ons for several years, then slowly started going off the deep end. After doing a H/C/I swap I found the car was burning almost as much oil as fuel, and was making what a stock longblock with bolt ons should have made. So the car got a forged 347 stroker and a bunch of other stuff. I never really took the time to document the build of this car until last winter when I did the Procharger, IRS and Tremec so I'll just start this thread from there and add to the beginning whenever I have time to sort through 3 different computers for pics...
Build log - Winter 2011/2012:
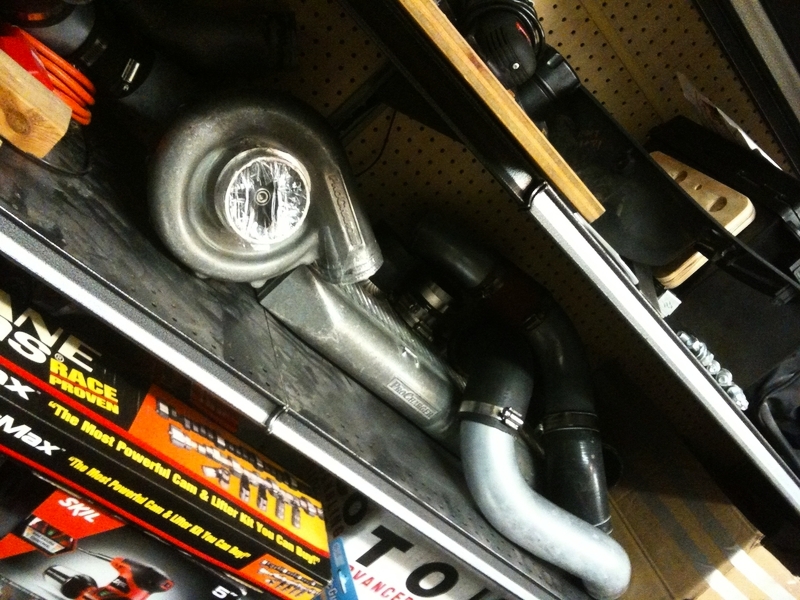
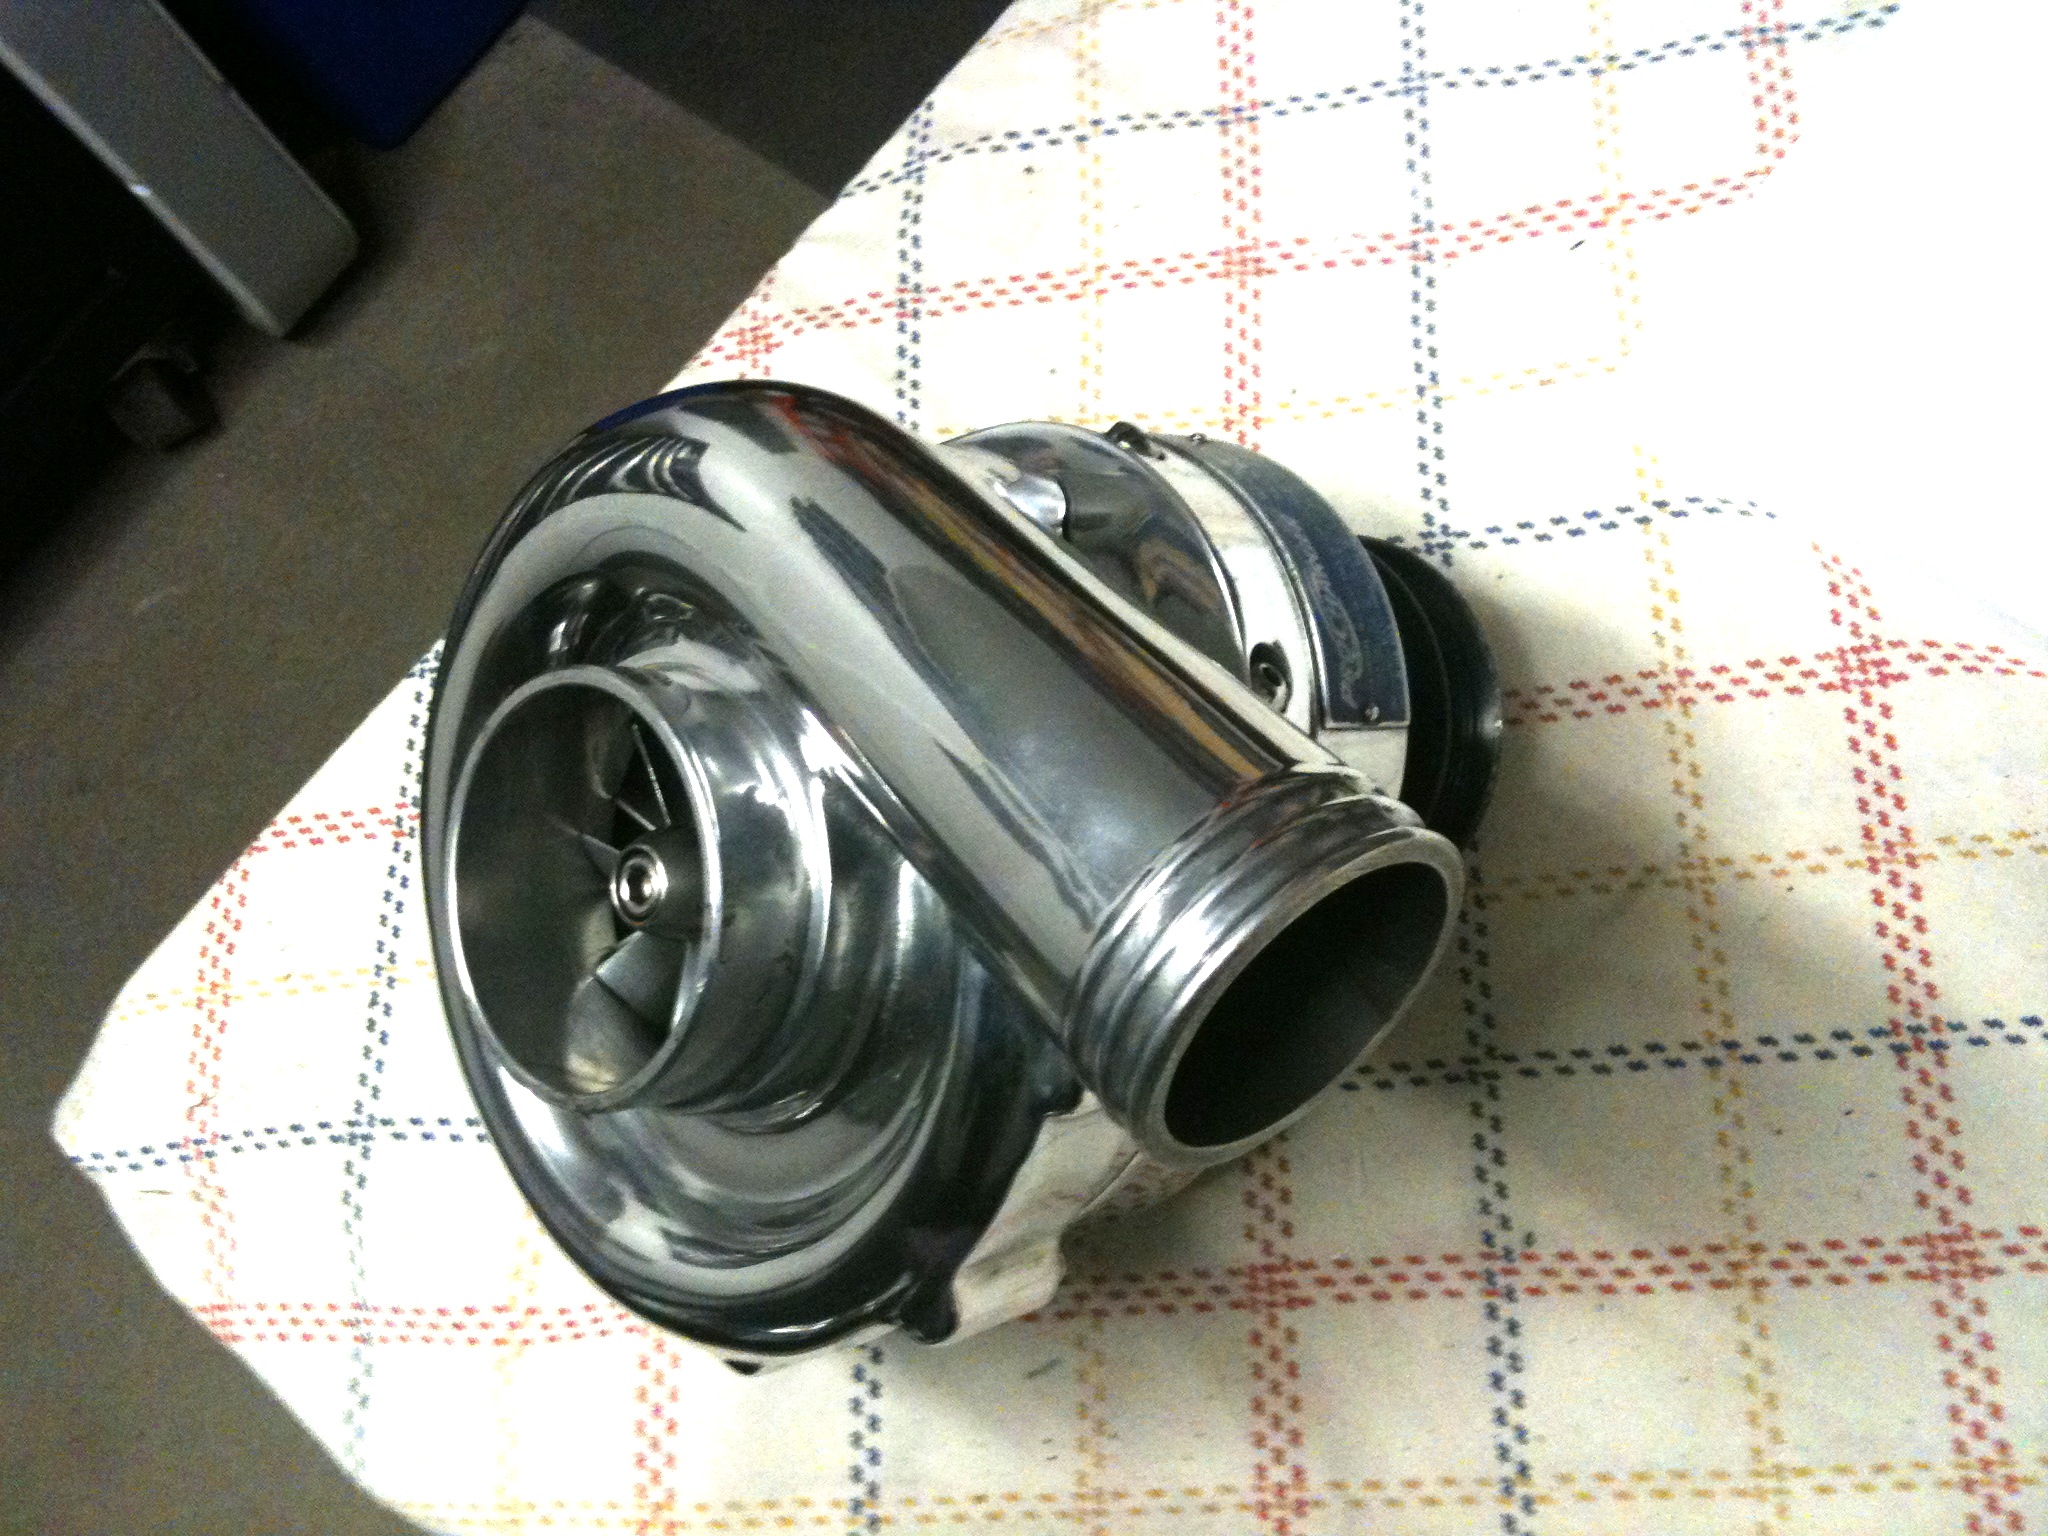
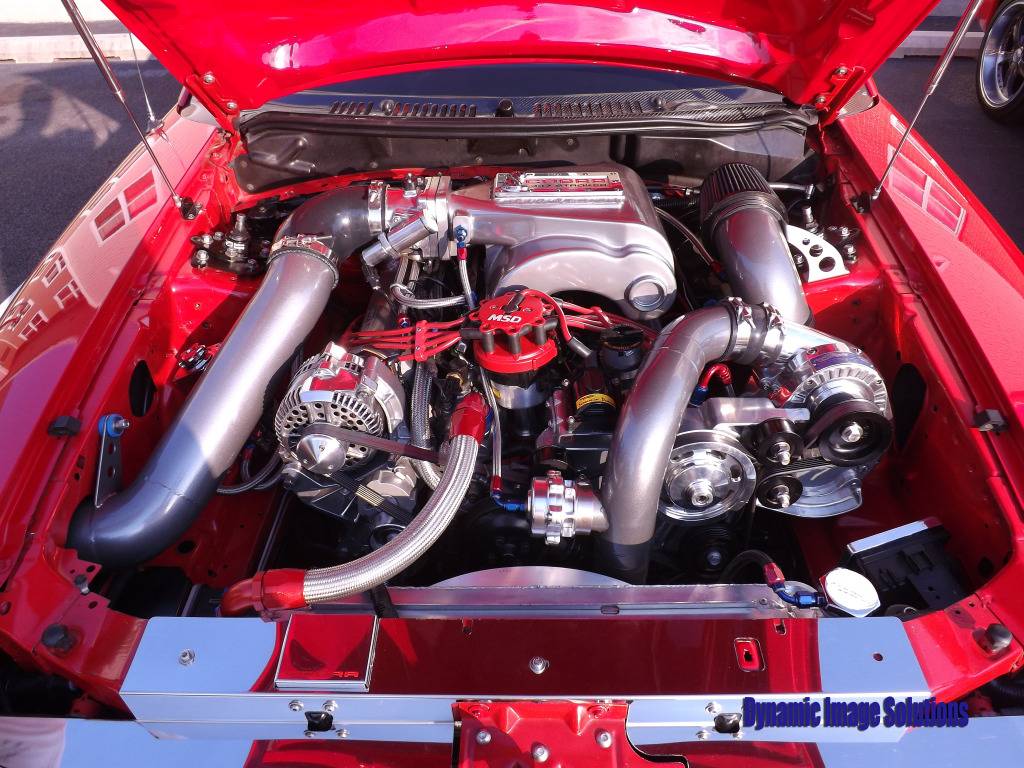
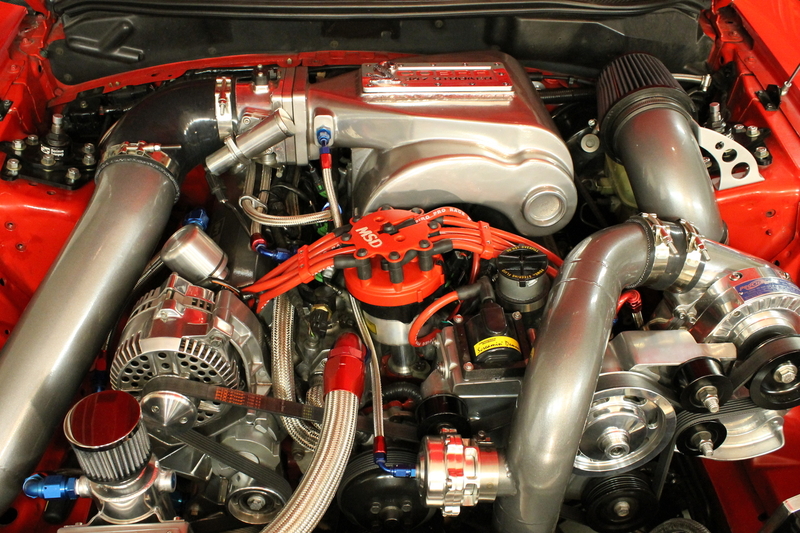
I was pretty happy with the car (actually I was ecstatic) after getting a feature shoot for 5.0 Magazine at the NMRA event in Columbus in Sept. 2011, but it was time to step things up. Right before leaving for Columbus I pulled the trigger on a used Procharger D1SC. It was a satin unit, and came with some very rough looking piping, cast 3 core intercooler, and the blower bracket...nothing else. The missing parts and crappy piping didn't bother me, I was planning to make my own piping anyway because my radiator setup wasn't going to let the Procharger piping fit anyway. So here's what showed up at my door:
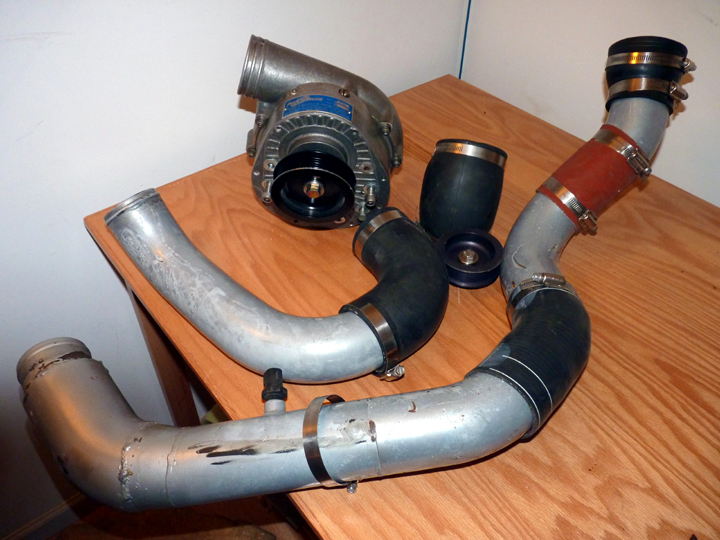
But alas, it was prime driving season still...so I forced myself to resist the urge to rip the car apart and instead the blower found its way to the shelf until the snow flew.
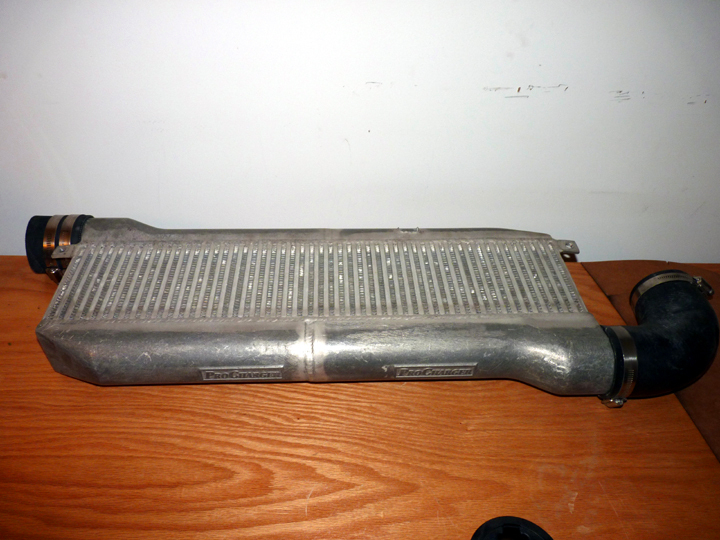
In the meantime I sent the head unit to Mirror Finish Polishing to spruce it up, and started looking for an upgraded Procharger sheet metal intercooler.
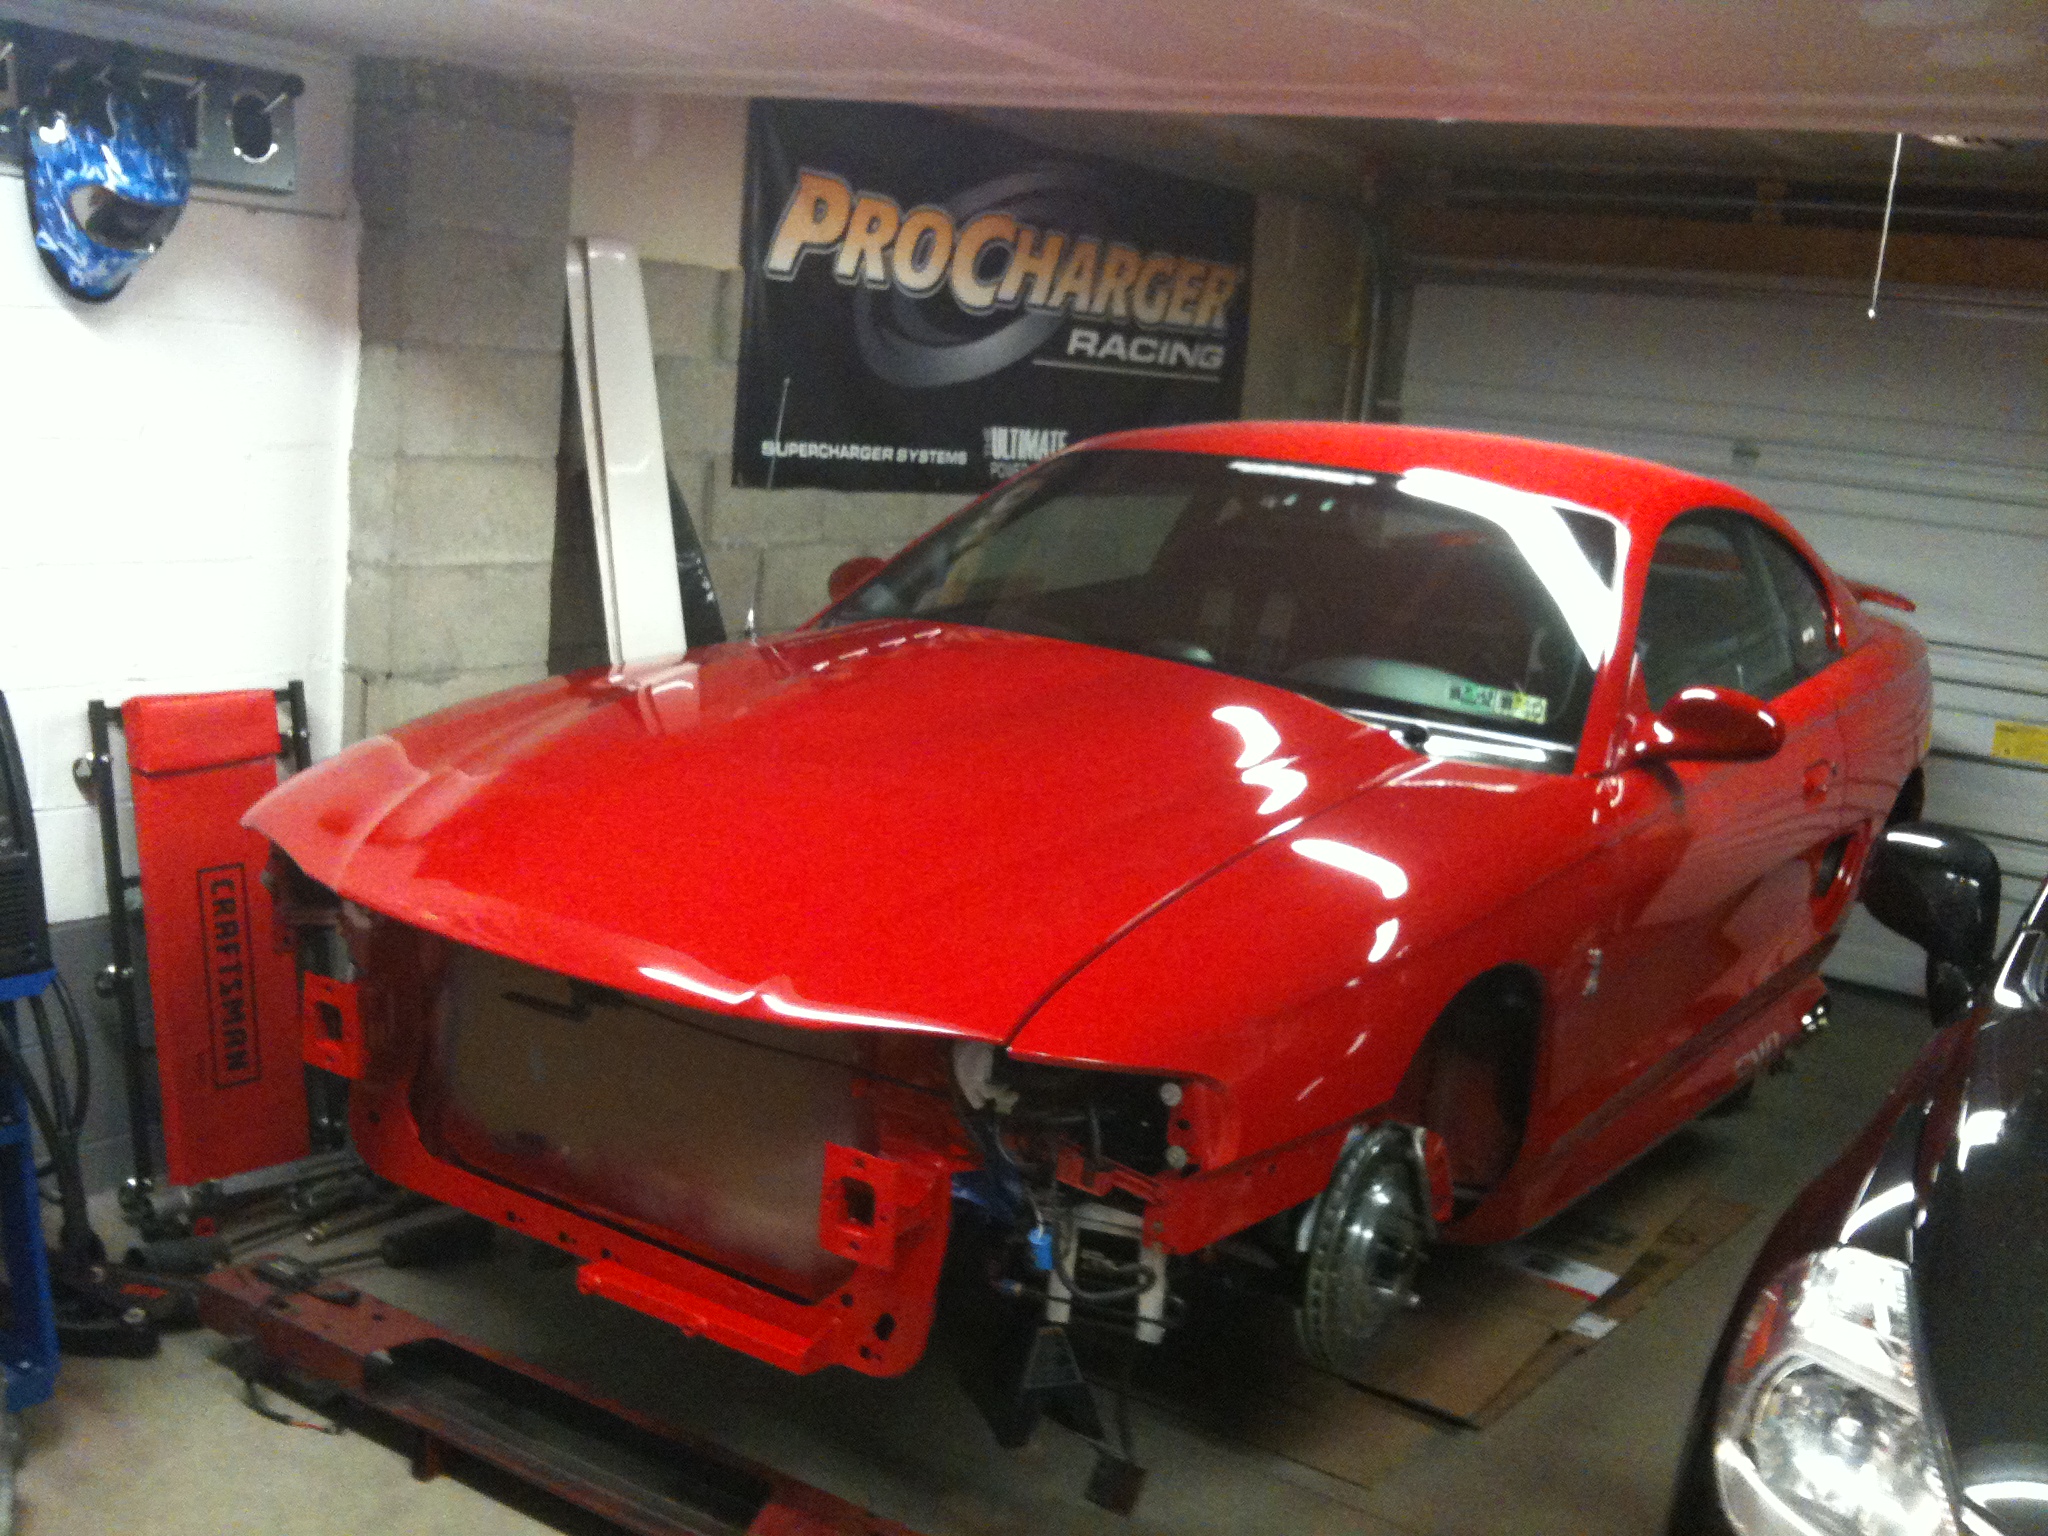
Once the weather turned colder and the insurance was off the car for winter, I started tearing into it.
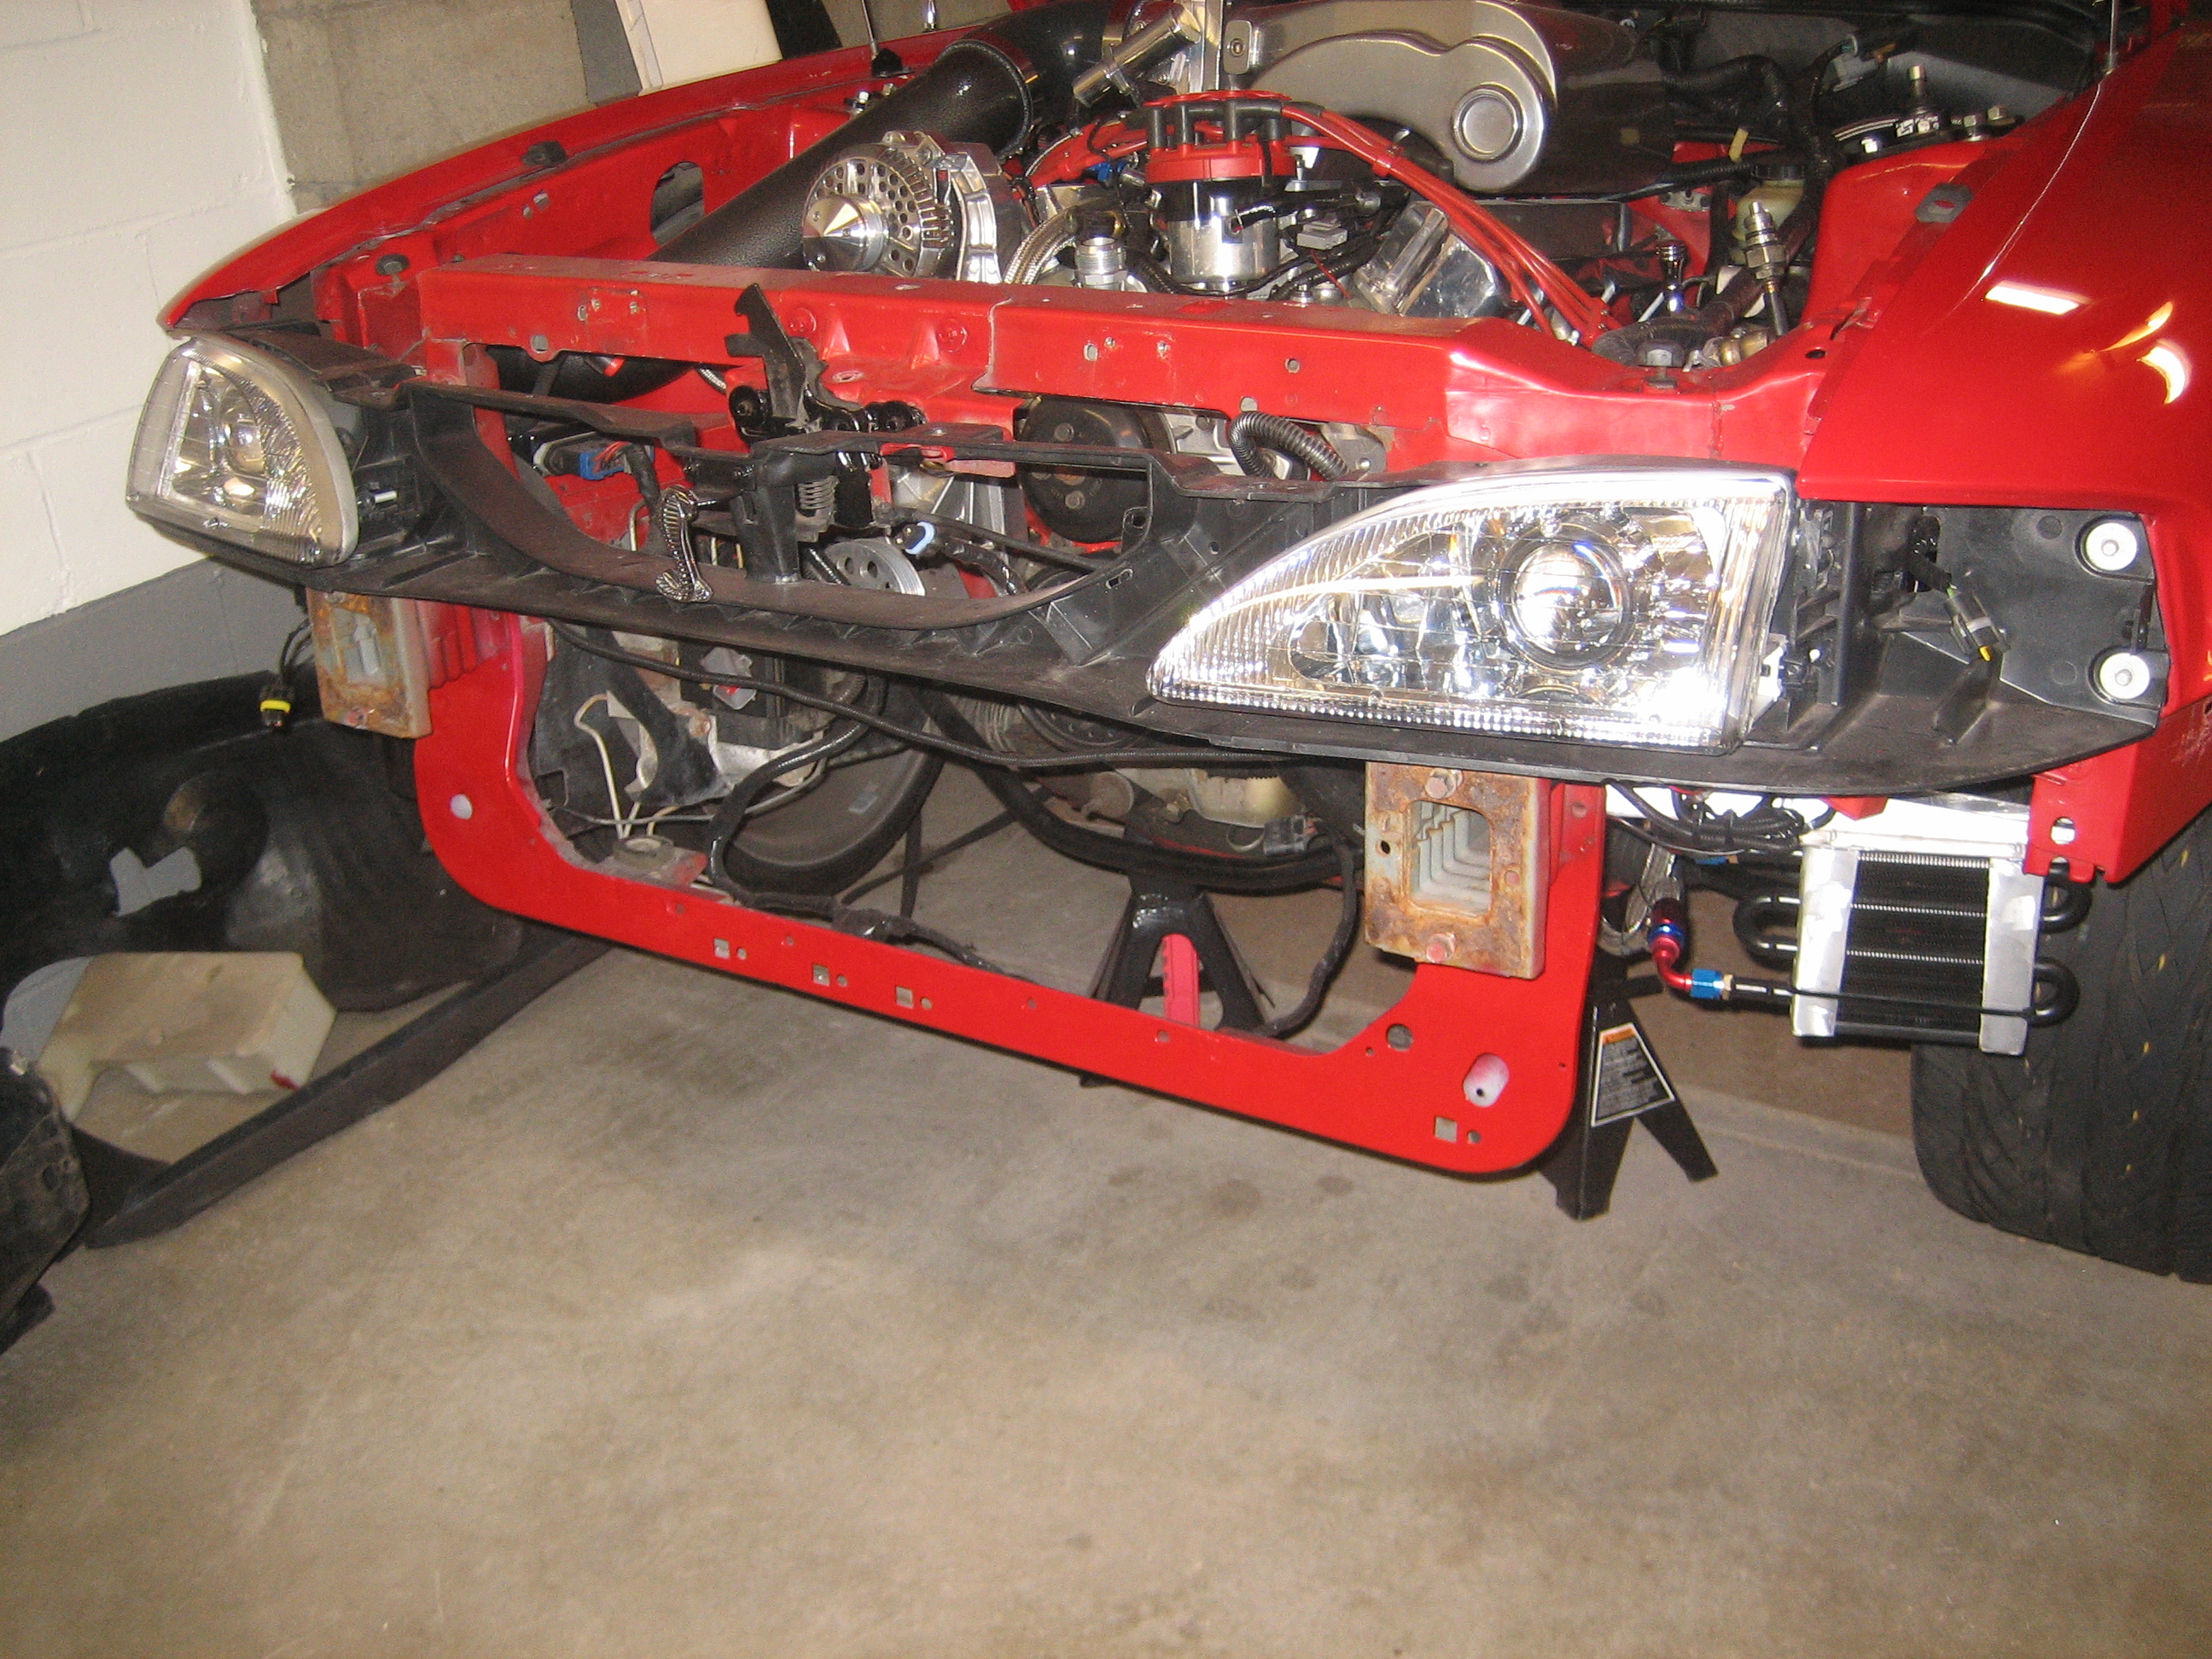
Front bumper cover and bumper support out of the way
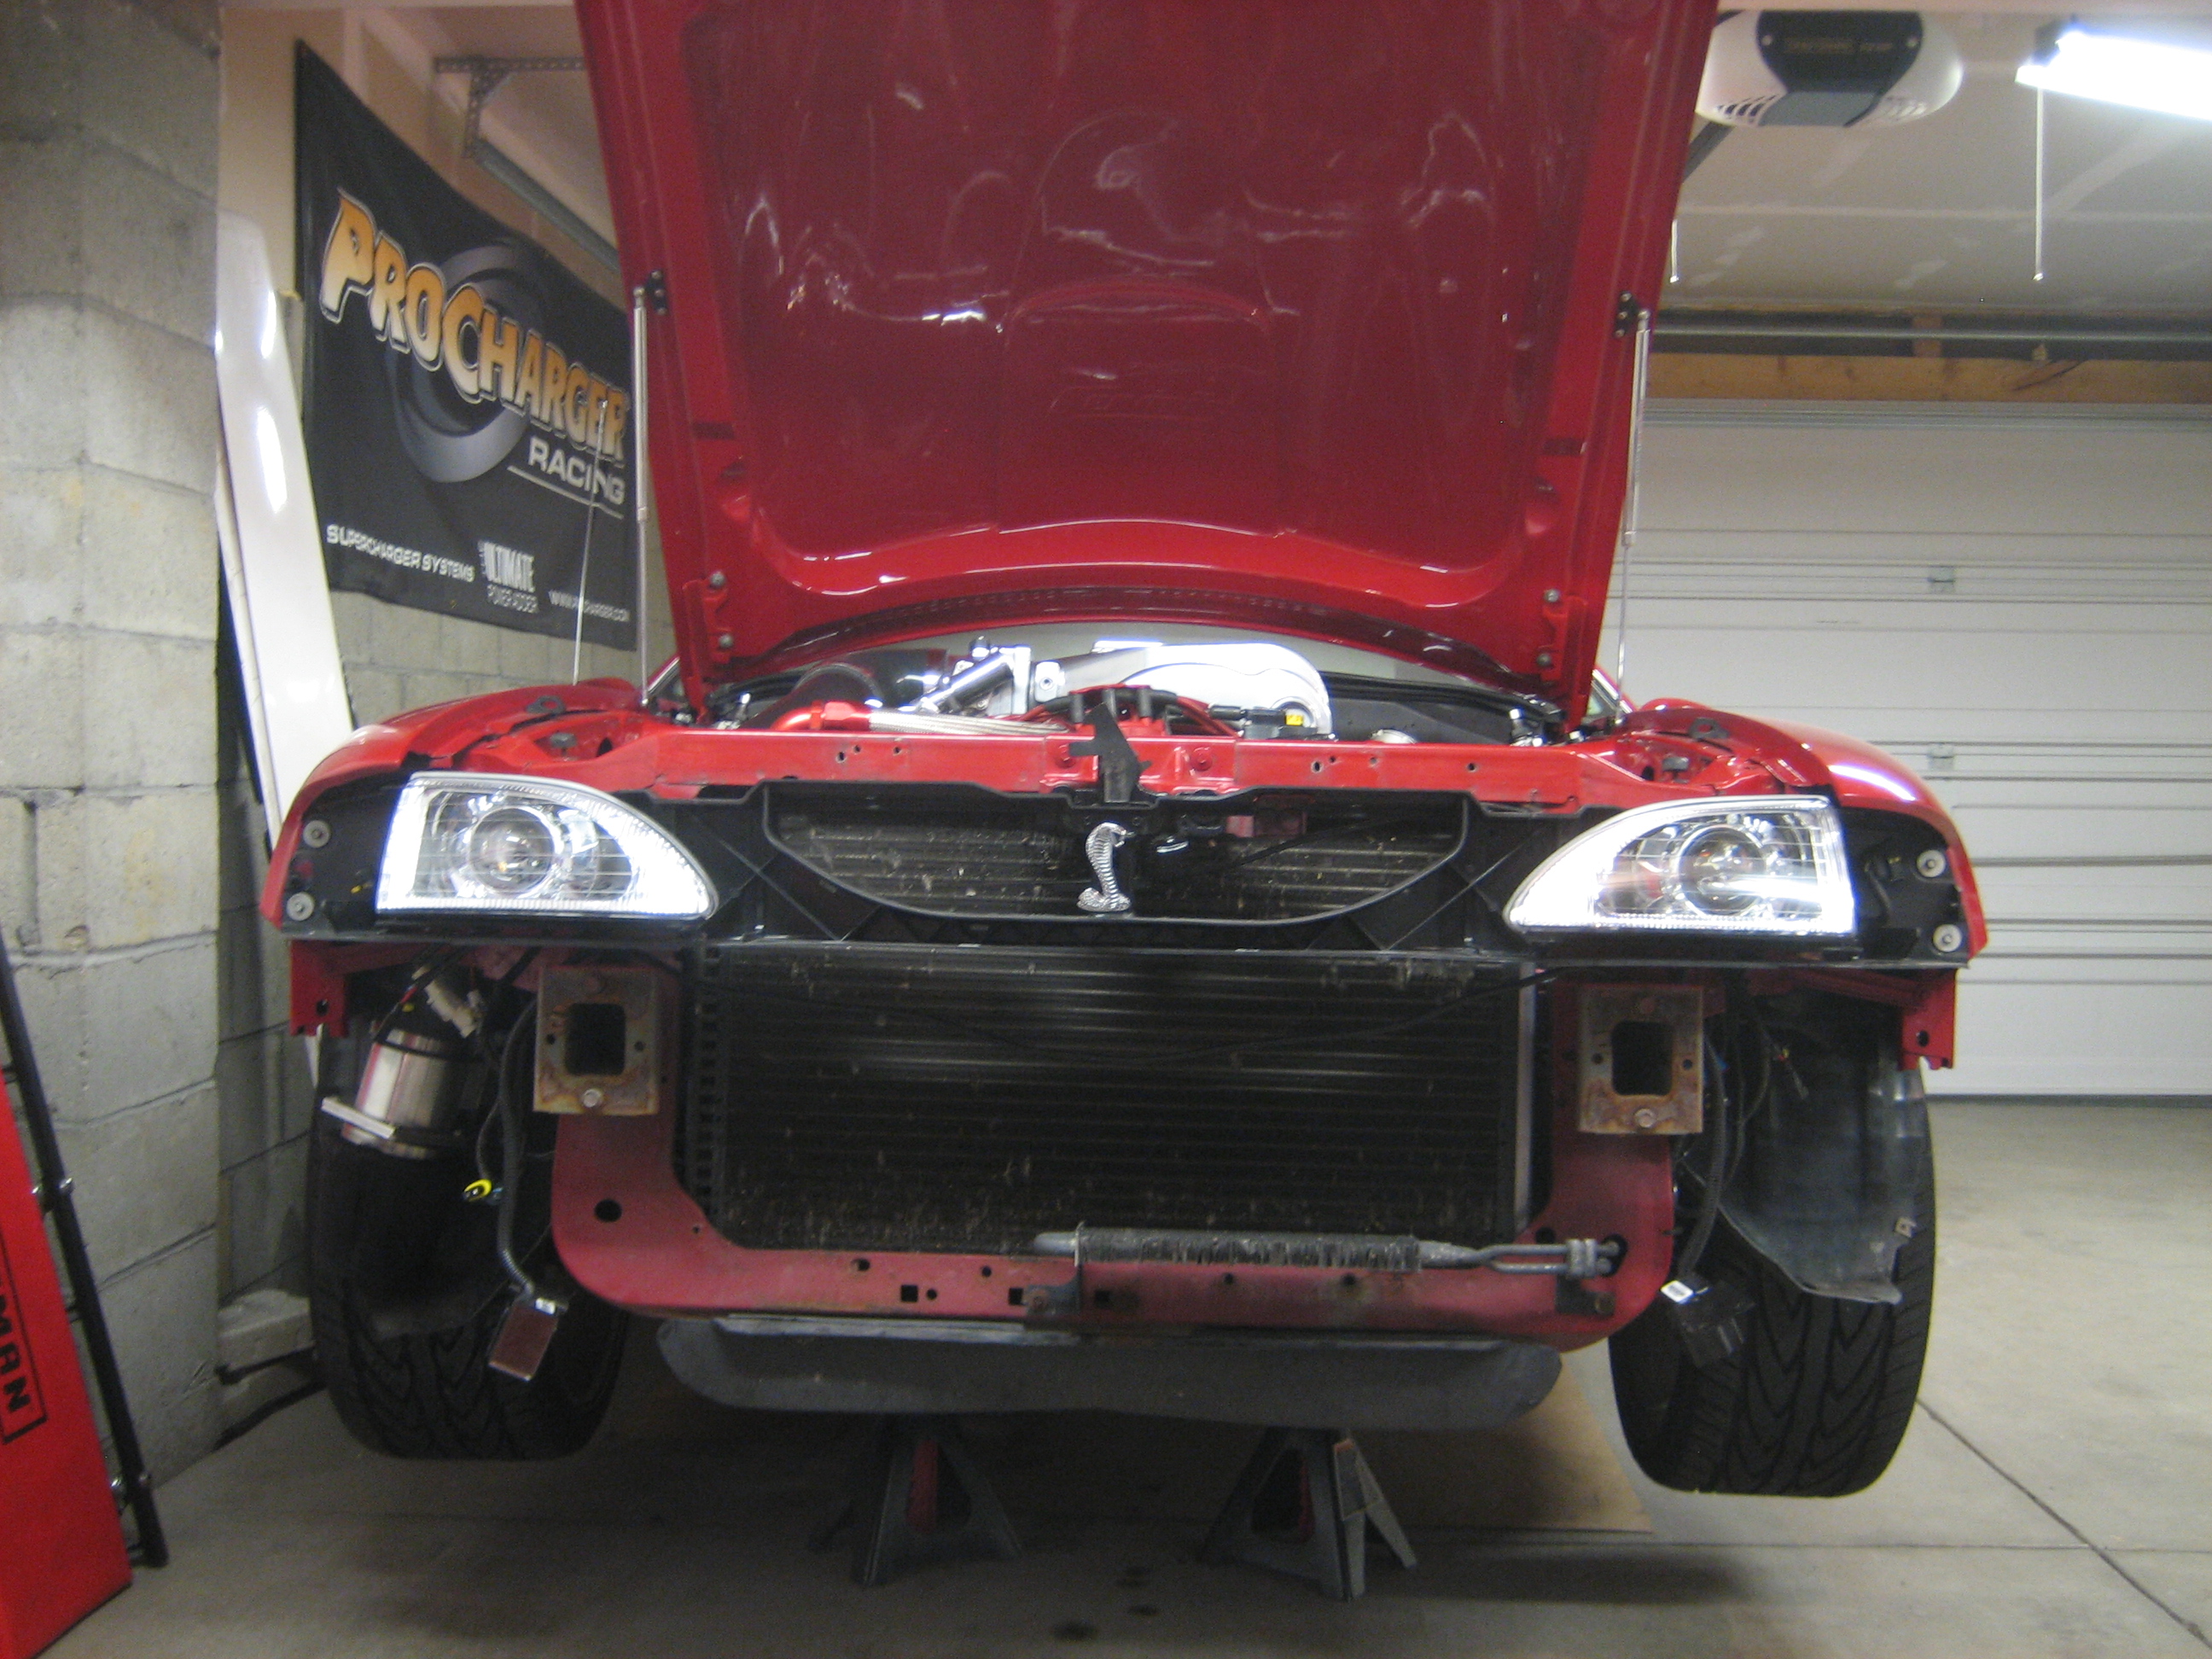
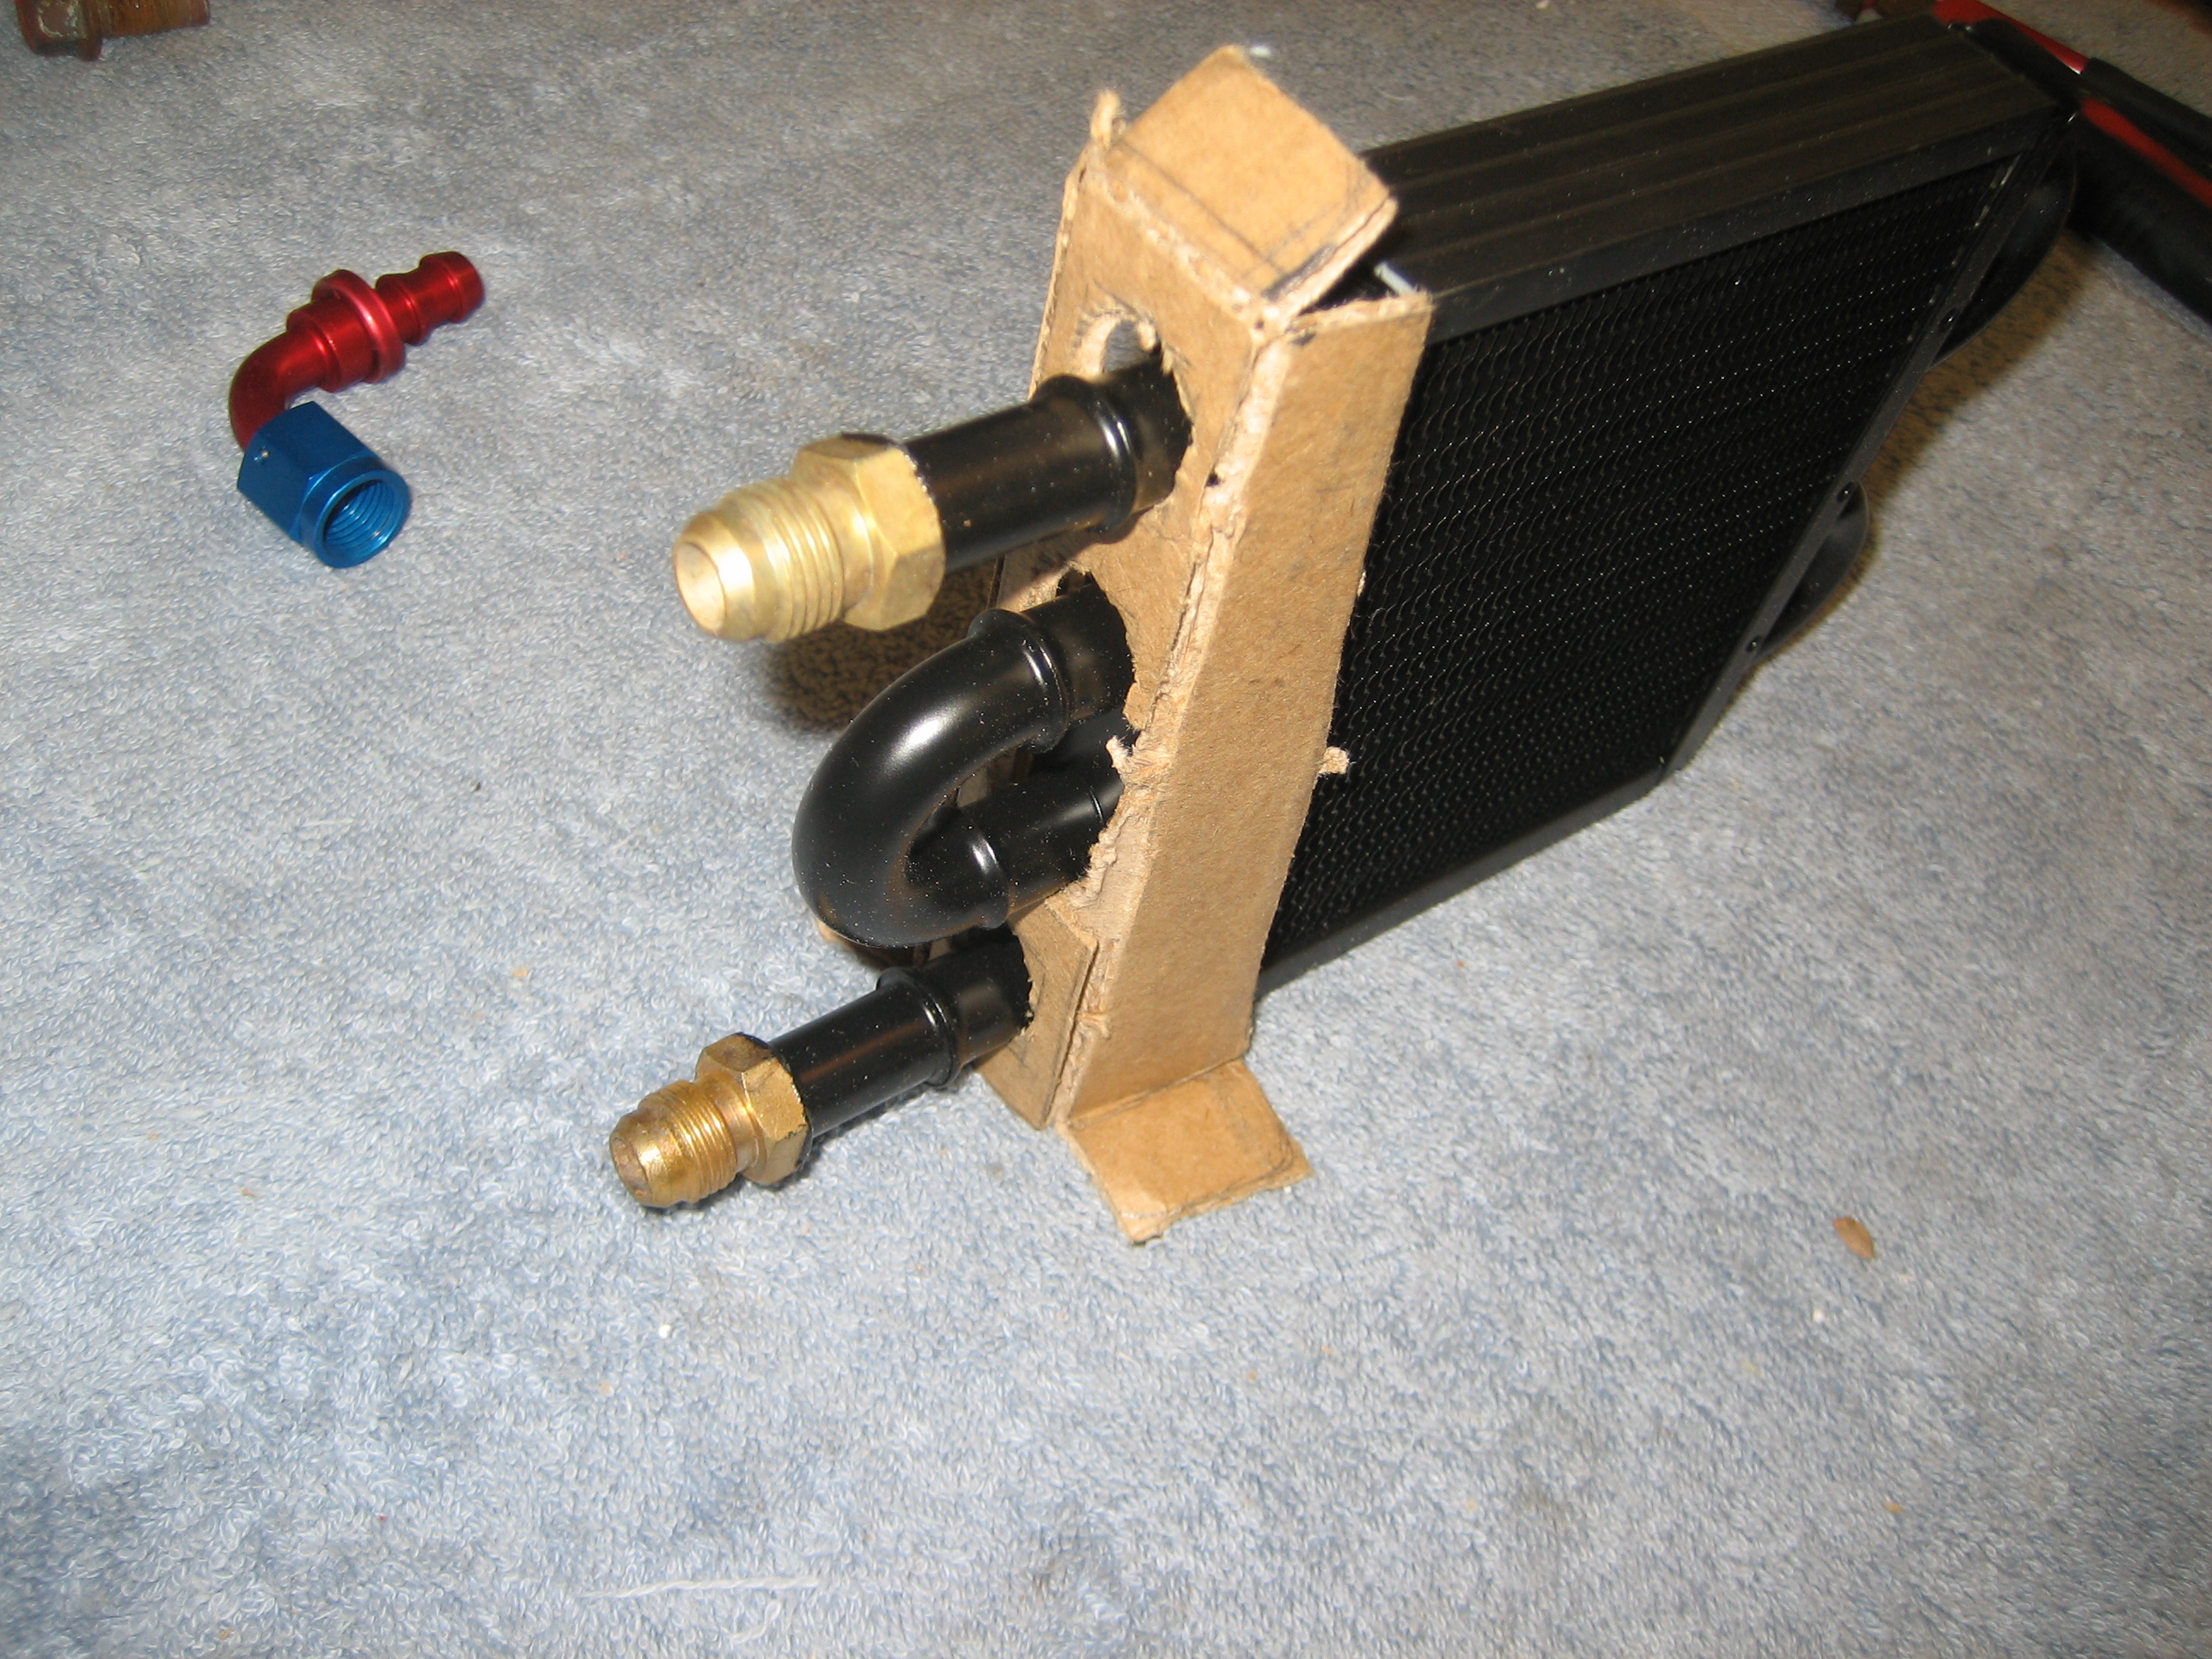
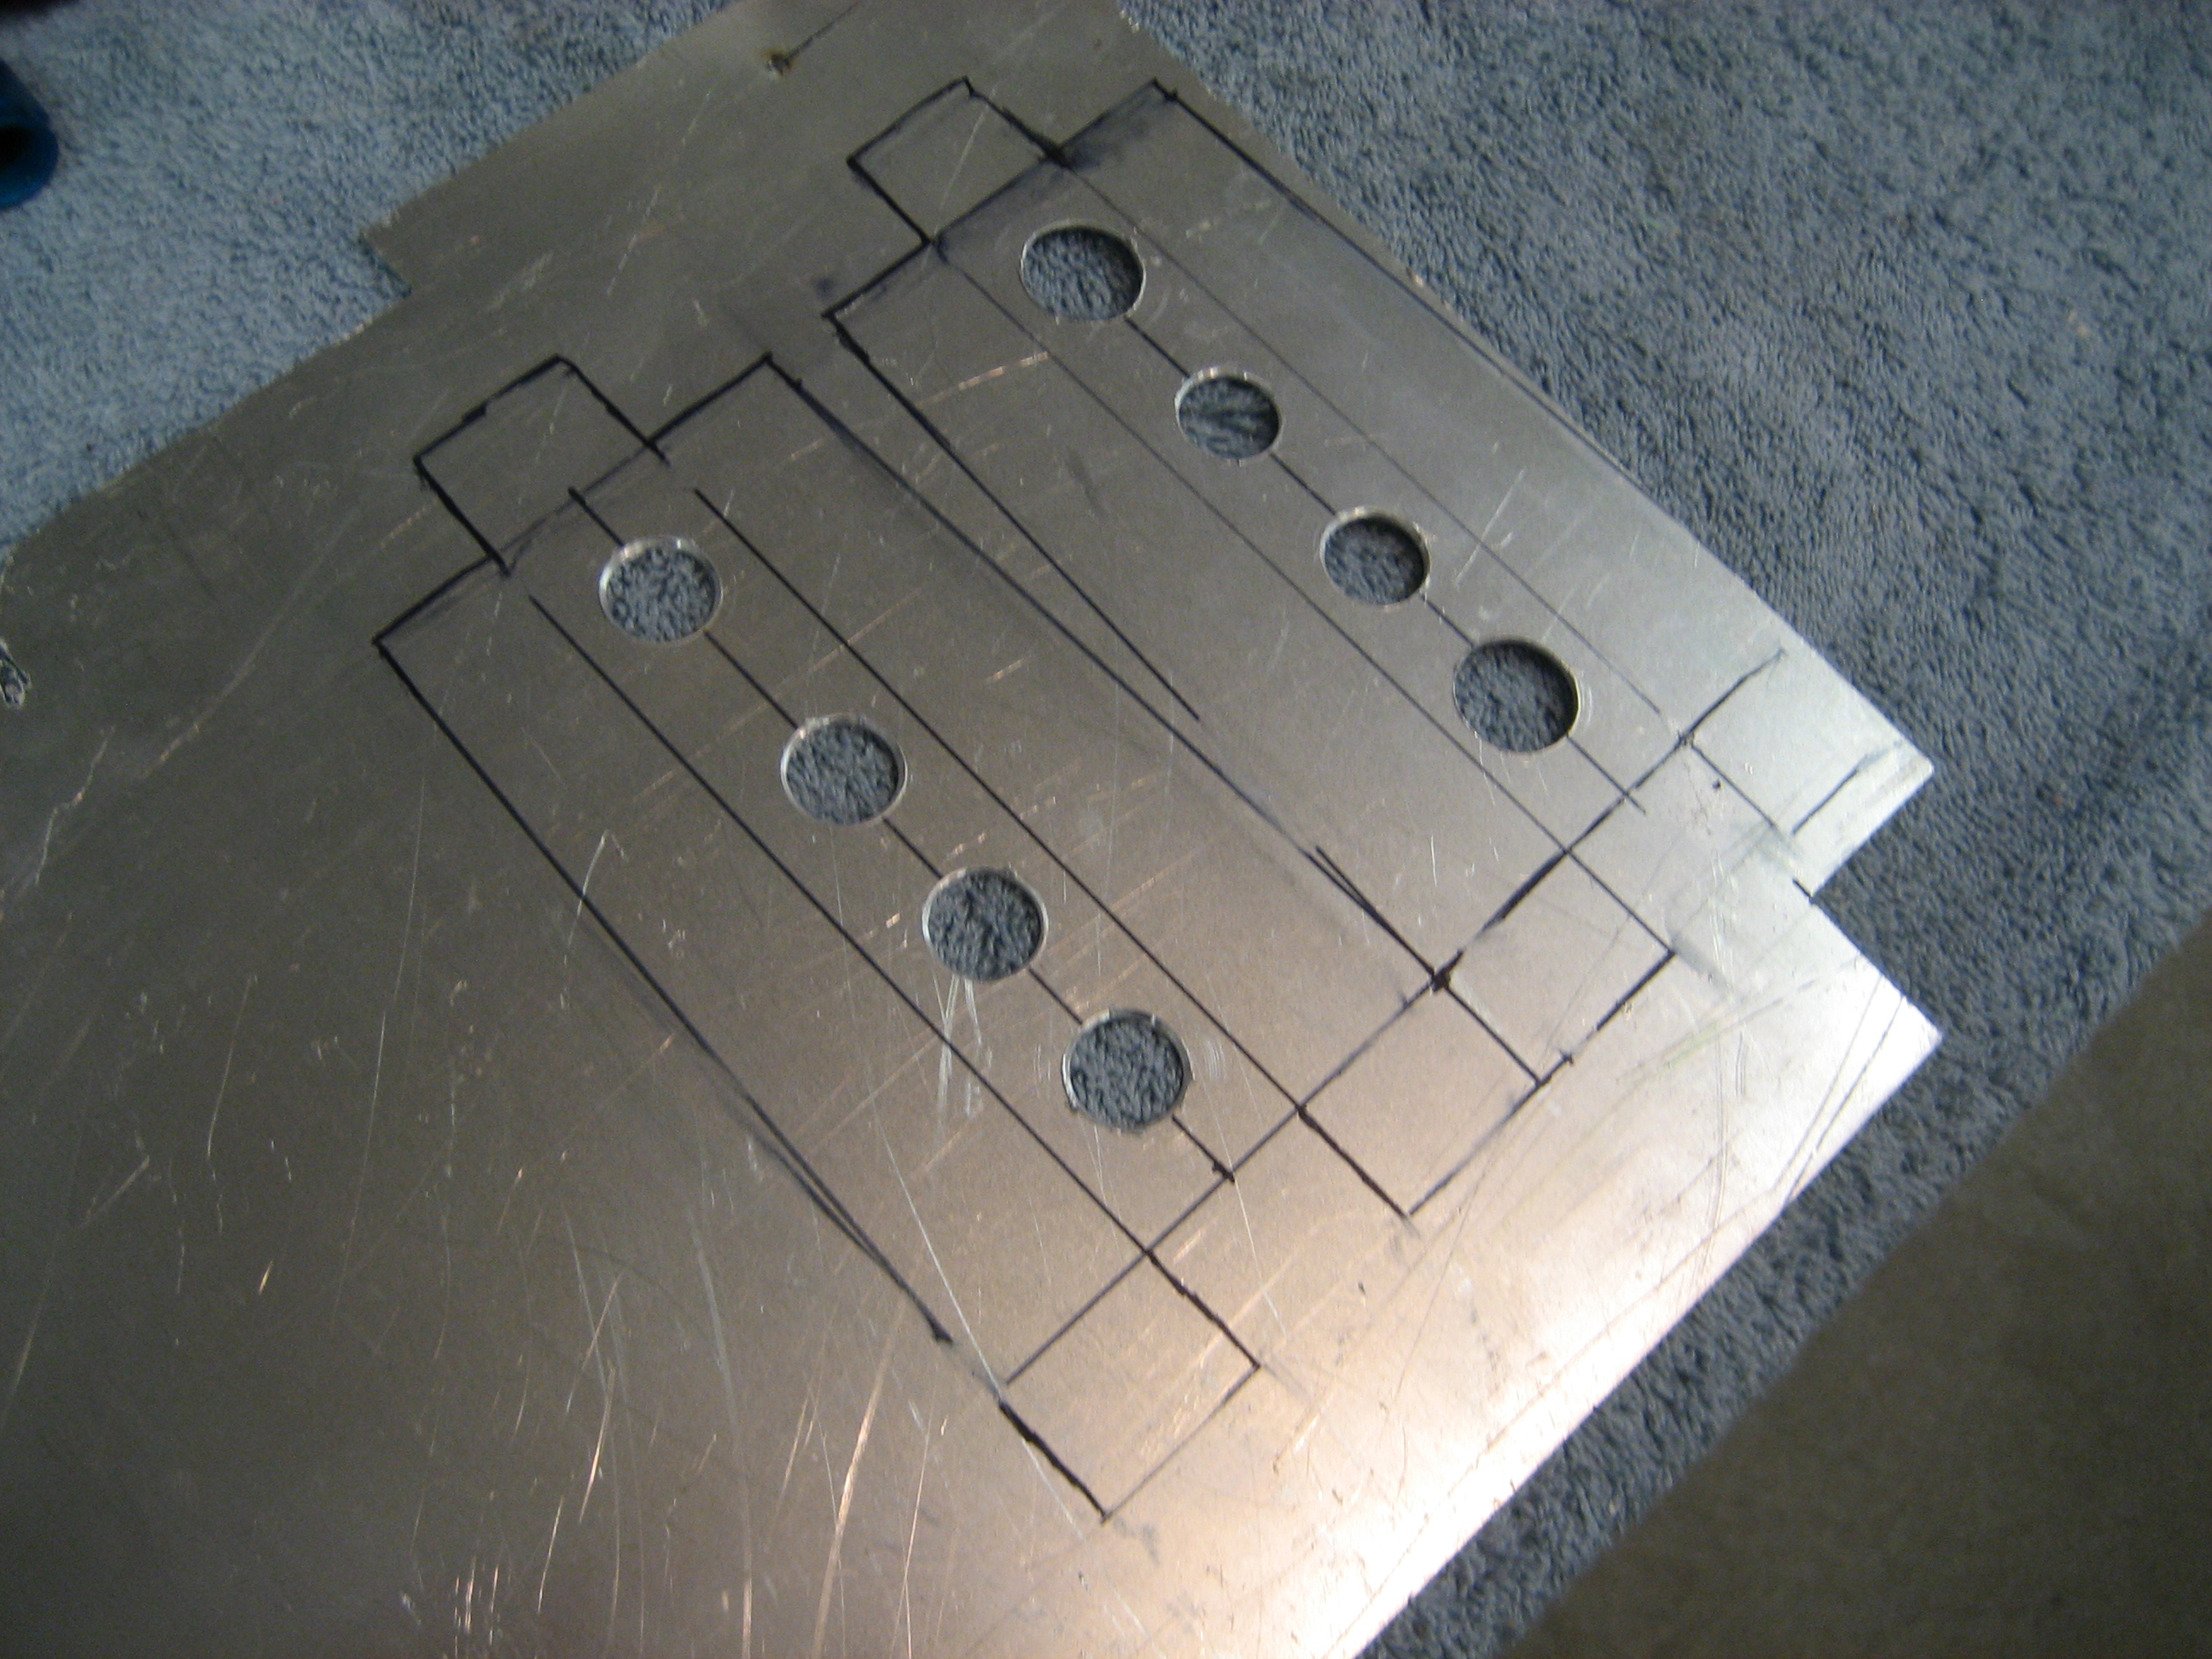
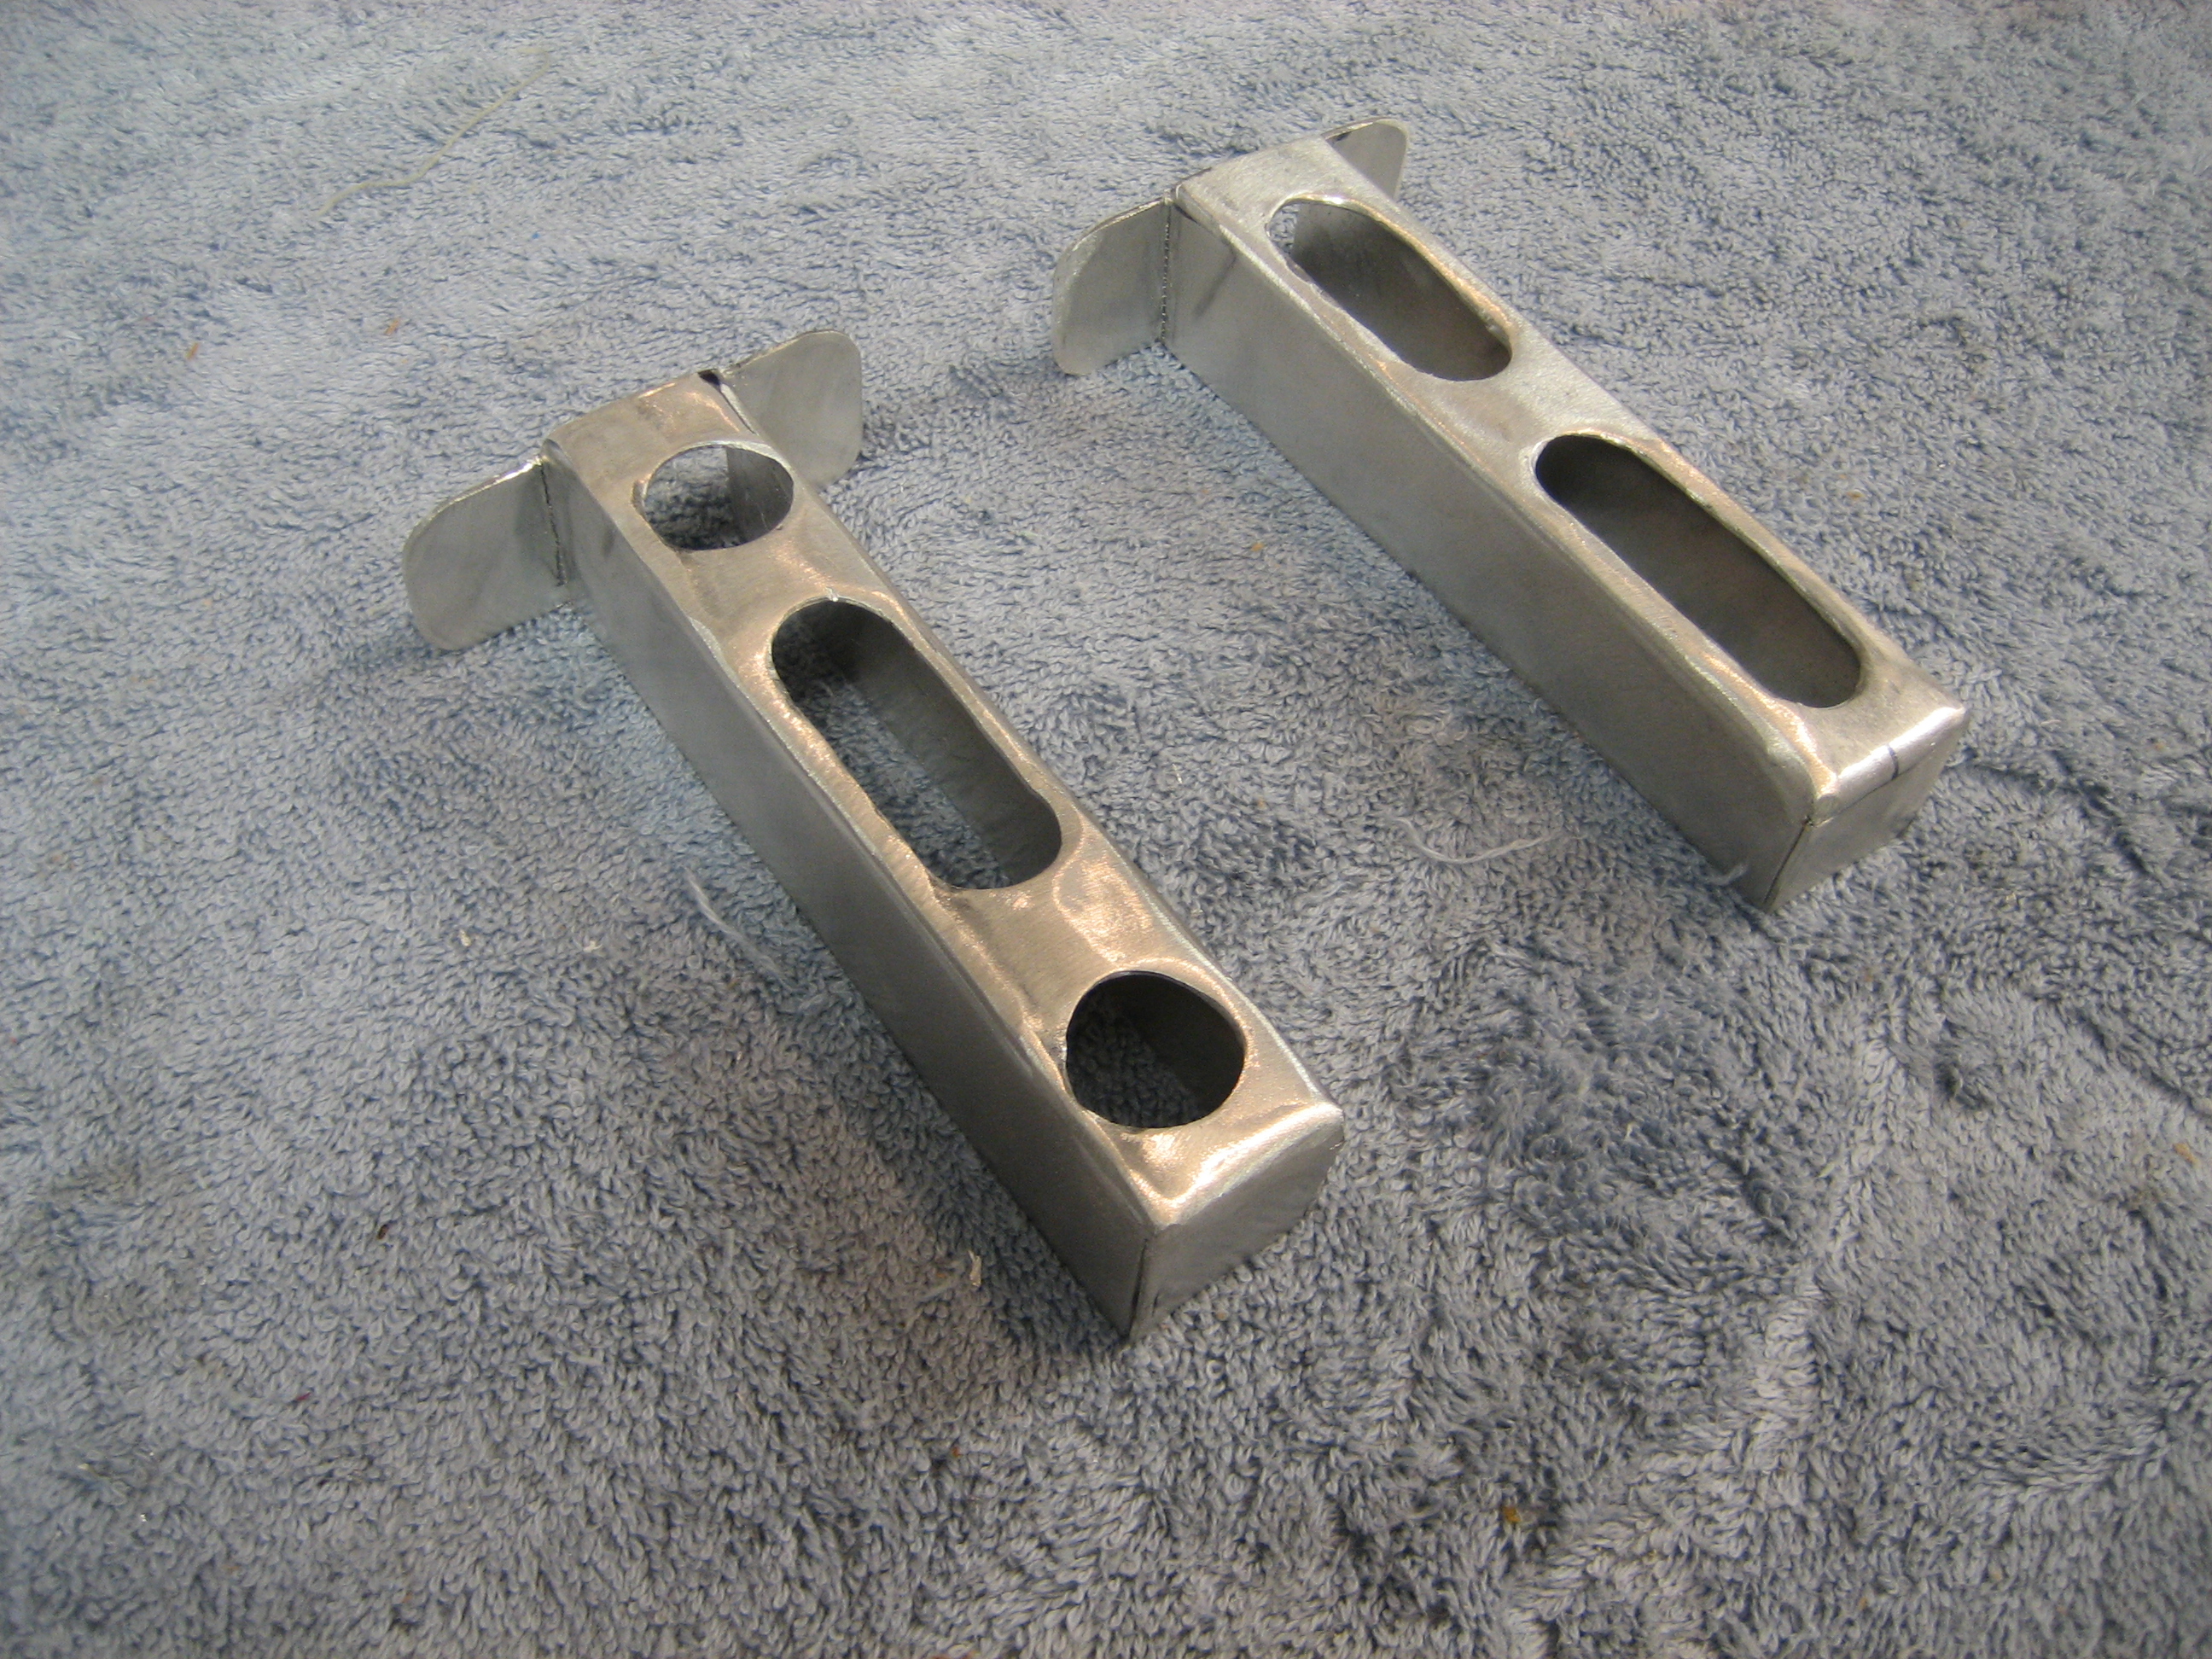
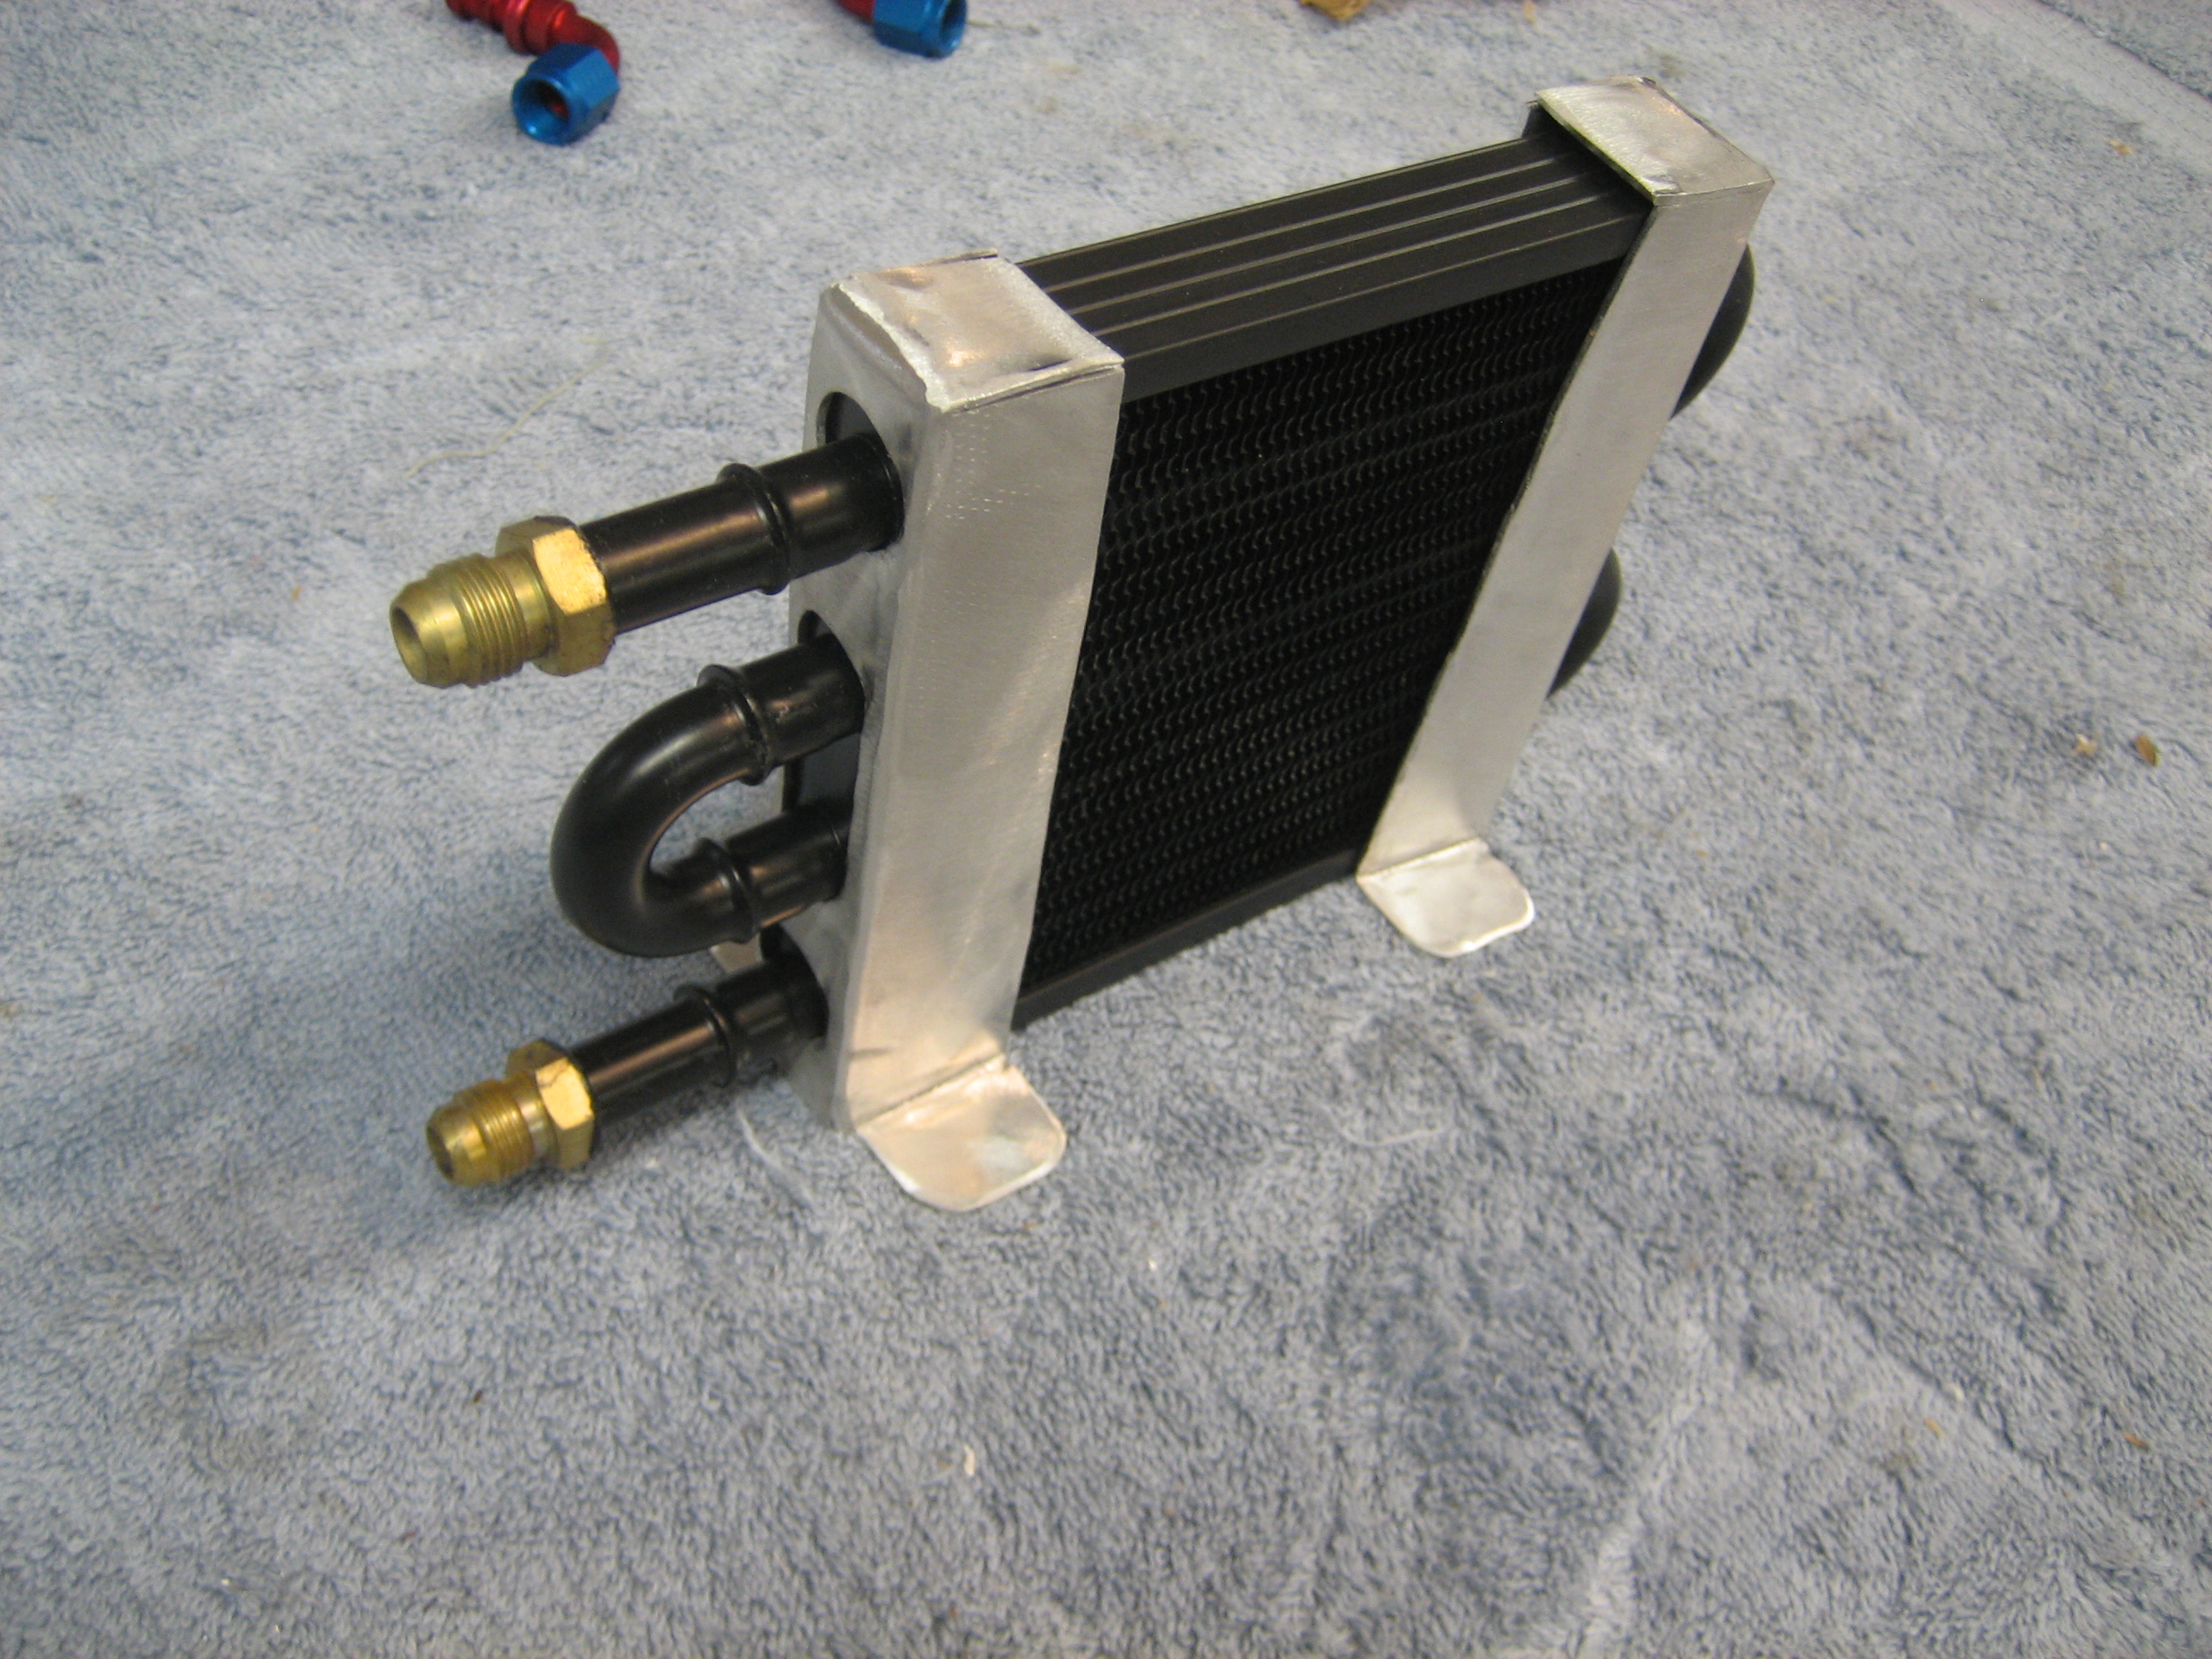
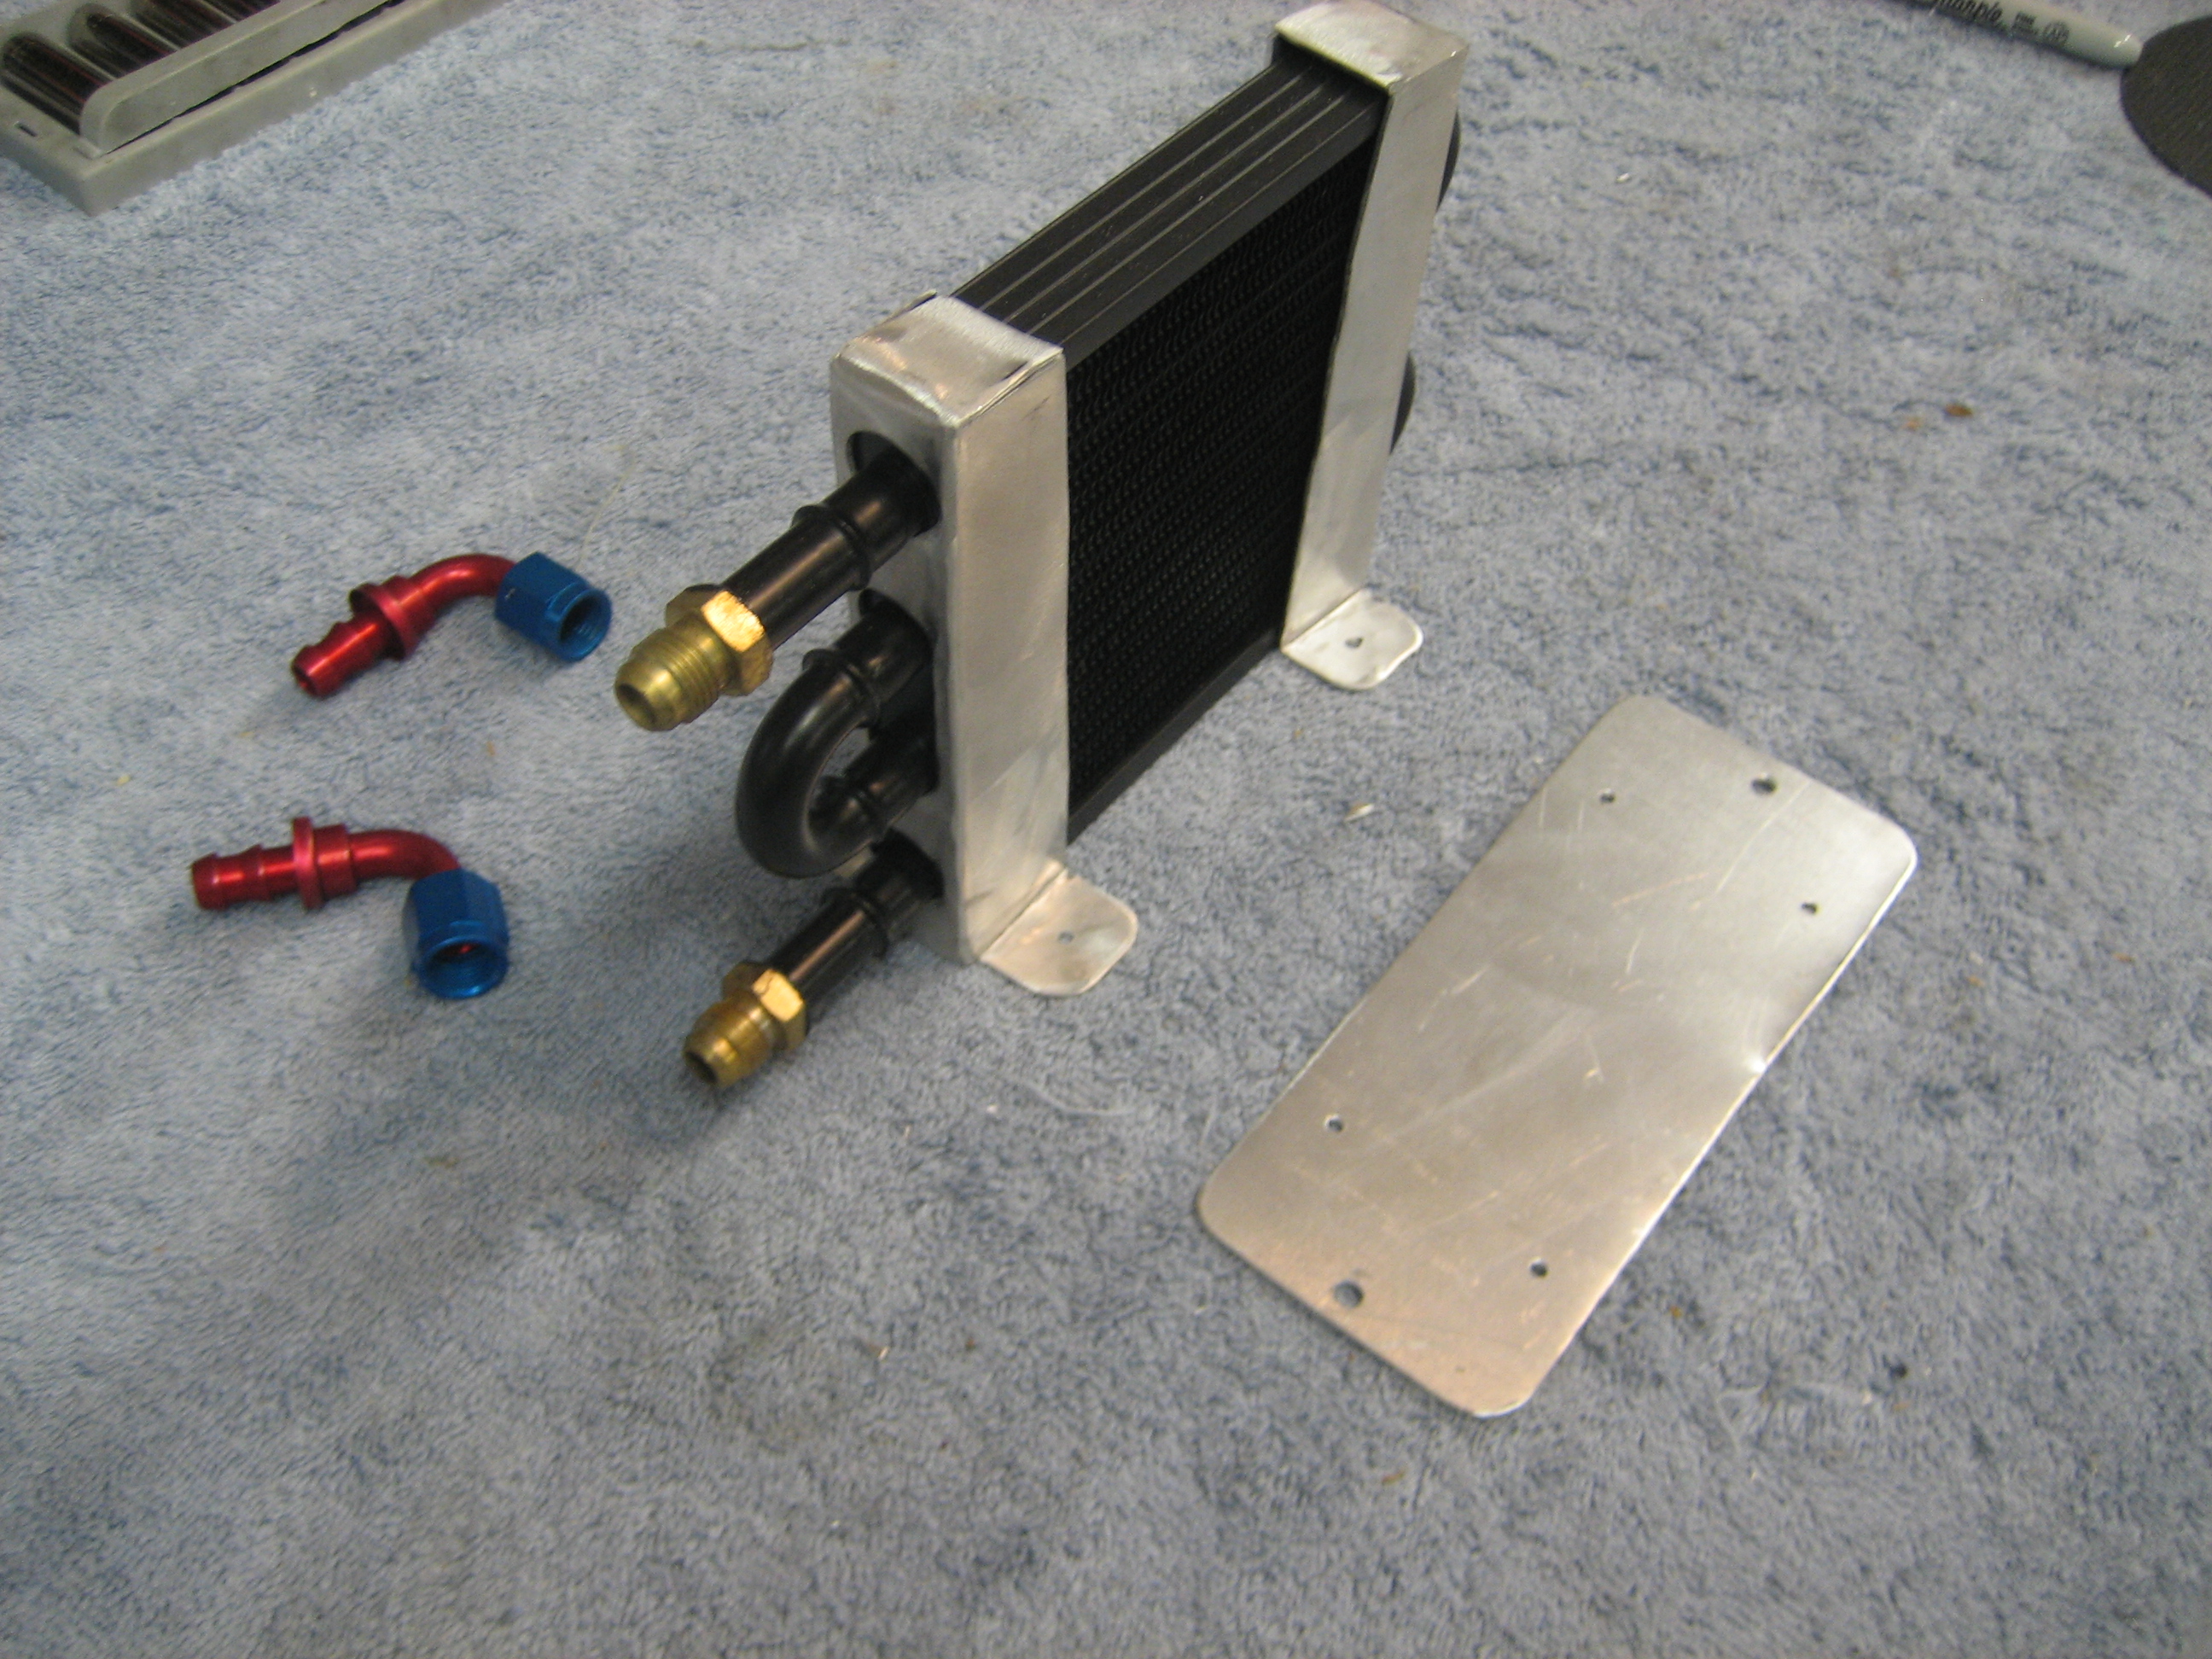
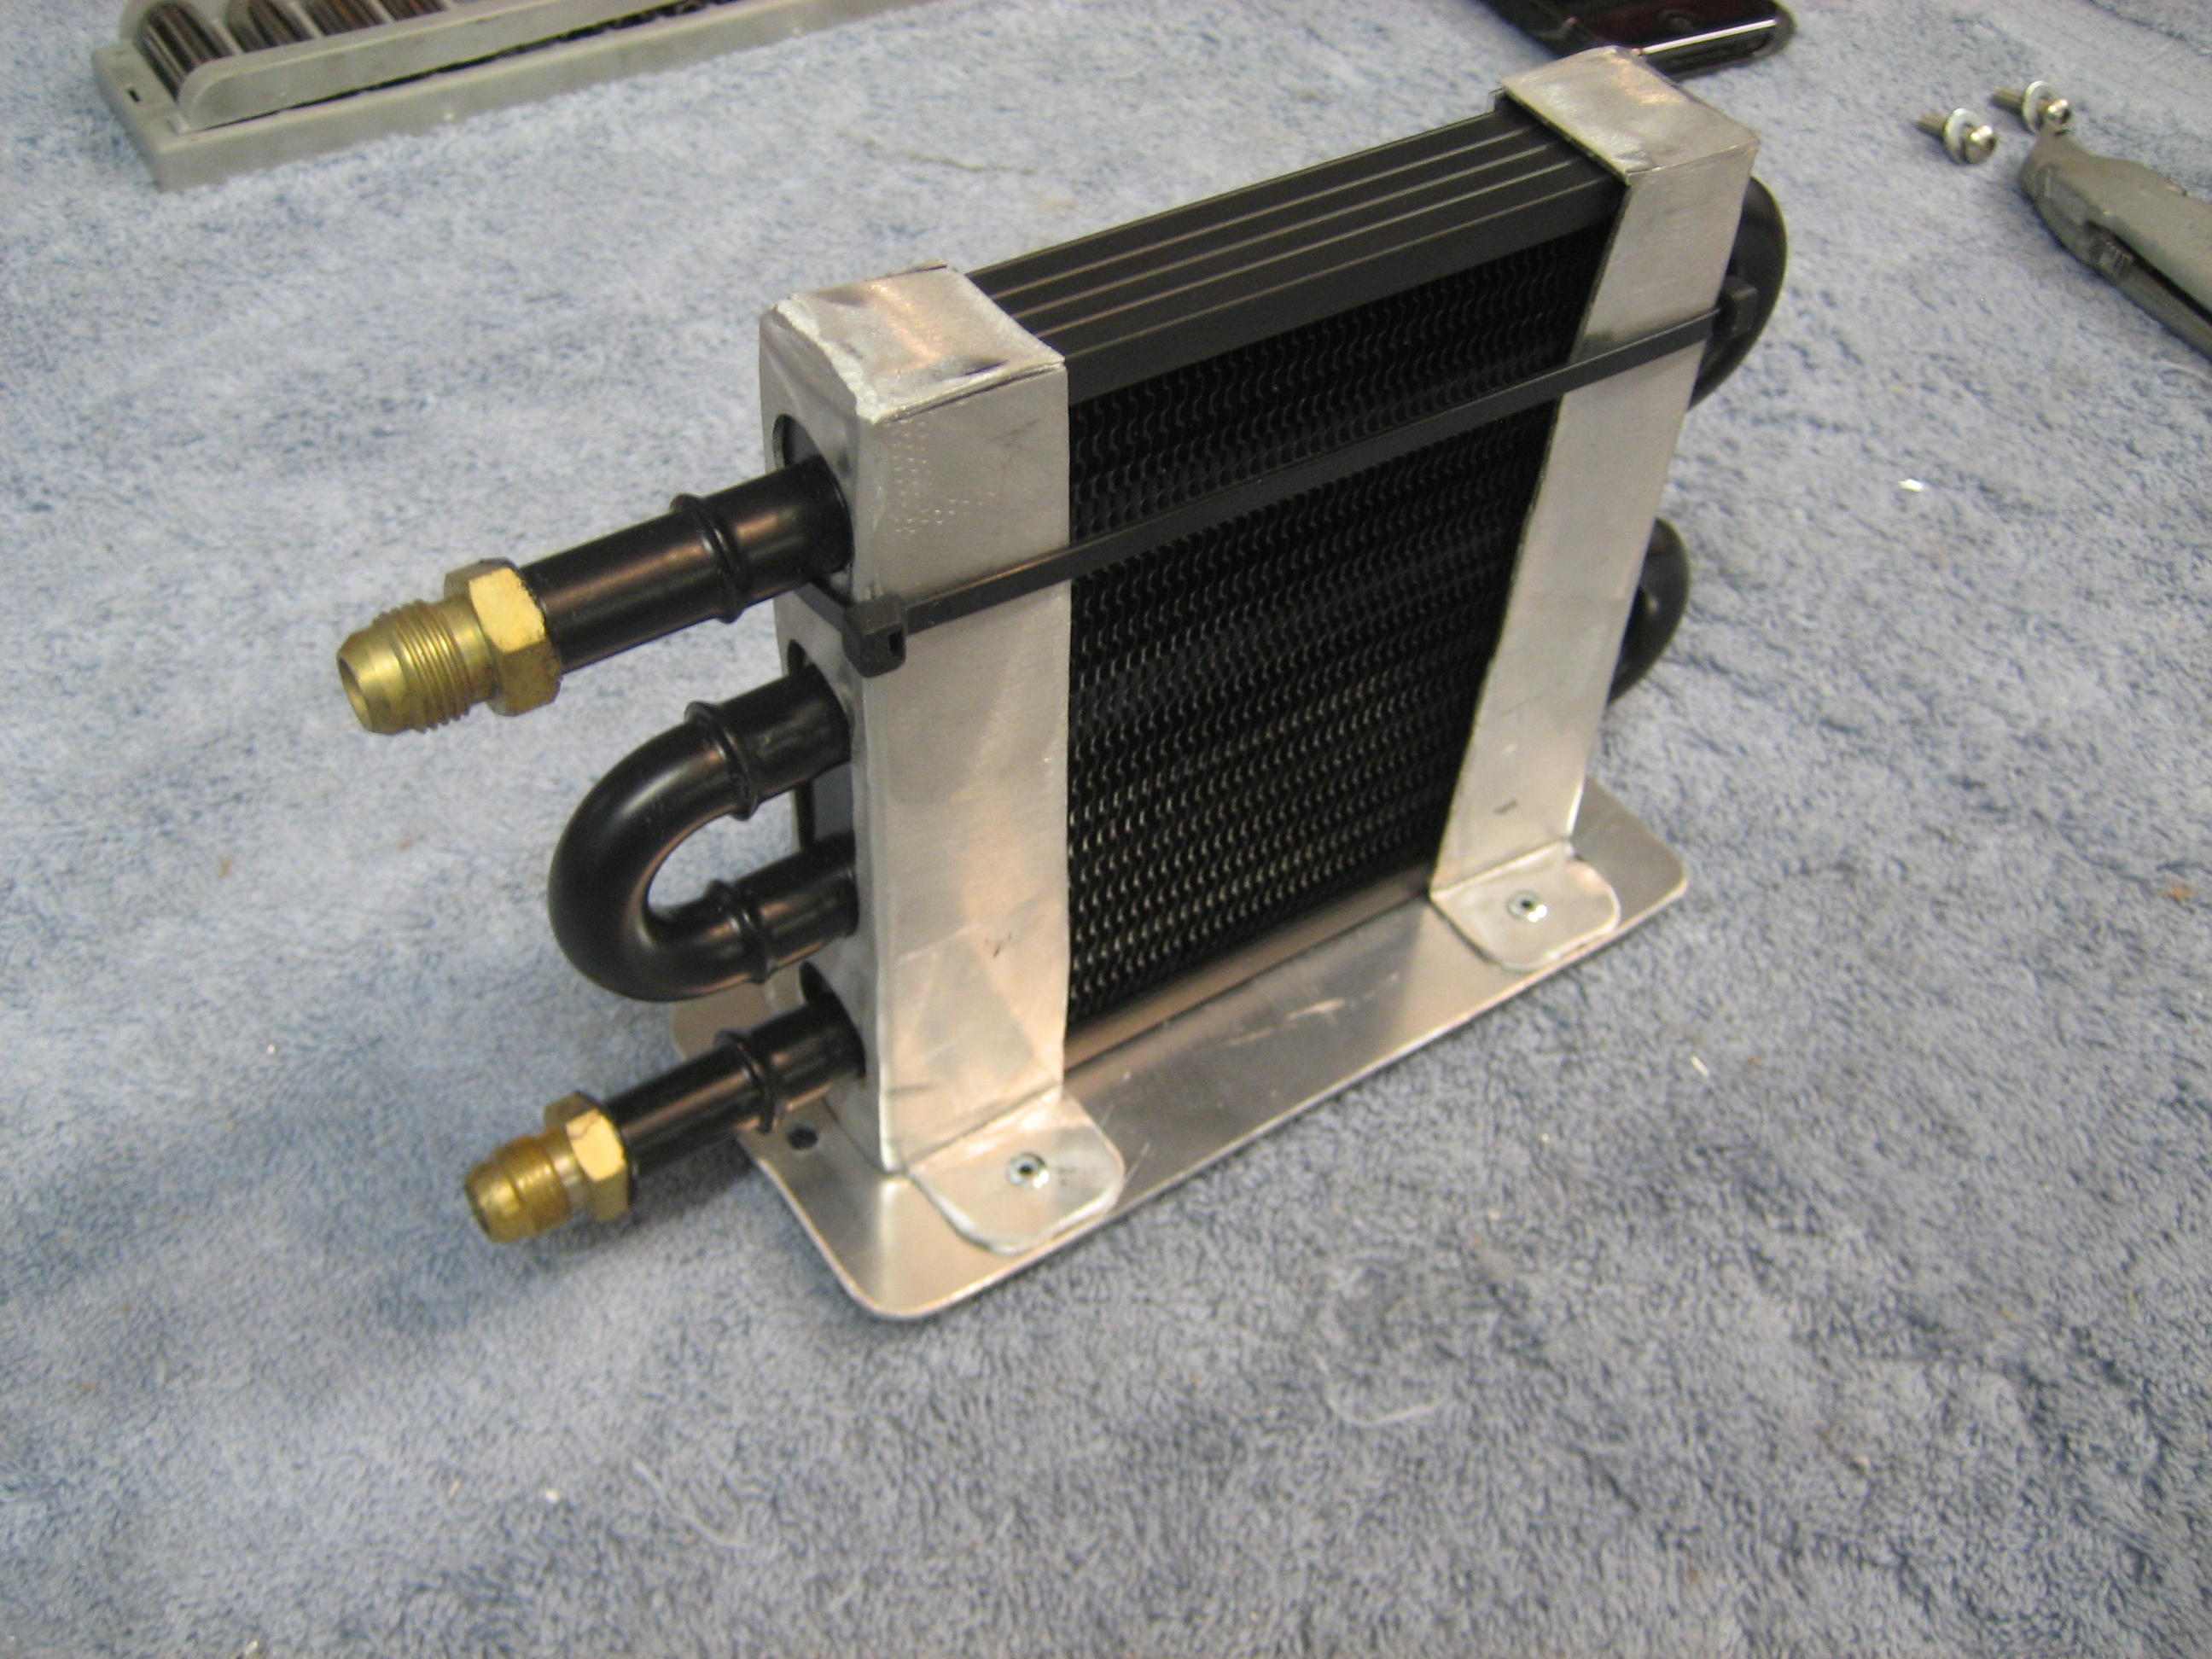
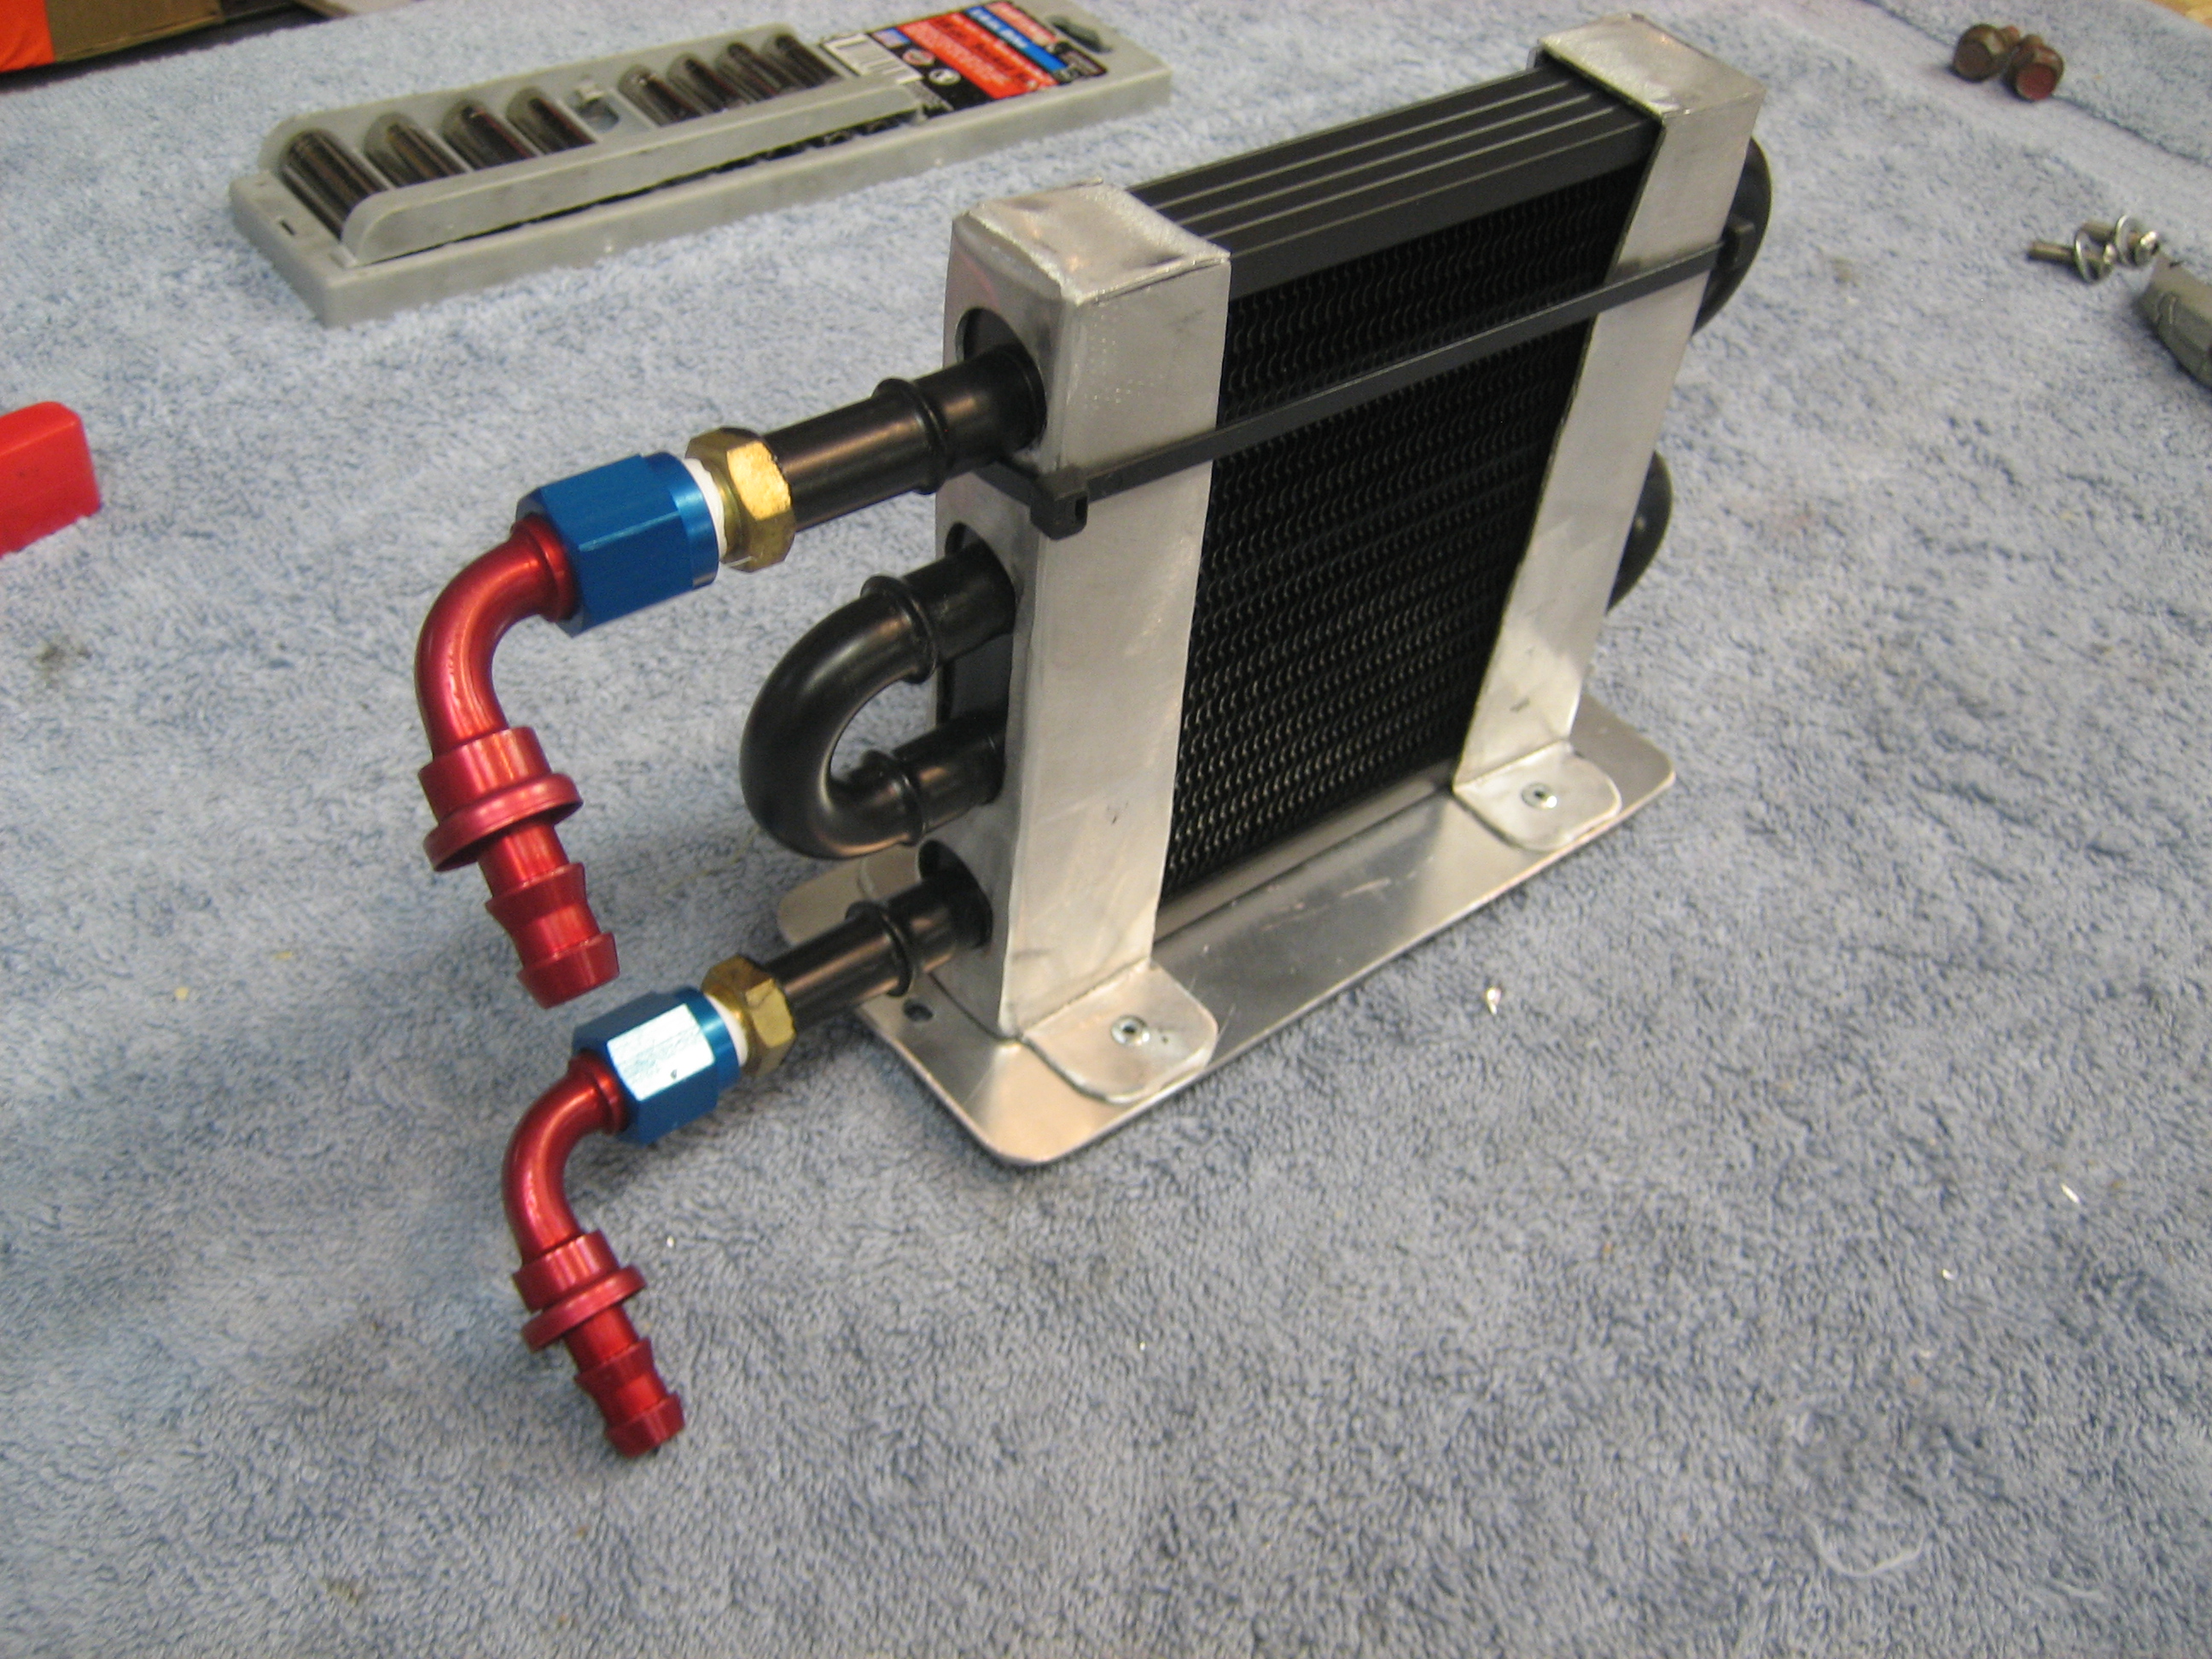
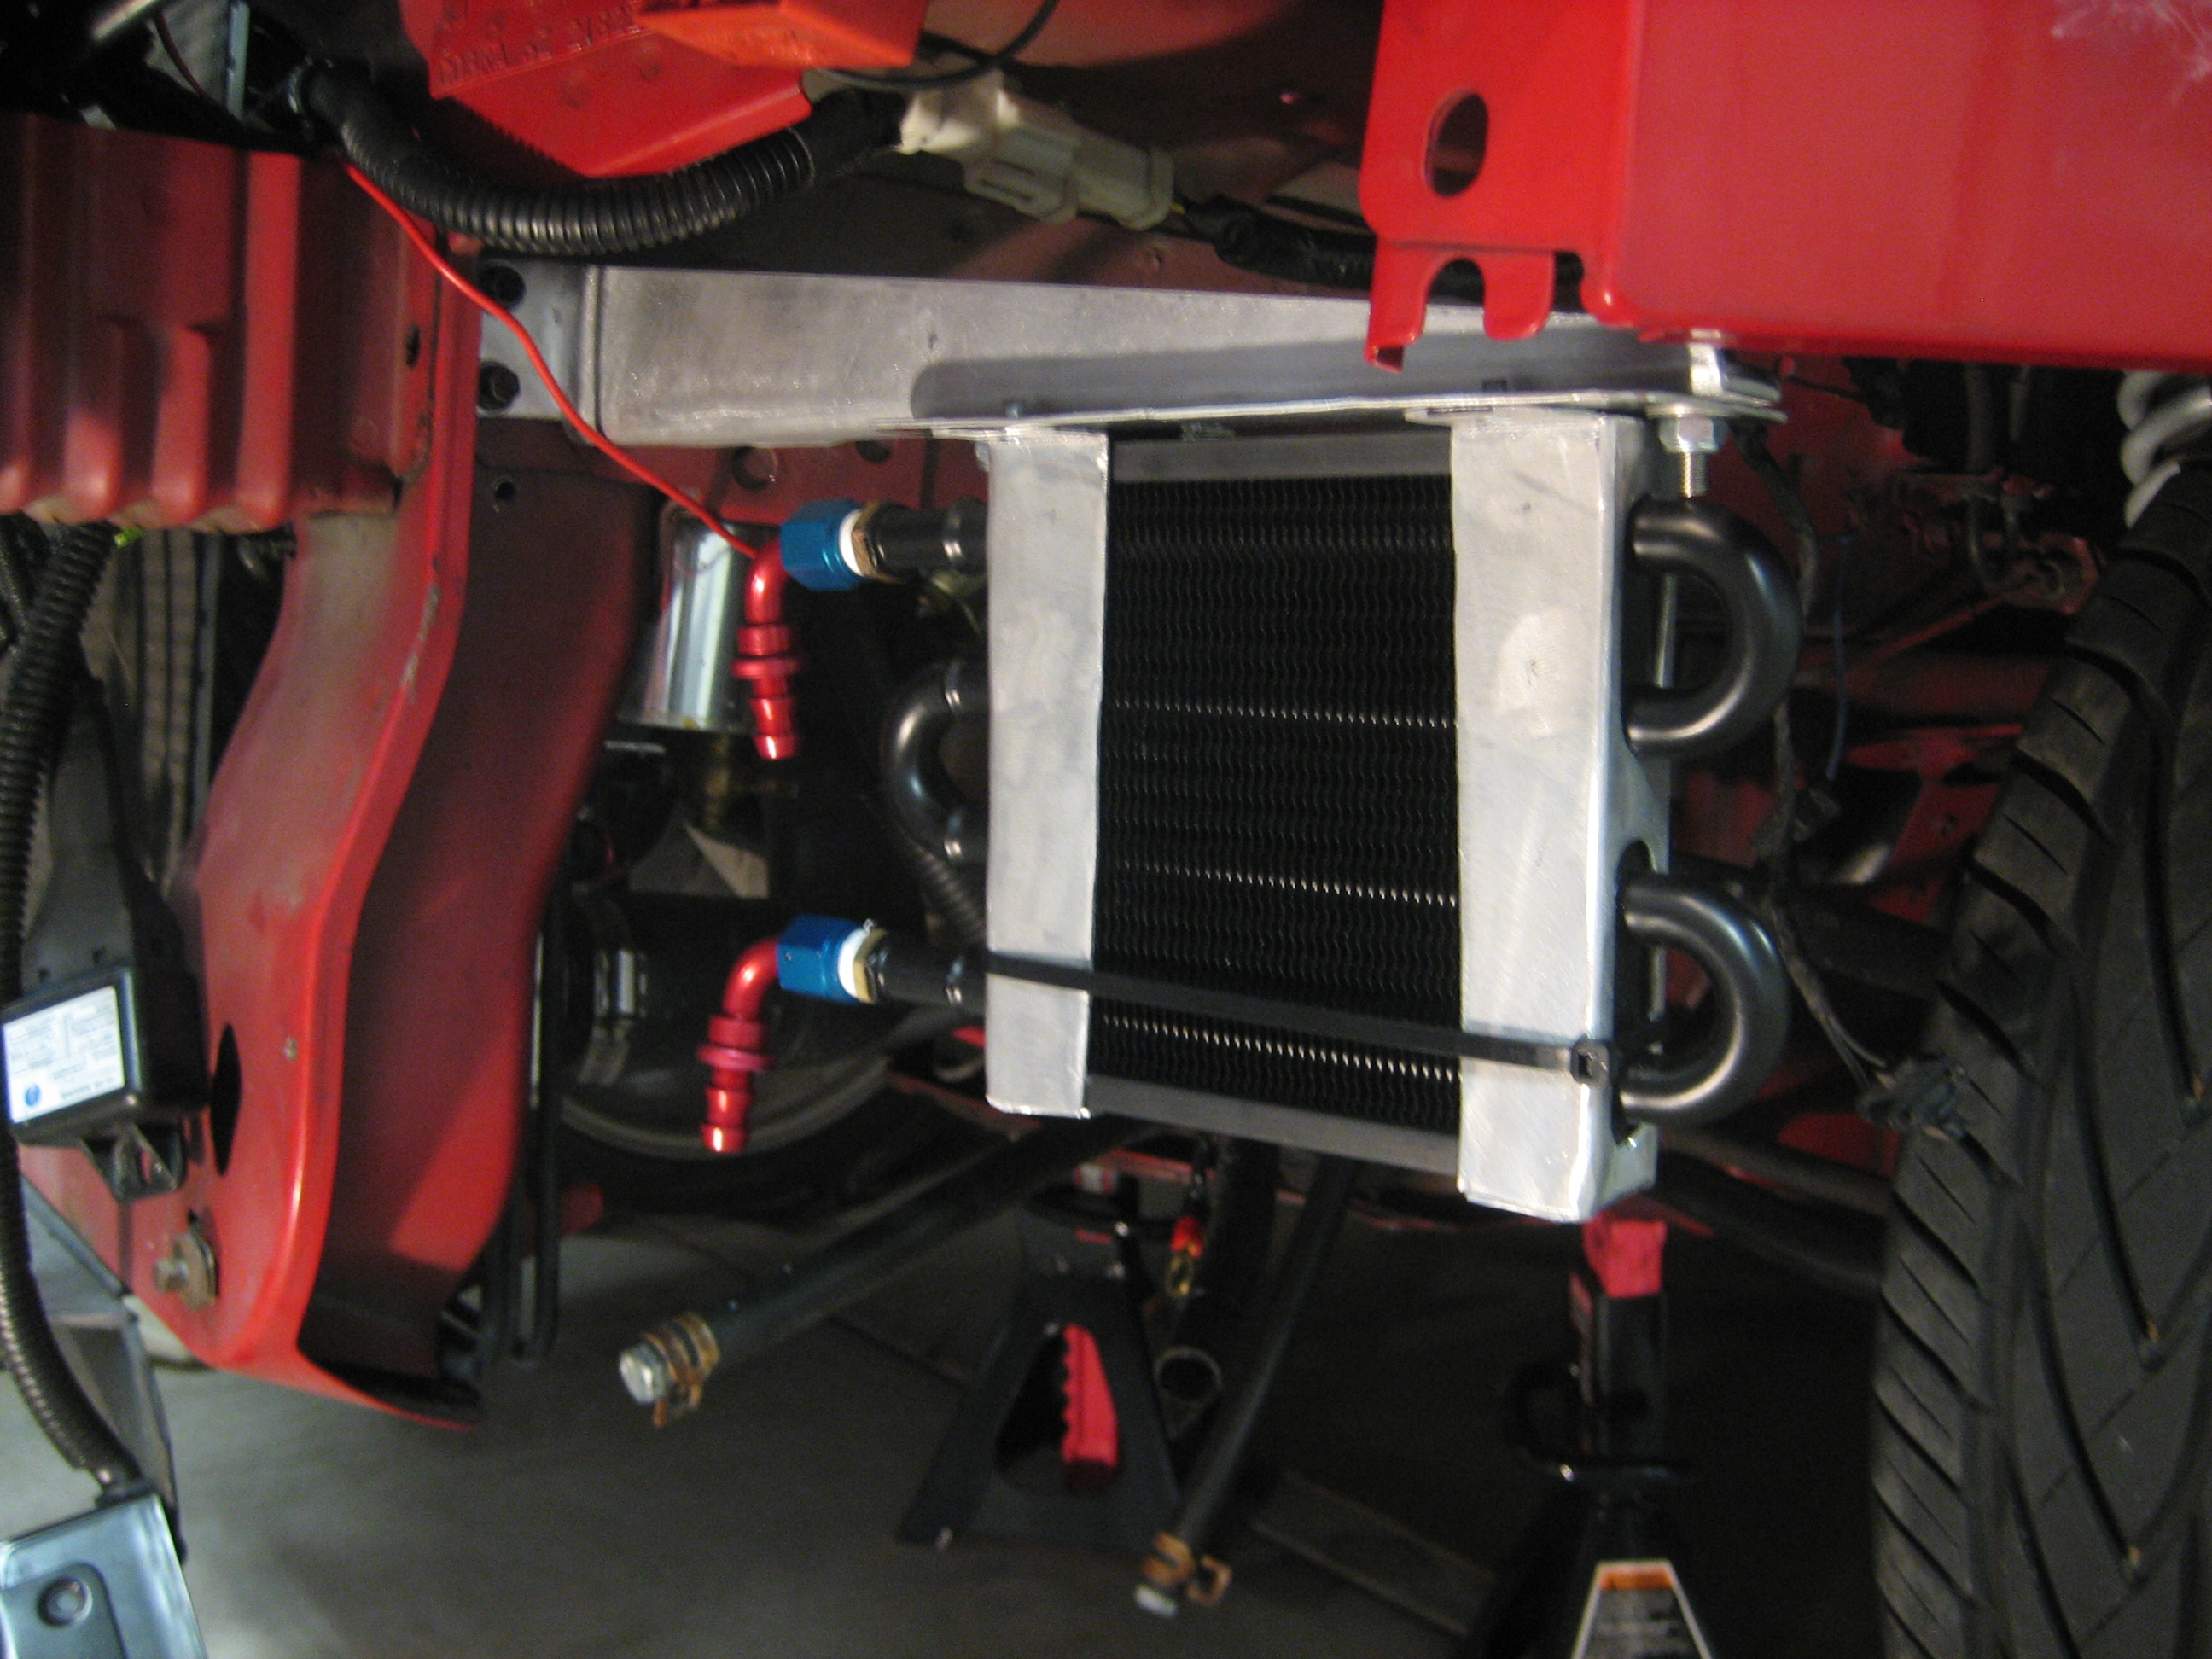
The power steering cooler had to go
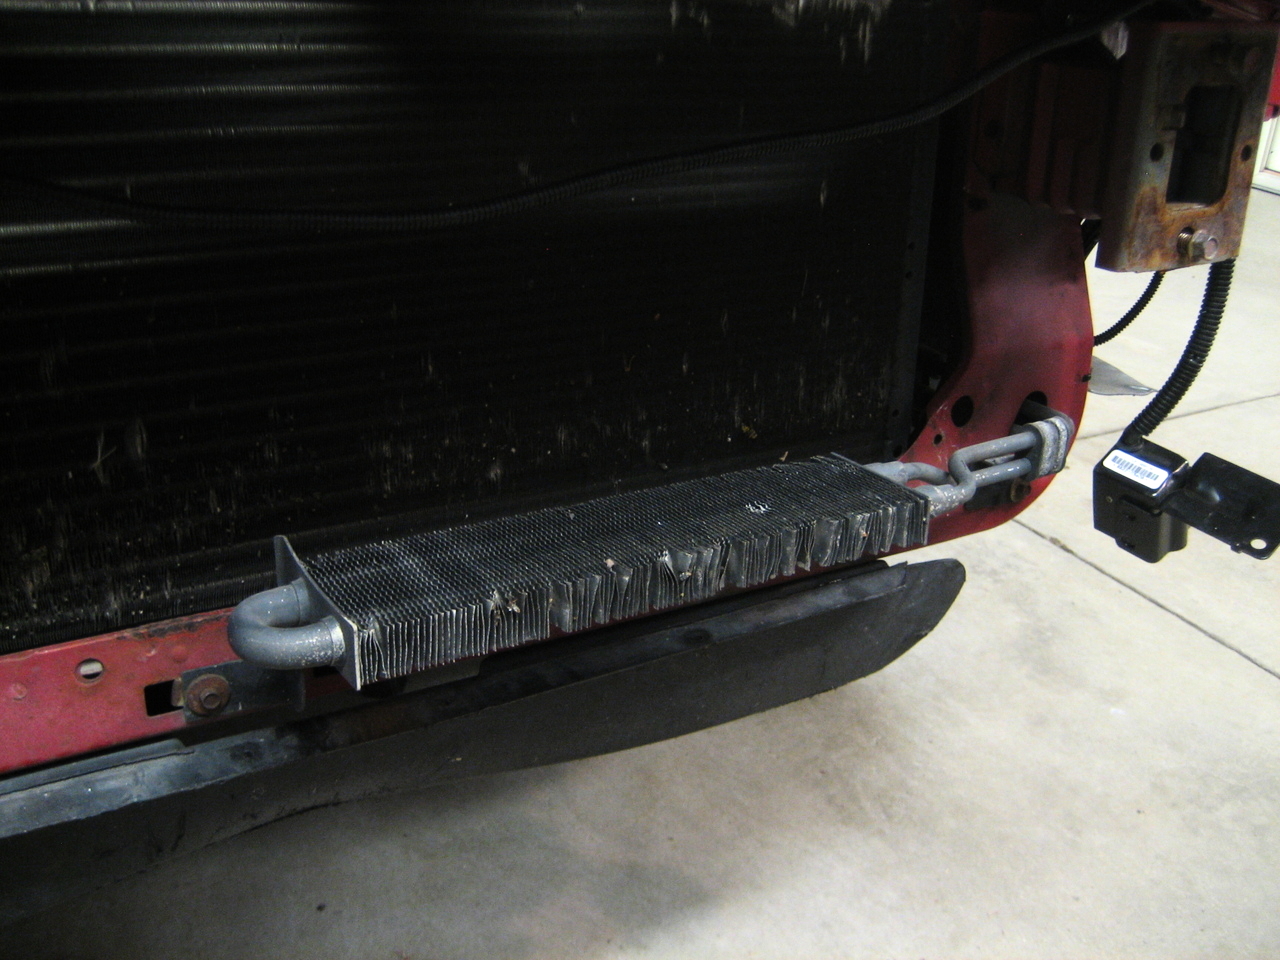
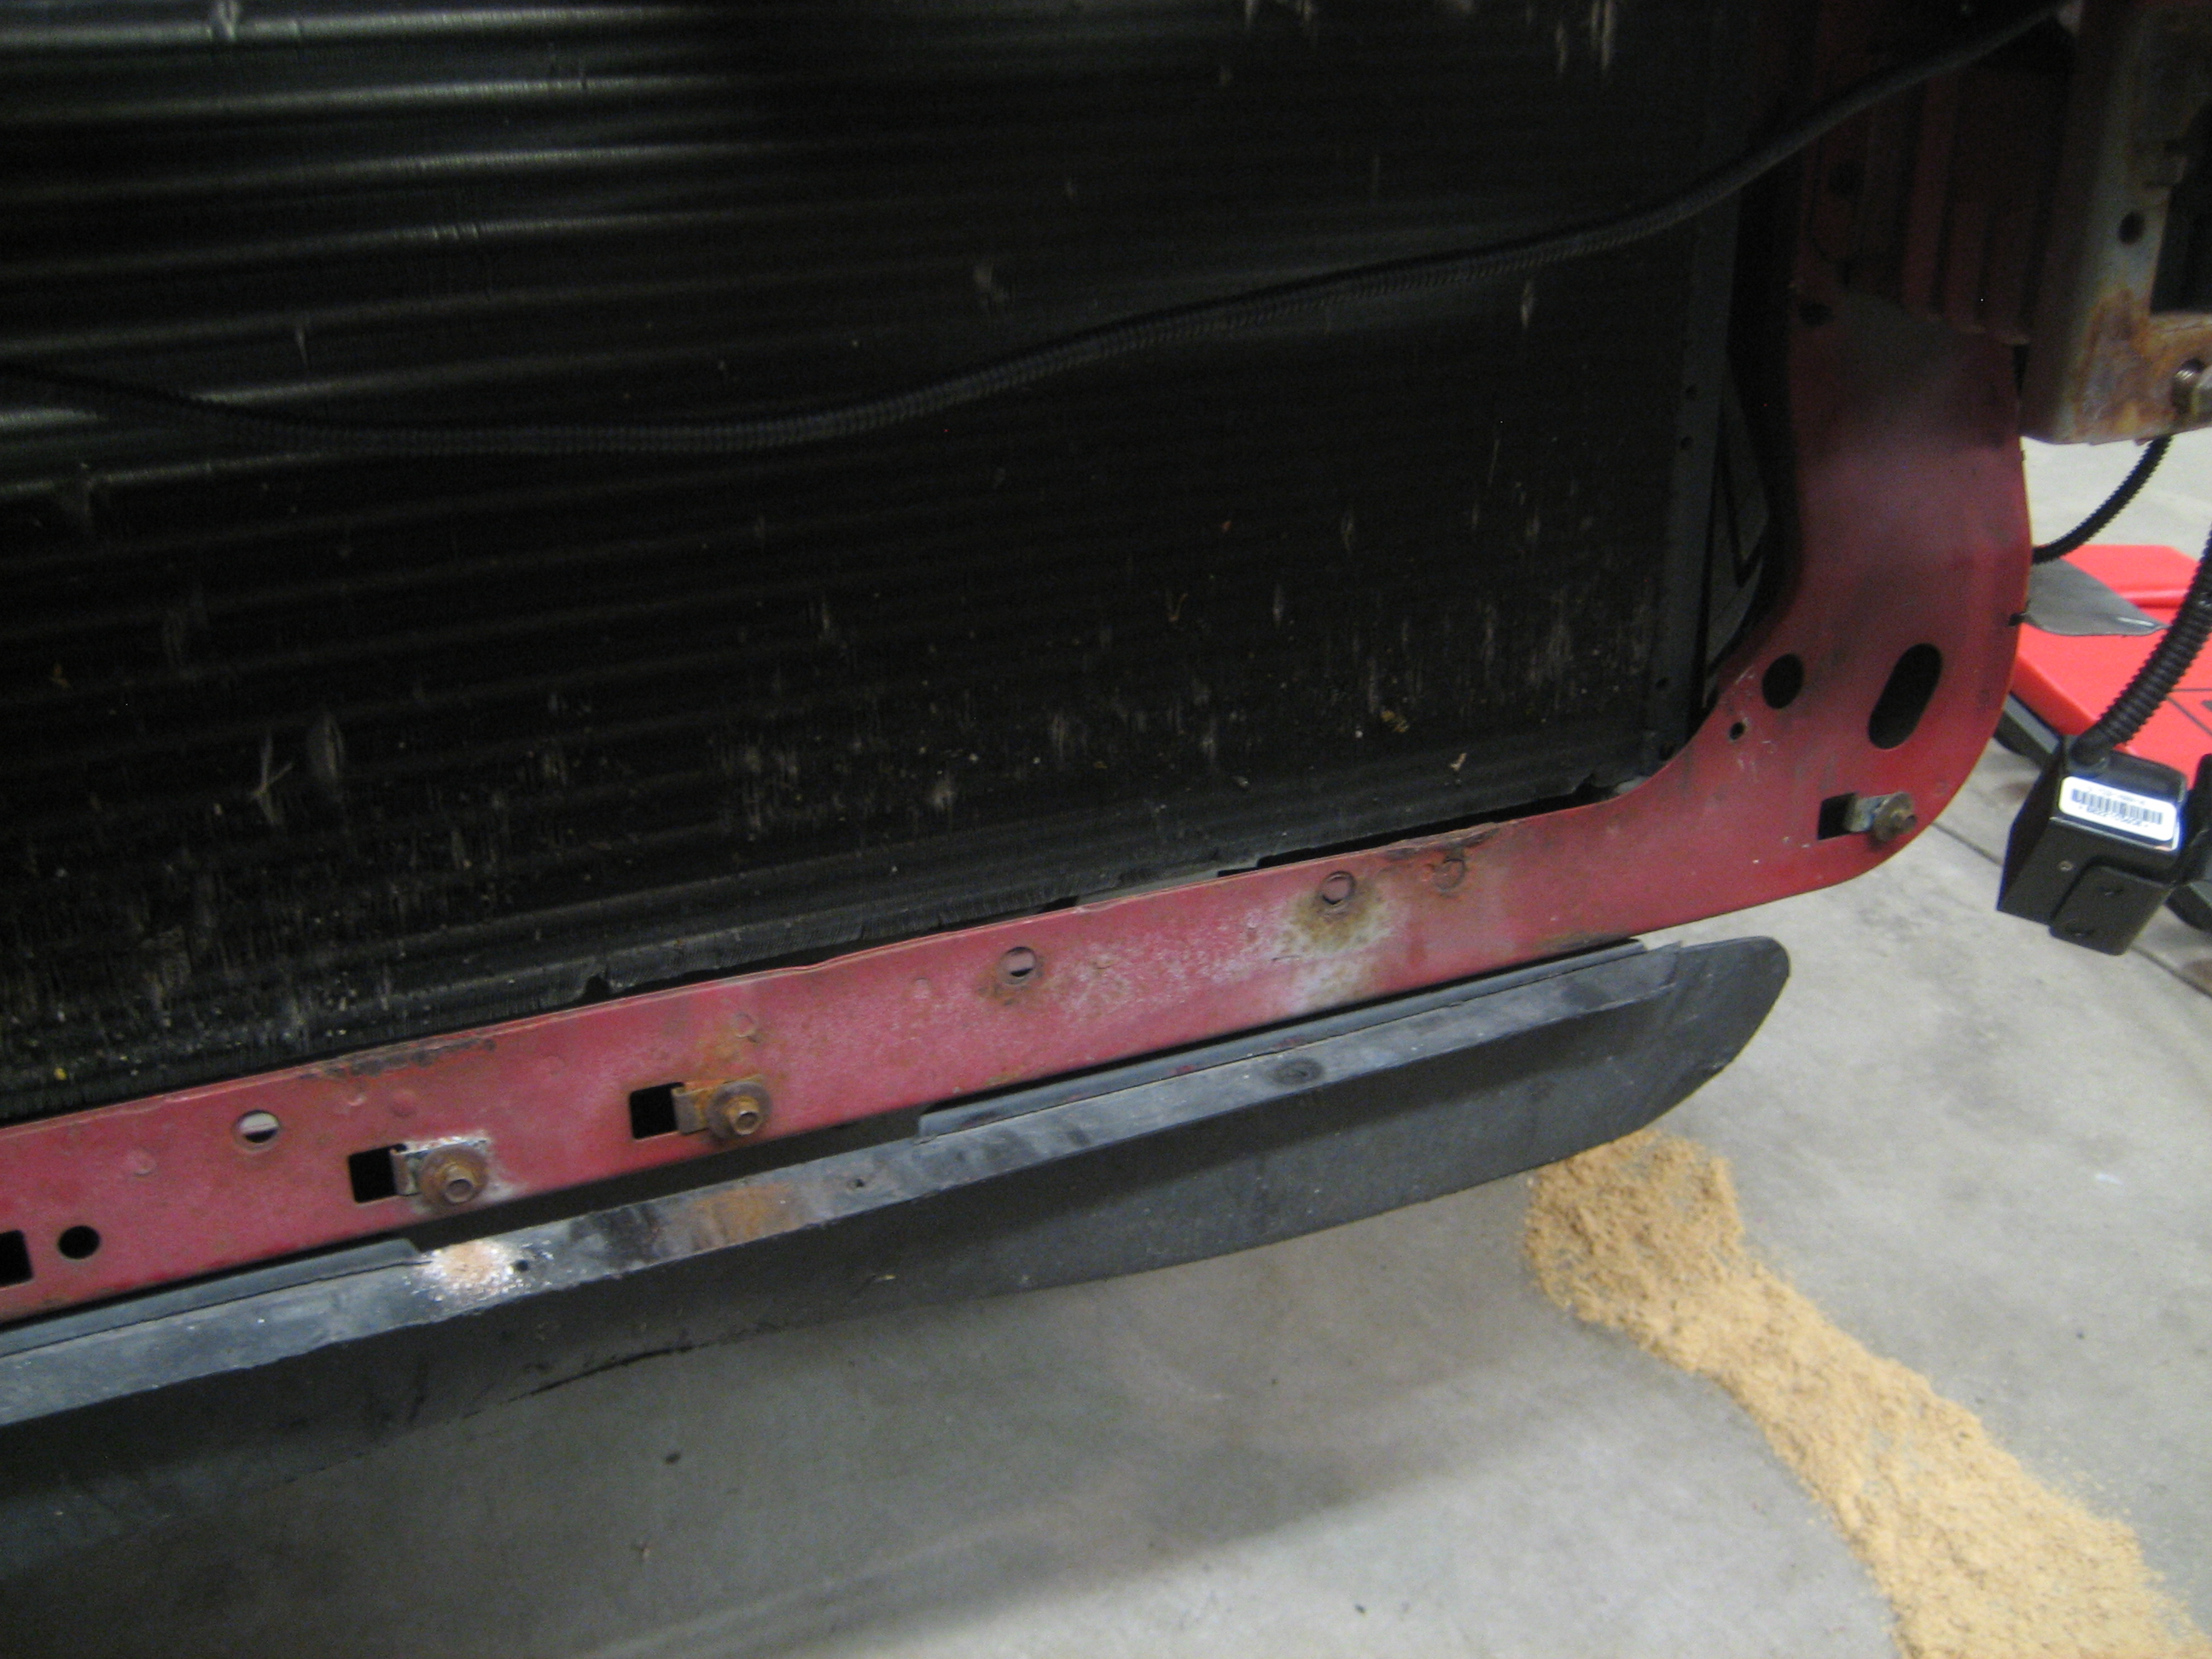
Picked up a Derale power steering cooler and some AN fittings (which I later swapped after learning I needed to use teflon-lined braided hoses for the pressure levels of power steering)

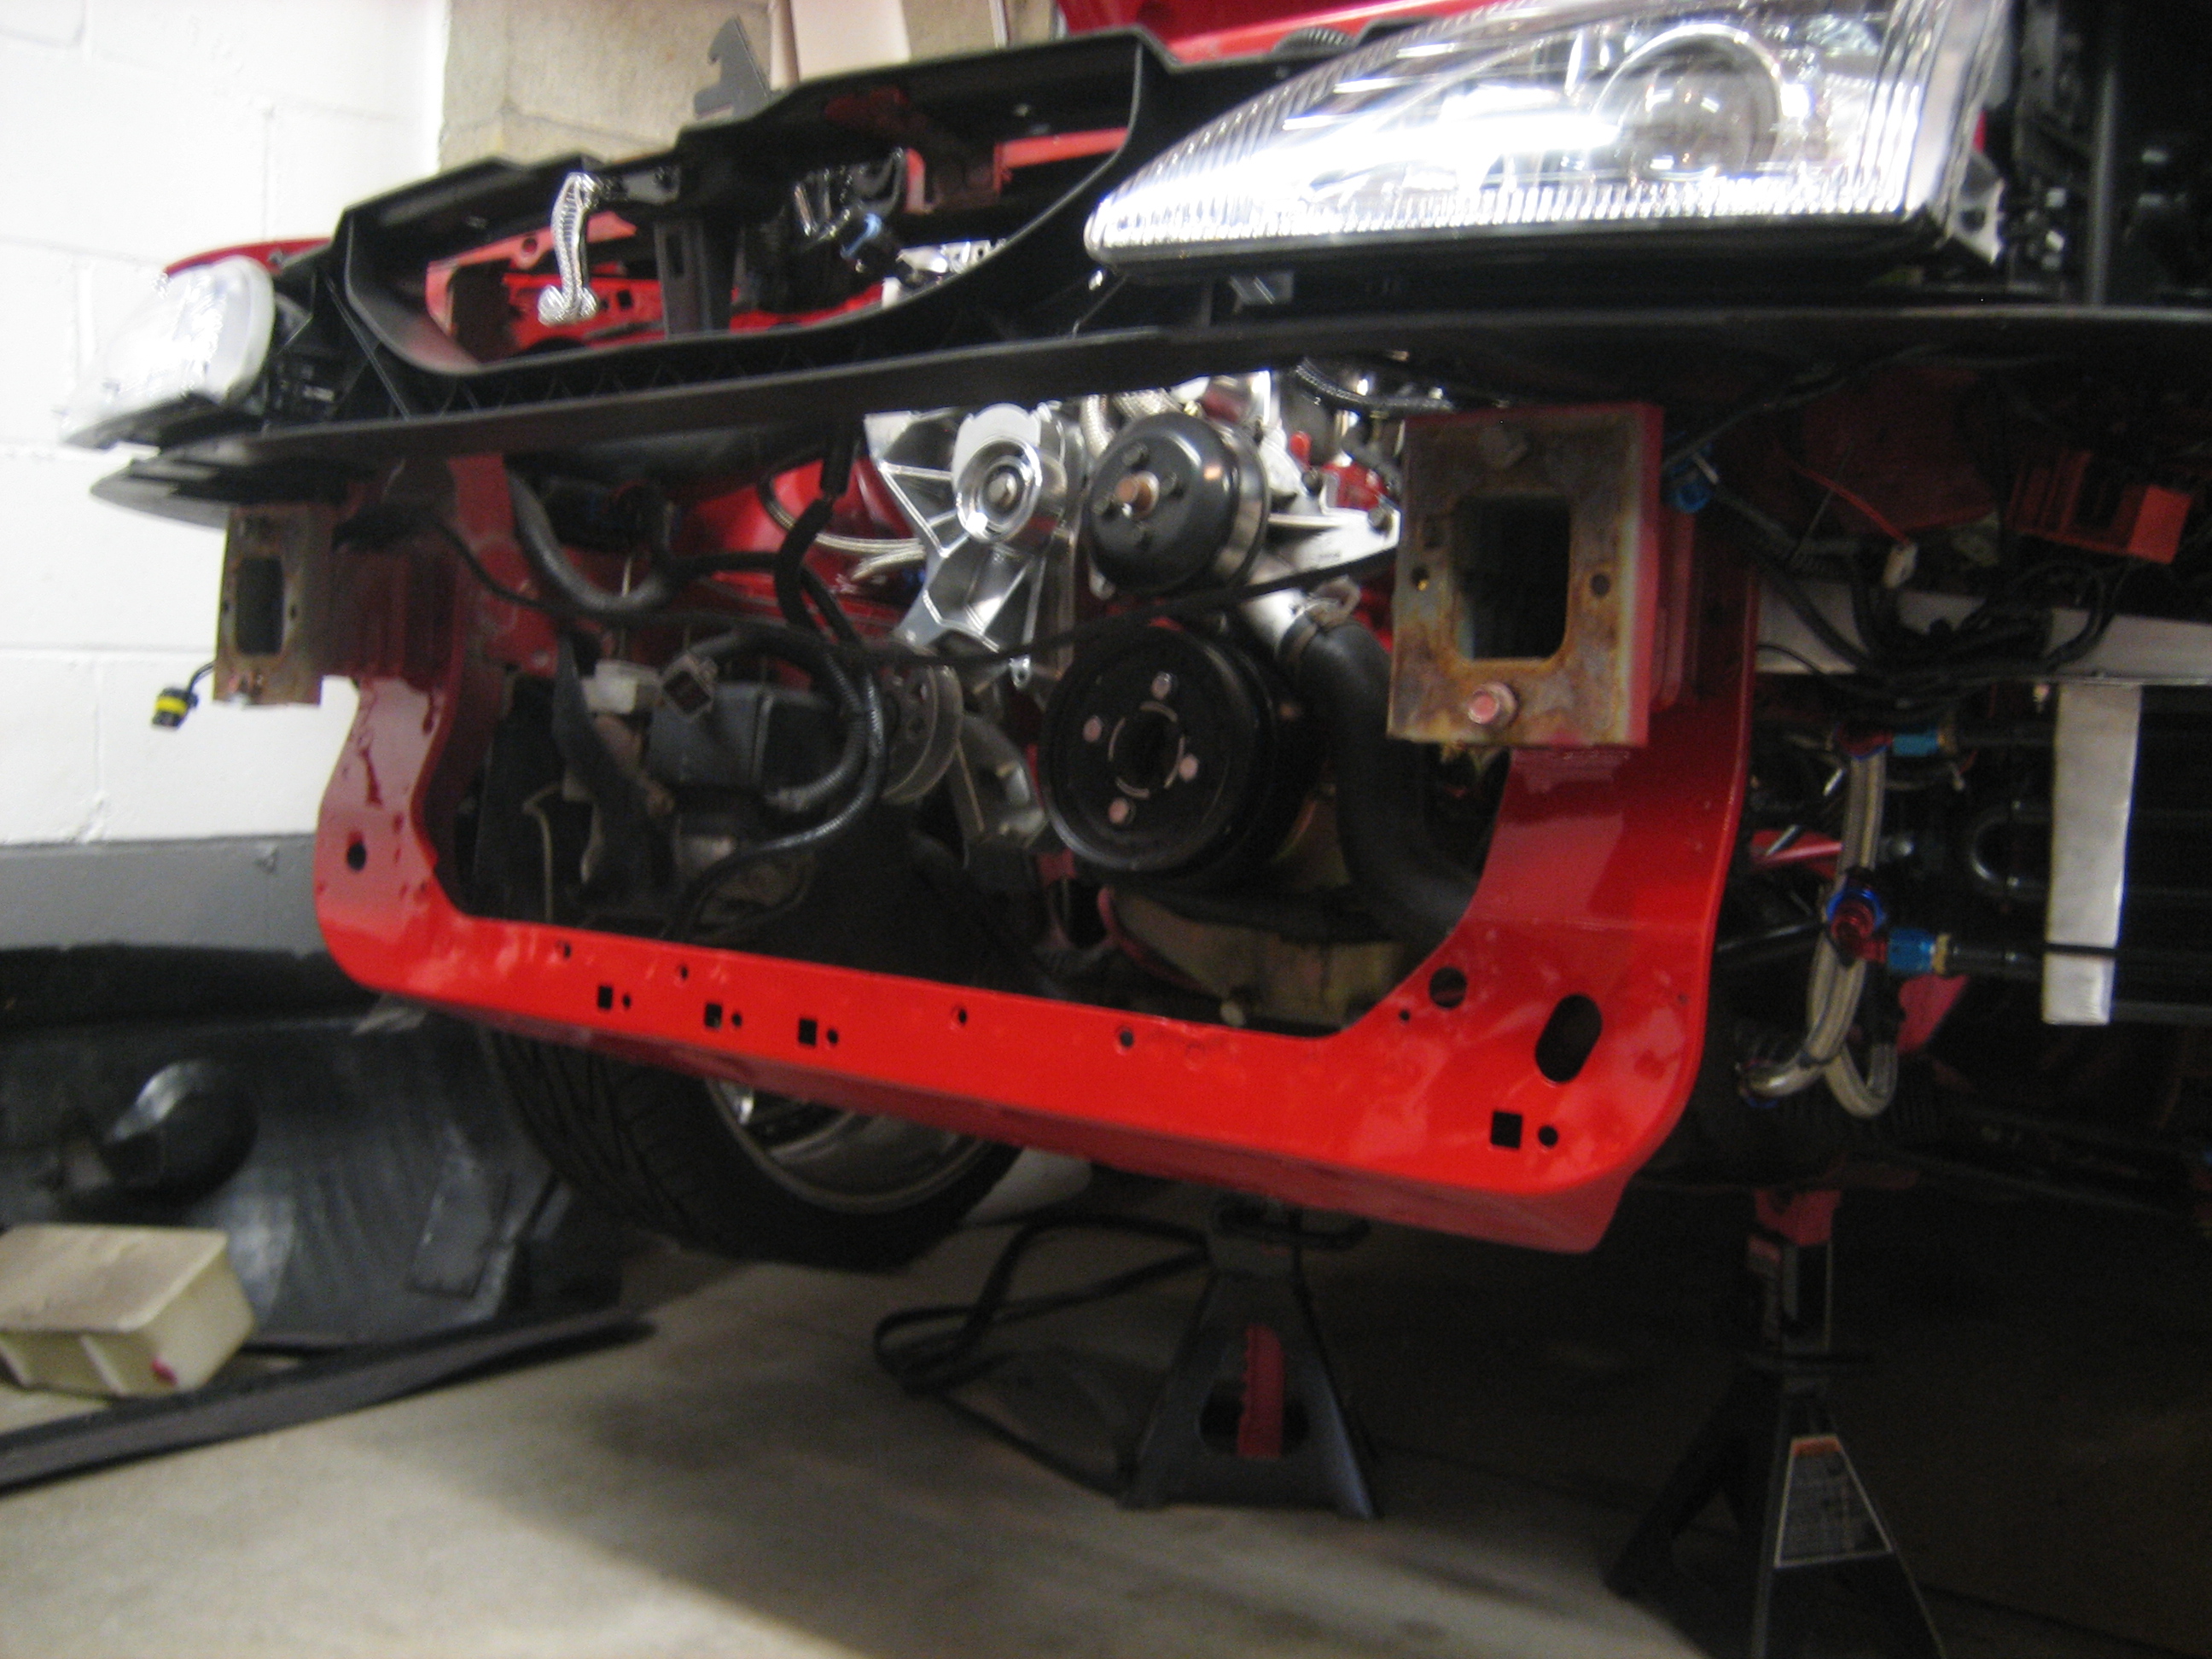
Power steering bracket, PS pump and AC compressor out of the way.
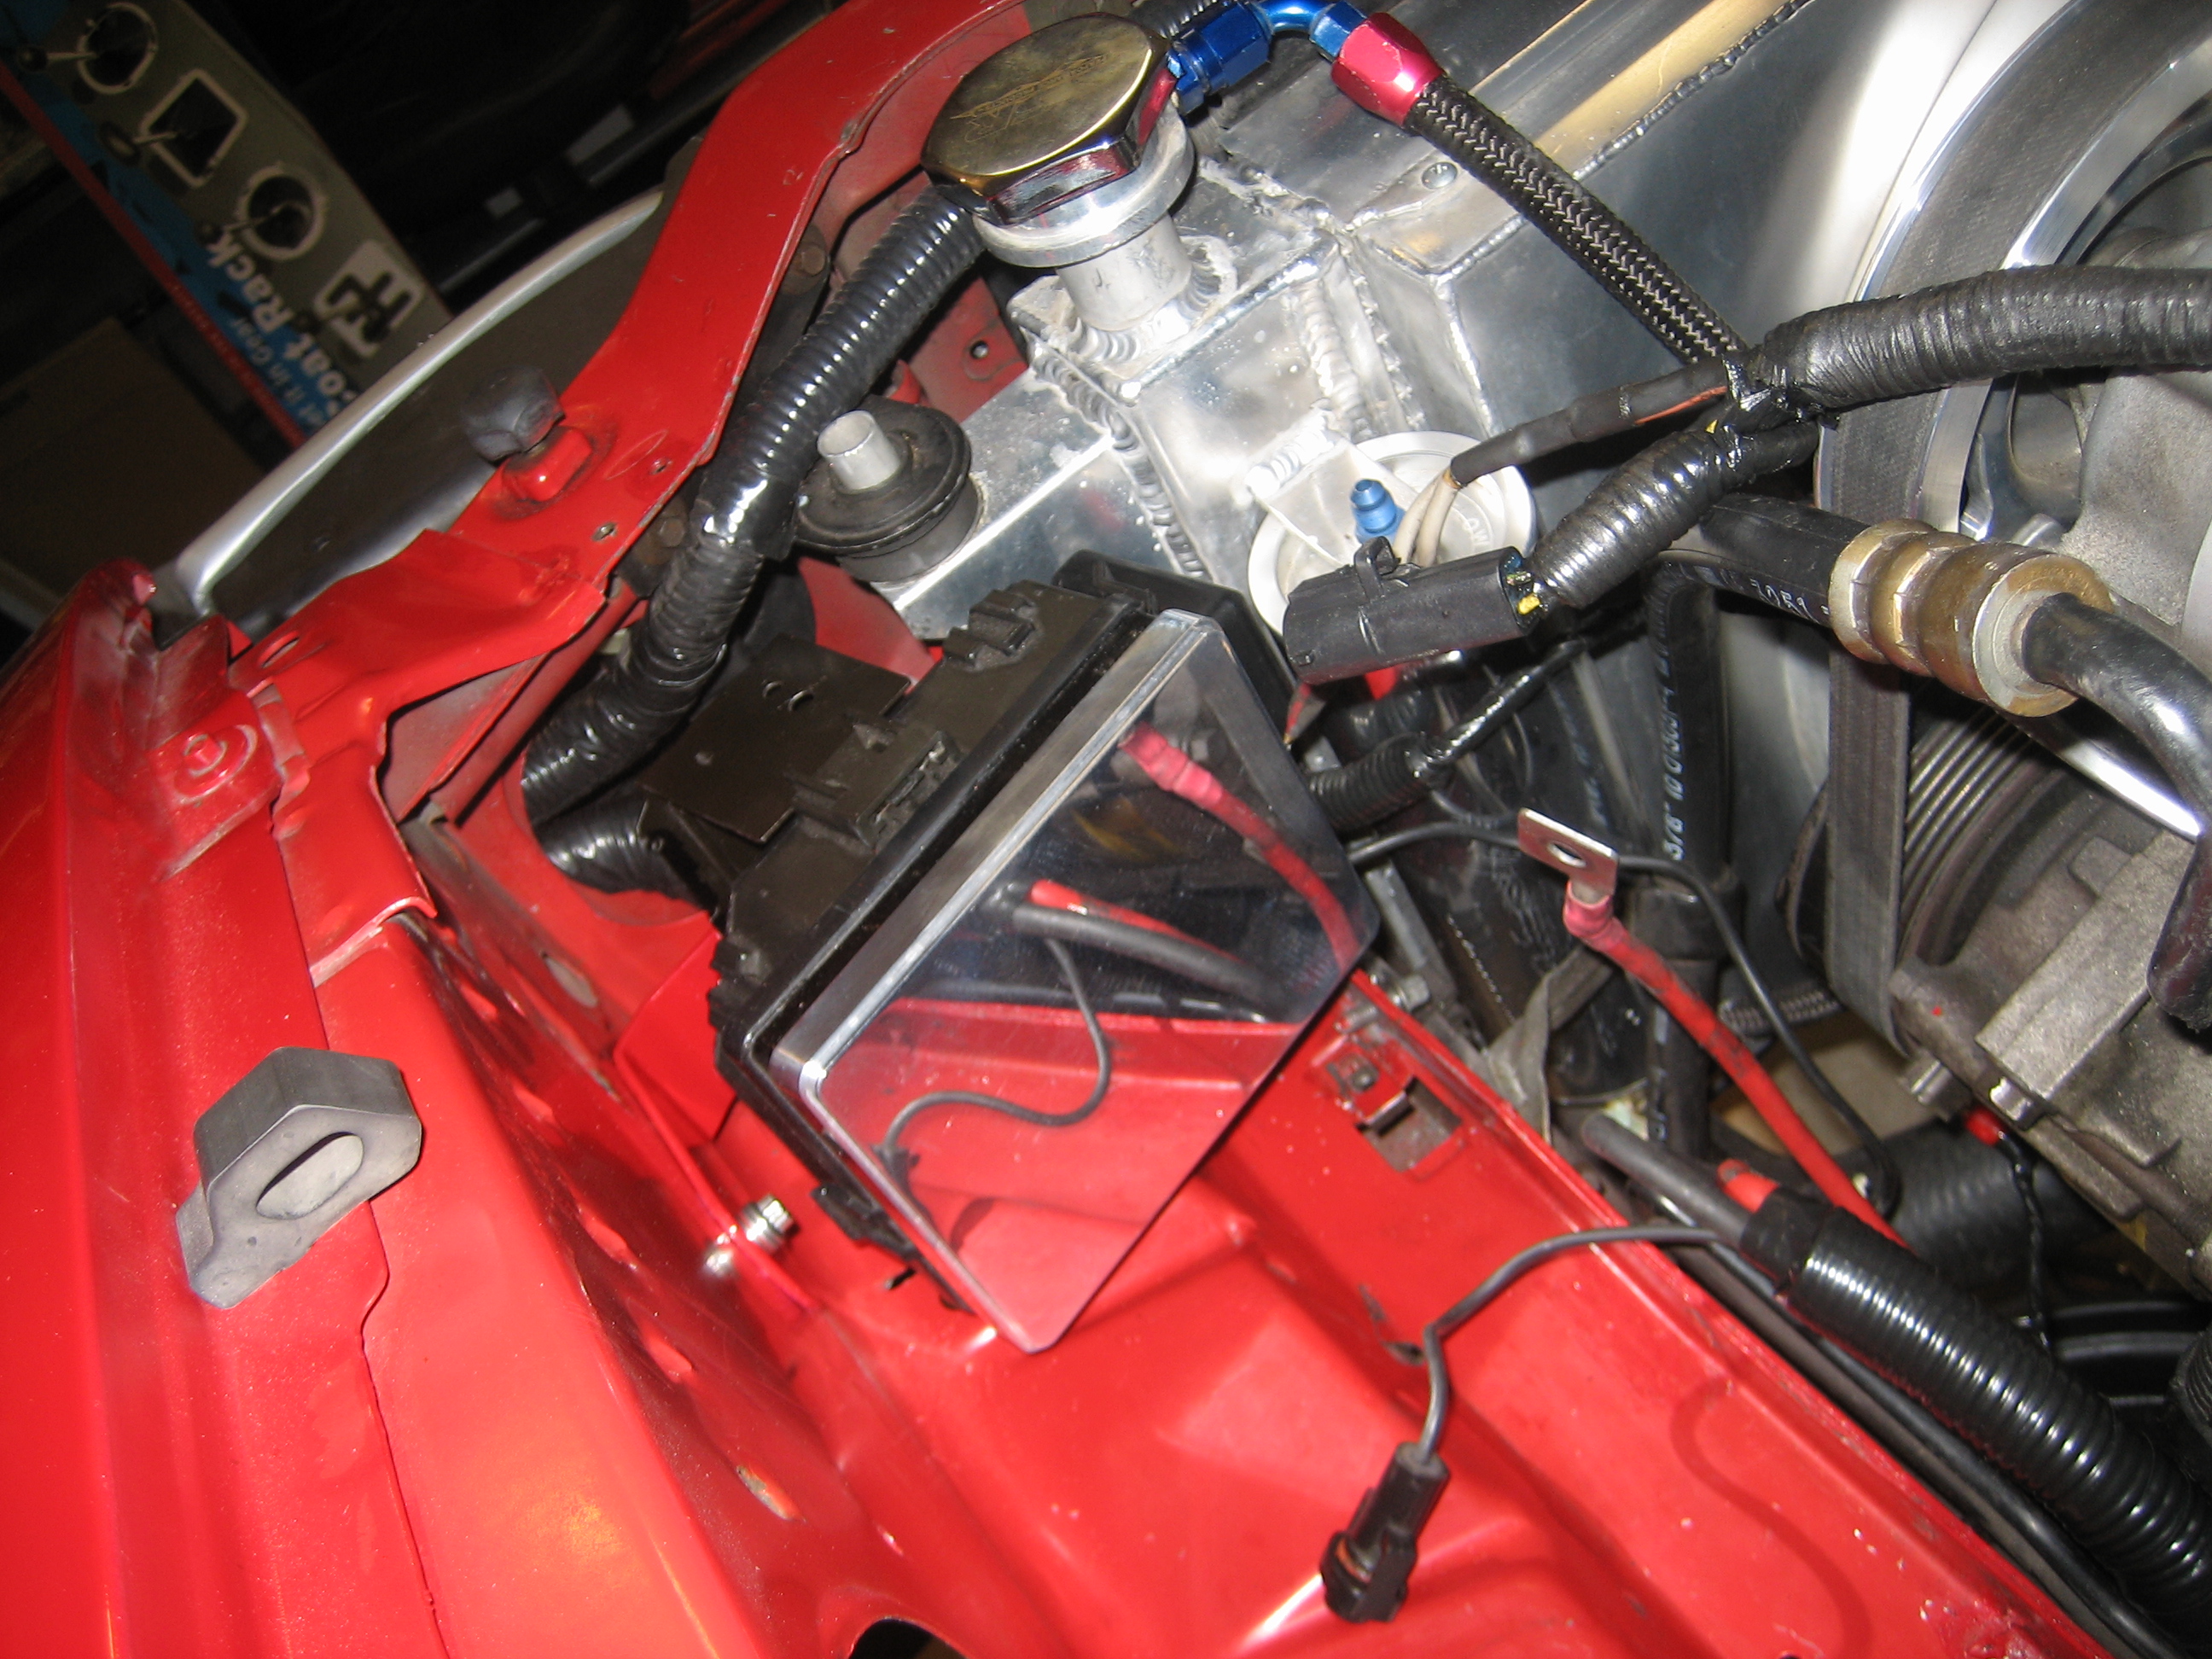
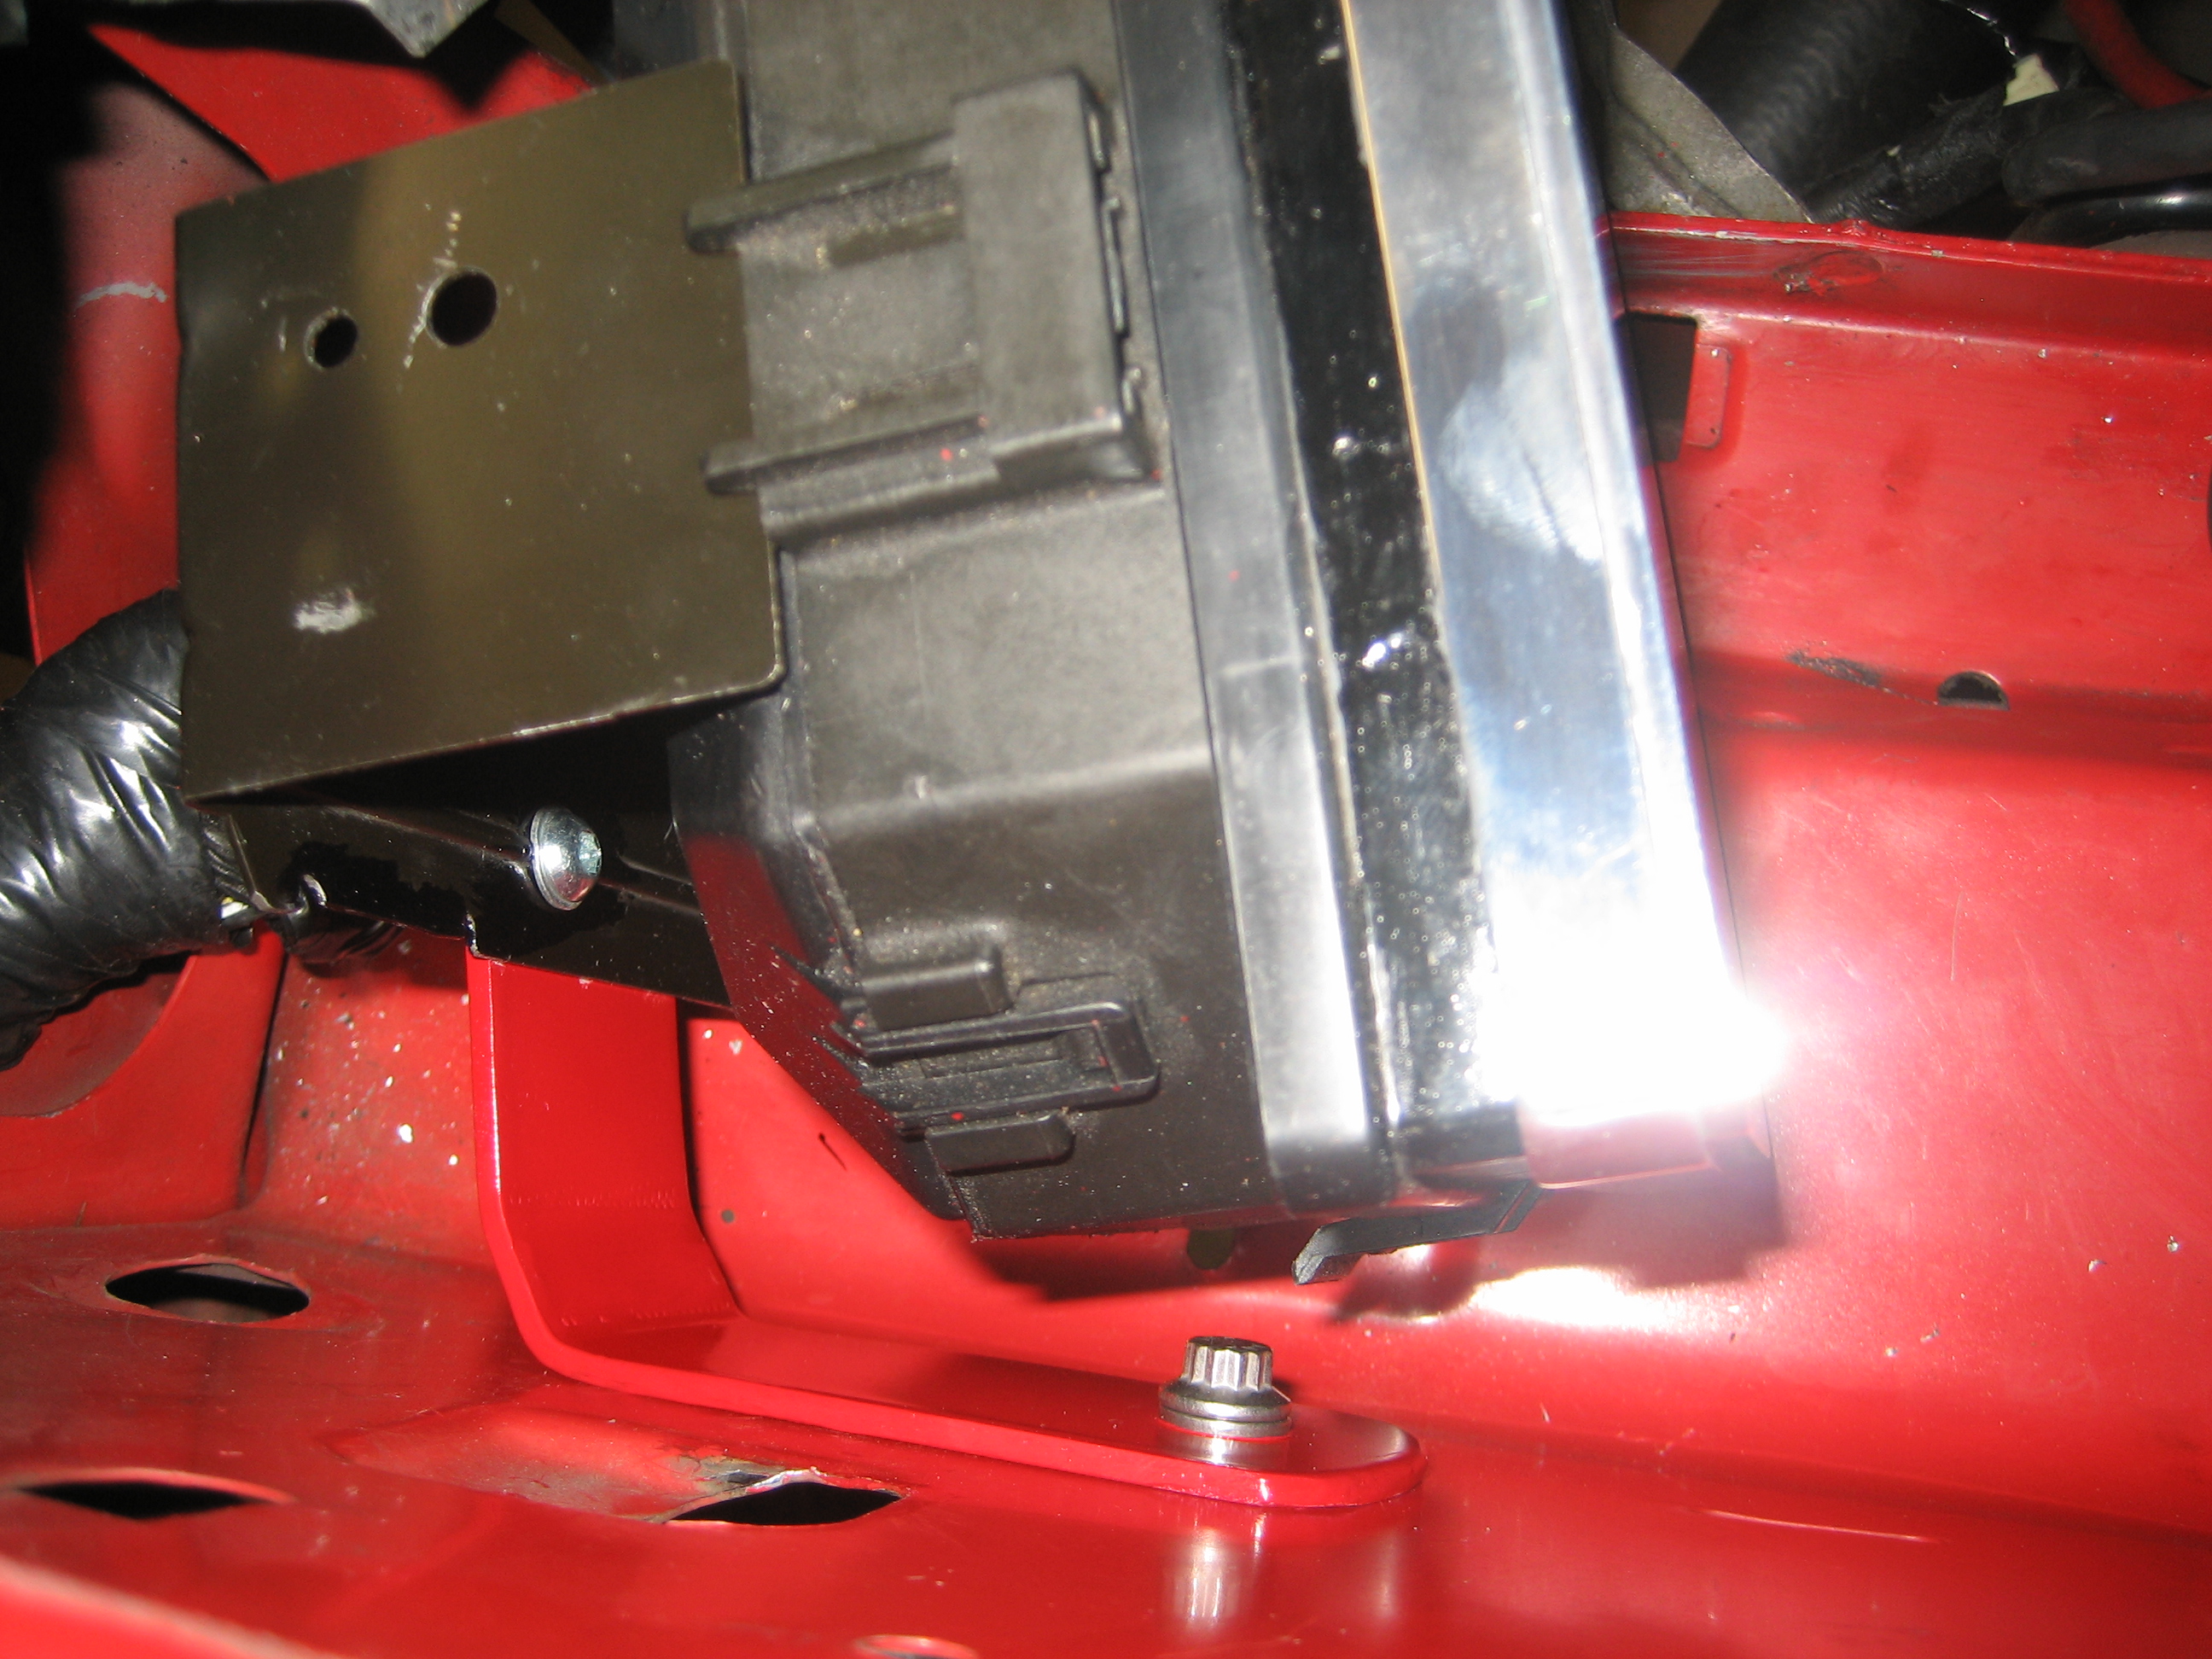
No pics of the process, but I also relocated the fuse box to right behind the driver's headlight, which required a couple days of boring work lengthening wires and separating the harness. I modded the fuse box's factory bracket and paired it with a bracket I made to mount it to the fender skirt. Also ditched the windshield washer reservoir. Finished product:
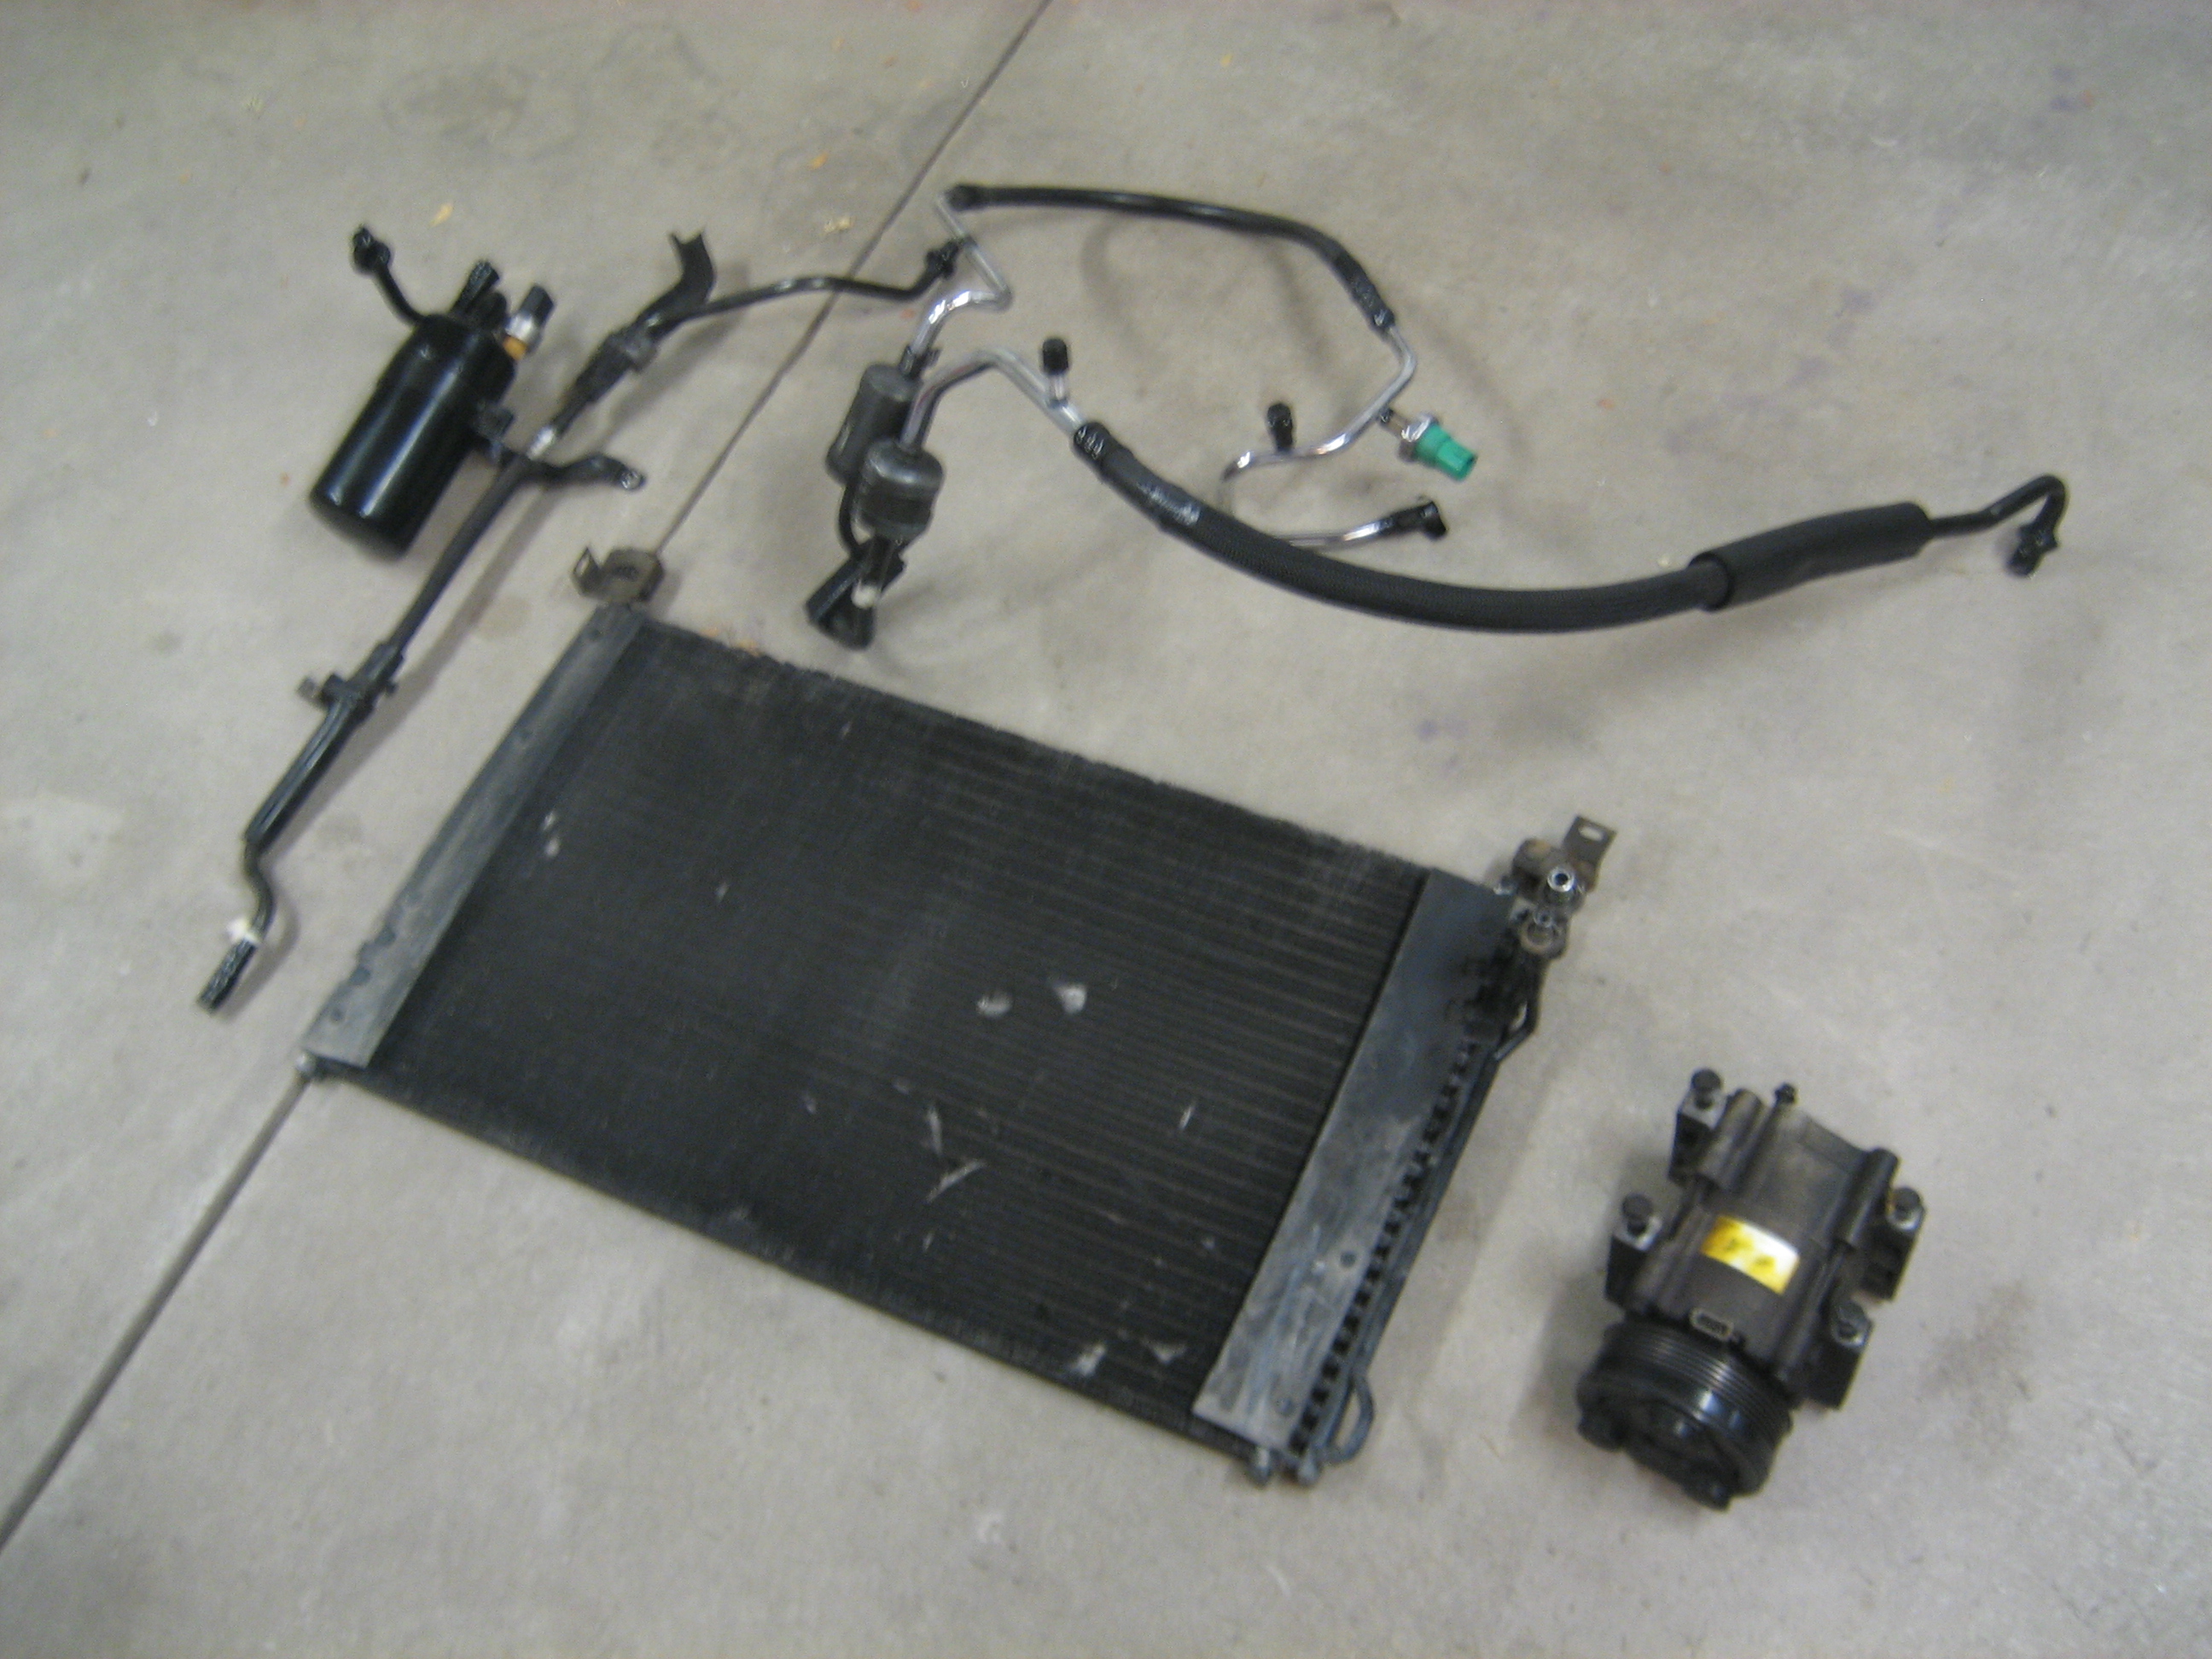
The AC condenser was just not going to fit with the way I wanted to mount the intercooler, so the whole AC system came out. I had used it maybe 3 or 4 times since I bought the car in 03, so I won't miss it, or its ugly hard lines that run in the way of everything in the engine bay. All that crap out:
 95 Rio Red Mustang Cobra
Procharger D1SC 347 stroker, full maximum motorsports suspension, Full Tilt Boogie 03 Cobra IRS, Tremec 3550, 19x9.5 and 19x11 HRE 542R. 566rwhp/614rwtq
https://www.pro-touring.com/threads/...ra-OCD-Machine
-
04-14-2013 #2
Registered User
- Join Date
- Jul 2010
- Location
- Pittsburgh, PA
- Posts
- 114
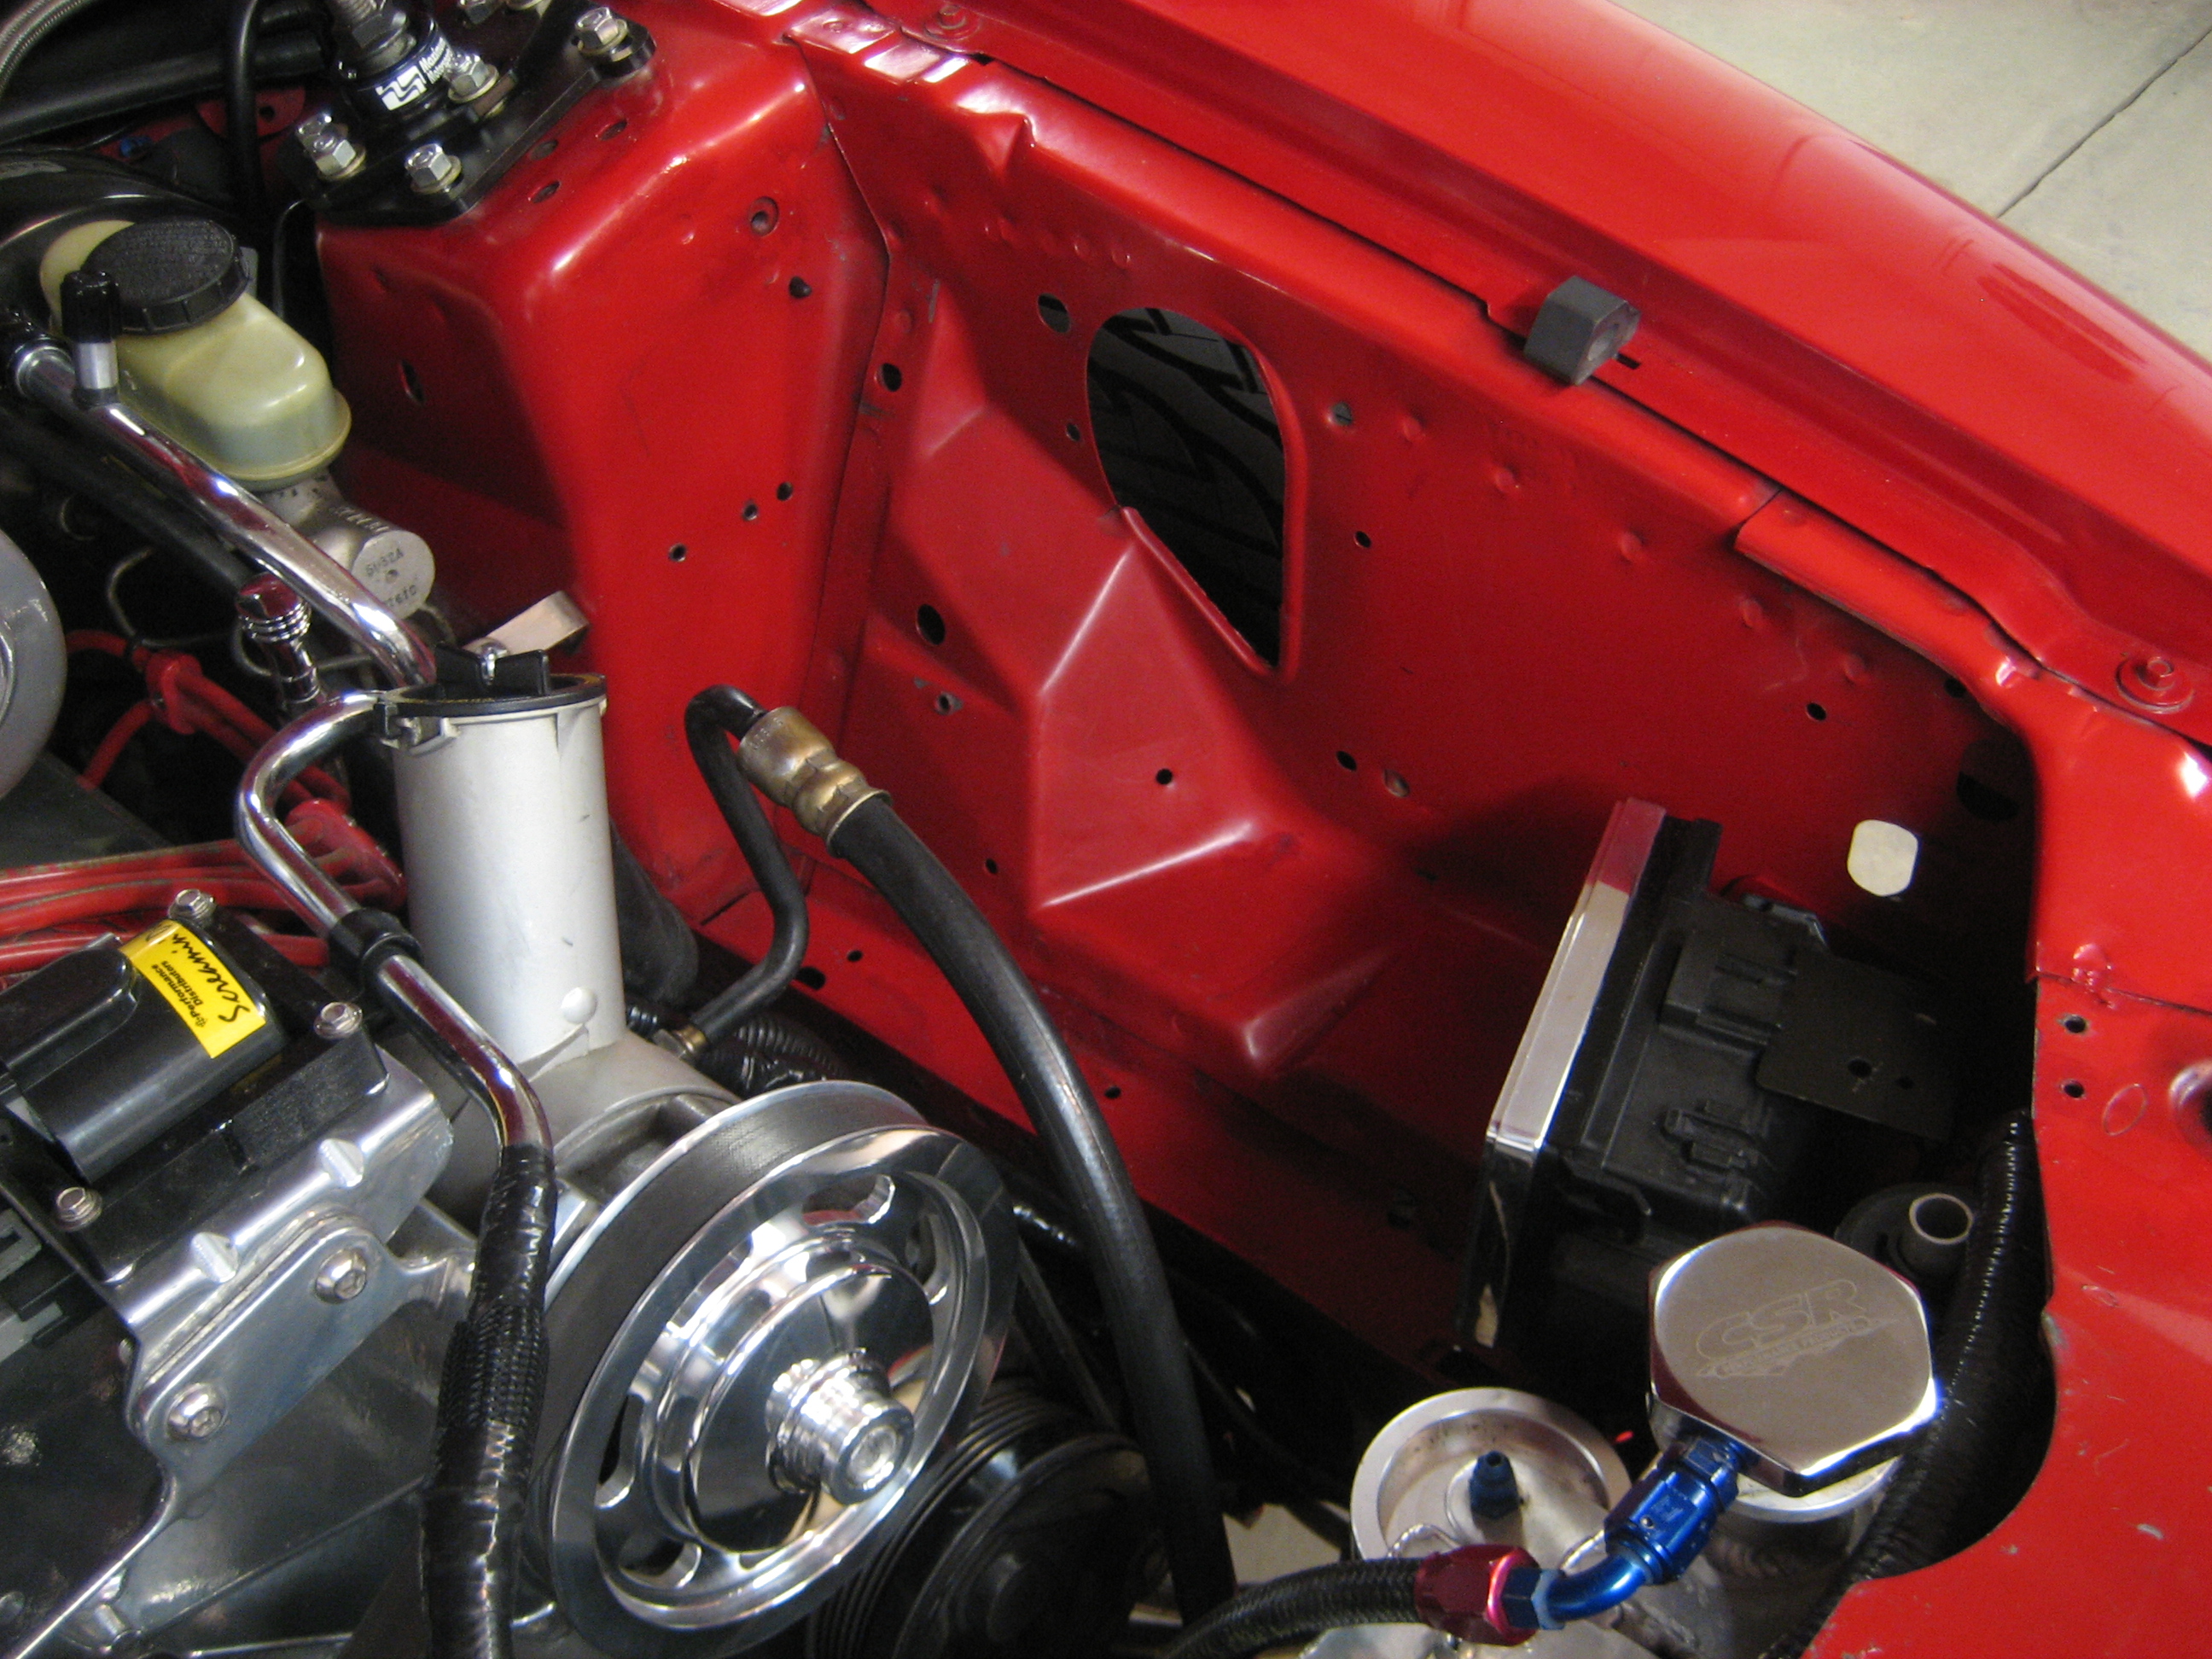
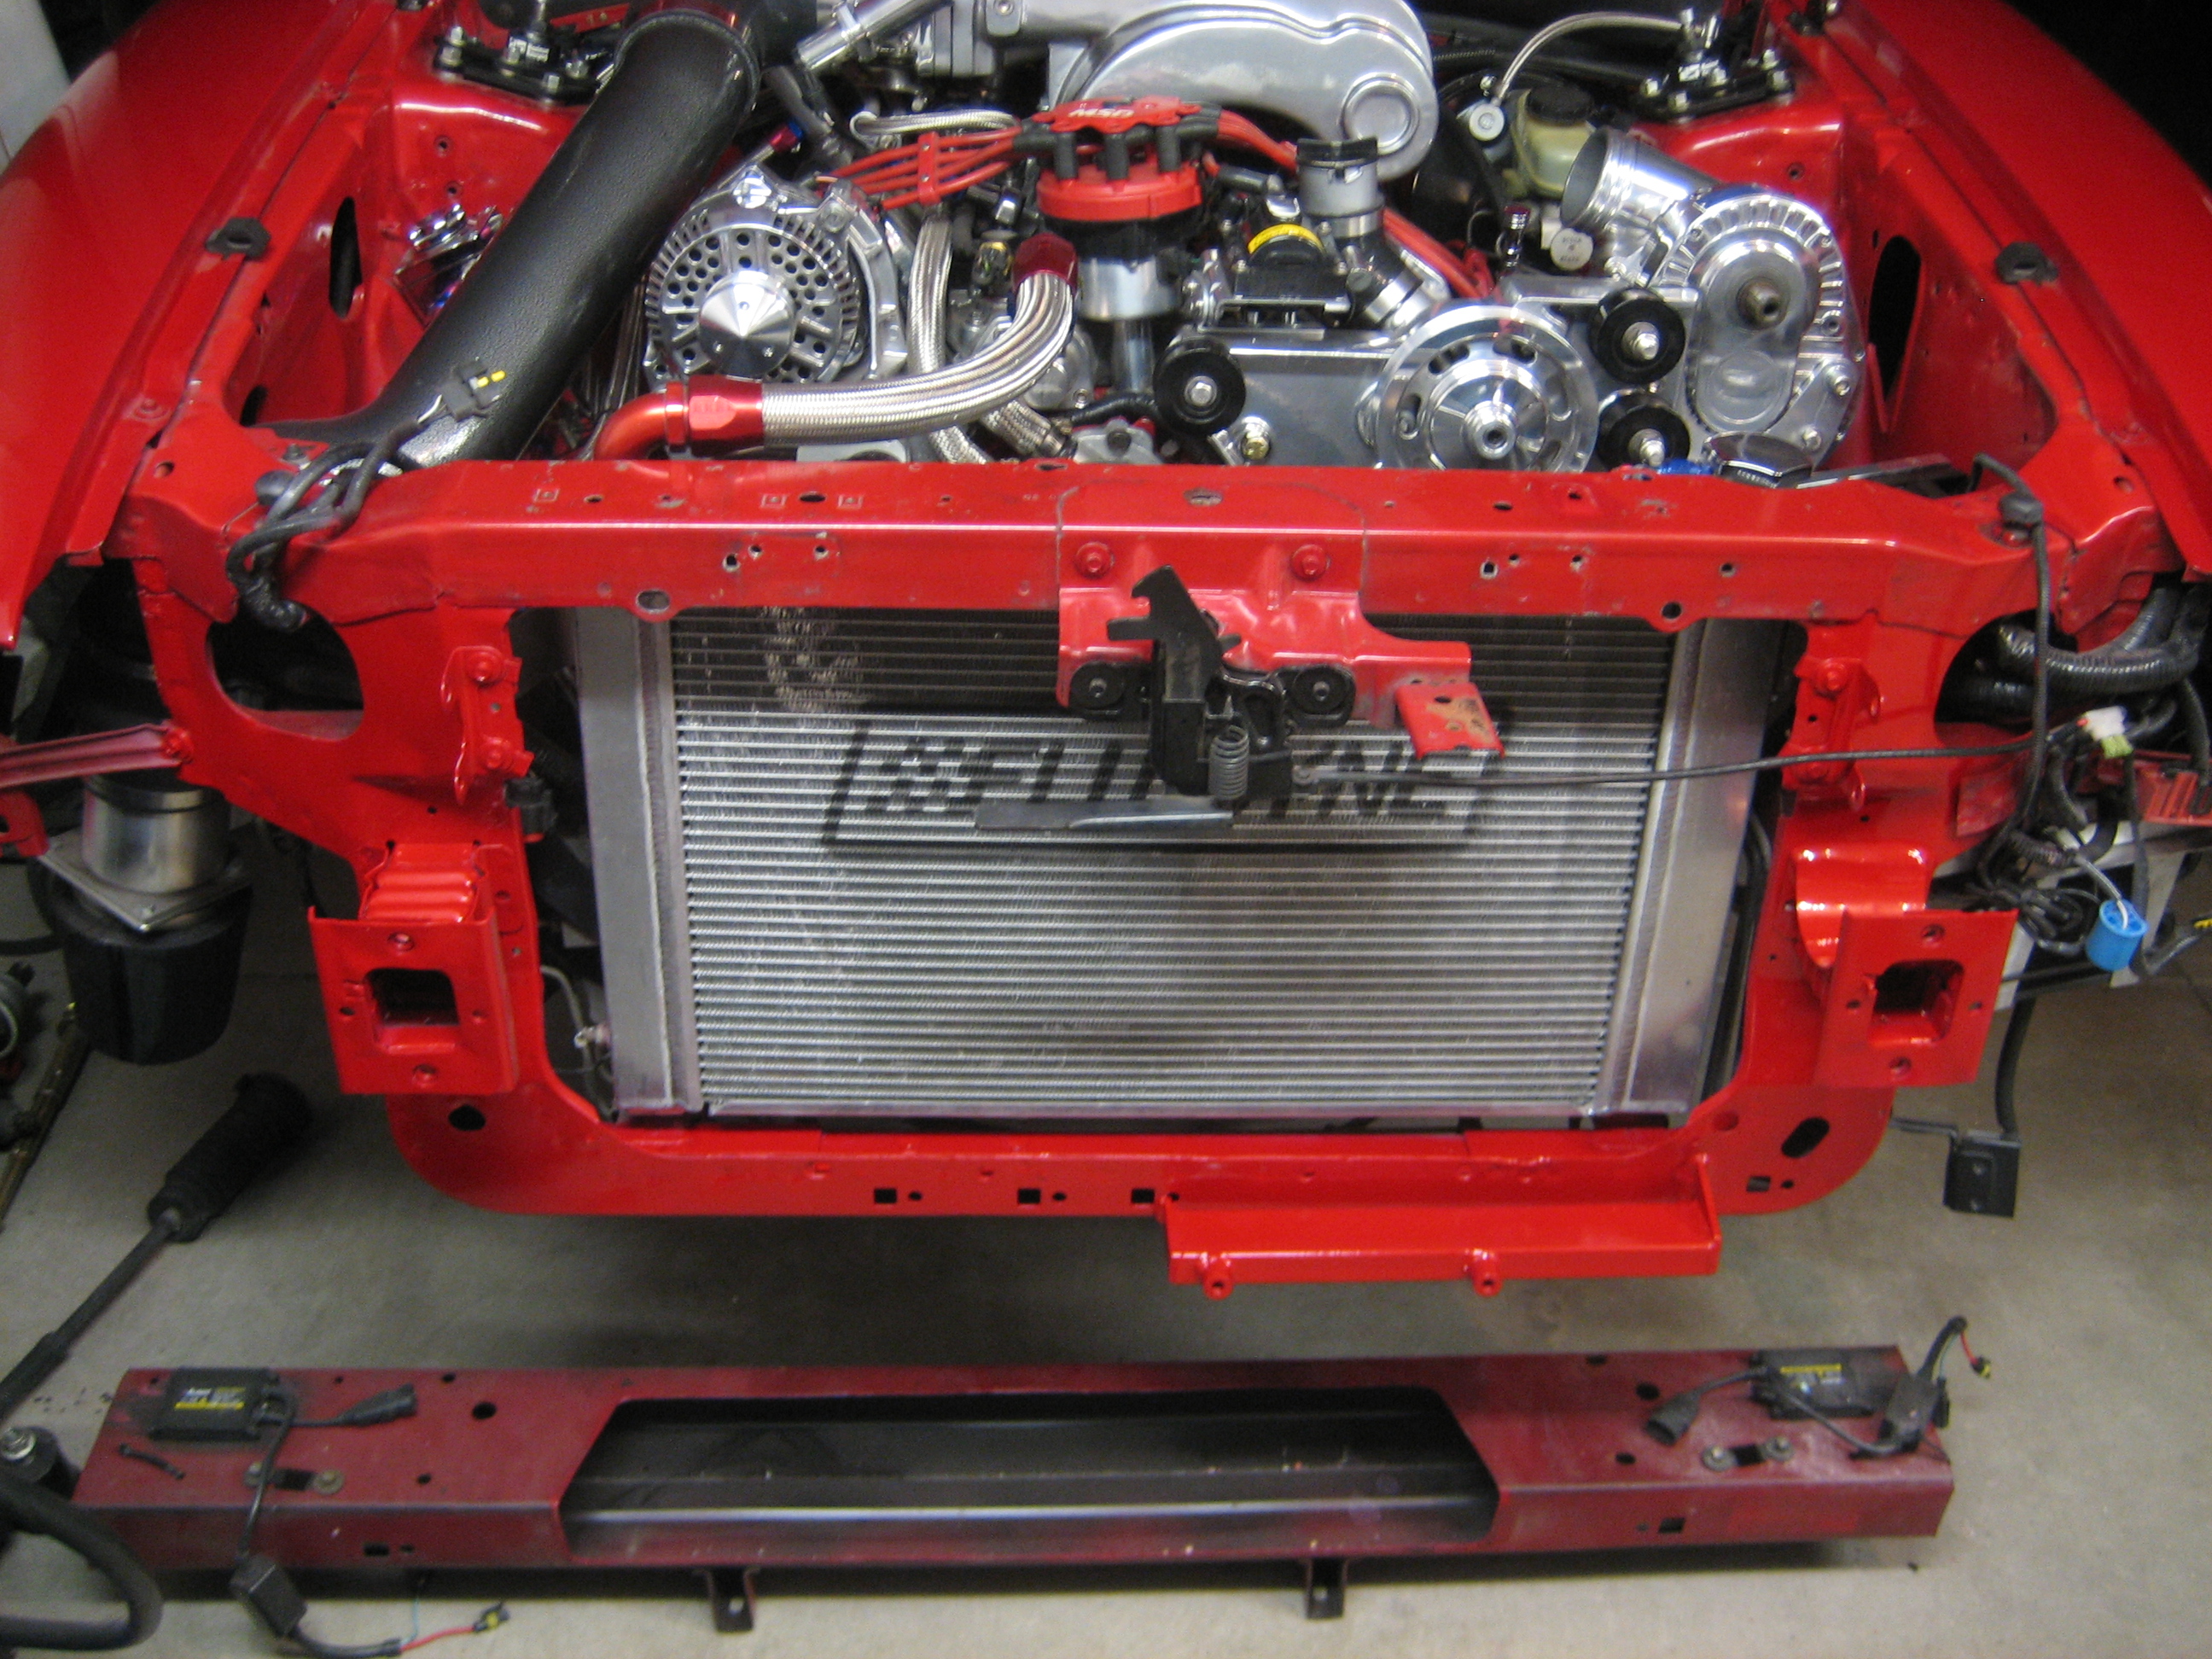
Next, the radiator core support needed some TLC. It had a bit of surface rust and just wasn't up to my standards.
Radiator back in
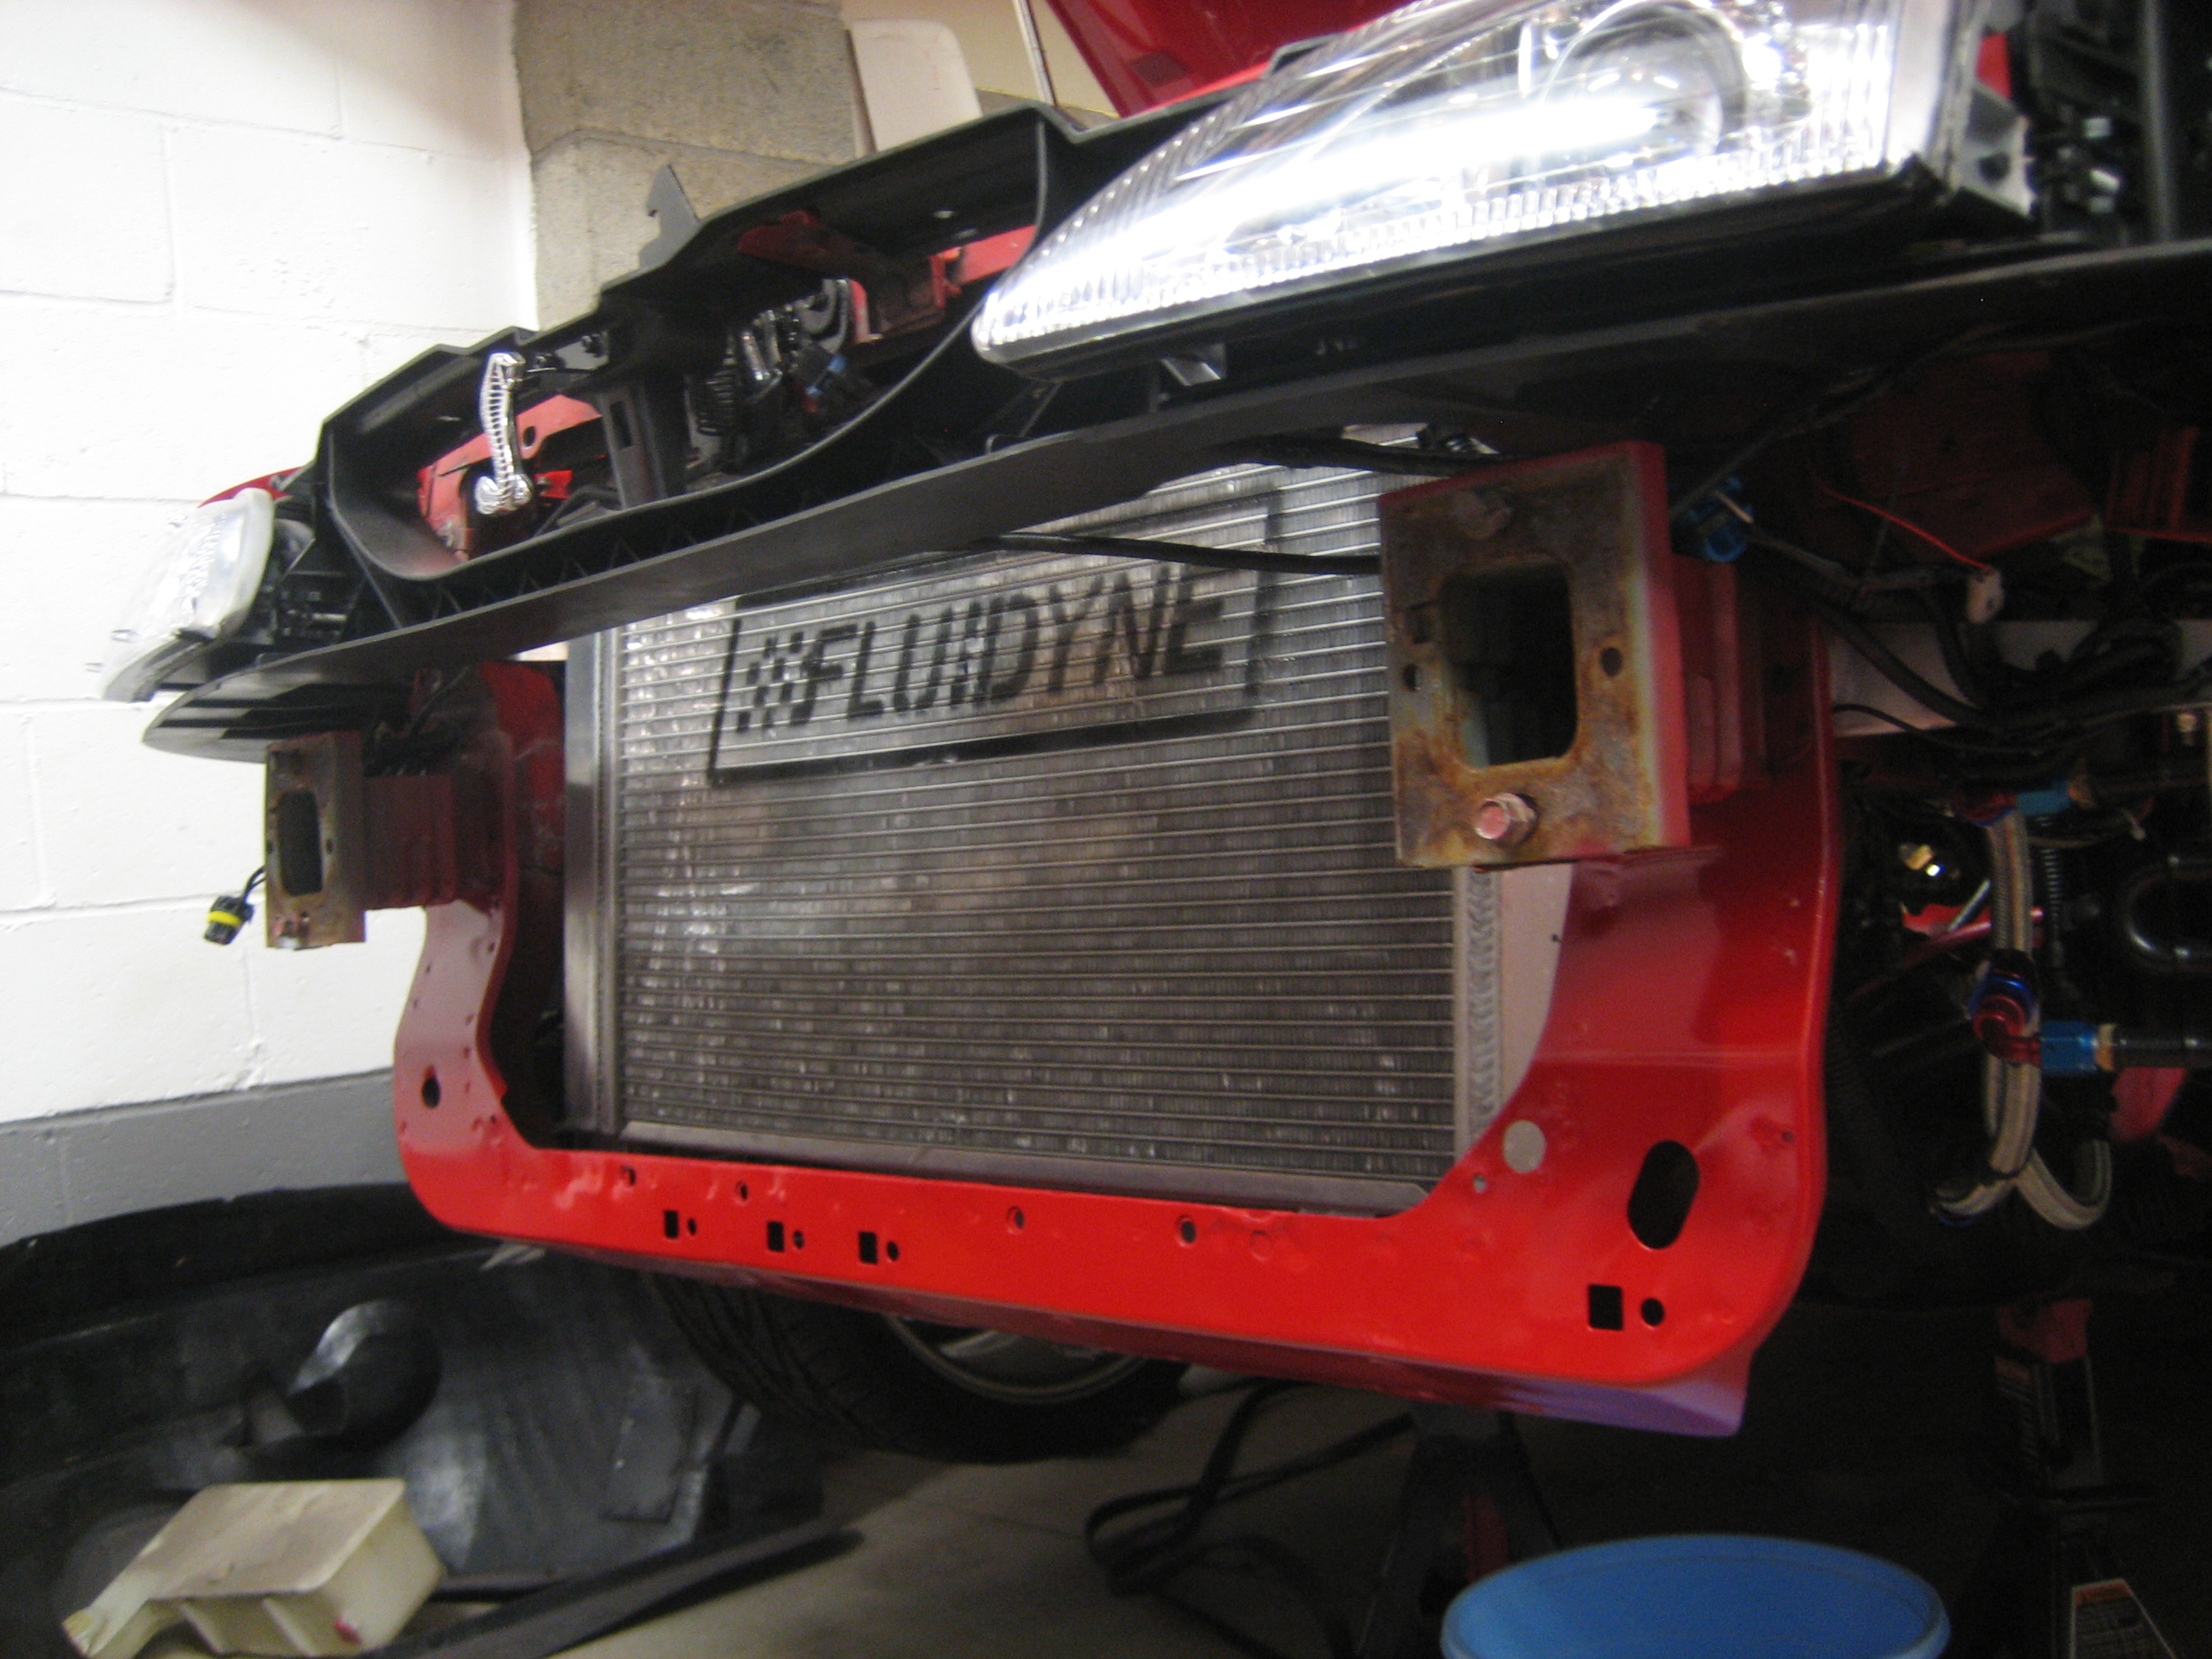
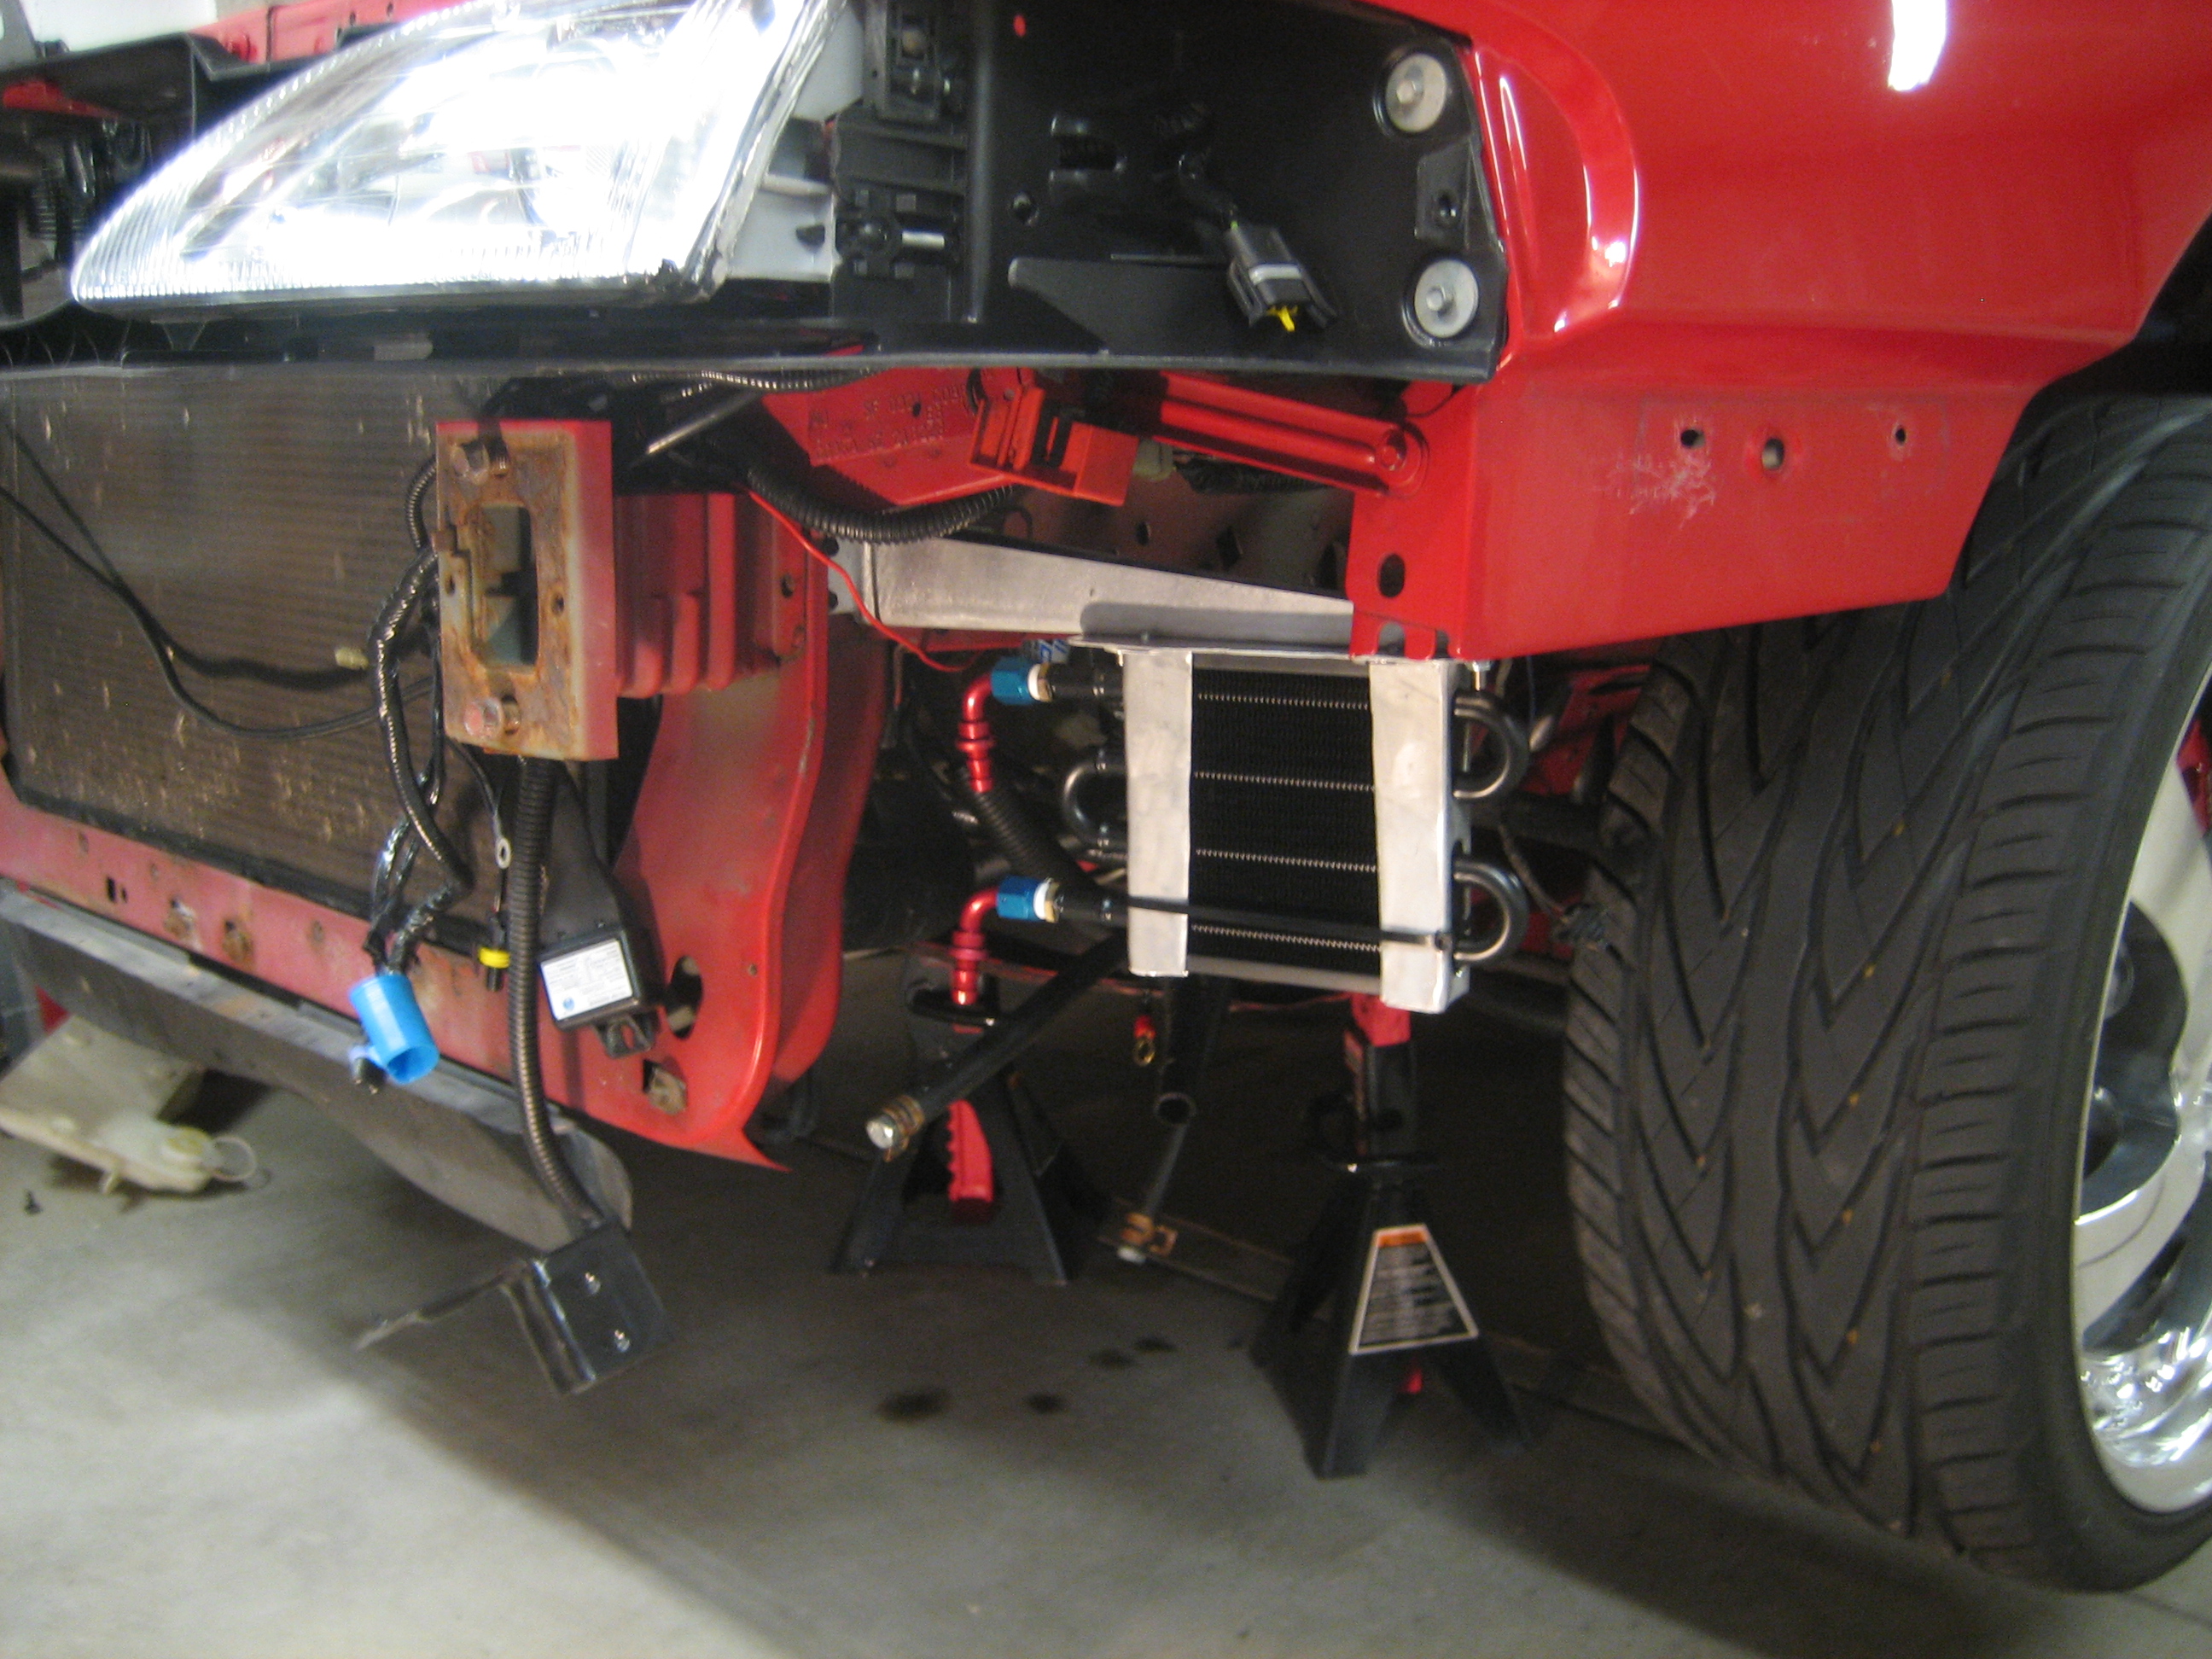
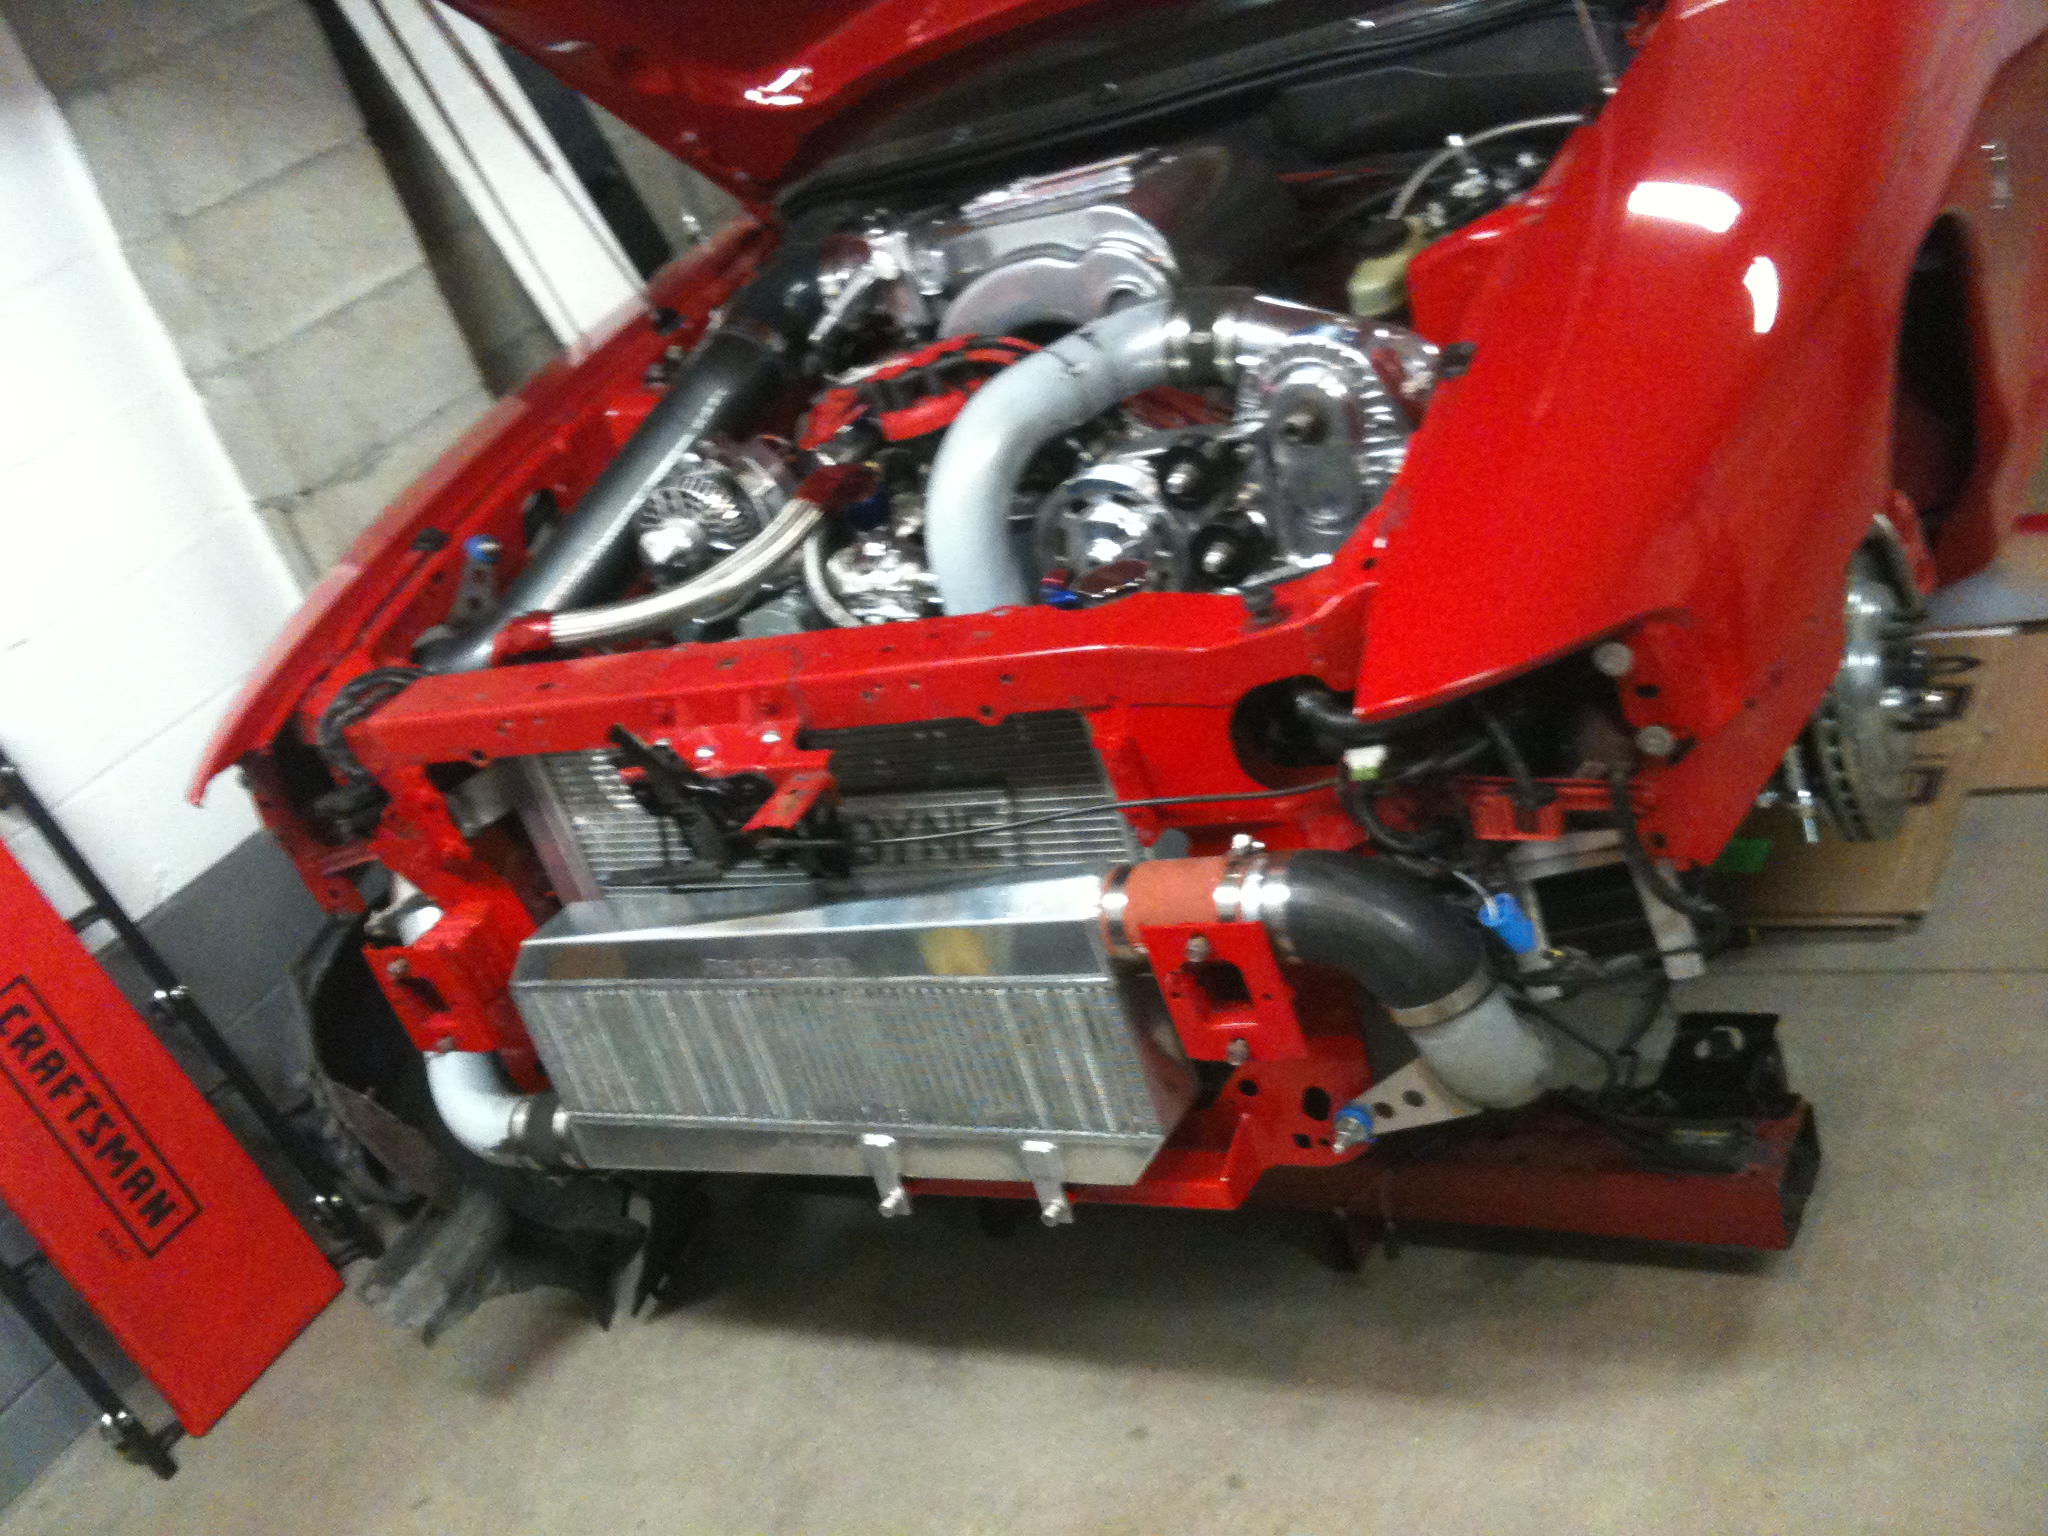
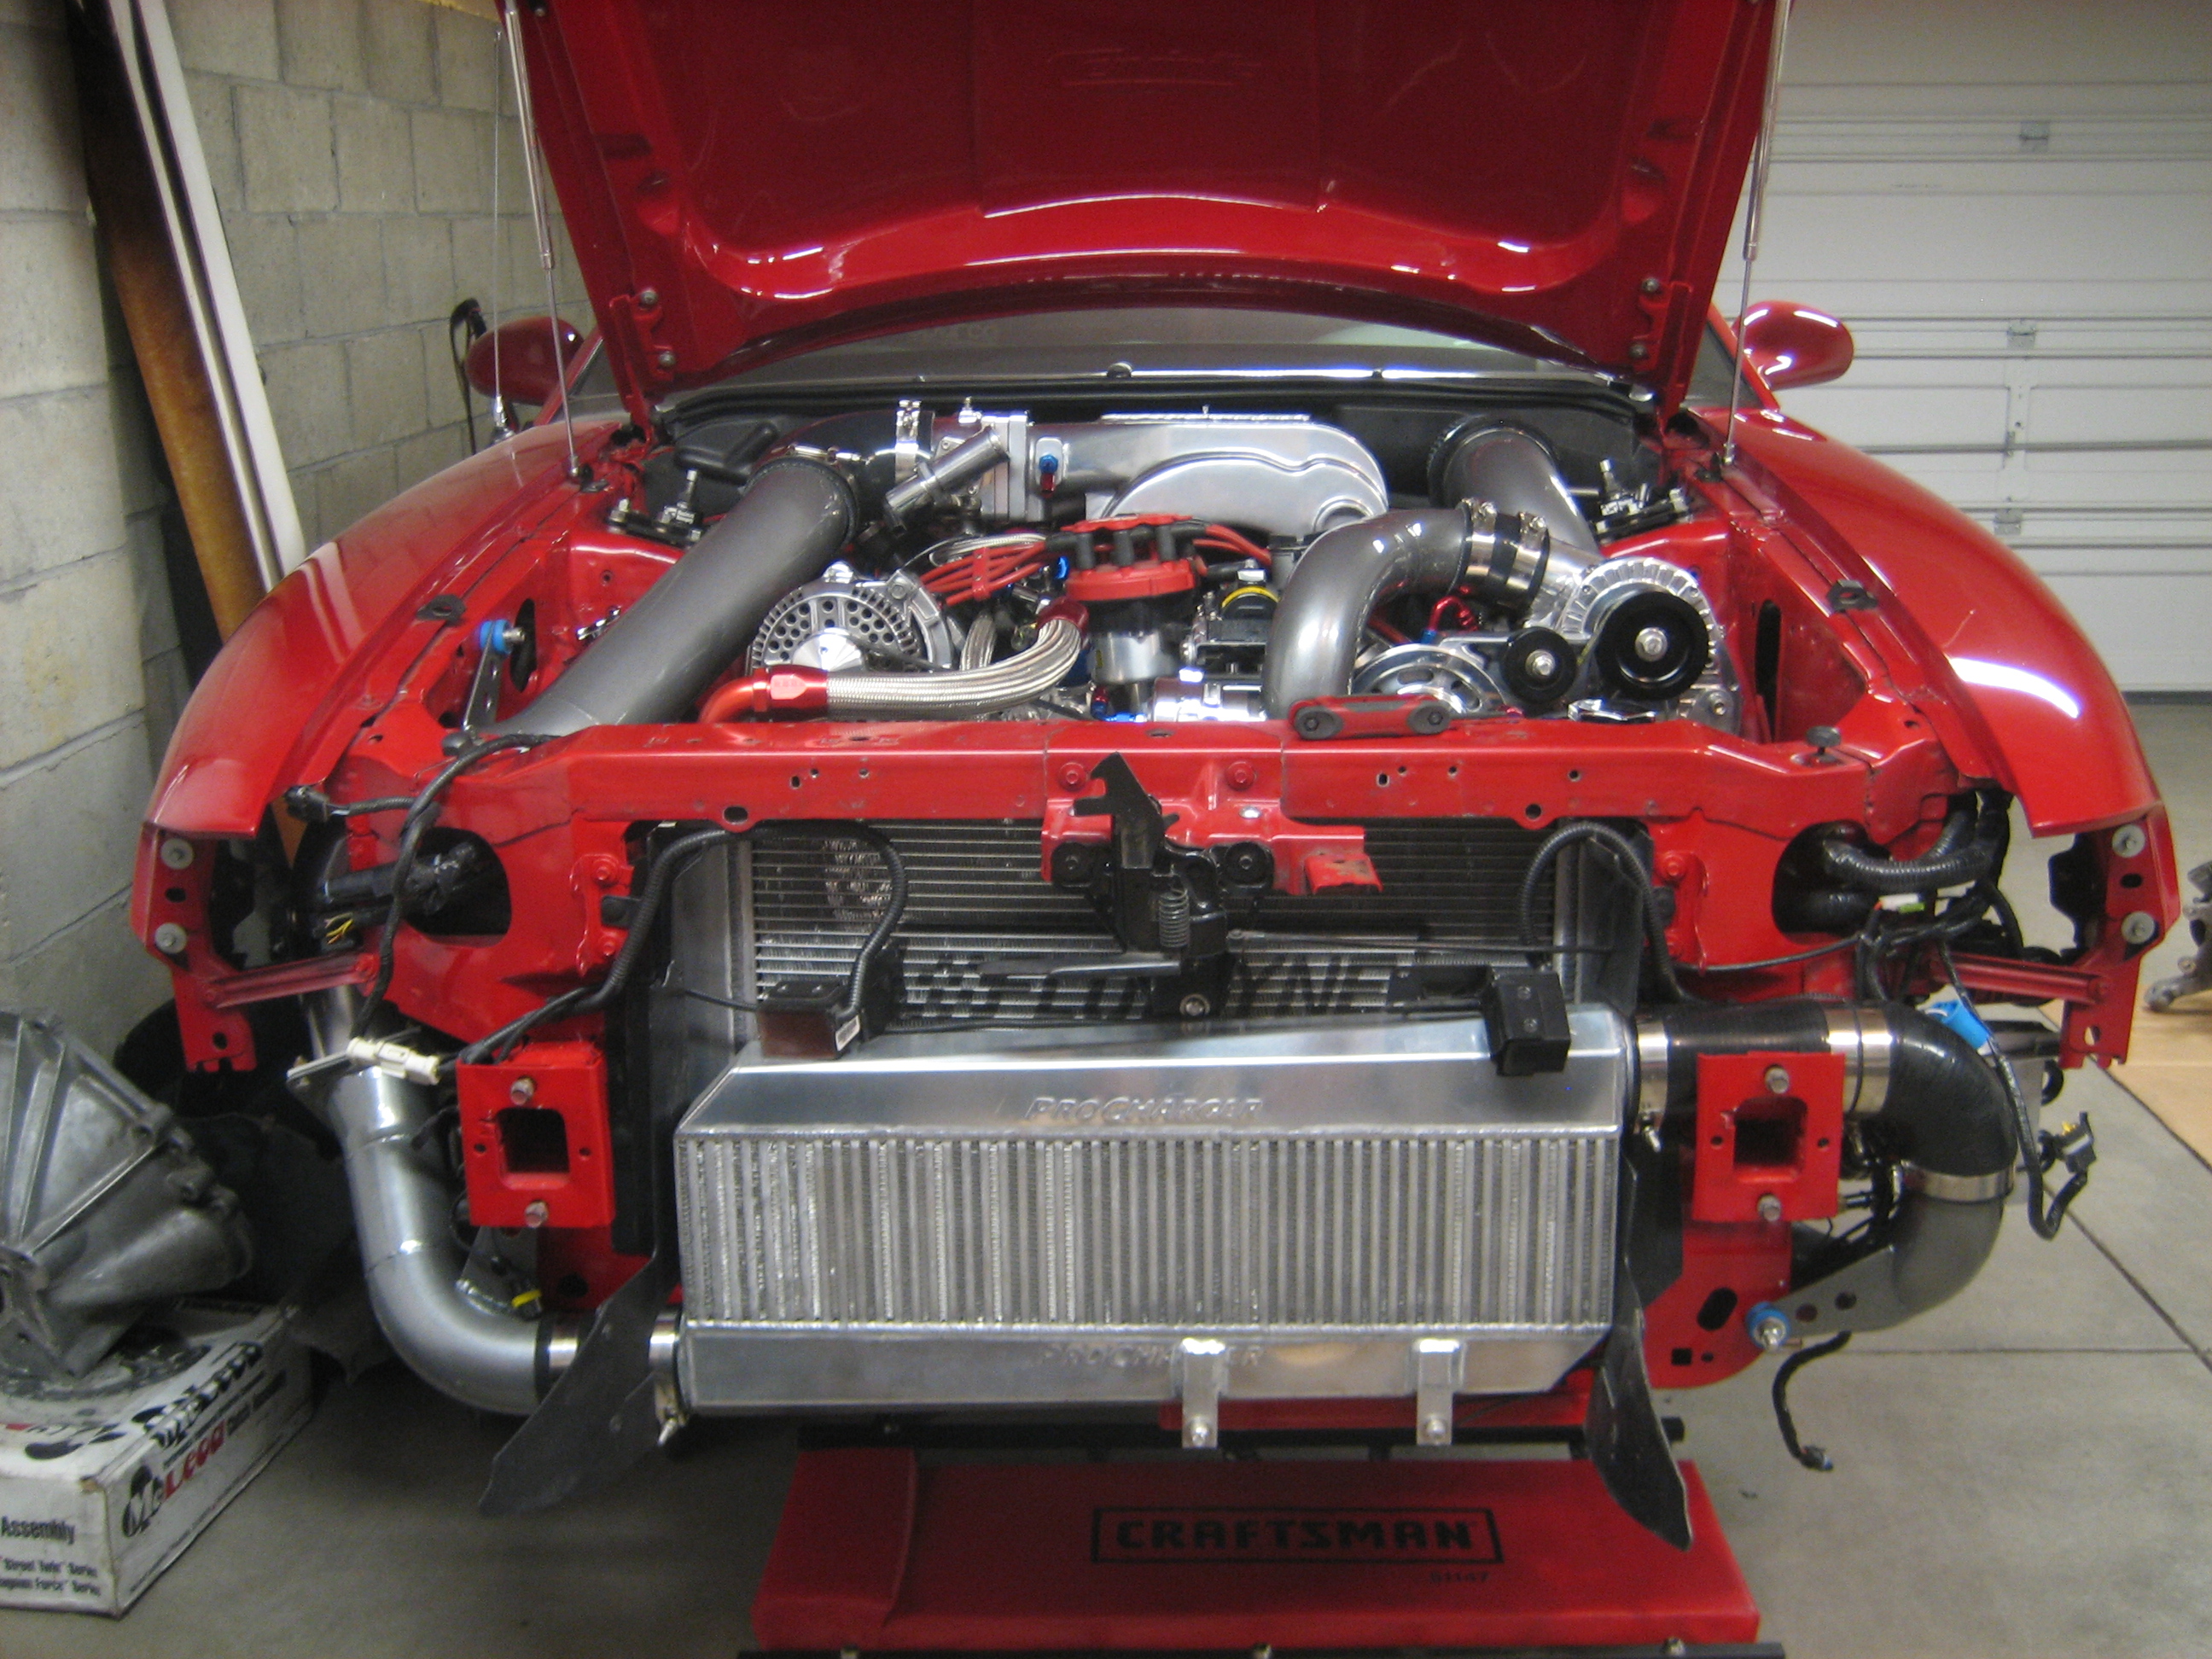
In the meantime I had found a great deal on a Procharger sheet metal intercooler, so I started mocking it up in place. I've seen people mount them low, but because of my lowness, I wanted the whole thing up above the bottom edge of the core support. Mocked in place sitting on jack stands:
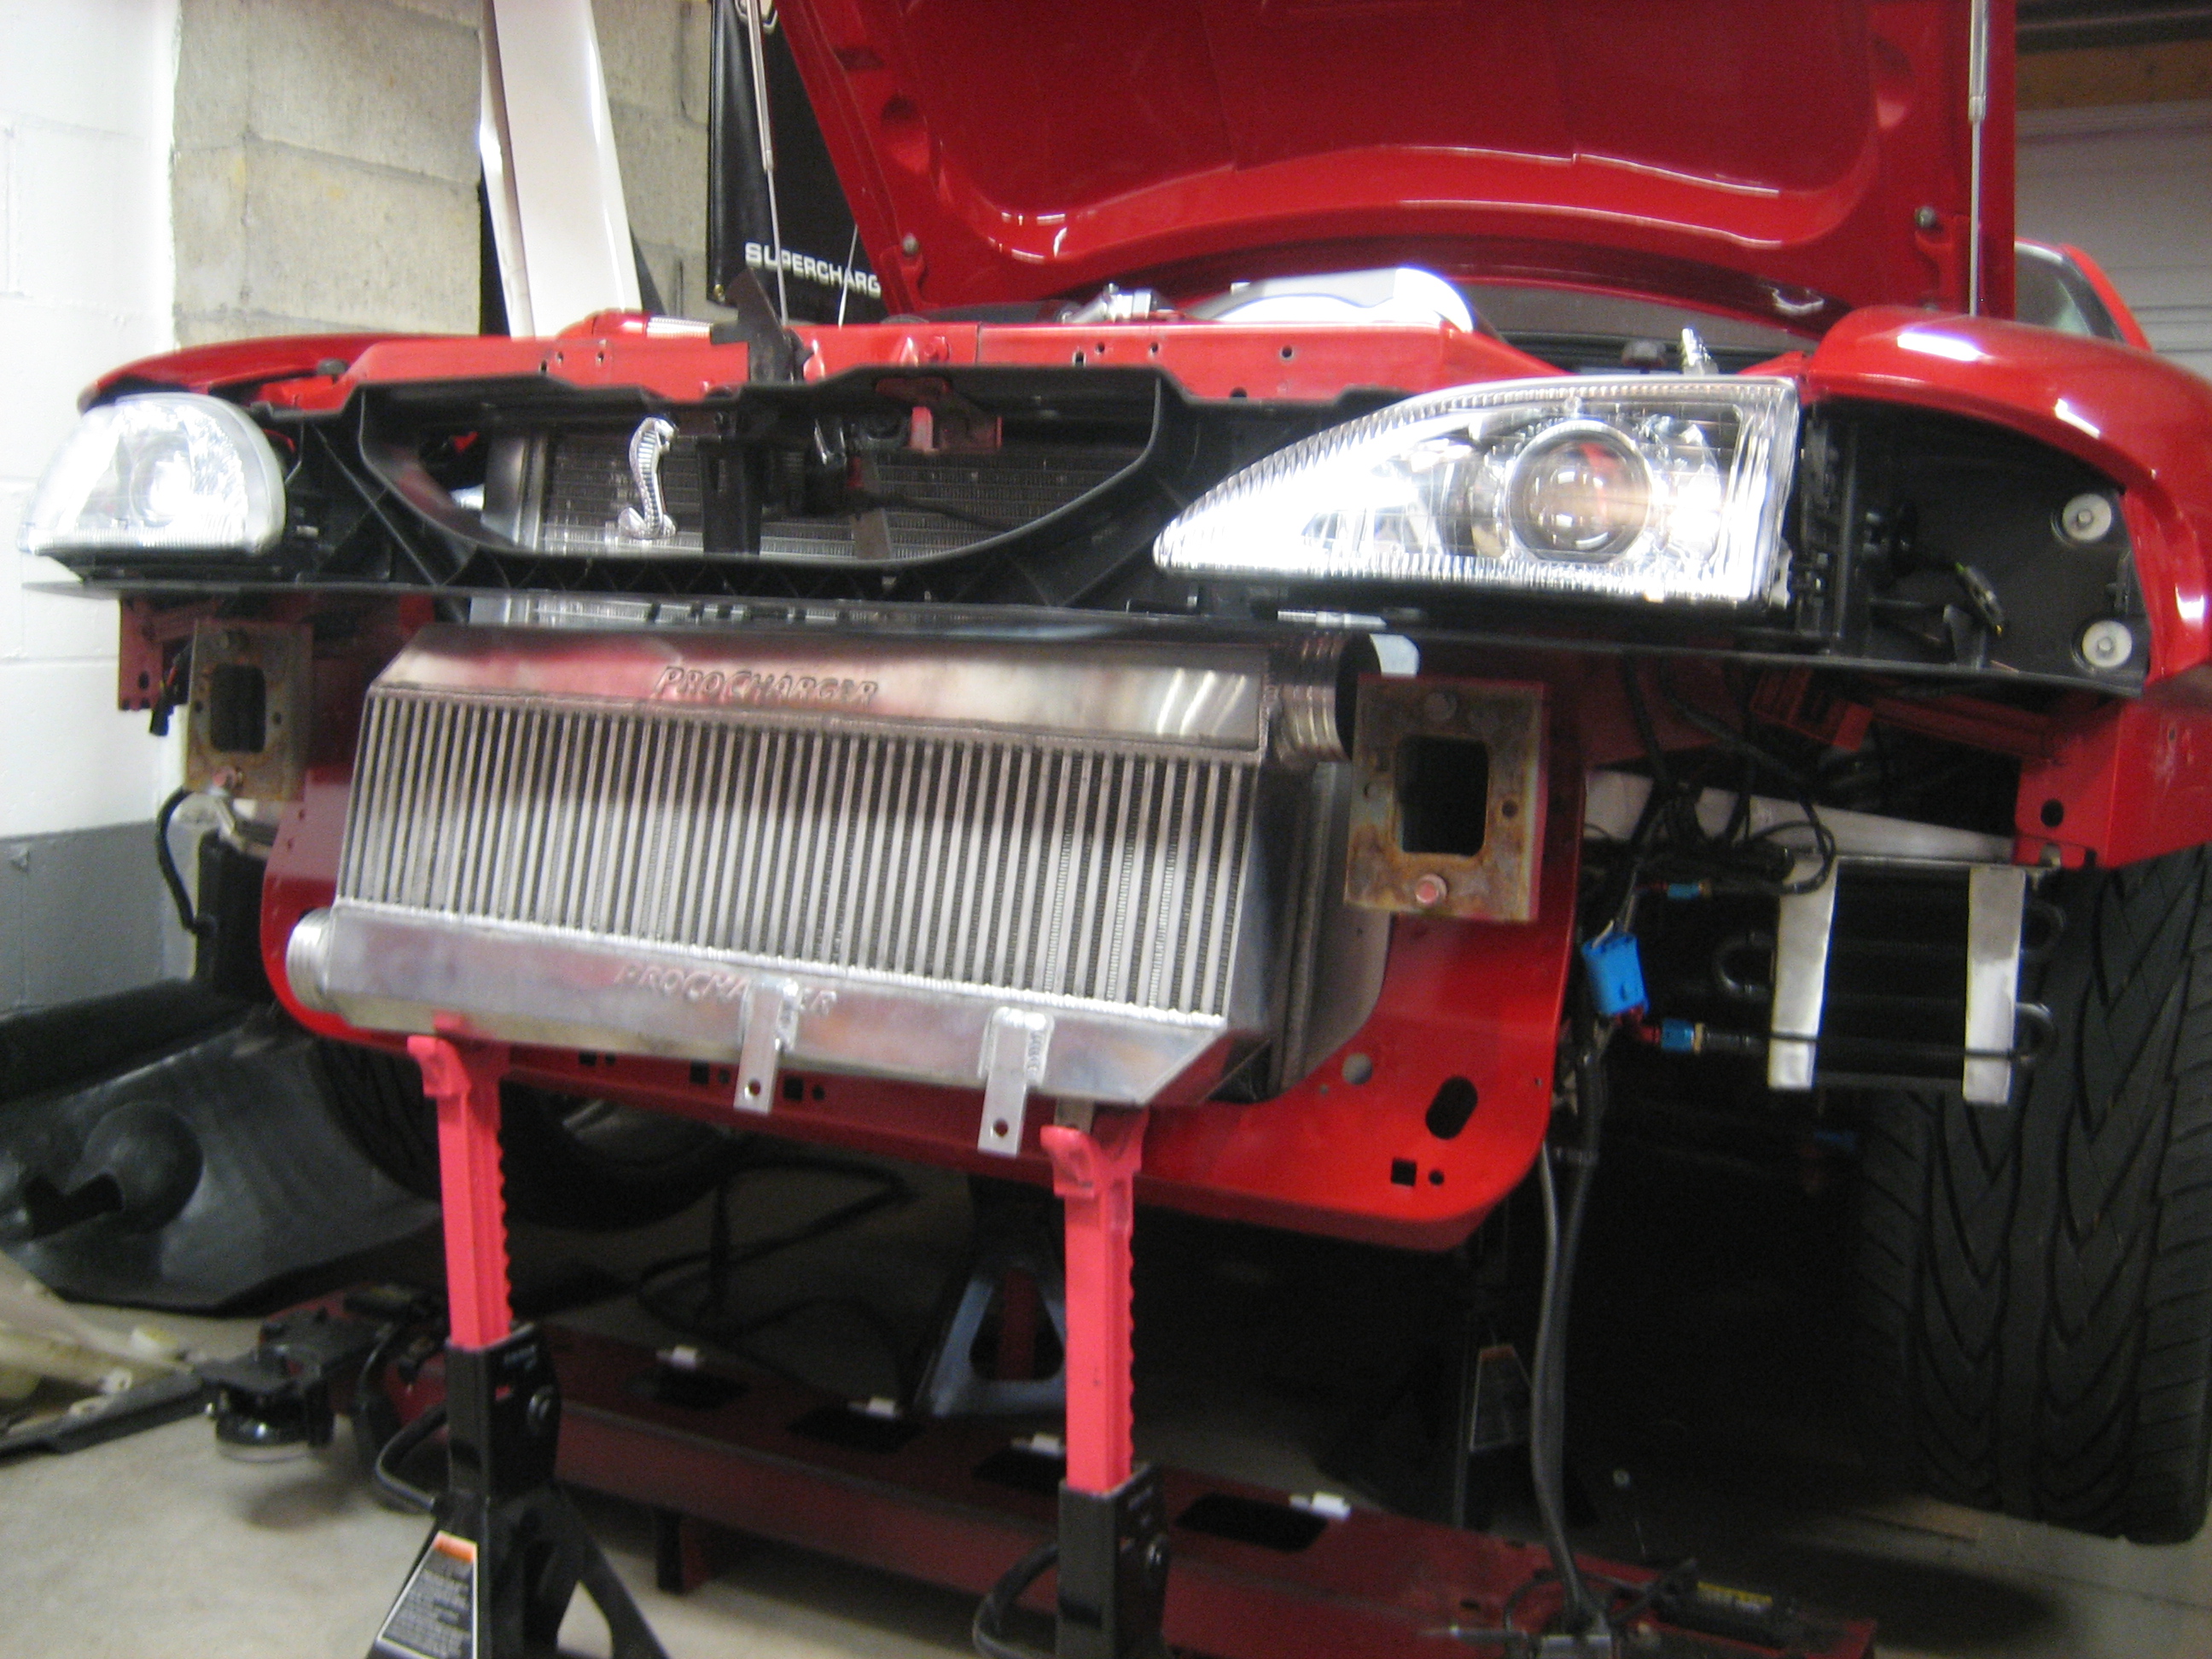
A little clearance issue to deal with here:
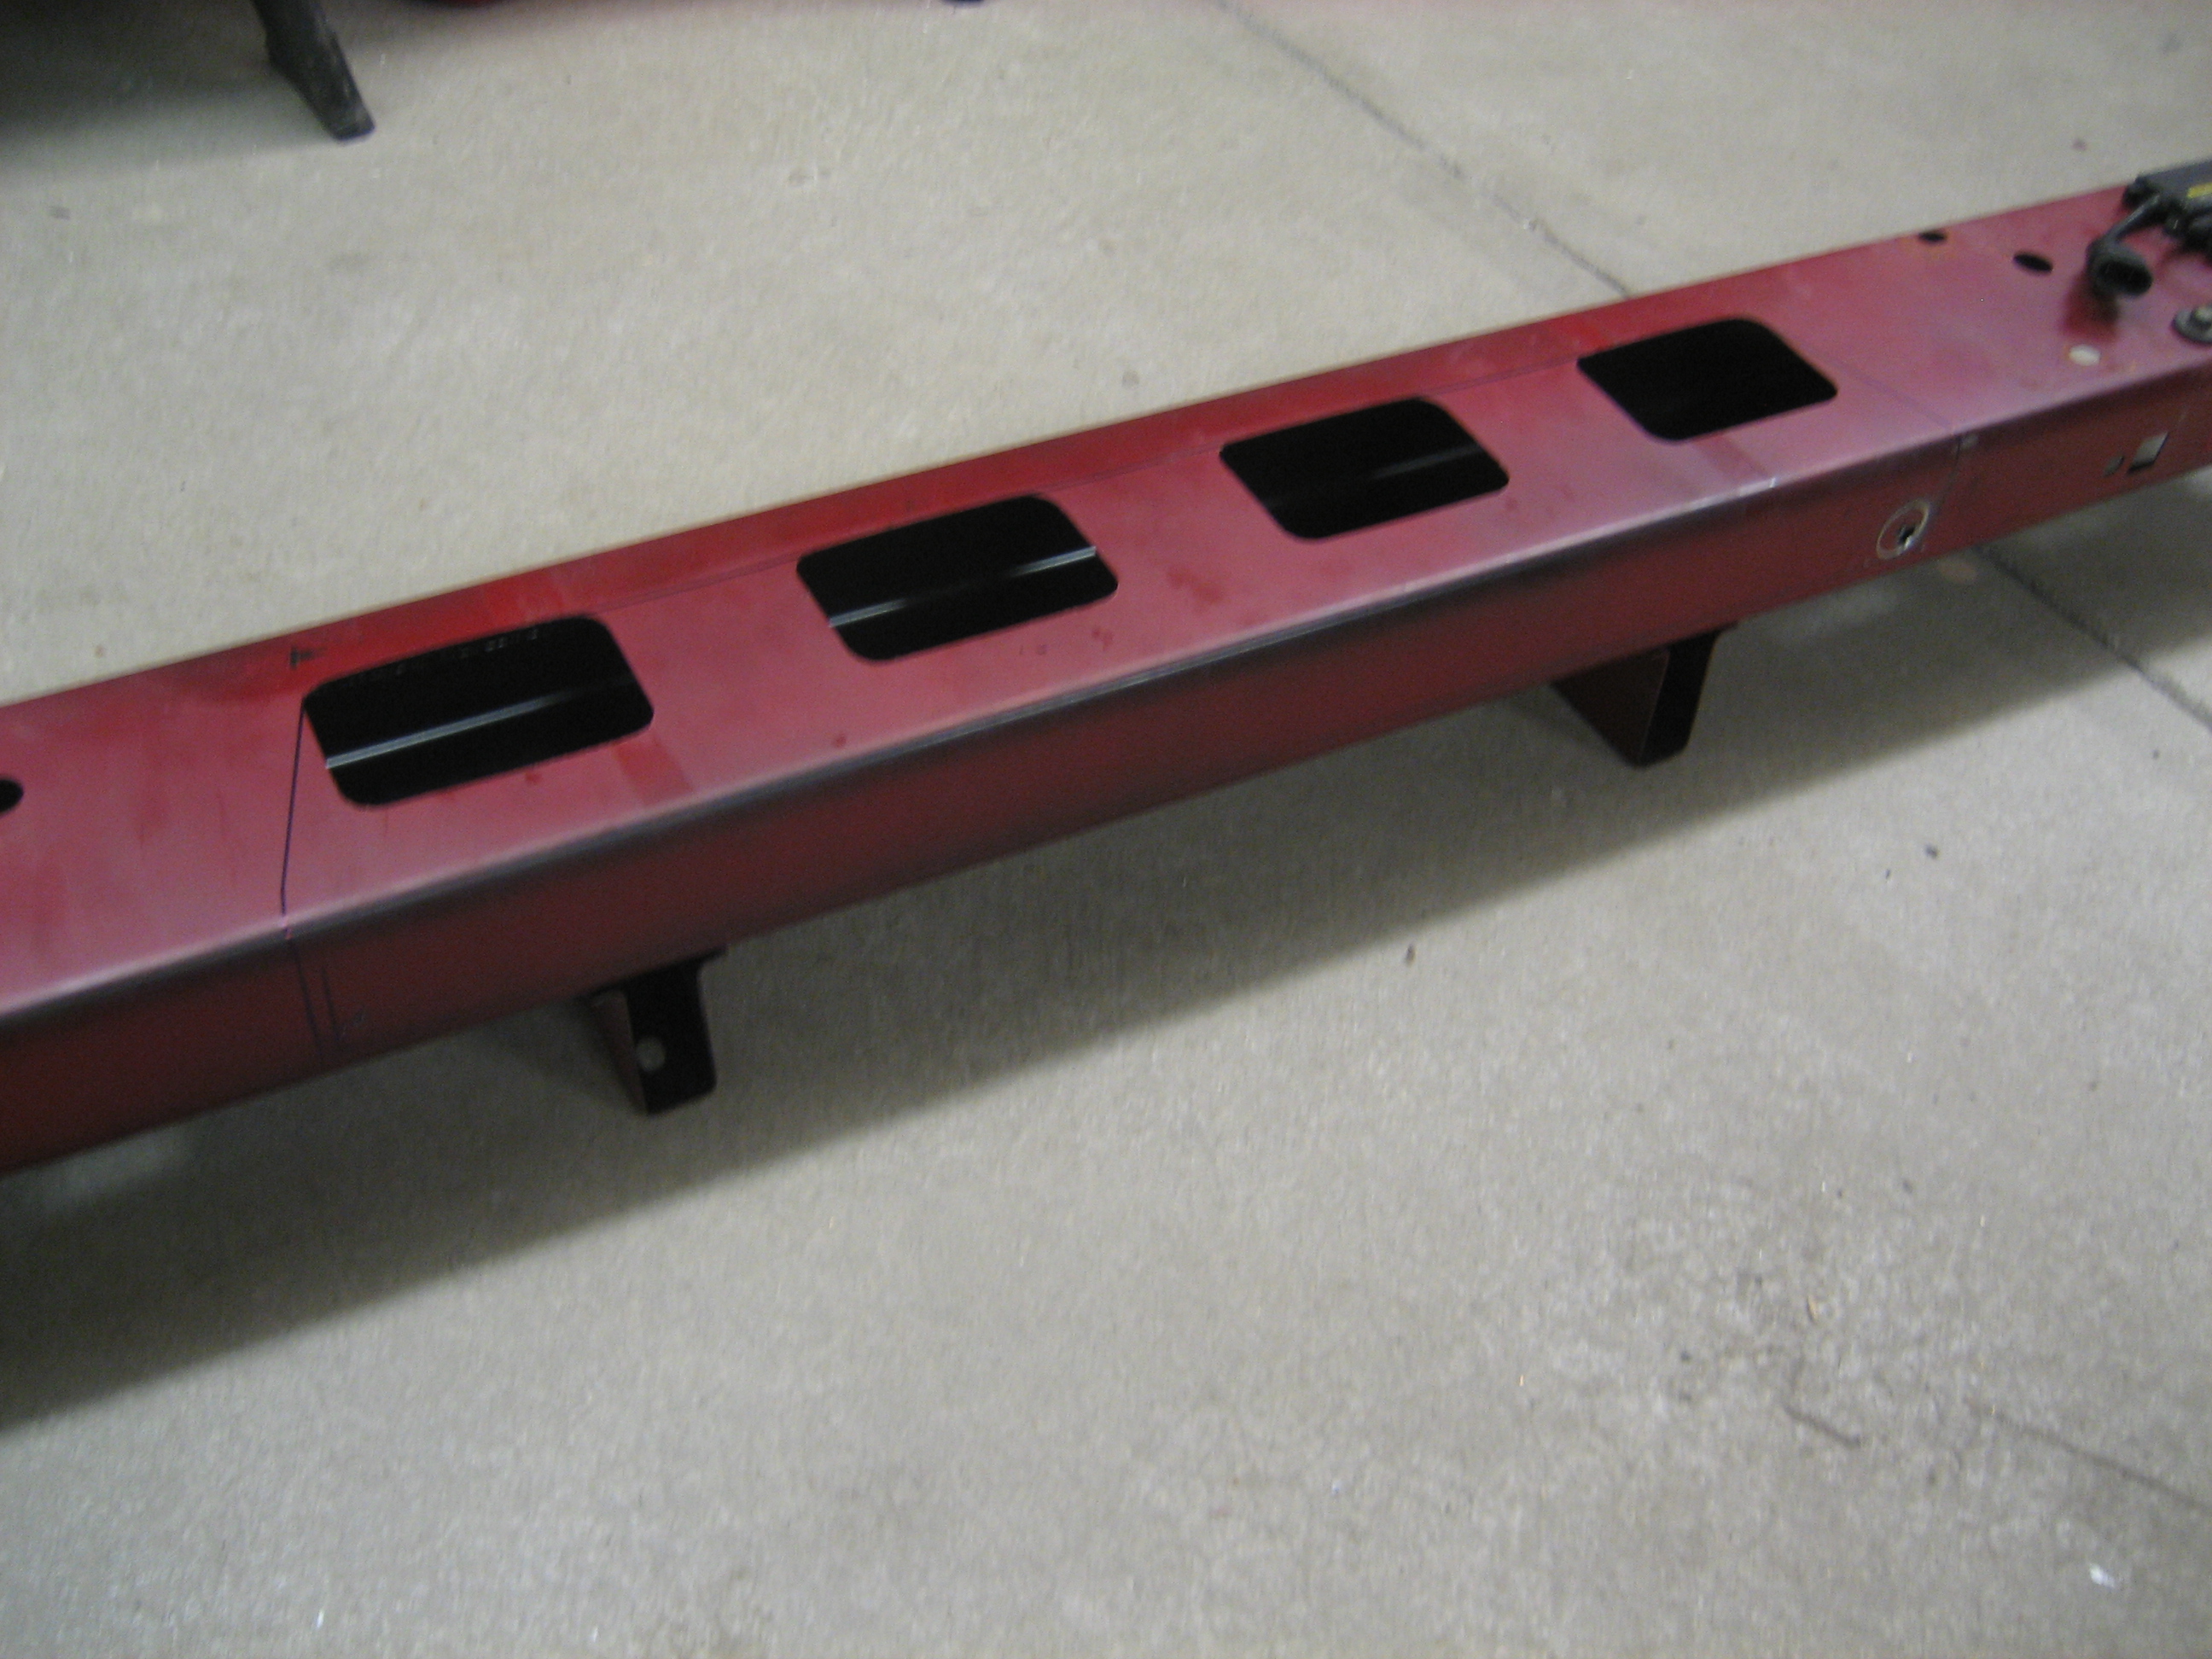
Marking and modifying the bumper support. I chose to cut only the bottom and back side, leaving the front intact. The air all comes in from the bumper cover opening beneath, so cutting the front wouldn't offer much benefit.

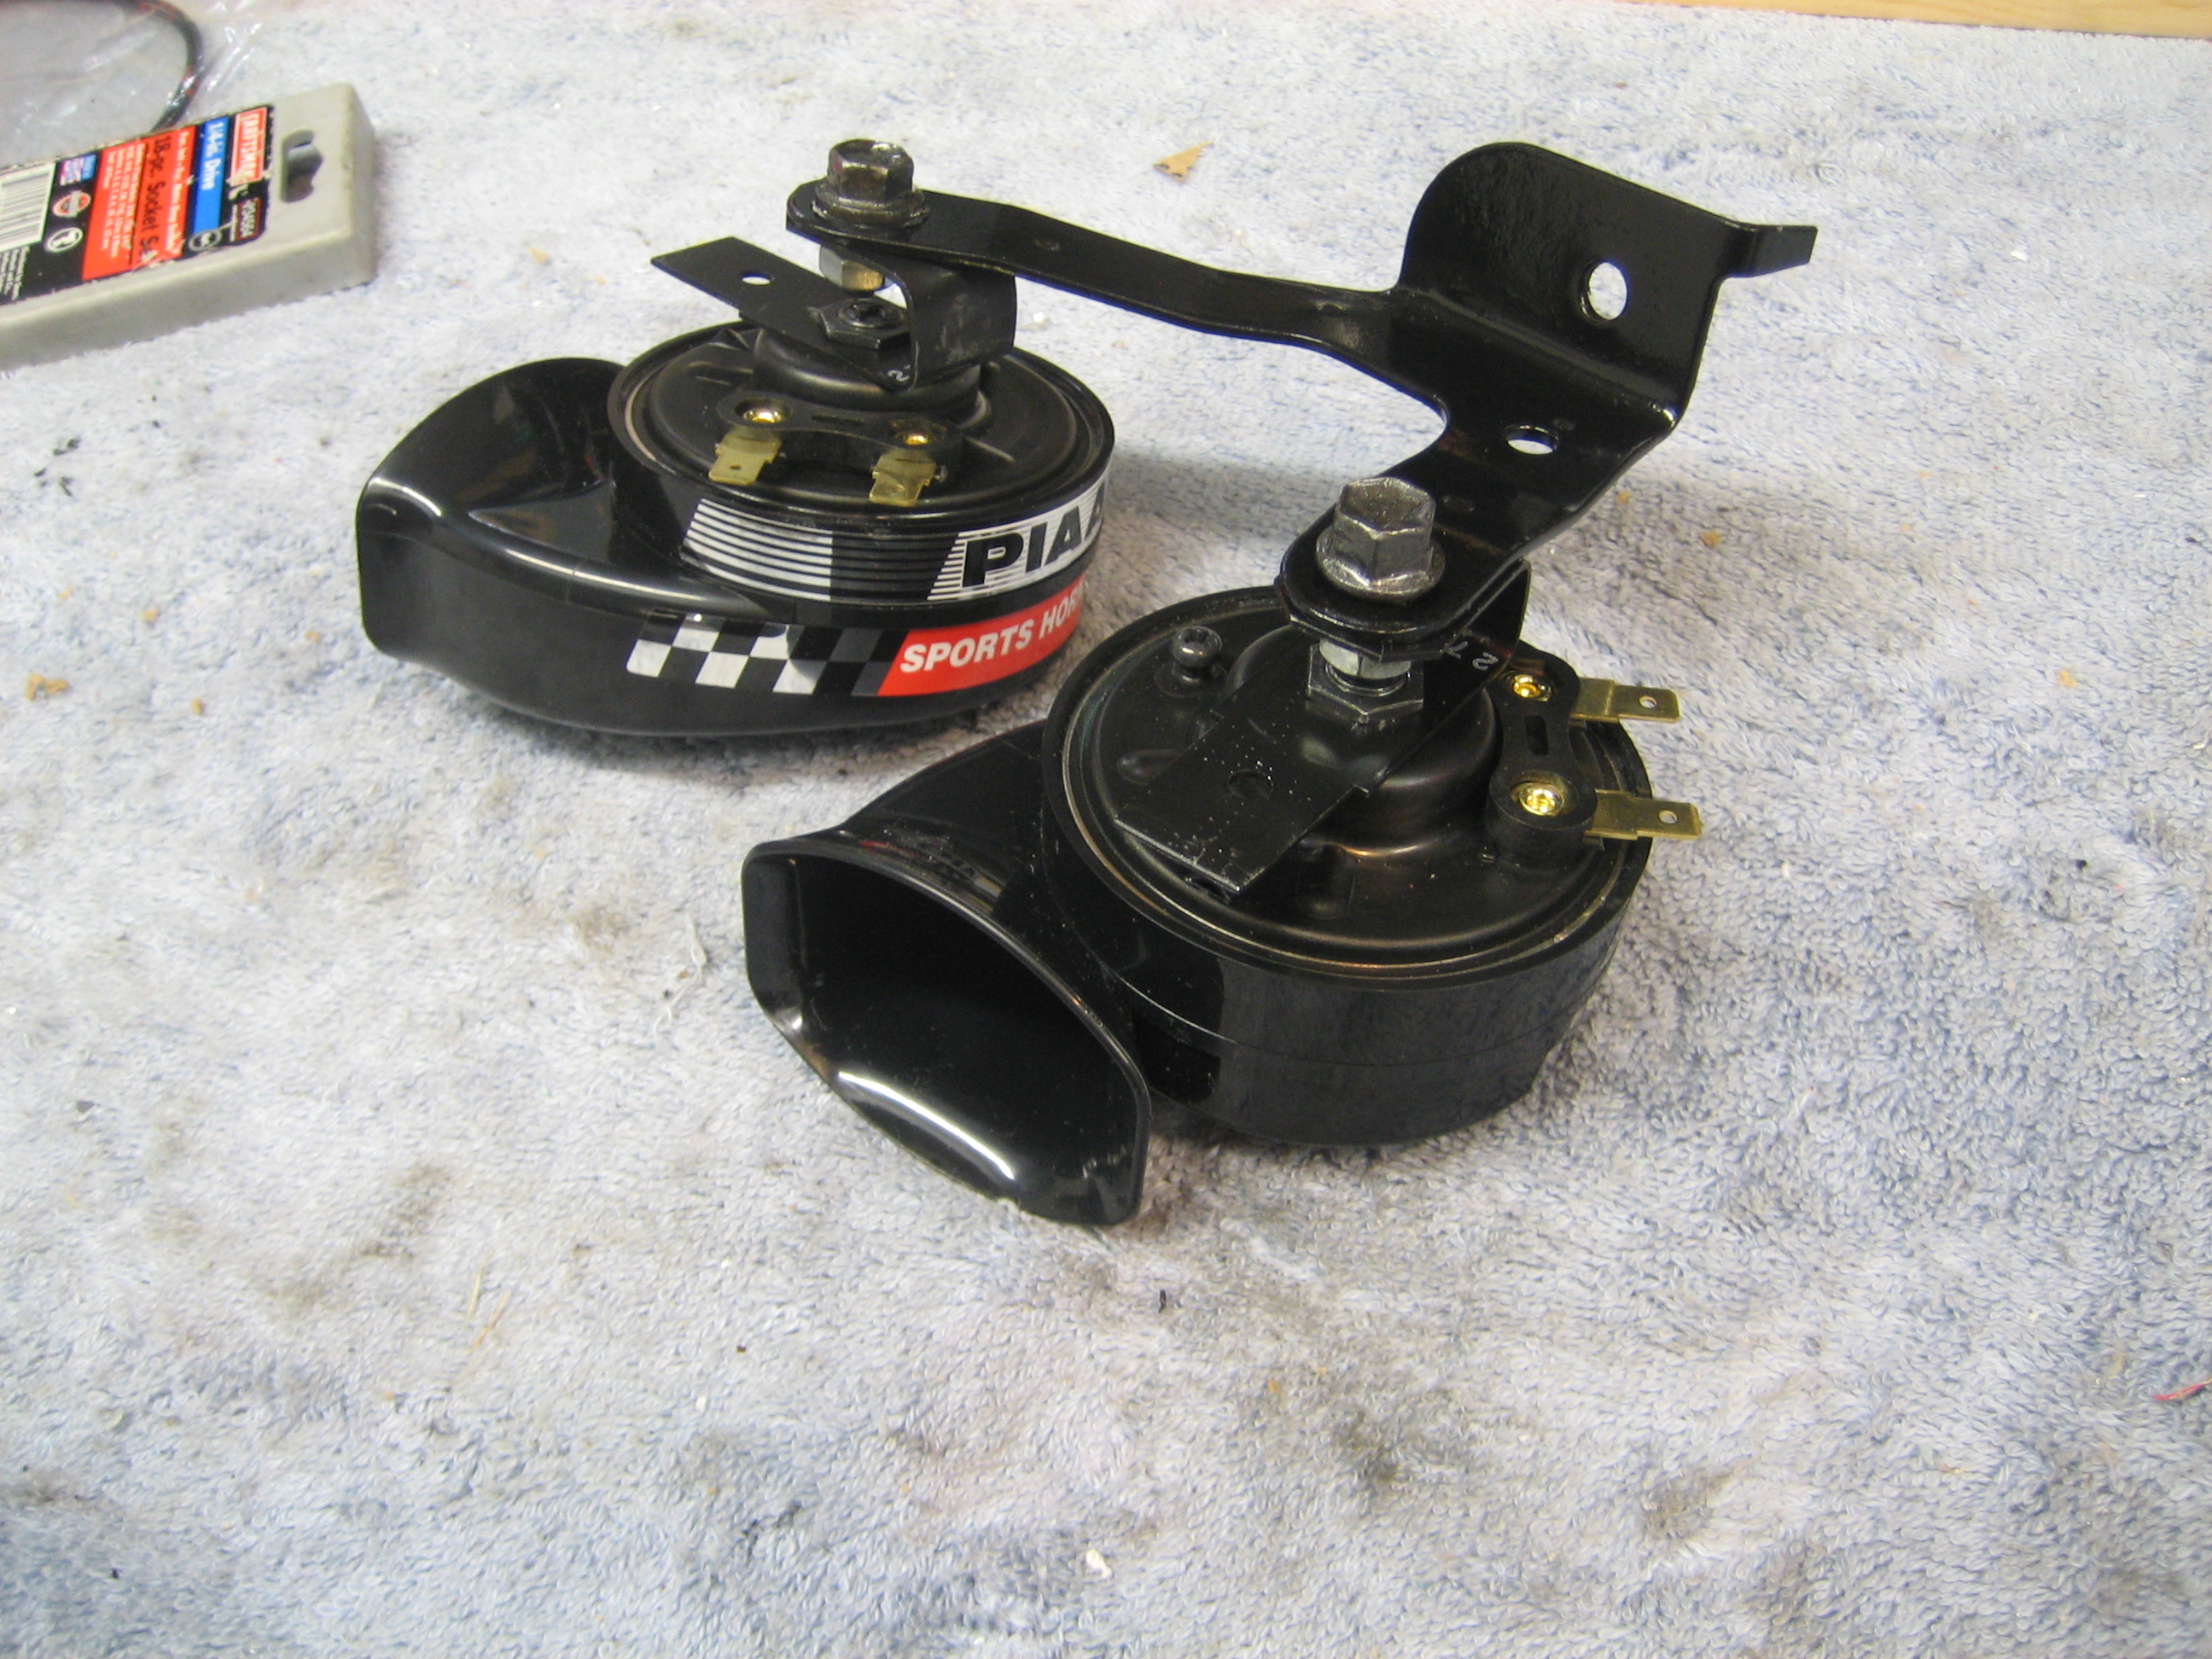
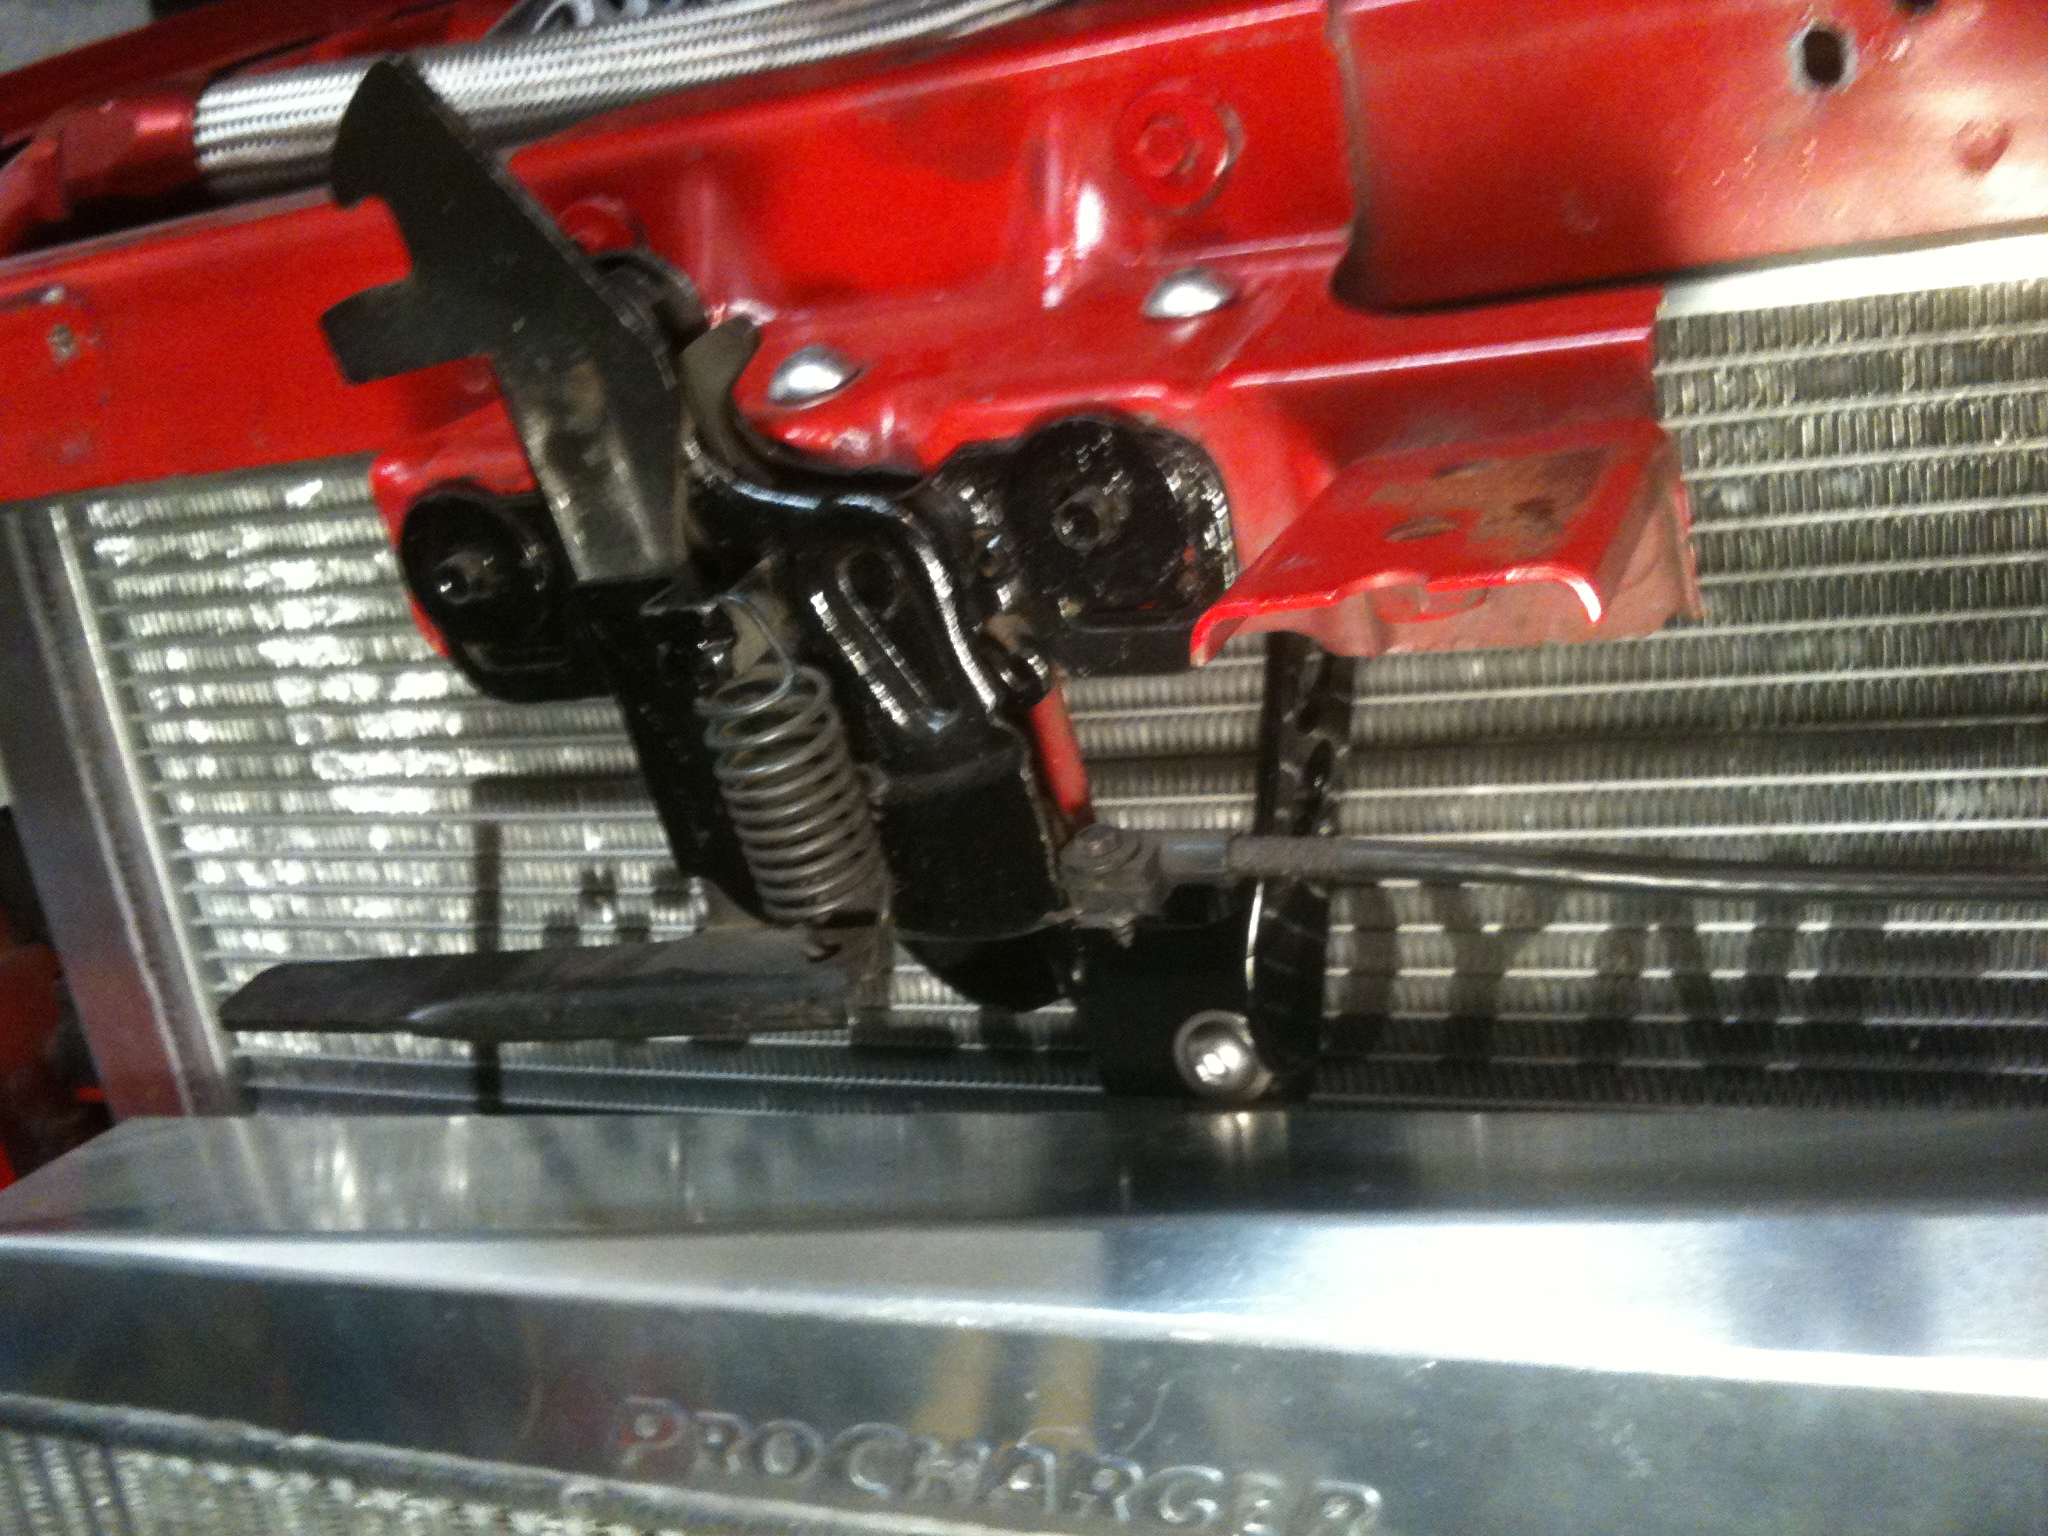
Back when I was removing the windshield washer reservoir, I had noticed the quite sad condition of the horns and their bracket... nothing this rusty has any place on my car, lol.
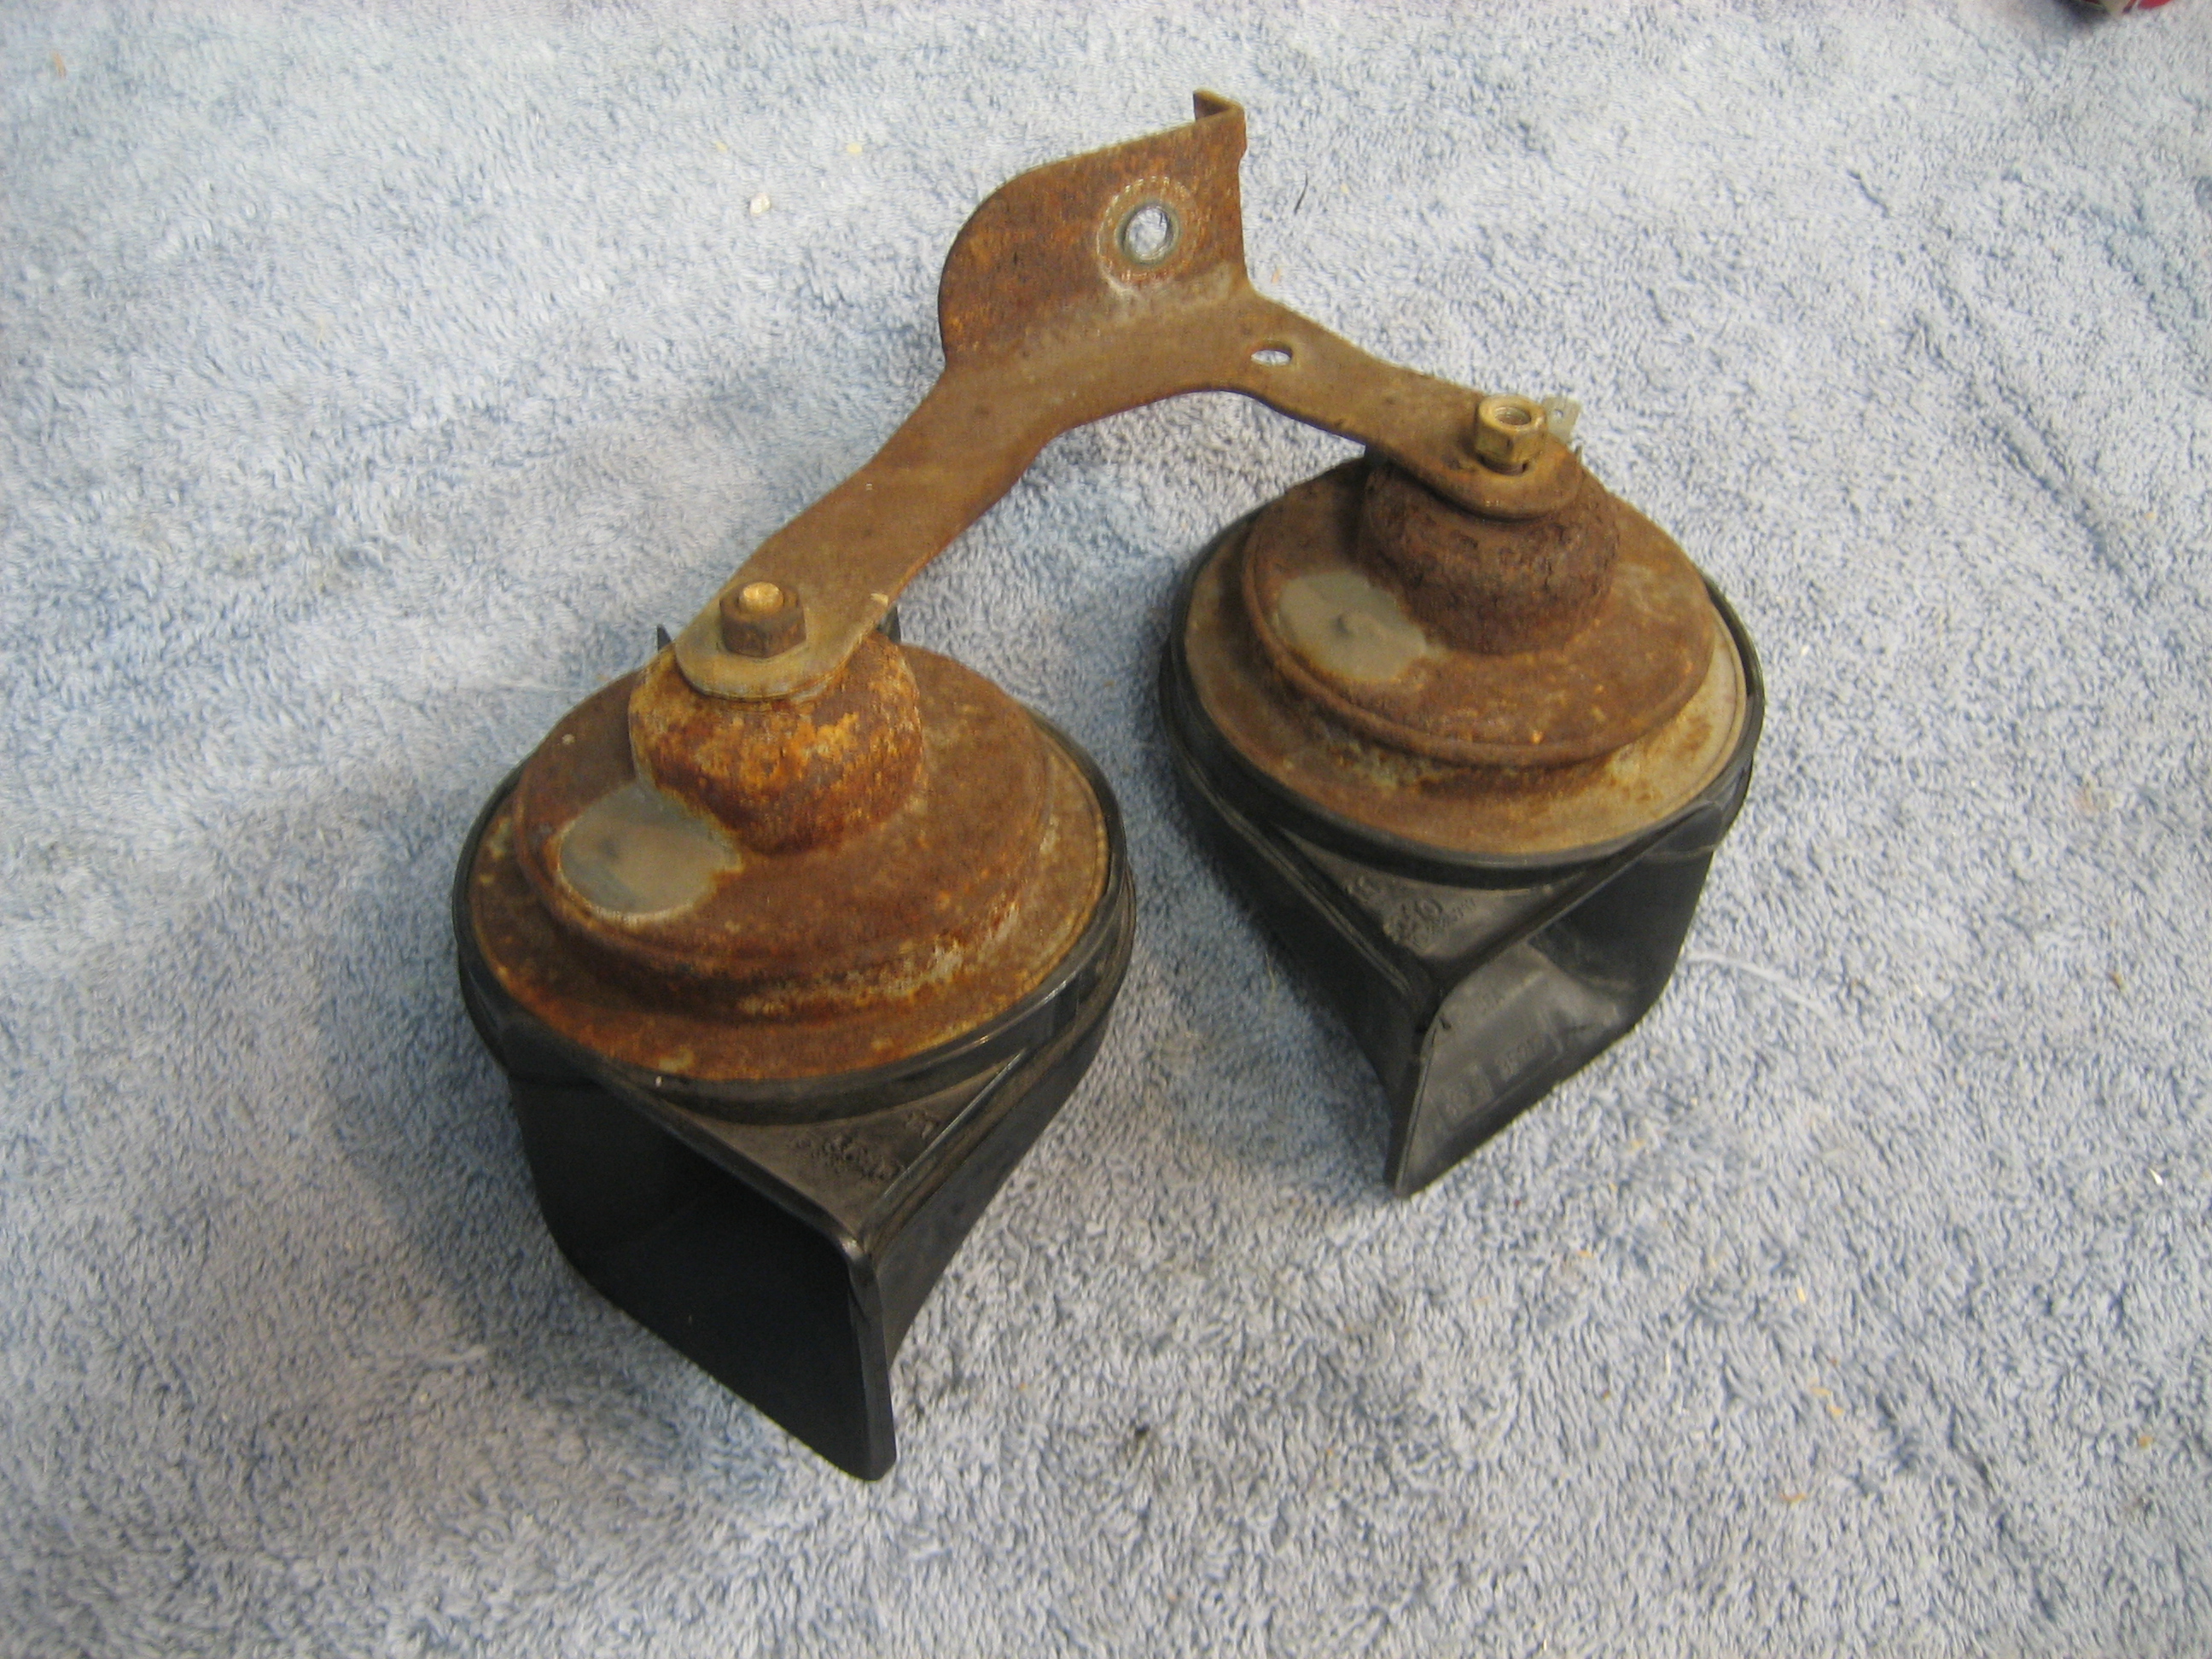
Bracket stripped and repainted, with new PIAA Dual Tone horns:
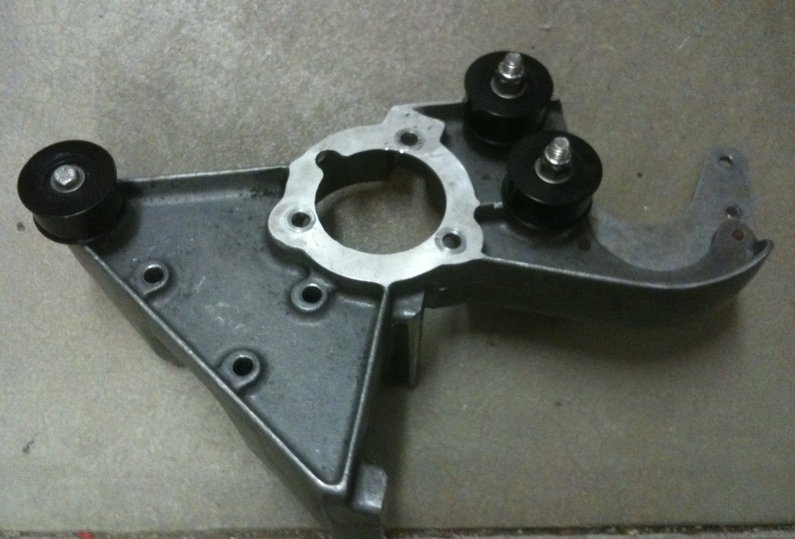
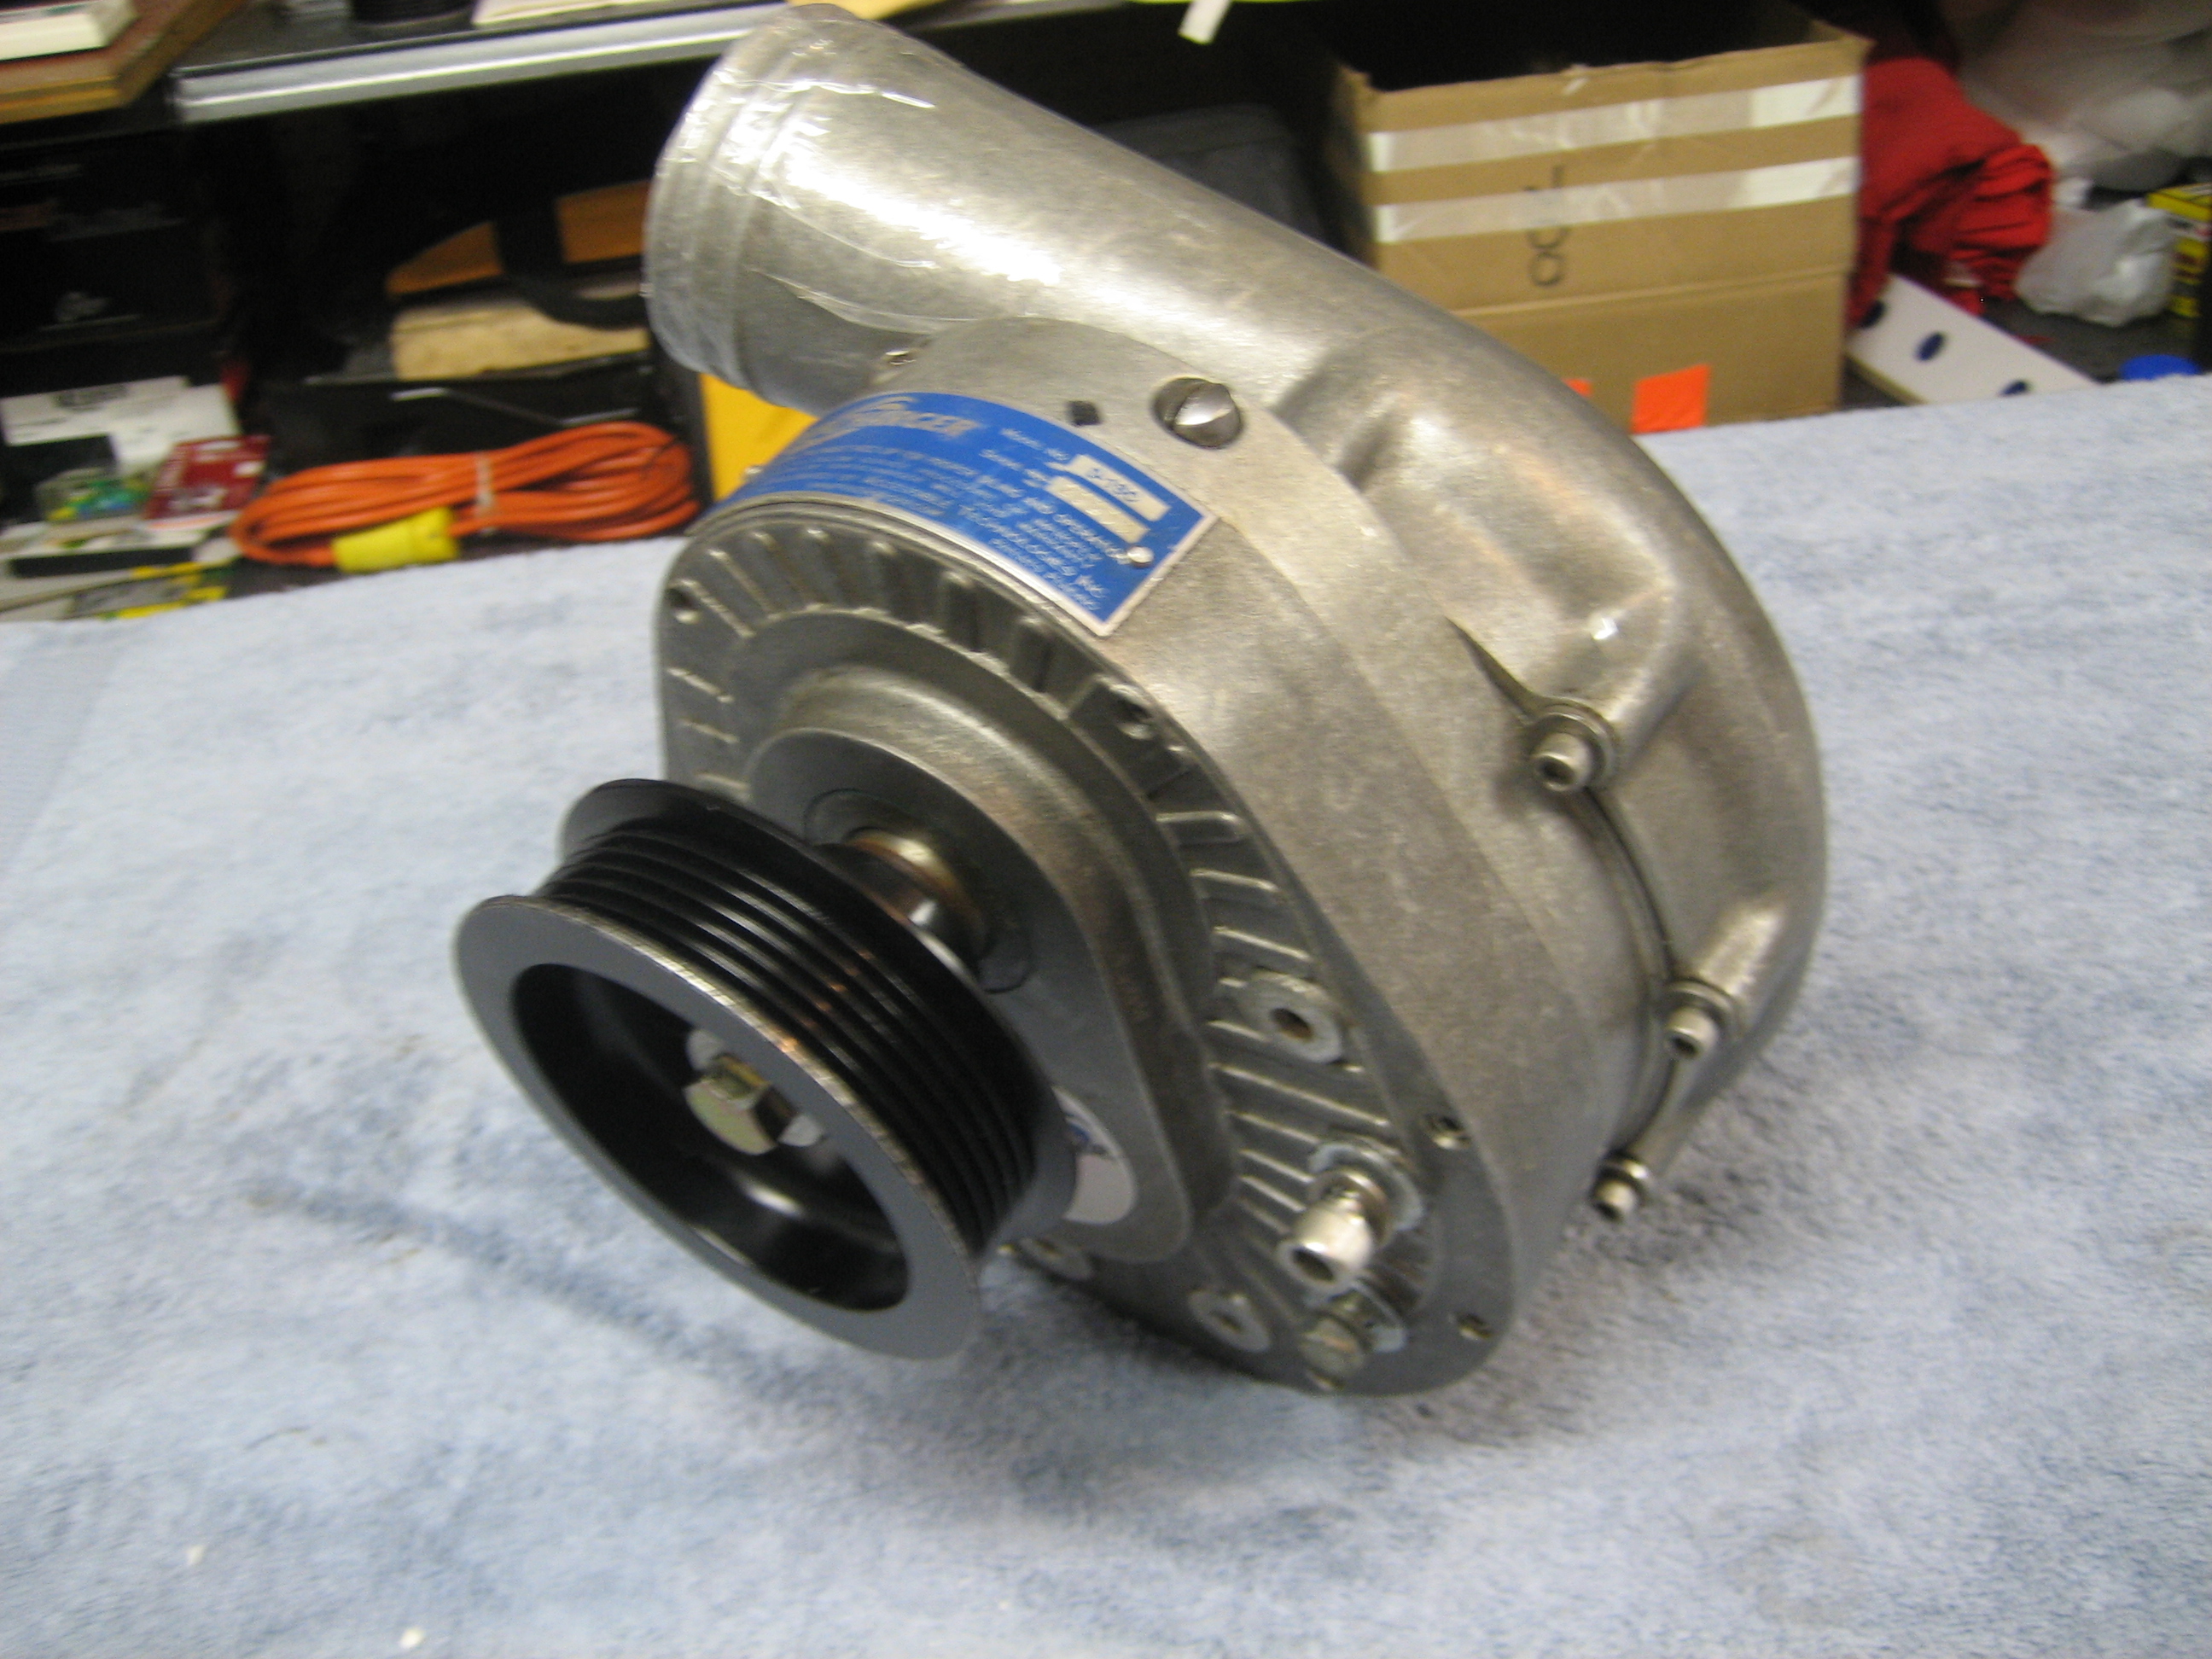
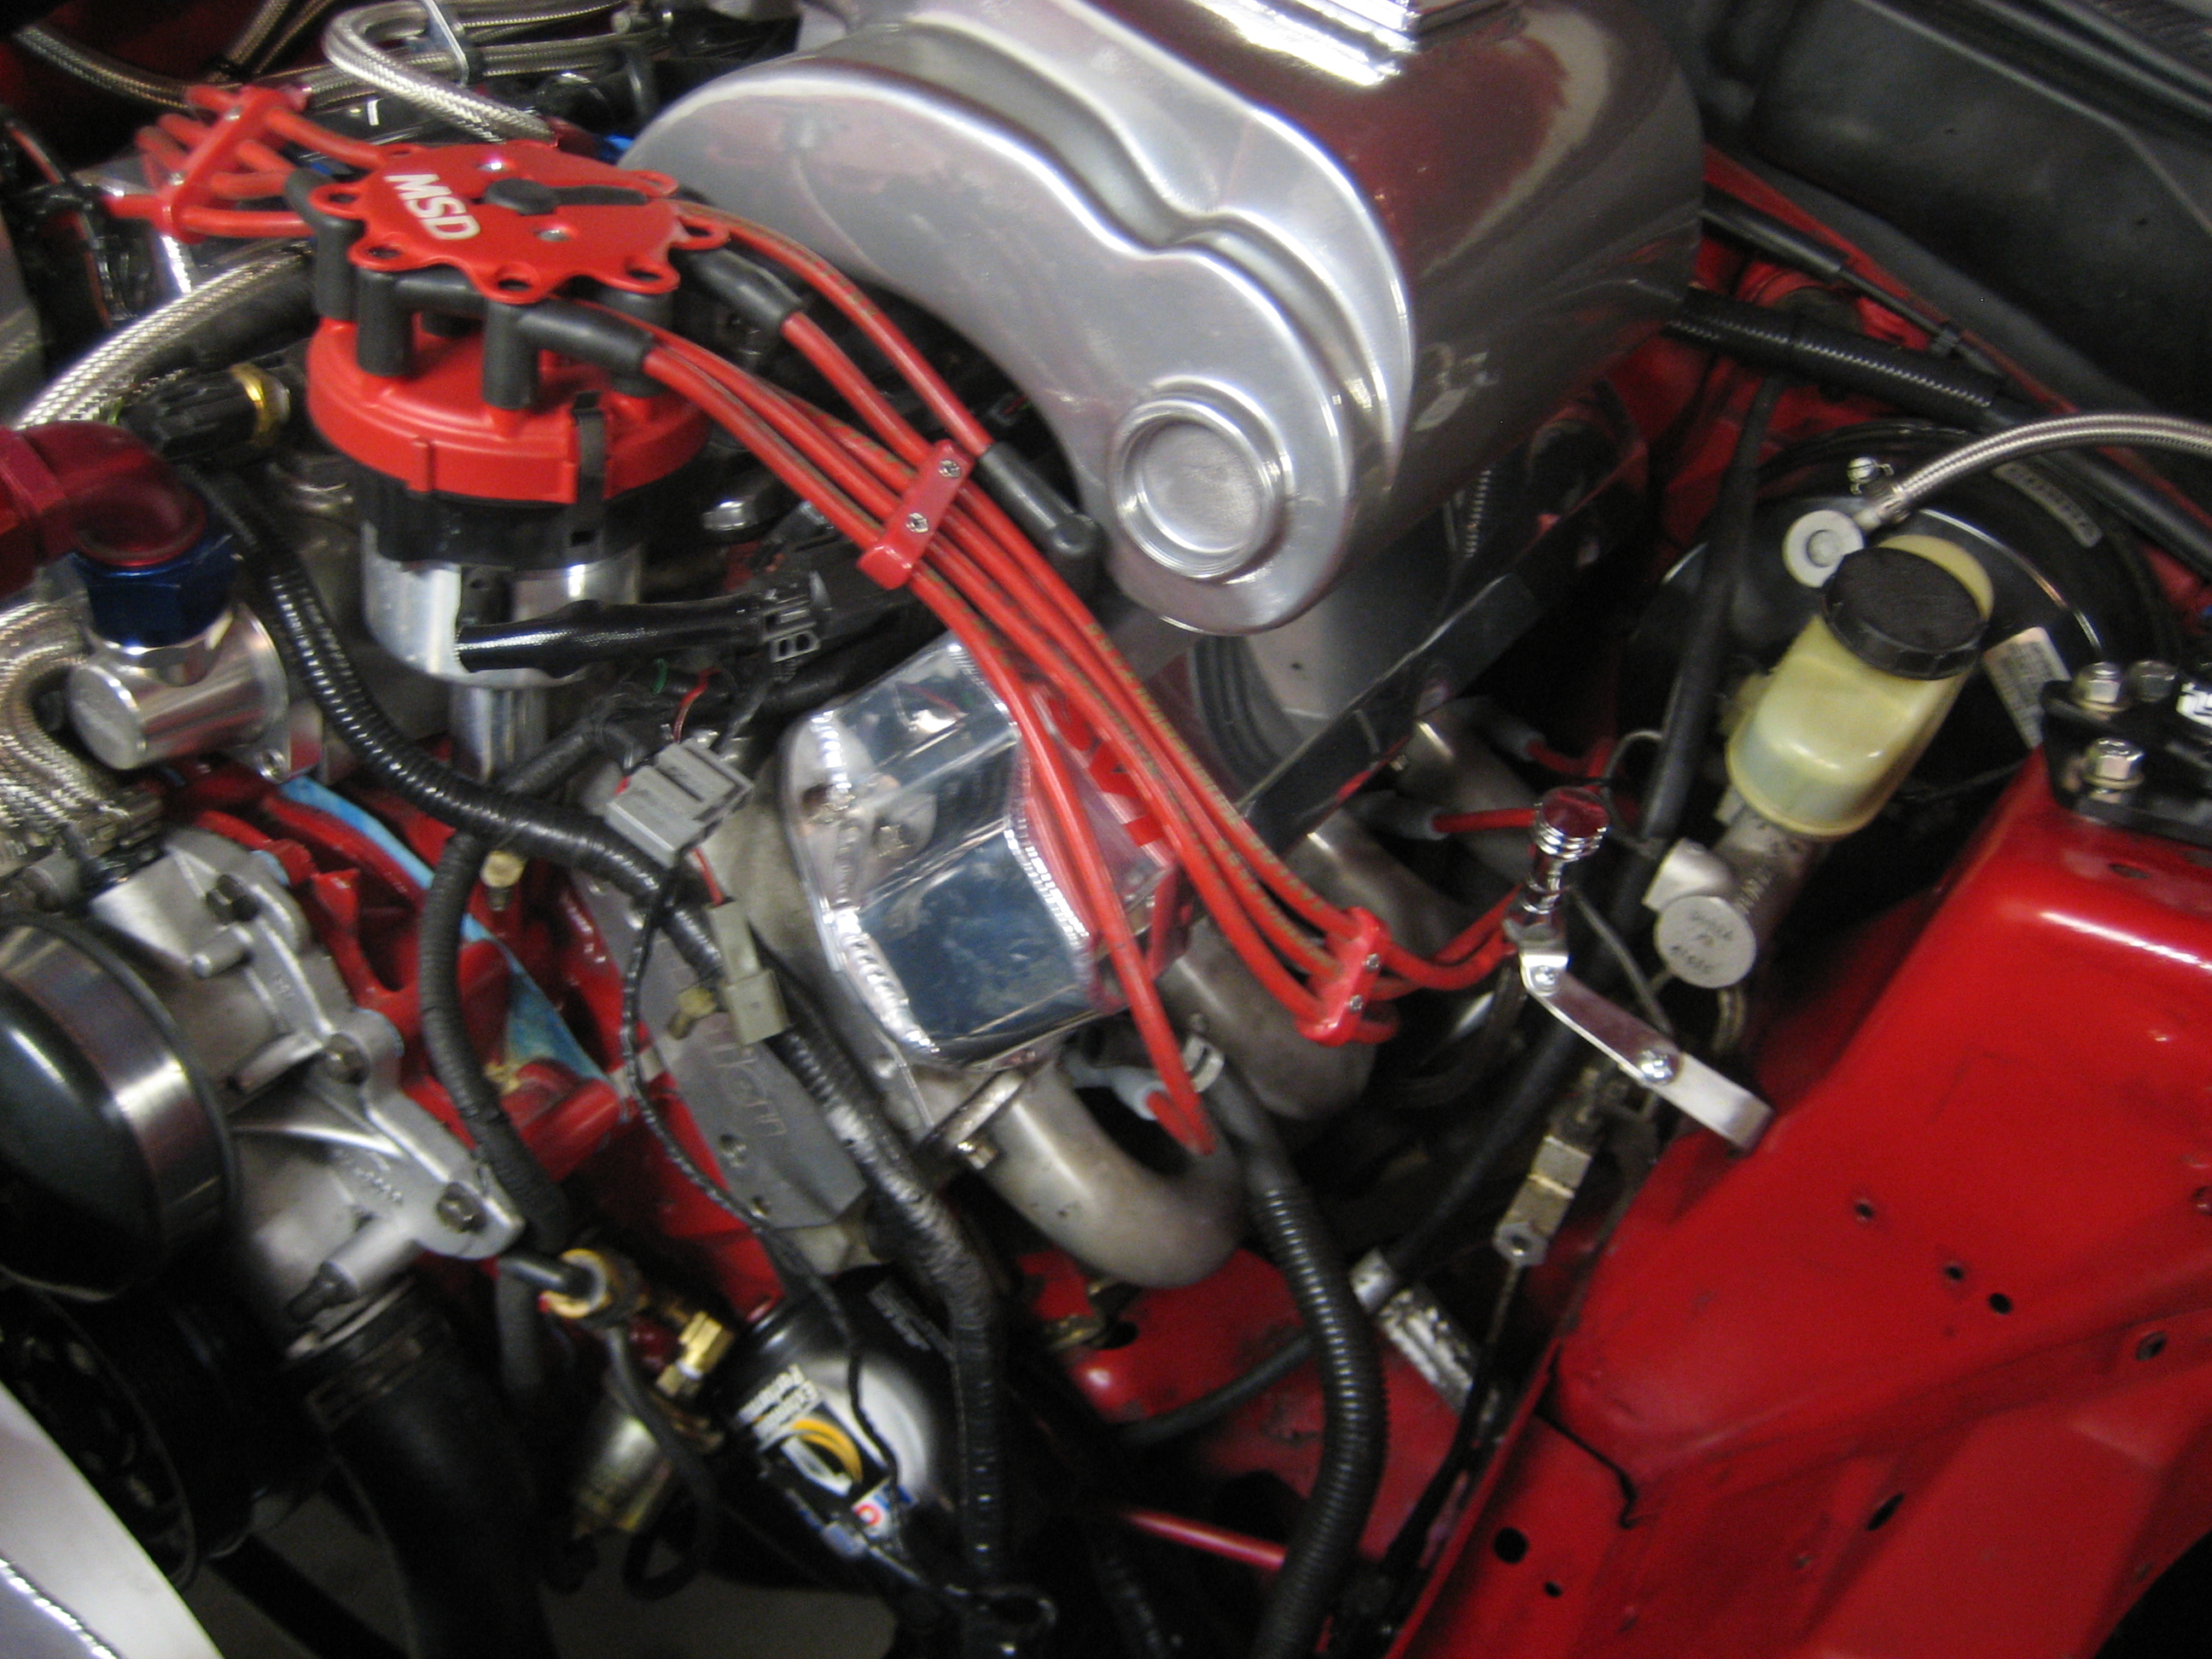
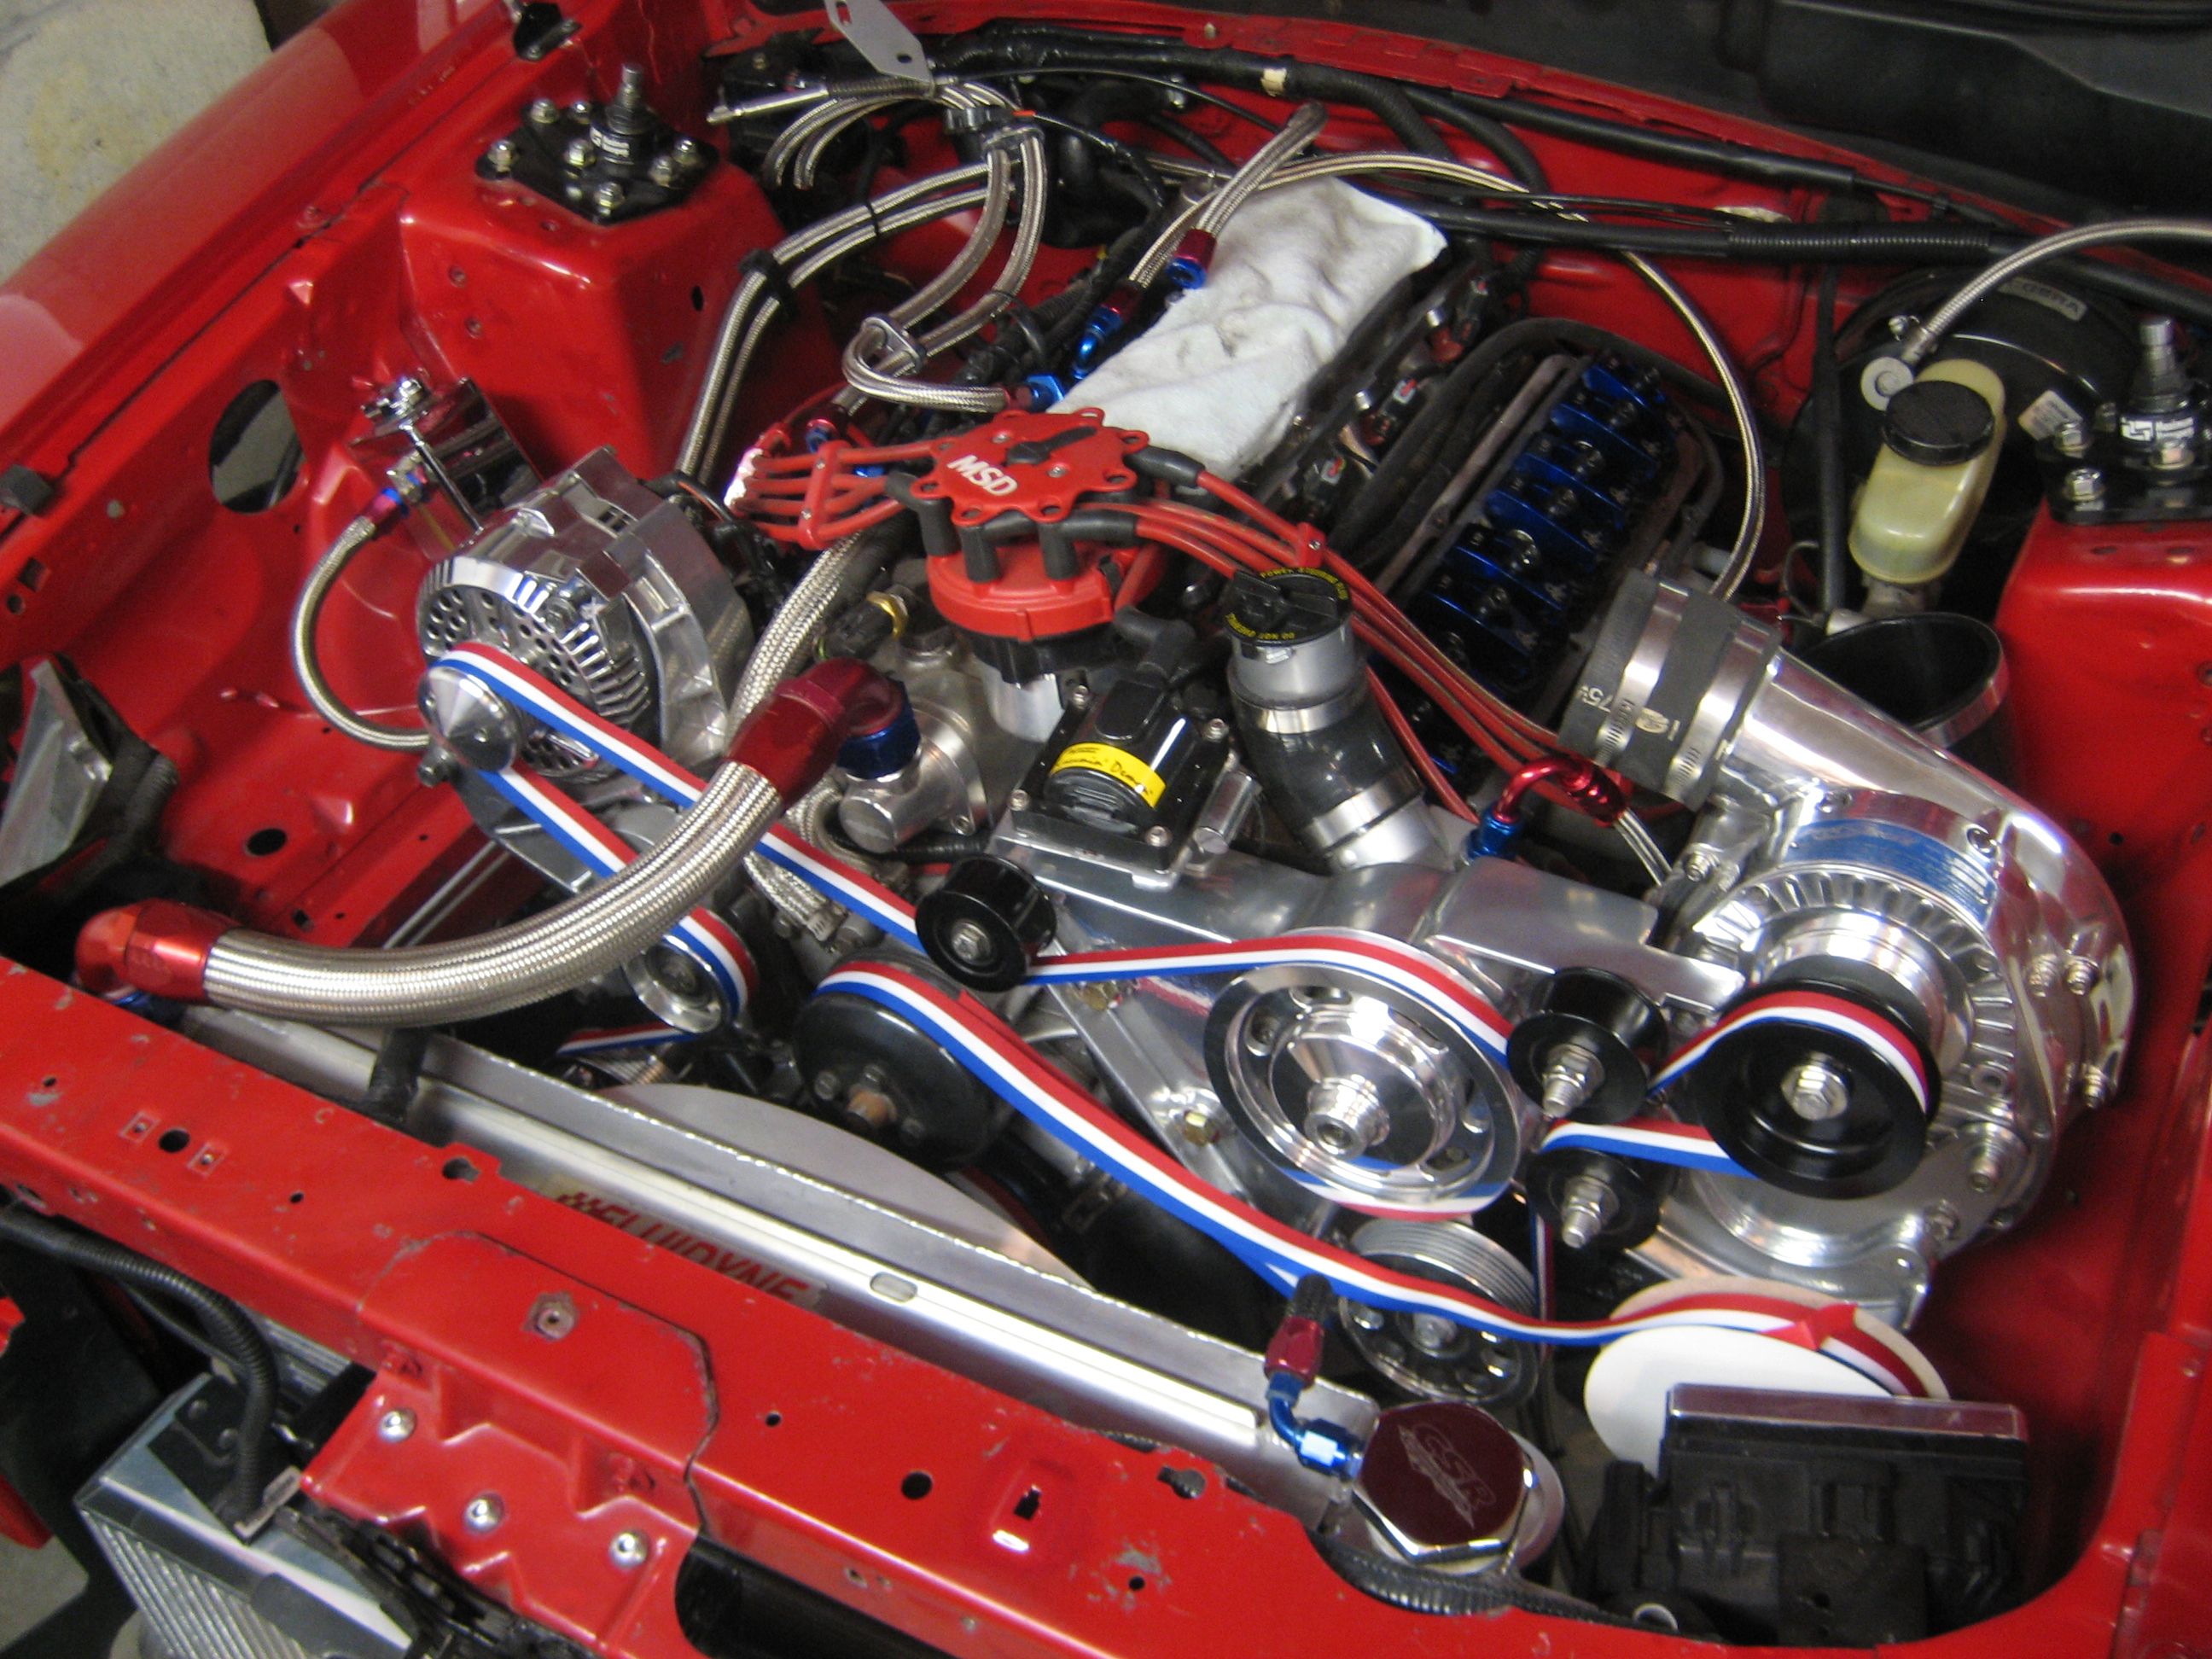
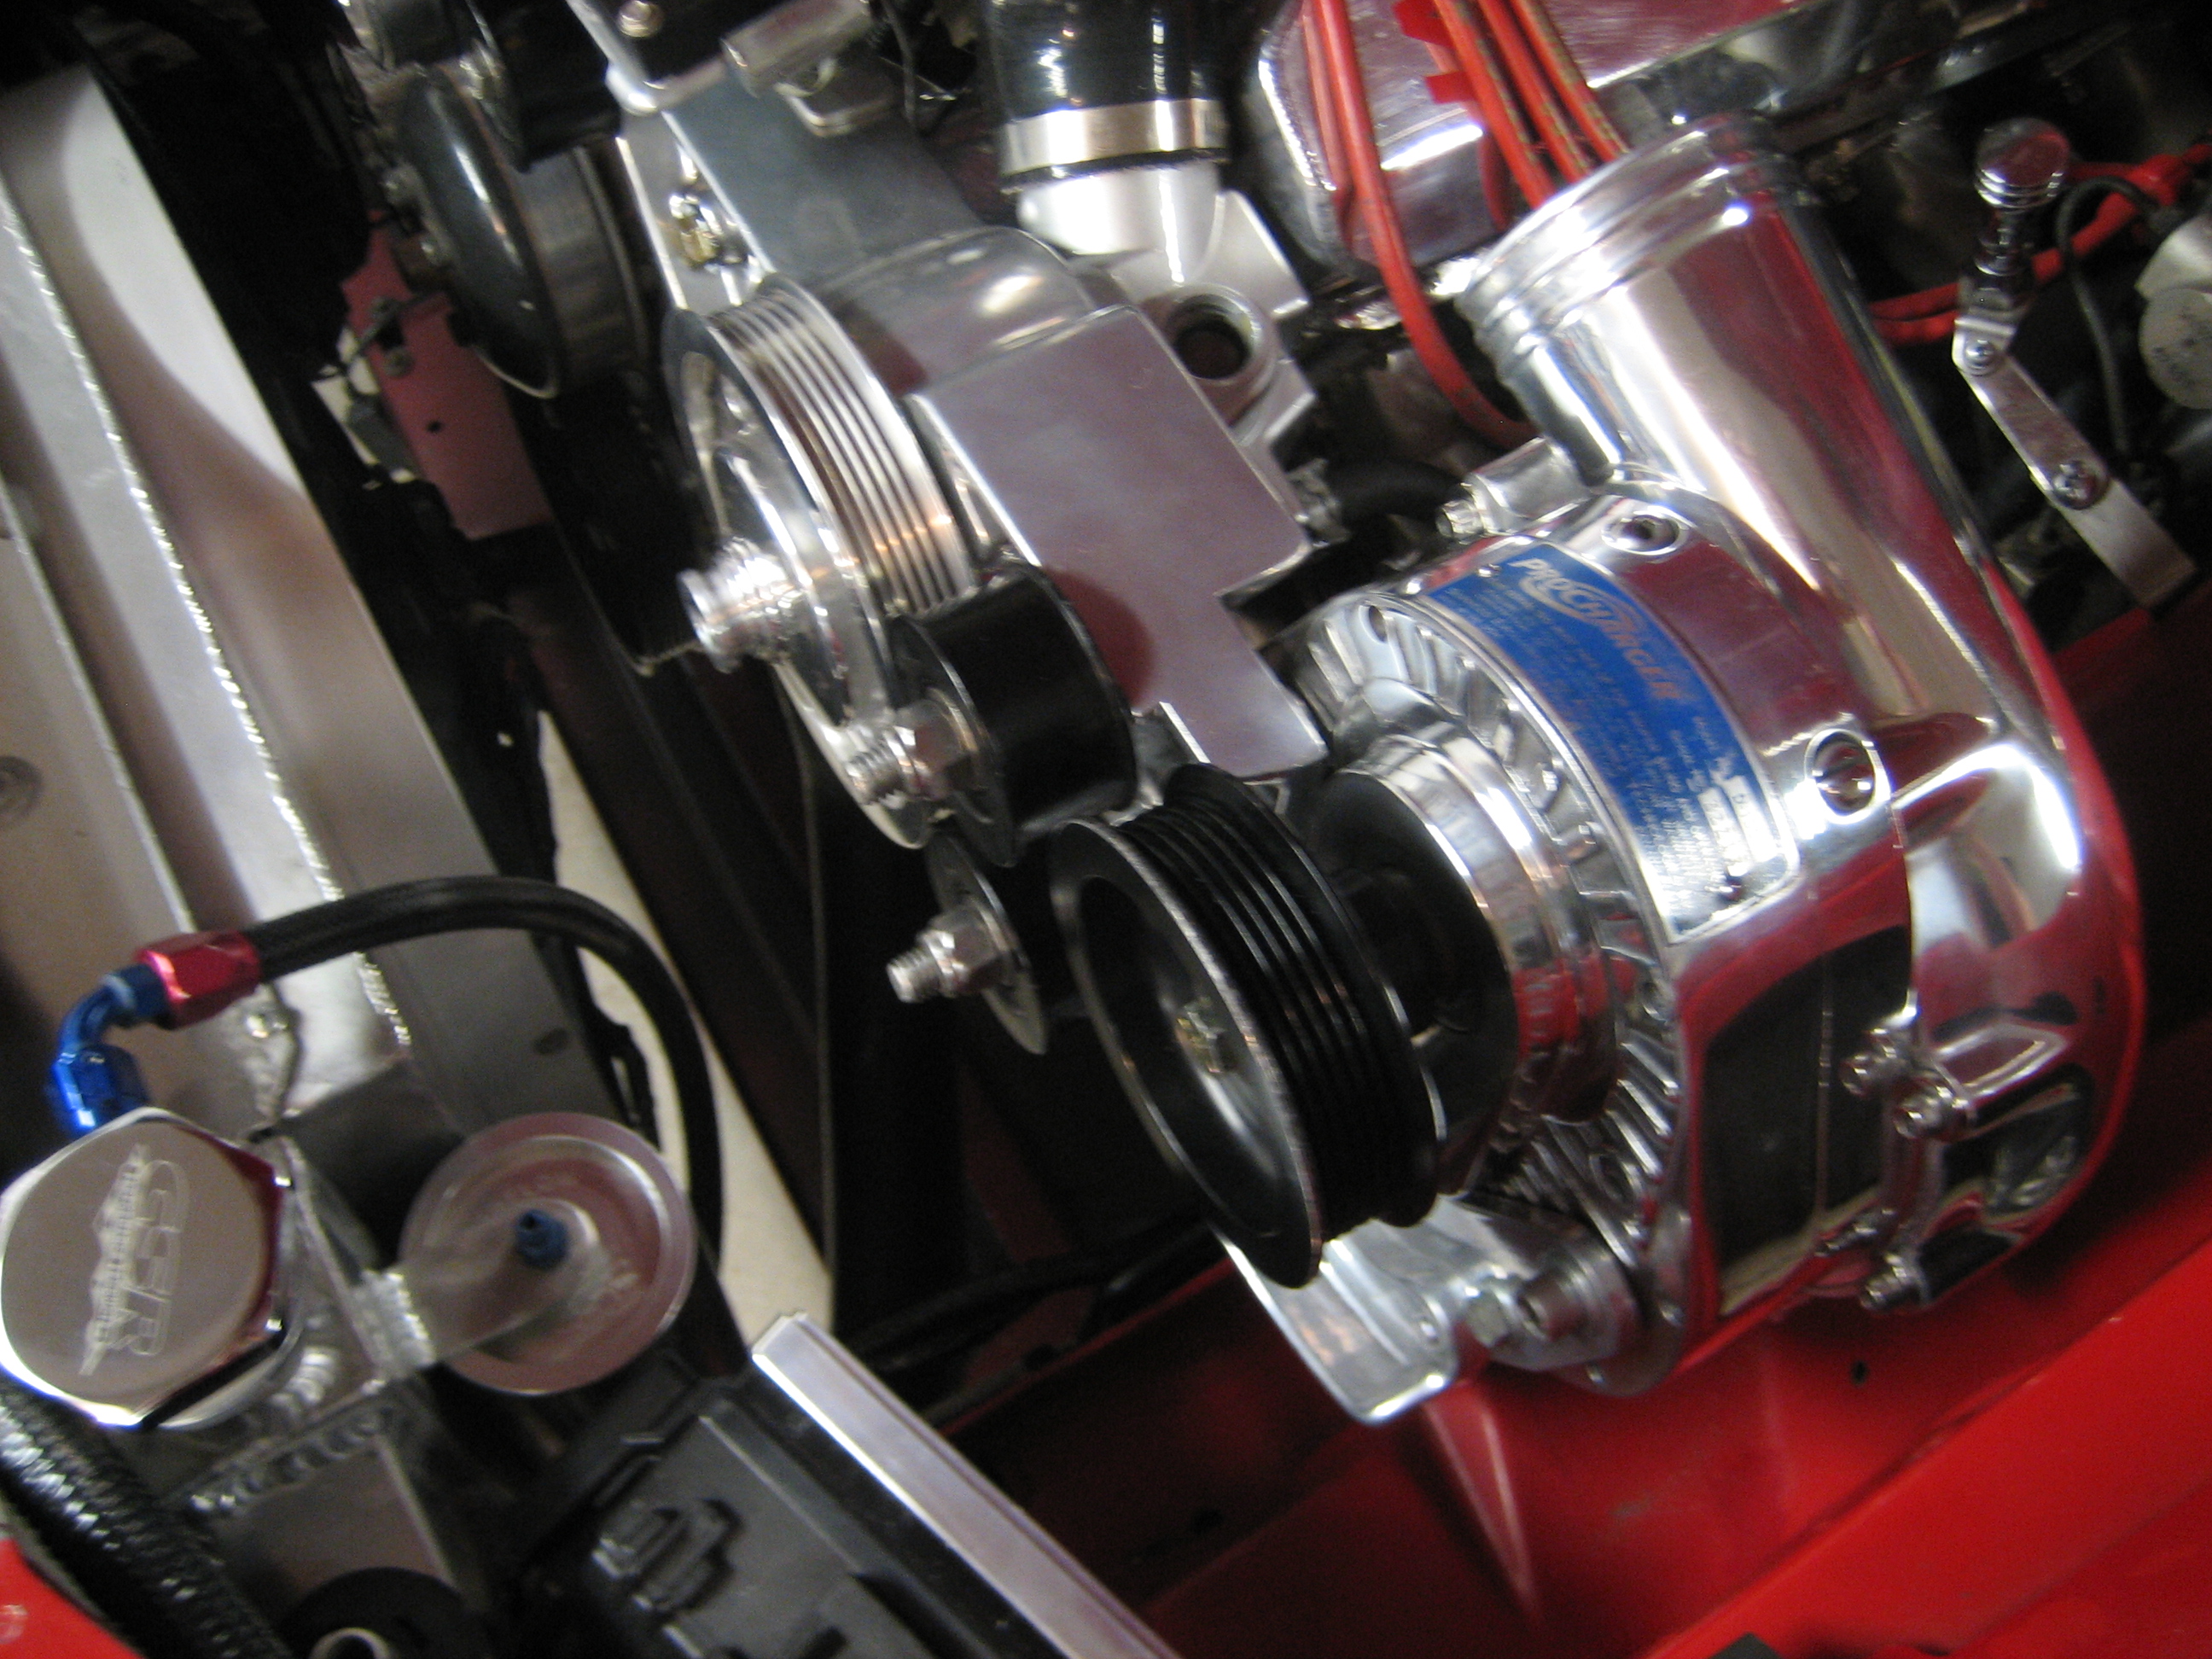
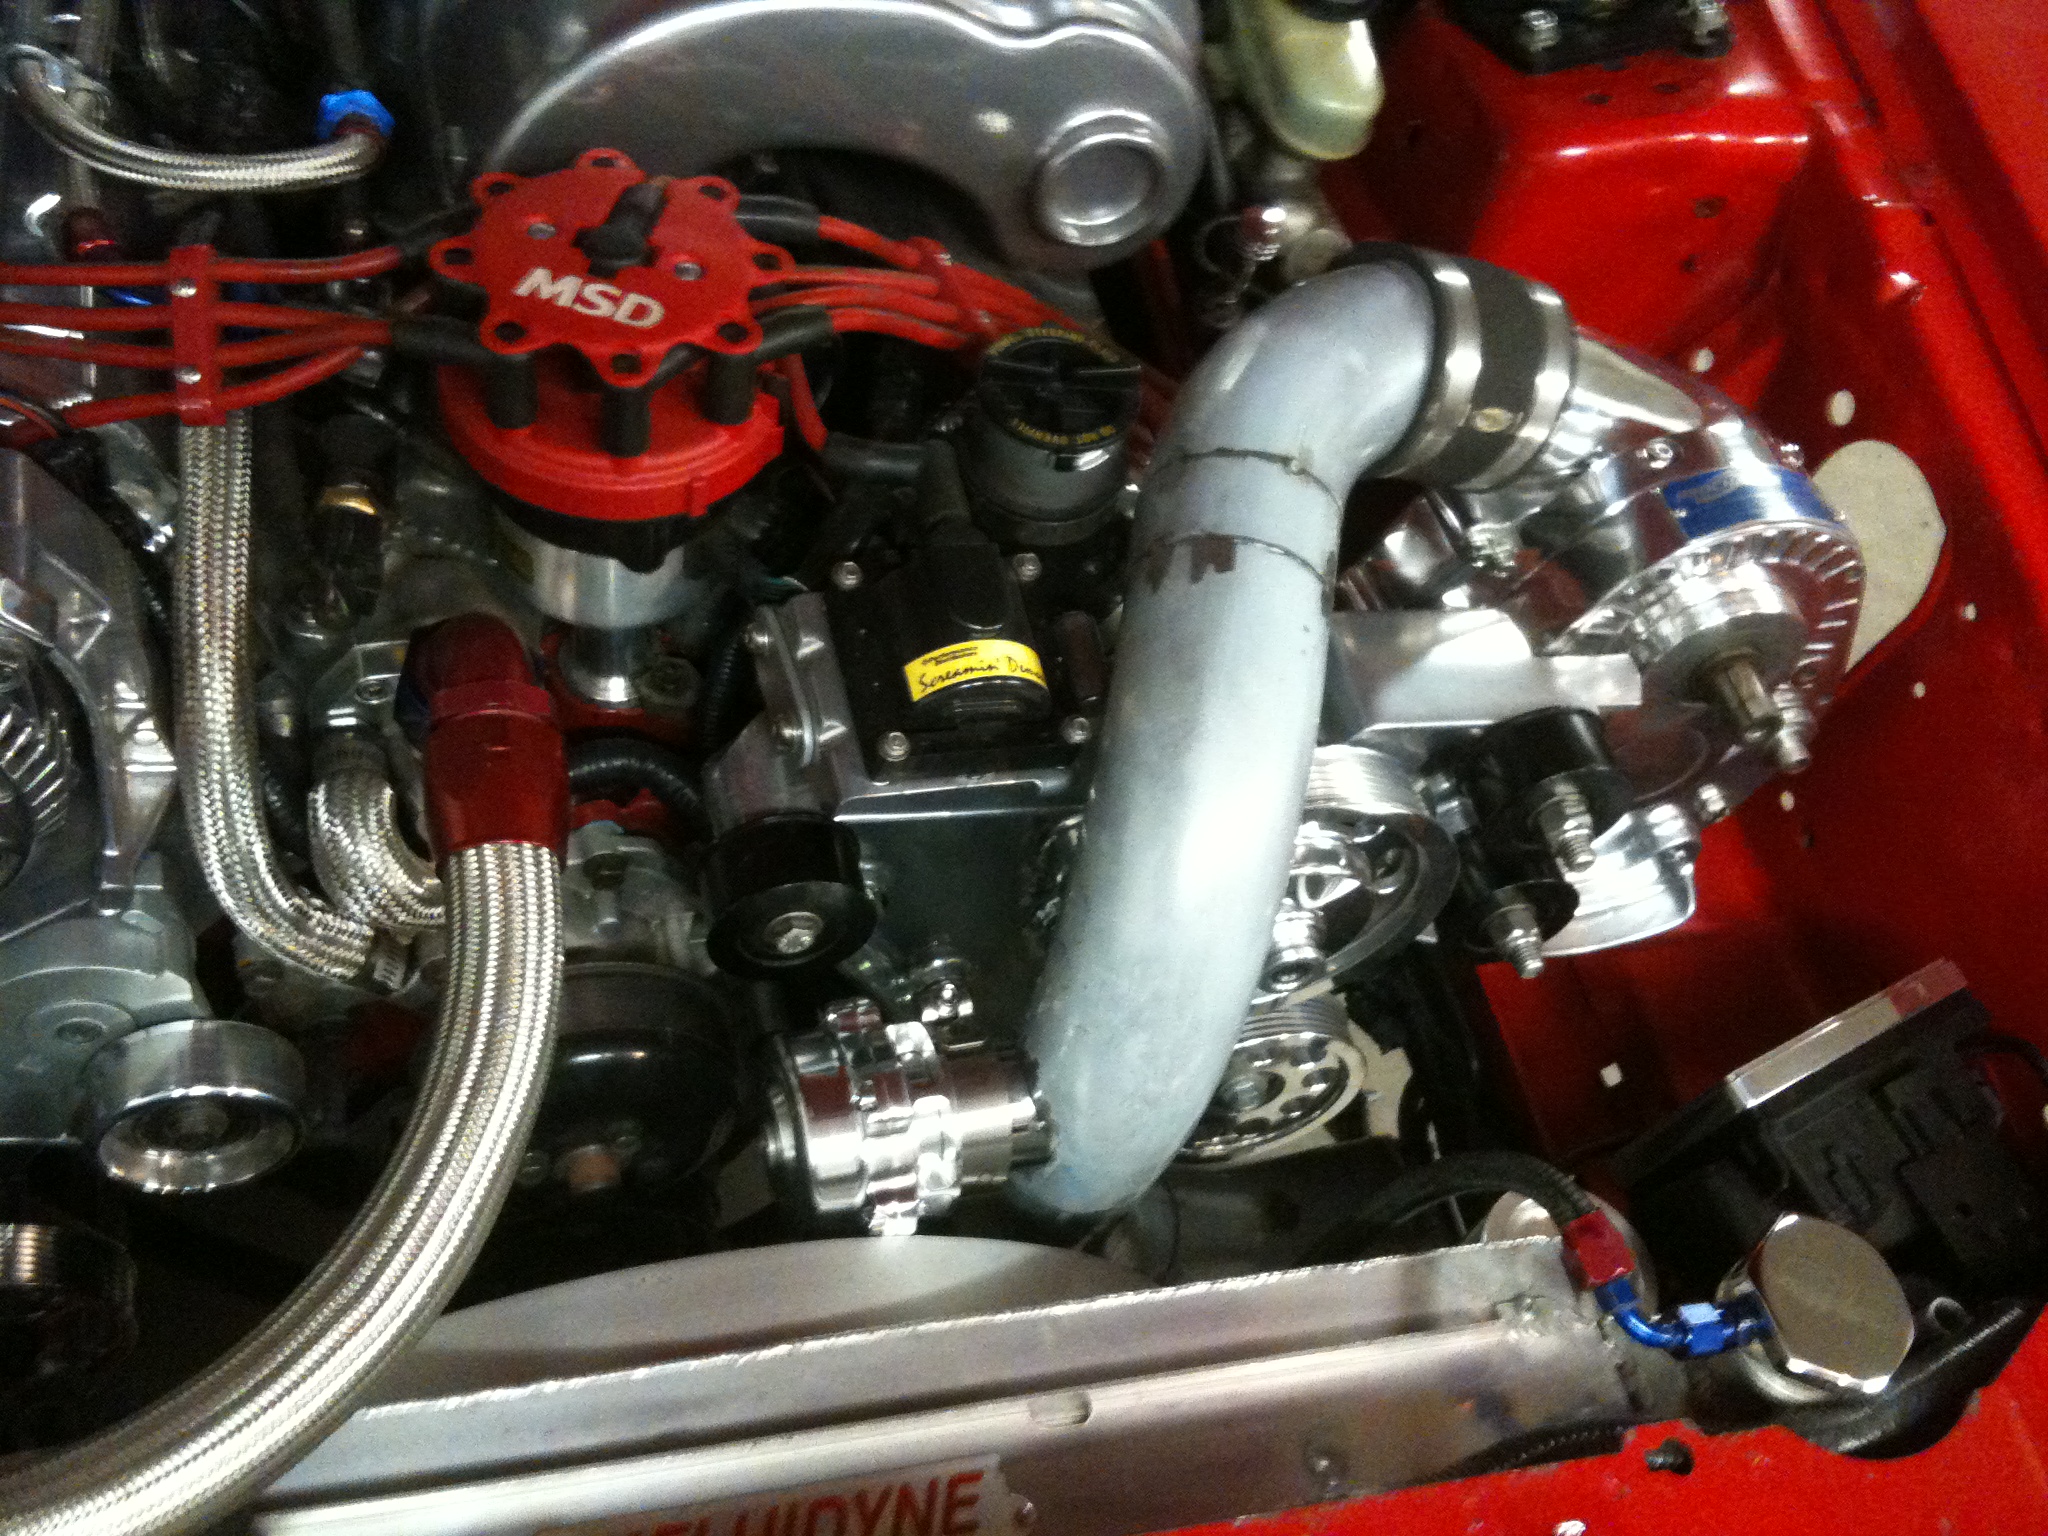
I smoothed the blower bracket and had it chrome powder coated, and the blower came back from Mirror finish polishing so those went on.

Made a bracket to mount the coil nicely, rather than just bolting it sideways on the bracket like Procharger suggests:
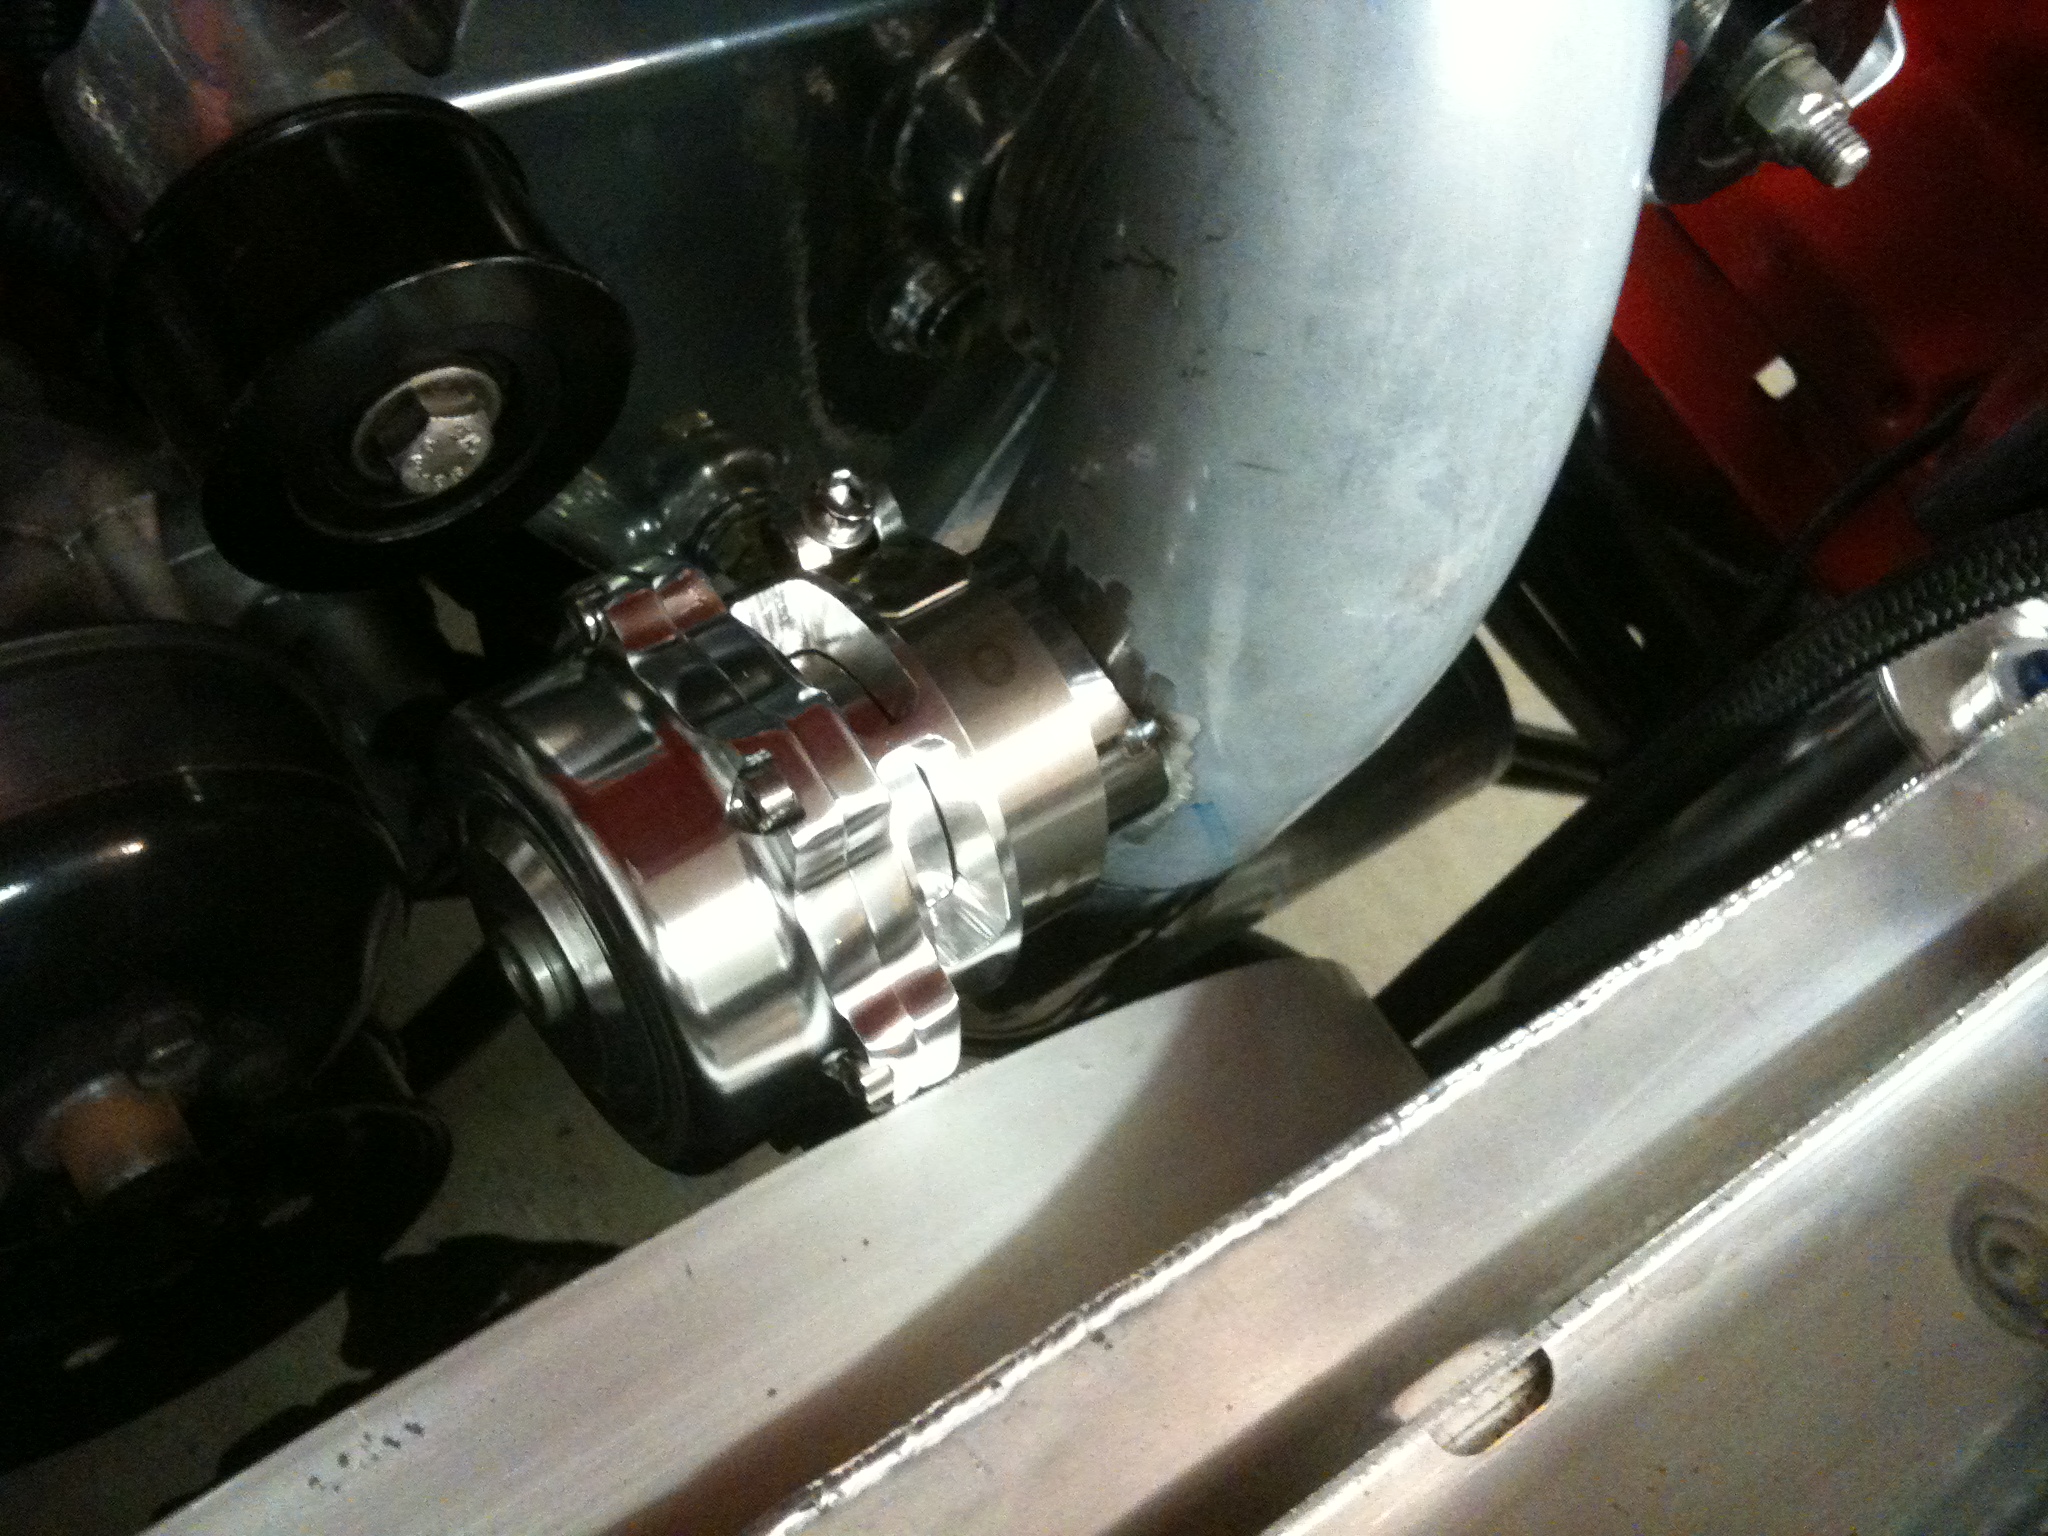
One issue the 94-95 Procharger kits suffer from is the power steering reservoir "puking" from time to time. This is due to the way the blower bracket tilts it inboard. So my solution was to cut the top of the reservoir off and add a 45 degree silicone coupler to level the top of the reservoir (it has worked perfectly btw). I also sanded and painted the whole power steering pump silver with a clear coat while it was off the car.
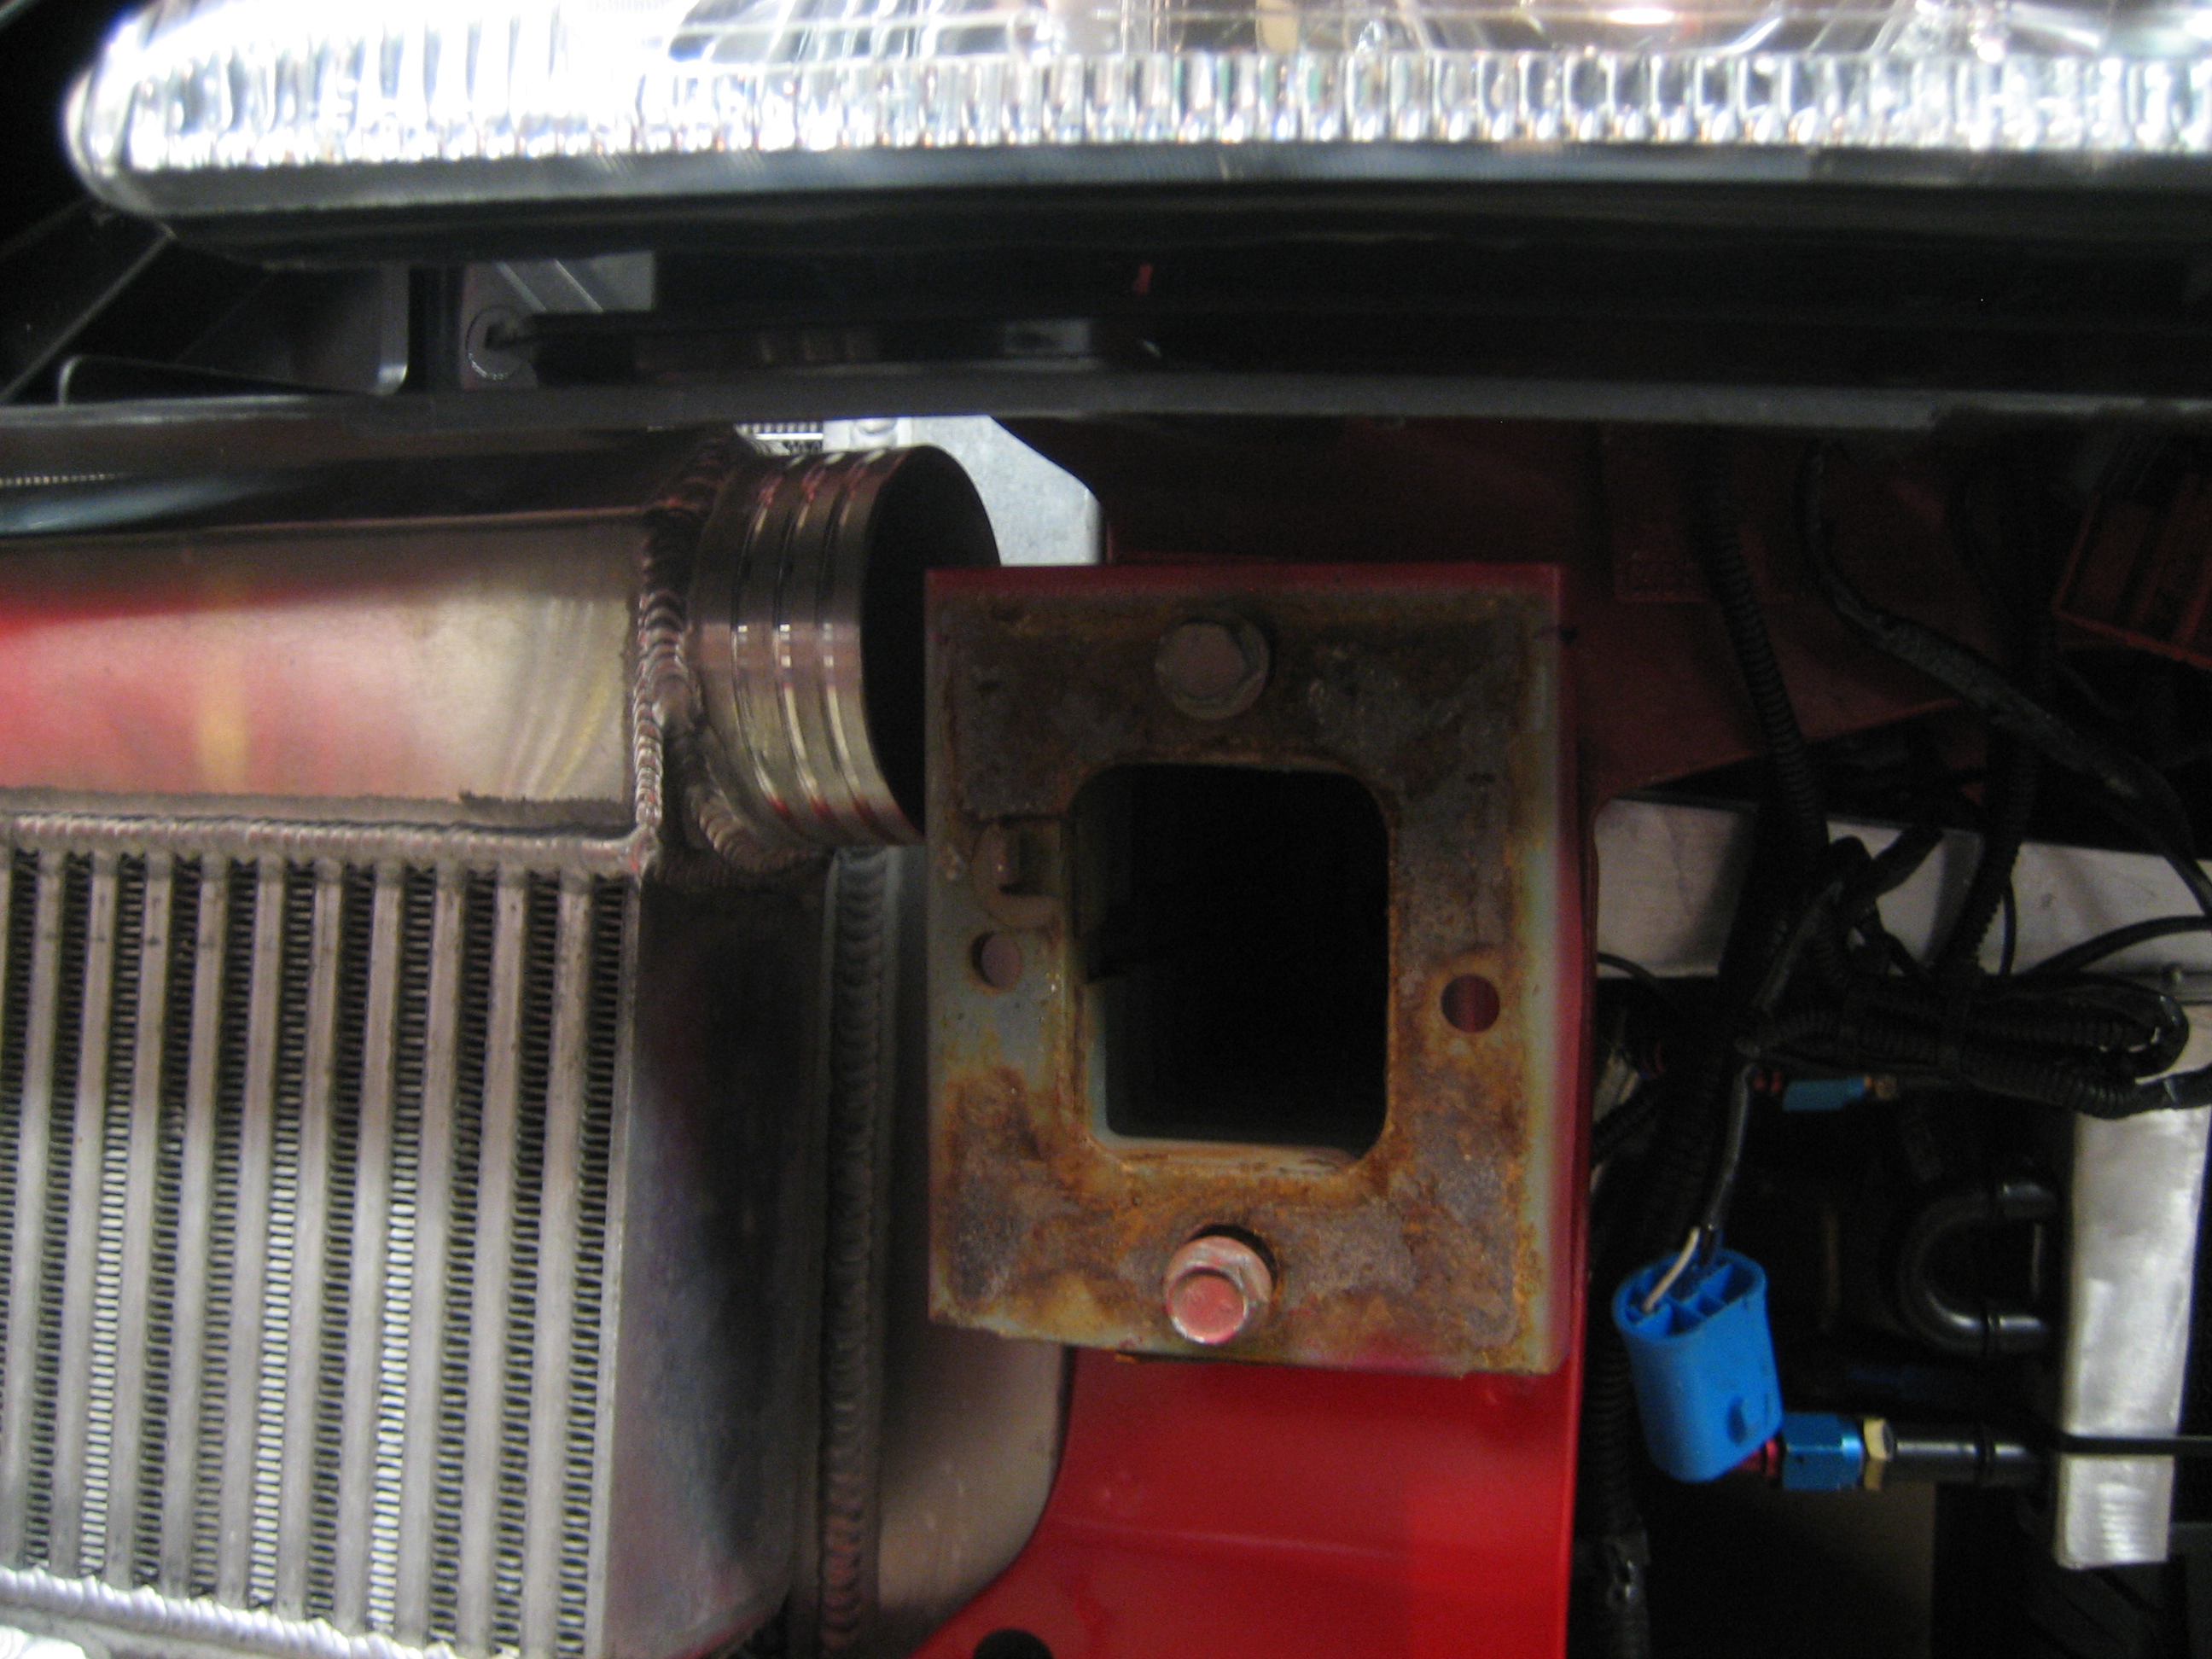
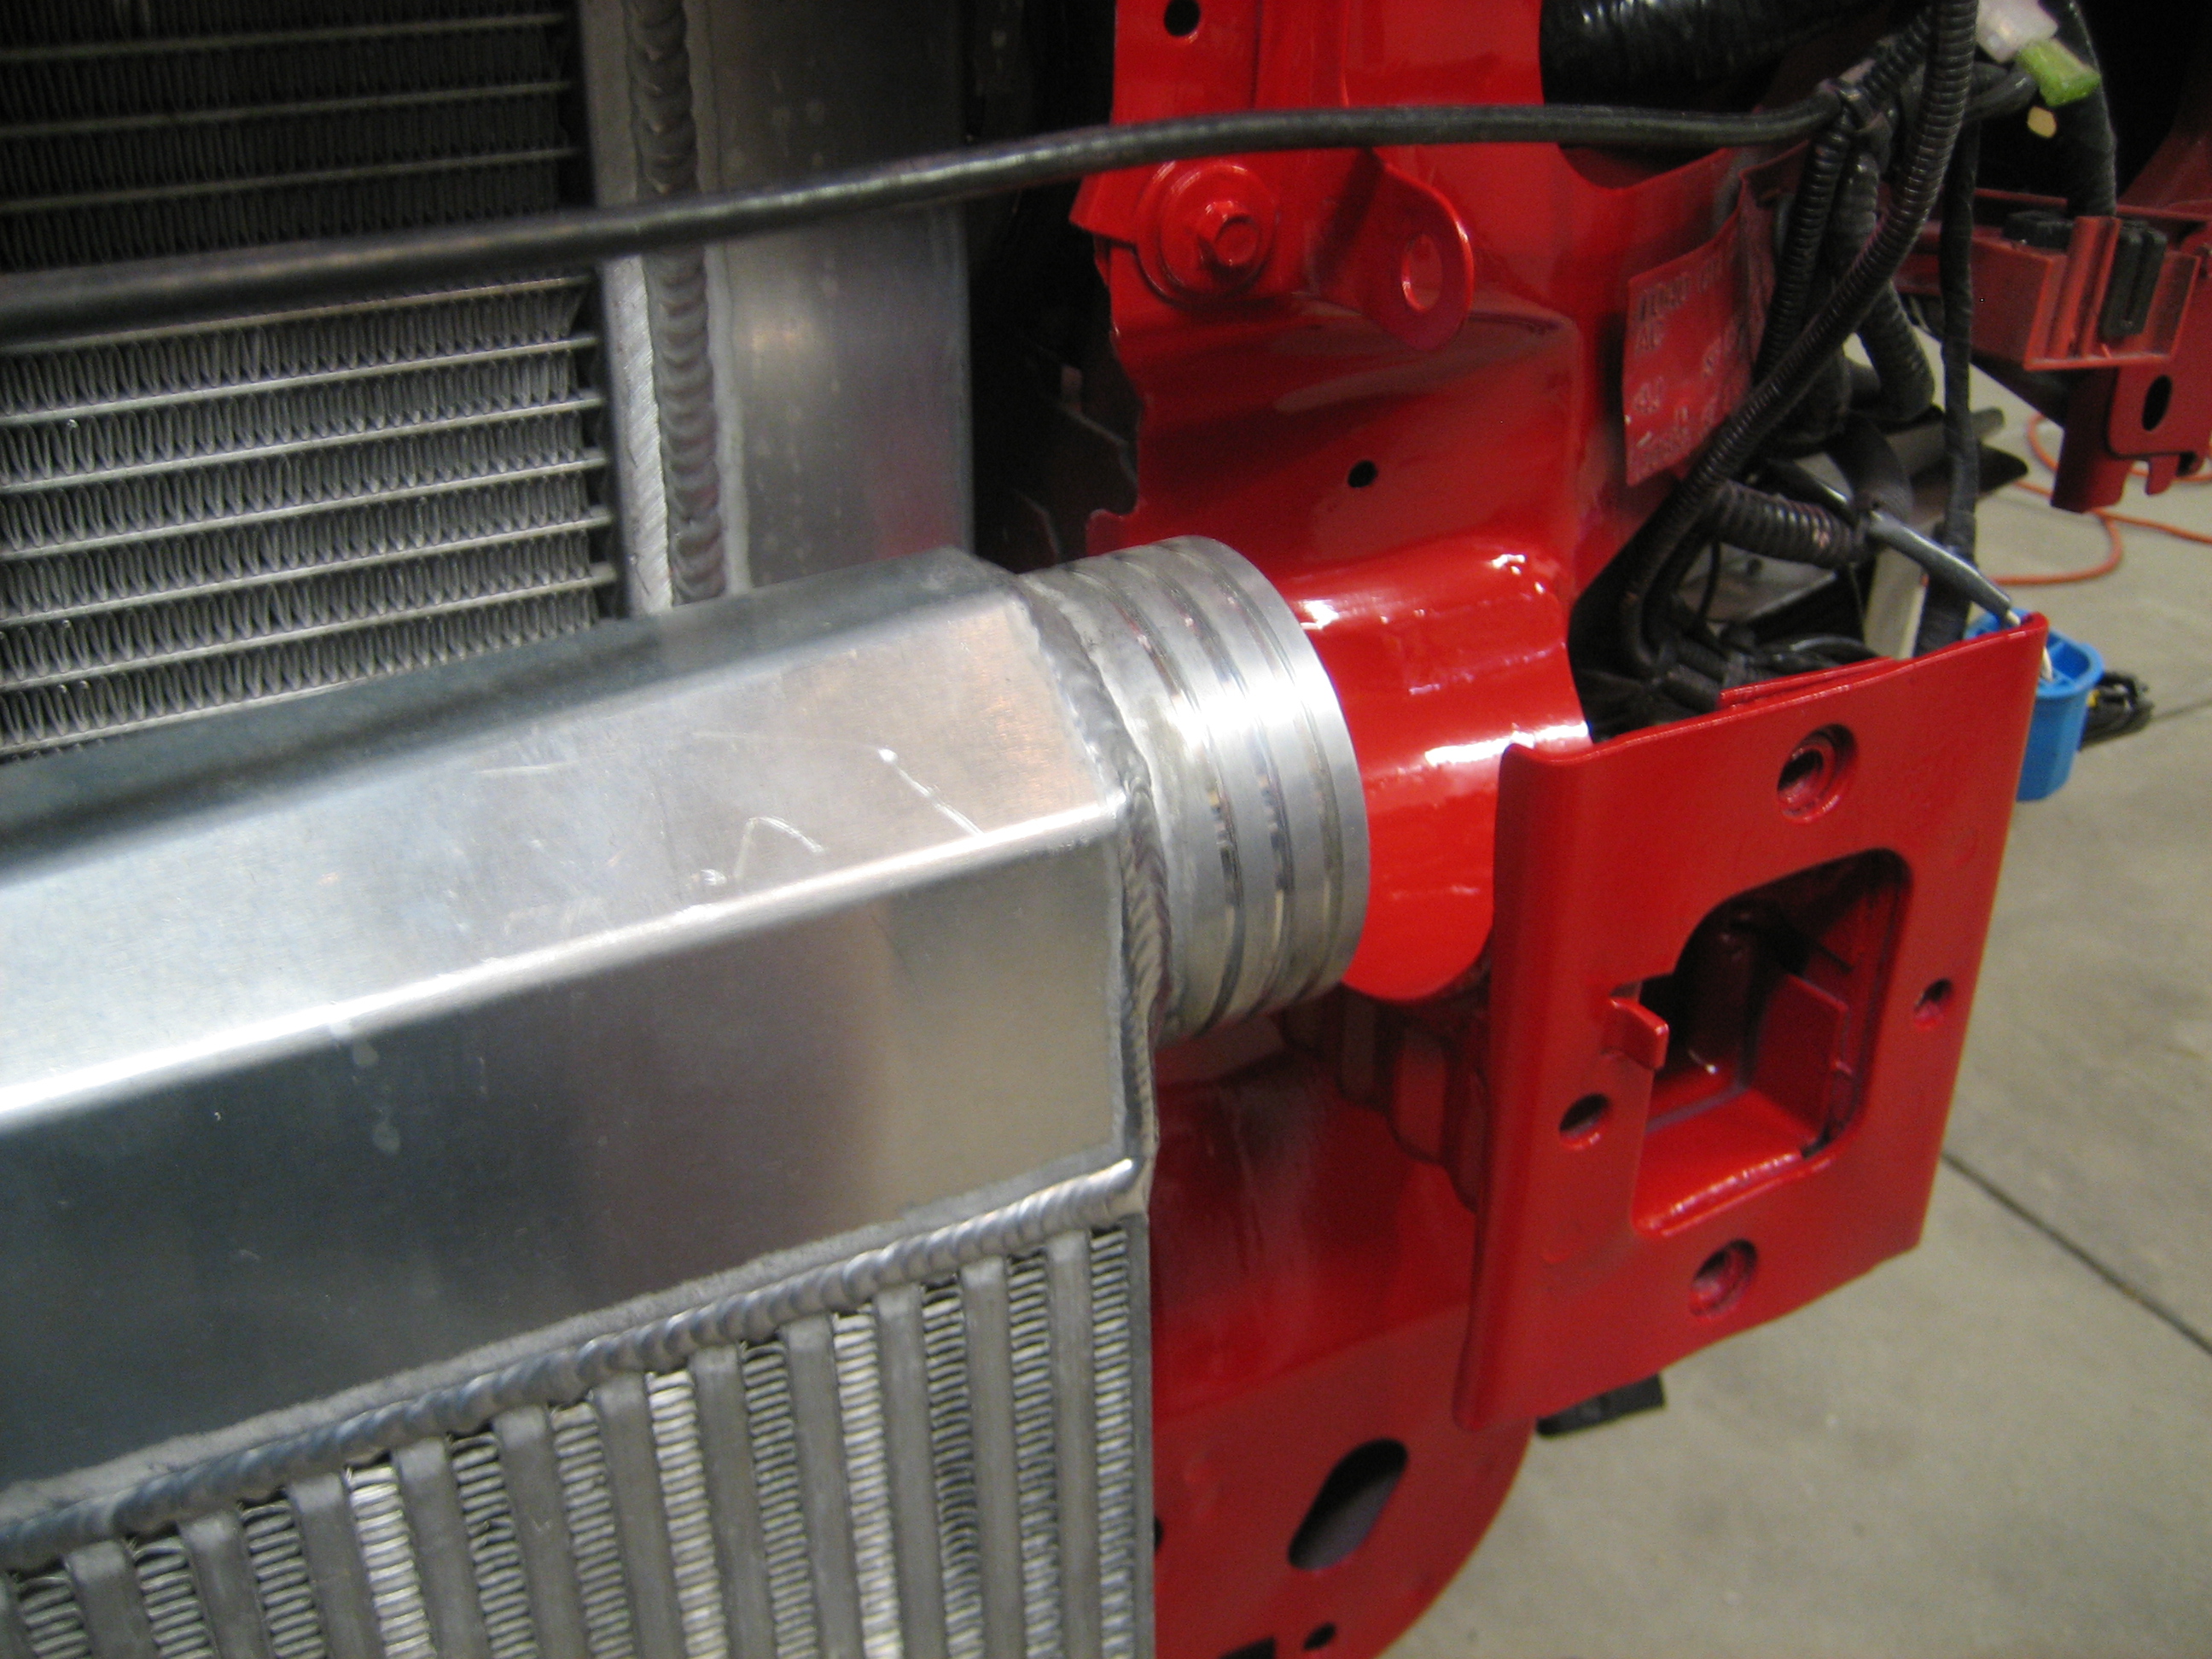
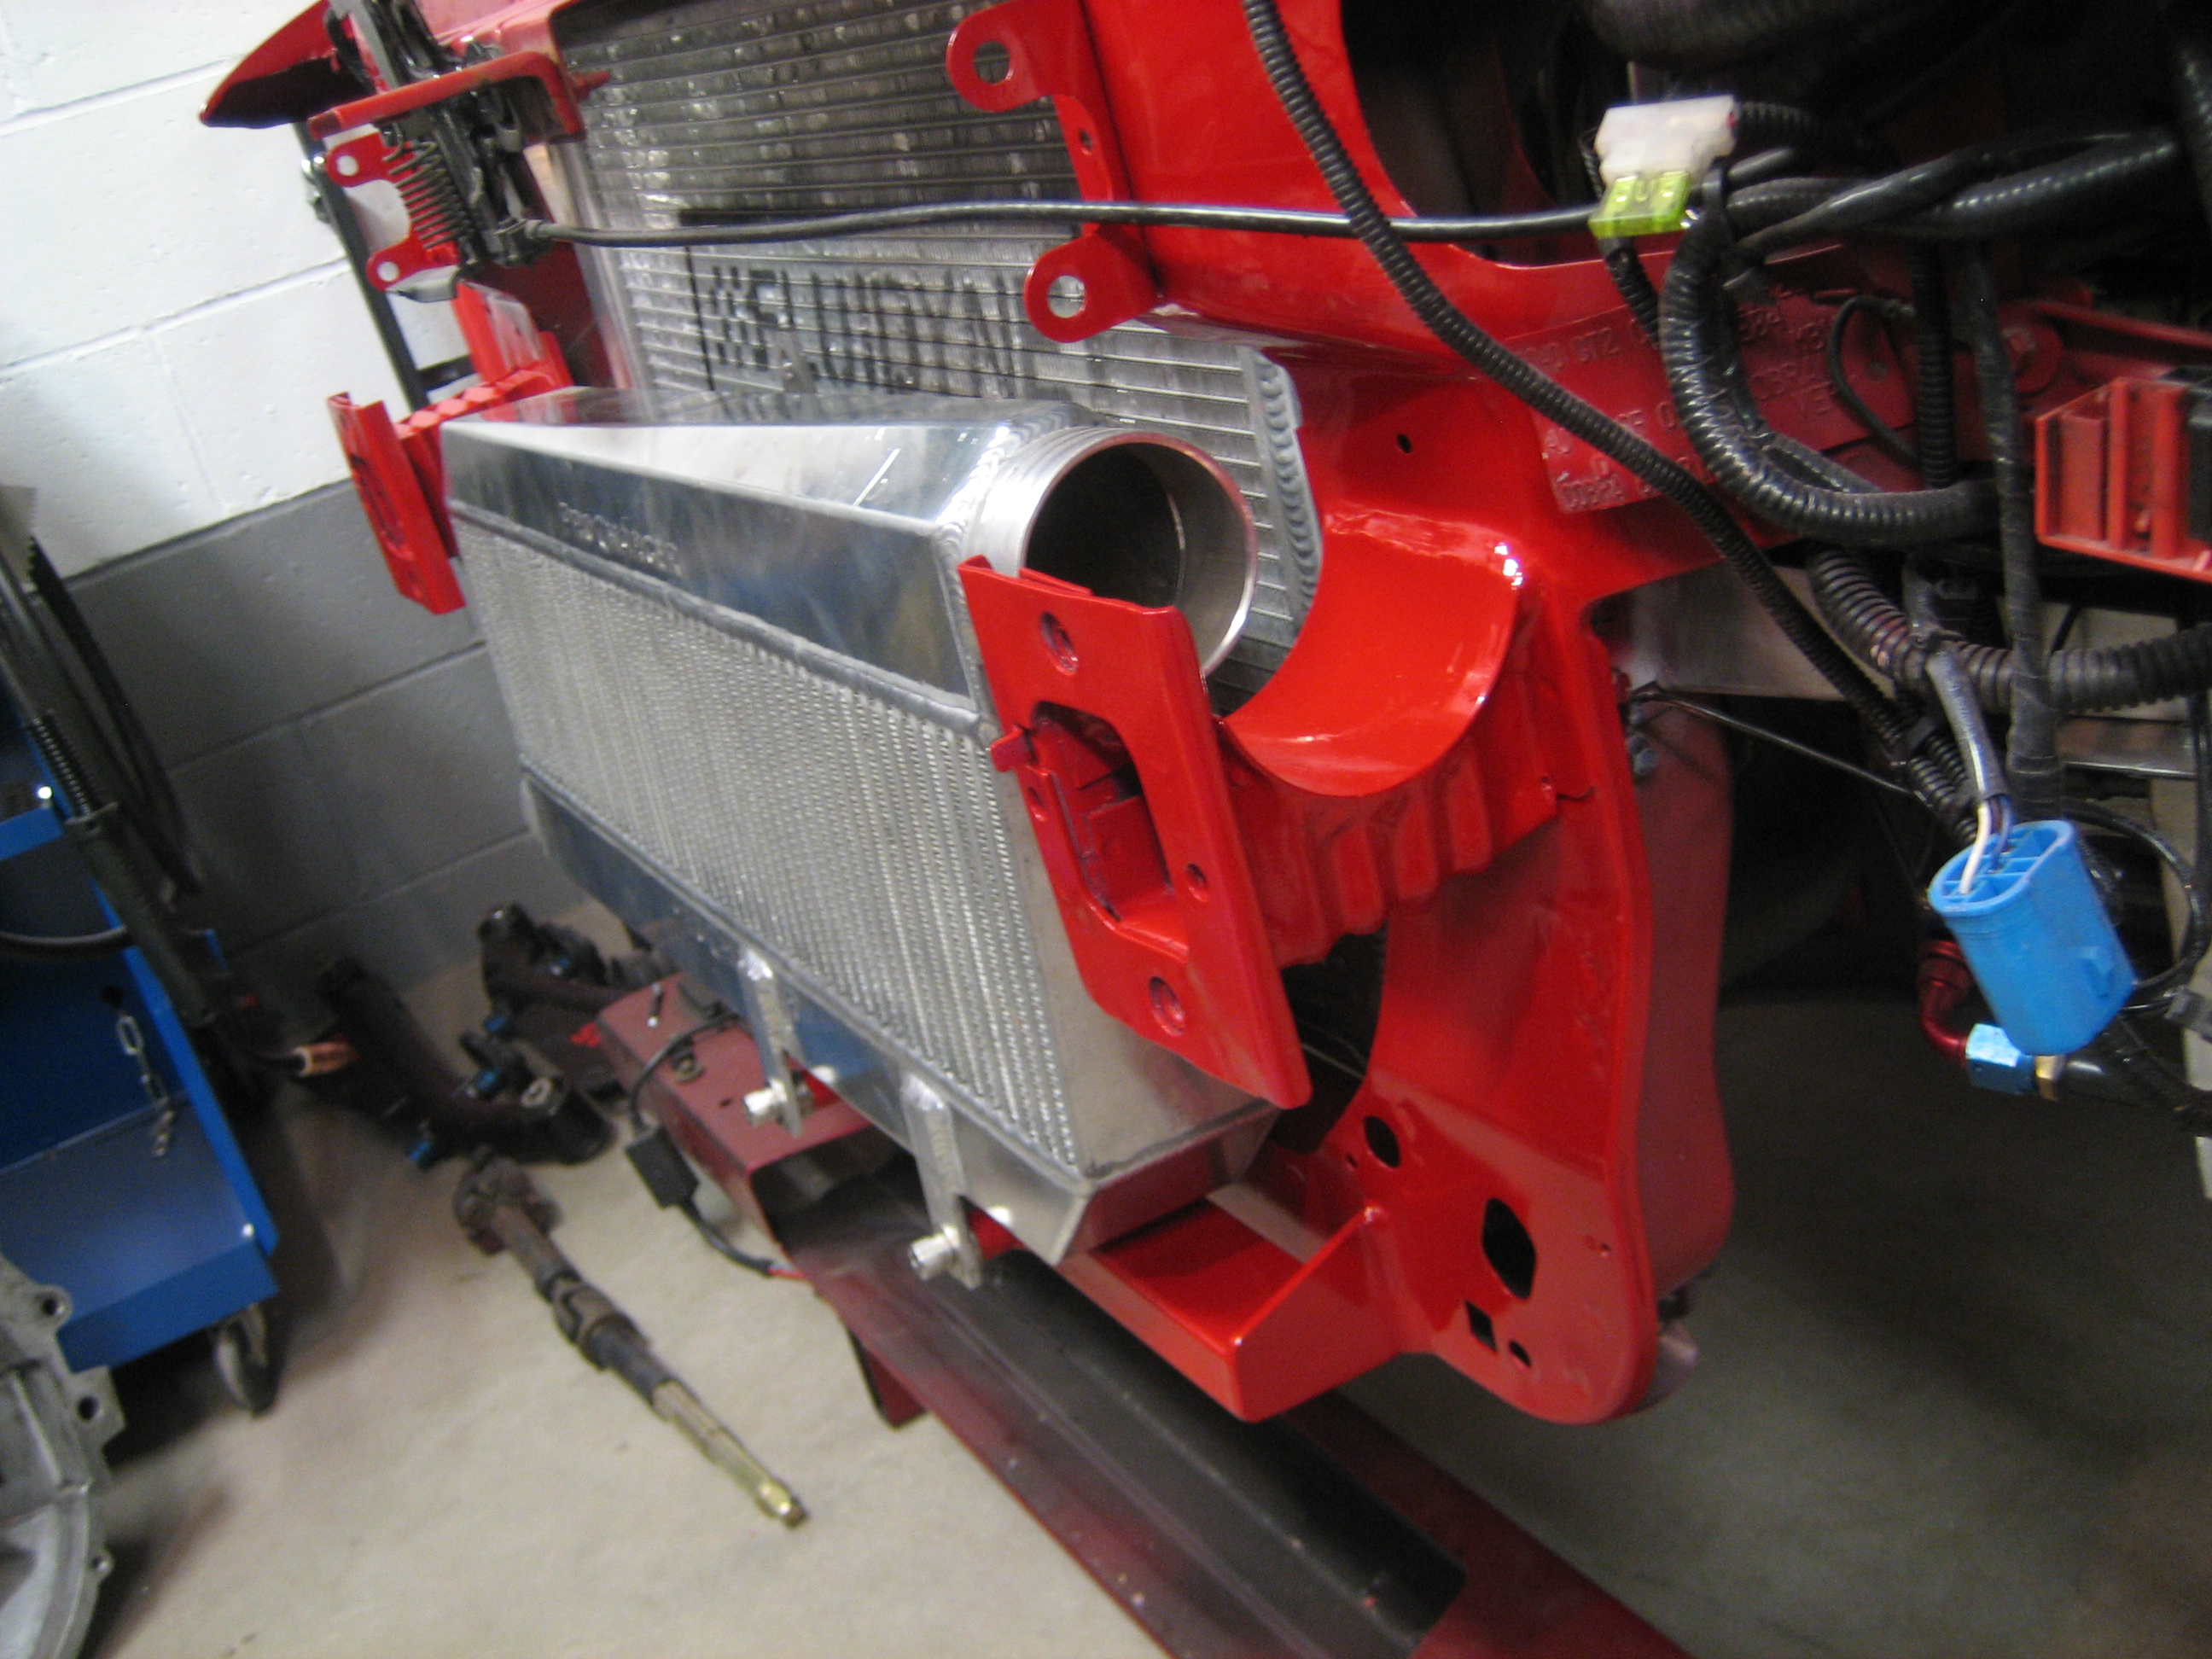
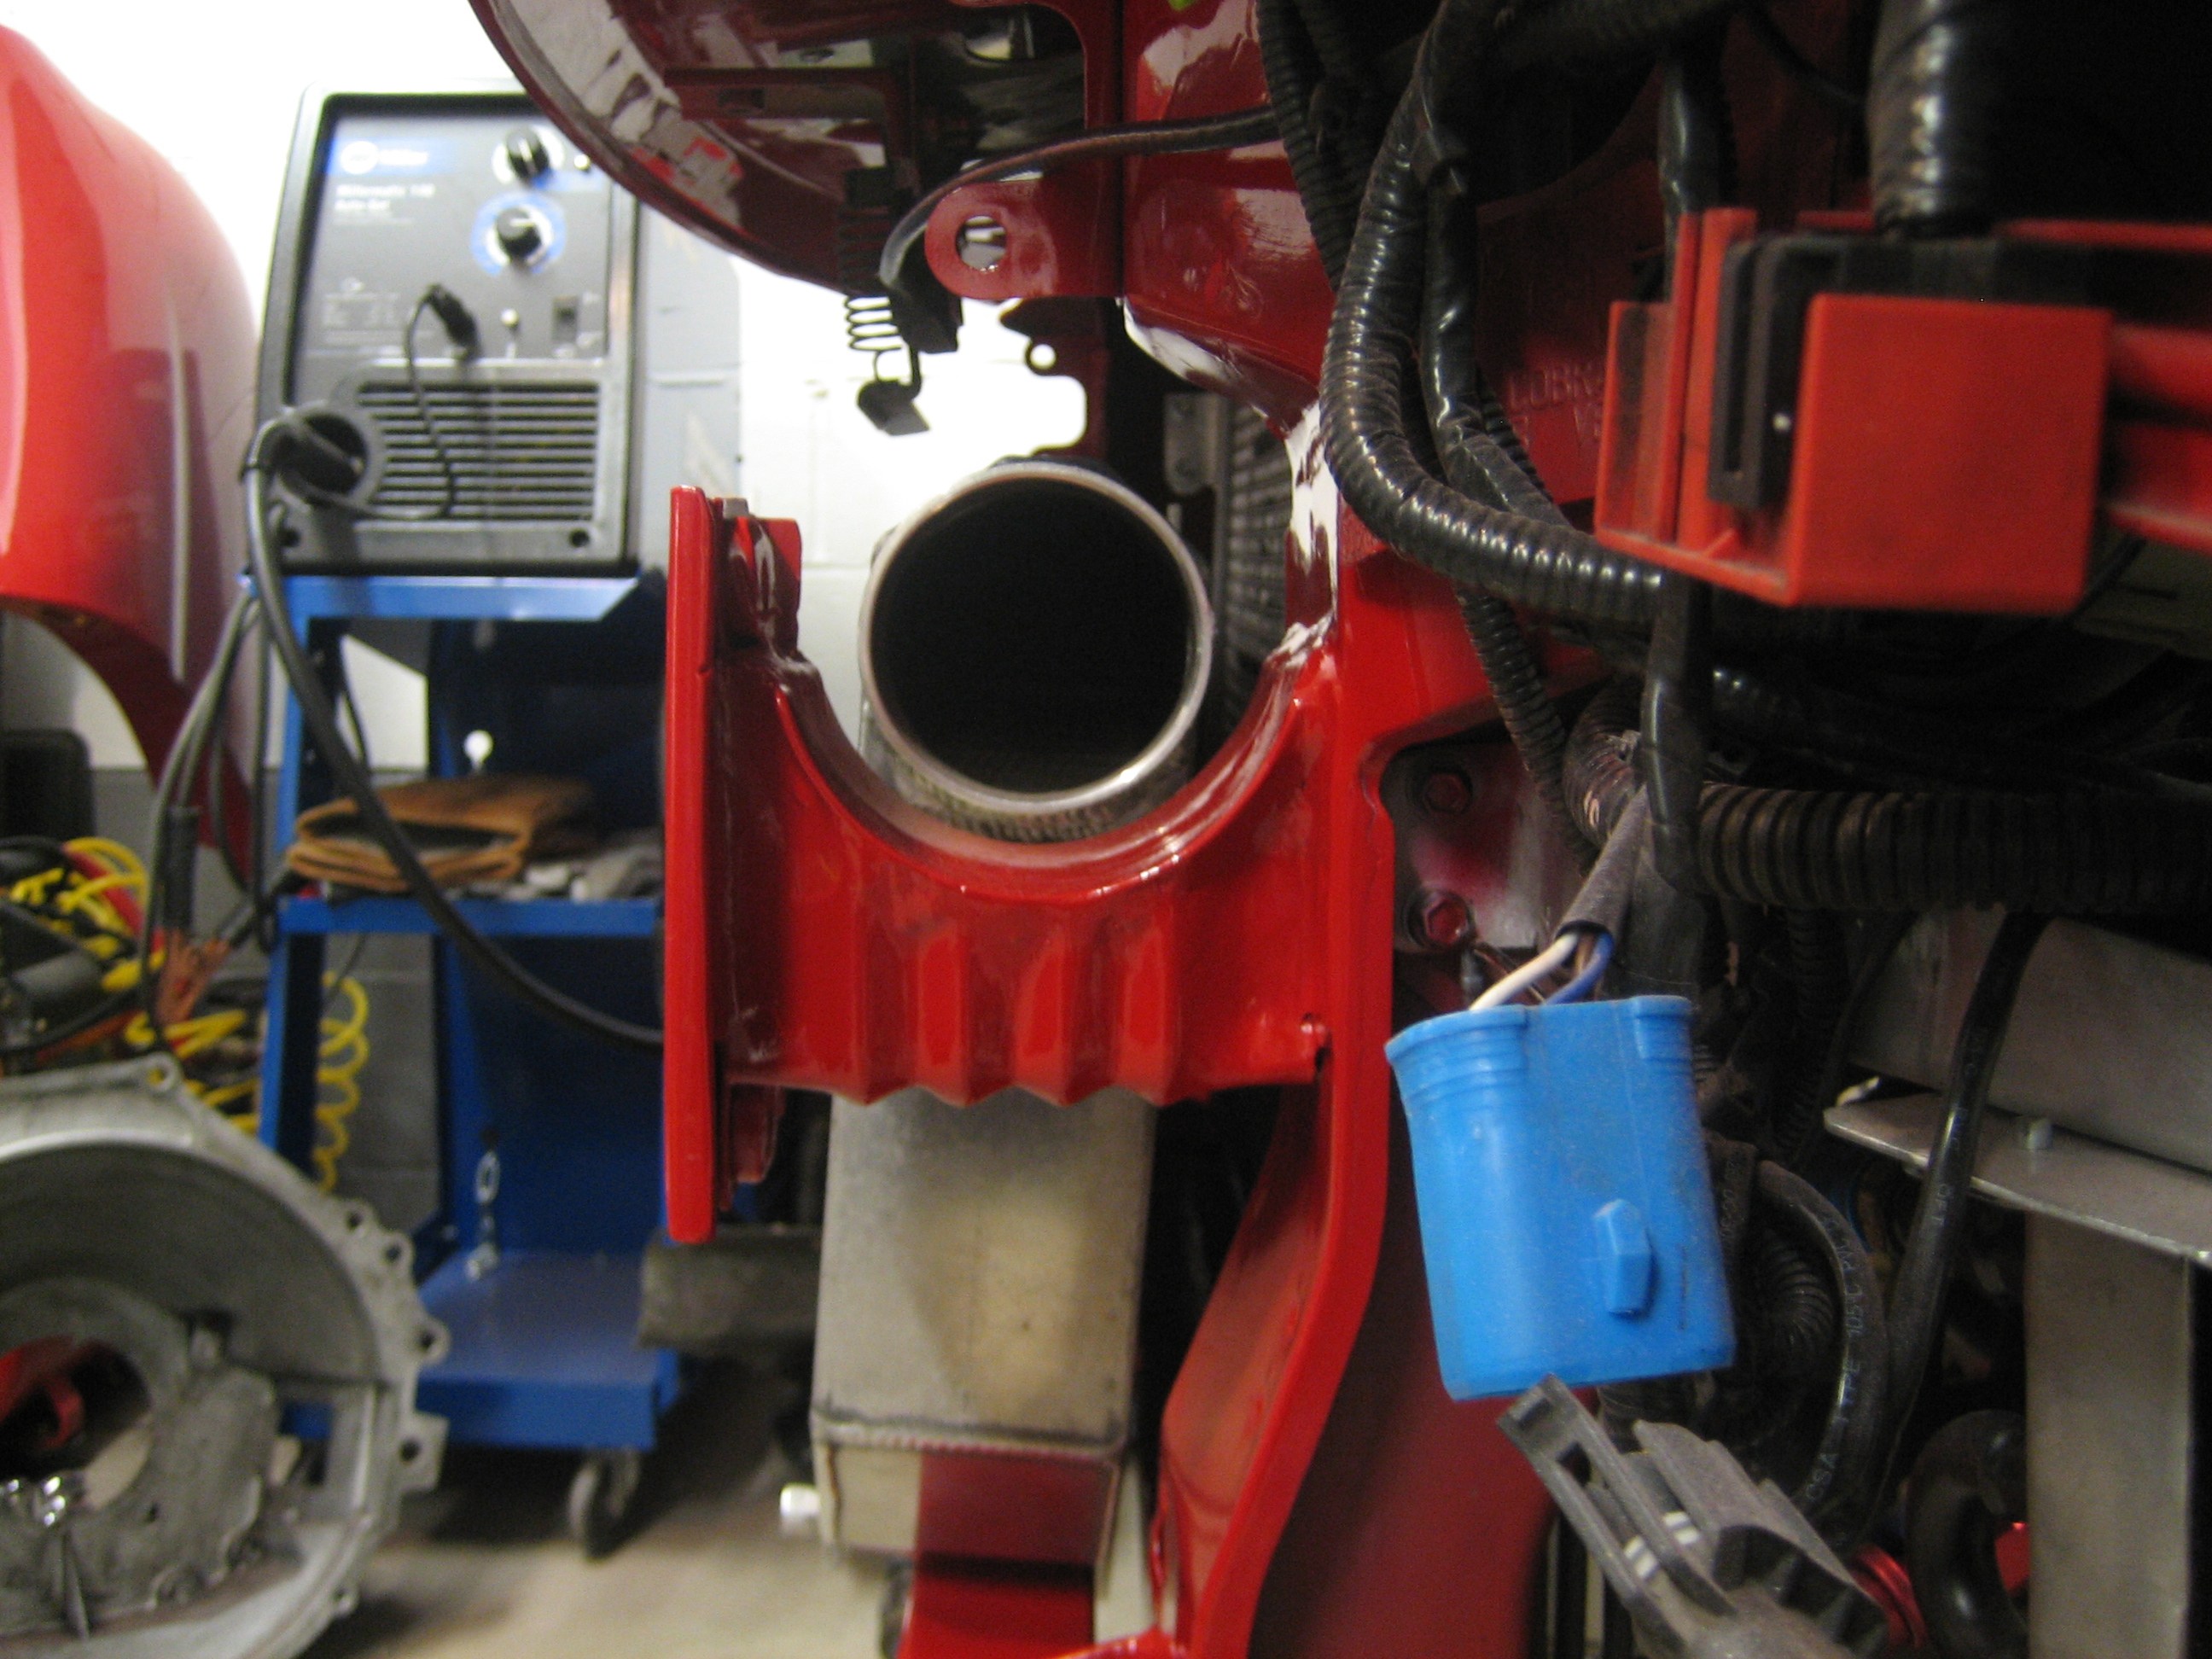
With some of the stuff in place under the hood, I turned my attention back to the intercooler. Made a bottom mount for it, as well as notched the bumper support bracket by cutting a 4" diameter notch out of it, then welded in a piece of 4" dia. steel piping. Then repainted the whole core support again, lol.

 95 Rio Red Mustang Cobra
Procharger D1SC 347 stroker, full maximum motorsports suspension, Full Tilt Boogie 03 Cobra IRS, Tremec 3550, 19x9.5 and 19x11 HRE 542R. 566rwhp/614rwtq
https://www.pro-touring.com/threads/...ra-OCD-Machine
04-14-2013 #3
Registered User
- Join Date
- Jul 2010
- Location
- Pittsburgh, PA
- Posts
- 114
Then fabbed up an upper mount that bolts to the hood latch bracket
The 3.35 pulley showed up from Procharger so that went on, then I needed to measure for belt length. Enjoy my patriotic method for measuring using a cheap spool of ribbon from walmart, lol. I can't remember why I had the upper intake off at this point though
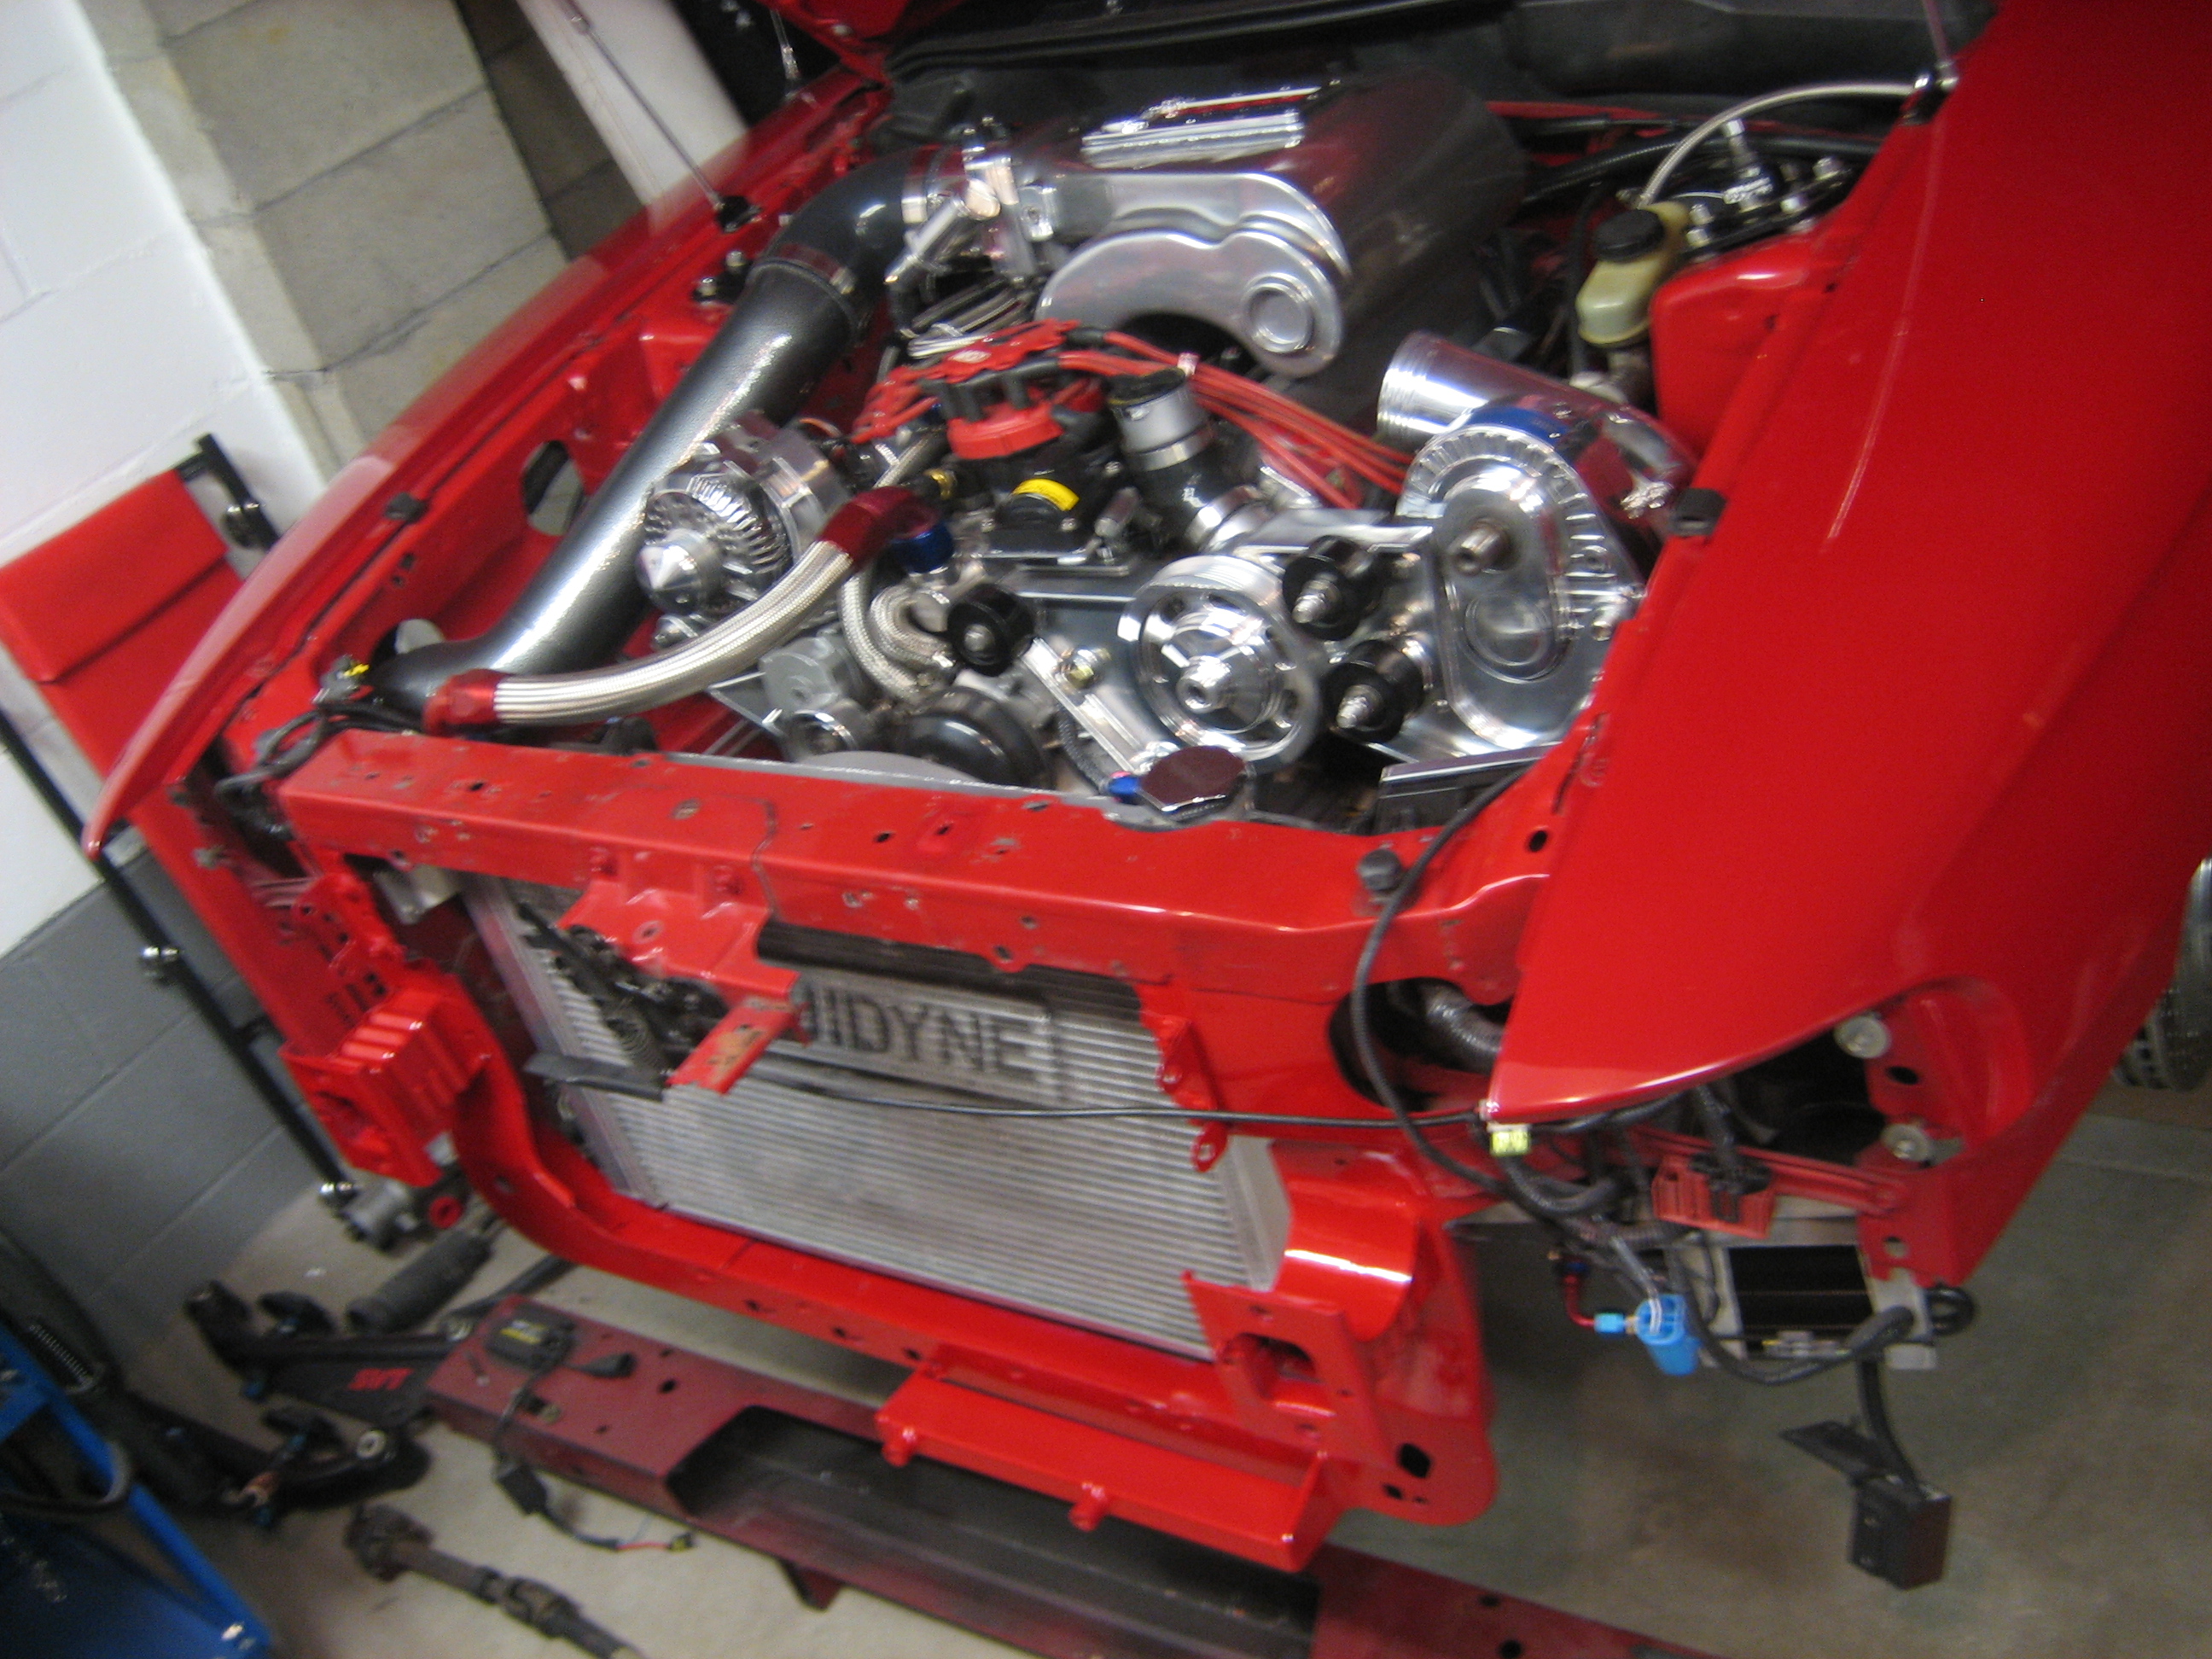
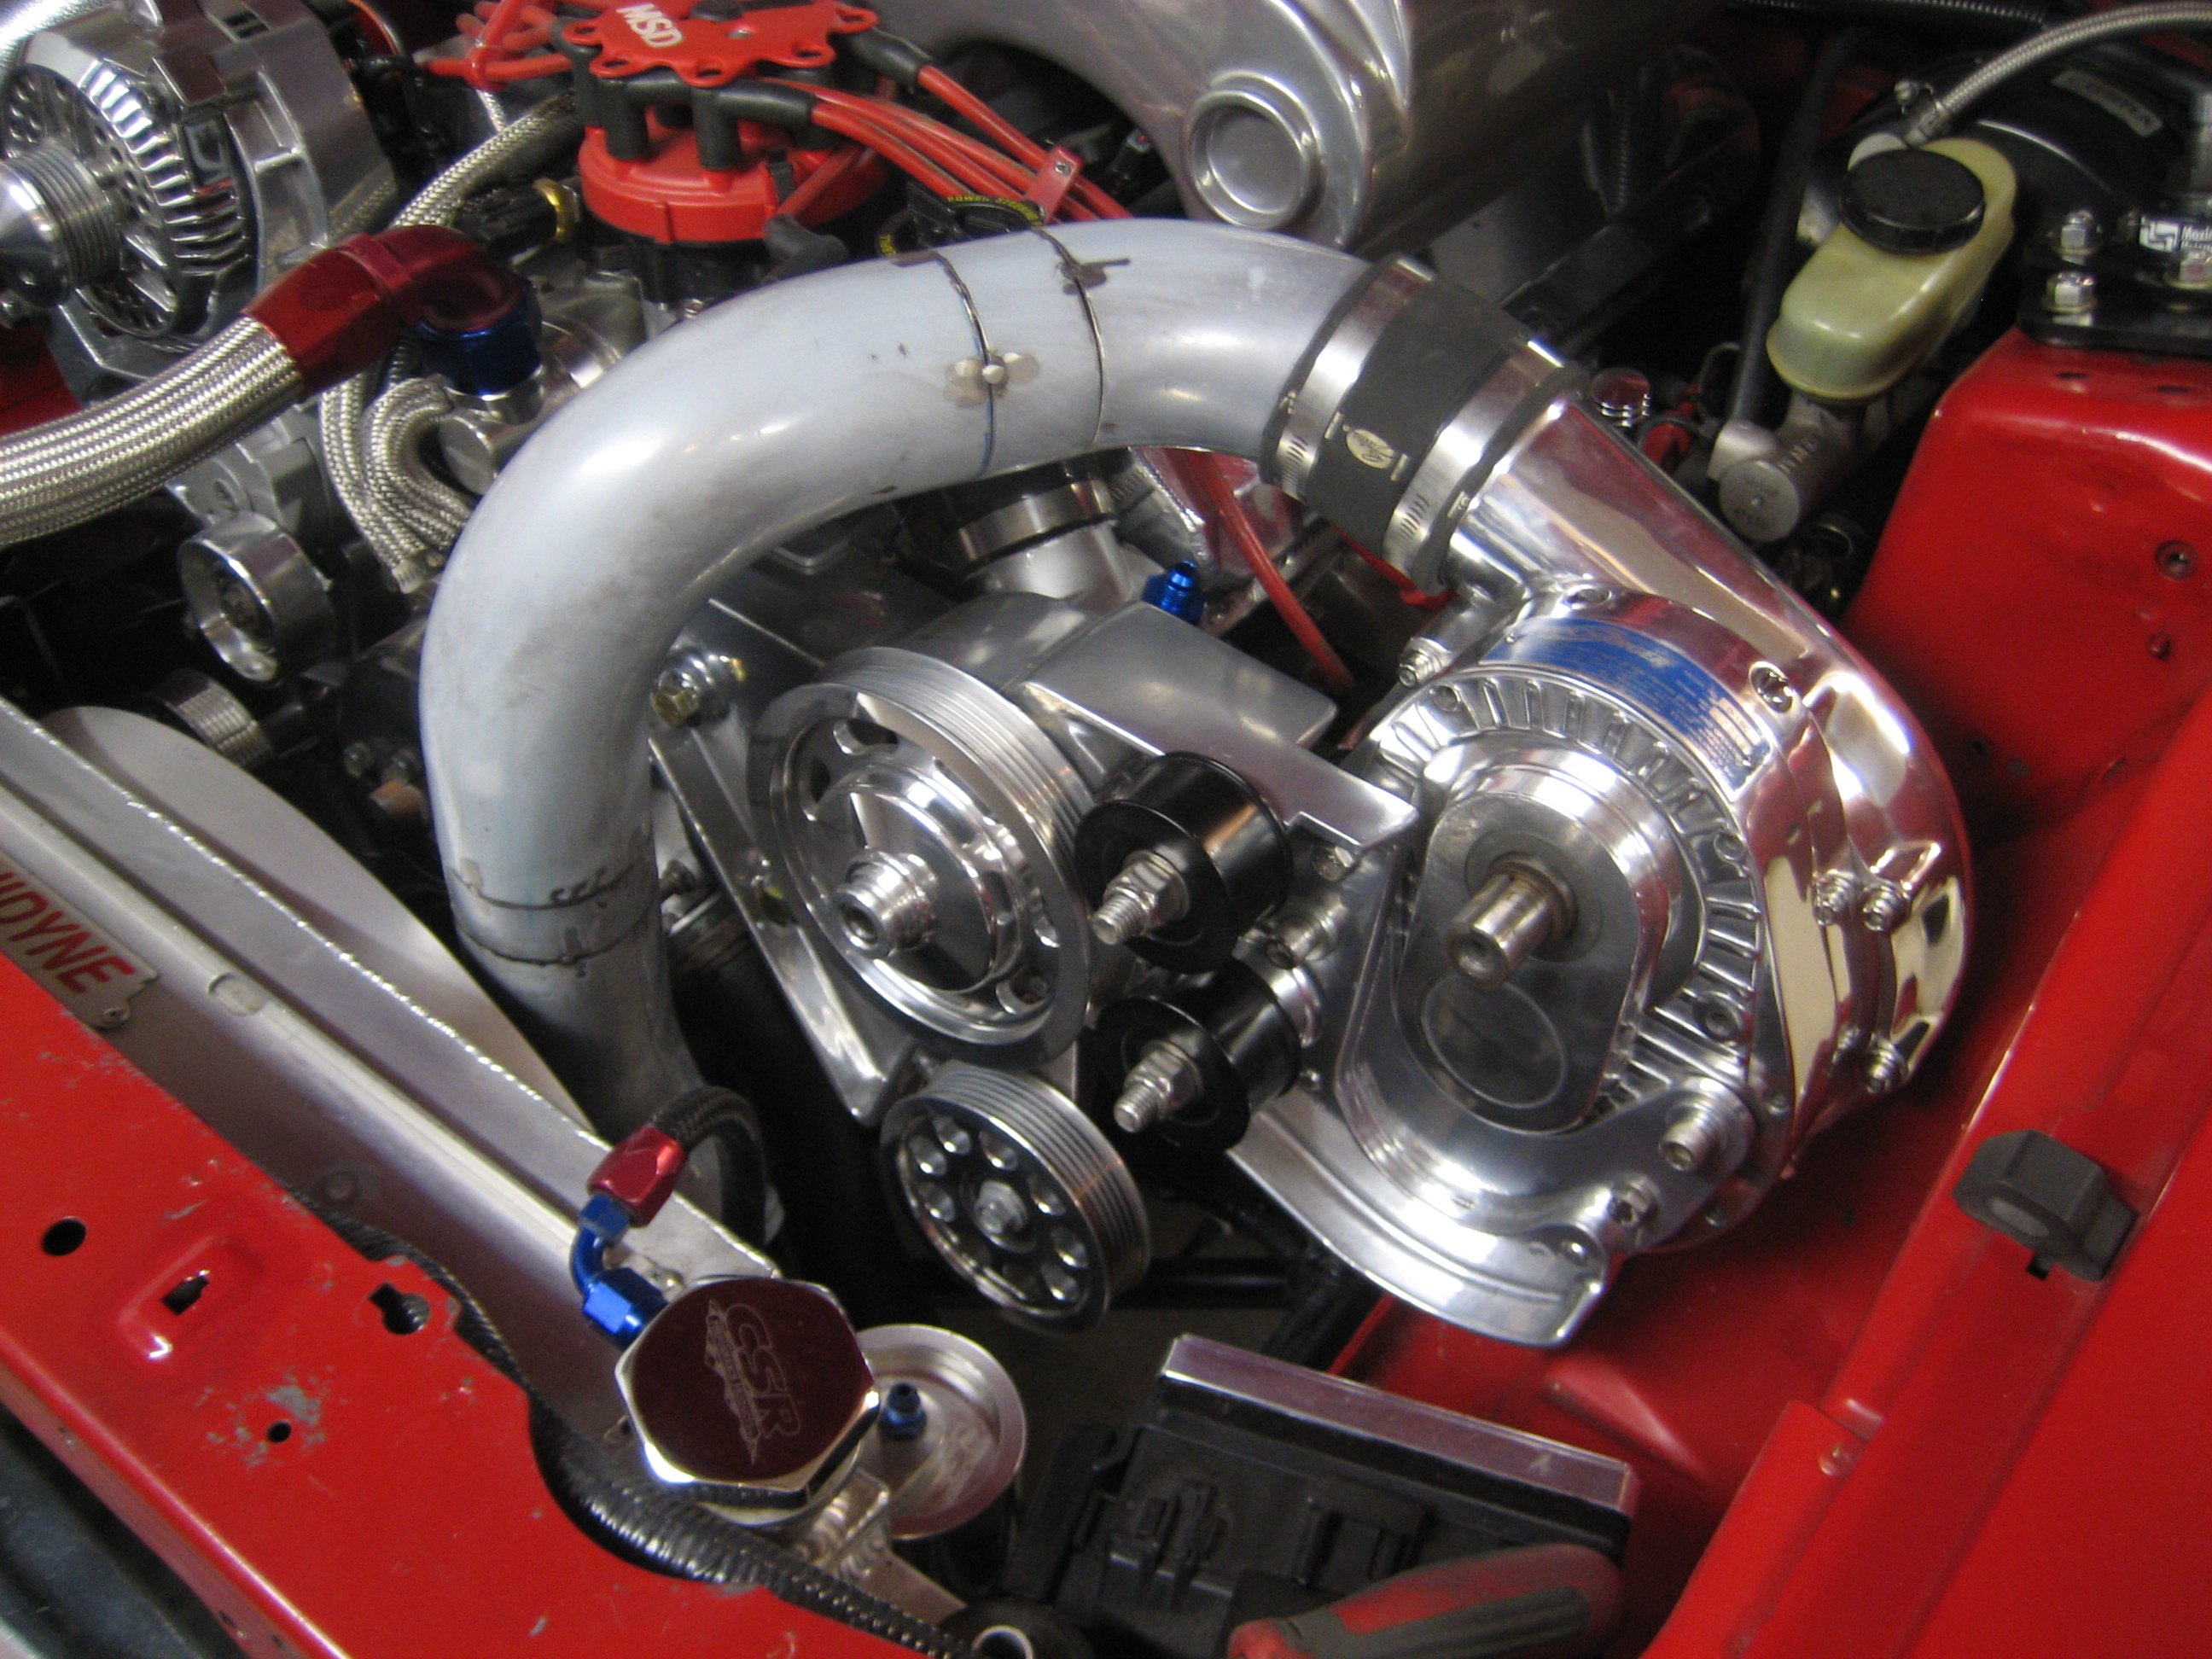
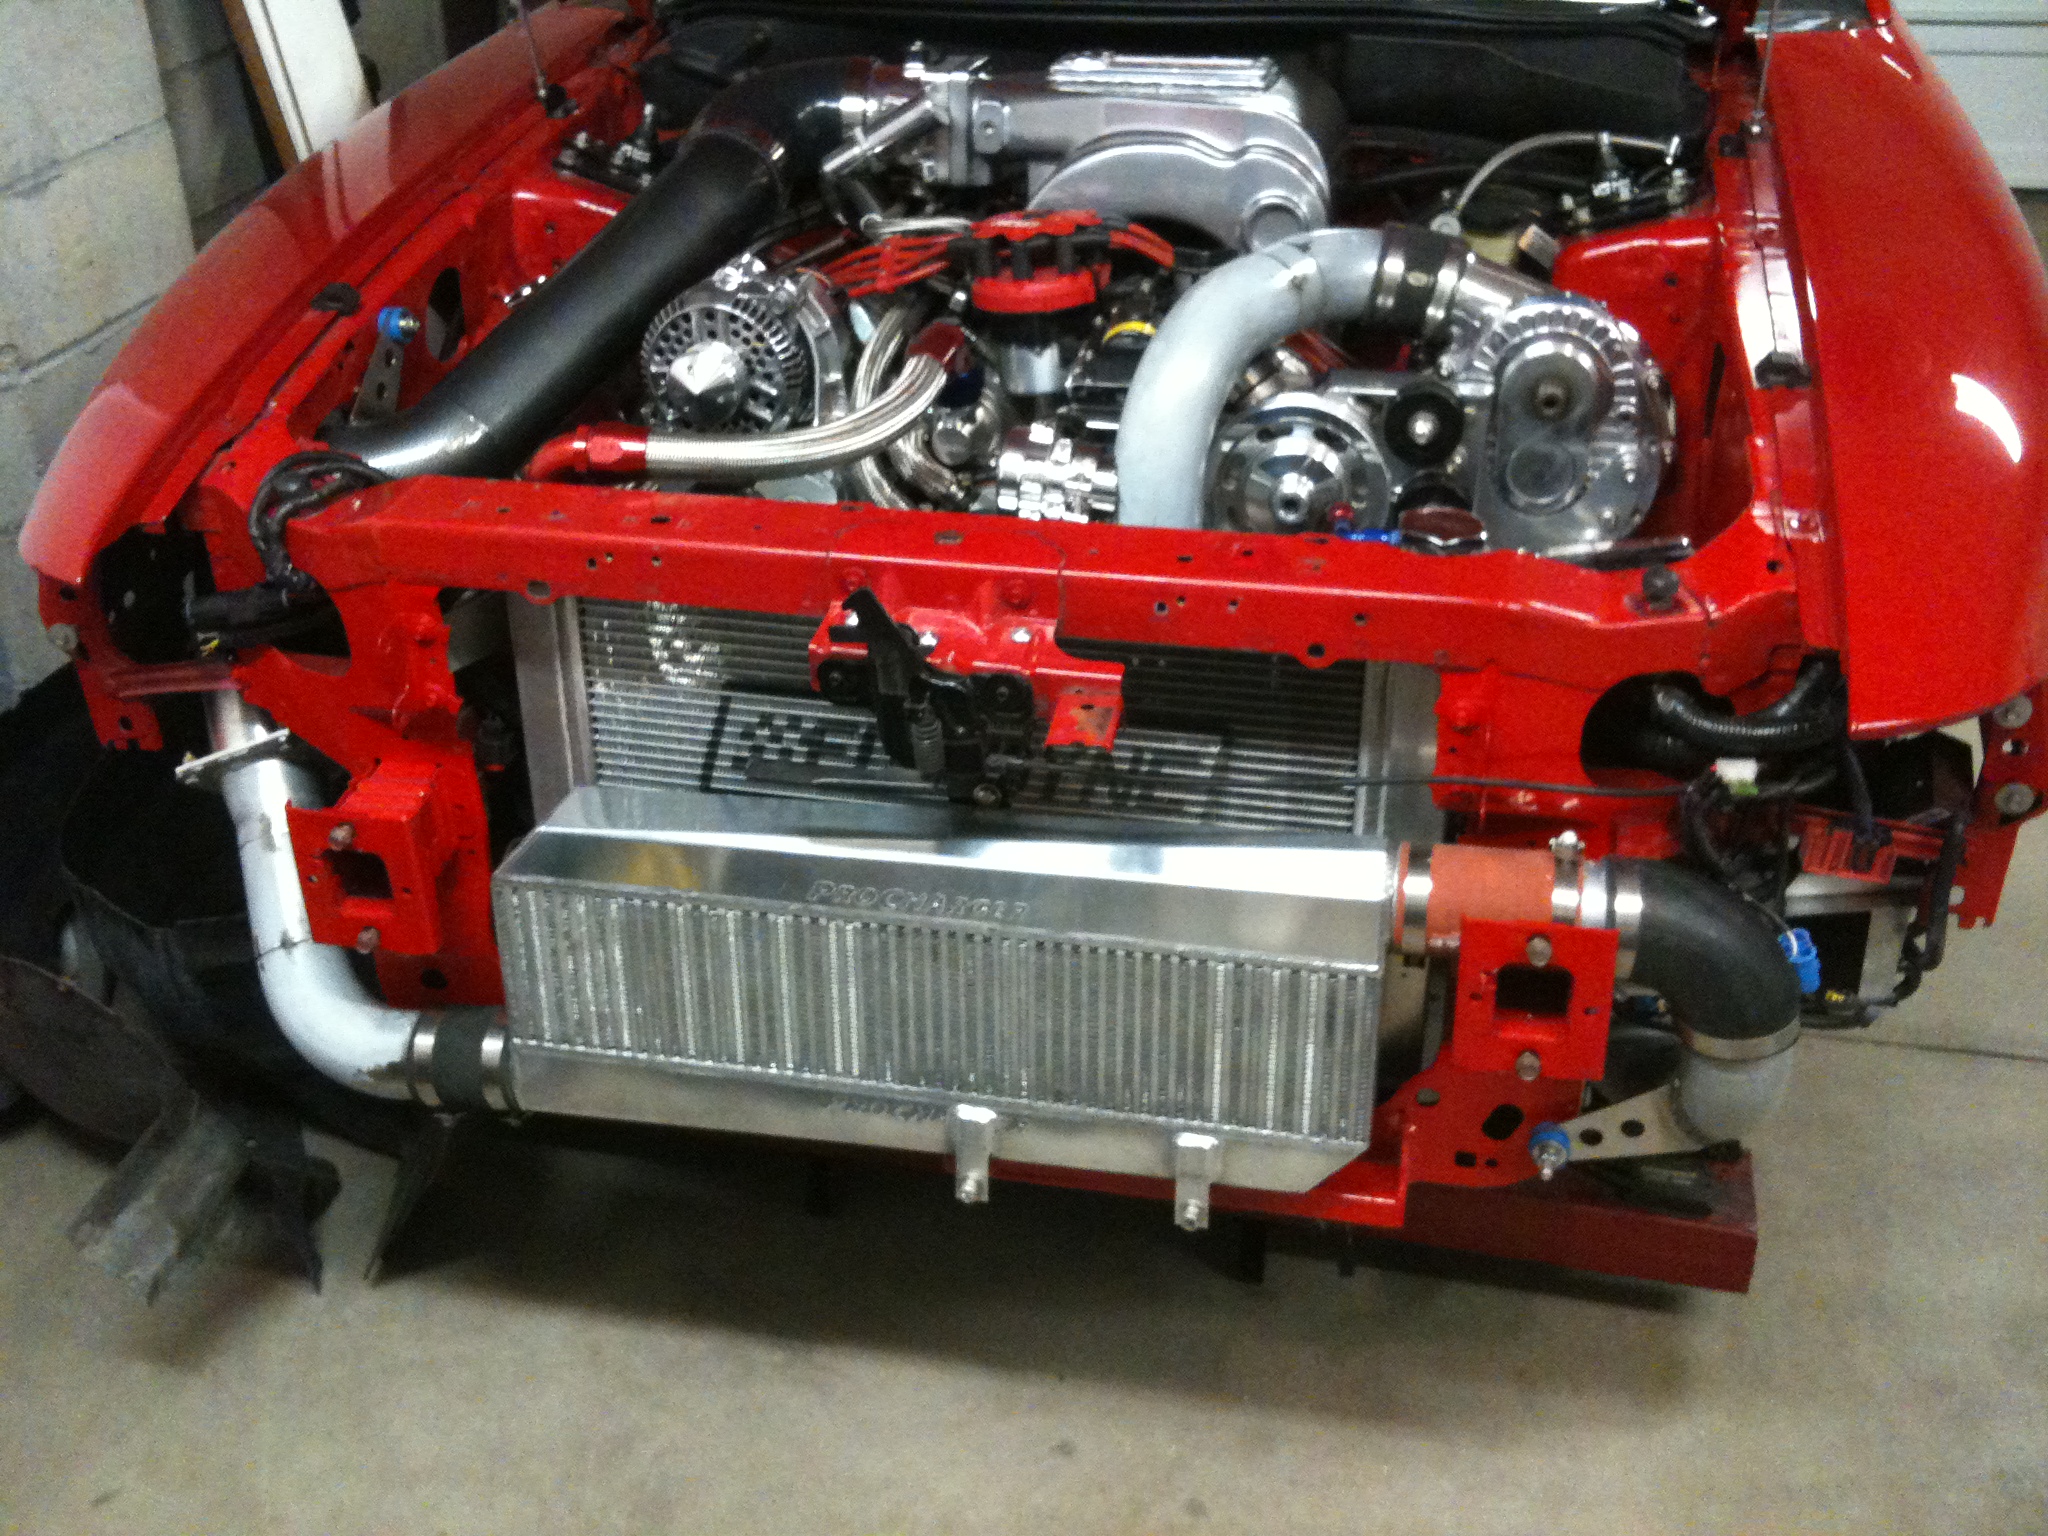
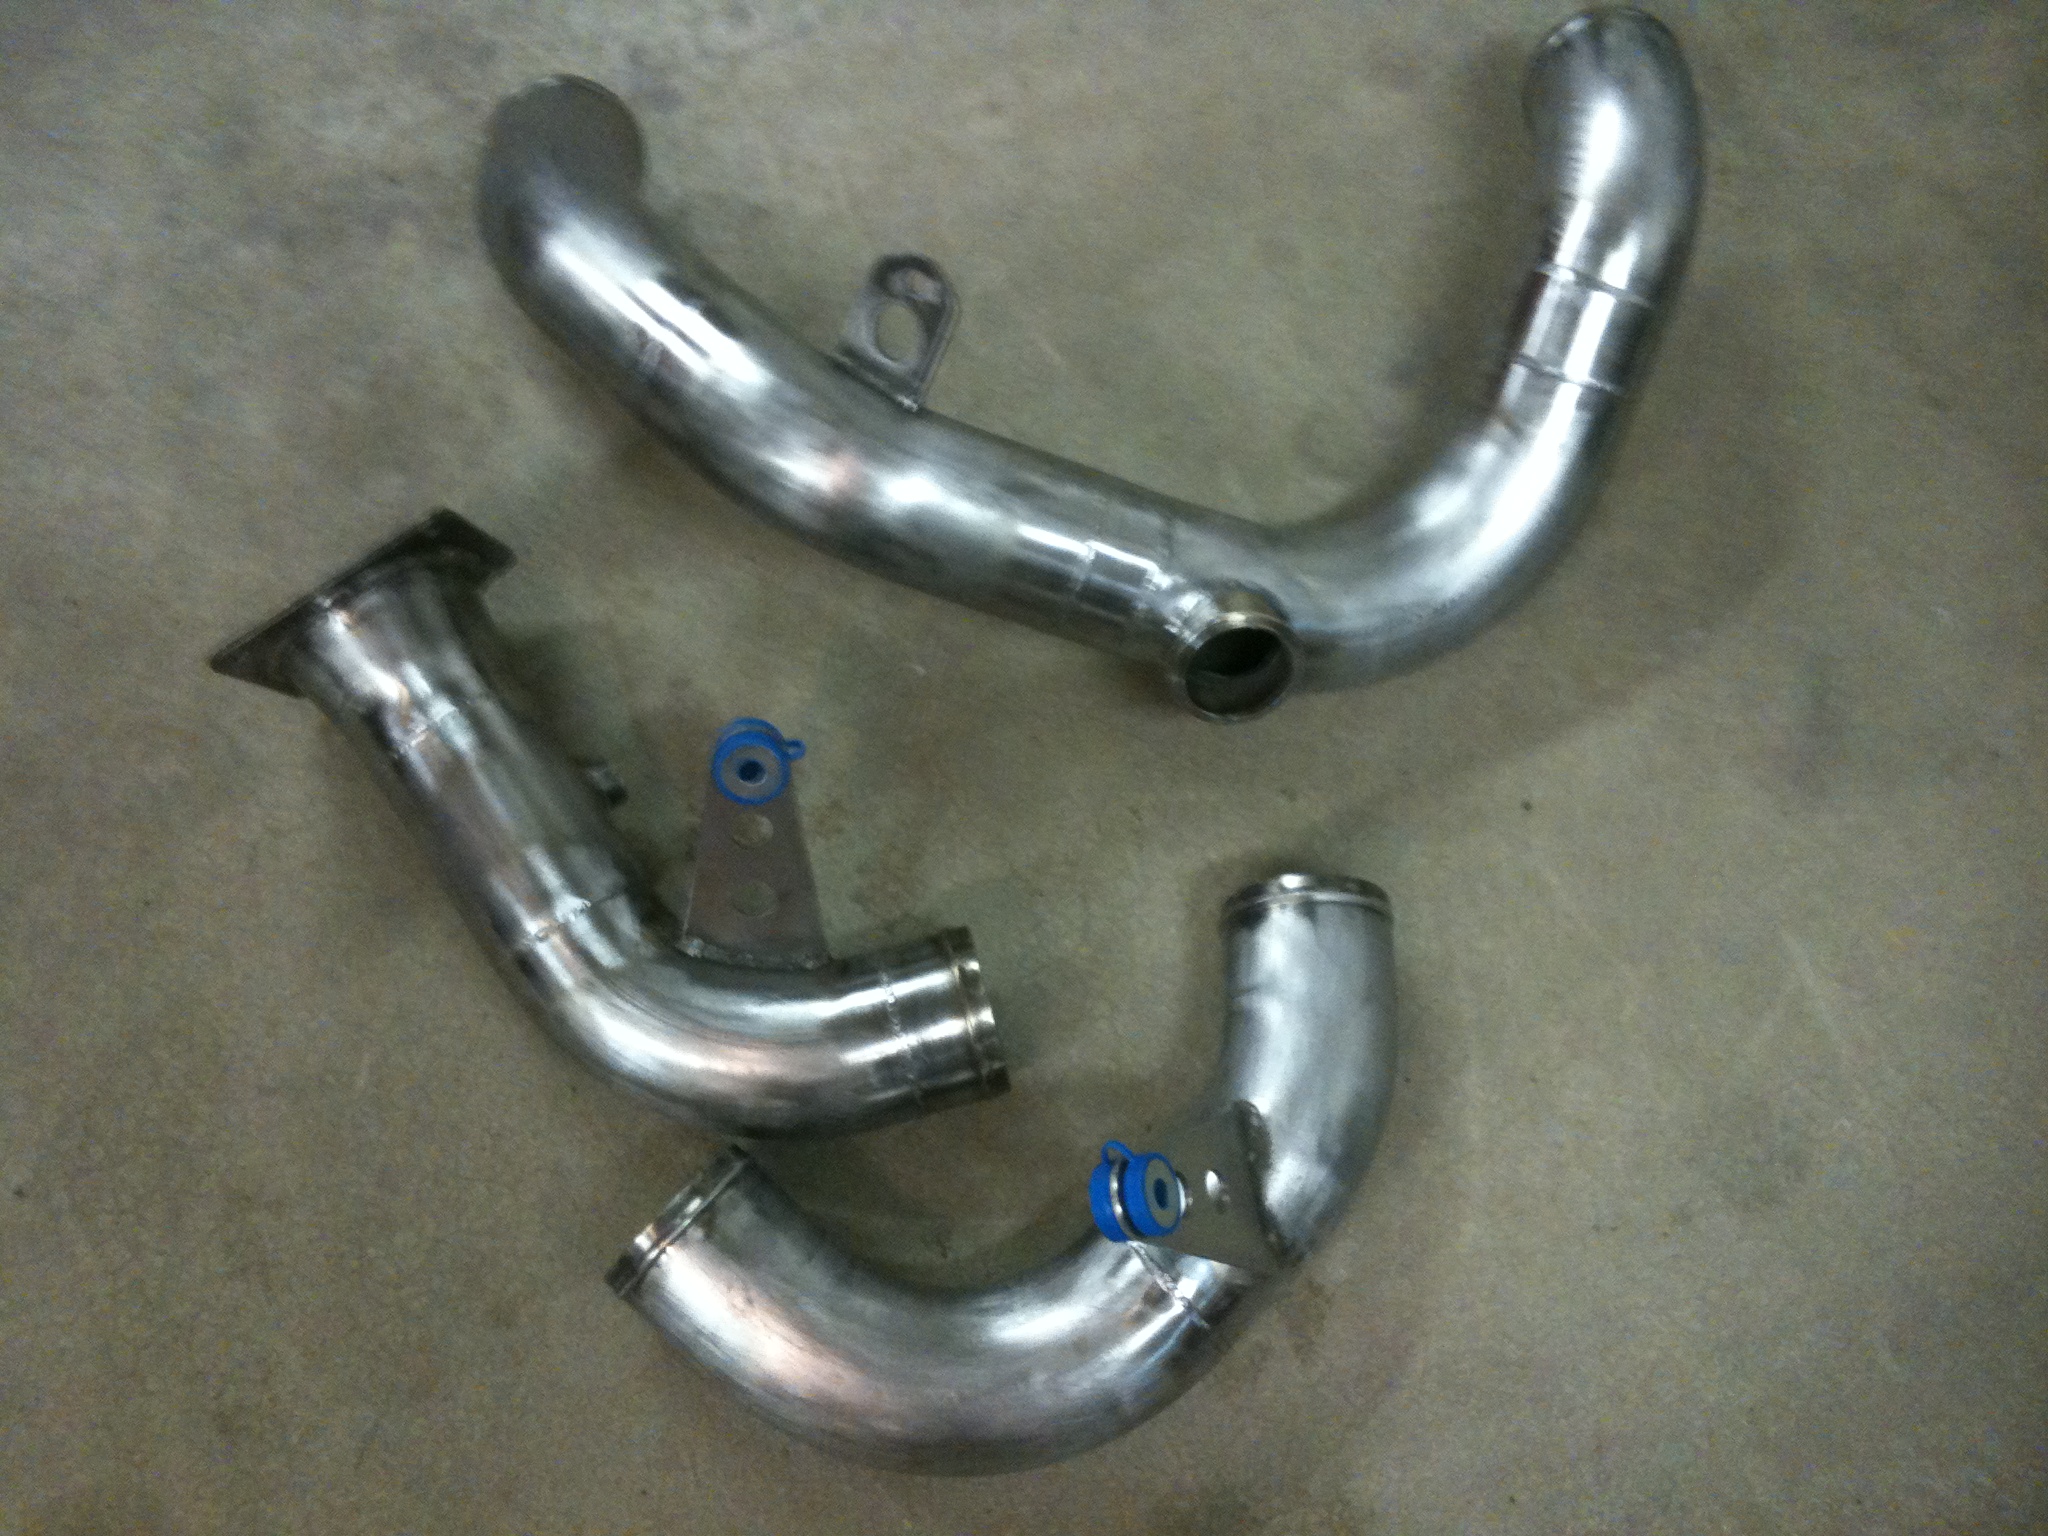
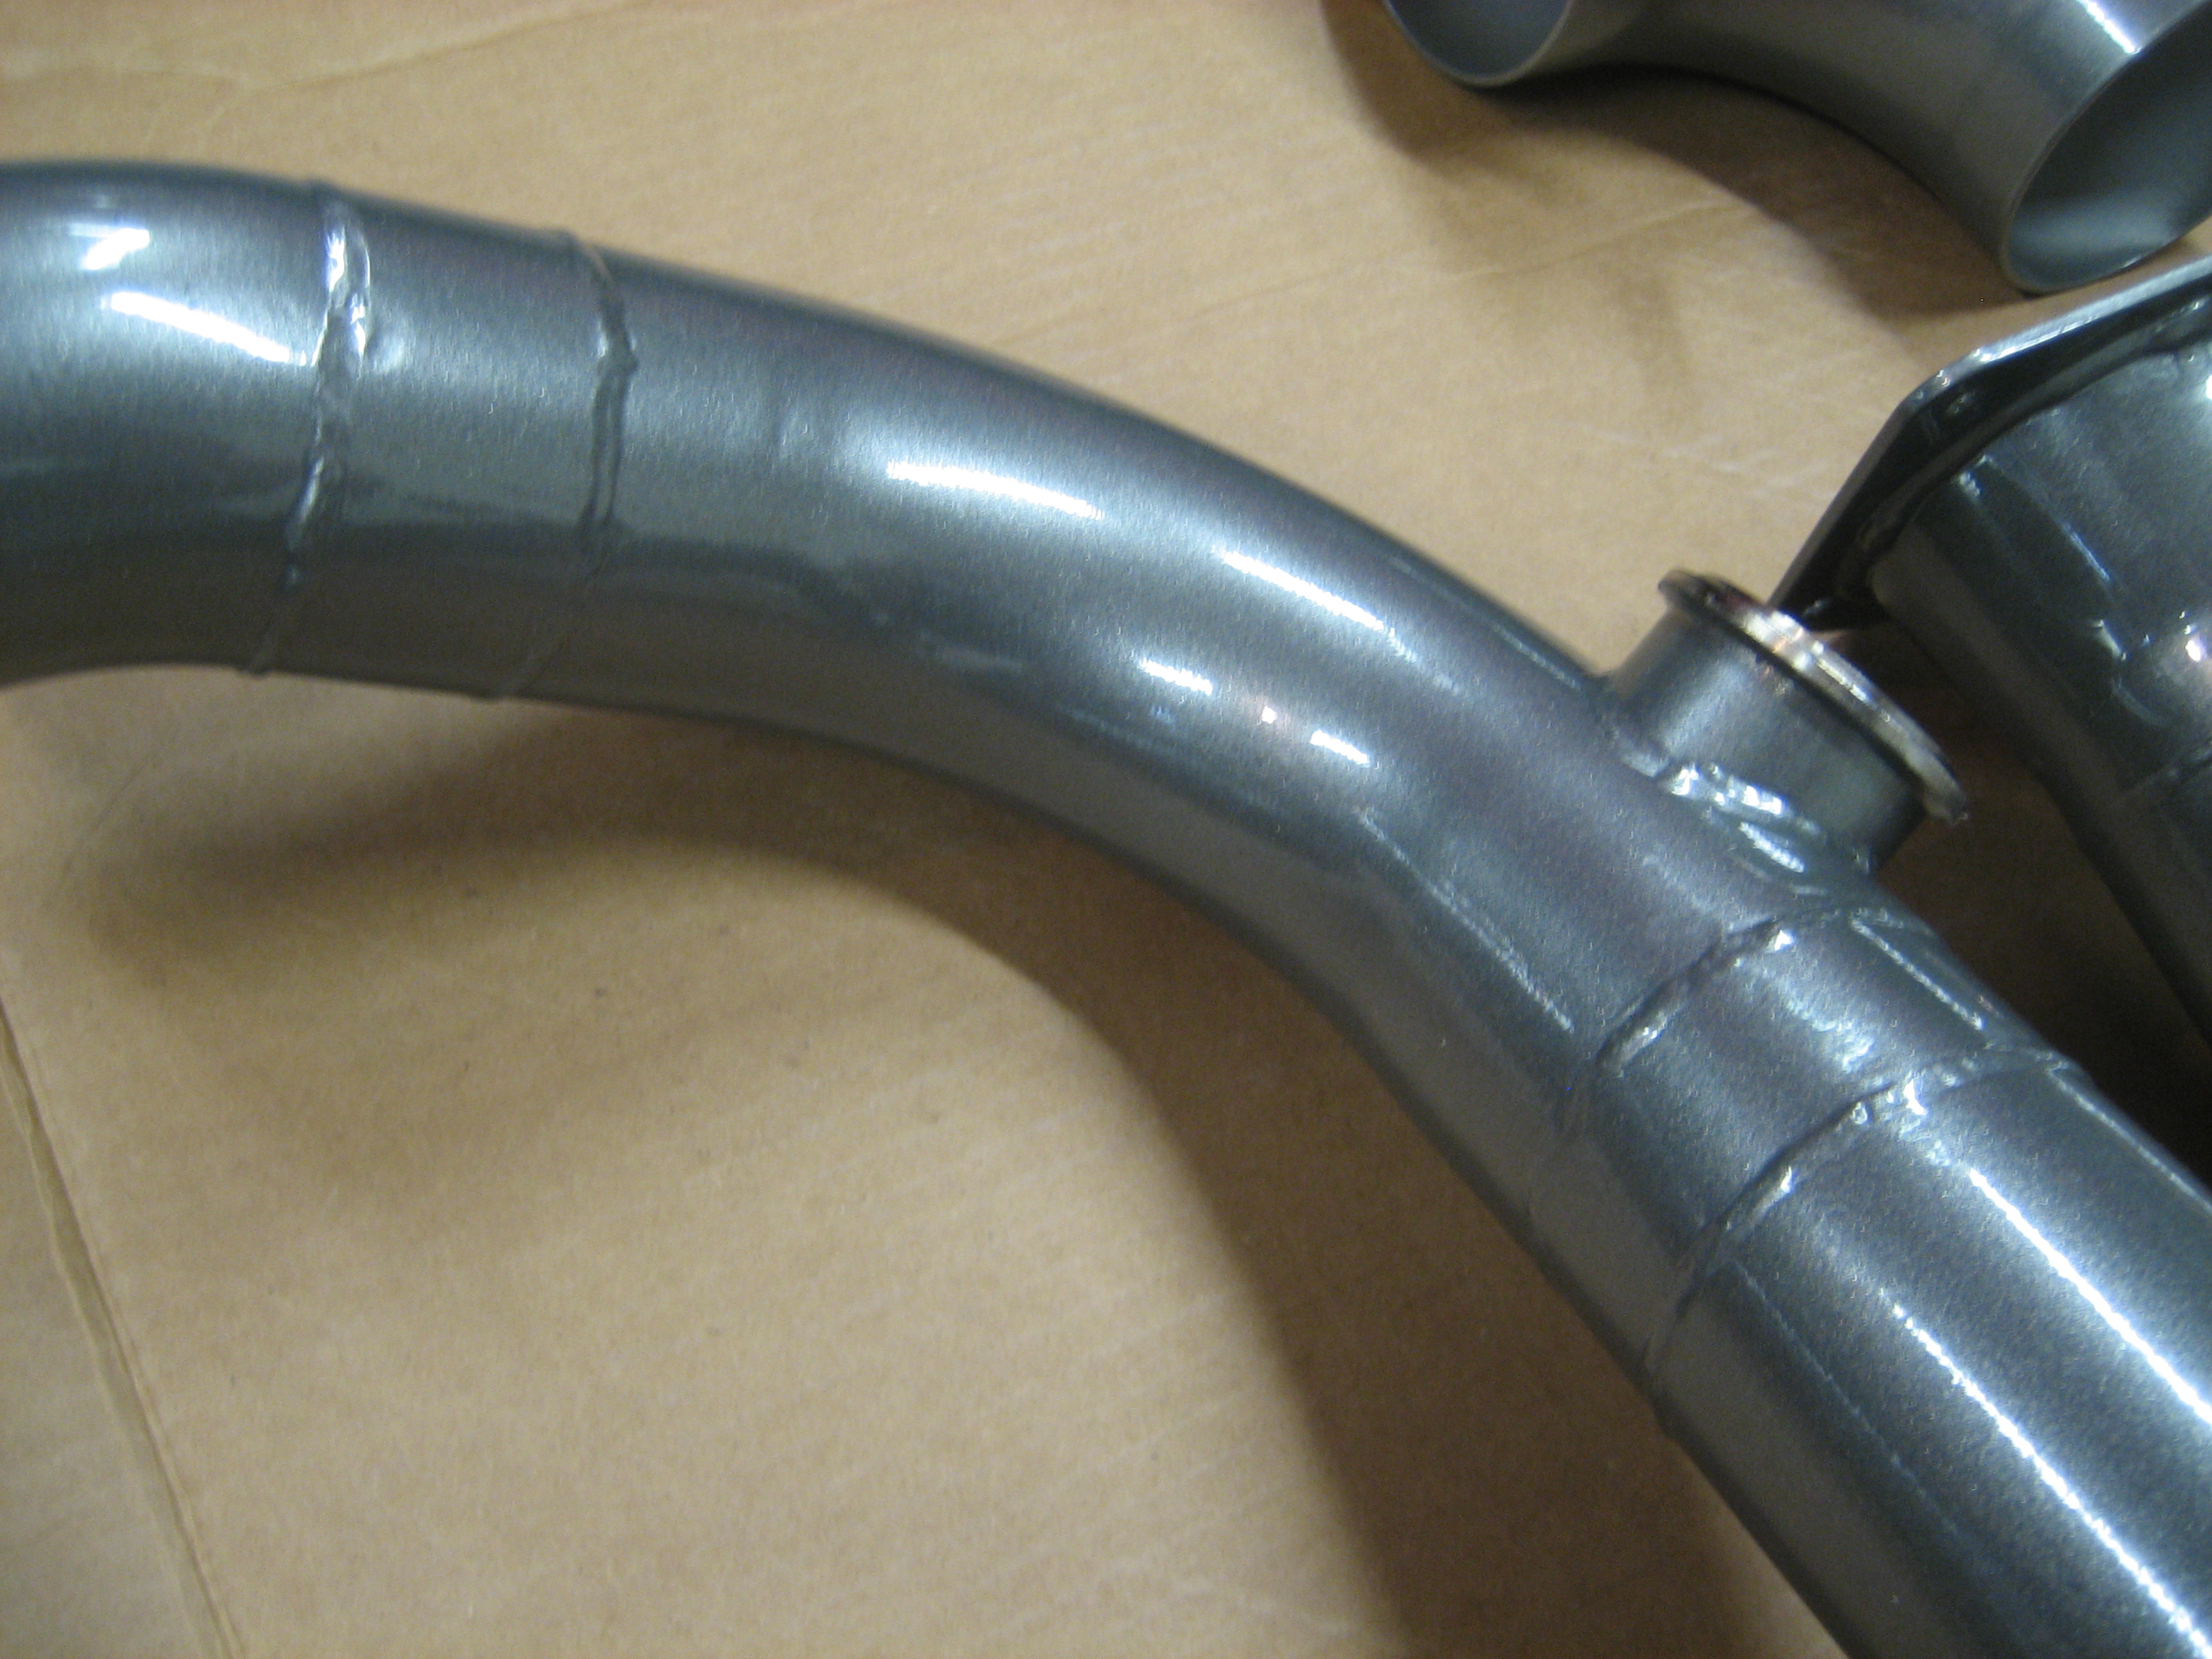
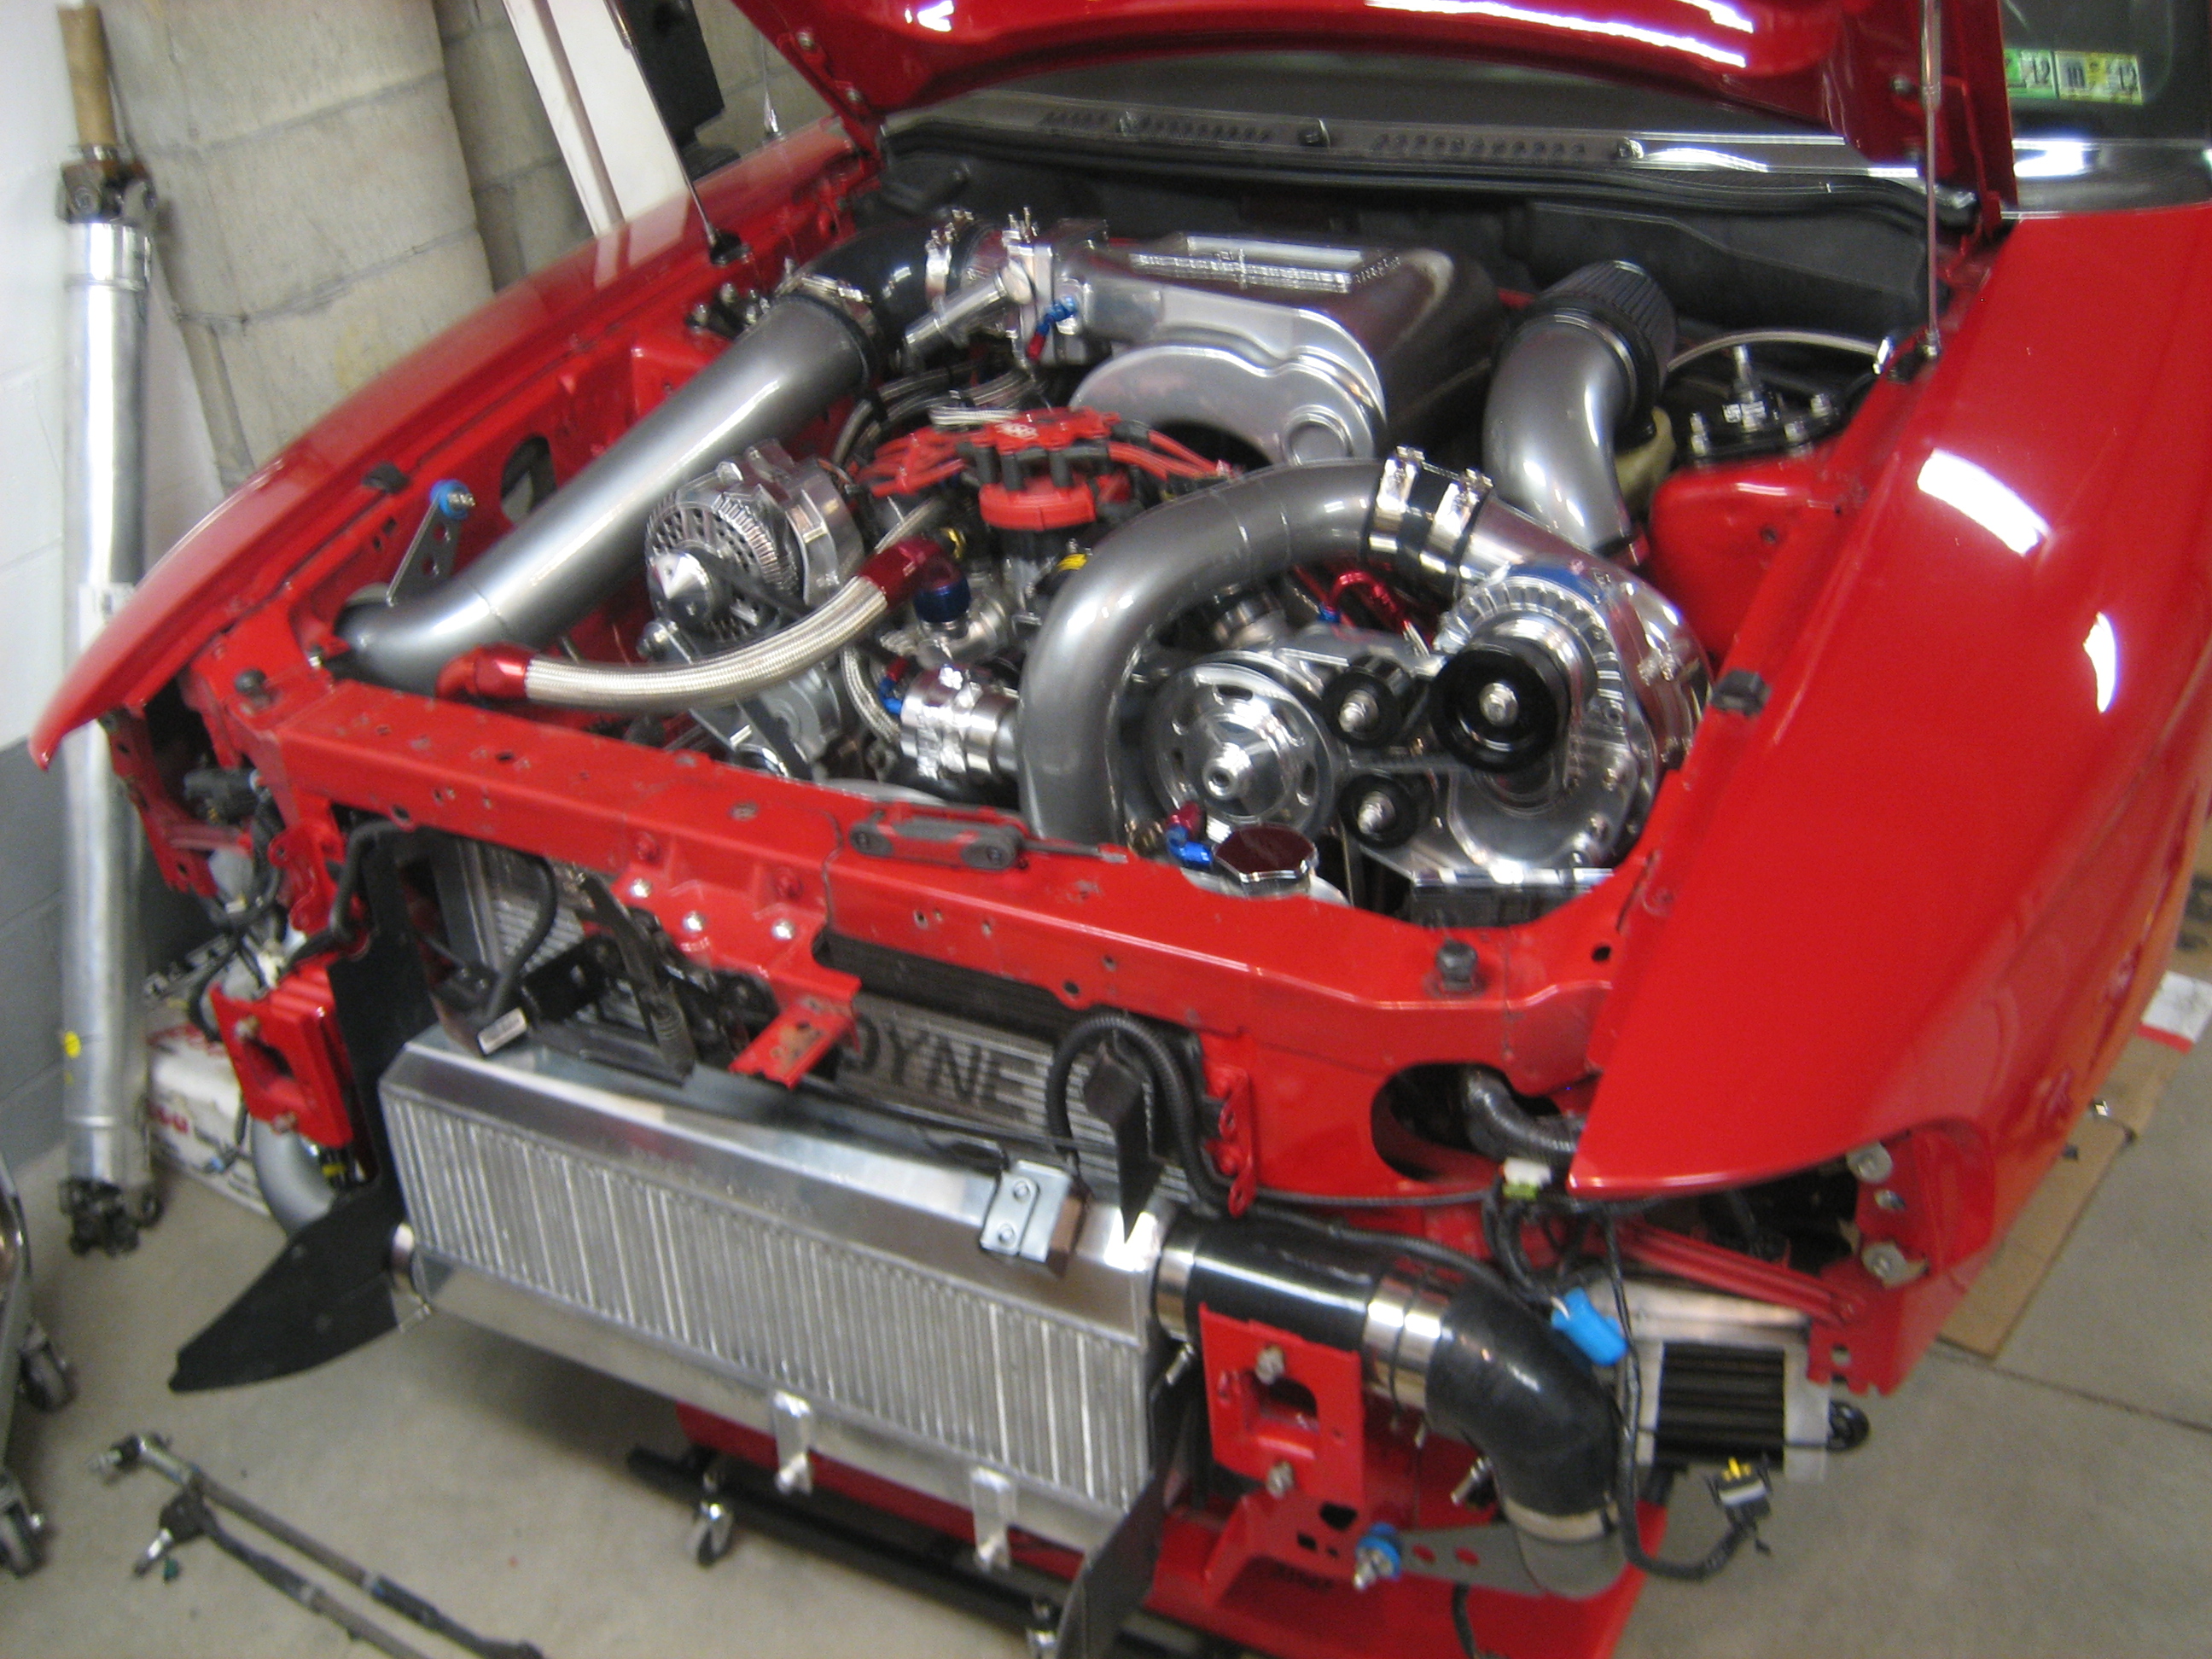
Next it was time to start fabbing the boost/intercooler piping. I chose to mount the Race Mart 50mm BOV font and center above the radiator (because why not, lol), and the plan was to modify the Anderson NA Power Pipe I already had modified for the Fox TB swap so it would tie right in. I bought a used piping kit from a new edge Procharger kit for parts. The plan was to cut up all the piping I had to get the bends I needed. This ended up being a MUCH cheaper alternative to buying all new bends, I only paid like $100 for the used piping kit. Another advantage is it gave me plenty of piping with bead-rolled ends so the couplers wouldn't blow off under boost. Mocked things up with crappy rubber elbows I had laying around, they were later replaced with silicone.
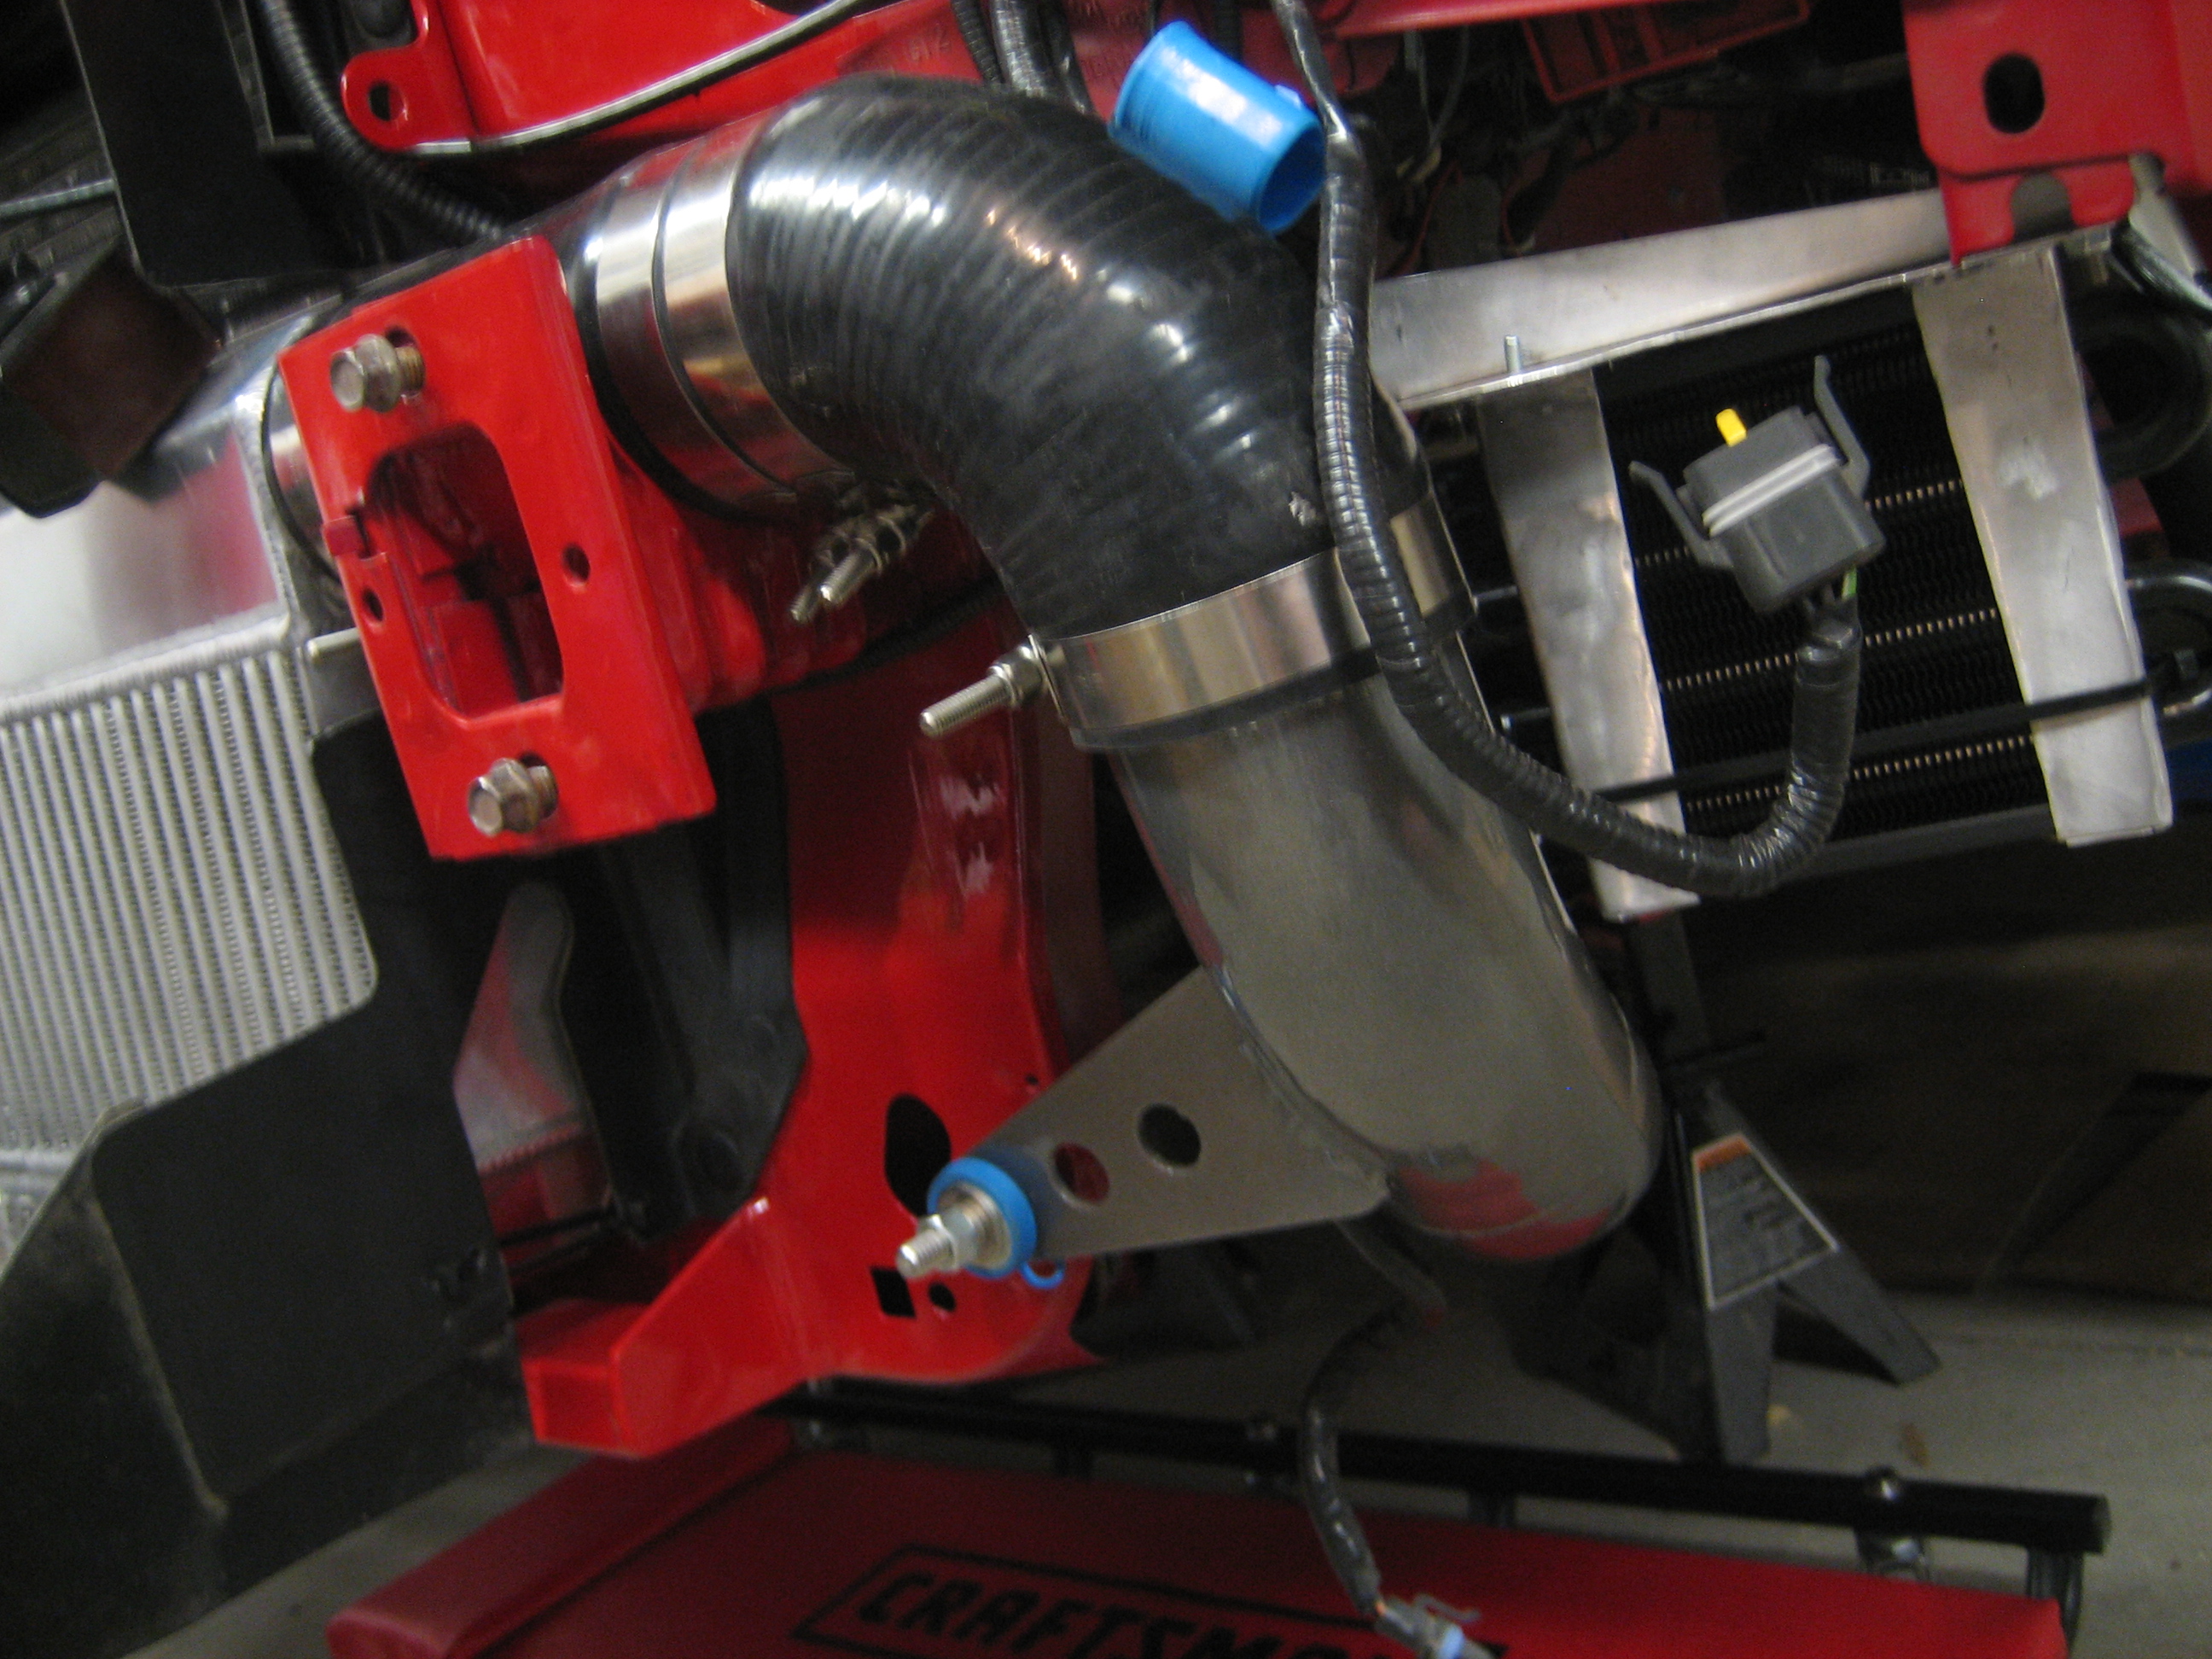
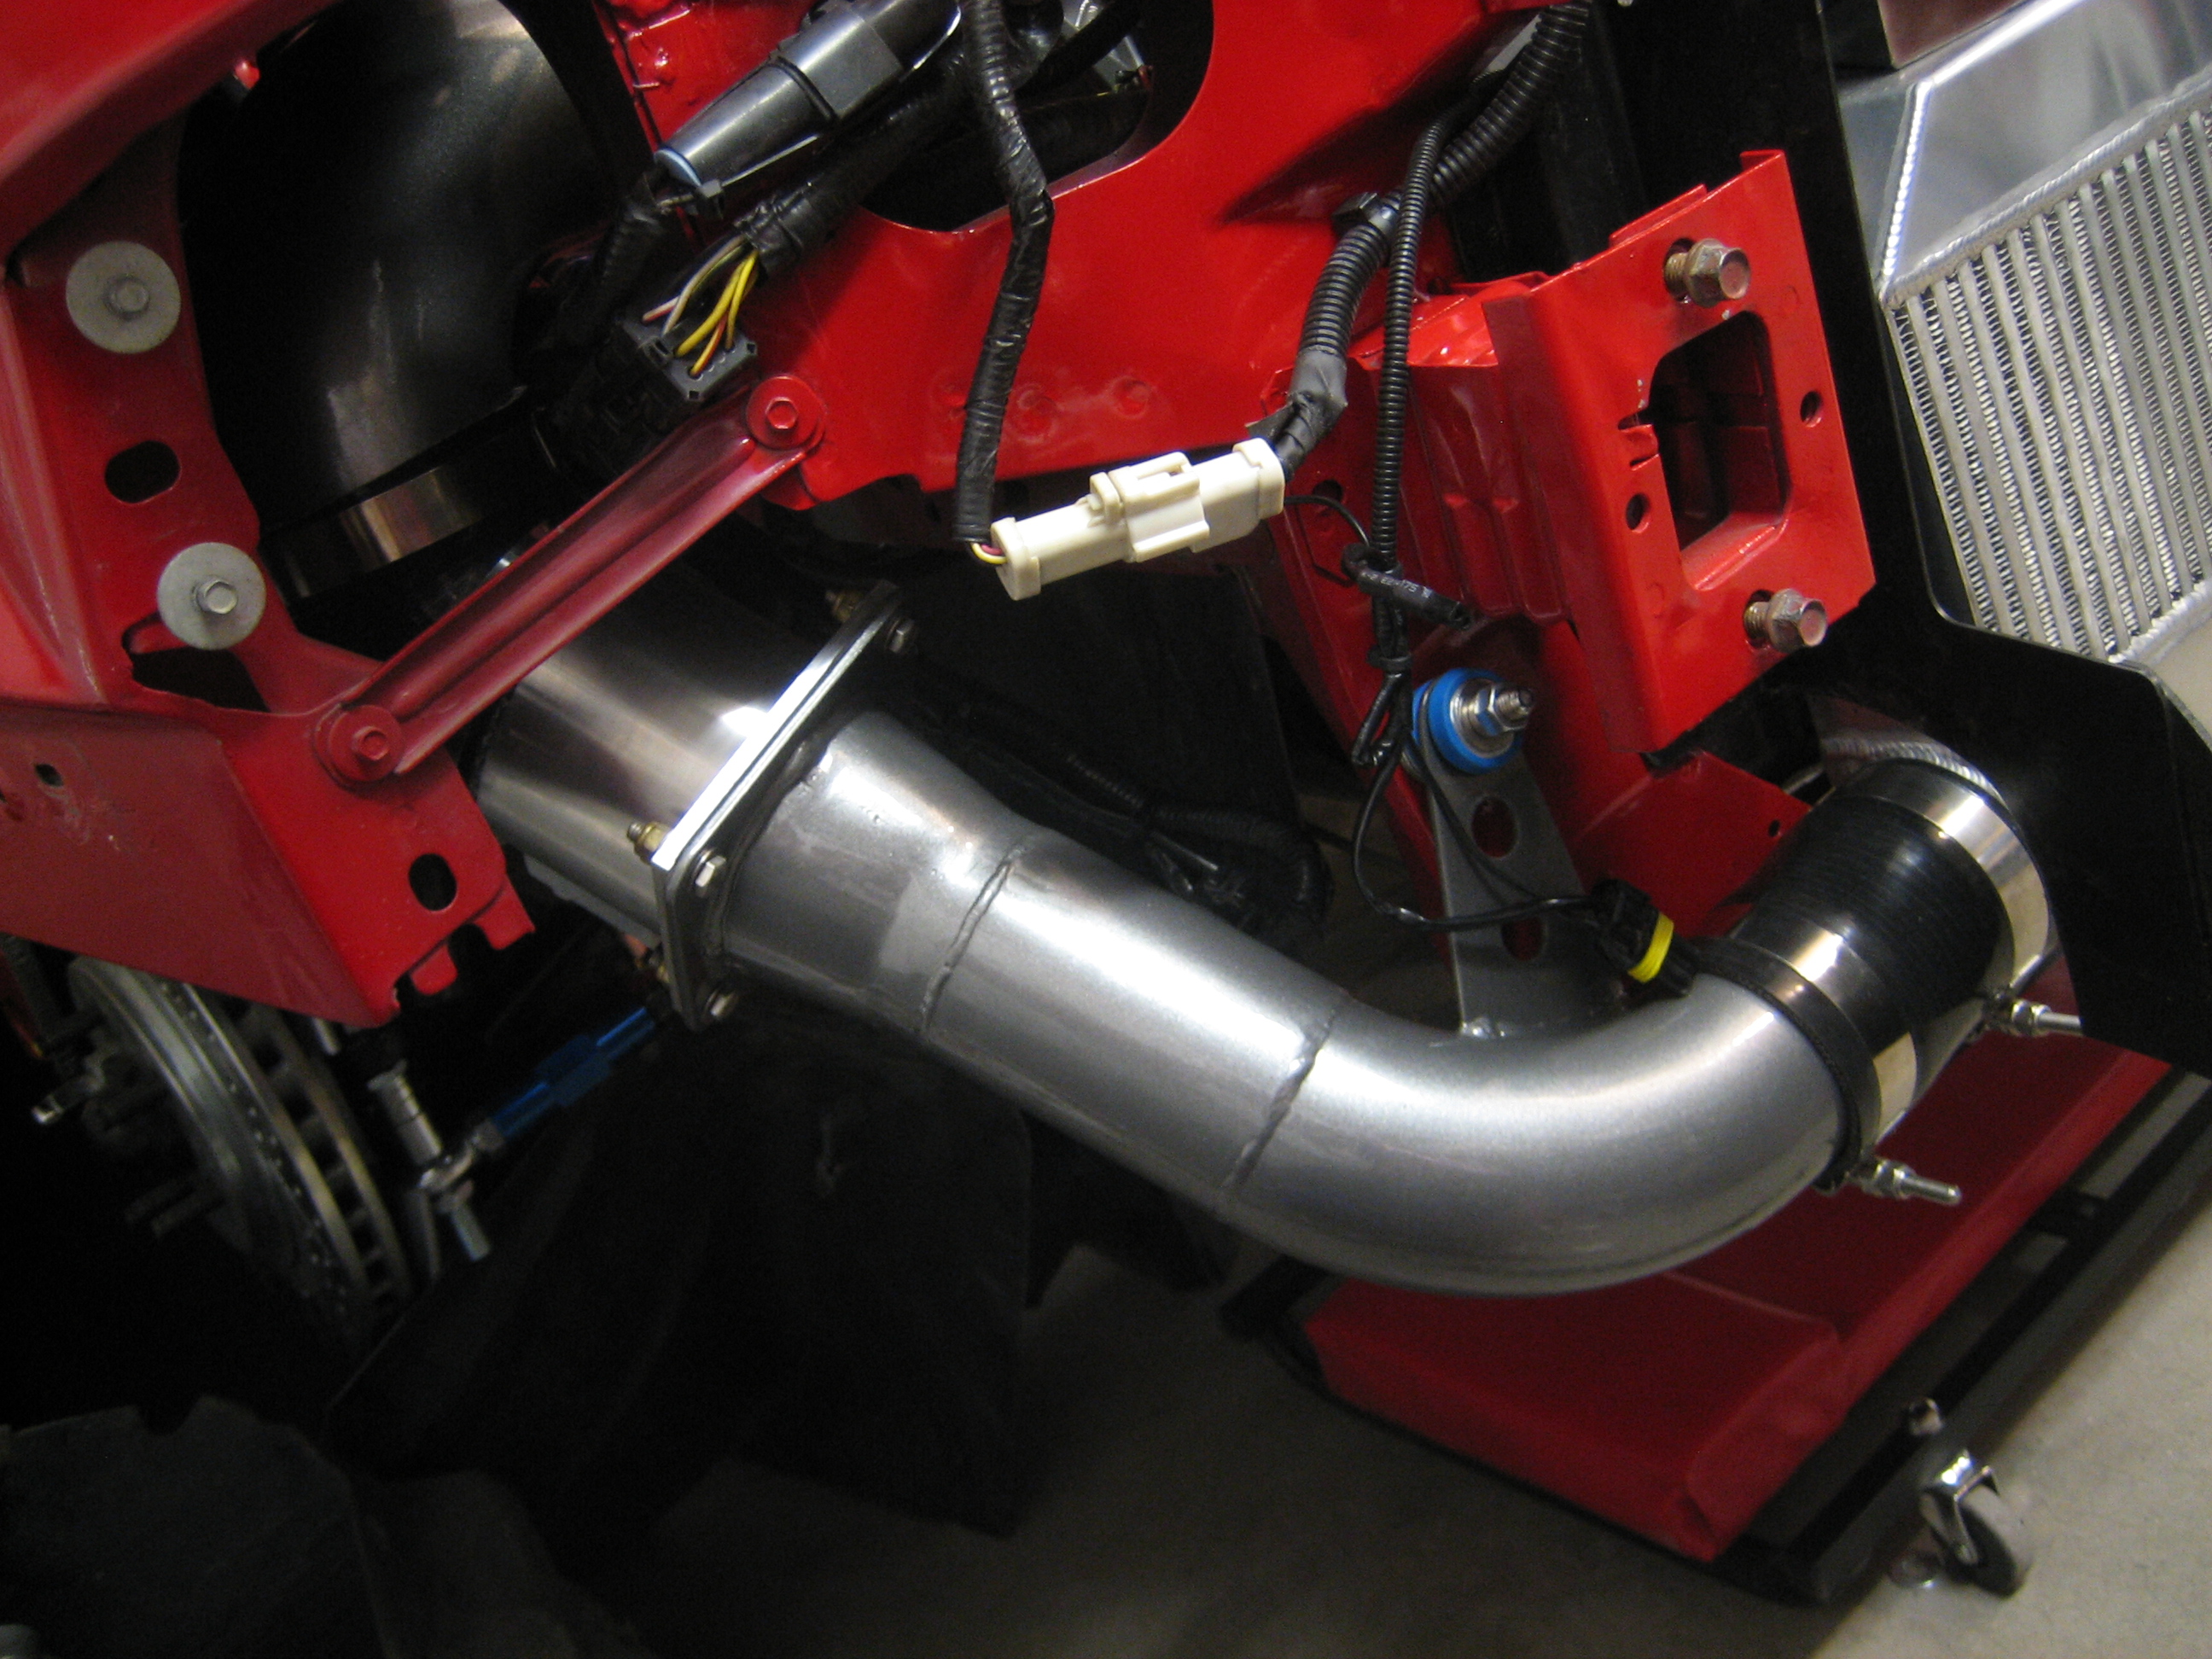
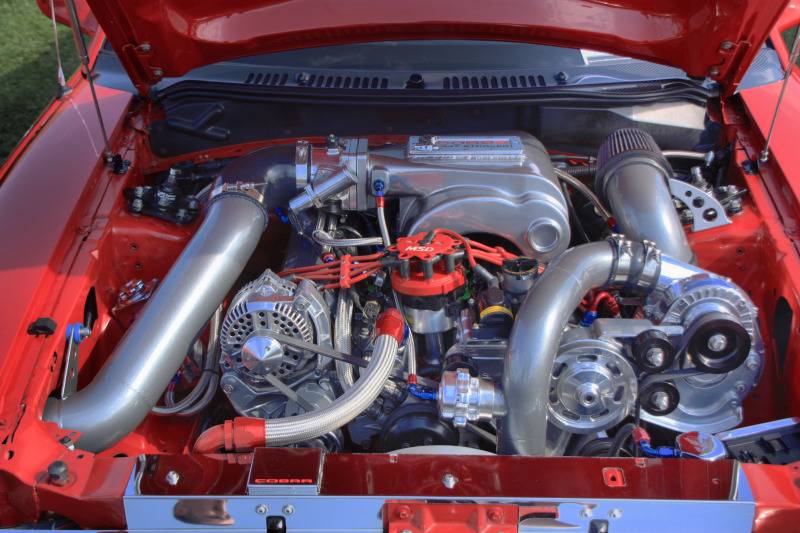
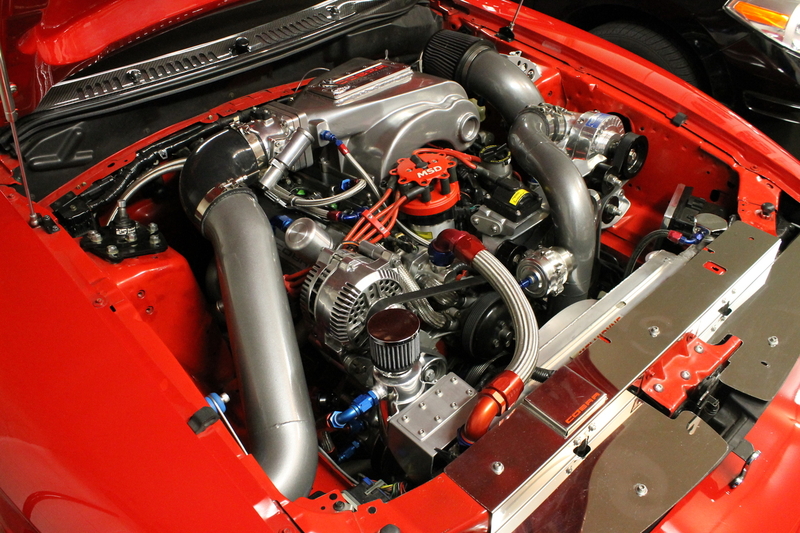
The primary reason I had to make my own piping was that the way Procharger routed it just wouldn't work with my radiator setup. It's much thicker and closer to the motor and because of the overflow bottle being where it is, the Procharger piping was just a no-go. I wasn't too sad though, because I wanted to make everything nicer and more solid than what they did anyway.
You can see here the clearance is tight. I ended up cutting away a lot of the fan shroud plastic to make room.
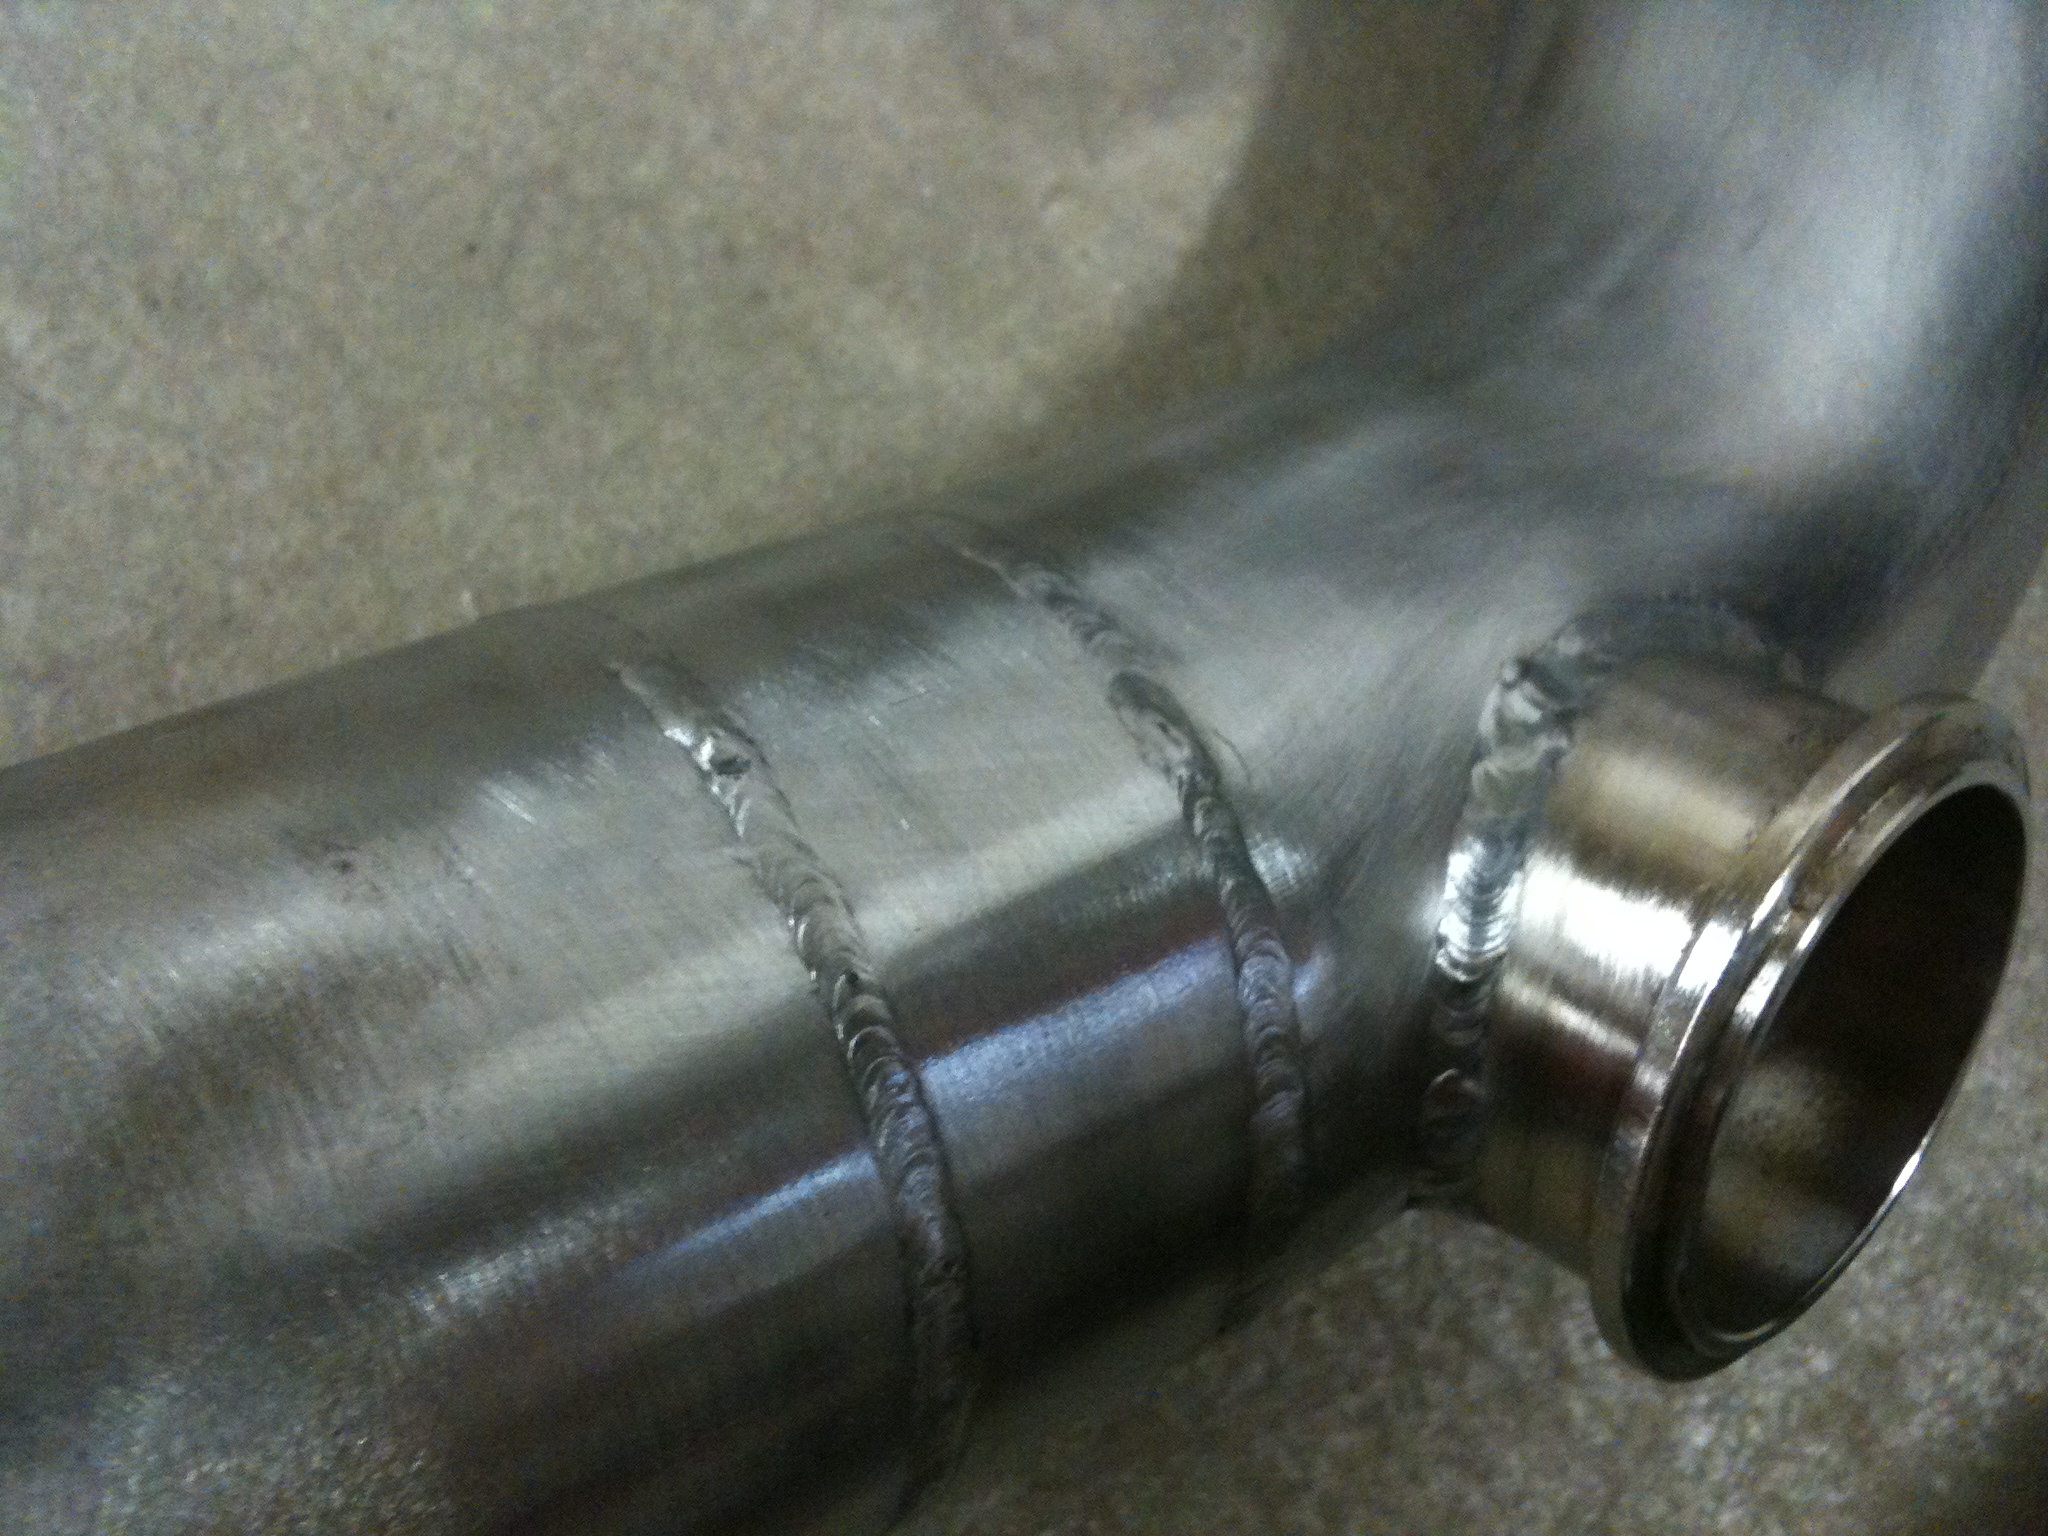
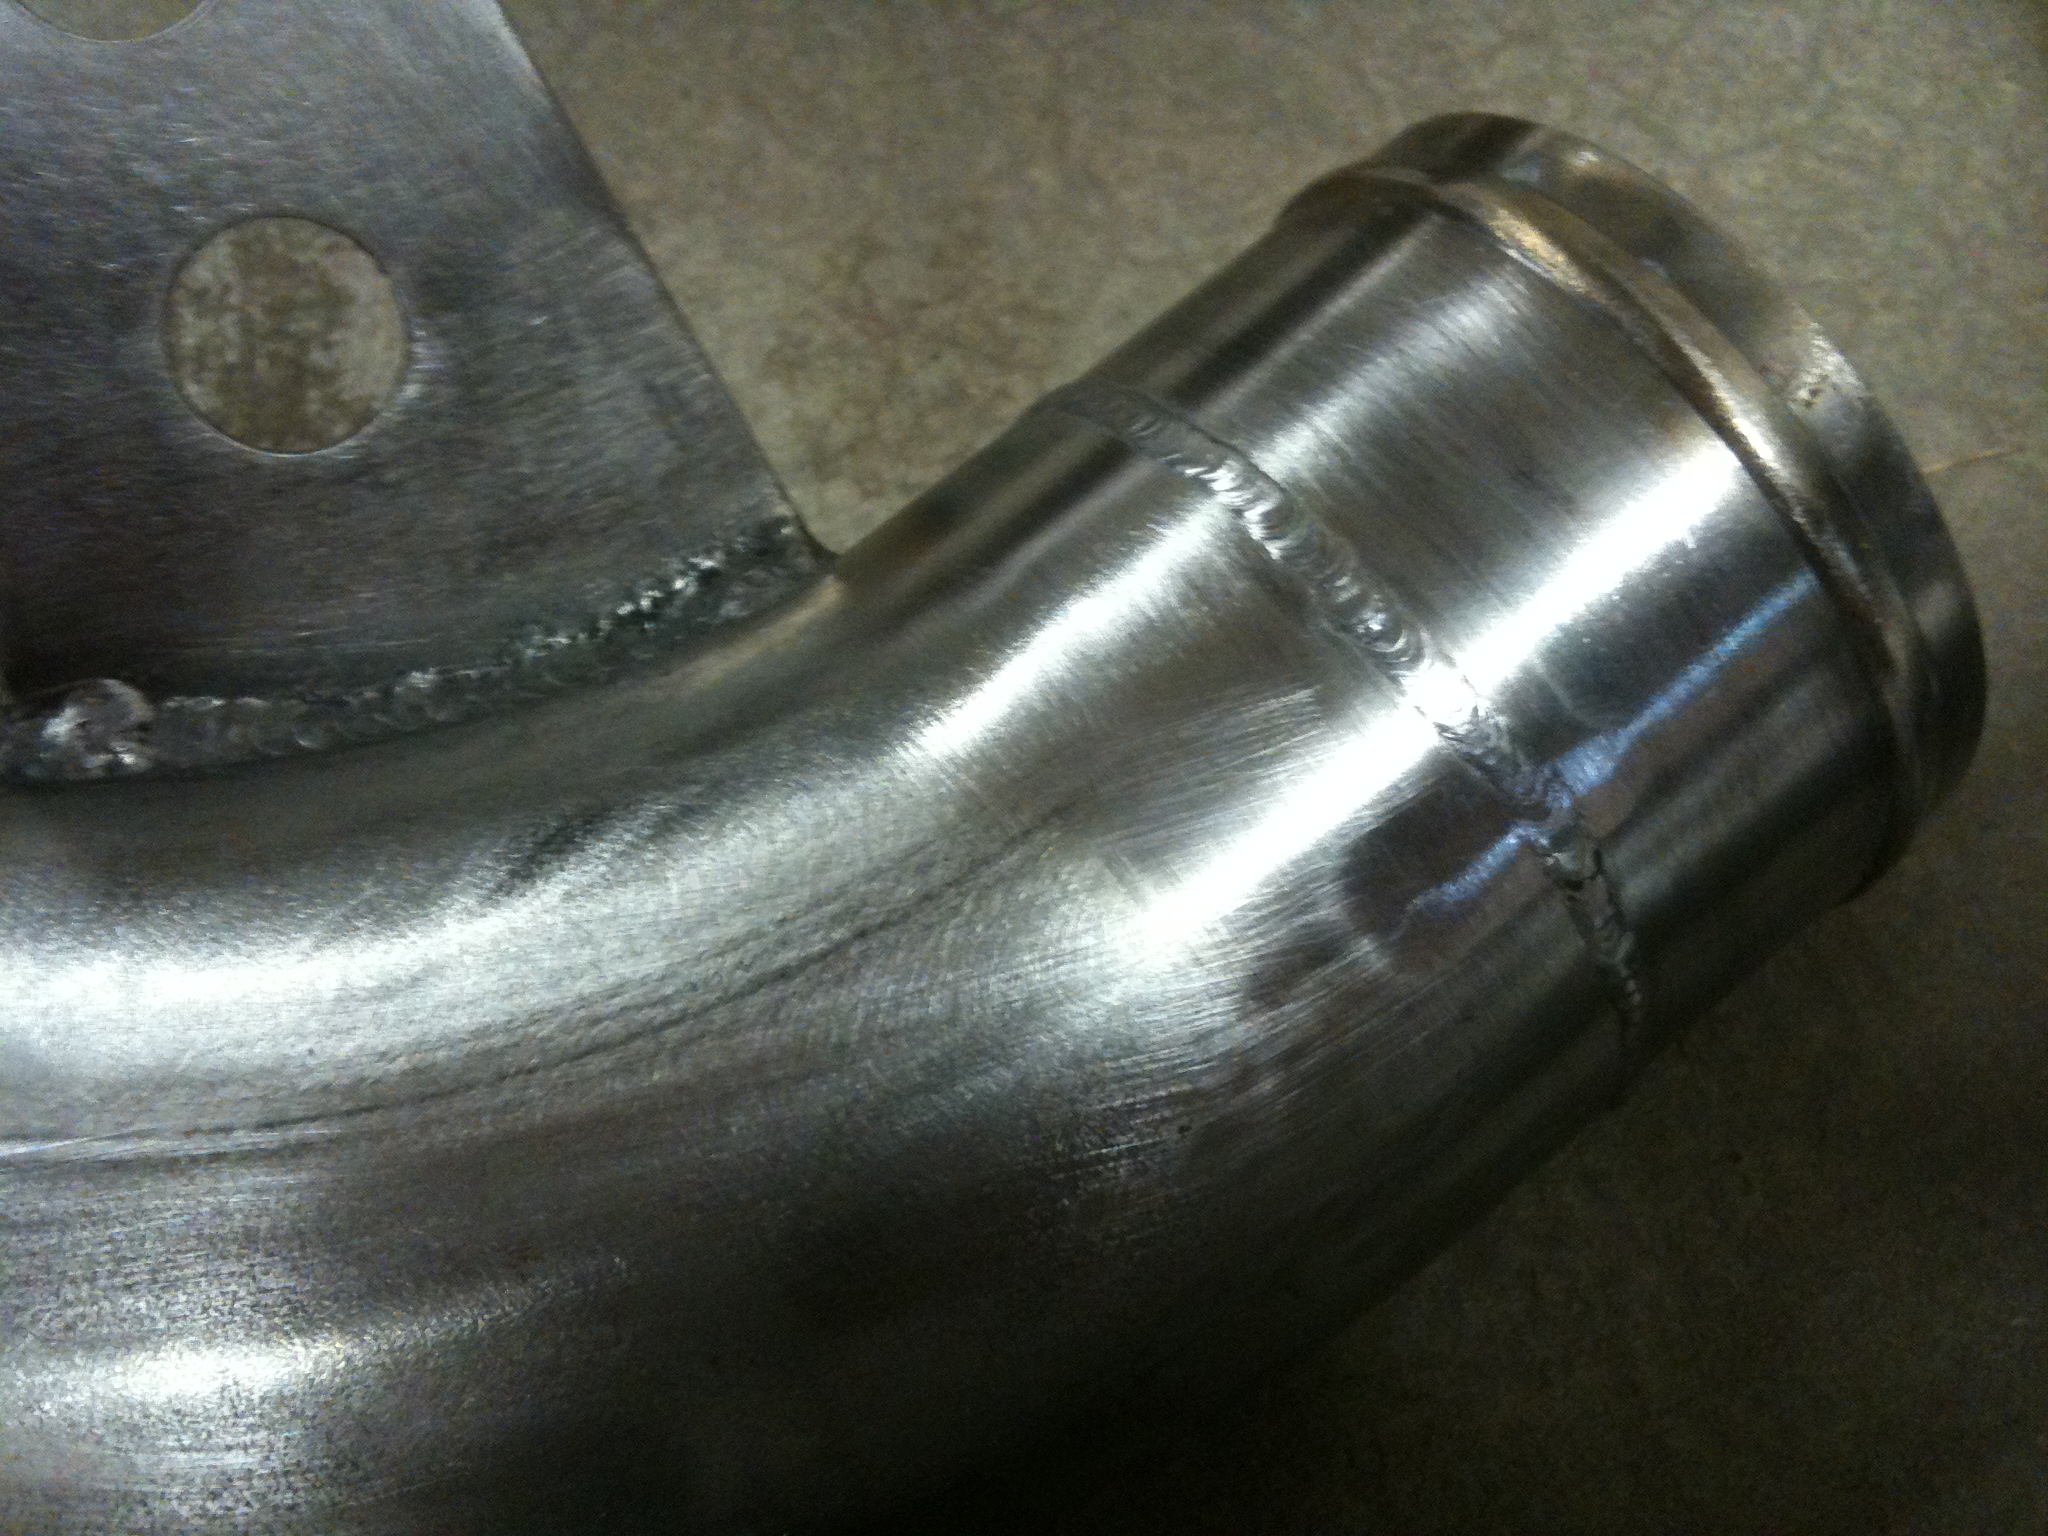
Pipes off the car, next step was to strip the powder coating, then take them to work and tig weld the seams (sorry I can't seem to find the pics of the other 2 pipes before stripping and finish welding :( )
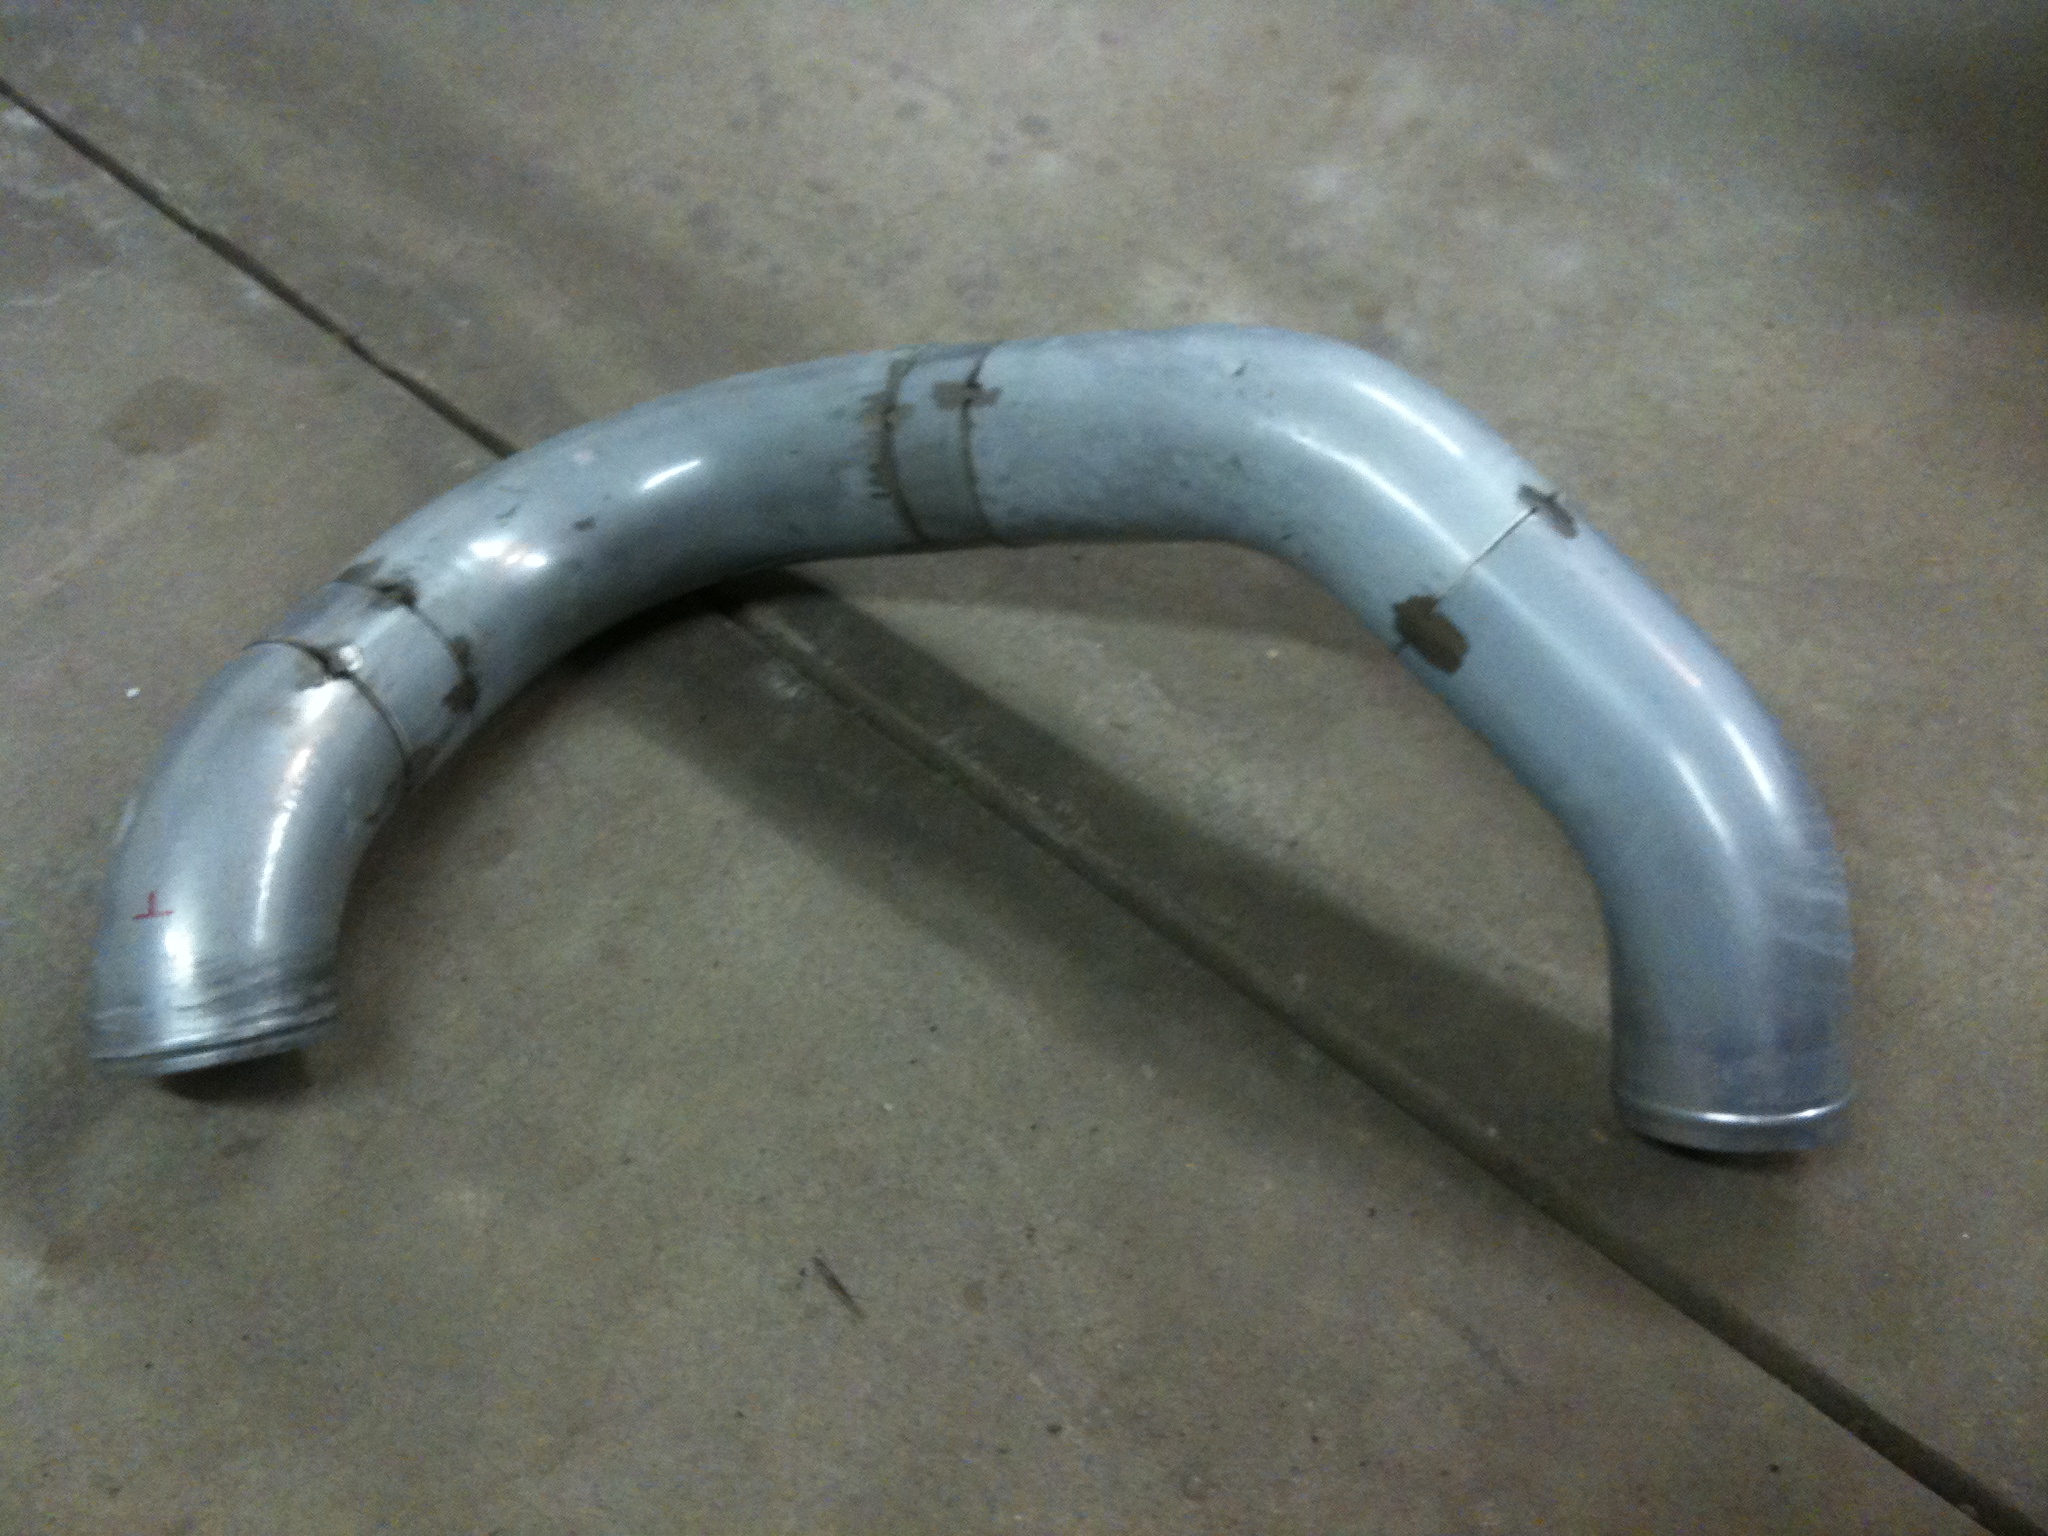
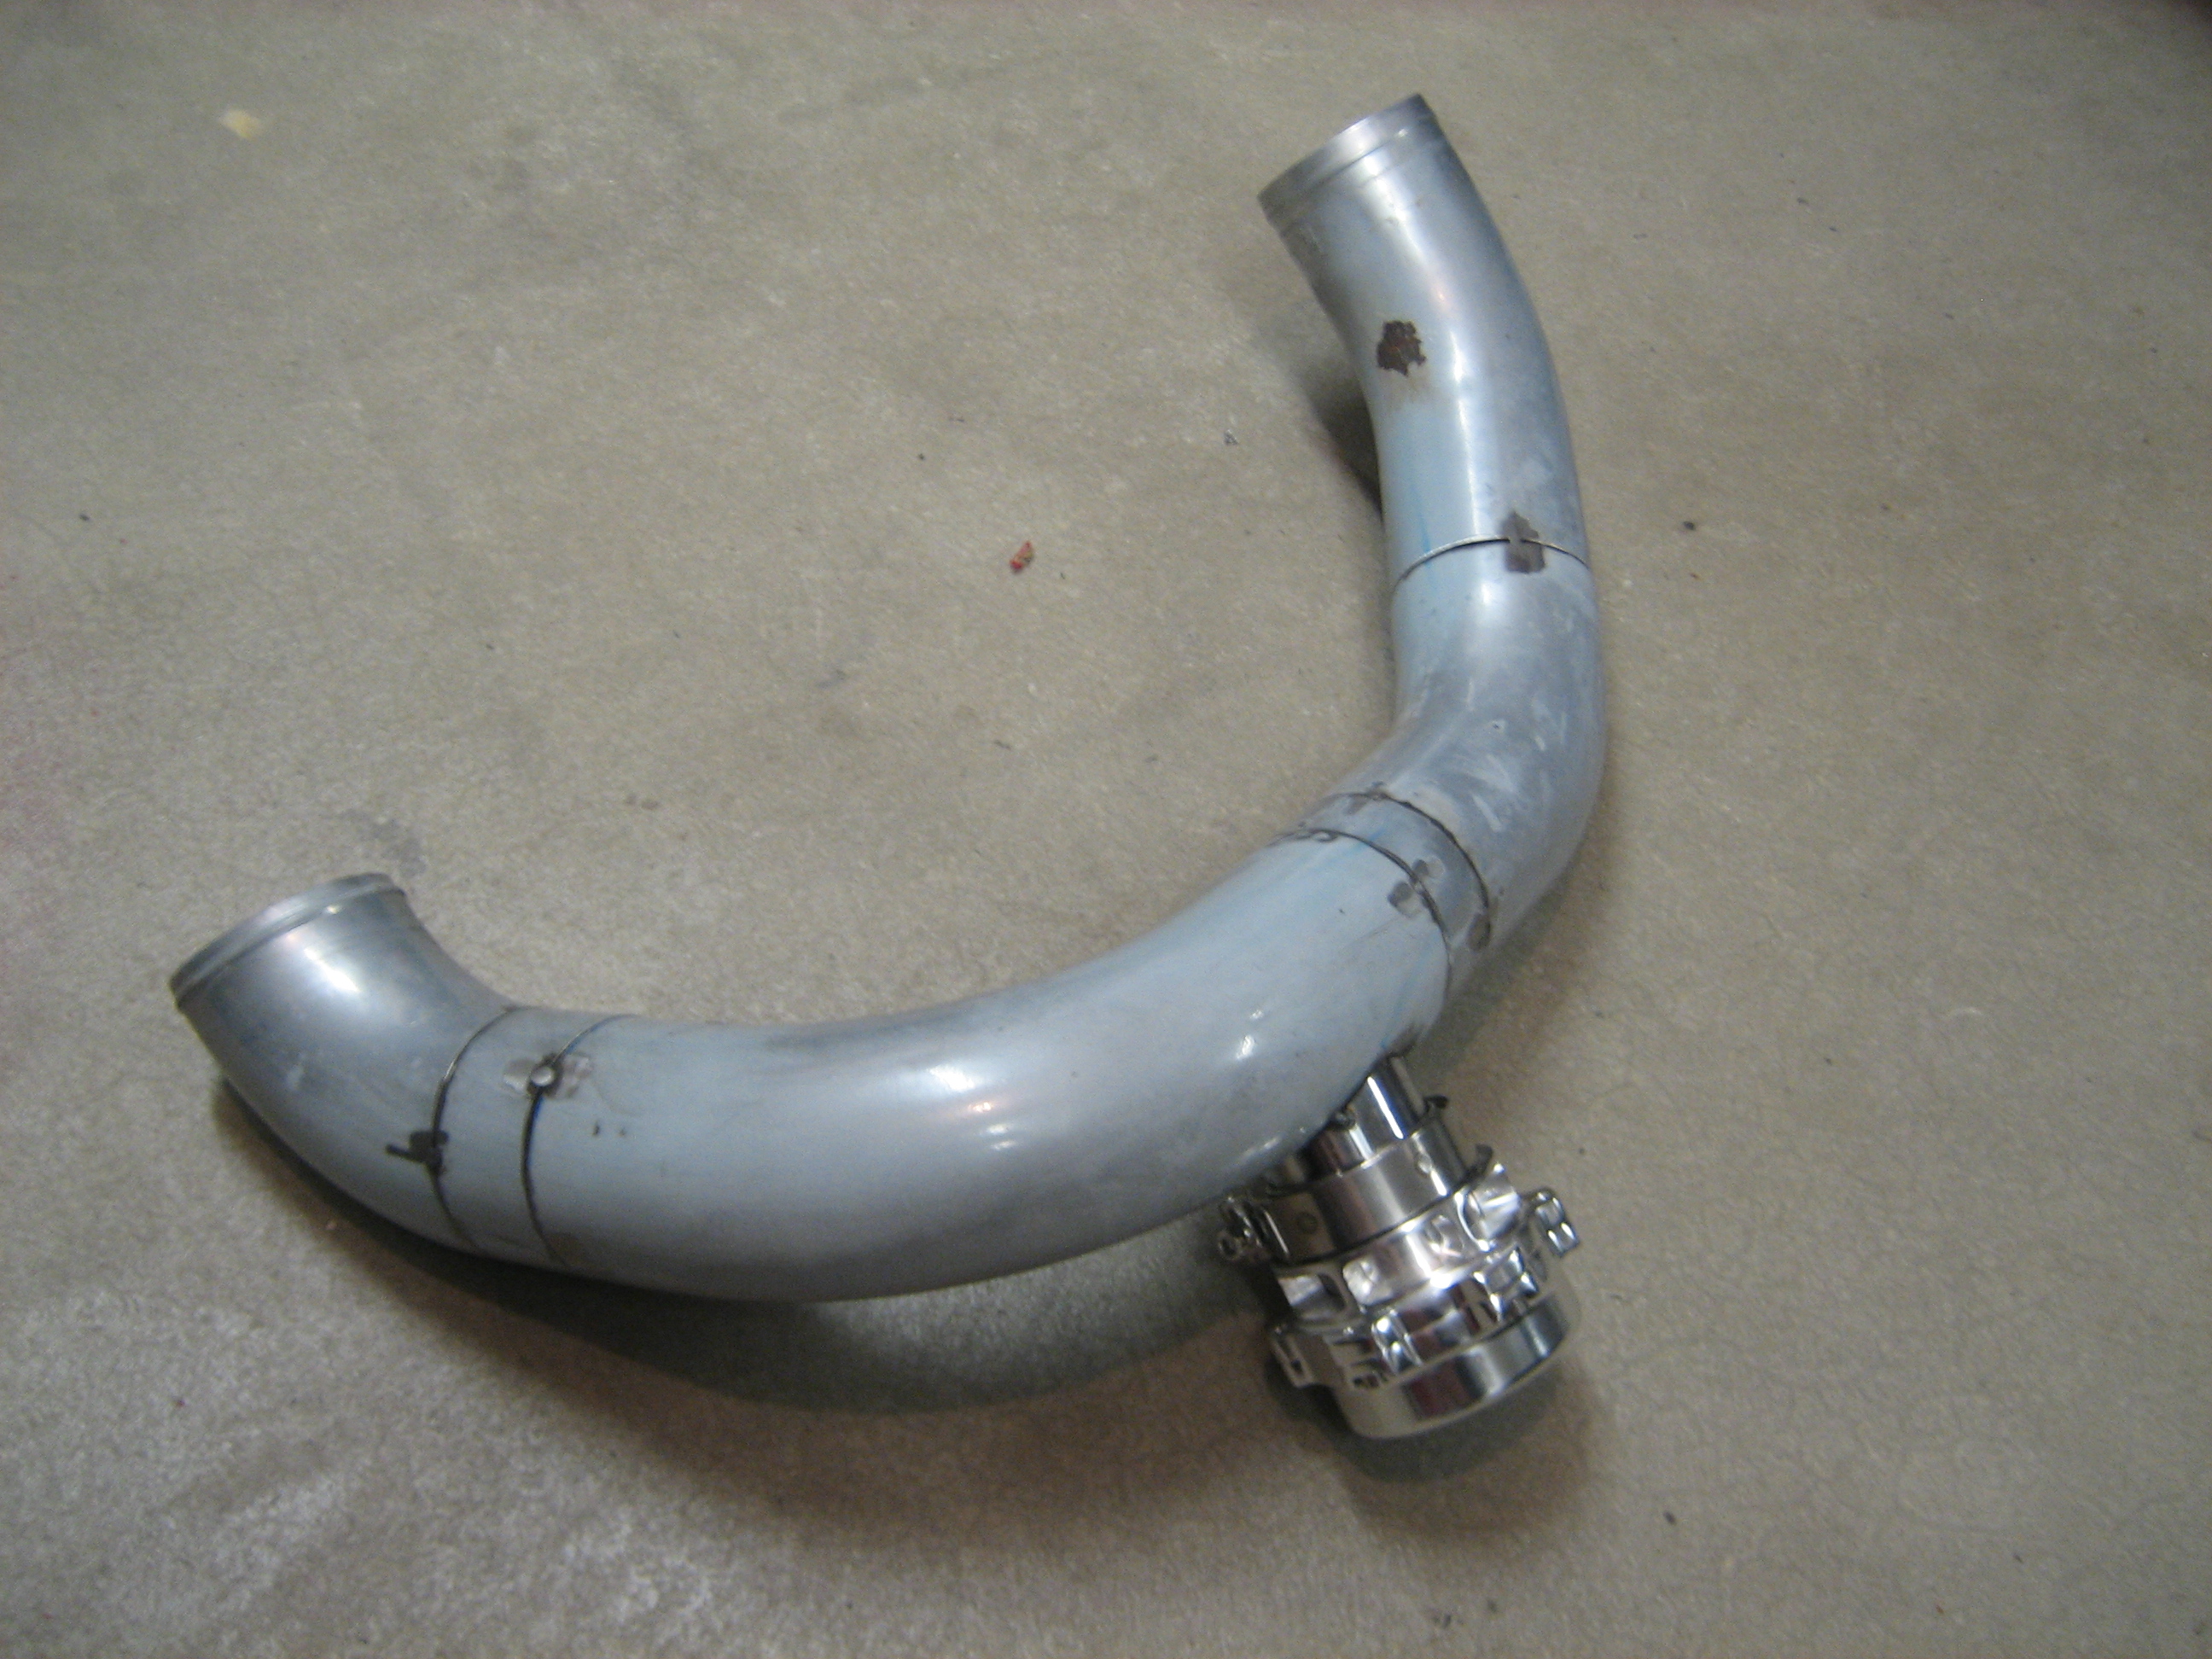
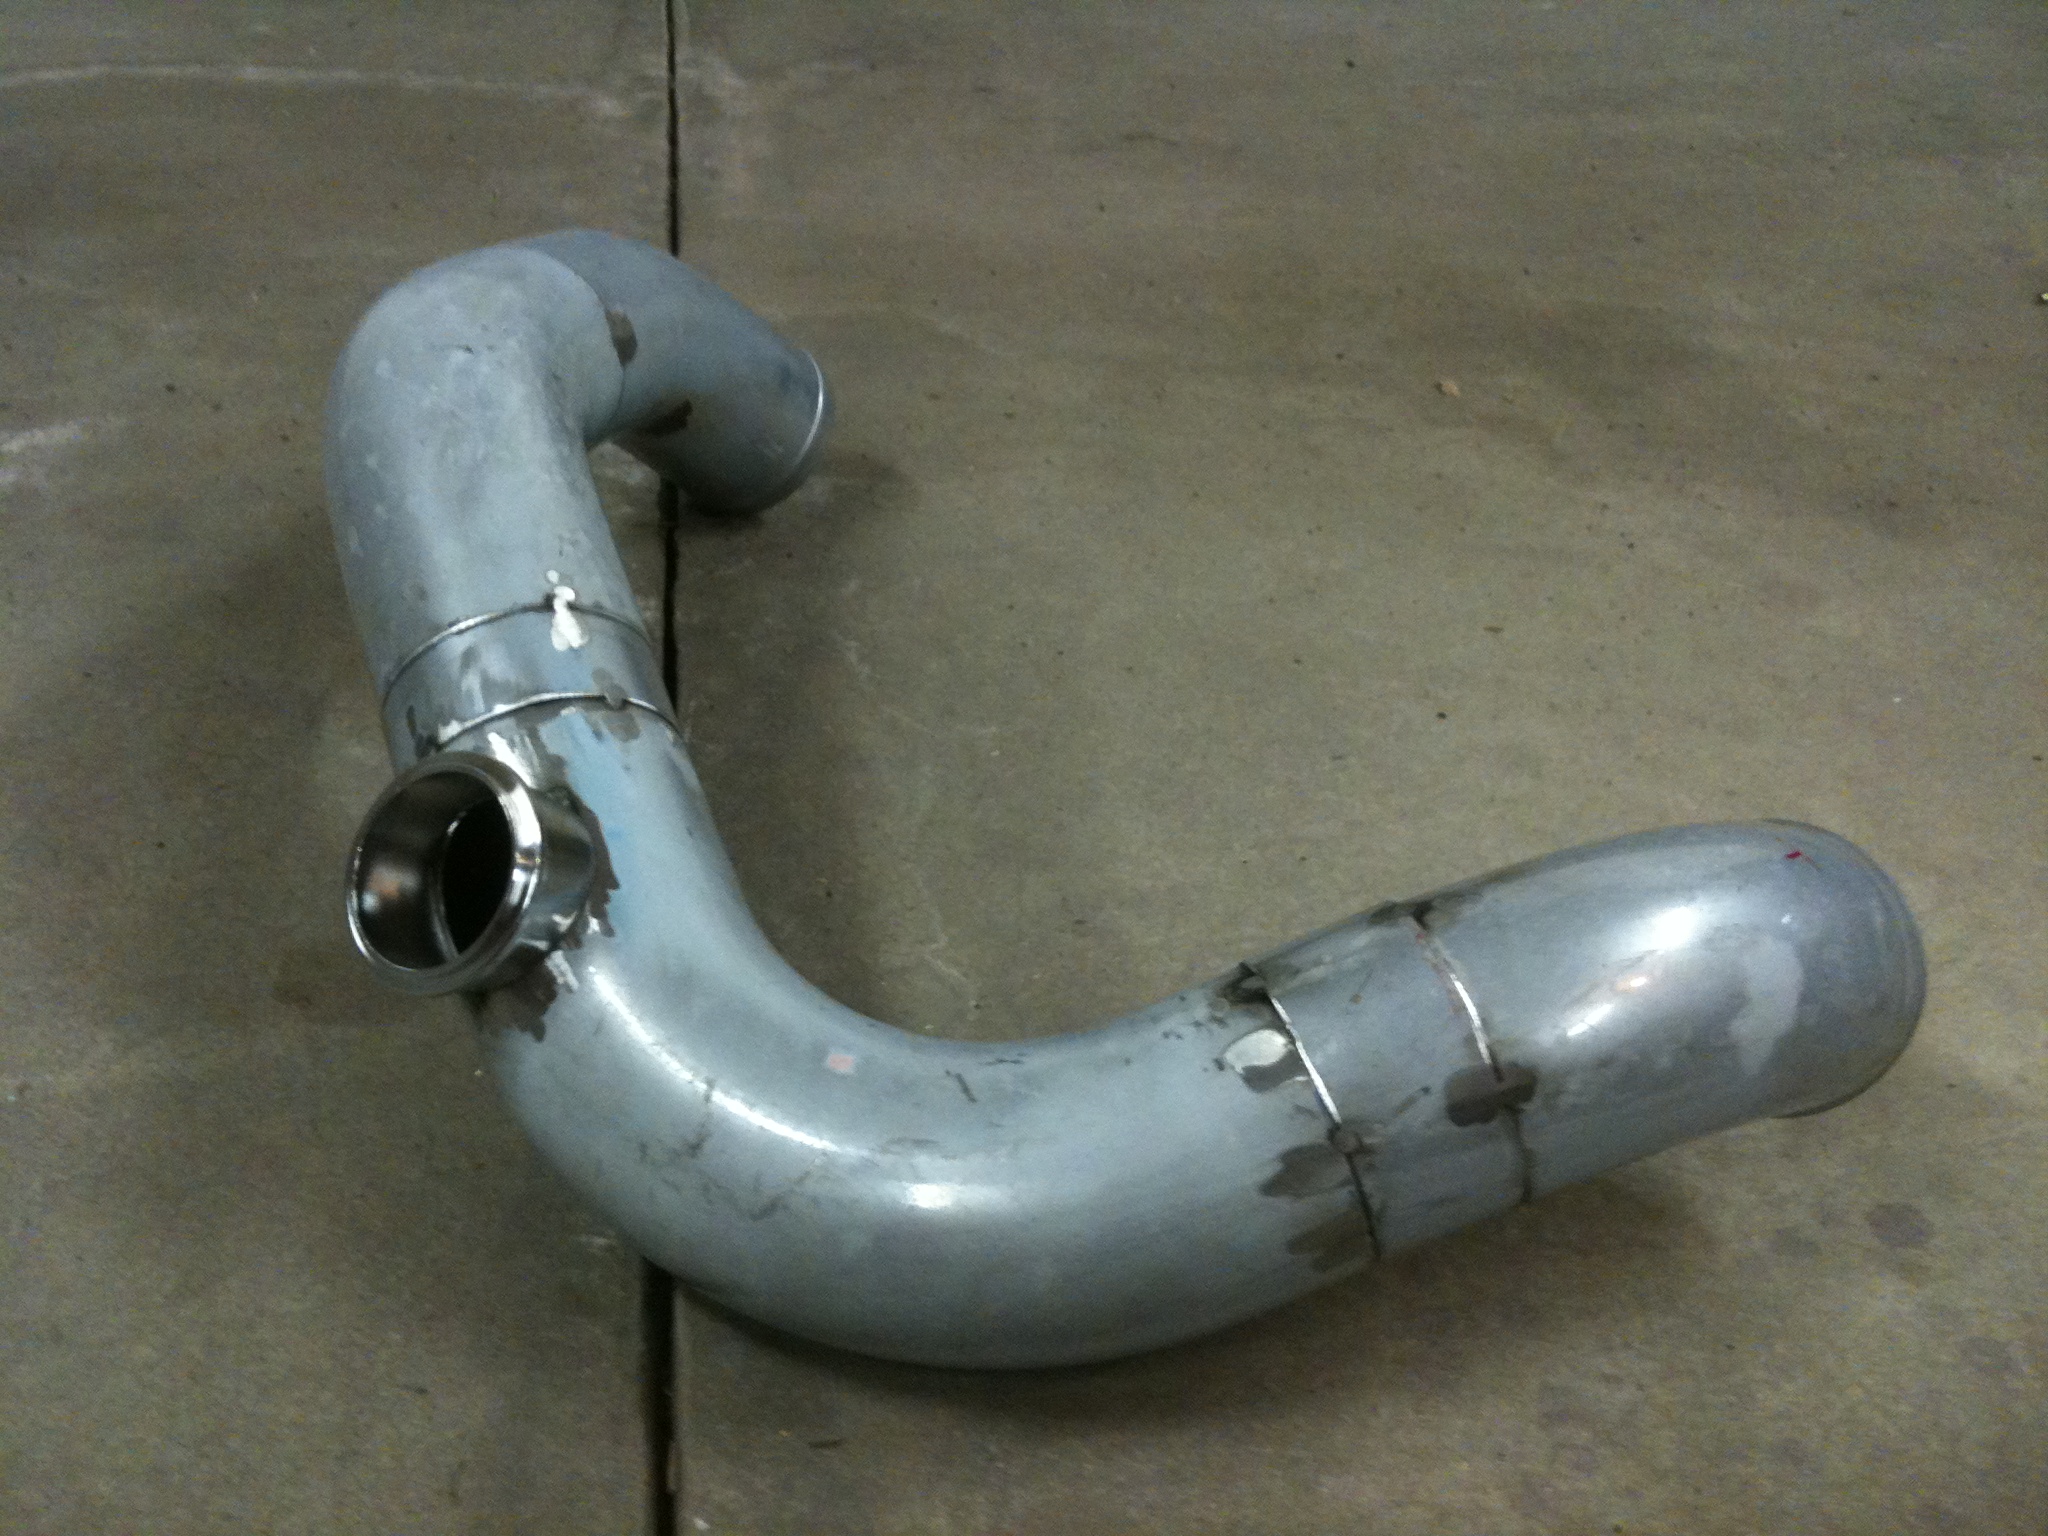
Piping stripped and finish welded:
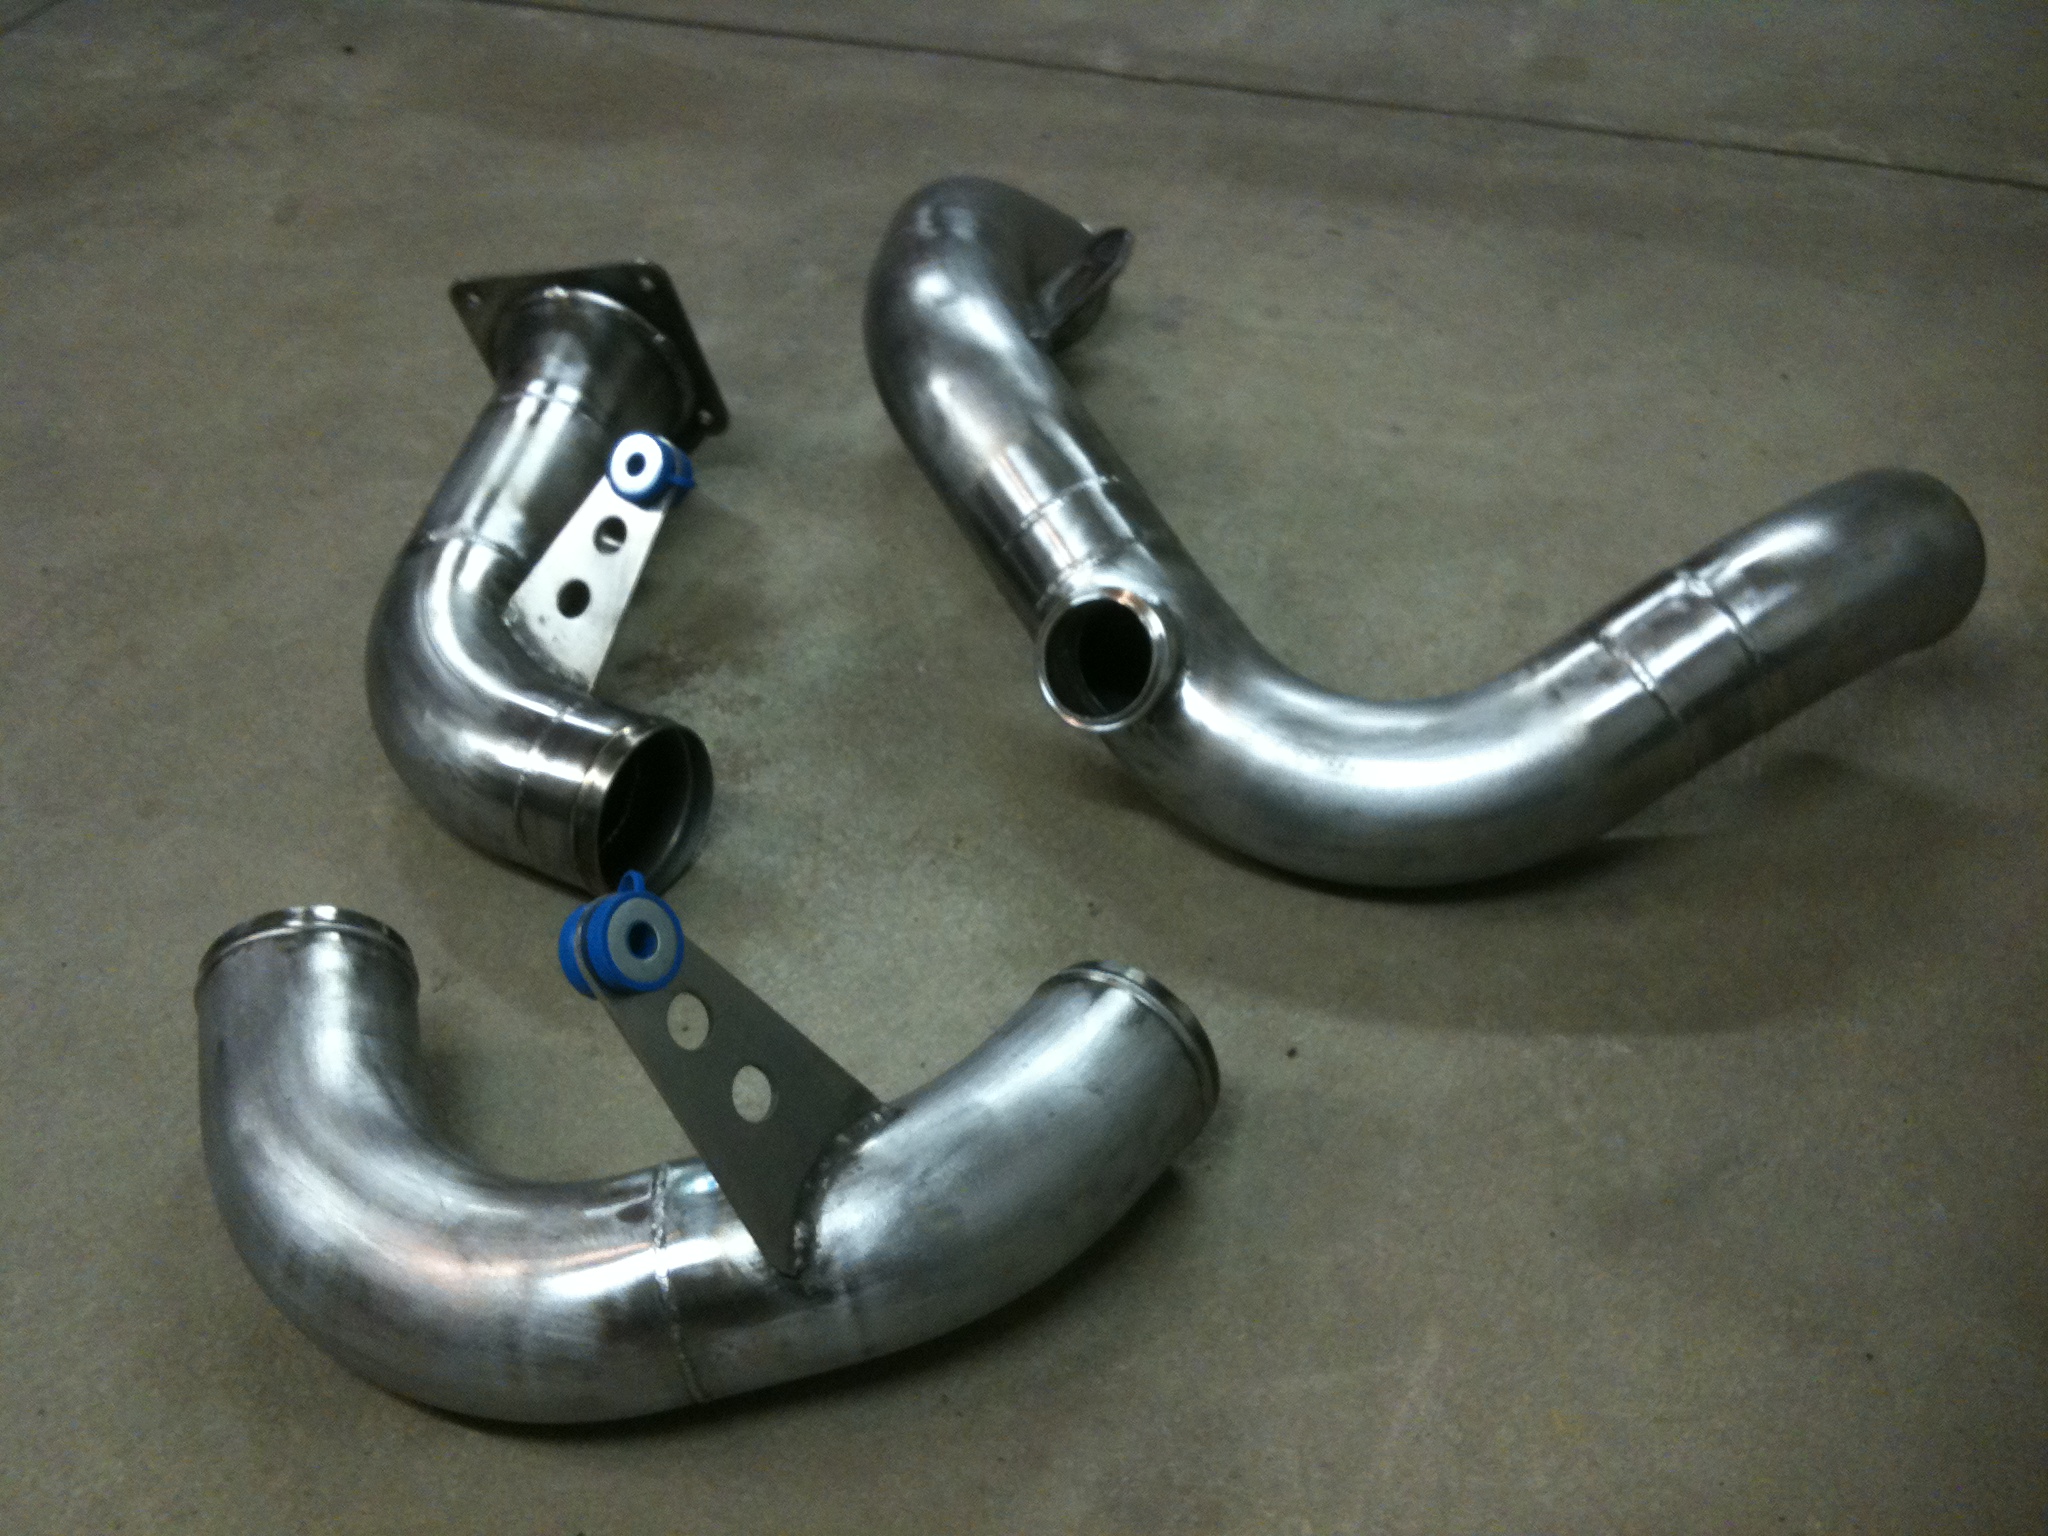
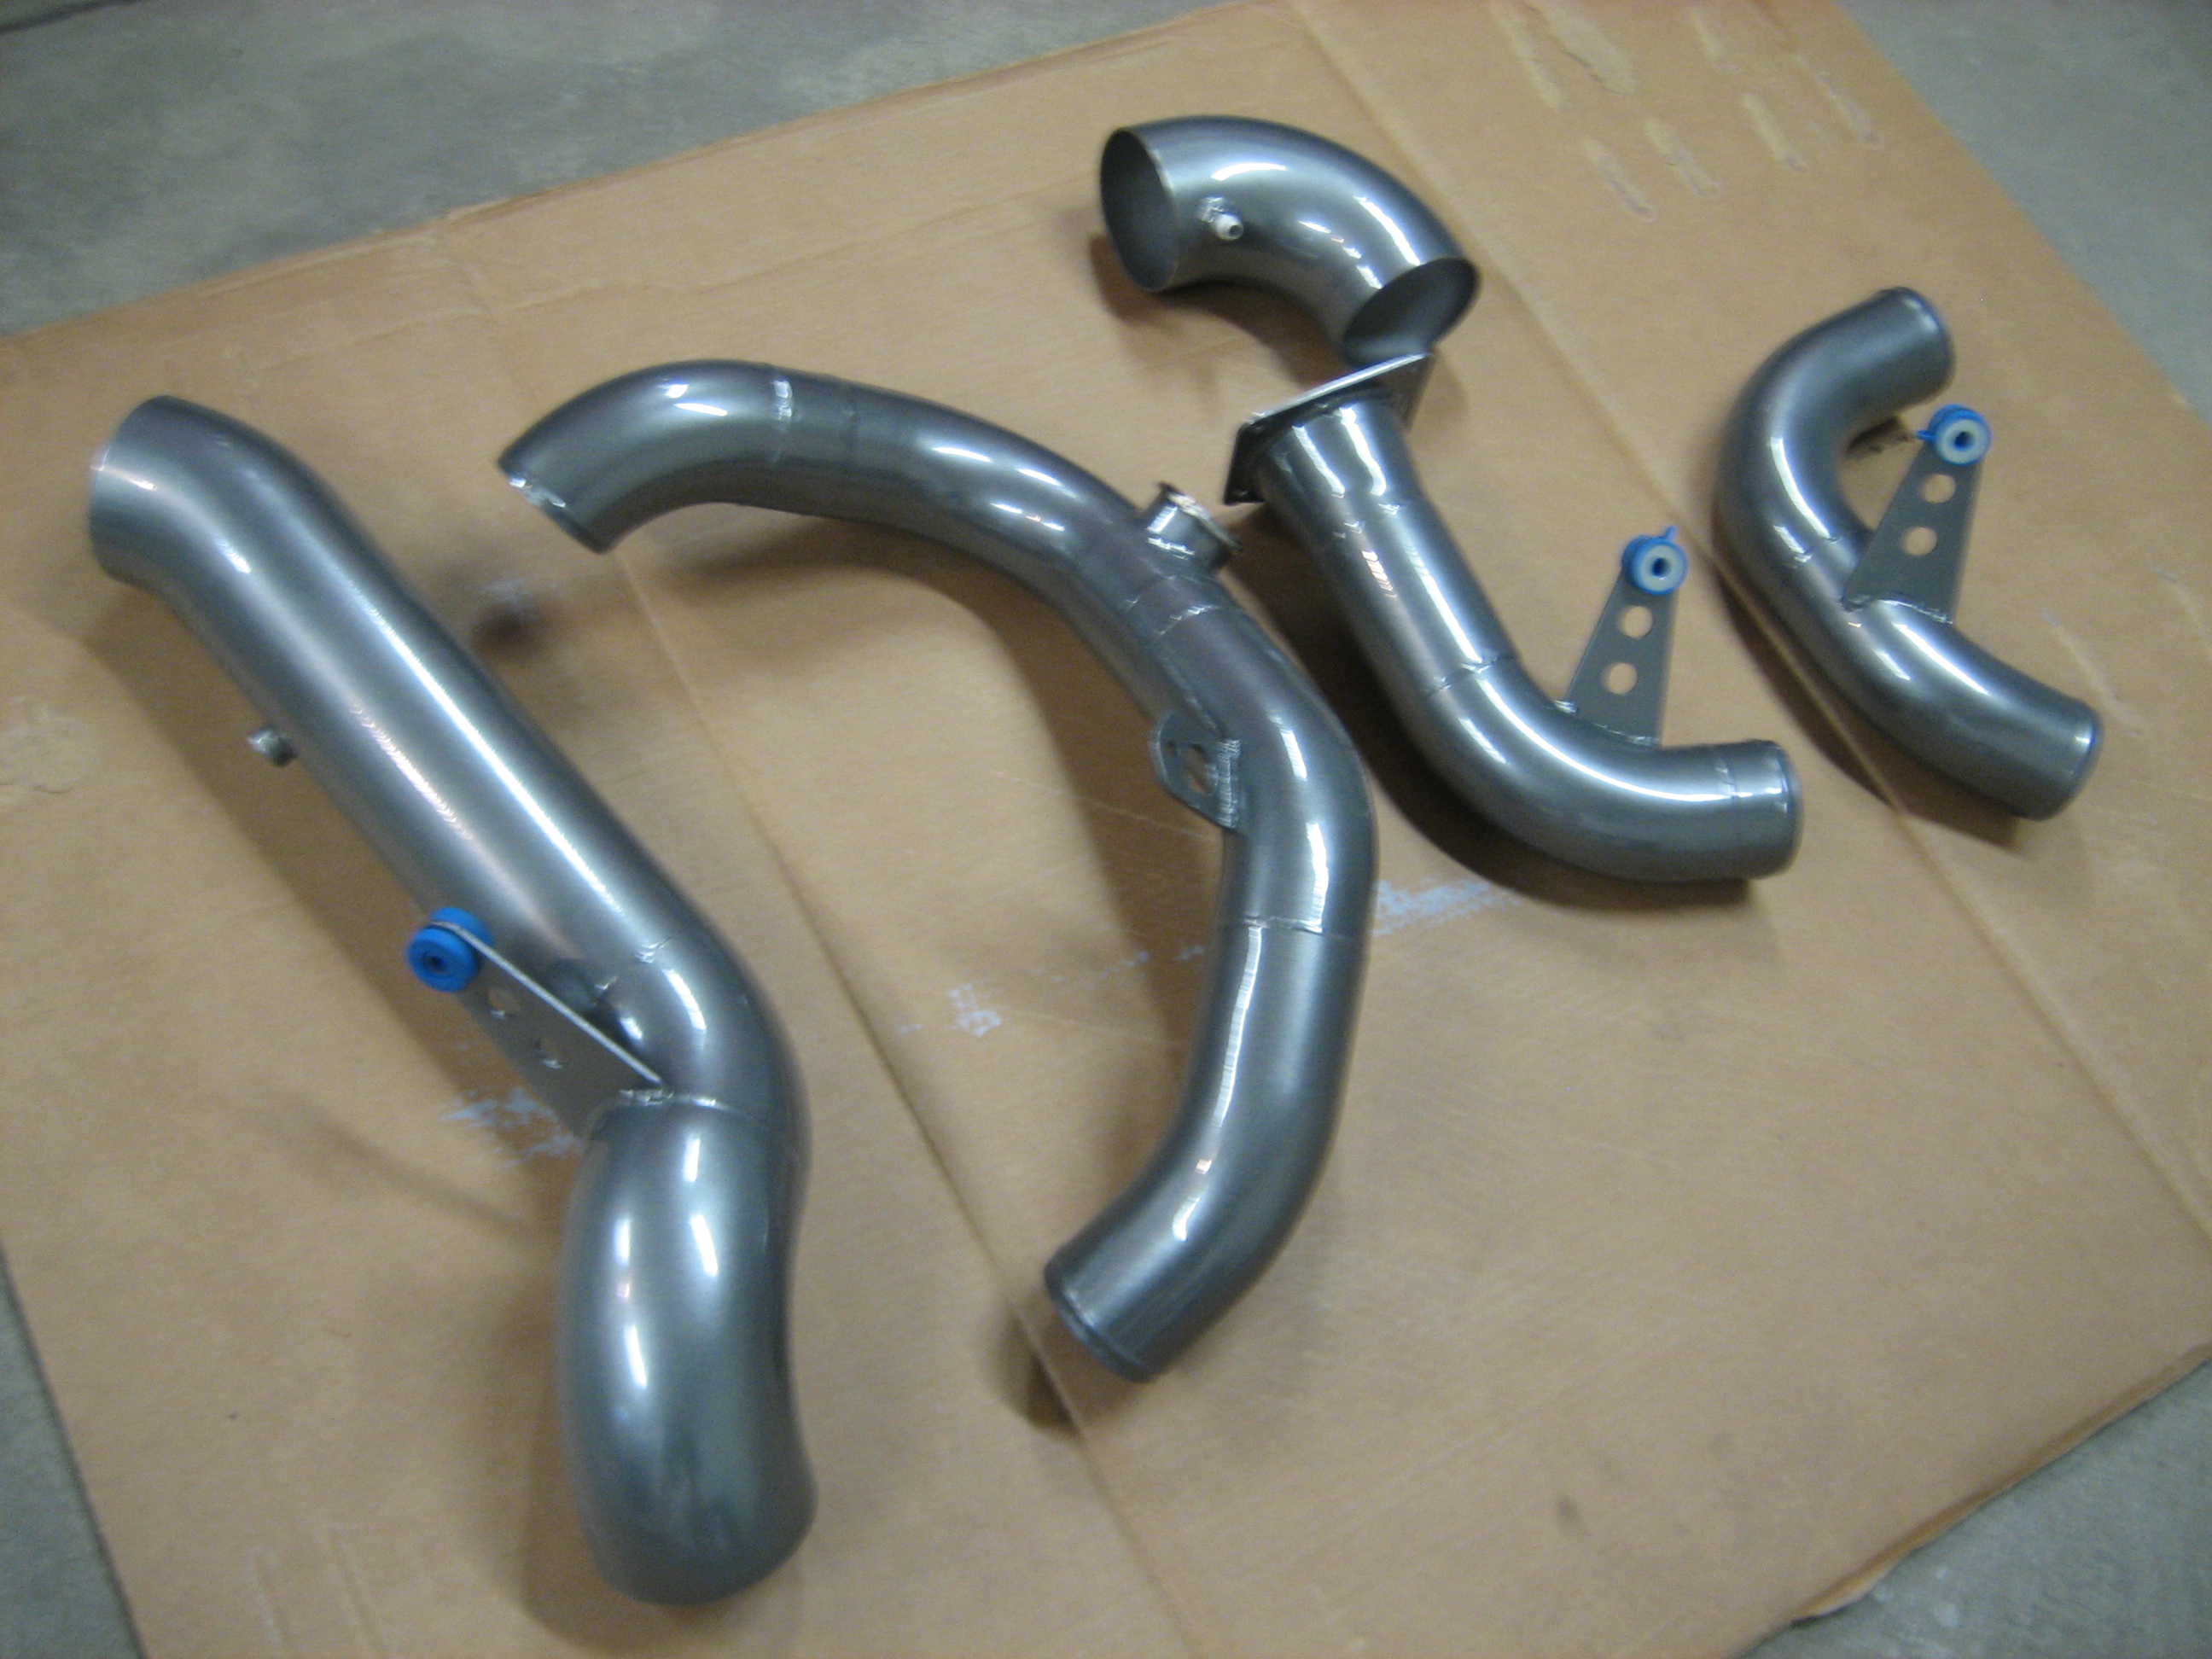
Piping back from the powder coaters:
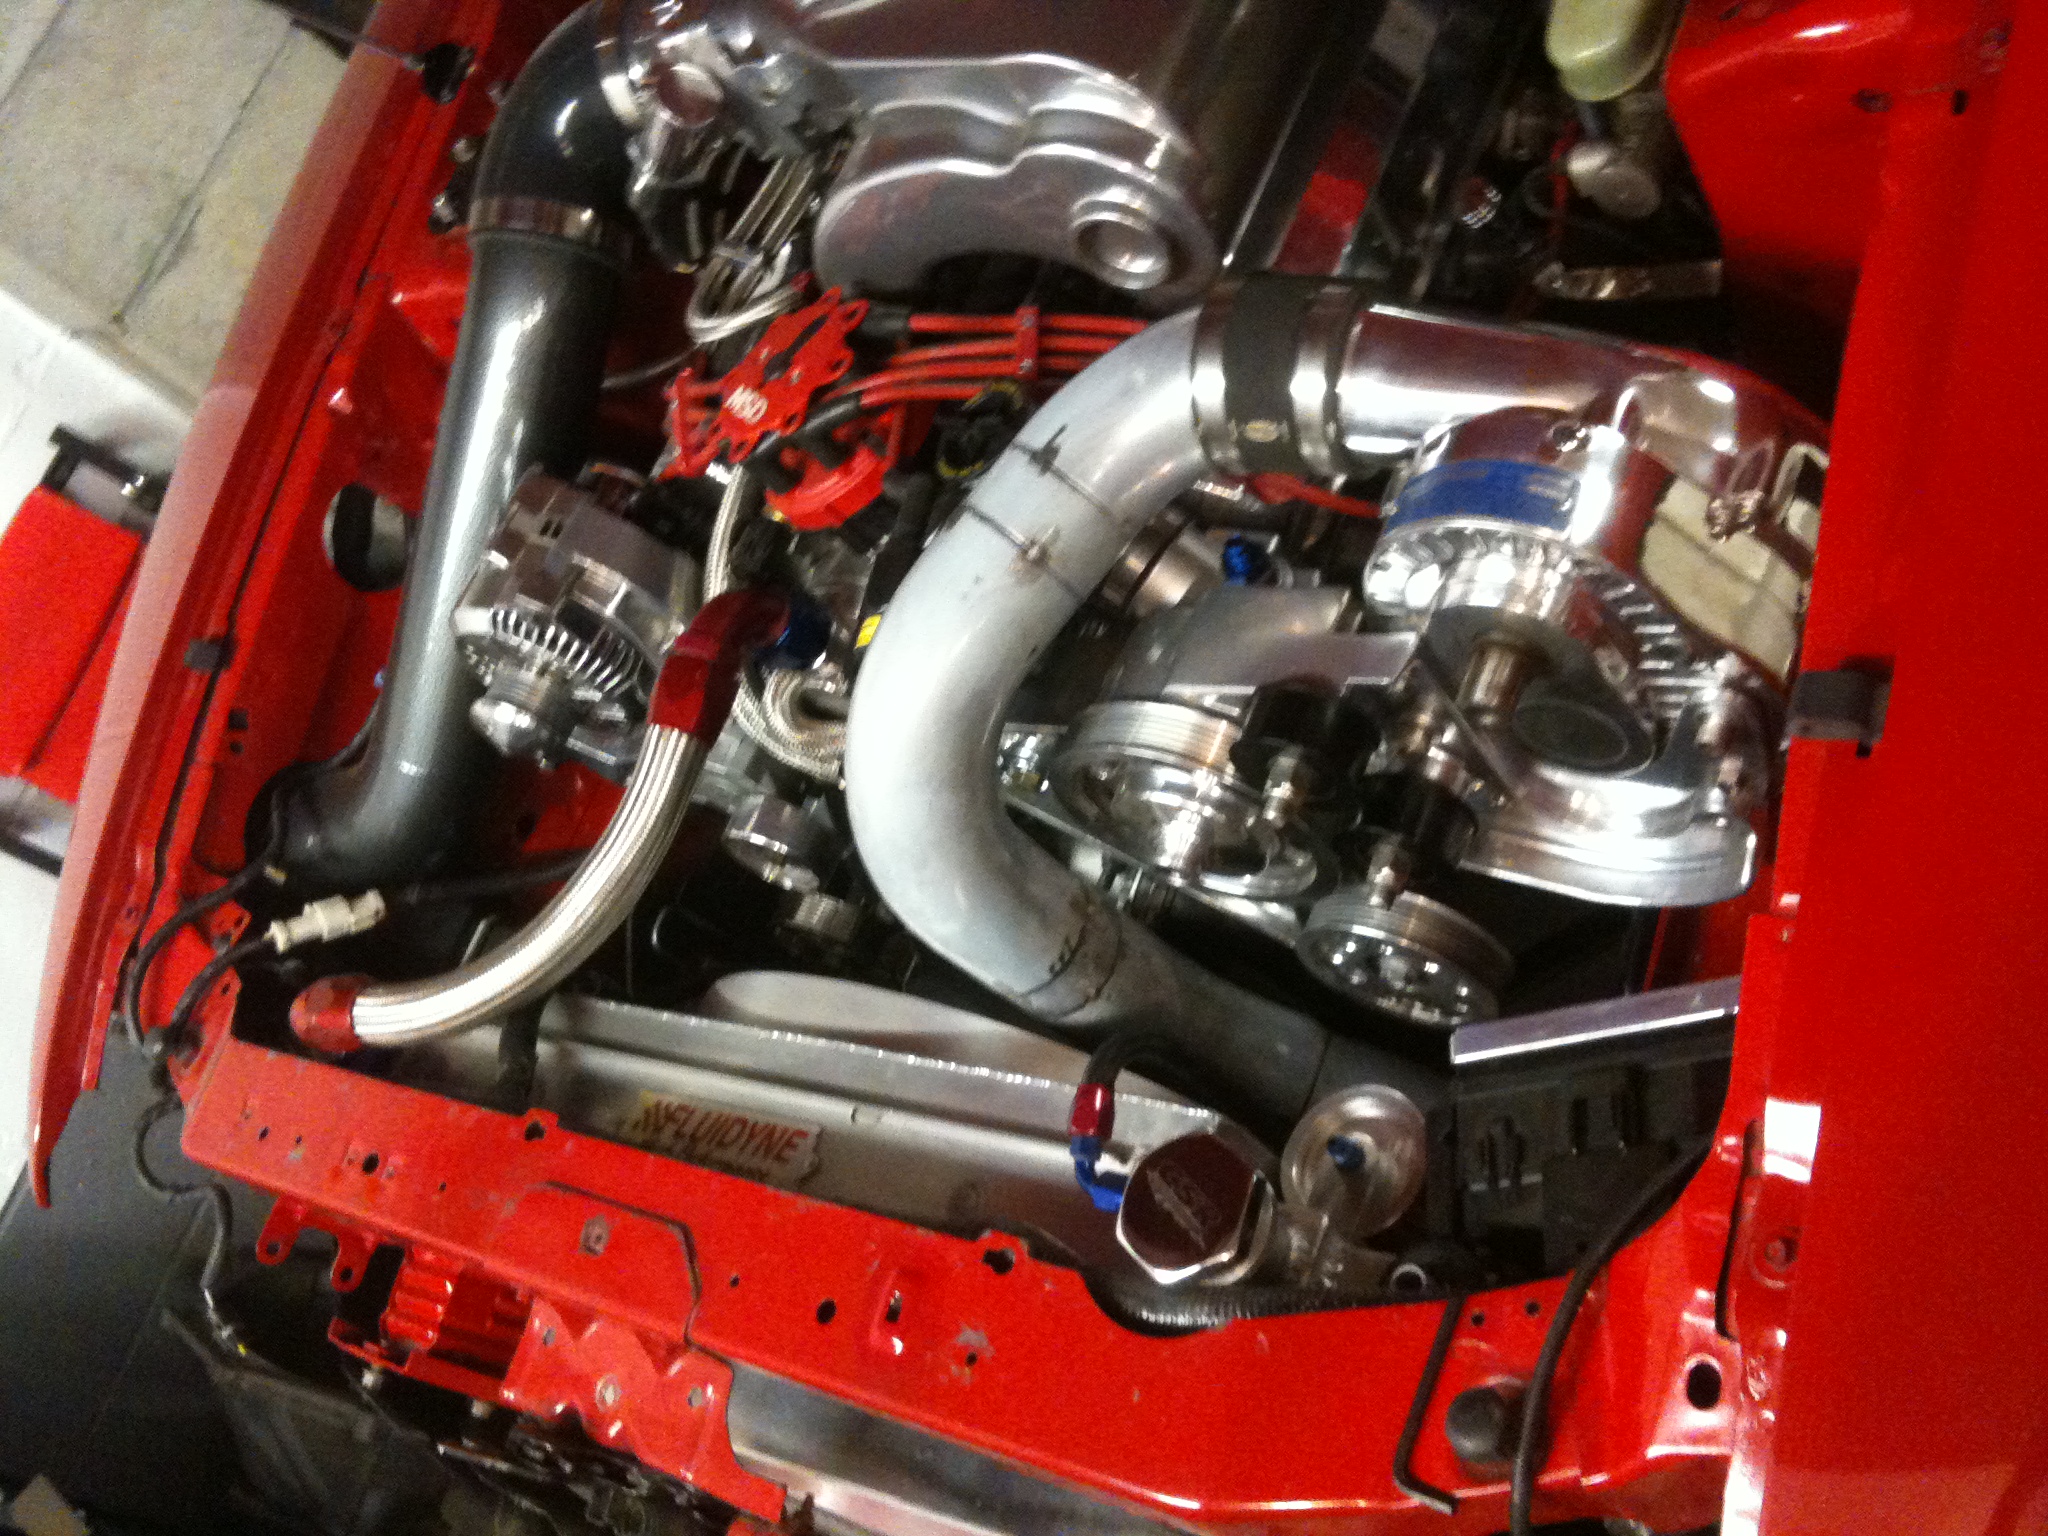
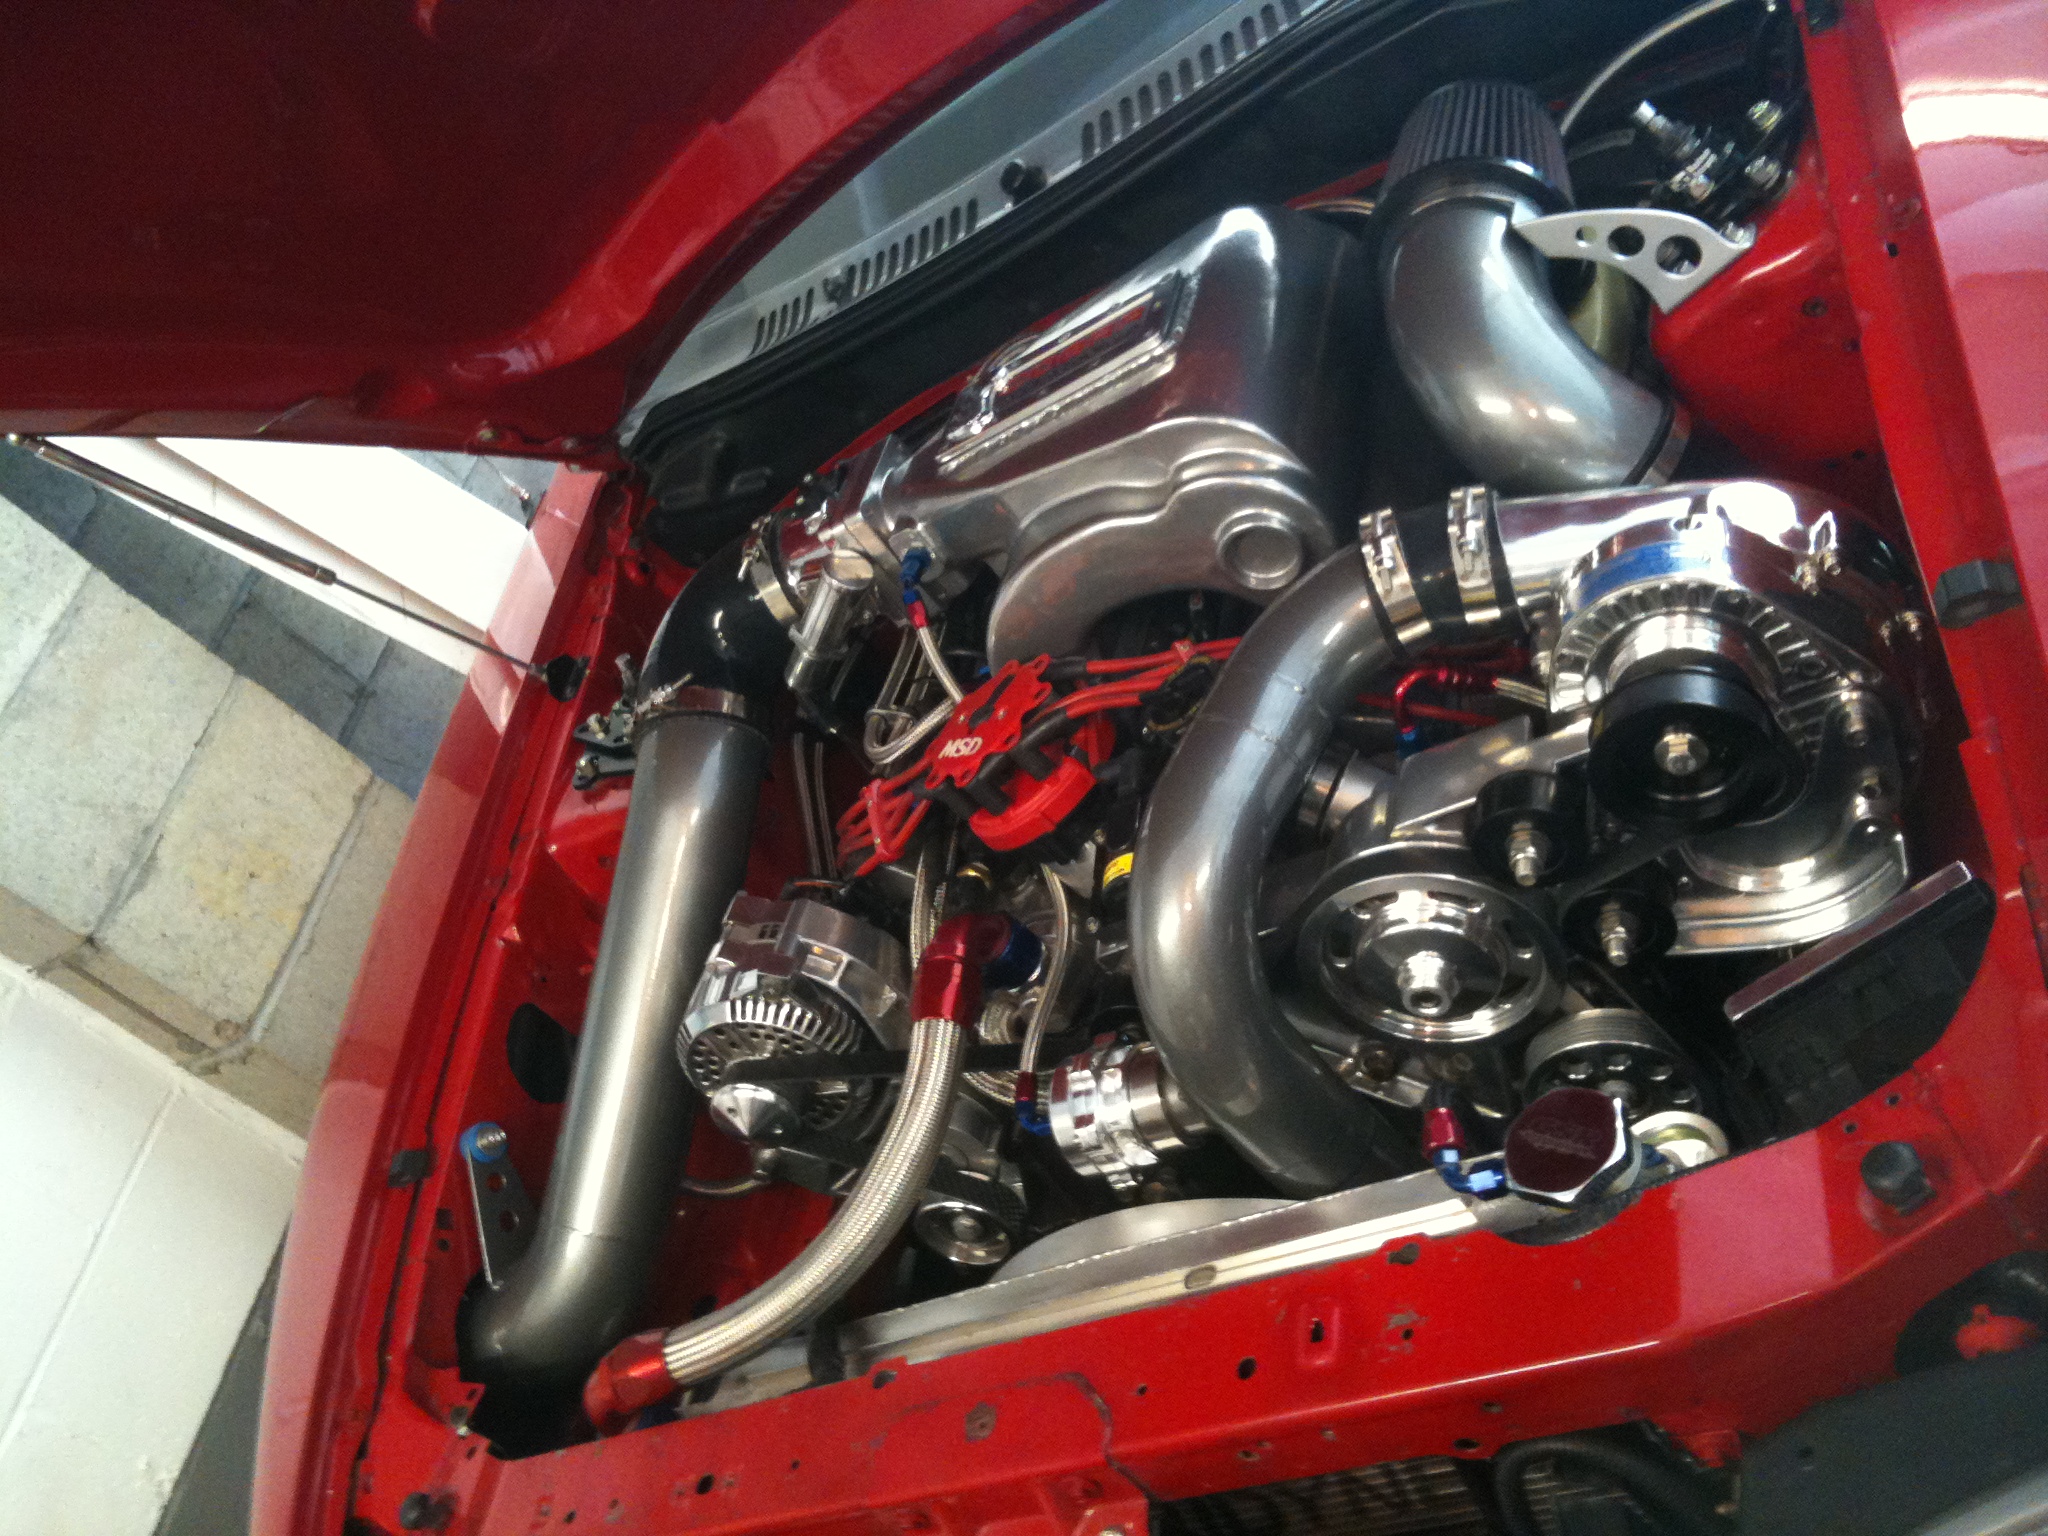
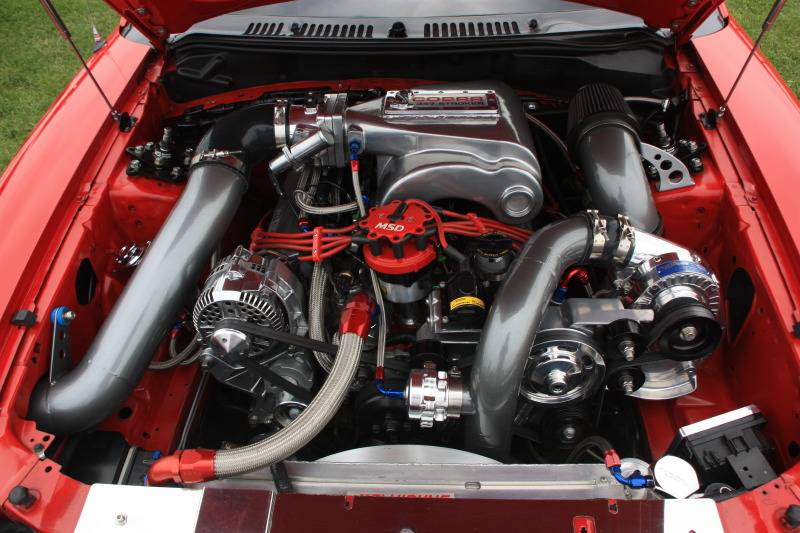
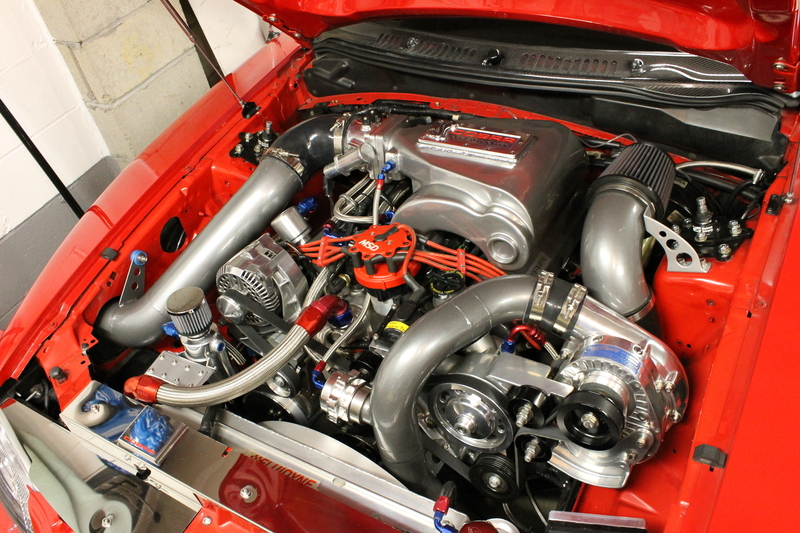
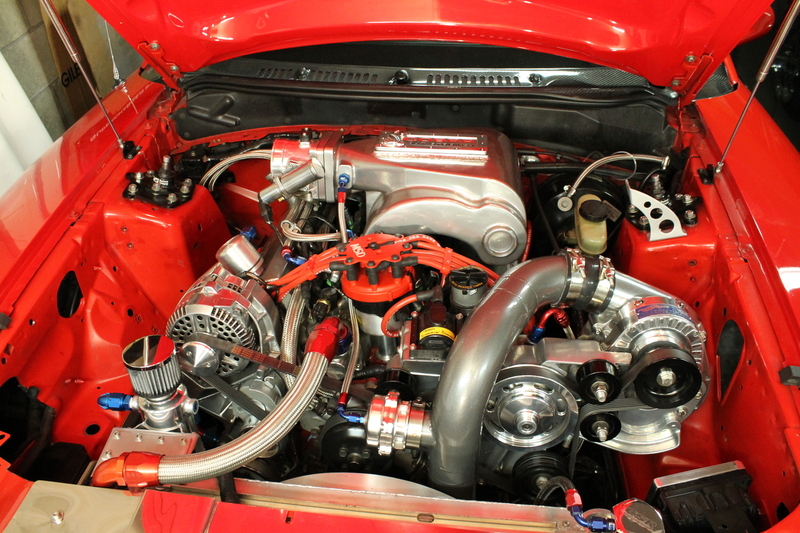
Piping FINALLY done and on the car:
 95 Rio Red Mustang Cobra
Procharger D1SC 347 stroker, full maximum motorsports suspension, Full Tilt Boogie 03 Cobra IRS, Tremec 3550, 19x9.5 and 19x11 HRE 542R. 566rwhp/614rwtq
https://www.pro-touring.com/threads/...ra-OCD-Machine
04-14-2013 #4
Registered User
- Join Date
- Jul 2010
- Location
- Pittsburgh, PA
- Posts
- 114
Fabbed up a small aluminum brace for the power pipe that anchors it to the strut tower.
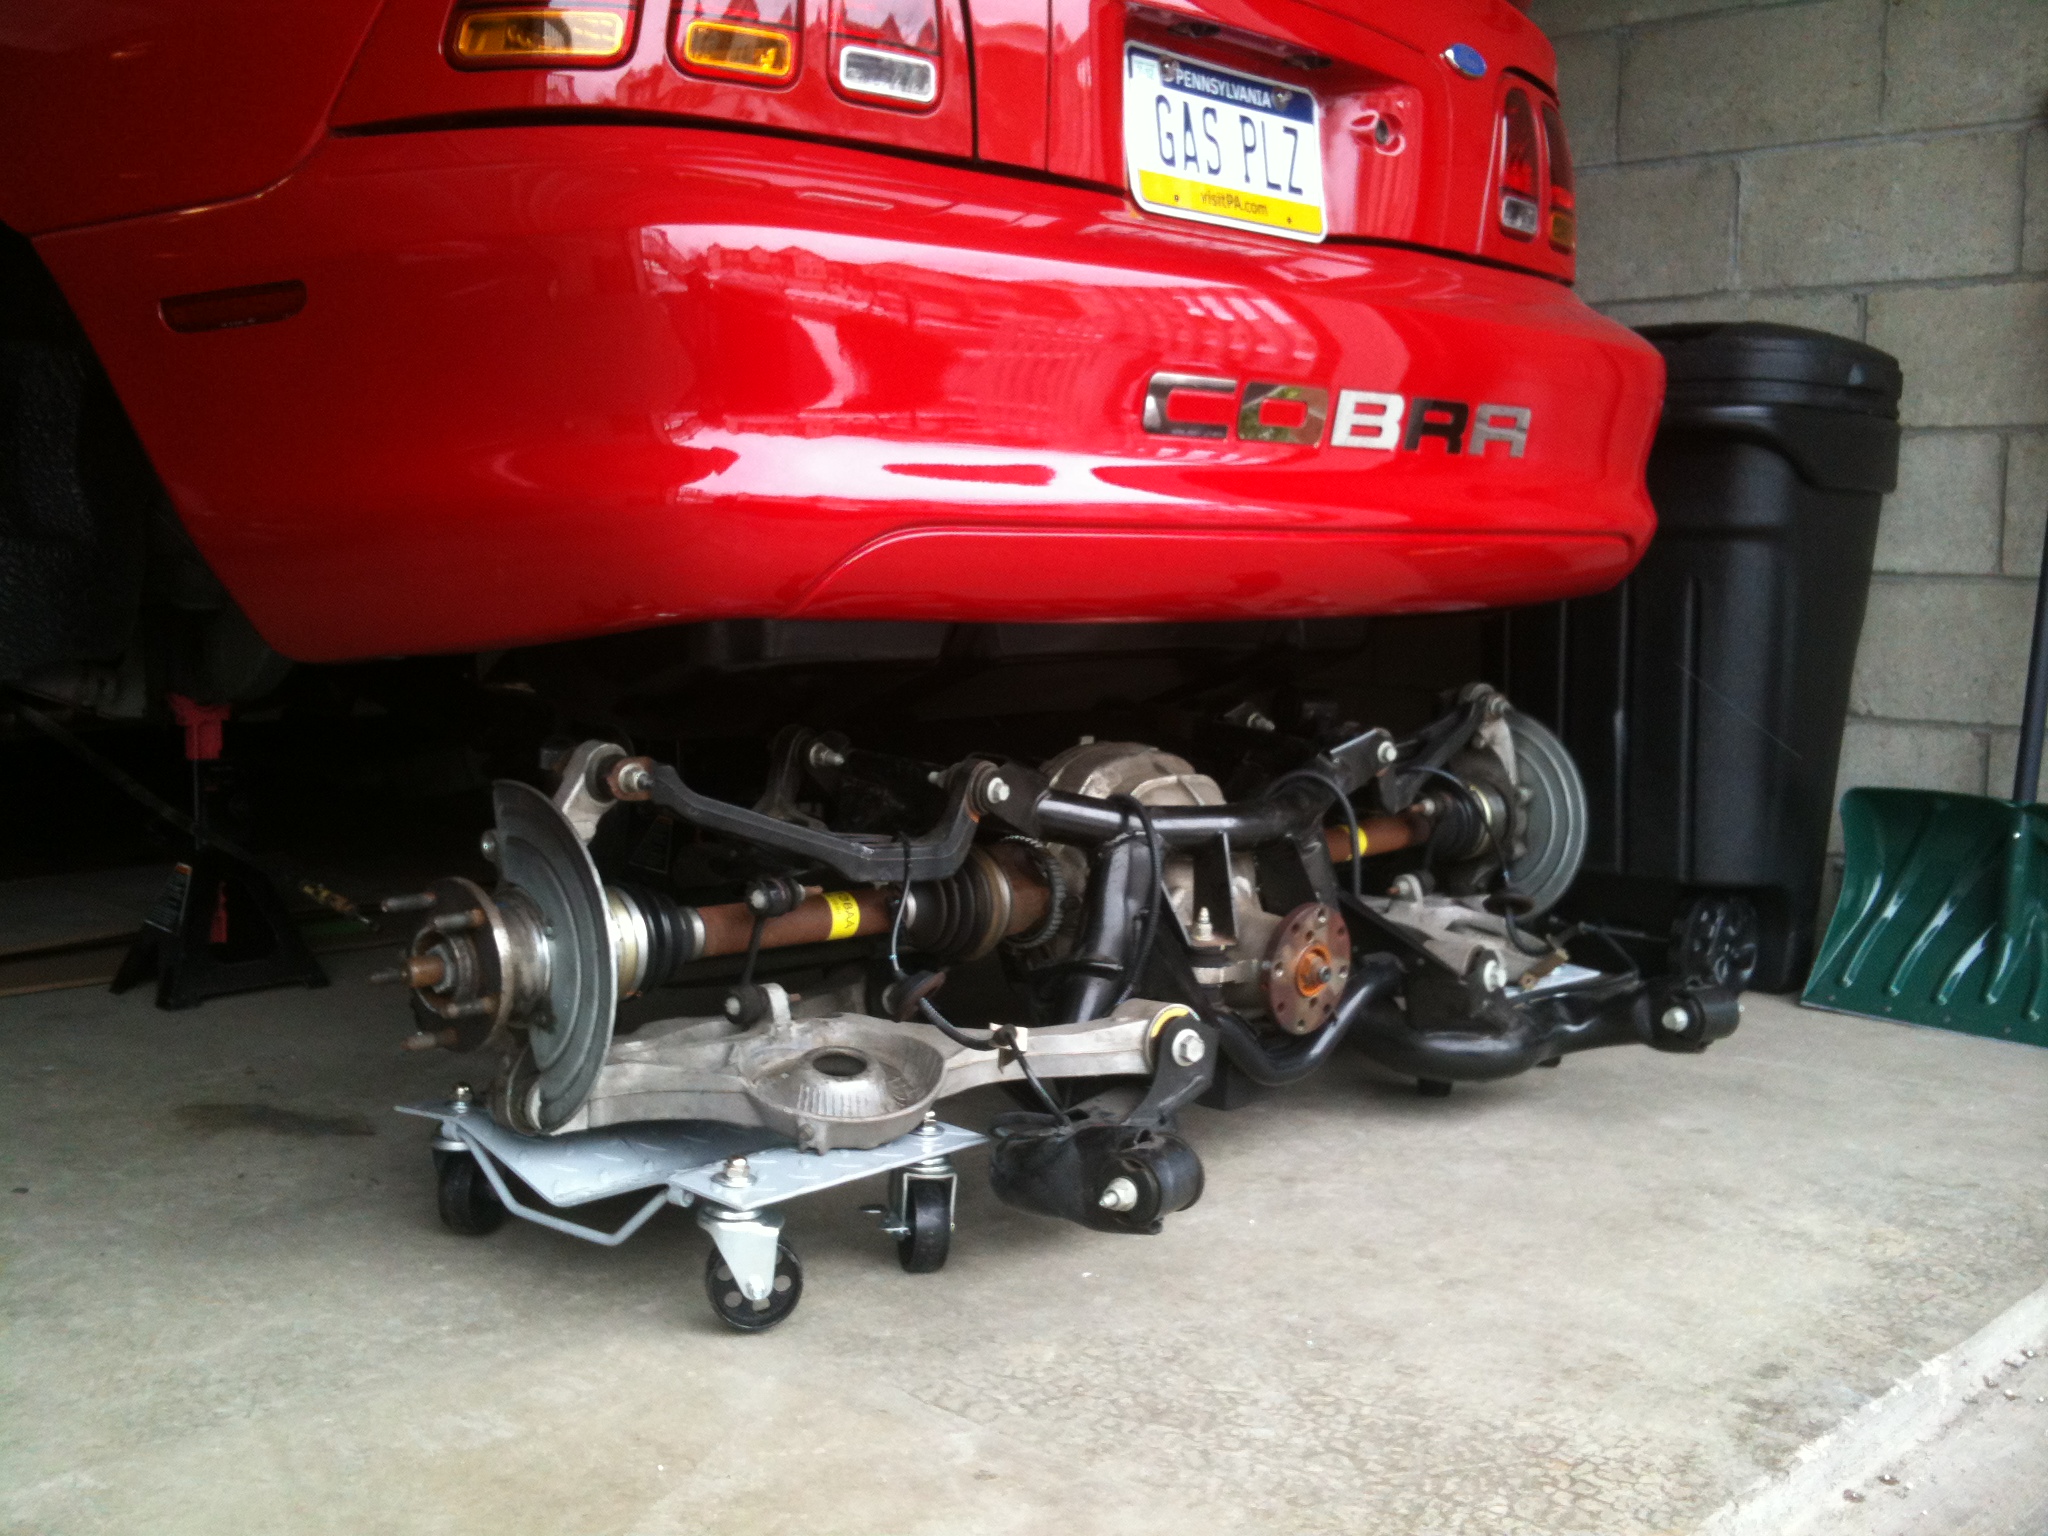
Next thing I know, I'm dropping the SRA out of the car. This is where the snowball started to grow that winter.
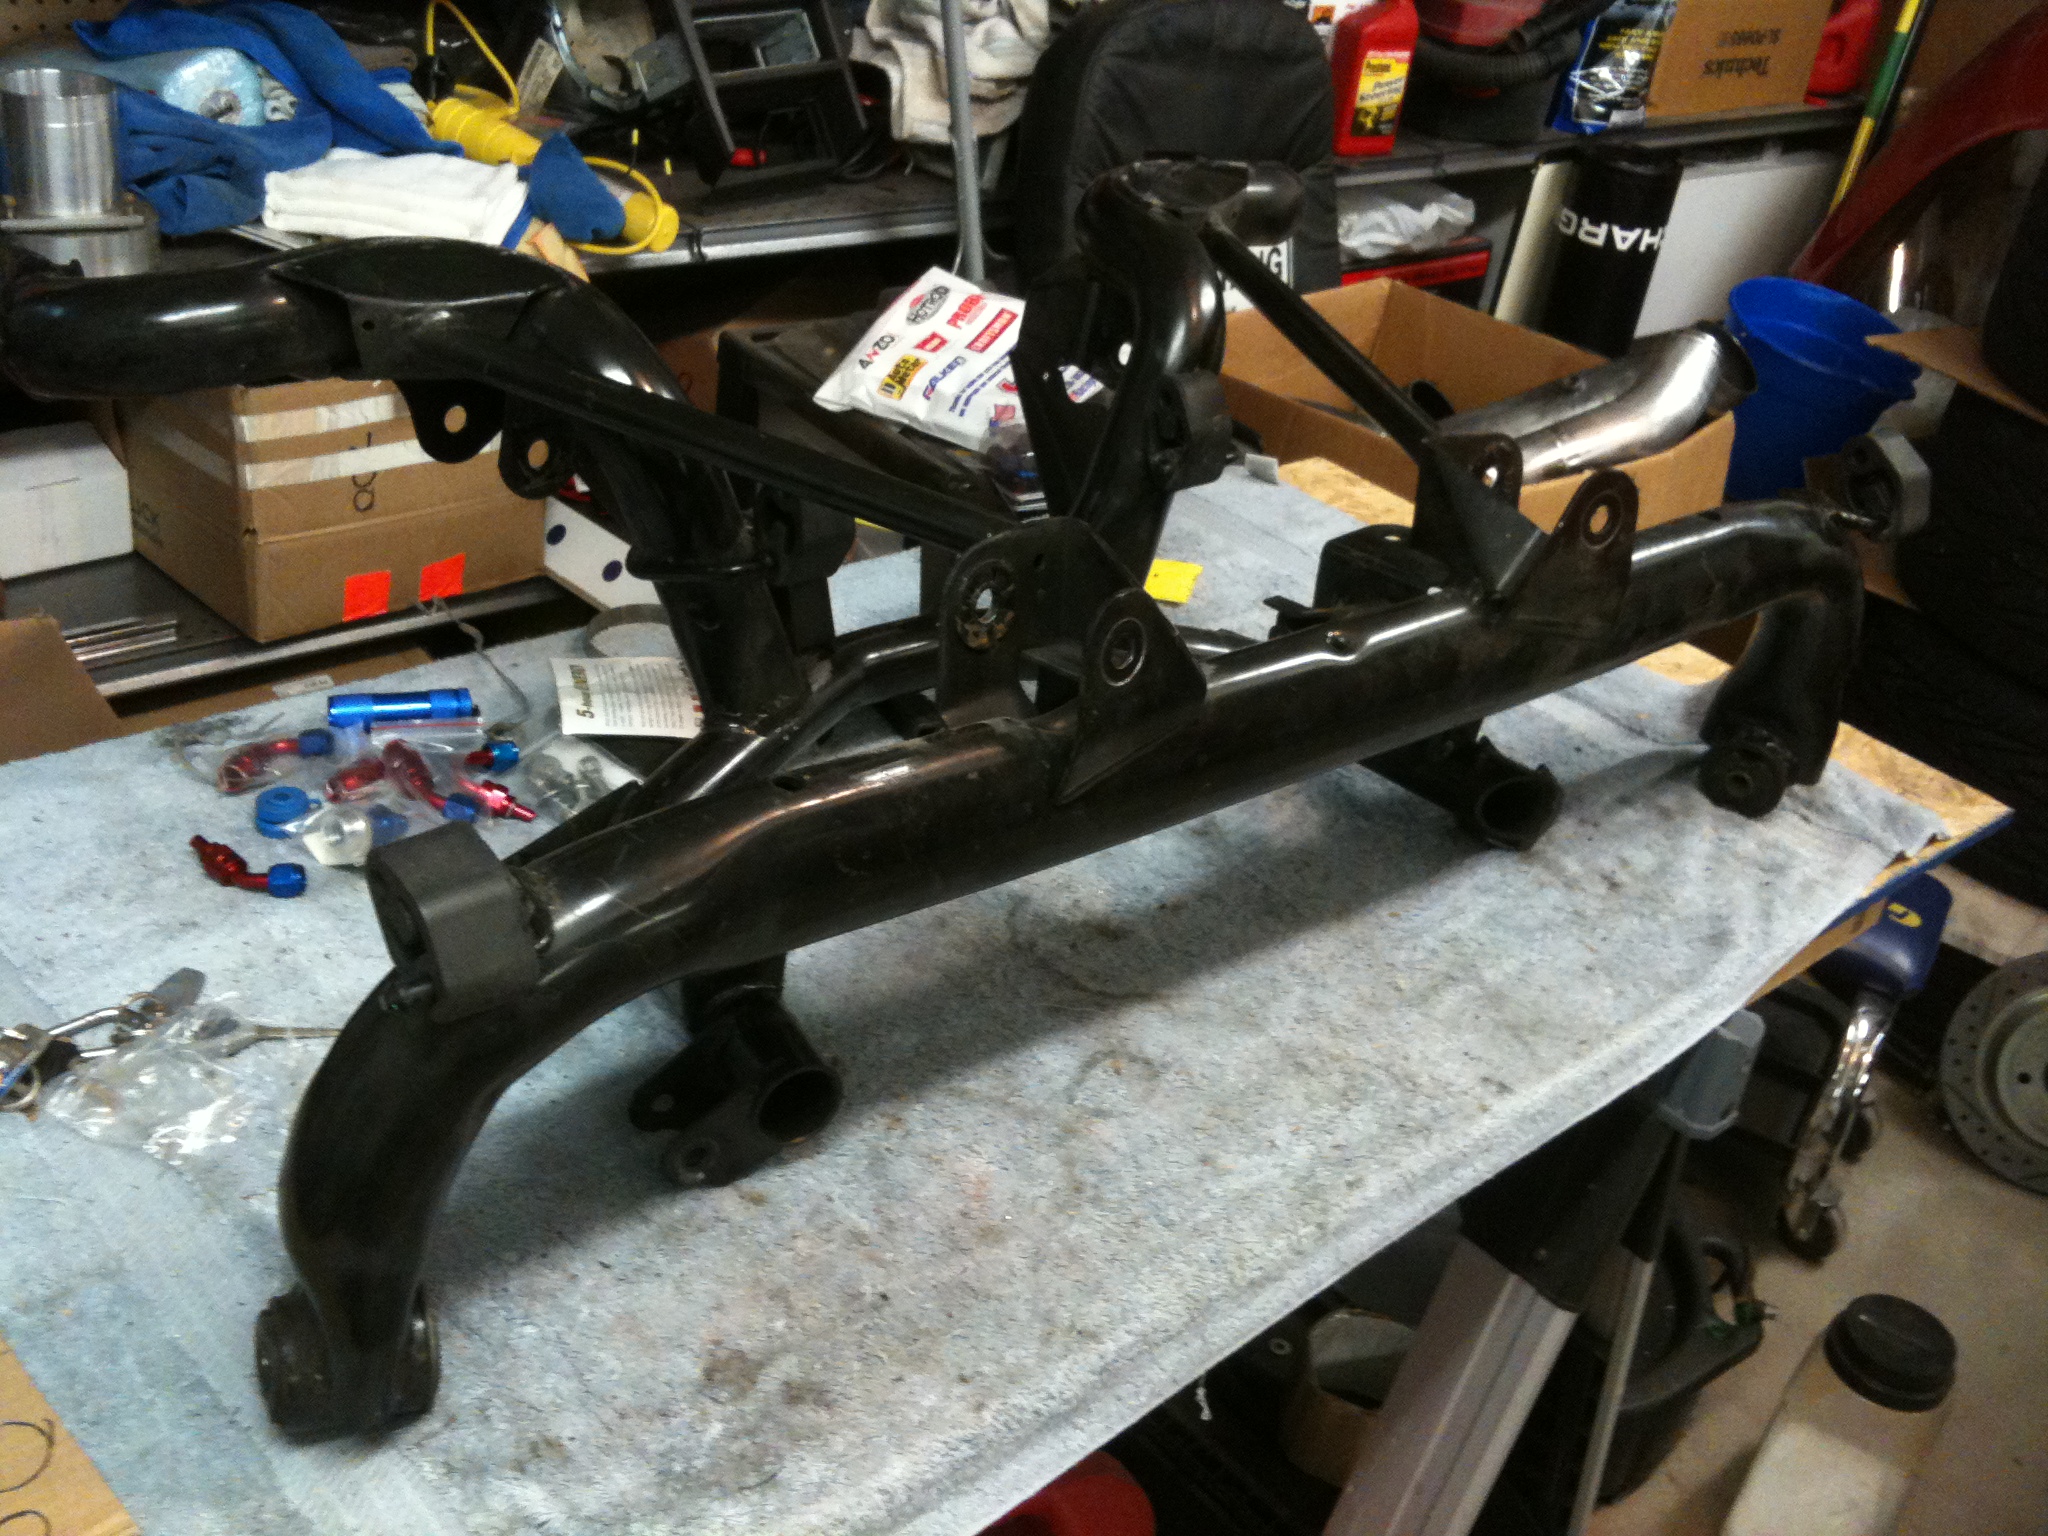
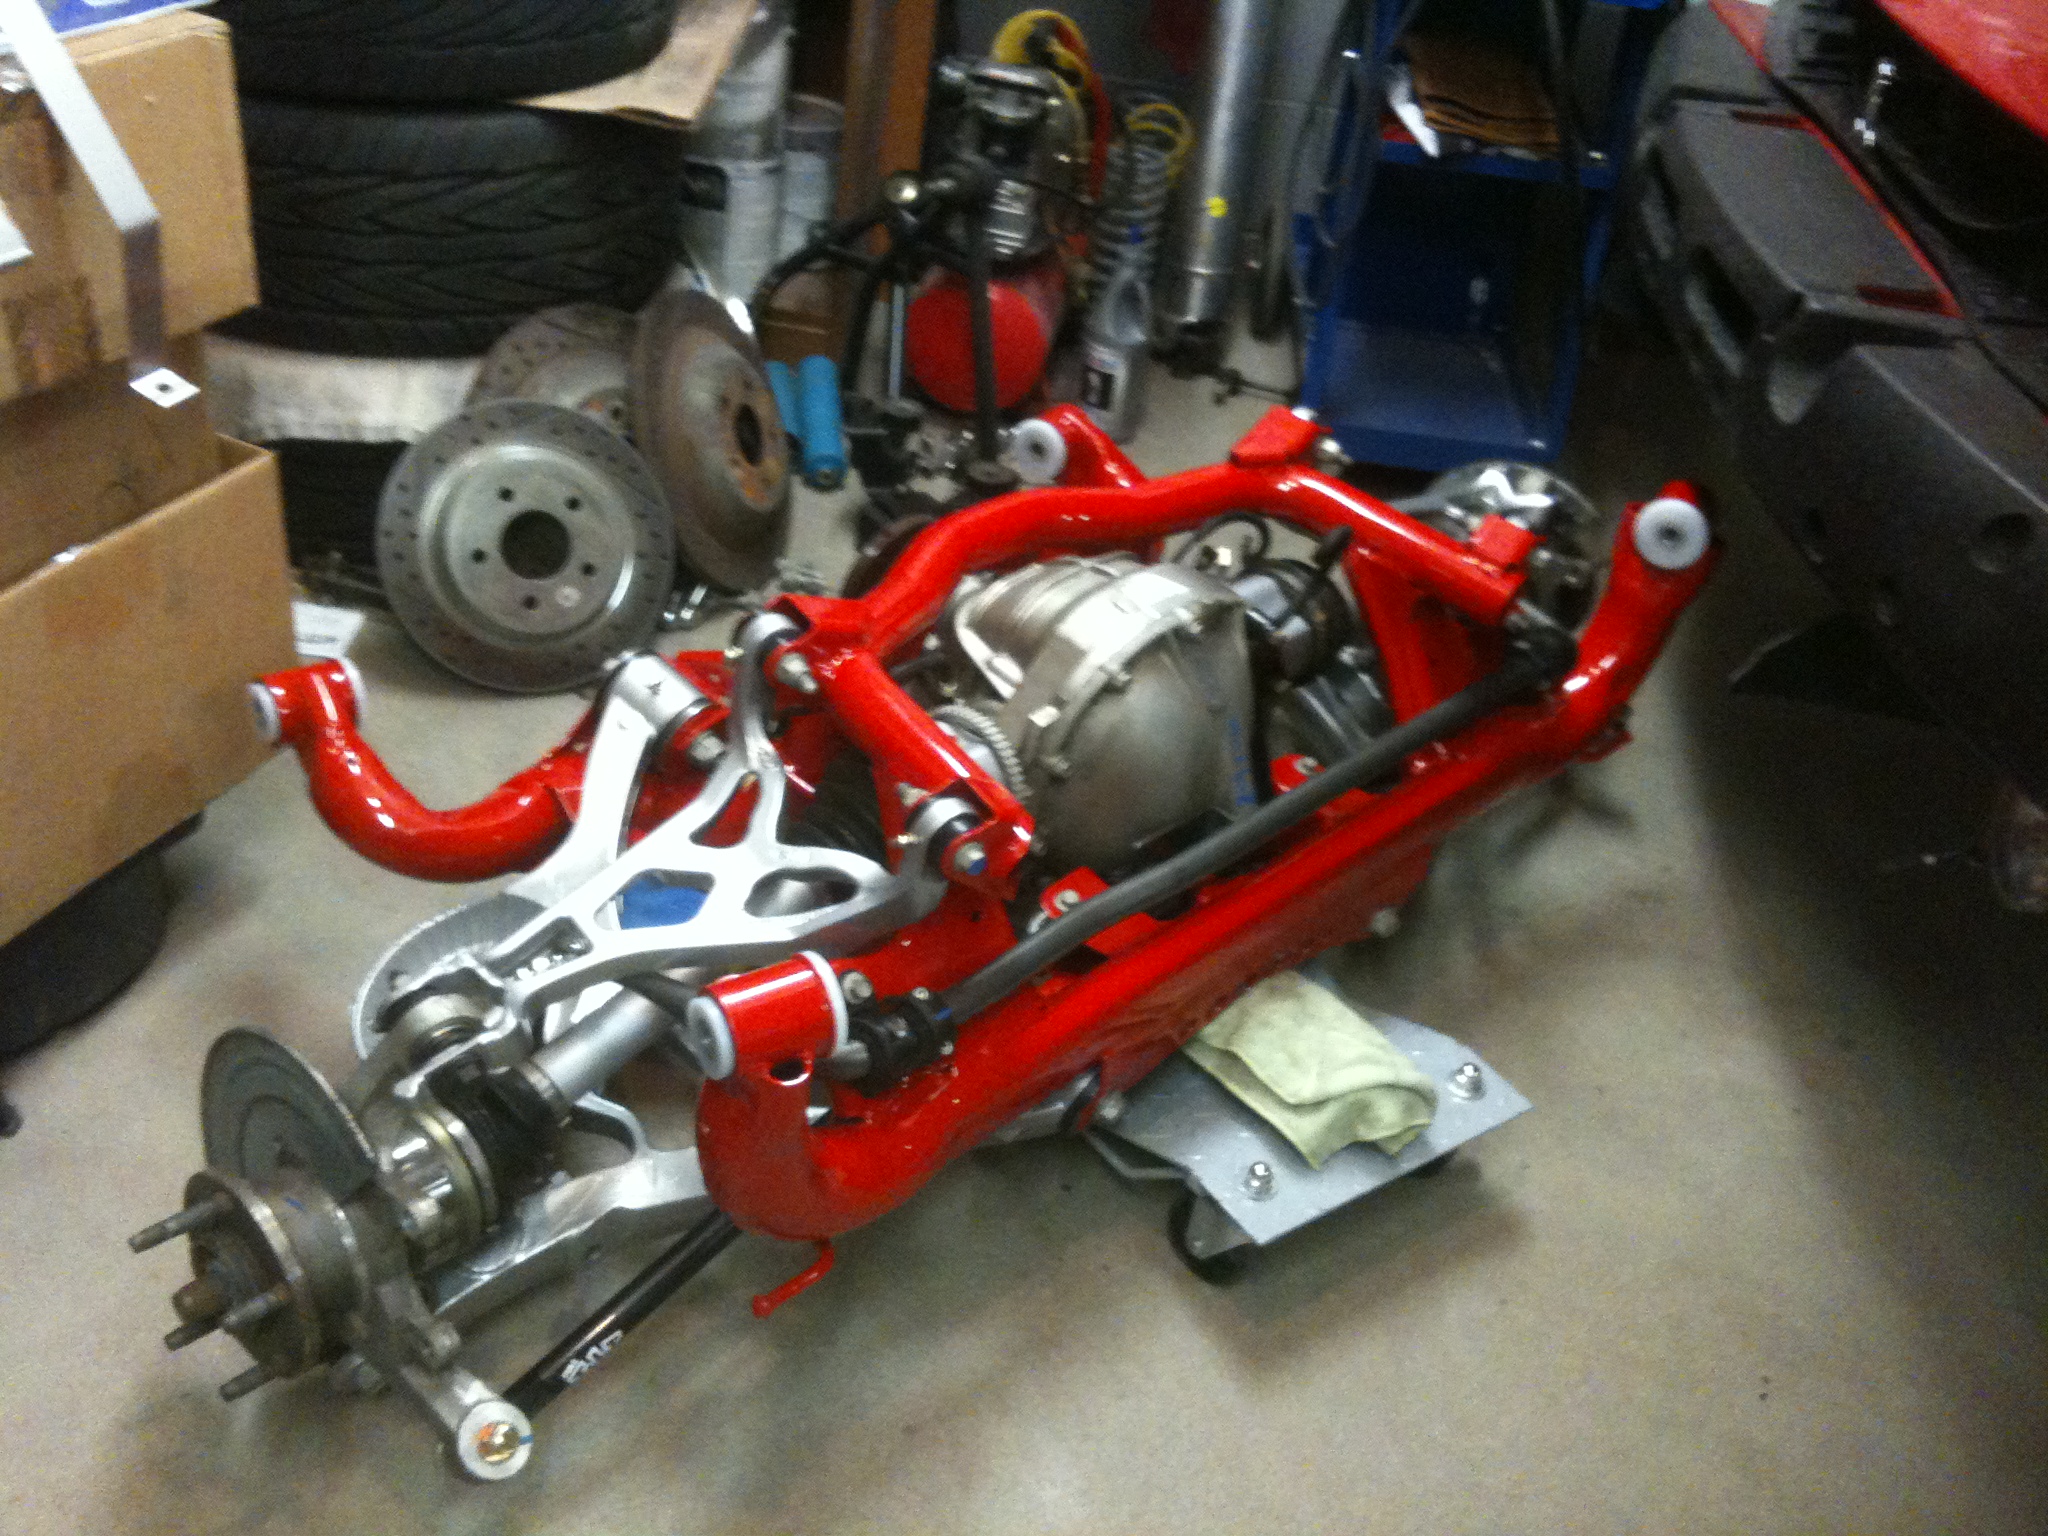
Then I found an IRS out of a 10k mile 03 cobra to replace that SRA.
Broke it down into 548998228942894 pieces one night
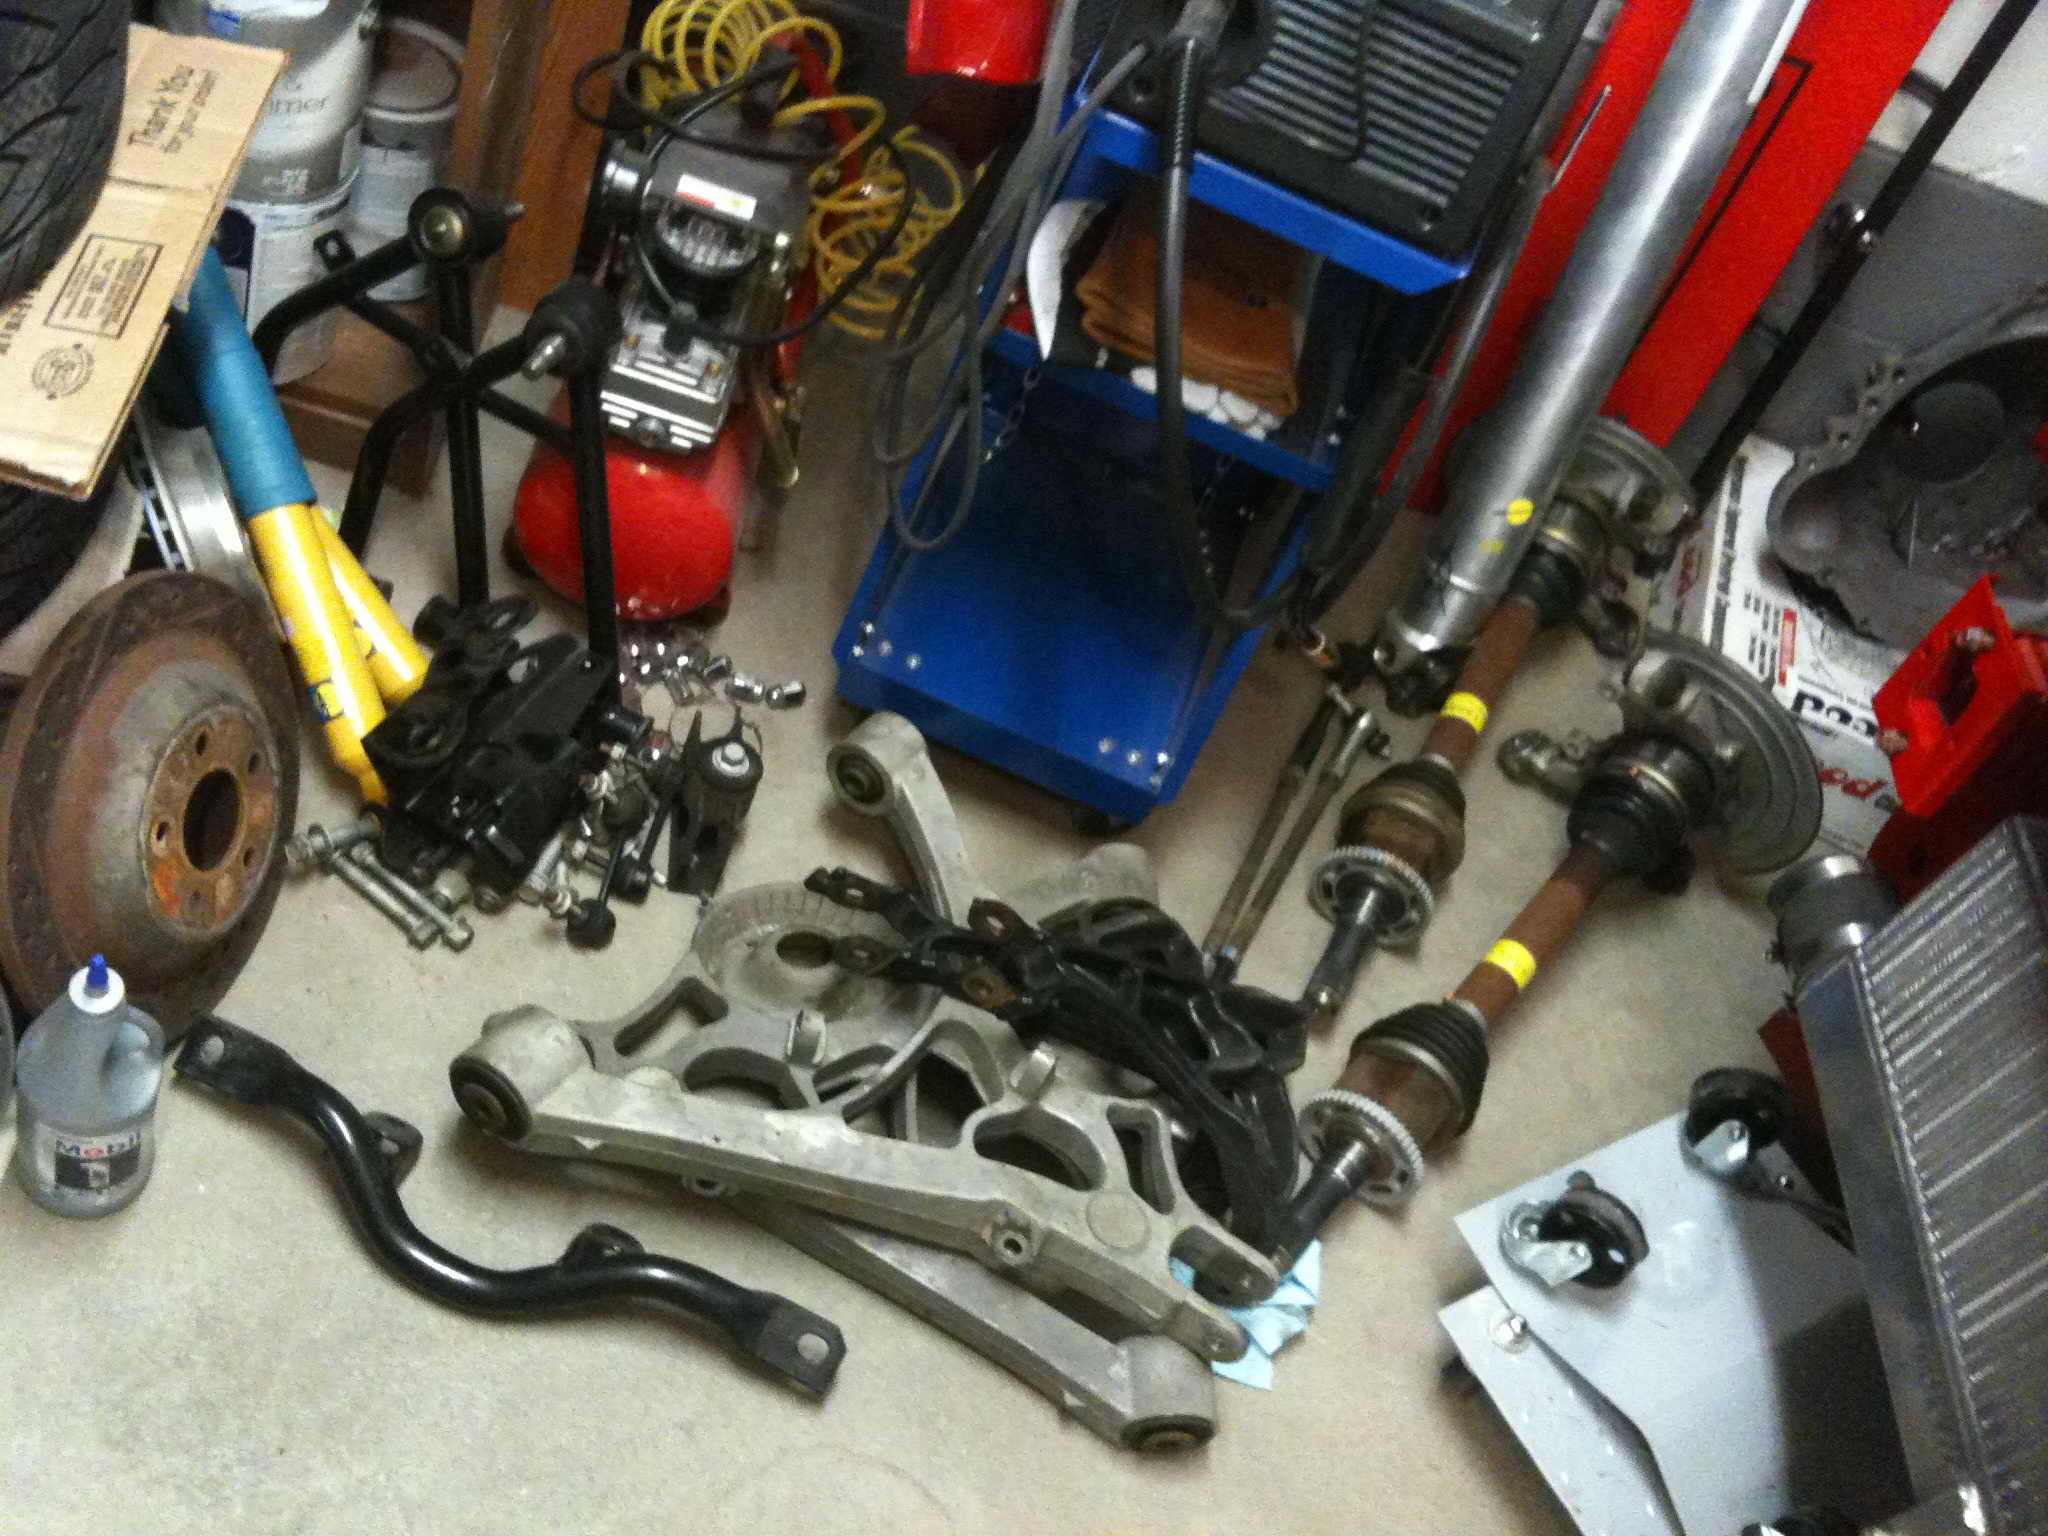
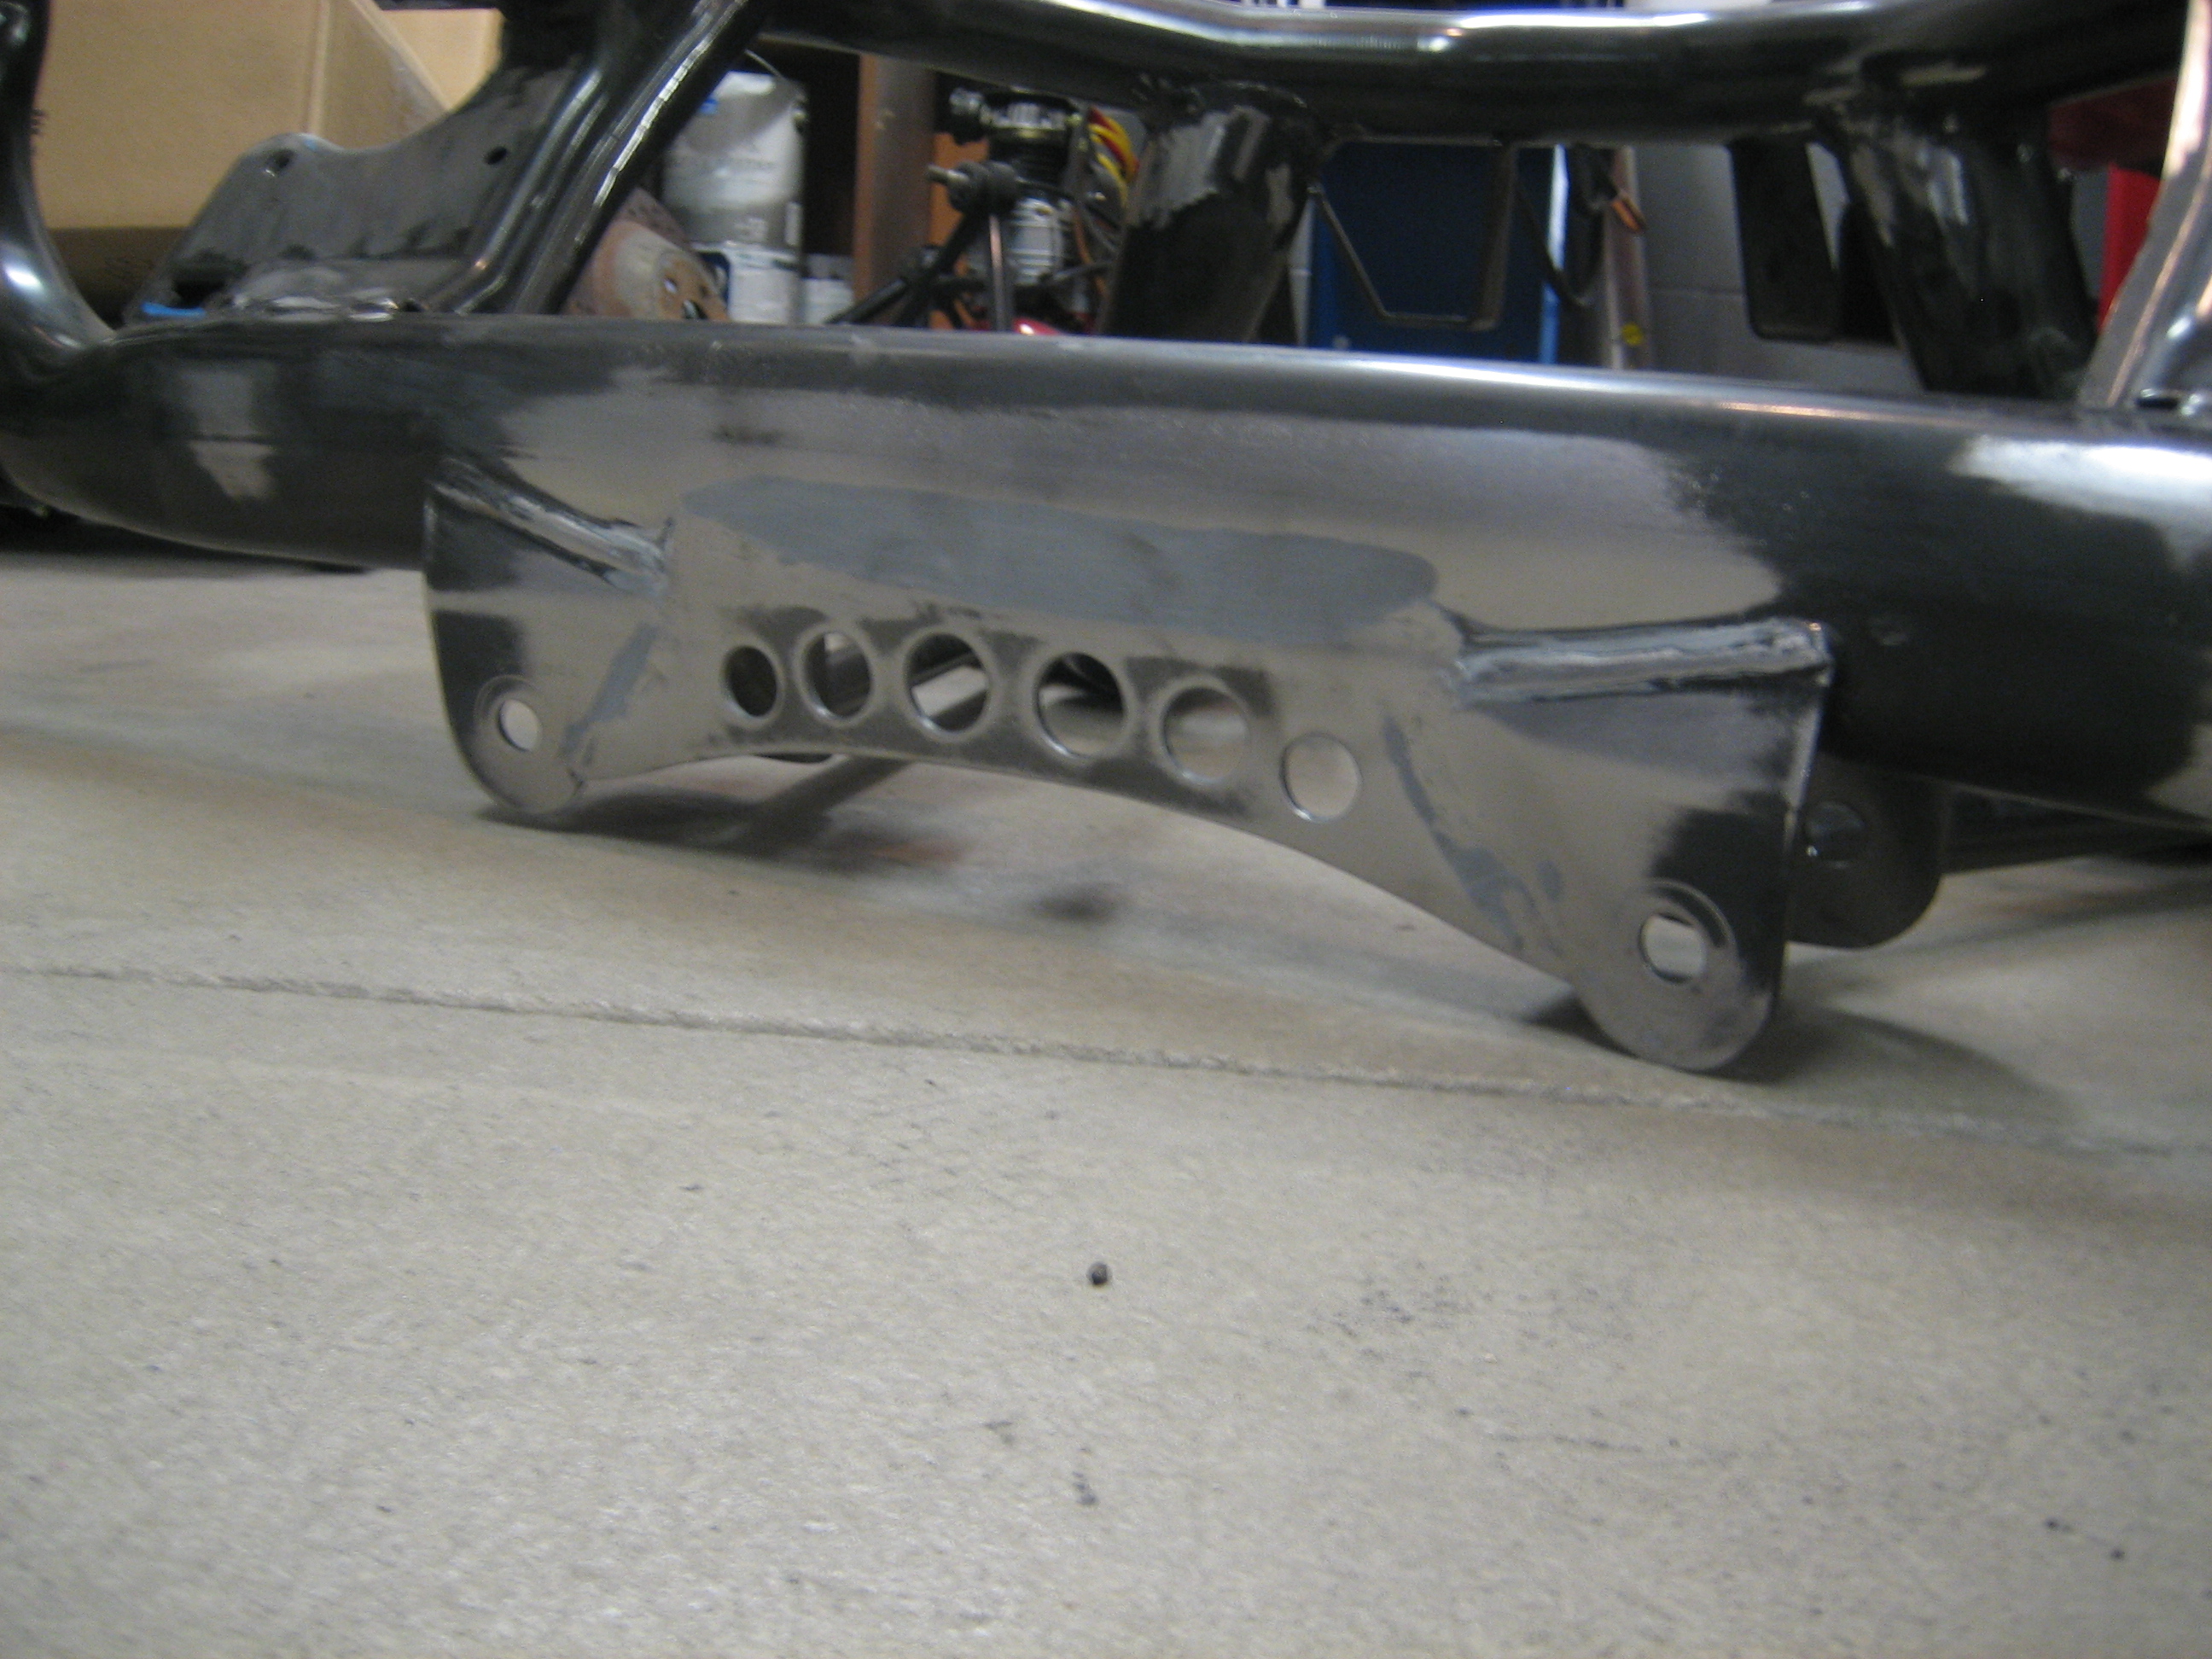
Started smoothing the cradle and getting rid of the massive amount of weld splatter it had from the factory. I decided since I'll always have side exhaust, I made a custom web panel to go between the LCA mounting ears, just because ;) Also began all the prep work to the cradle for the upcoming Full Tilt Boogie complete bushing kit, as well as drilling and tapping the control arms for grease fittings.
Stripped and painted the axles
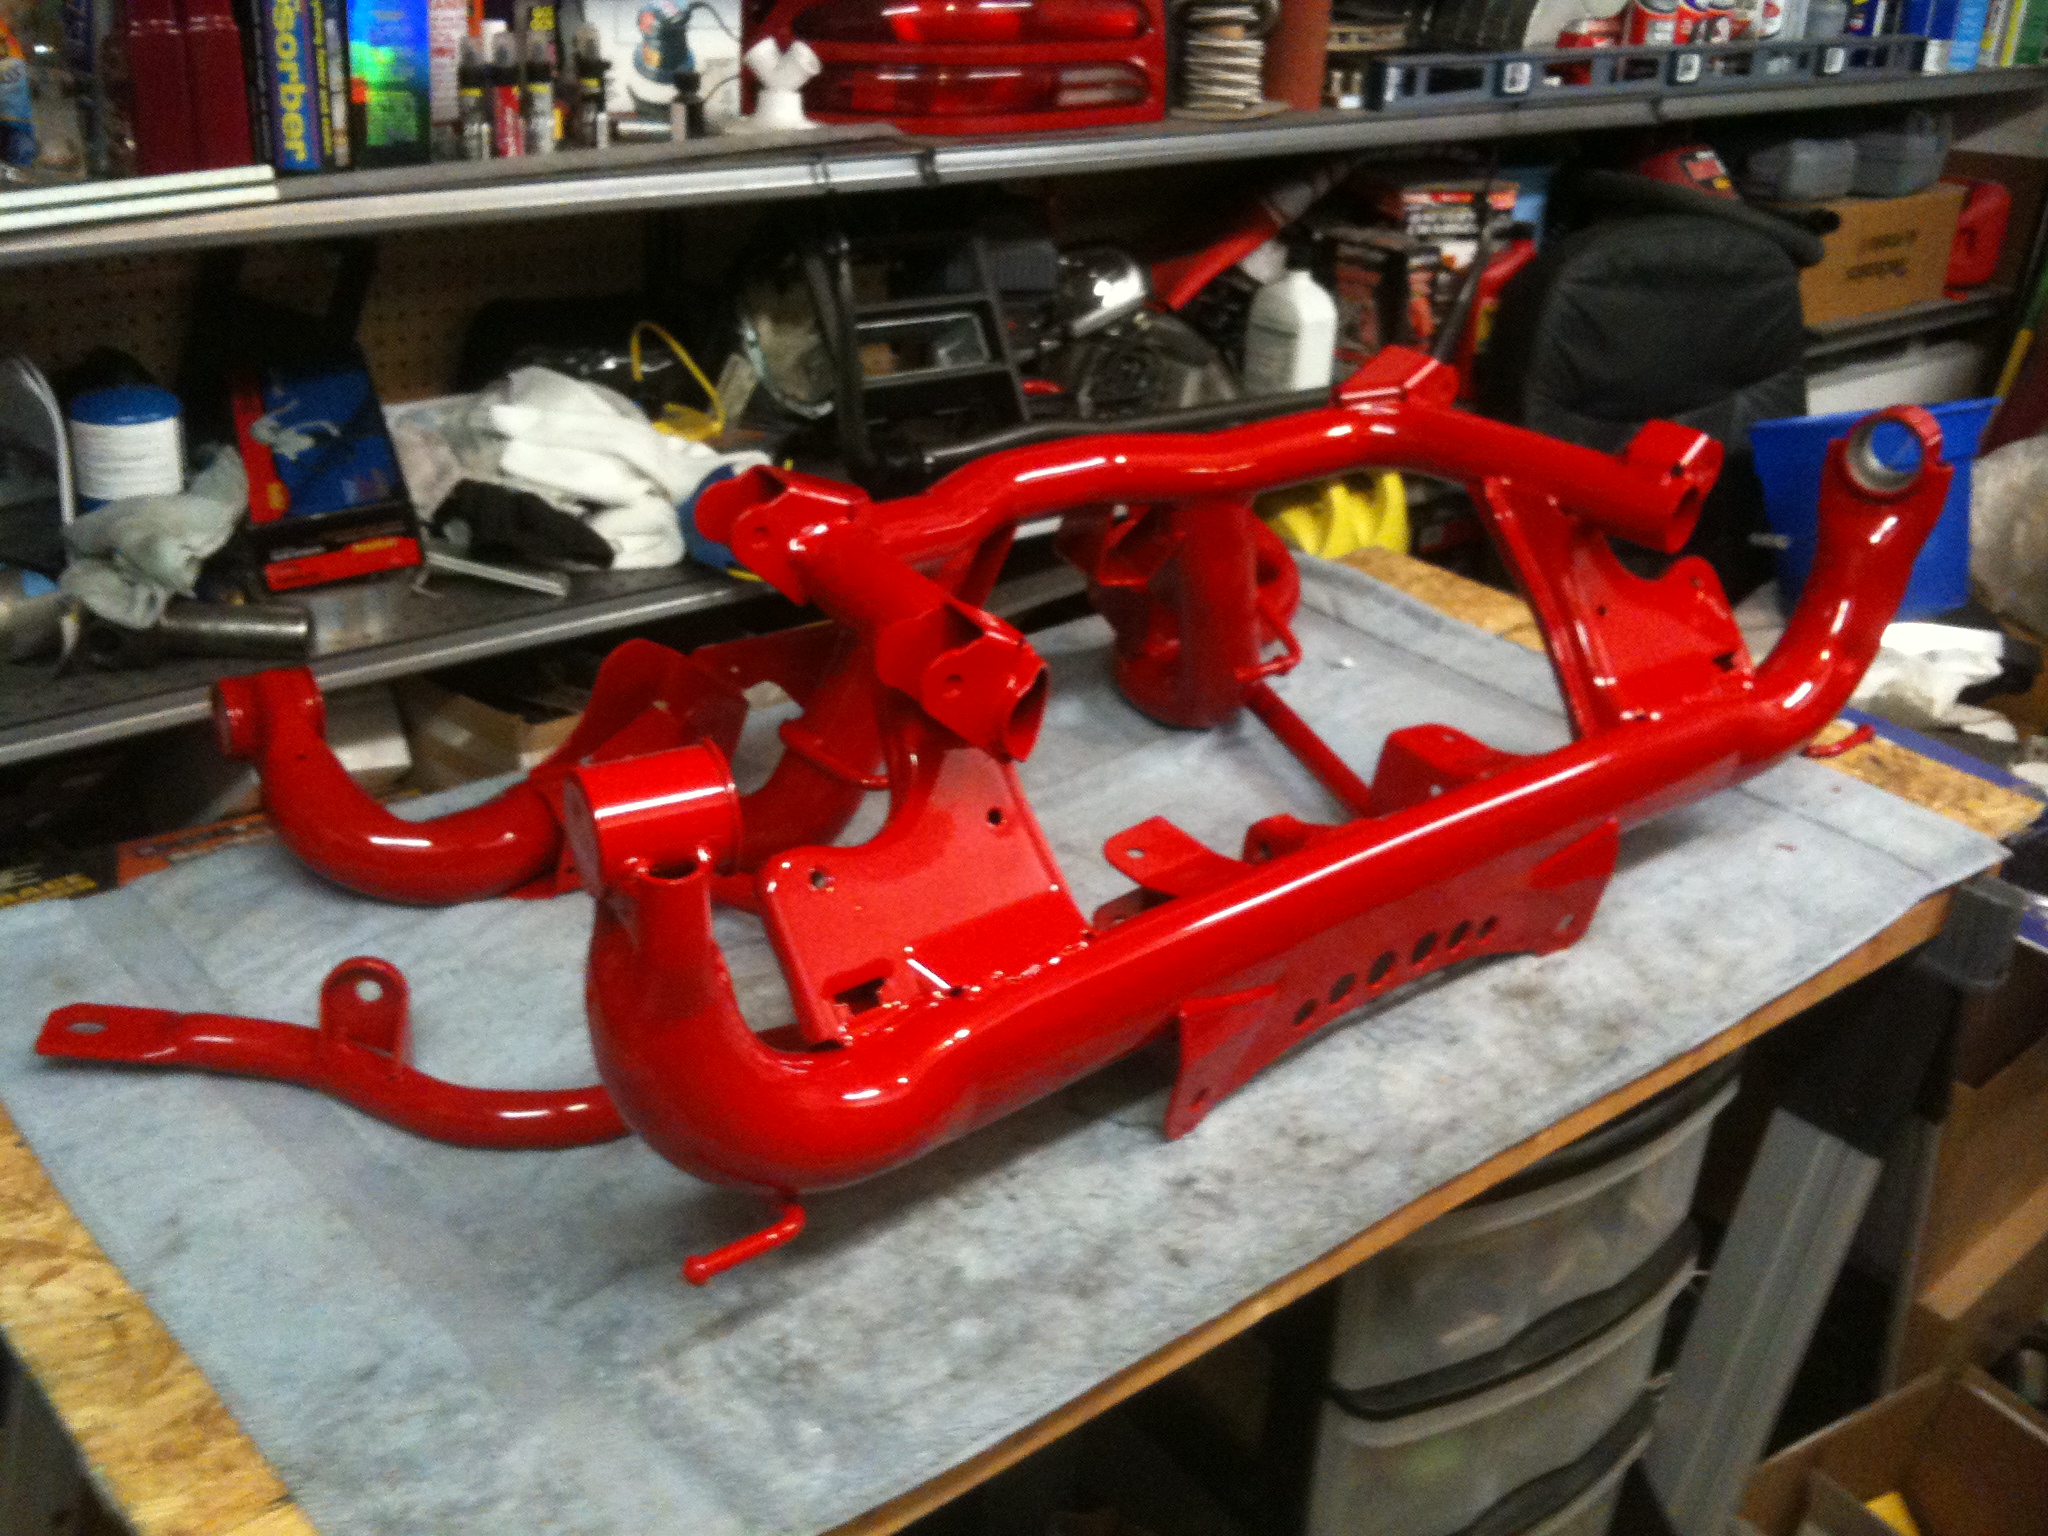
Fast forward a bit and I got the cradle and all the other IRS parts back from the powder coaters. I must have not taken a pic of the control arms and such but I smoothed them also, then had them powder coated. The sway bar and any removable brackets, etc. were all repainted as well.
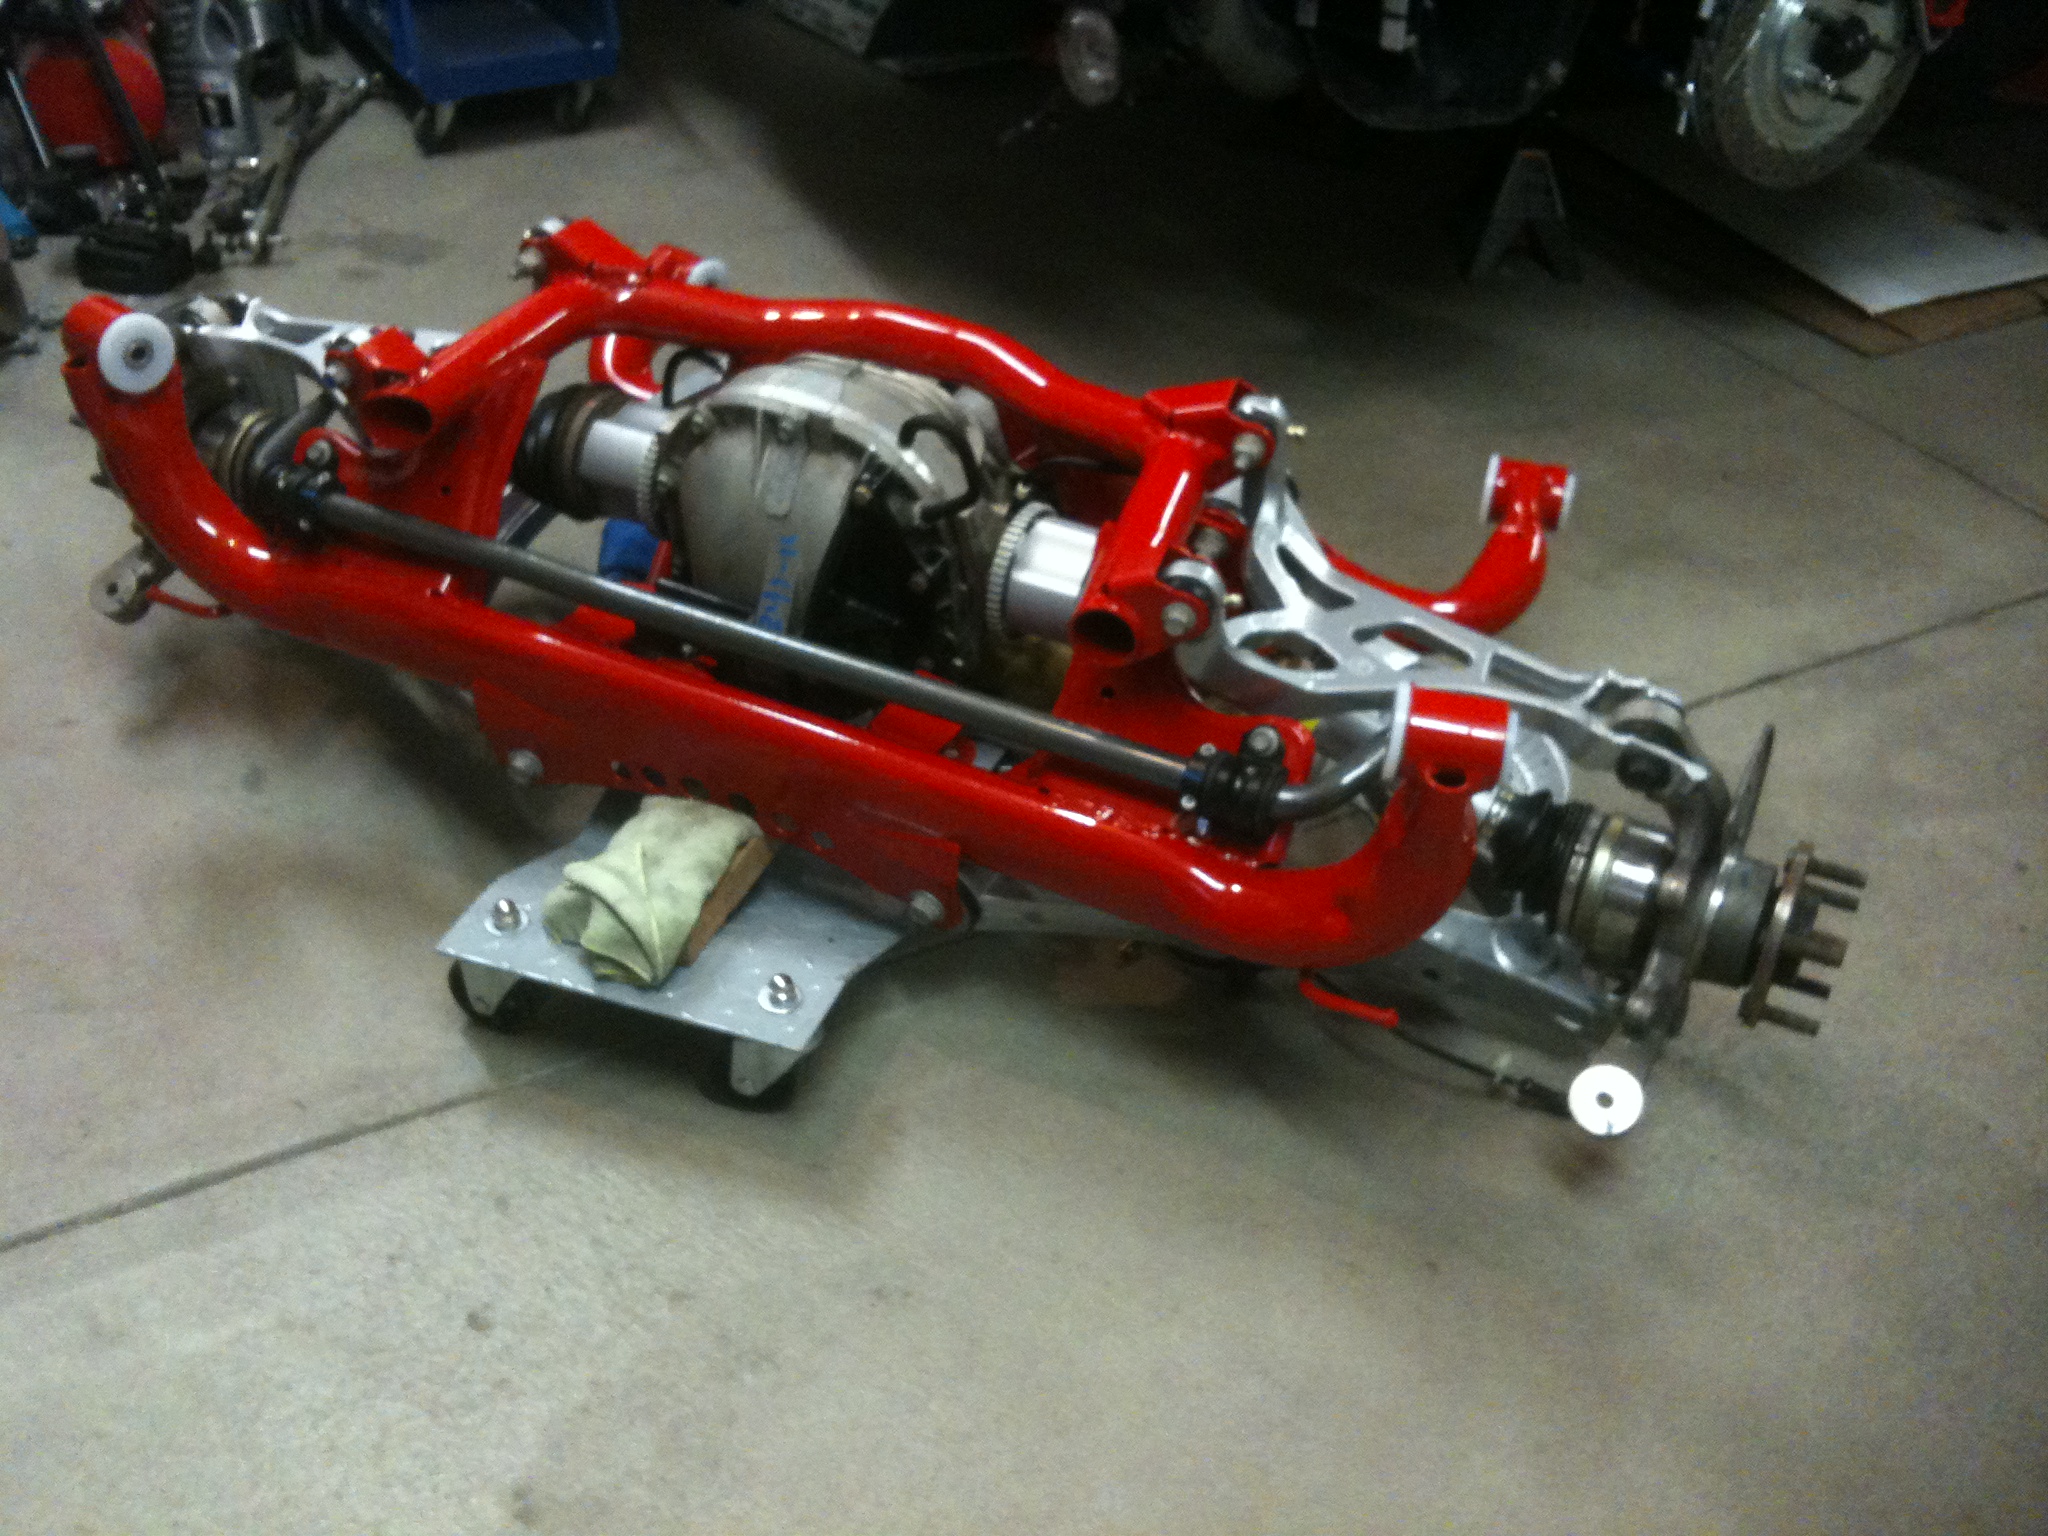
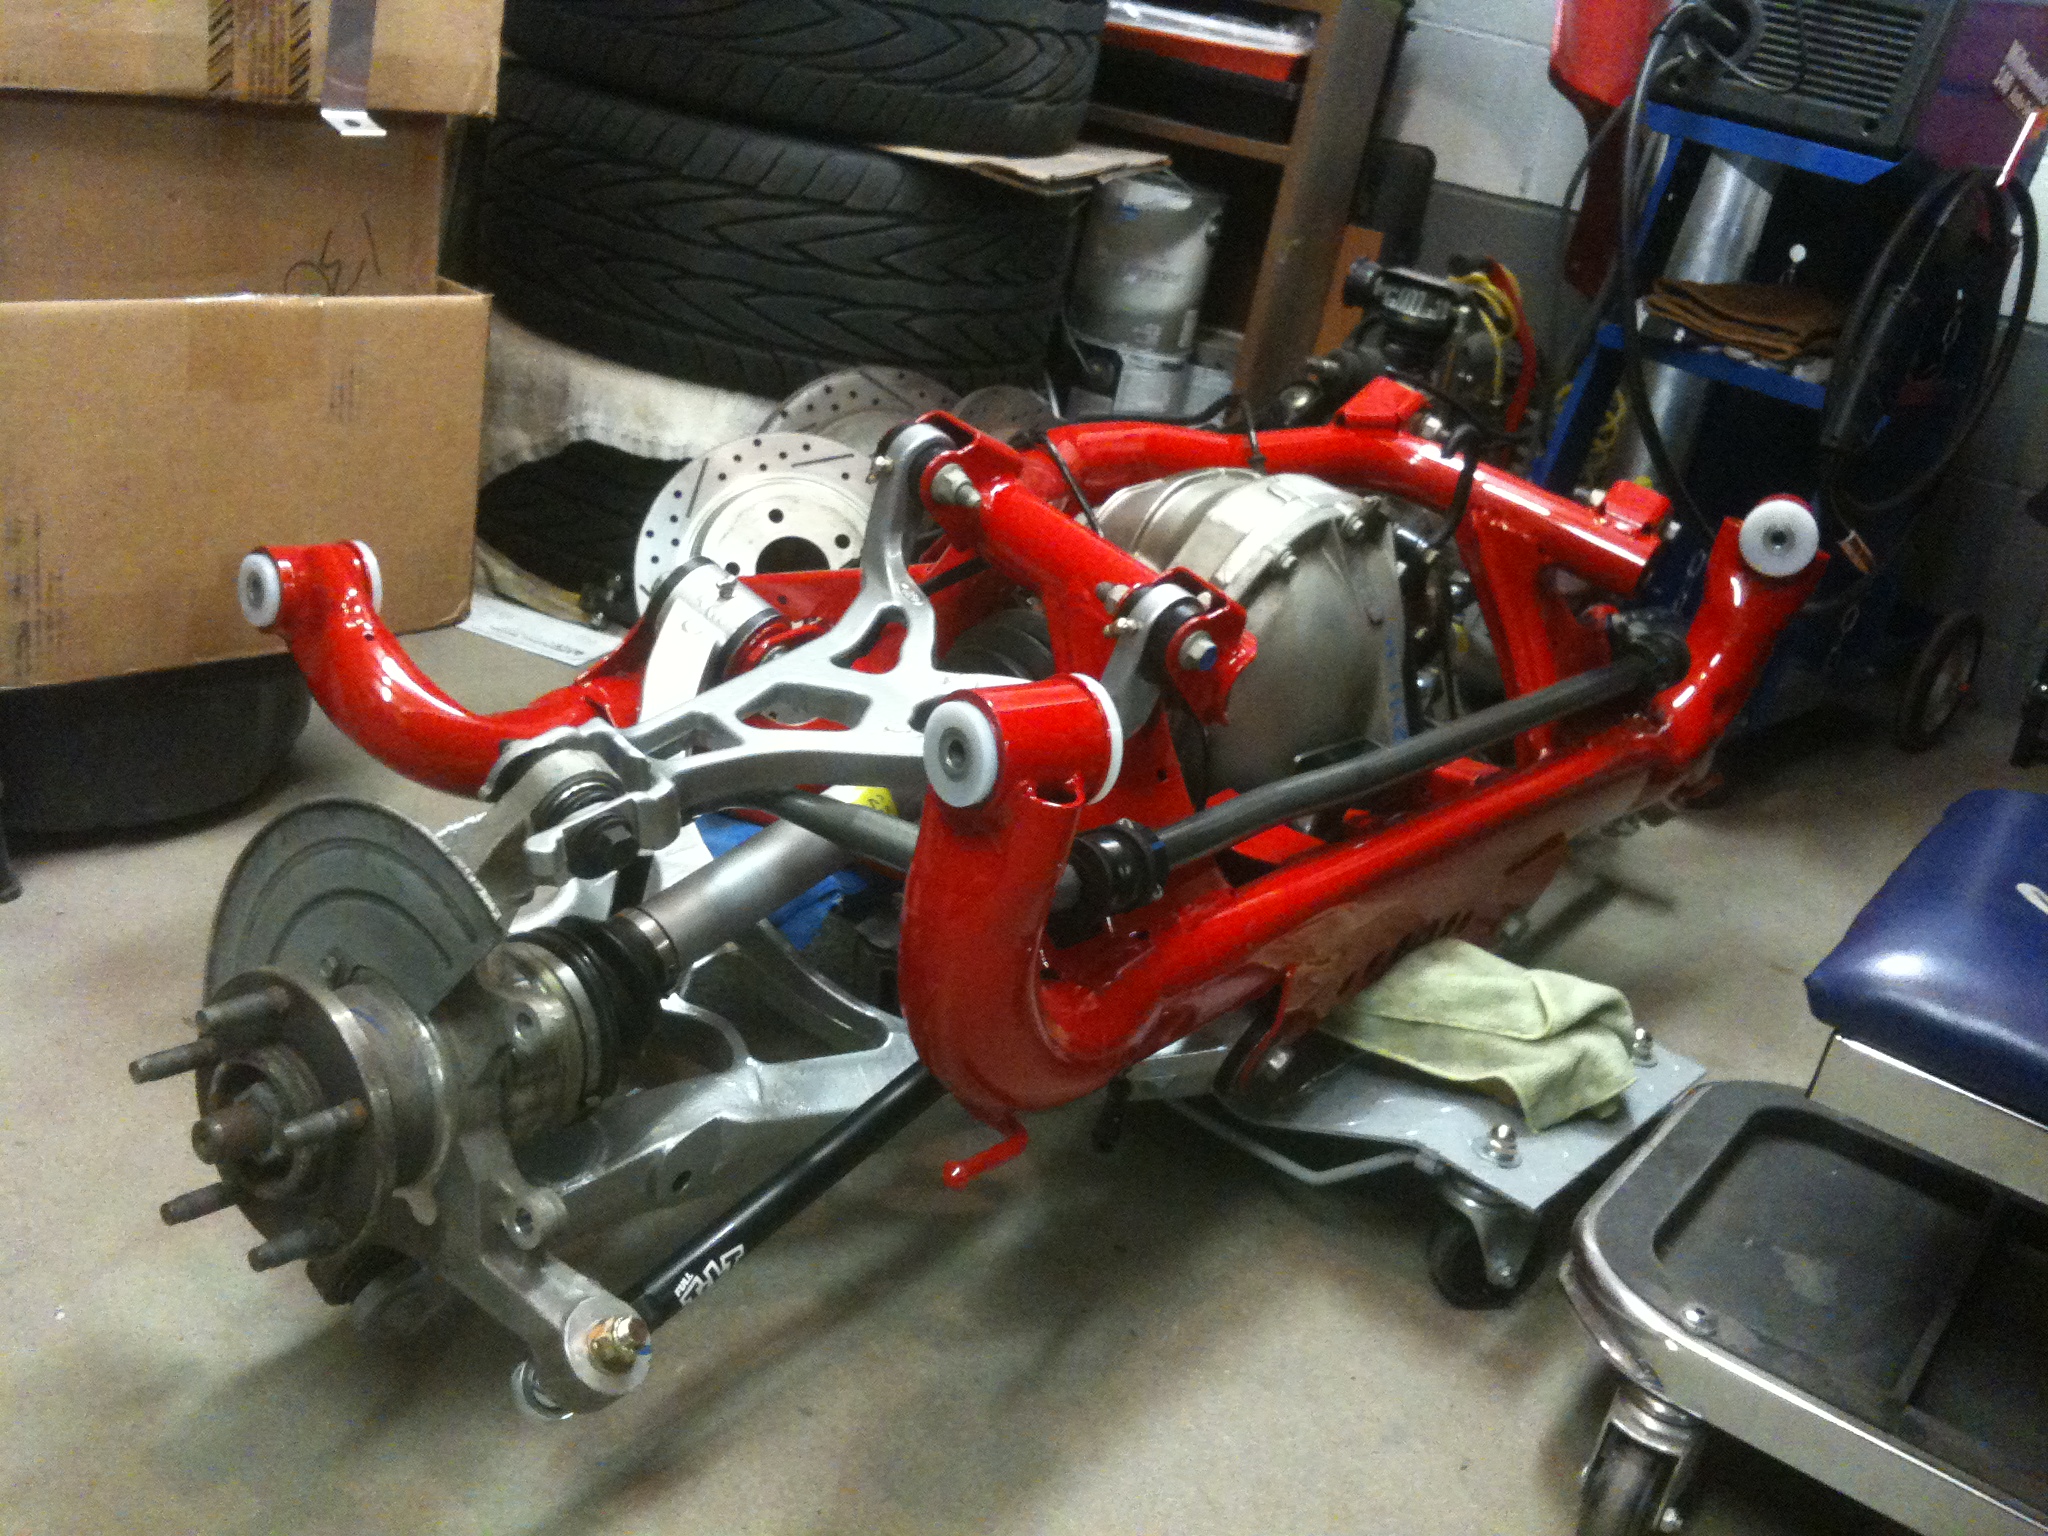
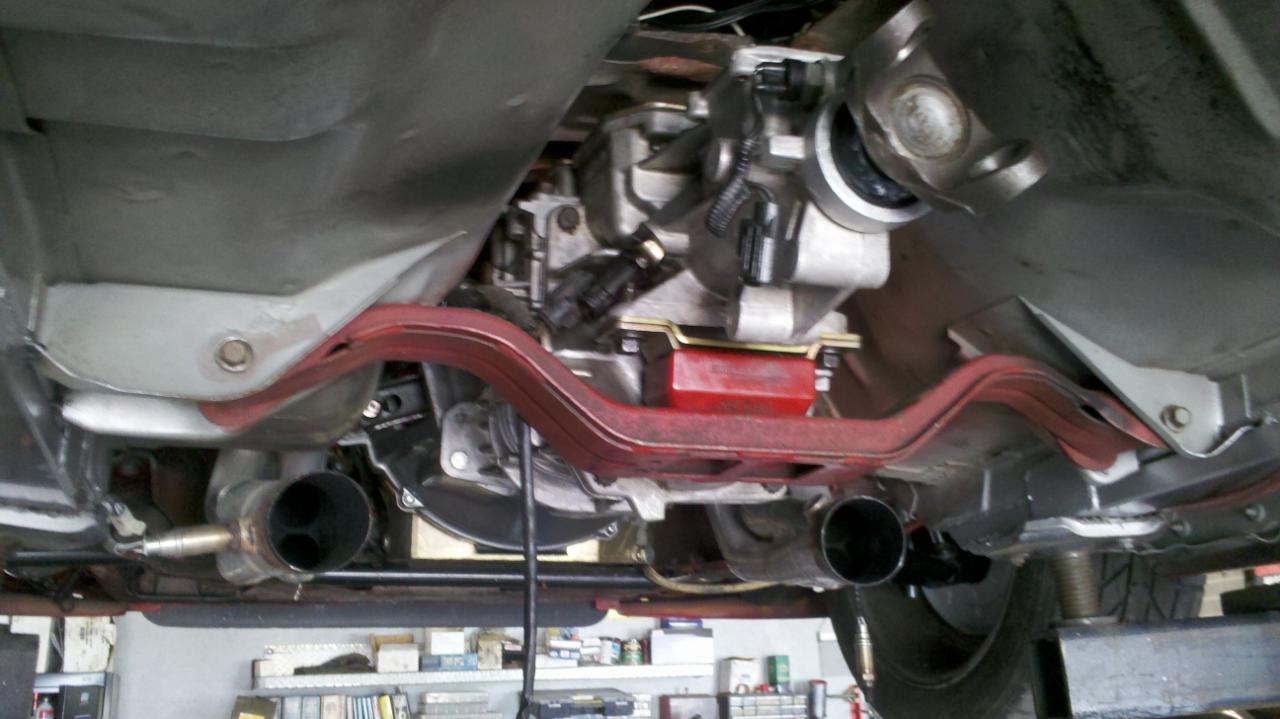
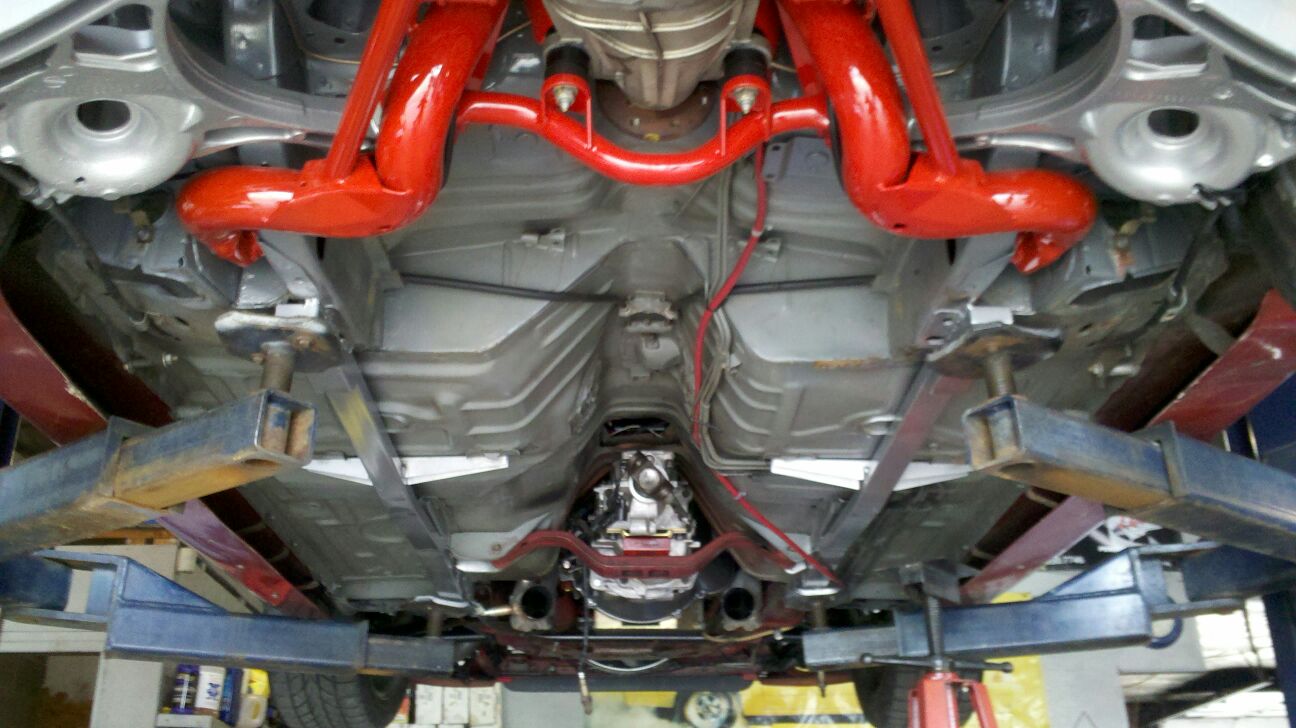
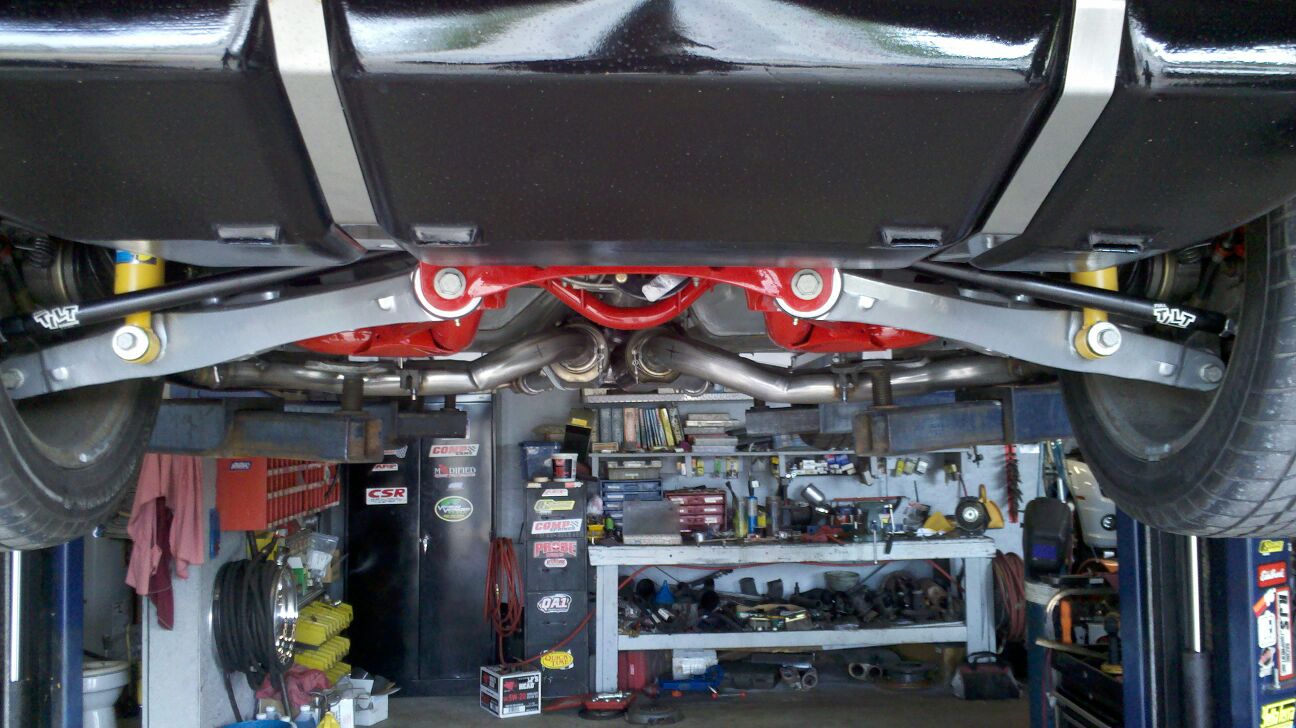
It took me a few days of on and off work to install all the bushings (TON of work), then an all day/late night carefully reassembling the entire IRS unit. Bruce and his crew at Full Tilt Boogie Racing leave no stone unturned with their install videos, which were a lifesaver. It was well worth it to stand back and look at this beauty though:
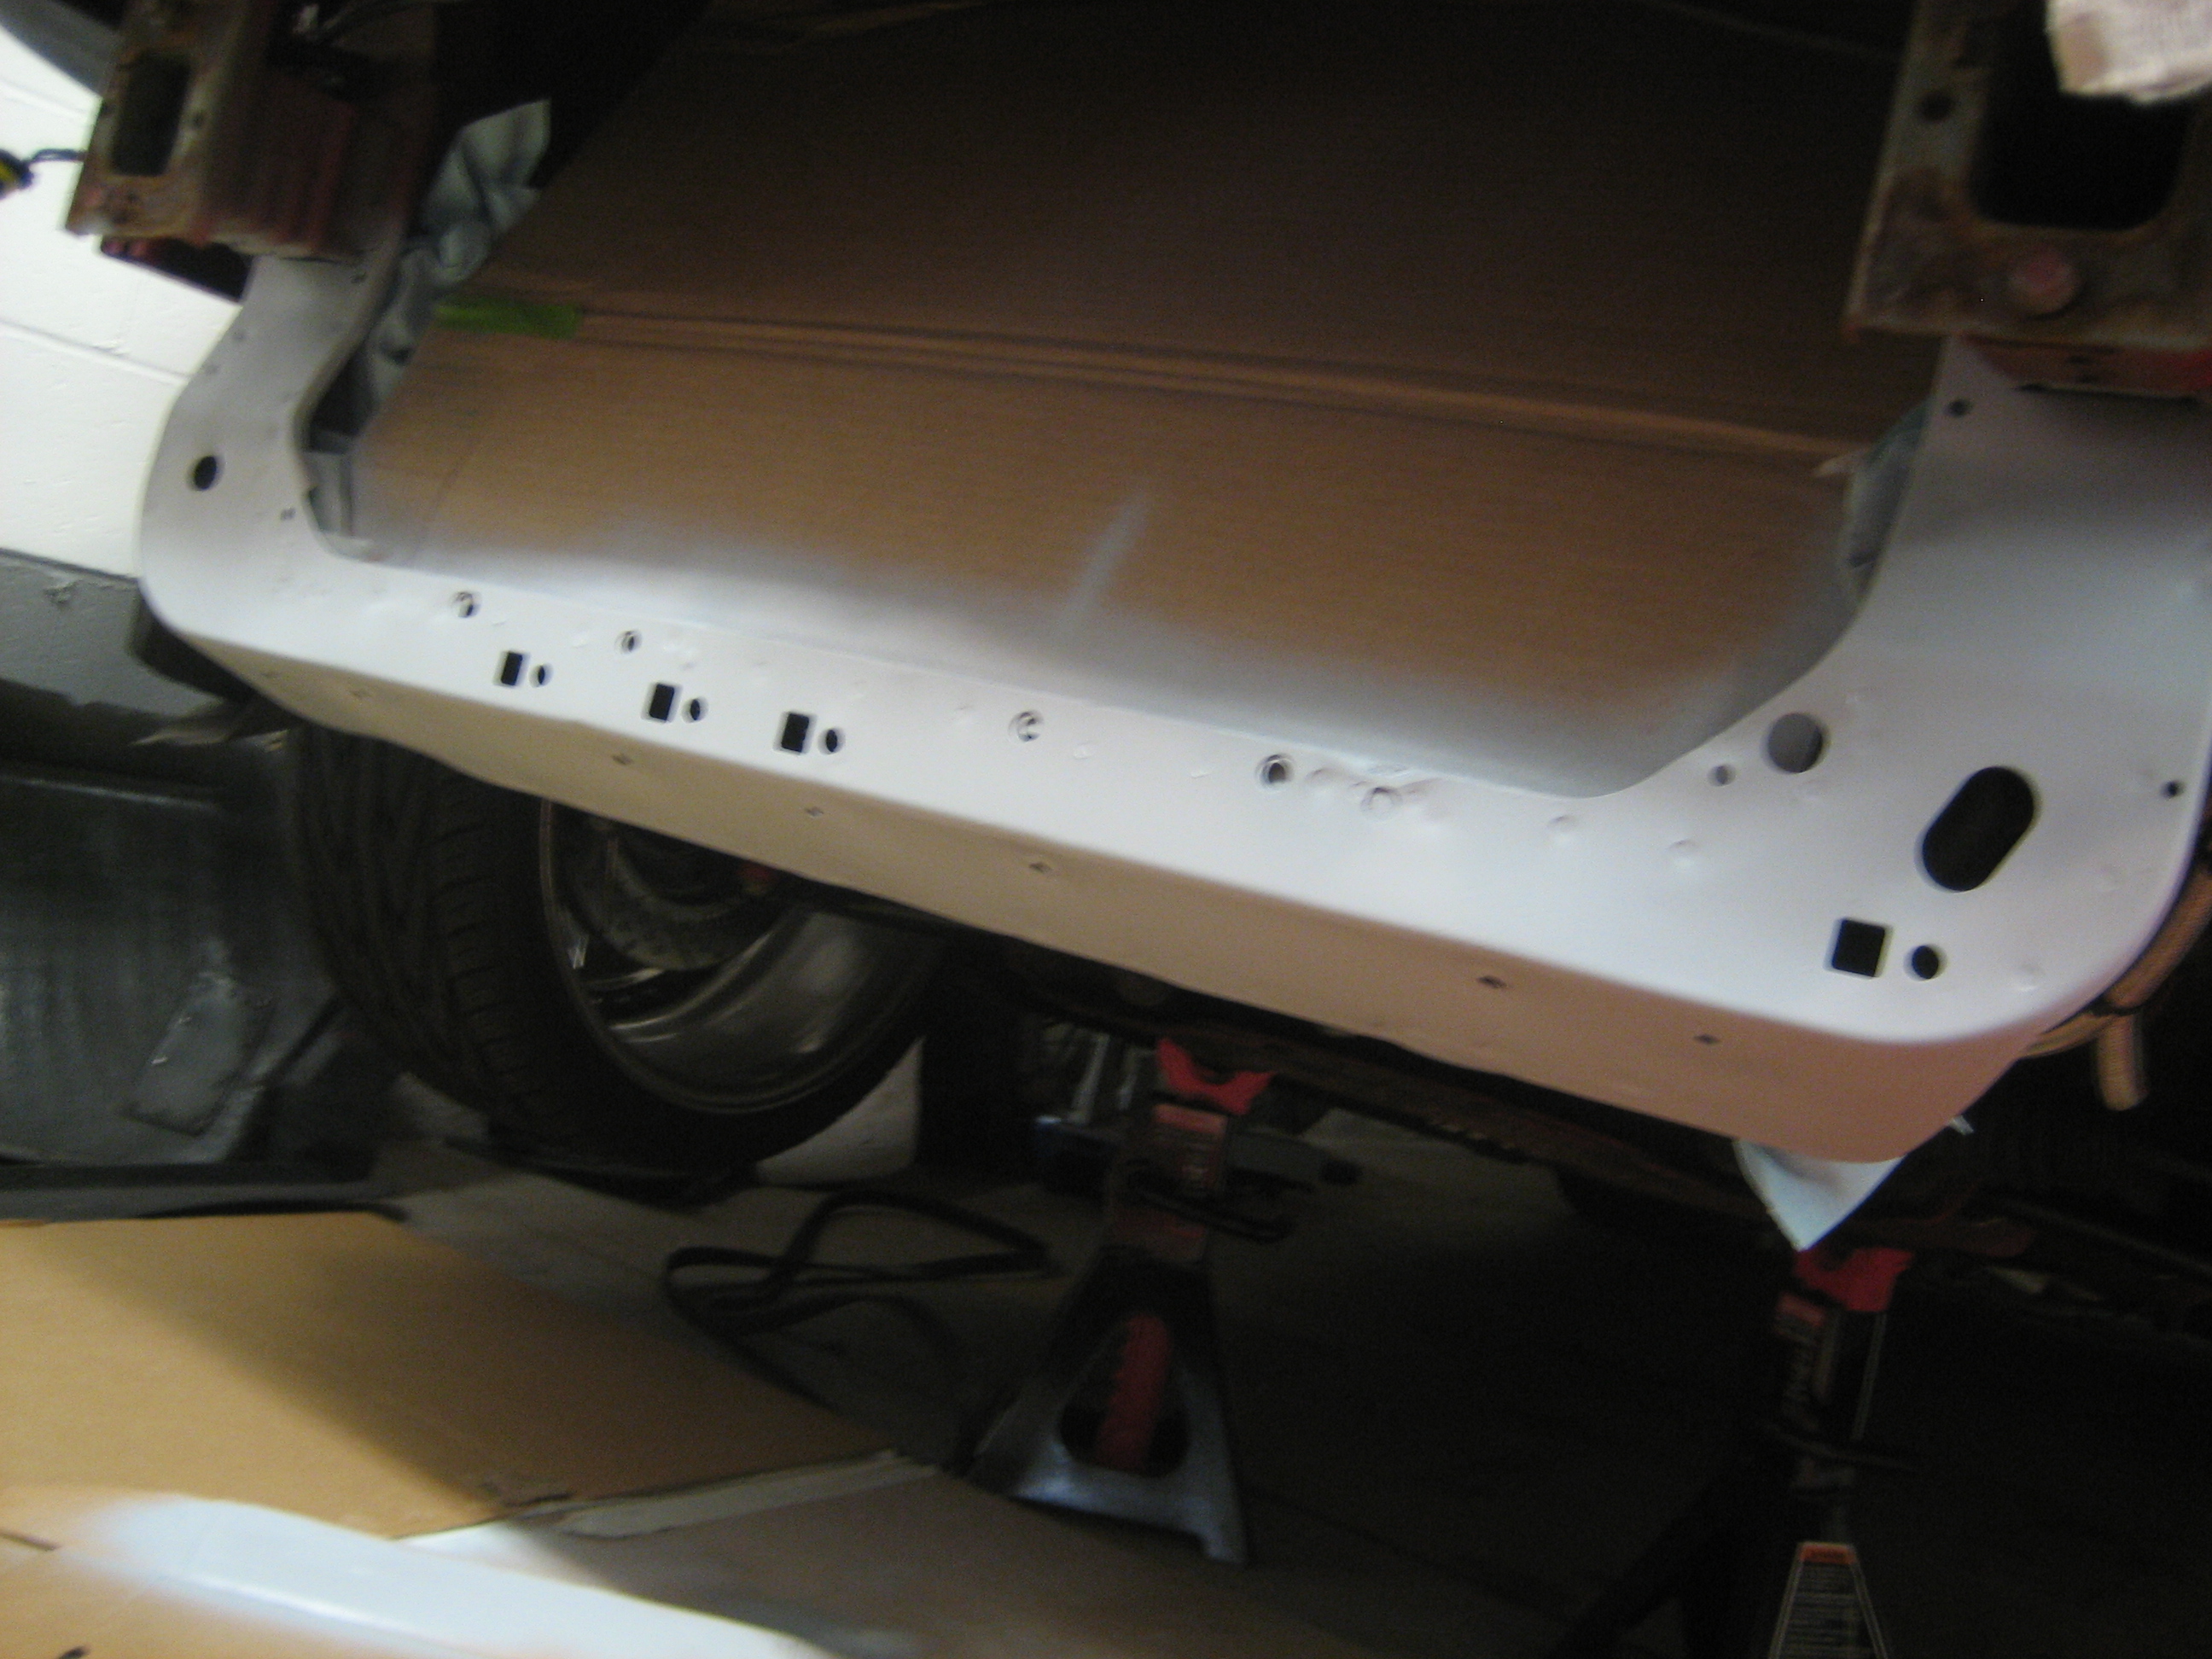
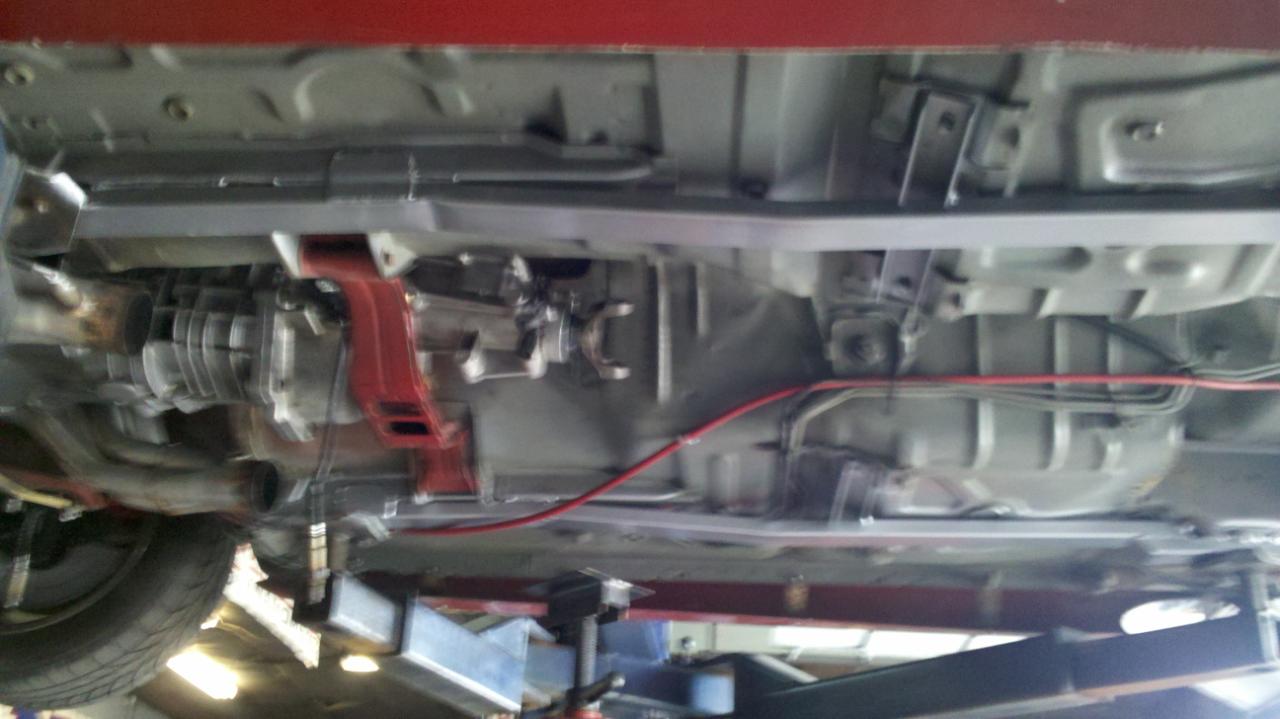
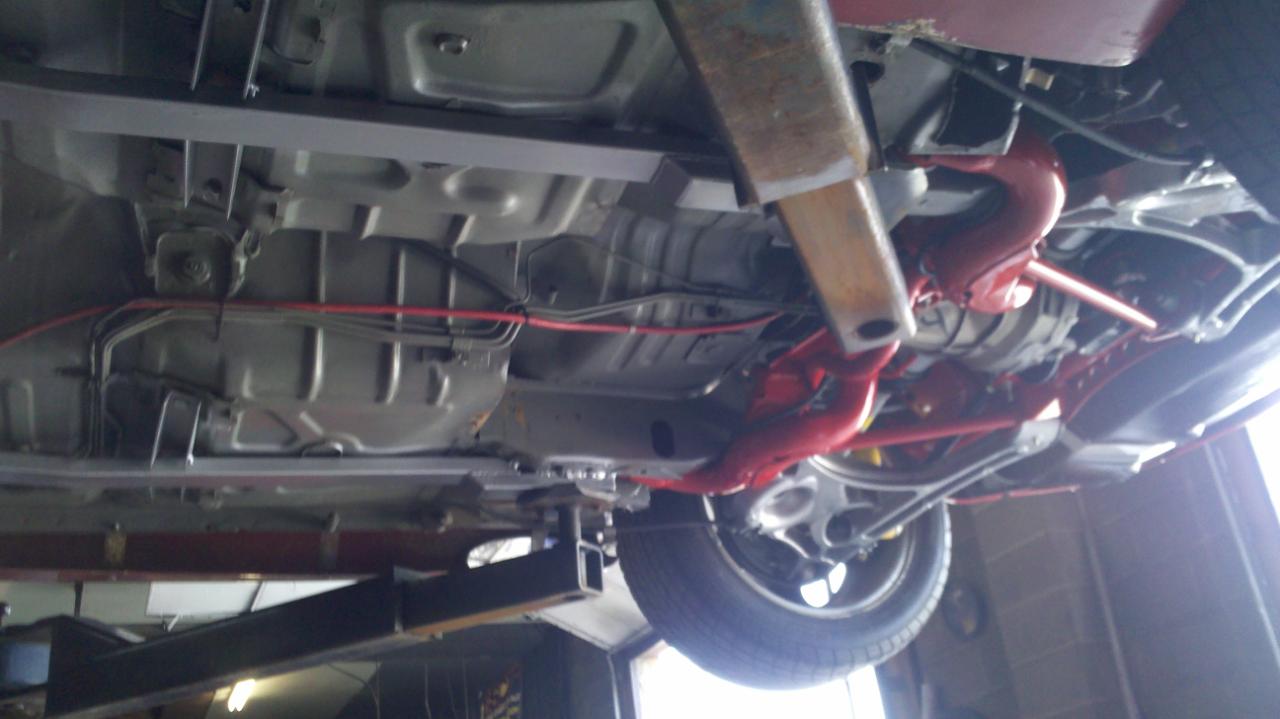
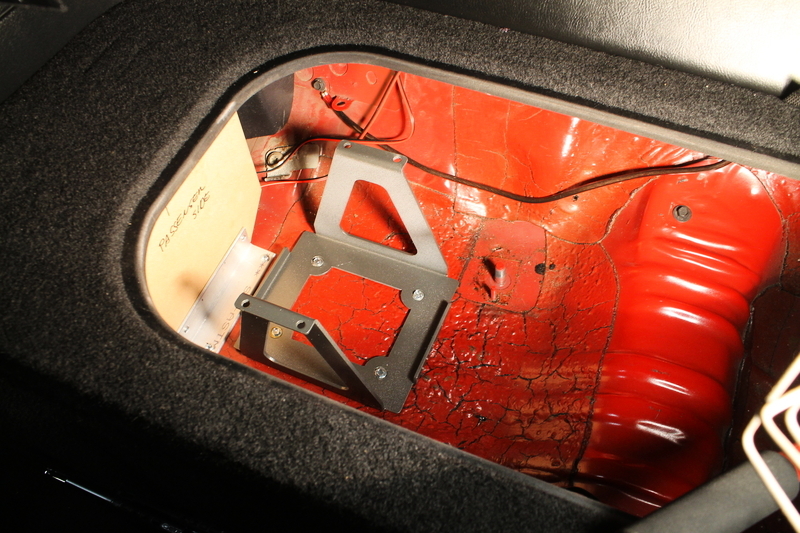
Before installing the IRS, I stripped and repainted the underbody (for the second time since owning the car, lol) in conjunction with dropping the tank to install an Aeromotive Stealth fuel pump, then a set of Ford Racing 42lb injectors under the hood. Smoothed and painted/cleared the tank cover and added some Glenn's Performance stainless tank straps also.
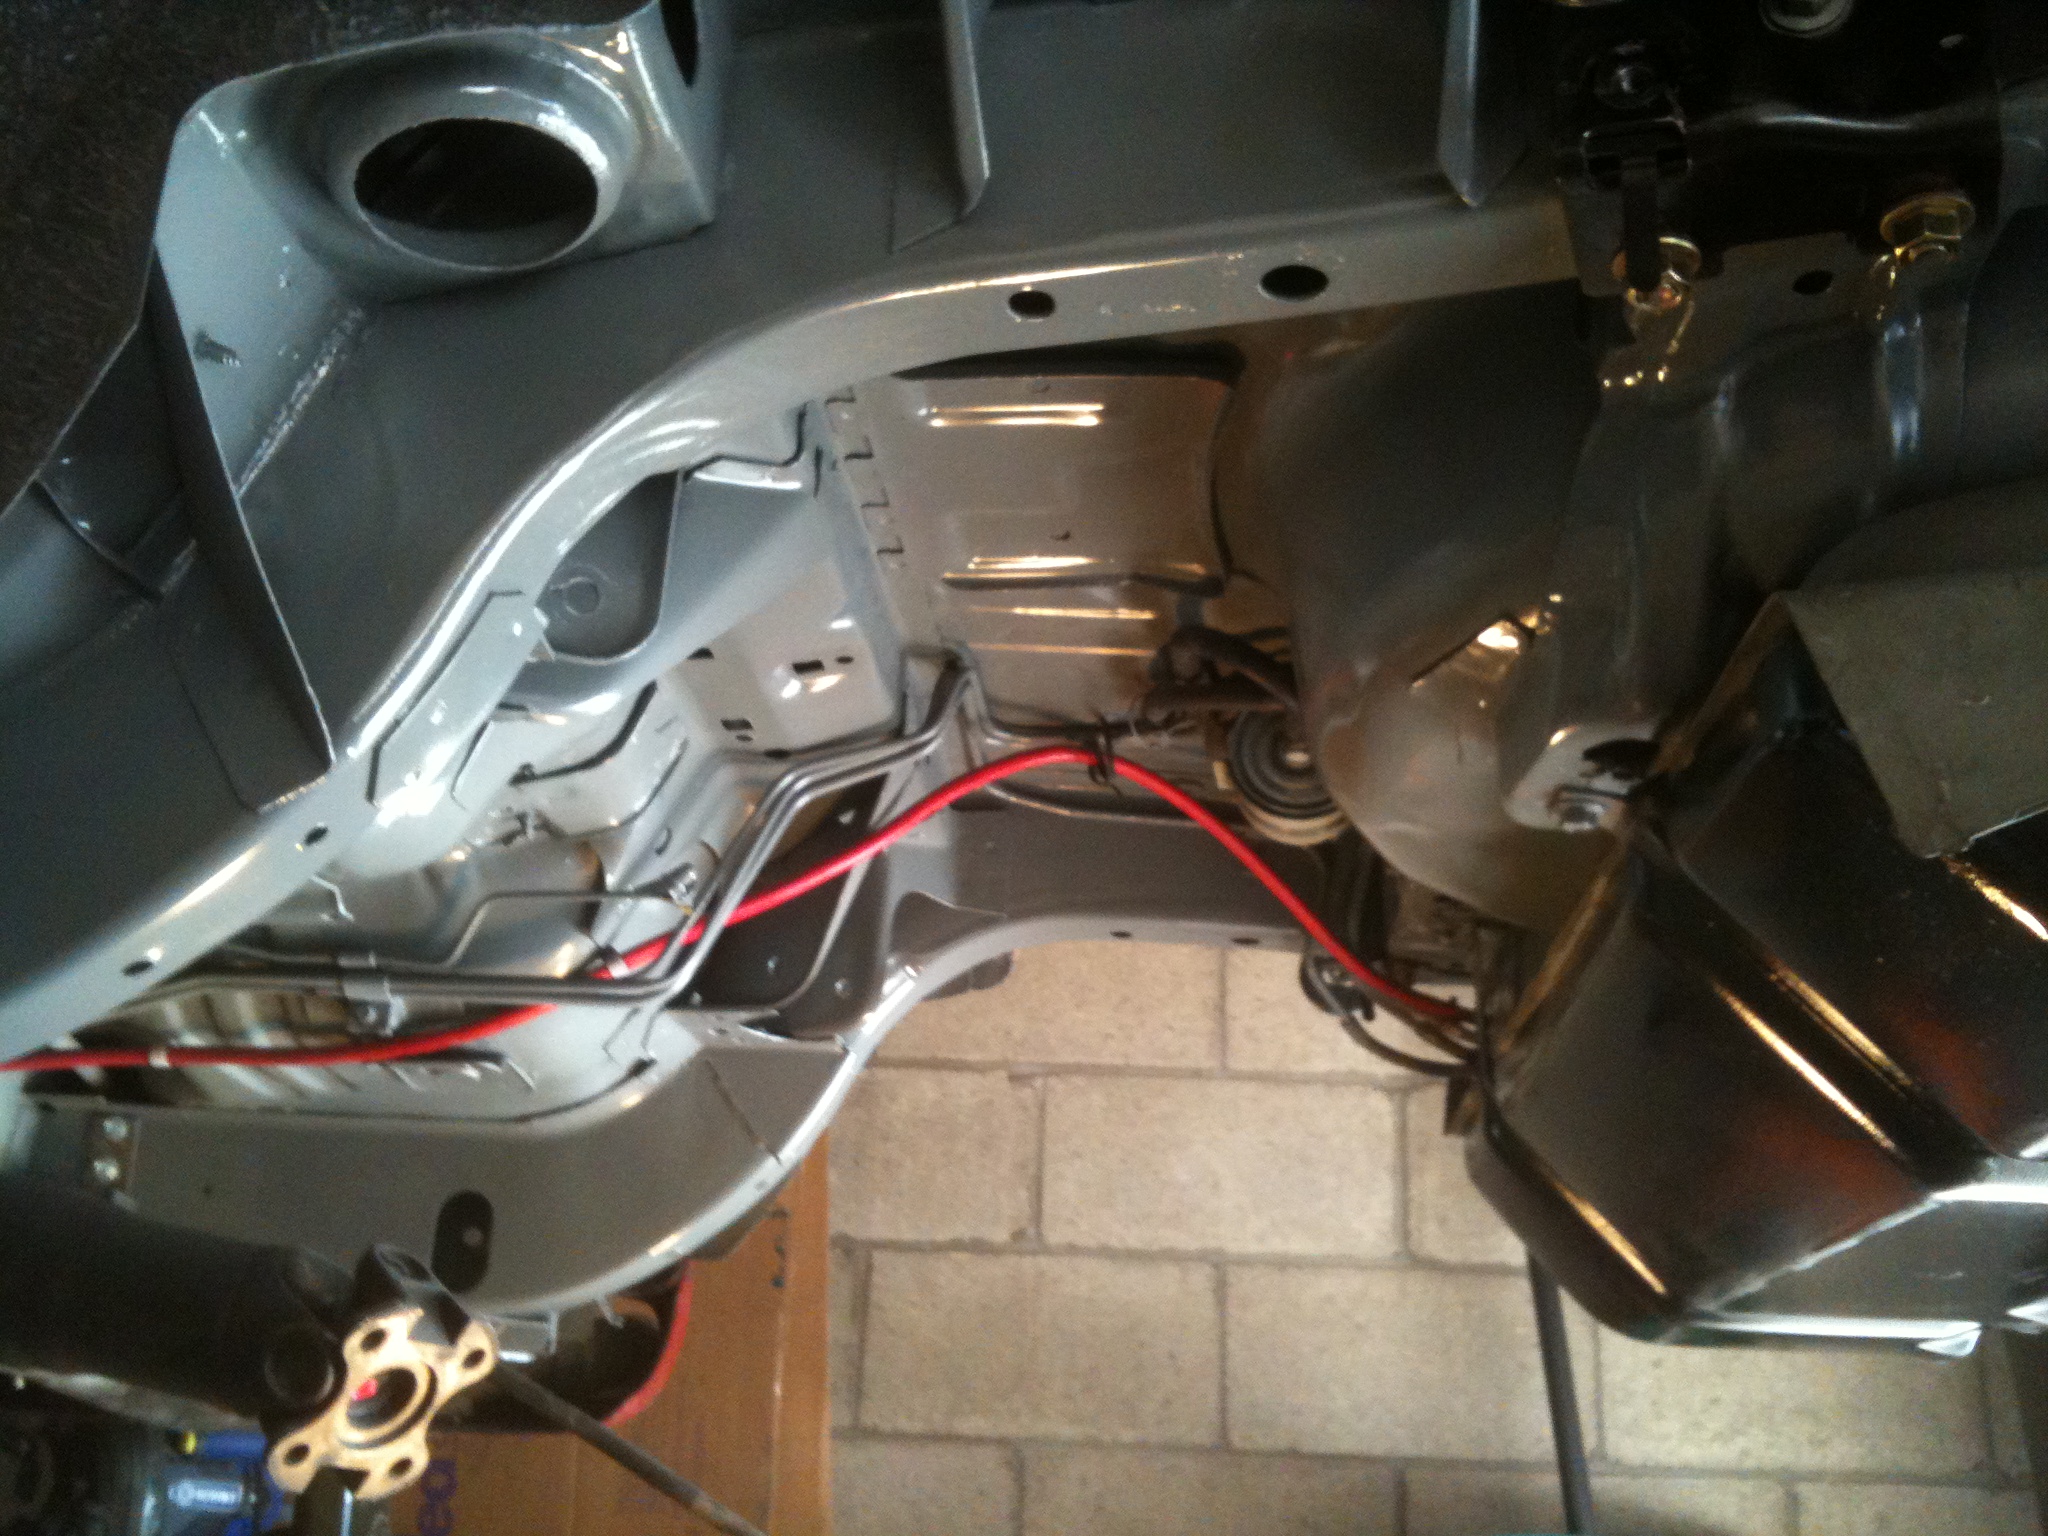
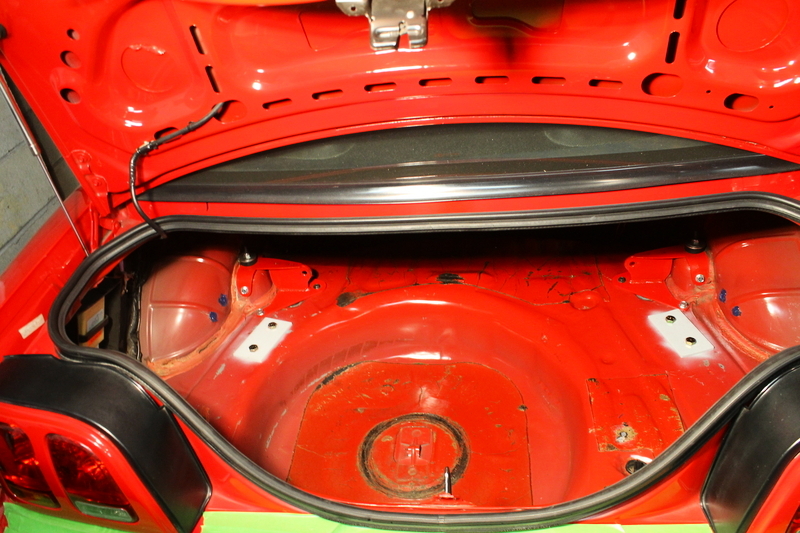
Also not pictured was swapping the rear driveshaft yoke for a hybrid unit to adapt to the terminator pinion flange, running new brake lines and mounting 99-04 Cobra Russell Stainless brake flex hoses, and mounting the rear IRS brackets by drilling up through the trunk. Here's a picture of the plates in the trunk however.
Had my dad drive up to my house and lend a hand getting this heavy ******* up in place. Took us almost 8 hours, having to be careful to not mess up the powder coat.
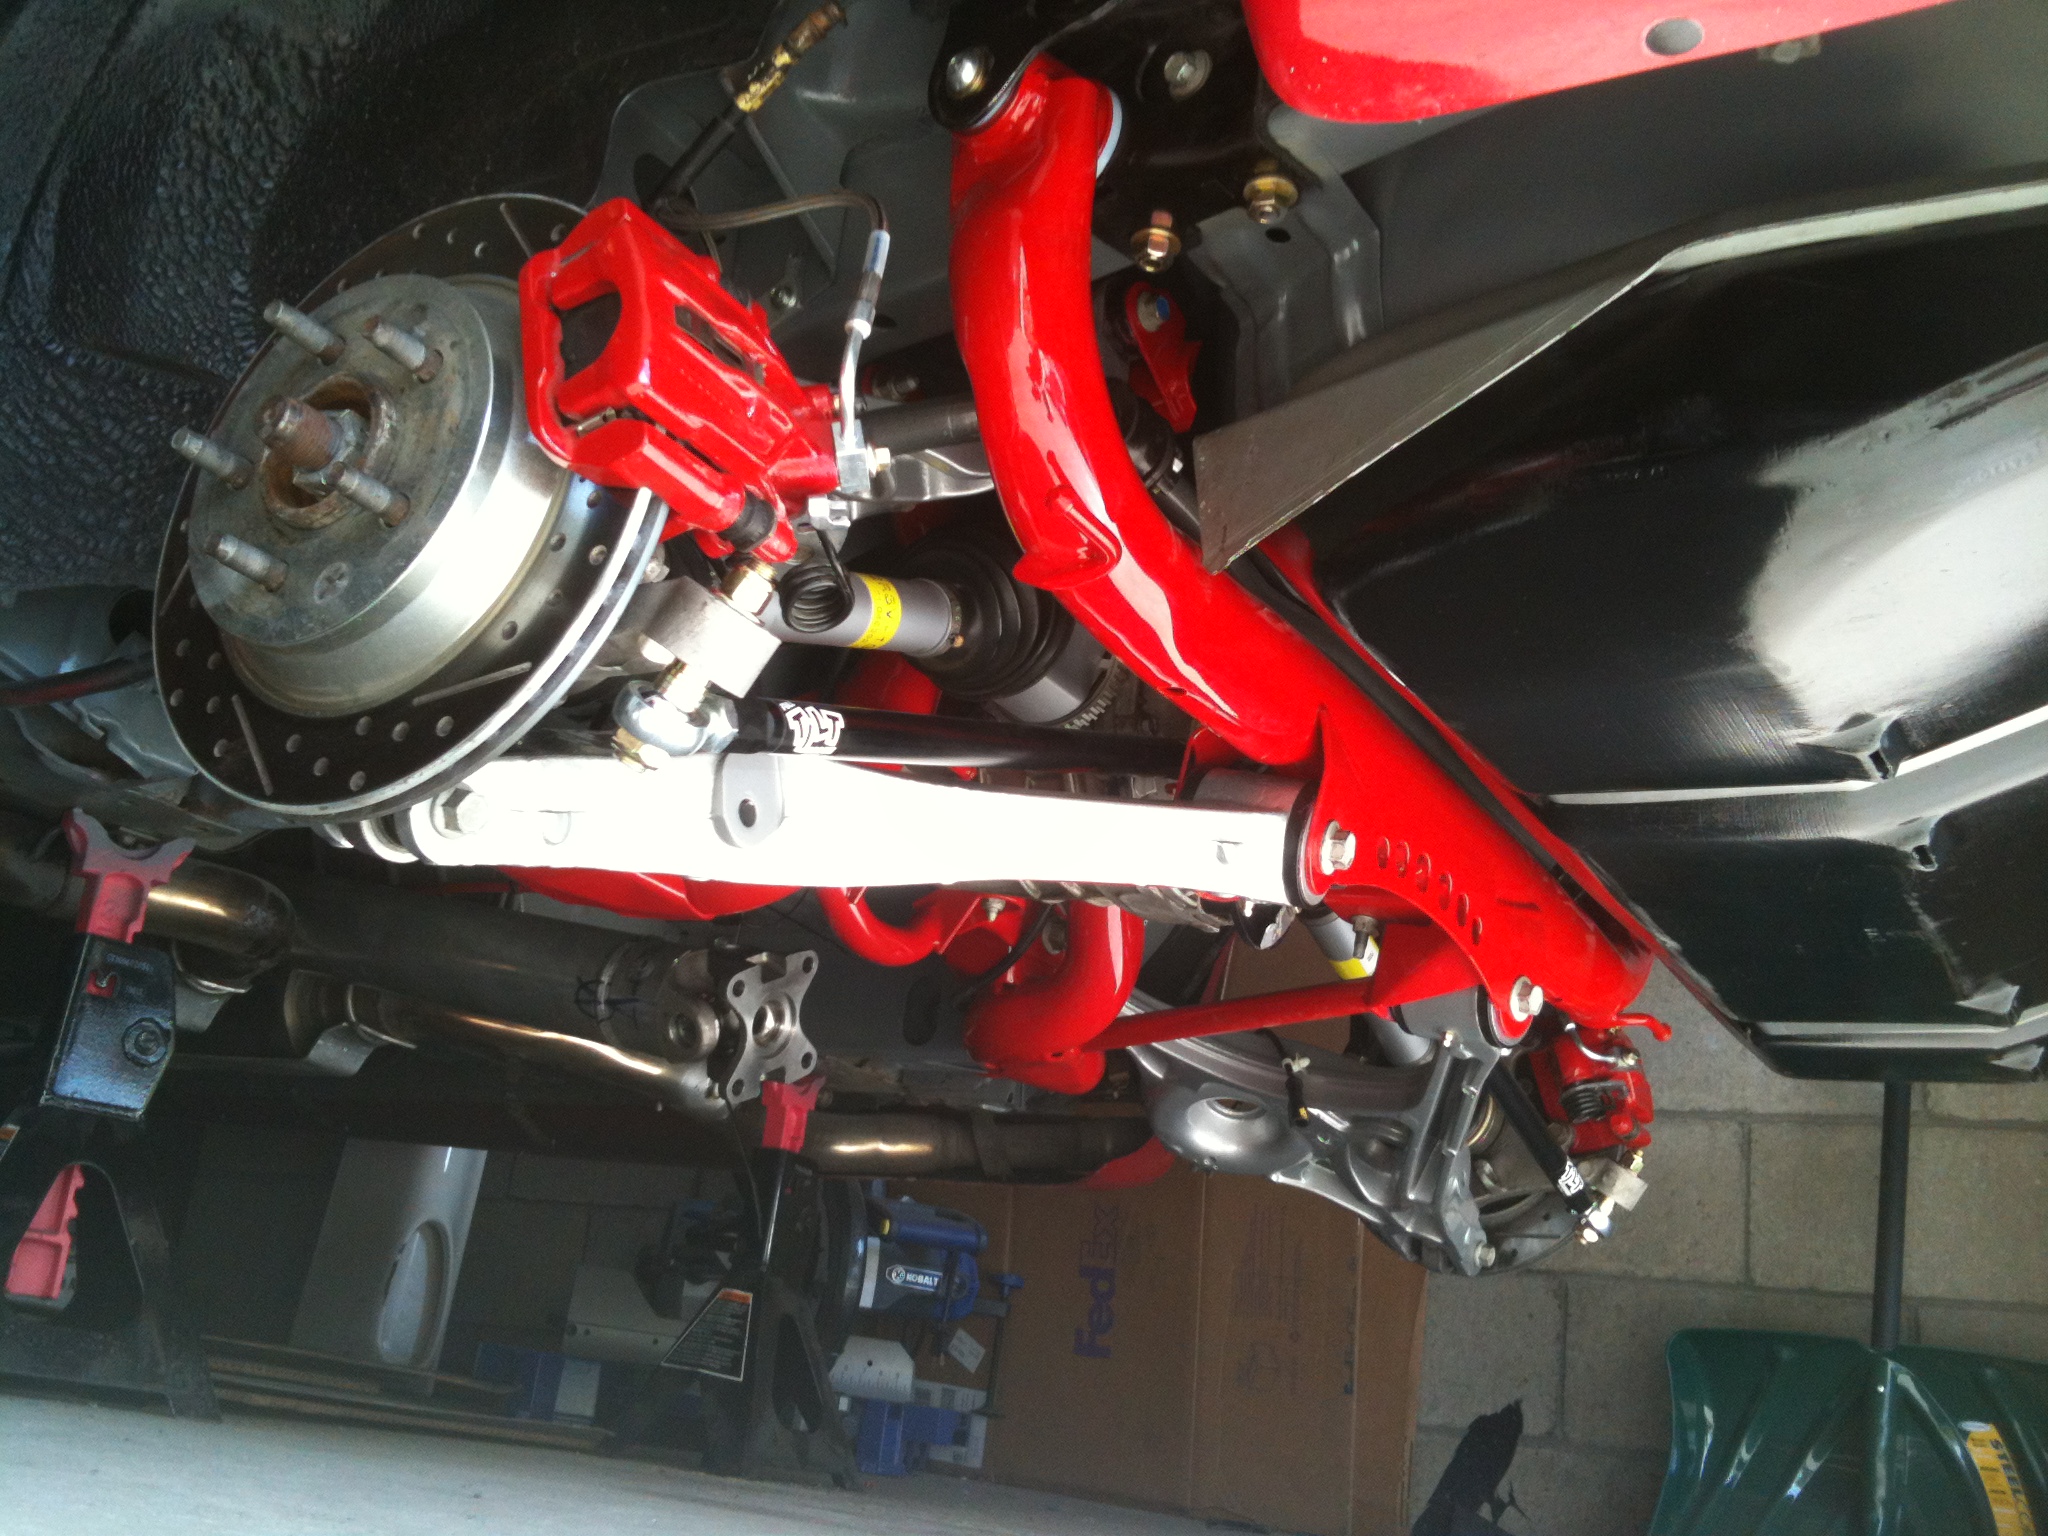
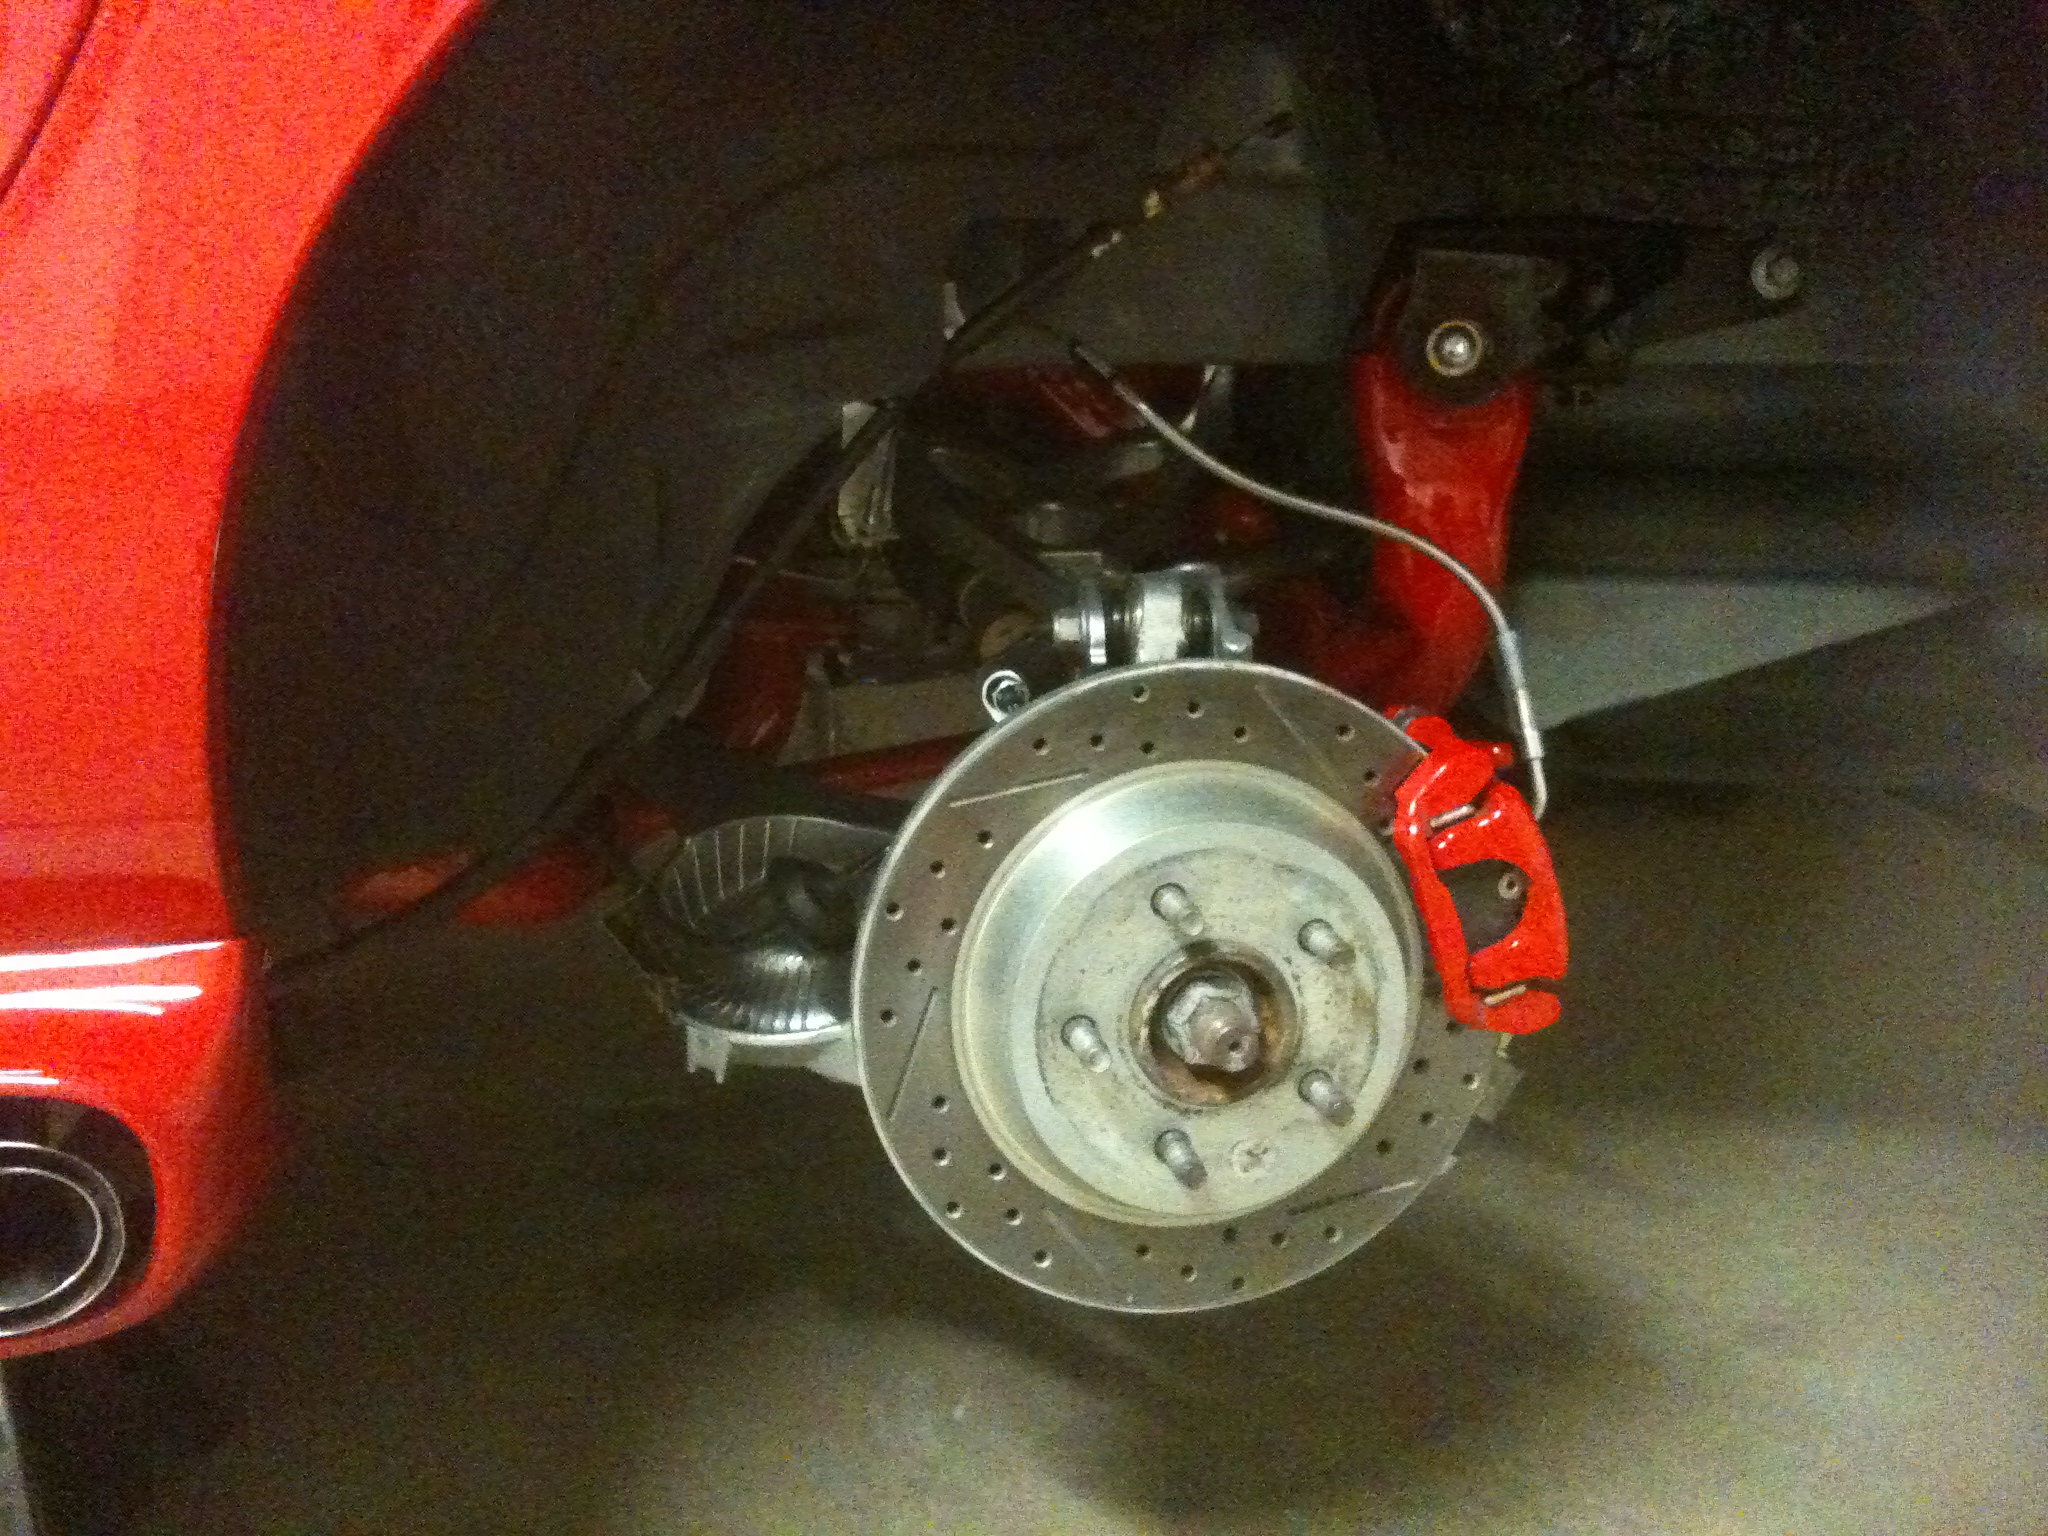
Added Maximum Motorports rear coil overs on Bilsteins, with 8-550lb Hypercoil springs.
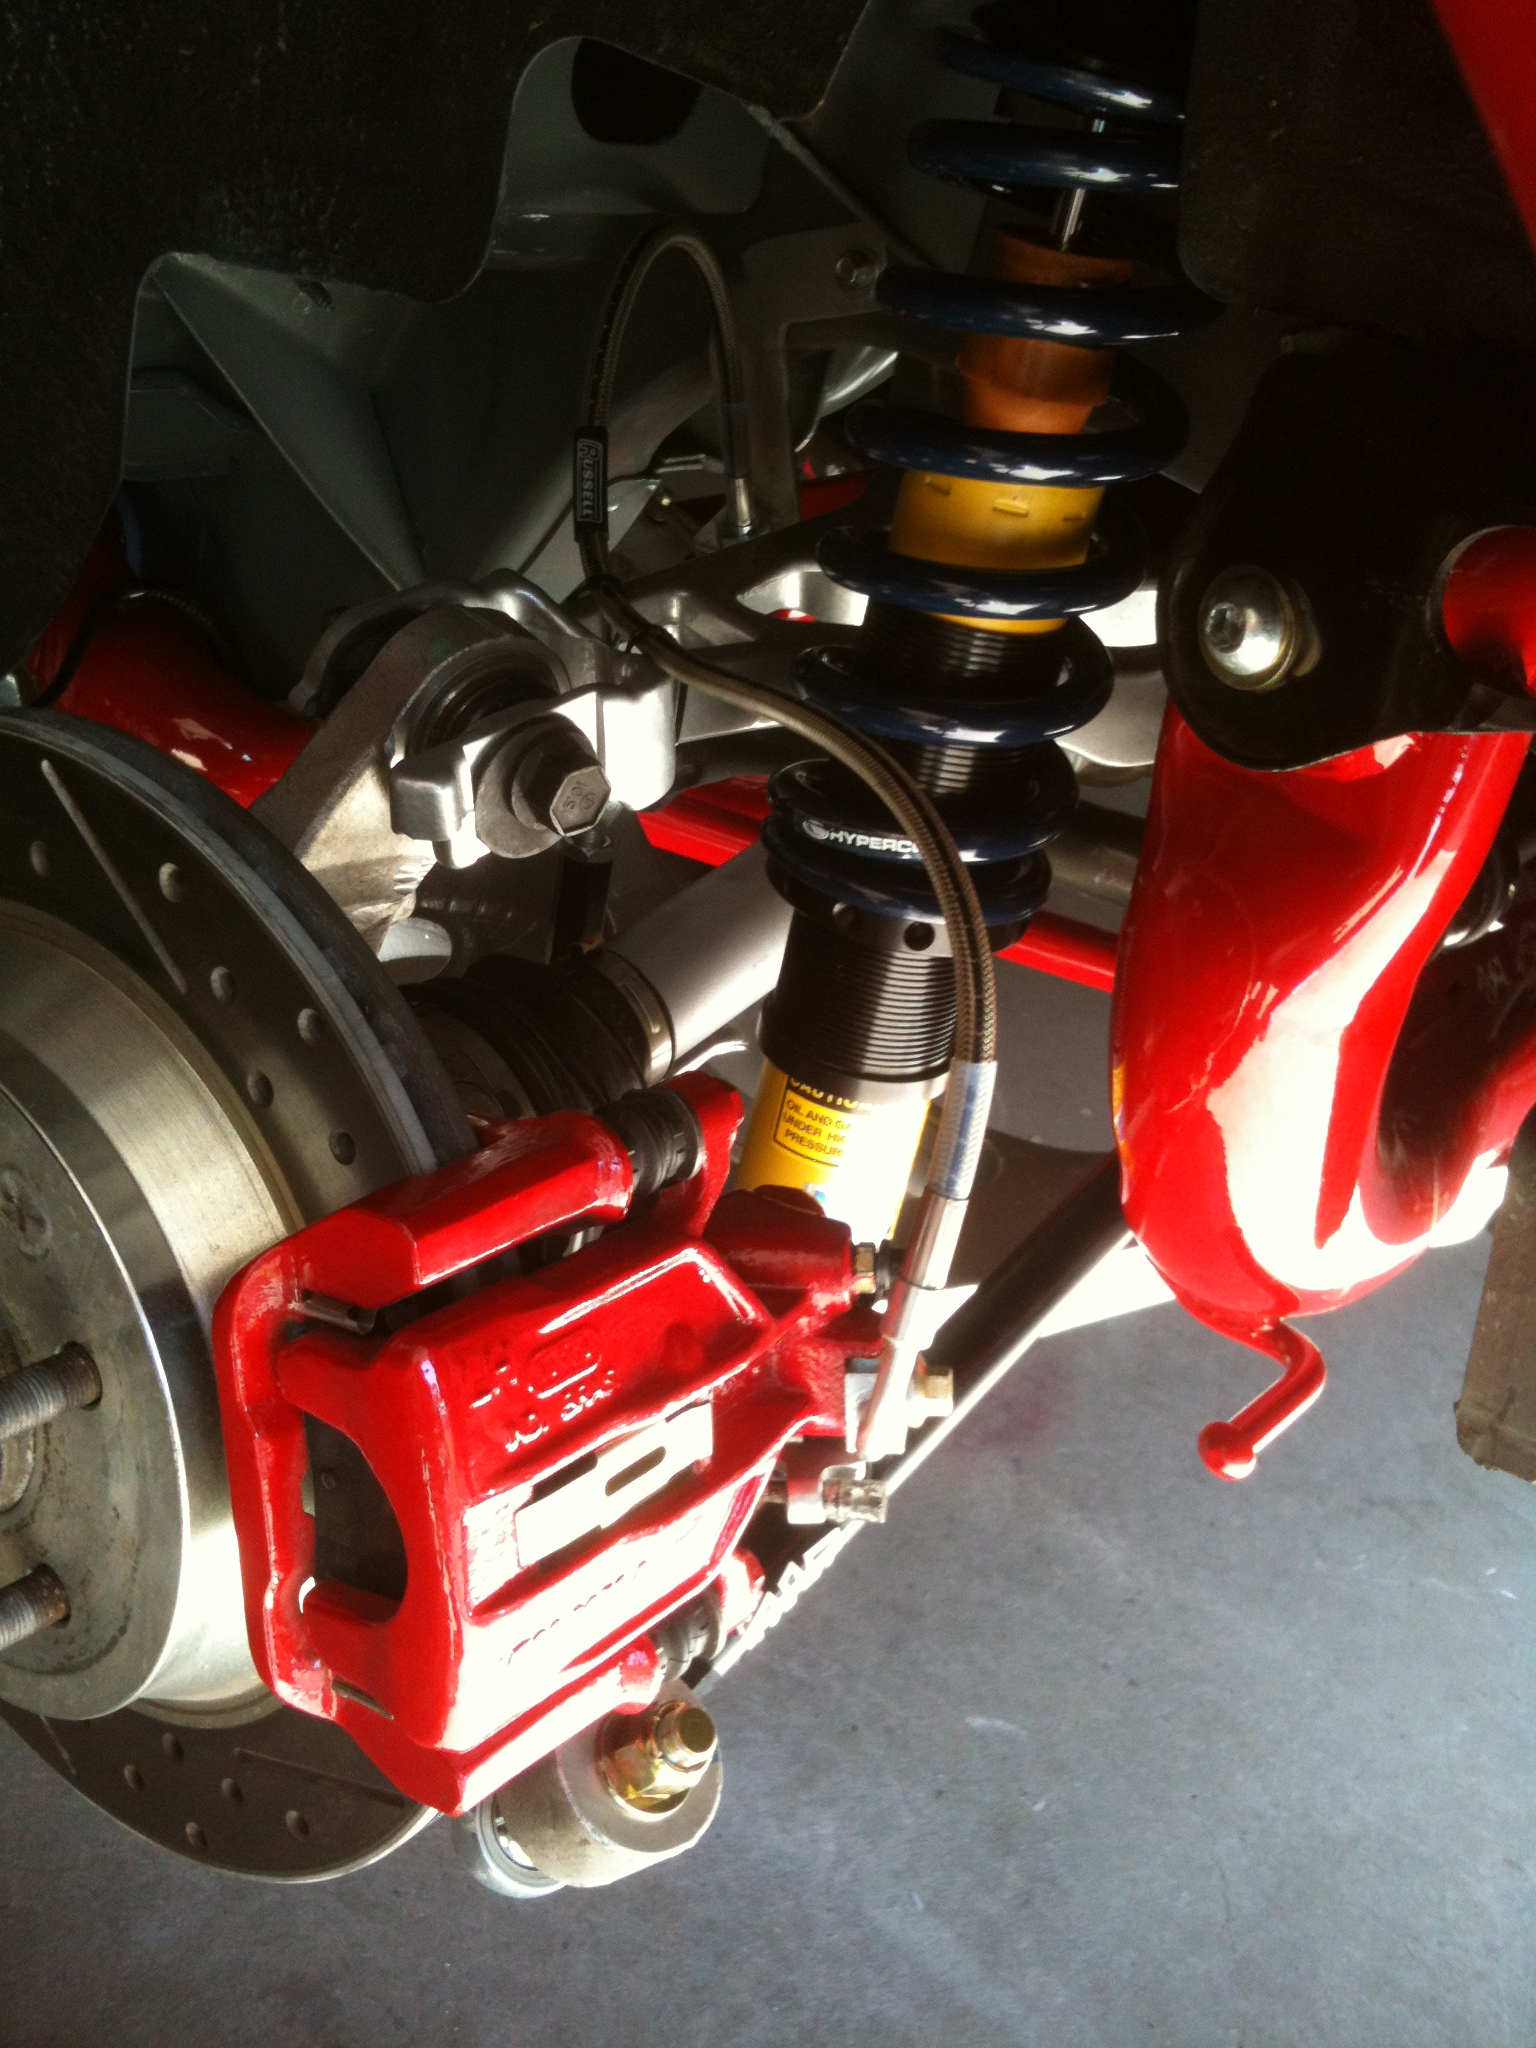
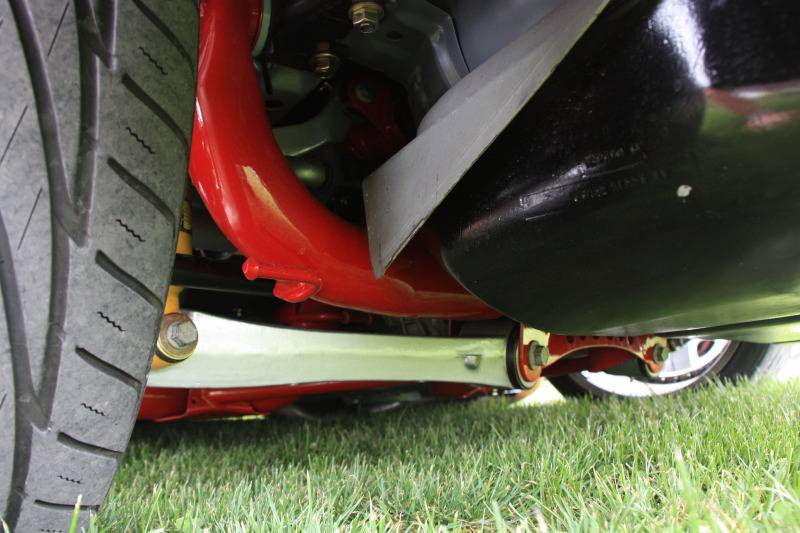
And at the recommendation of Maximum Motorsports, I changed my front coil over springs to 10-350lb Hypercoils (kept my Tokico D-Spec struts in place). You can also see the Maximum Motorsports MMFCA-7 non-offset control arms I switched to in place of my previous Team Z front control arms.
95 Rio Red Mustang Cobra
Procharger D1SC 347 stroker, full maximum motorsports suspension, Full Tilt Boogie 03 Cobra IRS, Tremec 3550, 19x9.5 and 19x11 HRE 542R. 566rwhp/614rwtq
https://www.pro-touring.com/threads/...ra-OCD-Machine
04-14-2013 #5
Registered User
- Join Date
- Jul 2010
- Location
- Pittsburgh, PA
- Posts
- 114
Added an 03 Cobra rack and steering shaft, converted the rack with Maximum Motorsport's AN adapter fittings and threw in some Energy Suspension Rack bushings.
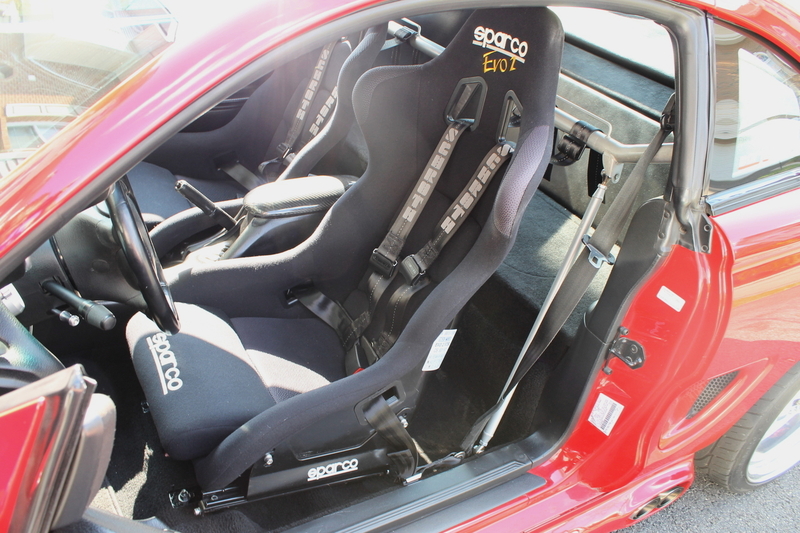
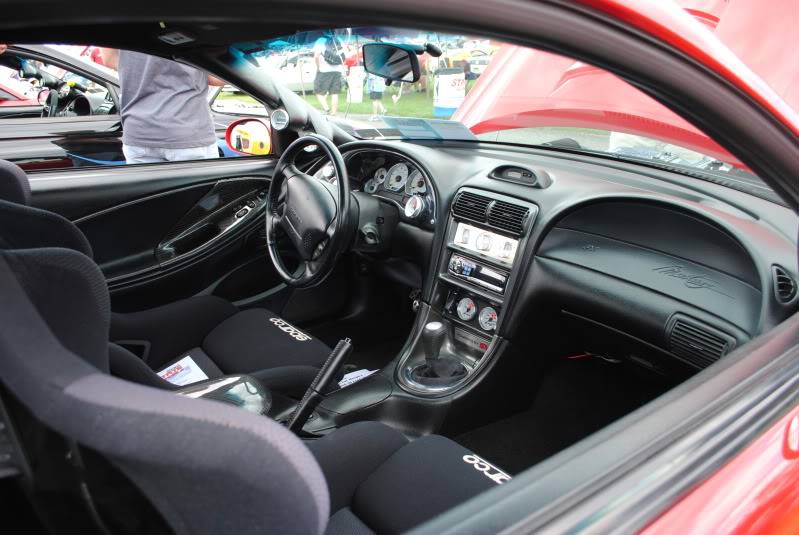
The last phase was to spruce up the interior, so in went a pair of Sparco Evo2's Schroth Rallye Cross 4 point harnesses (100% D.O.T. street legal), as well as a custom carbon fiber-wrapped cluster bezel to hold the new AEM wideband and the Autometer C2 boost gauge. The last interior change was a KDezines rear seat delete.
Had to make adapter brackets to mate the Sparco sliders to the seat brackets, they were for some reason left out of my order from Sparco. I didn't have time to wait for them to send them to me so I just made my own.
Didn't think to take a picture of the seats or gauges in place because I was in a mad rush getting it together for the appointment at the tuner, but here are a couple more recent pictures showing the interior.

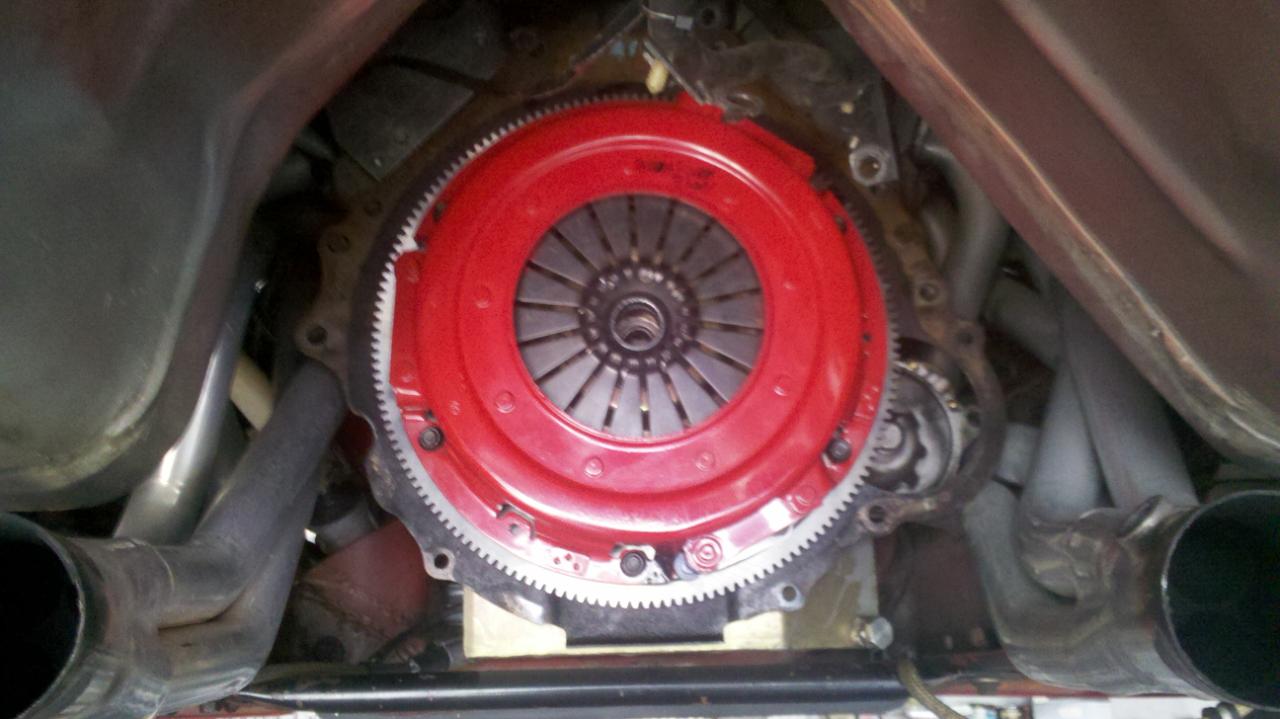
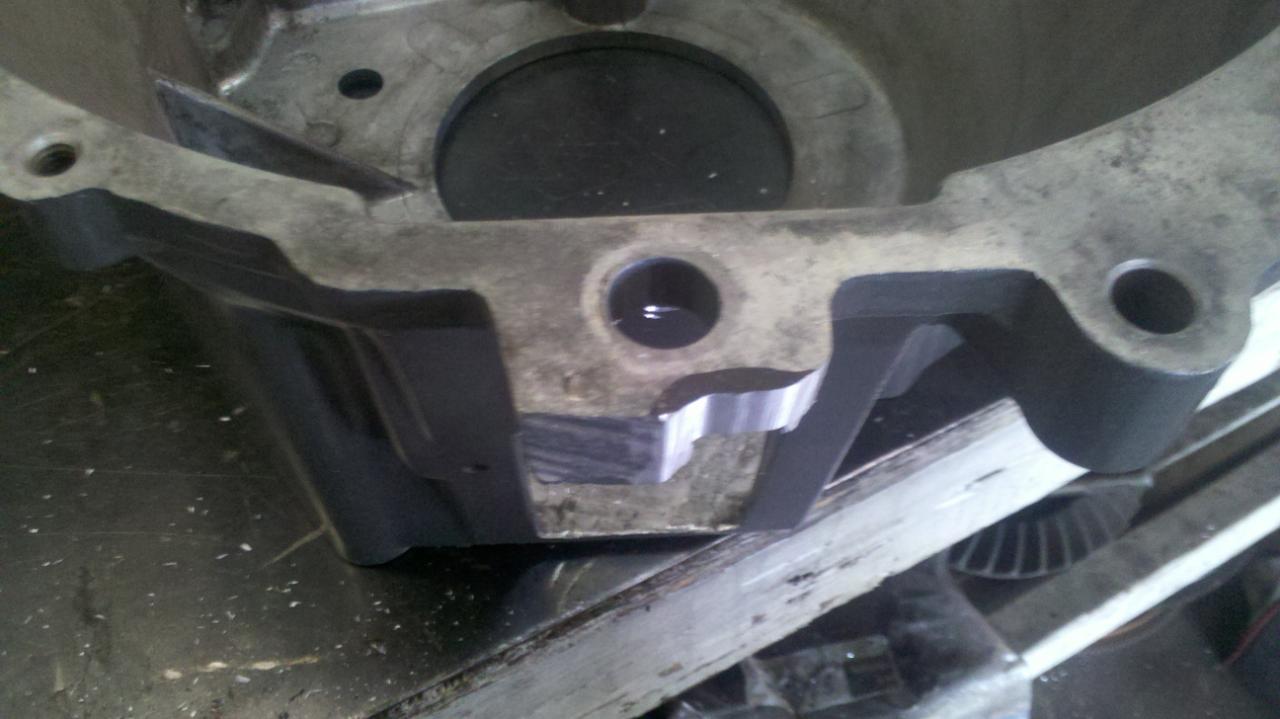
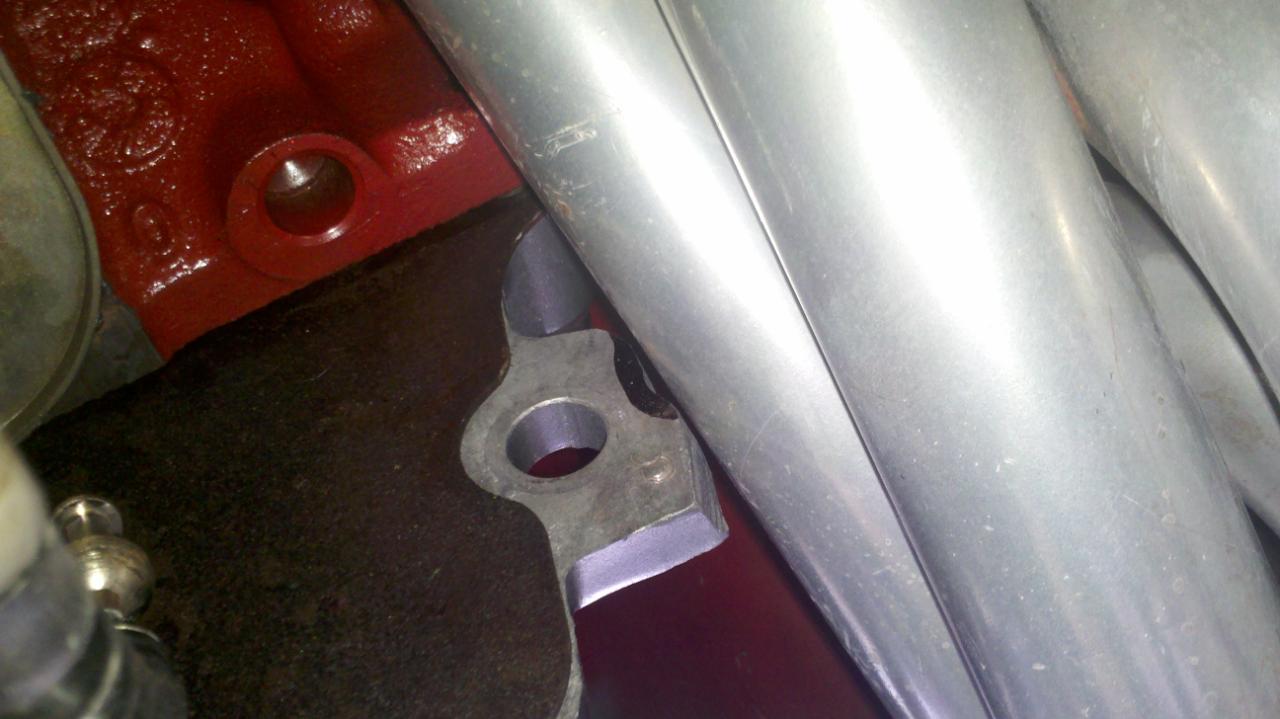
Next it was off to the dyno where my good friend Tim Rodeheaver of Rodeheaver's Hot Rod would be installing the built Tremec 3550 transmission (with MGW shifter), McLeod RST twin disc clutch and flywheel, aluminum driveshaft, rebuild my side exhaust to be higher, and weld in my new SpinTech subframe connectors. Normally I would have done the transmission, clutch and driveshaft myself, but my previous side exhaust was one solid piece from the long tubes back. This would mean I'd have to take the side skirts off to remove it or take a sawzall to it, neither of which was a tempting option. So while Tim was in there, I had him move the mufflers further up into the driveshaft tunnel and add V-band clamps after them so the side/tail pipes could be easily removed separately in the future. He ran into a small clearance issue with the header primaries and the bell housing, which you'll see in the pictures...nothing a little end mill work couldn't fix. I'm not totally happy with how the side/tail pipes turned out, they still aren't high enough off the ground so I'll be cutting them off soon and making new ones out of stainless oval tubing.
Then at last, it was time for it to hit the rollers. The first full pull made 556rwhp/614rwtq, which was a bit too much for my comfort with the block the car has, so the timing on the top end was backed down and the car made a nice strong 495rwhp/494rwtq. Here's a dyno video:
I had a couple boost-related issues to sort out before Carlisle but I slapped the HRE's back on the car, buffed and detailed the crap out of it and got it there mostly done. I thoroughly enjoyed the weekend even despite the few loose ends that still needed tied up.
95 Rio Red Mustang Cobra
Procharger D1SC 347 stroker, full maximum motorsports suspension, Full Tilt Boogie 03 Cobra IRS, Tremec 3550, 19x9.5 and 19x11 HRE 542R. 566rwhp/614rwtq
https://www.pro-touring.com/threads/...ra-OCD-Machine
04-14-2013 #6
Registered User
- Join Date
- Jul 2010
- Location
- Pittsburgh, PA
- Posts
- 114
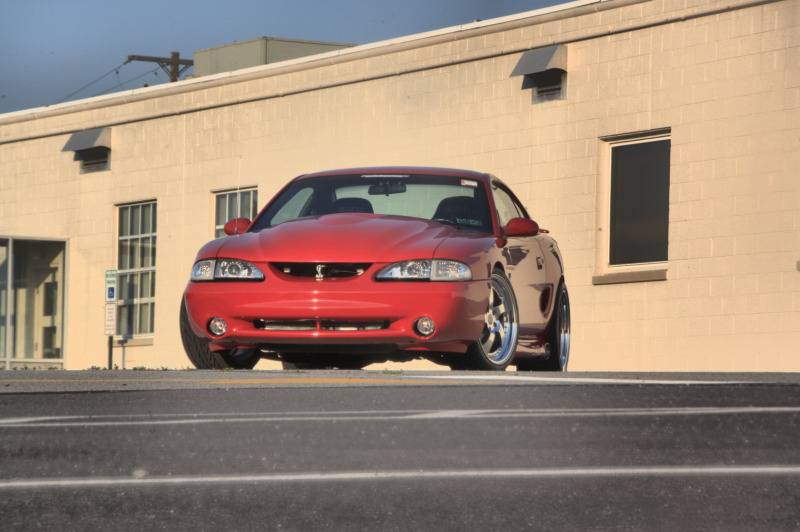
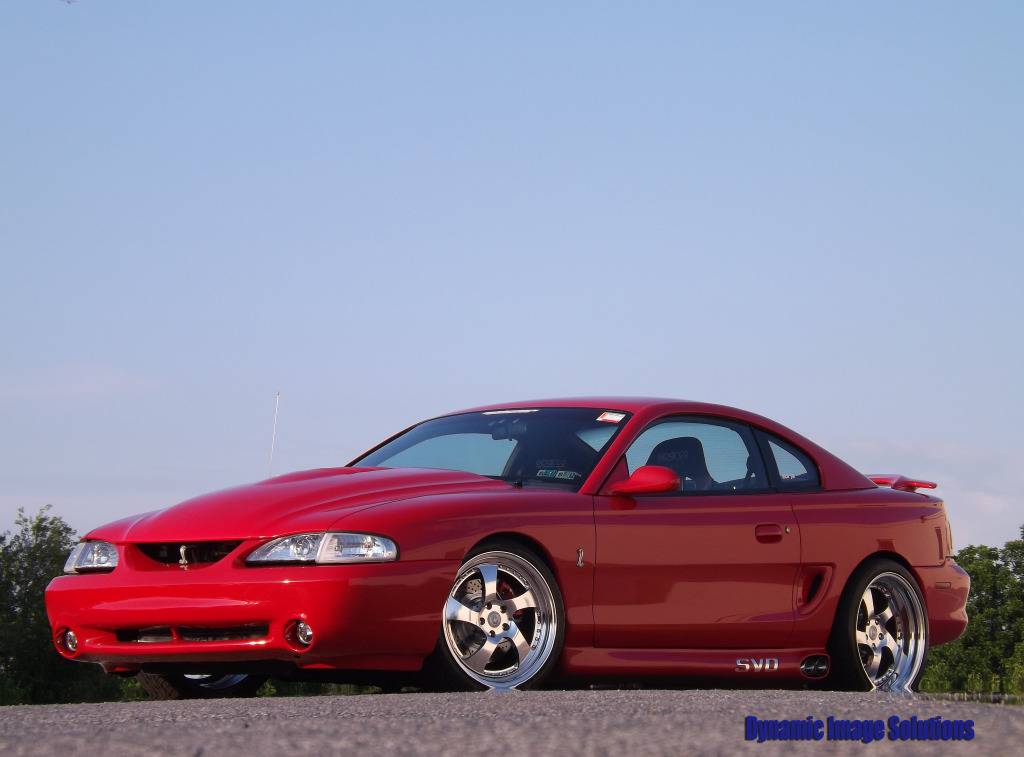
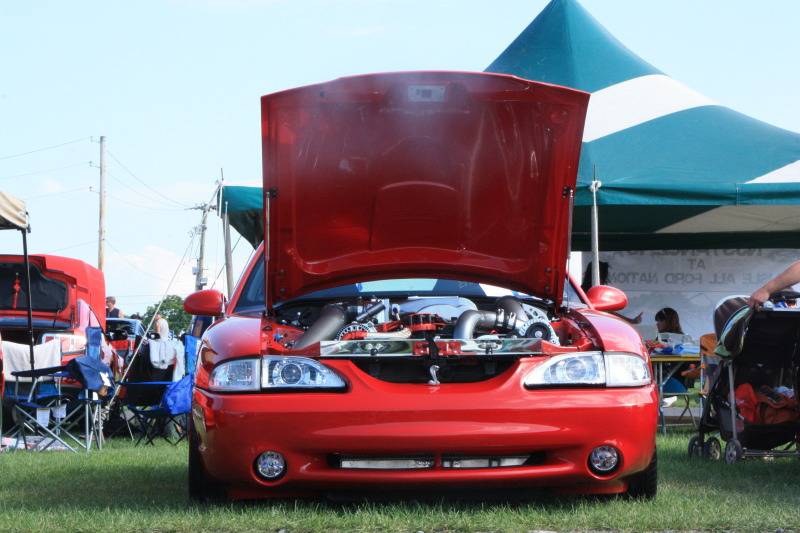
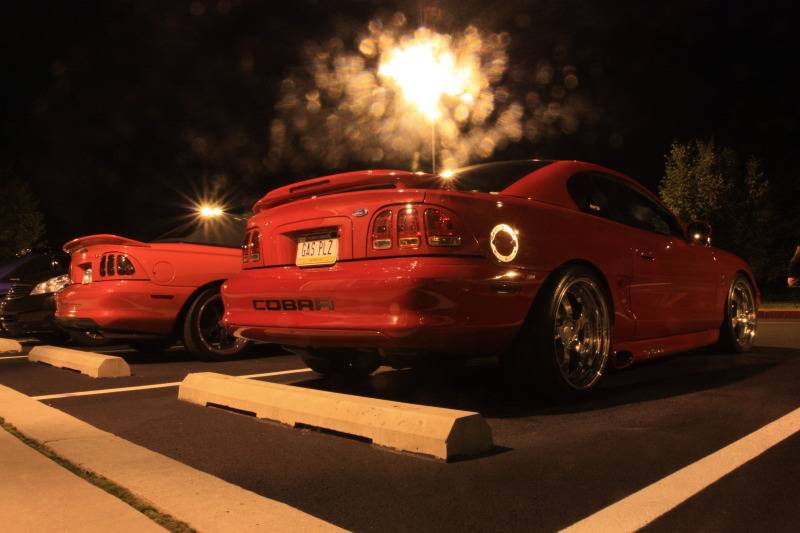
Some completed pics courtesy of a couple of my photographer friends


 95 Rio Red Mustang Cobra
Procharger D1SC 347 stroker, full maximum motorsports suspension, Full Tilt Boogie 03 Cobra IRS, Tremec 3550, 19x9.5 and 19x11 HRE 542R. 566rwhp/614rwtq
https://www.pro-touring.com/threads/...ra-OCD-Machine
04-14-2013 #7
Registered User
- Join Date
- Jul 2010
- Location
- Pittsburgh, PA
- Posts
- 114
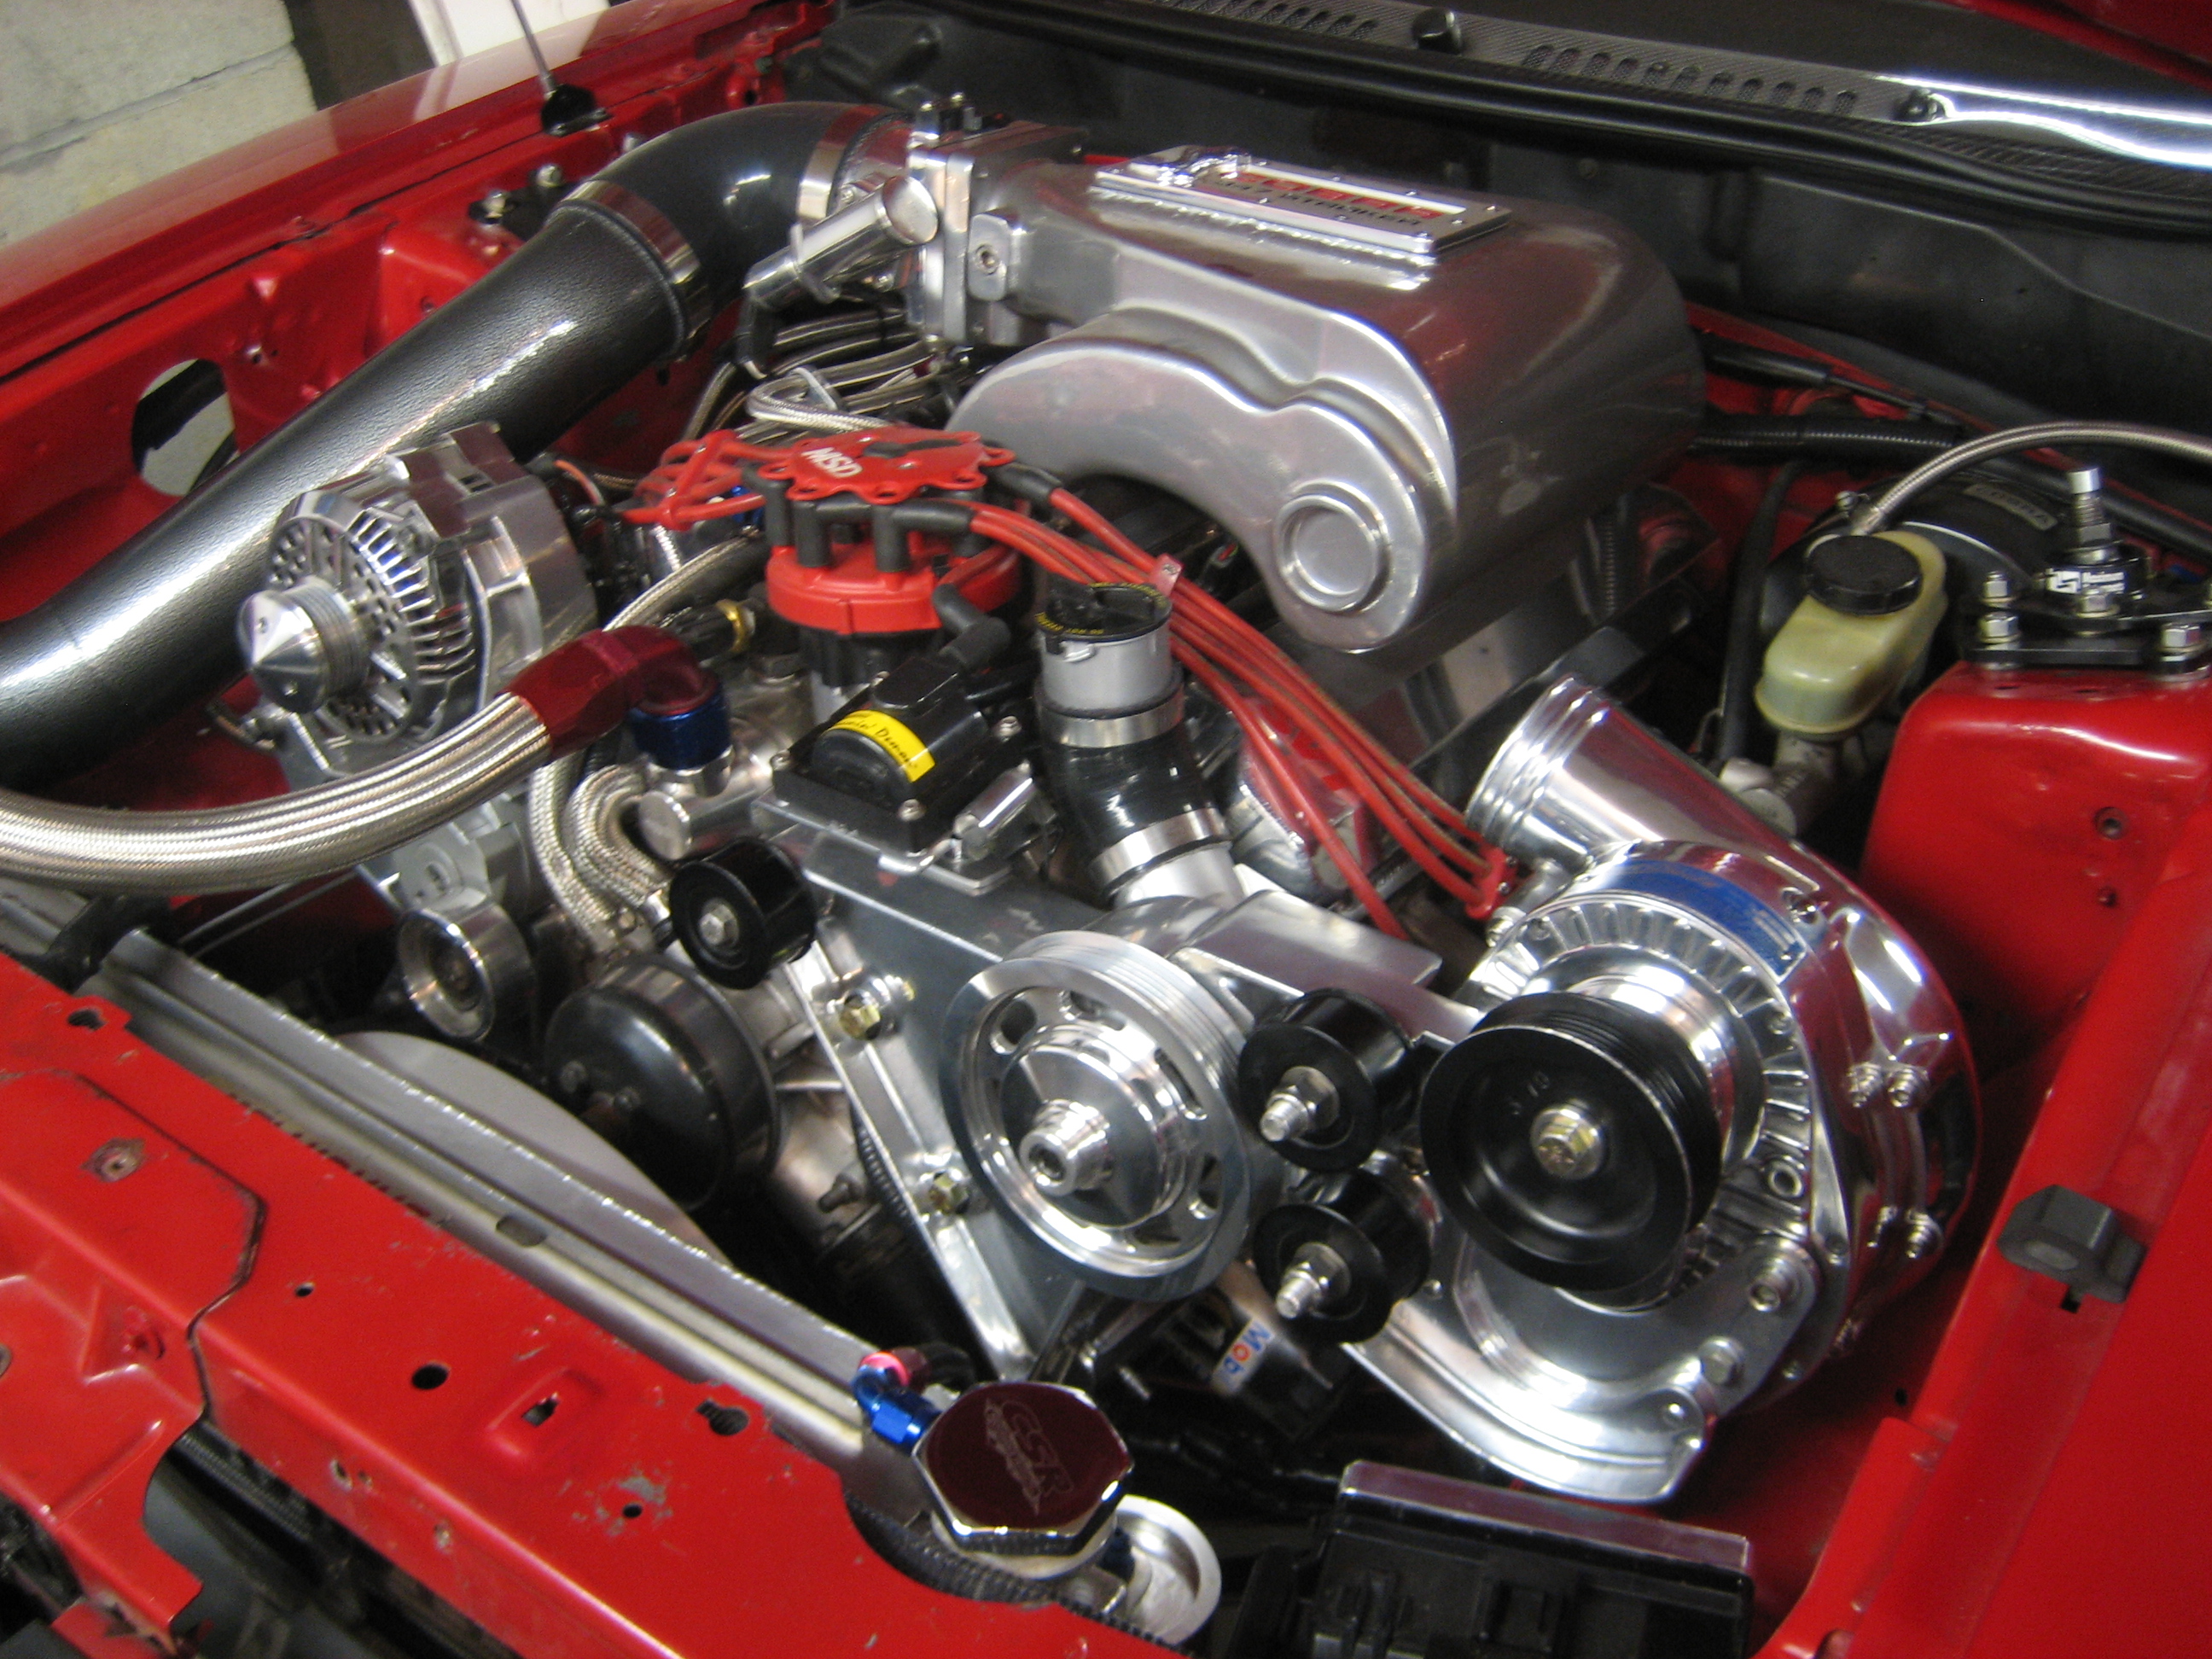
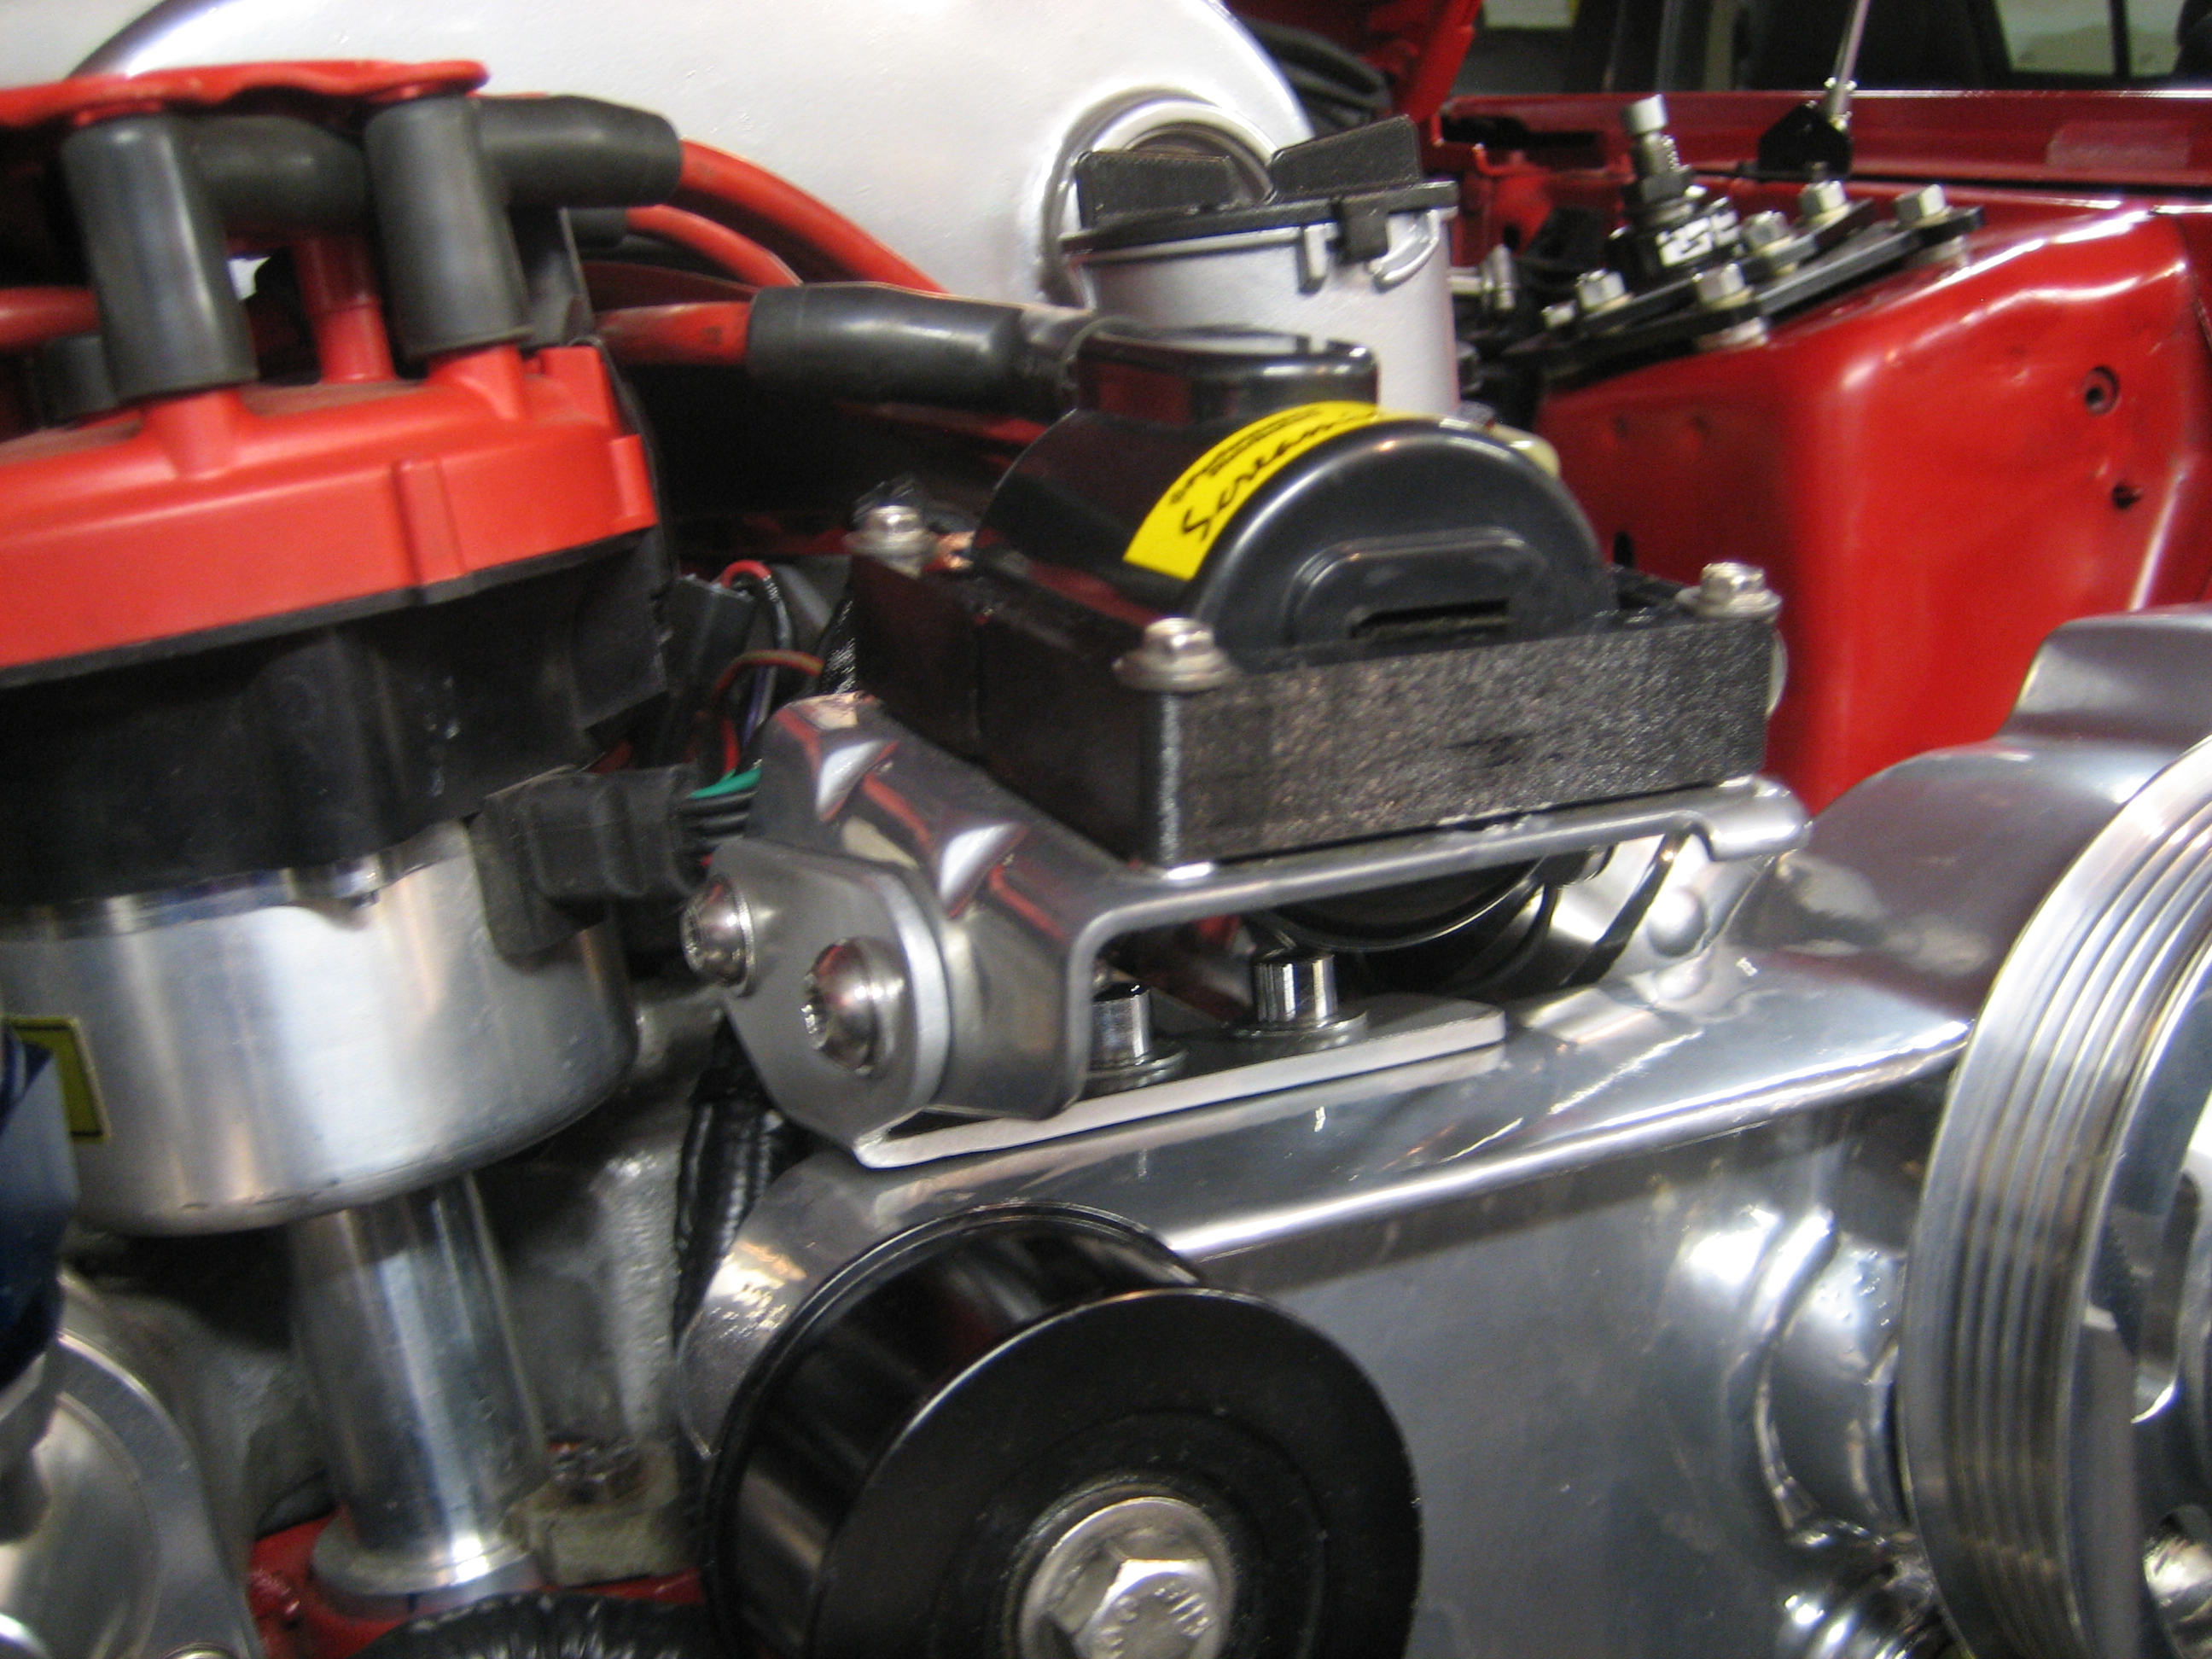
10/21/12 - GZ Motorsports Vacuum pump:
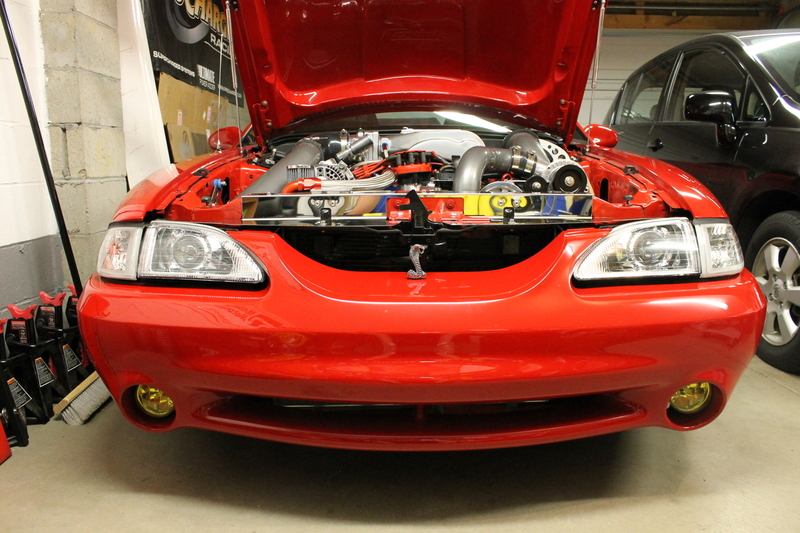
Tried out some yellow Lamin-X overlays on my fogs, I already have 3000k HID's in them so they should look pretty cool. I wasn't sure if I'd like the yellow fog look but I think I dig it.

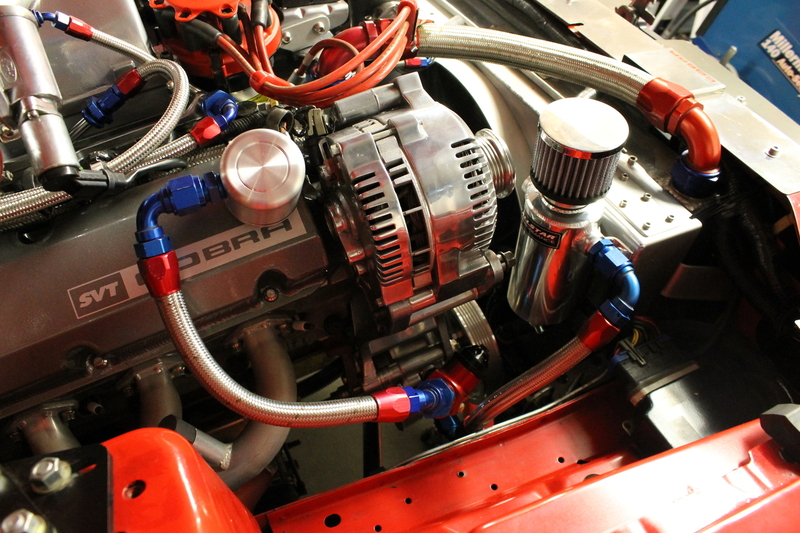
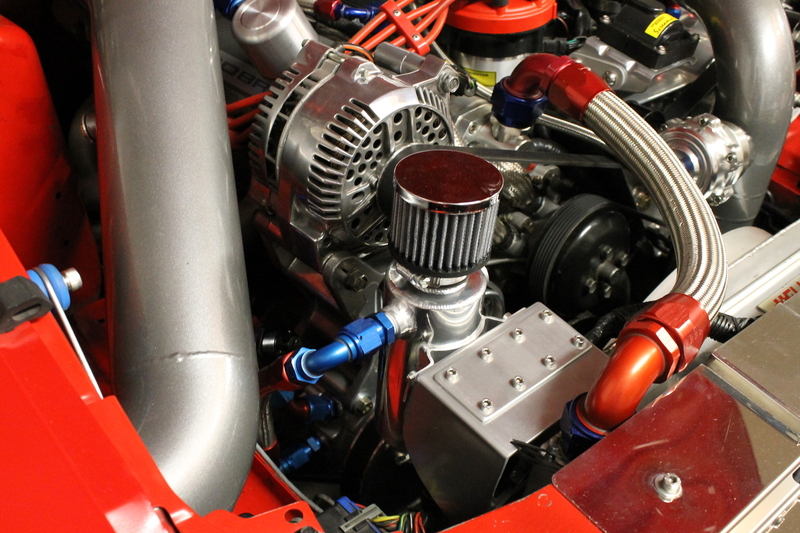
Also yesterday I finished up the GZ Motorsports vacuum pump install. Ever since I put the Procharger on, I'd been having issues with the dipstick blowing out under boost. I tried open breathers but the oil vapor smell was more than I wanted to live with, and after MANY MANY hours researching online I found that it seems no factory-style PCV system seems to work very well on these blown pushrods. So I sucked it up and pulled the trigger on a few parts. Got it started up yesterday, my tune will need a couple tweaks because the pump is messing with the idle slightly but overall it seems to work great.
GZ Motorsports VP102 Sportsman vacuum pump
March Performance 6.5" pulley
Custom machined 0.500" pulley spacer to use the 6 rib march pulley and serpentine belt rather than the GZ setup of a V-belt pulley and separate belt
Allstar Manufacturing breather tank
Aeromotive 33101 vacuum regulator
GZ Motorsports lock-on -10an breather
Earl's -10an fittings
Earl's -10an hoses
Custom fabbed breather tank mount bracket
Lokar Anchor Tight locking distick
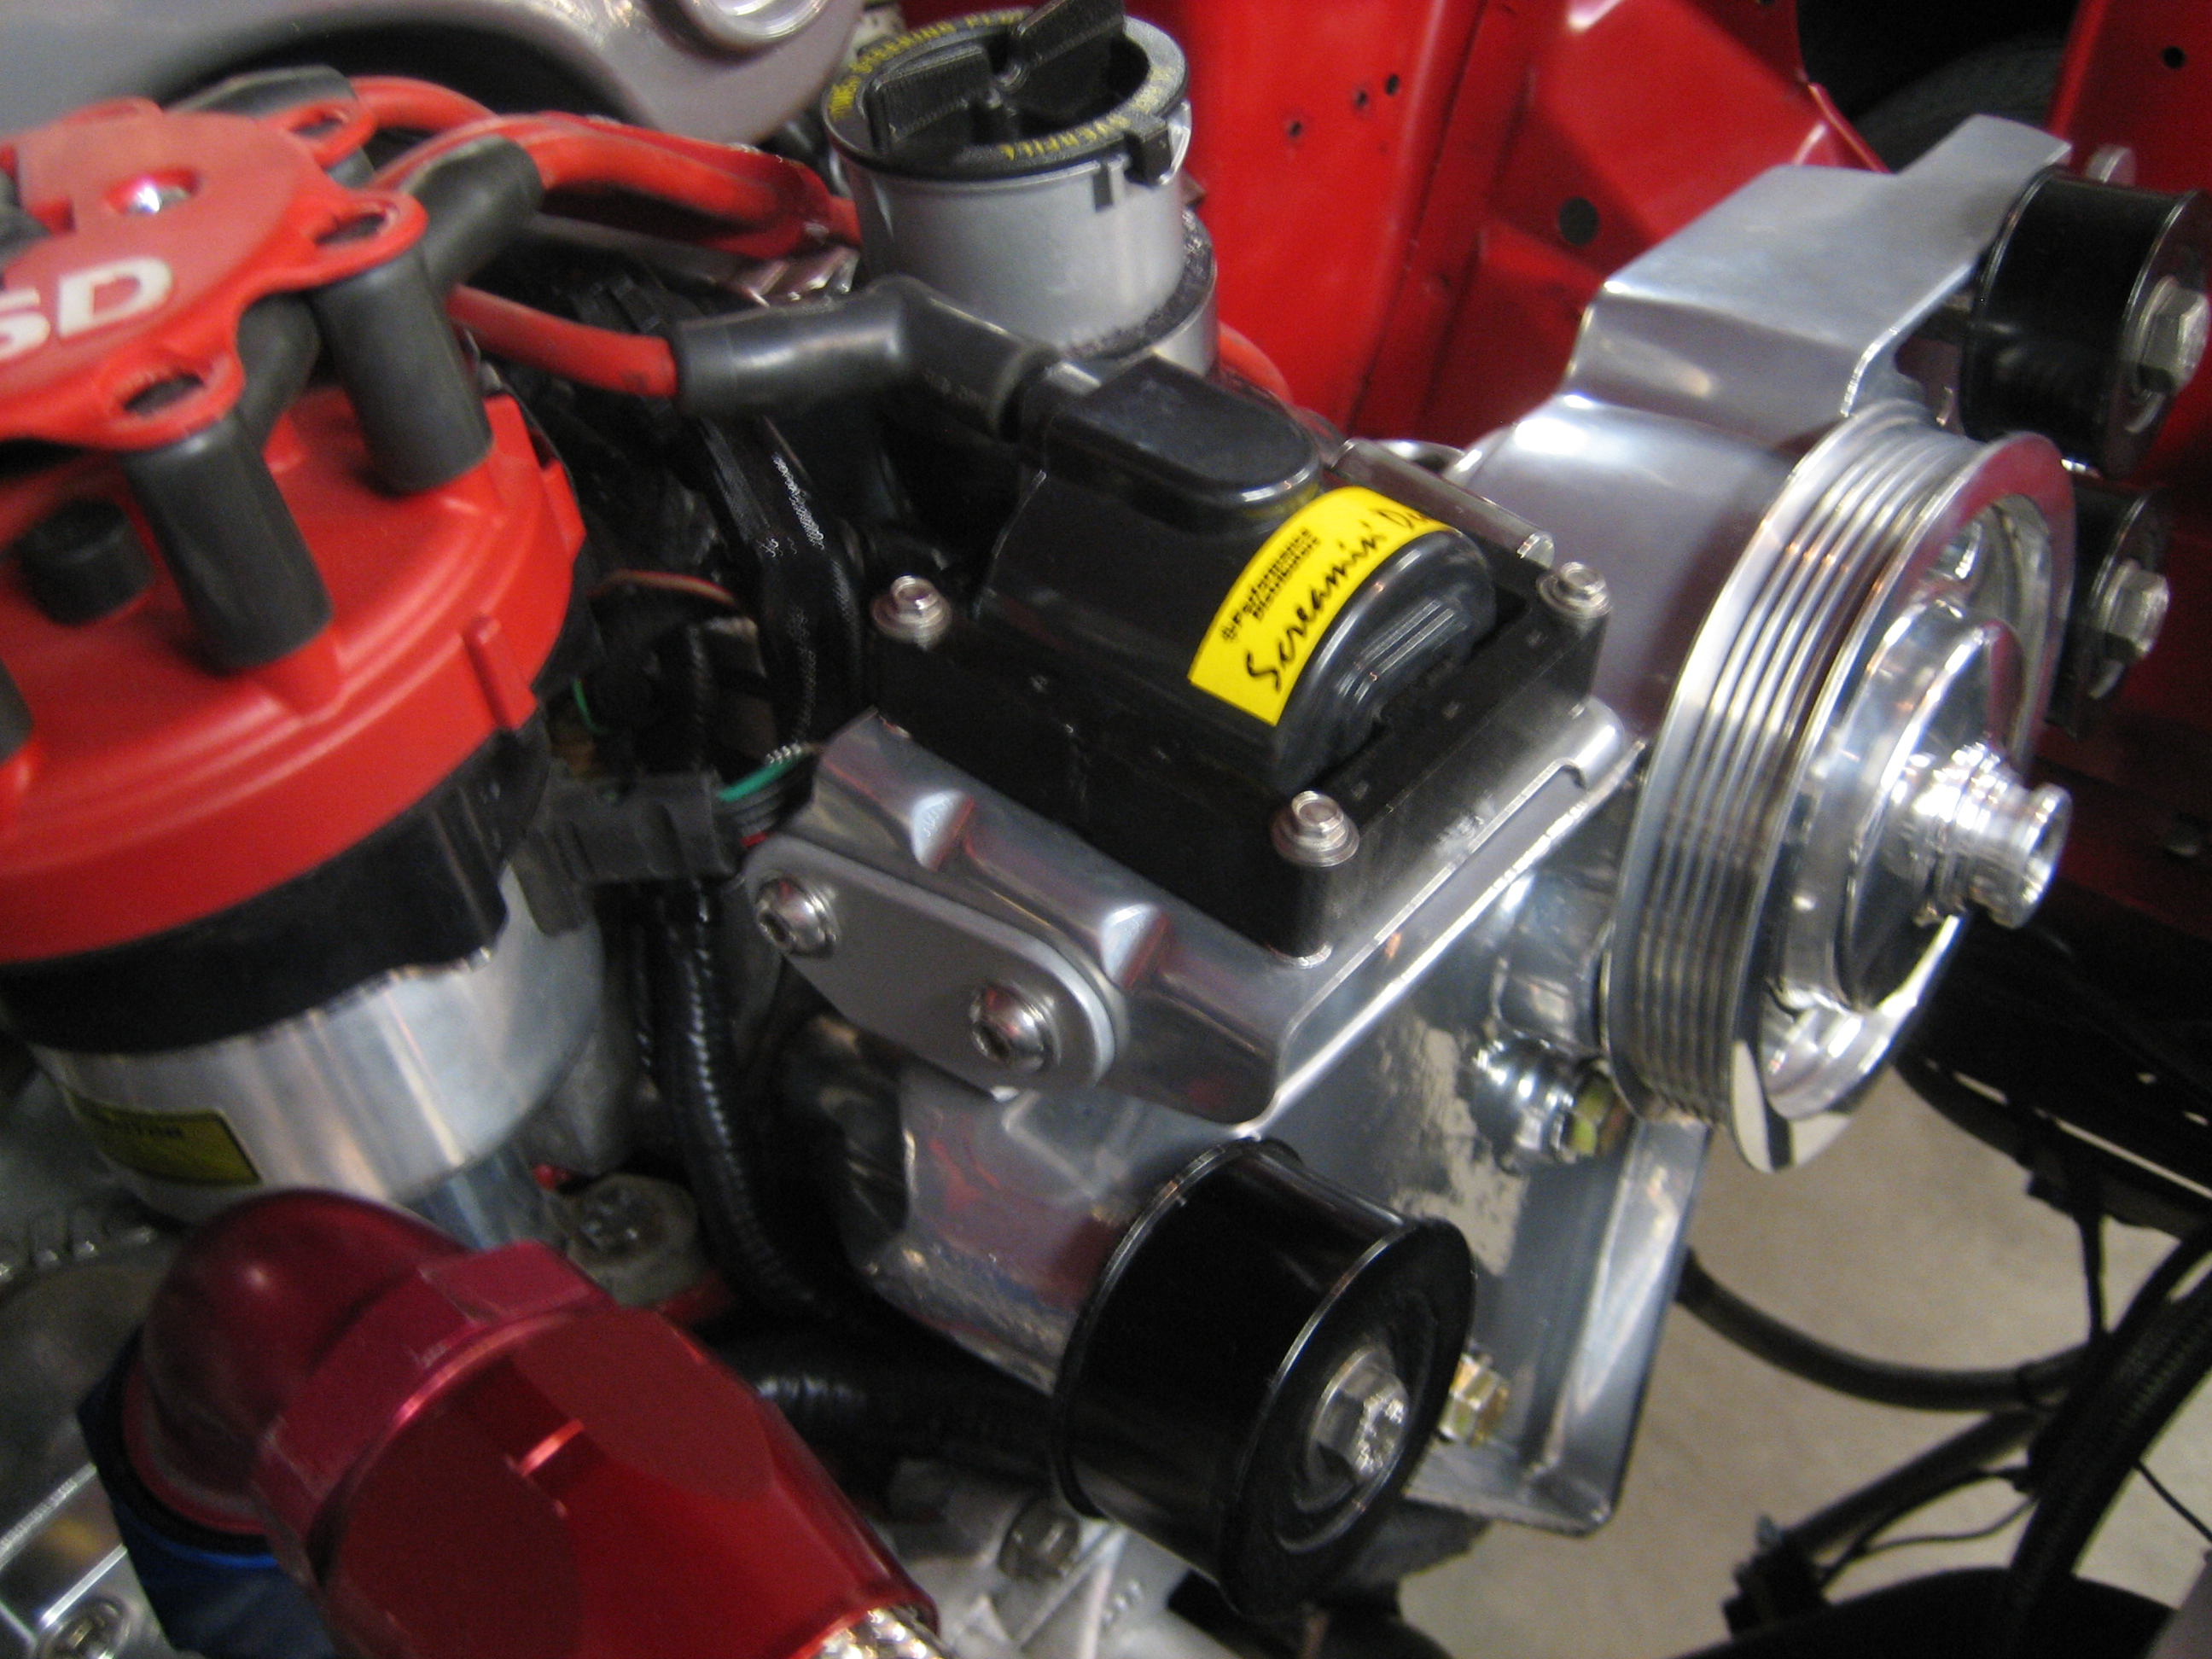
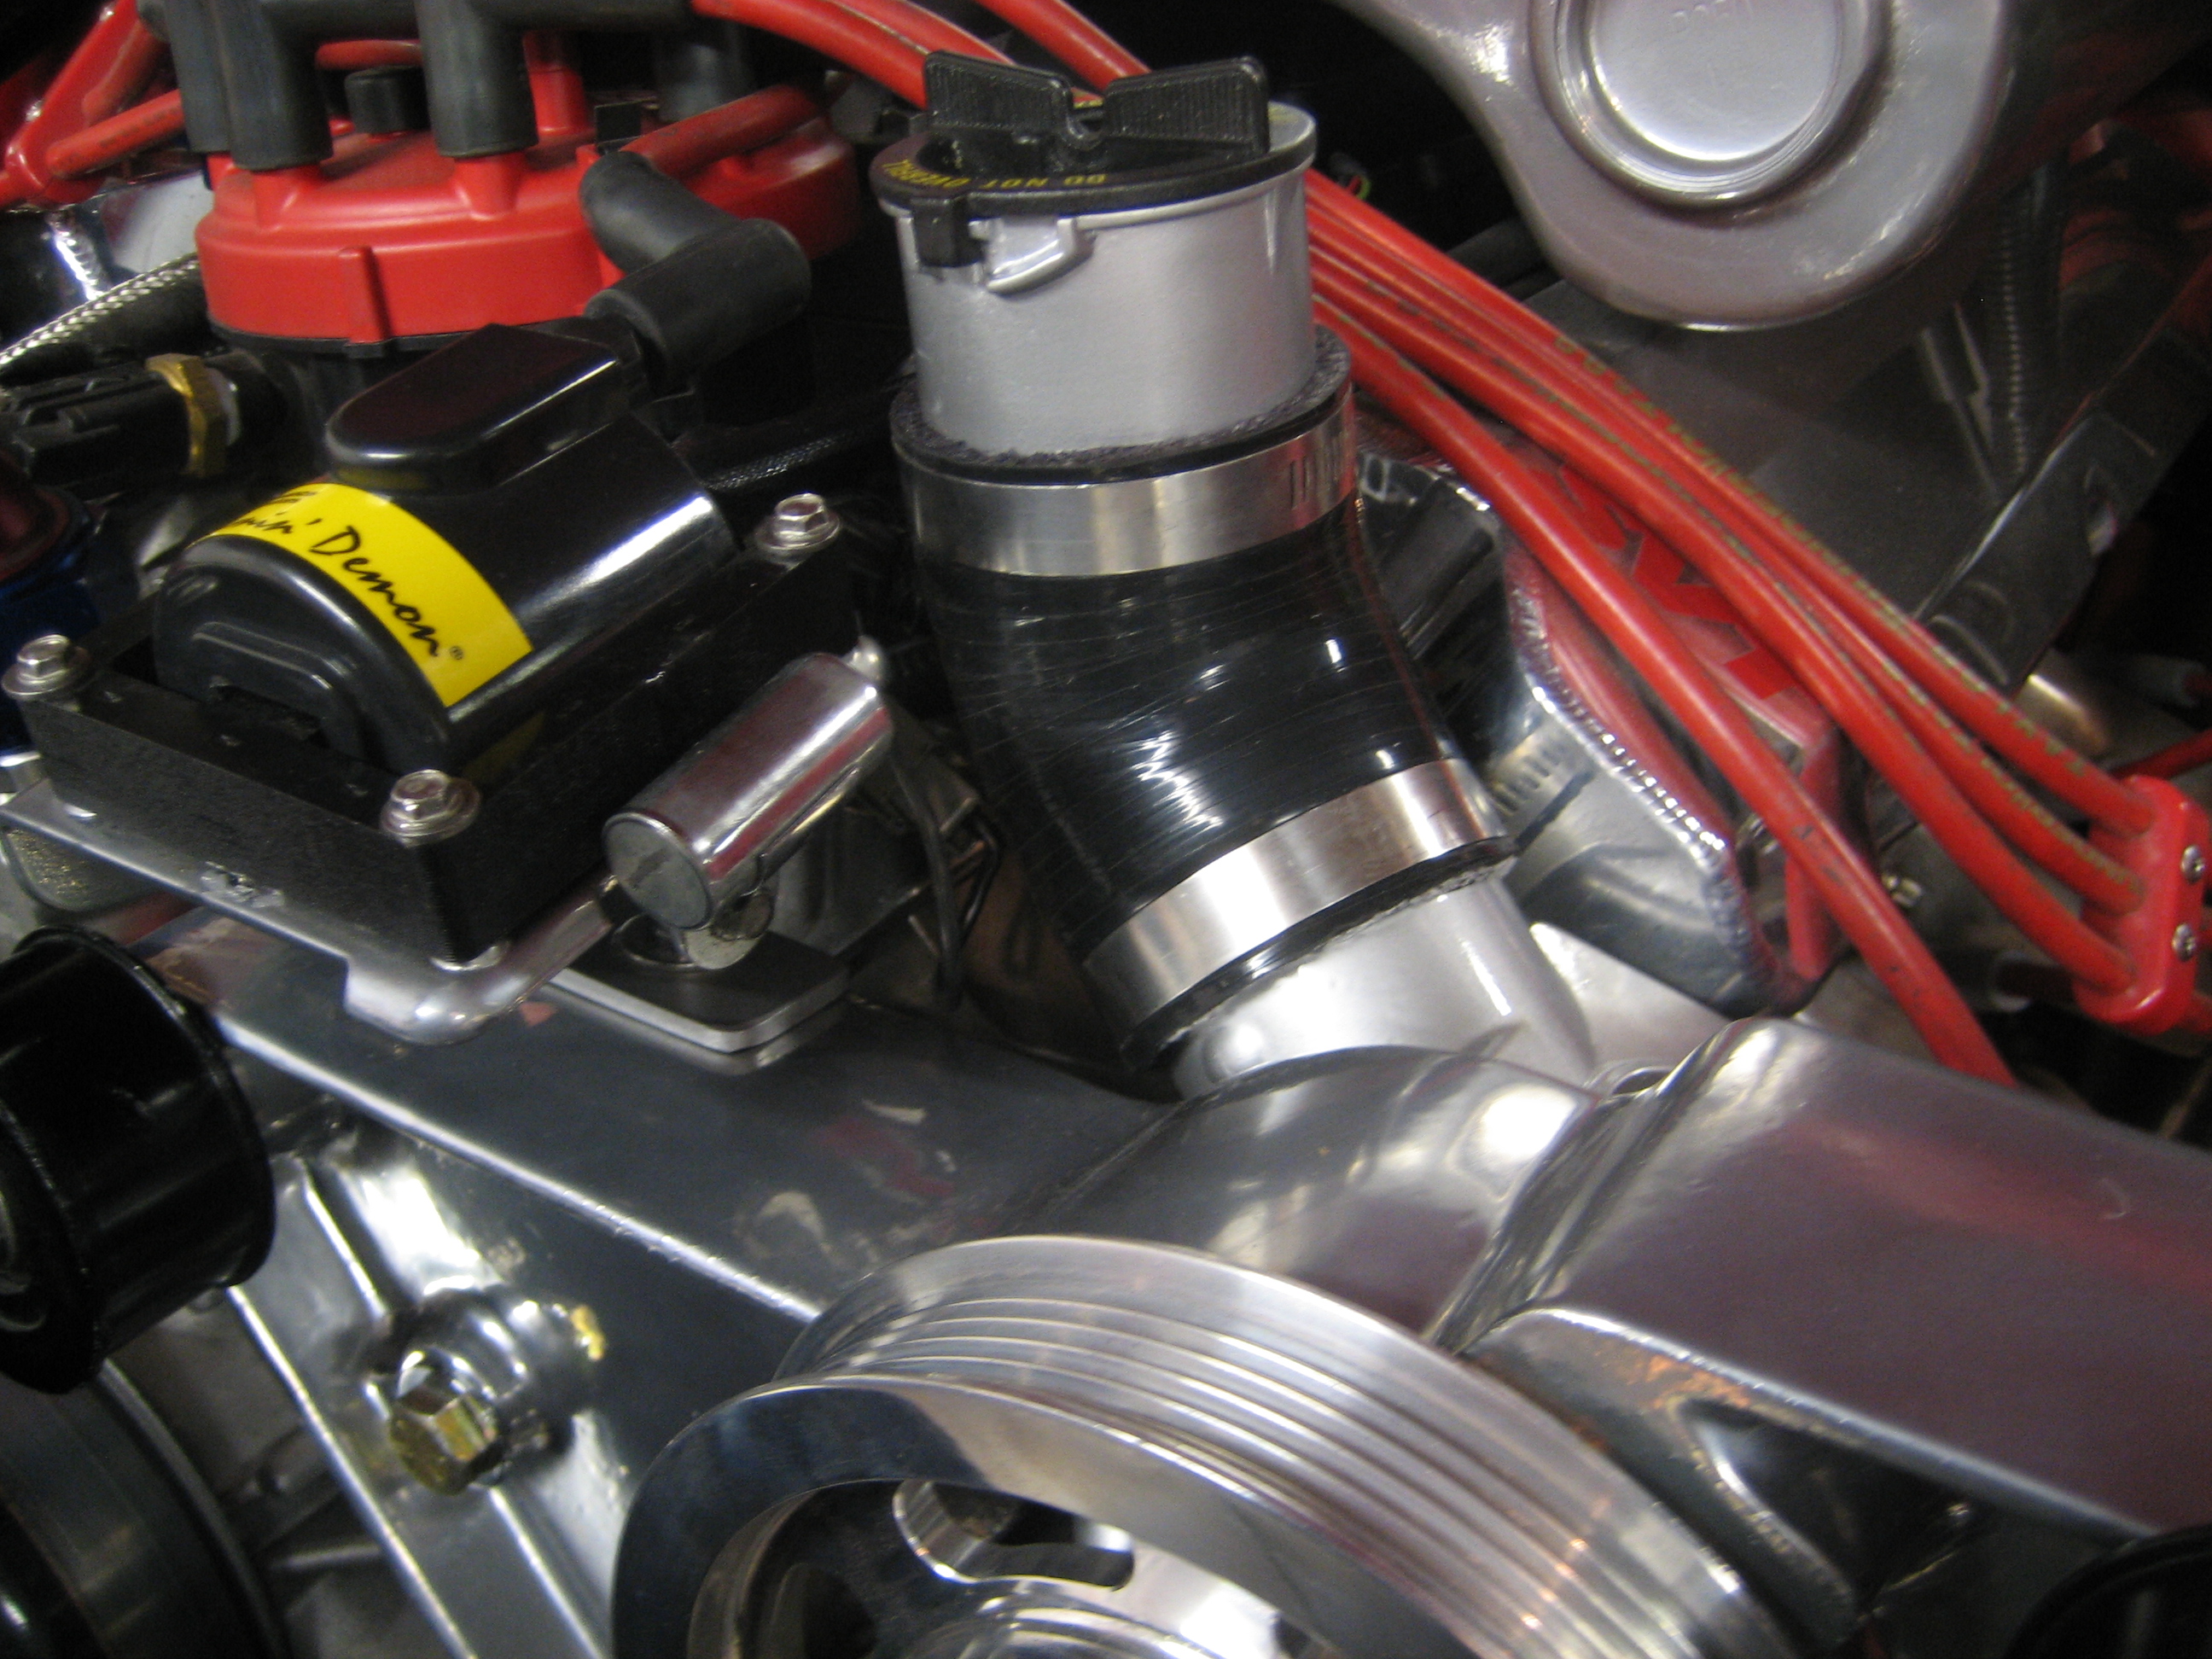
Some pics:
And a couple pics of the pulley spacer needed to push the pulley out where it needs to be.
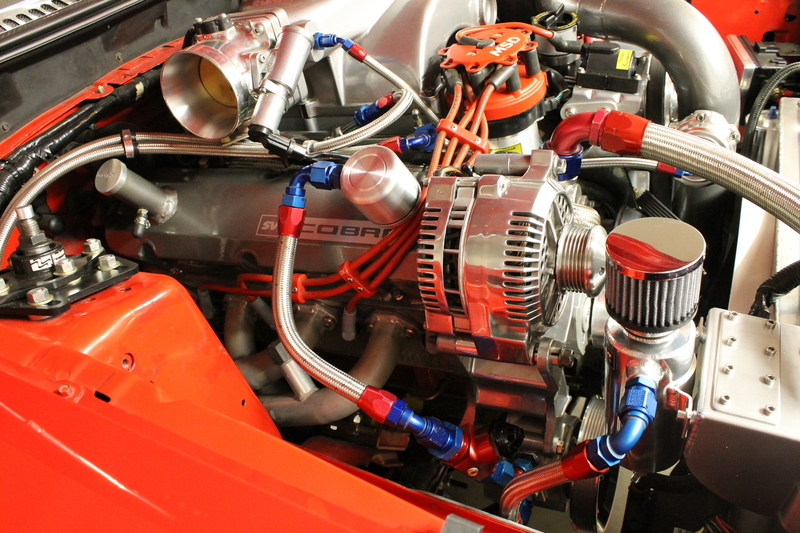
12/1/12 - Plug wires that don't suck
Well a couple weeks ago I was pulling a plug wire off a spark plug and the connector pulled out of the boot. I figured since I needed one new wire, might as well do them all. I have always hated how my wires were tight on some cylinders, and had TONS of extra length on others, plus the coil wire was way too short after adjusting the timing. I decided to take the plunge and do what I've been meaning to do for years and ordered a set of Taylor universal DIY plug wires and got to it. It took the majority of the day to make them but I am very happy with the result. They fit perfectly and are nice and neat like they always should have been. The "409" 10.4mm wires also look pretty beast compared to the old 8.5mm's I used to have.
Parts used:
Taylor 409 Pro Race Universal Spark Plug Wire Set p#79253
Made For You Vertical Wire Looms (replace lower valve cover bolts) p# 50-710-13
Taylor Wire Crimping Tool 43400
Pics:
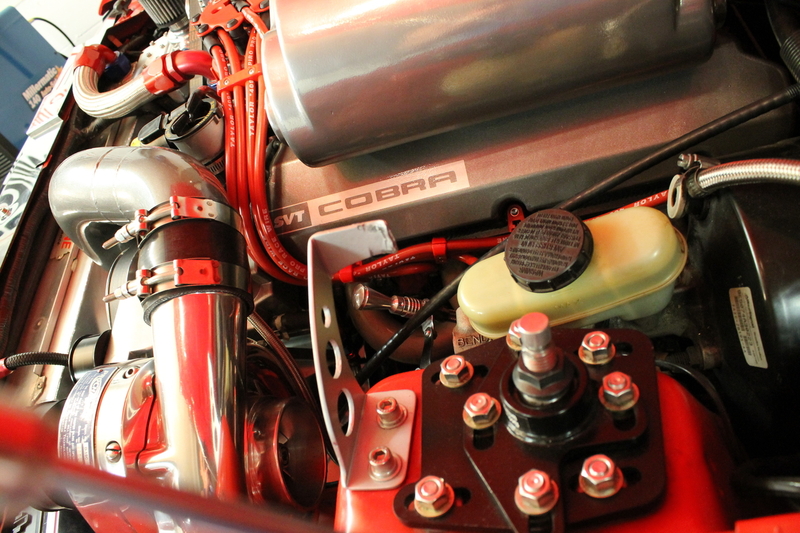
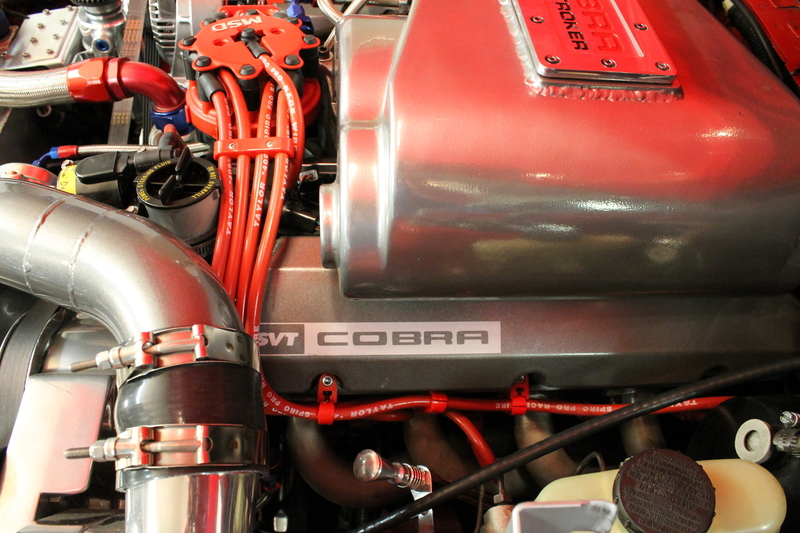
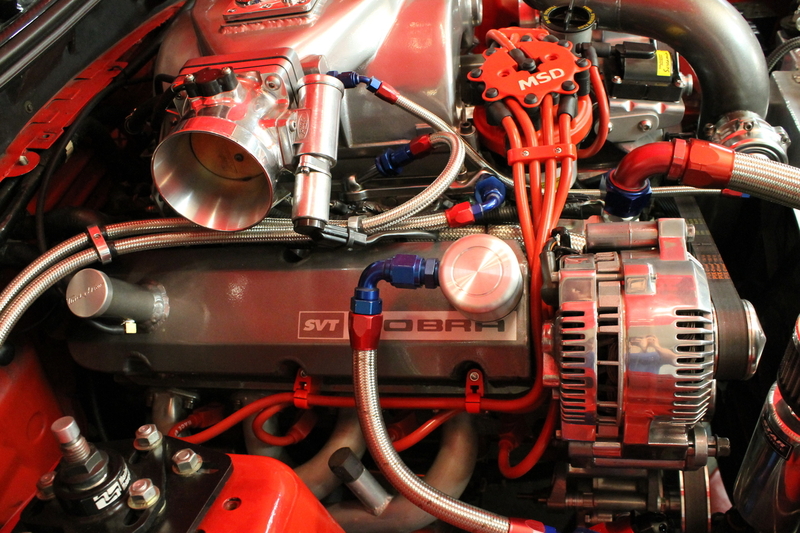
Coil wire has plenty of slack for timing adjustment
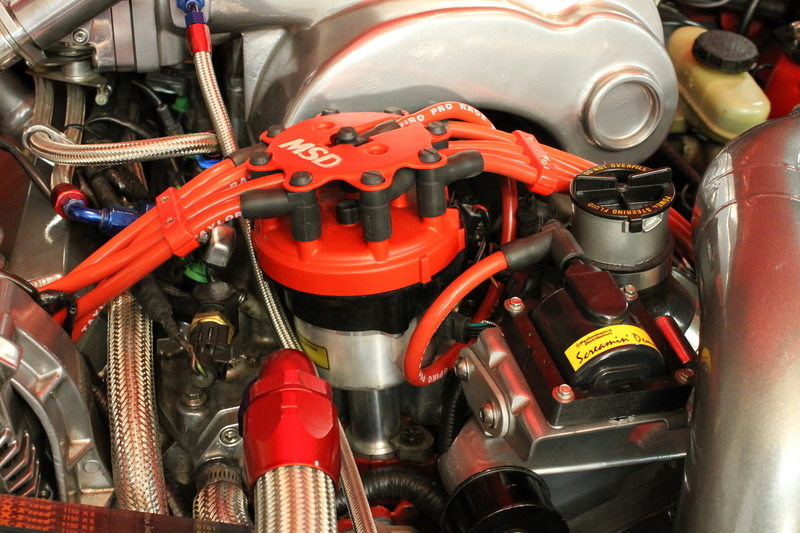
All buttoned back up:
 95 Rio Red Mustang Cobra
Procharger D1SC 347 stroker, full maximum motorsports suspension, Full Tilt Boogie 03 Cobra IRS, Tremec 3550, 19x9.5 and 19x11 HRE 542R. 566rwhp/614rwtq
https://www.pro-touring.com/threads/...ra-OCD-Machine
04-14-2013 #8
Registered User
- Join Date
- Jul 2010
- Location
- Pittsburgh, PA
- Posts
- 114
Since doing the plug wires I've been selling parts, collecting new ones, and thinking about new projects in my free time. By the time I actually turn a wrench, I have usually thought about it like 10 times at work, while falling asleep, etc. lol. I tend to brainstorm things waaaay too much, lol.
3/2/13 - moving the battery and changes to the trunk begin
I can't seem to find any pictures, but my trunk previously had a Taylor battery relocation on the passenger side and a custom sub box that fit into the driver's side corner of the trunk. Here's a picture of the box I had/have though:
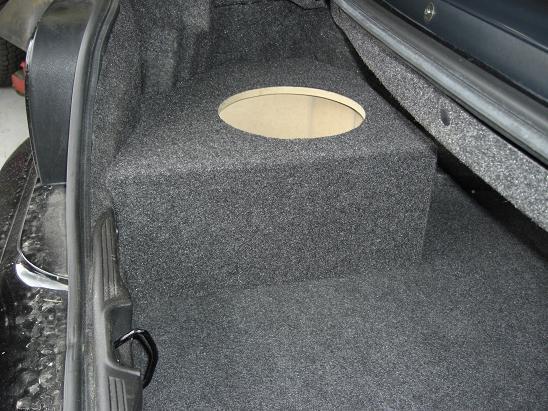
This was ok, but I got tired of the lack of trunk space, the worn, stained carpet, and my hacked up trunk panels (I cut them to accommodate the CHE rear shock tower brace and my previous Tokico D-Specs - you had to be able to access the top of the shocks to adjust them). Now I have Bilsteins with a MM coil over kit so I no longer need these hacked access points through the panels.
So far I've relocated the battery under the rear seat delete, and I'm planning to make a custom sub box to drop the sub down into the spare tire well. I'm also on the hunt for a pair of mint left and right trunk trim panels currently.
Now I'll go into some more detail with pics:
I have a K-Dezines rear seat delete. If you're not familiar with it, it actually raises the bottom up a few inches, which provides quite a bit more room underneath. Here's a link to their site: http://www.kdezines.com/MustangParts/RearSeatDeleteKits if you want any more info. They're great to work with and the quality of their kit is absolutely top notch.
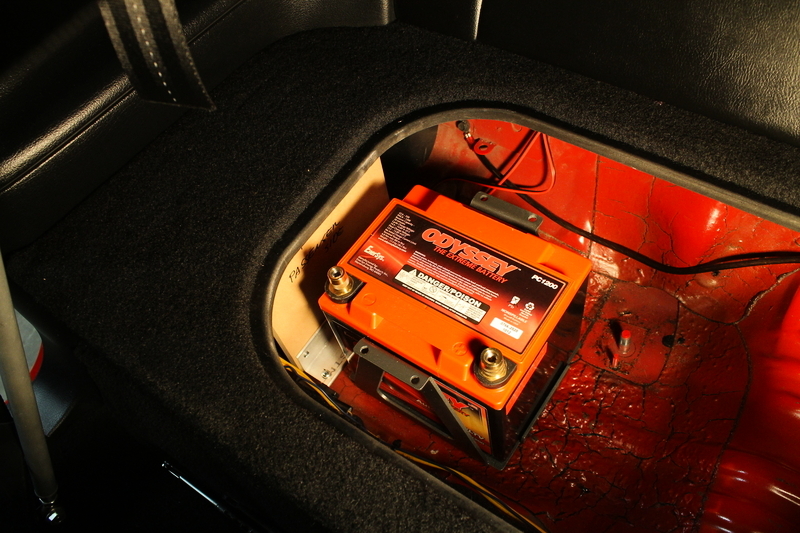
Anyway, this provided more than enough room to put the battery in that location. I was running a conventional Motorcraft battery, which required the battery box but a battery box definitely will not fit here. So here's the parts list for the battery relocation-relocation, lol:
Odyssey PC1200 Dry Cell Battery
Arctec Industries Battery Mount (pn# OY1201B)
Mil-Spec Battery Terminals
Various 2 gauge power and ground wire, ring terminals, etc.
Jegs Remote Charging Terminal Kit
First, protect the rear bumper cover with generous amounts of frog tape, and strip all that crap out of the trunk:
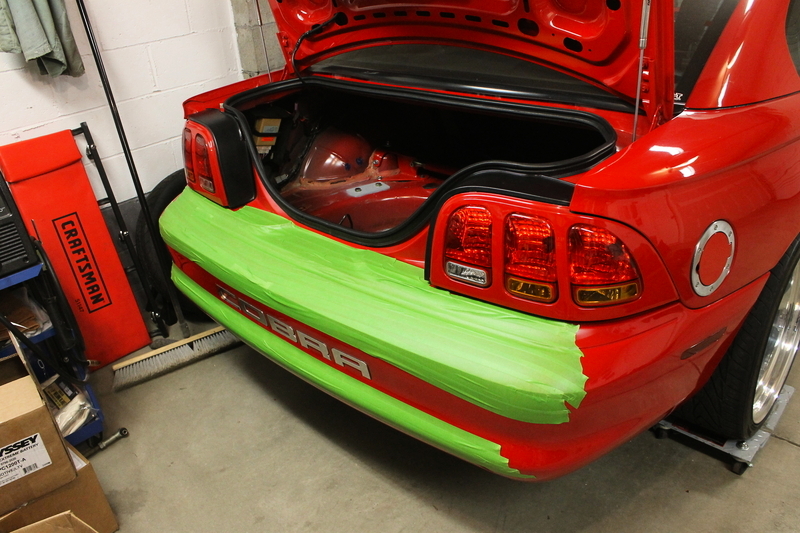
Then it was on to getting the battery mounted under the RSD, Shot the Arctec mount with some metallic dark gray paint and mounted it in place:
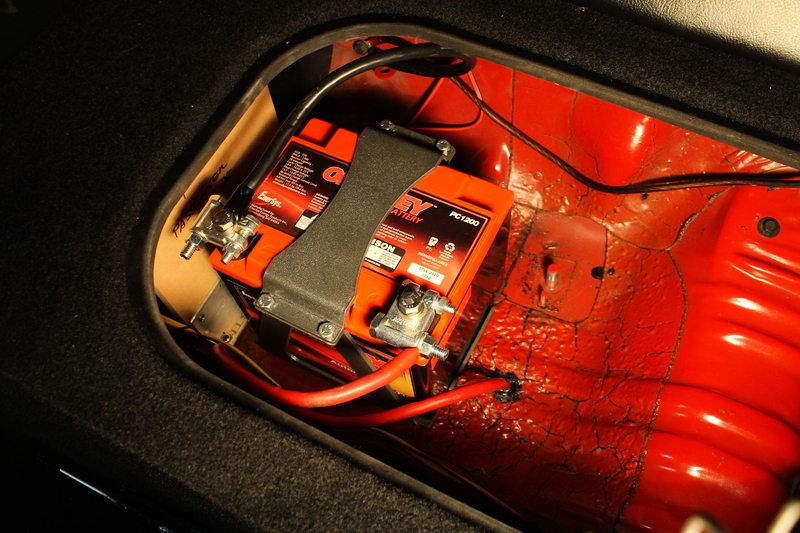
Odyssey battery in its new home:
Top plate of mount on:
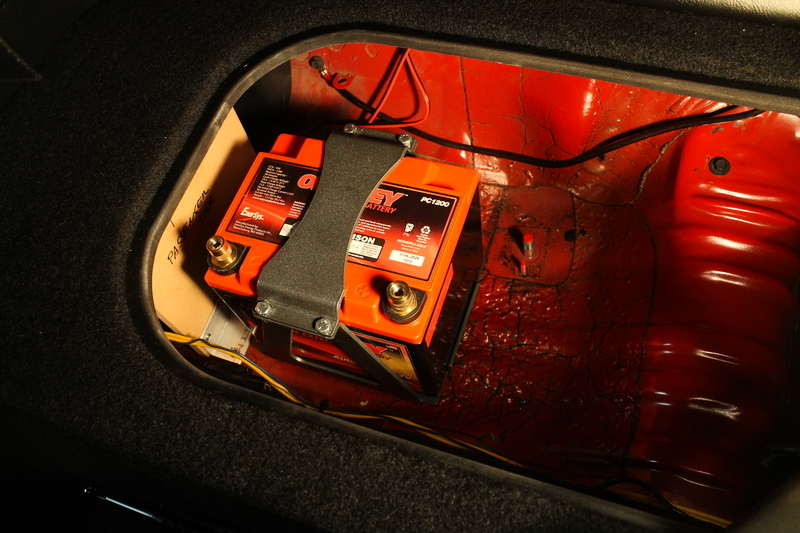
Terminals in place and cables run. The mil-spec terminals are really nice because they provide plenty of room to grow because of the threaded studs, especially coupled with the top bolts of the Odyssey's terminals. This will make it easy to attach power wires for things in the future should the need arise.
I then found myself looking at the trunk with disappointment, and upon remembering how I always wanted to lay down some Dynamat there, I placed an order for 20 sq. ft. of Dynamat Extreme and got to it.
This stuff is a little tricky, but not too bad It just takes some patience to trim all the pieces correctly and work the material over and around curves. Here are a few pics of the process:
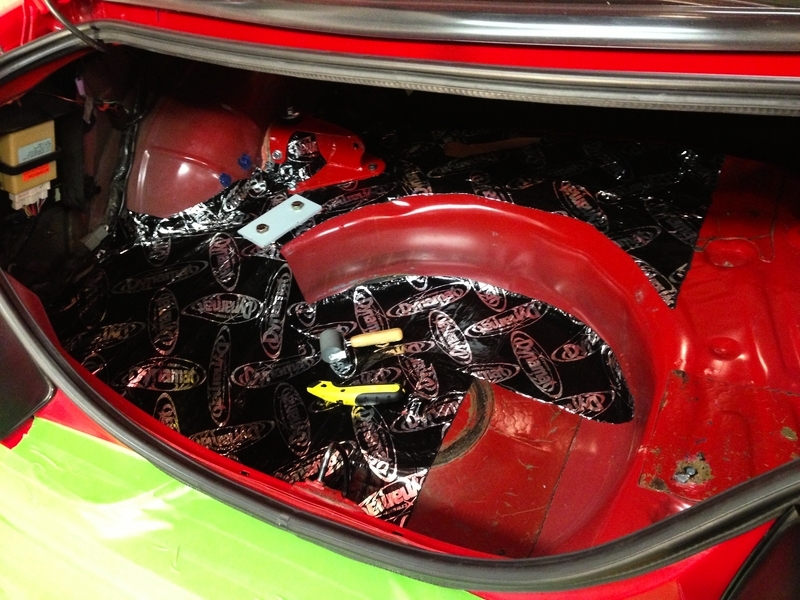
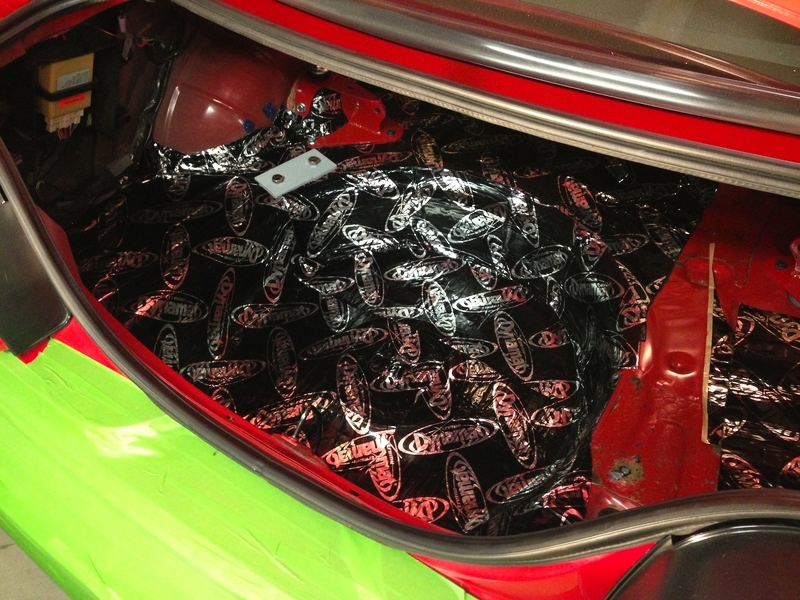
I didn't think to take a completed pic, but I ended up getting most of the wheel tubs covered also.
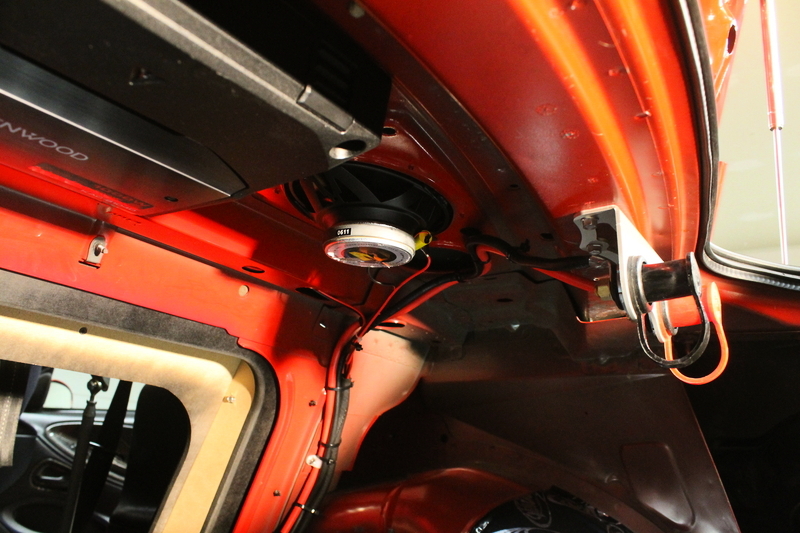
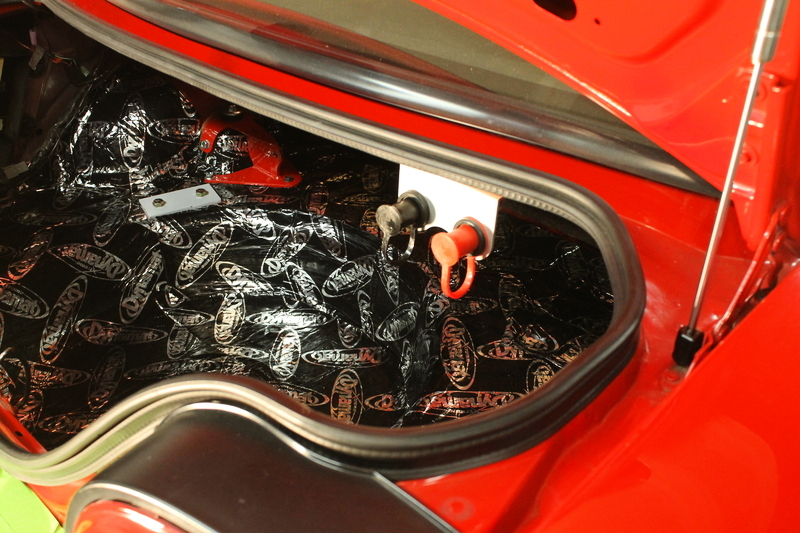
One issue with having the battery under the rear seat delete is that it makes it a bit hard to get to with a harness bar and fixed back Sparco seats. So to make it easier to charge the battery/hook up a battery tender or in an unfortunate case, attach jumper cables I decided to add remote charging posts in the trunk for easy access. I attached the bracket under the deck lid and think it looks pretty good there. I may add some "speed holes" to the bracket to make it look a little less plain-looking, not sure though. (you can also see in one pic I mounted the sub amp under the deck lid also, to get it out of the way).
Next step is finding some new side panels. I don't have pics but last night I made some cardboard templates for a floor panel. Planning to use 1/2" MDF and wrap it in either carpet or suede.95 Rio Red Mustang Cobra
Procharger D1SC 347 stroker, full maximum motorsports suspension, Full Tilt Boogie 03 Cobra IRS, Tremec 3550, 19x9.5 and 19x11 HRE 542R. 566rwhp/614rwtq
https://www.pro-touring.com/threads/...ra-OCD-Machine
04-14-2013 #9
Registered User
- Join Date
- Jul 2010
- Location
- Pittsburgh, PA
- Posts
- 114
So here's a picture of the aforementioned hacked trunk panels. I am pretty ashamed of how sloppy of a job I did lol. You can see the large holes in the base of the passenger side panel for the battery cables where they came into the trunk, the various stains and the holes/markings from a previously-installed SMR bar (ended up upgrading to the CHE piece instead).
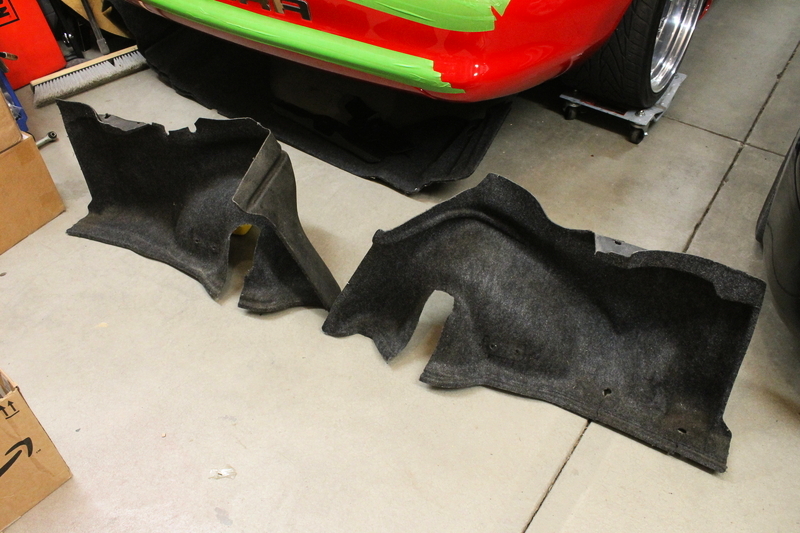
I took a trip over to a local mustang shop that is gutting a 95 GT vert to turn it into a coyote-powered drag car, with the intent of snagging a new rear trunk panel (the piece that goes behind the taillights) and ended up scooping that up for only $20 in mint condition. You can somewhat see it sitting under the car on top of the old panel in the picture above. But while I was there BS'ing with the shop owner a bit I noticed one of his guys working on taking out the interior, specifically a pair of kick panels with Polk Audio components in them, so I threw out an offer. I ended up picking up these beauties for a total of $70!!!
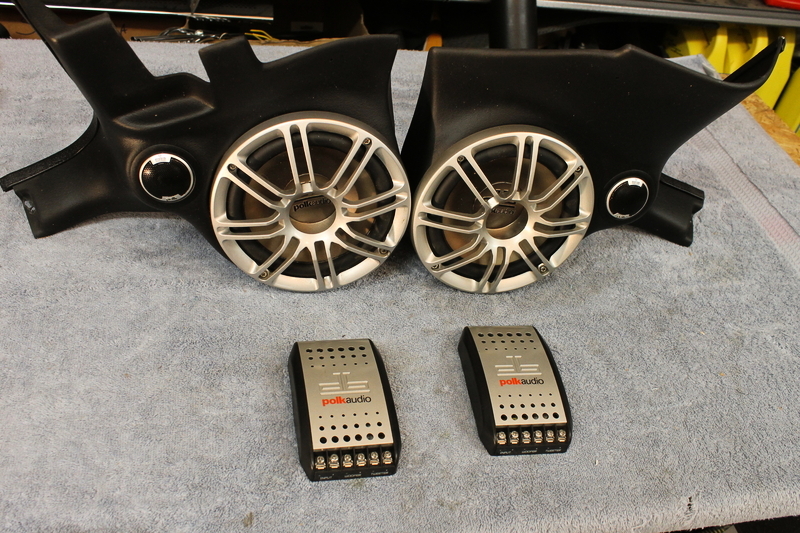

I'm thinking I'll probably paint the grilles and tweeter surrounds either metallic dark gray or satin black so they blend in a little, the silver would draw a bit more attention than I'm after.
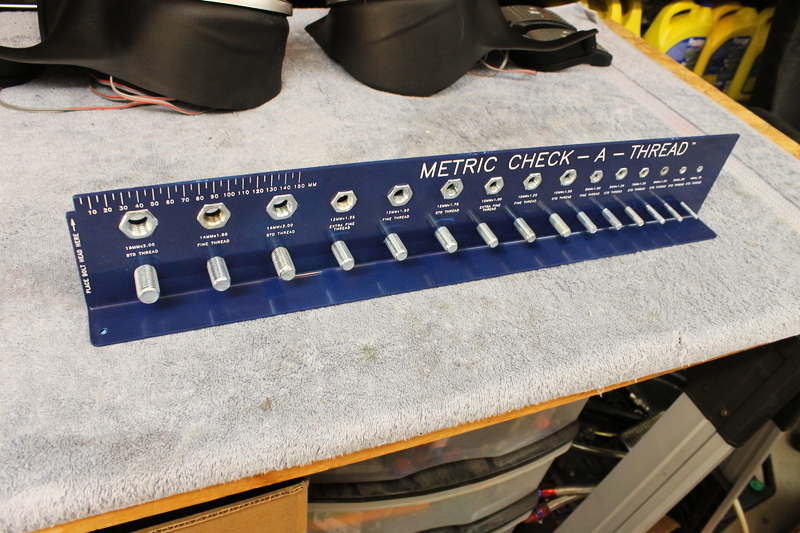
Lastly, I got home from work today and saw this had showed up. I've been looking for this exact one for a long time. We have a pair of these Check-a-Threads at work (standard and metric) and they are just so damn handy to have around for checking threads quickly. I scored this one brand new from eBay for $17 + shipping , compared to $50+ shipping for differently-branded ones I've seen online. I'll continue my hunt for a standard counterpart but for now I'll be happy with this one. It is probably a bit lame that I was so excited about checking metric nut and bolt sizes when I got home from work today, but I suppose that is the life of a car nut, lol.
 95 Rio Red Mustang Cobra
Procharger D1SC 347 stroker, full maximum motorsports suspension, Full Tilt Boogie 03 Cobra IRS, Tremec 3550, 19x9.5 and 19x11 HRE 542R. 566rwhp/614rwtq
https://www.pro-touring.com/threads/...ra-OCD-Machine
04-14-2013 #10
Registered User
- Join Date
- Jul 2010
- Location
- Pittsburgh, PA
- Posts
- 114
3/9/13 - Who needs a spare tire anyway?
You may remember I mentioned plans to make an enclosure to put the subwoofer down in the spare tire well. Here's the progress on that from yesterday and today.
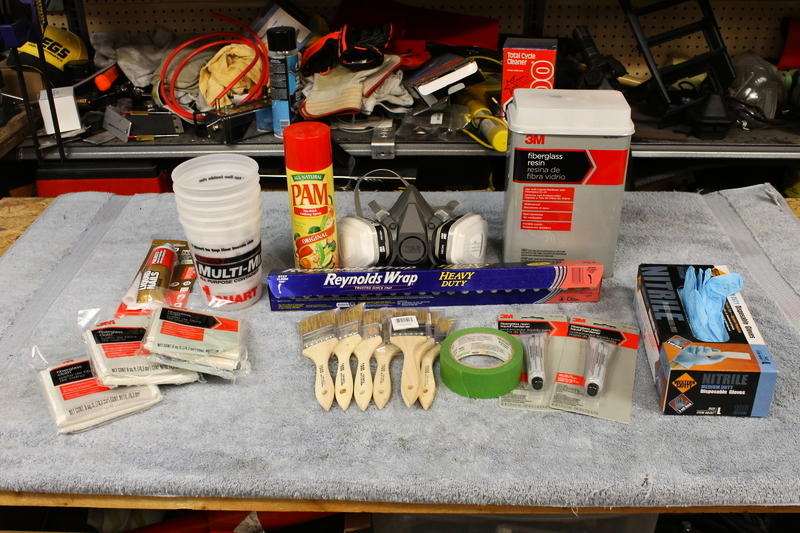
Picked up all the supplies (please excuse the mess on the shelf behind the work bench, lol)
- 3M Paint Spray/Pesticide Respirator
- Fiberglass cloth
- Fiberglass resin
- Fiberglass hardener
- Plastic paint mixing cups (with ounce measurements on sides)
- Mixing sticks
- Latex gloves
- Cheap paint brushes (the cheapest available - these will thrown away after use)
- Masking tape
- Cooking spray
- Aluminum foil
- Liquid Nails (for attaching the MDF top board)
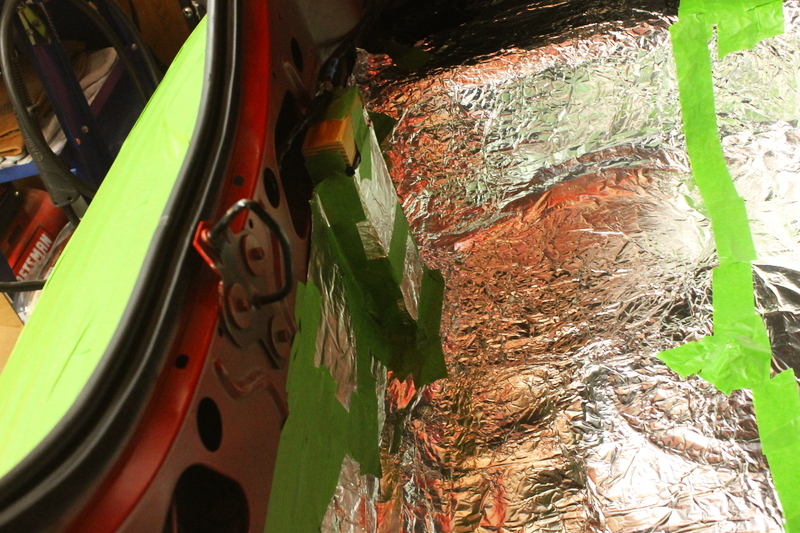
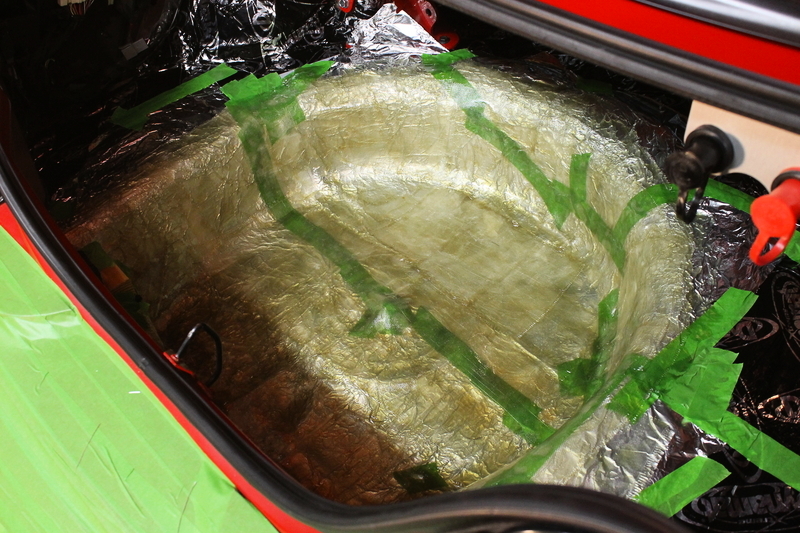
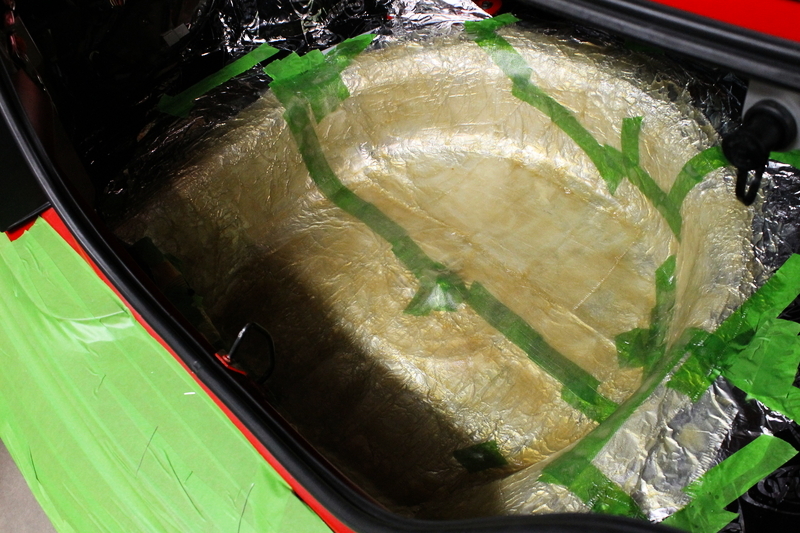
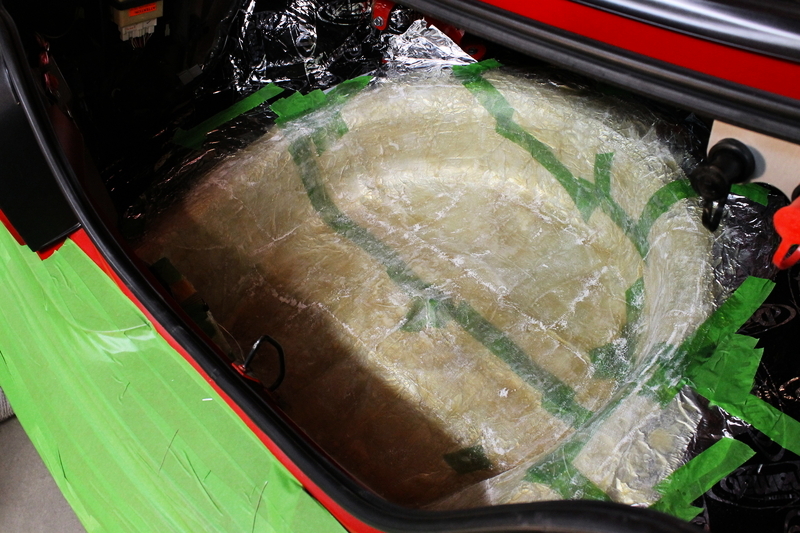
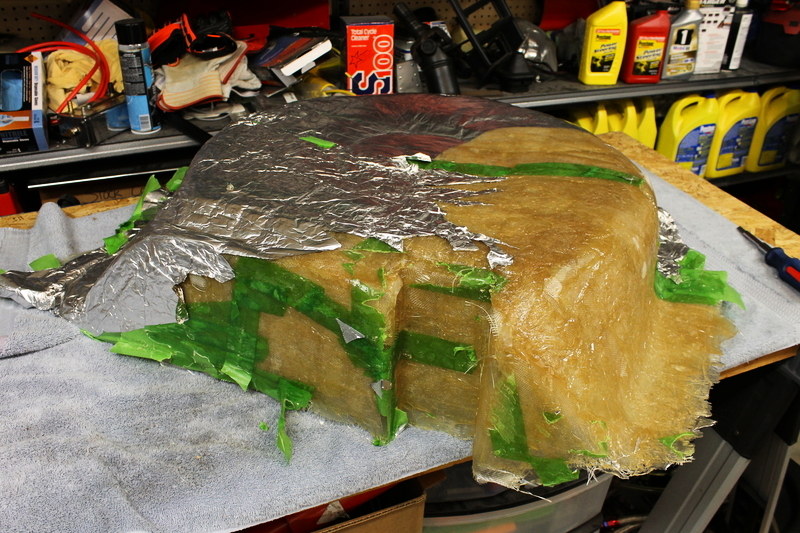
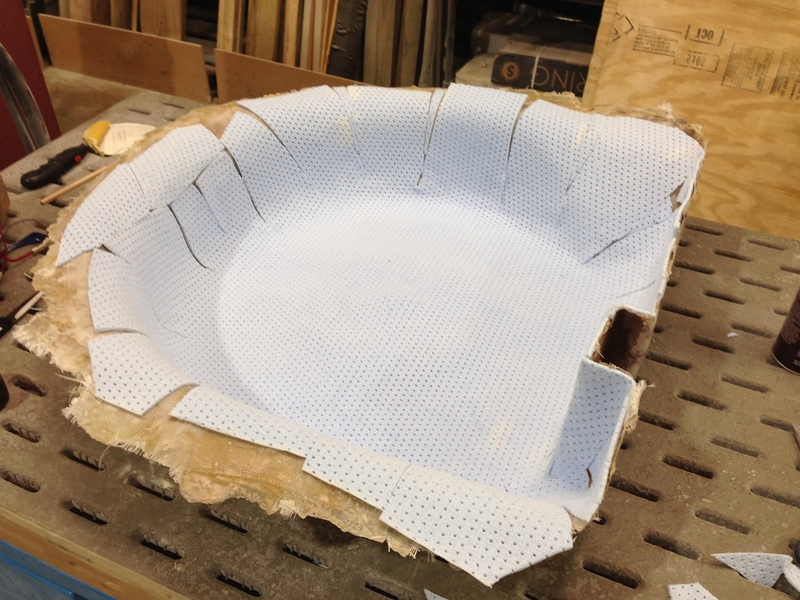
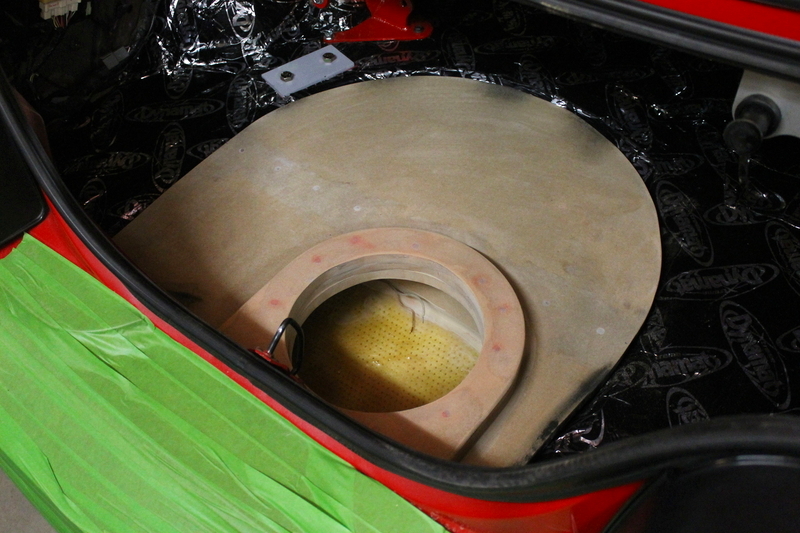
So, with all that in hand, it was time to line the spare tire well with the aluminum foil, being careful to work the foil into all the curves. Then I taped up the seams and any tears with masking tape to seal it all up.
Note the board here, this is to create a recessed place for the speaker terminal cup, then I can just route the speaker wires up below the taillight panel then around the driver's side perimeter of the trunk and up to the amp under the deck lid.
Now that the foil was down, I sprayed a coat of the cooking spray and laid down the first layer of fiberglass cloth. I cut it into long strips, then smaller rectangles until I got it all covered:
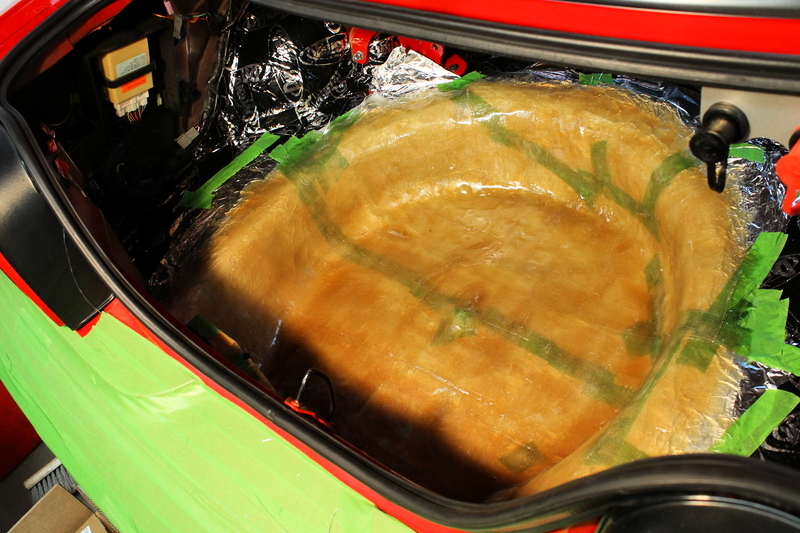
Then strapped on the respirator, put on some gloves and mixed up the resin, (10 drops of hardener per ounce of resin) and brushed it on:
(^ I know it looks like there's nothing there, but the cloth turns translucent as the resin soaks into it.)
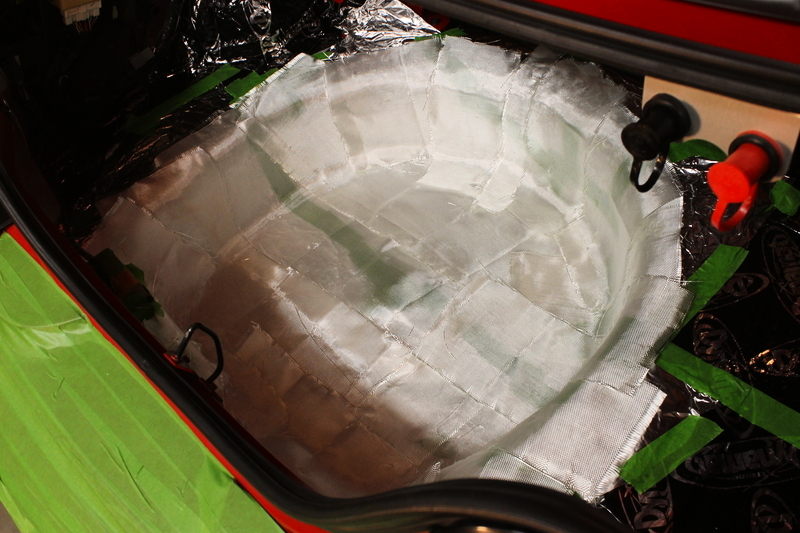
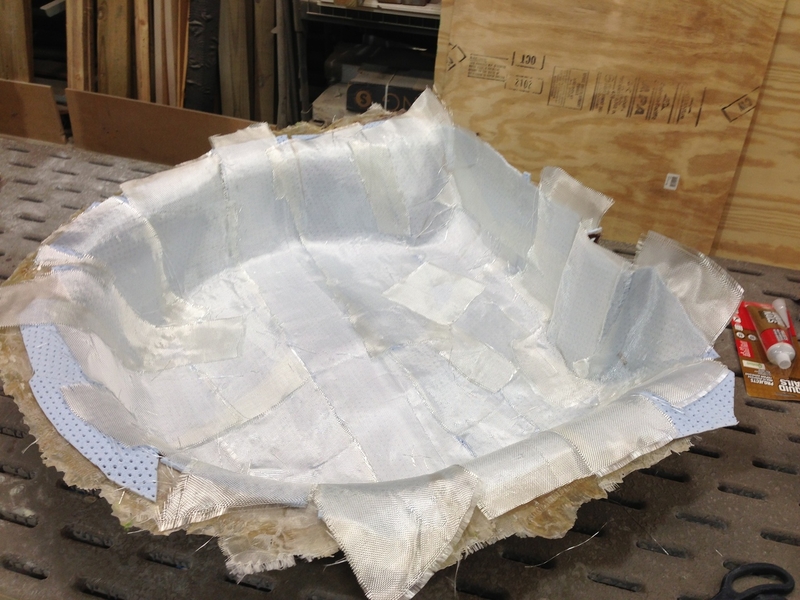
After another layer of glass and more resin:
Then after a third layer of cloth and resin:
At this point, I was out of fiberglass cloth because Home Depot only had three packages in stock, so I left it to cure overnight. Then took the wife out to dinner to make up for the house smelling like resin ;)
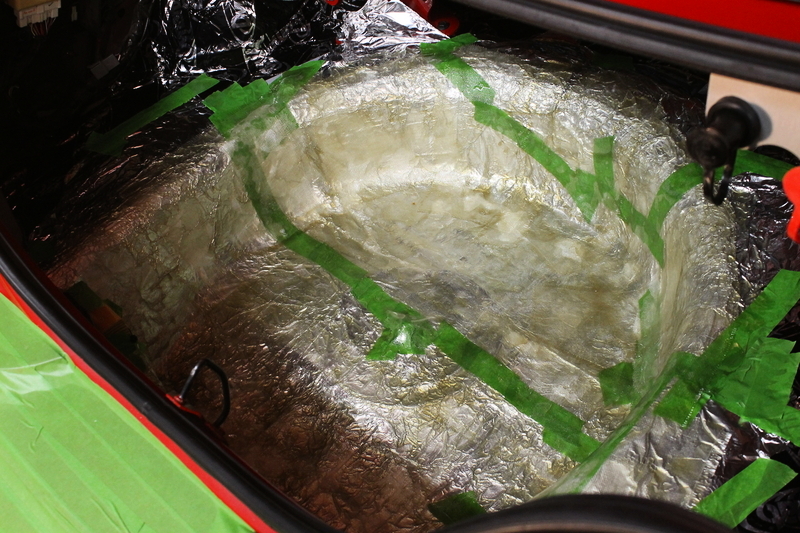
Fast forward to this morning...Saddled up the DD, went to Lowe's and picked up 5 more packages of cloth. Then I needed to sand the surface of the cured resin to give the subsequent layers something to adhere to:
Vacuumed out the sanding dust and added another 3.5 layers of glass and resin. I added a bit more to places I thought looked a bit thin. What you can't see here is 2.5 - 3 hours of bending and brushing on resin (SO MUCH FUN!)
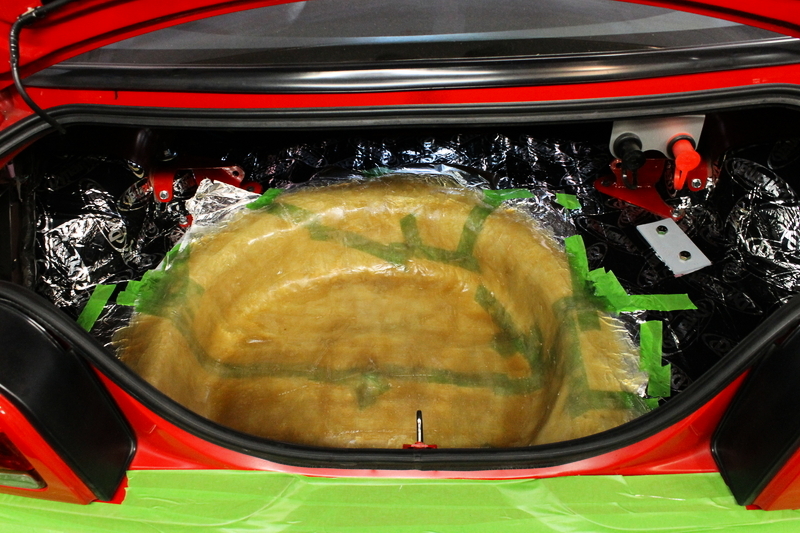
So above is how it sits currently, letting it cure over night again. I won't be adding any more layers, it's about 3/16" thick now, which is fine for my needs. Tomorrow I'll pop it out of the trunk and peel off the foil and tape. Then I'll need to make a cardboard template for the top board to cut from MDF. It'll also need some internal reinforcing underneath the top board to strengthen it.
Probably not the most visually exciting update but I thought I'd share anyway. It's also somewhat of a bonus tutorial for all you guys on the first step of making a spare tire well enclosure95 Rio Red Mustang Cobra
Procharger D1SC 347 stroker, full maximum motorsports suspension, Full Tilt Boogie 03 Cobra IRS, Tremec 3550, 19x9.5 and 19x11 HRE 542R. 566rwhp/614rwtq
https://www.pro-touring.com/threads/...ra-OCD-Machine
04-14-2013 #11
Registered User
- Join Date
- Jul 2010
- Location
- Pittsburgh, PA
- Posts
- 114
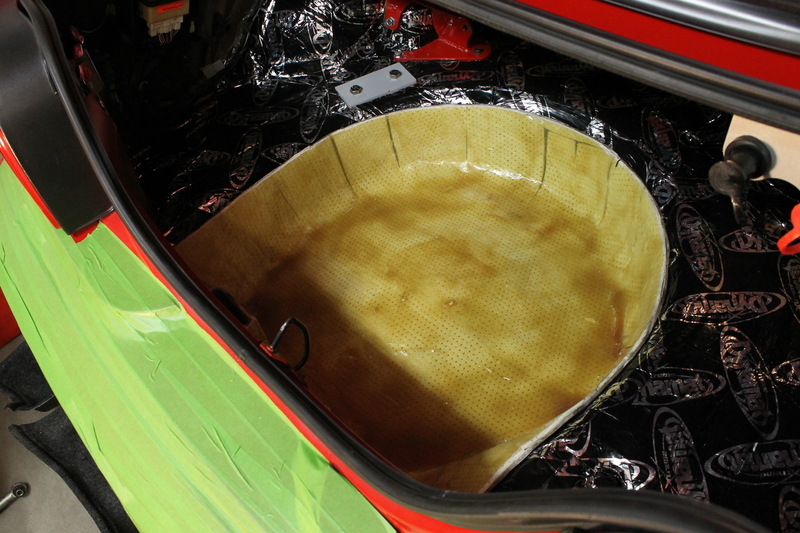
To my delight it popped out pretty easily after a little tugging. Here's how it looked, freshly-popped lol.
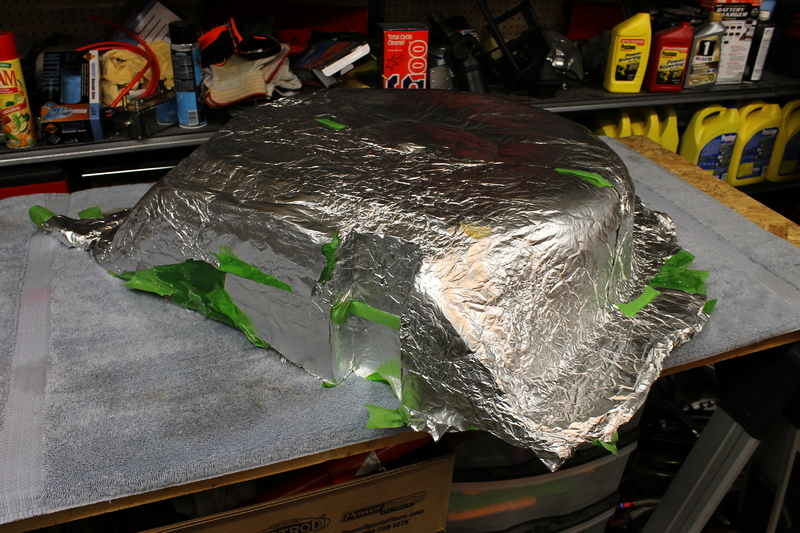
Starting the tedious process of peeling away the foil and tape:
About 2 hours later:
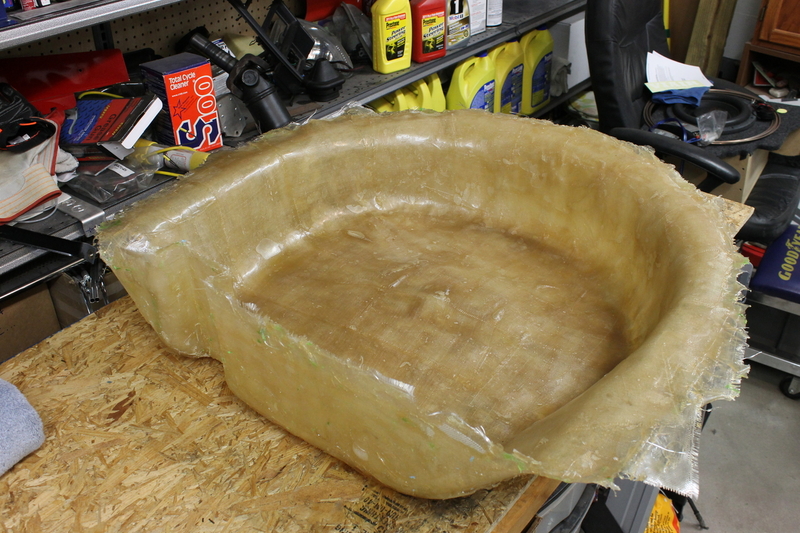
If I could offer any advice to someone about to do this project, I would recommend trying to keep the foil as smooth as possible. In the areas where it was crumpled/smashed, the resin really gripped onto it. This made it pretty difficult to peel away. I'm going to sand down the outside/bottom and add a bit of filler to get rid of some of the texture from the foil (necessary? no...but I'll refer you to the title of this thread ;) ). You can also see a few small areas here and there where the resin didn't fully penetrate the cloth, so I'll be brushing on a little bit more resin in those areas.
I'll be moving the rest of the work on this project to our shop at work now that I don't need the car close by, I'd like to isolate my garage from all the sanding dust lol. So my next update will have a slightly different setting.95 Rio Red Mustang Cobra
Procharger D1SC 347 stroker, full maximum motorsports suspension, Full Tilt Boogie 03 Cobra IRS, Tremec 3550, 19x9.5 and 19x11 HRE 542R. 566rwhp/614rwtq
https://www.pro-touring.com/threads/...ra-OCD-Machine
04-14-2013 #12
Registered User
- Join Date
- Jul 2010
- Location
- Pittsburgh, PA
- Posts
- 114
Some more progress, probably doesn't look like much but it was about 4 or so hours worth of work, lol. And most of that time was spent sanding, which may be one of the most miserable things to do lol.
So I sanded the crap out of the inside and outside of the tub for about 2.5 hours...unfortunately I forgot to take a pic before adding the filler. Next I added a layer of "Bondo Hair" fiberglass-reinforced filler (similar to Evercoat Tiger Hair if anyone has heard of that).
Filler on finally
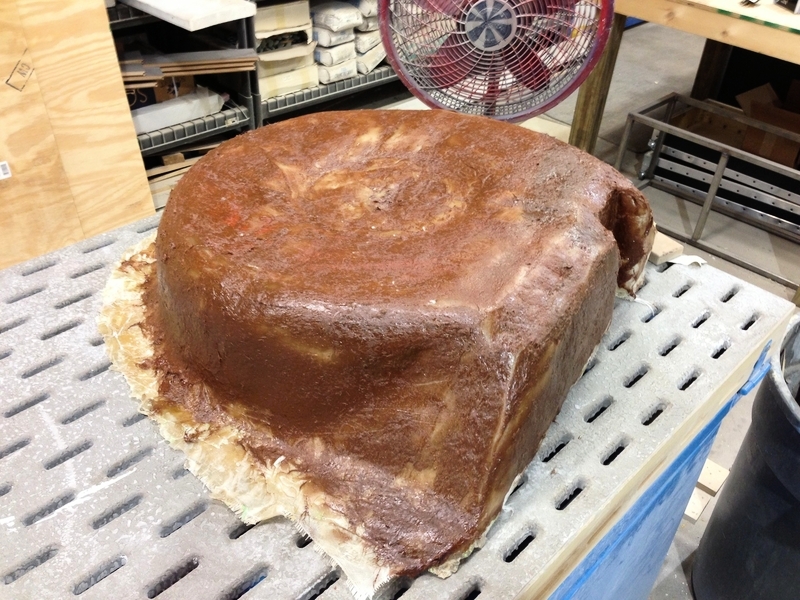
Let it cure about a half hour, then after an hour and a half of sanding or so later it looked like this:
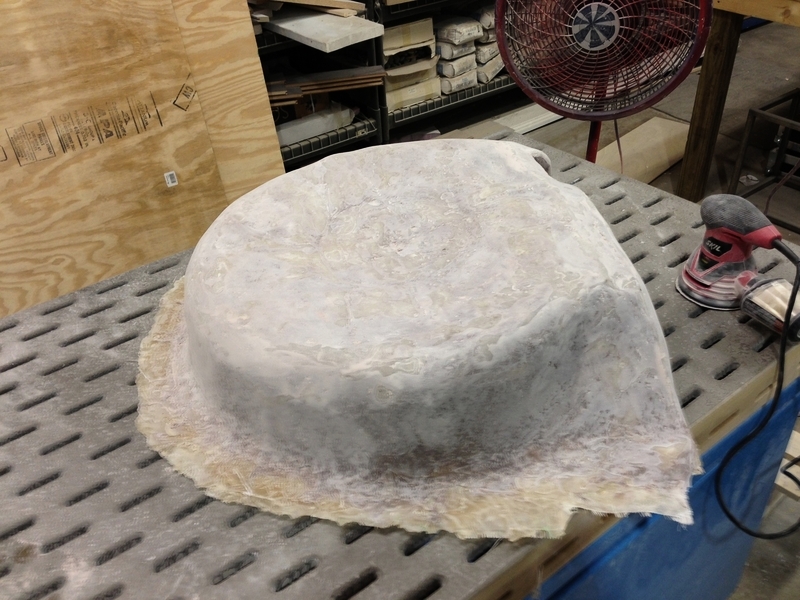
Thank God I took it to our shop at work to do this step, my garage and car would have been covered in dust, lol (down draft sanding table FTW) It still needs some more sanding and a little bit more filler in a couple spots. Then I can liquid nail a support rib inside it and then get to work putting the top on. I've decided once I get the tub smooth enough for my tastes, I'm going to coat it in some textured bed liner-ish coating, then obviously the top panel will be wrapped in carpet.
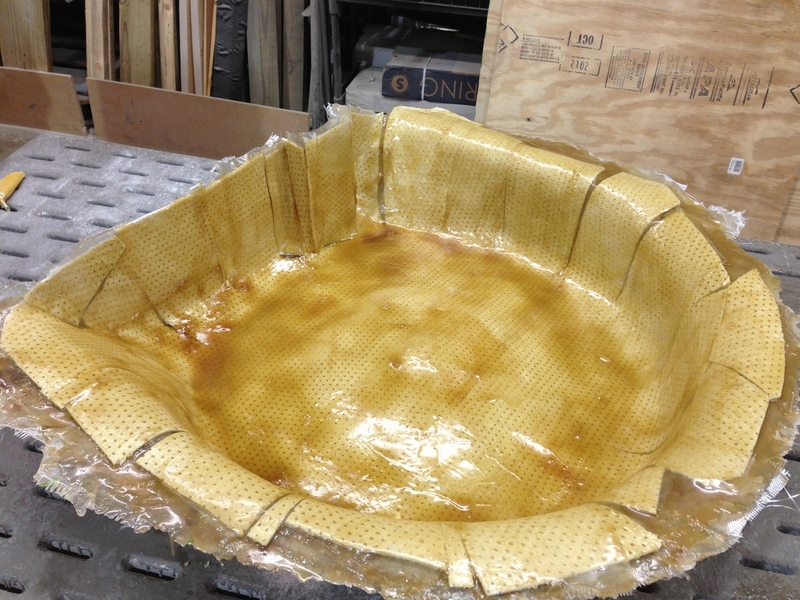
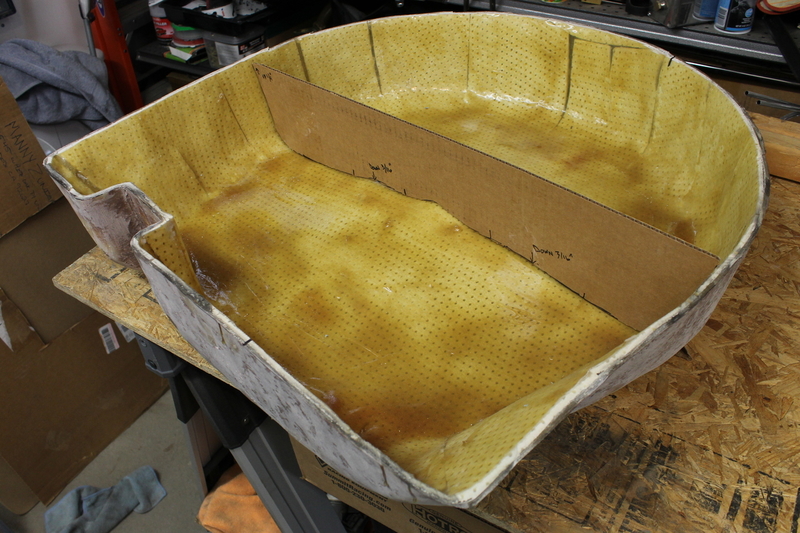
After sanding the inside and finding some air pockets, those areas were a bit thin for my liking, so I wanted to add a bit more thickness. I ordered a yard of 4mm thick Coremat to add a thick layer quickly. Coremat is a perforated, shredded polyester material that will give you the effect of adding 4 layers of glass much quicker. So here's the process of that:
First I had to start cutting the mat to fit inside the enclosure by making pie cuts to fit it nicely. A bit of 3M spray adhesive on the inside of the enclosure and on the back side of the core mat kept it in place. After getting a flap trimmed, I simply sprayed a light mist of adhesive on the back of the coremat and on the enclosure interior, waited a second and pressed it down to form it. This part took a little while to get it all fitting nicely.

Trimming done
Next came another layer of fiberglass cloth to lay over the core mat.
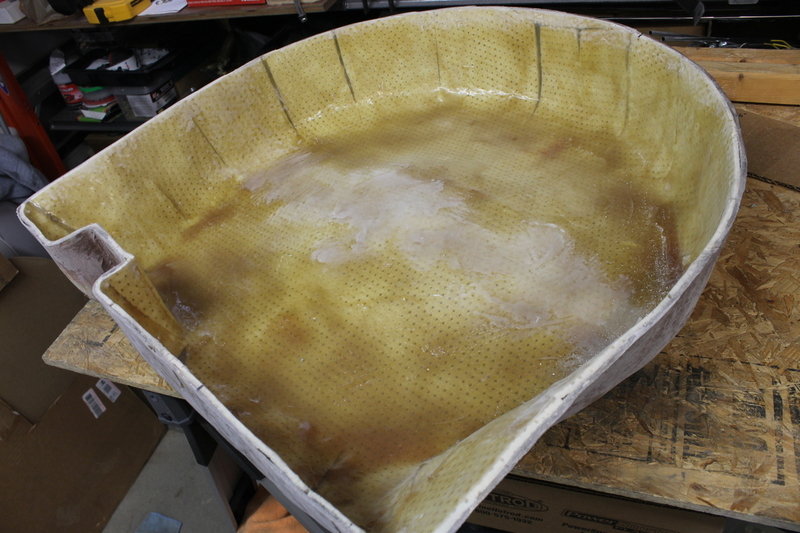
Then I mixed up three 24oz batches of resin and saturated the core mat and the fiberglass cloth. Then a final additional layer of cloth was laid down and another batch of resin over that. After about 3/4 gallon of resin I ended up with this, and left it at the shop at work for a couple days to save my house from the smell of the resin while it cured ;)
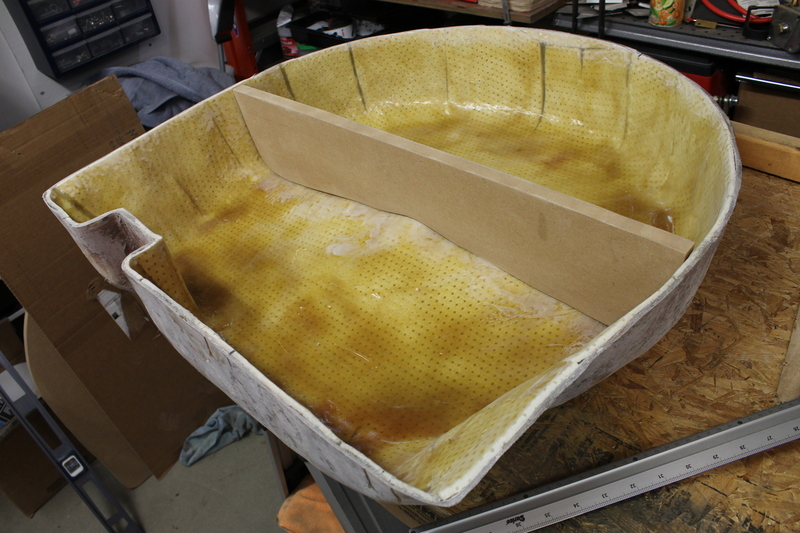
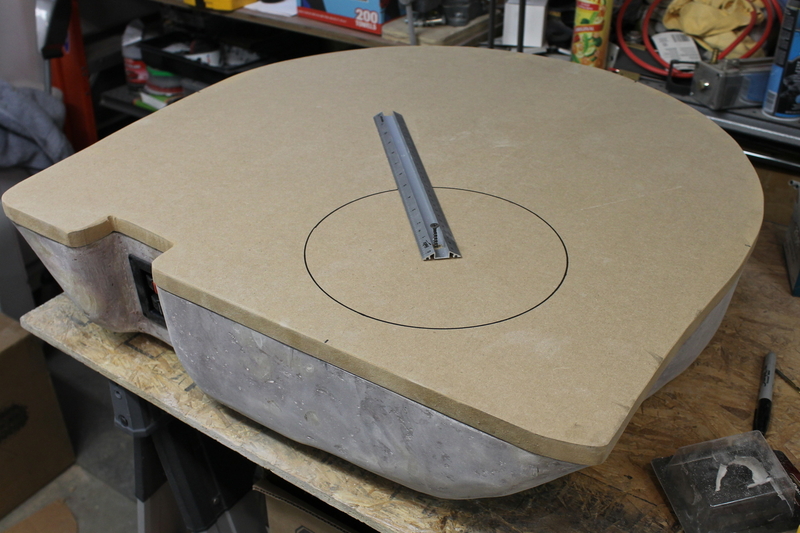
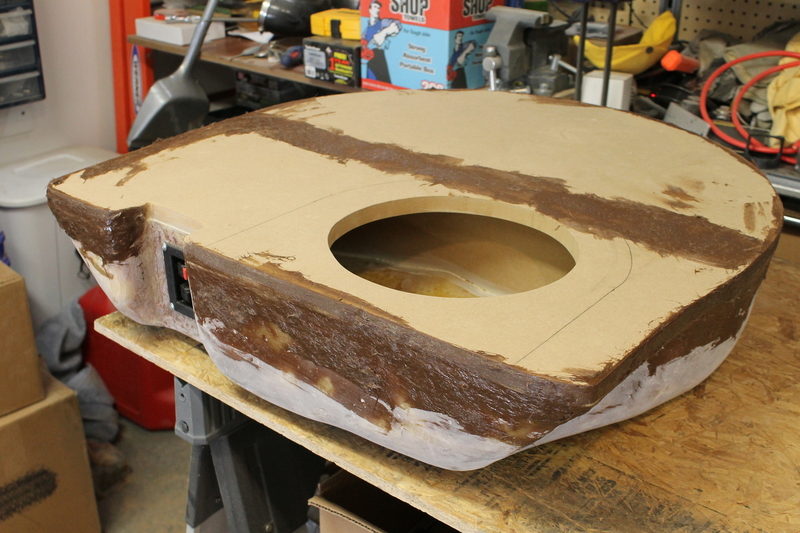
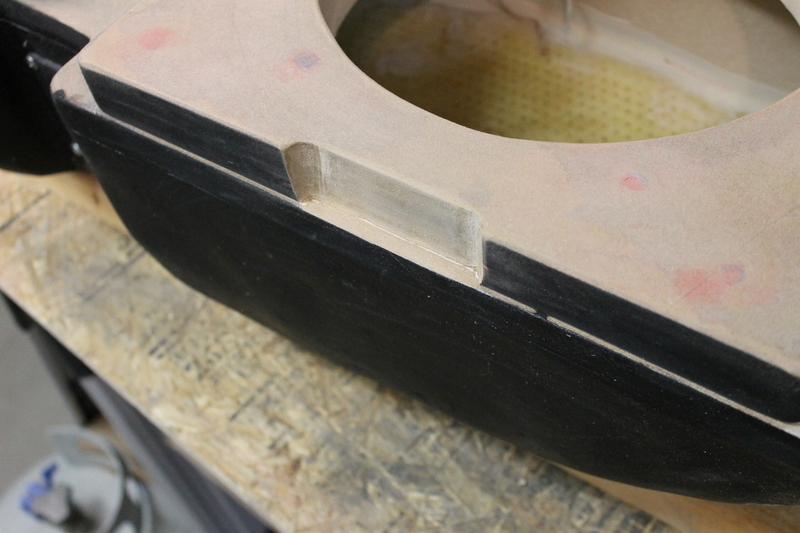
Took a trip to work a couple days later to pick it up and bring it home. Then it was time to mark it for trimming to get rid of the flange around the top edge that isn't needed.
Here's the highly sophisticated marking tool I came up with :eagerness:
I just slowly slid this around to mark the cut line, only the most high tech tools in my garage, lol.
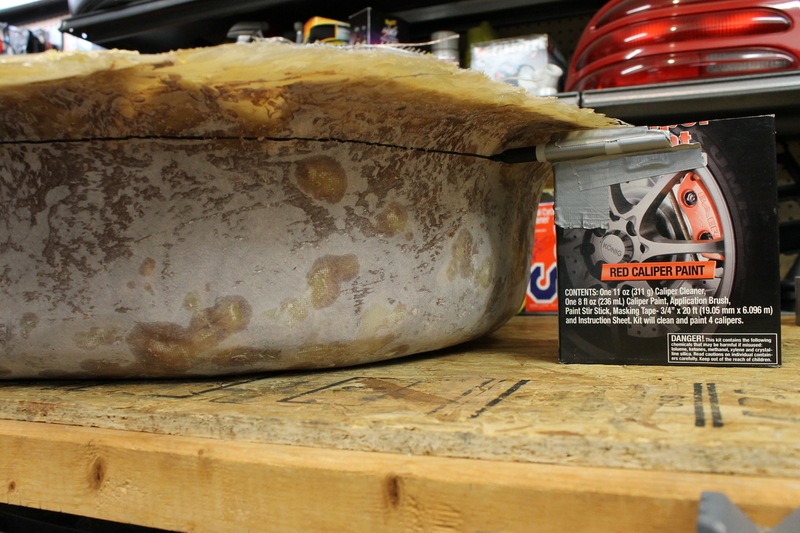
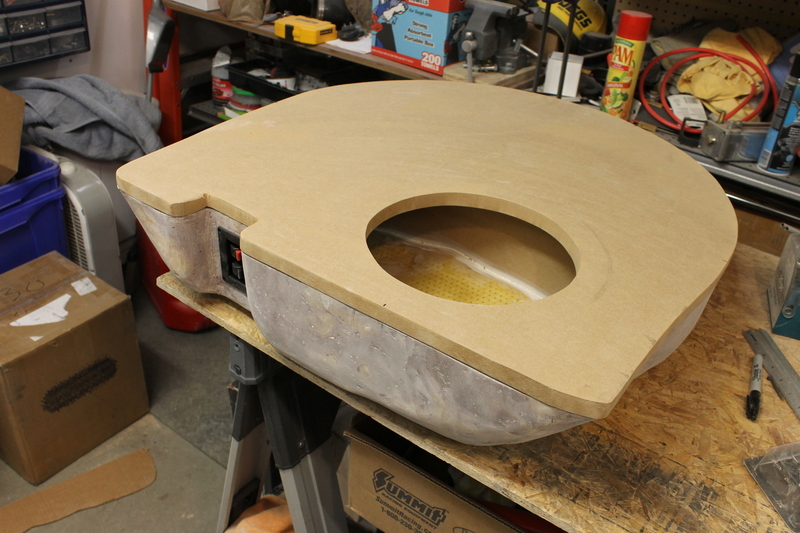
Then out came the cut off wheel and I made a tiny bit of dust cutting this off
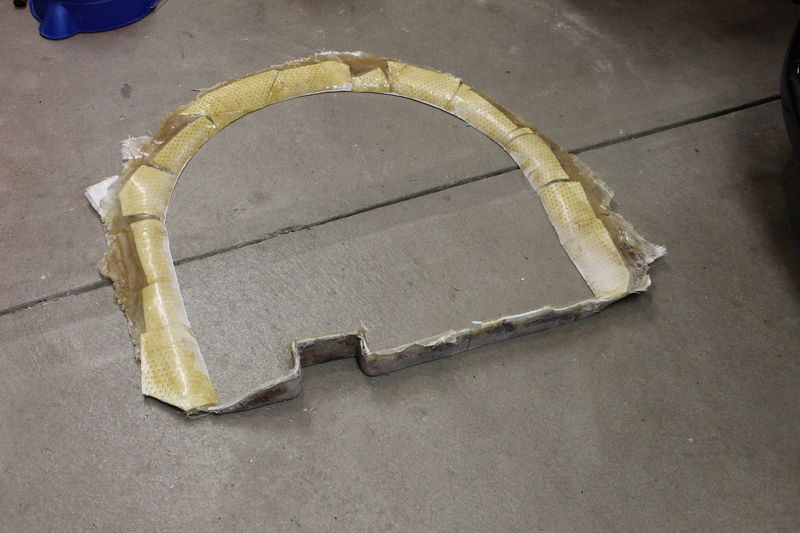
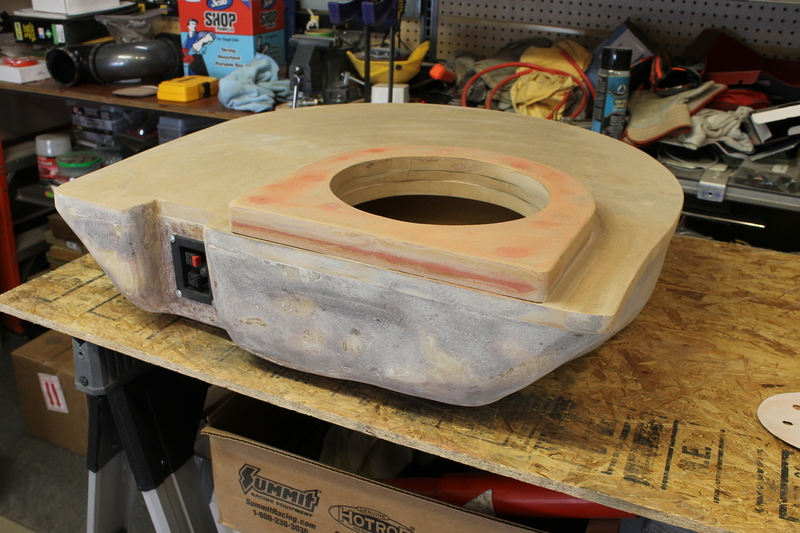
The finished lower tub of the enclosure
This thing is SOLID now, the wall thickness is about 5/16" or so, and it is hard as a rock. I'm really happy with how it turned out. Next step will be dividing the interior in half to reduce the volume to what I need for my sub, then adding the top panel of 3/4" MDF. The tub is 5-3/4" tall, and with the 3/4" MDF top the total height will hit 6-1/2", which is the exact depth of the tire well. My sub's mounting depth is 6-11/16" so I'll just have to add a thin ring of MDF where the sub mounts to space it up and get a little space undrneath it. It'll still be very low to the floor and close to flush so I think I'll be happy with the finished product.95 Rio Red Mustang Cobra
Procharger D1SC 347 stroker, full maximum motorsports suspension, Full Tilt Boogie 03 Cobra IRS, Tremec 3550, 19x9.5 and 19x11 HRE 542R. 566rwhp/614rwtq
https://www.pro-touring.com/threads/...ra-OCD-Machine
04-14-2013 #13
Registered User
- Join Date
- Jul 2010
- Location
- Pittsburgh, PA
- Posts
- 114
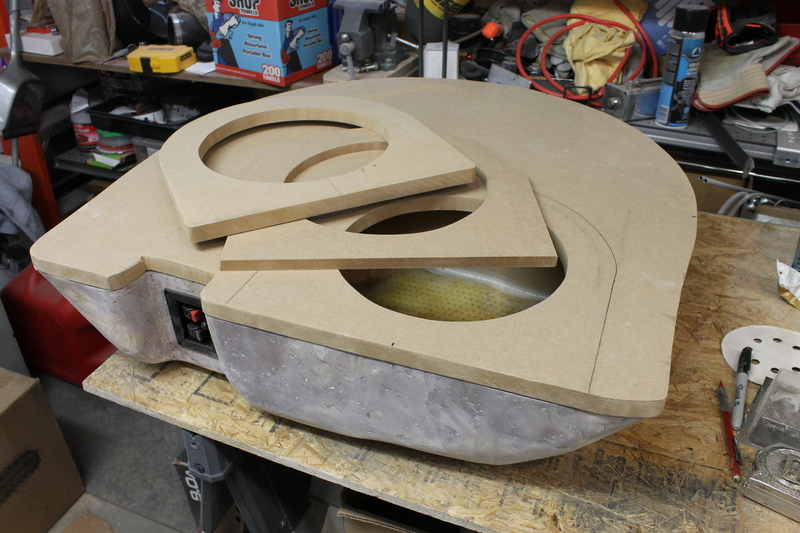
Spent a couple very dusty, messy days in the garage... but made a lot of progress!
Ran out to Lowe's and was reminded why a hatchback is the next best thing to a truck :rockon: , brought home a 4x8 sheet each of 3/4" and 1/2" MDF
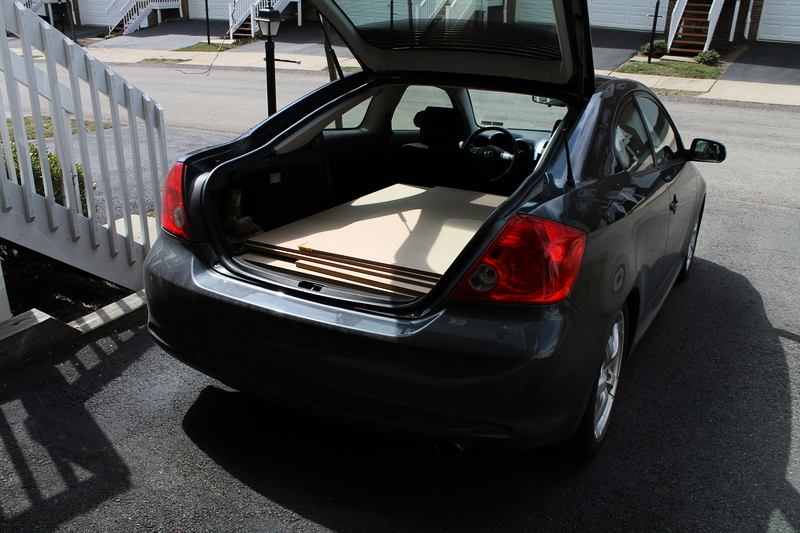
Side note, my new trunk side panels came in and they're in great shape. I'll come back to trimming those to fit nice and tight around the shock tower brace brackets later.
Quick test fit in the trunk to make sure the tub sits all the way down in... good to go!
Laid the tub face down on the piece of 3/4" MDF and traced the outline, then cut it out.
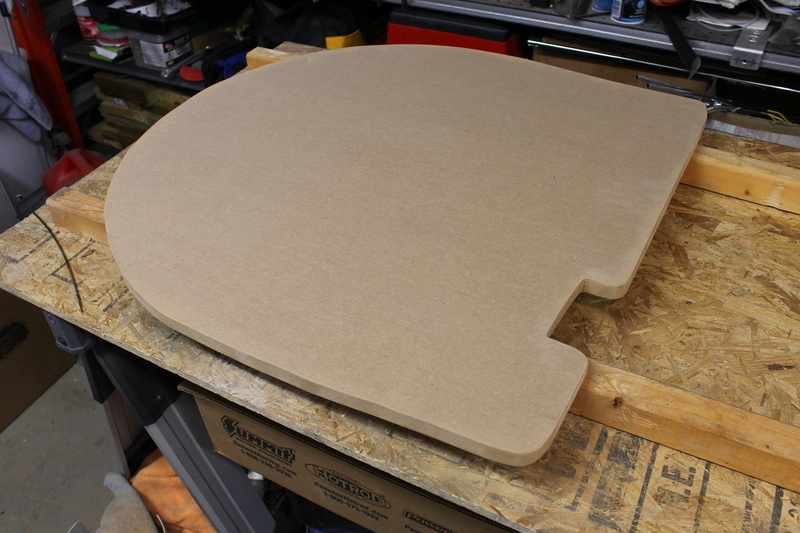
Made a cardboard template for the center divider to reduce the enclosure volume to a bit less than 1 cubic foot, takes a bit of trial and error but this is pretty much the only way to make it happen.
Sanded the interior to give the Liquid Nails something to adhere to
Cut a divider from 3/4" MDF, mocked up in place and everything looked good
Laid down a nice thick bead of Liquid Nails, better to have a lot than not enough.
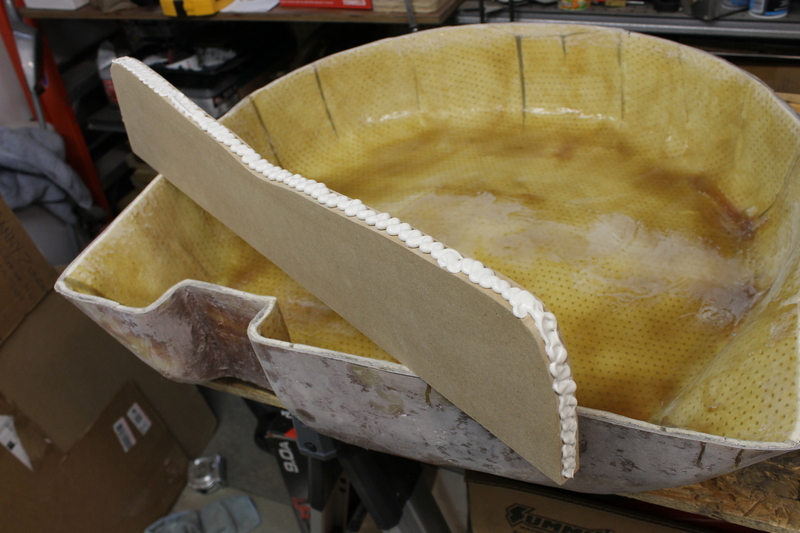
Divider in place, then let it sit over night to cure.

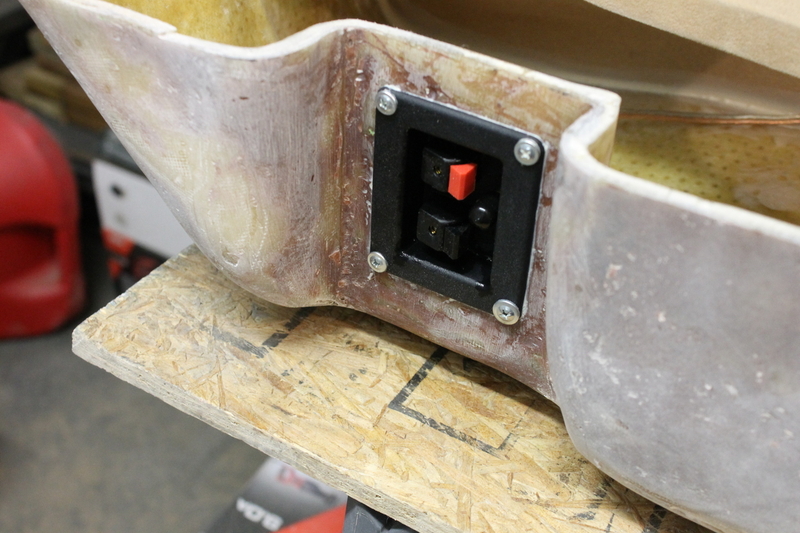
Marked and cut the hole for the speaker terminal cup (after a wild goose chase around town for almost an hour trying to find one, ended up finding out there actually is a Radio Shack near me, which is cool because I always thought there were none)
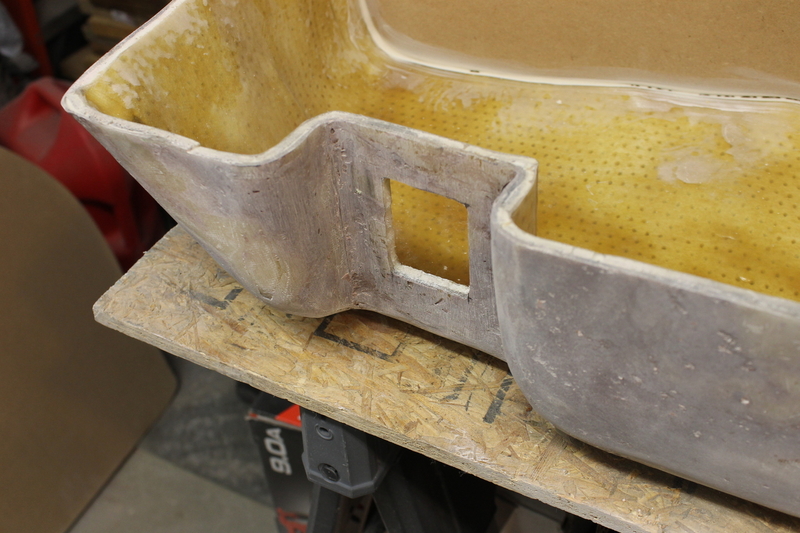
Looking good
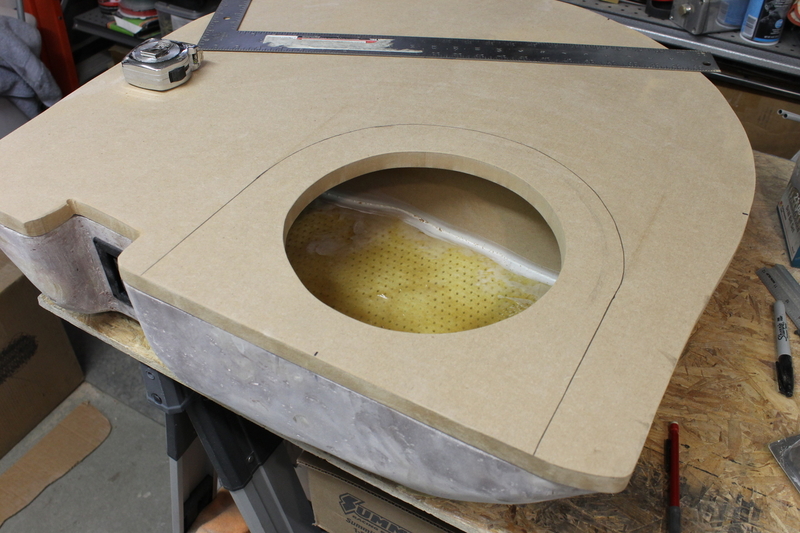
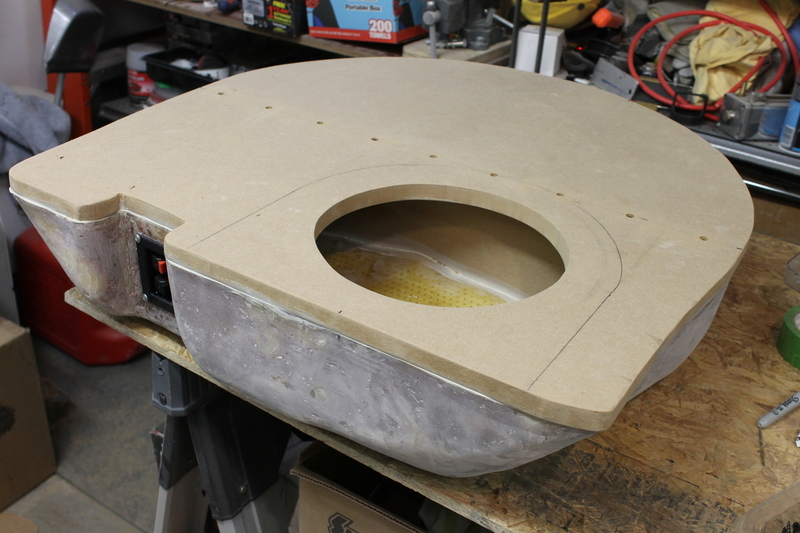
Sat the top back on and marked out the hole for the sub cutout, it may look off center but this location actually locates it right in the center of the trunk. The spare tire well in our cars is off center in the trunk to the driver's side.
Now I had been basing my needed depth for my sub off the numbers I found online from Boston because I hadn't yet taken it out of the old box. No idea where they got the dimension of it being 6-11/16" deep, it's a lot deeper sub than that for sure... (it's been a couple years since I put it in the old box so I forgot how big the magnet is on this *******)
So my idea was to space it up with a piece of 3/4" MDF, cut to the shape drawn out here:
Buuuut, even after the 3/4" spacer, the magnet was still hitting the bottom of the tub, so I cut an additional layer of 1/2"
Screwed the spacer layers together and mocked it in place, good to go!
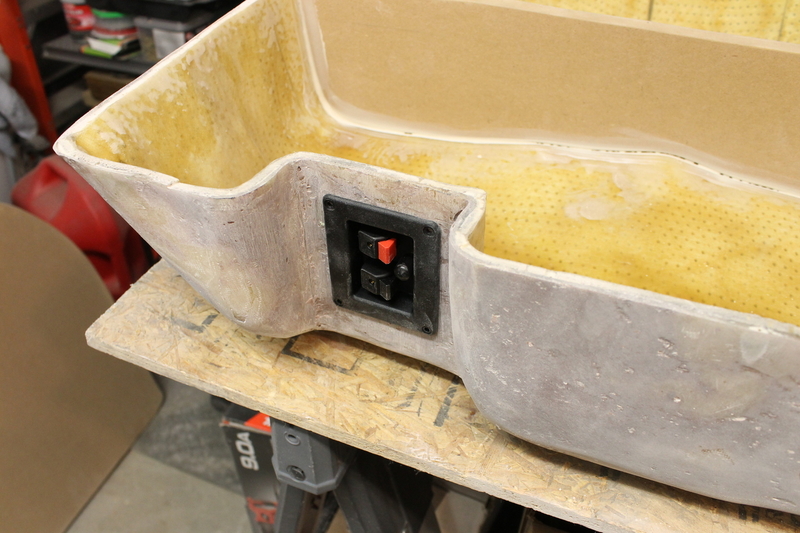
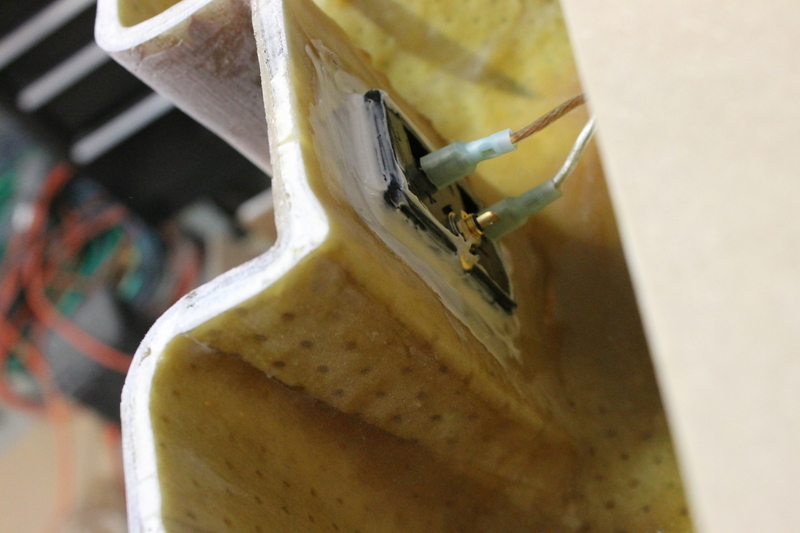
Before I attached the top, I took a minute to install the terminal cup. It had just been sitting in the cutout. Sanded the back of the cup's flange, then applied a bit of liquid nails inside the cut out, then screws to tighten it in place...then a bit more liquid nails around the edge from the inside. No leaks to worry about from here, lol.
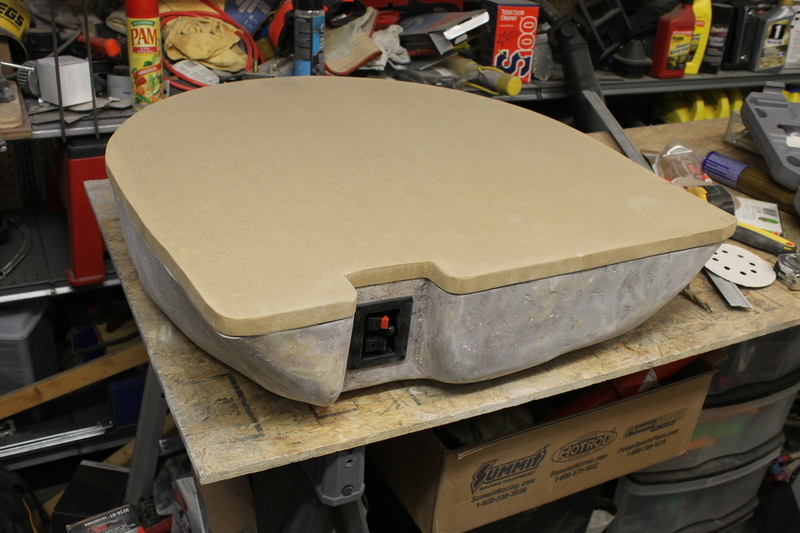
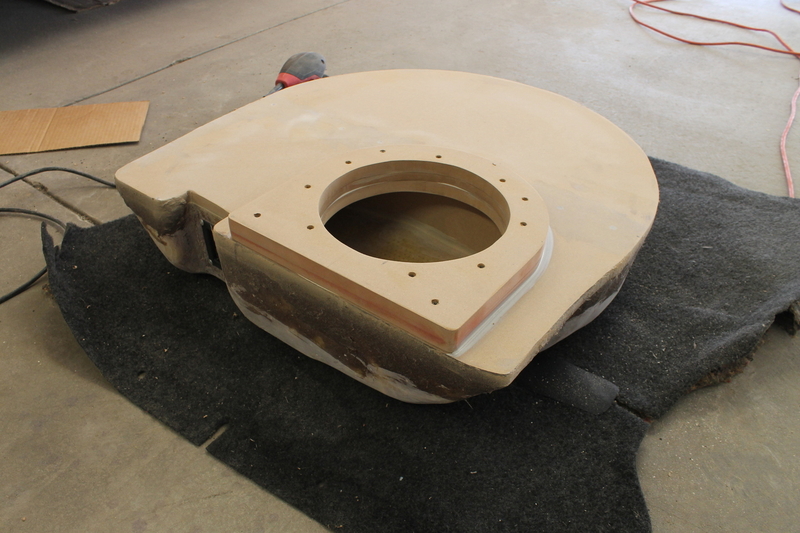
Time to attach the top panel, once again a nice thick bead of Liquid nails was run around the edge and on the center divider.
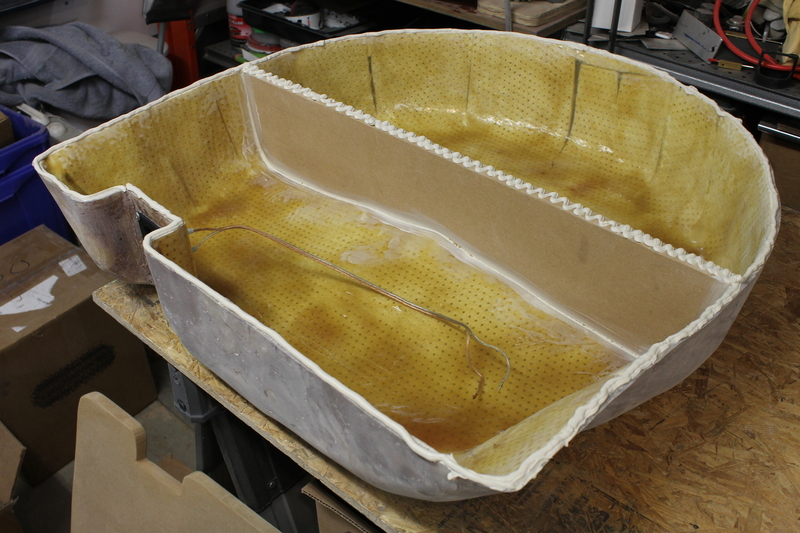
Laid the panel on top and used countersunk screws to attach the top panel to the divider, this also serves to draw the top panel down tight against the edges of the tub.
Added a layer of Bondo Hair over the countersunk screw holes and all the way around the edge where the top panel meets the tub. This is just further reinforcement, even though the Liquid Nails alone is probably plenty. Also, I sealed all the internal edges of the subwoofer side of the interior with caulking, unfortunately I couldn't really get a picture of that.
Sanded down the top while I allowed the sides a bit more time to cure (it was a bit thicker on the sides so it wasn't ready for sanding yet), then screwed the spacers in place, once again with countersunk screws. The stock trunk carpet makes a great sanding pad FYI haha
 95 Rio Red Mustang Cobra
Procharger D1SC 347 stroker, full maximum motorsports suspension, Full Tilt Boogie 03 Cobra IRS, Tremec 3550, 19x9.5 and 19x11 HRE 542R. 566rwhp/614rwtq
https://www.pro-touring.com/threads/...ra-OCD-Machine
04-14-2013 #14
Registered User
- Join Date
- Jul 2010
- Location
- Pittsburgh, PA
- Posts
- 114
Sides sanded smooth and the screw holes on the spacers were also filled and sanded smooth.
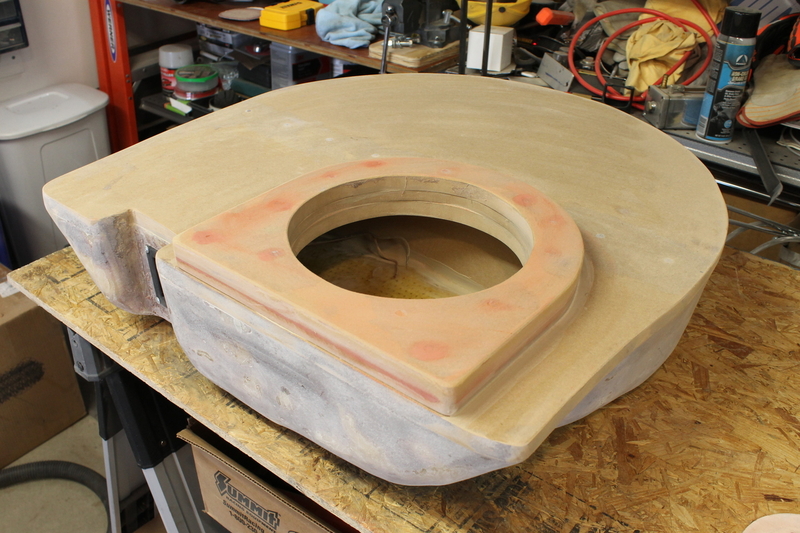
Finally it was time to lay down a textured coating on the bottom and sides of the tub.
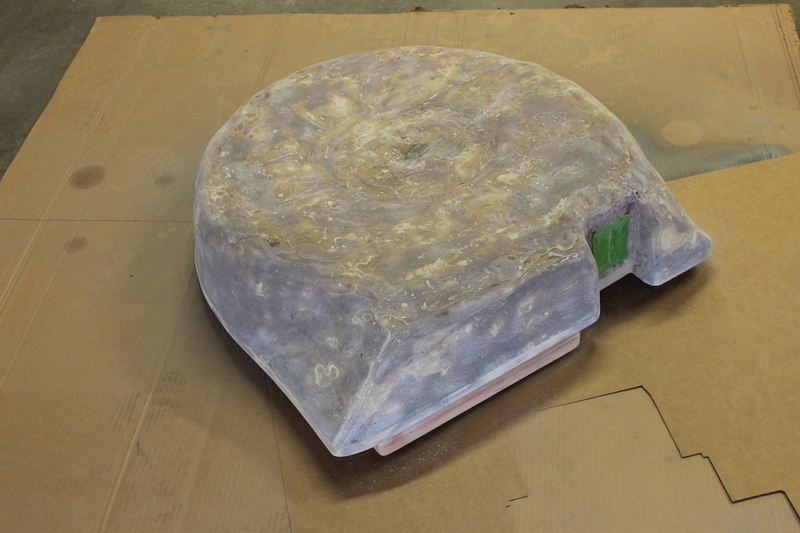
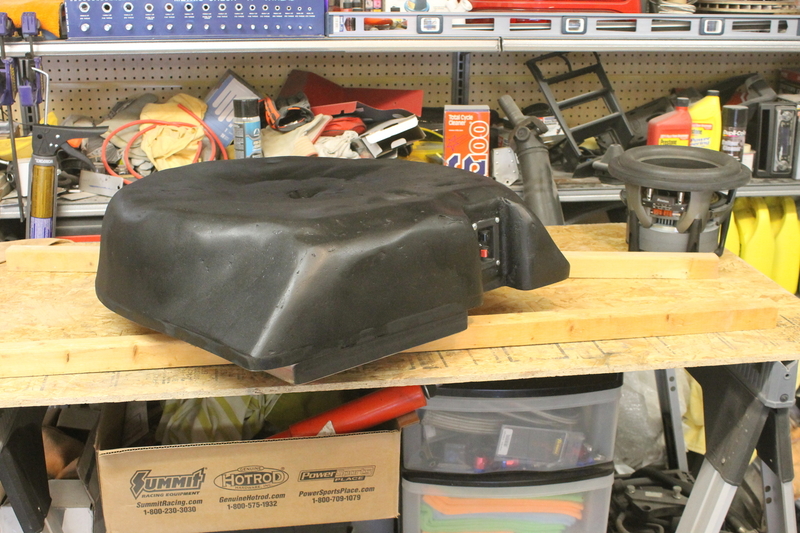
Sprayed it with Rust-Oleum Truck Bed Coating. This stuff is pretty nice, it dries with a rough texture which looks great. The bottom of the tub isn't 100% smooth as you can see, but I think it looks pretty good considering nobody will EVER see it, lol. It's only this smooth because I can't leave well enough alone, lol. This is how it sits for now, gonna let this cure really well for a few days then get back on this next week. The next step will be carpeting the top panel and the spacers. It wasn't totally dry in this pic yet, it ended up getting more textured and less glossy so it looks even better
Some of you may remember I said I would be doing all the dusty/messy work in our shop at work to keep it out of my garage, but I wanted to just get **** done today rather than having to pack up supplies, drive them to work, get all the lights and such turned on, etc. So I decided to make it happen in the garage. Well, the consequences of breaking that commitment became painfully apparent when I looked at the rest of the garage...
oops...
After 3 hours of hosing down the garage, squee-geeing the water out, washing the cobra, sweeping, shop-vac'ing, and wiping down every tool and item that was covered in dust...not to mention a wife returning home from shopping to a complete mess of a garage (lol), I finally had everything cleaned up and can sleep tonight knowing the cobra is sparkling and pretty again. I will not be sanding **** in this garage again, lesson learned! Next time I'll just take the time to pack stuff up and take it to work like I said I would, lol.
Took yesterday off working on the car to drive down to my parents' house in WV and start building a new work bench for my garage. My current setup of a piece of OSB on top of some saw horses isn't cutting it anymore lol. My dad has a fully-decked out wood shop, and a truck for picking up full sheets of plywood so it just made sense to make the trip there. I'm going back next weekend to finish it up.
Anyway, onto the progress on the car:
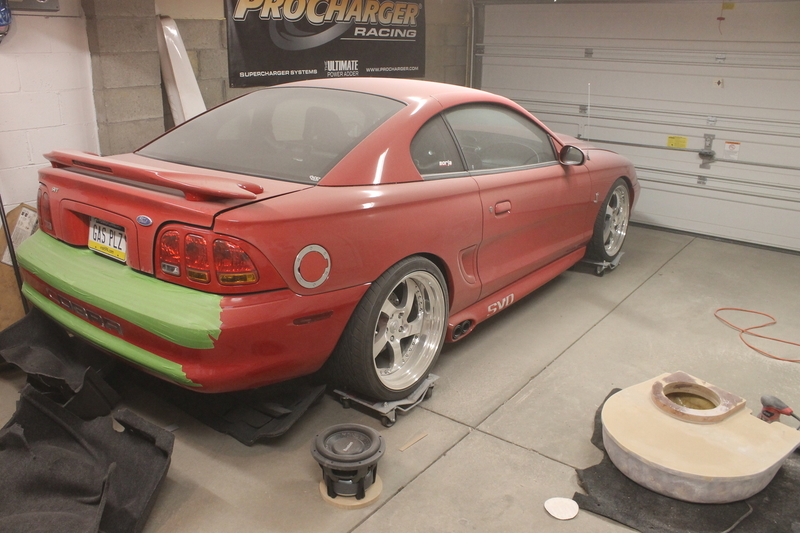
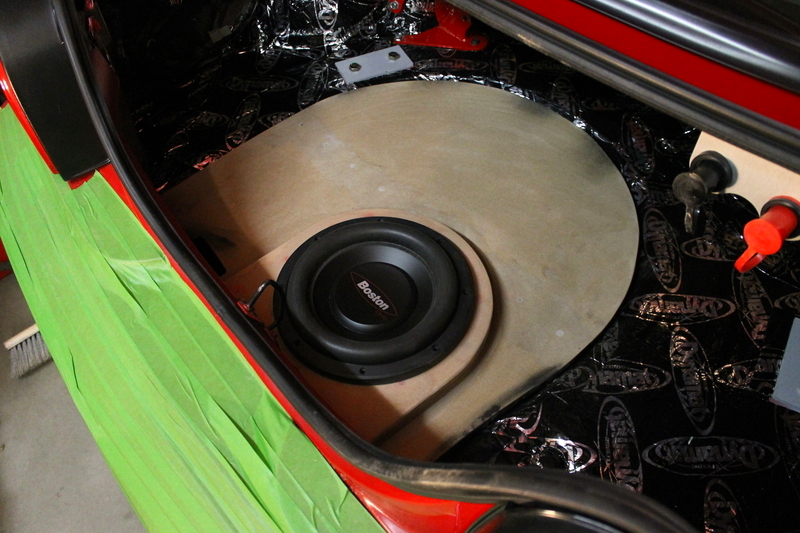
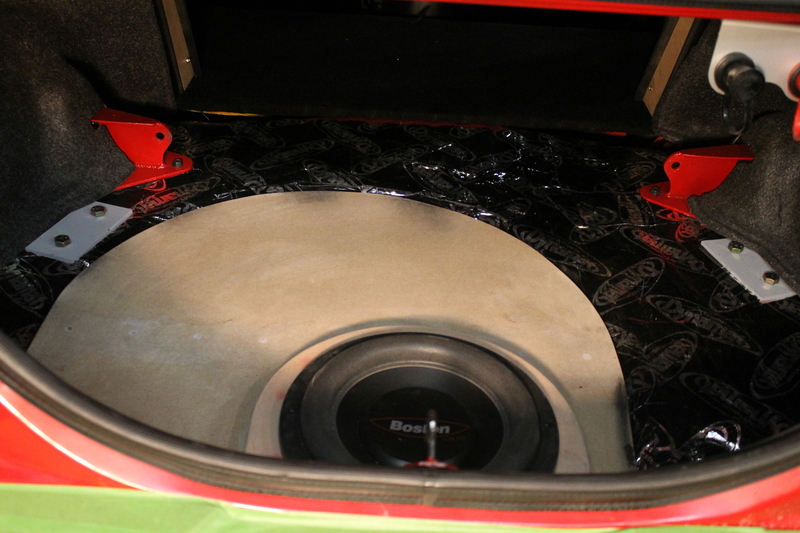
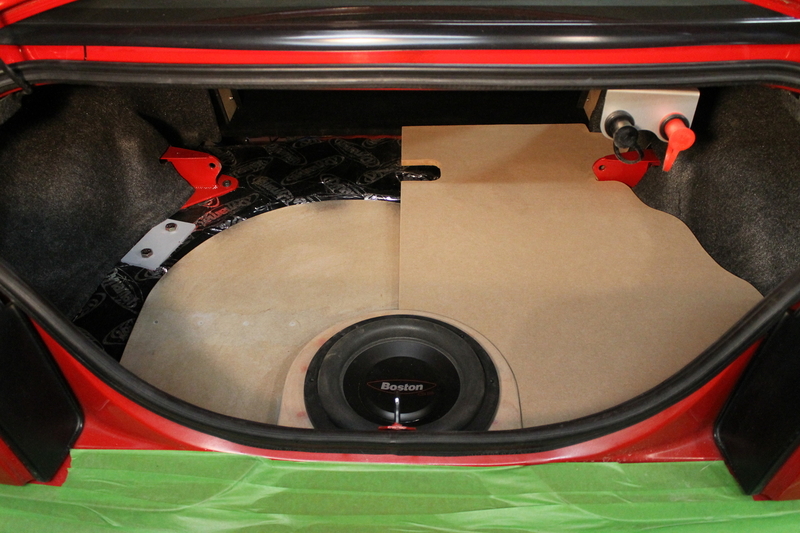
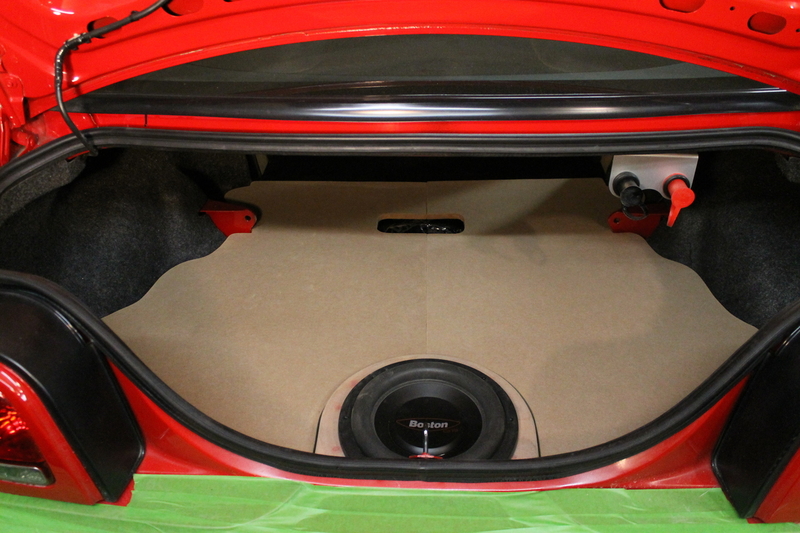
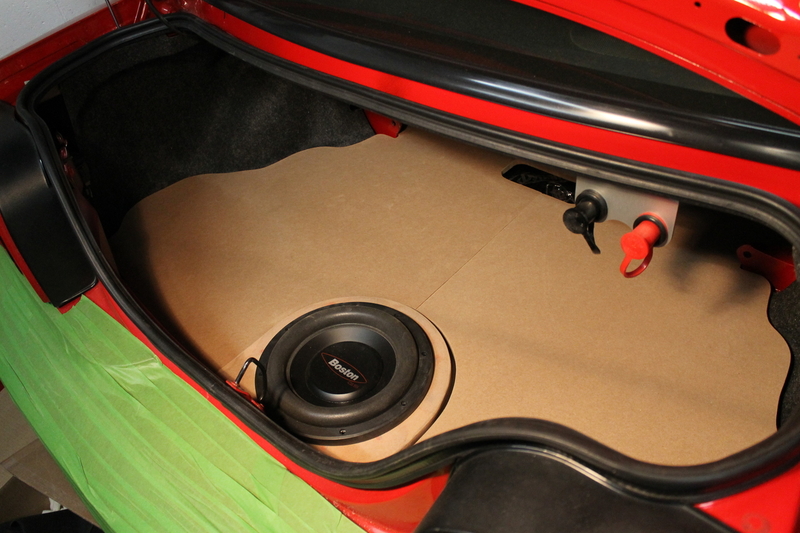
Test fit the box in the spare tire well, overall it fit nicely
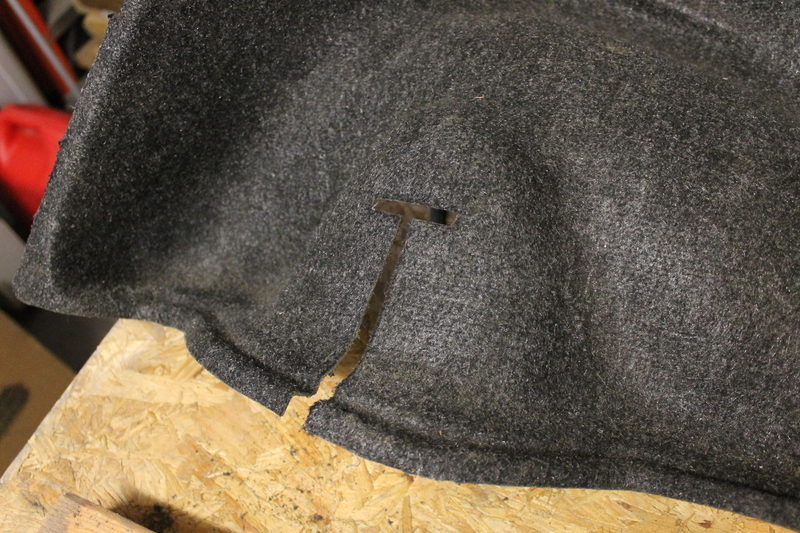
But it did need a little dremel action to clear some ribs below the trunk latch

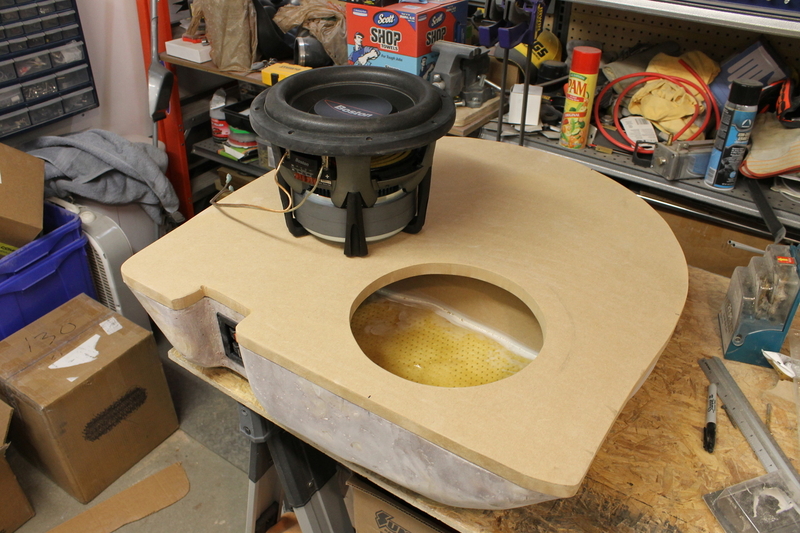
Dropped the sub down in place to get the full effect, still thinking about possibly adding a beveled 1/2" thick ring around the sub to give it a flush mount look, not sure if I'll do that or not yet.

Next, the new trunk panels came out for some trimming to fit over the shock tower brace brackets.
More dremel action
Panels in place, finally looking proper, rather than hacked like my old ones.
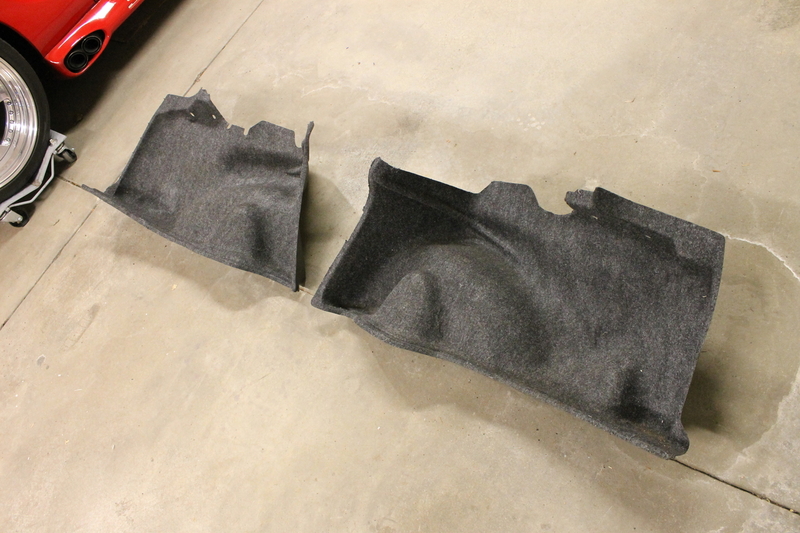
The trunk floor panel templates I made a few weeks ago then made a reappearance. Now that I had the trunk side panels in place I could make a few last minute changes to the templates for a perfect fit. As you can see, making the templates is no scientific process... I traced the stock trunk carpet about 1" larger all the way around, then just kept cutting away areas and notches... sometimes adding some material back with the help of some duct tape when I took too much, lol.
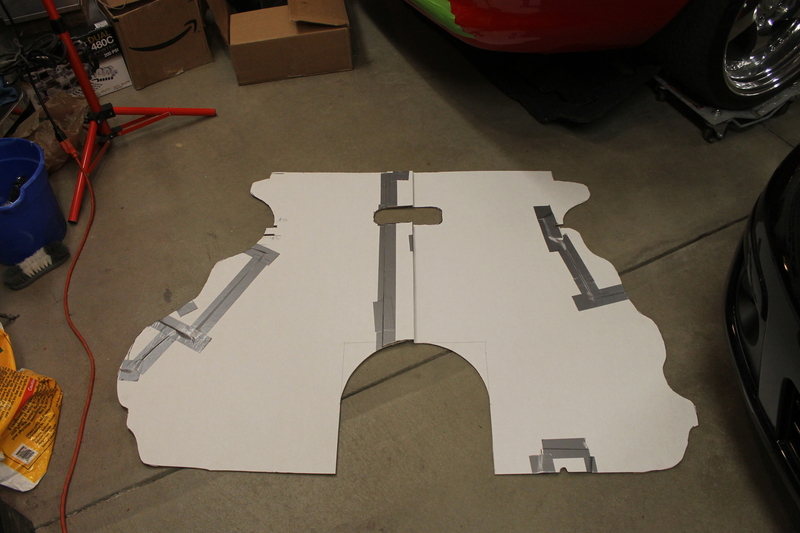
Traced out on the 1/2" MDF
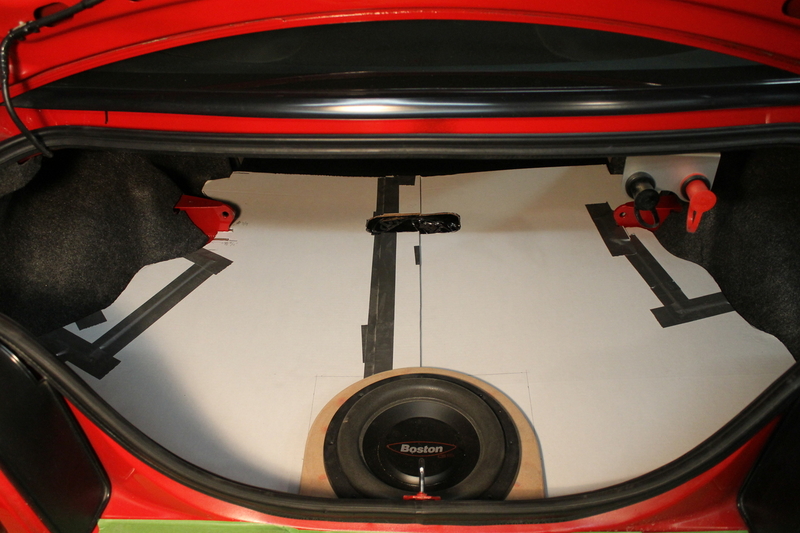
Cut out and ready to go in
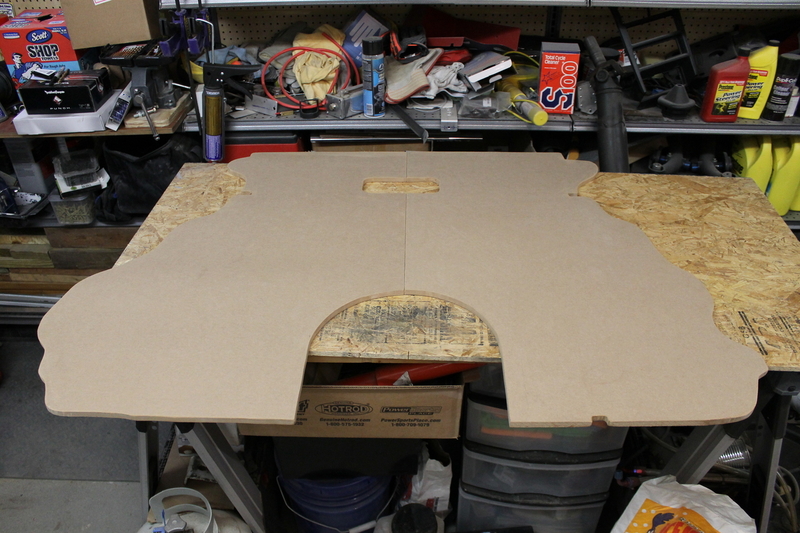
As you can see in the next pic, by splitting the trunk floor into two panels, it lets me get a nice snug fit all the way around. A one-piece panel wouldn't be able to slip under the shock tower brace brackets, and aside from that issue it would be very difficult to get into the trunk. The cutout near the rear seat area is to clear some weird bump in the trunk floor that would prevent the panel from laying flat. I'll be making a trim panel that will cover that area.
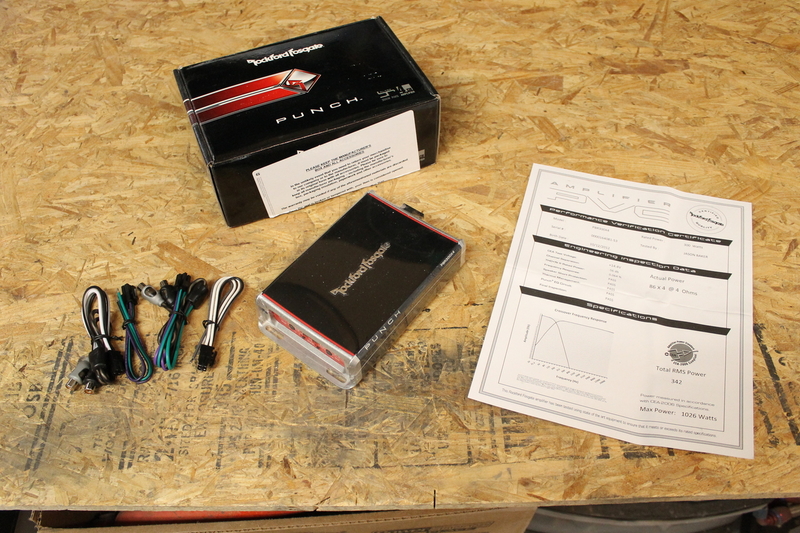
Also a few goodies showed up this week so I thought I'd share some pics :bananen_smilies102:
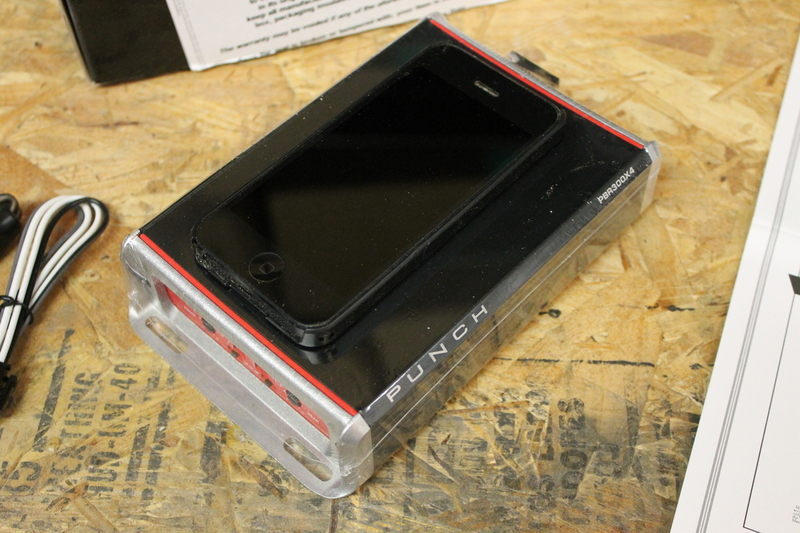
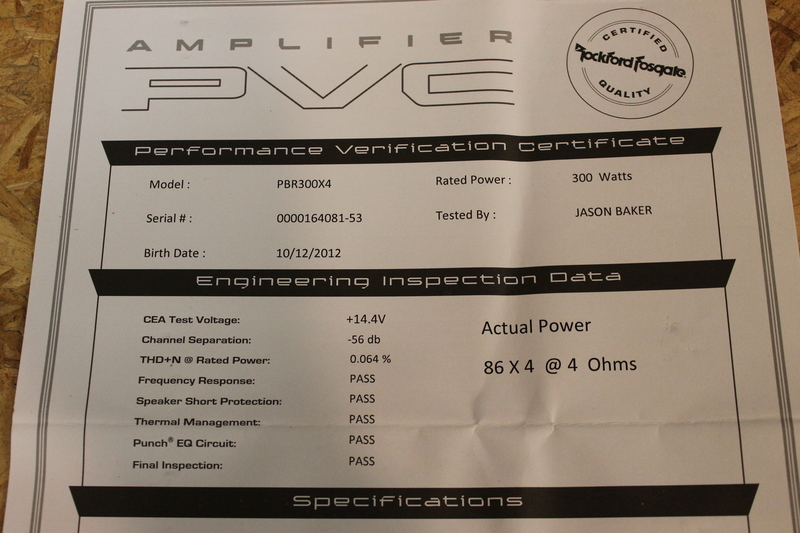
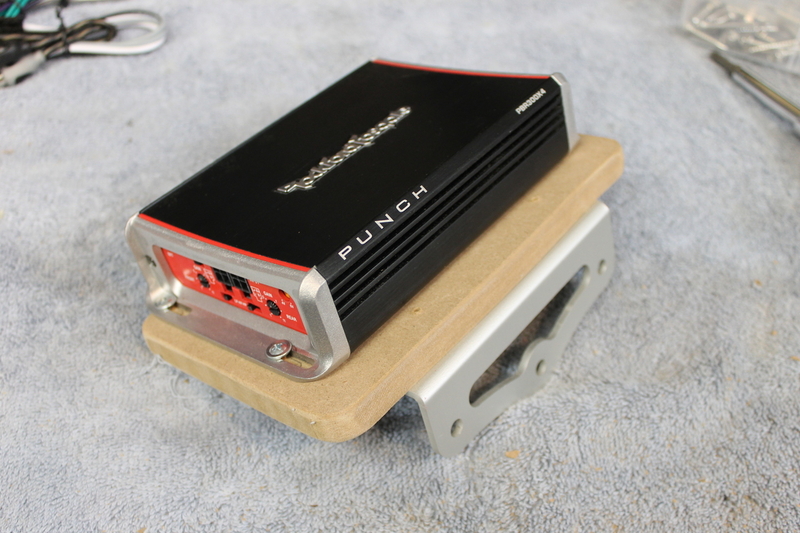
First off we have a badass little Rockford Fosgate PBR300x4 amp to power the new kick panel components and my rear deck speakers. This thing is impossibly small so it will easily mount just about anywhere, and it puts out 86 x 4 which will be perfect for powering my components.
My dusty iPhone on top of the amp to give you an idea of its size:
 95 Rio Red Mustang Cobra
Procharger D1SC 347 stroker, full maximum motorsports suspension, Full Tilt Boogie 03 Cobra IRS, Tremec 3550, 19x9.5 and 19x11 HRE 542R. 566rwhp/614rwtq
https://www.pro-touring.com/threads/...ra-OCD-Machine
04-14-2013 #15
Registered User
- Join Date
- Jul 2010
- Location
- Pittsburgh, PA
- Posts
- 114
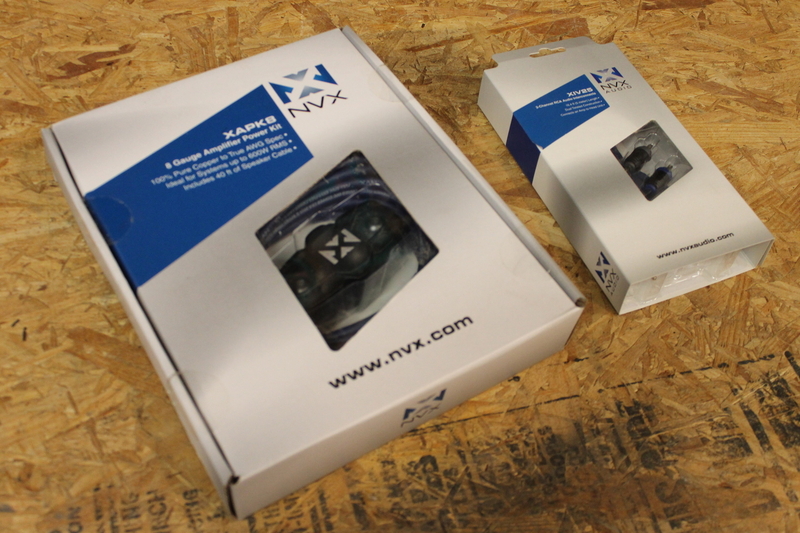
NVX 8-gauge power wiring kit and RCA cables for the amp
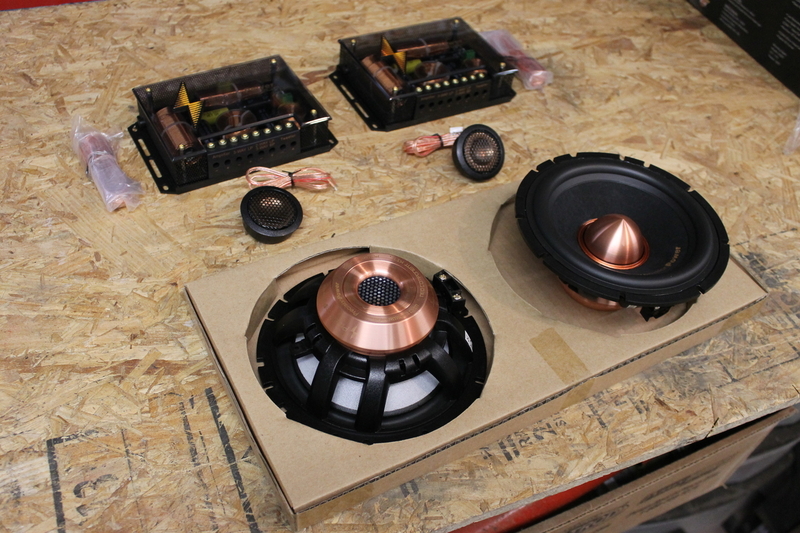
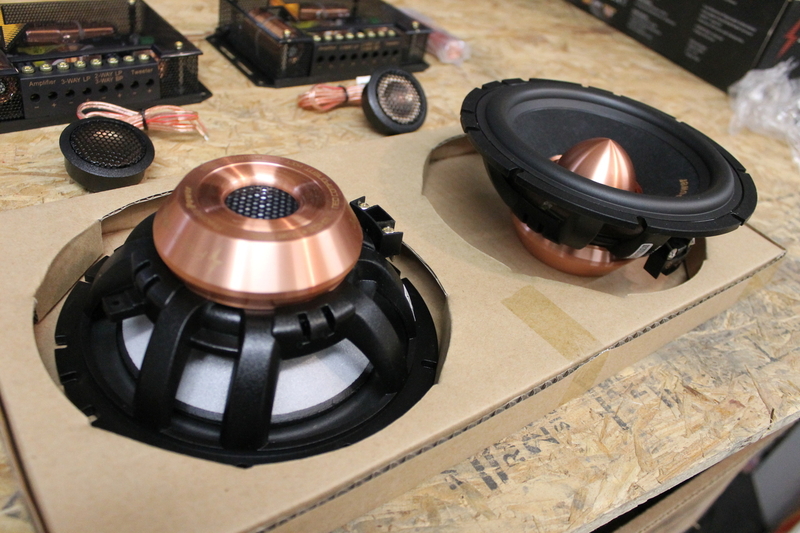
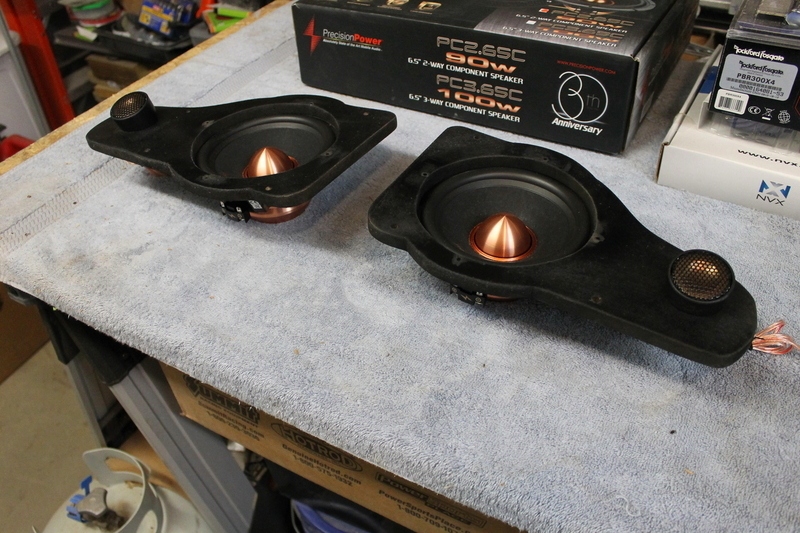
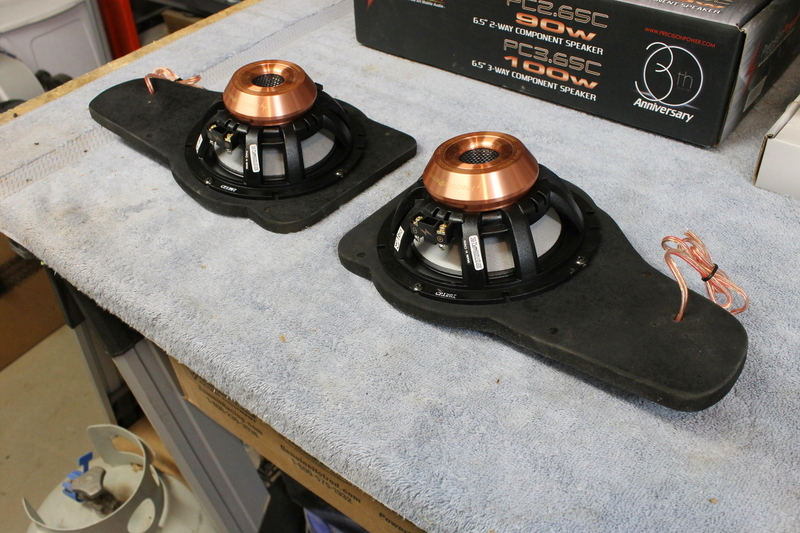
My rear 6x8's have been semi-blown for a couple years so I figured it was time to step up the rear sound stage while the trunk area is being reborn. Rather than going with 6x8's again, I'll make some adapter plates from MDF to run these 6.5" components from Precision Power. These are their PC2.65C two way components.
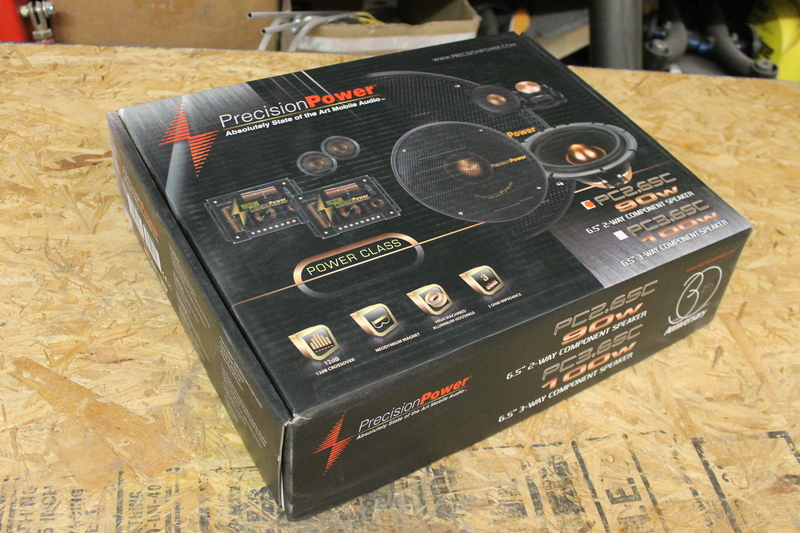
These things are beautiful IMO, almost a shame to hide under the rear deck.
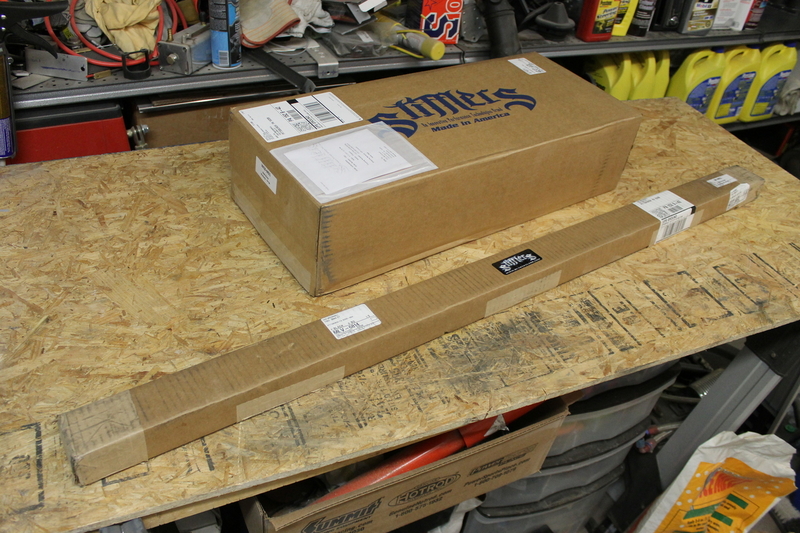
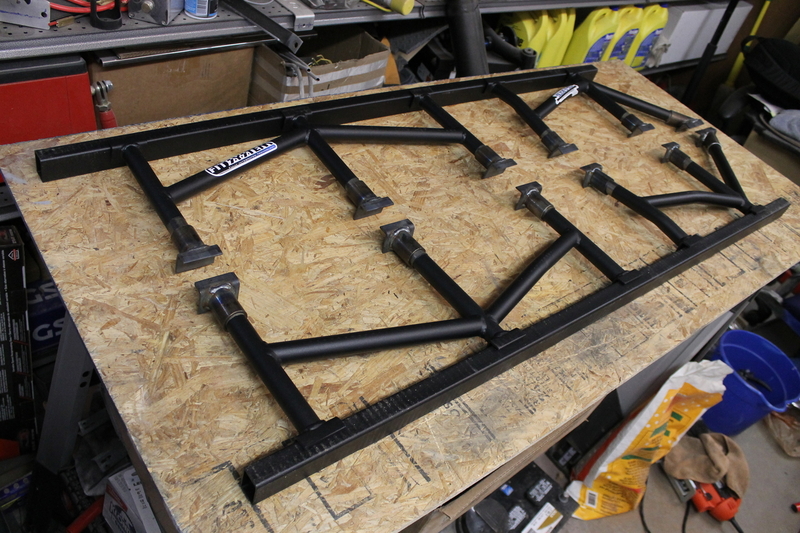
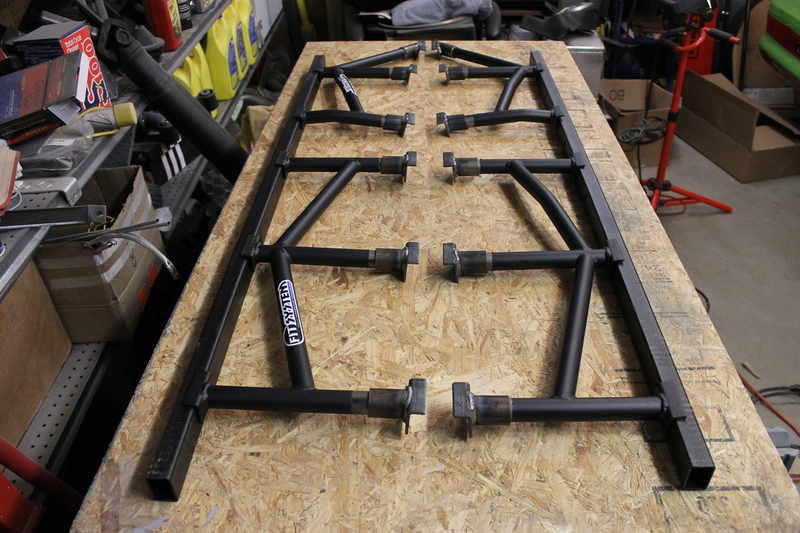
Lastly we have a little chassis stiffening for the cobra as well! My friend Tom Clark (Sinis Built) posted some pictures on facebook of the Stiffler's FIT System going on his pro touring 79 Pace Car build and I was intrigued. I wondered whether they would fit with the SpinTech subframe connectors I already have, so I gave Brian Figg at Stiffler's a call. Brian is an awesome dude with a background in mechanical engineering, and a super nice guy. After a bit of brainstorming and a little BS'ing about mustangs, we felt very confident that they will work, and since they sell each component of their FIT System separately, I was able to buy just the webbing braces and stiffening rail for the pinch weld to add to my existing SFC's. There may be a couple issues to deal with where my side pipes exit out the side of the car, because my exhaust is 100% custom, but the only way to find out is to have them in hand. I have some plans to make these things look incredible under the car, they won't be black when installed. Stay tuned for that, I won't be starting the FIT braces until after I'm finished with the trunk.
 95 Rio Red Mustang Cobra
Procharger D1SC 347 stroker, full maximum motorsports suspension, Full Tilt Boogie 03 Cobra IRS, Tremec 3550, 19x9.5 and 19x11 HRE 542R. 566rwhp/614rwtq
https://www.pro-touring.com/threads/...ra-OCD-Machine
04-14-2013 #16
Registered User
- Join Date
- Jul 2010
- Location
- Pittsburgh, PA
- Posts
- 114
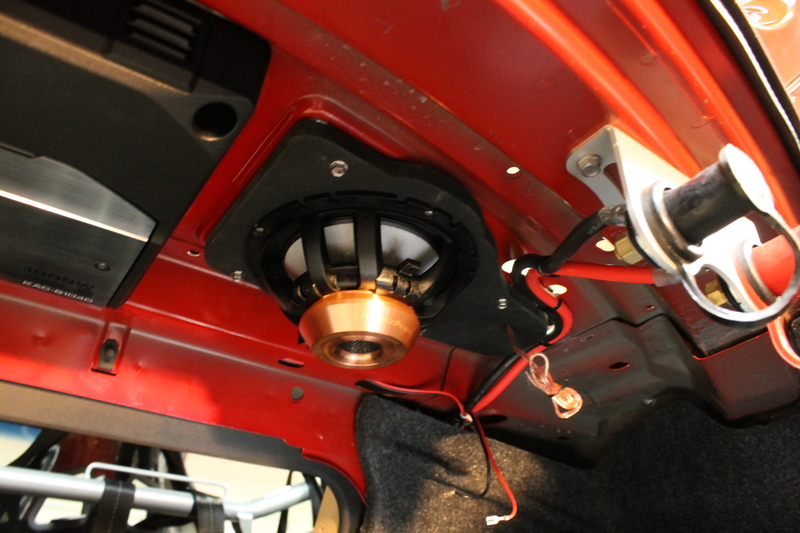
Decided I'd start working on getting the rear components mounted.
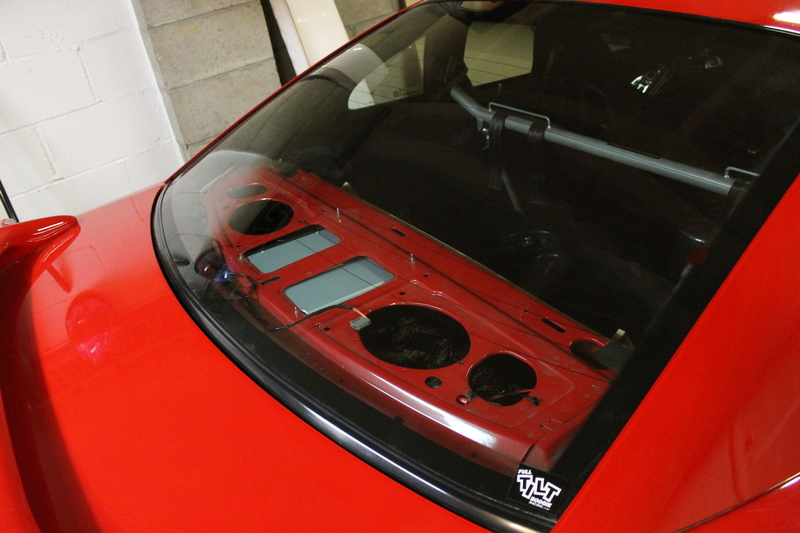
Pulled the interior trim and the old speakers.
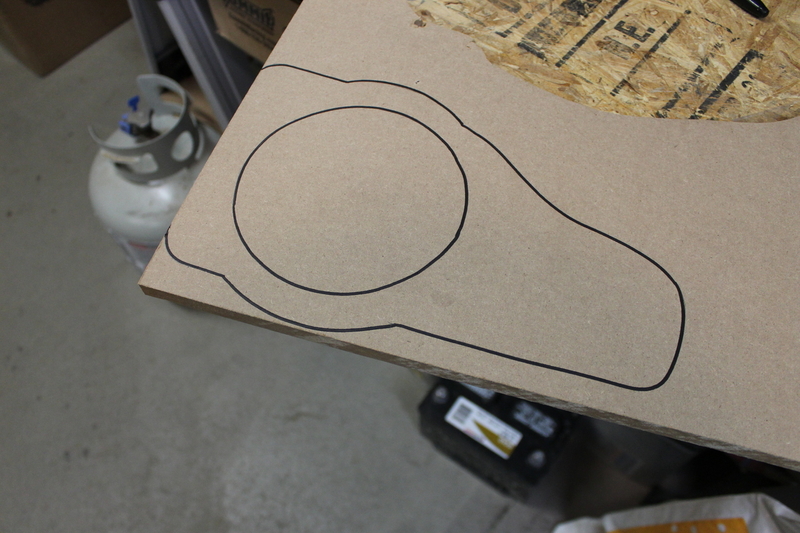
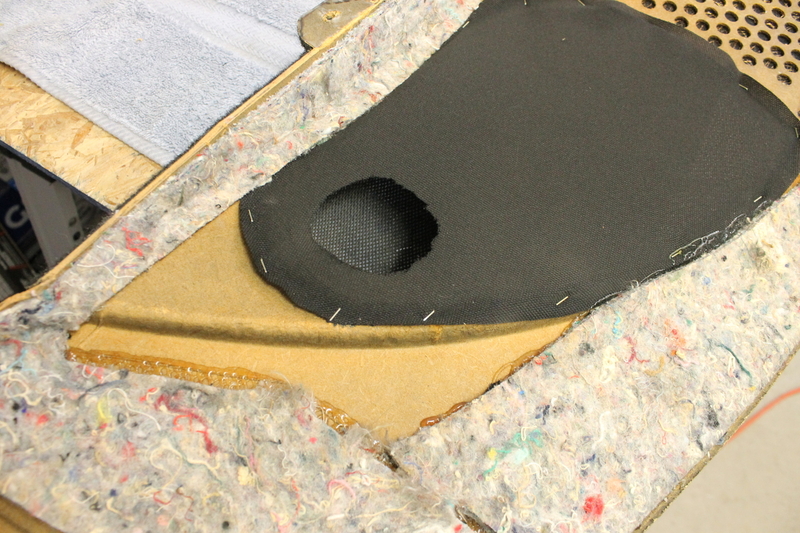
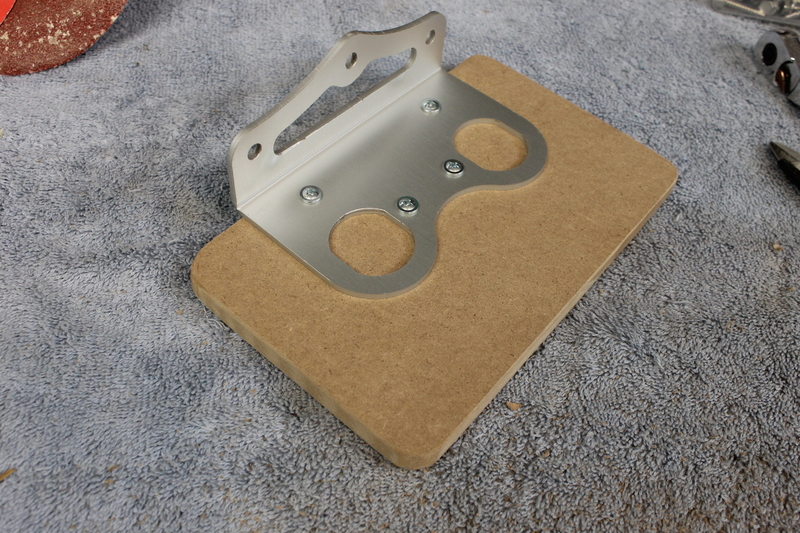
Then made a template out of cardboard for the adapter plate. The plates will attach underneath the package tray with sheet metal screws, the speakers will screw into them from the bottom, and the tweeters will attach to the top of the plates.
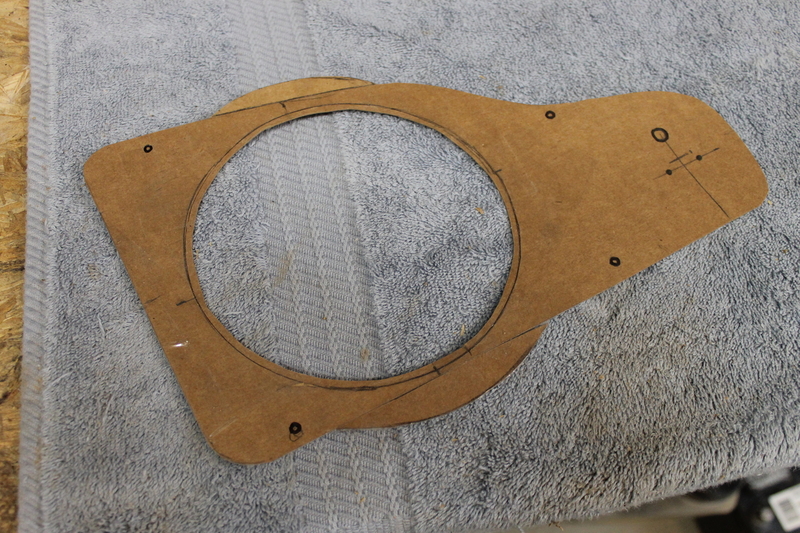
Marked out on the 1/2" MDF, ready to cut
Finished adapters
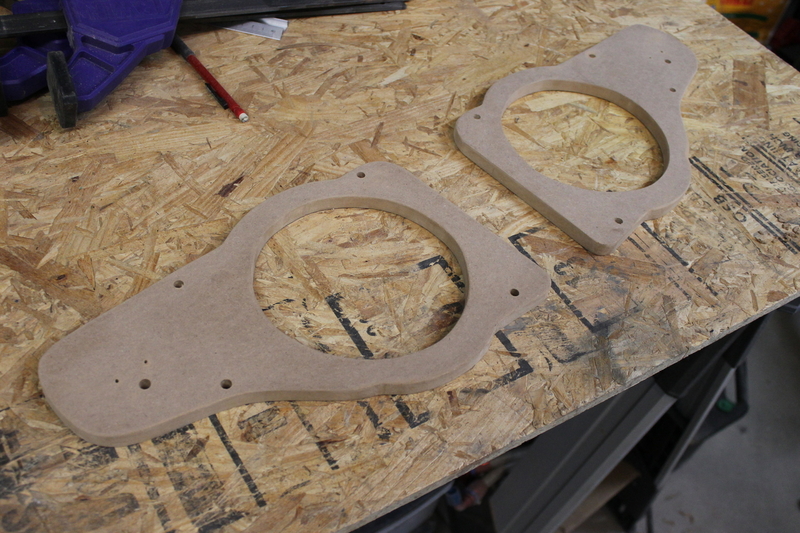
Here's how the speakers and tweeters will be attached
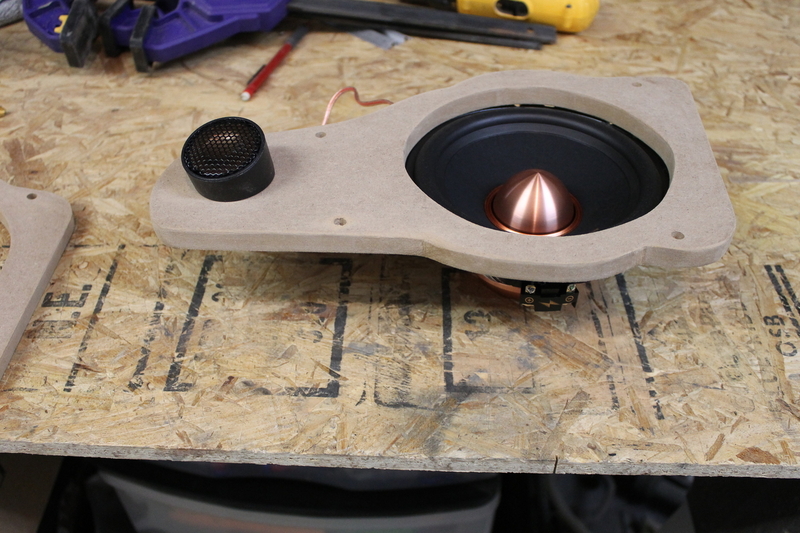
Shot them with a little satin black.
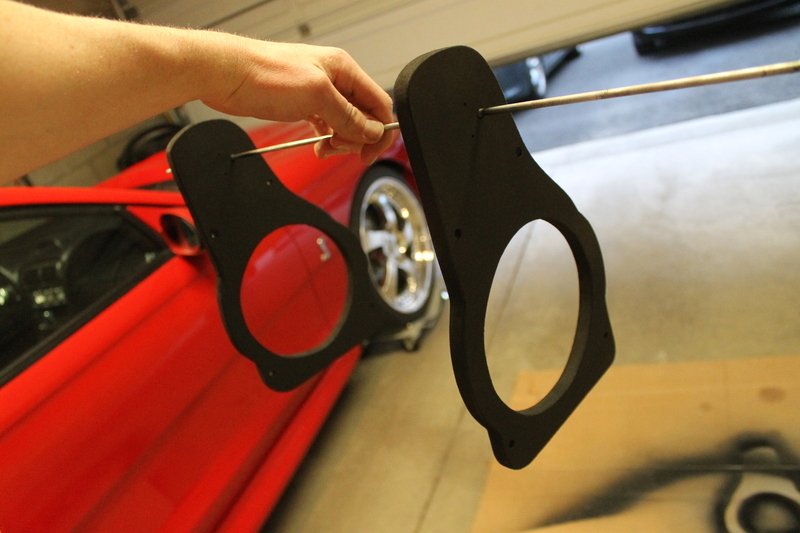
Components mounted, very happy with how these turned out!
 95 Rio Red Mustang Cobra
Procharger D1SC 347 stroker, full maximum motorsports suspension, Full Tilt Boogie 03 Cobra IRS, Tremec 3550, 19x9.5 and 19x11 HRE 542R. 566rwhp/614rwtq
https://www.pro-touring.com/threads/...ra-OCD-Machine
04-14-2013 #17
Registered User
- Join Date
- Jul 2010
- Location
- Pittsburgh, PA
- Posts
- 114
Took another trip to my dad's house again to finish up building the new work bench. I won't show any pictures of the work bench until I have it finished so I can just show the pictures all at once though, so stay tuned for that.
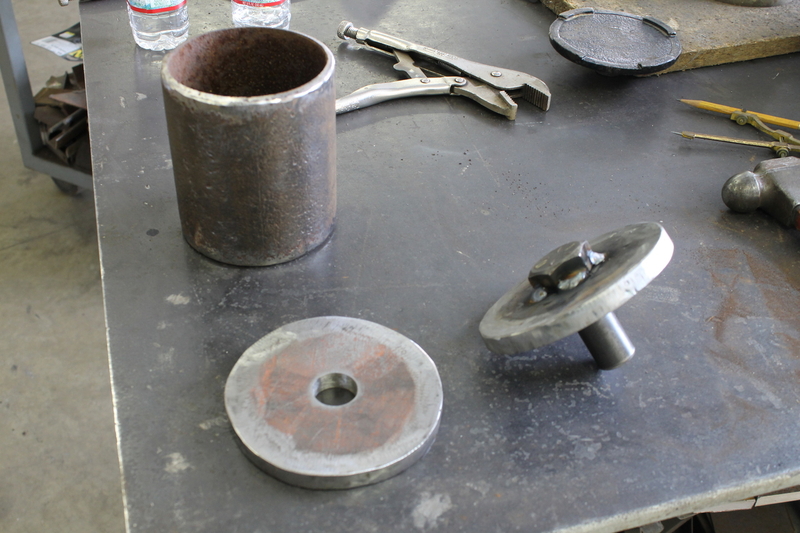
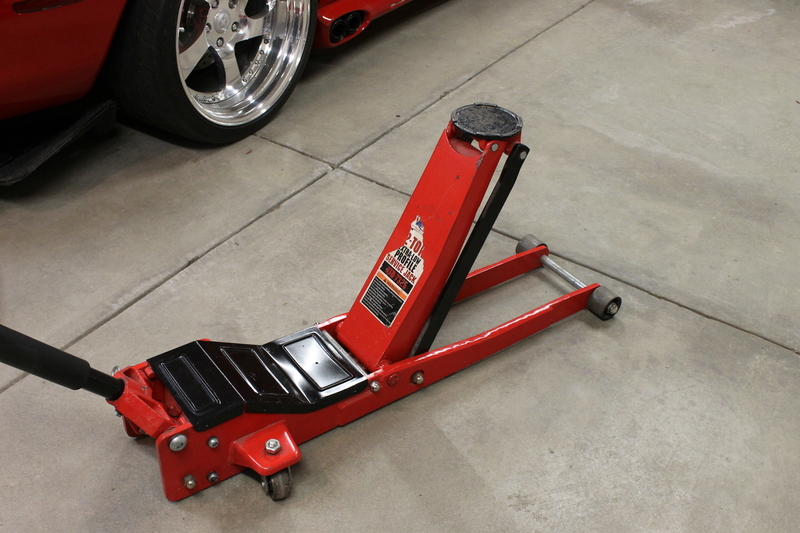
While I was there though, I took advantage of my dad's extensive collection of scrap metal to make an extension for my jack. I have a ridiculously low profile jack, in fact it's the only one that will fit under my car without driving it up on boards. The downside is it doesn't have a high enough max lift height to let me put the car on taller truck-style 3 ton jack stands to give me have plenty of room for welding in the FIT system and reworking my side pipes. So I decided to make an extension spacer to give it 6" of extra lift. This way I can jack it up normally and put it on the shorter 1.5 ton jack stands, then put the extension on and jack it up higher to use the higher 3 ton stands.
Started by cutting a piece of 5" diameter 1/4" wall pipeline tubing and cleaned it up, then torched out a couple 6" diameter plates from 1/2" steel and ground the edges smooth, followed by a 1" hole through both.
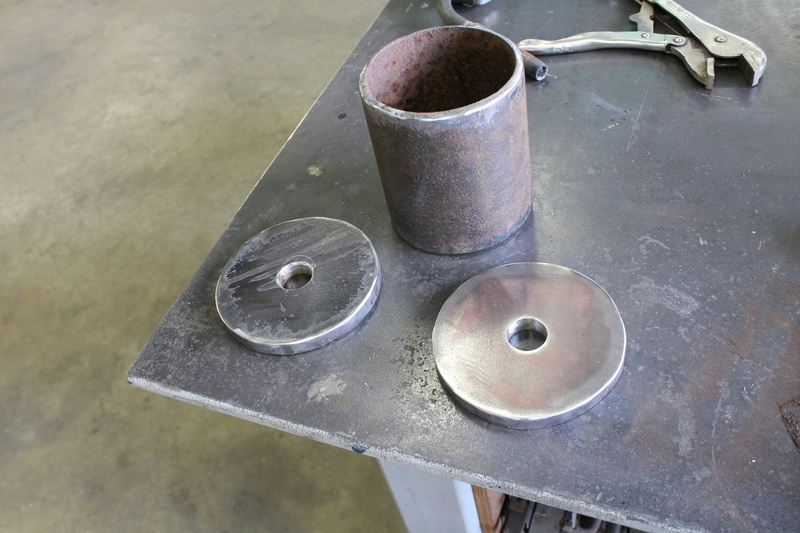
Here's the basic concept stacked up
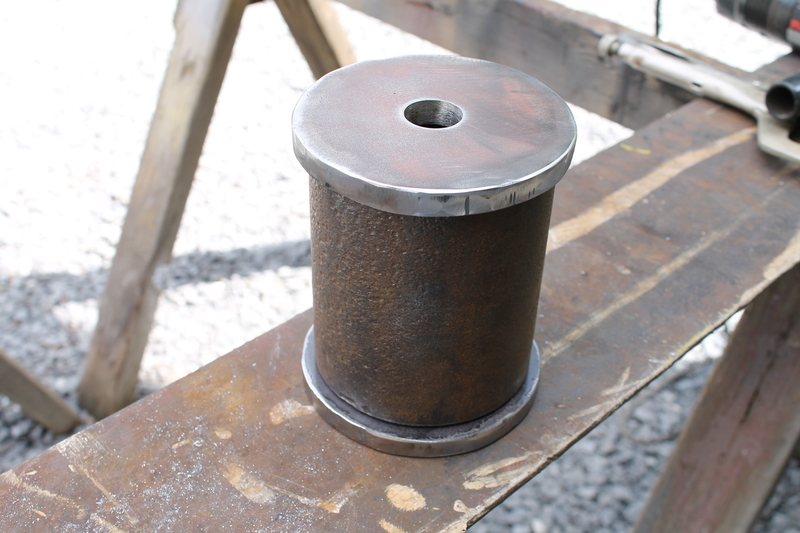
The existing jack plate will sit down into the top of the spacer like so

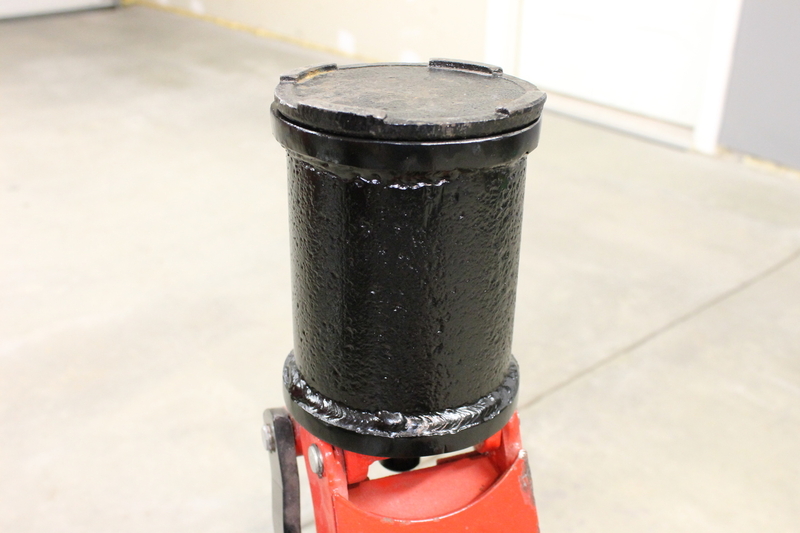
Found a huge 1" grade 8 bolt, cut it to length and welded it into the hole of one plate. This creates a pin that will slip down into the hole in the jack.
Stacked the pieces back together and clamped them in place
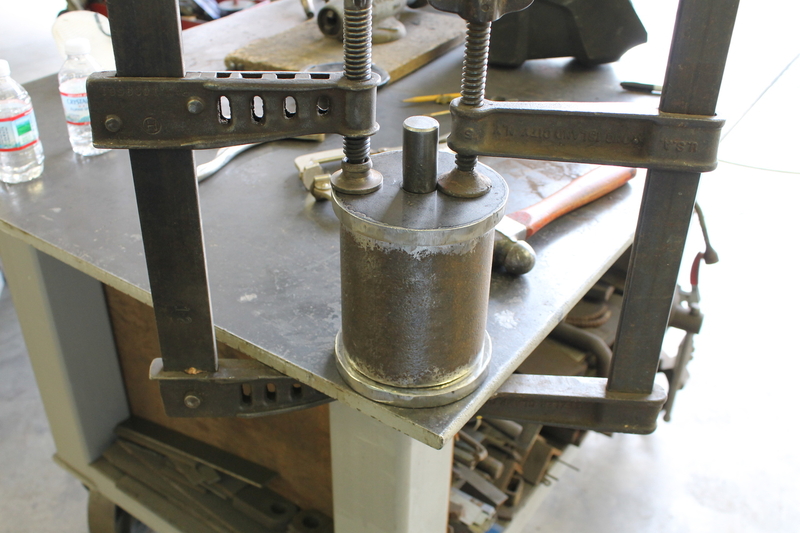
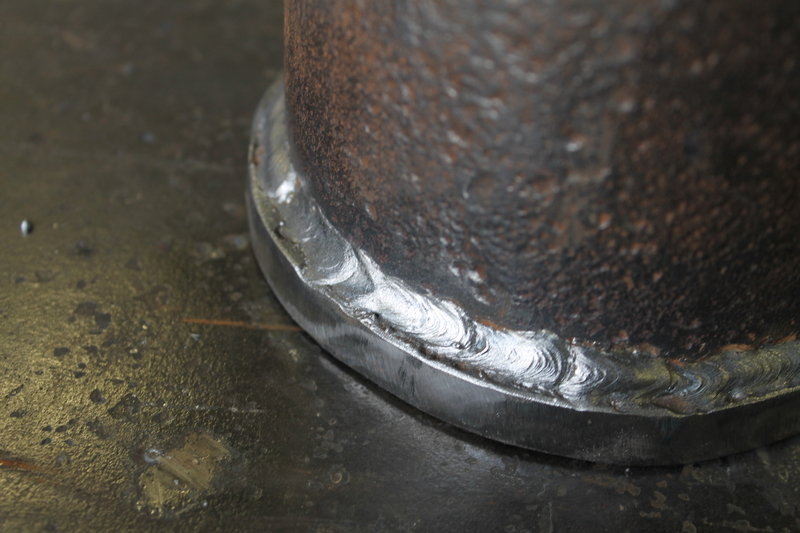
I then welded it all up with my dad's MASSIVE industrial-sized Lincoln welder, this thing is no joke...he said he's welded 1" thick steel with it! I'd love to have a big boy welder like his, maybe someday lol. Anyway, all welded up...
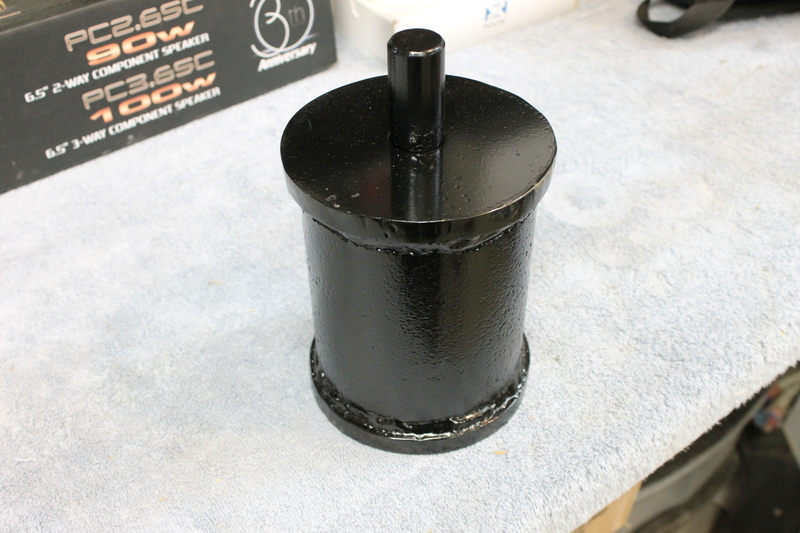
Painted and ready to go!

Ok so back to the progress on the car... I got the components mounted and they look great.
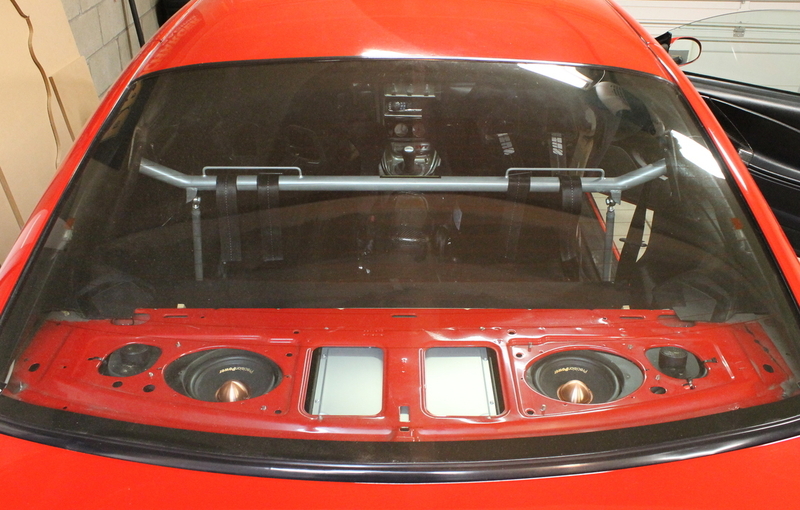
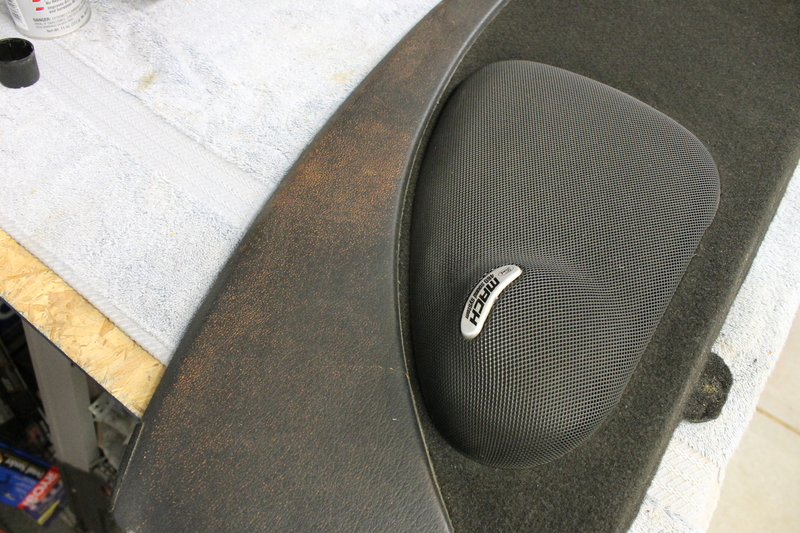
The rear package tray cover had always bothered me. It's been pretty badly faded the entire time I've owned the car. So it's about time I change that.
Supplies:
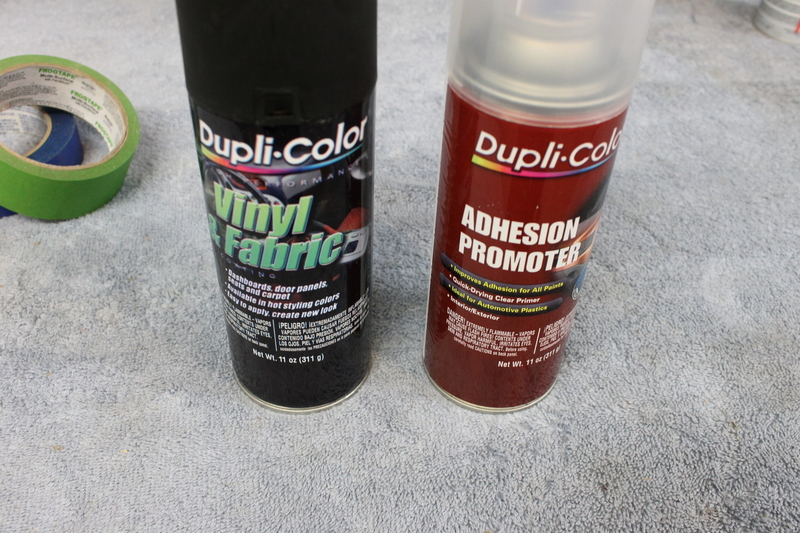
Cover masked and wiped down with acetone
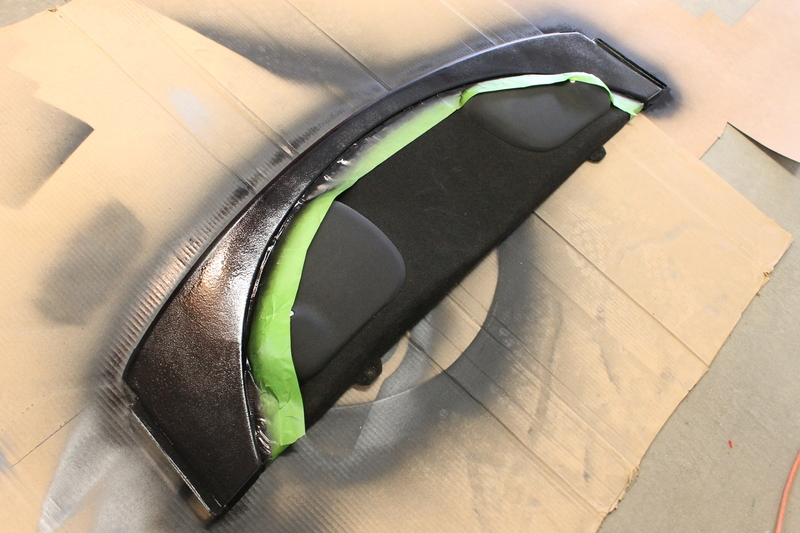
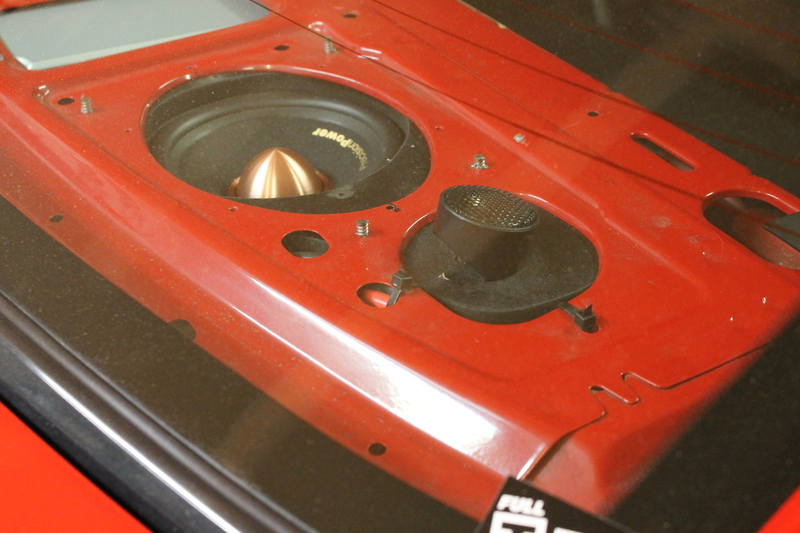
After drying, looking mint!
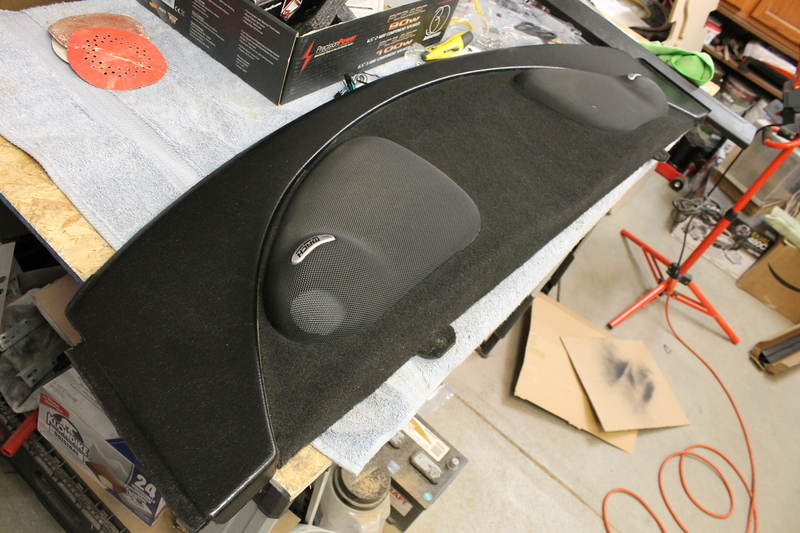
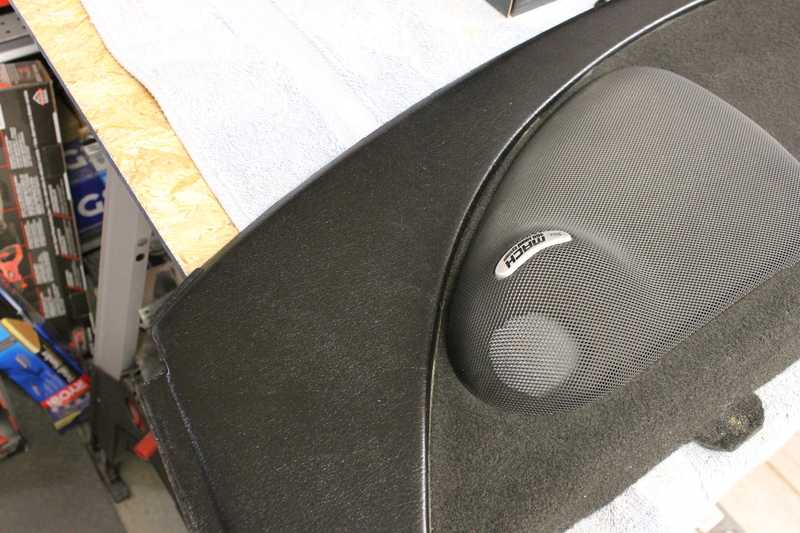
A little cutting of the fabric under the speaker grills to clear the tweeters
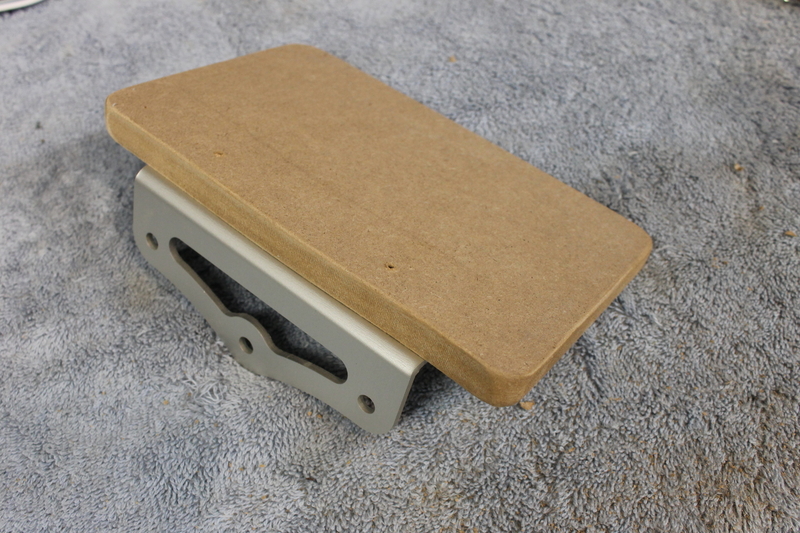
Worked on mounting the Rockford amp under the rear seat delete. I chose to mount it above the floor so I could have easy access to the wiring connections and gain adjustment. I had a spare bracket from the remote charging terminals I used in the trunk, so I drilled a few holes through that and attached it to a rectangle of 1/2" MDF to mount the amp to.
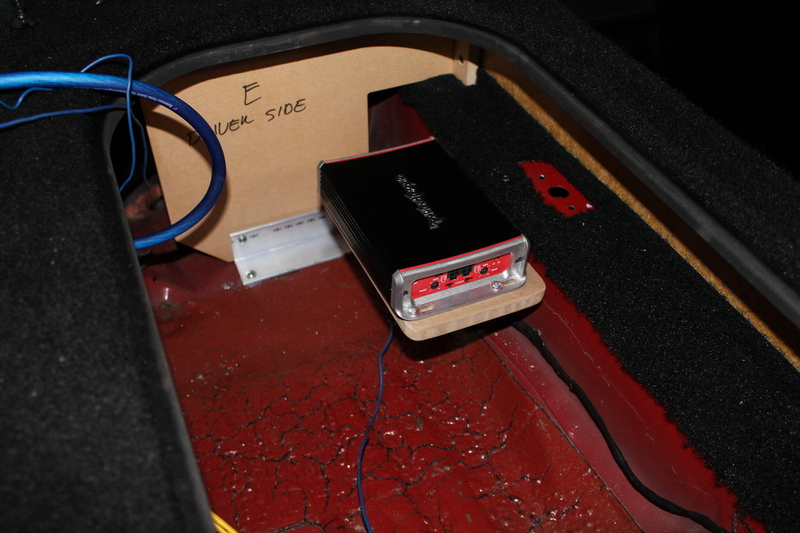
Mounted in place under the rear seat
After that I just worked on wiring things up, hopefully with the next update I'll have the wiring complete.95 Rio Red Mustang Cobra
Procharger D1SC 347 stroker, full maximum motorsports suspension, Full Tilt Boogie 03 Cobra IRS, Tremec 3550, 19x9.5 and 19x11 HRE 542R. 566rwhp/614rwtq
https://www.pro-touring.com/threads/...ra-OCD-Machine
04-14-2013 #18
Registered User
- Join Date
- Dec 2007
- Location
- Ravena, NY
- Posts
- 59
Ehh, just have built a camaro. Lot of wasted time on a mustang, lol. Looking good Dan!

04-14-2013 #19
Registered User
- Join Date
- Oct 2012
- Posts
- 219
Holy picture book batman! Thanks!
That fiberglass thick padding stuff is interesting.
06-25-2013 #20 Registered User
- Join Date
- Dec 2008
- Location
- Columbus, IN
- Posts
- 131
Very cool build!
'66 Mustang
'67 FireBird https://www.pro-touring.com/forum/sh...light=firebird
'68 Barracuda
'69 Mustang Mach 1
'97 Mustang Cobra
'04 Mustang Cobra
Tags for this Thread

 Reply With Quote


