

Results 361 to 380 of 709
-
03-02-2014 #361
 Registered User
- Join Date
- Mar 2008
- Location
- Wichita, KS
- Posts
- 375

is there any throttle body relocation option for that engine? it would be sweet to have it layed on its side so your intake elbow could be nice and open :D
Do car intake manifolds fit maybe?
67 GTO, LS2, T56
WILWOOD, FORGELINE, RIDETECH
-
03-02-2014 #362 Registered User
- Join Date
- Nov 2009
- Location
- the dirty mitten
- Posts
- 1,212
I am not aware of any elbows for this. The car intakes do fit but they do not offer active intakes which is something that I really like and want to maintain. The throttle body has a 3.5 inch diameter, the rectangle opening has roughly the same area. I am not even sure if there is enough room under the hood to have the throttle body on its side
Steve
1968 Dodge Charger All Wheel Drive project Red Bull<script type="text/javascript" src="safari-extension://com.ebay.safari.myebaymanager-QYHMMGCMJR/5cce6da5/background/helpers/prefilterHelper.js"></script><script type="text/javascript" src="safari-extension://com.ebay.safari.myebaymanager-QYHMMGCMJR/85dc54c0/background/helpers/prefilterHelper.js"></script><script type="text/javascript" src="safari-extension://com.ebay.safari.myebaymanager-QYHMMGCMJR/85dc54c0/background/helpers/prefilterHelper.js"></script>
03-03-2014 #363
Registered User
- Join Date
- Mar 2013
- Location
- Detroit Michigan
- Posts
- 45
I hate to just jump in here and be negative, while I do respect your effort of making your dream a reality and doing the work yourself, this thing scares the **** out of me. I would encourage to get some guidance from a professional fabricator, especially when it comes to a rollcage. If your suspension binds up and fails, or something else fails while doing 80 down the interstate the last thing you want is that cage coming apart and those cheap seats snapping in half.
Just some food for thought.
03-05-2014 #364
Registered User
- Join Date
- Nov 2009
- Location
- the dirty mitten
- Posts
- 1,212
User, no problem I appreciate any feedback, positive or negative. What it all comes down to is that there is no way that I could afford to have someone else build this for me. Once it is on the road I will be doing a lot of lonely road testing and inspection to check for damages. I will say that of the things that I have built, the cage is something that I am quite confident in. Plus the fact that the car is still the way it was from the factory. If the cage does nothing but add weight then it would still offer the same level of protection in a crash which I assume would be quite low anyway. The joints on my cage fit very snugly and went together great, I am happy with the way it turned out. I also am not sure what forces would act on my seats to snap them in half. Almost all forces should be applied to the 4 point harness. Any other force will be going directly to the seat bottom only
My big concerns are the suspension and steering parts. Anything else that I build can fail and it will not cause a loss of control, those will. However then take a moment to think about the stress that the suspension mounts will actually see. Lets say that I am pulling 1 lateral G and all of those forces are applied to just one tire. IF all of that force was the applied to only 1 of the 4 mounts it would have to stand up to around 2500 pounds of force. A control arm acting on its mounts can only apply tension or compression. I feel very comfortable with that.
Also dissecting a lot of what OEM's build, you can get a very good idea of forces are applied to where and what things can stand up to.
If I really wanted to I could keep any of my garbage welds or failures off of this thread. I knew when I put up that pic of the idler pulley that it would be criticized and I am glad that you guys pointed it out, if no one did then honestly I would be disappointed. I think that if the only pics that I or other guys posted up was beautifully made and without flaw, that would keep others from ever even attempting a build or even project of their ownLast edited by Motorcitydak; 03-05-2014 at 01:47 PM.
Steve
1968 Dodge Charger All Wheel Drive project Red Bull<script type="text/javascript" src="safari-extension://com.ebay.safari.myebaymanager-QYHMMGCMJR/5cce6da5/background/helpers/prefilterHelper.js"></script><script type="text/javascript" src="safari-extension://com.ebay.safari.myebaymanager-QYHMMGCMJR/85dc54c0/background/helpers/prefilterHelper.js"></script><script type="text/javascript" src="safari-extension://com.ebay.safari.myebaymanager-QYHMMGCMJR/85dc54c0/background/helpers/prefilterHelper.js"></script>
03-23-2014 #365
Registered User
- Join Date
- Nov 2009
- Location
- the dirty mitten
- Posts
- 1,212
It has been a little while since any work has been done. I started having my garage electrical line blowing the breaker so I stopped working on the car, left the line disconnected while I starting taking everything apart to find the issue. I have been pretty busy lately but finally got the whole thing apart.....to find out that the issue was the extension cord that I had plugged in to the battery tender on my truck which sits outside.....just glad nothing caught on fire, takes a lot of power to trip a 20amp breaker
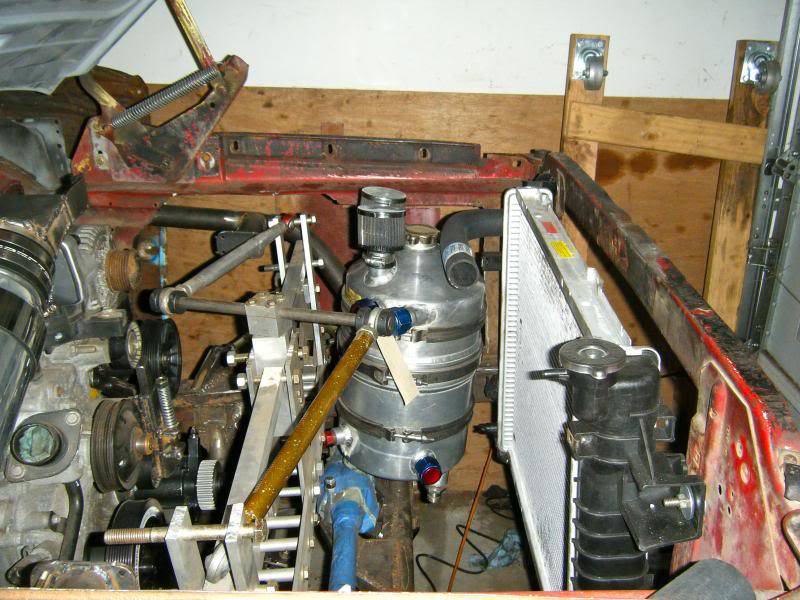
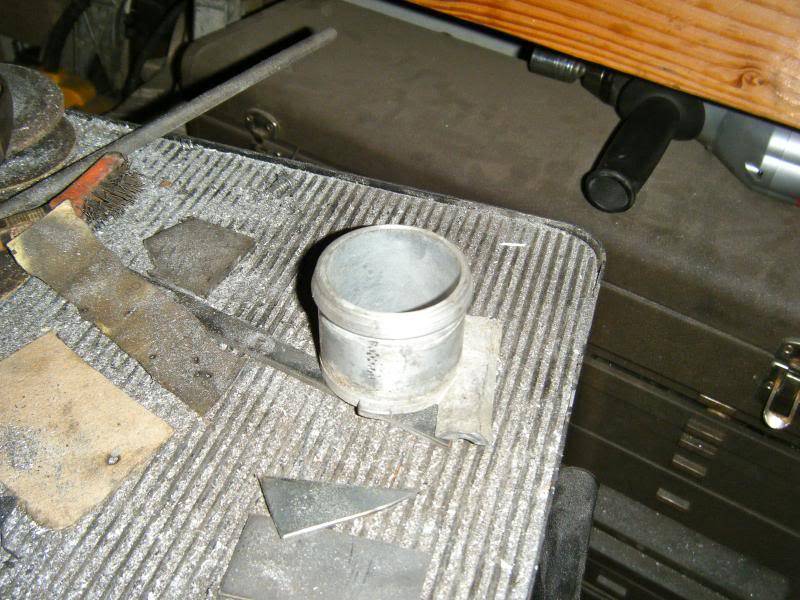
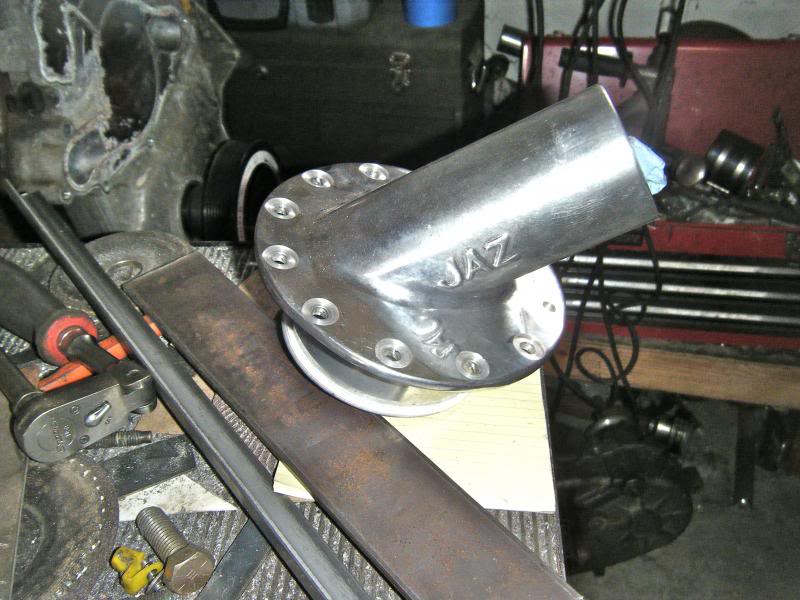
I have no progress to show but I did buy a few more things. I now have a 3 gallon oil tank that is going to take my XL shoehorn to get it in there and not interfere with anything else. This looks to be the only place in the engine bay that can fit a tank of this size. I wanted a round tank VS a box one so it can spin the oil against the sides. I also wanted a good amount of oil, figure I will run 2 gallons in here. Bad thing is that this looks like it will be in the way of a true air extracting hood that would be vented to remove all of the air from the radiator. I can still put holes in the hood but ducting them now may not happen
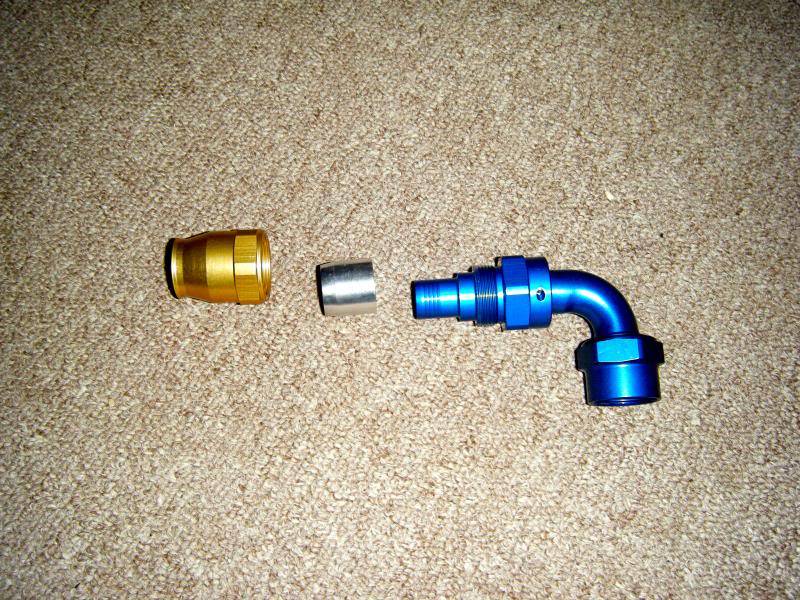
I also bought most of the fittings and lines that I will need, cost WAY more than I had hoped and still need more to finish up the system. I do have a question however, I got some reusable fittings from BMRS to go along with their lines but I need some help on how they go together. They are a 3 piece design with this thin aluminum piece that goes in between. My question is where does that piece go? On the inside of the line? the outside? have not been able to find an answer yet
Last edited by Motorcitydak; 03-23-2014 at 07:58 AM.
Steve
1968 Dodge Charger All Wheel Drive project Red Bull<script type="text/javascript" src="safari-extension://com.ebay.safari.myebaymanager-QYHMMGCMJR/5cce6da5/background/helpers/prefilterHelper.js"></script><script type="text/javascript" src="safari-extension://com.ebay.safari.myebaymanager-QYHMMGCMJR/85dc54c0/background/helpers/prefilterHelper.js"></script><script type="text/javascript" src="safari-extension://com.ebay.safari.myebaymanager-QYHMMGCMJR/85dc54c0/background/helpers/prefilterHelper.js"></script>
03-23-2014 #366 Registered User
- Join Date
- Sep 2012
- Location
- San Diego
- Posts
- 264
the sleeve goes between the braid of the hose and the hose it self.
so first put the nut portion over the braided hose, then the sleeve under the braid over the hose, then the hose end into the hose and screw the nut on.71 maverick.
71 comet in build process.
i work at Current Auto Performance www.currentautoperformance.com. i also build the differentials for San Diego Gear and Axle.
03-23-2014 #367
Registered User
- Join Date
- Nov 2009
- Location
- the dirty mitten
- Posts
- 1,212
Ahaaa, ok so there is a 3rd way I did not even consider, thanks a lot! BMRS sent me a 2nd set of those inserts so I assume that they would get replaced so you can use the rest of the fittings again put I plan on only having to put them together once. Just needed something that I could put together myself without a crimper
Steve
1968 Dodge Charger All Wheel Drive project Red Bull<script type="text/javascript" src="safari-extension://com.ebay.safari.myebaymanager-QYHMMGCMJR/5cce6da5/background/helpers/prefilterHelper.js"></script><script type="text/javascript" src="safari-extension://com.ebay.safari.myebaymanager-QYHMMGCMJR/85dc54c0/background/helpers/prefilterHelper.js"></script><script type="text/javascript" src="safari-extension://com.ebay.safari.myebaymanager-QYHMMGCMJR/85dc54c0/background/helpers/prefilterHelper.js"></script>
03-25-2014 #368 Registered User
- Join Date
- Oct 2011
- Location
- Wichita KS
- Posts
- 59
Steve,
Great fab on your build! I am also wanting to make my own LCA's, and UCS's to widen the front track of my car. Thanks for giving me the confidence in doing them myself! Man, I thought I was doing a lot of fab work on my car, but you get the trophy!!
03-25-2014 #369
Registered User
- Join Date
- Mar 2008
- Location
- Harrison, AR
- Posts
- 78
Very interested! Looks great! Keep going.
DavidDavid G
03-26-2014 #370
Registered User
- Join Date
- Nov 2009
- Location
- the dirty mitten
- Posts
- 1,212
Thanks a lot guys. I did get into it a little last night, mounted up the oil tank. Need to work on the lines from the pump to the pan and get fittings on the pan as well. Also need radiator hoses and to finish the intake.
Widetrax, if your cars mounting locations allow it or if you are going to make your own mounts, I highly recommend getting some universal racing control arms like the ones from these guys
http://pitstopusa.com/c-132107-chass...trol-arms.html
You can get lots of adjustment or change out arms to get the geometry you desireSteve
1968 Dodge Charger All Wheel Drive project Red Bull<script type="text/javascript" src="safari-extension://com.ebay.safari.myebaymanager-QYHMMGCMJR/5cce6da5/background/helpers/prefilterHelper.js"></script><script type="text/javascript" src="safari-extension://com.ebay.safari.myebaymanager-QYHMMGCMJR/85dc54c0/background/helpers/prefilterHelper.js"></script><script type="text/javascript" src="safari-extension://com.ebay.safari.myebaymanager-QYHMMGCMJR/85dc54c0/background/helpers/prefilterHelper.js"></script>
04-06-2014 #371
Registered User
- Join Date
- Nov 2009
- Location
- the dirty mitten
- Posts
- 1,212
Hope you guys are ready to see some crazy radiator hoses
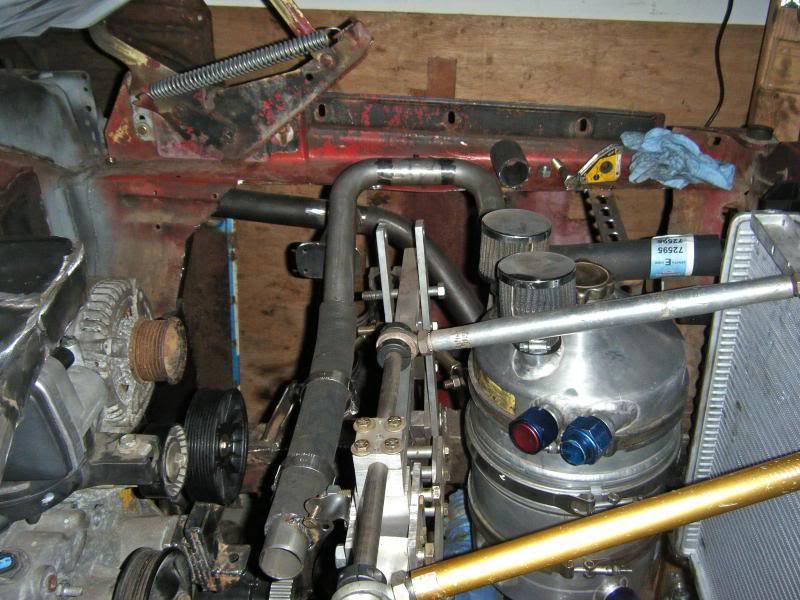
Because of the oil tank placement, the upper hose had to go the other way, up and over the drivers side inner fender
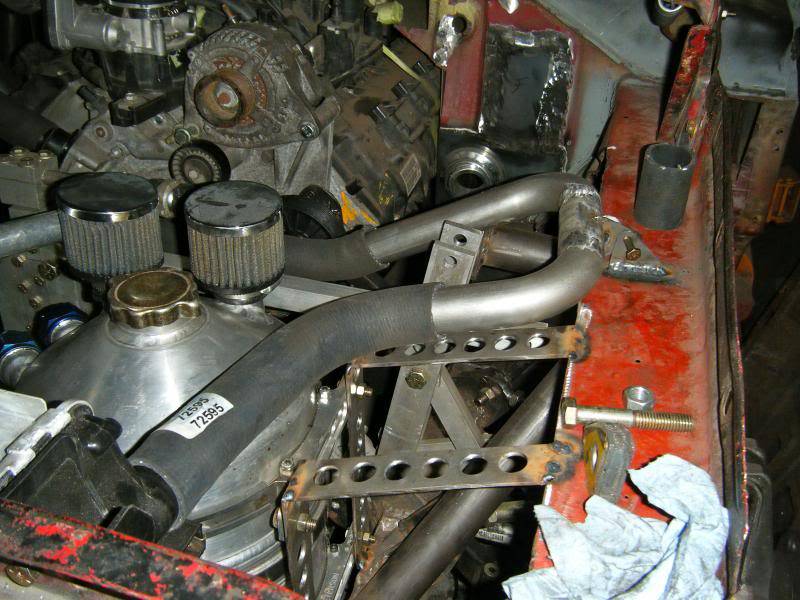
The upper hose has a mount on the inner fender and also one here on the shock tower thing
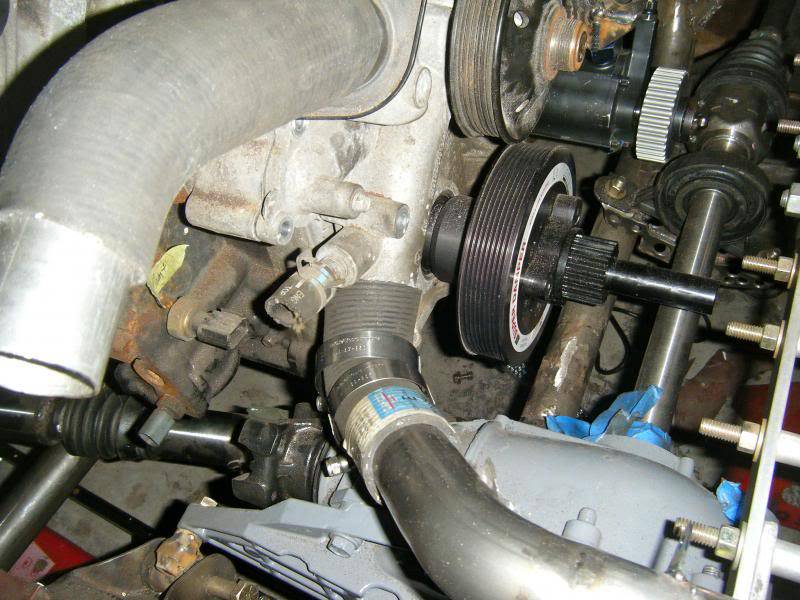
Now Chrysler put this little extension onto the water pump without ever considering if someone would want to put a differential there so I had to cut it off. I cut right thru one of the mounts but where that is on the timing cover happily does not come close to the new hose, I still have room there to put in a new shorter bolt
That gave me plenty of clearance around the hose, I can fit my hand easily around this so no worries about it rubbing
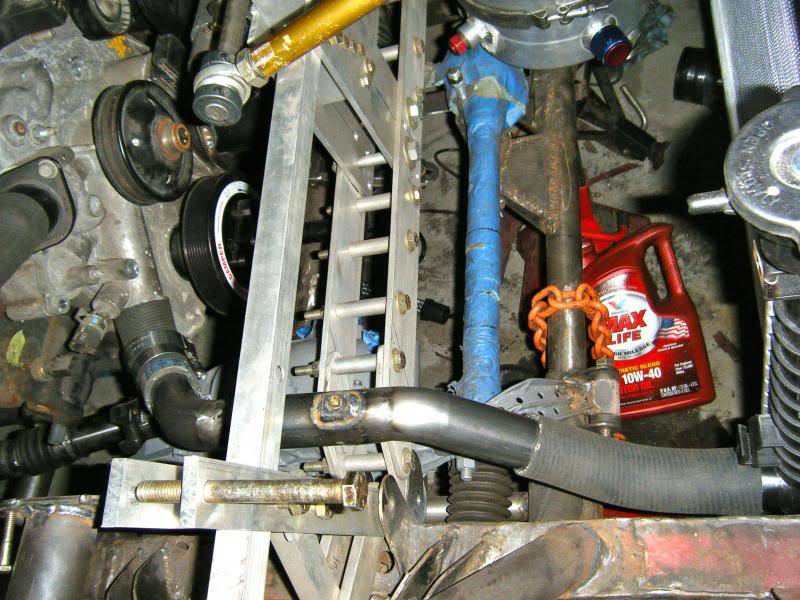
I had to go up and over the bridge. To get rid of the air bubble that this will create I put in a 1/8 NPT plug so I can bleed out the air. I was thinking about putting a 1/4 plug into the upper hose since it is above the radiator cap and then I can fill the rest of the system thru that
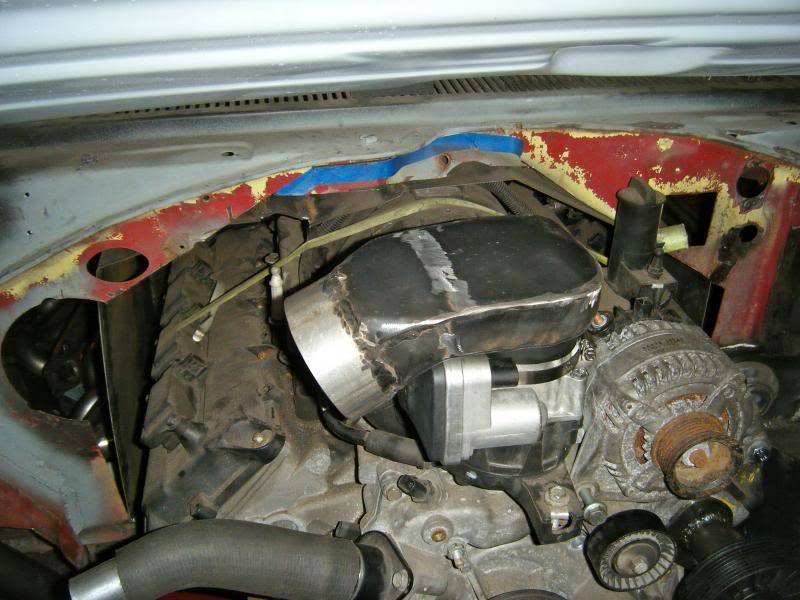
The air intake is capped off and now complete
The oil pan is also now complete. I am getting a bunch of parts ready to get powder coated
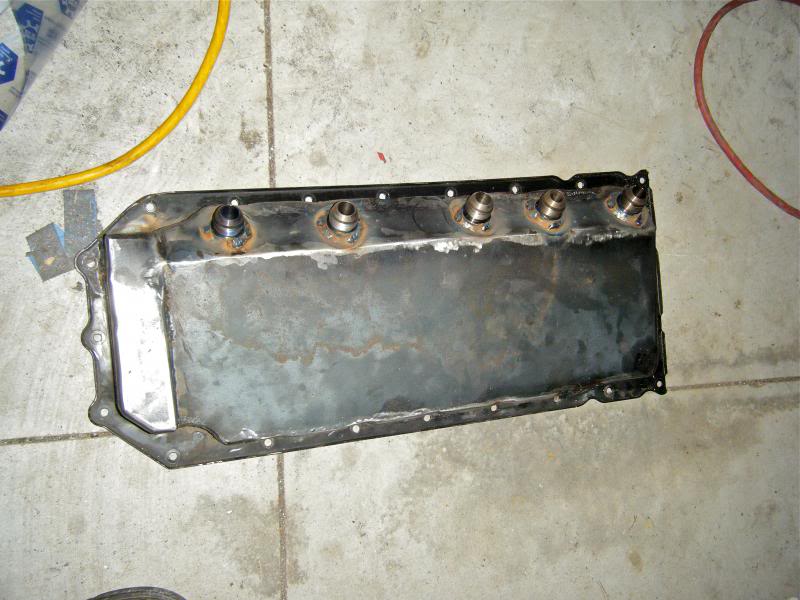
Also got my lines together, still have some more to go
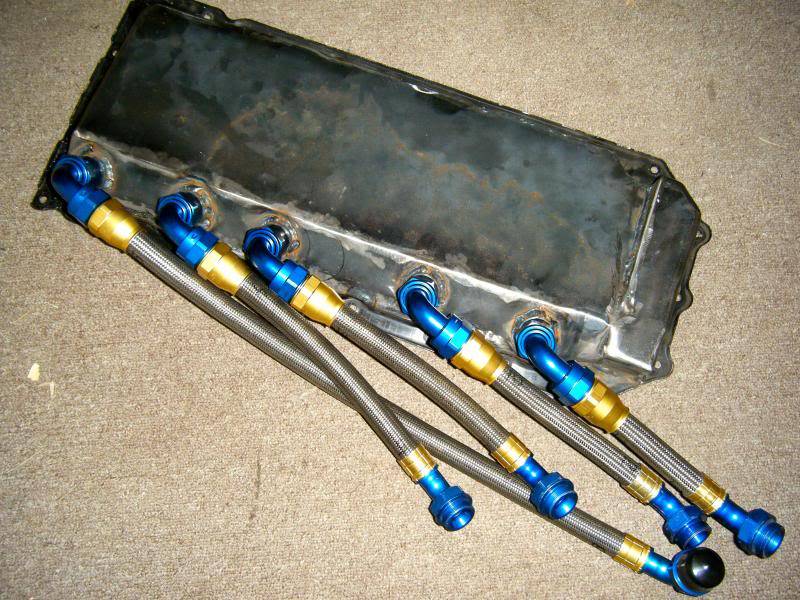
For the hose ends, I have T bolt clamps on all ends. I am going to use waterless coolant so there will be no pressure in the system and I was also planning to use bellow's adhesive on all of the fittingsLast edited by Motorcitydak; 04-06-2014 at 10:49 AM.
Steve
1968 Dodge Charger All Wheel Drive project Red Bull<script type="text/javascript" src="safari-extension://com.ebay.safari.myebaymanager-QYHMMGCMJR/5cce6da5/background/helpers/prefilterHelper.js"></script><script type="text/javascript" src="safari-extension://com.ebay.safari.myebaymanager-QYHMMGCMJR/85dc54c0/background/helpers/prefilterHelper.js"></script><script type="text/javascript" src="safari-extension://com.ebay.safari.myebaymanager-QYHMMGCMJR/85dc54c0/background/helpers/prefilterHelper.js"></script>
04-06-2014 #372 Registered User
- Join Date
- Aug 2011
- Location
- Clearwater/FL
- Posts
- 512
Have you looked into the 6.4l intake?
 Originally Posted by Motorcitydak

 85 monte, drift project- small block t5 and 8.8
88 Blazer sbc
05 300c
04-06-2014 #373
Registered User
- Join Date
- Nov 2009
- Location
- the dirty mitten
- Posts
- 1,212
Interesting......i had not looked into the 6.4, looks like it has variable runners as well......wonder if it will fit into my dog house
Good info about the intake here, $435 right from the factory
http://www.lxforums.com/board/showth...ntake-Manifold
And i cannot use it on my engine, the TB mount is forward and off to the drivers side, right where my alternator is and I cannot move it to where the car has it since that is where my front diff is. I am going to have to stick to my truck manifoldLast edited by Motorcitydak; 04-06-2014 at 03:12 PM.
Steve
1968 Dodge Charger All Wheel Drive project Red Bull<script type="text/javascript" src="safari-extension://com.ebay.safari.myebaymanager-QYHMMGCMJR/5cce6da5/background/helpers/prefilterHelper.js"></script><script type="text/javascript" src="safari-extension://com.ebay.safari.myebaymanager-QYHMMGCMJR/85dc54c0/background/helpers/prefilterHelper.js"></script><script type="text/javascript" src="safari-extension://com.ebay.safari.myebaymanager-QYHMMGCMJR/85dc54c0/background/helpers/prefilterHelper.js"></script>
04-06-2014 #374
Registered User
- Join Date
- Aug 2011
- Location
- Clearwater/FL
- Posts
- 512
That's the same thread I was reading...
85 monte, drift project- small block t5 and 8.8
88 Blazer sbc
05 300c
04-27-2014 #375
Registered User
- Join Date
- Nov 2009
- Location
- the dirty mitten
- Posts
- 1,212
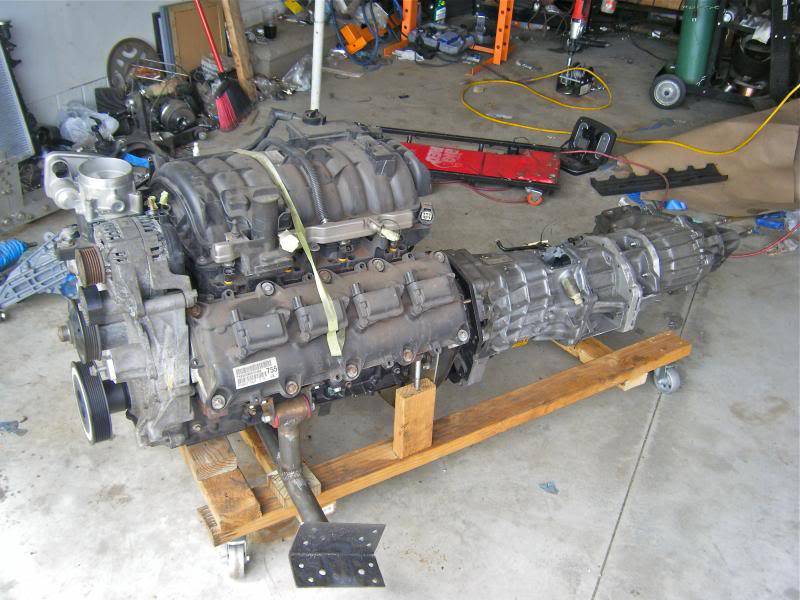
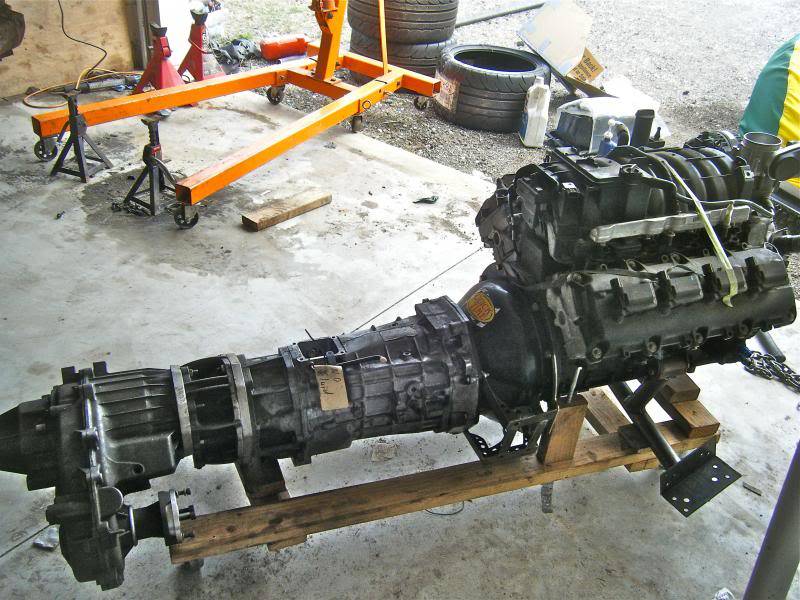
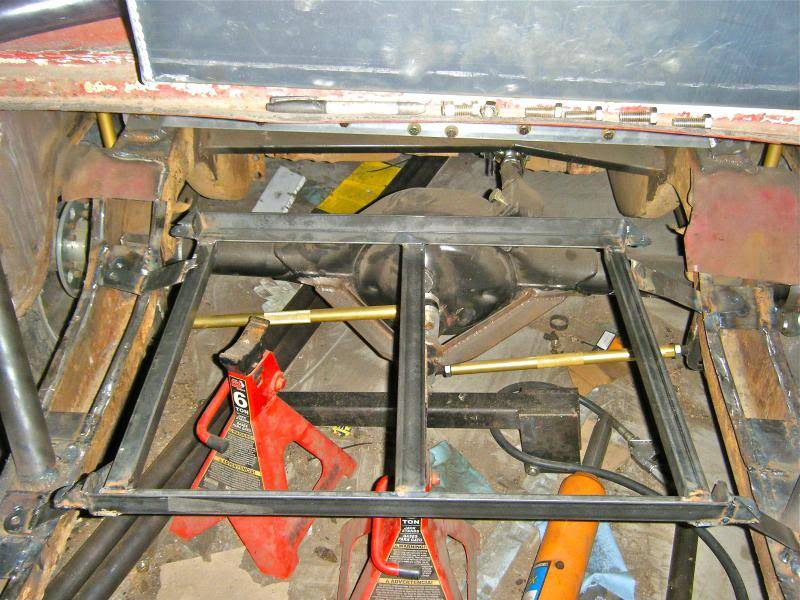
So I had a little unexpected break from my recent crazy busy work schedule. I used some of the time to make some good progress on the car. I ran out of reasons why the drive train and all those other parts needed to be in the car so out it all came. Didn't take much time to do which was nice
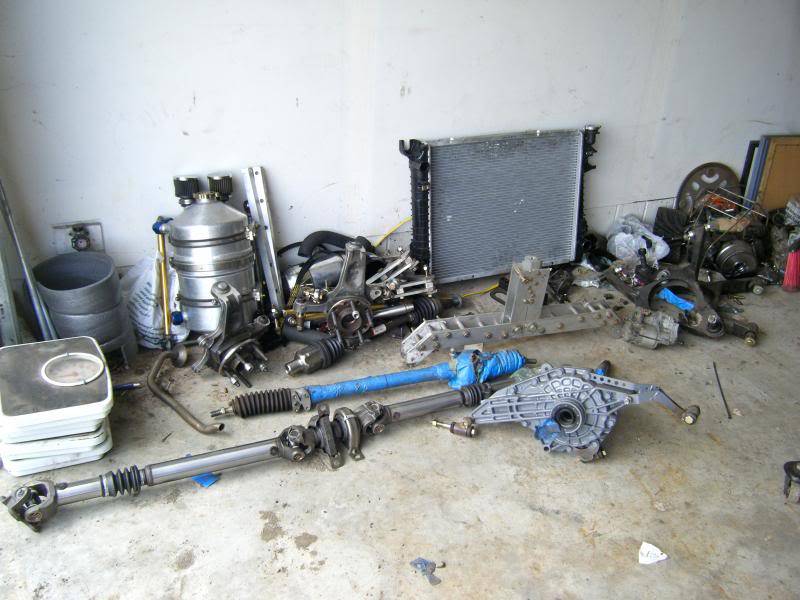
Then up the car went.....
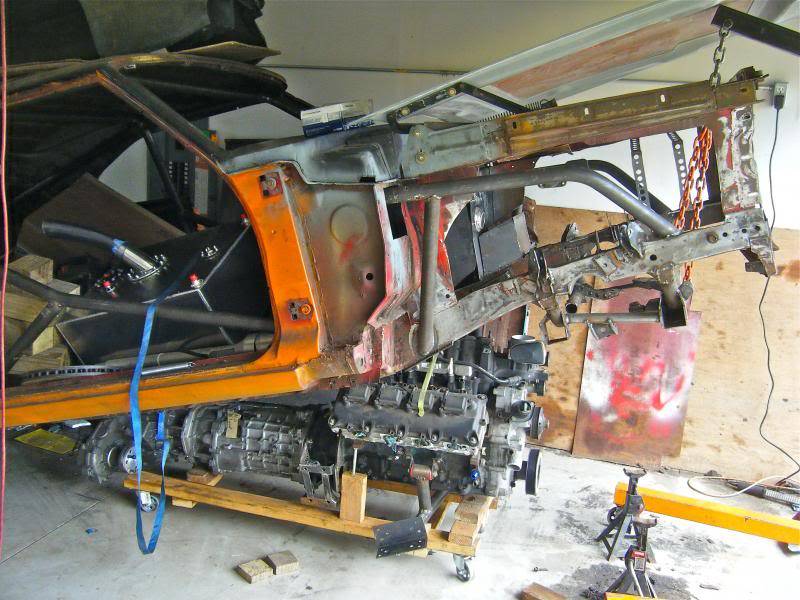
and out came the drivetrain
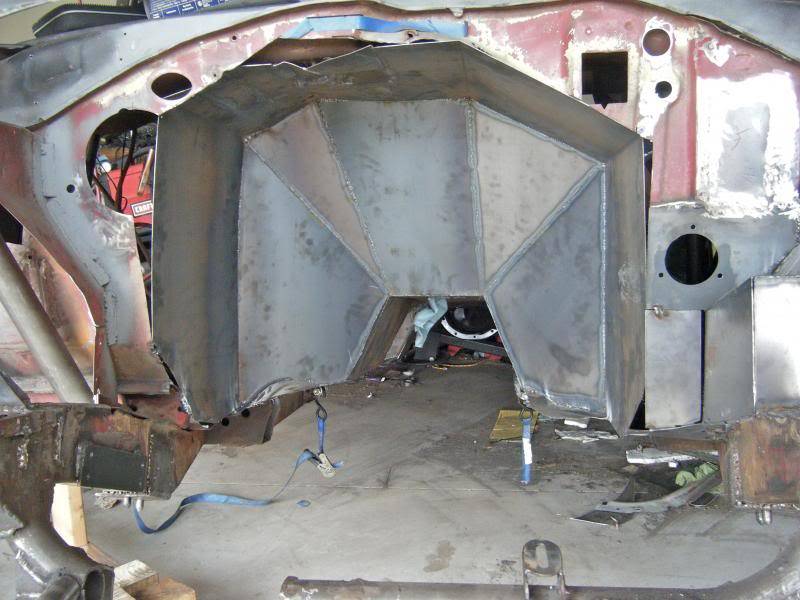
I will be finishing off the dog house area as well as a few other spots in the engine bay. I will be filling in all of these holes
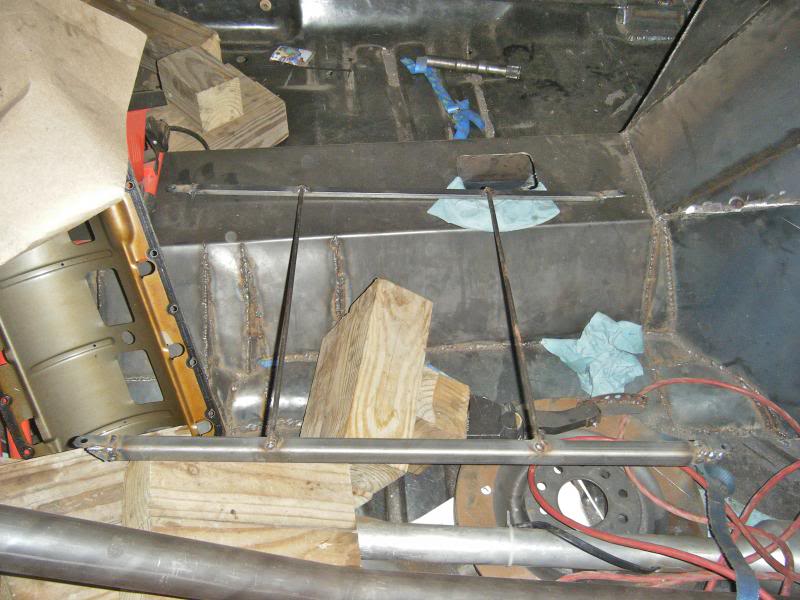
To keep progress moving along I picked up a 20 gallon Aeromotive stealth fuel cell along with a filler neck so I can still use the stock fuel filler cap
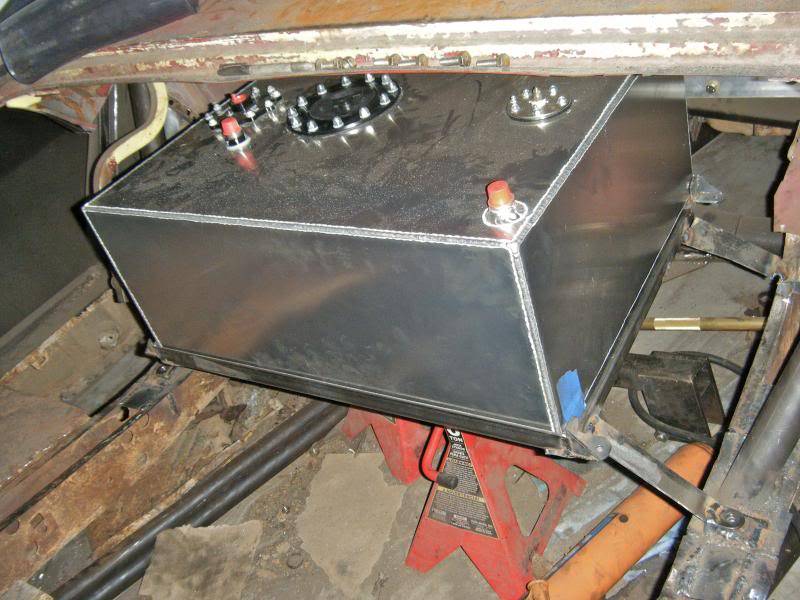
I started getting the mount done. The frame is done, just need to finish up the mounts. I have the cell mounted rather high and forward in the trunk because I have some plans for this area. Right now the cell sits level but after thinking about it I want to lower the drivers side a little so that when I am low on fuel it will flow towards the pump, figured just 2 or 3 degrees should be good right?
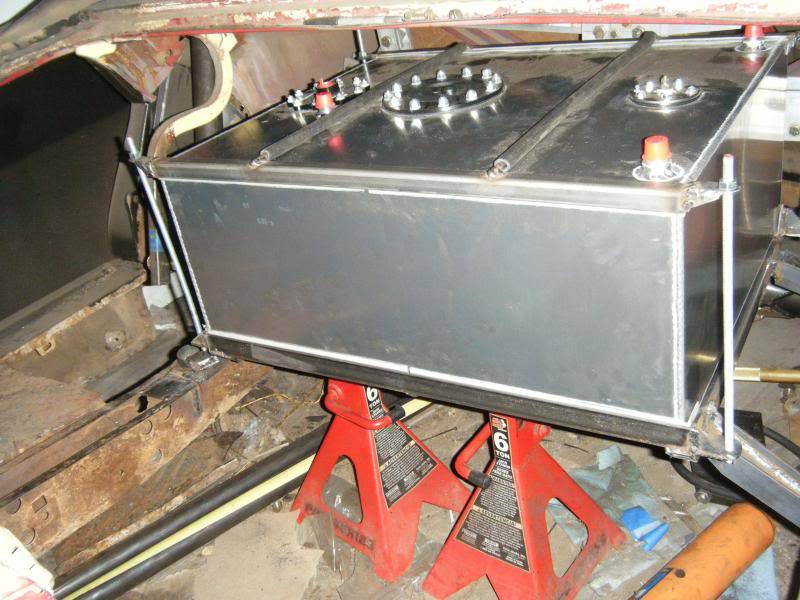
This piece goes on top of the cell and I have 4 pieces of all thread, one for each corner that will clamp it into place. I have some 1/16 inch thick nylon sheet that will insulate the aluminum cell from steel frame
I started getting the engine the way I want to, started off my drilling out and tapping the dip stick tube and plugging it with a NPT plug. I think I may use this for a vacuum gauge so I can keep an eye on crank case vacuum that the dry sump pump should be drawing

From the tank I will be using a corvette fuel filter/regulator. For the line I was thinking about going from AN line to hard line to get to the front of the car then adapt back to AN to go to the push of fitting on my fuel rail. What do you guys think about that?Last edited by Motorcitydak; 04-27-2014 at 12:32 PM.
Steve
1968 Dodge Charger All Wheel Drive project Red Bull<script type="text/javascript" src="safari-extension://com.ebay.safari.myebaymanager-QYHMMGCMJR/5cce6da5/background/helpers/prefilterHelper.js"></script><script type="text/javascript" src="safari-extension://com.ebay.safari.myebaymanager-QYHMMGCMJR/85dc54c0/background/helpers/prefilterHelper.js"></script><script type="text/javascript" src="safari-extension://com.ebay.safari.myebaymanager-QYHMMGCMJR/85dc54c0/background/helpers/prefilterHelper.js"></script>
04-27-2014 #376
Registered User
- Join Date
- Aug 2007
- Location
- Albemarle, NC
- Posts
- 1,149
thats the way I would do it. id also limit the amount of braided as much as humanly possible. probably only use a 6 inch piece for drivetrain flex, and hardline the rest.
Michael Crawford
1970 plymouth Duster back under construction:
https://www.pro-touring.com/showthre...uring-makeover
1987 GMC S15 https://www.pro-touring.com/showthre...ct-drivabeater
04-28-2014 #377 Registered User
- Join Date
- Aug 2011
- Location
- North Platte,NE
- Posts
- 876
Steve the 6.4 car intakes have an active runner valve. Only problem is they dogleg to the driverside. I think the 11+ Charger/300/Challenger 5.7 intakes are active as well.
04-29-2014 #378 Registered User
- Join Date
- Dec 2011
- Location
- Planit Oahu, Hawaii if you don't belive me check shipping prices
- Posts
- 254
I like how the build is going, in post 363, User was / is criticizing your fab / engineering skills. I personal will say that I was suspect of your welding skills, but after some research for vehicle reconstruction laws for Oahu Hawaii, I found that the look of the weld has very little to do with strength of the weld. so with out looking at the weld in person it is all most imposable to evaluate the weld.
as far as engineering goes, look at the size of materiel used by auto manufactures, so in my experience I all ways have used 2-3X the thickness of material needed for the component at hand.
and that I see you are blowing it apart, I think that your ride will be just fine and you will not have any catastrophic failures.
04-29-2014 #379 Registered User
- Join Date
- Jun 2012
- Location
- Upstate SC
- Posts
- 95
You had me at 180 degree headers!
04-30-2014 #380
Registered User
- Join Date
- Nov 2009
- Location
- the dirty mitten
- Posts
- 1,212
72, yeah I really like that 6.4 intake, just a shame about the TB location. I did not know that '11 and up cars had them as well, I will have to look into that. That being said the truck engine is still rated at 20hp more than the same year car 5.7 so I do not think that an intake swap is completely necessary. I did get some bad news from Hot Wire Auto who built the wiring harness and ECM in my Hemi '96 Dakota, they say that a manual trans ECM will not do the active intake so I will have to wire it separately with a nitrous activator.
FlyDoc, thanks for the comments. I would never defend the weld that I did on that idler pulley mount...and unfortunately on some other areas of the car. I ground that one down and re-did it, will show it as soon as I get it back. I will be doing that to some other areas on the car as well. I have been getting some frustrating welding results some times. I try to change one thing at a time (wire speed, power, direction of weld, etc...) but some beads I am fiddling with and it does not come out as planned. I also know that pictures some times will not show welds the best, I have looked over my pictures and been concerned only to go and look at the car again to see it is really not the same. Rest assured that when/if I do have failures, I will be the first to show off what happened and why. This car is in many ways an experiment and its results have always been and will continue to be shared with everyone.
I too like to see what the OEM's build then make my parts out of 2-3 times thickness. I some times have a hard time believing what actually works. The steering rack mount for example of my bmw is just a few pieces of maybe 12ga steel bent in C channel held in with 2 10mm bolts
astronaut, glad to have your attention, let me know when the space shuttle needs some new plumbing!
Speaking of plumbing, I do have the fuel cell mounted. It is nice to finally see it in place, it took a few long nights to get here. It is completely isolated from the steel frame by the nylon sheets and there is some fuel hose around the round bar on top. The tank is tipped 3 degrees down on the drivers side so that fuel will stay around the pump
Another fuel line question, is 1/4 big enough for it? Nicopp I am only finding in 1/4 and 3/16. I planned on using the same stuff for my brake lines as wellLast edited by Motorcitydak; 04-30-2014 at 10:45 AM.
Steve
1968 Dodge Charger All Wheel Drive project Red Bull<script type="text/javascript" src="safari-extension://com.ebay.safari.myebaymanager-QYHMMGCMJR/5cce6da5/background/helpers/prefilterHelper.js"></script><script type="text/javascript" src="safari-extension://com.ebay.safari.myebaymanager-QYHMMGCMJR/85dc54c0/background/helpers/prefilterHelper.js"></script><script type="text/javascript" src="safari-extension://com.ebay.safari.myebaymanager-QYHMMGCMJR/85dc54c0/background/helpers/prefilterHelper.js"></script>

 Reply With Quote


