

Results 21 to 40 of 104
Thread: 1970 Firebird Formula 505ci EFI
-
02-21-2011 #21

 Registered User
- Join Date
- Nov 2006
- Location
- Ma.
- Posts
- 5,567

Nice project ,it looks like you'll finnally get to use it pretty soon.
Wayne
Car FINALLY home !!!!!! lol
Project FNQUIK https://www.pro-touring.com/showthre...ghlight=FNQUIK
-
02-21-2011 #22 Registered User
- Join Date
- Jun 2007
- Location
- St. Pete FL
- Posts
- 934
I like
 HELP!!!
1973 TA 4 spd #'s match red/white = STOLEN
https://www.pro-touring.com/threads/...55#post1106255
03-19-2011 #23
Registered User
- Join Date
- Sep 2009
- Location
- Sandy, OR
- Posts
- 383
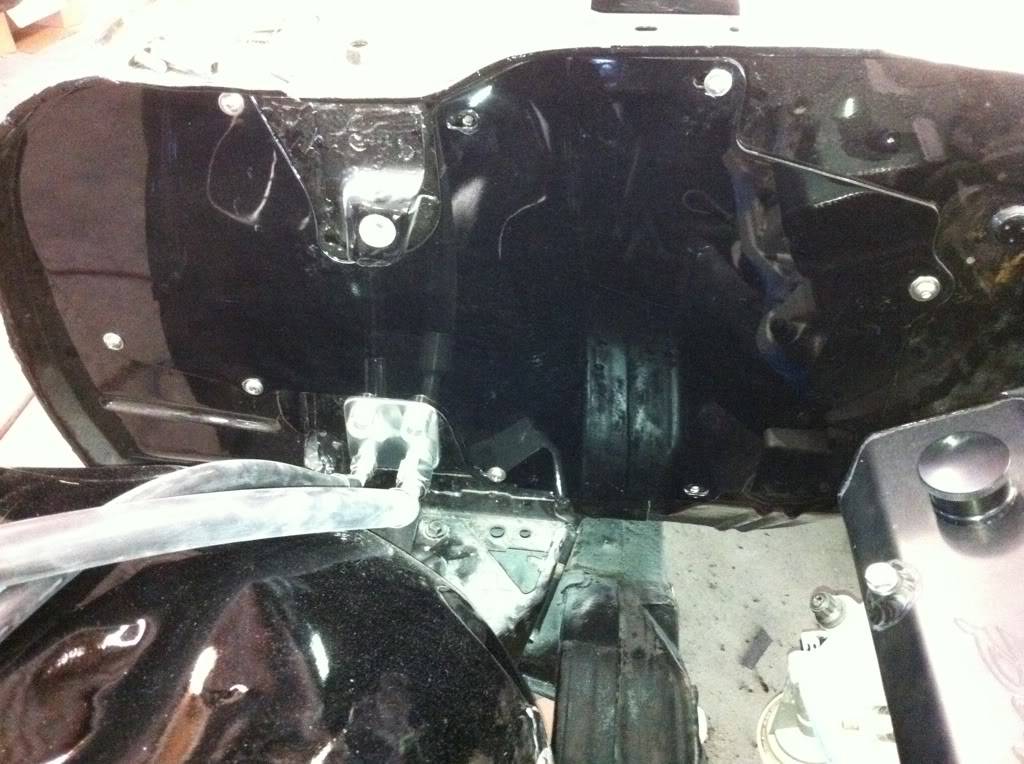
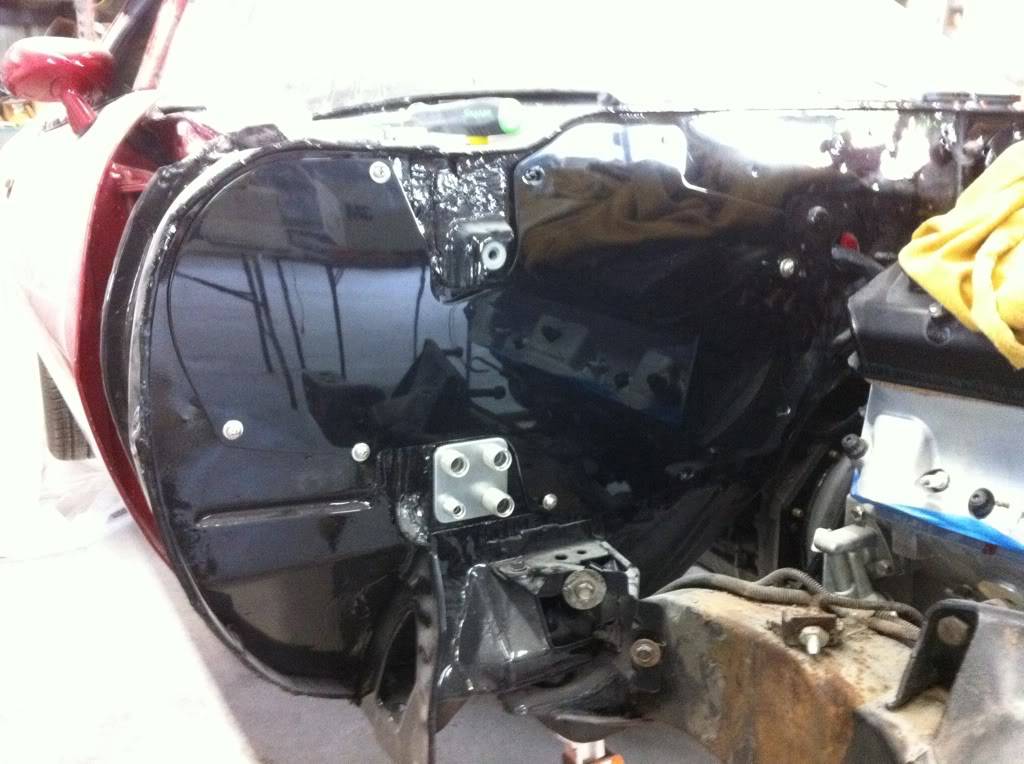
Well made a little progress. Got the evap core mocked up and fab'd some mounts
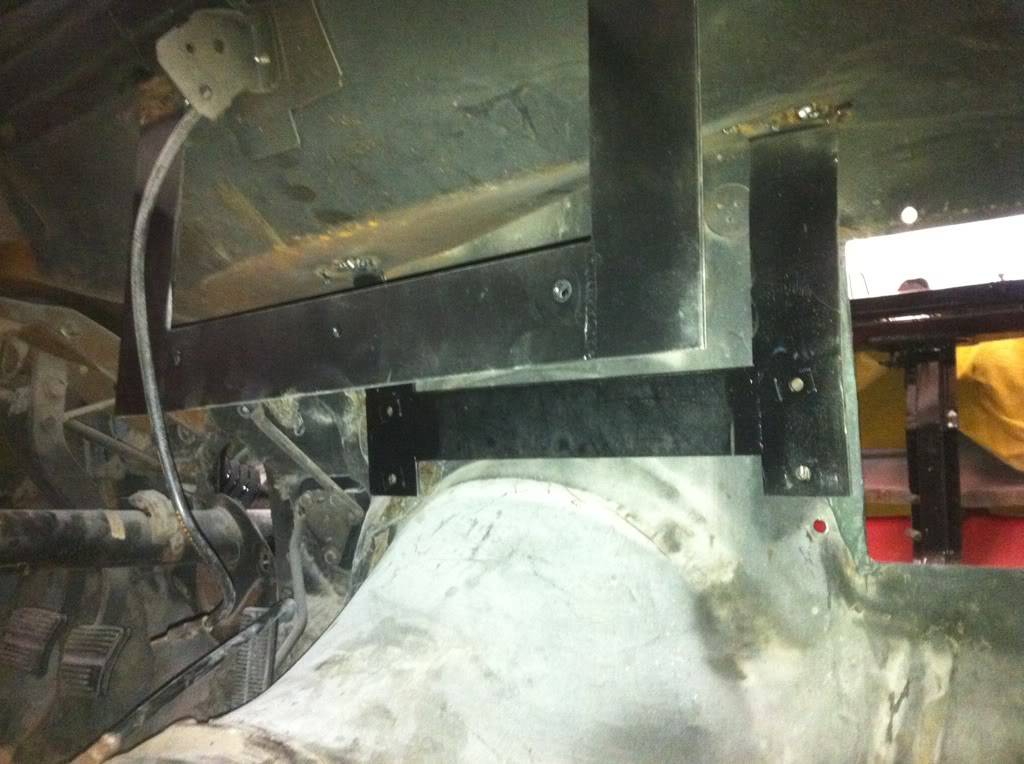
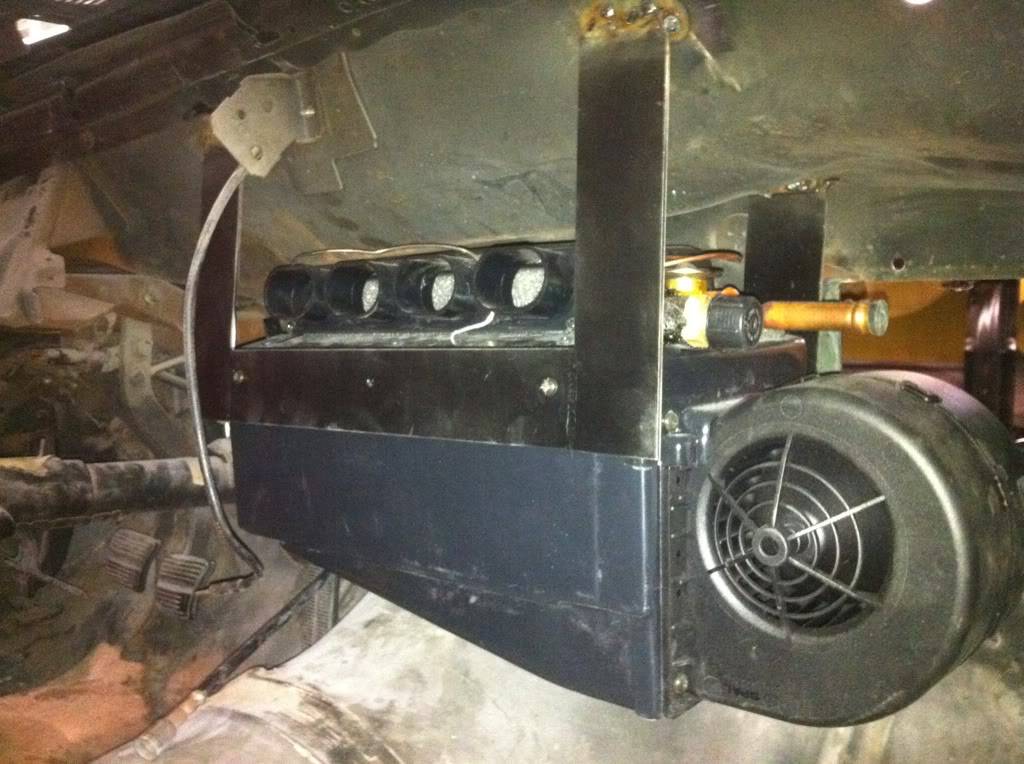
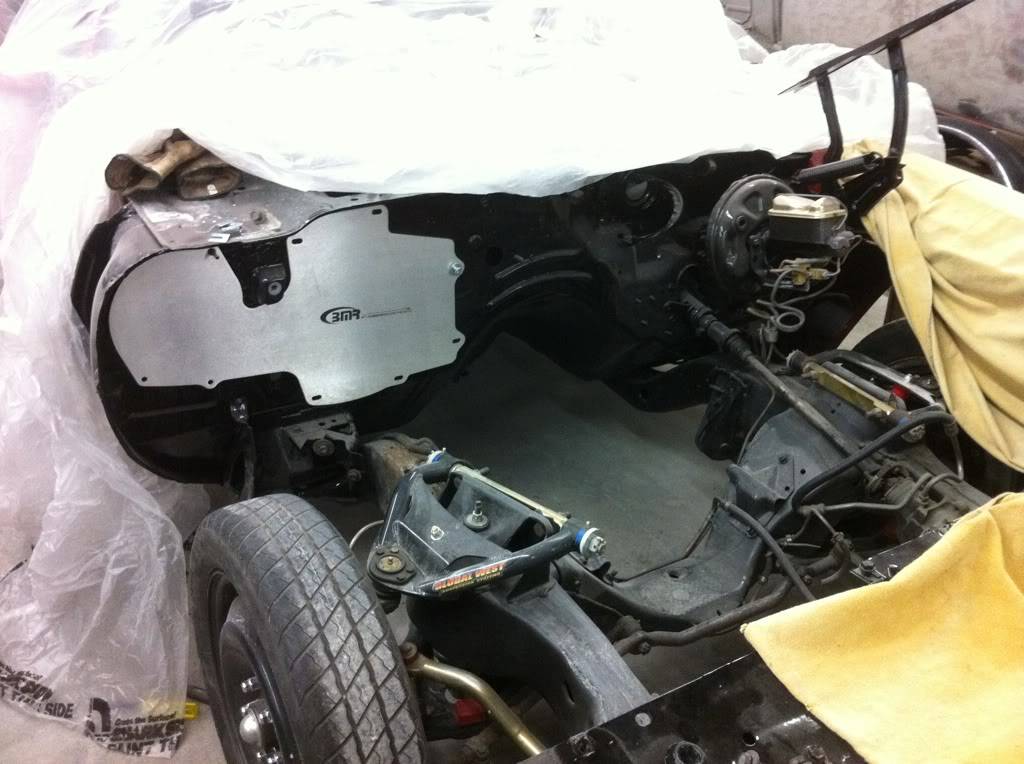
also began to fit up the a/c heater delete plate from BMR. I am going to paint it gloss black to match the firewall
03-20-2011 #24 Registered User
- Join Date
- Feb 2005
- Location
- Sydney, Australia
- Posts
- 1,798

Looks good...the AC system is a nice fit.
Regards,
Leigh
Sydney, Australia
1971 Firebird 455
https://www.pro-touring.com/showthre...Project/page27
03-20-2011 #25
Registered User
- Join Date
- Jun 2007
- Location
- St. Pete FL
- Posts
- 934
Is that their camaro kit? I didn't see Pontiac but they should be the same.
HELP!!!
1973 TA 4 spd #'s match red/white = STOLEN
https://www.pro-touring.com/threads/...55#post1106255
03-20-2011 #26
Registered User
- Join Date
- Sep 2009
- Location
- Sandy, OR
- Posts
- 383
It is the Camaro kit from Classic auto air. We used the street rod evap core but the rest of the kit is for a 2nd gen camaro. I will have to do some mods to get the switch and cables to work but everything else should go on with out a hitch. Originally Posted by cdoggy81

03-26-2011 #27
Registered User
- Join Date
- Sep 2009
- Location
- Sandy, OR
- Posts
- 383
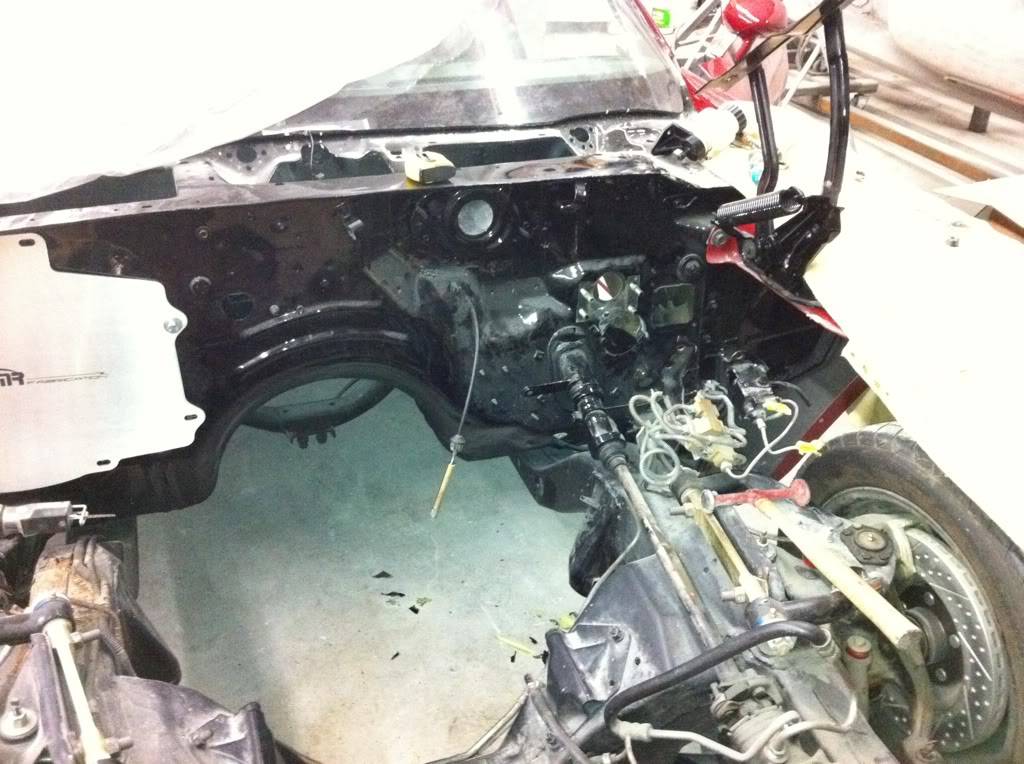
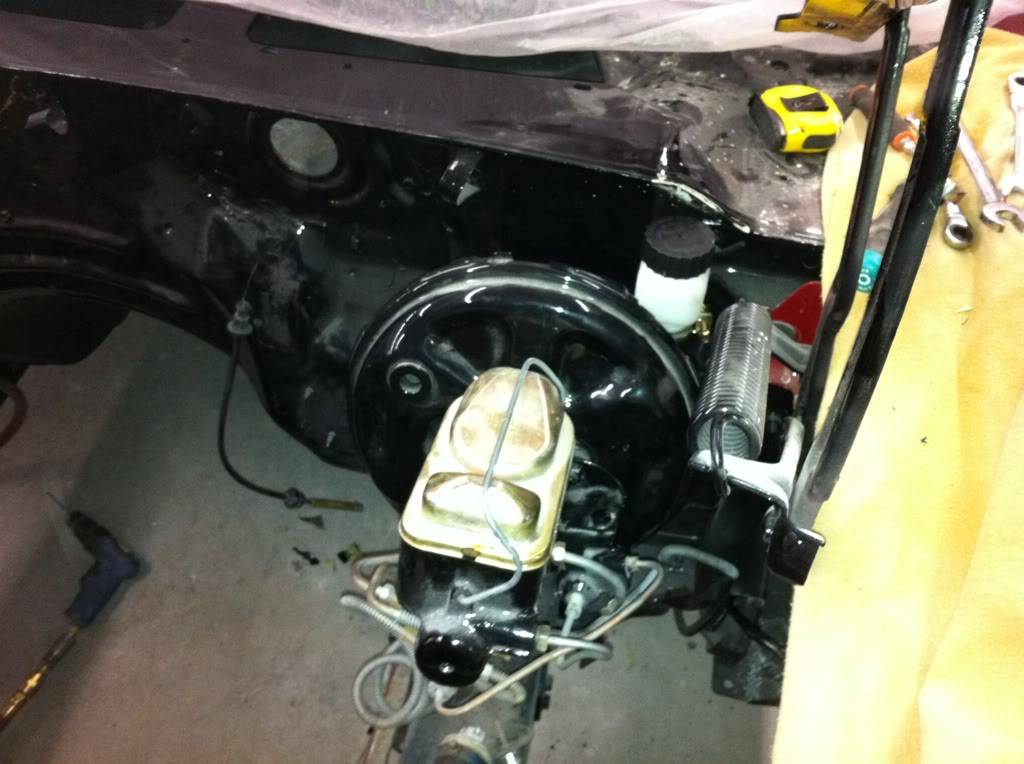
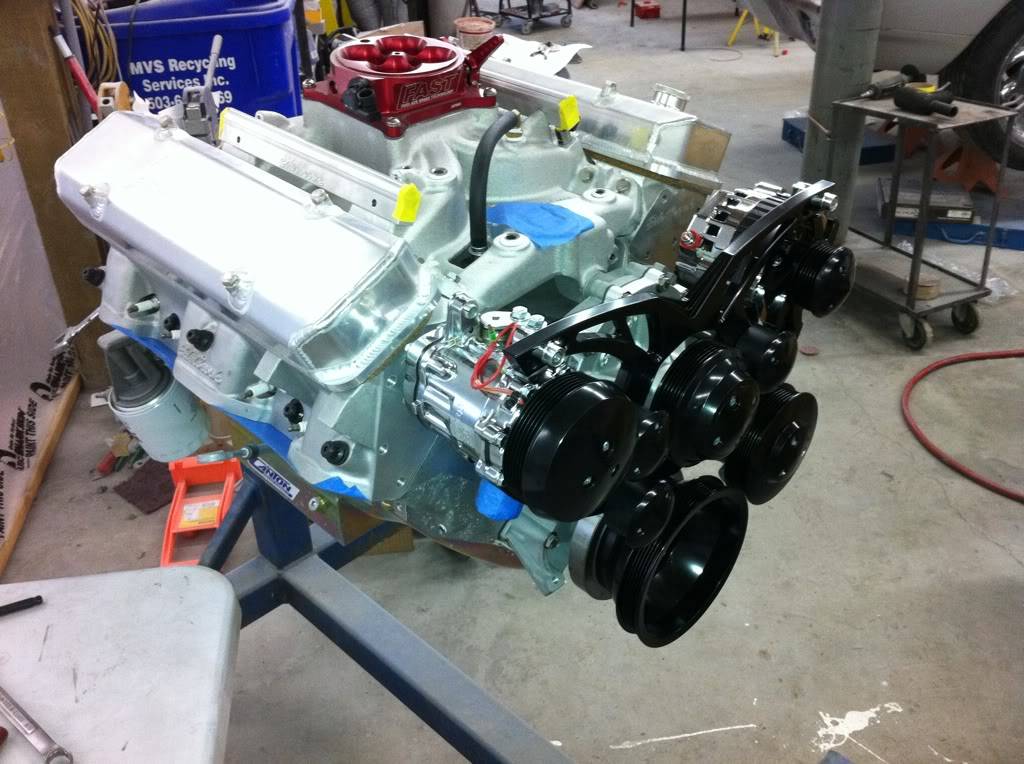
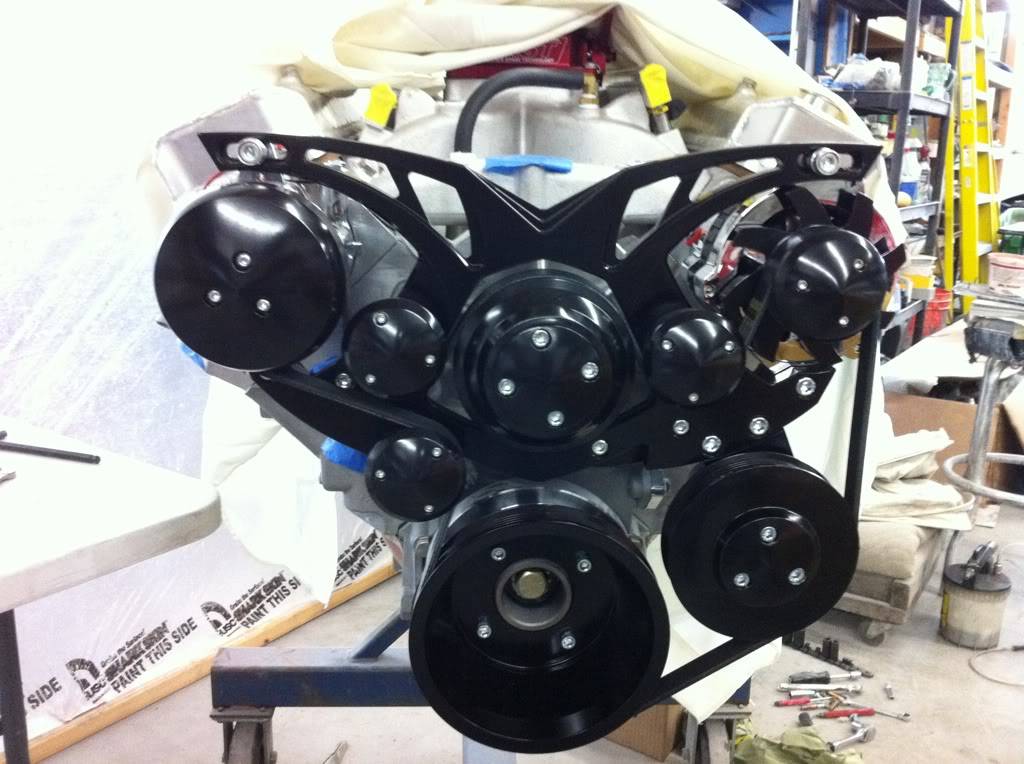
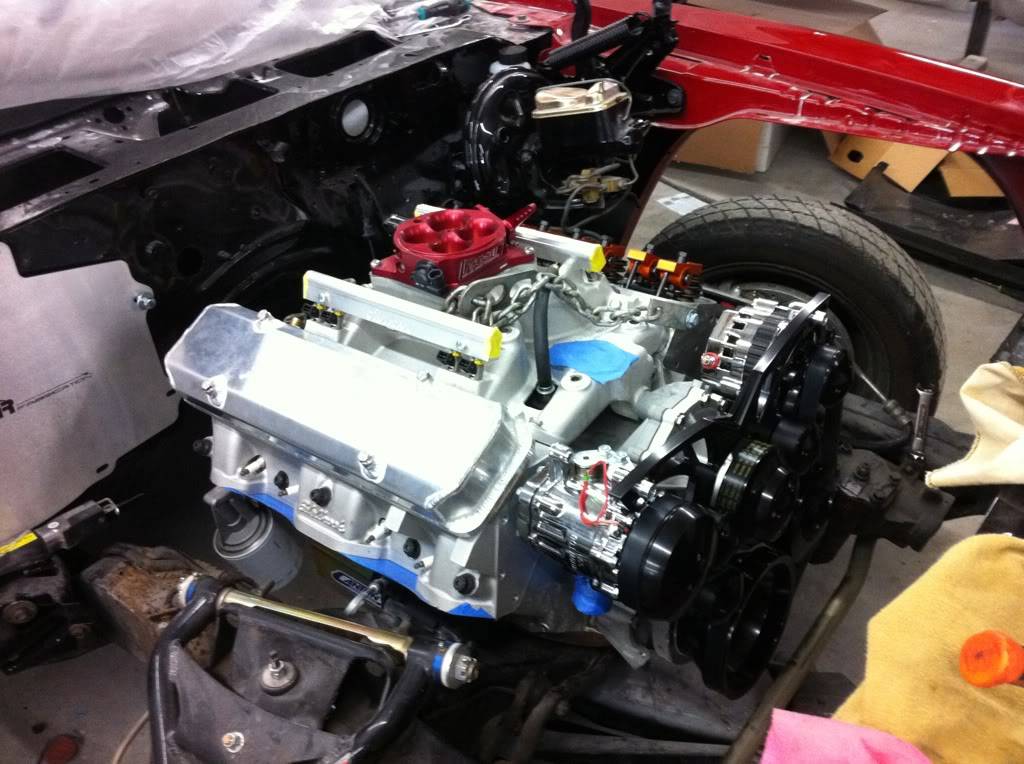
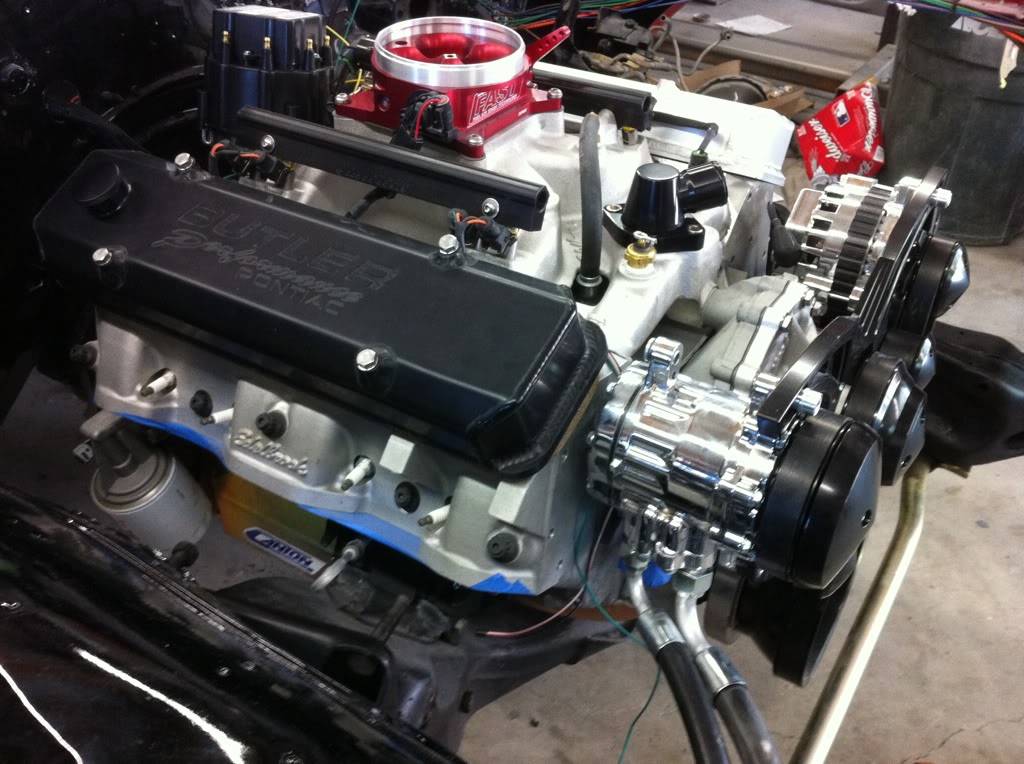
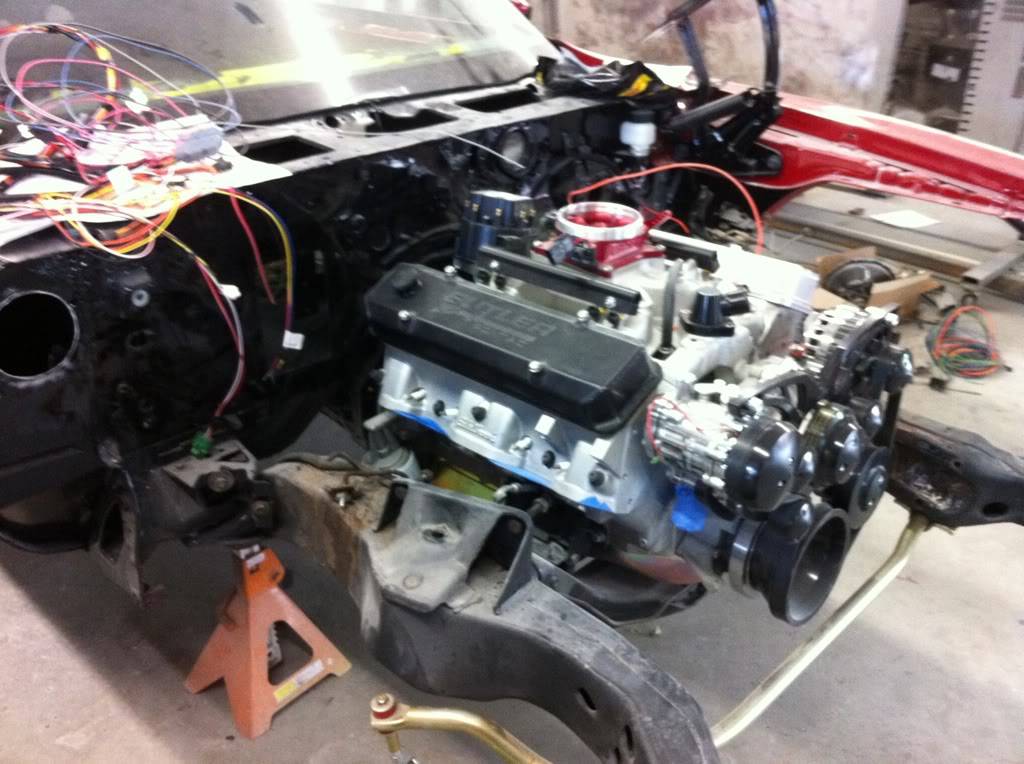
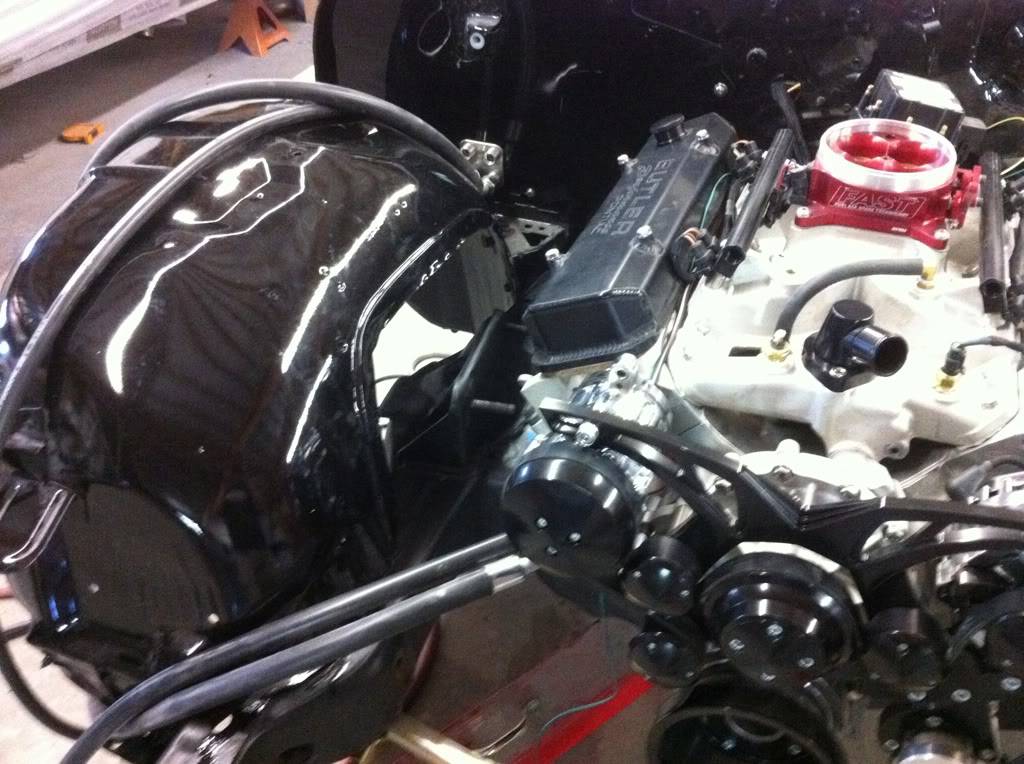
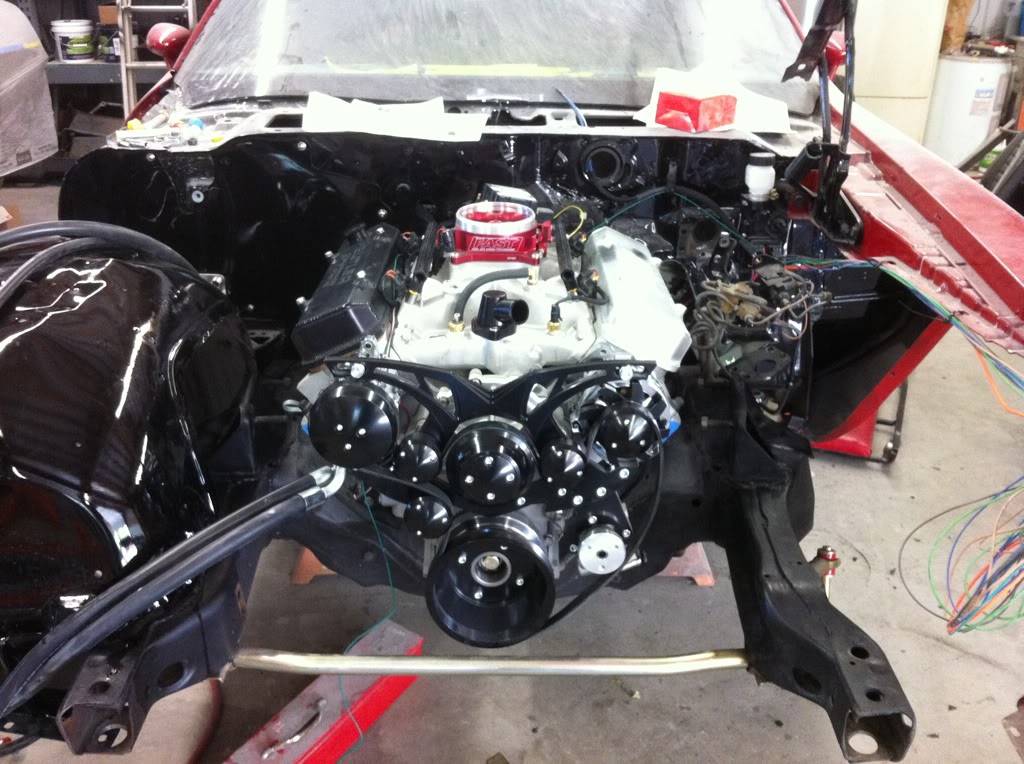
Got the March serpentine system in and installed. Got the valves adjusted and got the motor installed along with the hydraulic slave mounted. with the fabricated valve covers the d/s hits the factory booster so were gonna need to go with a 8" dual booster for clearance.
08-10-2011 #28
Registered User
- Join Date
- Sep 2009
- Location
- Sandy, OR
- Posts
- 383
Ok time for the long overdue update!
we've got the entire inside of the body coated in lizard skin insulation and sound control. Began wiring in the new AAW classic update wiring harness and the FAST EZ EFI harness. I removed a few lbs of wire on the efi harness since each wire is about 3 ft too long. Pulled the harness apart shortened it up and cleaned up the routing and added a braided loom since i cant stand "split loom"
Kevin decided to swap out his QA1 coilovers and global west a arms for Pro Touring F body Tubular arms and ridetech SA coilovers. We are also going to be mini tubing the car and adding a ridetech Air Bar in the rear.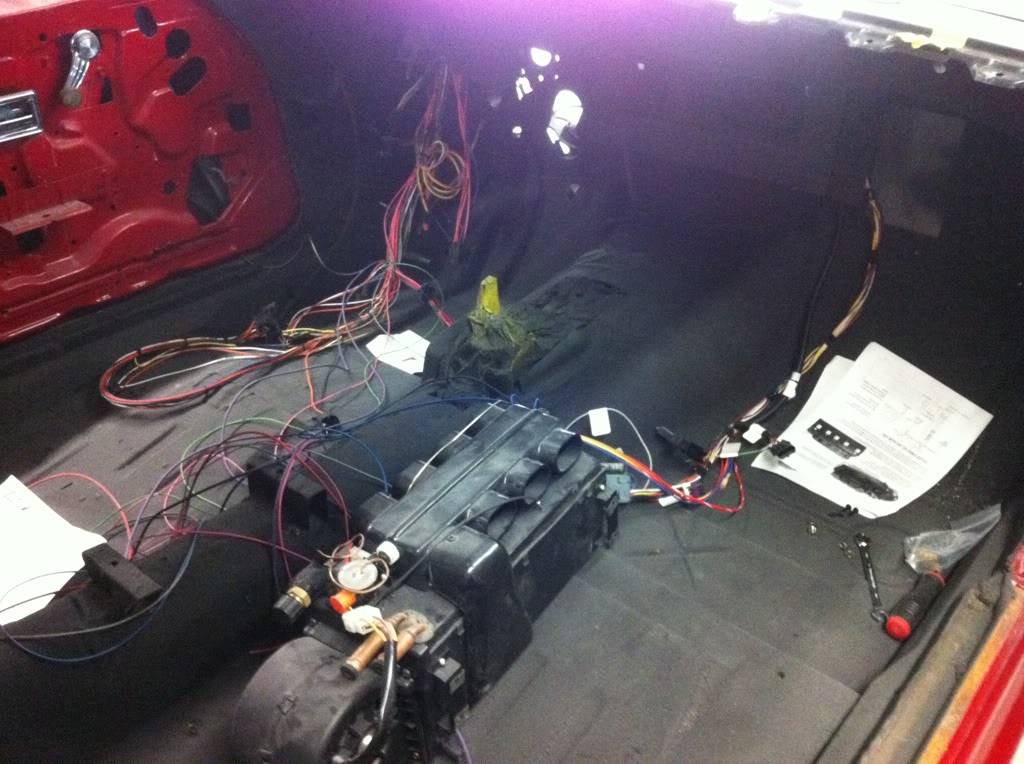
08-10-2011 #29
Registered User
- Join Date
- Sep 2009
- Location
- Sandy, OR
- Posts
- 383
08-10-2011 #30
Registered User
- Join Date
- Jun 2007
- Location
- St. Pete FL
- Posts
- 934
Looks good! I like the TA spoiler look on the Formula
Are going to go with the 73 TA style front air dam or the 70-71 style?
HELP!!!
1973 TA 4 spd #'s match red/white = STOLEN
https://www.pro-touring.com/threads/...55#post1106255
08-10-2011 #31 Registered User
- Join Date
- Dec 2005
- Location
- Birmingham, AL
- Posts
- 3,356
Why the change on the control arms? Any chance the old ones will be for sale if they are in good shape? Pm me if they are. Great looking project.
Stephen
08-10-2011 #32
Registered User
- Join Date
- Sep 2009
- Location
- Sandy, OR
- Posts
- 383
So we can run a more aggressive alignment without using a ton of shims. The PTFB A arms have 5-1/2* + caster built in where the global west only have 2-3* of + caster. The GW arms have already been sold but the QA1 Coilovers will be in the for sale section soon. Originally Posted by srh3trinity
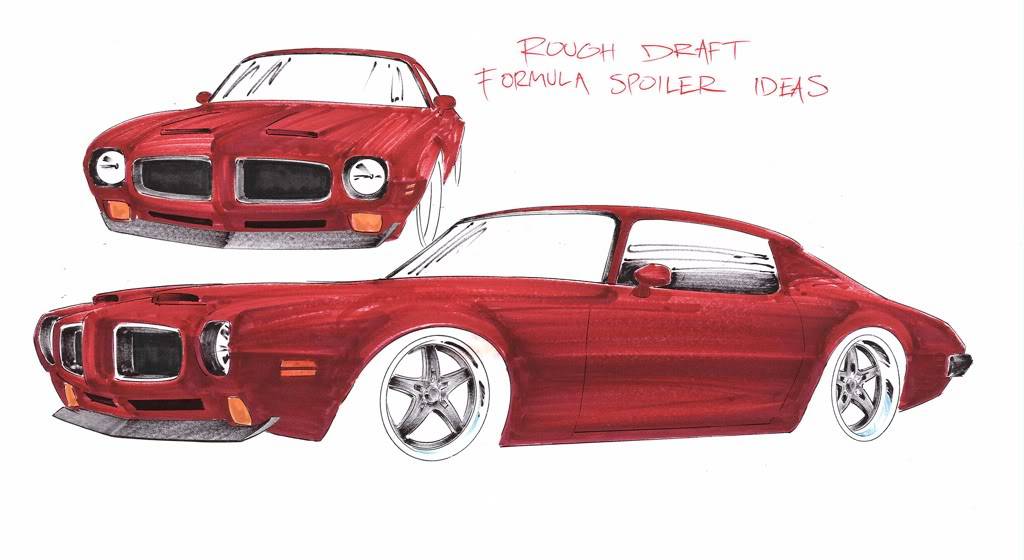
Its going to be a custom hand built front spoiler and we are going to shorten the rear spoiler height about 1-1/2-2". Originally Posted by cdoggy81
08-10-2011 #33 Registered User
- Join Date
- Jul 2005
- Location
- Portland, OR
- Posts
- 127
Thanks!! Like Luke said, we're planning on making a custom front spoiler that doesn't have the end caps like the T/A front air dam. I've always preferred the clean sides of the Formula over the T/A but liked the lower center air dam. So, in speaking with Jason Rushforth in the rendering, this is what were going to shoot for in the front. In order to counteract the effectiveness of the rear spoiler, we're going to shave off some height and somehow keep the compound blend around the rear fender. Hopefully, we'll reduce the typical Formula float. Once the rendering is finalized, I'll post it up. Originally Posted by cdoggy81
I honestly didn't know there was a difference in the front air dam style from the 70-71 to the 73. Makes sense since the nose changed. What were the differences?
Kevin
08-10-2011 #34 Registered User
- Join Date
- Jun 2011
- Location
- Ohio
- Posts
- 263
Looks Great!!!

08-10-2011 #35
Registered User
- Join Date
- Feb 2005
- Location
- Sydney, Australia
- Posts
- 1,798
As far as I know, the front spoiler and side spoilers are the same 70-73....the lower front apron changed between the steel and plastic versions.
I bought a factory repro style centre spoiler section for my 71 project. Car is looking good.
I know what you mean about the booster and tall covers being close...my tall valve covers come pretty close to the booster, but luckily they just miss.
If you're looking for a nice set up with the 8" dual diaphrame booster, The Right Stuff is selling a complete chrome booster/master and combo valve set up (pn 965-J85315171) thats on special at Jeggs at the moment. You also need part number BBK001 (mounting bracket for booster) and C02 eyelet, for a bolt in application on a 2nd gen.Regards,
Leigh
Sydney, Australia
1971 Firebird 455
https://www.pro-touring.com/showthre...Project/page27
08-10-2011 #36 Registered User
- Join Date
- Jun 2011
- Location
- Asheville N,C,
- Posts
- 14
My first car was a 1970 Formula, brings back so many memories, the ride the feel, just can't be imatated by anything elese, and this one should be in a class all by itself, love it
H-METAL camaro
08-11-2011 #37 Registered User
- Join Date
- Apr 2004
- Location
- OKC, OK
- Posts
- 3,739
looks good, we are getting ready to add t/a skirts to a 71 Formula in the shop.
Mike Redpath
Musclerodz & Customz
405-288-0189
pro-touring parts specialists
Musclerodz.com
facebook page
http://www.facebook.com/#!/pages/Mus...73054649402015
instagram
Musclerodz
08-11-2011 #38
Registered User
- Join Date
- Feb 2006
- Posts
- 478
Are you sure you can run that compressor up side down like that? I was sure I saw in the instructions that the ports had to be somewhere above 90 degree left to 90 degrees right.
Just asking Alex Godsey
Somerset, KY
Pro Touring 67 GTO
461 Pontiac Power
08-13-2011 #39
Registered User
- Join Date
- Jul 2005
- Location
- Portland, OR
- Posts
- 127
Thanks Leigh. I didn't know about the material change. Originally Posted by LeighP
Yeah. The welds on the tall cover just barely hit the booster. I was thinking about just thinning out the valve cover gasket from the cork something else but figured since these are so tough to get to seal anyway just go with the 8" dual. Thanks for the tip on the Right stuff booster. I'll have to check it out.
08-13-2011 #40
Registered User
- Join Date
- Jul 2005
- Location
- Portland, OR
- Posts
- 127
Well, I was thinking that Delta P across the compressor shouldn't care about whether or not the ports are up or down. But now that you've raised the question, I'm not so sure. Maybe there's a lubrication issue. I was looking through the instructions from March and didn't see anything specific in their instructions or tips from their website about it so I jumped on Sanden's website to see. On the 7176 compressor spec page, they always show the ports mounted up in the 12 o'clock but don't specifically mention it as a requirement. I'll call Sanden to find out for sure. Thanks for the tip. Originally Posted by gearbanger
Kevin

 Reply With Quote


