

Results 1 to 12 of 12
Thread: English Wheel Build
-
01-19-2011 #1
 Registered User
- Join Date
- Dec 2009
- Location
- Medina Ohio
- Posts
- 82

English Wheel Build
Hi all,
I posted a couple pics of the E-Wheel I have been working on and Aronhk_md mentioned I should post some pics over here for you guys to check out.
So here you go!
I did not take very many pics the first day so these are a little far into the project.
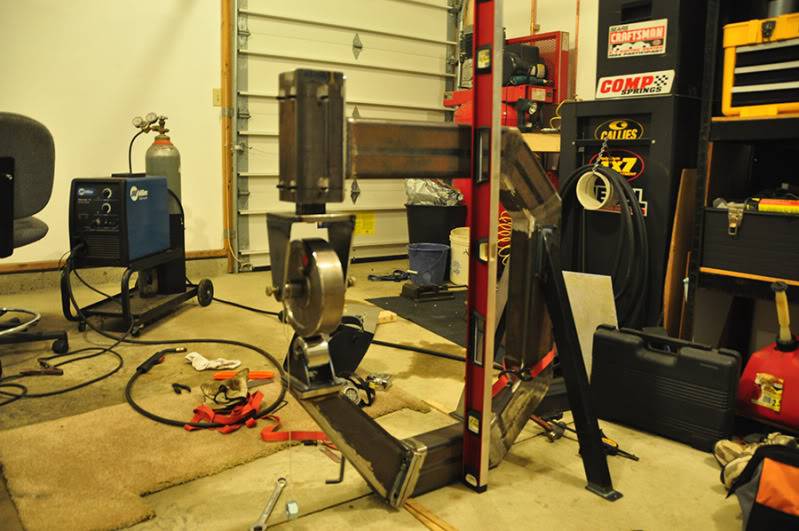
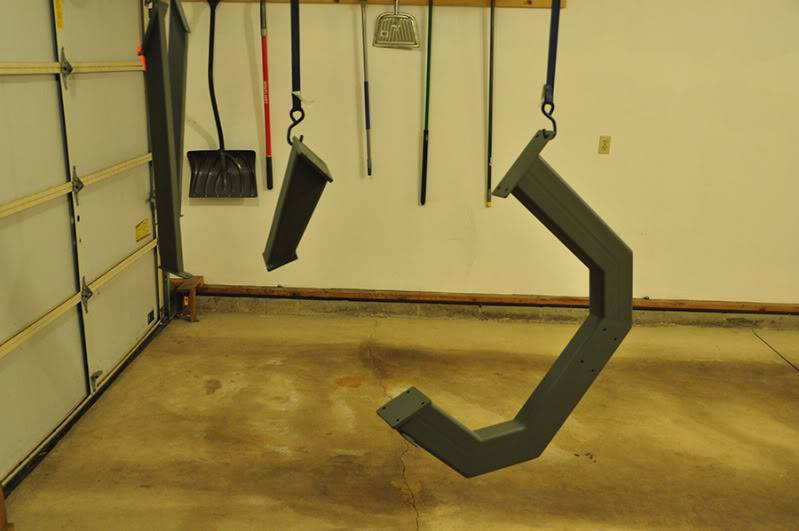
The Frame:
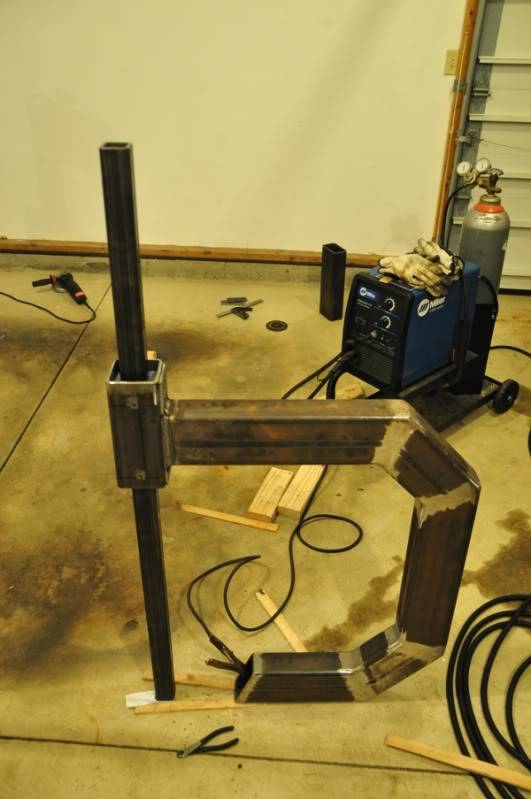
Another angle:
On the bench locating the lower anvil holder:

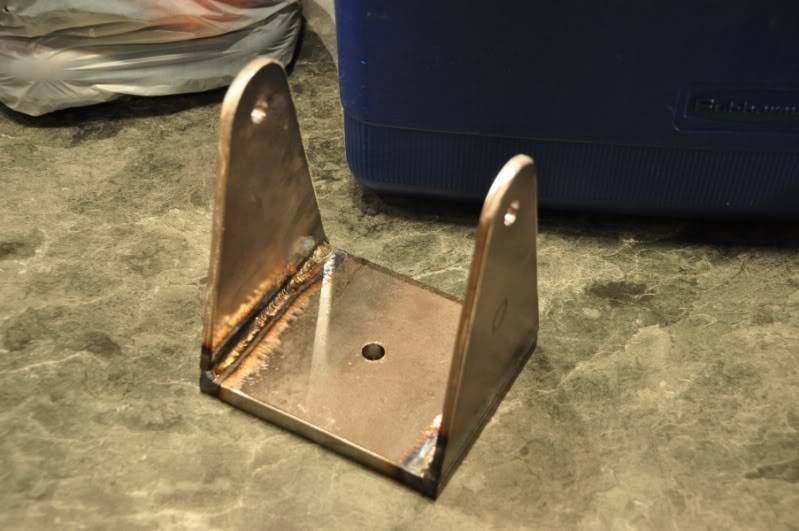
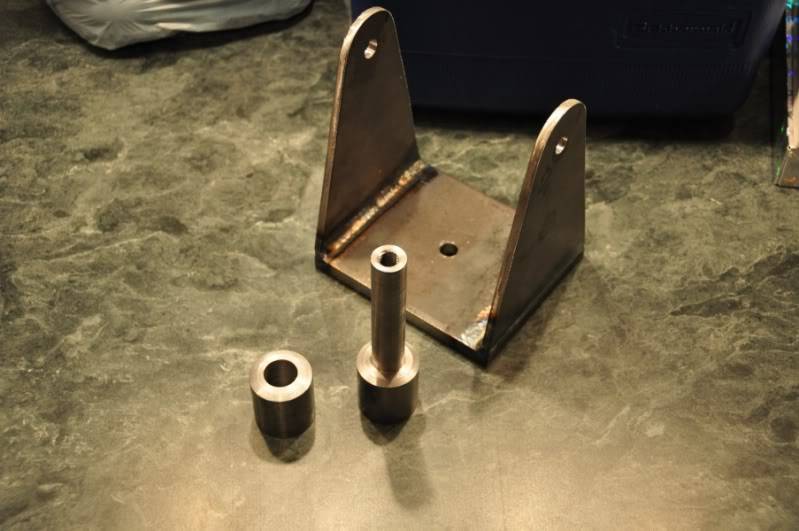
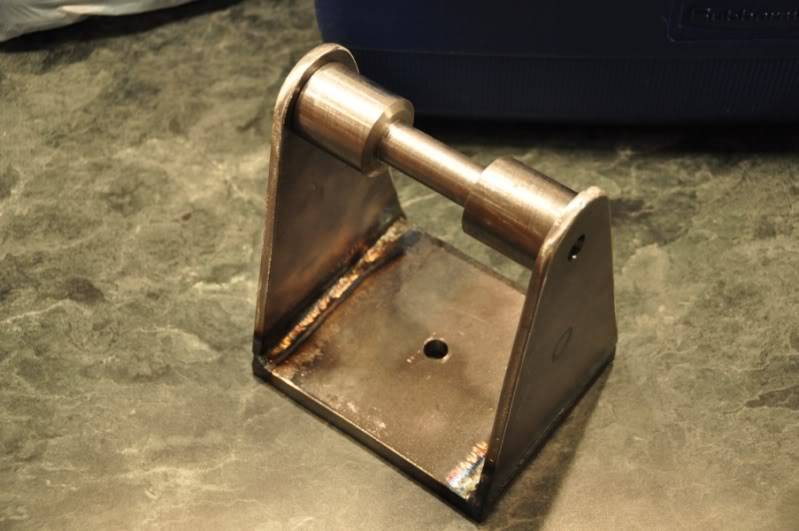
Upper Anvil Holder:
Upper Anvil Axle I machined up:
-
01-19-2011 #2
Registered User
- Join Date
- Dec 2009
- Location
- Medina Ohio
- Posts
- 82
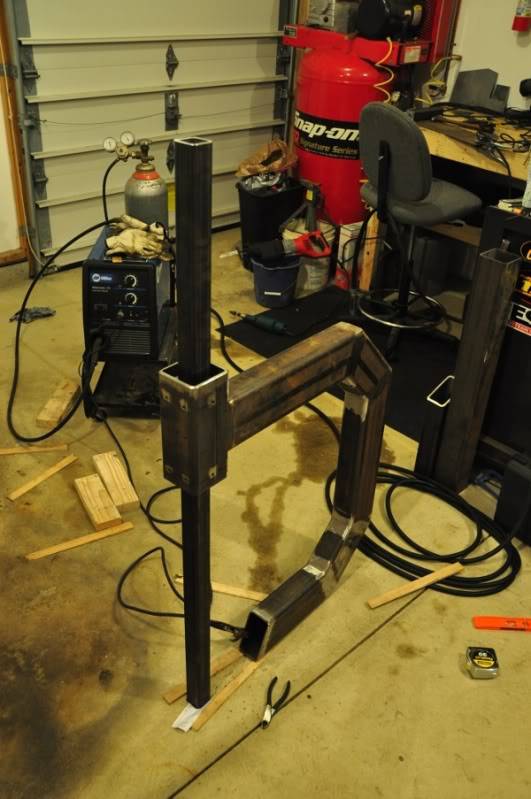
Upper holder assembled:
Location the lower holder for final welding:
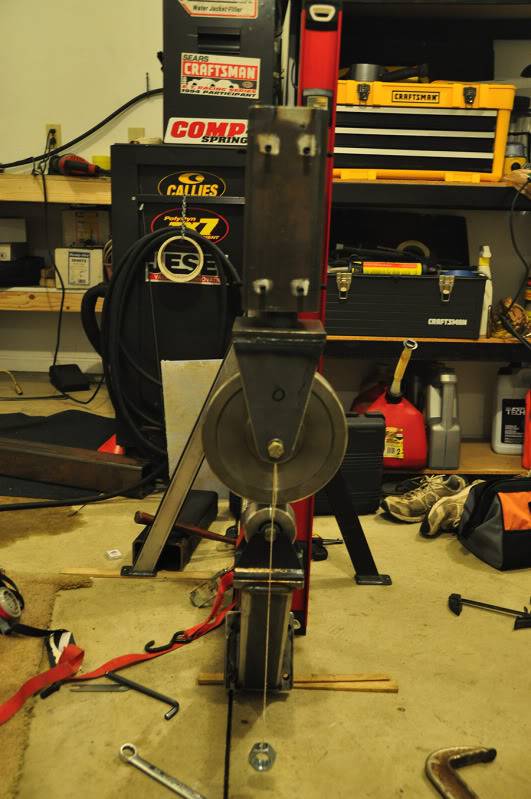
More location going on:
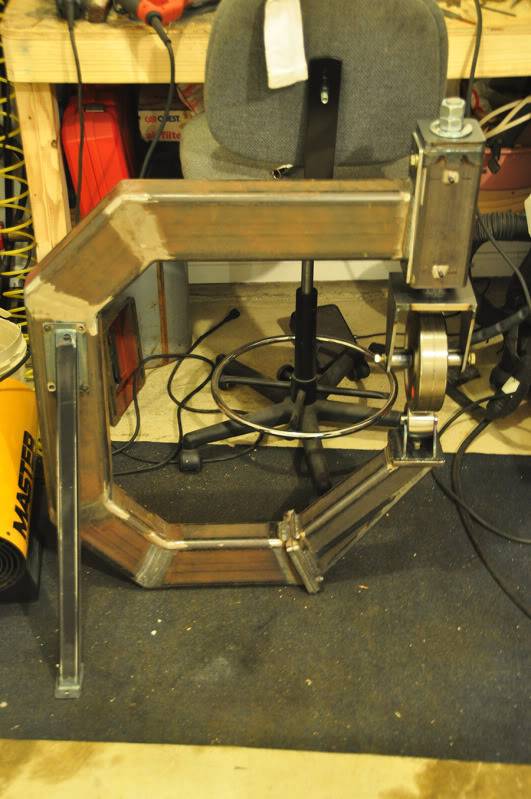
Almost finished product:
Broken down for some etching primer:
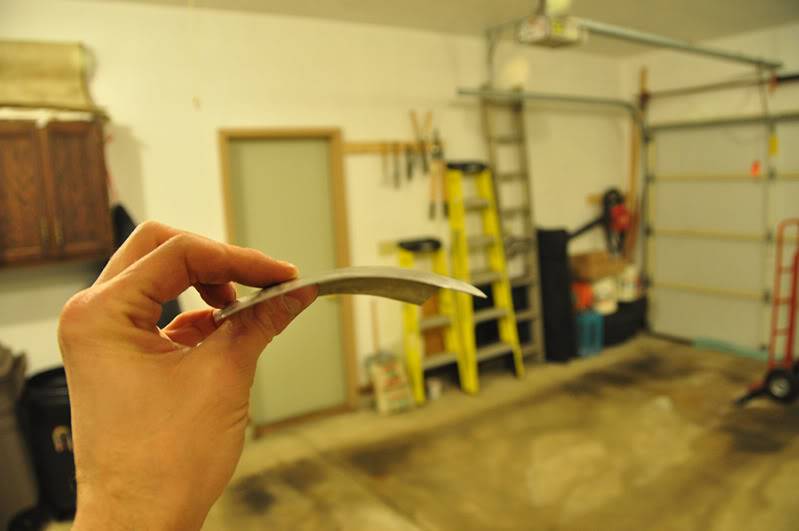
And finally some metal I shaped with her:
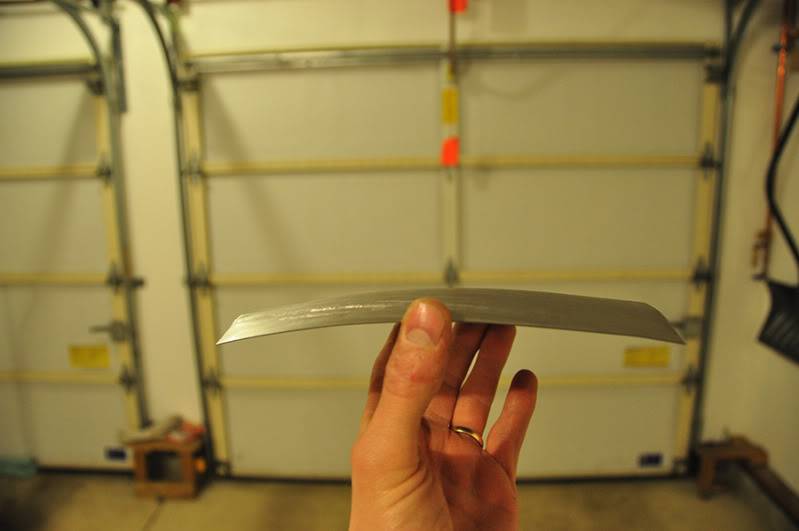
One more:
01-19-2011 #3
 Registered User
- Join Date
- Jan 2010
- Location
- Delaware
- Posts
- 689
Welcome Chris!......I think its very cool and hope the guys here think so too. :D
1973 Trans Am 455 SR block, ported 6x-8 heads, solid cam, Victor intake, 830 CSU carb, aluminum rods, 77mm Garrett turbo and methanol injection. 1064hp at the flywheel@5500 rpm
01-19-2011 #4 -Moderator/Sponsor-
- Join Date
- Jun 2001
- Location
- Orlando, FL
- Posts
- 10,603
Lovely work!
John Parsons
UnRivaled Rides -- Modern upgrades for your ride.
UnRivaled Rides recent project -- LS9-powered 69 Camaro
01-20-2011 #5
Registered User
- Join Date
- Dec 2009
- Location
- Medina Ohio
- Posts
- 82
Thanks guys. I can't wait to post some pics of actual panels I worked with it.
Chris
03-14-2011 #6 Registered User
- Join Date
- Jul 2008
- Location
- ohio
- Posts
- 1,135
thats neat where did you get the wheels? did you put it on its own stand and what do you think the total cost
keep the wheels a spinning and the Beavers a grinning (burt reynolds-smokey and the bandit)
03-15-2011 #7
Registered User
- Join Date
- Dec 2009
- Location
- Medina Ohio
- Posts
- 82
Howdy,
I got the anvils form HF. Would NOT suggest going that route to anyone though. I spent the better part of an afternoon standing in front of a crank grinder at Medina Mountain Motors grinding the wheels round and polishing them. I would go with Hoosier anvil if I were to do this again. I may end up with a set of their lowers before this is all done.... we'll see.
As for costs:
Steel 135.36
Hardware 14.80 My bolt selection isn't what it used to be!
Axle and Adjuster Material 9.00
Upper Anvil 41.54
Lower Anvils 95.85
Total 296.55
This is a "benchtop" model and the legs shown in the pics are the ones I am currently using. I may build some floor mount legs for it soon though. I don't have a ton of room in the ol' garage so the wheel is mounted to a bench in my basement. I'll have to post of some additional pics sometime. It still need final painting but it is all "finished".
Chris
03-15-2011 #8
Registered User
- Join Date
- Dec 2009
- Location
- Medina Ohio
- Posts
- 82
Oh, I almost forgot, I spent another $40-50 on Bearings for the HF upper wheel (I told you I would not recommend these...) and the torrington needle bearing setup for the upper adjuster.
So total would be closer to $350 all said and done.
03-23-2011 #9
New to Pro-Touring
- Join Date
- Oct 2010
- Location
- N/A
- Posts
- 42
looks a lot nicer that many of the "hobbyist" models I've seen for sale. Quick question, can you adjust pressure on the fly so to speak or do you have to stop and adjust it with wrenches every time?
03-24-2011 #10
Registered User
- Join Date
- Dec 2009
- Location
- Medina Ohio
- Posts
- 82
Hi there,
I really need to snap a couple pics of it all finish assembled. I made a hand wheel for the adjuster so yes I can adjust it on the fly. It's pretty stout, the main frame is 3x5x.250. She is NOT light by any means. I doubt I could lift it up onto the bench all assembled without help. Good thing it comes apart pretty quickly.
I'll get some additional pics asap.
Chris
03-24-2011 #11
New to Pro-Touring
- Join Date
- Oct 2010
- Location
- N/A
- Posts
- 42
thanks, a couple details on the tensioner would be awesome too if you don't mind, I've been looking for a simple and robust way of handling that.
03-24-2011 #12
Registered User
- Join Date
- Dec 2009
- Location
- Medina Ohio
- Posts
- 82
No problem,
I used 4x4x.250 tubing for the outer shell and 2x2x.250 for the quill. Inside there are four 1/4 thick plates of steel with 1/4 UHMW plastic glued to them. Two are 1 7/8" wide and 9" long and the other two are 3 /2" wide and 9" long. I welded 4 small tabs to the outer housing to hold the two thinner plates in the adjuster.
I used 1" all thread for the adjuster itself. I welded a nut into the 2x2 quill and then welded another nut to the all thread (red loctite probably would suffice). After that I simply drilled a 1" hole in the upper plate and welded it to the housing. Then all you have to do it adjust the allen bolts that are threaded into the outer housing. This design is VERY robust and there is NO slop what so ever. I cannot take credit for the design though as I found the info over on all metal shaping. They are a very helpful bunch over there and anything you would like to know about building an E-Wheel is over there. http://www.allmetalshaping.com/forumdisplay.php?f=29 you will probably have to create an account to see much though. Not to worry it is free.
Chris

 Reply With Quote


