

Results 621 to 640 of 949
-
09-29-2020 #621

 Registered User
- Join Date
- Apr 2005
- Location
- Chicago
- Posts
- 2,787
 let's be honest with ourselves, we both have issue's
 Originally Posted by NOT A TA

Thank you and wait till you see it anodized black. Originally Posted by TANKMASTERJ
Thank you and borrow as many as you want as that is exactly what I have done for years. Originally Posted by TonyV
marty-mj
GarageScene.net High Speed Welding KDHotrods RecoveryRoomInteriors WegnerAutomotive Autometer Ride-Tech
-
10-03-2020 #622
Registered User
- Join Date
- Apr 2005
- Location
- Chicago
- Posts
- 2,787
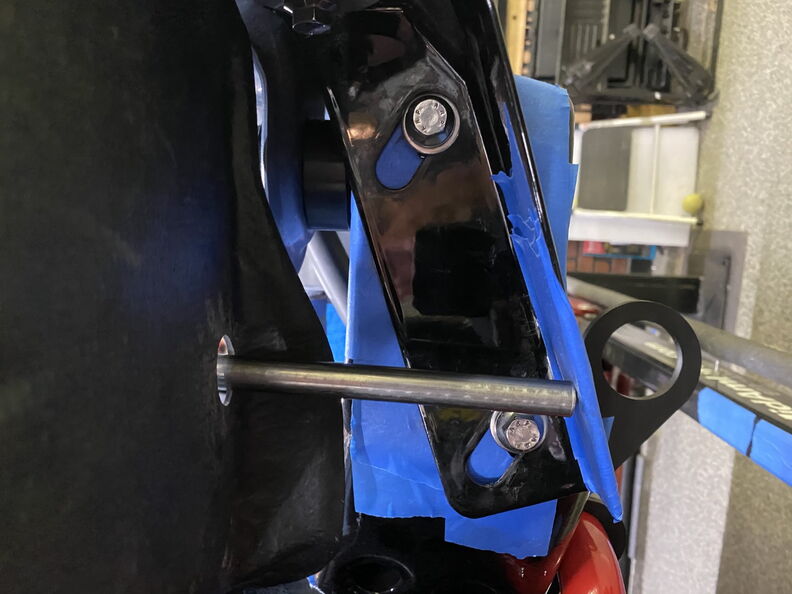
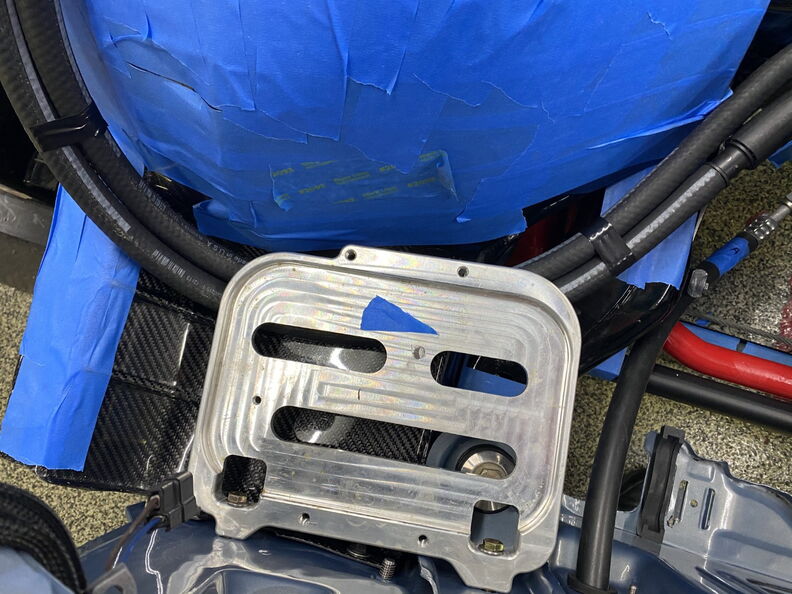
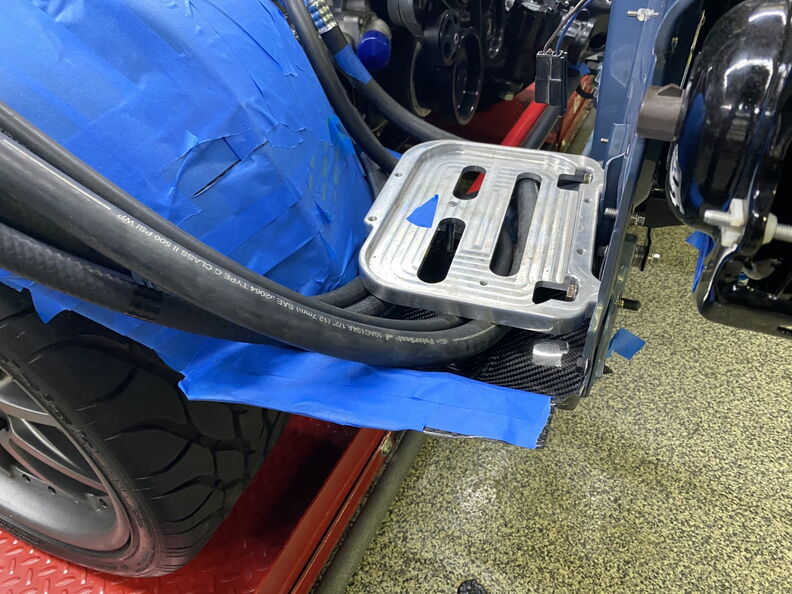
Battery Tray Support Concept ( 06-14-20 )
Moving back to the battery tray I need to figure out a good way to support the tray without over engineering it. The goal is
to come up with something simple that you wouldn't notice when you look under the car. It also has to be smooth to prevent
chaffing on the heater hoses.
Back from Ace Hardware with some supplies for my concept.
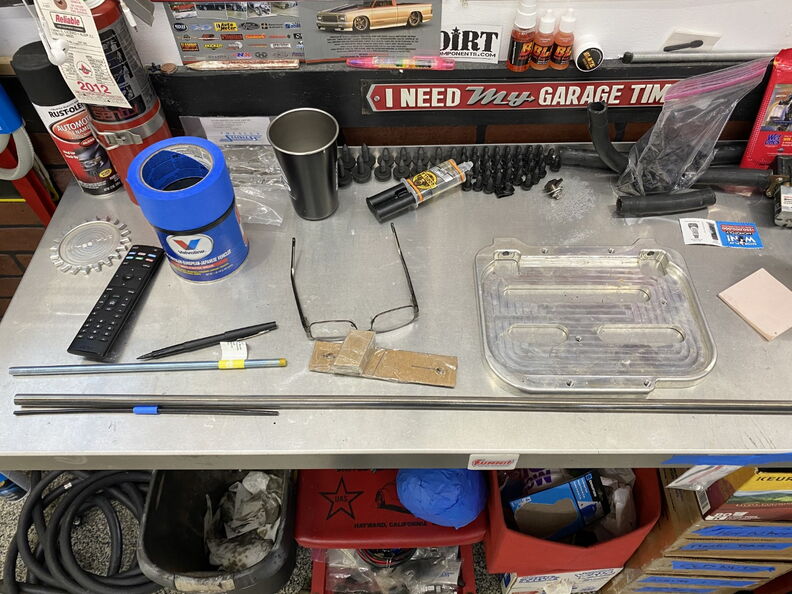
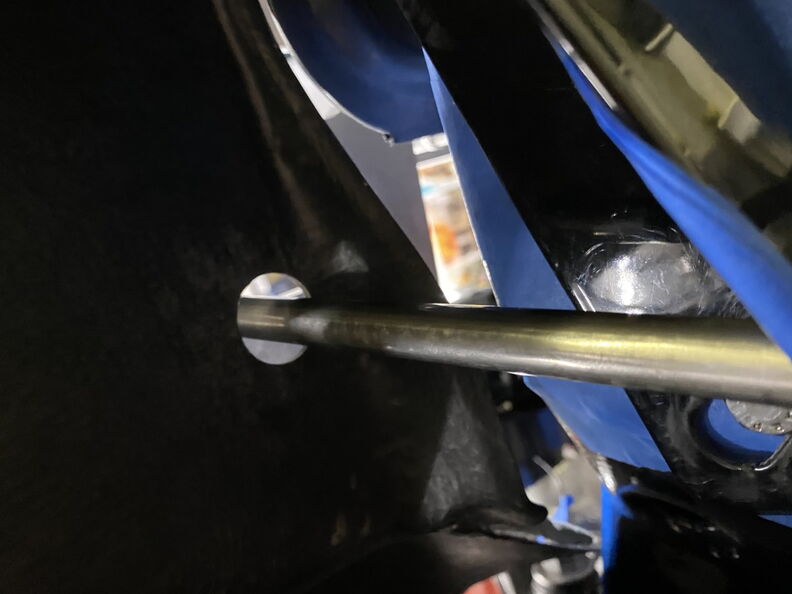
Support Sleeve.
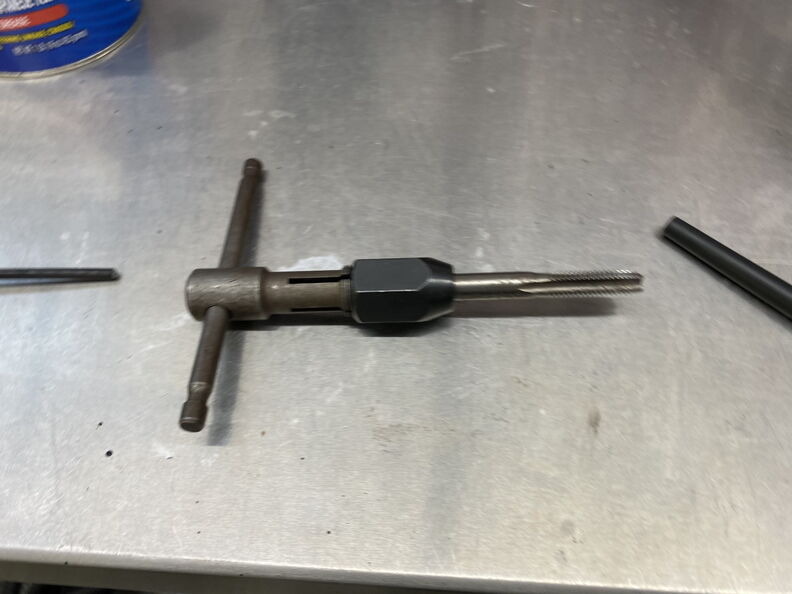
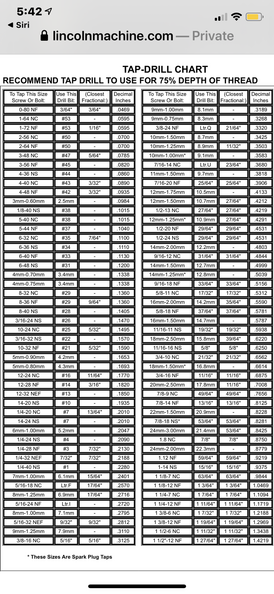
I need to thread a 3/8" stainless steel threaded rod into the bottom of the battery tray and anchor it to the core support bracket. You need
to drill the proper size hole for the 3/8" tap. If you don't have this Tap Cheat sheet it is worth saving this as I borrowed it from someone on one
of the BB forums years ago and have referenced it many times.
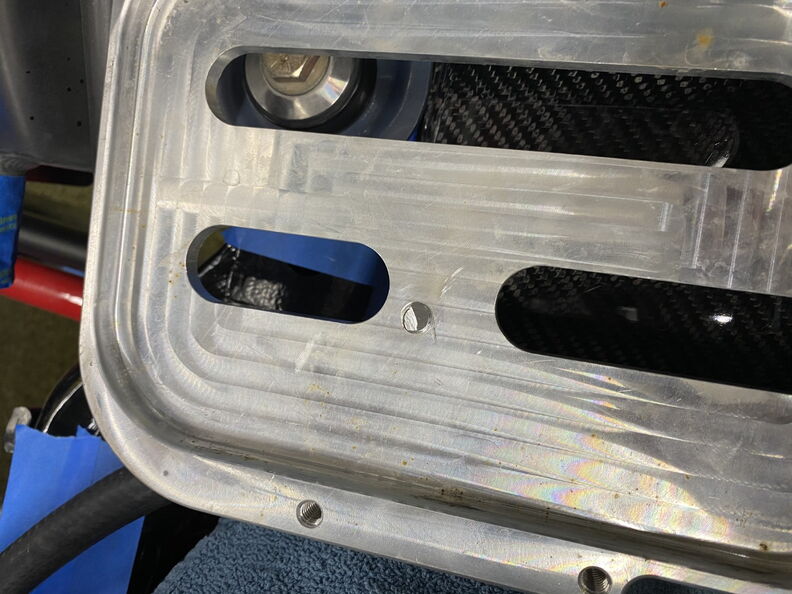
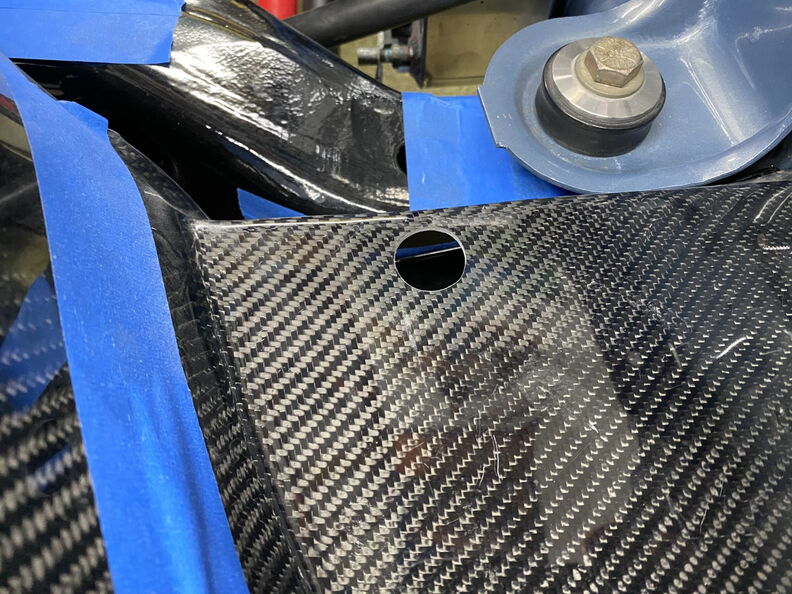
Drilling a hole in your Carbon Inner Fender is kinda nerve racking.
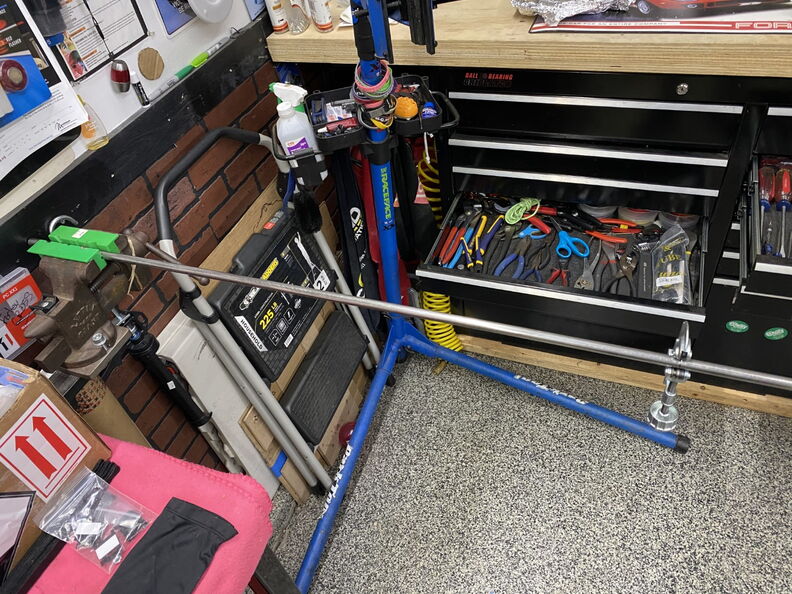
Concept # 1 -- Create a bracket the bolts to the existing core support bracket.
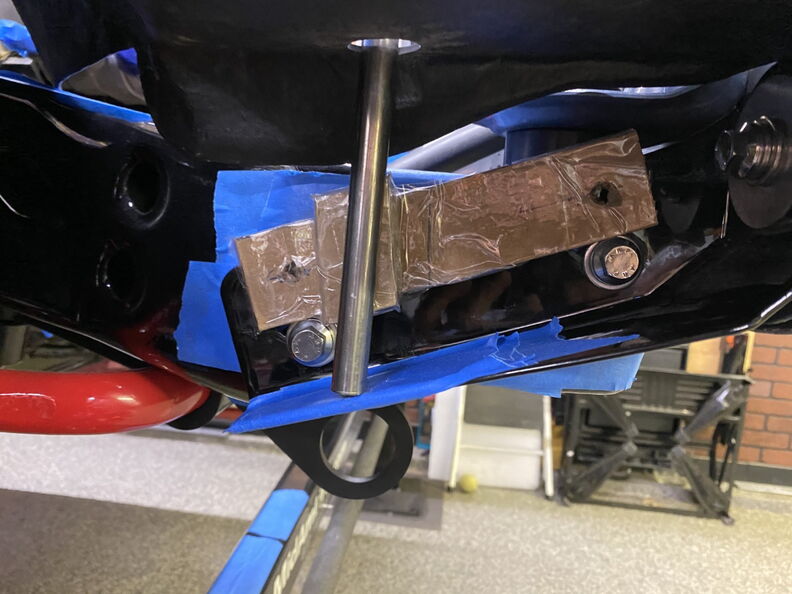
Concept # 2 -- However if I bend rod just a little bit to get it to reach
the core support bracket I can bolt it directly to it.
 marty-mj
GarageScene.net High Speed Welding KDHotrods RecoveryRoomInteriors WegnerAutomotive Autometer Ride-Tech
10-07-2020 #623
Registered User
- Join Date
- Apr 2005
- Location
- Chicago
- Posts
- 2,787
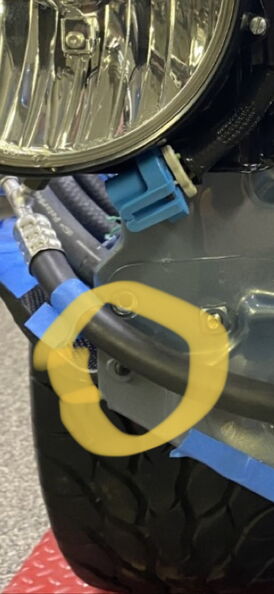
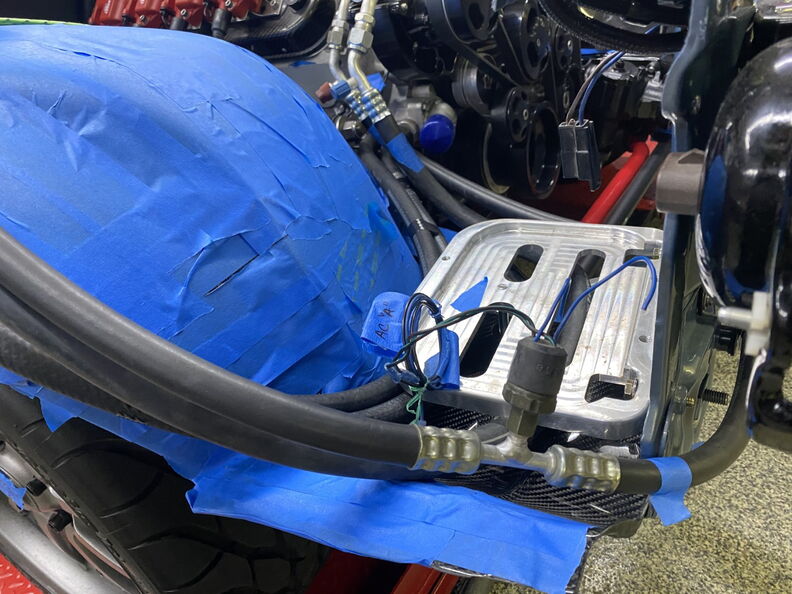
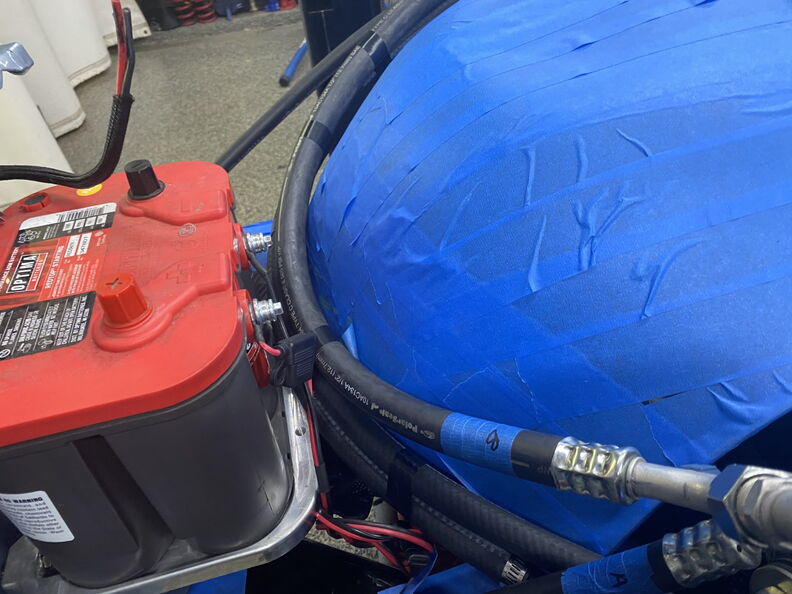
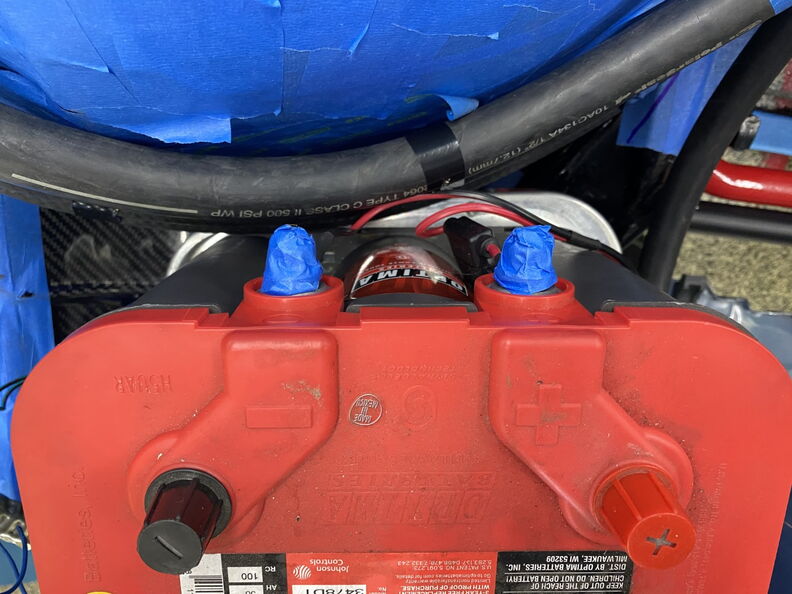
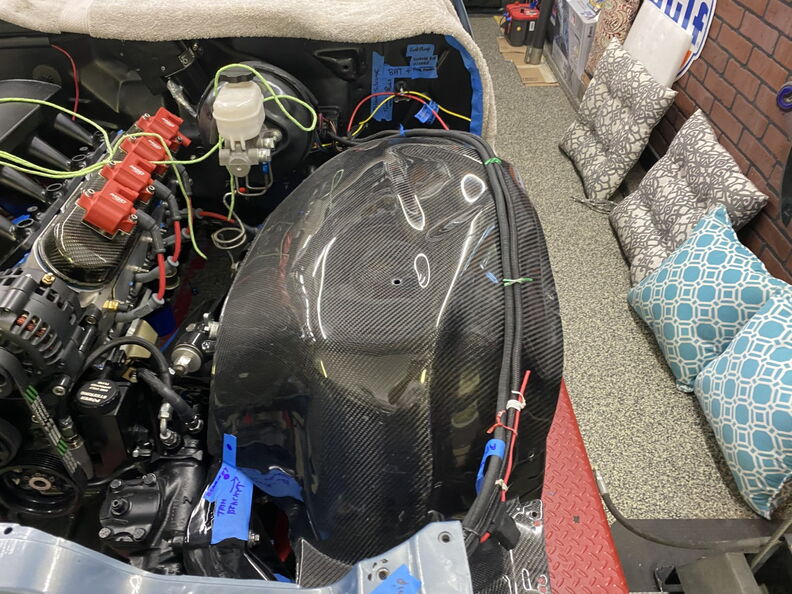
Coolant Hose Routing ( 06-14-20 ))
I started working on the coolant hose routing and found some issue that I an not liking. Especially since I plan to do the
Hot Rod Power Tour next year in this car.
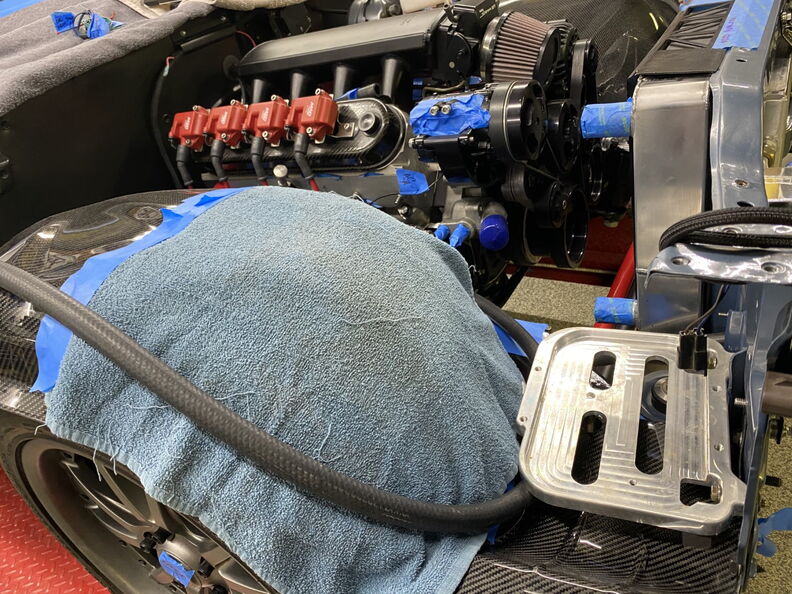
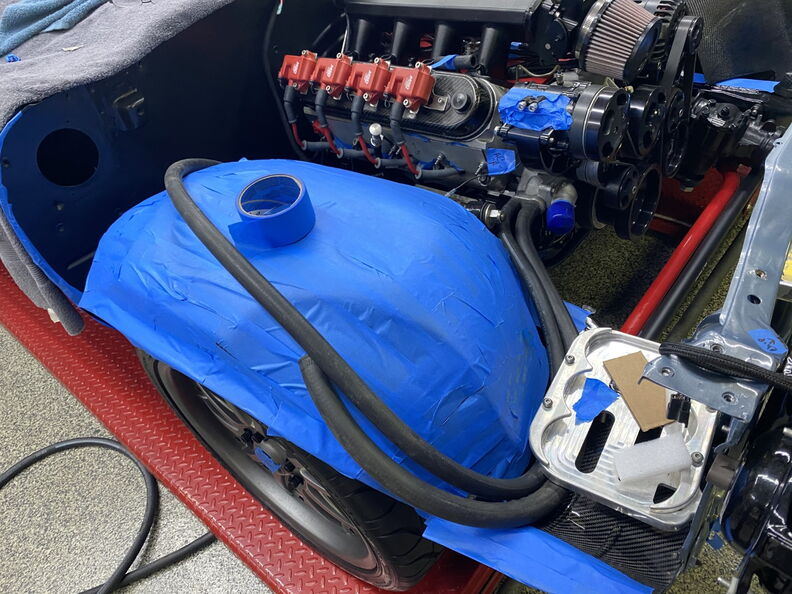
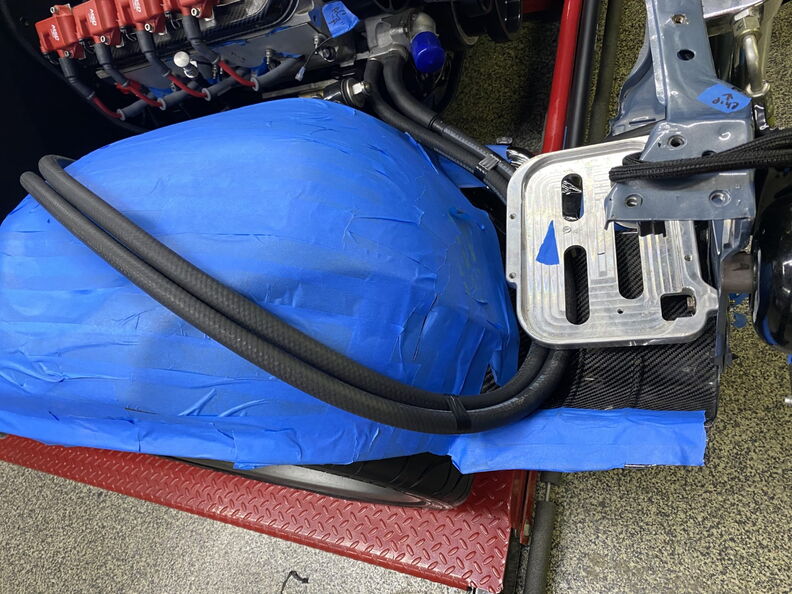
This looks like a possible area where bad things could start to happen so I am going to have to address this.
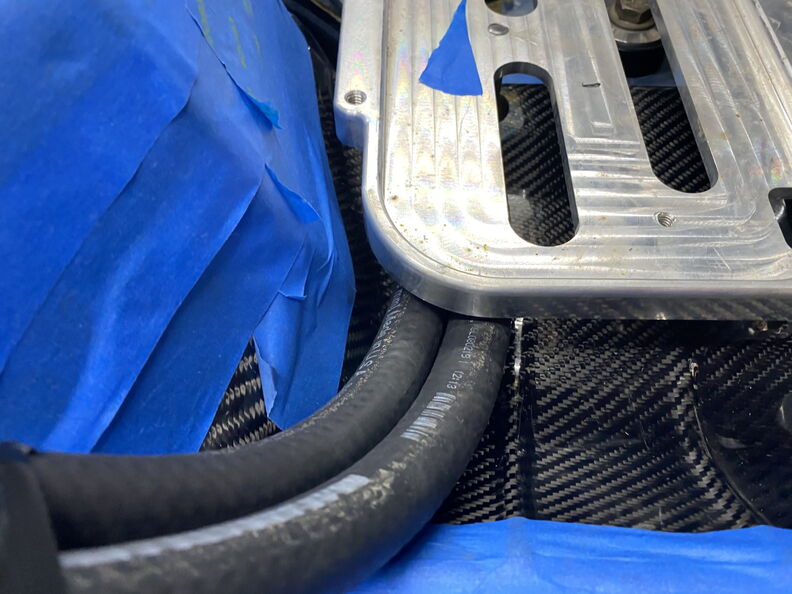
I plan to replace the plastic stepdown with a nicer version and use a heat shrink hose clamp to try to make it less visible.
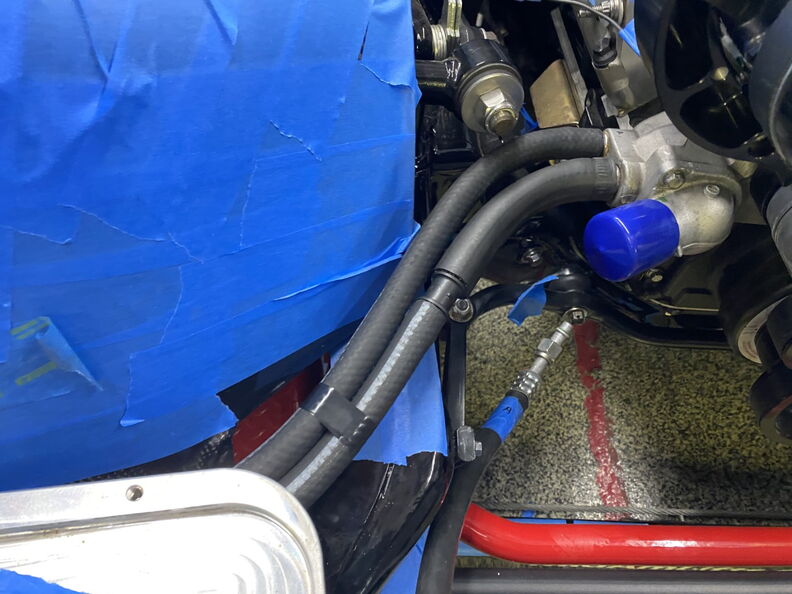
I also found a new adapter for the hose that I am considering ordering.

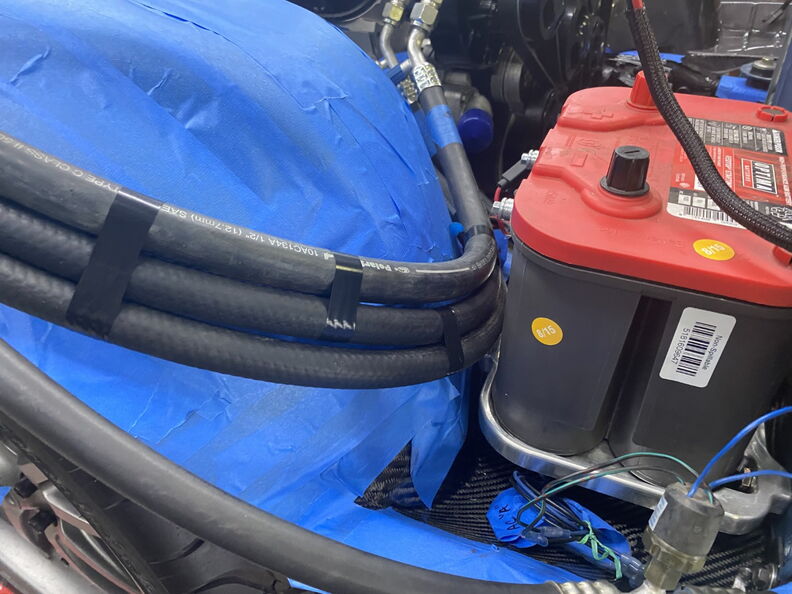
Now I need to find a line clamp that would keep the hoses close together like the temporary tape is doing. I am considering using
a larger version of the Heat Shrink Hose clamp to hold the hoses together.
Your thoughts as I am open to suggestions if anyone has one.
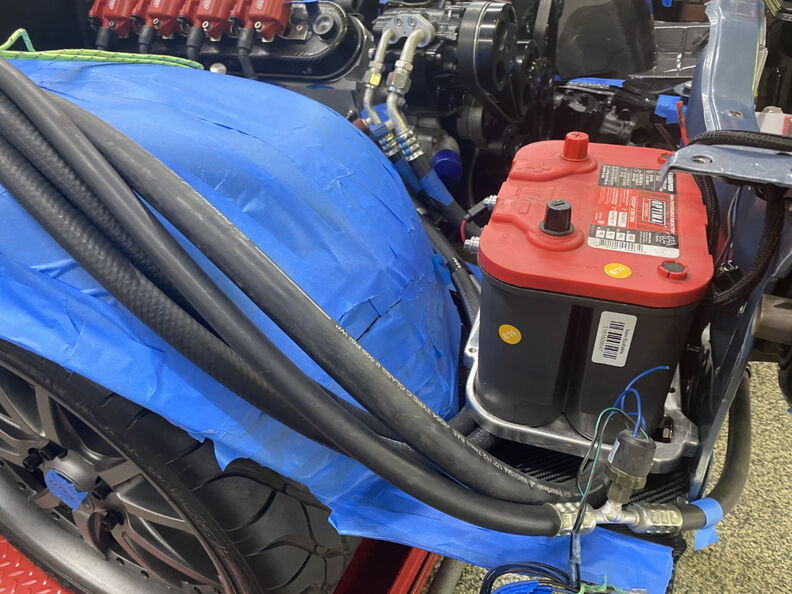
So I have made the decision to round the bottom of the battery to prevent chaffing on the heater hoses.
 marty-mj
GarageScene.net High Speed Welding KDHotrods RecoveryRoomInteriors WegnerAutomotive Autometer Ride-Tech
10-07-2020 #624
Registered User
- Join Date
- Apr 2005
- Location
- Chicago
- Posts
- 2,787
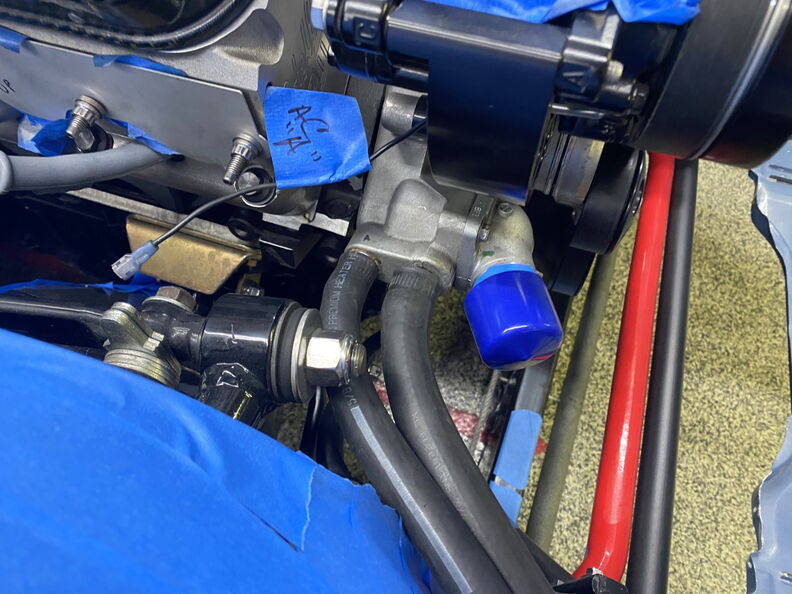
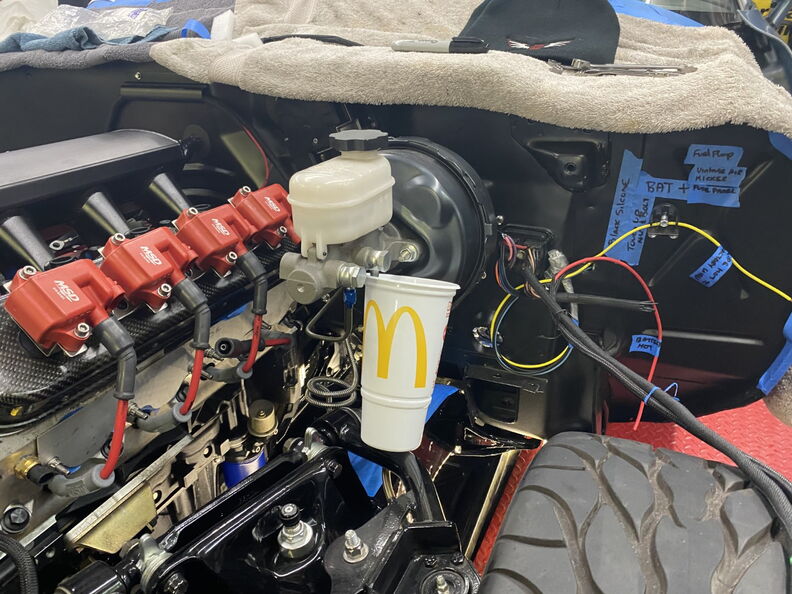
Vintage Air Fittings ( 06-20-20 )
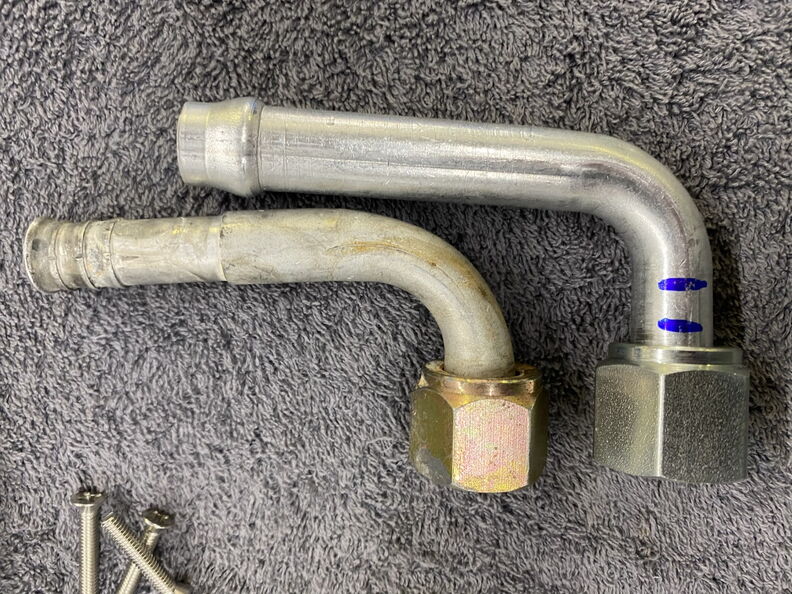
Once again I am working on the Vintage Air lines and I need some new fittings. I headed over to Midwest Hots to pick up the new
fittings. I am very happy they made improvements as these are much better.
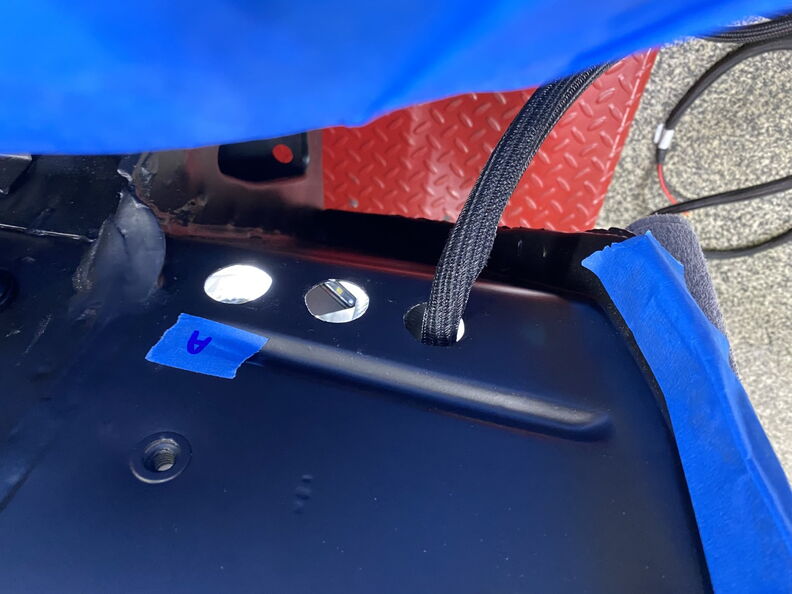
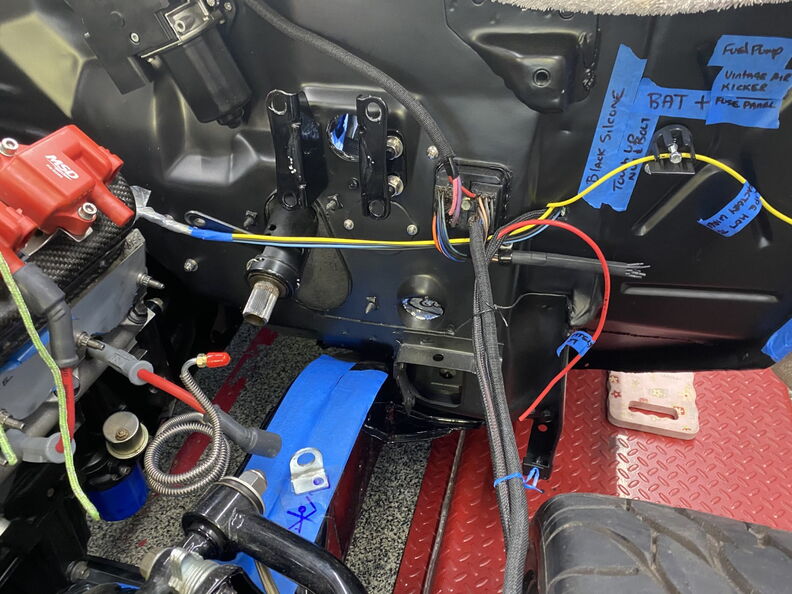
Prior to painting the firewall I added one new hole for the power wires for the Holley Terminator system. They made it clear in their instructions
that these wires need to be separated from all other wires in the car. So I moved them over to the passenger side of the Kick Panel.
ps Remember where these wire come out.
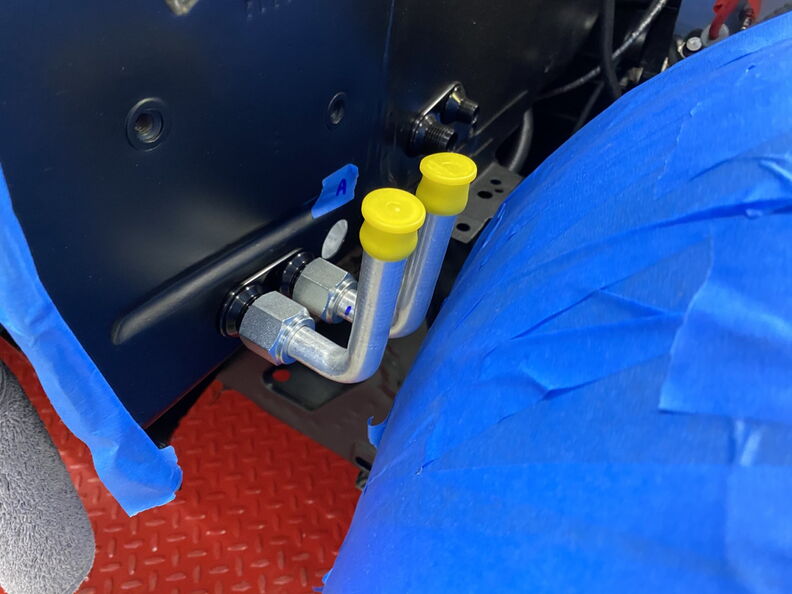
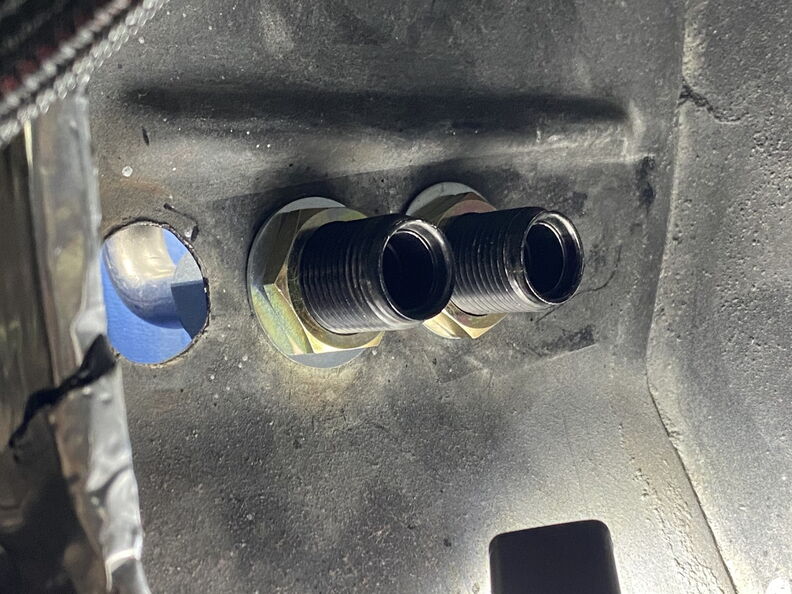
When I went to install the new Vintage Air fittings into the existing holes the new fittings hit the Anvil Inner fender. I starred at it for at
least 20 minutes and decided to put the old fittings back as the new ones didn't work. Hours later after lunch I took a second look and I
move the Vintage Air fittings over one hole. I as was shocked it actually fit like I had planned it. Talk about dumb luck.
I sourced "machined washer" from Grainger and installed them on the back side to act as washers.
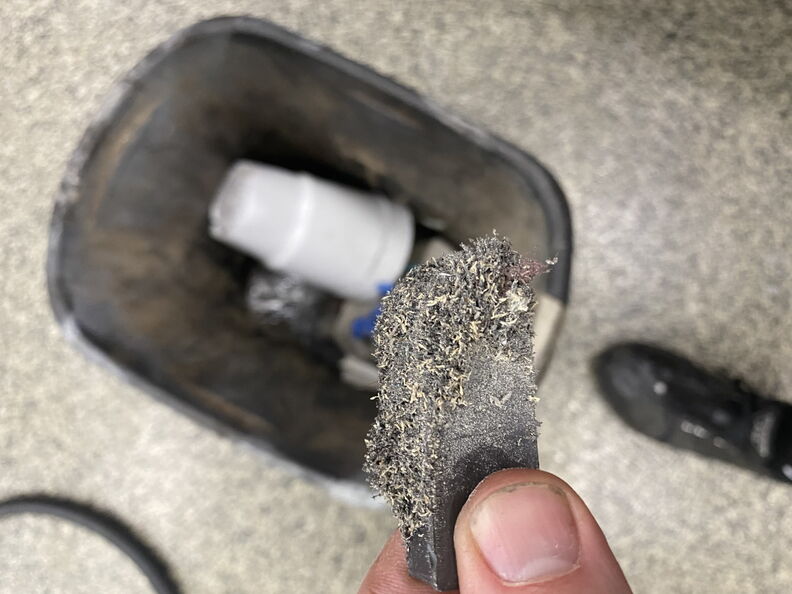
I decided to clean out all of the metal shavings that where inside the kick panel. So I got out my trusty magnet and started fishing for
metal shavings and I actually enjoyed this task.
Test fitting the new lines and I am very happy how they look coming off the firewall.
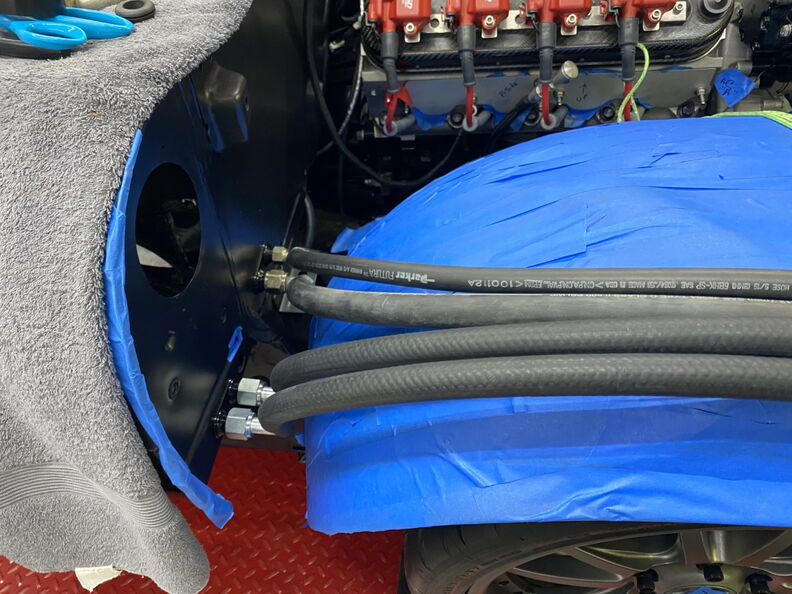
I am going to be moving this switch to location where I can service it if needed.
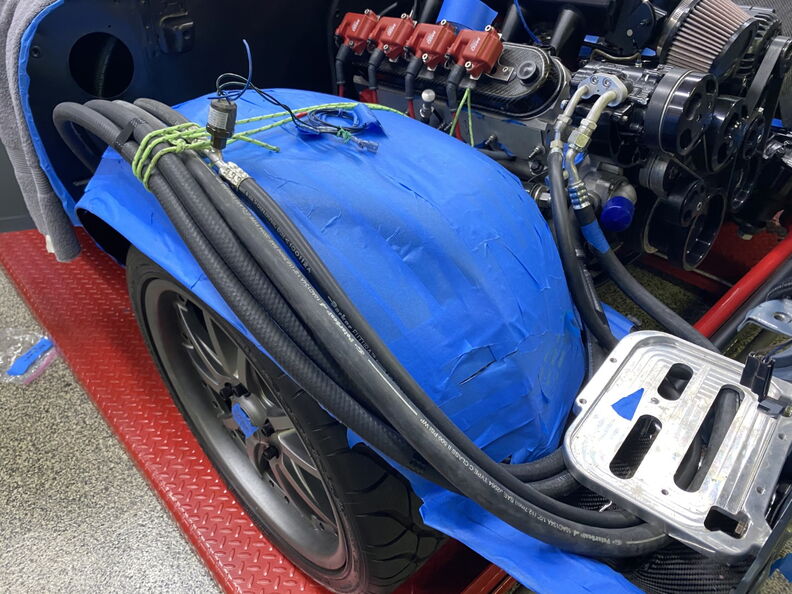
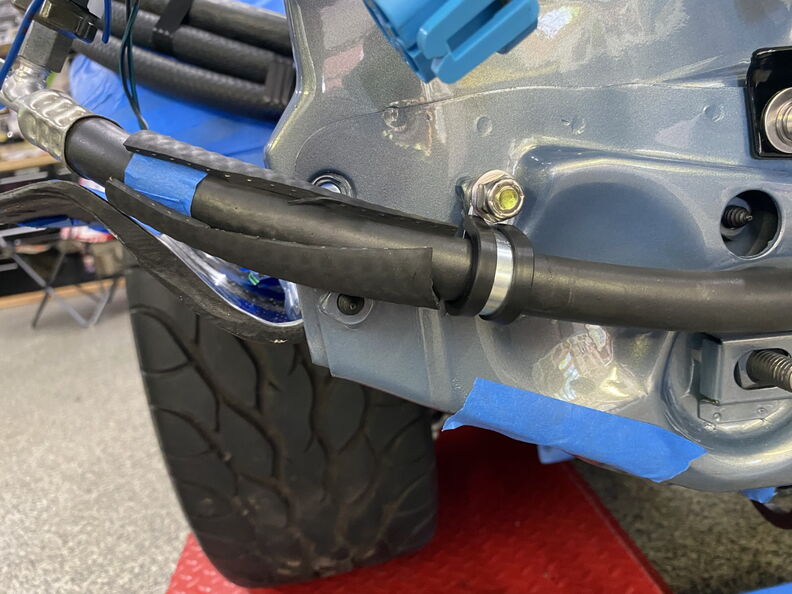
I am not liking how the AC lines look under the battery tray so I am going to try to figure out a new routing.
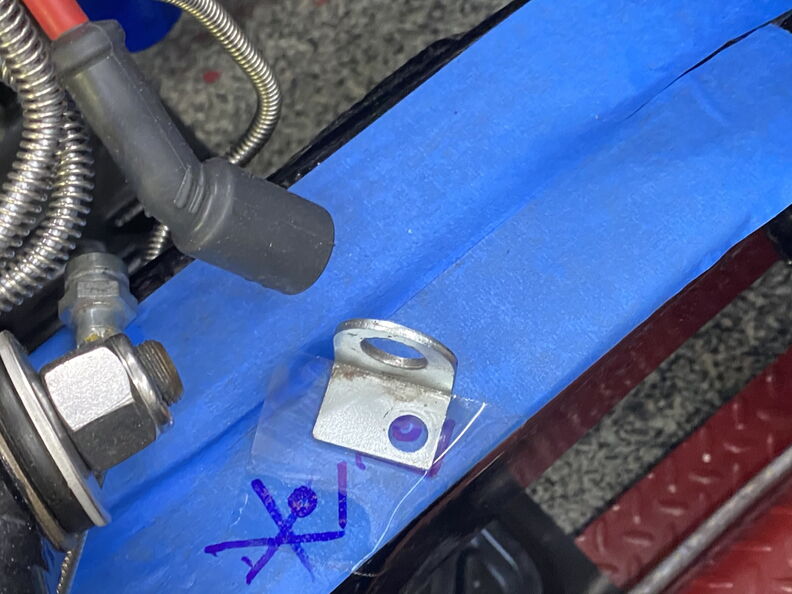
I don't like this either so I will be adding a line clamp to keep this line safe from harm as there is a bolt poking through the core support
directly into this line.
Flipping the line put the "Switch" in a much better locations.

Shadow is back.
 marty-mj
GarageScene.net High Speed Welding KDHotrods RecoveryRoomInteriors WegnerAutomotive Autometer Ride-Tech
10-08-2020 #625 Registered User
- Join Date
- Jul 2008
- Posts
- 454
Hey Marty,
Top notch work as always man, you never disappoint!!
You have part numbers for the fittings you used? Looking at getting a blacked out Vintage slimline underdash unit for my chevelle. Don't want to run the hoses through the kick panel vent like they do in their surefit series and was on the hunt for bulkhead fittings.*Jeff*
Project Salty - 1964 4 door Malibu, beaten, neglected, red headed foster child
Cammed LQ4 / T56 Swap Project Thread <-click to read! 😁
10-08-2020 #626
Registered User
- Join Date
- Apr 2005
- Location
- Chicago
- Posts
- 2,787
Vintage Air Standard Refrigeration Line Kits 547001
Originally Posted by Hotwire
Thank you very much and here ya go (( Vintage Air Standard Refrigeration Line Kits 547001 )) https://www.summitracing.com/parts/vta-547001marty-mj
GarageScene.net High Speed Welding KDHotrods RecoveryRoomInteriors WegnerAutomotive Autometer Ride-Tech
10-09-2020 #627 Registered User
- Join Date
- Nov 2006
- Location
- Ma.
- Posts
- 5,567
Nice work Marty, oh and Shadow is only making sure it's soft enough for his Dad to work on.
Wayne
Car FINALLY home !!!!!! lol
Project FNQUIK https://www.pro-touring.com/showthre...ghlight=FNQUIK
10-09-2020 #628
Registered User
- Join Date
- Apr 2005
- Location
- Chicago
- Posts
- 2,787
Good point I never thought of that. Originally Posted by Motown 454
marty-mj
GarageScene.net High Speed Welding KDHotrods RecoveryRoomInteriors WegnerAutomotive Autometer Ride-Tech
10-12-2020 #629 Registered User
- Join Date
- Apr 2001
- Location
- The Netherlands
- Posts
- 1,509

Looks good Marty!
10-13-2020 #630
Registered User
- Join Date
- Apr 2005
- Location
- Chicago
- Posts
- 2,787
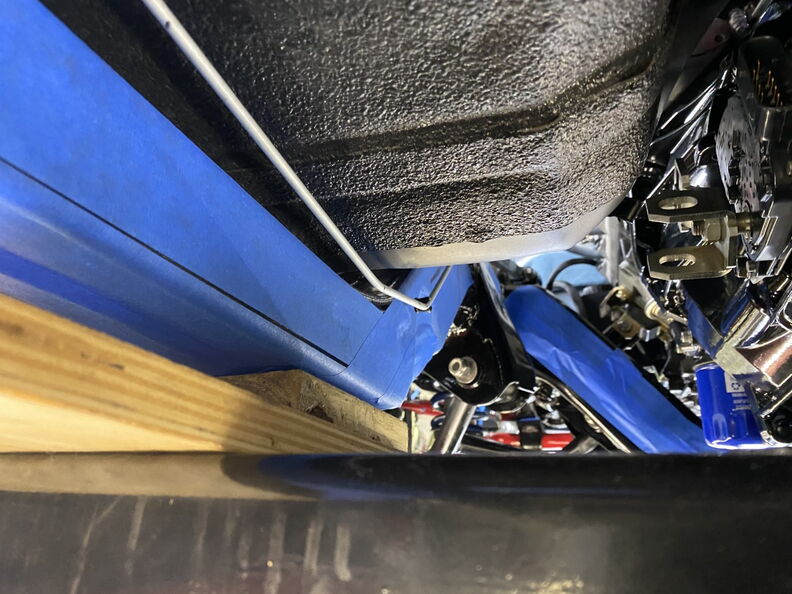
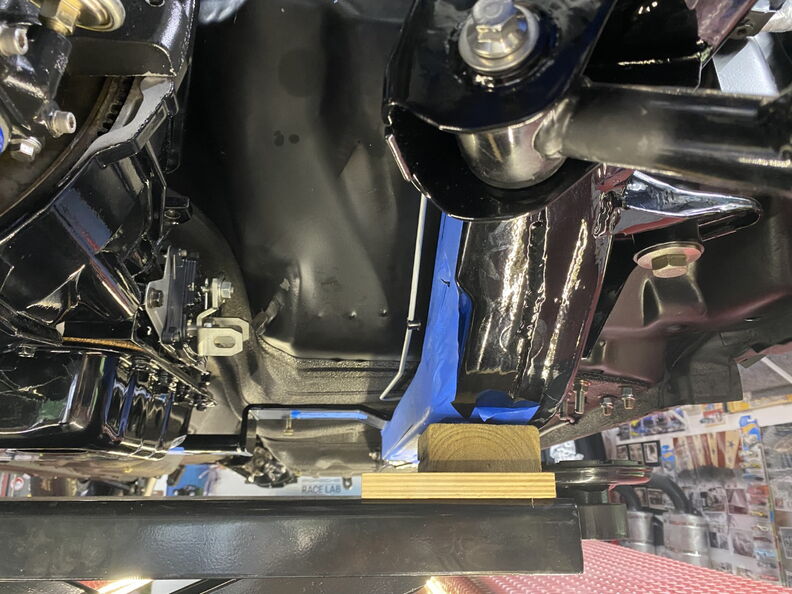
So I am trying to figure out a way to run the lines so they look good and if need I can service them if needed. Remember I am not building a show car I am building car that I can drive and easily fix without having to take the 1/4 of the car apart to get to stuff.
This might work and less chance of rub.
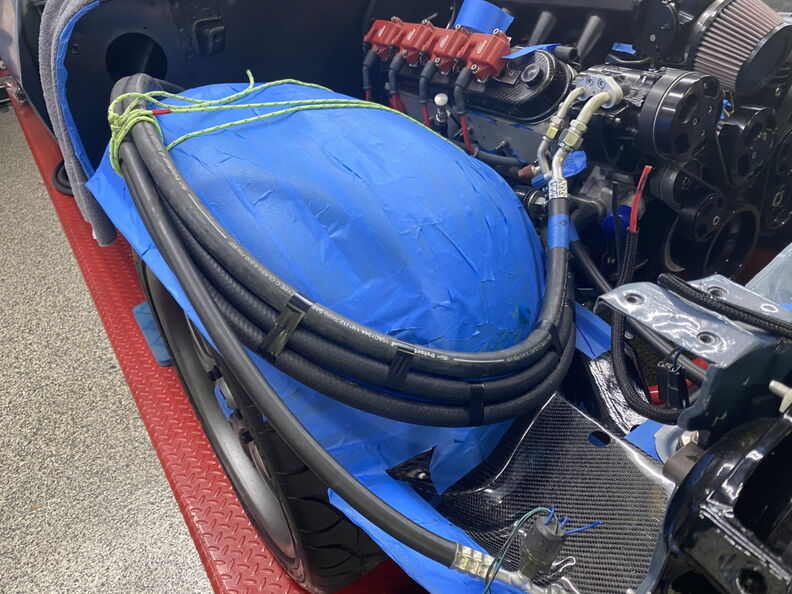
Choppy Choppy
So in order to charge the system I would need to have to trim/chop the inner fender or charge the system before I put the inner fender on.

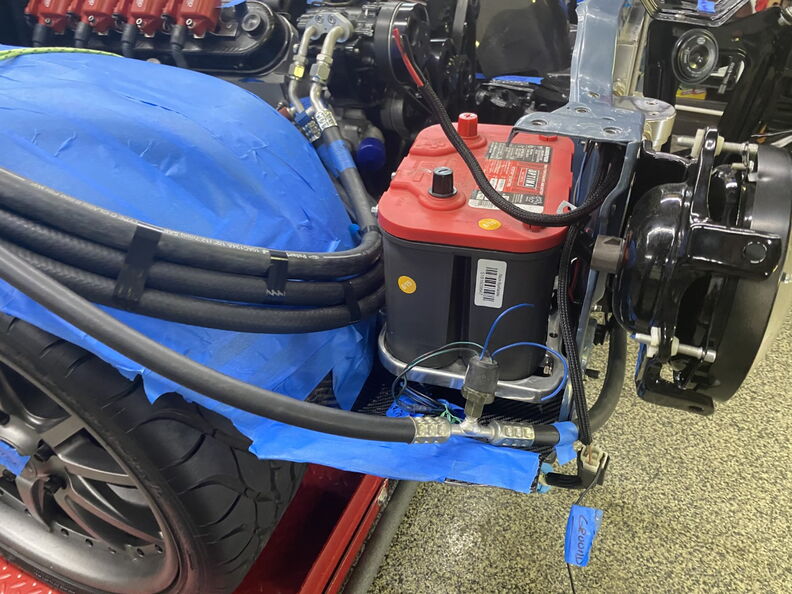
More blue tape notes
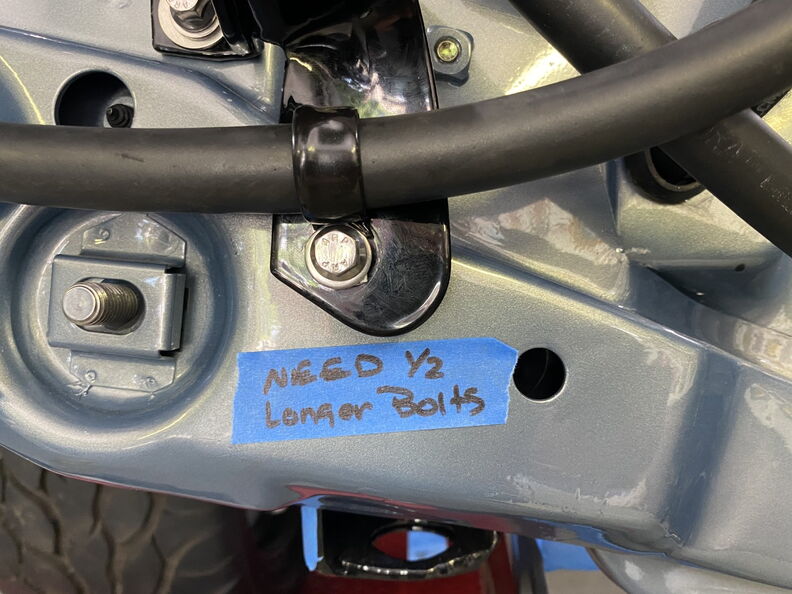
Stepping Back.
 marty-mj
GarageScene.net High Speed Welding KDHotrods RecoveryRoomInteriors WegnerAutomotive Autometer Ride-Tech
10-13-2020 #631
Registered User
- Join Date
- Apr 2005
- Location
- Chicago
- Posts
- 2,787
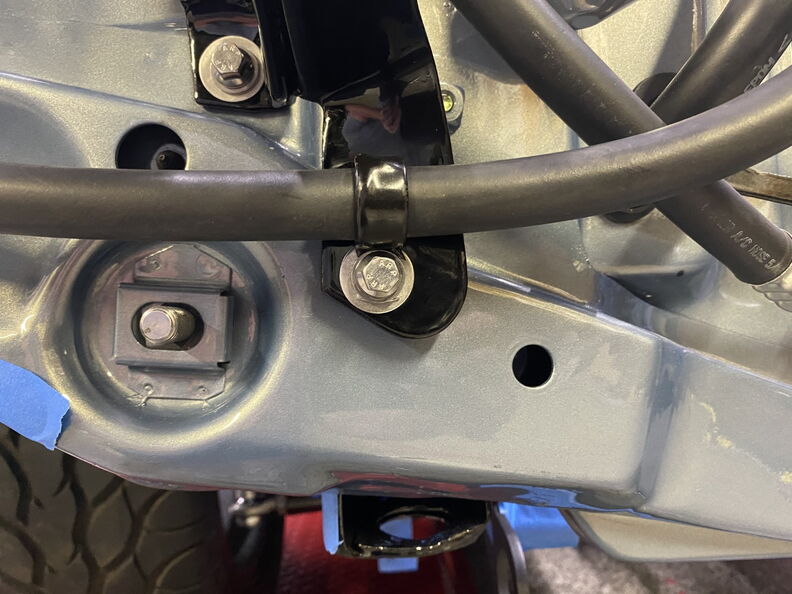
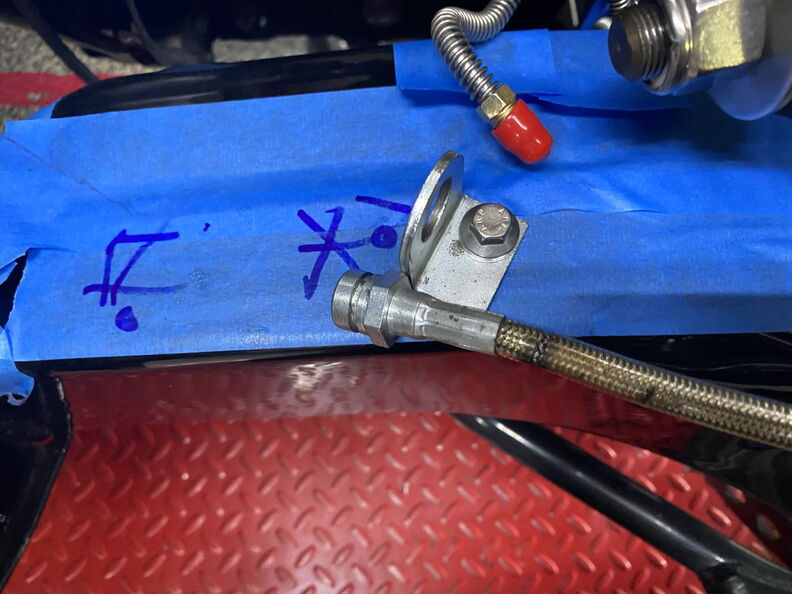
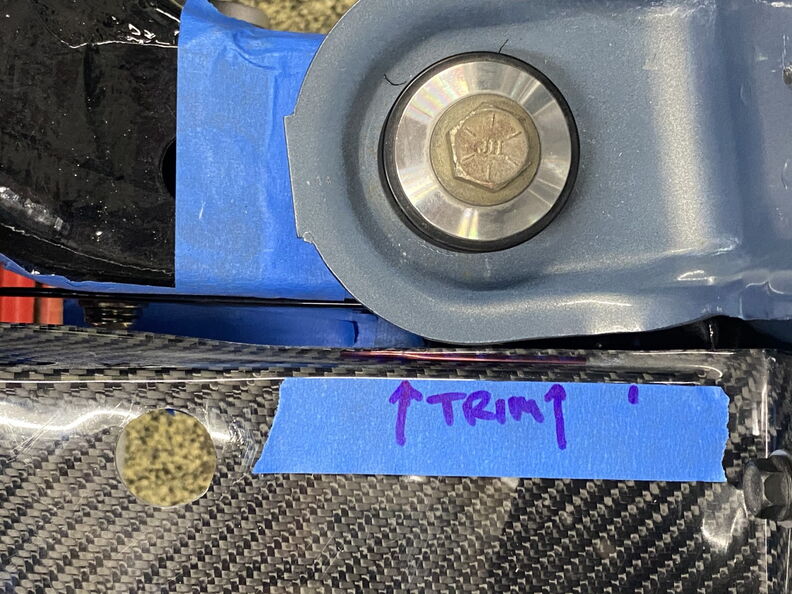
Committing to the new brake line routing. (( 07-12-20 ))
It took a little bit and I am finally happy with the location of the brake lines. So here goes nothing and if these don't work I am going to cry.
Step One remove the inner fenders...again (really I am getting good at this)
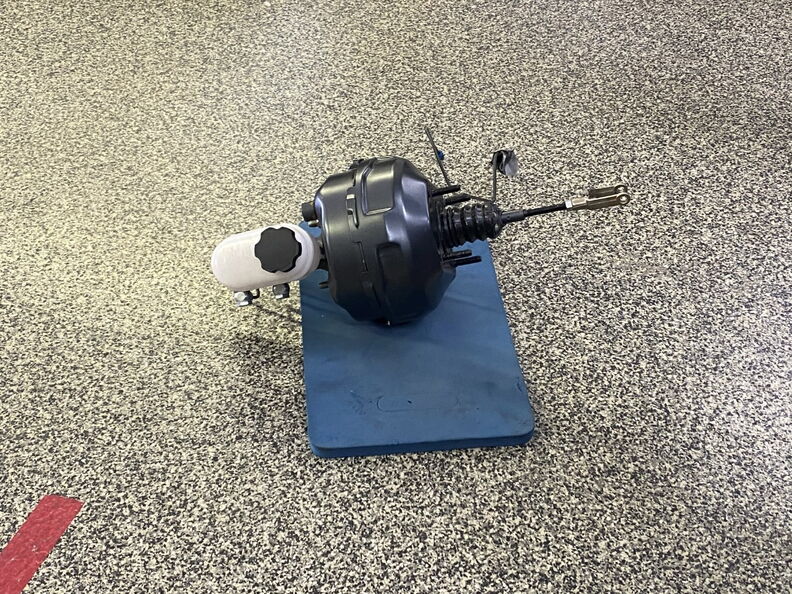
Step two remove the DSE Brake Booster (what an awesome piece) and slowly but surely loosen the nuts.
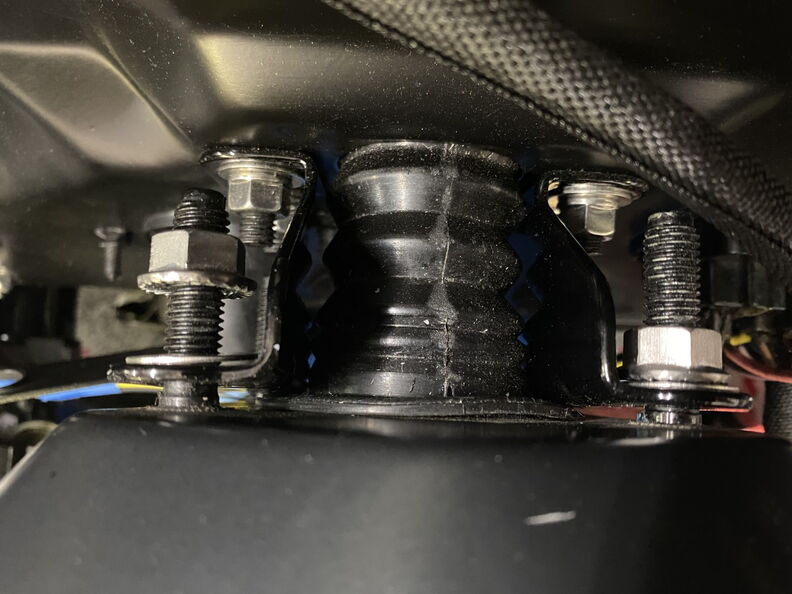
Eak !!!

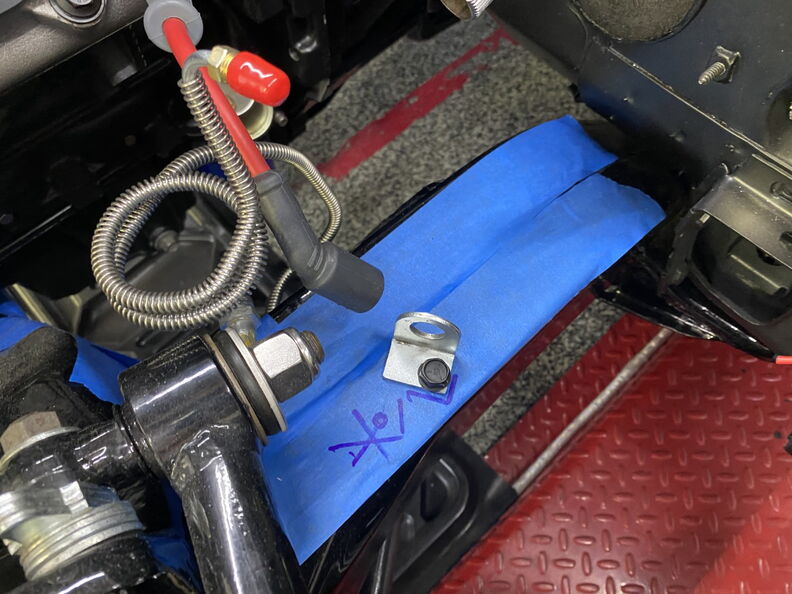
Tap the hole.
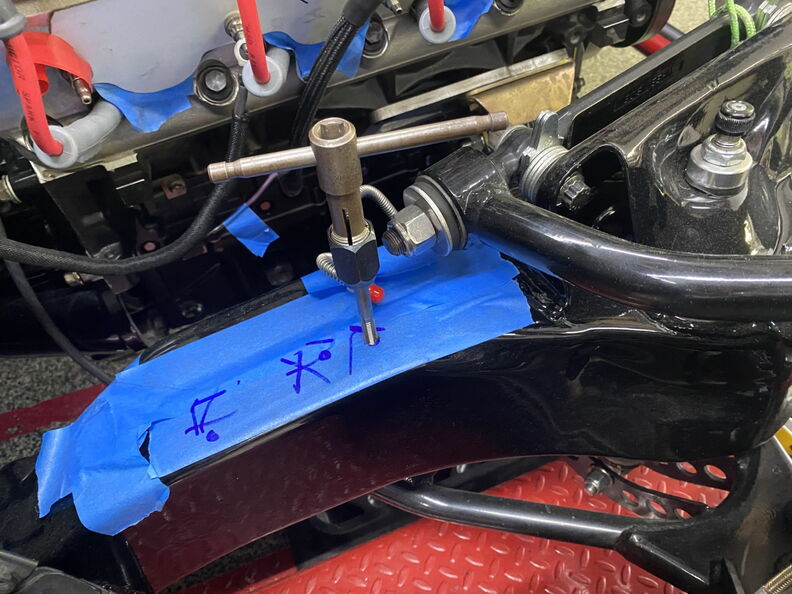
and install the ARP hardware from Totally Stainless.
 marty-mj
GarageScene.net High Speed Welding KDHotrods RecoveryRoomInteriors WegnerAutomotive Autometer Ride-Tech
10-17-2020 #632
Registered User
- Join Date
- Apr 2005
- Location
- Chicago
- Posts
- 2,787
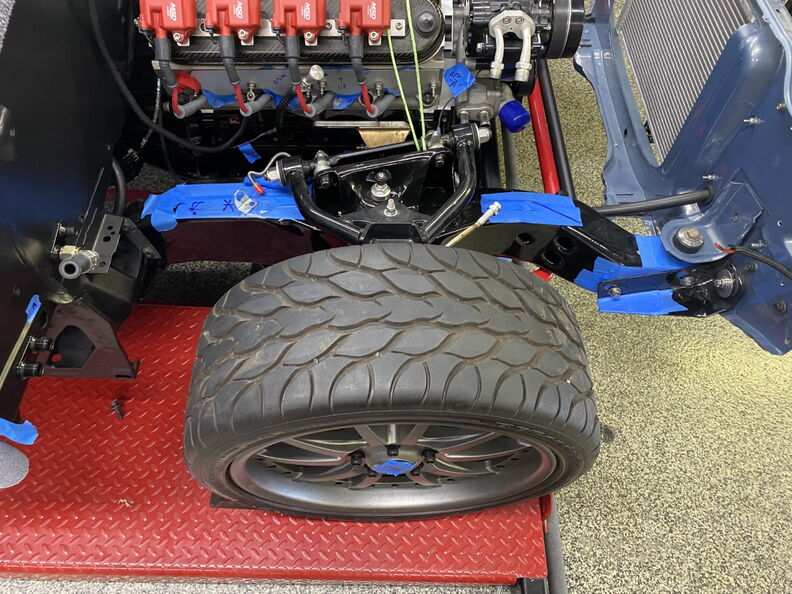
Inner Fenders Back on (( 07-12-20 ))
Once again the inner fenders are going back on.
I am looking for area's that need to be trimmed for better clearance
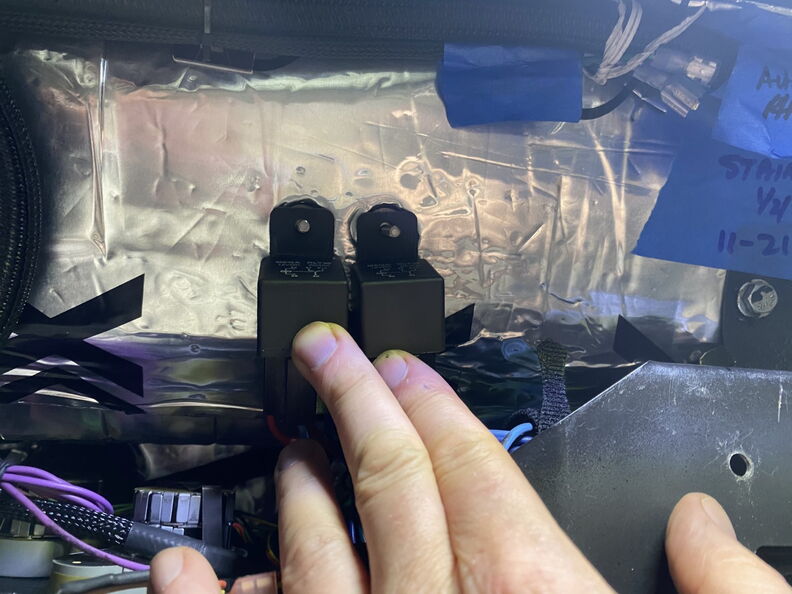
Yet another while I am here moment. These two relays are for the Vintage air and before they were sitting on the top of
the unit. By mounting them I will be able to access them if there is ever an issue.
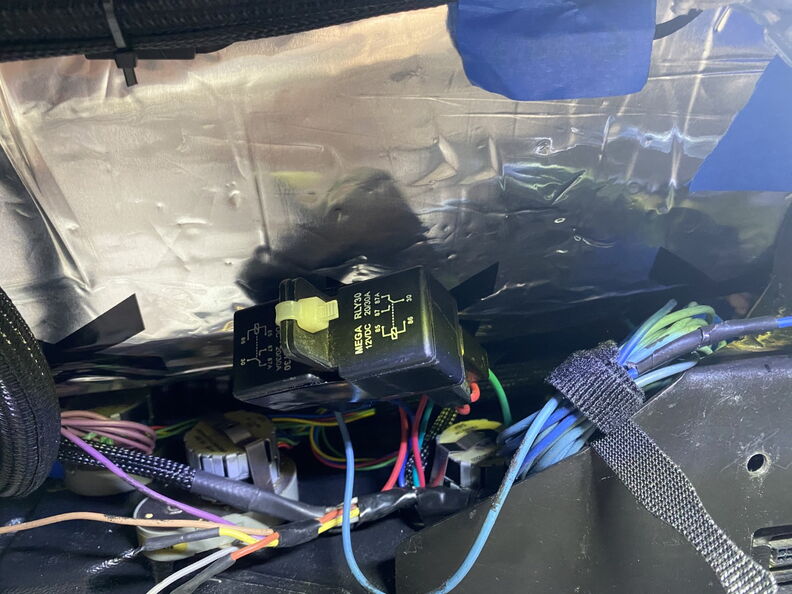
So I glued in a couple more Weld-Studs as this will be their new home.
Next up is finding a replacement for the fitting on the compressor.
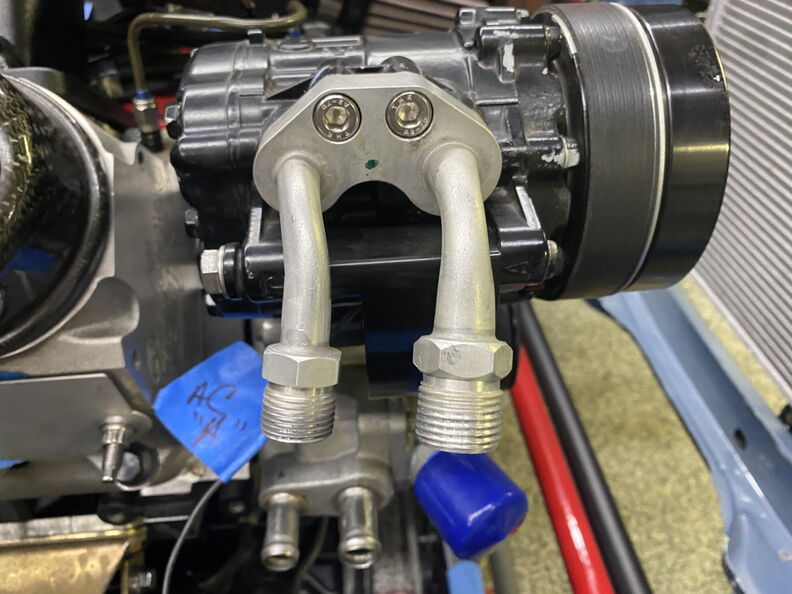
So it's off to Midwest Hot Rods to see what they have in stockmarty-mj
GarageScene.net High Speed Welding KDHotrods RecoveryRoomInteriors WegnerAutomotive Autometer Ride-Tech
10-19-2020 #633
Registered User
- Join Date
- Apr 2005
- Location
- Chicago
- Posts
- 2,787
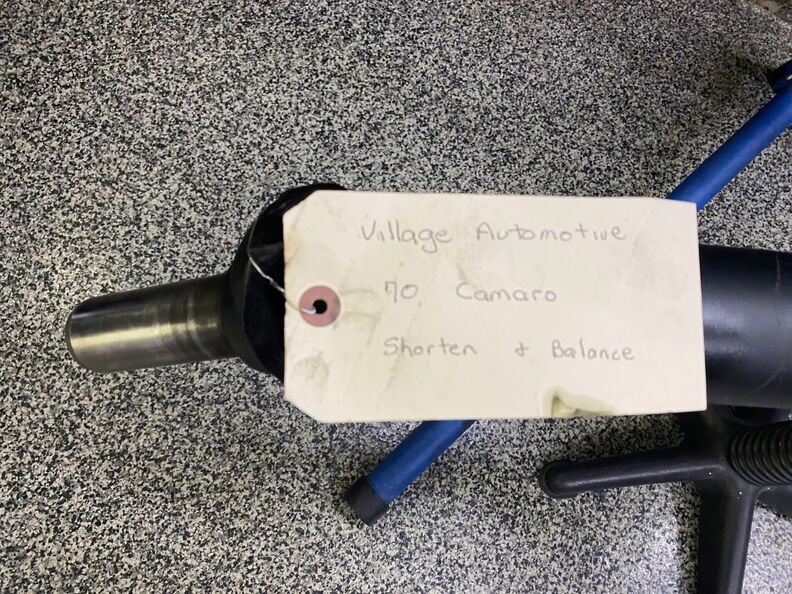
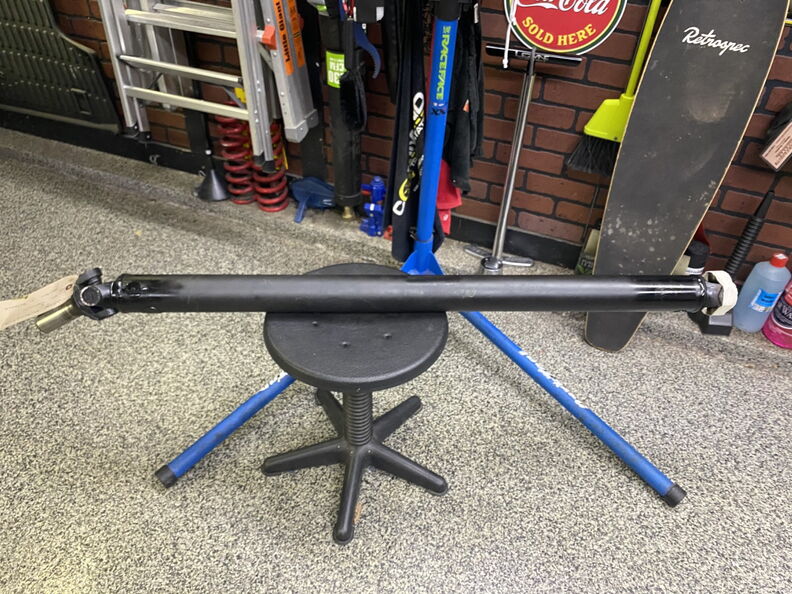
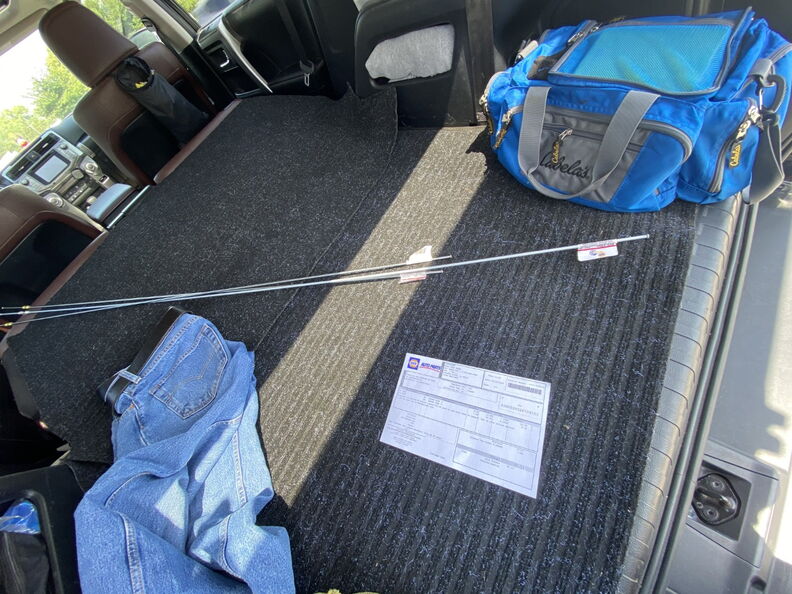
07-14-20 I dropped my driveshaft at Village Auto and they took care of shortening it for me.
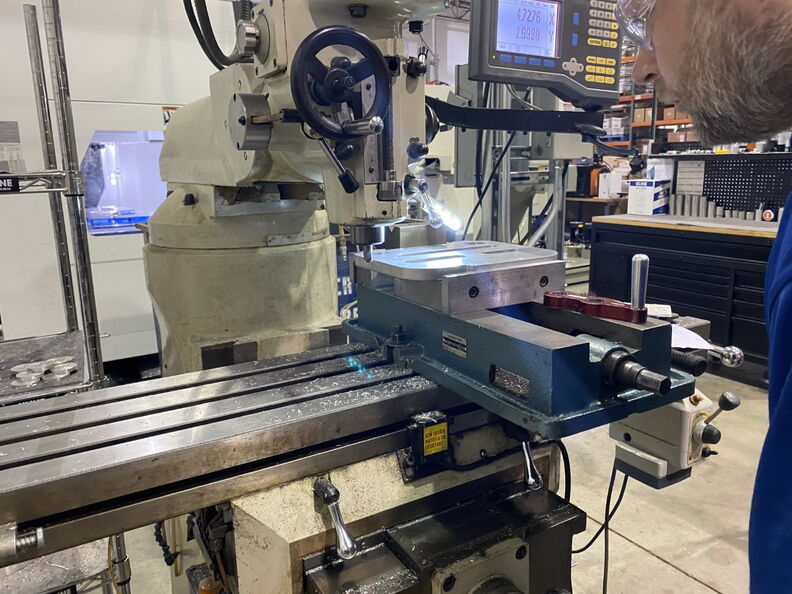
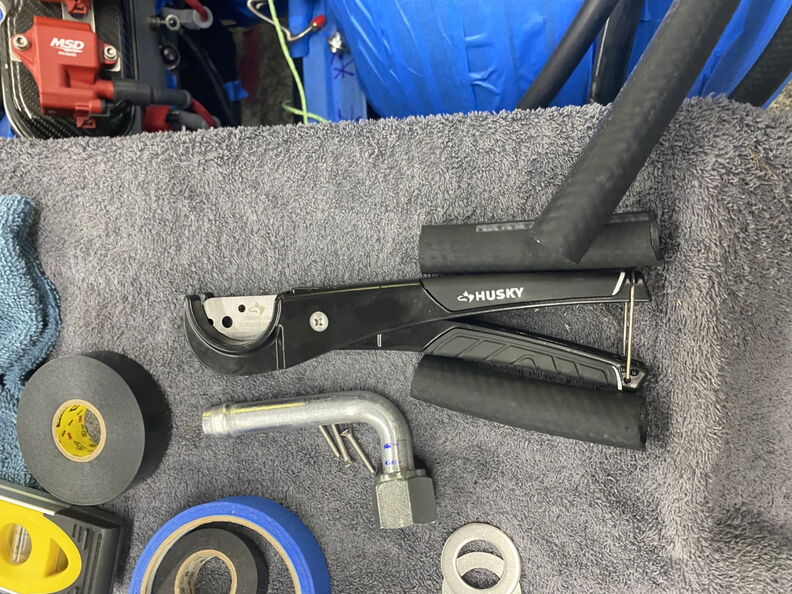
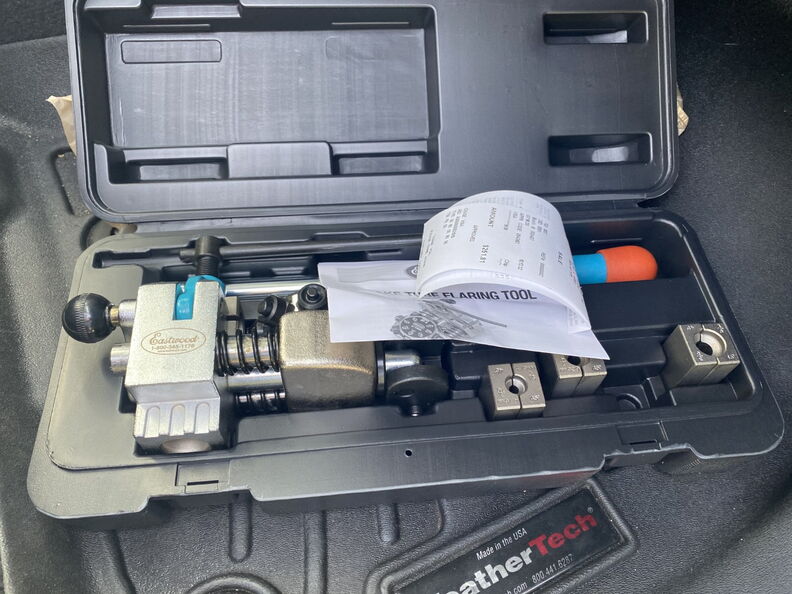
07-18-20 Time to start working on the brake lines and let me tell you I haven't bent lines in years so I asked Mike if he would come
over to assist me. I also picked up the Flaring tool from Eastwood hoping it would make my life easier.
I pick up some steel lines from my local Napa and maybe one day I will convert these to Stainless Steel.
Best 2nd Gen investment ever would be the DSE Brake Booster with the Kore3 brakes.
Here we go.
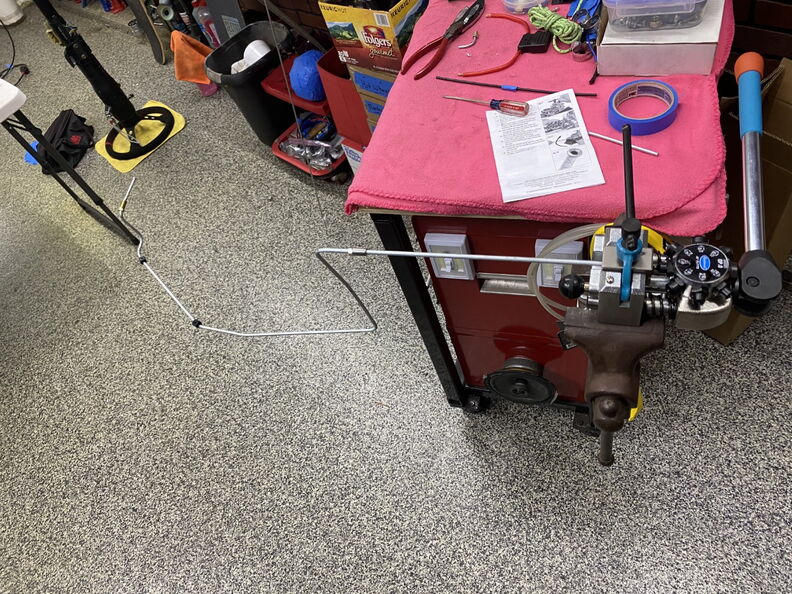
Love this tool.
 marty-mj
GarageScene.net High Speed Welding KDHotrods RecoveryRoomInteriors WegnerAutomotive Autometer Ride-Tech
10-20-2020 #634
Registered User
- Join Date
- Jul 2008
- Posts
- 454
Doing good man!!
Not sure what you're using for bending duties but I've been mildly surprised at the small Harbor Freight line bender (dark blue). It's done all my lines with no kinks. Larger bender, not so much.
Also, jealous of the Eastwood flaring tool! When I was working on my lines I found there were spots a traditional flaring tool wouldn't get into and I didn't want to pull the line down. I found this inline flaring tool at Summit, man, it's worth it's weight in gold. Makes great flares and is compact enough to work on the car.
https://www.summitracing.com/parts/cav-164
Keep it up!*Jeff*
Project Salty - 1964 4 door Malibu, beaten, neglected, red headed foster child
Cammed LQ4 / T56 Swap Project Thread <-click to read! 😁
10-20-2020 #635
Registered User
- Join Date
- Apr 2005
- Location
- Chicago
- Posts
- 2,787
Originally Posted by Hotwire
Thank you and that was the tool we used to bend the lines.
Also, if you need to borrow the tool I will be more then happy to ship it to you.marty-mj
GarageScene.net High Speed Welding KDHotrods RecoveryRoomInteriors WegnerAutomotive Autometer Ride-Tech
10-20-2020 #636
Registered User
- Join Date
- Jul 2008
- Posts
- 454
You are a gentleman and a scholar sir! I have a friend local that has one and have been itching to try it out but haven't found an excuse to bug him for it. Thank you for the offer! Originally Posted by syborg tt
*Jeff*
Project Salty - 1964 4 door Malibu, beaten, neglected, red headed foster child
Cammed LQ4 / T56 Swap Project Thread <-click to read! 😁
10-22-2020 #637
Registered User
- Join Date
- Apr 2005
- Location
- Chicago
- Posts
- 2,787
Back on the brakes lines (( 07-19-20 ))
Working on the line from the Drivers Side to the Passenger Side. I did purchase a factory line and modified it to work with my new layout. Which meant that I needed to straighten some of the bends & curves.
Getting closer
First bend
This was fun.
I plan to mount the lines with the Notchheads hard line clamps.
My End Goals would be to duplicate these lines in Stainless Steel.marty-mj
GarageScene.net High Speed Welding KDHotrods RecoveryRoomInteriors WegnerAutomotive Autometer Ride-Tech
10-22-2020 #638
Registered User
- Join Date
- Apr 2005
- Location
- Chicago
- Posts
- 2,787
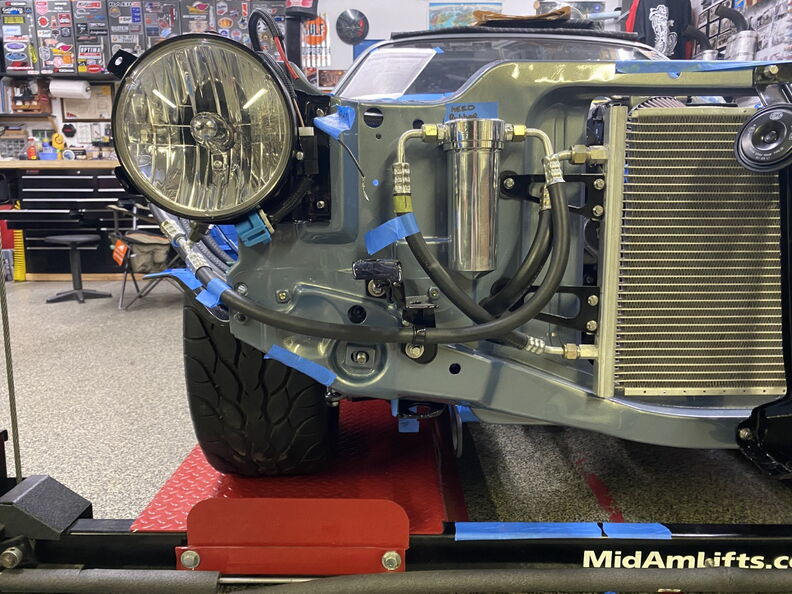
Time to make some modifications and order a few new parts. (( 07-25-20 ))
My plan is to keep this car simple and order a new steel trans pan with a drain plug and use ARP bolts to make it a little nicer.
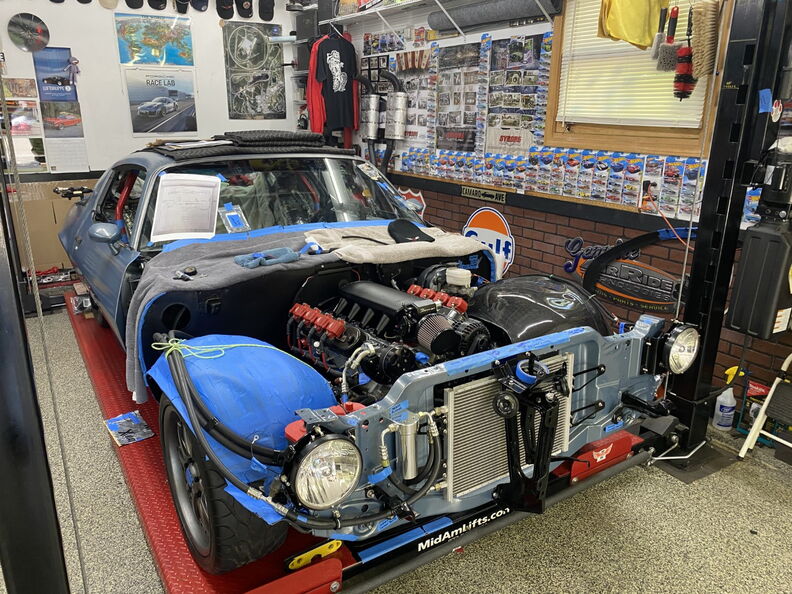
Time to mount the Radiator ...
So i need to lower the radiator down so out came the floppy disk.
While I am here I decided to fit the old trans lines and see if I can come up with something a little cleaner looking.
My favorite line that Kenny did.
Fitting the Fan Shroud.
The shroud also doubles as a way yo secure the radiator.
Plan "B" Okay new lower rubber mounts.
Time to remove these tabs.
and there gone....
Fitting the Anvil Radiator Close Out.
More Notes
marty-mj
GarageScene.net High Speed Welding KDHotrods RecoveryRoomInteriors WegnerAutomotive Autometer Ride-Tech
10-22-2020 #639
Registered User
- Join Date
- Apr 2005
- Location
- Chicago
- Posts
- 2,787
Trying to figure out the top mount for the Radiator (( 08-01-20 ))
Thank God I sell packaging as I have used so much cardboard and chipboard on this version on the car.
Splashing some paint on the cardboard so I see what it might look like.
This is not going to be fun but I plan to cut off the top of the Fan Shroud.
Now I need to clean things up.
I called in the Big Dog "Mr Mike Kelly"
So this was one of the most beautiful nights and I am certain all of my neighbors windows were open and of course we were not exactly being quiet.
So this went on for at least an hour.
marty-mj
GarageScene.net High Speed Welding KDHotrods RecoveryRoomInteriors WegnerAutomotive Autometer Ride-Tech
10-29-2020 #640
Registered User
- Join Date
- Apr 2005
- Location
- Chicago
- Posts
- 2,787
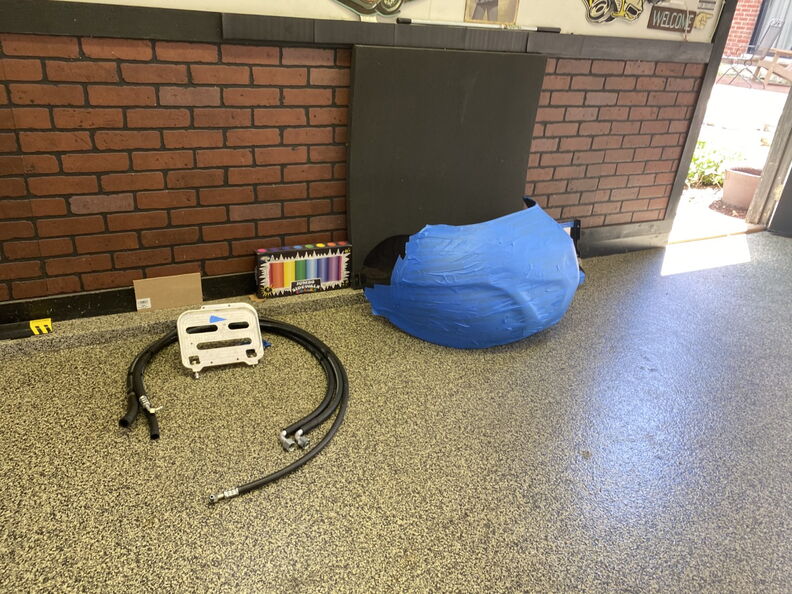
Afco Fan Shroud Redo (( 08-02-20 ))
So being honest this part has not been fun.
Time to remove all of the paint and create a new way to mount the fan shroud.
Close enough to take it over to get painted.
Remember this edge from the first picture.
marty-mj
GarageScene.net High Speed Welding KDHotrods RecoveryRoomInteriors WegnerAutomotive Autometer Ride-Tech

 Reply With Quote


