

Results 101 to 120 of 243
-
10-18-2011 #101

 Registered User
- Join Date
- Nov 2010
- Posts
- 1,387

nice project very well done!!! Keep going this is a budget brawler and I am envious micheal
68 Camaro RS twin turbo
https://www.pro-touring.com/threads/...d-Intent-V-2-0
1993 Toyota Supra 6768 Built Single Turbo
Slow Lifted Jeep No TURBO :(
Randal F
-
10-31-2011 #102
Registered User
- Join Date
- Aug 2007
- Location
- Albemarle, NC
- Posts
- 1,149
more money spent, more parts collected, more effort going into the car.
spent 55.95 for new sway bar mounts and bushings.

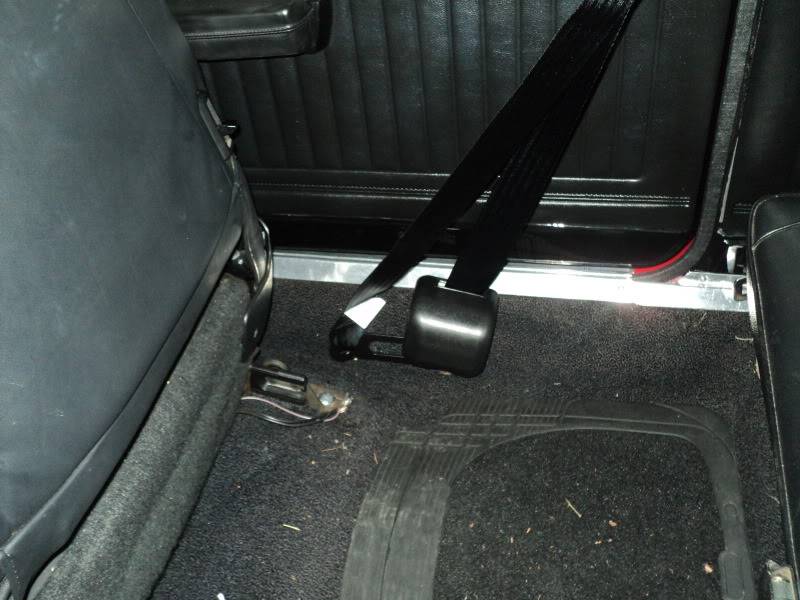
ordered a set of 3 point retractable seatbelts from http://wescoperformance.stores.yahoo...seat-belt.html
they were delivered tonight. hopefully ill get them put in this week. they are a VERY nicely made set of belts. i think i should have orders the 11 inch fixed end instead of the 8 though. well wait and see how they work.
175 for that.
worked some more on carb tuning since the manifold swap, and i cleaned it up. the car is driving much better now, more responsive, lot more low end torque, and it takes less throttle to maintain speed. have to change my entire tuine up from the single plane, though,.
new replacement spoiler has not arrived yet.
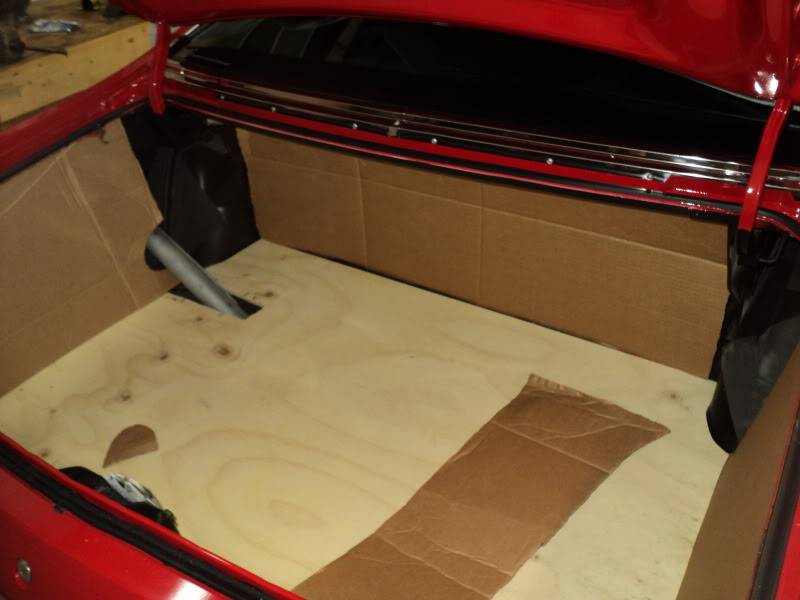
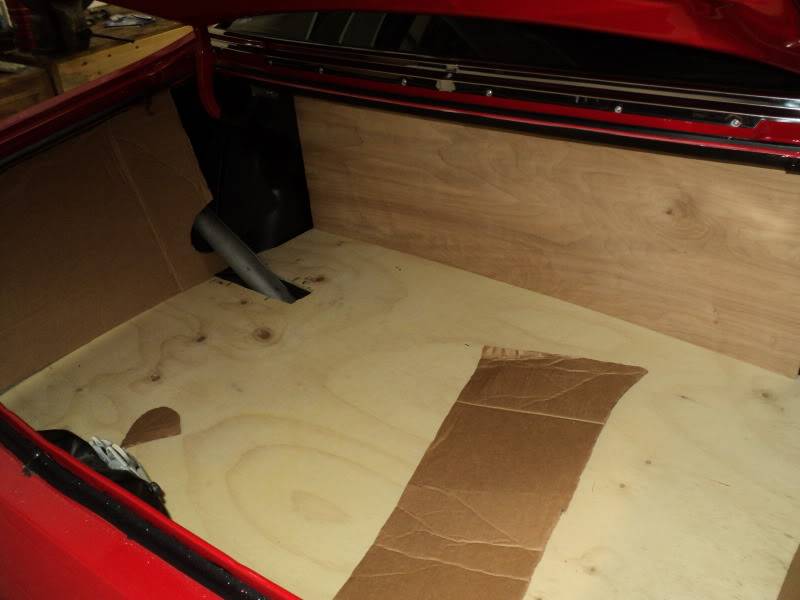
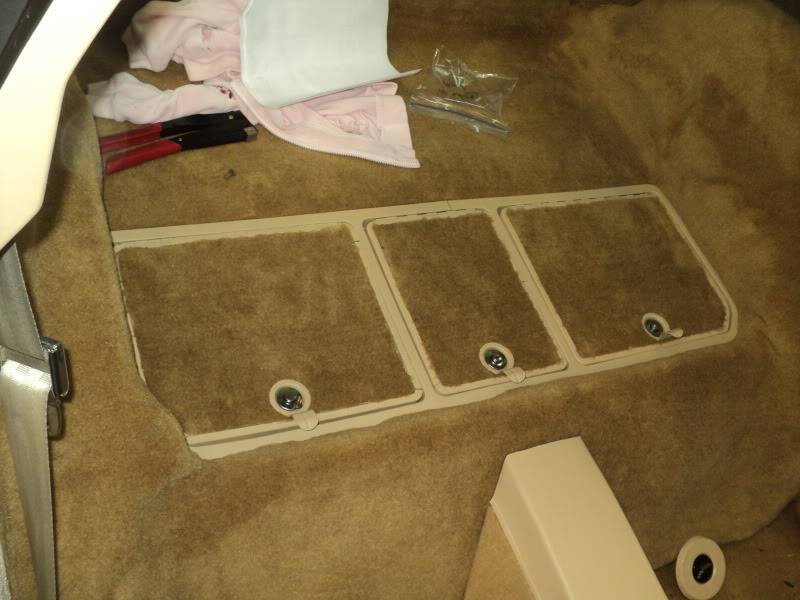
and i started working on finally finishing my trunk. got the floor made (still have to cut the access panel for the spare), made cardboard templates for the sides, and created my back "wall".
to so this, i first make a template out of cardboard. make sure it fits right and looks right, then transfer onto appropriate materials.
for the floor, im using 5/8 birch plywood (had half a sheet), for the back wall im using 1/8 paneling (had 1/4 sheet), for the sides im using 1/4 peg board so the ignition and audio can breathe (had half a sheet). ill be covering it all with carpet, and attaching them to the metal of the car with velcro.
heres pics of how far i got over the weekend.
new total (added all upfrom previous updates)
5029.74
more later this week when the belts are installed.
michaelMichael Crawford
1970 plymouth Duster back under construction:
https://www.pro-touring.com/showthre...uring-makeover
1987 GMC S15 https://www.pro-touring.com/showthre...ct-drivabeater
11-02-2011 #103 Registered User
- Join Date
- Nov 2008
- Location
- TN
- Posts
- 939
Where did you get the swaybar mounts? And those 3pt seatbelts should help a LOT!
Benjamin
Twin Dusters
'72 Plymouth Duster "Aero Duster" project
'72 Plymouth Duster "Daily Duster" project
https://www.pro-touring.com/showthre...RO-DUSTER-quot
11-02-2011 #104
Registered User
- Join Date
- Aug 2007
- Location
- Albemarle, NC
- Posts
- 1,149
its actually an energy suspension "conversion" kit. the bushings are only 15/16 though, and my sway bar is 1 1/8. didnt realize that when i ordered from summit. so ill have to get some new new bushings.
and i drove the car last night with the three point in the drivers side. its really freaking nice.
michaelMichael Crawford
1970 plymouth Duster back under construction:
https://www.pro-touring.com/showthre...uring-makeover
1987 GMC S15 https://www.pro-touring.com/showthre...ct-drivabeater
11-03-2011 #105 Registered User
- Join Date
- Oct 2011
- Location
- Katy, Tx
- Posts
- 309
Cool project... Was there a build thread for your S15? The one in your signature is broke. Curious about what you had done to it too...
11-03-2011 #106
Registered User
- Join Date
- Aug 2007
- Location
- Albemarle, NC
- Posts
- 1,149
umm.. search project drivabeater. that should come up.
ill try to fix the link tonightMichael Crawford
1970 plymouth Duster back under construction:
https://www.pro-touring.com/showthre...uring-makeover
1987 GMC S15 https://www.pro-touring.com/showthre...ct-drivabeater
11-05-2011 #107
Registered User
- Join Date
- Nov 2008
- Location
- TN
- Posts
- 939
Oops... you could just bore them out. It helps if you freeze them first...
Benjamin
Twin Dusters
'72 Plymouth Duster "Aero Duster" project
'72 Plymouth Duster "Daily Duster" project
https://www.pro-touring.com/showthre...RO-DUSTER-quot
12-17-2011 #108
Registered User
- Join Date
- Aug 2007
- Location
- Albemarle, NC
- Posts
- 1,149
wow, its been a while since Ive updated. Ivee been pretty busy doing a partial resto on a 79 corvette pace car. 52koriginall mile car thats been outside for the last decade or so. the seals had started leaking, trashing the interior. so the wife asked me if id be willing to take it on as a resto for her husbands retirement present.
before:
during (im not done yet):
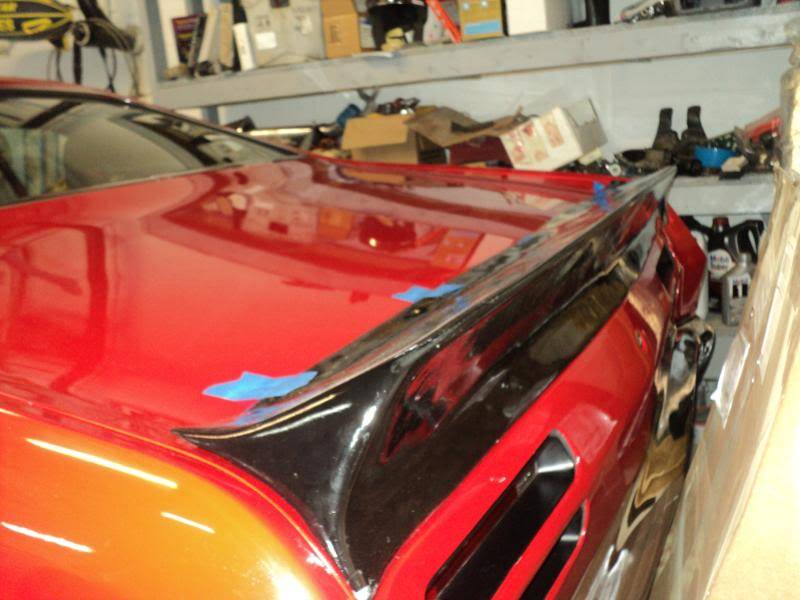
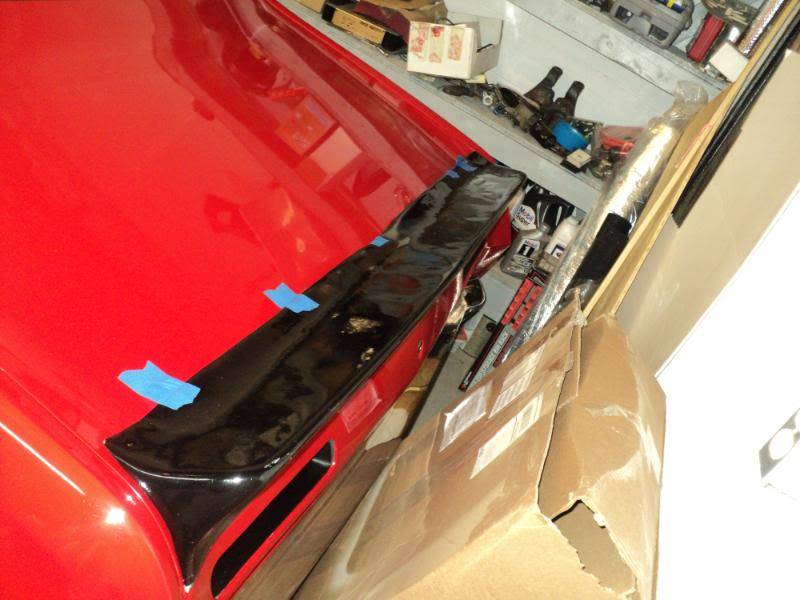
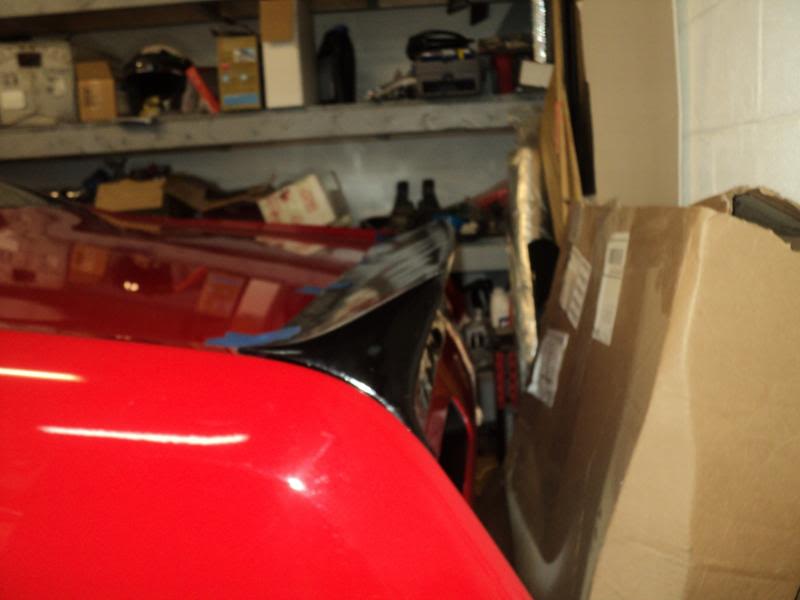
got my new spoiler in yesterday. finally. this one is the quality the last one should have been. seller (CNS mopar parts) stated that they think the last one popped out of the mold, and wasn't why it wasnt alldon'tt great. donrecommend id reccomend these guys to anyone or not. just....eh. they did stand behind their product and make things right, so ill give them bonus points for that,. pretty rare these days.
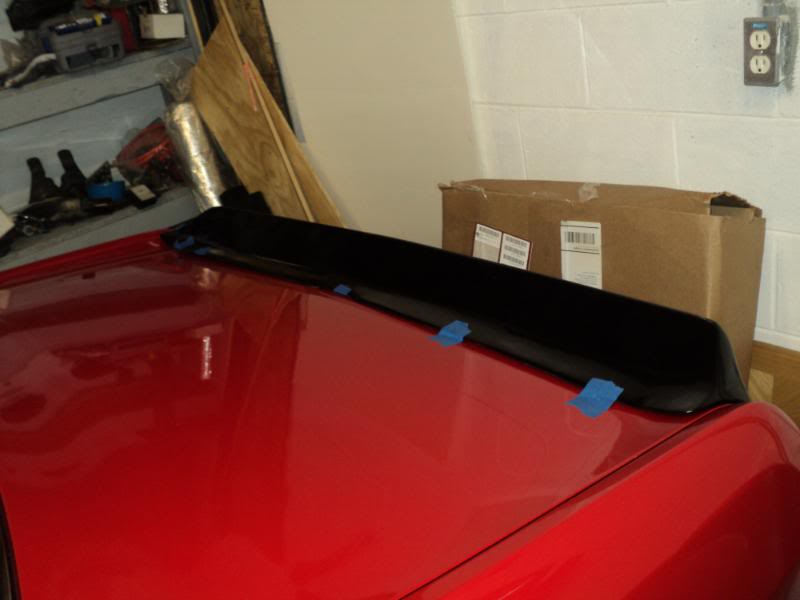
so i test fitted the new spoiler last night, taking a page from dartordemons play book and using blue painters tape didn'tld it on. picturese any picdidn'tm though. didnt have my camera with me.
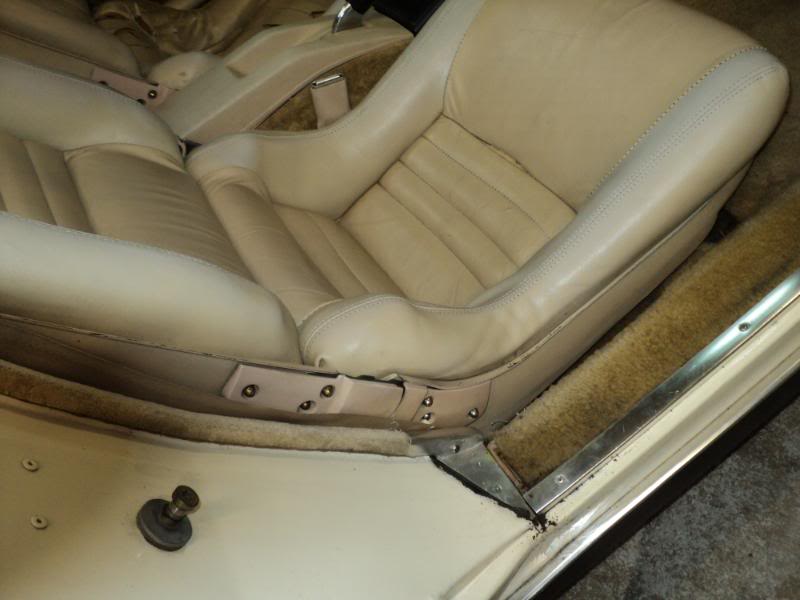
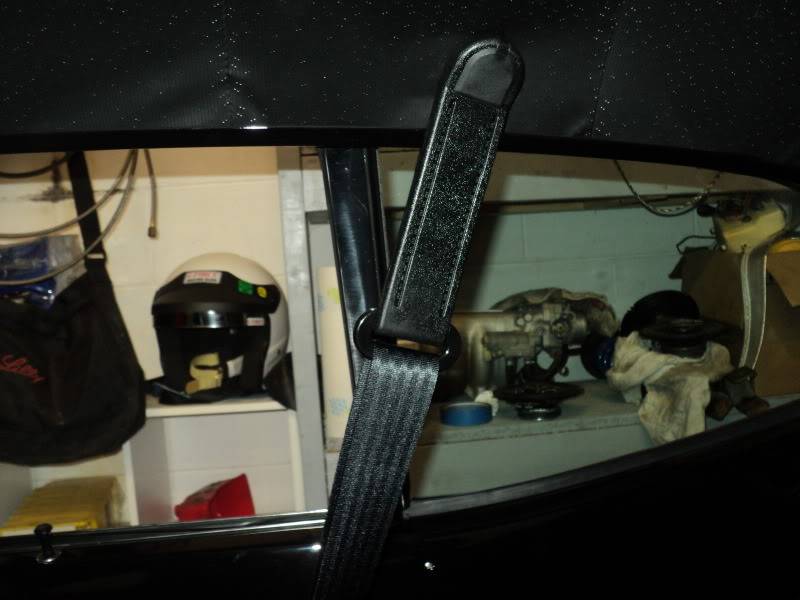
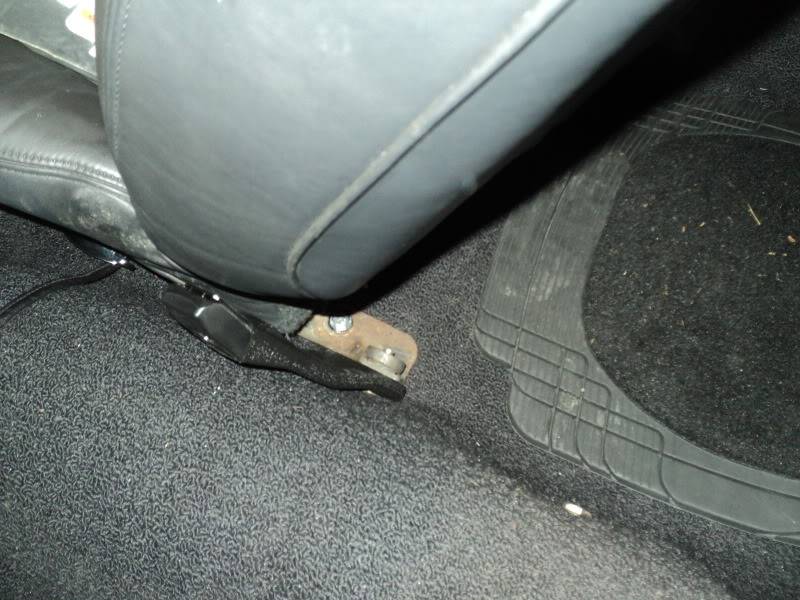
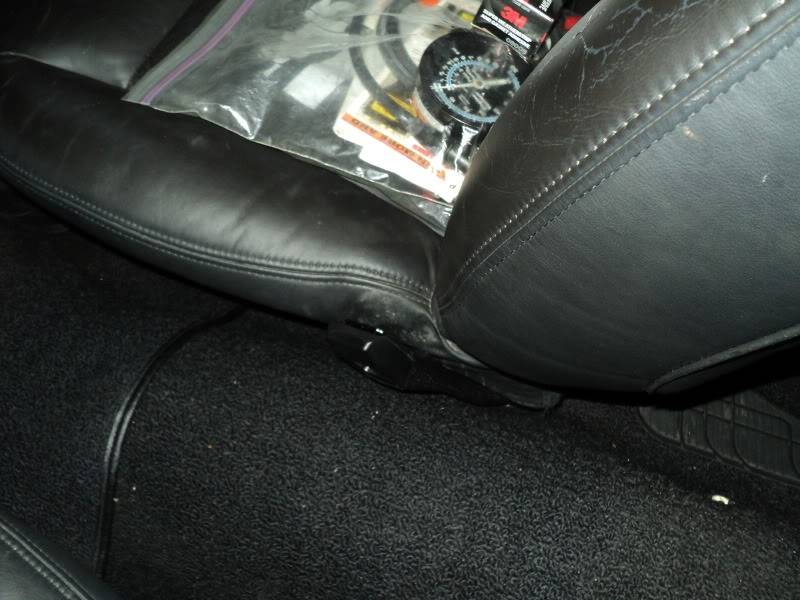
i also FINALLY instaseat beltsestcoyou'reatbelts. if youre plannioriginaltain the origonal mounting points, get the 11 inch buckles. i used the threaded mounbuckles the ford buckels built inseat beltsts.
the seatbelts work great, and very comfortable, and lock right up when you jump on the brakes or corner hard.
installed pics:
and im also still working on reducing the wind noise. noticedmyoday while driving that my rear edge of weatherstripping was moving around going down the highway. that cant be helping.
so while i had my weatherstripping stuff out for the vette, i glued the rear edge into place.
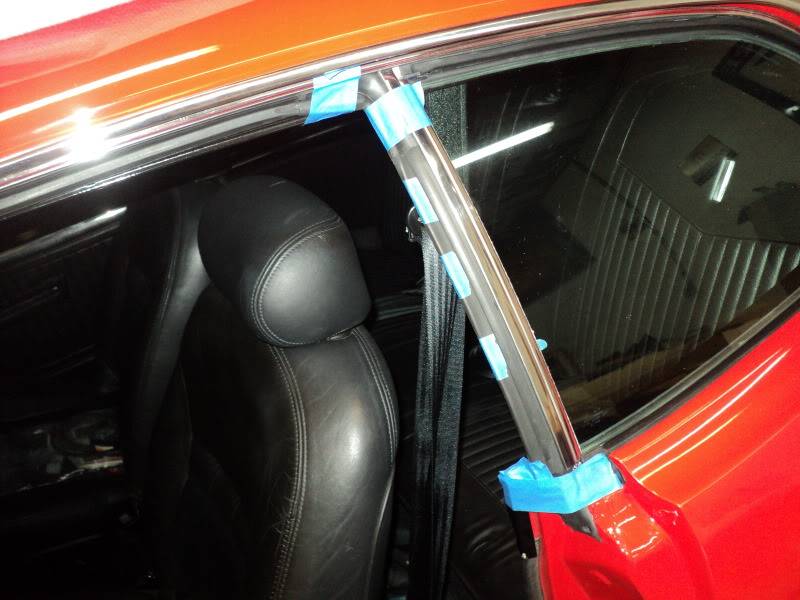
a question:
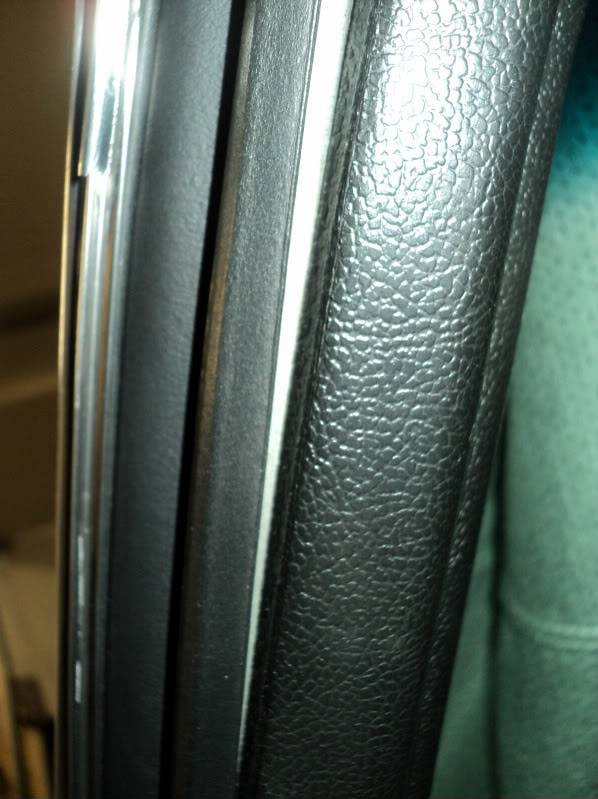
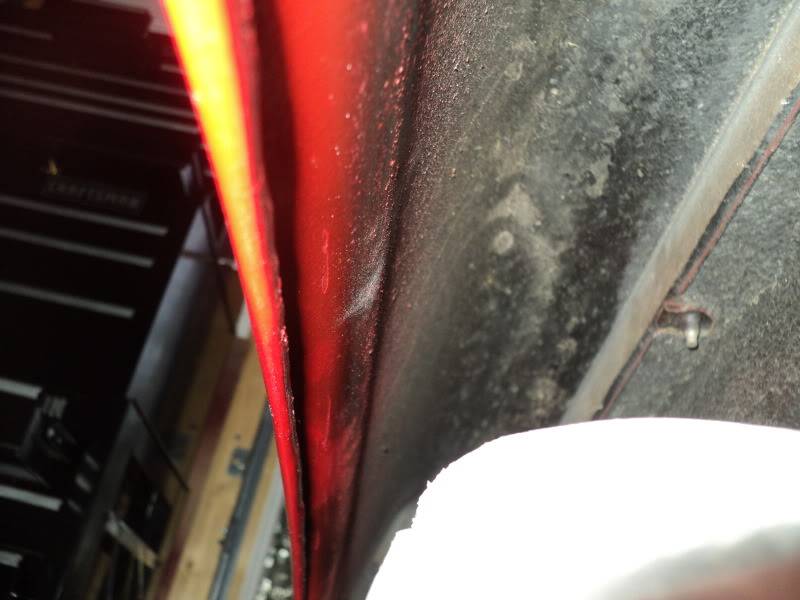
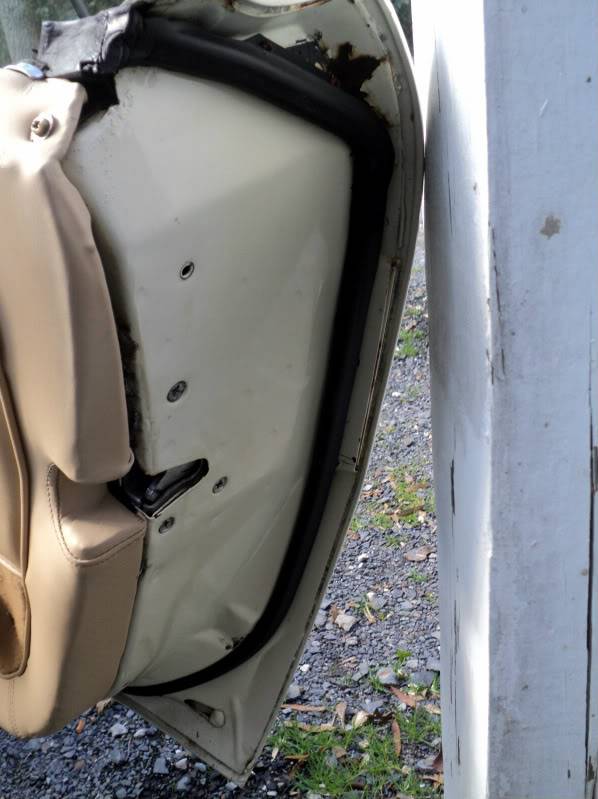
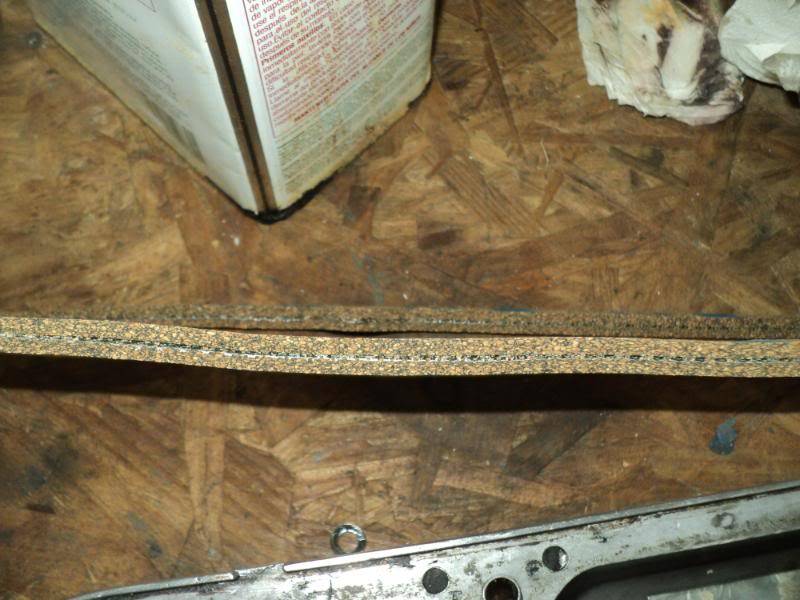
on the roofrails, how is the weatherstripping supposed to look? up on the leading edge at the a-pillar, inside of the car, the weamoldingpping wraps around the moulding like the picture shows. further back along the rochannelctually goes up in the channell entirely. which way is correct? or are both of them?
budget is the same.
i hope all of you have a merry Christmas if i dont talk with you before then.
MichaelMichael Crawford
1970 plymouth Duster back under construction:
https://www.pro-touring.com/showthre...uring-makeover
1987 GMC S15 https://www.pro-touring.com/showthre...ct-drivabeater
01-03-2012 #109
Registered User
- Join Date
- Aug 2007
- Location
- Albemarle, NC
- Posts
- 1,149
well, got the fenders fixed from where the heavily contacted during run through the hills.
my buddy bill owns a body shop (the collision center in albemarle, nc). we have an agreement worked out, where I'm not allowed to touch things that are painted, straight, or shiny. in return, hes not allowed to touch things with electricity. its a good trade for us. I'm helping do some repairs to the new yorker i wired for him (he damaged the harness when he pulled the car back down to the frame to change the entire color by two shades), and repaired the bulkhead connector on a 73 roadrunner 340 (stopped running while it was in for a repaint. he couldn't call the owner and say it was done with it not running) in exchange for him straightening and rolling and re-painting the fender lips on the front. heres pics (didn't cost me anything but time)
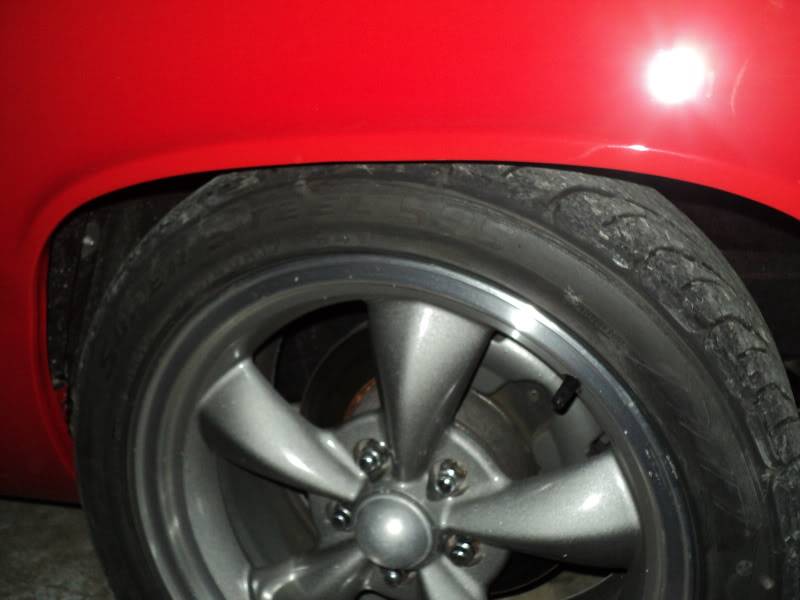
theres miles of clearance now. enough that i can comfortably fit 275/40/17's with the wheel spacer removed. i just may do it.....
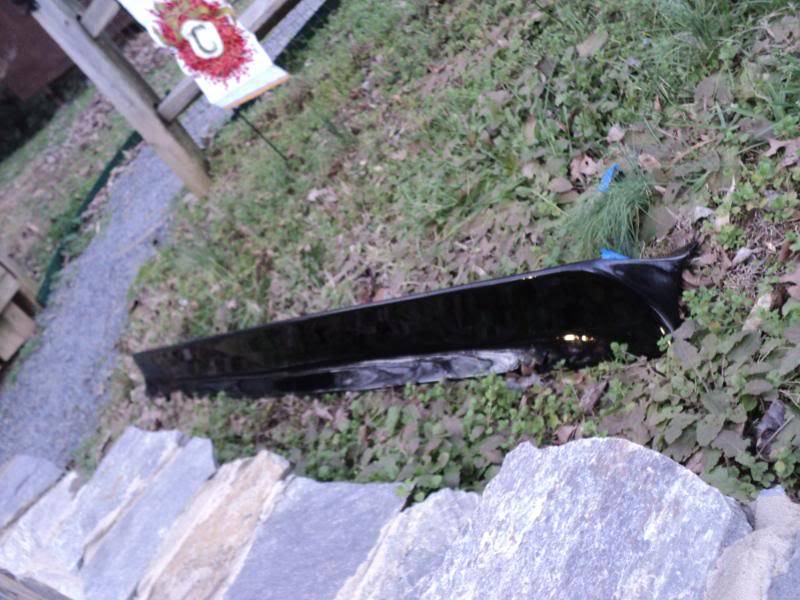
he also talked me out of the spoiler. so thats going up for sale. ill take 100 plus shipping (probably around 15 bucks)
tonight, i pulled the carb apart, cleaned it all up, richened the secondary side by two jet sizes, leaned the primary side by one jet size. well see how that does. did find some completely plugged passages.
Saturday, if all goes according to plan, ill be getting the car tinted. the guy that bought my s10 does tint, and part of the sale agreement was for a tint job. now that he cant figure out a problem with the truck, he finally has to pony up for it.
on the big news front, Ive decided I'm going with a five speed and EFI on this car. I'm trying to talk my best friend into letting his TKO500 go to me for a reasonable price (less than 4K on it) so i can fab up my own mounts, modify my bell housing, and slide it in.
I'm also currently collecting my parts for the EFI setup i want to run. Ive already got a used painless performance TPI harness from a vette race car that i took off, a slightly "blemished" 7737 ECM from the same vette, and 30LB ford racing injectors i paid 10 bucks for. now i need to find a decent and cheap 4bbl throttle body, get some injector bungs installed in my Victor Jr, and find a small block lean burn distributor. also need a set of magnum fuel rails. and a fuel pump. and other stuff I'm not thinking of.
I'm hoping to pull off the EFI and five speed swaps for under 2.5K total. its gonna be tough to do, but I'm confident in my scrounging abilities.
tomorrow, Ive got a half day at work, so I'm going to work on fine tuning the carb, and Friday on finally getting my door glasses adjusted properly. lets keep our fingers crossed that my plans work out.
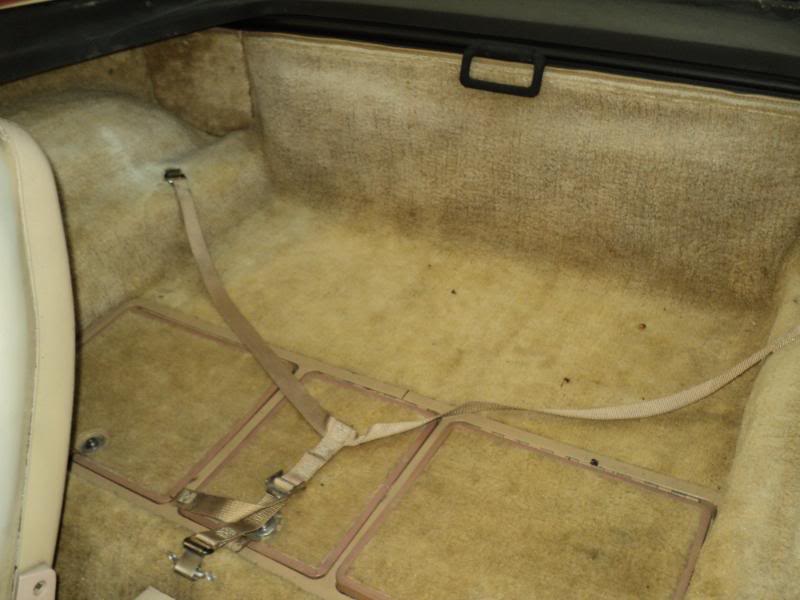
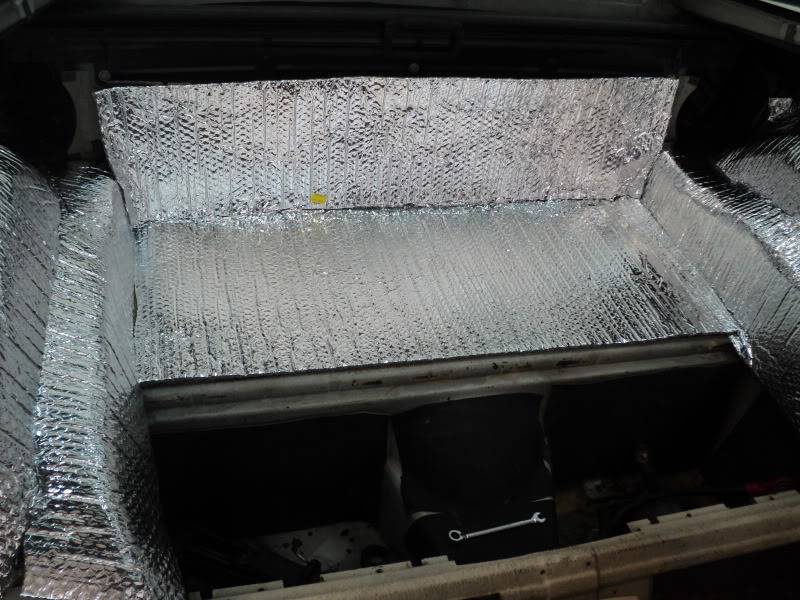
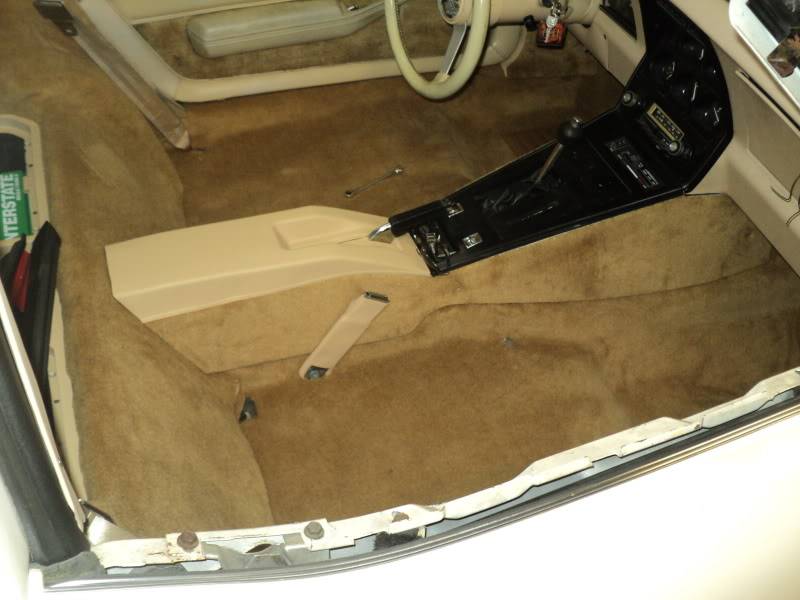
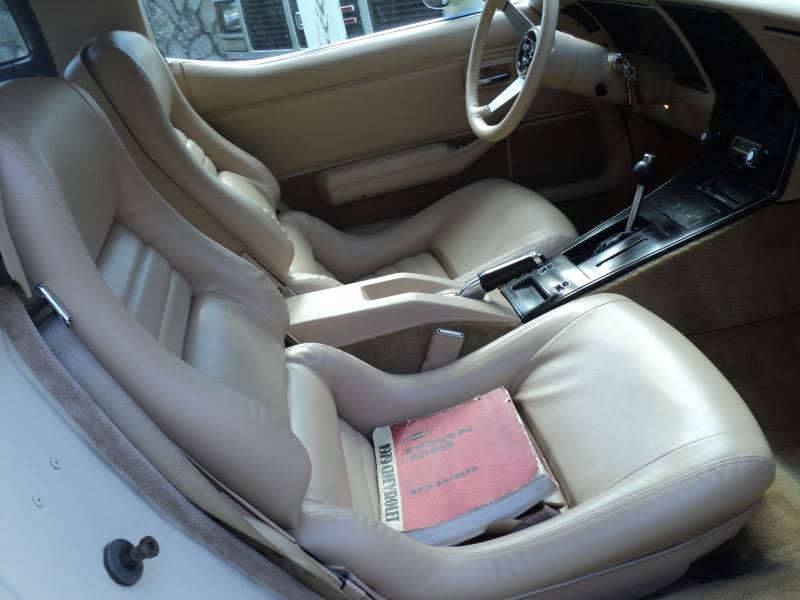
on a side job front, check out the vette. all Ive got to do is install the new classic auto sound stereo, wash, vacuum, and armor-all it, and give it back to sue and her husband. I'm pleased with how it came out.

MichaelMichael Crawford
1970 plymouth Duster back under construction:
https://www.pro-touring.com/showthre...uring-makeover
1987 GMC S15 https://www.pro-touring.com/showthre...ct-drivabeater
01-05-2012 #110
Registered User
- Join Date
- Nov 2008
- Location
- TN
- Posts
- 939
Wow... Rolling the fenders really opens up a lot of space...
Benjamin
Twin Dusters
'72 Plymouth Duster "Aero Duster" project
'72 Plymouth Duster "Daily Duster" project
https://www.pro-touring.com/showthre...RO-DUSTER-quot
01-05-2012 #111
Registered User
- Join Date
- Aug 2007
- Location
- Albemarle, NC
- Posts
- 1,149
best guess is about 1/2 inch on the outside edge of the tire.
should prevent another rubber chunk eye injury, ben.Michael Crawford
1970 plymouth Duster back under construction:
https://www.pro-touring.com/showthre...uring-makeover
1987 GMC S15 https://www.pro-touring.com/showthre...ct-drivabeater
01-06-2012 #112
Registered User
- Join Date
- Aug 2007
- Location
- Albemarle, NC
- Posts
- 1,149
well, i had a little spare time last night to start adjusting my door glass better. got all the drivers side pulled apart, regreased, etc. started adjusting. realized i needed to move the pane about 1/4 inch forward in the opening. other than that, it was fitting great. so i shut the door, and figured id get to it tonight. turned off the lights and heat in the shop, went to bed.
after work today, i came home all excited to finish both doors tonight and take the car up to get it tinted tomorrow.
this is what greeted me when i opened the door to the shop.
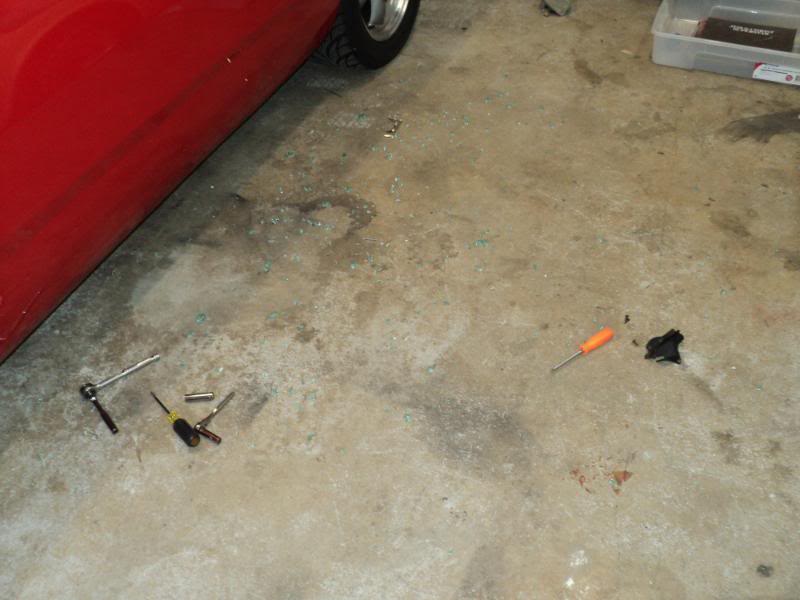
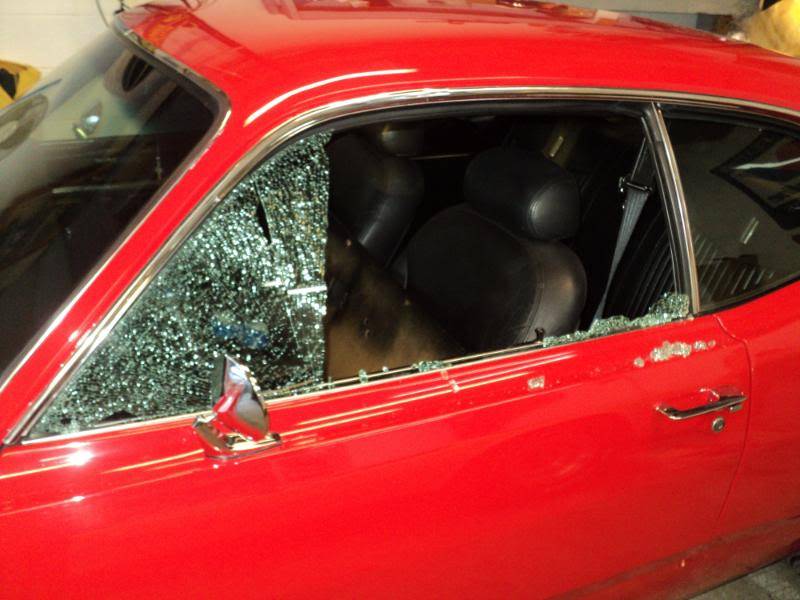
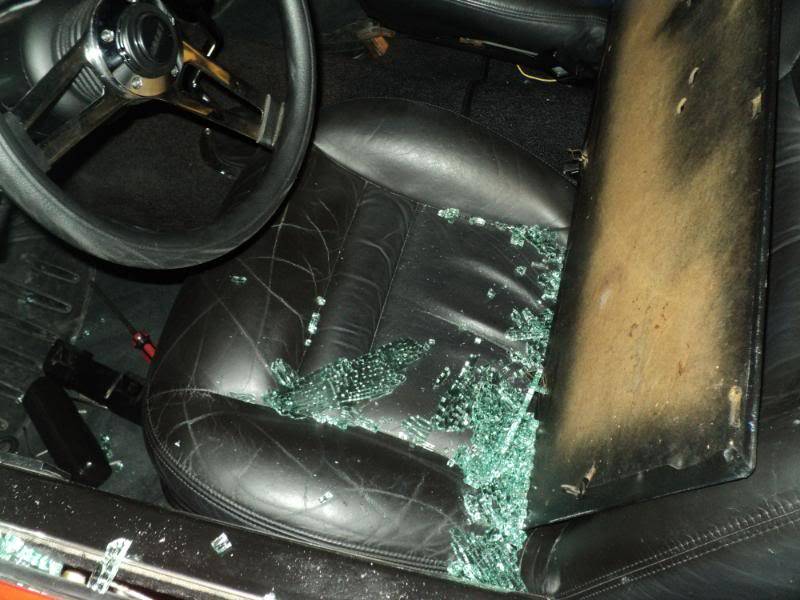

i was really proud of myself for not loosing my temper or even cussing when i saw that. Ive really been working on that lately.
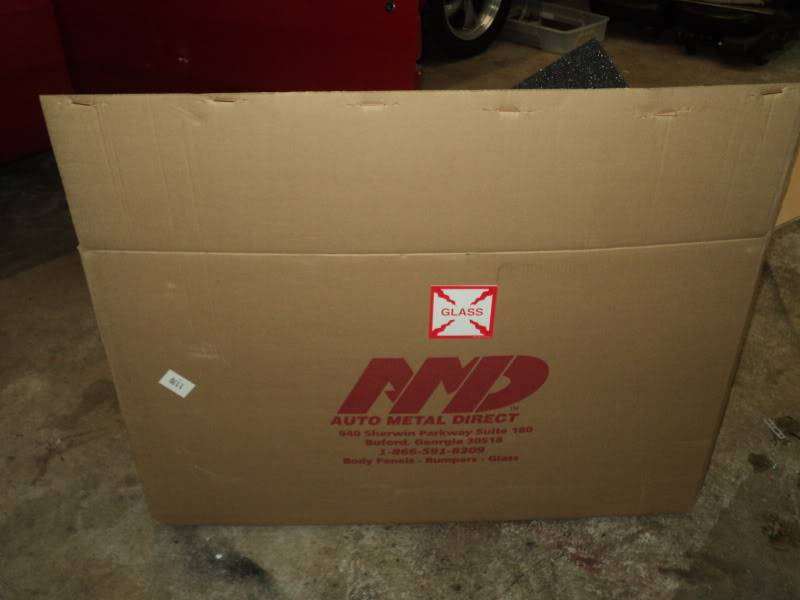
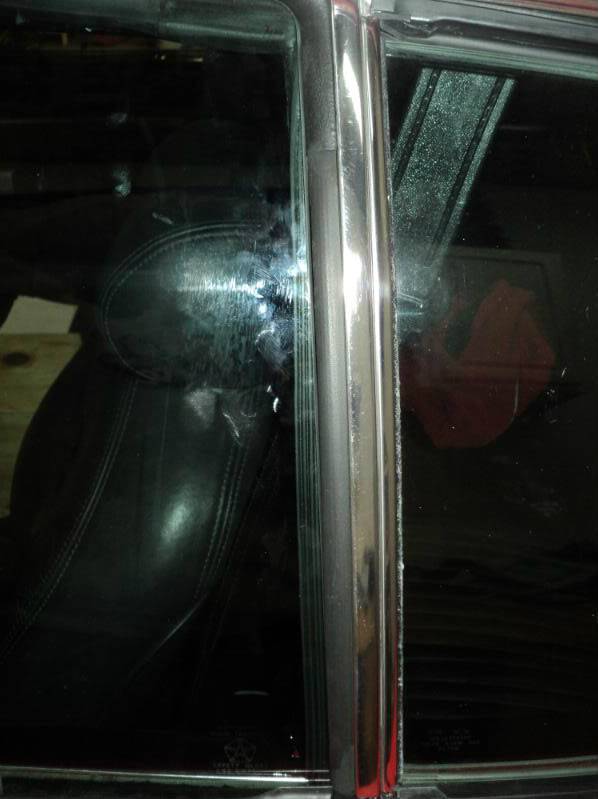
my only theory, and its a WAG, is that i somehow put tension on the glass with the new adjustments, and there was a tiny chip or imperfection in it. with the thermal expansion/contraction, and the new structural stresses, it shattered. again, just a WAG. so i ordered a new AMD door glass from summit tonight for 183.41 shipped. should be here next week. i also canceled my appointment to get it tinted. no point when i don't have all the windows in the car anymore.
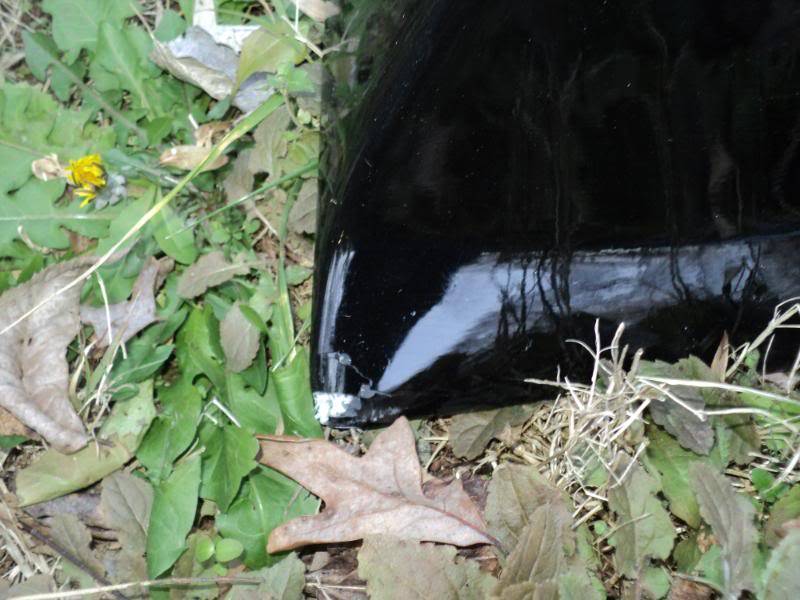
i also took some pics of the spoiler on the car so I could make a sale thread on it, and show folks what it looked like. as i was removing it to put it in a box for shipping, i dropped it. chipped the corner a little more. still didn't cuss!!!! i think i will have to make my own spoiler. thats about 1 inch wider, a little more laid back, and a little less curved.
so, tonight was expensive and crappy, but still a good night due to what i DIDN'T do.
current budget total is 5213.15
MichaelMichael Crawford
1970 plymouth Duster back under construction:
https://www.pro-touring.com/showthre...uring-makeover
1987 GMC S15 https://www.pro-touring.com/showthre...ct-drivabeater
01-06-2012 #113 Registered User
- Join Date
- Dec 2006
- Location
- SF Bay Area
- Posts
- 456
Hey man, we've ALL been there! Sometimes you just have to laugh at what life throws at you. Originally Posted by dusterbd13
 chunger
'68 Ranchero 500
'70 Cougar XR-7 Convertible
'98 Mustang GT Convertible
01-08-2012 #114
Registered User
- Join Date
- Feb 2010
- Location
- Central Texas
- Posts
- 78
I just finished reading all your posts about your Duster. I really like the project and the approach you are taking. Nice job.
01-13-2012 #115
Registered User
- Join Date
- Aug 2007
- Location
- Albemarle, NC
- Posts
- 1,149
thanks !
this weeks update is definately more positive than last week.
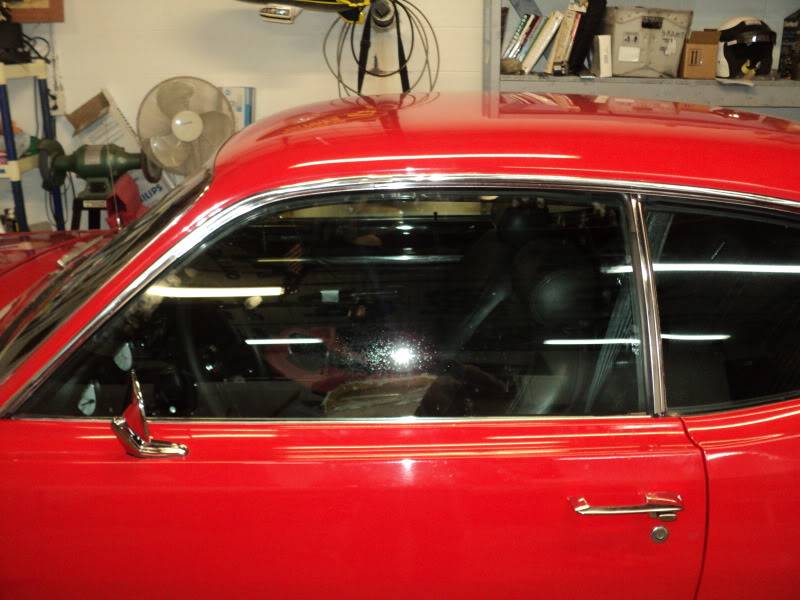
got my new window in. i had some reservations after reading about the quality of the AMD glass on the forums. but i was pleasantly suprised by what arrived. i had read about splotchy ting, incorrect shape, wavyness in the glass, etc. found NONE of that with my glass. seems a little thinner than the origonal, and the edges are not nearly as nice and beveled, but i only noticed that after really looking HARD at the origonal on the other side. all in all, money well spent. (and yes, i know its really dirty in the pics. i didnt have any paper towels to clean it with that night.)
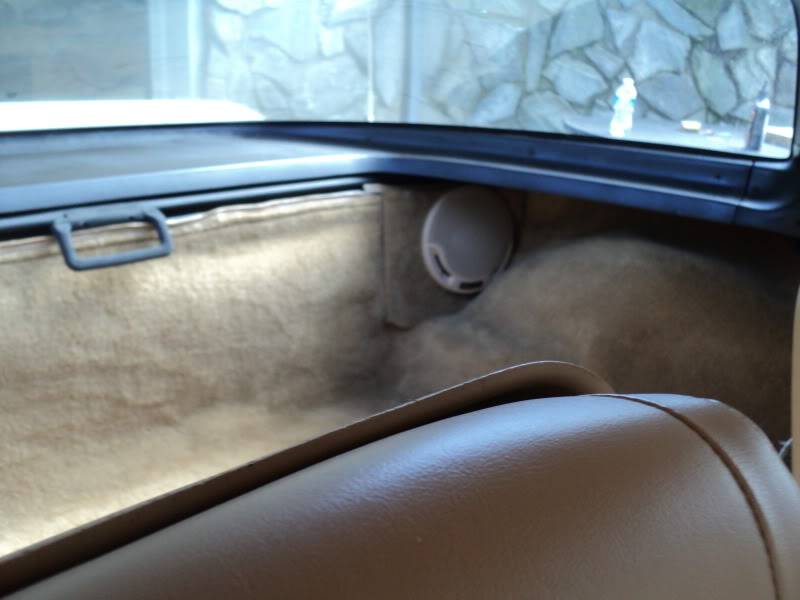
i also took the opportunity to clean, adjust, and relubricate everything in the door per the factory service manual. the window operation isnt perfect, but its a far cry better than any other time in my history with this car. it was almost pleasant to put it all back together. for the rubber spacers on the bolts that go through the glass, i cut down some vacuum tube that i had laying around. worked great. still need to really test drive the ar and see if i have any whistles or new noises going down the road, make some anti ratte covers for the door lock and latch rods, re-soun ddeaden the door, and reinstall the interior side. but that will wait until after the higher speed test drive.

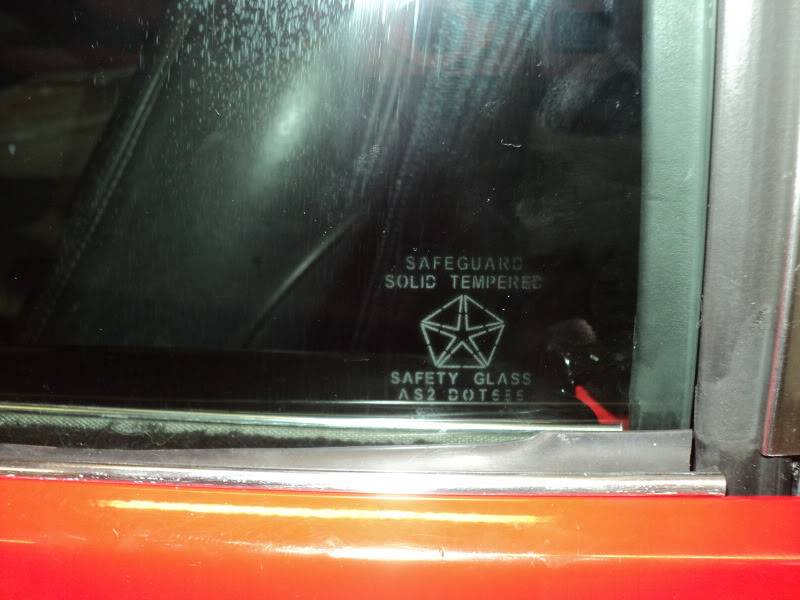
the etching was a really nice detail. its not on any of my other glasses, but it probably should be.
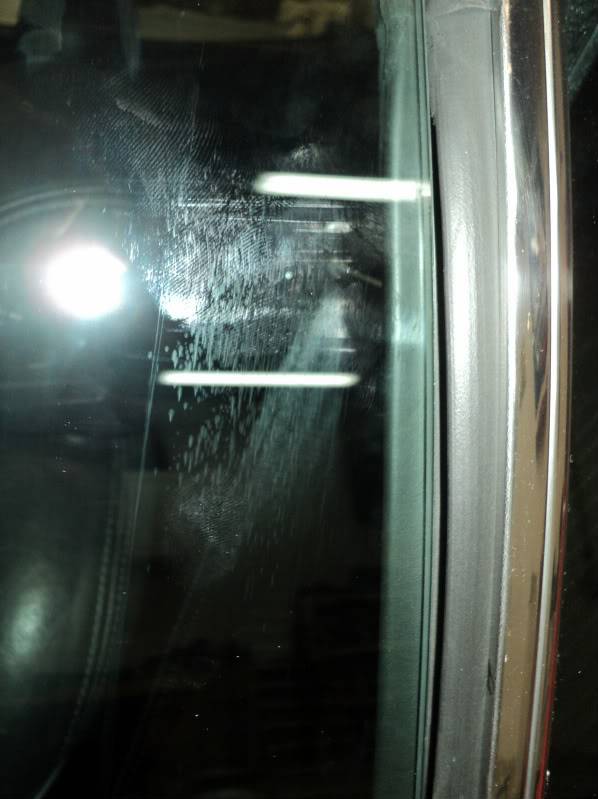
i also finished the weatherstripping reinstall, gluing, and adjustments etc on this door. still have to do the passengers side the same way. maybe tomorrow, but im only doing one door at a time.
i had no luck finding a good picture of how its supposed to be, but did get to look at a survivor car the other week so i was able to figure out how to fix mine. took decent pictures for reference when someone else needs the info.
and also started mocking up my console ideas. ive been looking to see if i could find a console with an armrest that was the right height and shape to fit the style of car that this is. i managed to be given a pair of 1979 AMC AMX consoles, one with the optional rallye gauge packages. im doing all my mockups and tweaks with the junk one, and will do my final version with the good one if i like it.
so, heres pics.
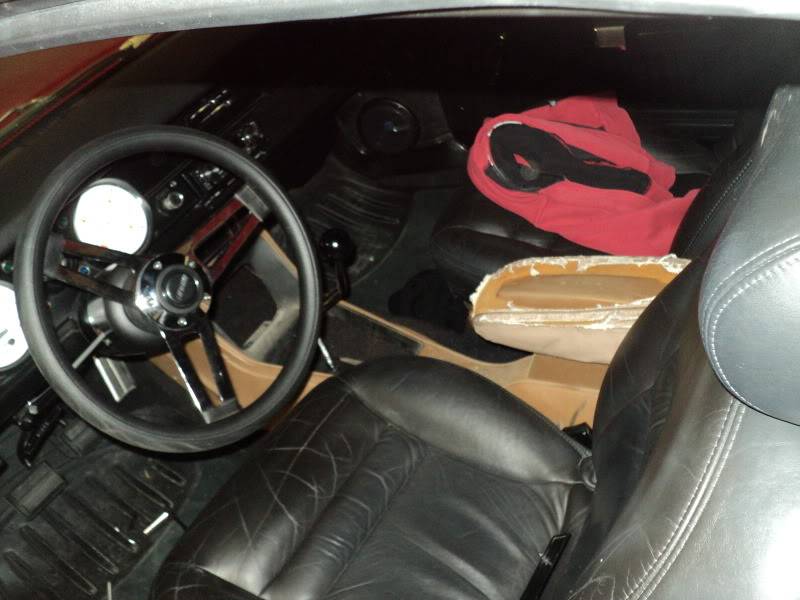
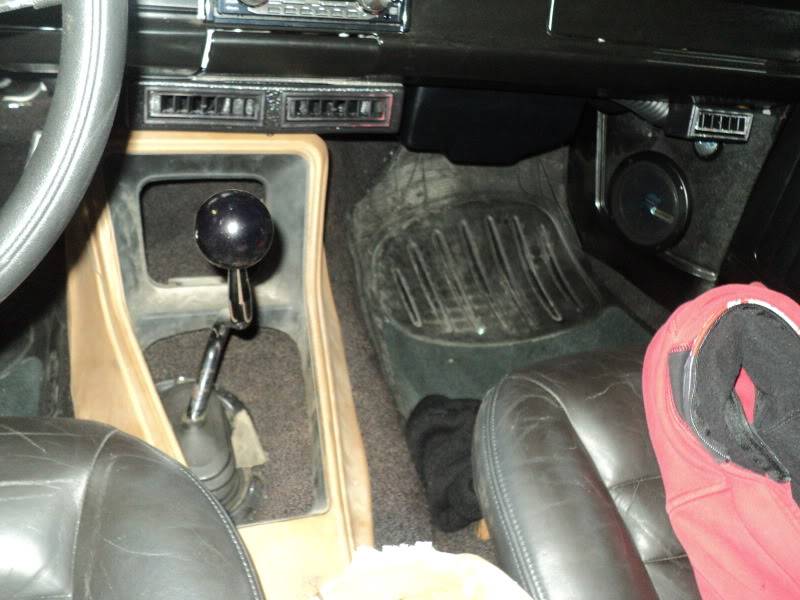
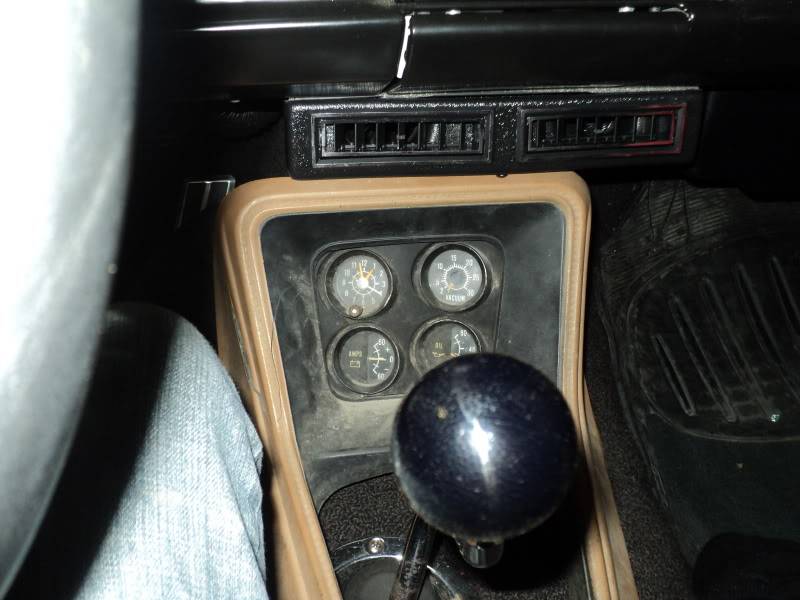
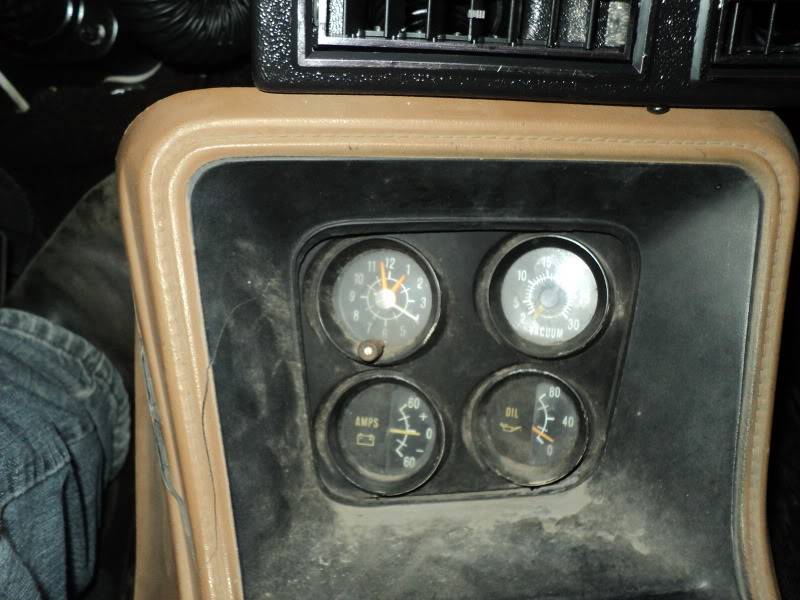
the shifter hole will line up perfect wheen i do the five speed swap, as that will put the shifter outlet in the center of the trans tunnel. still cant figure out what 4 gauges i would run down there, though. maybe vacuum, AF ratio, oil temp, and nitrous pressure? dunno. decision for another day, i guess.
the leading edge of the console by the dash still needs to go towards the center of the car, but i cannot do that right now due to the current shifter location. i think for this junk console, im going to cut that side out, build a temporary plate to fill most of the hole, and build a side for it around the factory shifter. then all just refinish ans swao in the other one when i do the five speed.
what do you all think?
michaelMichael Crawford
1970 plymouth Duster back under construction:
https://www.pro-touring.com/showthre...uring-makeover
1987 GMC S15 https://www.pro-touring.com/showthre...ct-drivabeater
01-16-2012 #116
Registered User
- Join Date
- Nov 2008
- Location
- TN
- Posts
- 939
I think it looks good!
Benjamin
Twin Dusters
'72 Plymouth Duster "Aero Duster" project
'72 Plymouth Duster "Daily Duster" project
https://www.pro-touring.com/showthre...RO-DUSTER-quot
02-05-2012 #117
Registered User
- Join Date
- Aug 2007
- Location
- Albemarle, NC
- Posts
- 1,149
ok, update time.
and admitting that this upgrade process has snowballed into much more than origonally anticipated. i think by the time im done here, not much of the origonal build will be left. or my bank account.
when last i updated, i was working on the center console ideas. origonally i was going to use the AMX console and gauges. i cut the junk one up, and drove it for about 100 miles one day. hated it. with a passion. so i threw the junk one out. kept the good one and gauges just in case i ever needed it.
i put my lunchbox between the seats normally to act as an armrest. so i got to thinking of making my own console the size of my lunchbox, and adding some cupholders and storage in the process.
using some 3/8 plywood i had left over, i glued up a box to try out.
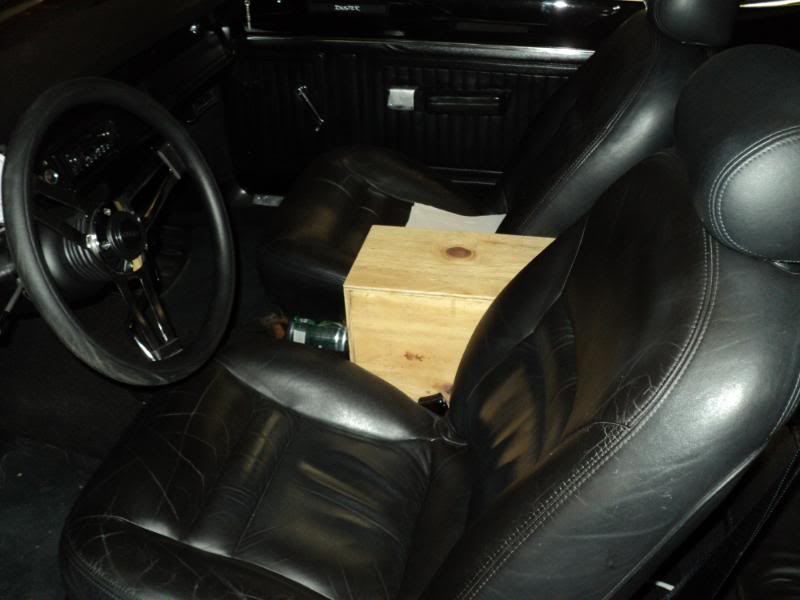
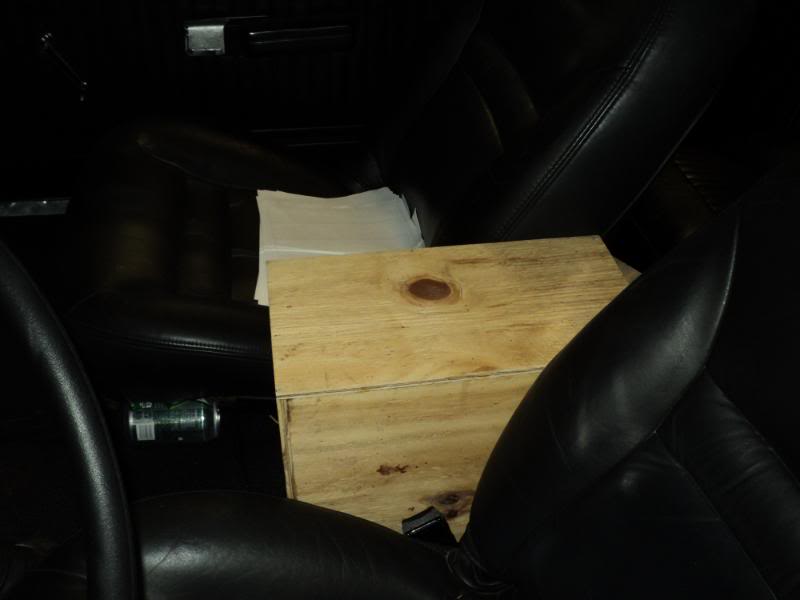
i have the cupholders clamped up at work, drying.
id like some feedback on the shape of the center part of the console. just seems way too square to me.
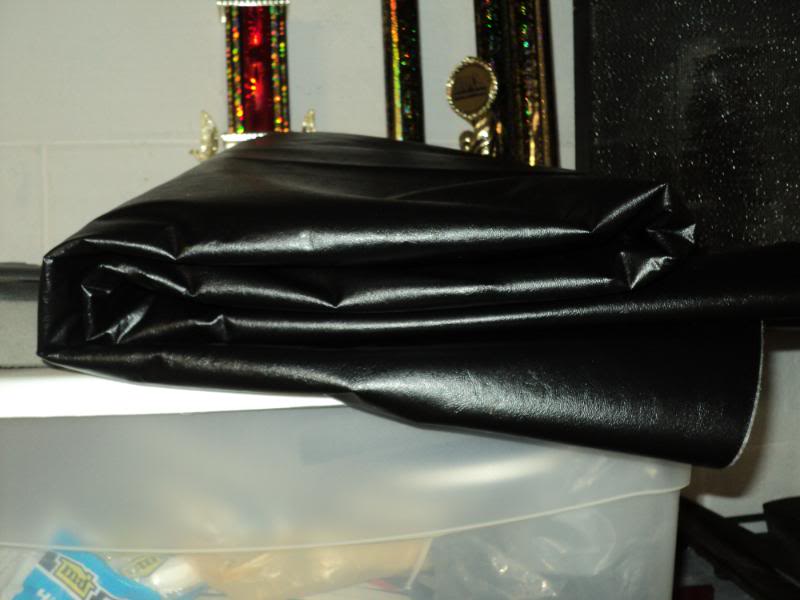
i also went up to hancock fabrics and bought some vynil. cost me 25 bucks for 6 yards worth, which will be enough to cover the console, some of the trunk close out panels, and the custom door panels that im planning on making. (yes, its snowballed into custom interior stuff now.)
more pics when i make up my mind on the console shape, and actually get some time to work on it.
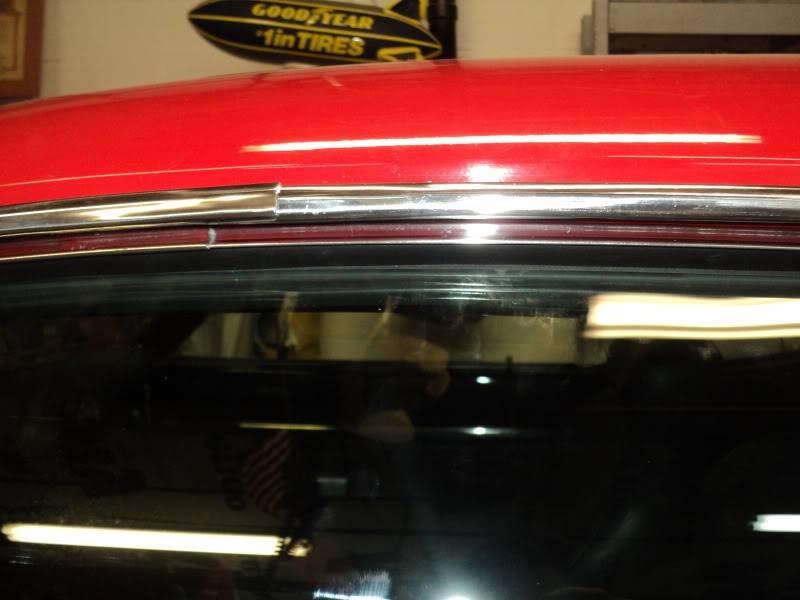
on my last update, i also made the claim that i finally got my windows adjusted properly. i didnt, really. had a lot of wind noise from the rear quarter window to the front window seal. after running through EVERY adjustement i could, i still had the noise. finally broke down and spent 7 dollars on some weatherstripping from lowes to put in the gap. (the ribbed part you can see in the picture) NOW theres no wind noise. i swear the reproduction roofrail seals are to blame. they cant be made right to give me this much of a fight.
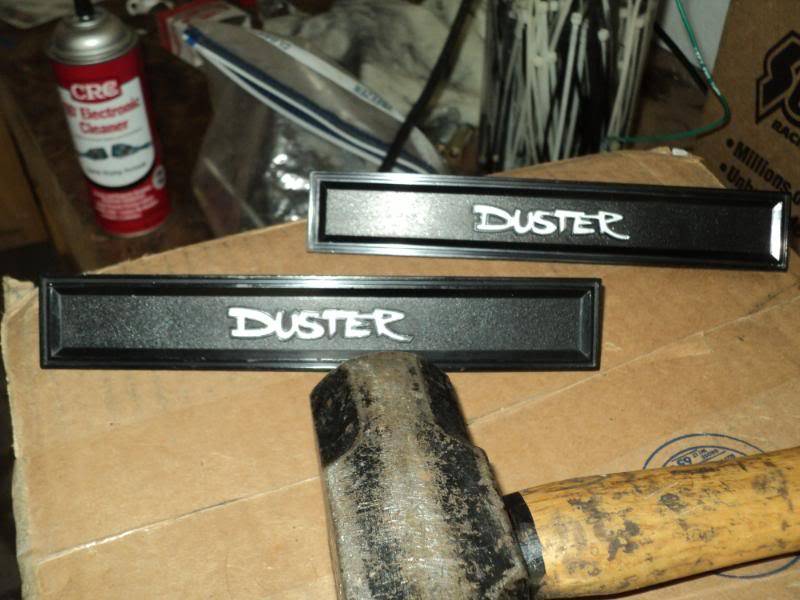
i also repained the door emblems before i put them back in.
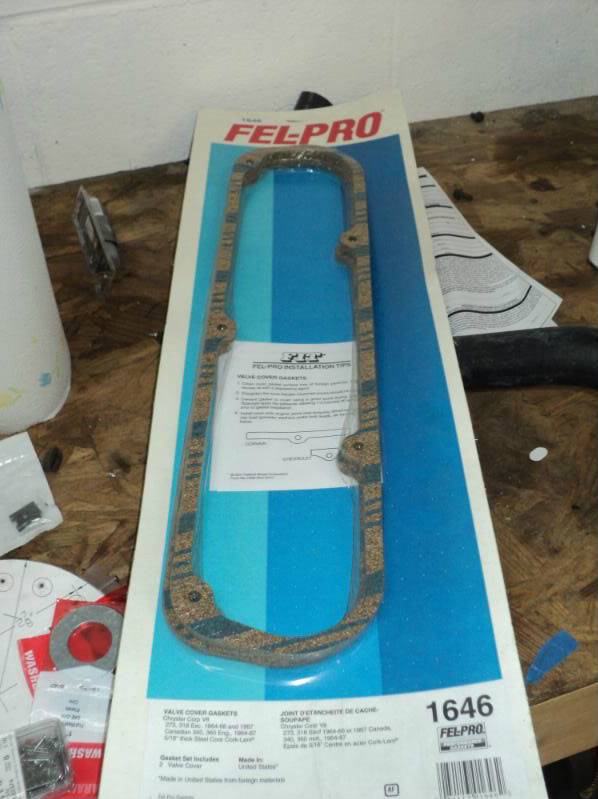
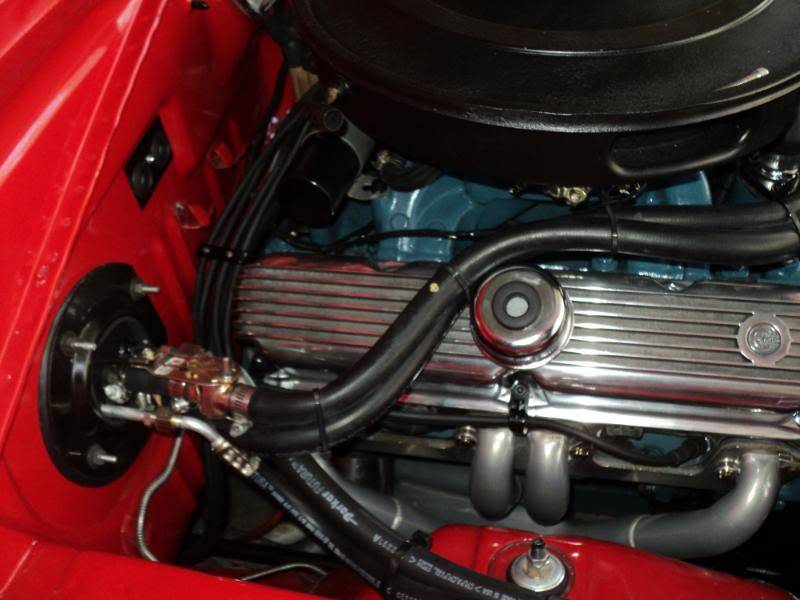
on my last few drives, i smelled burning oil on the passengers side. i had assumed it was a leaking intake manifold rear seal leaking down on the header. so i started pulling the intake. luckily before i got too far, i noticed where all the oil had gotten to. figured out it was the calve cover gaskets.
ive had a set of finned aluminum cal custom valve covers for this car since the mid 90's. when i redid the car this last time, i went back to the stock covers as i didnt want it to look like something that wasnt stock. been thinking off and on about reinstalling the cal-customs. this was my motivation.
when i pulled them put of storage, they looked REALLY bad. needed a lot of work.
so i broke out my old harbor freight buffer, rouges, and wheels and went to town.
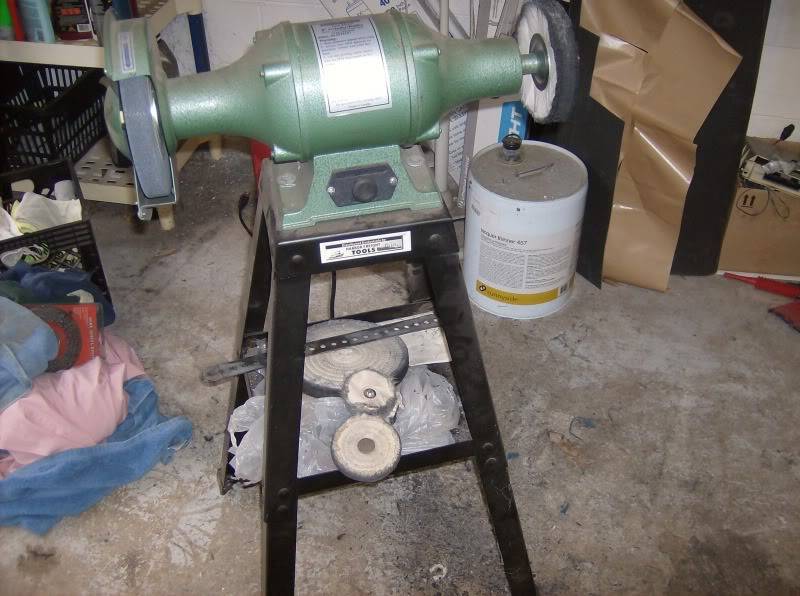
10 hours later, i had them and a 280z valve cover done. (the 280z cover is for my best friend, whos building one)
side by side pic with the stockers
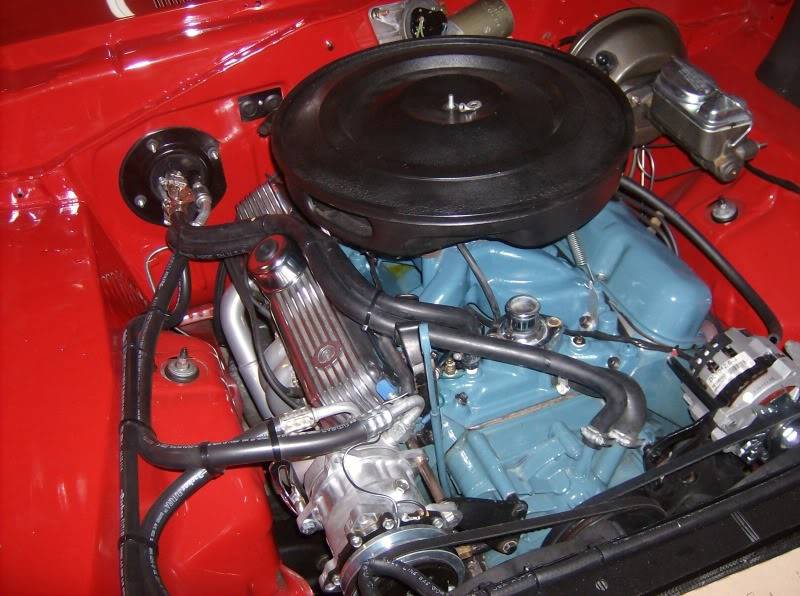
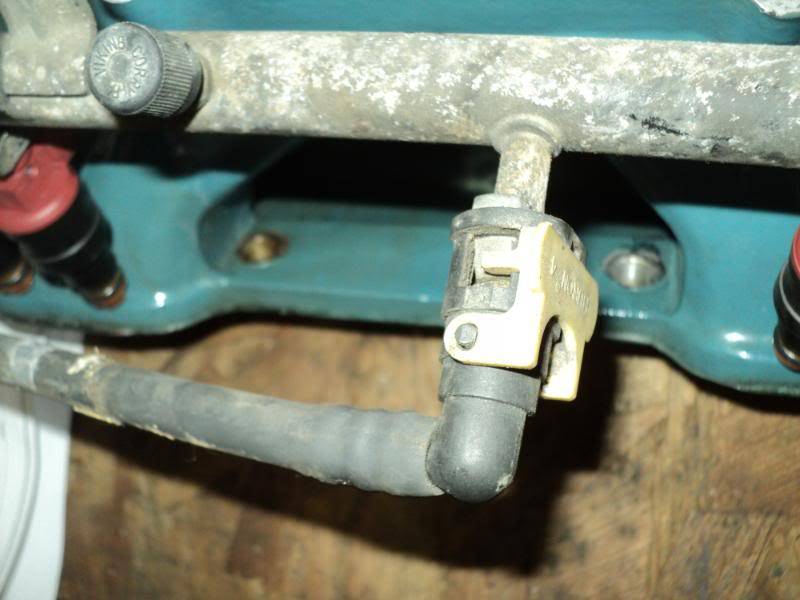
turns out that these made contact with my intake manifold. the simple solution was this:
cost me 45 bucks and had to be special ordered. works perfect, though.
to get these on, i also had to buy an oil fill cap, breather, elbow, bolts, and drill and baffle the drivers side for the PCV valve.14 bucks for all of that. also 4 dollars worth of 3/8 rubber line.
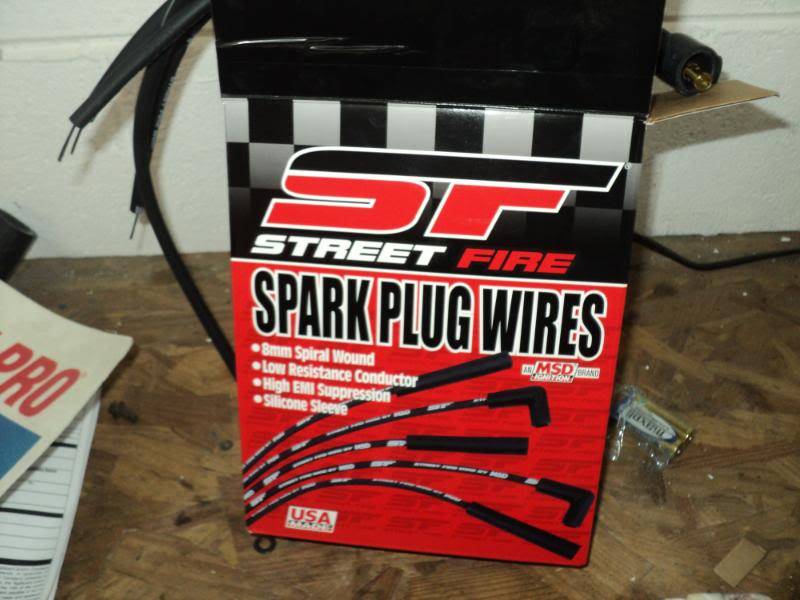
once i got them on, i realized i had no more plug wire separators. ive looked at the made4you wire looms in summit for years. so i ordered them. very nice product, especially for only 35 bucks.
put my 7 mil parts store wires in them, and was not happy with the result.

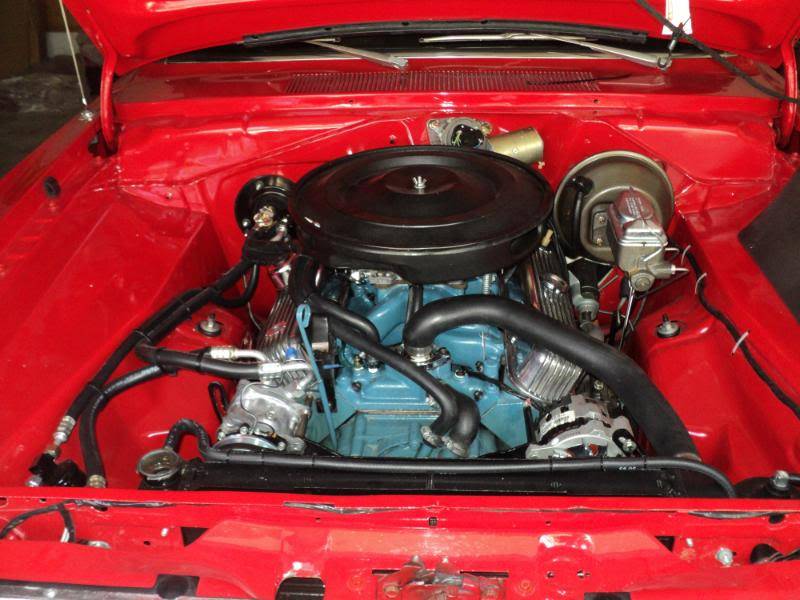
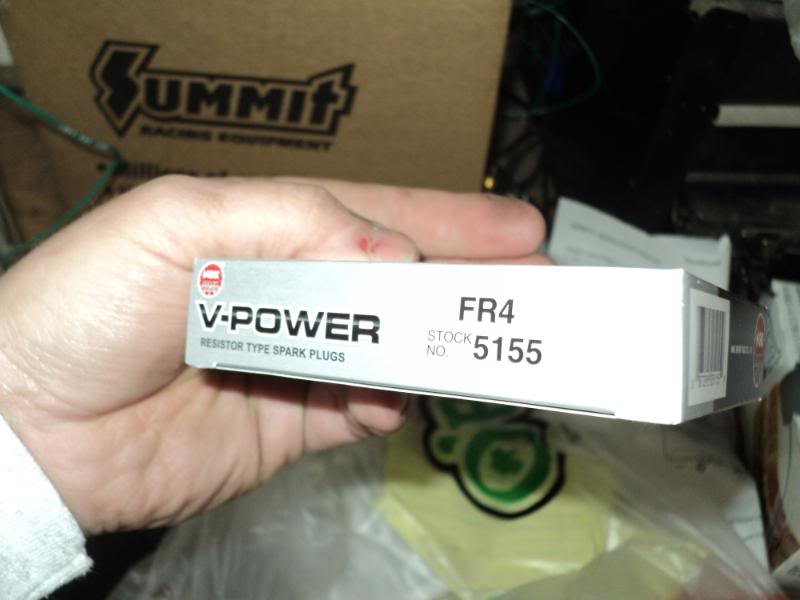
so down at autozone, they stock MSD street fire cut to fit wires. bought them for 45. still dont have them on, though. also got 16 worth of fresh plugs. fidured it was good time to do it.
havent got them in yet. on the plans for this week.
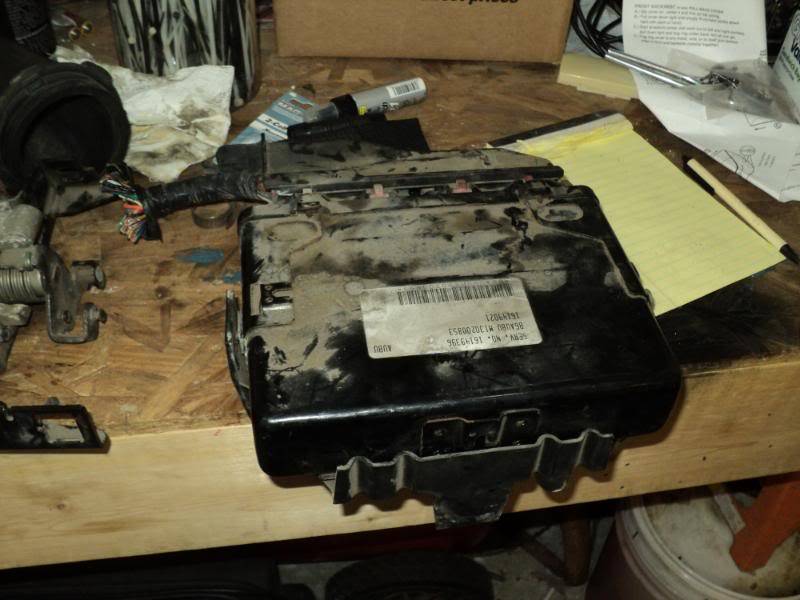
lastly, ive amassed more parts for my EFI conversion. all of it cost me 85 at pull-a-part today.
got a fresher ECM (7727 interchange)
5.9 magnum throttle body
5.9 magnum fuel rails (and installed my free 30lb injectors)
lean burn dist and the parts o convert it to GM HEI style computer control, new oil pressure switch
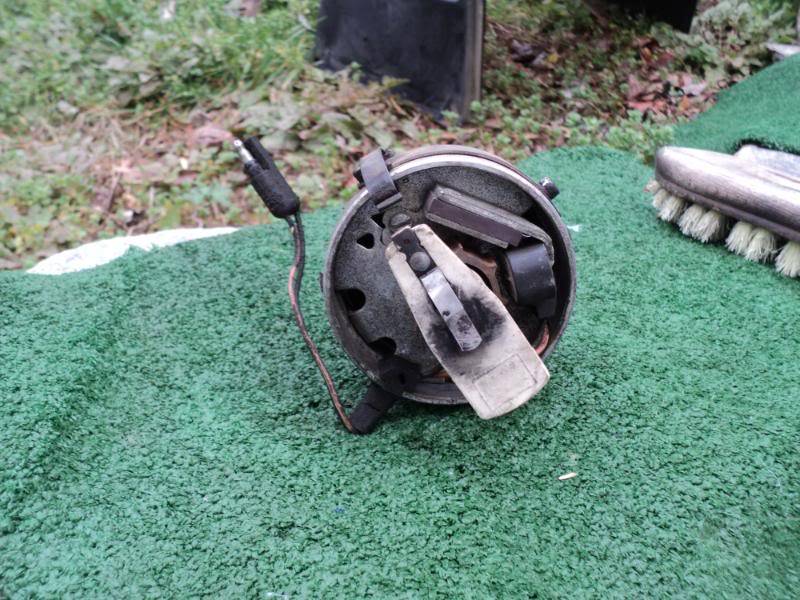
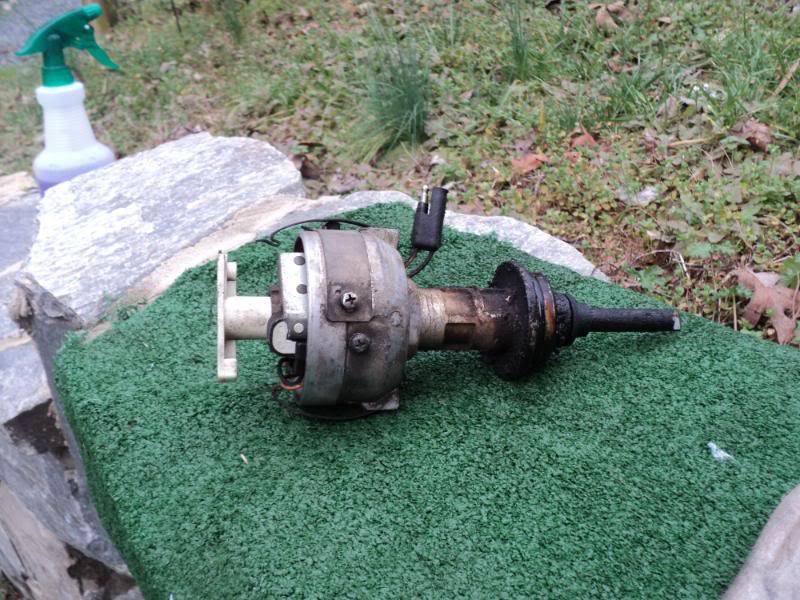
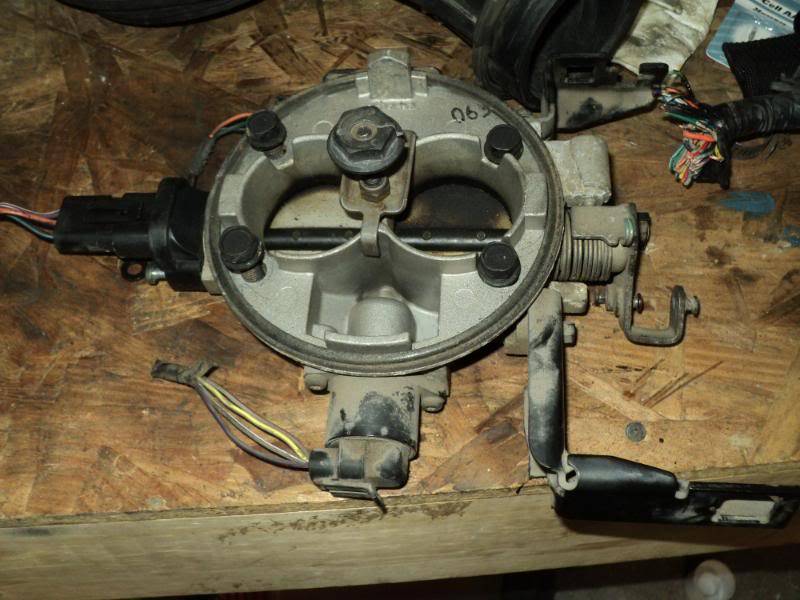
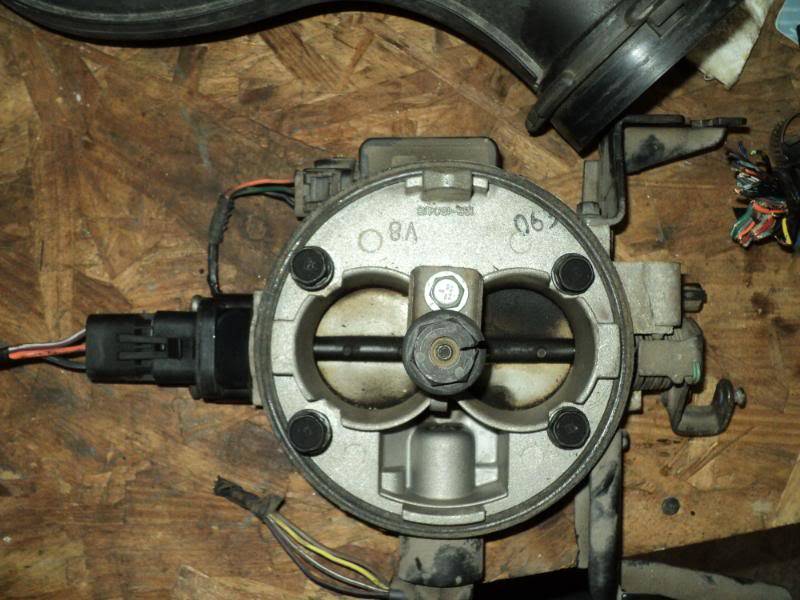
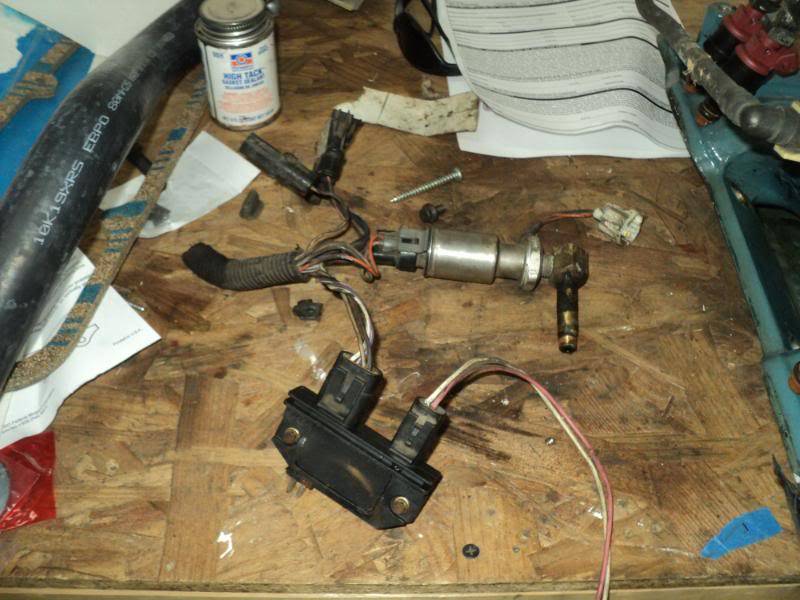
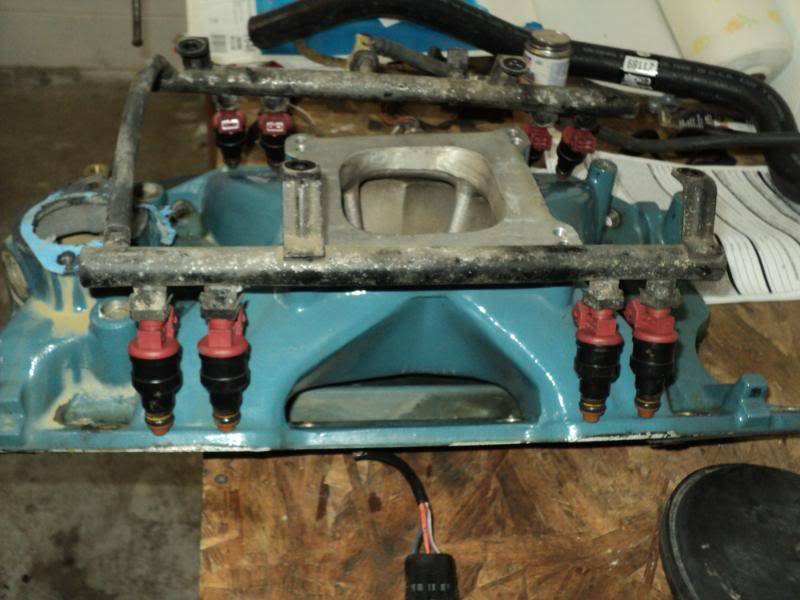
question. does anyone have a source for an AN adapter version of this fitting?
so, thats all for now. hoping to get the plugs and wires finished this week so i can get it cleaned up for my wife and i's trip to the beach for our anniversiary in two weeks.
new budget total: 5489.15
michaelMichael Crawford
1970 plymouth Duster back under construction:
https://www.pro-touring.com/showthre...uring-makeover
1987 GMC S15 https://www.pro-touring.com/showthre...ct-drivabeater
02-05-2012 #118 Registered User
- Join Date
- Apr 2008
- Location
- Lakeland, FL
- Posts
- 516
Awesome progress! i saw you were looking into efi a bit ago. But let me get this straight-that ecm is from a chevy, like an LT? also, are you concerned about the tuning and the restriction of the throttle body? Ive admired your engine compartment for years now, i remember looking at it before i even started on mine to get some motivation, and it just keeps getting cleaner! keep up the great work!
Tim
71' Demon-408, efi, 'viper spec' T56, Dana 60 w/ triangulated 4 link
02-05-2012 #119
Registered User
- Join Date
- Aug 2007
- Location
- Albemarle, NC
- Posts
- 1,149
thanks, tim.
im not really concerned about the throttle body restriction. if it proves to be one, i can get it re-machined and bored to something like a 54 or 60MM. again, not worried.
the ECM is a chevy piece, used on l98 and lt1 corvettes, camaros, and millions of FWD cars with 60* v6's. very versitile, well supported, and well hacked ecm. used onb on my s10 when i built it, used a couple on some track cars, etc. its also wetherproof, for underhood applications. not necessary for this install, but i have a painless tpi harness that i removed from a track car that went a different way setup for this ecm. otherwise i would have used a 7730 for the smaller case. same ECM, different case, plugs, and size.
michaelMichael Crawford
1970 plymouth Duster back under construction:
https://www.pro-touring.com/showthre...uring-makeover
1987 GMC S15 https://www.pro-touring.com/showthre...ct-drivabeater
02-05-2012 #120
Registered User
- Join Date
- Apr 2008
- Location
- Lakeland, FL
- Posts
- 516
Ah very cool, so it looks like there will be very little to no learning curve with this setup for you then..thats always a plus!
Tim
71' Demon-408, efi, 'viper spec' T56, Dana 60 w/ triangulated 4 link

 Reply With Quote


