

Results 21 to 40 of 243
-
11-06-2010 #21
 Registered User
- Join Date
- Aug 2007
- Location
- Albemarle, NC
- Posts
- 1,149

well, another month and 600 miles (can you tell I'm really starting to enjoy driving this car?)
the weekend before the woolly worm festival, i had to go to Columbia SC and help a friend move. figured it was a nice day, and it would be a good shakedown run. (Columbia is 160 miles each way, all interstate). all things considered, it was a successful trip. the car hadn't left my state in over a decade, or really gone on any trips further than 50 miles each way since the resto. so, to put this into prospective: it was mostly untested, with a lot of used parts and "good enough" stuff.
i had some issues.
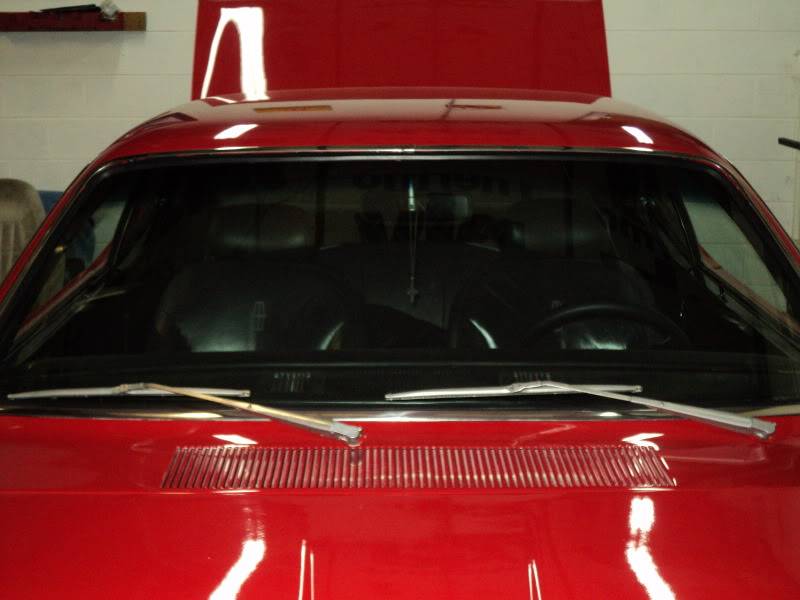
on the trip down, the wind whistle from the passengers side window about drove me nuts.
when i finally got there, one of my center caps popped off in the parking lot. just laying there by the car.
i lost left rear brake light, all exterior lighting, and charging system.
on the trip home, the axle got very, very, very noisy.
i figured out my trip odometer in the autometer speedo is not accurate. it changes anytime you turn the car off.
so, i was kinda bummed by all the problems my shakedown run revealed. left it parked for a couple of weeks while i went to the woolly worm festival, worked around the house, and went to my 10 year high school reunion.
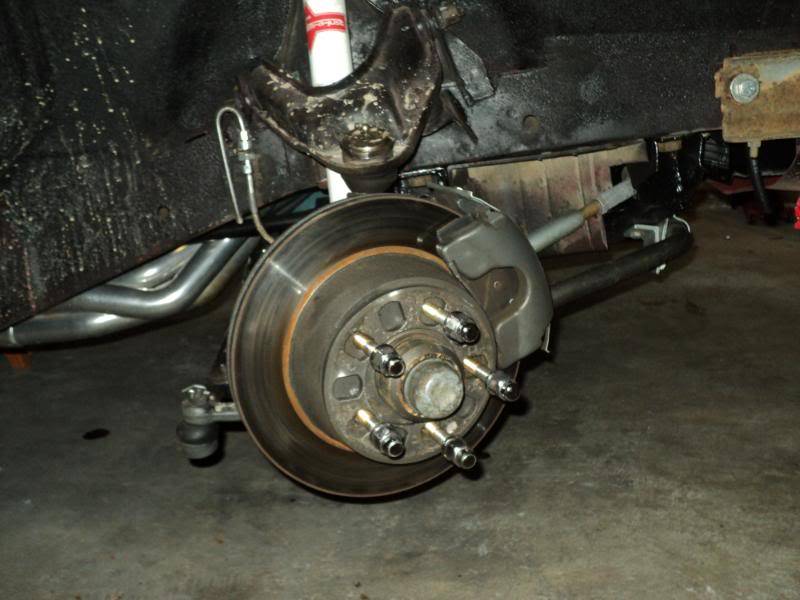
When i diagnosed the rear axle noises, it became apparent that the wheel bearings were bad, and that the ring gear is what is making the router noises. i played with the idea of the 8.8 rear axle from the explorer. was actually starting to pull one down at pull-a-part. the truth of the matter is, i just couldn't bring myself to do it. i may have issues with my 8.75, but its the origonal axle housing to the car, and it actually has sentimental value to me.
the wheel bearings were the first thing to fix. i figured since they are the green type, if they fail i may have an axle come out of the car, with tire attached. no bueno.
after looking, and looking, and looking, i found jegs to have the cheapest price at 88.72 shipped. not bad.
spent a half day putting them in, and playing around in the ship.
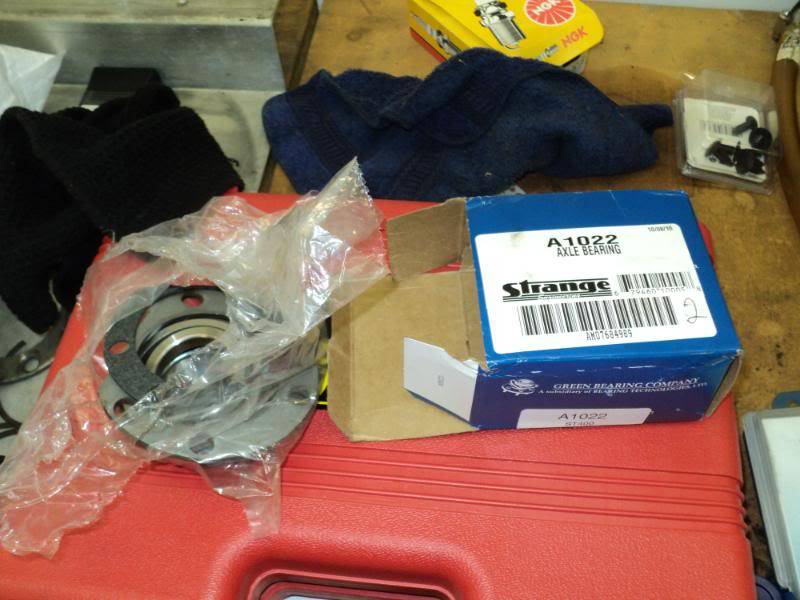
the axle bearings alone reduced my noise by 60%. now all that's left is the pissed off router that appears any time its under acceleration load. gets really bad at highway speeds. so I'm saving my money to have that rebuilt.
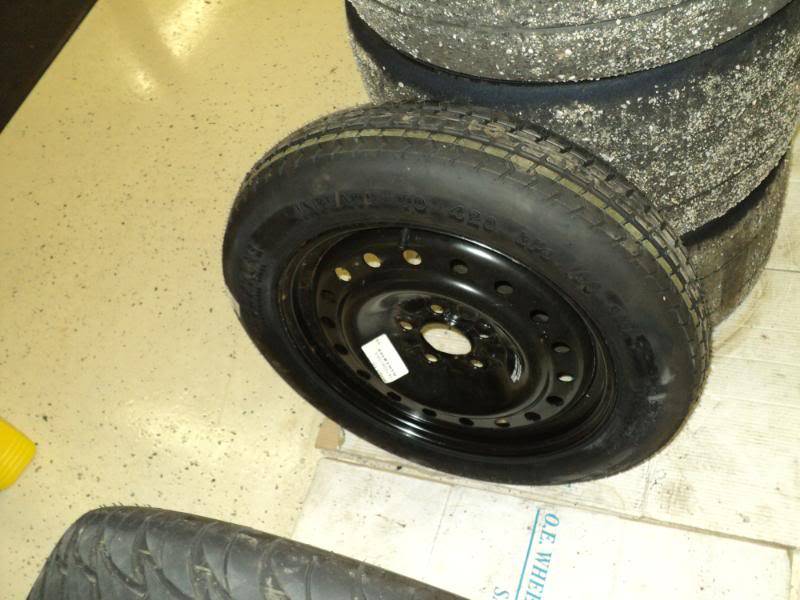
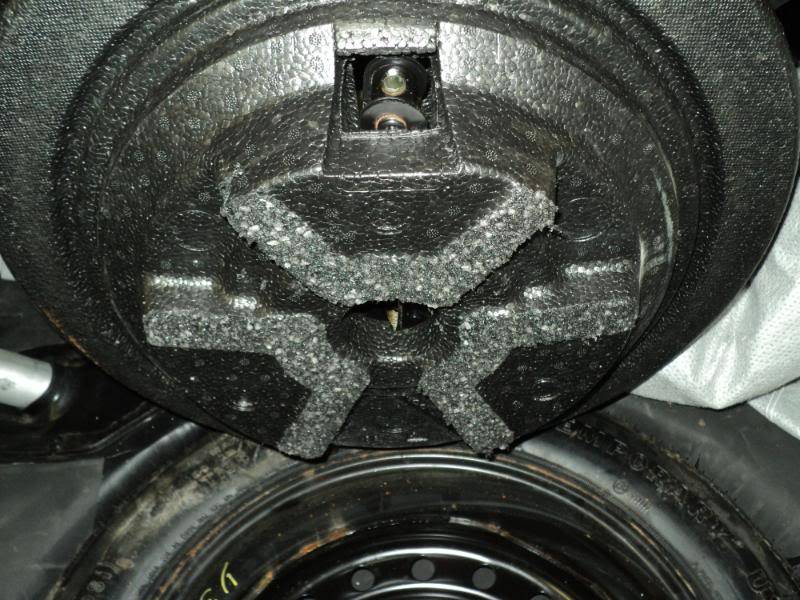
also, i was able to find a spare from a charger. its a 17 inch donut, that clears everything perfectly. paid 28.34 from parker motors in oakboro.
to make my spare tire jack tray fit some better, I've started cutting on it. I'm hoping to get it to be a low enough profile to barely come above the trunk floor.
Ive readjusted the passengers side window, and it has reduced the whistling by 50%. also, i shimmed the weatherstripping using some double sided moulding tape i had left over from my s10. little 1/8 thick tape made an incredible difference.
i couldn't figure out how to take an interesting picture of an adjusted window, so i didn't.
the center cap issue happened because when the tape shrank when it got hot. pulled half of it right off the one side of the cap. to fix this issue, i bonded some small sections of mountain bike inner tube to the cap. took two layers to get a good fit.
I've already shortened Mary's seat belt as well. have i mentioned that the pep-boys belt is a PITA?
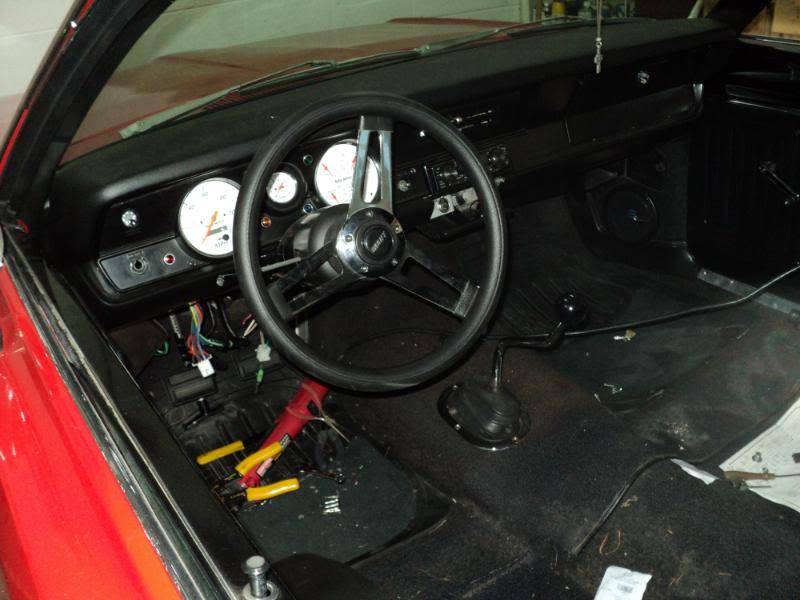
the car is now up for the electrical and body work. i have the front bench out, and the dash all torn apart. found a couple of my crimps had come loose on my dash lights, had a bad weatherpack terminal on my turn signal/brake light connector, and a bad headlight switch. still haven't figured out the charging system, ut I'm leaning towards a loose connection in the bulkhead connector.
next up, ill take pictures of this stuff, and finish it up.
current total is.....
1345.40
michaelMichael Crawford
1970 plymouth Duster back under construction:
https://www.pro-touring.com/showthre...uring-makeover
1987 GMC S15 https://www.pro-touring.com/showthre...ct-drivabeater
-
11-06-2010 #22 Registered User
- Join Date
- Nov 2008
- Location
- TN
- Posts
- 938
I can cure my wind whistles to up to well over 80mph just by rolling up the window all the way then giving it a extra touch of a turn. If that makes sense.
Good call on keeping the 8 3/4. The only reason I am going with the 8.8 is that I don't have one. That and I can't afford one.Benjamin
Twin Dusters
'72 Plymouth Duster "Aero Duster" project
'72 Plymouth Duster "Daily Duster" project
https://www.pro-touring.com/showthre...RO-DUSTER-quot
11-06-2010 #23 Registered User
- Join Date
- Oct 2009
- Location
- Copperas Cove, TX
- Posts
- 325
I really like reading the updates on your car. Keep up the good work!
Andy McCatherine
1982 Monte Carlo SS (clone)
11-07-2010 #24 Registered User
- Join Date
- Jul 2010
- Location
- OREGON
- Posts
- 365
Subscribed as Im sure this will be a great thread with great info and a budget of some sort which I can afford..
11-07-2010 #25
Registered User
- Join Date
- Aug 2007
- Location
- Albemarle, NC
- Posts
- 1,149
pictures from this weekend.
Friday, i went over to a friend of mines place. he runs a body shop. I do all his electrical work on the street rods/hot rods, (wired a 50 new yorker convertible, just fixed a lot of hacks on a 57 chevy convertible, waiting on him to drop off a 69 mach 1) and he sends me business.
well the 57 was warranty work. he had another guy wire it before him and i started working together, and needless to say it was a hack job. really quite scary. so i patched the worst of it, fixed the vintage air, and generally tidied and tightened everything up for him. in return, he helped me out some on the duster and put a back bumper on my Subaru. we both came out of this car happy.
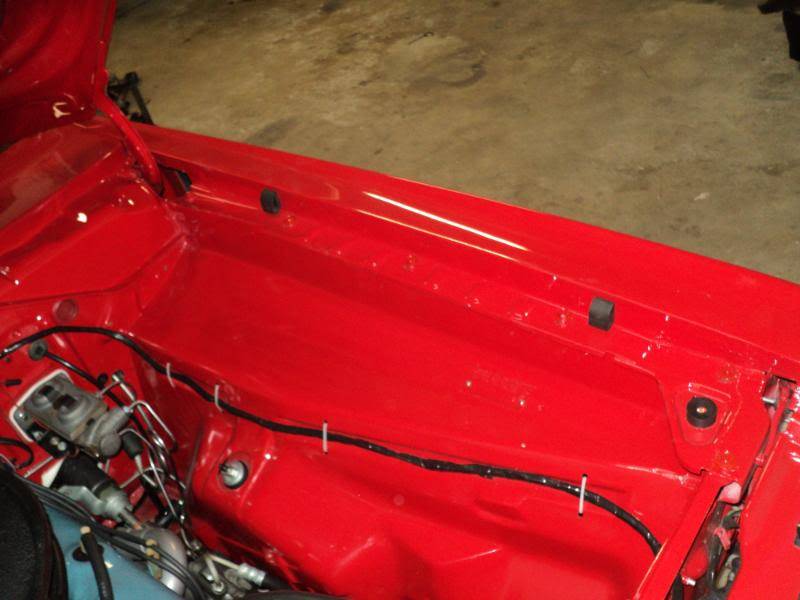
on the duster, Bill cut my rear fender lips to keep them from rubbing, as well as touched up all my nicks and scratches. he also repainted all my under hood bolts from where they chipped when i assembled the car.
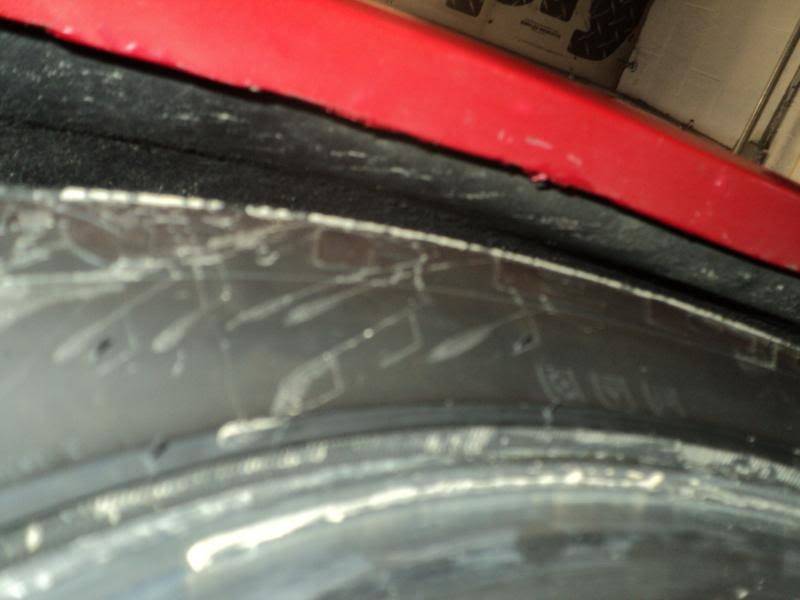
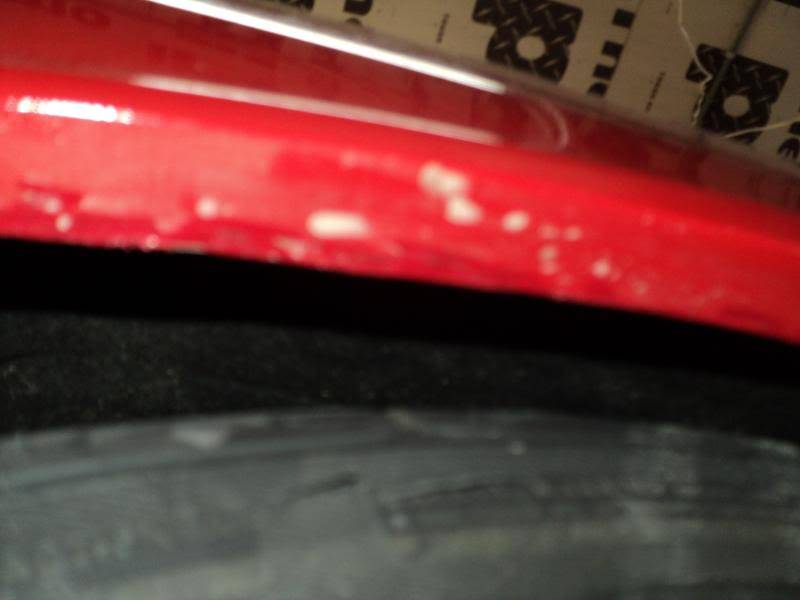
he cut a total of 1/2 inch from the fender lips by the way, leaving me about 1/4 between the tire sidewall and the fender. and it doesn't even look like it was cut at all.
pass side:
drivers side
fender bolt touch up:
i also spent most of the day working on the electrical.
pulled the bench, the e-brake lever, fuse panel, column cover, fresh air vent, and amp to get to the connections i need to re-do in the dash. also was able to swap my headlight switch out under warranty at advance. hopefully this week ill get some time to get all that back together, and start on figuring out my intermittent connection problems at the bulkhead.
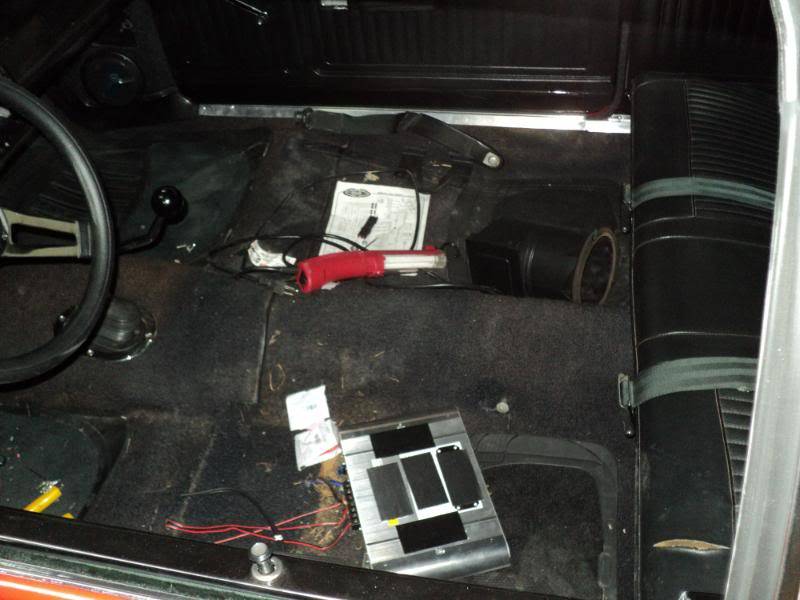
and i didn't realize how bad my carpets were until now. i may pull them out soon and re-dye them.
budget remains the same.
michaelMichael Crawford
1970 plymouth Duster back under construction:
https://www.pro-touring.com/showthre...uring-makeover
1987 GMC S15 https://www.pro-touring.com/showthre...ct-drivabeater
11-07-2010 #26 Registered User
- Join Date
- Dec 2009
- Location
- Fresno
- Posts
- 164
nice thread
Really like this thread. You are making great progress and love how you are tracking cost as you go along.
11-14-2010 #27
Registered User
- Join Date
- Aug 2007
- Location
- Albemarle, NC
- Posts
- 1,149
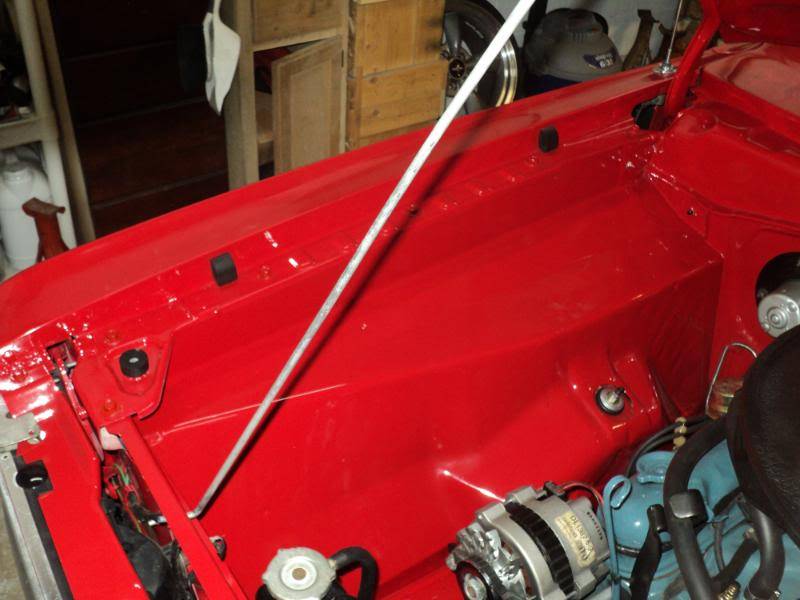
i had some time Friday and Saturday to work on the car some.
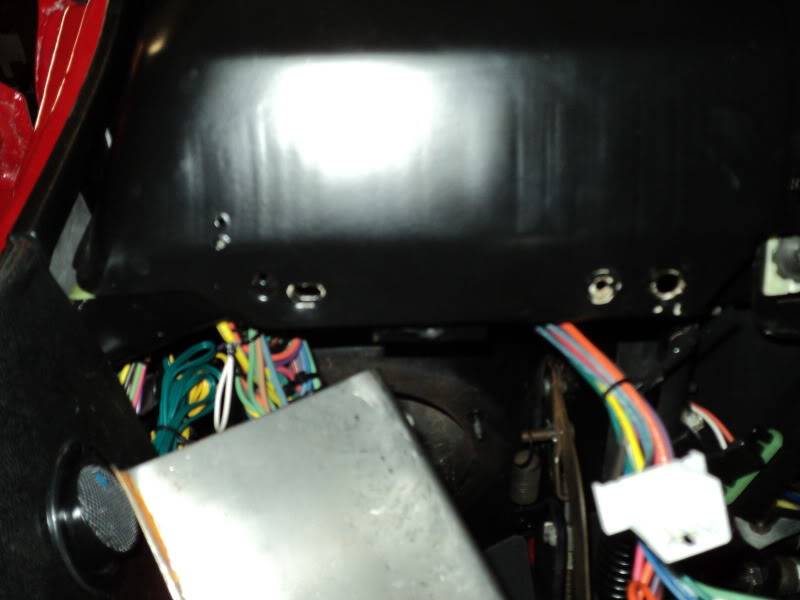
started out by re-installing the headlight switch, after putting some electrical contact goo on it. tightened down the wiper switch that had worked loose as well. i also re-crimped all my connections under the dash. when i wired this car, i had used some really nifty ratcheting crimping pliers. apparently, sometime in the middle of the car, they had crapped out. half the crimps were plenty tight, half were able to be pulled apart with minimal force. so, while they were accessible, i redid them.
when i reinstalled the fuse panel, i re-made the mount, as the toe pf my boot always hit the circuit breaker for the lighting system when i power shifted. the new mount is a good 2 inches higher than before. the tail light and turn signal problem turned out to be bad connections in the weather pack between the column and dash harnesses. i cut it out, as the nearest place that has readily available small quantities of weather pack terminals is 40 miles away. also, the weather packs took up a LOT of real estate under there. i used a 9 pin "Power connector" from the black bins at radio shack. 9 bucks for the male and female sides. I've used these for a lot of aftermarket stereo installs into muscle cars, gauge clusters, etc. they work really well after you tweak the pins a hair for good connection. out of the package, only about 3/4 make good contact. but they're small, readily available, and cheap.
with the dash wiring out of the way, i moved onto other things.
one thing to remember before the next part. i built/assembled this car in a thrash to finish before my wedding. needless to say, i didn't make it. came close, but got taken out by a car accident. i finished the car shortly after being married, when time and money were extremely short. needless to say, I'm finding some things that should not have been done the way they were, or at all. also finding things that i should have noticed during assembly, but die to being in a hurry, i didn't.
i did a nut and bolt check while i was around the interior. most interior screws i got about 1/2 turn on. i found that the steering column bolts i got about 2 turns out of, and 3/4 of the door hinge bolts were barely touching the sheet metal.
after i got done with this, and got everything i had taken out of the dash put back together, i vacuumed the carped hoping it would help.

it didn't.
pulled it out to vacuum it again and hit it with a leaf blower to get all the sand out that my shop vac didn't.
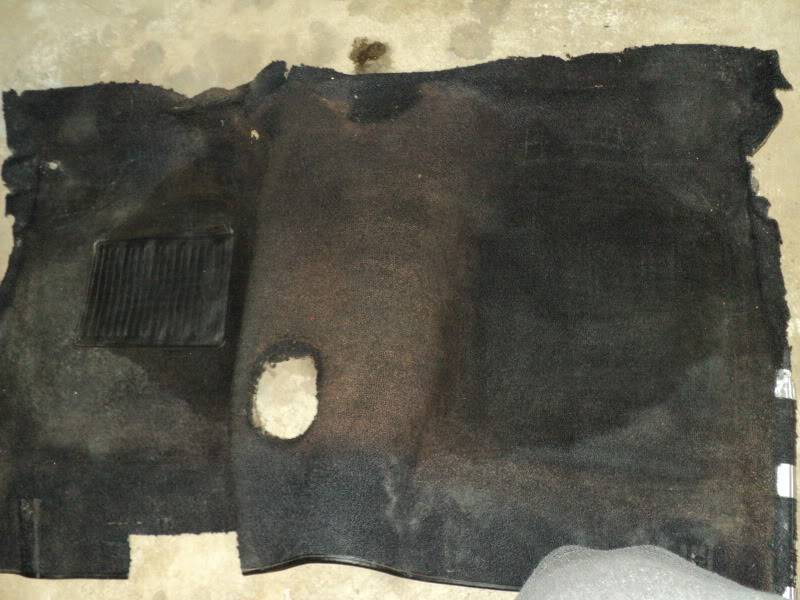
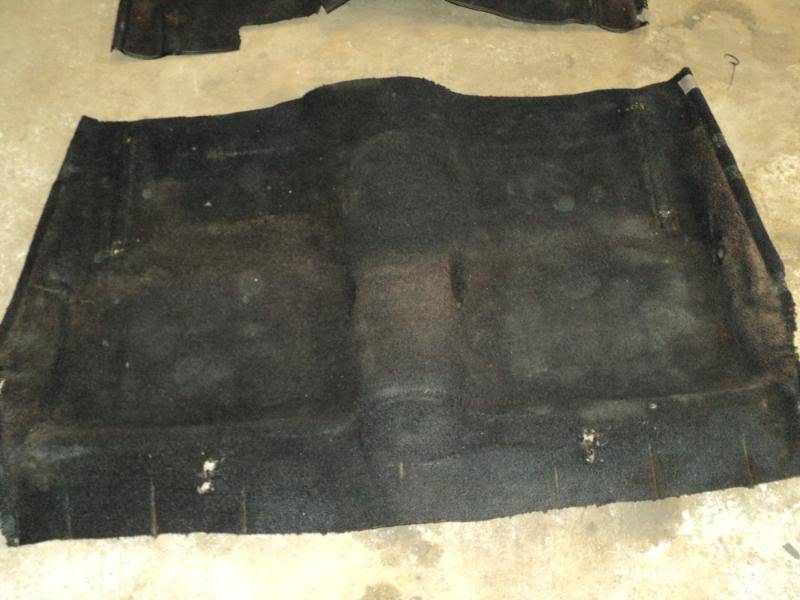
still did not help.
the carpets were purchased in 1996 at the metrolina swap meet for a total of 96 bucks. they may have fit better if i had known what i was doing back then, but they have always fit badly since i installed them. now, in addition, they are stained, have a few holes, are faded, and are getting a bit fuzzy from age. after realizing that I've got bigger fish to fry financially right now (rear axle, seat belts, etc), and that if i go with a T5 ill need to change them anyway, i went with the budget alternative.
i learned this while flipping some cars during college.
vacuumed the carpets again.
cut the strings, fuzzies, etc off of them. started putting repeated dustings on them with a can of Dupli-color vinyl and fabric dye. after a few dustings, they looked pretty even on color. so i waited for the paint to dry, and brushed them down with a stiff bristled brush. helps to break up the painted fibers and make it look more factory. more needed on the cut pile versus loop carpet, but i did it anyway.
here's what they looked like afterwards (7 dollars and an hour later)
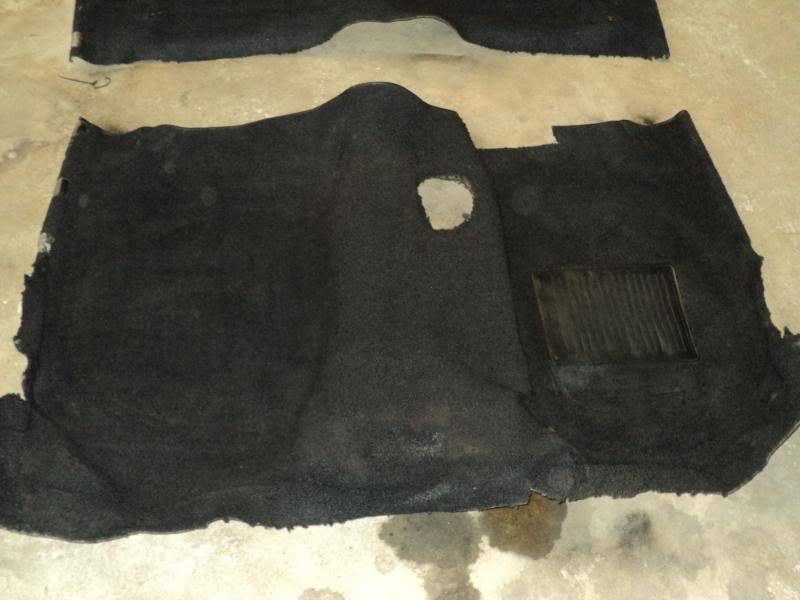
i wouldn't go so far as to call them great, but i will say that they are good enough.
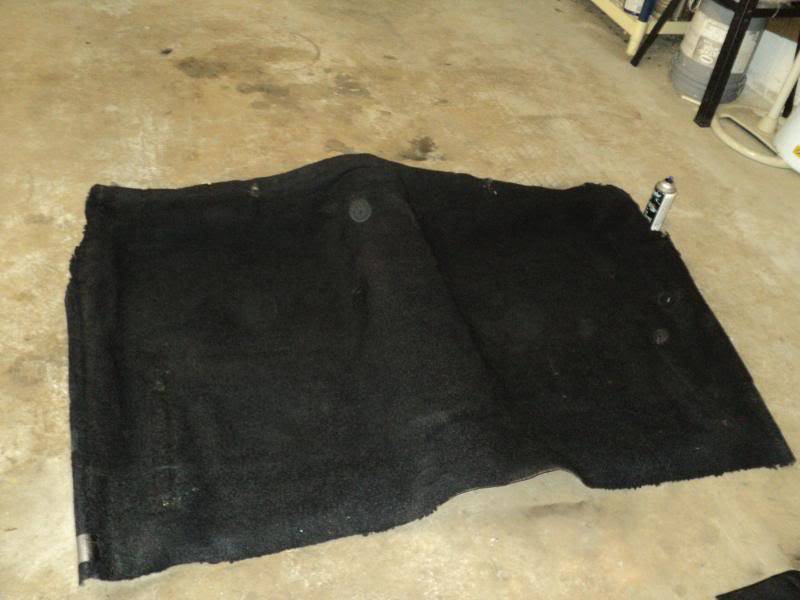
before reinstalling them, i looked to the foil backed jute job i did.
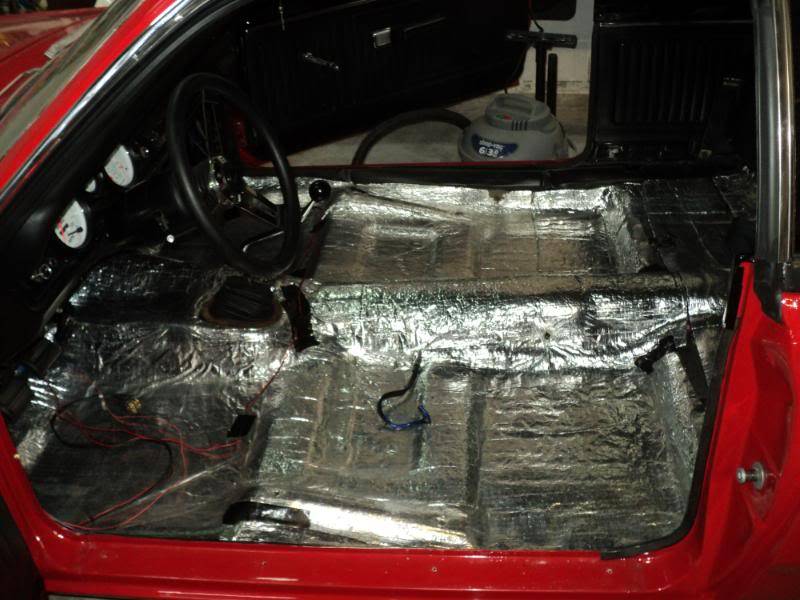
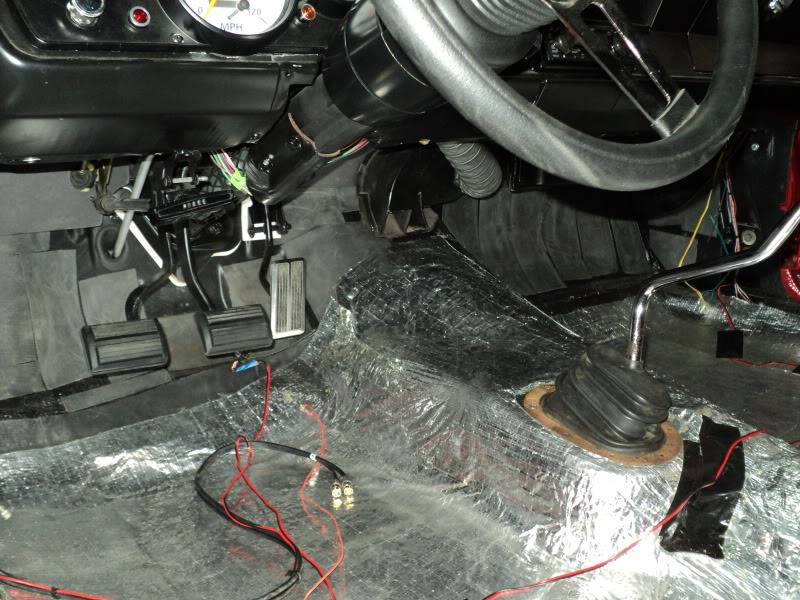
why i didn't go up the toe boards, i don't remember. probably ran out of materials, or was worried about it showing above the carpets.
so, 15 dollars of 3M spray adhesive, and a 20.99 roll of foil backed jute from pep-boys in Charlotte later, i covered the toe boards. my wife came down and helped with this, as i suck with fabrics and such.
i didn't take any pictures before carpet re-install, so here's after reassembly.
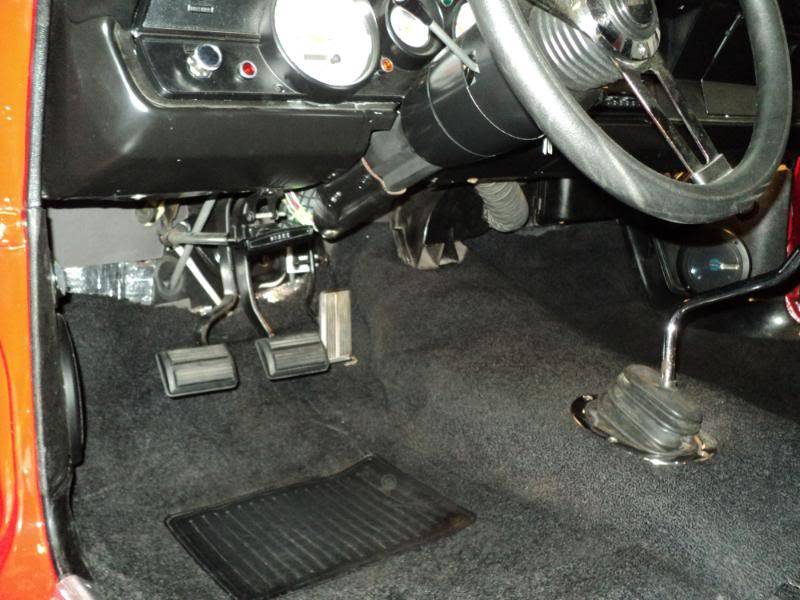
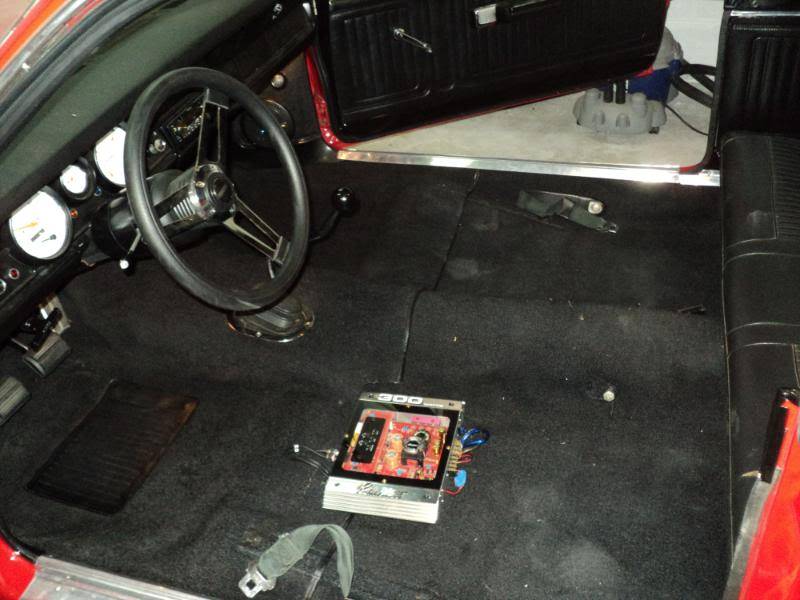
put the amp back in (an old audiovox rampage amp i traded a pack of smokes for in 2001 while i was working at a gas station). took the time to tune in my gain frequencies and crossover points. sounds a lot better from the kick panel speakers now.
Then i put the front bech back in, and put in Mary's car seat to double check the belt. belt is just right this time. (third try)


i also started messing with getting my hood springs and splash shields in. used the springs from the hood hinges on a dodge daytona, as i read in another guys thread that that is what he used for his AAR hood. unfortunately, i am not as successful as him. i mounted them just like his picture, but they do not hold the hood up at all. they are only pre-loaded about 1/2 turn, so i think i may need to preload them more. which to do so will require me pulling the hood and hinges.
here's pics of the attempt.
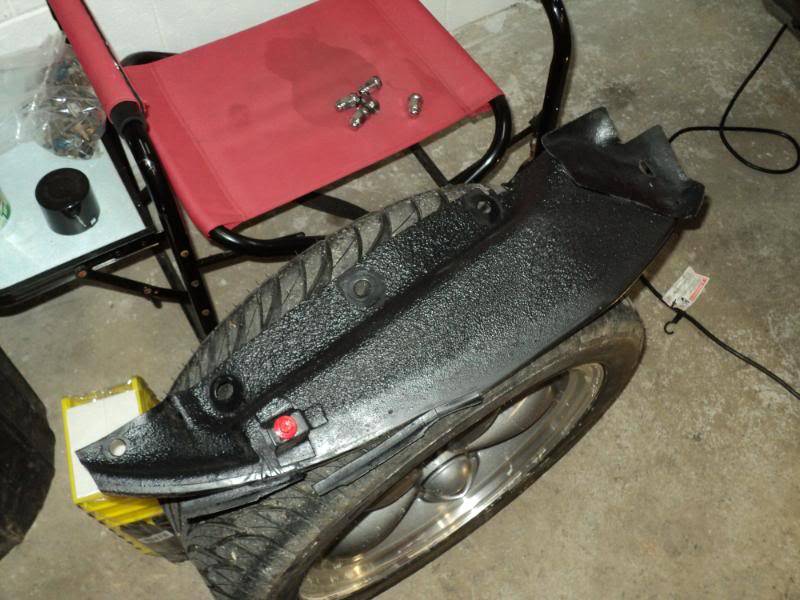
and my refinished splash shields that never made in in during the resto.
took the family out to dinner Saturday night just to try it out. all the lights work properly, the gauges are more accurate and stable, there is less engine noise in the interior, and less squeaks and rattles.
also, we put a full tank of gas, Jenn, and Mary in the back seat, then went over some nasty dips in the road. the tires hit the wheel wells about the same time that the axle hits the bump stops.no fender contact though. YAY!!!
Jenn says its still too loud, though.
i guess you cant make her happy all the time.....
total as of now: 1397.39
more later, after i get some more time. got to pull the hood next for the springs, bulkhead connector, and booster.Michael Crawford
1970 plymouth Duster back under construction:
https://www.pro-touring.com/showthre...uring-makeover
1987 GMC S15 https://www.pro-touring.com/showthre...ct-drivabeater
11-14-2010 #28
Registered User
- Join Date
- Nov 2008
- Location
- TN
- Posts
- 938
Great progress!
Benjamin
Twin Dusters
'72 Plymouth Duster "Aero Duster" project
'72 Plymouth Duster "Daily Duster" project
https://www.pro-touring.com/showthre...RO-DUSTER-quot
11-20-2010 #29
Registered User
- Join Date
- Aug 2007
- Location
- Albemarle, NC
- Posts
- 1,149
if y'all cant tell, Friday nights are my nights in the shop. that's why i gibe an update at the end of the week most weeks. its my time to decompress and relax, as i have a pretty stressful job.
Tuesday night i went out to dinner for Mexican with a couple of buddies of mine form out of town. got to talking cars, marriage, religion, politics, etc. before this, we were helping Dallas clean some of his stuff out of his parents barn. while we were cleaning, we turned up a partial nitrous kit. solenoids and plate. Dustin, my other buddy, said that he had an MSD timing retard, bottle, and some other nitrous stuff that he had yanked off an old mustang coupe. so i paid for both their dinners in exchange for the nitrous stuff that they had. Mexican came up to a total of 40 bucks.
all I've managed to pick up so far is the plate and solenoids. Dustin's going in for hernia surgery next week, so when I'm over helping him out around the house ill grab the other stuff.
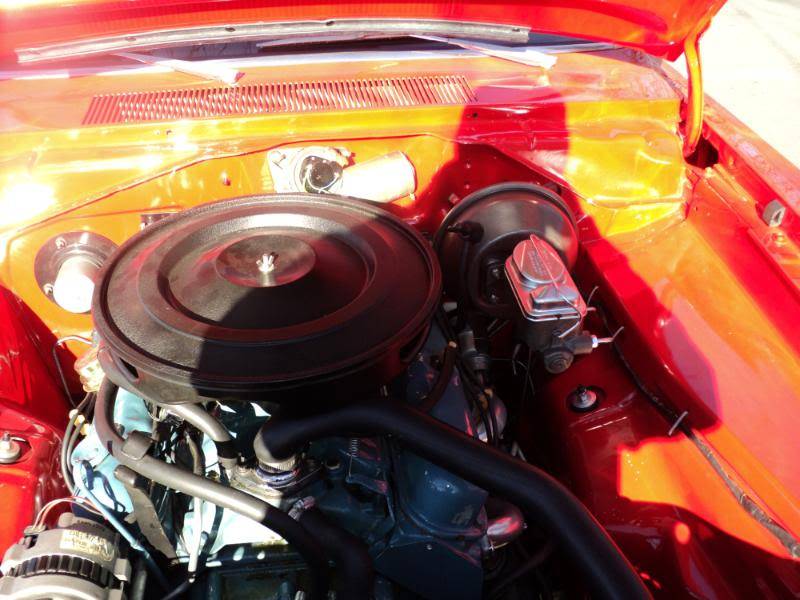
Last night i pulled the hood off the duster, and put the front end up on stands so i could pull the wheels. Took a picture of the front end, just for reference later when i finish tweaking it.
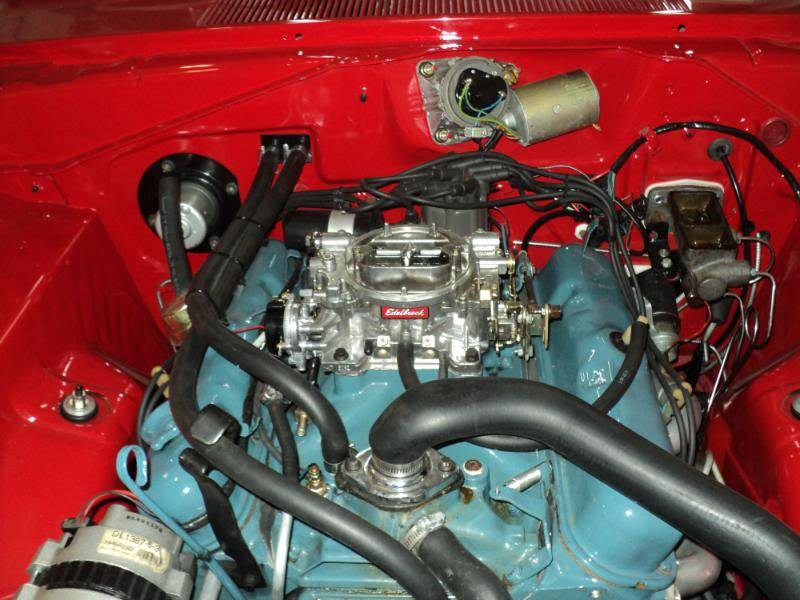
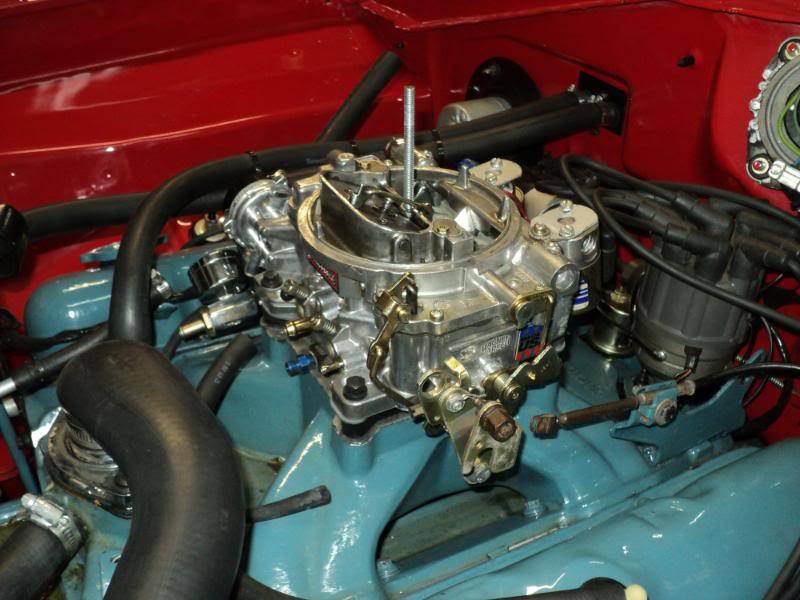
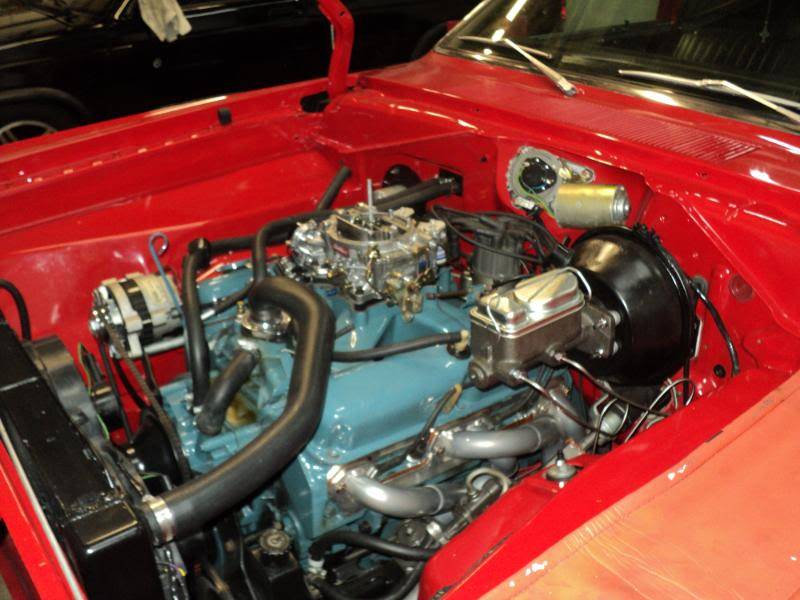
i then pulled the carb off for a little tweaking. installed an electric choke kit, and went a little richer with the metering rods. well see how it works when its back on the ground.
on the edelbrock parts, you'd think that for 106 bucks they'd send you a copy of there tuning guide. on the choke, you'd think that they'd use decent hardware and tap the holes for you. they don't. took me an hour just to do the choke.
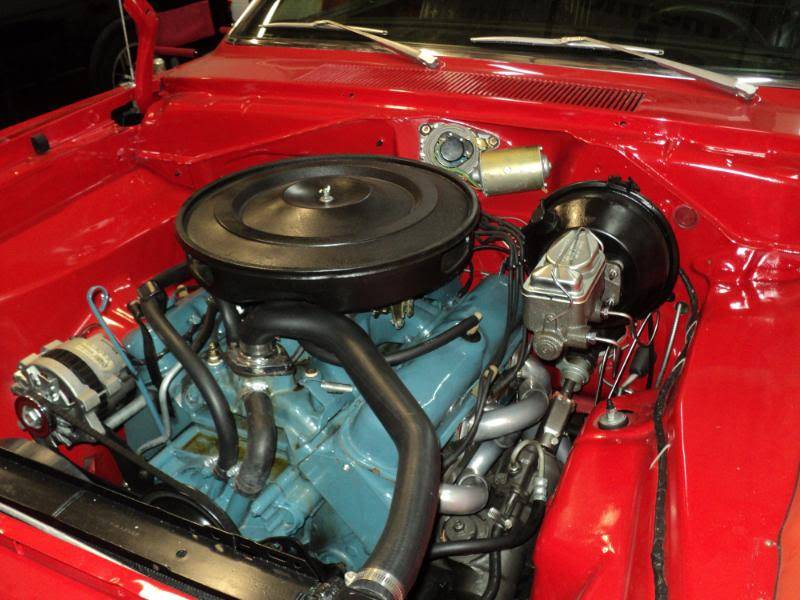
i then moved on to the brake booster install. its funny, i started the process of upgrading the brakes months ago, and only managed to buy, clean, and paint parts. never got them on. i did buy a reman master, as the one that came with my booster assembly was for drums, and the manual cylinder was running out of fluid on full brake pedal depression. the reman unit came out at 24.67 with my commercial discount at autozone.
here's the parts shortly before install. you'll see in the picture a carter AFB that i just finished rebuilding. its going on Dustin's 331 powered 280Z project. really neat carb once i got inside of it. i have 20 bucks in it, and that's including a bigger accelerator pump, high flow needle and seats, blending in the venturis, etc. came out of Dallas's' barn as well. rebuilt it in exchange for my rear disc setup, which ill get pictures of when i pick it up.
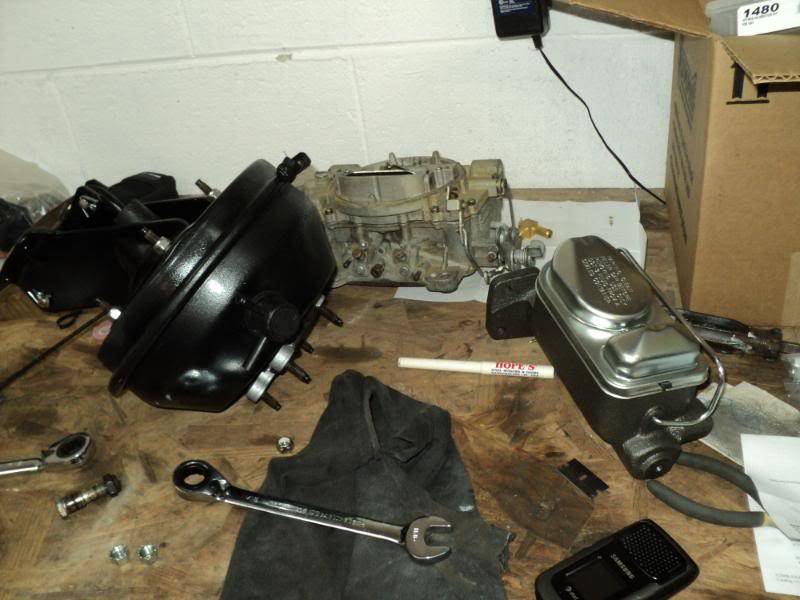
spent a while getting it all in. when i backed the car into he shop, i didn't pull far enough away from the workbench to open the drivers door fully. made it VERY difficult to get the brake push rod bolt out. after about an hour, though, the old manual setup was laying on the bench. put the new booster on, and decided that it is stable enough not to need any of the support brackets. (honestly, i cant figure out where they're supposed to go to, either. been way too long since I've pulled the unit.)
put my classic tube stainless lines in the prop valve after re bending them to make them clear the firewall, and installed the master. only got it bench bled last night, as my bleeder setup wont work on his type of master. have to get help from Jenn this week.
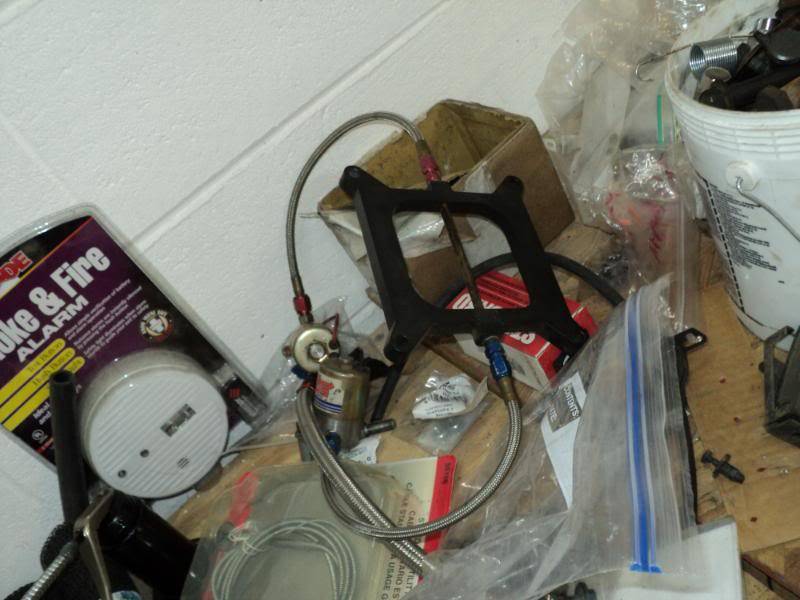
then, i decided to play with the nitrous a little bit. i want a really clean install, and one that is almost unnoticeable. mounted the solenoids to the back of the carb, and plate underneath. using the same wiring lead that i had hooked up for my line lock to activate the solenoids. this will be operated by the old cuda flasher witch in the dash.
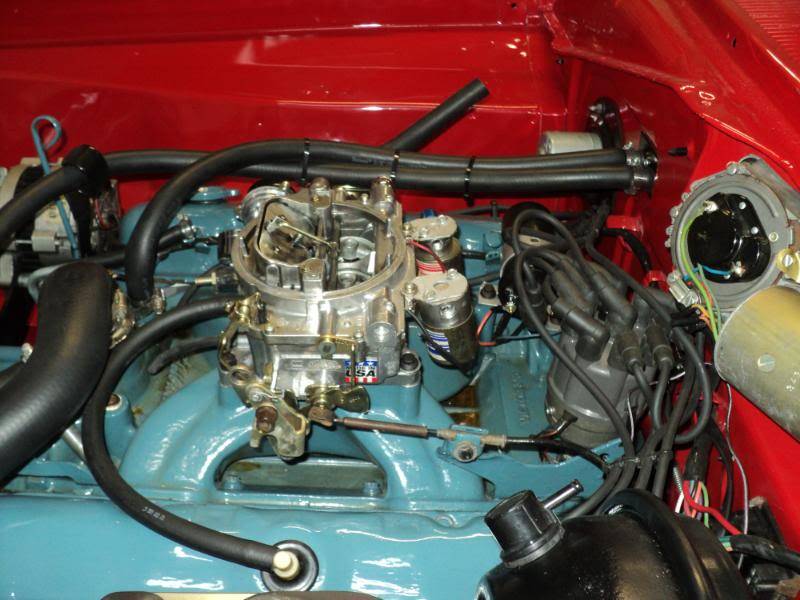
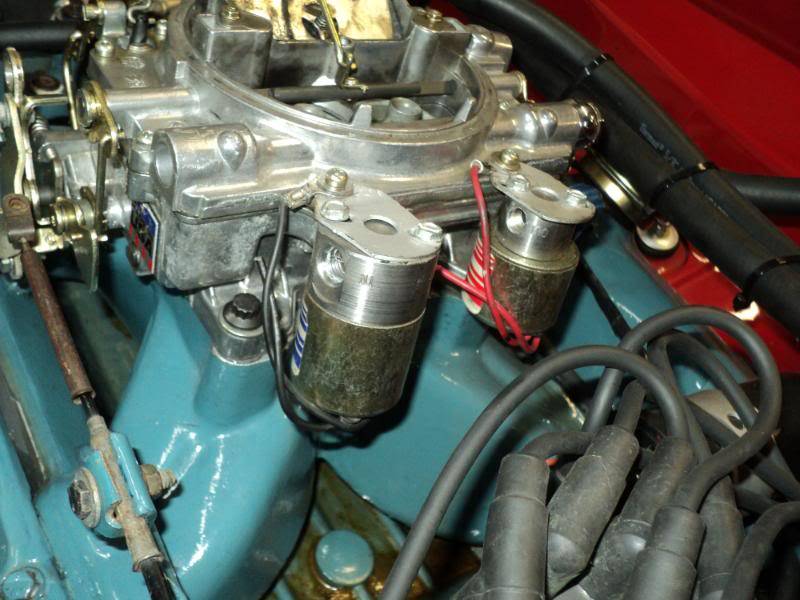
and one with the air cleaner on, just to prove that its hidden.
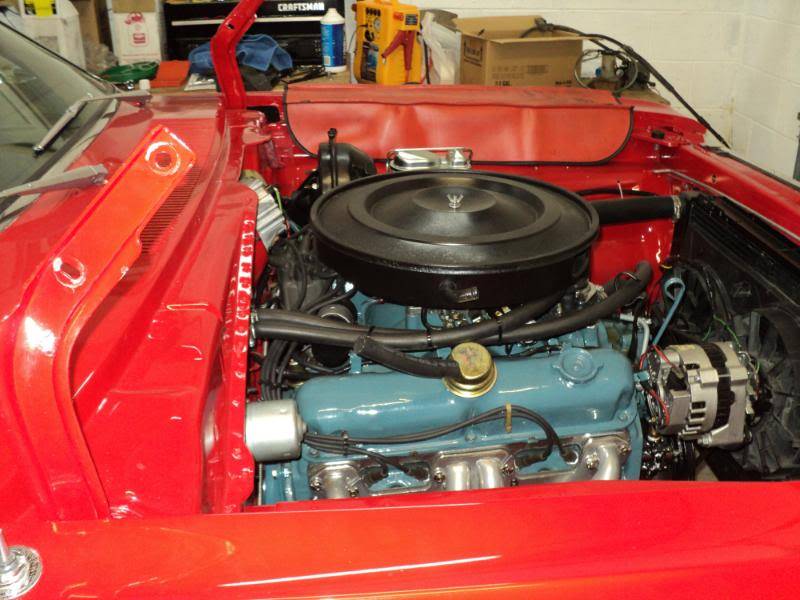
ill be blacking out all the lines, probably by placing them inside of rubber hoses. that ought to finish the deception.
also worked on the hood hinges. now have the hood springs pre-loaded one full turn. well see if its too stiff or not for the glass hood.
grand total as of this weekend:
1568.06
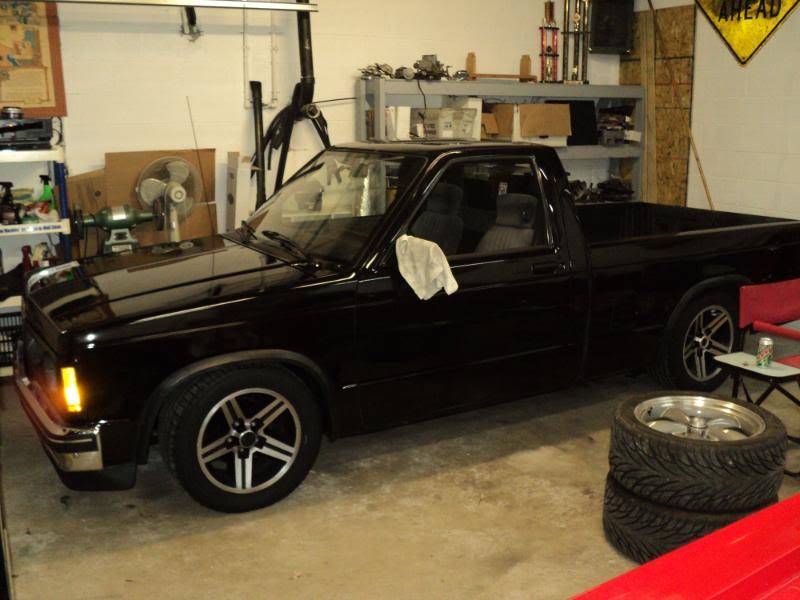
finished out last night by working on getting the truck detailed so i can finally sell it.
thanks for looking, and feedback, both positive and negative, is always appreciated. (helps to keep me motivated.)Michael Crawford
1970 plymouth Duster back under construction:
https://www.pro-touring.com/showthre...uring-makeover
1987 GMC S15 https://www.pro-touring.com/showthre...ct-drivabeater
11-20-2010 #30 Registered User
- Join Date
- Dec 2005
- Location
- Birmingham, AL
- Posts
- 3,356
Another great build thread. The Duster is cool. Can't believe you are selling the truck. That is one of my favorite builds. Reminded me of the history of hot rodding. Combination of vision, inegnuity, hard work and parts that came together to make a better vehicle, and the money that you invested (or lack thereof) was impressive.
Stephen
11-20-2010 #31
Registered User
- Join Date
- Aug 2007
- Location
- Albemarle, NC
- Posts
- 1,149
iv got a limit on how many cars i can have at my place. (imposd by my wife.) ireally, really, really want a 64 elcamino. so the truck has to go for 6000, or trade, i figure its a good deal. ive loved that truck, and wasa blast to buid and run, but its time to move on a bit.
the budget theme ive always had is taking a little dieviation for this project. i usually subtract the parts i seell frojm the total, but this time i dont think its fair as im starting with a complete car. so im budgeting his one to show what it takes to make an older restoratin come up to standard for pro-touring.
thanks for the compliments and encouragemnet. ive needed that after this week. nice to see appreciation of your hard work.
michaelMichael Crawford
1970 plymouth Duster back under construction:
https://www.pro-touring.com/showthre...uring-makeover
1987 GMC S15 https://www.pro-touring.com/showthre...ct-drivabeater
11-20-2010 #32
Registered User
- Join Date
- Nov 2008
- Location
- TN
- Posts
- 938
Very nice! I love the hidden Nitrous! Also, Do you hook your breather line up to your air cleaner box or just leave it hanging like that?
Benjamin
Twin Dusters
'72 Plymouth Duster "Aero Duster" project
'72 Plymouth Duster "Daily Duster" project
https://www.pro-touring.com/showthre...RO-DUSTER-quot
11-20-2010 #33
Registered User
- Join Date
- Aug 2007
- Location
- Albemarle, NC
- Posts
- 1,149
its usually hooked up. just didnt for that pic
Michael Crawford
1970 plymouth Duster back under construction:
https://www.pro-touring.com/showthre...uring-makeover
1987 GMC S15 https://www.pro-touring.com/showthre...ct-drivabeater
12-23-2010 #34
Registered User
- Join Date
- Aug 2007
- Location
- Albemarle, NC
- Posts
- 1,149
so a month has gone by without an update. between the holidays, work, family, etc i haven't had much of a chance to mess with the car. o have gotten a little time here and there to tinker.
found the problem with my power brake conversion: something in the booster had gone bad, causing it to lock up when vacuum was applied. so 97 bones later, i had another one on order from my local advance. (they beat everyone else's price) shot some clear on it to keep that nice bare steel look it had going on.
also, notice the prop rod is finally gone! wound up pre-loading the hood hinge springs 1 full turn to get the right tension for the fiberglass hood.
once the brakes were working properly, i went to fire it up for a test drive. and smelled gas.
turned out that the regulator mount had vibrated one of the screws out that held the regulator on, causing the bracket to crack by the other screw. this allowed the brass fittings to smack against the block, causing them to leak. advance honored the one year warranty on the holley parts, and got me a new regulator, bracket, and screws under warranty. cool. also raided my coffee can of fitting to do away with the crush sleeve brass ones that were on there. i don't like having more rubber on the car, but for right now it works. maybe next fall when i pull the motor for the oil pan gasket and a fresh coat of color ill fix it.
so then i went on a test drive. the throttle hung on me, and i could not get it to idle at any LESS than 4500 RPM. couldn't get it fixed on the side of the road, so i limped it back home. pretty scary ride through the neighborhood....
what happened was that the 4 hole carb gasket used when i put the nitrous plate on was smaller than the throttle plates on the eddy carb. the butterflies went through the holes out, but wouldn't come back in. THAT one took me a while to figure out.
so today i had to run some errands for the wife (and decompress after a rough week at work) and decided to try it again. after adjusting the choke and setting the idle, she ran great. didn't leave my block until i KNEW it wouldn't hang up again. then i ran some errands, and went for some alone time at the top of morrow mountain. while i was up there, i snapped a couple of pictures. dont mind the car, its filthy.
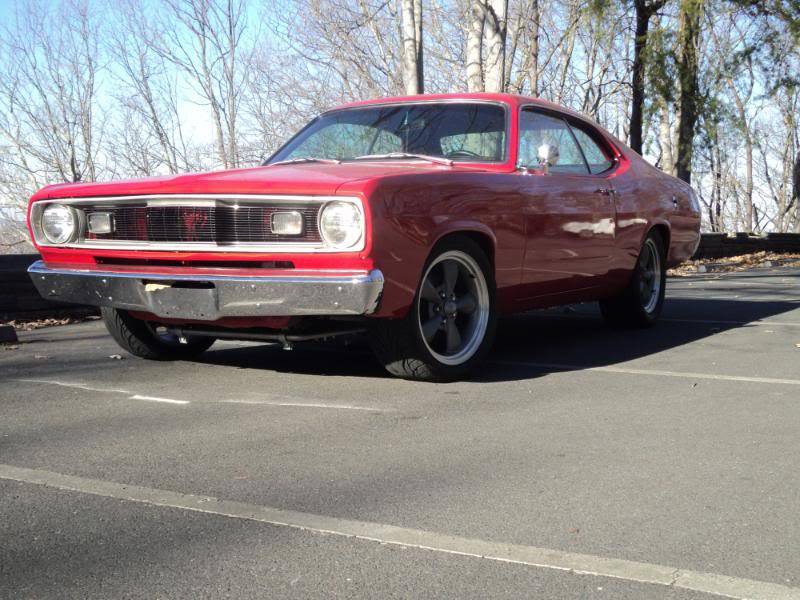
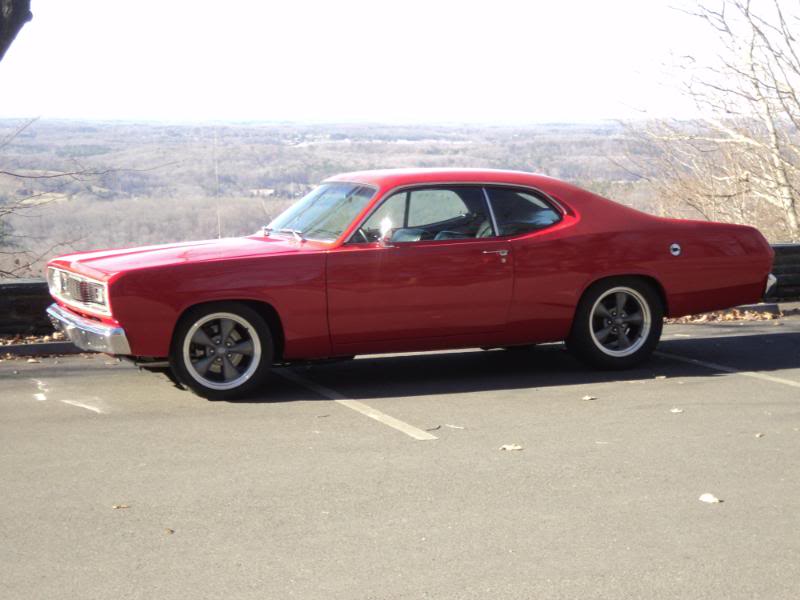
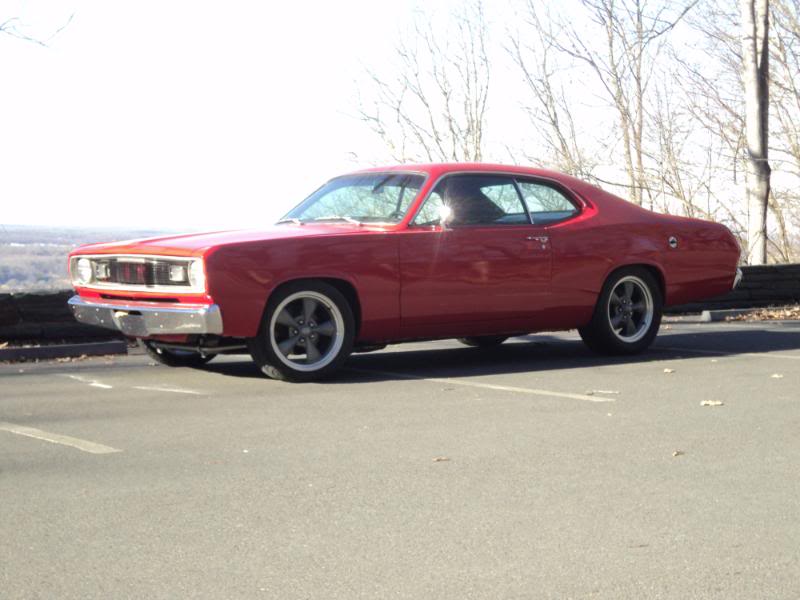
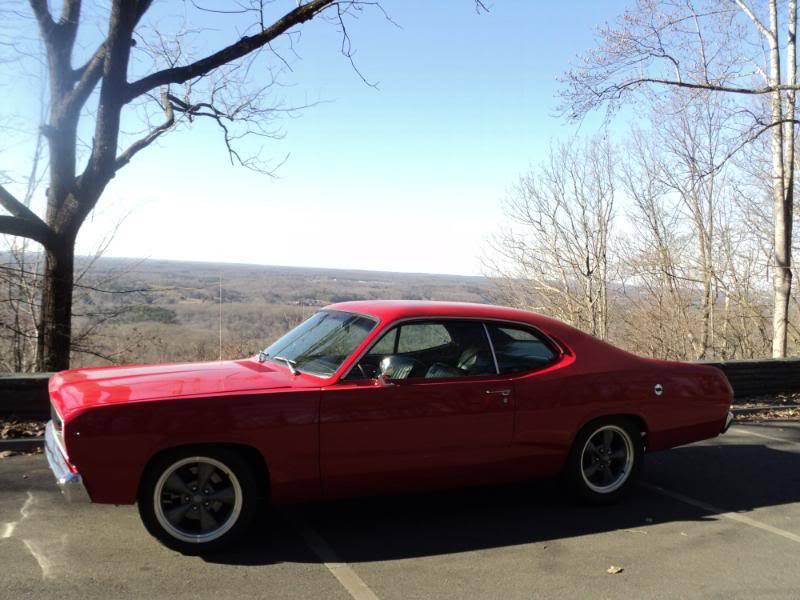
gotta say the car ran and stopped great.
budget total is 1665.06
michaelMichael Crawford
1970 plymouth Duster back under construction:
https://www.pro-touring.com/showthre...uring-makeover
1987 GMC S15 https://www.pro-touring.com/showthre...ct-drivabeater
12-23-2010 #35
Registered User
- Join Date
- Oct 2006
- Location
- Colorado
- Posts
- 256
Awesome! Love your car, project and budget. Drive the wheels off of it!
Wes
12-24-2010 #36
Registered User
- Join Date
- Nov 2008
- Location
- TN
- Posts
- 938
Nice! I had my throttle hang up on me the other day too, Luckily mine was a bit easier to diagnose, and my car makes a bit less power than yours. Looks good! have fun driving it!
Benjamin
Twin Dusters
'72 Plymouth Duster "Aero Duster" project
'72 Plymouth Duster "Daily Duster" project
https://www.pro-touring.com/showthre...RO-DUSTER-quot
12-24-2010 #37 Registered User
- Join Date
- Apr 2009
- Location
- san diego
- Posts
- 5,102
That cars looks great! Almost makes we want to build a duster next.
My build thread: https://www.pro-touring.com/showthre...ing&highlight=
The mustang build thread: https://www.pro-touring.com/showthre...el)&highlight=
12-28-2010 #38
Registered User
- Join Date
- Dec 2009
- Location
- Fresno
- Posts
- 164
Love the thread. Well its great when a plan finally comes together and everthing finally works like it should. Happy Holidays.
01-30-2011 #39
Registered User
- Join Date
- Aug 2007
- Location
- Albemarle, NC
- Posts
- 1,149
Life around my house can get a little hectic at times, not leaving me much time to play with cars. that, and sometimes id rather hang out with my wife and daughter that go down in my unheated shop.
but i do have an update. sort of.
a few weeks ago, Dustin and I went to the pull-a-part in Winston Salem for some much needed guy road trip time. we also needed a couple of parts for some various DD stuff.
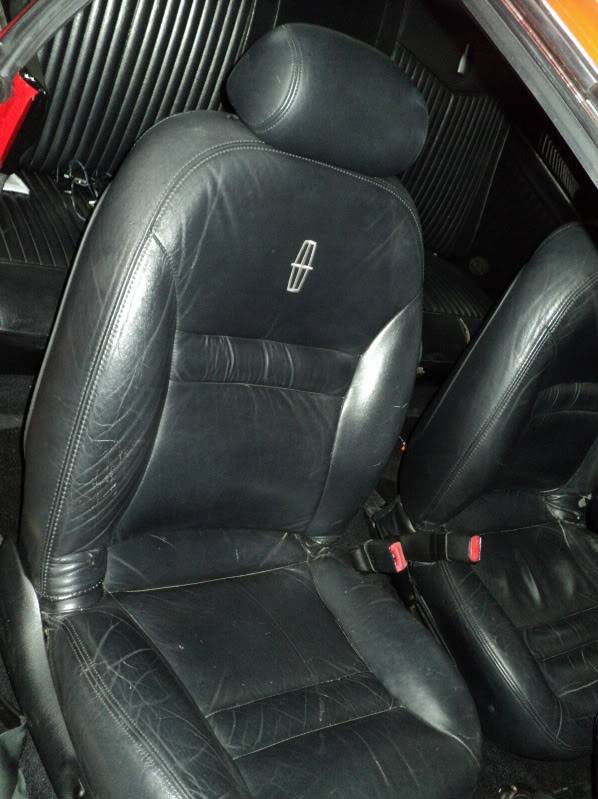
whenever i go to a junkyard, i always eyeball the 2 door cars, looking for leather buckets in good shape that may look right and be comfortable for the duster. I've never found a set that really did it for me. usually i look for stuff in the import and GM sections (were i normally spend most my time at the boneyard, because of my dailys)
this time, i went to the ford section because of Dustin. spent WAY too much time in there stripping an early 80's courier. so i got bored, and started looking at ford seats. lo and behold, a clean black on black 1994 Lincoln mark VII was getting unload off the forklift as i was wondering around. looked in it, and it had a set of mint black leather seats. so i sat in it (and fell asleep). yup, comfortable. yup, power every which way. yup, fold forward. so we decided to pull them. If you do this as well, i will warn you, find a way to power them in the junkyard. it took us almost 4 hours to get them out with what hand tools we had due to the inside rear bolt location. you could only get 1/4 flat at a time.
but, they were only 46.72 for the pair.
these seats were also at the furthest point of pull-a-part from my truck, so i found out just how heavy they are.
tonight, we were rebuilding a carb for the next project (stay tuned, its an AMC), and decided while i had an extra set of hands to uncover the duster and pull the bench. we also threw the Lincoln buckets in, just to make sure i liked the size and shape in the car. remember, these are literally sitting on the floor, not even squared or shimmed. also with all the adjustments set wherever they were when the battery was pulled from the Lincoln. but i already dig them in the car.
heres pics, and will post more when the swap is finished. then, on to seat belts, alignment stuff, and autocrosses this summer.

budget total: 1711.78Michael Crawford
1970 plymouth Duster back under construction:
https://www.pro-touring.com/showthre...uring-makeover
1987 GMC S15 https://www.pro-touring.com/showthre...ct-drivabeater
02-09-2011 #40
Registered User
- Join Date
- Aug 2007
- Location
- Albemarle, NC
- Posts
- 1,149
so I've spent a little time over the last week working on the duster.
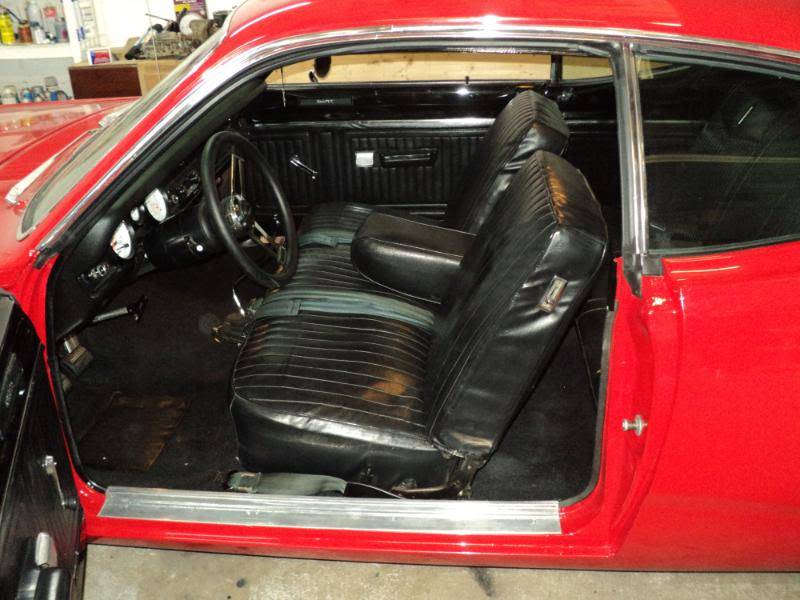
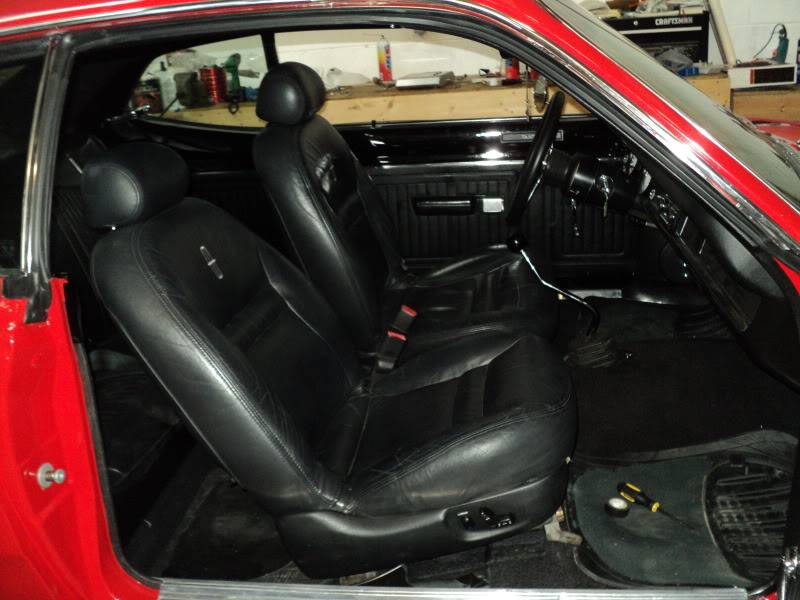
first order of business was getting the seats fit and wired into the car. decided that id start with the drivers side, as that's the most important for comfort and fit. (makes sense, as I'm the ONLY person that drives this thing.)
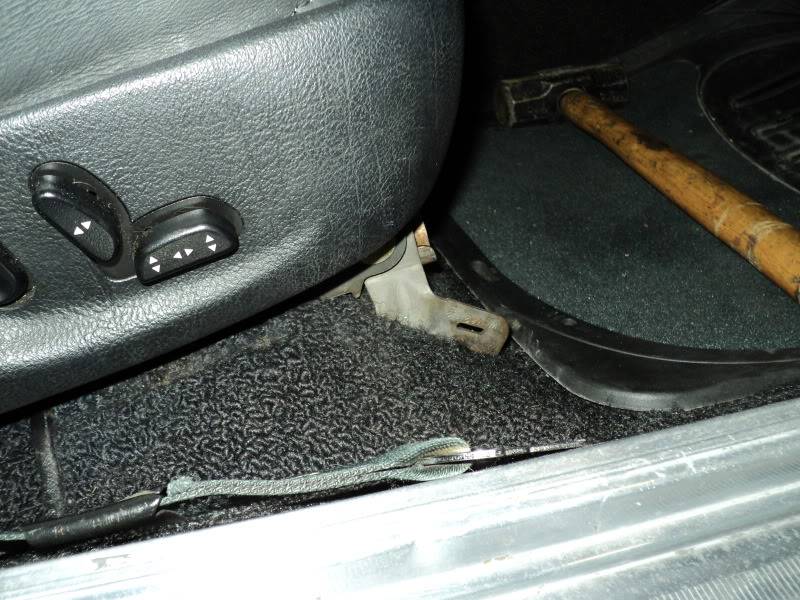
when i started out, the seat was awfully high in the front, causing some discomfort between me, the roof, the steering wheel, and the clutch pedal. i had it lowered as much as i could. heres what the stock Lincoln mount looked like:
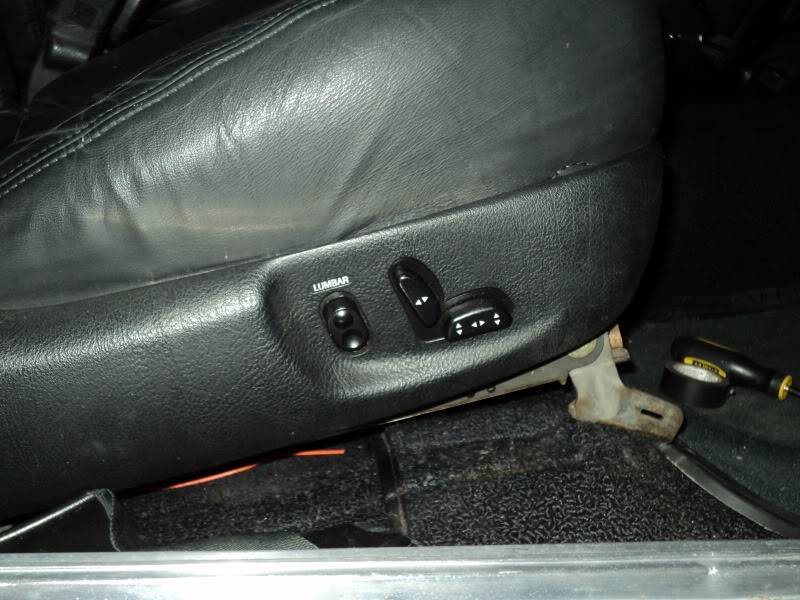
i used the back mounting hole for the bench seat to base things off of. put a spare carriage bolt through the back outboard Lincoln mount point and the factory hole. that's how the seat was sitting in that picture.
wound up figuring out that the front leg of the seat was not sitting flush to the contours of the floor pan, and that if i trimmed it a bit, it would allow the front edge of the seat to drop dramatically, alleviating most of the fitment problems.
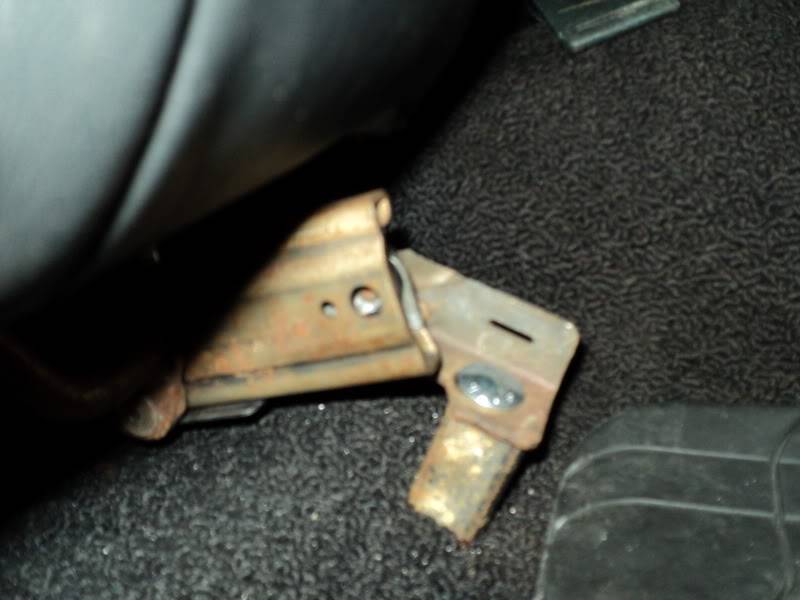
so i got out the harbor freight sawzall that my old boss gave me for Christmas one year (my good craftsman was broken by my brother, and i haven't fixed it yet) and started a cuttin'.
heres what i wound up with.
now i have a lot more clearance at all the tight spots. just about perfect seat bottom angle as well, and that's with the tracks all the way bottomed out in their travel.
this is when i started to over think things and screwed up.
when doing this, never try to use a tape measure and estimate the center line of the car. wound up moving the whole seat 1.5 inches towards the door, and mounting it there. seemed good in the garage, so i took it up the road for a test. it just didn't sit right. was offset to the steering wheel, which made my hips twist on the pedals, etc. went back to the shop, and tried the bench mounting point again. only put the one bolt in it, as i already had a couple of spare holes in the floor pan now.
went back up the road, and it fit me like a glove. so, i figure the few holes now count as weight reduction.
i took the car down to troy, up through the uwharries, and back home. before i even got the rest of the install completed, i knew it was the best money and time I've spent on the car in a long time. i also knew that i had a few new problems to contend with.
problem 1. when i was adjusting the seat, i heard something sound like it was cracking, and my front component speakers stopped working. apparently the seat motors and the amp were attempting to occupy the same space at the same time now, and the seat won. dammit.....
problem 2. i have no cup holder. for the last 16 years, I've been putting my coffee cup in between my side and the armrest on the bench. fit great and NEVER spilled.
problem 3. i lost my armrest
all solvable.
first though, i had to finish installing the seats.
drilled the new front mounting hole for the door side, and moved on to the inside. the tracks on that side needed to come up a hair in the back, and a bunch in the front. for the back, i used a steel wheel lug nut from an 86 dodge diplomat as a spacer. the tapered side fit perfect in the ford mounting hole, and it leveled the seat out to .1 degree at the back. to get the front the same, i wound up using 1/8 wall 1X1 square tubing to make a spacer. length of 1.75 inches.
also, made some floor washers/seat reinforcements out of some 1/4 plate i had laying around. 3X3 squares with a hole drilled in them. also, for hardware, i used some carriage bolts i had bought down at Lowe's with nylock nuts. total in hardware was 5.86
to power the seats, i had left a 20 amp lead in my harness along the door sills for eventual power windows or locks. so i pulled those over to where the seats were to power the seats.
to fix my amp problem, i wired the components directly to the head unit. they actually sound better now that they're not powered by the old audiovox amp.
also learned that after powering the passengers side seat, it has a micro-switch in it. when you tilt the seat back forward for rear seat access, it automatically slides the seat forward with the electric adjusters. when you put it back upright, it goes back to exactly where it was set before. really nice unexpected feature. thanks ford!
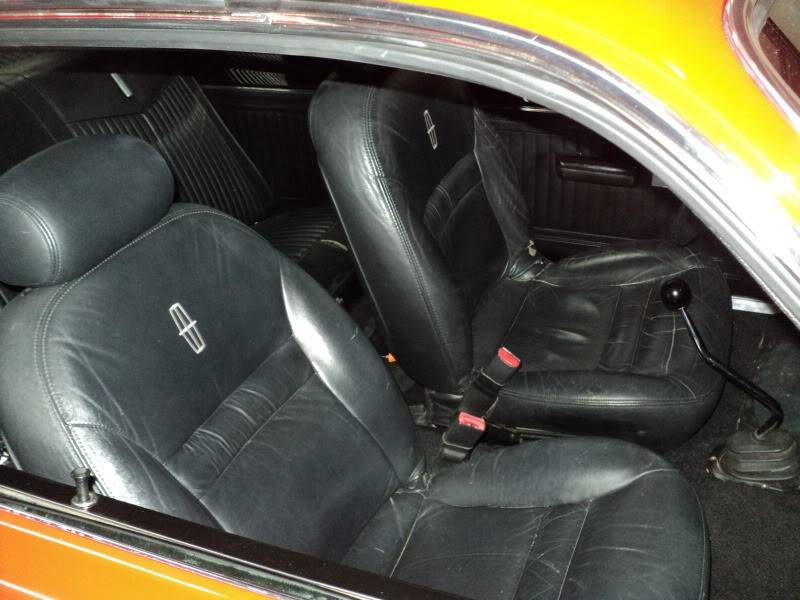
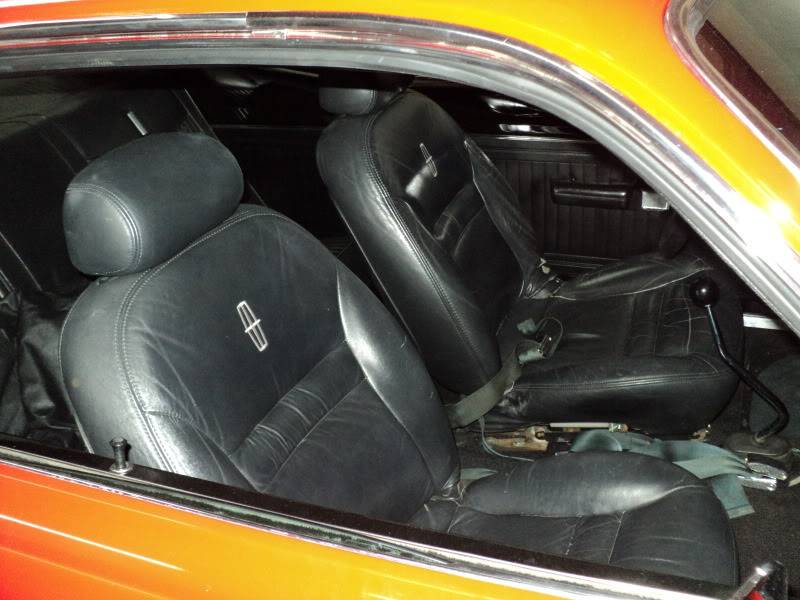
heres pics of both seats mounted, and the mounts i made. (both seats mounted the same way, with the same hardware and measurements)
after i got done with the seats, i went back to the trunk. i permanently mounted the amp and subwoofer enclosure, as i dint want them sliding around at high rates of lateral acceleration. use #10 screws and fender washers up through the trunk floor to mount the sub box, and some s10 screws with captured washers to mount the amp. all these parts came out of my magic bolt box.
last on the list is my news of the week:
I'm going autocrossing with this car and my dad on Sunday. Tarheel Sports Car Club is having their test and tune day down at Maxton, and its time to see what this old girl can really do. I'm excited. hopefully ill have some time to get the carb fine tuned between now and then.
total is 1717.64
stay tuned, ill have action shots good lord willing.
michaelMichael Crawford
1970 plymouth Duster back under construction:
https://www.pro-touring.com/showthre...uring-makeover
1987 GMC S15 https://www.pro-touring.com/showthre...ct-drivabeater

 Reply With Quote


