

Results 201 to 220 of 243
-
12-15-2015 #201
 Registered User
- Join Date
- Aug 2007
- Location
- Albemarle, NC
- Posts
- 1,149

My last update was 9/5/13!!!
Holy cow. Two years, three months, ten days.
I should probably account for that amount of time. Most of you guys have seen other stuff Ive been working on, but for those of you that didnt, ill provide links.
Short version: medical, house, life, automotive ADD.
Long version:
Im a mental health clinician for my day job, ran the local hot rod shop for years for a side business, father, husband, son, and I think part magpie (ooh!! Shiny!!!). my day job has become more and more involved since moving into residential services, often requiring 80 hour weeks, no sleep, high stress, etc. very consuming job. Which means less time for other things. Also, my daughter has been becoming more and more involved in various activities, which I also like to be involved in to support her. So when Im not at work, Im there. And when Im not doing that, I build cars for others. And when Im not doing THAT, Im fixing my own stuff, and renovating the house. Obviously, not a lot of hours left over there. Well, couple of years ago, it became apparent that I needed to become more involved in the bodywork on my El Camino. As seen here: https://grassrootsmotorsports.com/fo...e/60101/page1/ so that sidetracked me considerably from the duster. Spent a lot of hours at the body shop, and a LOT of money. During that period, driveline specialties rebuilt the rear end again, making it quiet. Apparently their previous supplier had some troubles with the gears, and then went out of business. They honored it anyway. Very great guys. I also realigned the car, and daily drove it through that January and February when my daily was down. I also broke a lowering block while dialing the car, and wound up doing the hanger flip instead. Lowered the rear too much, but never got around to a solution.
In April of 2014, I was helping brother Dustin build his woodshop. It had started raining, and we were almost finished. So I decided to be superman. Carrying a couple of sheets of¾ ply above my head in the wet grass, I slipped. Hurt my left knee and ankle pretty bad. Couldnt push in the clutch anymore, so the car got parked. I limped along for a few months, and finally went to the doctor. Turned out that I had shattered my left ankle, and that my knee would mostly heal once it was rebuilt. So September of 2014, I had reconstructive/repair surgery. I was able to try to drive the car again in January 15. I managed to make it to Indian trail (about 60mi) before the interior filled with smoke. Dash fire. Crap. So had it towed home, and put it in time out to think about what it had done. After fighting, and losing, with the comp claim through insurance, I was pretty disgusted. I also had to rebuild my deck, and the shop needed a major overhaul before I could really work down there. So we jerry rigged the car back together to run long enough to drive it down to dads. That was in April or so of this year, at the same time that I decided to close down the shop. It was no longer worth the time/money that it was taking/making. No longer made me happy like it once did, either. The duster has been living in the corner down there since. While it was out of the way, I did this: https://grassrootsmotorsports.com/fo.../103346/page1/
So, with those small projects finished up, and a status update on my life out of the way, I guess we get back to the intent of this thread: converting a duster to a pro-touring car, on a budget.
Where the car left of:
Burned up wiring harness. Bad vibrations in the driveline. Stiff clutch. Piss poor running. Dead spot in steering. Back end too low. Various creaks/bangs/pops from the suspension. Ac intermittent. Electric fans making noise. Brakes making noise. Parking brake inoperable. Various leaks. Drivers side window tracks need work. Console needs dyed. Needs cleaned everywhere.
The previous budget: 7996.27
Money spent (the best I can remember)
Edelbrock fuel rails: 110
Tanks inc in tank pump: 235, summit racing
Roll of steel fuel line: 21 (oreilleys)
91 corvette ECM with MEMCAL 45 (carguts in south carolina)
Adjustable fuel pressure regulator, ebay 21
Ez mini 21 circuit harness, ebay 135
Kenwood 3 channel amp, swap meet, 20
Polk dash speakers, pull a part 12
Memphis belle 6x9 speakers, free
4 gauge amp wiring and terminals, free
battery jump terminals, 17 ebay
New total: 8612.27
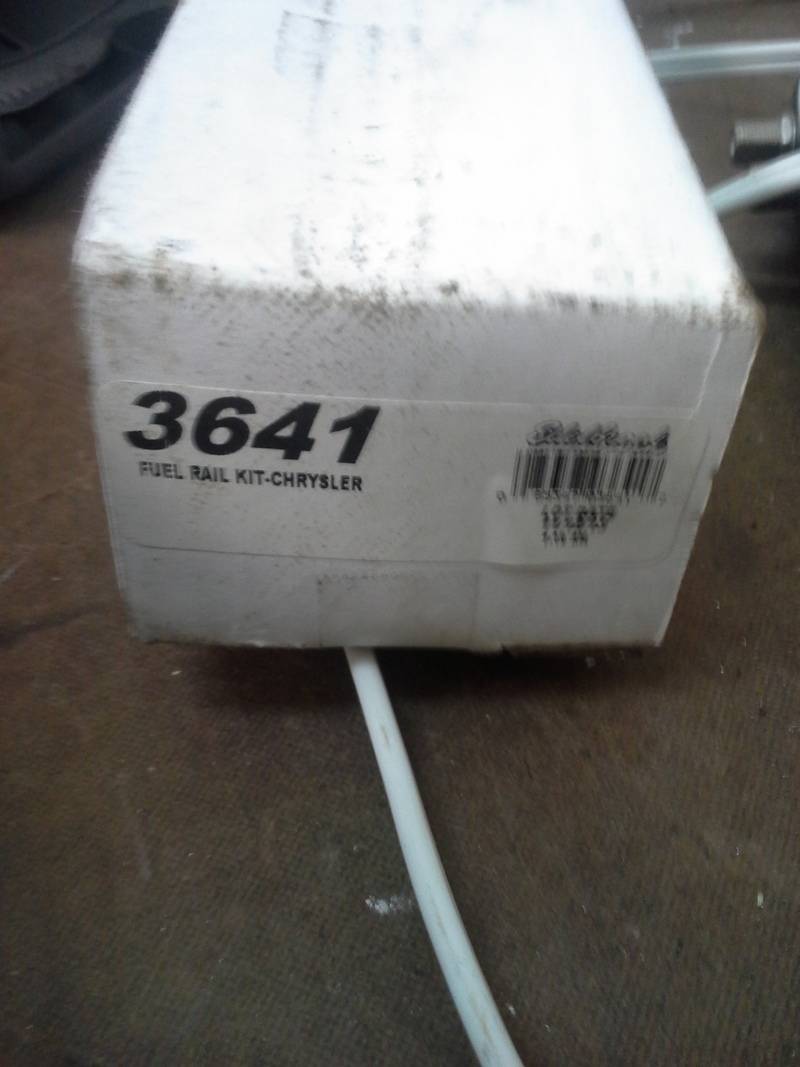
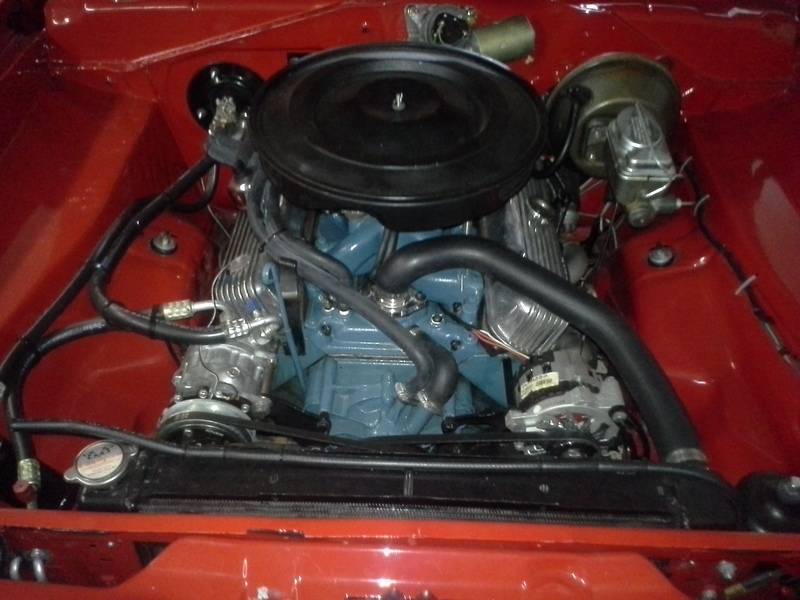
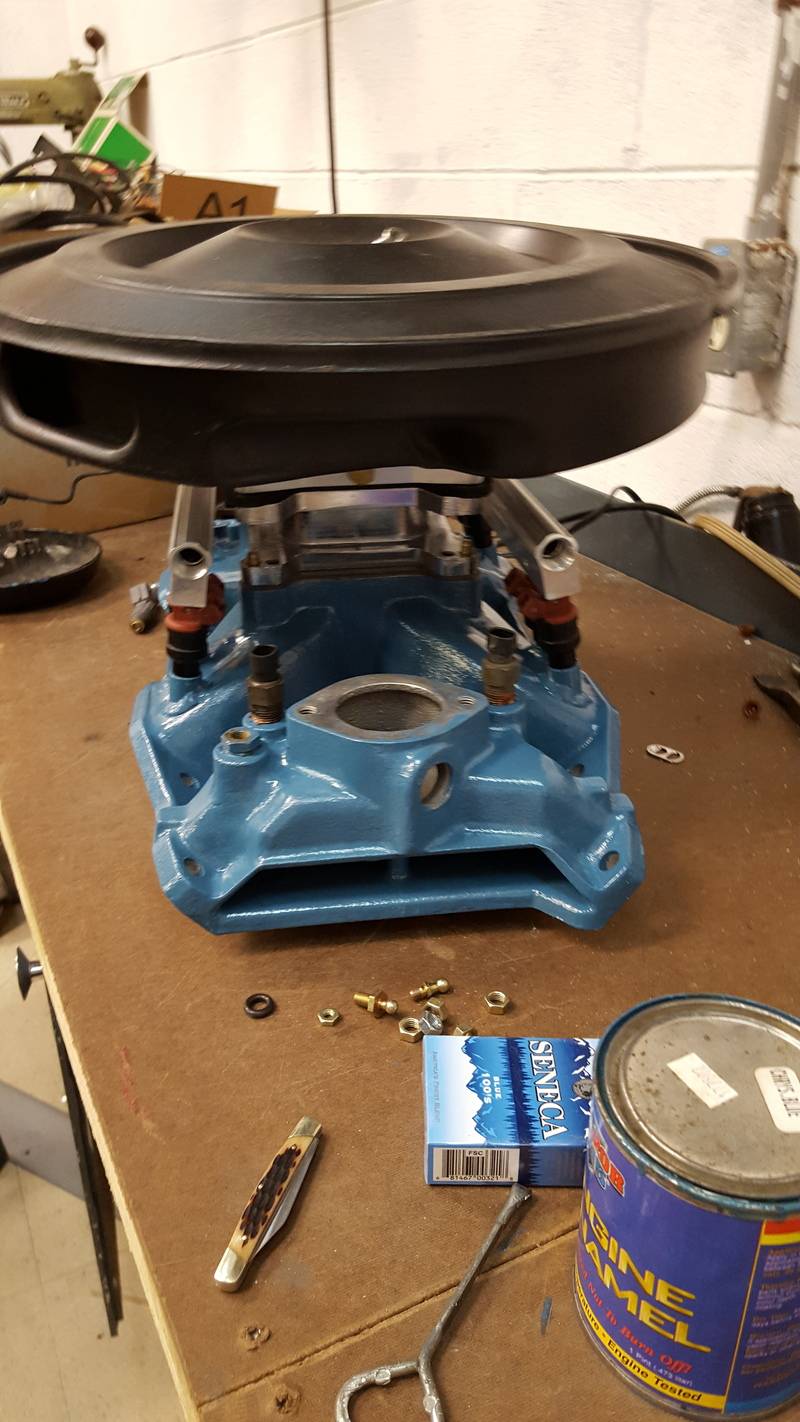
So this past month, I decided it was time to bring the old girl back out of the time out corner. I started in on finally finishing the intake that I began to convers for port efi. It needed lots and lots of work to finish. So I pulled it, my magnum fuel rails, etc. off the shelf. I also learned, somewhere in the last couple of years, that the GM ECM I plan on using does not like a fixed fuel pressure. The ecm works better with a vacuum referenced regulator. This meant that the single inlet, return less, magnum rails would need to be modified to work. Instead, I spent the good money on a set of edelbrock aluminum fuel rails. Easier to set up as a return style, easier to mount, and look better.
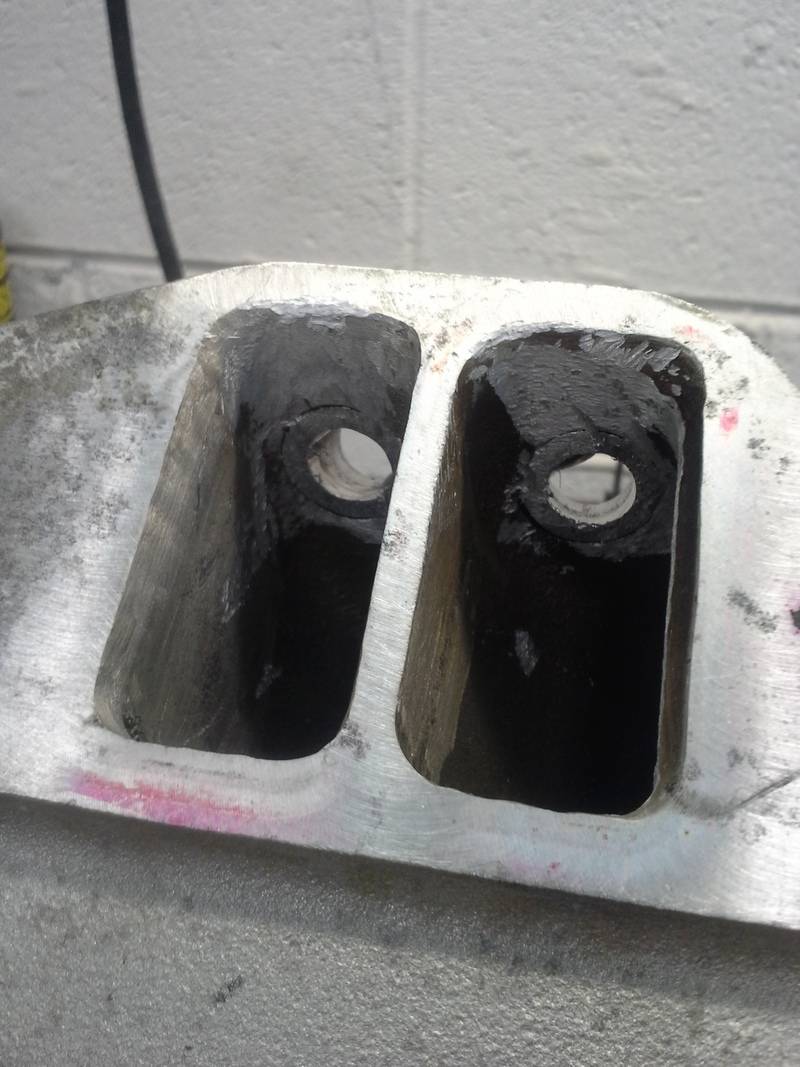
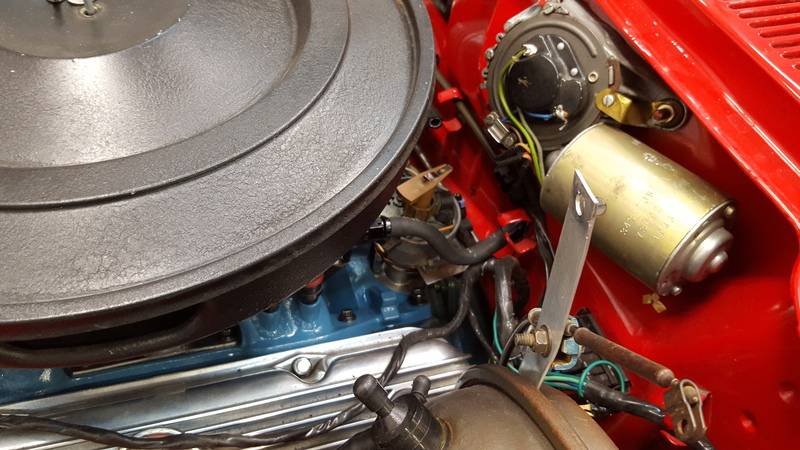
Anyway, I pulled the parts out of storage, and this is what met me:
Half finished, mostly butchered intake.
Melted injector pintles on my 30lb injectors:

Shiny box of fuel rails:
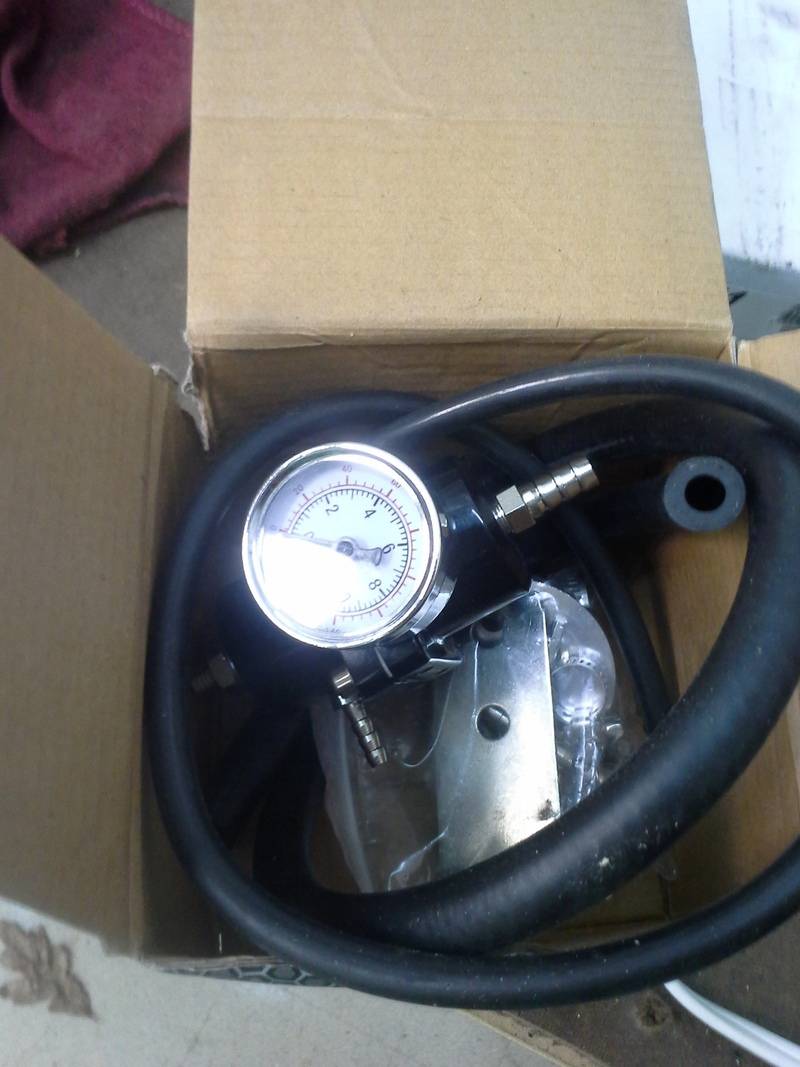
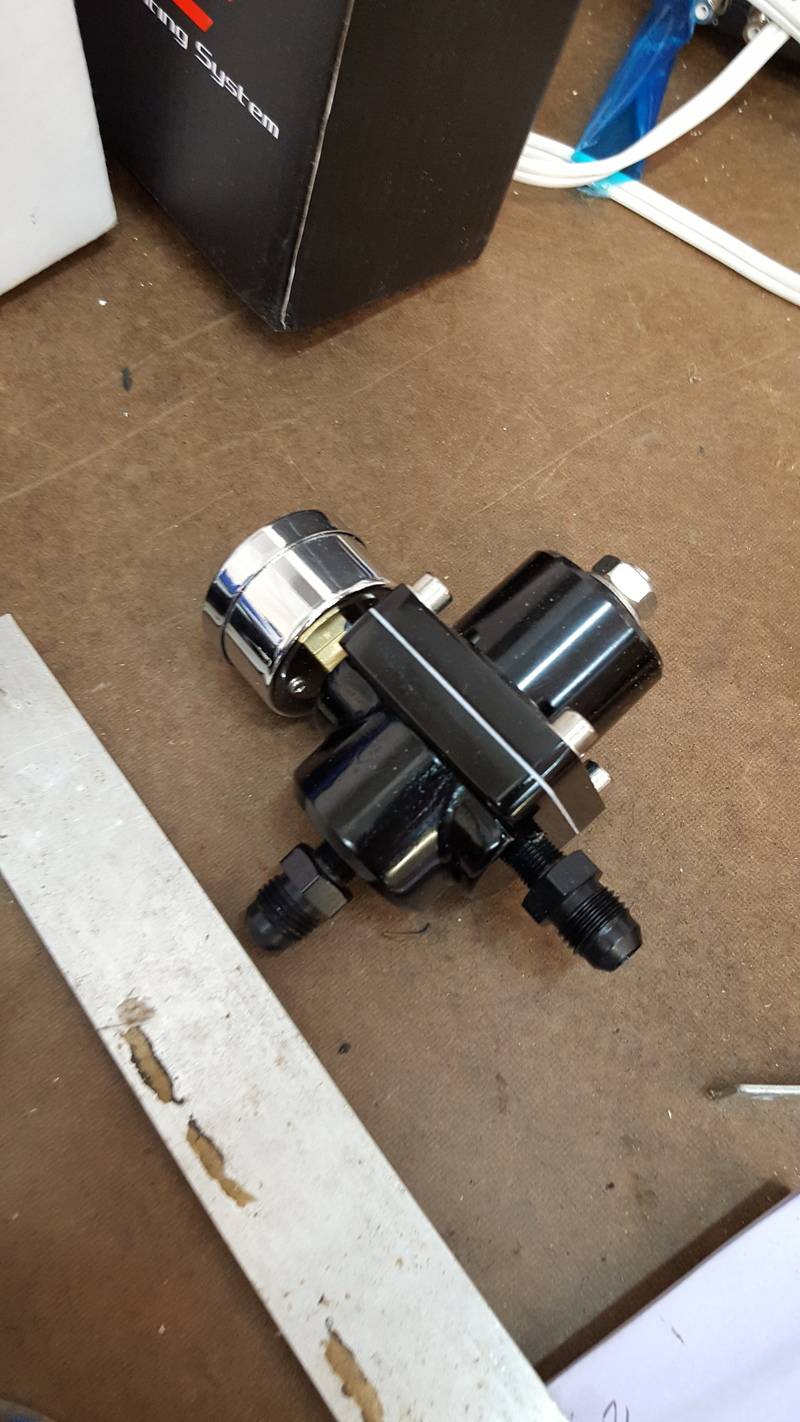
Ebay sourced vacuum referenced fuel pressure regulator:
So I got to porting. Took more than a couple of hours, but the intake runners/bungs are done. Still need to decide what to do about the plenum, if anything.
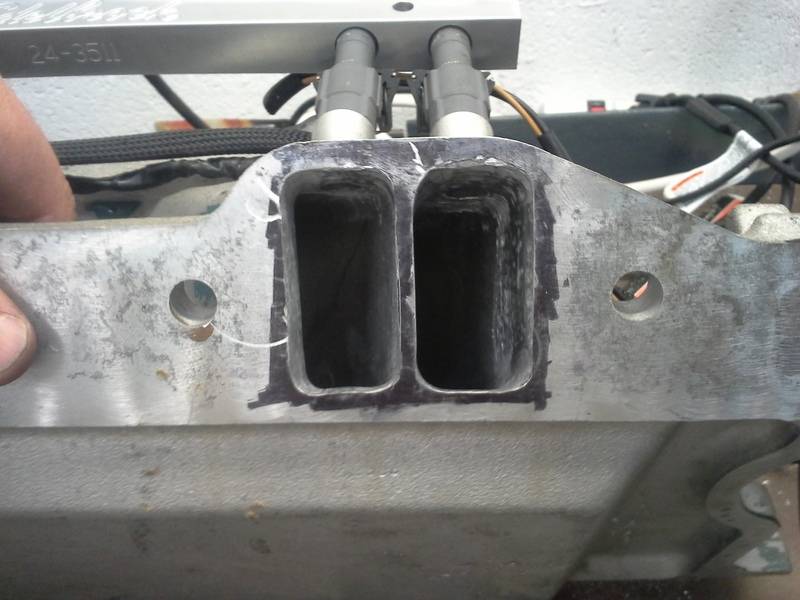
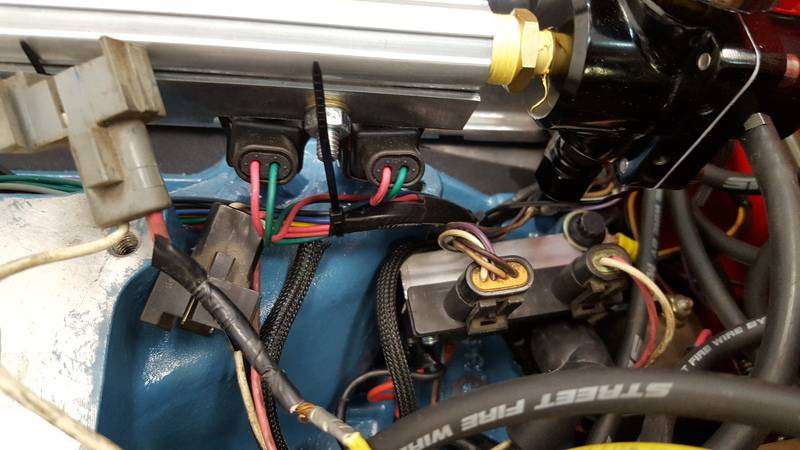
Mock up with a spare set of ls1 injectors (26lb), edelbrock fuel rails. The 30lb test out fine, and will be rebuilt with new o-rings and pintle caps. What happened was that when we welded the bungs in, we used the rails and injectors as a jig. Too much heat. Only a few got melted, and those seem to be fine.
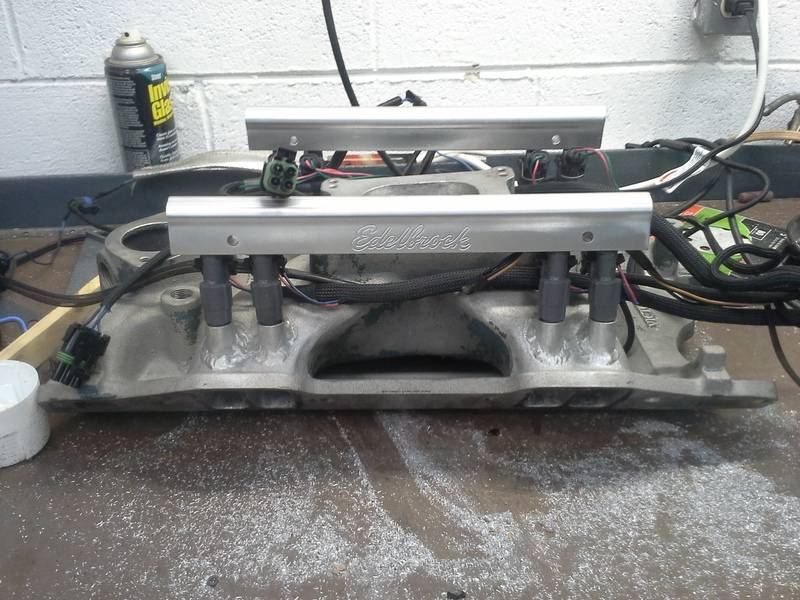
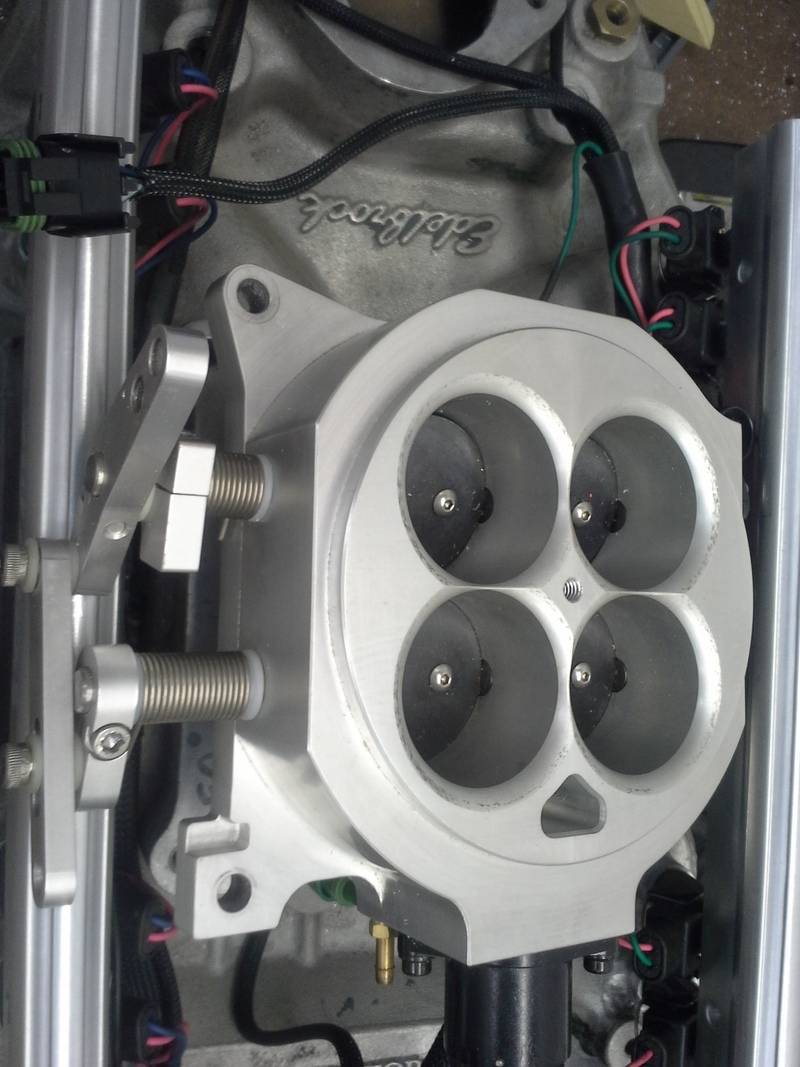
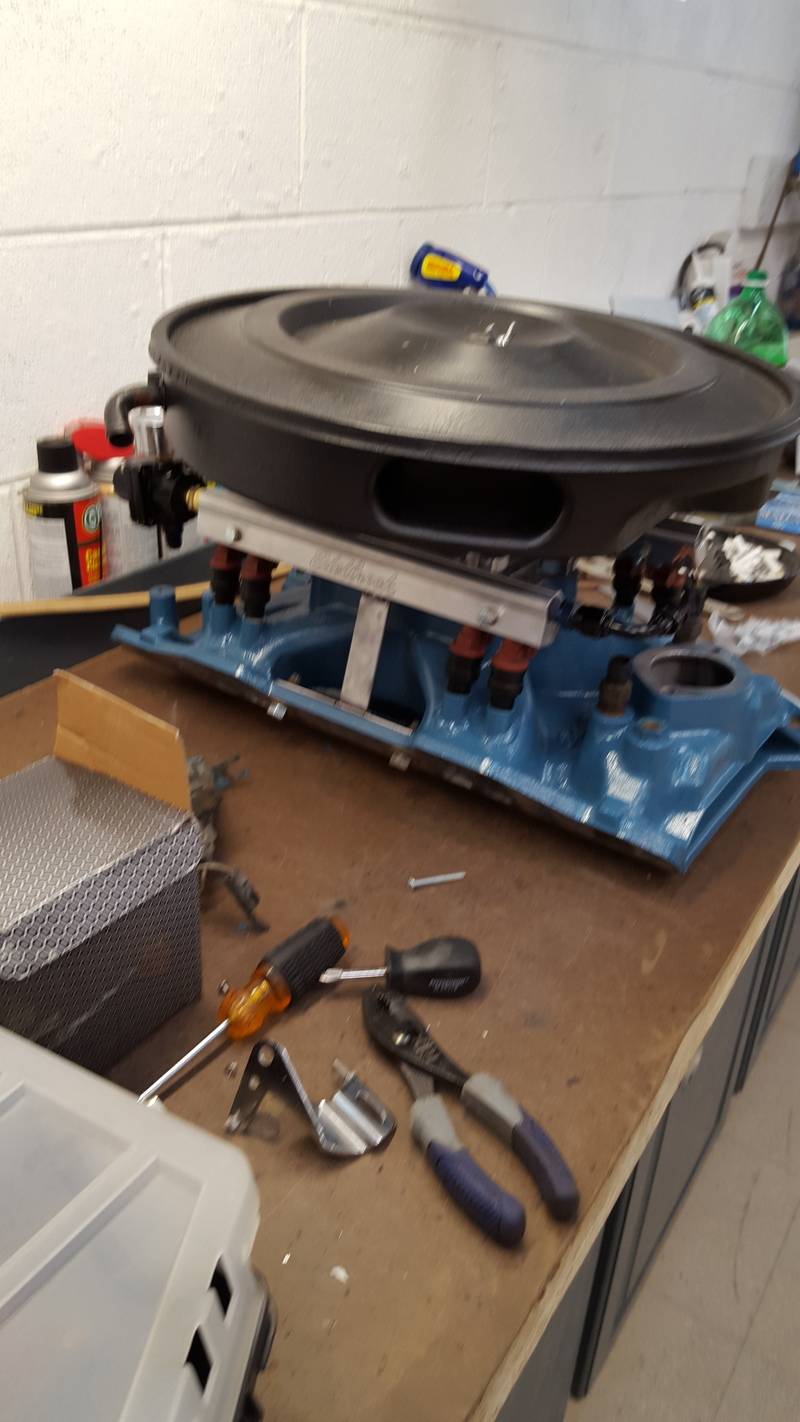
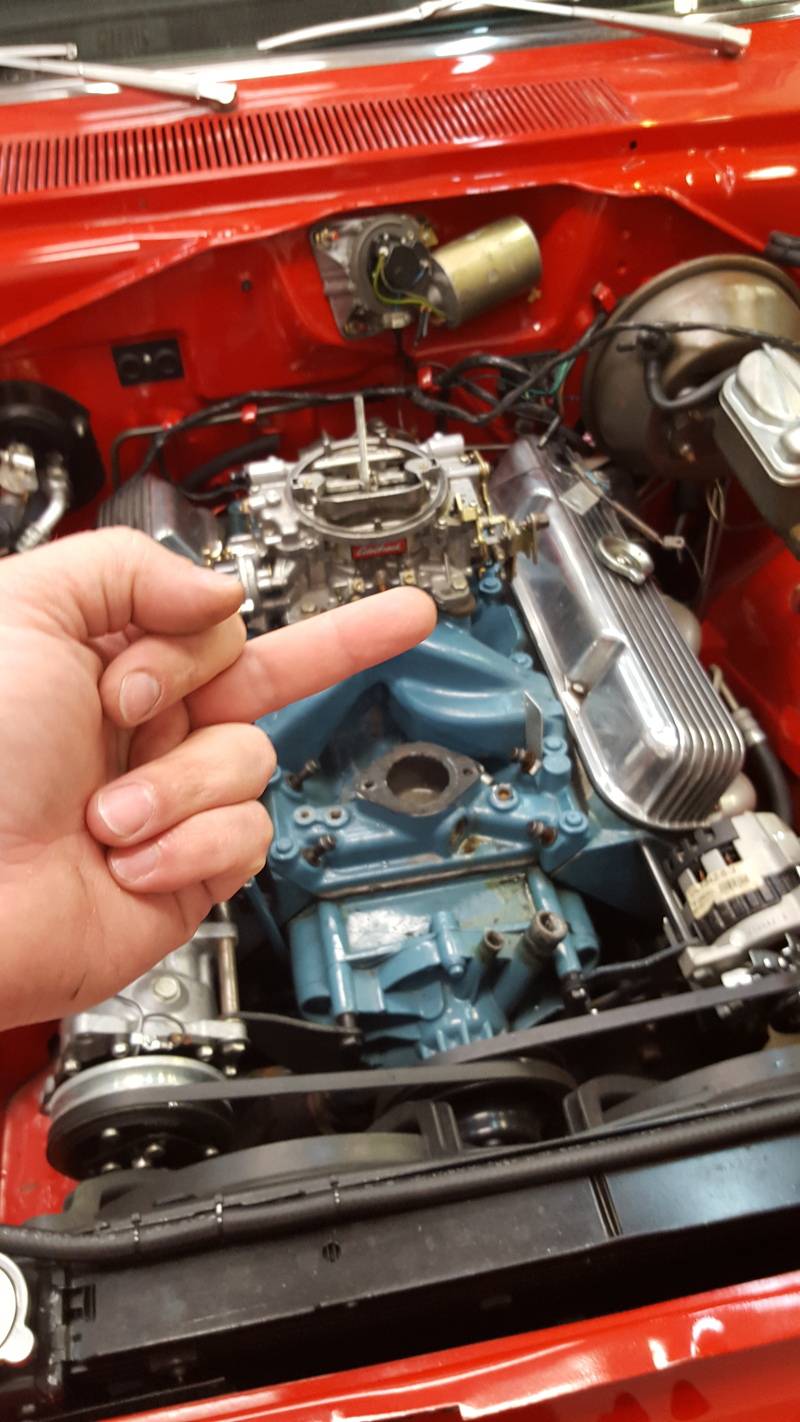
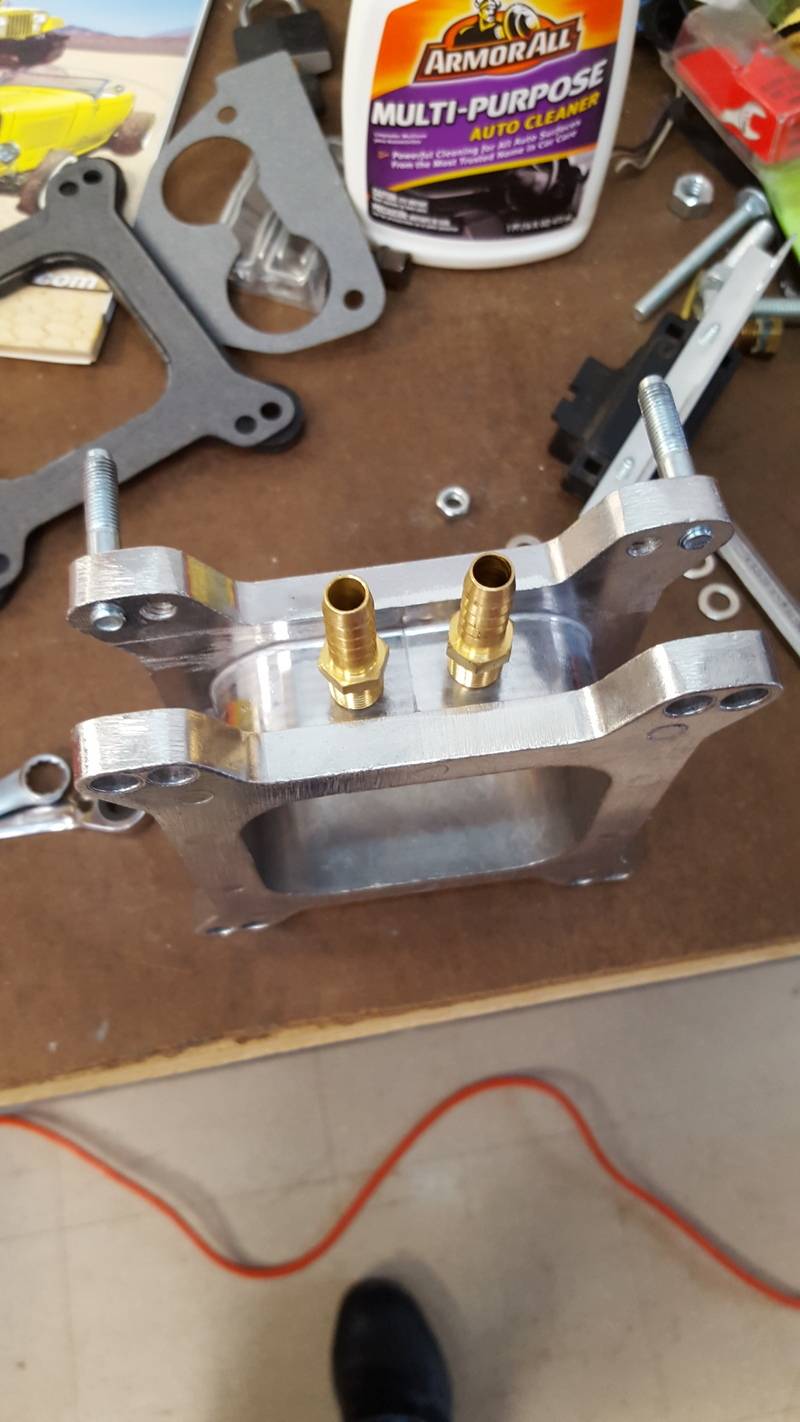
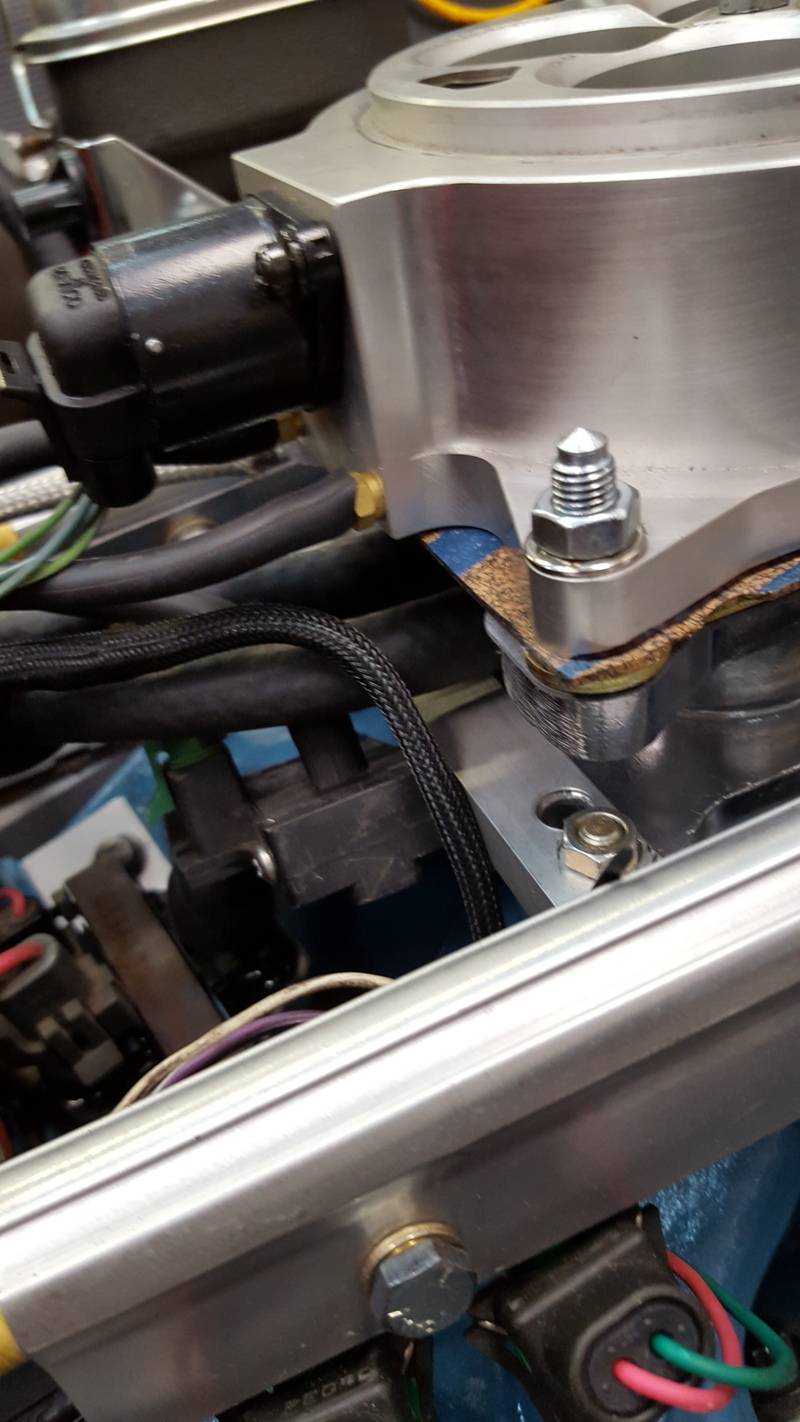
I got excited to see this setup this close. So I grabbed the 4bbl throttle body and the used 7727 ecm harness off the shelf and started a further mock up. The throttle body hits the fuel rails pretty badly. The harness needs altered significantly from its time powering a tuned port corvette. But it all will work together. A 2 inch open spacer will be used under the throttle body, which will allow it to clear the rails. Additionally, with the shorter throttle body and taller spacer, its still ½ inch shorter than the 950/1 inch spacer I ran on this manifold before. I can also drill and tap the spacer for my power brake/pcv ports, and my intake air temp sensor, thereby cleaning up the engine visually.
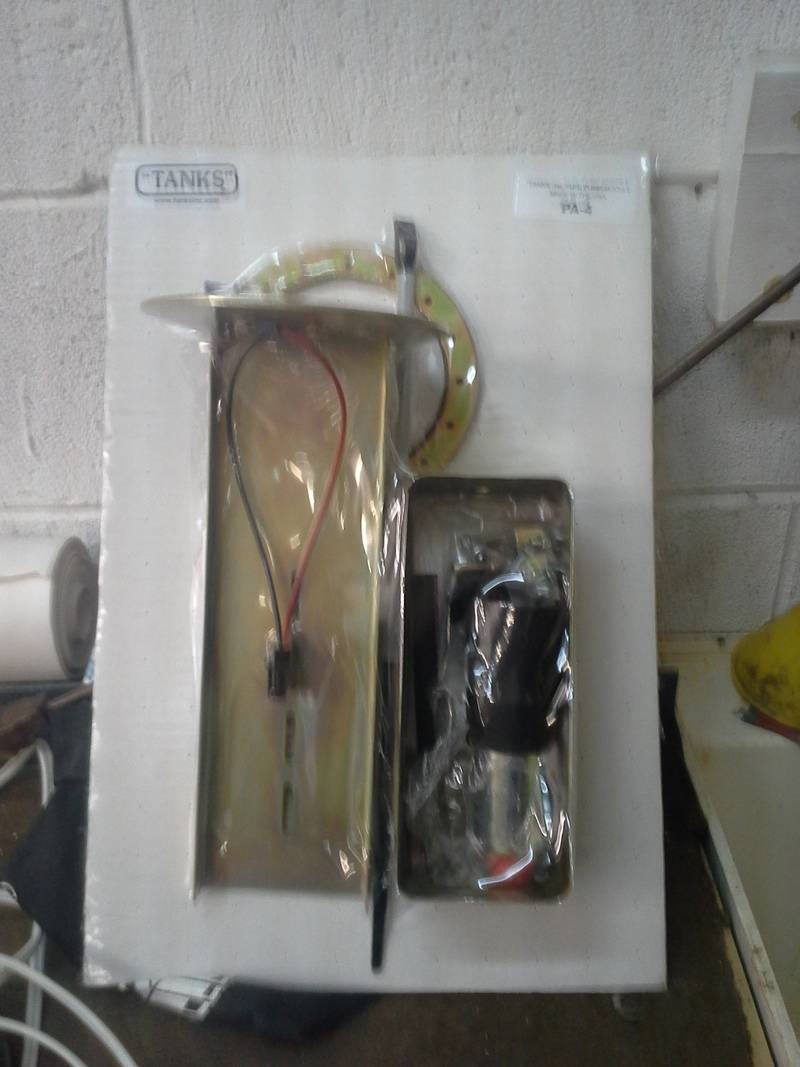
Nest up, I moved onto the fuel system for the efi conversion. Initially I had planned to use an in tank module from a late model gm product based on some write ups I found on the internet. Unfortunately, I couldnt find a pump that would fit that would feed the small block in the duster. Rather than being faced with finishing another module and section of fuel tank to section in, I hit the easy button. I ordered the tanks inc pa-4 module with a walbro 255. 235 from summit, free shipping. I had debated between this and a surge tank/dual pump setup. Im running that version on my elky, and have been impressed with its performance. However, I didnt want to have fuel components inside the trunk of the car, and the pa-4 should clear the trunk floor with a couple of hammer whacks. So I went with the pa-4.
 Michael Crawford
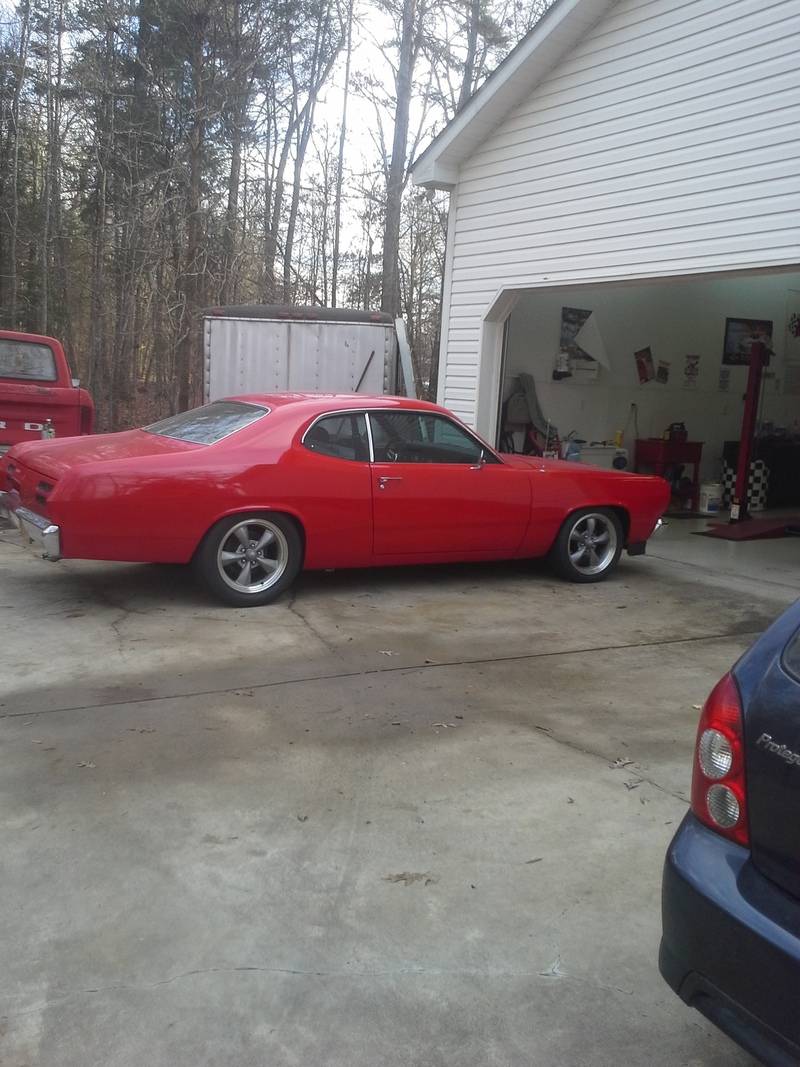
1970 plymouth Duster back under construction:
https://www.pro-touring.com/showthre...uring-makeover
1987 GMC S15 https://www.pro-touring.com/showthre...ct-drivabeater
-
12-15-2015 #202
Registered User
- Join Date
- Aug 2007
- Location
- Albemarle, NC
- Posts
- 1,149
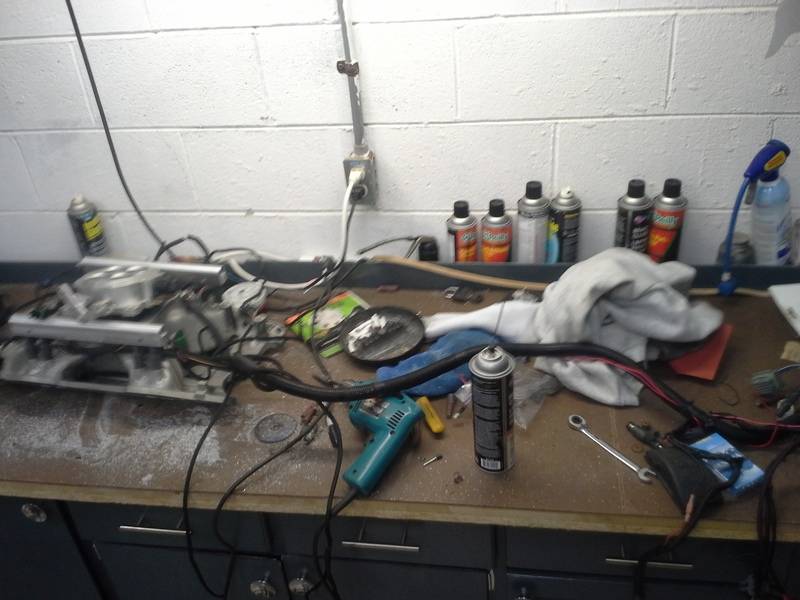
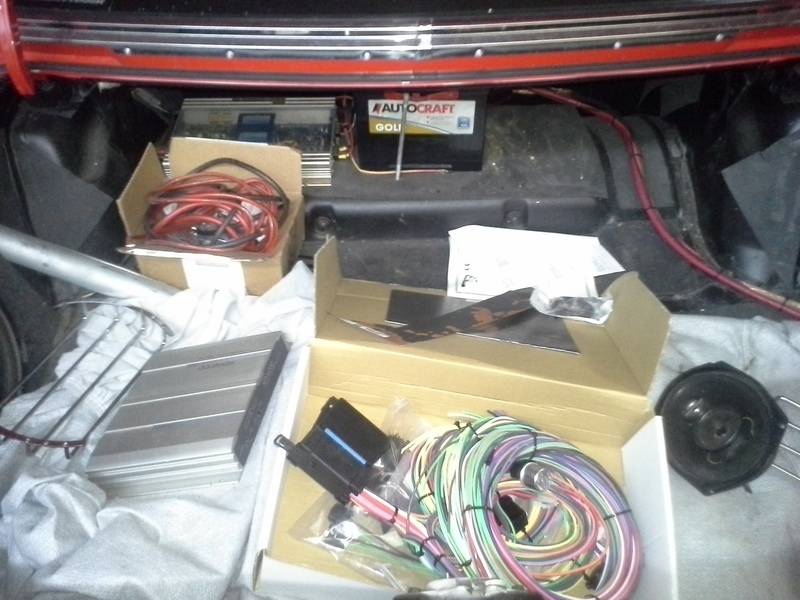
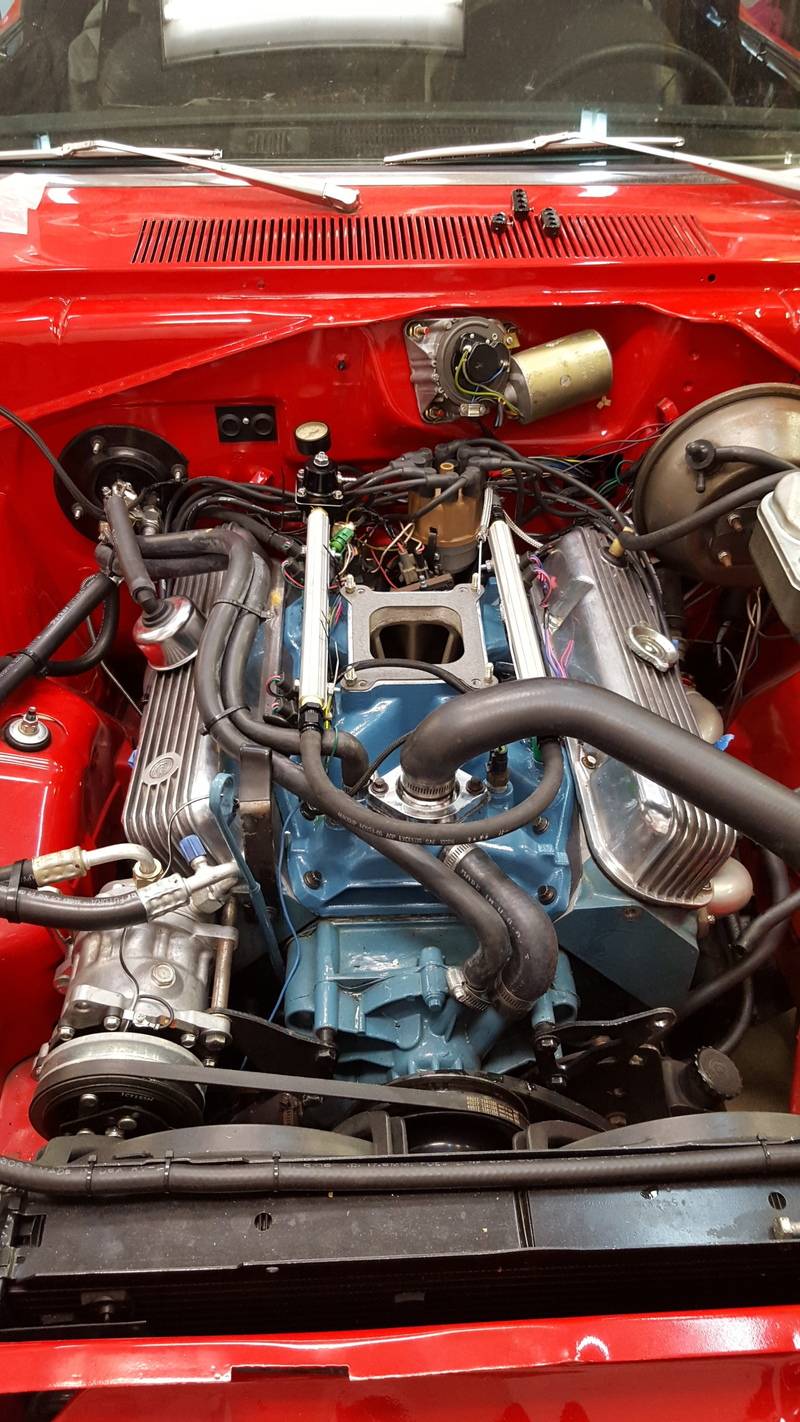
So this past weekend was the install time. I went down, and took some time out pictures. Here is where we started at. Car has not been moved, or touched, since april. Parts I started acquiring are in the trunk where they landed when they came in. new harness to replace the burned up one. New amp to replace the dead ones. Jump terminals. Etc. misc duster parts in a duster shaped storage box.
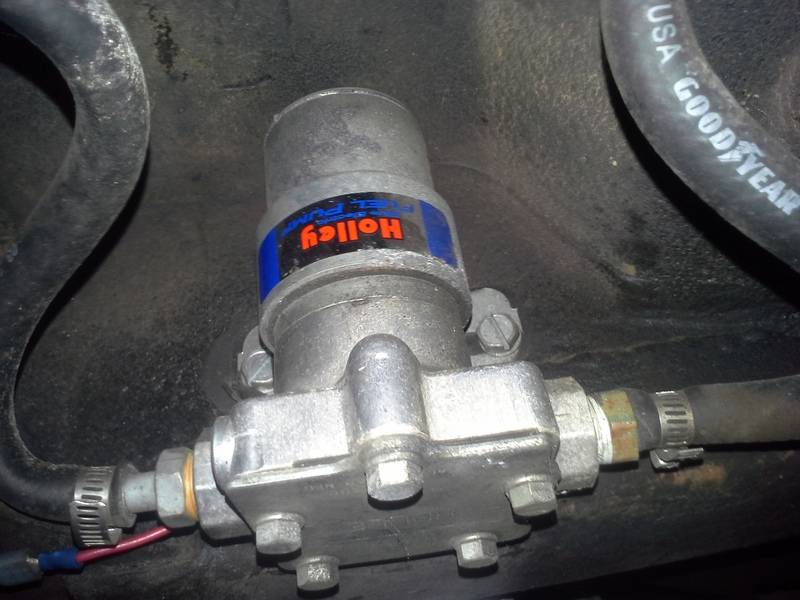
So Friday after work, I went down and got the car started. Fired up easier than it had any right to, but ran like crap. Eh. Don’t care. Its going efi. Drained the tank using the Holley pump (which I will NOT miss the noise of) and dropped the tank. Sat it outside to air out for a while.
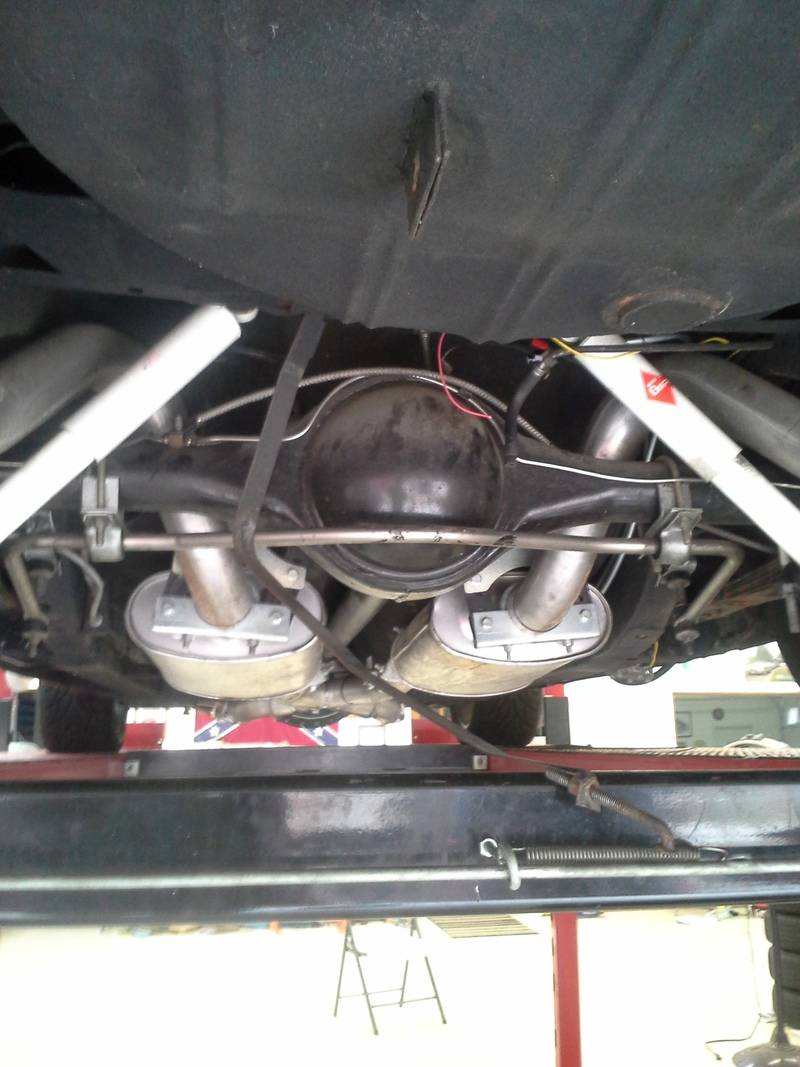
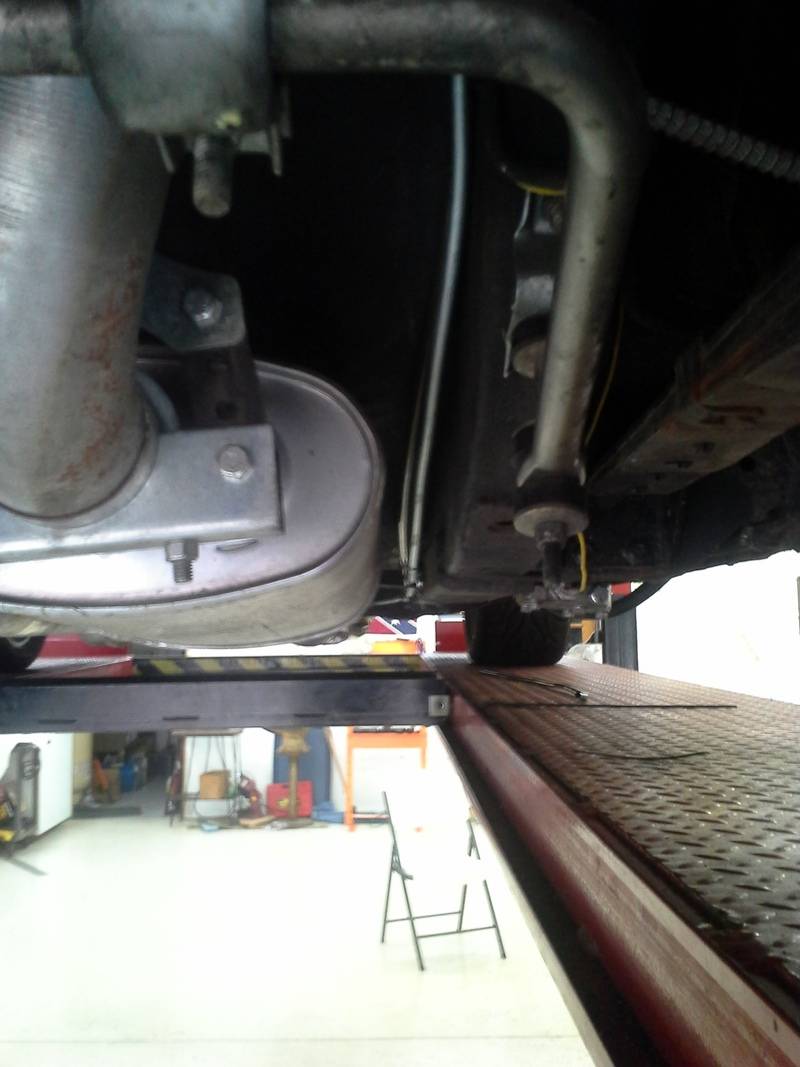
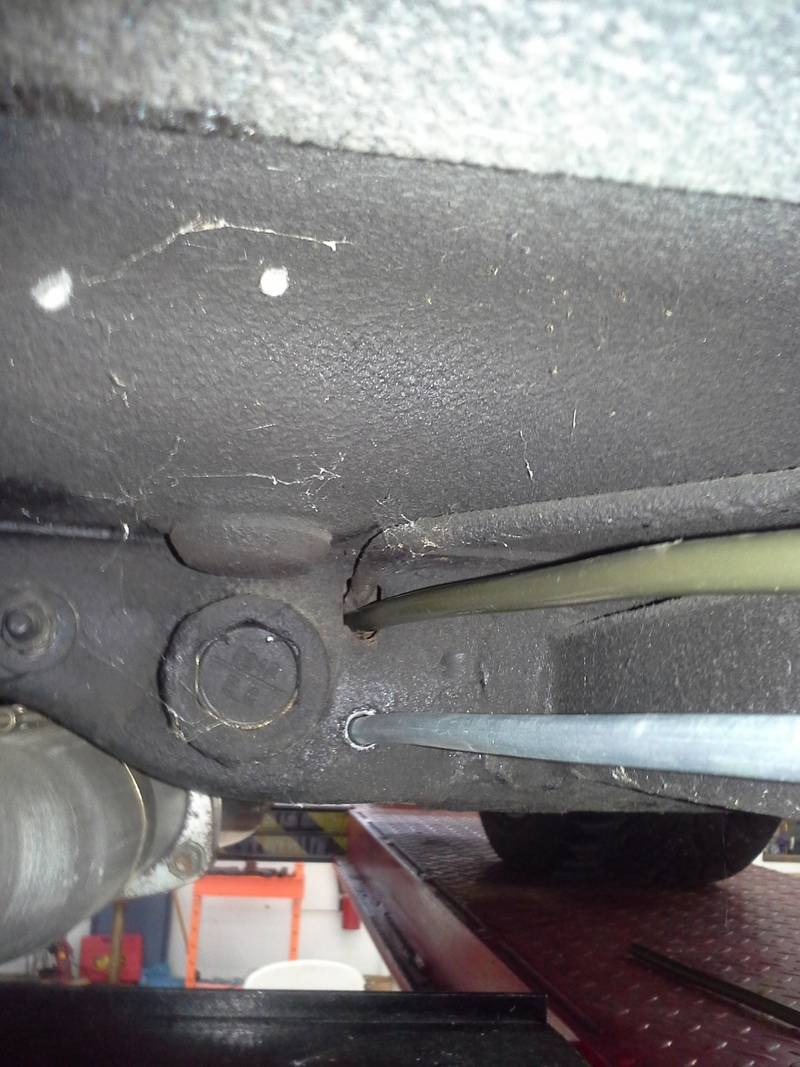
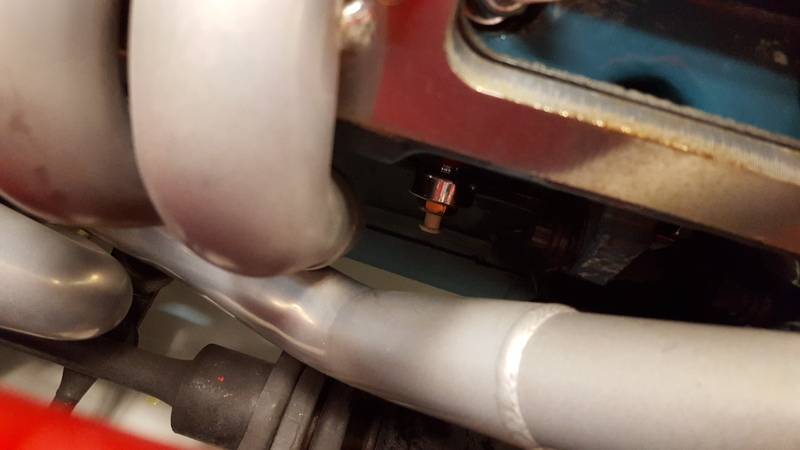
Proceeded to run the new feed and return lines. Decided on 3/8 for both to ensure an adequate safety margin for whatever I decide to do to the car later. Ran it along the sub frame connectors, through the t-bar cross member, and up the firewall, as well as into the trunk. Cut and flared the ends for AN flare nuts (had them). Green is pressure, and runs along the firewall to drivers side of the engine. Silver is return, and stops on the firewall near where the HVAC lines come out, as that is where I will mount the regulator. I made sure to route them in a way that in the event of a hard front end impact, they should not get severed. Fire bad.

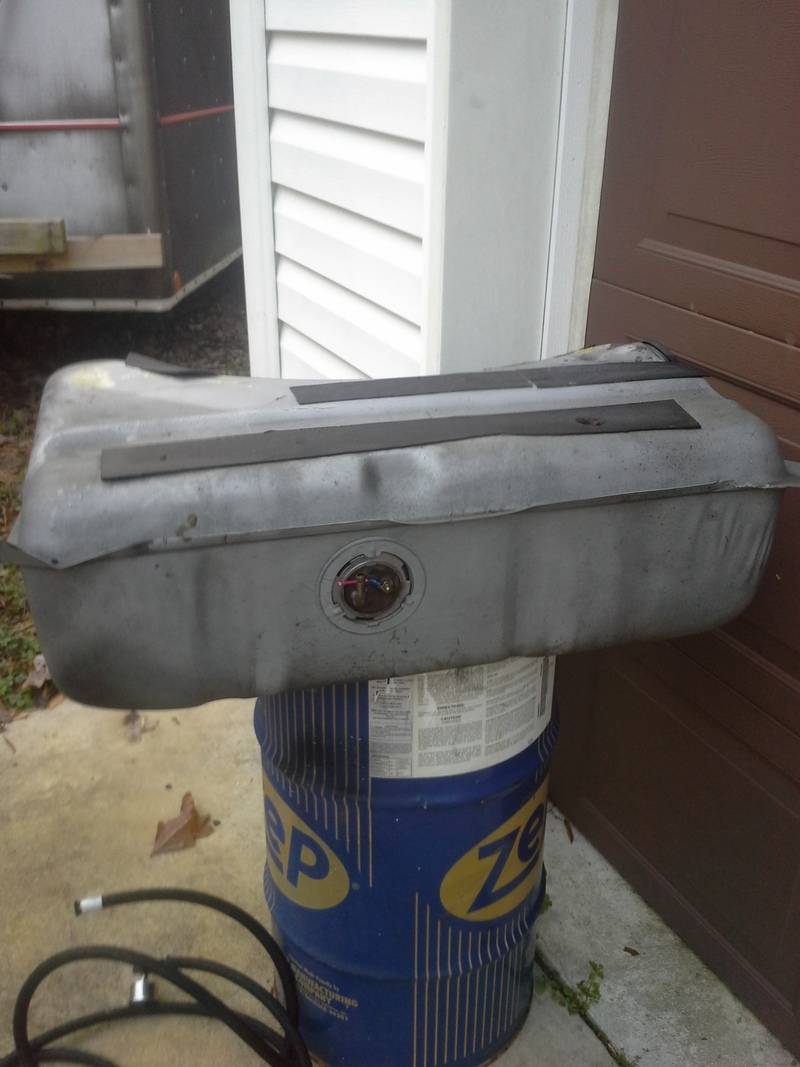
I then moved on to the pa-4 install. This is where things get interesting.
I had to modify a gas tank full of extremely explosive gas fumes. Effectively, I’m adding heat and possible sparks to a giant bomb. Oh my.
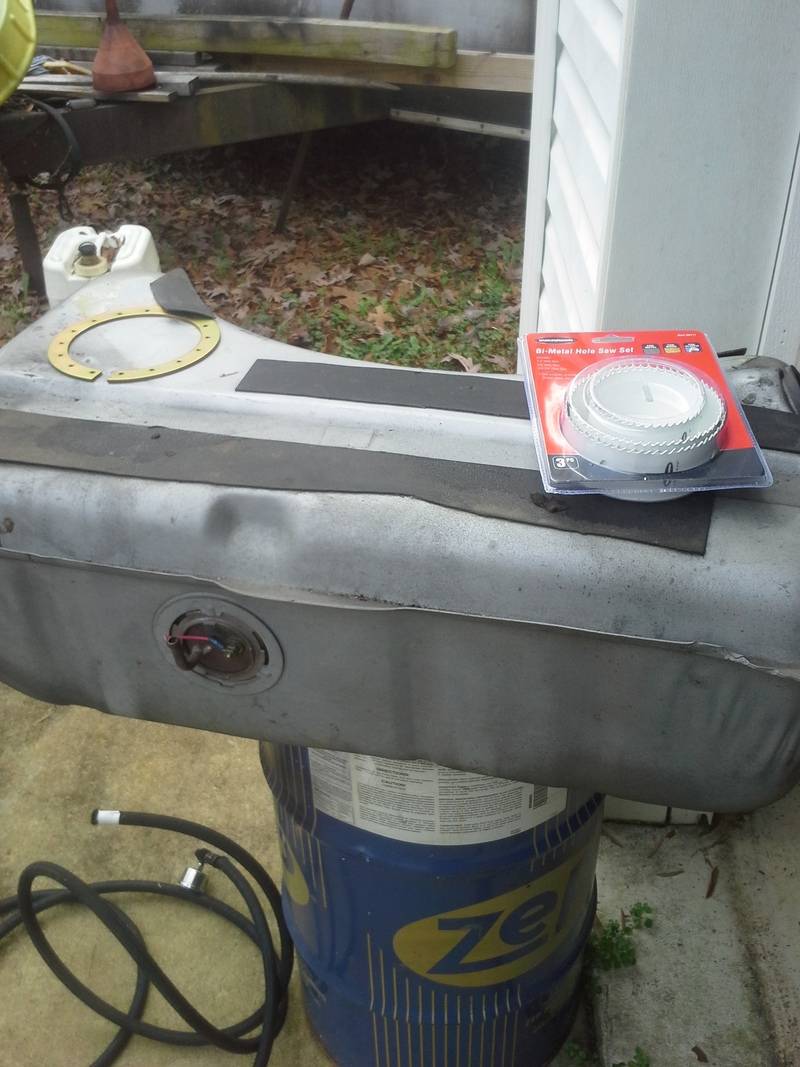
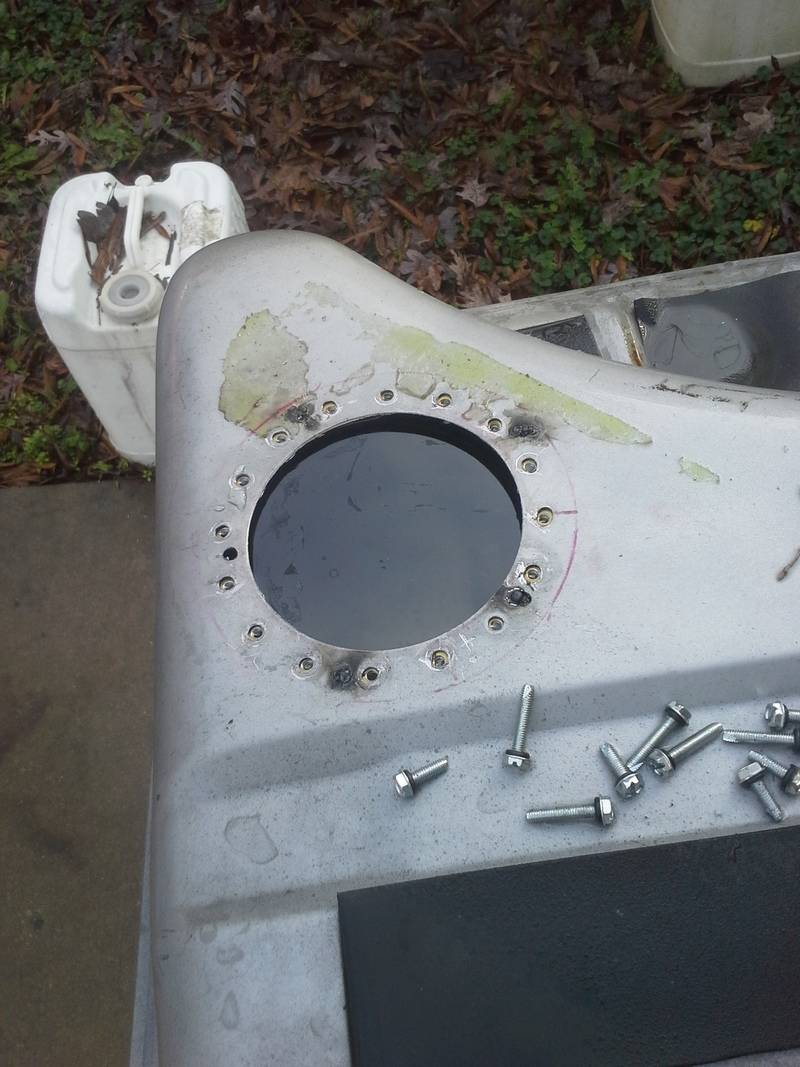
The safest way I could think of to do this was fill the tank with water. I put the fill tube in to make the water level higher, and proceeded to use a harbor freight 4.25 hole saw to cut into the tank. Worked well. Water came pouring out.
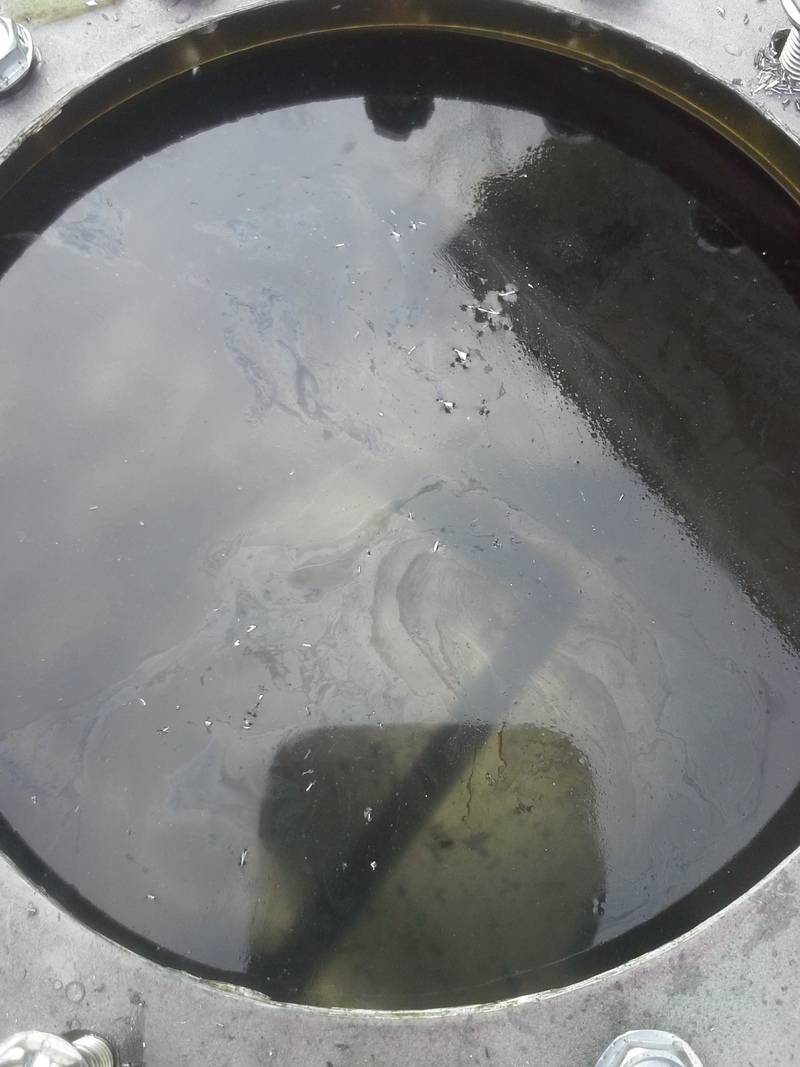
But at least the inside of my tank is squeaky clean. That makes me happy.
Got the mounting ring all set up, and decided that if I ever had to service the pump on the side of the road, life would be much better if the ring didn’t fall to the bottom of the tank. So best way to solve that would be to tack weld it in place.
It blew up. But only a little.
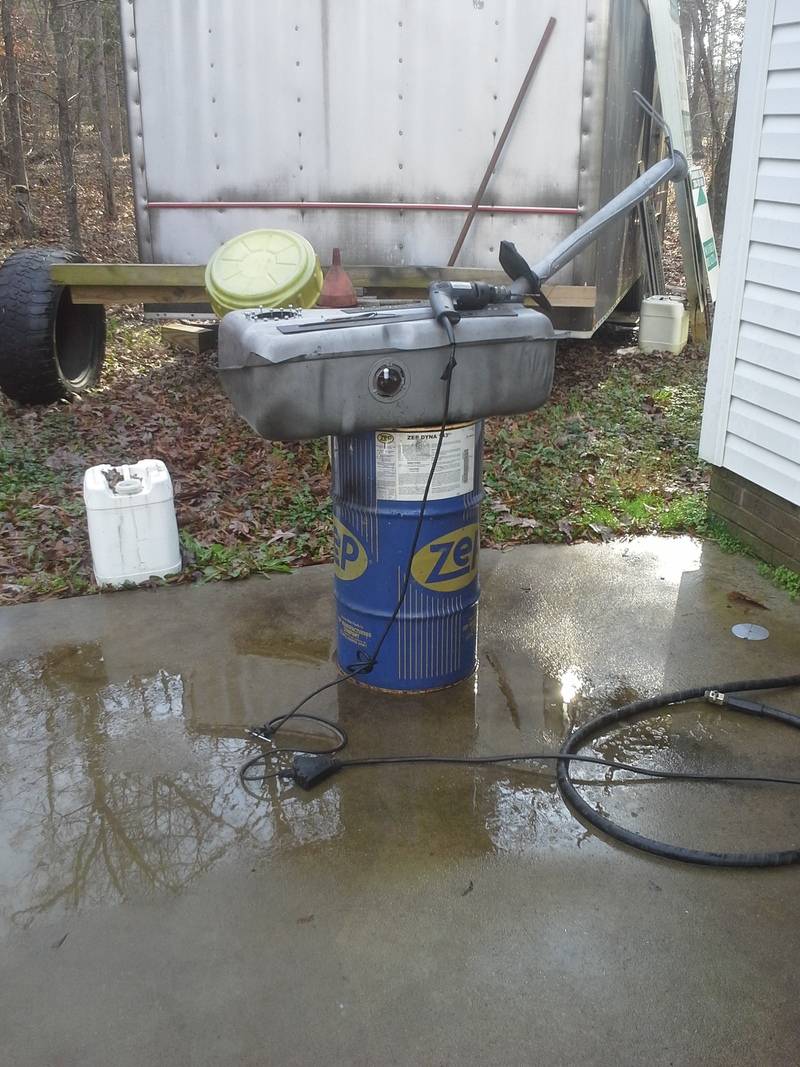
Apparently what had happened was there was an air pocket in the tank that wasn’t filled with water. It was filled with explosive gas fumes. When it went off, it blew half the tank of water out through the hole for the pump. Shot it high enough it was dripping off the roof of the garage. It scared me. A lot.
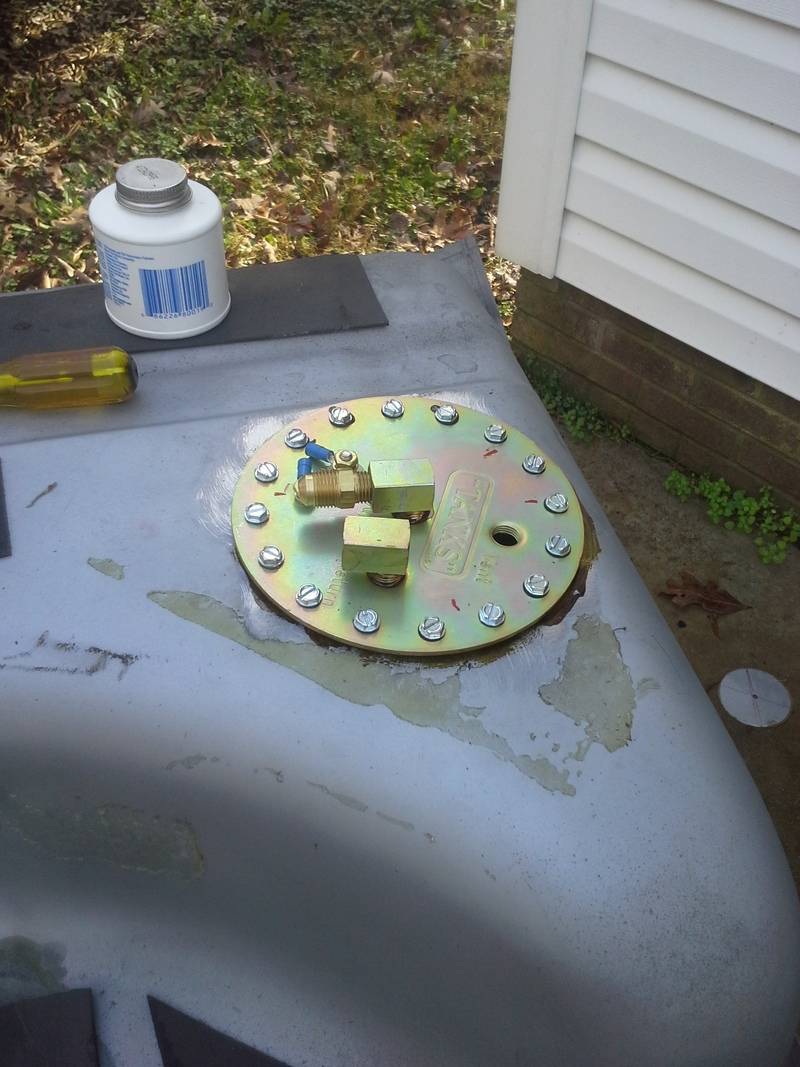
Anyway, I finished up the pump assembly.
I then proceeded to go to mount it in the car. I thought I would have enough clearance to snake the lines out between the trunk floor and tank. Big old hairy no.
What I wound up with:
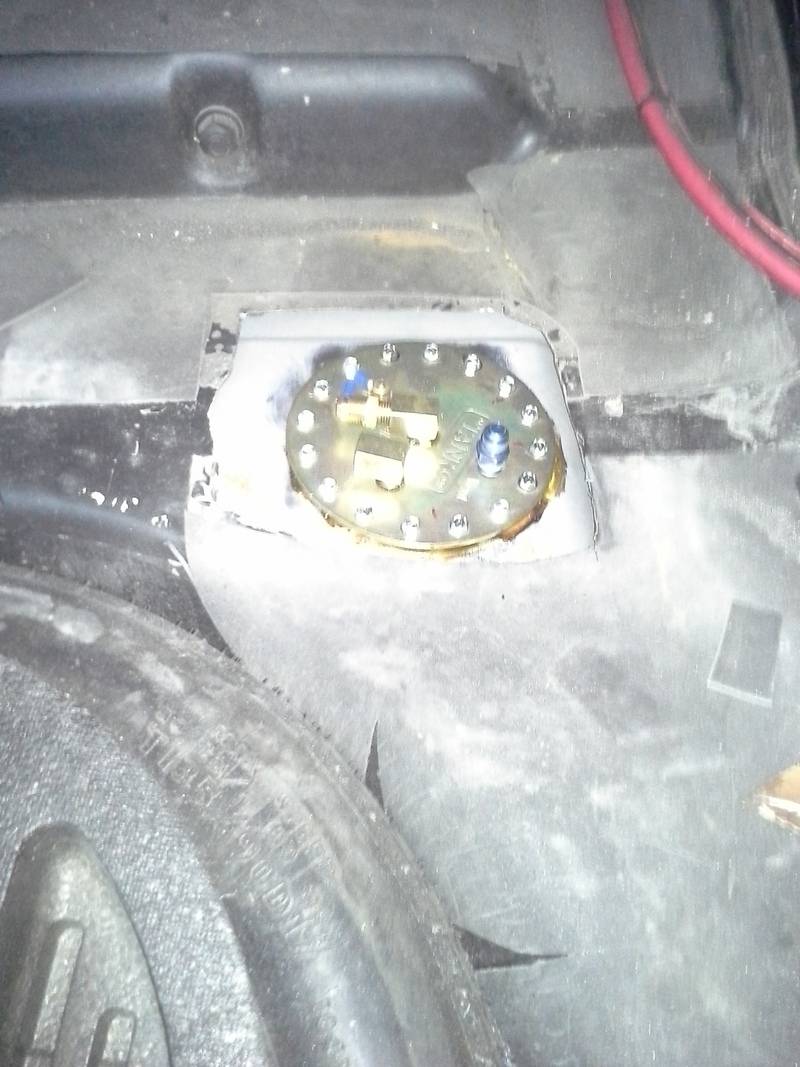
Ill make a cover that covers the pump assembly and seals it outside, as well as protects the lines. But the cover will be easily removable for side of the road service if ever necessary. The lines were rerouted to come into the trunk to hook up, and ill also mount a fuel filter in here. Guess I didn’t succeed in keeping fuel components out of the trunk after all…..
Anyway, filled back up with gas and hooked the carb system back up so I could drive it home. The gasket on the module is leaking, so I need to address that, and I also need to learn about tank venting and get that sorted out before hooking the whole efi system up.
But she’s home. And on the road to recovery. Still have a few other projects to finish before I blow her apart to address the long list of issues, as well as go efi, but it’s near the top of the list.
Side note about budget line items: ecm is for the factory memcal so knock sensor and limp home will work. I lost mine. Polk and Memphis belle speakers, as well as amp, are for stereo upgrade. Jump terminals because I have a hard time reaching the battery being as fat and short as I am.Michael Crawford
1970 plymouth Duster back under construction:
https://www.pro-touring.com/showthre...uring-makeover
1987 GMC S15 https://www.pro-touring.com/showthre...ct-drivabeater
12-16-2015 #203
Registered User
- Join Date
- Sep 2015
- Location
- SW KS
- Posts
- 162
Good to see its back on the priority list. Love your build and your tenacity.
12-17-2015 #204
New to Pro-Touring
- Join Date
- Aug 2014
- Posts
- 6
Good to see you back. Sounds like life has been getting in the way. Hate it when that happens!

I would have suggested the Aeromotive Phantom pump assy. That was a breeze to install and everyone loves it. Good price too. But it looks like you have a great solution as well.
Michael, I hate to criticize, but you have a fire just waiting to happen. You cannot...under any circumstance...run your fuel line through your chassis like that. You MUST use some sort of grommet there. Either rubber, or go to Home Depot and purchase some hard plastic electrical grommets. Those are actually pretty darn good. But I can promise you without a doubt that the way you have it will end up rubbing a hole in the line. Please please please fix that!
Such a great project...keep us informed!!
12-17-2015 #205
Registered User
- Join Date
- Aug 2007
- Location
- Albemarle, NC
- Posts
- 1,149
Aw crap. I had meant to do that. Now that you point it out, I realize I didn't. THANK YOU for catching my mistake.
Michael Crawford
1970 plymouth Duster back under construction:
https://www.pro-touring.com/showthre...uring-makeover
1987 GMC S15 https://www.pro-touring.com/showthre...ct-drivabeater
01-05-2016 #206
Registered User
- Join Date
- Aug 2007
- Location
- Albemarle, NC
- Posts
- 1,149
So, budget first:
Previous total: 8612.27
Parts bought:
2 inch spectre carb spacer, and edelbrock 6an fuel filter from amazon: 54.06
½ thick carb gasket, oreilleys, 7.99
6an-18npt adapters, eBay: 7.80
Injector rebuild kit, eBay: 19.25
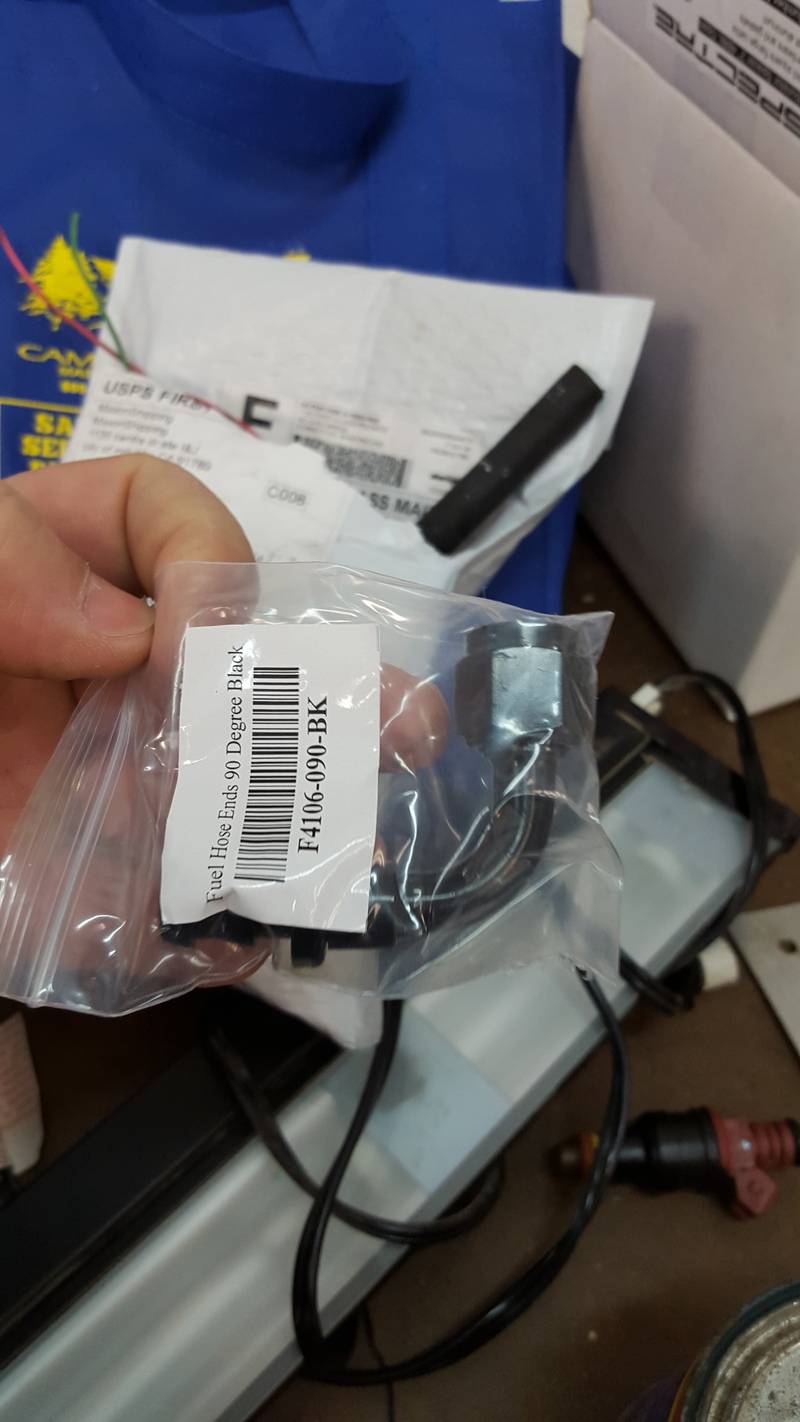
5x 6an push lock, straight, eBay: 25.20
2x 6an push lock 90: 10.42
2x 6an/6an adapters, eBay: 3.98
1x 6an-1/4npt, eBay, 2.19
6 foot aeroquip socketless hose, free!
New total:
8743.16
Not too much of an update. Mostly just collecting parts. AN plumbing is expensive, but I think I have everything I need except for the fuel rail fittings now. Im also hoping I can clear the hood at this point .
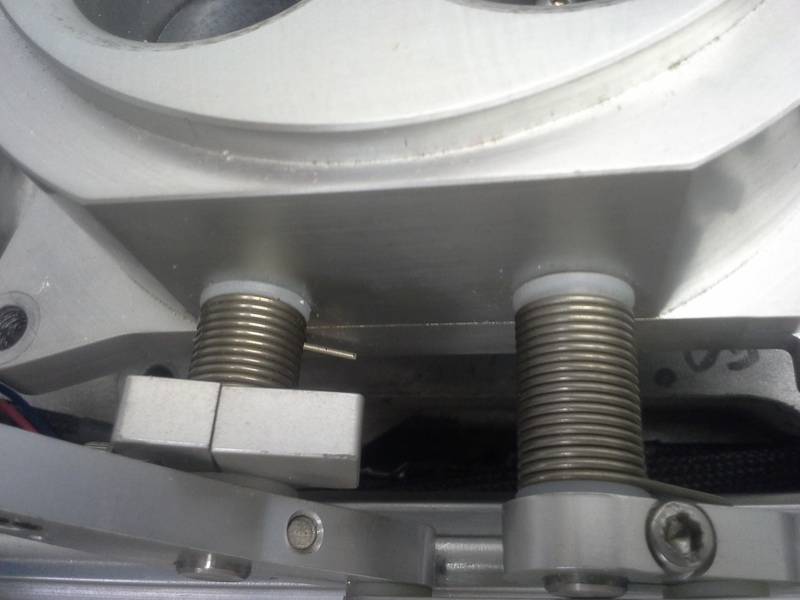
The intake/throttle body/spacer/air cleaner stack is pretty tall. But it had to be to clear the rails with the linkage on the throttle body. Only other option is to try and modify the throttle body by removing springs and shortening shafts. Or, ditch the 4bbl throttle body all together, and run a 454 TBI setup with the injector pod removed. Supposedly flows about 780cfm that way. Well see what happens when its all bolted together.
I also need to make rail hold downs. Ill do that in the near future after the intake is painted, and everything is put together with wiring, etc to see what I have to do to clear stuff.

Pictures of AN fittings:
Lastly, I rebuilt and cleaned the 30lb injectors, as well as did some math. These are rated at 30lb at 43.5lb of fuel pressure. At 60lb, they will flow 36lb, which should be enough for 400rwhp. In theory, at least.
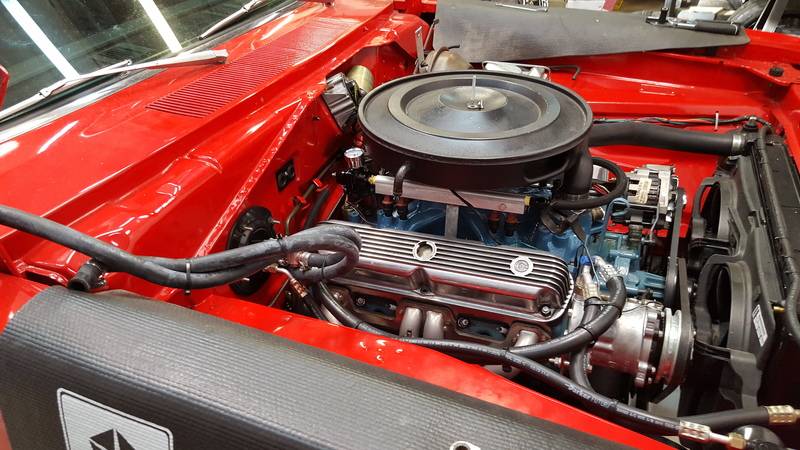
So we went from this:
To this:
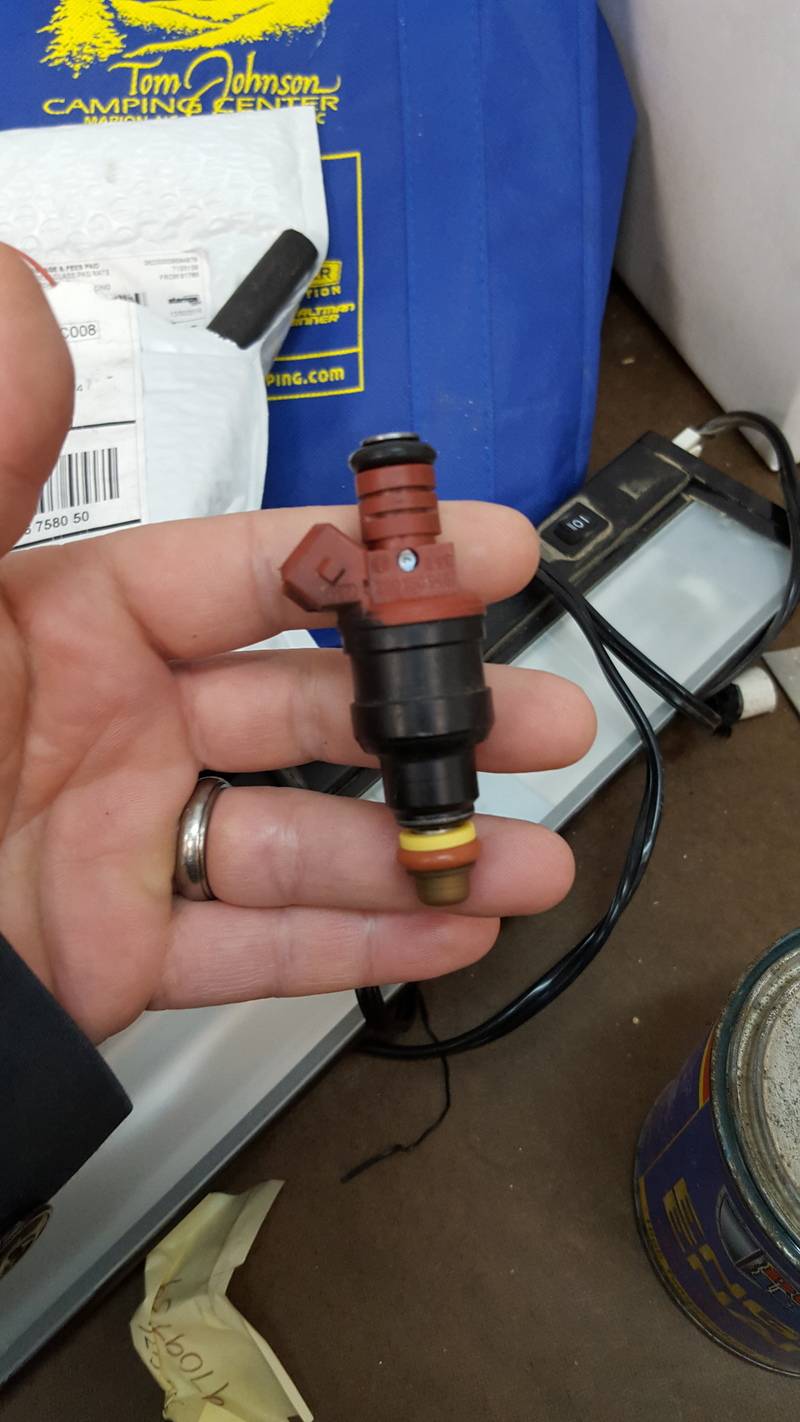
I think well be ok here. Worst case, Ill pick up some newish 36lb injectors, and swap them out.
Lastly, I guess ill throw up a for sale ad here. I will no longer need the Holley blue pump, regulator, 750 edelbrock carb with electric choke, electronic ignition distributor, and pro-comp air gap intake. Figure a screaming deal at 300 plus shipping obo. If anyone is interested ..
Next up is painting the intake, modifying the spacer for some vacuum ports, mockup, etc. just chipping away at things.Michael Crawford
1970 plymouth Duster back under construction:
https://www.pro-touring.com/showthre...uring-makeover
1987 GMC S15 https://www.pro-touring.com/showthre...ct-drivabeater
01-05-2016 #207
Registered User
- Join Date
- Jan 2005
- Location
- Burleson Tx
- Posts
- 268
Next time welding a used gas tank run a fairly large hose connected to another running cars exhaust for a while. It will remove any remaining fuel and vapors. I have done this many times.
Kenny
01-05-2016 #208
Registered User
- Join Date
- Aug 2007
- Location
- Albemarle, NC
- Posts
- 1,149
I'd heard that somewhere before. Seemed like it was an old wives tale. Guess not. I'll probably try it if there's a next time. This time scared me bad enough that I probably won't ever attempt it again.
Michael Crawford
1970 plymouth Duster back under construction:
https://www.pro-touring.com/showthre...uring-makeover
1987 GMC S15 https://www.pro-touring.com/showthre...ct-drivabeater
01-06-2016 #209
Registered User
- Join Date
- Sep 2007
- Location
- Upstate, SC
- Posts
- 18
First thing I would have done is got up off the ground and look over to see if the neighbors were watching Originally Posted by dusterbd13

01-06-2016 #210
Registered User
- Join Date
- Aug 2007
- Location
- Albemarle, NC
- Posts
- 1,149
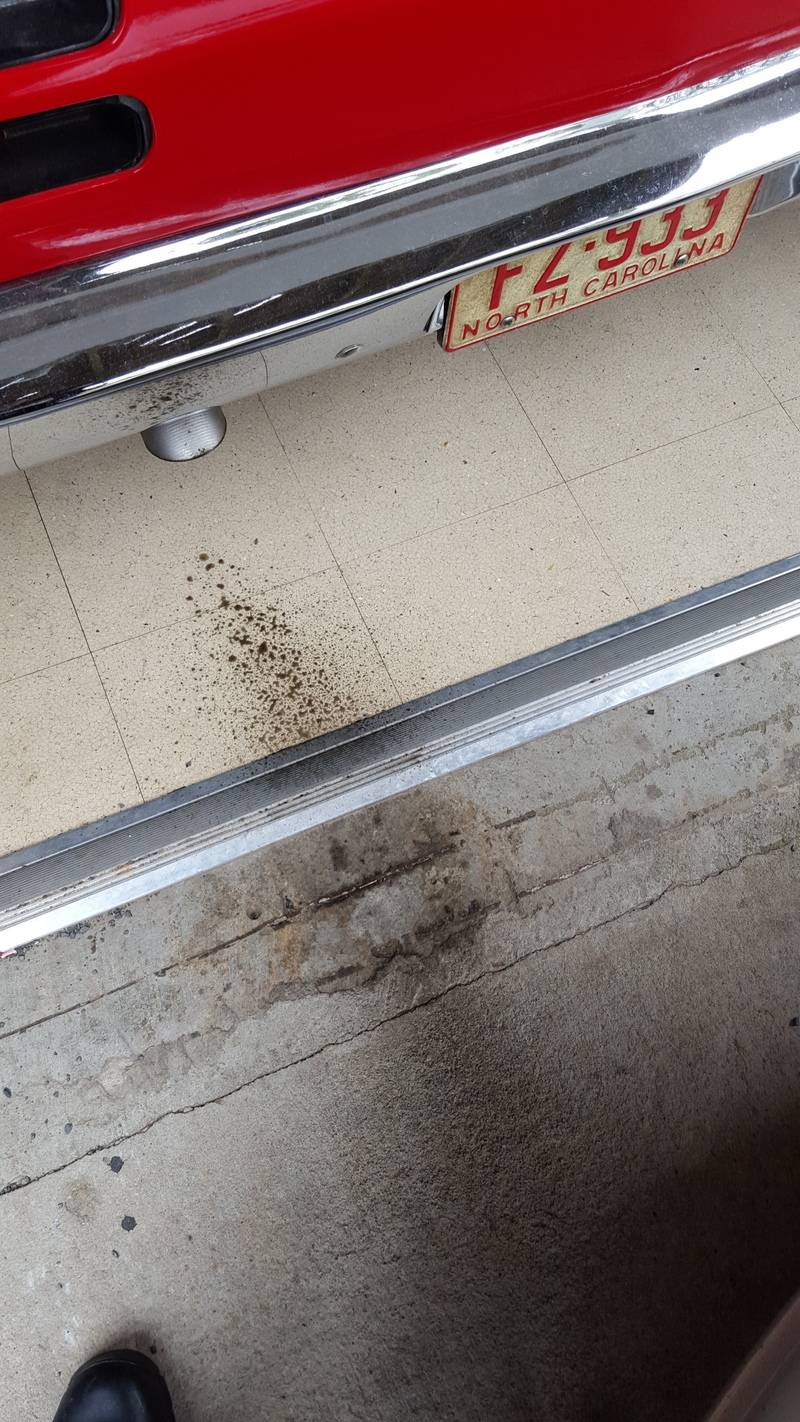
No neighbors or witnesses, thankfully. Just some hurt pride and a skidmark.
Michael Crawford
1970 plymouth Duster back under construction:
https://www.pro-touring.com/showthre...uring-makeover
1987 GMC S15 https://www.pro-touring.com/showthre...ct-drivabeater
01-10-2016 #211
New to Pro-Touring
- Join Date
- Aug 2014
- Posts
- 6
I would assume that was in your shorts, no??? Originally Posted by dusterbd13
Any inert gas like was mentioned will work well Michael. The gas (exhaust in this case) displaces the oxygen more than the fumes. Can't go boom without oxygen! That is exactly how an EGR valve works. Dilutes the mixture with inert gas so the combustion process is cooler...and therefore reduces oxides of nitrogen.
OK y'all...big night tomorrow night. ROLL TIDE!!!
01-15-2016 #212 Registered User
- Join Date
- Jan 2008
- Location
- Charlotte
- Posts
- 1,295
I know how life gets in the way of things!
Glad to see your back at it!
Skid mark reminds of Black Sheep:
https://youtu.be/d22vhfJ3ii8?t=1632005 LeMans Blue Corvette w/ T56 & Z51 & C6Z06 Brakes, Build Thread: https://www.pro-touring.com/showthread.php?64496
2005 GMC Sierra 2500HD LLY / Allison
2014 Chevy SS LS3 / 4 Door
01-16-2016 #213 Registered User
- Join Date
- Nov 2009
- Location
- the dirty mitten
- Posts
- 1,212
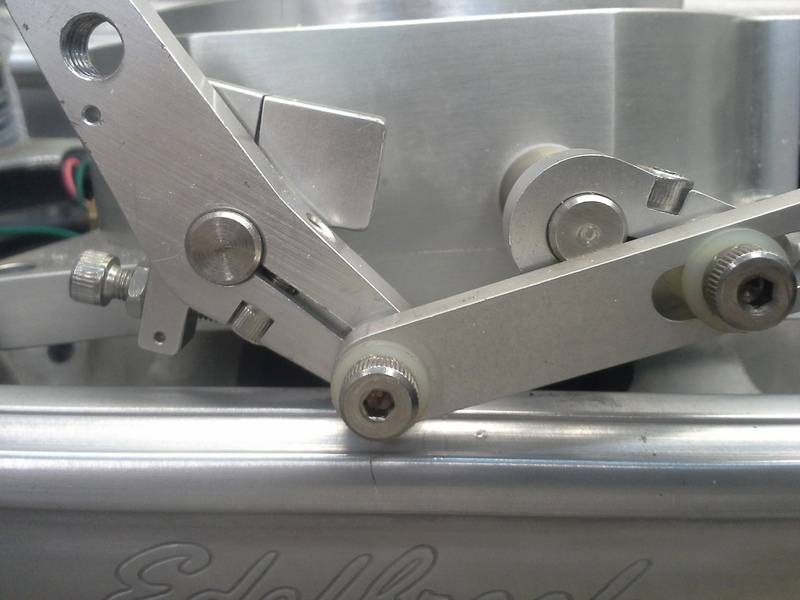
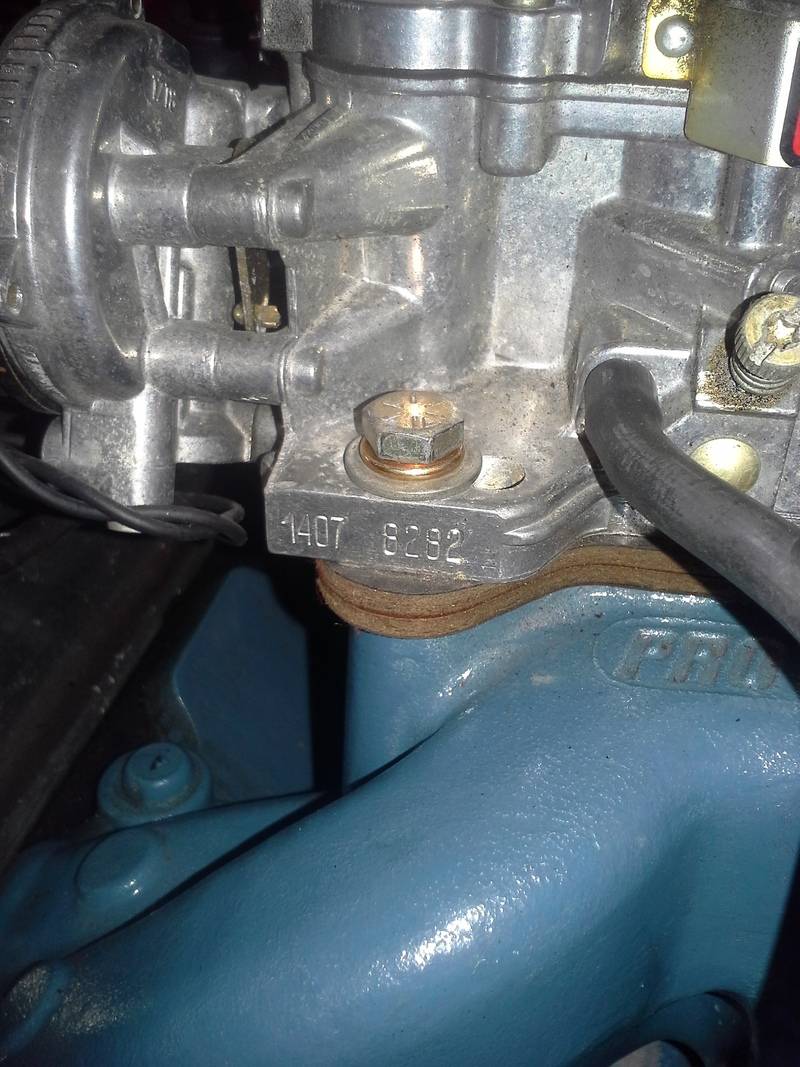
Glad to see more progress on the car and that you are going EFI. I see those fragile push lok fittings for the hose, yours on the carb in that pic really needs to go in further into the hose until that washer hits the collar on the fitting. It is a PITA but what I did was wrap the hose in a rag and put it into a bench vise then put a block of wood on top of the fitting and hit it with a BFH. Straight fittings are easier to do than that 90 but it will do the job
Steve
1968 Dodge Charger All Wheel Drive project Red Bull<script type="text/javascript" src="safari-extension://com.ebay.safari.myebaymanager-QYHMMGCMJR/5cce6da5/background/helpers/prefilterHelper.js"></script><script type="text/javascript" src="safari-extension://com.ebay.safari.myebaymanager-QYHMMGCMJR/85dc54c0/background/helpers/prefilterHelper.js"></script><script type="text/javascript" src="safari-extension://com.ebay.safari.myebaymanager-QYHMMGCMJR/85dc54c0/background/helpers/prefilterHelper.js"></script>
01-17-2016 #214 Registered User
- Join Date
- Apr 2008
- Location
- Lakeland, FL
- Posts
- 516
Great to see you back on here Michael (and going to 'the dark side' w/ efi). Just as I'm reading this I'm contemplating going back to a carb, I'm not going to, but I've been chasing an intermittent issue where I randomly lose power. I think you're going the right way with your ecu choice.
I've welded on a couple diesel tanks, I dumped some water and dry ice (to make co2), it didn't make me less nervous, but I havnt ignited anything yet!Tim
71' Demon-408, efi, 'viper spec' T56, Dana 60 w/ triangulated 4 link
01-23-2016 #215
Registered User
- Join Date
- Aug 2007
- Location
- Albemarle, NC
- Posts
- 1,149
previous total:8743.16
money spent:
iat/cts and various wiring connectors at pull-a-part: 21
correct 3/8npt to 6an fuel rail fittings: 25.91
6 feet 1x12ga steel: 14
new total: 8804.07
so ive been chipping away at this.
ive gotten the intake painted with por15 left over from the dual plane.
and I spent most of today making injector rail hold downs and a map sensor mount.
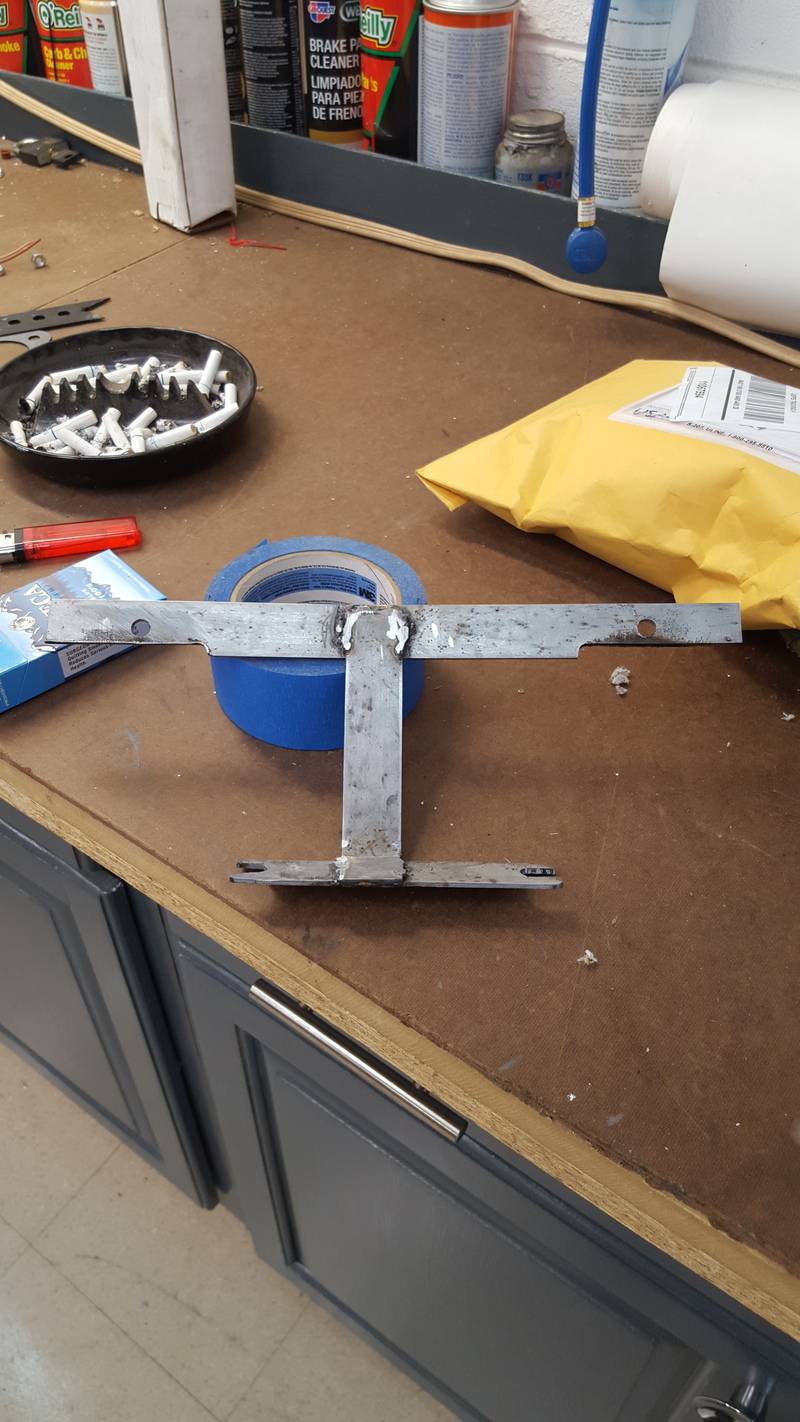
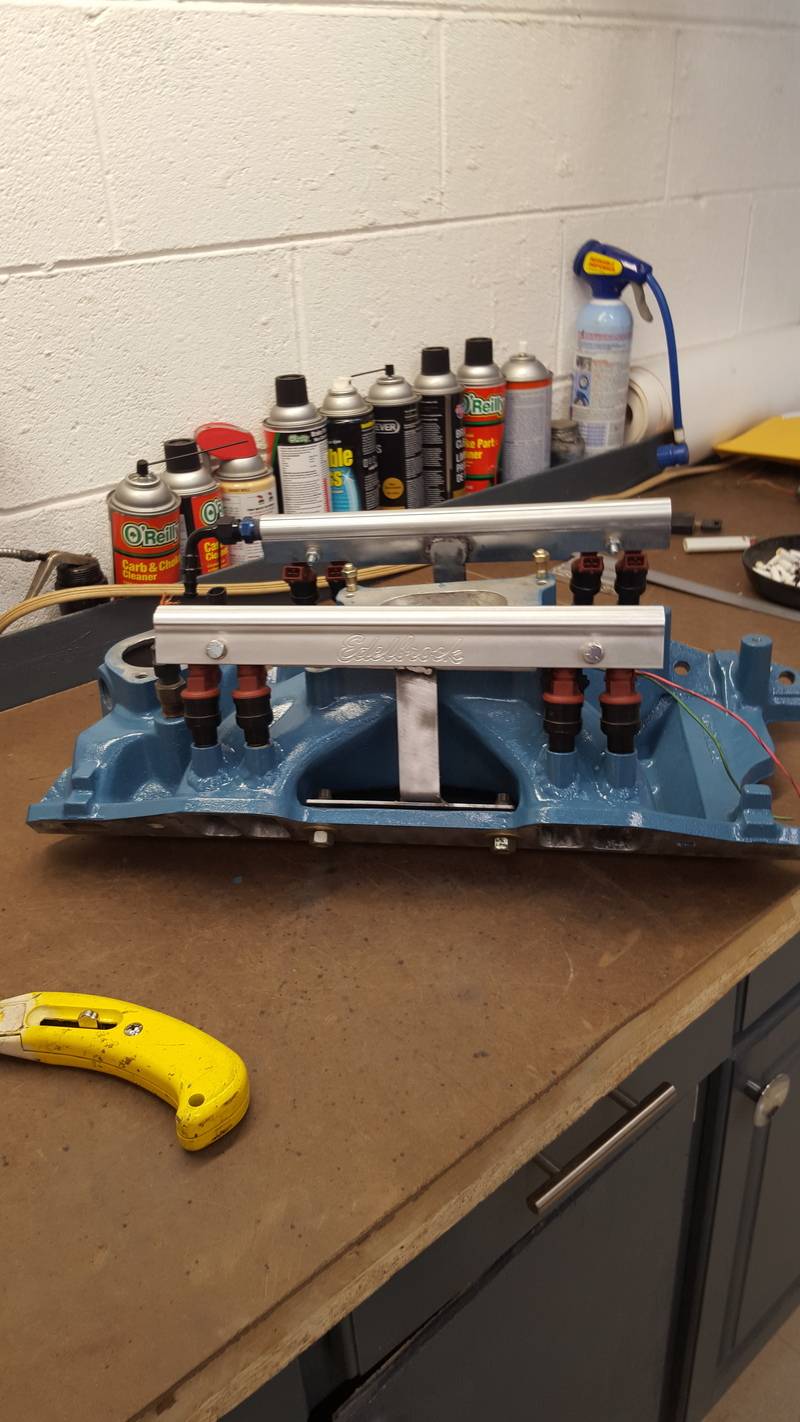
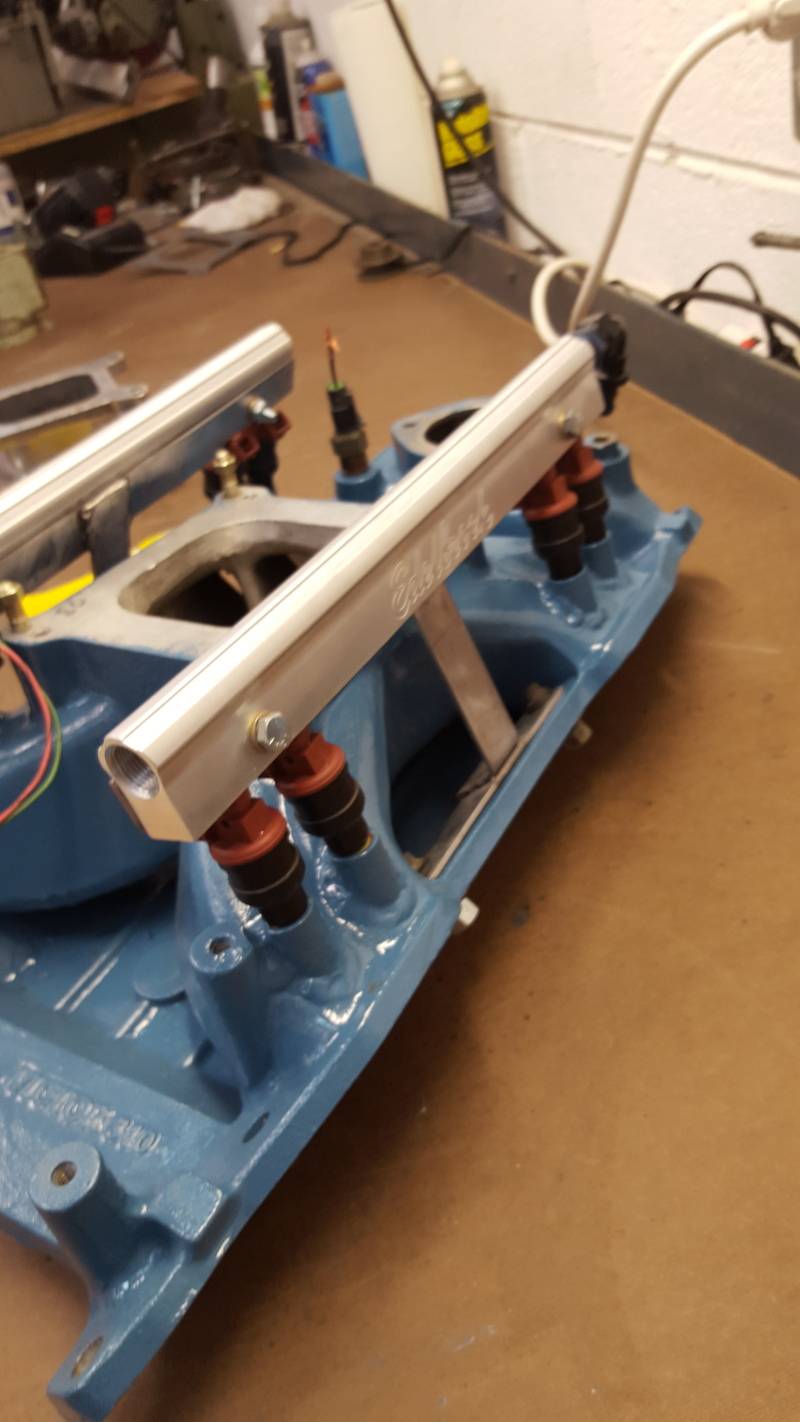
tomorrow will be making the fuel pressure regulator mount, coil bracket, and maybe drilling/tapping the carb spacer for the IAT and nipples for PCV and power brake vacuum lines.Michael Crawford
1970 plymouth Duster back under construction:
https://www.pro-touring.com/showthre...uring-makeover
1987 GMC S15 https://www.pro-touring.com/showthre...ct-drivabeater
02-16-2016 #216
Registered User
- Join Date
- Aug 2007
- Location
- Albemarle, NC
- Posts
- 1,149
Update time!
Previous budget: 8804.07
Money spent:
Misc brass fittings at lowes: 6.50ish
O2 sensor (4 wire), e coil, o2 sensor bung, and another set of gaskets 75
Sold intake, carb, distributor and fuel pump -350
Reman lean burn distributor 32
New total: 8567.57
So, I finally got around to the start of the major overhaul here.
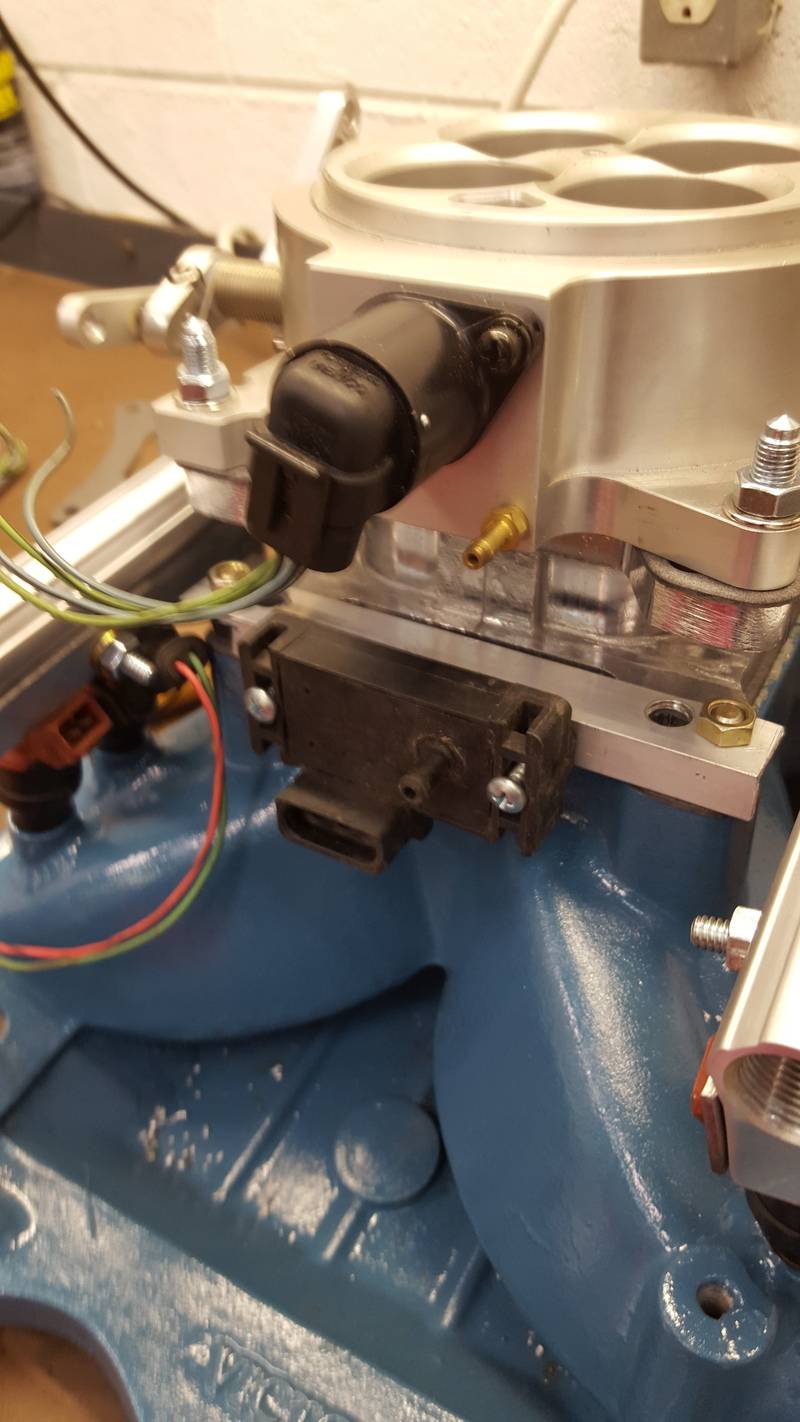
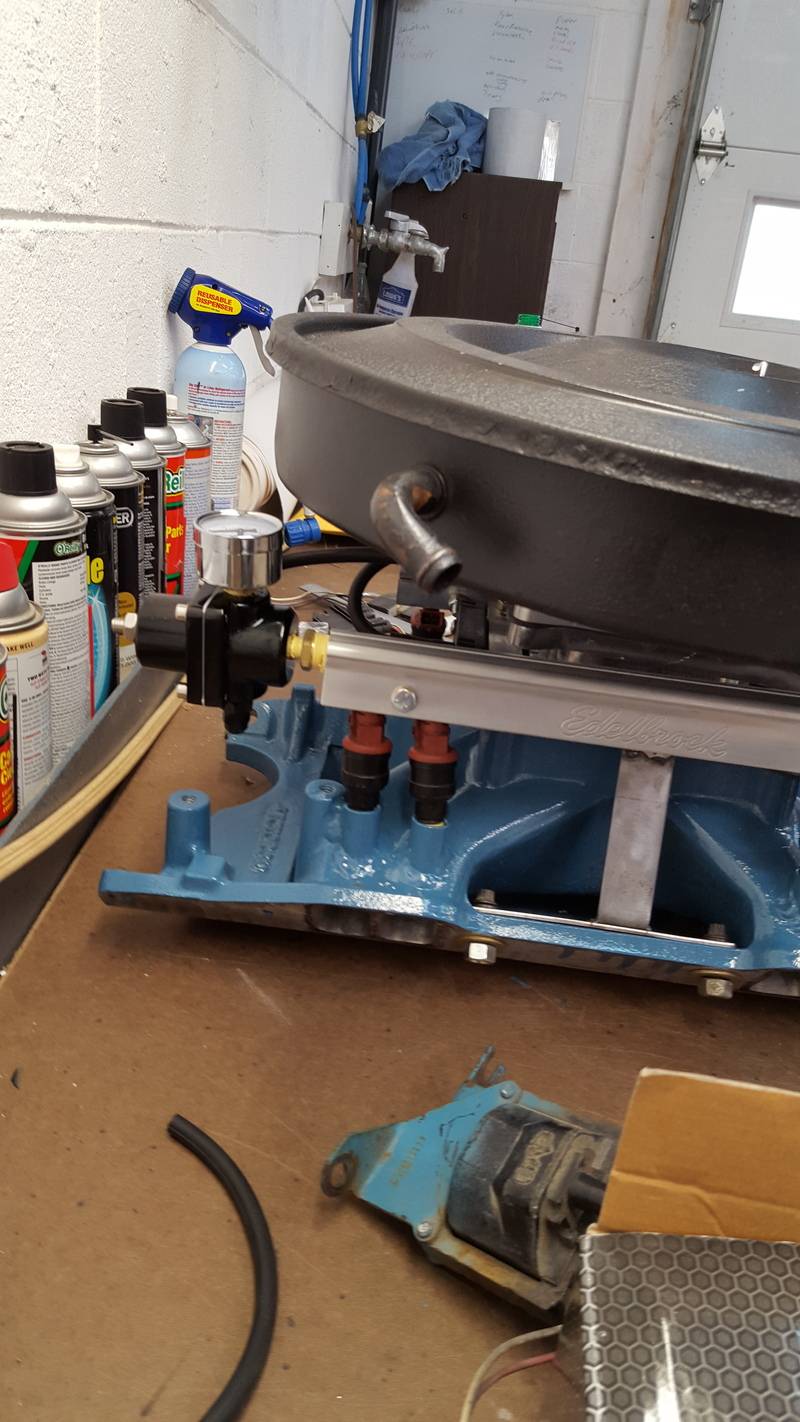
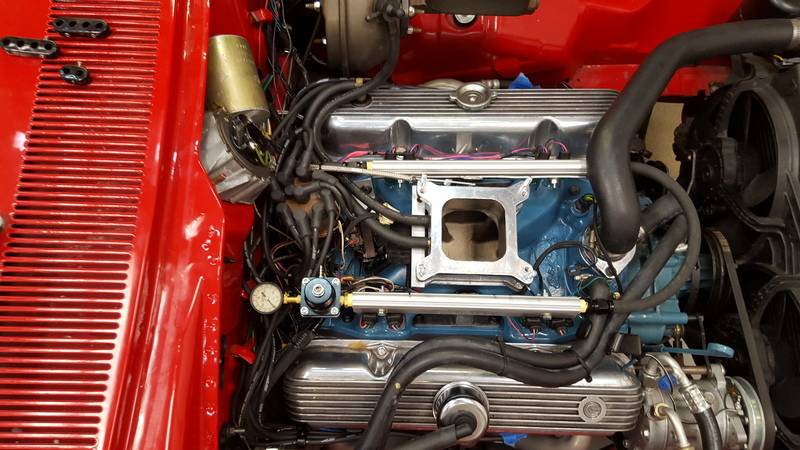
But before that, I worked on finishing the intake up. Wanted to mount the fuel pressure regulator or the rail originally, but had decided that it wouldn't fit. Them I couldn't find anywhere else I wanted it. So I went back to the rail idea. Picked up some brass fittings from lowes, and here is where we wound up.
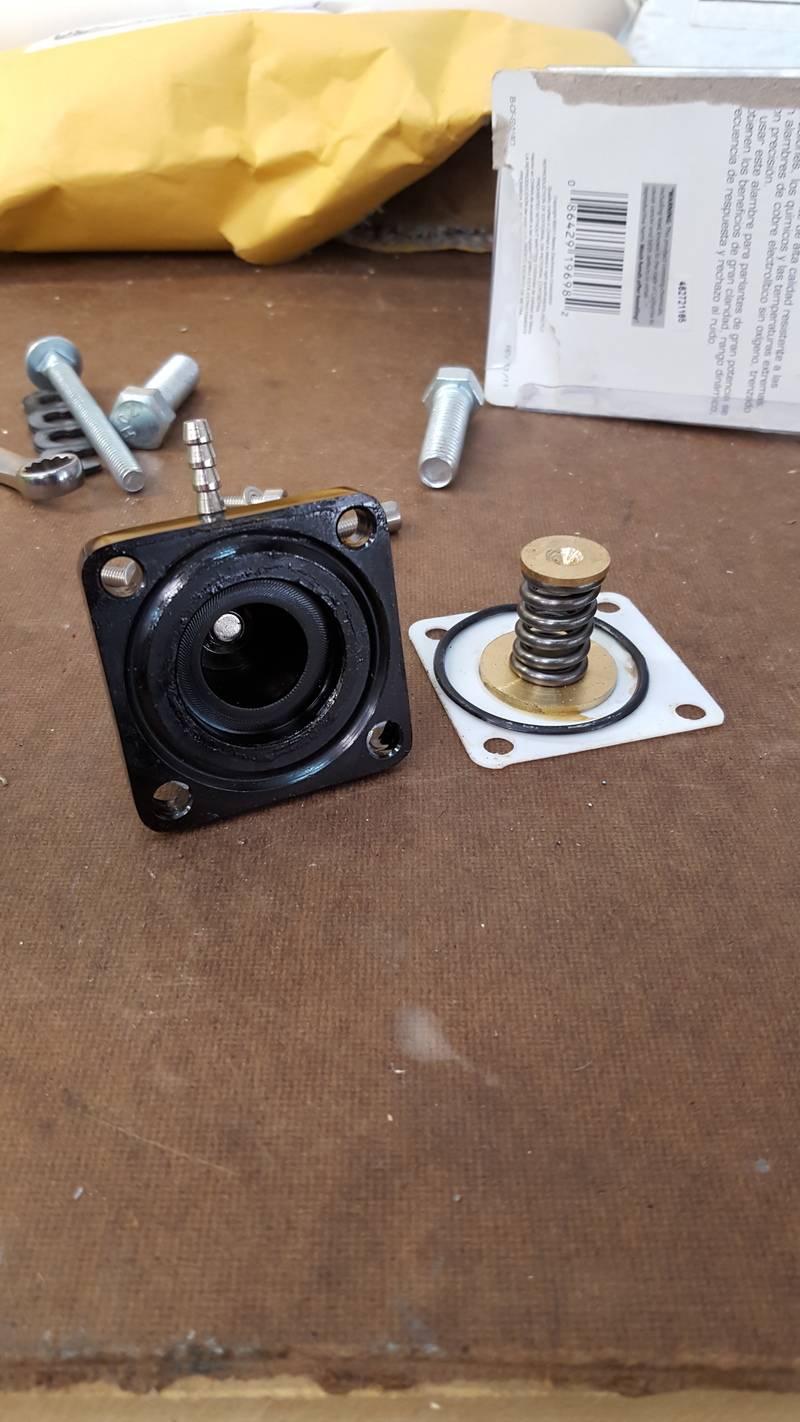
I then went to test this cheap ebay regulator. It leaked, both fuel and vacuum. Not good. Not good at all.
So I tore it apart, hoping it was something simple. It was. The Chinese kids that built it pinched the o-ring when they put it together. And left metal shavings throughout. So I cleaned it up, put in a new o-ring, and put it back together. Much success was had.
So, now ive got all the fab work done. In theory.
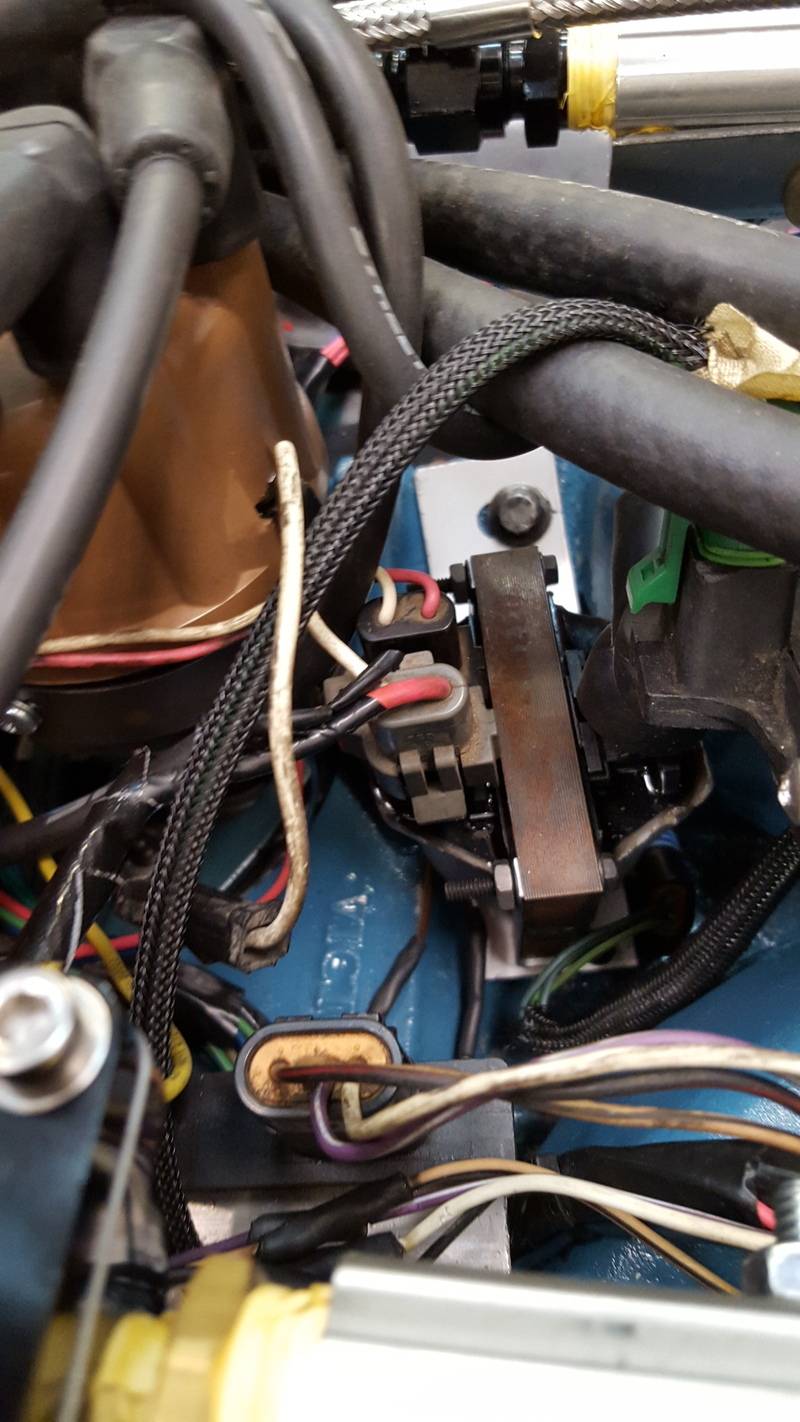
I was stoked. Moved onto distributor modification. All that I wanted to do was mount the ignition control module under the distributor where it would be nice and out of the way. So I used the infamous CAD (cardboard aided design) and made a bracket. Dissembled the lean burn unit I had picked up years ago, and cleaned it all up, etc.
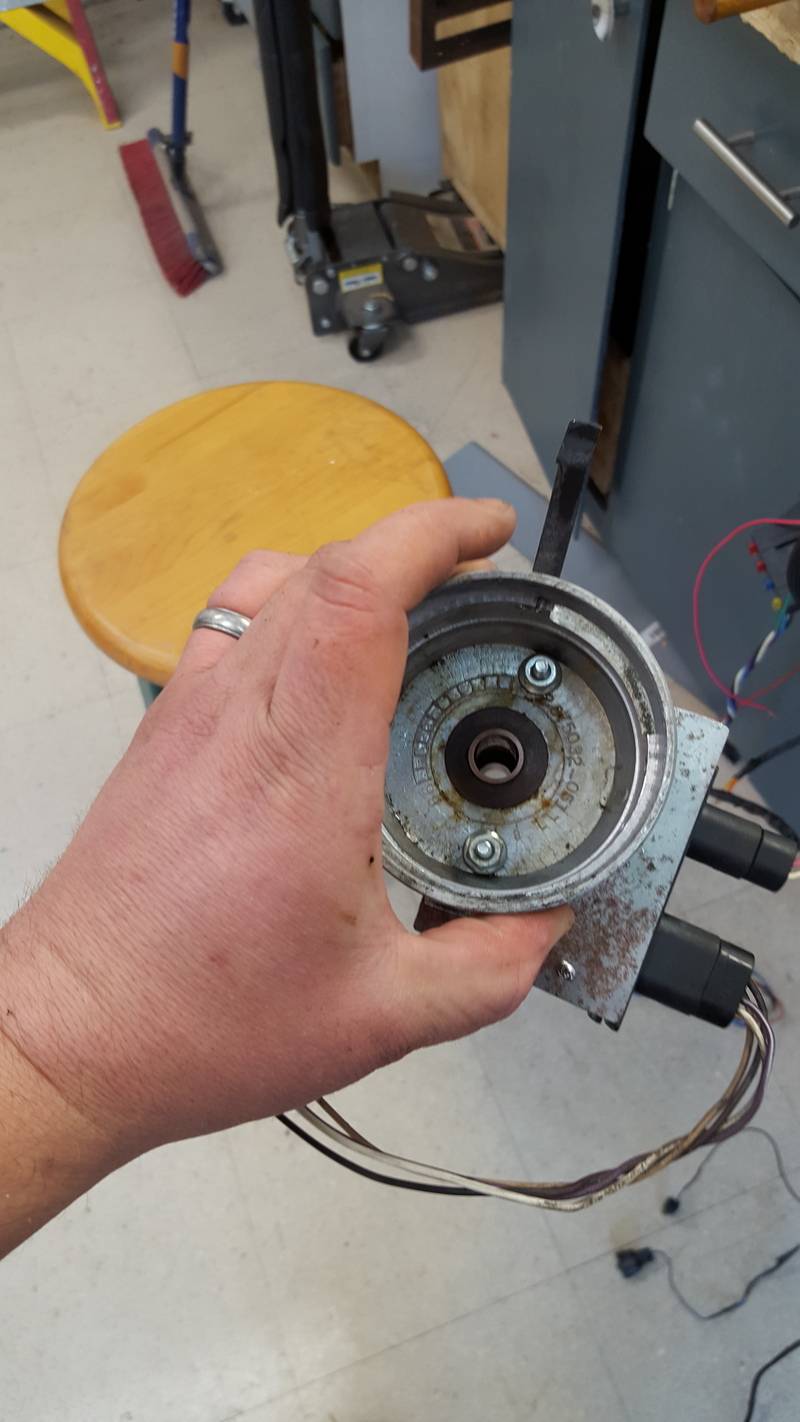
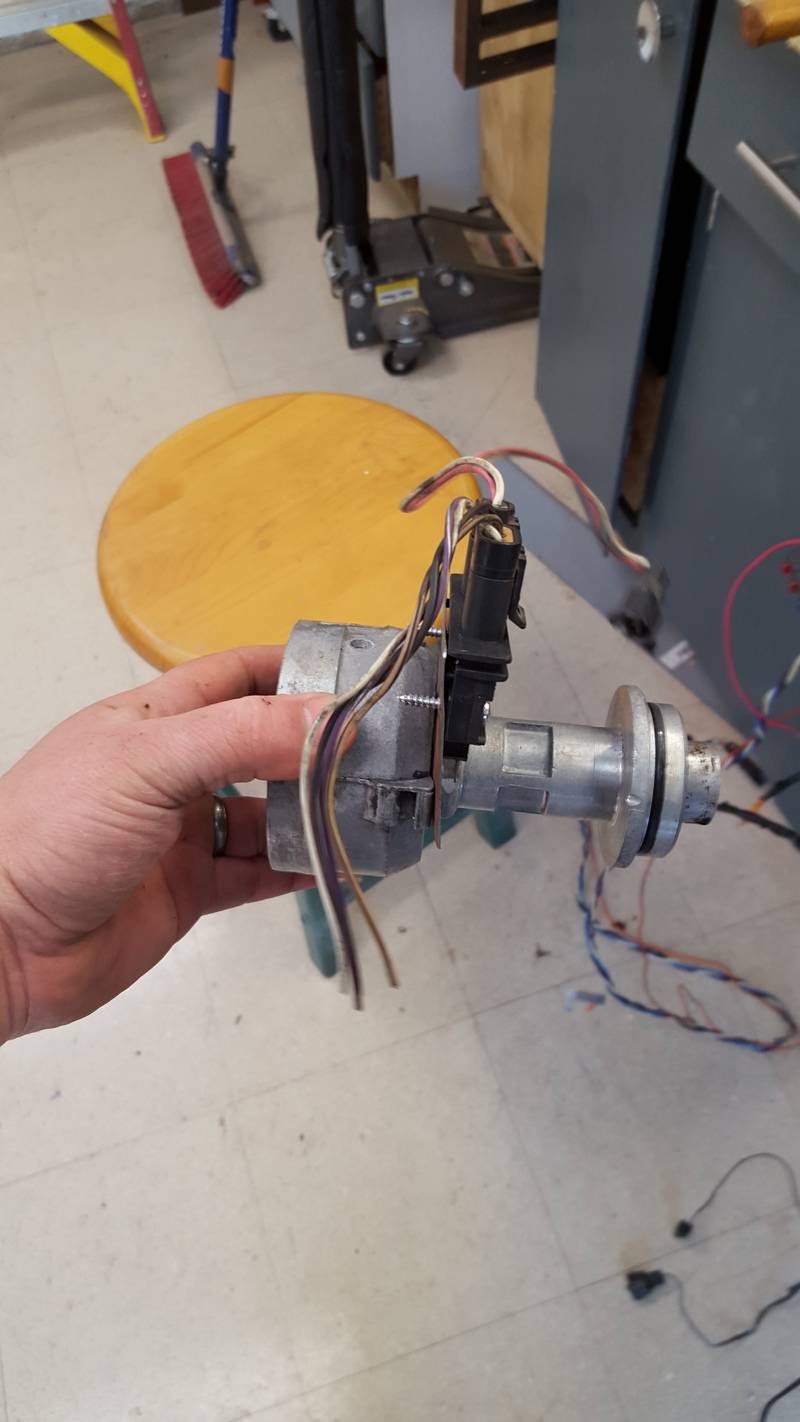
It got scrapped for two reasons. 1, I lost one of the hold down clips for the cap over the years, and I was unable to locate a replacement. 2. There was no way to service the module once I installed the distributor in the car. 3. The hall effect sensor was fried. And then I dropped it. So.... I ordered a cardone reman unit from work. First one was bent. Second one works great!! I also wound up relocating the module to a piece of angle aluminum held down under one of the coil mount bolts.
So then a guy on craigslist actually showed up with cash for the intake setup. So we pulled the car out, pulled the hood, and removed it all.
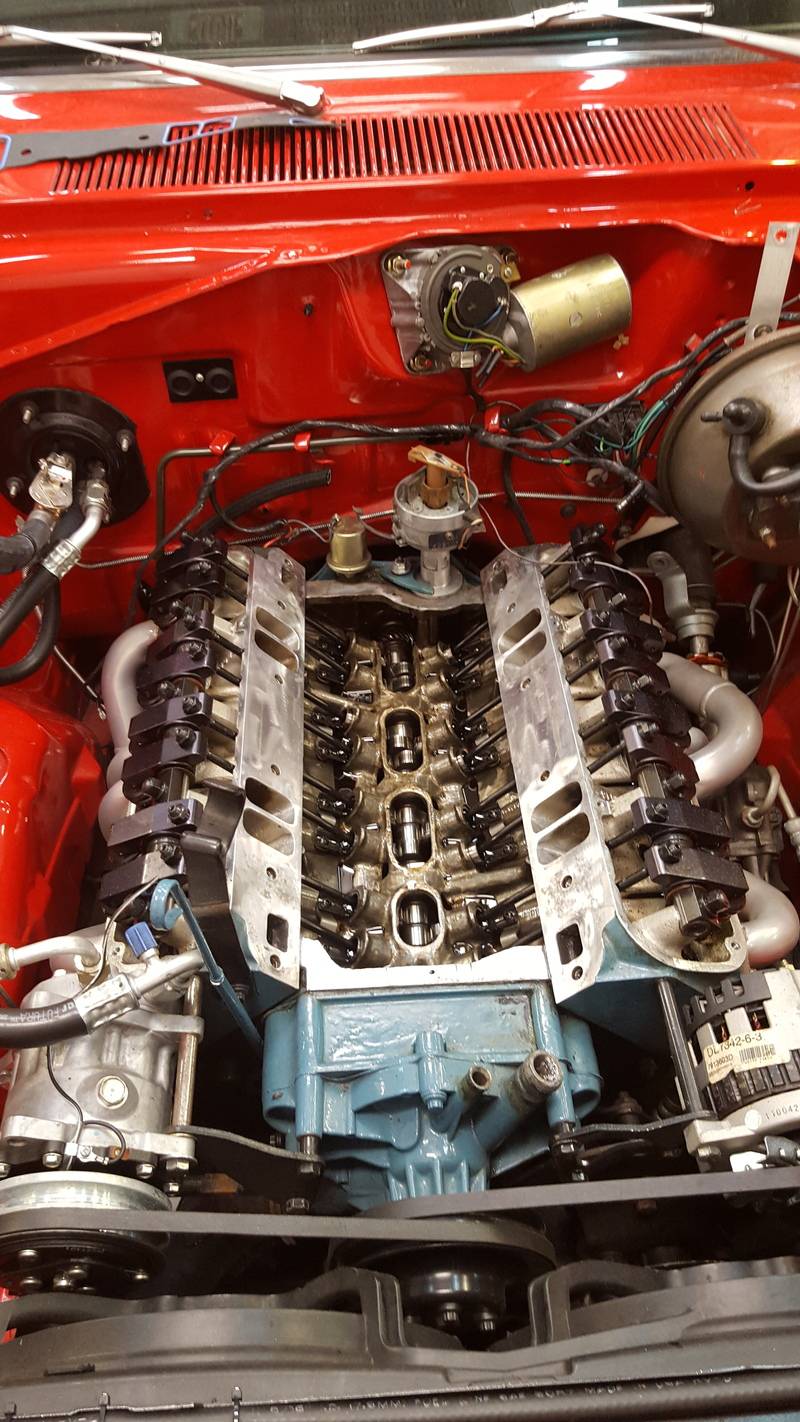
Went ahead and drained the block as well, and installed the knock sensor in the passengers side water jacket plug hole.
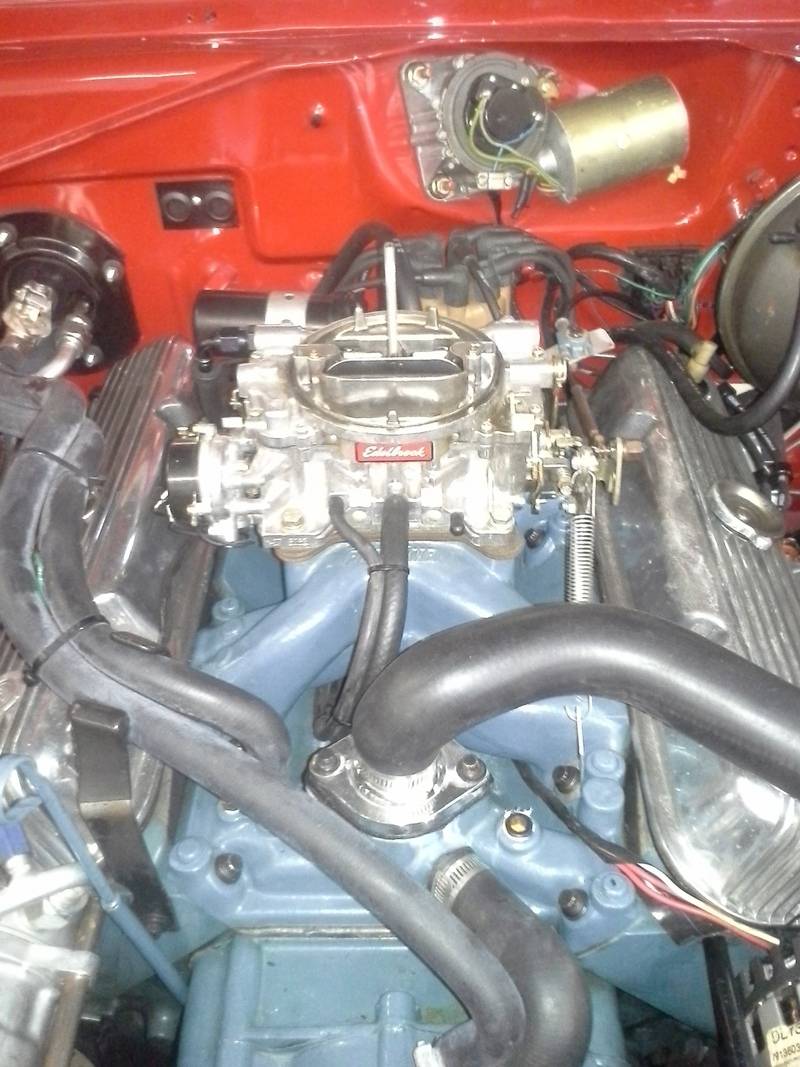
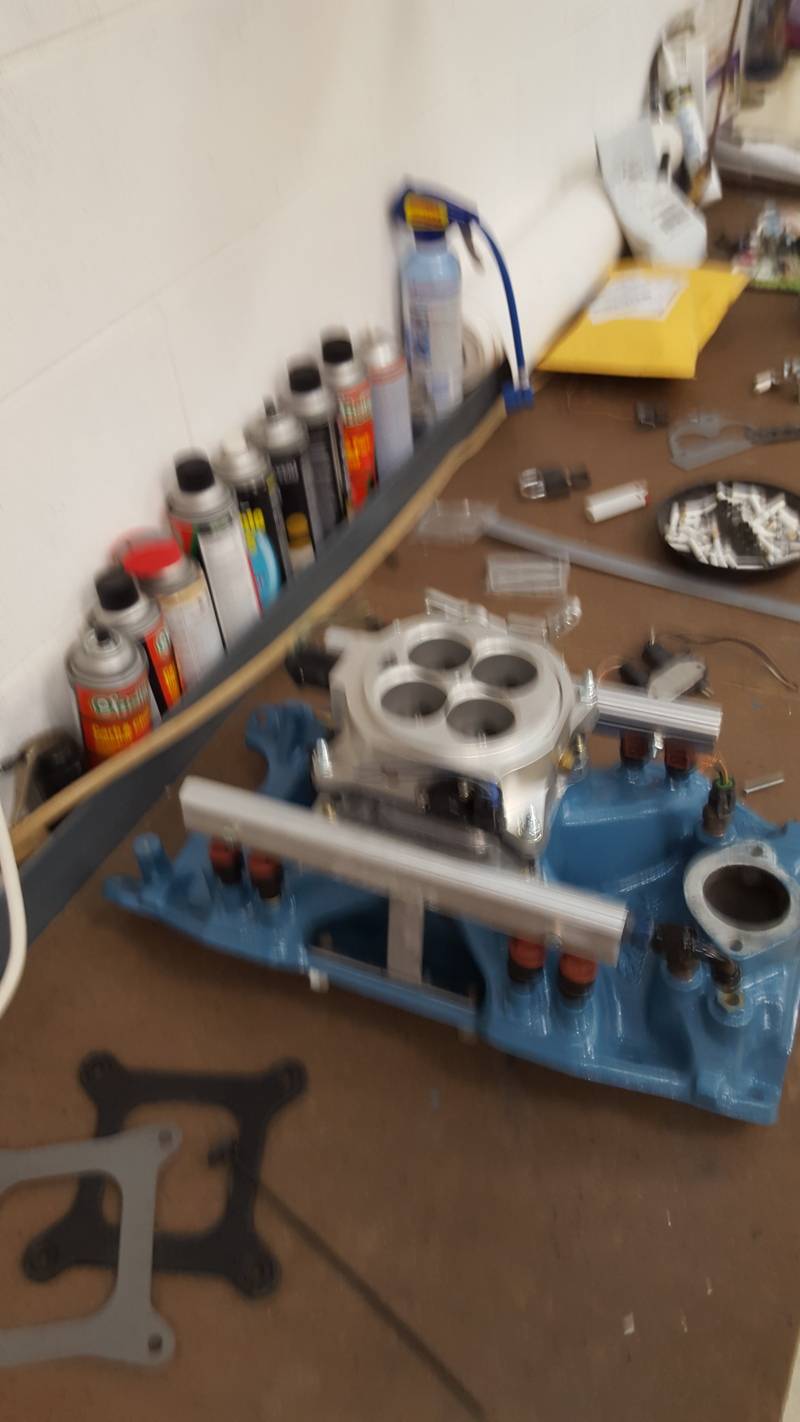
I then went ahead and installed the efi intake, and plumbed it. Came out different than I expected, but it is satisfactory. I dig it.
At this point, I have fired it on ether, and started chasing lots of fuel leaks. Unfortunately, im now pulling the intake back off, as I lost a pintle cap down into the head. Better safe than sorry. Then, back onto fuel leaks. Im hoping to be able to test fire on full efi in the near future. Then, rewire and tuning!!Michael Crawford
1970 plymouth Duster back under construction:
https://www.pro-touring.com/showthre...uring-makeover
1987 GMC S15 https://www.pro-touring.com/showthre...ct-drivabeater
03-01-2016 #217
Registered User
- Join Date
- Aug 2007
- Location
- Albemarle, NC
- Posts
- 1,149
Michael Crawford
1970 plymouth Duster back under construction:
https://www.pro-touring.com/showthre...uring-makeover
1987 GMC S15 https://www.pro-touring.com/showthre...ct-drivabeater
03-01-2016 #218 Registered User
- Join Date
- Apr 2015
- Location
- Burlington KY
- Posts
- 357
its a good sign!
"Racing is life. Everything else is just, waiting"
03-01-2016 #219
Registered User
- Join Date
- Apr 2008
- Location
- Lakeland, FL
- Posts
- 516
Looks great! I hope your tuning procedure goes smoothly, I'm still on that step!
Tim
71' Demon-408, efi, 'viper spec' T56, Dana 60 w/ triangulated 4 link
03-26-2016 #220
Registered User
- Join Date
- Aug 2007
- Location
- Albemarle, NC
- Posts
- 1,149
Budget first:
Previous total 8567.57
Parts:
Two -6 to 3/8 compression fittings: 29 from summit
Alternator from 89ish buick 3800 31 pull a part
Two new gates belts 22
Tuning from tpichips.com 250
Mr gasket throttle cable 21
5 relay panel, from britian via eBay, 41
12.5 ft of black, and 12.5 ft red 4 gauge cable, eBay, 21
Edelbrock steel carb “spacer” 20ish
Roll of cork gasket paper (had it)
42lb injectors, eBay 100
New total (ish. I'm having a hard time keeping up with the receipts at this point. Too much work, not enough organization) 9102.57
When I last updated, it was mostly sorta running. Not well, and not consistently, but running.
The first order of business was to get the fuel leaks stopped. There were a bunch of them. Compression fittings above the header. Flare from steel line to 6an male/male (both!). O rings on injectors slightly.
To fix the compression fittings, I just had to tighten them. The flares I cut off, and tried the earls compression to AN adapters from summit. These things were wonderful to work with. Very nice product. O rings were piddled with, then swapped out for 42lb ev1 style injectors. These are slightly shorter, which gives me the ability to lower my throttle body, and maybe fit the hood back on. They also don't leak, because they are running at 43.5psi vs the 65psi that I was running the 30lb injectors at. This engine made 390 at the rear wheels previously, which would pretty much max out 36lb injectors. Running the 30lb at 65psi, they were effectively 38lb injectors. Which were marginal. The 42s allow a little headroom (if I manage to make more power with the efi), and lower fuel pressure, which I deem safer.
Next up is a picture of the new mount for the ignition control module. Forgot to add a picture. Its a pretty simple piece of angle aluminum bolted to one of the old mounts for the stock coil. I have a heat sink from a vortec powered Chevy truck to add when I get to it, as these things get really hot and need all the help with cooling they can get.
With the fuel leaks stopped, it was time to add an 02 sensor. Drilled the driver side head pipe just behind the 3 bolt collector flange, and welded in a bung. No pictures. Ran it there so I can only have one wiring leg to the trans and 02 sensor, making a cleaner installation. Its also not in the collector due to the ceramic coating. Most recommendation are to put it in the collector so as to keep heat in it. I am running the heated sensor so I don't have to worry about it.
Then we moved onto coolant in preparation for tuning. Hooked bu the heater hoses, tightened, filled with water, etc. All ready to go.
Up next was the vacuum for the PCV and power brakes. These both have 3/8 line. I had no vacuum ports left. But I did have that nice 2 inch spacer, a rabbits foot, and no fear of failure.
Hit them with the drill press, a tap, and...
In the previous picture, you can kind of see the Mr gasket throttle cable. What a worthless piece of ****. It binds, the part in the kit don't fit one another out of the box, etc. Completely unusable. But I cut to fit and modified, and....
It still is unusable crap. I'm buying a lokar. Maybe then my throttle wont hang up.
I then had to mount my GM E coil. Wanted to mount it in the valley between the throttle body and distributor. You know, in all that wide open real estate I don't have. I bent a piece of aluminum, and did it though.
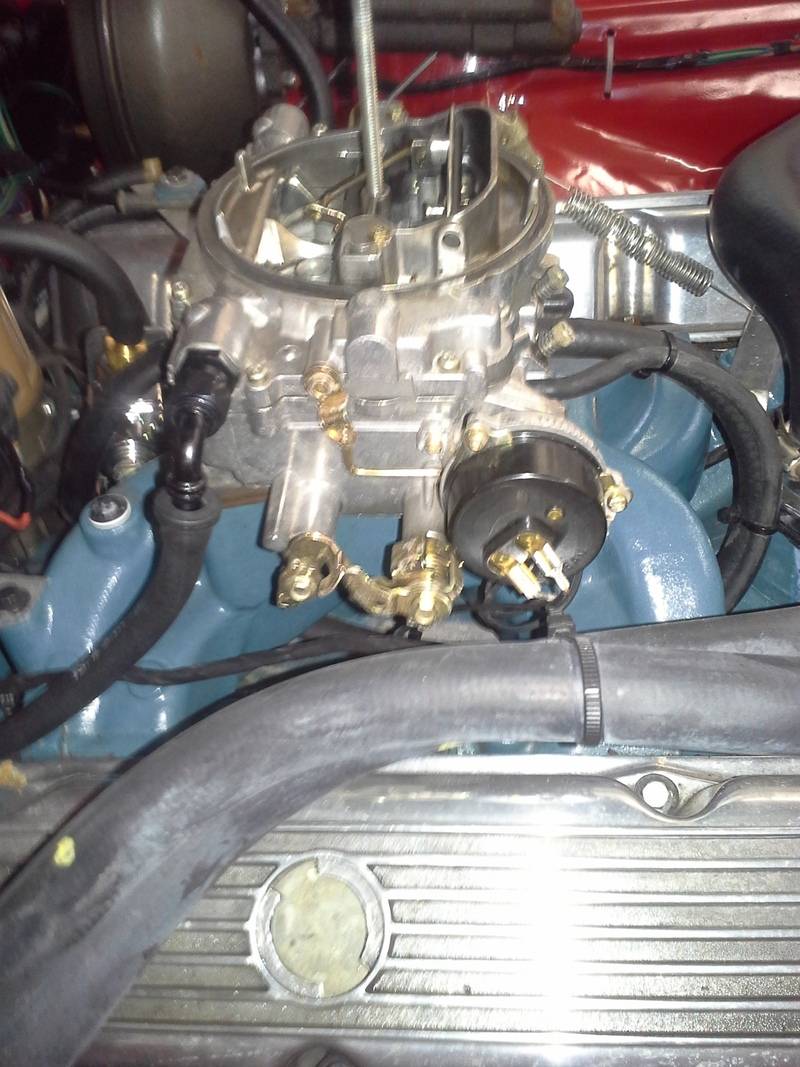
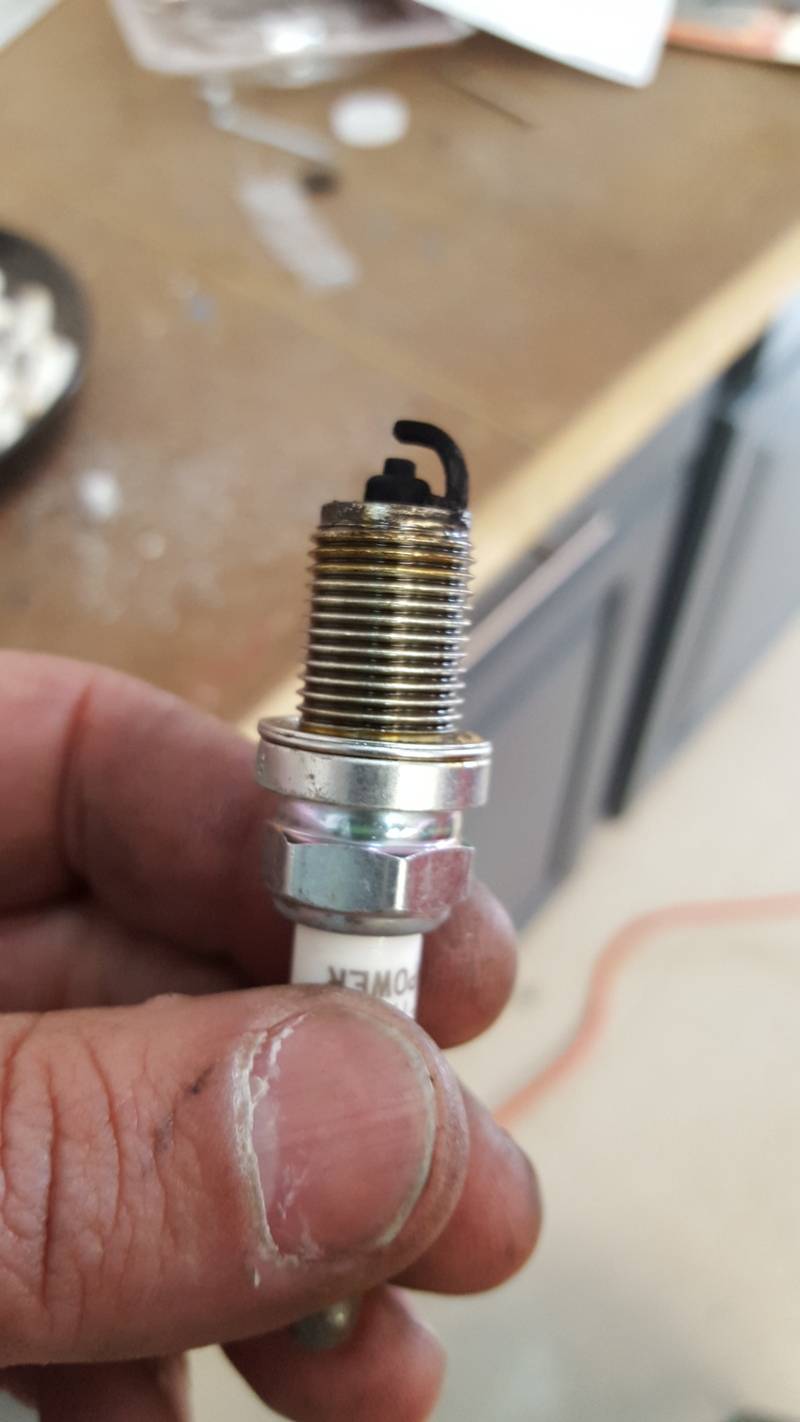
So with all that done, it was time to start getting it tuned. I had to get my laptop to talk to my chip burner, then talk to the ecm, then get tuner-pro to work, etc. I hate how complicated my new laptop and windows 10 has made all this. Wound up having to get a windows 10 compatible serial to USB adapter, and using a 10k resistor to get everything to working. The 10k resistor makes the ecm go into diagnostic mode, which jacks the IAC wide open, jacks timing, etc. Does some very funky things. I didn't know about that until I was trying to set IAC counts and idle speed. So I need to figure out how to access the ALDL stream without the 10k resistor. Anyway, while fighting with a high idle, I found an issue.
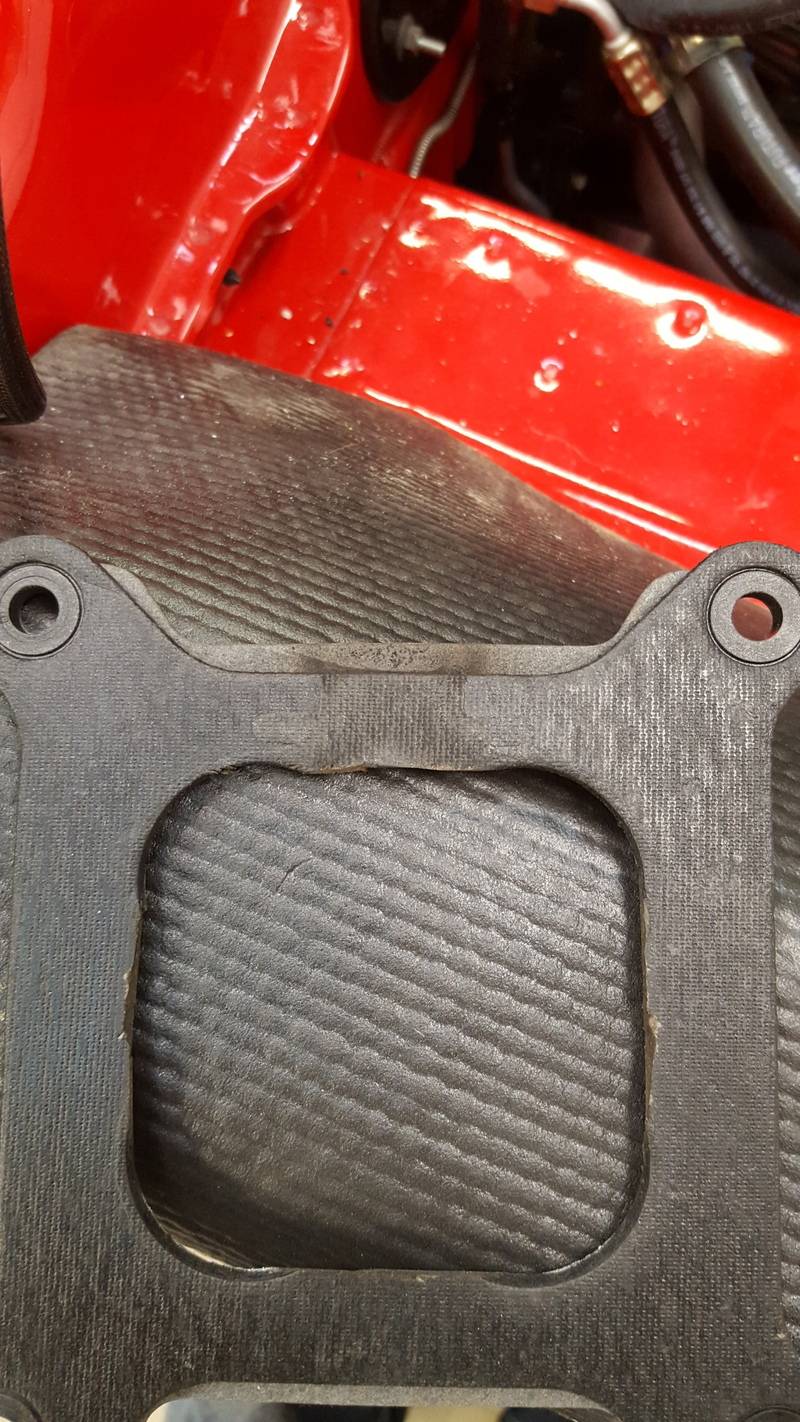
The scorch is from where it backfired. Through the IAC port. To OPEN AIR.
The IAC port was a giant vacuum leak. Apparently, this early Holley throttle body has a different design from the later in the IAC port, which makes the IAC port overhang a normal carb gasket by 3/8 of an inch. Massive, massive vacuum leak. Aint no way its going to idle or run properly. I managed to find an off the shelf solution though. The edelbrock sheet metal carb spacer/adapter thing.
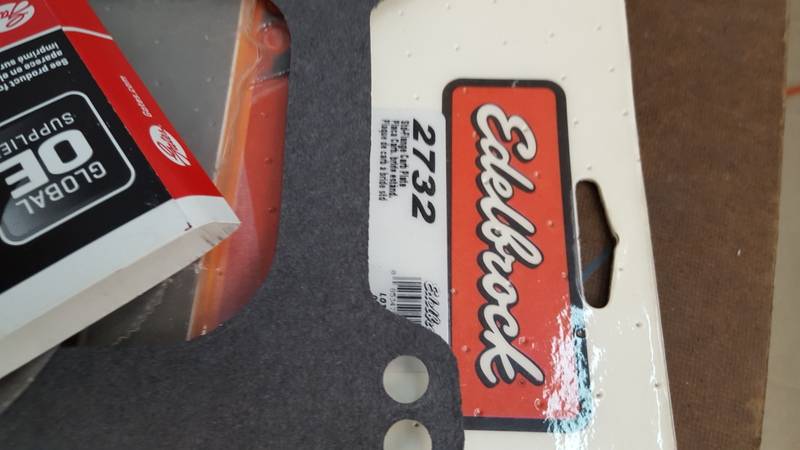
It was within a couple of thousandths of covering the whole hole. I could see light through the crack when I shone a flashlight down the IAC port from the top, but only if I looked from the right angle. Close enough with a nice thick cork base plate gasket, as no off the shelf gasket exists that covers the IAC hole.
Now that that's done, we move on to something unrelated, but necessary.
I wanted a better accessory drive, with more fail safe, and more belt wrap.
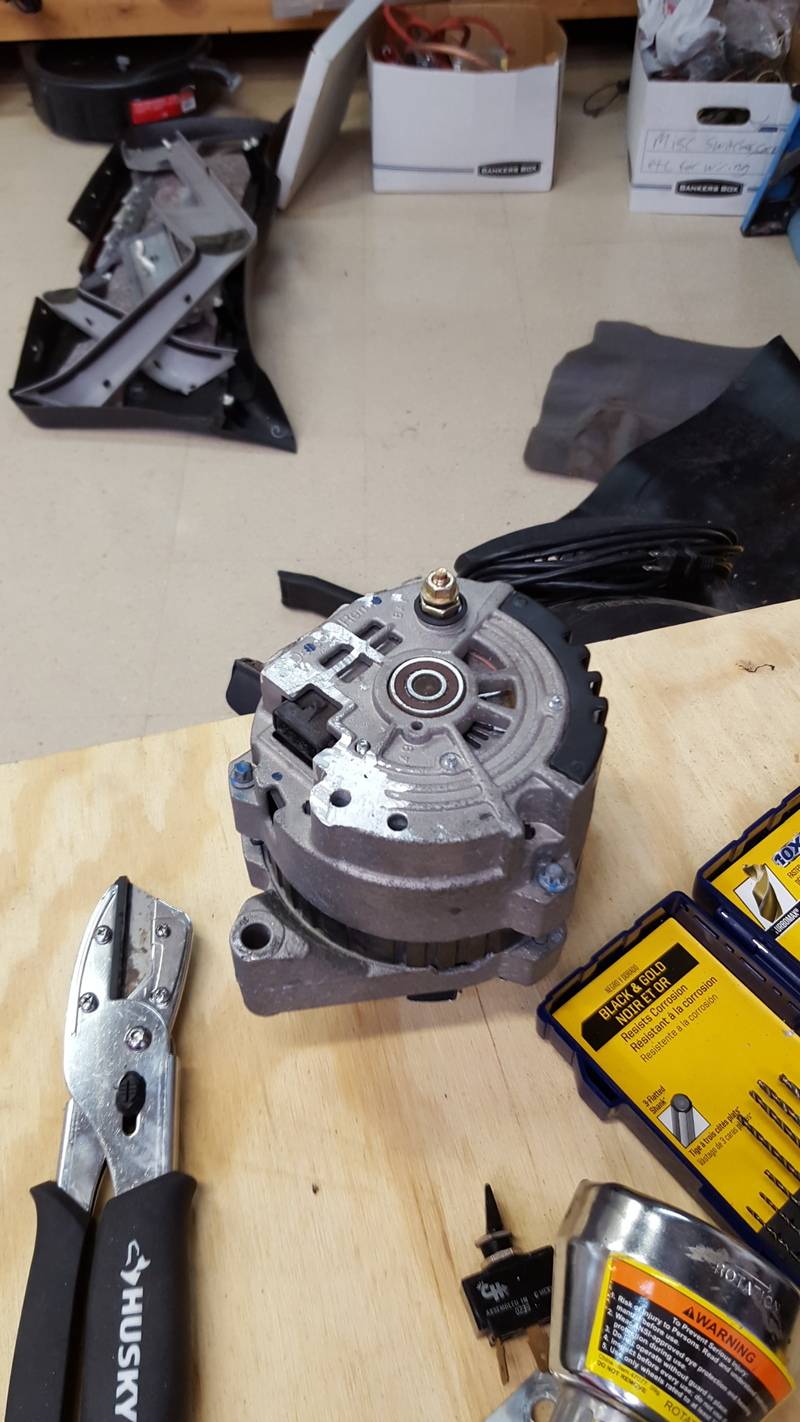
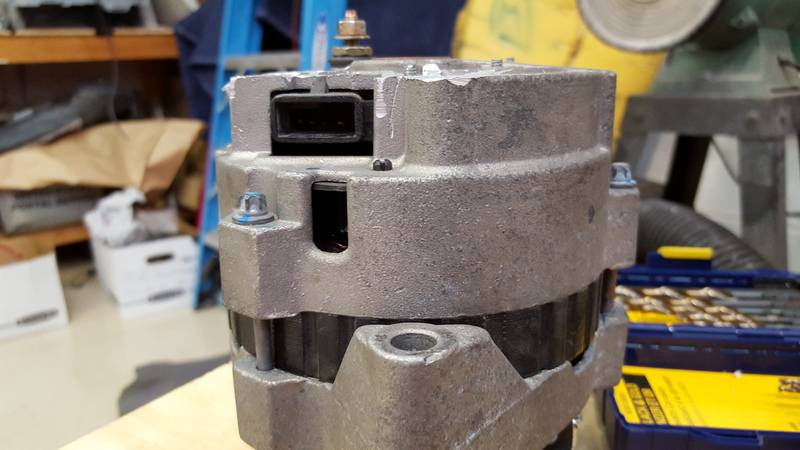
So I started with a different alternator. The mounting lugs on the previous one were maybe 90 degrees apart, not 180 like mother mopar intended. It was also clocked wrong and dead. So, time to make it better. When I designed this accessory drive, I used a single belt to run the alternator, power steering pump, crank, and water pump. Also a belt from crank, water pump, air compressor. I wanted more of a fail safe. And the fact that I only got a roughly 1/4 wrap on the alternator/power steering pullies didn't help.
So, using a Buick 3800 alternator, with a 180 mounting design got me closer. At least better angles on the adjusters and mounts. But still not what I wanted. I wanted to be able to move the alternator in between the head and bracket and run a third belt. Started with re-clocking the case, which got me closer. The, broke out the dremel fro that last 1/8 of an inch.
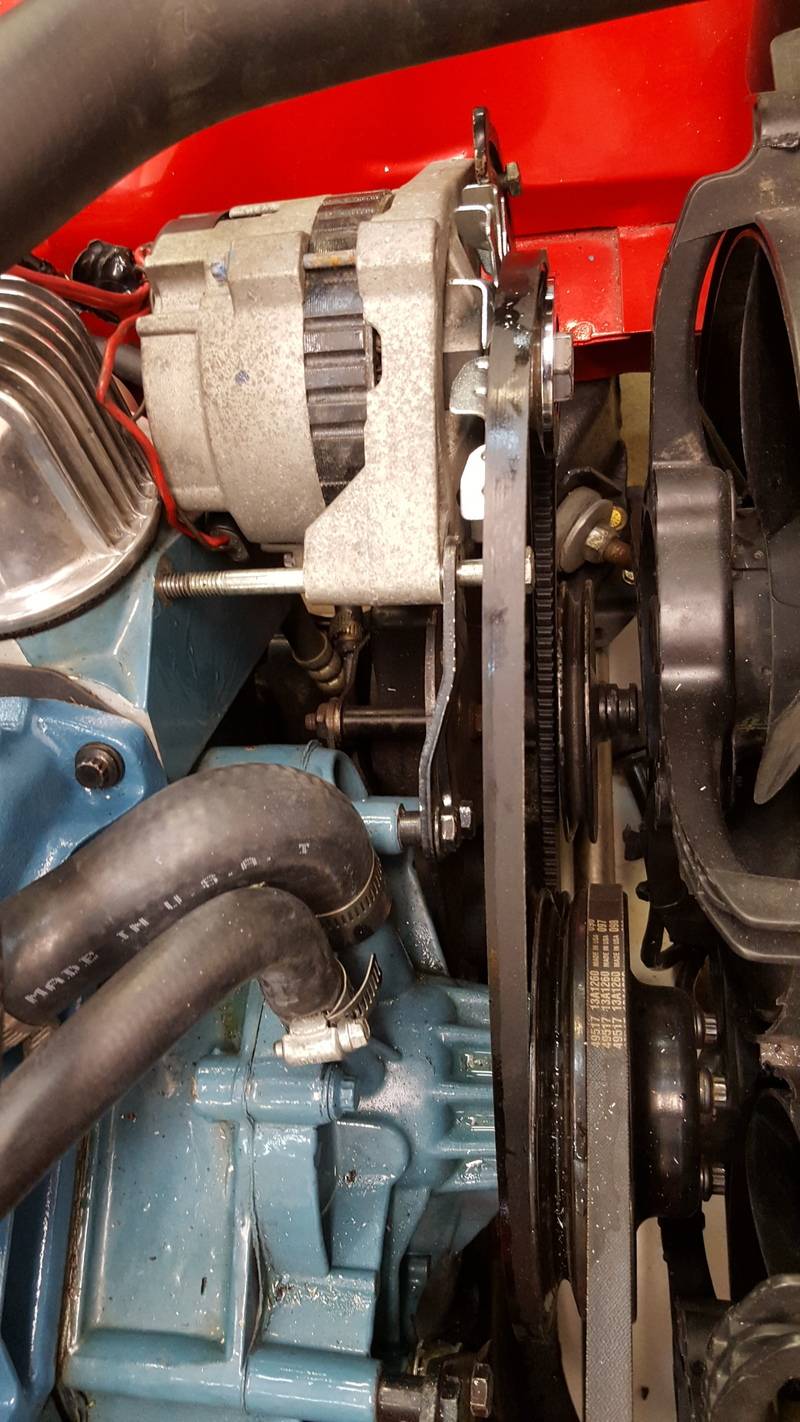
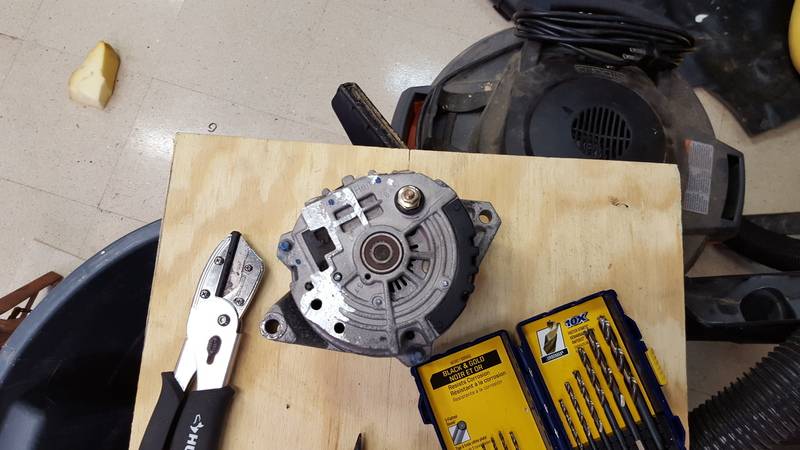
Whee!!!
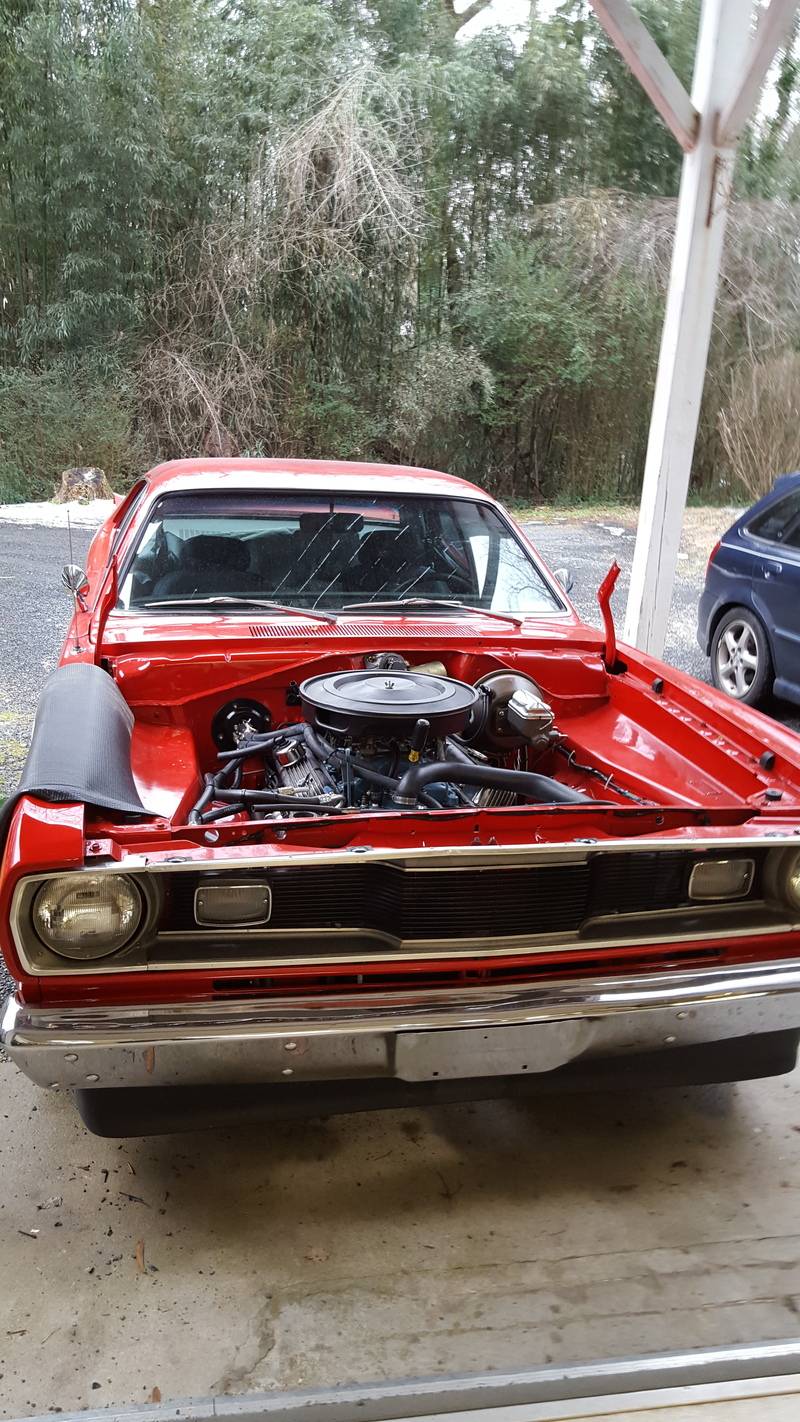
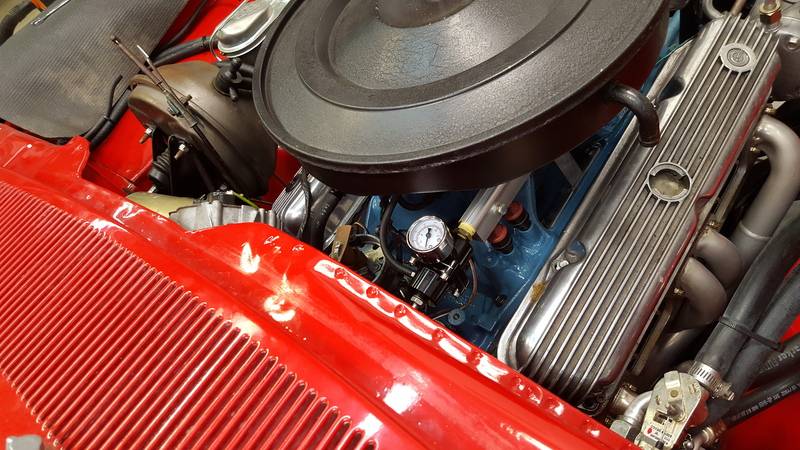
We then paid the tuner to send me a base map for me to try, and data log. Using Brian at www.TPIchips.com so far, hes been a pleasure to work with. He doesn't answer the phone, but is prompt with emails. Anyway, he sent me a base tune to try. First one was pretty rich still.
Second one got a whole lot better. Enough that I was able to move the car under its own power on EFI. I have no signal from the oxygen sensor, and need to work on tuning some more, then run it around the block a few times before I blow it apart for the wiring harness.
http://vid54.photobucket.com/albums/...pslx8nx0a8.mp4Michael Crawford
1970 plymouth Duster back under construction:
https://www.pro-touring.com/showthre...uring-makeover
1987 GMC S15 https://www.pro-touring.com/showthre...ct-drivabeater


 Reply With Quote


