

Results 21 to 40 of 299
Thread: 1970 Firebird Twin Turbo Build
-
07-19-2010 #21

 Registered User
- Join Date
- Feb 2005
- Location
- Sydney, Australia
- Posts
- 1,798

AHHHHH, this is Firebird heaven....man, that thing is so cool!
Regards,
Leigh
Sydney, Australia
1971 Firebird 455
https://www.pro-touring.com/showthre...Project/page27
-
07-19-2010 #22
Registered User
- Join Date
- Feb 2010
- Location
- Fort Worth, TX.
- Posts
- 64
Effin A.....looks very cool!!
07-19-2010 #23
Registered User
- Join Date
- Feb 2009
- Posts
- 85
great progress man. cant wait to see this thing complete!
FadedSS
07-19-2010 #24 Registered User
- Join Date
- May 2009
- Location
- so,cal
- Posts
- 22
WOW beautiful ,
awsome car dude.
07-22-2010 #25 Registered User
- Join Date
- Aug 2008
- Location
- Charleston, SC
- Posts
- 354
I LOVE the rendering. Best I have seen by far. I am curious how close the build gets to the rendering. I have a few questions because I am trying to build something low and slung from a second gen TA. No disrespect meant in any way, I'm just trying to avoid mistakes so I am just trying to learn! Originally Posted by tcronkright

I noticed that the rendering has wheel well flares that aren't in the build thus far. Will they be added or is there a reason they were left out. Since the wheels are already on it, would they look set back too far now if the wells are flared out?
Will the running lights be round as drawn on the metal work or square as in the drawing?
Will the lower inlets in the front grill be installed or will it be solid as it is now?
Like I said, that is just amazing. Stunning rendering. I hope the builder gets it close.
07-22-2010 #26 Registered User
- Join Date
- Apr 2007
- Location
- Odenton MD
- Posts
- 197

Nice
07-22-2010 #27 Registered User
- Join Date
- Aug 2005
- Location
- Hamilton, NJ
- Posts
- 4,295
Is that a metal rear spoiler??
Scott from NJ.
Vent Windows Forever! ...
Feather-light suspension, Konis just couldn't hold
I'm so glad I took a look inside your showroom doors
07-23-2010 #28
Registered User
- Join Date
- Feb 2006
- Posts
- 478
Man that is a really cool project. I love the depressed stripe and the tail end design. And I love it that you are using Pontiac power.
I would highly recommend using one of the forged cranks available for the Pontiac v8 over the eagle. I think the eagle is really only safe for about 700-800 hp and I know you may start out there but you will undoubtedly get froggy for more power later. It would be $700 well spent for the forged crank.Alex Godsey
Somerset, KY
Pro Touring 67 GTO
461 Pontiac Power
07-23-2010 #29 Registered User
- Join Date
- Jan 2009
- Posts
- 110
Thanks for the interest. We are very excited about this build. As for the wheel flares, the front fenders were widened by about 1" and tailored back into the door so the factory seem remains constant. The wheel flares will continue on the back side of the rear wheel opening and tie into the rear diffuser panel.
The running lights are an addition to the original drawing. We opted to make a custom metal valance and chin spoiler. We will cut in 3" round running lights. We will also cut in the lower inlets and trim them out. The ride height will be as shown in the rendering.
Originally Posted by Doug1
07-23-2010 #30
Registered User
- Join Date
- Jan 2009
- Posts
- 110
You bet!
Originally Posted by BonzoHansen
07-23-2010 #31
Registered User
- Join Date
- Oct 2004
- Location
- stanwood, wa
- Posts
- 324
Can you tell us more about the hood your gonna be building? This is the best car I've see on here so far, awesome.
07-23-2010 #32 New to Pro-Touring
- Join Date
- Jan 2009
- Posts
- 25
Baddd Assss! Can't wait to get started on my project...
07-23-2010 #33
Registered User
- Join Date
- Jan 2009
- Posts
- 110
Agreed. This engine should make a bit over 2,000 hp with high boost. We will likely limit it to around 1,300 hp and about the same torque at the rear tires. This will run on pump gas. Here are some specs on the engine:
Butler Performance AI2 Pontiac 400 block bored to 475 cu. in.
Eagle forged 4340 crankshaft
Eagle H-beam forged connecting rods
Ross custom forged pistons 8.5:1 compression ratio
Comp Cams Hydraulic roller camshaft (All Speed Performance turbo grind)
Comp Cams hydraulic roller lifters
Kaufman KRE 340 CFM aluminum CNC ported cylinder heads
Stainless steel Ferrea valves
Comp cams valve springs and retainers
Comp Cams Chromoly pushrods
T&D shaft mount Rocker arms
Comp Cams billet adjustable timing chain
Melling high volume oil pump
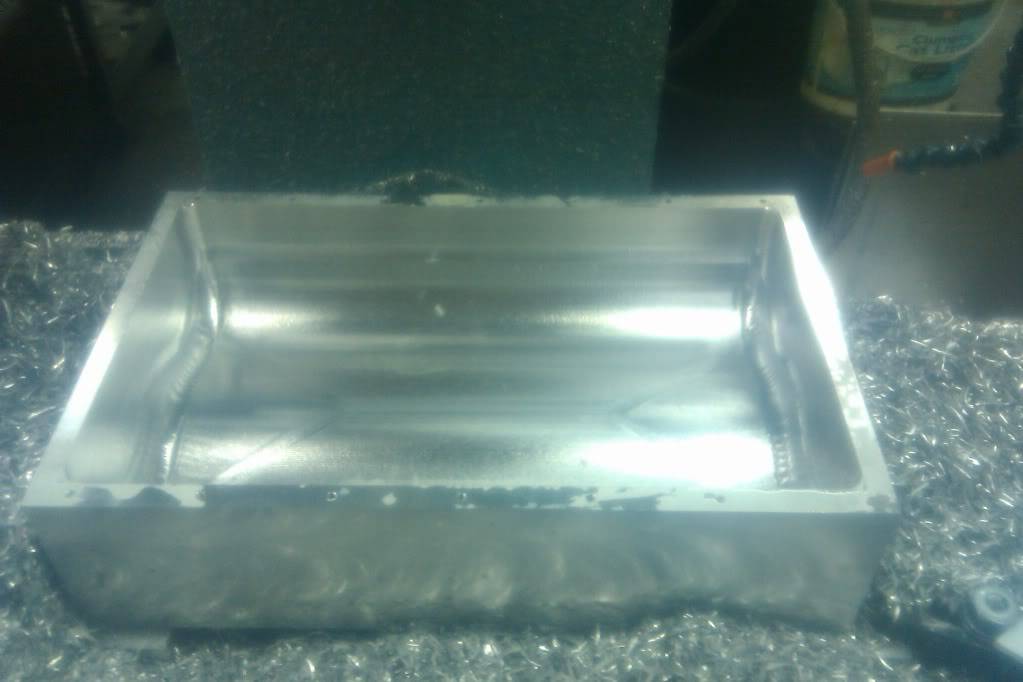
Canton racing high capacity oil pan and pick up
Custom Visner Engines intake with dual fuel rails
Custom Visner Engines dual throttle bodies
FAST injectors - two per cylinder
Billet Specialties accessories drive
Butler AI2 475 cu. in. Performance Block
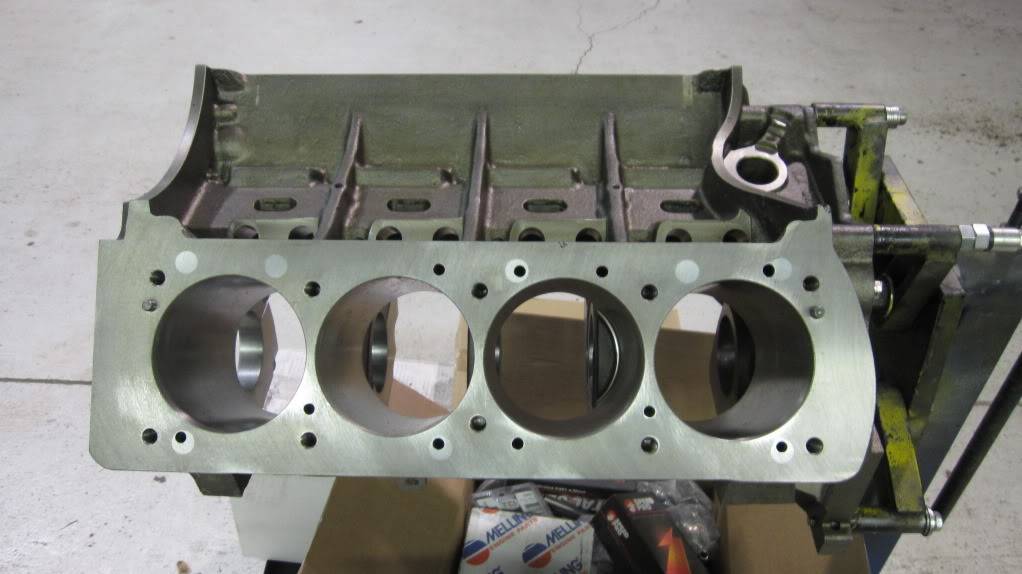
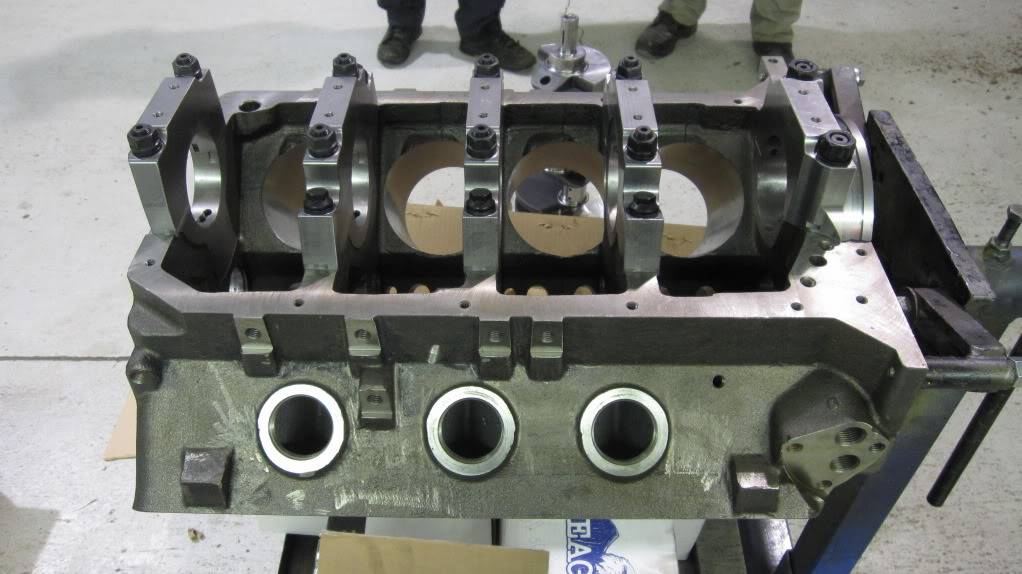
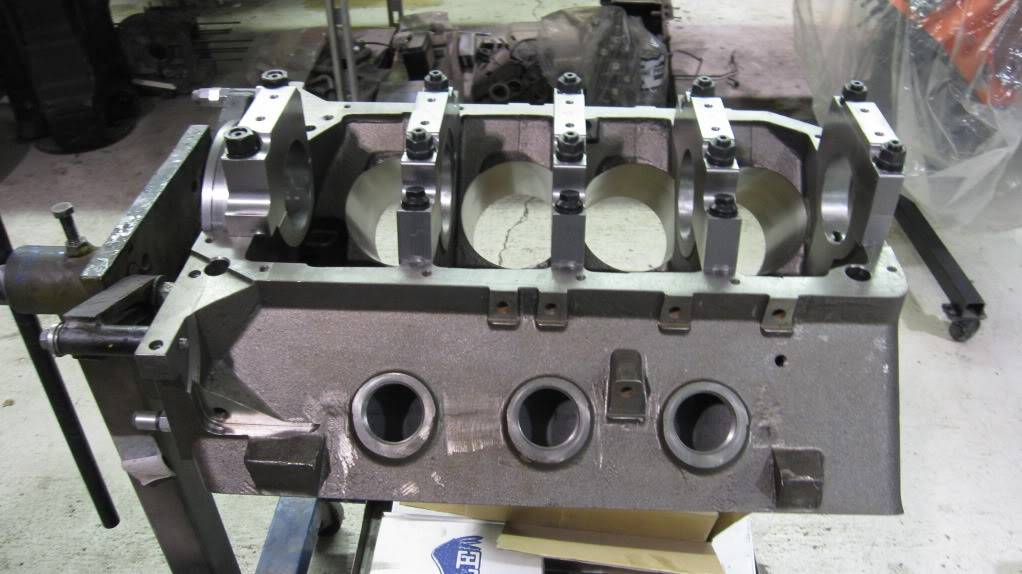
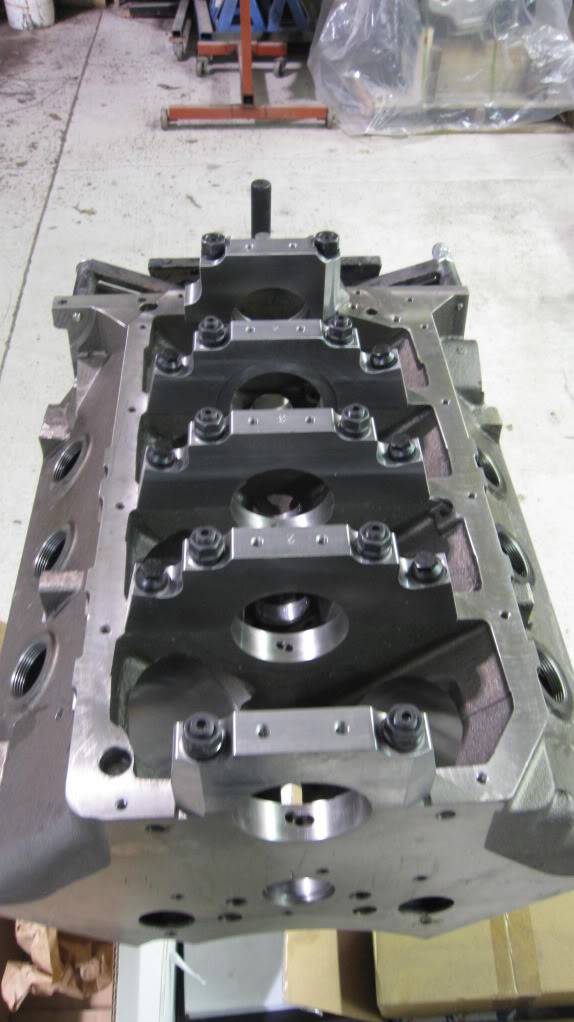
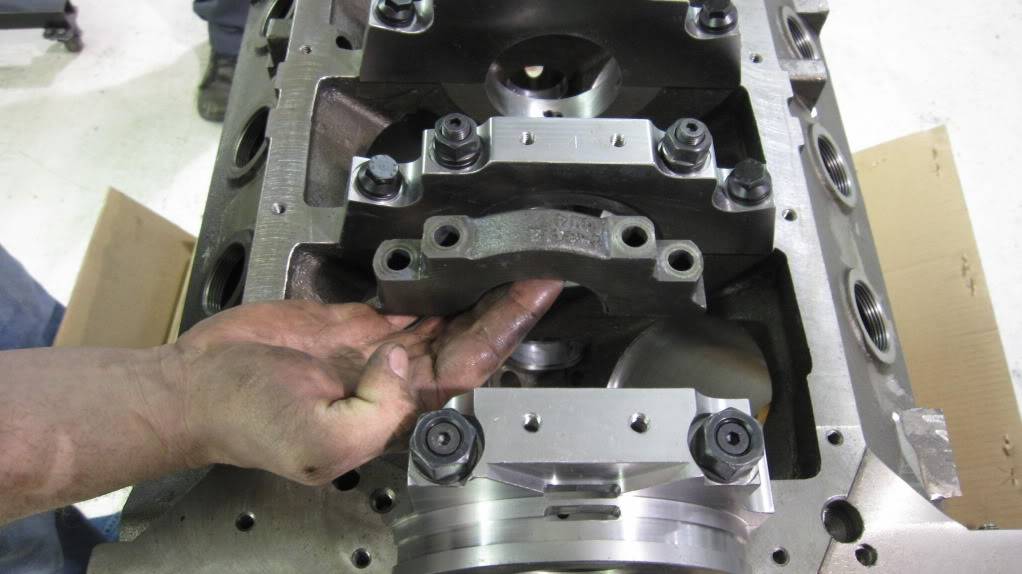
Here is a comparison of a standard Chevy 4-bolt main and the mains we are using. Need the strength when we apply the boost
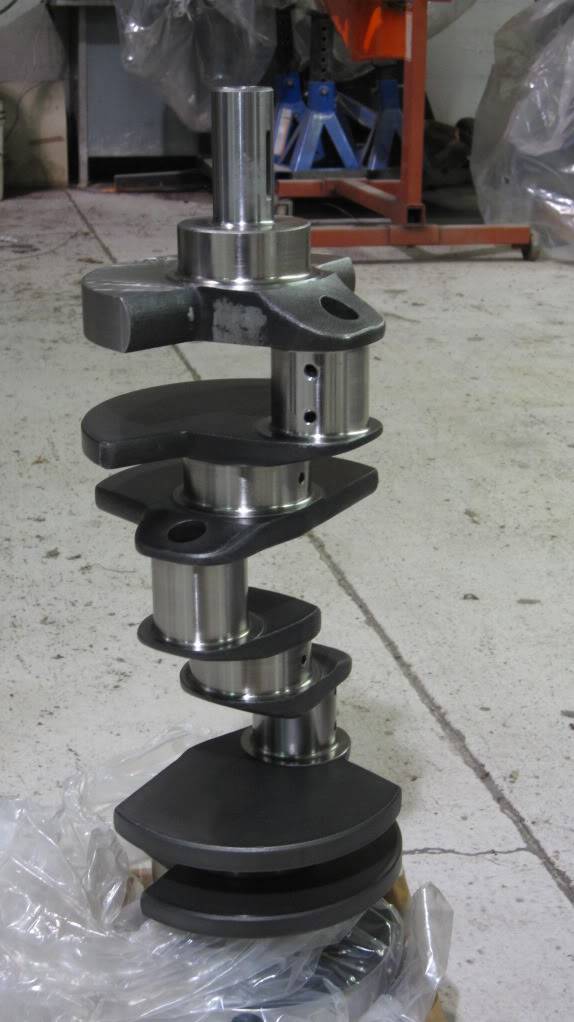
Turned crank
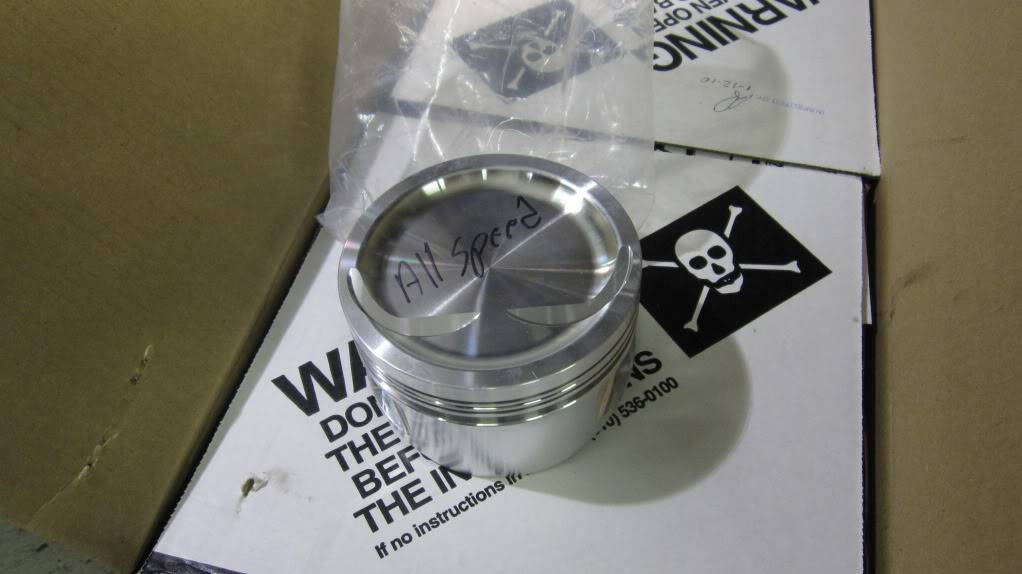
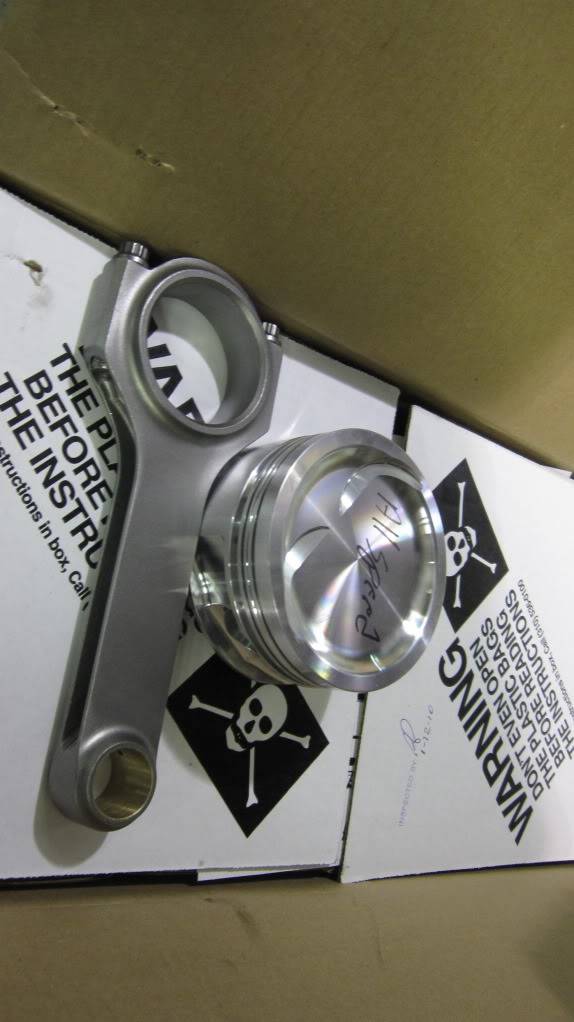
Custom pistons and connecting rods
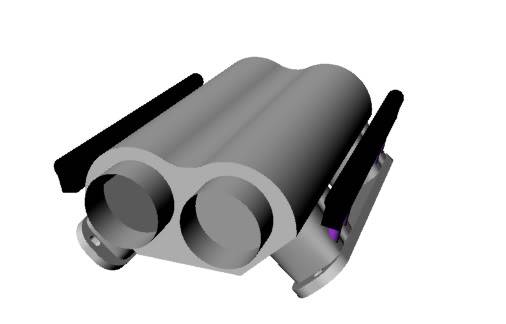
I just left Visner Engine's shop and they were milling the top of the intake out of this chunk of billet. Here is the CAD design of the intake. We are going to build a set of custom throttle bodies with the linkage concealed under the intake so the entire top will be smooth. The CAD shows one fuel rail per side, but we are running two per side as we will have two injectors per cylinder.

Originally Posted by gearbanger
07-23-2010 #34
Registered User
- Join Date
- Jan 2009
- Posts
- 17
Awesome build, and looks like a well-built engine. If I may make one suggestion it would be to reconsider your rod choice. Eagle rods are excellent for the money, but with the amount of boost and power you are planning on making would you be better served by Crower or Oliver rods? Keep up the good work.
07-24-2010 #35
Registered User
- Join Date
- Aug 2008
- Location
- Charleston, SC
- Posts
- 354
I still have a question about the wheel flares if you don't mind. I am working on a 2nd gen build that has similar wheel well flaring to the your actual rendering. However, I found that the wheel flare design at the top of the wheel wells was not driveable without coming out a good 3-4 inches.
So I am trying to work around that now. I noticed in your build that you just skipped significantly flaring the top of the wheel wells on both the back and front. It is a pretty noticeable difference from the rendering. Did you run into the same problem I did? Is this why the change? If not, do you plan to try to flare the tops like in the rendering? How would you address the driveability issues as drawn?
07-25-2010 #36 Registered User
- Join Date
- Dec 2008
- Location
- Clearwater, FL
- Posts
- 199


 :
:

 and that doesn't even begin to say how e'fing sick that car is. Awesome work man.
SOLD: 1993 Saleen Mustang #20, 1 of 56 Hatchbacks, 17" Sterns, Black & Gold.
and that doesn't even begin to say how e'fing sick that car is. Awesome work man.
SOLD: 1993 Saleen Mustang #20, 1 of 56 Hatchbacks, 17" Sterns, Black & Gold.
www.fquick.com/SS1156
1970 Camaro SS clone..... just getting started on it
07-27-2010 #37 Registered User
- Join Date
- Oct 2006
- Location
- Morristown, NJ
- Posts
- 154
Wow!!! That looks awesome.
1973 Camaro Type LT/RS
http://www.apiem.com/camaro
07-29-2010 #38
Registered User
- Join Date
- Jan 2009
- Posts
- 110
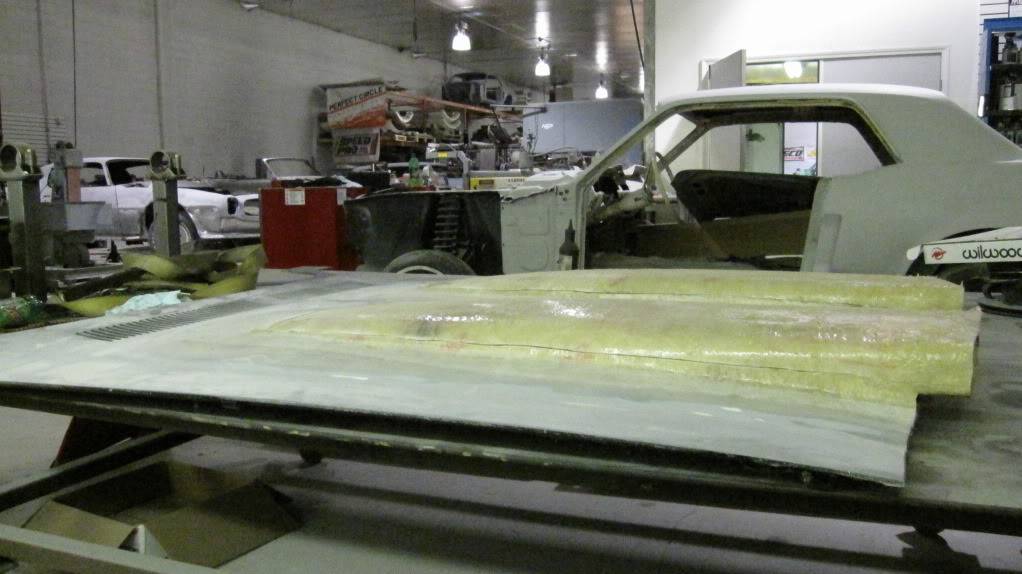
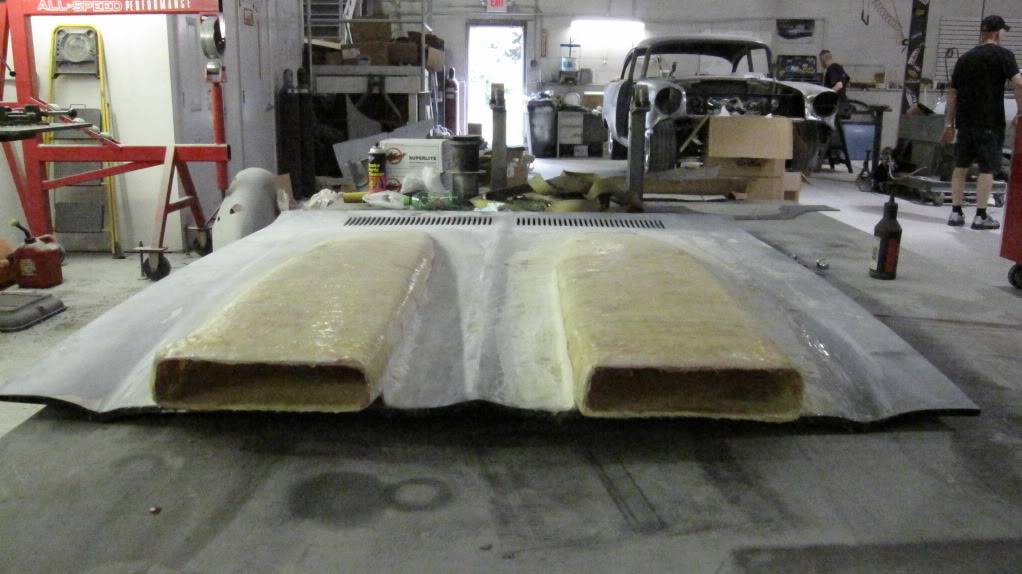
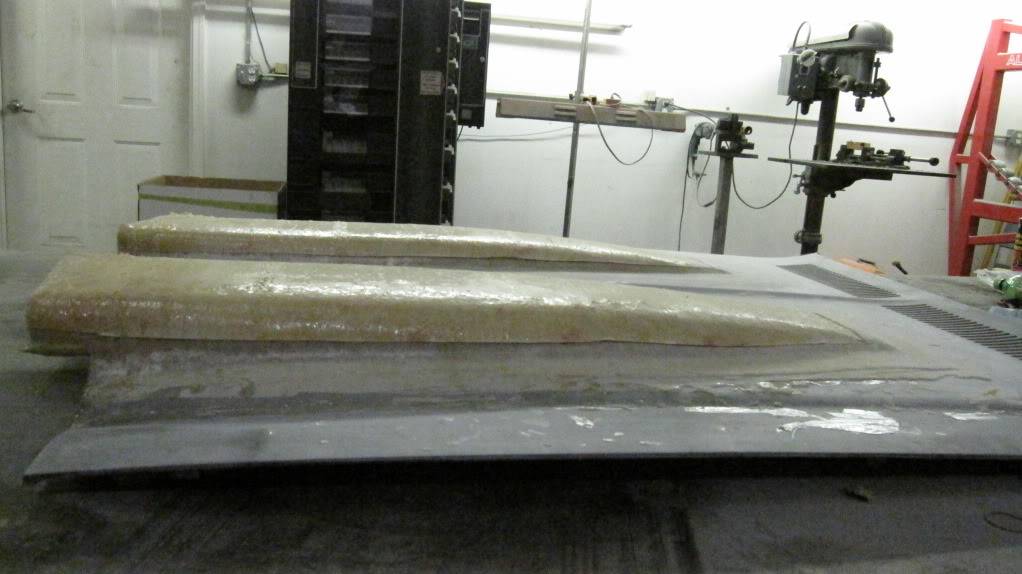
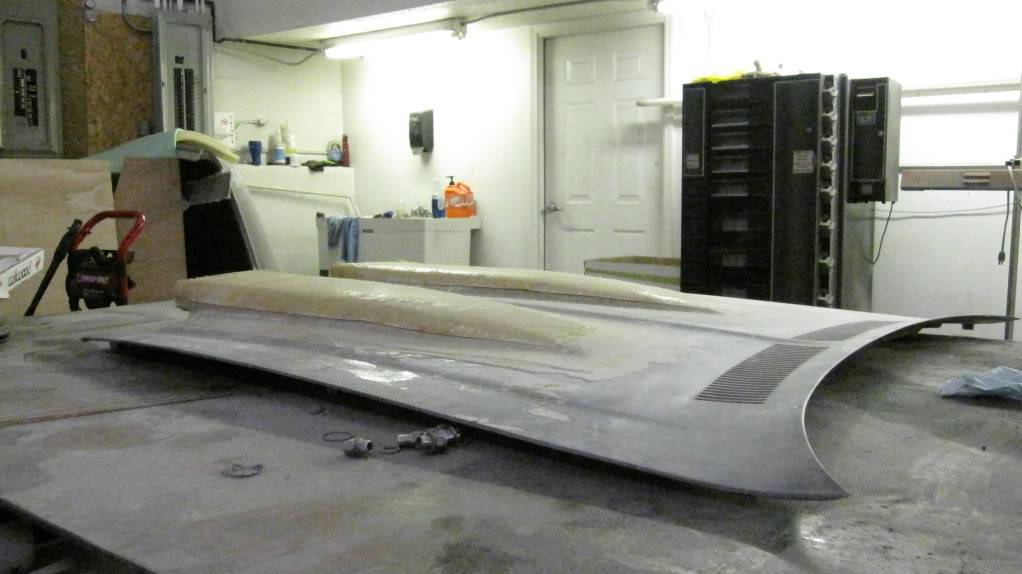
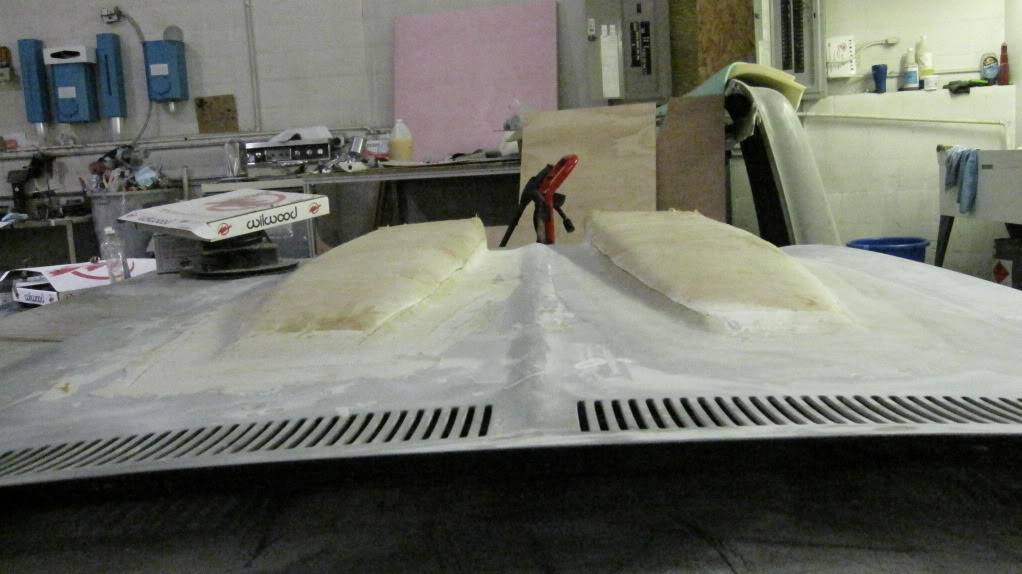
The hood is an original formula fiberglass hood. We are extending the snorkels forward over the nose about 1.5 inches, extending them back about 6" and making the snorkels thicker. We will relocate the existing factor holes to maximize air flow and distribution. The snorkels will be fully functional as we want to get more air into the engine bay to cool it because of the extra heat of the turbos. Originally Posted by a73formula
Here are a few pictures of an original formula hood we used.
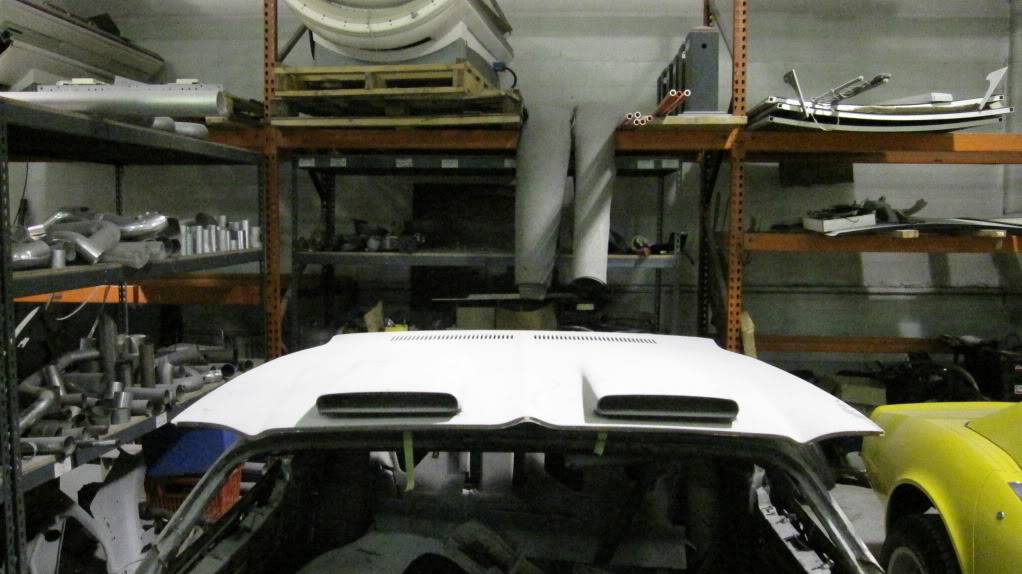
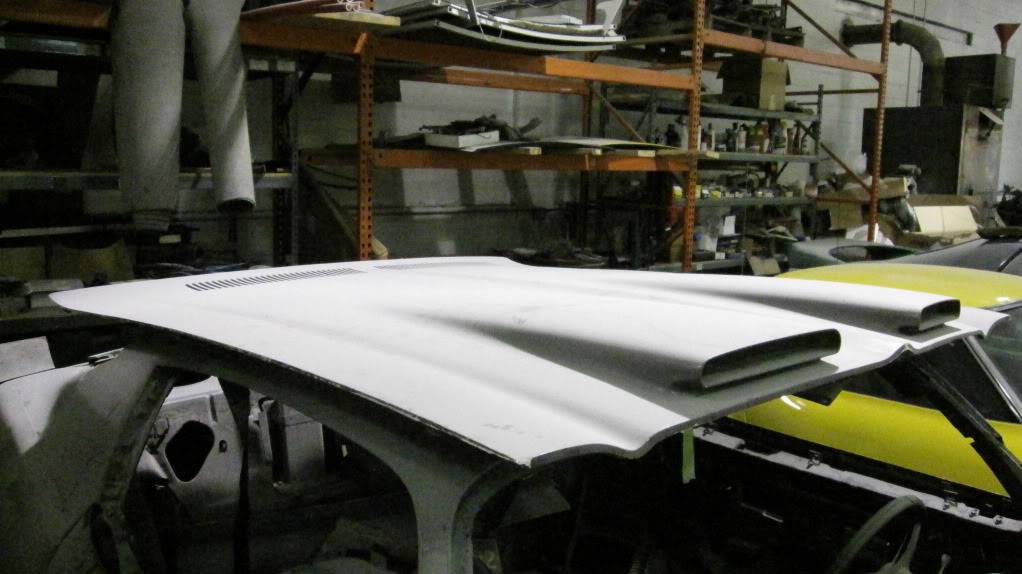
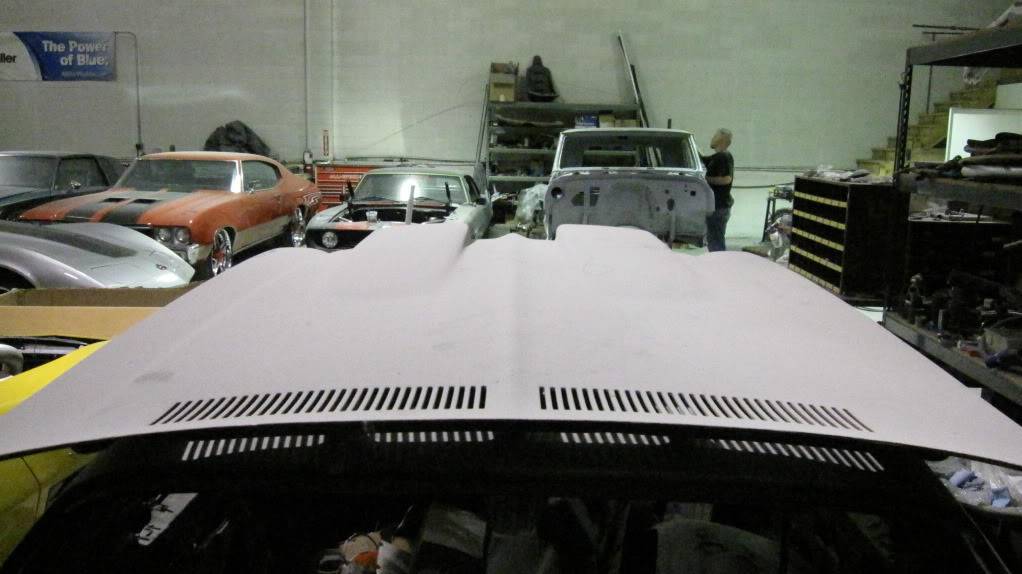
This is the hood as modified to show the enlarged snorkels.
07-29-2010 #39
Registered User
- Join Date
- Aug 2008
- Location
- Charleston, SC
- Posts
- 354
Would you mind addressing my question regarding the flares?
07-29-2010 #40
Registered User
- Join Date
- Jan 2009
- Posts
- 110
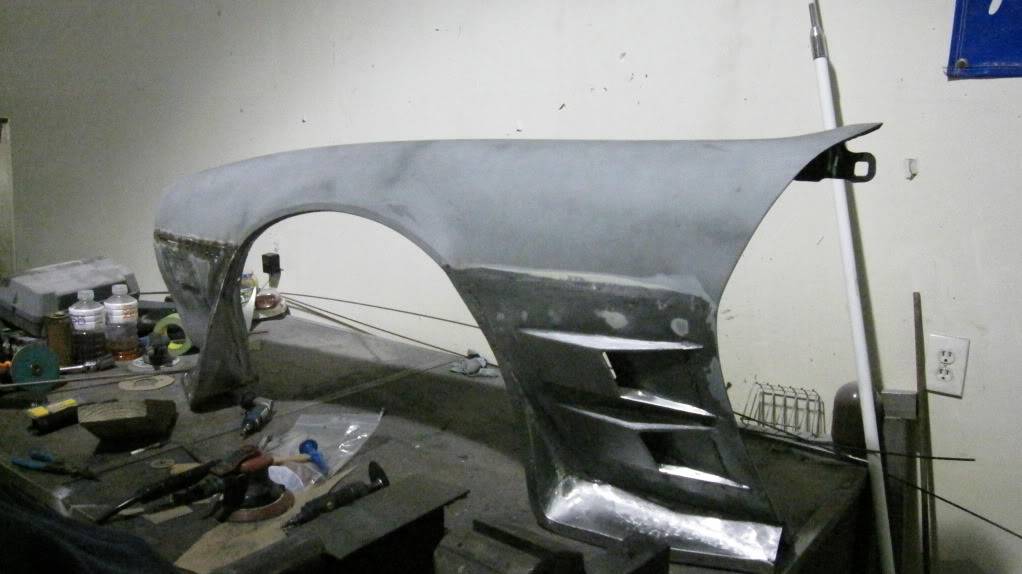
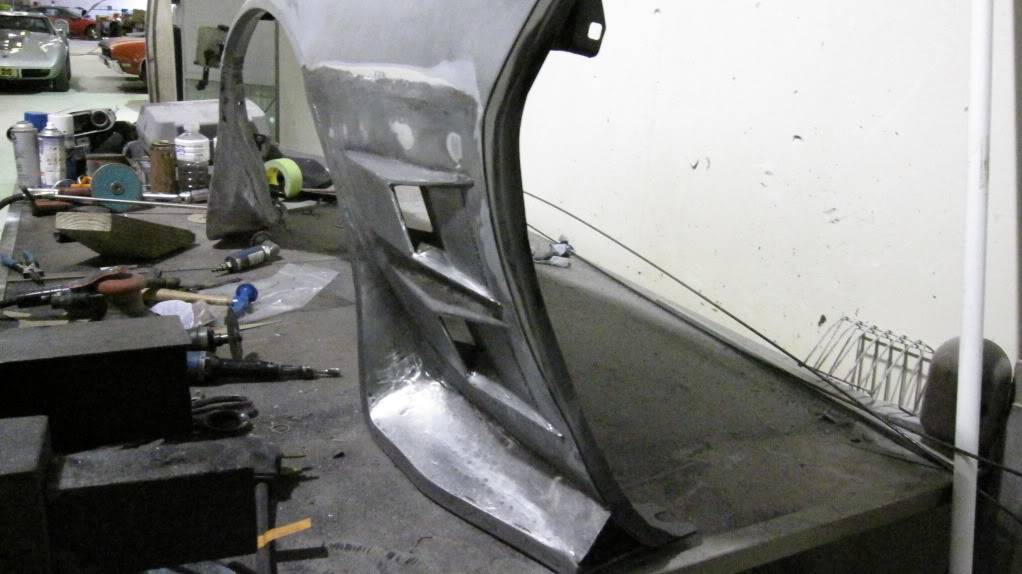
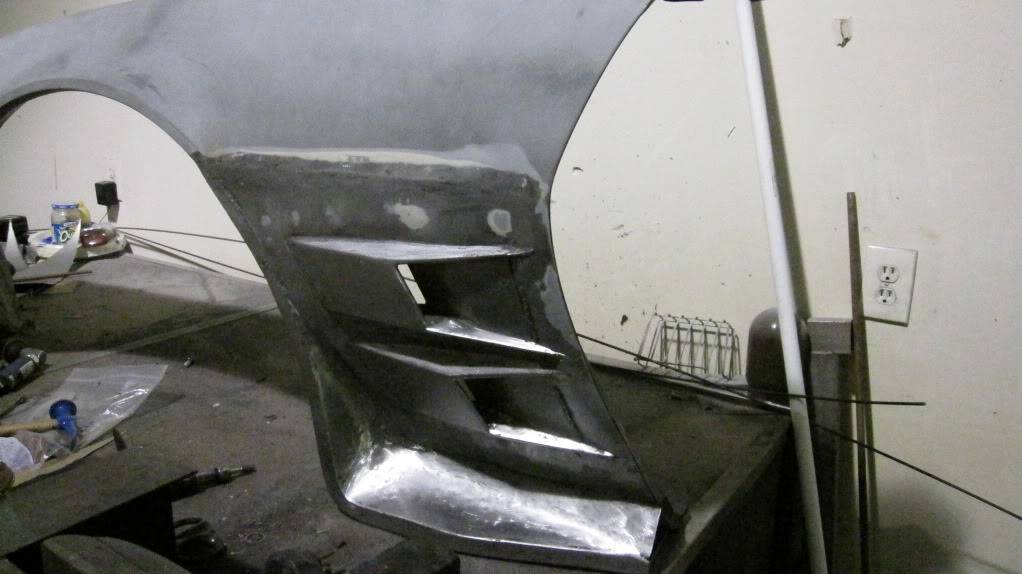
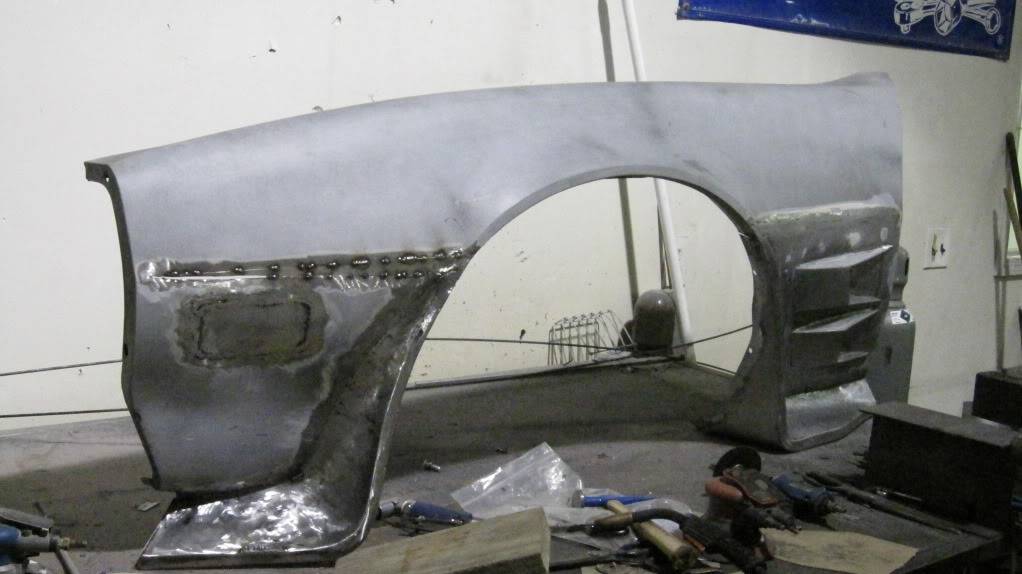
We flared the front fender about 1.25 inches and are making custom inner fenders. This will allow us to run a 19" x 10" wheel on the front. I like the stock lines and I try to keep thinks subtle yet accentuated. I did not want to extend the door panel out so wraping the flares over the wheel well was not an option - just did not look right as we tapered back to the door. The custom inner fenders and precise wheel offsets has created the room we need to run the wide front tire. Similar issue in the back. We installed DSE's mini-tubs and just finished the install of the DSE Quadralink suspension kit. The axles were narrowed and the wheel offsets optimize the space. We are running 20" x 12.5" wheel in the back. The flare over the top of the rear wheel well would have made the door lines look odd. We are in the process of carrying the valance around the back side of the rear wheel opening and along the back quarter that will tie into the rear diffuser. I hope this helps. Originally Posted by Doug1
Here is a picture of the driver's side fender. You can see where we stretched the panel, covered the running light openings, closed out the flares and added the side vents.


 Reply With Quote


