Results 341 to 360 of 614
-
11-17-2015 #341

 Registered User
- Join Date
- Apr 2005
- Location
- Chicago
- Posts
- 2,787

I seriously love this build not only for the quality of the pictures but for the attention to detail.
marty-mj
GarageScene.net High Speed Welding KDHotrods RecoveryRoomInteriors WegnerAutomotive Autometer Ride-Tech
-
11-17-2015 #342 Registered User
- Join Date
- Jan 2006
- Location
- McKinney, TX
- Posts
- 1,625
This thing is amazing, I am in awe.
66 Mustang "Project: Ballin on a budget"
89 Mustang "Box Wine"
11-18-2015 #343 Registered User
- Join Date
- Aug 2002
- Location
- Sweden
- Posts
- 902

Thanks guys!
I really appreciate the feedback!
It keeps me motivated.
Regarding picture quality - well.. Yes, I think that's important. The only drawback is that it takes some time to rig before taking a picture, so the spontaneous pictures has almost disappeared from my project library.
11-18-2015 #344 Registered User
- Join Date
- Mar 2014
- Location
- Yuma, AZ
- Posts
- 635
Glad to see progress is being made, you sir are excellent at fabricating! When this is done I have no doubt it would be able to run with any of the big name cars! Keep up the good work!
Nelson
1969 Chevelle "Cone Smasher" Family Project
https://www.pro-touring.com/threads/...uot?highlight=
1984 "Rustang" GT, 5.0, 5 Speed Project
https://www.pro-touring.com/threads/...T-(Slow-Build)
11-18-2015 #345 Pro-Touring Veteran
- Join Date
- Jul 2006
- Location
- Merritt Island,FL
- Posts
- 1,182
Great build, love it ! Very nice work and skill !
Check out my web site.
http://screaminperformance.net
11-18-2015 #346
Registered User
- Join Date
- Apr 2005
- Location
- Chicago
- Posts
- 2,787
Save the Spontaneity for your wife or girlfriend they will be more appreciative then us guys. We like the picture quality and now that I am back on my 70 I am going to strive to take better quality pictures. Originally Posted by Ripper
 marty-mj
GarageScene.net High Speed Welding KDHotrods RecoveryRoomInteriors WegnerAutomotive Autometer Ride-Tech
11-20-2015 #347
Registered User
- Join Date
- Aug 2002
- Location
- Sweden
- Posts
- 902
Lol, I'll save the spontaneity for her instead.
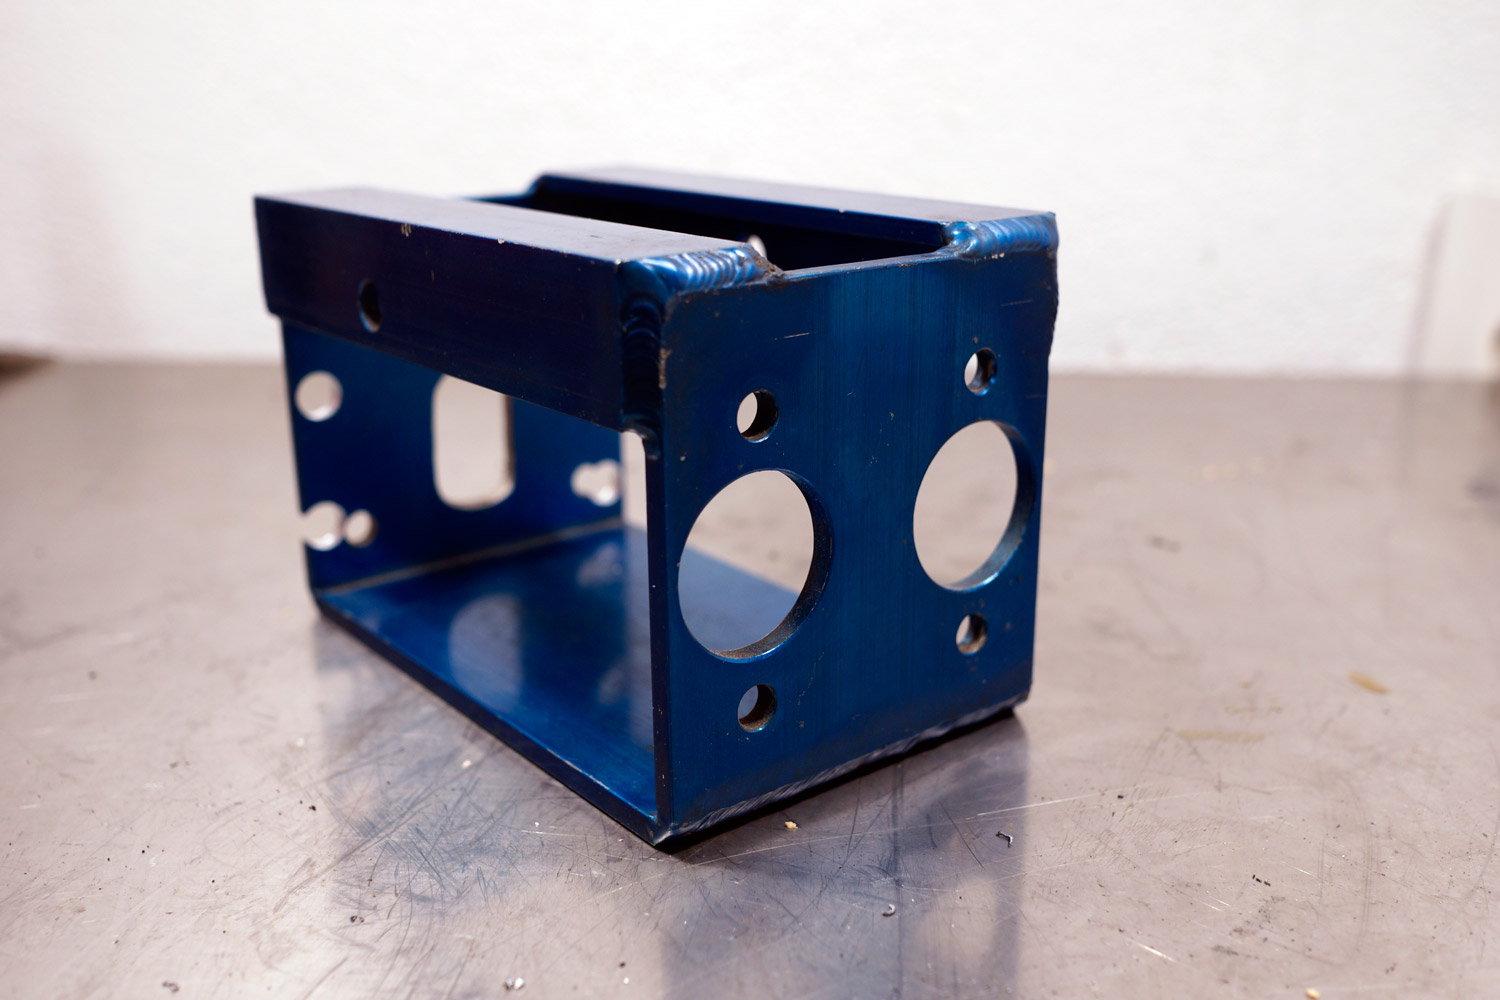
Some updates: I was going to use a balance bar for the brake setup but I didn't wanna integrate it into the firewall since there's a chance I wanna upgrade it with a brake booster in the future.
At first, I was going to make one frome scratch, but I scrapped that idea when I came over an empty housing cheap.
My initial concept (the balance bar itself is missing...)

The housing:
With wilwood cylinders:
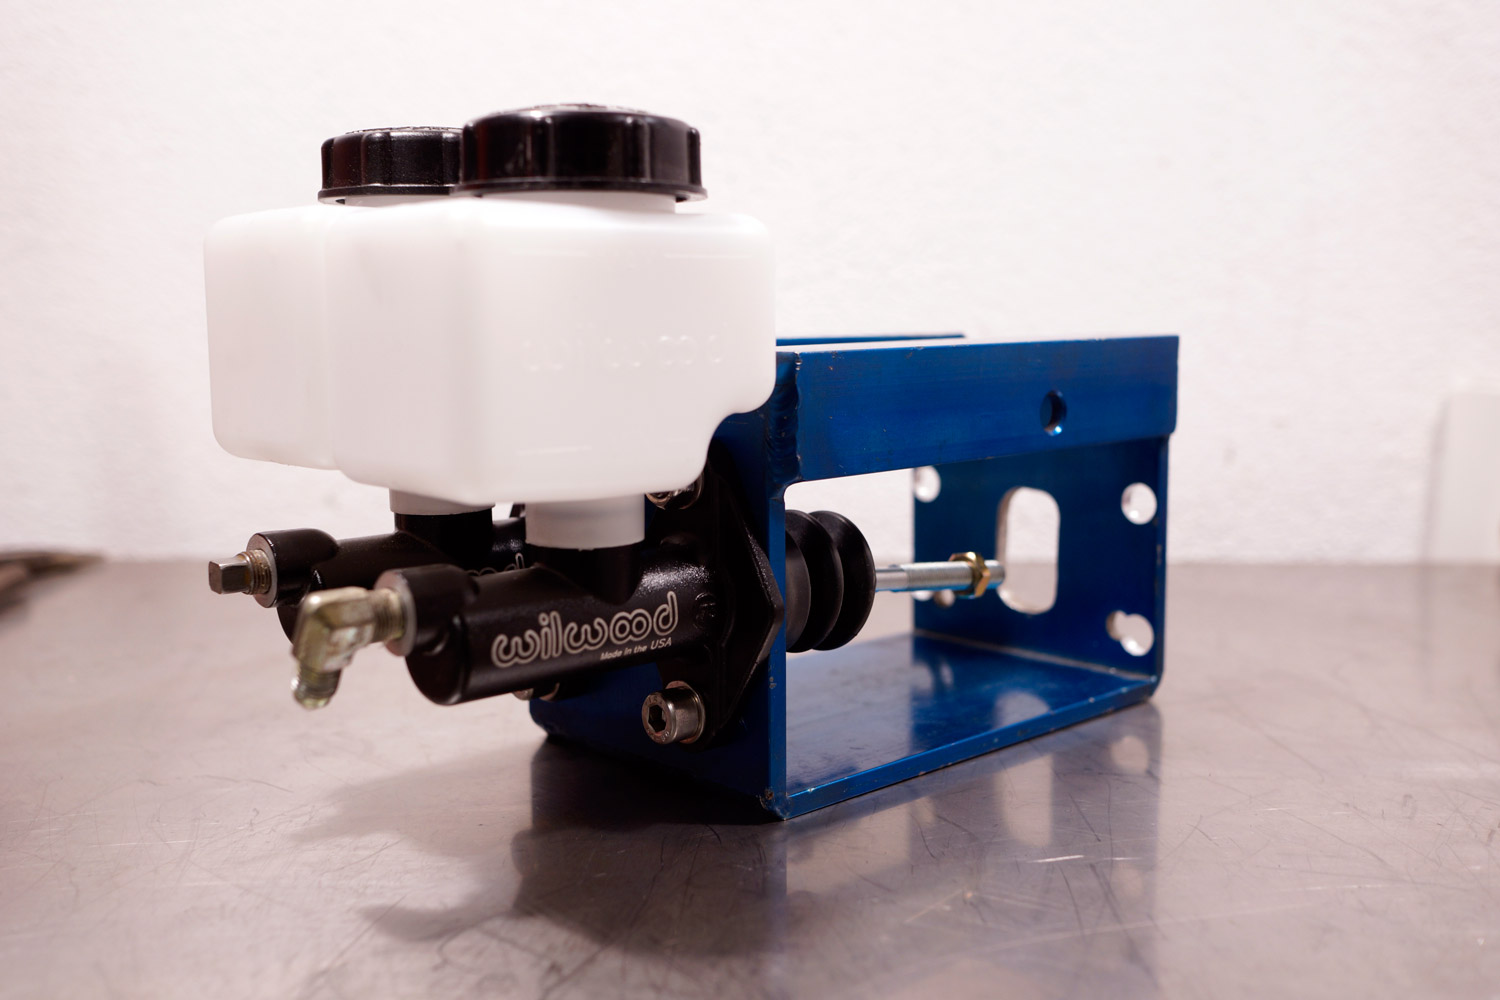
Nothing is bolt on in my world...
Obviously the housing was empty, so I had to purchase a wilwood balance bar. There was no rocker arm included. A new costed 125$, so I made one by myself. Of course the balance bar was inch-sized outside and I only had metric reamers, so I turned a new steel tube for the balance bar too.
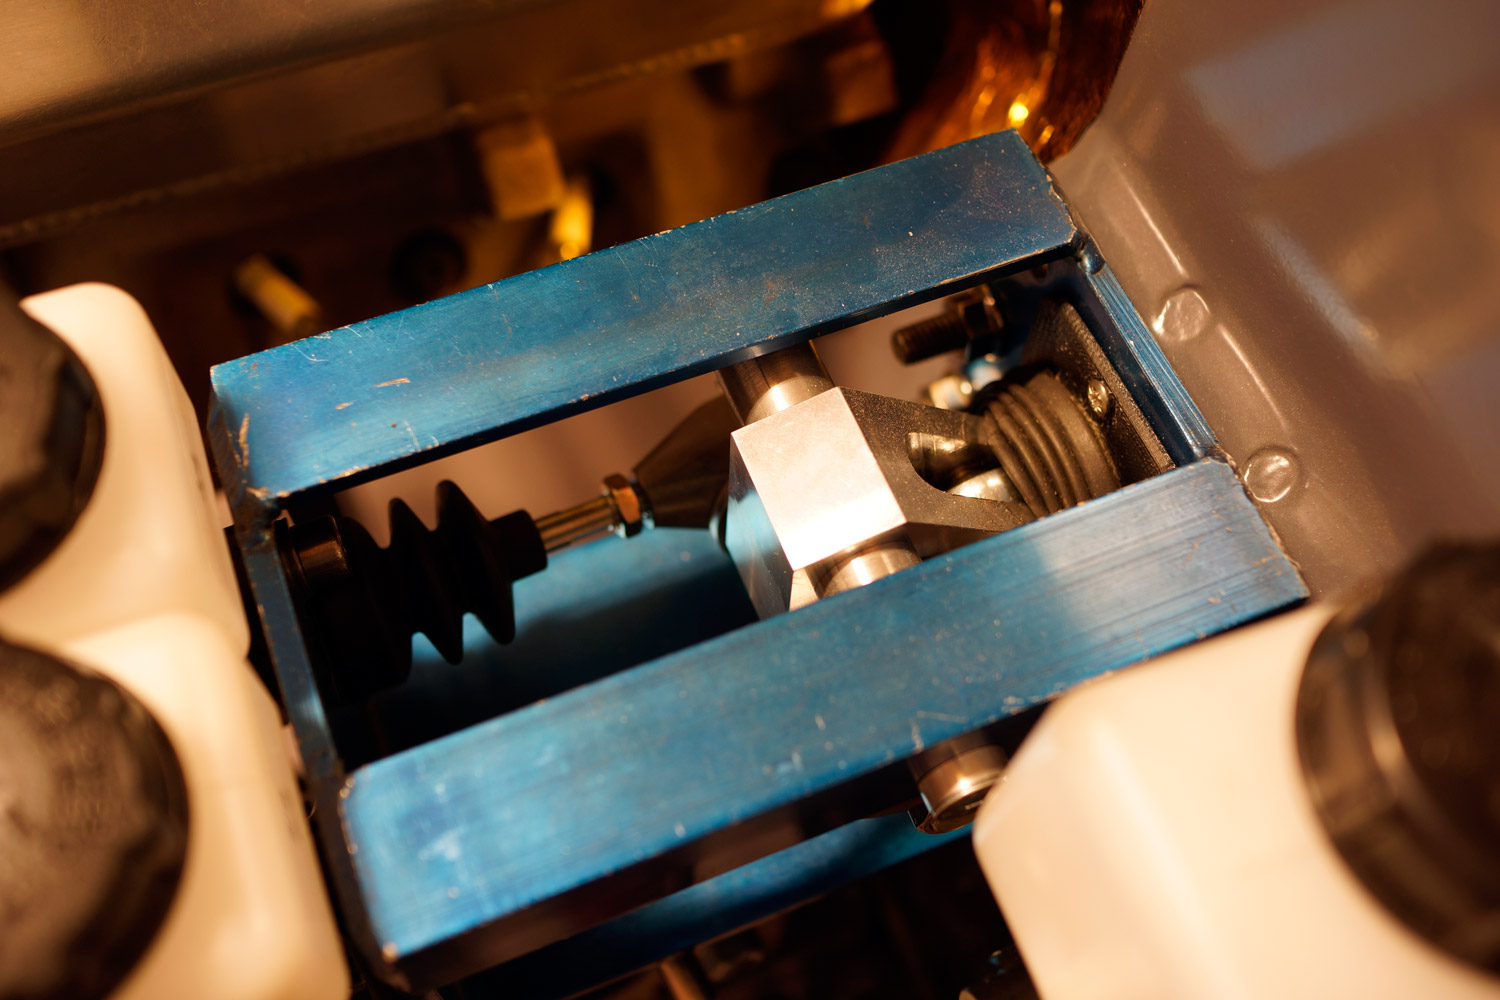
I want a sealed firewall, so I had to locate a gaiter in reasonable dimension and to fit that to the housing, I 3D-printed a flange to hold it.
Alot of engineering which I forgot to take pictures at, of course...
Alot of engineering which you don't even see... I must be crazy, but you should have realized that by now.
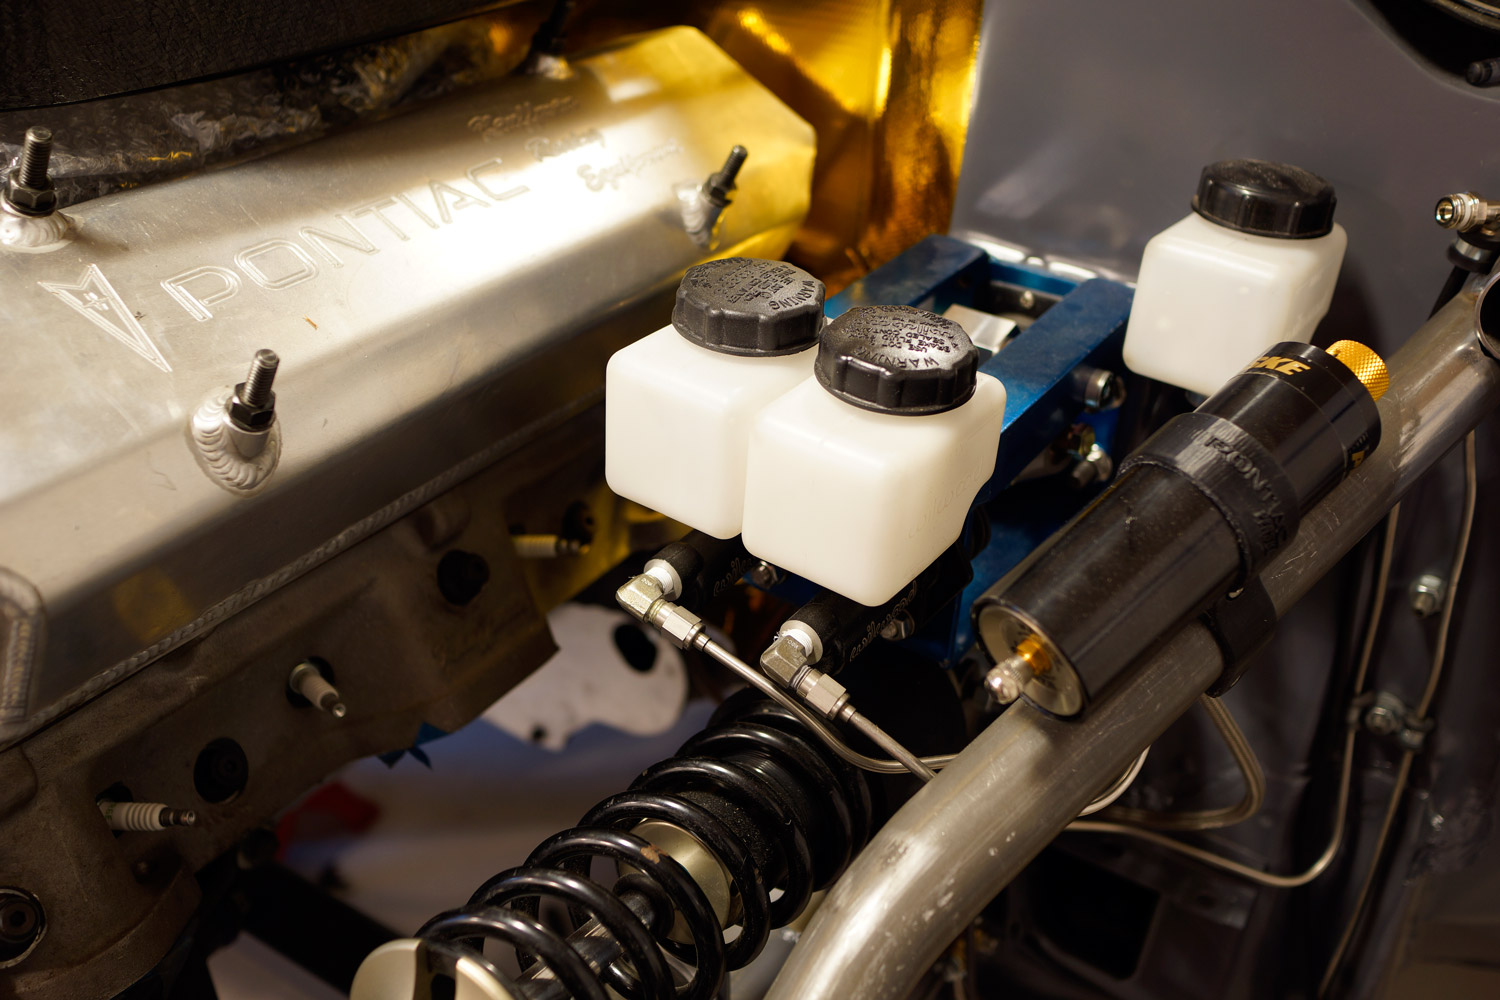
Another picture with the lines connected.
I wanted swiveling AN-units, but couldn't find any so I used fixed ones and tightened them as much as possible and used some extra PTFE tape. They sit tight, but since I had to have them in a certain angle, it was probably possible to tighten them another 90º before until they really really _really_ tight.
I'm not worried, but I'll test it when there's fluid in the system
11-20-2015 #348
Registered User
- Join Date
- Apr 2005
- Location
- Chicago
- Posts
- 2,787
Since there isn't a like button I will just post one here.
marty-mj
GarageScene.net High Speed Welding KDHotrods RecoveryRoomInteriors WegnerAutomotive Autometer Ride-Tech
12-10-2015 #349
Registered User
- Join Date
- Aug 2002
- Location
- Sweden
- Posts
- 902
Ok, suspension... I've probably mentioned that I raised the fenderlips appr 40mm (1,5" or so) to make the car really low but still don't have the wheels inside the fenders.
Ground clearance will be 80mm and I've almost finished my exhaust (which was a real pain to build and prevent from hanging down).
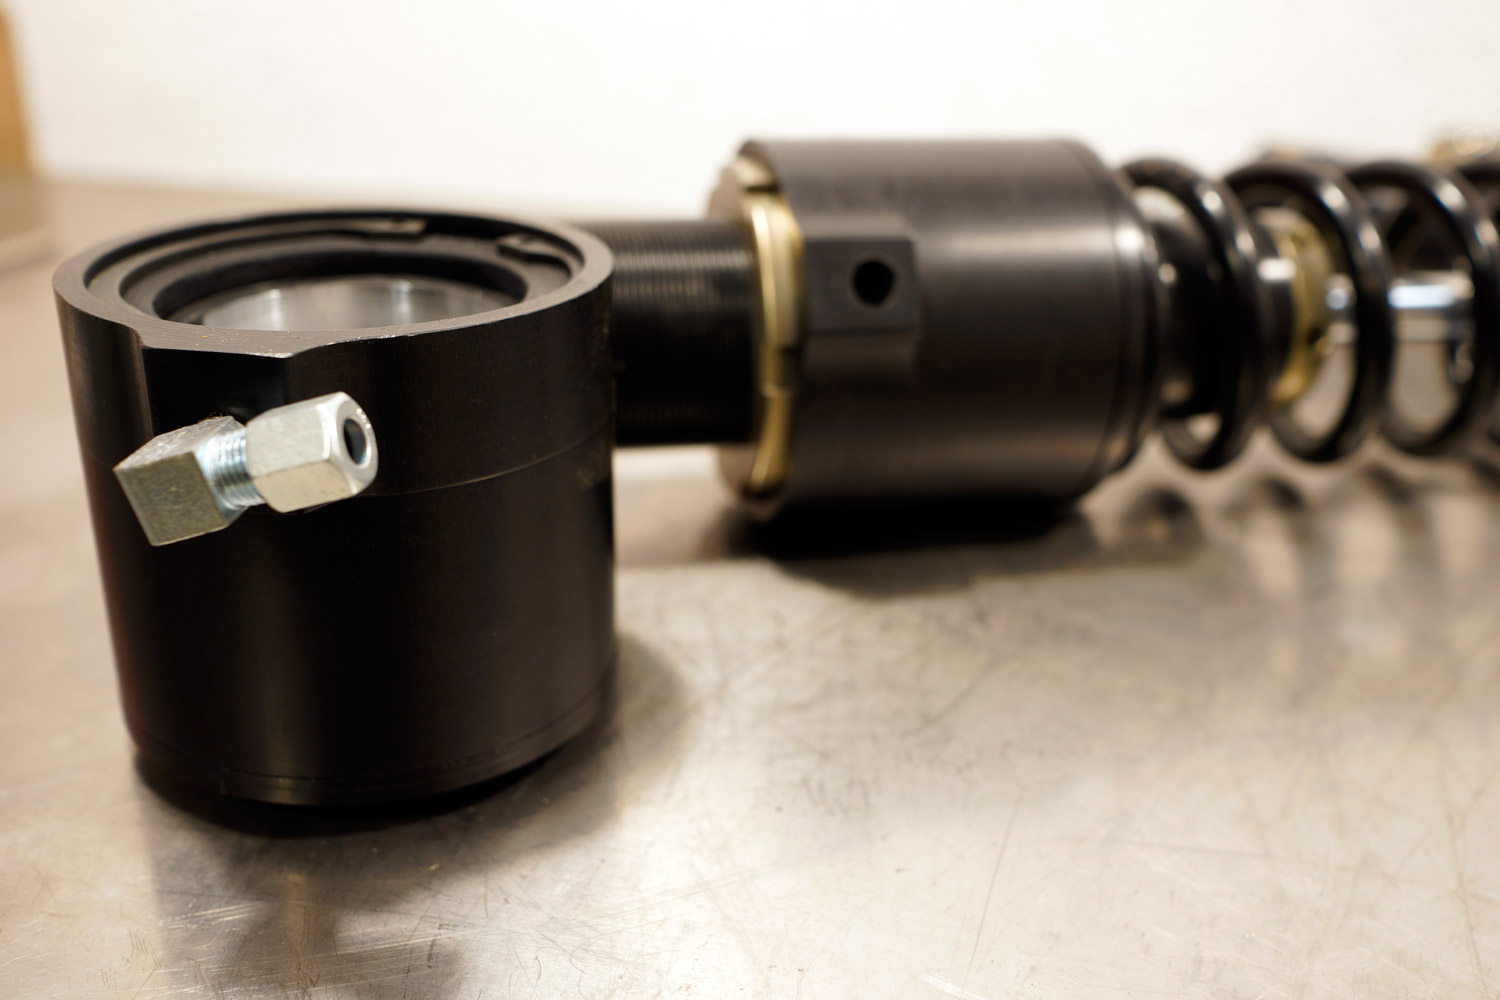
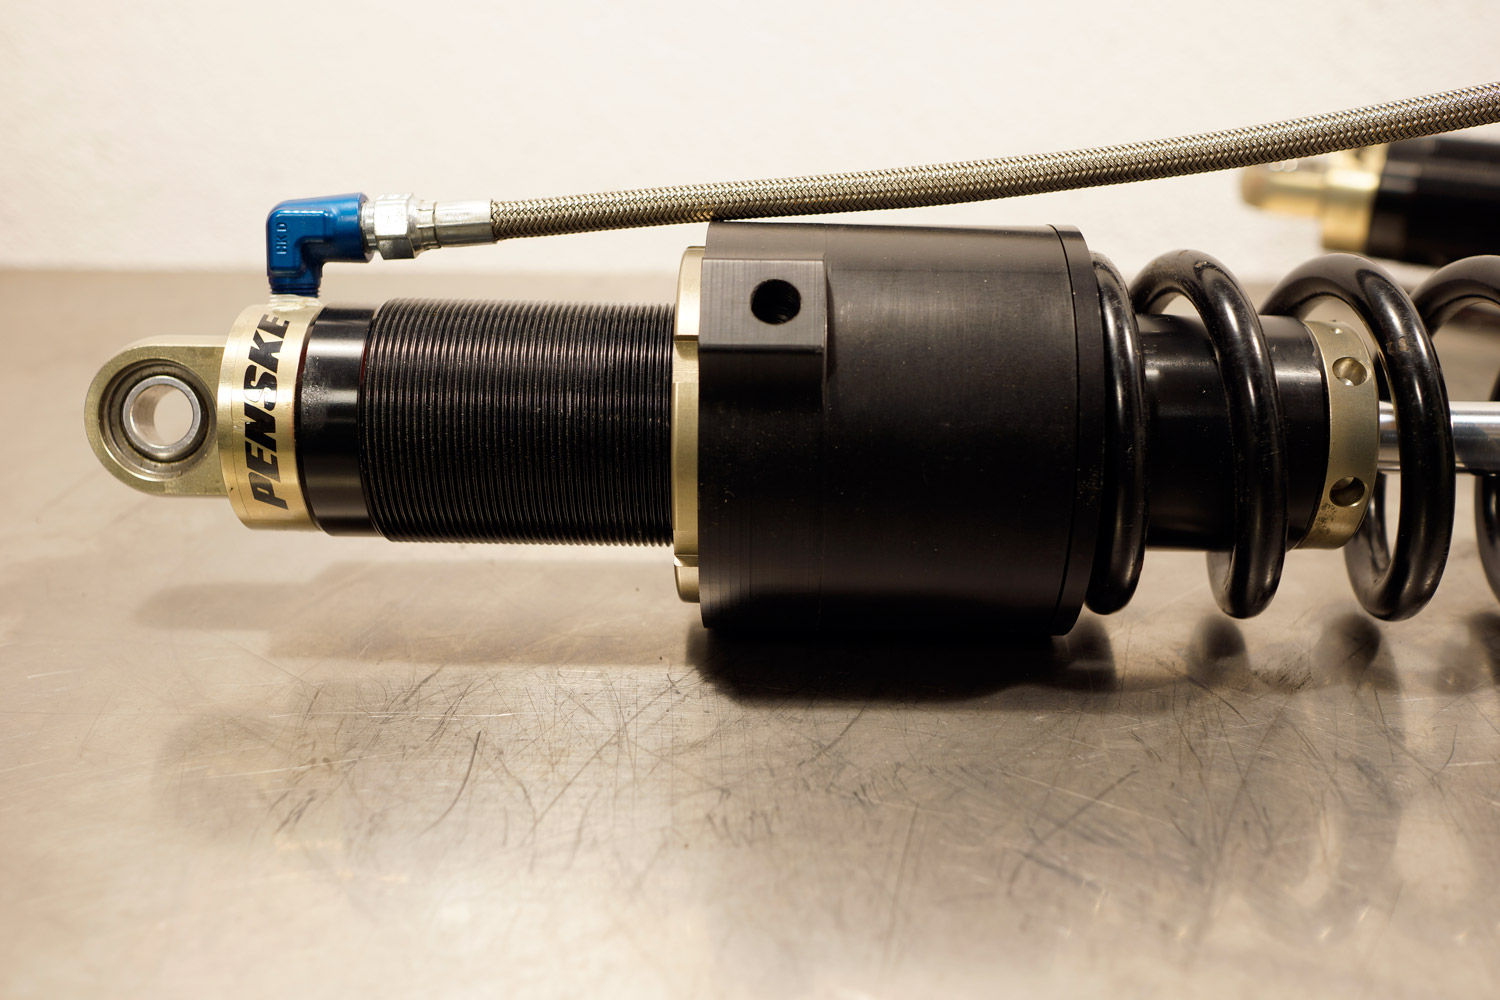
I really wanted good dampers/springs so airsuspension was never considered. But since it's not a 100% race car, I still needed to solve the battle of speed bumps and the urban djungle. To do this, I teamed up with a friend that shared the same problem for his Bentley Expedia replica (yes, the Le Mans winner...) since he had CNC-machines. I designed, he manufactured two sets.
This is as close to bolt on parts I'm coming, lol.
It's basically hydralic pistons shaped as tubes, made in aluminum and then hard anodized. Some minor tricks in them to keep them compact and light weight, but still capable of lifting the car.
I'll put them on all four corners to be able to lift the entire car 2", but front would be enough. They will hopefully lift all corners at the same time if I manage 50/50 weight ratio, but we'll see. Plan B is to have a separate circuit for the rear.
12-10-2015 #350
Registered User
- Join Date
- Dec 2010
- Location
- Apex, NC
- Posts
- 1,020
Catching up on your posts. Outstanding work! and yes, never, ever , under any circumstances, do you think about how much is left. Just chip away Originally Posted by Ripper
12-11-2015 #351
Registered User
- Join Date
- Aug 2002
- Location
- Sweden
- Posts
- 902
Thanks!
Yes, it's really hard to find motivation when you realize it's probably another couple of years until it's finished. But I try not to think about it.
Ok, I needed a pump for the lift-system. I got this pump from a friend, which is a 12v system from a pallet truck. Complete system with all electrics etc. Almost plug and play
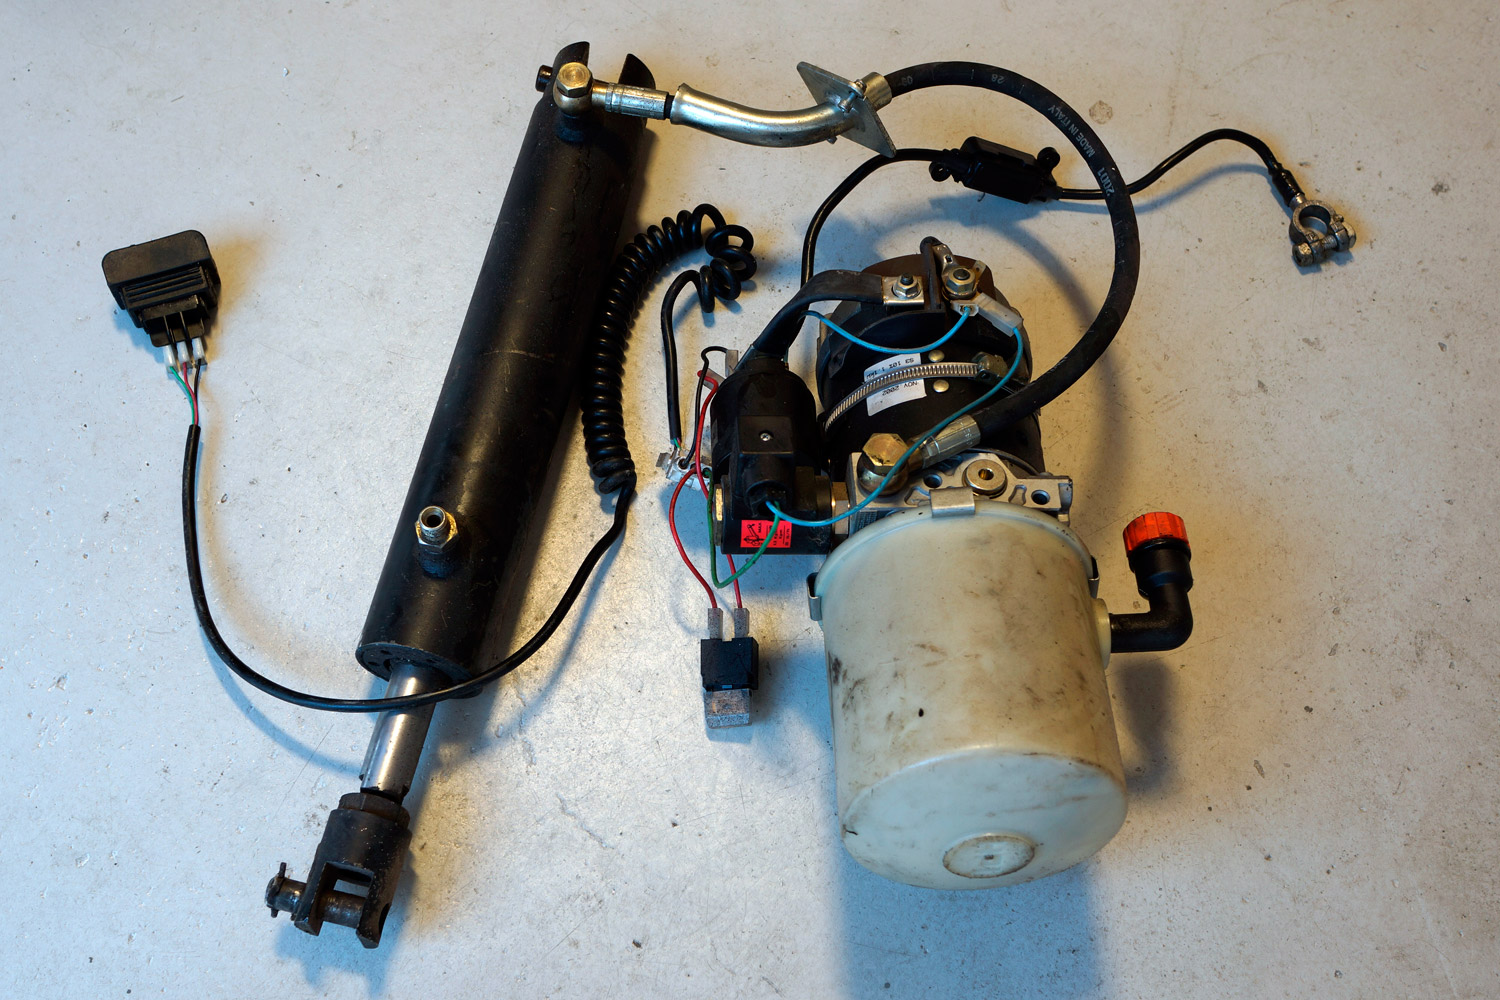
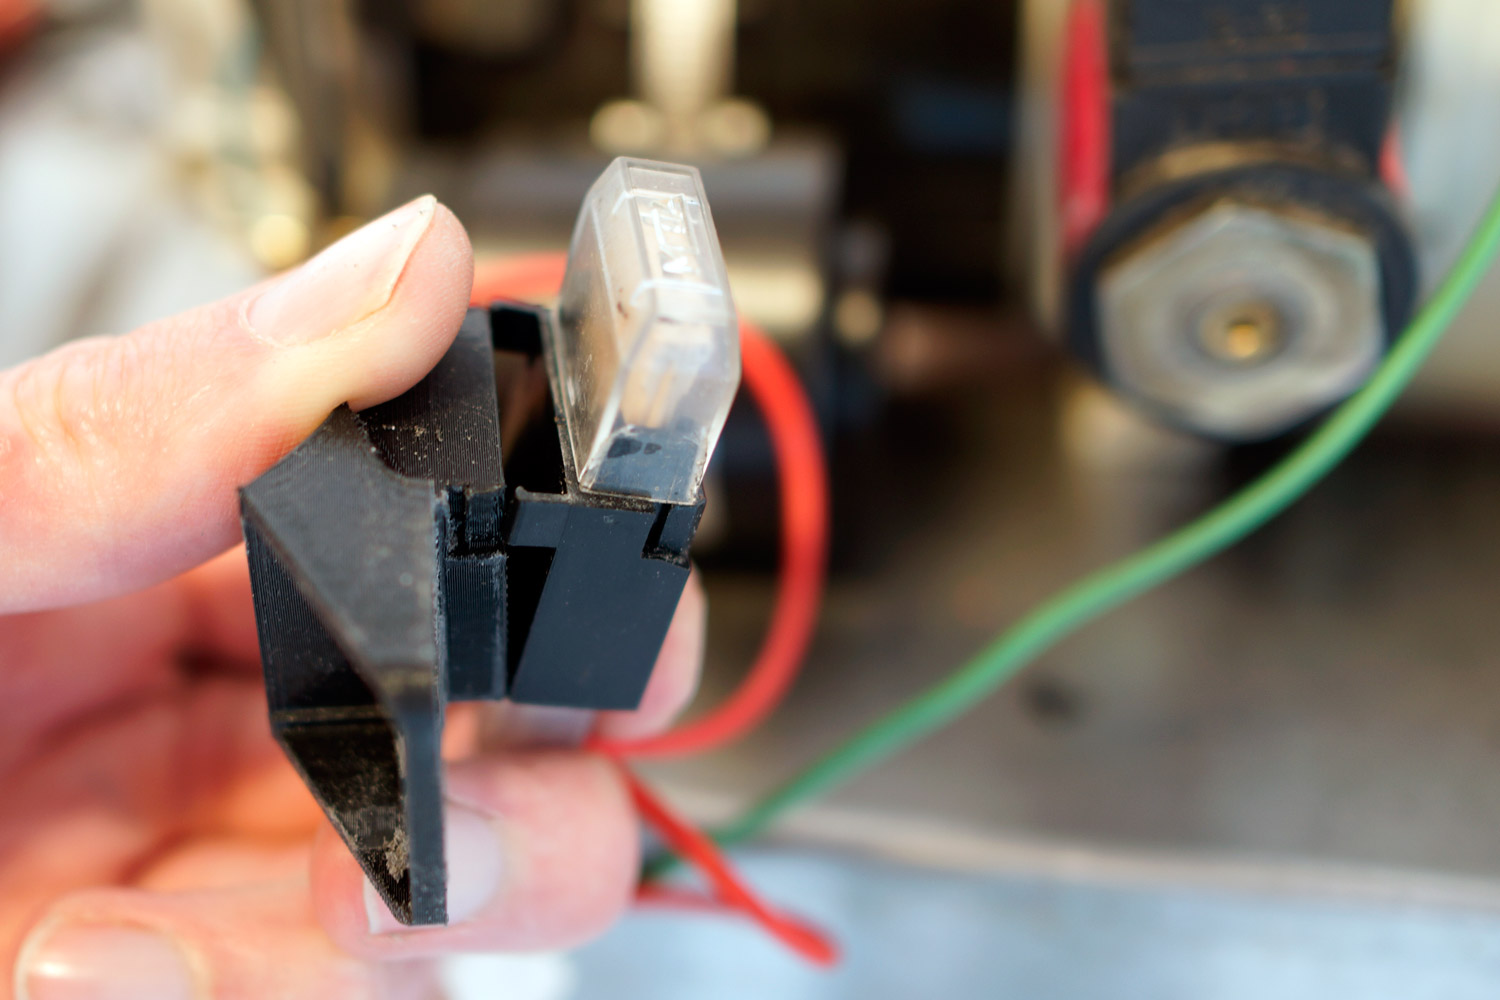
It needed some clean up to fit the Pontiac-standard, so I 3D-printed a new fixing point for the fuse block so it could be taped to the motor. I copied the click mount from the plastic piece I threw away so I could mount it in the same way as stock.
(3D-printed to the left)
Also included a mount for the connector to the switch so it didn't hang loose anymore.
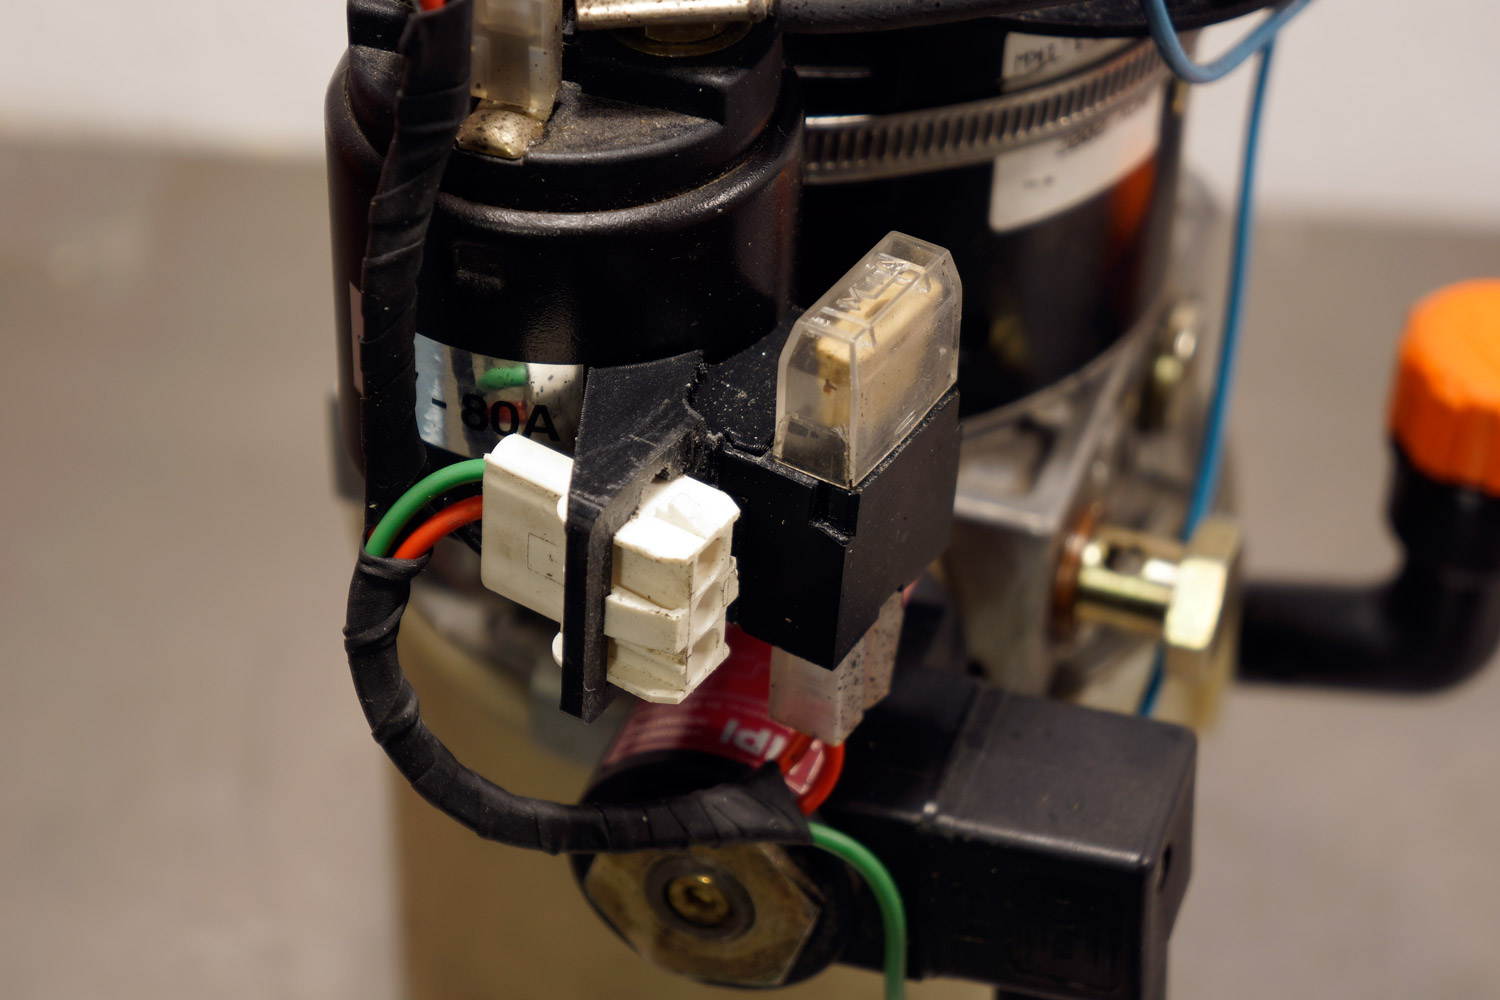
Now it looks better (taped the cables also)
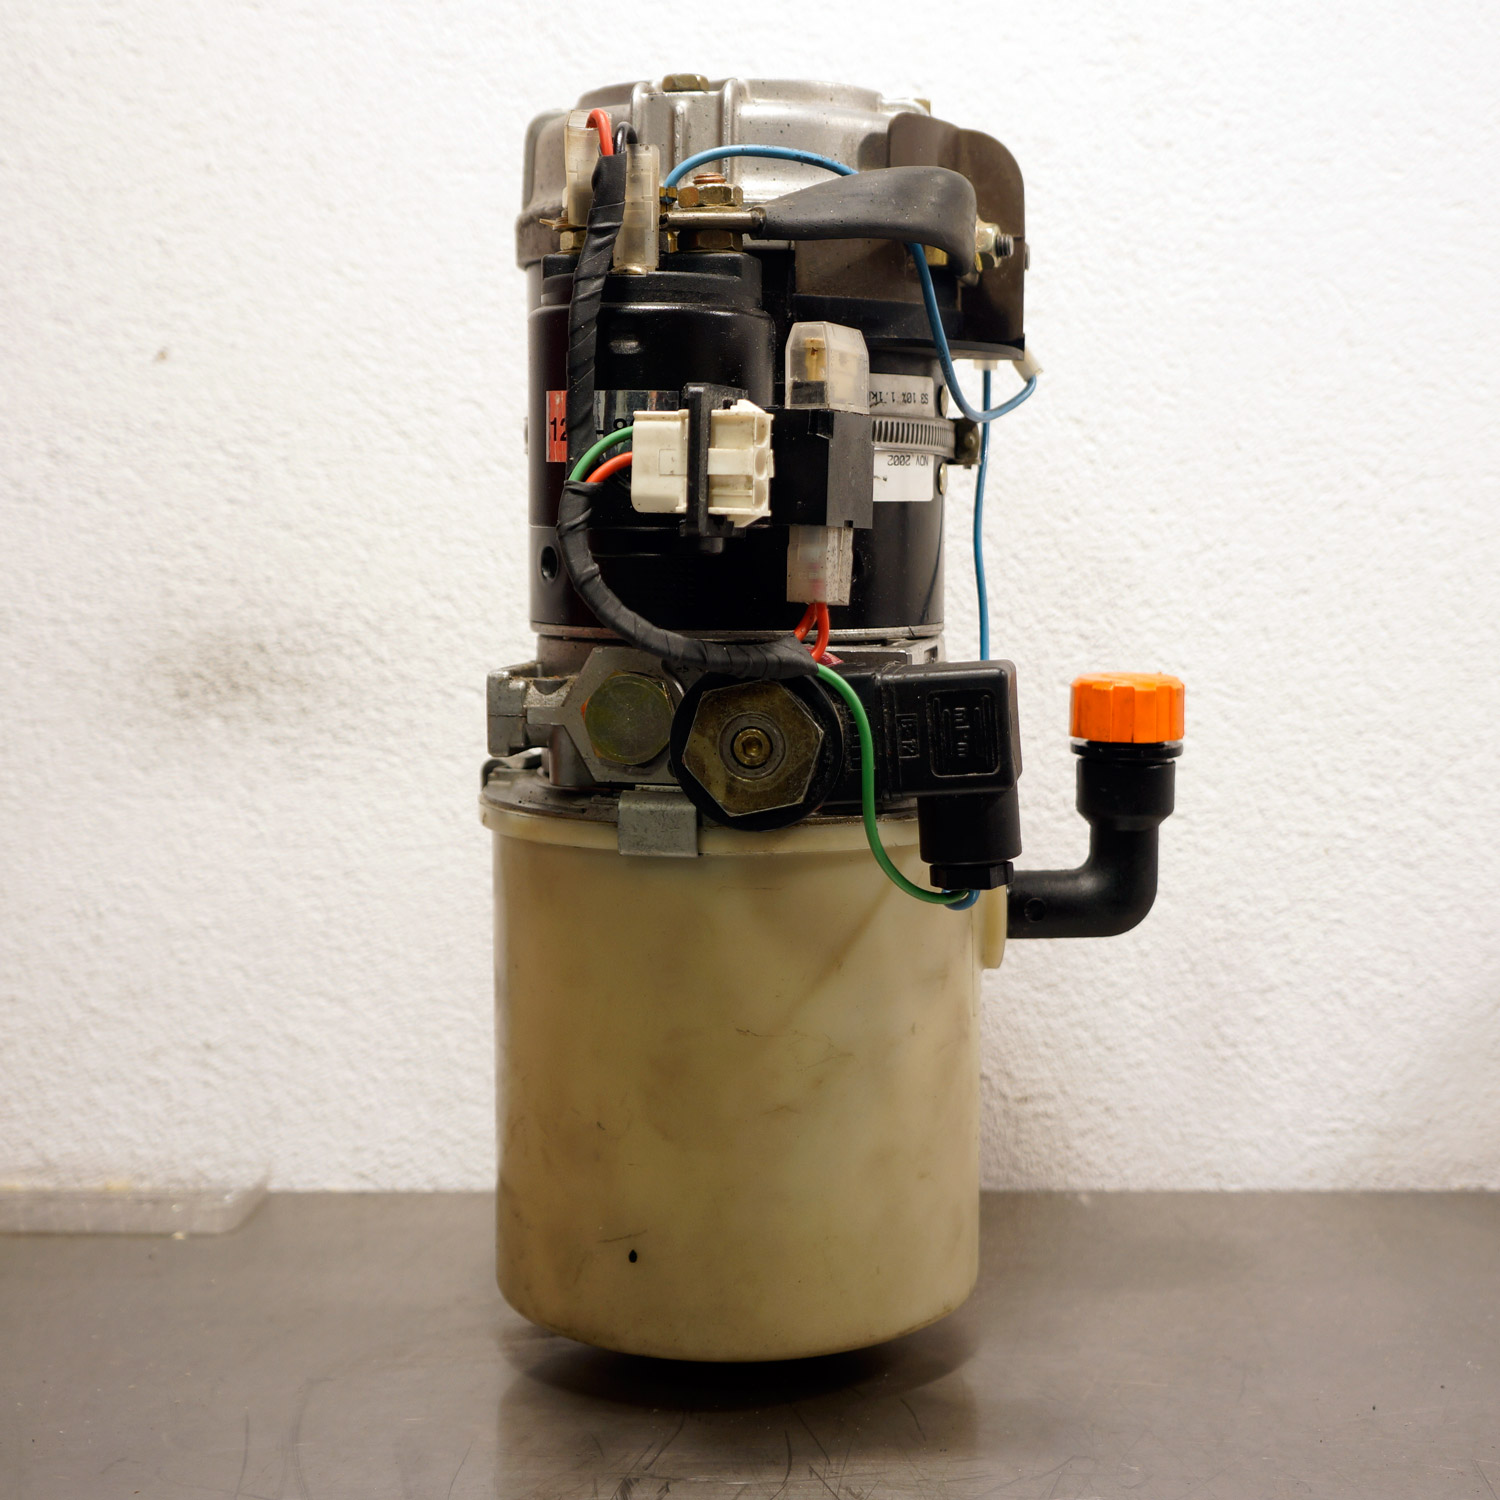
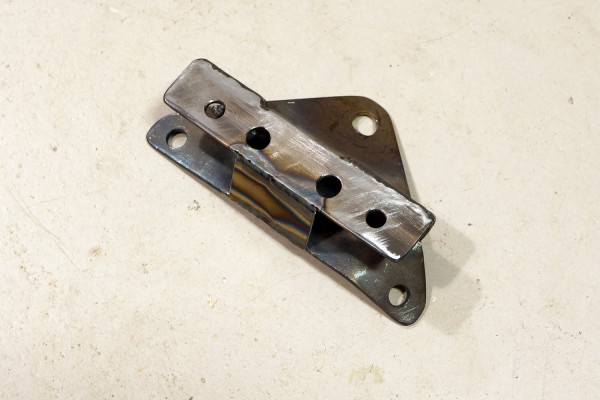
Made a mount to attach it (otherwise I would have to position the pump inside the coupé and enter the bolts under the car - too short arms to do that)
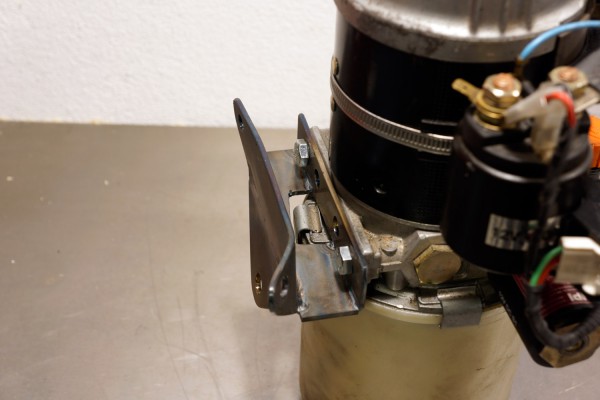
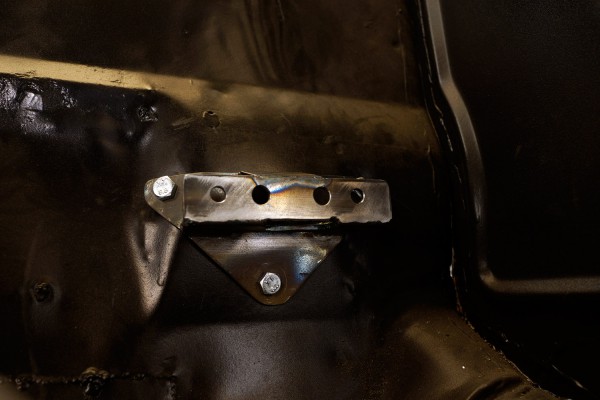
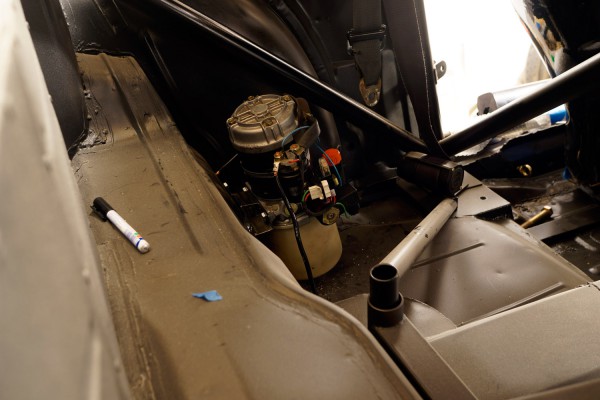
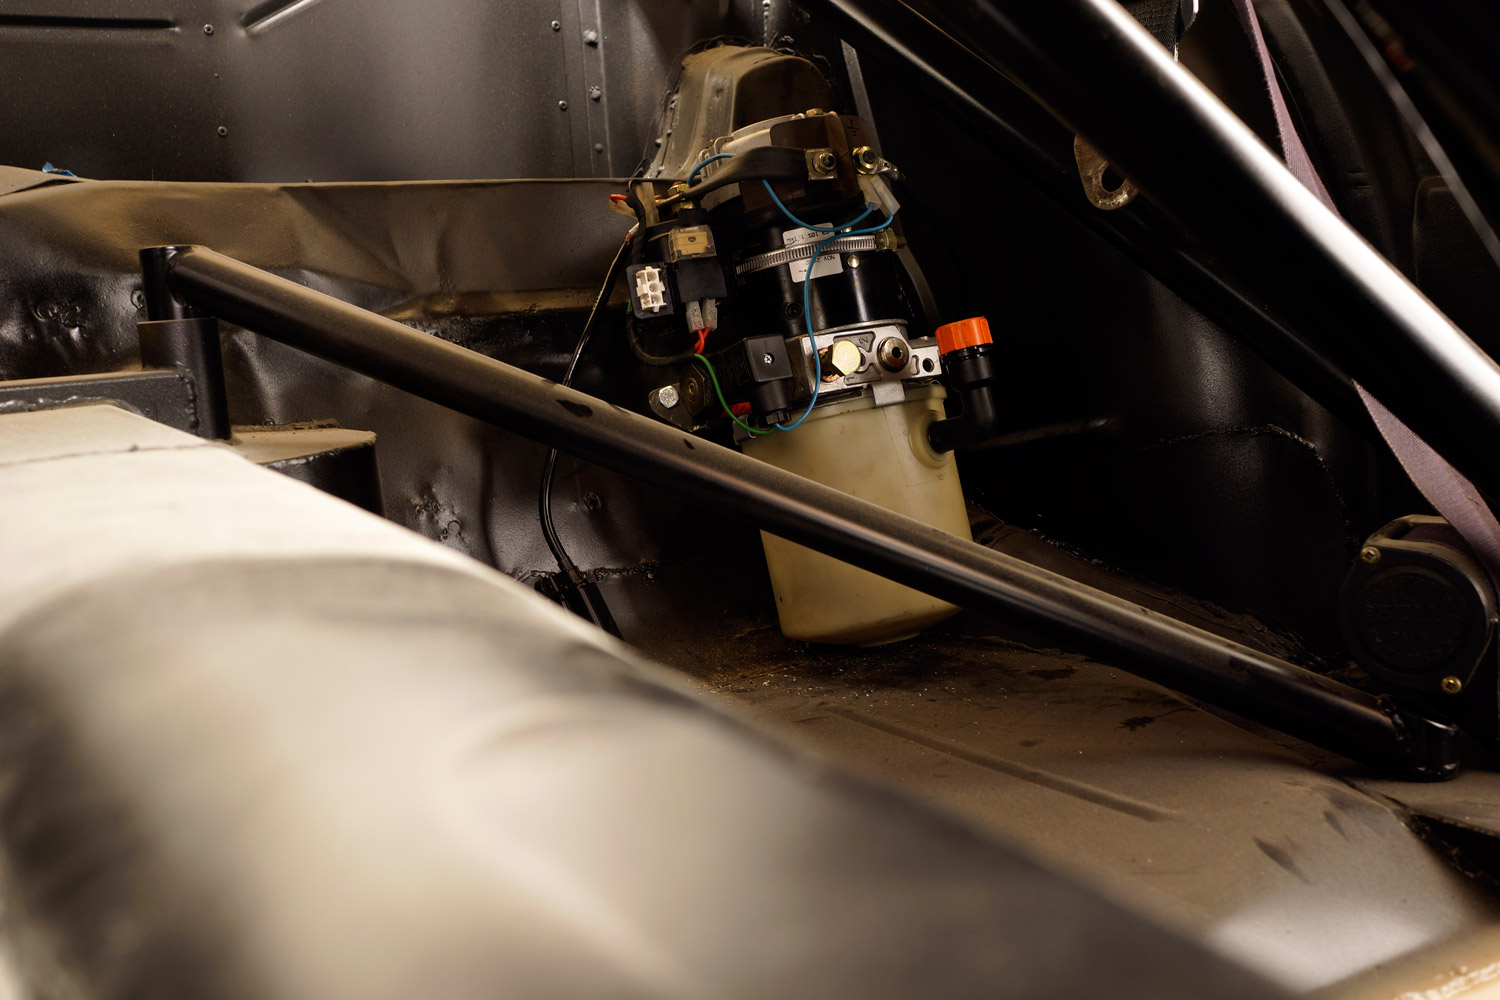
So, here it is. Sitting behind the driver seat. I'm gonna fit a extinguishing system there and then cover everything with some panels... in the future...
12-18-2015 #352
Registered User
- Join Date
- Aug 2002
- Location
- Sweden
- Posts
- 902
I replaced this:

With this:
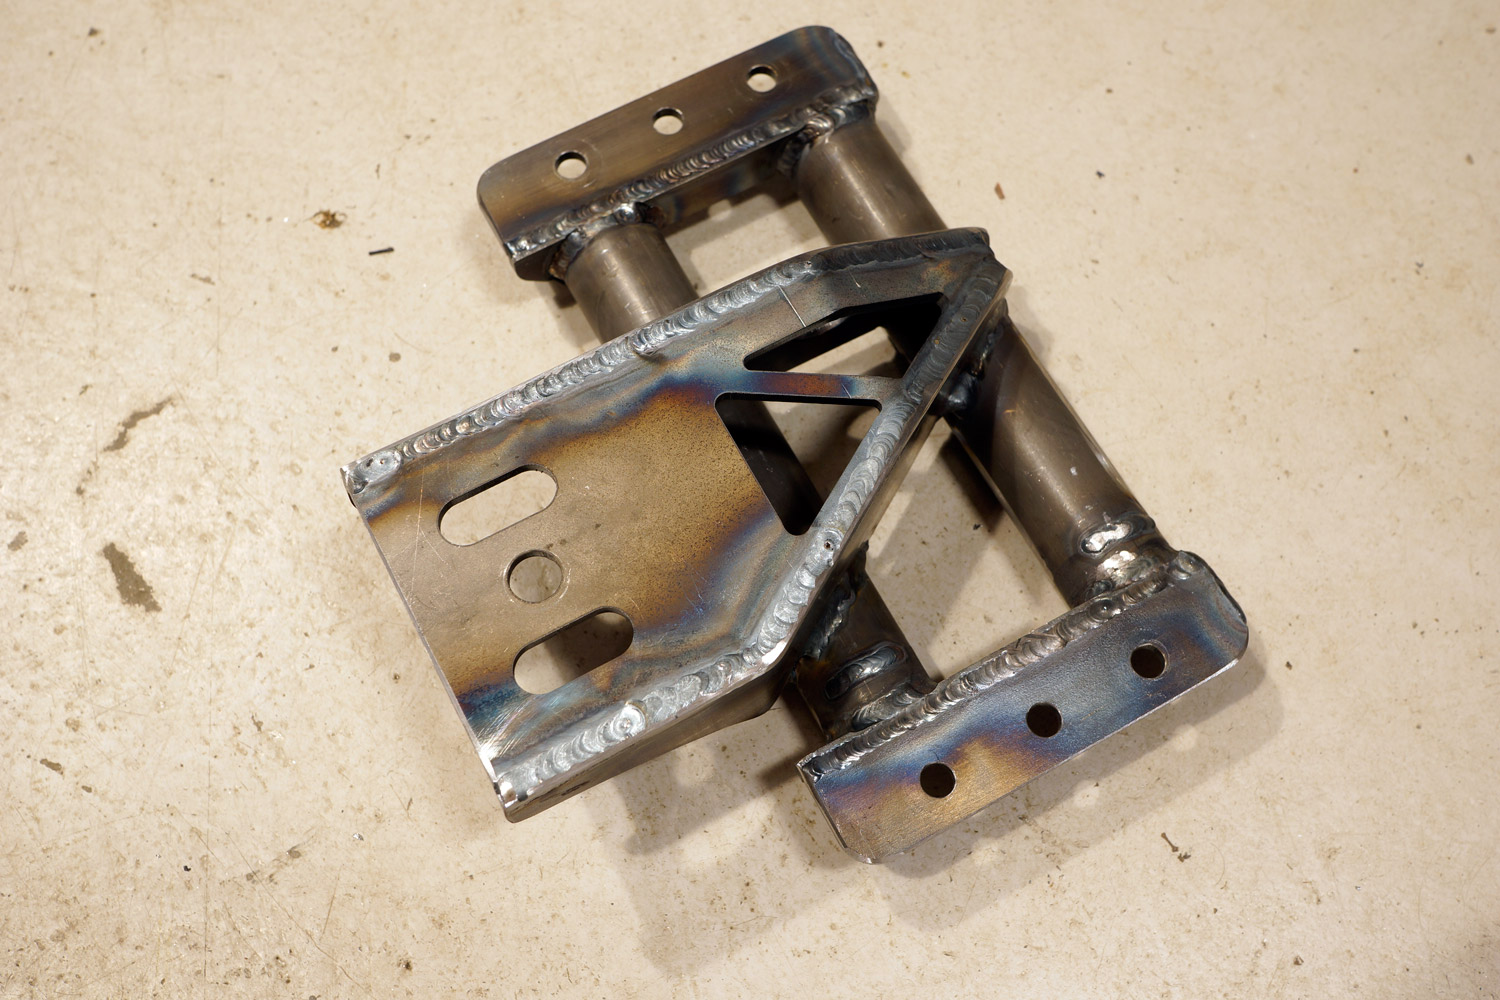
I used the beam/reinforcement allready integraded into the body. Cut it up and welded mounts (attached to a fixture, of course, so I know the future C-C measurement) to it and made a quick mockup to find out what measurements the new member should have:

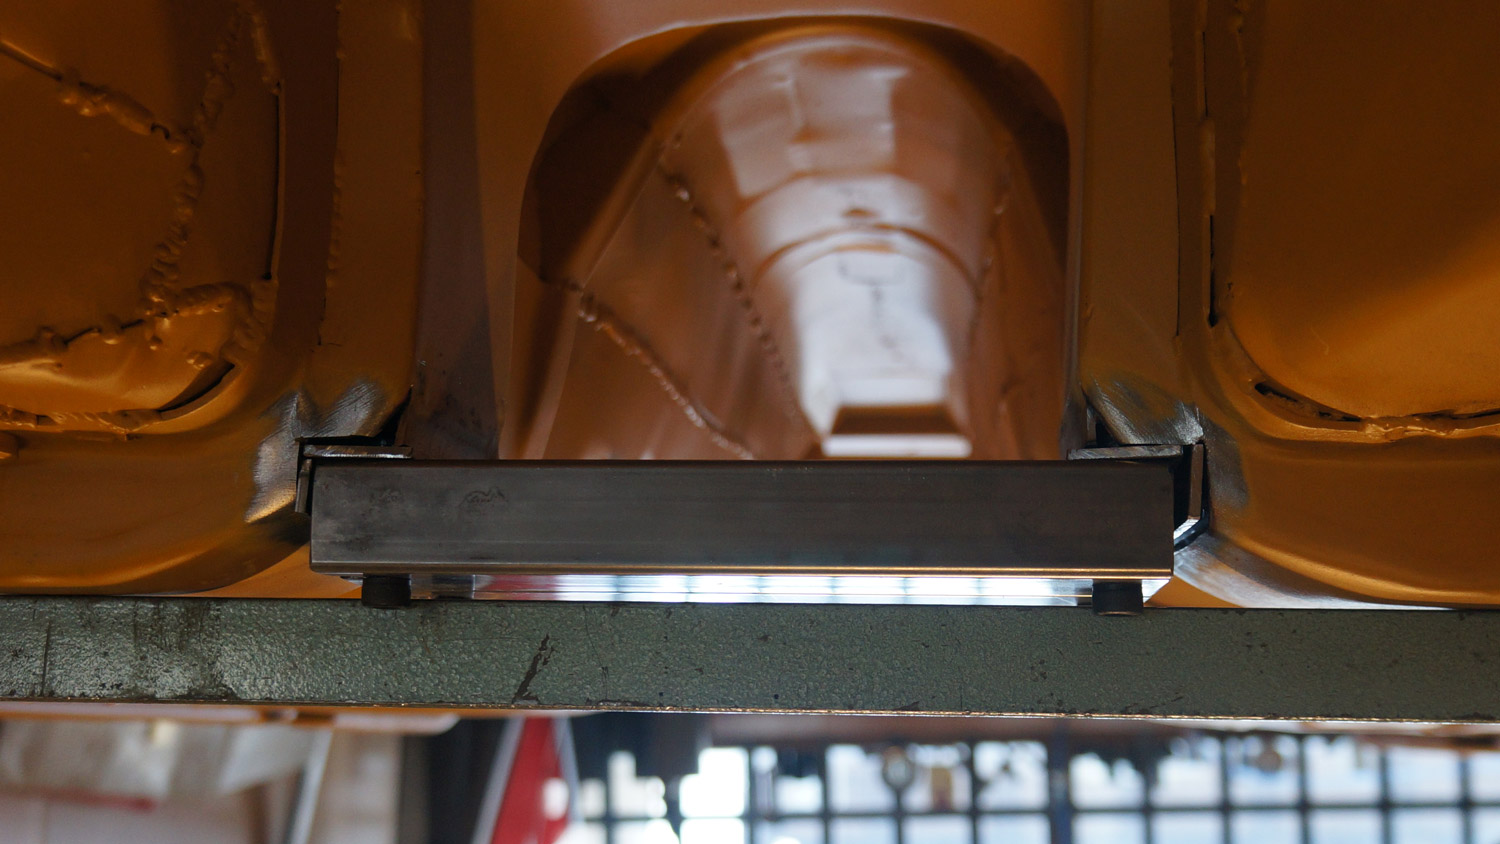
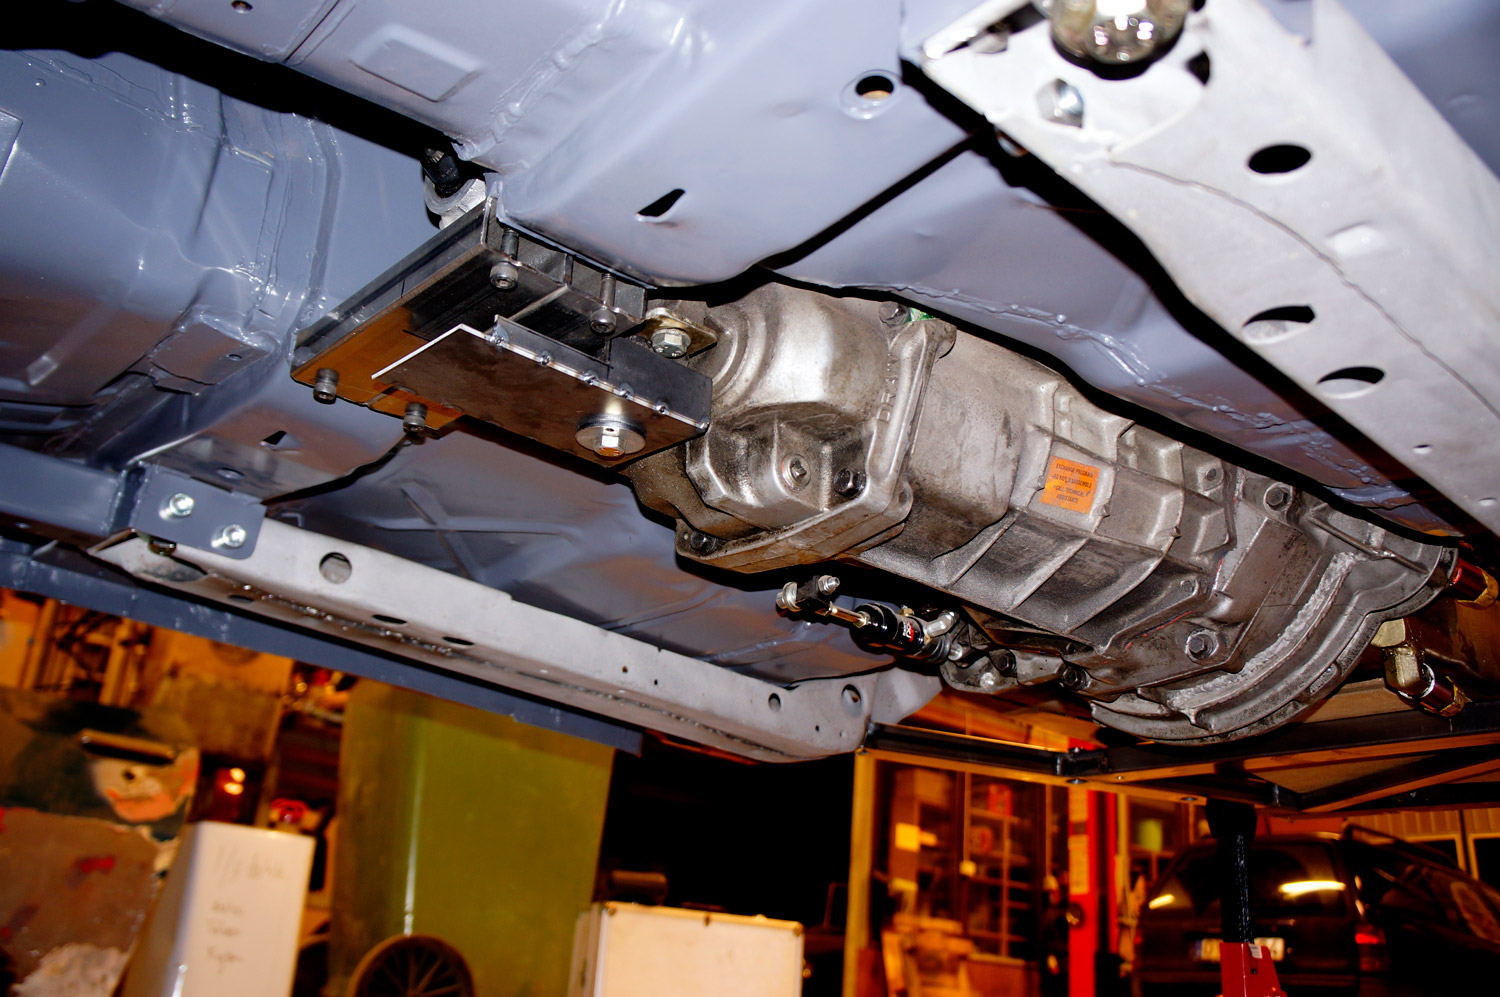
When it was measured, I made some parts in CAD and ordered these. Two tubes later it looked like this:
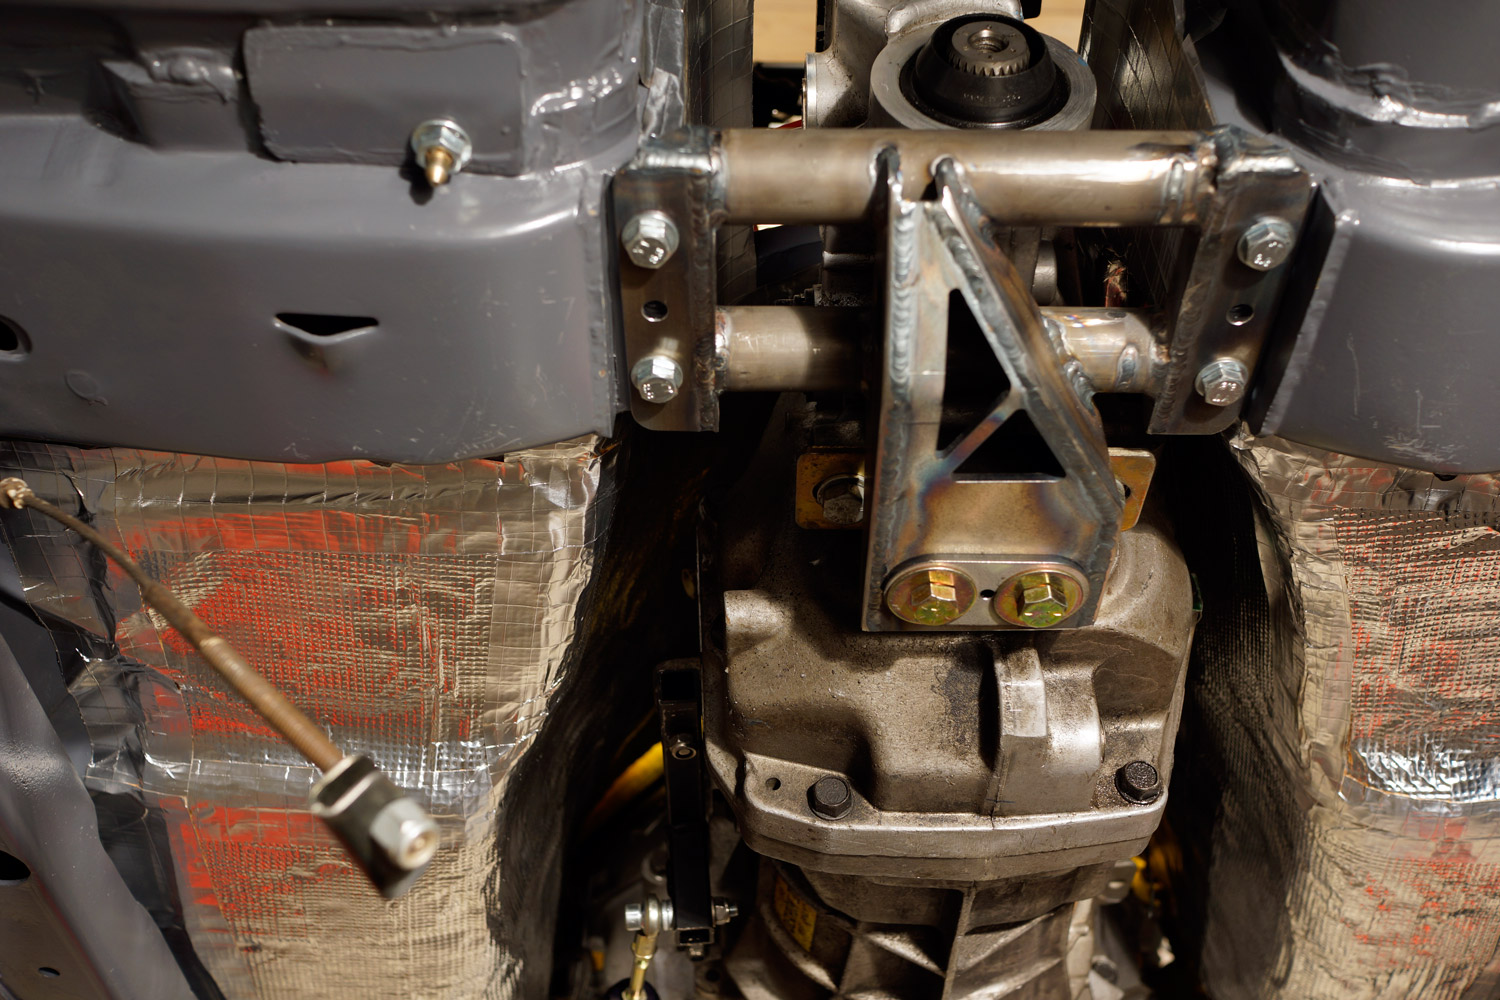
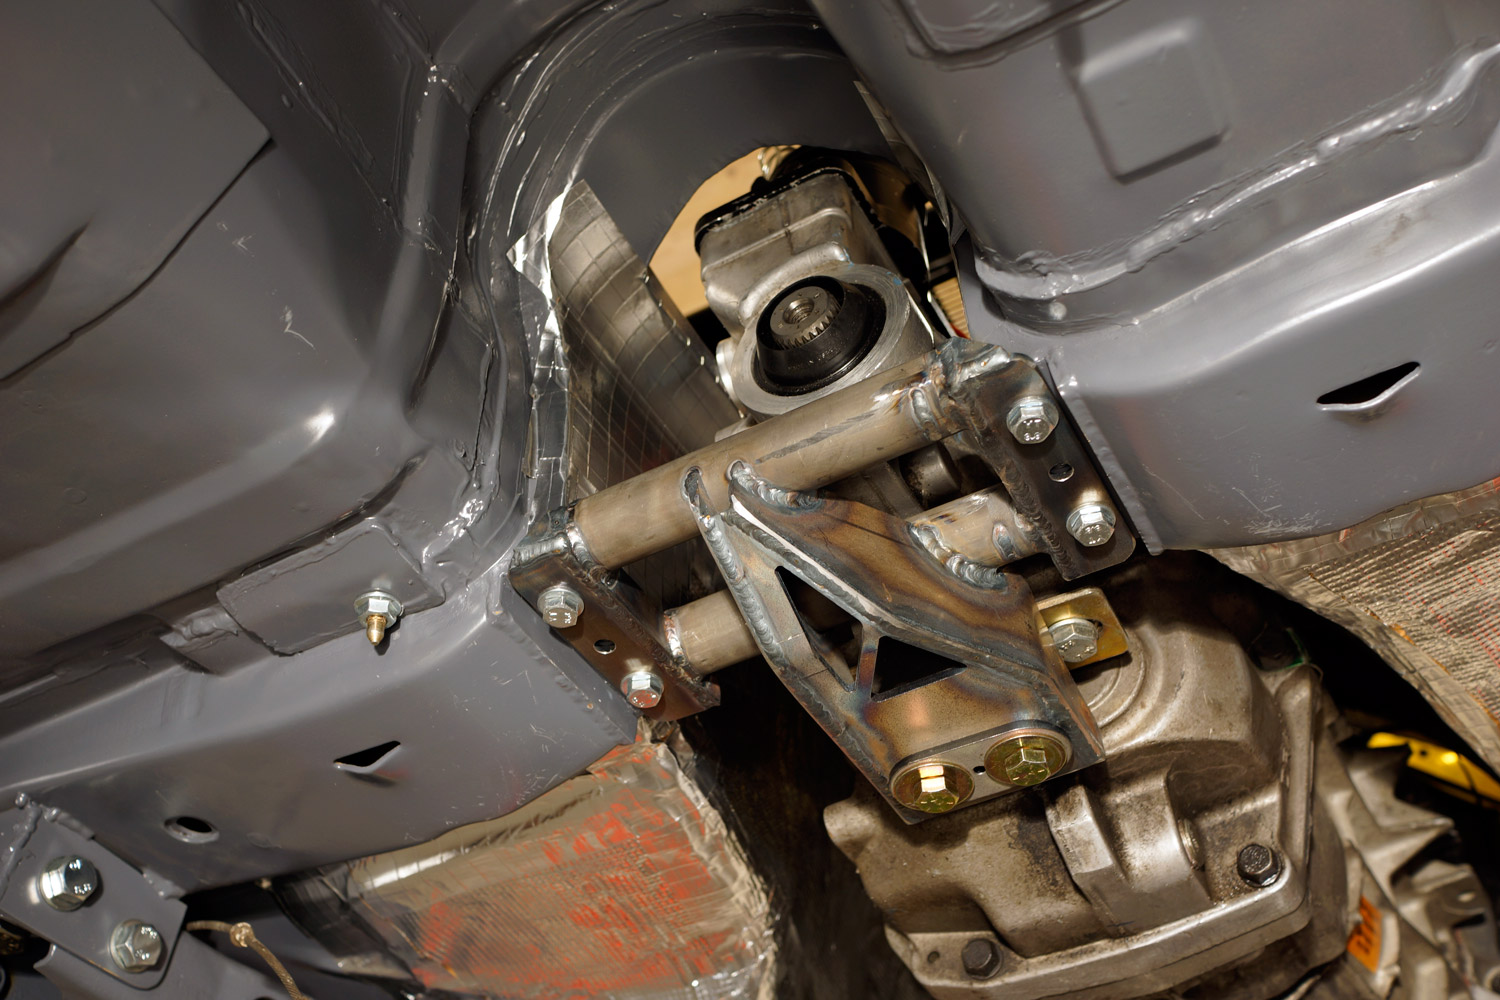
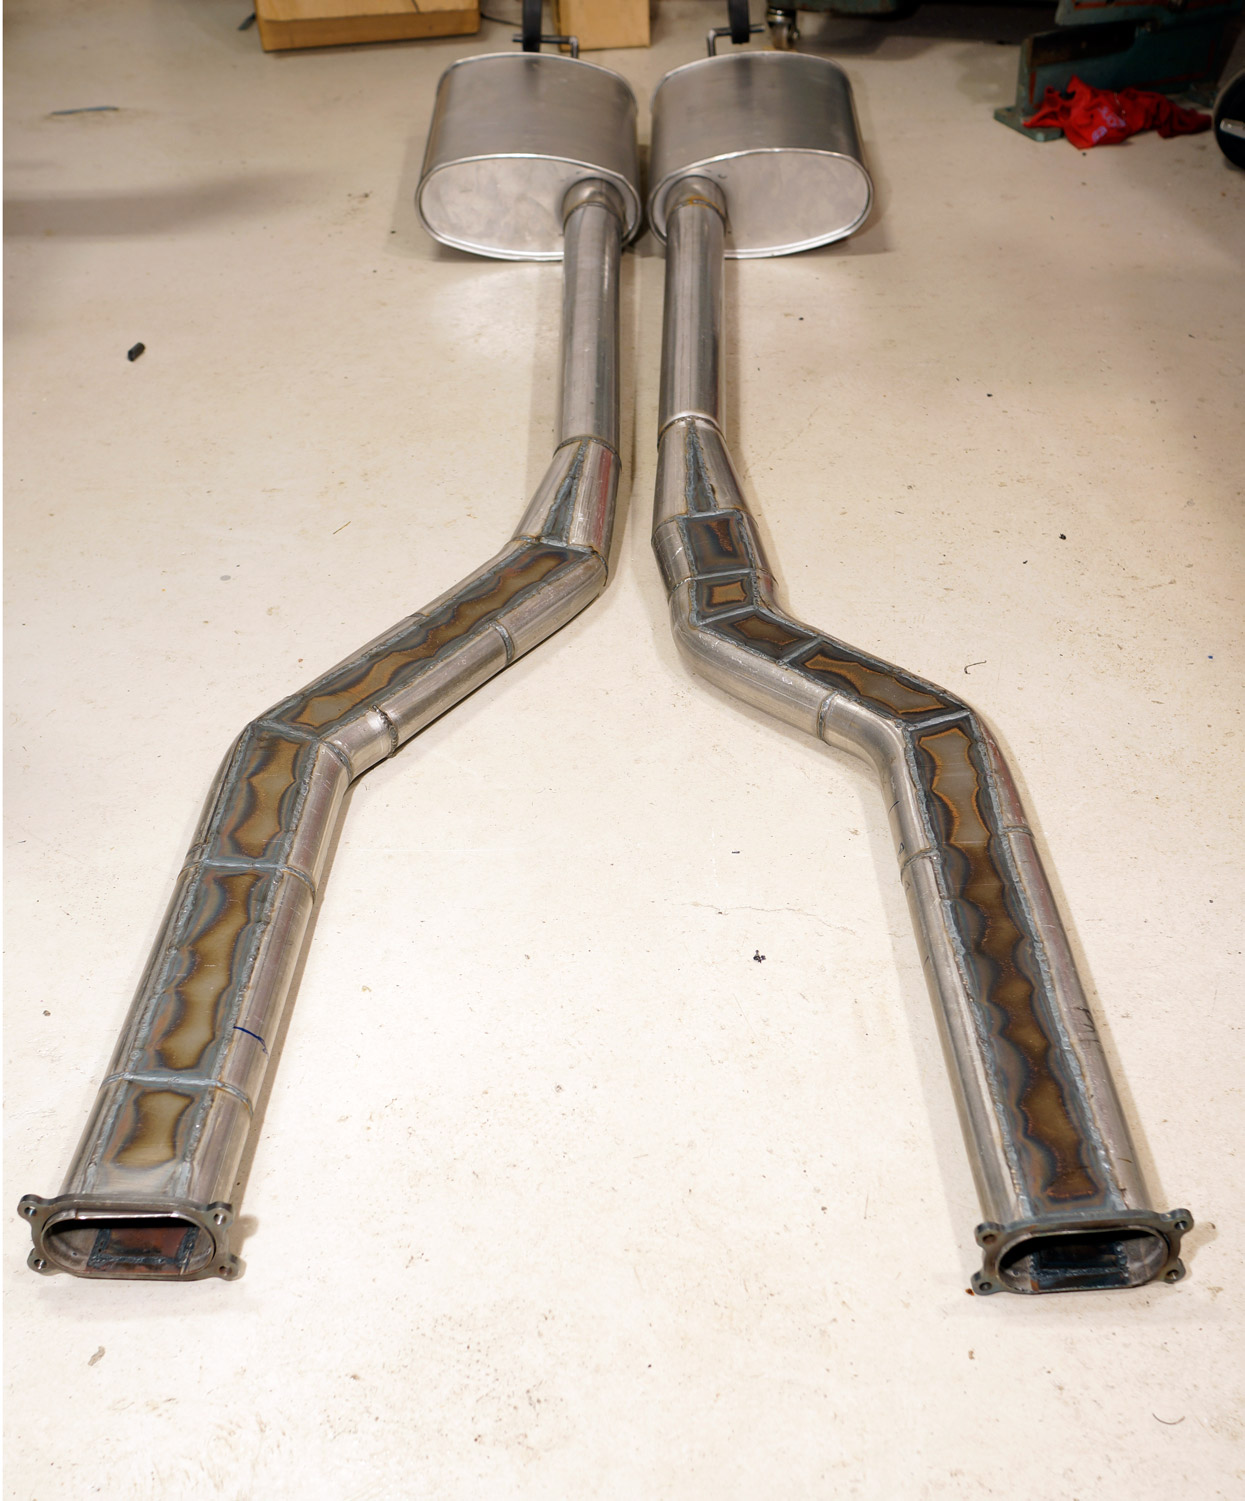
Well, there was actually a smaller modification to fit the exhaust on the passenger side since the transmission is moved slightly towards the passenger side. To do that, I chamfered the member slightly (which explains the welds on the tube - small accident with the angle grinder...)
And here's my new exhaust. Was going to be a temporary exhaust, but I'll probably develop this more in the future until I'm satisfied with the sound.
12-18-2015 #353 Registered User
- Join Date
- May 2009
- Location
- Connecticut
- Posts
- 409
Fantastic build! Is the crossmember bolted to a captive nuts inside the tunnel?
Aldin
1969 Camaro (Weapon of Choice) in the works
12-18-2015 #354
Registered User
- Join Date
- Aug 2002
- Location
- Sweden
- Posts
- 902
I used weld nuts inside the profile. When I googled captive nuts they looked weaker than what I used but principle is the same.
This is what I used:
12-18-2015 #355
Registered User
- Join Date
- Apr 2011
- Posts
- 164
Where do you get them? Originally Posted by Ripper
12-18-2015 #356
Registered User
- Join Date
- Aug 2002
- Location
- Sweden
- Posts
- 902
You mean where in Sweden I got them? ;)
(i.e. Swedol has them)
A quick ebay search found a couple of different dimensions:
http://www.ebay.com/sch/i.html?_from...d+nut&_sacat=0
12-18-2015 #357 Registered User
- Join Date
- Oct 2015
- Posts
- 122
 WARNING! Never google "Captive Nuts". It gets really weird. Originally Posted by Ripper
12-18-2015 #358 Registered User
- Join Date
- Dec 2011
- Location
- Planit Oahu, Hawaii if you don't belive me check shipping prices
- Posts
- 254
Have you considered manufacturing those? Originally Posted by Ripper
I would Like a set.
12-19-2015 #359 Registered User
- Join Date
- Nov 2007
- Location
- Dayton, Ohio
- Posts
- 435
quoted wrong post
Last edited by 69stang; 12-19-2015 at 11:27 AM. Reason: remove post
Roger
69 Mustang coupe, under construction
2011 Mustang - DD
https://www.pro-touring.com/threads/...ang-SuperCoupe
Freedom Of Speed!

12-19-2015 #360
Registered User
- Join Date
- Nov 2007
- Location
- Dayton, Ohio
- Posts
- 435
You can get them at McMaster-Carr. I've gotten them there before. Originally Posted by hotrod56
http://www.mcmaster.com/#weld-nuts/=10b5upbRoger
69 Mustang coupe, under construction
2011 Mustang - DD
https://www.pro-touring.com/threads/...ang-SuperCoupe
Freedom Of Speed!

 Reply With Quote