

Results 41 to 60 of 877
-
03-09-2010 #41
 Registered User
- Join Date
- Feb 2010
- Location
- Fort Collins, Colorado
- Posts
- 20
What are your opinions on the fatman kit so far? I've always been curious about their stuff, just haven't physically seen a car running their stuff.
Mike
-
03-09-2010 #42 Registered User
- Join Date
- Jan 2010
- Location
- Calgary, Alberta, Canada
- Posts
- 620
Man I love your car, as you can probably tell! Originally Posted by kmcanally

I'm likely going to narrow a 9" from a truck. Narrow 1 side to center the pinion and have a 58-58.5" rear. Then I can space the wheels out to exactly where I want.
I assembled the QA1 rear coil overs tonight. Can't wait to build the rear 3 link!
Wes
03-09-2010 #43
Registered User
- Join Date
- Jan 2010
- Location
- Calgary, Alberta, Canada
- Posts
- 620
So far I've been very under impressed. There seem to be fitment issues with just about every system so far. The crossmember support is pretty ghetto. I'll describe this better later when I start fabrication of my replacement supports. I need to get some material this week so i can work on it this weekend. Originally Posted by mbrunson427
Overall I think the design is sound and with some modification it should handle pretty well. The details on assembly and exactly which parts are required to complete the kit are very poor.
Wes
03-10-2010 #44 Registered User
- Join Date
- May 2004
- Location
- Dallas, TX
- Posts
- 864

Hi Wes, I thought you would recognize me. Since you are adding available tire room/clearance by changing to a coil-over why not go ahead and move the inner wheelhouse flush with the outside of the frame rail? Then you could run at least a 295 tire on the 18x10 version of the FR500.
Originally Posted by Wesley J
03-10-2010 #45
Registered User
- Join Date
- Jan 2010
- Location
- Calgary, Alberta, Canada
- Posts
- 620
If I could start over again, I would..... But, my 275's arrived today and the wheels should be here this week. Originally Posted by kmcanally
Decided to stick with my 8" diffy as my car is pretty underpowered, I have 2 sets of gears, its posi and its a good width. I'm sure it'll be able to handle the 400 HP I have planned for the car.
Rear suspension fab starts this week/weekend. I'm still short my spherical rod ends but the bushings will do for now for the fabrication. I'm going with a custom 3 link with poly bushings on one end and sphericals on the car end of all the links.
I've been doing the rear suspension design on a couple of spread sheets. Things are looking good. I'm planning to have 3 different lower link mount points on the axle mount which should give me 100%, 65% and 27% antisquat. I spent some time on sensitivity analysis of my assumptions on these numbers and I'm pretty confident that I'm within +/- 10%. With the 3 points of tuning I should be happy in the drag strip as well as the autocross.
Today's parts:
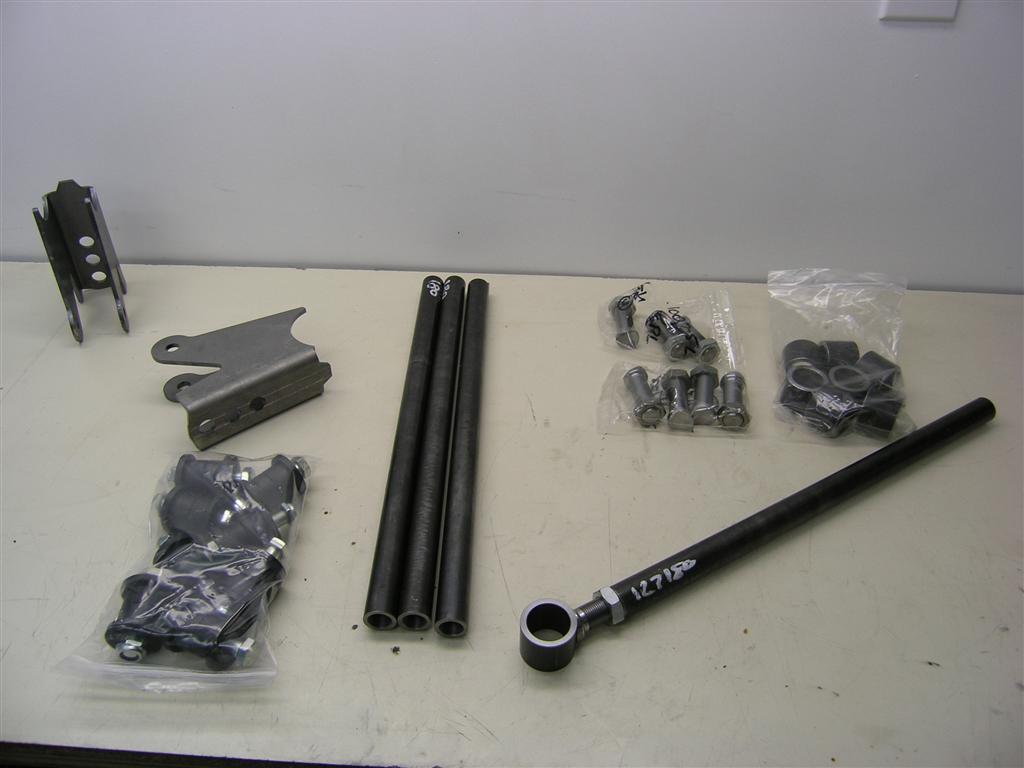
Wes
03-11-2010 #46
Registered User
- Join Date
- Jan 2010
- Location
- Calgary, Alberta, Canada
- Posts
- 620
I have what I'm assuming to be the original I6 radiator in the car with no fan shroud. Not exactly conducive to keeping the little car cool. So, I spent time over at Mustang Forums and found a good solution.
Summit Racing has a universal that guys are using that fits well. It's not a direct bolt in but who cares.
http://www.summitracing.com/parts/SU...s/?prefilter=0
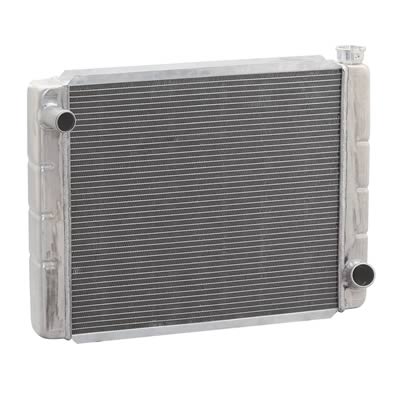
Cheap and shipping was completey reasonable, $220 total.
I'll build an aluminum shroud and add an electric fan.
Wes
03-11-2010 #47 Registered User
- Join Date
- Apr 2009
- Location
- san diego
- Posts
- 5,102
Looks cool Wes, where is the third link going? center on the diff? What length were you able to get? Does it come into the back seat?
My 3-link is still on the drawing board, but im getting closer to taking the car off the road to build it. My 3 link will have an upper link of 14" and no back seat penetration. however I will be cutting the trunk to get the low ride height I want.My build thread: https://www.pro-touring.com/showthre...ing&highlight=
The mustang build thread: https://www.pro-touring.com/showthre...el)&highlight=
03-11-2010 #48
Registered User
- Join Date
- Jan 2010
- Location
- Calgary, Alberta, Canada
- Posts
- 620
I'm essentially copying the EVM 3rd link. It doesnt protrude into the floor and ends up being approximately 11.5" long.
I'll post my drawings and calculations once I get to the fab stage. The true pivot locations will be slightly different than what I have measured (with the exception of the front lower link). I'll adjust the lower link axle mount to correct my IC as required. I'm planning to have 3 adjustments but we'll have to see how the geometry/space/clearence works out.
Damn, I need to order my spherical rod ends...
Wes
03-15-2010 #49
Registered User
- Join Date
- Jan 2010
- Location
- Calgary, Alberta, Canada
- Posts
- 620
Well, I had a pretty good weekend working on the car. Spent about 20 hours in the shop.... My wife is awesome.
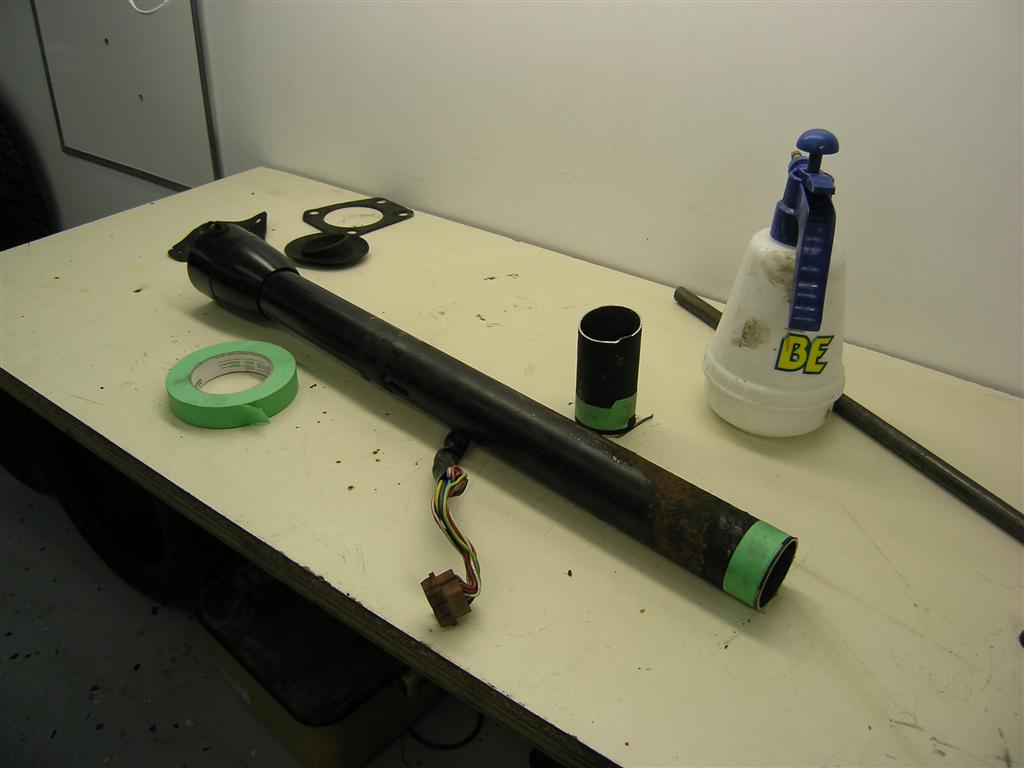
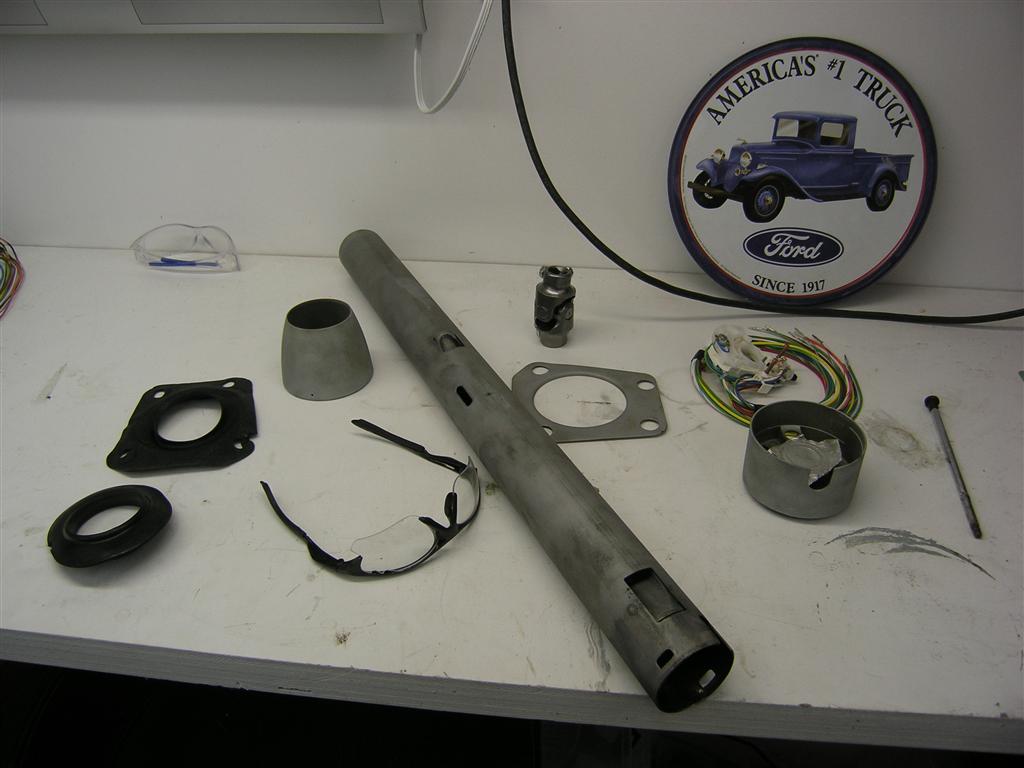
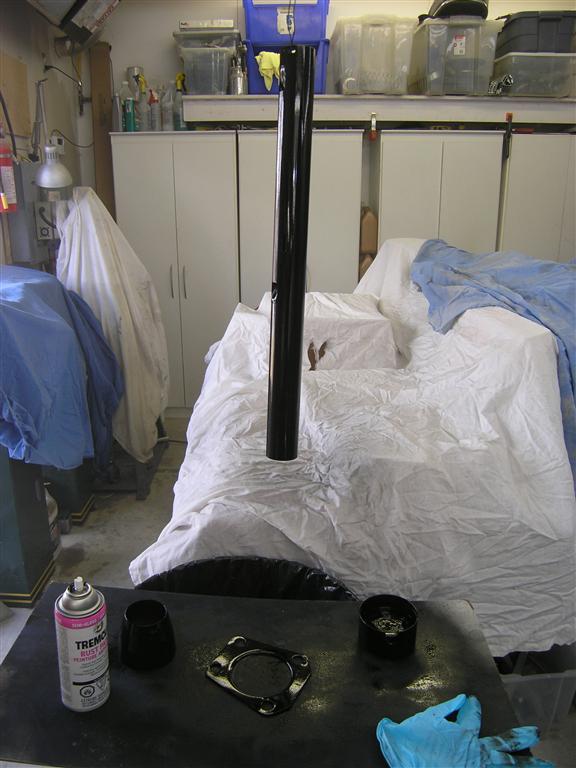
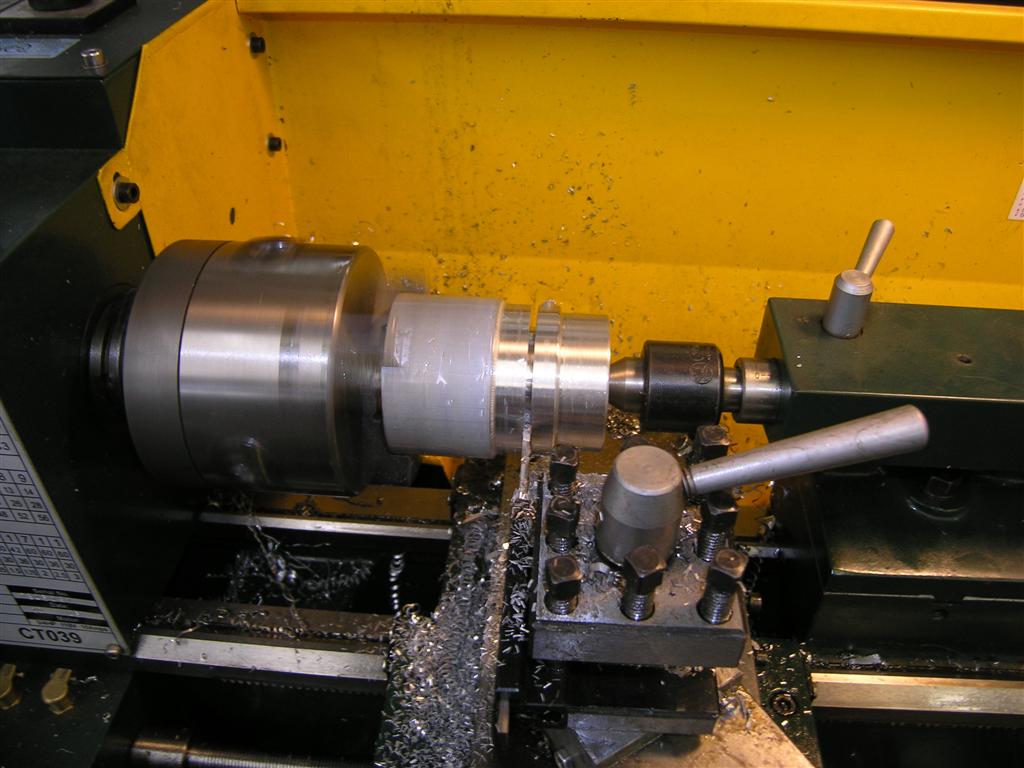
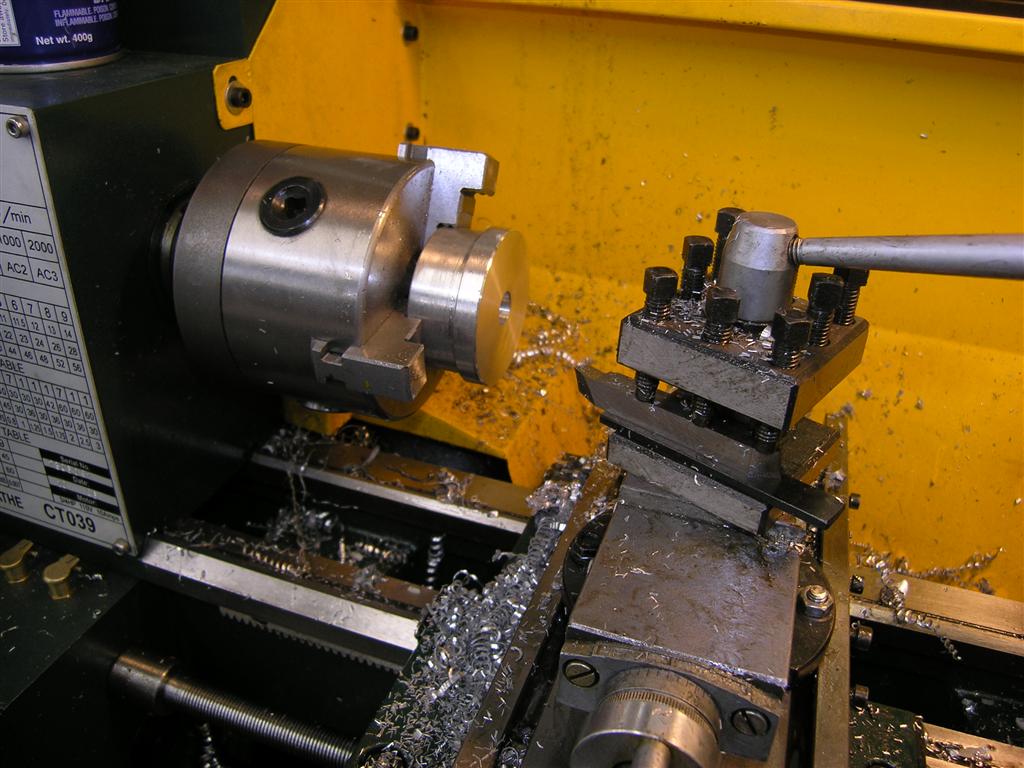
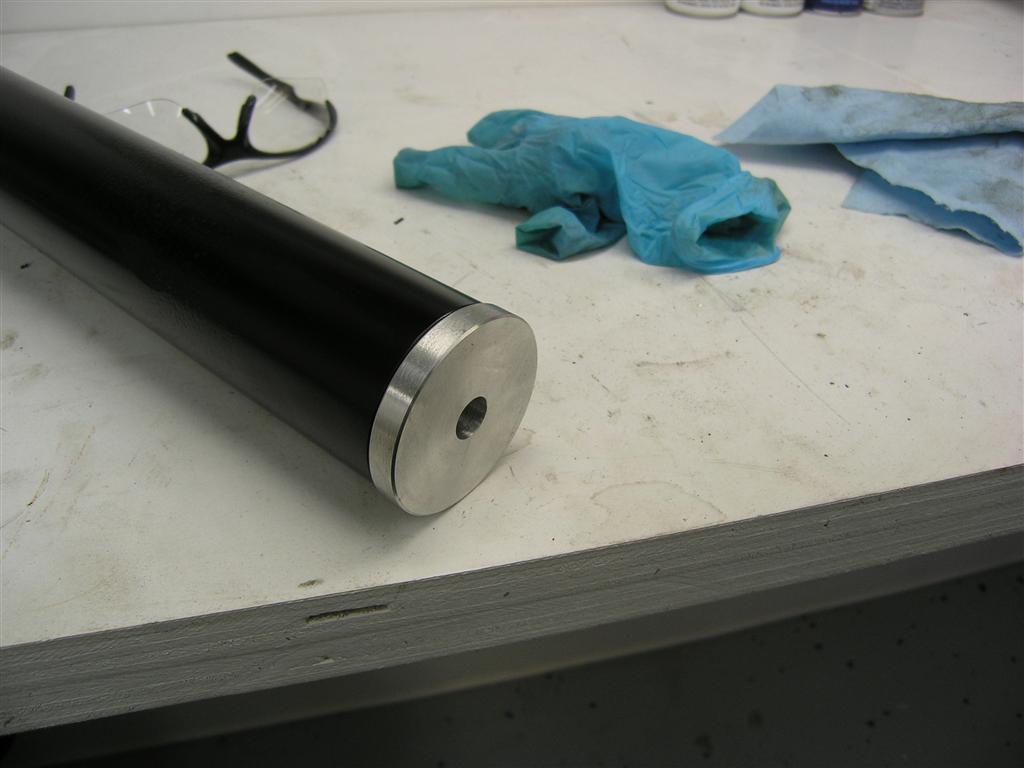
Completely disasembled the steering column, sand blasted and repainted. Spent some time on the lathe building the lower shaft support. Dont ask why I didnt buy an Ididit column. I prefer to build stuff rather than bolt stuff on. Building stuff is cheaper and most importantly, I have fond memories of riding around in my Dad's Mustangs as a child so I want to keep the original interior feel.
Didnt quite get the shaft support bearing section done as I didnt have a bearing and my frickin boring kit wouldnt go that small...
Pics:

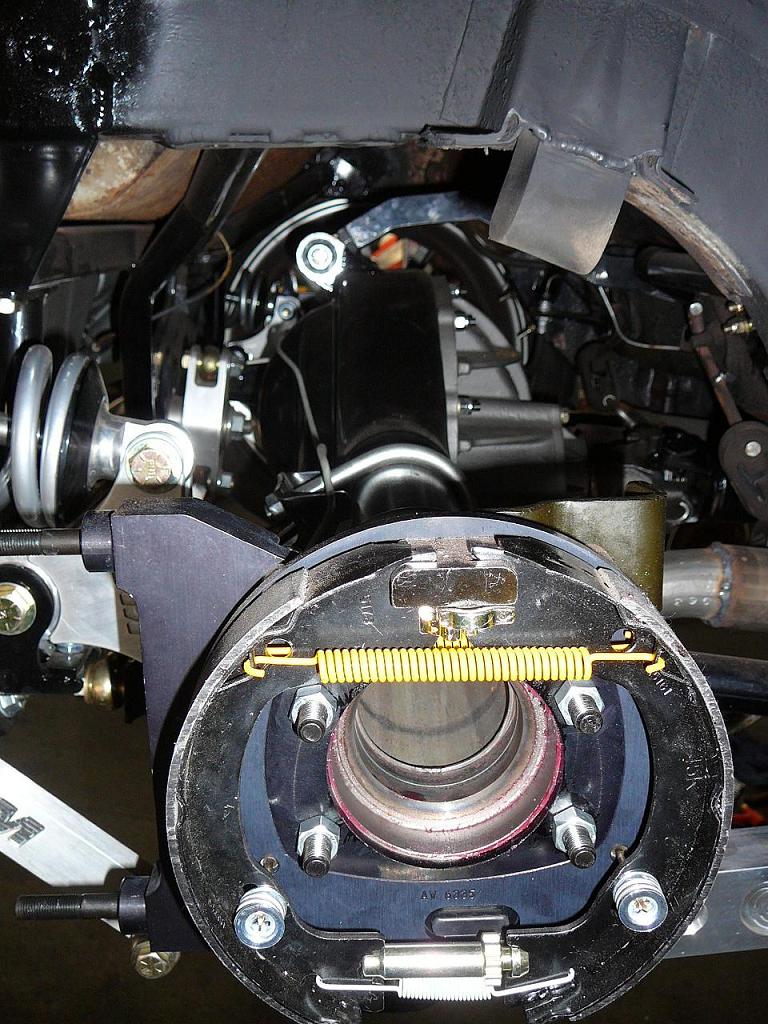
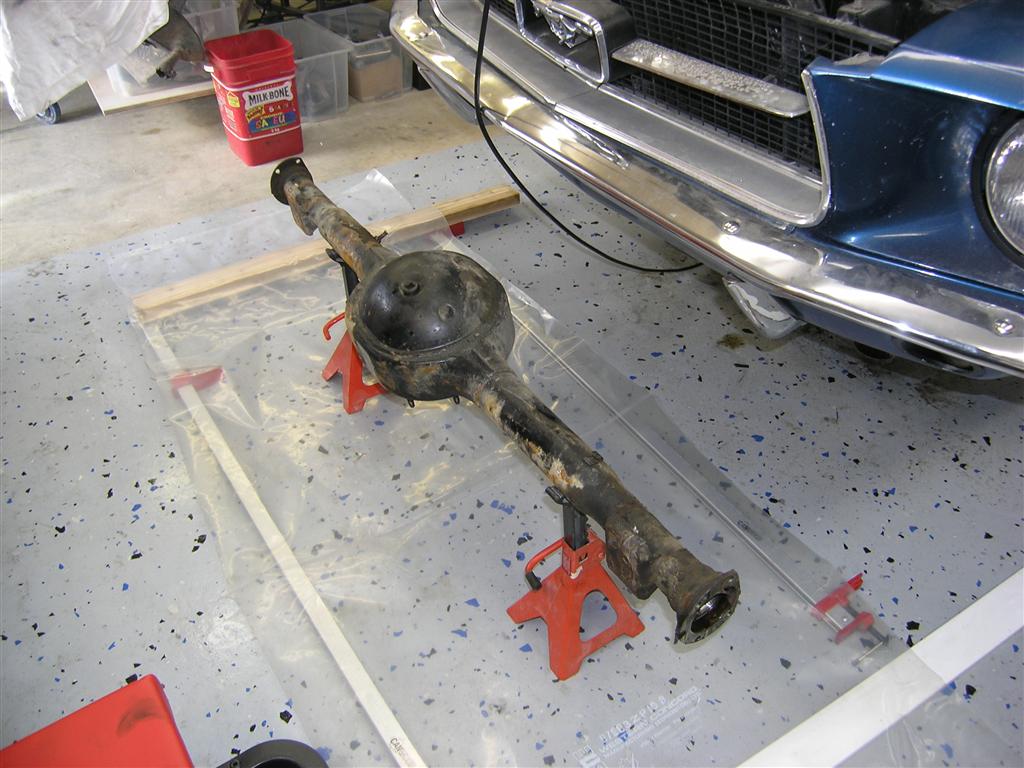
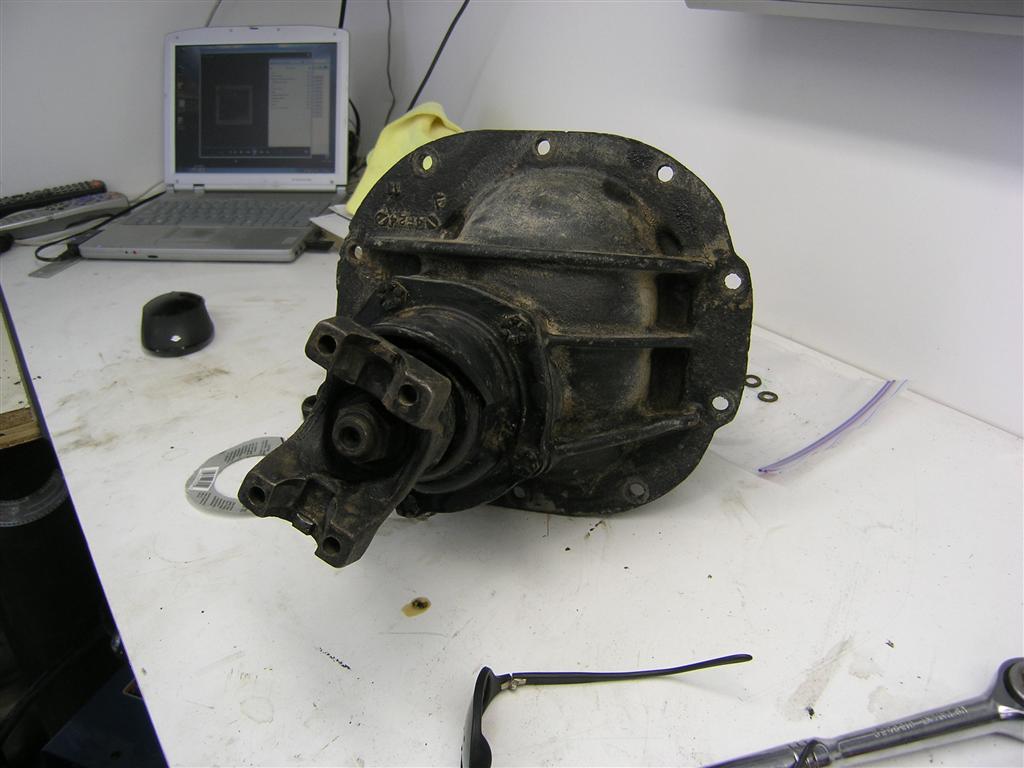
Then I proceeded to test fit the SN97 rear brakes to measure up for a bracket. Should work very well.
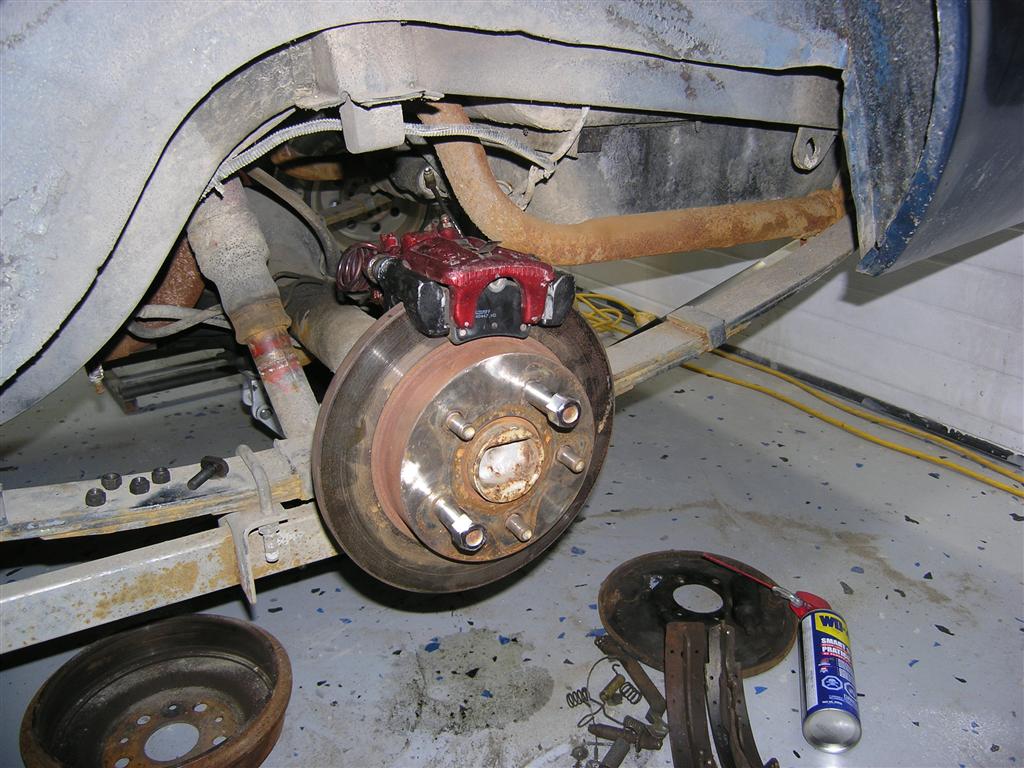
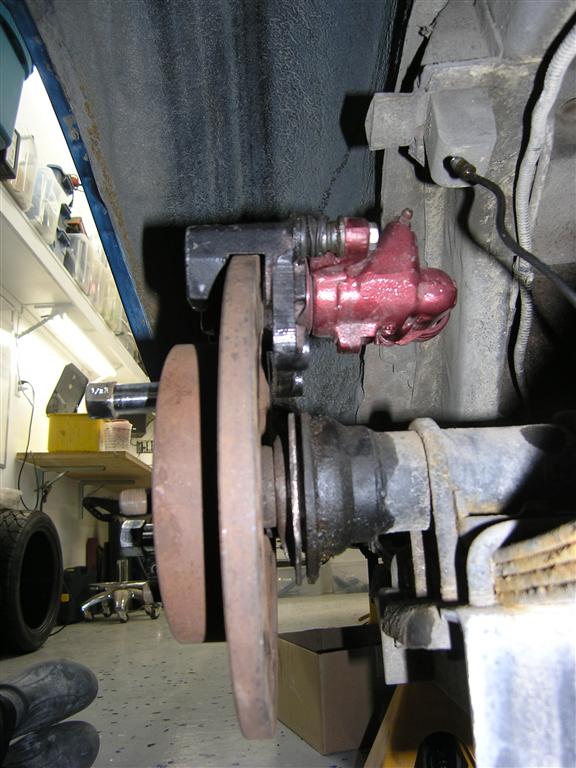
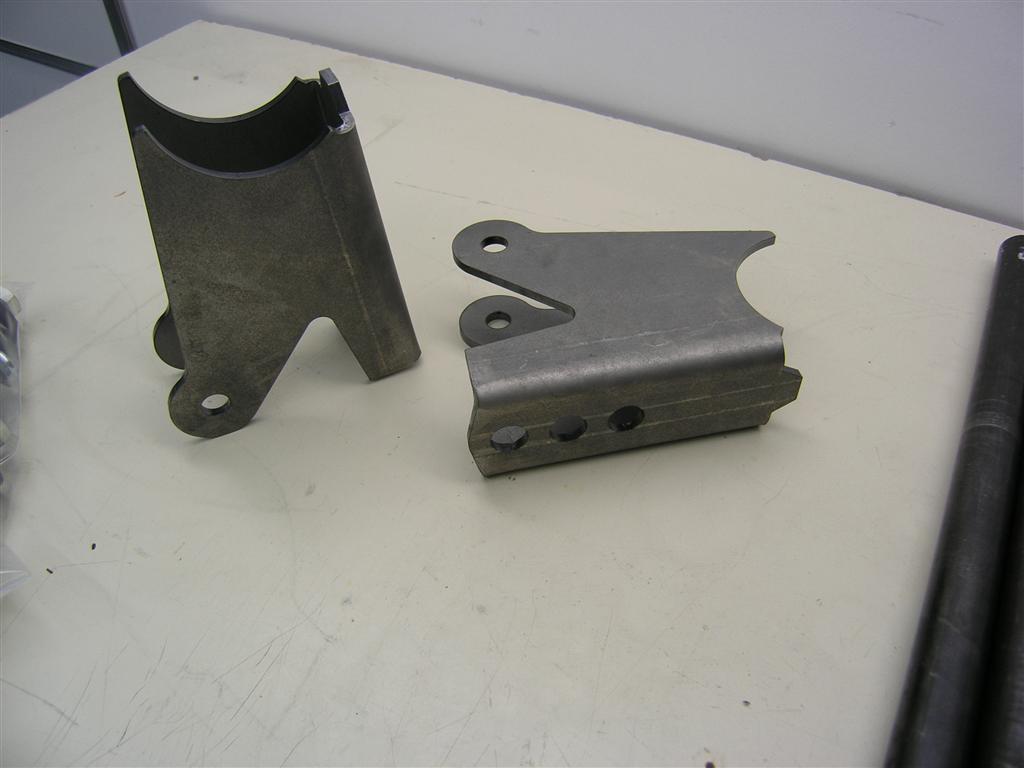
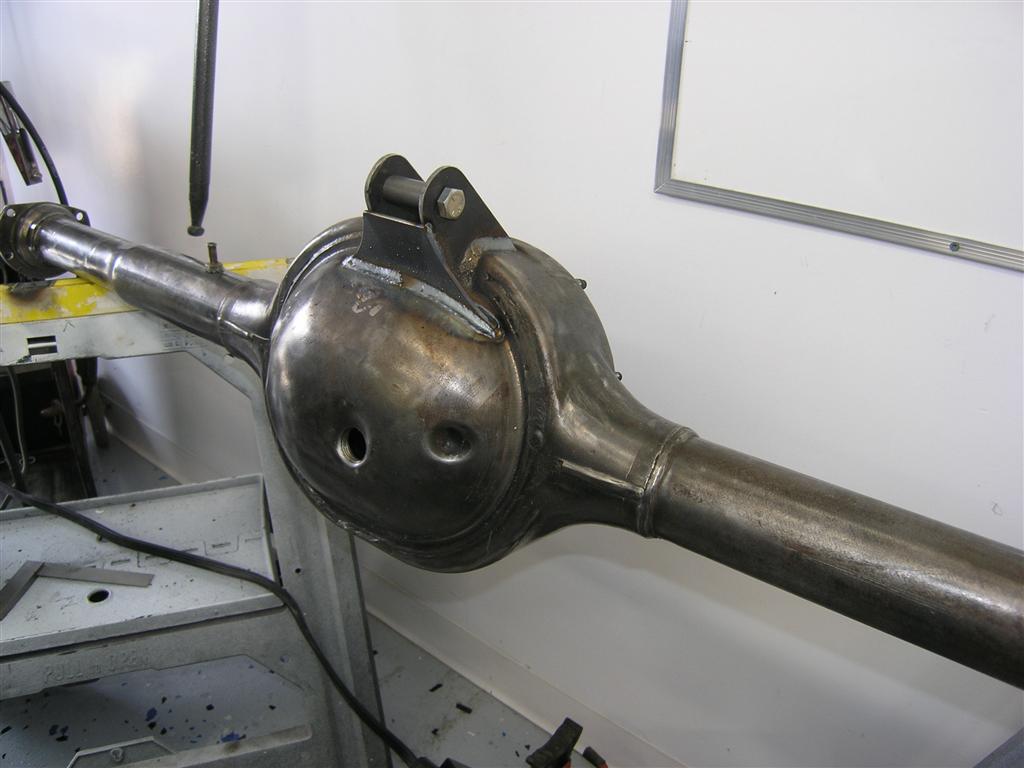
Pulled the differential and spent a bunch of time cleaning up the housing in preparation to build the brackets. Fabbed up the upper 3 link mount. Got that done and went to work under the car prepping for the upper 3 link chassis mount. I've got a couple of great ideas, its gonna be pretty skookum.
More pics:
And me the dirty *******:

Wes
03-15-2010 #50 Registered User
- Join Date
- Dec 2006
- Location
- SF Bay Area
- Posts
- 456
Project is coming along nicely Wes. Are you using a kit for the rear brakes? Ala - the UltraStang one, or are you fabbing it all up yourself?
chunger
'68 Ranchero 500
'70 Cougar XR-7 Convertible
'98 Mustang GT Convertible
03-15-2010 #51
Registered User
- Join Date
- Jan 2010
- Location
- Calgary, Alberta, Canada
- Posts
- 620
Thanks.
I'm going to fab them up myself. Those ultrastang kits are very nice but it's about $3 of materials and I have all the tools to make them myself. I'm going to build a wooden template on the bandsaw. The time saved in grinding will make the template worth while. I'll cut up the stock backing plates for the axle retainer spacer dealio. An hour or 2 with the plasma and grinder and I'll be set. I'll send them off to powder coat with the rest of the junk.
Wes
03-15-2010 #52 Registered User
- Join Date
- Jan 2010
- Location
- SLC. UT
- Posts
- 368
nice fab work, and nice welds

that 3 link will be nice. I converted my 96 to a 3 link and it made a huge difference. I think you'll like it!
Jeff -- 96 Mustang - 2V Stroked Modular Turbo // 13 RAPTOR // 67 Mustang Fastback build - Coyote 5.0
03-15-2010 #53
Registered User
- Join Date
- Dec 2006
- Location
- SF Bay Area
- Posts
- 456
Heh, that kinda applies to *alot* of areas on our cars, doesn't it? Originally Posted by Wesley J
But, yea, I mean, if you have access to a plasma, you are set. I'd venture a guess that if you were to make a few extra sets, you could probably unload them too (hint hint...).
chunger
'68 Ranchero 500
'70 Cougar XR-7 Convertible
'98 Mustang GT Convertible
03-15-2010 #54
Registered User
- Join Date
- Jan 2010
- Location
- Calgary, Alberta, Canada
- Posts
- 620
Dont you mean *all* Originally Posted by chunger

Its funny you mention that cuz I was thinking the same thing... I have a friend with a CNC plasma......But, yea, I mean, if you have access to a plasma, you are set. I'd venture a guess that if you were to make a few extra sets, you could probably unload them too (hint hint...).
Wes
03-16-2010 #55
Registered User
- Join Date
- Jan 2010
- Location
- Calgary, Alberta, Canada
- Posts
- 620
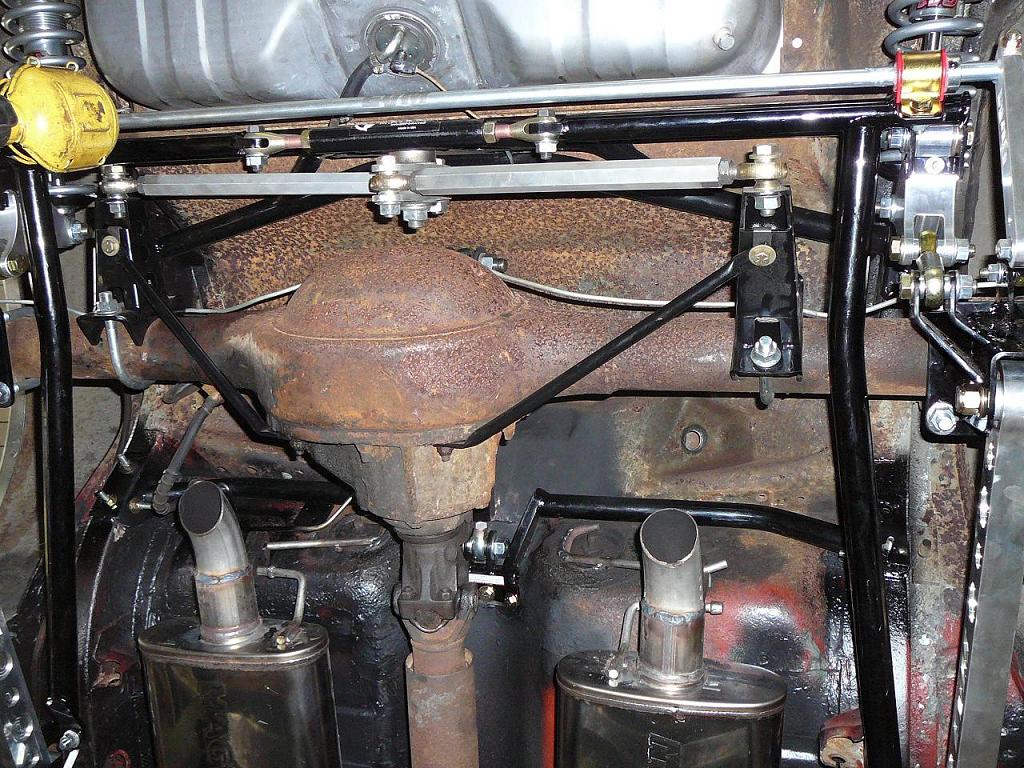
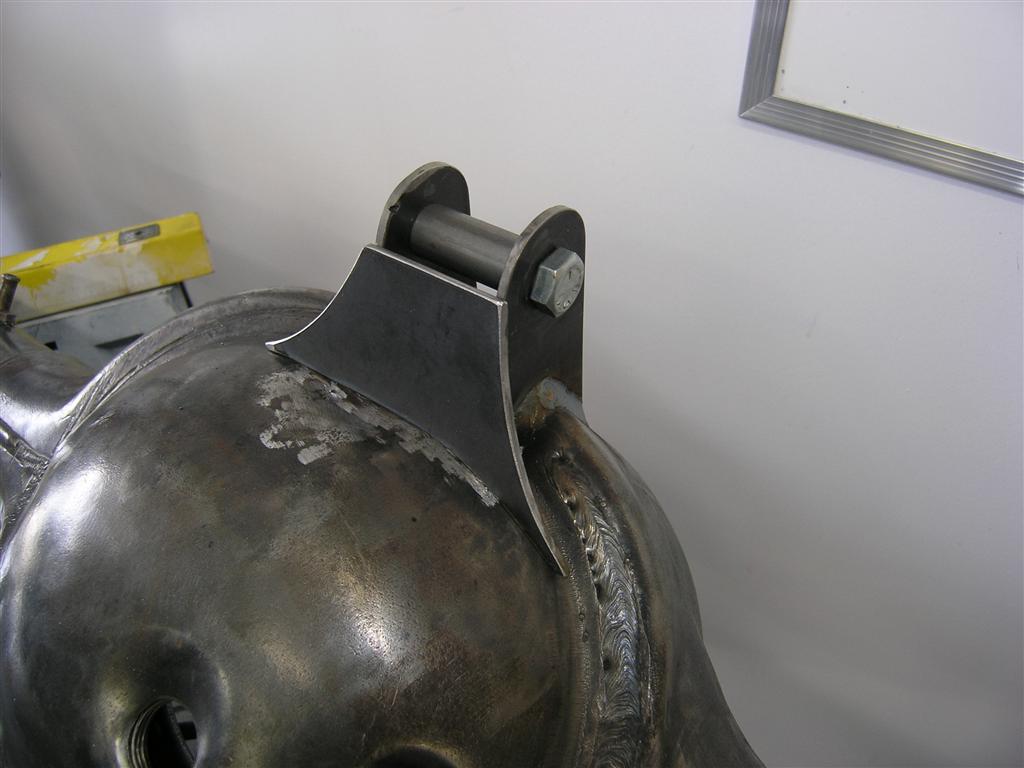
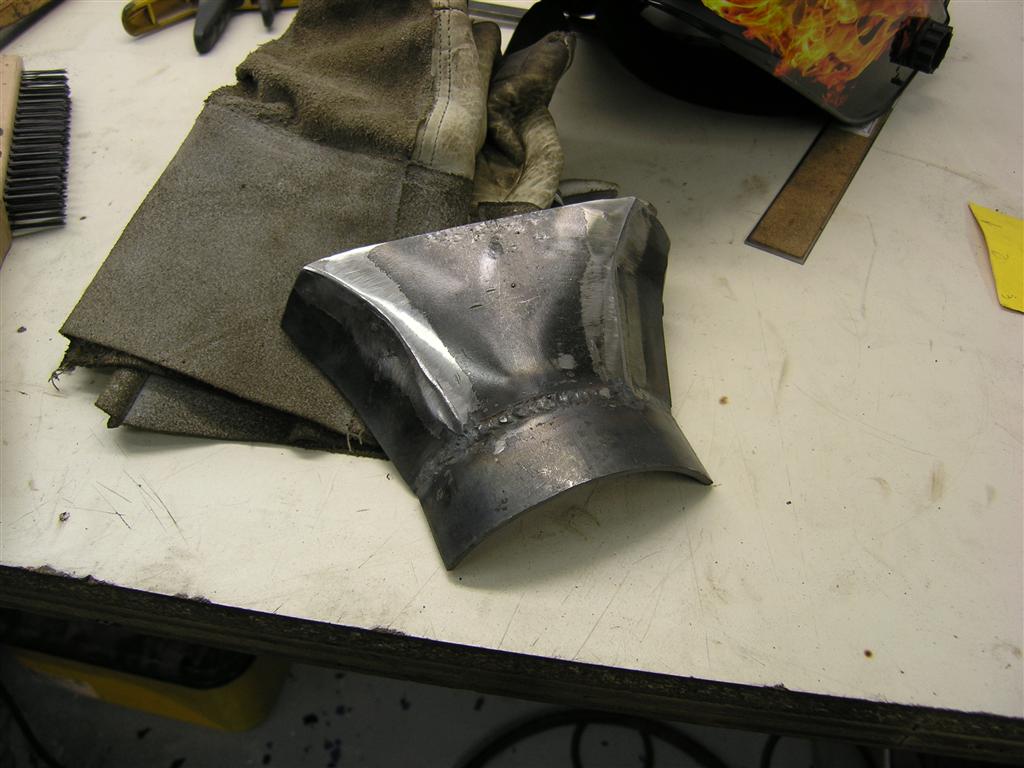
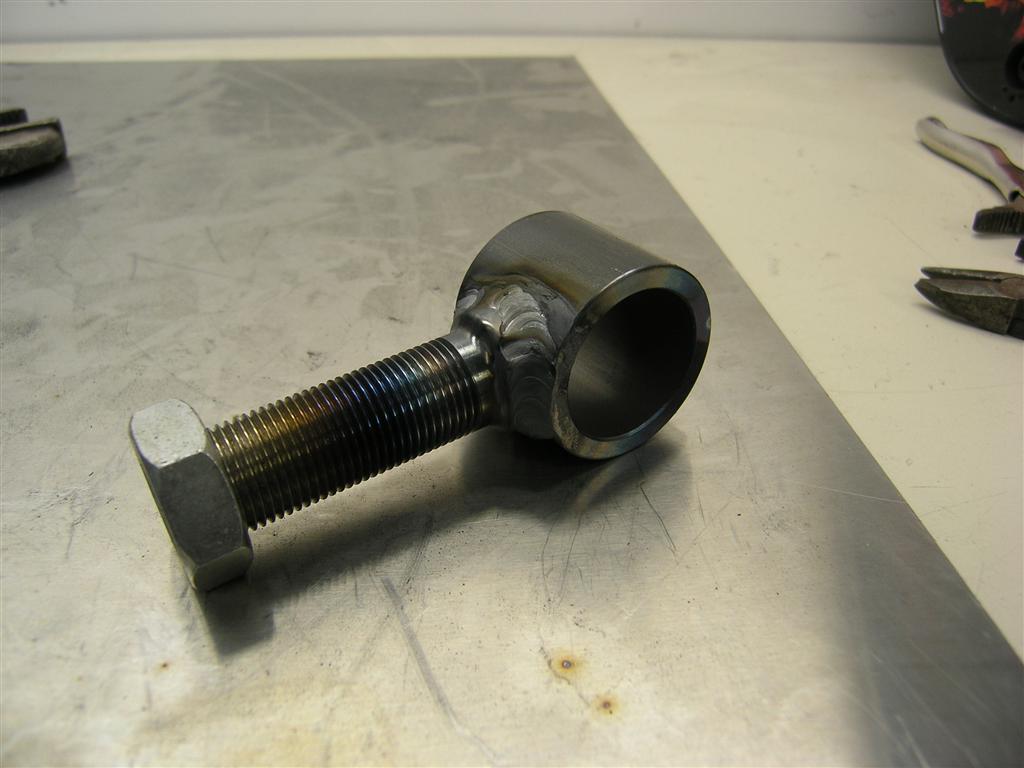
Spent the evening building the plate to act as a base for the upper link mount. A few posts above shows the EvM 3 link that Im using as my inspiration. The base plate was quite enjoyable to make. It consisted of welding 4 curved pieces together to form a relatively complex piece. This will allow for a solid base for the pivot to live. I TIGd it together to get a good solid piece without a bunch of bead buildup. Although Im getting pretty good at TIGing aluminum, my steel beads are hit and miss .
Tomorrow Ill get the rearend in place to measure for the pivot location.
Pics:
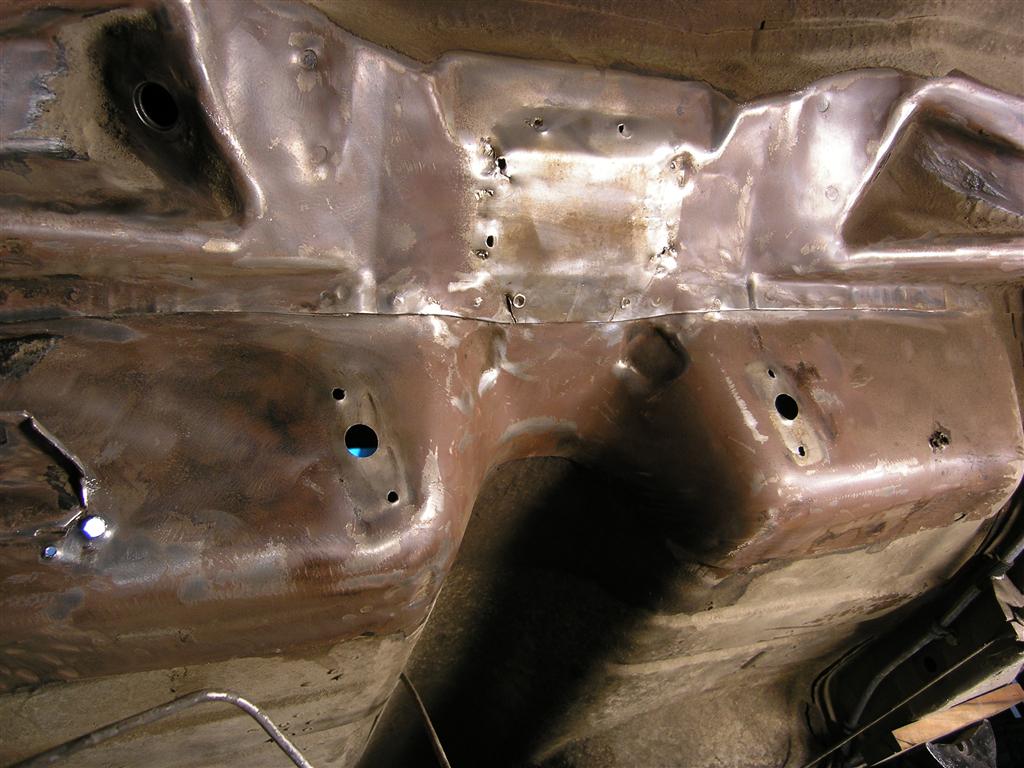
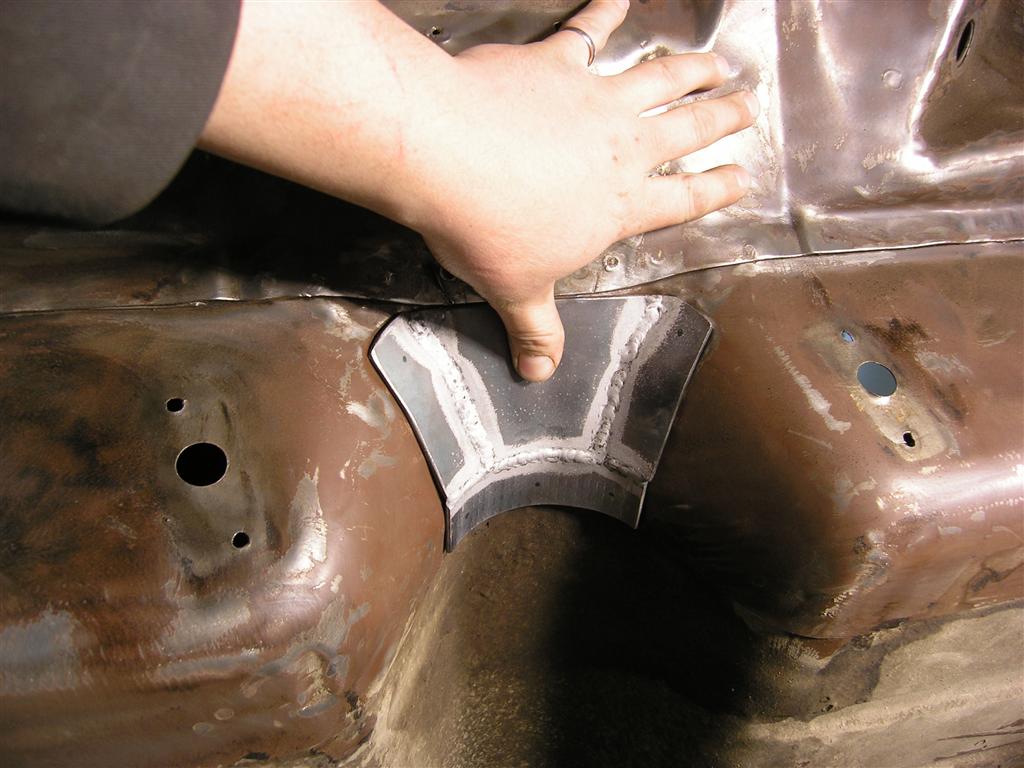
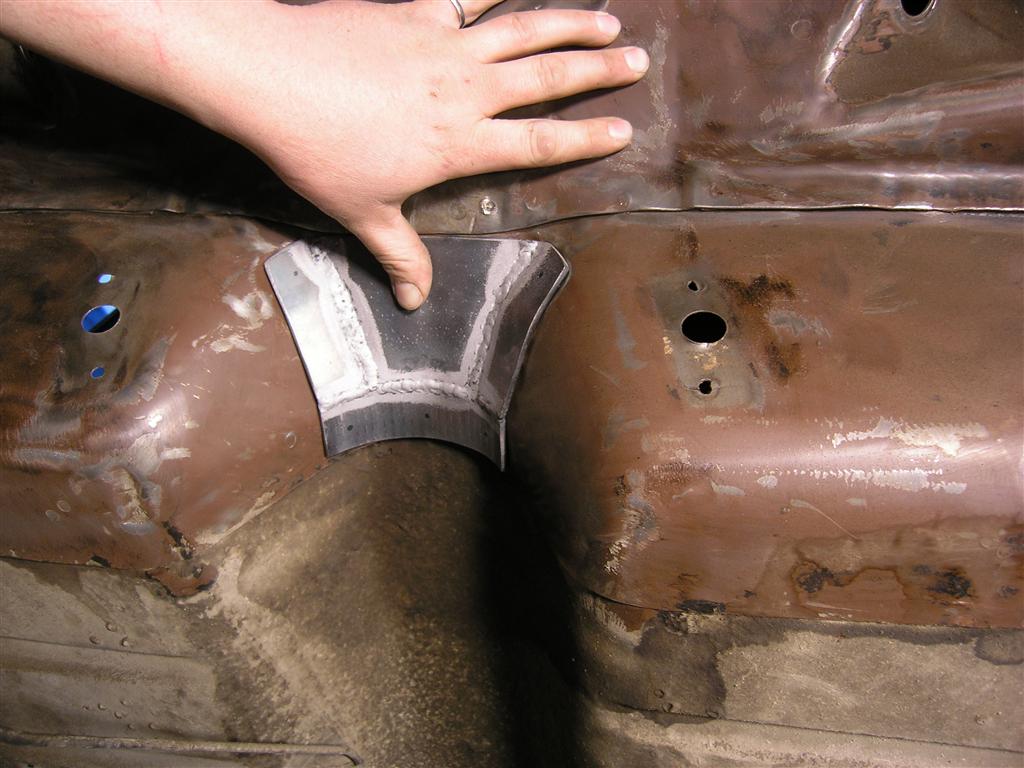
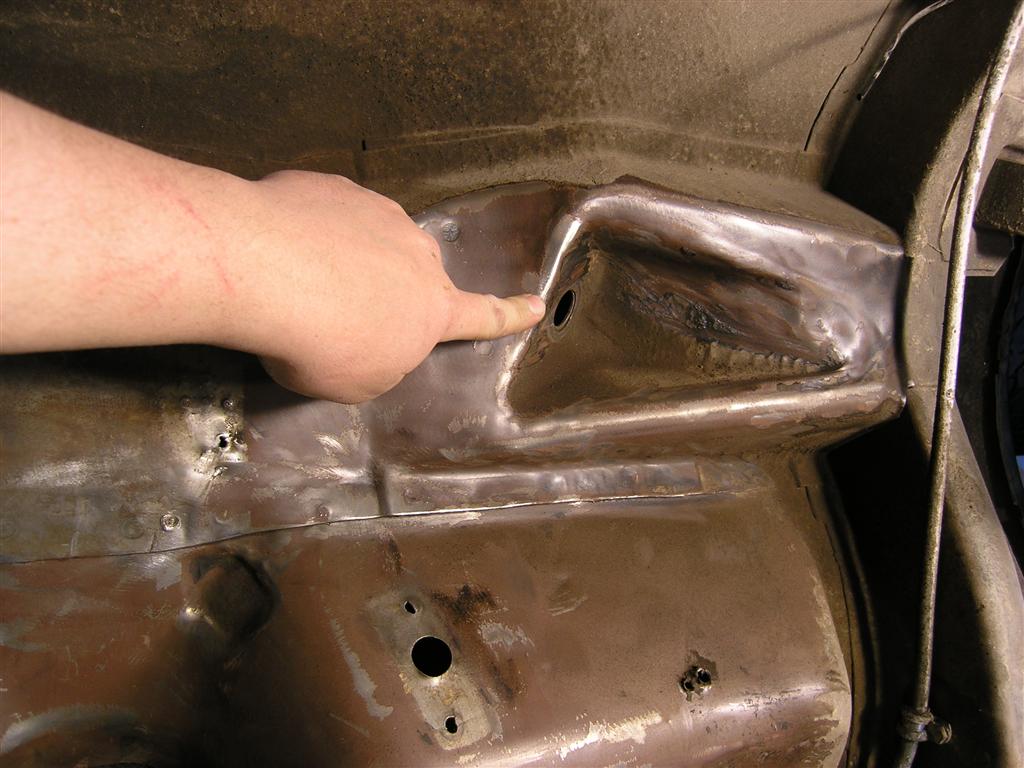
I need to pay particular attention to the location of pivot point in order to minimize the tortional effects on the mount. The crossmember that ties this mount to the frame rails will also be mounted to the old upper shock mounts that I'm pointing to.
Wes
03-16-2010 #56
Registered User
- Join Date
- Oct 2009
- Posts
- 14
Just an adder... north racecars has brackets for this (you'll look capable in fabbing these)...also the caliper will not bleed in that horizontal position, are you planning to rotate them 90 degrees? I had mine the same way and changed it... Originally Posted by Wesley J
I've just completed my custom 3 link (protudes well into car and attaches to cage) and cobra brake 9" on my open track 89 stang coupe ... HERE
Good luck!
03-16-2010 #57
Registered User
- Join Date
- Jan 2010
- Location
- Calgary, Alberta, Canada
- Posts
- 620
Thanks for the feedback and yes, I'm going to run them rotated towards the back. I had it in that position to show clearly in the picture how the axle flange lines up with the caliper mount. I'm not saying I would've neccesarily thought of that myself but I was fortunate to read something recently wrt that.
I'll go have a look at your 3 link.
Cheers,
Wes
03-16-2010 #58
Registered User
- Join Date
- Oct 2009
- Posts
- 14
After I get my coupe on the track, I'm considering a classic coup build...on a budget if possible...LOL Originally Posted by Wesley J
03-17-2010 #59
Registered User
- Join Date
- Jan 2010
- Location
- Calgary, Alberta, Canada
- Posts
- 620
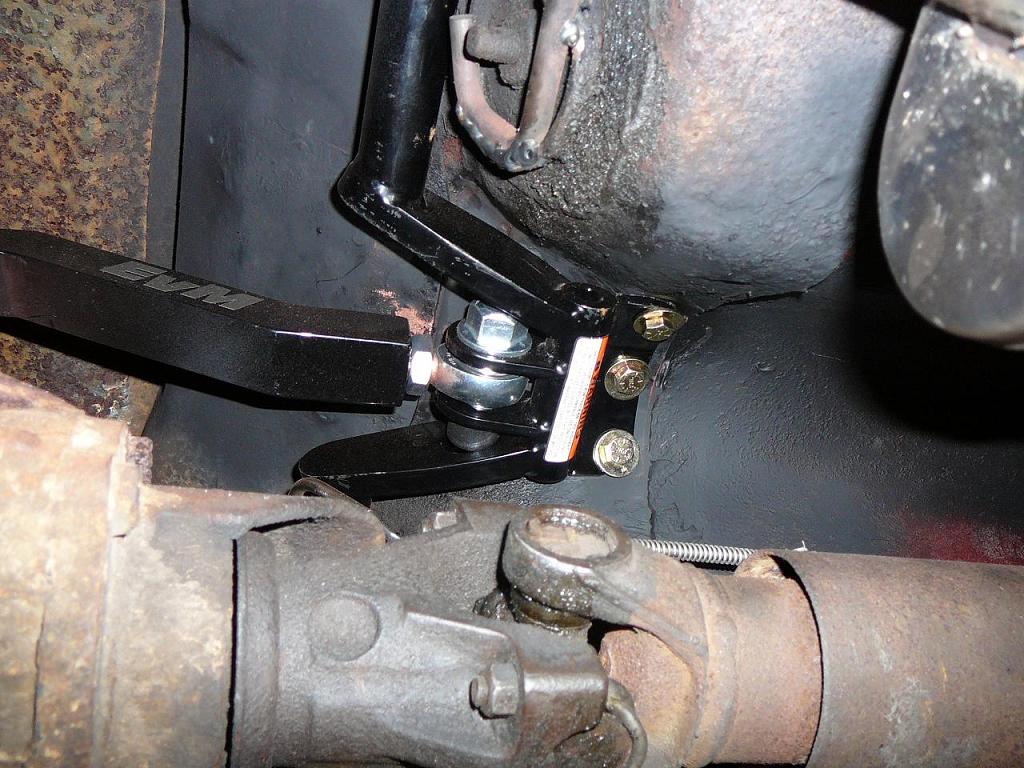
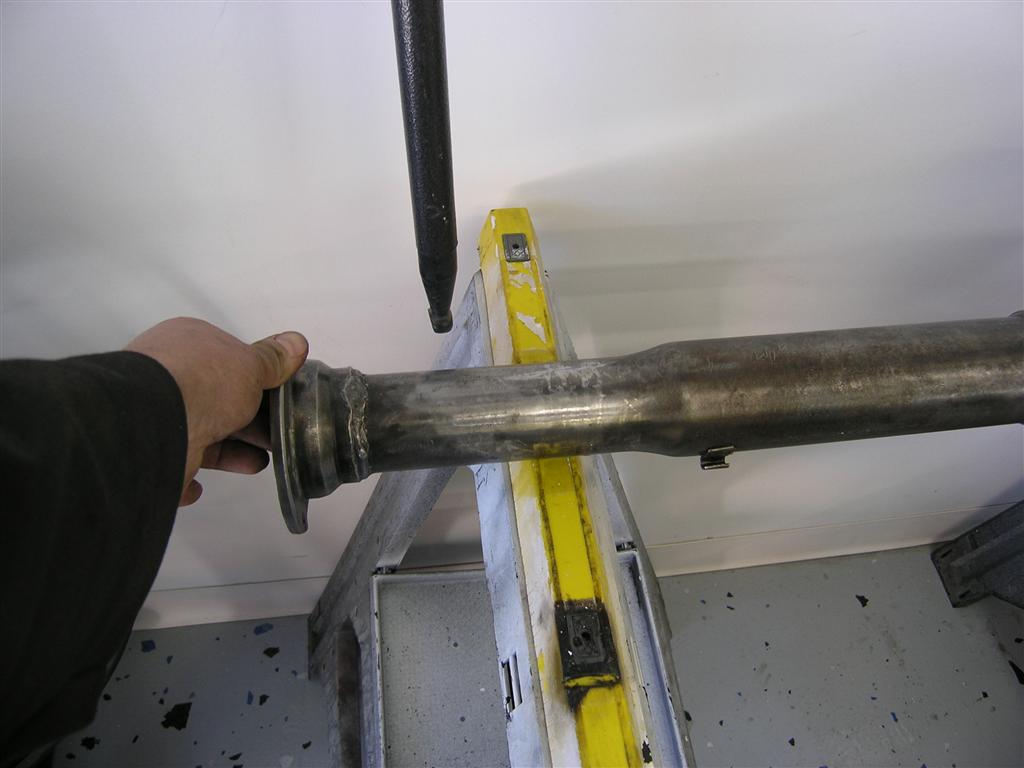
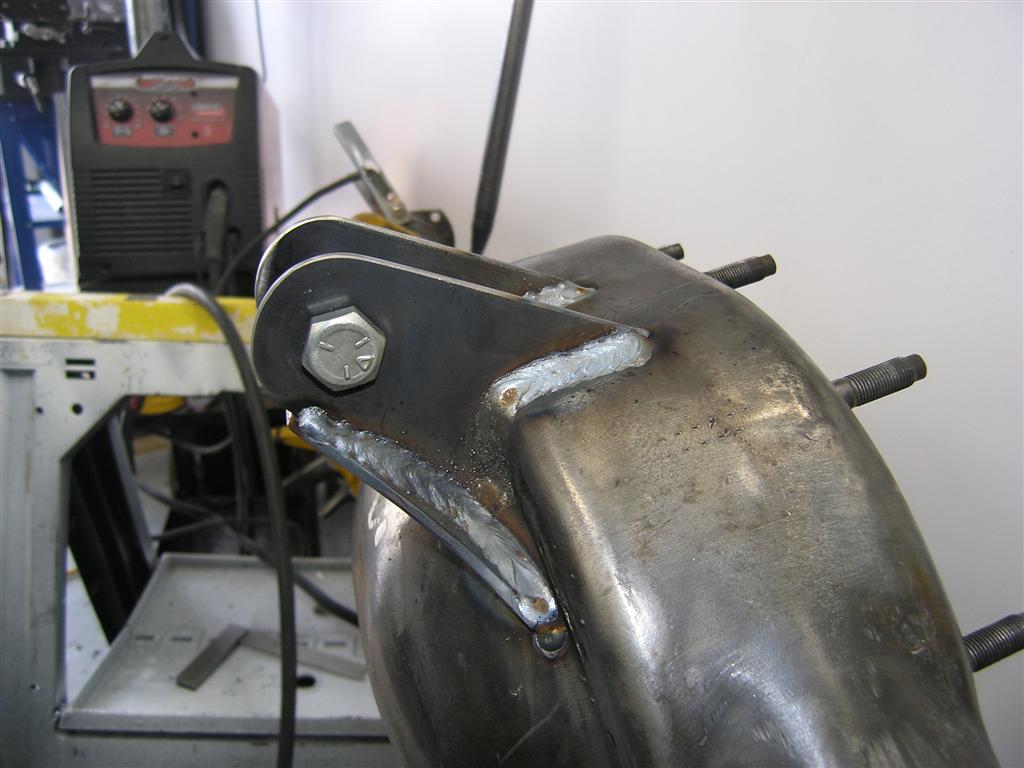
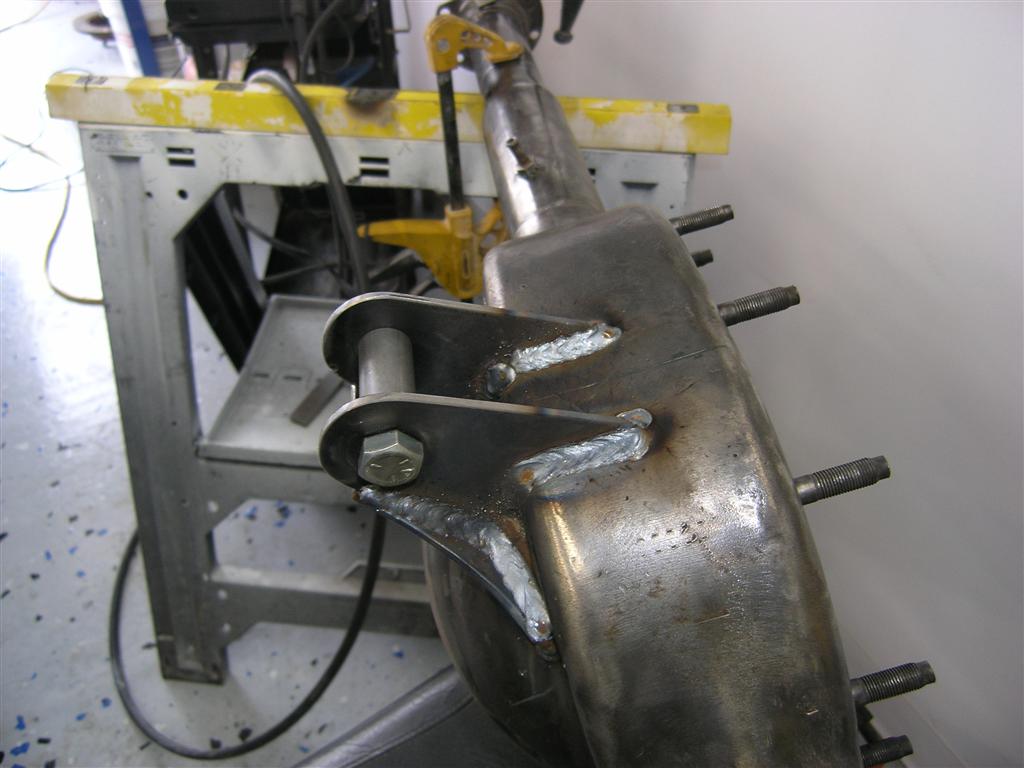
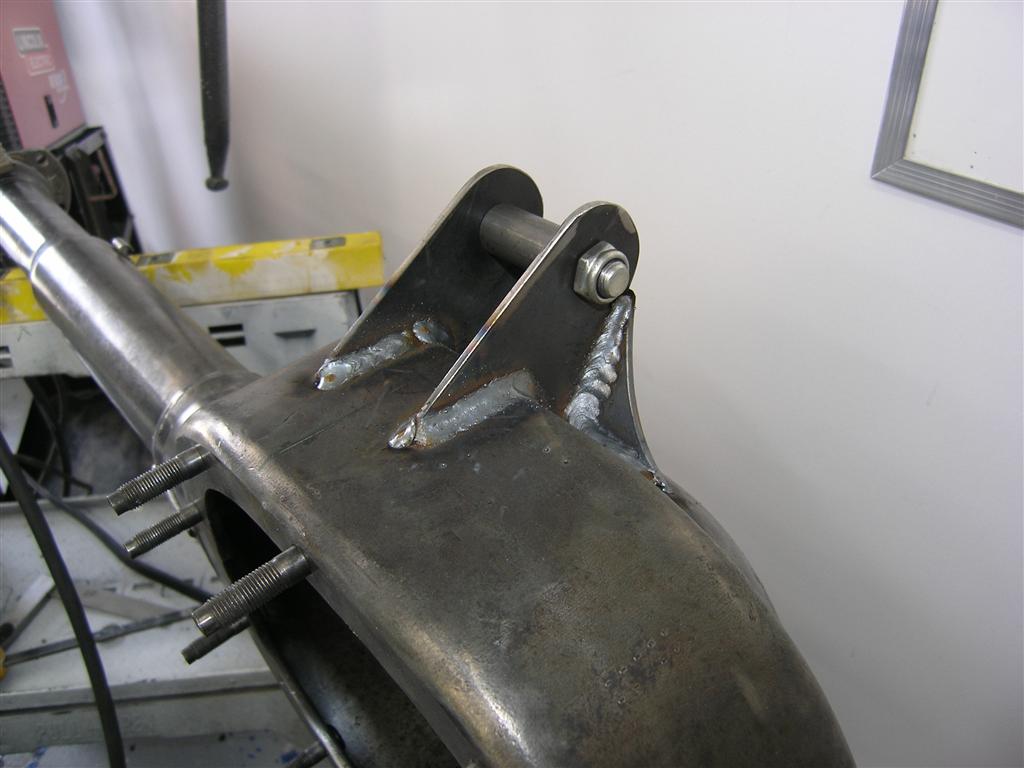
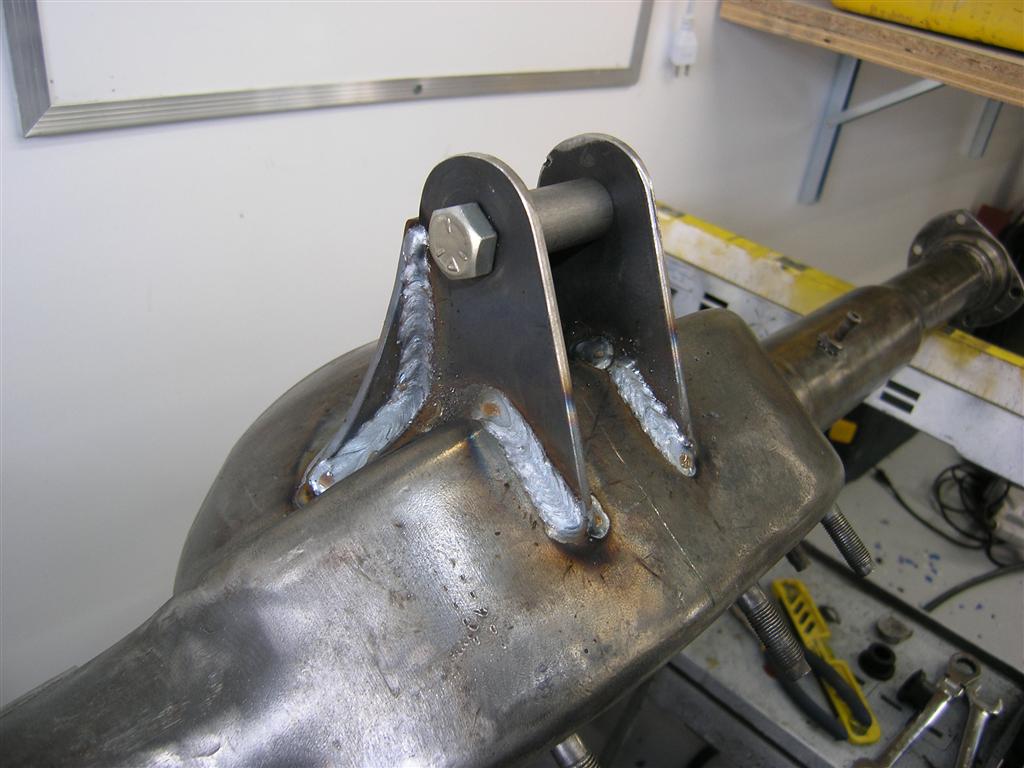
Well, I got some wooden stands cobled together in order to do some more figuring for my upper link. Turns out that my eye could use some calibration... So, I spent the evening re-jigging my upper link mount on the axle. Now its good to go so I can spend time finishing up the upper link mount on the the chassis as well as hopefully fab up the actual 3rd link.
Re-drilling the pivot, welded on a guide to make it square.

My steel TIG skills are getting better:
Ballpark axle position:

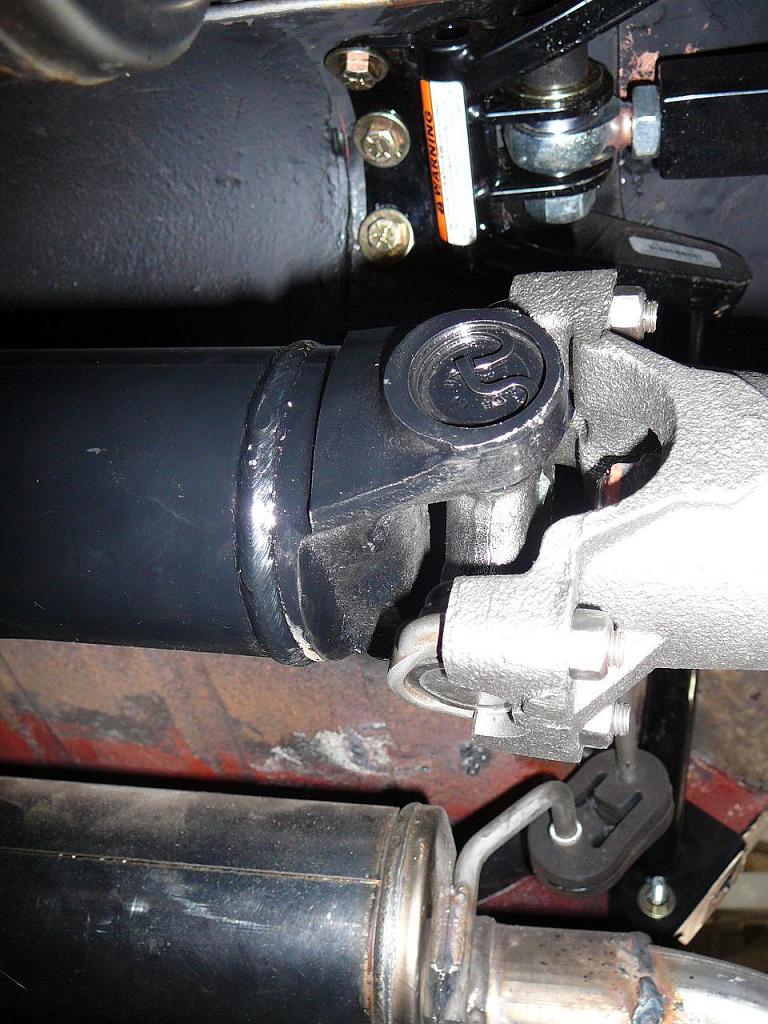
I've taken Friday off so I can go and get the material to complete the rear suspension this weekend. I'm planning to go hardcore this weekend with the goal of completing the rear suspension minus swaybar. Wont know what I'm doing with it until the shocks, and exhaust are mocked up. FedEx woke up my wife this morning with the delivery of my stainless 2.5" Magnaflow system. Sweet.
Wesley J
03-17-2010 #60 Registered User
- Join Date
- Nov 2006
- Location
- Ma.
- Posts
- 5,567
Nice work Wes. the rear is looking good.
Wayne
Car FINALLY home !!!!!! lol
Project FNQUIK https://www.pro-touring.com/showthre...ghlight=FNQUIK

 Reply With Quote


