

Results 201 to 220 of 248
Thread: Our F85 Power Tour Project
-
10-19-2015 #201

 Registered User
- Join Date
- Nov 2006
- Location
- Ma.
- Posts
- 5,567

Damn that looks nice!
Wayne
Car FINALLY home !!!!!! lol
Project FNQUIK https://www.pro-touring.com/showthre...ghlight=FNQUIK
-
10-19-2015 #202
Registered User
- Join Date
- Sep 2015
- Location
- SW KS
- Posts
- 162
That wrap looks sharp!
Chris
10-21-2015 #203 Registered User
- Join Date
- May 2001
- Location
- Mesa, Az.
- Posts
- 1,433
Thought you guys might like to see some more photos. These are closer up with the trim going back on.
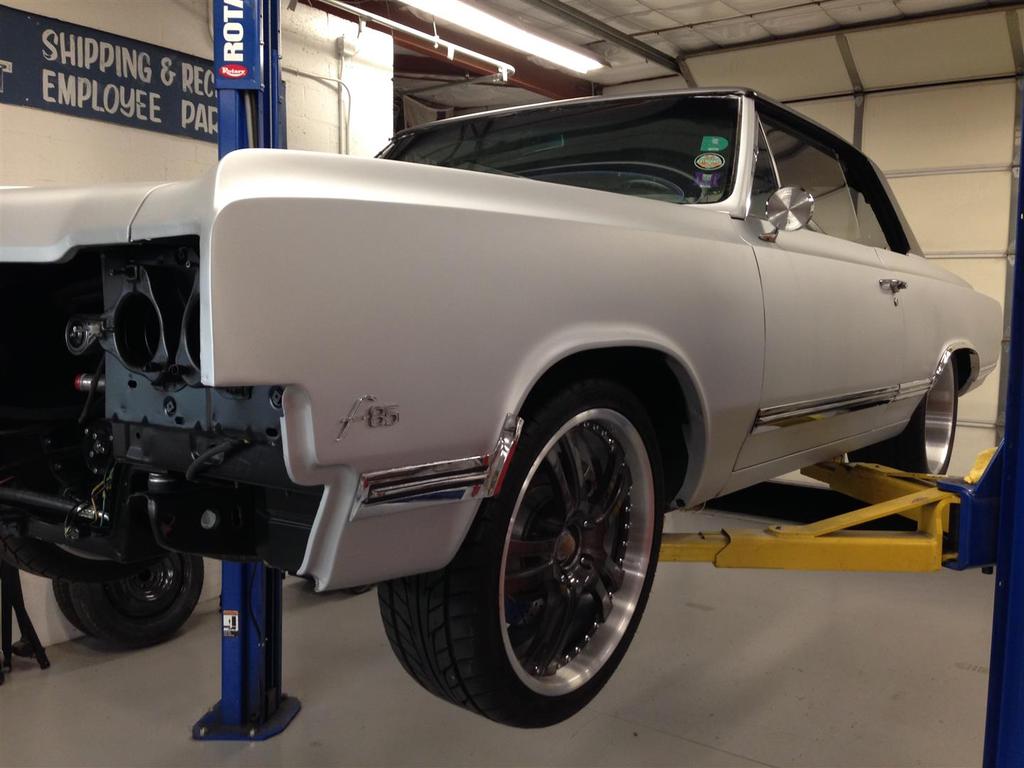
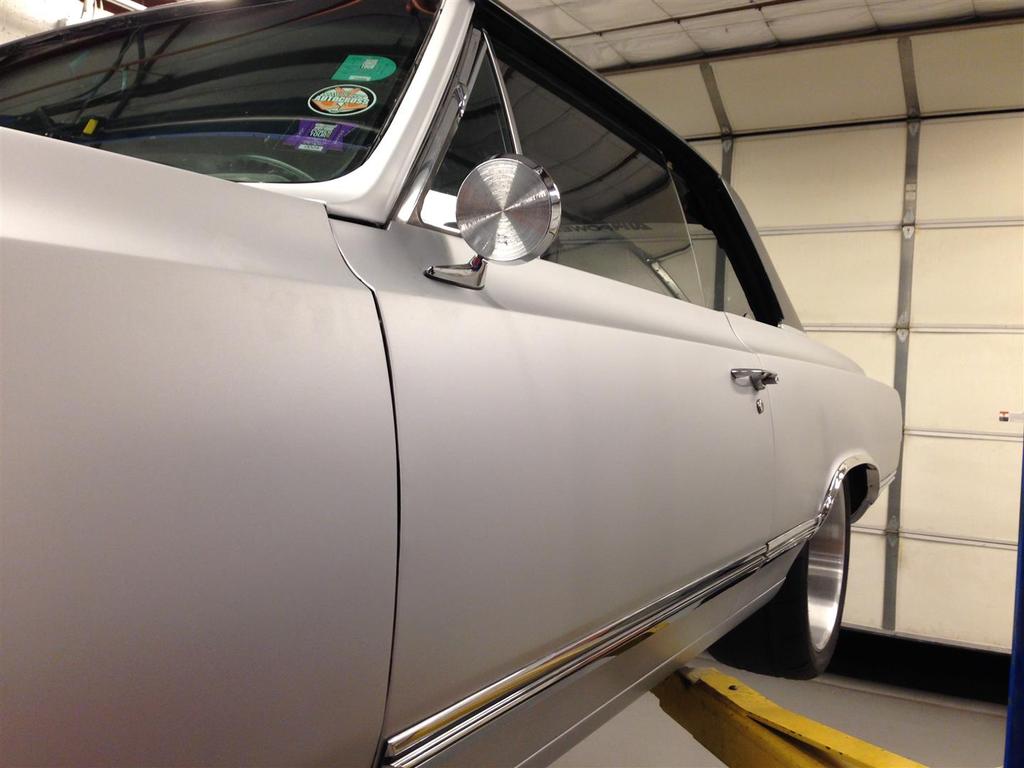


 Phillip
64 Studebaker Daytona Twin Turbo- http://bit.ly/1SgxQ0g
65 Cutlass F-85 - http://bit.ly/1W4lJm4
10-21-2015 #204 Registered User
- Join Date
- Mar 2005
- Location
- Phoenix,AZ
- Posts
- 495
Cool update.
James W.
1987 Oldsmobile
11-23-2015 #205
Registered User
- Join Date
- May 2001
- Location
- Mesa, Az.
- Posts
- 1,433
I've had a lot of people asking how the wrap is done.. Is it like wall paper, is it like a sticker, do you get it wet to install it... Things I never thought I'd hear. Well here is a small clip of it going on. Granted, like anything else, these guys make it look super easy. The material is very thin. Even a piece of dirt under it will show through in the final product. Yes it's sticky back like a sticker but has way more technology built into it than a simple piece of vinyl. No, you don't get it wet, well, unless you want too. Ha-ha.
Here is a short clip:
Phillip
64 Studebaker Daytona Twin Turbo- http://bit.ly/1SgxQ0g
65 Cutlass F-85 - http://bit.ly/1W4lJm4
12-29-2015 #206
Registered User
- Join Date
- May 2001
- Location
- Mesa, Az.
- Posts
- 1,433
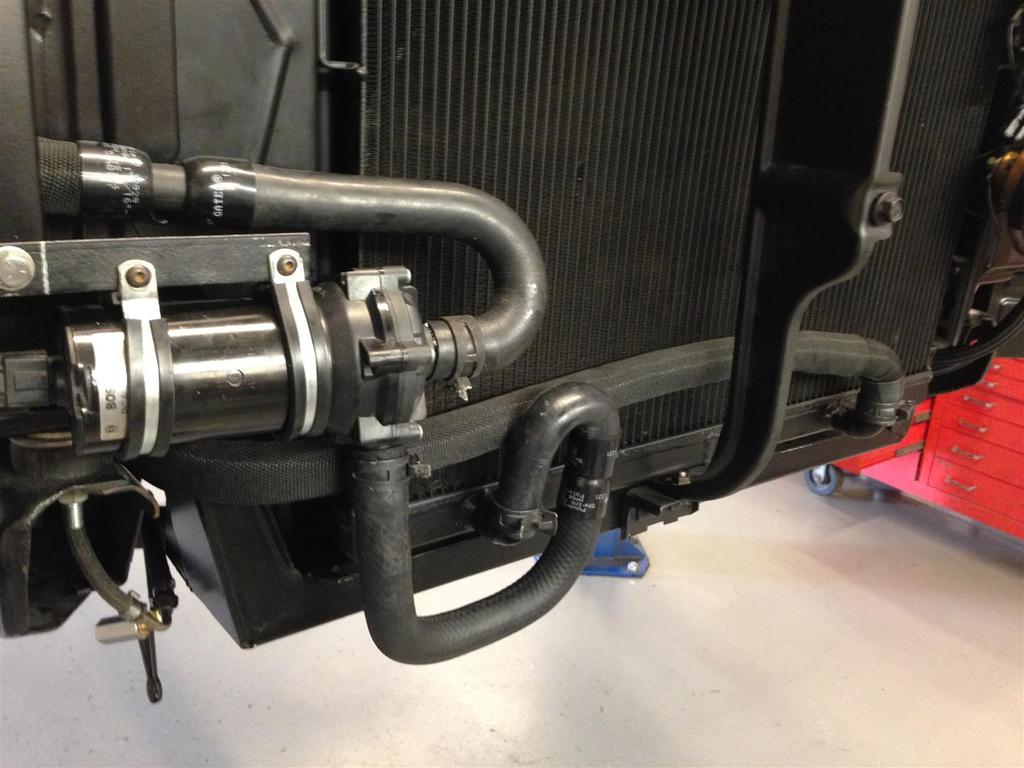
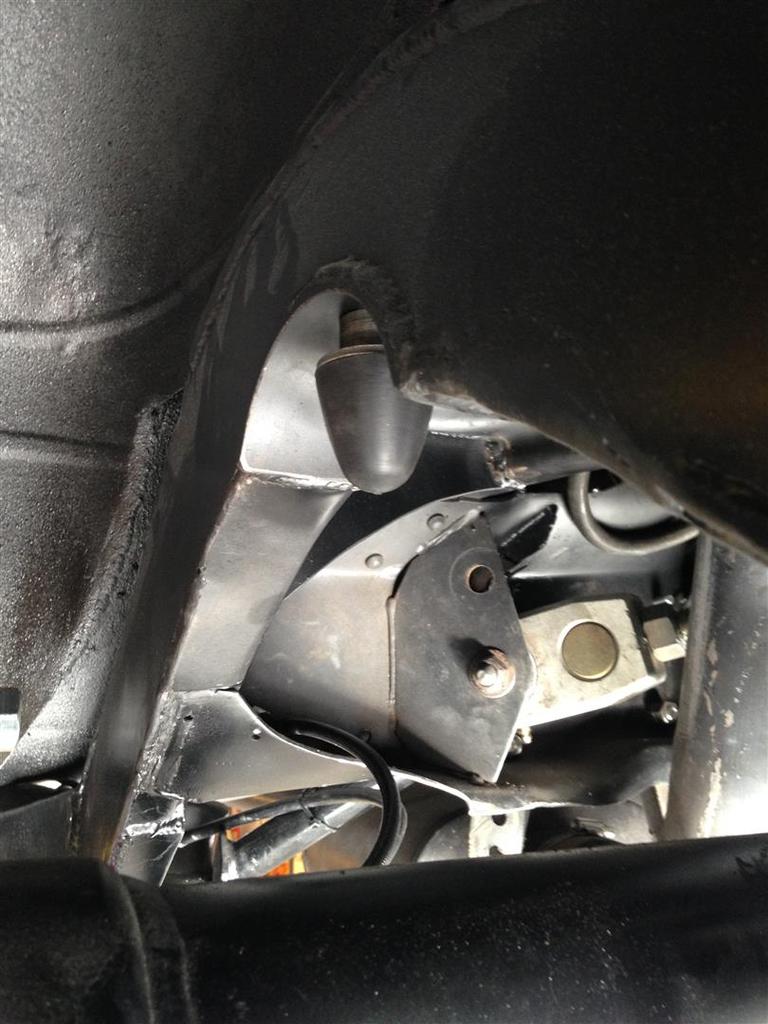
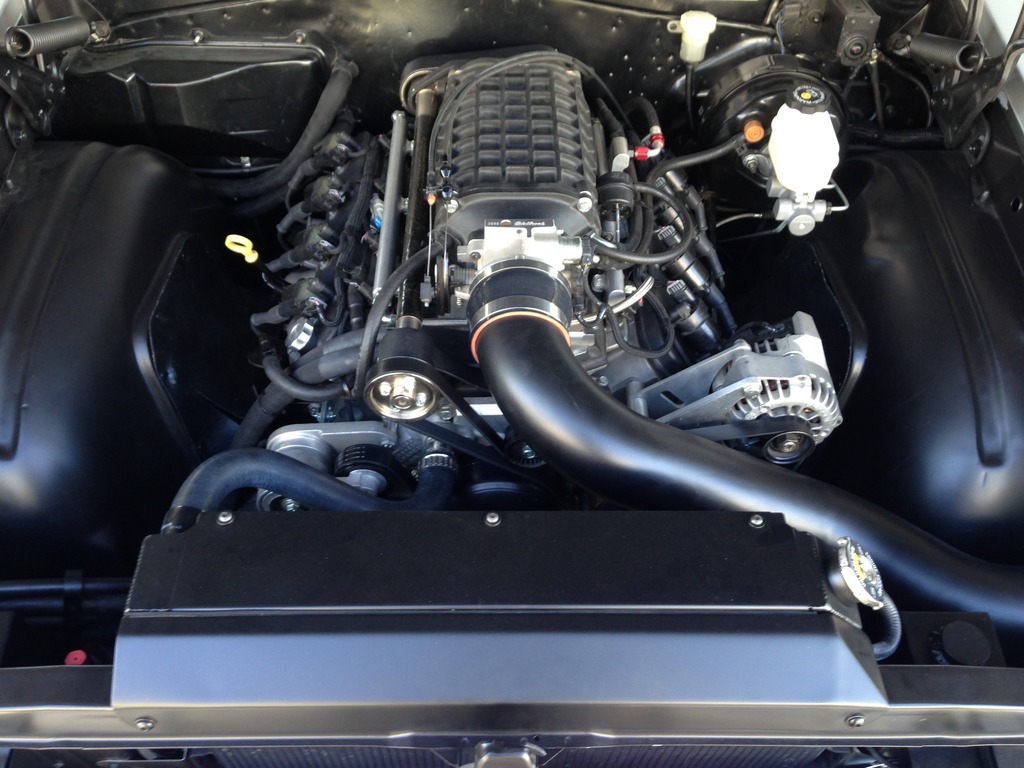
I realized I hadn't posted an update in a while. We've really been focusing on the small details and getting ready to fire it back up after a year and a half. We've got some parts out being powder coated as well as waiting on a few items to come back from the polisher. I snapped a few photos of the engine bay. It's about 98% done. I just need to fix a few details.
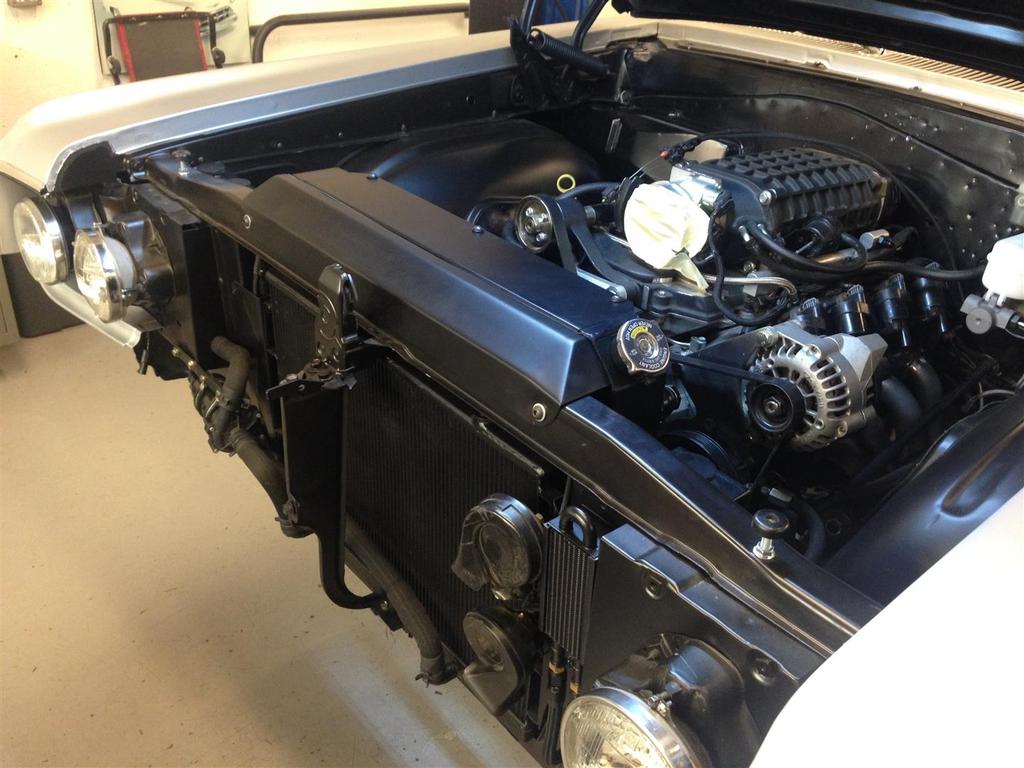
Also, I hooked up the battery and turned the key on to make sure all was in order. The intercooler pump then spewed coolant all over the front, out of the top of the reservoir. Apparently you need to plumb the pump correctly for that not to happen. Unfortunately at this point I'm beyond designing, and into making things work. A few things like the angle of the inlet on the intercooler are basically fixed now so I had to get creative on plumbing the pump back in correctly. It will all be hidden behind the bumper so that's not really a big deal.
I also decided to add some bump stops in the back. I just don't feel comfortable without them. If the shocks were to bottom out that would put a great deal of stress on the stock shock mounts which were never designed to take the weight of the car, let a lone bottoming out on it.
That's it for now. Hopefully the next post will be after fire up.Phillip
64 Studebaker Daytona Twin Turbo- http://bit.ly/1SgxQ0g
65 Cutlass F-85 - http://bit.ly/1W4lJm4
12-29-2015 #207
Registered User
- Join Date
- Apr 2014
- Posts
- 803
Awesome car and great job!!
Pat
12-29-2015 #208 Registered User
- Join Date
- May 2011
- Posts
- 311
Really nice, its been awhile since we all communicated. I will try and get the 64 F-85 in the street with AC on! and get on the 2016 Tour if you guys are going. I heard it may come back this way through Dallas or Texas somewhere. I need to update my thread too, here a few pictures. Again I like it!!! ( No I love it)
64 F-85 post car Resto-Mod project-my RV when I retire
12-29-2015 #209 Registered User
- Join Date
- Aug 2004
- Location
- Mapleton, IL.
- Posts
- 250
Wow Phillip the wrap looks great! I like the colors and it looks like the top matches the wheel centers.
Mark
Current project 1963 Chevy II
https://lateral-g.net/forums/showthread.php?t=58772
1964 Buick Skylark
Build thread https://www.pro-touring.com/threads/...t-budget-build
12-31-2015 #210
Registered User
- Join Date
- May 2001
- Location
- Mesa, Az.
- Posts
- 1,433
Thanks! Yes that was a happy accident as that is not the center wheel color I actually ordered. I wanted the Brushed Ti powder but when Jason had them redone they came back Brushed Gun Metal. He apologized and I said holy cow. This is even better than I'd hoped for! Haha. In person it's almost a dead on match color wise. I'm excited to roll it out in the sun when it's all finished. That silver should really pop. Originally Posted by 64G-lark
 Phillip
64 Studebaker Daytona Twin Turbo- http://bit.ly/1SgxQ0g
65 Cutlass F-85 - http://bit.ly/1W4lJm4
01-05-2016 #211
Registered User
- Join Date
- May 2001
- Location
- Mesa, Az.
- Posts
- 1,433
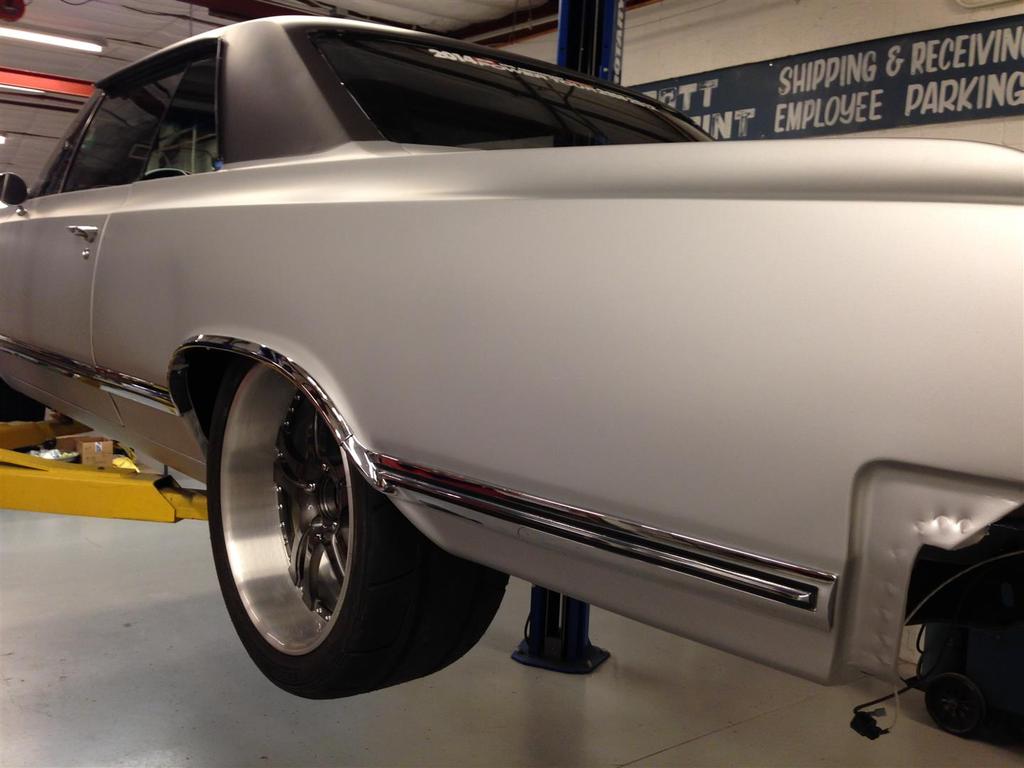
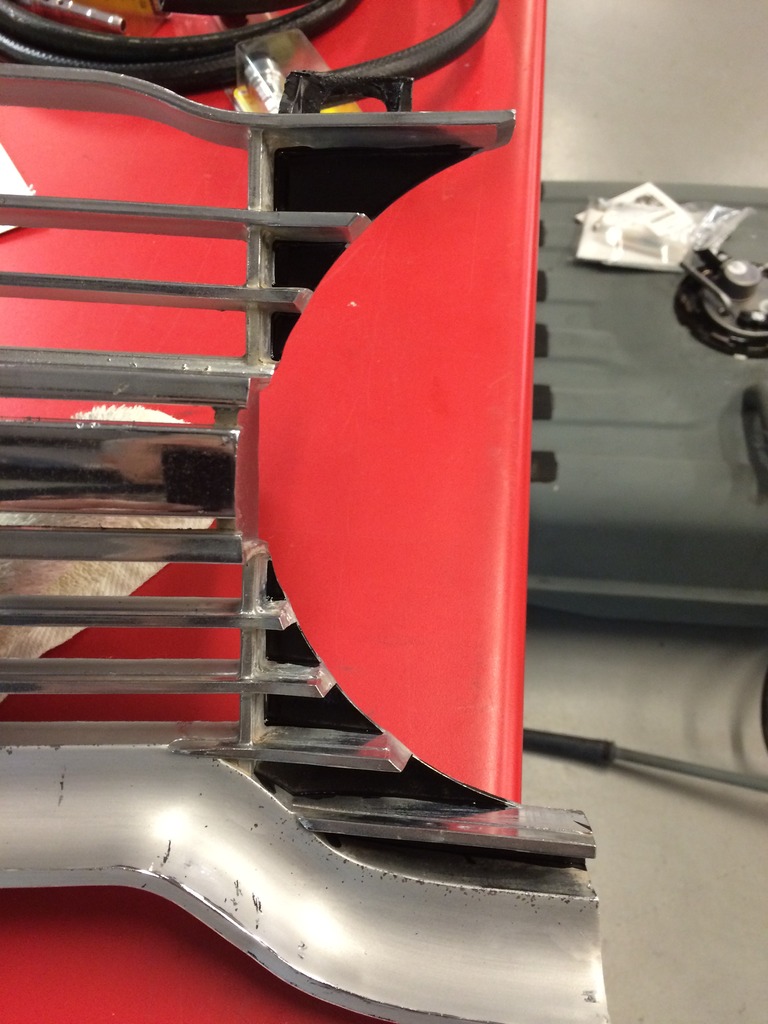
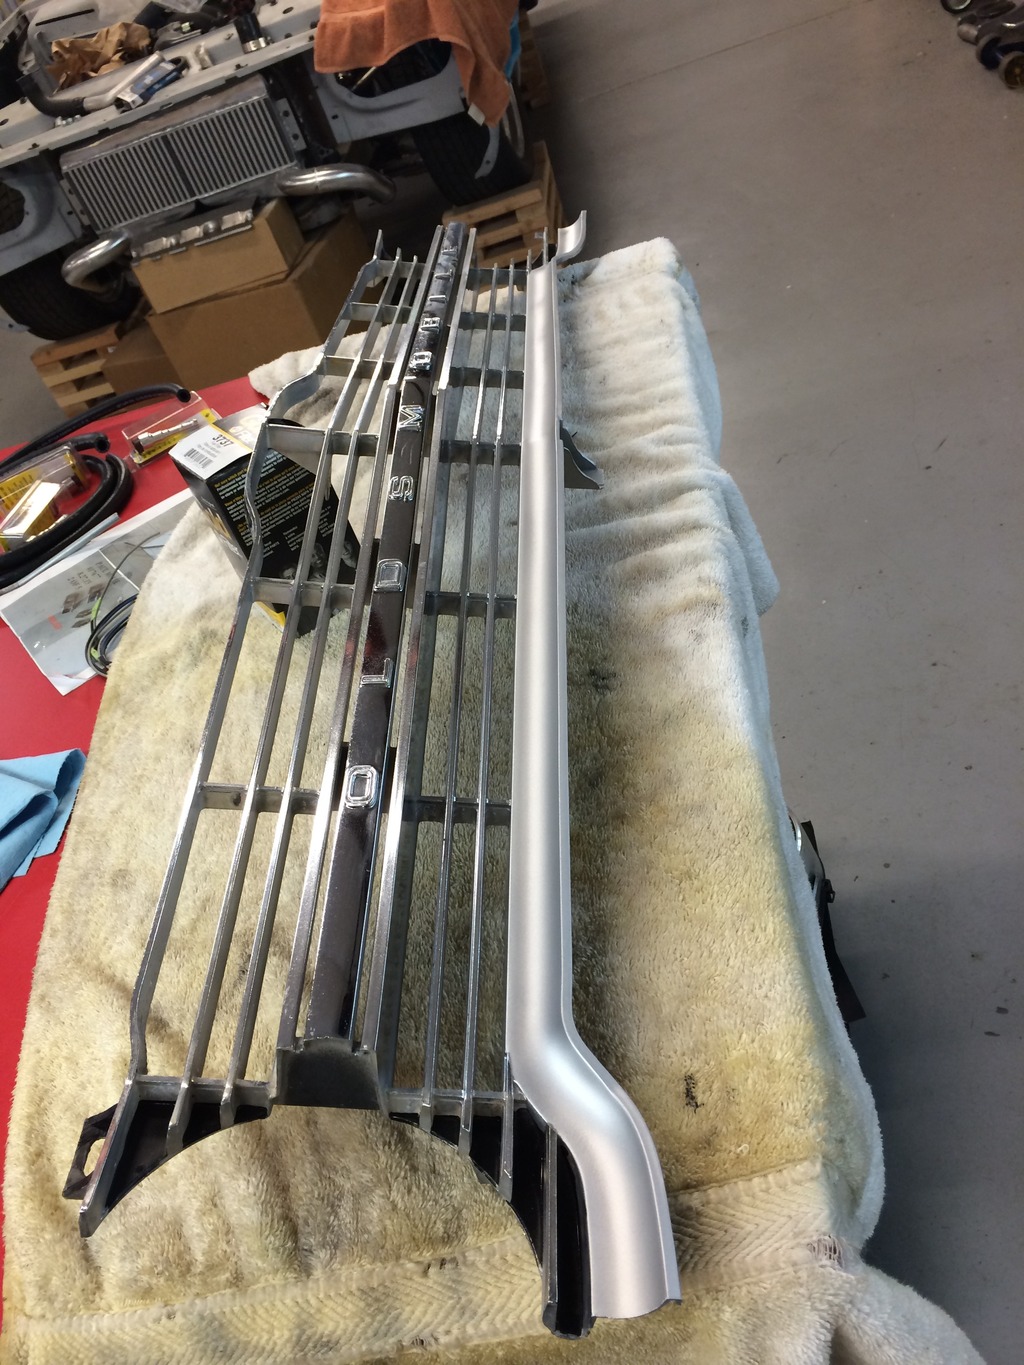
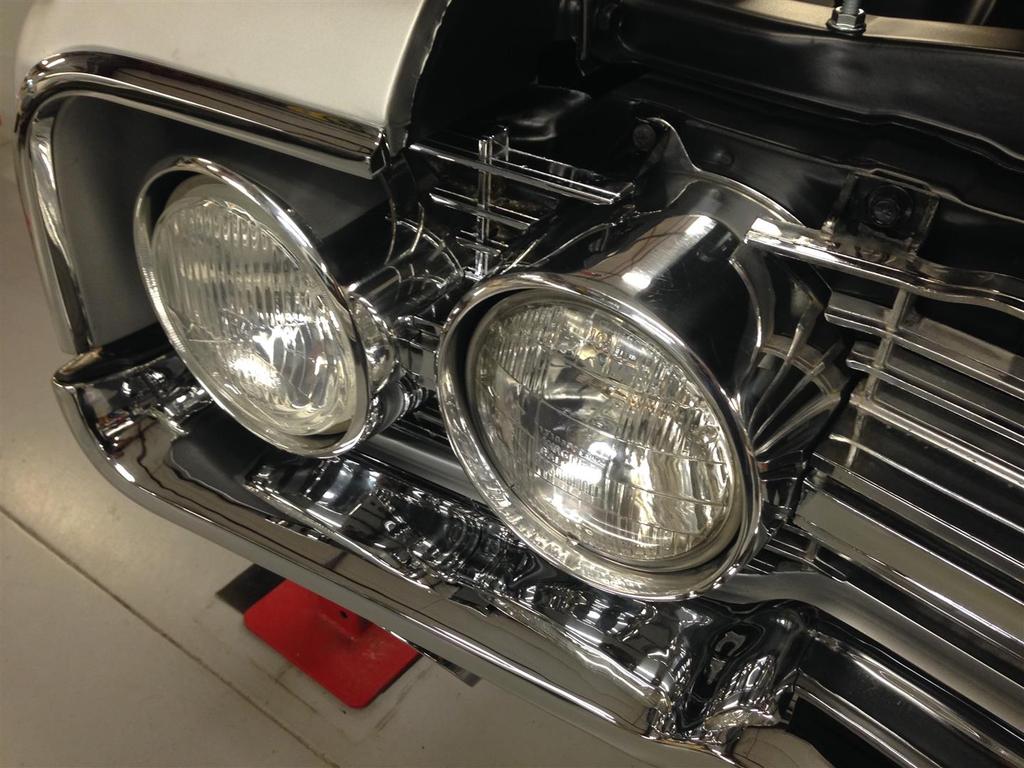
Well... 16 months after taking out Bambi I drove the car up and down the street in front of the shop. It really is a good feeling to have the Deer Slayer moving again under its own power. While we continue to try and finish up some small details here are a couple more pictures. We test fit the grille I pulled out of the Arizona desert. It's cleaning up okay but we'd definitely like to find a nicer one. Here are some shots of it after about 4 hours of steel wool and polishing wheels. After that Paul took to the paint brush and got the black put back in the recesses as well as silver paint along the bottom to match the rest.
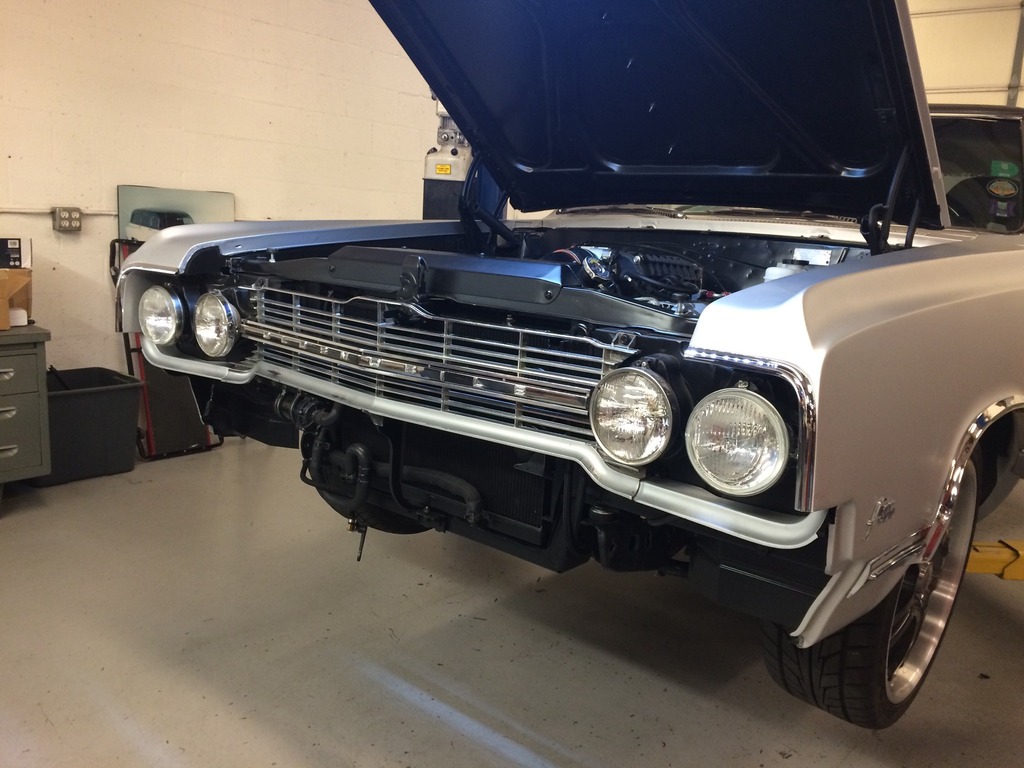
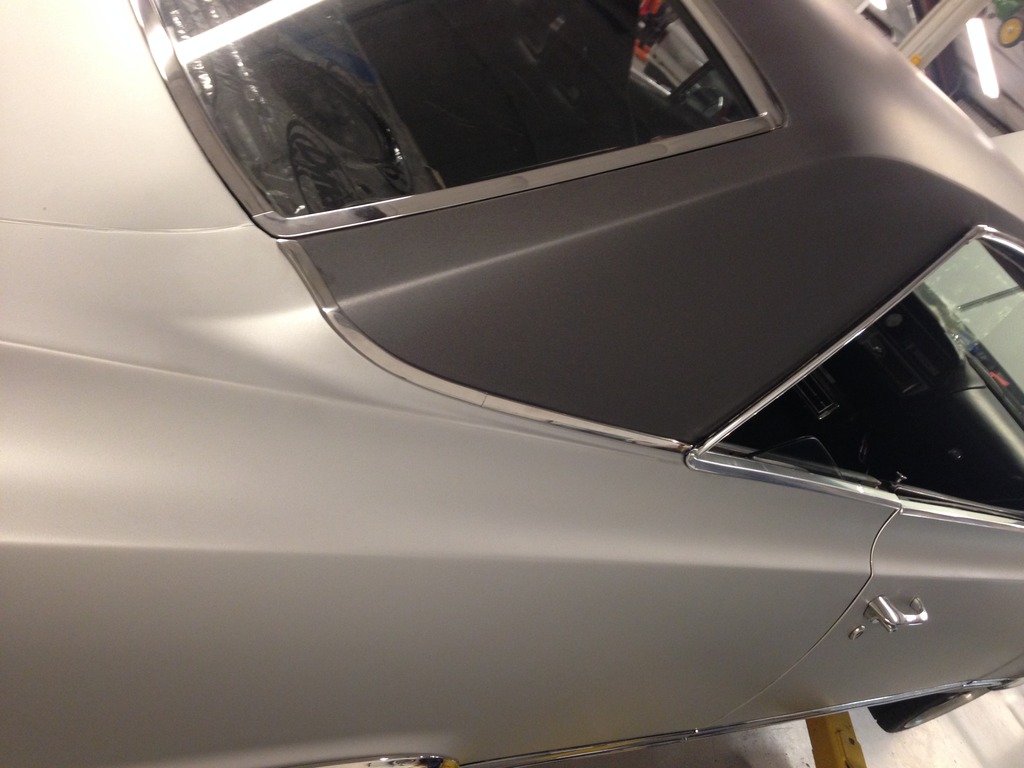
Also, we spent some time getting the two tone trim put back on. Some of the clips were still in great shape and some, not so much. So one side is now on. Every piece of trim that goes back on really does make the car look even better. The contrast of the bright work and the matte finish looks great in my opinion.
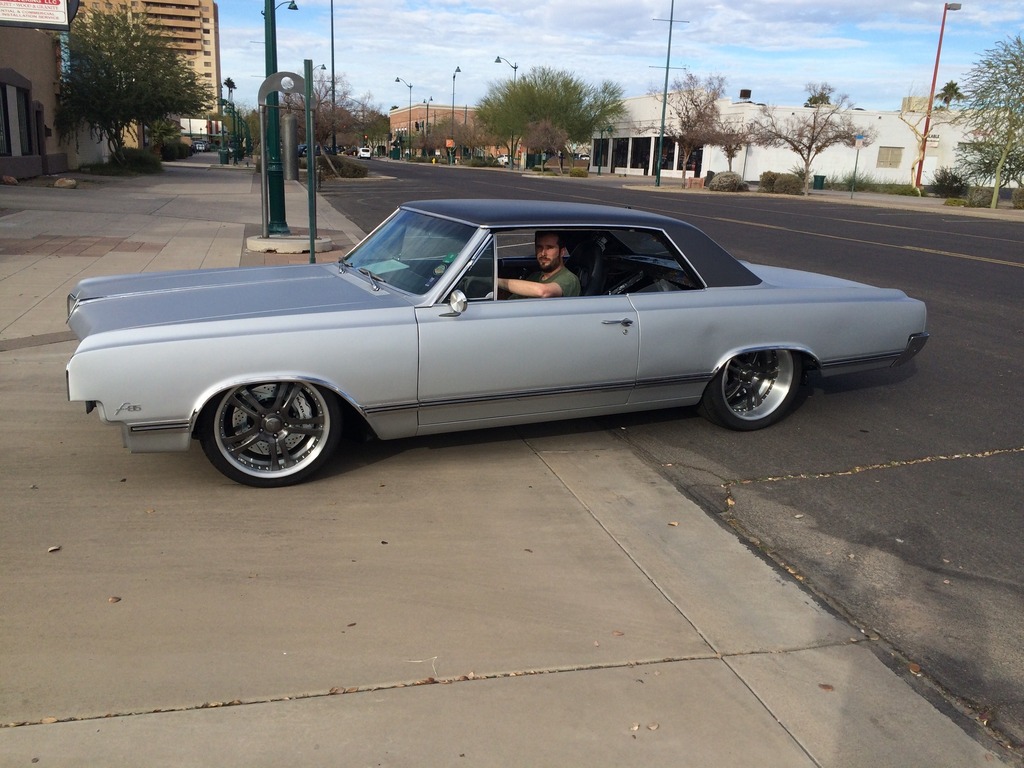
And finally this is after the very first drive. The new Mark Williams 3rd member had been sitting around the shop for about 5 years so it took some time for the clutches to quiet down but so far everything seems to be coming together. Next we need to get the bumper put back on and schedule the interior shop to install the new headliner. Won't be long now boys!
 Phillip
64 Studebaker Daytona Twin Turbo- http://bit.ly/1SgxQ0g
65 Cutlass F-85 - http://bit.ly/1W4lJm4
01-07-2016 #212
Registered User
- Join Date
- May 2001
- Location
- Mesa, Az.
- Posts
- 1,433
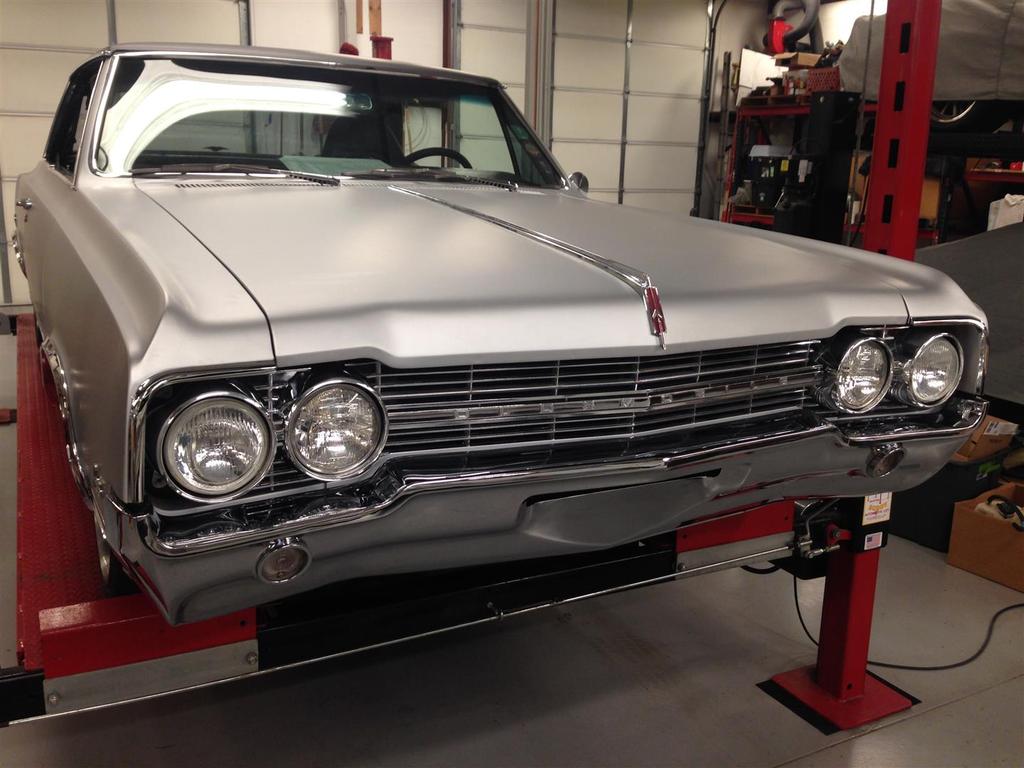
Paul and I got the bumper and the headlight buckets put back on last night. Man this stuff is shiny! Haha. We're just missing 1 last piece of trim that is getting re chromed. Soon the surgery will be over! After that we started the car up and realized the temp gauge quit working. Going to need to look into that now. Not sure why she's fighting us at the last minute. I also made an appointment to have the new headliner installed. We've enjoyed the original "patina'd" head liner but I think with all the new updates it's time to let go. So a new headliner from Legendary Auto Interiors is here along with new visors and sail panels. We're into the home stretch now for sure.


On a side note the Power Tour 16 route was leaked today from the cover of a Hot Rod issue. Here ya go.
Phillip
64 Studebaker Daytona Twin Turbo- http://bit.ly/1SgxQ0g
65 Cutlass F-85 - http://bit.ly/1W4lJm4
01-07-2016 #213 -Moderator/Sponsor-
- Join Date
- Apr 2001
- Location
- The City of Fountains
- Posts
- 15,975
Love the look of this car!!!
Andrew1970 GTO Version 3.0
1967 Cougar build
GM High-Tech Performance feature
My YouTube Channel Please Subscribe!
Instagram @projectgattago
Dr. EFI
I deliver what EFI promises.
Remote Holley EFI tuning.
Please get in touch if I can be of service.
"You were the gun, your voice was the trigger, your bravery was the barrel, your eyes were the bullets." ~ Her
01-07-2016 #214
Registered User
- Join Date
- May 2001
- Location
- Mesa, Az.
- Posts
- 1,433
That means a lot Andrew. Thanks! Originally Posted by andrewb70
Phillip
64 Studebaker Daytona Twin Turbo- http://bit.ly/1SgxQ0g
65 Cutlass F-85 - http://bit.ly/1W4lJm4
01-07-2016 #215 Registered User
- Join Date
- Dec 2008
- Location
- Detroit
- Posts
- 2,585
Man, that is a beauty!... Should turn lots of heads on Power Tour...
Big dreams, small pockets....
Chris--
'72 Cutlass S LSA/T56 Magnum
Bowler Performance, Rushforth Wheels, ATS, Holley EFI, KORE3, Ridetech
Project Motor City Madness
01-12-2016 #216
Registered User
- Join Date
- May 2001
- Location
- Mesa, Az.
- Posts
- 1,433
As long as it doesn't turn Bambi's head.. We're good Chris! Haha. Originally Posted by csouth
Here is a real short video of it running again. I had the resonators off getting coated.
Phillip
64 Studebaker Daytona Twin Turbo- http://bit.ly/1SgxQ0g
65 Cutlass F-85 - http://bit.ly/1W4lJm4
01-12-2016 #217
-Moderator/Sponsor-
- Join Date
- Apr 2001
- Location
- The City of Fountains
- Posts
- 15,975
Man....this makes me want to sand the Cougar down and wrap it.
Is there a website you can point me to for getting the material and the available colors?
Andrew1970 GTO Version 3.0
1967 Cougar build
GM High-Tech Performance feature
My YouTube Channel Please Subscribe!
Instagram @projectgattago
Dr. EFI
I deliver what EFI promises.
Remote Holley EFI tuning.
Please get in touch if I can be of service.
"You were the gun, your voice was the trigger, your bravery was the barrel, your eyes were the bullets." ~ Her
01-12-2016 #218
Registered User
- Join Date
- May 2001
- Location
- Mesa, Az.
- Posts
- 1,433
We're super happy with the wrap. Here is where I bought my samples from (I'm using Avery but only because they had the colors I wanted. I've used 3M too and it's a very good product as you'd expect from 3M). You can also order your material there, but if you are going to have an installer do it, usually they get it locally. Just be sure to tell them before hand that you want to keep the extra material. Vinyl is like paint. Each roll is slightly different just like if you mixed paint two seperate times. Sometimes you don't notice, sometimes it's real obvious. Originally Posted by andrewb70
http://www.metrorestyling.com/category-s/1230.htm
Order the 12x12 samples if you're serious. Order the 3x5 if you're just playing around with the idea. I taped them to the hood, side, trunk with painters tape and rolled it outside, looked at it inside, you know, really got a feel for how the colors would look in different lighting. Then you can also lightly install them and see how they look over the concave and convex contours of the body.Phillip
64 Studebaker Daytona Twin Turbo- http://bit.ly/1SgxQ0g
65 Cutlass F-85 - http://bit.ly/1W4lJm4
01-14-2016 #219
Registered User
- Join Date
- May 2001
- Location
- Mesa, Az.
- Posts
- 1,433
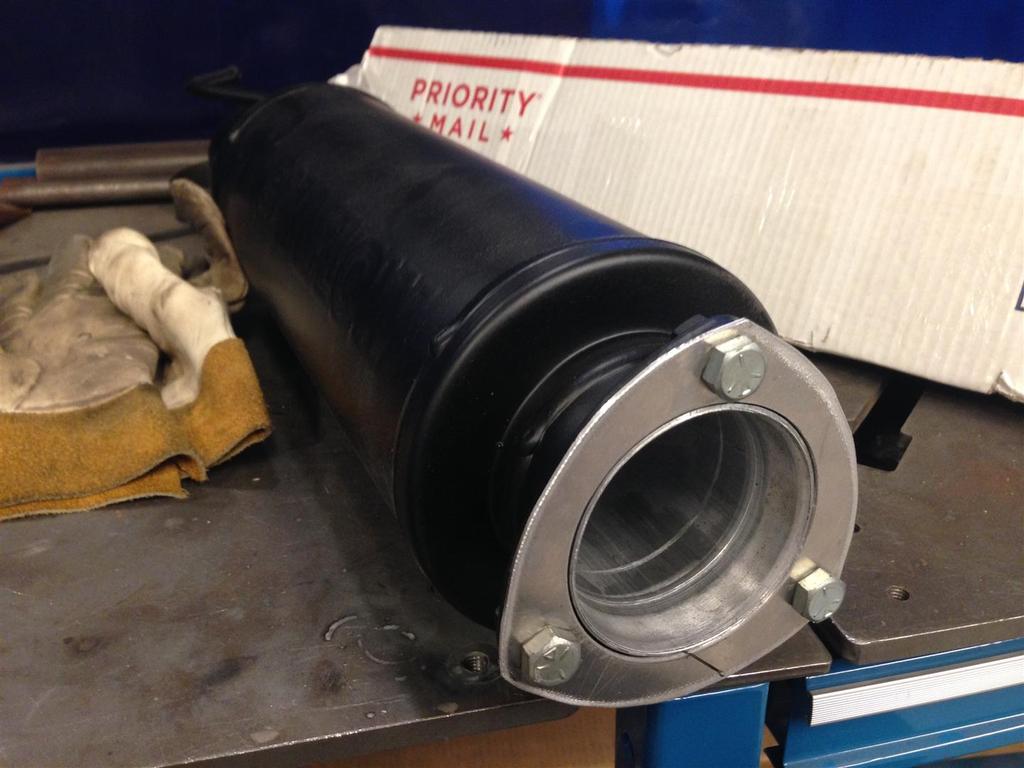
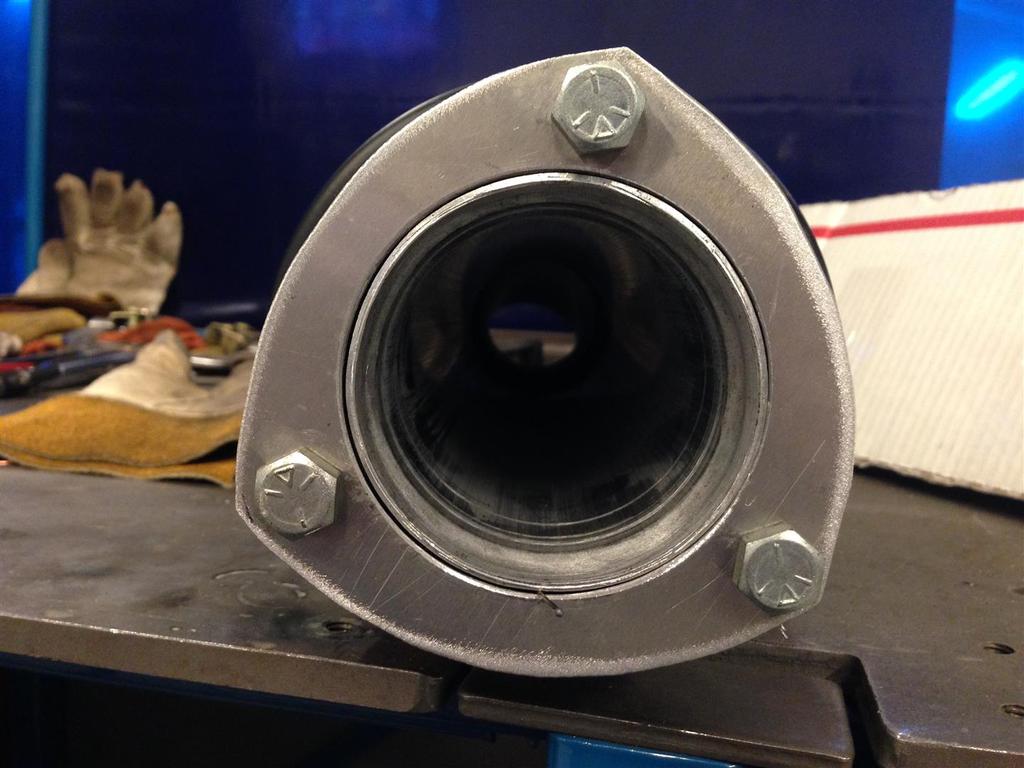
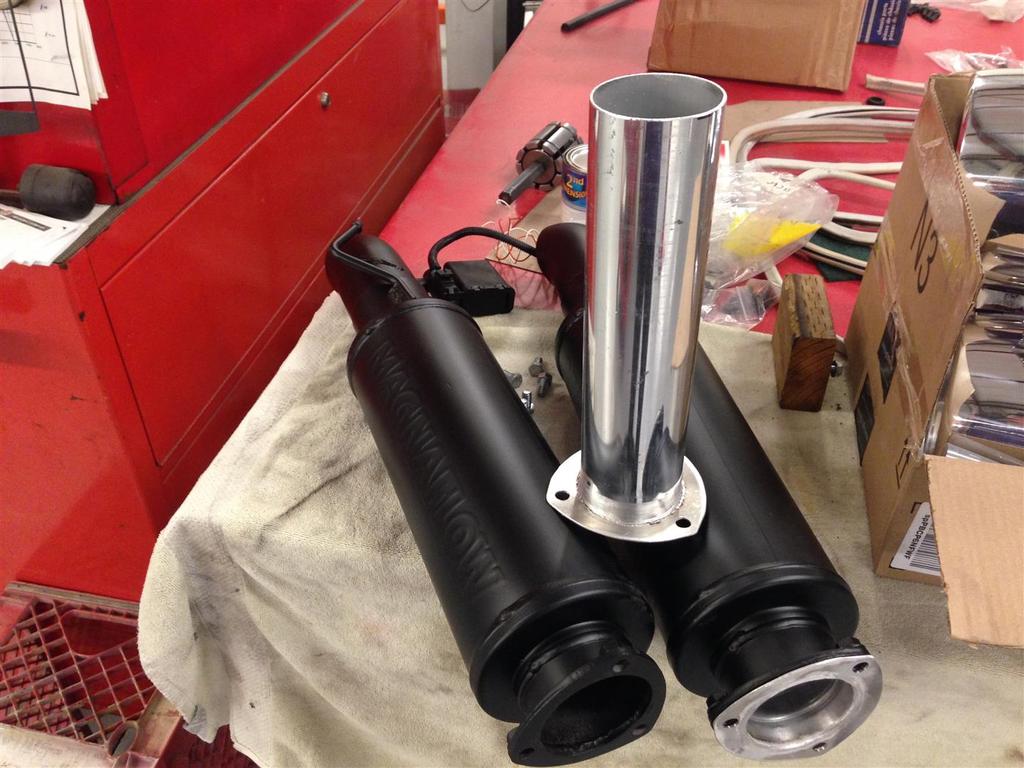
Here is a unique project idea I had. I've always run Spintech mufflers in the past, but on this car with the supercharger people were suggesting I go Magnaflow. Cool, however this thing was WAY TOO loud in a bad way. Super raspy and almost ear splitting at WOT. So, we put these resonators on it. They were the shortest 3" ones that Magnaflow sold. Problem is, that made the car really too quiet. Instead of ripping it all out and going with something else, I wanted try out a unique idea I had to really fine tune the sound between the two pieces. I think it came together nice.
I wanted to use aluminum, just because I didn’t want to make it heavier than it needed to be. So, I originally got some 3” tubing. Well shoot. It doesn’t fit inside. So I cut it and tried to squeeze it down to fit and weld it back up. Didn’t work. I ended up with an oval’ish tube.
Next I ordered 2.75” tubing. Come to find out that’s about what the 3” resonators are in the middle. They we’re loose going in but tightened up some in the middle. Problem was I still had a 3” hole at the end with 2.75” tubing. Can’t really weld that too well. Tried one of those exhaust pipe expanders from Harbor Freight. Broke that instantly, go figure. Next I was thinking I’d go to a muffler shop and just have them expand it. Which would have worked, but probably cost like 20 bucks. Then I thought some more. When you squeeze sheet metal it gets longer. So, if I put it in the bead roller and pinch the heck out of it, then rolled it, is should get bigger, stretching it out. Sure did. Good thing I’ve got a huge motor on there. It didn’t even flinch at turning it even though I’d tightened it down with pliers. I didn’t get a shot of before but you can see where I rolled it to enlarge it. Got it welded, sanded and bolted up. It took the raspness out of regular driving but whoa buddy, she’s still loud as hell at WOT. Will probably leave it like this for now. Might end up cutting a few more inches off but we’ll see. I’d like to drive it with the interior in it.
As for the flanges, I just traced an old gasket and cut those out of aluminum. I still need to do some final sanding on them to match the contour of the flange currently on the exhaust system, but I was excited to get it in and hear what it sounded like.

Phillip
64 Studebaker Daytona Twin Turbo- http://bit.ly/1SgxQ0g
65 Cutlass F-85 - http://bit.ly/1W4lJm4
01-30-2016 #220
Registered User
- Join Date
- May 2001
- Location
- Mesa, Az.
- Posts
- 1,433
Drove the Deer Slayer to work this week! Besides having a small coolant leak from the supercharger canister, and having my hood latch break so far so good. I did notice that the driver's side header is also hitting the frame so we need to shimmy the engine in the mounts and rotate it some to get a little clearance. Here are some shots I took after getting to work. Really feels good to get behind the wheel again.
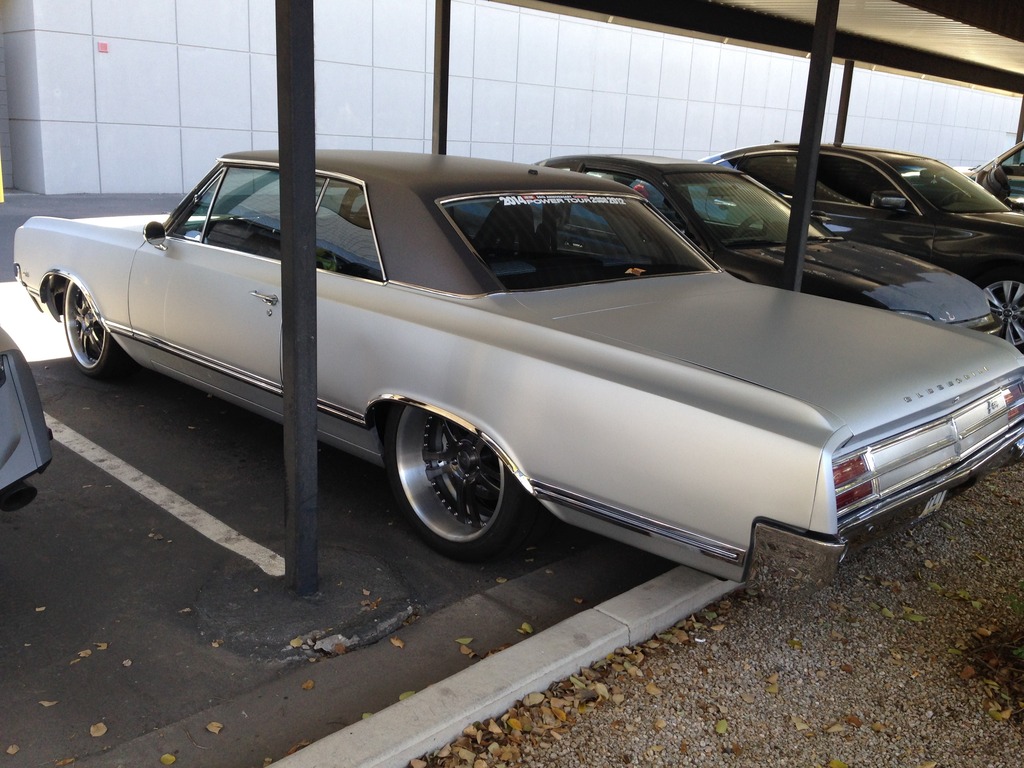
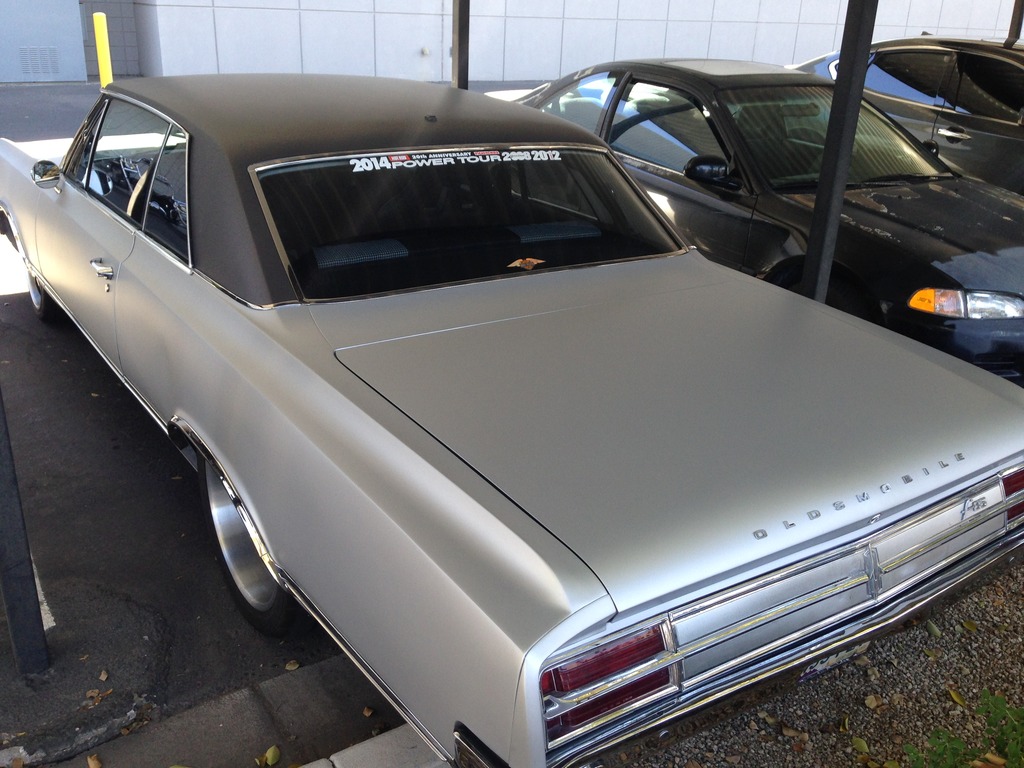

 Phillip
64 Studebaker Daytona Twin Turbo- http://bit.ly/1SgxQ0g
65 Cutlass F-85 - http://bit.ly/1W4lJm4

 Reply With Quote


