

Results 701 to 720 of 862
Thread: The BAD AST Project - Faze II
-
01-08-2017 #701

 Registered User
- Join Date
- Mar 2004
- Location
- Mid-Michigan
- Posts
- 2,764

Thanks a lot guys! It sure does feel good to be back on this.
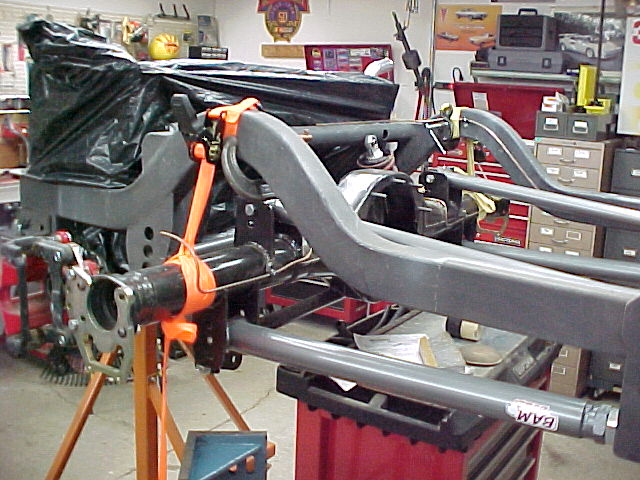
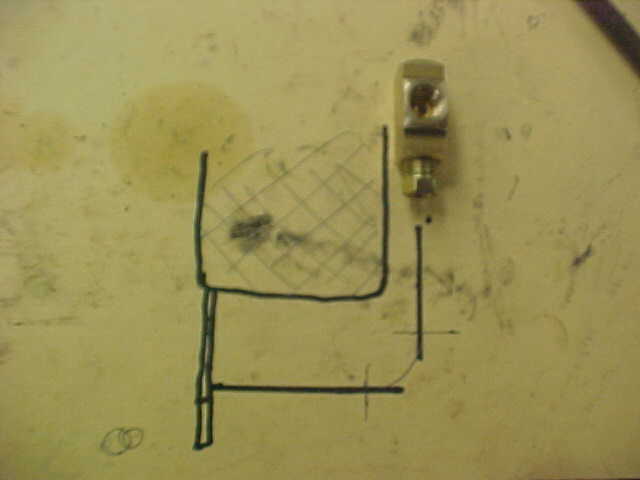
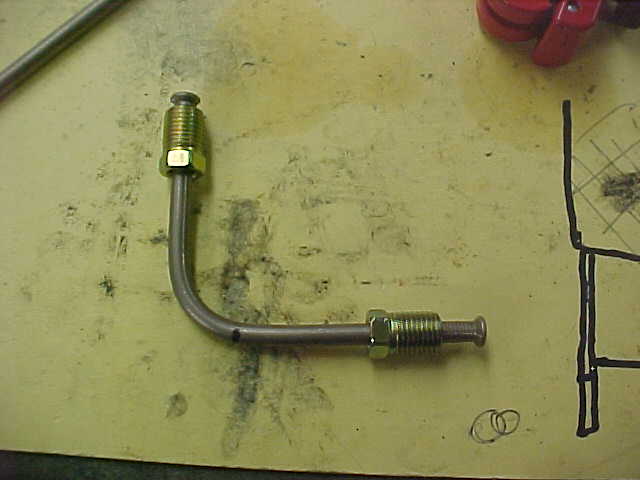
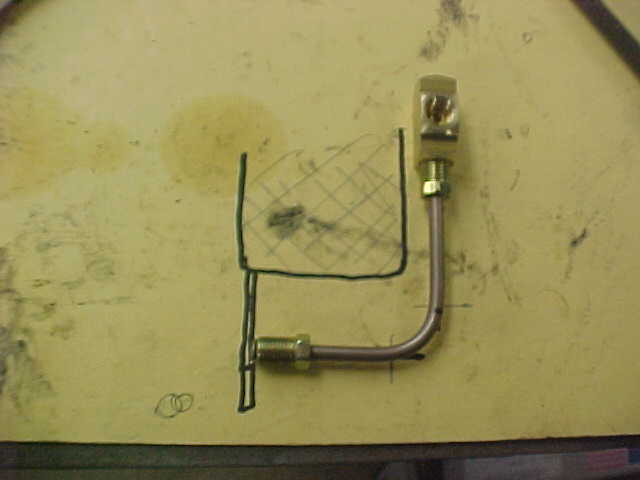
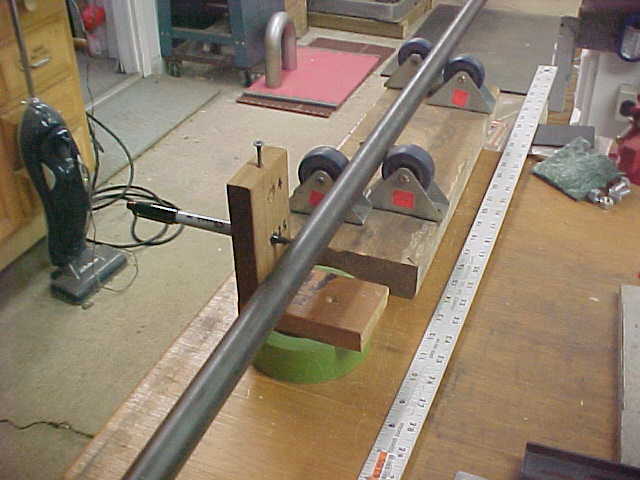
I got the front line ran today. A flare, 2 bends and a few clips and it is in place.
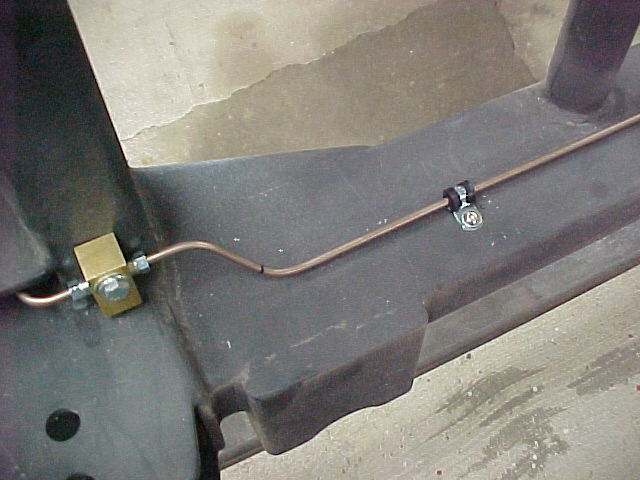
I made a little sketch to get the bends in the right spot.
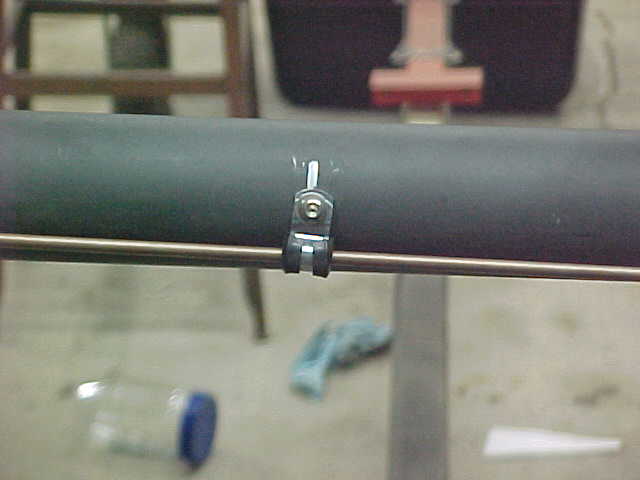
All clipped in. I put the clips on 12" centers. Seems to support the line very well. I need to terminate the end of course, but I can't do that until the front suspension is mocked up. I'll do that along with the rear.
Had to a little re-routing to get around the motor mount tubes. Looks okay? or not...

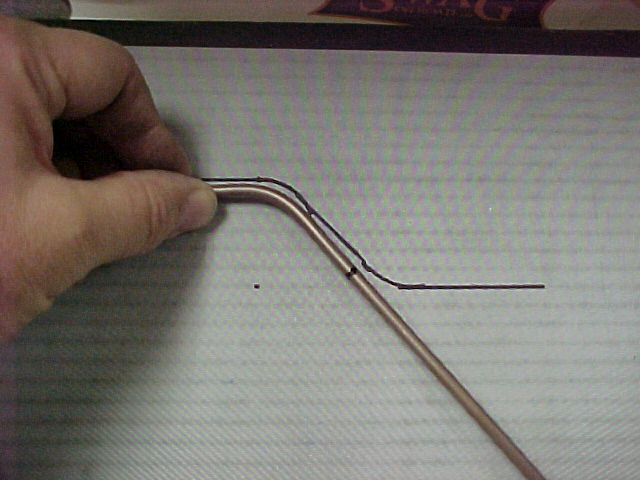
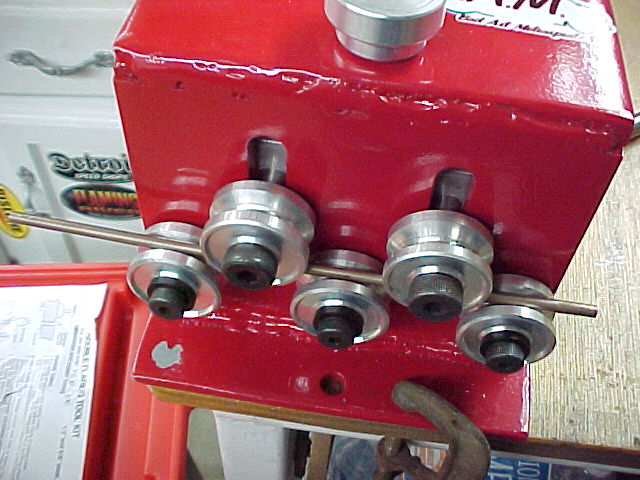
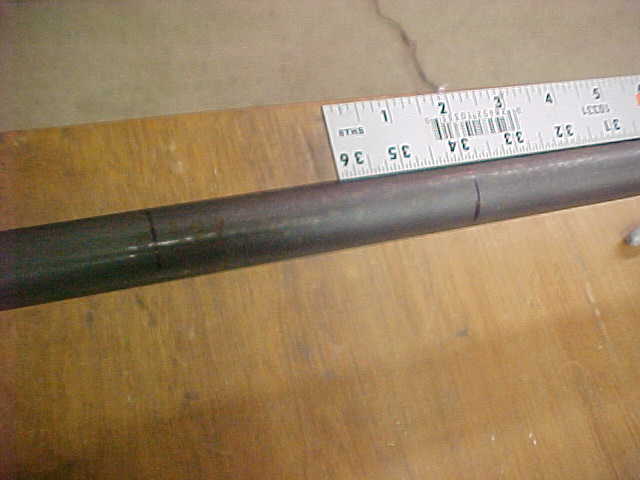
I used the tubing straightener I built a while back to get all of the lines straight. It works like a champ.
I also spent some time figuring out where to put the soft line tabs. I need to weld one to the rear shock cross member but want to verify rear end travel before I do. You can see the layout lines above the shock mount hole in the cross member.
I will be assembling the rear suspension so I can run it thru it's travels (and finish the shock mounts. ).
).
Mark
Mark:
"Bad Ast" Astro Van. Just because I did it... Doesn't mean it's possible...
This my Bad Ast thread...
https://www.pro-touring.com/showthre...roject-Faze-II
This is my Fotki album...
http://astroracer.fotki.com/
-
01-09-2017 #702
Registered User
- Join Date
- Mar 2004
- Location
- Mid-Michigan
- Posts
- 2,764
Got the rear suspension assembled tonight. It still fits... which is a good thing.
I rolled the housing underneath the frame after rolling it flat on the rotisserie. The better half helped hold the housing while I got the bars slipped into place.
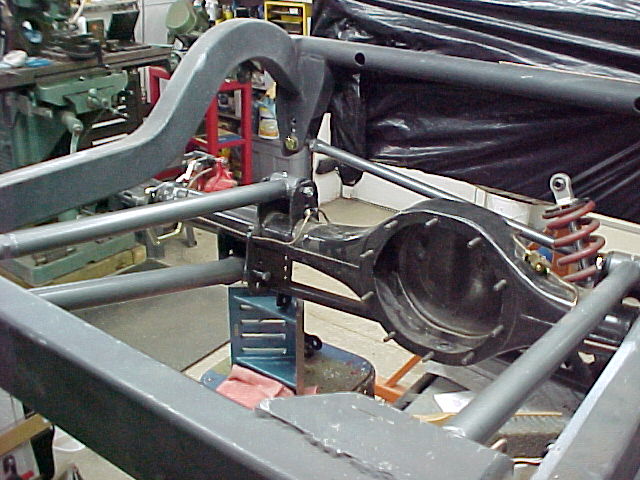
With the bars all bolted up and the panhard bar in place I used a couple of tie down straps to get it raised up so I could connect the shocks.
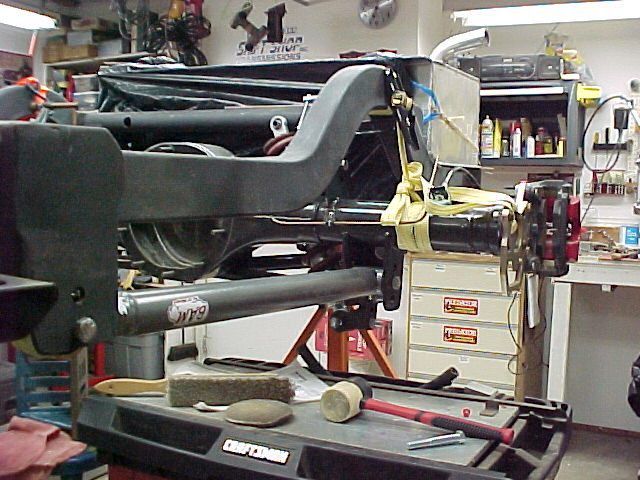
I was also working on the upper shock attachments. right now there is a 1" hole drilled thru both sides of the upper cross member. I went to Durand and picked up a 4' piece of 1" O.D. x 1/4" wall D.O.M. and cut a couple of sleeves for the 1/2" bolts that hold the upper shock eyes. Once everything is pulled back apart I will weld these in.
Getting this hung in there tonight was enough for me. Tomorrow I'll start finishing up the brake line stuff.
MarkMark:
"Bad Ast" Astro Van. Just because I did it... Doesn't mean it's possible...
This my Bad Ast thread...
https://www.pro-touring.com/showthre...roject-Faze-II
This is my Fotki album...
http://astroracer.fotki.com/
01-10-2017 #703
Registered User
- Join Date
- Mar 2004
- Location
- Mid-Michigan
- Posts
- 2,764
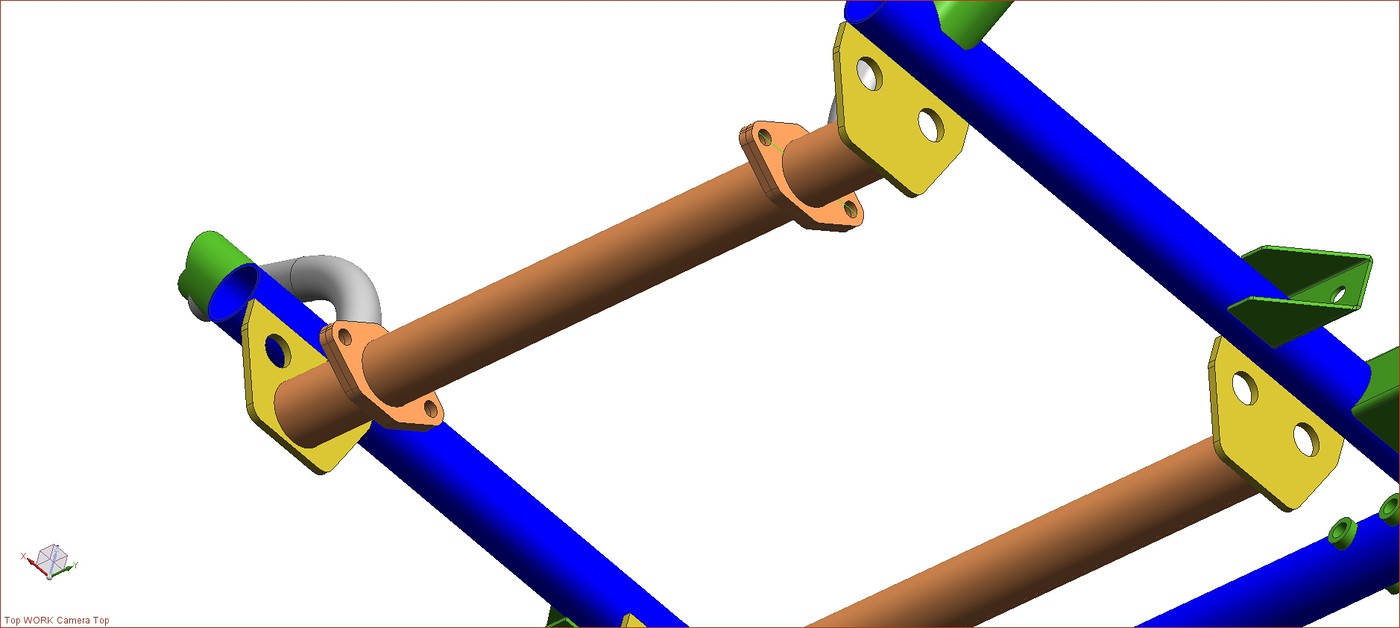
Last nite I went to bed at 9:30 after working on the suspension for 4 hrs. I woke up at 10:30 and my mind was running, working on the van. I never got back to sleep and was still awake when the alarm went off at 3:45. It was well worth it though as I figured out how I am going to drop the engine in the frame. It's still a bit of a tear up but it's super easy and all I have to make are a few 1/4" plates. Everything else will be reused after I cut the cross members out. I worked on the design all day today in UG and have dimensioned drawings. I am going to wait to do the job until I have the frame on the ground with the all of the suspension mocked up. I just need to verify ground clearance to the lowered cross members and trans pan but I think the plan will work.
Here are some screen shots up so you can see where I am taking it.
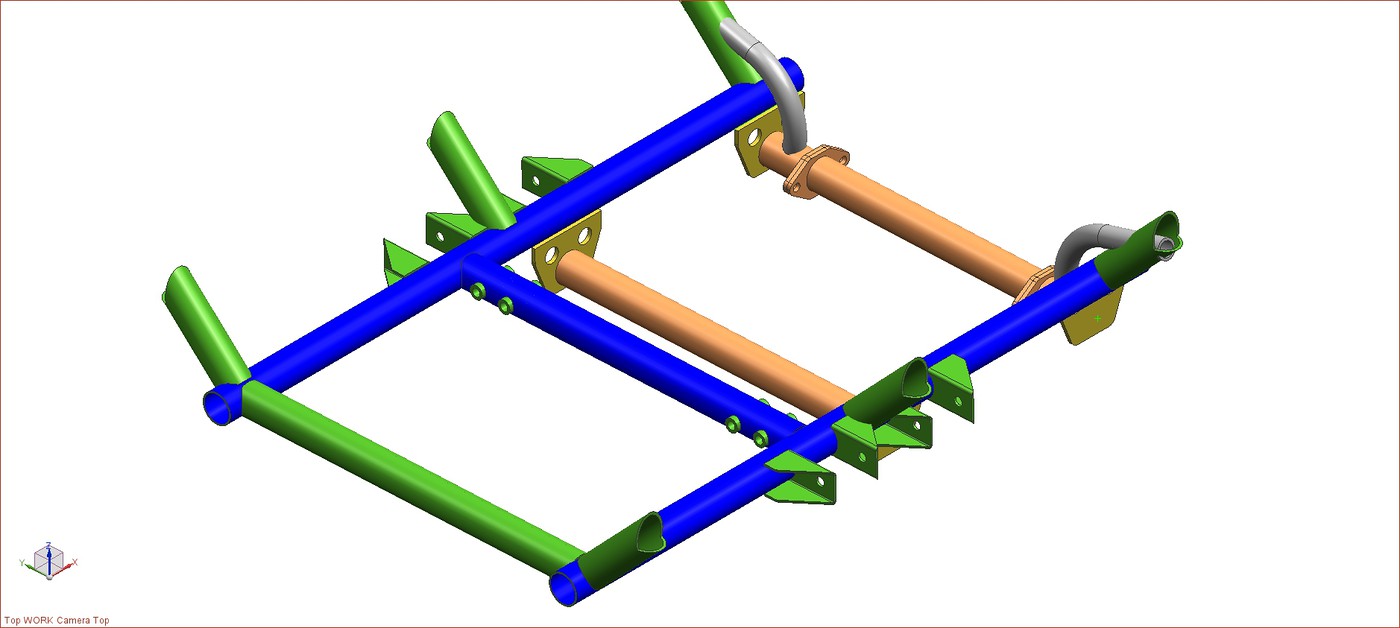
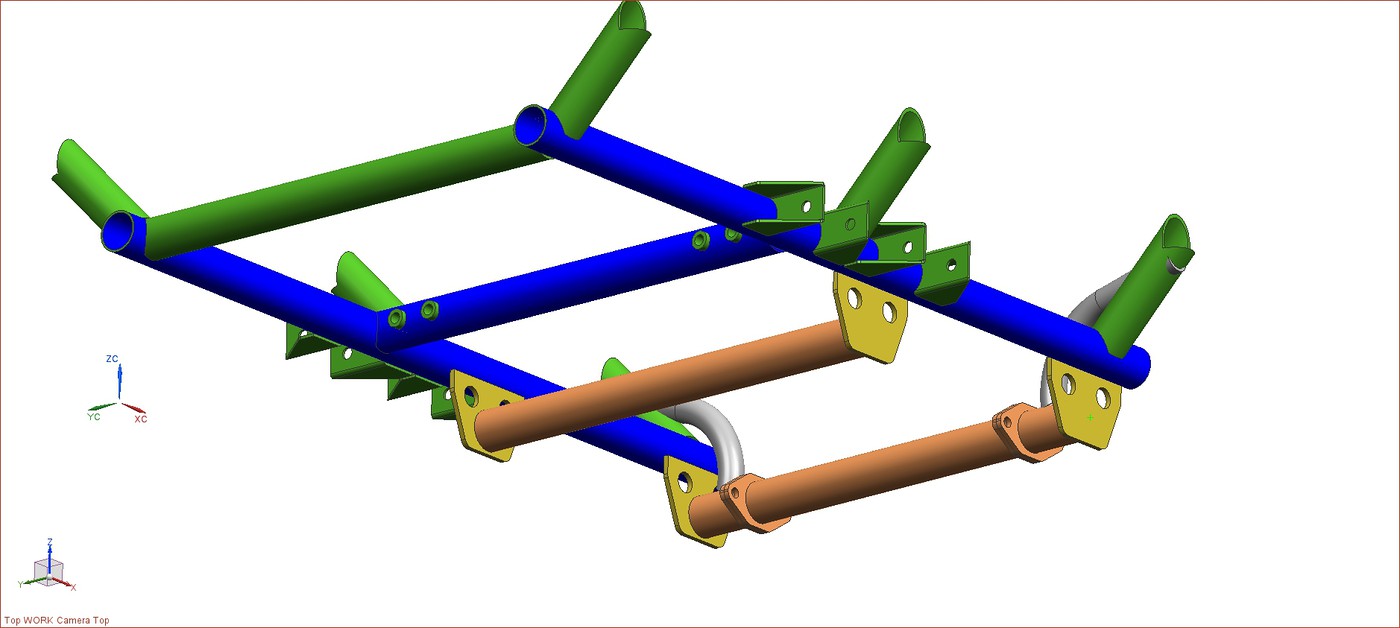
The biggest change is the drop-out piece in the rear cross member. This will allow removal of the pan without having to yank the engine.
MarkMark:
"Bad Ast" Astro Van. Just because I did it... Doesn't mean it's possible...
This my Bad Ast thread...
https://www.pro-touring.com/showthre...roject-Faze-II
This is my Fotki album...
http://astroracer.fotki.com/
01-10-2017 #704 Registered User
- Join Date
- Jul 2011
- Location
- Prescott, AZ
- Posts
- 206
We're so happy to see a van build thread here, and on top of that, one with so much ingenuity! You've done some things here in ways we never would have though of. We'll be sticking around for the updates!
01-11-2017 #705
Registered User
- Join Date
- Mar 2004
- Location
- Mid-Michigan
- Posts
- 2,764
 Originally Posted by Centerforce

Thanks! Glad you like the project. If you have any comments or questions please feel free to ask.
MarkMark:
"Bad Ast" Astro Van. Just because I did it... Doesn't mean it's possible...
This my Bad Ast thread...
https://www.pro-touring.com/showthre...roject-Faze-II
This is my Fotki album...
http://astroracer.fotki.com/
01-11-2017 #706
Registered User
- Join Date
- Mar 2004
- Location
- Mid-Michigan
- Posts
- 2,764
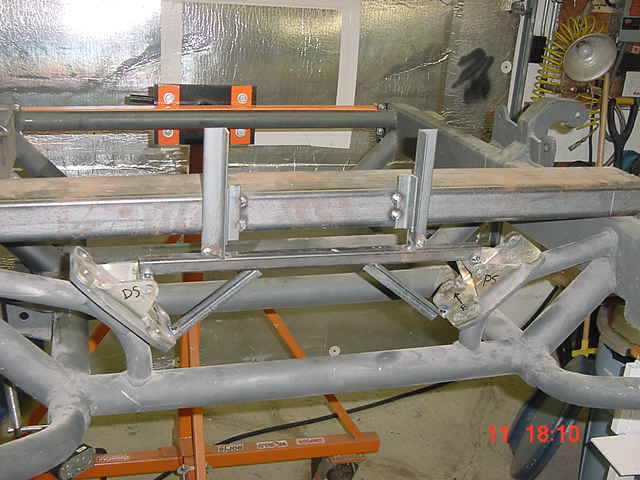
I'm still looking at this frame mod. A co-worker and I were looking at it today and came to the conclusion I could probably get rid of those Cross Members completely. That would improve ground clearance dramatically.
Any other opinions? Using the engine as a partly stressed member and with all of the bracing up to the 2 x 4 rail can I get away with simply deleting those two cross members?
MarkMark:
"Bad Ast" Astro Van. Just because I did it... Doesn't mean it's possible...
This my Bad Ast thread...
https://www.pro-touring.com/showthre...roject-Faze-II
This is my Fotki album...
http://astroracer.fotki.com/
01-11-2017 #707
Registered User
- Join Date
- Mar 2004
- Location
- Mid-Michigan
- Posts
- 2,764
I built a motor mount jig tonight. I used the solid motor mounts, bolted them in and then welded some tube and angle to maintain their position when unbolted.
Now I can cut them out and gut the cross member and not worry about getting them back where they belong.
I tacked pieces of angle onto the frame to locate a piece of 2 x 4 tubing set on the top rails.

Another piece of angle is welded to both ends of the 2 x 4 to locate it side to side
I then tacked some more angle to the 2 x 4 to locate the jig side to side.
Now, once the mounts are cut out and trimmed I can drop them straight down 3 inches and rebuild the attachments to the frame.
If I can delete that cross member I will be happy.
MarkMark:
"Bad Ast" Astro Van. Just because I did it... Doesn't mean it's possible...
This my Bad Ast thread...
https://www.pro-touring.com/showthre...roject-Faze-II
This is my Fotki album...
http://astroracer.fotki.com/
01-16-2017 #708 Registered User
- Join Date
- Dec 2010
- Location
- Fredericksburg, VA.
- Posts
- 3,155
Mark,
I'm glad to see you finally moving again on this project!Steve Hayes
"Dust Off"
68 Camaro
Given sufficient initial acceleration, even pigs can fly!
01-26-2017 #709
Registered User
- Join Date
- Mar 2004
- Location
- Mid-Michigan
- Posts
- 2,764
Thanks Steve, it's good to be back at it.
Well, I did some serious thinking, looking back through all of my build pics and came to the conclusion the engine is staying where it is. Too many other issues when I start lowering it more. Alternator, oil pan clearance, trans mount, etc. I am leaving it where it sits and I will deal with the air cleaner/dog house issue when I get to it.
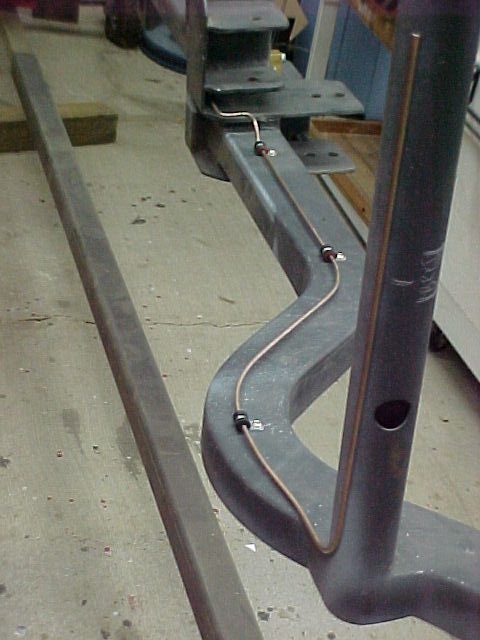
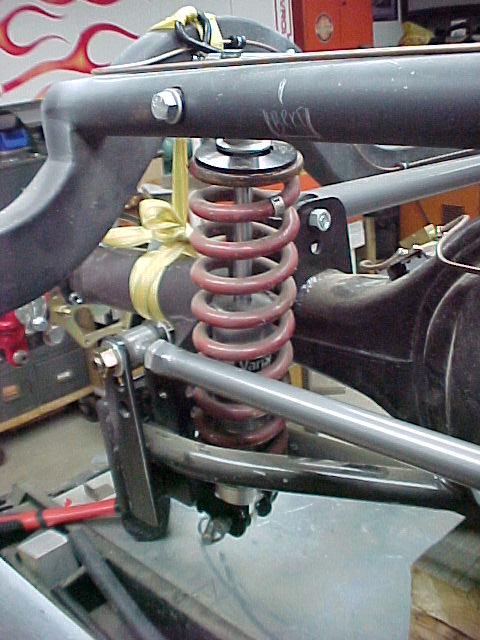
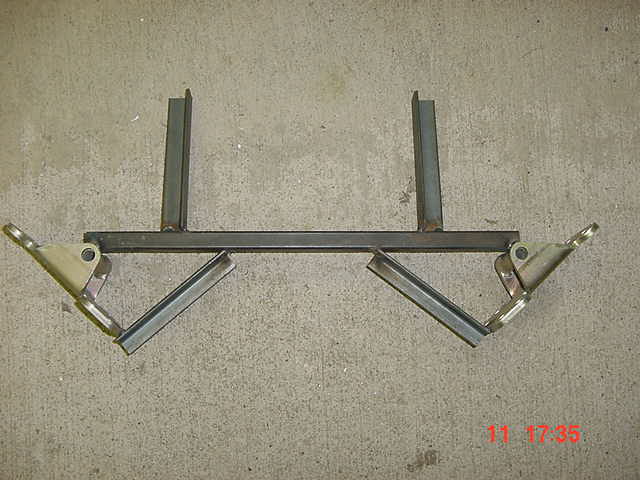
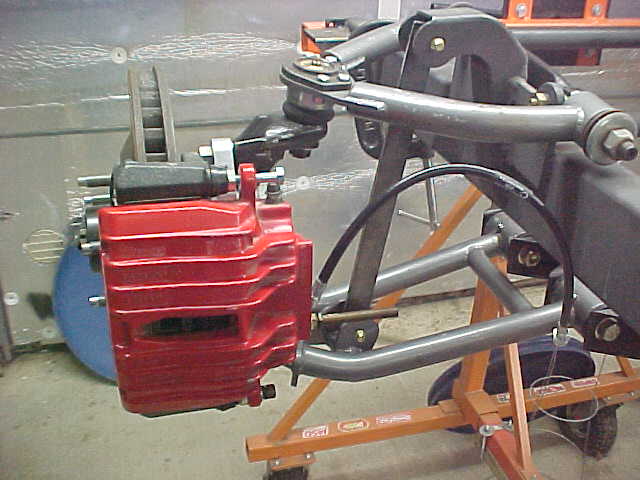
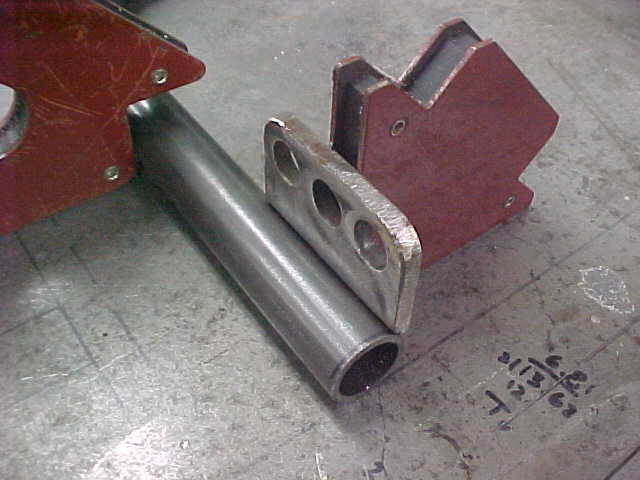
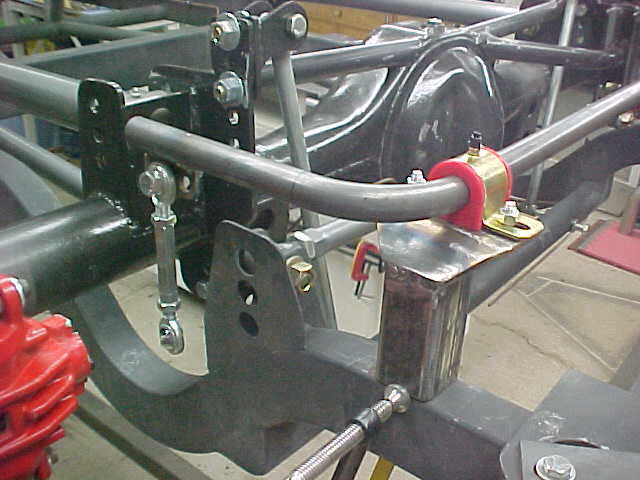
I've been working on the brake line routing. Like the rear suspension I mocked up both of the front suspensions so I could bolt up the soft lines I got from Tobin.
Everything looks pretty good, I have the spots for the weld-on tabs marked out and am looking at steering stops, stab bar attachments and a few other issues that need to be rectified before the chassis is painted.
Here are a few pics from the last few nights.
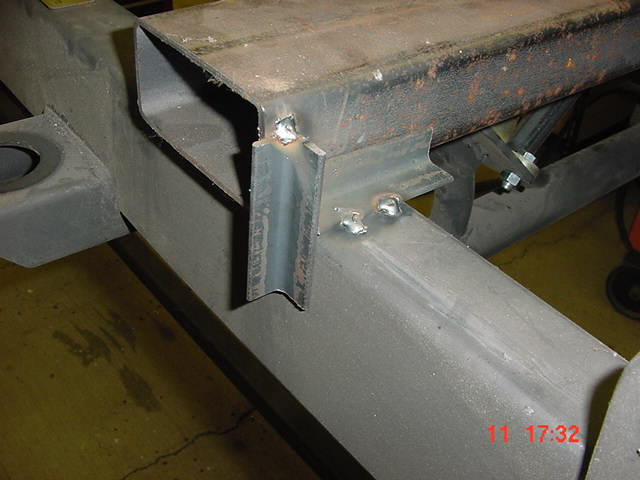
One tab needs a cut out to fit on the rear crossmember.
Cut out with the bandsaw and cleaned up with the grinder, fits like a glove...
This is where the tab will go. On the drivers side right above the shock mount.
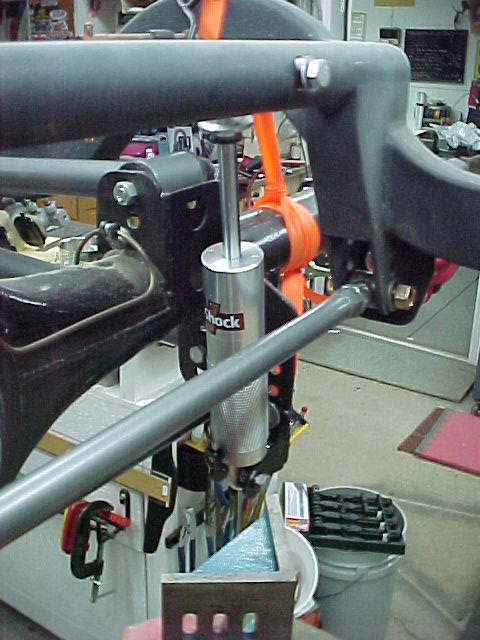
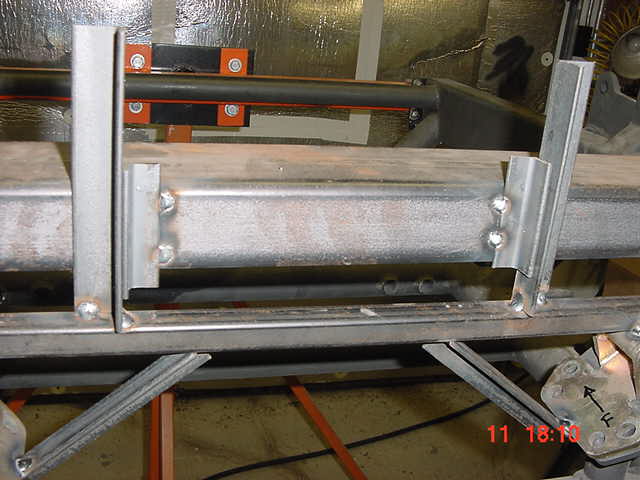
I hung the front suspensions & brake corners.

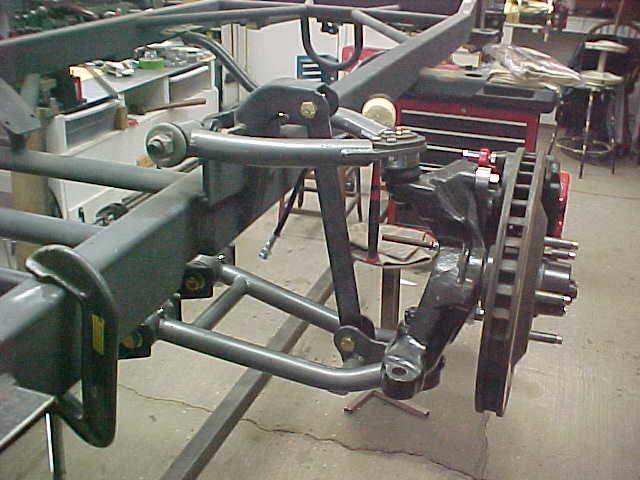
With the lines bolted to the calipers I could move the corner through left and right steer to see where the lines wanted to fall naturally. This is important to avoid twisting the lines during steer. Twisting will weaken the lines AND MAY loosen fittings over time. Not a good thing.
With no steer, going straight, the hose is relaxed and in a good spot to stay out of the coil-over AND the wheel as it is spinning rapidly next to it. (I hope)...
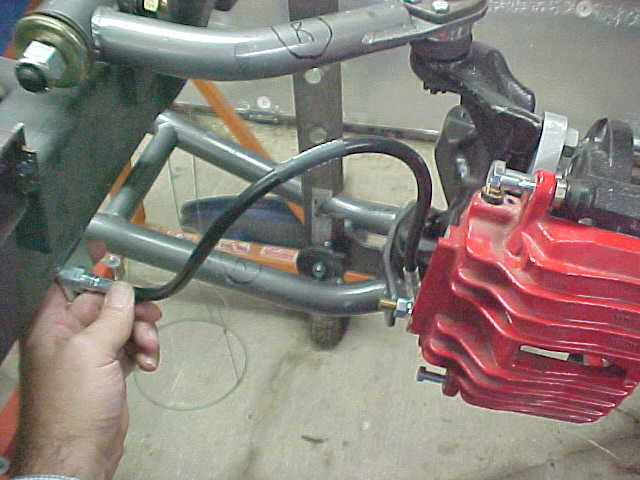
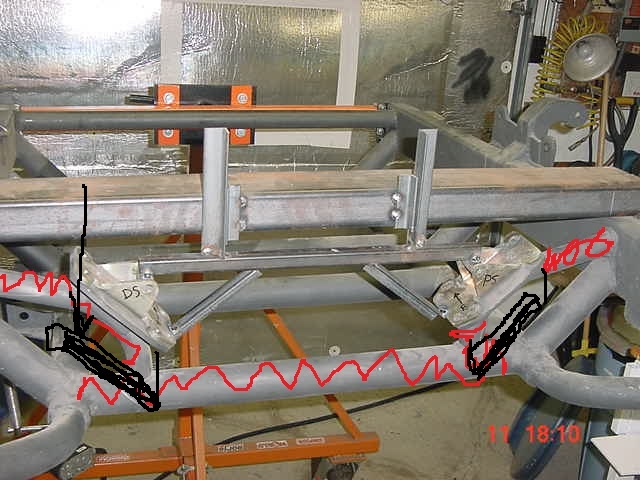
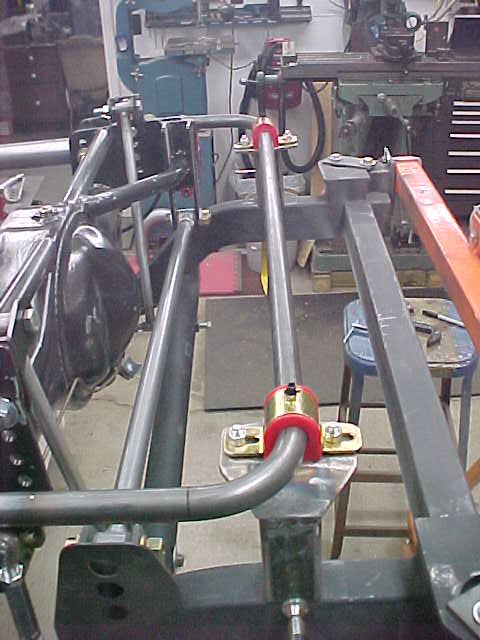
RH corner at right lock. The hose curls up in a linear arch with no twist.
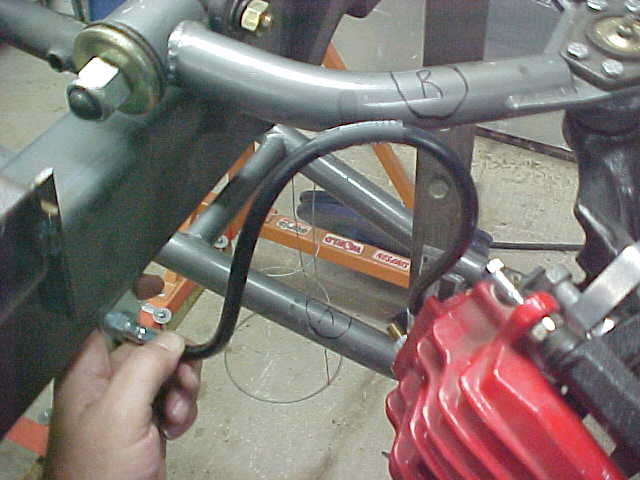
At full left lock the hose still has some length so it is not pulling against either fitting.
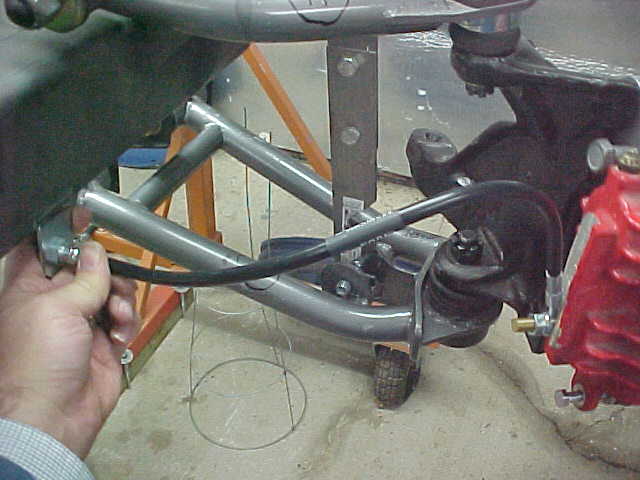
The LH side line is pretty much a mirror image of the right side. I thought it would be but I still had to mock it up to verify my "think so".
Next step will be mounting the rack and developing the steering stops. Is there a rule of thumb for how much to leave at the end of rack travel? I was thinking about a 1/4" or so. Anybody?
Well, that's where I'm at with it. Lots to do to get this thing wrapped up and paint ready.
MarkMark:
"Bad Ast" Astro Van. Just because I did it... Doesn't mean it's possible...
This my Bad Ast thread...
https://www.pro-touring.com/showthre...roject-Faze-II
This is my Fotki album...
http://astroracer.fotki.com/
01-27-2017 #710
Registered User
- Join Date
- Mar 2004
- Location
- Mid-Michigan
- Posts
- 2,764
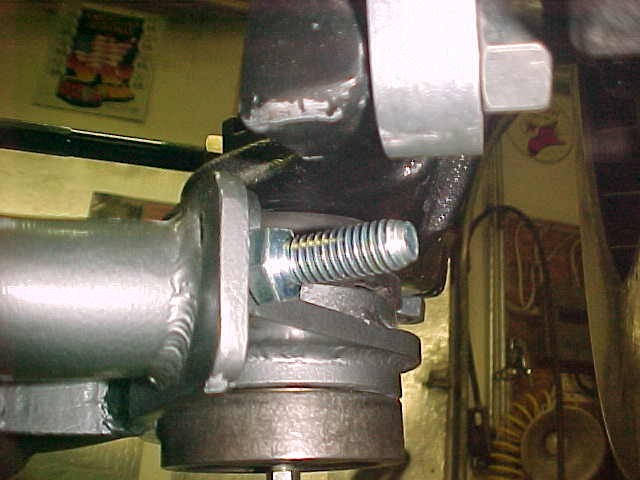
I got a bit done tonight. Worked on the steering stops. I bolted in the rack and got the steering "wheel" centered (it's a pair of vise grips...). Full lock to lock on the Corvette rack is 2.63 turns, just shy of 2 3/4's. Turning the wheel to full lock and then backing out of that by about 1/4" of travel (on the knuckle) should get me a good starting point for setting up the stop bolts.
I took some pics but it's kind of hard to see. I used a magnet to set the bolt where I want to hit the LCA and measured for a piece of 3/8th's plate I will use to fab the bolt tab.
This is the right lock stop bolt on the passenger side.
This is the right lock bolt on the drivers side.

Using these positions I came up with 4 stop tabs that just happen to all be the same size. 1" wide by 1 1/2" long. I laid them out on a scrap piece of 3/8th's and chunked them out with the bandsaw.
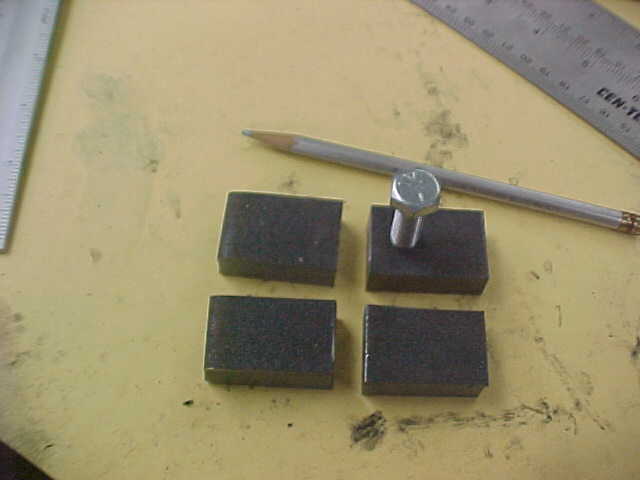
I laid out the hole in each one and drilled and tapped for a 3/8-16. The tap I used is out of the original Craftsman tap and die set I bought with graduation money in 1974... It has cut a LOT of threads and I have never broken any of the taps.
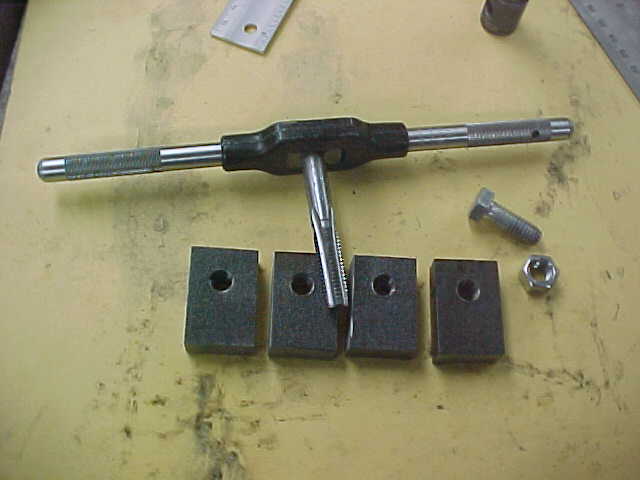
I'll round these over a bit before I weld them to the knuckles. I will also flatten that edge on the control arm to give a better target for the bolt head.
I got SOMETHING done tonight. ;)
MarkMark:
"Bad Ast" Astro Van. Just because I did it... Doesn't mean it's possible...
This my Bad Ast thread...
https://www.pro-touring.com/showthre...roject-Faze-II
This is my Fotki album...
http://astroracer.fotki.com/
01-28-2017 #711
Registered User
- Join Date
- Mar 2004
- Location
- Mid-Michigan
- Posts
- 2,764
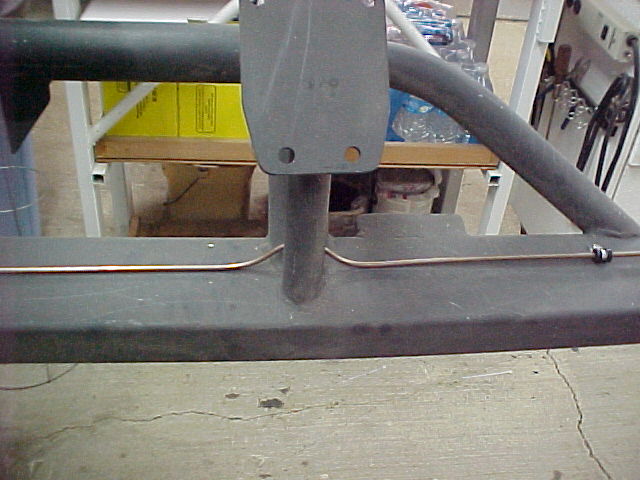
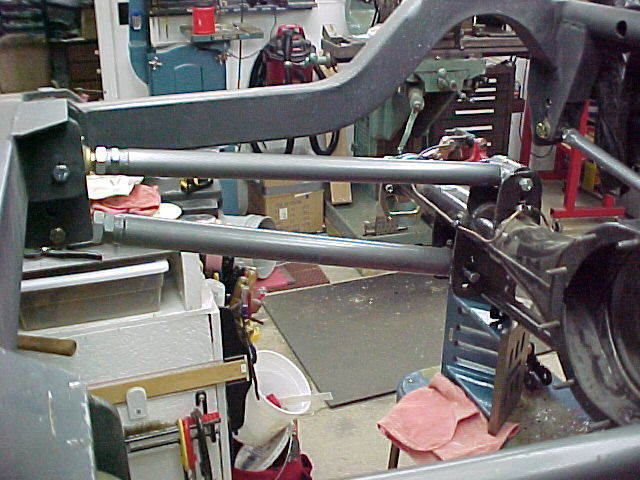
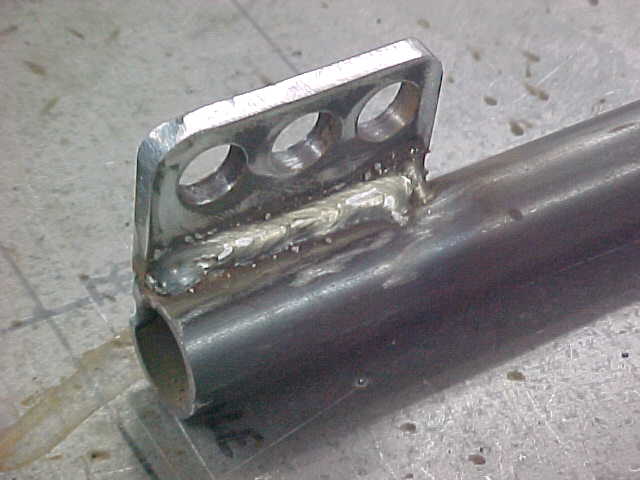
Picked up a junction block for the front brake lines. It will split the line from the prop valve out to the left and right front calipers.
It will sit on the driver side inner frame rail.
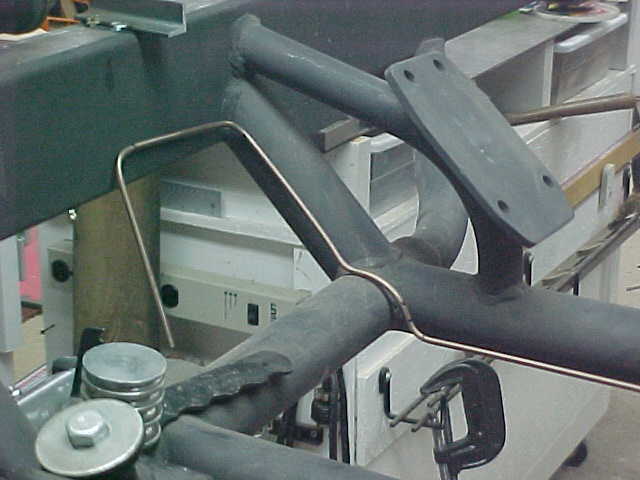
I grabbed a chunk of NiCop (my last bug piece) and started looking at getting it routed from the junction block to the passenger side rail.
The best route was running back a bit to the last crossmember that runs right under the front of the engine. After getting a few bends done it started looking pretty good.
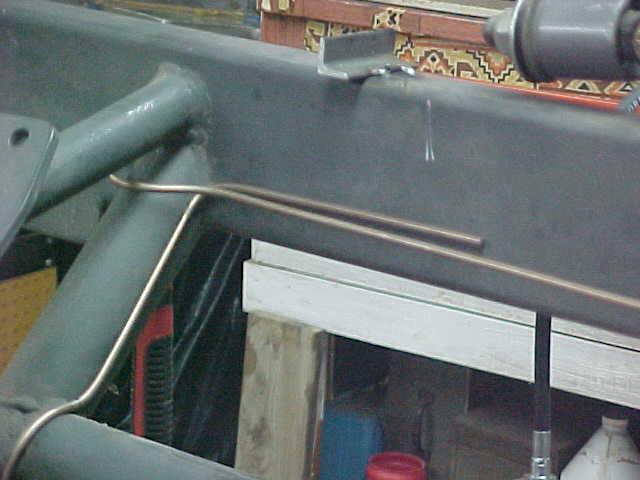
Dinking it around all of that tubing took some time but I got it ran and I didn't destroy it in the process.

This is the passenger side. It runs forward a bit once it gets back to the rail and will drop down under the rail to reach the weld-on brake tab. I won't finish this end until the tab is installed.
The line is still loose, I haven't added the clips yet. I will center it and tweak the fit as I install the clips.

I also got the line built from the junction to the left front tab. This was a no brainer as it was only about 4" long with one bend.
I took some quick measurements and did a layout so I could get the bend and the lengths out to the tab correct.
Once I had that figured out I put a flare on each end and a bend in the middle. Done!
Fits like a glove!
Thanks for watching!
MarkMark:
"Bad Ast" Astro Van. Just because I did it... Doesn't mean it's possible...
This my Bad Ast thread...
https://www.pro-touring.com/showthre...roject-Faze-II
This is my Fotki album...
http://astroracer.fotki.com/
01-30-2017 #712
Registered User
- Join Date
- Mar 2004
- Location
- Mid-Michigan
- Posts
- 2,764
Didn't get a lot of time out in the shop Sunday but it was enough to get the clips mounted for the Right Front hardline.
I started in the middle of the crossmember. Once this was tightened up I could center the line and determine where to put the end clips.
I mounted the outer clips so they captured the tangent of the bend radius on each end. This keeps the line from itching around between the clips.
This is the driver side bolted up.
And the passenger side. I'll finish routing this end after the brake tabs are welded on.
MarkMark:
"Bad Ast" Astro Van. Just because I did it... Doesn't mean it's possible...
This my Bad Ast thread...
https://www.pro-touring.com/showthre...roject-Faze-II
This is my Fotki album...
http://astroracer.fotki.com/
01-31-2017 #713 Registered User
- Join Date
- Sep 2009
- Posts
- 2,709
That is some excellent fabrications skills there! Keep up the progress!

1955 Nomad project LC9, 4L80e, C5 brakes, Vision wheels
1968 Camaro 6.2 w/ LSA, TR6060-Magnum hybrid and etc SOLD
1976 T/A LS1 6 Speed, and etc. SOLD
Follow me on Instagram: ryeguy2006a
02-05-2017 #714
Registered User
- Join Date
- Mar 2004
- Location
- Mid-Michigan
- Posts
- 2,764
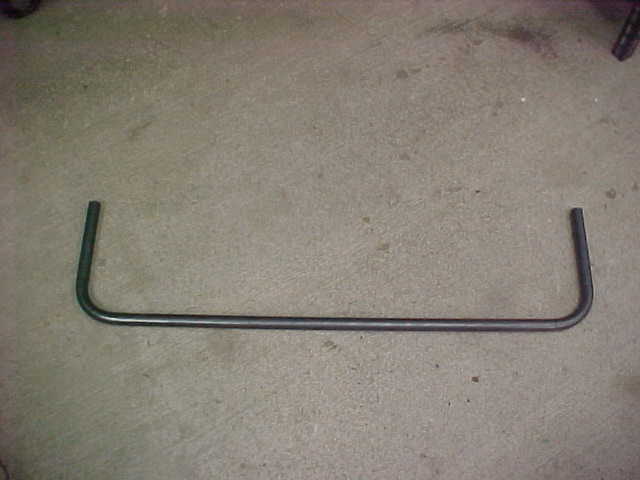
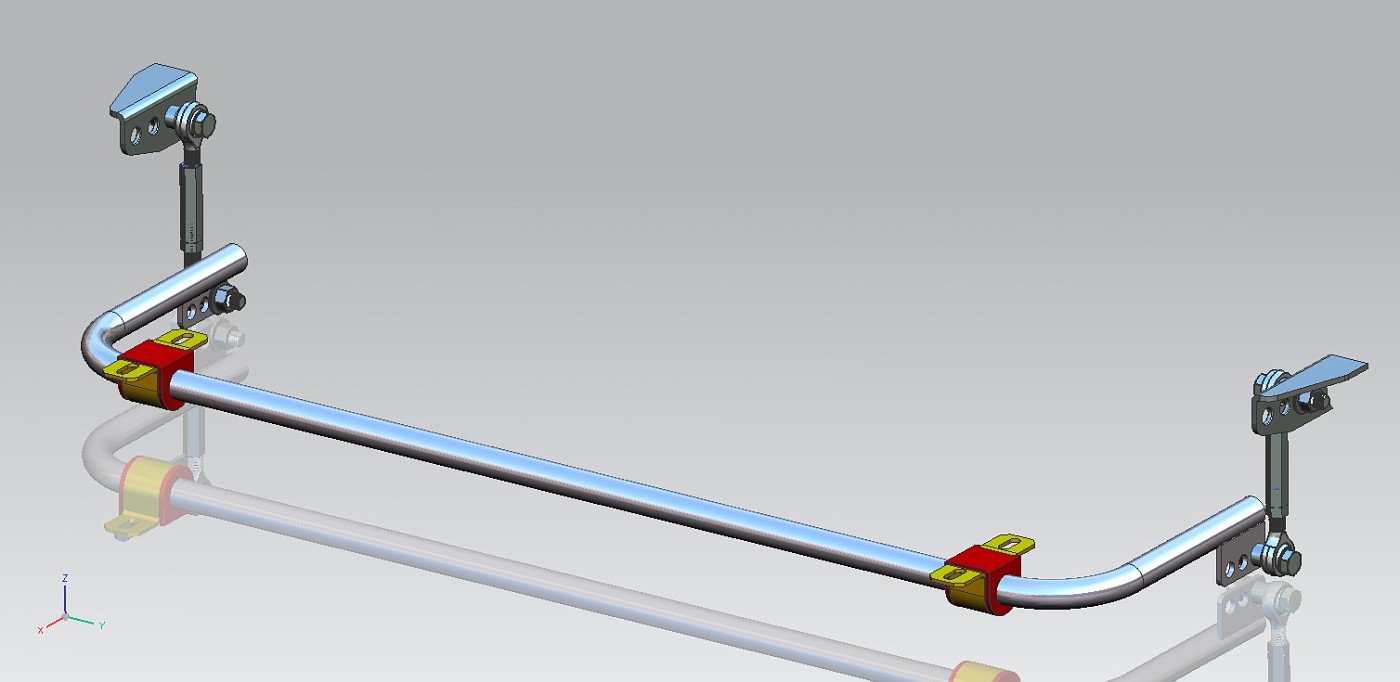
I was working on another project during the week so I didn't get much done on the van until Saturday morning. I rolled the tubing bender out and got the rear anti-roll bar bent up.
I made a drawing of the bar in CAD with dimensions so laying it out took no guess work. The 4.71 dimension is the arc length of the "centerline" of the bend. This is the length of tubing used to make the 90deg bend between the tangents.
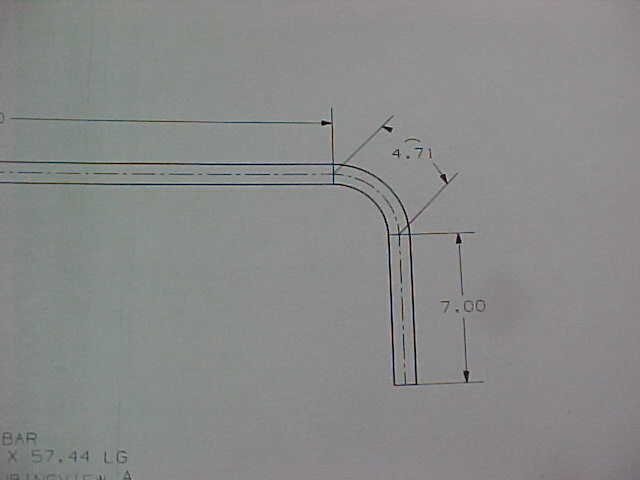
Using the roller jig to mark the tubing. I laid out the tangent lines just like the drawing said. Rolling the tubing in the jig gives me a perfectly straight line, all around the tubing, at each tangent point. makes setting it up in the bender easy.

Here you can see the two tangent points laid out for one bend.
Getting the bender set up. Having it on the cart AND automated, sure does make this less of a chore. The rear bar is 1" O.D. x .095 wall 4130. it bends pretty easy anyway but this makes fun.

Set up for the 1st bend and about a 1/2 of the way through it.

Out to 90 degrees. I am sneaking up on 90 here. To get "90" the tubing needs to be over bent so that, when it springs back, it stays at 90. I over bend it a bit, stop, loosen the jack screw to let the machine relax, measure the bend then bend a bit more if needed. I did this twice for the first bend and once for the second. Knowing what it takes helps with the second bend.
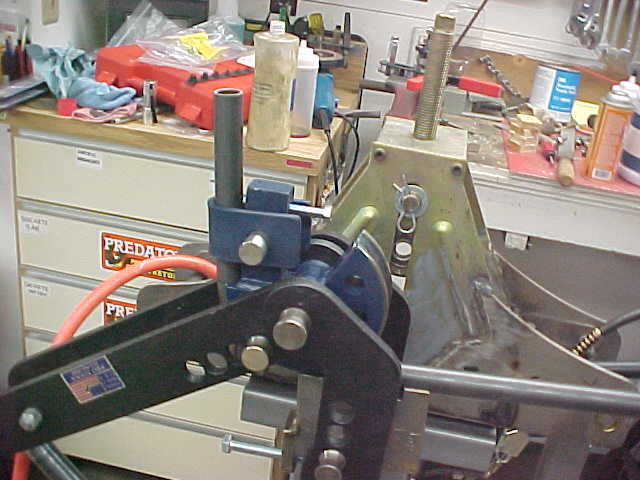
getting the second bend done.

Part of doing this correctly is making sure the second bend is on the same plane as the 1st bend. Having one leg point up and the other pointing down is not a good thing.
This is the bar after bending. Setting it on the floor tells me if I got it right or not. No rocking in either direction means I got it right.
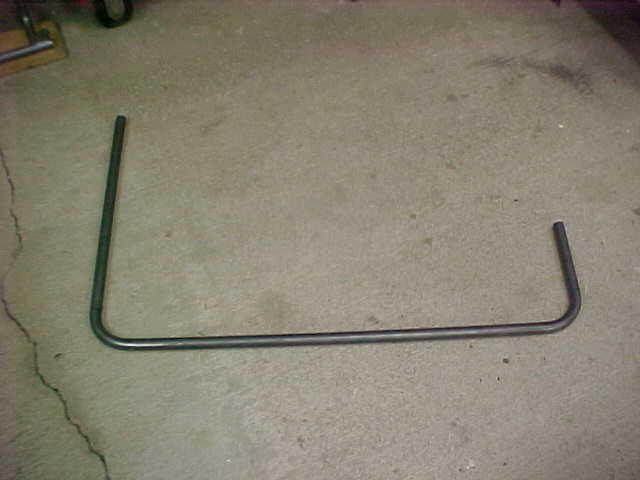
In this pic you can see the tangent points and where they fell in the bend.
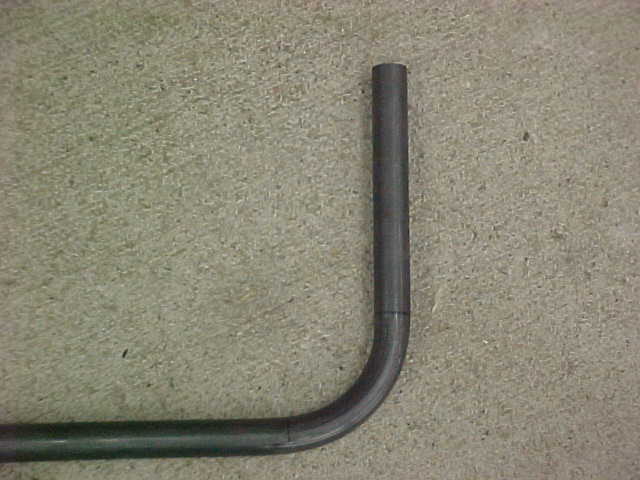
All trimmed up and ready for the endlink tabs to be welded on. I won't do that until I get the rest of the system mocked into place so I can tack everything at one time.
This is how the bar looked in my CAD model.
Thanks for following.
MarkMark:
"Bad Ast" Astro Van. Just because I did it... Doesn't mean it's possible...
This my Bad Ast thread...
https://www.pro-touring.com/showthre...roject-Faze-II
This is my Fotki album...
http://astroracer.fotki.com/
02-05-2017 #715
Registered User
- Join Date
- Oct 2016
- Posts
- 556
Wow !!
02-06-2017 #716
Registered User
- Join Date
- Jul 2011
- Location
- Prescott, AZ
- Posts
- 206
That's a very neat little bending setup you have there. We looked back a few pages into the thread and found out you made the base. Very nice execution, and bonus points for being compact and portable!
02-06-2017 #717
Registered User
- Join Date
- Mar 2004
- Location
- Mid-Michigan
- Posts
- 2,764
Thanks for the compliments! I can't take credit for the base design, I picked those up off another site. The bender works great mounted on the stand and I can roll it anywhere I want. Originally Posted by Centerforce
You will notice the Harbor Freight tubing roller next to it. That works well also.
MarkMark:
"Bad Ast" Astro Van. Just because I did it... Doesn't mean it's possible...
This my Bad Ast thread...
https://www.pro-touring.com/showthre...roject-Faze-II
This is my Fotki album...
http://astroracer.fotki.com/
02-08-2017 #718
Registered User
- Join Date
- Mar 2004
- Location
- Mid-Michigan
- Posts
- 2,764
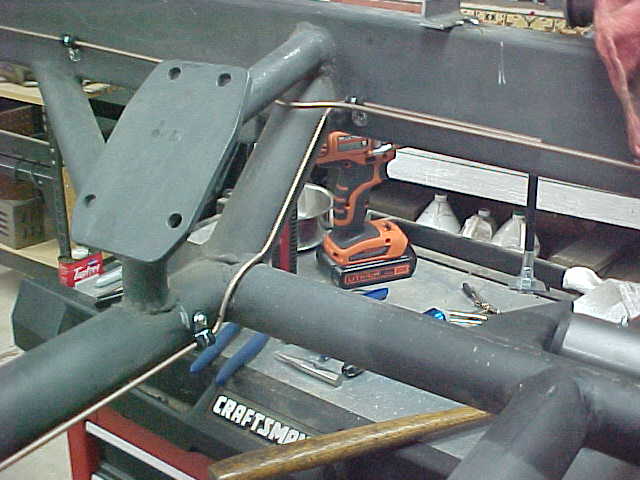
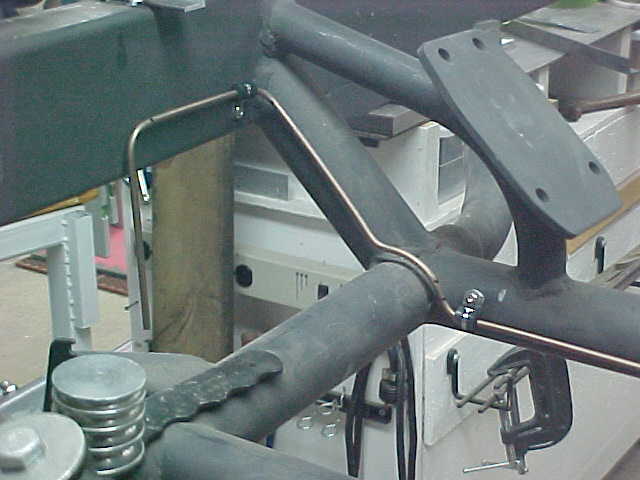
Got a few things done in the last couple of days. Tonight I got the tabs welded onto the stab bar and got that mocked up.
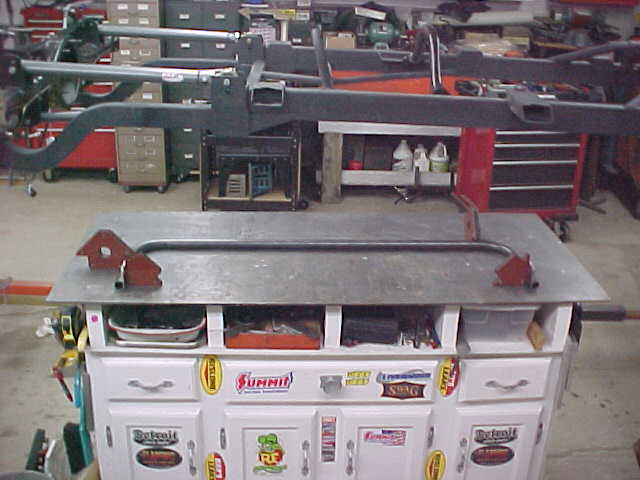

I need to clean up the spatter but the old Airco did a good job.
Mocked up on the stands with bushings.
Thanks for watching.
MarkMark:
"Bad Ast" Astro Van. Just because I did it... Doesn't mean it's possible...
This my Bad Ast thread...
https://www.pro-touring.com/showthre...roject-Faze-II
This is my Fotki album...
http://astroracer.fotki.com/
02-08-2017 #719
Registered User
- Join Date
- Mar 2004
- Location
- Mid-Michigan
- Posts
- 2,764
I got around to ordering the springs for the coil overs this week. Got them thru Speedway, they were on sale and, with free shipping, I saved a bit of cash.
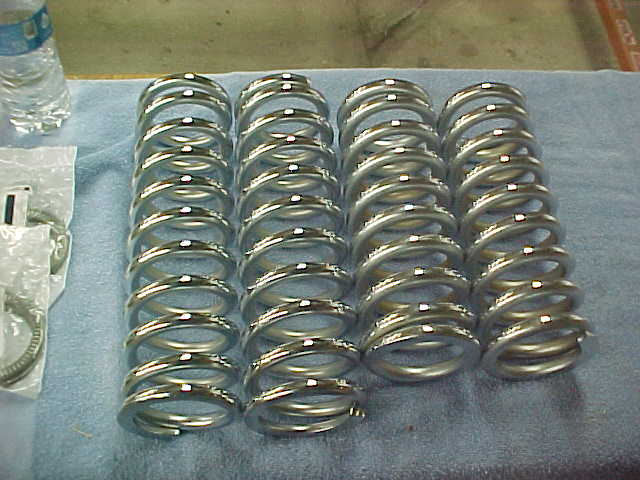
Mocked up on a shock. I also got the Thrust bearings that go between the spring and lower seat.

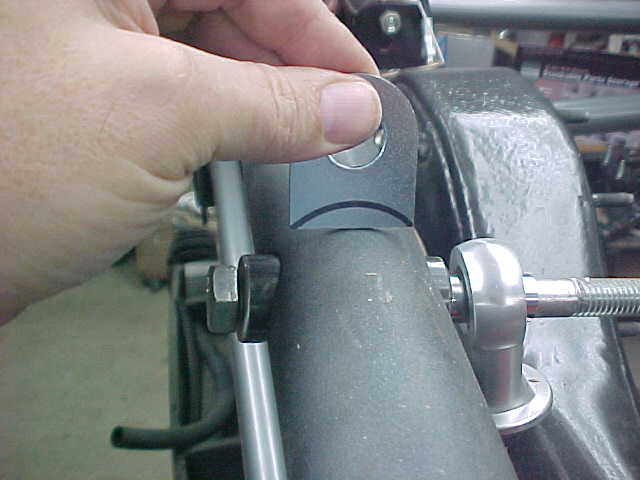
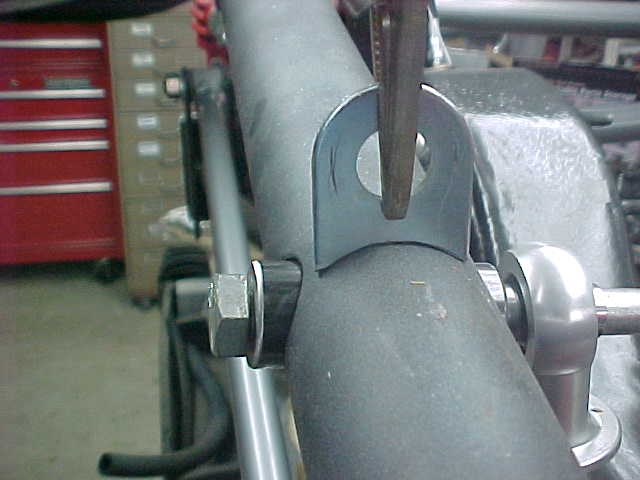
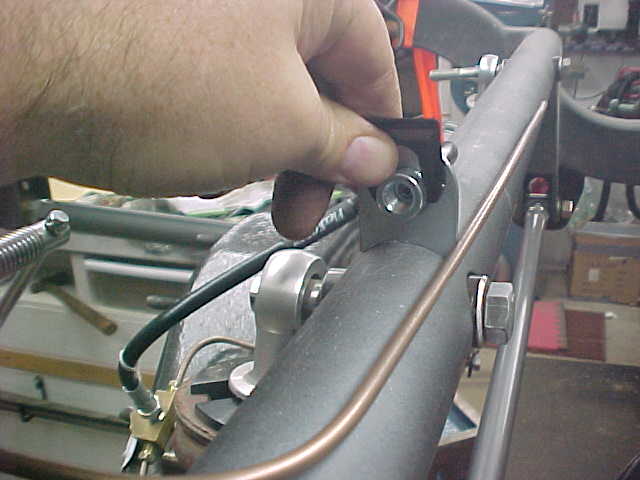
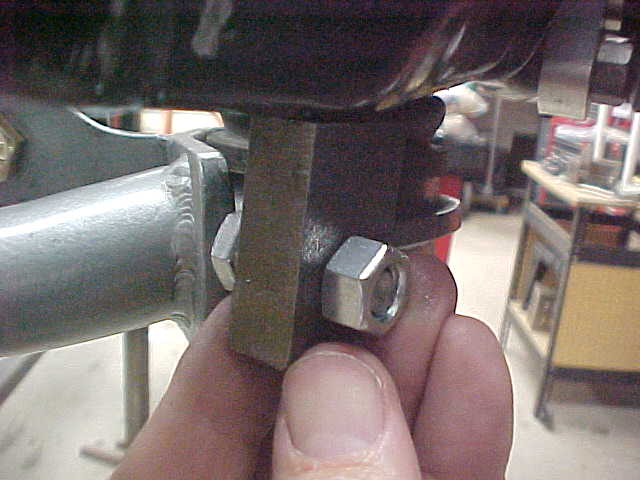
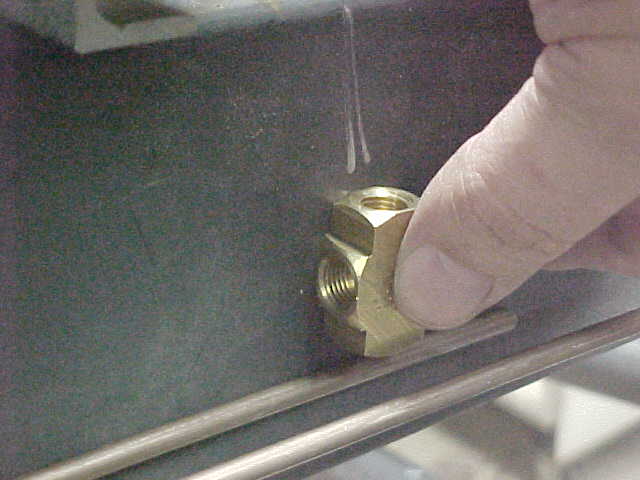
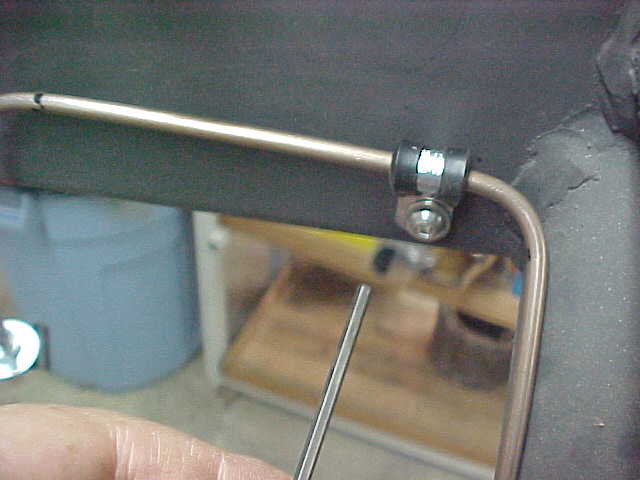
Instead of welding on the brake tabs I decided to go with these bolt on guys. I think this will be a lot cleaner on the frame. As you can see I have them bolted down already.
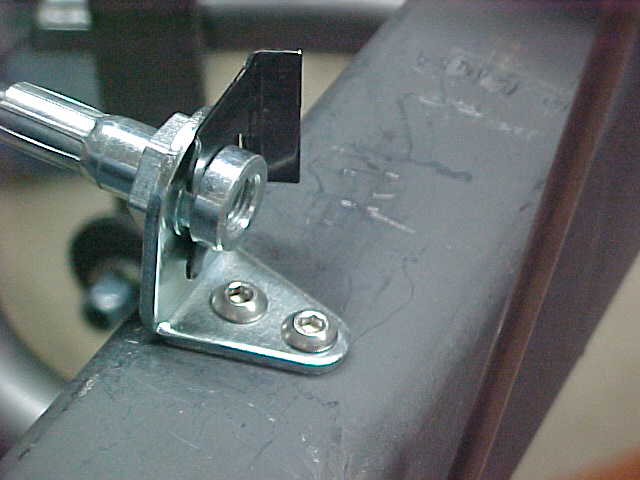
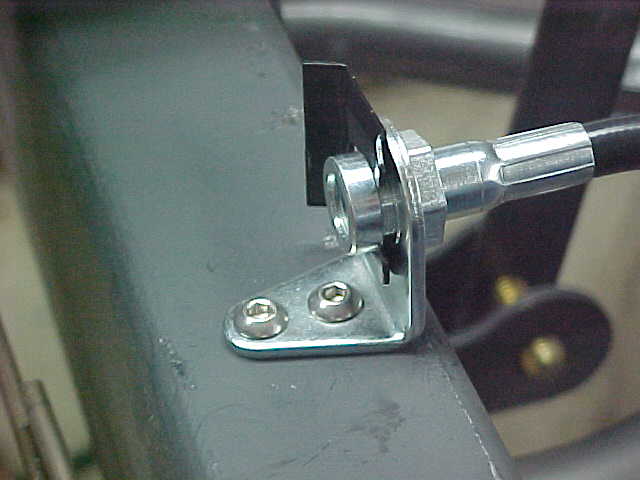
I did have an issue with these though. As received the hole for the brake line was to small. I had to drill them out with a 5/8ths bit to get the line to go in.
This was one of the straight tabs I had been using.
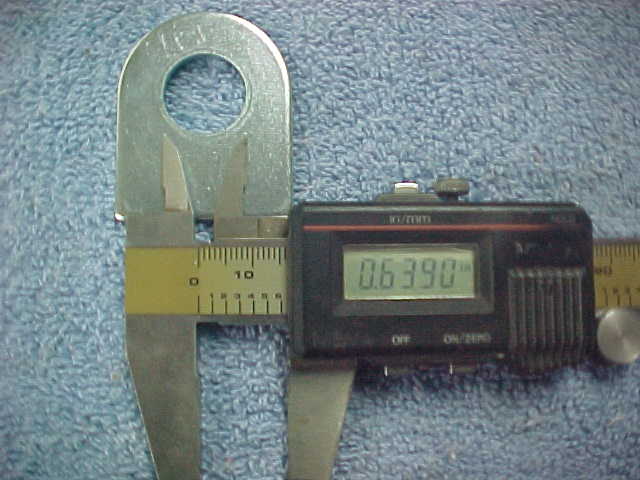
This was the hole size in the new tabs...
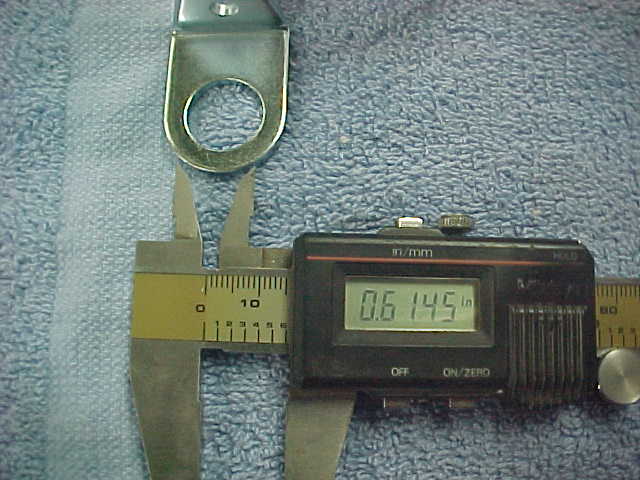
.025 makes a big difference here.
MarkMark:
"Bad Ast" Astro Van. Just because I did it... Doesn't mean it's possible...
This my Bad Ast thread...
https://www.pro-touring.com/showthre...roject-Faze-II
This is my Fotki album...
http://astroracer.fotki.com/
02-12-2017 #720
Registered User
- Join Date
- Mar 2004
- Location
- Mid-Michigan
- Posts
- 2,764
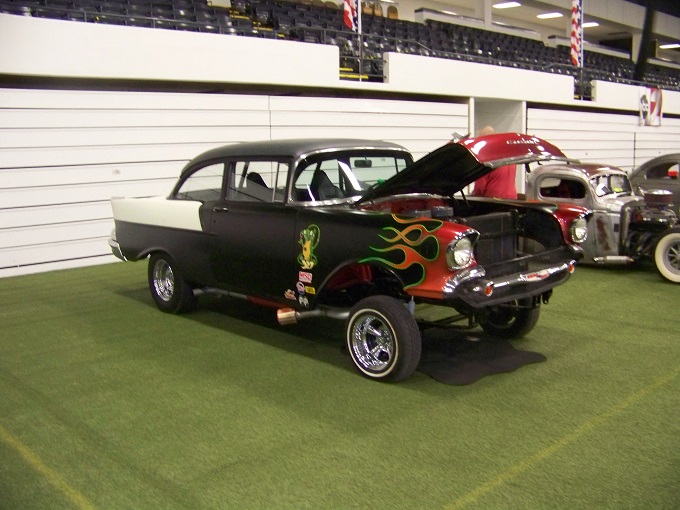
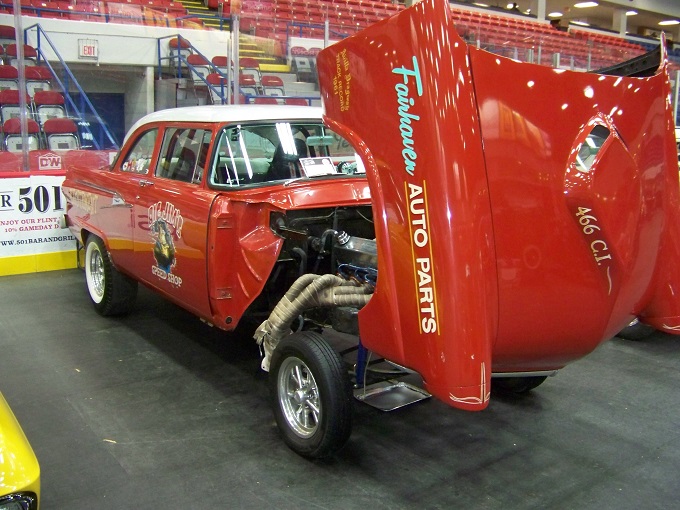
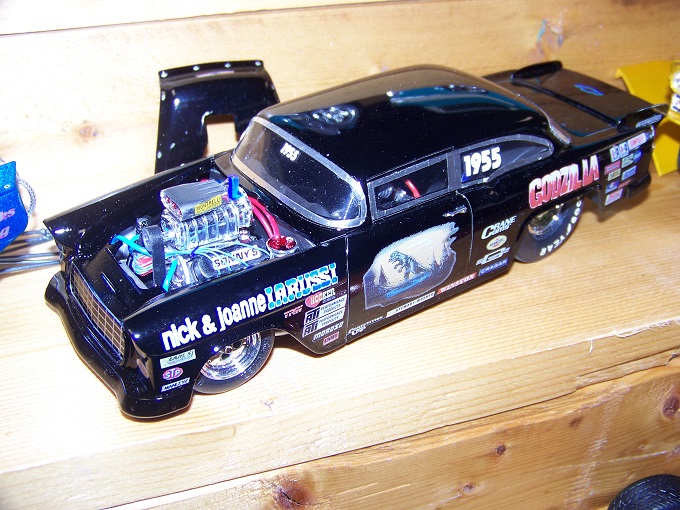
Back To The Bricks CHROME & ICE Indoor Car Show.
You need to put this show on your schedule for next year. The show was excellant! I was there most of the day Friday and all day Saturday. Lots of spectators and the vendors were great! I hooked up with Flint Auto Upholstery to have them install a new headliner in the wagon and talked to a bunch of people about their cars. Had a good time and I expect next year will be even better!
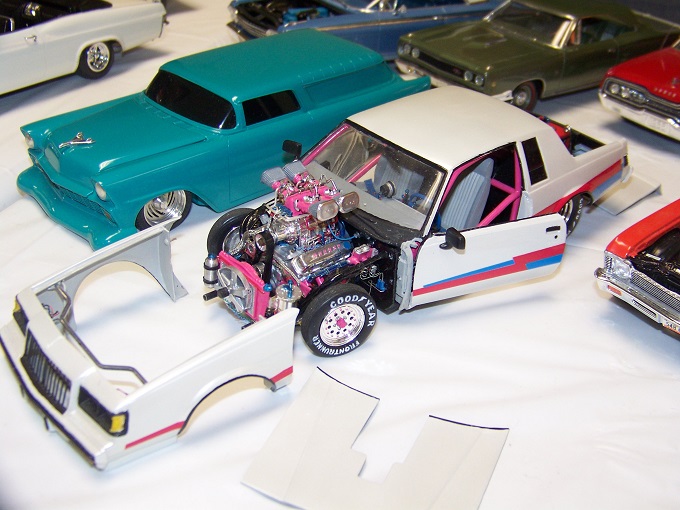
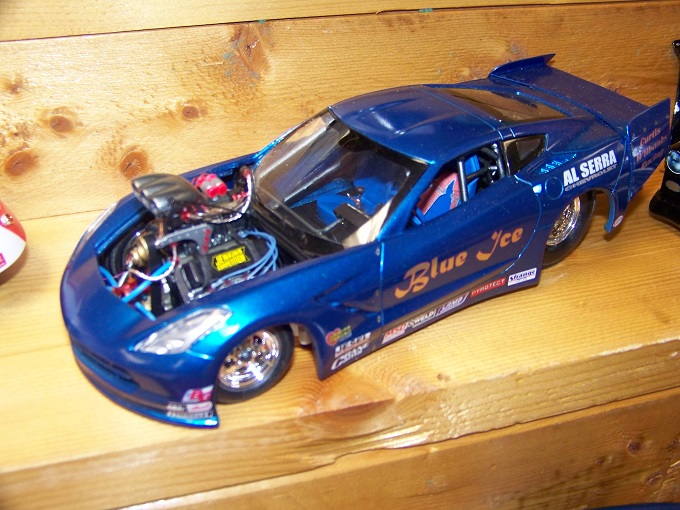
The Flint Area Auto Modelers had a nice display also with three tables of models for people to look at.
Here are a few pics from the big & small car shows.
 Mark:
Mark:
"Bad Ast" Astro Van. Just because I did it... Doesn't mean it's possible...
This my Bad Ast thread...
https://www.pro-touring.com/showthre...roject-Faze-II
This is my Fotki album...
http://astroracer.fotki.com/

 Reply With Quote


