

Results 641 to 660 of 862
Thread: The BAD AST Project - Faze II
-
10-03-2013 #641

 Registered User
- Join Date
- Mar 2004
- Location
- Mid-Michigan
- Posts
- 2,764

Hey Mike,
Yea, I have gotten better with the new crimper. Just a matter of figuring out which set of dies it takes to get the right compression. I have decided to quit showing my crimps "naked". They are good and strong and very serviceable but from now on they will be dressed in heat shrink.
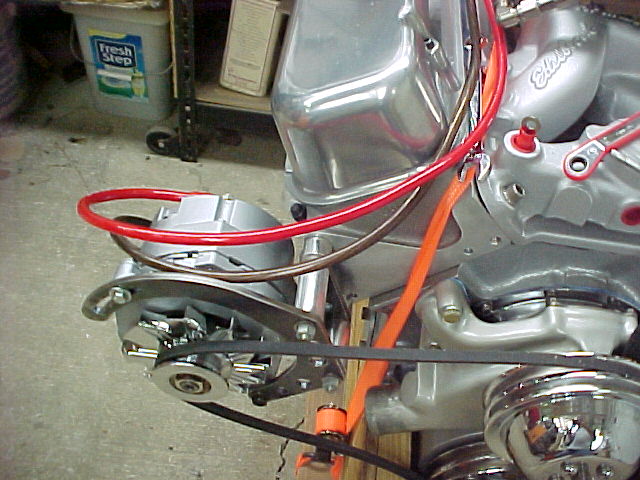
I have been getting some excellent shop time so far this week. I have most of the 4ga cables made and cleaned and painted the alternator with hammered silver.
Here is the alternator in a b4 and after series. I pulled it apart to re-clock it from a 9:00 a o'clock to a 12:00 o'clock because the connector was hitting the block.
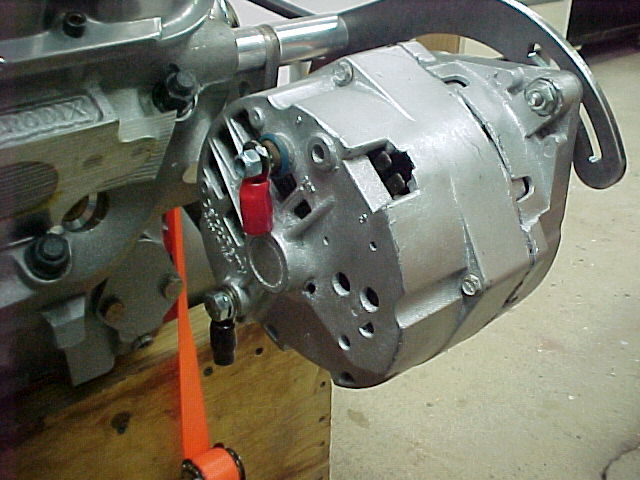
I pulled the fan and pulley off to do this, besides I had a chromed set-up to put on it anyway. While it was apart I threw some grease into the rear needle bearing.
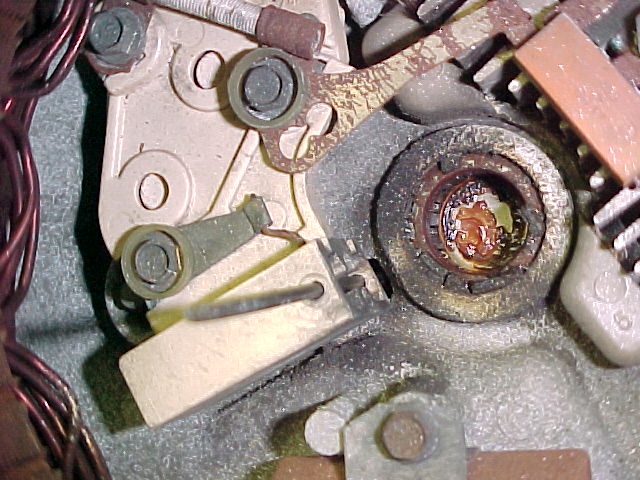
I had the alternator bench tested before I pulled it apart and it was putting out over 15 volts. It's a 108 amp 12SI that I got with the engine when I bought it. Should do the job to power the van.
After some paint and a chrome fan and pulley.
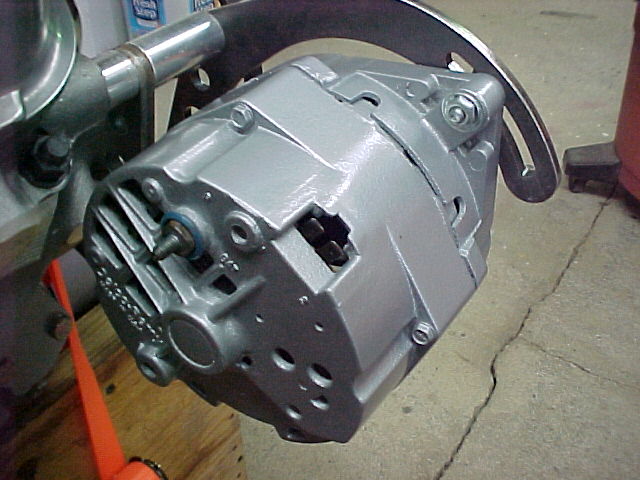
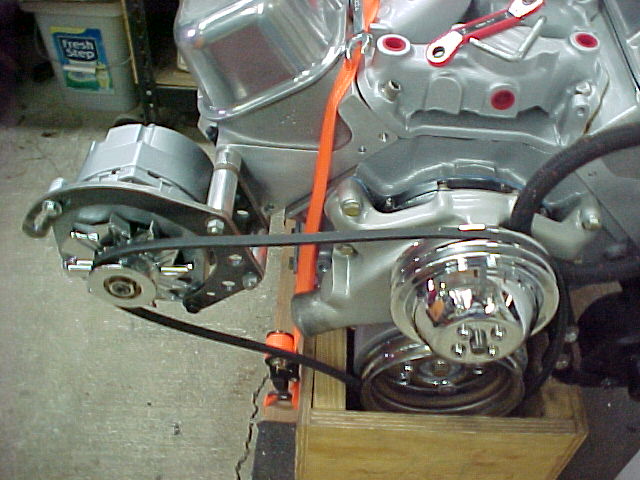
One issue with the new pulley is alignment to the engine pulleys. It is a bit thicker so I will end up facing about an 1/8th inch off the block spacers to get it back into alignment.
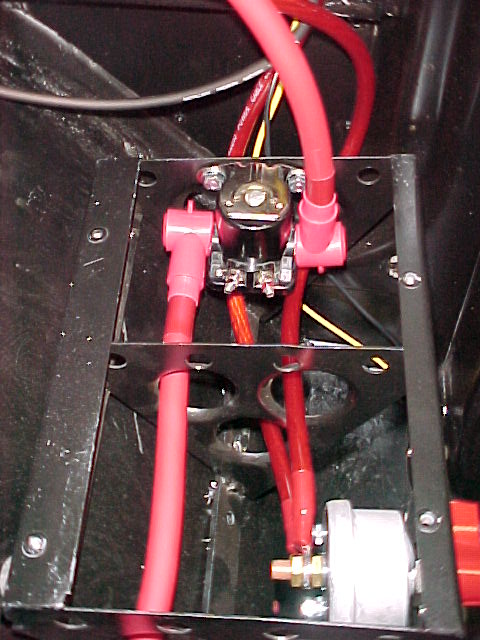
Here are some pics of the cables I have been building. These are 4 ga and are for battery charging and power distribution off the front junction block I hung a couple of weeks ago.
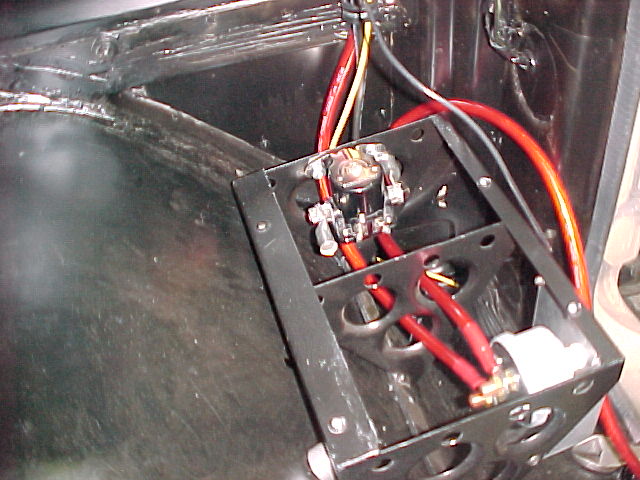
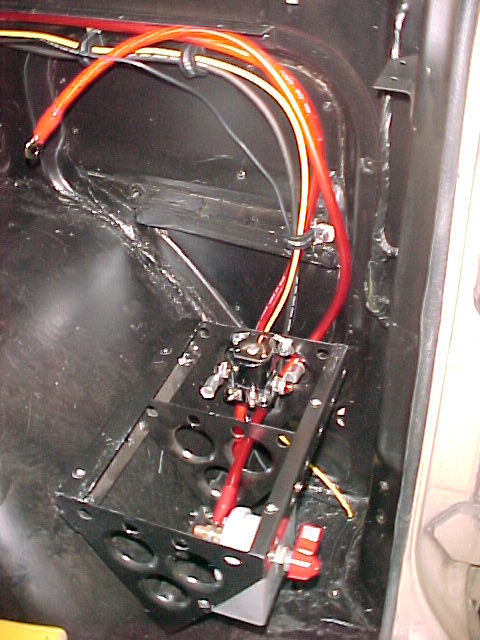
All of this will be covered with loom at final install.
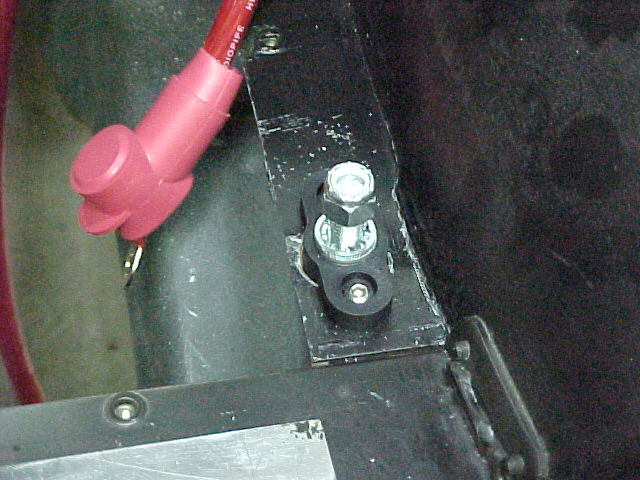
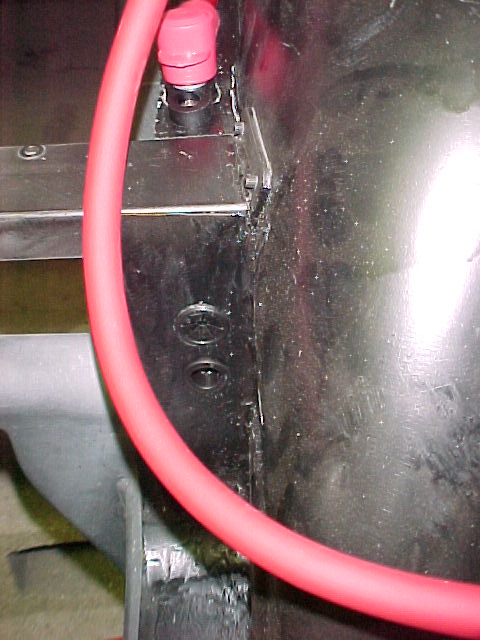
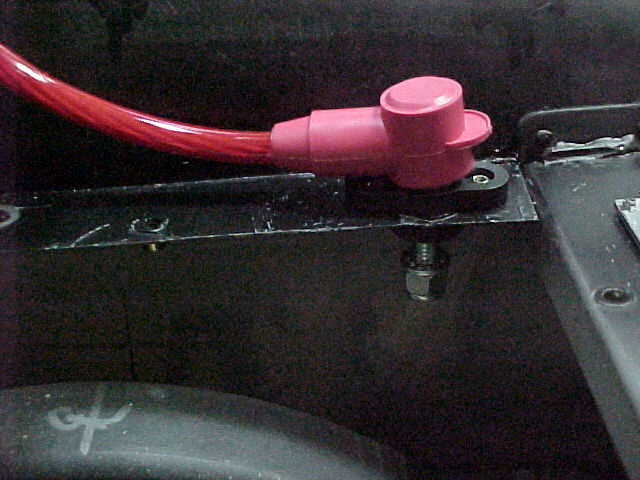
These cables from the alternator will run up to the junction block for the red one and to the frame for the black one (5/16-18 drilled and tapped hole).
The power box in the rear gets fed from the Master Disconnect under the battery. It feeds the front junction block and is also the battery charge wire.
The wire feeding out the bottom bolts to the cable pass-though mounted in the rear tray. I drilled a one inch hole for that and bolted it in with #10 button heads.
Mark:
"Bad Ast" Astro Van. Just because I did it... Doesn't mean it's possible...
This my Bad Ast thread...
https://www.pro-touring.com/showthre...roject-Faze-II
This is my Fotki album...
http://astroracer.fotki.com/
-
10-07-2013 #642
Registered User
- Join Date
- Mar 2004
- Location
- Mid-Michigan
- Posts
- 2,764
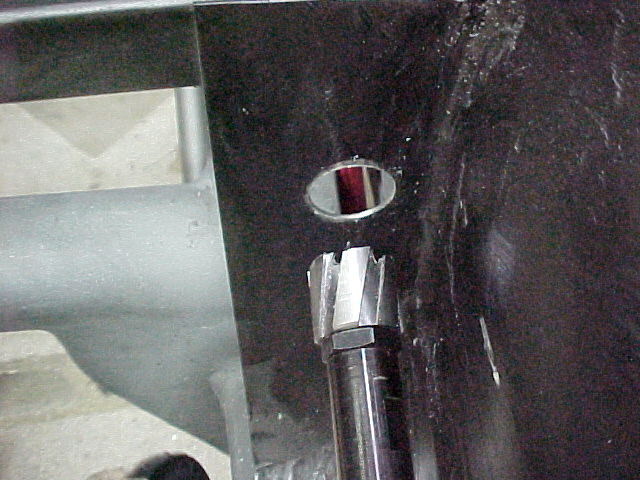
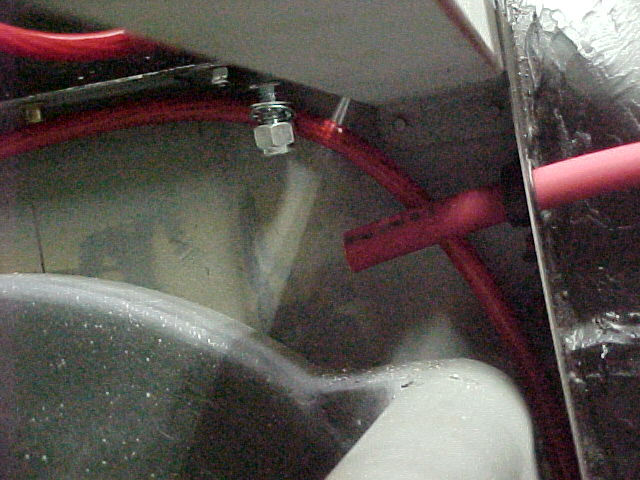
Got a bit more done over the weekend. The 1/0 starter cable will pass though the bulkhead for the front of the fuel tank. You can see the location for the hole here in silver, just to the right of the tank.
I drilled an 1/8th inch pilot hole then used a 7/8th's Rota-broach to cut the hole. Nice and clean.
I also cut another, smaller hole for the rest of the wires that will be coming from the front. fuel pump, starter, fuel sender and alternator disconnect will go through the lower bushing. Got a pic with the snap bushings in place.
Here's a pic with the starter cable routed through the top bushing.
I got the cables from the battery to the starter solenoid and to the starter proper built.
The hydraulic crimper works great for doing these big crimps. I start with the #70 die and finish up with the #50.
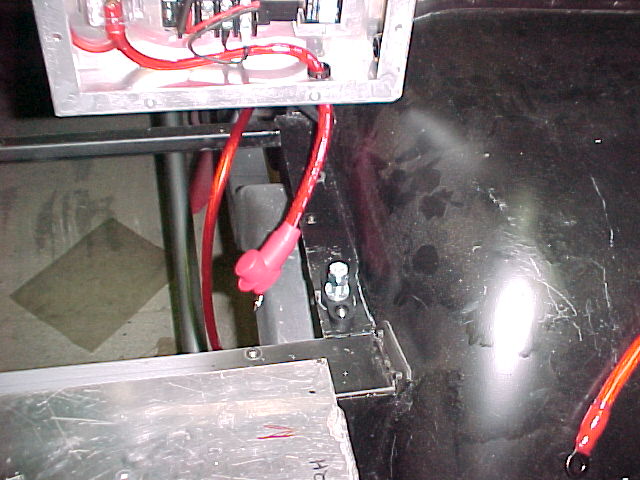
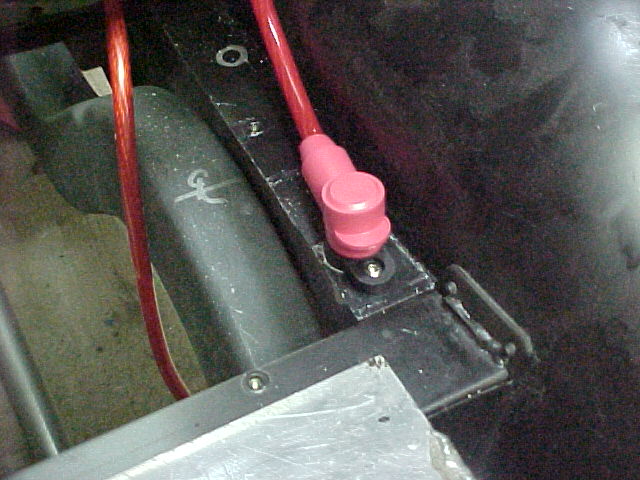
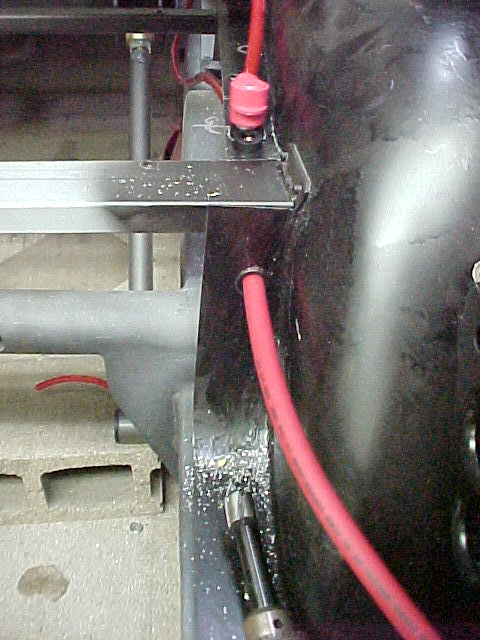
This is a pic looking at the right inner wheel well. You can see the junction block for the charge wire up top and how the battery cable passes forward through the bulkhead from the back.
I used the junction block for the charge cable because the cable wanted to do a 180 deg turn to go up through the floor after coming rearward from the distribution block. This was the best way to do it and keep it clean.
 Mark:
Mark:
"Bad Ast" Astro Van. Just because I did it... Doesn't mean it's possible...
This my Bad Ast thread...
https://www.pro-touring.com/showthre...roject-Faze-II
This is my Fotki album...
http://astroracer.fotki.com/
10-19-2013 #643
Registered User
- Join Date
- Mar 2004
- Location
- Mid-Michigan
- Posts
- 2,764
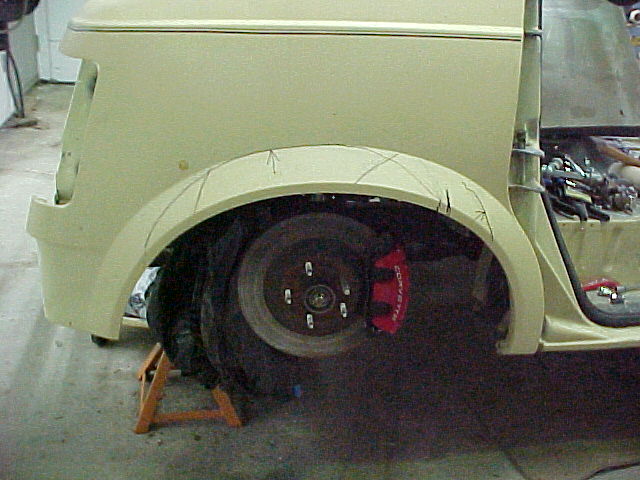
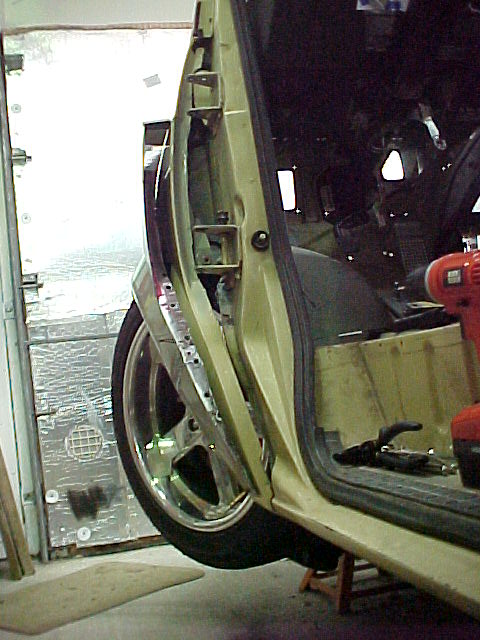
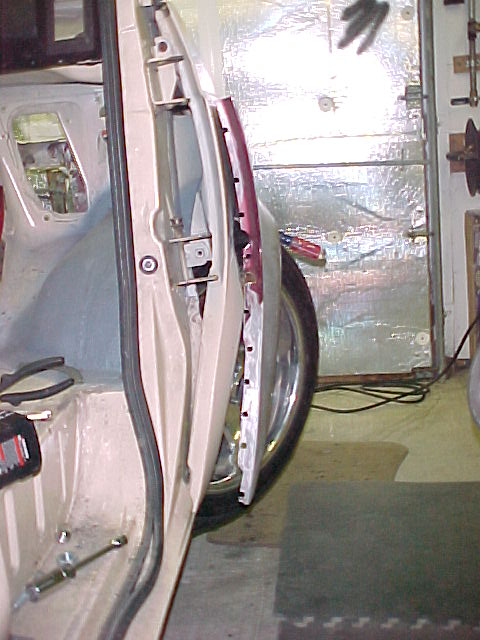
Worked on something other then wiring today. Mel came out and we attacked the left front fender. I want to get both front fenders modified for tire clearance before we pull the body back off the chassis. We got the left front clecoed in place today. In order to get the width I need at full left lock we ended up trimming out the original wheel well lip back to the new inner fender line.
Doing some sketching and thinking. We had the tire in place with the suspension in full jounce and marked full lock left steer and full lock right steer on the wheel well lip.
Yea, this is kinda ugly... Just the initial cut. We will end up removing all of the lip and most of the flare by the time we are done.
Tire in place and positioned at full left lock
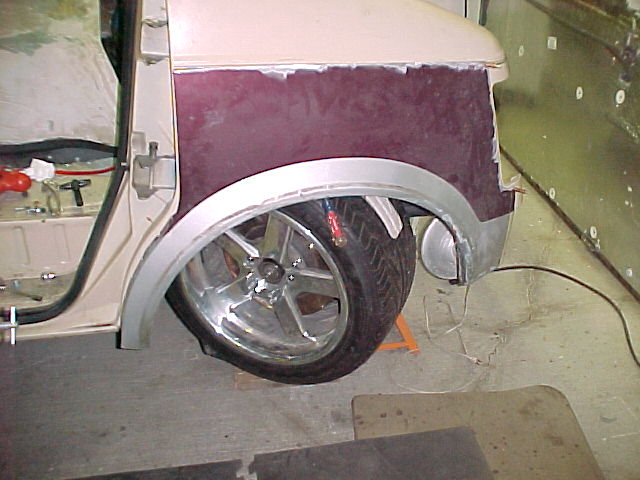
My plans are to make this a "sorta" wide body mod. Clamming an additional fender right over the existing to get the tire covered by the flare at full jounce/left lock. Left lock is worst case by about a quarter inch over right lock.
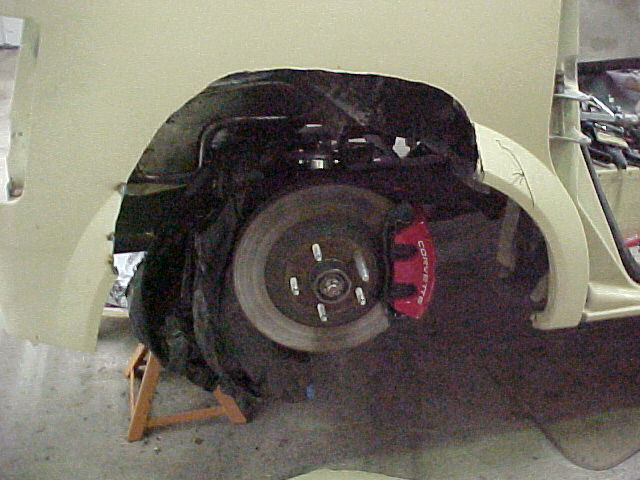
Here is the "new" fender, Mel is cleaning it up with the grinder after we trimmed off all of the extra stuff and removed the inner bracing so we could set it on top of the original with no interference.
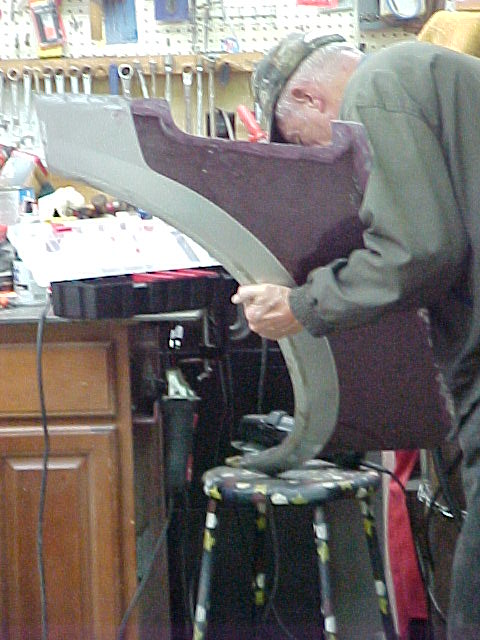
Set in place with a couple of clecoes holding it on at the front. We let the tire hold it out in the middle and worked on the rear of the flare to get it to suck back in at the bottom.
This ended up being a lot easier then we thought it would be. A couple of passes through the shrinker dies brought it right back to the original flare.
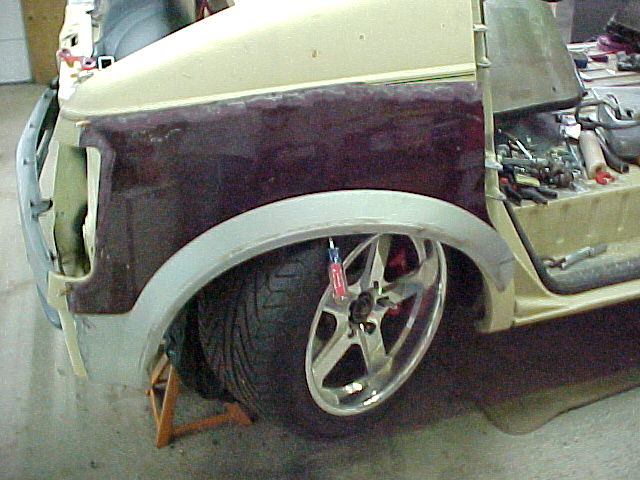
This angle gives you a good look at the mostly final shape. There is still a lot to do. I plan to fill the gap with screen so all of the flanges will have to be modified and shortened up to inset the screen about an inch or so into the fender opening.
The top will get closed in with a long pie shaped piece that will blend out to nothing at the front of the fender.
The new piece will have a bit of an angle on it. Blending it down from that little reveal to the new outer skin. I plan to keep the same sharp corners as the rest of the body lines.
Well, that's what I did. Thanks for looking.
MarkMark:
"Bad Ast" Astro Van. Just because I did it... Doesn't mean it's possible...
This my Bad Ast thread...
https://www.pro-touring.com/showthre...roject-Faze-II
This is my Fotki album...
http://astroracer.fotki.com/
10-24-2013 #644
Registered User
- Join Date
- Mar 2004
- Location
- Mid-Michigan
- Posts
- 2,764
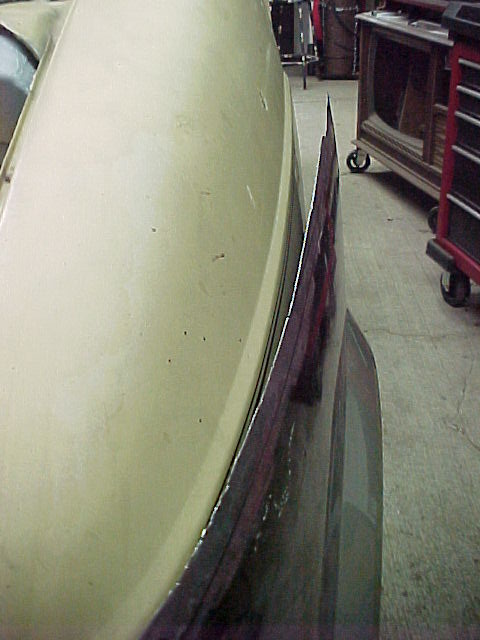
Did some "shopping" yesterday afternoon in my buddies junk yard. Picked up a front bumper off a pick up truck.
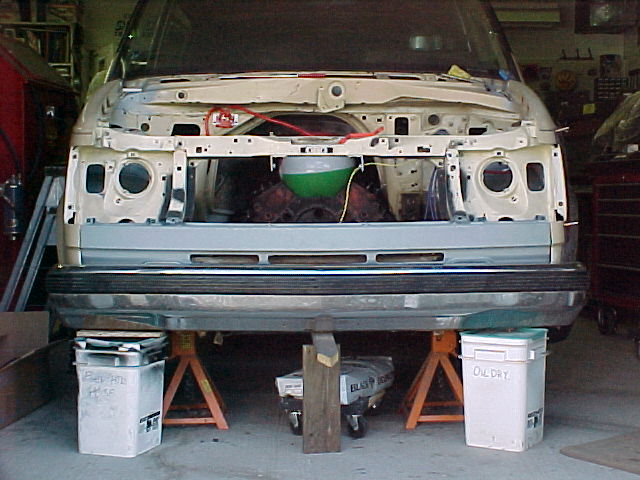
A little slicing and dicing and it will fit just fine. Looking from the passenger side the truck bumper shape isn't all that different from the 'stro.
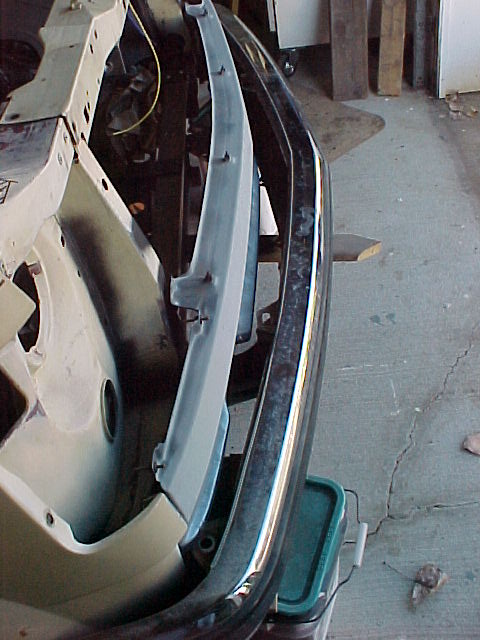
The ends will need trimming and tucking but I will be doing some custom stuff out here anyway. I may use the ends of the Astro bumper and graft them to the truck.
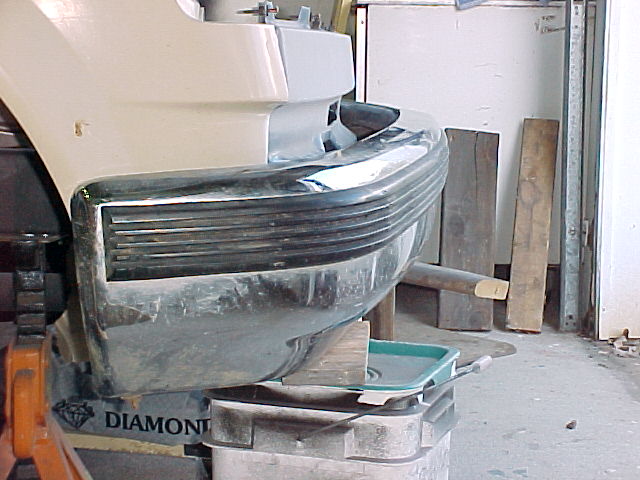
I will try to incorporate the Astro bumper mounting hardware into this swap. The frame will pick up the two center brackets and the Astro's have some long outers that sweep back toward the frame to carry the ends of the bumper. A little work should see those fitting up fine.
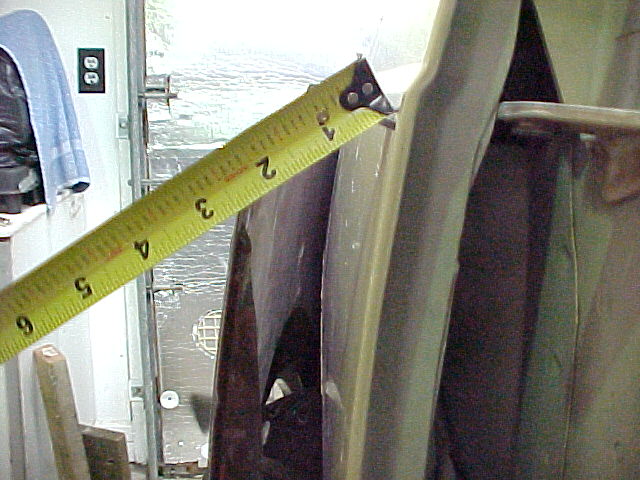
I also did some template making for the widebody fender mod. Laid the shape of the fender onto a piece of foam core and cut it out with a razor knife.
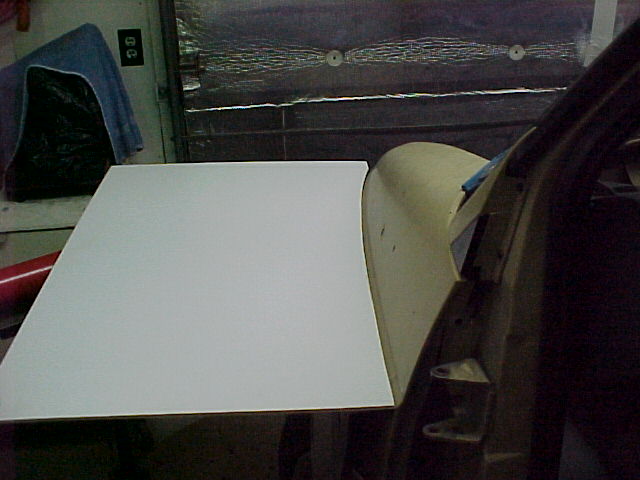
This piece narrows drastically as it goes toward the front. As it narrows it also creates a wedge effect in the flare from front to back.
I like that wedge and will play it up as I develope the filler piece.
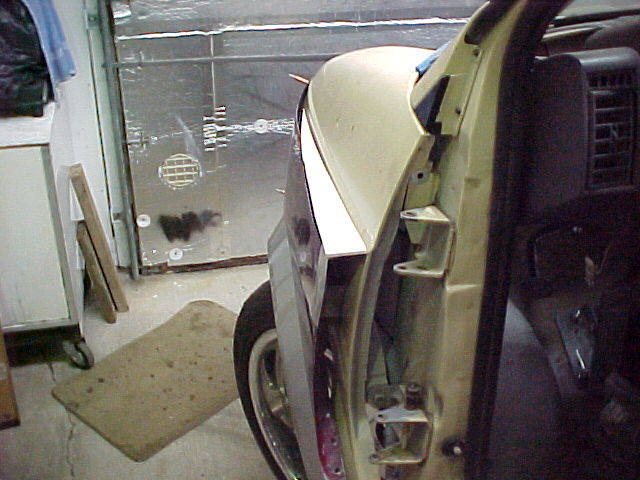
I am looking at shape and angles here. I am thinking I will drop the outer edge another inch. I like the shape as it tapers toward the front so I will take some more off the top of the fender to get it where it needs to be.
I also worked on the lower "dogleg" as it rolls in toward the old fender flare. Ran it back through the stretcher to lessen the curl and get it to better match the shape of the existing flare.
I have been doing some sketching for the design of the fender grilles. There is a lot of work to do here to get what I see in my head.
If anyone has some suggestions I am open to them.
Thanks for looking.
MarkMark:
"Bad Ast" Astro Van. Just because I did it... Doesn't mean it's possible...
This my Bad Ast thread...
https://www.pro-touring.com/showthre...roject-Faze-II
This is my Fotki album...
http://astroracer.fotki.com/
11-17-2013 #645
Registered User
- Join Date
- Mar 2004
- Location
- Mid-Michigan
- Posts
- 2,764
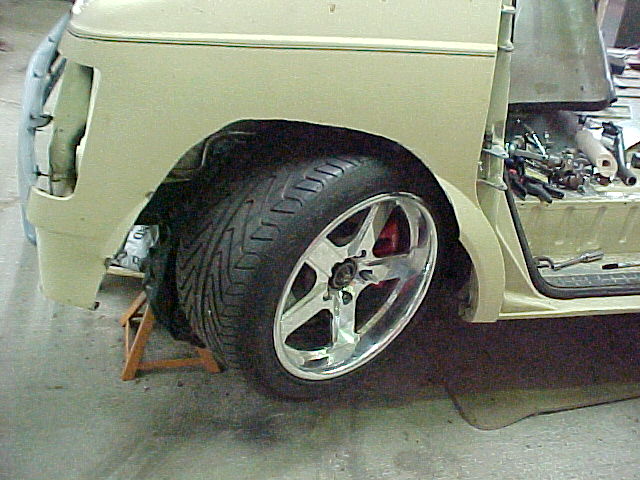
Worked on the right front fender Friday. Mel did some trimming with the plasma cutter on the original fender for tire clearance.
This is pretty much the same as the drivers side.
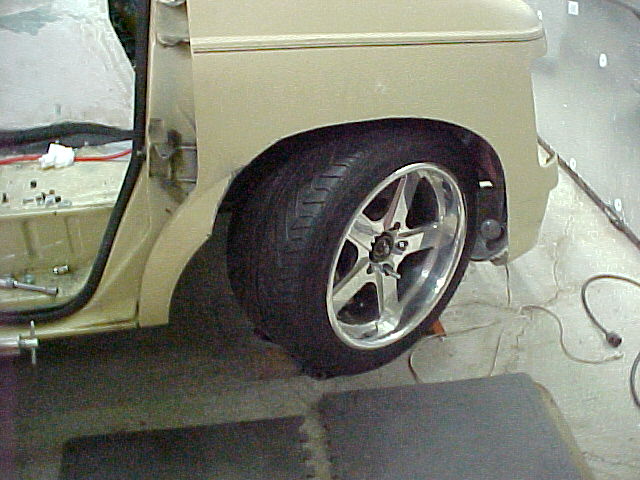
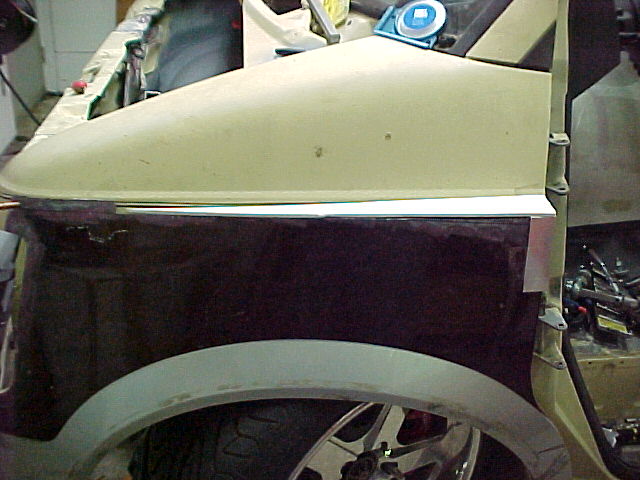
While Mel was working on that I gutted the donor fender and got it trimmed down to fit over the original.
Once it was clecoed in place I had to do a little shrinking to get the bottom to follow the shape of the original fender.
After some shrinking it flowed nicely down to the bottom of the original. Doing some trimming on the flange let it snuggle right up to the original.

This gets the van to a point where we can pull the body back off to start finishing things. We will start prepping it to do that tomorrow.Mark:
"Bad Ast" Astro Van. Just because I did it... Doesn't mean it's possible...
This my Bad Ast thread...
https://www.pro-touring.com/showthre...roject-Faze-II
This is my Fotki album...
http://astroracer.fotki.com/
11-19-2013 #646
Registered User
- Join Date
- Mar 2004
- Location
- Mid-Michigan
- Posts
- 2,764
I was planning to post this stuff Sunday afternoon but that big storm changed my plans... Power went out at 5:00 or so Sunday afternoon and finally came back on at 10:00 last night. Which is great because we were hearing Friday or Saturday would be the soonest. Thanks Consumers!
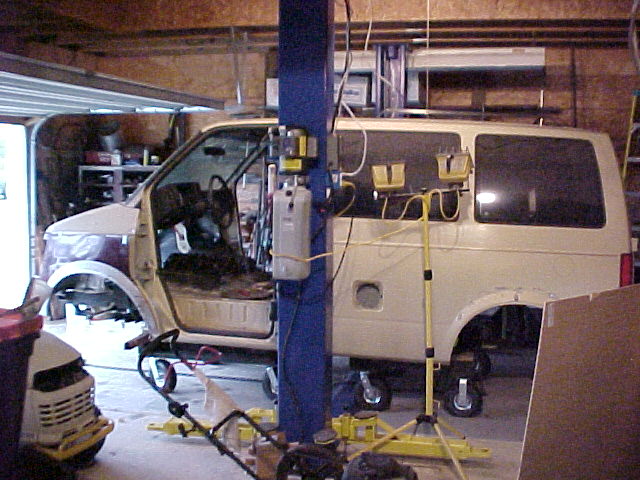
The plan to get the fenders clearanced was so we could get the van moved over to the hoist side. With the Passenger side fender cut up we could do the move. We pulled the front suspension to lighten the load and started raising the van so we could slip the trundle cart in place.
From the work height we raised it about a foot so the cart could slide under the trans crossmember.
I get kind of nervous taking a vehicle to the top of the jack stands...
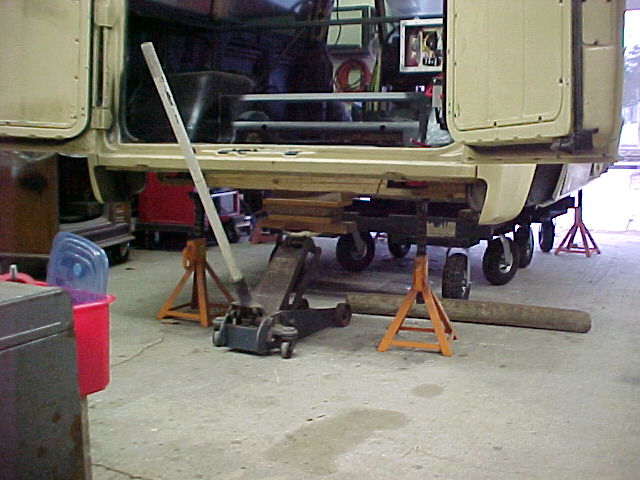
It went well though and we had the van on the cart in just a few minutes.
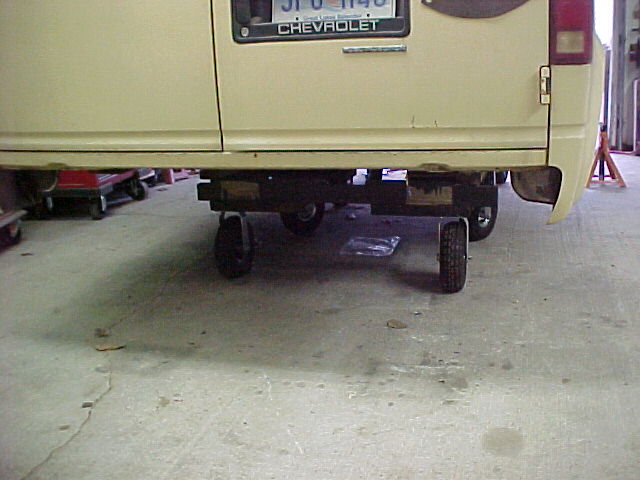
Just as we are setting the van on the cart a nice little downpour comes thru to get the grass and leaves nice and soaked.... Sitting a spinning. The Cubby couldn't drag the weight up that little incline to the driveway because of the wet grass and leaves...
We ended up hooking Mels '79 Parisienne to the cart and hauling it up to the driveway with that. Worked well and he didn't spin a tire... We pushed the van into place on the hoist side and called it a day.
I did a bit of cleaning on the work side after Mel left but it was starting to get nasty, weather-wise, so I locked up the shop and went into the house.
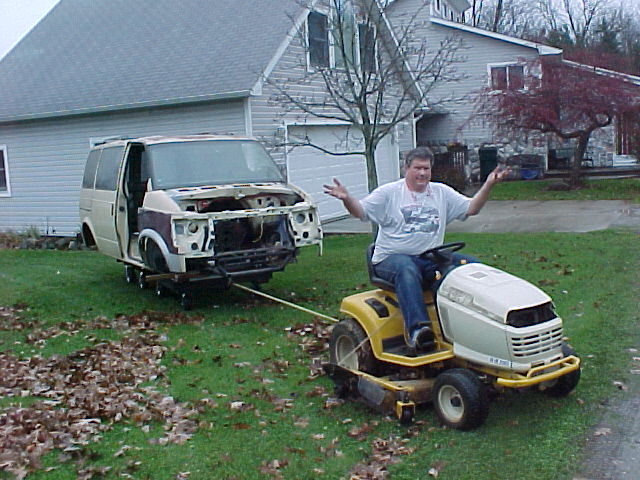
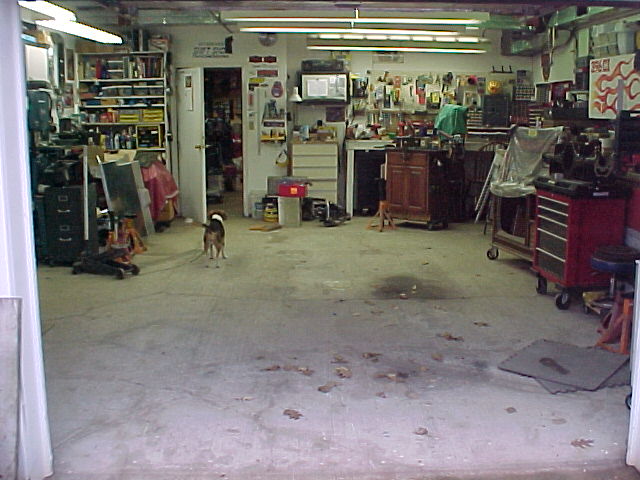
Almost exactly two years since this space has been empty!
I got the fender work posted Sunday but, by that time, the wind was really starting to kick up so I shut down the computer right before the power failed...
My plans to get the body off the chassis Monday were shot in the foot by the power outage so i'll get to that later this week...
MarkMark:
"Bad Ast" Astro Van. Just because I did it... Doesn't mean it's possible...
This my Bad Ast thread...
https://www.pro-touring.com/showthre...roject-Faze-II
This is my Fotki album...
http://astroracer.fotki.com/
11-23-2013 #647
Registered User
- Join Date
- Mar 2004
- Location
- Mid-Michigan
- Posts
- 2,764
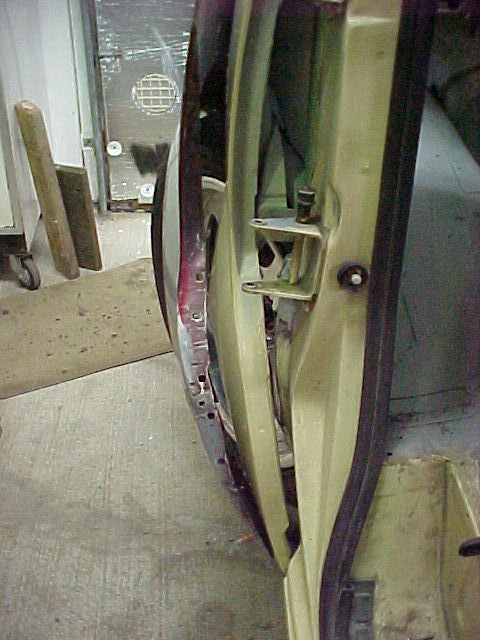
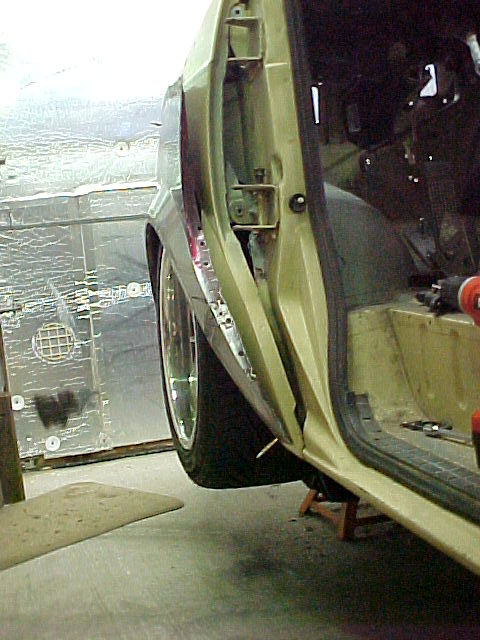
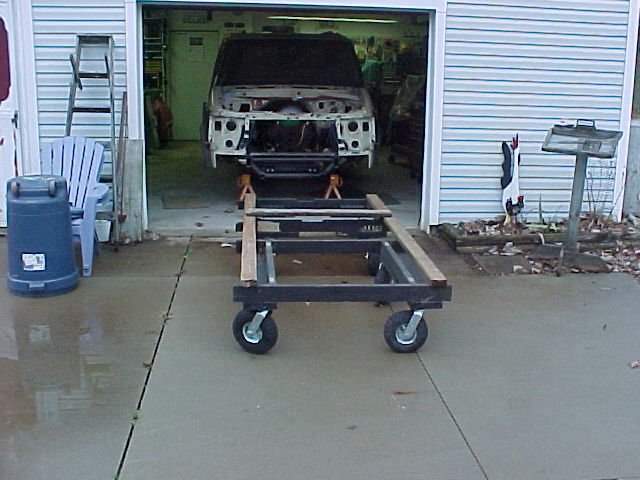
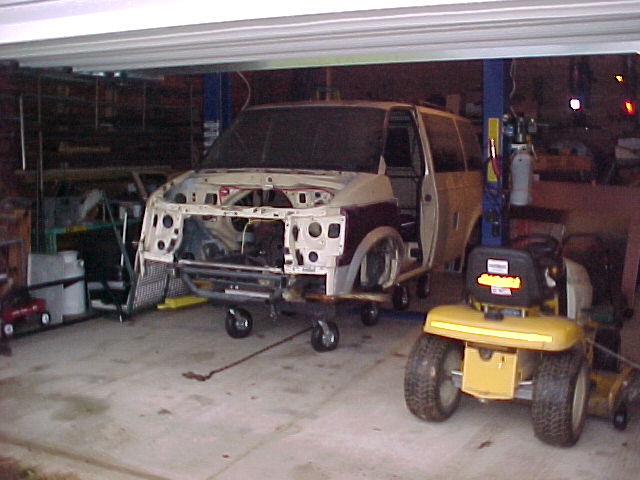
Got the body off the frame today. It was a two step process but it went smoothly. First lift was to get the van off the trundle cart. Raised it just enough so I could roll out the cart. Once the cart was out of the way I set up four jack stands to lower the frame onto. Once the I had the van on the stands I repositioned the arms to the body rails and hoisted her up, off the frame.


It'll be easy to set the frame back on the cart so I can roll it over to the working side. Need to finish up the cleaning first...Mark:
"Bad Ast" Astro Van. Just because I did it... Doesn't mean it's possible...
This my Bad Ast thread...
https://www.pro-touring.com/showthre...roject-Faze-II
This is my Fotki album...
http://astroracer.fotki.com/
11-24-2013 #648 Registered User
- Join Date
- Apr 2001
- Location
- The Netherlands
- Posts
- 1,509

Lot's of progress Mark! And it's starting to look like a car more and more :-) Cool!
12-17-2013 #649
Registered User
- Join Date
- Nov 2002
- Location
- Finland
- Posts
- 209
progress looks good, is it done now? ;)
Chris
12-17-2013 #650
Registered User
- Join Date
- Mar 2004
- Location
- Mid-Michigan
- Posts
- 2,764
Thanks guys! And no, Chris, sadly it isn't done yet... Haven't been working on it. I am "thinking" about it, but no physical work is getting done.
This is what I've been working on for the last month:
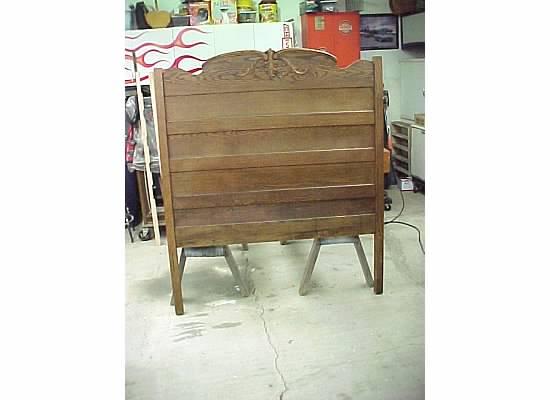
This is an antique bed my wife bought a few years ago. Converting it to a queen from a full size. I started it before I got side tracked with the van build. It has been taking up a lot of space in the machine shop. With the van out of the way, I decided to freshen up my woodworking skills and finish this dude up. It is just about ready for stain at this time so I hope to get back on the van during x-mas break. All of this "add-on" stuff does so with zero mods to the original bed...
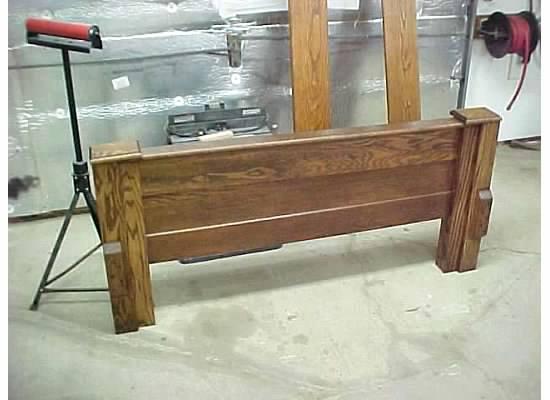
This is the headboard as purchased.
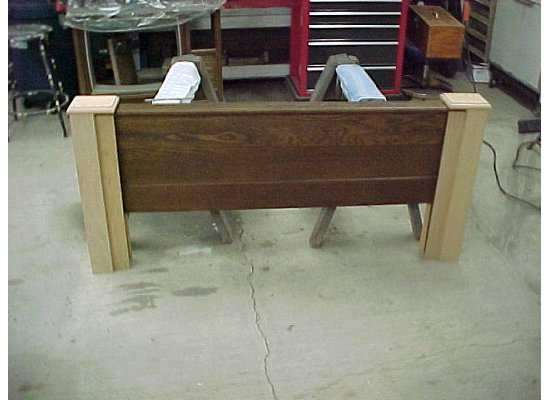
Here is shot of the footboard with the slip covers.
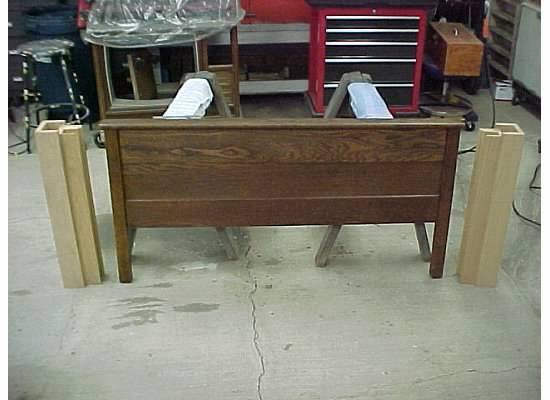
With the covers slipped on.
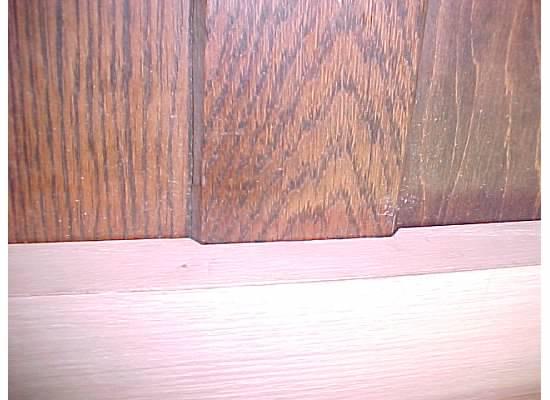
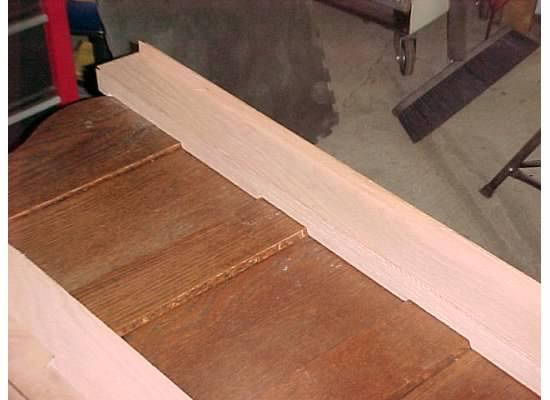
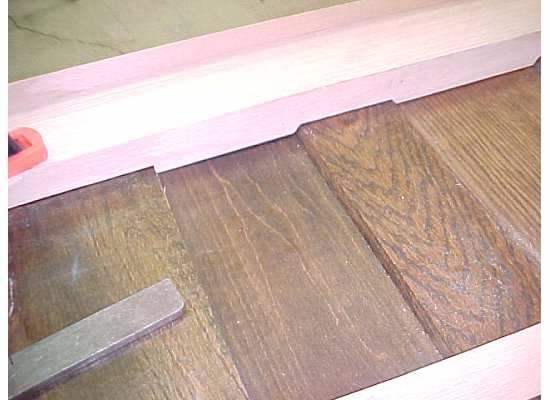
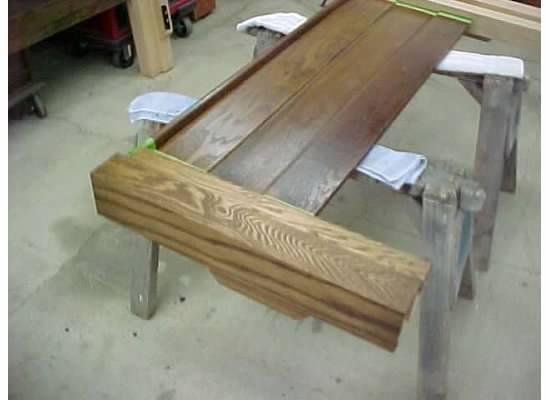
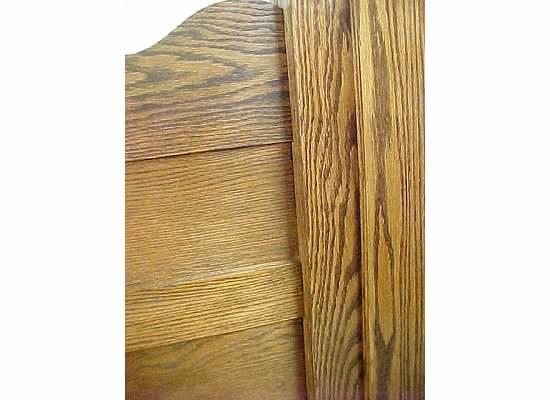
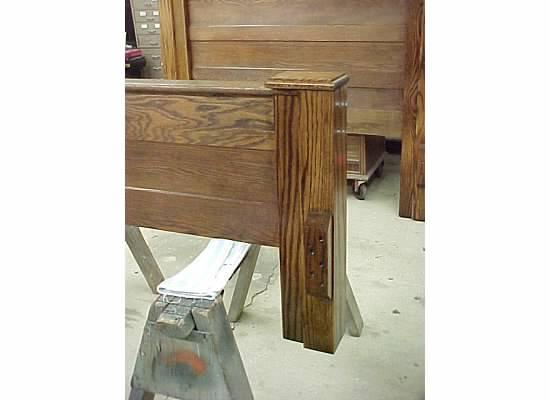
Some of the work on the headboard covers. Lots of pieces here.
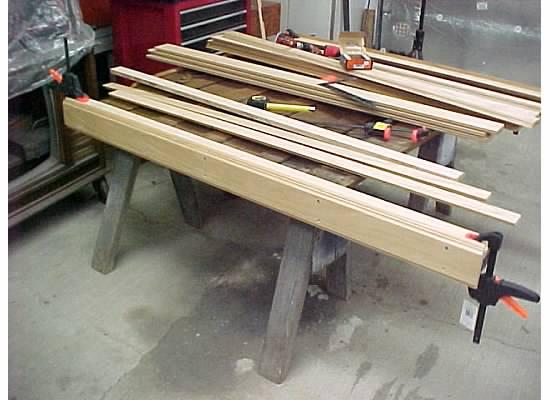
Fitting the slip covers. The tall piece on the left is one that got ripped to width and will get fit to the tongue and groove.
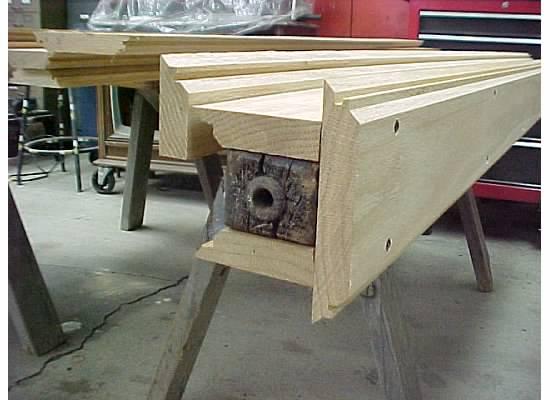
After ripping the filler piece is still a bit to tall because I have to cut notches to drop it into the T&G of the headboard.
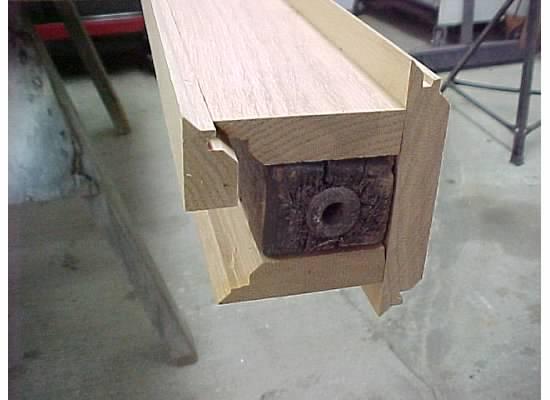
Cutting the notches and fitting the filler pieces.
MarkMark:
"Bad Ast" Astro Van. Just because I did it... Doesn't mean it's possible...
This my Bad Ast thread...
https://www.pro-touring.com/showthre...roject-Faze-II
This is my Fotki album...
http://astroracer.fotki.com/
12-19-2013 #651
Registered User
- Join Date
- Dec 2013
- Posts
- 2
Mark, I haven't looked at this thread in a while and all I can say is WOW! Your fabrication skills and talent are over the top.
I look forward to seeing this project completed, should be a blast to drive.
Happy Holidays!
Fred (aka the transmission guy)
12-19-2013 #652
Registered User
- Join Date
- Mar 2004
- Location
- Mid-Michigan
- Posts
- 2,764
Hi Fred! Thanks for the compliment! It's all relative though as I could never do what you do with a transmission!!!
The plan is too have the van running this year. Once it's on the road I will be doing a bunch of short hops just to get things broke in and to keep an eye on the suspension. When I get confident enough I do plan a trip up your way. I think you and Pat both need to get a ride.
I have a bunch of Pontiac engine stuff, would you be interested?Mark:
"Bad Ast" Astro Van. Just because I did it... Doesn't mean it's possible...
This my Bad Ast thread...
https://www.pro-touring.com/showthre...roject-Faze-II
This is my Fotki album...
http://astroracer.fotki.com/
12-19-2013 #653
Registered User
- Join Date
- Dec 2013
- Posts
- 2
I would love a ride in the beast when you get it done, I look forward to it!
I am interested in the Pontiac engine parts, I'll send you an email.
12-19-2013 #654
Registered User
- Join Date
- Aug 2013
- Location
- Albuquerque, NM
- Posts
- 7
Mark, I just ran across this thread and got drawn into all the detailed fab work you are doing. Fantastic work! I wasn't too sure how I felt about the vehicle platform you chose, but its turning out amazing and you certainly haven't held back on the details. Also, noticed you were in Michigan. I grew up in Jackson. I'm currently serving in the military, so not at home at the moment. I plan on heading back after my time is up though. I'll keep following the thread. Looking forward to seeing more!
Rich
12-21-2013 #655
Registered User
- Join Date
- Mar 2004
- Location
- Mid-Michigan
- Posts
- 2,764
Thanks Rich! I appreciate the kudos! I get a lot of "why an Astro?" comments and all I can say is why not? It's different and will be the only one like it. It is definitely NOT a belly button car...
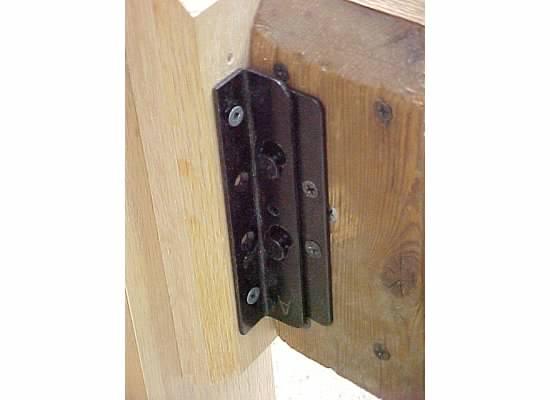
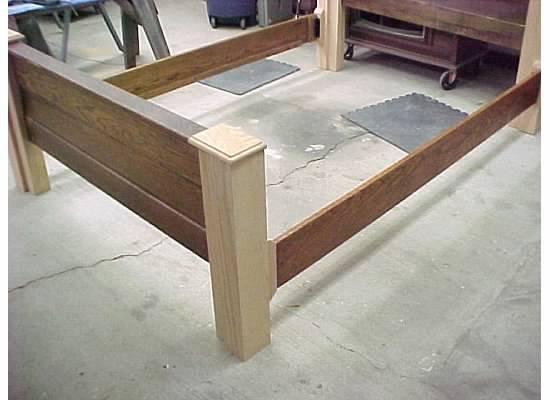
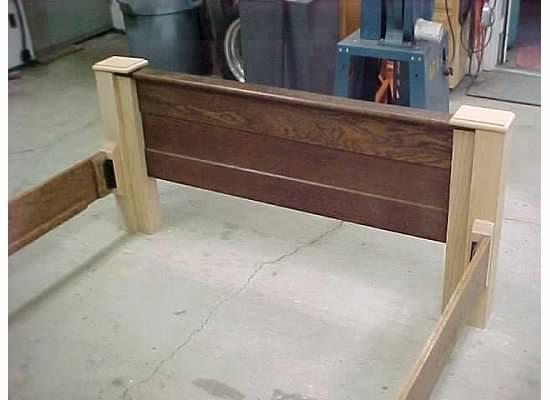
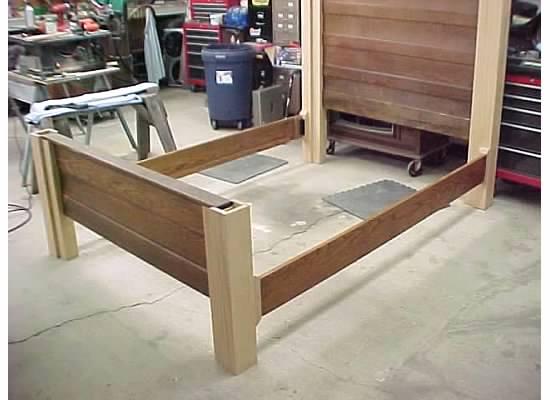
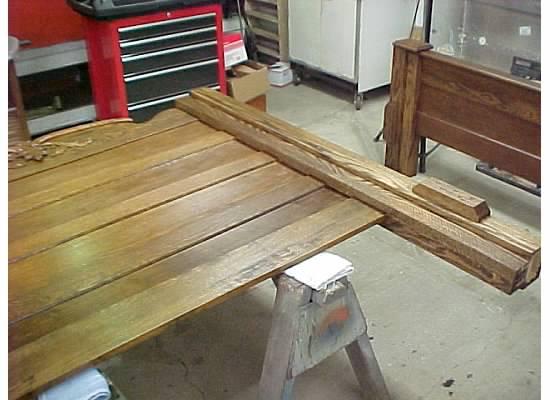
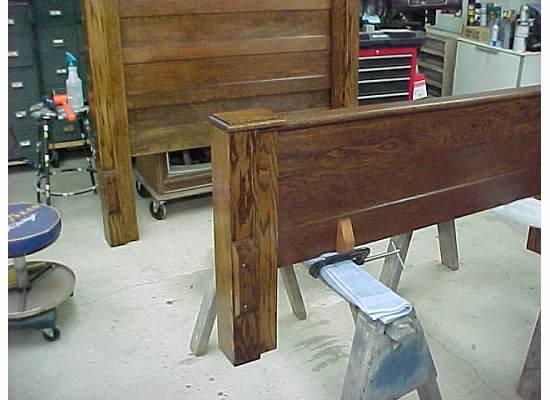
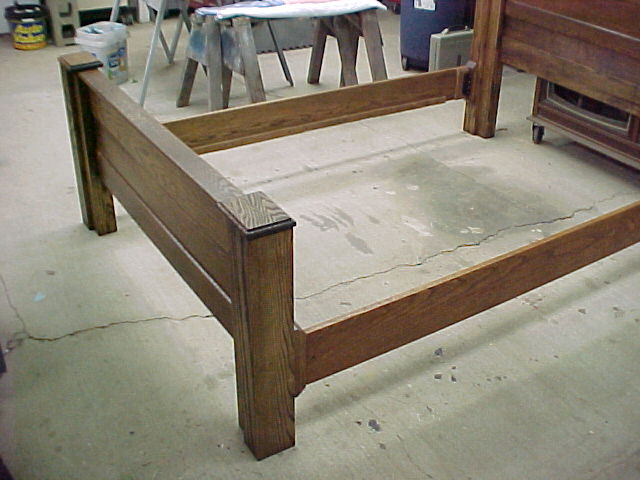
I am finally getting this bed project wrapped up. Thursday I got it assembled for the first time. Screwed the brackets to the head and foot boards temporarily to do the mock up. Went together well with no problems.
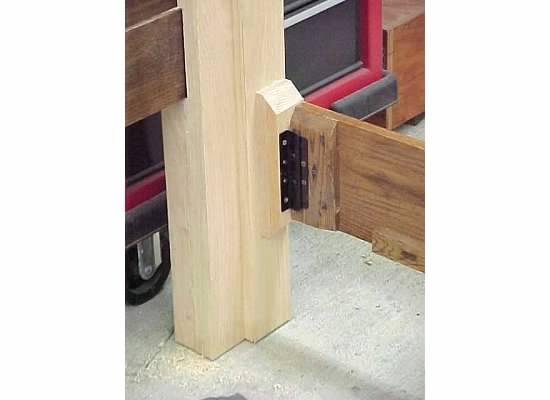
Once these brackets a slipped together it makes for a very strong assembly. I was kind of surprised by how stout it is.
All put together.
 Mark:
Mark:
"Bad Ast" Astro Van. Just because I did it... Doesn't mean it's possible...
This my Bad Ast thread...
https://www.pro-touring.com/showthre...roject-Faze-II
This is my Fotki album...
http://astroracer.fotki.com/
12-21-2013 #656
Registered User
- Join Date
- Mar 2004
- Location
- Mid-Michigan
- Posts
- 2,764
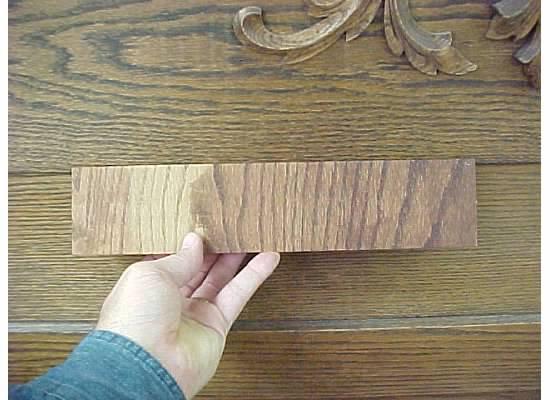
I did a few test panels to match the stain and determined I needed darker then what I had on hand. I ended up with Dark Walnut to get a good match.
The pics show my first test strip with Provincial oak, red oak & English chestnut. Too light. The next strip is the dark walnut and it is a winner.
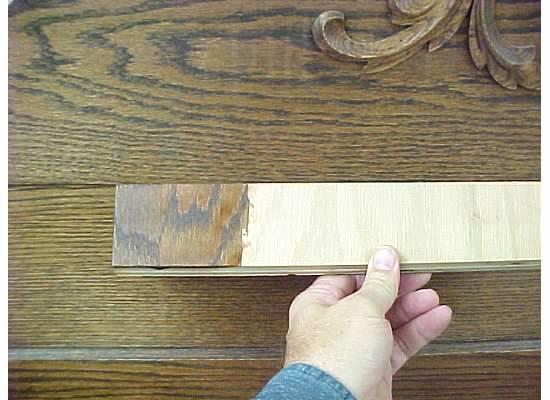
Friday I got kicked out of work at 9:30 so I stopped at the Meijer's on 59 and 23 and got the dark walnut. I was home at noon so I prepped the bed parts, masked off the old parts and put on a coat of stain. I used the wipe down towels to freshen up the old pieces. Cleaned up real nice.
The color is nearly perfect.

 Mark:
Mark:
"Bad Ast" Astro Van. Just because I did it... Doesn't mean it's possible...
This my Bad Ast thread...
https://www.pro-touring.com/showthre...roject-Faze-II
This is my Fotki album...
http://astroracer.fotki.com/
12-21-2013 #657
Registered User
- Join Date
- Mar 2004
- Location
- Mid-Michigan
- Posts
- 2,764
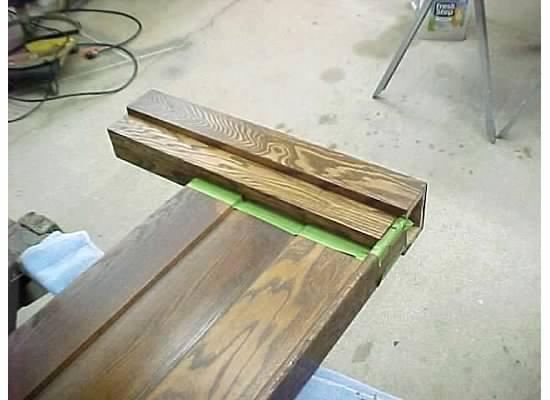
This morning I got the first coat of polyurethane on it. For the first coat I thin the poly about 50% with mineral spirits. I also added just a "touch" of the red oak stain. This gives the poly a hint of red which ties it back into the original stain a bit as there is a hint of red in it.
I hit this with some ScotchBrite a little bit ago and put on a final coat of full strength poly.
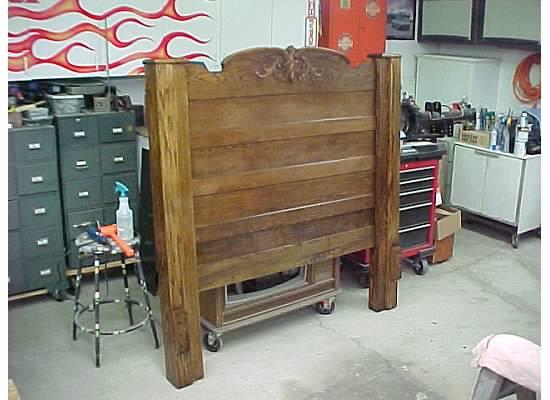
The only thing left to do is to pick up some ash 1 x 3's to make the bed slats from. I'll do that Monday and then this dude will be done...
Thanks for following along!
MarkMark:
"Bad Ast" Astro Van. Just because I did it... Doesn't mean it's possible...
This my Bad Ast thread...
https://www.pro-touring.com/showthre...roject-Faze-II
This is my Fotki album...
http://astroracer.fotki.com/
12-21-2013 #658 Registered User
- Join Date
- Aug 2004
- Location
- Ontario, Canada
- Posts
- 2,313

The last time we bought a bed the wife insisted on stepping up to a queen size. Now by the time I get over to her side of the bed I've forgotten why I'm there.

KenIf there is a hard way to do something, I'll find it!
My other car is a Vega.
12-22-2013 #659
Registered User
- Join Date
- Mar 2004
- Location
- Mid-Michigan
- Posts
- 2,764
Ain't that the truth! Originally Posted by Kenova


The bed has turned out great and I think it looks fantastic! The wife is upset with me though... Now that it is finished she will have to do some cleaning to get it set up in the bedroom.
Here are some pictures: All that's left to do is pick up some ash for the slats. I'll do that this week and it'll be done!


 Mark:
Mark:
"Bad Ast" Astro Van. Just because I did it... Doesn't mean it's possible...
This my Bad Ast thread...
https://www.pro-touring.com/showthre...roject-Faze-II
This is my Fotki album...
http://astroracer.fotki.com/
05-07-2014 #660
Registered User
- Join Date
- Mar 2004
- Location
- Mid-Michigan
- Posts
- 2,764
Well, after a LONG, COLD winter and a bunch of little shop projects I am slowly getting back into the van build. I have spent the last few nights working out my fuel line routing. I have that nailed and modeled up a 1/2" line in NX. Made a drawing and will probably be bending up some hardline tomorrow afternoon.
I figured up what I needed for fittings and hose to get the hardline hooked up to the tank and pump and ordered that stuff from Jegs Monday afternoon. It came on the FedEx truck today. I'll get back into it fairly quickly.
The biggest show stopper I had was the doghouse to carb clearance/shifter in the way stuff and I think I have an out for that. We'll see. I have to get the chassis out of the way to do the fuel line and cable routing. Rebuilding the doghouse is on top of the list but I can't do that until I can get back inside the van. It's still sitting on the hoist about 5 ft. in the air.
Anyway, thought you would all like an update.
MarkMark:
"Bad Ast" Astro Van. Just because I did it... Doesn't mean it's possible...
This my Bad Ast thread...
https://www.pro-touring.com/showthre...roject-Faze-II
This is my Fotki album...
http://astroracer.fotki.com/

 Reply With Quote


