

Results 41 to 60 of 167
Thread: Madaguy 1955 Nomad Build
-
02-26-2023 #41

 Registered User
- Join Date
- Nov 2000
- Location
- O-town
- Posts
- 4,282

Great build Rye! I'll be watching!
Steve68- 1968 Camaro SS LSX T56, 12bolt 3:90's, 18" Fikse Profil 13s, Deep Fathom Green paint, Spearcos, just bunch of old junk because another member said so, LOL
70 Nova SS street/drag 454, T400, 3:55, ugly!
-
02-27-2023 #42

 Registered User
- Join Date
- Sep 2009
- Posts
- 2,707
Thanks Steve!
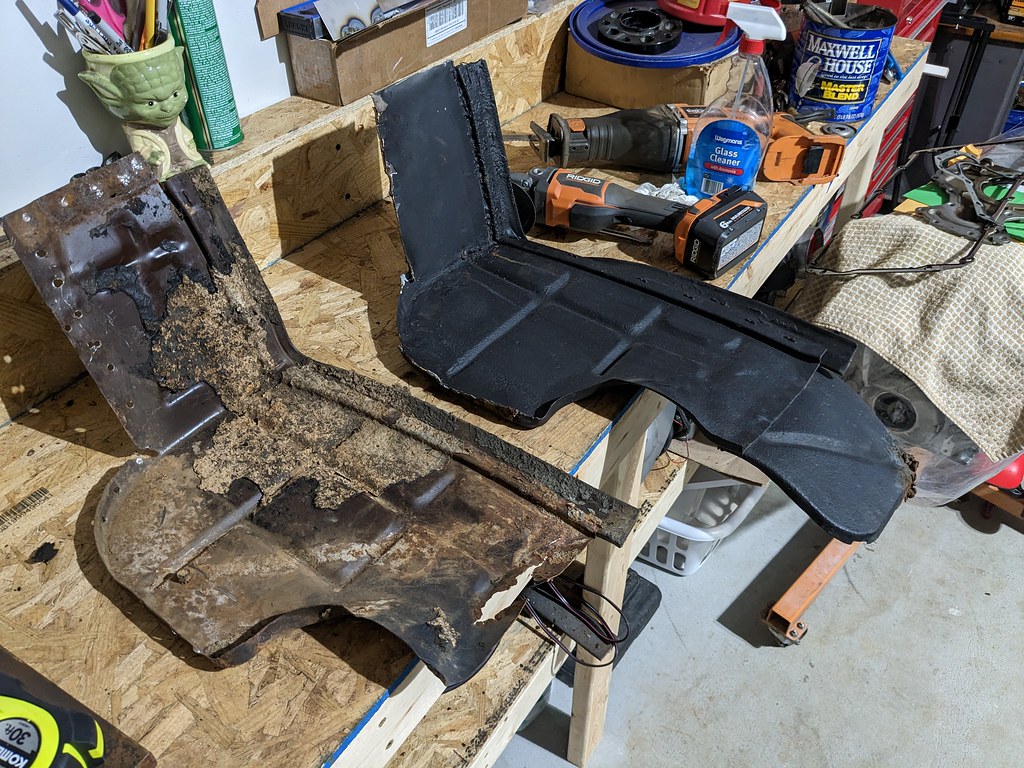
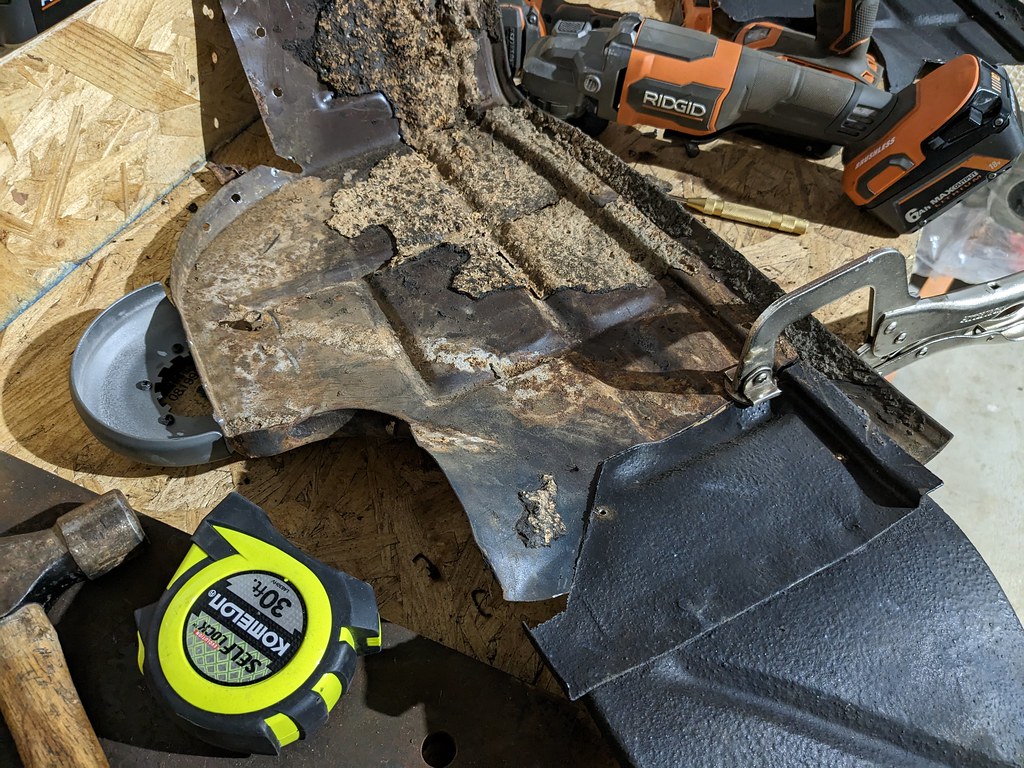
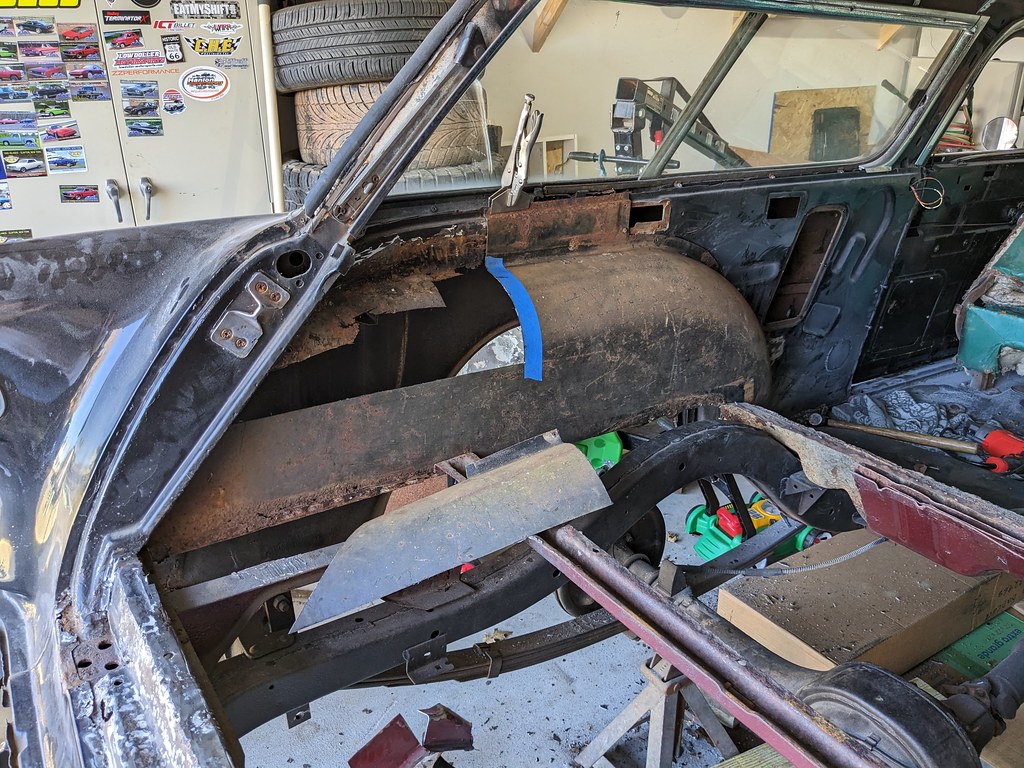
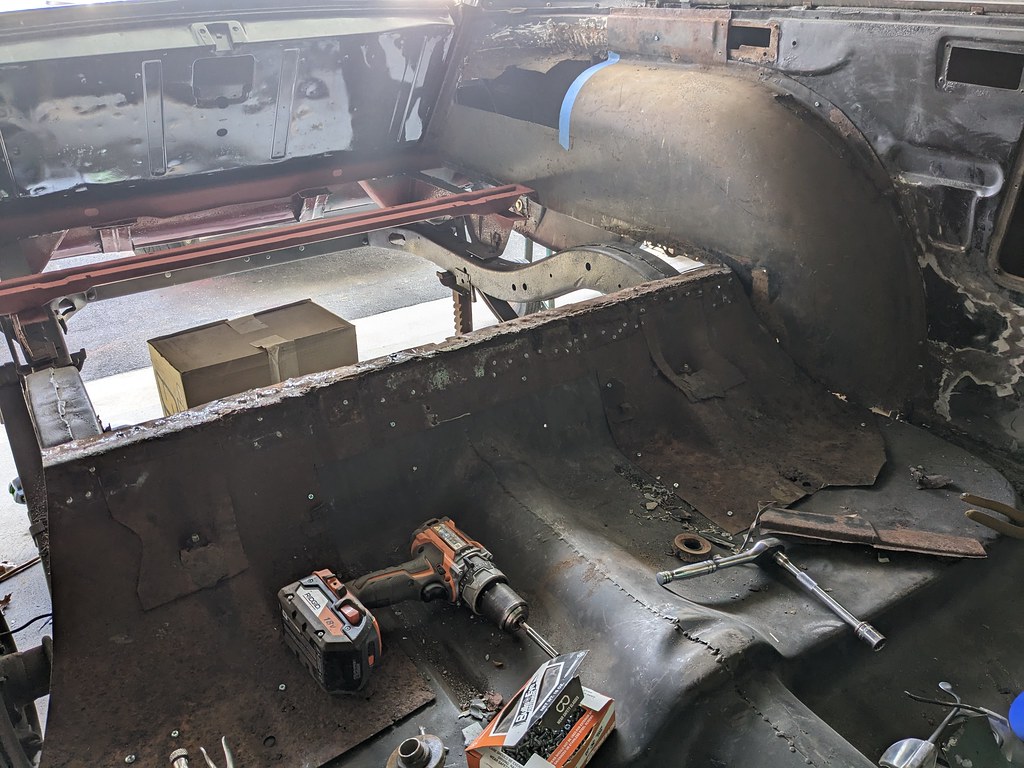
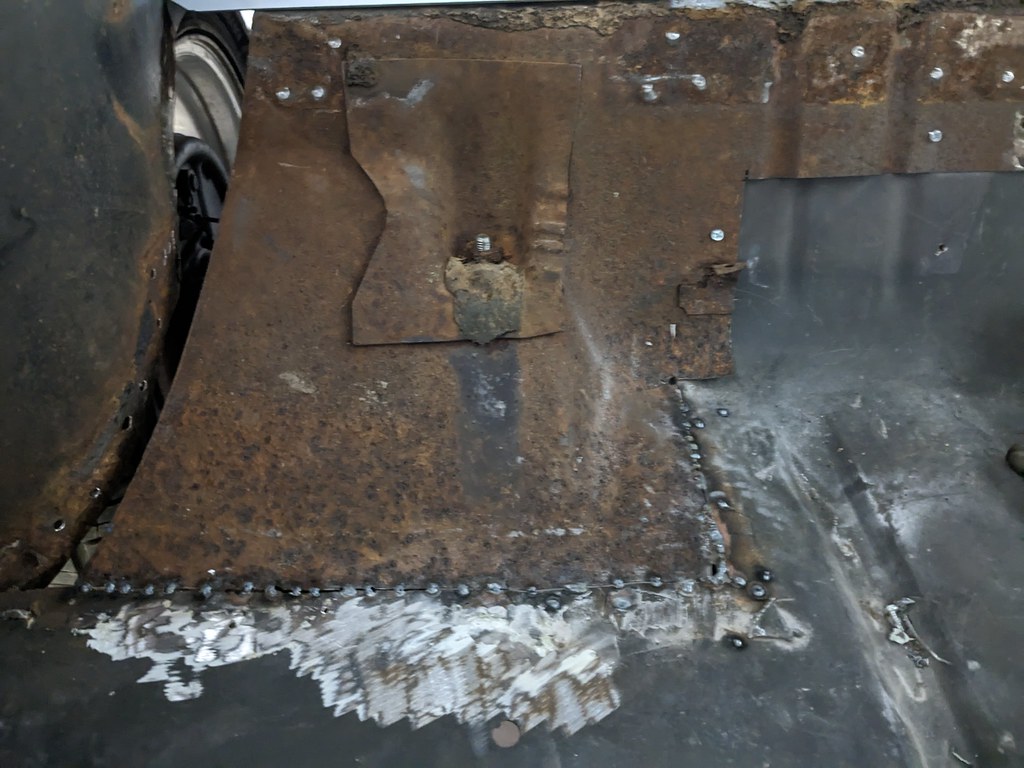
So my plan this time around was to buy a car that was painted, and didn't need a whole lot of repairs. I'd say the plan failed, but in my defense the previous owner hid the "repairs" very well. Seems like I just keep cutting deeper and deeper, but thankfully I came to the end of the covered up rusty metal. It's disappointing to see when people just layer new metal over rusty metal then cover it with body filler. I kept going on the driver's side and finally hit the original metal.
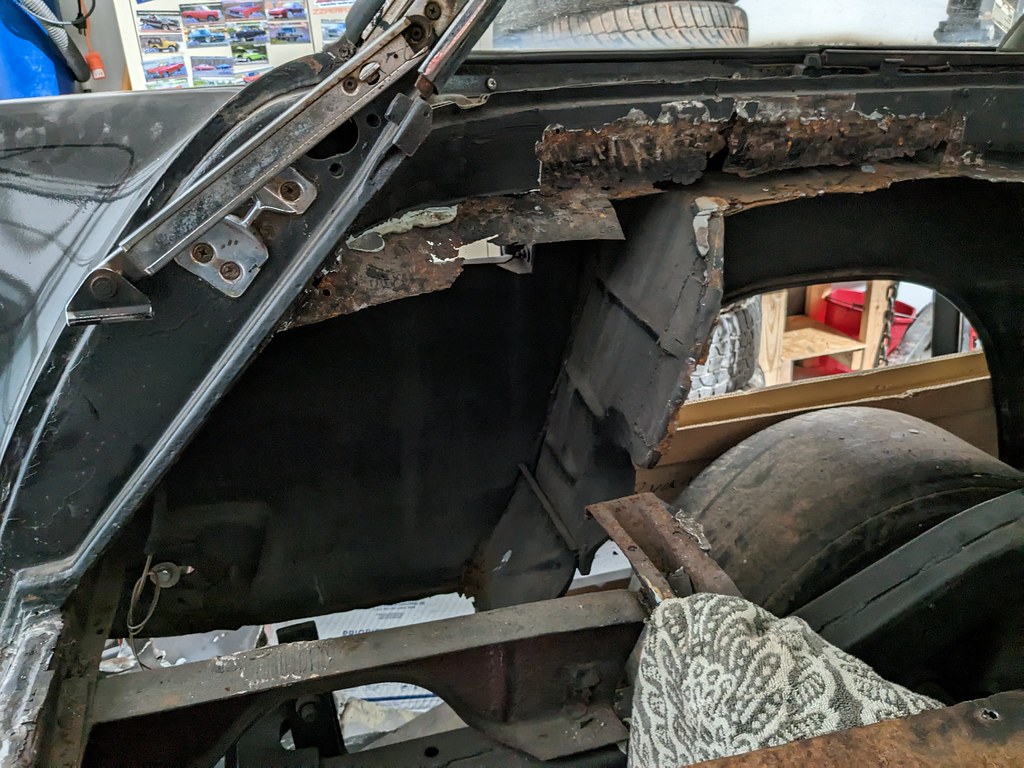
That panel above the wheel well will need some patches, but thankfully I have extra from the wheel wells that I bought. Glad that the window channels are in good shape. Out comes that outer wheel well.
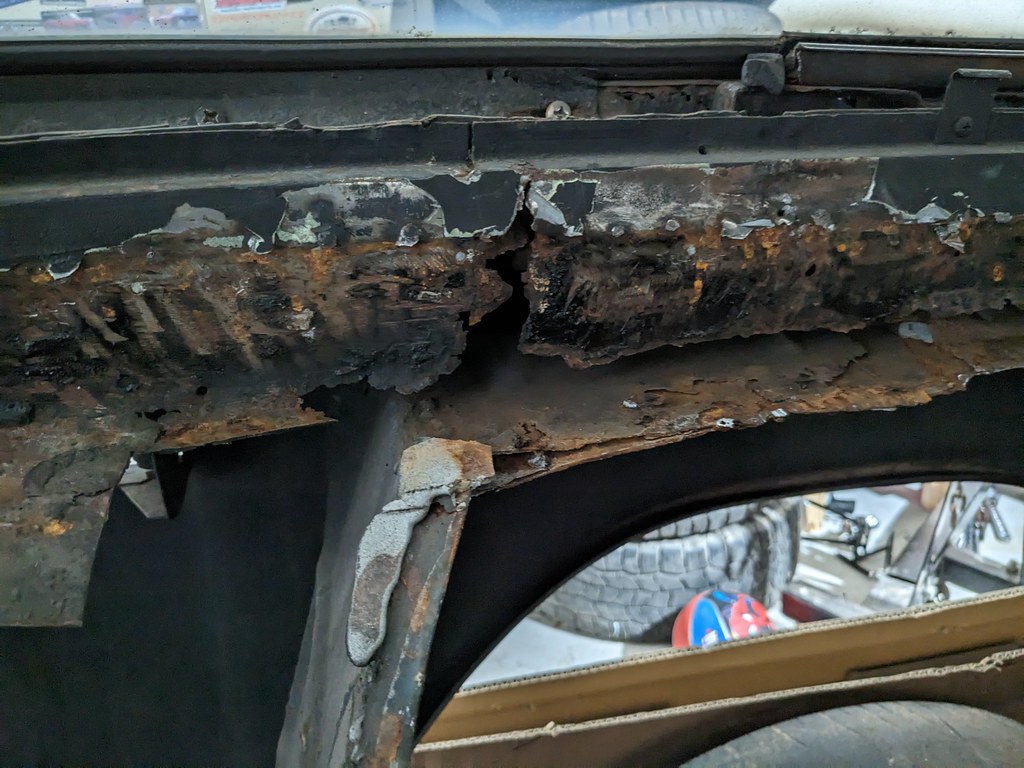
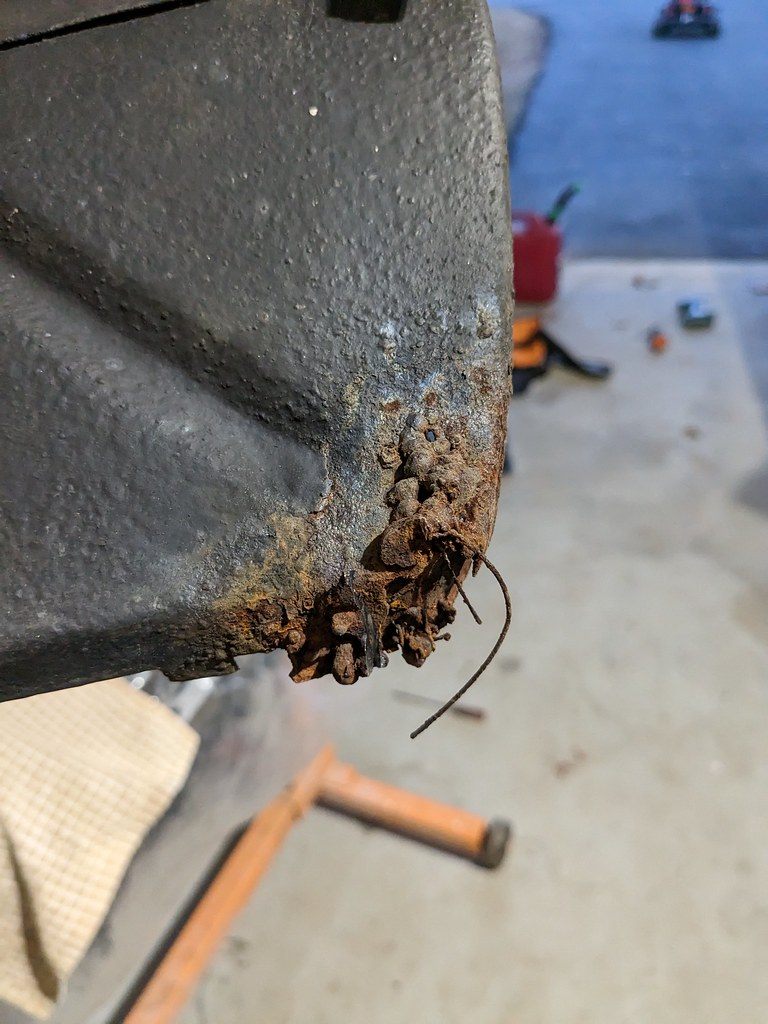
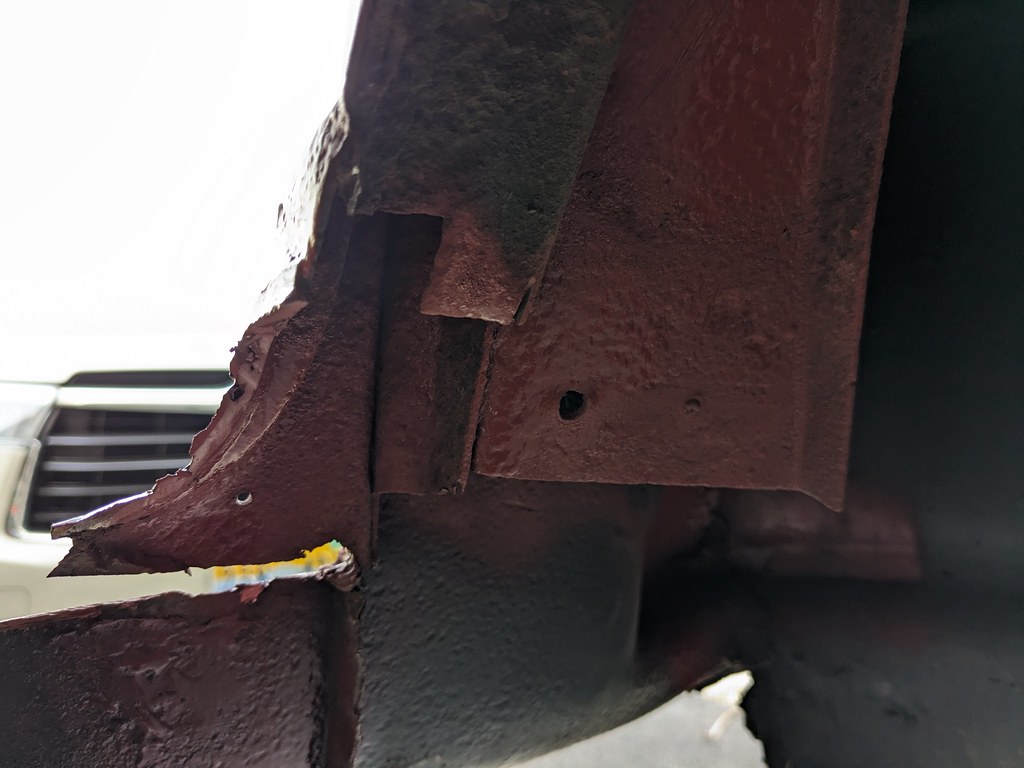
It's easy to see now, but when I was looking under the car it all looked minty. Here you can see the bottom looks great, but the top had another secret. More new metal layered over rusty metal.
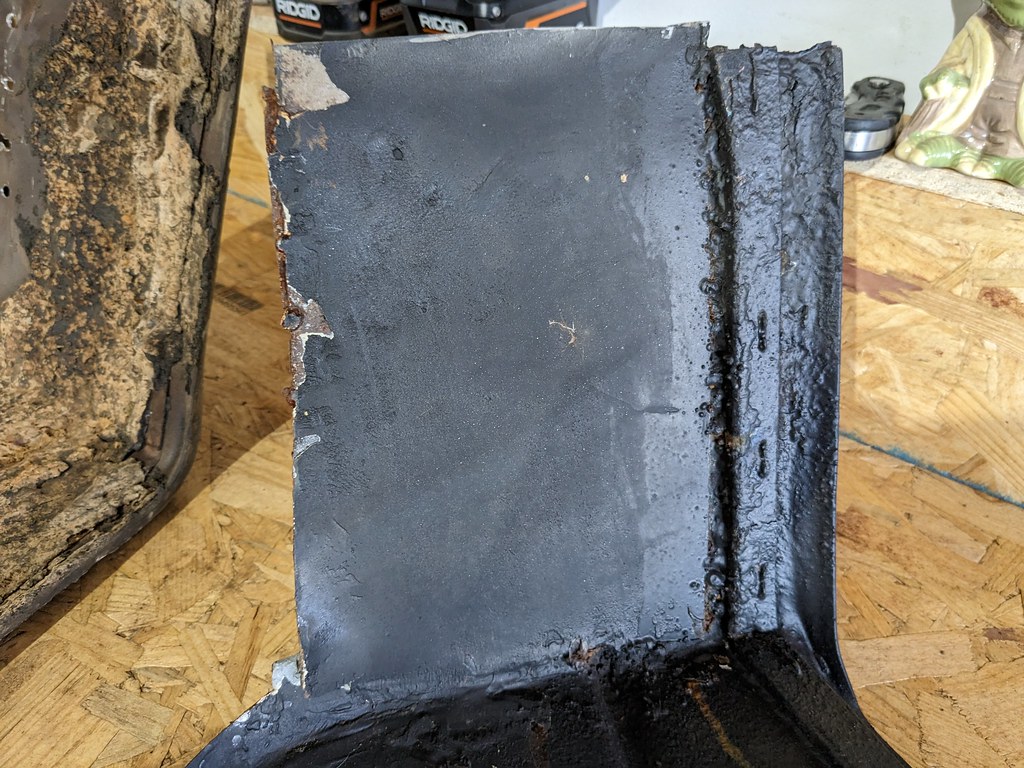
I'm glad when I pulled the wheel houses out of that 9 passenger wagon that it came with the outer wheel houses because they are in pretty good shape with just some small patches needed. The lower section of the wheel house is in good shape, so I can section off what I need and splice it to the one in good shape.
Did a little measuring, then just cut it. It lined up nicely, and after I tacked it in place fits just like the one that came off the car.
Finally broke out my new welder. Everlast MTS 225, and the MIG Function works great. I should have ground back the metal more, but the kiddos were sleeping and didn't want to be too loud.
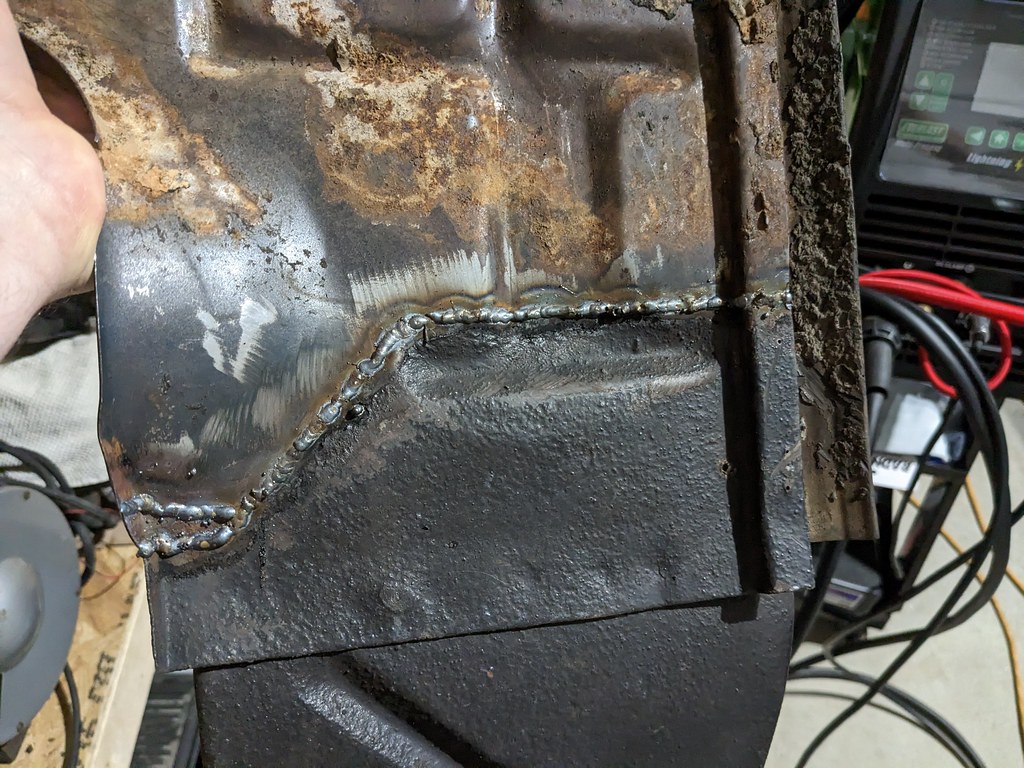
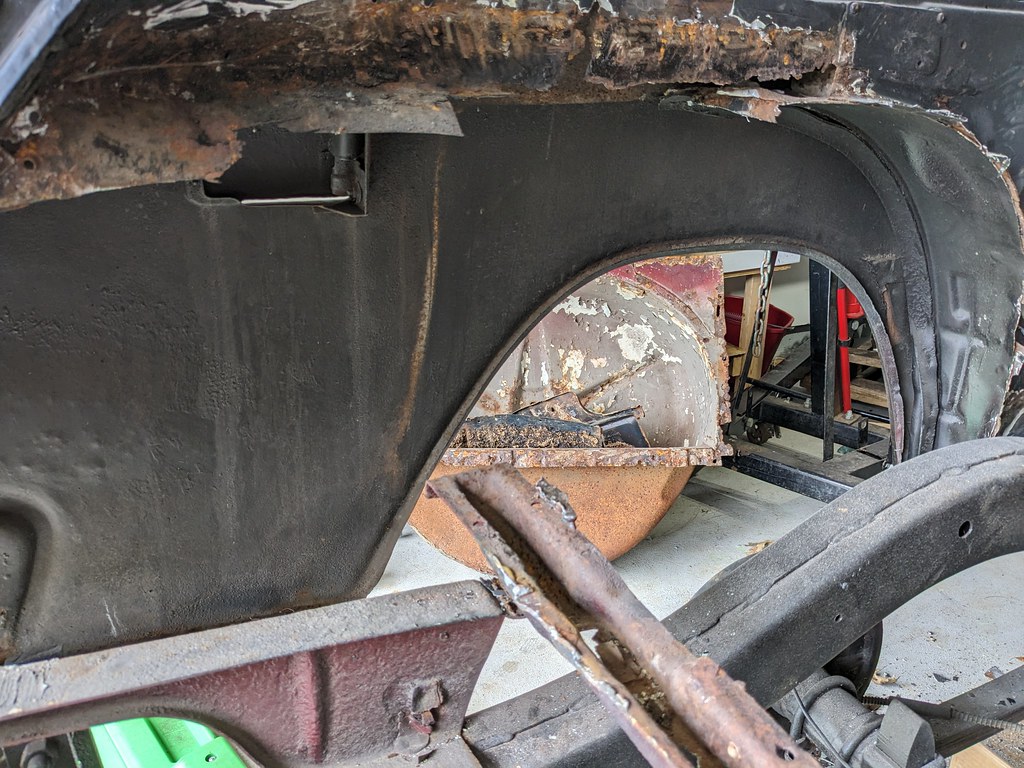
The front outer wheel house is actually in great shape, but I'll need to weld on a new tab that attaches the rear/upper panel that I just repaired.
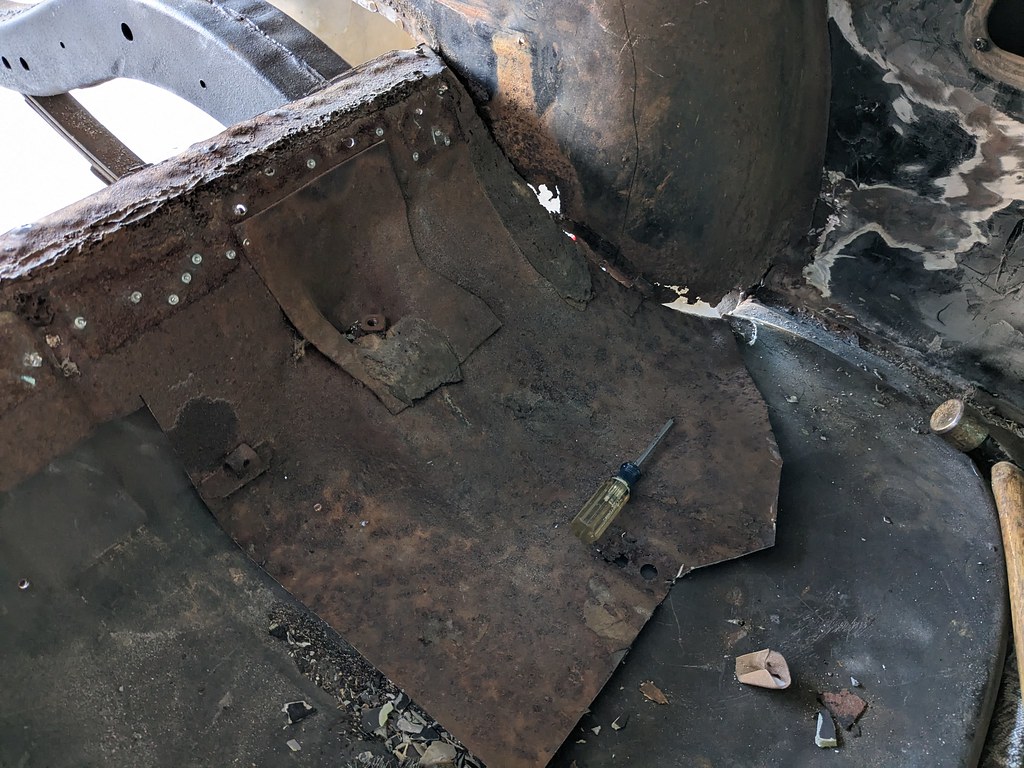
Here's just another example of what not to do. If you have weak stomach's, scroll quick.
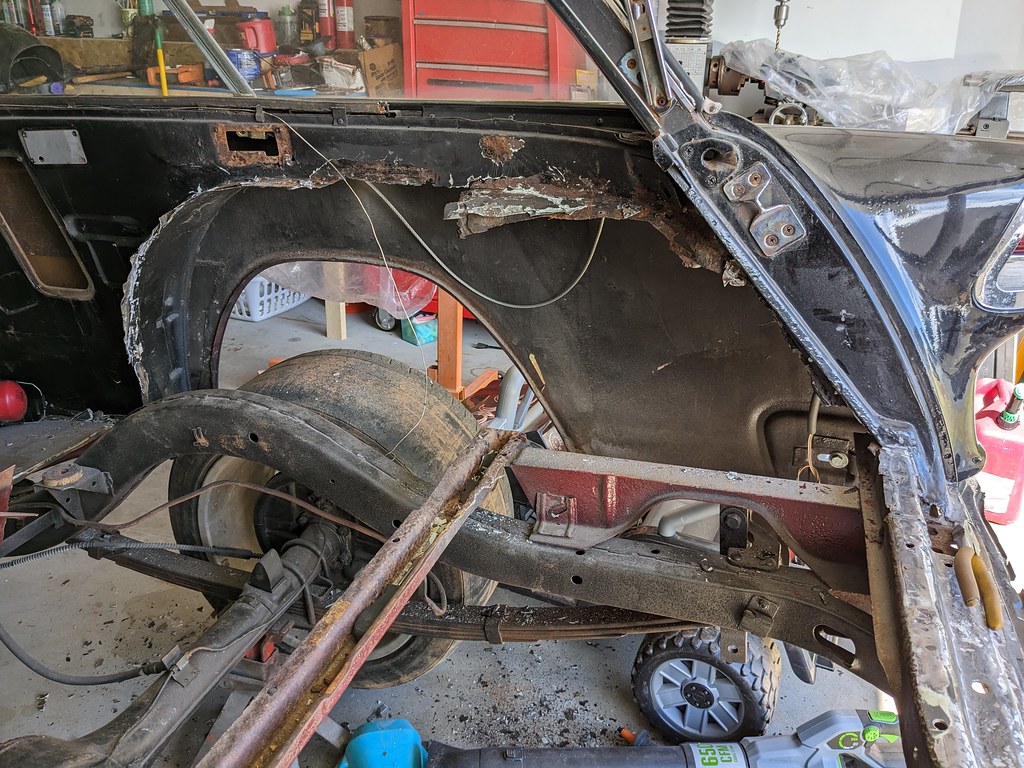
After all of that cutting I decided to get some motivation and roughly mocked up the wheel wells again. To get a better idea of how they will sit, I needed to trim off the little dip from the 9 passenger cargo panel. Just needs to be straight across, so painters tape did the trick.
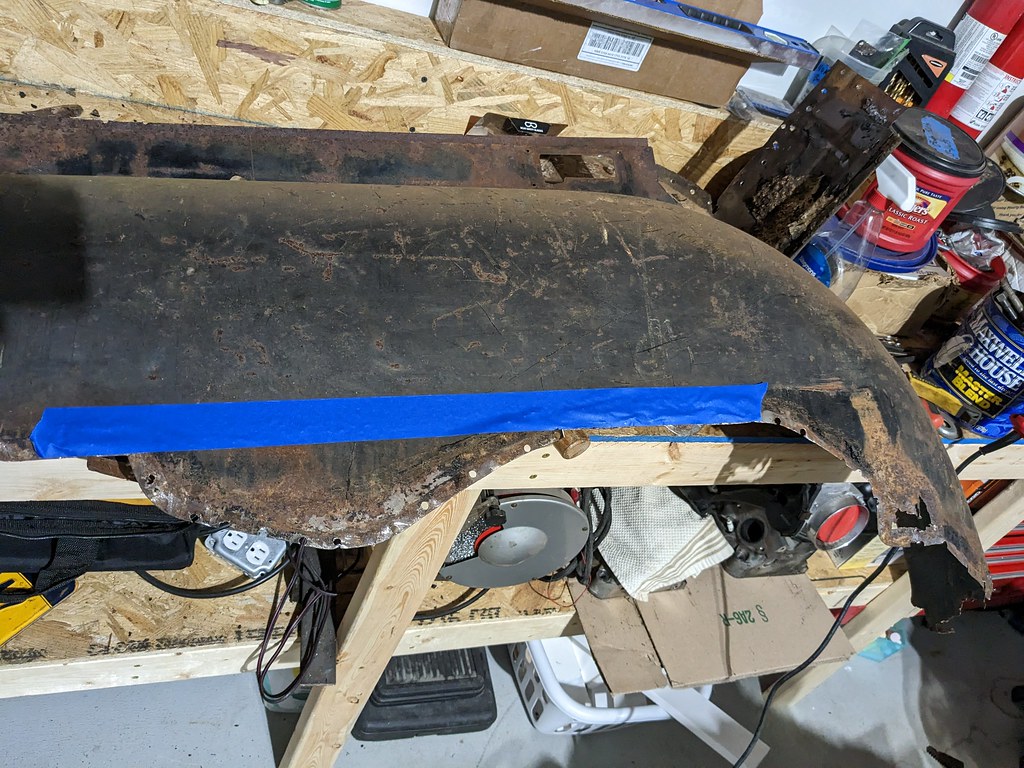
What I'm coming to realize is that the rear section of the wheel house is much different on the Nomad vs the other tri5 wagons. I could see that the angle was different, but that also makes the top section too long so I'm going to need to do some cutting. I made one big cut, then was able to get the panel to sit down nicely where it will eventually go. It's a bit unconventional, as there is usually just a flange left that welds to the upper structure, but since mine is so rusted in spots, I'm going to be doing a little of both and left the top tab attached. I'll spot weld that to the upper channel, then left the flange for the rest of the wheel house. I'm going to use some sheet metal screws when the time comes to secure it all, and tack weld the whole wheel well together once it's all fitting great. Then I can remove it and weld into a solid piece on my bench.
Really happy with that fitment. Once I get the panel all patched up, it will fit really well.
Then one thing that kept bothering me was that middle brace seemed to be shifted towards the driver's side. It wasn't allowing the wheel well to go straight back, then I threw a tape measure on it and it was about 3/8" towards the driver's side. With that information, it changes the game. I needed to see what was going on with the passenger's side too so that I can make sure that it's square. Time to cut up the passengers side. I was hoping to leave it and get the one side mocked up to give the body more rigidity. Nope...
I'll spare the details, but it's the same story on this side as well.
This is why we can't have nice things.
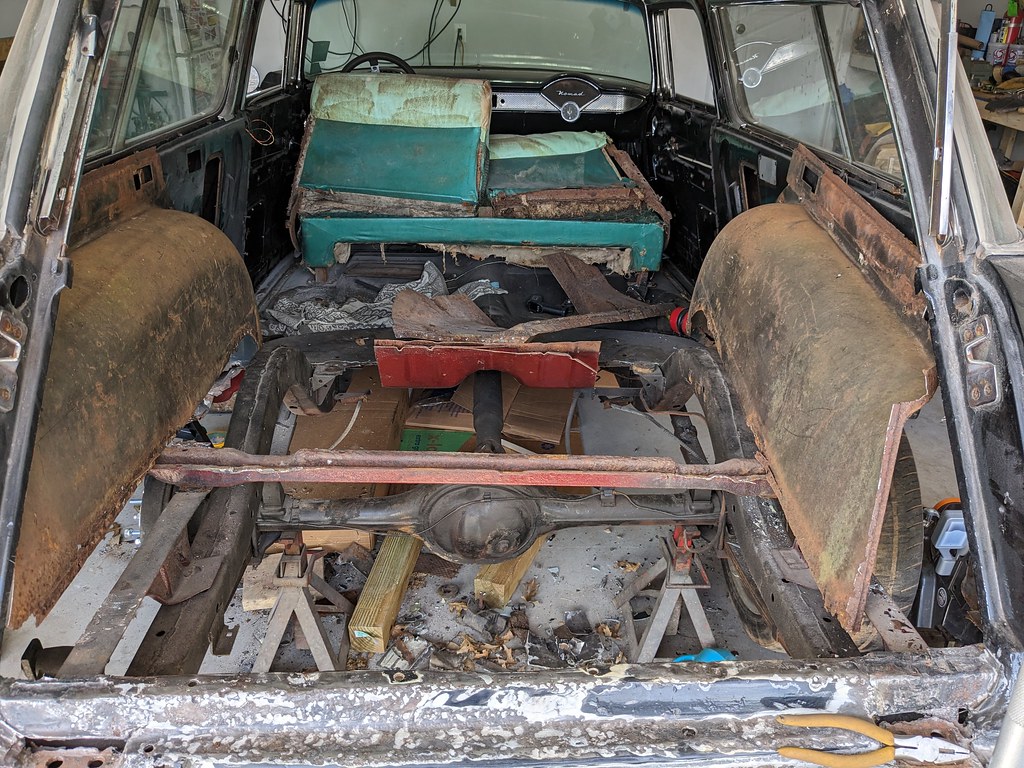
I don't like leaving the car like this, but it gives me the motivation to get it back together.
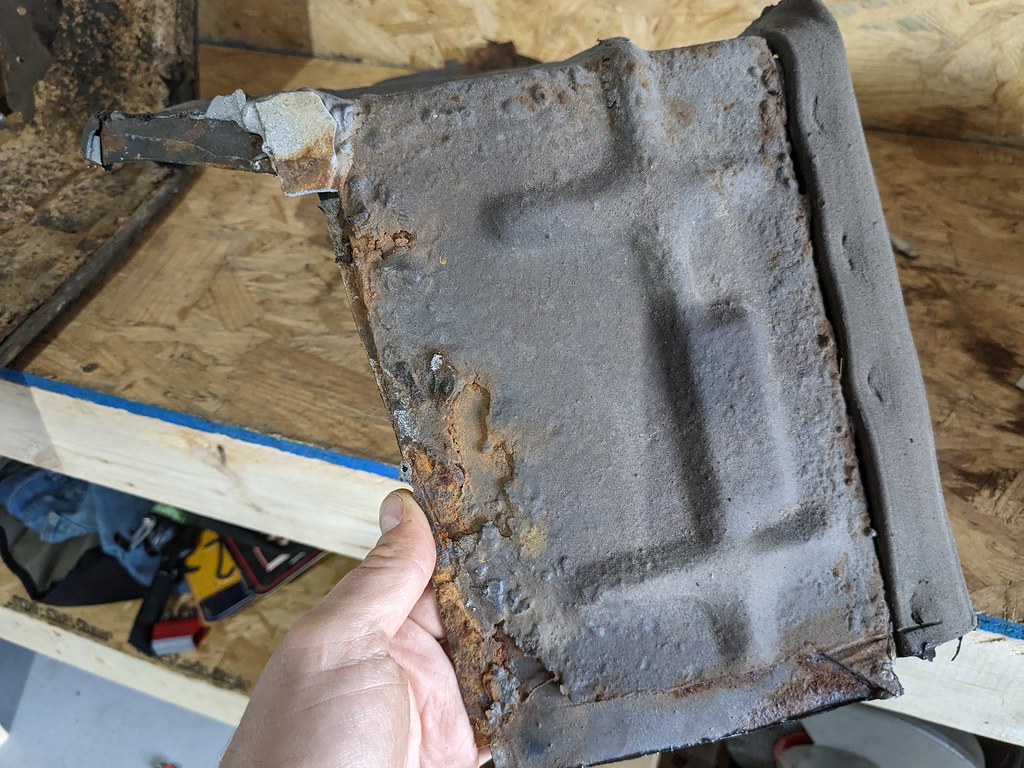
I'm going to pick up some weld-through primer very soon and get some panels welded back into the car shortly. Another panel that I need to replace which is going to be a huge PITA will be the heavy steel panel where the tailgate mounts. That was spliced and cut up over the years, so it just needs to be completely cut out and a new one welded in. I need to replace that panel before I do a final weld of the wheel wells because it attaches to almost everything in the rear of the car. I also need to figure out how to brace it all from moving when I replace that panel. That's one of the next items on my list to address, so stay tuned.
Cheers,
Ryan
1955 Nomad project LC9, 4L80e, C5 brakes, Vision wheels
1968 Camaro 6.2 w/ LSA, TR6060-Magnum hybrid and etc SOLD
1976 T/A LS1 6 Speed, and etc. SOLD
Follow me on Instagram: ryeguy2006a
-
02-27-2023 #43
Registered User
- Join Date
- Nov 2000
- Location
- O-town
- Posts
- 4,282
cut grind weld cuss repeat
Steve68- 1968 Camaro SS LSX T56, 12bolt 3:90's, 18" Fikse Profil 13s, Deep Fathom Green paint, Spearcos, just bunch of old junk because another member said so, LOL
70 Nova SS street/drag 454, T400, 3:55, ugly!
-
02-28-2023 #44
Registered User
- Join Date
- Sep 2009
- Posts
- 2,707
Yes sir! Hoping to be doing more welding than cutting though going forward.

1955 Nomad project LC9, 4L80e, C5 brakes, Vision wheels
1968 Camaro 6.2 w/ LSA, TR6060-Magnum hybrid and etc SOLD
1976 T/A LS1 6 Speed, and etc. SOLD
Follow me on Instagram: ryeguy2006a
-
02-28-2023 #45
Registered User
- Join Date
- Nov 2000
- Location
- O-town
- Posts
- 4,282
That's always a plan, my buddy has a welding business, he actually worked for me on the Shuttle program, he welded all my 4 link parts, in about 2 hrs, he tells me "Stevie you make my life so easy, I just come here and weld! no fab, no set up, everything is done for me!!! Originally Posted by ryeguy2006a
 Steve68- 1968 Camaro SS LSX T56, 12bolt 3:90's, 18" Fikse Profil 13s, Deep Fathom Green paint, Spearcos, just bunch of old junk because another member said so, LOL
70 Nova SS street/drag 454, T400, 3:55, ugly!
-
03-01-2023 #46
 Registered User
- Join Date
- Mar 2011
- Location
- netherlands
- Posts
- 43

With so much rust and bad repair jobs in the past would it not be a good idea to have the car sandblasted or dipped?
Greets Paul.
'71 ford capri mk1 427 v8.
'65 ford mustang 5.0 efi aod, running on LPG. Sold now.
-
03-01-2023 #47
Registered User
- Join Date
- Sep 2009
- Posts
- 2,707
That may be the case if I was doing a full on show car, but this project will be a nice cruiser that will go to Cars and Coffee events. Maybe an occasional car show. The paint that's on it is decent 7/10, so I'm going to stick with that. If I blew the car apart to blast it, I'd be spending tens of thousands of dollars and push the completion date out at least 4 years. If I can continue at my current pace, I think that the rear cargo area will be back together in the next month or so. Then I can focus on doing the LS swap, basic interior, brakes and possibly be driving the car by the end if the summer. At least that's my plan right now. I do change my mind a lot so who knows. Originally Posted by capri v8 driver
1955 Nomad project LC9, 4L80e, C5 brakes, Vision wheels
1968 Camaro 6.2 w/ LSA, TR6060-Magnum hybrid and etc SOLD
1976 T/A LS1 6 Speed, and etc. SOLD
Follow me on Instagram: ryeguy2006a
-
03-01-2023 #48
Registered User
- Join Date
- Nov 2000
- Location
- O-town
- Posts
- 4,282
Thats the way to do it, fix and drive it,
I have a 88 GT Vert' super nice car PO wrecked it, I got it easy fix, nope frame straightener ripped the frame and strut tower apart rusty, I replaced everything, sanding priming, trying to make it look smooth and nice, buddy has the body shop says just paint it and be done everything gets covered anyways, scuff it and shoot the damn thing fix it!!
now its just drive the damn car!Steve68- 1968 Camaro SS LSX T56, 12bolt 3:90's, 18" Fikse Profil 13s, Deep Fathom Green paint, Spearcos, just bunch of old junk because another member said so, LOL
70 Nova SS street/drag 454, T400, 3:55, ugly!
-
03-13-2023 #49
Registered User
- Join Date
- Sep 2009
- Posts
- 2,707
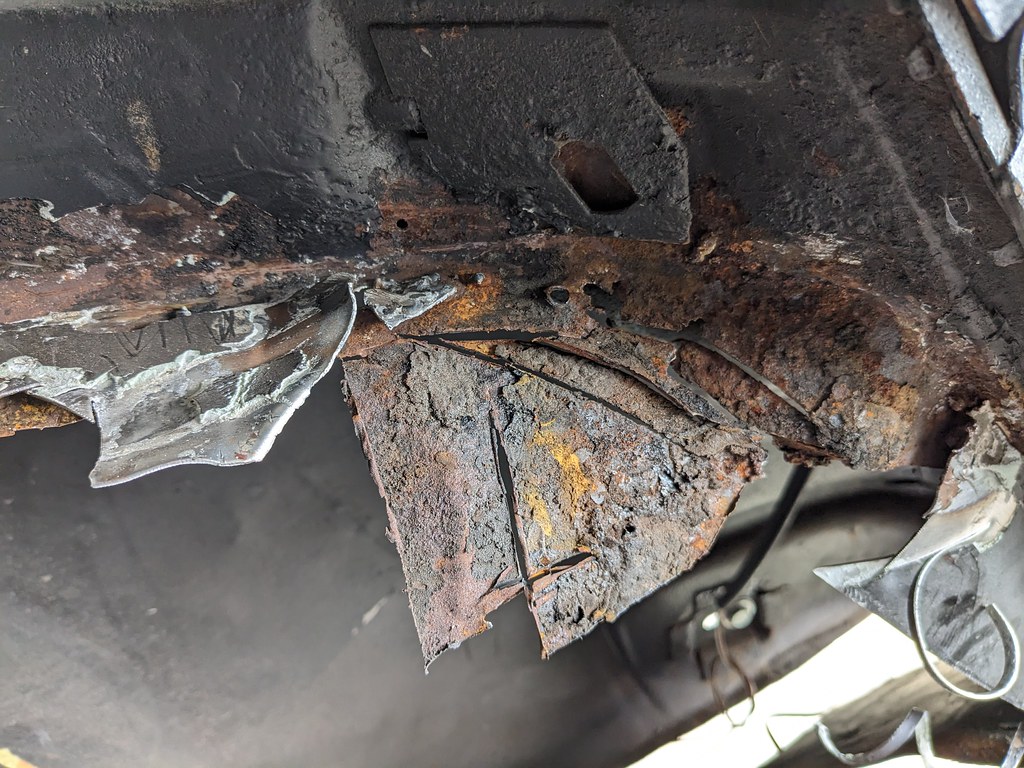
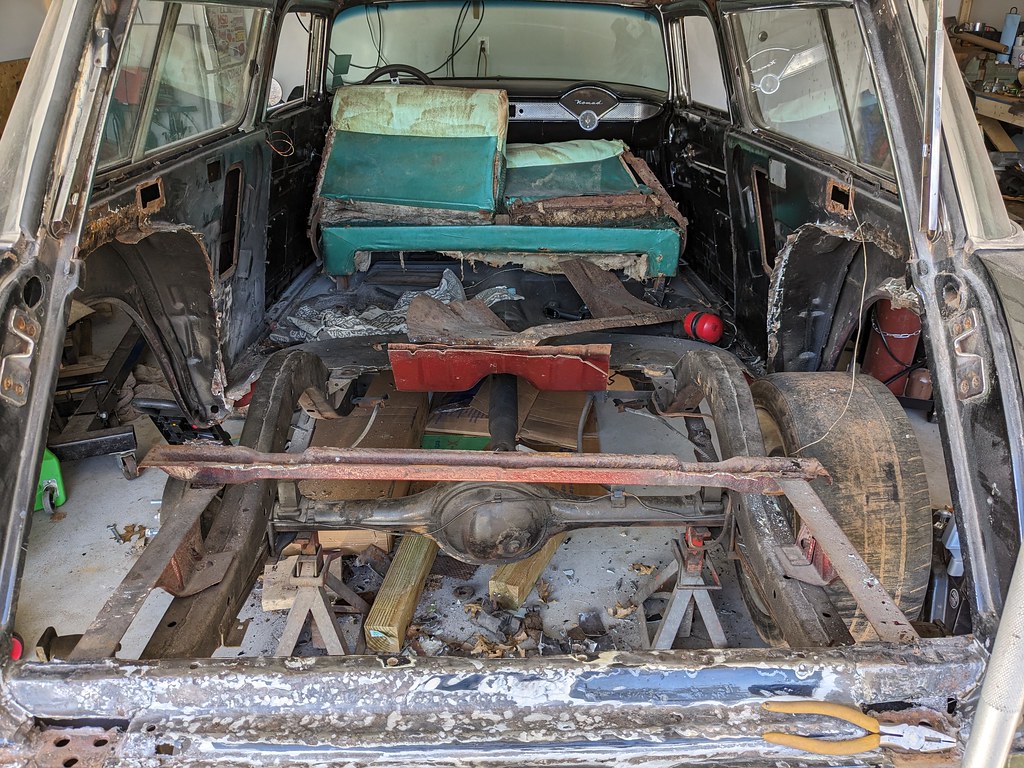
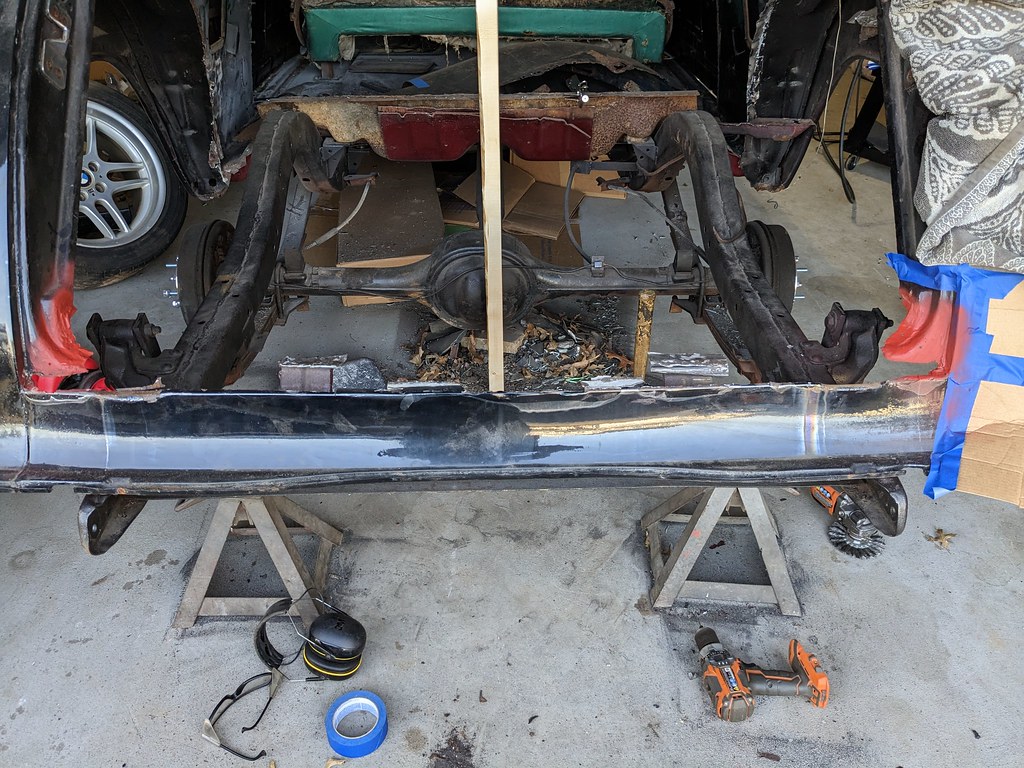
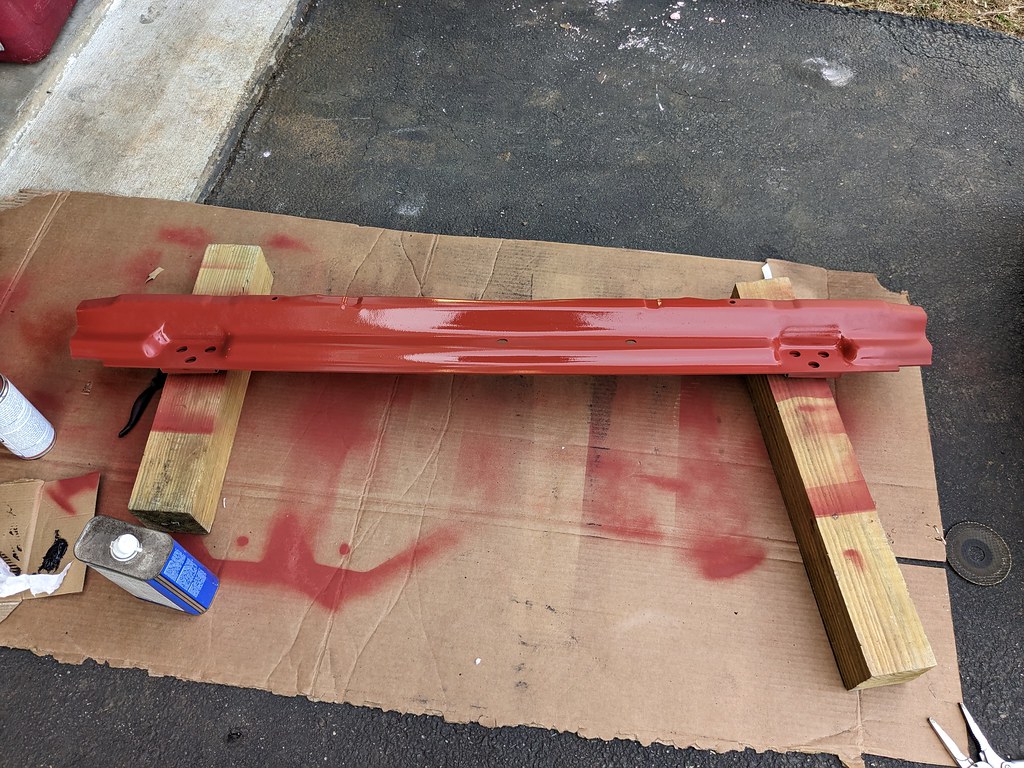
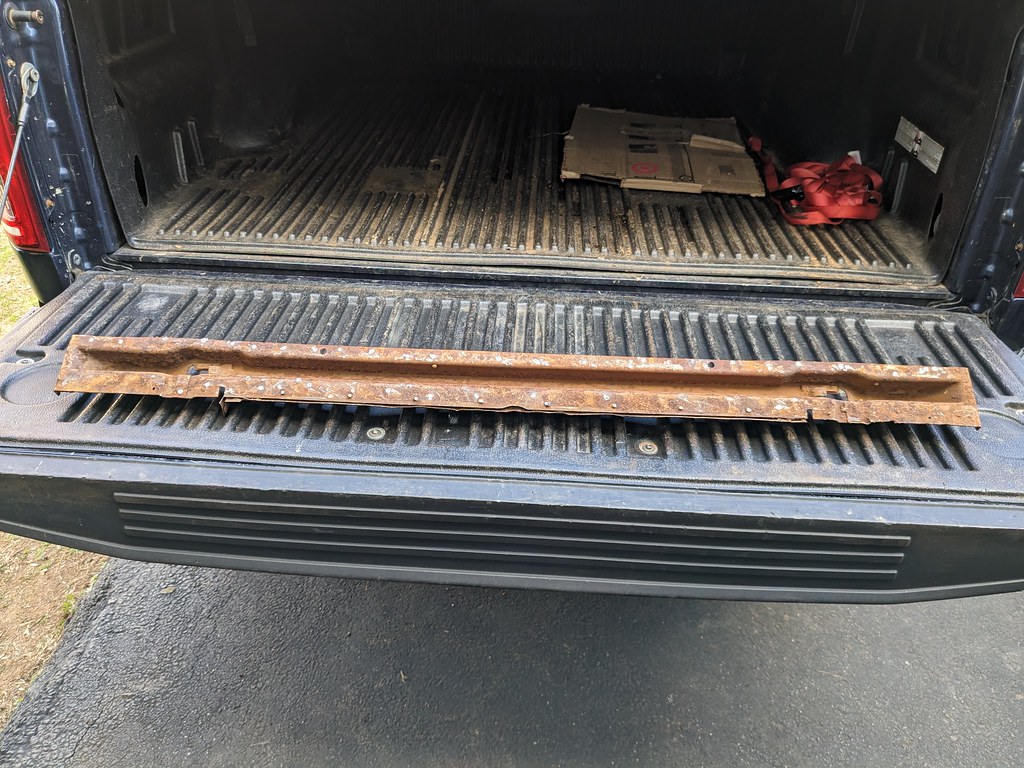
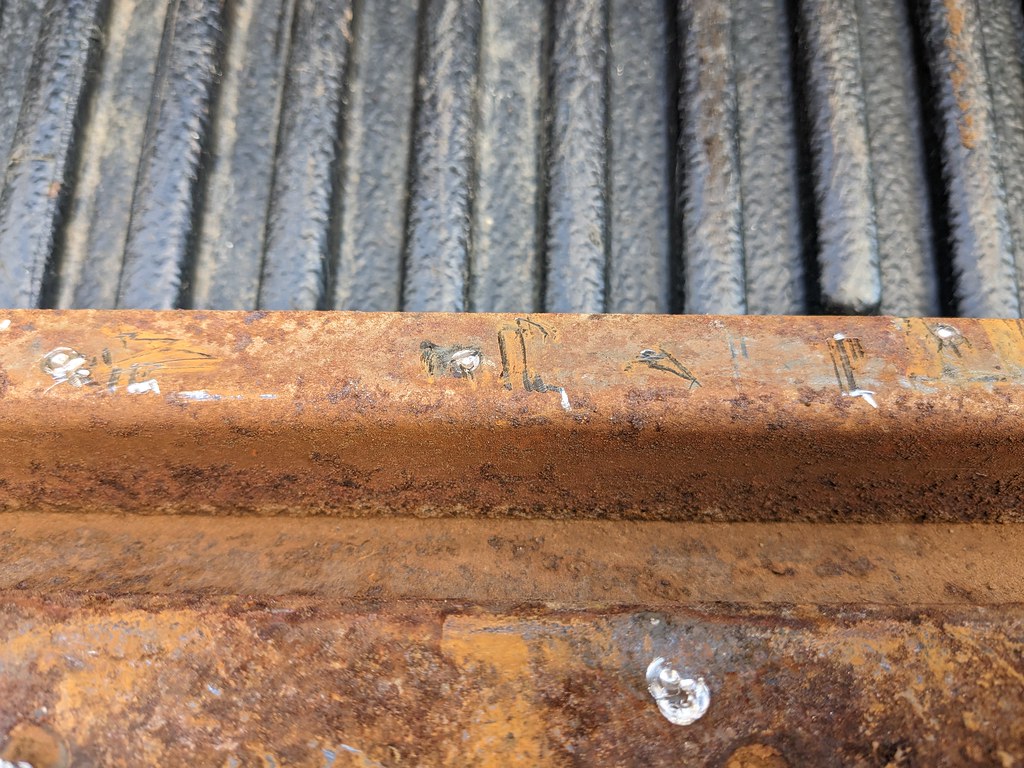
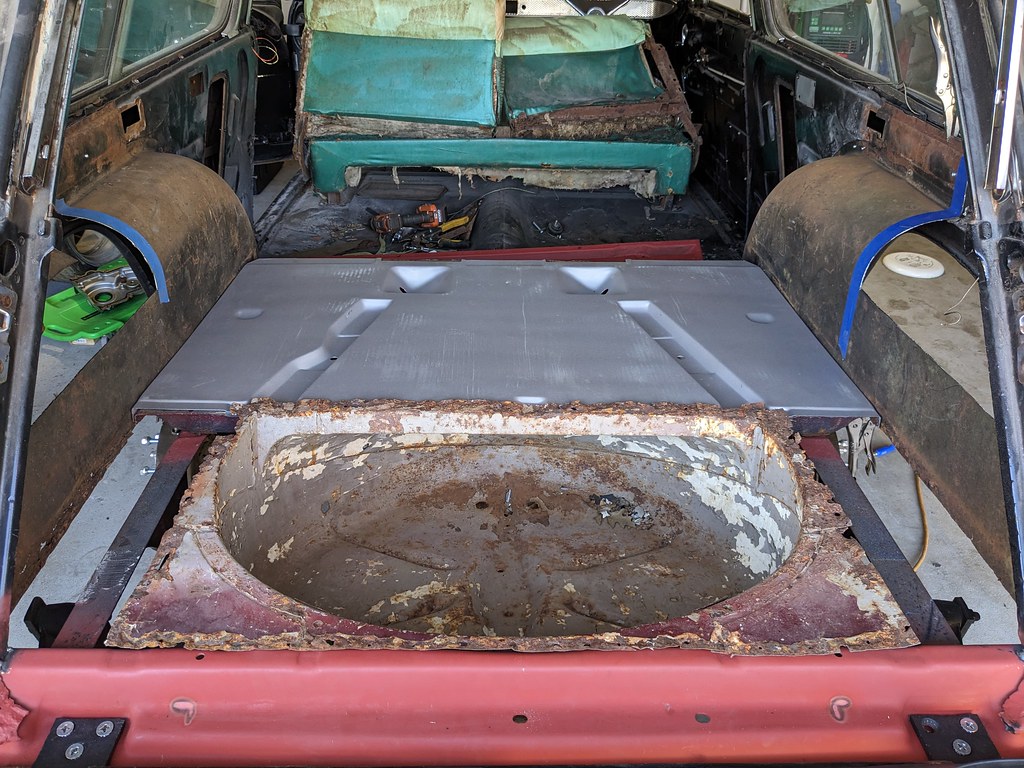
With all the old wheel wells cut out, the next project was to cut out and replace the rear brace where the tailgate mounts. It had been repaired over the years (poorly) and needed to completely cut out and replaced. I had been thinking about how I wanted to replace this panel over the last several weeks and while crude, I found the best way to approach this panel replacement was to prop up the rear of the roof. It would be held up in place, but allow me to work around the panel. What I learned in hindsight is that this panel is the only thing holding up the rear of the car. More on that later. So I bought some fresh cut off disks and got right to work.
After about 30 mins of carefully cutting off the rear panel, this is when I realized that it is the main support for the rear of the car. In a panic I quickly got it all removed, and the new panel in place and clamped with multiple vice grips.
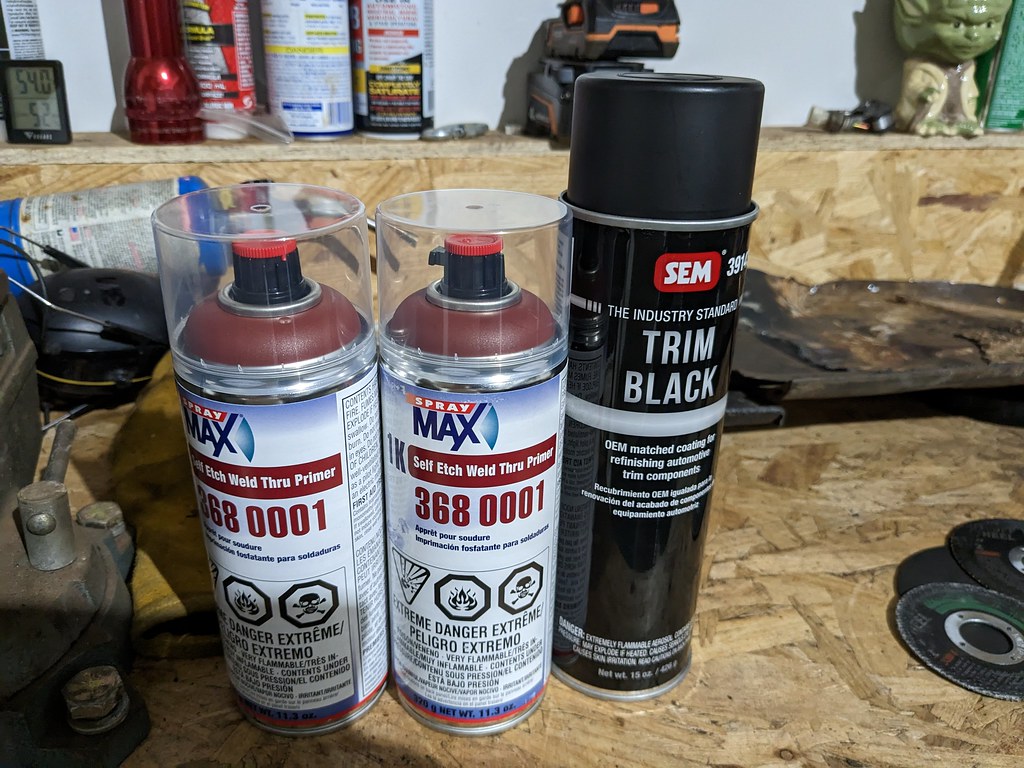
I grabbed some really nice weld-through primer at my local auto paint store. They recommended this over the copper weld as they said the body guys love this now because it gives great coverage and is half the cost. Figured they would be the best guys to learn from so I grabbed two cans. Also some Trim black paint for the firewall when I get to that point.
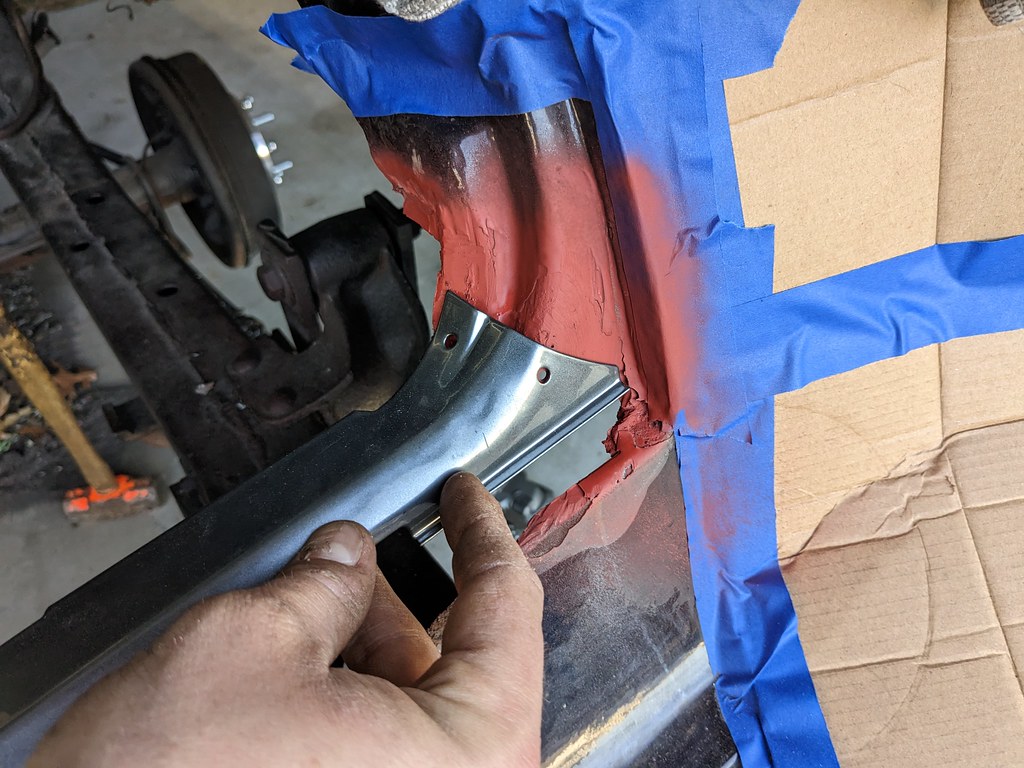
There was some fitment required to get that new panel to fit nice and tightly to the rest of the panels. Once I was happy with the fitment I got the fronts and backs all painted with the weld-through primer.
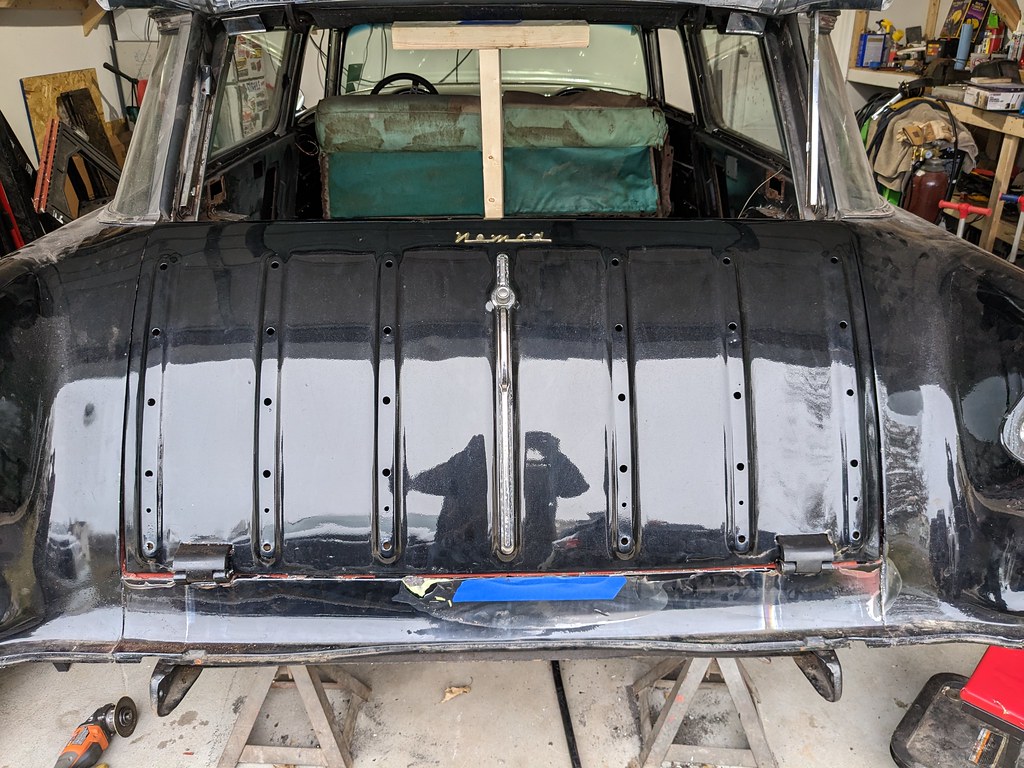
I was able to get the screws that had rusted off long ago removed so I could fit up these hinge covers. I need to clean it all up with a flap disk, but for now it's ugly and the covers fit nicely. I'll clean them up later after the support panel is welded back in.
Then I coated the support panel to get it all fit up.
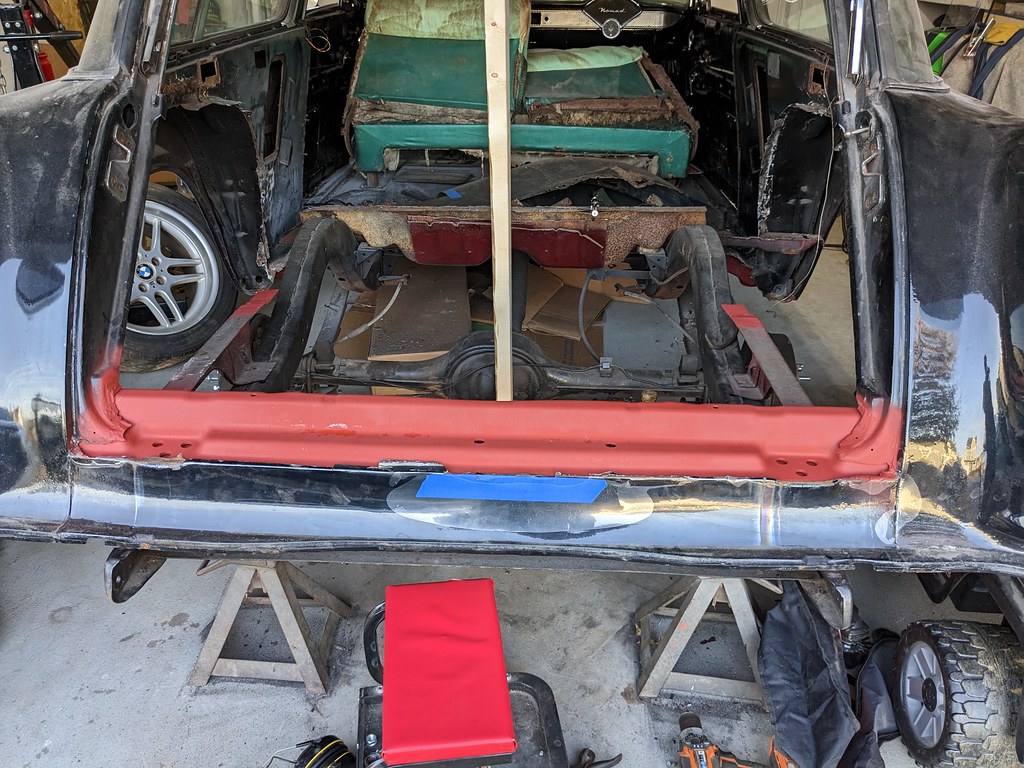
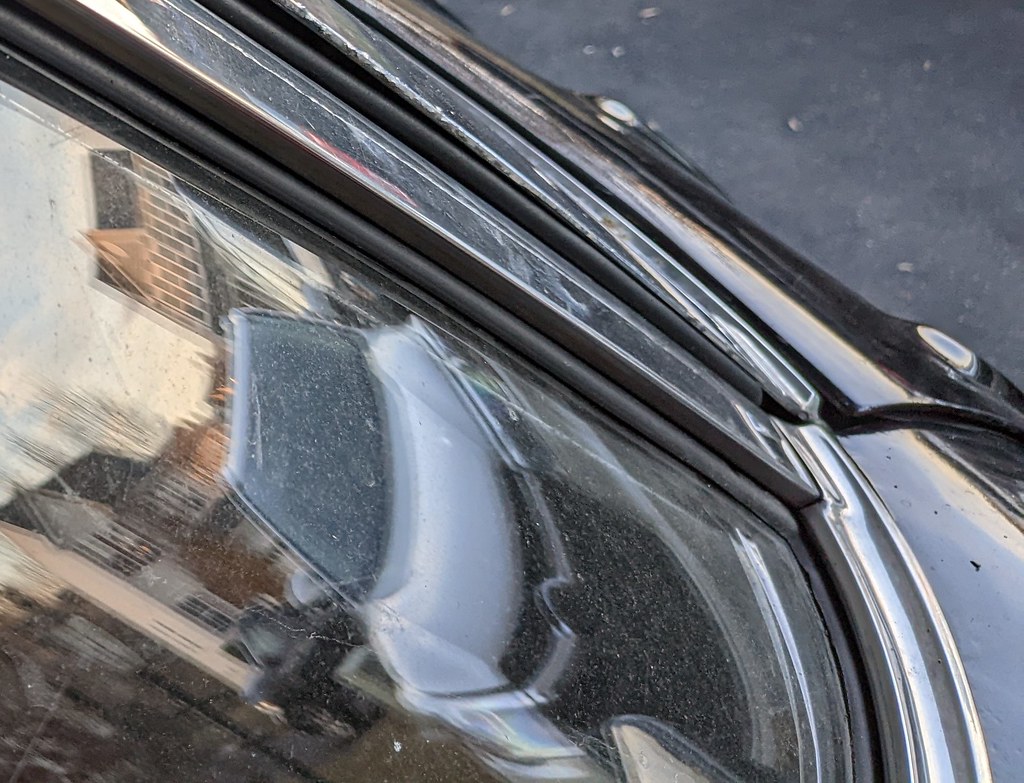
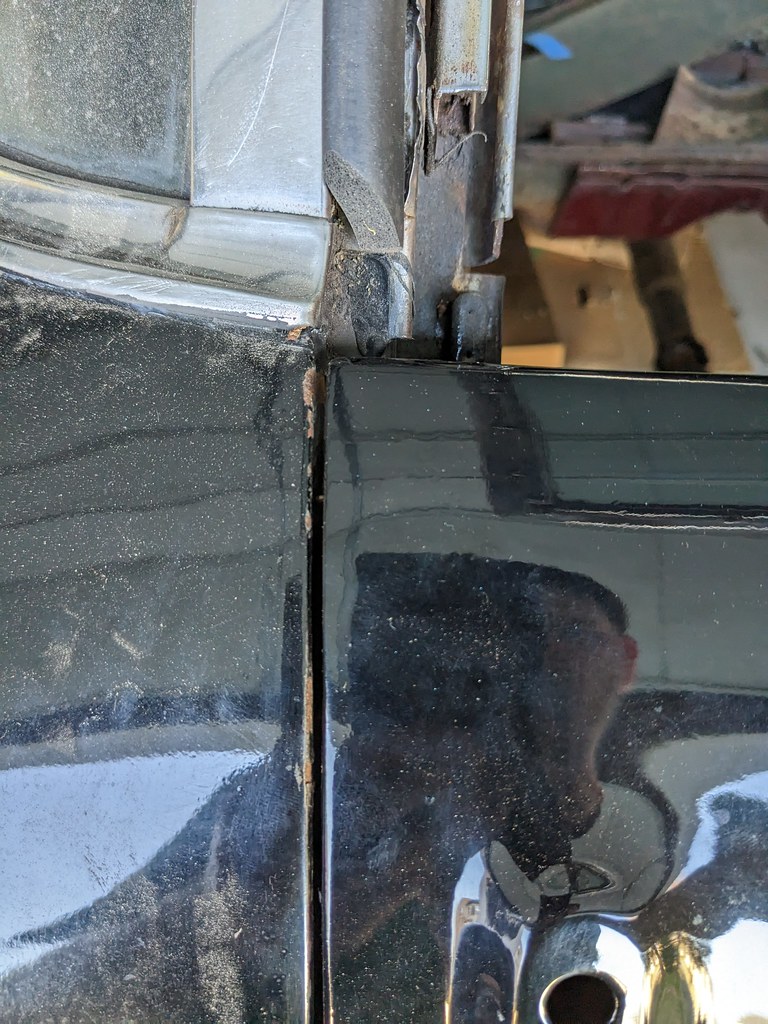
At this point, I was happy with the rear support panel fitment against the body. But after I rebuilt the rear hinges with the new panel in place, I tried to re-fit the rear tailgate without success. Whatever I did the tailgate was still tight at the top left, and loose bottom right just the same as when I bought the car. It then dawned on me that the rear of the car had possibly shifted when they previously installed those big wheel tubs. This is a picture of the tailgate fitment when I bought the car. It was actually touching and overlapping at the top left side.
So what I did was with the tailgate in place, I left the support panel clamped to the body and unclamped it from the body mount supports. The rear of the car could be shifted a bit left and right. I pushed it towards the passenger side about 3/8" and to my surprise the tailgate fit almost perfect. Definitely within the factory tolerances back in 1955. I couldn't believe it was really that simple. Before I did this, I also checked the body vs. the frame alignment. Best I could do was a frame to pinch weld and it came up that the body was shifted about 1/2" to the passenger side.
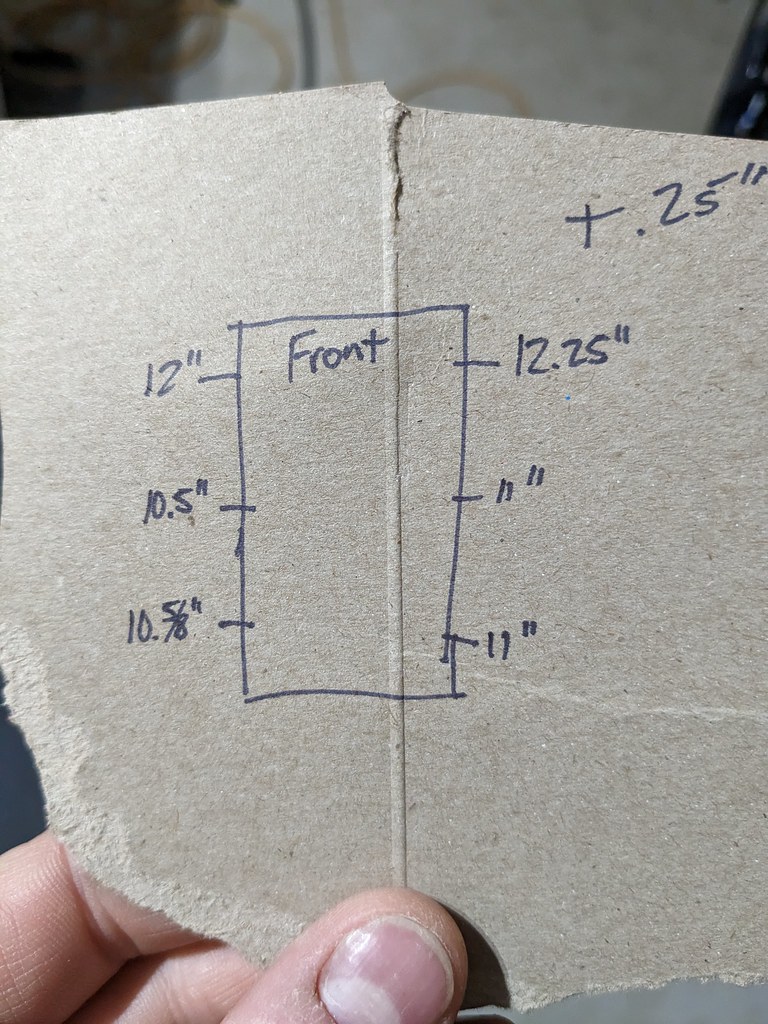
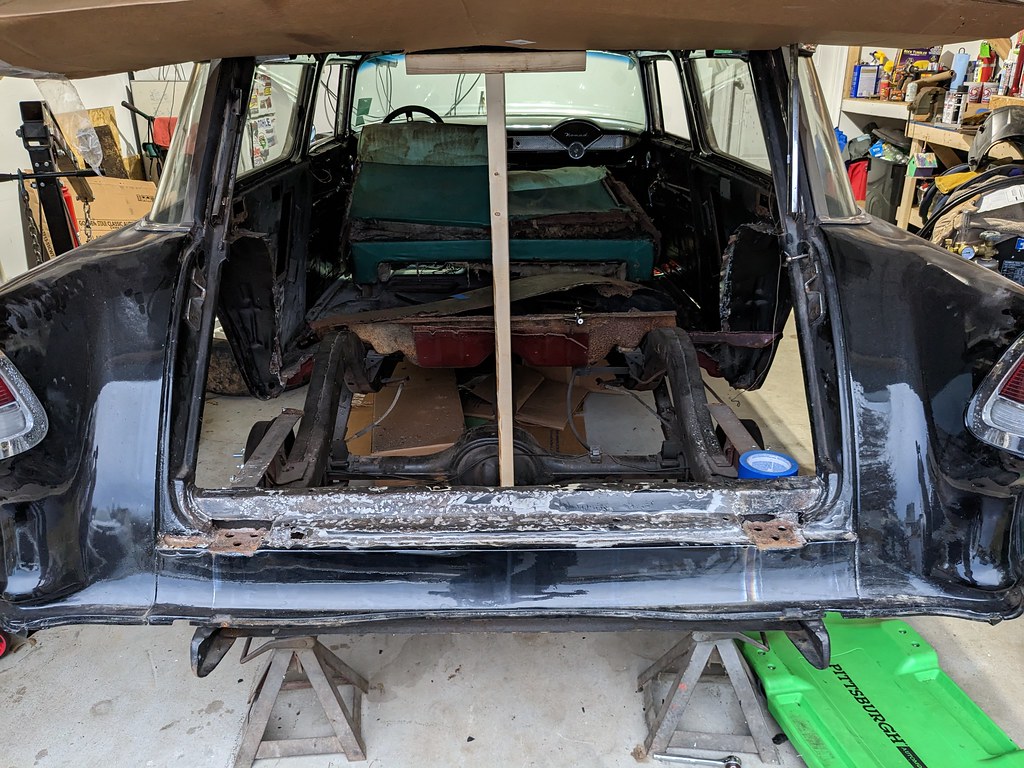
With that problem solved, I attempted to center the body on the frame, but wasn't able to with my current toolset. So instead I made sure that the rear body mount supports were both shifted to the passenger side, and matched the rest of the body. That way when it's centered, the rear mounts will be too. Time to weld it back together!
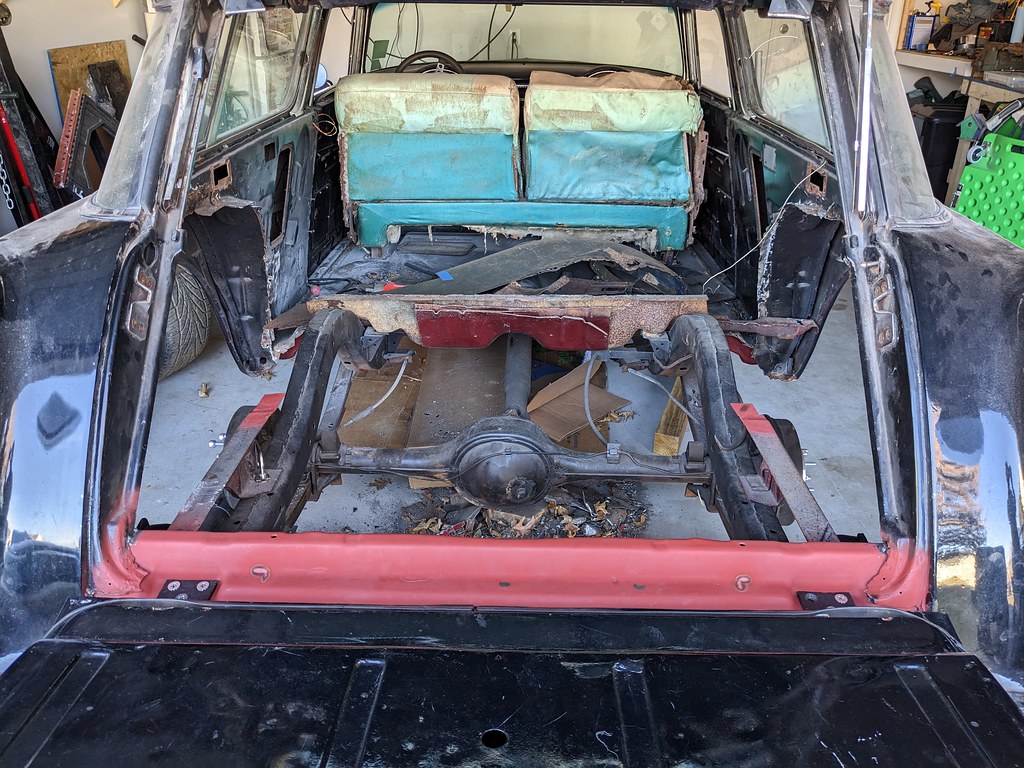
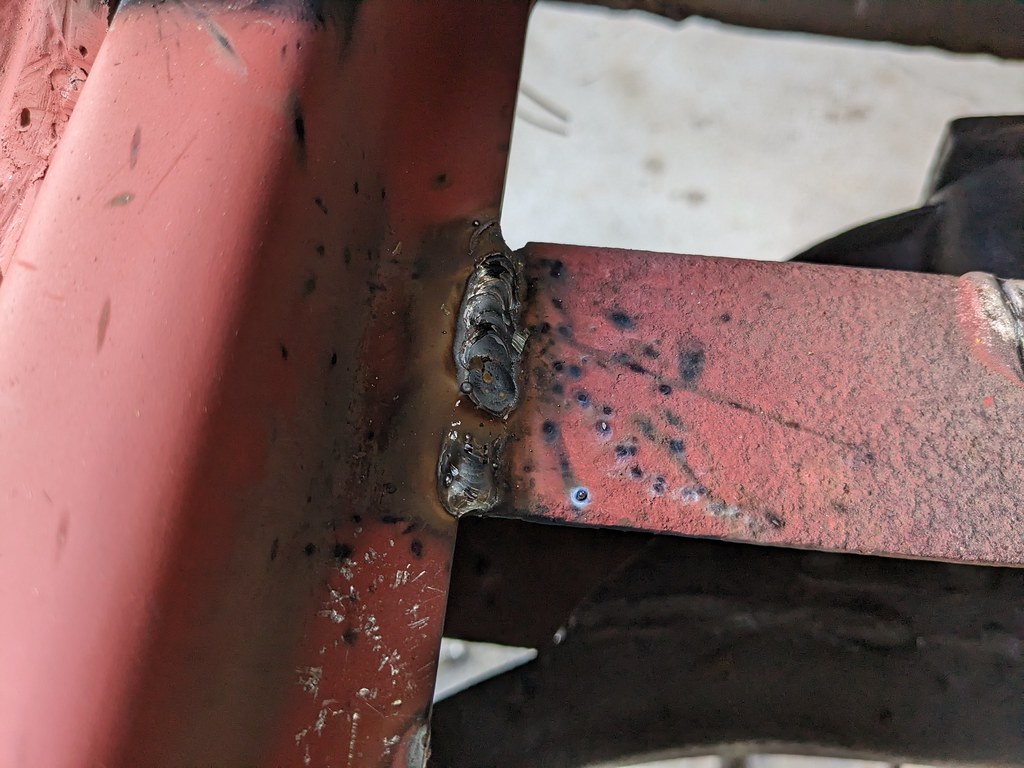
My new Everlast welder does a good job. I still need to dial in the settings, but that had solid penetration on both panels.
I'm very happy to get rid of that wooden support and have the body being supported by the mounts again. I measured many times during the process as well as taped around the board top and bottom to ensure that it hadn't moved. Next up, parts updates!
1955 Nomad project LC9, 4L80e, C5 brakes, Vision wheels
1968 Camaro 6.2 w/ LSA, TR6060-Magnum hybrid and etc SOLD
1976 T/A LS1 6 Speed, and etc. SOLD
Follow me on Instagram: ryeguy2006a
-
03-13-2023 #50
Registered User
- Join Date
- Sep 2009
- Posts
- 2,707
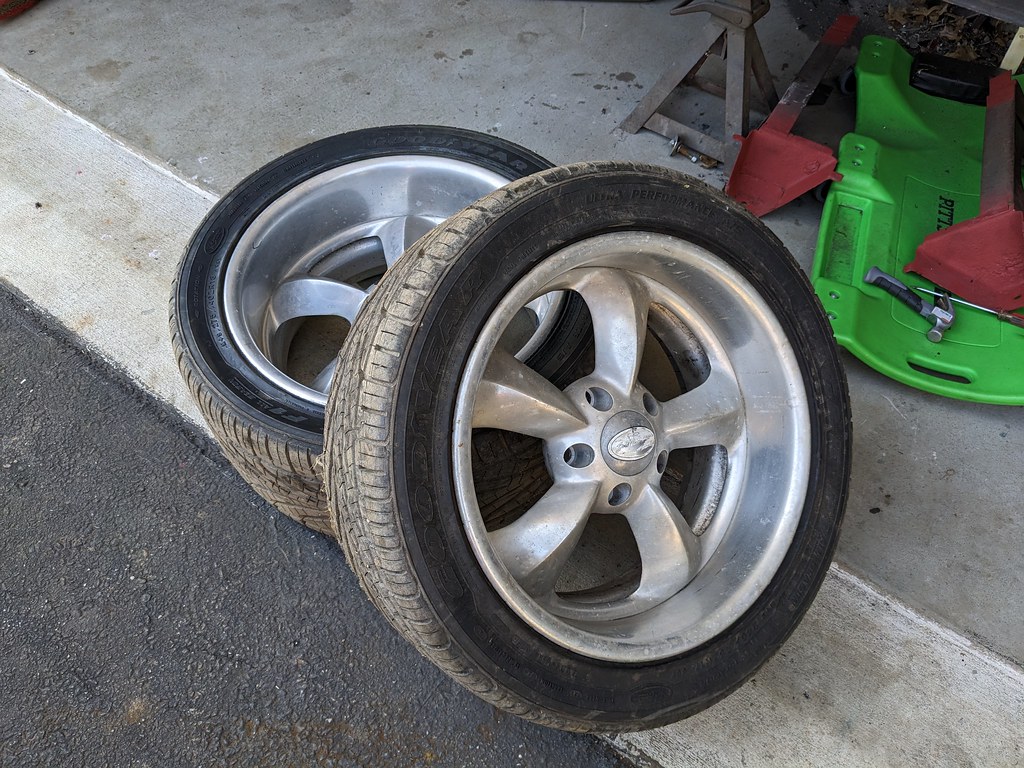
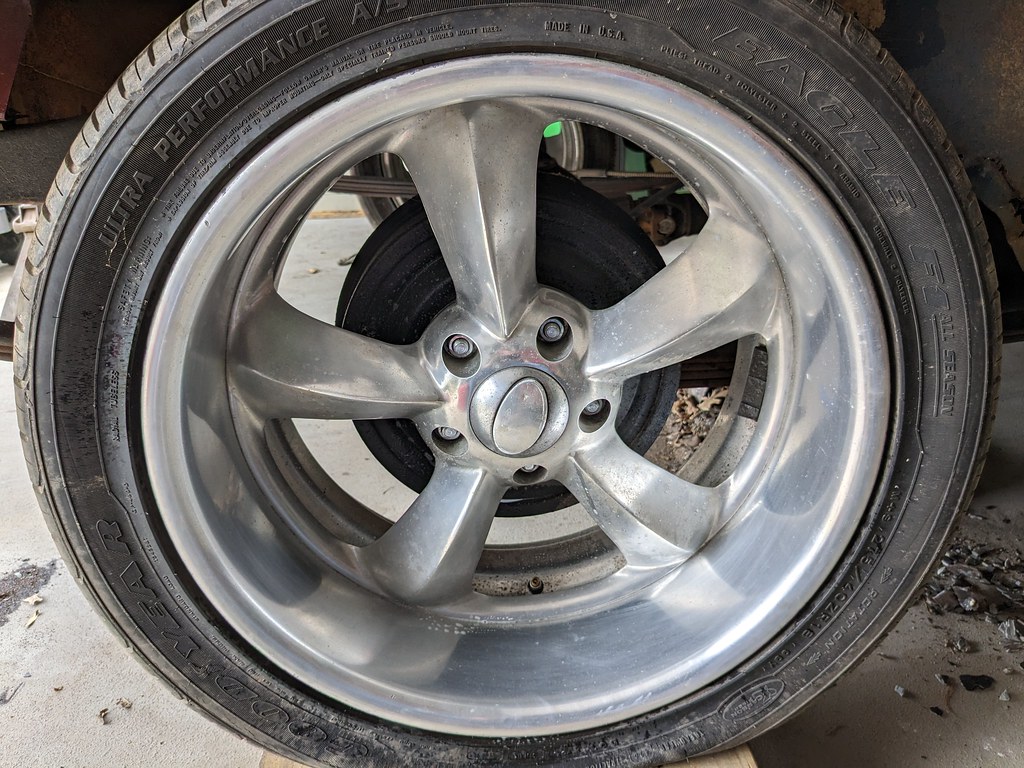
I'm always on the look for parts and came to realize that the M-Parallel wheels that I bought just don't go with the style on this car. So I posted them online and was able to sell them and then picked up a set of Boyd Coddington wheels that need some polishing. They are double staggered 17x8 fronts and 18x9 rears. Really happy with this style. They need new tires that are a much larger diameter, but otherwise love the style. I'm going to try to get away with using the tires that are on it at least for a little bit. Probably not though since I change my mind frequently haha.
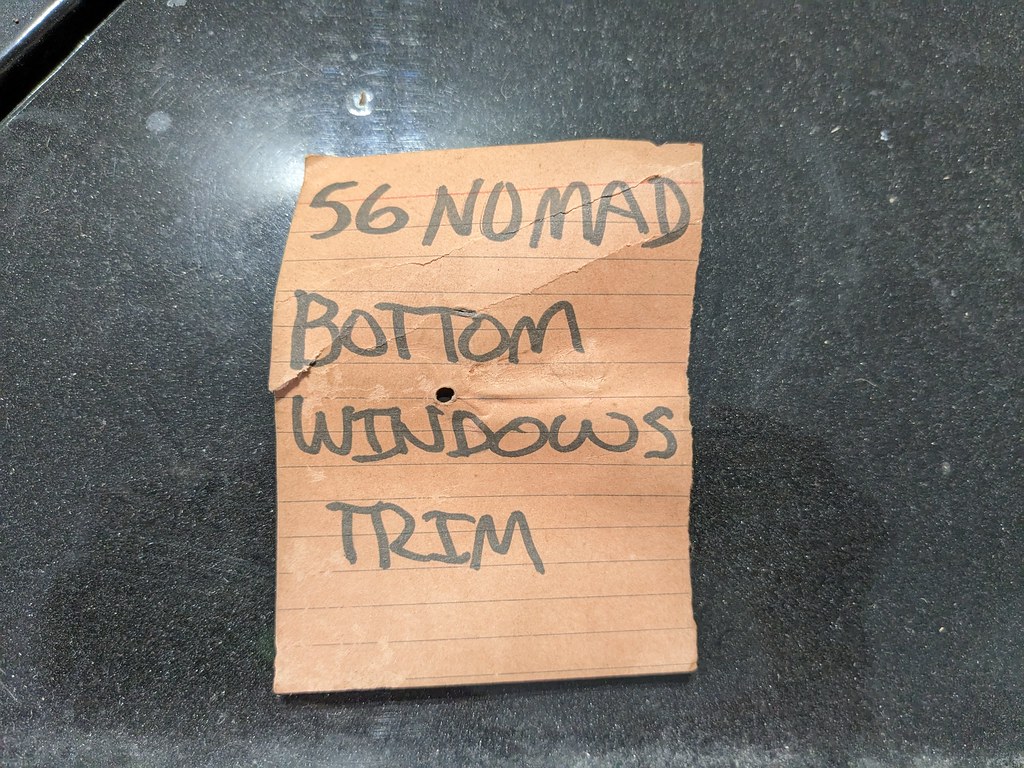
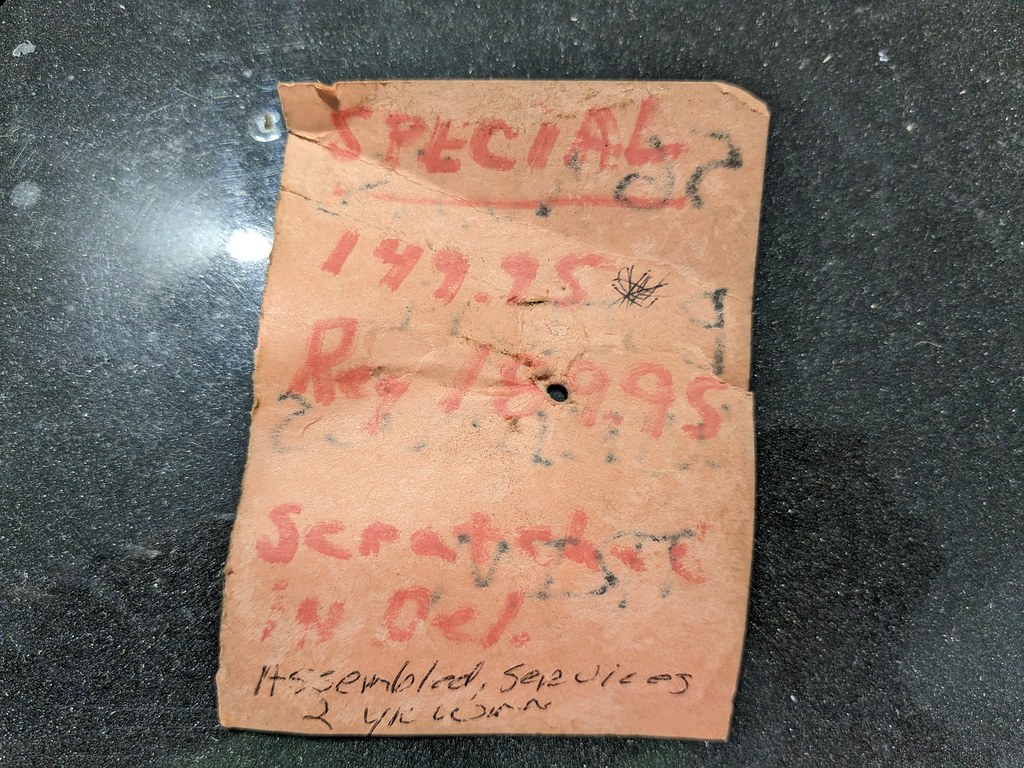
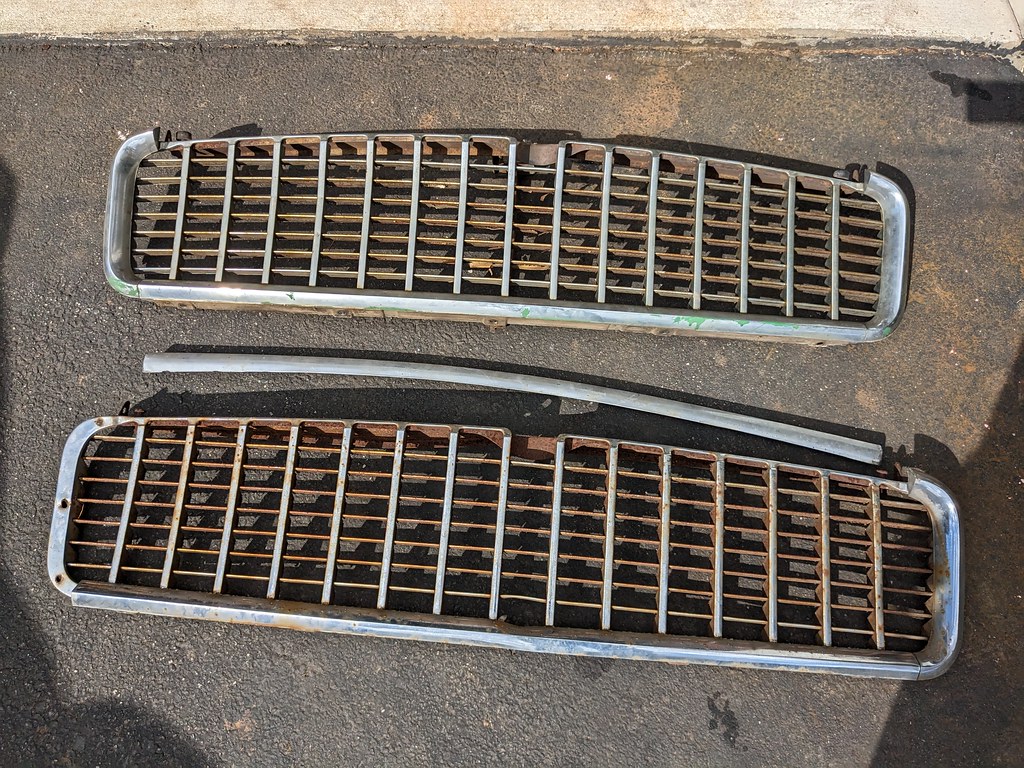
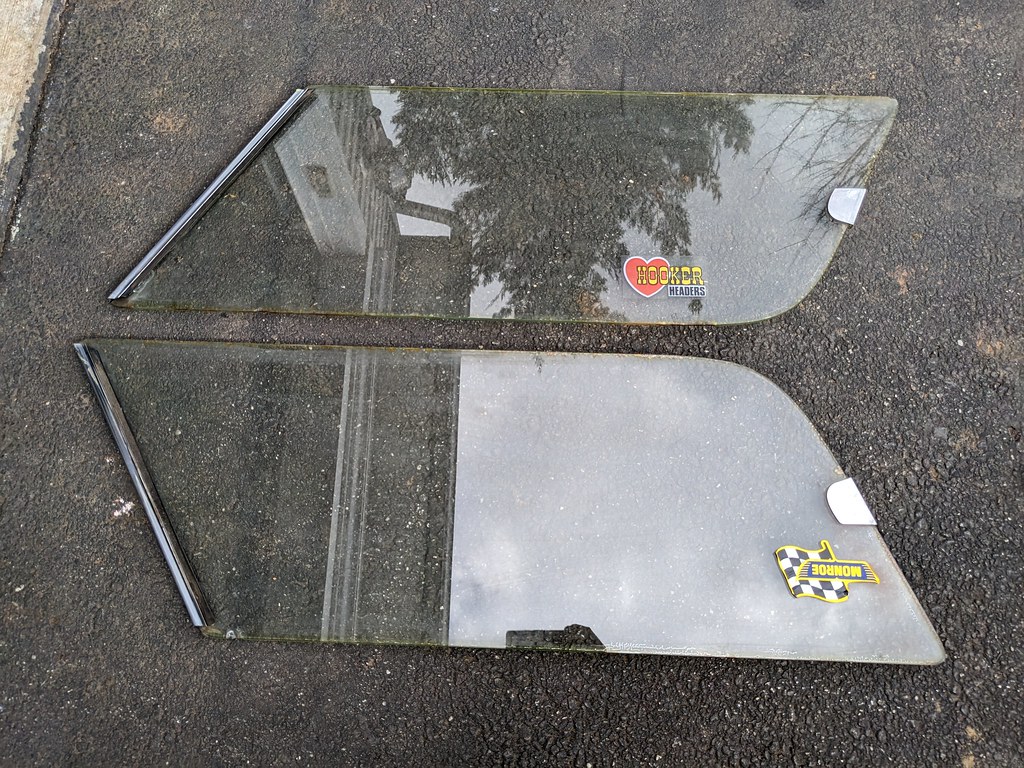
Next up was probably the best deal that I'll get on this car. I saw an ad for a pair of front grills that weren't in great shape, but came with the trim that goes around the opening which I didn't have. I chatted with the guy a bit and he said that he had some Nomad parts in his attic. So I went that next morning to see what he had. When I got there he had some side and rear windows that were in good shape that also had some trim I didn't know I was missing and the side window latches. Perfect! I also mentioned to him that I was missing the interior window garnish moldings and he said that he thought he had them, but wasn't sure where they were. So after building a little rapport with the guy, I joked that I would be willing to go up and look if he didn't mind even though he didn't know me from Adam. To my surprise he said yes, so up I went. It was actually very well lit, and after about 5 mins I saw them. I was stoked, but then my heart sank because I didn't know what he was going to ask for them so I asked him. He said he wasn't sure, so I said, How's $100 bucks and to my great surprise he said yes! If you don't know, take a minute and search Nomad Garnish Mouldings on eBay. I almost felt guilty buying them for that price, but so happy to have them. Sometimes you just have to ask!
Here they are!

Got home and saw this tucked in-between the bundle of moldings. Wonder what shop these came from?
Here's the other parts I got too. I couldn't stop smiling the whole way home.
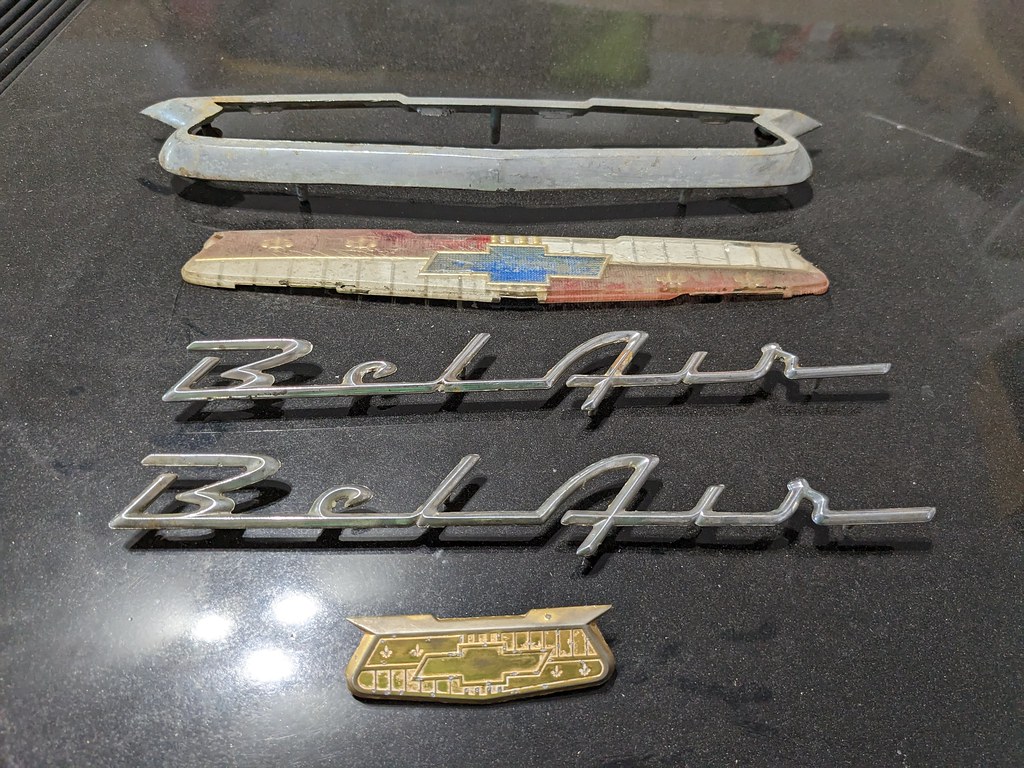
Then before I left we were talking and he said that he had a bunch of emblems he wasn't going to ever use and that I could have them if I wanted. Yes Sir!
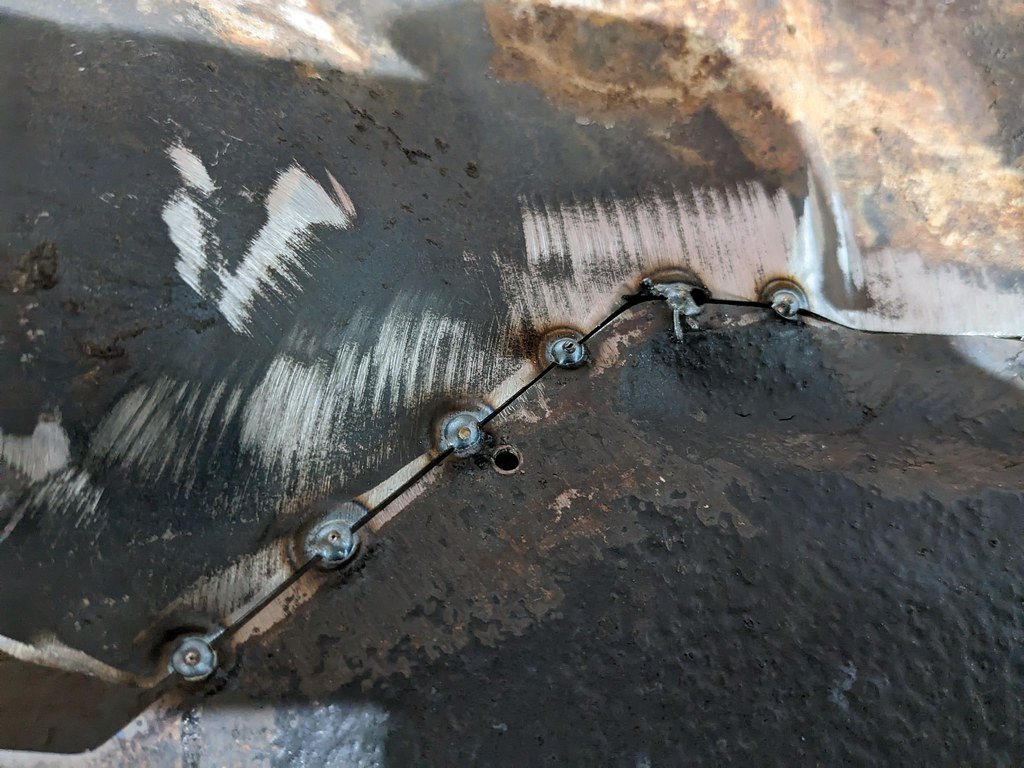
Now that the rear support panel is final welded in, I was looking at what my next steps were. I needed to weld the middle support back in and squared up with body. After looking at that panel a bit, it was too rusty for re-installation. The good news is that the 9 passenger cargo/floor panel that I cut out had one that was in fantastic shape. So, broke out the spot weld driller again. It took me about an hour to get it all broken loose, plus I like re-using original metal vs. buying a new one.
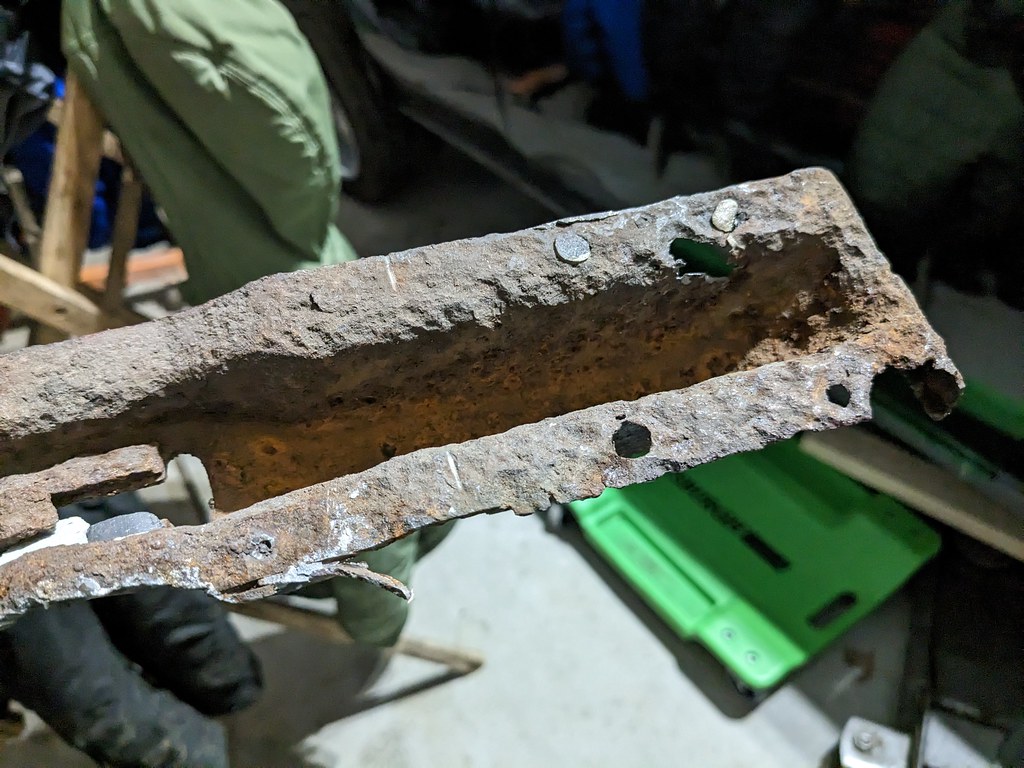
This panel is in really good shape, just needs to be cleaned up before I weld it in the car. It's hard to believe this car sat in a field for 40 years!
That brings the build up to date. Hoping to get the inner panels cleaned up so that the inner wheel wells can be re-installed very soon. I can't wait to test fit the rear seat!
Cheers,
Ryan
1955 Nomad project LC9, 4L80e, C5 brakes, Vision wheels
1968 Camaro 6.2 w/ LSA, TR6060-Magnum hybrid and etc SOLD
1976 T/A LS1 6 Speed, and etc. SOLD
Follow me on Instagram: ryeguy2006a
-
03-13-2023 #51
 Registered User
- Join Date
- May 2012
- Location
- Kansas City, Missouri
- Posts
- 666
Wow you hit the jackpot at his house. Some hard to find parts and a great deal. It's looking way better. Those windows look really great shape too.
-
03-13-2023 #52
Registered User
- Join Date
- Nov 2000
- Location
- O-town
- Posts
- 4,282
Nice to meet people that will help instead of gouging you, which seems that's what everyone wants to do,
Steve68- 1968 Camaro SS LSX T56, 12bolt 3:90's, 18" Fikse Profil 13s, Deep Fathom Green paint, Spearcos, just bunch of old junk because another member said so, LOL
70 Nova SS street/drag 454, T400, 3:55, ugly!
-
03-20-2023 #53
Registered User
- Join Date
- Sep 2009
- Posts
- 2,707
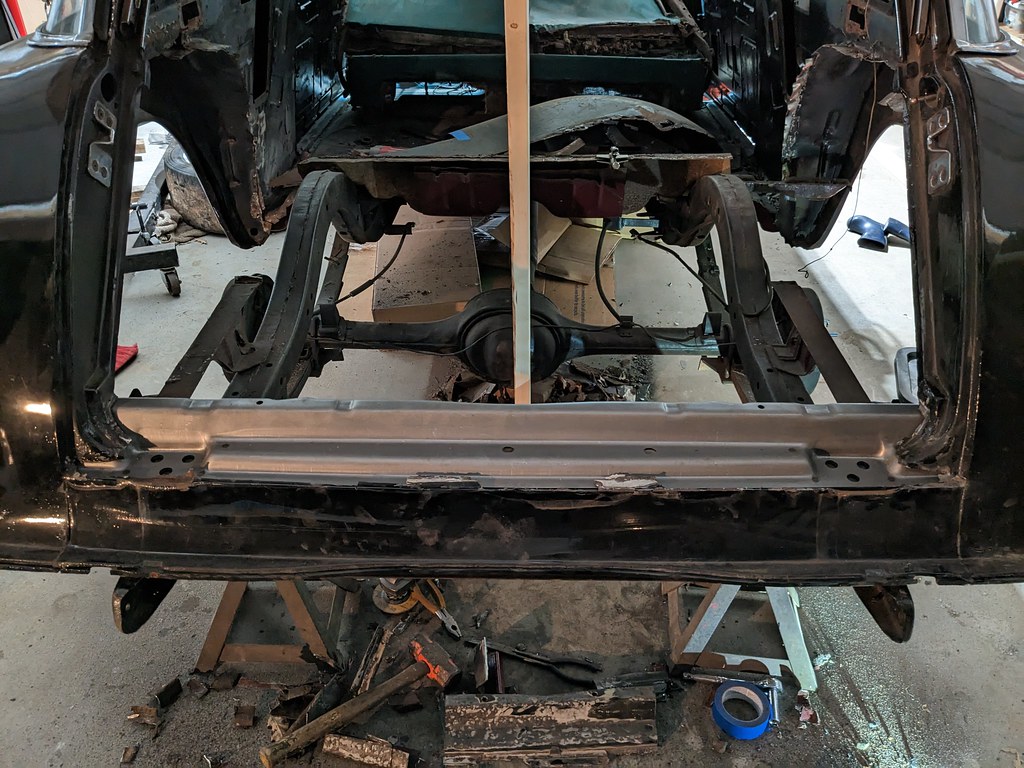
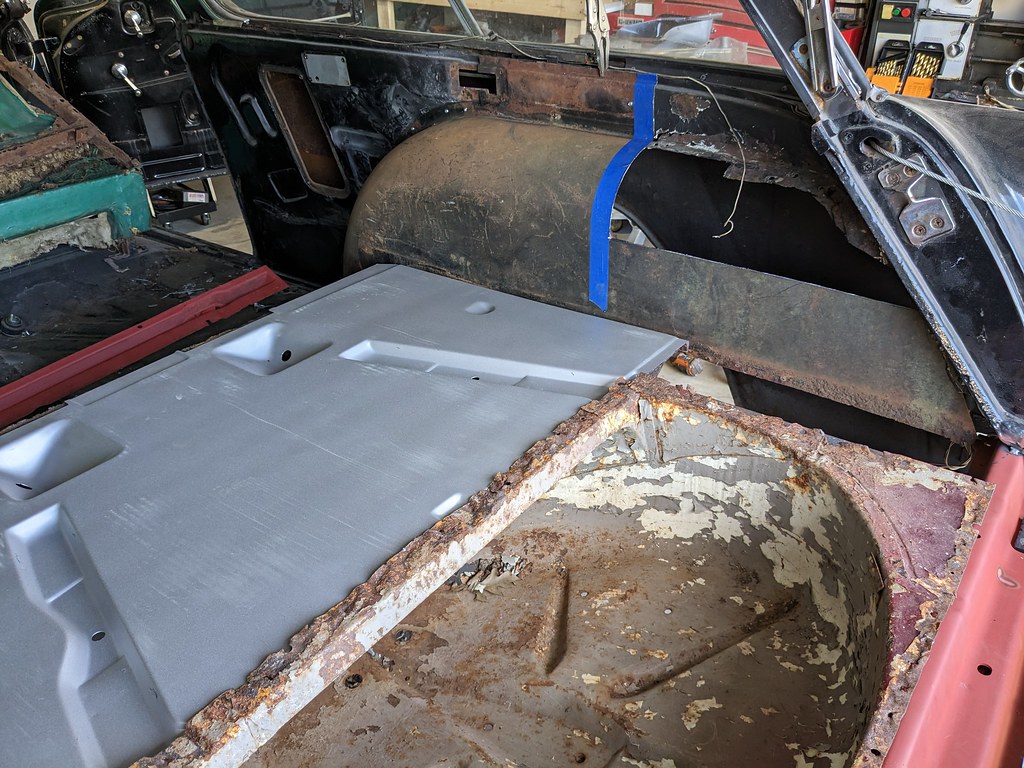
All the work over the last several weeks getting the rear brace cut out and replaced has led up to the fitment stage which I have been looking forward to for so long. I've seen many shops these days use sheet metal screws instead of clecos, so I decided that I'd give them a shot. I started off by getting the driver's side wheel well in place, and the rear floor section. I made sure to offset the rear floor body mounts to the passenger side to copy the rest of the body mounts. With the new body mounts installed, (Thanks Zanie) and shifted all the way over to the passenger side, the wheel well lined up perfectly. So I got out a box of screws and went to town zipping them in every few inches, and it worked so nicely. Pulls the metal up tight to the body and will only leave a small hole when I remove them. I still have a bunch of metal that needs to be trimmed off this panel, but I'm very pleased with how it is fitting. There are also a few spots that are pitted badly that I'll need to cut out, but I'll do that after the majority of the panel is welded in.
Next, I was able to get out the new cargo panel and do a real test fit. I was super excited because it dropped right in place which tells me that I'm right on the money! Always nice when a plan comes together. I found out that again, the 9 passenger wagon cargo panel is just a little bit different. It didn't have two little dips in the brace for the gas tank, so it's not going to work without some modifications, so I'll leave that for another day. Threw in the crusty one just to get everything mocked up.
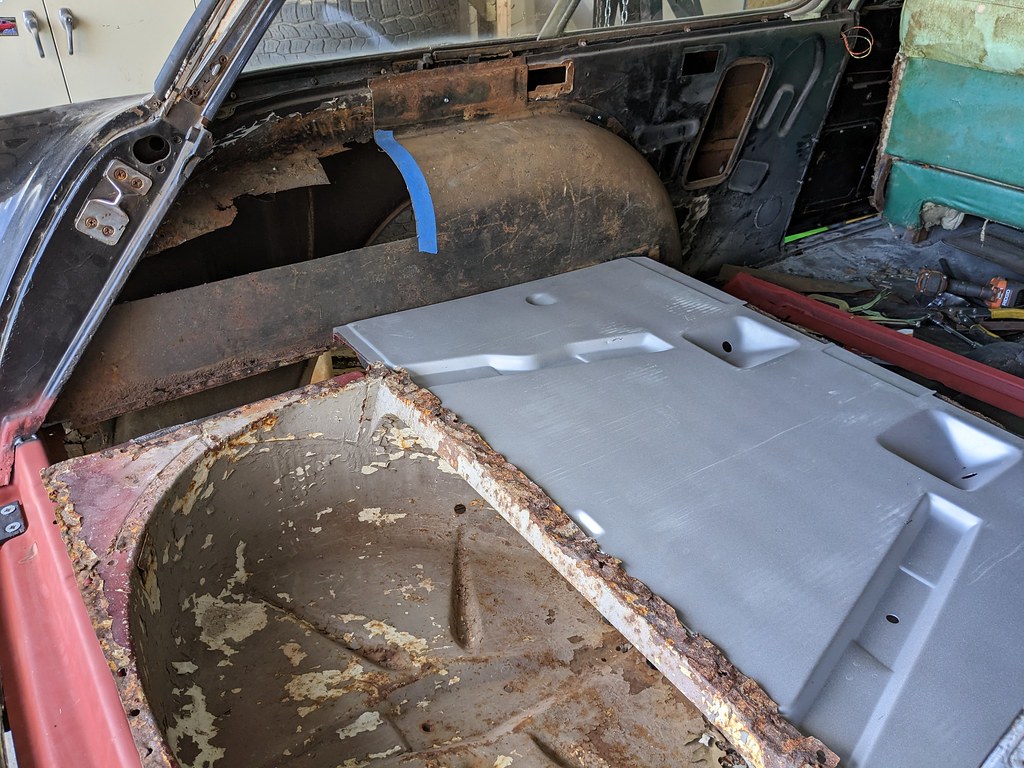
Next I pulled out the passenger side wheel well, and got it trimmed up for installation. I copied what I did on the driver's side to make things easy. Once that rear upper section was cut out, I had to trim the back slightly and it went right in. Held it in place with sheet metal screws and it really almost fell into place. Very happy with how everything is fitting up. Not sure if it's because they are original parts, or what but I'm not complaining. All the work to get them cut out and trimmed up has really paid off.
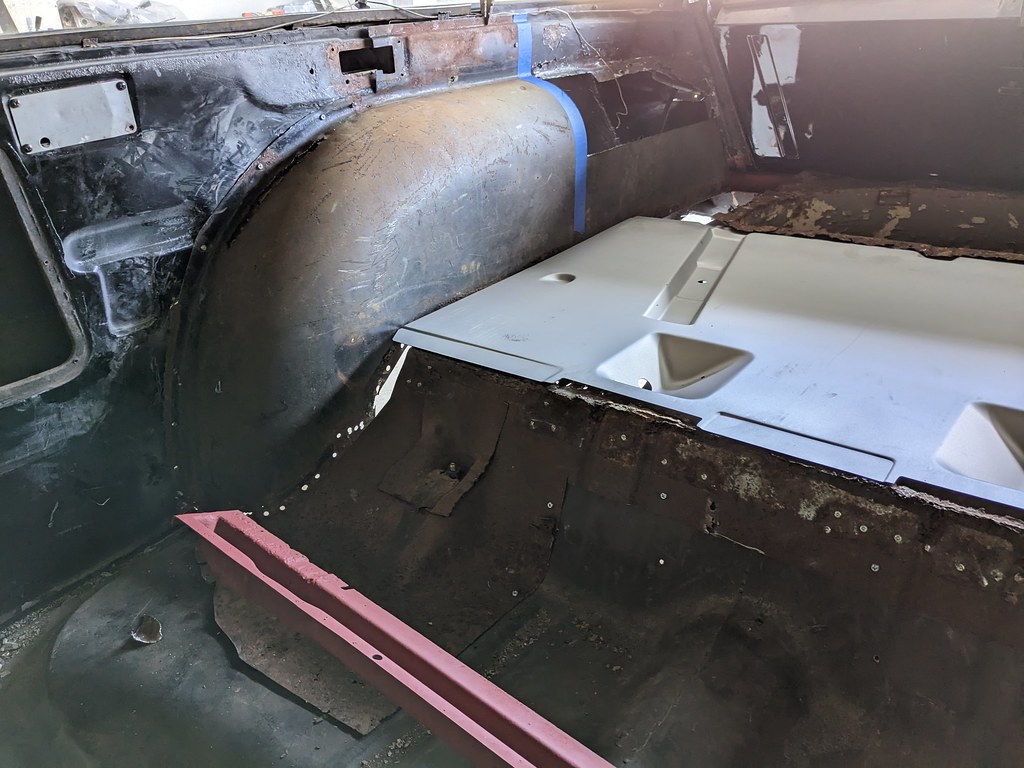
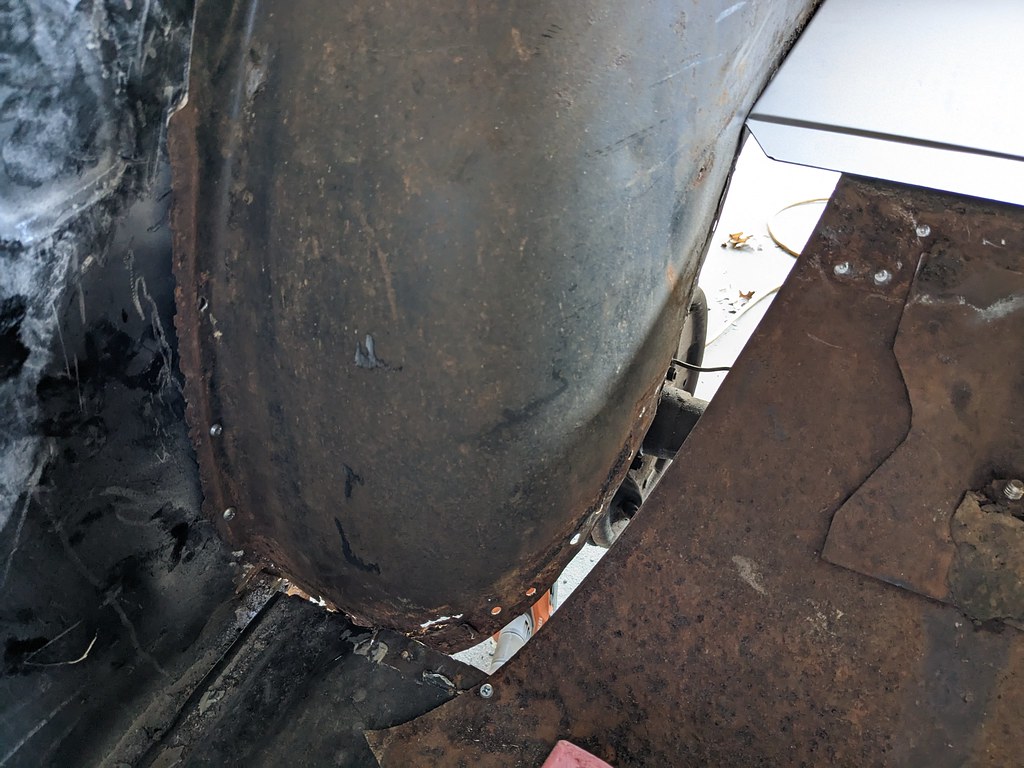
The daylight showing from the underside is quickly shrinking! The passenger side wheel well piece will need to be fabricated as it was cut out before I got the panel. I bought a shrinker/stretcher kit from harbor freight so I should be able to knock those out pretty quickly. What's most important to me is how nicely the wheel wells are fitting up to the outer wheel wells, inner structures, cargo area and rear floor pans. Now that it's all fit up I can leave the panels in place and build all my patch panels now that I know it all fits so nicely.
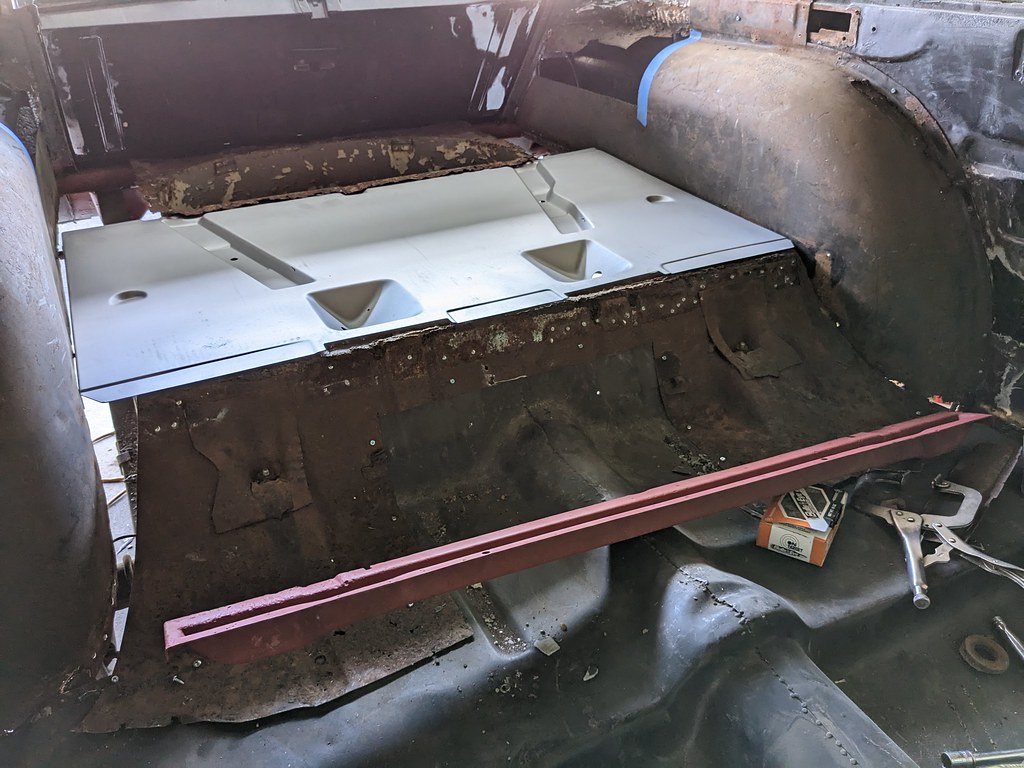
And here's the shot I've been waiting so long to see. It's really coming together nicely, but now that 80/20 rule kicks in. All the little details, patch panels and etc are what is going to take up the majority of the time before I can final weld them in. Hoping that I can put in a few minutes here and there over the next several weeks and get it all welded together.
1955 Nomad project LC9, 4L80e, C5 brakes, Vision wheels
1968 Camaro 6.2 w/ LSA, TR6060-Magnum hybrid and etc SOLD
1976 T/A LS1 6 Speed, and etc. SOLD
Follow me on Instagram: ryeguy2006a
-
03-20-2023 #54
Registered User
- Join Date
- Jul 2015
- Location
- KY
- Posts
- 116
Making good progress. Theres no way I could get all that fab work done. Let alone quickly. How it keeps going well.
-
03-21-2023 #55
Registered User
- Join Date
- Jan 2020
- Posts
- 137
Wow what a project! Was wondering when you might get another project car. Im sure this build thread will be just as epic as your old one!
-
04-03-2023 #56
Registered User
- Join Date
- Sep 2009
- Posts
- 2,707
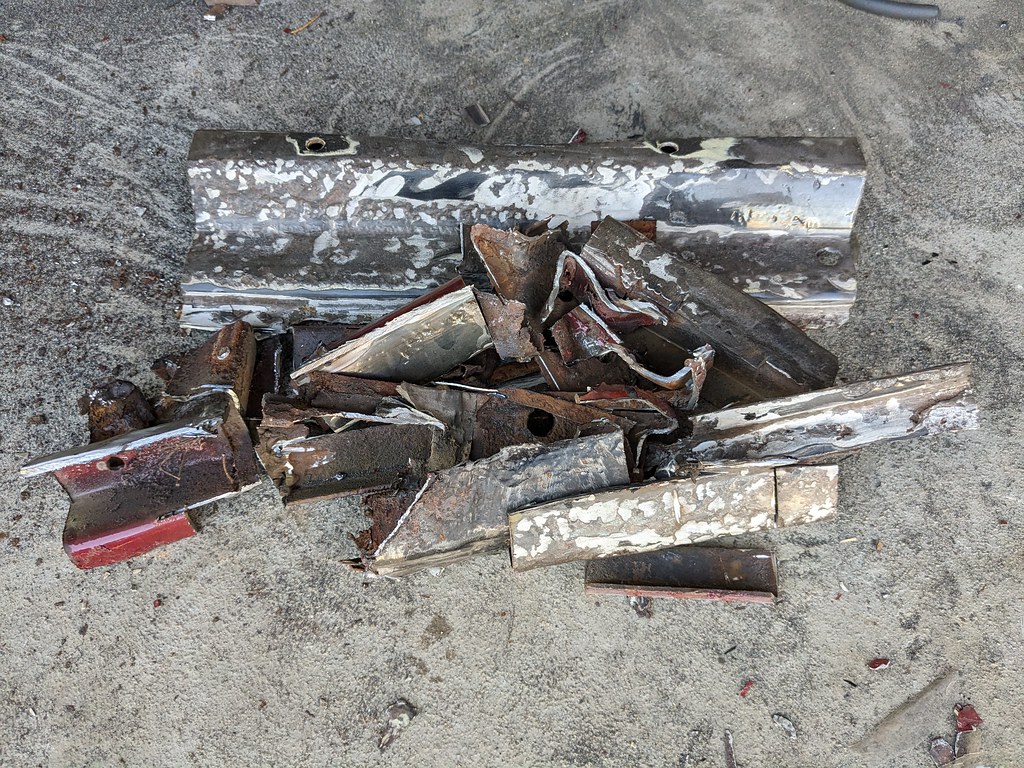
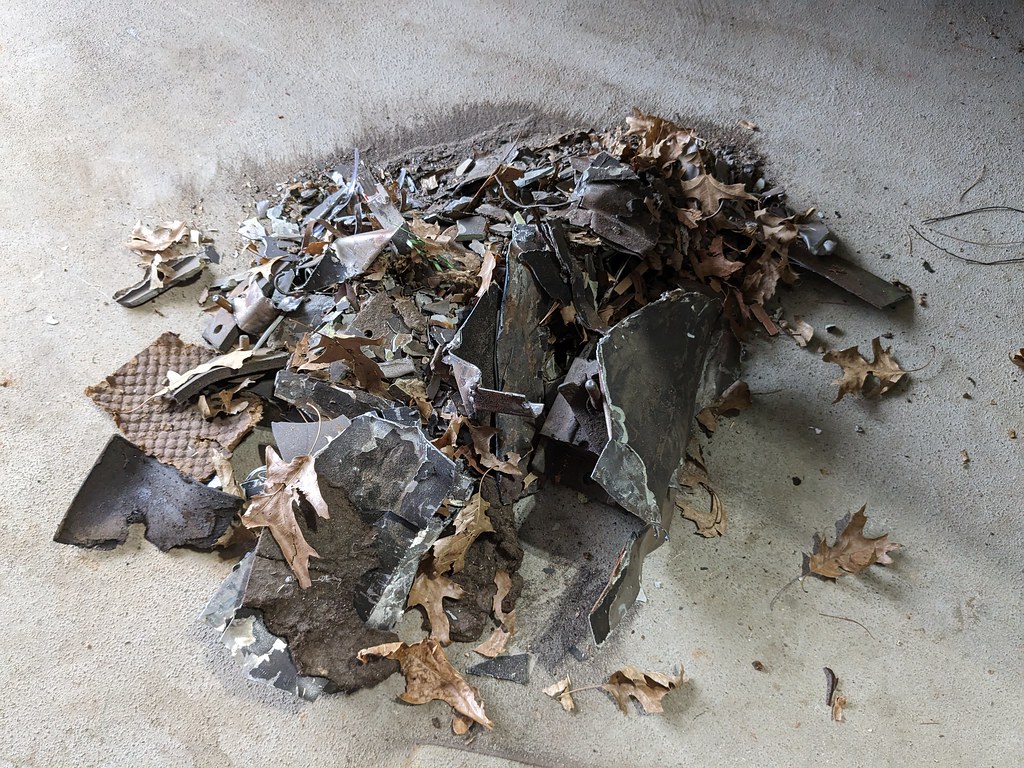
I wasn't able to get anything done last weekend as my parents came down to visit from NY. I was able to get a little done through the week last week and this past weekend. The biggest thing was getting the car cleaned up and cleaned out in the interior to start work on welding in the panels. I had been sweeping all the dust, rust and little pieces of metal and body filler into a pile under the car. I was pretty shocked when I saw how large that pile was. About 3' in diameter!
I got the car centered up and up on my tried and true wheel stands. I built these over 10 years ago when I was building my first car and have kept them around as they come in handy.
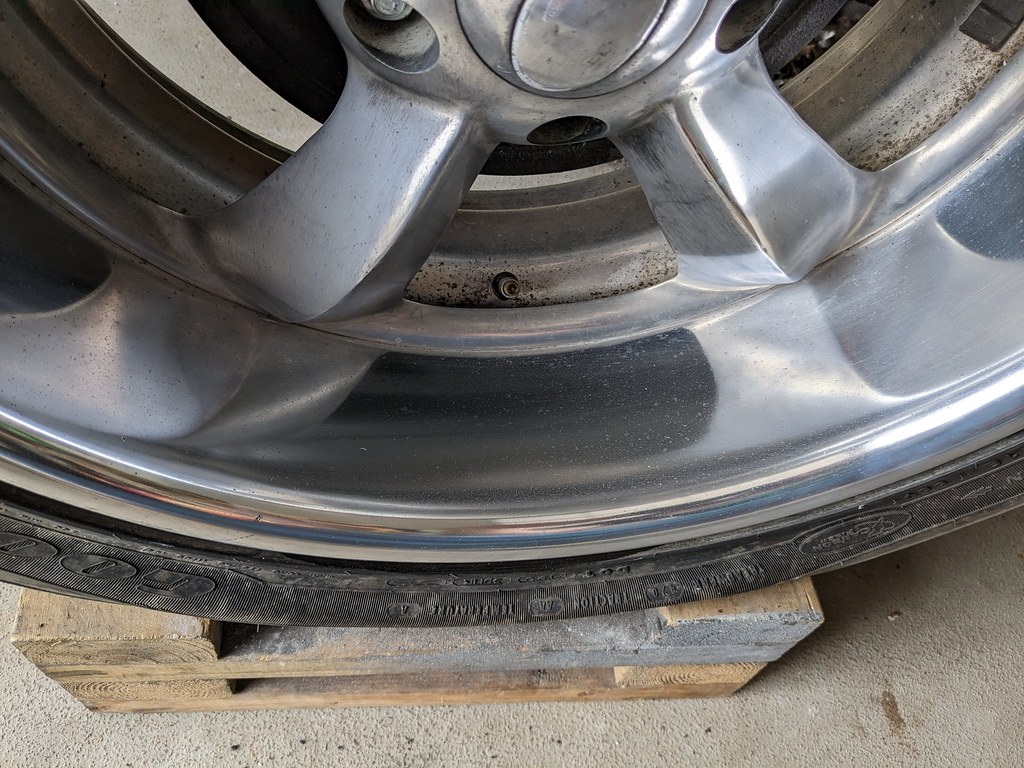
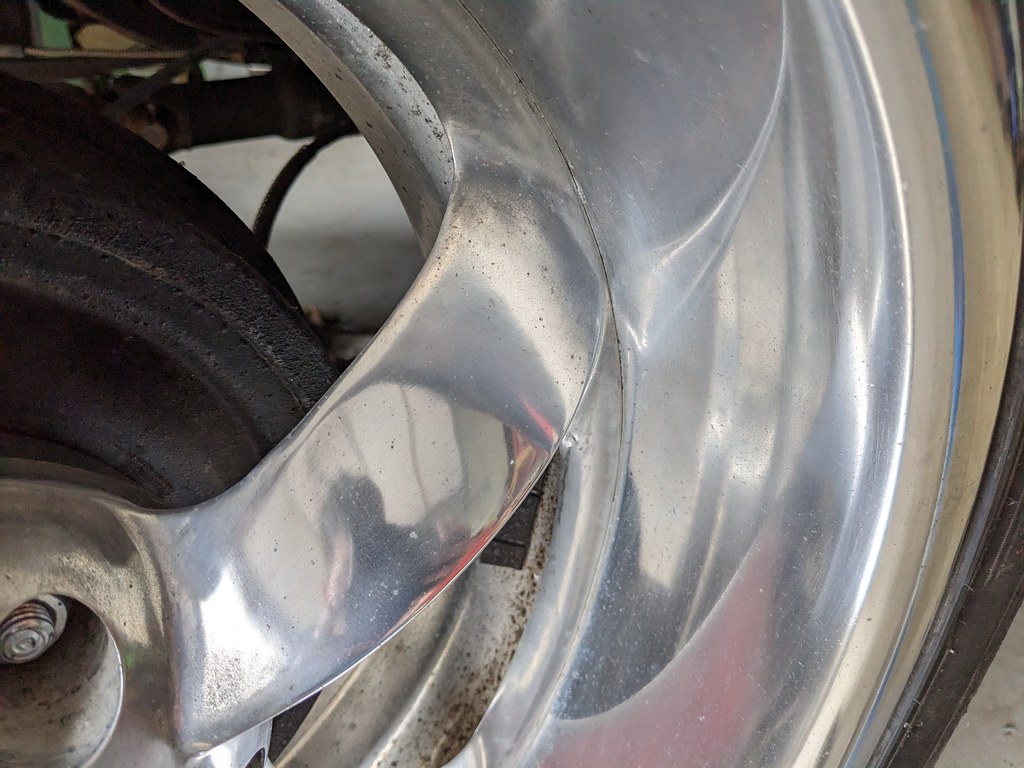
After I bought the Boyd Coddington wheels, I had been going back and forth with them because they were going to need a lot of elbow grease to bring the shine back, needs 4 new tires and the fronts may or may not be able to fit the C5 front brakes. But I bought one of those powerball polishers and wanted to give it a go. It turned out decent for just a little polishing with a red scuff pad and about 10 minutes with a powerball. There were some stubborn "dots" that weren't coming out so I'm not sure exactly what do with that situation.
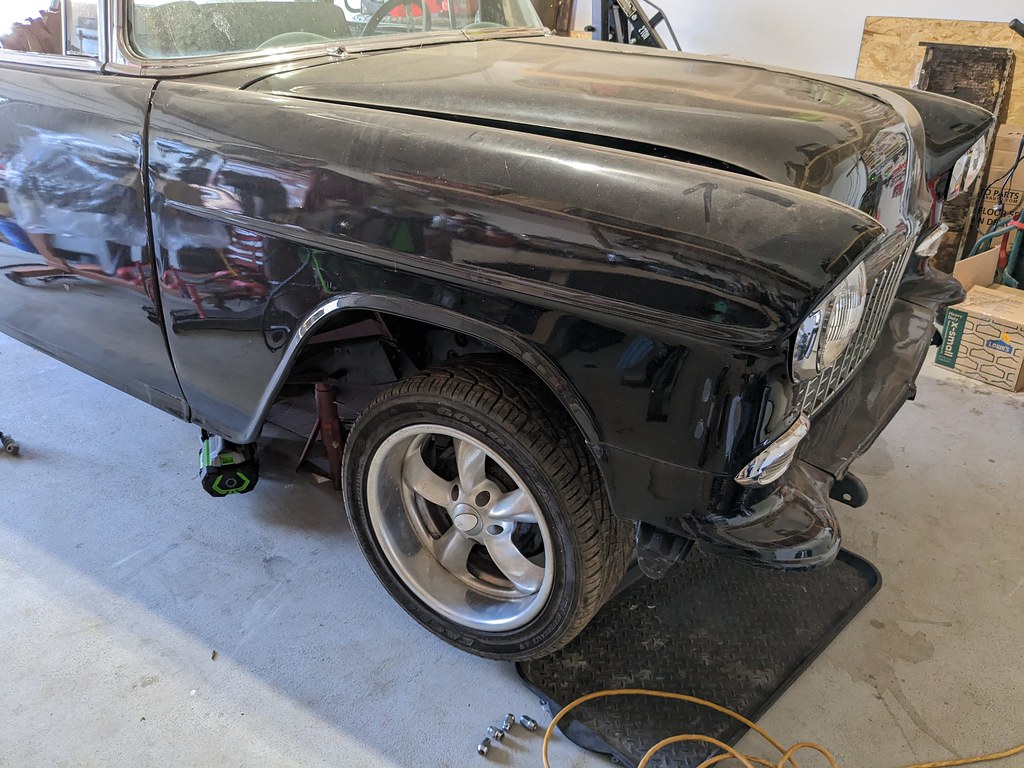
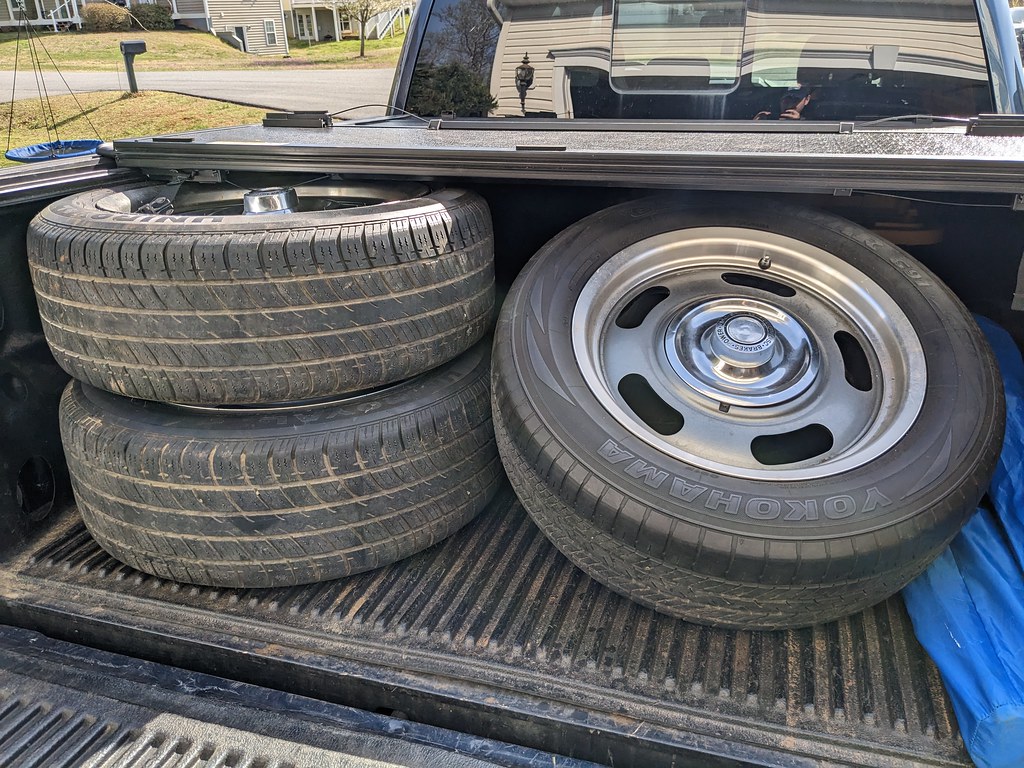
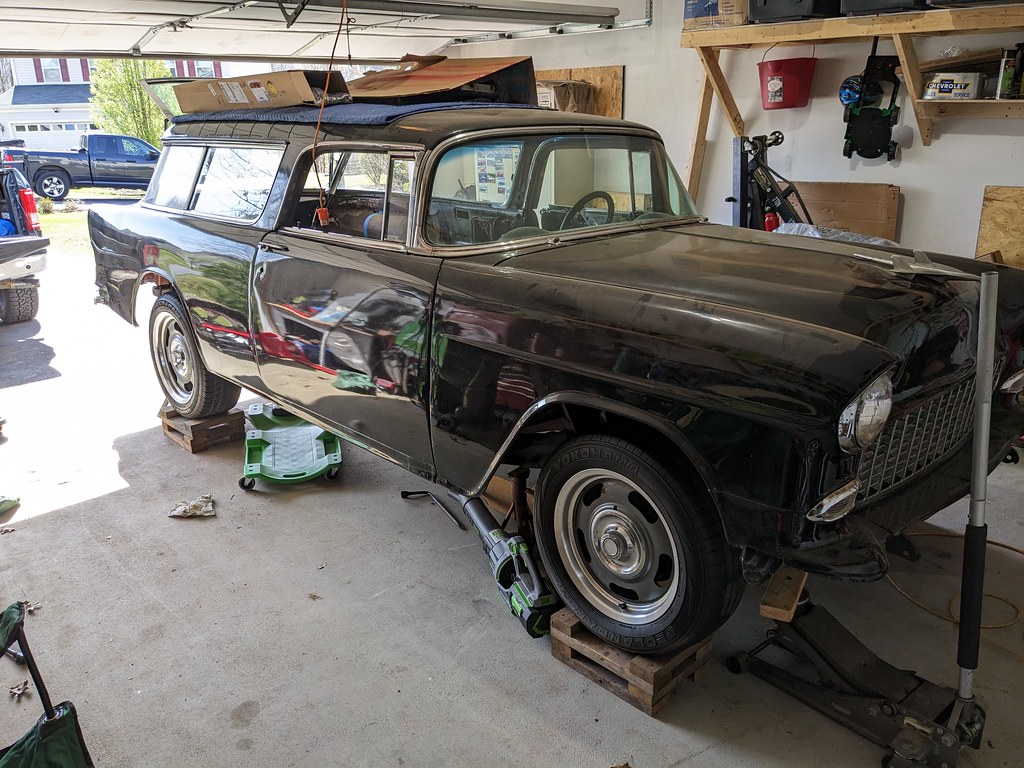
Well this morning on my way to drop off my son to a spring break camp, I saw a set of what looked like enlarged rally wheels on the side of the road. I turned around and they were Vision 55 wheels in 17x8" and 18x8.5" with good tires. I called the guy and couldn't believe when he said $400 for the set. I couldn't get to the ATM and back quick enough. When I got home I confirmed that not only will the C6 base brakes fit, but the Z51 brakes should also work with a small spacer or grinding on the caliper. I really love the way that they look and are very period correct. They were off of a truck, so they have 27" tires which work perfectly in my wheel wells. Couldn't be happier as these were a set of wheels that I had originally considered if I couldn't find any used.
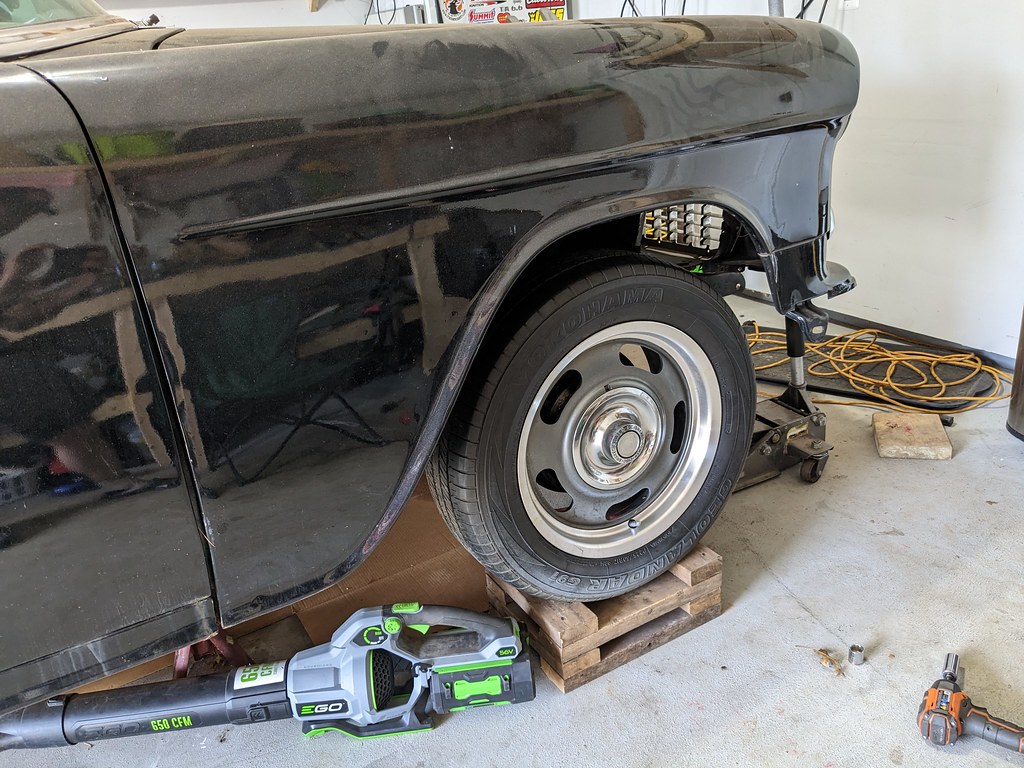
Love the way they fill out the wheel wells, just needs to be lowered slightly in the front and rear.
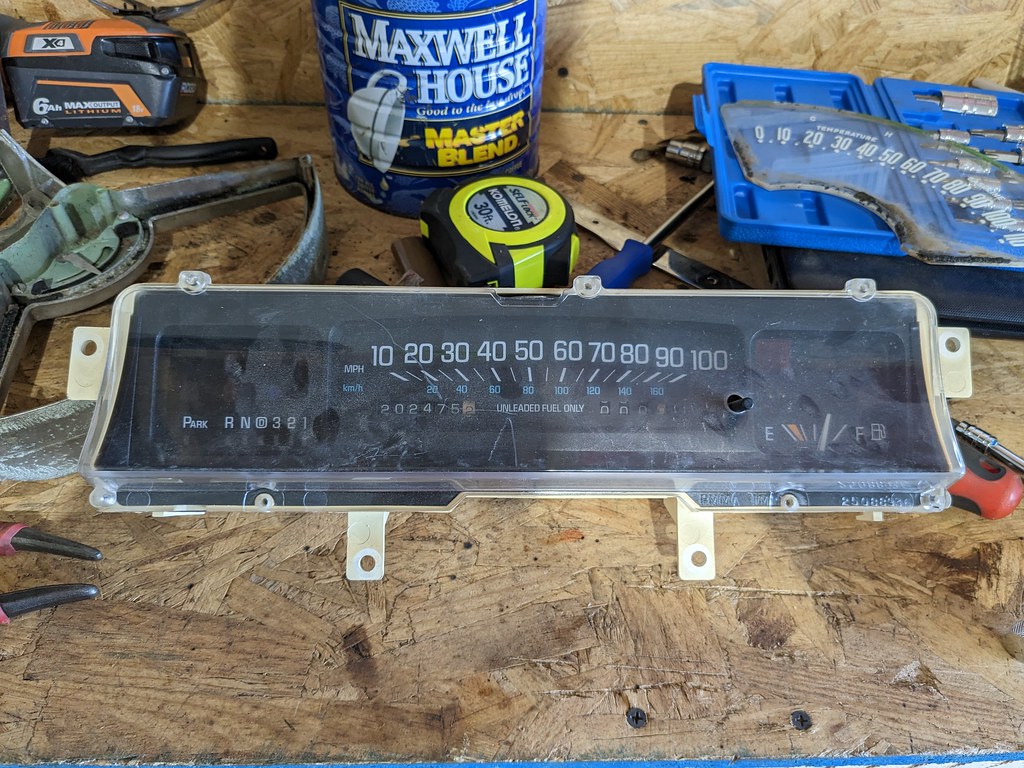
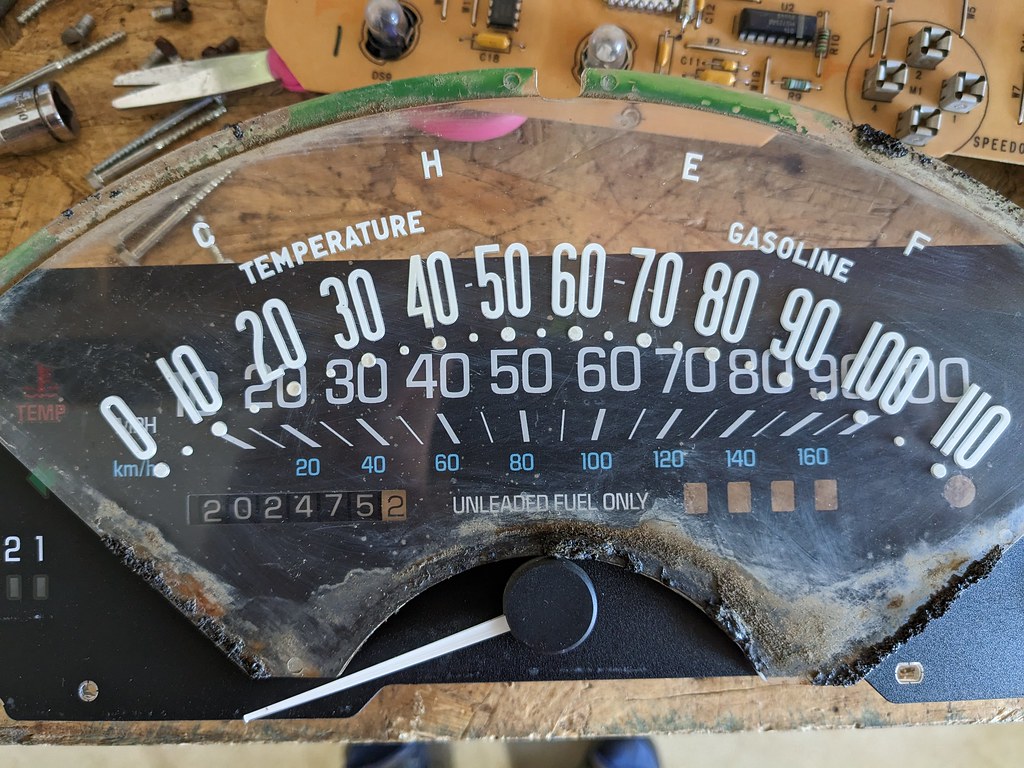
I have also been considering my options for gauges, and I'm going to attempt to retrofit this 99 Buick LeSabre speedometer into my stock dash cluster. The sweep is very close the 55-56, and it should have the same 4k PPM signal that I'd need from the transmission. I tore it apart and am trying to figure out how to get it all to work together.
Once my younger son woke up from nap, I was able to get the jig saw and grinder out so that I can start butt welding the rear floor pan section to the existing floor pan. It took a while to get the rhythm, but once I did, it started going pretty quickly. Had to stop for for Sunday dinner, but I'll hopefully get to plug away at it a few minutes here and there throughout the week. There are a few spots that have deeper pits, so the plan is to get the panel tacked in along the entire perimeter, then go back and cut out the bad spots and replace with good solid metal. That hopefully reduces the amount that the panel is distorted.
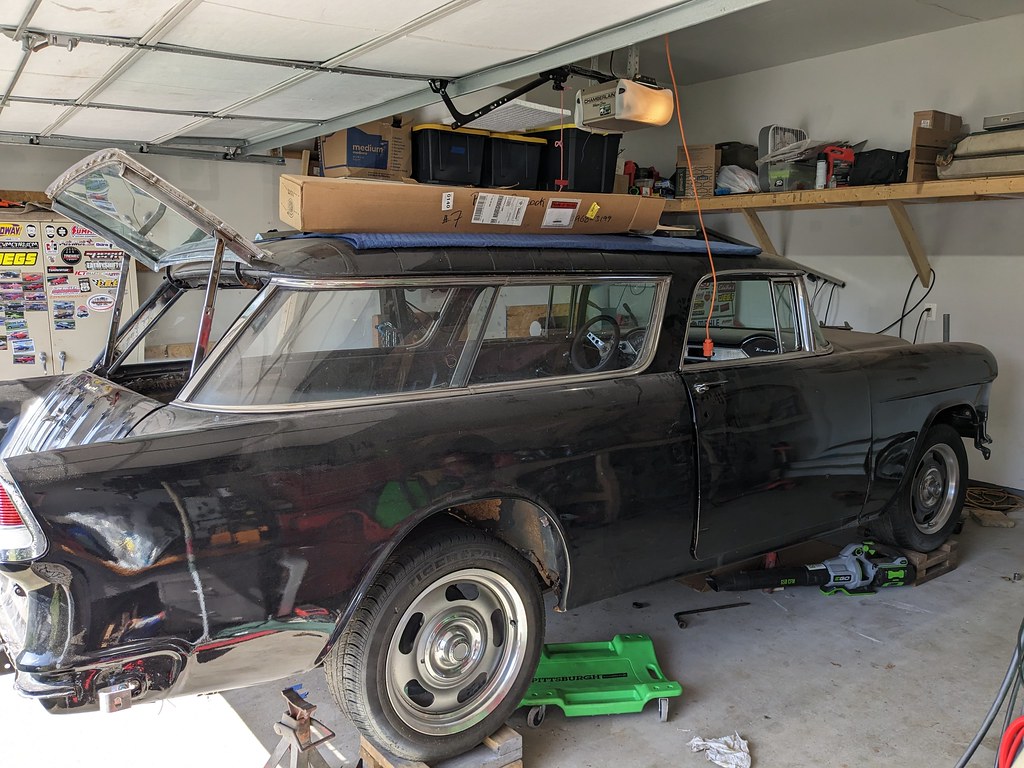
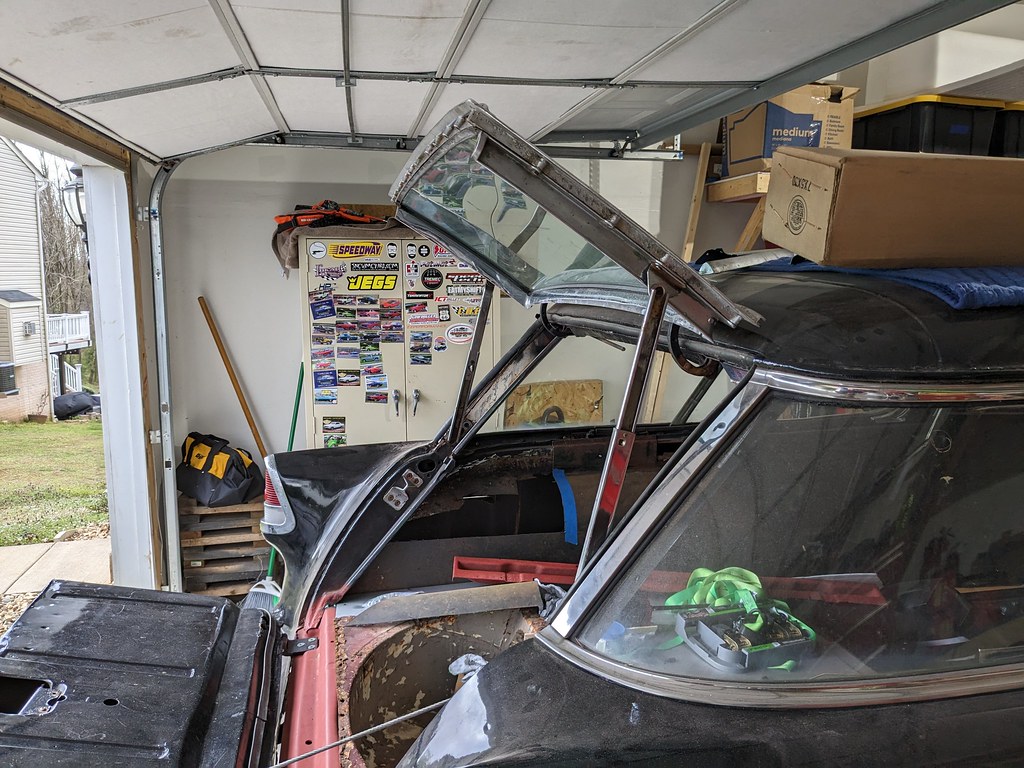
Another thing that is very common with Nomad's is that the rear lift gate can become distorted and twisted over time due to the torsion rods that help assist with lifting it. Mine is twisted, but not nearly as bad as some that I've seen online. So the best thing that can be done at this point is to remove the rods. I talked with the owner of Mad Mooks who is one of the few go to guys for repairing the liftgates, and he suggested just cutting out the rods. They are such problem that they aren't really worth anything, so that's what I did. I noticed that for some reason I wasn't able to lift the gate up past about level with the roof, but it should lift much higher. Well it was the rods that were holding it back.
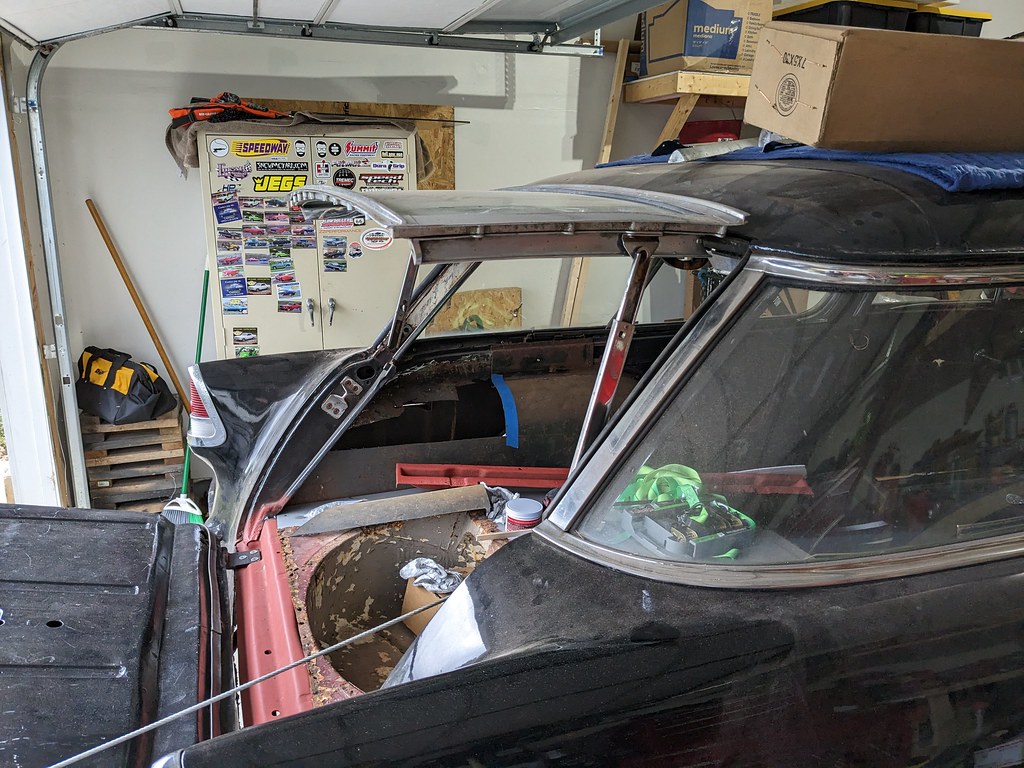
Now it lifts all the way up! They make gas struts, but the liftgate really isn't that heavy so I'm not going to worry about it.
Cheers,
Ryan
1955 Nomad project LC9, 4L80e, C5 brakes, Vision wheels
1968 Camaro 6.2 w/ LSA, TR6060-Magnum hybrid and etc SOLD
1976 T/A LS1 6 Speed, and etc. SOLD
Follow me on Instagram: ryeguy2006a
04-03-2023 #57
Registered User
- Join Date
- May 2012
- Location
- Kansas City, Missouri
- Posts
- 666
Great find on the wheels. Those look so much better than the Boyd wheels. Always loved the rally wheels
04-03-2023 #58 Registered User
- Join Date
- Nov 2009
- Location
- the dirty mitten
- Posts
- 1,212
Congrats on scoring those wheels! Funny how things can pop up in your back yard like that. Ive heard before how any project you could want is likely within a short drive from you, just things are not always for sale when you are in the market. Also I bet you feel good getting that whole mess out of the car!
Steve
1968 Dodge Charger All Wheel Drive project Red Bull<script type="text/javascript" src="safari-extension://com.ebay.safari.myebaymanager-QYHMMGCMJR/5cce6da5/background/helpers/prefilterHelper.js"></script><script type="text/javascript" src="safari-extension://com.ebay.safari.myebaymanager-QYHMMGCMJR/85dc54c0/background/helpers/prefilterHelper.js"></script><script type="text/javascript" src="safari-extension://com.ebay.safari.myebaymanager-QYHMMGCMJR/85dc54c0/background/helpers/prefilterHelper.js"></script>
04-03-2023 #59
Registered User
- Join Date
- Jul 2017
- Location
- Island Lake, IL
- Posts
- 131
Keep the motivation man. Good job!
04-04-2023 #60
Registered User
- Join Date
- Sep 2009
- Posts
- 2,707
I'm so happy that I scored those wheels yesterday. I've been worrying about what wheels to run and it's a huge relieve that they checked all my boxes. Good tires, will fit C6 brakes, and look great on the car. I also saw that Vision wheels have other hub caps, so I may look into the smooth ones.
1955 Nomad project LC9, 4L80e, C5 brakes, Vision wheels
1968 Camaro 6.2 w/ LSA, TR6060-Magnum hybrid and etc SOLD
1976 T/A LS1 6 Speed, and etc. SOLD
Follow me on Instagram: ryeguy2006a

 Reply With Quote


