

Results 61 to 80 of 88
Thread: 1951 f16
-
02-16-2022 #61
 Registered User
- Join Date
- Sep 2013
- Location
- sw Kansas
- Posts
- 1,644

O&S was tying up loose ends in preparation for the next cold snap. I made some brackets for adjuster / stops at the end of the bed. This cover doesn't encapsulate the tail gate so there wasn't anything to level it out. I'd like to tell you that I made it and the pressure in the gas springs perfectly level but that isn't true.
 When putting the bed cover frame back on, I had no. 8 screws attaching the hinge to the front bed panel. I drilled and tapped them to 1/4". I believe that I'm ready to move to gluing the foam and Haartz material to the plywood for the cover. I have a friend who is an interior guru who told me what to do, not how to do it.
-
02-19-2022 #62
Registered User
- Join Date
- Sep 2013
- Location
- sw Kansas
- Posts
- 1,644
O&S had a plan today. 1st thing this morning I was moving vehicles around and had the heater started in the shop. My wife commented that I was moving with resolve.
I removed the bed cover frame and sat it on saw horses. I clamped the plywood to the frame and drilled the holes for the elevator bolts. I bolted the plywood to the frame and seated the elevator bolts. I removed the plywood and placed it on the saw horses. I laid out the landau foam and glued it down. I used a 9" paint roller to apply the glue. I laid out the top cloth and made sure there were no wrinkles in it. Then I glued it down. I left the underneath side edges longer than they need to be. When this gets taken apart for paint, I will probably trim some excess back to around 2" of overlap per side. My left over gas springs aren't strong enough. I will look over the charts and get 2 more on the way. I need some kind of wiper to seal up the edges. Time for more research.
-
02-20-2022 #63
Registered User
- Join Date
- Sep 2013
- Location
- sw Kansas
- Posts
- 1,644
O&S had a plan. It met failure.
I thought I could trim a piece of abs sheet and make most of the headliner in one piece. After a couple of hours of trying, I admitted defeat and cut it in two. The seam is overlapping and glued together. The ends have 2 more parts. One is the tight radius in the corner behind the door heading to the rear window. The other goes straight up from the door frame to the top. I'm not done trimming those parts. I used 2 more of the small led lights for the dome light. I have the area behind and under the seats left to do. I purchased enough black carpet to do all of that. I think I will use the abs to do the radius from the door post to the flat area on the back of the cab. I will have to heat it up and put a radius in the panels. Once I trim the carpet to size, I will need to get the sewing machine out and edge all of it. I am an amateur at this so it takes lots of time and the results aren't great. More learning ahead.
-
02-21-2022 #64

 Registered User
- Join Date
- Jun 2017
- Posts
- 113
The skills

-
02-21-2022 #65
Registered User
- Join Date
- Sep 2013
- Location
- sw Kansas
- Posts
- 1,644
^^^
Thank you for the compliment.
-
02-26-2022 #66
Registered User
- Join Date
- Sep 2013
- Location
- sw Kansas
- Posts
- 1,644
The new gas springs arrived for the bed cover. I am going to have to install a brace on the cover frame. The new springs are the correct capacity but the frame has a slight bow in it when it's closed. I'm out of material so a shopping trip may be necessary. The bed mat arrived. I laid it out both directions to see if I could flatten it. I think it will be 100 degrees in the shade before it flattens out. LOL. I worked on the latch some. I made a spacer for the 2" bolt going through the bear claw end and flipped the handle bracket to correct the geometry some. Today is the 1st day that it has got above freezing in the last week. I plan on making some more progress in the next few days.
-
02-27-2022 #67
Registered User
- Join Date
- Sep 2013
- Location
- sw Kansas
- Posts
- 1,644
O&S plodded along today and accomplished a little bit. I removed the 2 brackets that I made for the battery cable attachments and drilled and tapped one more hole in each one. The hole is on the angle part of the bracket. This allowed me to cut off the furthermost hole from the post and shorten the bracket. There's still nothing cool about it but it's less obnoxious than it was.
The sniper's throttle actuation was hyper sensitive off idle. I had changed the cable and pedal arrangement 4 times trying to find a solution. I improved it but it still wasn't right. I googled it and found Holley makes a bracket to move the cable connection farther away from the throttle shaft to change the ratio of leverage. I was a little skeptical that it would make enough difference. I was surprised at the difference it made. I moved the point .875" which is around 30% more than the original. It fixed most of the problem while creating another one. The throttle pedal is now higher than I wanted. The pedal has to have more travel to compensate for the increased travel of the throttle lever. Raising it up from the floor was the logical solution. I think modifying the pedal will be next. I raised the adjusters on the rear coilovers about .4" from where there were. I keep adding weight to the rear and loosing the ride height I wanted. I have a spare tire in the bed but I will need a floor jack and some tools to be road ready. What I did may not be enough.
-
03-03-2022 #68
Registered User
- Join Date
- Sep 2013
- Location
- sw Kansas
- Posts
- 1,644
O&S snuck away from yard work for a while today and painted 2 panels for color tests. In the photoshop pics my friend did, there was green and maroon in matt finish. In the low cost paint materials assortment, I ordered a quart of British racing green and wine red metallic. The green is very close to a color used on Mack and Chevy trucks. One look at it in the sun and that was a no sell.
The maroon is a high intensity pearl metallic. The kind that only looks good in the sun. The panel didn't make me get real excited but it could be a very good color to go along with the shape of the truck. I took some pics later in the day and the colors don't look great in the pics. There are pieces of grass that have blown on them but not stuck to the paint.
-
03-04-2022 #69
Registered User
- Join Date
- Sep 2013
- Location
- sw Kansas
- Posts
- 1,644
O&S made a tiny bit of progress today. I removed the bed cover and welded the brace I fabbed up to it. Had I chose this option to begin with, all these parts would be in primer and I would be crossing something off the list. LOL. So much for hindsight again.
I took the maroon panel out and tried to take a few more pics of it. The camera I'm using doesn't have enough resolution to show everything that's in the color but my thought is that it's not as dark as it needs to be to compliment the shape of the truck.
-
03-05-2022 #70
Registered User
- Join Date
- Sep 2013
- Location
- sw Kansas
- Posts
- 1,644
The truck got it's 1st road trip today, albeit a short one. 60 miles round trip. The distance from the seat to the throttle pedal isn't going to work for me. I'm not sure where I will make changes from here. The independent suspension on both ends makes a Cadillac out of a hot rod. The only time you know what's there is if you are pressing it around a curve or corner.
It needs more bottom end power for me to be happy. Using an aftermarket efi and a double plane intake manifold lets the engine give up some of the torque that a factory efi engine has. No thought's on a solution to that. There is the obvious cost but the parts shortages have changed the option list substantially from 5 years ago.
-
03-20-2022 #71
Registered User
- Join Date
- Sep 2013
- Location
- sw Kansas
- Posts
- 1,644
O&S was unhappy with how the bed cover fit. The front was around 3/8" higher than the rear. The easiest way to remedy that was a new hinge with a longer flange. That got installed , nutserts were installed in the front bed panel and the frame was painted in black. O&S plodded along for a couple of hours today. I flipped the cover over and trimmed some of the material back to make the sides and ends closer to the edges. I bolted the unit together and installed on the truck. After leveling the cover I realized that the latch had to be relocated. I had made it non-adjustable. Quite brave of me.
I adapted a bracket to the latch and attached the bracket to the tailgate. I may revise that when the tailgate gets' painted. By machining a slotted plate to weld into the tailgate, I could make this nicer. For now, this is crossed off the list.
-
03-26-2022 #72
Registered User
- Join Date
- Sep 2013
- Location
- sw Kansas
- Posts
- 1,644
O&S plodded along today. I had half of a plan in my head from months ago. That went out the door in less than 5 minutes. I had thought about carpeting the rear panel of the cab. After removing the seats and seeing how dirty everything was, I decided on easy clean to be a priority. I had some 1/8" abs left over that became the center panel. It is fairly rigid so I don't think any strange noises will originate from it. I used 1/16" on the radiuses on the ends. The carpet is cut but needs the edging sewed on. I have not done that before so there maybe room for some education there.
I'm planning on carpeting the firewall above the dynadeck. I need to make a pattern for that and do some research on how to attach it to the firewall over the insulation. Lots left in the interior but there are less bare spaces now. I don't think the pics show much detail, just lots of black. There are some dirty spots on the rear panel that will need some chemical to clean them. A quick wipe of water was not successful. I didn't have any button head fasteners to install, yet.
-
06-18-2022 #73
Registered User
- Join Date
- Sep 2013
- Location
- sw Kansas
- Posts
- 1,644
After going to a spring show, it was time for disassembly and some paint. The body work wasn't finished last fall before the weather got cold. I'm going to assemble the truck and go to Pueblo and then finish painting after that before it's time to go to Salina. Yes, I know, lots of extra work. When you are down to one rod, and you want to go see your friends, there is some work involved. LOL.
-
06-18-2022 #74
 Registered User
- Join Date
- May 2012
- Location
- Kansas City, Missouri
- Posts
- 666
Looks nice love the color
-
06-19-2022 #75
 Registered User
- Join Date
- Oct 2016
- Location
- Auckland, New Zealand
- Posts
- 68
 X 2. Colour looks really nice.
 Originally Posted by thumper877
 cheers Russell
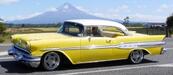
My 1957 Pontiac Star Chief powered by a 5.3 LS with a 4L60E transmission, on 18" US Mags Big Slots.
-
06-19-2022 #76
Registered User
- Join Date
- Sep 2013
- Location
- sw Kansas
- Posts
- 1,644
Thank you.
O&S has the front inner fenders and the running boards painted. Moving along at a turtle's pace.
-
06-20-2022 #77
Registered User
- Join Date
- Sep 2013
- Location
- sw Kansas
- Posts
- 1,644
I did a 9 hour stint today.
-
07-20-2022 #78
Registered User
- Join Date
- Sep 2013
- Location
- sw Kansas
- Posts
- 1,644
Unless something major changes, this will be the last update for this thread. I have painted and assembled the truck. There is many small items to be addressed. For now, it will finish out the season of shows that I regularly attend.
-
07-21-2022 #79
Registered User
- Join Date
- Oct 2016
- Location
- Auckland, New Zealand
- Posts
- 68
Lovely looking beast. Job well done for sure.
cheers Russell
My 1957 Pontiac Star Chief powered by a 5.3 LS with a 4L60E transmission, on 18" US Mags Big Slots.
-
07-26-2022 #80
 Registered User
- Join Date
- Nov 2006
- Location
- Ma.
- Posts
- 5,567
That's a gorgeous color! Nice job it looks great!!
Wayne
Car FINALLY home !!!!!! lol
Project FNQUIK https://www.pro-touring.com/showthre...ghlight=FNQUIK
-

 Reply With Quote


