
Results 41 to 60 of 121
-
03-26-2022 #41

 Registered User
- Join Date
- Mar 2005
- Location
- Walton, NY
- Posts
- 737
Shooting for May 23rd driving. That's 1yr from the day I sold my last Beretta...and dailying the 8.1 truck sucks with fuel prices so high. haha
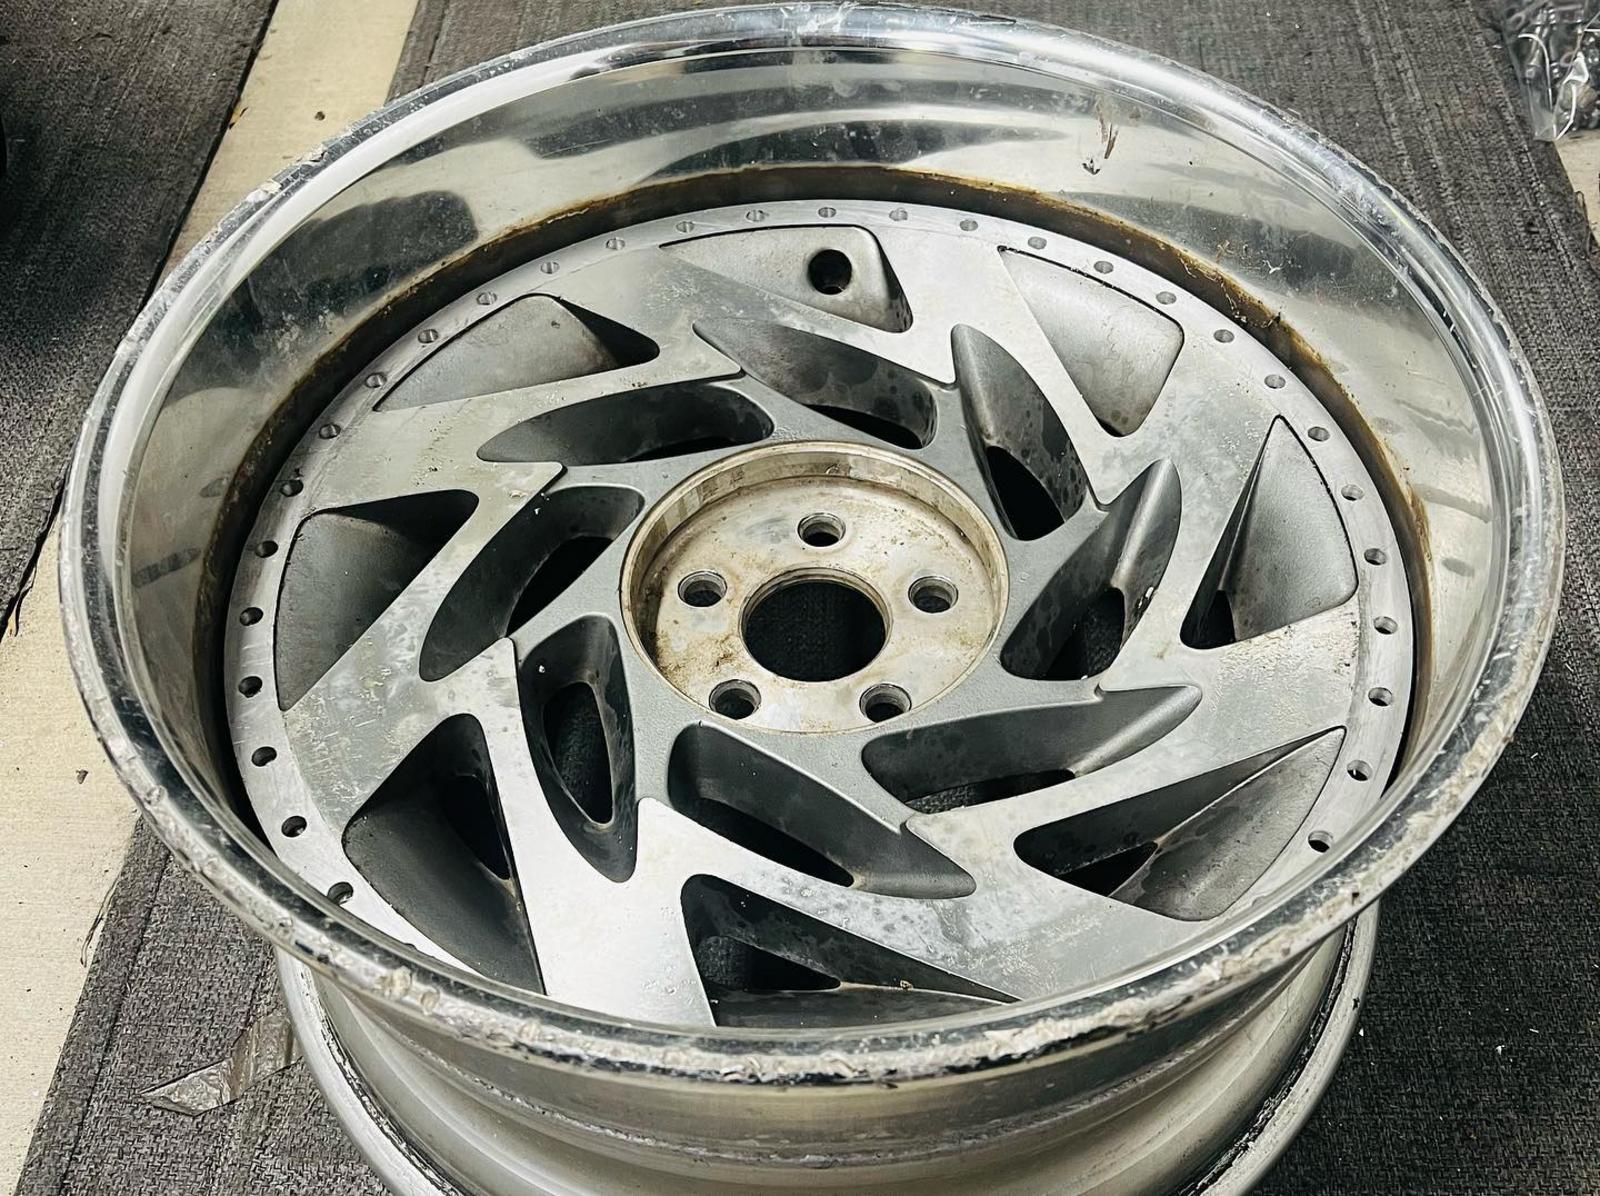
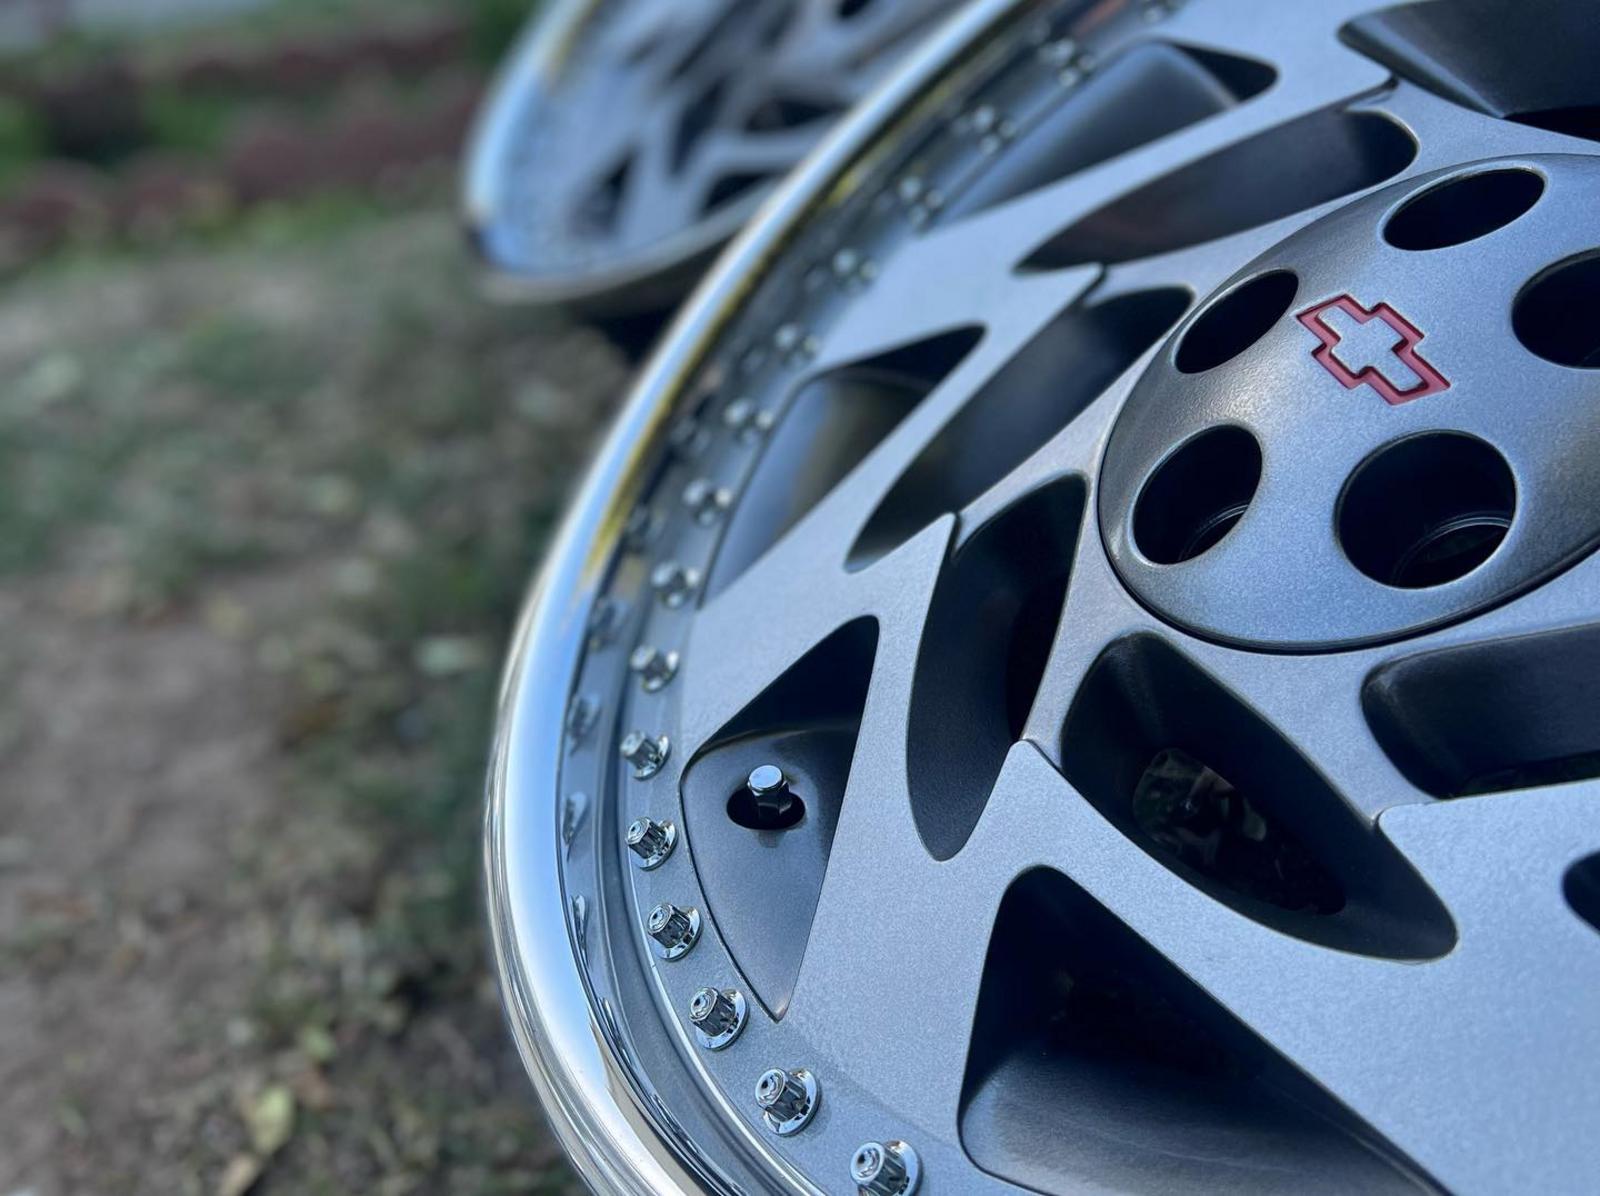
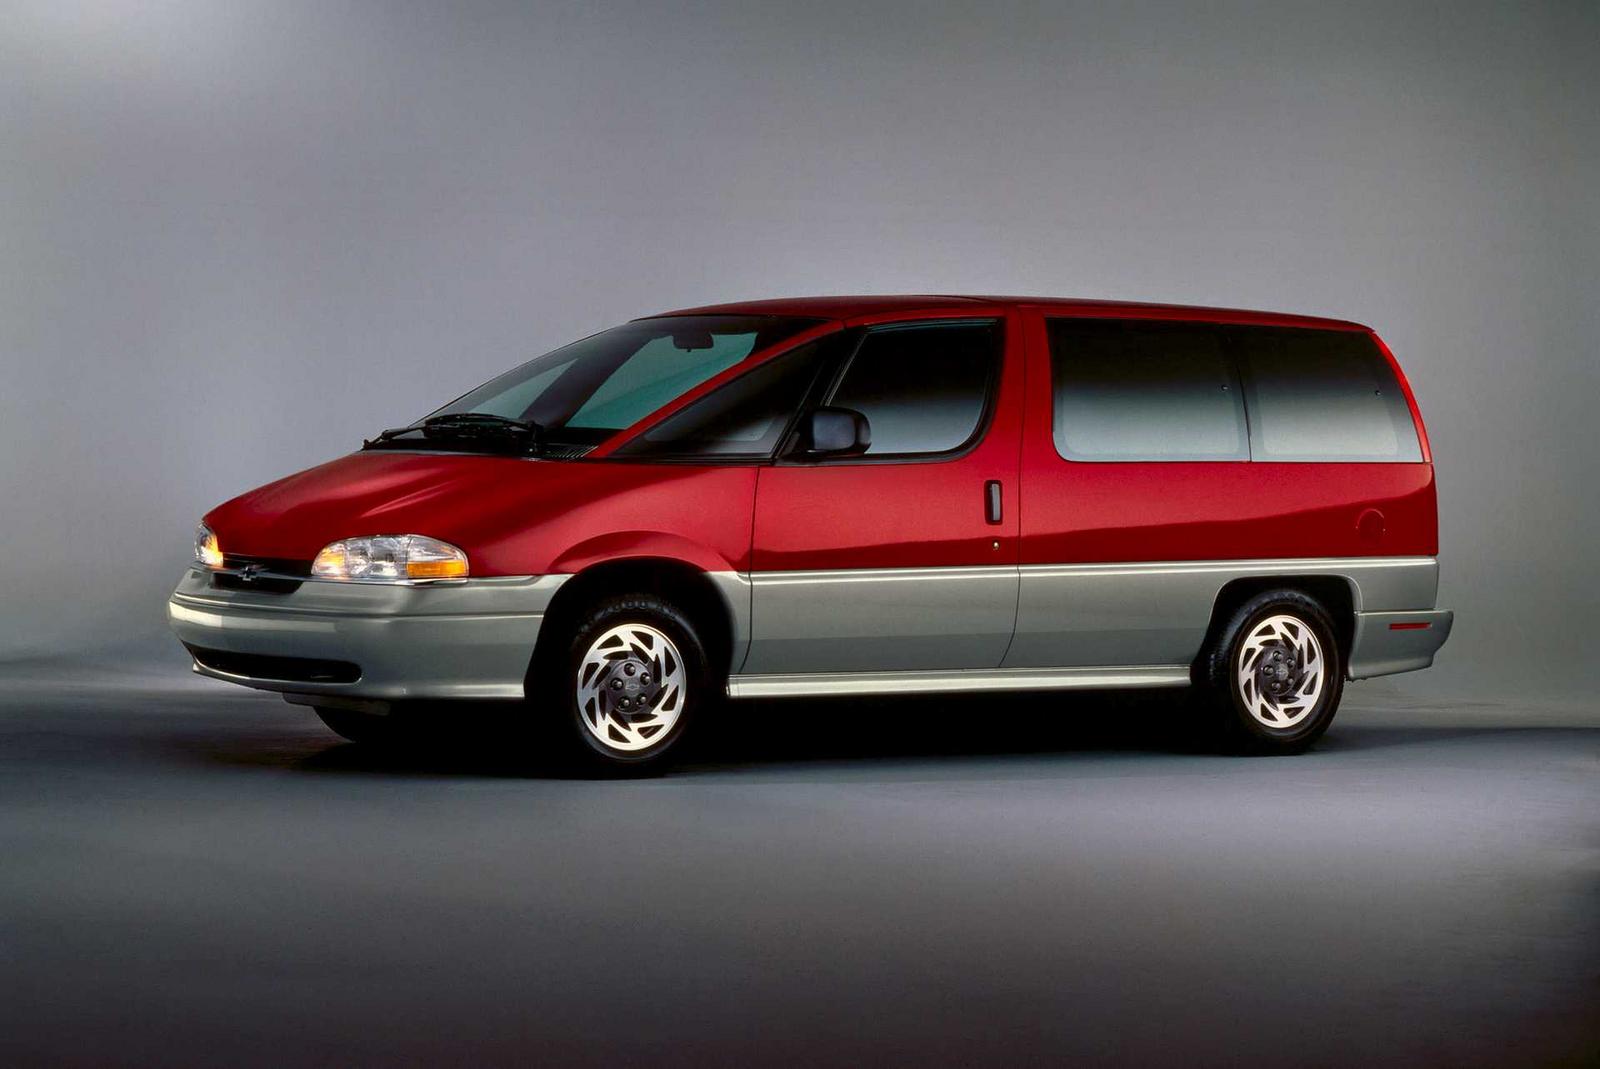
The stock wheels are sooooo 90s. Pretty unique. That's why I like them. And there's actually a 5x115 version from Lumina APV minivans that could be cool for my slicks. They're 15x6, so they would need to be wider...but the offset would be about right to add 2in to the face and still fit (with my 5x114.3 to 5x100 adapters taken off). I sorta got that idea from a guy taking old OEM wheels and upsizing the rims to make them 3-pc. Here's a pic of an 18" Z26 wheel the guy did for (I think) a VW guy.
A deep dish 15" minivan wheel would look pretty cool.
-
03-30-2022 #42
Registered User
- Join Date
- Mar 2005
- Location
- Walton, NY
- Posts
- 737
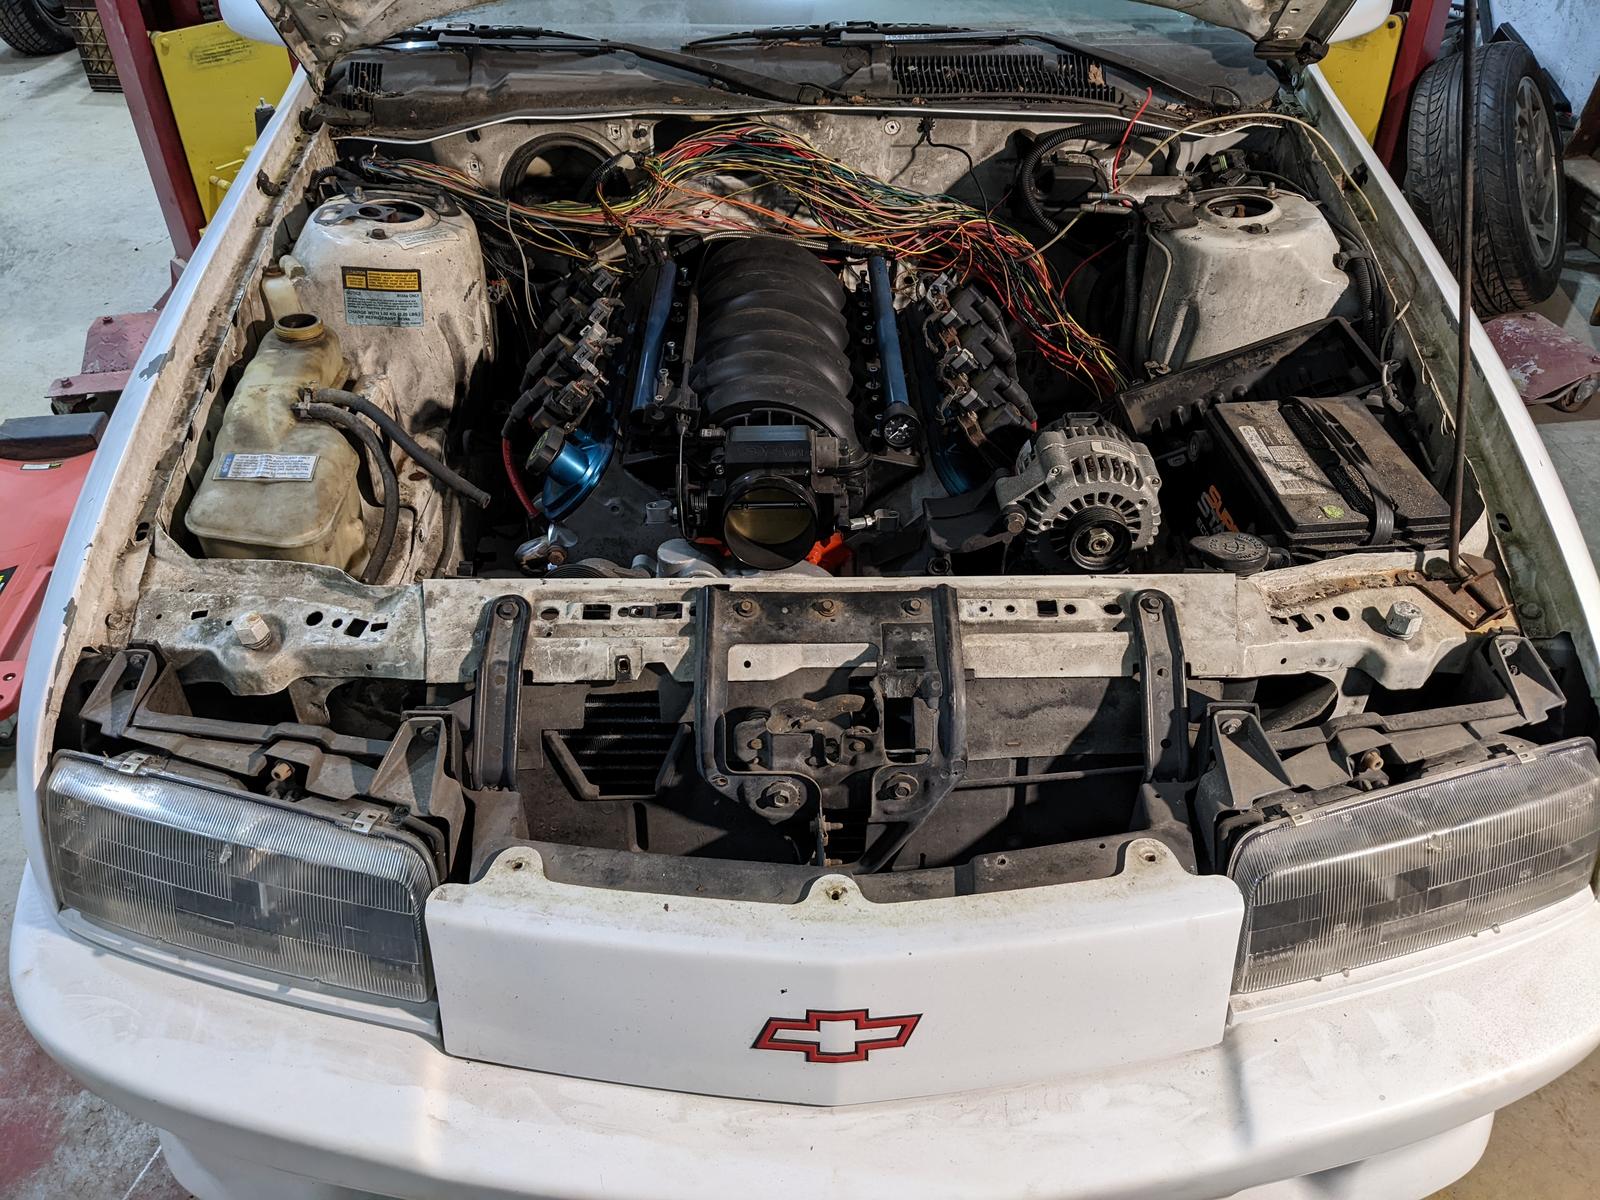
It's in, and this will be final placement - offset to the pass side. Figuring out radiator, fans and hoses. Just bought the Camaro steering rack too. Need to cut the firewall and floor out to fit the trans and weld up the engine mounts. Probably should wash it too. haha
Gotta keep making good progress to get it done before June. haha
https://youtu.be/T87LyyP1CSA
-
03-31-2022 #43

 Registered User
- Join Date
- Sep 2009
- Posts
- 2,705

Love it man! Keep up the good work.

1955 Nomad project LC9, 4L80e, C5 brakes, Vision wheels
1968 Camaro 6.2 w/ LSA, TR6060-Magnum hybrid and etc SOLD
1976 T/A LS1 6 Speed, and etc. SOLD
Follow me on Instagram: ryeguy2006a
-
03-31-2022 #44
 Registered User
- Join Date
- Oct 2015
- Posts
- 362
Wow, that's really offset. Why so much offset? Pedal room?
My half a$$ed build thread.https://www.pro-touring.com/threads/...elle-6-0-4L60E
Tighten it till it strips & back it off a quarter turn.
-
03-31-2022 #45
 Registered User
- Join Date
- Aug 2007
- Location
- Denton Texas
- Posts
- 1,236
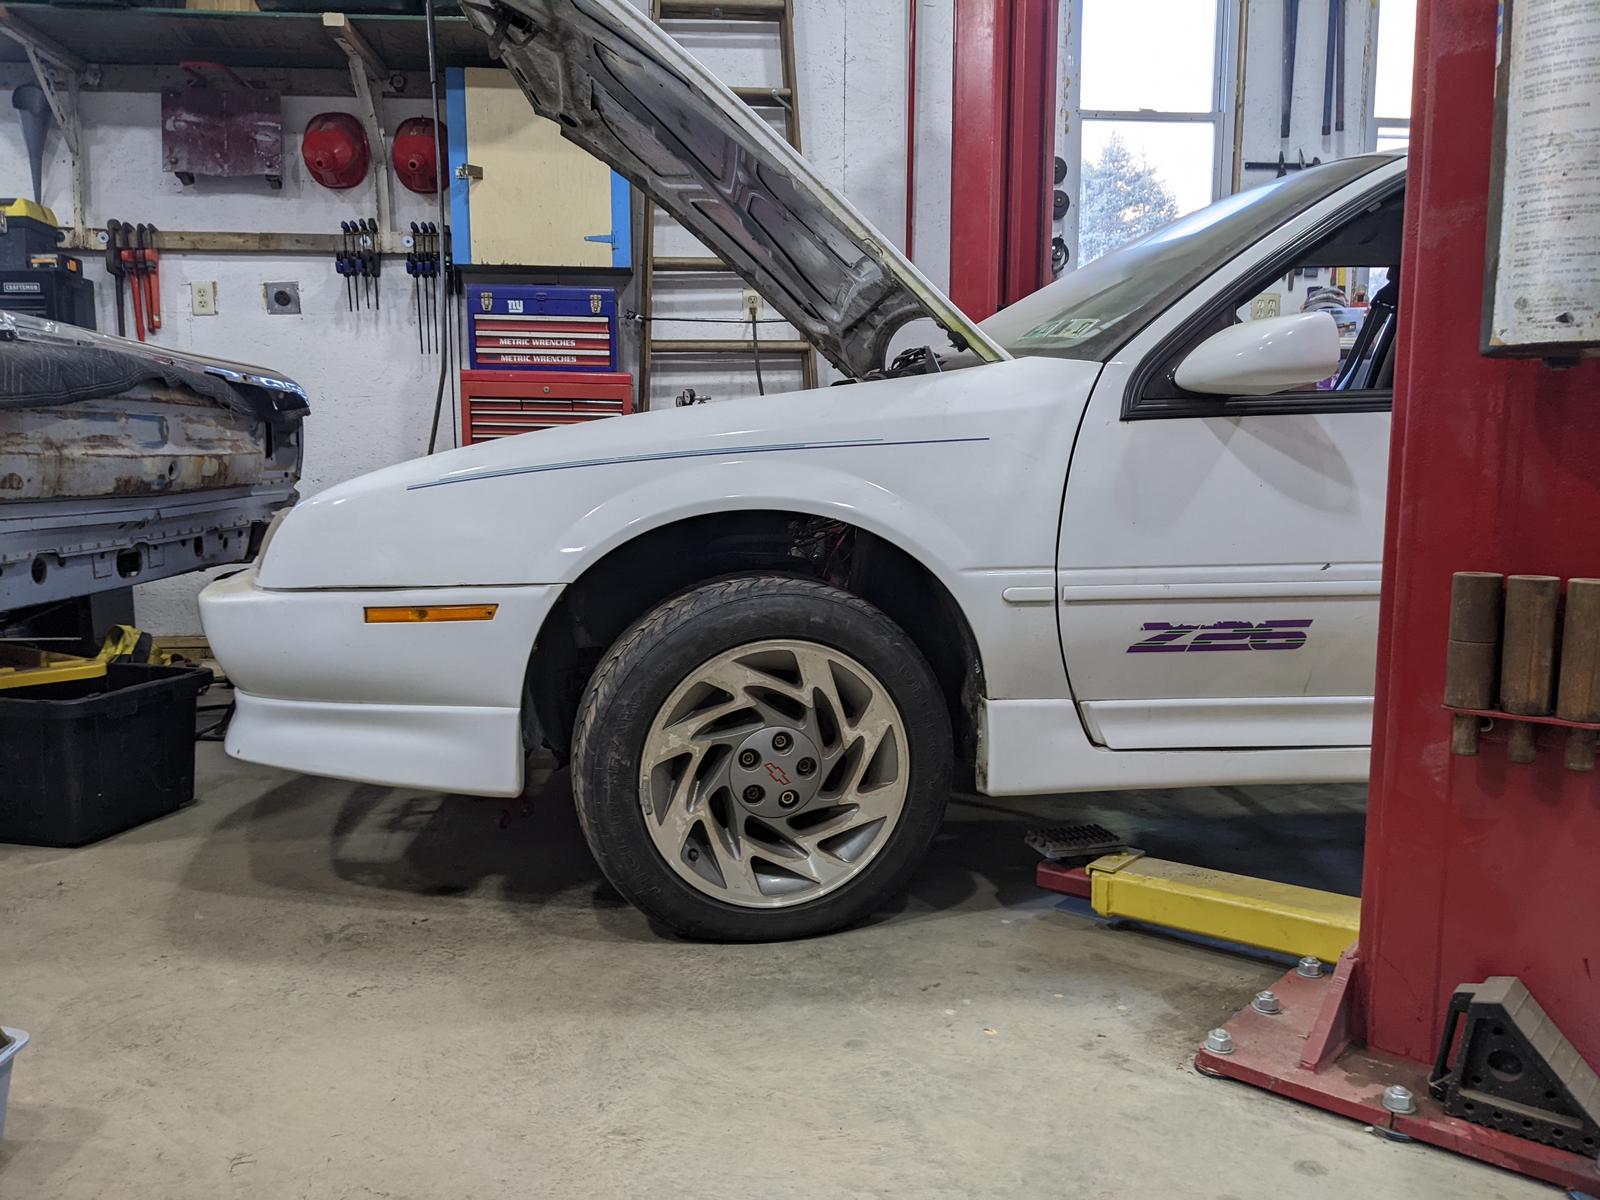
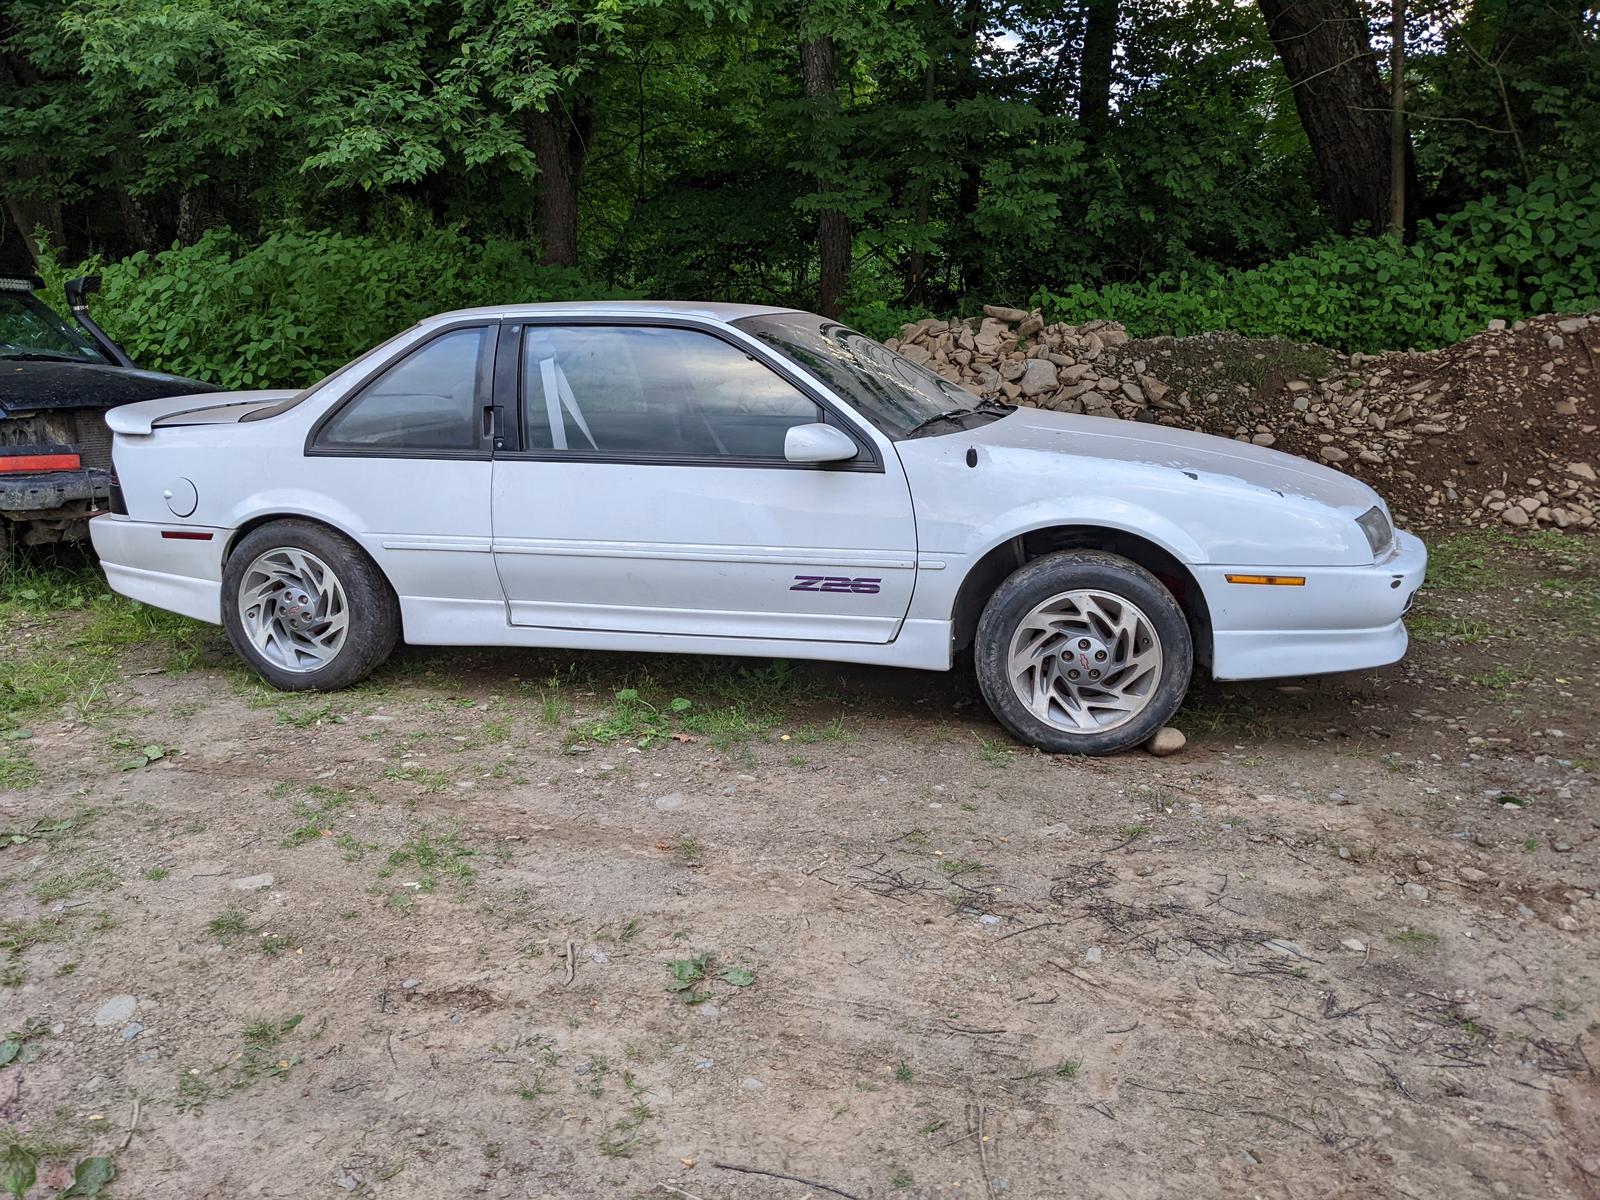
Im in I always loved the Beretta's I had a Black GTZ back in the day
-
03-31-2022 #46
Registered User
- Join Date
- Mar 2005
- Location
- Walton, NY
- Posts
- 737
Yeah, steering shaft in the bay and foot room for the driver. The Ford 8.8 is already offset anyway, and it also gives room for the torque arm down the driver side of the driveshaft (formerly exhaust) tunnel.
-
04-07-2022 #47
Registered User
- Join Date
- Mar 2005
- Location
- Walton, NY
- Posts
- 737
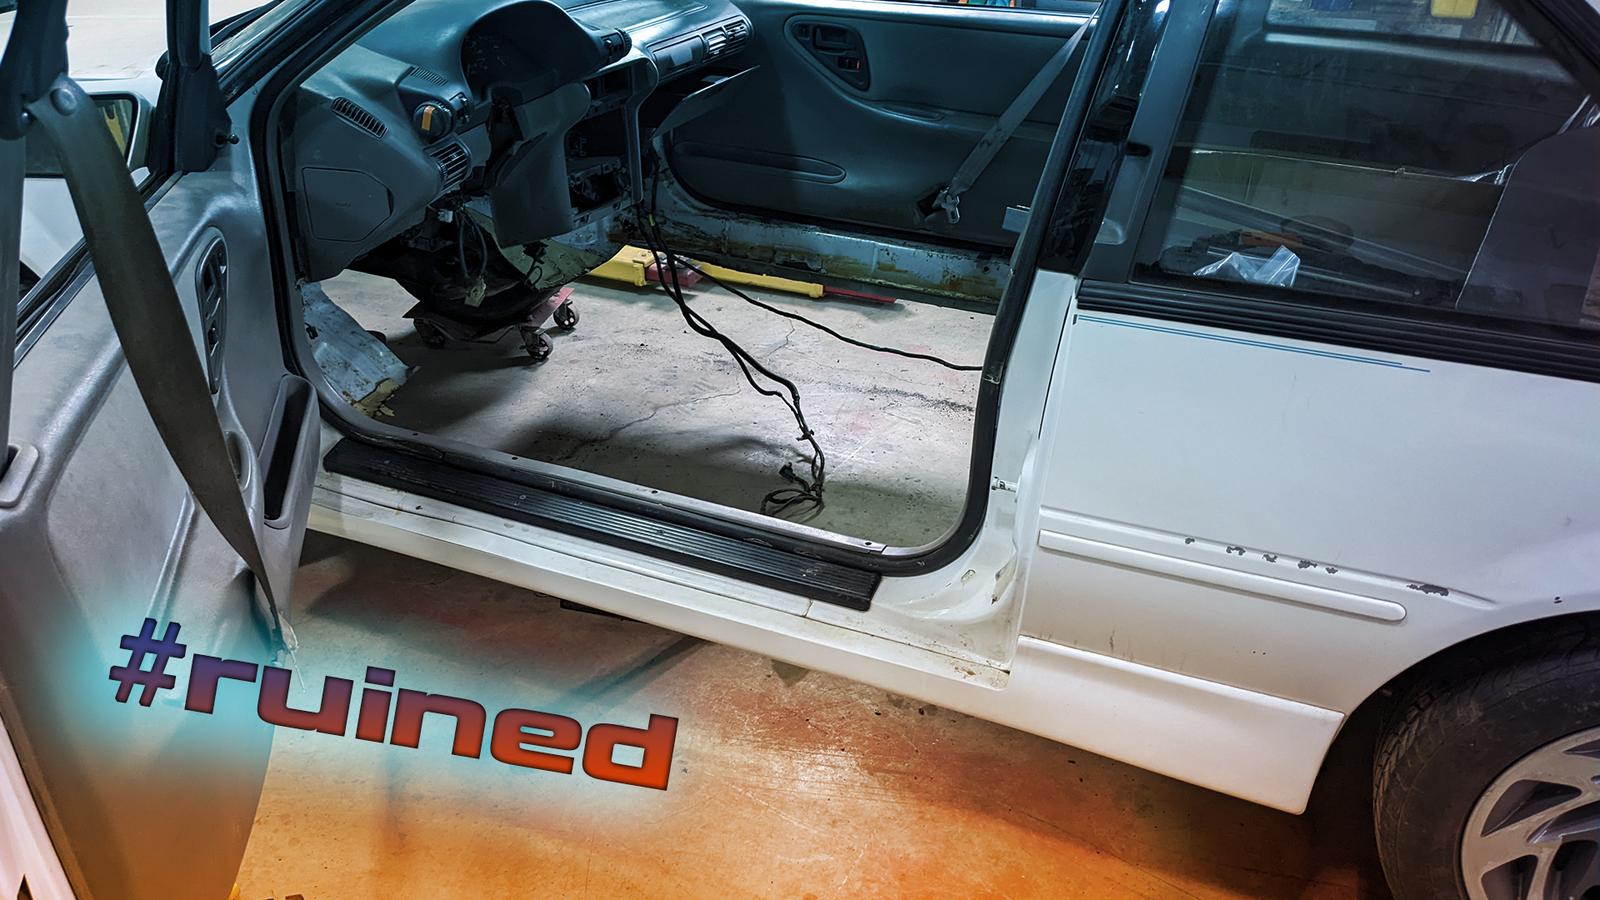
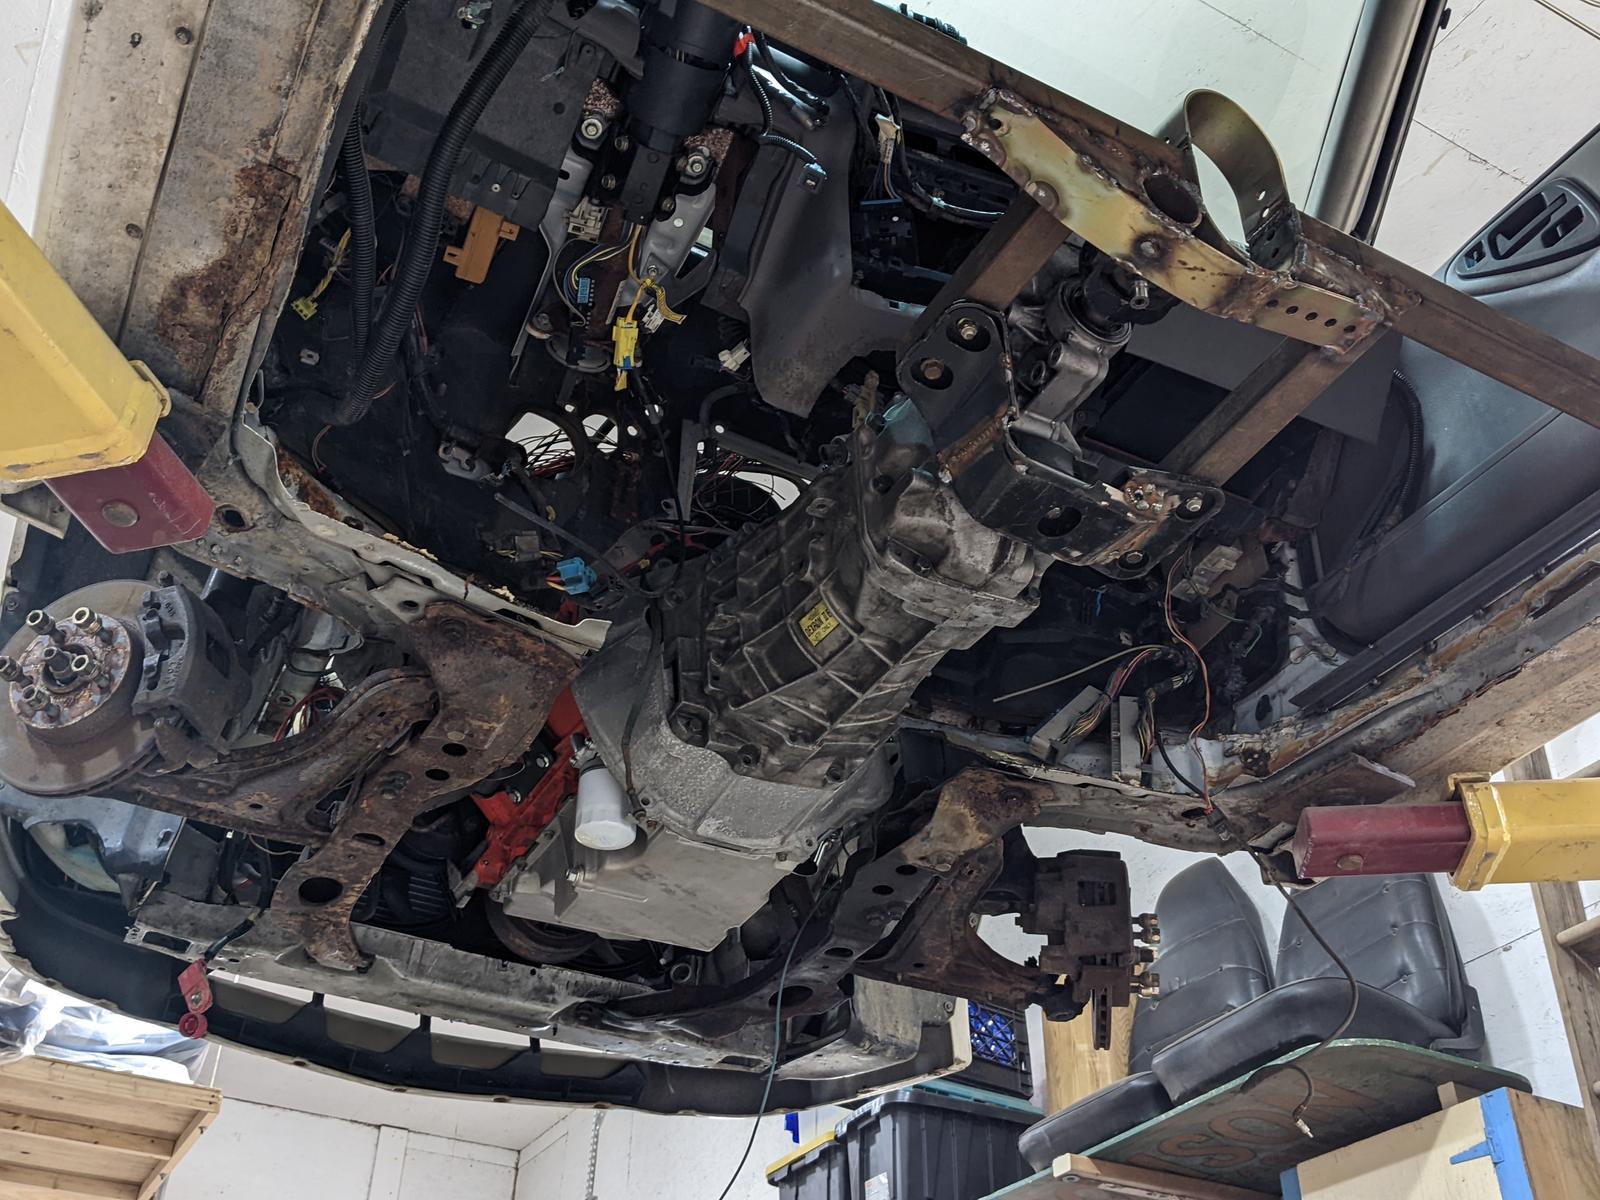
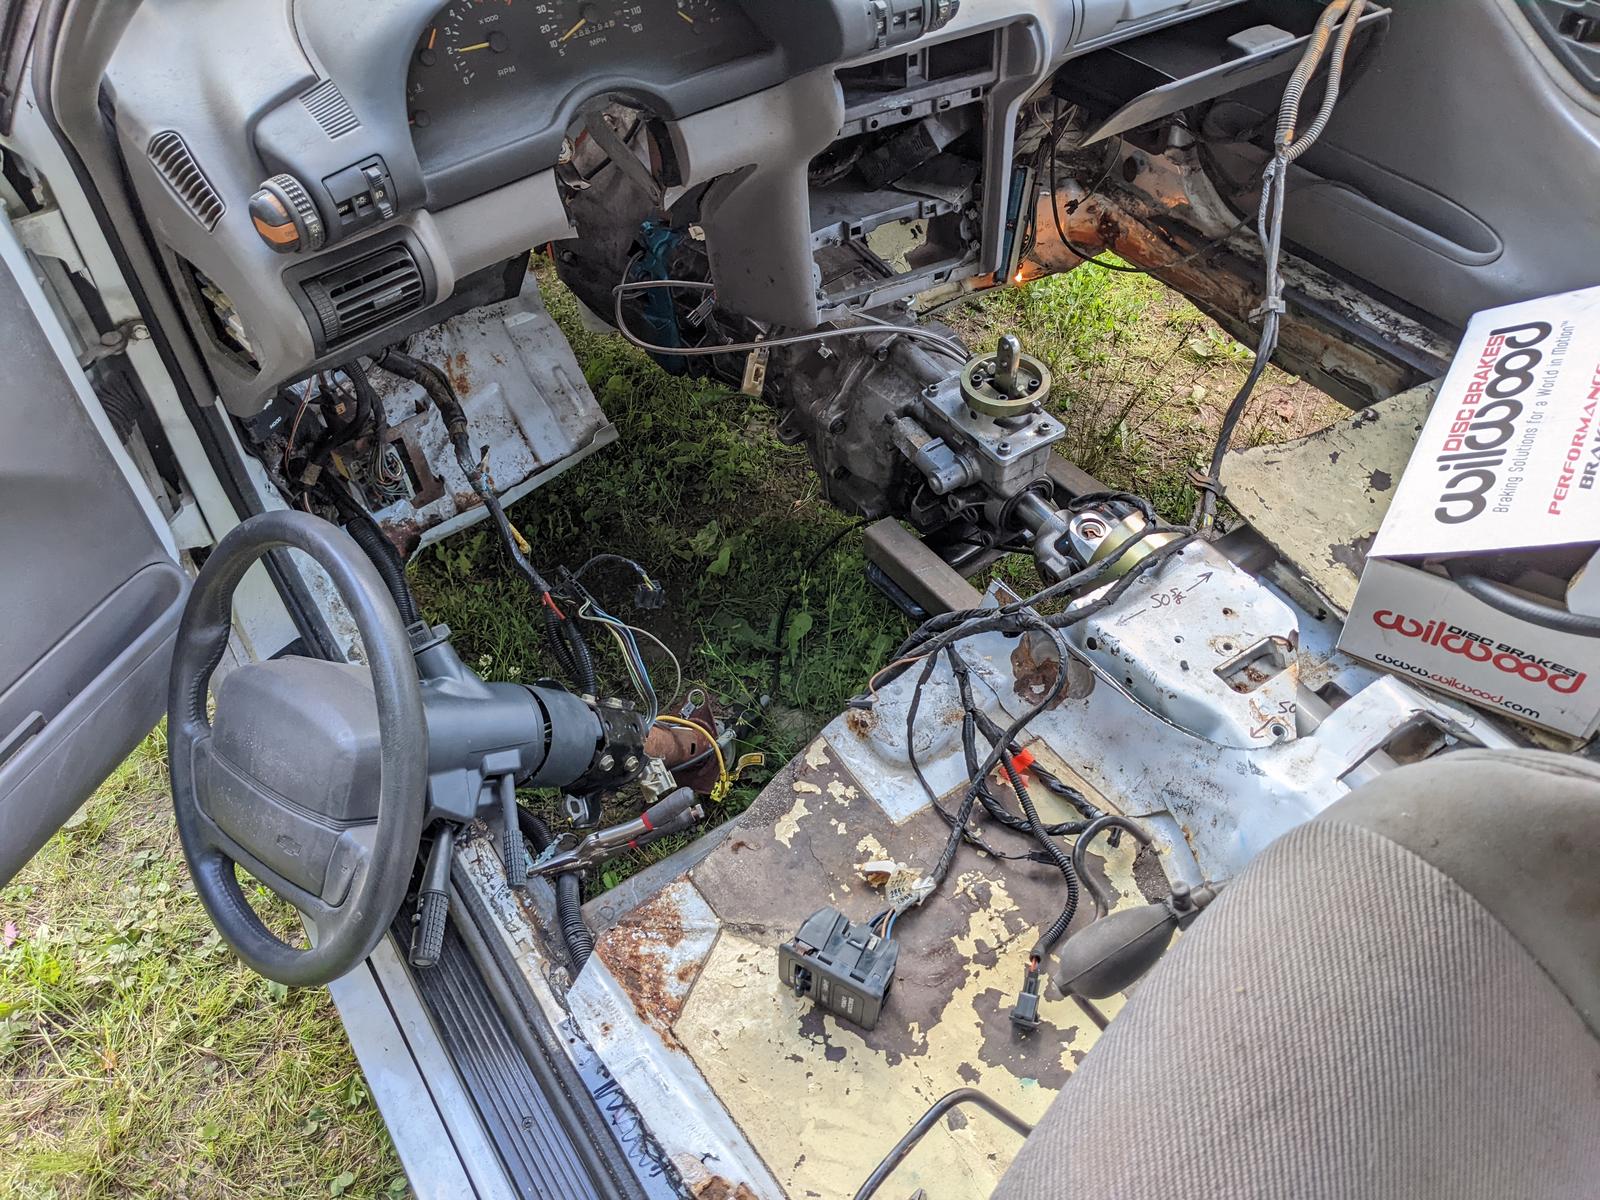
Keep plugging away at it. Sawzalled the firewall and floor out to mock up the trans and the 5spd fitment could be better...that's for sure. Working on a solution to that right now.
https://youtu.be/qDjVmT1ggmM

-
04-08-2022 #48
Registered User
- Join Date
- Sep 2013
- Location
- sw Kansas
- Posts
- 1,642
Anyone seen Fred Flintstone around?

-
04-13-2022 #49
Registered User
- Join Date
- Mar 2005
- Location
- Walton, NY
- Posts
- 737
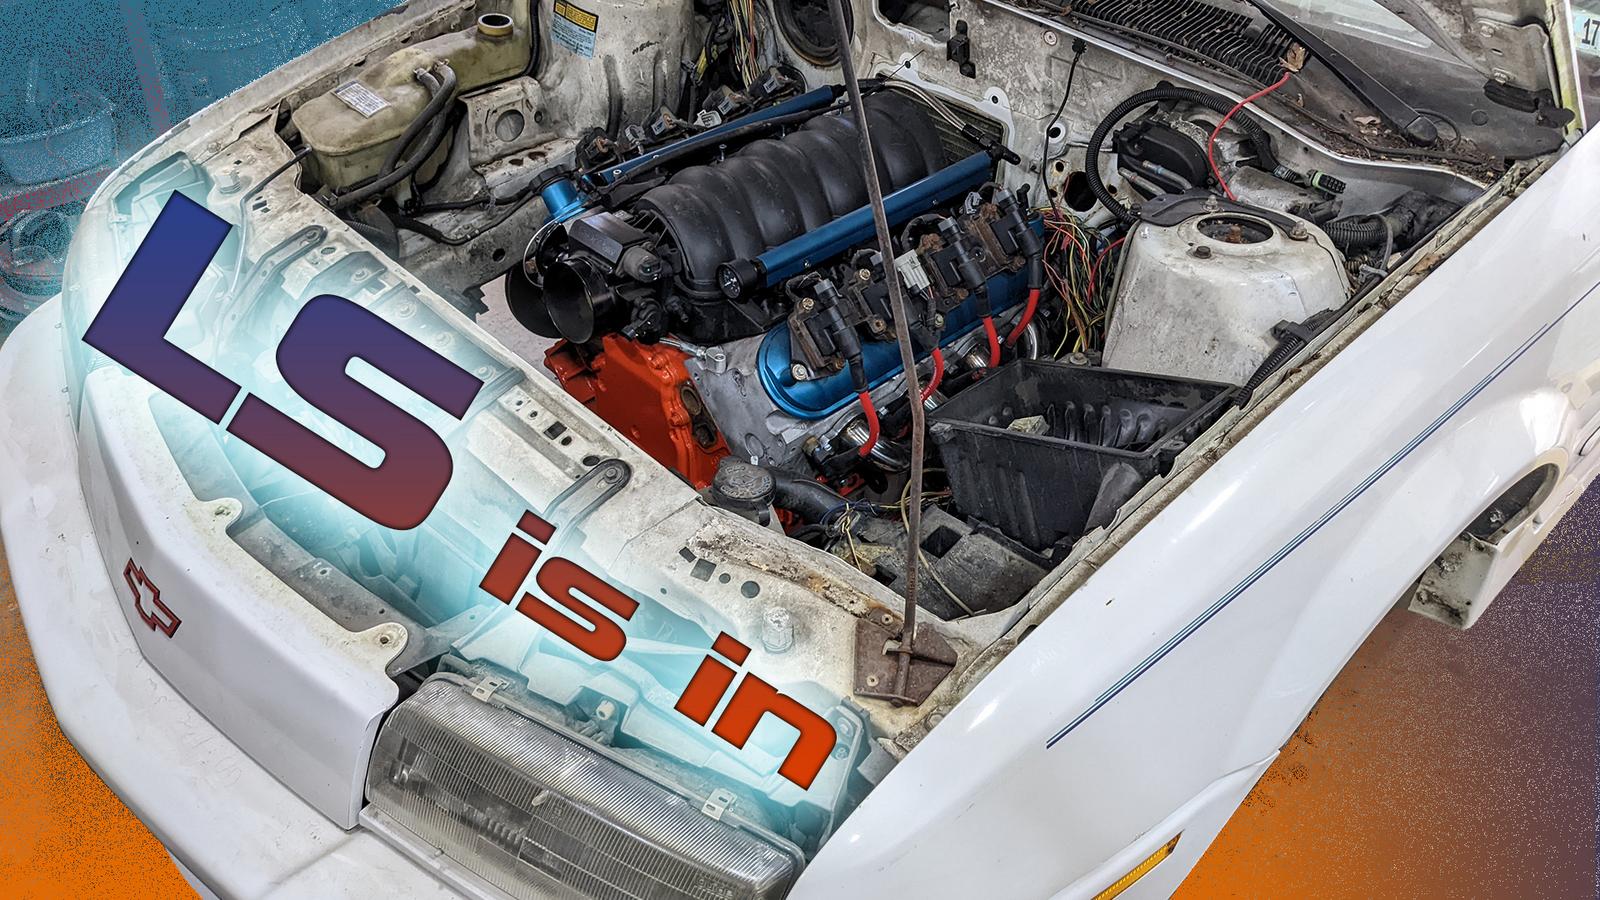
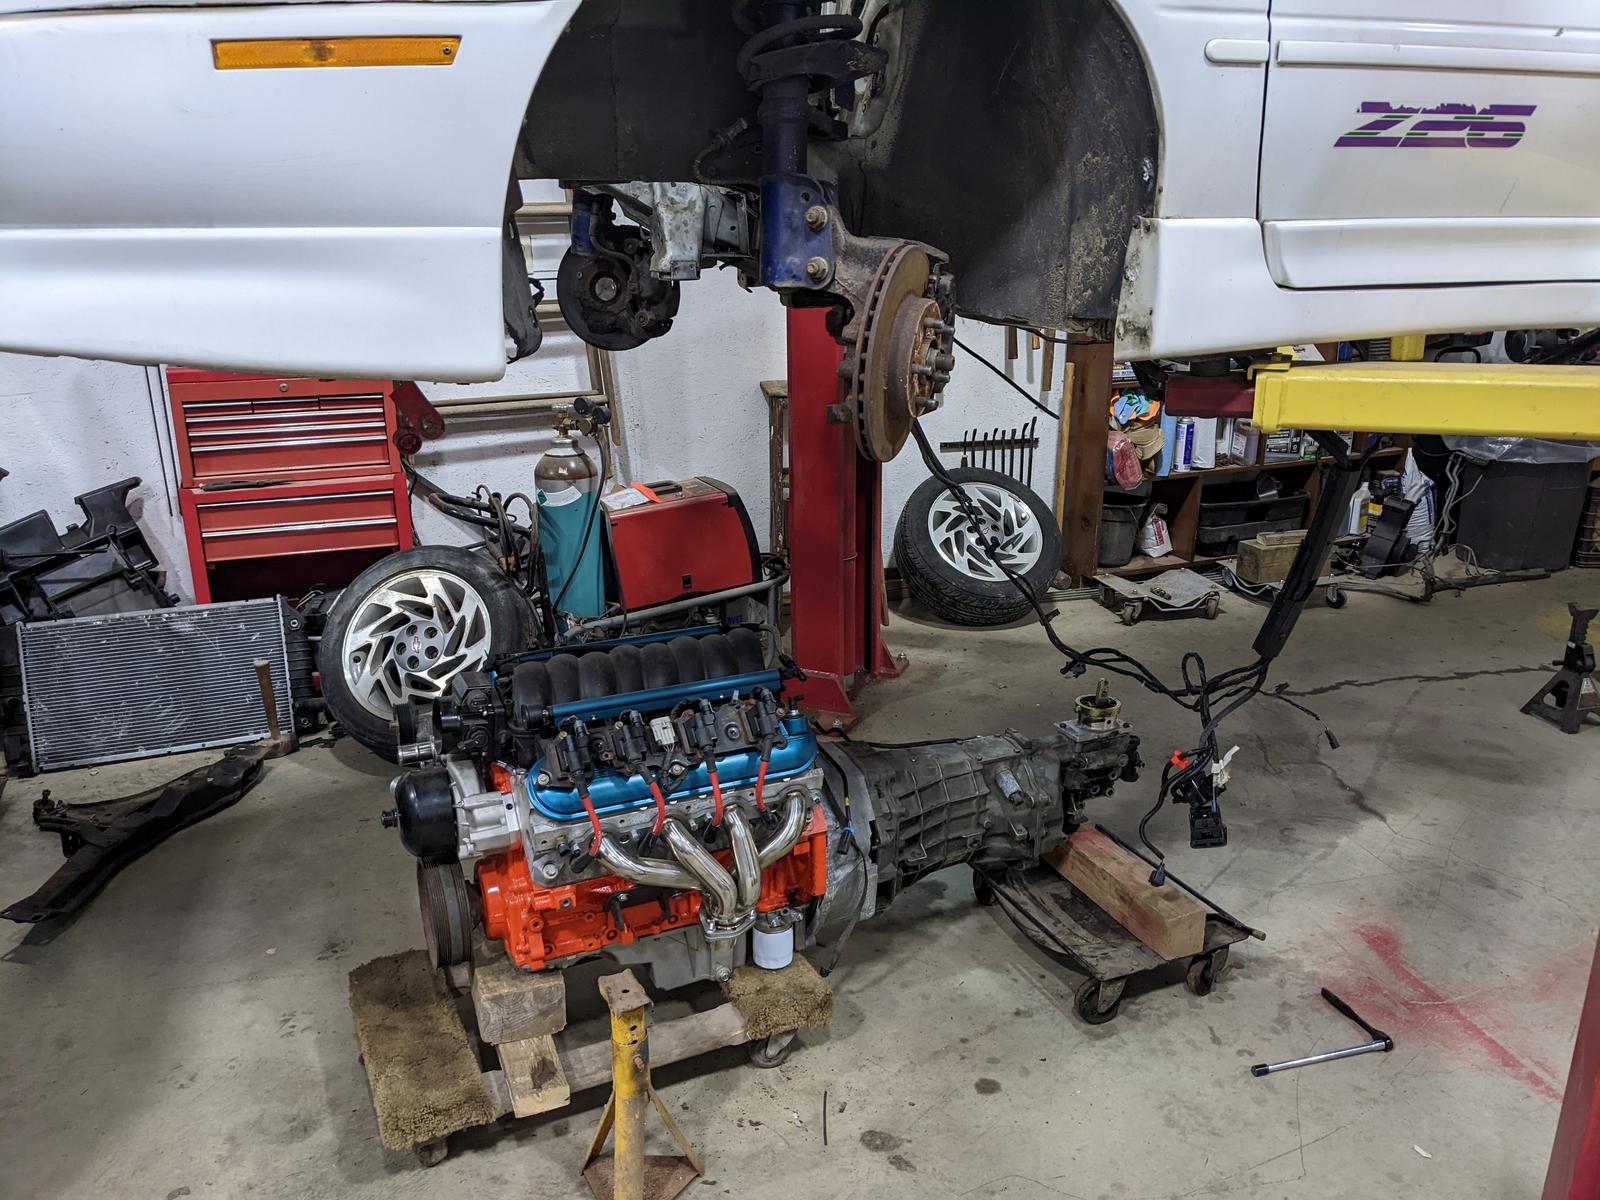
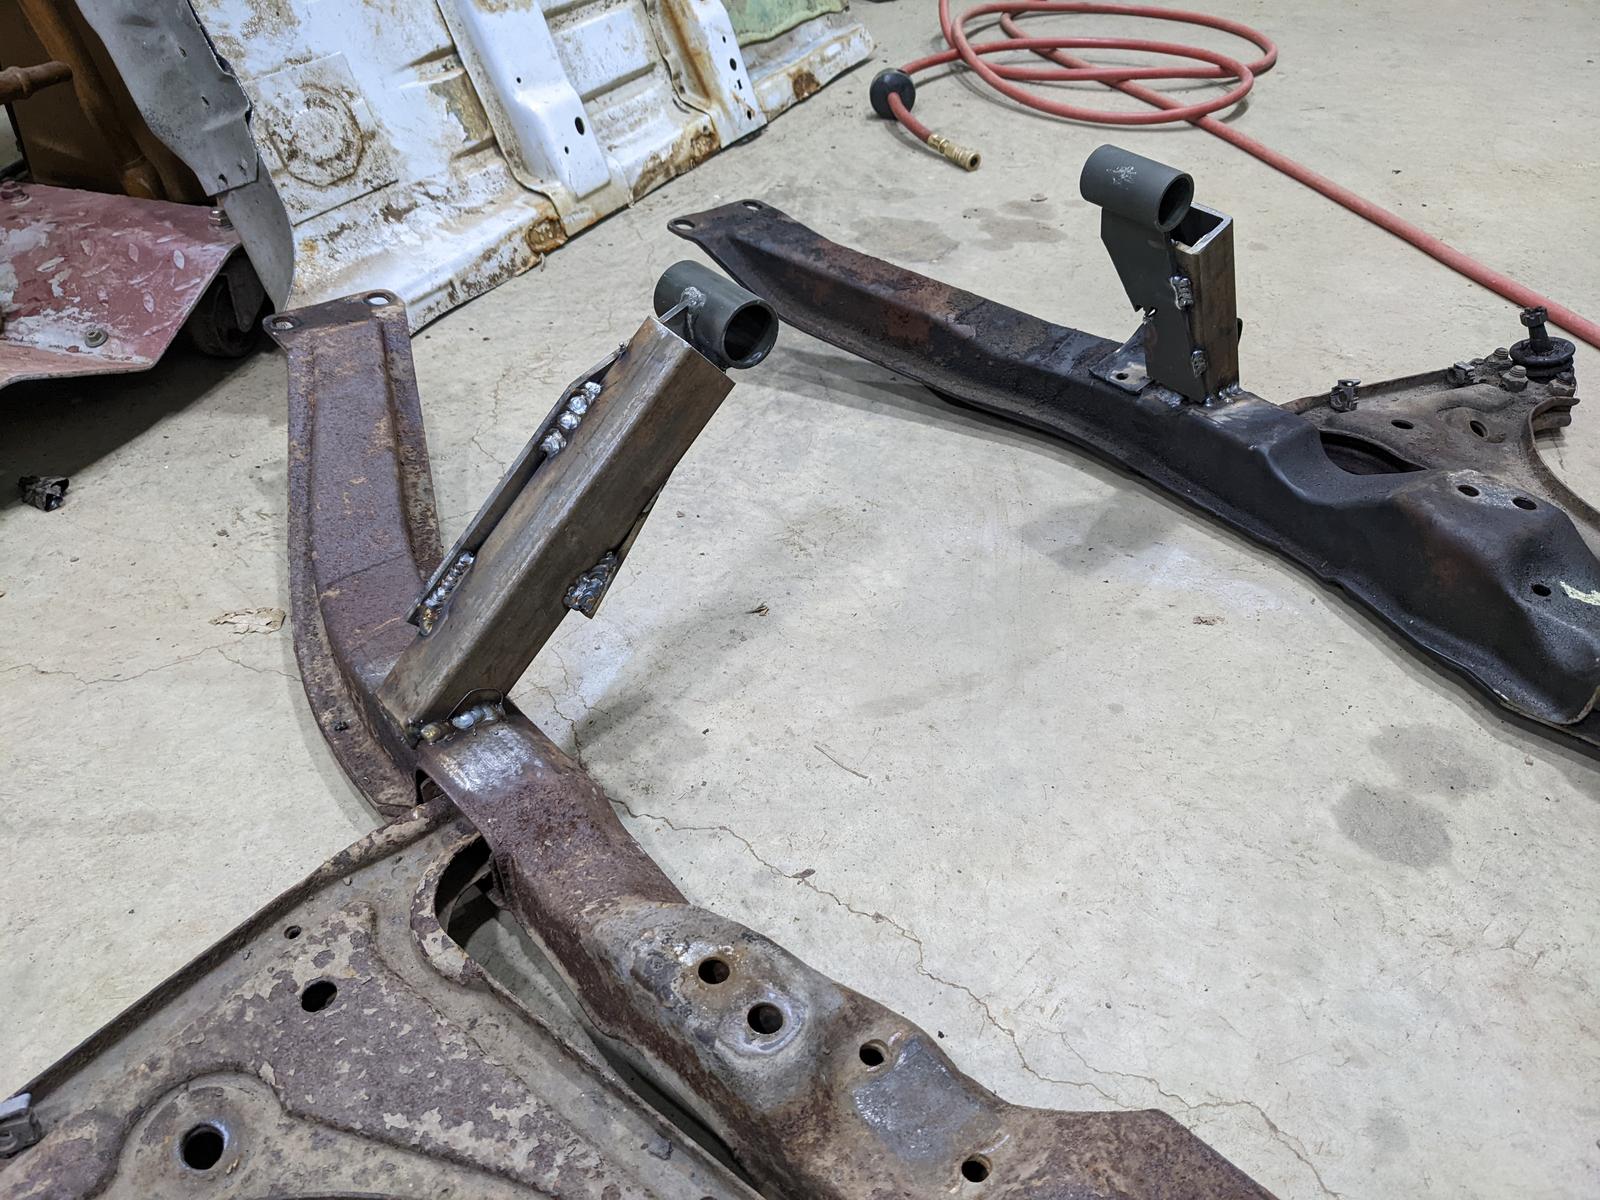
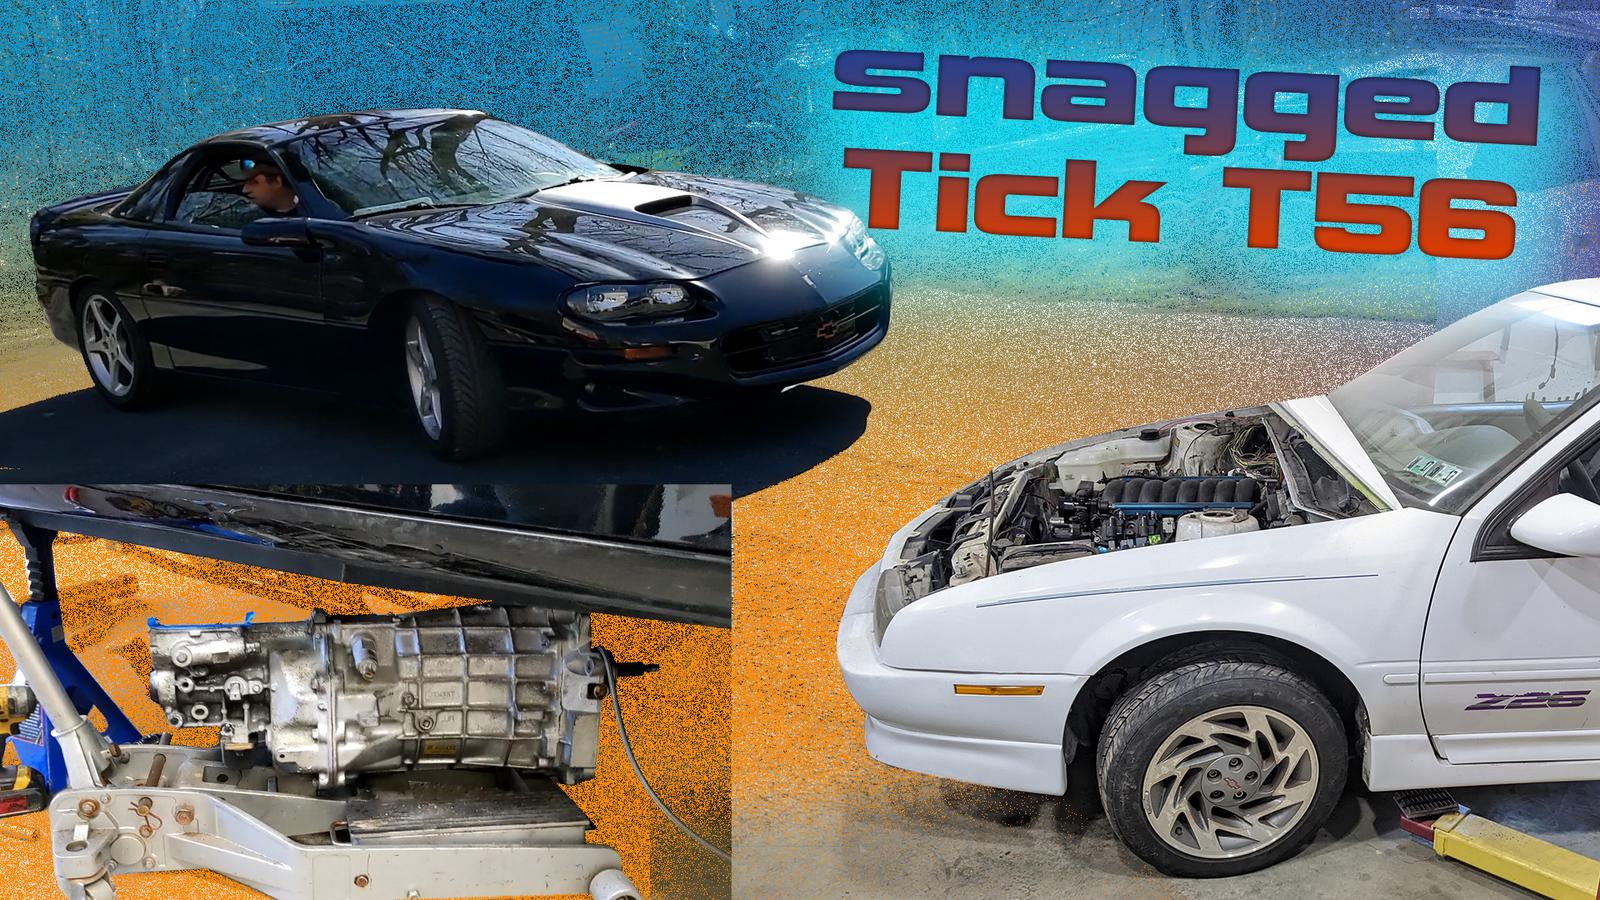
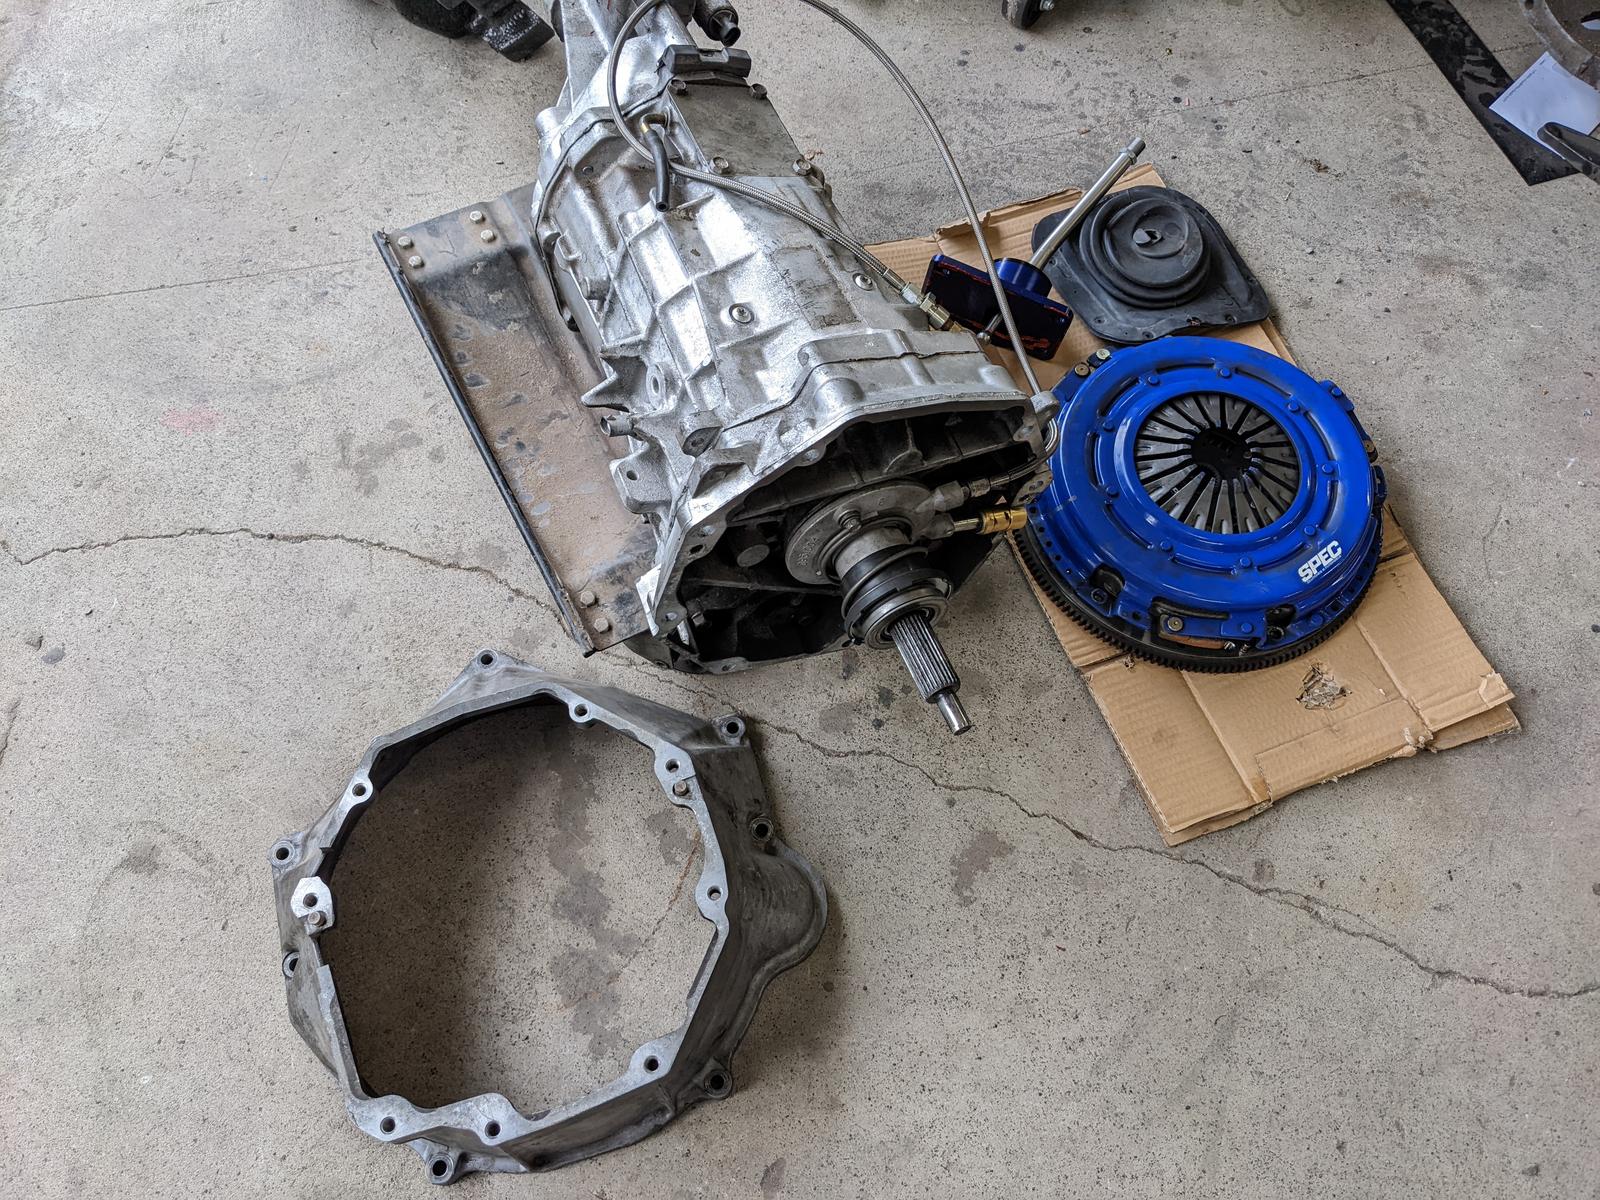
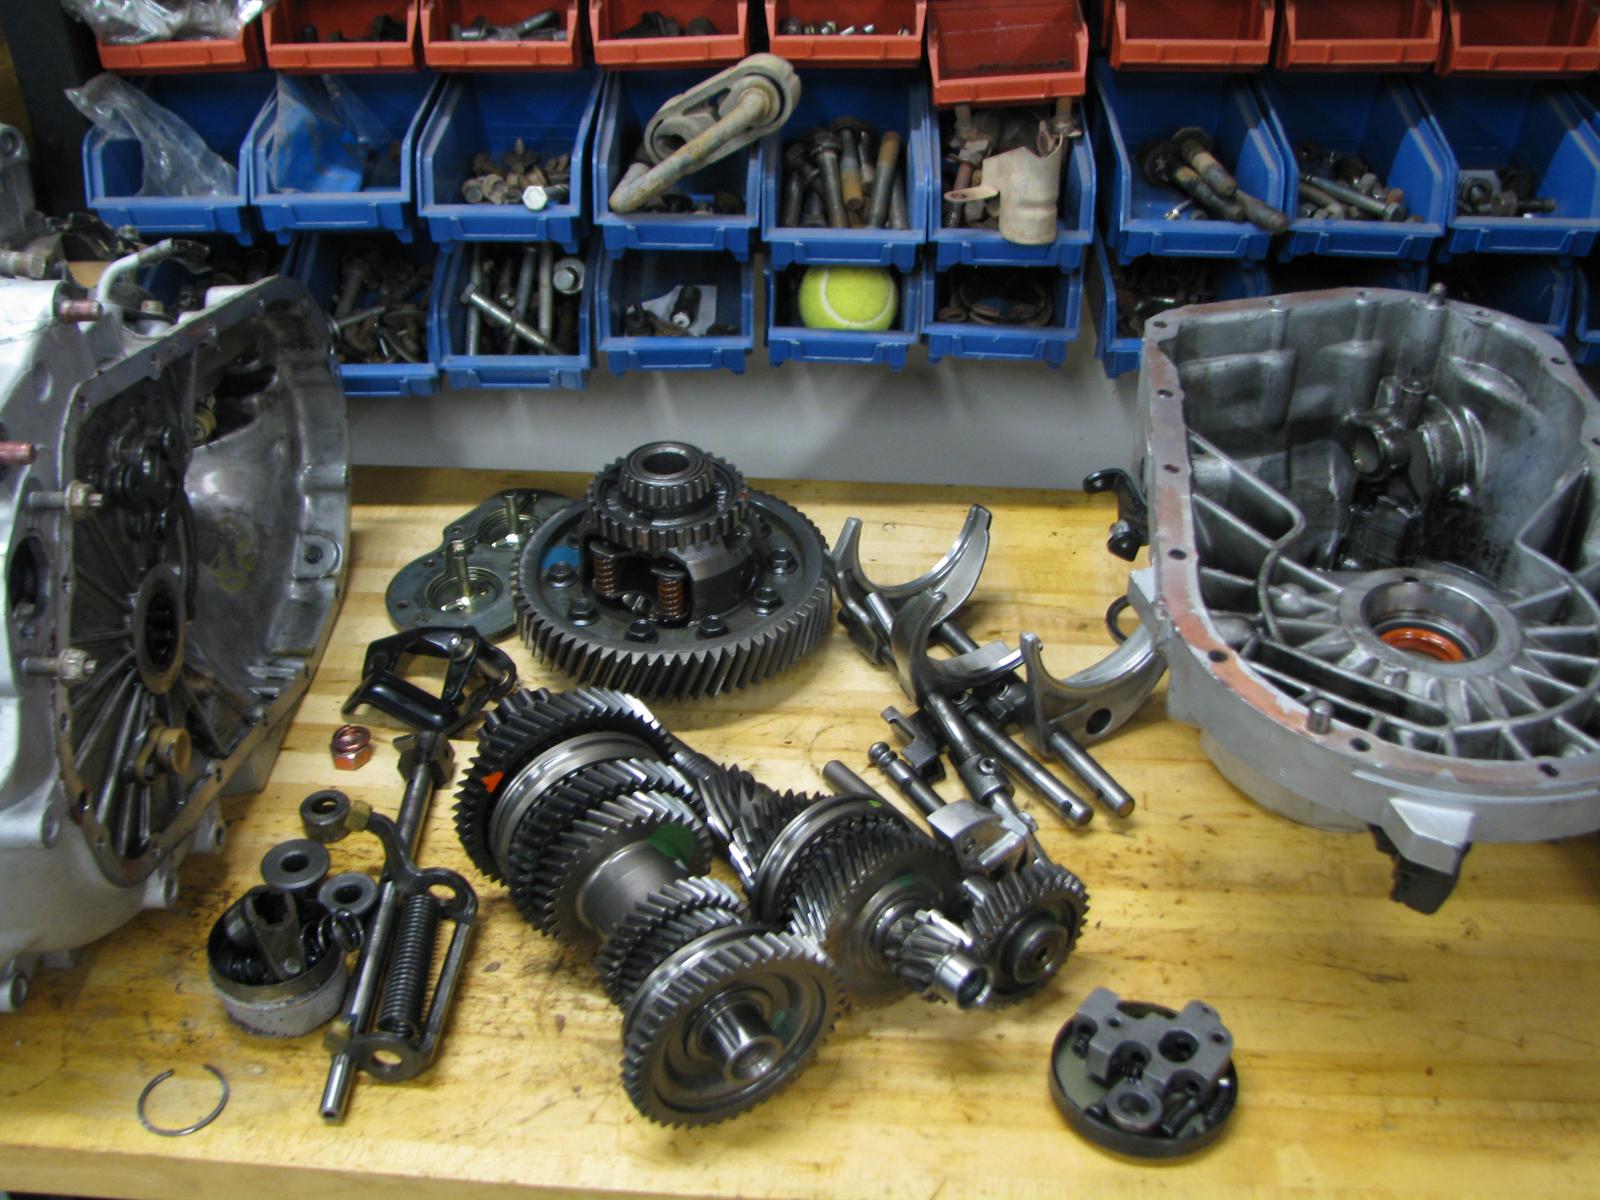
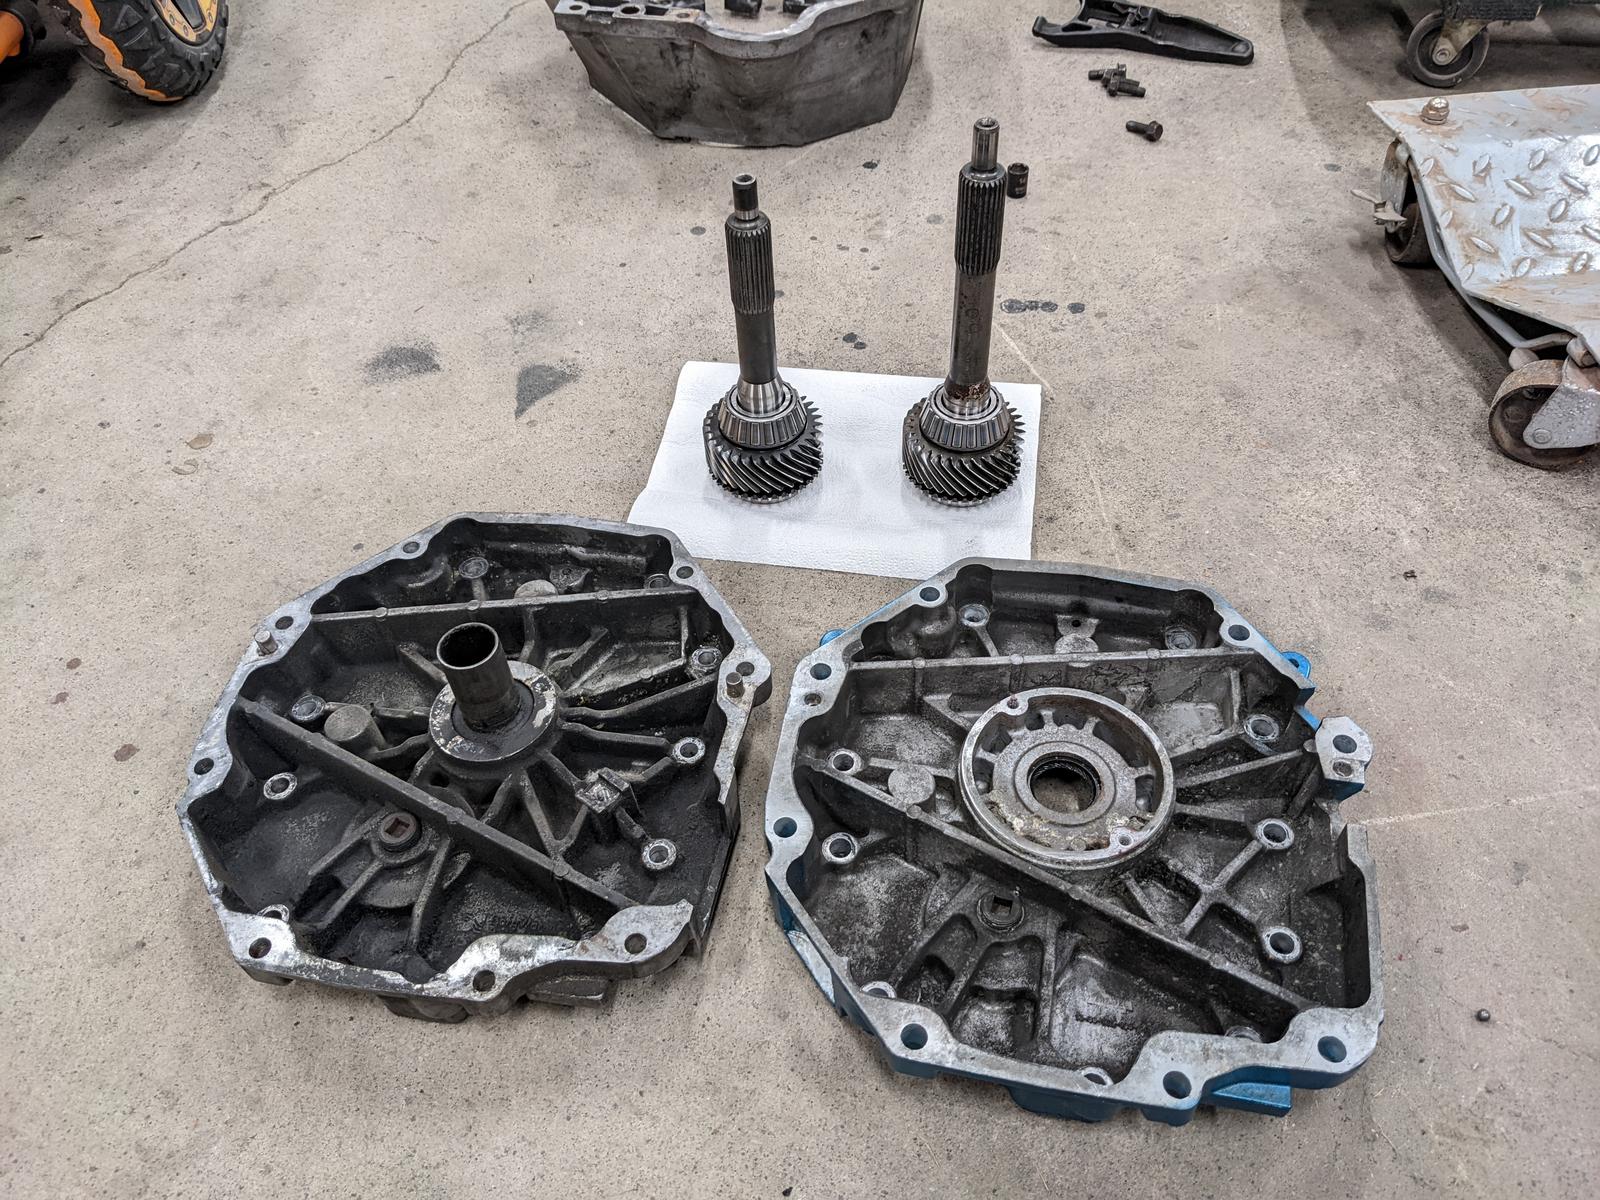
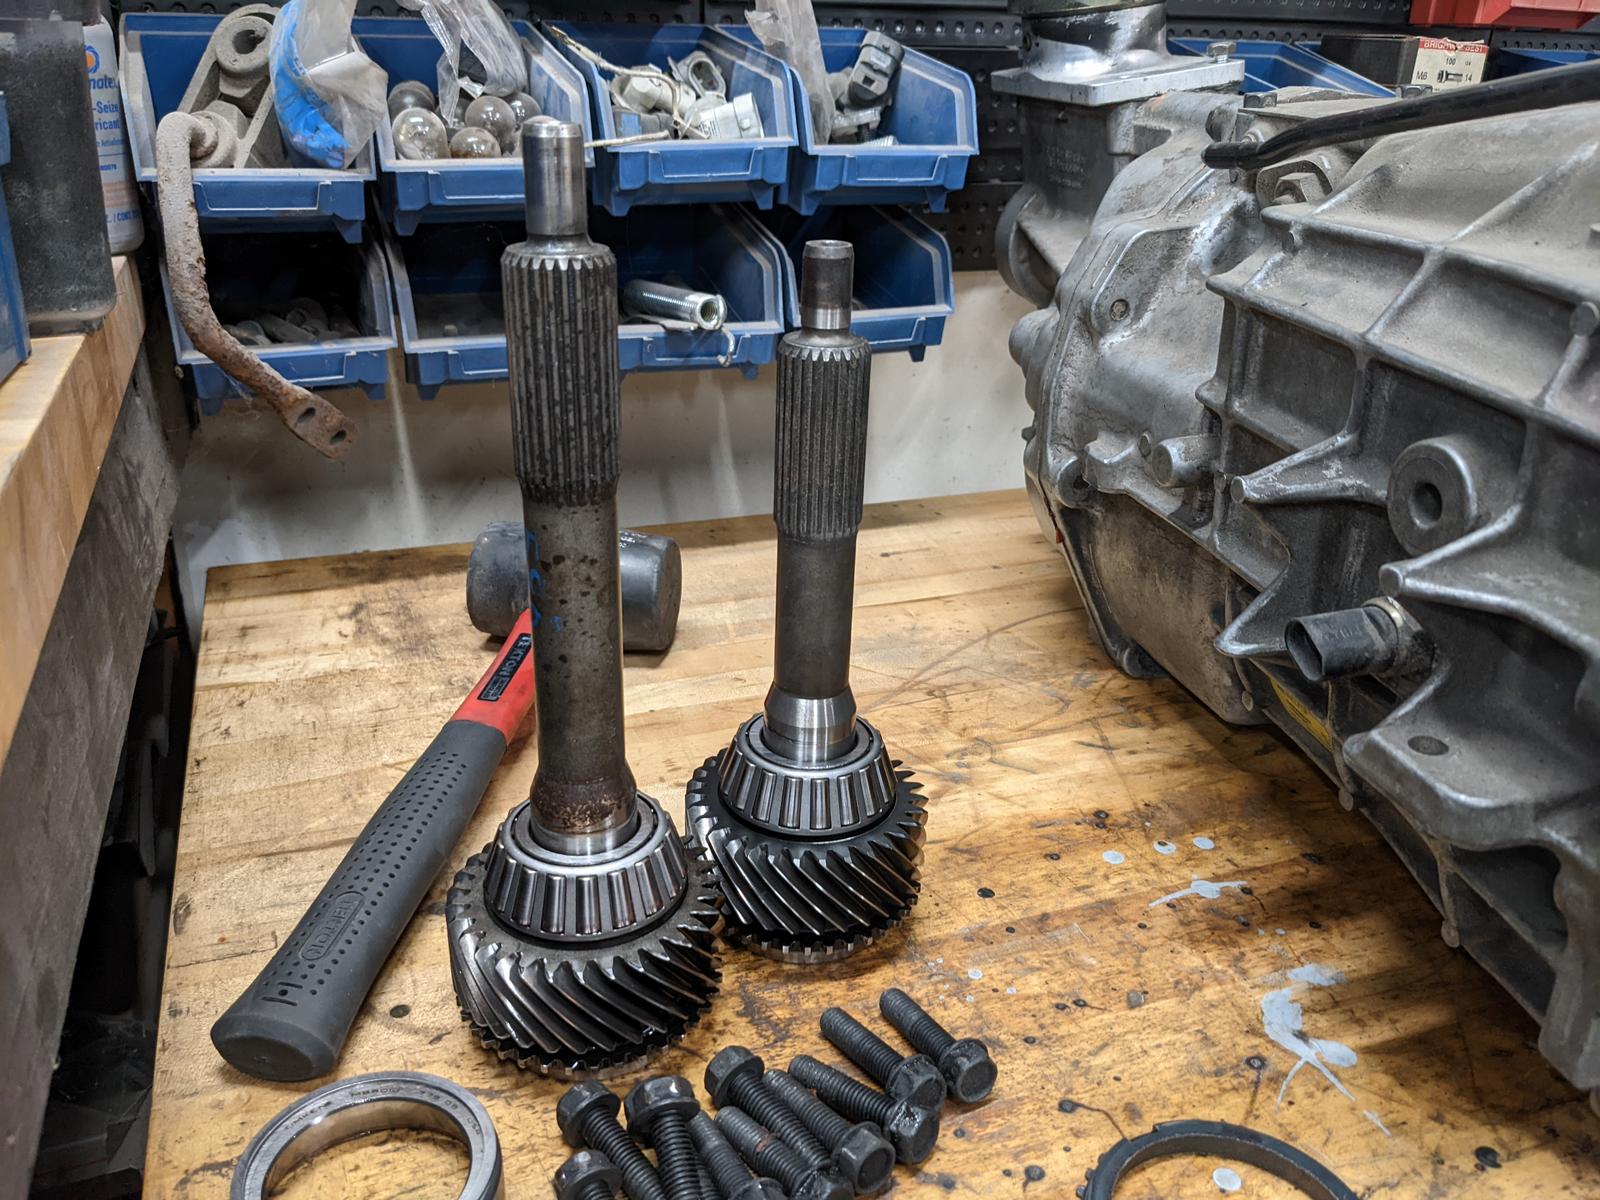
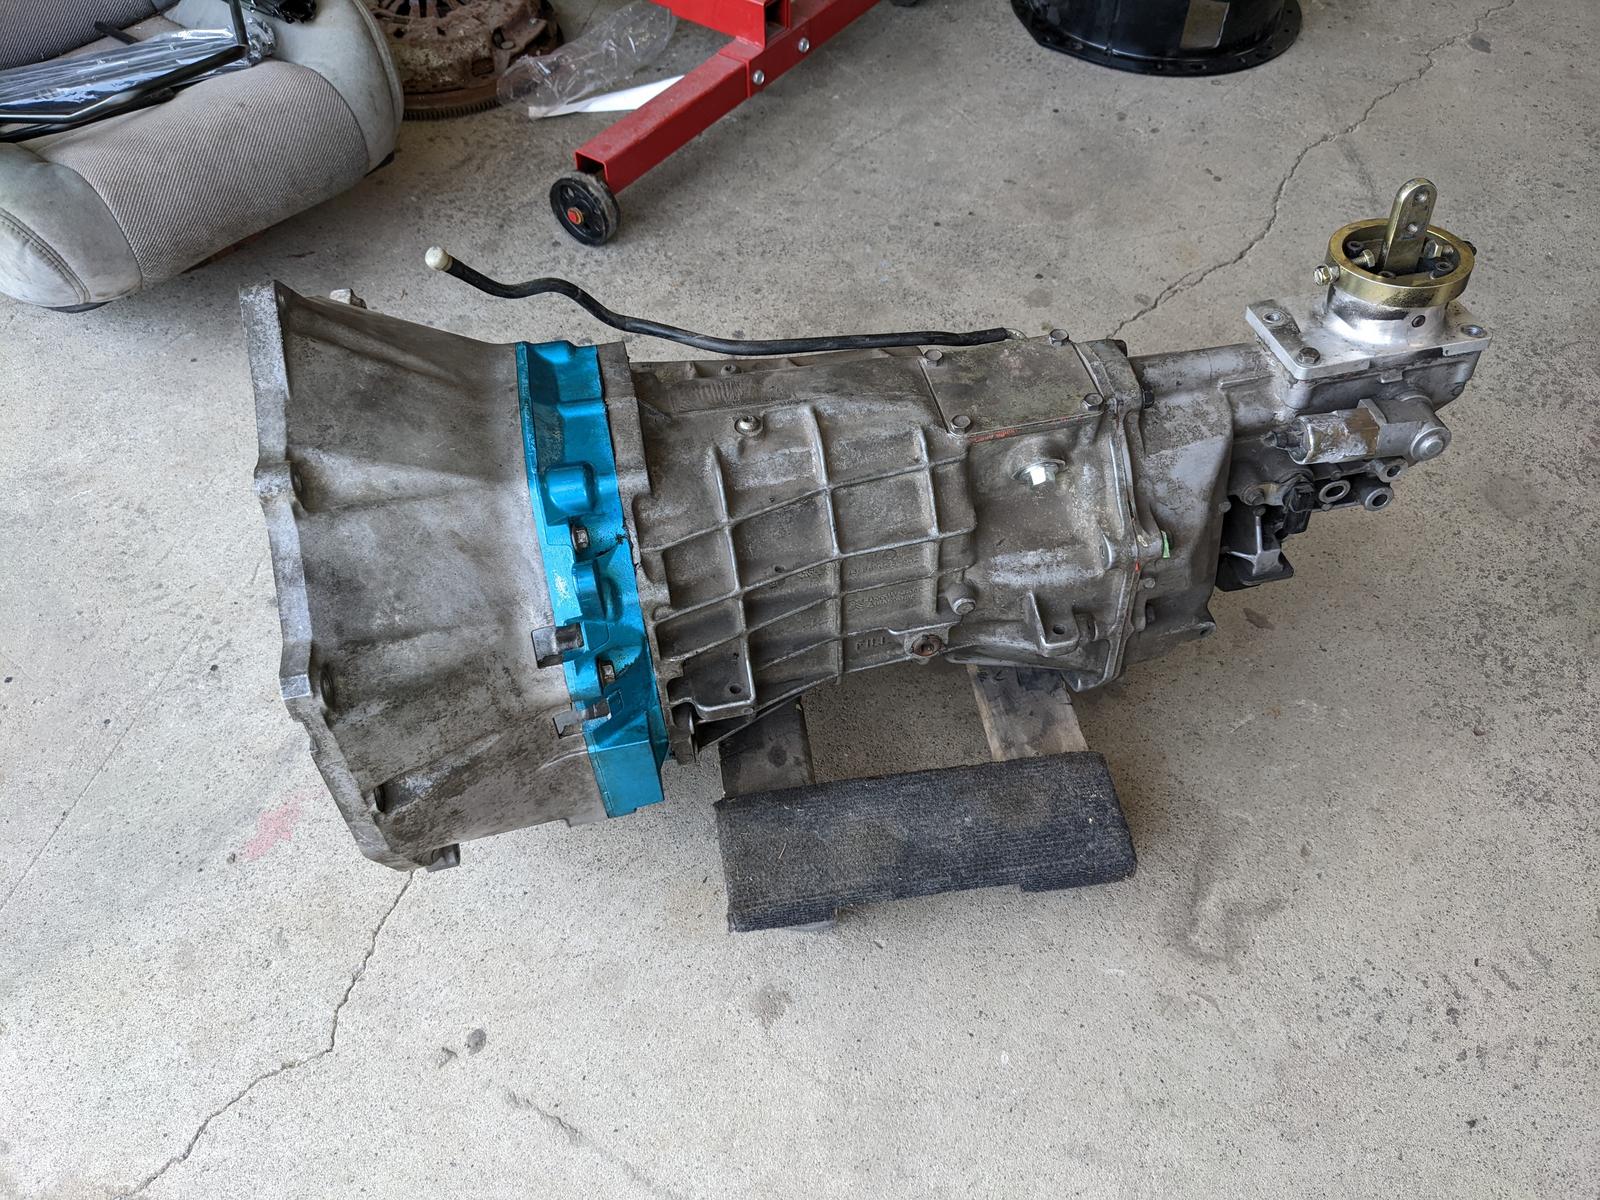
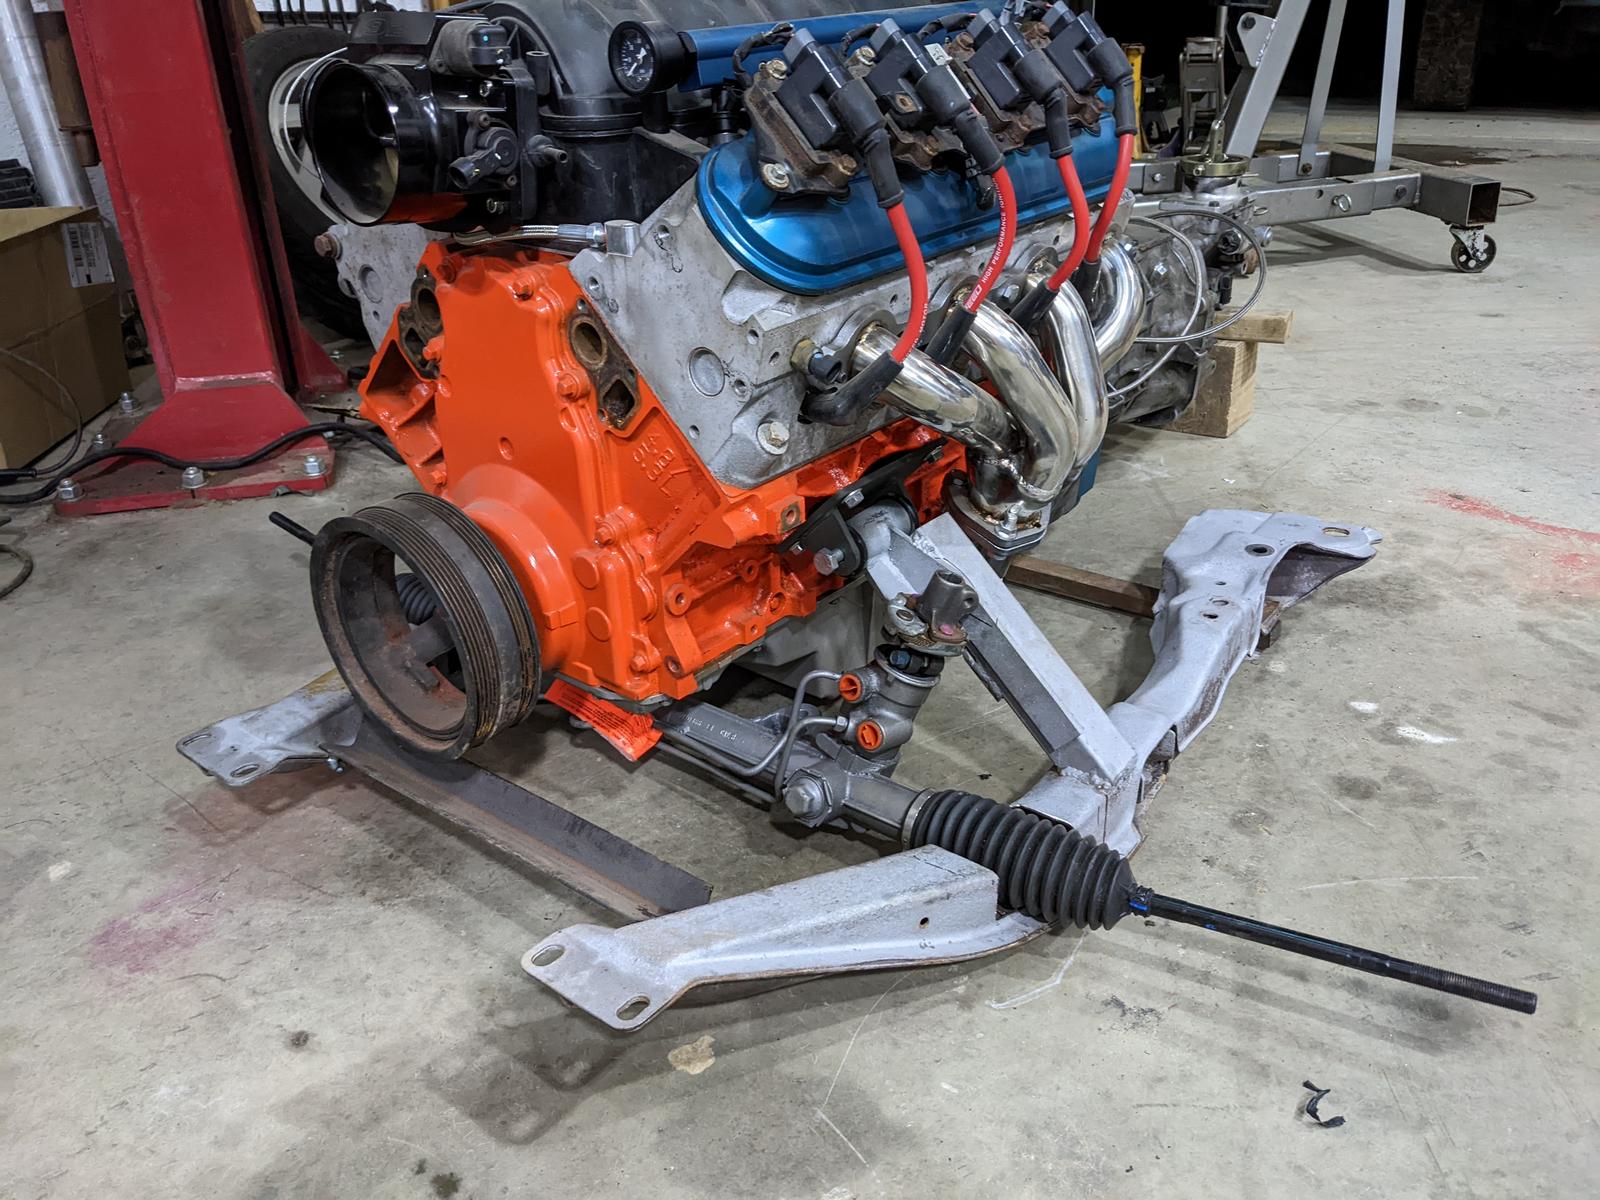
More solid progress this week...and a huge upgrade! Screw the budget, I'm going t56 6spd. I mocked up my Camaro trans just to compare and it fits basically perfect. And every single thing about the t56 is better than nv3500...shift feel, strength, aftermarket, gear splits, highway rpm... Just price is the only issue. And it looks like I've found a nice solution to that, buying a Tick Performance level 2 for my Camaro and using the stock Camaro trans in the Beretta. I'll have to swap input shafts, front plates and bellhousings...but well worth it to upgrade both cars at the same time.
https://www.youtube.com/watch?v=sI4HAS2zp7A
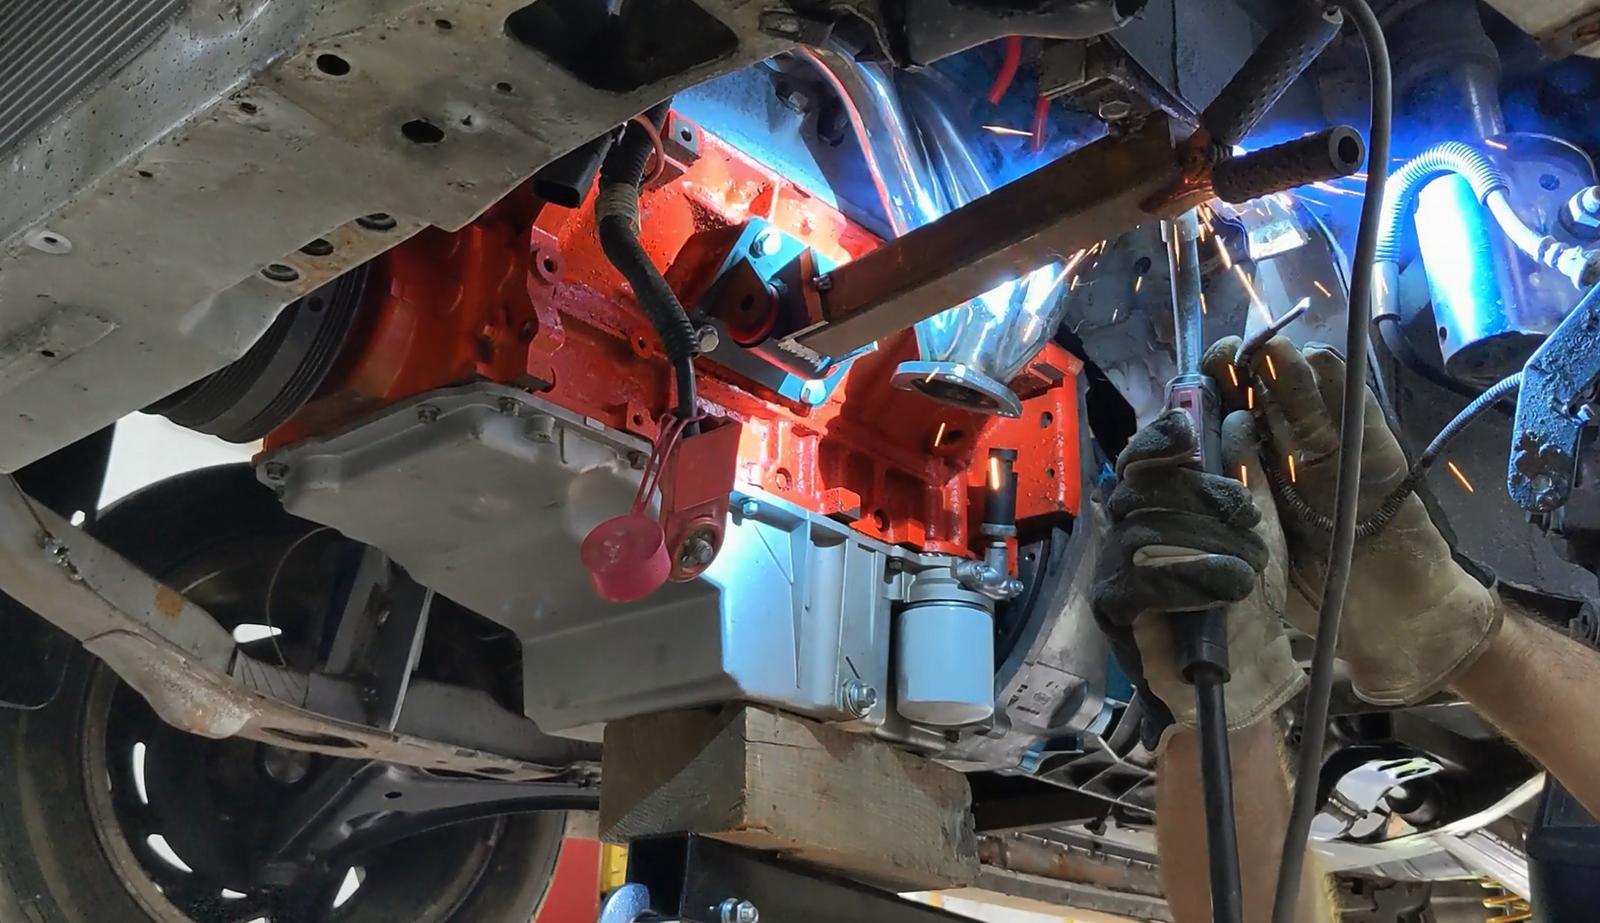
Got the motor mounts all done. The subframes will become one piece with a C channel crossbar for the steering rack up front, and a skidplate/brace in the back under the oil pan/bellhousing.
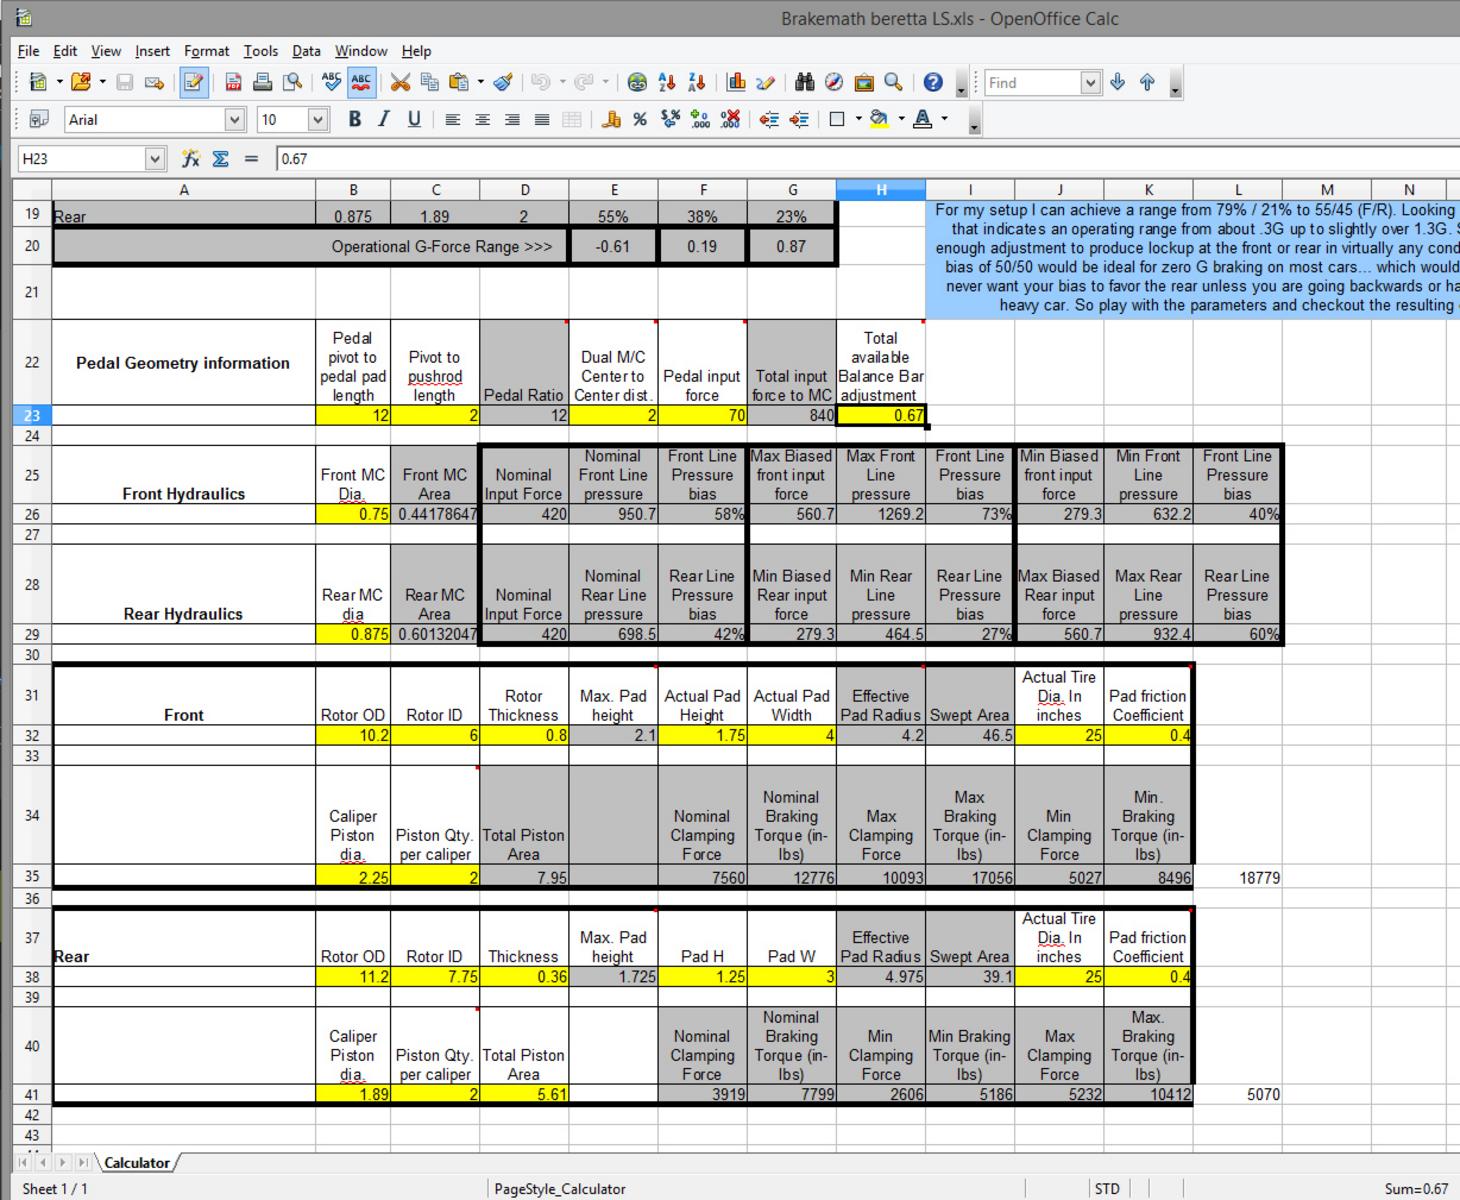
Got my brake math figured out and the Wilwood pedals and Afco masters ordered. Next step is to make them coexist with the steering column.
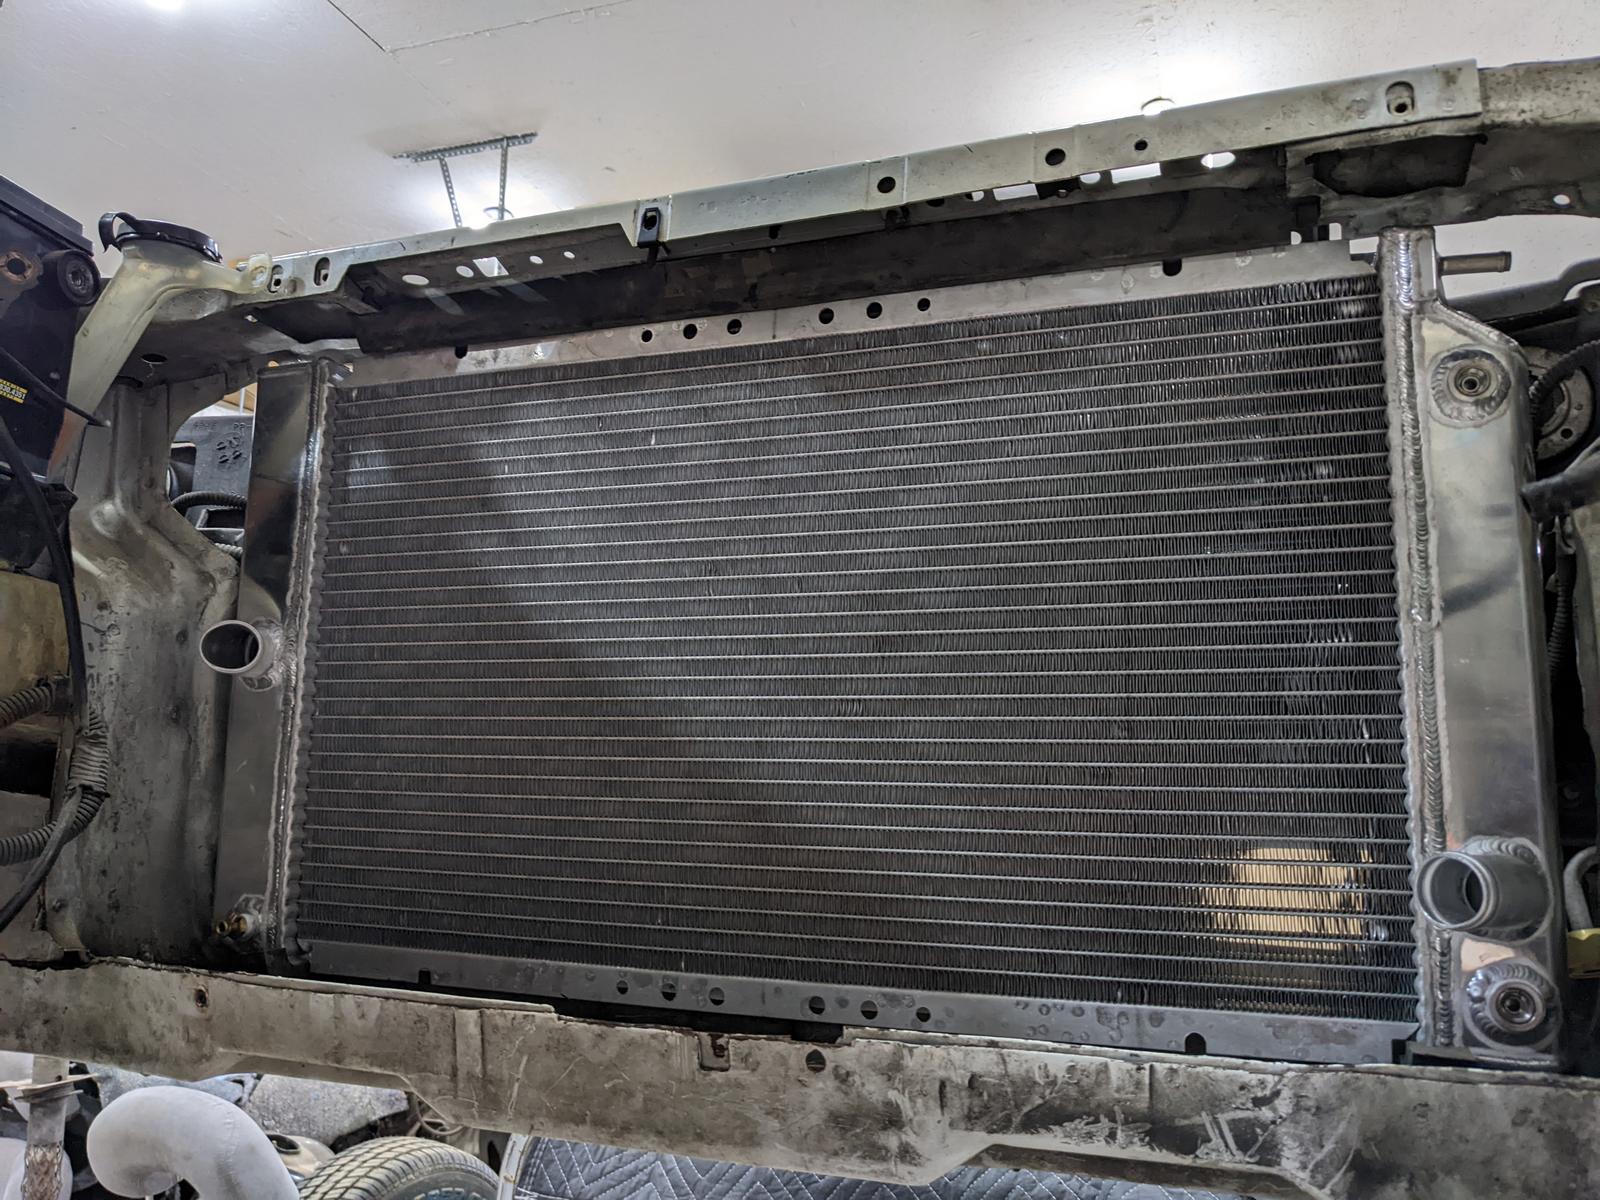
Bought a rockauto full-aluminum radiator and pushed it forward for some more fan and water pump room. Looks like it will work pretty mint.
Also got the crossmember in and the back half of the raised floor mocked up. Not too far away now! Just trans mount...torque arm mount...front floor...tunnel...pedals...steering...wiring...

-
04-20-2022 #50
Registered User
- Join Date
- Mar 2005
- Location
- Walton, NY
- Posts
- 737
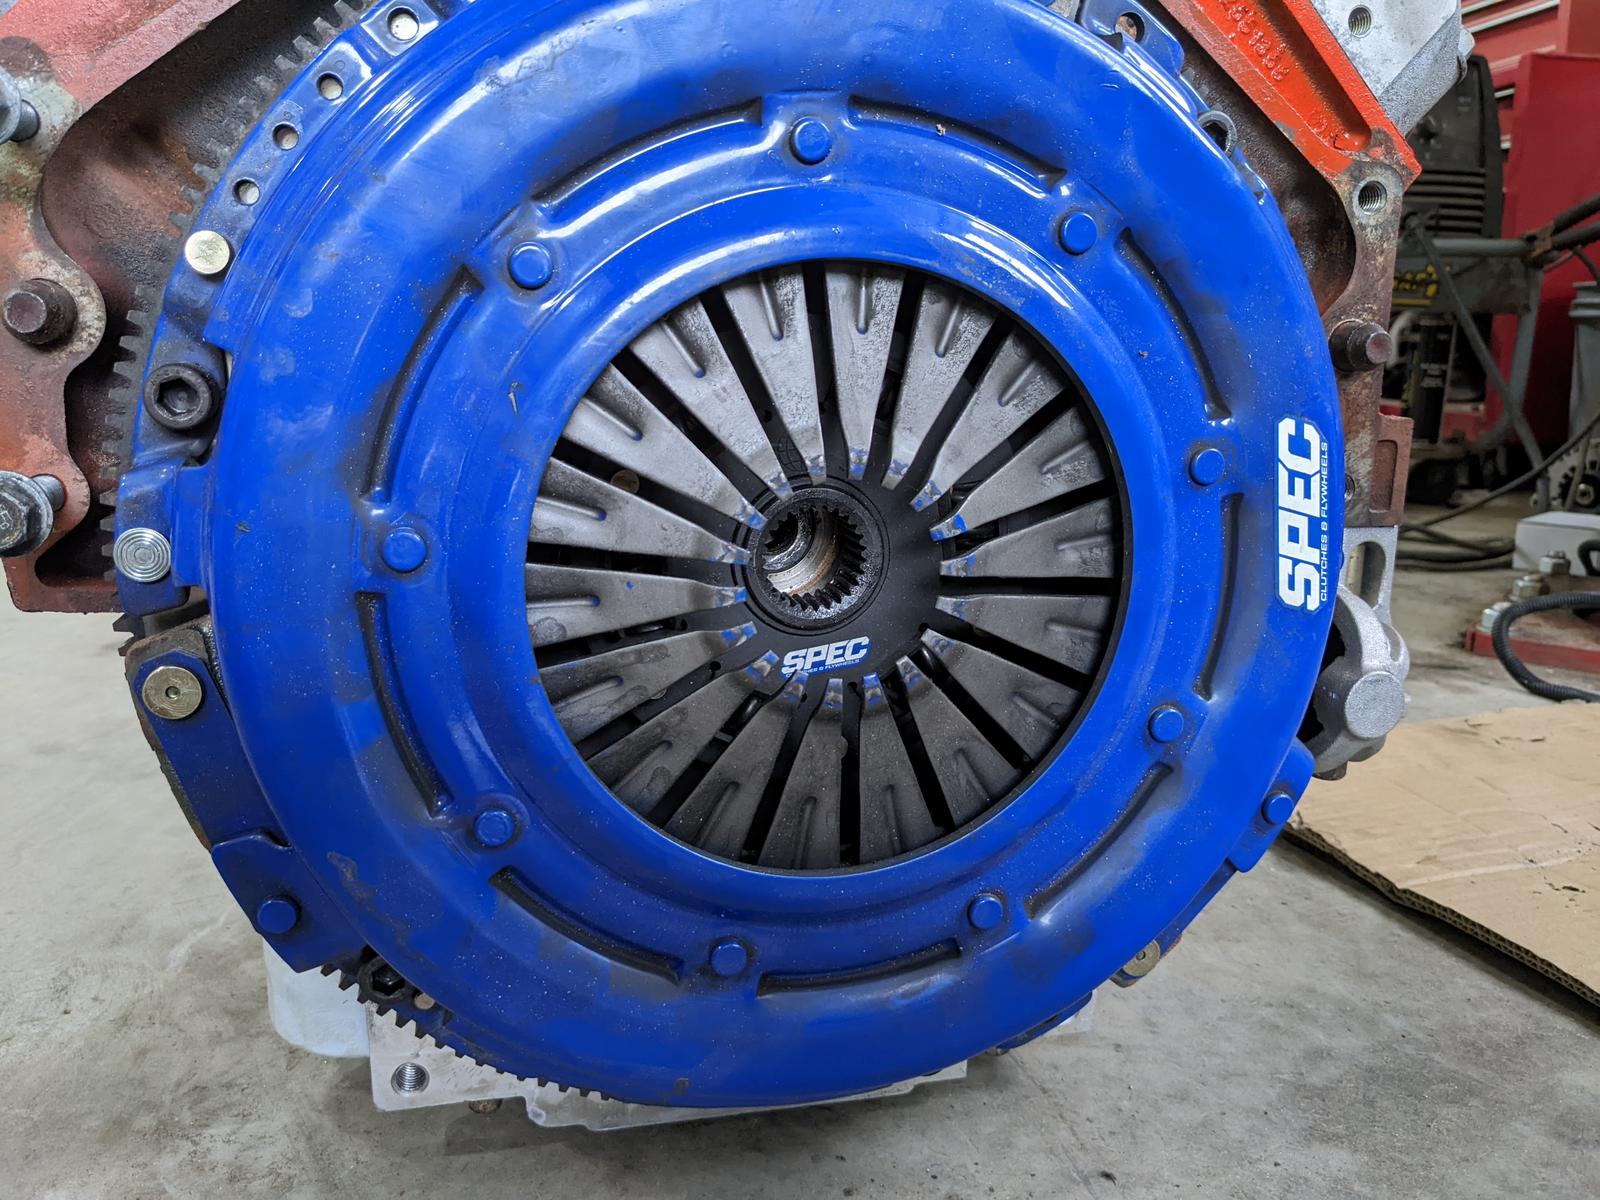
So that 6spd that's mocked up in the Beretta is stolen from the Camaro. Still needed to find another one...and I was able to snag a used Tick Performance T56 built for nitrous! Test drove to make sure it was good and pulled it in the guy's garage. That one will go in the Camaro once I swap it from LS to LT style. I'll take the LS input shaft, front plate, bellhousing, clutch & flywheel and throw them in the Beretta with the stock 94 T56 that I used to run in the Camaro.
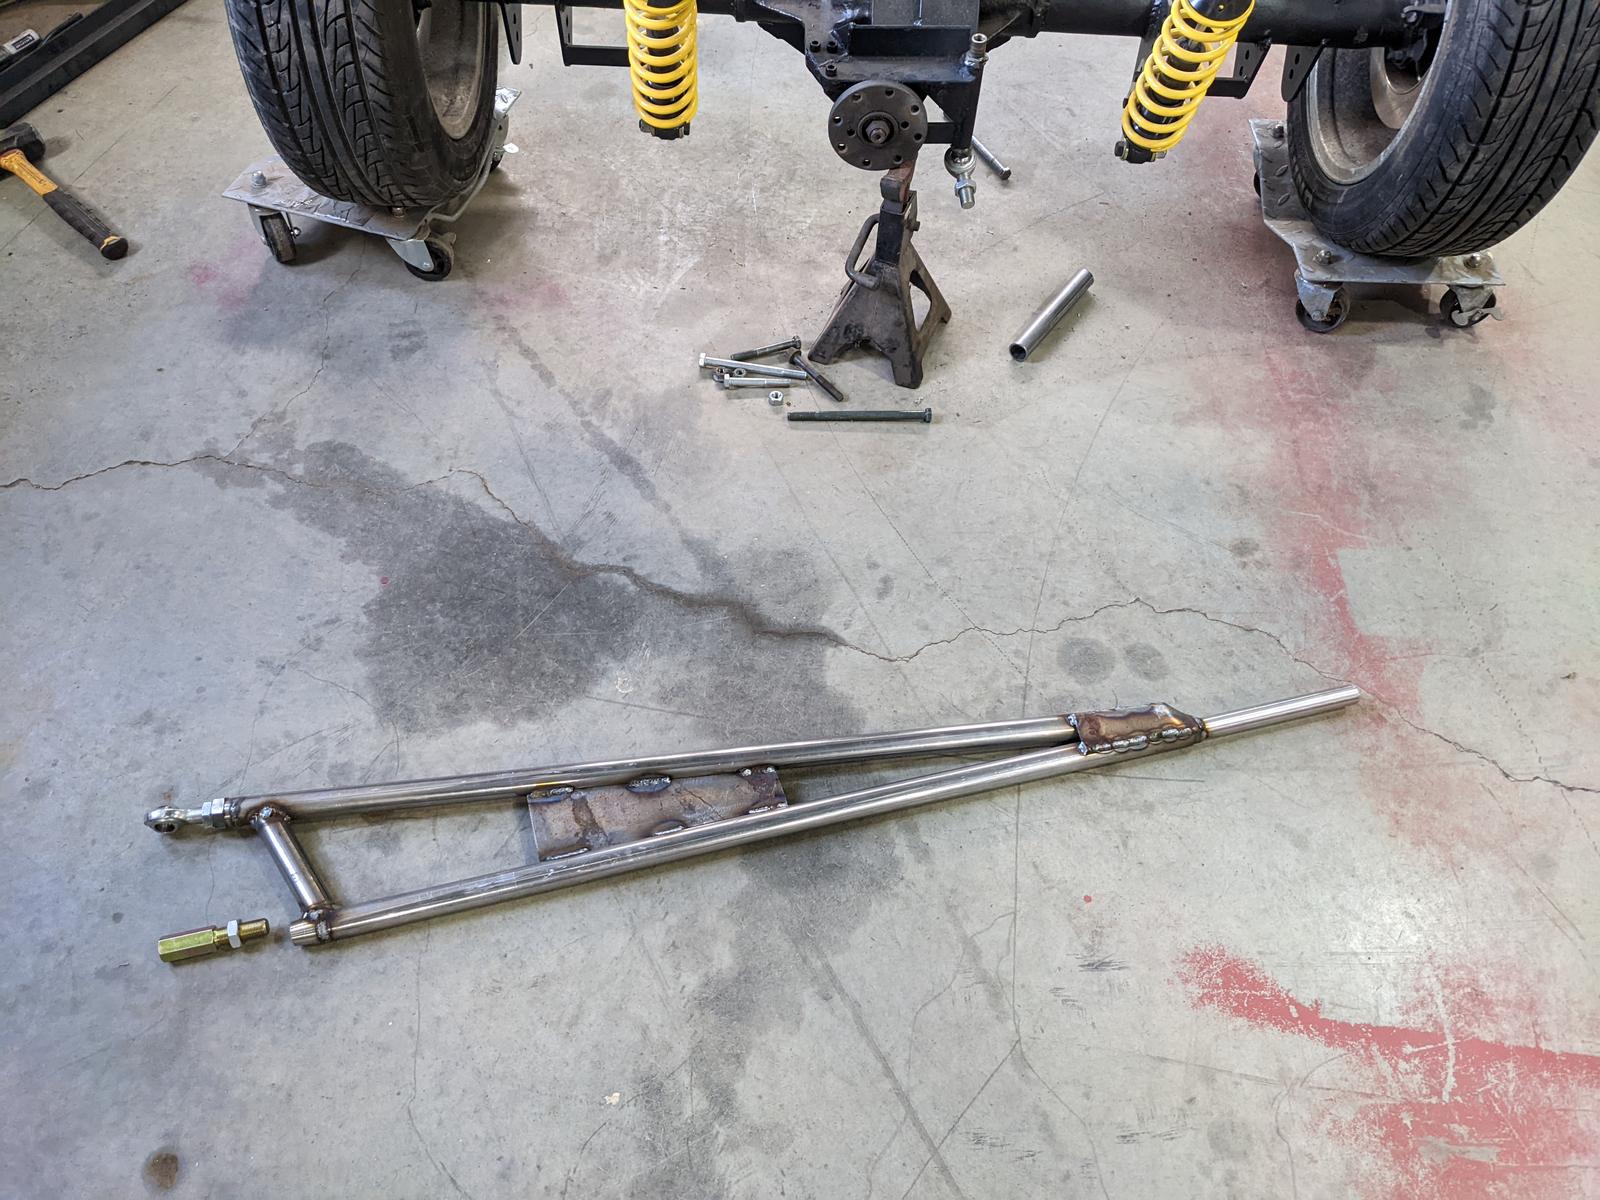
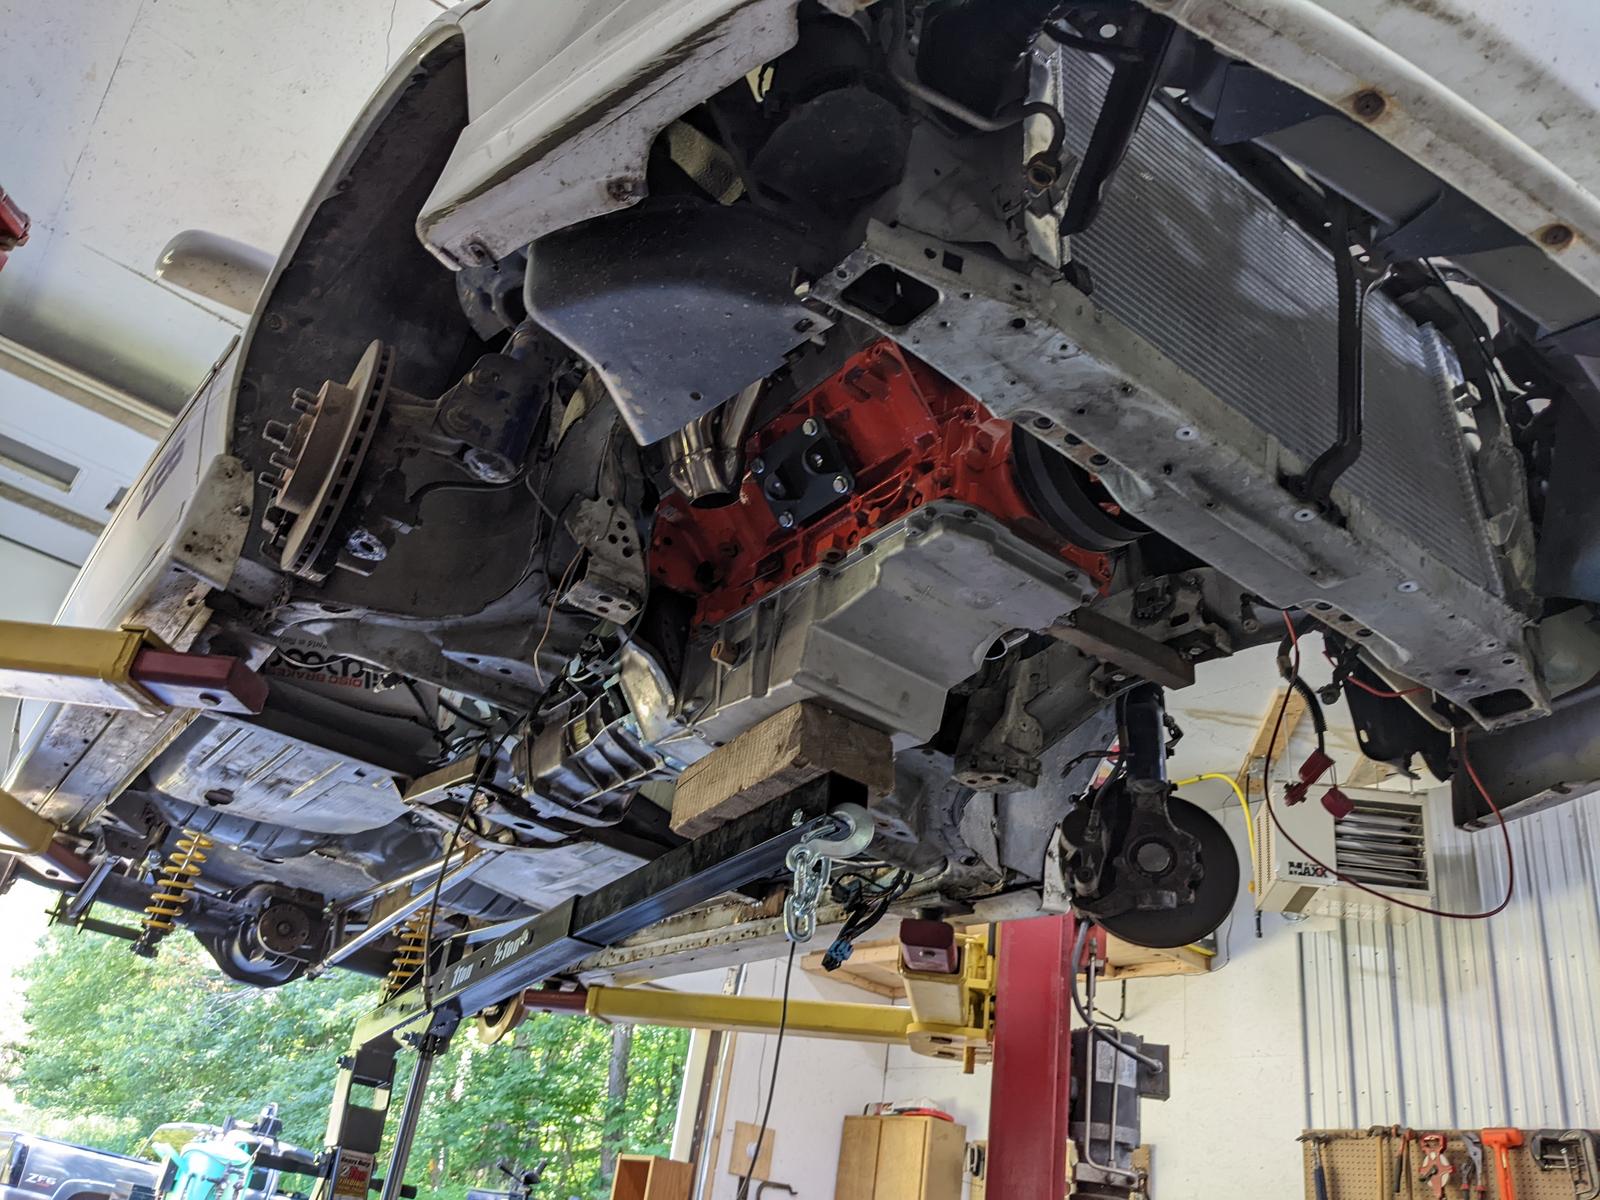
Also got the crossmember built and welded in and the torque arm fabbed and installed. So now it's sitting on the suspension and it's a lot higher in the front than I expected. so I gotta figure out some coilover sleeves for the struts with a higher rate and less height. Keeps moving forward though, that's the key.
https://youtu.be/3W7nko-Vj54
-
04-21-2022 #51
Registered User
- Join Date
- Sep 2009
- Posts
- 2,705
Looks good man! So what are your plans for the floor? When you get the floor back in do you plan to add a brace for the front of the trans mount? Looks like as is, it would be putting a lot of leverage on that mount.
1955 Nomad project LC9, 4L80e, C5 brakes, Vision wheels
1968 Camaro 6.2 w/ LSA, TR6060-Magnum hybrid and etc SOLD
1976 T/A LS1 6 Speed, and etc. SOLD
Follow me on Instagram: ryeguy2006a
-
04-23-2022 #52
Registered User
- Join Date
- Mar 2005
- Location
- Walton, NY
- Posts
- 737
Yeah, I'll weld the trans mount "arms" right into the floor, as will the crossmember. I don't love the design, but it was the best I could come up with that allows the engine/trans to be installed from the bottom and also leave some room for exhaust. The exhaust will be really tight coming through the firewall and I also need room for my feet and pedals. The floor is already gonna be raised 3in...I didn't want another crossmember that would be even higher than that.
I just mocked in the front floor and it looks pretty decent.

-
05-09-2022 #53
Registered User
- Join Date
- Mar 2005
- Location
- Walton, NY
- Posts
- 737
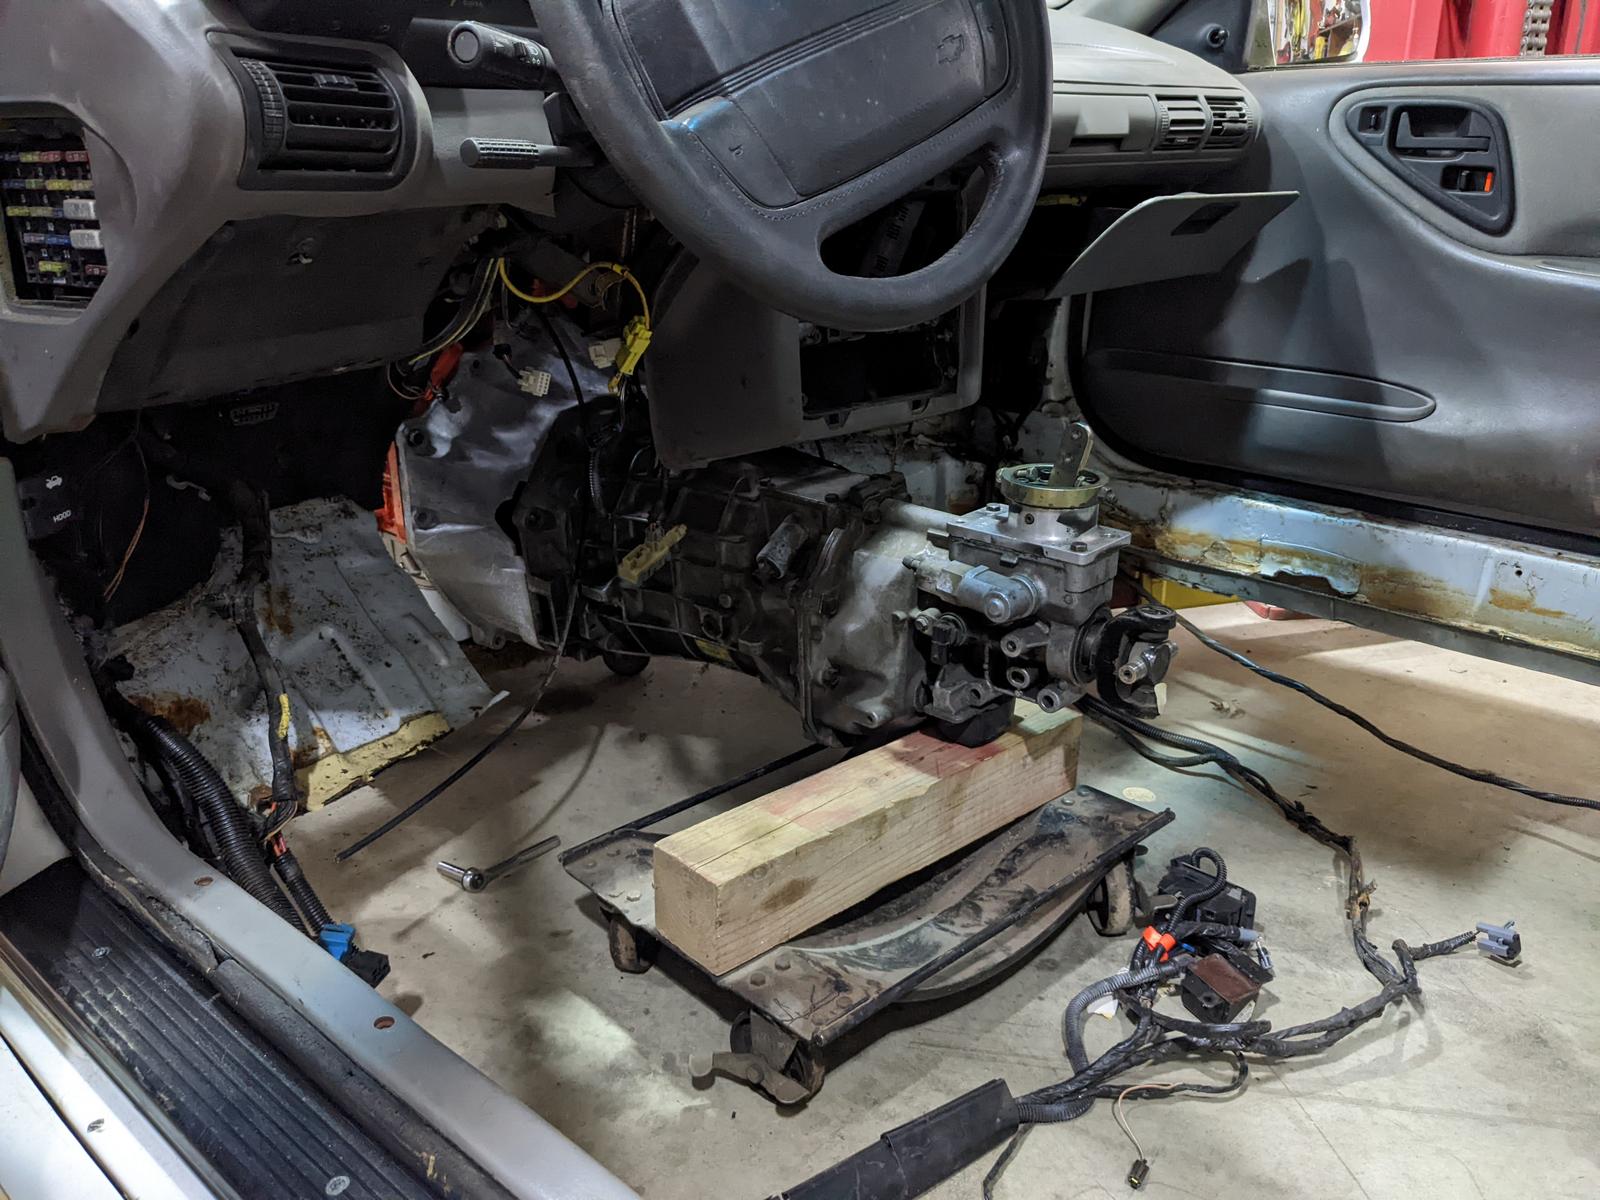
Got the stock LT1 trans swapped over to LS style and ready to go in the Beretta. I'm doing a video of that process at some point. You need a shim kit to get the clearance and preload right. This is the second "Beretta" trans to get opened up on that bench...I rebuilt a FWD 5spd years ago. haha
Also got a few things figured out and started final floor installation. Not a ton of progress in the last couple weeks, but it's still going forward. Couple more things came in while I was on vacation in Texas so I can jump back on it.
https://youtu.be/hW1XC6hA9x8

-
06-05-2022 #54
Registered User
- Join Date
- Mar 2005
- Location
- Walton, NY
- Posts
- 737
Started mocking up steering and it's kind of a mother. Most of the RWD stuff has been going pretty well, but this is a pain in the ass! haha
Driveshaft came in and didn't fit...and I couldn't chuck it in the lathe to trim it down, so it went back to Texas to get fixed.
https://youtu.be/ESzU80rEKA0


-
06-22-2022 #55
Registered User
- Join Date
- Mar 2005
- Location
- Walton, NY
- Posts
- 737
Got it all connected from V8 crankshaft to rear tires. Put the Camaro clutch in it, fixed the trans yoke that Texas "fixed" and put it back on the ground.
The old man has to get a junk Cuda parted before Mopar Carlisle, so he needed his lift. The nerve!
Getting it outside really shows how high the front is with less weight in front of the tires. RWD distribution is so much better... Gonna have to cut the coils though.
Still fighting with the steering. And I'm at the point now that I might be cutting out the engine mounts I welded in to fit the rack better. I knew it was going too smoothly. haha
https://youtu.be/eY5Lu1RB3zk

-
07-11-2022 #56
Registered User
- Join Date
- Mar 2005
- Location
- Walton, NY
- Posts
- 737
Yeah, it's a little sketchy...but you can lift an engine from the bottom with a cherry picker.
https://youtu.be/xuwgxGyi-Lc
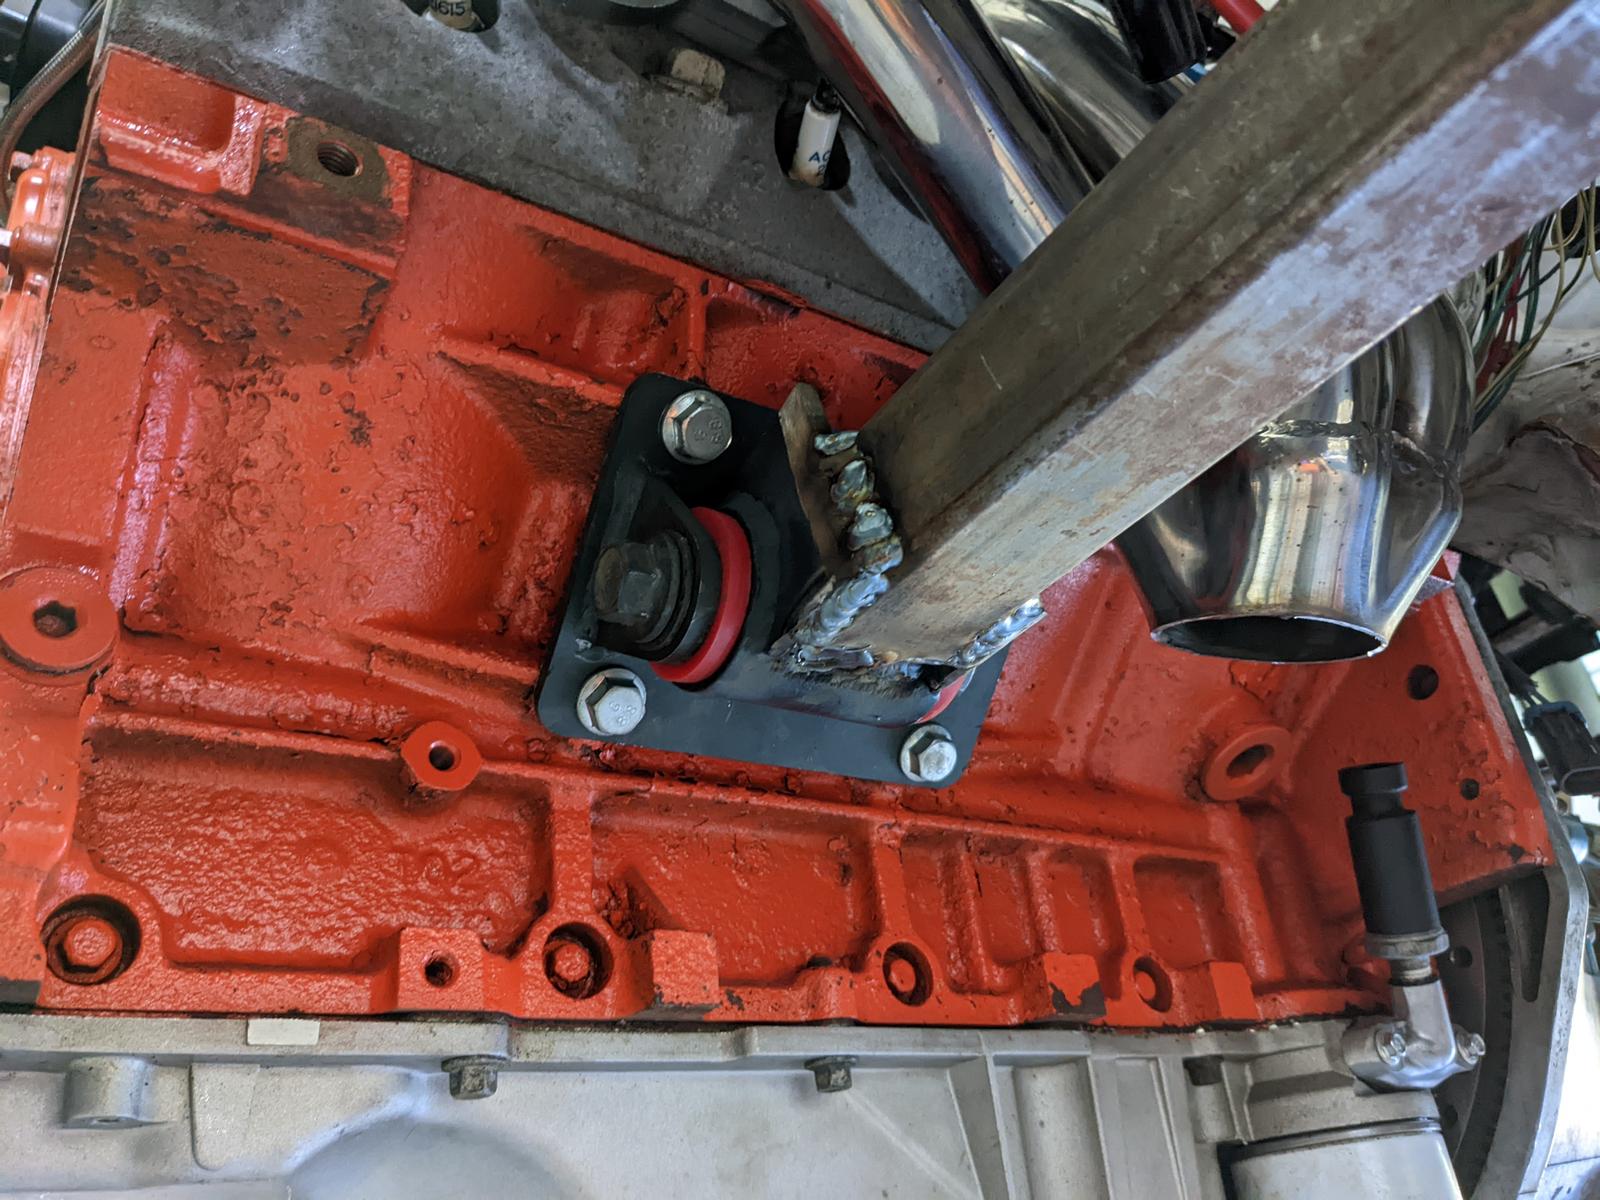
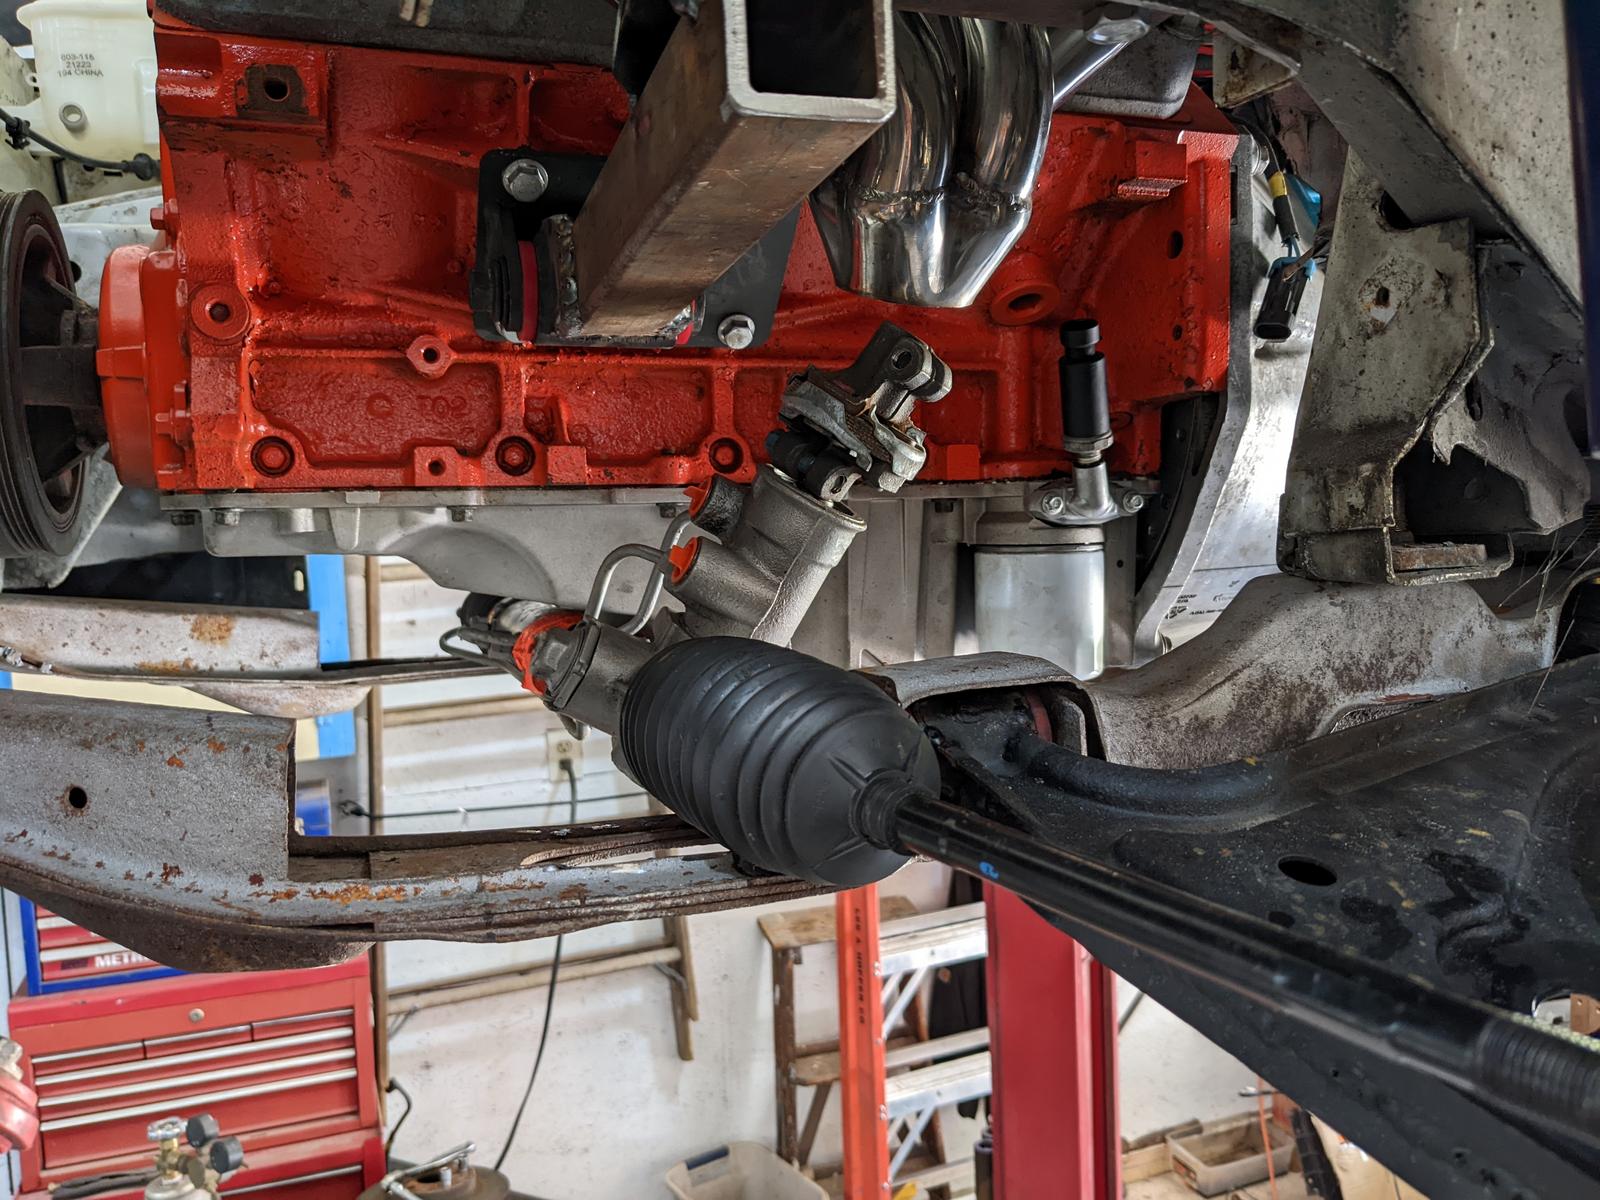
I had to cut the engine mounts out and change them to make the steering rack fit better. After butchering the stock subframe, I welded some structure back in and made my rack mounts.
Once my rod ends and steering arms come in from Speedway, it should steer!

07-12-2022 #57 Registered User
- Join Date
- Jul 2008
- Posts
- 454
Good work so far!
You could run a Holley 302-2 oil pan and gain more clearance for the rack.
https://www.pro-touring.com/threads/...n-Buyers-Guide
Would swept back shorty swap headers help w/ the rack as well?
https://www.269motorsports.com/heade...g/?sku=25-1021
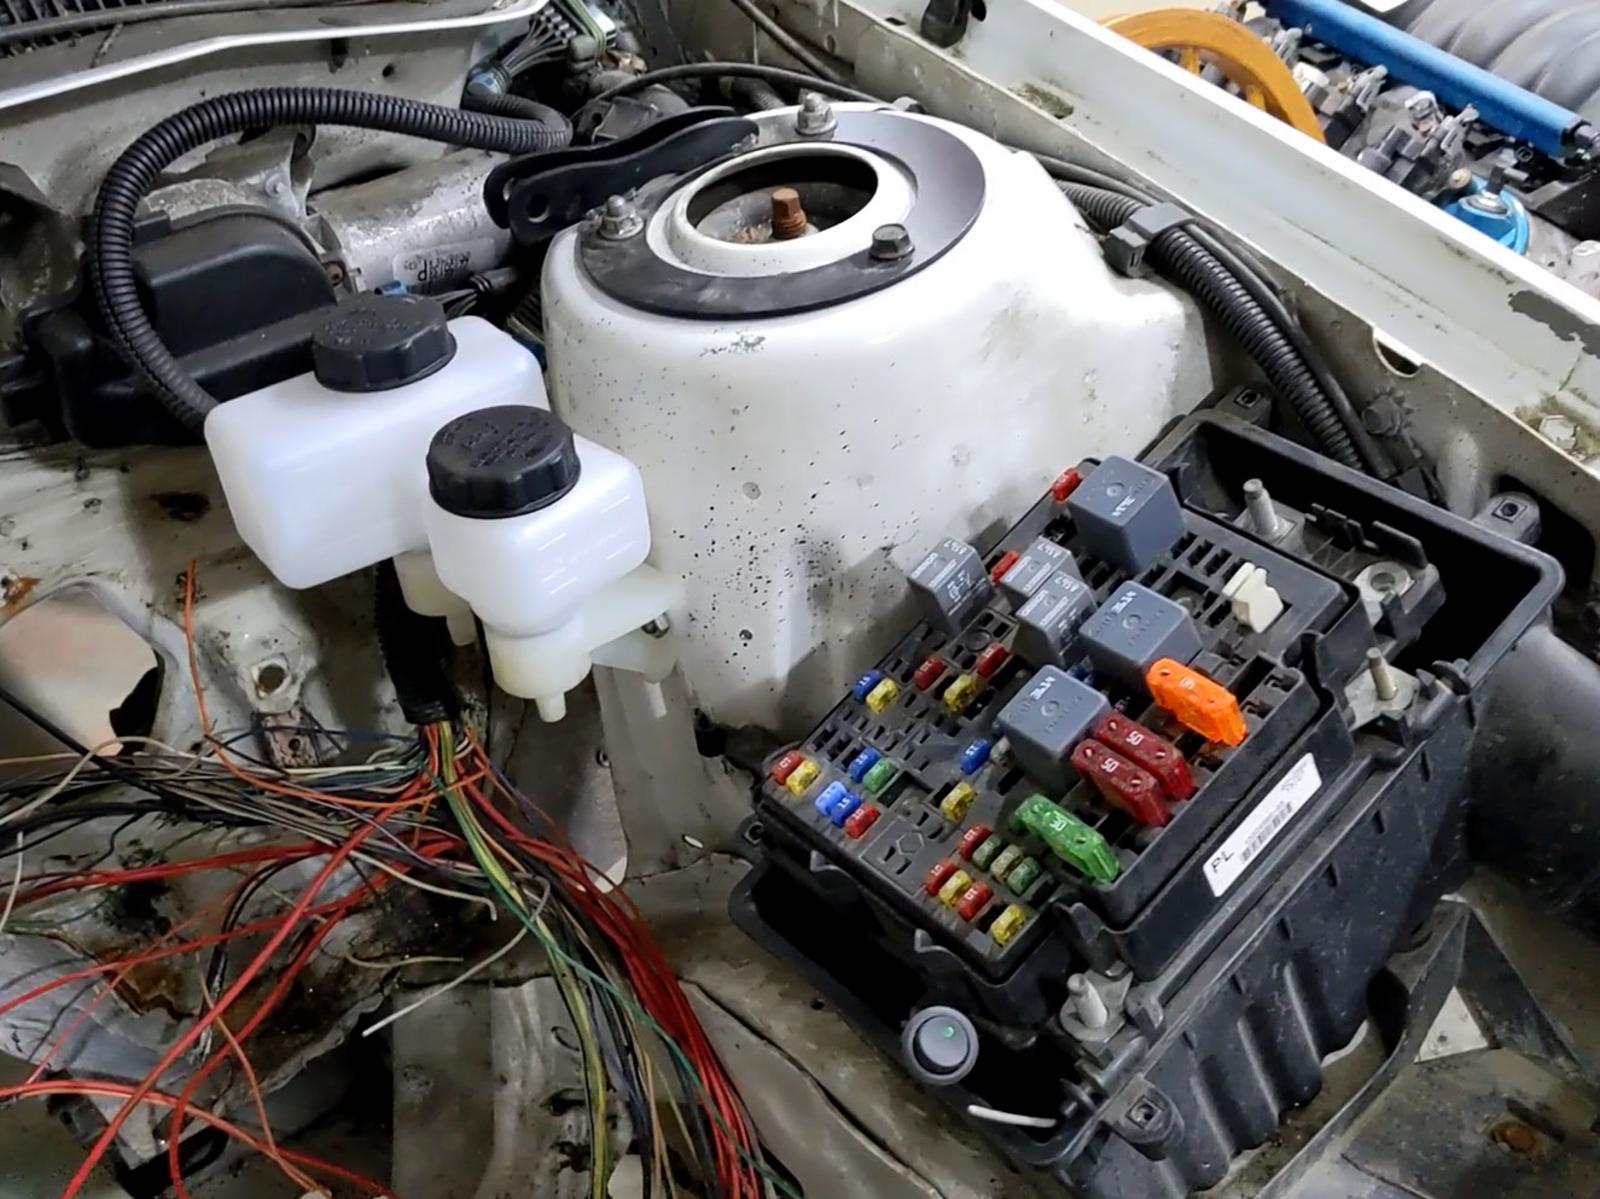
When you go to clean the engine bay / wheels, use aluminum brightener. It's an acid, so be careful as far as spraying it on open electronic connections, but it will work wonders. Spray it on, agitate with a long bristle brush, then rinse it off as quickly as possible. Go back w/ soap and water to neutralize the acid and you have a super clean engine bay / wheels. It will dull polished aluminum. I usually use wheel/tire cleaner on the engine bay after the initial acid wash.
This is what it did to my sill plates, just try not to inhale the mist when spraying it, stuff is strong.
 *Jeff*
Project Salty - 1964 4 door Malibu, beaten, neglected, red headed foster child
Cammed LQ4 / T56 Swap Project Thread <-click to read! 😁
07-12-2022 #58
Registered User
- Join Date
- Mar 2005
- Location
- Walton, NY
- Posts
- 737
The rack is basically as far back as it can be with those control arms. I would have liked another half inch or so, but that's where it's at. The tie rods will be at a slight angle back, when the wheels are straight, but it should be ok now. I would have tried to overtravel the inner tie rods if I left the v1 engine mounts in.
I wouldn't mind a little bit more angle to the headers, but it couldn't be much, because the unibody where the subframe mounts would be in the way, and I'd lose floor space right at the firewall. I planned on staying super cheap and using the stock manifolds, but they would have put the downpipes into the firewall.
I need to do a cleaning once I have trans tunnel and floor built. Itching to get this car driving!
07-13-2022 #59
Registered User
- Join Date
- Sep 2009
- Posts
- 2,705
Great work man! l can't wait to see this thing up and running, although I moved out of the area. Down in Charlottesville, VA now.
One thing I can't help but ask is if you plan to add any sort of gussets or a top plate or something to the section that you cut out? Maybe I'm not fully understanding how it bolts into the car, but it sorta looks like it's going to fold in half the way it is now. I'm sure you have a plan though.
1955 Nomad project LC9, 4L80e, C5 brakes, Vision wheels
1968 Camaro 6.2 w/ LSA, TR6060-Magnum hybrid and etc SOLD
1976 T/A LS1 6 Speed, and etc. SOLD
Follow me on Instagram: ryeguy2006a
07-19-2022 #60
Registered User
- Join Date
- Mar 2005
- Location
- Walton, NY
- Posts
- 737
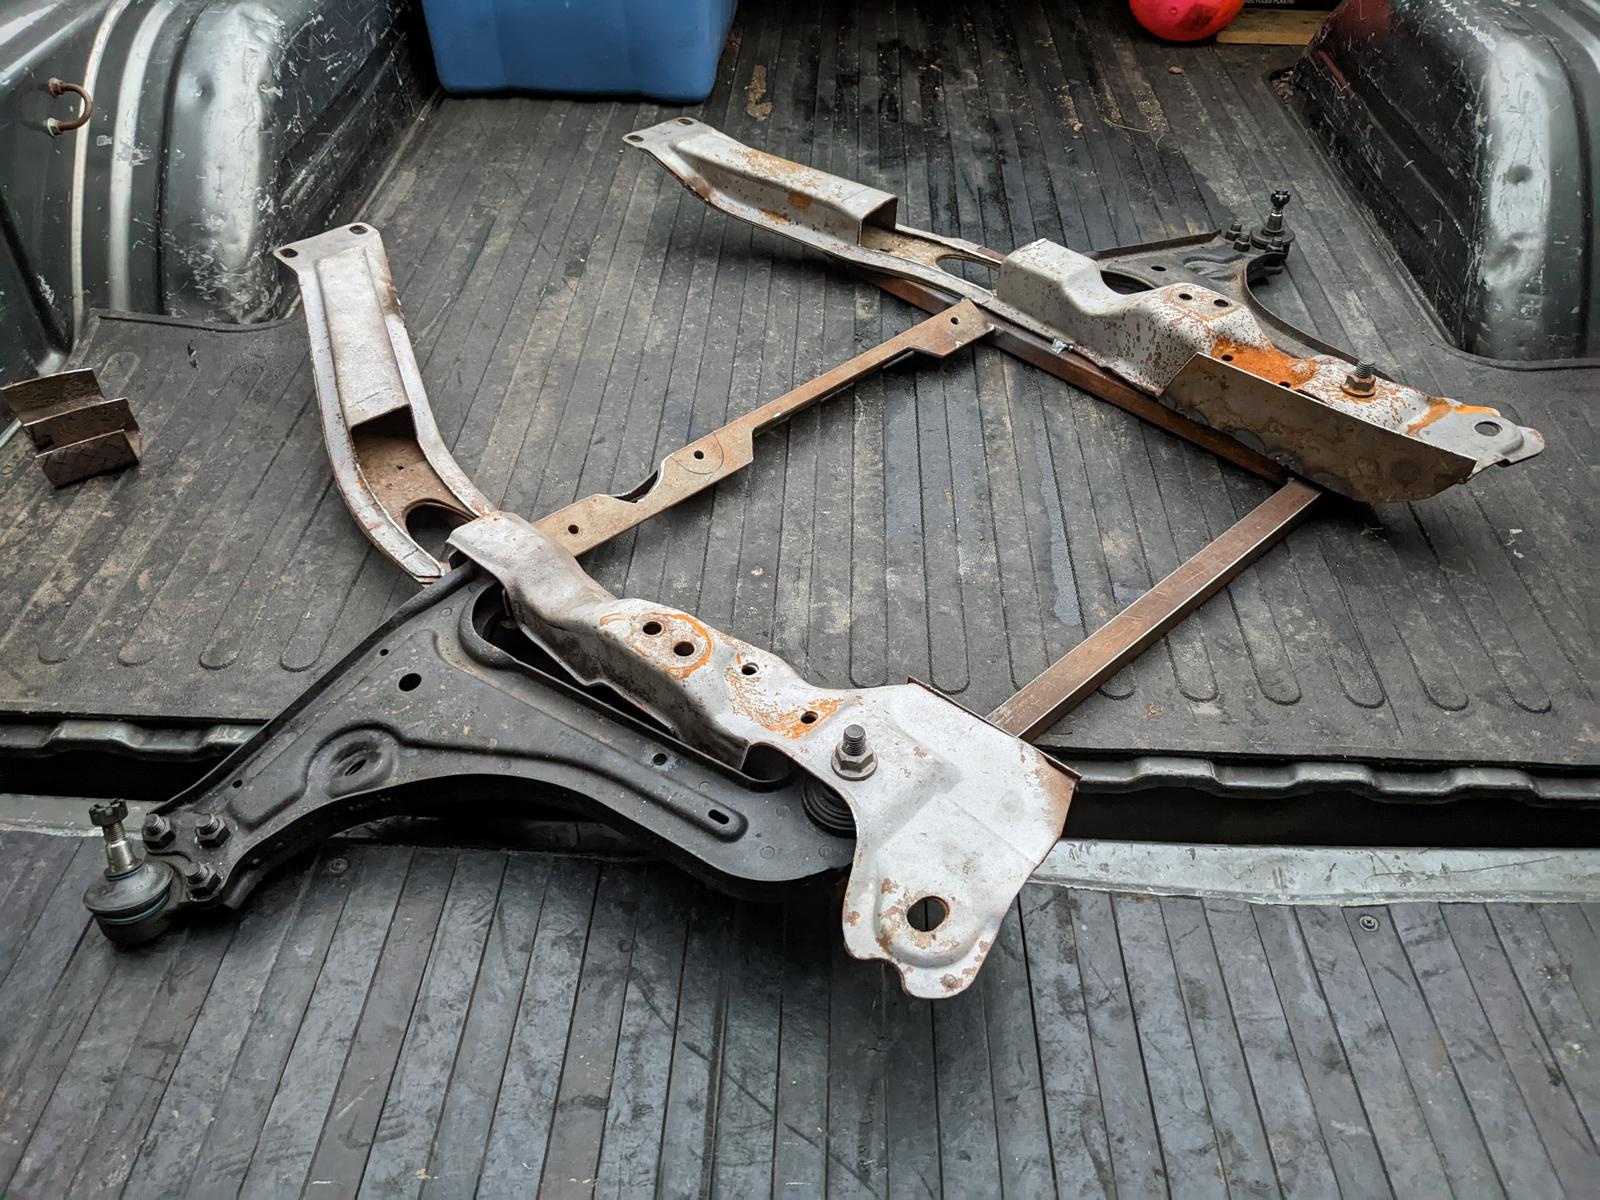
Yeah, it looks terrible...but should be ok. A friend of mine (SpankRanch Garage on youtube) did a somewhat similar RWD conversion years ago keeping the V6 but using a T5. He just cut it off completely ahead of the rack and drives it that way. I added a 1x1 rectangle tube under it to help a little. You can see it better in the video.
This whole car is an experiment and my driving style should find any weaknesses! haha
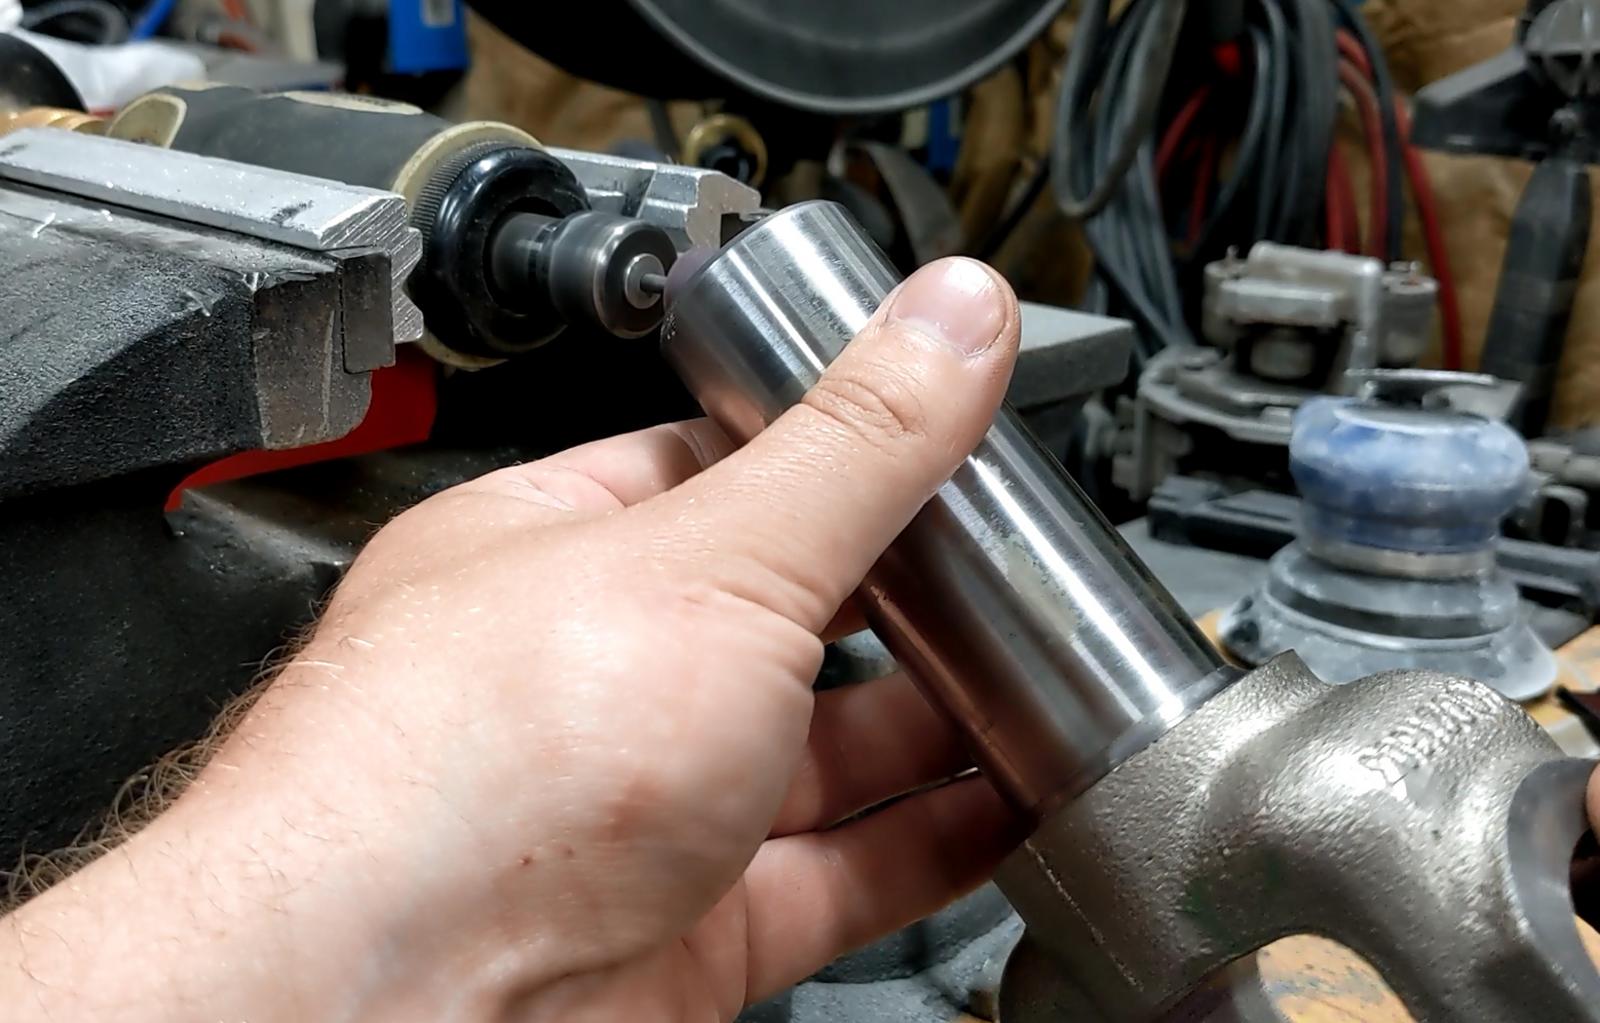
Now I'm putting a bend in this 1948 Ford steering arm and redrilling the tie rod hole. I marked off 4 and 5in. 5in would get me the same steering angle as a 2000 Camaro, and 4in would get me 20% more. Once the bend is in I can test clearance.


 Reply With Quote


