Results 81 to 100 of 121
-
01-03-2023 #81

 Registered User
- Join Date
- Sep 2009
- Posts
- 2,705

Nailed the stance!

1955 Nomad project LC9, 4L80e, C5 brakes, Vision wheels
1968 Camaro 6.2 w/ LSA, TR6060-Magnum hybrid and etc SOLD
1976 T/A LS1 6 Speed, and etc. SOLD
Follow me on Instagram: ryeguy2006a
-
01-05-2023 #82

 Registered User
- Join Date
- Mar 2005
- Location
- Walton, NY
- Posts
- 737
I can go about 1.5 lower or 2.5 higher (yeah right). Now to make the rear match... Originally Posted by ryeguy2006a

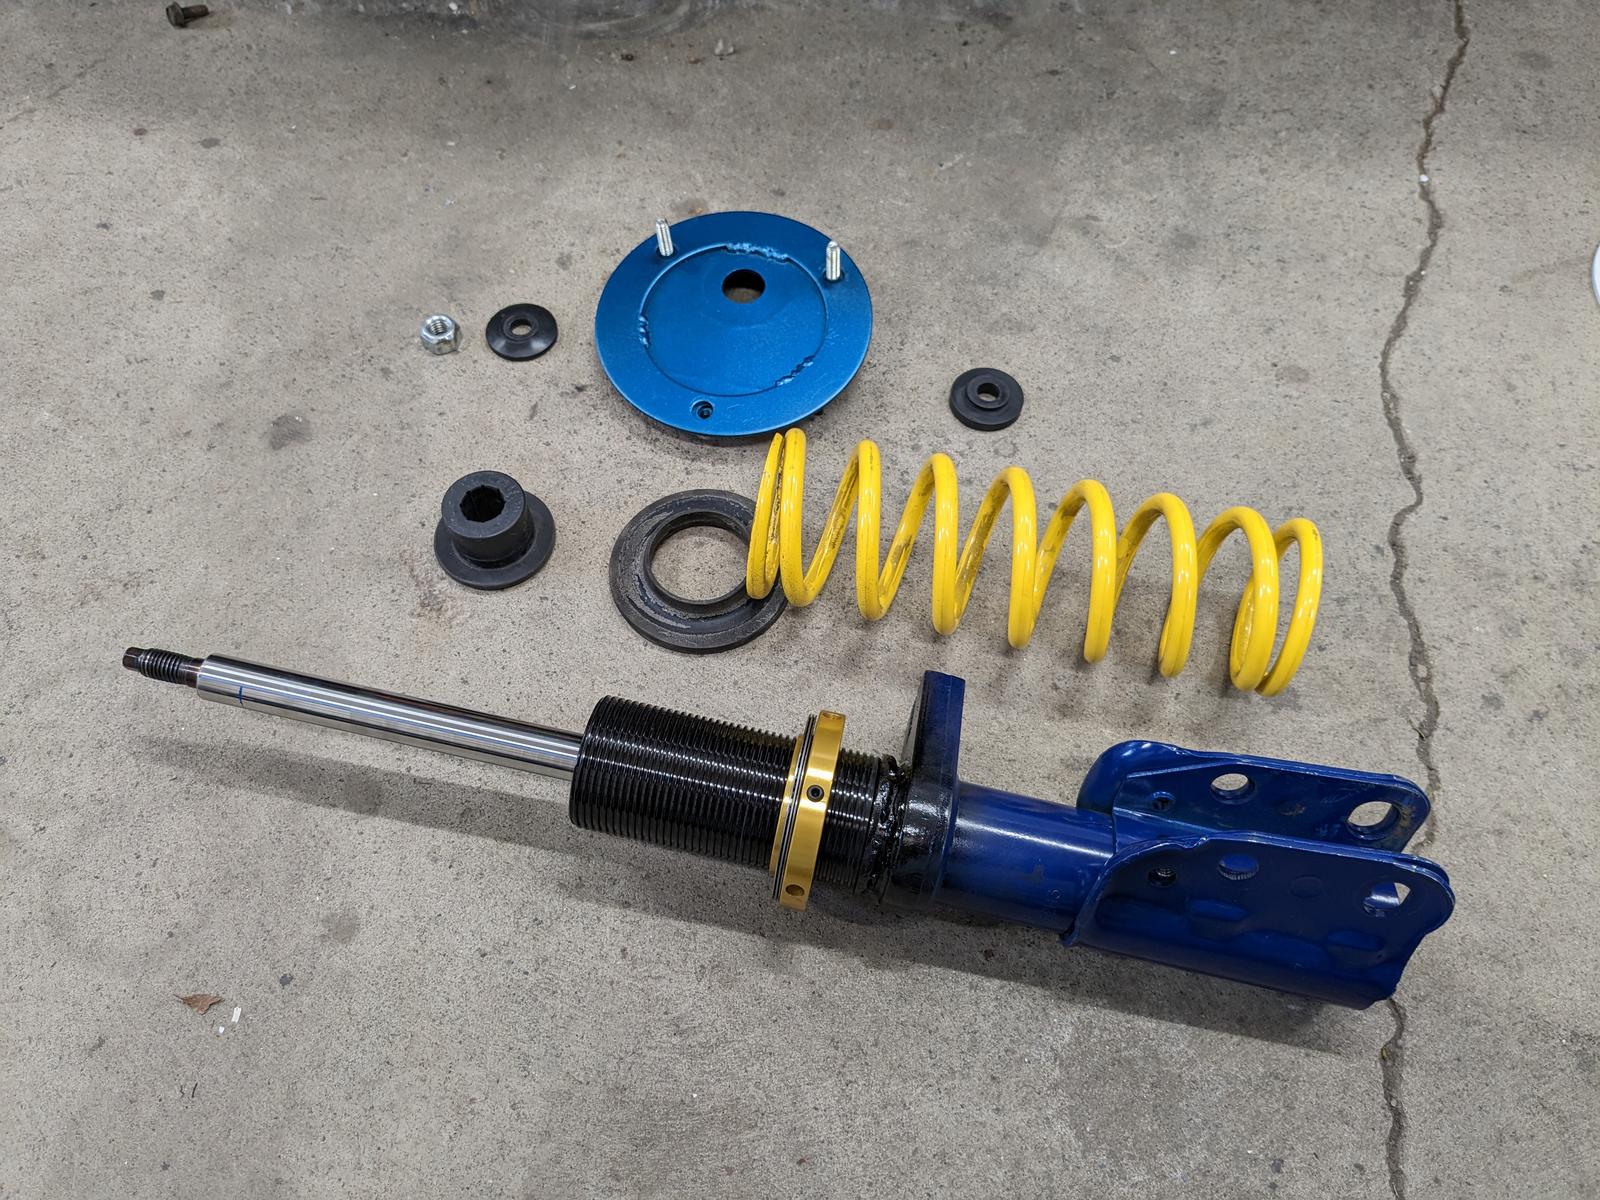
Got the coilovers all done and the video up.
https://youtu.be/et8G4sg5xGA
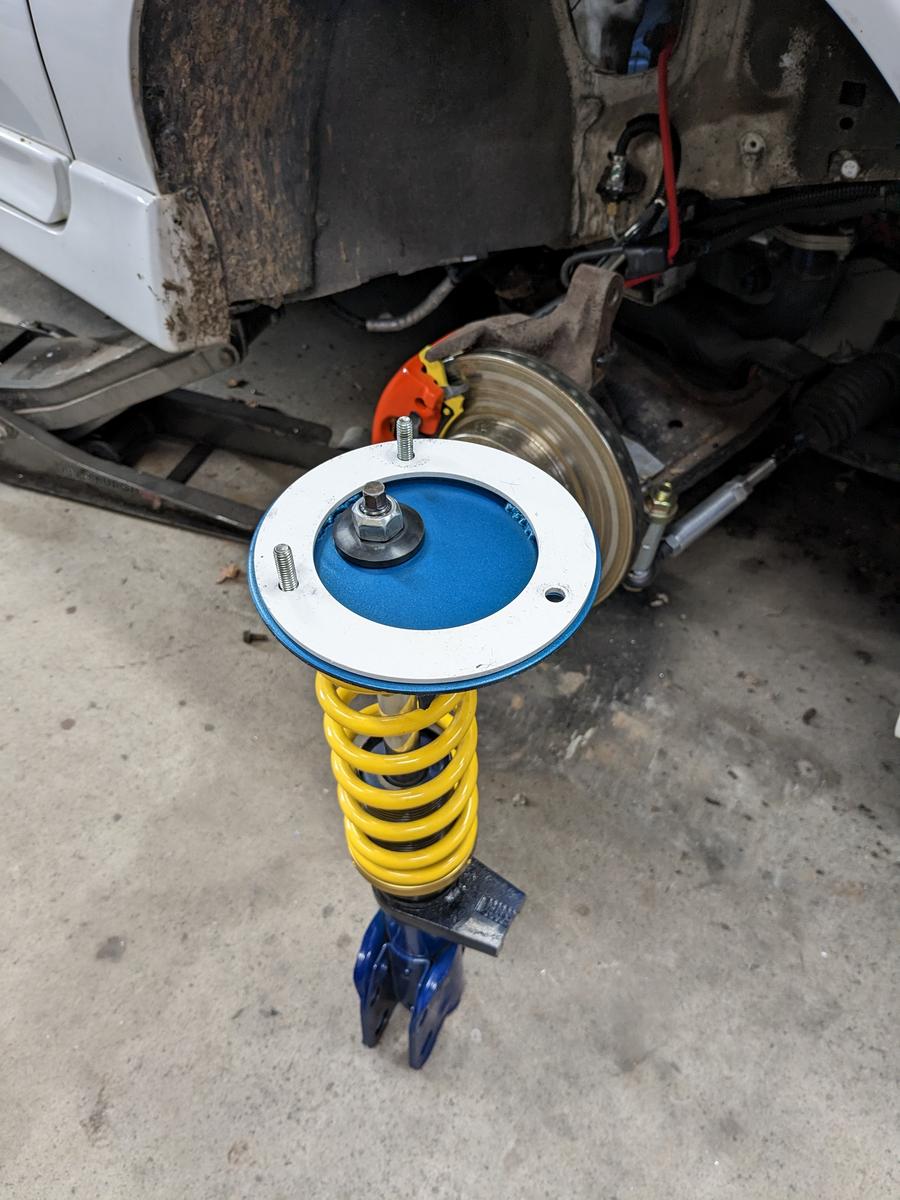
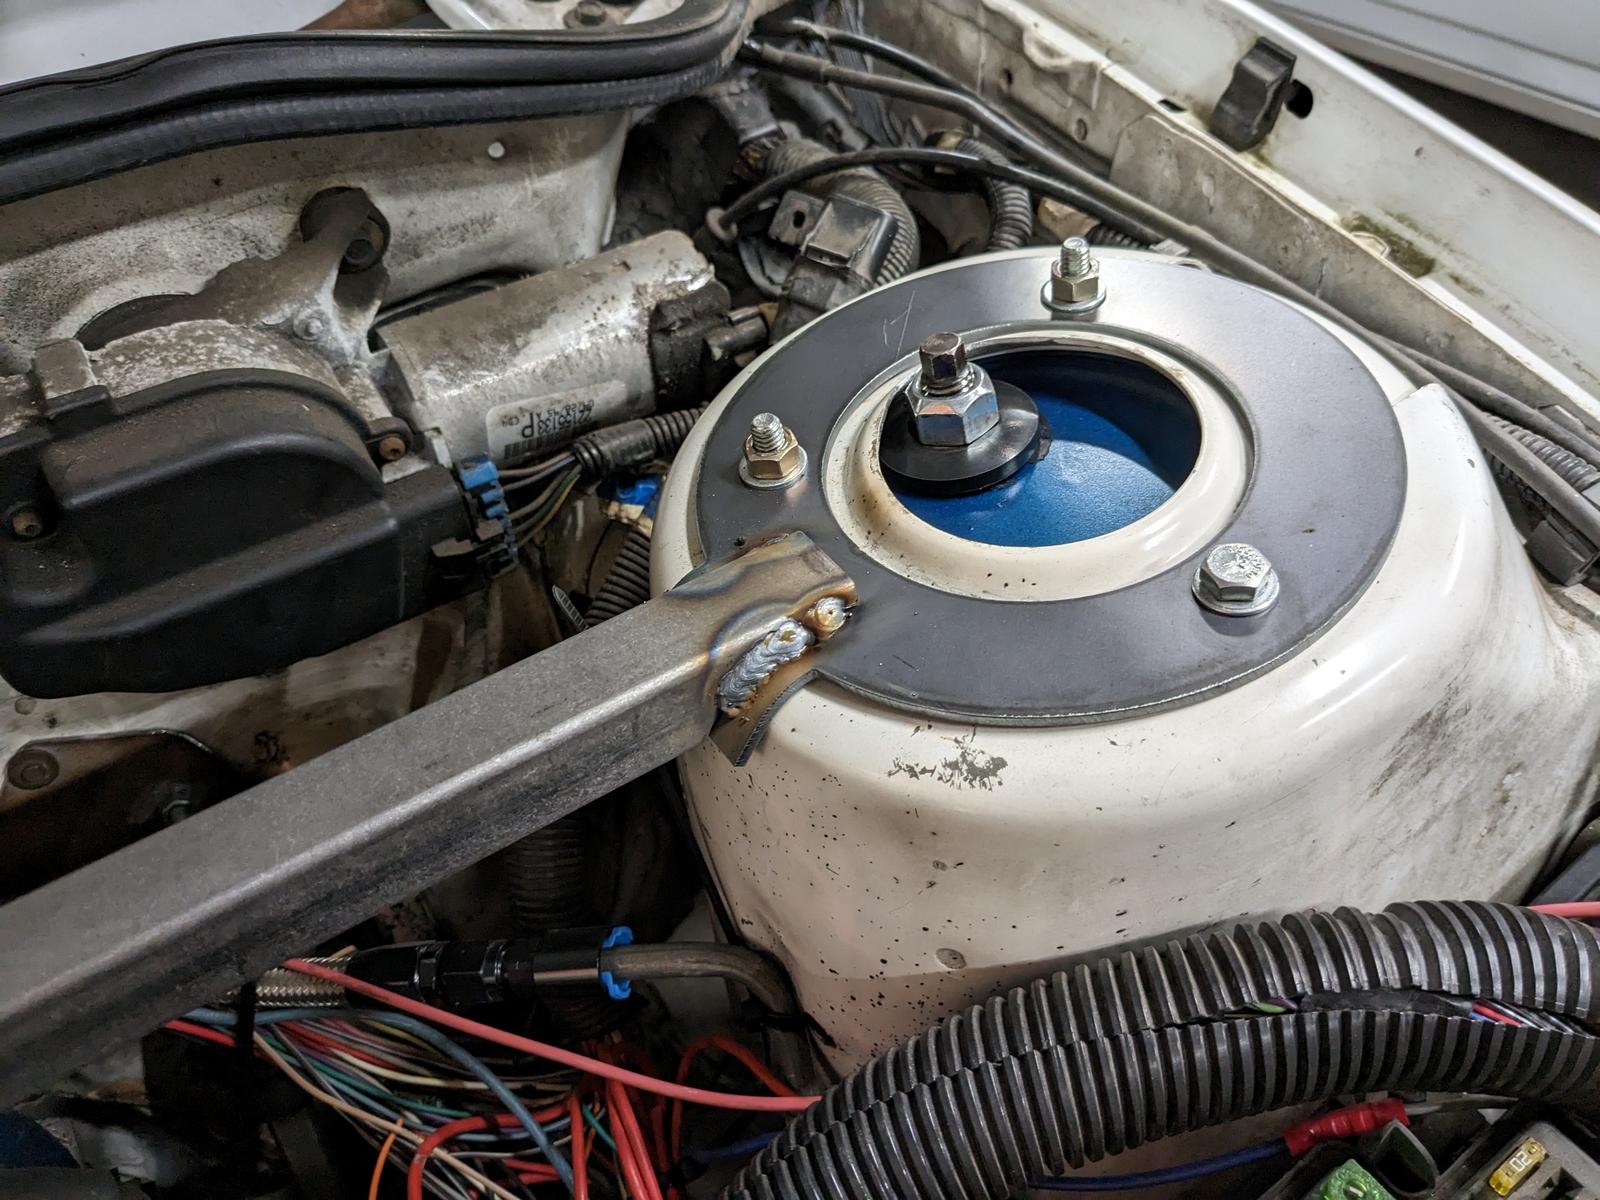
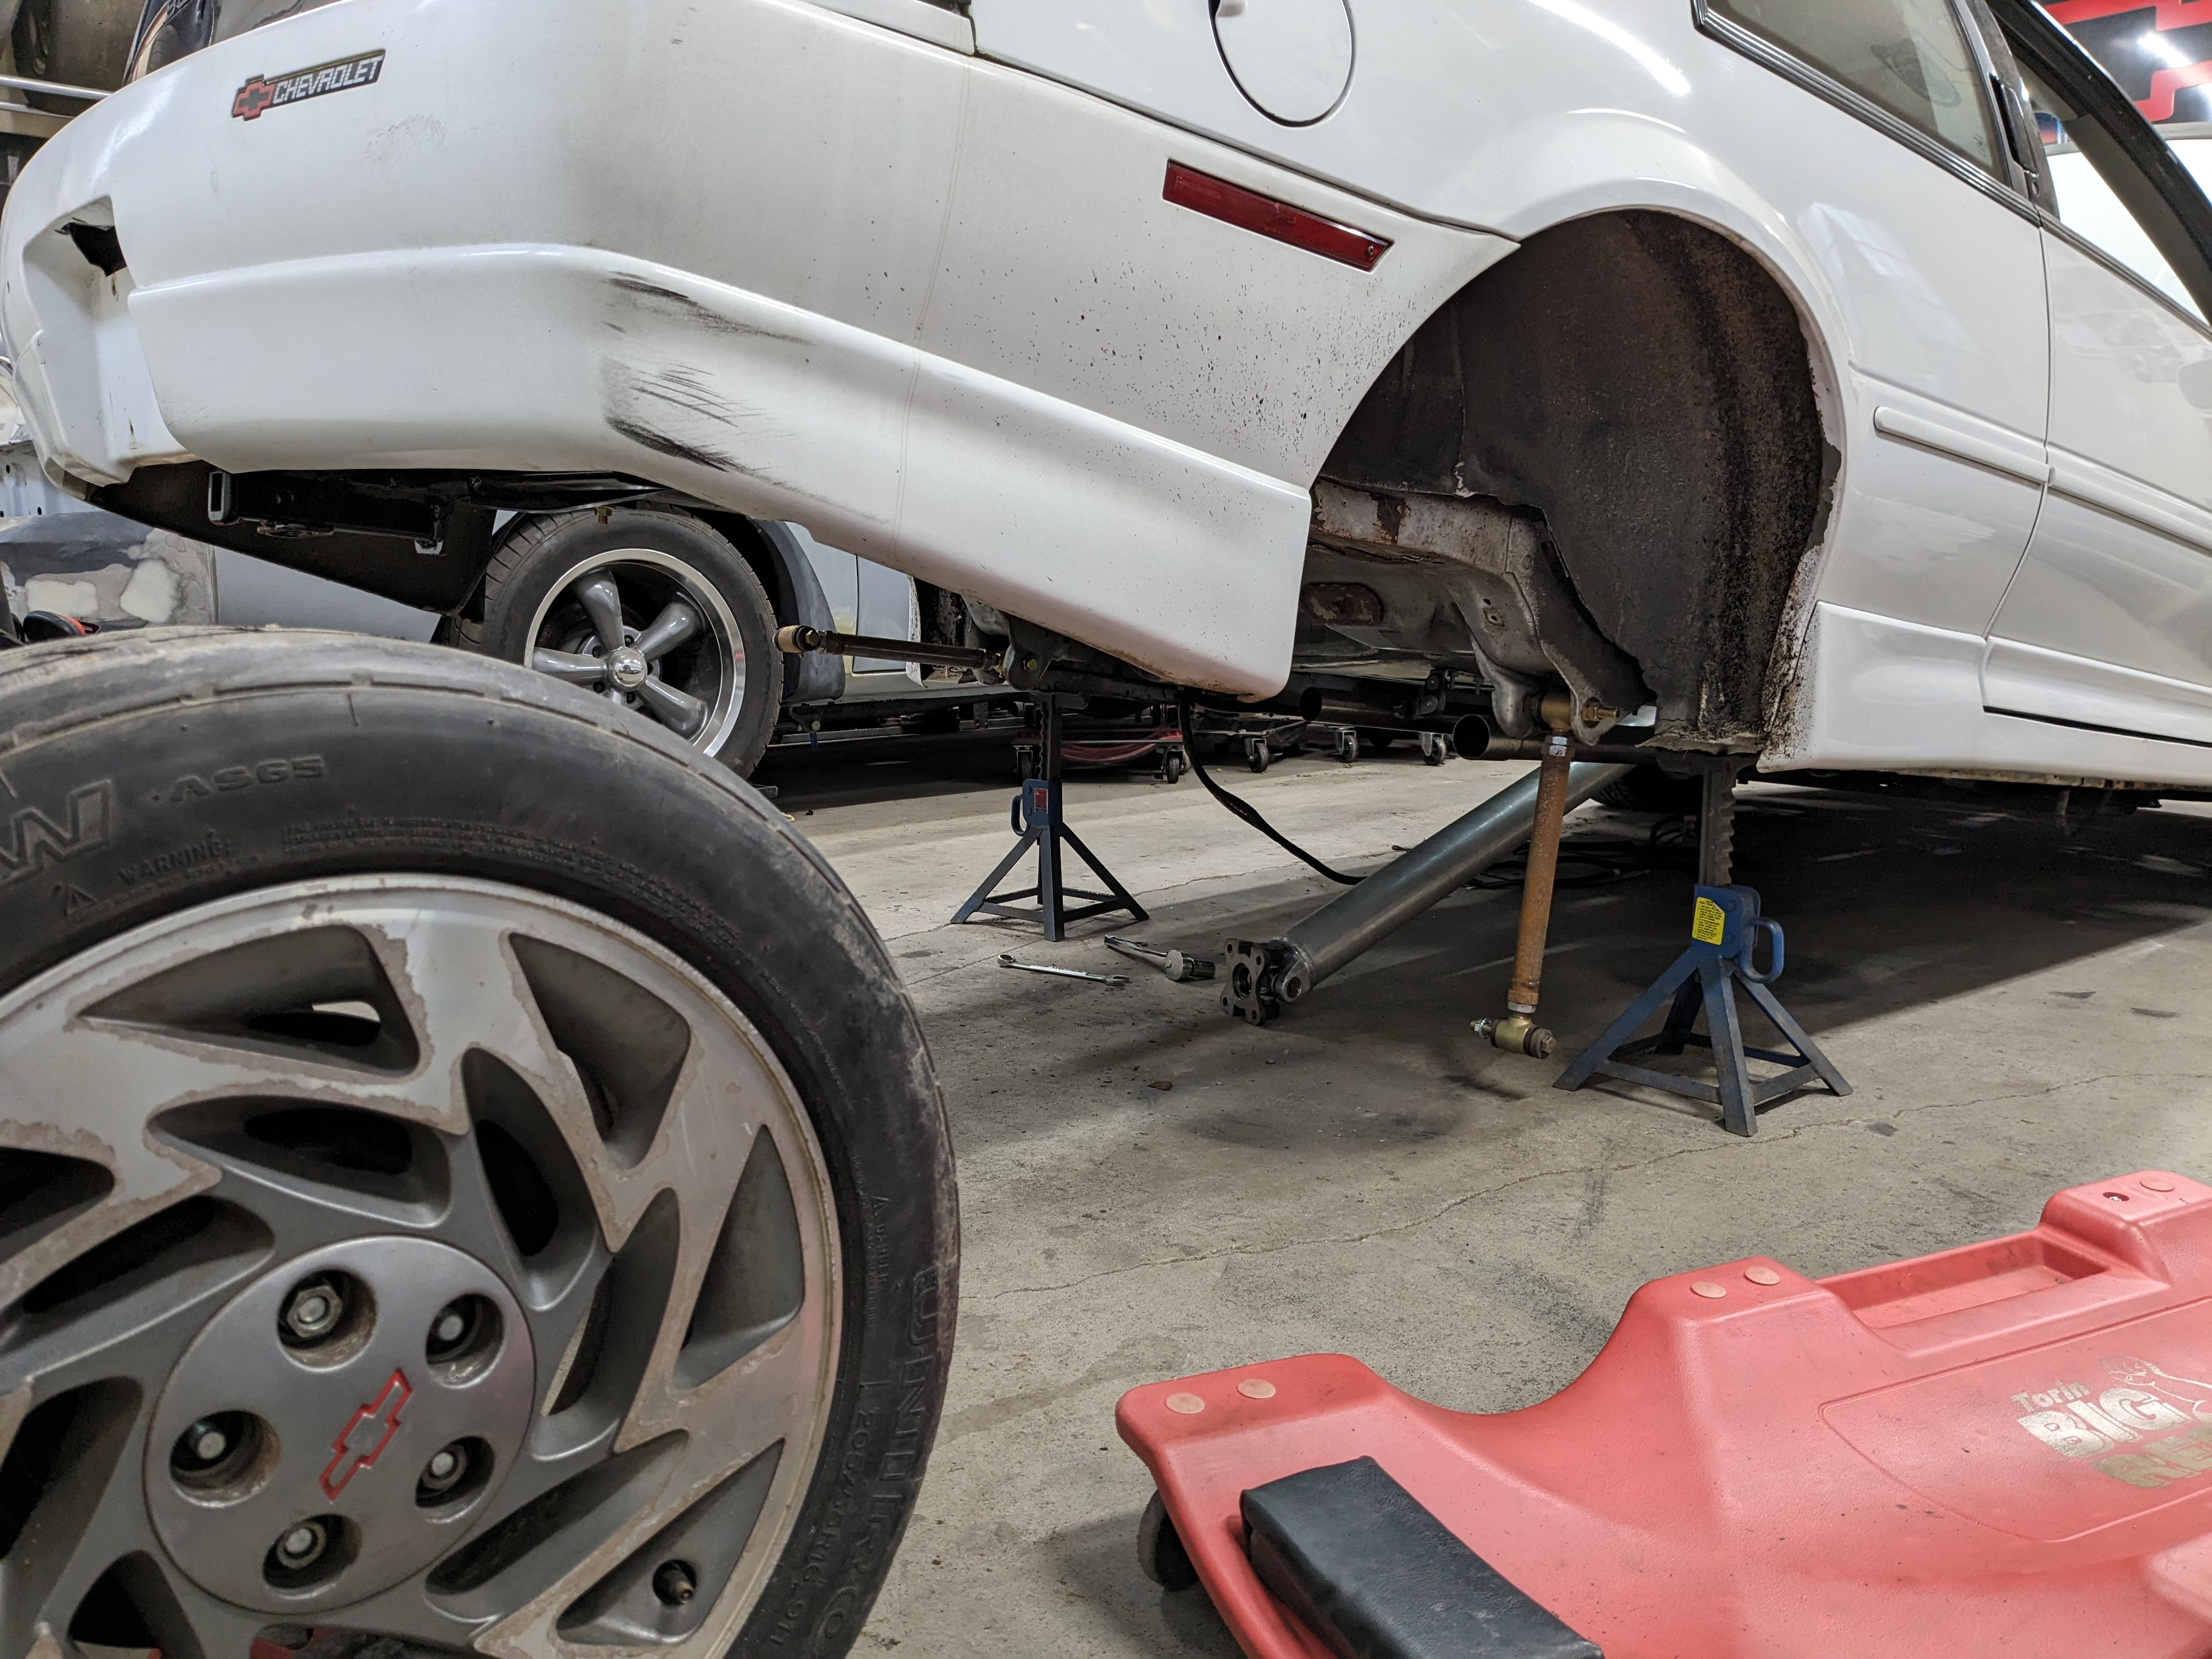
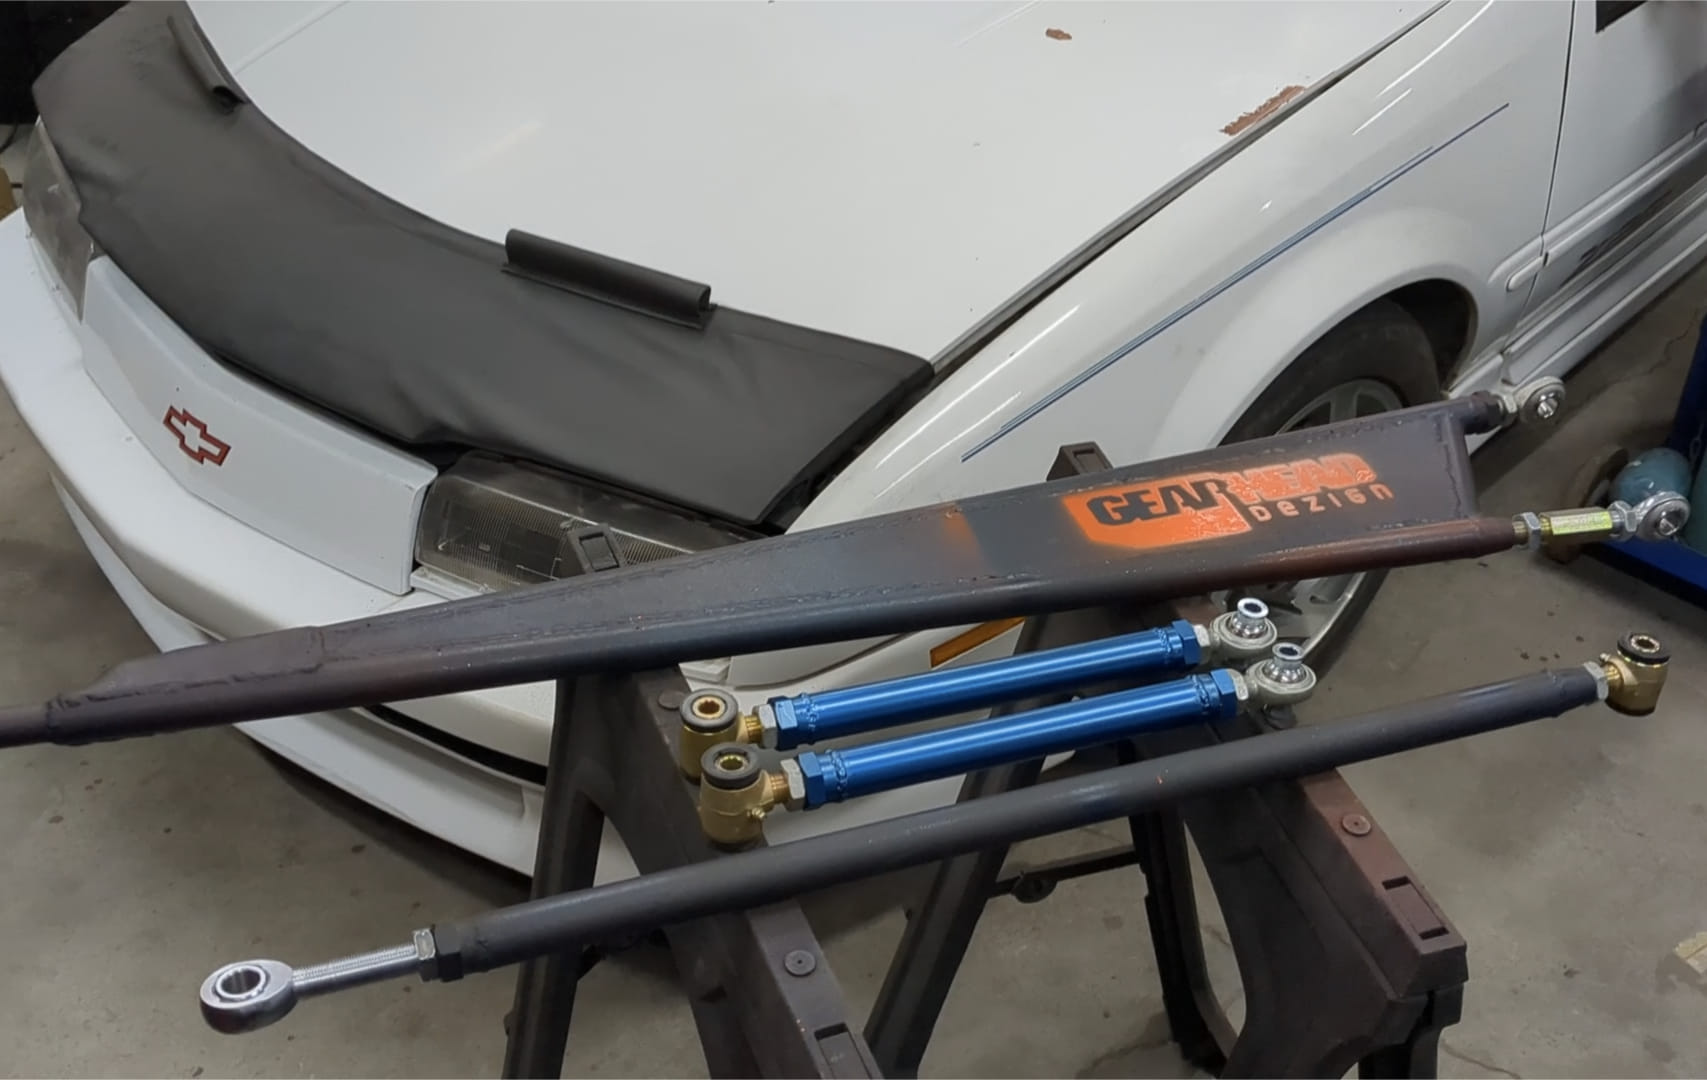
My friend Alex cut some plates on his plasma table from a PDF I designed in Adobe Illustrator (poor man's CAD). haha. I moved the pivot back for more caster and isolated with rubber so the NVH should be fine. Using 200lb springs instead of the factory 145lb, and I had to cut the perch off completely. I also cut the steering arm down so I can use it as a mount to make the 33mm Blazer swaybar direct acting.

Now the front looks so good I'm hacking up the rear unibody frame to get the ass down to match. On the next episode of...Gearhead dezign. haha
-
01-05-2023 #83
Registered User
- Join Date
- Jul 2006
- Location
- Chesapeake, VA
- Posts
- 605
Love what you're doing with the car.
Cars are meant to be driven.
John B
-
02-11-2023 #84
Registered User
- Join Date
- Mar 2005
- Location
- Walton, NY
- Posts
- 737
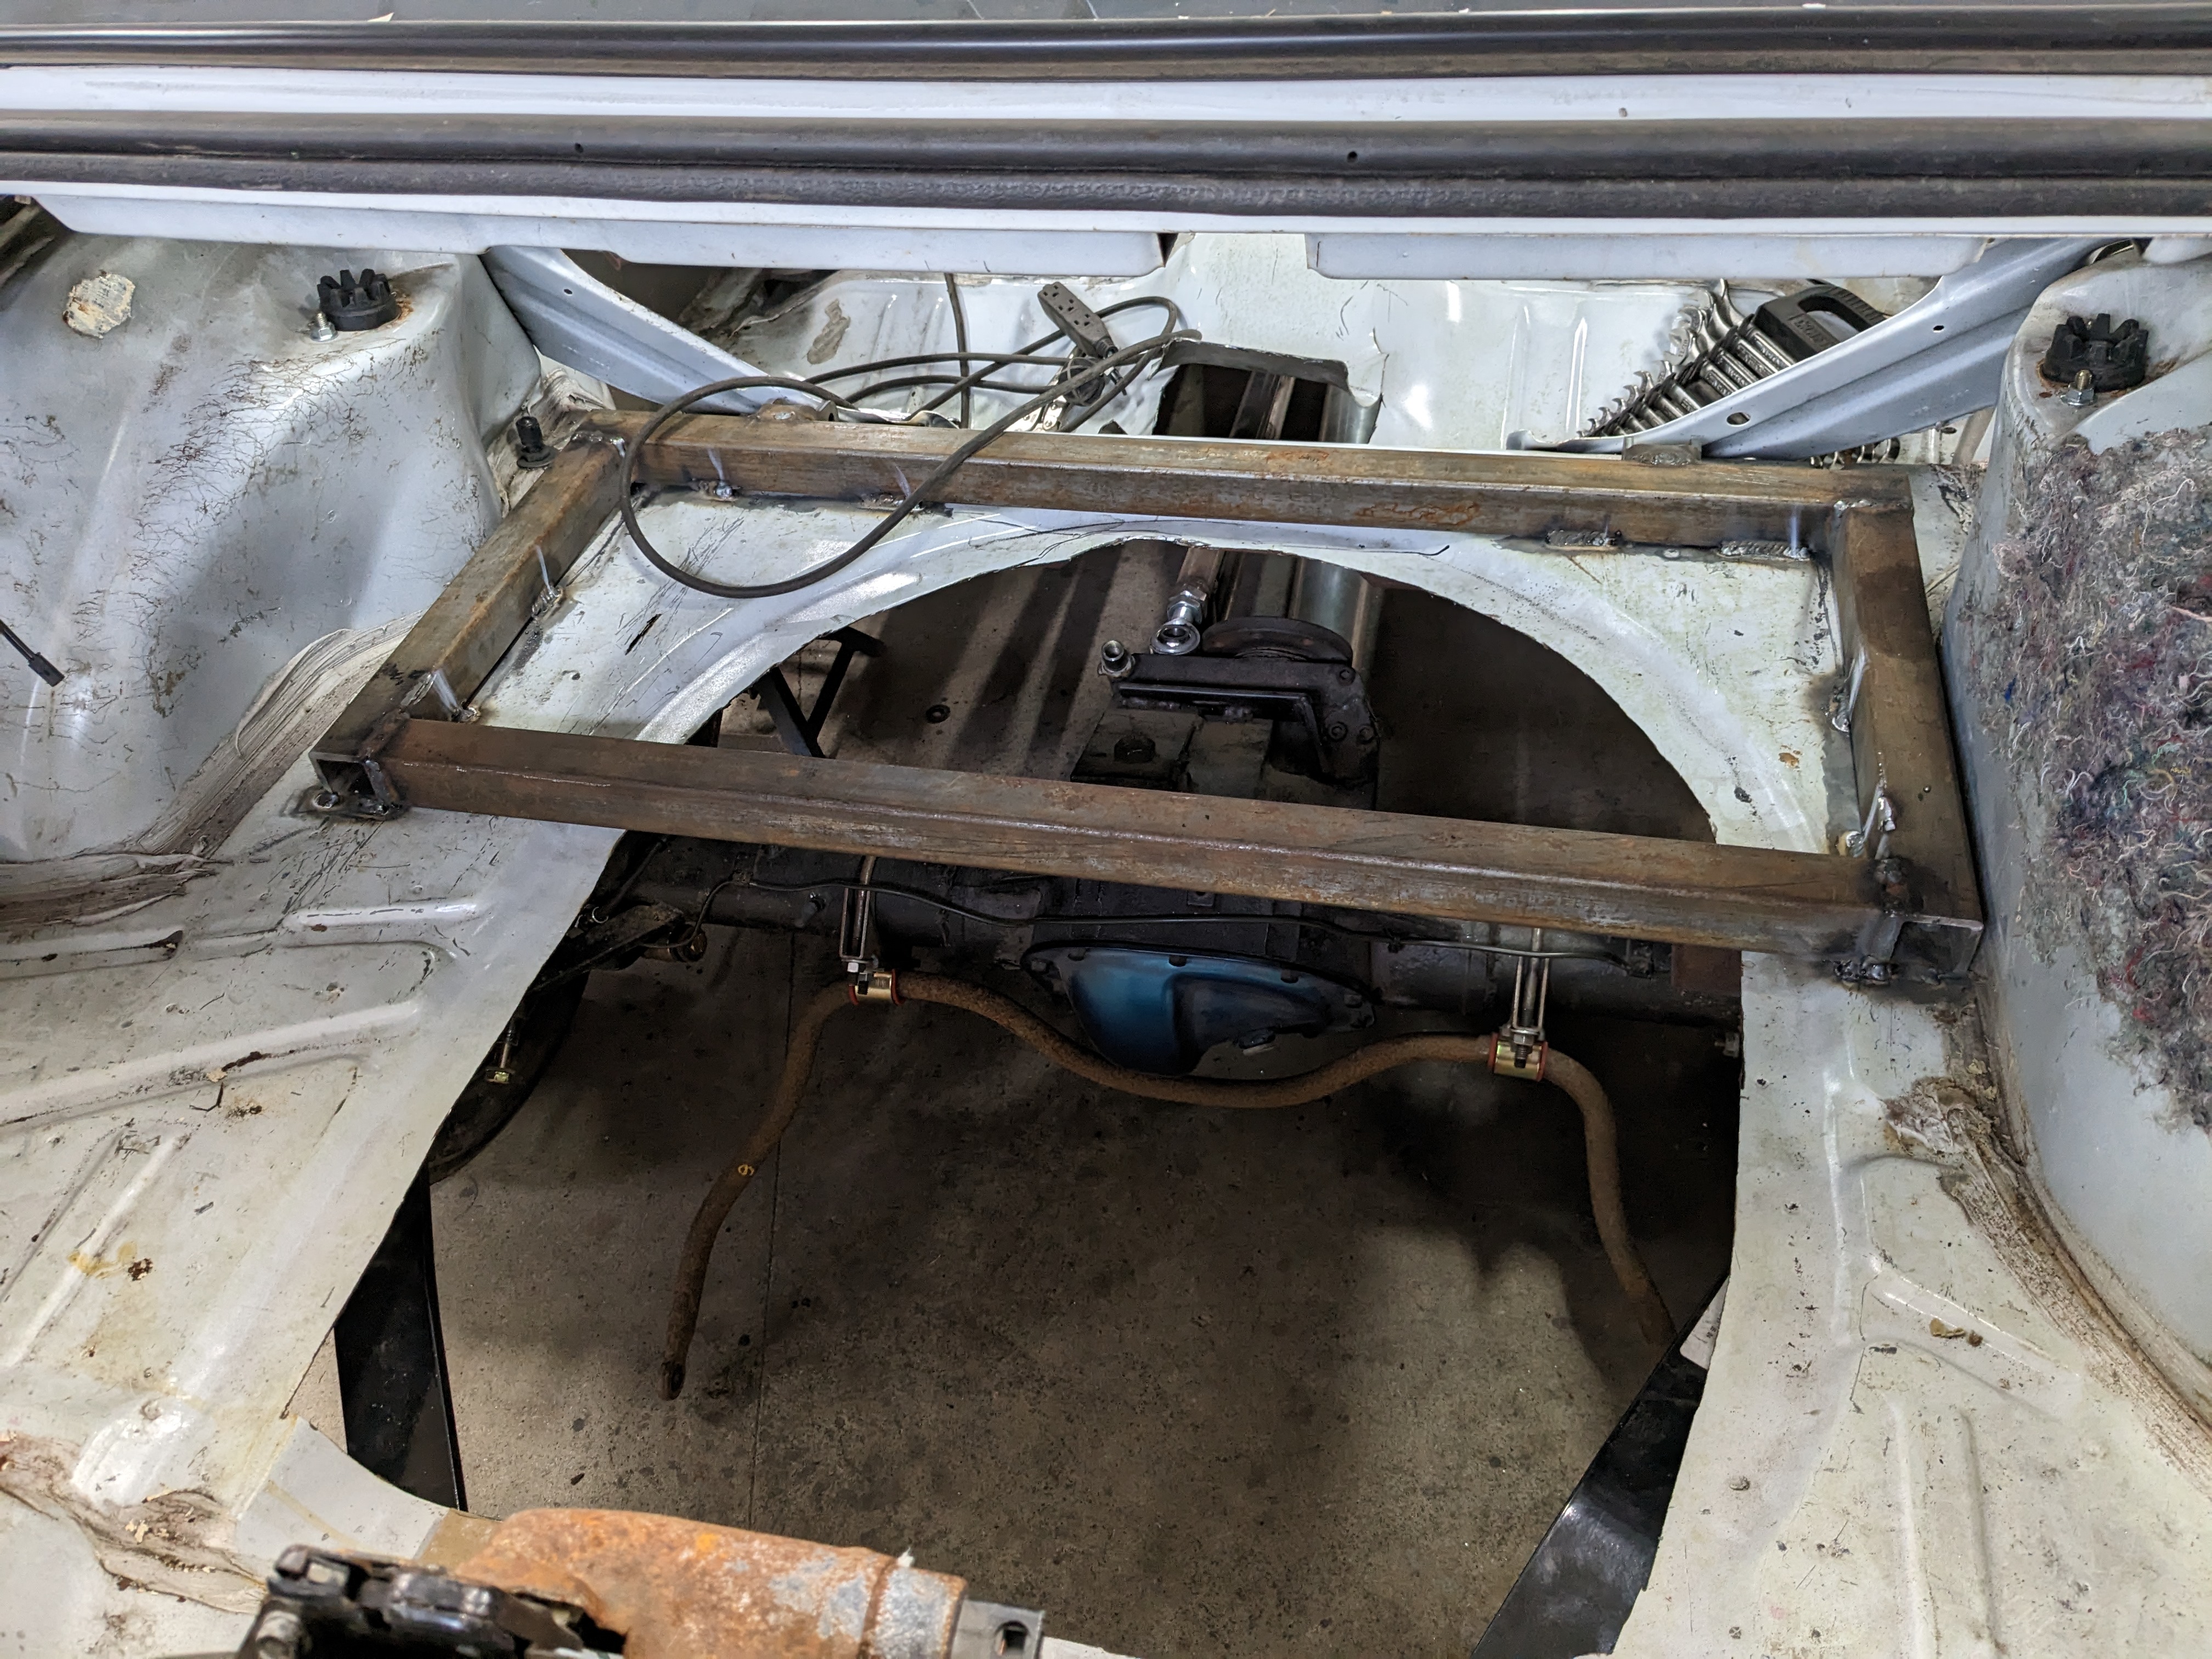
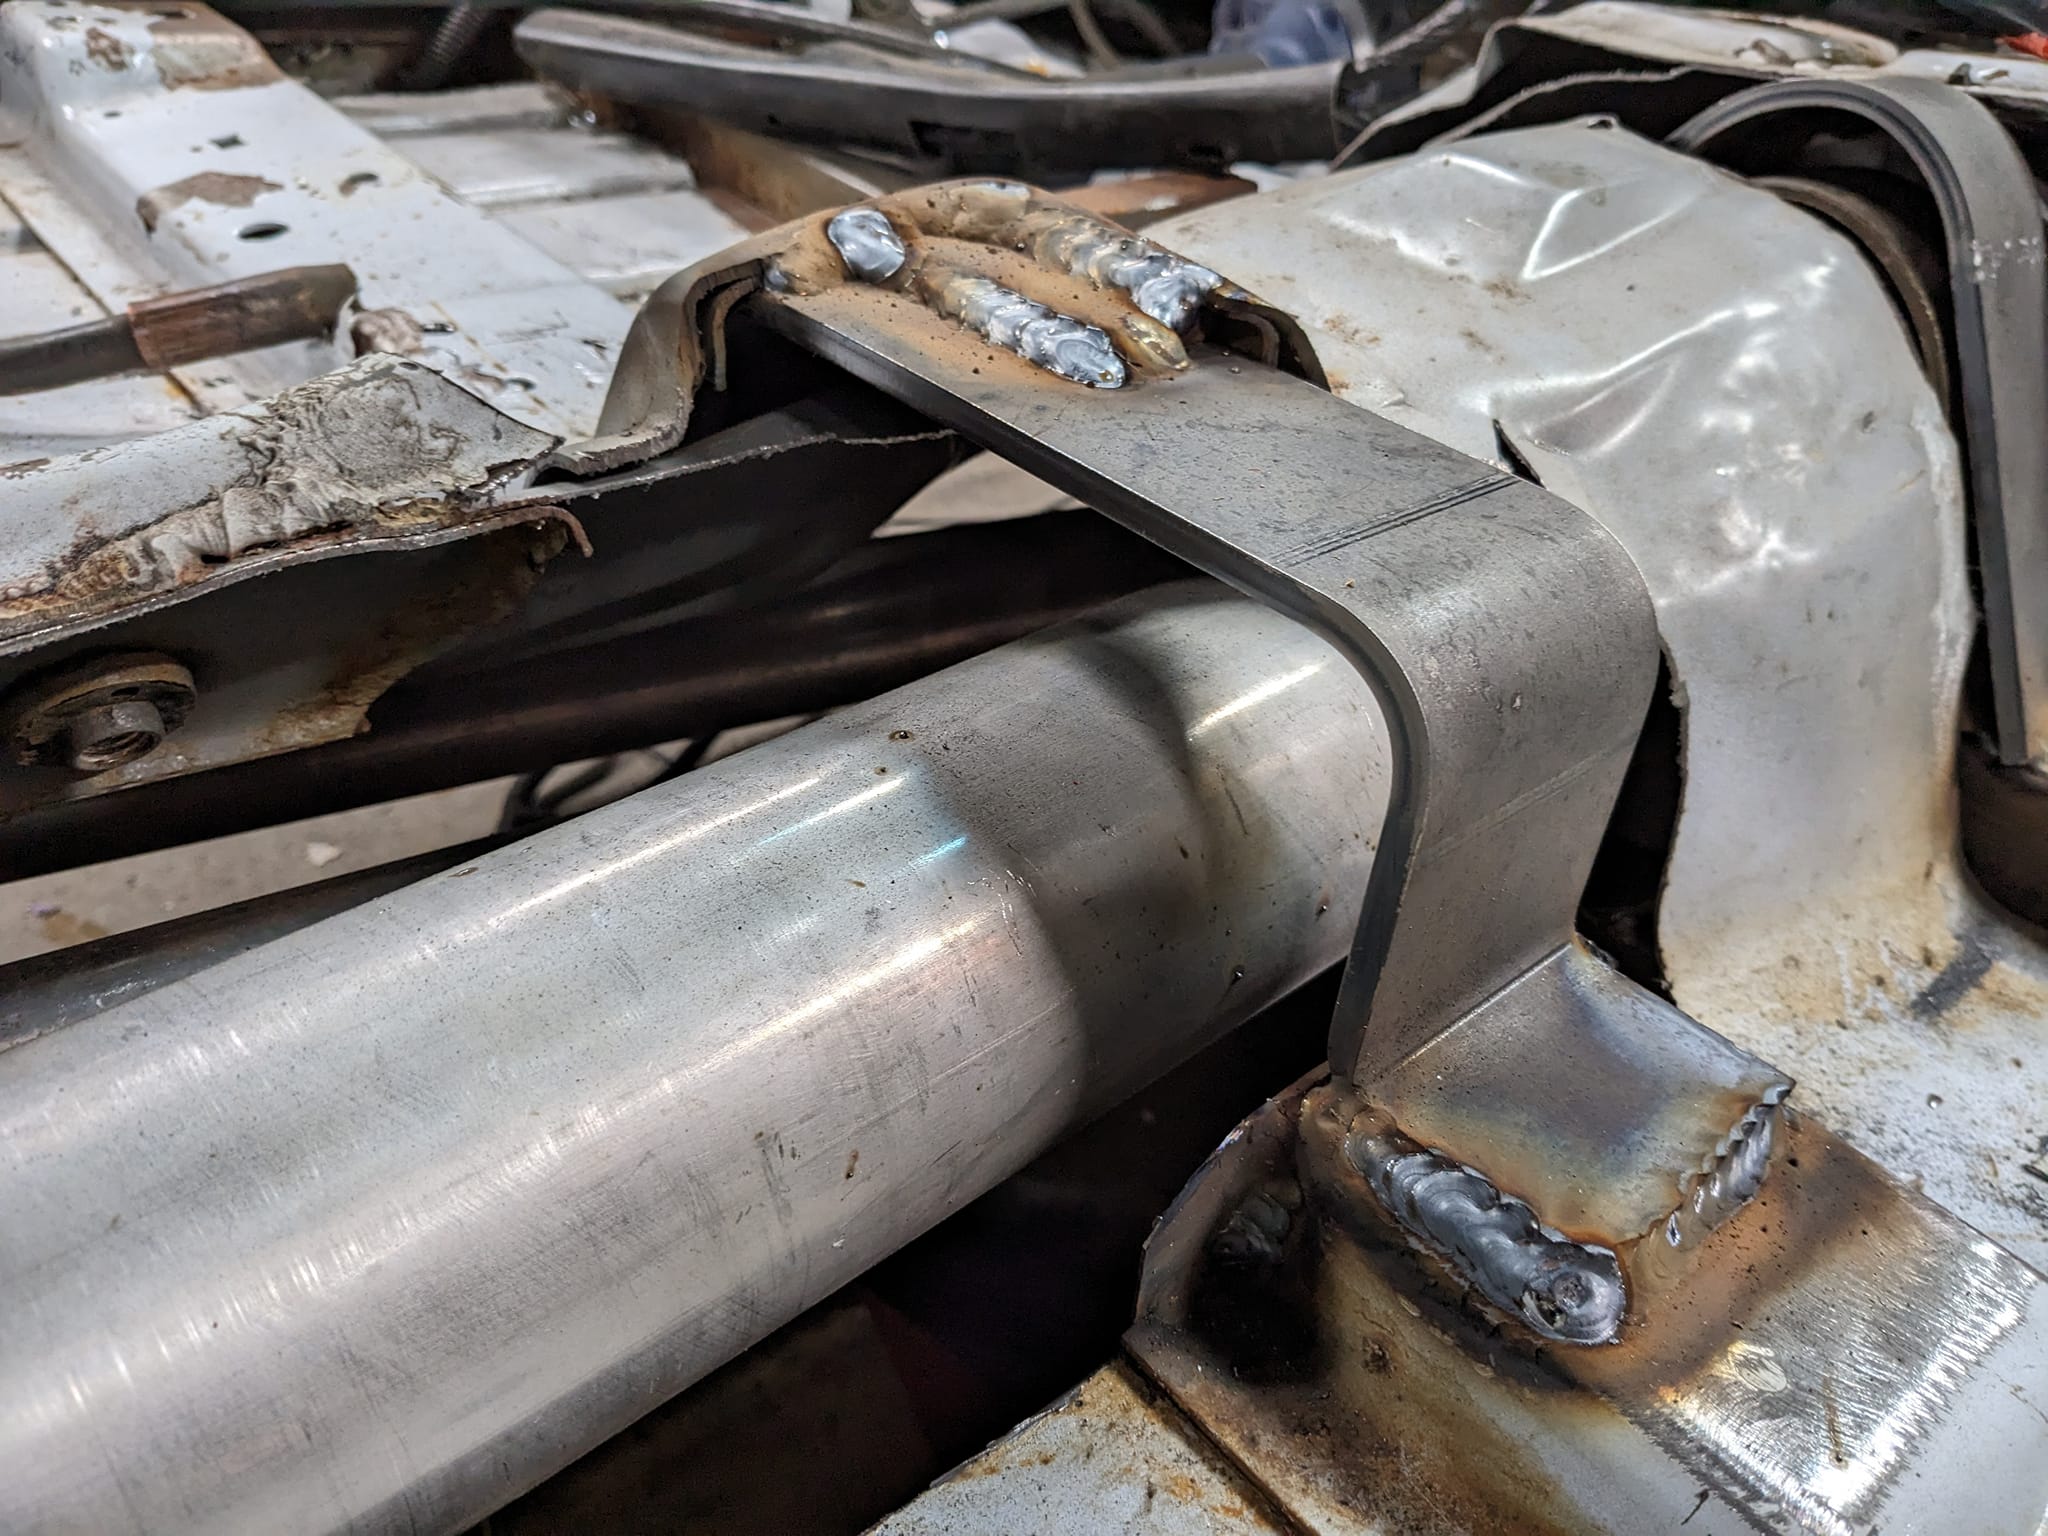
Guess I forgot to post my "rear subframe" video. Worked out pretty nice as some new rear structure to be able to clearance the unibody for lower ride height and move the coilover mounts up to keep my full shock travel. It's also going to be a nice solid mount for the fuel tank but that will be in another epsiode...
https://www.youtube.com/watch?v=XFPeDoHrME4
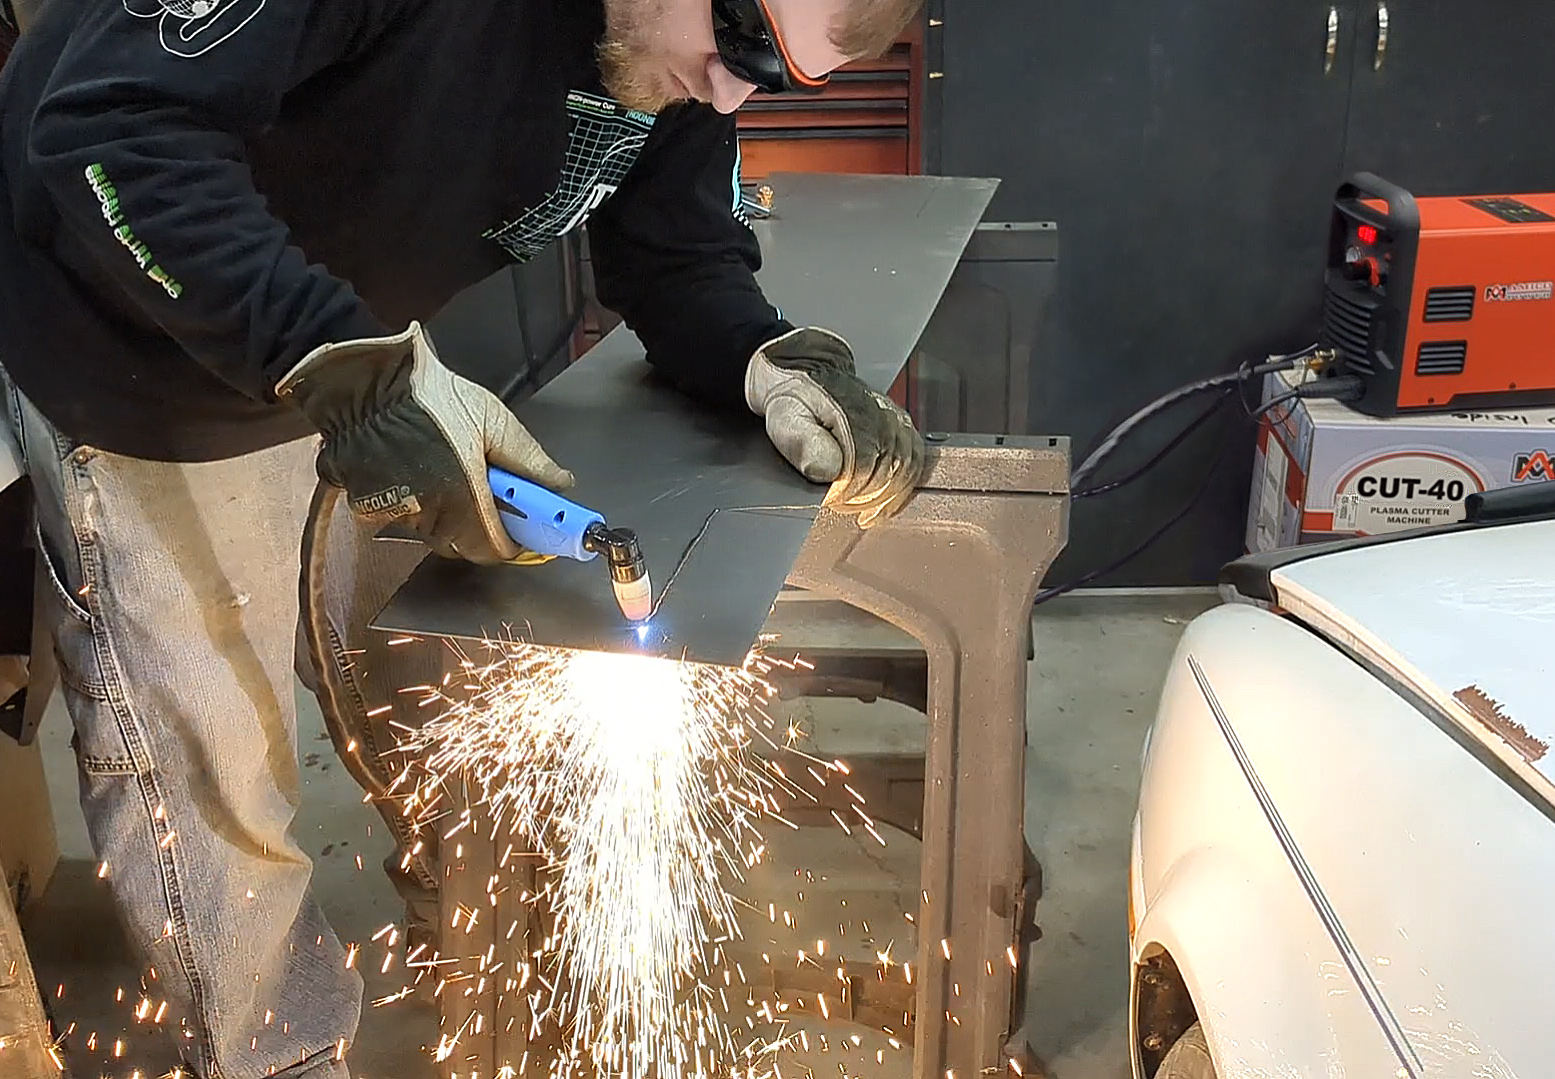
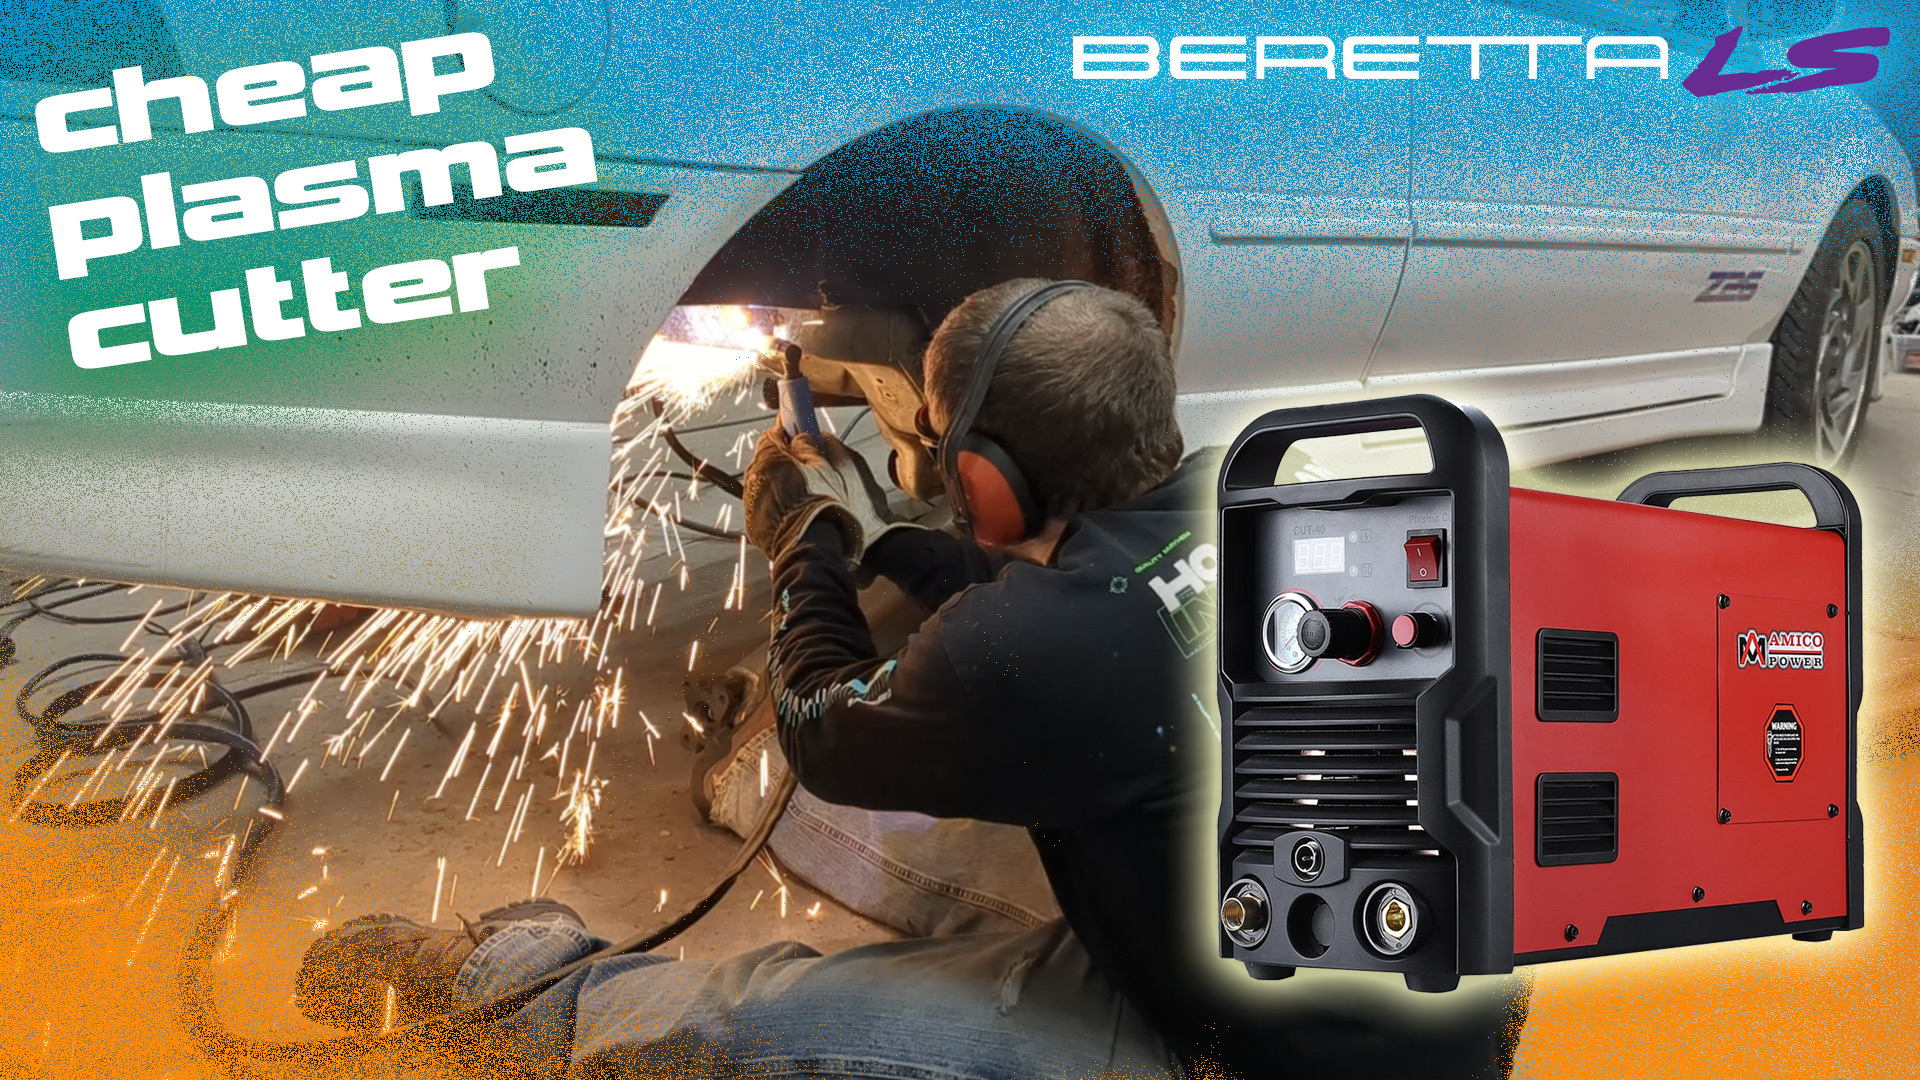
Even bought a new tool...that I should have bought years ago! Love it already
-
03-01-2023 #85
Registered User
- Join Date
- Mar 2005
- Location
- Walton, NY
- Posts
- 737
Plasma video is up
https://www.youtube.com/watch?v=voA9OiYLK0o
-
03-03-2023 #86
 Registered User
- Join Date
- Aug 2004
- Location
- Harriman, Tennessee
- Posts
- 1,290
That just doesn't look safe to me. Originally Posted by woody80z28
Why do termites eat houses?
Because they have Munchausen Syndrome.
-
03-19-2023 #87
Registered User
- Join Date
- Mar 2005
- Location
- Walton, NY
- Posts
- 737
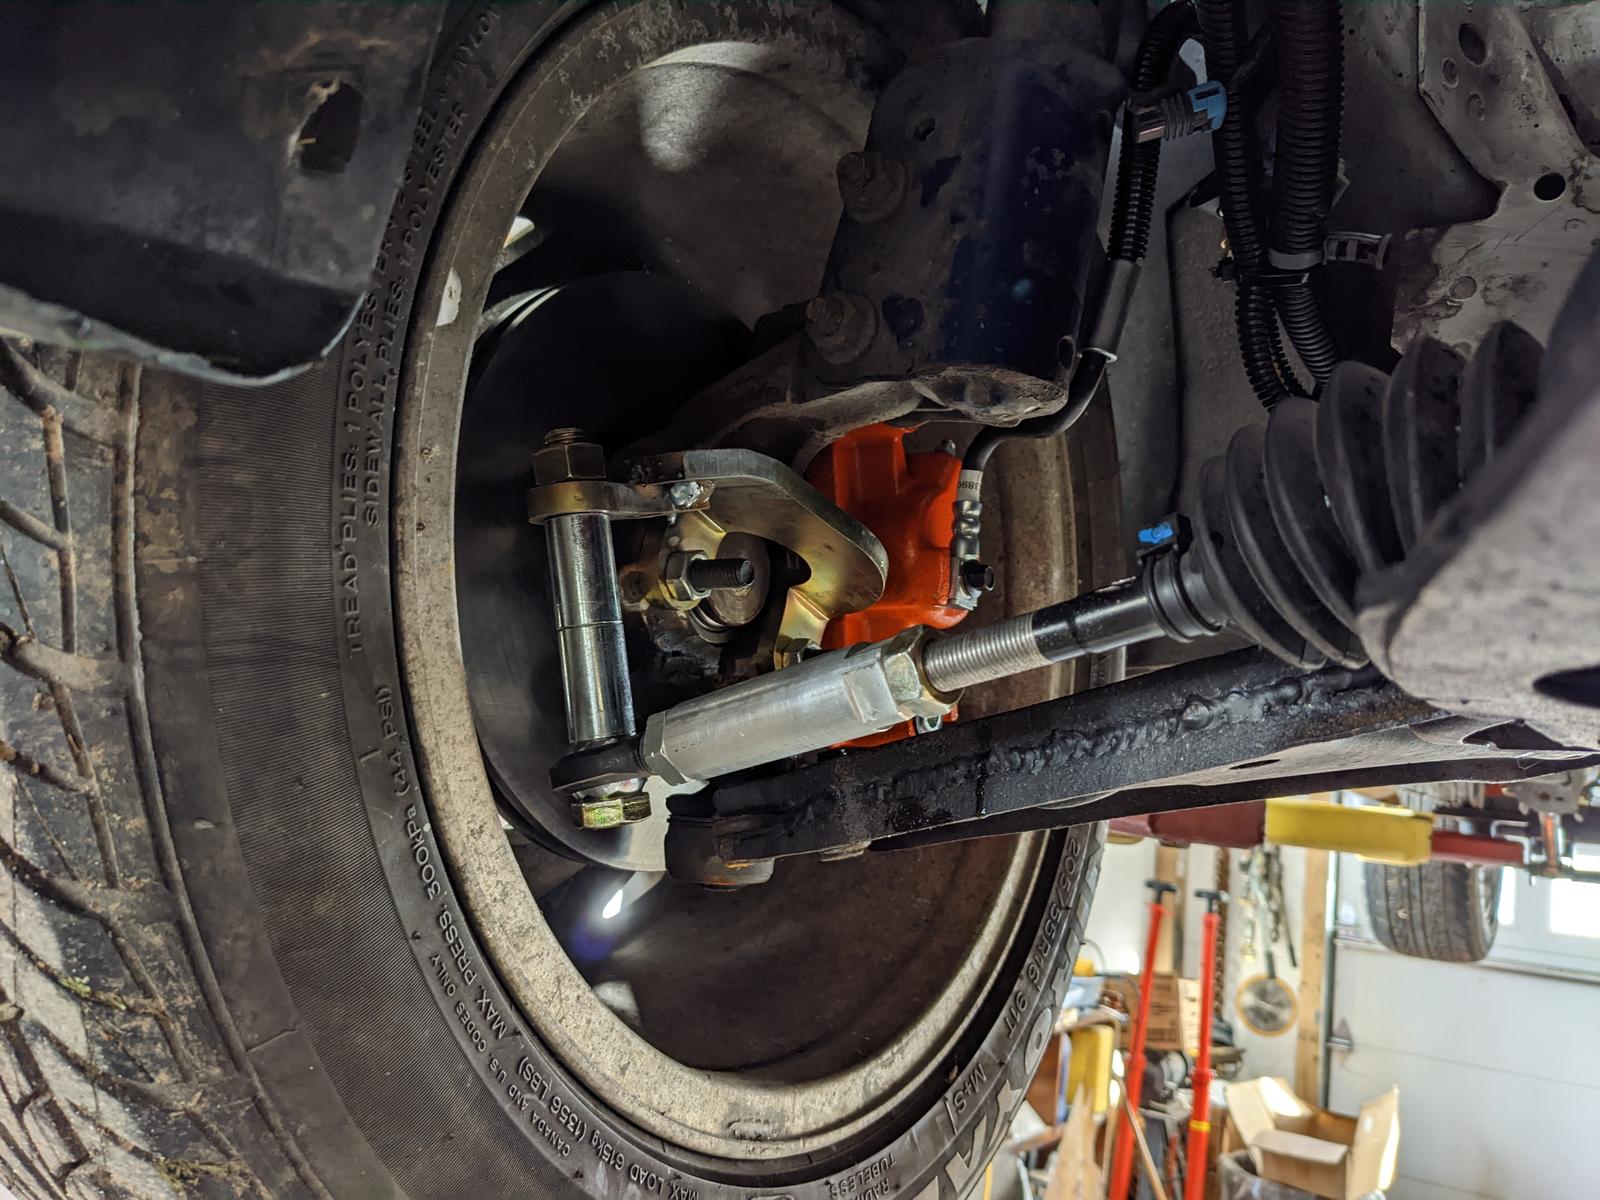
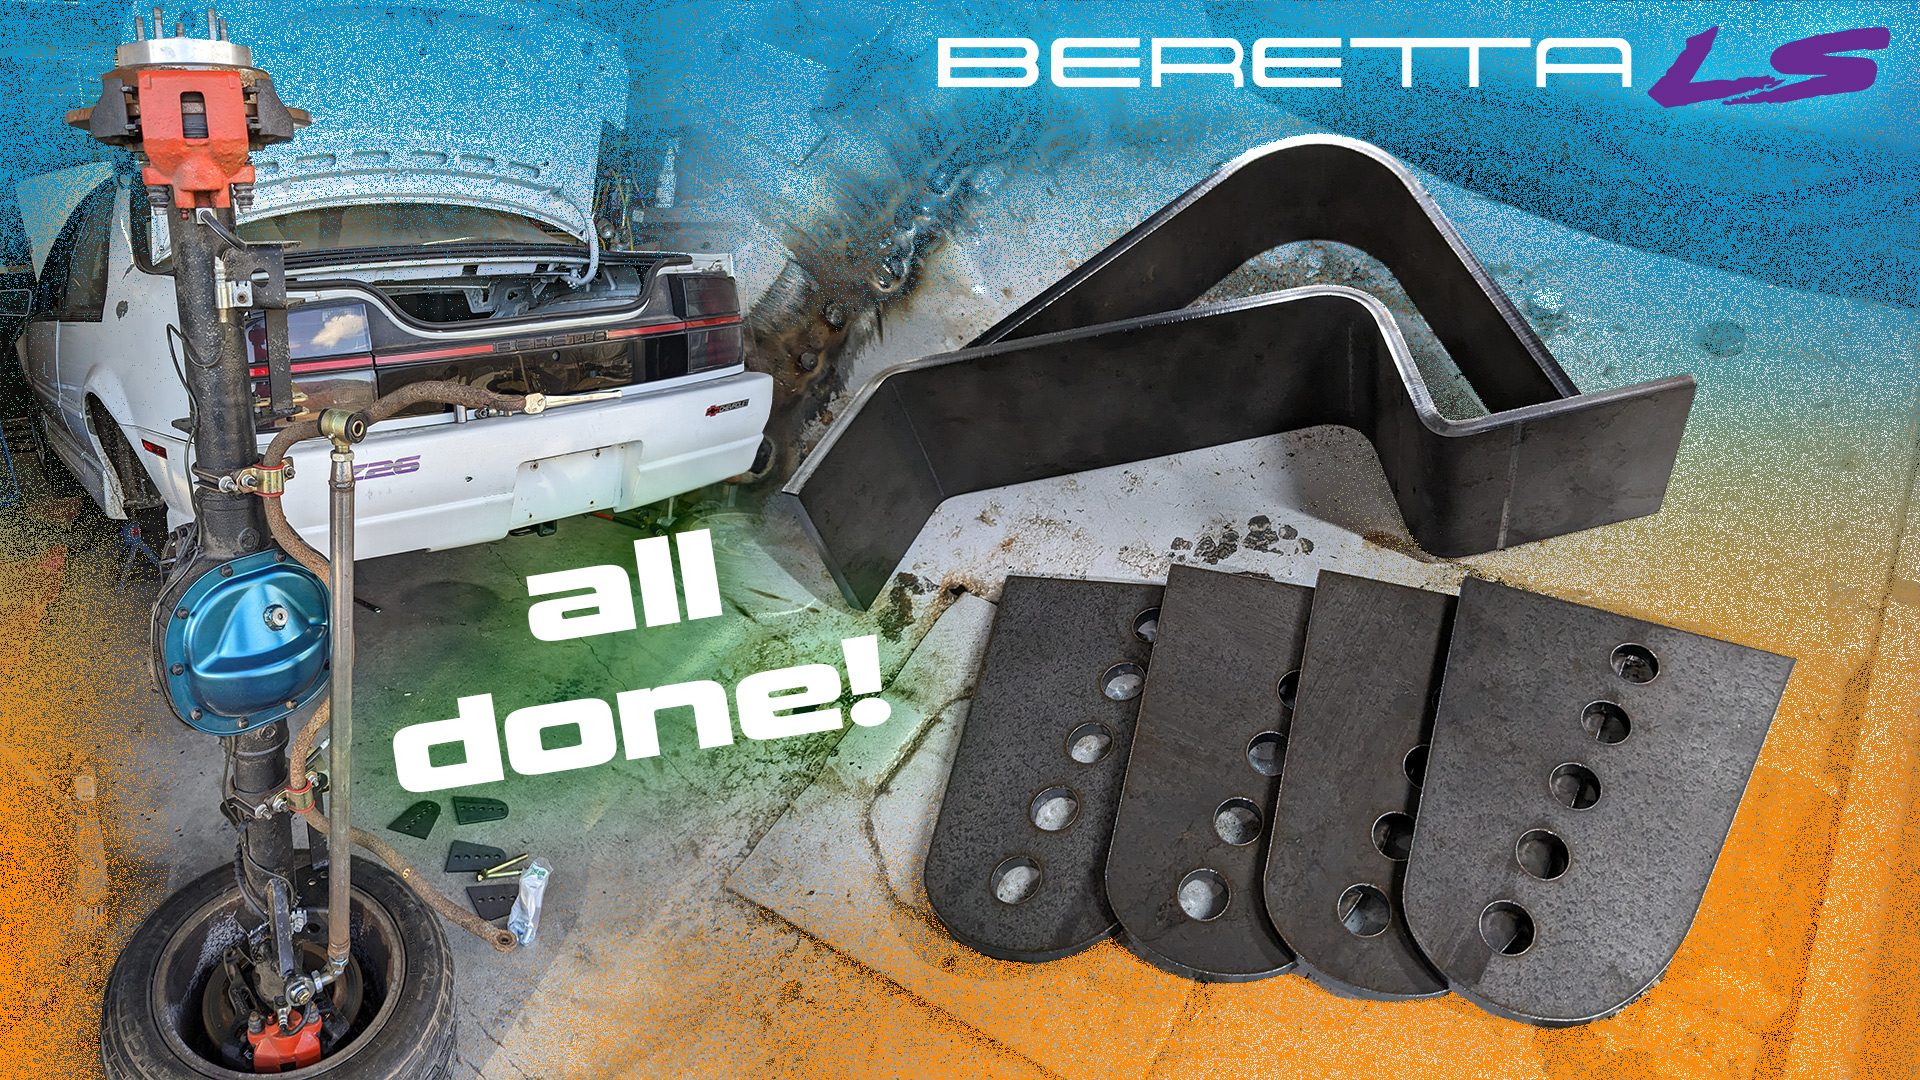
I'll be revisiting that soon. The Ackermann still isn't perfect, and now I actually have a buddy who can laser cut and bend me custom brackets, so I don't have to buy 48 Ford brackets and modify them. haha Originally Posted by ProTouring442
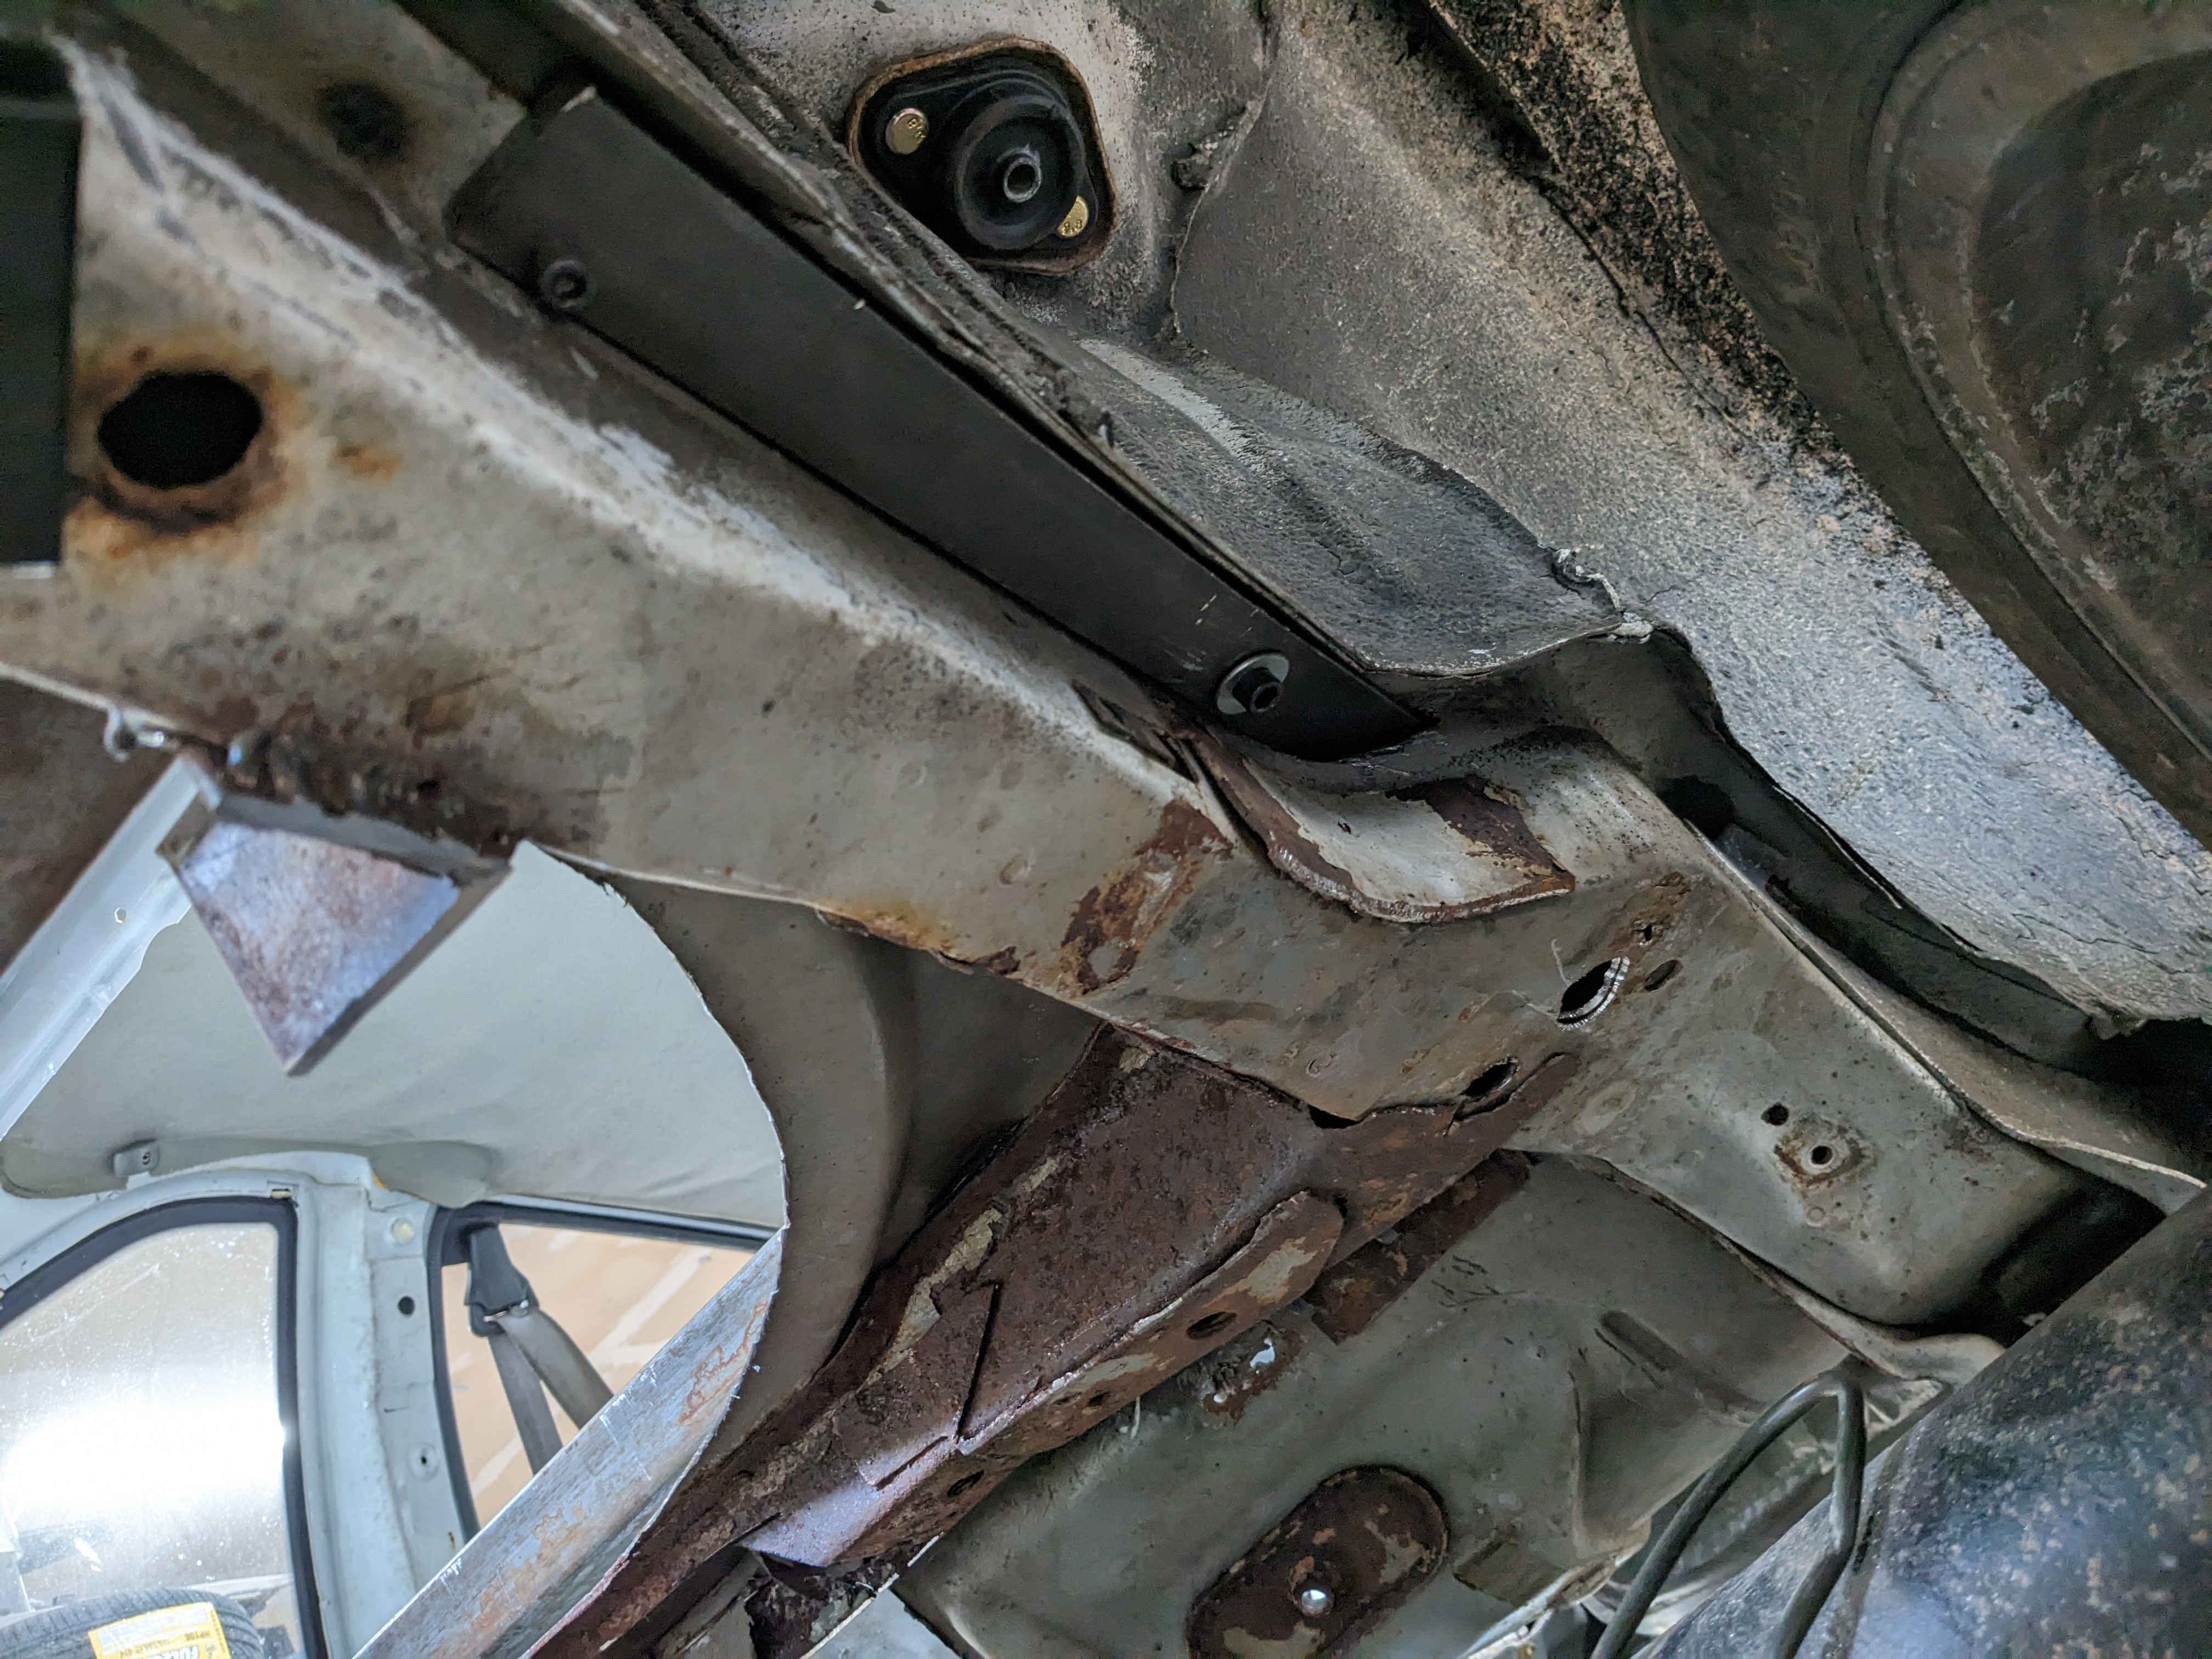
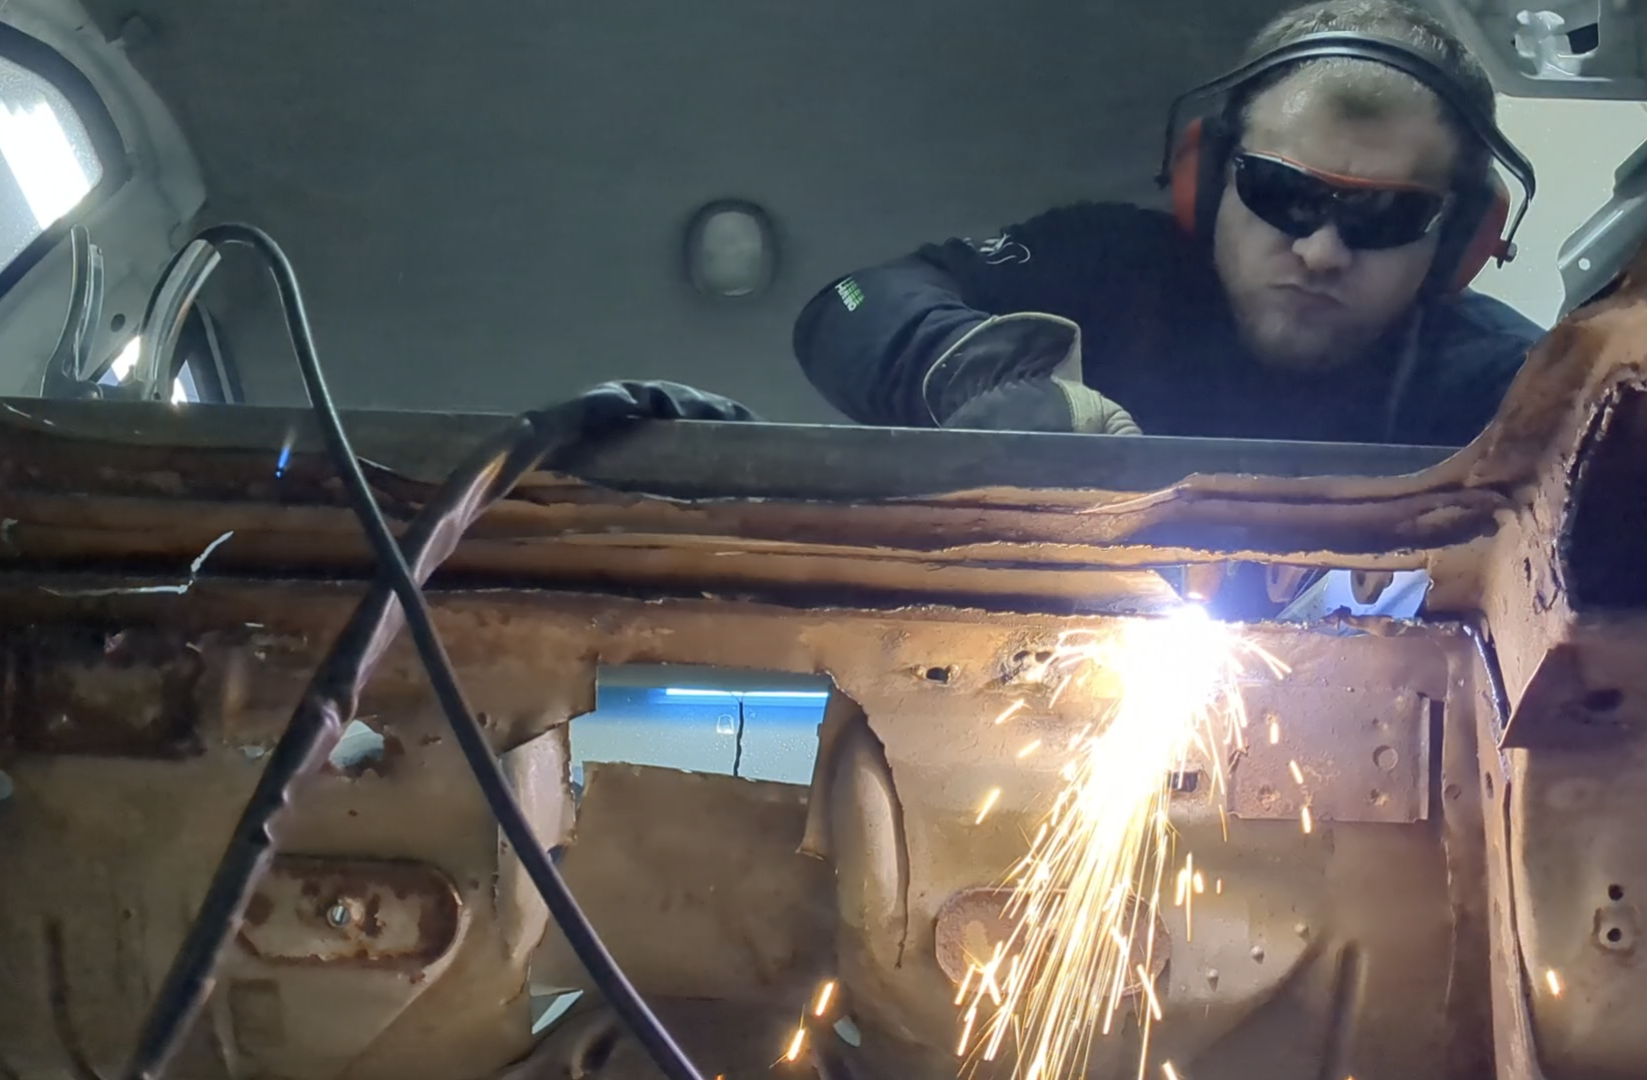
Rear suspension completely finished! Had that same buddy laser some brackets to relocate the lower control arms and panhard bar at the lower ride height. Converted LCAs to rod ends on one side and welded more bracing on the torque arm. Also bent some 3/4" plates to strengthen the driveshaft tunnel structure, and welded in my rear firewall for the gas tank which is next on the list. Road legal is getting closer and closer.
https://youtu.be/wgorm1vNeYw


-
03-25-2023 #88
Registered User
- Join Date
- Apr 2007
- Posts
- 193
All you'd have to do to make it near trophy-truck-strong, is to tri-plate it with longer fabricated steering arm parts. Then use a big bolt back at the hollow in the spindle, and a locating pin through the three layers, about where the weld is now. Originally Posted by woody80z28
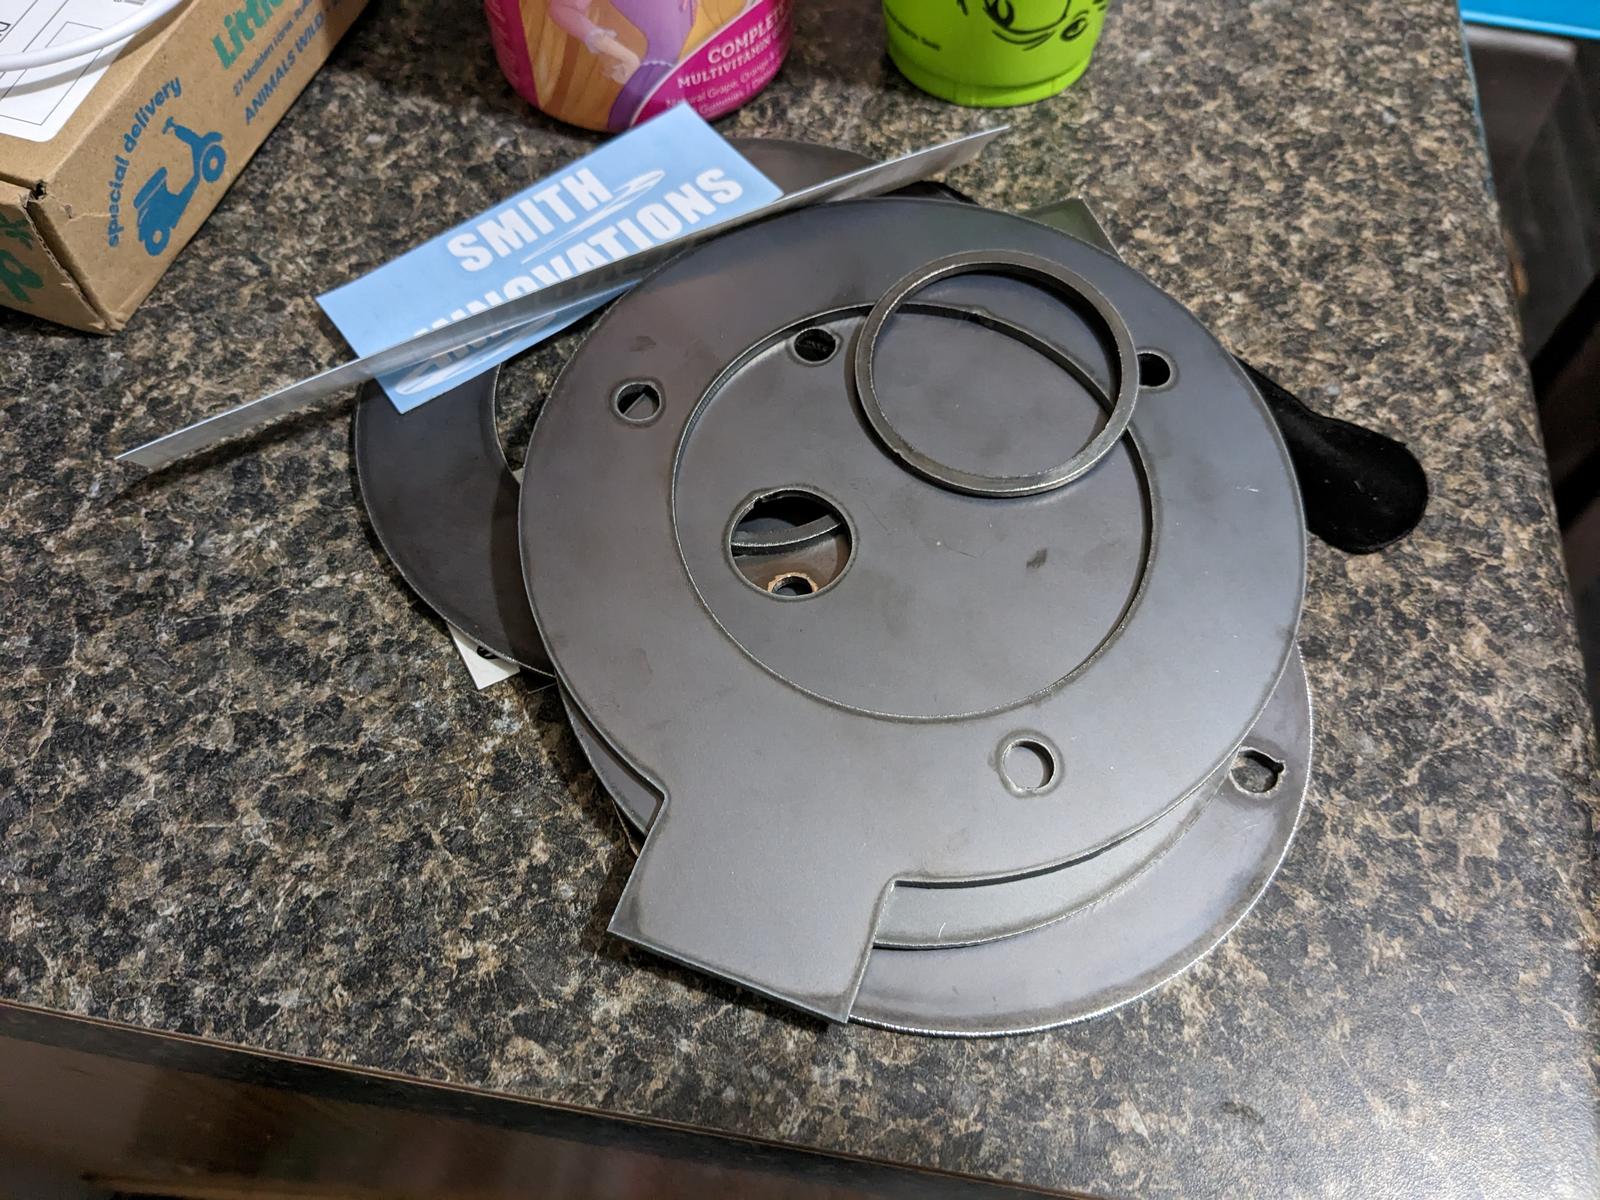
Center "layer" is just a spacer. Tough part is going to be curving the steering arms to nest with the existing. Bending that would take a lot of force.
-
03-27-2023 #89
 Registered User
- Join Date
- Nov 2018
- Posts
- 645
I was thinking he could just flip them driver side to passenger side, mount them so the cross piece between the mounting bolts across the back of the hub goes underneath, and eliminate most of the need for a long linkage as this would put the arm right down where the tie rod is. But that's based off the pictures, don't know if that would work from a thousand miles away.
-
03-27-2023 #90
Registered User
- Join Date
- Apr 2007
- Posts
- 193
If it would work that is even better. Kudo's for the 3D imaging you did for that idea!
-
04-03-2023 #91
Registered User
- Join Date
- Mar 2005
- Location
- Walton, NY
- Posts
- 737
I like the 3-plate idea. I can definitely do that or something like that. A while back I bought another pair of plates cause I knew I'd be reworking it. https://www.speedwaymotors.com/Speed...lain,3298.html
I can't switch them side to side because the angled spacing of the hub bolts throws it way out of whack. Ideally I'd like to clean-sheet the design now that I'm working with my buddy that can laser and bend heavy steel. The problem I foresee is the ball joint getting in the way of bending down. May need to bend the two mounting ears in different directions if possible. This is one of the next projects on my list, so I'll try out some plastic-aided-design and see if I can make it work.
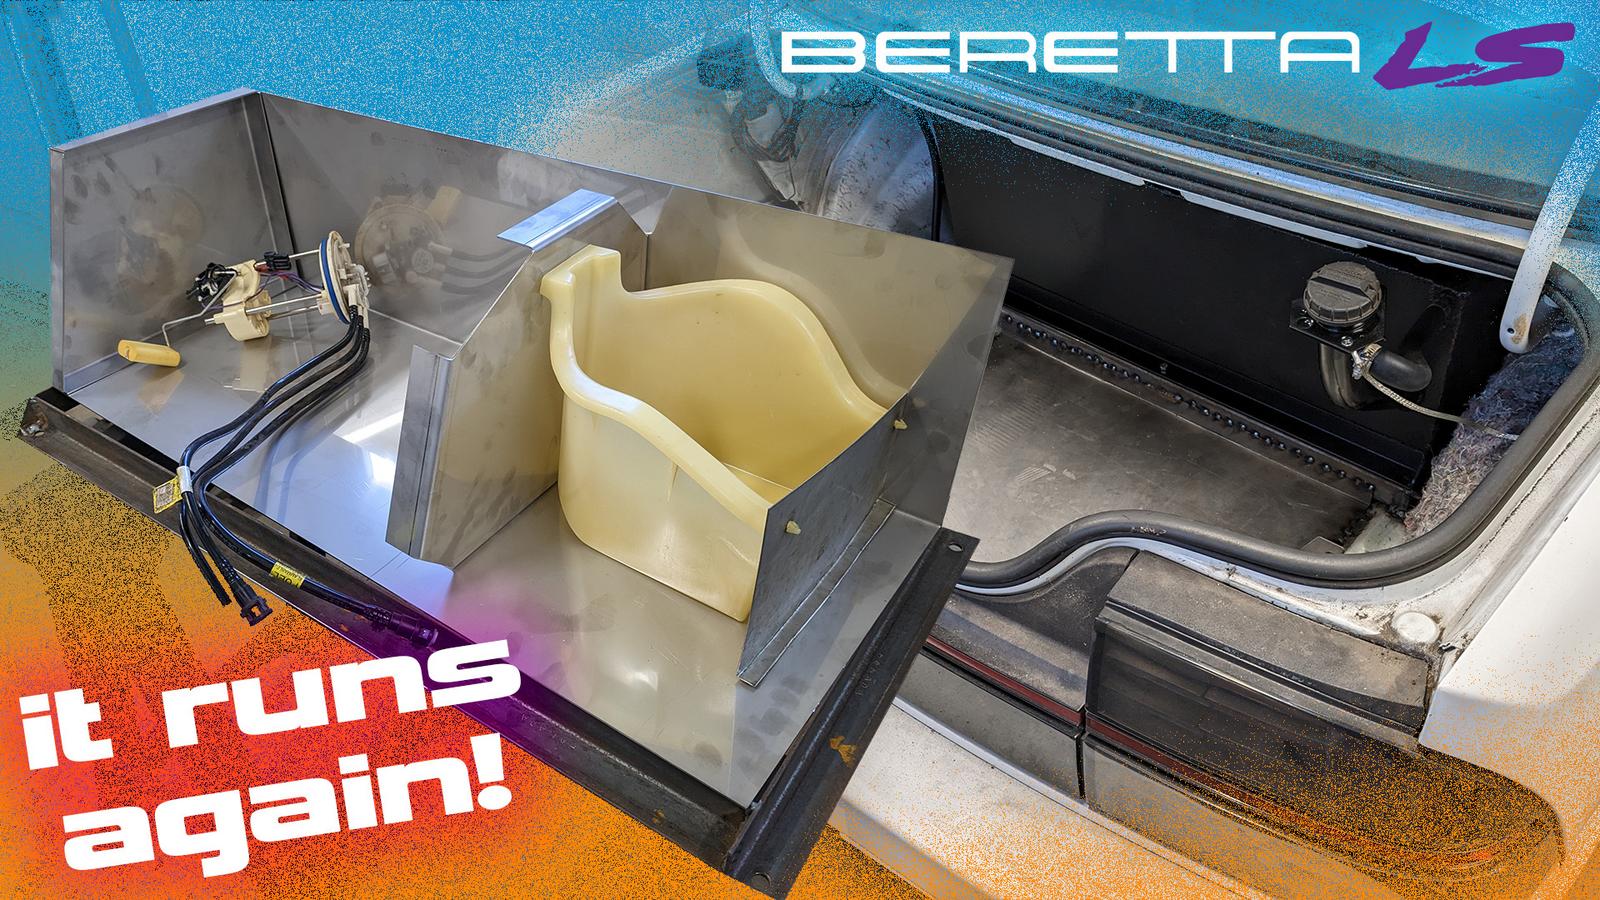
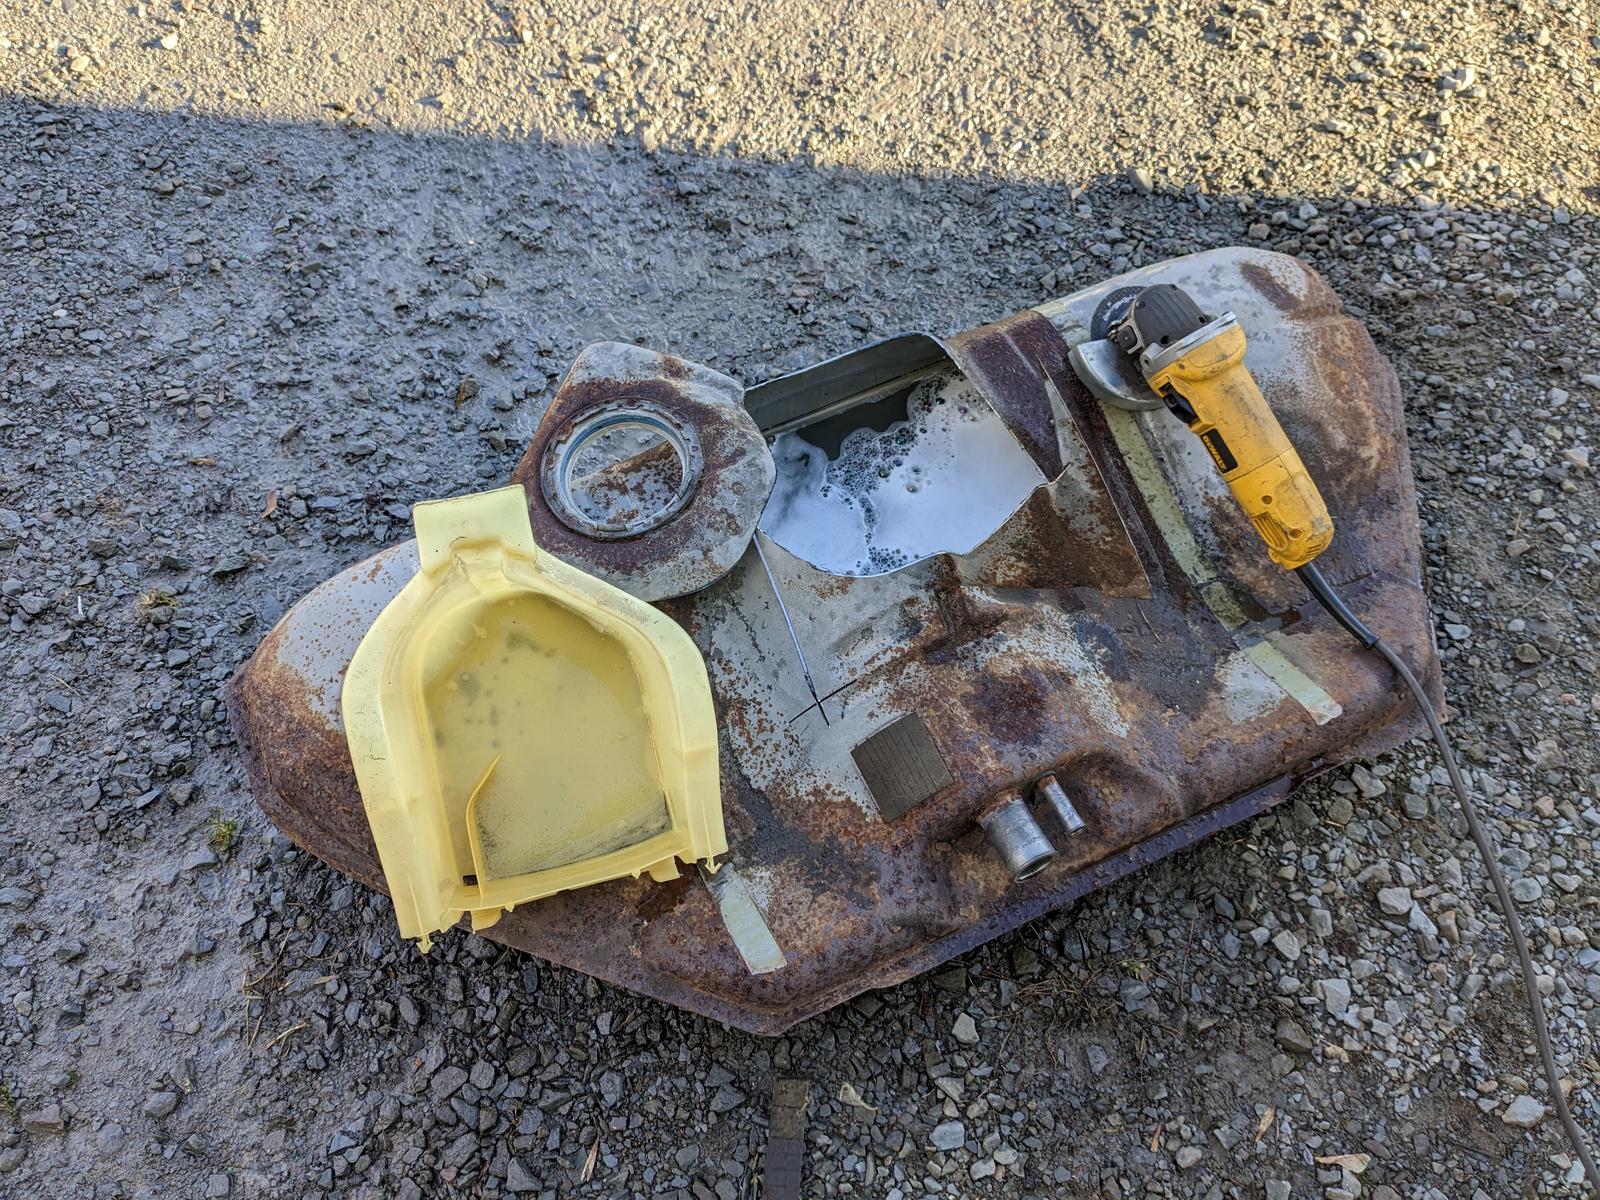
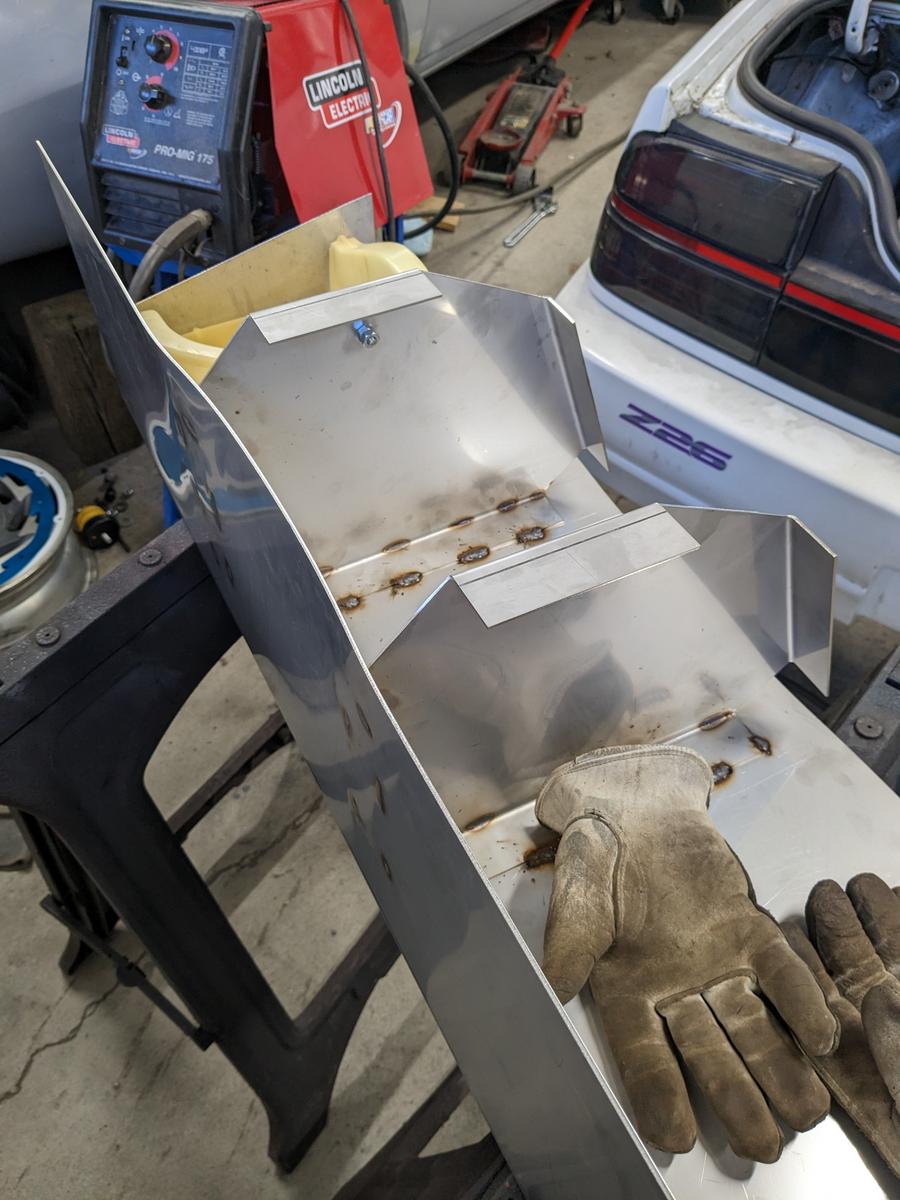
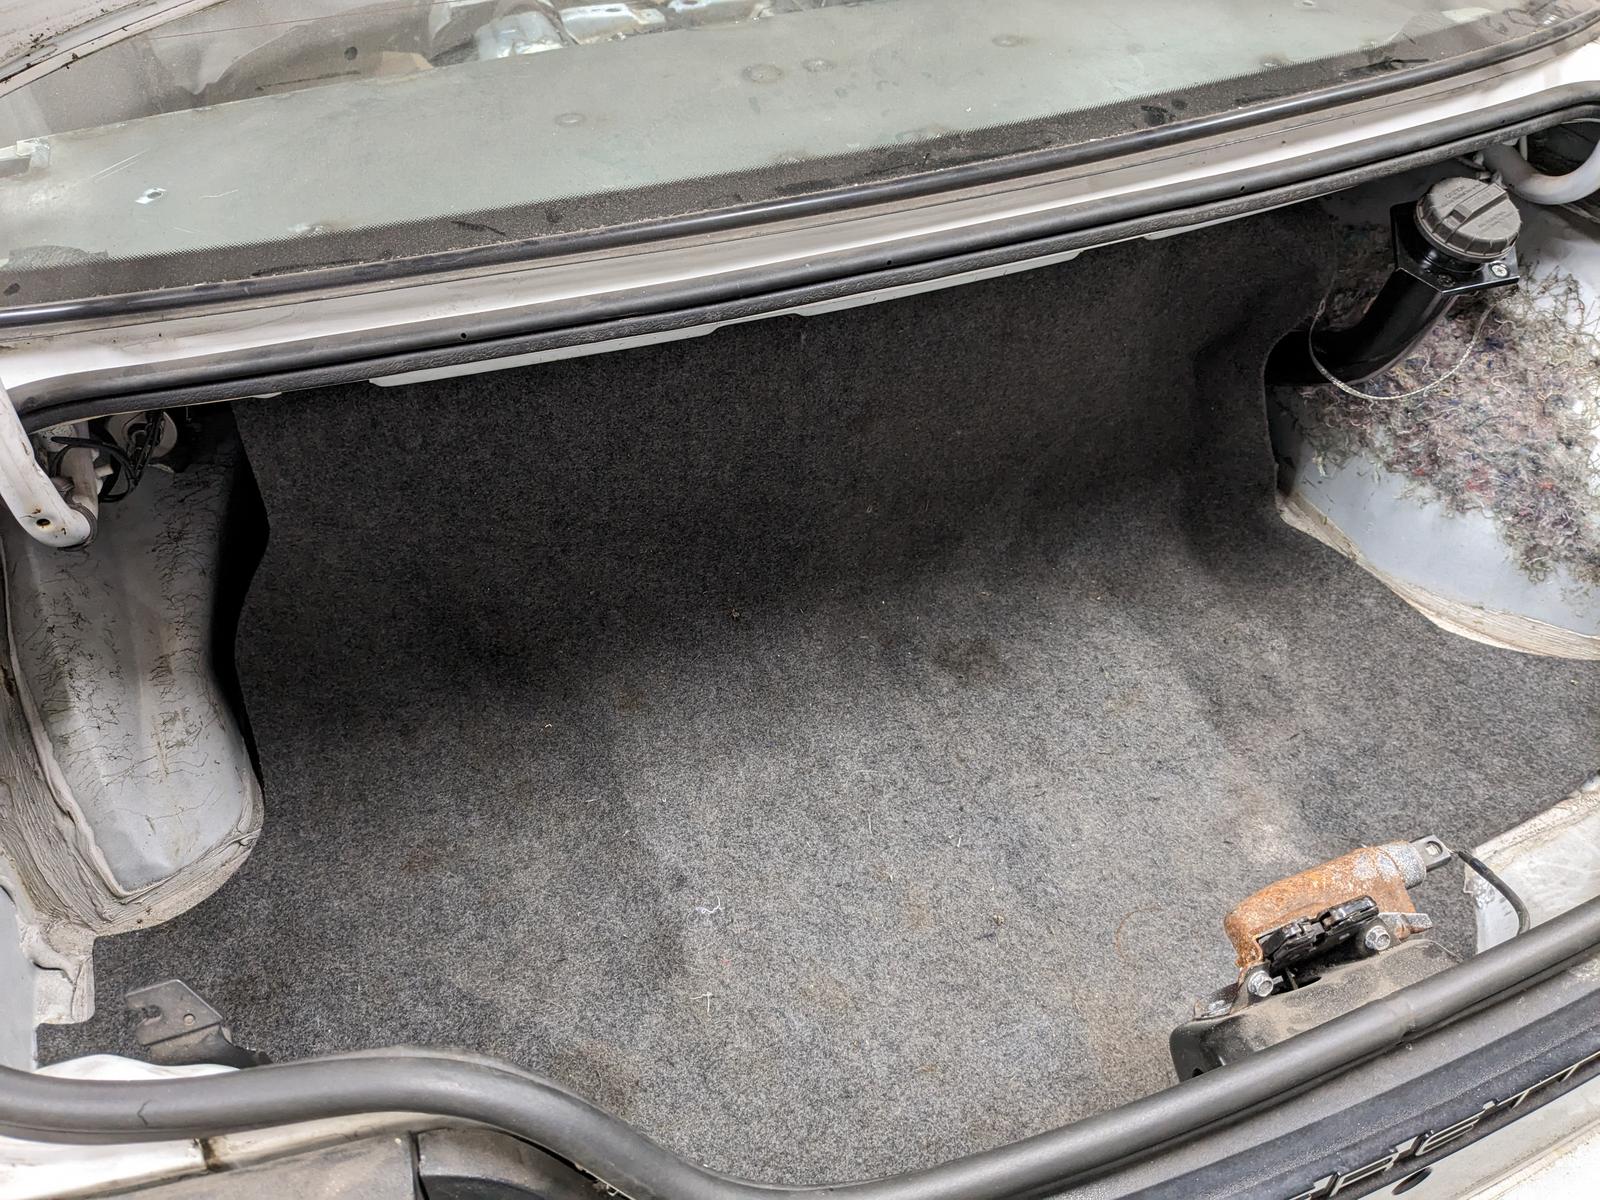
It's running again! Got the DIY stainless fuel tank done. Fits nicely and leaves a decent trunk with 17gal capacity. It's 14g 304SS and kinda heavy, using the factory fuel pump module with a Walbro 255HP. I don't love that the filler is inside the trunk, but I couldn't come up with a better way to do it...the factory filler spot is just way too low. Ideally the tank weight would be lower, but at least it's further back to get the f/r weight bias better.
https://youtu.be/vfYE3A_DLsA
-
04-04-2023 #92
Registered User
- Join Date
- Nov 2018
- Posts
- 645
Bummer on the steering arms being unflippable.
-
04-05-2023 #93
Registered User
- Join Date
- Sep 2009
- Posts
- 2,705
Nice work on the tank!
1955 Nomad project LC9, 4L80e, C5 brakes, Vision wheels
1968 Camaro 6.2 w/ LSA, TR6060-Magnum hybrid and etc SOLD
1976 T/A LS1 6 Speed, and etc. SOLD
Follow me on Instagram: ryeguy2006a
-
04-22-2023 #94
Registered User
- Join Date
- Mar 2005
- Location
- Walton, NY
- Posts
- 737
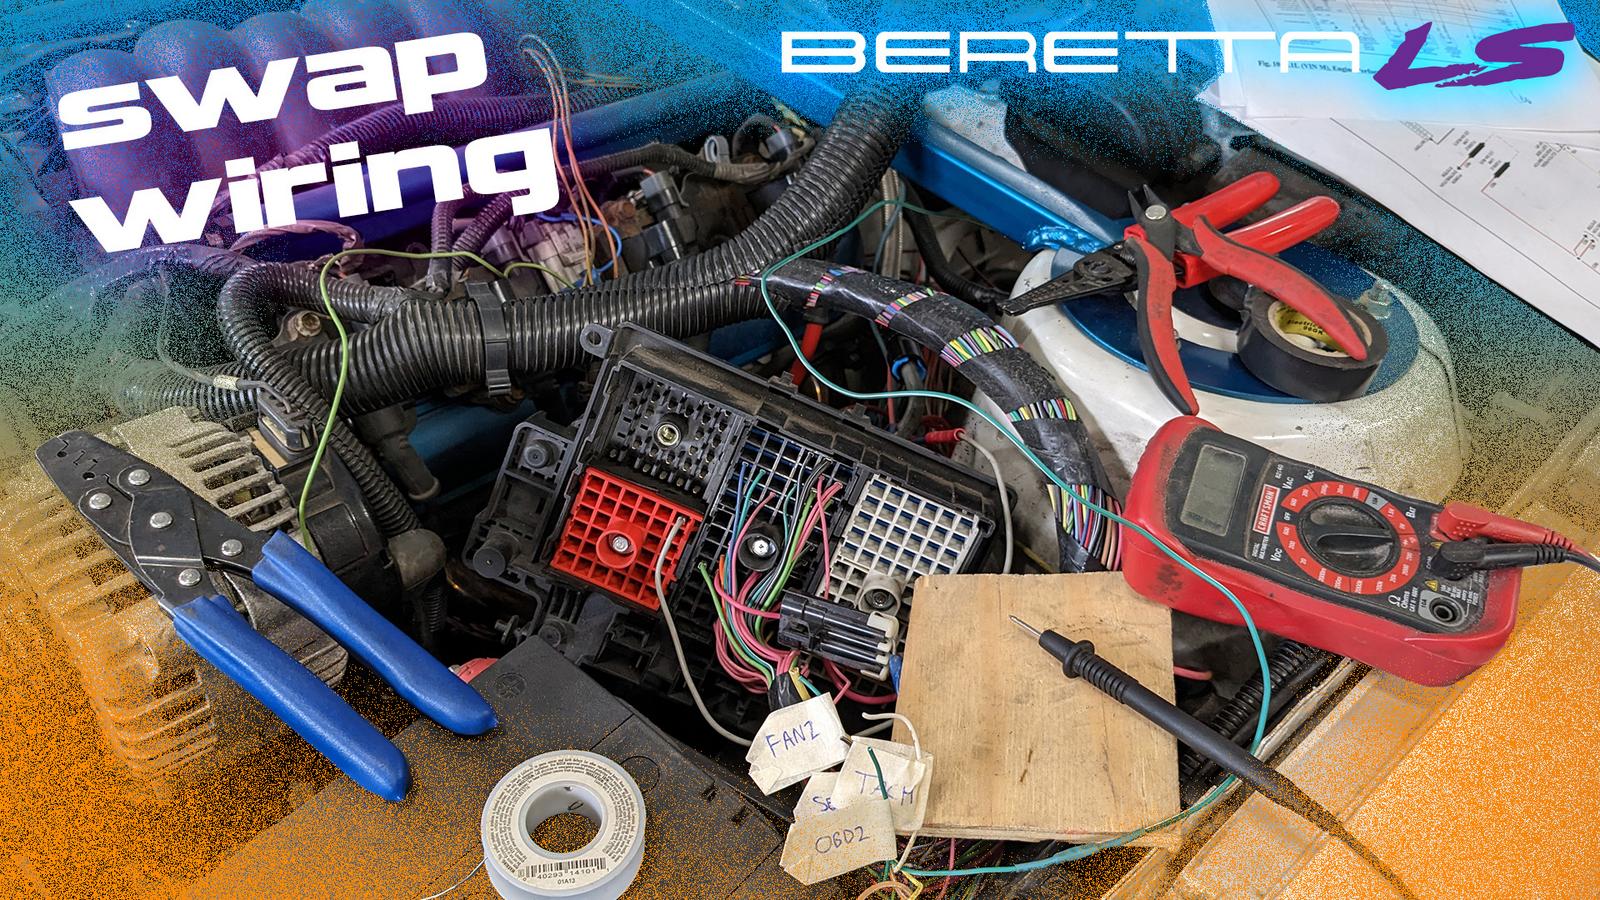
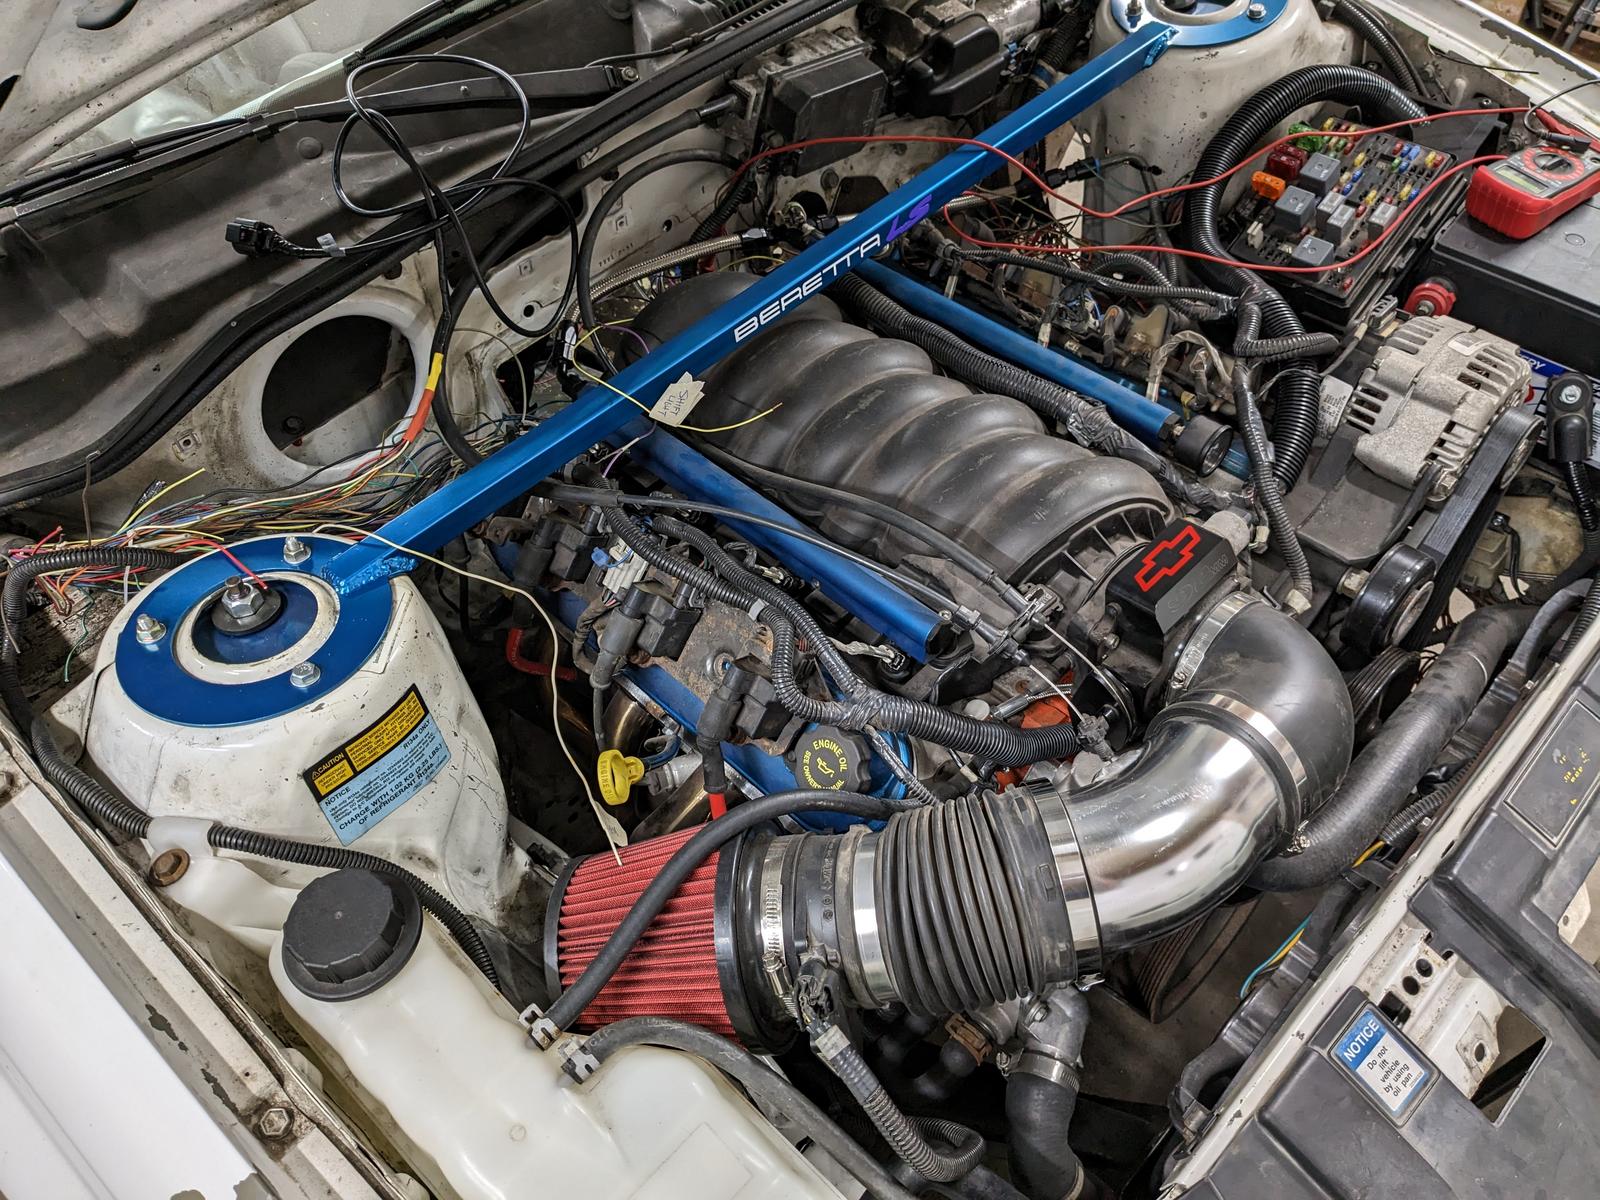
Keepin on keepin on. Got the wiring 100% finished. Now the key turns the car on & off and all the gauges work. I even fixed the trunk popper that needed to be in "park". haha
https://youtu.be/iWSmuRs3MpE
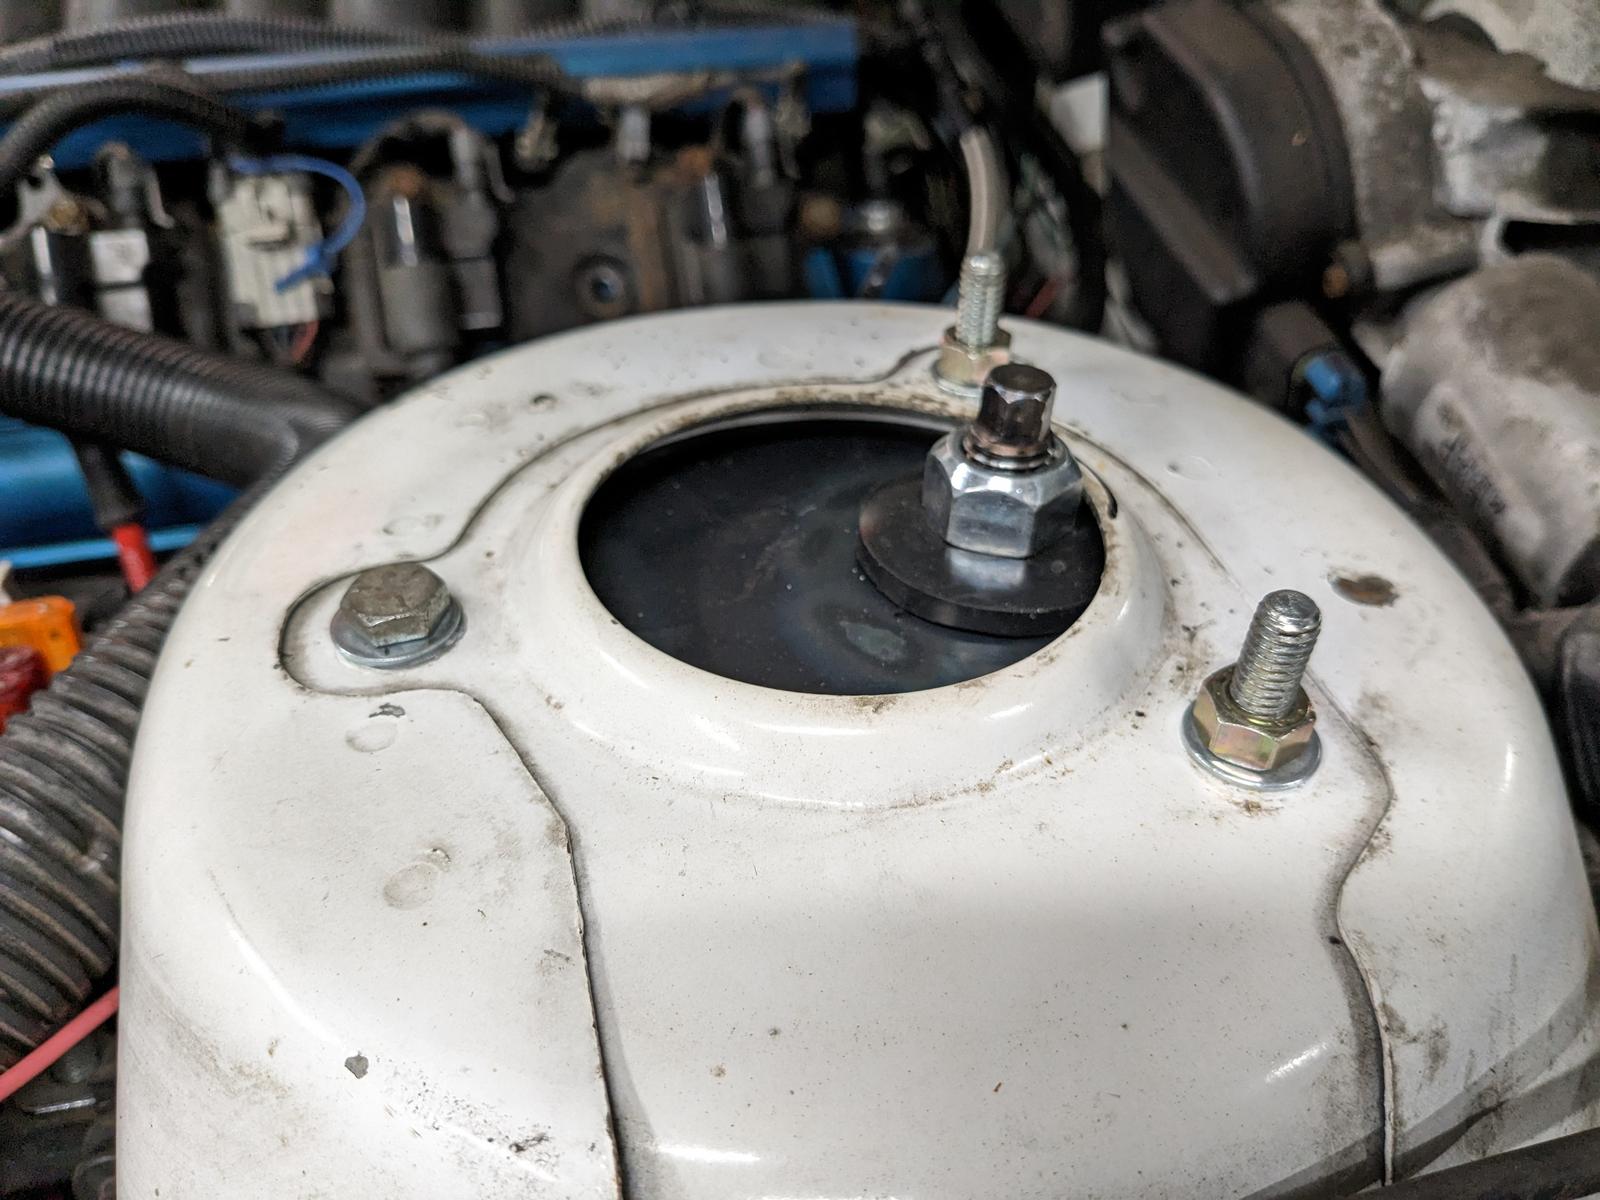
Found some nice little surprises. Being a 96 actually simplified some of the wiring since it matches up to 2000 OBD2 truck. Oil pressure connector plugged right in and 98 Camaro coolant temp sensor also plugs right in (I had laready cut mine off though) lol. The truck fuse block fits awesome in the air cleaner and I made a little bracket to hold it secure.
I added PCM control for fan1 & fan2, reverse lockout solenoid and wired my wideband datastream into the Bank1 sensor2 signal for logging. Most of all the wiring I was able to leave in it's loom and repurpose wires I didn't need. I used a bunch of the Beretta PCM wires through the firewall bulkhead to get circuits into the interior without adding holes. And I added circuits to the PCM by using wires I didn't need for auto trans junk, etc. I also used the wiring leg that went to the auto trans plug to do reverse lights and reverse lockout without adding to the bundle inside the loom.
I hope this is all the wiring I have to do for a while. I took almost a week and crimp solder & shrunk it so I shouldn't have to chase down gremlins later. I also added fan override switch and a couple circuits through the firewall that I'm not using yet. So there's room to grow.
-
05-29-2023 #95
Registered User
- Join Date
- Mar 2005
- Location
- Walton, NY
- Posts
- 737
Got the tunnel video done. Got it basically built at my house and took it back to the lift for final finishing and seam sealing. It all fits pretty well. Gonna look damn near factory with carpet!

[MEDIA=youtube]T-GXMyhoxL0[/MEDIA]
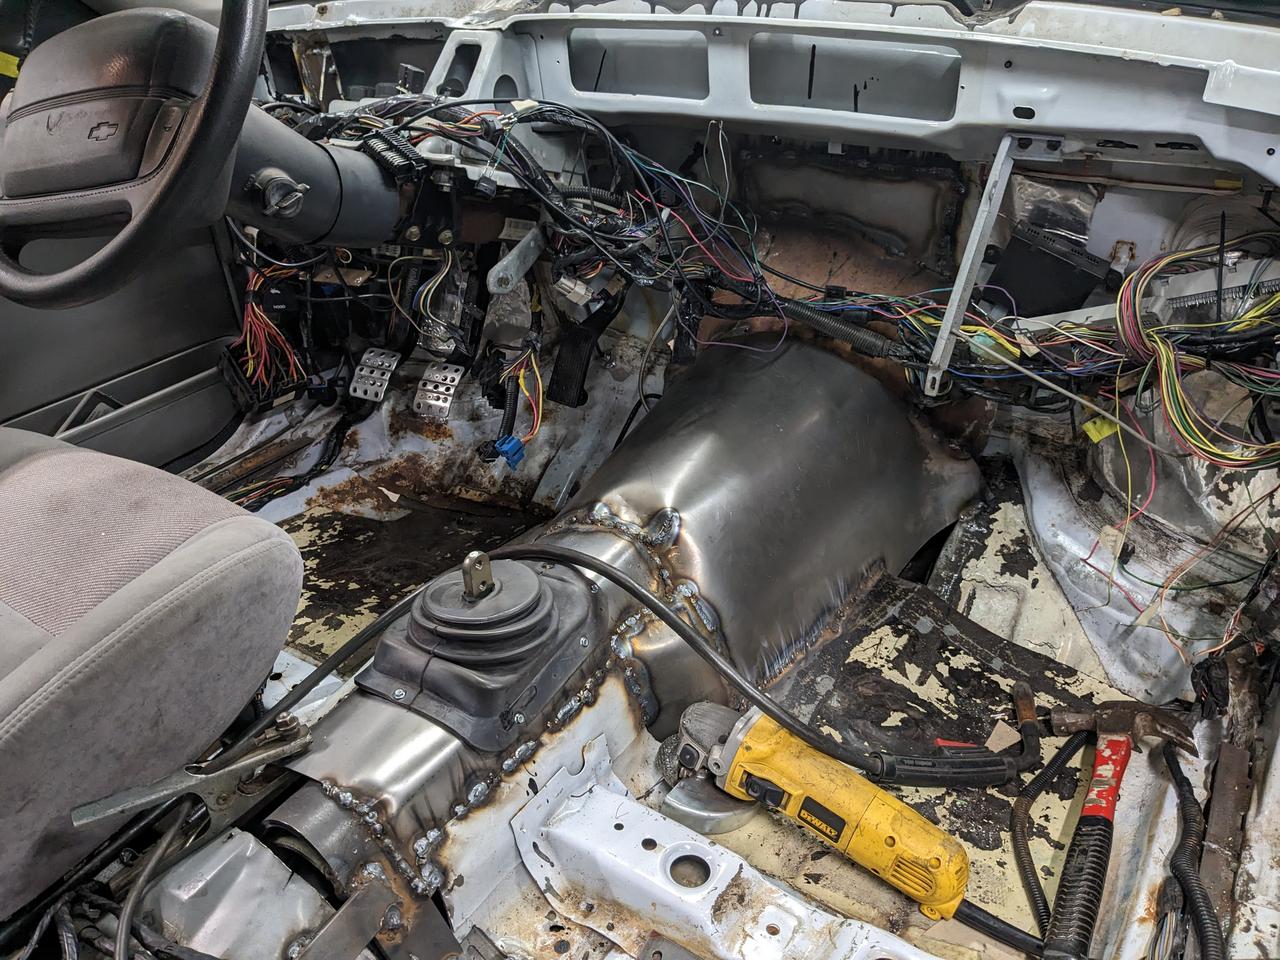
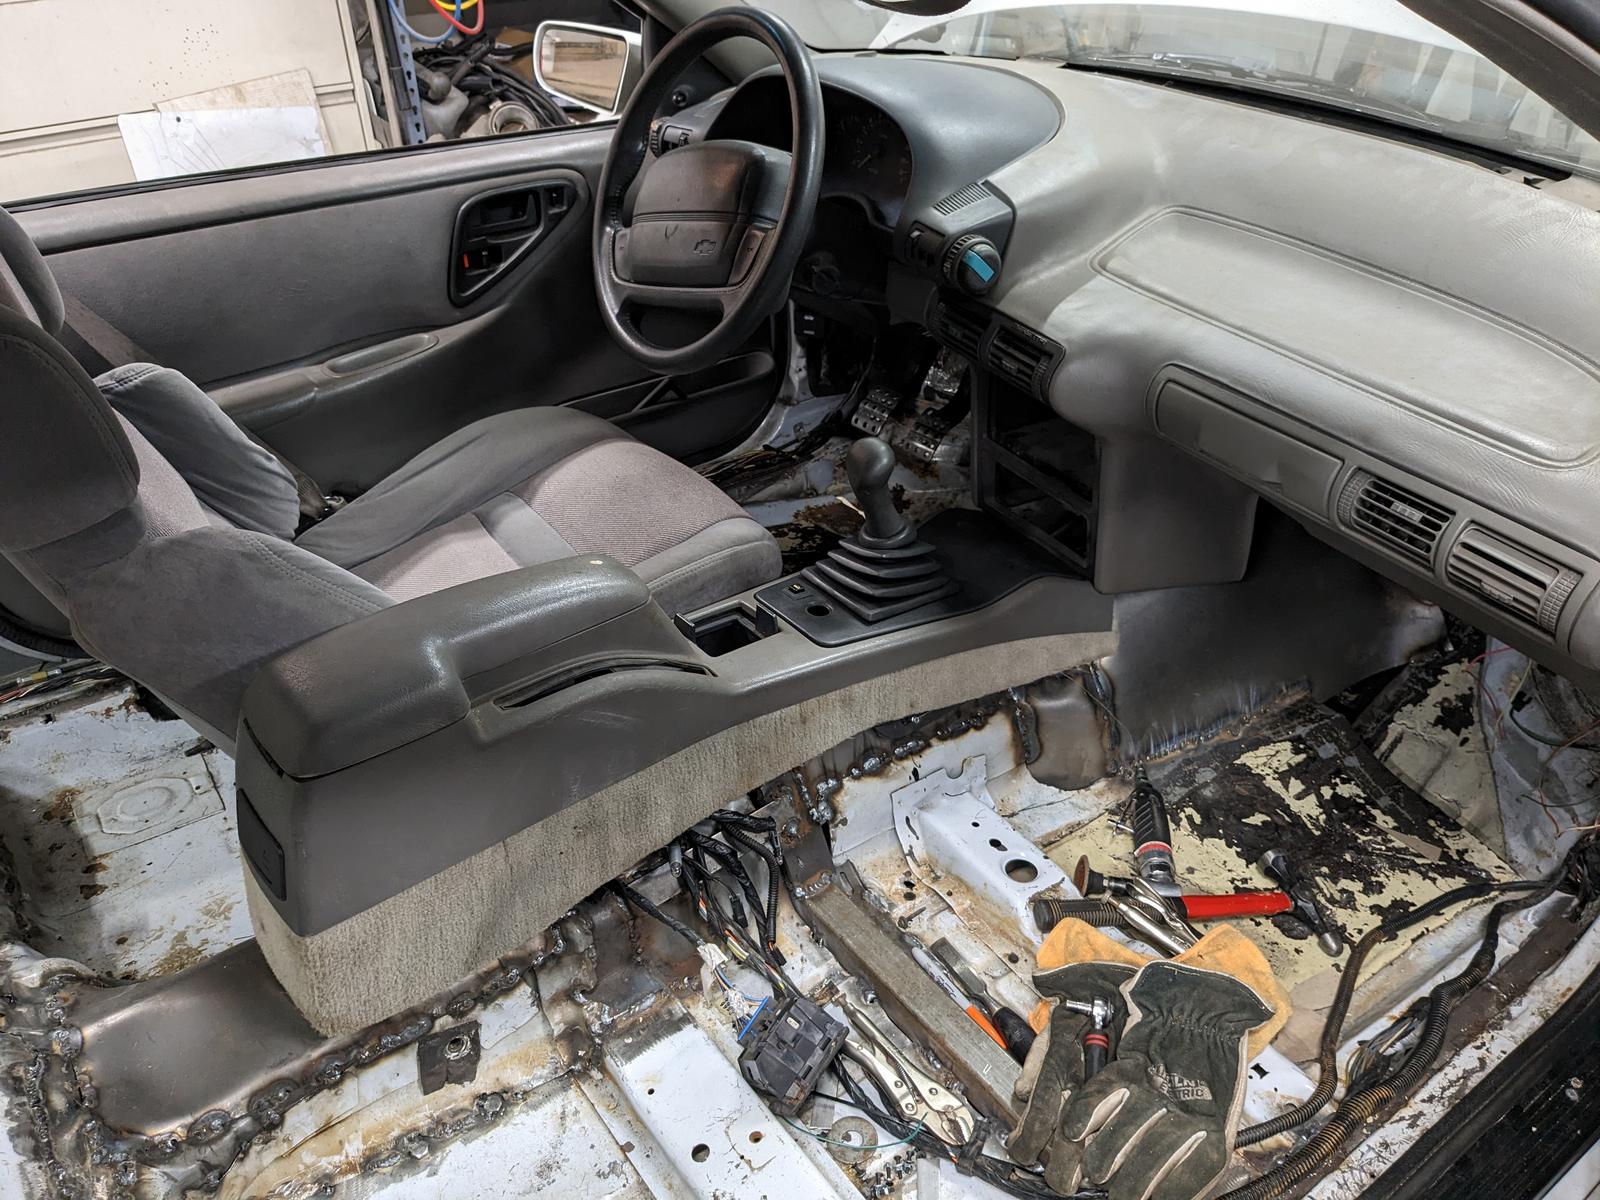


Everything is back in place and the exhaust is done, so that will be the next video.
-
06-01-2023 #96
Registered User
- Join Date
- Apr 2010
- Posts
- 96
This is a very ambitious build. Hats off to you. It takes a lot of courage to bit off a challenge such as this. I wish I could drive it. Lol
-
06-02-2023 #97
Registered User
- Join Date
- Mar 2005
- Location
- Walton, NY
- Posts
- 737
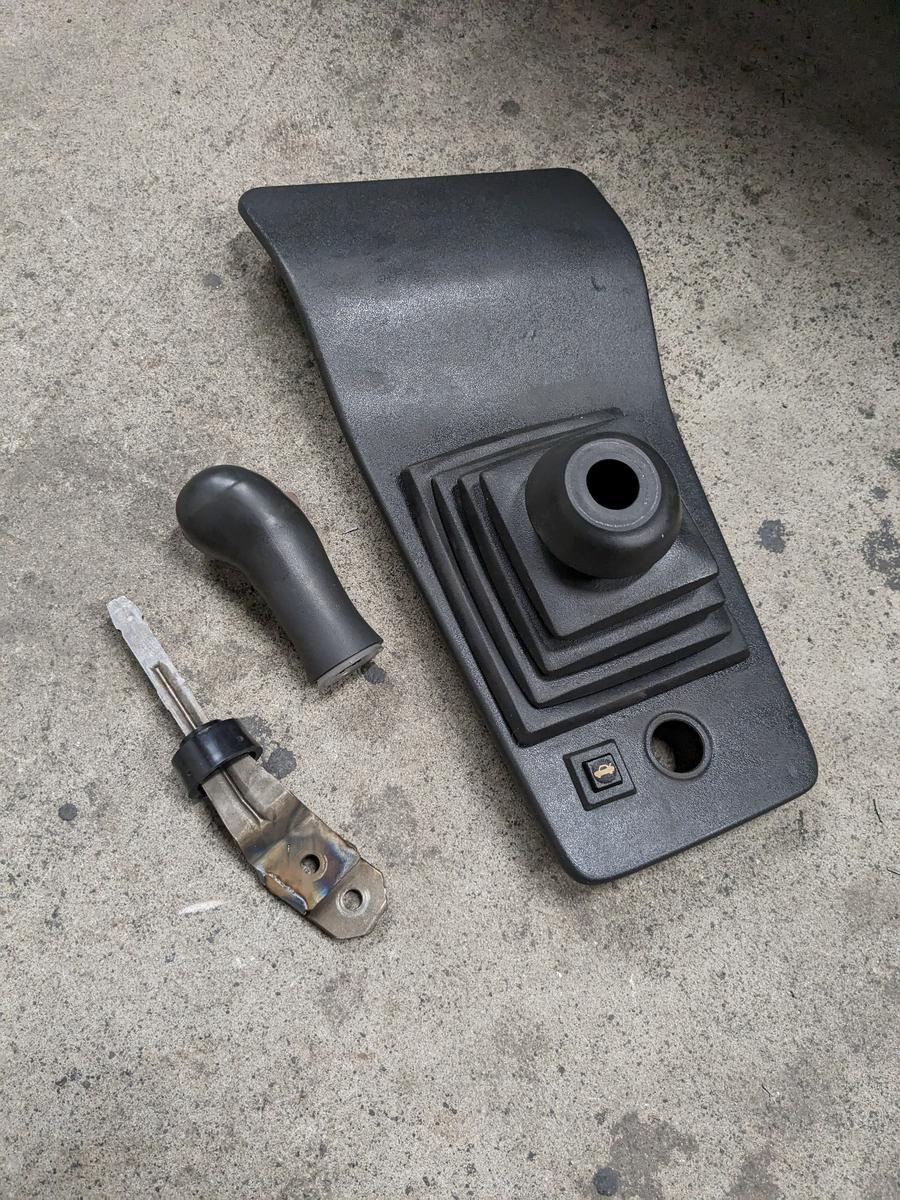
New steering arms are done and I just registered it for plates...all goes well I'll be street driving it this weekend!
06-05-2023 #98
Registered User
- Join Date
- Mar 2005
- Location
- Walton, NY
- Posts
- 737
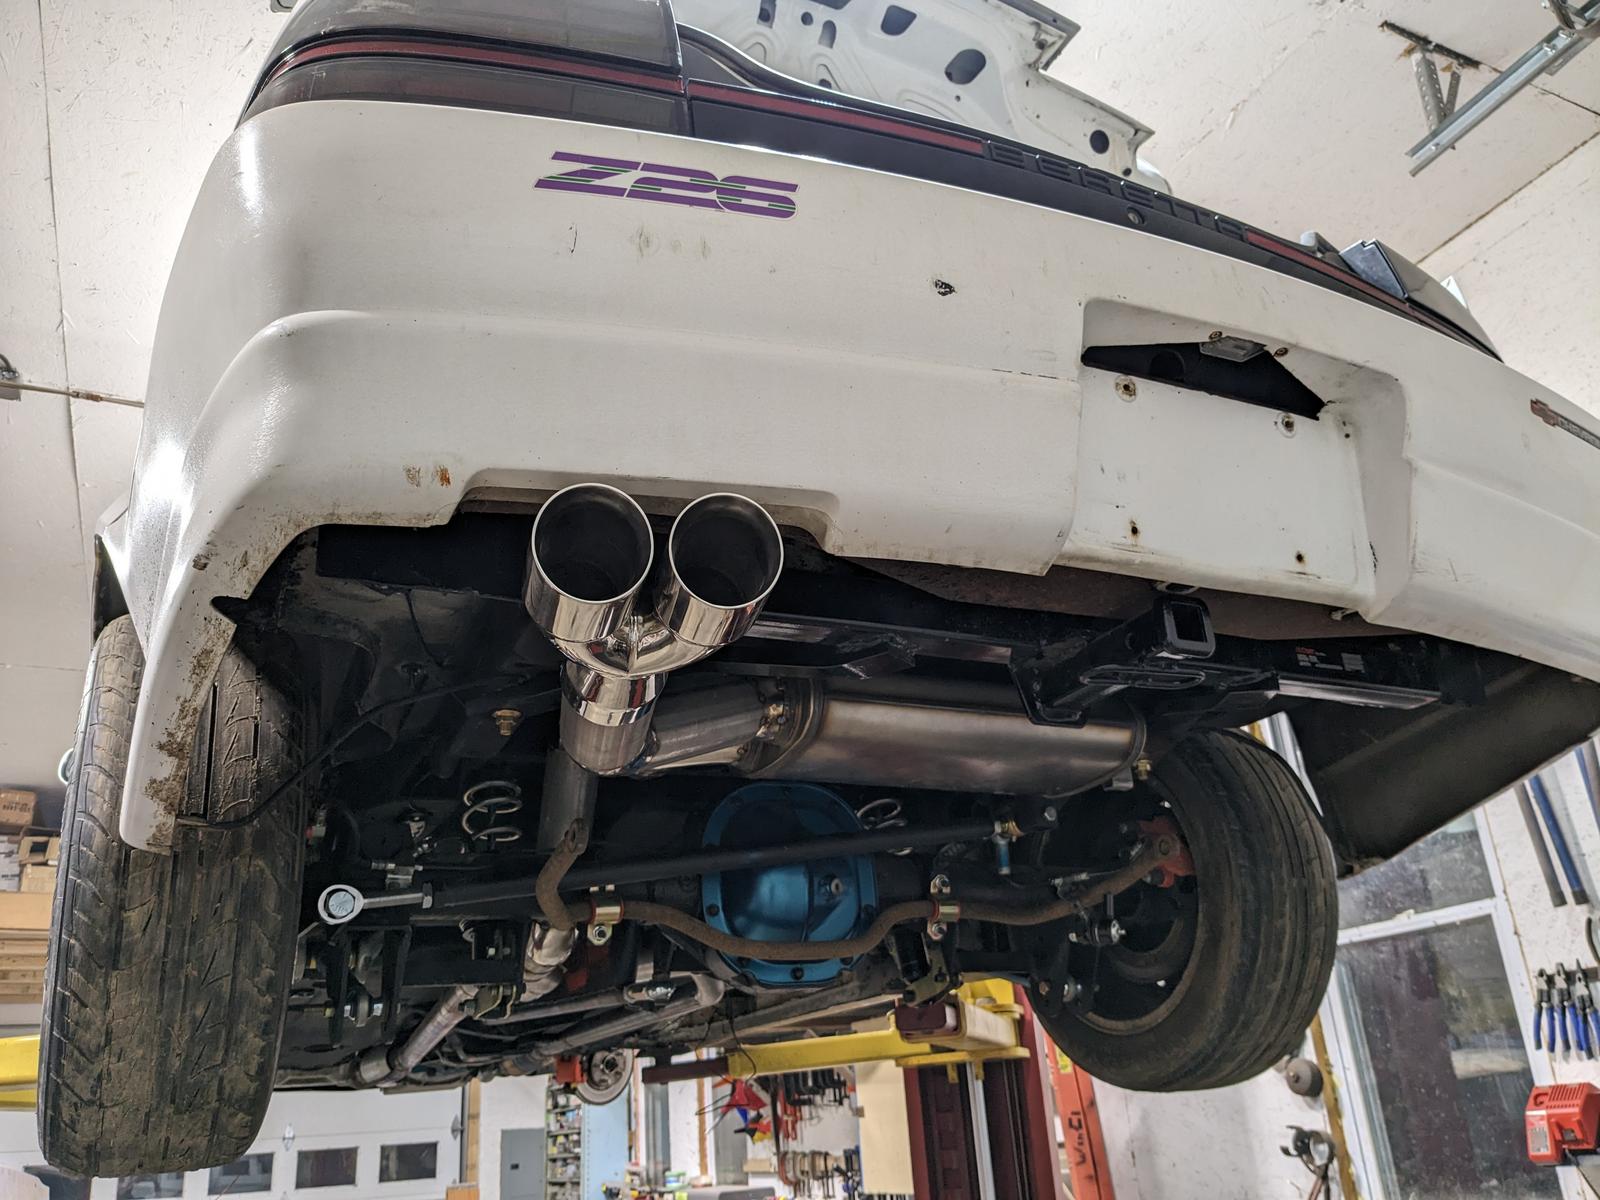
Exhaust video is up.
https://youtu.be/7gUHzuSZFoQ
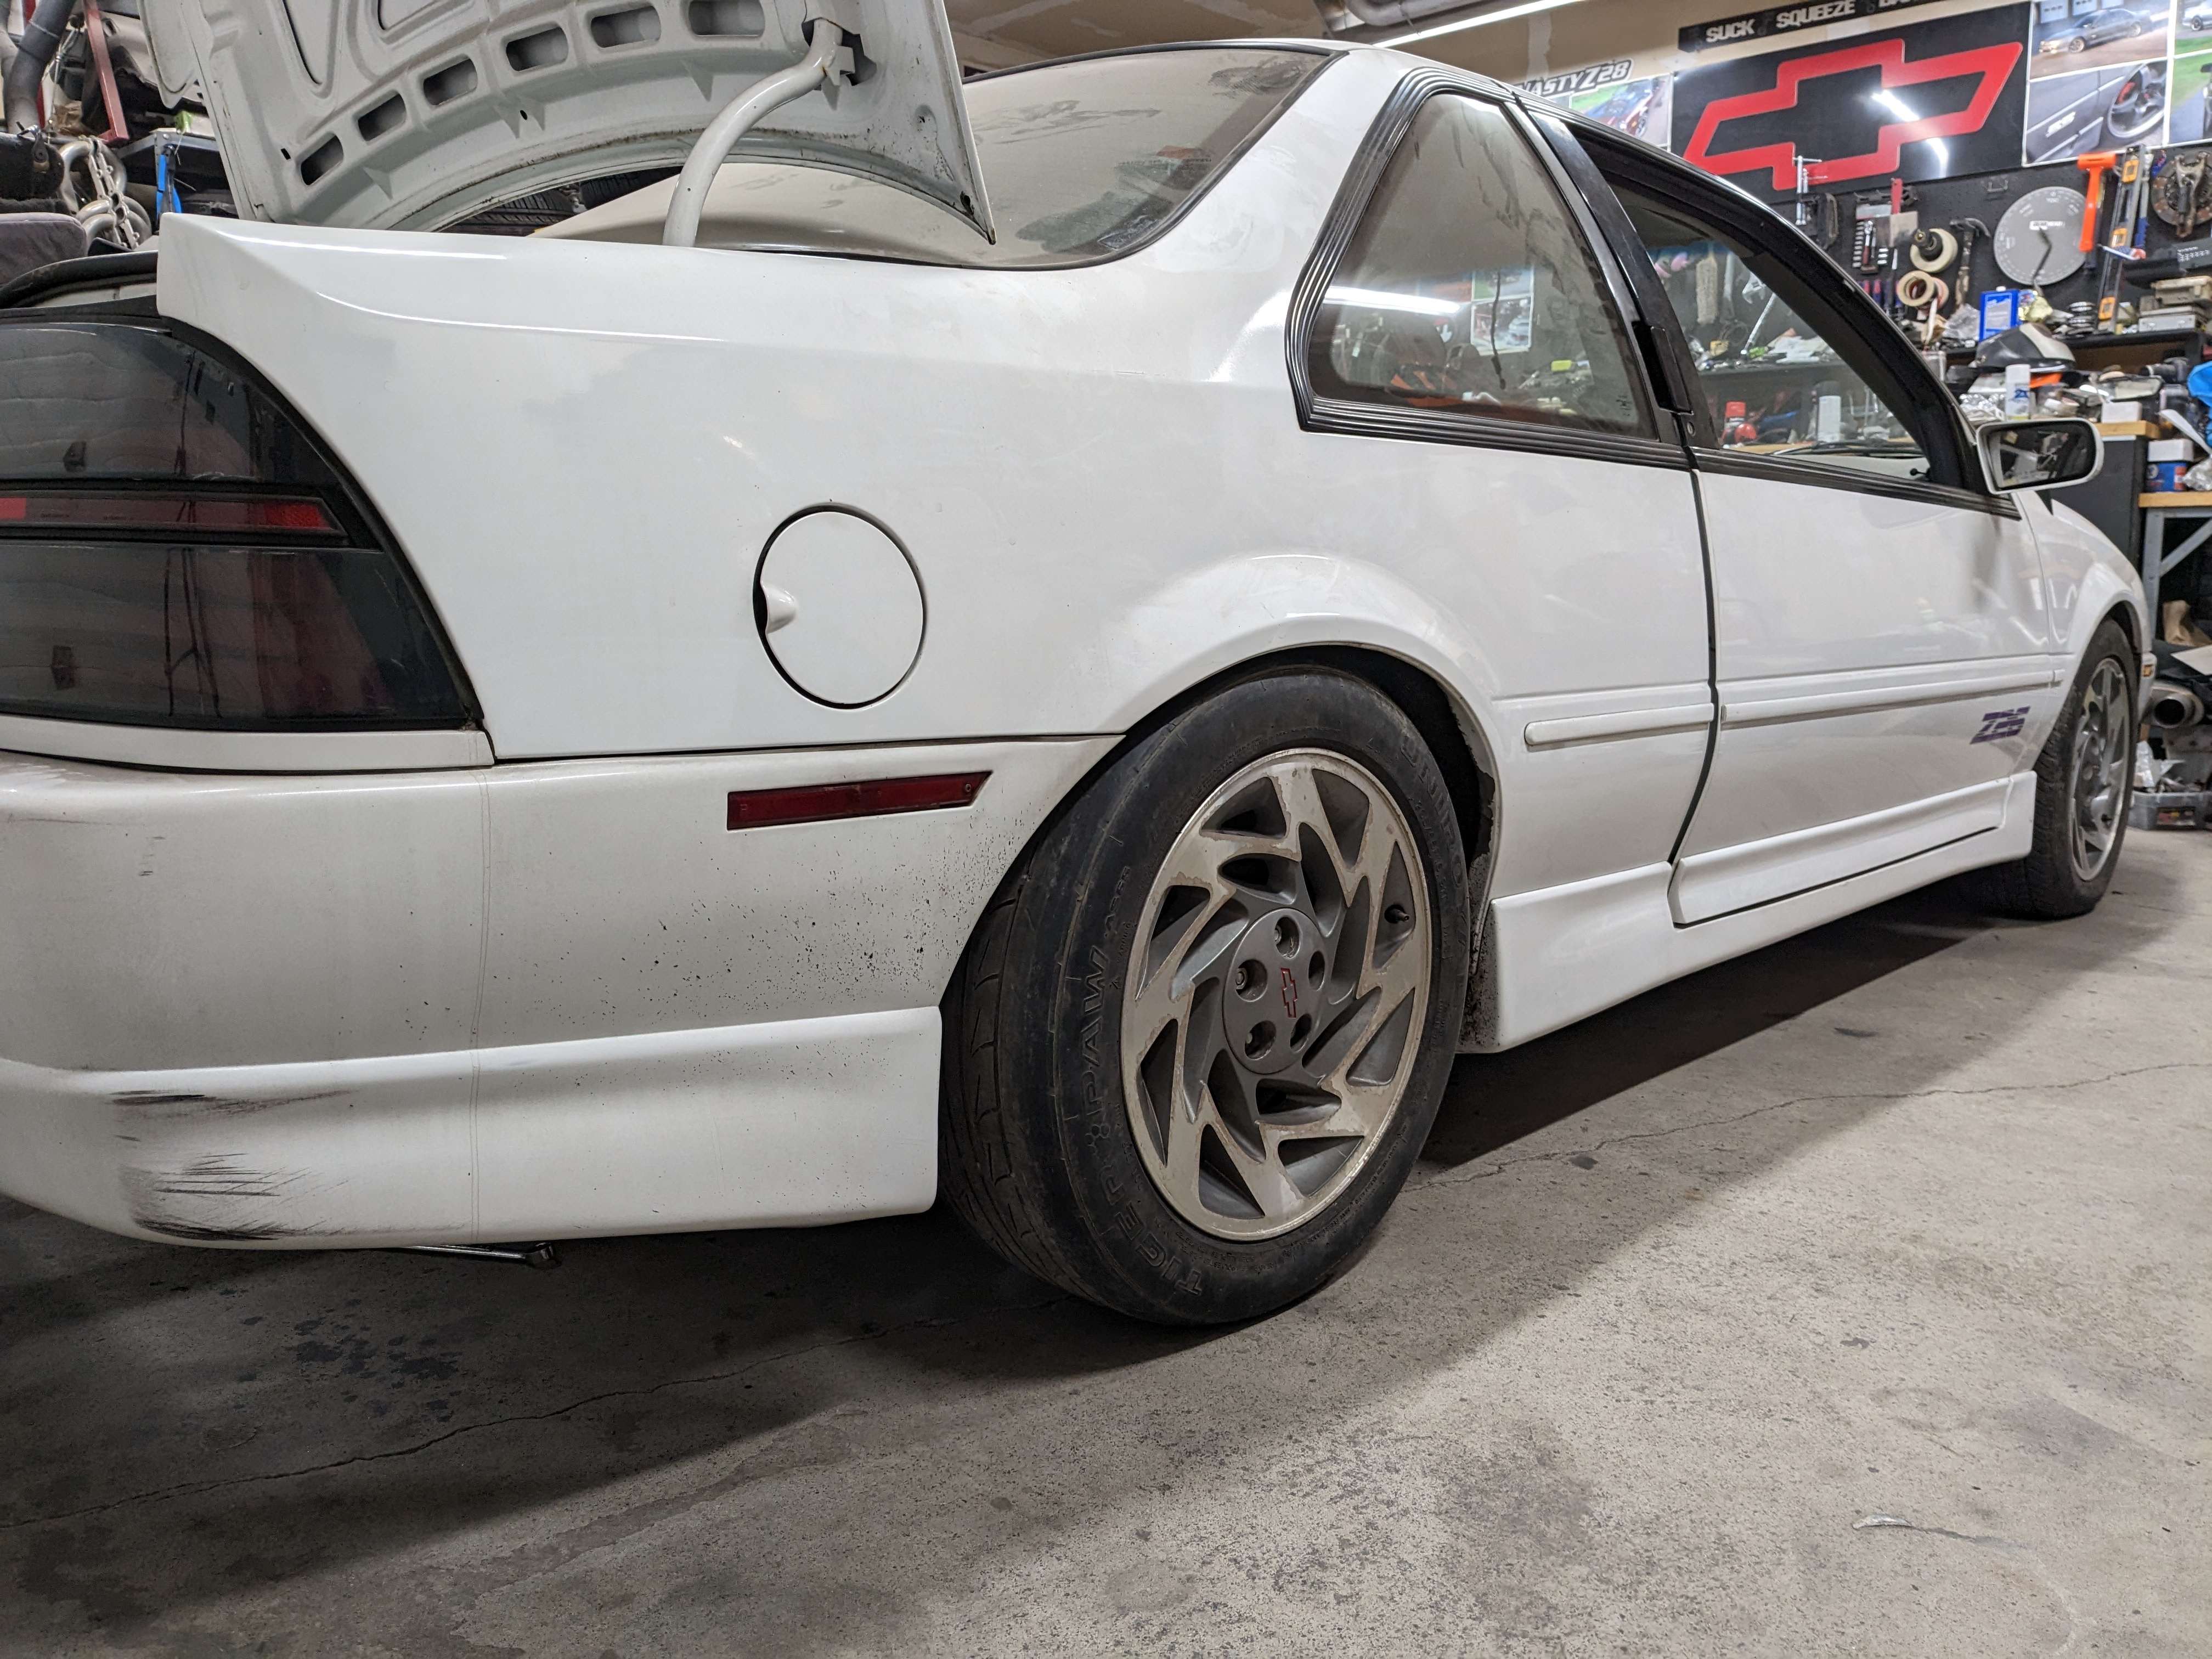
Also put tags on it and drove the first street miles. It looks absolutely amazing this low, but I dunno if it's gonna live in NY this way. haha Exhaust scrapes on the driveshaft on bumps too...so there's a little bit to work out there.
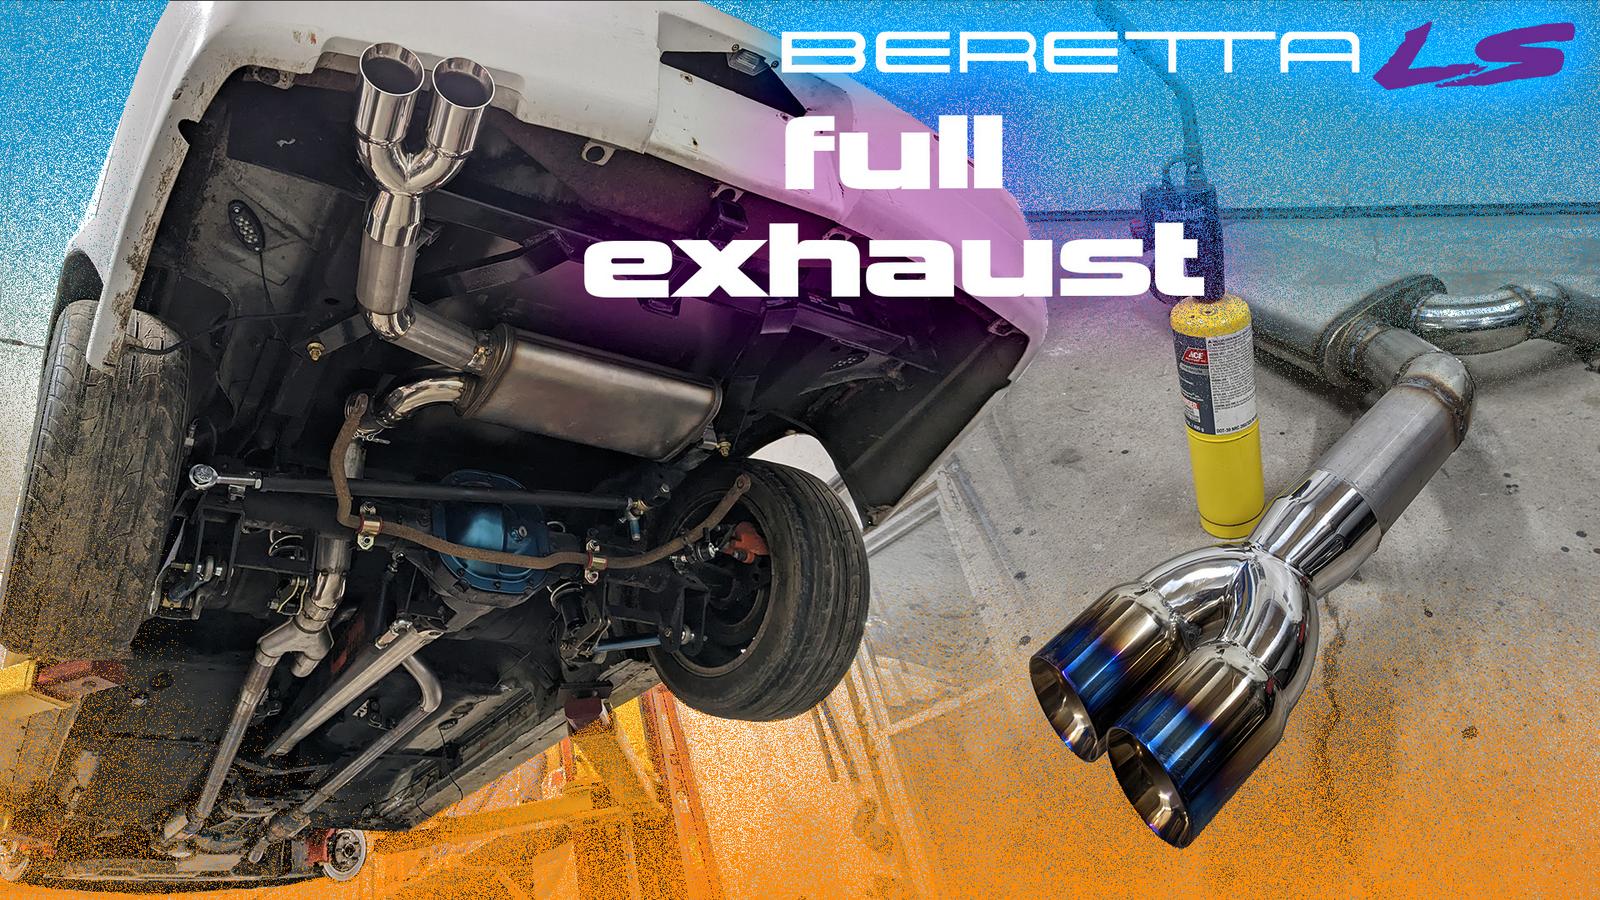
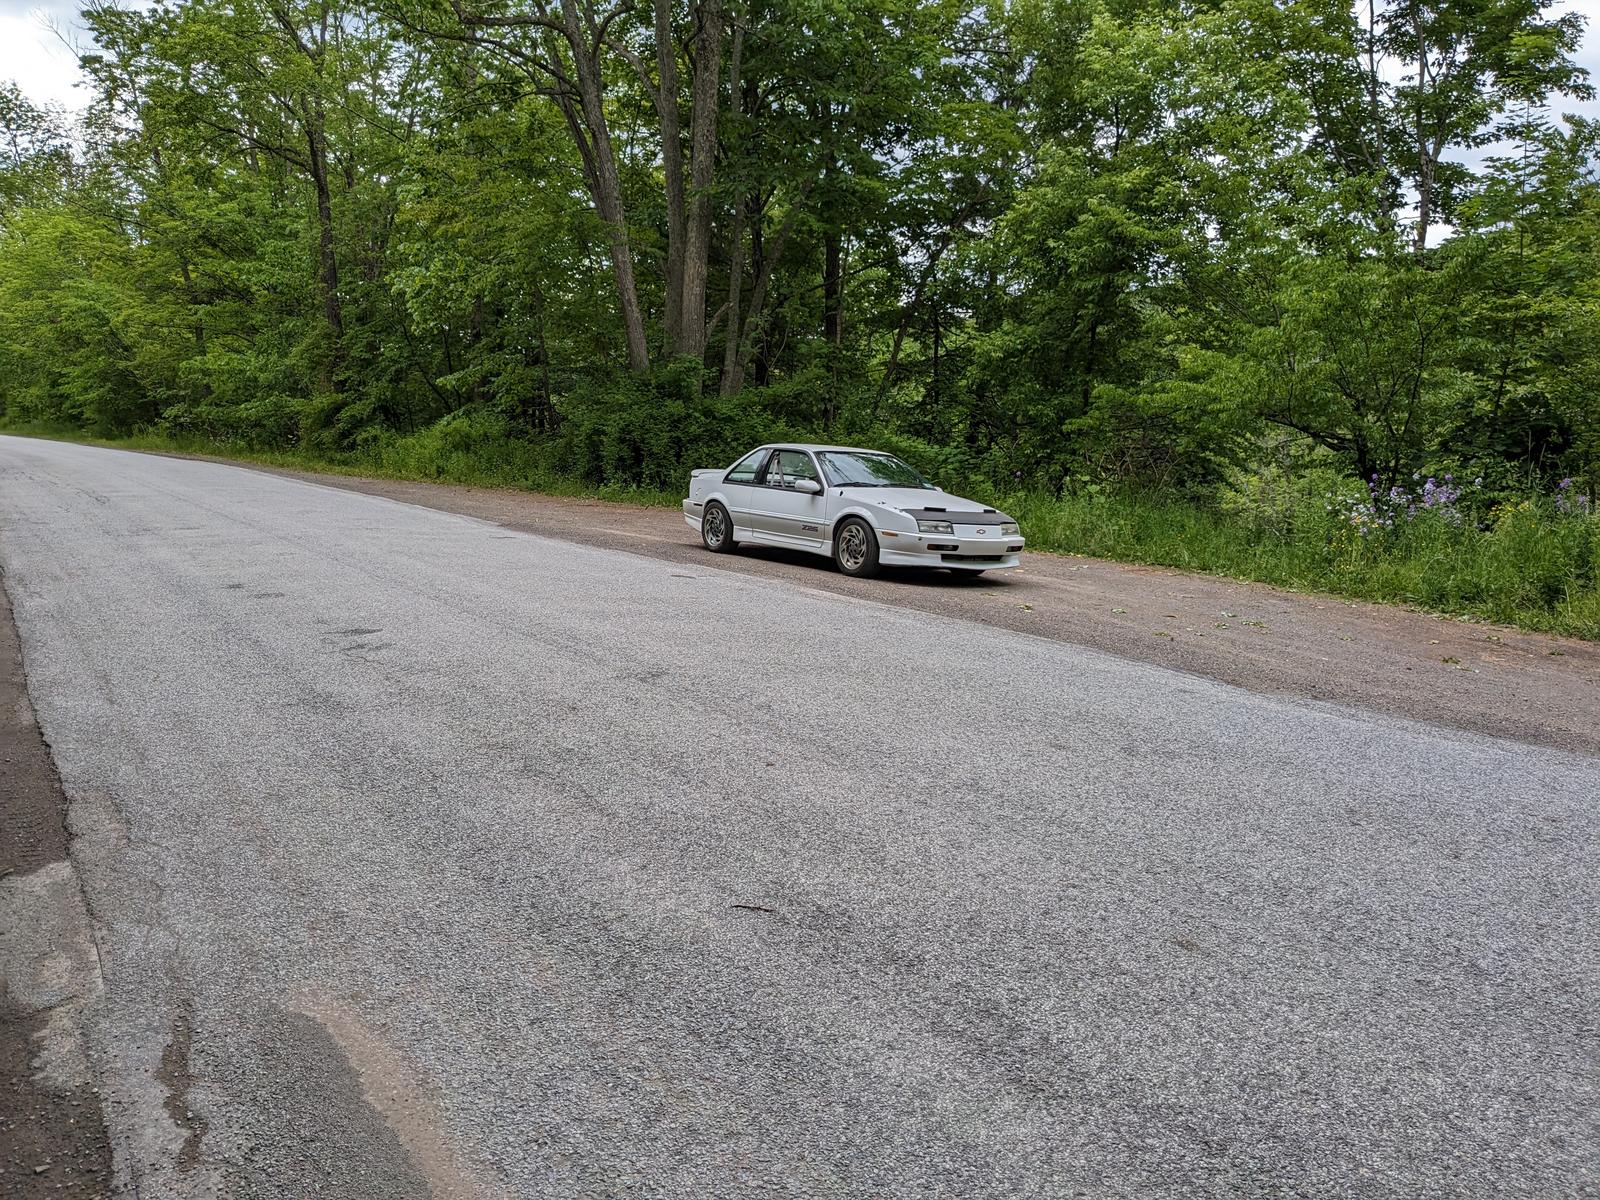
Steering is SO MUCH better. Basically perfect even before alignment. Very happy with that. More info to come.
07-02-2023 #99
Registered User
- Join Date
- Mar 2005
- Location
- Walton, NY
- Posts
- 737
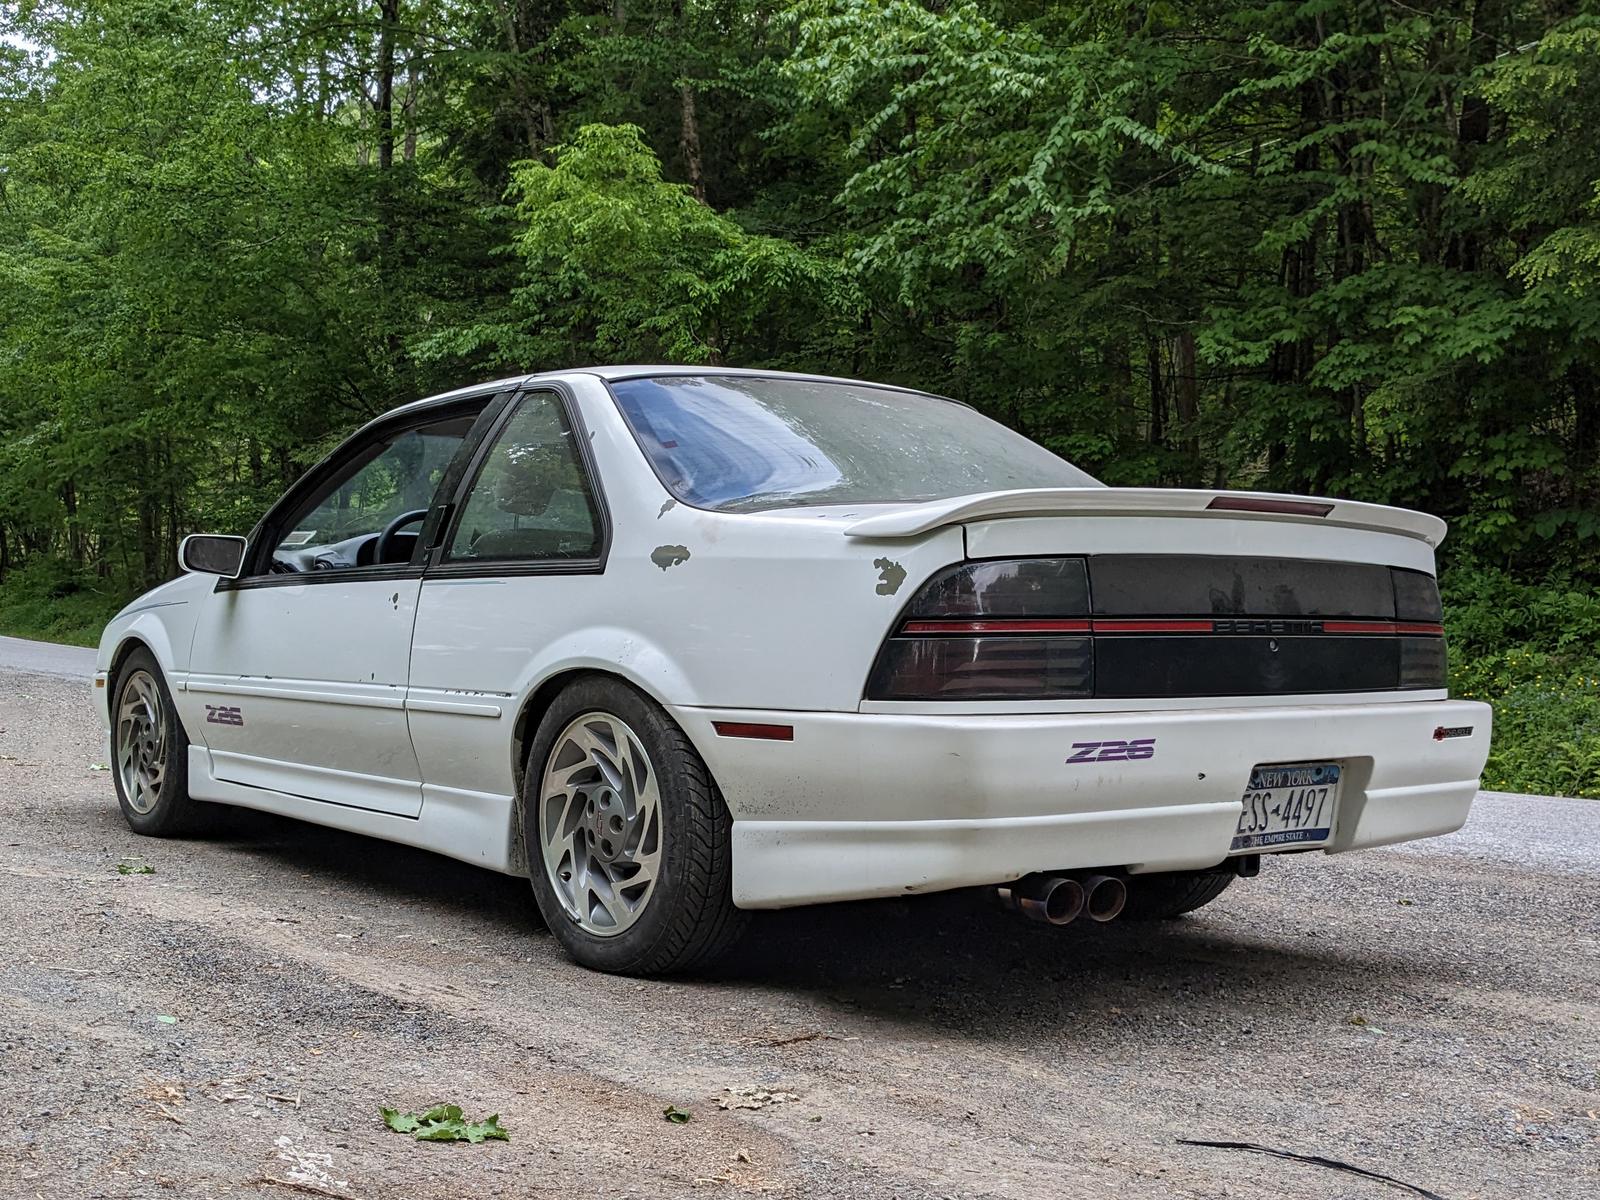
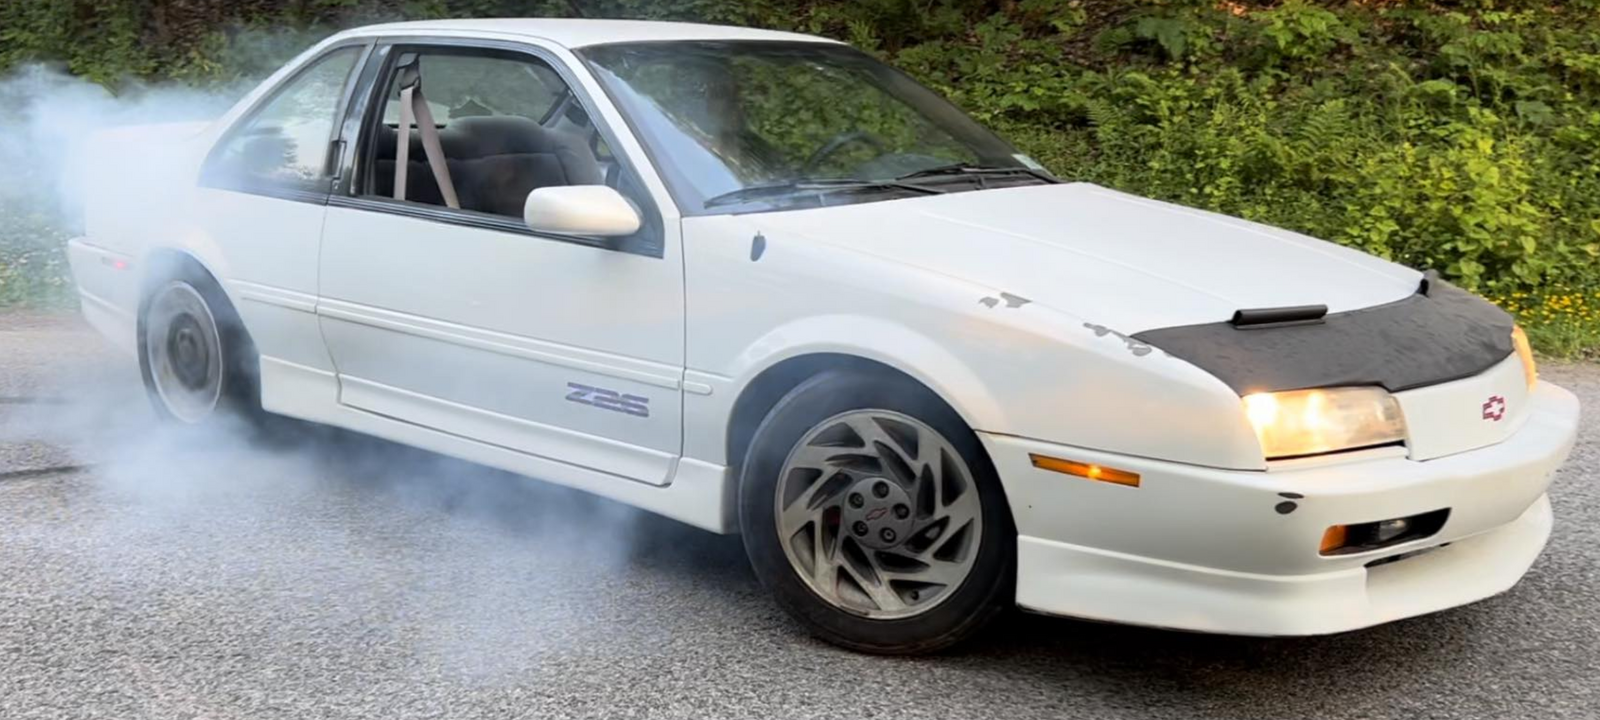
Still not completely finished, but I towed it to Carlisle. I took 4th place out of 4 cars in my class at the show (guess people don't like half-finished interiors and chipping paint). And I took 2nd out of 3 (2 running) at the donut/burnout contest. But nothing broke so I'm calling that a win.
https://www.youtube.com/watch?v=42yYXYGVmQM


07-09-2023 #100
Registered User
- Join Date
- Mar 2005
- Location
- Walton, NY
- Posts
- 737
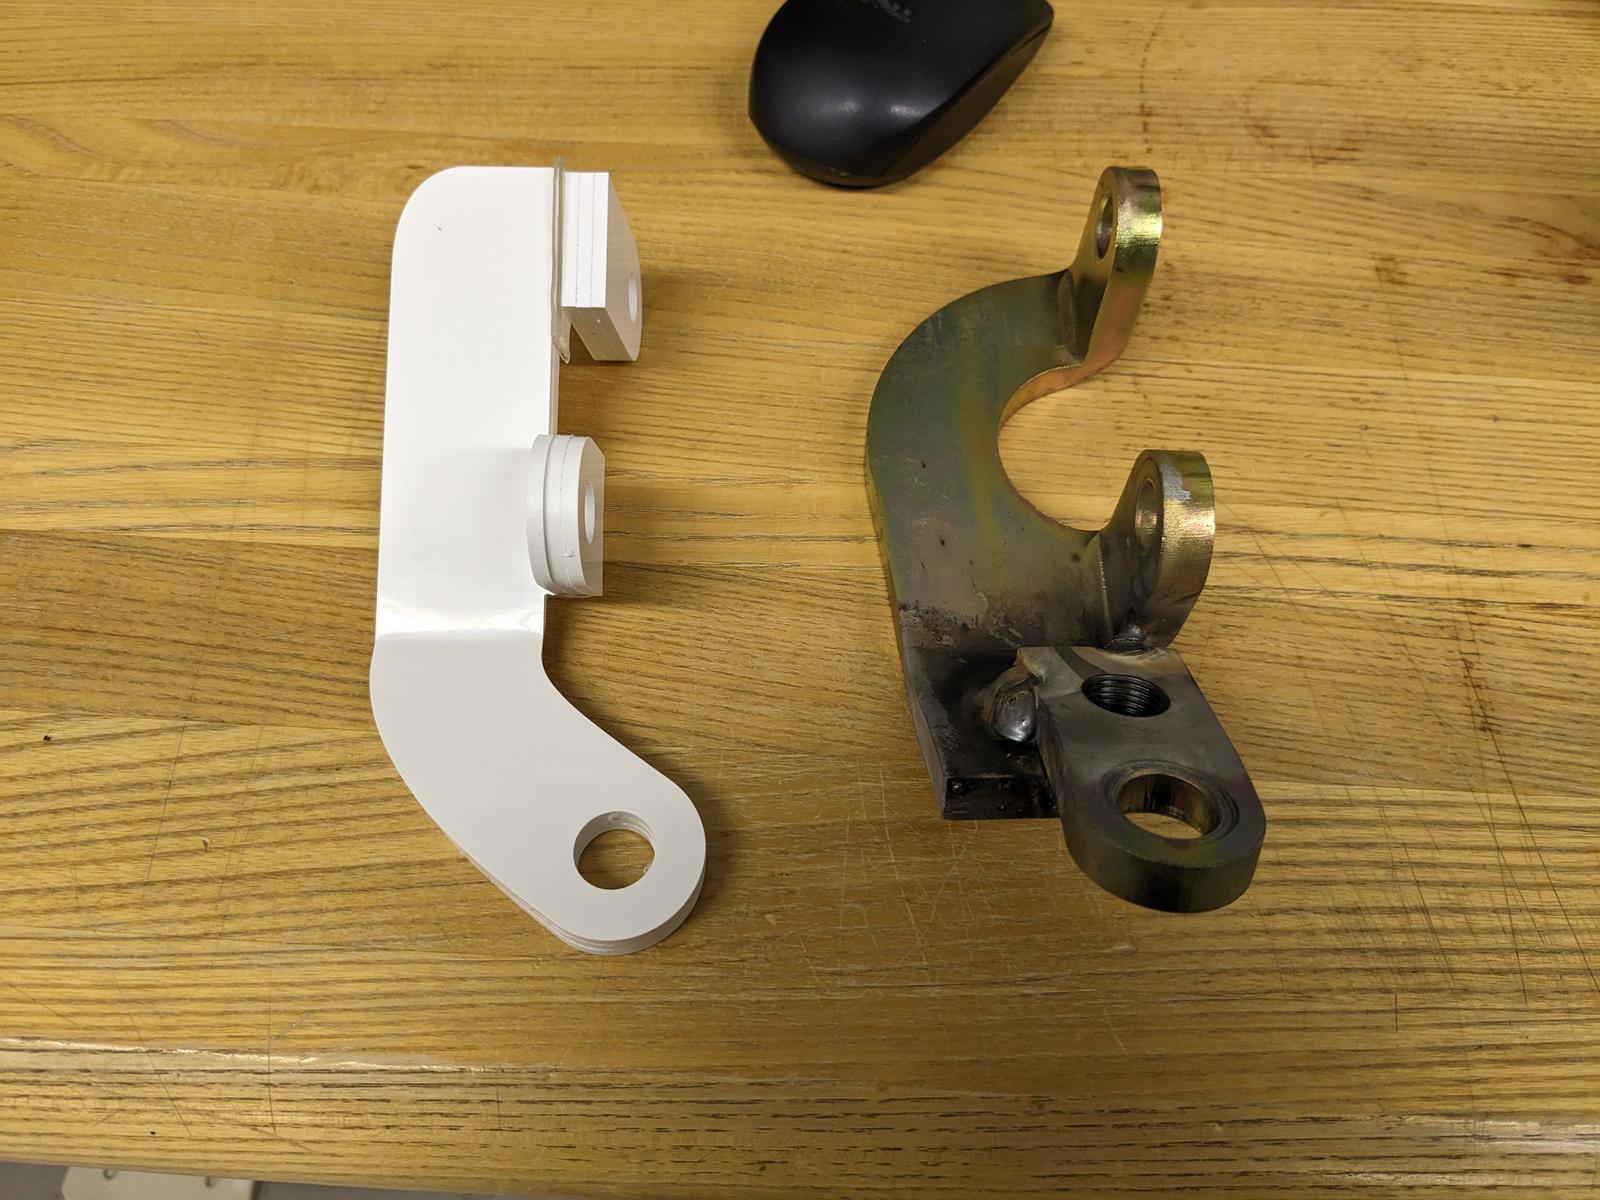
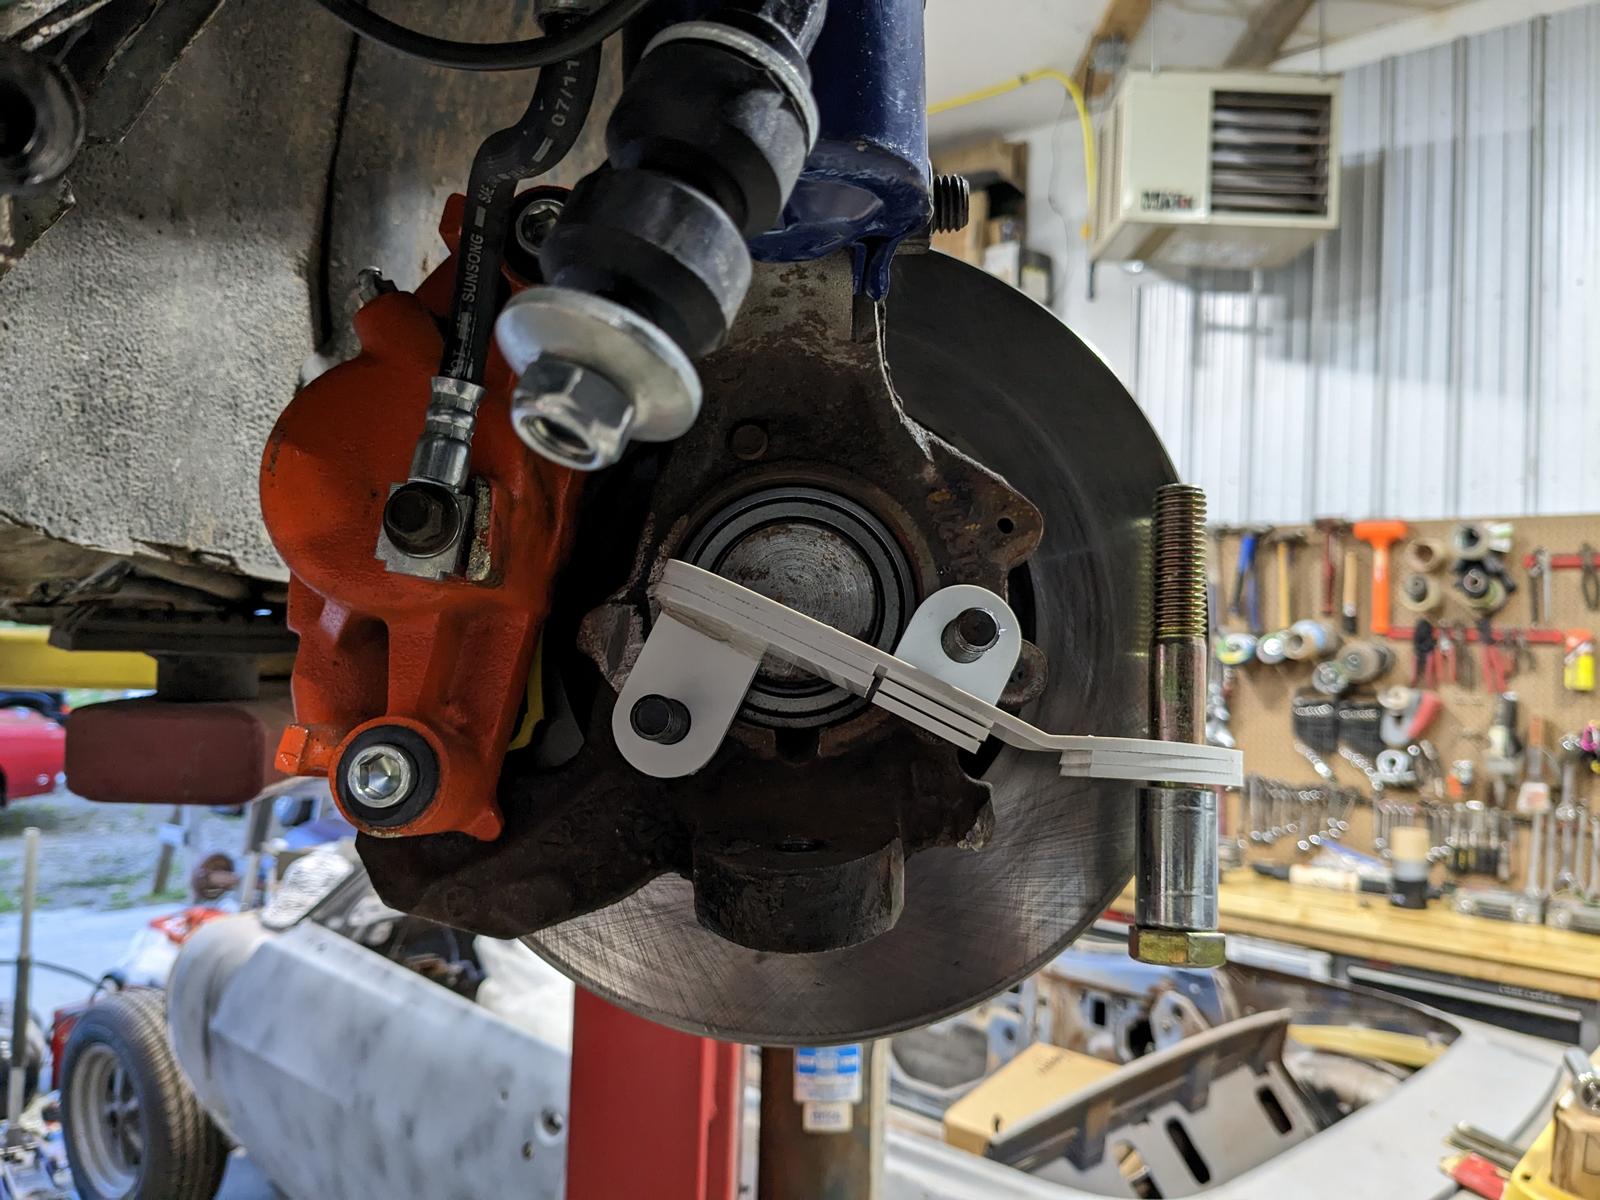
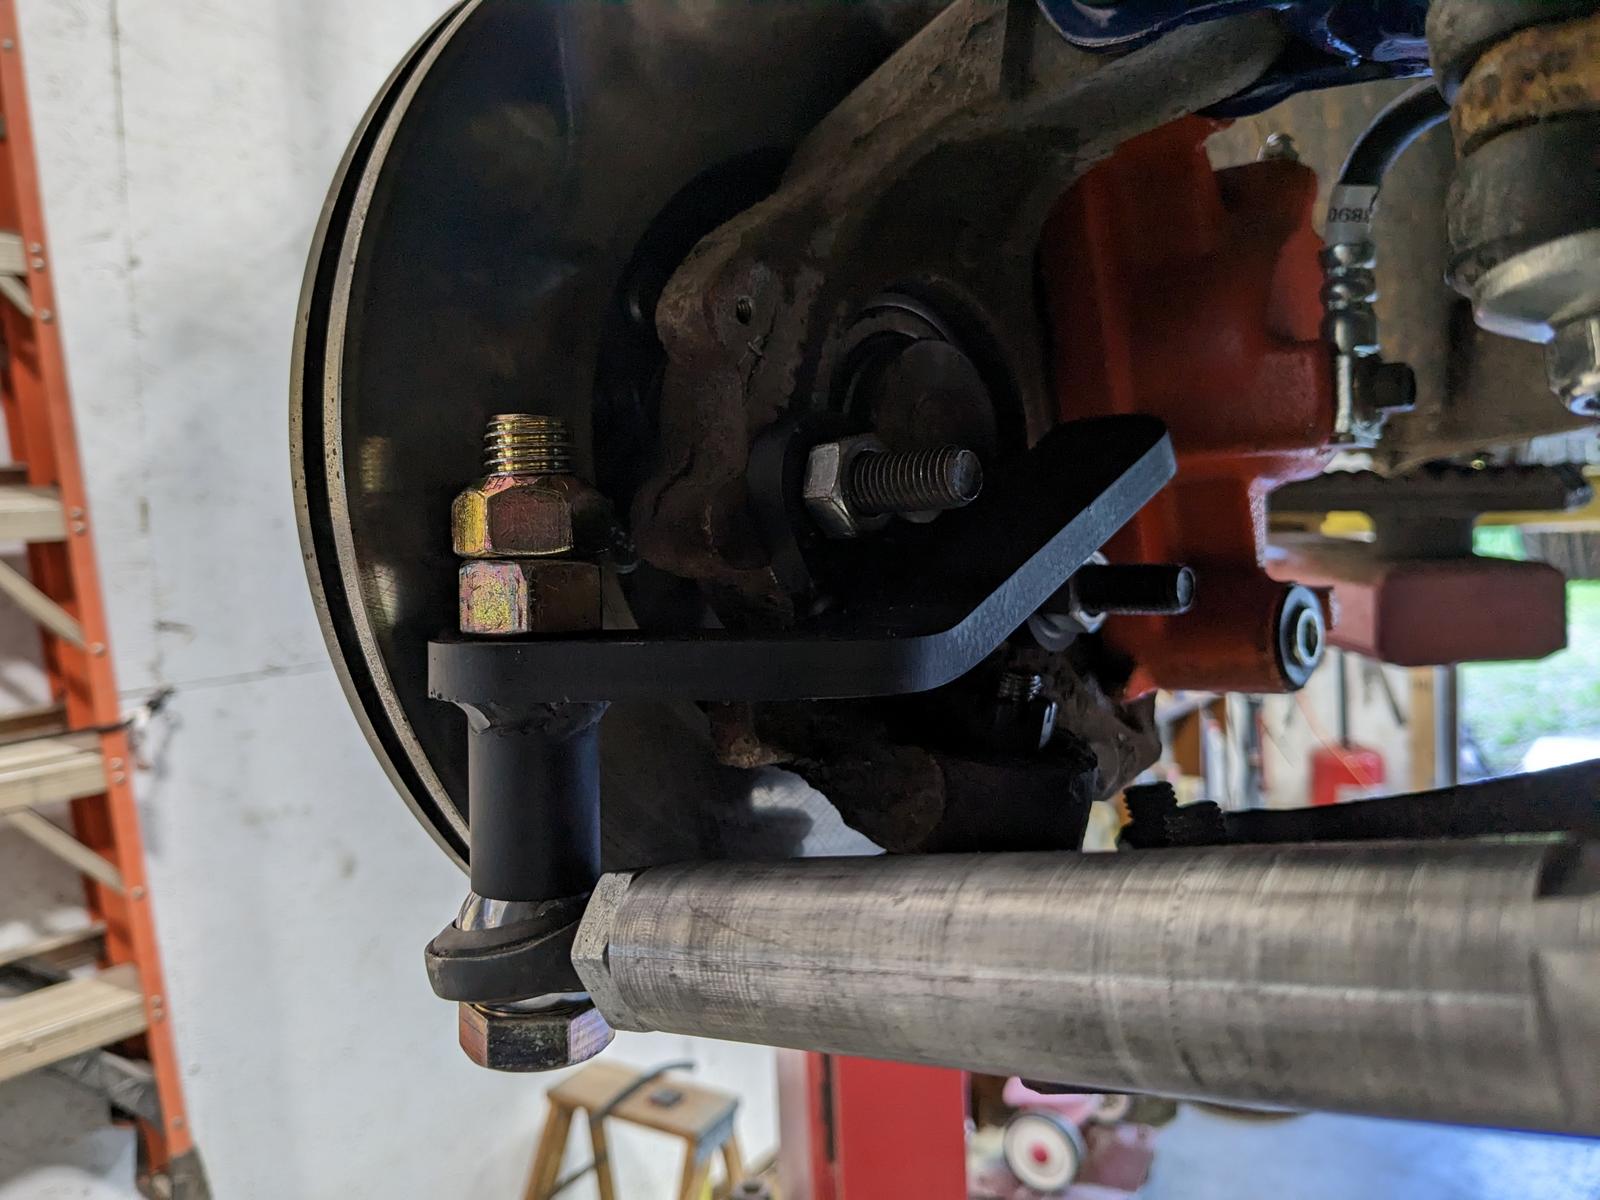
(Completed this before Carlisle) Another revision to the steering done and this time it's perfect! Clean sheeted the design rather than trying to modify those '48 Ford arms. Did the math to determine for sure that I needed like 31% more steering angle on the inside wheel for the Ackerman to be correct at 103" wheelbase and 60" track width. That was 1-1/8" outboard of the balljoint at IIRC 5" forward of the ball joint. I made a mockup in plastic at work and had the local Empire Metal Works laser them in 3/8 steel. Now I'm super happy with the steering and it feels great.
https://youtu.be/TIpaXvBFh48


 Reply With Quote