

Results 61 to 80 of 121
-
07-20-2022 #61
 Registered User
- Join Date
- Jul 2020
- Location
- McCordsville IN
- Posts
- 11
I would have never guessed that that this car could be this cool. Congratulations
-
07-21-2022 #62 Registered User
- Join Date
- Sep 2009
- Posts
- 2,707
 I was wondering if that wasn't the case. Just wanted to mention it in the spirit of safety.
 Originally Posted by woody80z28

 Please continue, as I love where this is going. As I said before, I had a '90 Cav Z24 and wanted to do this exact thing.

1955 Nomad project LC9, 4L80e, C5 brakes, Vision wheels
1968 Camaro 6.2 w/ LSA, TR6060-Magnum hybrid and etc SOLD
1976 T/A LS1 6 Speed, and etc. SOLD
Follow me on Instagram: ryeguy2006a
08-05-2022 #63 Registered User
- Join Date
- Mar 2005
- Location
- Walton, NY
- Posts
- 737
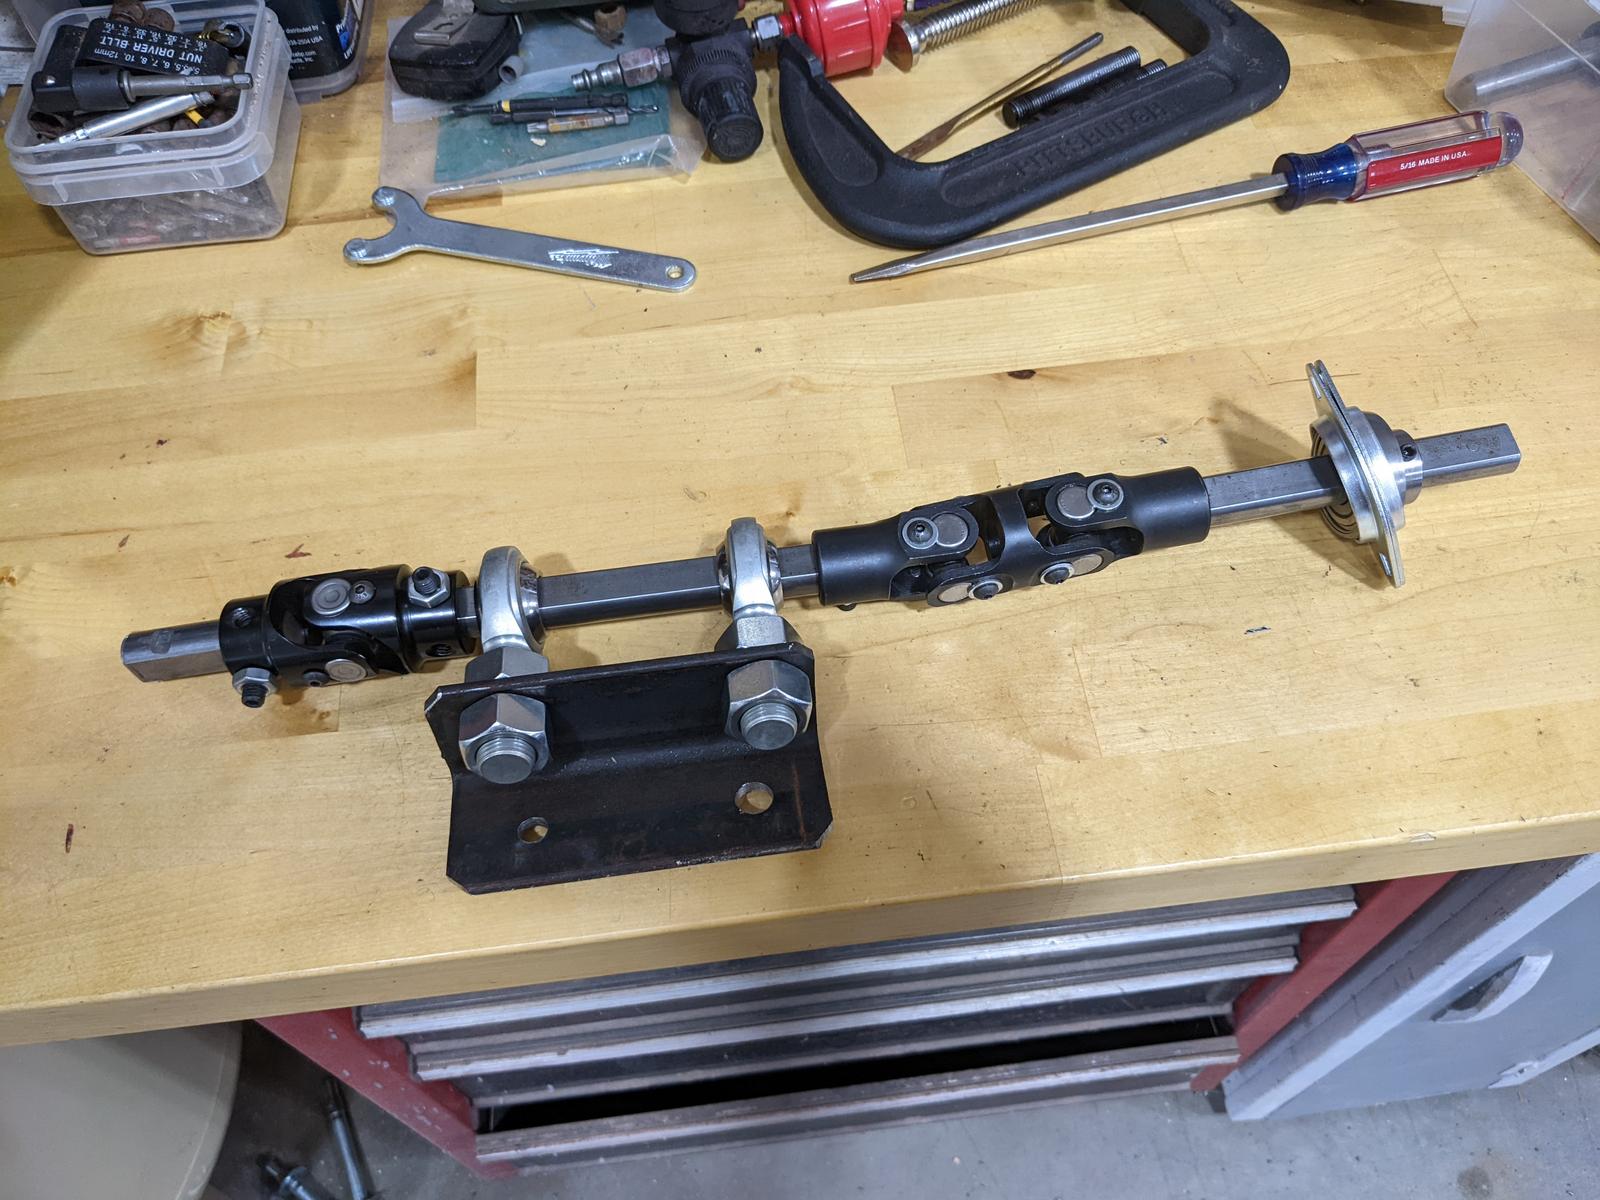
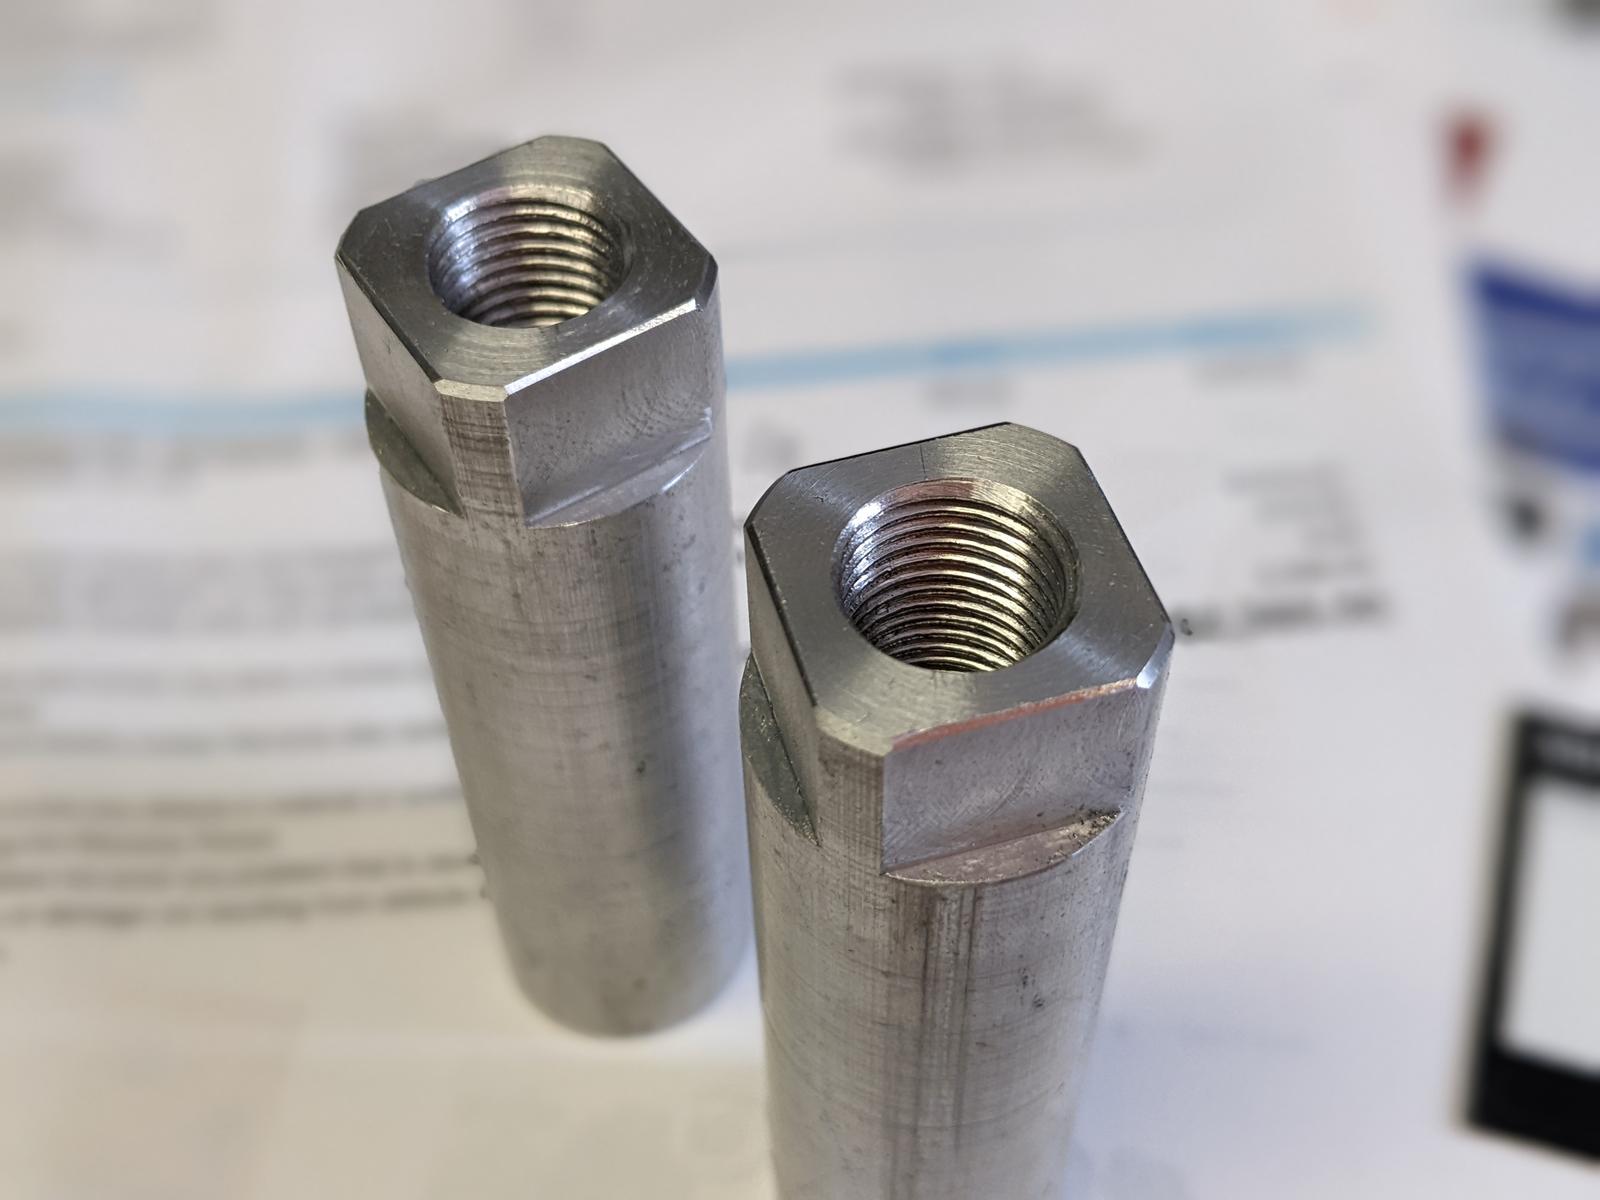
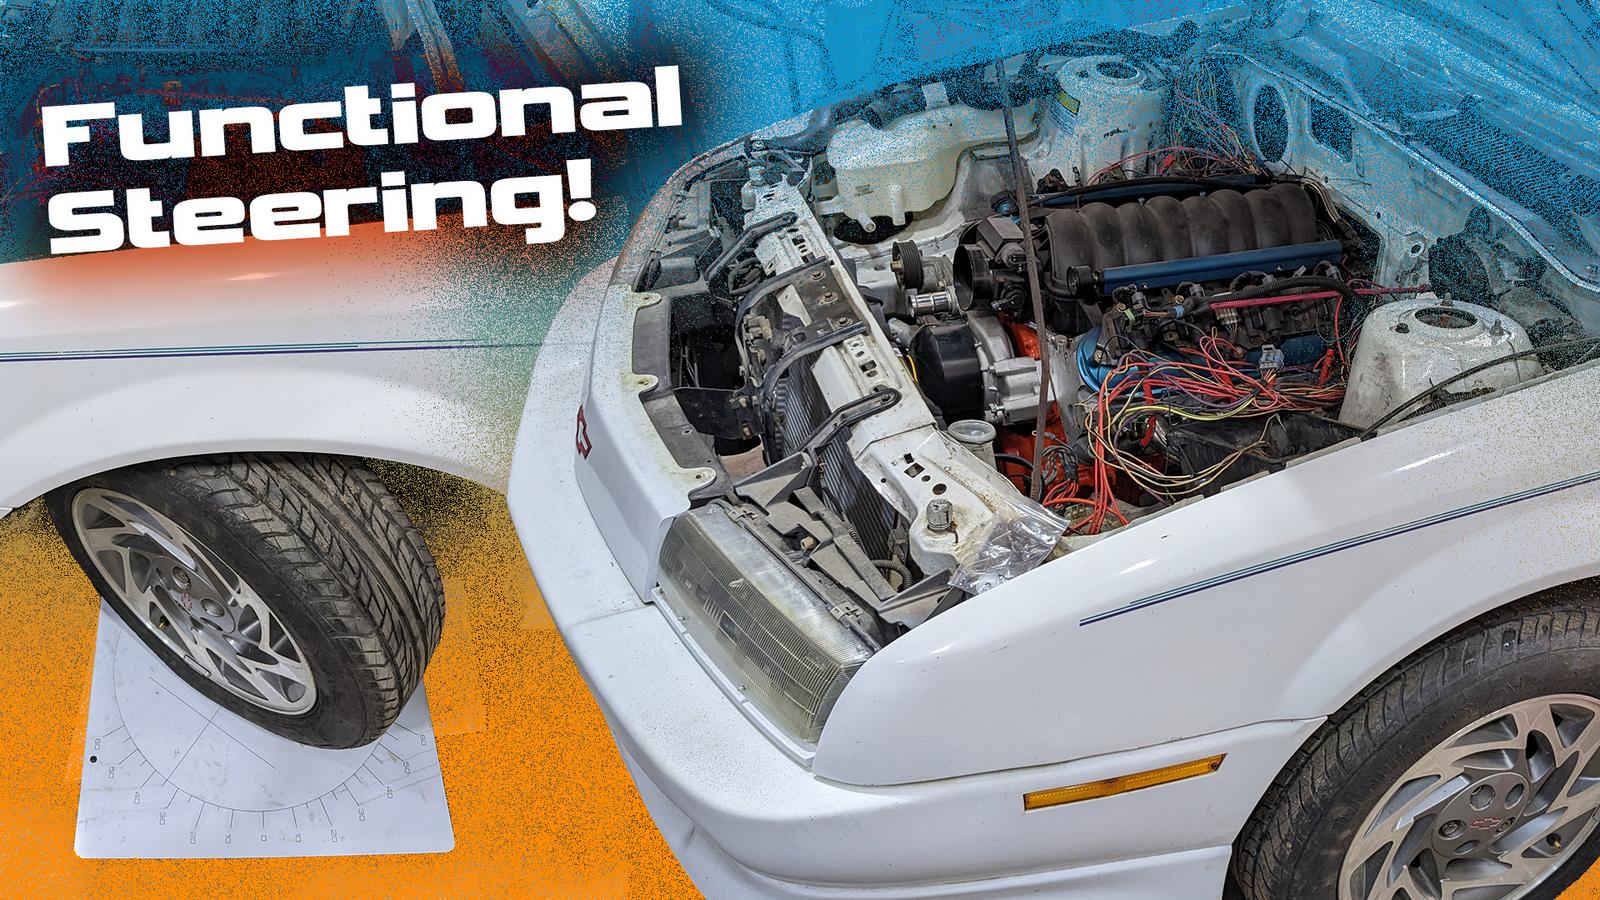
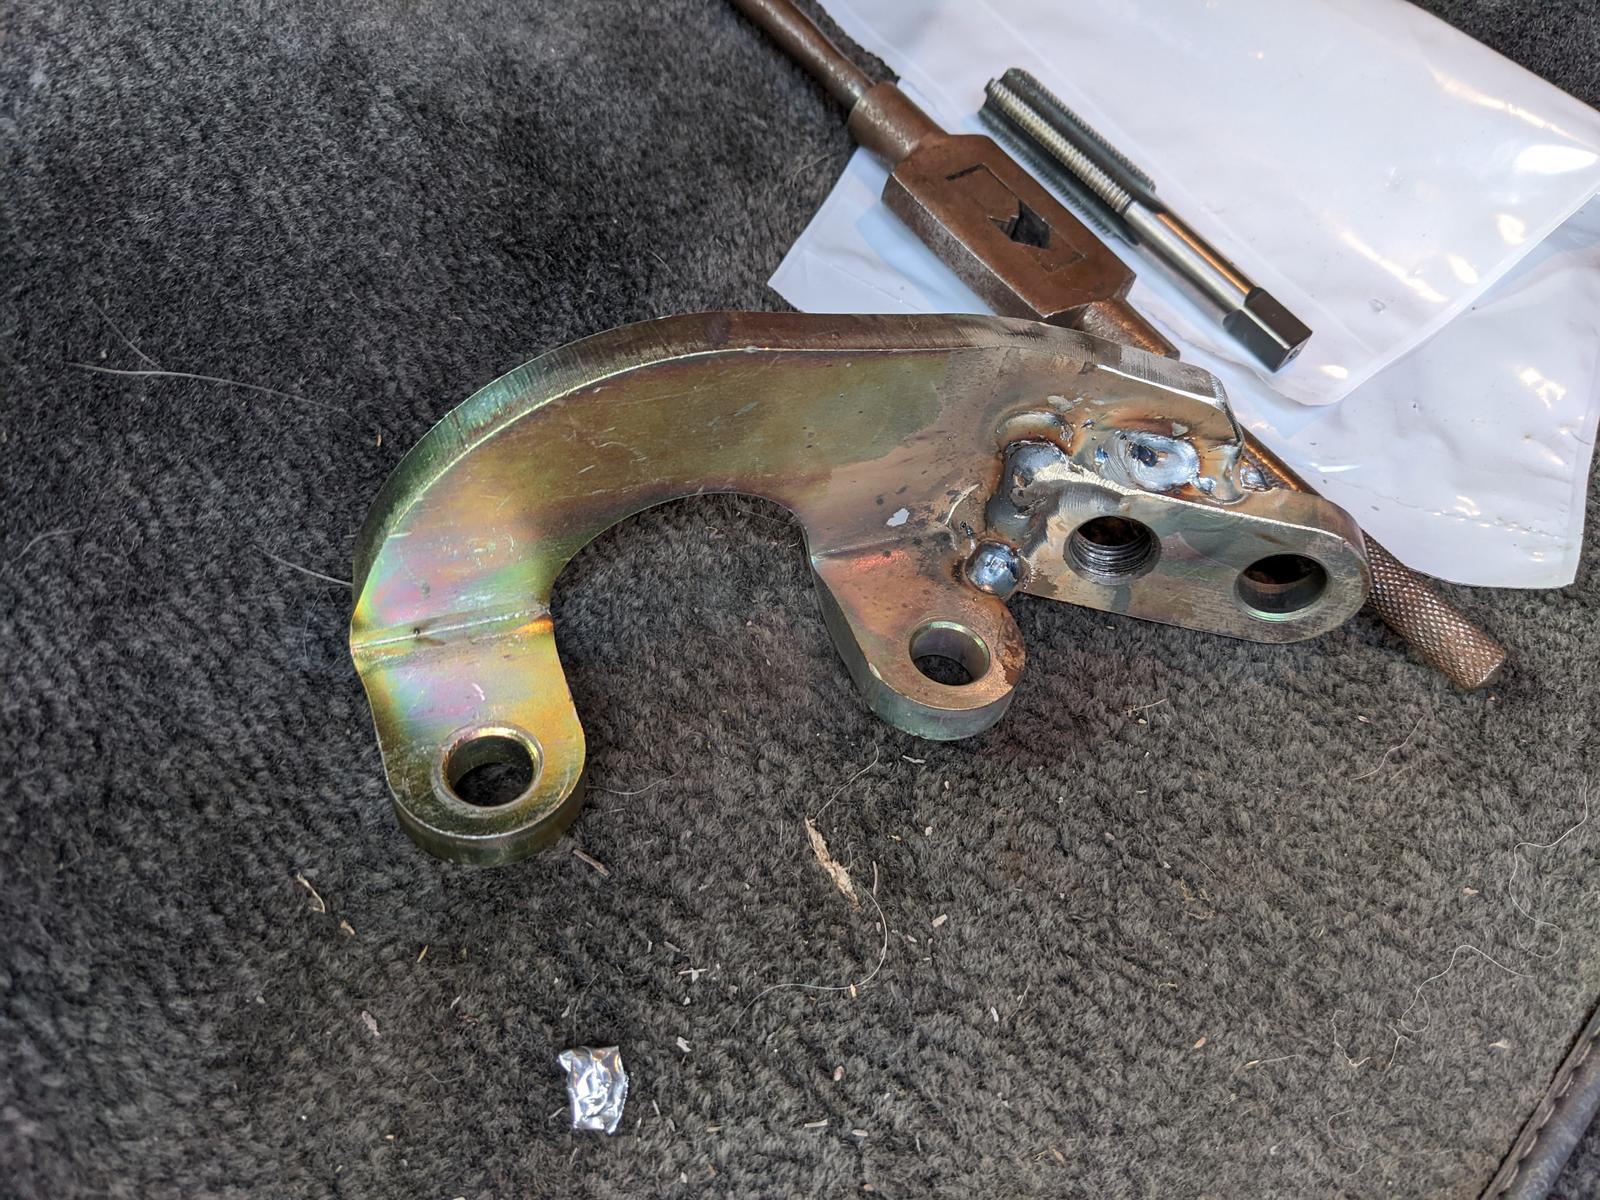
Ok, it's connected from steering wheel to tires now. 6061T6 tie rod sleeves are done and just finished my firewall bearing bracket where the rack was and pushed it around outside. A lot easier with the tires pointing the direction you want and not flopping all over!
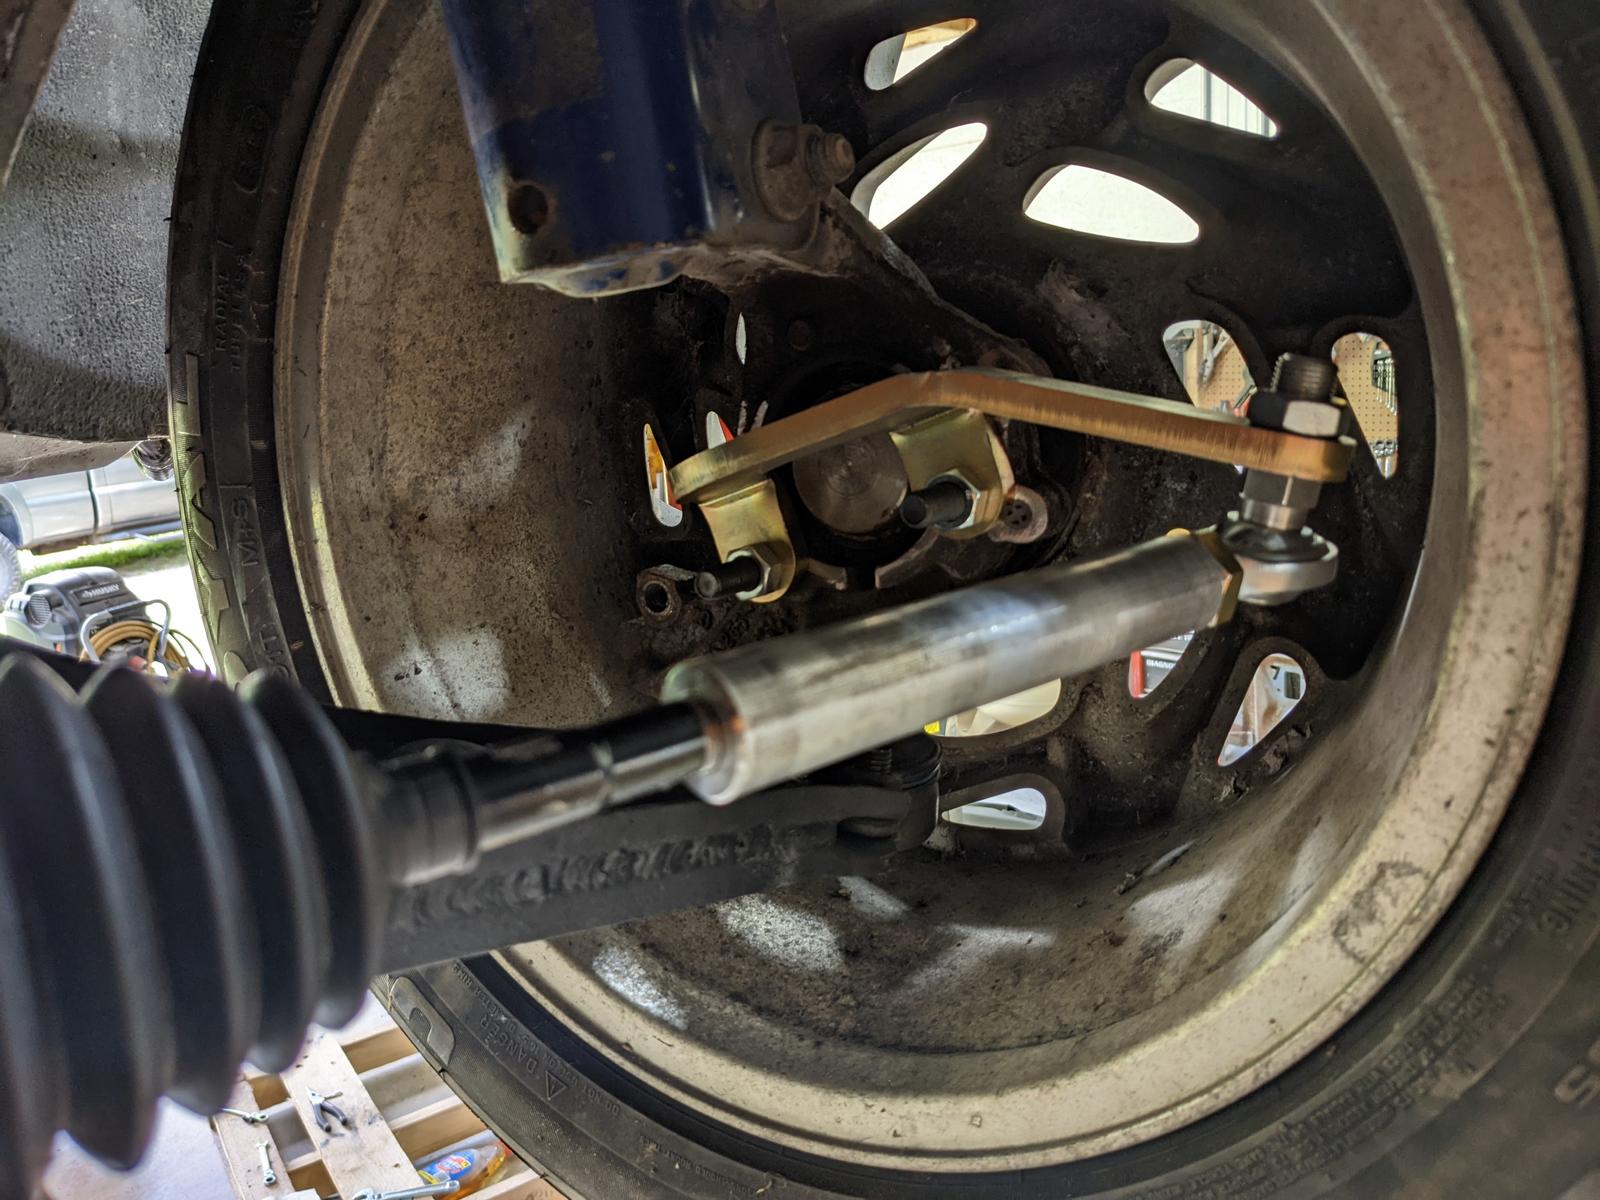
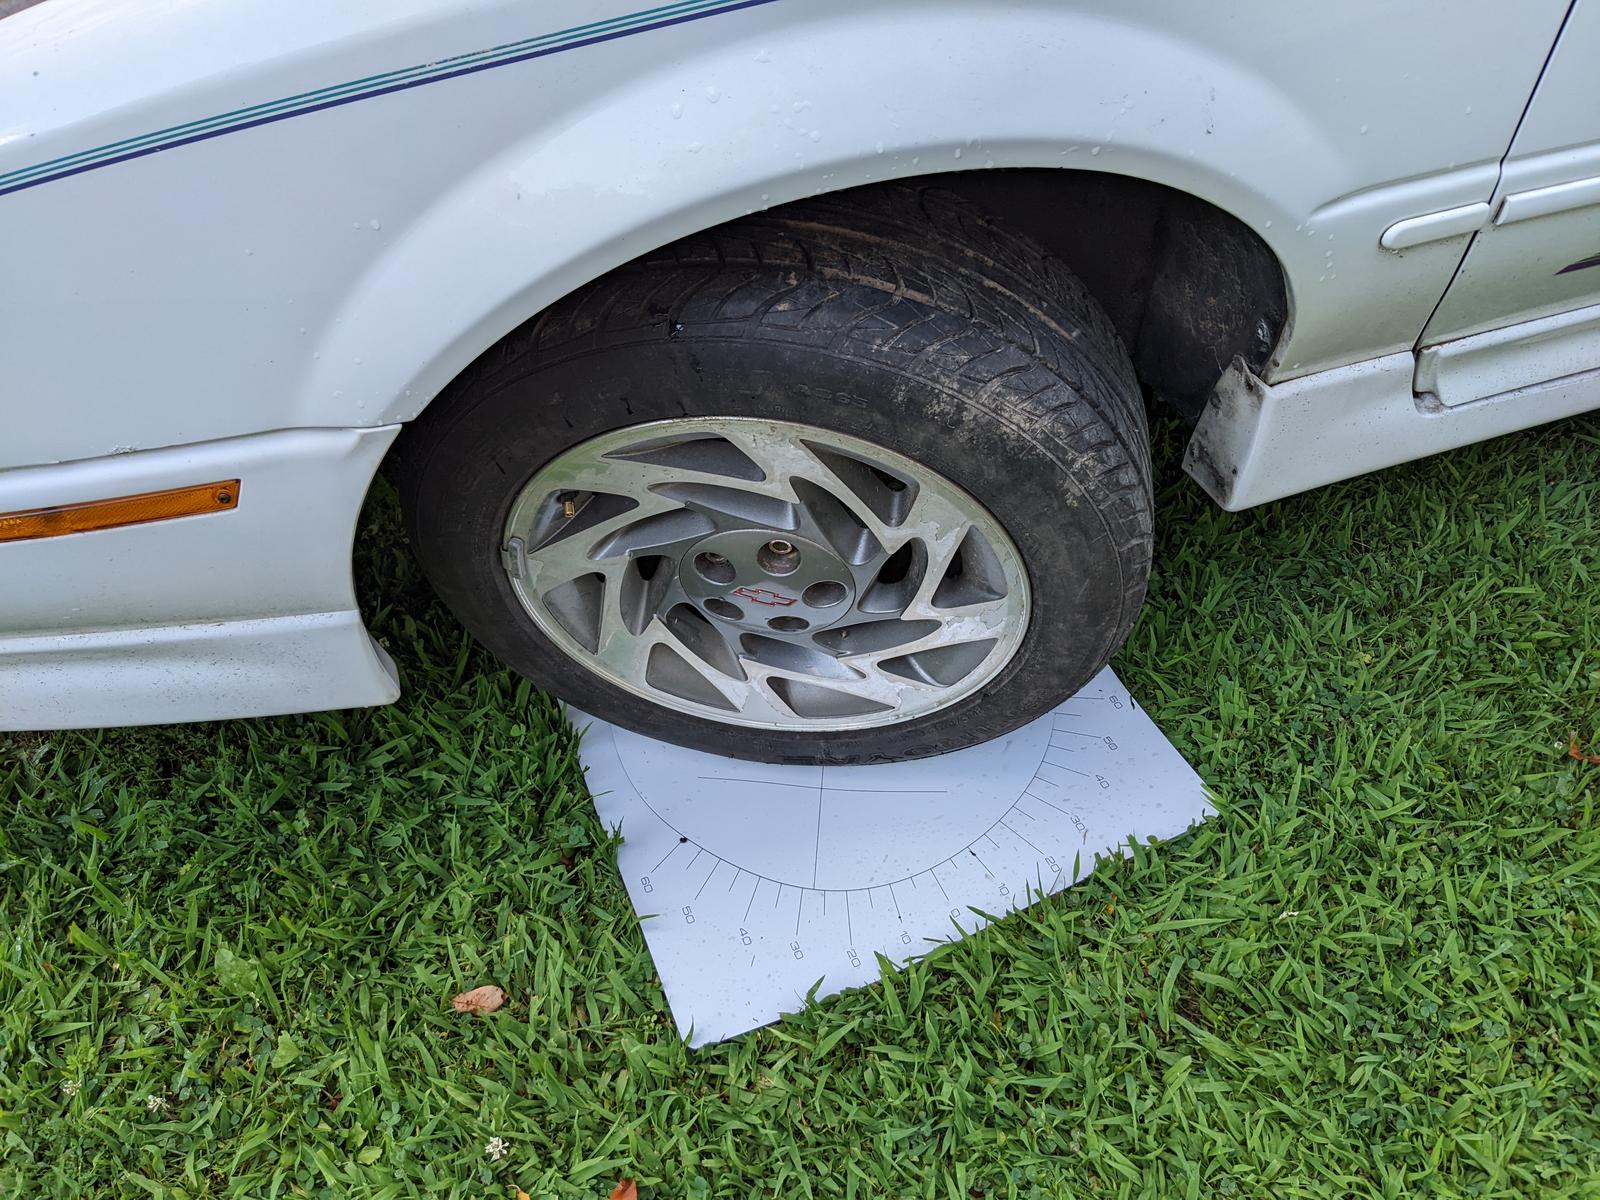
It does look to me like I have some reverse Ackermann, so the arms will need some more modification...bring the tie rod hole just outboard of the ball joint hole. Right now with the mostly unmodified Ford steering arms it is just inside the ball joint location. I just built a steering angle gauge to see where I'm at so I'll know what to modify. Looks like 35ish degrees of angle right now, but I'll know a lot better once I use my DIY gauge. And when I move the steering arms laterally I'll also move them down. They have a slight angle up at the current ride height, and I'm going to bring the ride height down by inches...so they'll need to be better.
https://www.youtube.com/watch?v=RPuoVV1pJHo

08-08-2022 #64
Registered User
- Join Date
- Sep 2009
- Posts
- 2,707
Nice update! I watched your latest video, nice work.
1955 Nomad project LC9, 4L80e, C5 brakes, Vision wheels
1968 Camaro 6.2 w/ LSA, TR6060-Magnum hybrid and etc SOLD
1976 T/A LS1 6 Speed, and etc. SOLD
Follow me on Instagram: ryeguy2006a
08-10-2022 #65
Registered User
- Join Date
- Mar 2005
- Location
- Walton, NY
- Posts
- 737
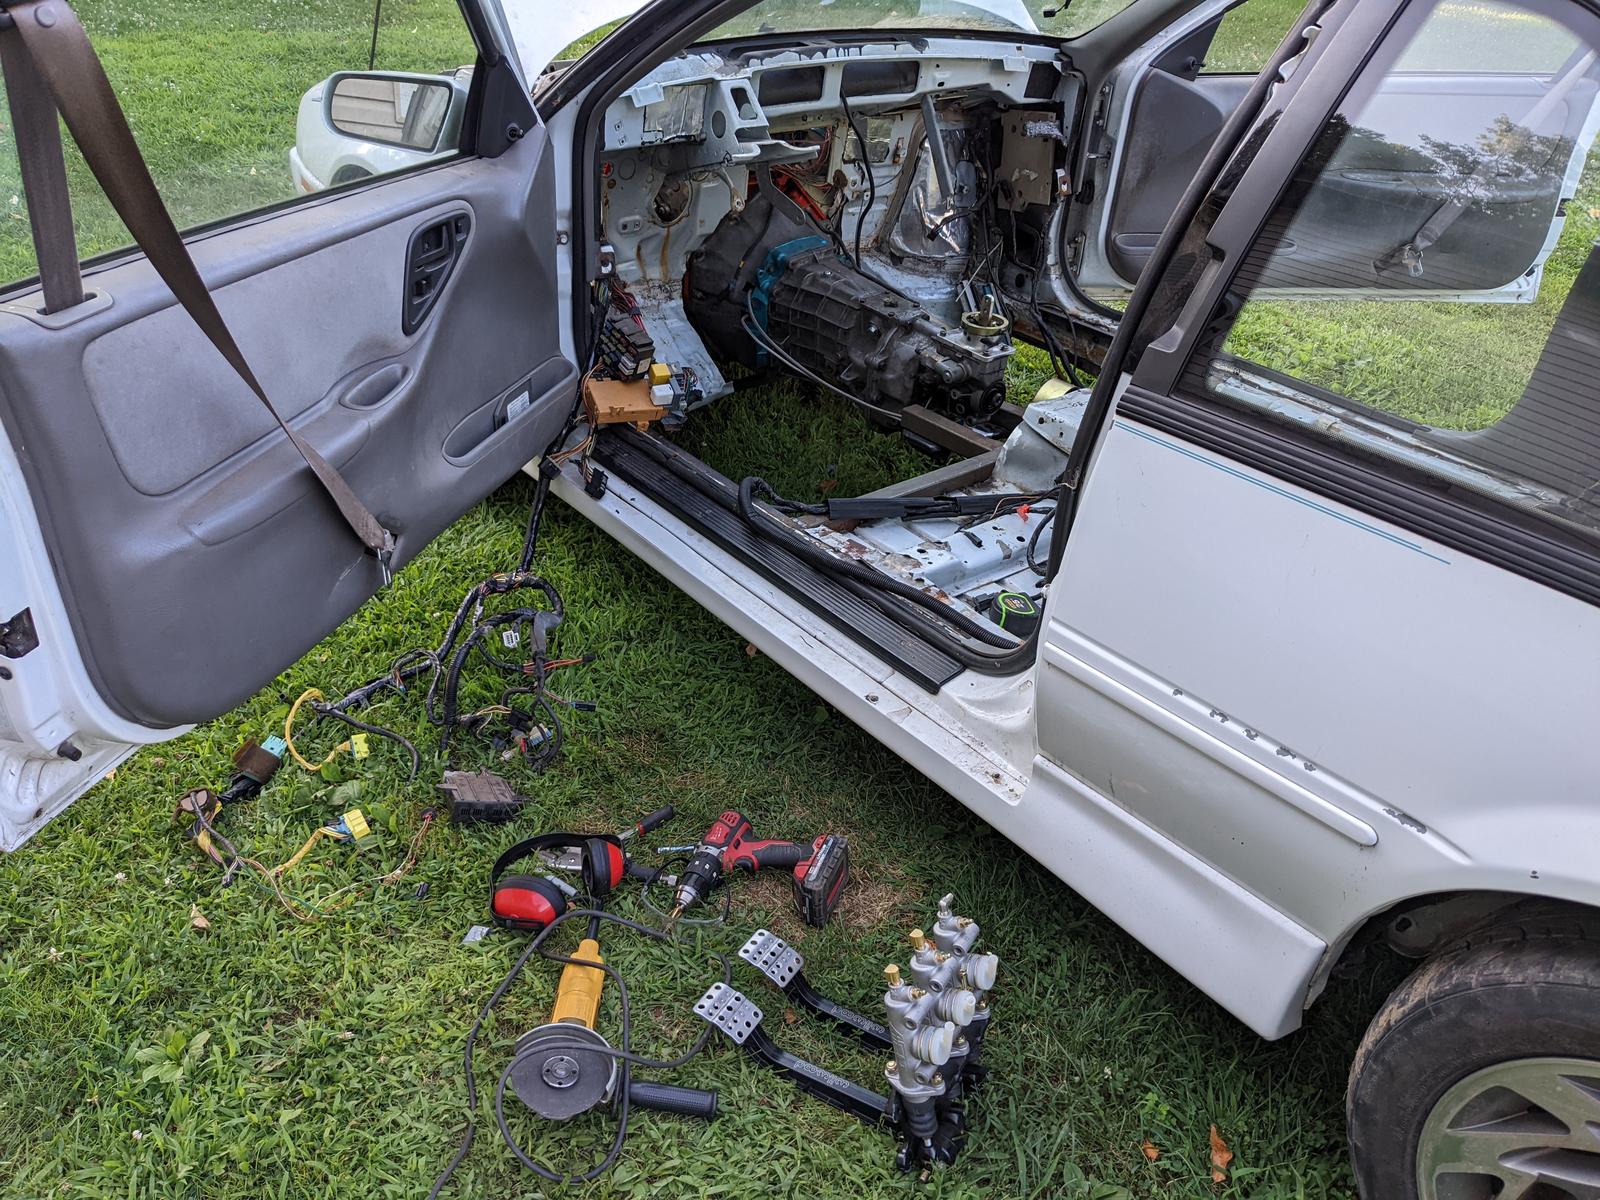
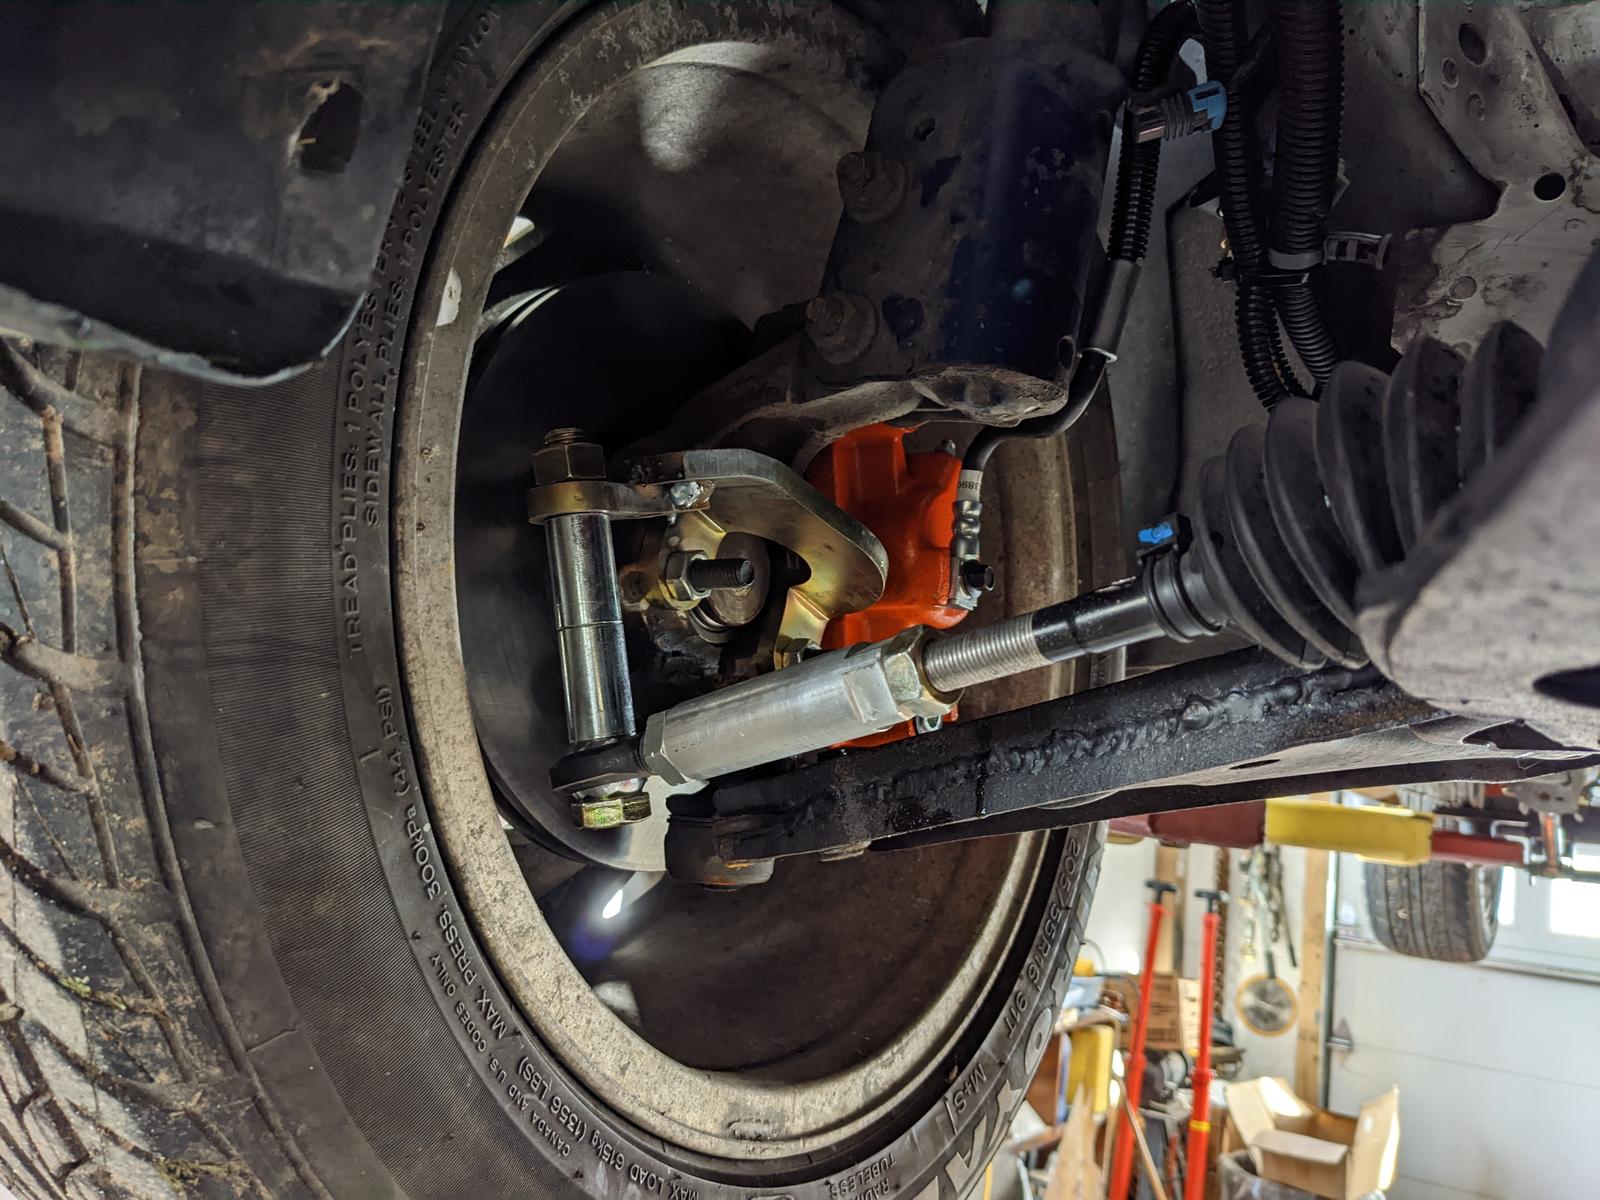
Oof...the Ackermann is bad. 27 degrees outside wheel and 15 inside. And that only averages to 21 degrees steering angle. So I'm going to cut those arms and offset toward the outboard side, while sliding underneath the stub. That will move them down for better tie rod angle, out for the better Ackermann and back for more angle. And to get 40+ degrees steering angle, I'll have to cut the distance in half from balljoint to tie rod hole...so I may actually cut the lower control arm and move the balljoint forward. That will keep the tie rod angles happier, and also add some caster. Which would be welcome since FWDs have less caster than their RWD counterparts typically.
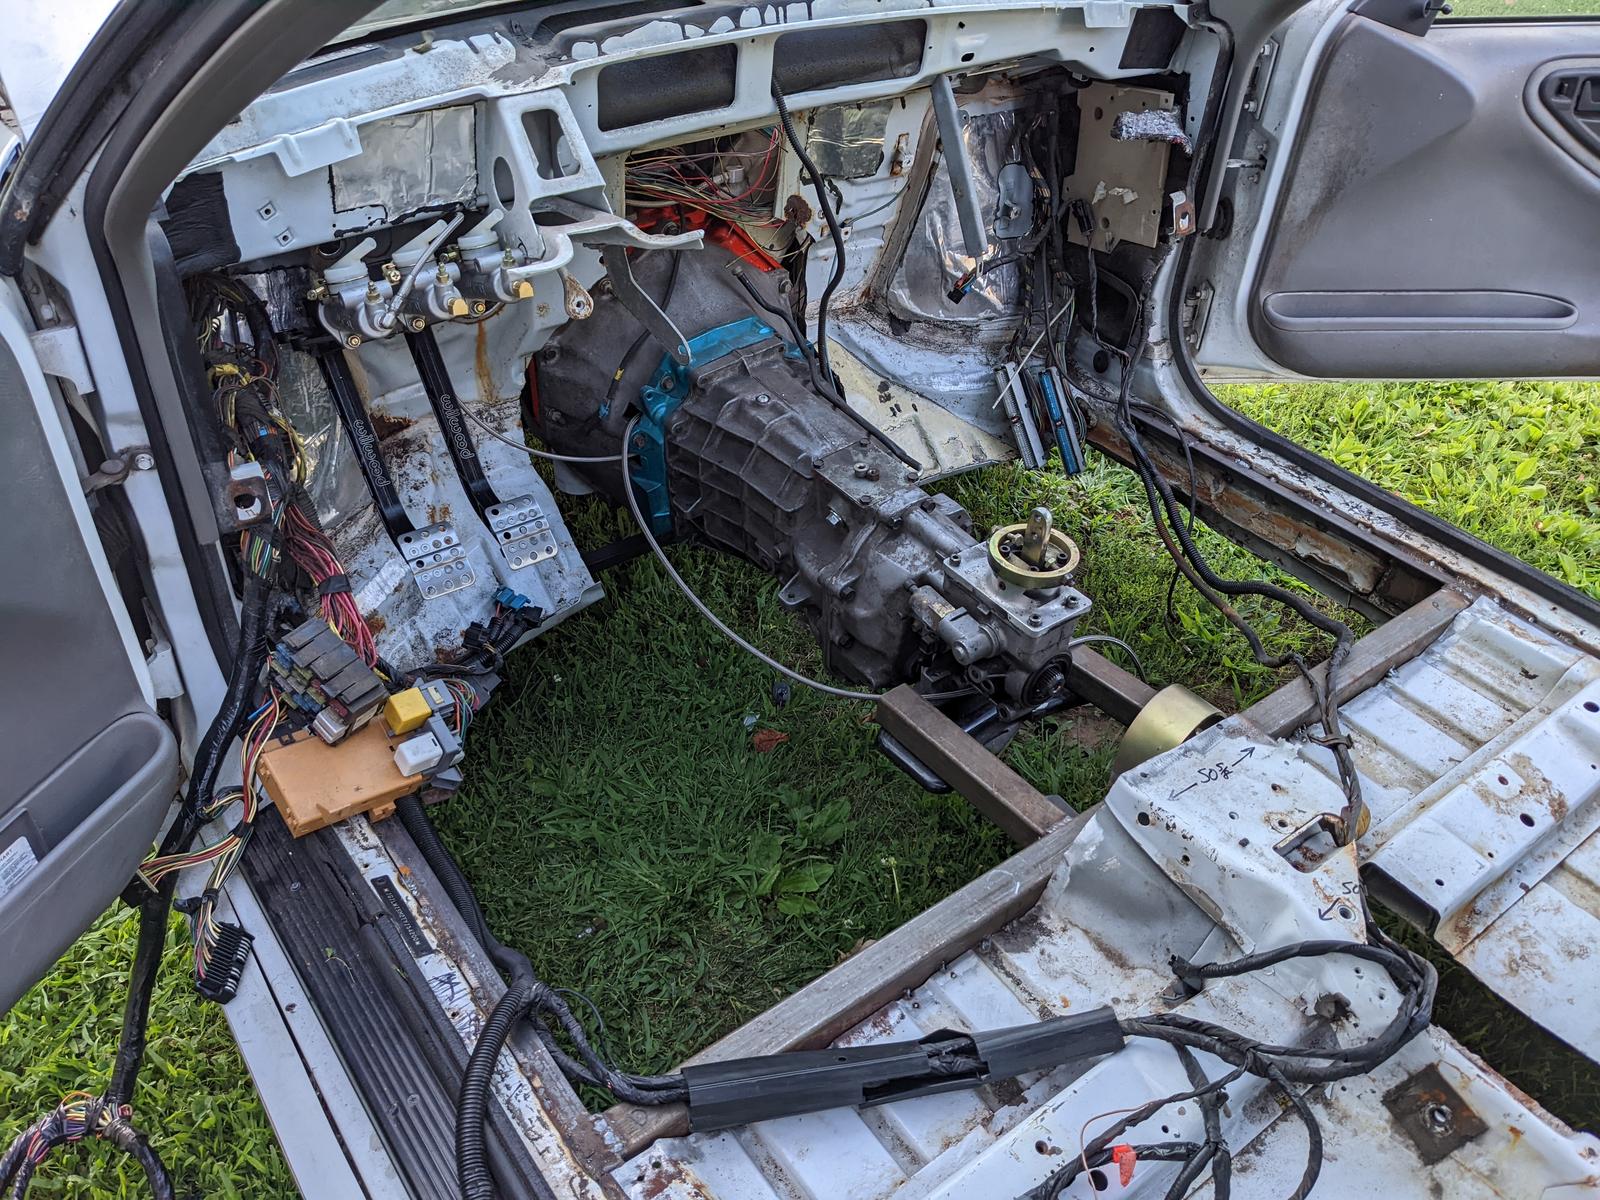
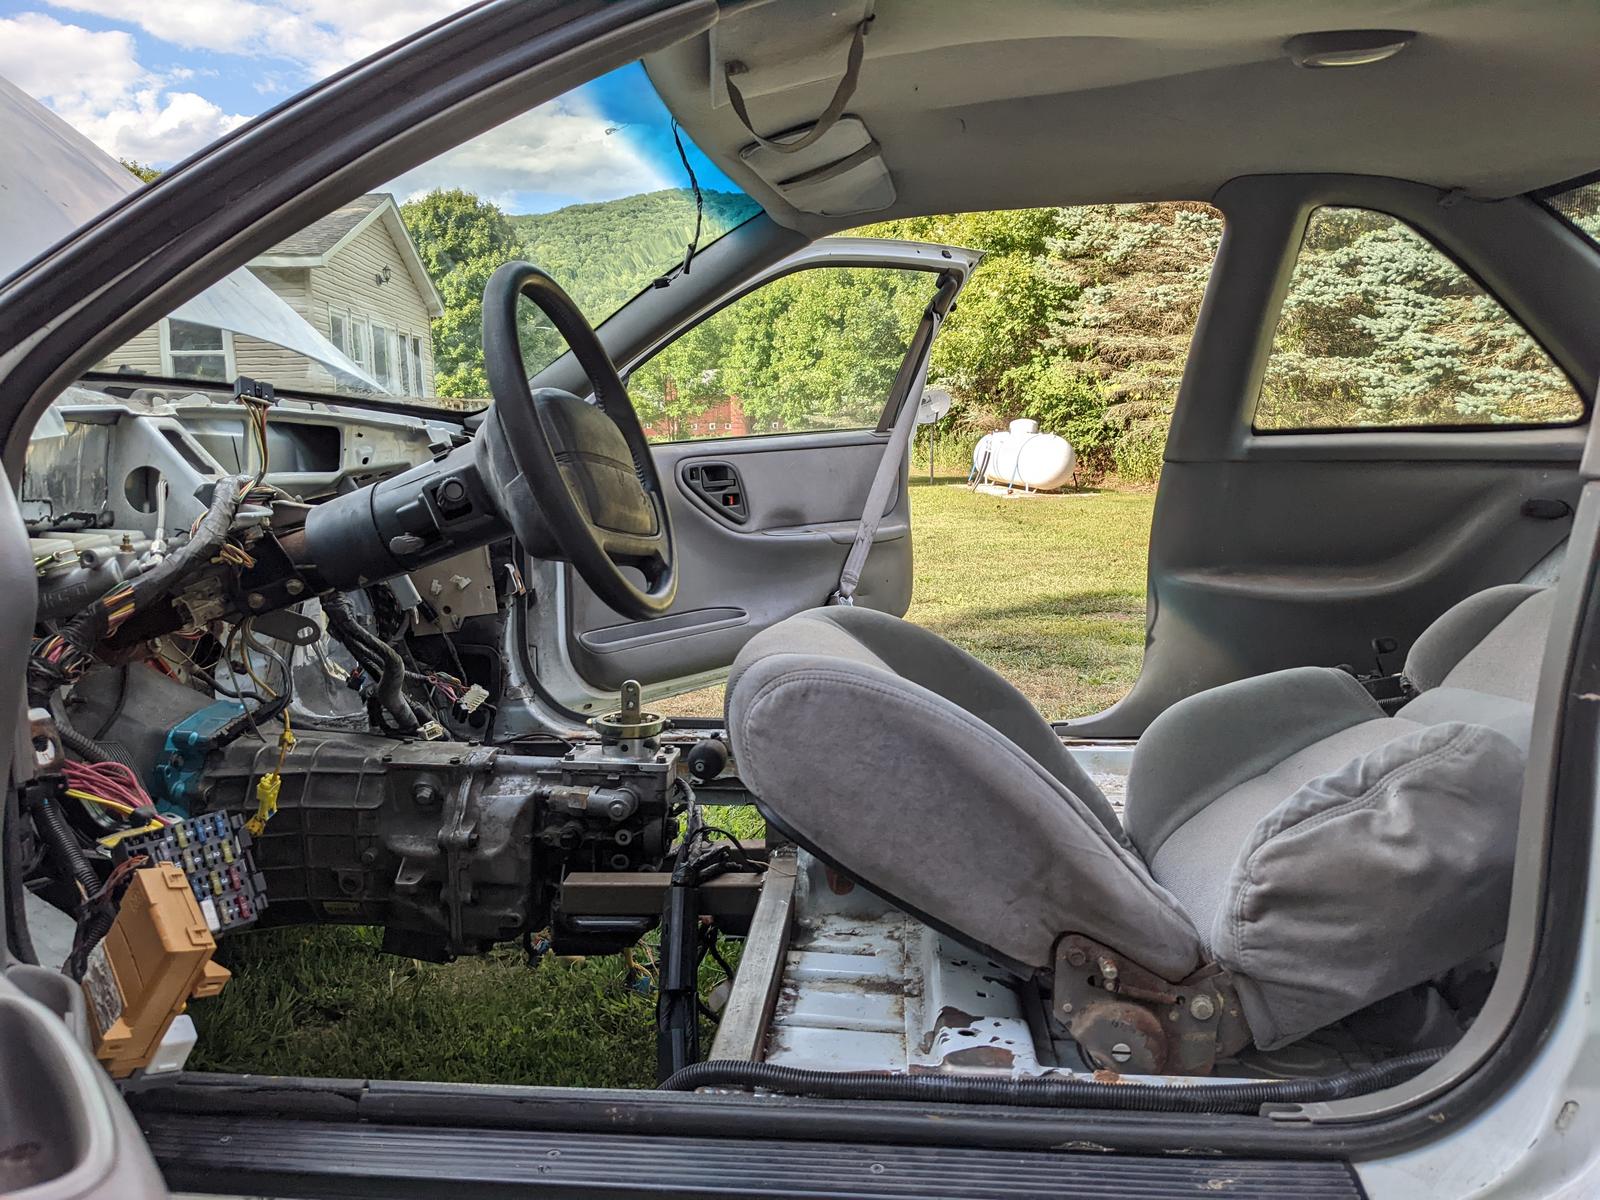
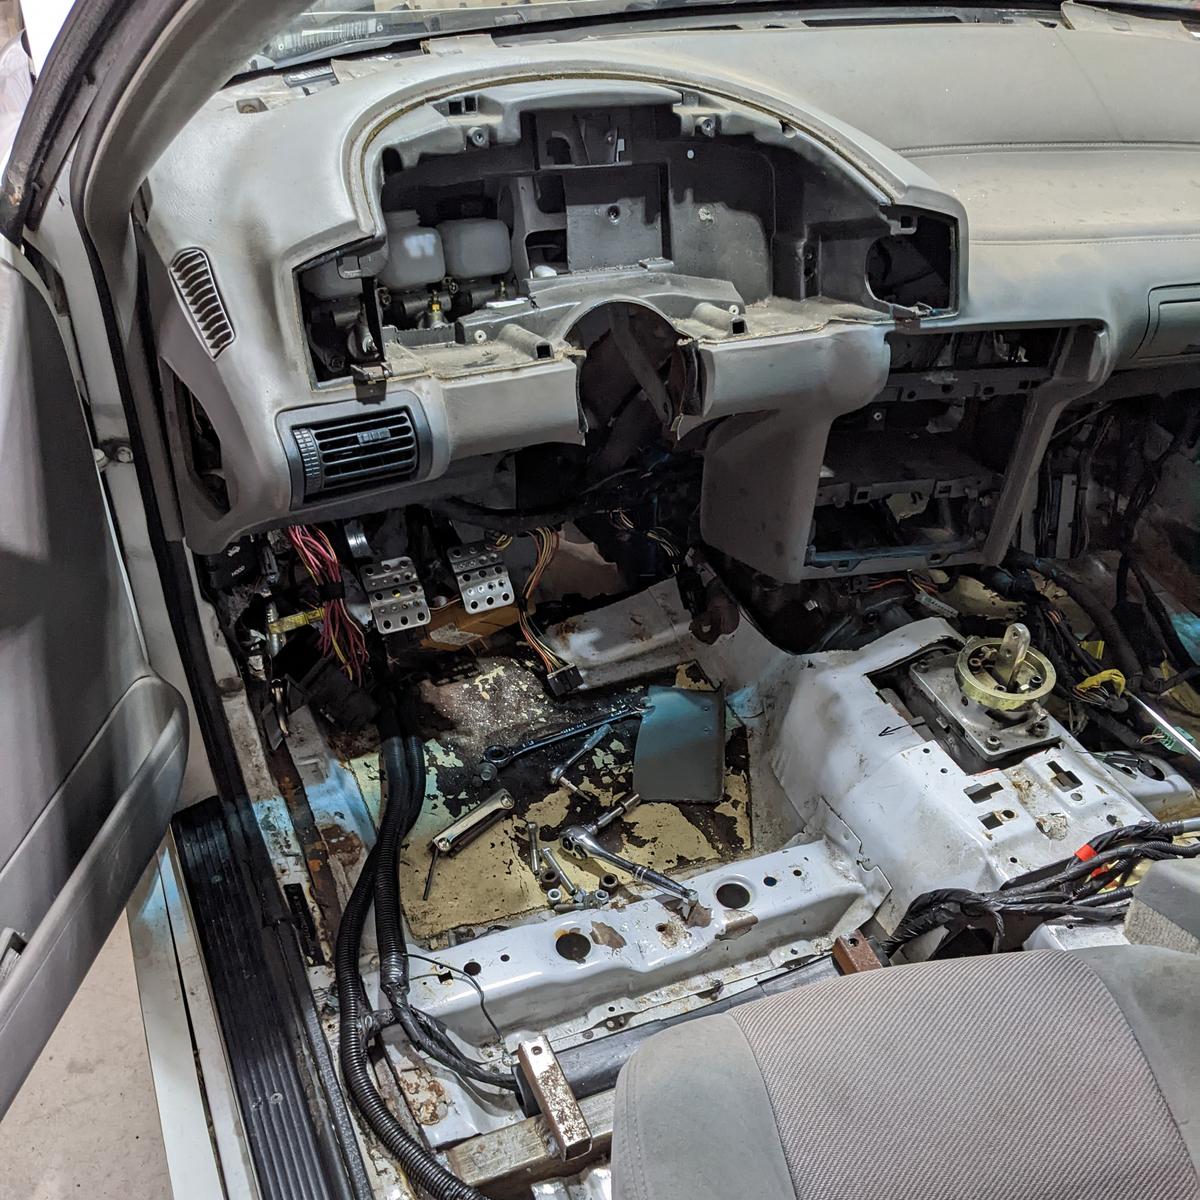
But I did get pedals mocked up! Gotta make a seat mount and tack the front floor in to see how the ergonomics are. Then it can go back inside on the lift to mess with the steering. Project keeps dragging...I was really excited when it seemed like I was making fast progress. I went from fully FWD to rear axle, engine & trans mounted than I have with these little steering and pedals...
08-12-2022 #66 Registered User
- Join Date
- Jul 2006
- Location
- Chesapeake, VA
- Posts
- 607
That trans takes up a ton of space in such a small car. It'll be snug inside, but I like that.
Cars are meant to be driven.
John B
08-16-2022 #67
Registered User
- Join Date
- Sep 2009
- Posts
- 2,707
This would have been way faster if you just bought the swap kit man...

Looks great. Can't wait to see some driving videos.
1955 Nomad project LC9, 4L80e, C5 brakes, Vision wheels
1968 Camaro 6.2 w/ LSA, TR6060-Magnum hybrid and etc SOLD
1976 T/A LS1 6 Speed, and etc. SOLD
Follow me on Instagram: ryeguy2006a
08-20-2022 #68
Registered User
- Join Date
- Mar 2005
- Location
- Walton, NY
- Posts
- 737
Haha. Right?
If were to build another RWD Beretta the second one would be done faster! That's for sure!
It has required more reinventing than I was hoping it would require, and I'm past my $5k budget already. But money-wise it's almost done. Still eating up time though...
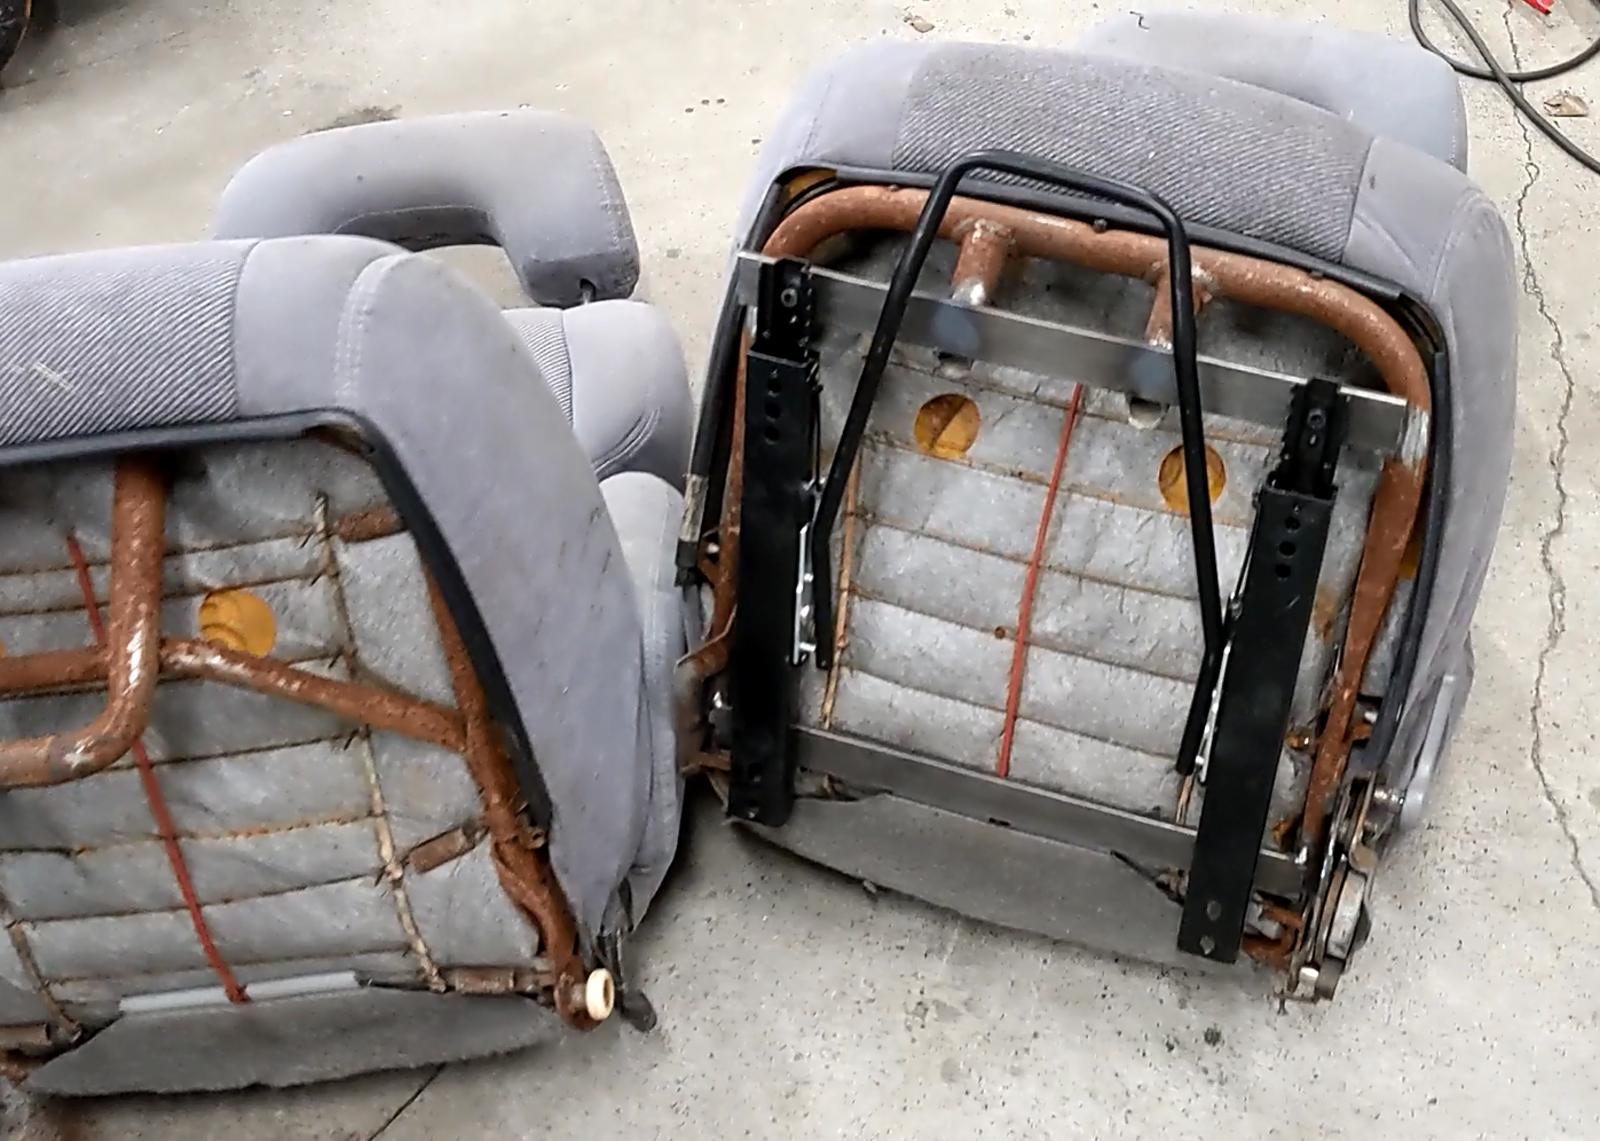
Worked on the seat fitment and that's also being less than easy. The Beretta tracks are very tall, so I figured I could keep them about the same spot with slim universal tracks, but the seatback adjuster may actually require a notch in the factory sheetmetal crossmember to function. Just another problem to solve...
09-12-2022 #69
Registered User
- Join Date
- Mar 2005
- Location
- Walton, NY
- Posts
- 737
Pedals in, seat in, column moved, shifter sorted. All seemingly minor things that eat up time.
https://youtu.be/LOlVVI7qerY


10-26-2022 #70
Registered User
- Join Date
- Mar 2005
- Location
- Walton, NY
- Posts
- 737
Ok. Steering is done for now. Current limitations keep it from being perfect...but I'm gonna roll with it for a bit! I need to do some more research on different racks, but I'm too far behind to keep pissing away more time on it. Snow is coming soon! haha
I got the pedals completely finished and made some progress on the radiator too. Been taking some stuff home to work on during the week to try and get more accomplished quicker. So far it seems to help a little compared to only getting a day or two a week at my old man's place.
https://www.youtube.com/watch?v=q__XA1CGj7g
11-14-2022 #71
Registered User
- Join Date
- Mar 2005
- Location
- Walton, NY
- Posts
- 737
https://youtube.com/shorts/0gFmT303q3w
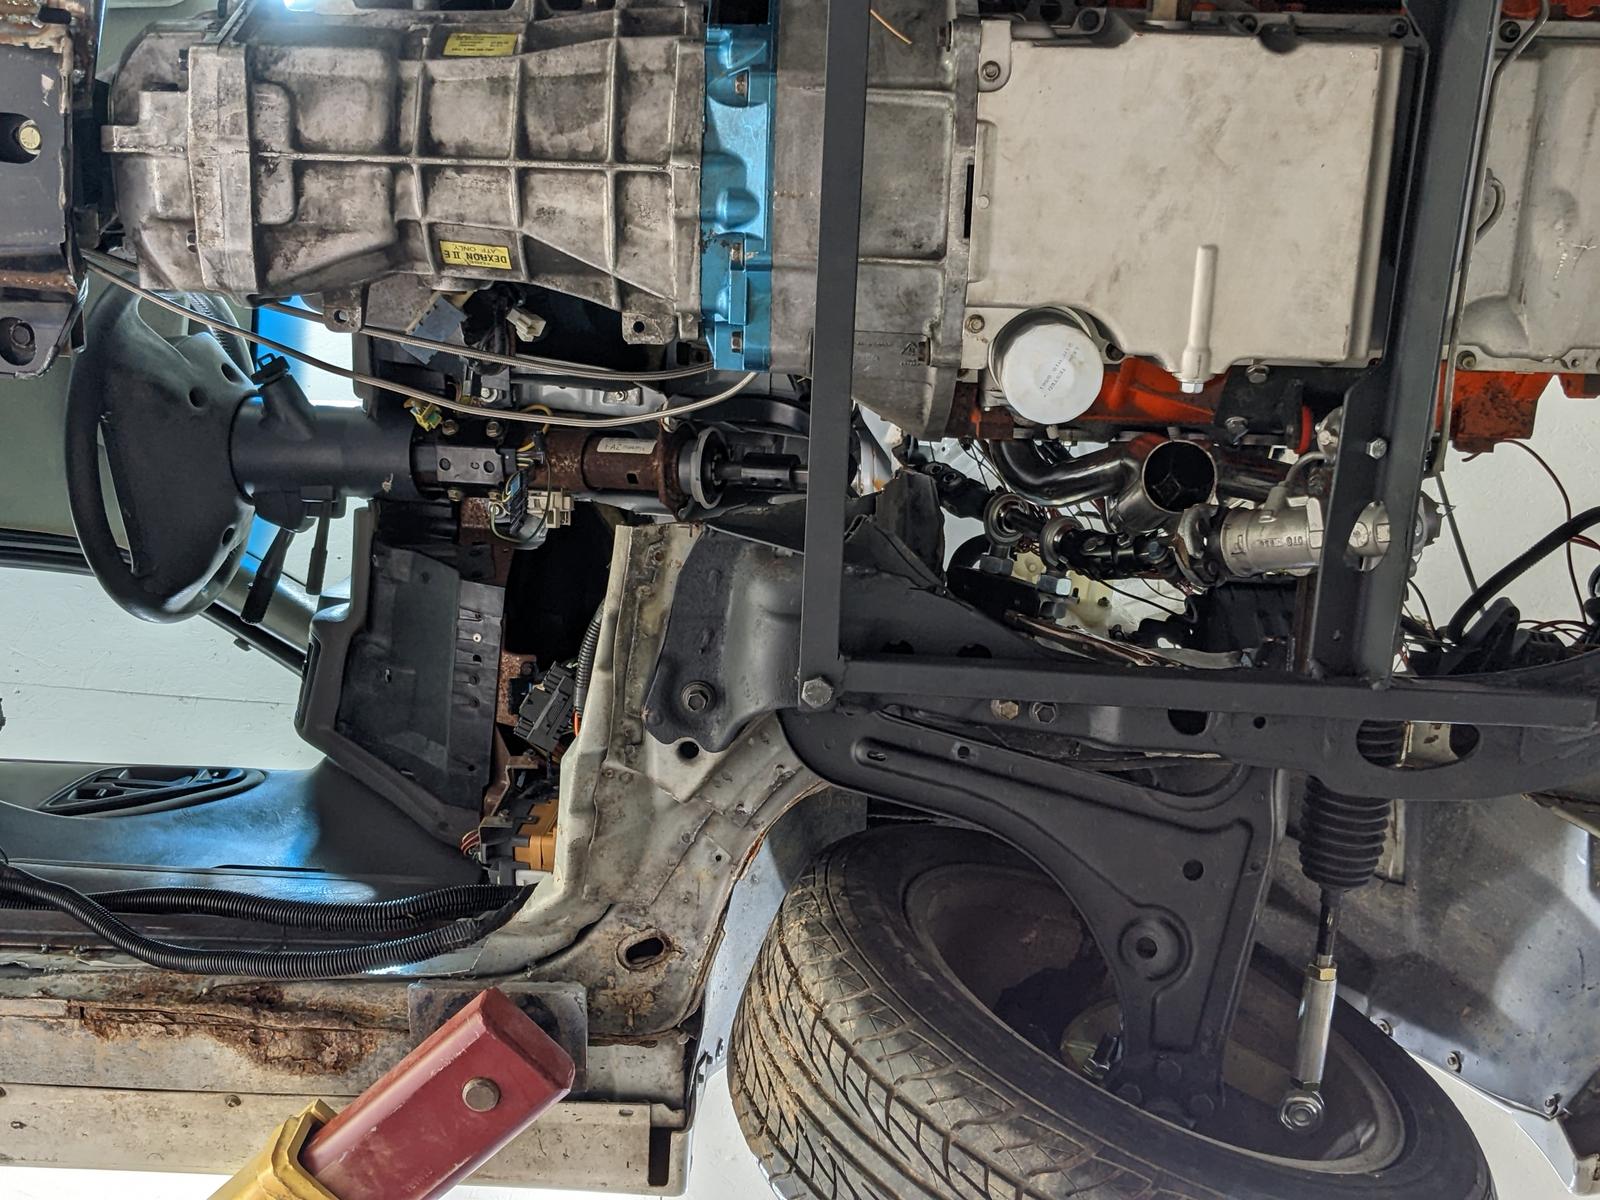
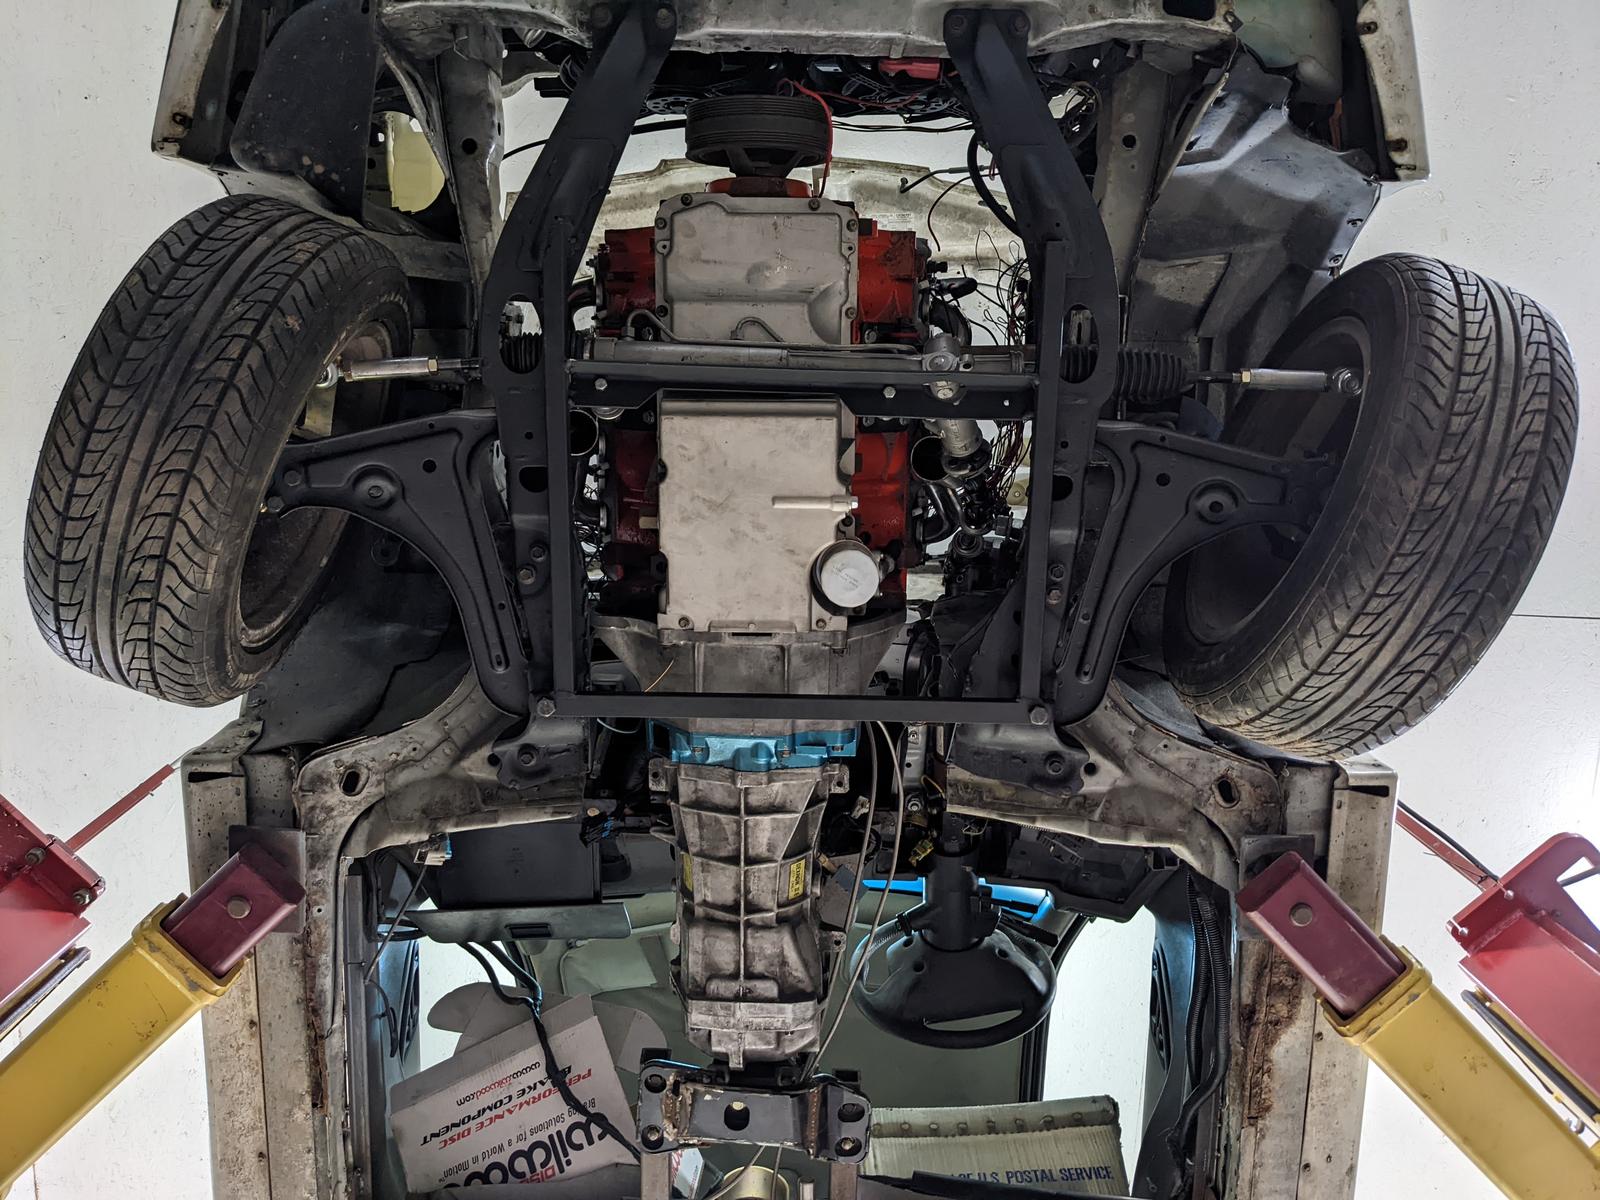
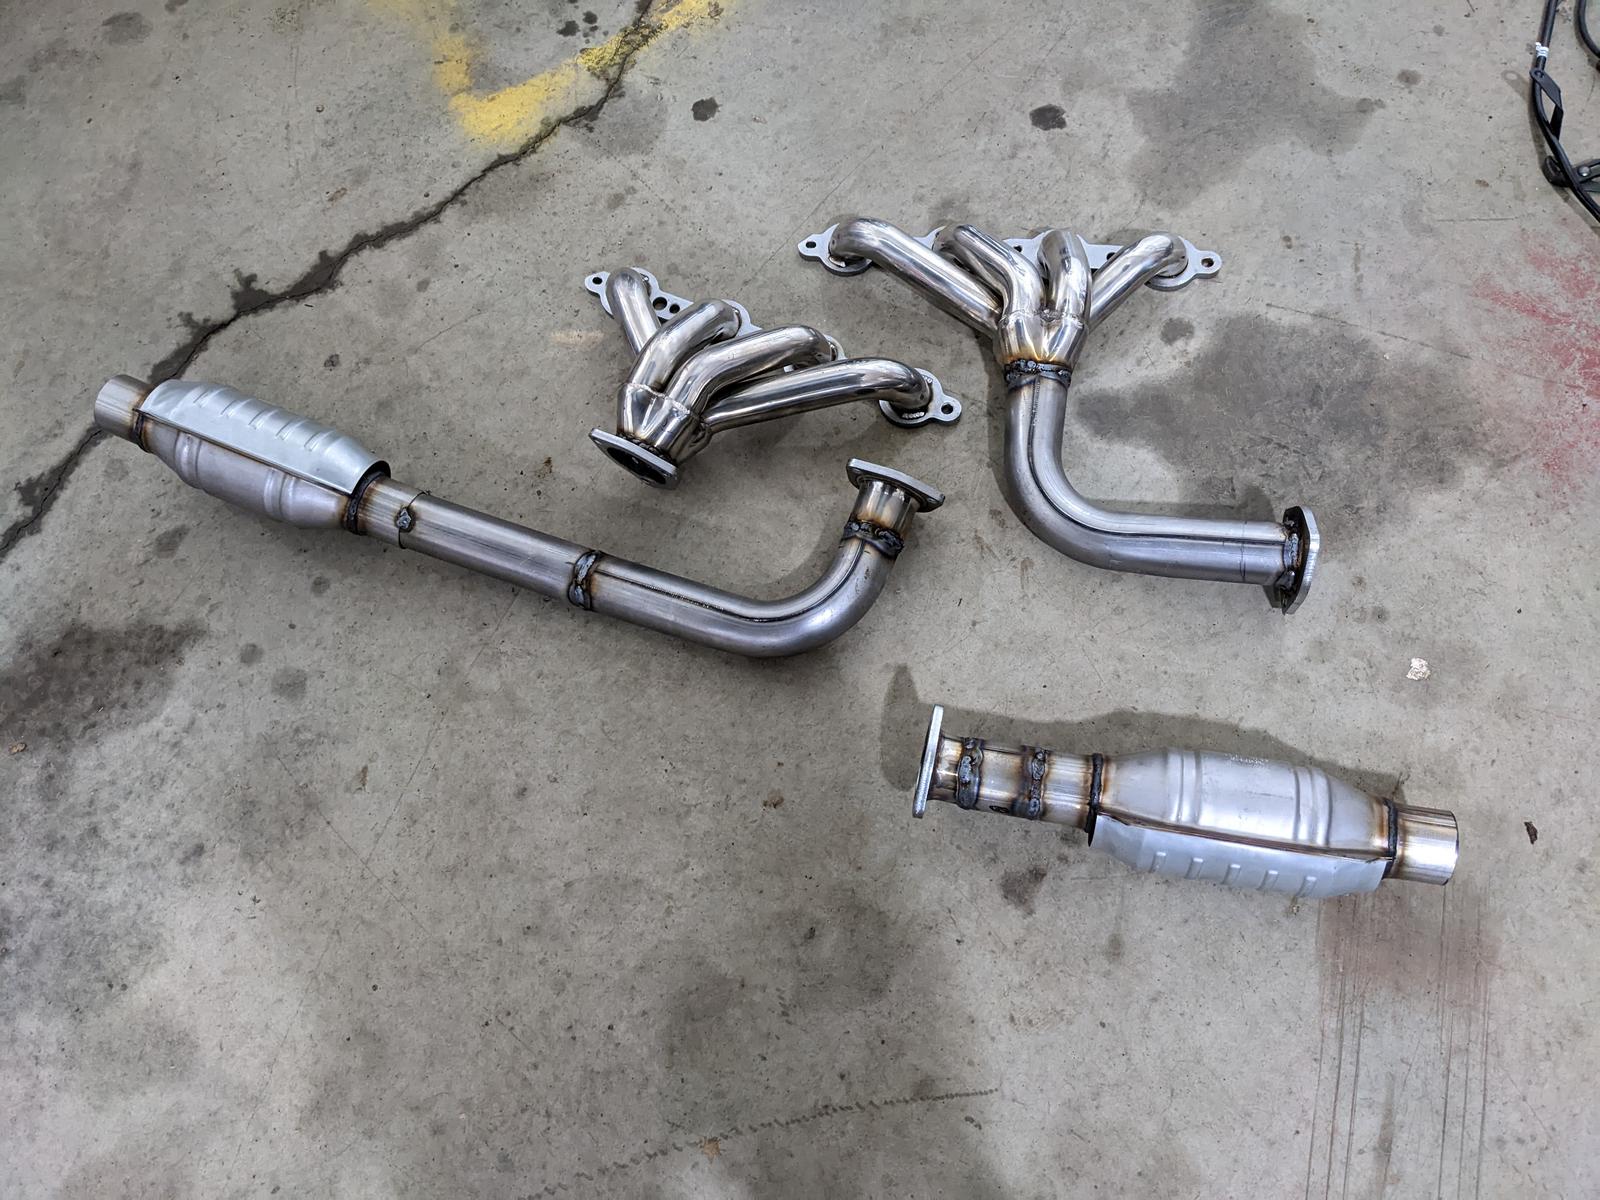
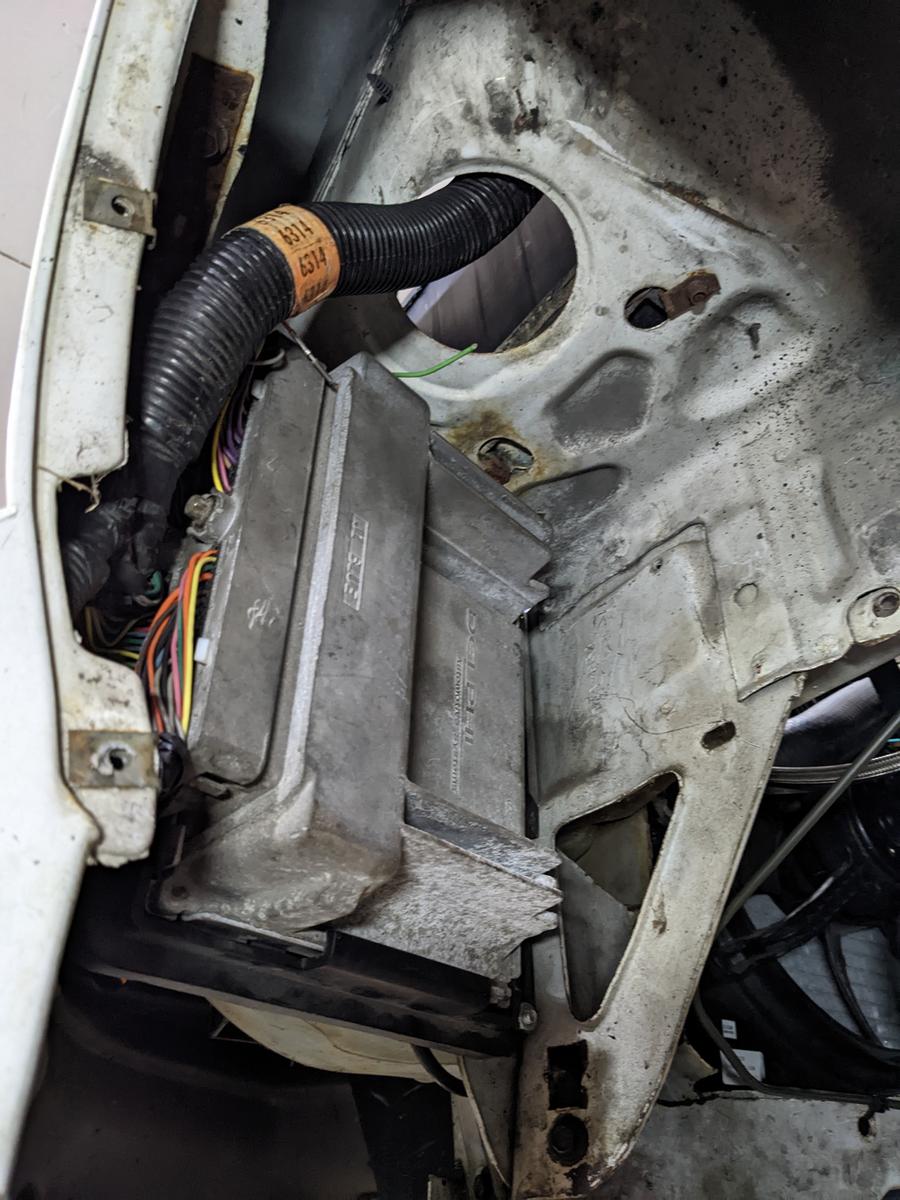
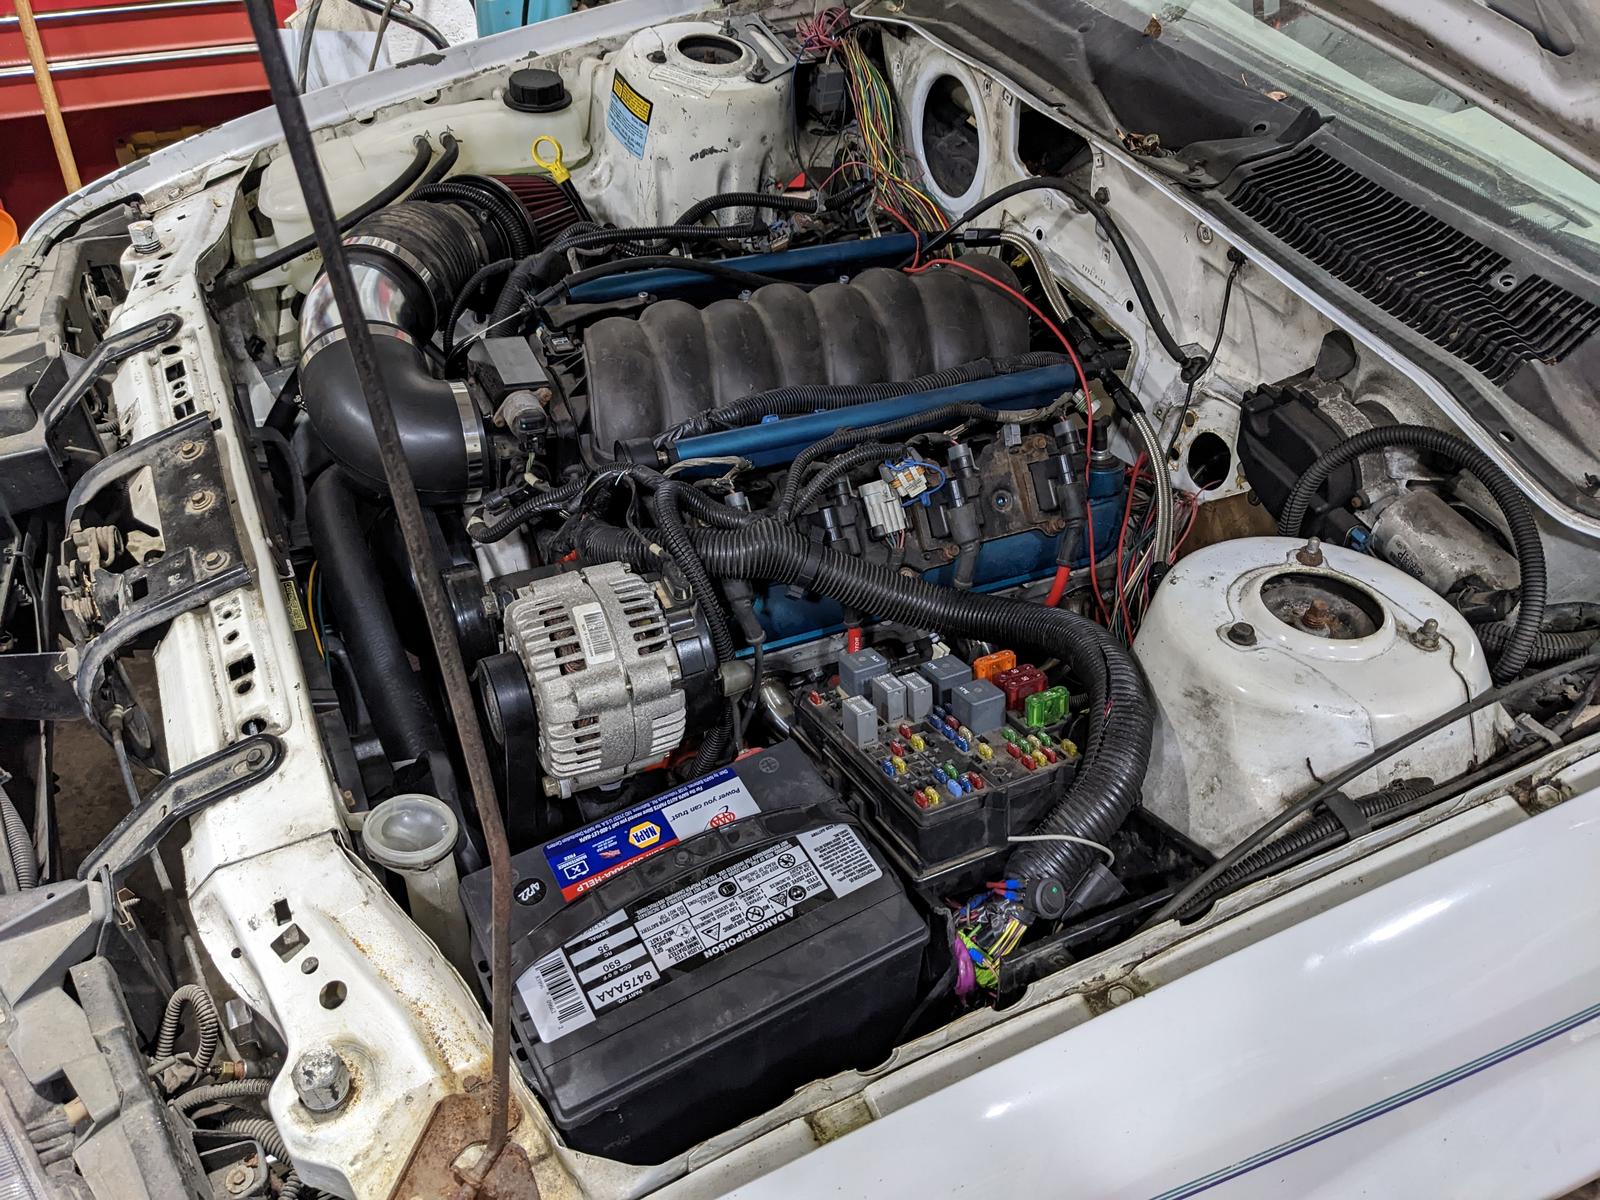
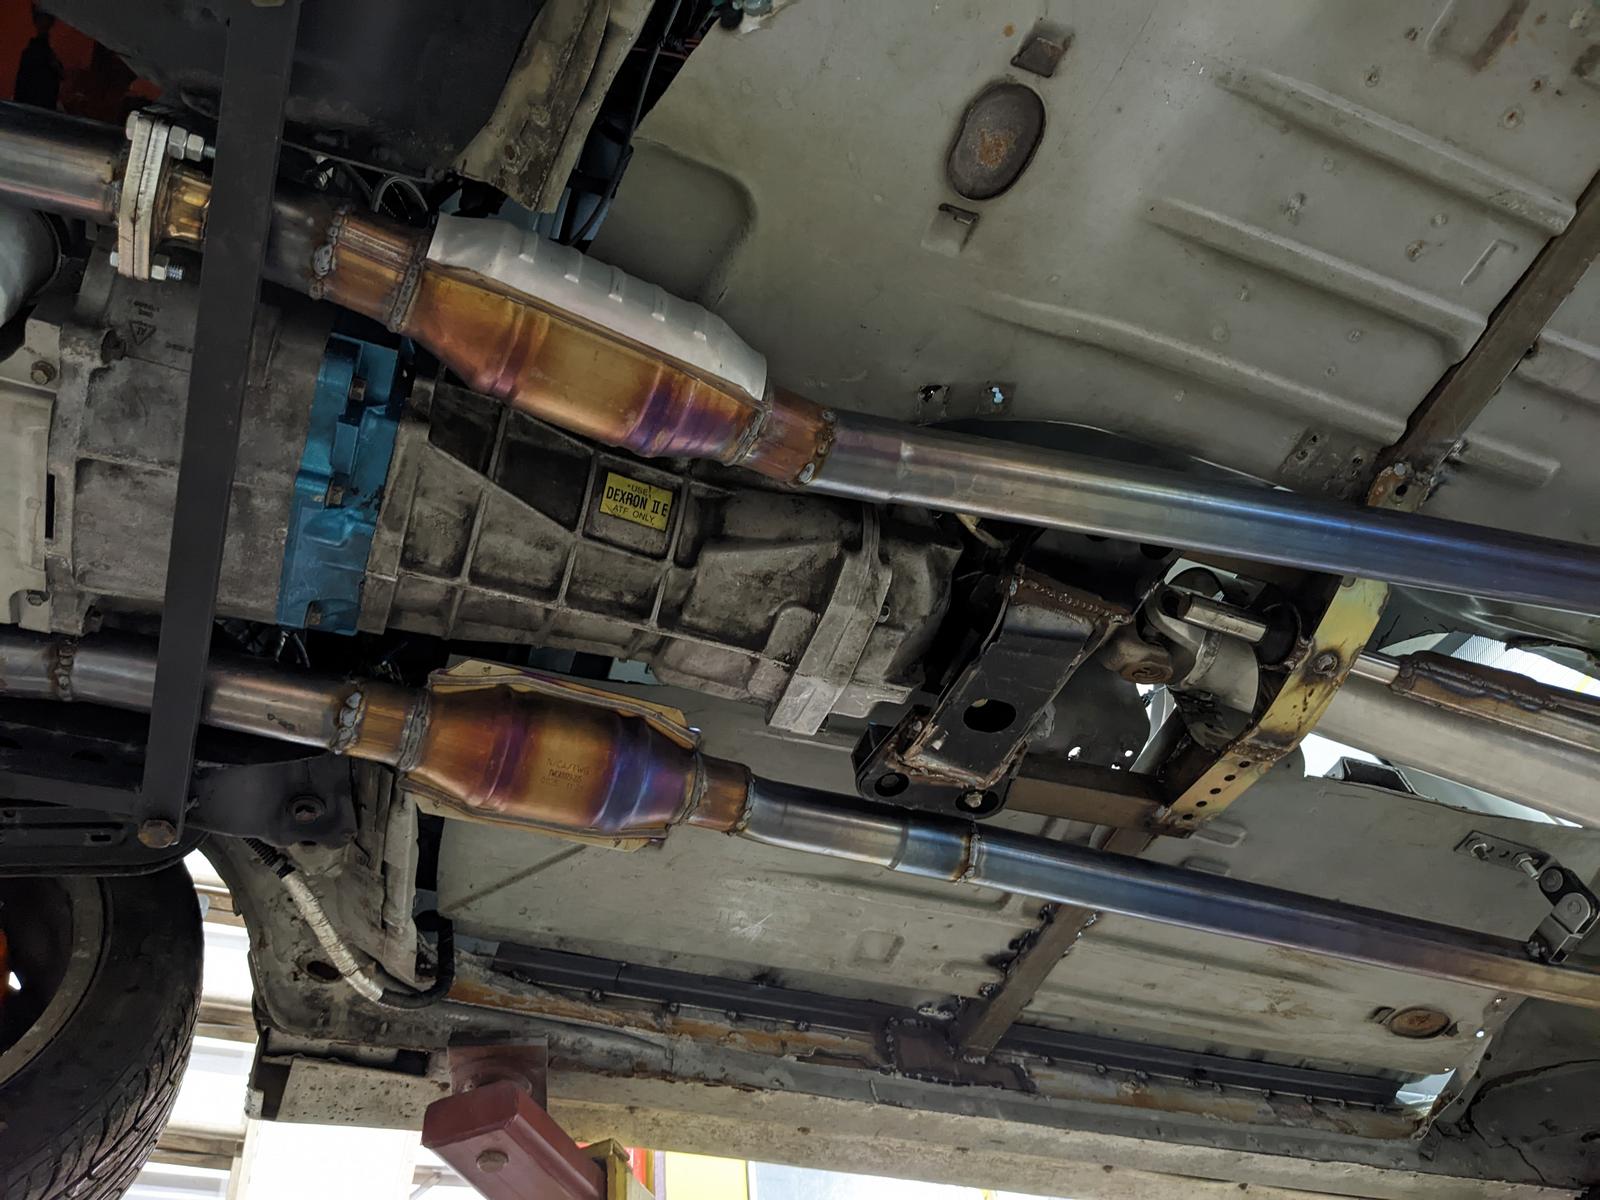
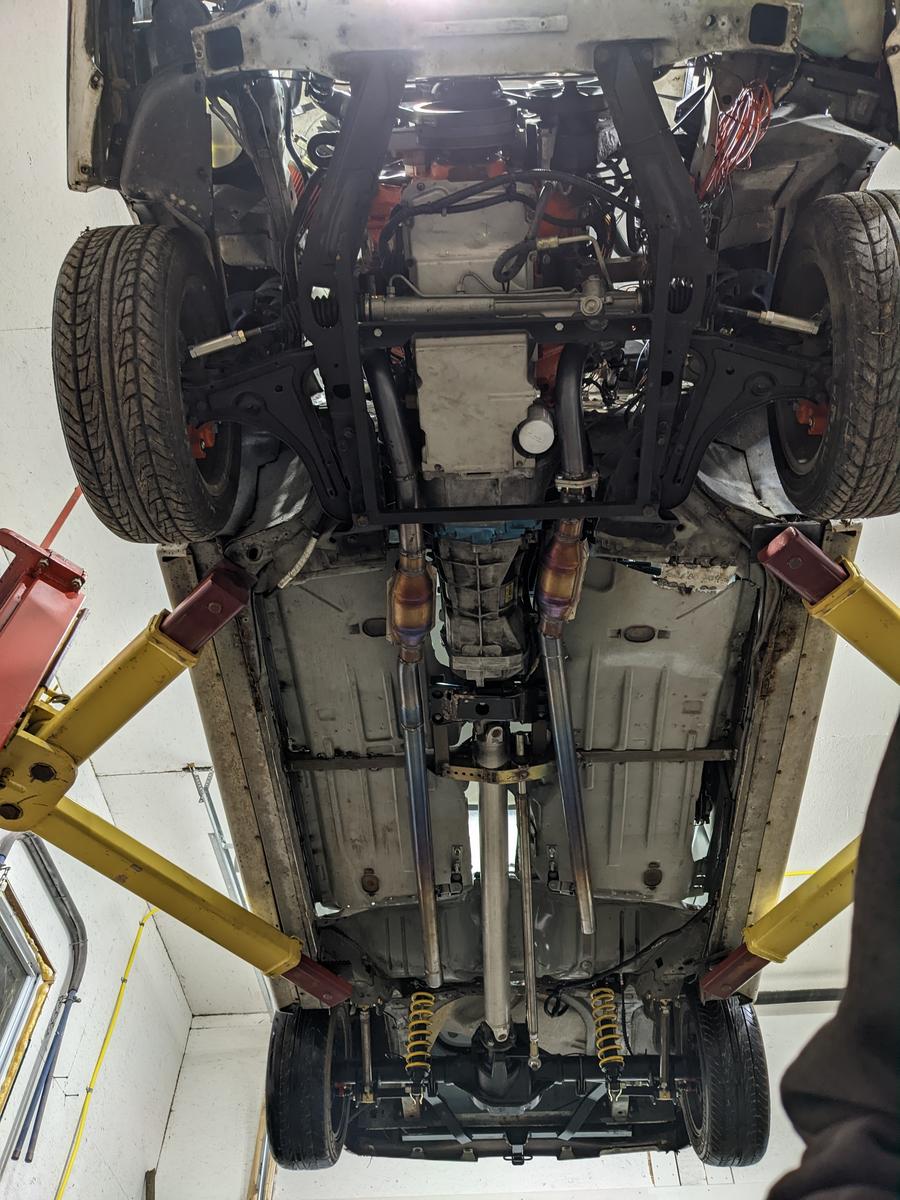
It's alive! Put a ****load of hours in on it over the last week+, cause I'm getting kicked off my old man's lift for his dumb new Mopars. A lot of the final little details turned out really well. It's uncanny how well a truck fuse block and PCM fit a Beretta. haha And my modified headers miraculously can be removed from the top side, and still have access to the starter and steering shaft.
The fuel tank and a couple other things are sloppy cobbed together at the moment, so it's still not road worthy. But it runs and will be making tire smoke by this weekend. More detailed video coming soon, obviously.
11-15-2022 #72
Registered User
- Join Date
- Sep 2013
- Location
- sw Kansas
- Posts
- 1,643
Good progress.

11-20-2022 #73
Registered User
- Join Date
- Jul 2006
- Location
- Chesapeake, VA
- Posts
- 607
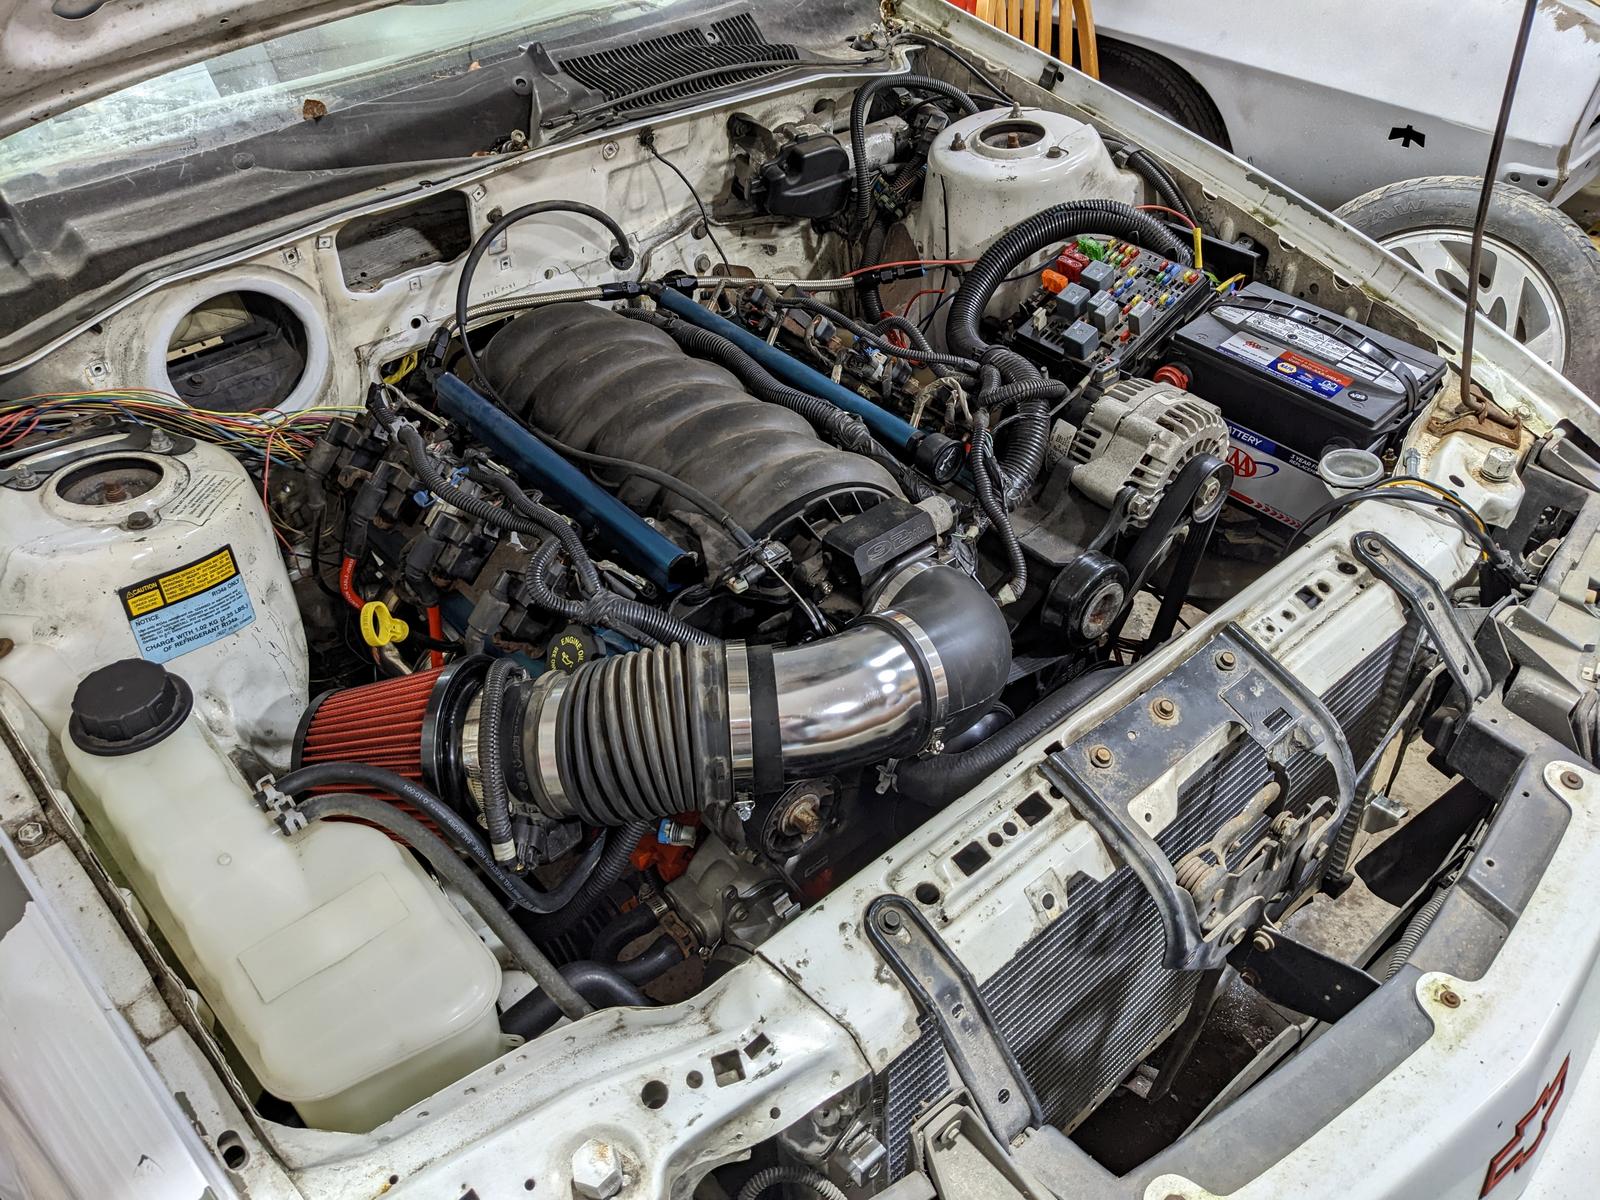
It looks neat and tidy under there, especially since you're putting 10lbs of stuff in a 5lb bag.
Cars are meant to be driven.
John B
11-24-2022 #74
Registered User
- Join Date
- Mar 2005
- Location
- Walton, NY
- Posts
- 737
I took A LOT of measurements on my other Beretta before I decided to buy another one for this project. haha Originally Posted by jaybee
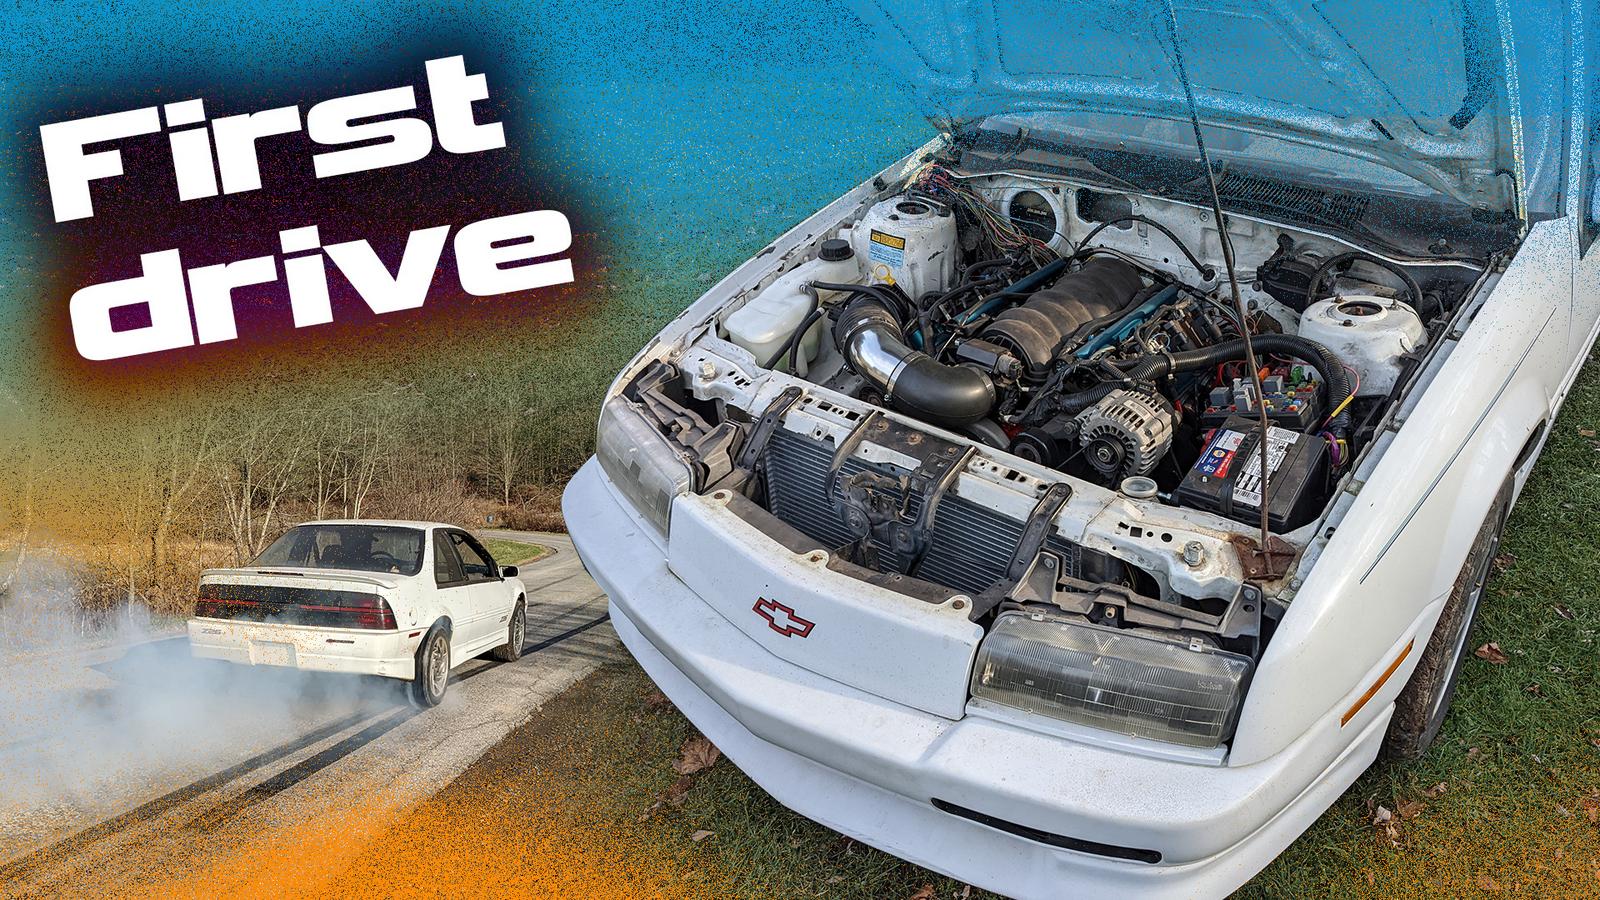
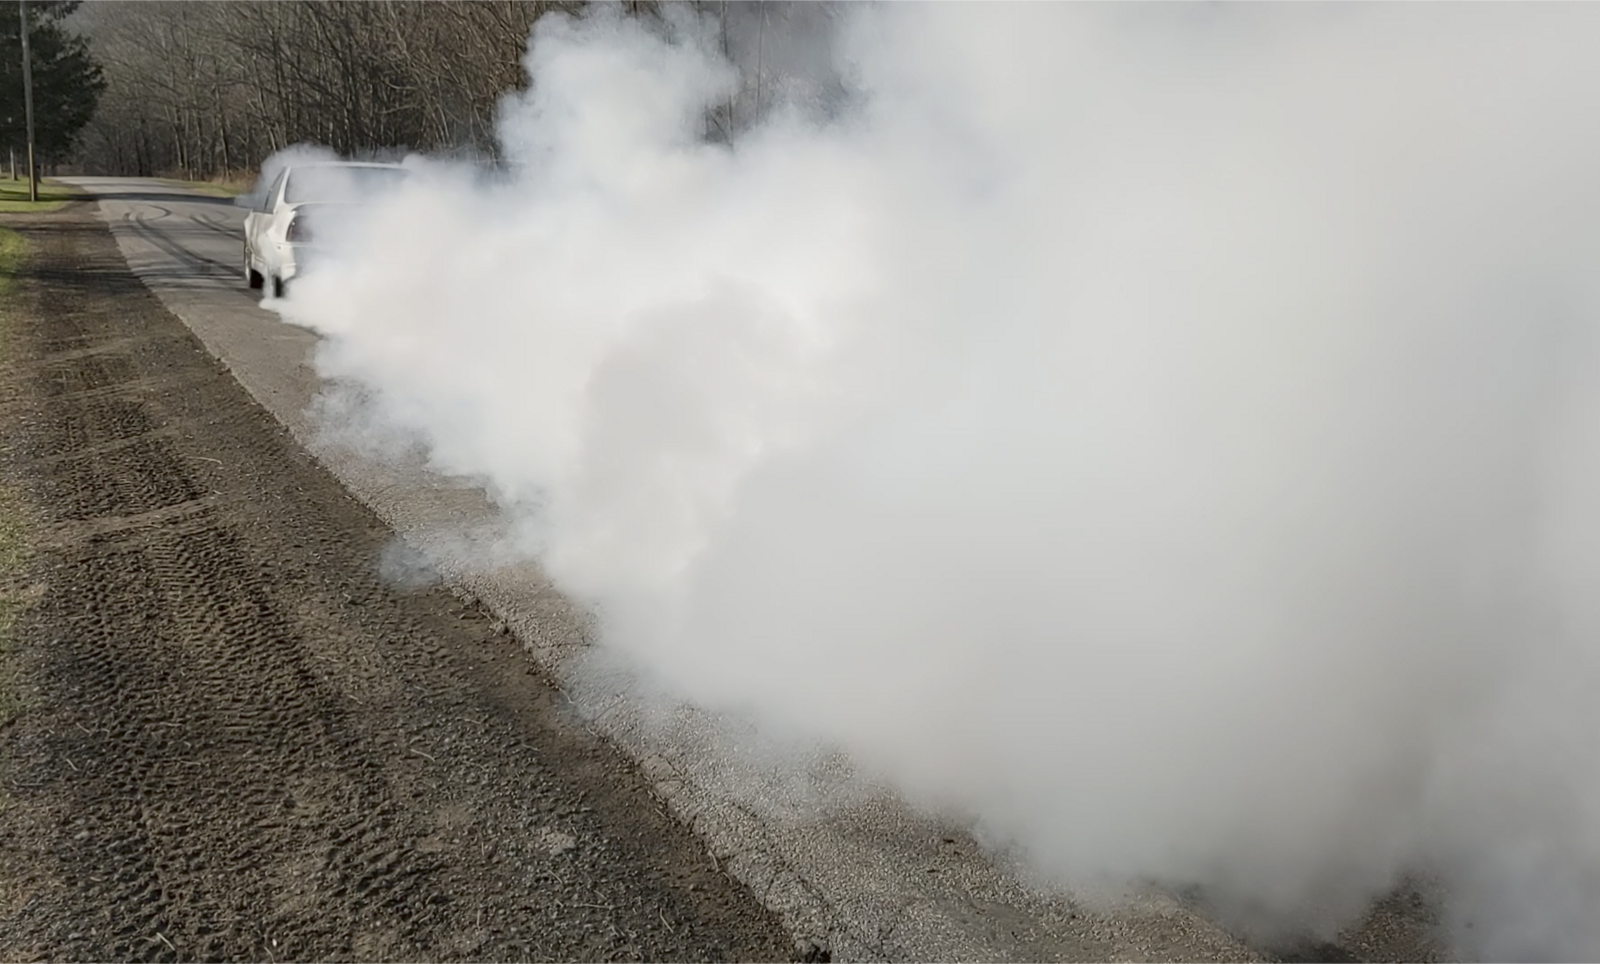
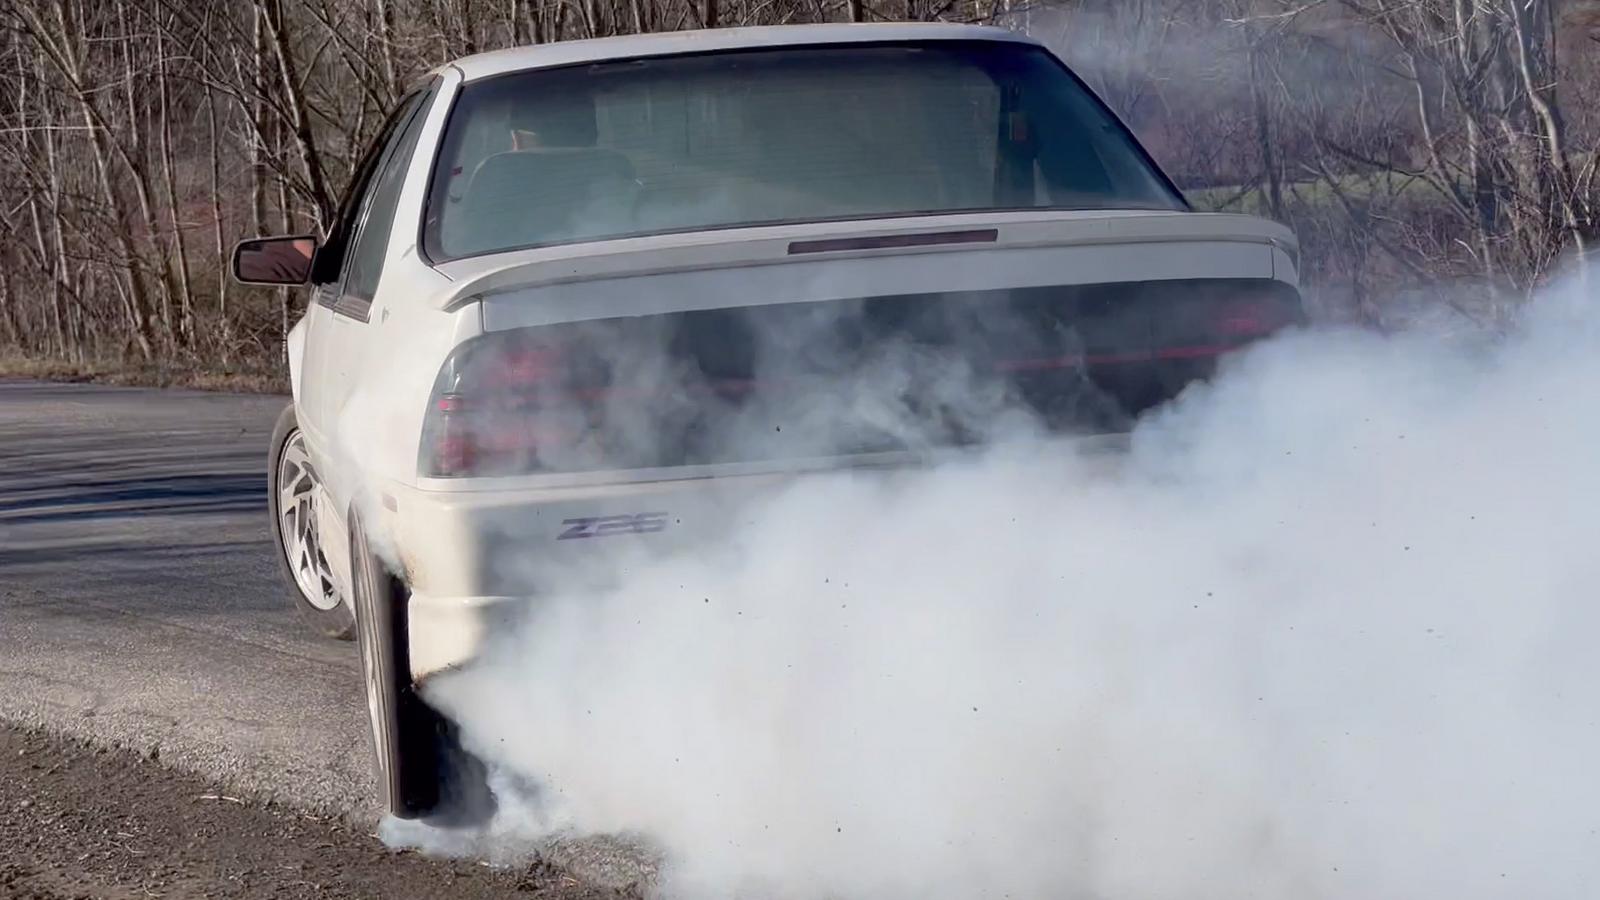
Here's the thrash video. And the next one will show smoke!
https://www.youtube.com/watch?v=RoANNtGaPe0
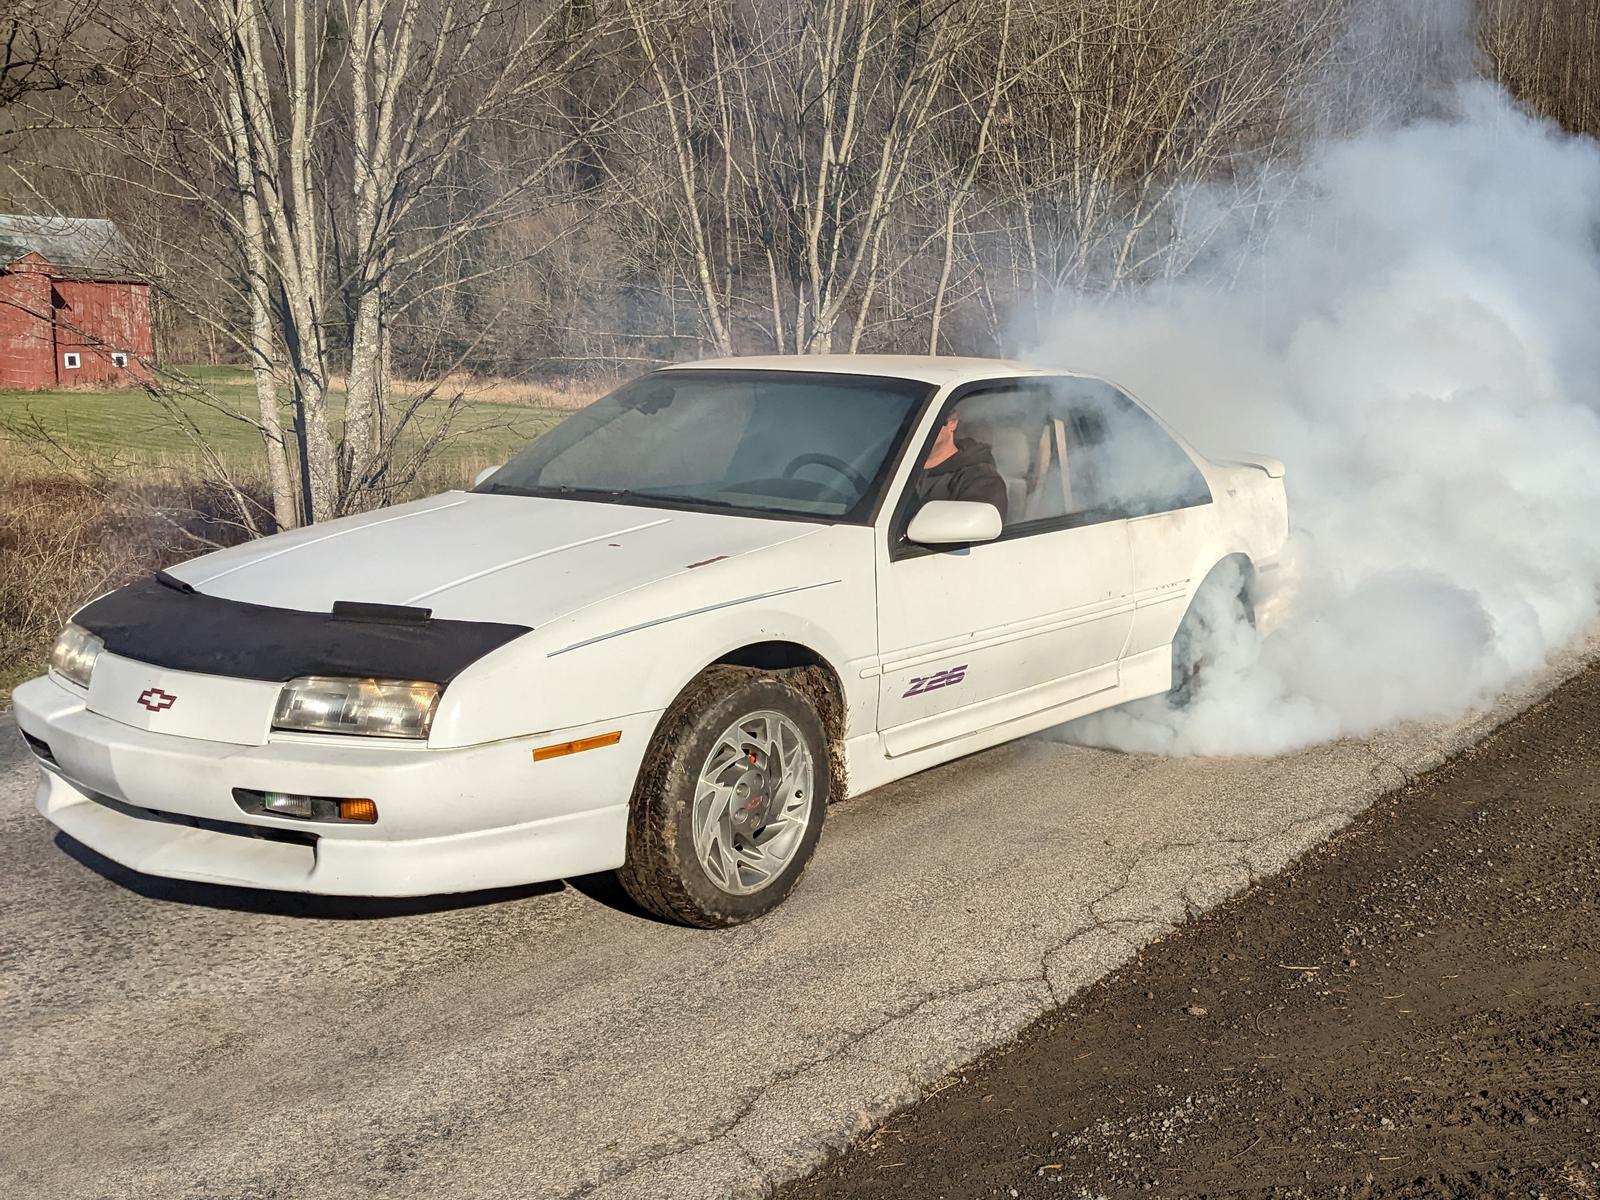
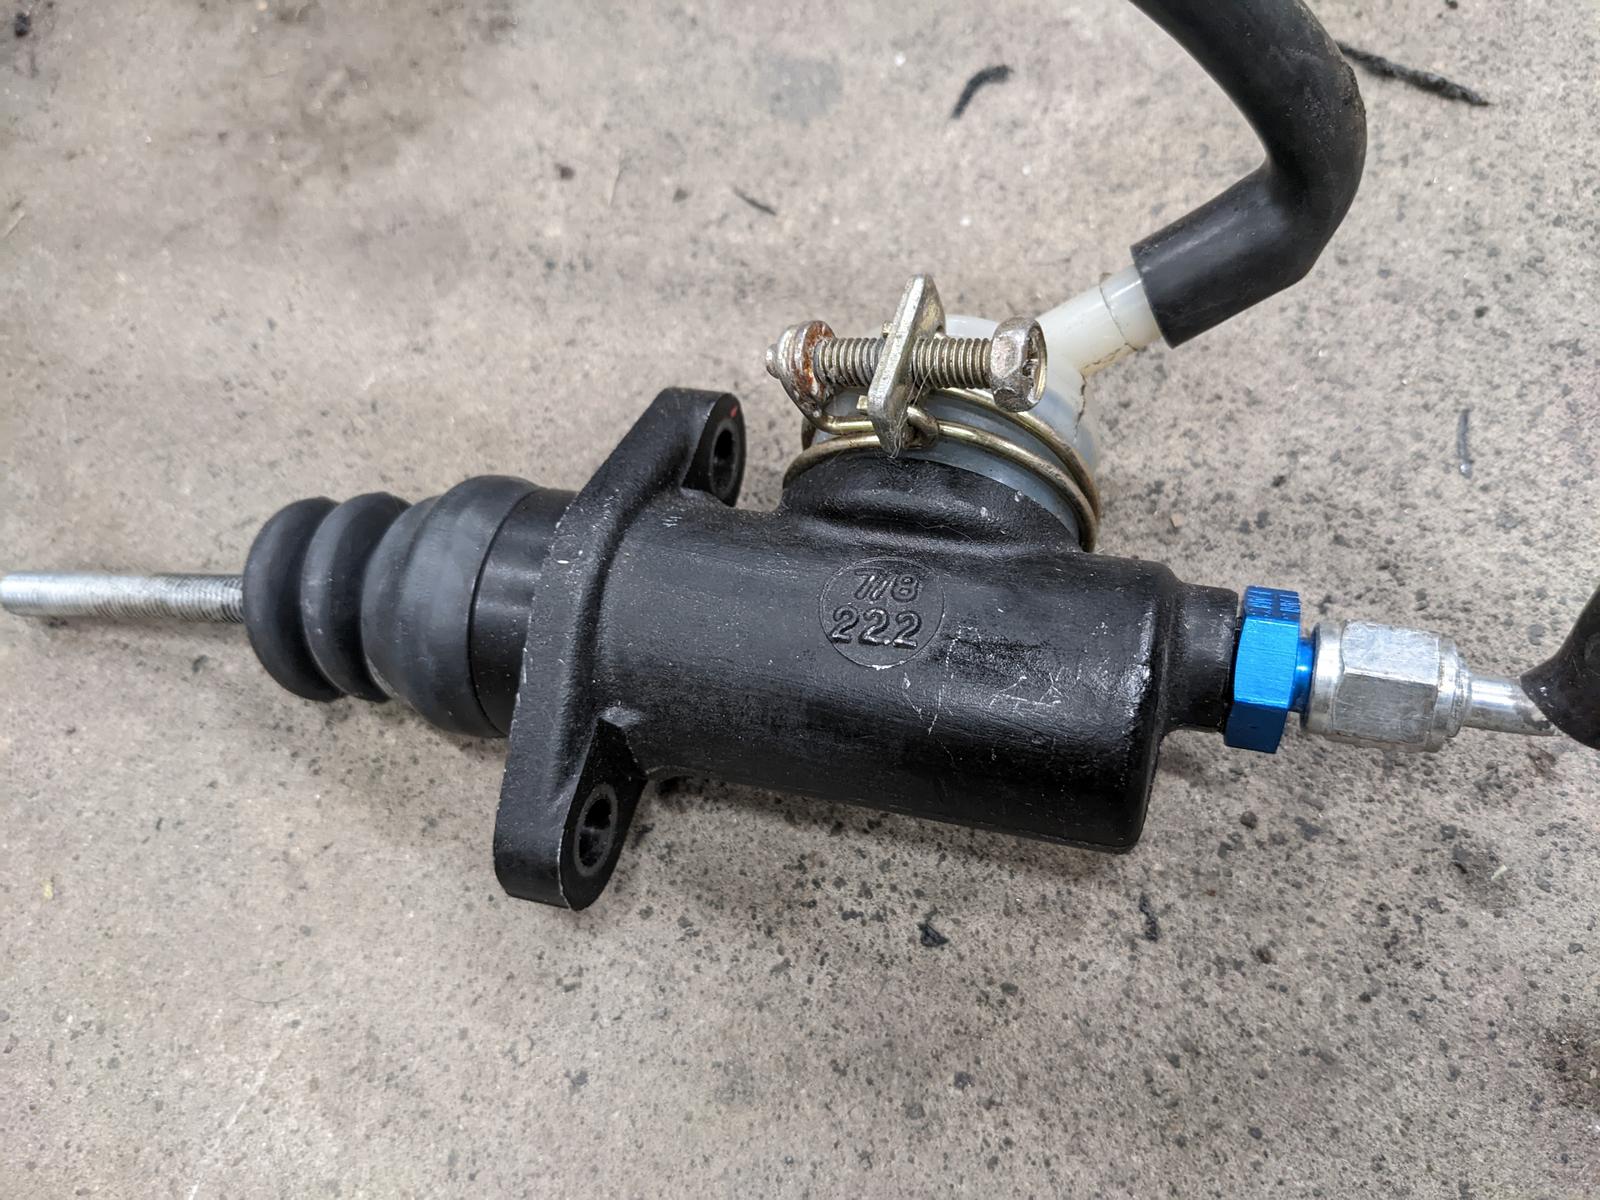
After I got it fired, I discovered the clutch wouldn't fully disengage. 6.1:1 Wilwood pedals and 3/4 bore master should have been ok considering the 4th gens had 6:1 pedals and 3/4 master cyl...but apparently McLeod and Spec clutches both need a 7/8 master. Fittingly enough, my used Spec clutch did come with a 7/8 master. Probably should have done some homework on that then. But it was a universal style Tilton that fit the Wilwood pedals just like the Afcos I'm running.
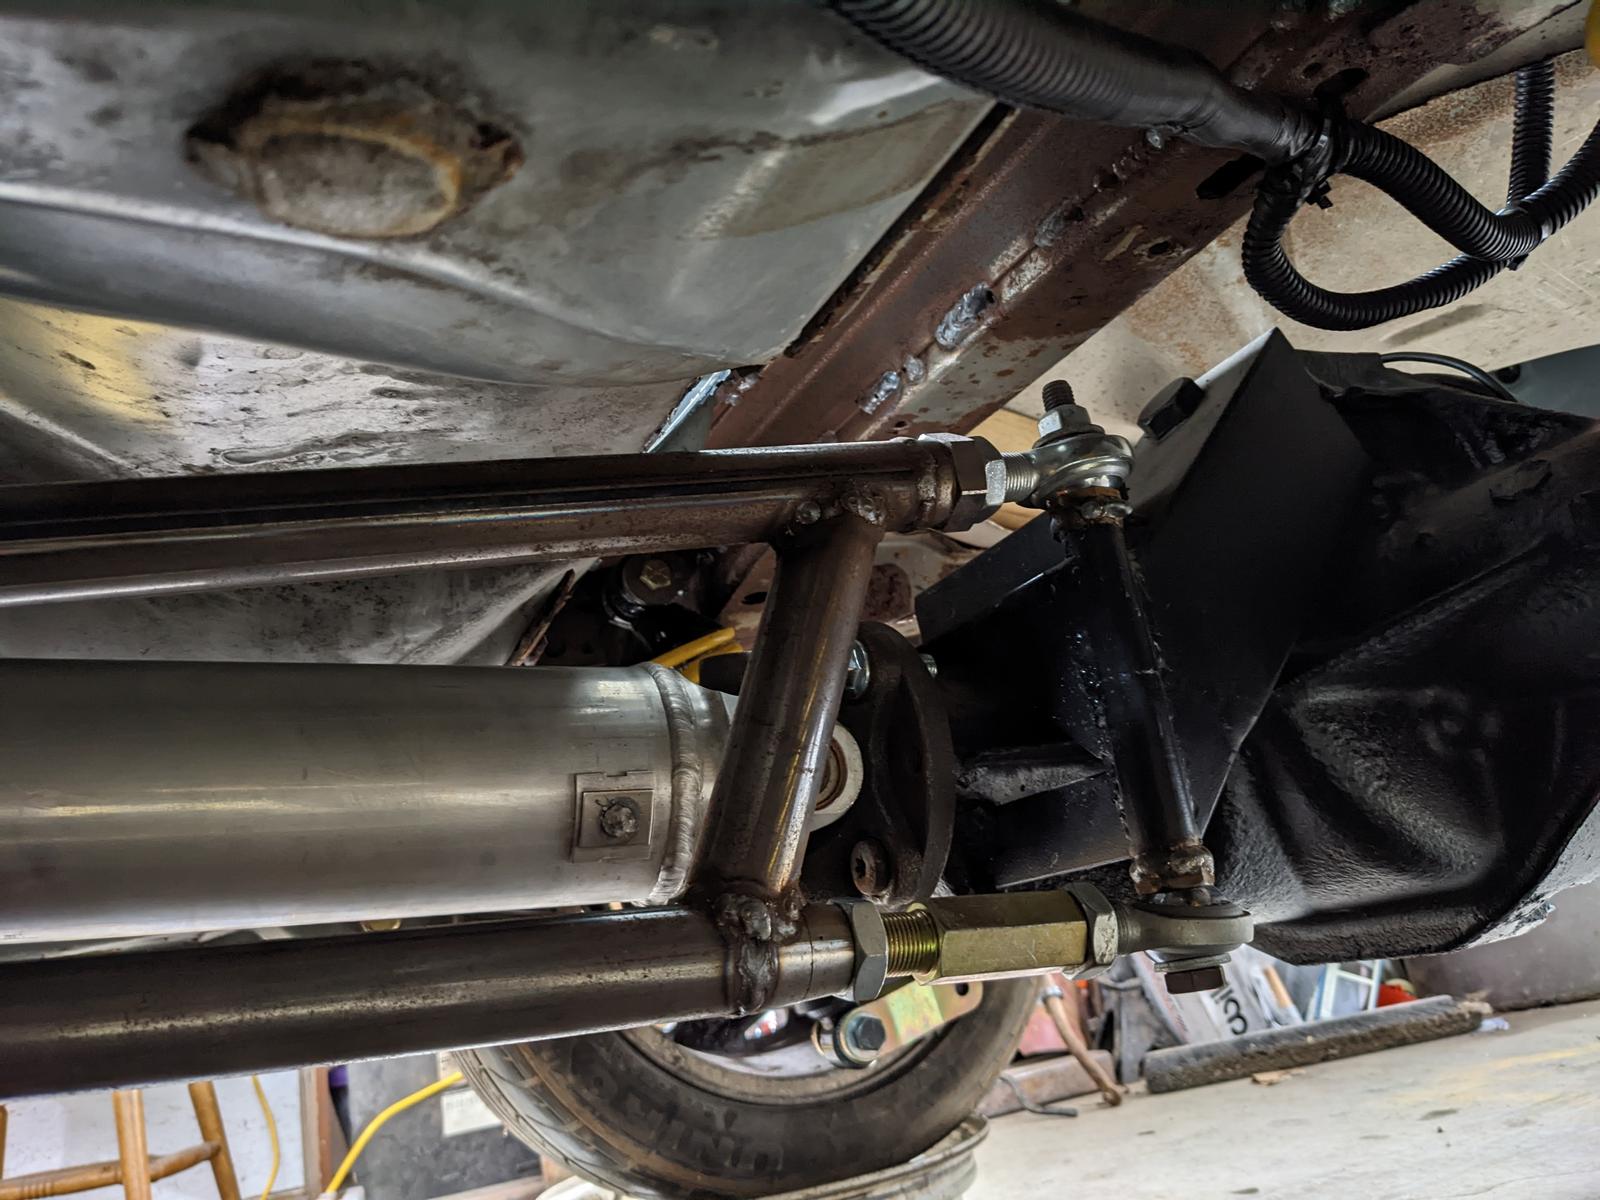
It was sketchy AF on the initial test drive! My "oh how bad can it be" bumpsteer was really bad, so I stole a couple 5/8 heims from the Camaro and dialed it in a lot better. I also adjusted my pinion angle (cause I had forgotten) and made a tweak to the driver rear lower control arm length. Should be a marked improvement on the next test drive.
12-01-2022 #75
Registered User
- Join Date
- Nov 2022
- Location
- La Center, WA
- Posts
- 18
Cool project! My cousin had one of these back in the day not as fast as this one though.
Martin
12-03-2022 #76
Registered User
- Join Date
- Mar 2005
- Location
- Walton, NY
- Posts
- 737
I don't know how fast it is. Prob 12s? But it is so much fun. I love it.
https://www.youtube.com/watch?v=oNF7uPUjVHE

12-03-2022 #77 Registered User
- Join Date
- Nov 2018
- Posts
- 645
Ugh, this really torques my nuts. GM had so many good looking cars like this one, and ruined them with front wheel drive. Builds like yours shows the potential these cars had, if only GM hadn't screwed them up by putting the engines in wrong.
12-07-2022 #78
Registered User
- Join Date
- Mar 2005
- Location
- Walton, NY
- Posts
- 737
Video is up! https://www.youtube.com/watch?v=ei15Jh8ABZk
And I'm also thinking about doing some t-shirts.

12-08-2022 #79
Registered User
- Join Date
- Sep 2012
- Posts
- 15
Awesome project! Always thought this would be a cool setup!
12-24-2022 #80
Registered User
- Join Date
- Mar 2005
- Location
- Walton, NY
- Posts
- 737
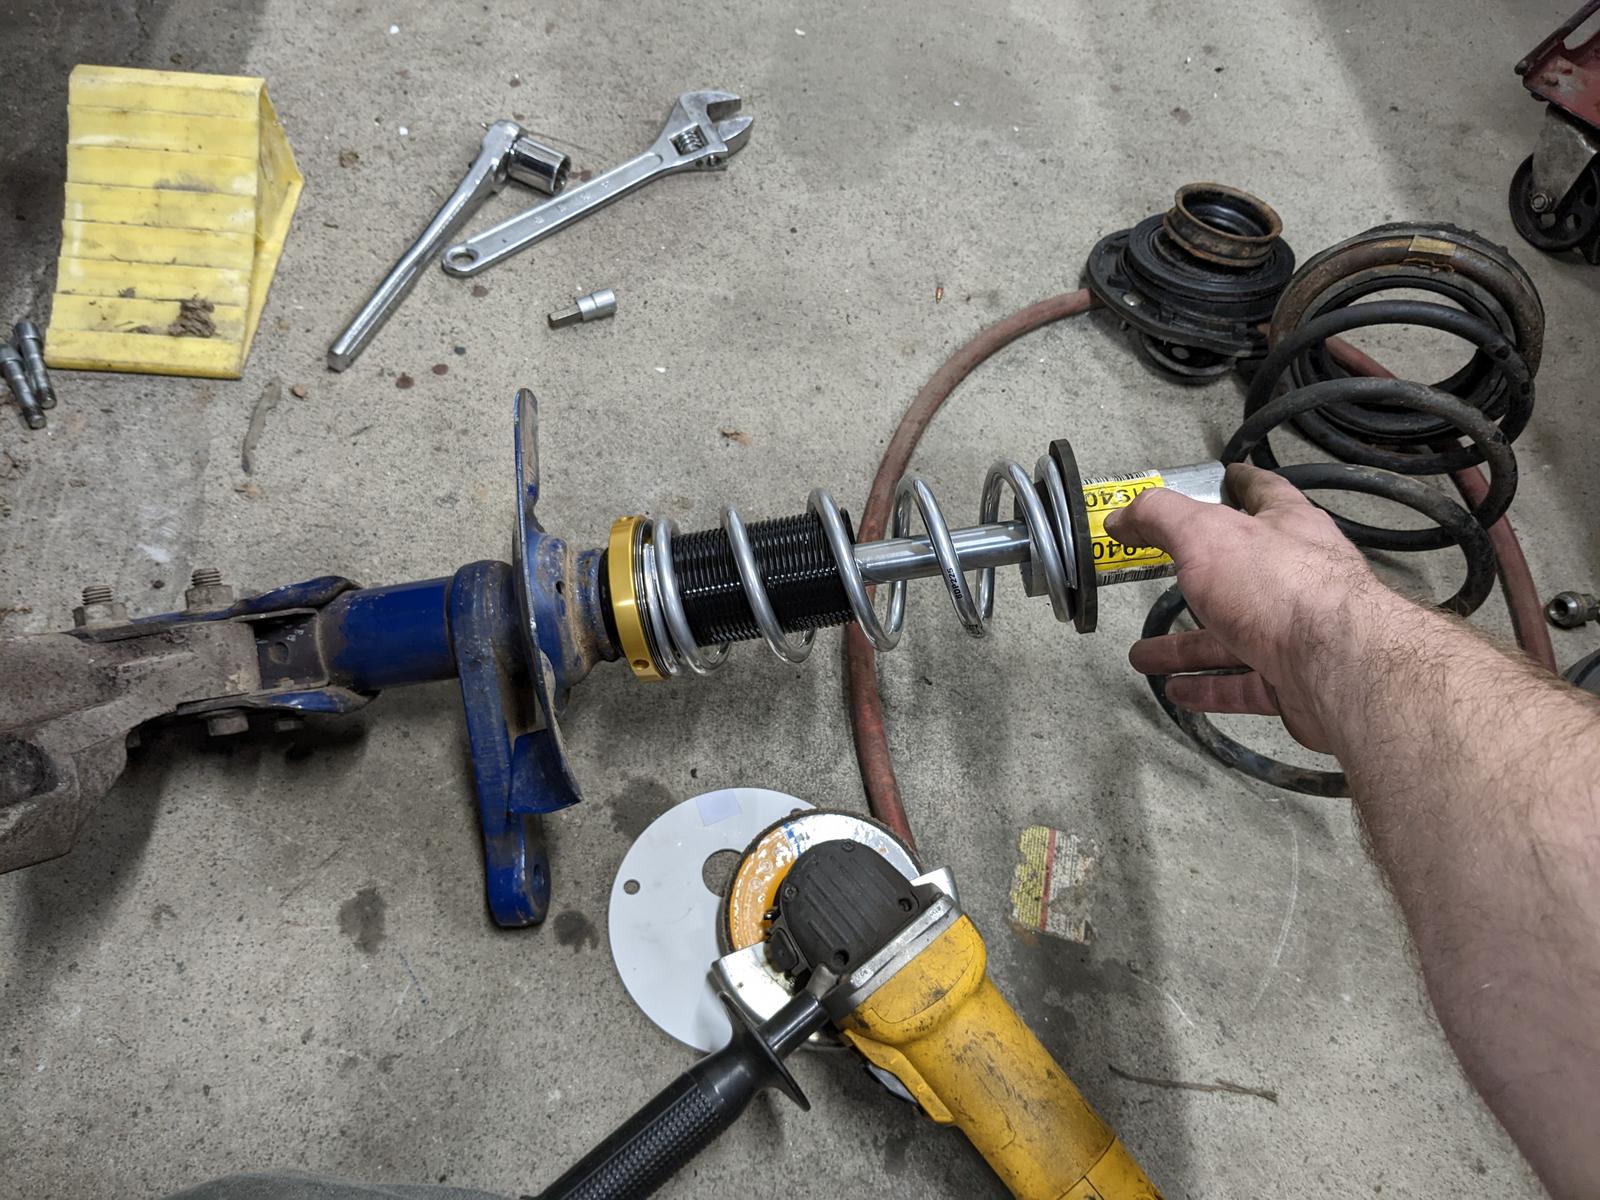
Coilovers for the front in the works! No pillowball mounts and nasty NVH though...I'm using a DIY non-adjustable strut mount with 2 more degrees caster built in. And it has rubber isolators for the spring and the strut stem. My mock up shows it working beautifully. The picture on the ground is in the center of the adjustment, so I can go up or down about 2 inch from there. More info to come once I finish it up and make a video.
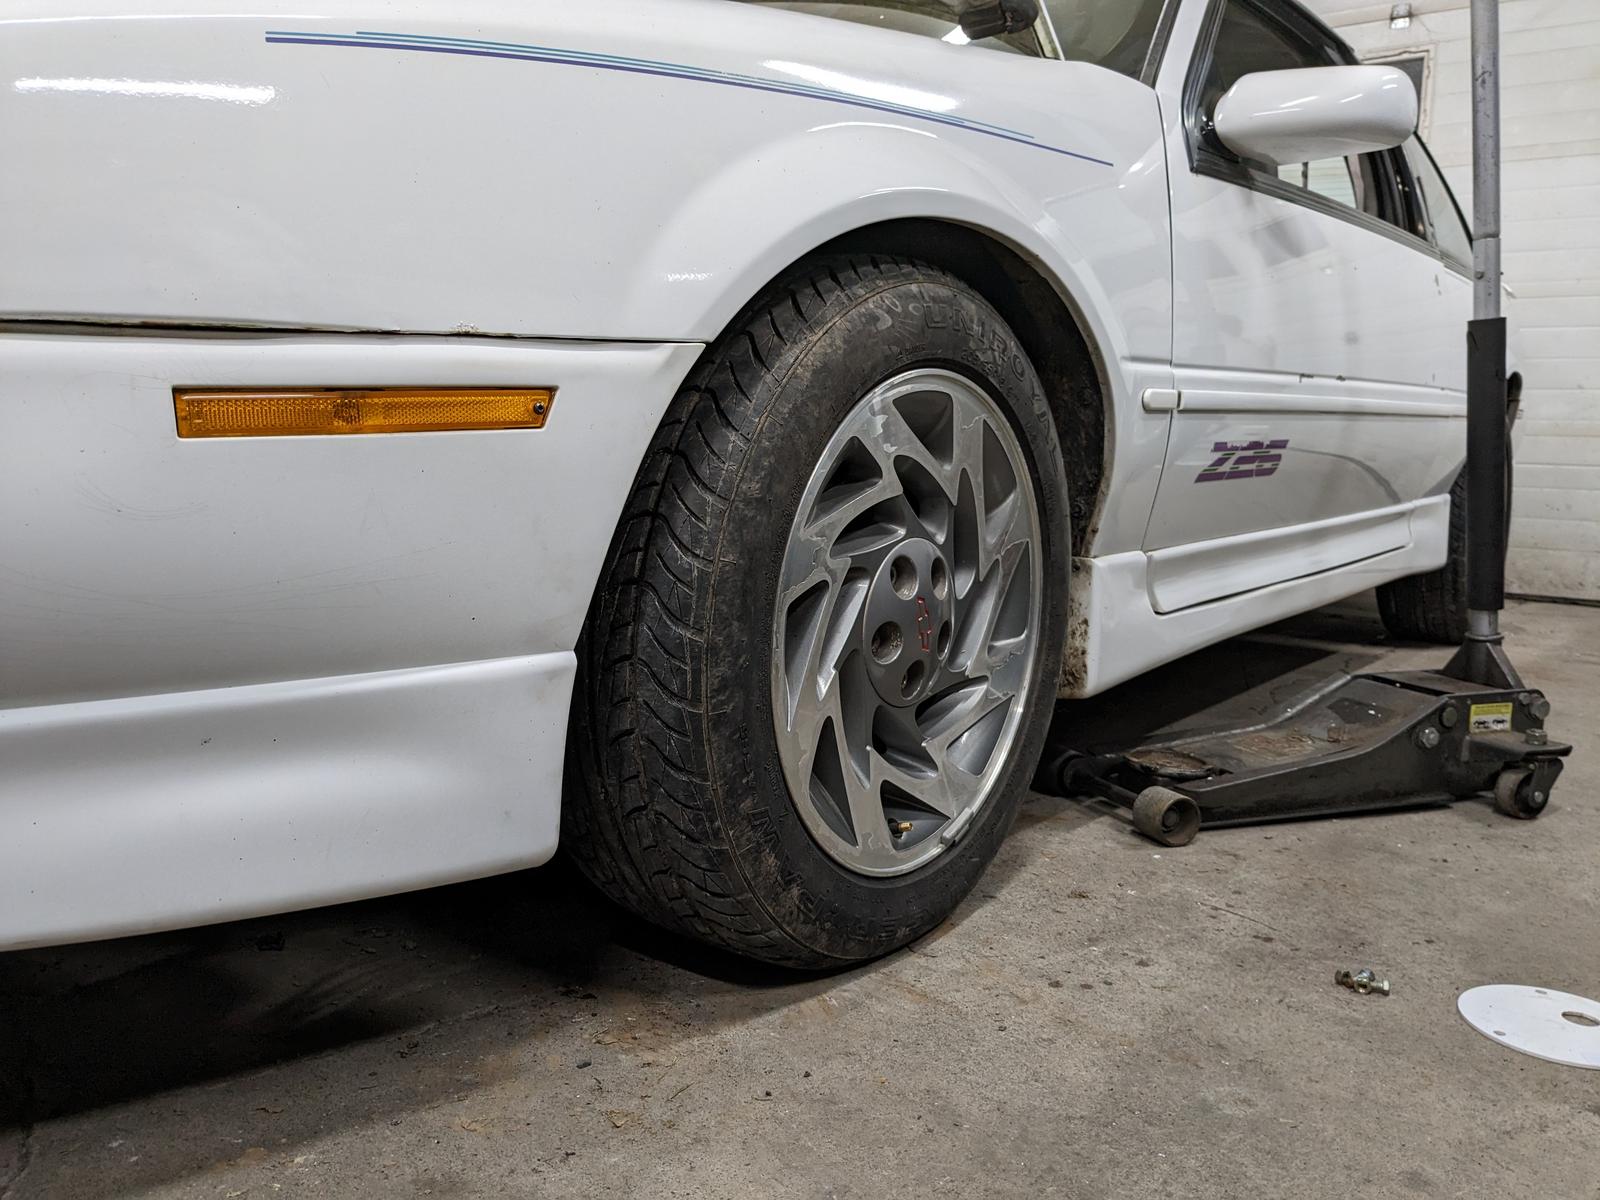
You can also see another change if you look close, but I'm not gonna spill the beans on that just yet.


 Reply With Quote


