

Results 41 to 60 of 119
Thread: derekf's 69 El Camino build
-
05-15-2021 #41

 -ɹoʇɐɹǝpoW-
- Join Date
- Jul 2002
- Location
- Mesquite, TX
- Posts
- 4,928

You know what would be really cool? If I could go out and do some work on the car without finding a) a repair I did years ago that I'm ashamed of my work on, or b) some more rust.
Yeah, this weekend (and last weekend) weren't so good on those fronts.
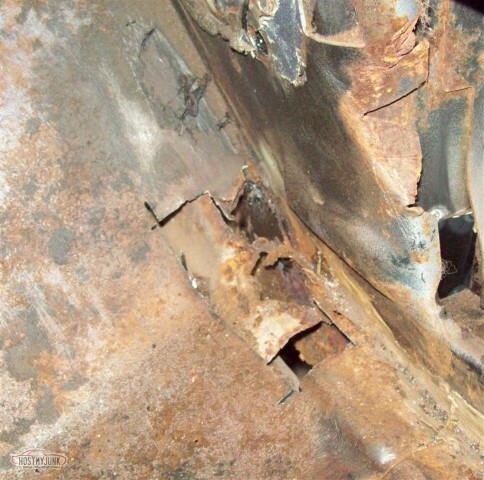
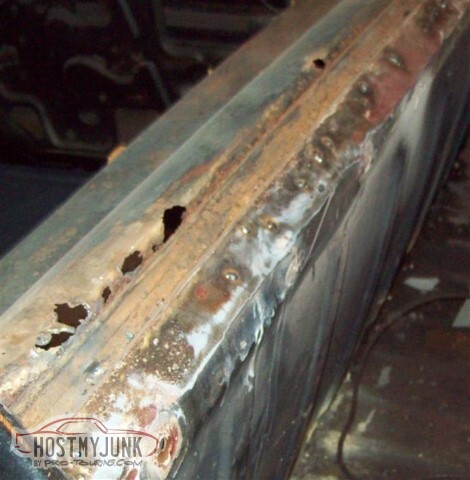
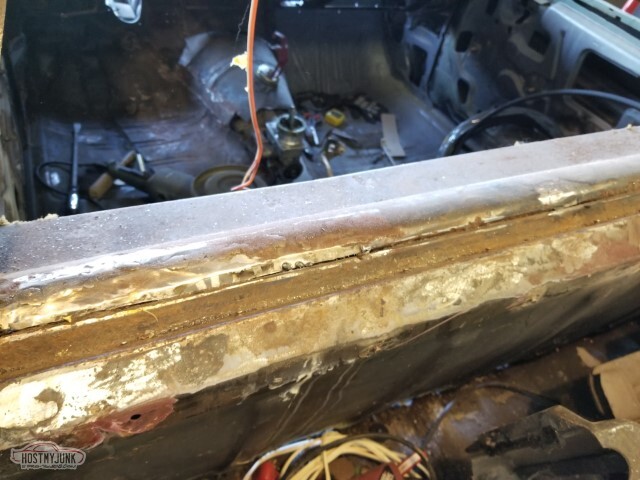
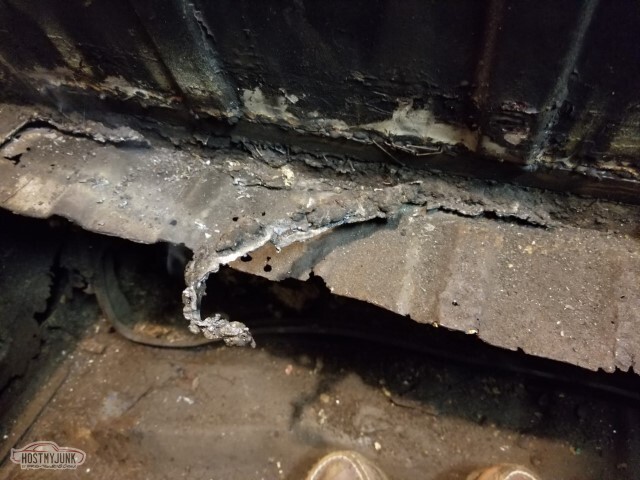
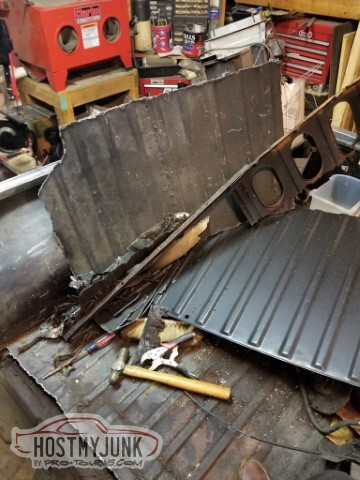
Cleaned up the bed some, and found that the back of the cab has some large rust holes. Also really not happy with my welding of the bed-patch-panels in; that's going to be a bigger pain to correct than the back of the cab.
At least I *think* I'll be able to use a flat bit of metal to patch the back of the cab.
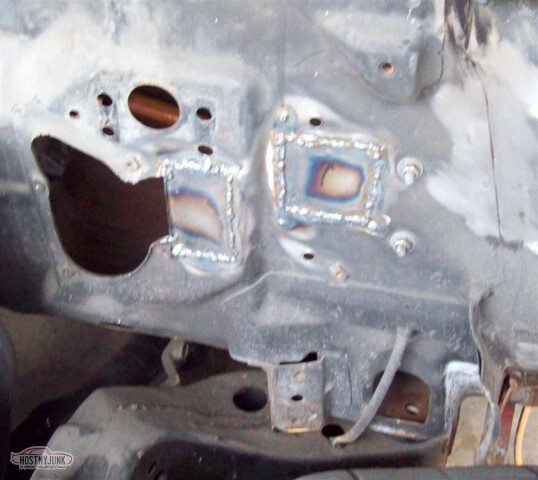
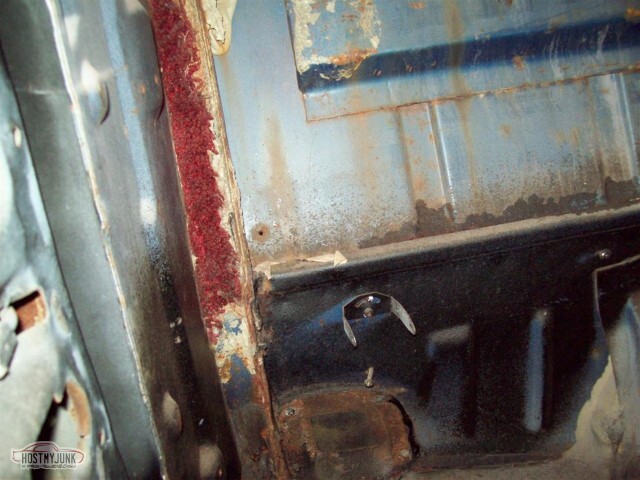
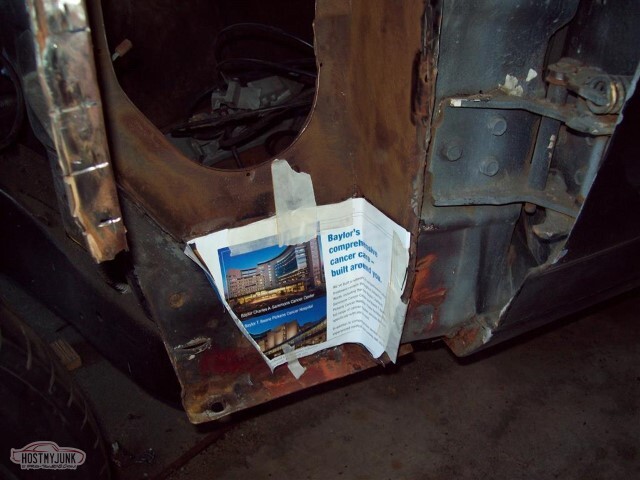
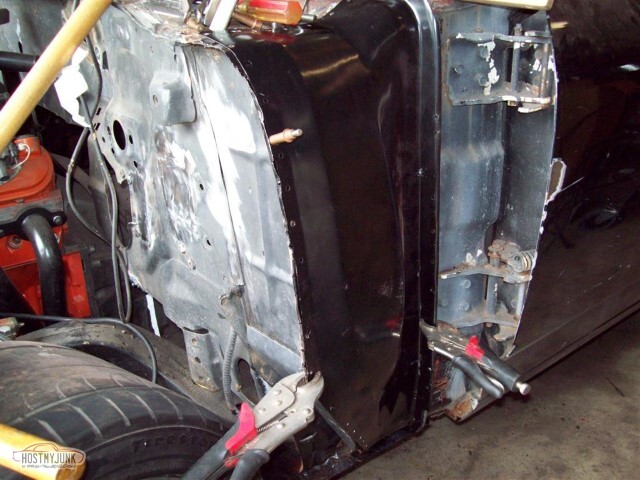
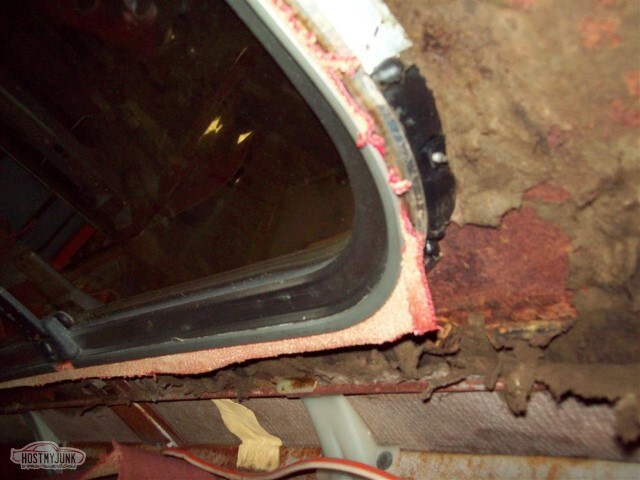
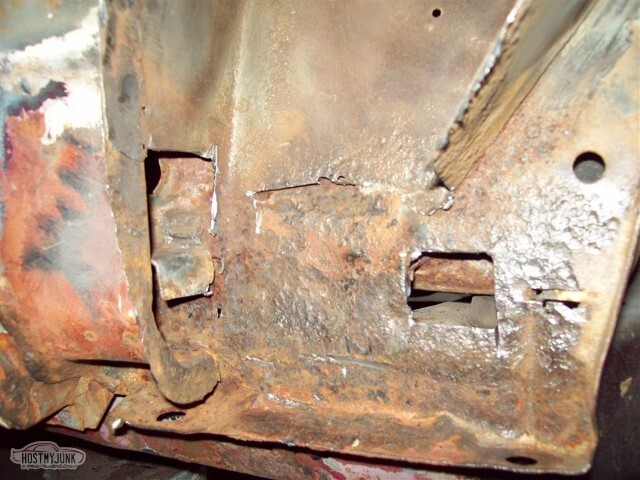
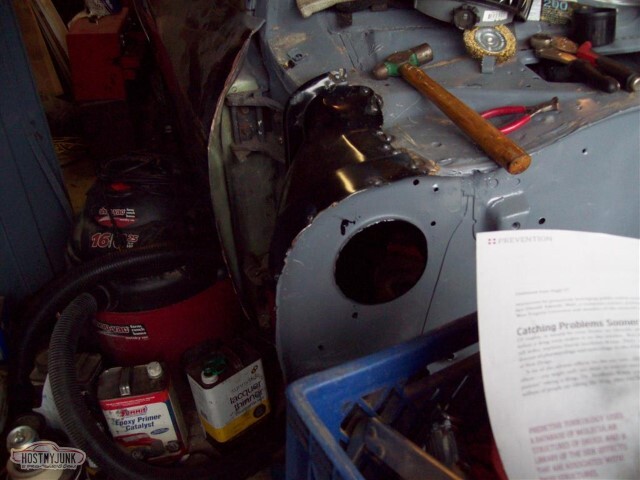
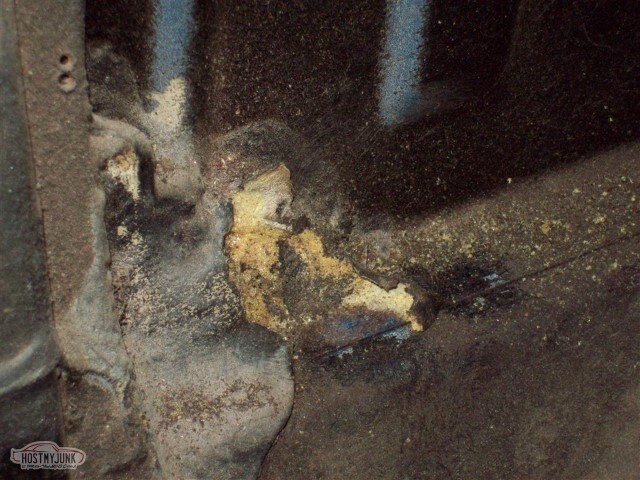
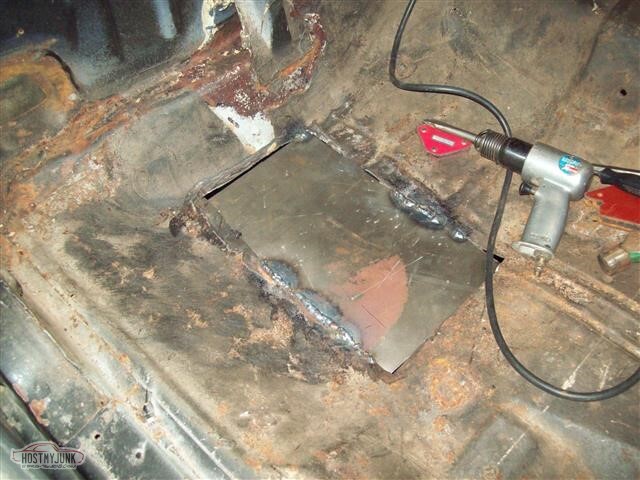
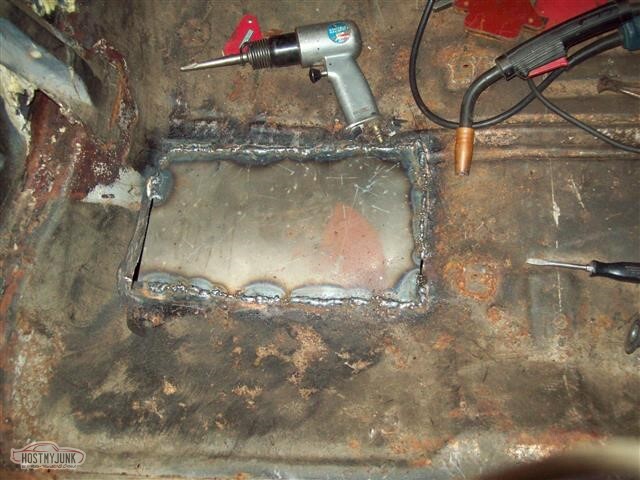
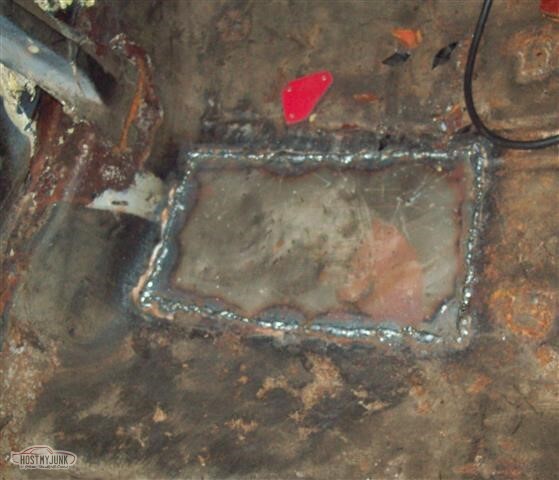
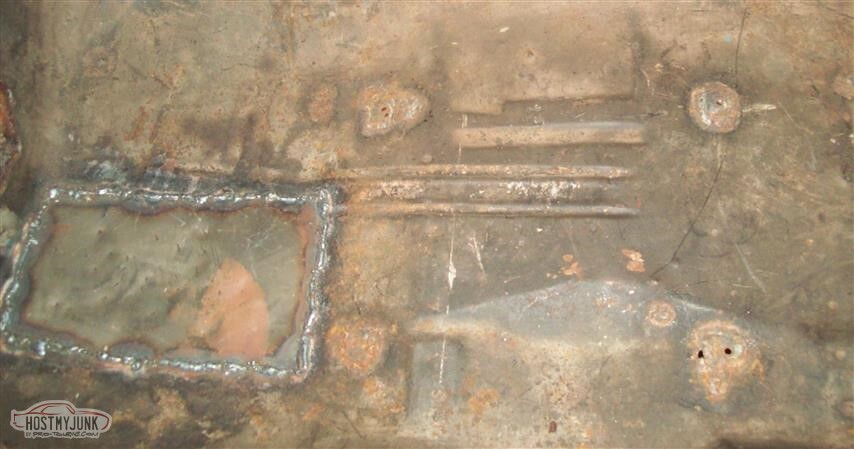
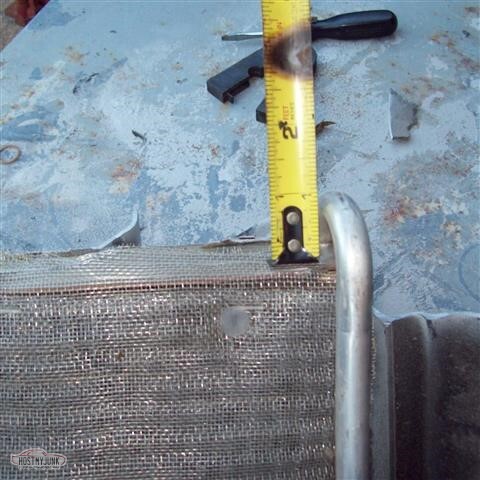
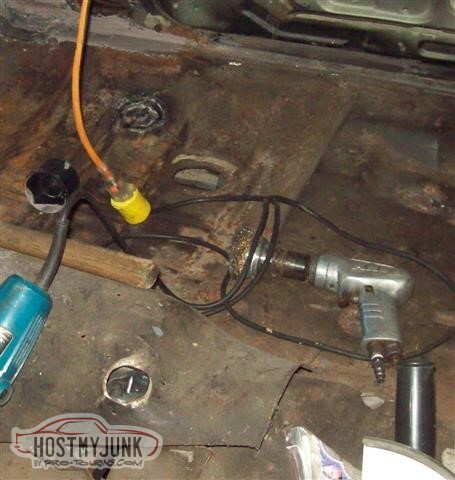
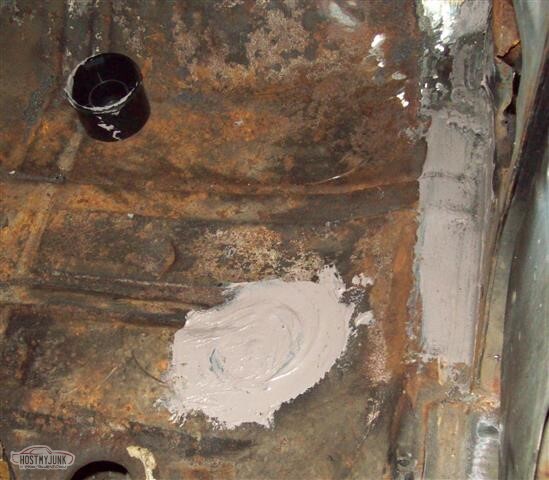
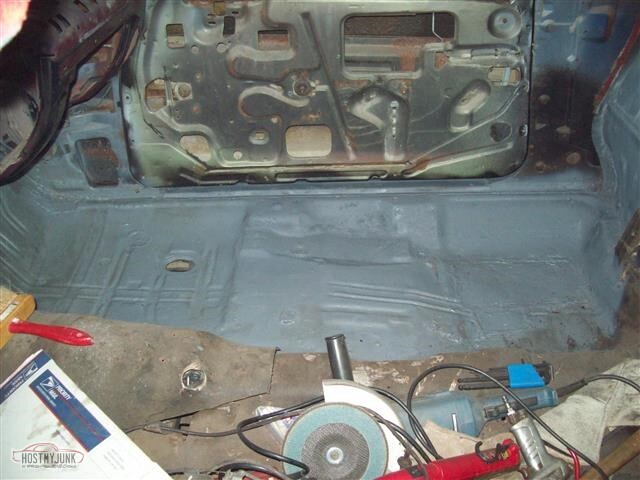
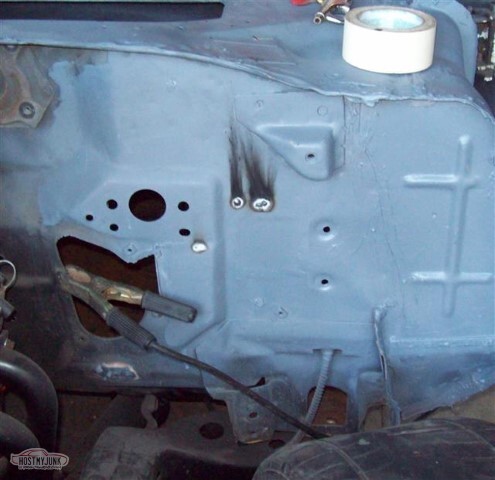
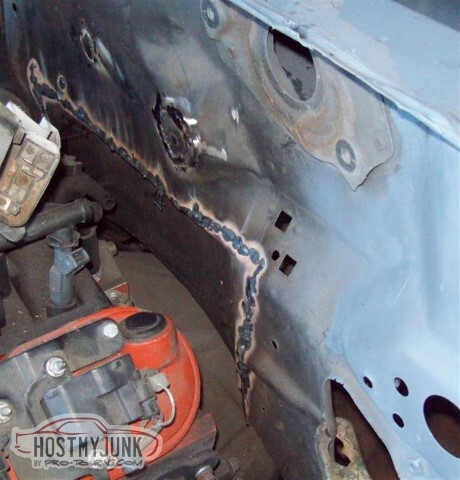
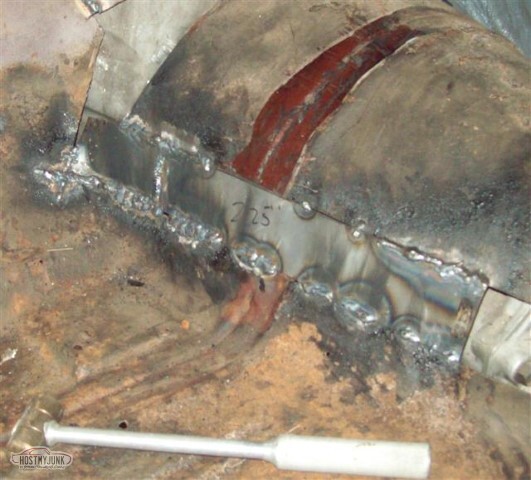
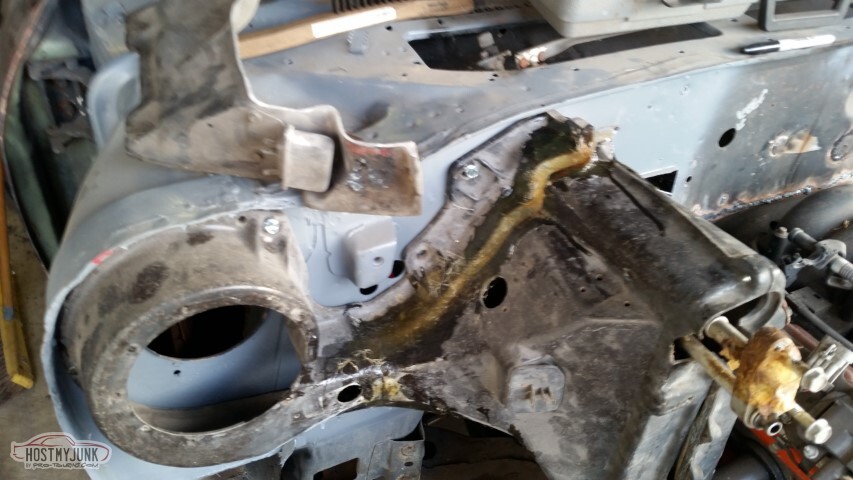
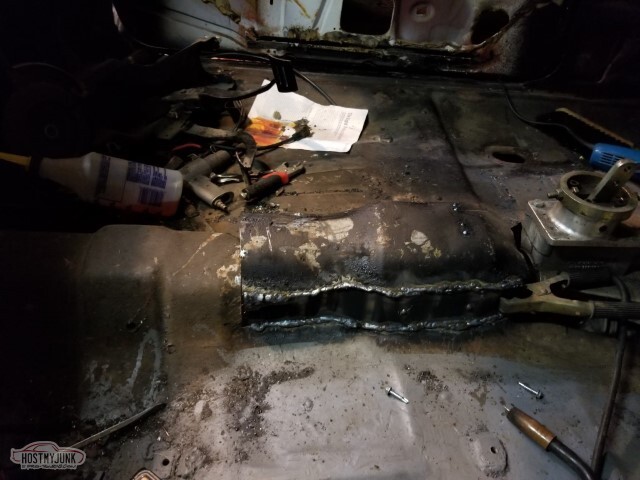
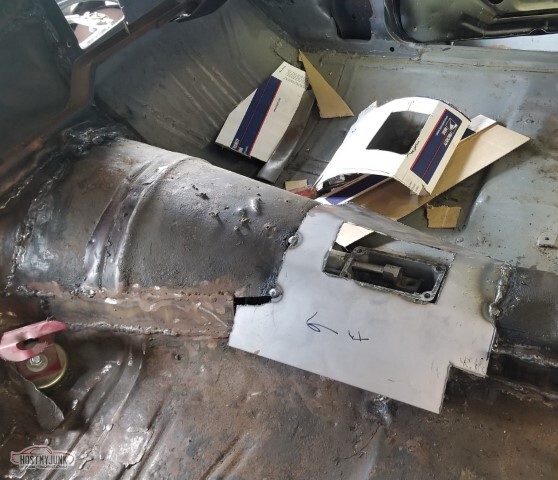
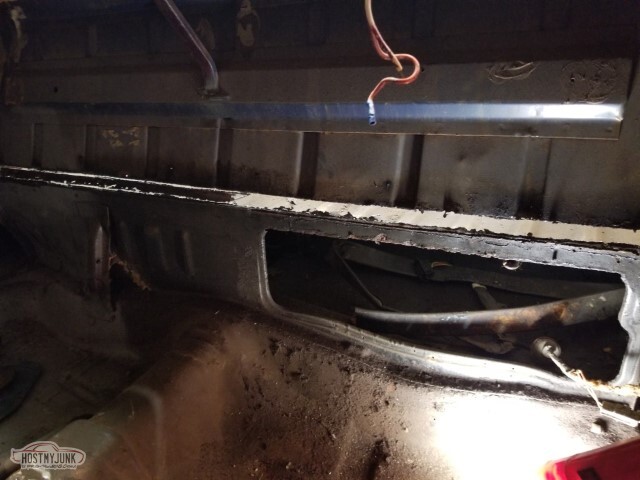
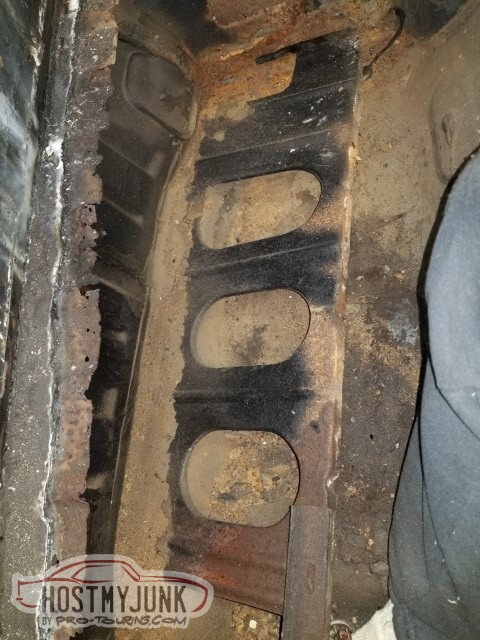
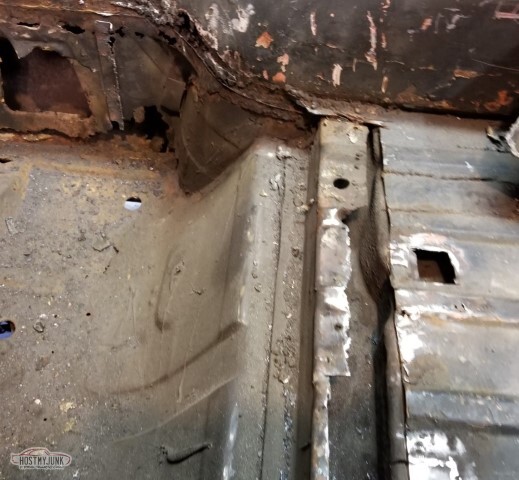
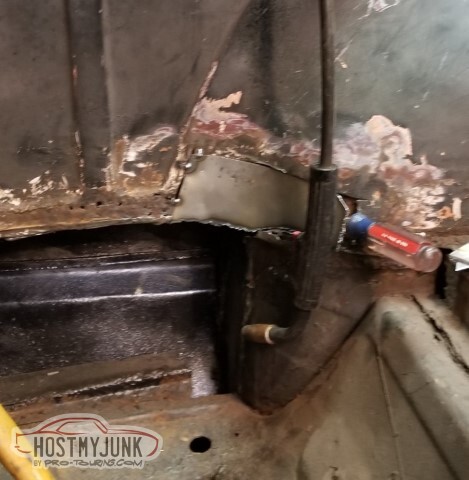
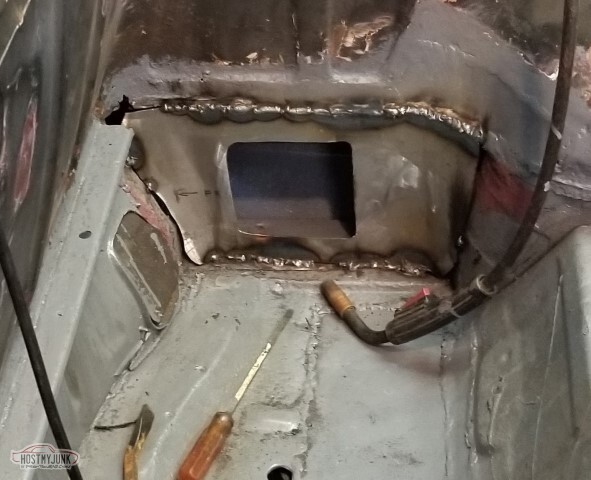
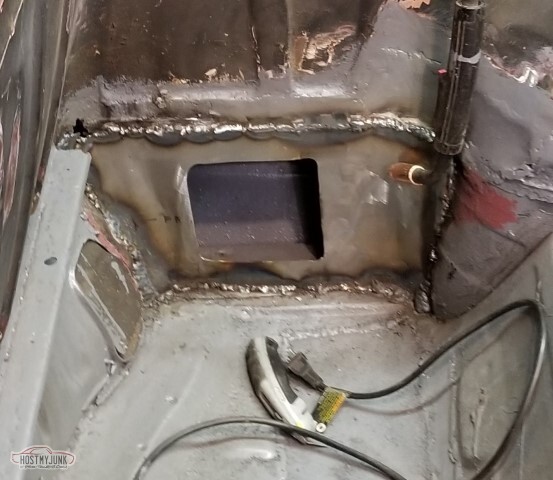
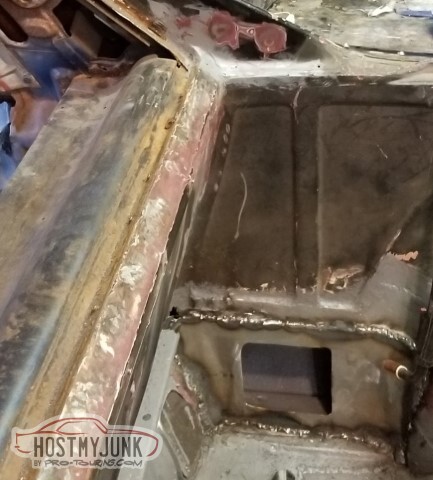
I've been putting it off for months (years) - it's time to fill the holes that won't be needed on the firewall. Here I've cut out the part of the column hole that will be part of the clutch pedal assembly.
Patch panel made with the bent lip.
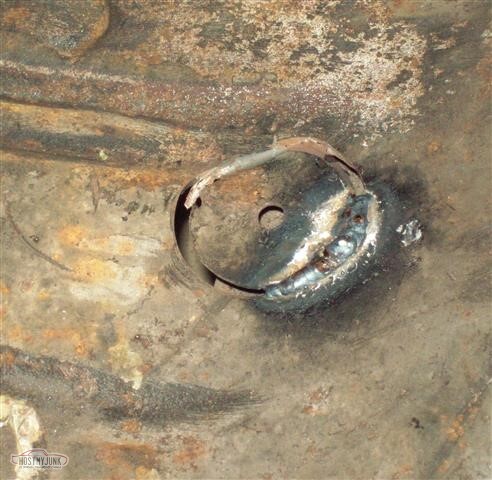
Same done on the old fusebox hole.
I bought a couple of wire brush attachments for the drill, they work really well at cleaning up seam sealer and funk.
Note the notch I'd cut for the AC box. This was a mistake.
Tore down the passenger side door too. Add door-edge-stainless to the shopping list; the larger bit didn't survive.
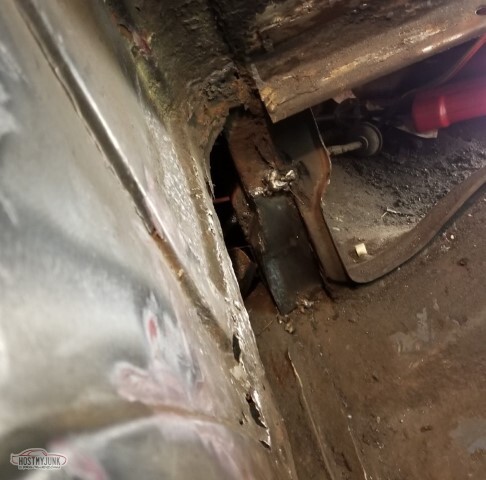
Either a) my car is set to ride far too high, or b) I've got a problem with the SPC UCAs. More research required; either way, I'll likely need some manner of droop stop.

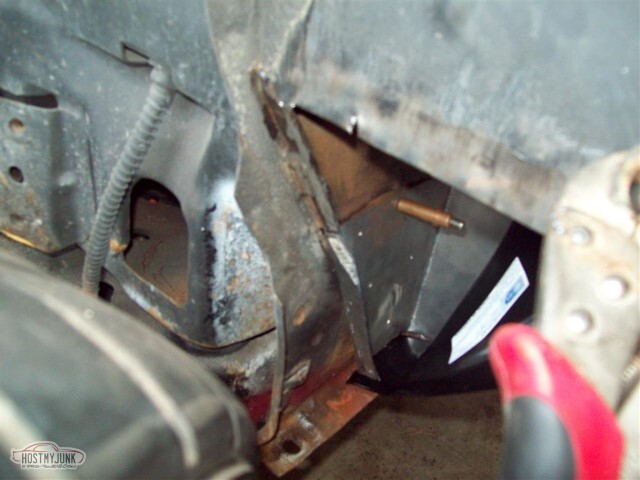
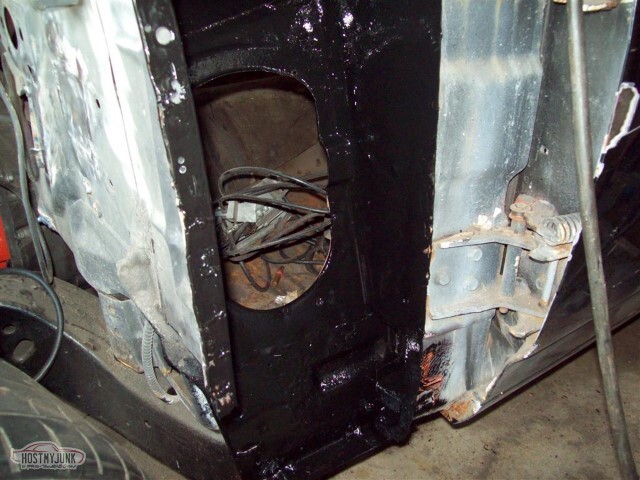
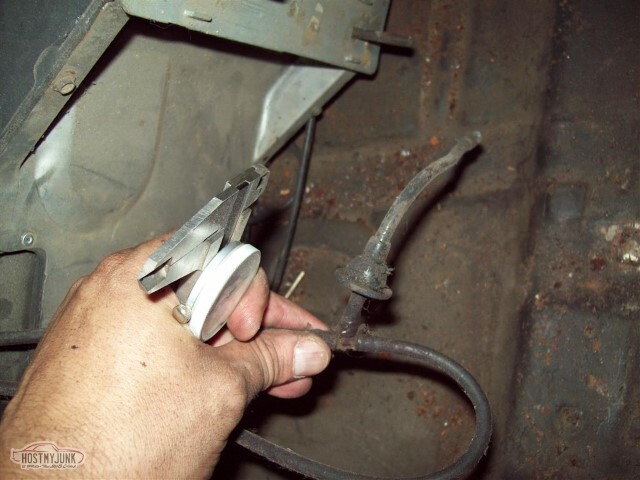
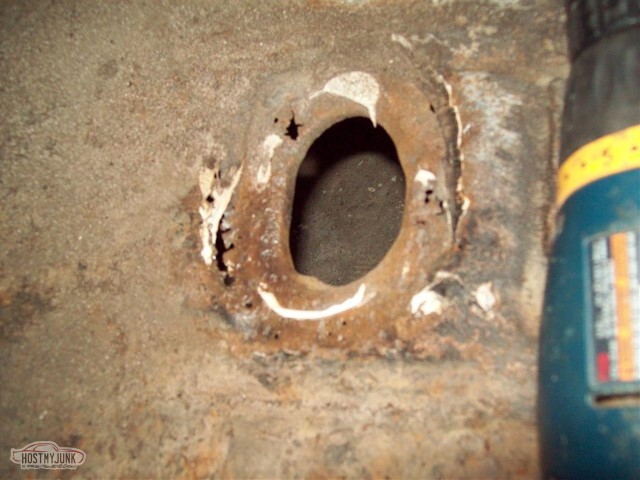
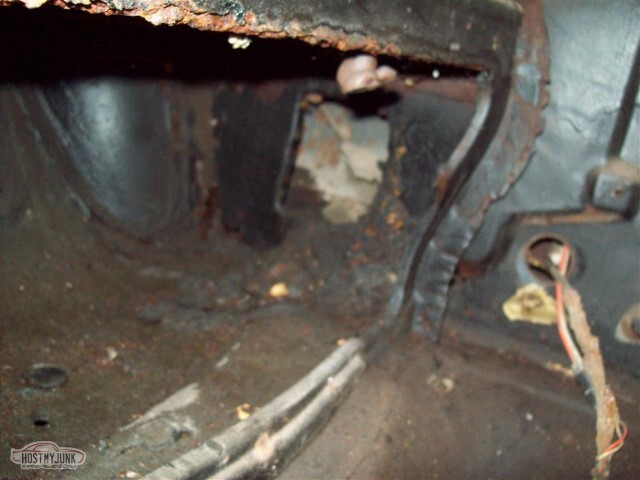
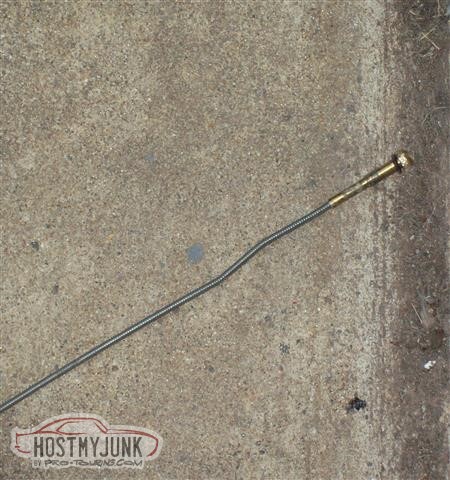
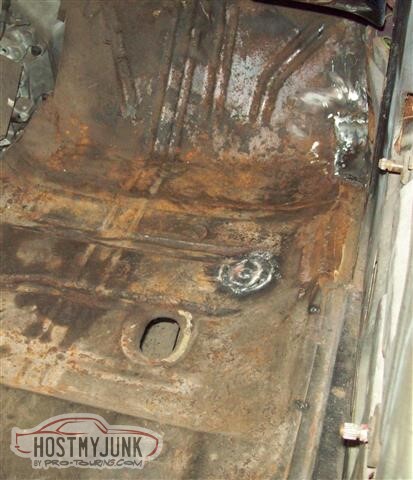
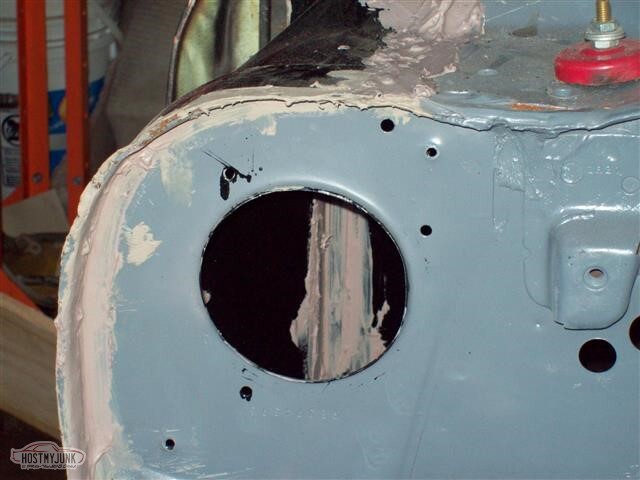
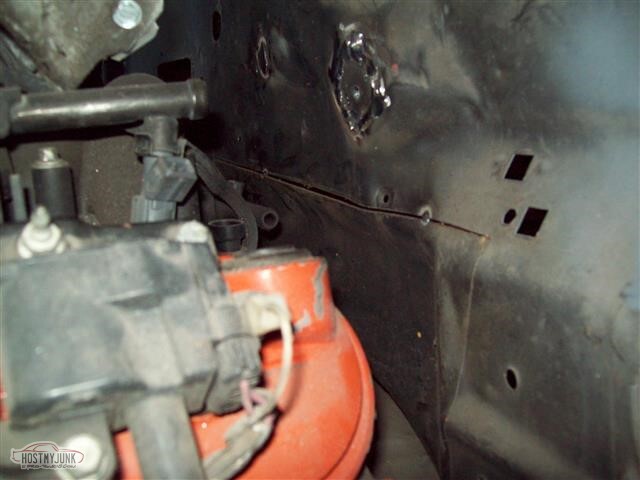
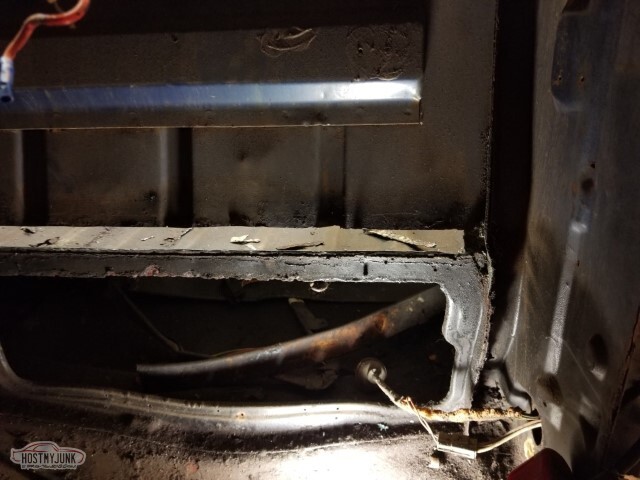
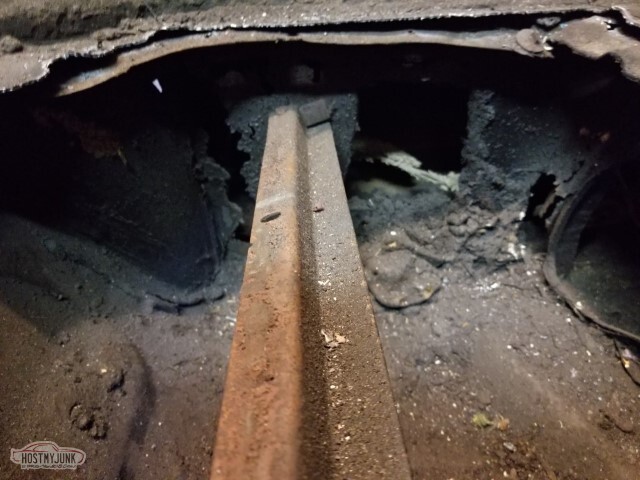
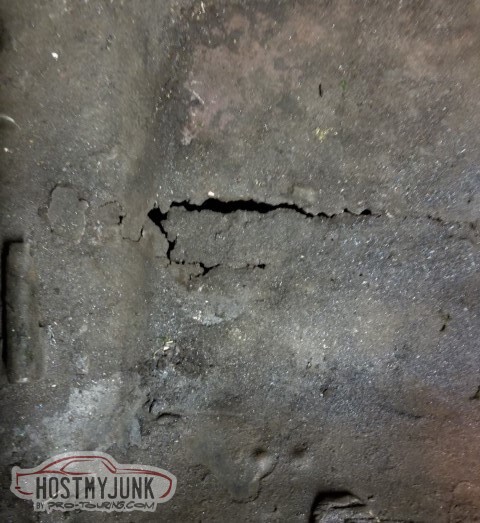
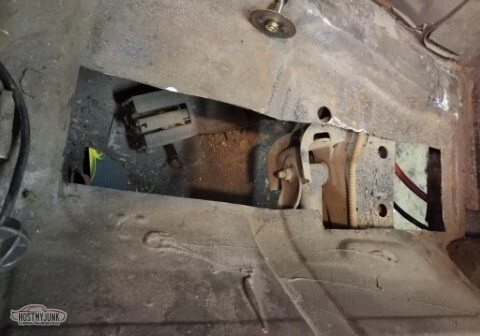
Whatever the round hole is at 8 o'clock to the wiper motor.. it's fixing to not be a hole. Same with where the speedo cable used to come in.
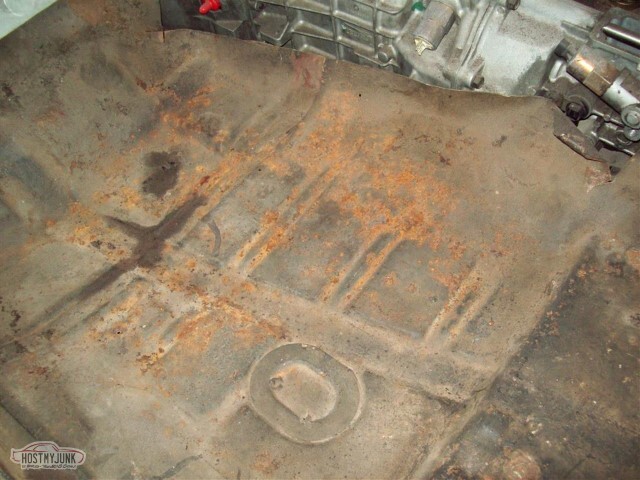
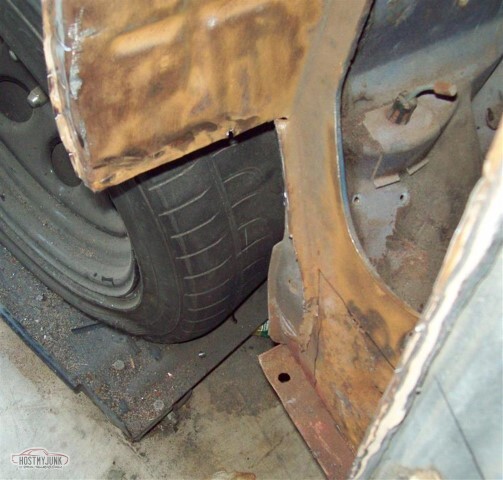
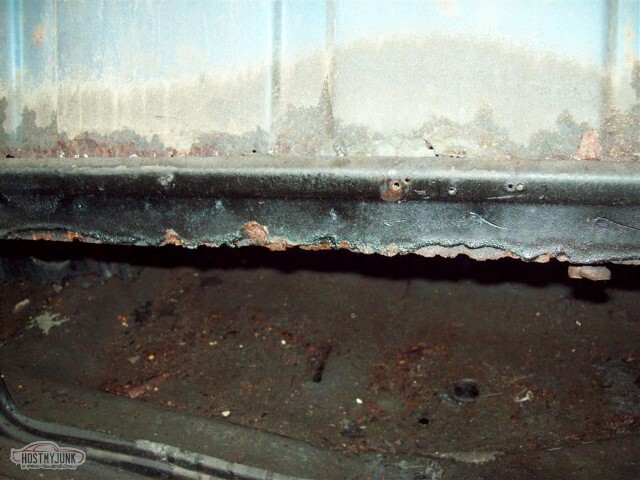
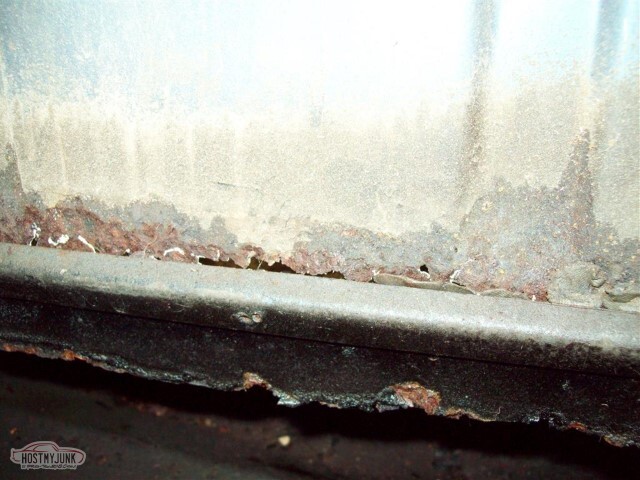
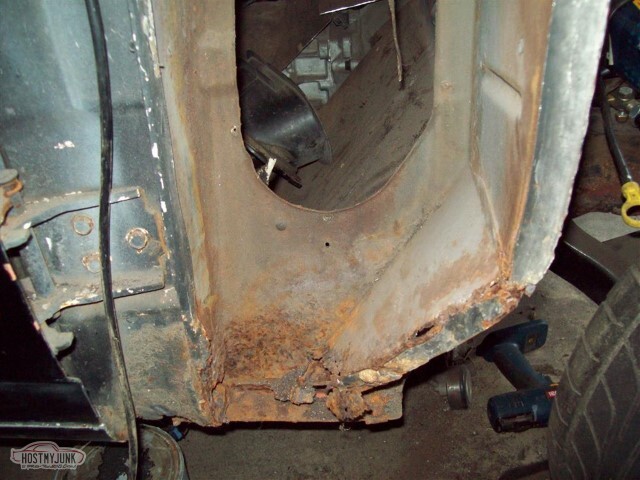
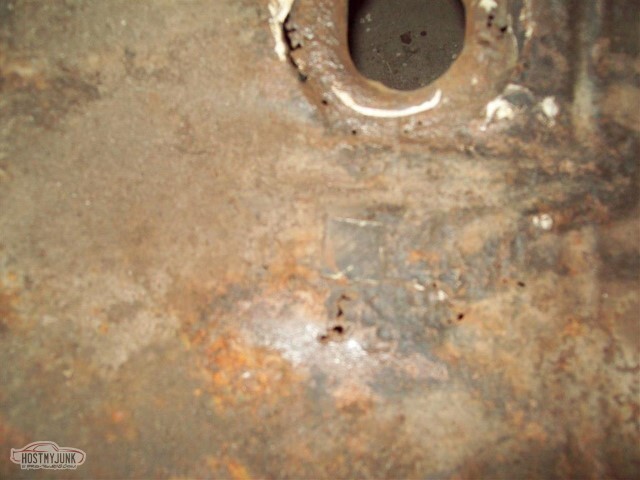
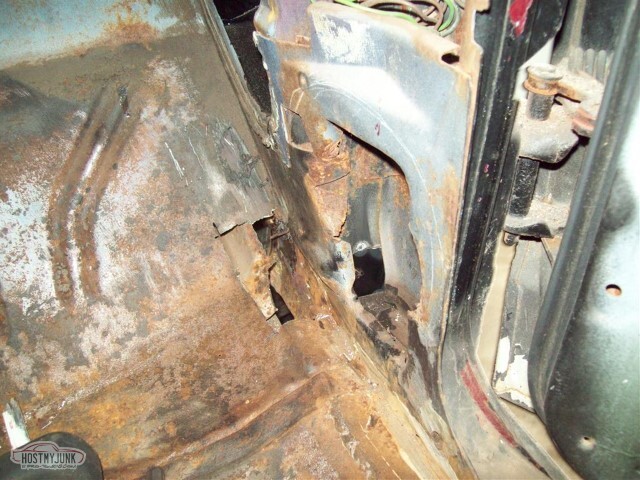
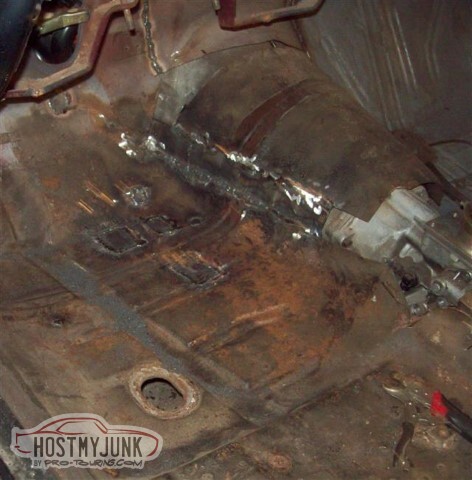
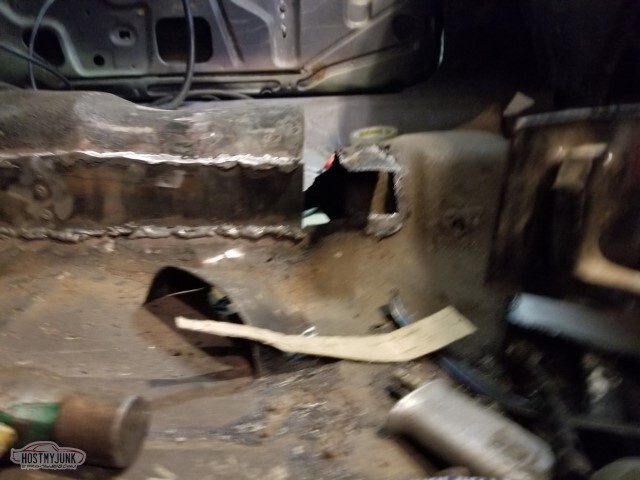
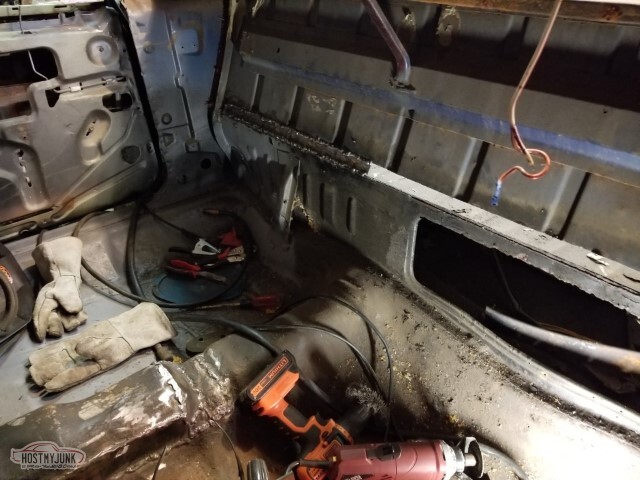
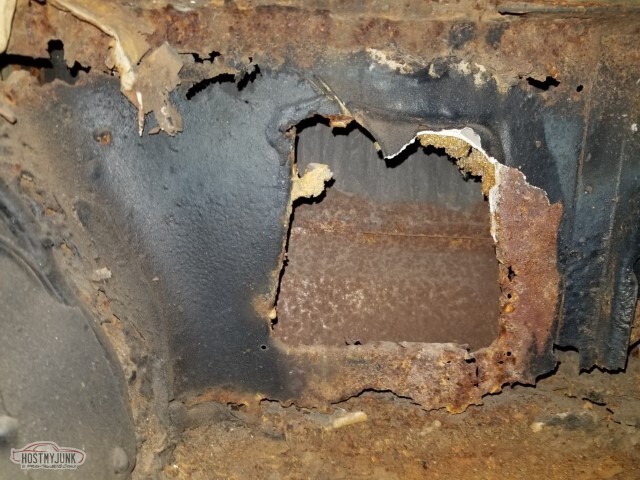
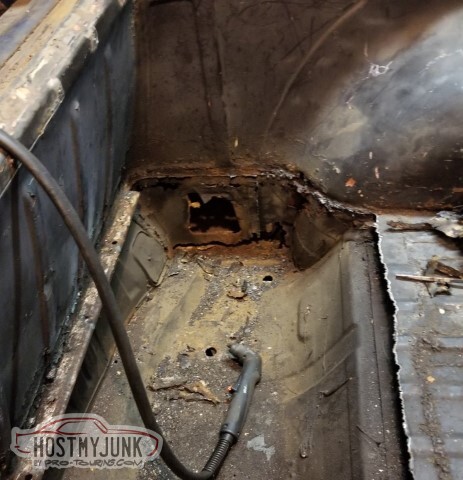
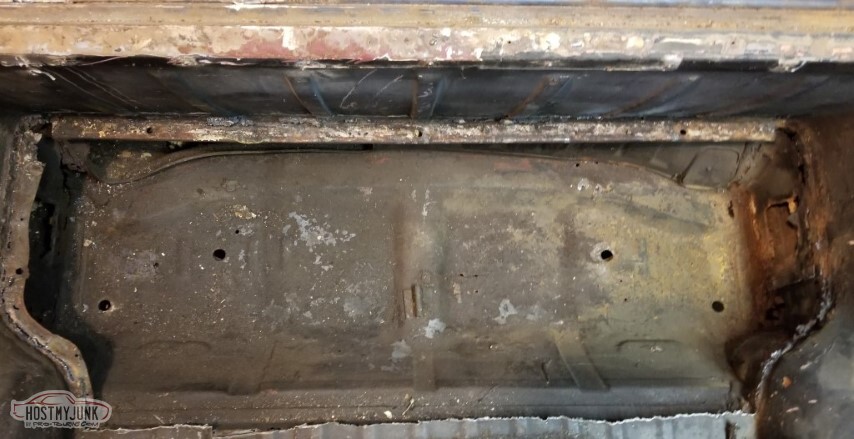
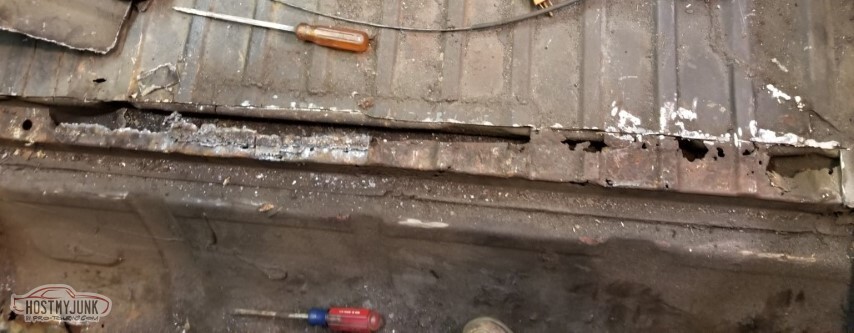
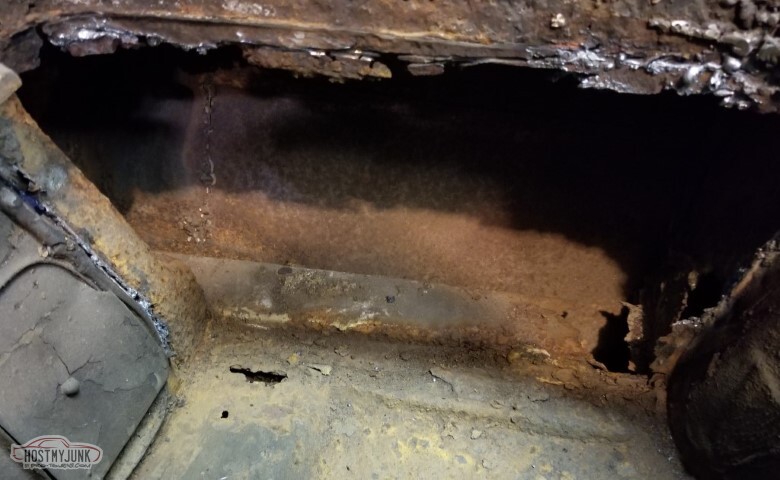
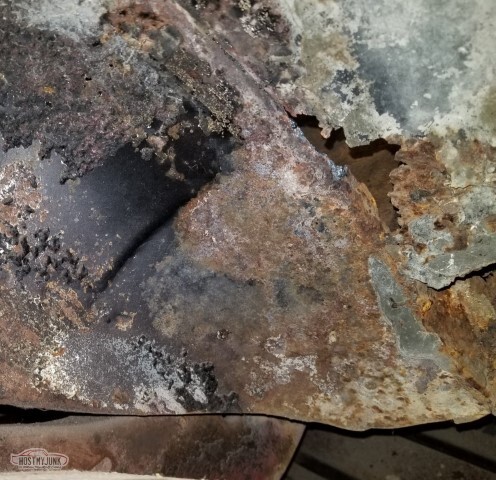
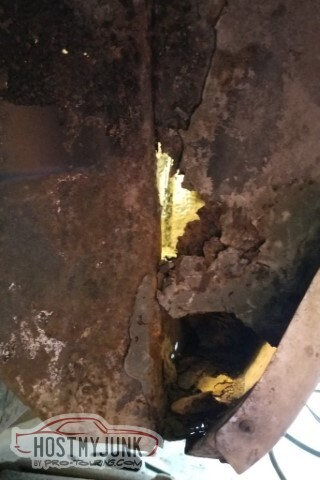
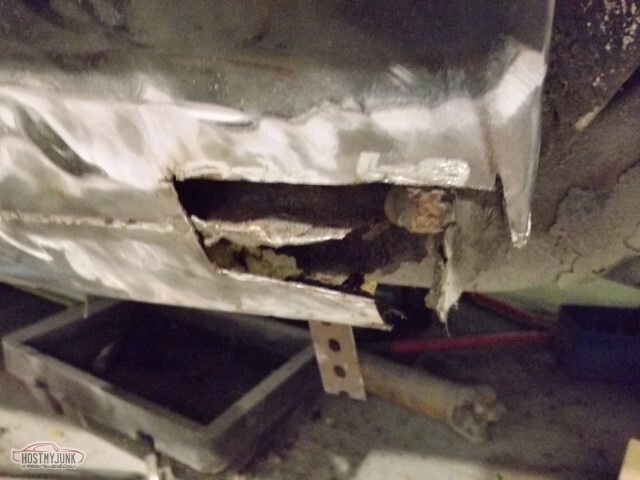
I think I may need to replace the driver's pan; there's a lot of rust to it here (and some holes).
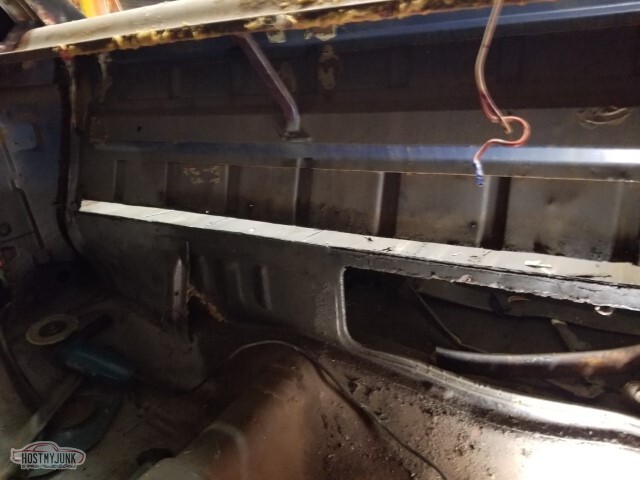
Remember the notch for the AC box?
Mistake corrected.
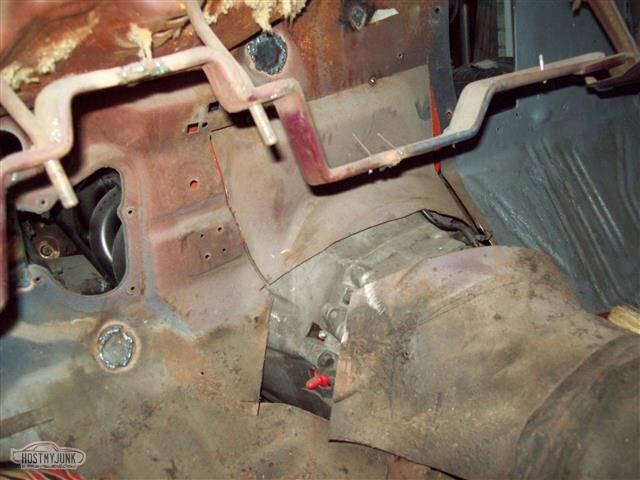
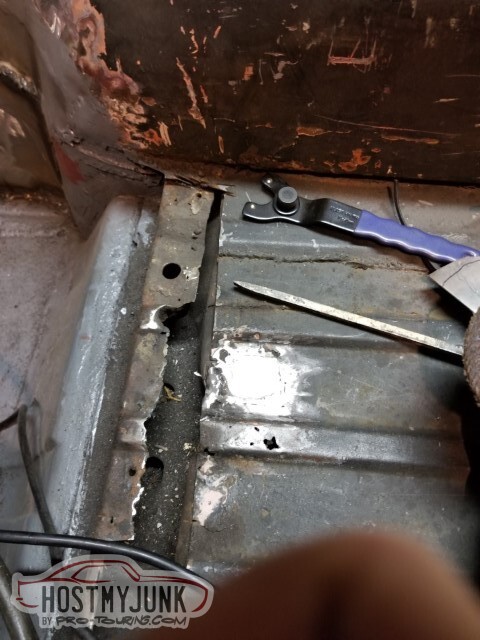
I can't get the big grinder at some of these welds. I need to get some more Roloc disks, I think.
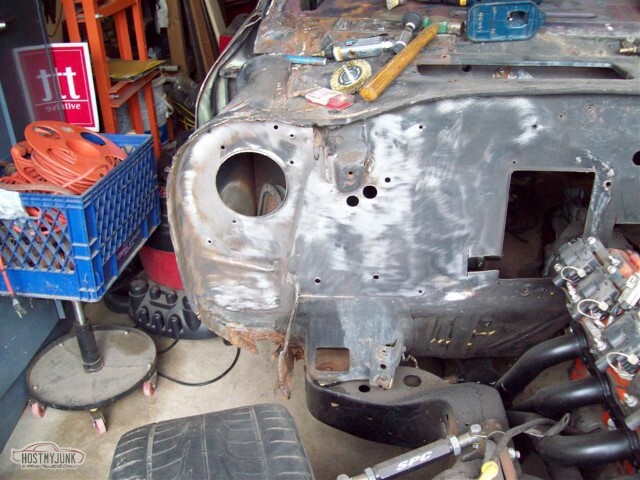
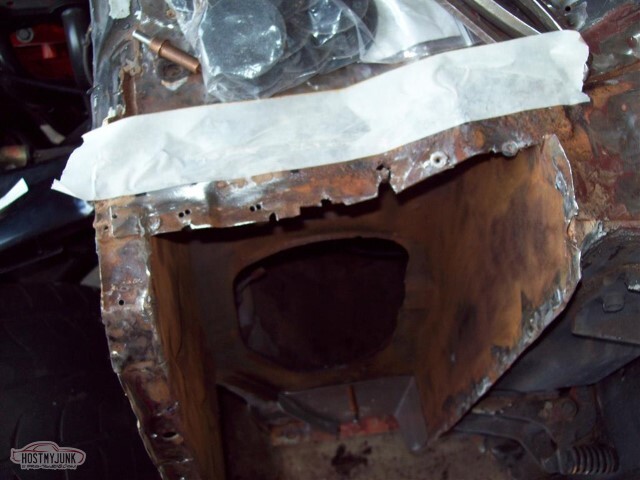
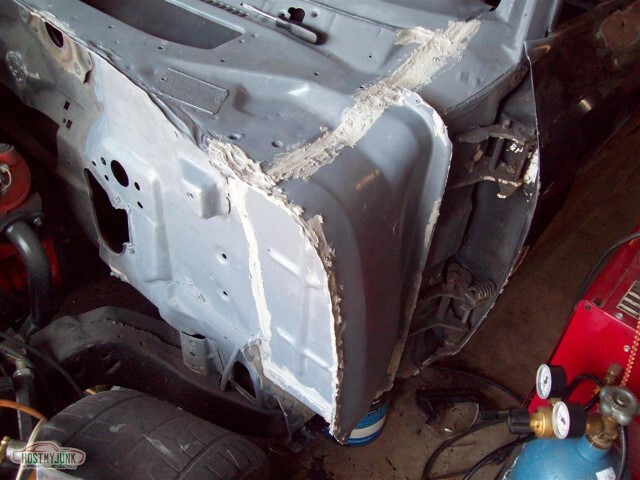
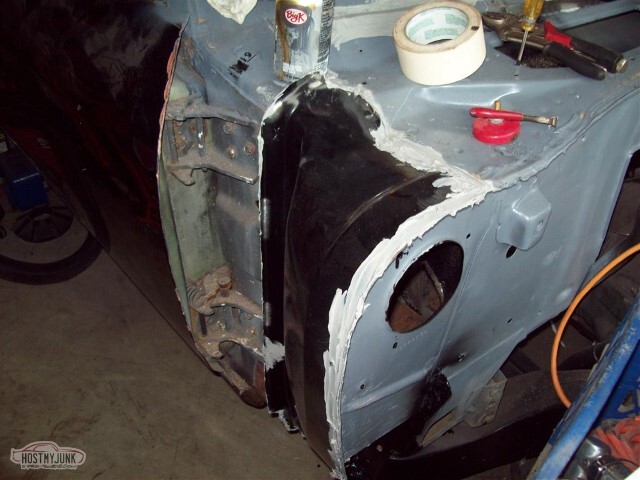
I cut the driver's side cowl side off.
Found some (surprise!) additional rust inside.

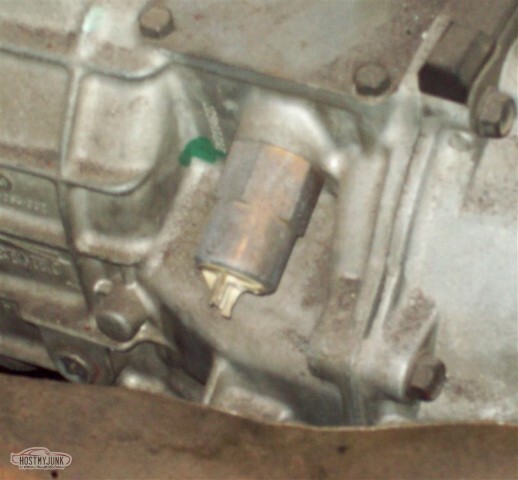
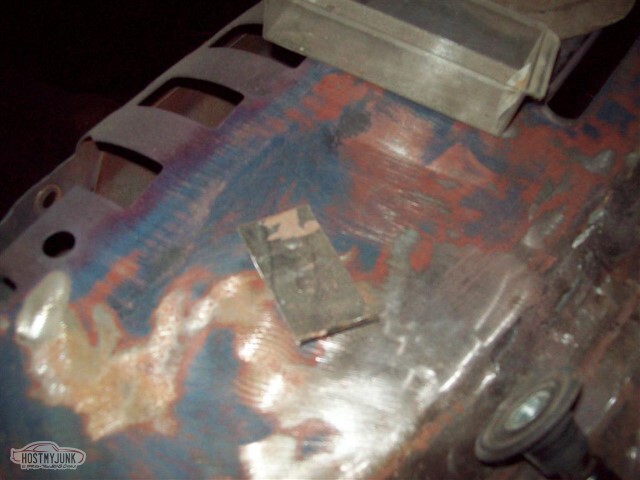
The plastic plug is broken. Need to replace. Think this is the skip-shift solenoid, so perhaps I just need to bypass and have a nice day.
Wirebrushed some. Marks indicate where I'm contemplating cutting the old metal out.
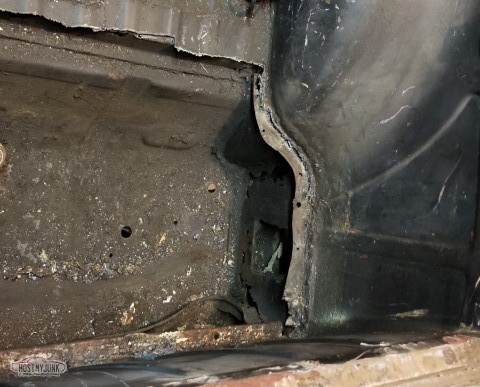
I know I have to replace the rear bit where the hole is. Not so sure about the inner layer.
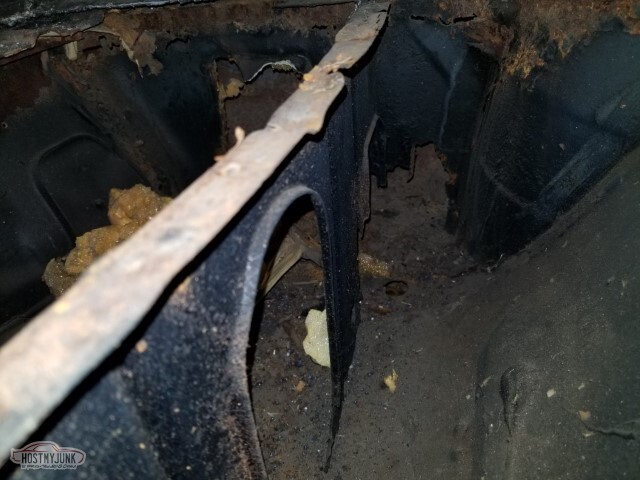
Top of the cowl needs some repair on the edge too.
And I still need to fabricate the flat panel on the bottom. Unsure how it mounts to the inner side of the cowl.
And with that, I've had far more fun than the law will allow for the weekend and I'm calling it 'done'. I need some seam sealer before I get much further. Looks like the opening on the inside will allow me to re-prime and seam-seal the inside after putting it together.
And then do it all again on the passenger side.
-
05-15-2021 #42
-ɹoʇɐɹǝpoW-
- Join Date
- Jul 2002
- Location
- Mesquite, TX
- Posts
- 4,928
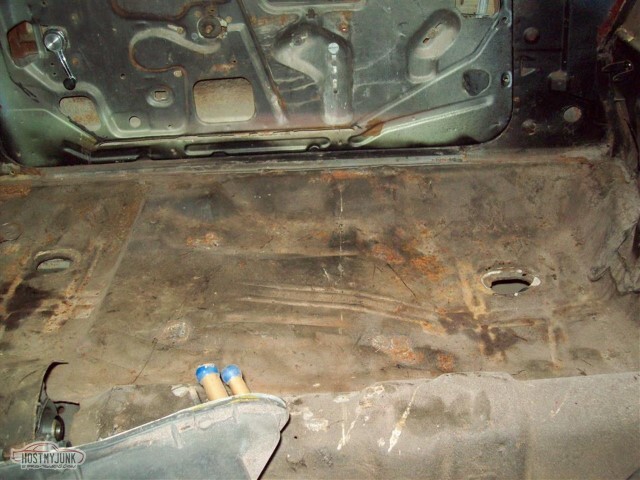
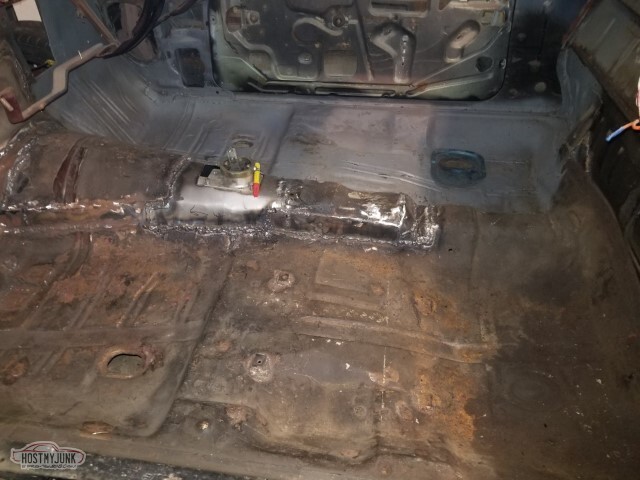
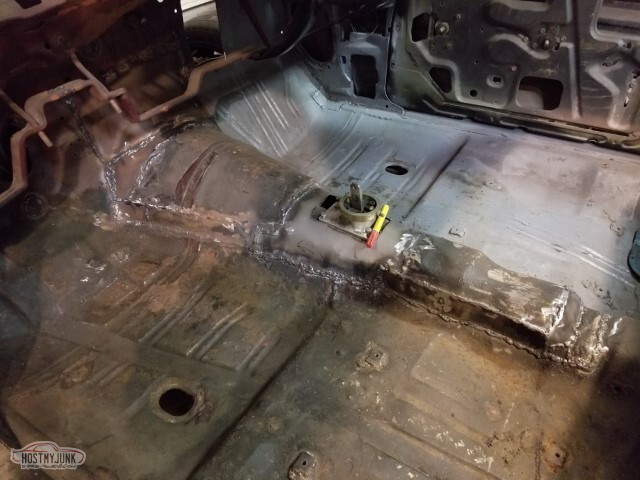
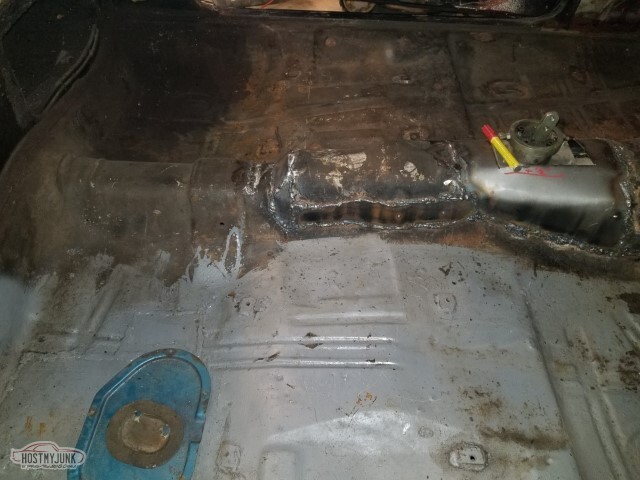
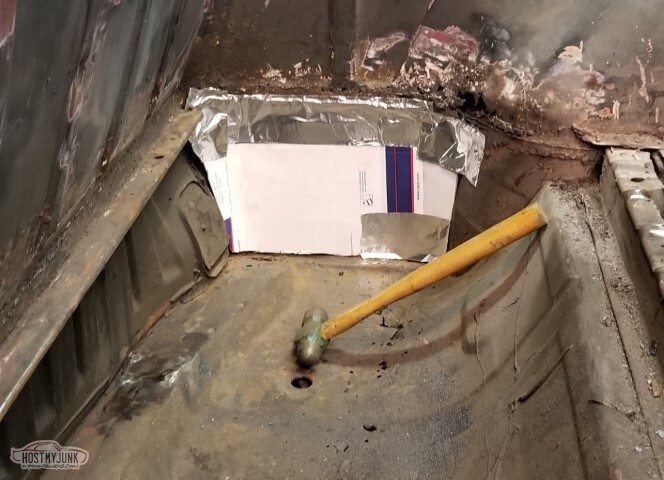
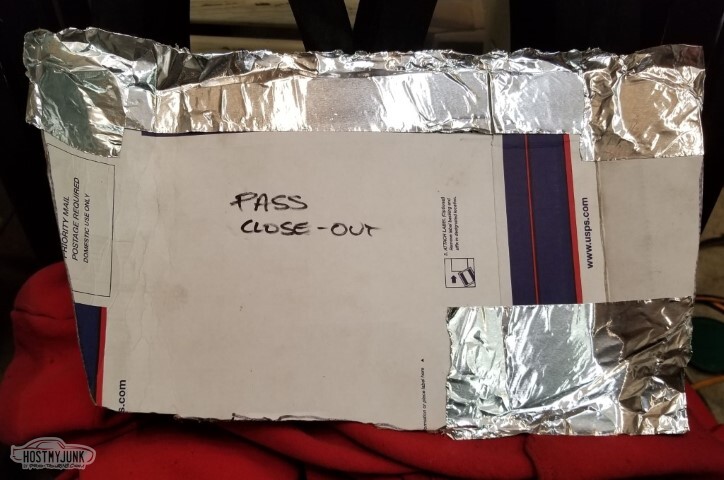
Picked up some of the stuff on the pass floorboard (and moved it to the driver's side)
Found the firewall chunk I replaced this past weekend. Figures.
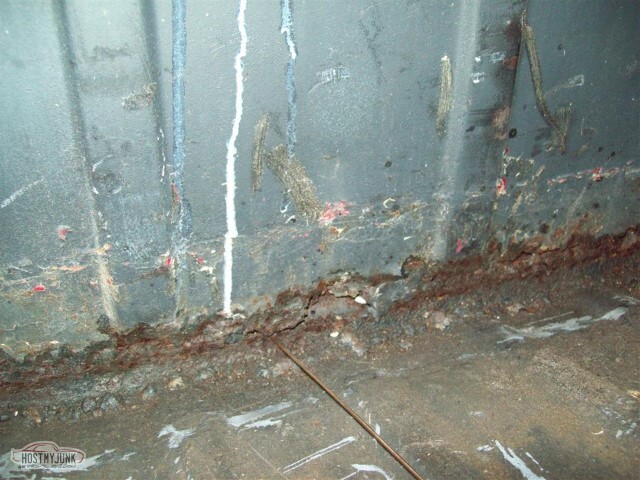
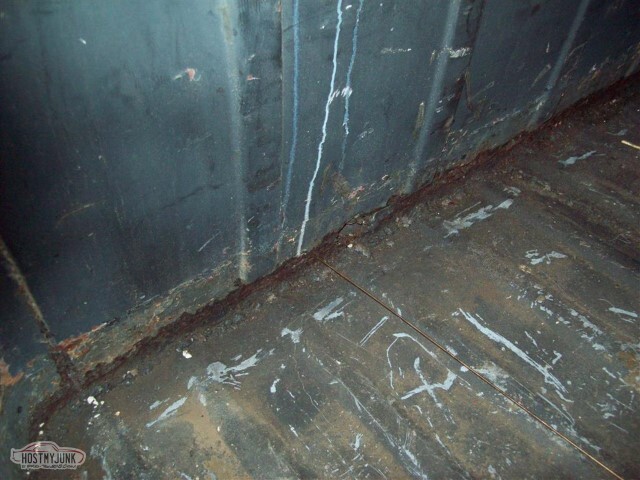
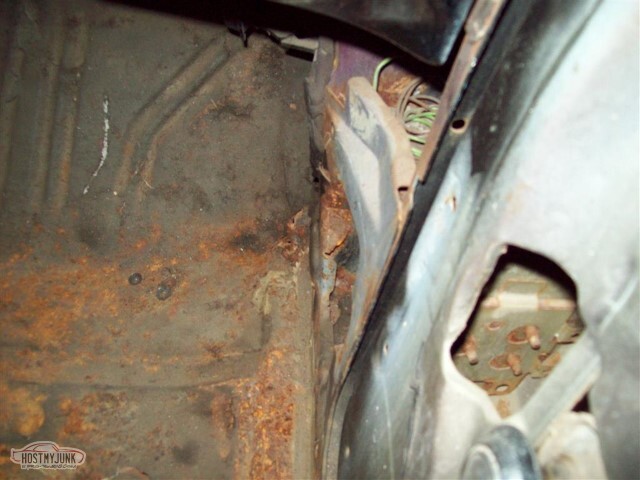
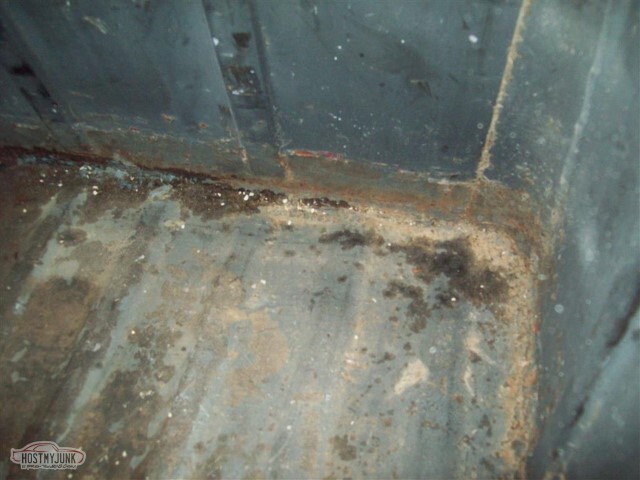
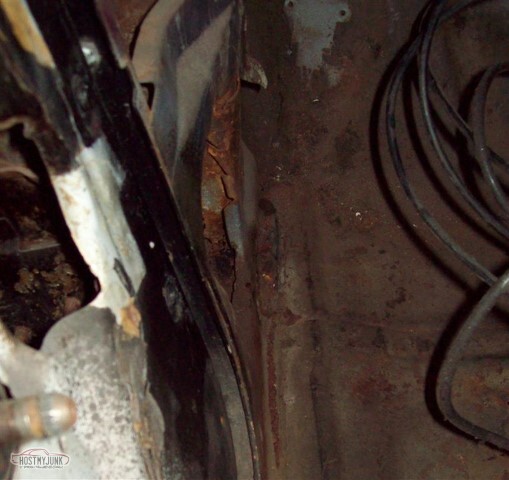
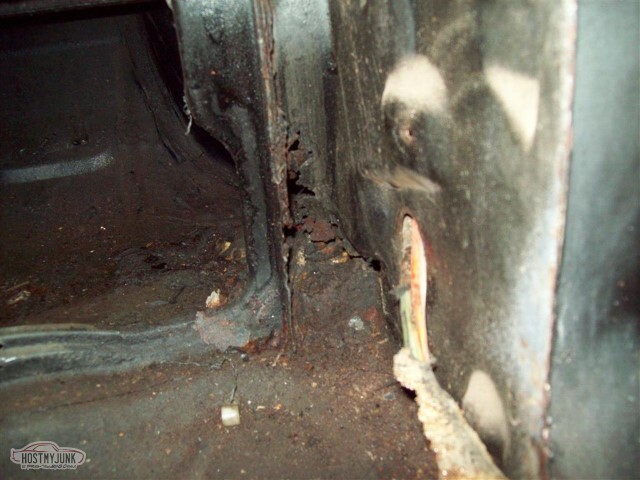
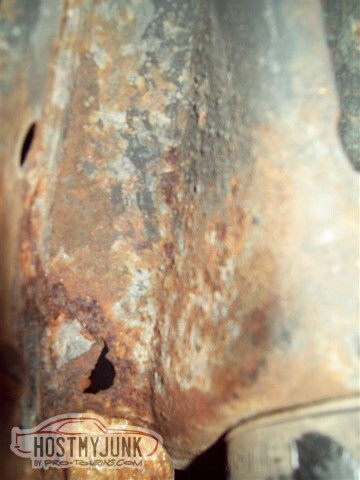
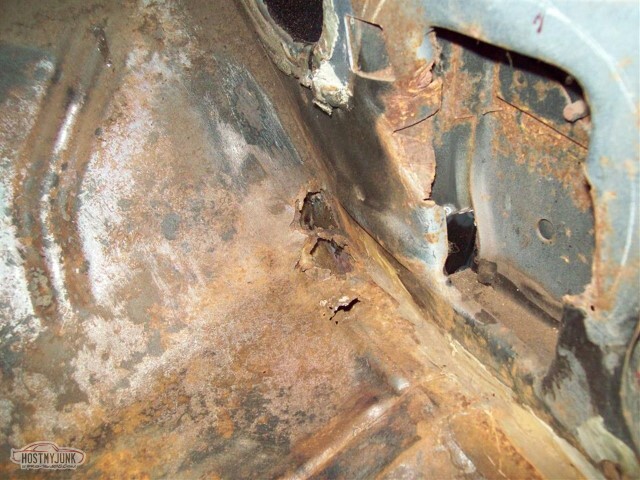
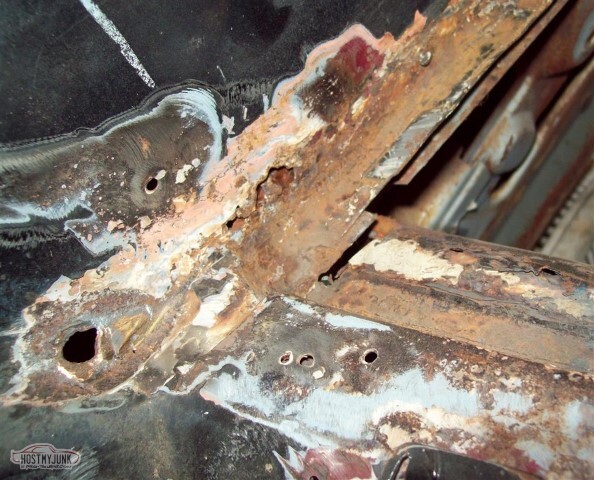
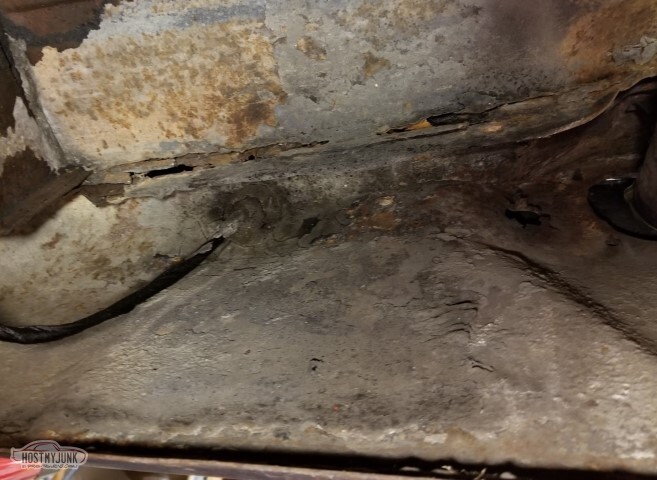
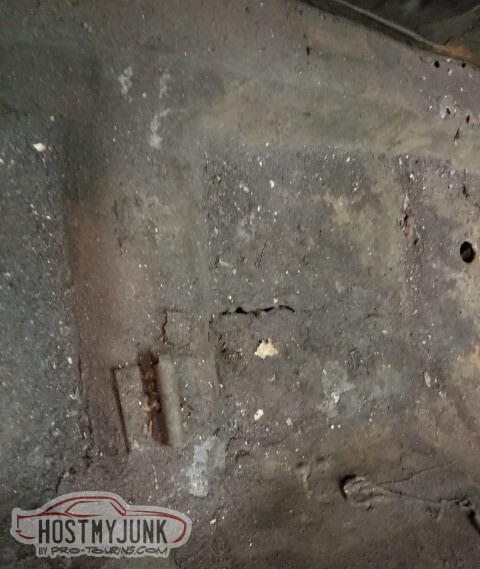
I've got more rust next to the kickpanel, far forward (I patched behind it back in 2001 or so). First new rust for the day.
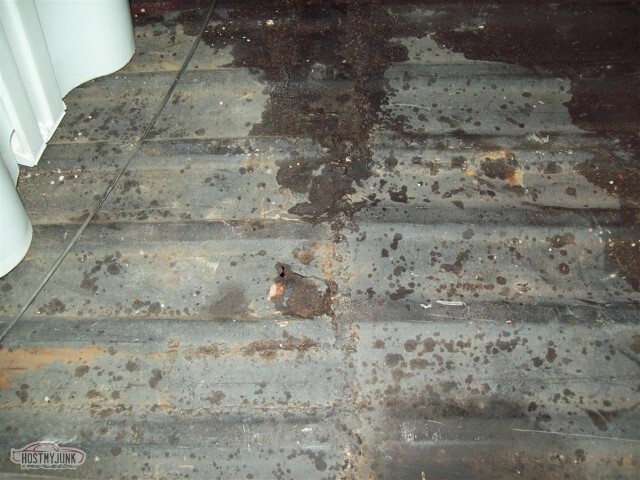
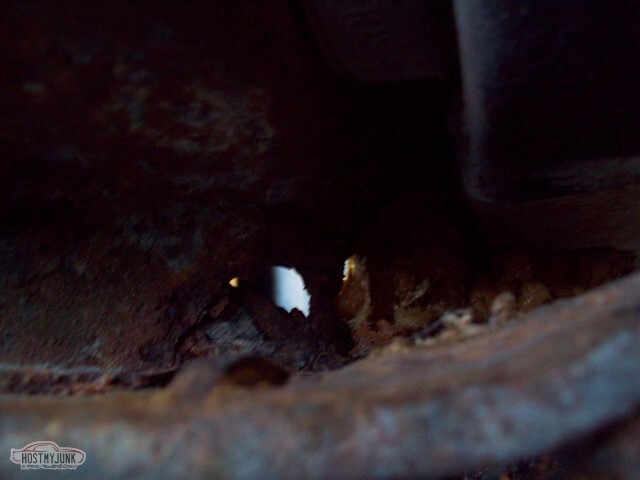
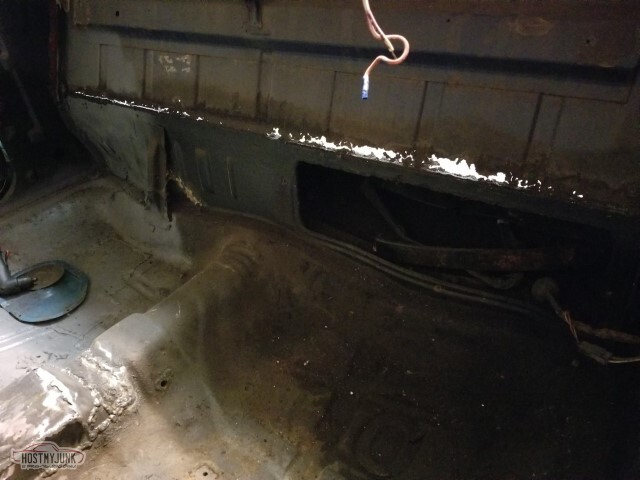
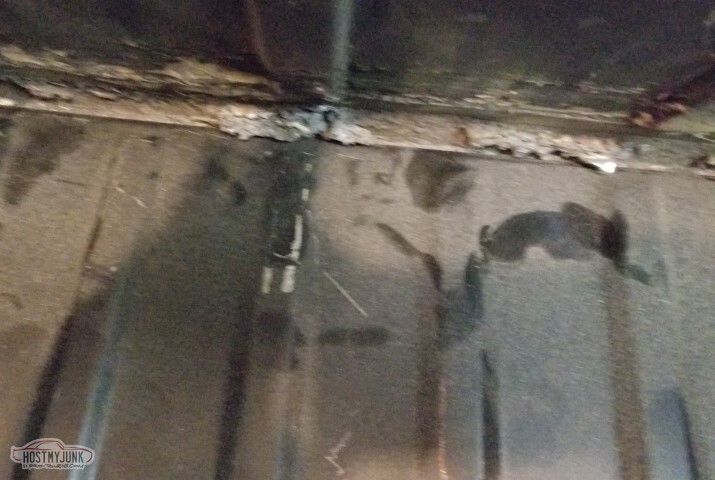
You can't really tell with the flash, but there's a lot of spots where daylight comes through here. More rust!
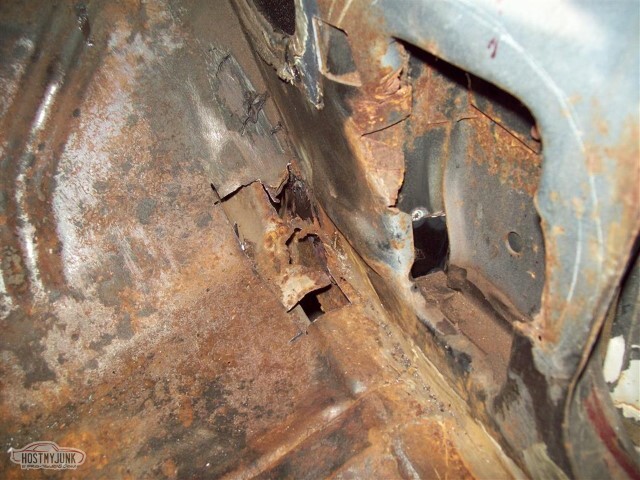
I have a small hole in the bed, and some really embarrassing welds. More rust, and shame.
More shame.
More rust.
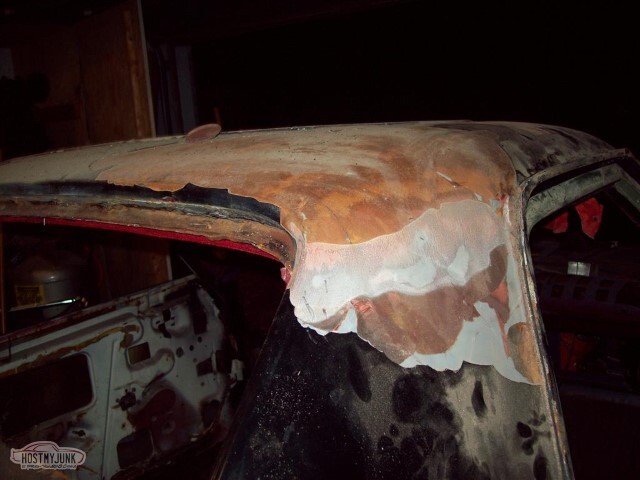
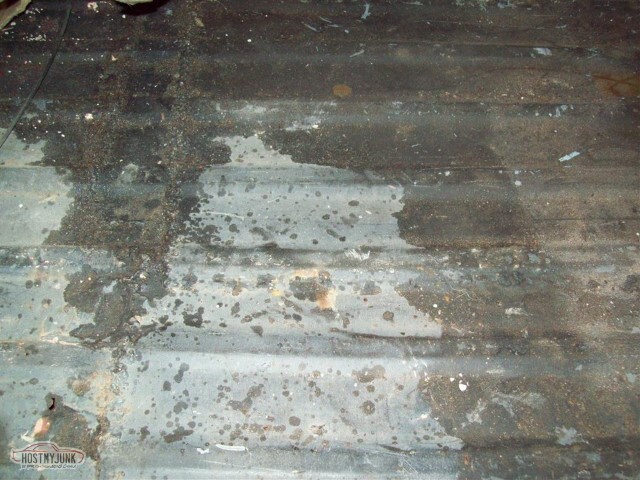
I think I mentioned the bad paint... now that I've cleaned off the roof, you can see it.
I am not sure if that's rust far forward on this side or not.
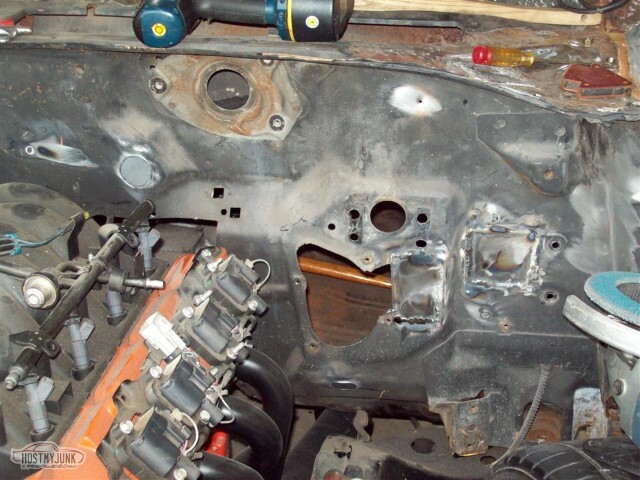
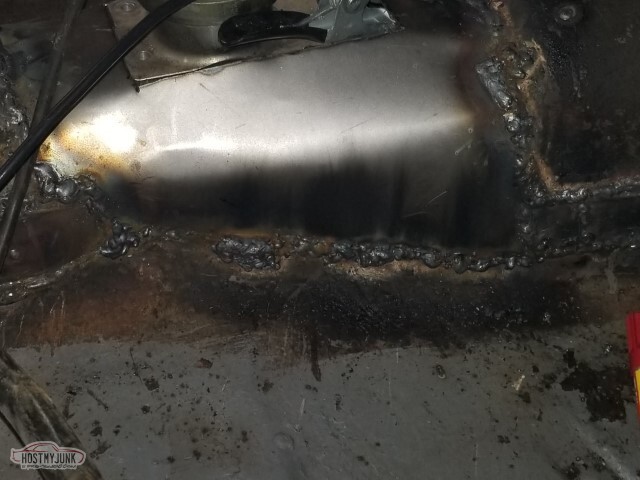
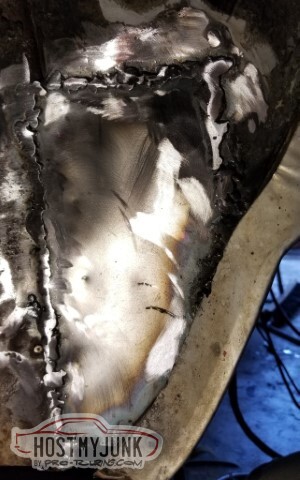
I think I got good penetration on the firewall repair.
I'd love to say that I didn't know why my welds here look like crap... but I do know. It was easier to weld along the side of the ribs as it kept me from missing the seam. I didn't think about how hard it would be to clean up.
The shameful welds continue.
I'd had a 9-inch (complete) in the bed (unsecured) for a year or so, and it would slide around when I turned corners. Here is where it did the damage - hopefully the stud welder/puller can pull this out.
05-15-2021 #43
-ɹoʇɐɹǝpoW-
- Join Date
- Jul 2002
- Location
- Mesquite, TX
- Posts
- 4,928
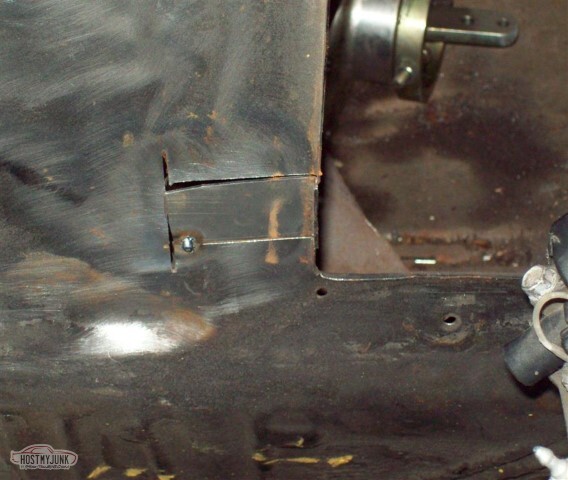
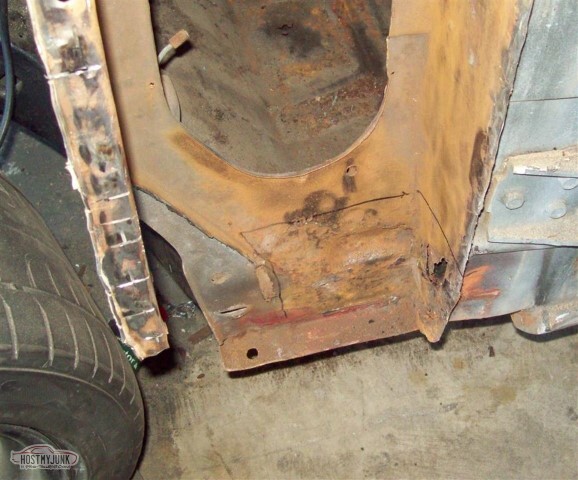
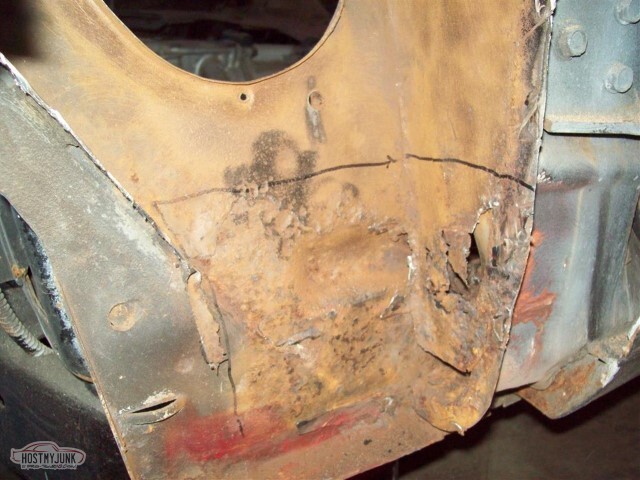
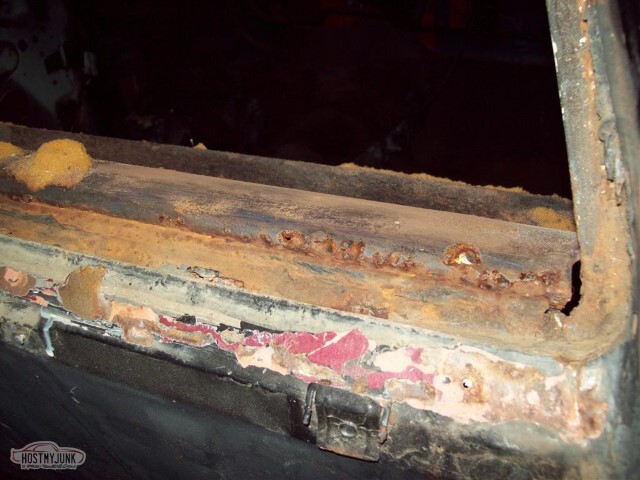
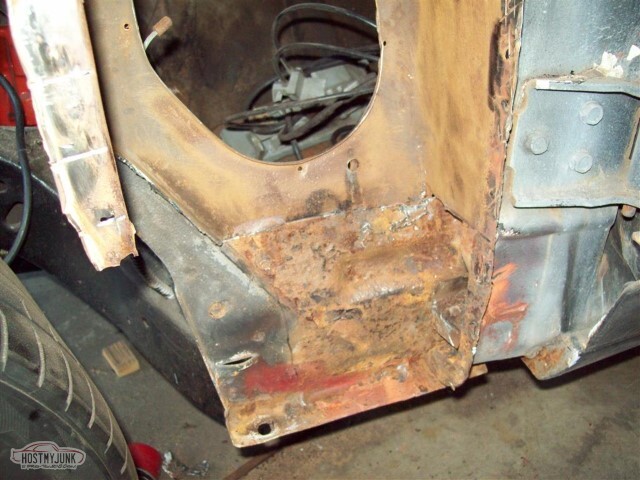
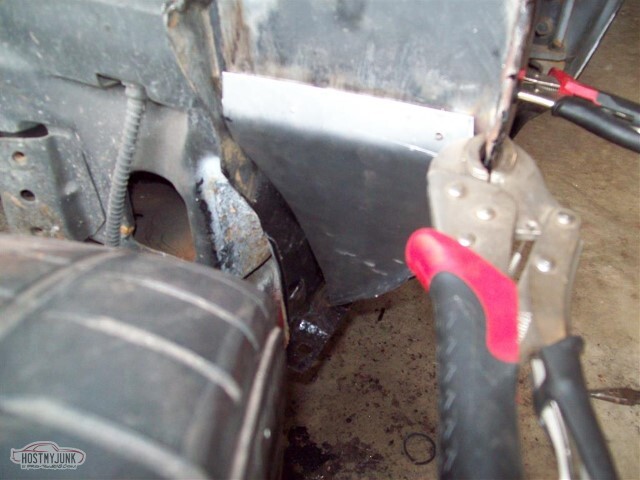
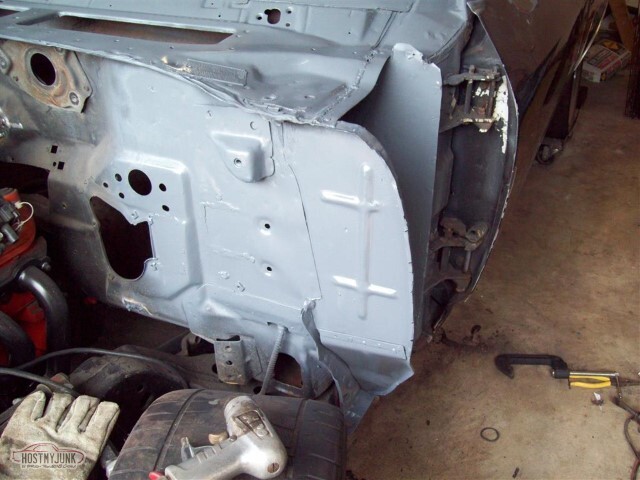
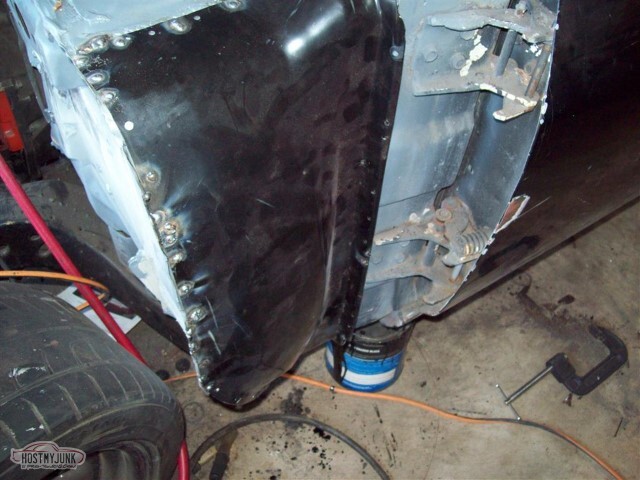
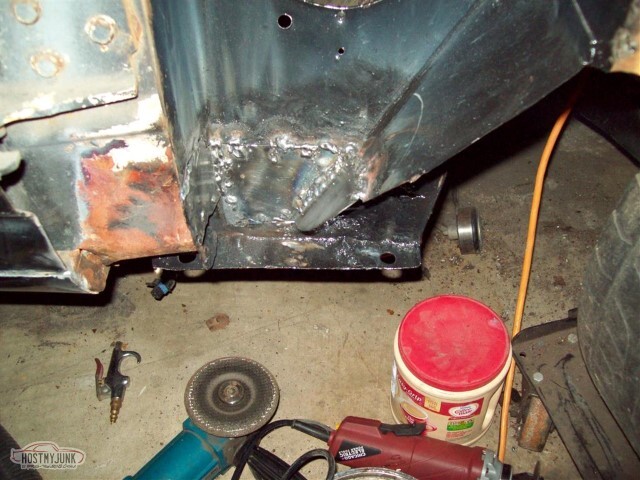
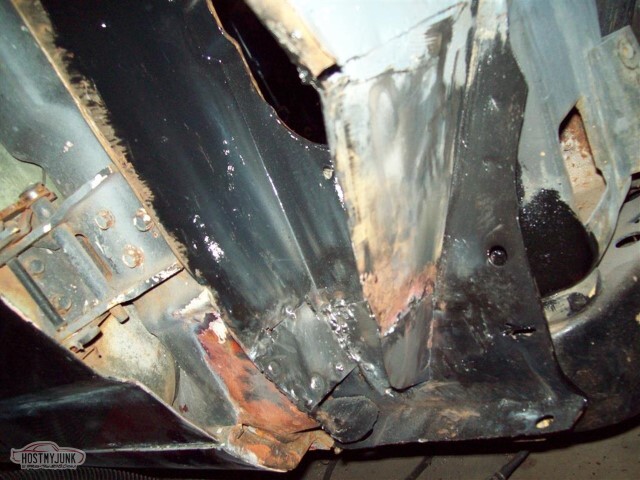
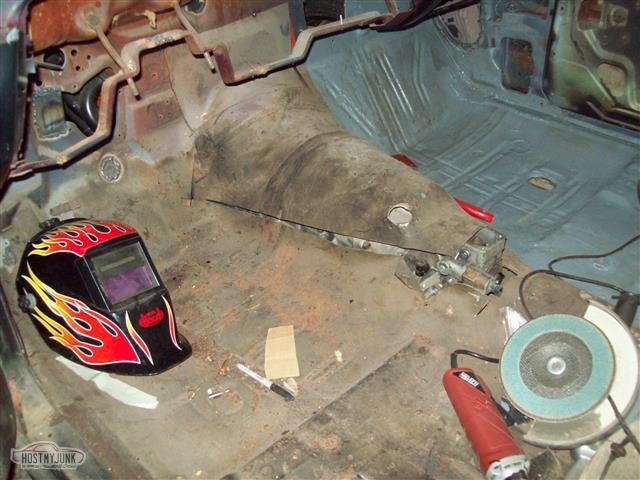
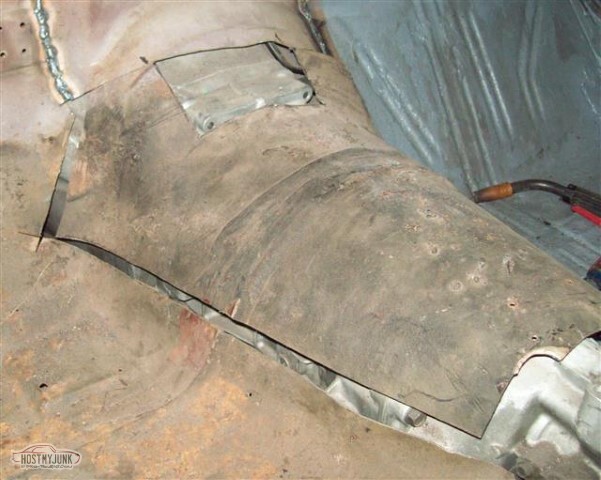
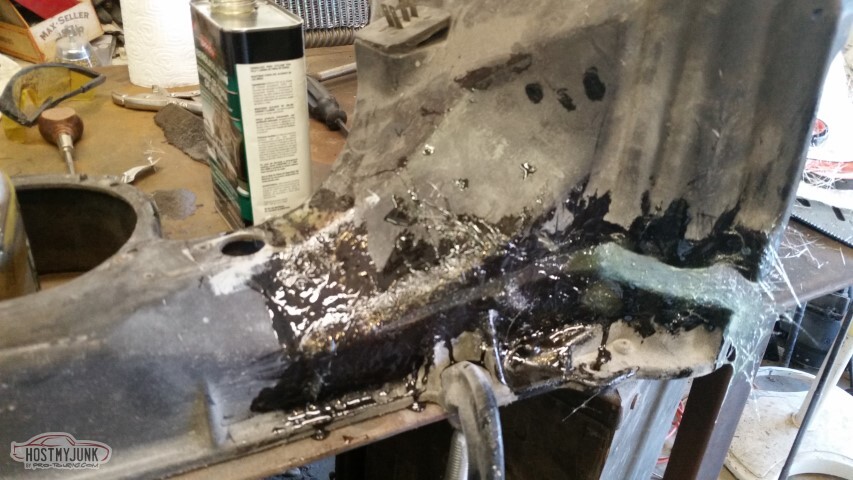
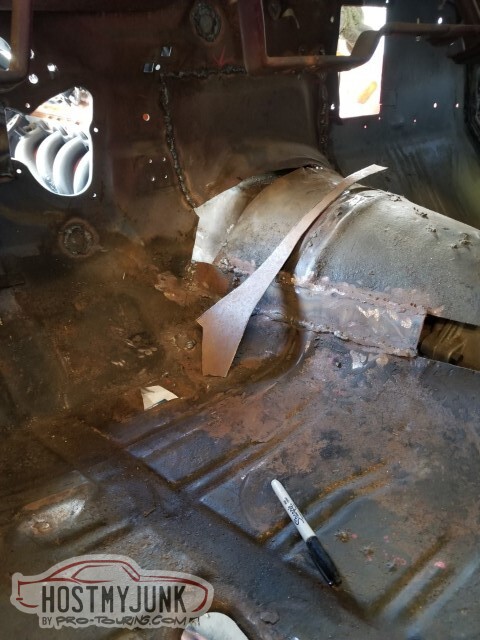
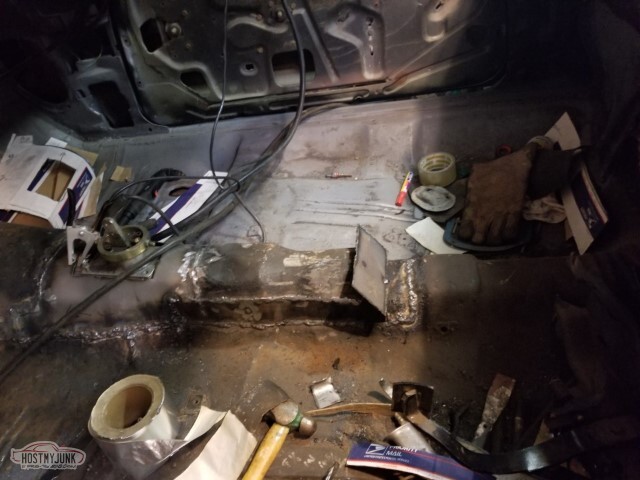
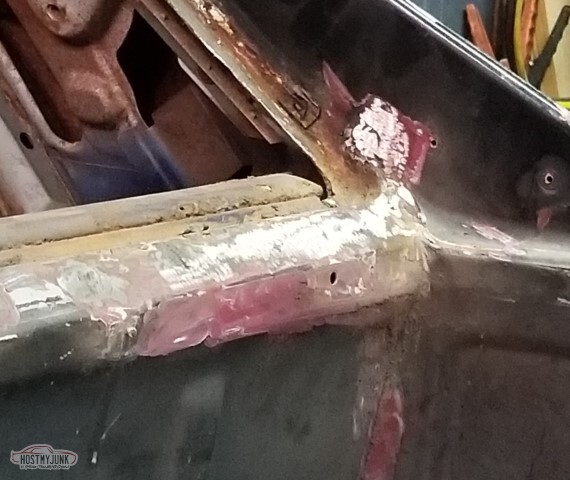
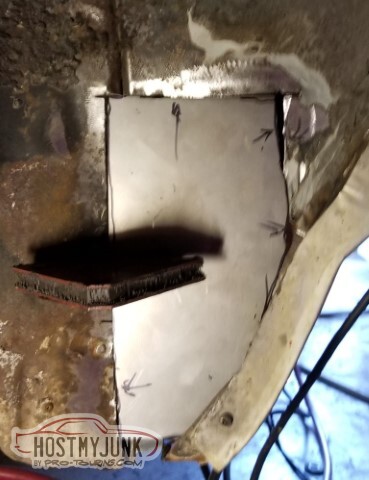
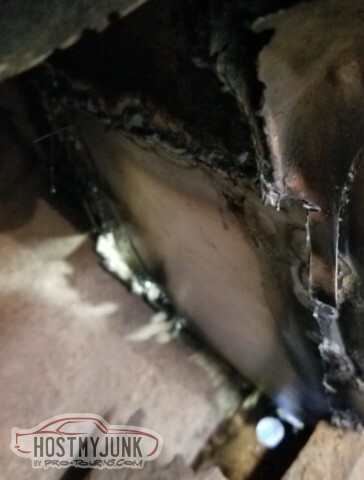
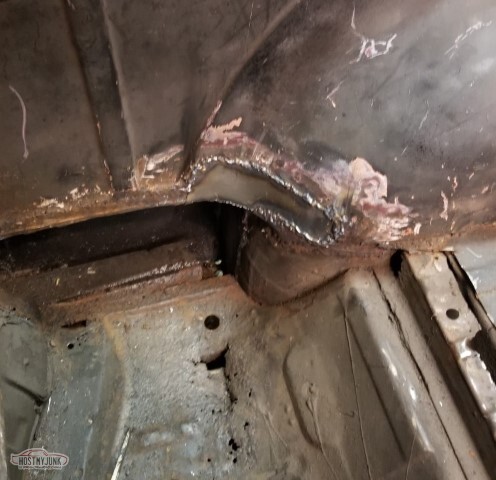
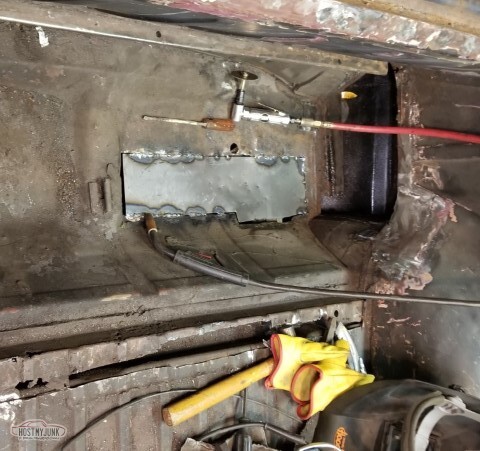
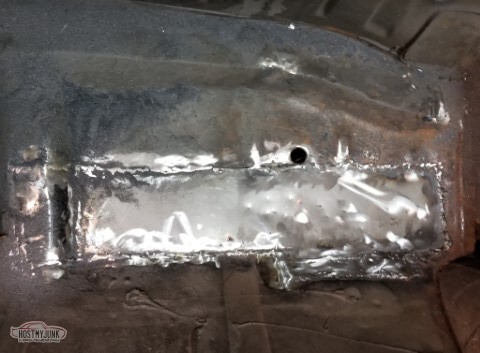
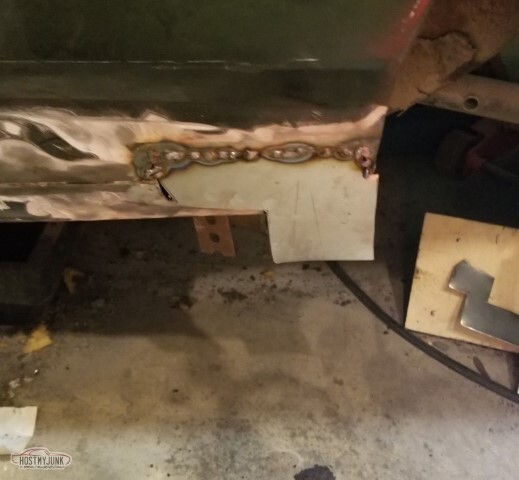
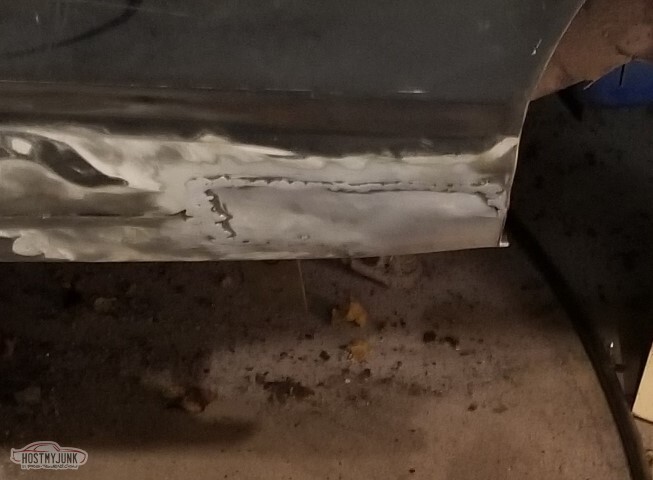
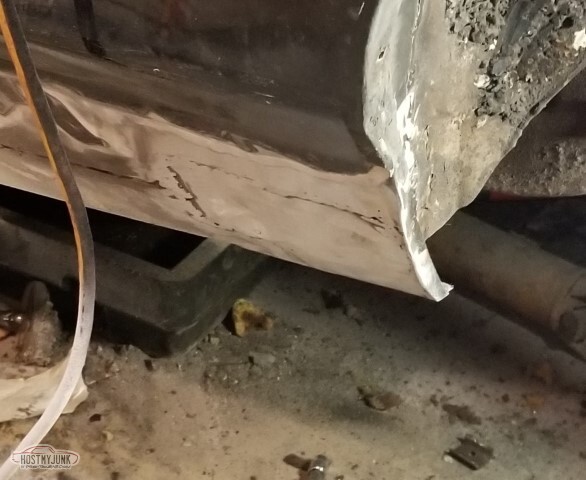
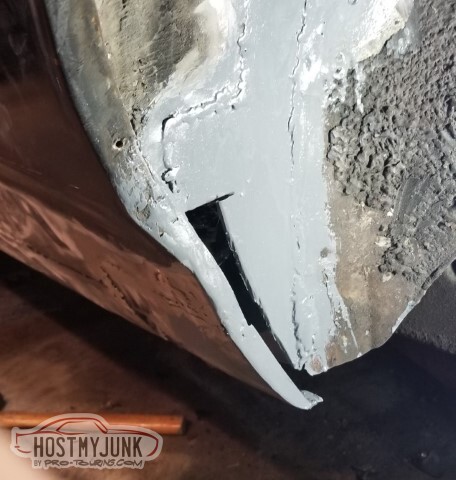
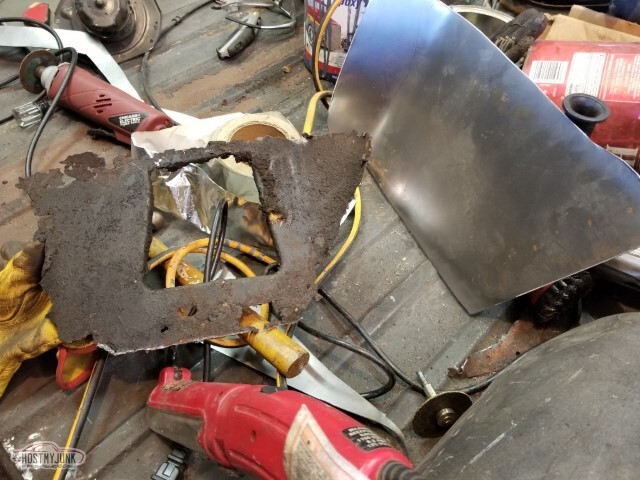
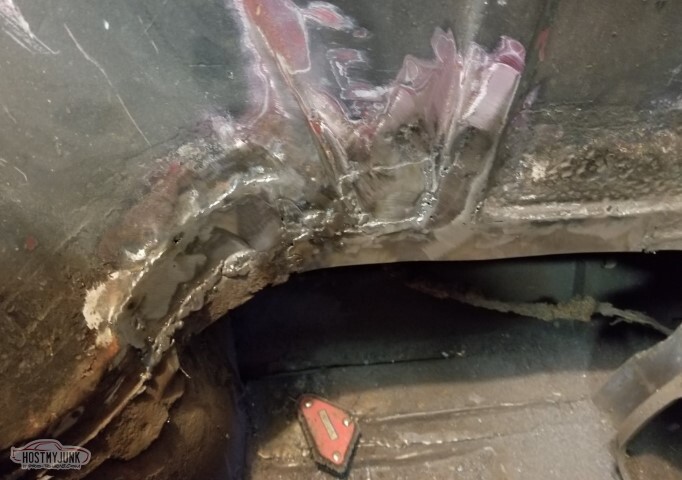
If'n you'll recall, back in post 41 I cleaned up this area and was thinking to cut the outer layer off on the bottom. Here, I've indeed cut it all off. The underlying metal is pitted and unpleasant, but intact enough. Air chisel works better than hammer and chisel at cleaning spot welds away.
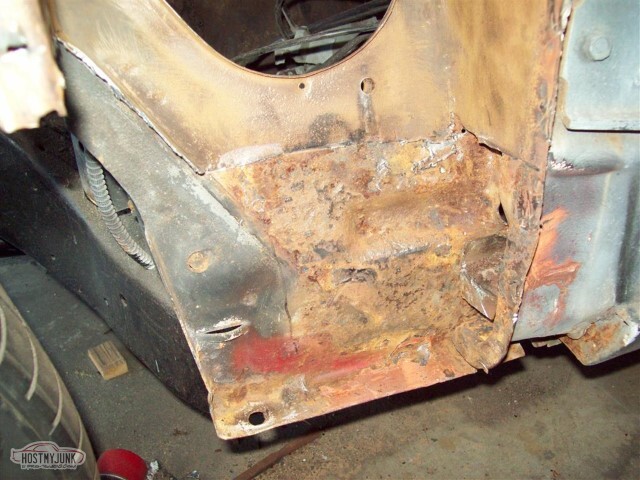
Alternate view.
Cardboard to make a template for the patch as a single piece. Throatless shear for the cuts (best hundred bucks I ever spent at Harbor Freight), hammer and vice for the bends.
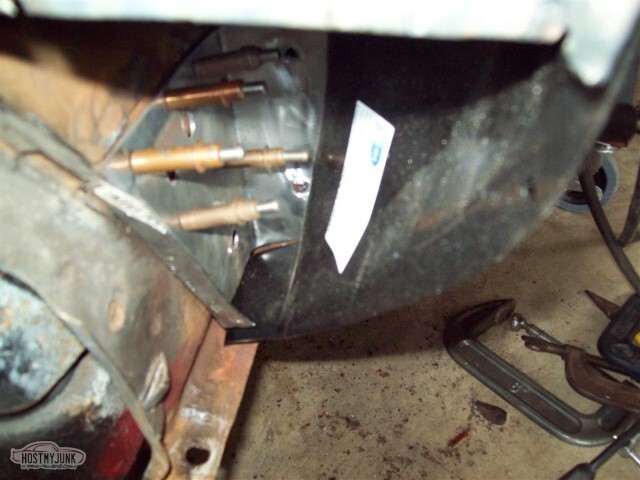
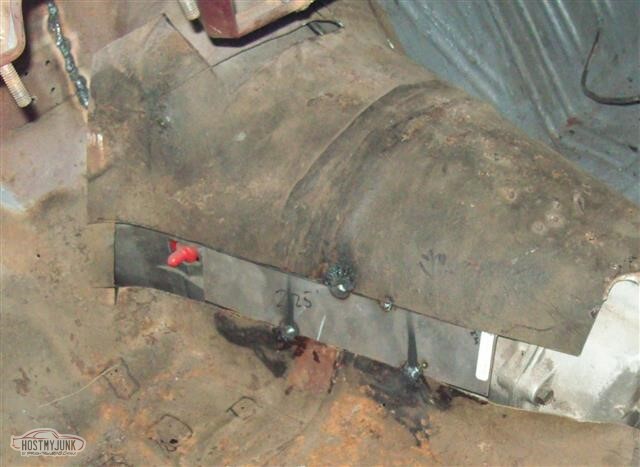
Father in law built planes for a long time, and a few years back he gave me his tools. These included, among other things, several hundred Clecos. Now's a good time to start using them for test fits. Here the angle on the front edge isn't quite right.
And, as I mentioned, I'll have to cut and replace the edge here. Used masking tape to show where 1 inch in from the edge was.
Replaced this inch, but apparently took no pictures. Towards the windshield there's an area where an inch probably wasn't far enough in, so I suspect I'll be doing more here.
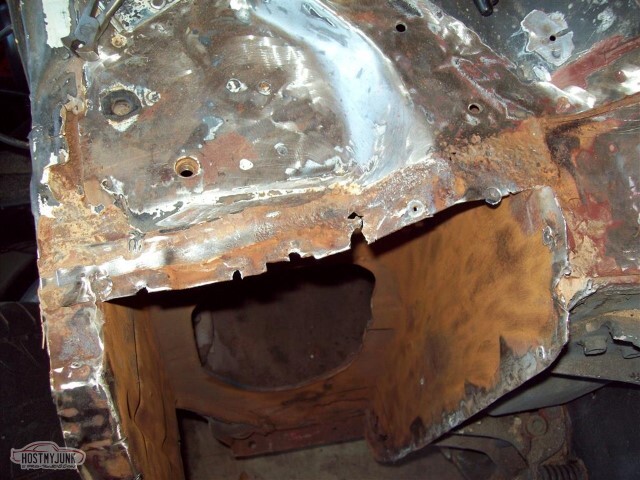
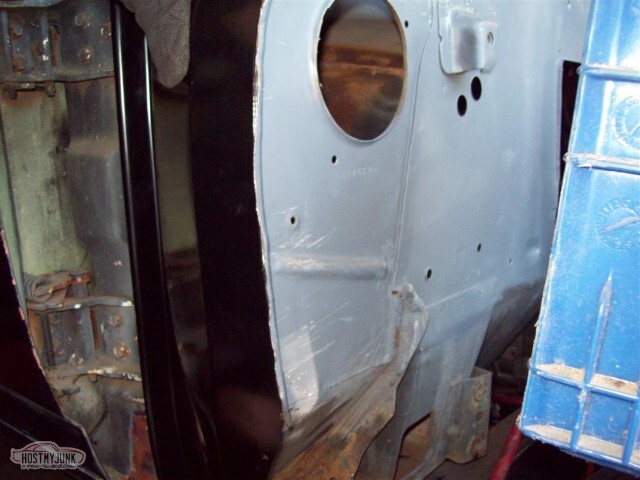
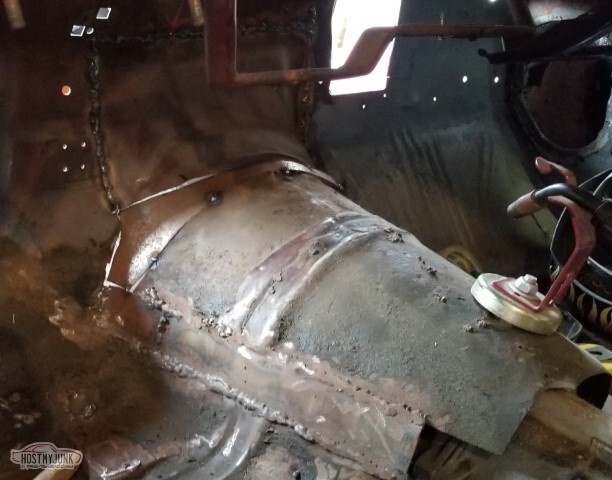
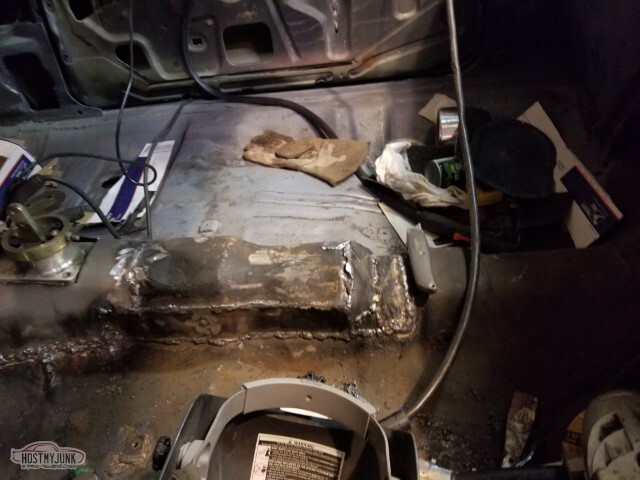
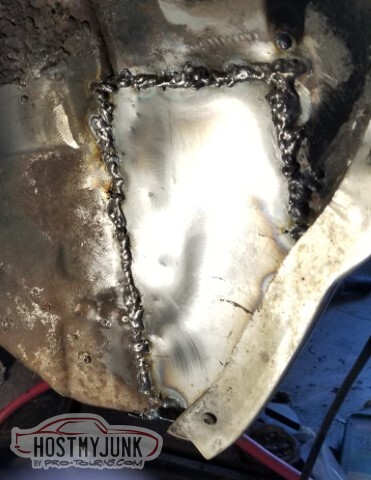
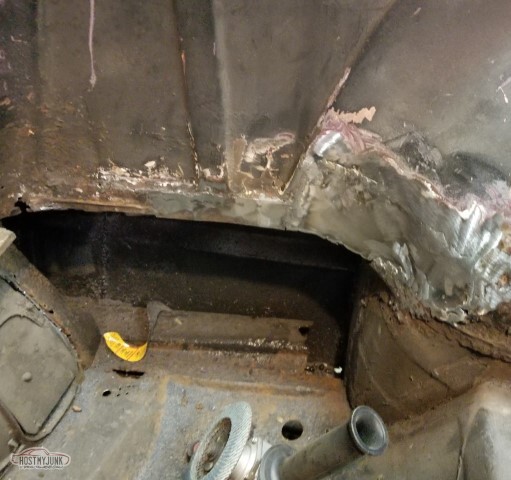
Replacement panel is "good enough" here.

Additional tweaking needed to get the outer cowl panel to clear.
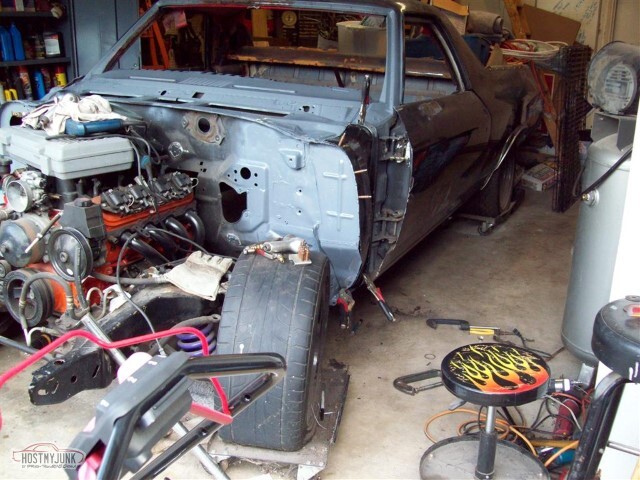
So how am I going to protect all this rusty metal once it's all back together?
Oh wait, isn't that pretty well exactly what POR-15 is for?
Do I have any? Yes. Yes, I do.
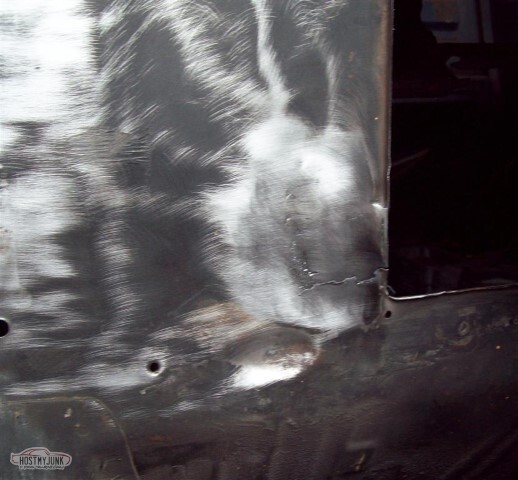
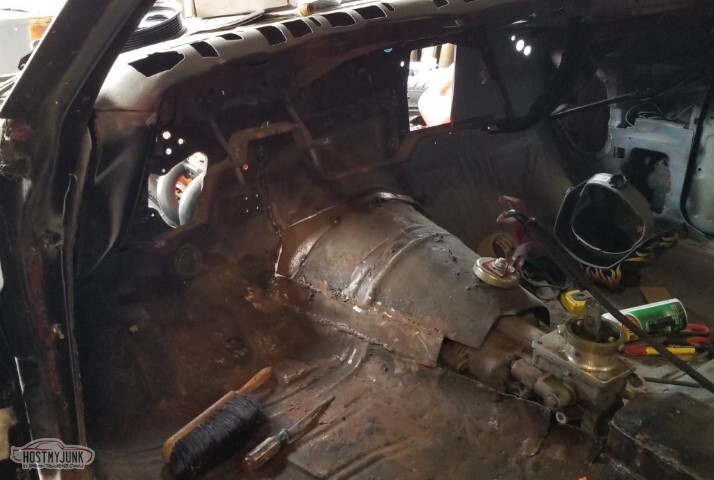
The entire side of the cowl got a coat, and with that I must be done for the day - I can't do anything else with this until it dries.
Still need to make the last closeout piece for the front of this side of the cowl. Seam sealer is on order, new roloc disks have arrived.
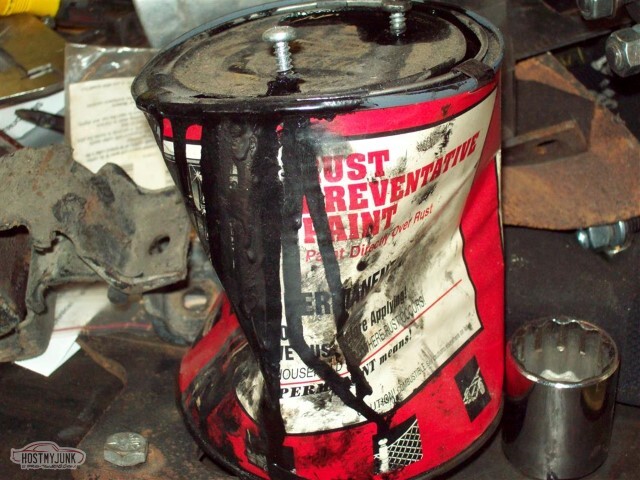
My can of POR-15. This is the same can I did the insides of the quarter panels on the Chevelle with back in November of 2002, and I bet I had it for a while before then - probably approaching 15 years.
They say the shelf life on an opened can is 6 months.<br><br>Advice (from the POR rep I bought this from): Do like I did, put two sheet metal screws in the lid and never take the lid off; just remove the screws to pour some. If you take the lid off, the paint will glue it closed when you put it back on.
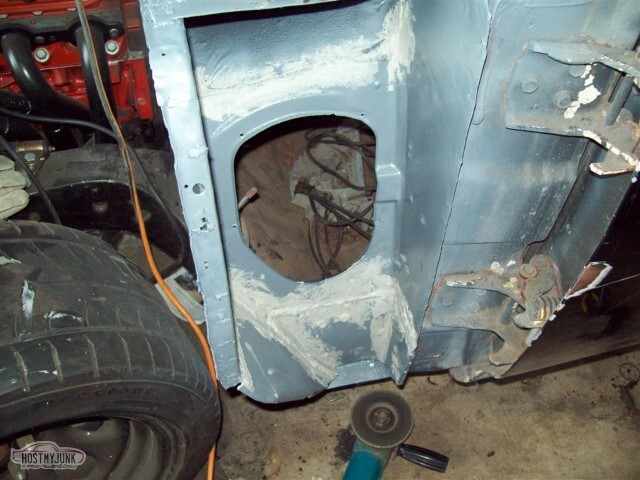
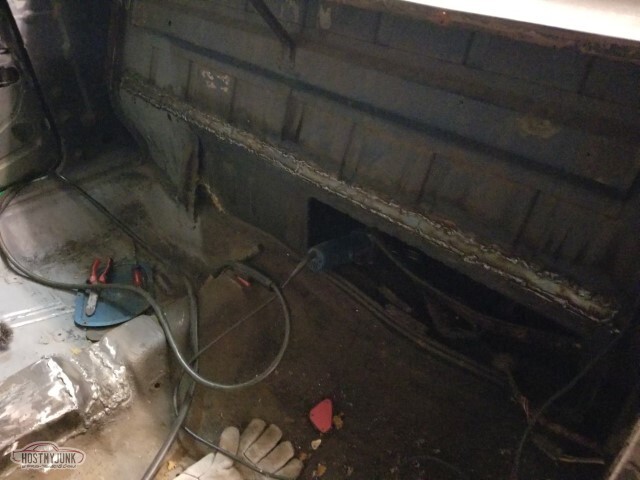
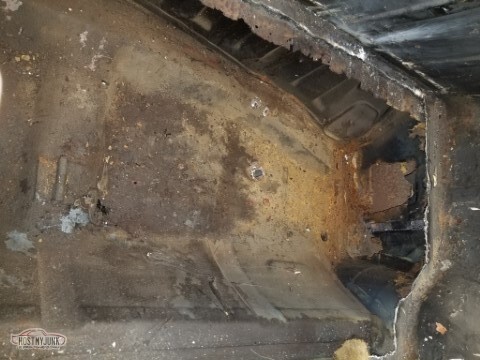
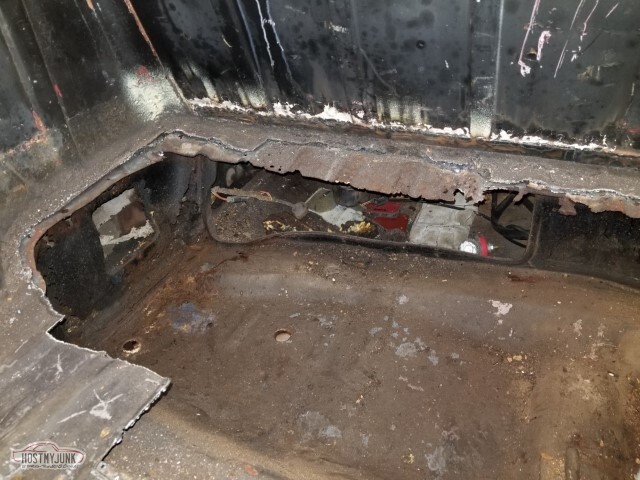
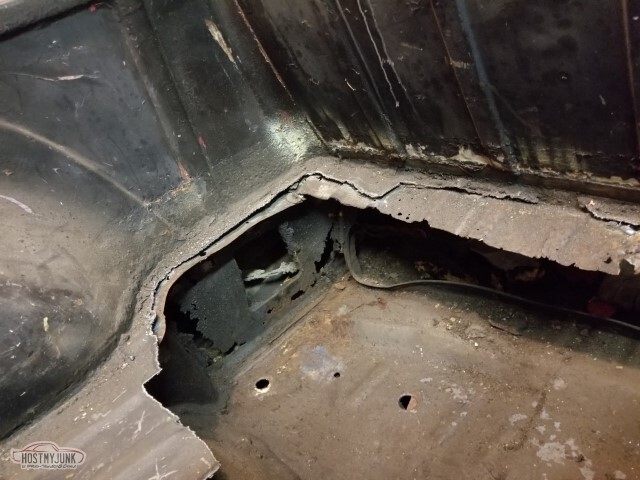
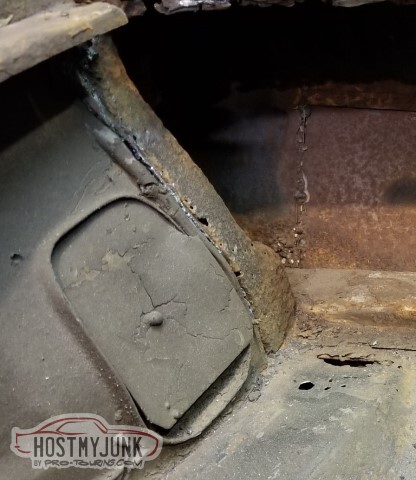
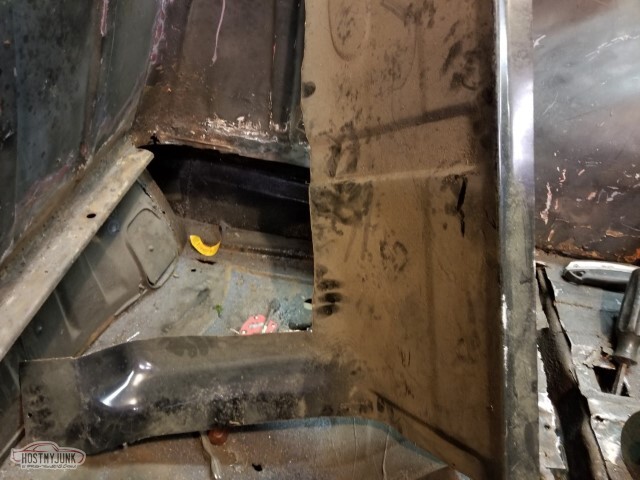
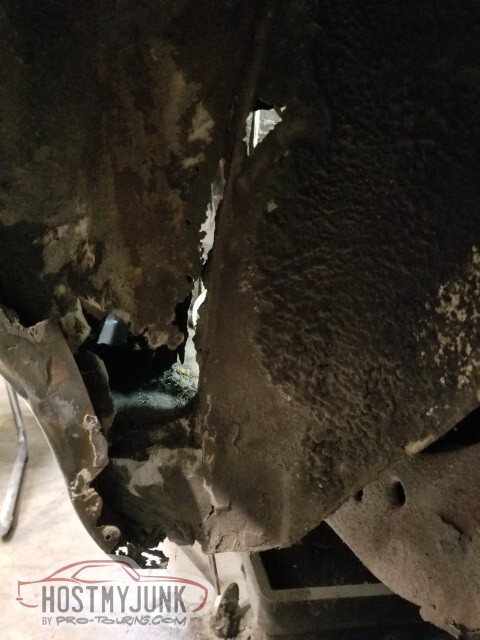
And then foolishly, I went poking around in the car. Here's the view after removing the smuggler's box thing (this would be the rear seat area if this weren't a truck). Lots of rust. Sigh. Not entirely sure how I'm going to fix this.
Even the lip of the smuggler's box mount is rusted.
Here's the hole in the back wall of the cab, from the inside.
And another hole on the side of the box (to be fair, I knew about this one).
So to recap: Rust repair almost complete in the drivers' cowl.
Still have rust to repair in:
- Pass cowl
- Package tray
- Smuggler's box lip
- Driver's front floorpan (middle)
- Driver's front floorpan (cowl edge) (maybe)
- Pass rear floorpan
- Pass front floorpan (cowl edge, far forward)
- Cab rear wall
- Smuggler's box side
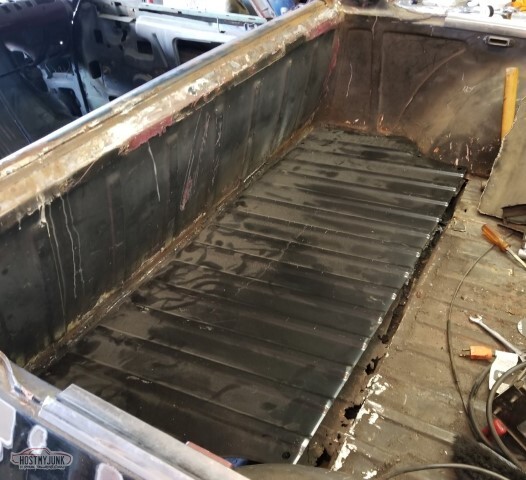
- Bed floor
- Driver's wheelwell
- Next to fuel filler (inner)
- (maybe, there's bubbling in the paint) Driver's side rocker in front of the rear wheel
- (maybe) driver's side rocker behind the wheel
- Pass side: no idea.
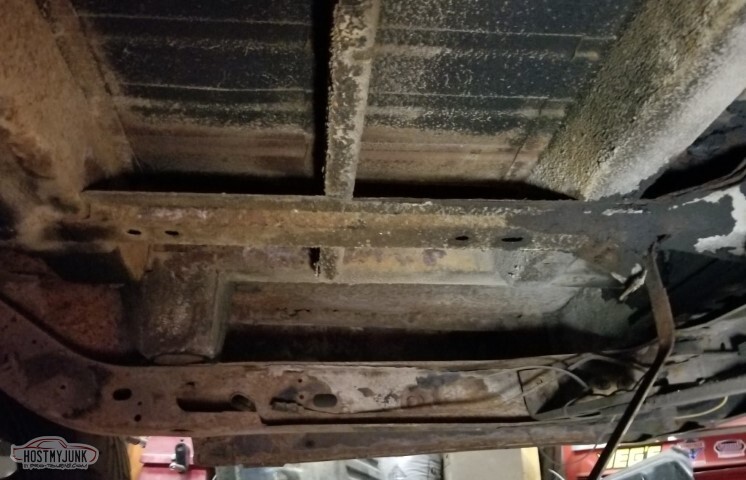
Additionally, I need to figure out what I'm doing with the tranny tunnel and firewall that got cut up for the T56. The reverse lockout does stick out quite a bit so it's going to need a bit more than just adding some height to the existing tunnel..
I suppose it's not surprising that I don't feel like I'm making that much progress. I suppose it's something that every panel I'm having to patch is getting patched with 16ga steel and not something thinner.
The thought has crossed my mind to cut my losses and get a different body, but it feels like that would be 'cheating'.
05-15-2021 #44
-ɹoʇɐɹǝpoW-
- Join Date
- Jul 2002
- Location
- Mesquite, TX
- Posts
- 4,928
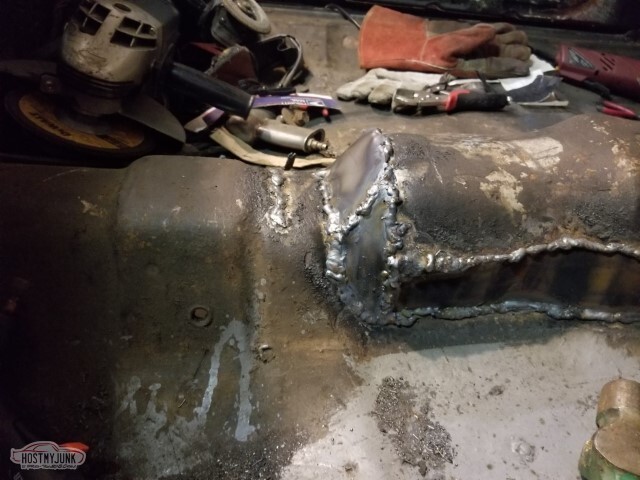
Made the closeout panel for here. It looks like it's just got the one bend... but it's actually got quite a few to line up with the various other surfaces it needs to meet.
and hey look, the outer panel fits over it.
Today's "thing I found that I'm embarrassed by" is the welds on the inner closeout panel, which leads to today's lesson: Don't have a fan blowing on you (and the weld surface) while welding, if you expect the shielding gas to shield.
Sprayed primer over everything. My brushable seam sealer order is supposed to come in on Tuesday, so I should be able to button the rest of this up next weekend (and then start over again on the other side).
Not particularly happy with how these things look - need to get a better grinding stone and try again on the welds. They ain't got to be perfect, but if I can see the welds on the thumbnail, they aren't quite good enough.
Primed those areas that were bare metal (on both sides)
I think the passenger side cowl is probably a little worse inside. Also found (was reminded of) a couple of other places on the windshield channel (front of dash) where there's some rust; still need to figure out what I'm going to do about those.
The plan for the floorpans is currently just to patch the rustholes (rather than buy new pans)... so cowl, floorpans, cowl rear, package tray... then back to the mechanicals.
05-15-2021 #45
-ɹoʇɐɹǝpoW-
- Join Date
- Jul 2002
- Location
- Mesquite, TX
- Posts
- 4,928
It's full summer now, so it's to the point where I can't stand to work in the midday heat, so I'm moving my garage time to evenings.
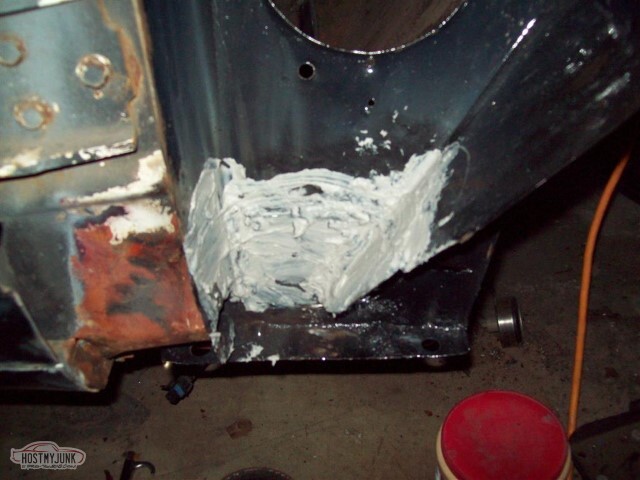
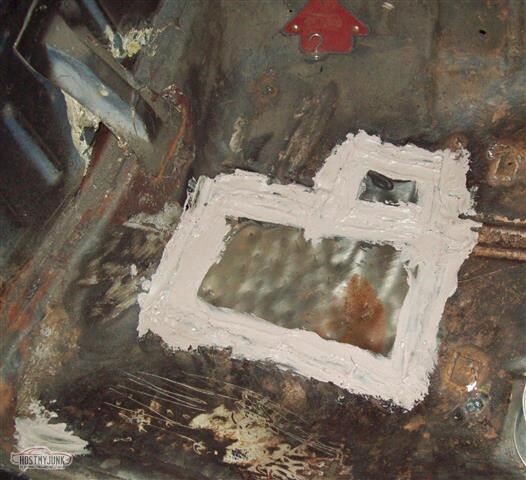
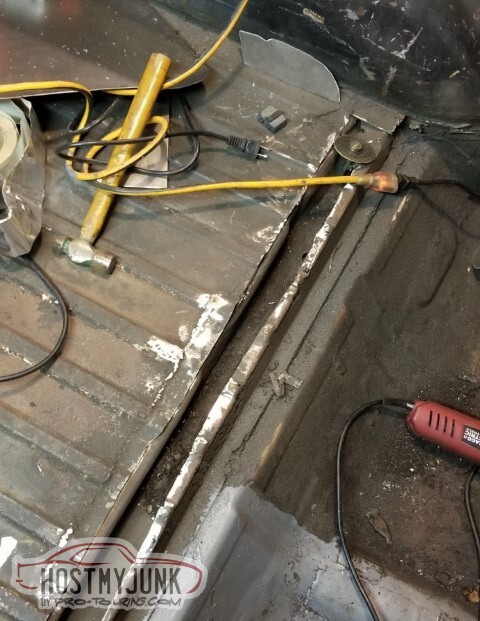
The seam sealer (3M) showed up last week, so time to apply it in here. Took a grinding stone to the obvious welds, too. Still need to use the Roloc sanding disks on them.
Seam sealer is a little too thick to apply pretty with a paintbrush, so I applied it ugly.
Even though there's the large access hole, I am not sure how I am going to seal the insides of the panel once I weld it in. Still need to paint the whole inside area too, and strip/prime/paint the replacement panel.
Cut the passenger side cowl panel out. I had expected this side to be in much worse shape than the driver's side, but in some ways it's actually better. I won't have to replace the entire front panel, but I think I will have to do the outer edge/lip. Lower panel looks a little worse than the other side.
Confirmed (pic through the access hole thing): there is rust far forward on the pass footwell. Figured there was. Expect there's similar on the driver's side, but I haven't confirmed that yet.
and from the front. Note the crappy rust-inducing foam. Guess what that induced?
This will look really nice once it's done.
Plenty of other holes I need to seal up in the firewall/cowl area too. I assume some are needed for other purposes.
I know there's the two-port vacuum line that goes through the firewall, and I imagine a line goes to the flapper at the top of the cowl; there will be a hole for that. Not sure grommet size but I reckon it's attached to the AC controls.
Several ports that look to be for radio antenna, including one that appears to be an antenna bulkhead connector. That might be a nice thing to have.
A positive surprise: I cut the headliner away expecting to find rust-holes, but only (thick) surface rust. I guess I need to find a replacement gasket for the sunroof so I can pull this out. I suppose I won't be replacing the roof panel.
Will need to take a wire brush to all this insulation. Once it's primed/painted, I'm guessing Dynamat or a Dynamat-a-like. Possibly LizardSkin... but it'll need something.
05-15-2021 #46
-ɹoʇɐɹǝpoW-
- Join Date
- Jul 2002
- Location
- Mesquite, TX
- Posts
- 4,928
I hope you wanted to see pictures, because I have several. This is a couple of weekends worth of updates because I didn't post the stuff from last week.
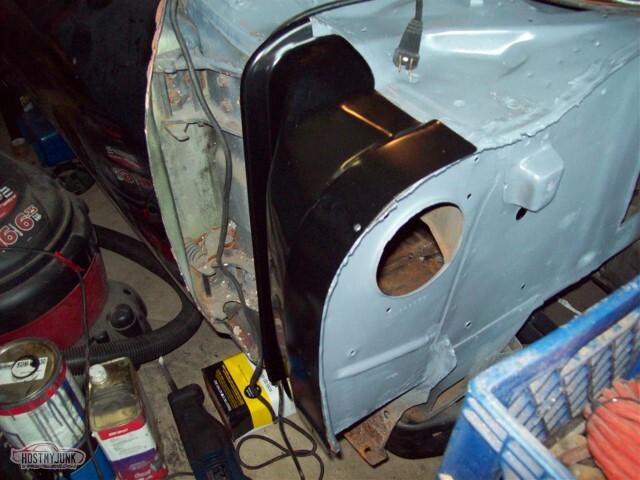
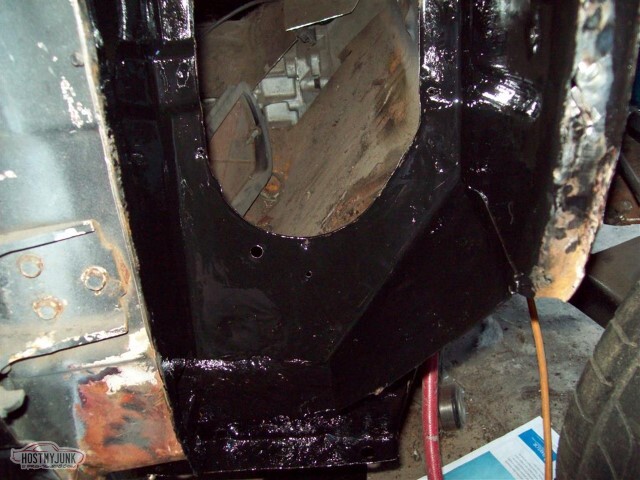
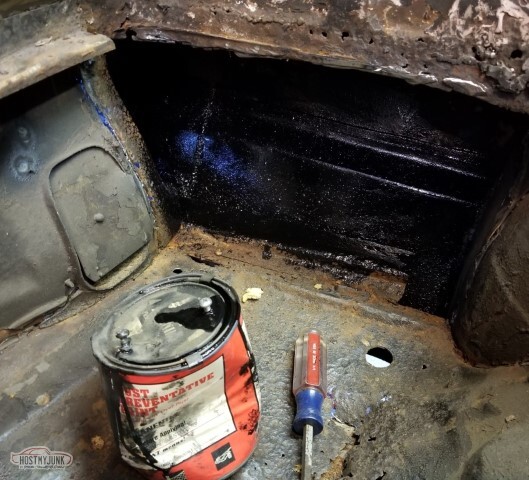
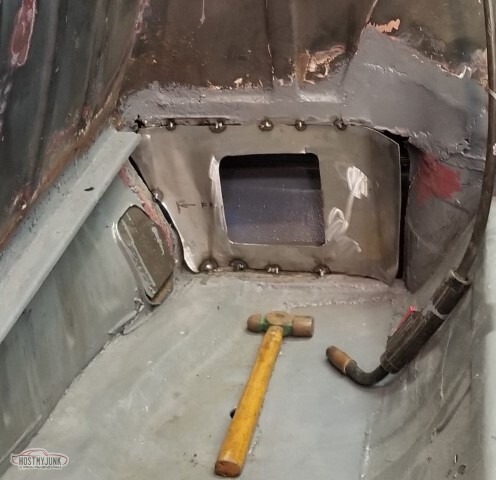
Coated the inside of the driver's cowl with Nason Chassis Black in preparation for installing the cover.
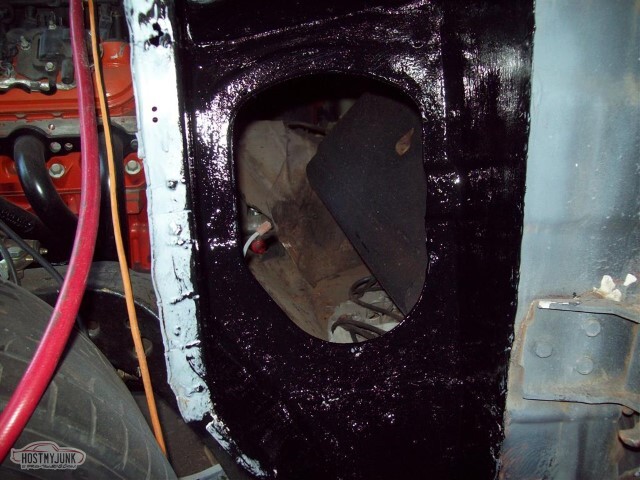
Cover installed.
Passenger side seems to fit really well out of the box.
Of course, first there's the rust to take care of.

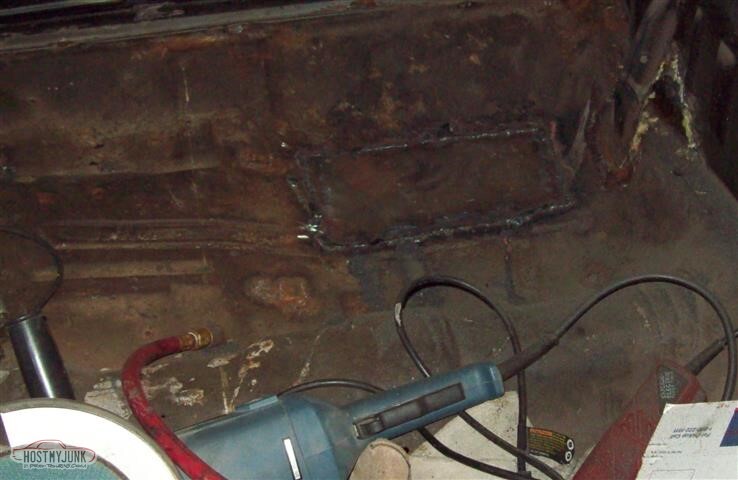
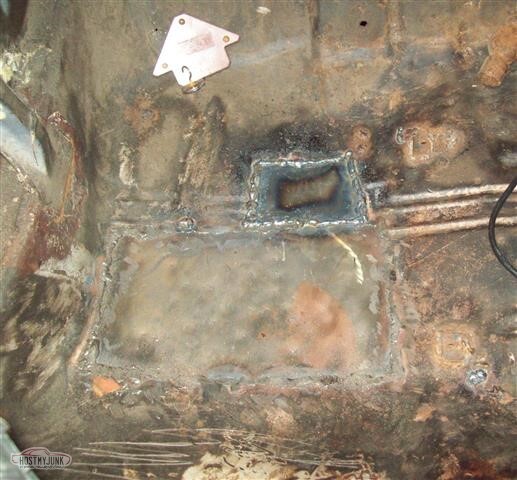
Here I've cut the rusted out portions away, as well as a square that was rusted through the inner panel.
Inner panel square repair complete.
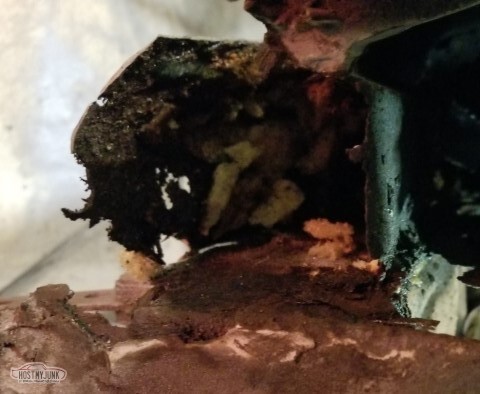
Everywhere that there was rust here, I found the expanding foam that I'm now going to call "rustfoam".
Folks, please don't use this stuff on your car.
Coated the inside of the pass cowl with POR-15.
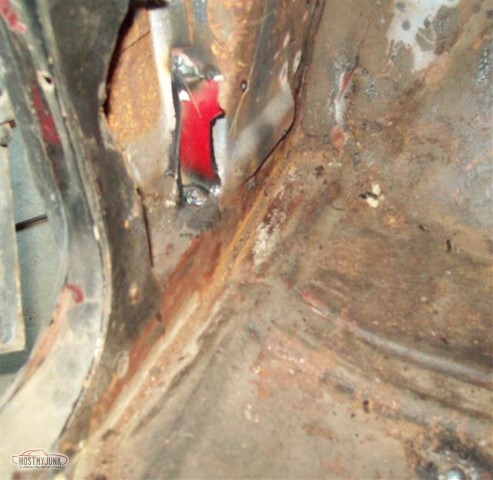
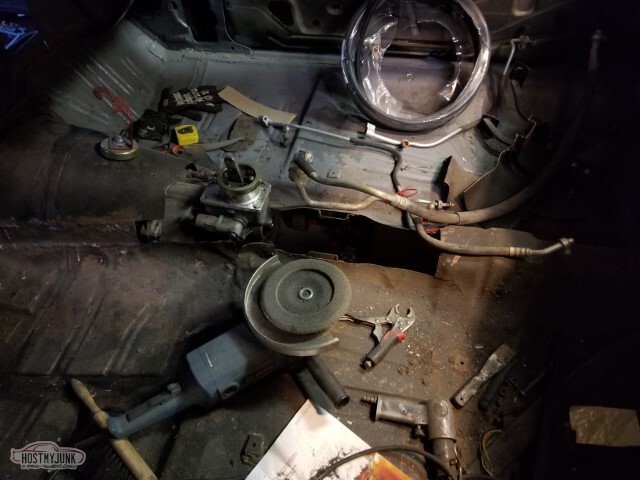
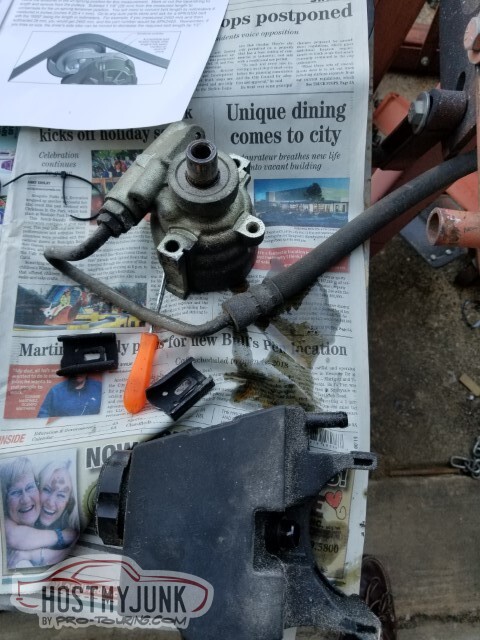
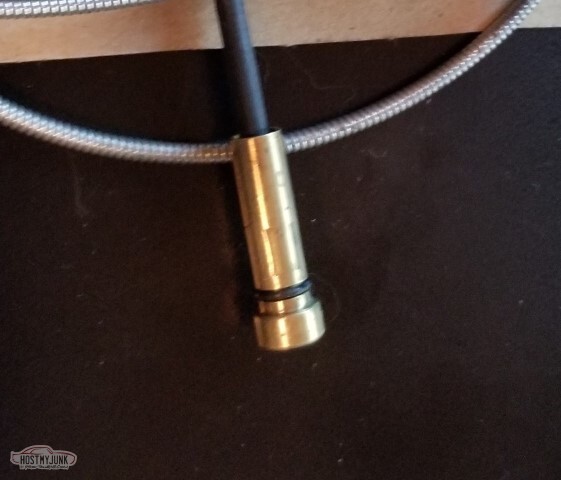
I'd mentioned the vacuum hose for the cowl flap thing. Here's the hose with grommet.
Here, in the shadow, is the hole that grommet goes into.
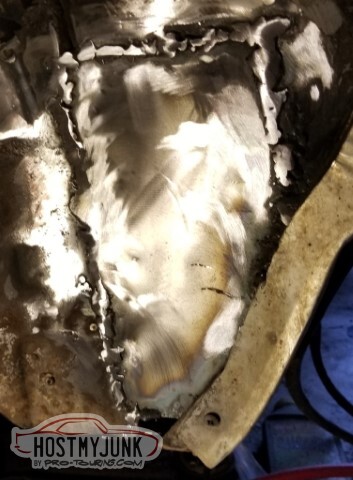
Driver's side primed and seam-sealed.
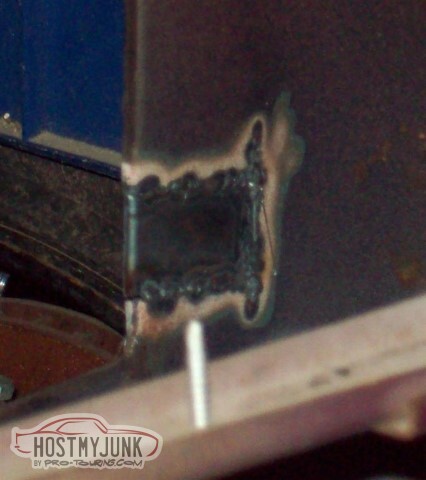
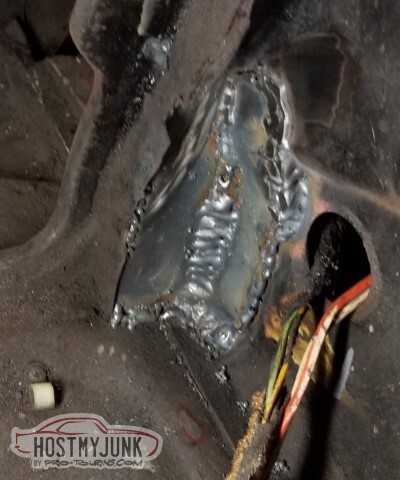
They say that it takes 10,000 hours to become an expert in something. Obviously I've spent quite a bit less than that welding - my welds are ugly and have huge beads... but I get good penetration and they do hold the metal together.
So the realization that I had here is: it doesn't matter. They're fine being ugly. I don't even have to grind the beads down much, here.
Alternate view.
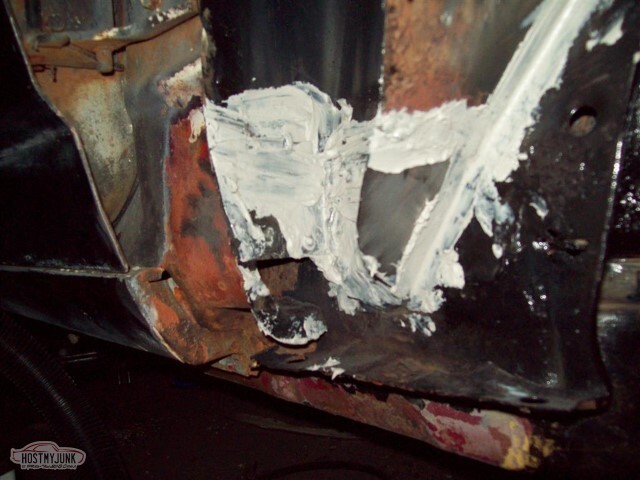
I am also apparently not good at applying seam sealer. However, I appear to have had practice doing finger-painting.
I did coat the inside of the panel with Chassis Black before doing these welds.
Weld beads smoothed a little.
Seam sealer applied. Guess on this side I'm seam sealing before priming.
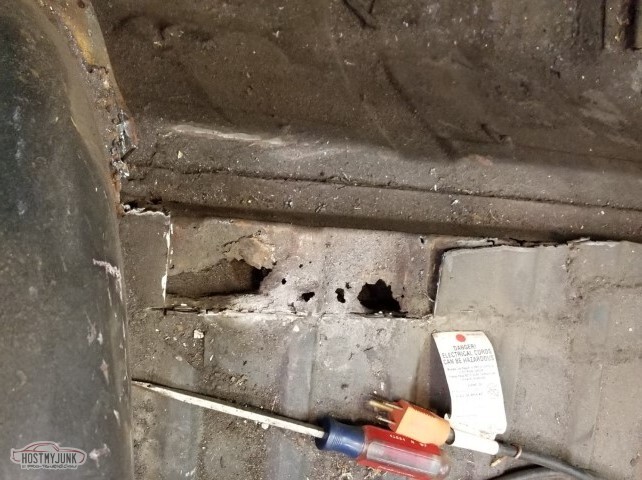
Moving on to the interior.. yes, I will need to replace the rear part of the pass pan. I've got serious rust around the drain plug thing.
Additionally, there are some holes forward of there.
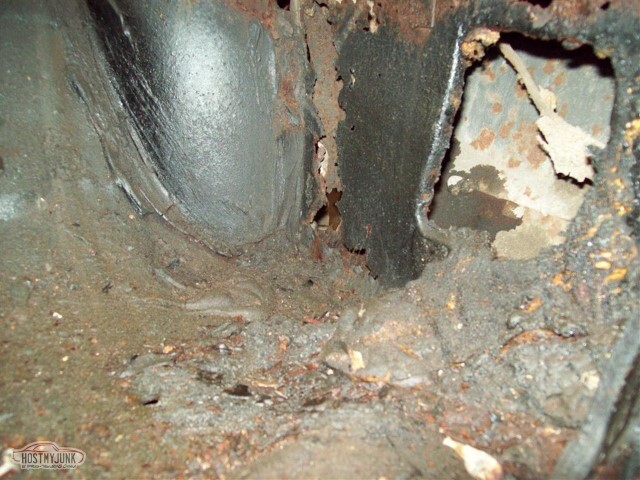
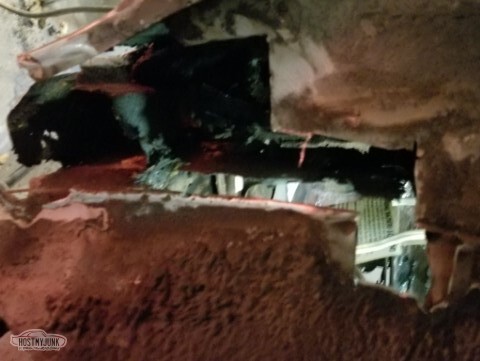
Behind the brace on the back wall: A pile of seam sealer covering a mound of Rustfoam.
The big mound here next to all the rust holes: More Rustfoam.
Here is where the Rustfoam was on the front - you can tell where it was because there's no metal there now.
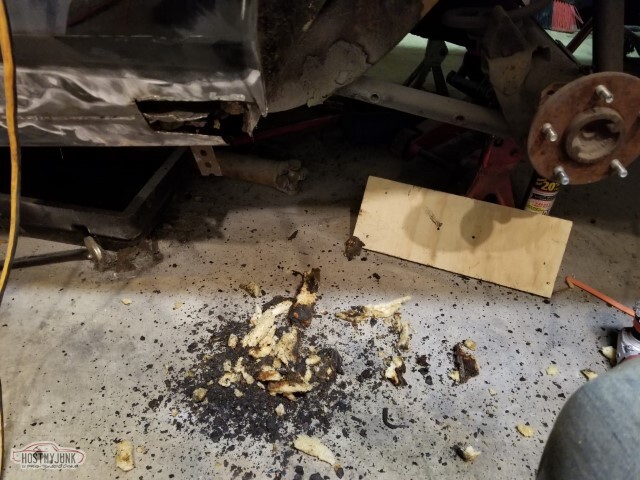
Cut out the rust.
Cut cut cut.
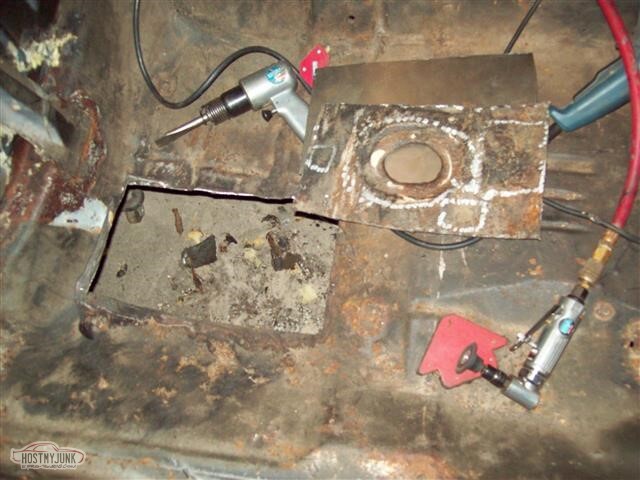
Ok, rust cut out. Make a patch.
Coat the patch with something on the outside so it won't rust. Stop rust repair here so paint can dry.
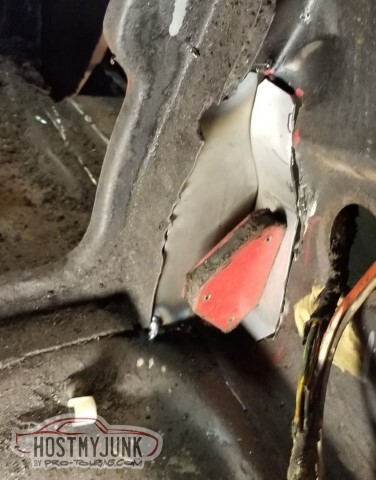
Some additional rust found on the rear kickpanel thing.
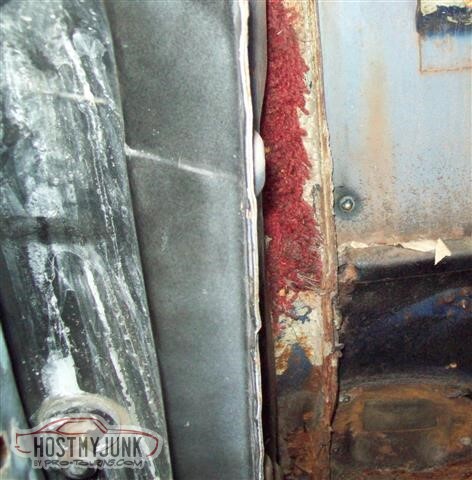
Seems to go through to the door jamb.
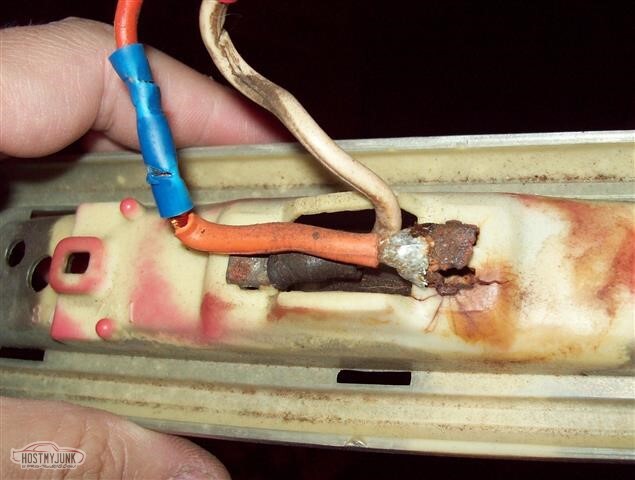
The vacuum-operated flappy thing from the pass kickpanel has tested successfully - vacuum makes it open, lack of vacuum makes it close.
Similarly, the flap-thing from the cowl moves with vacuum.
Vacuum applied:
<tr><td>Vacuum released:

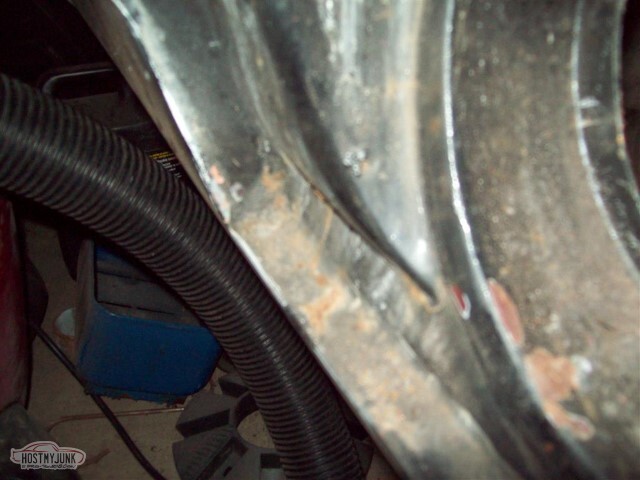
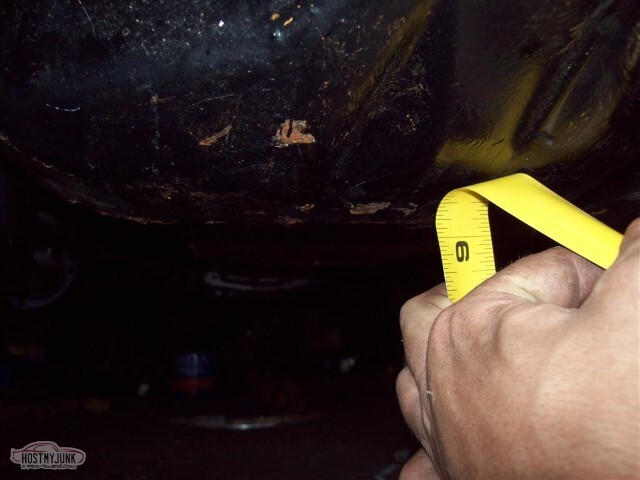
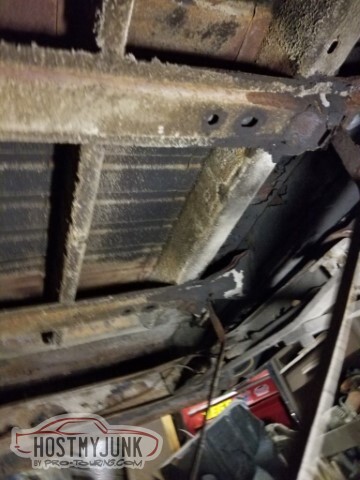
The Harbor Freight wheel dollies appear to give about 2 1/4" additional clearance from the ground.
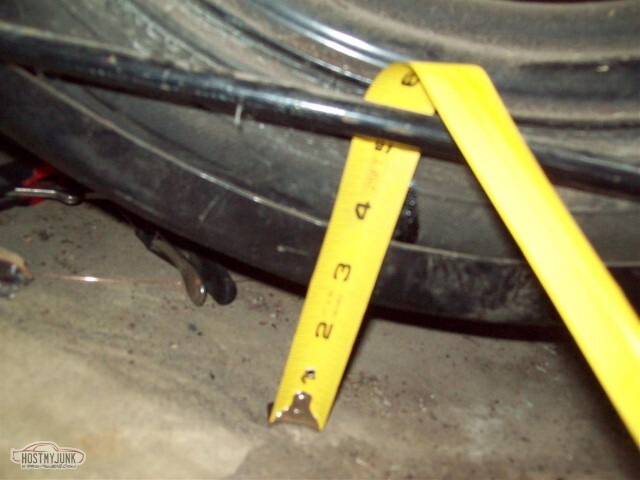
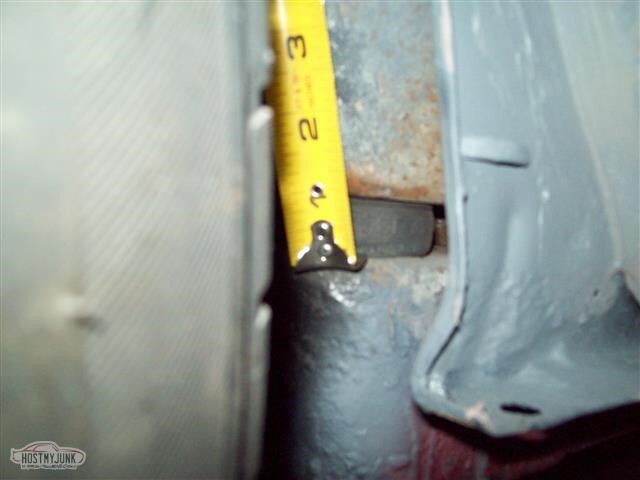
This means that my 9.5" crossmember clearance is actually 7 1/4" from the ground.. found a couple of posts on Pro-Touring.com where people are talking about 3-4" crossmember height... no wonder my UCAs are hitting the frame - my ride height is way too high!
The spring adjusters are set to halfway already - guessing I need to cut the top portion of the adjusters down by about 2.5-3 inches when I pull the front suspension all back apart.
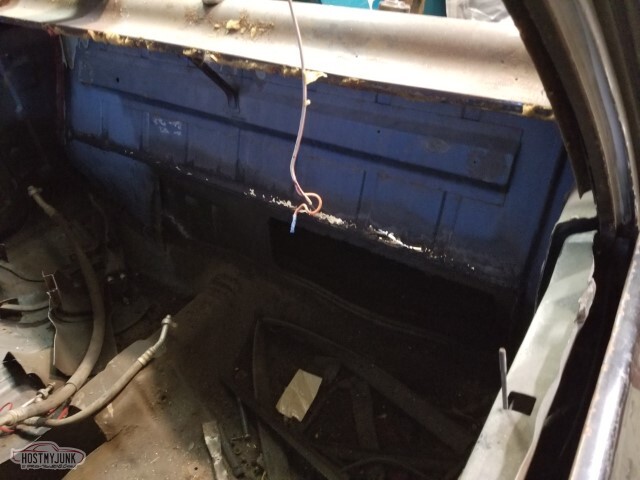
And, of course, it wouldn't be a day with the El Camino if I didn't find some more rust (beyond the door jamb and rear pass pan) - this is driver's side behind the rear window.
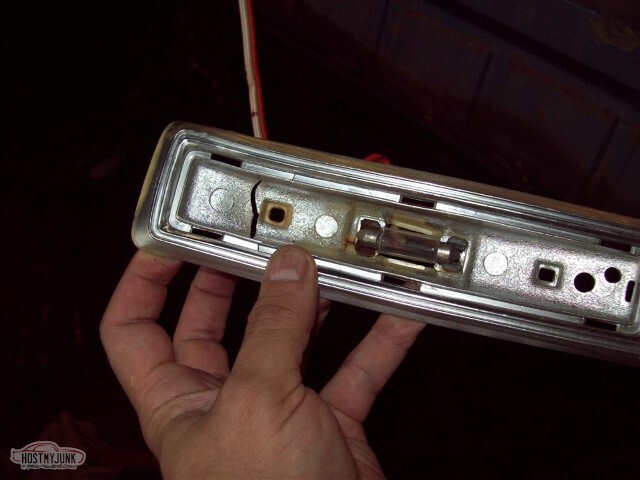
Looks like the dome light also needs to be replaced (not particularly surprising)
Still need to seam-seal the cowl panels from inside, and paint the insides.
Then pass front floor repair, and other rust repair.
05-15-2021 #47
-ɹoʇɐɹǝpoW-
- Join Date
- Jul 2002
- Location
- Mesquite, TX
- Posts
- 4,928
I've been OK with the knowledge that I need to pull the sunroof out to repaint because masking and painting around it really didn't go well. In order to reinstall the sunroof, I'll need new weatherstrip for it as removal is destructive. That's fine; I'd been told that it was a Cars and Concepts sunroof and those are relatively easy to find the parts for. I emailed The Sunroof Doctor a couple of times asking about the weatherstrip (since their website says they have all the C&C inventory) but they couldn't be bothered to respond.
SunroofExpress, on the other hand, responded quickly to my inquiry but not with the answer I was hoping for:
"The sunroof in your vehicle is a Remove-A-Top sunroof and parts are no longer available for this roof panel."
Well, crap.
So options:- Cut a bigger hole and put a bigger sunroof in.
- Replace the roof panel
- Don't paint, or don't remove the sunroof before painting
Option 1 sucks. I hate the sunroof I have, I sure don't want a bigger one.
Option 2 sucks too; as much as I'd love to have a nice pristine roof I think replacing one may be a bit beyond my skill level.
Option 3 is also not good.
05-15-2021 #48
-ɹoʇɐɹǝpoW-
- Join Date
- Jul 2002
- Location
- Mesquite, TX
- Posts
- 4,928
I ground the welds I'd done to the front of the pass side floorpan some, but I didn't take a picture.
Instead, I started on the constellation of rustholes on the rear of the pass side pan.
Rather than handle each area individually, I decided to replace that whole area. Here you see the in-progress.
In this image, as you can see, I've started welding in the patch.
I have been having feed problems with the welder. Sometimes it feeds the wire correctly and I get really good welds... and sometimes the drive roller just spins and barely moves the wire, and then I get things that aren't really welds.
Pretty sure I've narrowed it down to needing to replace the cable liner. I'll pick one up on the way in to work tomorrow.
I've also been running with far too much shielding gas pressure. I guess that's from when I was trying to use up what was left in the tank, but the result is that between the floor patches and the cowl repair, I've almost used the entire bottle of gas again.
This is where I left this, since I'm having trouble welding.
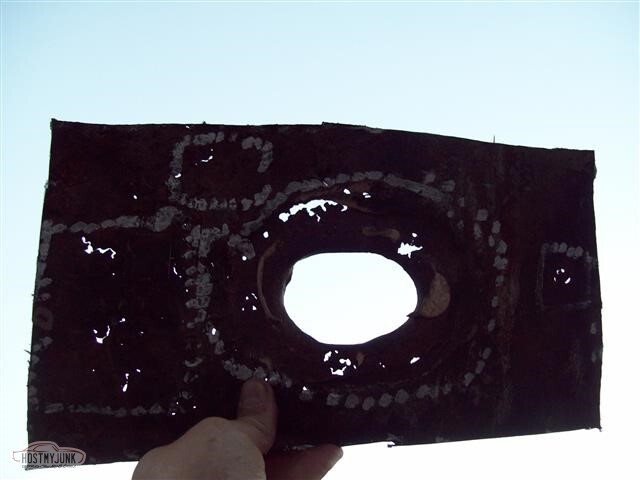
For your enjoyment, this is what the panel I cut out looks like with the sky behind it. Silver paint pen used to mark areas that I knew had problems; looks like I missed some too.
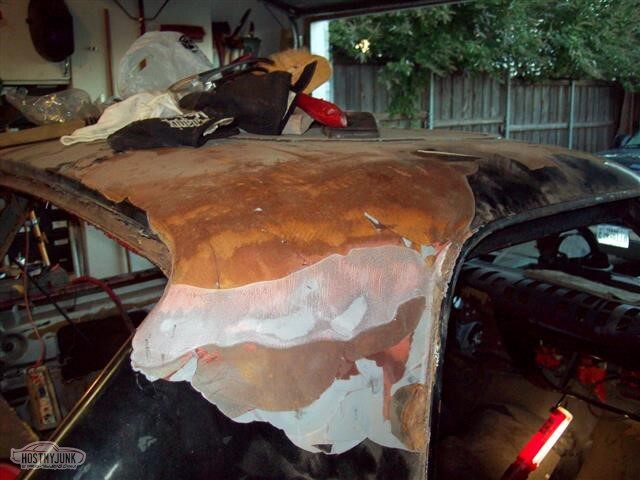
The car continues to shed the old paint in chunks. This is without any sort of tool usage; just peel where it's already peeling up.
05-15-2021 #49
-ɹoʇɐɹǝpoW-
- Join Date
- Jul 2002
- Location
- Mesquite, TX
- Posts
- 4,928
Pass floor complete.
Getting the liner out of the MIG welder wasn't easy, and it might be because of these two kinks here,
and also this kink here at the gun end. There may also have been others that weren't obvious on the driveway.

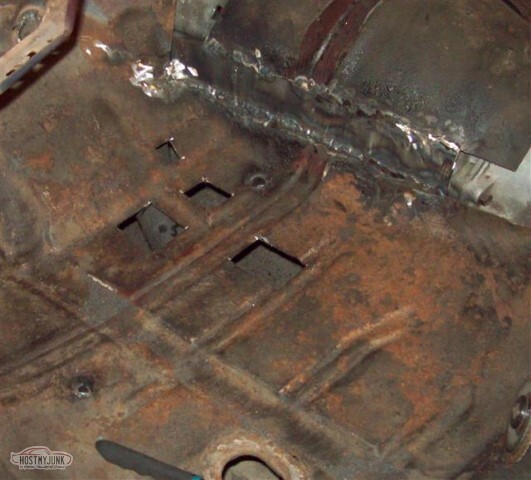
With the new liner in place, the gun feeds great! Here the pass floor patch is complete.
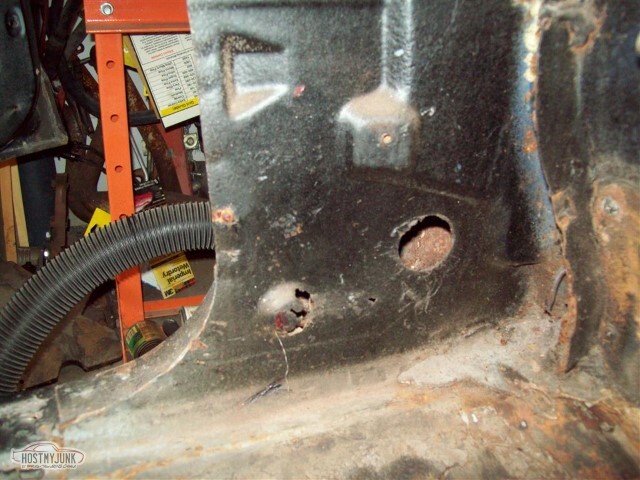
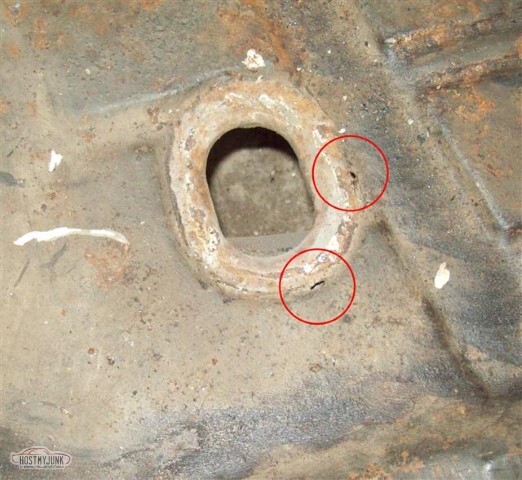
The screw-hole on the back wall is filled in with weld bead. So are all the holes in the floor I'd used to put wire guides from various amps, and the holes that are always too big for the door sill moldings (those will need redrilled smaller later).
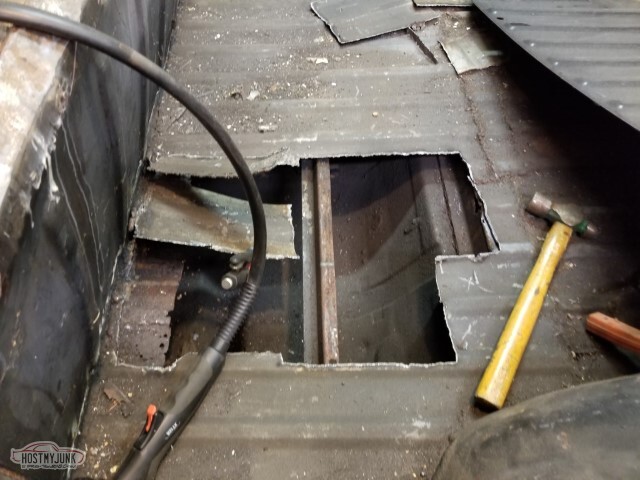
Remember back in post #14 when I had to cut a hole in the floor to get a rusted tranny crossmember bolt out?
Well, time to make the car not remember either.
Rear half of pass floor
... and the front. I still need to grind my welds, and clean off the surface rust and undercoat here, but it's (so far as I can tell) solid now. Here's where I ran out of shielding gas, too.
Since it's required that I find more rust every time I get out here, here I find that the terminal on my dome light has almost rusted through.
I've got no idea how that happens.
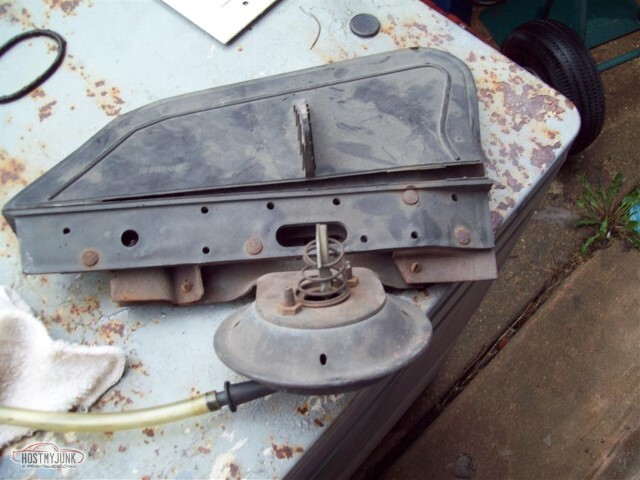
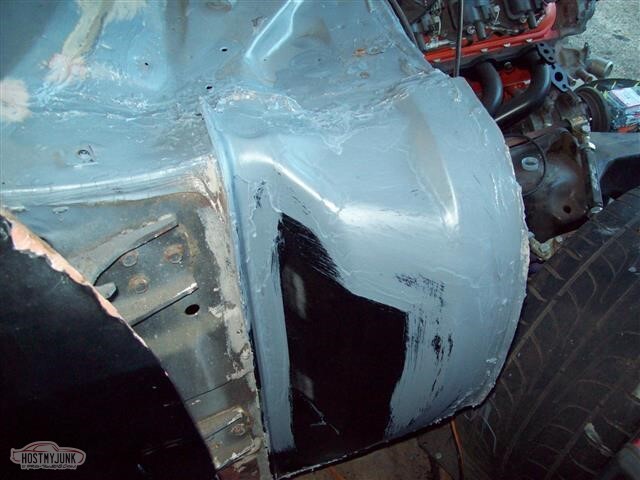
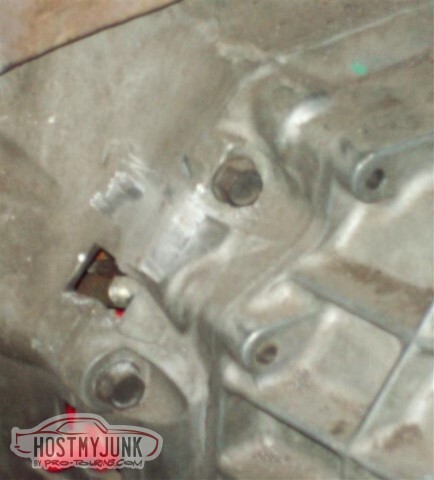
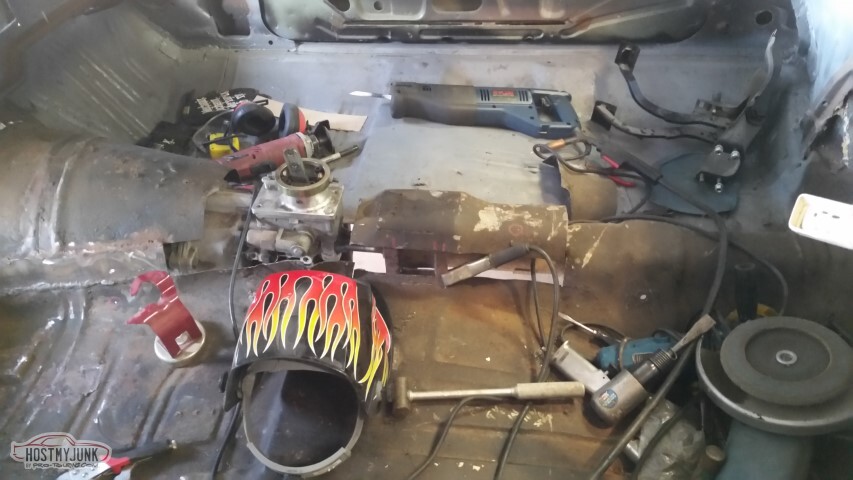
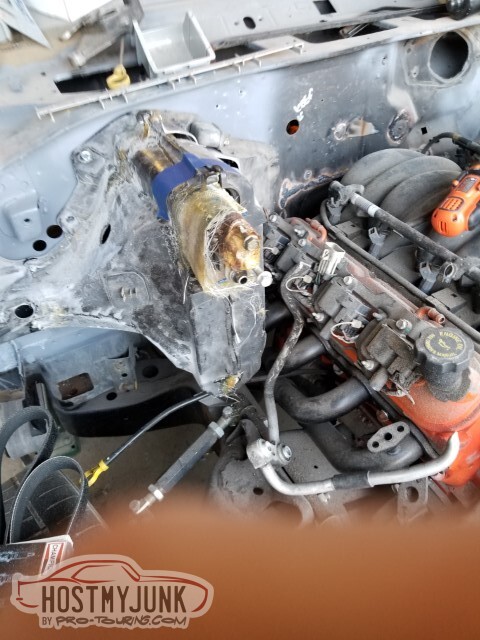
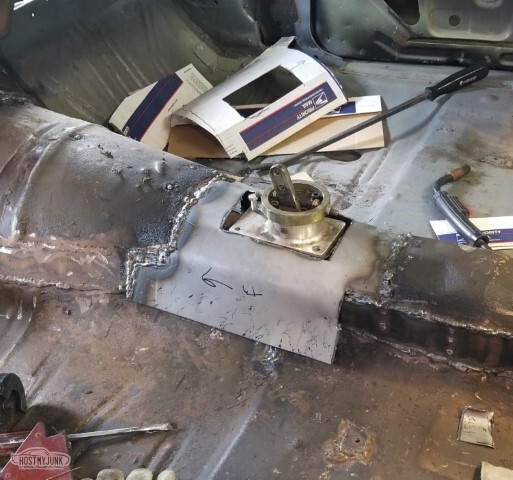
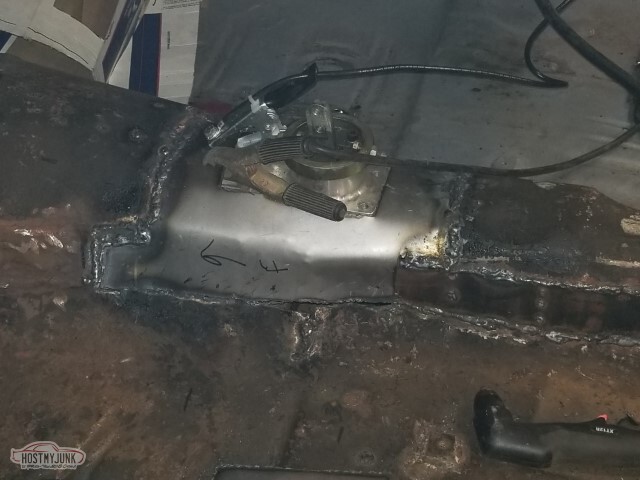
Next up: alter the AC box to accept the Camaro coil. Here I've cut it long-ways.
The coil fits in like this. It's deeper, and it's not as tall.
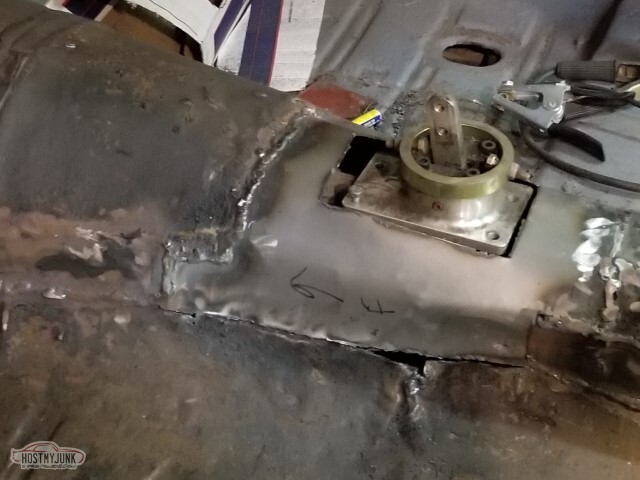
Inlet has a spiffy block-off that will seal that.
... but it looks like it'll require that I build that part out even more.
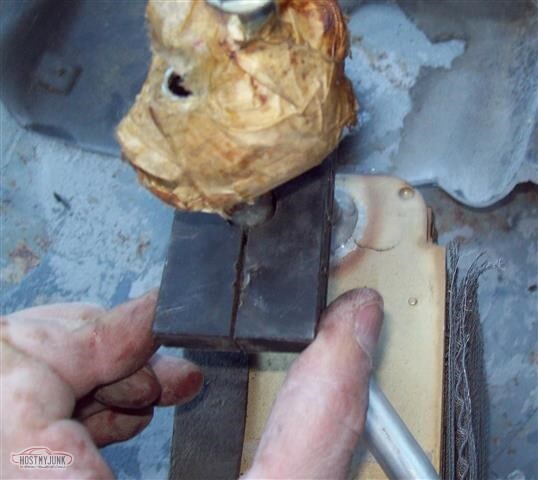
I've got to fashion a block-off (as described in post 32) for the right side here (which is the bottom)
.. and a spacer/blockoff that's about an inch thick for this part.
I know that the firewall is just sandwiched between the inside and outside AC boxes here, but (not that you can tell), there's about 1/4" where the firewall and AC box aren't lining up here, when the internal box isn't installed.

05-15-2021 #50
-ɹoʇɐɹǝpoW-
- Join Date
- Jul 2002
- Location
- Mesquite, TX
- Posts
- 4,928
I didn't really get a good picture of it, because it's explicitly in the areas I can't see... but I put seam sealer on the inside of all the seams inside the cowl sides.
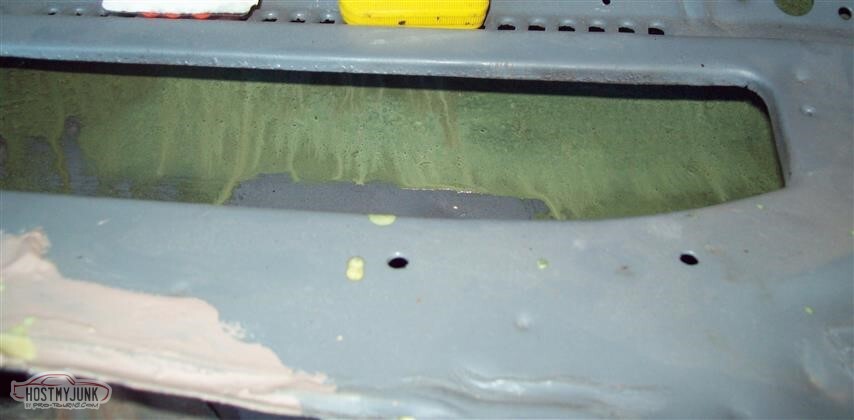
A coworker gave me some "Qurox Polymeric Rust Convertor" to try. They use it on the building's chillers when they show a little rust and apparently it works well for them there. I used it on the inside of the cowl where I can't spray primer, and I used a brush to put it there. It's green here, but it dried more brown-greyish.
I ground the welds on the pass floor.
The hole I'd made for the crossmember, too.
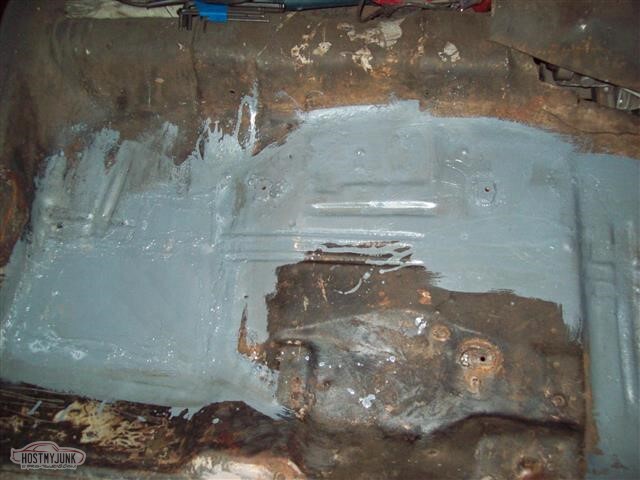
Next step was to take a wire wheel to the rest of the pass floor. I found more rust (shown here with a drop light under the car for clarity).
What do we do about rust? Cut it out and put in new metal.
A little regret on not replacing the whole pan now.
I've seen folks be meticulous with masking tape to ensure that their seam sealer is even and straight.
This is the opposite.
So I don't like spraying epoxy primer in the garage - it permeates the whole house and creates an annoying whining sound from the spouse.
This time, instead, I used a brush. Yeah, it still stank, and I ended up making a second batch and spraying it after all.
The goal was to get some primer on the pass floor after sealing it.
The brush is sloppy and uneven but it met the requirements.
Protected from the elements.
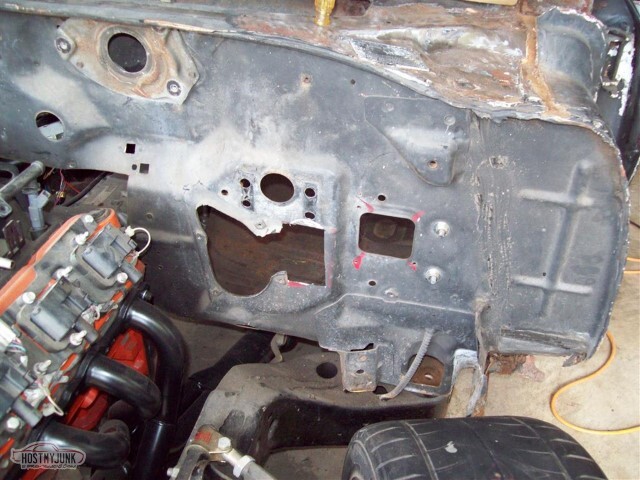
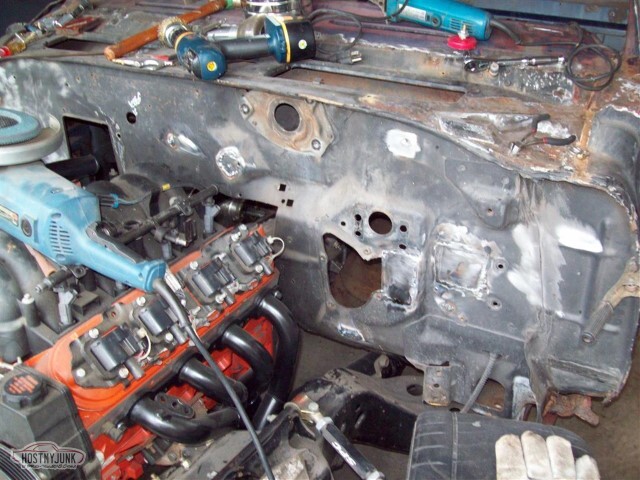
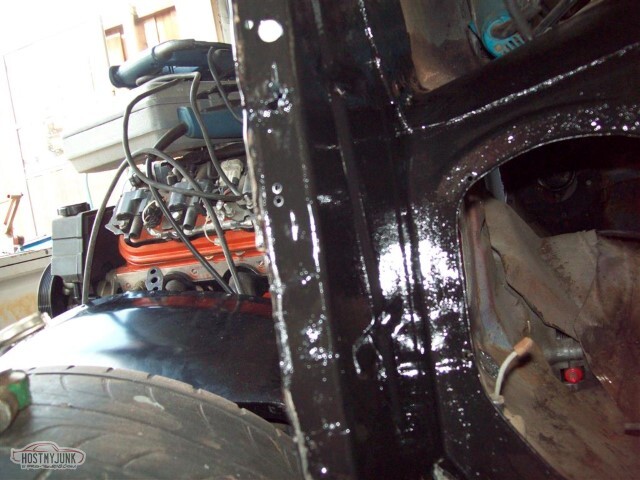
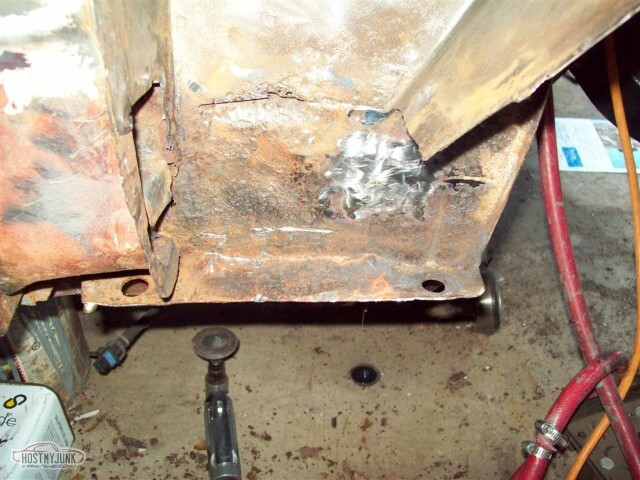
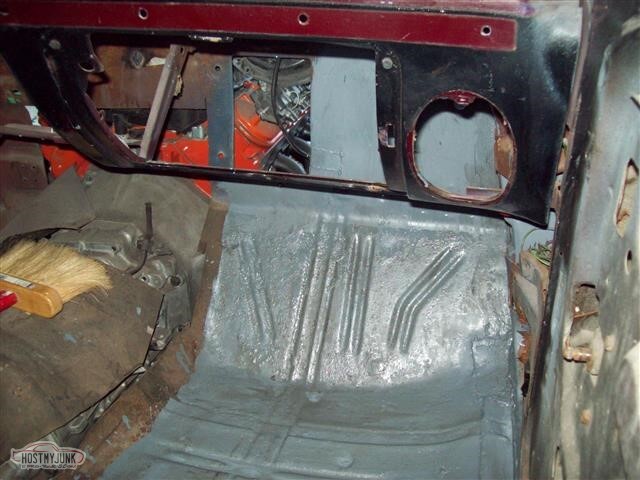
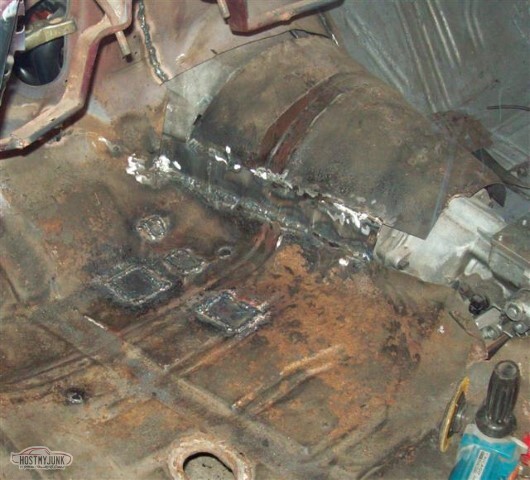
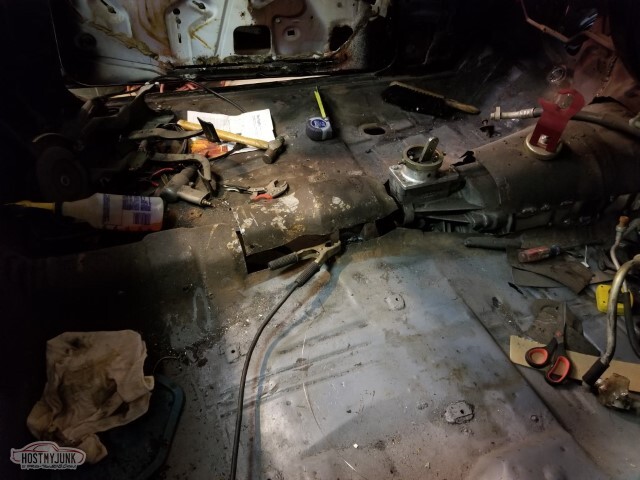
I ground down the giant weld bead blob on the firewall, and then I got to looking at how much room there was at the back of the engine.
I am not entirely sure why I cut this chunk of the tunnel away - it looks like I've got plenty of clearance with it in place.
See, it's a good 1/2" above the transmission all through this area.
I'm not even convinced - other than the area at the shifter - that this part of the tunnel couldn't have stayed.
I suspect this is from when I was thinking I needed to be 3 degrees up rather than 3 down, but that doesn't explain the front cut.
And all that's with the 45 year old body bushings that look to be ~ 7/8" tall; the new poly bushings are about 1" so there'll be a little more clearance too.
It's going to suck to try to clean up the welds on the firewall side when I put the tunnel back together.
I've got one small rust hole in the front on the pass side that I found when I was brushing on the primer. I'll need to fix that still, and then work on the tunnel and driver's side.
It will be ironic if the tunnel goes back to its starting point, but I have to raise everything behind it for driveshaft clearance.Last edited by derekf; 05-15-2021 at 04:31 PM.
05-15-2021 #51
-ɹoʇɐɹǝpoW-
- Join Date
- Jul 2002
- Location
- Mesquite, TX
- Posts
- 4,928
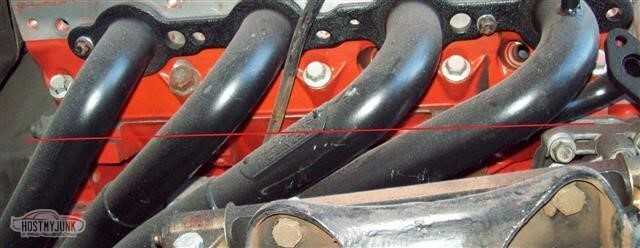
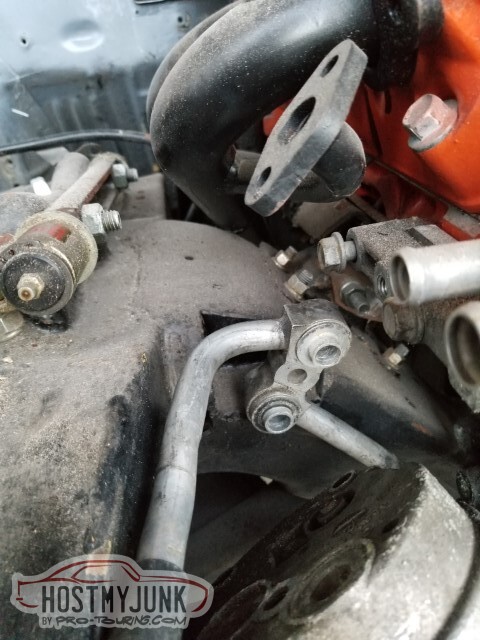
The headers just barely touch the frame on the pass side.
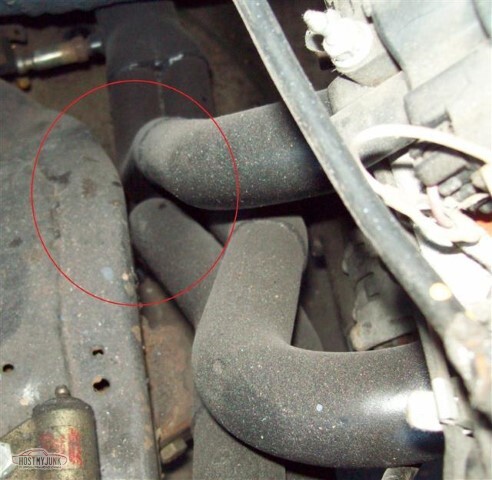
I'd thought to cut at the red line and just weld in some more metal to fill in the gap, but the Internet suggested that instead I remove the tubes from the flange, cut them a little shorter, and weld them back in.
That seems like a better plan. Still will need to chop off the emissions stuff and weld those closed.
A couple of pinholes needed to be closed up.
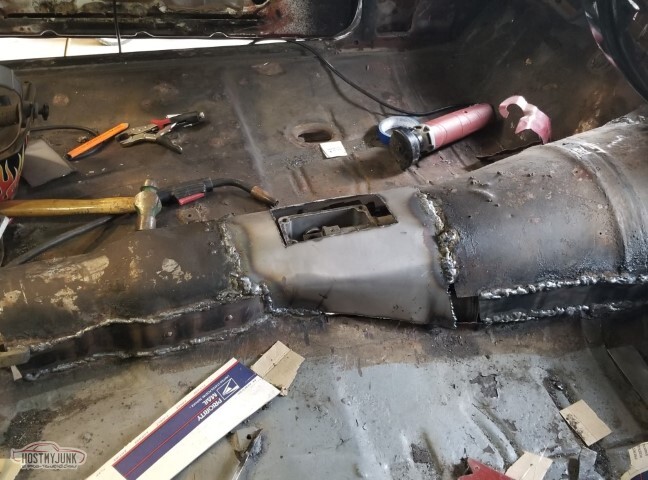
After welding the firewall part of the tunnel together, there's still a lot of clearance.
I cut the slave cylinder mount off the tranny for clearance.
Tunnel still didn't fit. I figured it was hitting at the top where the transmission juts up a little. That wasn't it.
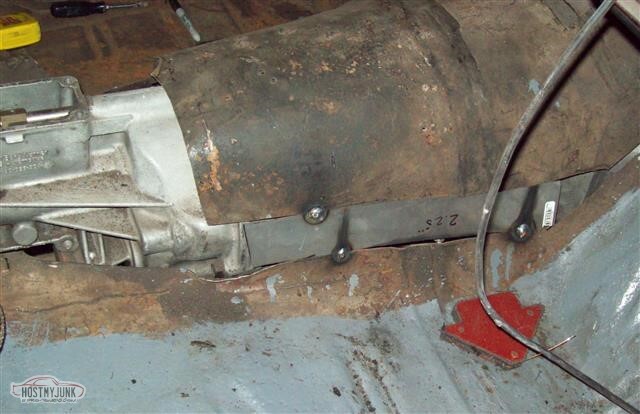
Slid the panel forward so I wasn't having to make a curved filler at the front, and raised what was left 2.25" on each side.
(pass side)
Welded all the screw holes on the driver's side closed. Ground them flat, too, but didn't take a pic for some reason.
I've been giving some thought to the package tray rust. I don't think I need to use the 16ga steel I've been using on the floor for this but I definitely don't want to be using the 26ga stuff that seems to be the other option at the local hardware stores.
Screw holes in the sail panel also welded up and ground flat.
There's several rust holes that will need real repairs, too.
Of course, I can't do anything without finding additional rust. Here it's small, but big enough to require repair.
Additional welding on the tunnel. You can see some of my other floor-rust in the foreground.
I was extremely surprised to not find any rust under the seam sealer here in the corner. That may be a first for this car.
I cut out the floor rust.
And now I have less rust.
And now I have less weld bead and less rust. Still a couple of tiny rust holes I need to fix, and the new rust found today at the drain thing... but this is progress.
05-15-2021 #52
-ɹoʇɐɹǝpoW-
- Join Date
- Jul 2002
- Location
- Mesquite, TX
- Posts
- 4,928
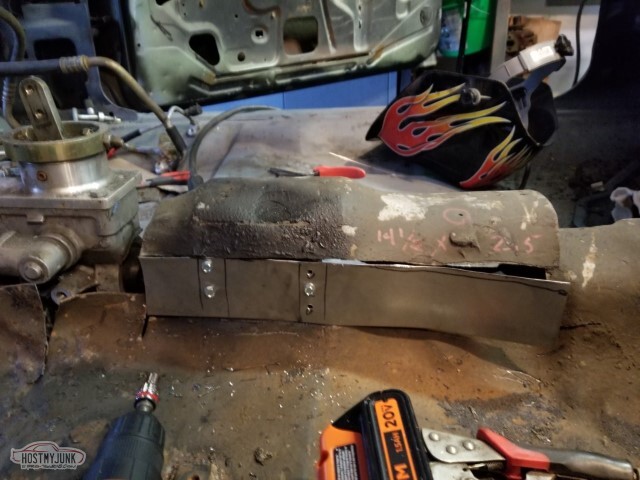
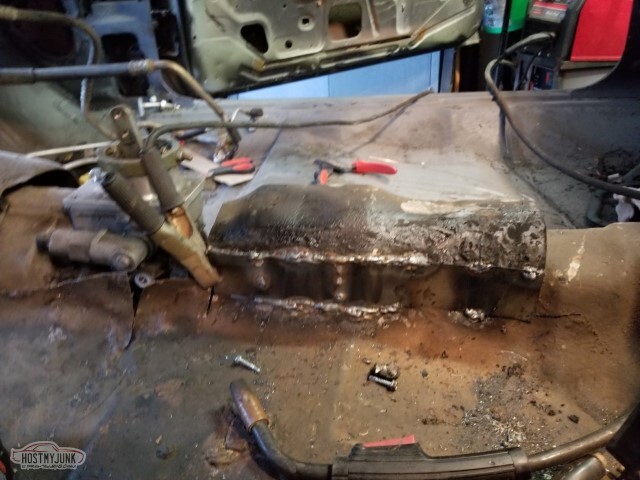
So here's essentially where we left off last time. The brace was extended to add two inches to the tunnel with some 16ga. It's just tacked in there at this point.
You might also see the driveshaft in the transmission. Turns out, this is not the right yoke -- I've never owned a TH400 but somehow I ended up with the 32 spline yoke from a 400's driveshaft rather than the 27 spline. Since I'm an idiot, I thought it just wasn't sliding in right and I may have damaged the output splines. Will have to pull the tailshaft housing off to check; was going to have to pull the engine/tranny out anyway to finish the welds and paint the underbody/firewall.
The tacked-together brace didn't hold when I started trying to get the jammed-in-there driveshaft back out.
Here you see the remaining rust in the back wall of the cab.
I've patched the holes on this side of the package tray. Not perfect, but doesn't have to be.
No picture, but also patched the inside of the sail panel.
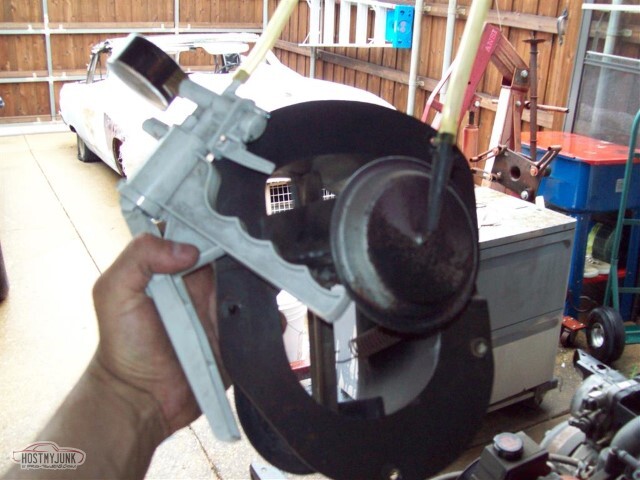
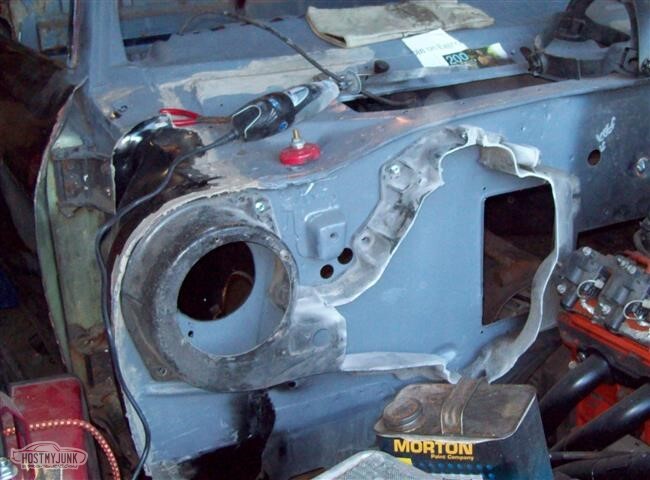
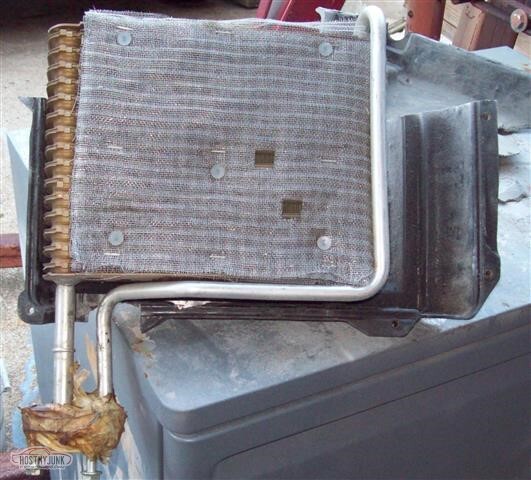
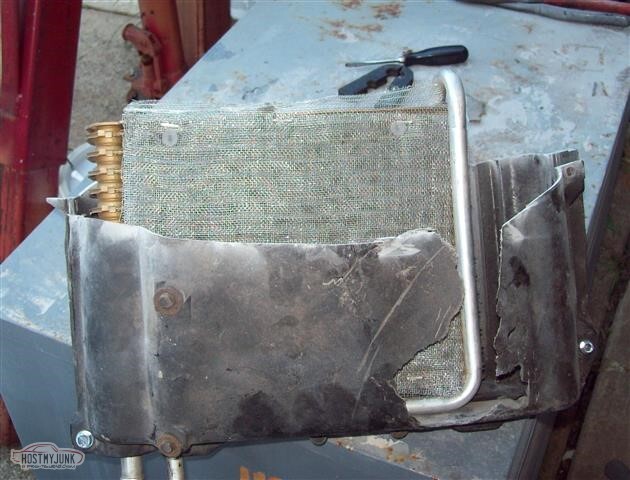
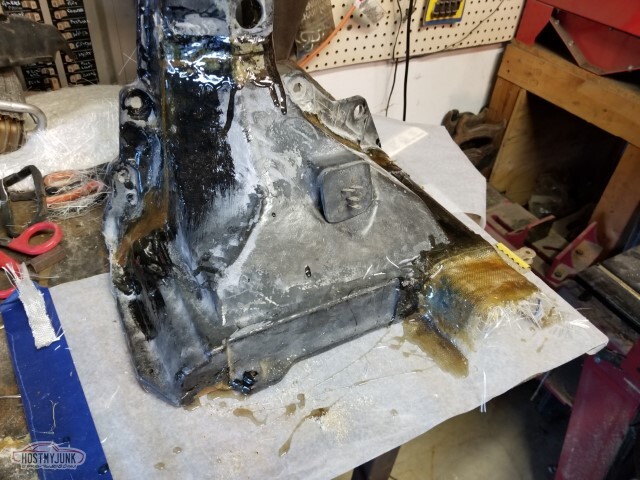
So I had a great idea: Make the firewall box that the General put in the car in '69 fit the 4th gen F-body evaporator. It needs to be deeper, and the best way to do that is to pie-cut the box and fiberglass it back together.
Pie-cut so the blower housing doesn't change shape - don't want to try and do anything fancy there, hoping to end up with a stock 69 fan there.
2021-05-11 edit: Confusion - this is the third or fourth time I've mentioned this?
The new core is not as tall as the old one, so a spacer was made out of cardboard and also covered in fiberglass. Here is where I learned the difference between "fiberglass mat" and "fiberglass cloth".
The fiberglassery also needs to happen to the inside, of course. Doesn't have to end up pretty here.
It actually looks like it's going to work pretty well. At this point I've not actually done anything to keep the core lined up or sealed (see the big rough hole in the front the lines come out of)
The F-body evaporator uses a plastic spacer with a rubber weatherstrip around it. I've wrapped fiberglass around it to secure and seal it. This looks to be working out well.
Time to build out the flange so it can be mounted.
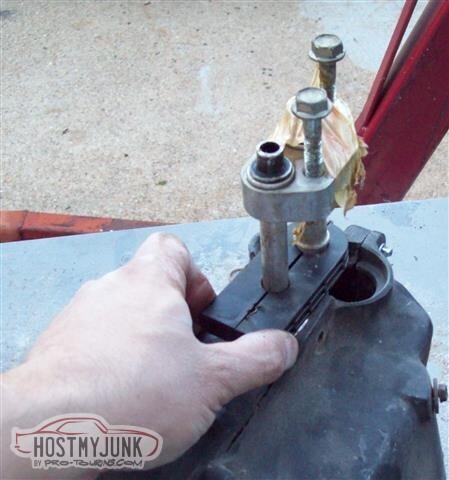
I got the Holley alternator relocation bracket. It looks nice, but my Friendly Local Auto Parts Store (FLAPS) did not have the Corvette PS pump it calls for.
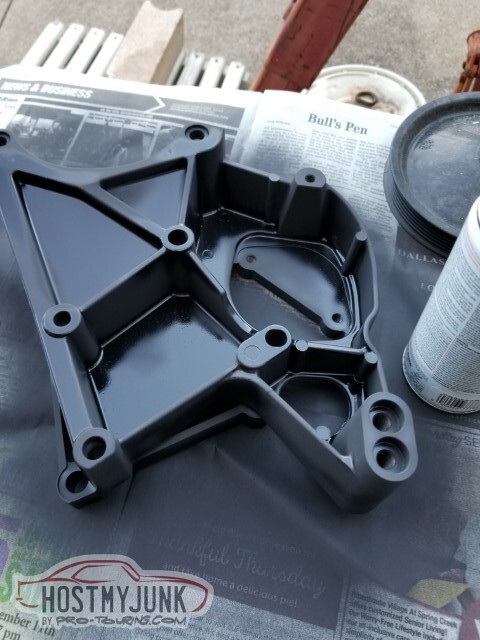
Painted and bolted up.
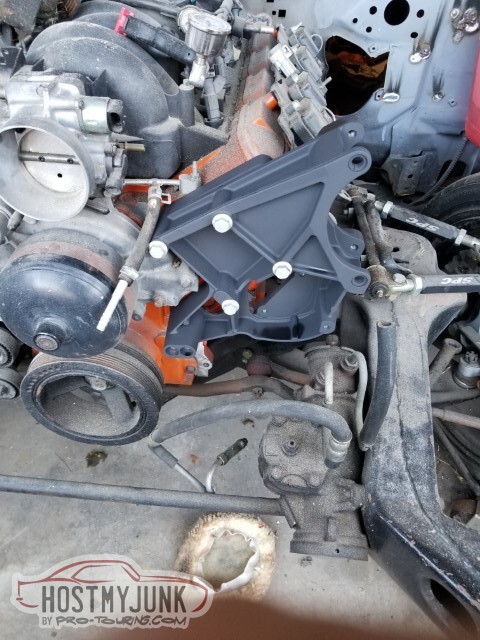
The FLAPS did, however, have the 2005 Silverado 145a alternator, so now I have it instead.

Tore down the F-body PS pump to see how closely it matched what the instructions were calling for.
It does not. Will have to special-order the Corvette PS.
The mid-length adapter for the Holley kit comes with the adapters for both the alternator and for the AC.
I'd thought to list the AC side for sale for roughly half the price of the adapter set.

I went ahead and tried mocking up the lines for the stock F-body AC compressor, to see just how much more notching would be needed.
All of it.I'd have to notch everything.
That won't do.
Suppose I'm going to need the Holley adapter after all.
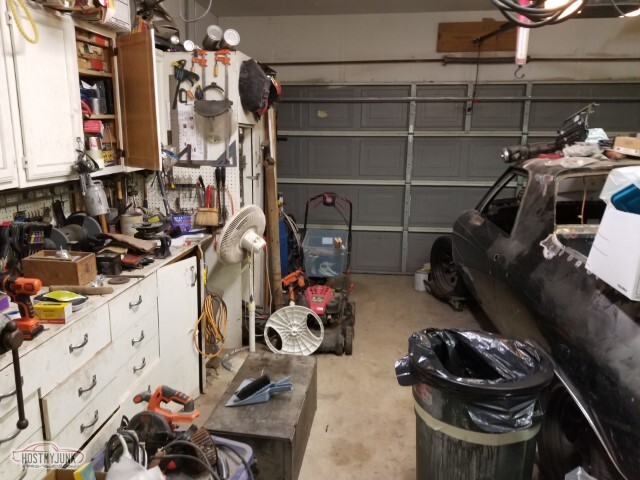
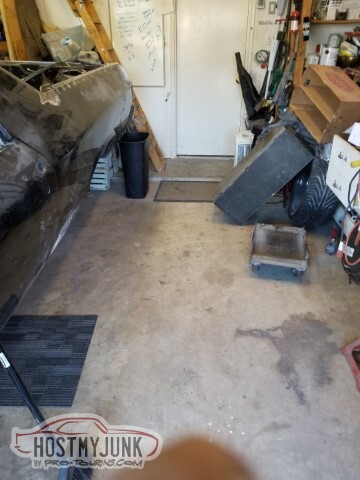
Garage is significantly cleaner at this point.
05-15-2021 #53
-ɹoʇɐɹǝpoW-
- Join Date
- Jul 2002
- Location
- Mesquite, TX
- Posts
- 4,928
So apparently at some point a Summit Racing location opened not too far away. Let's go spend money.
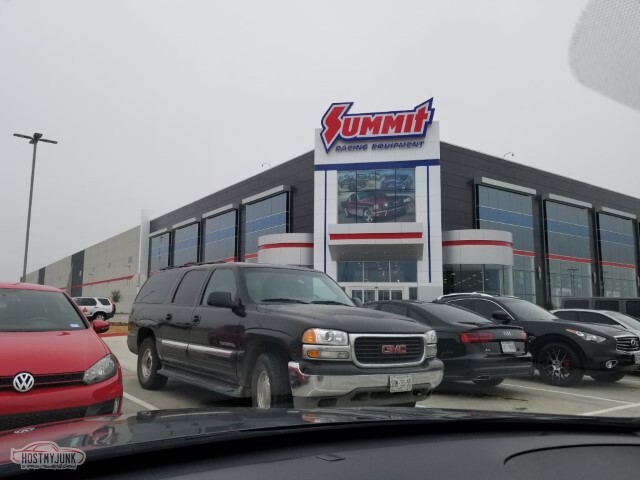
Primary goal was to get the AC side of the Holley relocation brackets (accomplished). Also got the PS pump needed; not mounting the pulley until after remove/reinstall the engine again -- I've already broken one new PS pulley; not doing that again.
Engine will be coming out "relatively soon" - I'll want to finish up the welding of the firewall/floor/tunnel, and then seal and paint.

Next task: Try again on raising the tunnel (as mentioned last time, at one point I'd tacked the brace on both sides and broke both free accidentally.) This time it ain't breaking.
The nice part about "interior floor" is that it ain't got to be pretty, it just has to be solid. This is 16ga.
And welded all the way around. You might notice that the screw in the upper left has a blob of bead that's run down around it... oops. I think I'll need to clear that and remove the screw. I also ran out of shielding gas at this point (quick run to Northern Tool for a cylinder exchange).
Even raised 2.25", the tunnel sure is shorter than the shifter housing.
Equivalent done on pass side too. Will need to continue the process towards the back; next brace also has the seat belt mounts so will have to be extra strong.
Also still need to finish the front part of the tunnel, of course.
And another shot of the engine with most of the accessories in place. Once I've pulled/reinstalled the engine and done the pass header modifications (see post #51) I think the core support can go in, along with the radiator etc. and we'll be a few steps closer.

05-15-2021 #54
-ɹoʇɐɹǝpoW-
- Join Date
- Jul 2002
- Location
- Mesquite, TX
- Posts
- 4,928
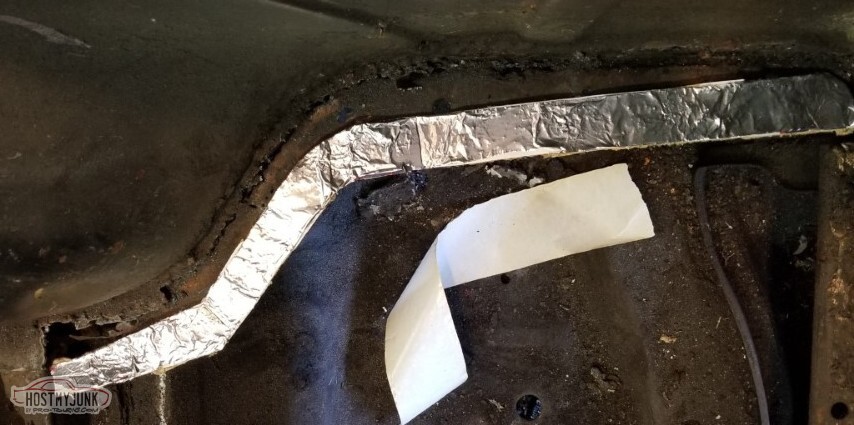
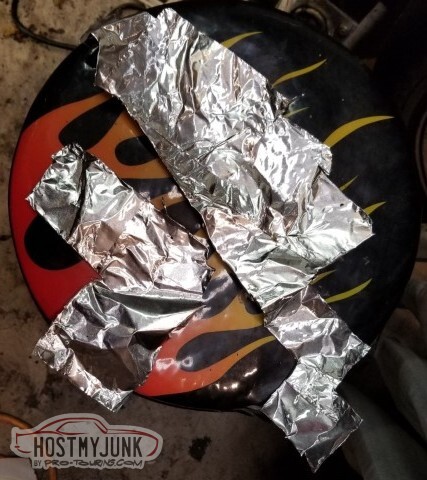
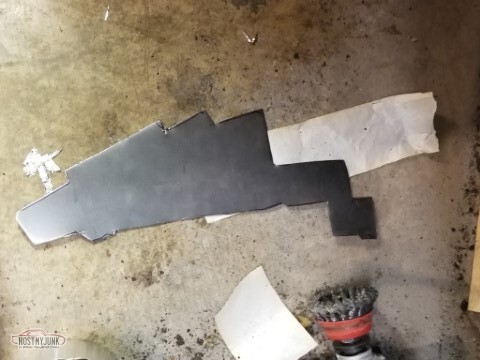
Let's get started with this oddly-shaped hole. I found that aluminum tape - the heavy duty stuff you'd use on ducting - works wonderful for making a pattern.
Tacked in.
Looks damn near like the same image.
So I'd been worried about transmission angles and driveshaft clearance - I'd seen a video on someone's tunnel mods and they'd not needed to go all the way back. Let's start with checking angles.
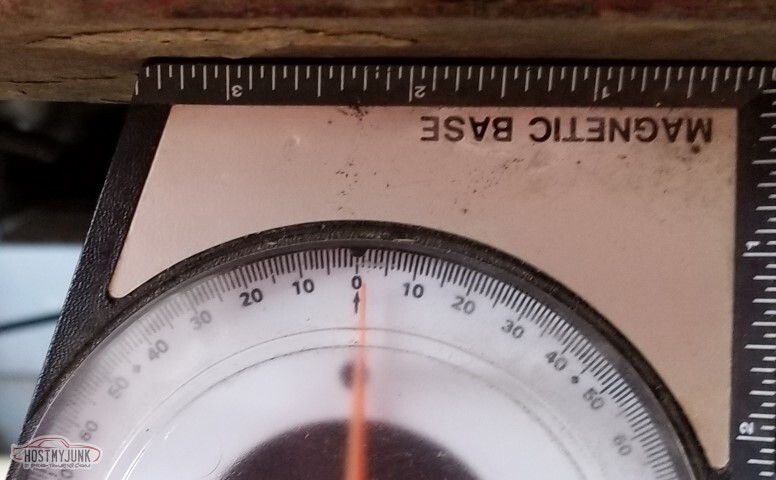
This is on the frame, which I would *assume* is a level plane to compare everything else to. This is the driver's side, so the frame is pointing one and a half degrees (give or take) down towards the front.
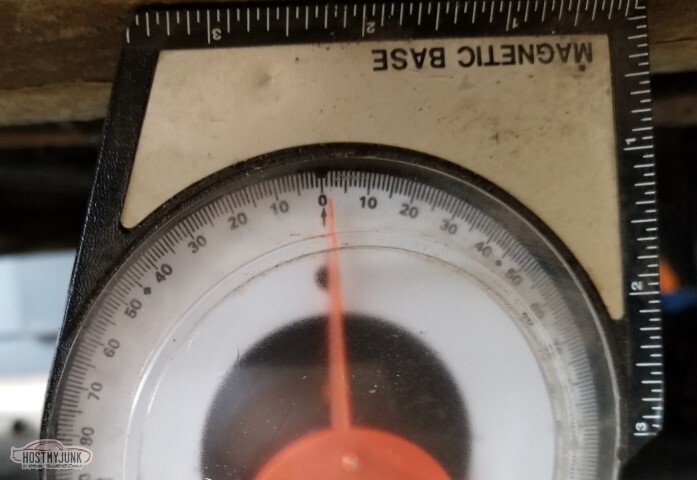
From the passenger side, and the magnetic base on the output shaft flat, it looks like we're about 2 1/2 degrees *up*. That won't do. There is a quarter inch spacer in the transmission mount though, we can remove that.
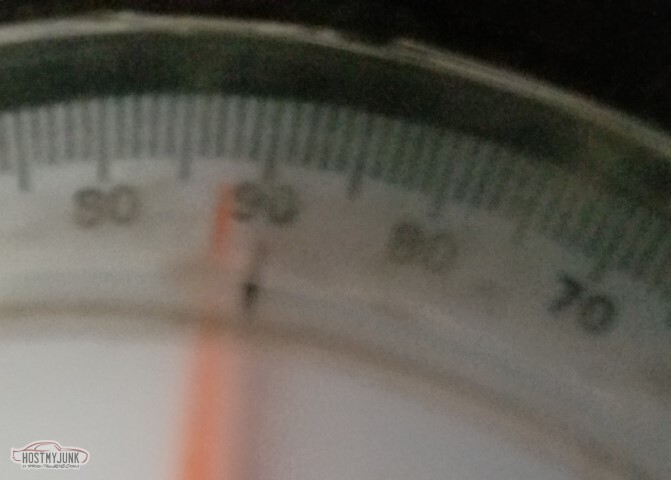
The driver's side front tire was flat when the initial measurement was taken. Aired up now, looks more like one degree down in the front.
Now the transmission shows 4 1/2 degrees down. Possibly more than we'd like, not positive I trust the reading though.
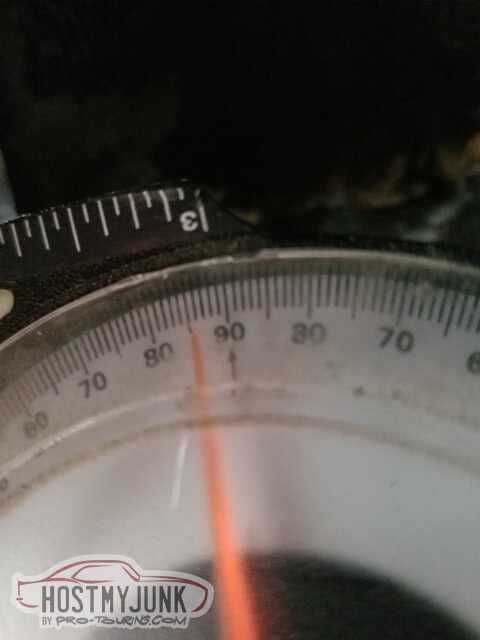
With no other changes, the balancer says we're two degrees down (well, plus one degree for the frame) so 3 down.
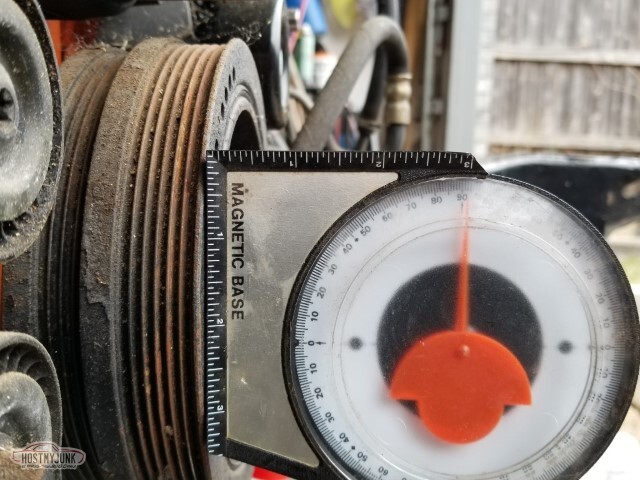
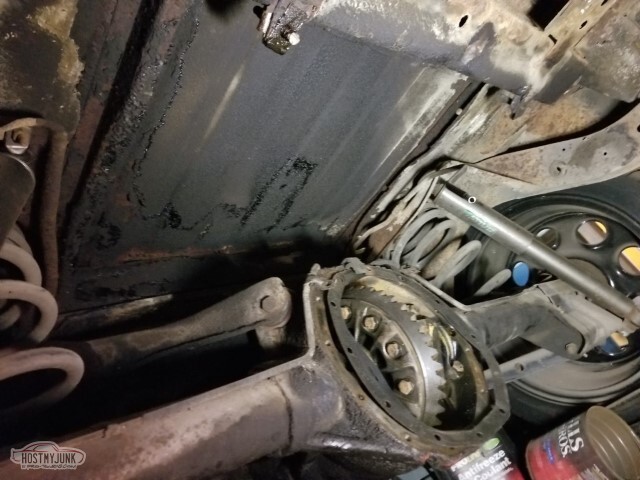
Regardless, it looks like there's going to be plenty of clearance for the driveshaft - this is how much higher it is when it contacts the underside of the body.
The little dip behind the shifter does not line up with any of the plans and so needs to be cut out (in progress here)
And... removed.
(And... blurry)
My first plasma cut! That's harder than it looks, the cuts were horrible.
The pattern wasn't quite right neither - hard to fake it for the curves.
I used 16ga steel for this - this will NOT be weak. Can't really bend it by hand though, so it's the tack-and-bend-and-tack-and-bend method.
I'm apparently still a horrible welder.
Mostly in place on the pass side.
Yes, removing the transmission will be difficult; possibly impossible without pulling the engine. I do still need to replace the body bushings though, which will give a little more standoff.
Driver's side will require some trimming before it can go any further.
This is the point where I ran out of shielding gas, and did not get to the gas dealer in time.
I want to finish up the tunnel, then on to the back wall of the cab! Not until I get more gas though.
05-15-2021 #55
-ɹoʇɐɹǝpoW-
- Join Date
- Jul 2002
- Location
- Mesquite, TX
- Posts
- 4,928
Last week we left off with running out of shielding gas. Off to the local cylinder exchange!
Day 1: Bought a replacement cylinder (well, exchanged it). Asked - just like every other time - about upgrading, they answered that they can't do that anymore.
Day 2: The new cylinder is empty.
Day 3: They have no other cylinders of my size. Manager is willing to upgrade me from a #2 to a #3. Sends me home with a #3 cylinder, just pay the difference in the exchange price (ten bucks!)
Day 4. This is a carbon dioxide cylinder, fittings are different. Back to the store.
Day 4, cont'd: No C25, but they have a #3 of pure Argon. That'd work! The connector looks like it's the same.
Nope. I can't MIG with pure argon - zero penetration. It's like welding teflon.
Call up there, they don't know when they get new cylinders in.
Day 5. Call in the morning, he says they have some #3 C25 cylinders.
Head up after work, they do, they're in the wrong cabinet (in with the acetylene).
Net result: Five trips to the store (not named as I think he wasn't supposed to upgrade me like that), $45 total expenditure, but now I have a #3 C25 cylinder.
The argon gave some really crappy welds. When I go after the underside I'll have to go over this again from there.
Measure once, cut twice-or-more with the plasma method of fitment on the driver's side.
Leads to having to make a lot of bead to fill gaps. Towards the very end dropped back and changed welder settings, from voltage D and speed 6 down to B and 3 1/2 - seems to have helped quite a bit.
Time to work on closing out the back of the transmission hole - since the remainder of the tunnel doesn't have to be raised, I can just slope down as convenient.

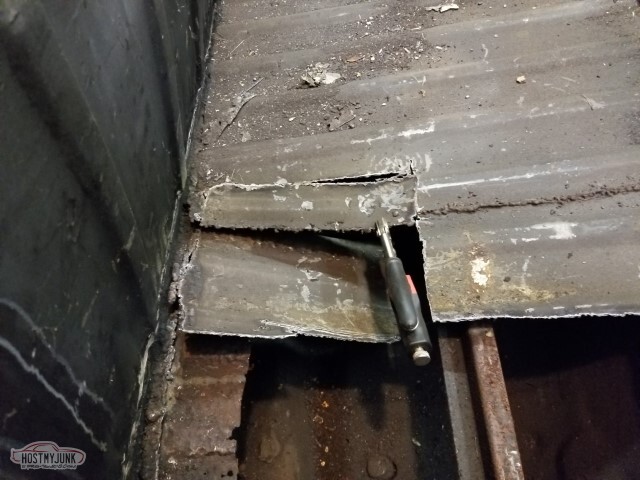
Unfortunately, my first cut was actually halfway through the brace. I'll have to have a more abrupt cap.
Better view of where the brace is.
So I started to measure and make a pattern, but decided instead to fake it with a chunk of plate and the plasma (I'm enjoying it too much)
Welded up the mis-cut, weld-and-hammer-and-weld-and-cut-and hammer, it's ugly but the tunnel is closed. Still need to grind the welds, need to get more flap disks.
Passenger side. The new welder settings are helping.
Oh hell, that looks like progress.
Yep, that's real nice.
Still nice.
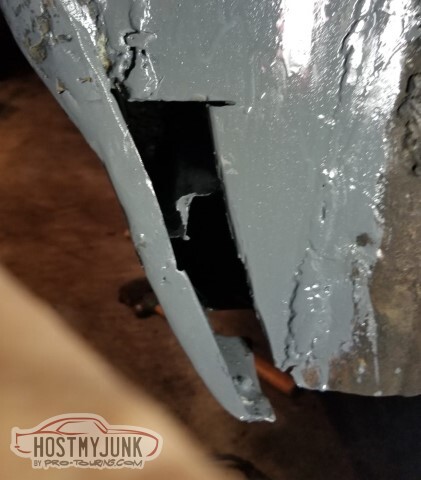
Next task: fix the rust hole across the back of the cab.
You know what's good at cutting out rust?
Plasma.
Tacked a bit of angle iron to use as a guide and cut along it.
Little bit of cleanup and it looks like a nice clean spot for some weldery.
Near side, where the big rust was.
Plasma again, cut some 16ga of the correct width to weld in place. With the new welder settings it's just working out.
Ended up being three pieces of metal. Still needs cleanup but I really like it.
Here's what it looks like from the bed. Not quite sure how I'll handle this side - maybe try to use the TIG to smooth it? It's flush, at least, if not smooth. Didn't *see* any pinholes but some may become apparent once I grind both sides.
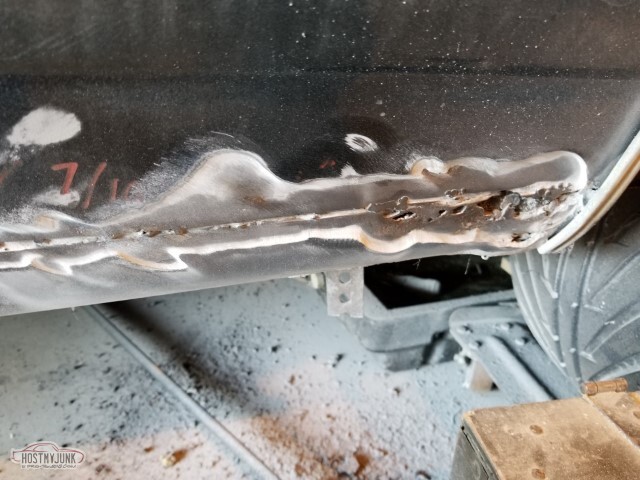
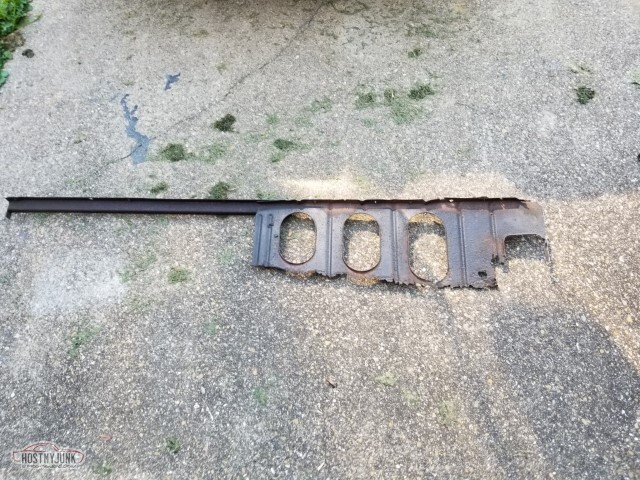
Started to cut for the replacement of the bed hatch cover - what I had was this abomination of JC Whitney bed patch panels lap welded poorly. Here you can see there was no penetration between these two
I do not know what the front of the bed floor hatch cover is supposed to look like - is this part of the old cover left behind, or is that the mount?
And with that, I've had enough. I need to research and find what the front of the bed hatch thing is supposed to look like. Hopefully another update next week!
05-15-2021 #56
-ɹoʇɐɹǝpoW-
- Join Date
- Jul 2002
- Location
- Mesquite, TX
- Posts
- 4,928
So I chopped up the fake bed cover. Stored in the compartment is:
Rust!
Driver's side.
Passenger side. I broke free this large chunk of rust-enhancing foam. Sigh.

The support is rusted out too.
Better view of the driver's side. There is some bubbling on outside of the bottom of the quarter here.
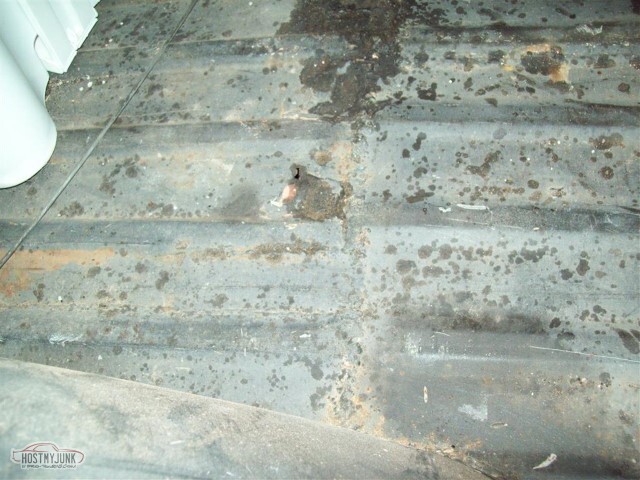
You can see little tiny pinholes in the floor here.
Better view of the support.
Support removed. You can probably see the pinholes better now.
The plasma makes it fun. I cannot tell if the lower layer here is part of the old lid, or something for the lid to mount to for sealing purposes.
Without flash you can get a better idea of just how much rust is there.
At least - and it's not much consolation - the "welds" didn't have any/much penetration.
Pile of removed metal grows.
Trying to clean up the side. The shelf the panel mounts to was gone, but there were weld gobs stuck to the panels.
At least the shelf-tab-thing exists here.
Swept and cleaned.
Test fit of the panel. A couple of weld-gobs are in the way.

Blurry closeup of the gobs.
Driver's side, behind the fuel filler. Rust at the edge of the bed, because of course there's rust.
The bolts for the fuel tank were apparently original; I had to cut them with a sawzall.
Surprise - there's no rust in this image!
Passenger side has the same rust at the edge of the bed.
Again - a rust free image.
Drained the fuel tank. There wasn't much in it, thankfully. At best this is 93 octane from 2008.
Need to clean it up, inside and out.
Patched rust holes and tonneau cover snap holes in the sail panel and in the section below the rear window.
Those pinholes? They became perforations, tear at the dotted line.
Removing the "patches" at the back of the footwell. Sigh.
It's all horrible.
So yeah. My car is made of rust and sadness.
Good news though:- It's not a show car
- It's NOT a show car
- It doesn't have to be a show car
I had thought that I would build a battery box and mount the battery on the pass side of this area, and hinge the lid. Now I'm not sure how I would seal that from water - don't want to have to do this again in the future. Battery may end up in the stock location.
05-15-2021 #57
-ɹoʇɐɹǝpoW-
- Join Date
- Jul 2002
- Location
- Mesquite, TX
- Posts
- 4,928
Test-fit of the front bed panel. It doesn't seat. It looks like I'll need to round the back corners
Made a pattern for the pass side panel shelf
Flap disk to clean up the welds on the strip.
Finished cutting the front-of-bed damage away.
Cut out the pass side panel. Once again, more rust than expected:
Namely, this at the front of the wheelhouse.
I used the plasma to remove the side panel. It looks like I sliced through to the cab, too.
Yep. I'll have to weld that back up.

View from the wheelwell
Without flash, to make the holes more obvious.
Made a pattern for the pass side closeout, too.
I've found that the aluminum tape you'd use for ductwork is really really good for patterns - it's stiff enough to hold a shape, soft enough to cut with a knife.
Completed pattern. I'll cut a square out of the middle of the real metal. I'll need it to paint/seal the backside.
Of course, can't close that up until the wheelwell is fixed. Took the wheel off for access.
Cut me a nice square. Partway through this process, my die grinder failed (didn't know that was a thing) - started getting a serious wobble, which made the cuts not really work so well.

So following the bad cuts here, I broke out the angle grinder with a wire wheel on it. It failed too - switch got stuck in the "on" position.
Off to harbor freight. Tools replaced.
Patch panel created
Ugly welds applied.
From the inside.
Grind welds.
Grind, grind, grind. Still pending seam sealer.
Applied POR-15 to the inside of this area. I'm not going to be cutting the contents out.
Still the same can.
It's getting low though. Need to get a new can.
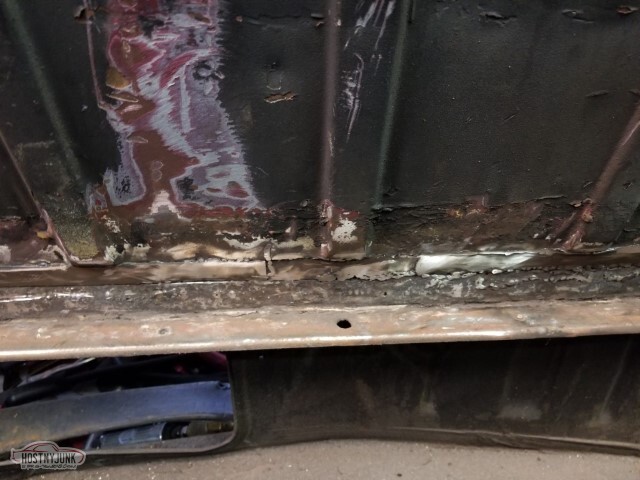
Driver's side behind the door had some bubbling going on. This is less rust than I expected.
05-15-2021 #58
-ɹoʇɐɹǝpoW-
- Join Date
- Jul 2002
- Location
- Mesquite, TX
- Posts
- 4,928
Continuing the unending saga of the car that will end up made entirely of weld bead. Start with the front of the wheelwell...
..and weld it.
Cleaned up, and the bits in front also done. Hopefully this will properly approximate the correct shape in the long run.
Once is happenstance. Twice is a coincidence. Three times is enemy action.
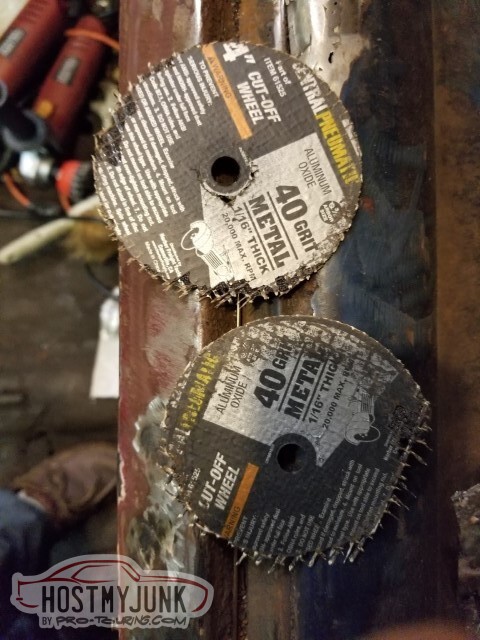
This is probably numbers three and four (4" cutoff wheels from HF). These kinda suck - they break off in chunks and get out of round. Didn't have that problem with the previous (probably Northern Tool) versions.
A reminder-to-self to not buy these again.
The perforations in the footwell have become a tear, or two tears as the case may be.
Bonus for the eagle-eyed: You can see the tunnel starting to tear as well, at the bottom.
Really only one thing to do about this:
This gets me partway there, but I don't want to try and manually bend a replacement for the tunnel-hump - I guarantee it won't be "right".
I Have Heard that the floorpans from 1st gen A bodies are correct for this generation El Camino.
Oddly enough, I have part of a passenger footwell from the Chevelle. Let's find out.
Yes, the hump is damn near identical. The seat belt mount (on the right here) is not quite the same - was smaller on the earlier pan.
So next up for this side of the footwell is seam sealer. Before we seal, we have to prime, so I mixed up some epoxy primer.
It's cold out - like 50F in the garage. Hopefully it'll cure overnight.

It did not cure overnight.
No working on the footwell for me. That's fine though; I've got other work to do.
There is rust on the quarter in front of the wheel.
Never thought I'd say it about this car, but the rust wasn't as bad as I anticipated here.

This is the rust in the wheelwell. This is exactly as bad as I anticipated.
If you look closely in the rocker you can see the wide variety of rust enhancing foam that the car has been treated with.
Here I've already removed quite a bit.
This is not the sum total of the foam I pulled out. Some of the dirt was still moist.
That's a more interesting statement if I point out that the car has been in a garage since 2006.
2021-05-11 edit: entry written in 2019
I've cut out the rust from the outer panel.
Also cut it out from the inner.
Used the aluminum tape to make templates.

This is the trimmed panel for the inner.
This is progress; still need to finish the package tray and the footwell, then it's just bed floor (and whatever I find after that).
05-15-2021 #59
-ɹoʇɐɹǝpoW-
- Join Date
- Jul 2002
- Location
- Mesquite, TX
- Posts
- 4,928
Weld and cut and weld and bend and weld and bend.
Also had to make the lip, since the old one was rusted away.
I remain not a very good welder. Weldor. Whatever.

It ain't perfect but bondo will hide a lot of sins.
Not pictured: The patch in the wheelwell did not match the outside bend.
Made a new patch that did, and cut the inner fender away to join cleanly. Primed all the things, in preparation for seam sealer -- there are areas in here that will be inaccessible once this is closed up.
Alternate view
I do not expect to need this part, but I can't see throwing it away yet.
Time to start on the pass side bed closeout.
This is the point where I ran out of welding wire. Don't want to get cleaned up and make a run right now, so may as well clean up so I can work easier.
I can see (most of) the bed!
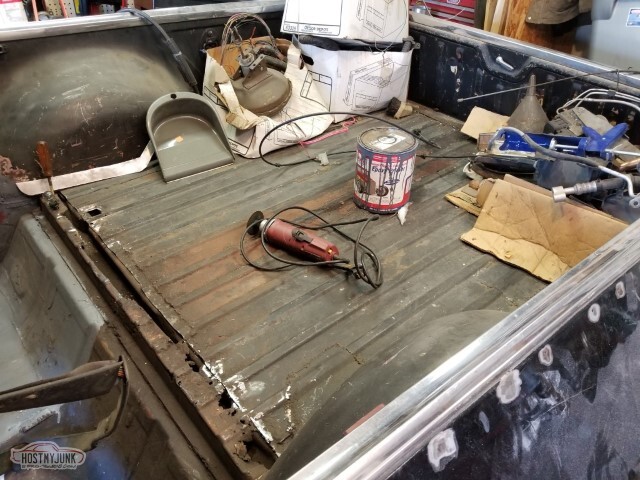
And now I have access to the workbench and room to work! Woo!
Went and got the welding wire.
Once you have wire, it's time to weld.
Welded the perimeter. Still need to make a patch for the inner corner of the bed.
And, since God is an iron, here's where I ran out of shielding gas.
Even though I didn't have the shielding, I went ahead and welded in the patch on the passenger side package tray.
You can kinda see the holes in the "footwell in primer" pic in post 58.
05-15-2021 #60
-ɹoʇɐɹǝpoW-
- Join Date
- Jul 2002
- Location
- Mesquite, TX
- Posts
- 4,928
Here's what the driver's side panel looked like after cutting out the closeout.

And here is the pile of rust that used to be the closeout, with its replacement.
I am having feed trouble with the welder, or something else - it's not welding "right" and it doesn't sound correct as the arc flows.
Maybe it's the new wire (Hobart branded); maybe the new cylinder doesn't have the right C25 gas in it. Maybe it's the tip or the nozzle.
Maybe it's the liner.
I replaced the tip and the nozzle. Internet says Hobart wire is the good stuff.
So I went to my local welding supply store (Metroplex Welding Supply) and told them I needed a liner for a Lincoln, and this is what they gave me.
This is Tweco 42-23-15.
This does not fit my welder.
Unfortunately I cut it before realizing it was wrong, so we'll see tomorrow if they make it right or no.
This is what the end is *supposed* to look like.
(picture missing)
I've mail-ordered a Tweco 23-40-15 for significantly cheaper than what MWS sold me the wrong thing for.
More cab rust repair! I failed to take an explicit picture here, you can kinda see the rust low and to the right in this pic:
from post 55.
I'll be patching in two parts because (choose one or more)
- I'm lazy
- it's easier
- I don't have a shrinker/stretcher/brake.
Here's where I really started to notice that my welds were worse than usual.
Yes, that's saying quite a bit.
And even worse from the backside.
I can do little tack welds well enough as it sits, and a whole bunch of them were used to weld in this patch.
Still need to fix the rusthole on the rib, of course.
The jagged edge on the cut part kept snagging my pants so it needed to go.
The closeout for the wheelwell is done. (not pictured: closeouts for the backside and bottom of the rocker)

Found a rustspot in the driver's side floor too. Handled.

The rust around the bedside has been somewhat handled - still have some issues to work on and it's generally rough - but it's no longer rusted metal.
The square at the rail has also been corrected here.
Yes the welds still look like crap; I'm pressing on regardless.
Coated things with POR-15.

New MIG liner en route, new seam sealer coming. Bought wheels and metal to build the new welder cart, replacement plexi for the sandblaster, replaced both die grinders that recently failed. Plenty of honey-dos for the weekend so short update.
Not pictured: Think I got the AC box figured out. The ACDelco tensioner that the Holley accessory conversion needs has arrived.

 Reply With Quote


