

Results 1 to 20 of 43
-
05-01-2022 #1
 Registered User
- Join Date
- Aug 2007
- Location
- Albemarle, NC
- Posts
- 1,149

vintage cup car duster hybrid build on the low budget
So, my end game is a street legal-ishrace car that was incredibly safe, cheap to operate, easy tomaintain, and would be able to do full days of two drivers at trackslike vir without maintenance or worry. It needs to be legal forhillclimb as well, and easy enough to drive I could hand it tofriends and family to use. I also want to do it on the cheap, as im asocial worker and my wifes an elementary school teacher
.
Its a tall order.
I had gotten the AMC back to rebuild. Ihadn't done much of anything, as to get it where I wanted requiredfull frame rails, suspension swap, rust repair, and adapting circletrack equipment in. it was going to be a huge job of years.
I had been thinking lately that if Ihad to do it again, I wouldn't have started with the AMC, id havestarted with an ex cup car or something. These thoughts were inspiredby a few guys setting up ex circle track cars for hill climbs androad-racing on GRM, and the fact that its been a day dream since highschool.
Talking with my dad last Friday nightat the cruise night, I mentioned it to him. He made the comment thatI should just keep my eyes open and see if I find a good deal whilemaking up my mind on the AMC.
Ny dark, I had found a VERY prominisnglead on facebook and messaged him.
 Screenshot_20220423-190727_Facebookby MichaelCrawford, on Flickr
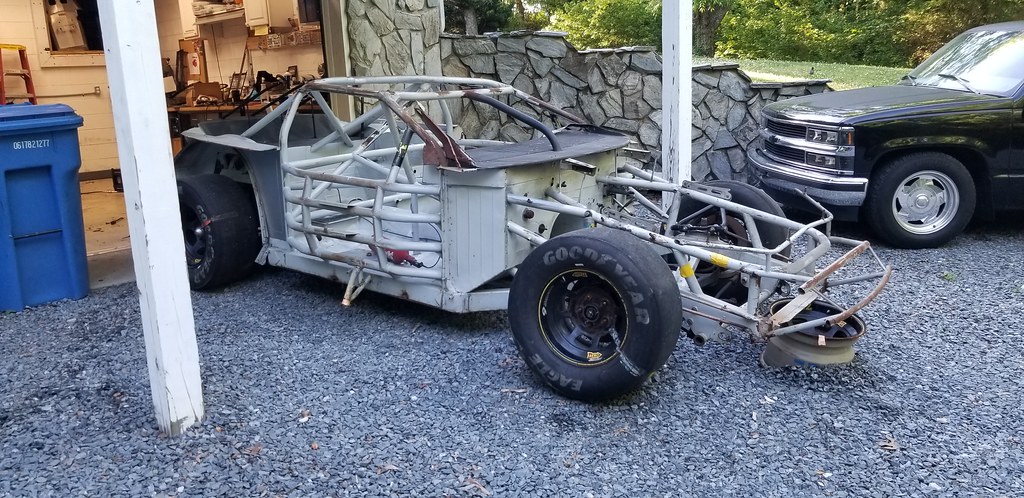
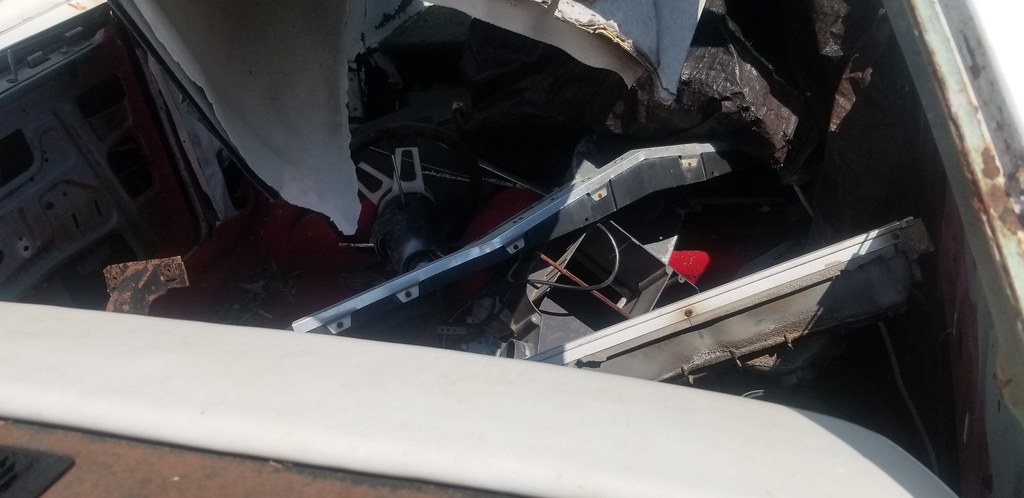
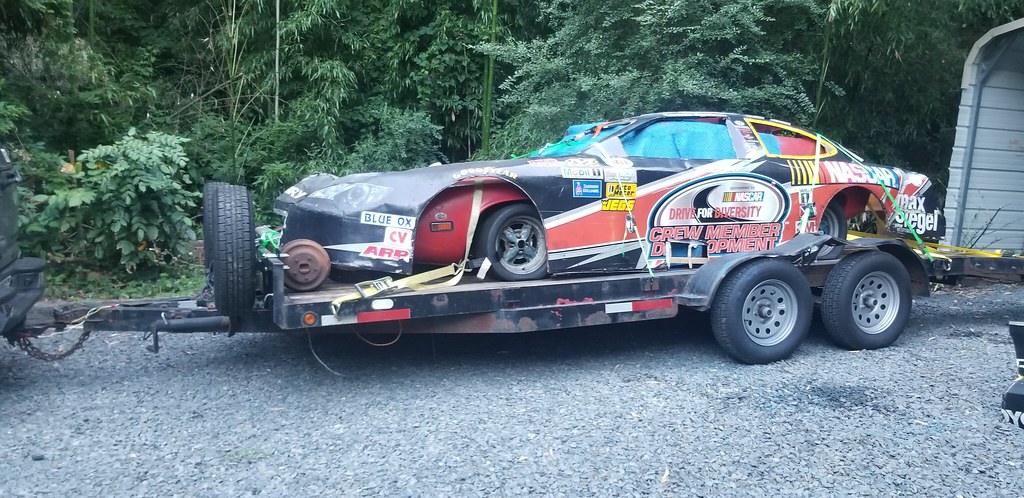
turned out he was one of the guys thatruns with M4Them with the classic stock cars. He cut his own price to1200 out of the gate, and he wasn't terribly far away. I listed theAMC for break even pricing, and scheduled a time to go see it. Hesent me many more pictures, but had bought it in a parts lot from thepit crew training school and had no history or idea what it was otherthan a Taurus body with a Toyota wrap. I just saw the cage, and truckarms, and front suspension and fell in love.
 received_734530364400278by MichaelCrawford, on Flickr
 received_519778693143052by MichaelCrawford, on Flickr
 received_705531537354102by MichaelCrawford, on Flickr
Since I know less than nothing aboutnascar stuff, I sent everything to my friend Steve for review. Hesaid the chassis looks square, and could be setup for road-racerather easily.
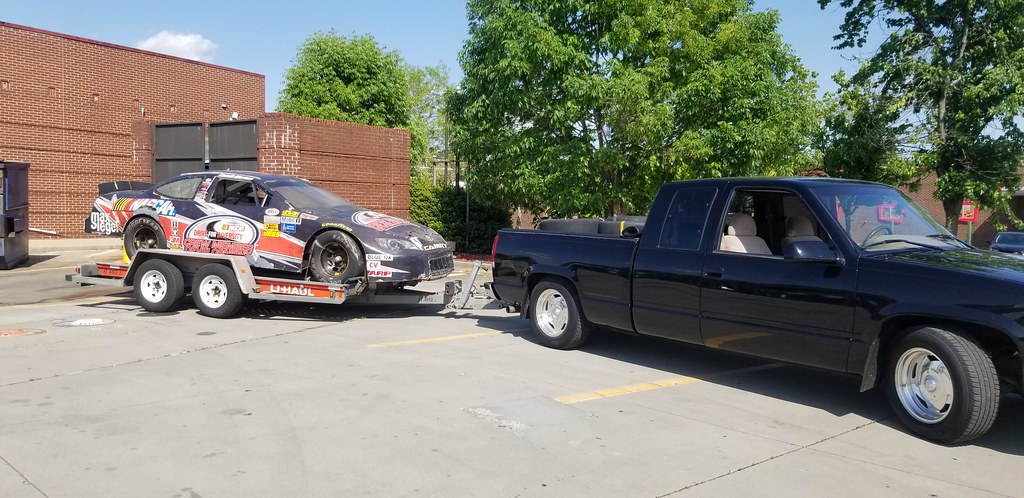
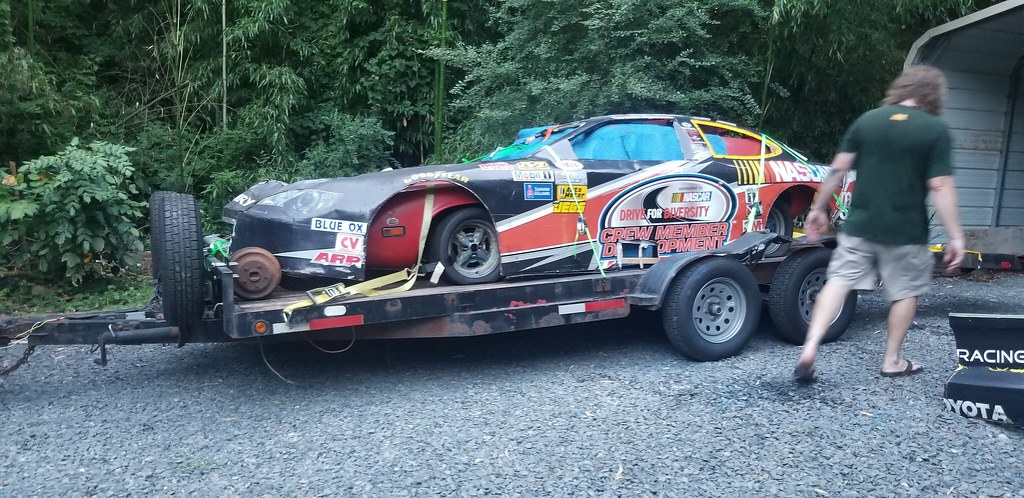
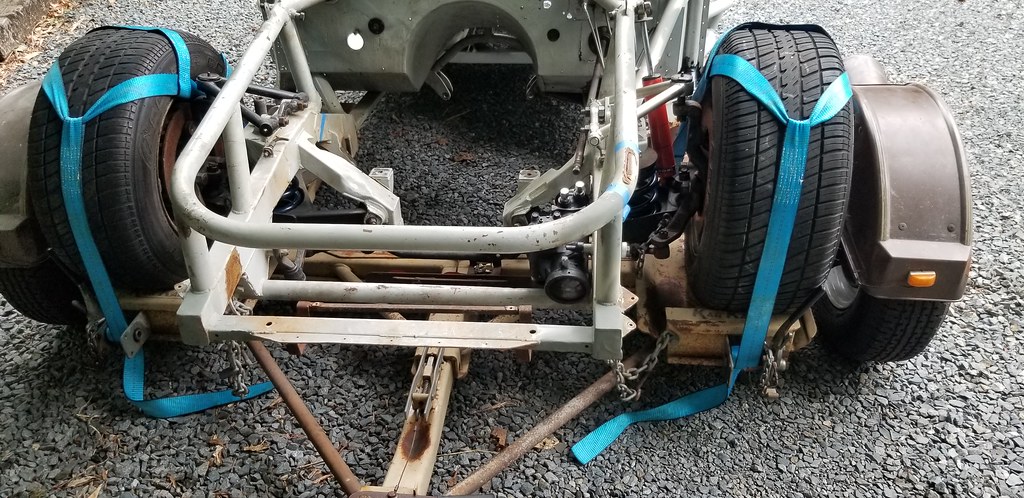
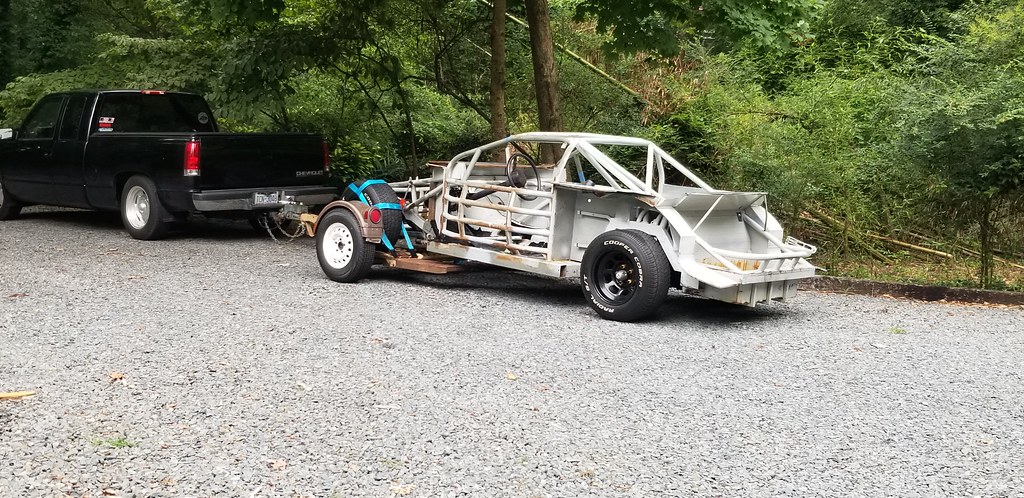
So Thursday I took out of work a fewhours early. Traveled to huntersville to get the closest uhaul to geta trailer at, then to Matthews. We got the car loaded up, he gave mesome spare parts like the brakes and another 8 wheels, and sent me onmy way. This was my first ever time using a uhual trailer, using mytruck to haul a car on a trailer, and trailering (not tow dollying)all by myself. It was pucker inducing alone, and add into that therush hour traffic starting and GPS taking me all narrow back roads,and I was terrified. But I did it, just took my time and let my headand truck cool off frequently. It was mind boggling to look at everytime i stopped though, and many people gave me thumbs up.
 20220428_150917by MichaelCrawford, on Flickr
 20220428_153624by MichaelCrawford, on Flickr
 20220428_161044by MichaelCrawford, on Flickr
when I got home, I was faced withgetting the car down my street and into my driveway. This requiredbaacking the trailer down an alley and a sharp turn into my driveway.I had never done it. Anywhere.
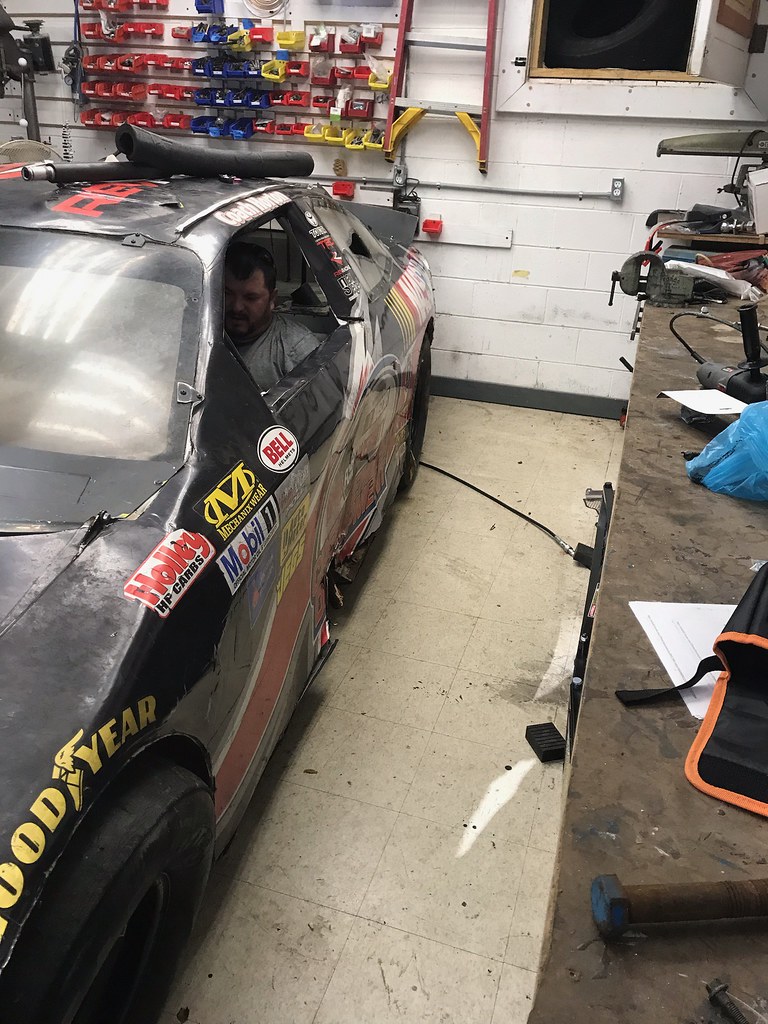
But, I DID IT. Took me 20 minutes, butgot it done. Called my wife, daughter, and stu over to help pushstuff and spot, but we got it done. Then I got in it for the firsttime.
 IMG_5293by MichaelCrawford, on Flickr
much like the scene from tommy boy, itsa fat guy in a little coat getting in and out. This is an issue.
But one for another day!!
I went to take the trailer back, andwound up doing crisis calls for some troubled teens at the curch,somoe more work for my dayjob (did I mention I was on the phone doingmental health work the whoe time I was towing too?), and crawled intobed about 11.
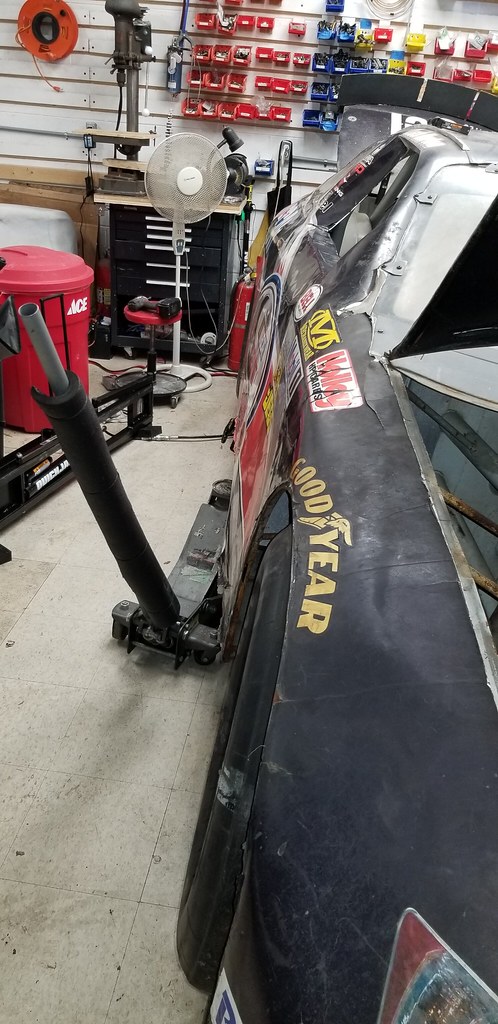
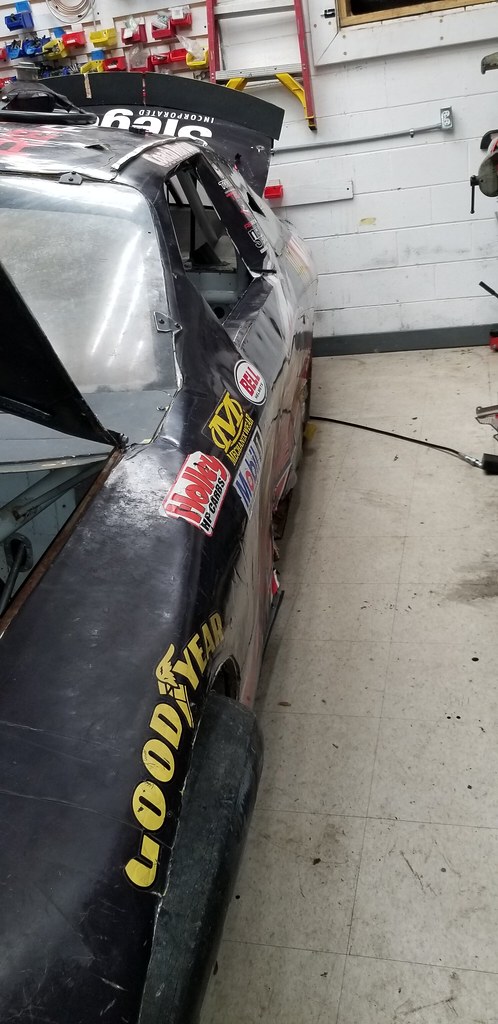
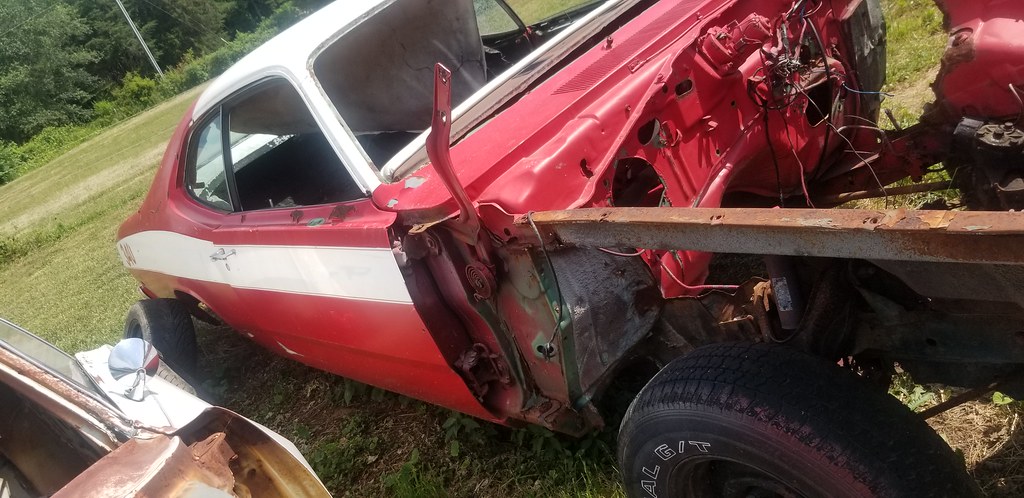
friday was a super long day in thesaddle, but I confirmed sale of AMC and delivery. And started tryingto sell the body off. Since high school shop class, I have dreamedabout a duster race car with slicks hanging out of the fenders, bigcage, boom tube exhaust, etc. I doodled it on everything, but couldnever bring myself to do it to my 70 DD I had at the time and stillhave. Considered it a pipe dream. However, I now own a nascar withwindow openings too small to use, a body thats too rough to put ontrack due to structural integrity concerns, and skills that highschool me never dreamed existed. I was able to sell the body for $200has garage art, and keep all the ducts, lexan, window braces, etc.mind you, I did this before actual measurements or anything....
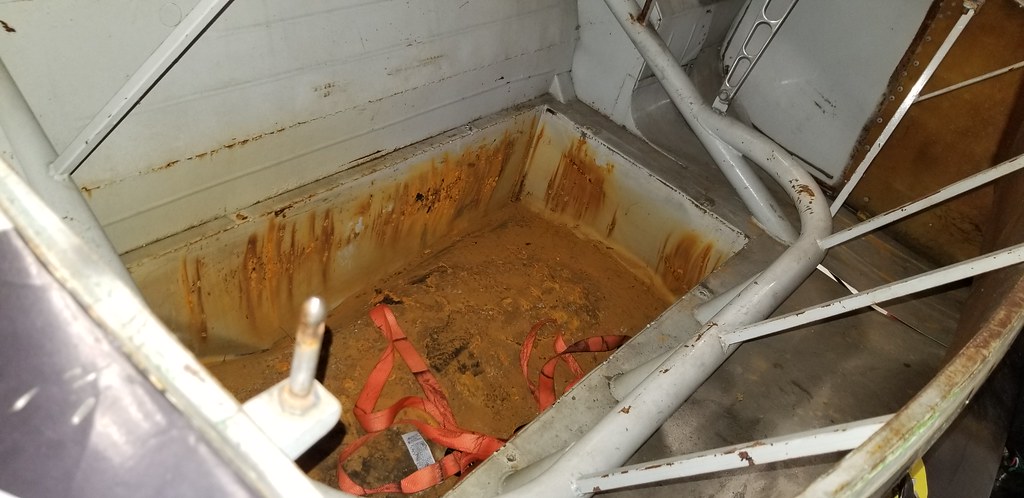
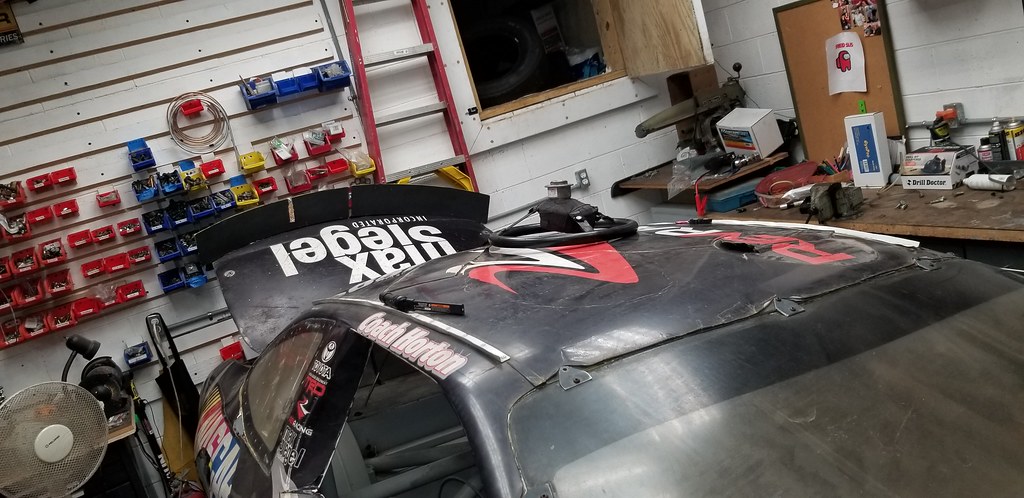
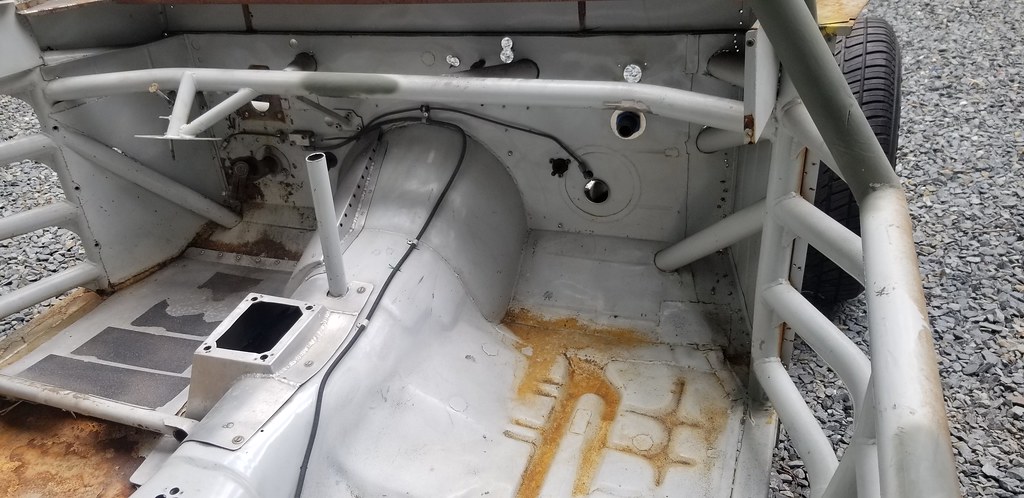
anyway, yesterday I pulled the caroutside, got out the superclean and hose, and started cleaning. See,I hate getting dirty. And a good visual inspection and identificationof what I bought is step one with every project. This one cleaned upfairly ok, all things considered. Id needs more, but that will belater.
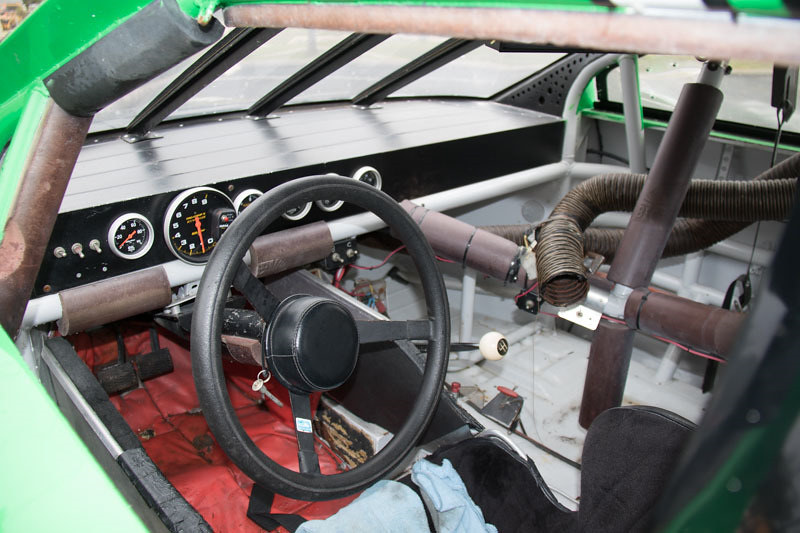
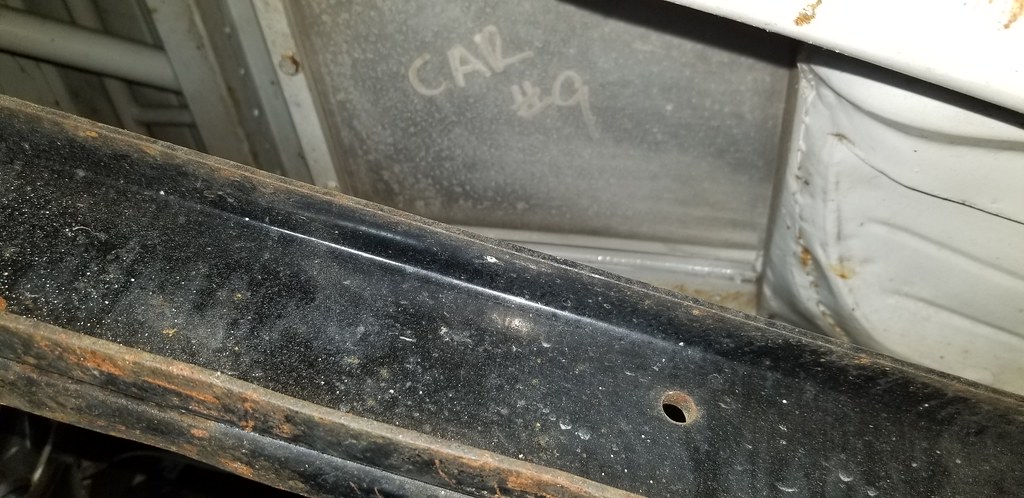
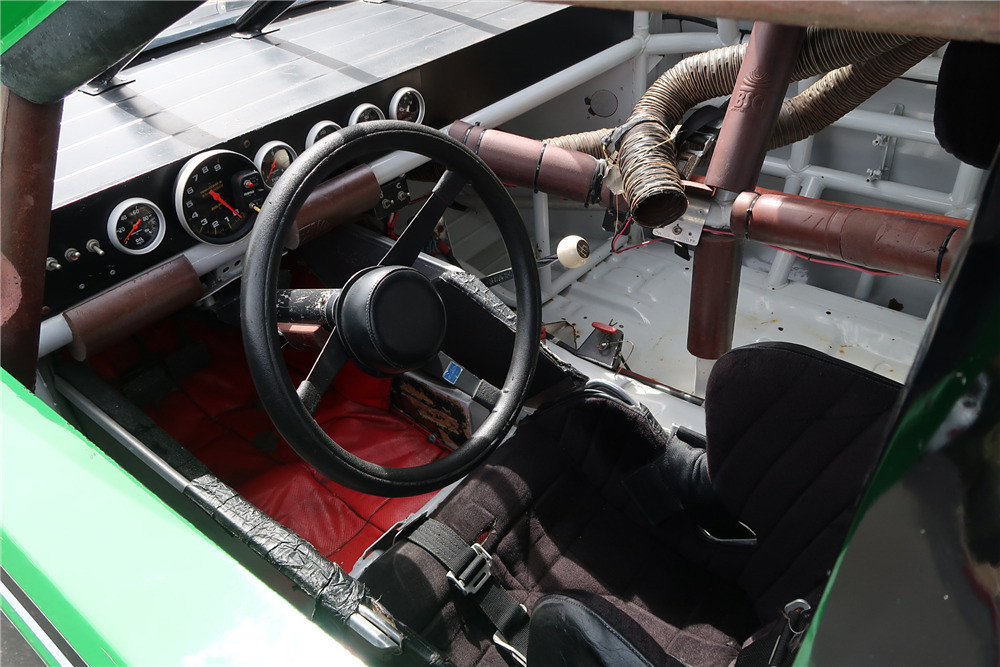
So, what I got in a stock car is what Ibelieve to be a 94-95 vintage spam or napa #9 chassis. Look at thepedal box (single master, mecganical clutch, 4 bolt columnattachemnt, stock appearing pedals) to one of the 94-95 t nirds Ifound on the internet. Also, the cage tube layout.
 received_331398688905867by MichaelCrawford, on Flickr
 201900_Interior_Webby MichaelCrawford, on Flickr
the reason I think #9 is that I foundthat written in sharpie on the underside in a few places, and thenapa blue interior paint. I haven't found any stamping or numbersotherwise.
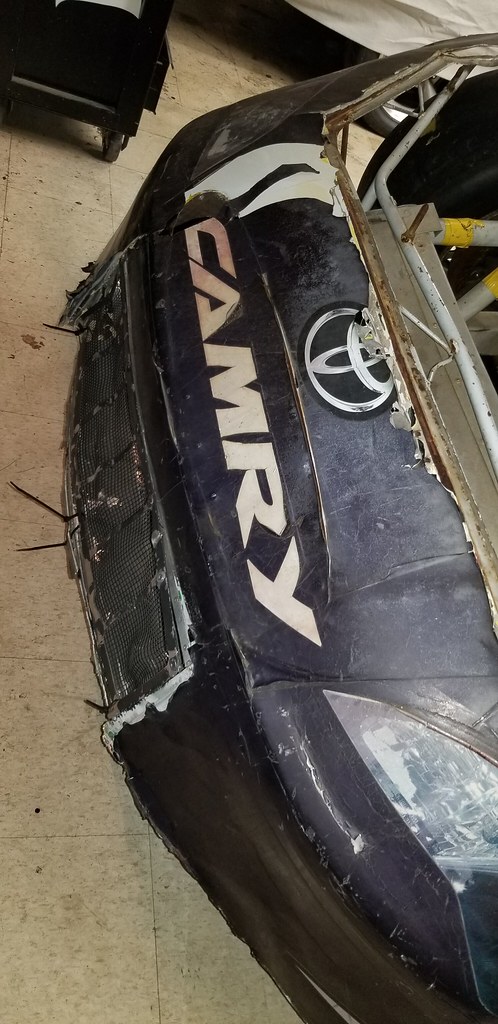
Regardless, after its stint as a cupcar, I believe it was re-bodied as the new 99 taurus car, and used asa show car for a while. Then, it was sent to coach hortons for pitcrew training.
So, more pictures of what I got (photodump time!)
 20220428_203558by MichaelCrawford, on Flickr
 20220428_203603by MichaelCrawford, on Flickr
 20220428_203551by MichaelCrawford, on Flickr
 20220428_203608by MichaelCrawford, on Flickr
 20220428_203615by MichaelCrawford, on Flickr
 20220428_203626by MichaelCrawford, on Flickr
 20220428_203648by MichaelCrawford, on Flickr
 20220428_203740by MichaelCrawford, on Flickr
 20220428_203757by MichaelCrawford, on Flickr
 20220428_211447by MichaelCrawford, on Flickr
 20220428_211455by MichaelCrawford, on Flickr
 20220428_211501by MichaelCrawford, on Flickr
 20220428_211618by MichaelCrawford, on Flickr
 20220428_211750by MichaelCrawford, on Flickr
 20220428_211754by MichaelCrawford, on Flickr
 20220428_211802by MichaelCrawford, on Flickr
 20220428_211807by MichaelCrawford, on Flickr
 20220430_073331by MichaelCrawford, on Flickr
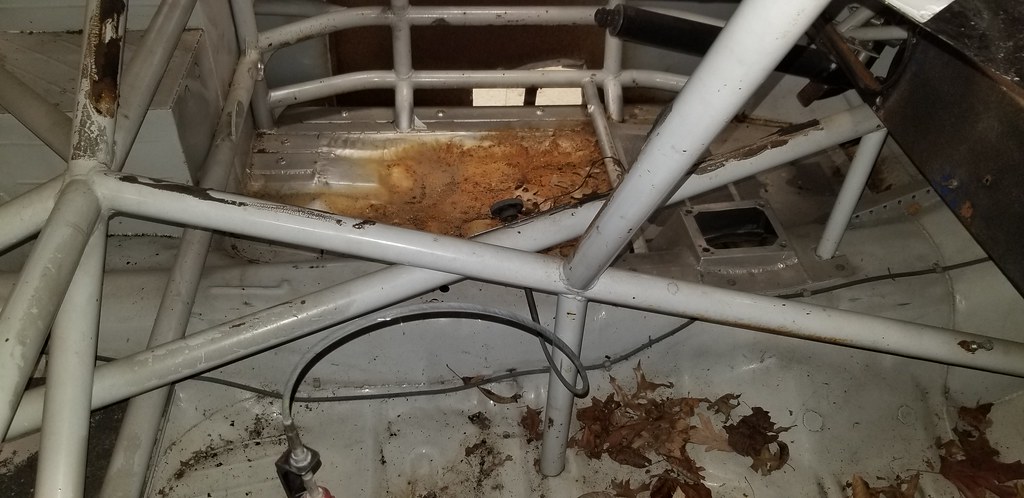
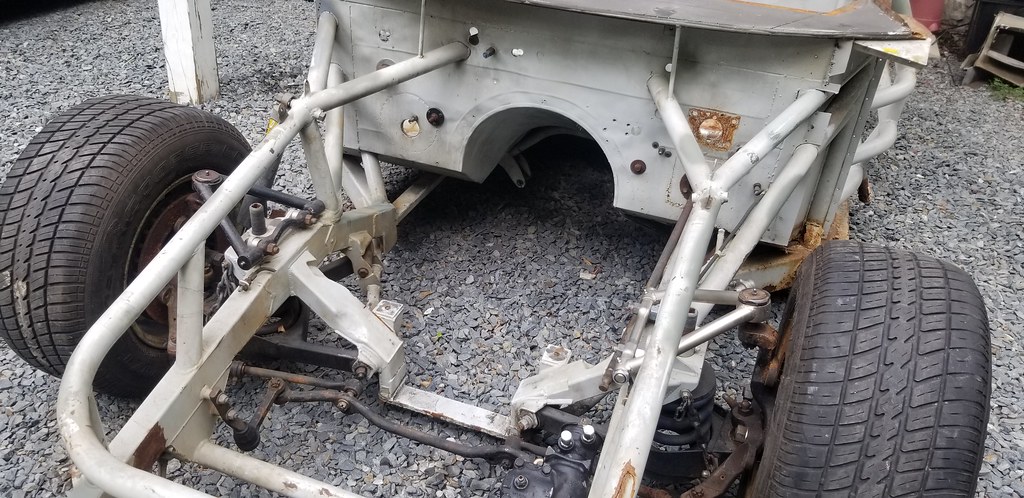
so I then began disassembly a littlefurther. First was pulling the windows for better access. The lexanis mighty rough, but may be able to be reused. I also pulled thespoilers for potential reuse. Then, got it up on the quickjacks andpulled the wheels. And started measuring all the spots I think arecritical. Seems like, other than the wheelbase, the duster bodyshould fit! It will be shrink wrapped, but looks like it will clear.This is major. However, actually skinning the chassis as a dusterwill await it being a running, driving NASKART and getting shakendown.
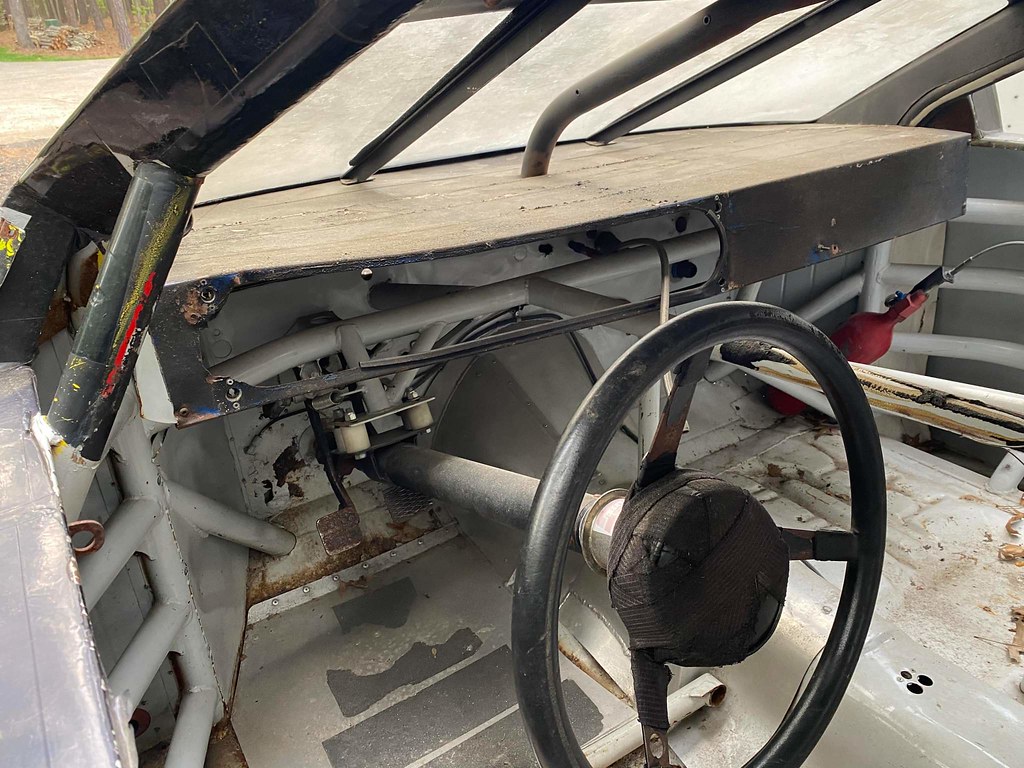
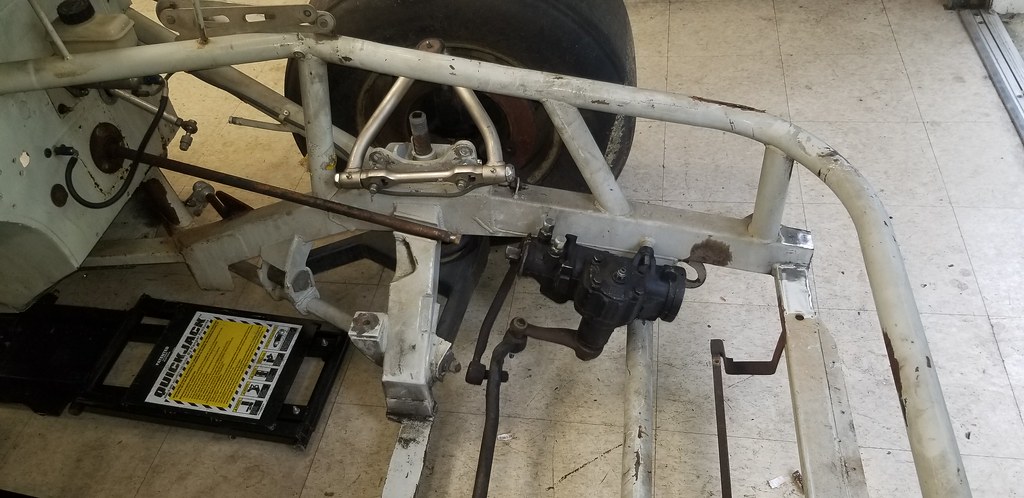
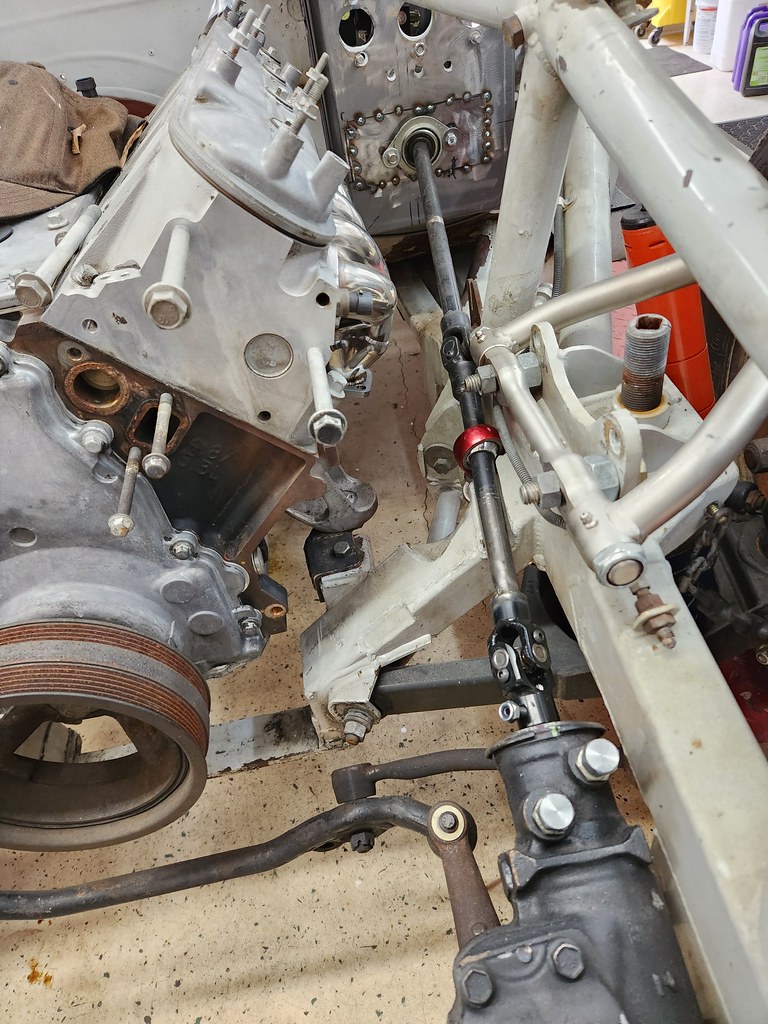
Today after church, I started trying tofigure out what some of the parts are. First up is the steeringlinkage. See, I got the car without a steering box. I was able tosource a used one from halfast in 12:1 ratio. But I need a pitmanarm, and this steering linkage has some play in the joints. Its notobvious. But the inner tie rod end holes in the centerlink have beenwelded and redrilled.
received_705531537354102by MichaelCrawford, on Flickr
per measurements, the closest thing Ican find is the howe racing 71-73 camaro center link. Only differenceis the tie rod point center to center, by ¼ inch. Which I think isdown to measurement error. However, the tie rods don't match camaro,and I have no idea about the pitman or idler. Anyone have any ideashere?
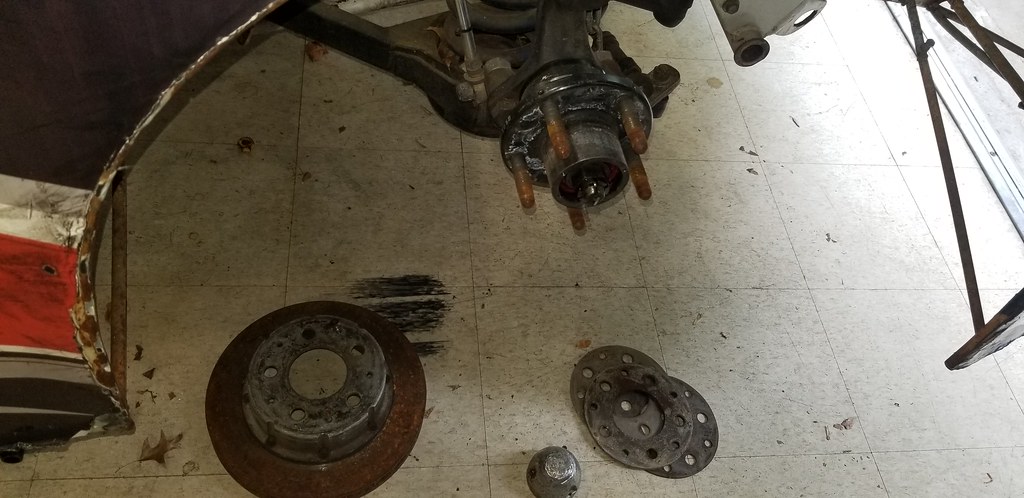
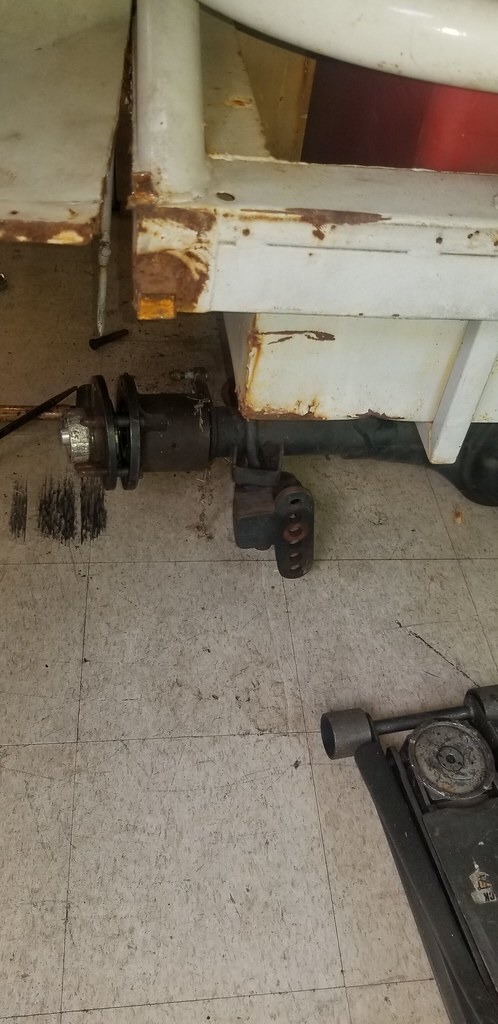
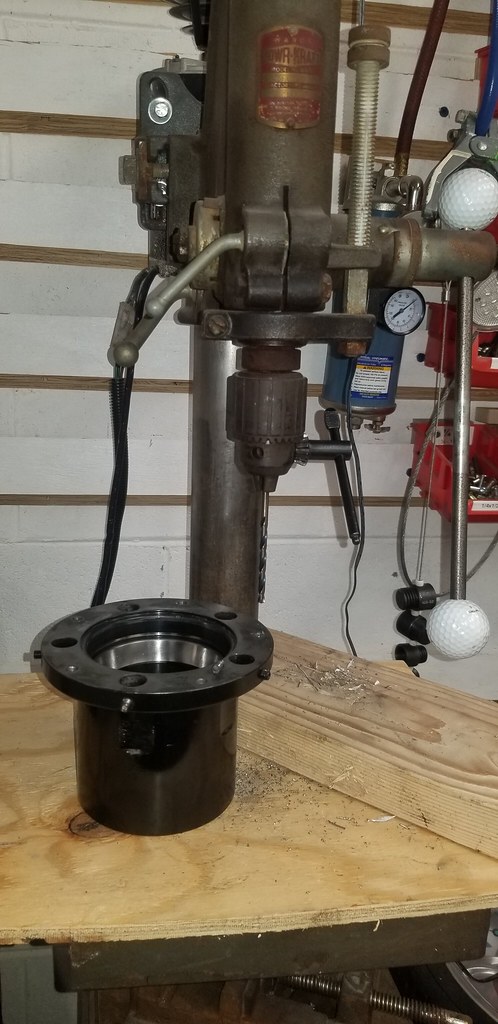
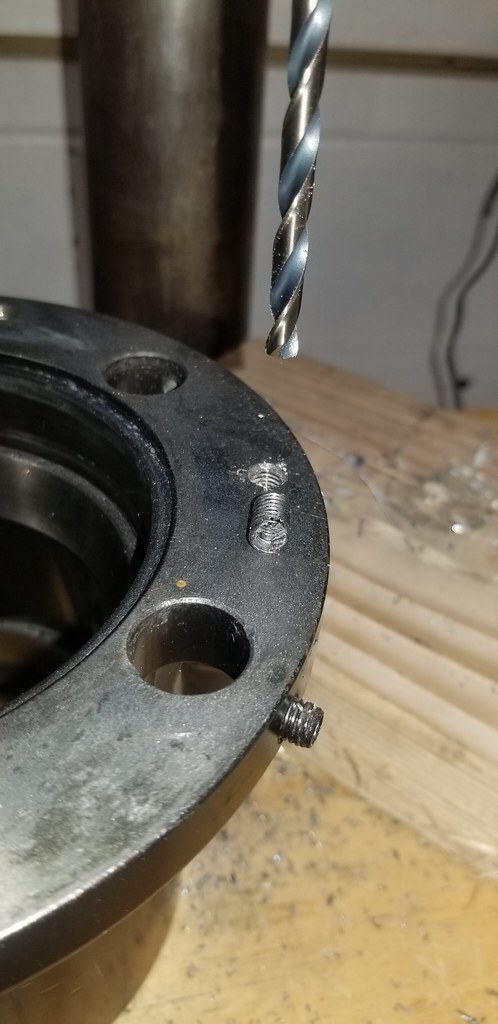
Next is spindles and hubs up front.When I pulled the wheels, I noted that there was a stack of spacersbolted to the rotor hat. Also, the dust cap was incredibly beat up,no safety wire on the rotor bolts, etc. obviously, this whole thingneeds disassembled, inspected, cleaned, etc. step at a time. The huband spindle I haven't been able to identify yet. Id like to, so I canget bearings, longer studs, and new dust caps. The numbers didn'tseem to come up with anything. Any ideas?
 20220501_152609by MichaelCrawford, on Flickr
 20220501_152625by MichaelCrawford, on Flickr
 20220501_152629by MichaelCrawford, on Flickr
 20220501_152719by MichaelCrawford, on Flickr
 20220501_152723by MichaelCrawford, on Flickr
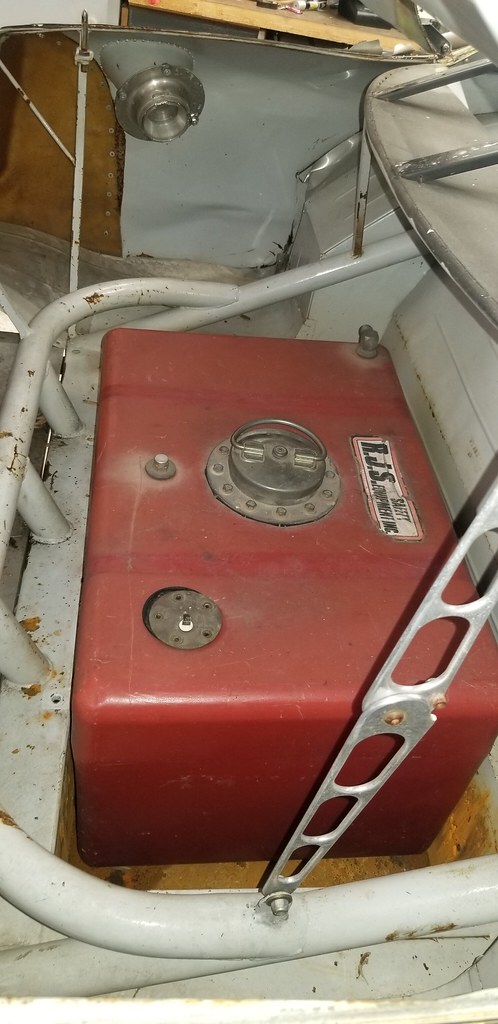
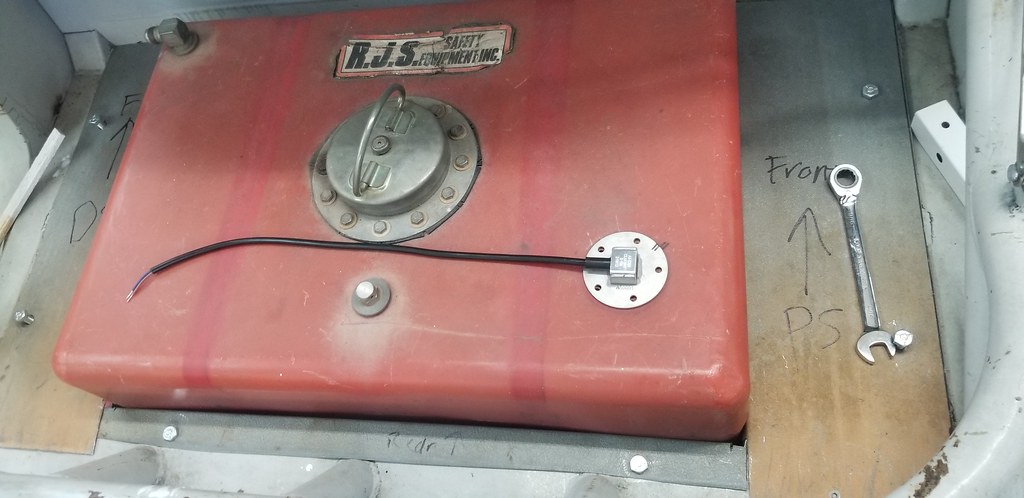
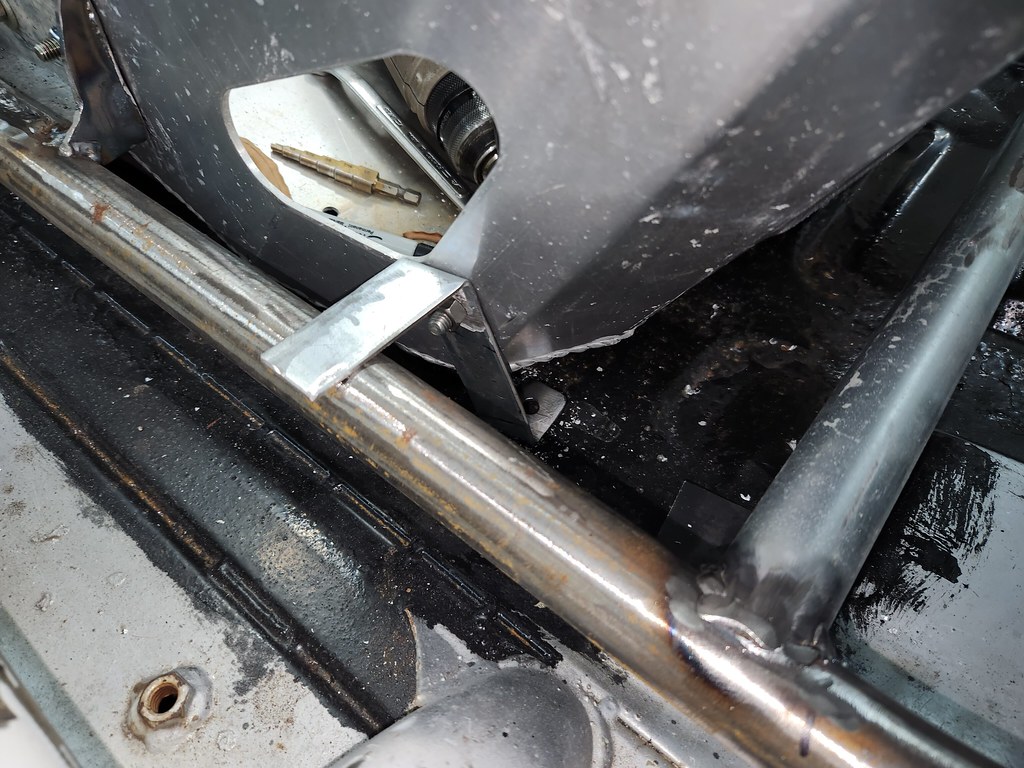
I also test fit my 25 gallon fuel cell.I had gotten this and started a filing cabinet can for it when Istill planned the AMC. I will use the filing cabinet metal to repairthe crushed and rusty metal floor, and then form the top of the canto pick up all the bolt holes that are left around the cell. Itsticks up proud of the floor about 6 inches, and is slightly smallerthan the can itself, so I will add some stops and supports to retainit in the can better. The 25 gallon capacity is crucial to my goalsthough, as I figure the ls will go through about that much a day ontrack and I don't want to carry jugs in the truck if I don't have to.
 20220423_153431by MichaelCrawford, on Flickr
 received_747466956414654by MichaelCrawford, on Flickr
 20220501_150815by MichaelCrawford, on Flickr
I figure ill finish this out with therest of the brushstrokes. I have a complete 5.3 ls and wiring,saginaw 4 speed, and have just obtained kevco mounts for the swap. Ihave an aluminum radiator, 12 wheels, pirelli TA2 slicks, ultrashieldseat, full box of autometer gauges, f body oil pan, harnesses,accusump, c5 corvette fuel pump module, new fuel sending unit, box oftilton masters, wilwood remote bias adjuster, tilton floor mountpedals, a ton of 3an lines, a couple of fire suppression systems, andmisc supplies. I know ill need hanging pedals for a bias bar setupand hydraulic clutch since I cant make the floor mount tiltons I havework, ill need to sort the rear axle (I'm thinking 8.8 explorer, butthe offset pinion is making me pause), remove the body for access,ill need boom tubes, driveshaft, wear items, oil cooler, etc. illneed to find a sway bar for the front, a fourth shock or a matchingset, and square up the spring rates. Find long tube headers for thels. Lots of other stuff as I go. Lots. And lots more.
the next steps are Steve coming by tolook at cage rework for passengers side and door bars with me andinspect the chassis with me, and get the body off. I also need tomake it roll, and be able to tow dolly.
So, all in, the cup car cost 1200, soldthe body for 200. the rest of the parts haul and buying/selling haveme at a car, large pile of parts and spares, etc for 2318 with 315recoup.Michael Crawford
1970 plymouth Duster back under construction:
https://www.pro-touring.com/showthre...uring-makeover
1987 GMC S15 https://www.pro-touring.com/showthre...ct-drivabeater
-
05-01-2022 #2 Registered User
- Join Date
- Nov 2018
- Posts
- 645
This looks like an interesting project. So you plan to put a Plymouth Duster body on the frame of this race car?
On the hub related parts, check with https://www.speedwaymotors.com/ as they cater to the racing market. They may be able to help you ID what you have, and they have decent prices as far as parts go.
05-02-2022 #3
Registered User
- Join Date
- Aug 2007
- Location
- Albemarle, NC
- Posts
- 1,149
Yessir. And then put plates on it too. Sure, it wont be cam class legal, but it will be FUN.
Michael Crawford
1970 plymouth Duster back under construction:
https://www.pro-touring.com/showthre...uring-makeover
1987 GMC S15 https://www.pro-touring.com/showthre...ct-drivabeater
05-29-2022 #4
Registered User
- Join Date
- Aug 2007
- Location
- Albemarle, NC
- Posts
- 1,149
Previous budget was 2318 with 315 recoup
new money:
wilwood pedal box with three brake pedals and bias bars, no clutch pedal: 40
upper control arms and alignment shims from SRI: 200
pedal box mount plate from speedway: 17 shipped
trade phantom tach for autogage and speedometer
open 31 spline ford 9 inch hogshead: 60
front calipers that were with the car: 100
1971 camaro pitman arm: 35
1971 camaro drag link: 55
gallon rustoleum slight machine gray: 50
4x 255/60/15 cooper cobras: 160
new total: 3035 with 315 recoup
when we left off, car was more or less as purchased. I had made a general plan, and a general action item list.
So, I got to it.
First order of business was getting the body off. This took quite a few hours. Many spot welds, braces, and tabs. Finally came down to brute force, but I was able to save it well enough for the guy that bought it for wall art.
 20220509_182219 by Michael Crawford, on Flickr
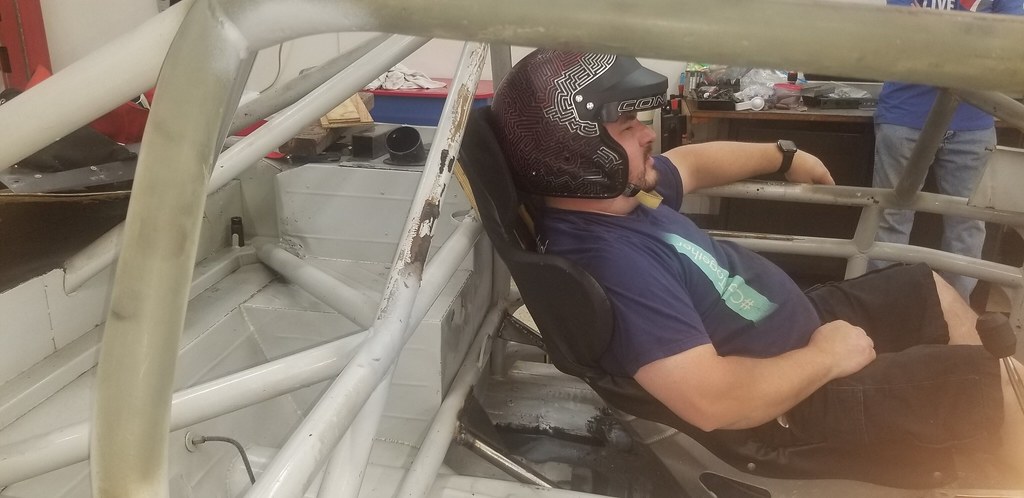
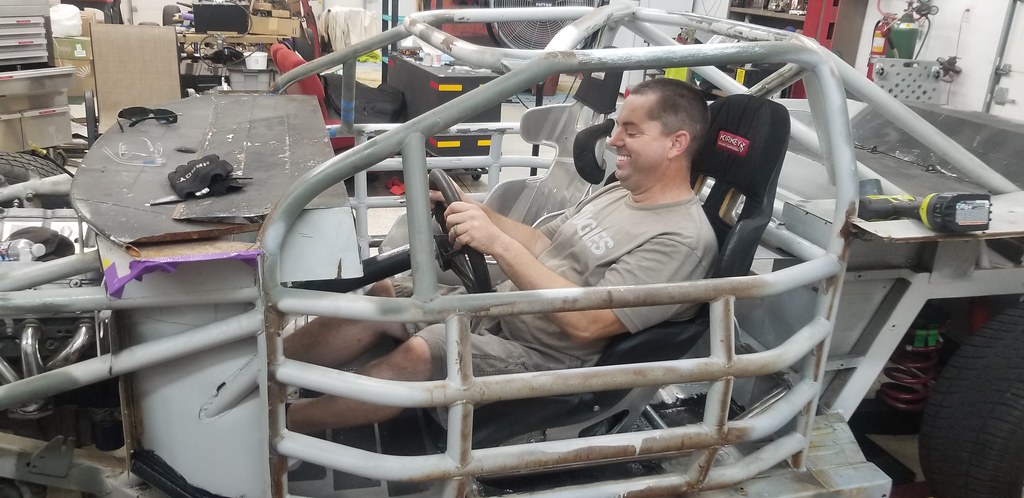
I gabbed my seat, sat it on the floor, ant test fit myself to my new car. And made engine noises. Cause that's what you do.
 20220509_173229 by Michael Crawford, on Flickr
pushed outside for cleaning u the shop and car. Easier than trying to walk around it
 20220510_075311 by Michael Crawford, on Flickr
steve came over later in the week to review the car with me. We discussed my plans, thoughts, and fears. He stated that the car is quite possibly late 80s, the tubes in the passengers side could be removed without fear, the 9 inch is straight enough for road course, and the chassis does not have hardly any offset. I got lucky, apparently.
Which meant I could go wholle hog without fear.
First order of buisness was cutting the front bimper mount off after taking it tp the nads a couple of times. Ill add something in its place when the car gets skinned.
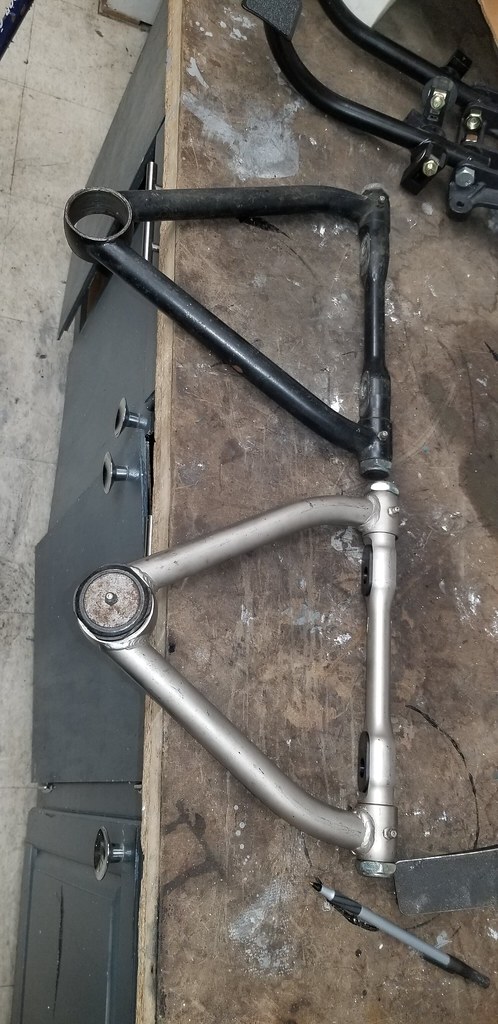
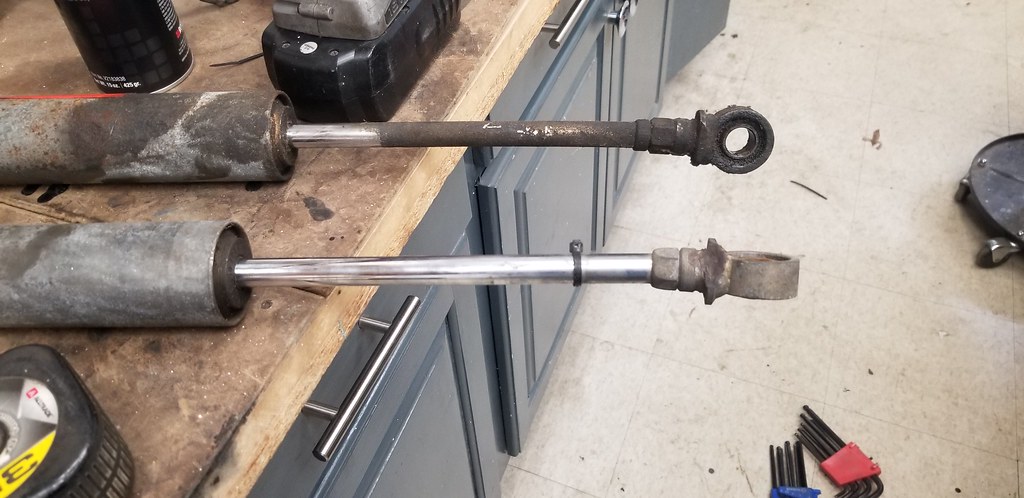
I also went to SRI for their used parts. Got a pair of same spec upper control arms, caster slugs, alignment shims, and looked at all the other parts for a while. Ultimately decided to hold off for now, until I get a better feel of what I have and what I need. When I git home, I squared the upper control arms, and installed the steering box. Somewhere in here I also determined the steering linkage is 70-73 camaro. I ordered a pitman arm from ebay for 35 (cheapest I could find) and a non damaged center link from oriellys. I know they aren't race spec, but they should get me going and sorted out. If I find later I need to make changes, ill at least have a starting point.
 20220512_072340 by Michael Crawford, on Flickr
 20220514_080502 by Michael Crawford, on Flickr
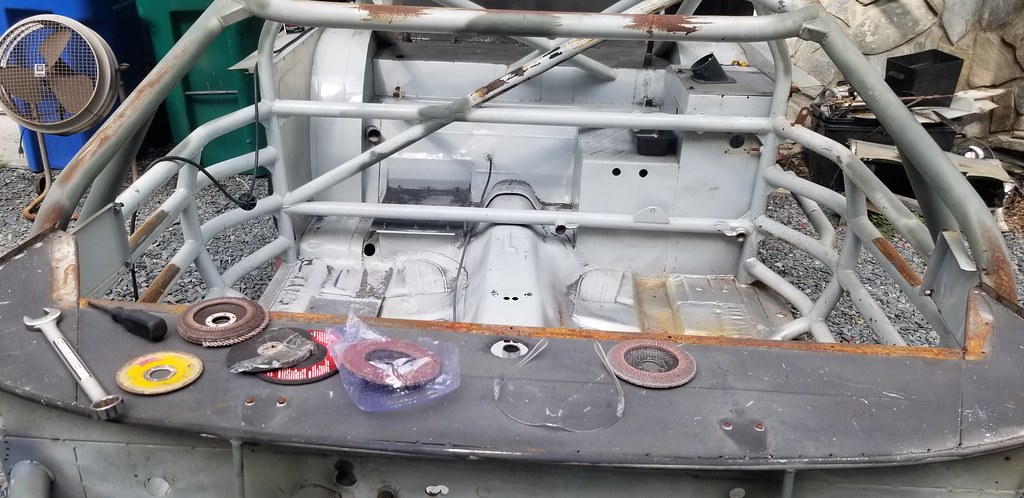
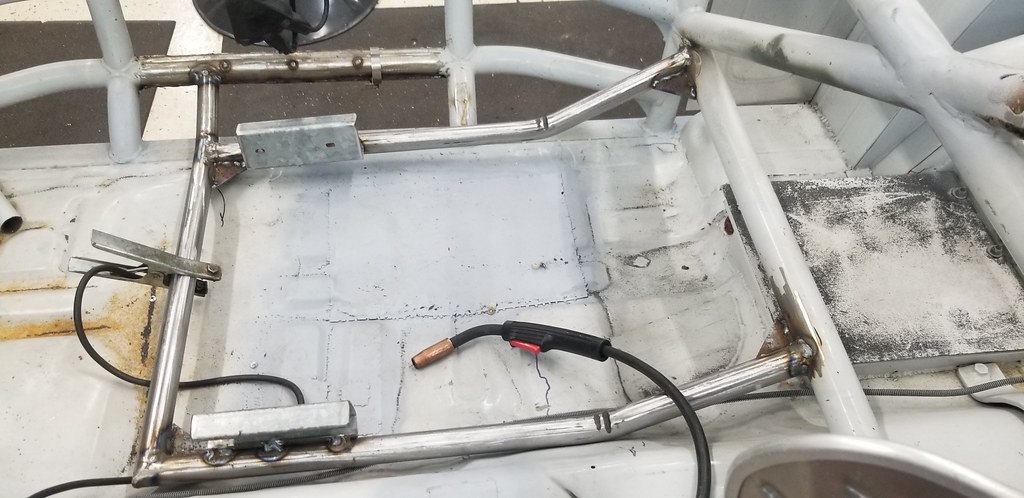
after that, ive done a lot of cutting and grinding. I ground down all the stubs and spot welds left from body removal. I cut out the passengers side bars. I ground down the layers of paint and vinyl around the door openings. I cut out the original pedal box. Everything you see in green etch primer is somewhere I have touched with a grinder. Not all pictured, because it gets repetitive.
 20220528_175122 by Michael Crawford, on Flickr
 20220528_175043 by Michael Crawford, on Flickr
 20220528_171752 by Michael Crawford, on Flickr
so, well go off chassis for a minute to finish up the update.
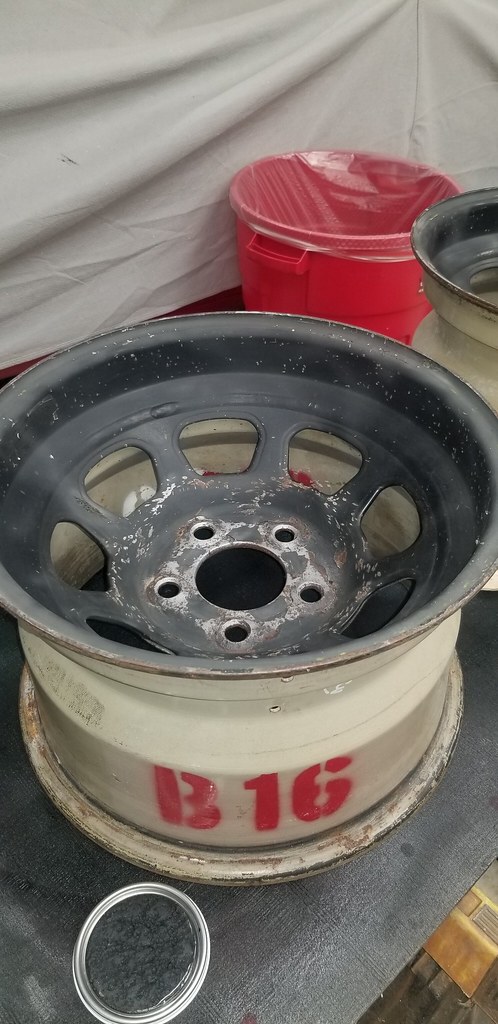
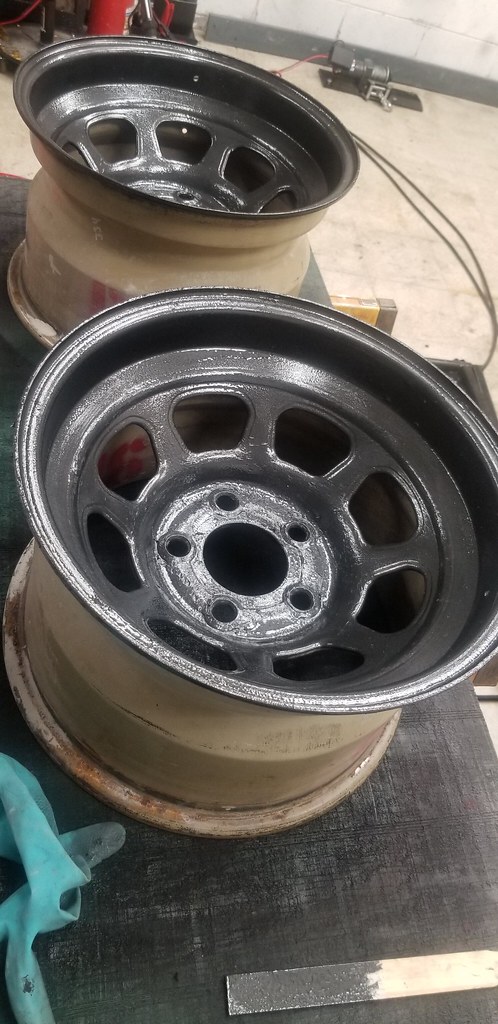
First, I needed tires that held air. I also need tires for storage and towing. I found a set of 255/60/25 cooper cobras for 160 used. Right height, wide enough, next door to a stop for work. So I bought them. I went ahead and cleaned up the 8 spare wheels that came with the car. Had a friend with a blast cabinet blast off the rust and stickers. It didn't touch the powdercoat though. One set I did in rustoleum hammered black. It came out more dark gray. Other set I shot in rustoleum gloss black. Had the tire shop mount up a set of the TA2 slicks, and the coopers.
 20220522_152246 by Michael Crawford, on Flickr
 20220523_071648 by Michael Crawford, on Flickr
 20220525_154857 by Michael Crawford, on Flickr
I also started working on finalizing parts for the brake system. I was able to obtain the original to the car JFZ front calipers to match the rears. I assume all four calipers will need rebuilt, and need to do a LOT of research on JFZ stuff. Initially it seems they were bought by wilwood, and may be able to use all wilwood pads and seals. But....
 20220528_160422 by Michael Crawford, on Flickr
I also lucked out on a set of wilwood pedals in a hanging orientation. The set came with three brake pedals and balance bars, but no clutch pedal. Steve is making me a bushing for one of the brake pedals to turn it into a clutch pedal. Ill just need to make a clevis. But for $40 I ain't complaining. Anyone need a brand new bias bar for wilwood pedals?
Also, I got the wilwood pedal box plate from speedway. They're 15 bucks, but I had a $10 off coupon, so total shipped was about 17 bucks. I wasn't expecting ¼ plate steel being the material, but it ought to be sturdy!it'll all work beautifully with my wilwood bias adjuster knob and box of tilton cylinders I picked up a while back.
 20220528_160420 by Michael Crawford, on Flickr
I also was able to source a 31 spline 9 inch hogshead. For 135 I got the whole assembly. Patrick had bought the housing for 75, and for an extra 60 I got the rest. I think its a 2.7x open, which is far from ideal, but its a start.
 20220518_080106 by Michael Crawford, on Flickr
lastly, I finally was able to get paint for the chassis. I decided on rustoleum light machine gray, which seems to be sold out EVERYWHERE. I found the gallon at the oakboro hardware store. It was $50, but its definitely enough for shooting the whole chassis and touch ups afterwards. Plus, its almost an exact match for what was on here!
 20220529_092318 by Michael Crawford, on Flickr
that's all for now. Its under the carport for a while while I do a terminator x install on the vortech supercharged cuda my buddy brought me. Gotta replenish the hot rod fund somehow.
 20220529_135250 by Michael Crawford, on Flickr
Michael Crawford
20220529_135250 by Michael Crawford, on Flickr
Michael Crawford
1970 plymouth Duster back under construction:
https://www.pro-touring.com/showthre...uring-makeover
1987 GMC S15 https://www.pro-touring.com/showthre...ct-drivabeater
06-22-2022 #5
Registered User
- Join Date
- Aug 2007
- Location
- Albemarle, NC
- Posts
- 1,149
Previous budget was 3035 with 315 recoup
new money:
73 duster 340 body with 71 front clip and crap inside: $660
lug nuts: 20
front wheel studs: 20
inner axle seals: 30
outer axle seals: 20
rear hub hardware: 12
rear u bolt: 5
3/4-16 locknuts: 21.13
white rustoleum: 14
springs: 100
shock lot: 20
Kirkey and cover: 80
9 inch hogshead and 31 spline carrier 20
new total: 4057.13 with 315 recoup
I have to say the cuda took a minute and a few odd scope changes. However, its done and the owner is super happy. Im also REALLY impressed with the sniper stealth 4150 and holley's homework on this. So much better than all the other systems ive done. Way, way better than them. Way better than the fast and megasquirt ive used as well. Just a quality product.
 20220605_162356 by Michael Crawford, on Flickr
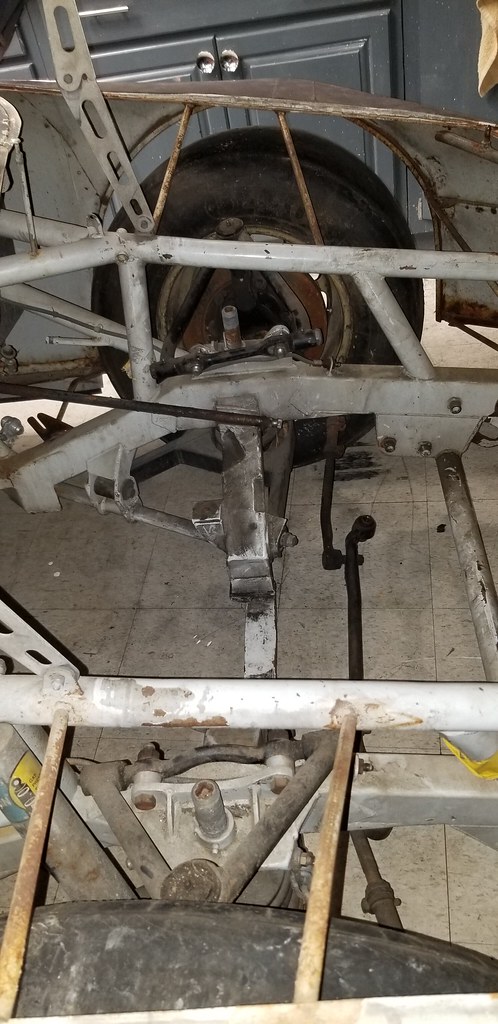
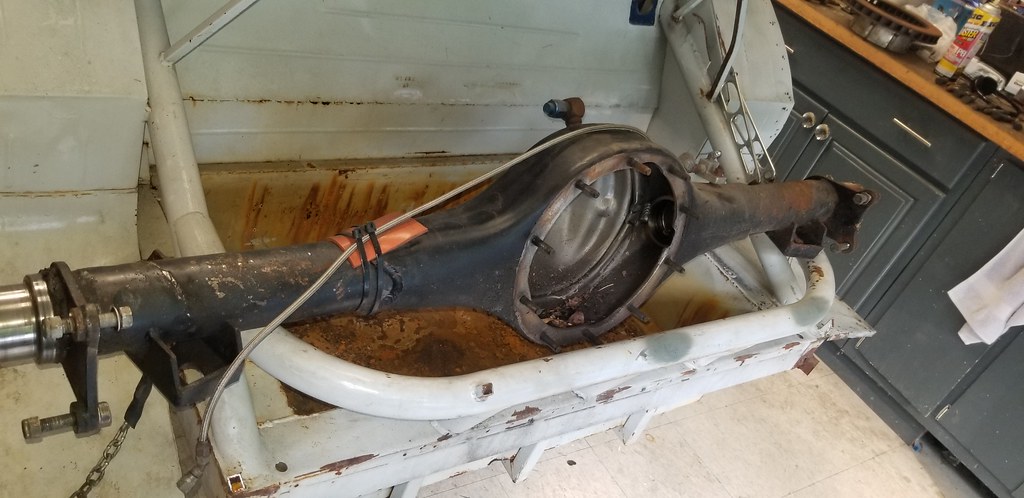
with that done, I pulled the nascar back in the shop. I decided that the next step was to rebuild the rear end and suspension. I did this for multiple reasons. Biggest was that I needed to go through it all before I was willing to tow dolly it to dads shop where I have the good welder and can complete the cage repairs. The cage repairs are the next real step to do before test fitting the drivetrain and getting all the ergonomics sorted.
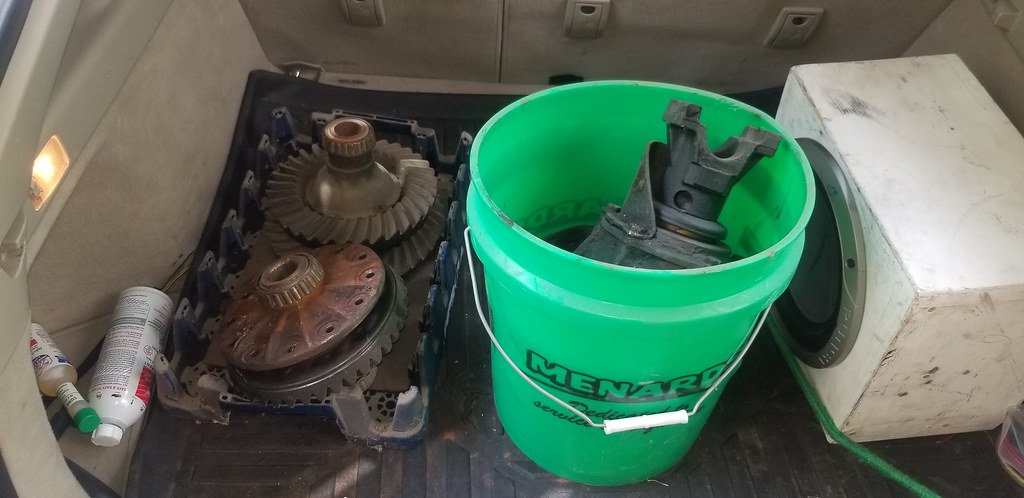
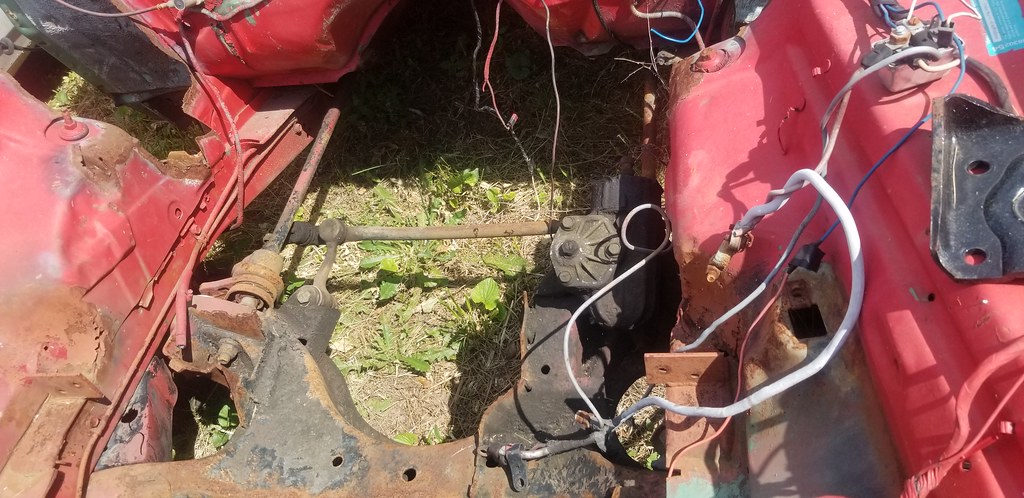
I pulled the rear axle, truck arms, etc to get started. It all came apart pretty easy. I had to cut one of the u bolts that just refused to come apart to release the truck arm from housing.
 20220610_164239 by Michael Crawford, on Flickr
 20220611_080835 by Michael Crawford, on Flickr
 20220611_180458 by Michael Crawford, on Flickr
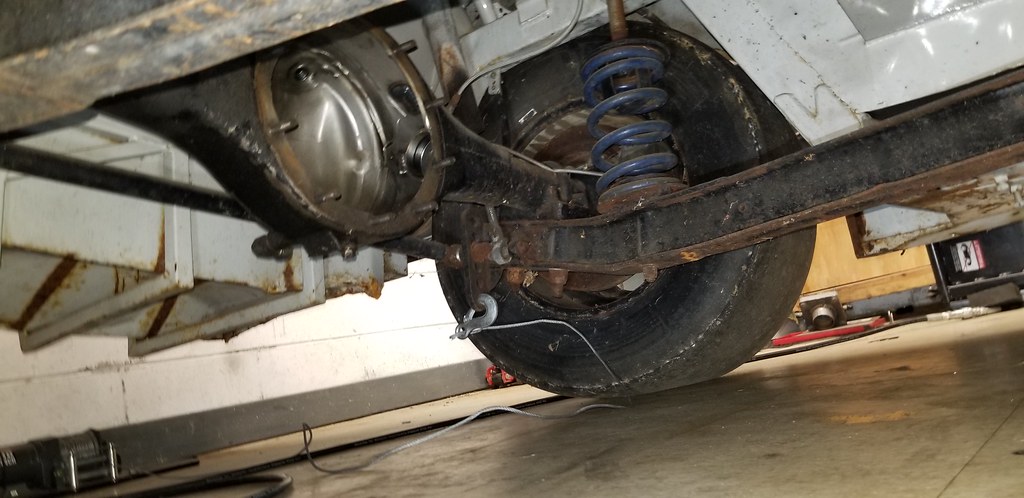
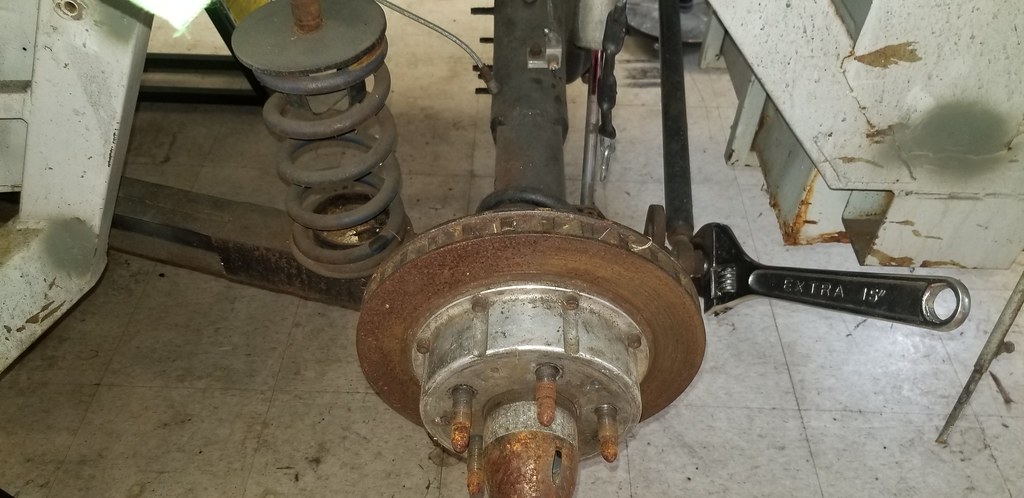
upon disassembly, I found the rear shocks were bent and leaking. Additionally, there were no inner seals on the axle tubes, most of the hardware on the rear hubs was either mangled or missing, and the grease seals were a mere suggestion.
 20220610_174316 by Michael Crawford, on Flickr
 20220611_180507 by Michael Crawford, on Flickr
So I started clean up. Ordered replacement hardware from amazon as it was all fine thread socket head screws. Disassembled the rear hubs and bearings, cleaned up in the parts washer. We were able to identify them as speedway engineering hubs, with the right rear bearing being a super low friction piece. Chased all the threads and had to drill out some broken hardware. I went ahead and repainted everything while it was apart, cleaned up the studs, etc.
 20220617_102546 by Michael Crawford, on Flickr
 20220617_102557 by Michael Crawford, on Flickr
to replace the bent shocks, I found an add on facebook for 6 30 series koni shocks and 4 bilstien. The lengths listed seemed workable, so I contacted the seller. Turned out he only wanted $20 for all 10 shocks. So I bought them. I love konis on the autocross and corvette applications ive tried them in, but it seems they're not common in the circle track world, but for the price I took a gamble.
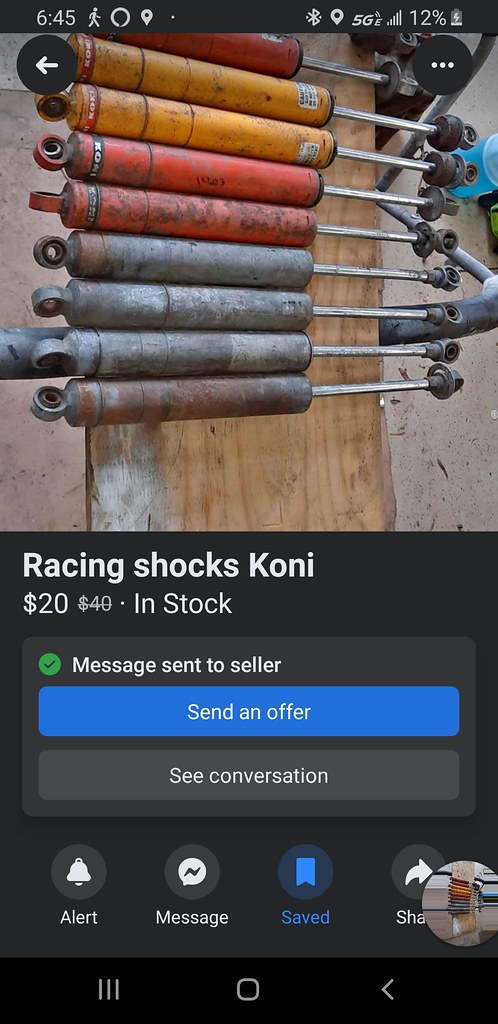 Screenshot_20220610-184525_Facebook by Michael Crawford, on Flickr
bought a kirkey seat and cover from the seller too. Its a wide seat, and the cover is perfect. So for $80 I brought it home. Apparently no pictures on my phone, and I don't feel up to going out to the shop for one (have food poisoning). Regardless, I started cleaning and painting the konis. Turns out duplicolor Chevrolet red-orange is a perfect match
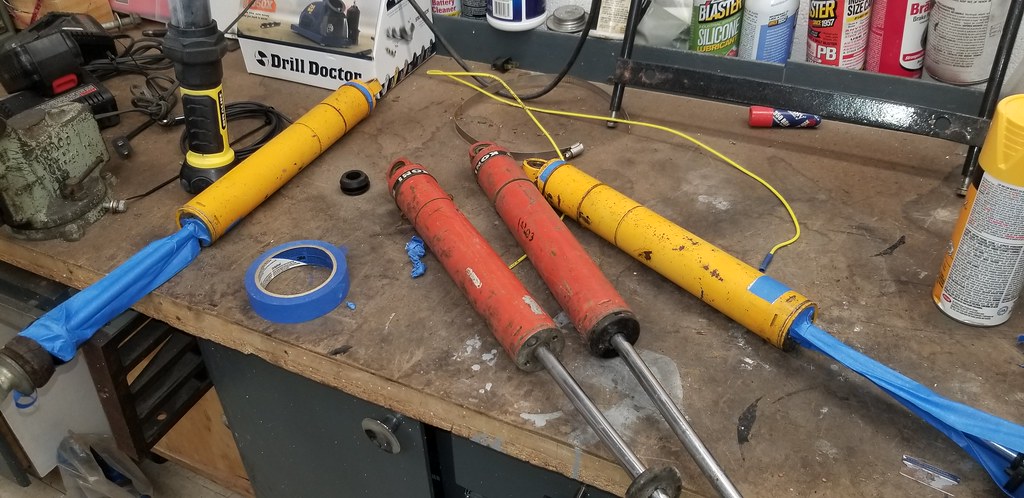 20220614_162312 by Michael Crawford, on Flickr
 20220614_163044 by Michael Crawford, on Flickr
 20220615_084736 by Michael Crawford, on Flickr
somewhere in here I started to get the gearing and hogshead sorted out for the rear axle, and the axle itself sorted. I pulled apart the cheapo 9 inch u bought from runion. Cleaned up the hogshead, verified the 2.76 open diff, and later discovered that its a 28 spline, not 31. which probably wont work. Unfortunately.
Regardless, its filling the hole in the housing for now.
 20220614_175555 by Michael Crawford, on Flickr
 20220615_152906 by Michael Crawford, on Flickr
the housing cleaned up beautifully, and was shot in gloss black rustoleum. I installed the rebuilt hubs with new seals and fresh grease, obtained the inner axle tube seals, and put it together. I did get used floater axles win 27.75 and 32 inch lengths, 31 spline. However, apparently this housing is significantly narrower than the current (last 20 years) cup axle. So I will have to have custom shafts made. I could get the shafts in 28 or 31 spline, and am debating with myself which way to go as both my hogsheads are 28 spline open, but I have a 31 carrier. And 31 track lock seem to be easier to find.
 20220617_091035 by Michael Crawford, on Flickr
since I alluded to it, I scored a hatch load of parts from a mopar buddy. He had a “pile of 9 inch crap” that needed to leave. Most of it was exactly that, but in the pile was a whole 3.5x 28 spline hogshead and a 31 spline open carrier. Right gear ratio at least! And I gave him $20 bucks for steak, which made him happy. Ill buy his dinner too one night.
 20220617_141008 by Michael Crawford, on Flickr
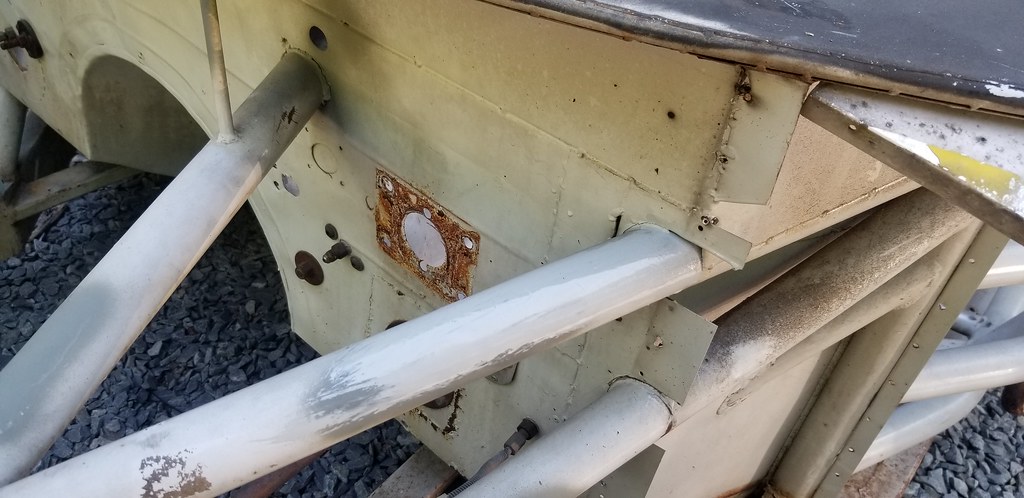
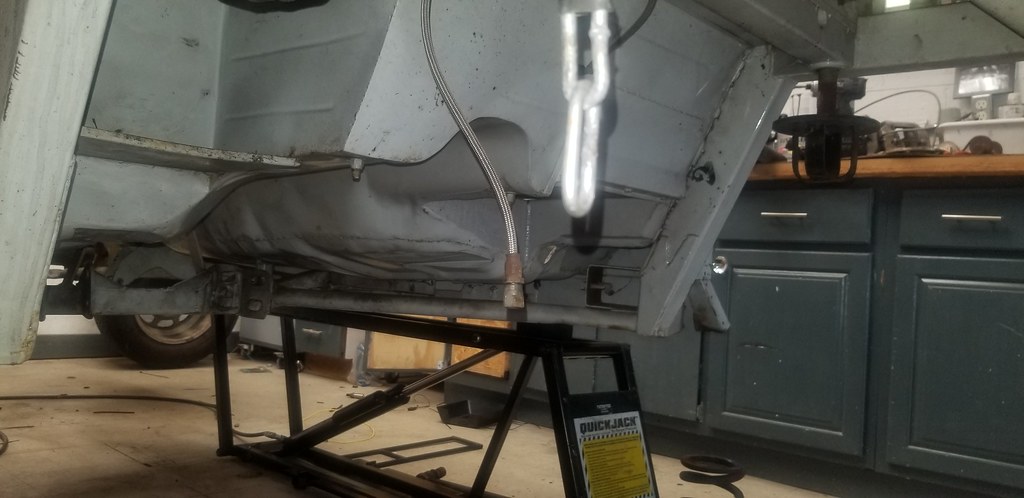
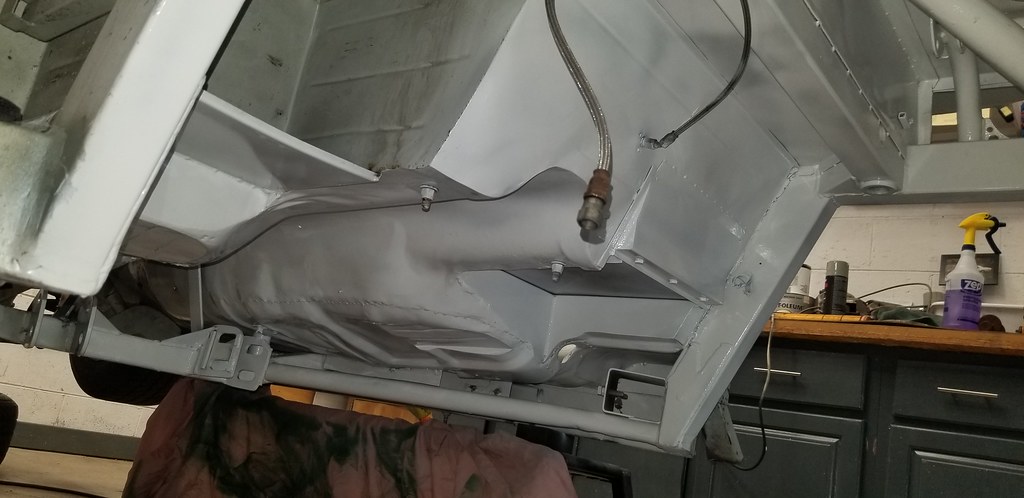
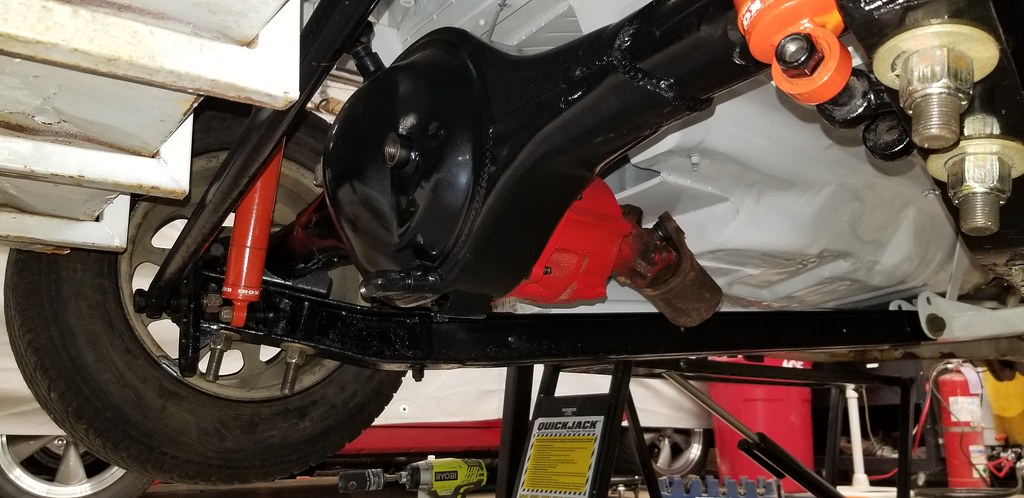
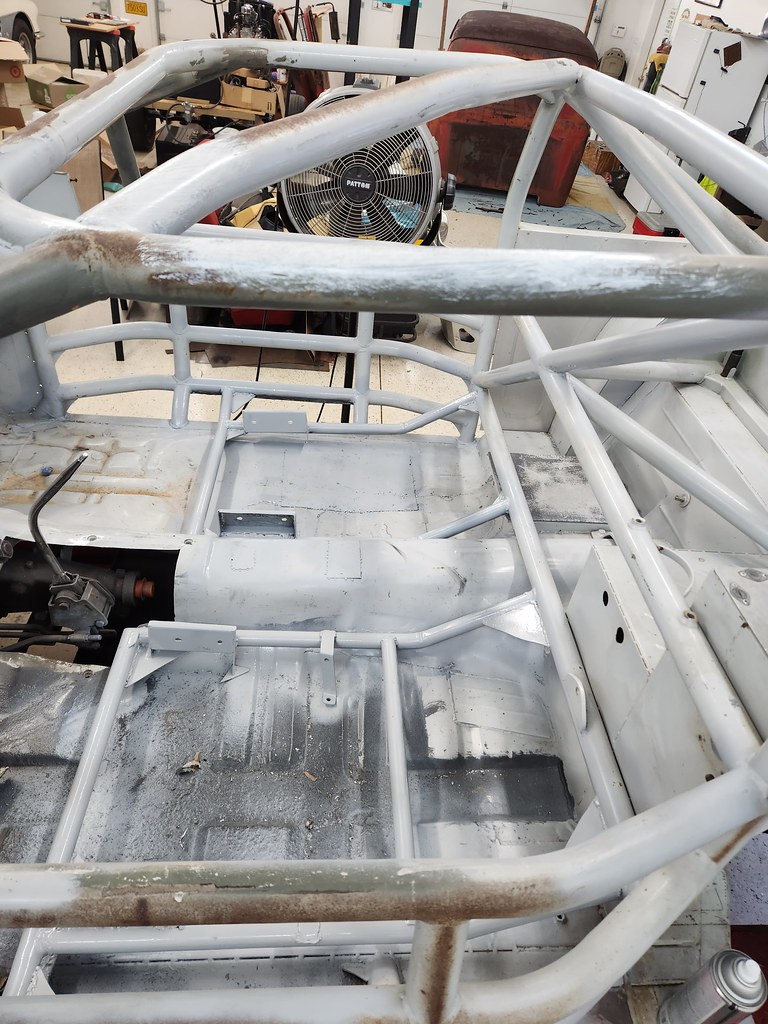
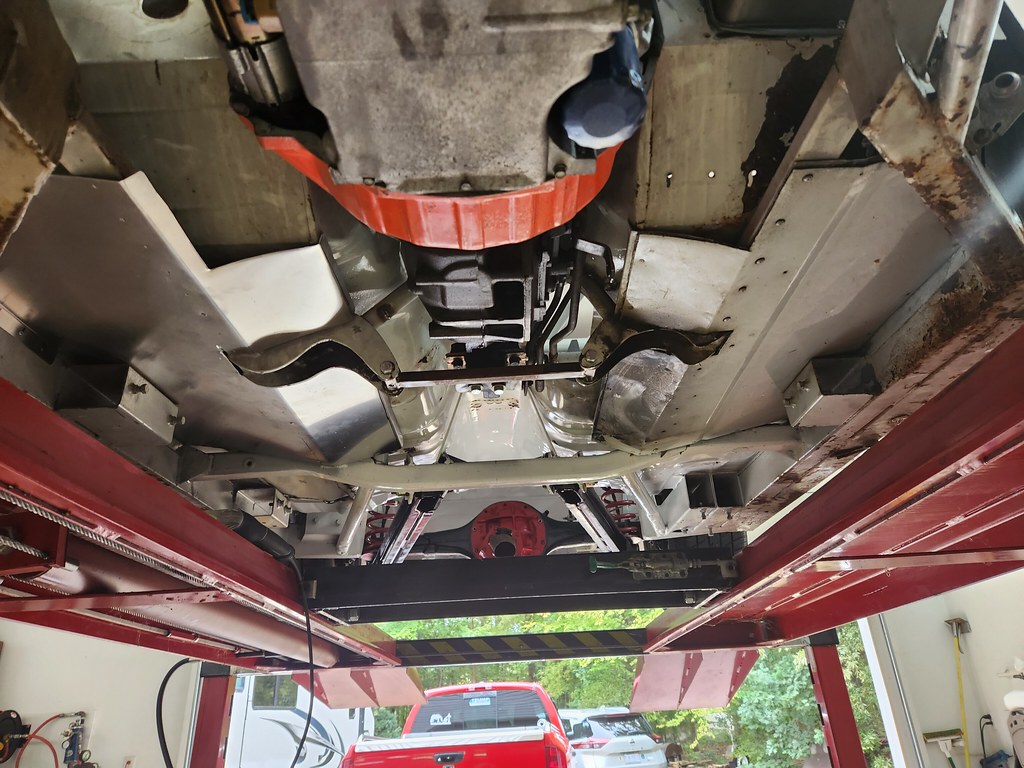
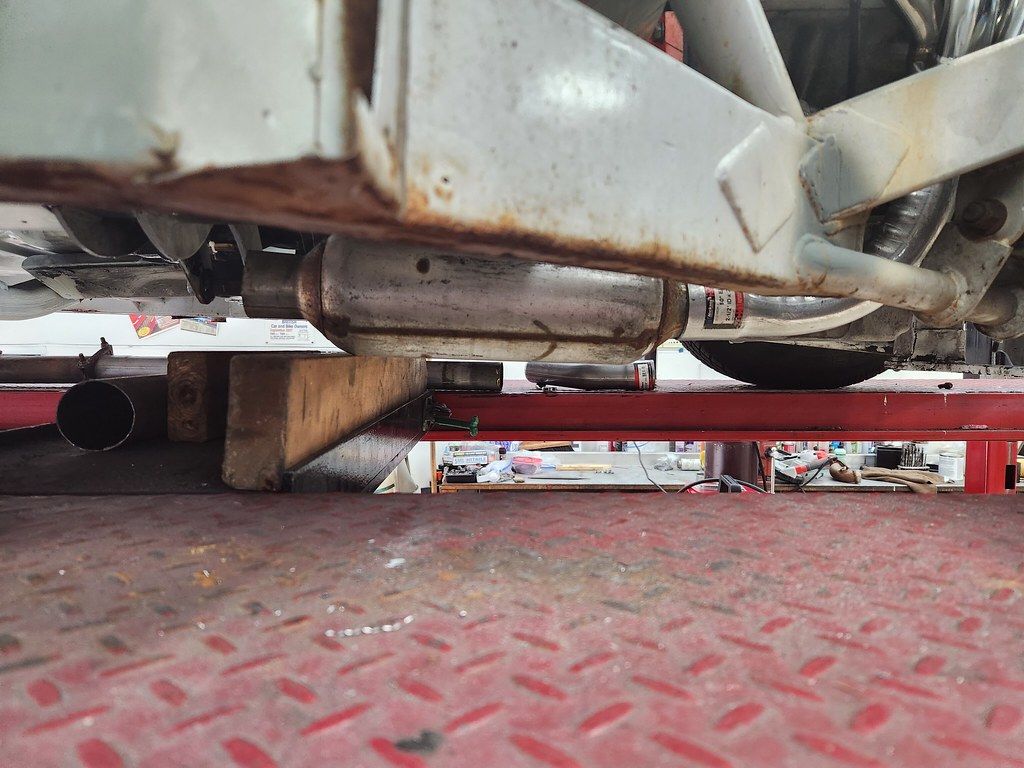
I also took the opportunity to do the underside of the car. This is not fun. The quickjacks made it better, but it still sucks. I scrubbed everything down with brown scotchbrite pads and superclean to get the grease, oil, and grime off, wiped down with windex and a paper towel, and shot with rattle can white rustoleum.
 20220612_082611 by Michael Crawford, on Flickr
 20220612_082618 by Michael Crawford, on Flickr
 20220613_174003 by Michael Crawford, on Flickr
 20220614_073658 by Michael Crawford, on Flickr
 20220617_090636 by Michael Crawford, on Flickr
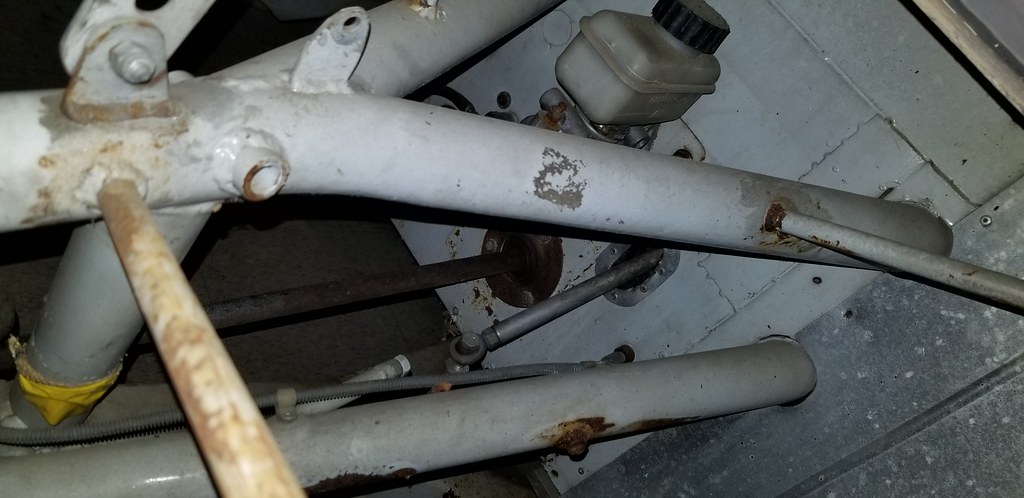
I went ahead and began reassembly with new locknuts, cleaned and greased adjusters, new to me 550lb eibach springs out back, the konis, etc. starting to come together back there, and after a good nut and bolt check ill get the brakes on, and towed down to dads. Only one picture at the moment, as that's all that's on my phone to upload to flickr at the moment.
 20220620_191302 by Michael Crawford, on Flickr
other stuff that ive been working on, such as brakes, aren't quite ready yet and I have no pictures. I was able to figure out the rotors are still available (at $112 each. Holy crap), the rear JFZ calipers are an exact match to the wiliwood superlites Patrick gave me, the fronts use a common wilwood backing plate, steve made me a delrin bushing so I can use a spare brake pedal as clutch in mt pedal box with a custom clevis, etc. lots of little things and baby steps.
Another baby step was getting the body out of my driveway. Stampie picked it up, strapped it to a lotus europa on his trailer, and took it with him to the buyer in Florida who is hanging it on his wall. He was unable to get the passengers side, but its ok, it worked out in the end.
 20220615_202229 by Michael Crawford, on Flickr
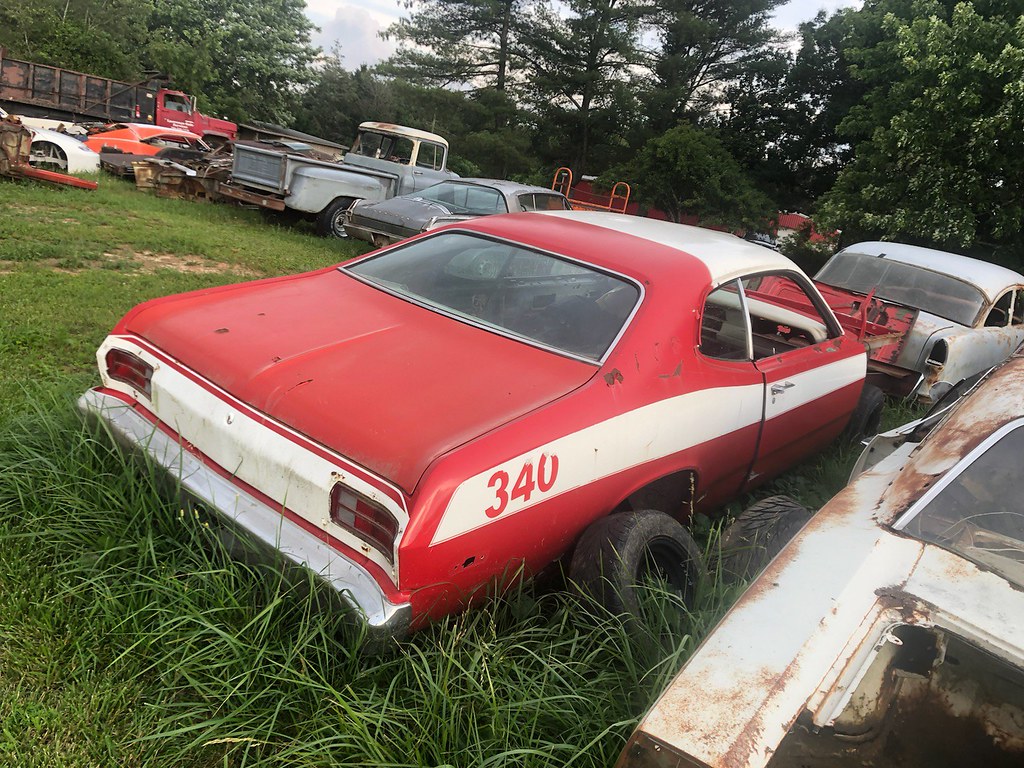
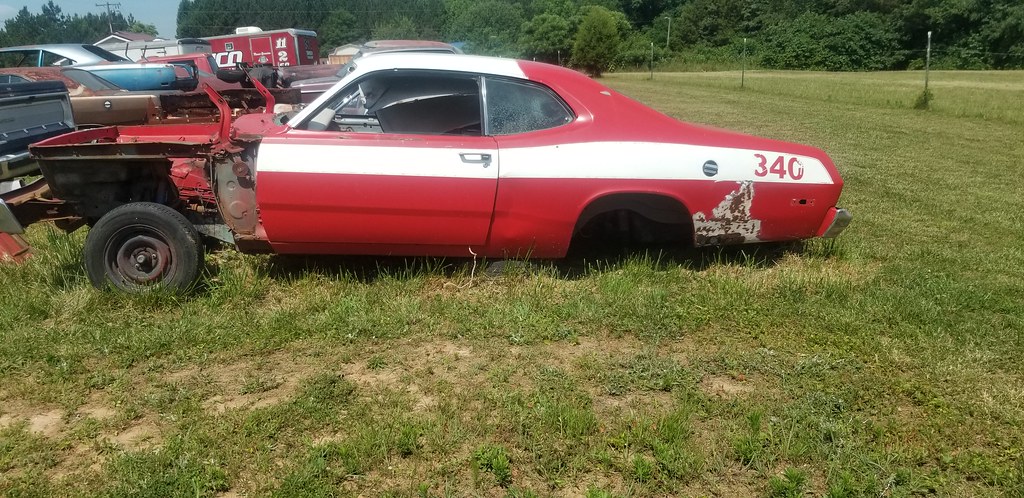
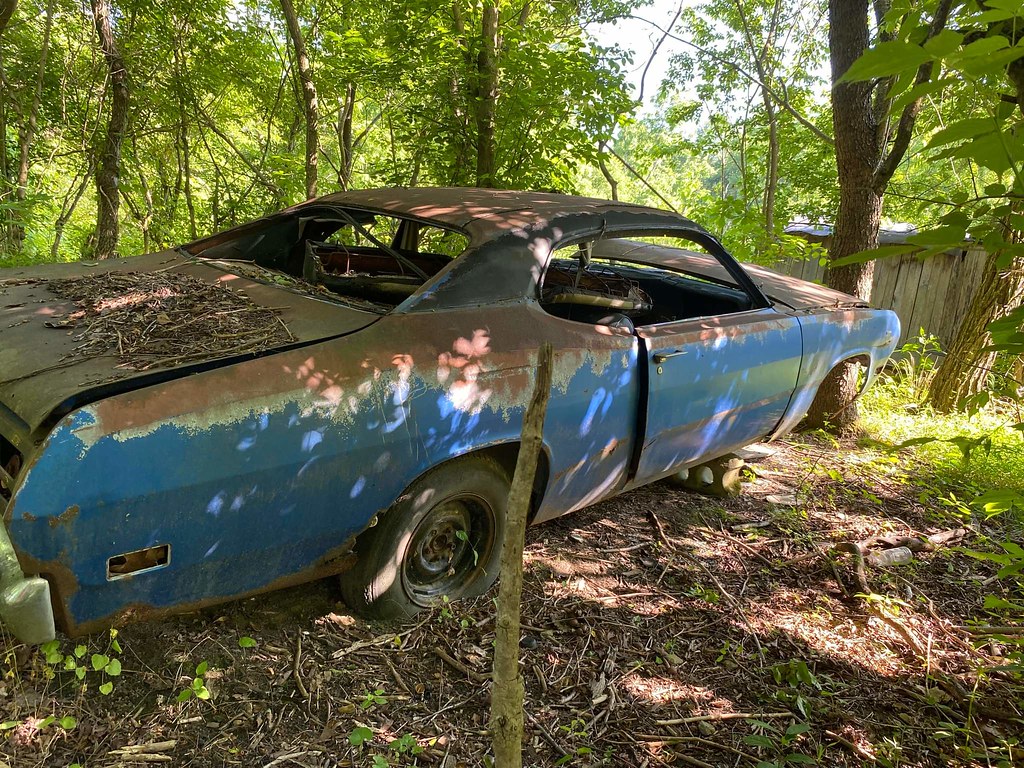
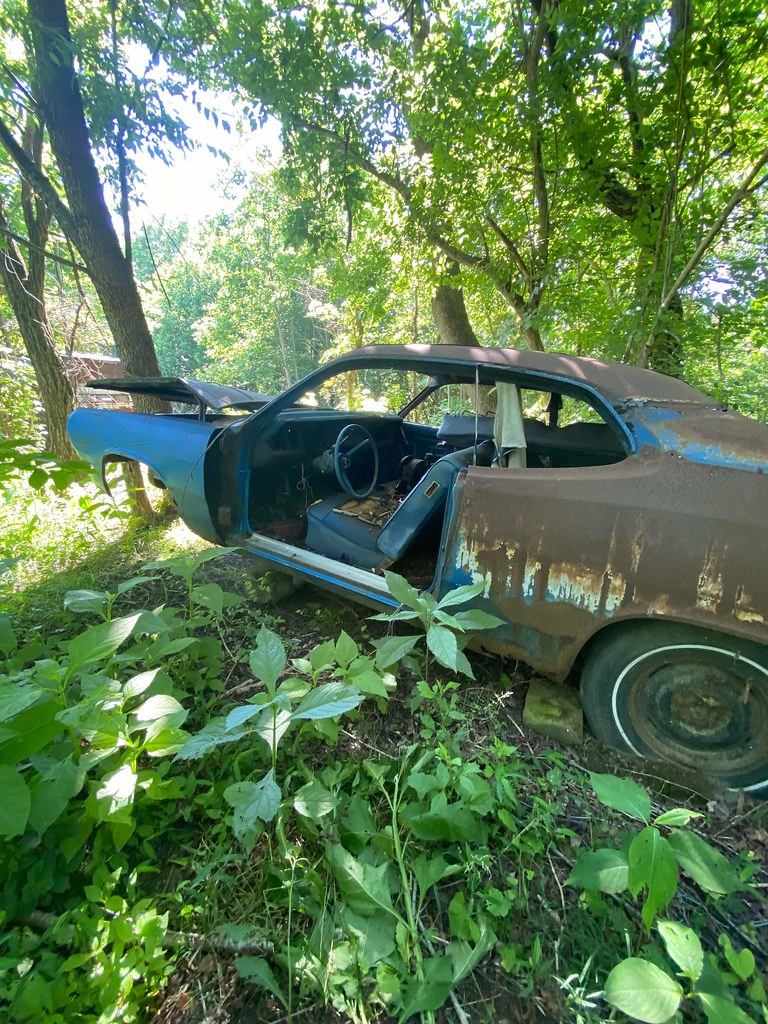
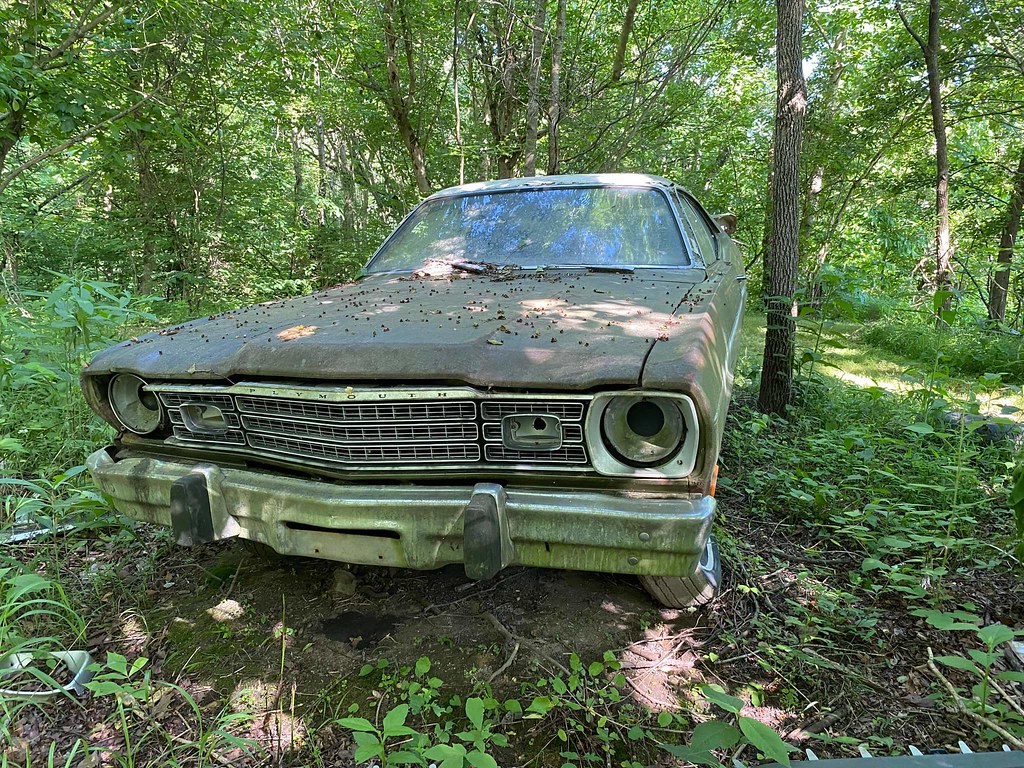
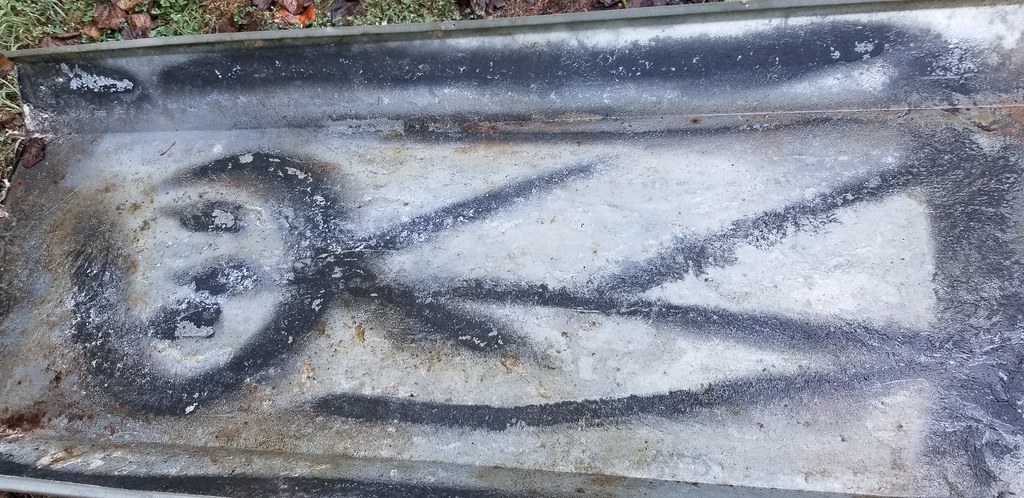
I also bought a body. Its not as bad as I was looking for, but it was the right price and has some recoup parts on it. The car is a 73 340 car that was hacked up for a big block drag car, and then parted out and left for dead. There's no windshield, which is a problem. I want to keep a glass windshield in here for maintenance and longevity reasons. I know lexan is more impact resistant, but ot becomes a wear item pretty quickly. The seller did throw in a 70-72 front clip for me, as that's the car I want to clone. There's the manual steering box and big bolt discs still present, a gas tank, a grant steering wheel, etc. ill need to go pick it up when I free up some space, and my mopar buddy that gave me the 9 inch stuff thinks he wants to buy everything im not using on my car to fix the rust in his daughters. So I may be able to use his rotisserie and help, and get it done quicker and easier than I thought! Hopefully be able to sell off enough to mostly zero the car out.
 IMG_4598 by Michael Crawford, on Flickr
 20220611_110754 by Michael Crawford, on Flickr
 20220611_110801 by Michael Crawford, on Flickr
 20220611_110807 by Michael Crawford, on Flickr
 20220611_110817 by Michael Crawford, on Flickr
until next time!Michael Crawford
1970 plymouth Duster back under construction:
https://www.pro-touring.com/showthre...uring-makeover
1987 GMC S15 https://www.pro-touring.com/showthre...ct-drivabeater
07-24-2022 #6
Registered User
- Join Date
- Aug 2007
- Location
- Albemarle, NC
- Posts
- 1,149
Previous budget was 4057.13 with 315 recoup
new money:
71 and 76 duster parts car, with a title: 400
3an bulkhead fittings: 35.83 ebay
remove kevco mounts and nascar trans mount: -55
block hugger headers: 71.99 ebay
92mm throttle body and adapter for cable: 76
brake line armor: 18.95
brake caliper seals and bleeders and crossover tube materials: 111.13
steering shaft from jeep grand Cherokee: 14.99 pullapart
sold bench seat, steering column, door guts and driveshaft from the dusters for $100
bought tubing and had bent for seat mounts: 140 outlaw performance
new total: 4776.02 with 415 recoup
been busy. Been having a good, time, but busy. Its been a whirlwind, and going in many different directions. So I don't really have a coherent narrative for this update, but ill give a fair whack at trying to create one with some revisionist history. All timelines are subject to fuzzy math and poor recollection. You've been warned...
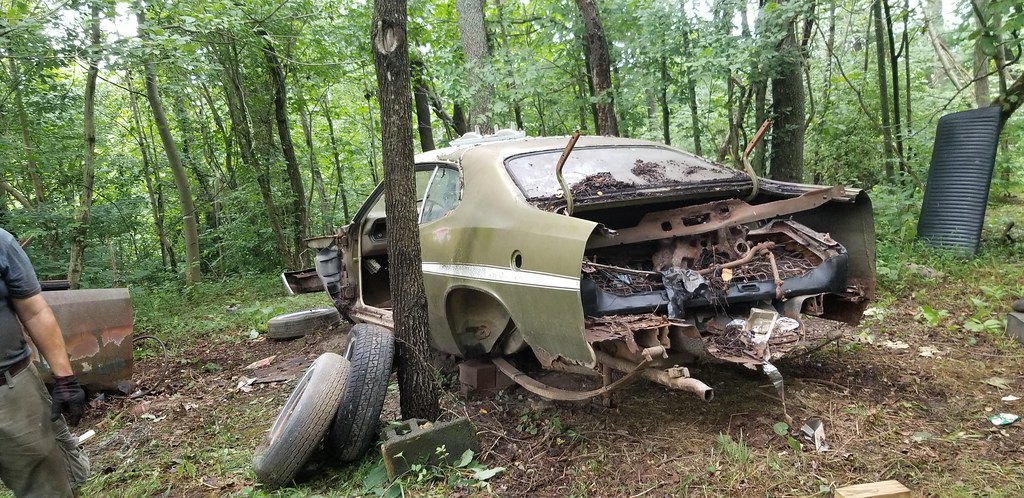
so, to start the whirlwind, I drove to Tennessee. Well, more correctly brother Dallas and I drove to Tennessee. I had a nice guy from church hill Tennessee offer me a pair of heavily rotted and parted dusters for $200 each. A 72, and a 76. I bought them both, but didn't see a value in trying to bring them back as cars. So I got all the “salvageable” parts from the, loaded into Dallas trailer, and brought them home. The list included a nice bench seat, steering column, all stainless trim, poison ivy, live wasps. And a signed title and vin plate. I sold off the bench, column, door guts from the 72 demon door, and a driveshaft to the cuda guy for $100 before they were even on the trailer. Still have a 75 dart sport grille to sell, 74-76 rear bumper, half vinyl top trim, roof-rail trim, and rear window trim to clean up and sell along with the nice 74-76 door panels. Hoping to zero it out except for gas and grub.
 20220709_080128 by Michael Crawford, on Flickr
 received_737540007598423 by Michael Crawford, on Flickr
 received_1179935605913150 by Michael Crawford, on Flickr
 received_1844203485786760 by Michael Crawford, on Flickr
 received_1016722475713927 by Michael Crawford, on Flickr
 20220709_154307 by Michael Crawford, on Flickr
 20220709_154322 by Michael Crawford, on Flickr
 20220709_154311 by Michael Crawford, on Flickr
 20220710_083939 by Michael Crawford, on Flickr
alright, enough body parts. Back to the chassis.
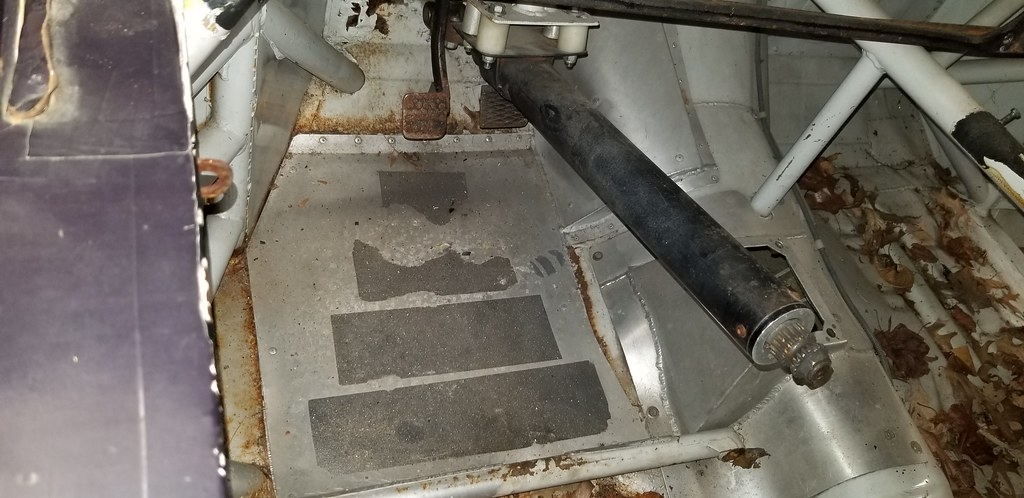
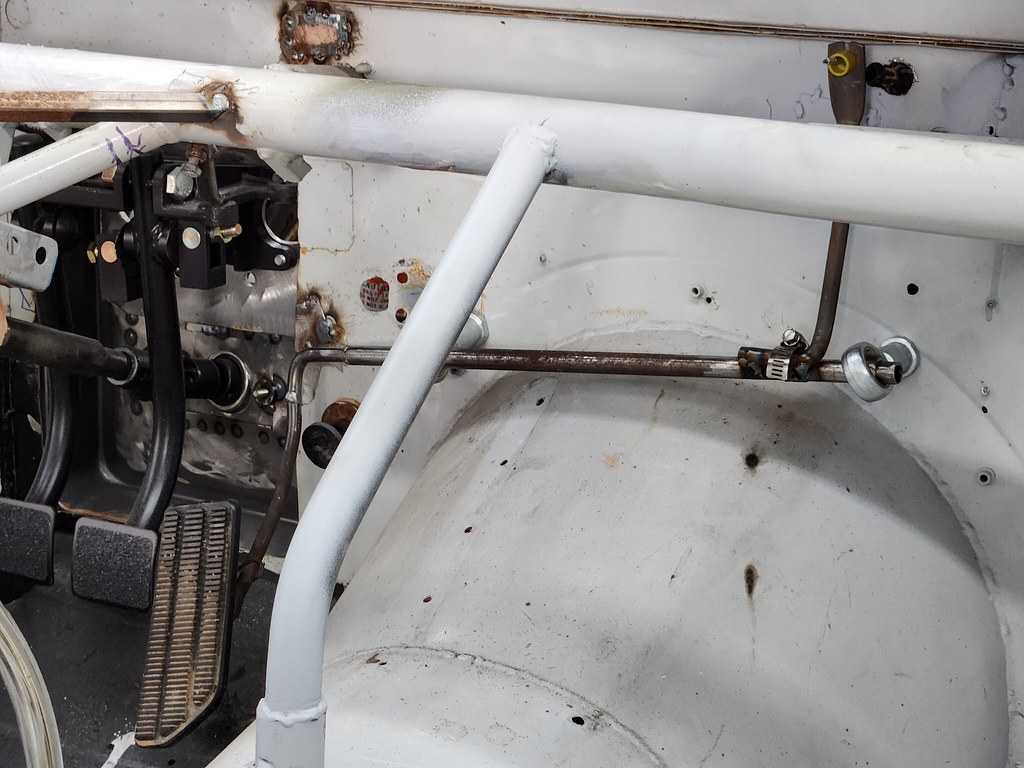
So, I decided that I was going to get the brake pedals sorted. My thoughts are that I work from the firewall out for controls and fitment of driver. I cut up the speedway plate to clear, and drilled and tapped all four corners for 1/4-20 bolts. Cut out the firewall and bolted it in place. Made sure all the masters would fit under the tubing (will have to run remote reservoirs) and then got bulkhead fittings to use to run the hard lines inside the car as much as possible for safety and heat shielding. Ill need shorter lines, but I had these....
 20220715_080310 by Michael Crawford, on Flickr
 20220715_080325 by Michael Crawford, on Flickr
then we get to the calipers. These were all a fight to get apart. Lots of air pressure, heat, lube, and cursing. But we got them apart, and no pitting or damage of hydraulic areas noted. 3 of 4 crossover tubes are garbage, 6 of 8 bleeders broke. We took a bunch of measurements, and ordered parts. Meanwhile, I cleaned and painted bodies. The JFZ fronts were heavily beaten, and I wound up using the dremel to grind off the peened over parts and a flap wheel to smooth it all out. No real finished pictures cause I'm a slacker.
 20220710_092532 by Michael Crawford, on Flickr
 20220718_174603 by Michael Crawford, on Flickr
so that brought me up to what I could easily accomplish at my shop. It was also time to test out my tow dolly and make sure the naskart fit. So I took it to dads. It BARELY fit the tow dolly.
 20220716_074811 by Michael Crawford, on Flickr
 20220716_074744 by Michael Crawford, on Flickr
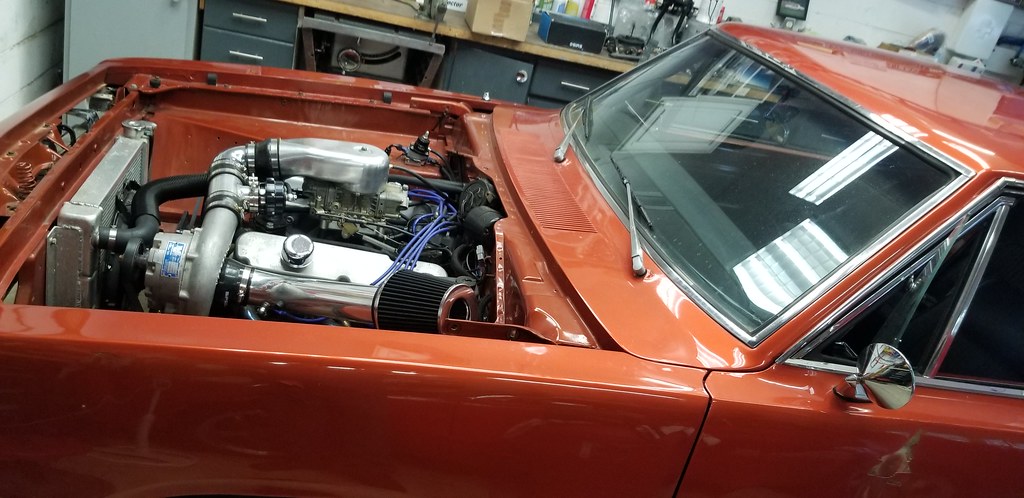
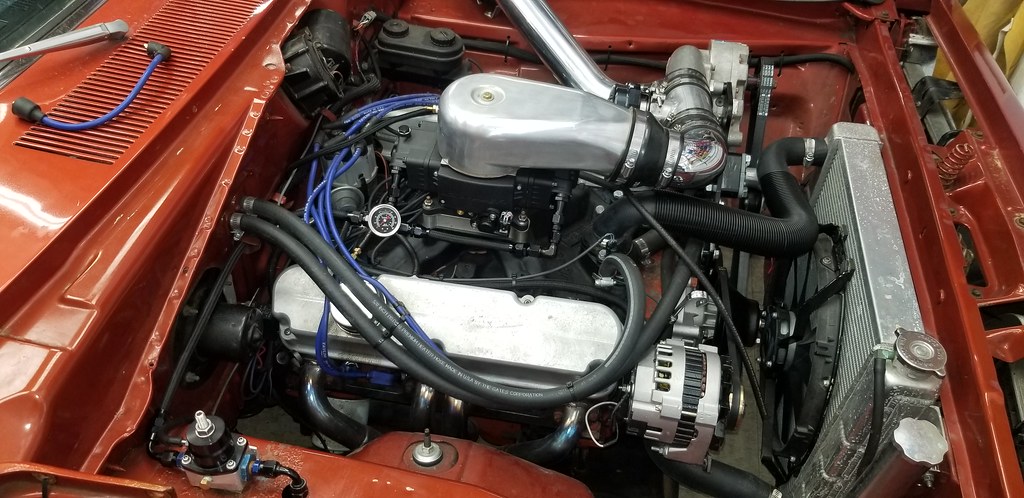
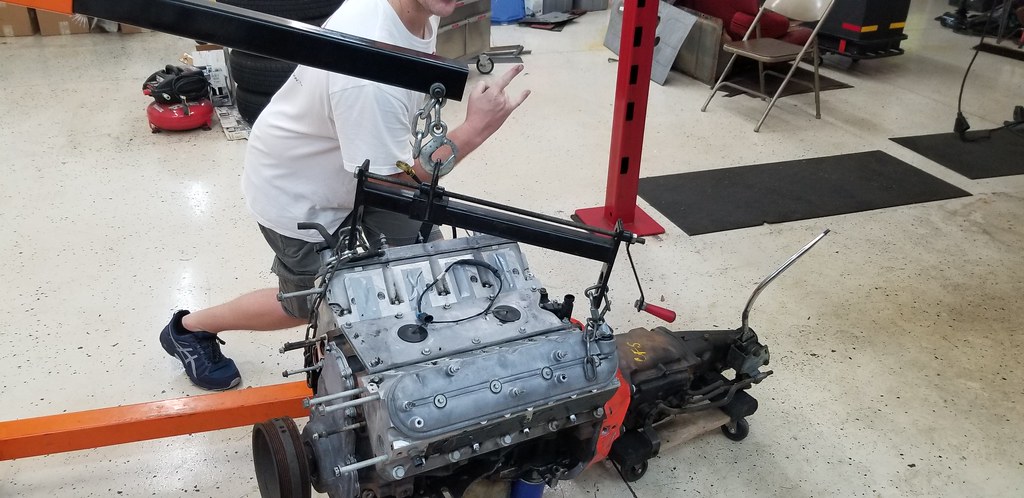
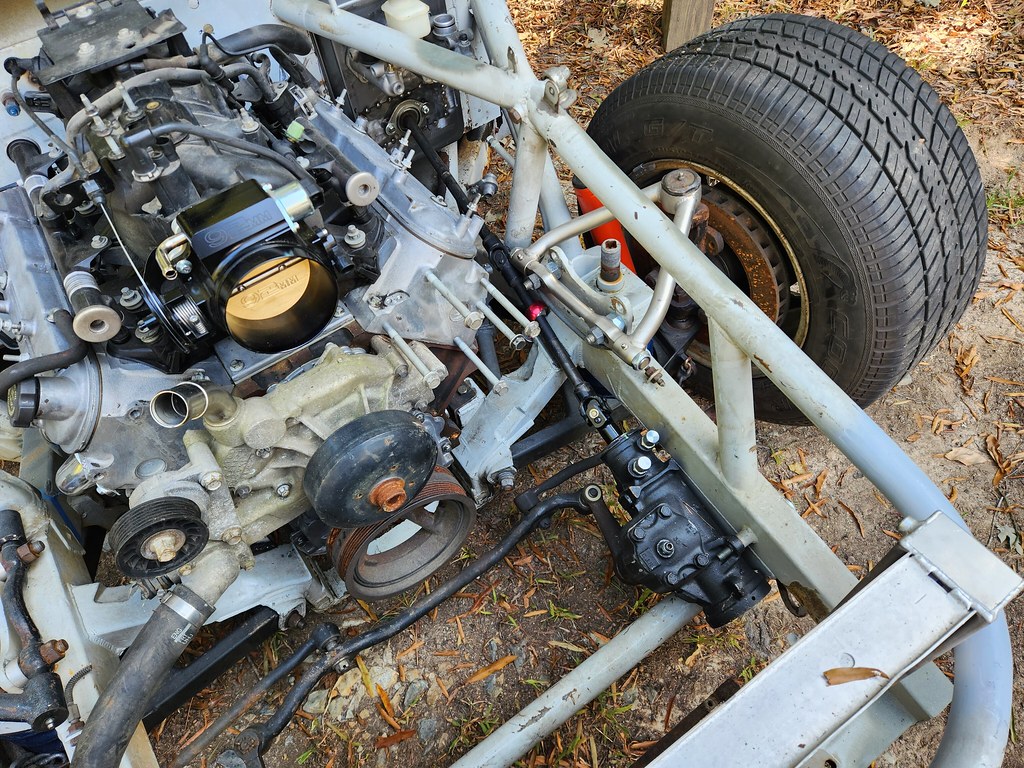
got it up on the lift, and decided that the next order of business was drivetrain fit. I needed to see it. I was beginning to lose vision and motivation.
So dad, brother dustin and I bolted the saginaw and sbc truck bellhousing to the 5.3, bolted on the kevco mounts, and slid it in.
 20220716_160906 by Michael Crawford, on Flickr
 20220716_162318 by Michael Crawford, on Flickr
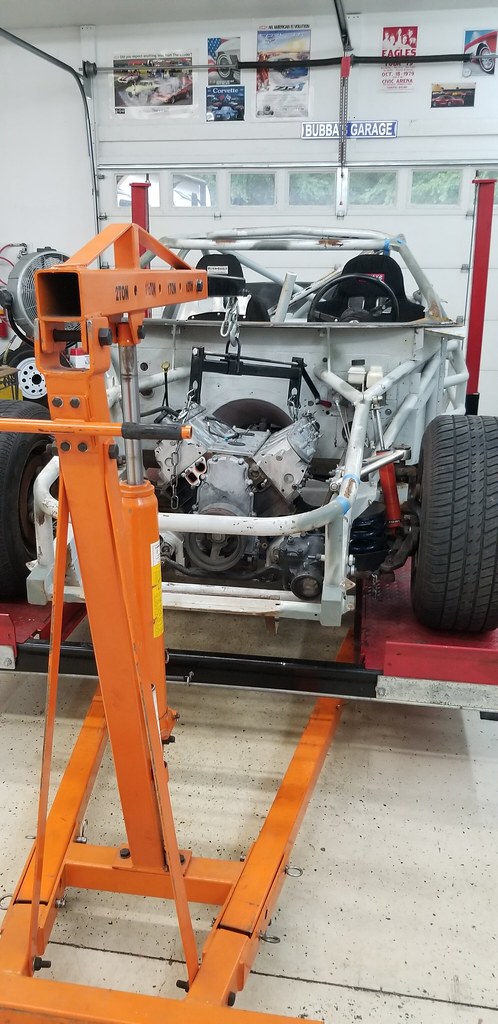
the kevco mounts weren't even close. Nor was the nascar trans crossmember. We also tried the truck manifolds. I may could have made them work, but it would have been tough. So, I stood and stared and thought. We shimmed the engine with chunks of wood and a jack to where I wanted it. Eventually figured out the c5 corvette pedestals I had in cold storage would be close. They were, and with a couple pieces of angle iron the engine sat it.
 20220717_112038 by Michael Crawford, on Flickr
it was close. So I got my fab on. I figured locating the trans first would set the fore/aft location, as well as make sure it was centered in the tunnel. I made a slotted piece for the trans mount from a chunk of my last desk chair with my drill press and dremel. The rest was a chink of 1x1 square tube with a rough wall thickness of 3/16. overkill, but I had it all. I think I made it have too much drop, but I have room to shim for driveline angle. I may have to remake it, but that's a problem for future me in a few days.
 20220720_073221 by Michael Crawford, on Flickr
 20220723_101005 by Michael Crawford, on Flickr
 20220723_102149 by Michael Crawford, on Flickr
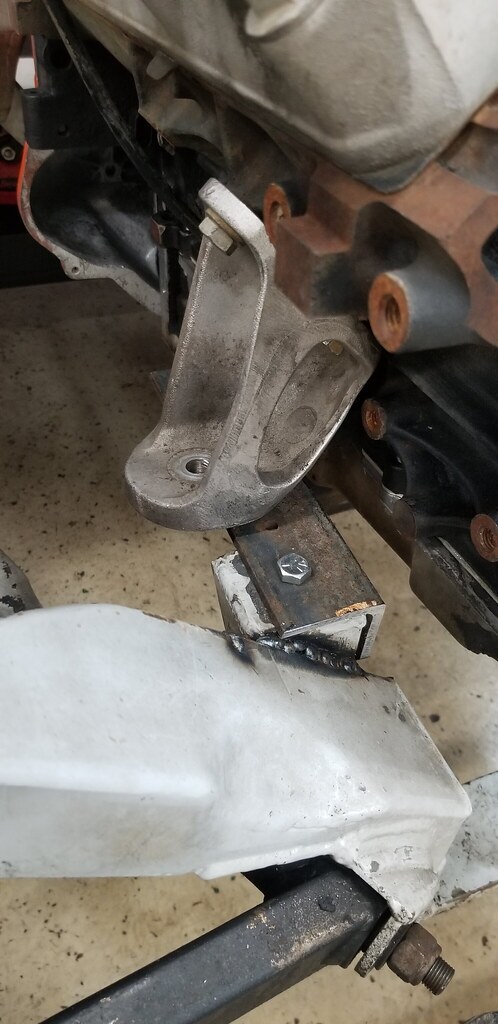
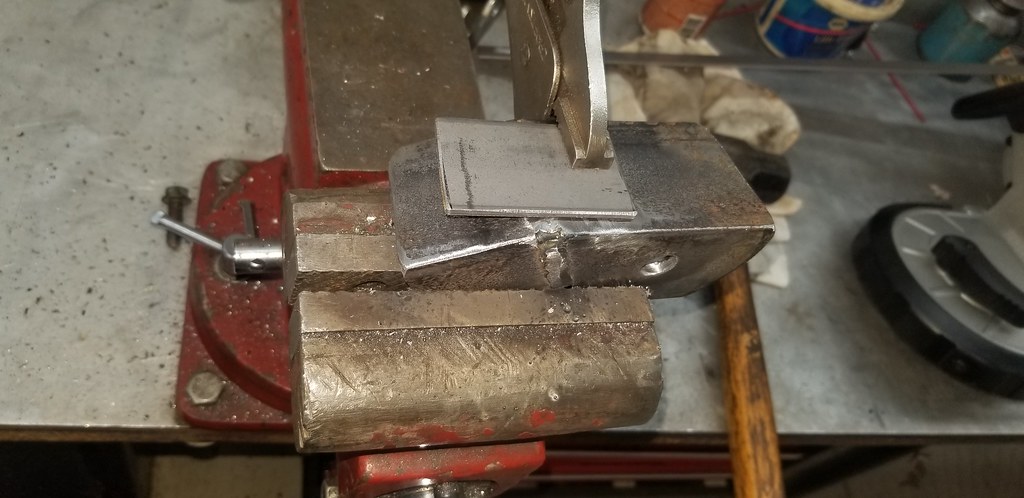
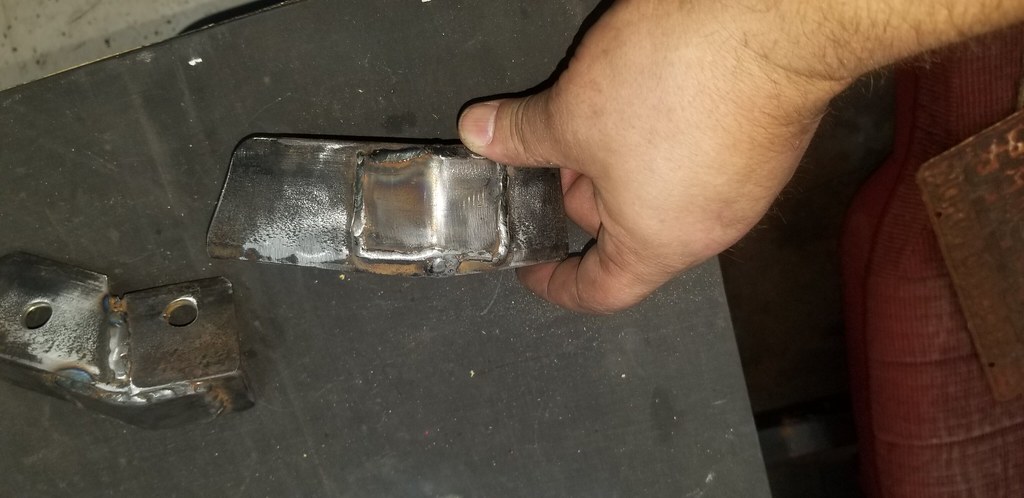
engine mounts were next. The angle iron was close, but needed to come down a few degrees in the horizontal plane and outward a nit in the vertical. So I proceeded to adjust and weld in one plane at a time. Shared with my group text of smarter than me friends, and was encouraged to fishplate the verticals. So I did. And then shaped them. And bolted them in.
 20220723_114857 by Michael Crawford, on Flickr
 20220723_121050 by Michael Crawford, on Flickr
 20220723_124013 by Michael Crawford, on Flickr
 20220724_154643 by Michael Crawford, on Flickr
I was pretty chuffed with how they came out, but even happier with how the engine is sitting in the chassis, minus the truck oil pan.
 20220717_111149 by Michael Crawford, on Flickr
 20220717_111203 by Michael Crawford, on Flickr
 20220717_114258 by Michael Crawford, on Flickr
 20220716_175831 by Michael Crawford, on Flickr
last up is the seats and mounts. i had formed a chunk of pvc in the correct angle to match what stubs were left when I bought the car. Took to a local shop that's run by a buddy of mine, and had him bend some 1.25 tubing for me. It kinked, but his bender doesn't do that on bigger tubing. He sold it to me for cost of materials due to it.
Welded in the drivers side stuff, and did huge gussets to boot. Figured it was a good idea.
 20220724_153207 by Michael Crawford, on Flickr
 20220724_153310 by Michael Crawford, on Flickr
I'm still not certain how I want to get the seat to attach to the structure. Cant come up with anything I'm happy with, so I'm open to suggestions.
 20220724_153639 by Michael Crawford, on Flickr
 20220724_153649 by Michael Crawford, on Flickr
 20220724_153654 by Michael Crawford, on Flickr
 20220724_153700 by Michael Crawford, on Flickr
ill leave off with a picture of an engine I found on Facebook marketplace earlier today. It finally gives me what I want mine to look like. I'm not sure there's a “pretty” stock or low budget LS, but this is a “not bad” one.
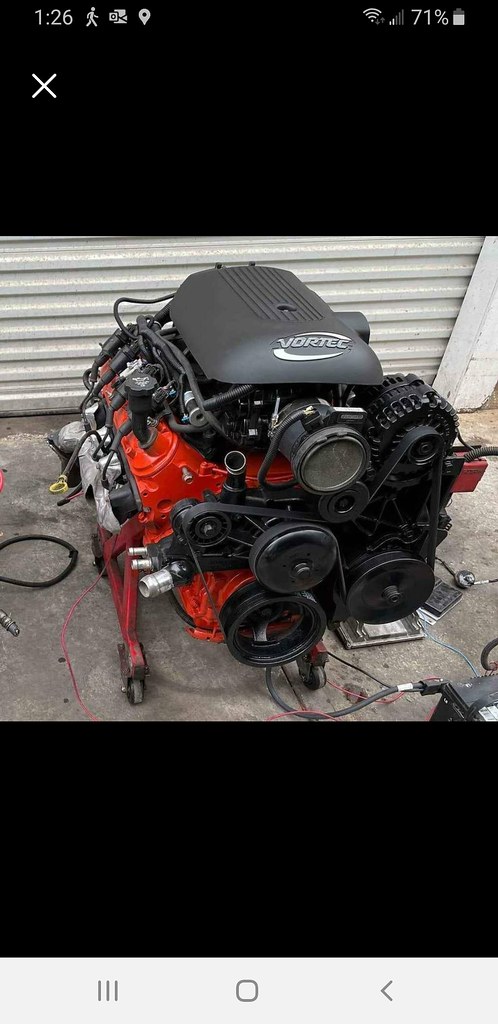 Screenshot_20220724-132613_Facebook by Michael Crawford, on Flickr
Michael Crawford
Screenshot_20220724-132613_Facebook by Michael Crawford, on Flickr
Michael Crawford
1970 plymouth Duster back under construction:
https://www.pro-touring.com/showthre...uring-makeover
1987 GMC S15 https://www.pro-touring.com/showthre...ct-drivabeater
07-25-2022 #7 Registered User
- Join Date
- Sep 2009
- Posts
- 2,709
Really cool project!

1955 Nomad project LC9, 4L80e, C5 brakes, Vision wheels
1968 Camaro 6.2 w/ LSA, TR6060-Magnum hybrid and etc SOLD
1976 T/A LS1 6 Speed, and etc. SOLD
Follow me on Instagram: ryeguy2006a
07-25-2022 #8
Registered User
- Join Date
- Aug 2007
- Location
- Albemarle, NC
- Posts
- 1,149
Thanks! I was beginning to think that this may not be the right forum for this one. Seems like its a bit too race car for here.
But, apparently I may be wrong!
And i love the m parallels on your Camaro. One of my favorite wheels.Michael Crawford
1970 plymouth Duster back under construction:
https://www.pro-touring.com/showthre...uring-makeover
1987 GMC S15 https://www.pro-touring.com/showthre...ct-drivabeater
07-25-2022 #9
Registered User
- Join Date
- Oct 2017
- Posts
- 116
Great off the beaten path project!
07-26-2022 #10
Registered User
- Join Date
- Sep 2009
- Posts
- 2,709
This is definitely the right forum haha. I had the same thing happen when I was posting to my build thread. Lots of views, but not many would post.
1955 Nomad project LC9, 4L80e, C5 brakes, Vision wheels
1968 Camaro 6.2 w/ LSA, TR6060-Magnum hybrid and etc SOLD
1976 T/A LS1 6 Speed, and etc. SOLD
Follow me on Instagram: ryeguy2006a
07-26-2022 #11 Registered User
- Join Date
- Nov 2007
- Location
- Dayton, Ohio
- Posts
- 435
Love these kind of builds with a lot of fabrication.
 Roger
Roger
69 Mustang coupe, under construction
2011 Mustang - DD
https://www.pro-touring.com/threads/...ang-SuperCoupe
Freedom Of Speed!

09-05-2022 #12
Registered User
- Join Date
- Aug 2007
- Location
- Albemarle, NC
- Posts
- 1,149
Previous budget was 4776.02 with 415 recoup
new money:
remove les radiator -20
add ron davis radiator 140
piece dom tube bent at welding shop: 25
piece 1/8x3x36 steel 29.99
kirkey seat back braces 51
new total: 4912.02 with 415 recoup
if you've notices, by build style resembles a ping pong ball in a blender, so I frequently don't really have a coherent narrative, but I give a fair whack at trying to create one with some revisionist history. All timelines are subject to fuzzy math and poor recollection as always.
I think I will start this one with the oddesy of the soul that ergonomics has become. Its making me rethink everything, and think through the long term stresses, accident stresses, weight, and conflicts with service and usage. Really making me stretch my brain in new and different shapes...
when we left off, I had the tubes in, and the seats mocked up. I didn't like it. Just couldn't find the sweet spot with my helmet, roll bar padding, and pedals connected to master cylinders. I really needed to find a few more inches of legroom.
 20220727_191035 by Michael Crawford, on Flickr
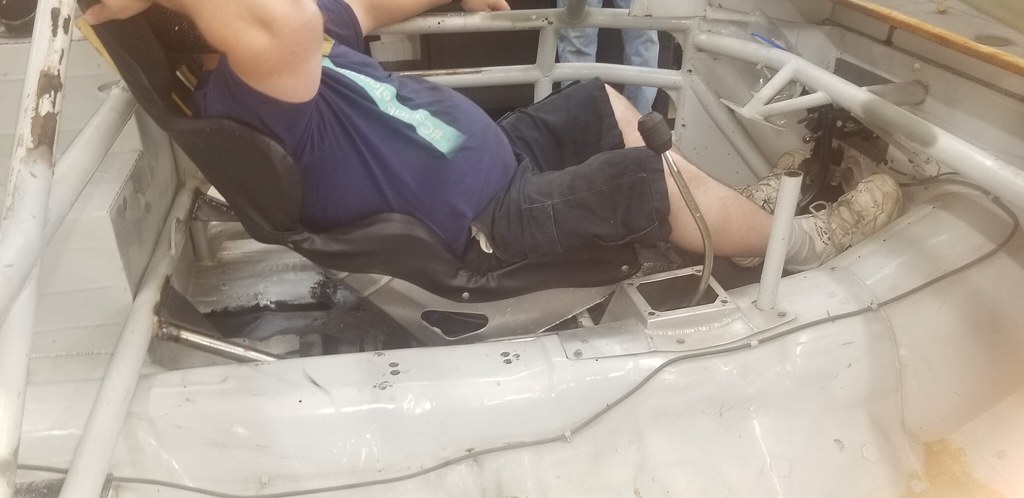 20220727_191038 by Michael Crawford, on Flickr
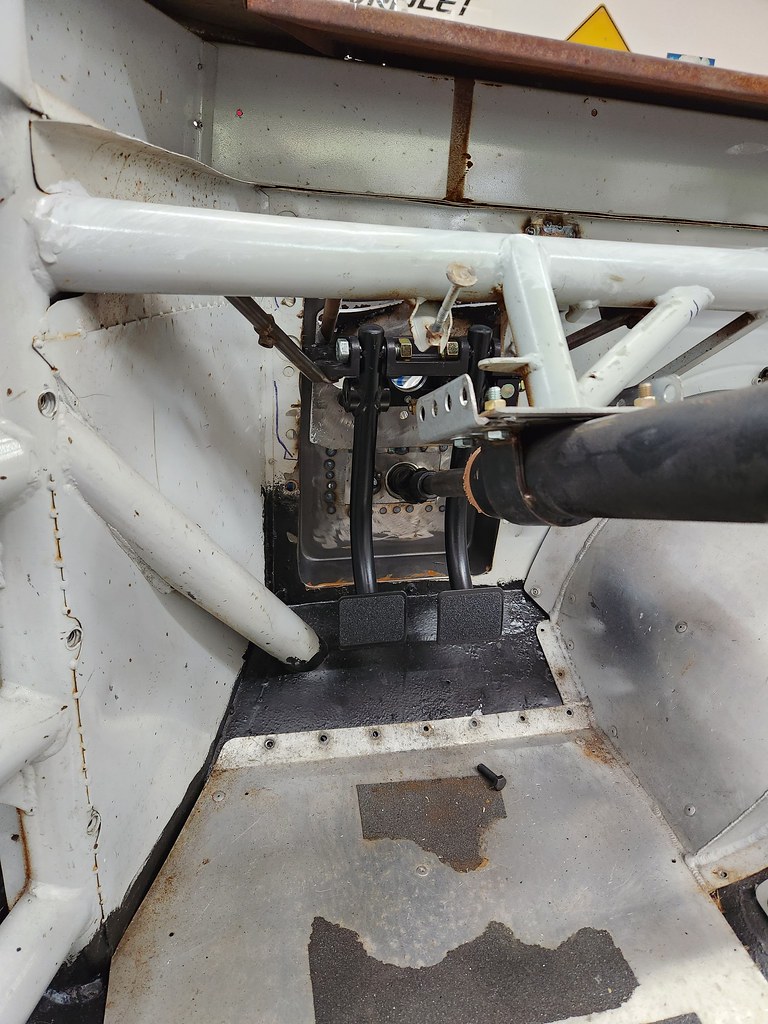
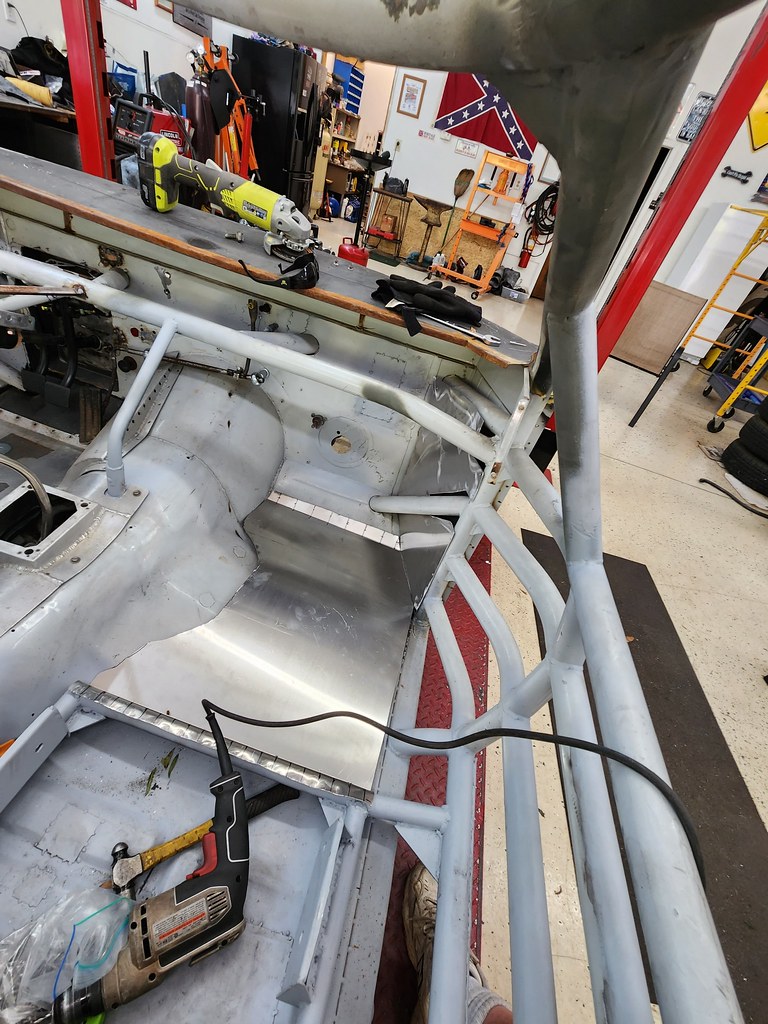
So I did. I chopped out the firewall right around the ¼ plate the pedals mount to and pushed them forward a bit. I liked it. But needed to make it a little better. I don't have a box brake, so I have to get creative.
I went to dollar tree and walmart and found cake pans.
First attempt proved my concept, but the pan was too small and the pedals hit the firewall. It was a banana bread pan, and I didn't have a picture. But the next size up was a brownie sheet, and nailed the spacing with a little grinding and clearancing.
 20220731_111159 by Michael Crawford, on Flickr
 20220807_092136 by Michael Crawford, on Flickr
then it was time to make structure. The pan has all the rigidity of a wet paper towel. So I built off the ¼ plate with ½ inch tubes and gussets. I tied the plate to the dash bar, and the pedals to the dash bar as well. Then gusseted it. Its solid as hell. Ignore the first coat of paint. Its crappy, but the first coat to keep it from rusting while I do other stuff. It'll get better. Promise.
 20220810_175457 by Michael Crawford, on Flickr
 20220813_150357 by Michael Crawford, on Flickr
 20220905_143212 by Michael Crawford, on Flickr
 20220905_143238 by Michael Crawford, on Flickr
so, with the pedals finally and totally sorted, I could go back to seat mounting. Its still in progress, so feedback is still welcome.
I started with the vertical front mounts. Decided to use c channel, as it made the most sense to me. Two 5/16 bolts on wither side with fender washers had it pretty secure. I then ordered kirkey seat back braces after failing miserably to make my own. Sent pictures for review to Steve, and he recommended I cut down the top of the c channel, and add gussets to box the remaining c channel to increase weld area. Additionally, he wanted to see rear seat mounts at the base of the seat at the rear. So today I spent all day doing that. I also added a leg down to a pad on the floor for extra resistance to flexing over time. That corner only being supported by the riveted in heat shield made me nervous for longevity. Now im ok. Still have to tie in the bottom of the seat though. The harnesses wrap around the side tubes and have a really nice pull angle. Im super happy with that.
 20220827_124218 by Michael Crawford, on Flickr
 20220905_143222 by Michael Crawford, on Flickr
we then went to the other side. First we filled holes. Lots of holes.
 20220814_141718 by Michael Crawford, on Flickr
then created the seat frame again. This is all still in process, but will get the same treatment as the other side.
 20220827_130325 by Michael Crawford, on Flickr
the lowest door bar has taken a hell of a beating over the years, having jack points ripped off and repairs scabbed on. So I ground it smooth and welded a cap of roll bar tubing over it as a reinforcement.
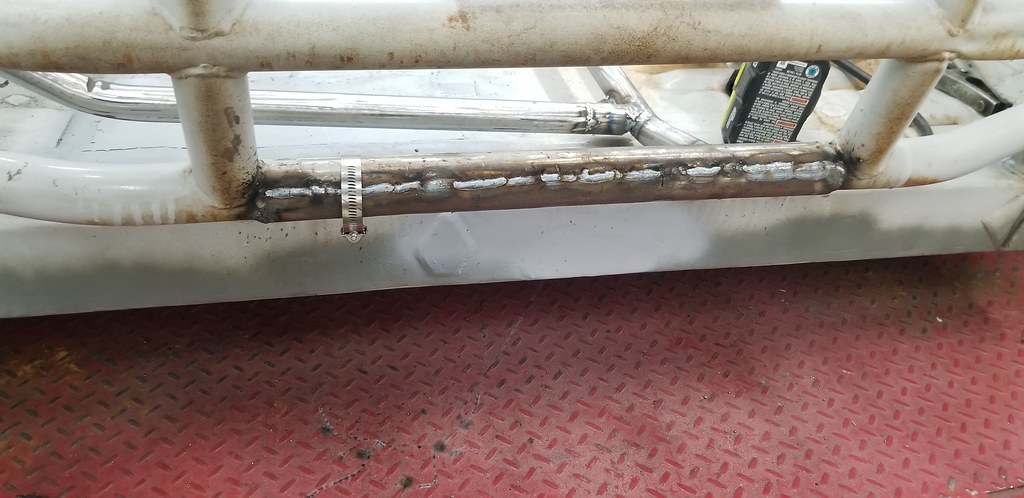 20220827_122158 by Michael Crawford, on Flickr
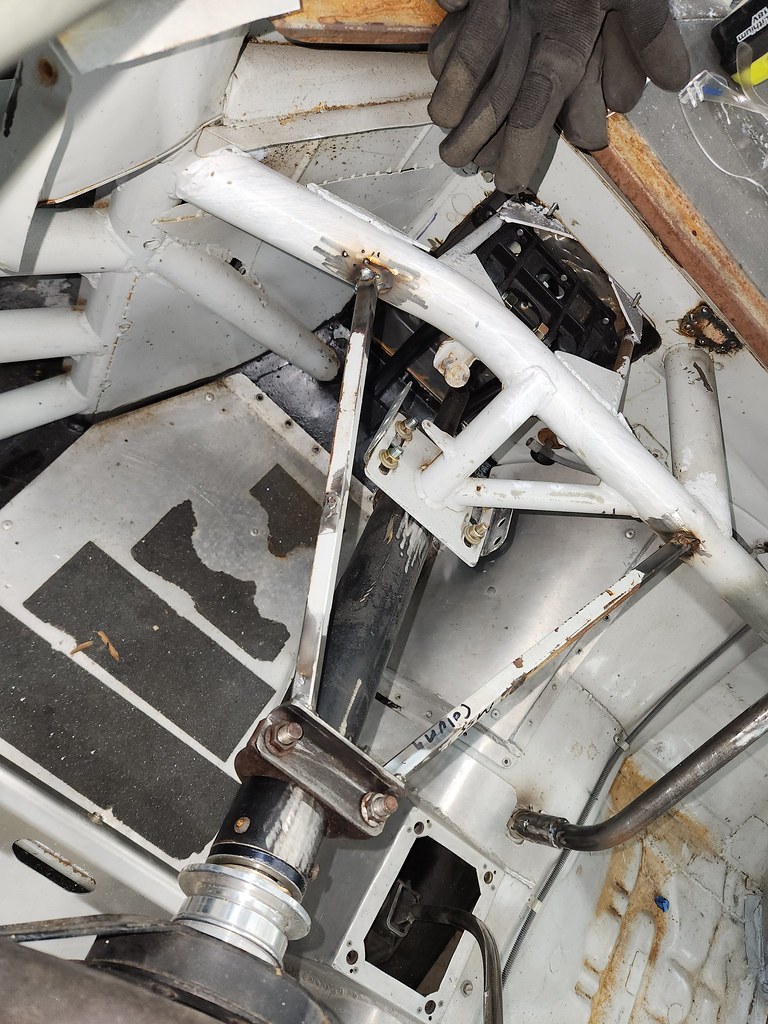
so, while im in the seating area, lets talk about the stub of rollbar bracing sticking up from the trans tunnel. I decided that a piece of tube inserted in the stub, bent to meet the dash bar. Simple, light, strong. I added some rosette welds to spread the load.
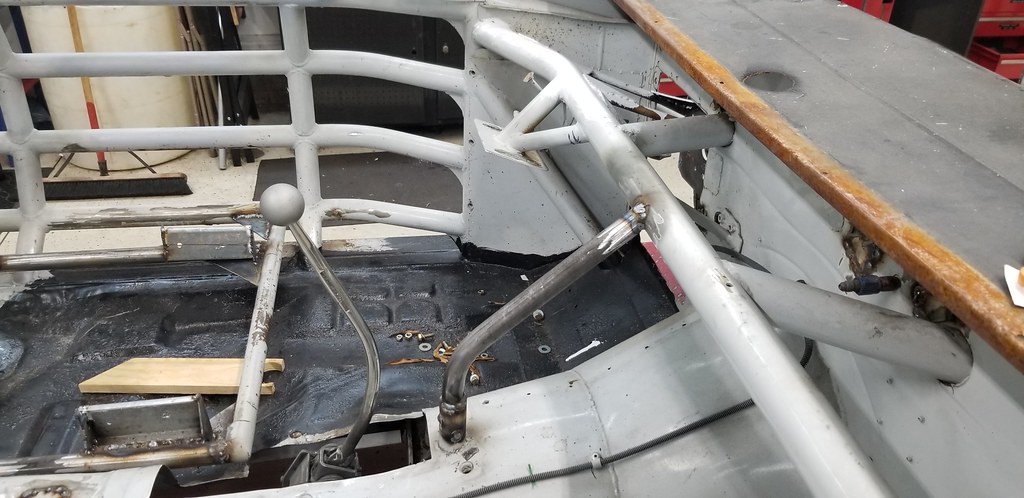 20220905_143310 by Michael Crawford, on Flickr
lastly, lets talk about the steering column. The mount was cracked and bent, the wheel was about three inches into my gut, the quick release was work slap out, and the lower bearing was missing. So, step one was cutting the housing down till it was close. Step two was repairing the new quick release io was given via drilling out and helicoiling the buggered threads. I mounted up the grant steering wheel that I sold to brother Dustin in the 10th grade after dad made me pull it from the duster. Honestly, this steering wheel is the reason I have brother Dustin in my life. Its special.
 20220827_135637 by Michael Crawford, on Flickr
regardless, I chopped about 8 inches out of it to fit my seating position and comically proportioned fat ass. The smaller wheel really helps as well. Then, I used the anvil and beat the mounting plate back into shape. Welded up the cracks. Added some 1x1 angle to reinforce things and square up the mounting pattern. Made sure that it would mount up square and easy. Then, we solved he lack of lower bearing with a bit of ash wood turned down into a bushing in the finest British tradition. We even cut grease channels in it to reduce turning friction. Seems like as good a solution as any, and was free due to dad being a woodworker. And lets be honest, if the wood is on fire, im already completely and irredeemably ****ed. So, ill run it.
 20220827_124212 by Michael Crawford, on Flickr
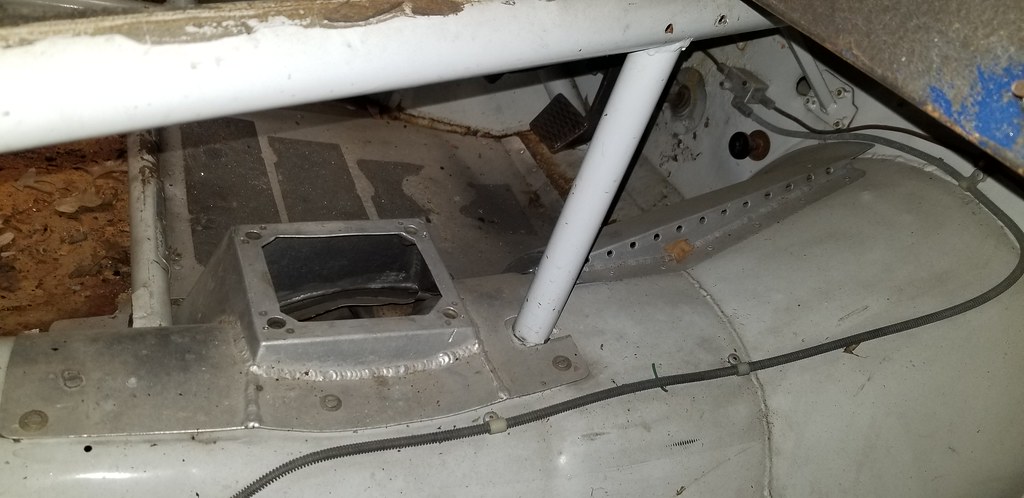
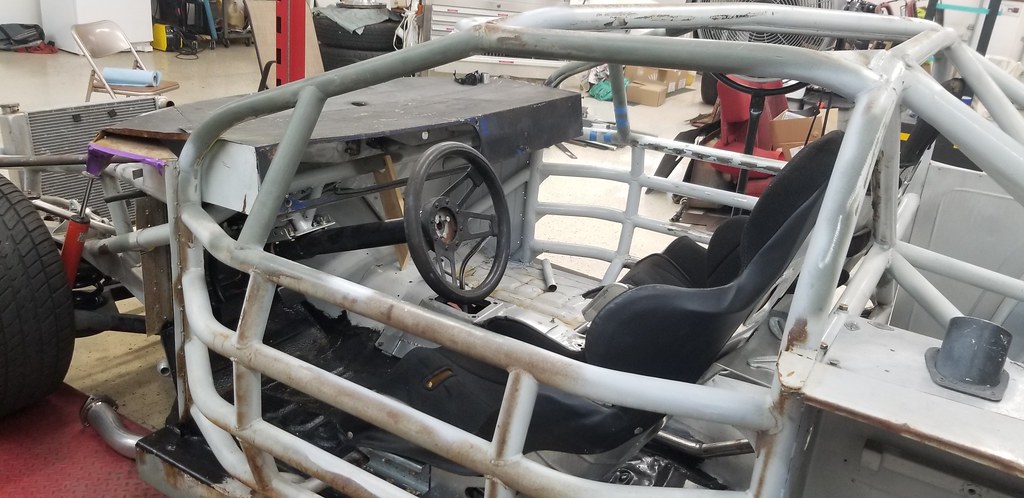
leaves the compartment looking kinda like this when I walked out of the shop today. Still more to do, such as the passengers seat boxing, a kick plate and heat shield on the passengers floor, kick panel padding mounts, some more holes, fab a gas pedal.....
 20220827_135632 by Michael Crawford, on Flickr
20220827_135637 by Michael Crawford, on Flickr
in progress is rust repair. On the nascar. Rust repair.
Well, and making the new cell fit, and fixing damage, etc.
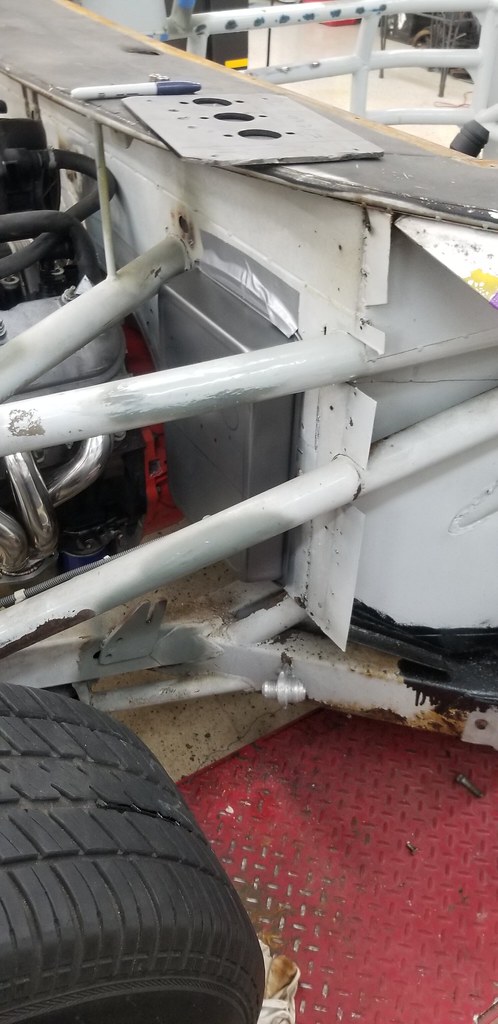
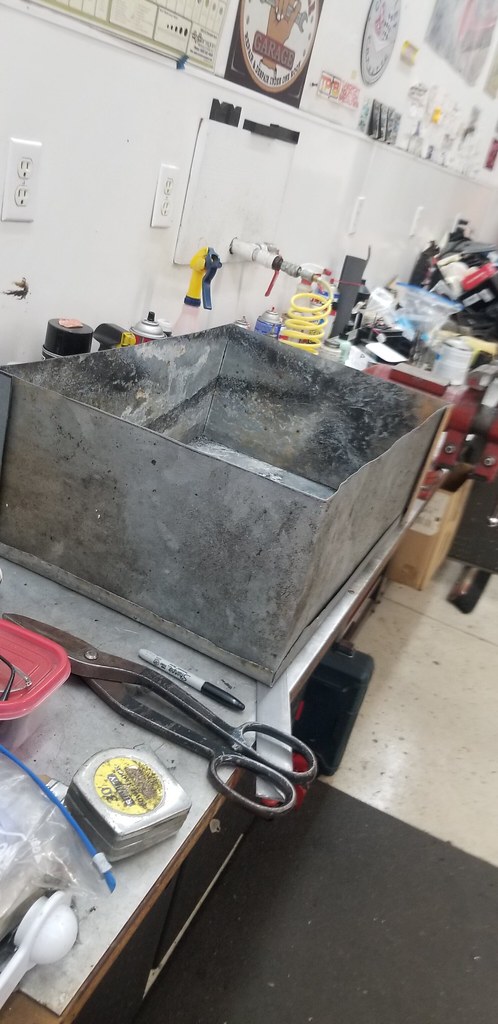
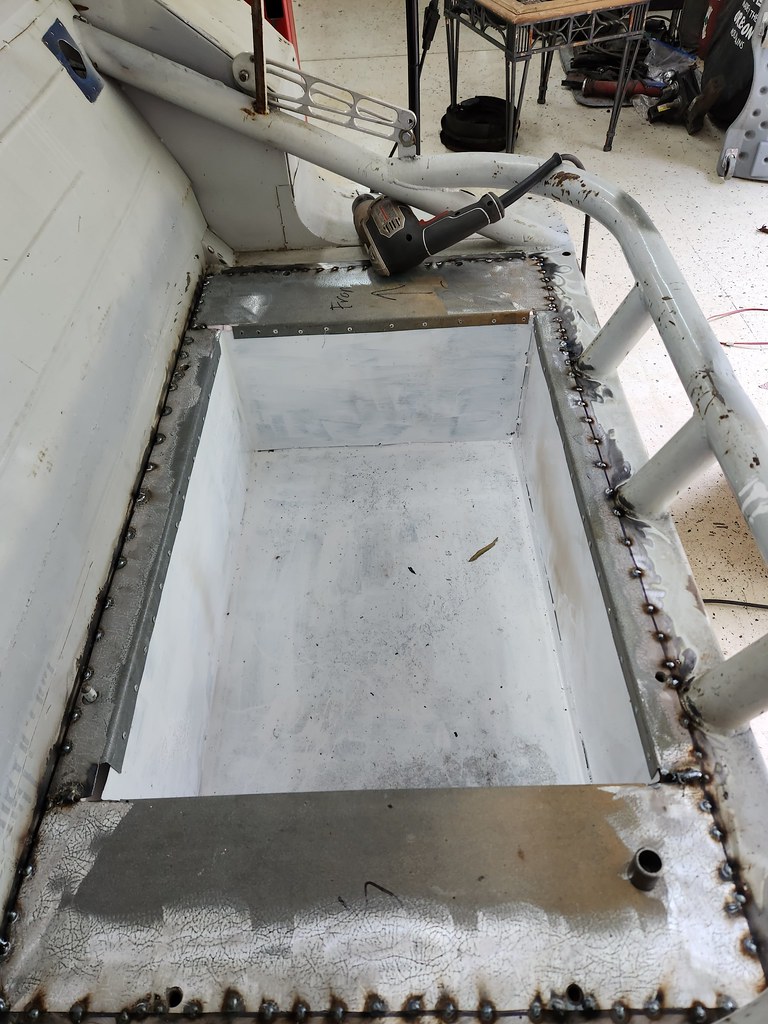
I cut out the whole old fuel cell enclosure and painted up the metal that has never been painted to prevent it from rusting.
 20220905_143252 by Michael Crawford, on Flickr
I then went to my metal pile, and pulled out some galvanized sheet metal from what Dallas called a water heater shed. It had fiberglass insulation glued inside, and was originally a giant enclosure. I got all the fiberglass off, and discovered the guy spraying the glue was bored.
 20220831_090455 by Michael Crawford, on Flickr
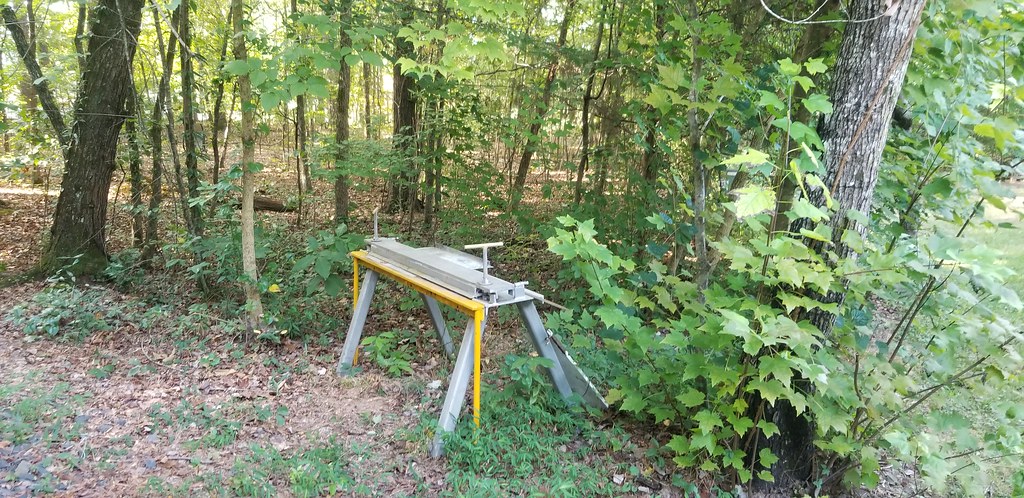
made a cut sheet, cut it up with tin snips, and took it to my scenic sheet metal brake that lives in a nice quiet corner of the woods. Now, this isn't a box brake. Or a finger brake. Or a good brake. But its what I got to work with, so we made it work. I also used flanging pliers for the bottom piece.
 20220829_152031 by Michael Crawford, on Flickr
 20220831_090544 by Michael Crawford, on Flickr
 20220903_092627 by Michael Crawford, on Flickr
 20220903_093711 by Michael Crawford, on Flickr
welding galvanized sucks. But its almost done. Next is finish it to the trunk floor.
 20220903_121034 by Michael Crawford, on Flickr
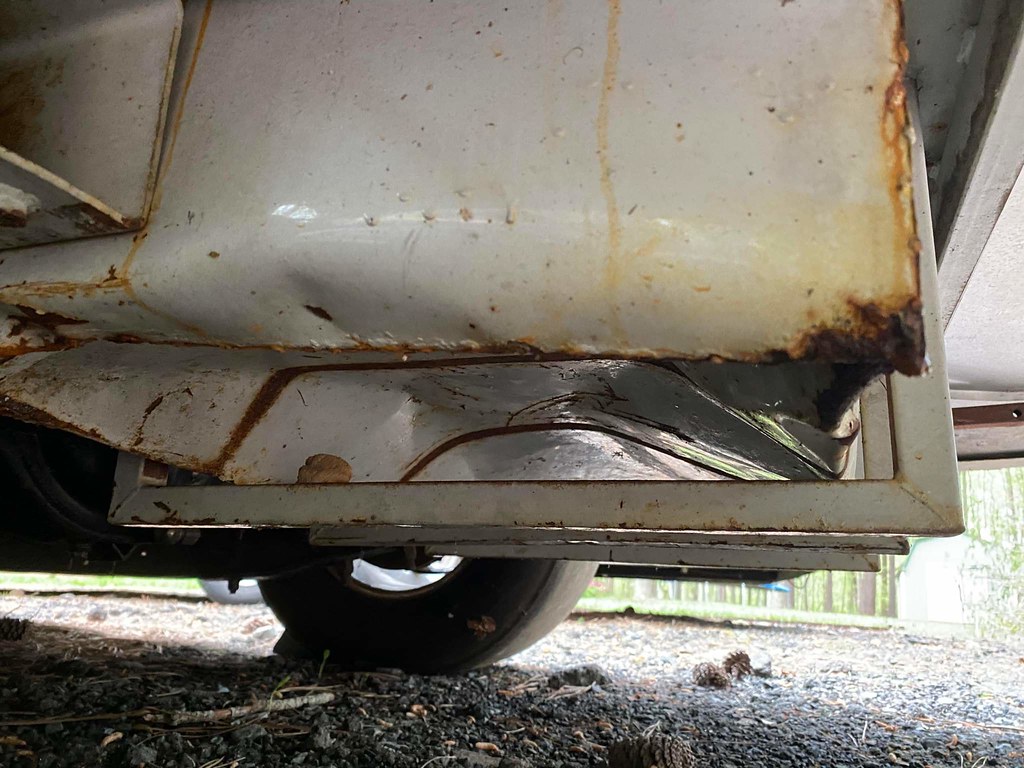
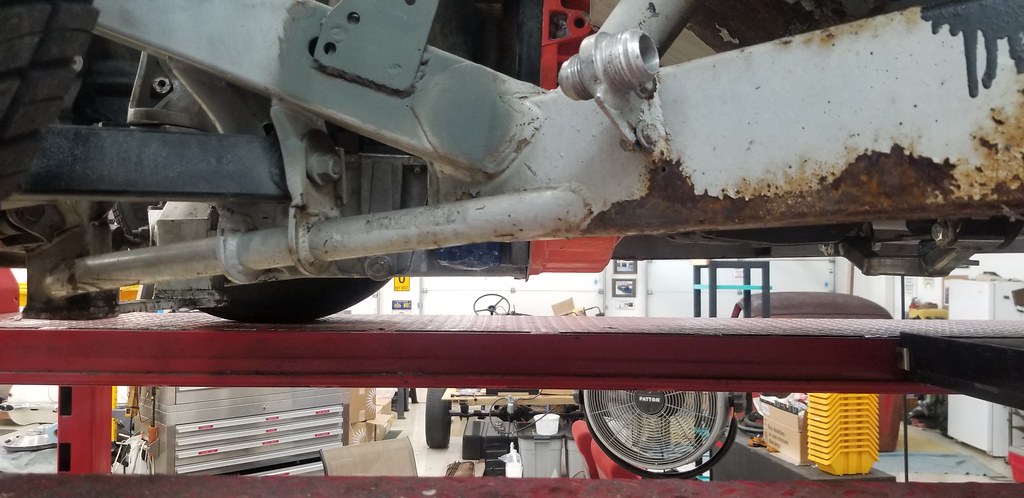
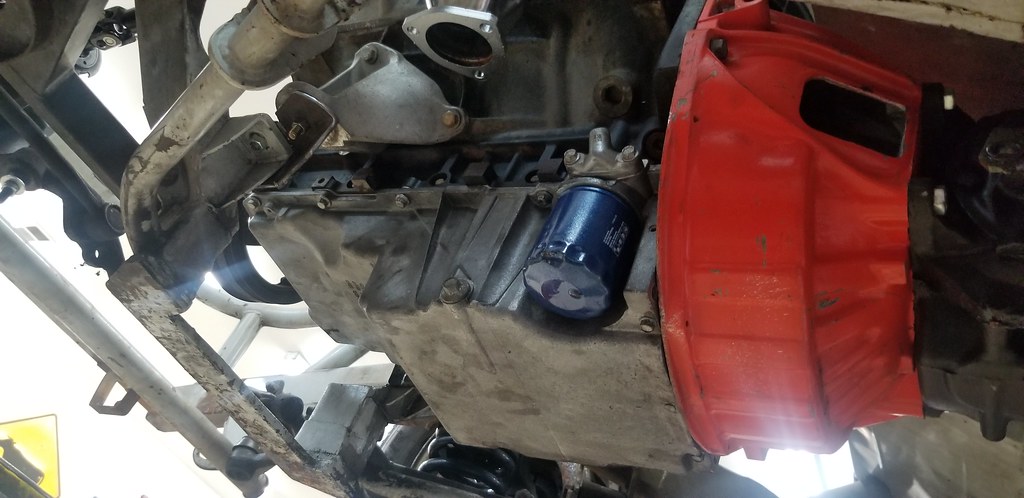
in the process, I swapped on the f body pan. To do so, I had to modify the truck windage tray. When I dropped it, I found surface rust in the cylinders and on the crank weights. I'm not hopeful about the health of this one, but its what I have for now. The f body pan is so much better for ground clearance. I'm debating cutting the flat bottom piece off the frame that's the lowest point, and replacing with a piece of tubing. It would make the lowest point an inch and a half higher, and round which would be less likely to dig in.
 20220809_190223 by Michael Crawford, on Flickr
 20220809_190232 by Michael Crawford, on Flickr
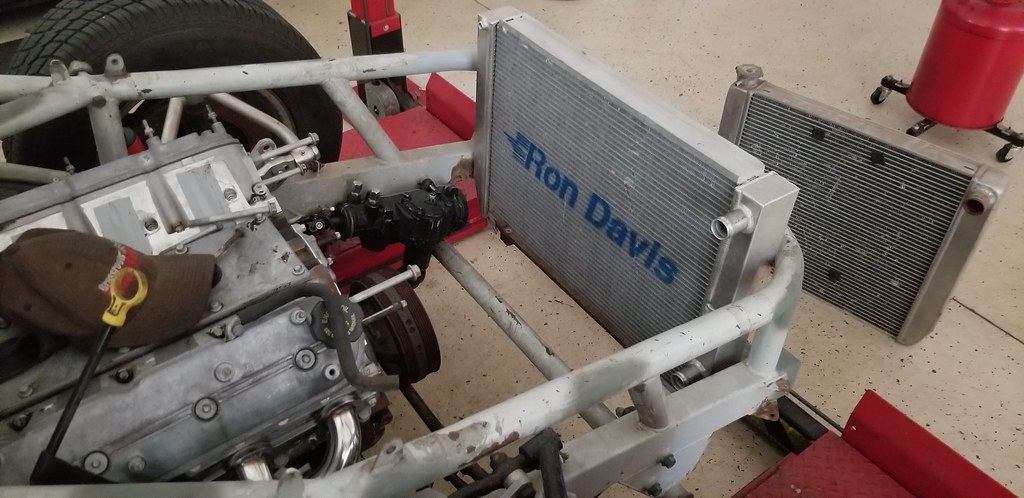
I also picked up a new radiator. The $20 one I picked up had the wrong outlets and dimensions. I scored a brand new ron davis dual pass for $125 from facebook, and bought a hans 20L from the same guy for another $125. the radiator is EXACTLY what I needed.
 20220831_153642 by Michael Crawford, on Flickr
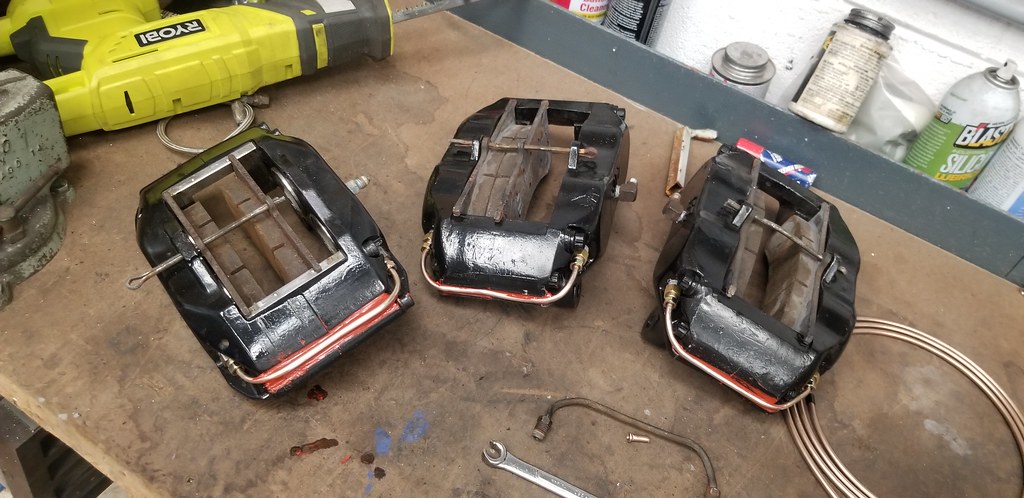
ill leave with a picture of the finally finished calipers.
 20220810_152554 by Michael Crawford, on Flickr
Michael Crawford
20220810_152554 by Michael Crawford, on Flickr
Michael Crawford
1970 plymouth Duster back under construction:
https://www.pro-touring.com/showthre...uring-makeover
1987 GMC S15 https://www.pro-touring.com/showthre...ct-drivabeater
09-05-2022 #13
Registered User
- Join Date
- Jul 2006
- Location
- Chesapeake, VA
- Posts
- 613
Cool project! I love that you're putting a Duster body on it, too.
Cars are meant to be driven.
John B
09-13-2022 #14
Registered User
- Join Date
- Dec 2015
- Posts
- 194
Love it! I can't wait to see this one come together!
09-14-2022 #15
Registered User
- Join Date
- Aug 2007
- Location
- Albemarle, NC
- Posts
- 1,149
Thanks yall!
Feels like zlow progress at this point, and im sick of seat mounts, but its turning out niceMichael Crawford
1970 plymouth Duster back under construction:
https://www.pro-touring.com/showthre...uring-makeover
1987 GMC S15 https://www.pro-touring.com/showthre...ct-drivabeater
09-18-2022 #16
Registered User
- Join Date
- Aug 2022
- Posts
- 14
I sometimes wish I was still in N.C. so I could come across the "locals" only deals like this. Miss all the nascar takeoff parts for cheap.
10-09-2022 #17
Registered User
- Join Date
- Aug 2007
- Location
- Albemarle, NC
- Posts
- 1,149
Previous budget was 4912.02 with 415 recoup
new money:
bike brake cables: 4.49
½ inch heims: 11.98
2x strap steel: 12.72
4x exhaust 90s: 39.96
2x exhaust 45: 19.98
new total: 5001.25 with 415 recoup
so, a month has passed. Started my new career, been working on family as well. So not a lot of progress to show (at least in my mind)
first up, lets talk about fishing the firewall kickout. To so do, I had to finish the steering. This was accomplished by using a hodgepodge of leftover dirt track stuff and the nascar stuff. A firewall support bearing was out into the kickout with weld nuts, and the previous column drop heim joint was purposed as a middle shaft support bearing. It works nice!
 20220924_141158 by Michael Crawford, on Flickr
 20220924_102031 by Michael Crawford, on Flickr
 20220924_141212 by Michael Crawford, on Flickr
the column still had quite a bit of wiggle in it. So a couple pieces of re-purposed square tube, a used 2.25 exhaust clamp, and a scrap of angle iron later, its rock hard
 20220925_115049 by Michael Crawford, on Flickr
then, it was time to get a gas pedal in. the last control surface to sort. It took some head scratching, but ultimately I took a free gmt400 vortec gas pedal and cable, and cut them up. I extended the gas pedal horizontal part with some ½ rod, and slid it through a pair of heim joints to mount to the firewall. Then, I clocked everything to make sure I could use the throttle stop and still get WFO. Cut down the cable housing, and used a bicycle brake cable to replace the frayed inner cable that came with my free stuff. Like I said, lots of head scratching.
 20221008_111618 by Michael Crawford, on Flickr
 20221009_111503 by Michael Crawford, on Flickr
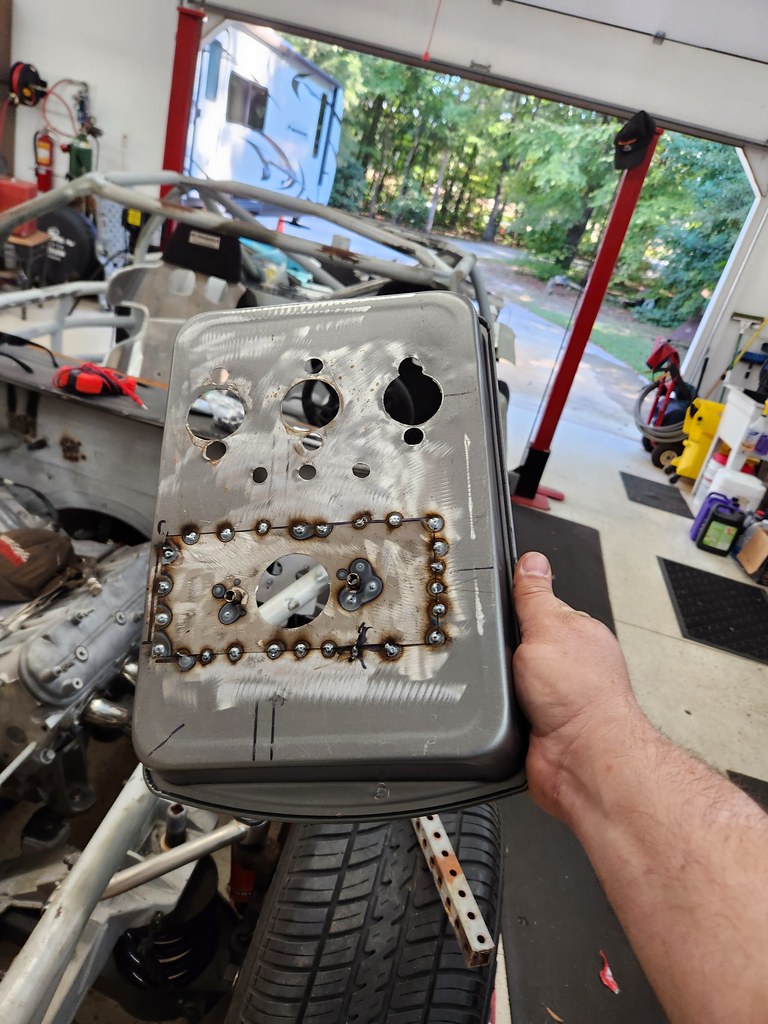
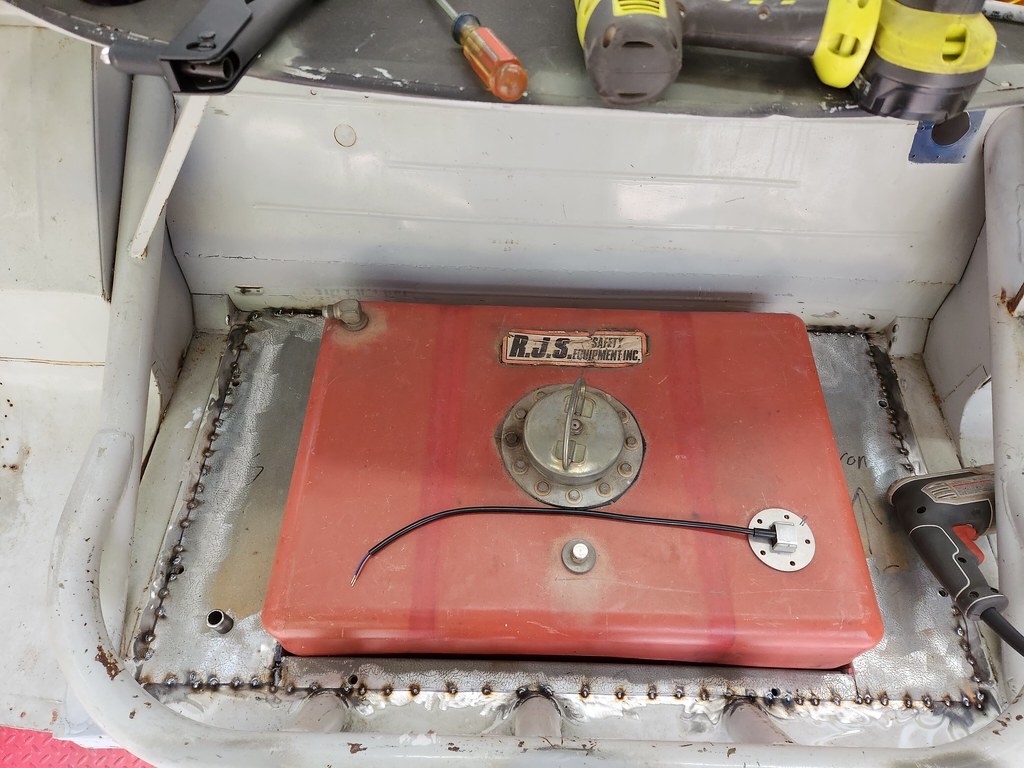
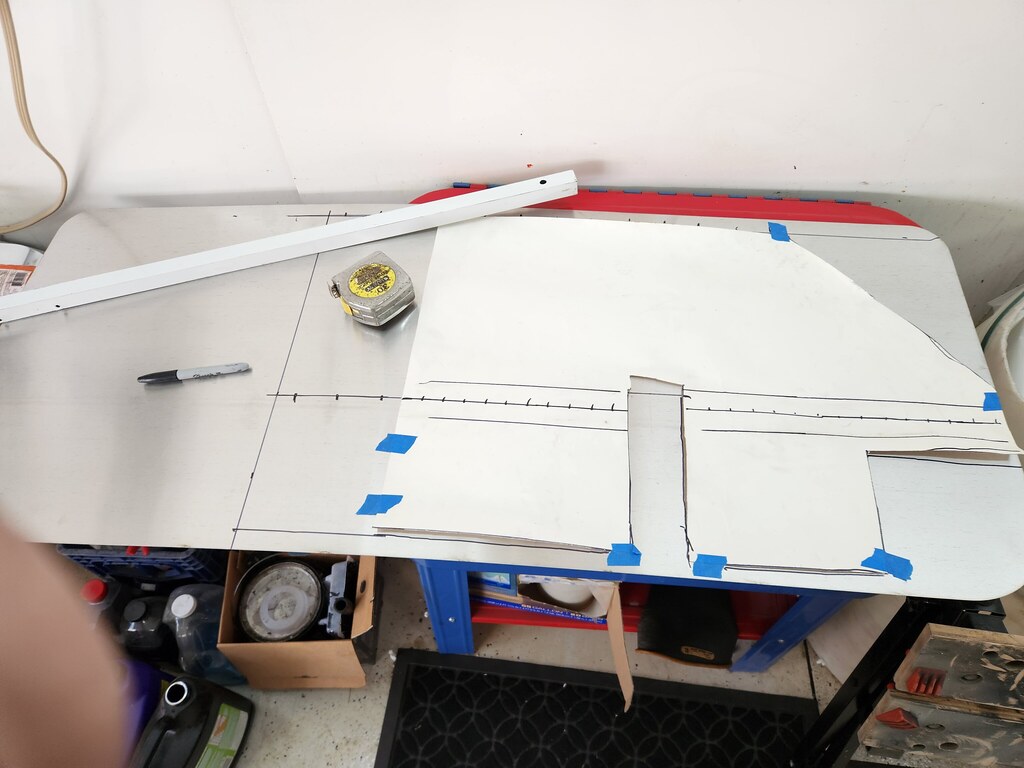
lets next talk about the fuel cell. When we left, I had the box made, but nothing else. So I centered the box, and bent up some pieces of galvanized metal to reach the maximum points possible in the trunk pan, and one inch down the box. Used a sharpened bolt to mark the welded in mounting nuts and transfer through the galvanized. I also spaced 1/8 holes at one inch intervals on all the floor to box flanges for rivets. Thought being that they will have a less sharp head than ground weld, and therefore present less risk to the cell integrity over time.
 20220911_143304 by Michael Crawford, on Flickr
 20220911_143242 by Michael Crawford, on Flickr
trimmed up the floor pieces, spot welded every inch and ran the rivets after a base-coat of white rustoleum.
 20220924_141309 by Michael Crawford, on Flickr
 20220924_141227 by Michael Crawford, on Flickr
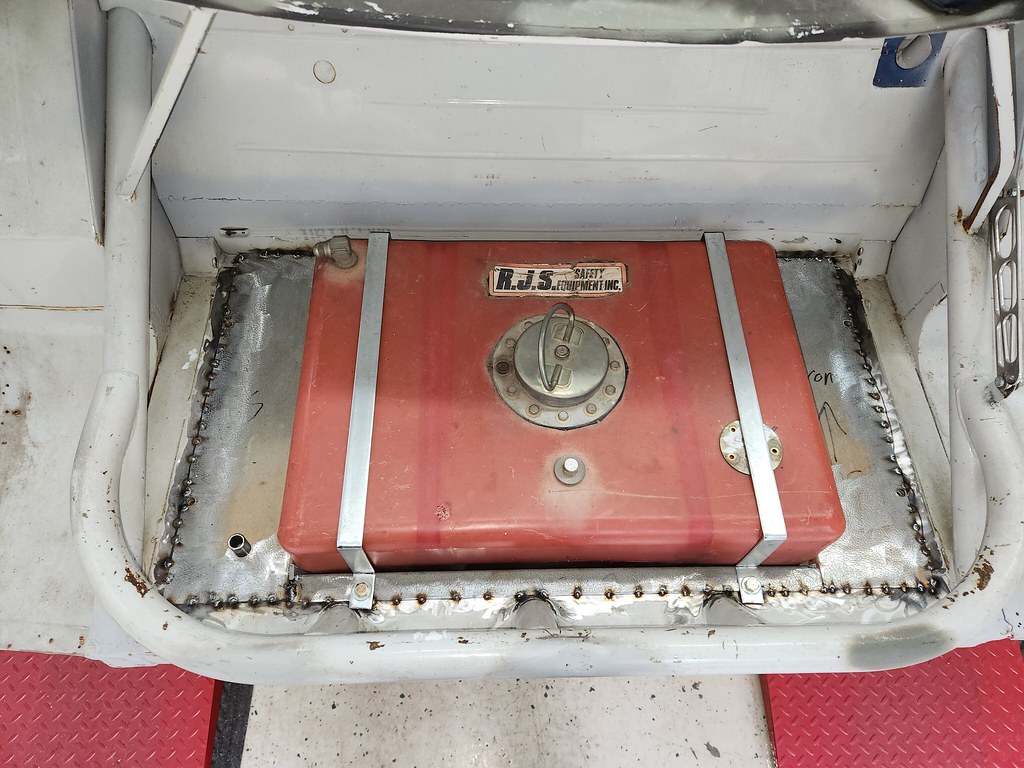
finished by bending up some straps. Quite happy with how this turned out. Still have to clean the cell, re-gasket, install the fuel pump module, etc. but its damn near sorted!
 20220925_104638 by Michael Crawford, on Flickr
next lets move onto finishing up seat mounts, grinding welds, etc. lotta work, and brother dallas came to help. It was a good time with a good friend. The seats grew a pair of mounts at the rearmost section, braced from the mounting frame, to the seat, then through bolted through the floor. Really stiffened things up.
 20221001_091757 by Michael Crawford, on Flickr
 20220910_173053 by Michael Crawford, on Flickr
 20221002_094839 by Michael Crawford, on Flickr
next lets talk about the aluminum work. My plan is to build in as much heat shielding as is realistically possible. NASCAR used an under floor heat shield with some fiberglass sandwiched, the aluminum floor liner on top with fiberglass sandwiched. I decided to replicate this on the passengers side, using some 16ga aluminum. Starting with CAD, I made a model.
 20221002_110816 by Michael Crawford, on Flickr
took it out to Walden (my sheet metal brake in the woods. Anyone know the reference?) and bent it up. Then fit it into place.
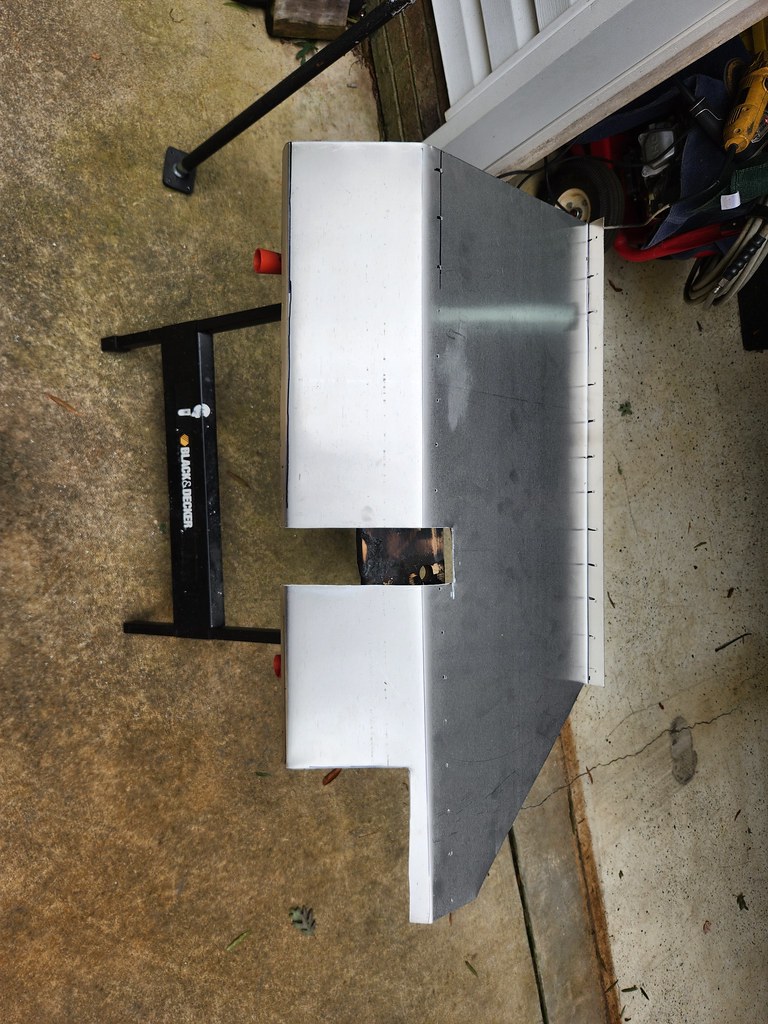 20221002_113348 by Michael Crawford, on Flickr
 20221002_135322 by Michael Crawford, on Flickr
looks right! I also rebuilt the trans mount to fix the drop issue as you can see here
 20221002_135328 by Michael Crawford, on Flickr
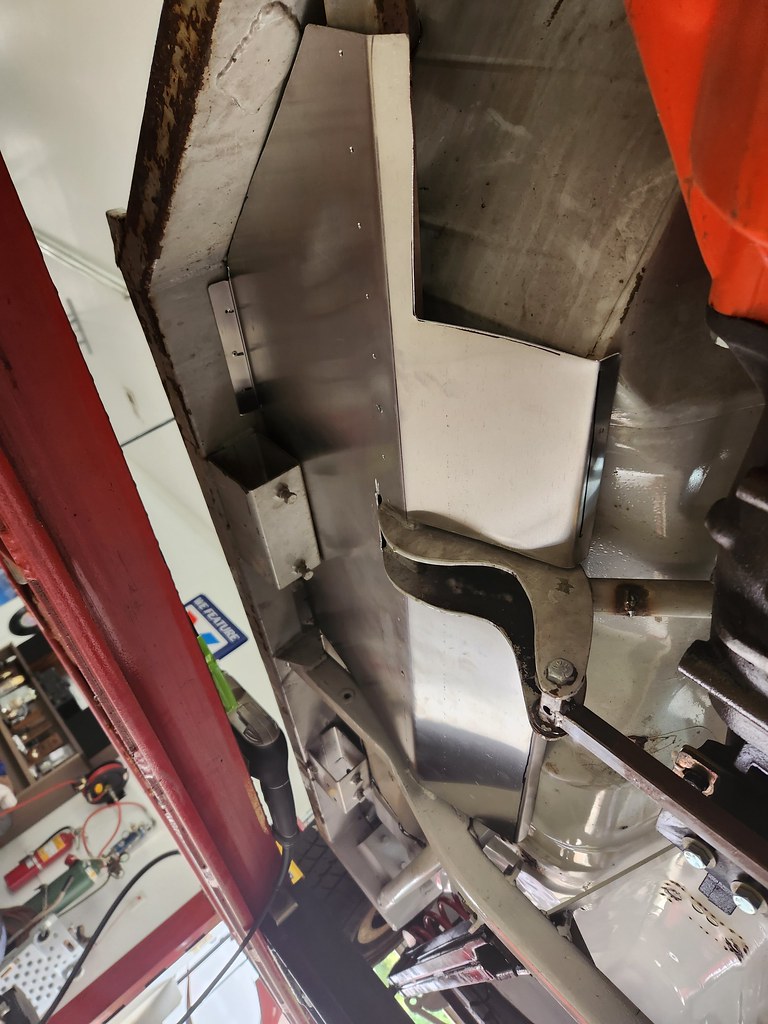
while I had the cad fired up, I used another sheet of aluminum to make the passengers side kick panel closeout and upper heat shield. The fuel lines will run under and behind there as well, and wiring foir the engine will come out of the big hole in the firewall. Still in prigress is a kick plate for instructor to brace against and protect the stuff. Ecu will be buried above the dash bar, mounted to it. Out of the way but serivicible.
 20221008_144135 by Michael Crawford, on Flickr
next, I got to thinking about line mounts, batter kill switches, brake bias stuff, fire suppression control, etc. I have a general plan somewhere between these two vintahe nascar pictures I found
 218788_Interior_Web by Michael Crawford, on Flickr
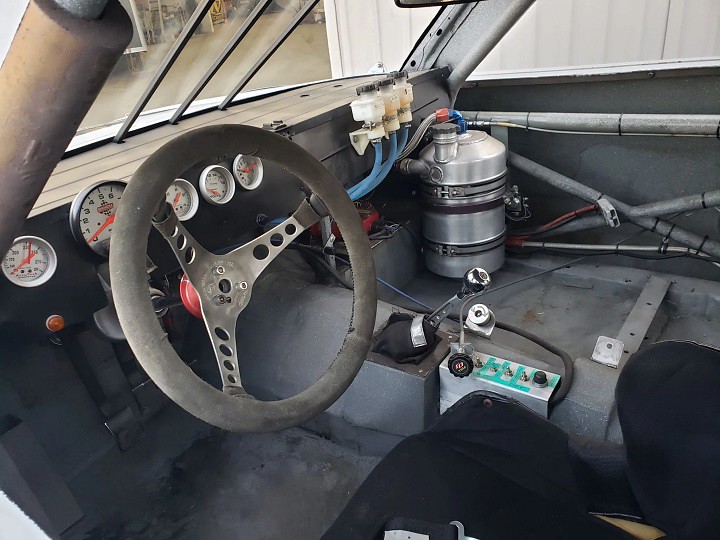 1982-Oldsmobile-Cutlass-NASCAR-IMSA-For-Auction-004-Interior by Michael Crawford, on Flickr
I really like the trans tunnel mounts. Simple, light, accessible, and elegant. All the solutions should be.
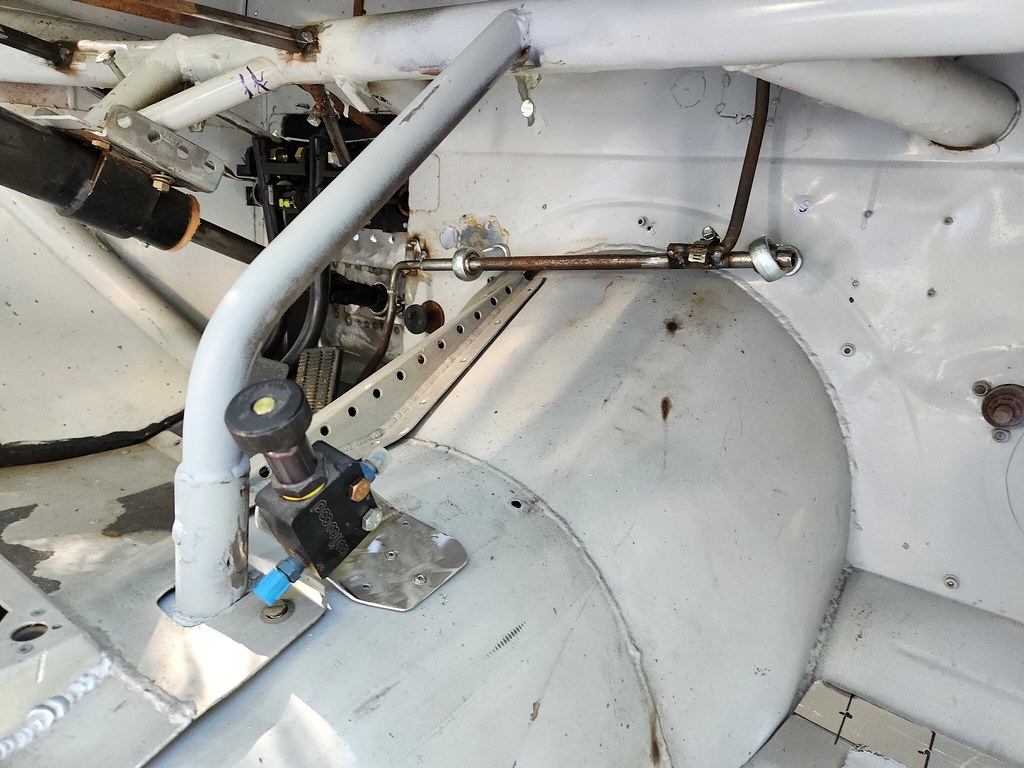
Step one is the gross adjustment for brake bias, which due to the caliper choices I have I will have to dial in first. It should be a set it and forget it, but I want it acessible in case. It wobbles way more than I would like, so I will probably box it in.
 20221009_111518 by Michael Crawford, on Flickr
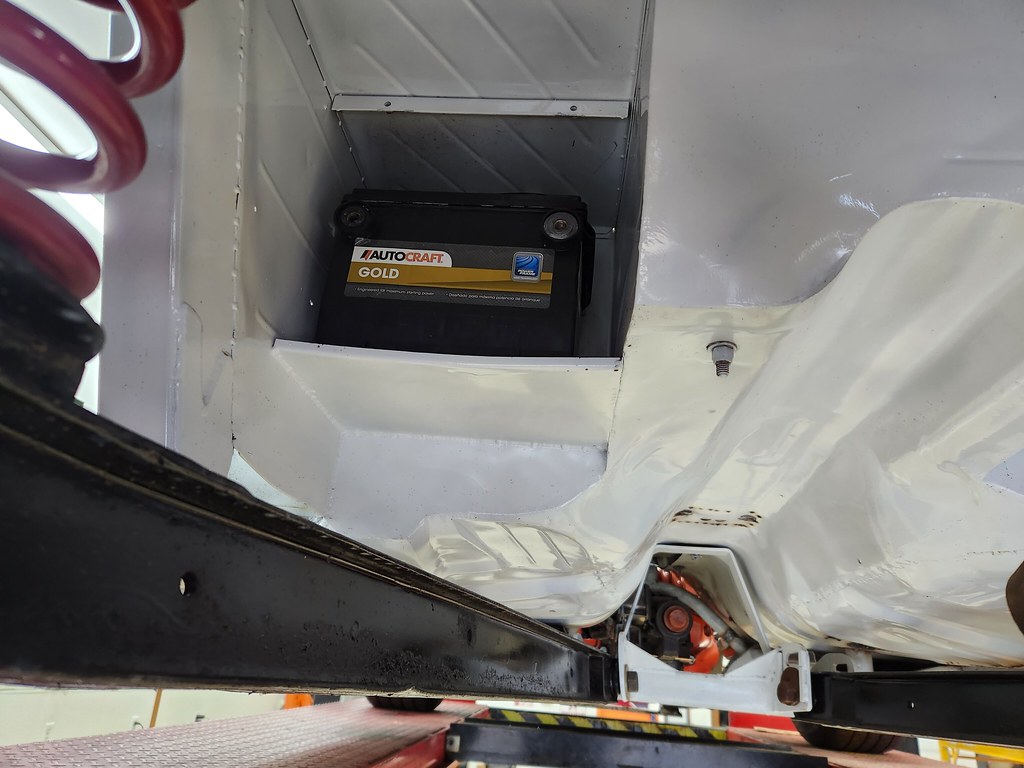
next, seeing how the batter box works. I had a 75 series core kicking around from where the battery in my truck crapped out. It fits like the box was designed for it, but its heavy and im not quite sure how to make a hold down for it. Im planning to try a lawnmower battery next, as smaller and lighter and cheaper. However im open to ideas, feedback, and more vintage nascar battery box information than I currently posses.
 20221009_095718 by Michael Crawford, on Flickr
lastly, I started on exhaust. I have the shorty headers, a pile of 2.5 exhaust sections from a camaro, a pair of jones performance chambered bullet mufflers (I think) that stampie gave me, a welder, a portaband, and no fear of failure.
Started with a pair of 90s right off the collectors, tucking as close to the block as I could and still clear the oil filter and starter. The only place that the mufflers will fit is right at the bell housing. There's just no other room anywhere to put them. Ideally, id run the dr gas spin muffler boom tubes with longtube headers, but right now I need to stay low buck. After all, a $20k pay cut has to come from somewhere. This exhaust will do just fine for now with a stock 5.3. and hopefully sound good. The mufflers have 3.5 inches of ground clearance. Again, not ideal, but serviceable. The x pipe and ovalized sidepipes will come next.
 20221002_154849 by Michael Crawford, on Flickr
im really running to the end of my “do before painting chassis and mounting body” list. I believe two more weekends of effort will see it blown apart and ready for paint prep. My buddy art owes me, and im calling in part of that and having him to the prep and shoot. While hes doing that, ill retrieve my duster body and get it ready to become a hat.
Until next time
 20220615_202235 by Michael Crawford, on Flickr
Michael Crawford
20220615_202235 by Michael Crawford, on Flickr
Michael Crawford
1970 plymouth Duster back under construction:
https://www.pro-touring.com/showthre...uring-makeover
1987 GMC S15 https://www.pro-touring.com/showthre...ct-drivabeater
10-10-2022 #18
Registered User
- Join Date
- Jun 2012
- Location
- Chicago burbs
- Posts
- 247
Man this is such a cool project. Can't wait to see the body on it.
1969 442 6.0L LQ9 T56
Fab9 w/ custom 3 Link conversion
FAYS2 Watts link
Thanks to Mark at SC&C for his honesty and passion for the sport, and Ron Sutton for the wealth of knowledge that has helped shape so many of the cars on this site.
10-14-2022 #19 Registered User
- Join Date
- Feb 2012
- Location
- Vancouver,Canada
- Posts
- 91

Bud this is such a cool build!! Have to love that baking pan foot box extension you came up with...such a cool build. Any thought as to a paint scheme? Git er' dun!
10-14-2022 #20
Registered User
- Join Date
- Aug 2007
- Location
- Albemarle, NC
- Posts
- 1,149
Thanks yall. The brownie pan seemed stupid to most at first, but it fits the bill! Cheap, solid, rolled edges, right size....
I have given some thoughts to paint. There a few schemes in my head. Any or all are on the table.
The 71-72 duster 340 had a blackout hood treatment optional with the 340 wedge callout in white on the left front corner. This hood treatment and similar callout are mandatory for this build, cause i always wanted to do it. However, body color and other graphics are up in the air. Od green, panther pink, white, new honda accord purple, and petty blue are all options. Most likely the car will never see proper paint and body. I plan to make cheap and dirty fiberglass body panels wherever possible, and the car will probably be shot in rustoleum or a good satin rattle can job. Reason being is that i tend to make everything super nice, then get pissed when it gets scuffed/chipped/dinged/bent while being used. I essentially keep chasing cosmetic perfection, then want to keep it that way. Which means i dont use it like intended, and then just don't use it. Trying to break that habit here. Race car pretty is the goal.Michael Crawford
1970 plymouth Duster back under construction:
https://www.pro-touring.com/showthre...uring-makeover
1987 GMC S15 https://www.pro-touring.com/showthre...ct-drivabeater

 Reply With Quote


