

Results 21 to 36 of 36
Thread: 1966 Nova Turbo Build
-
05-05-2020 #21
 Registered User
- Join Date
- Dec 2019
- Posts
- 26
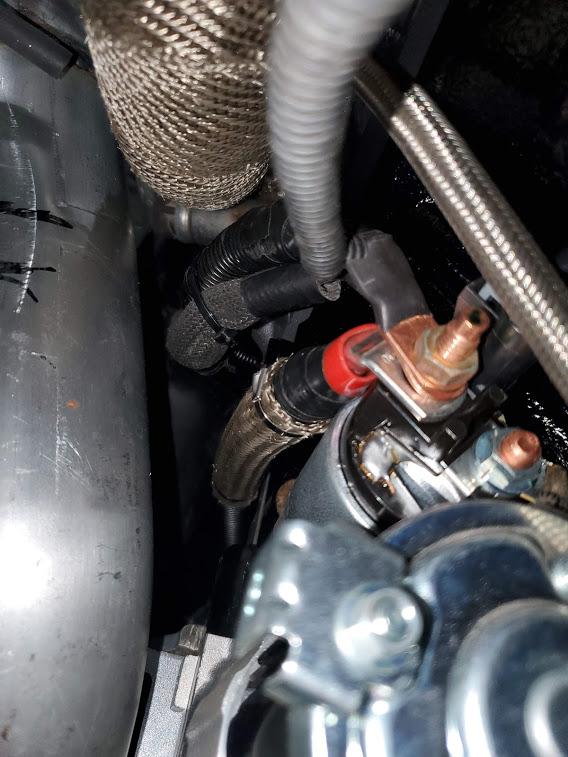
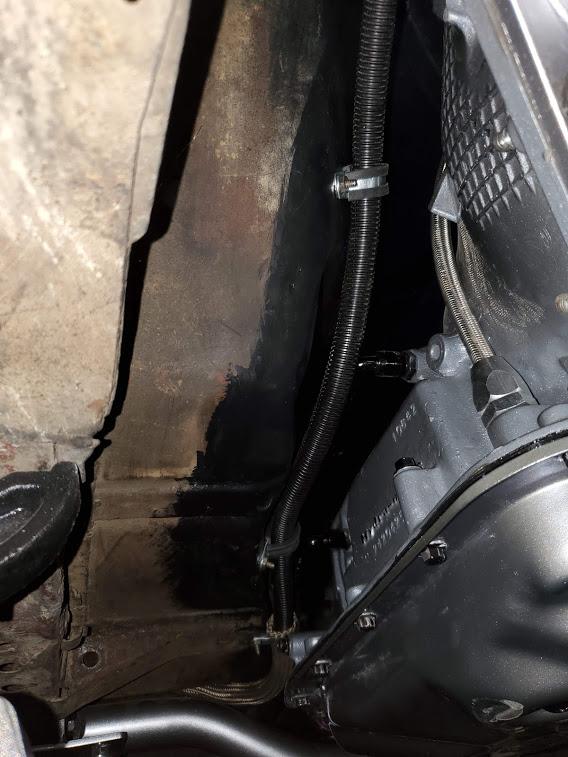
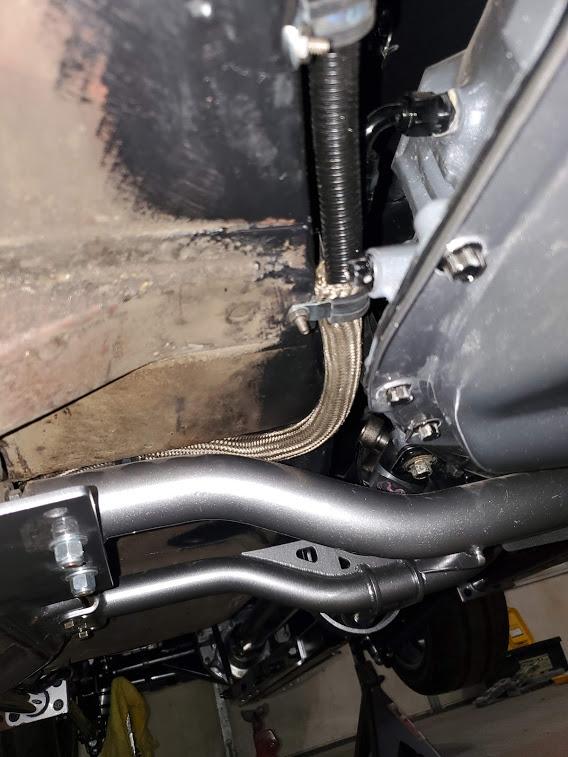
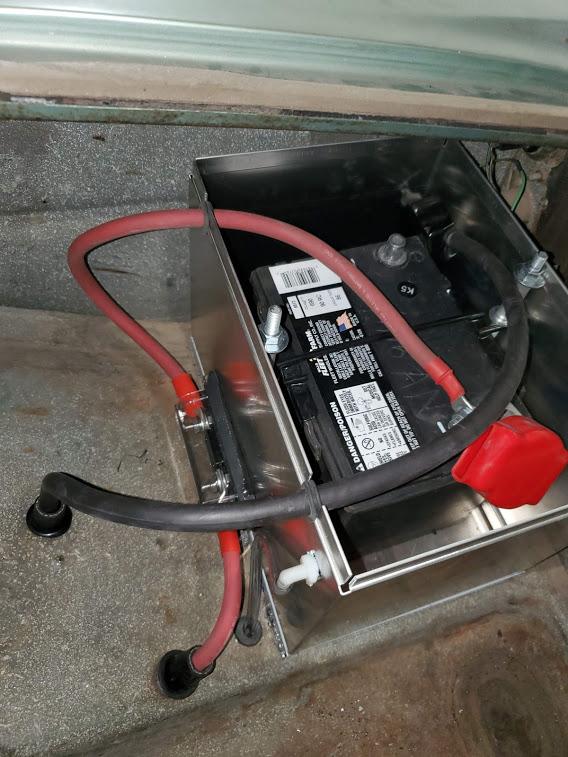
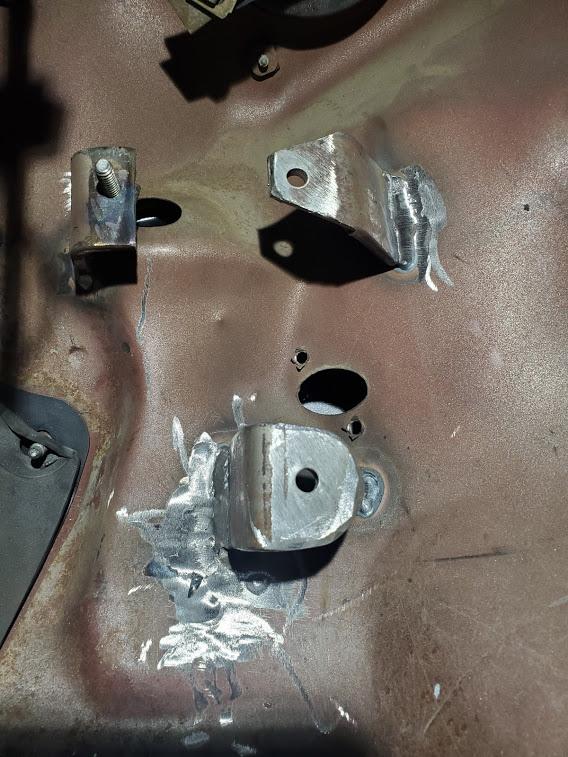
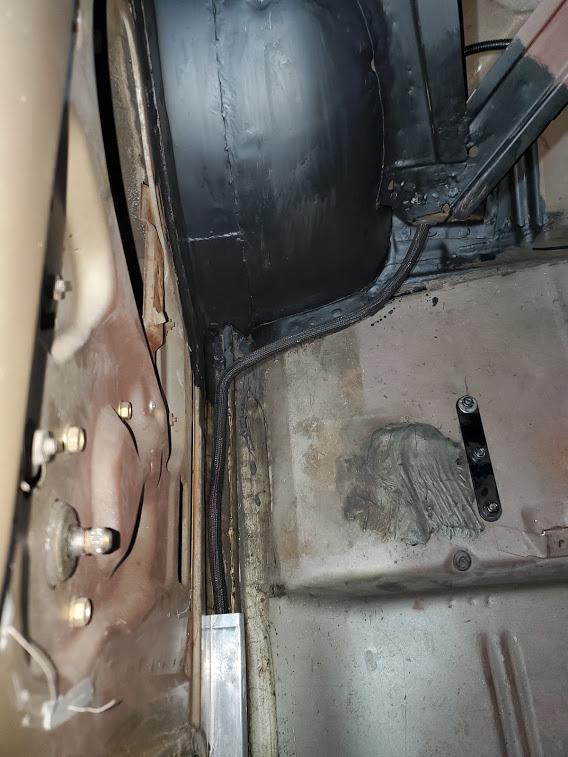
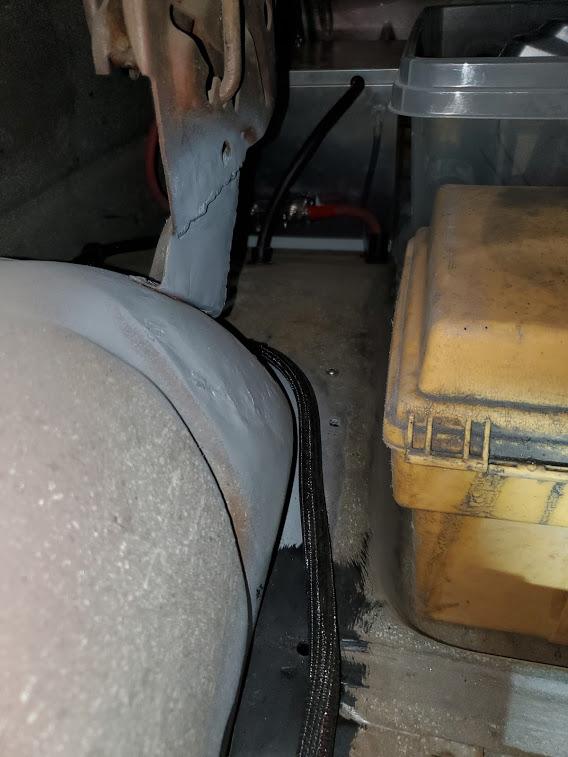
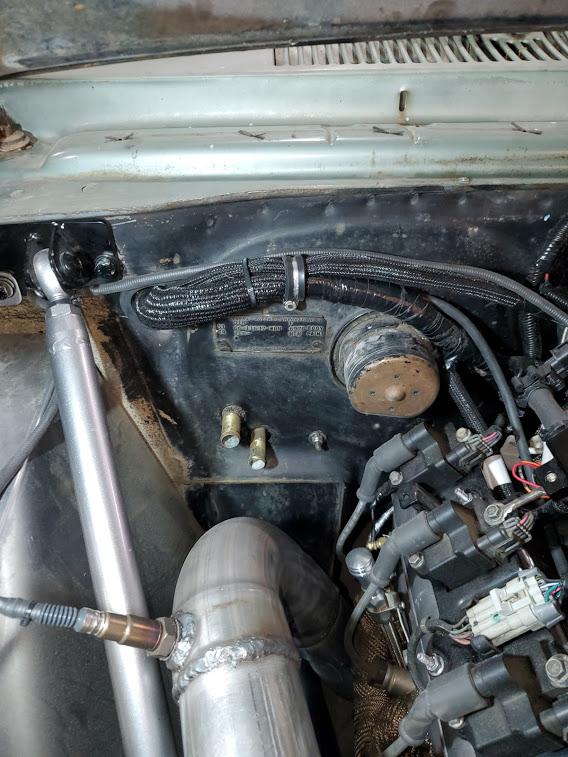
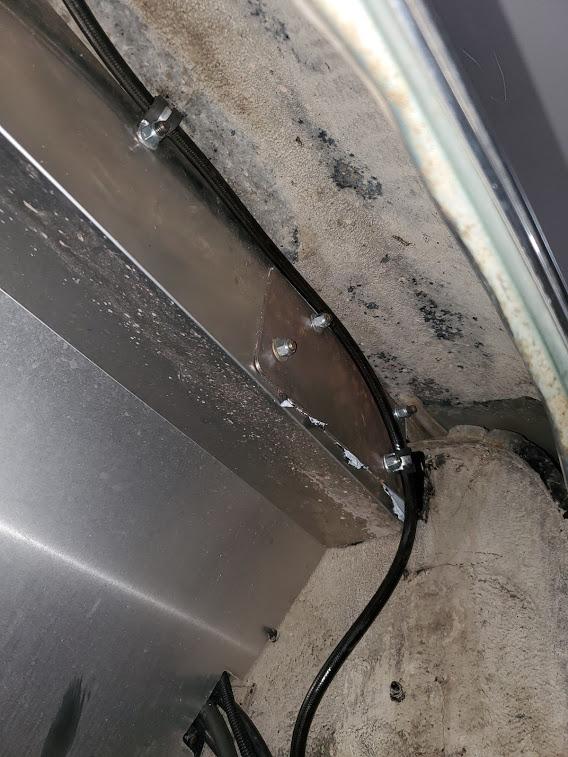
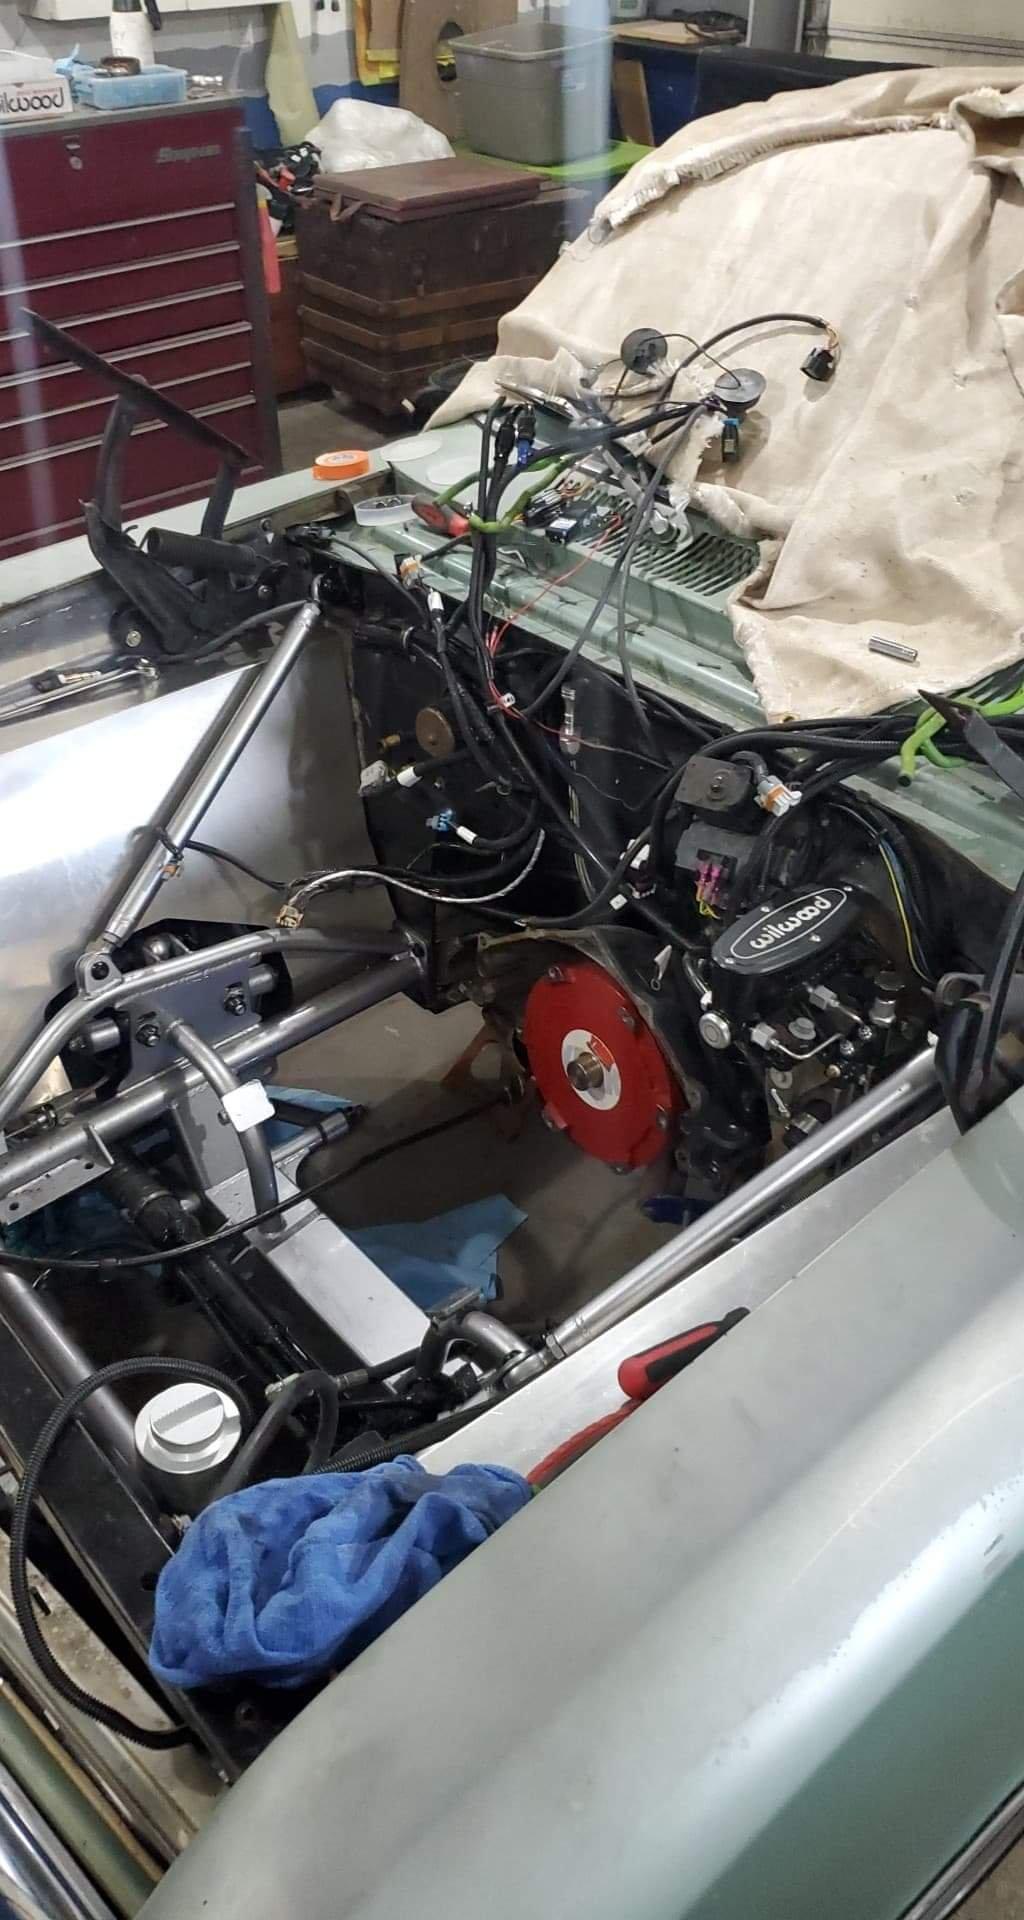
I ran the positive battery cable on the outside of the car. I put some heat shielding around the areas that cross over the exhaust, just for some added protection. Its the same DEI material that i used on the exhaust wrap, and its pretty nice to work with. I also put plastic wire loom on entire length under the car. When i went through the floor board in the rear, i used a rubber grommet and slid a thick rubber hose for added protection. For the negative side, I put it to the frame rail. I used a 10mm bolt i had laying around. When i went to tighten it, it started to crush the famerail a little, since its hollow. I took a piece of 3/8 black iron pipe, and slipped it in there and welded it, so that it created a spacer, or big washer.
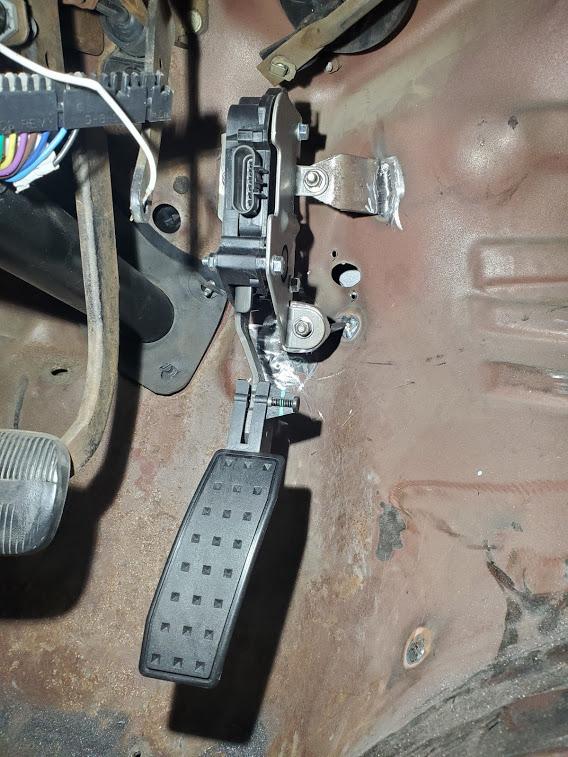
I got the gas pedal installed. I used the GM performance gas pedal, 10379038, that holley says to use. I made the brackets out of 3/16 flat stock that i had laying around. Getting the pedal height was some trial and error, but after a few attempts, i got it to my liking.
I'm patiently waiting for the holley system. its on back order until may 13th, but I'm hoping it doesn't take longer. I primed the engine with oil. Since i have power to the car, i could crank it over and watch my oil pressure go up. It took a little bit of cranking but it did go up. Part of the problem was, i forgot to put 8oz of oil into the new oil pump. There is a little side port on the LS block that goes directly into the oil pump. As per instructions of the melling oil pump, your supposed to put 8 oz of oil in there. Once i did that, and cranked it for about 10 seconds, the car got oil pressure. It was a small win knowing that i have oil pressure!
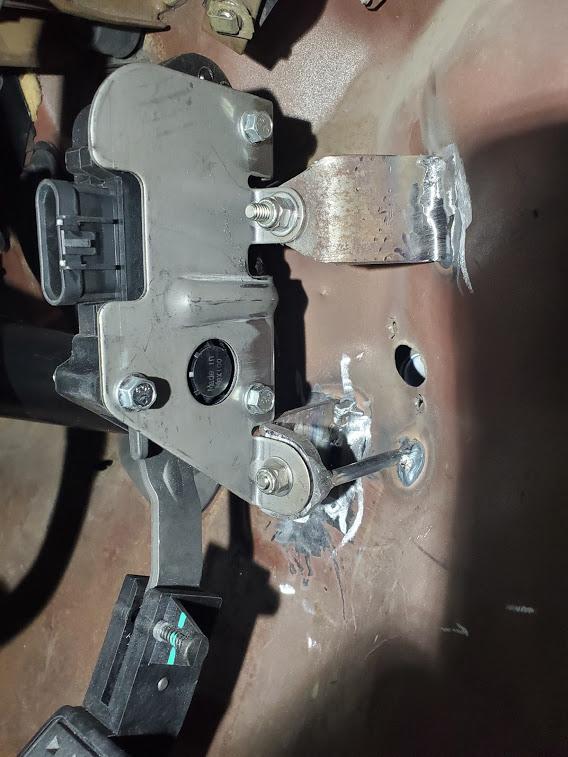
Here is the routing of the battery cable starting at the starter. ( im going to put some heat shield around the other ignition and alternator wires as well)
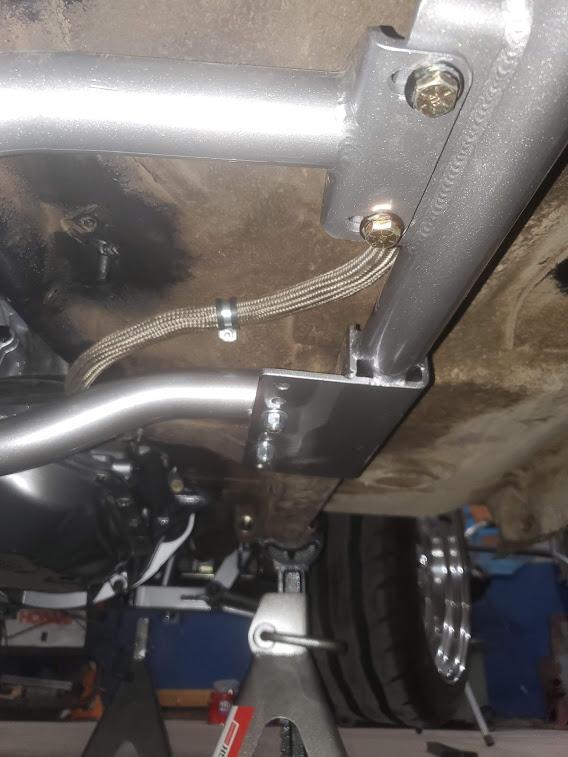
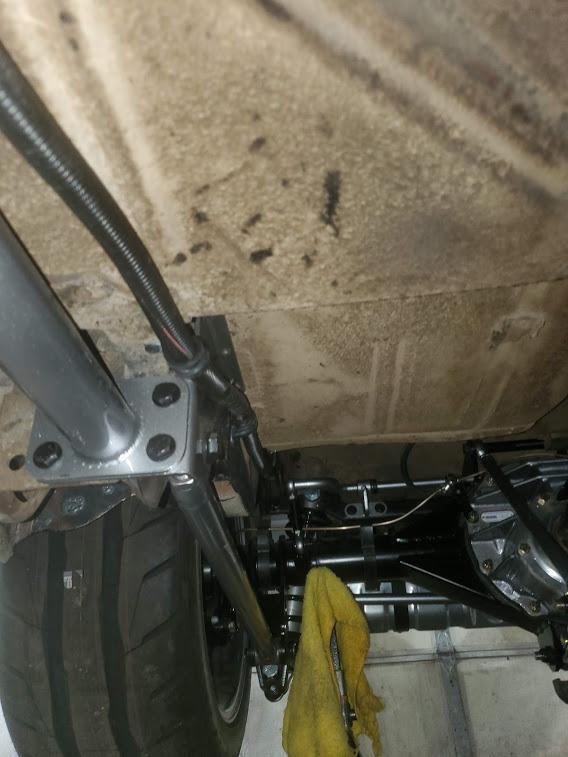

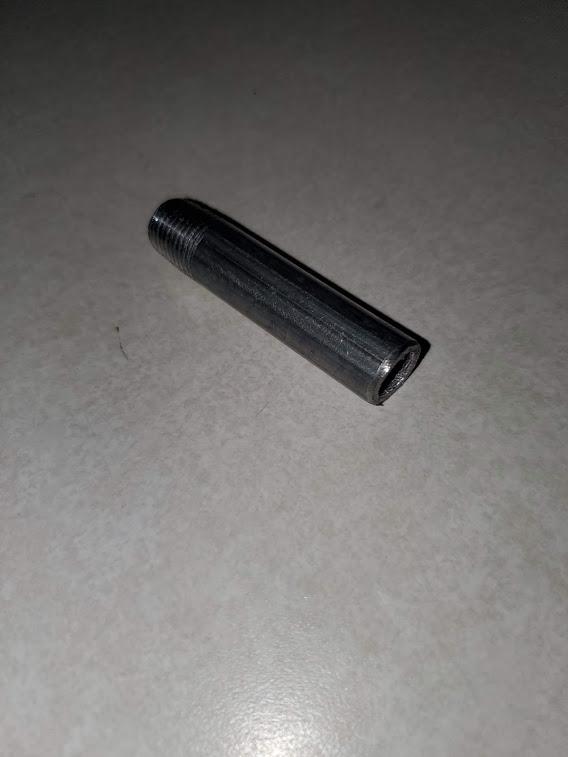
Black iron pipe i inserted into the frame rail to make a spacer for the ground bolt.
Forgot to add these 2 pictures of when it was on the lift at the exhaust shop.
-
05-11-2020 #22
Registered User
- Join Date
- Dec 2019
- Posts
- 26
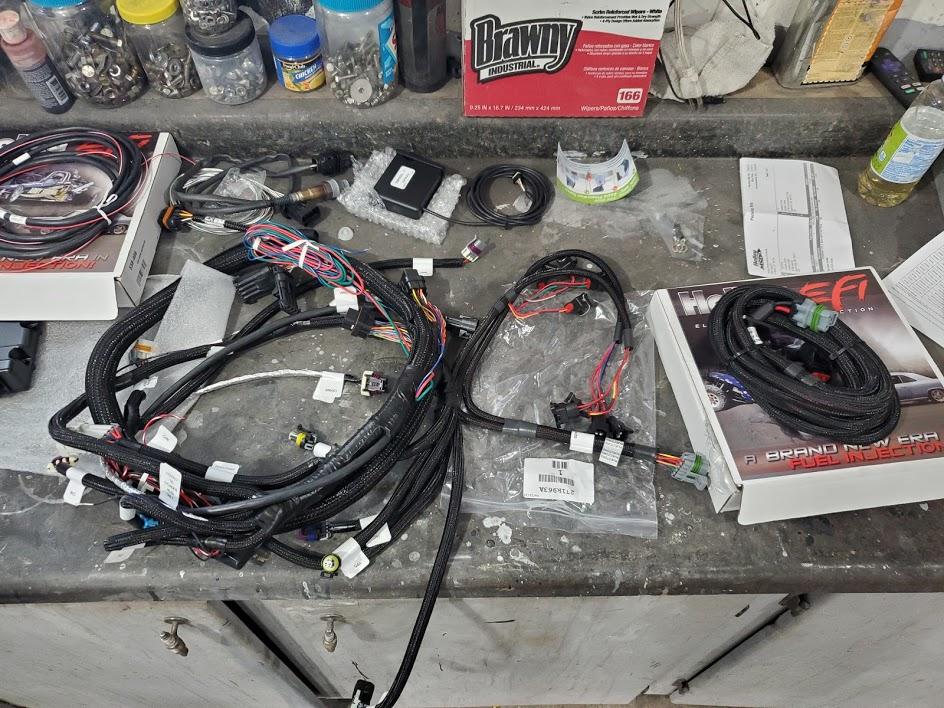
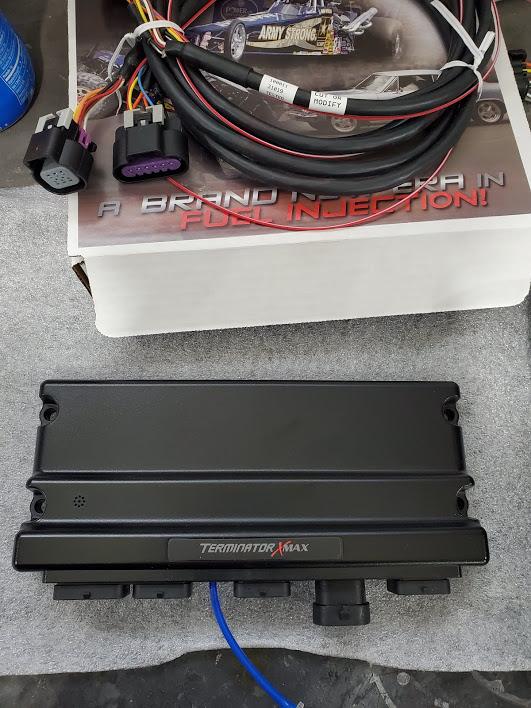
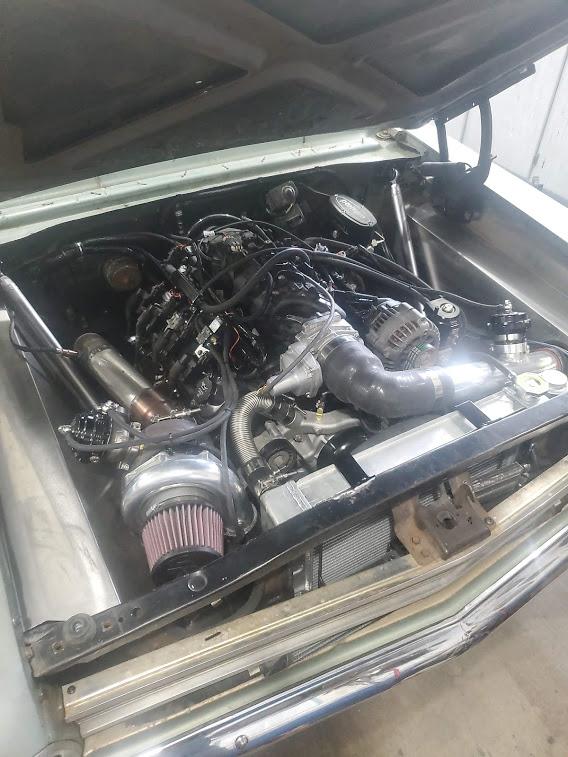
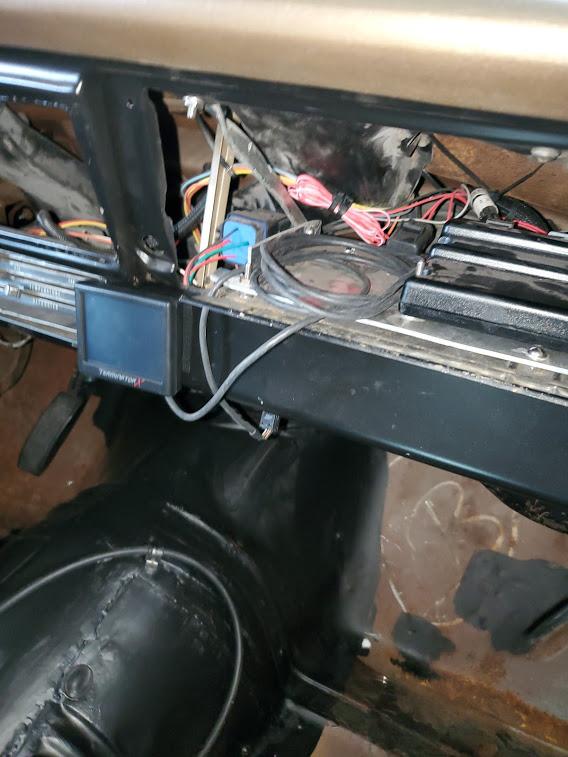
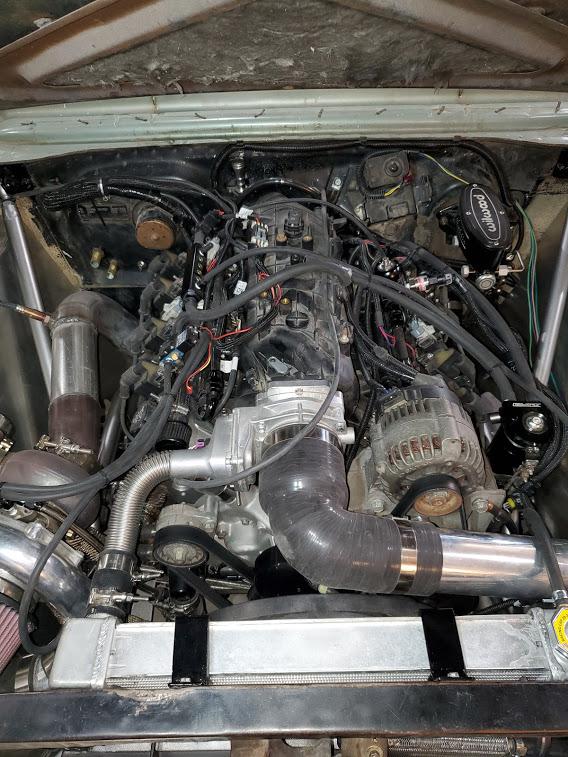
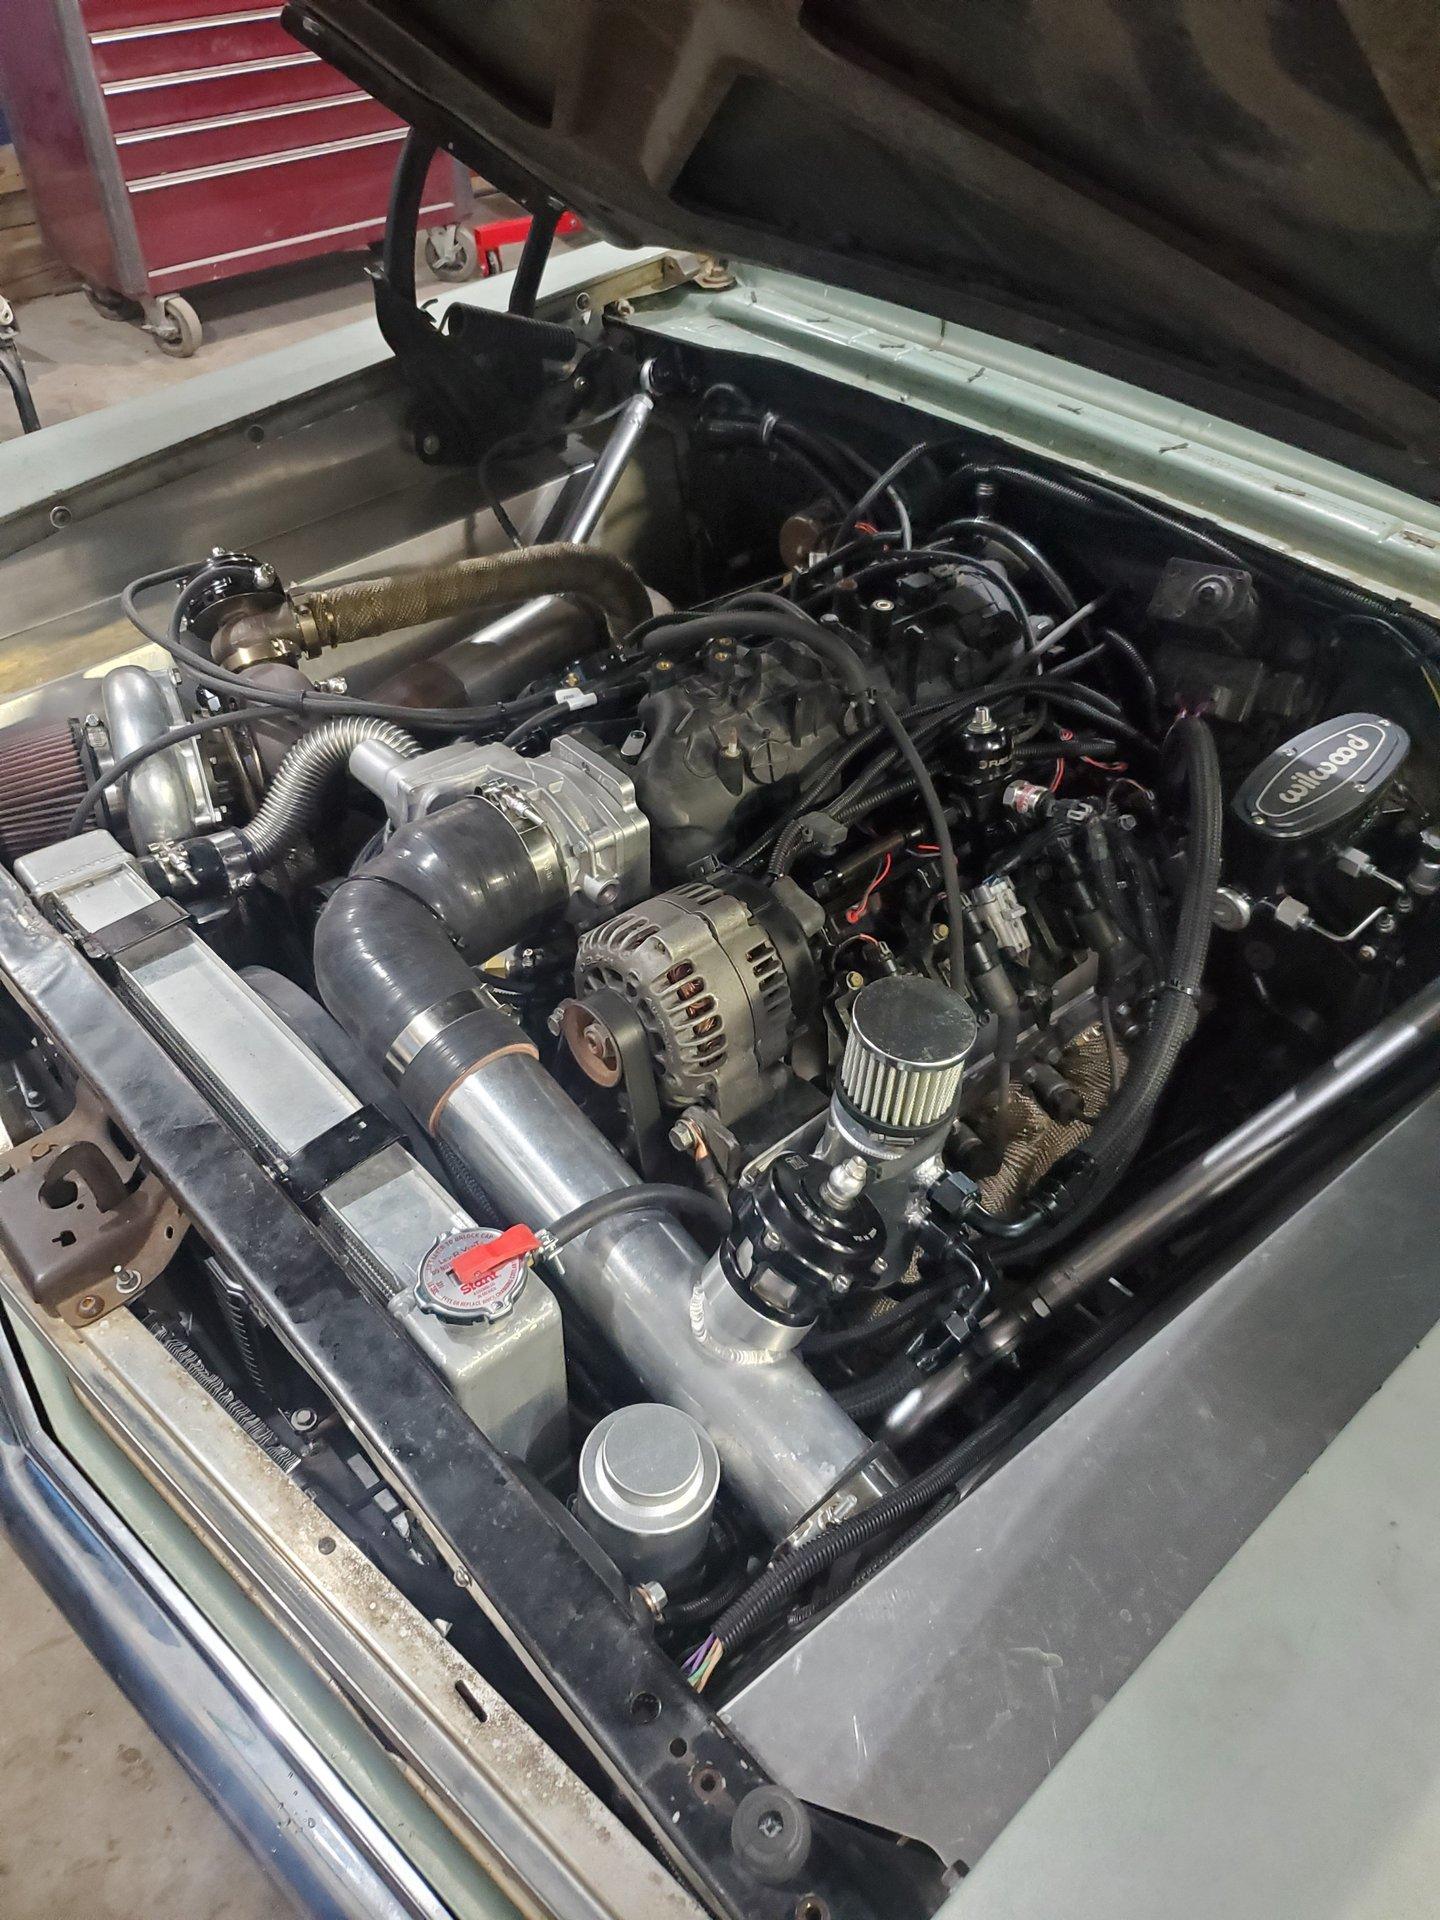
The holley terminator xmax came in earlier than expected! I got it in the mail on Friday, and Dad and I started to install it on Saturday. Want to share my success of terminator x max DBW install. Followed the directions, worked like a charm. Took about 5 hrs to hook it all up just to make it start. Hardest part for me was getting the grounds to the back of the head and cleaning the paint off to get a good ground, since its so close to the firewall. Other than that, it fired in less than 2 seconds, and idles like a charm. Still have to route all the wires and mount pcm, but very happy with everything. Here's a video of the first and 2nd startup. I did have a fuel leak on first startup. I didn't notice it while i was priming the lines because there was a o-ring leaking on the bottom of the fuel rail that was kinda hidden. Nothing bad happened and i took it all apart and fixed it and then fired it up for the 2nd time with no leaks. Dad and I are so excited to take it around the block, hopefully in a few weeks.
06-12-2020 #23
Registered User
- Join Date
- Dec 2019
- Posts
- 26
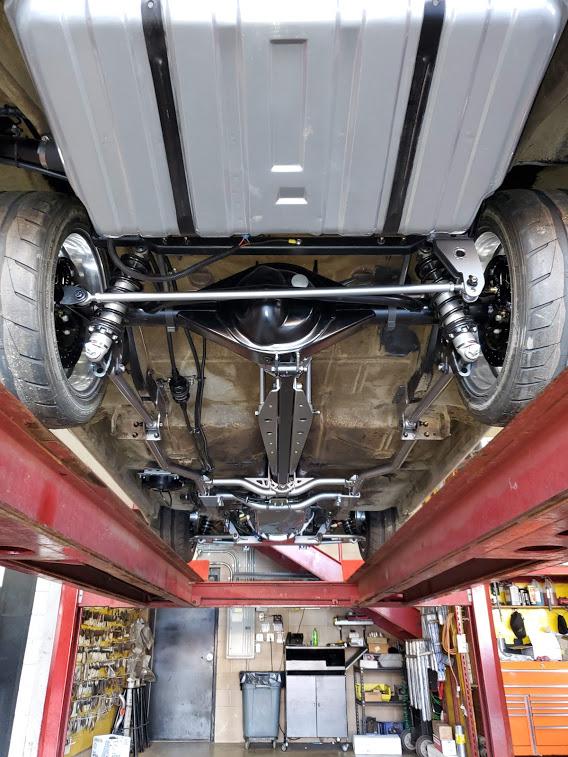
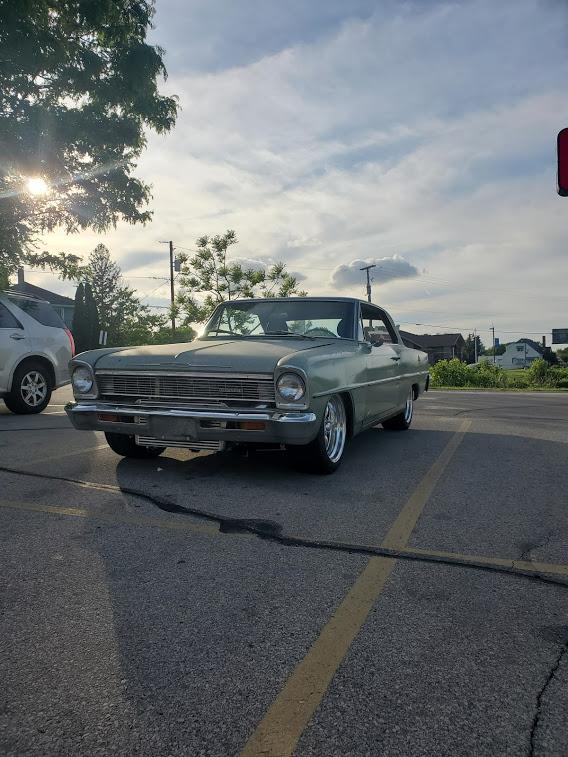
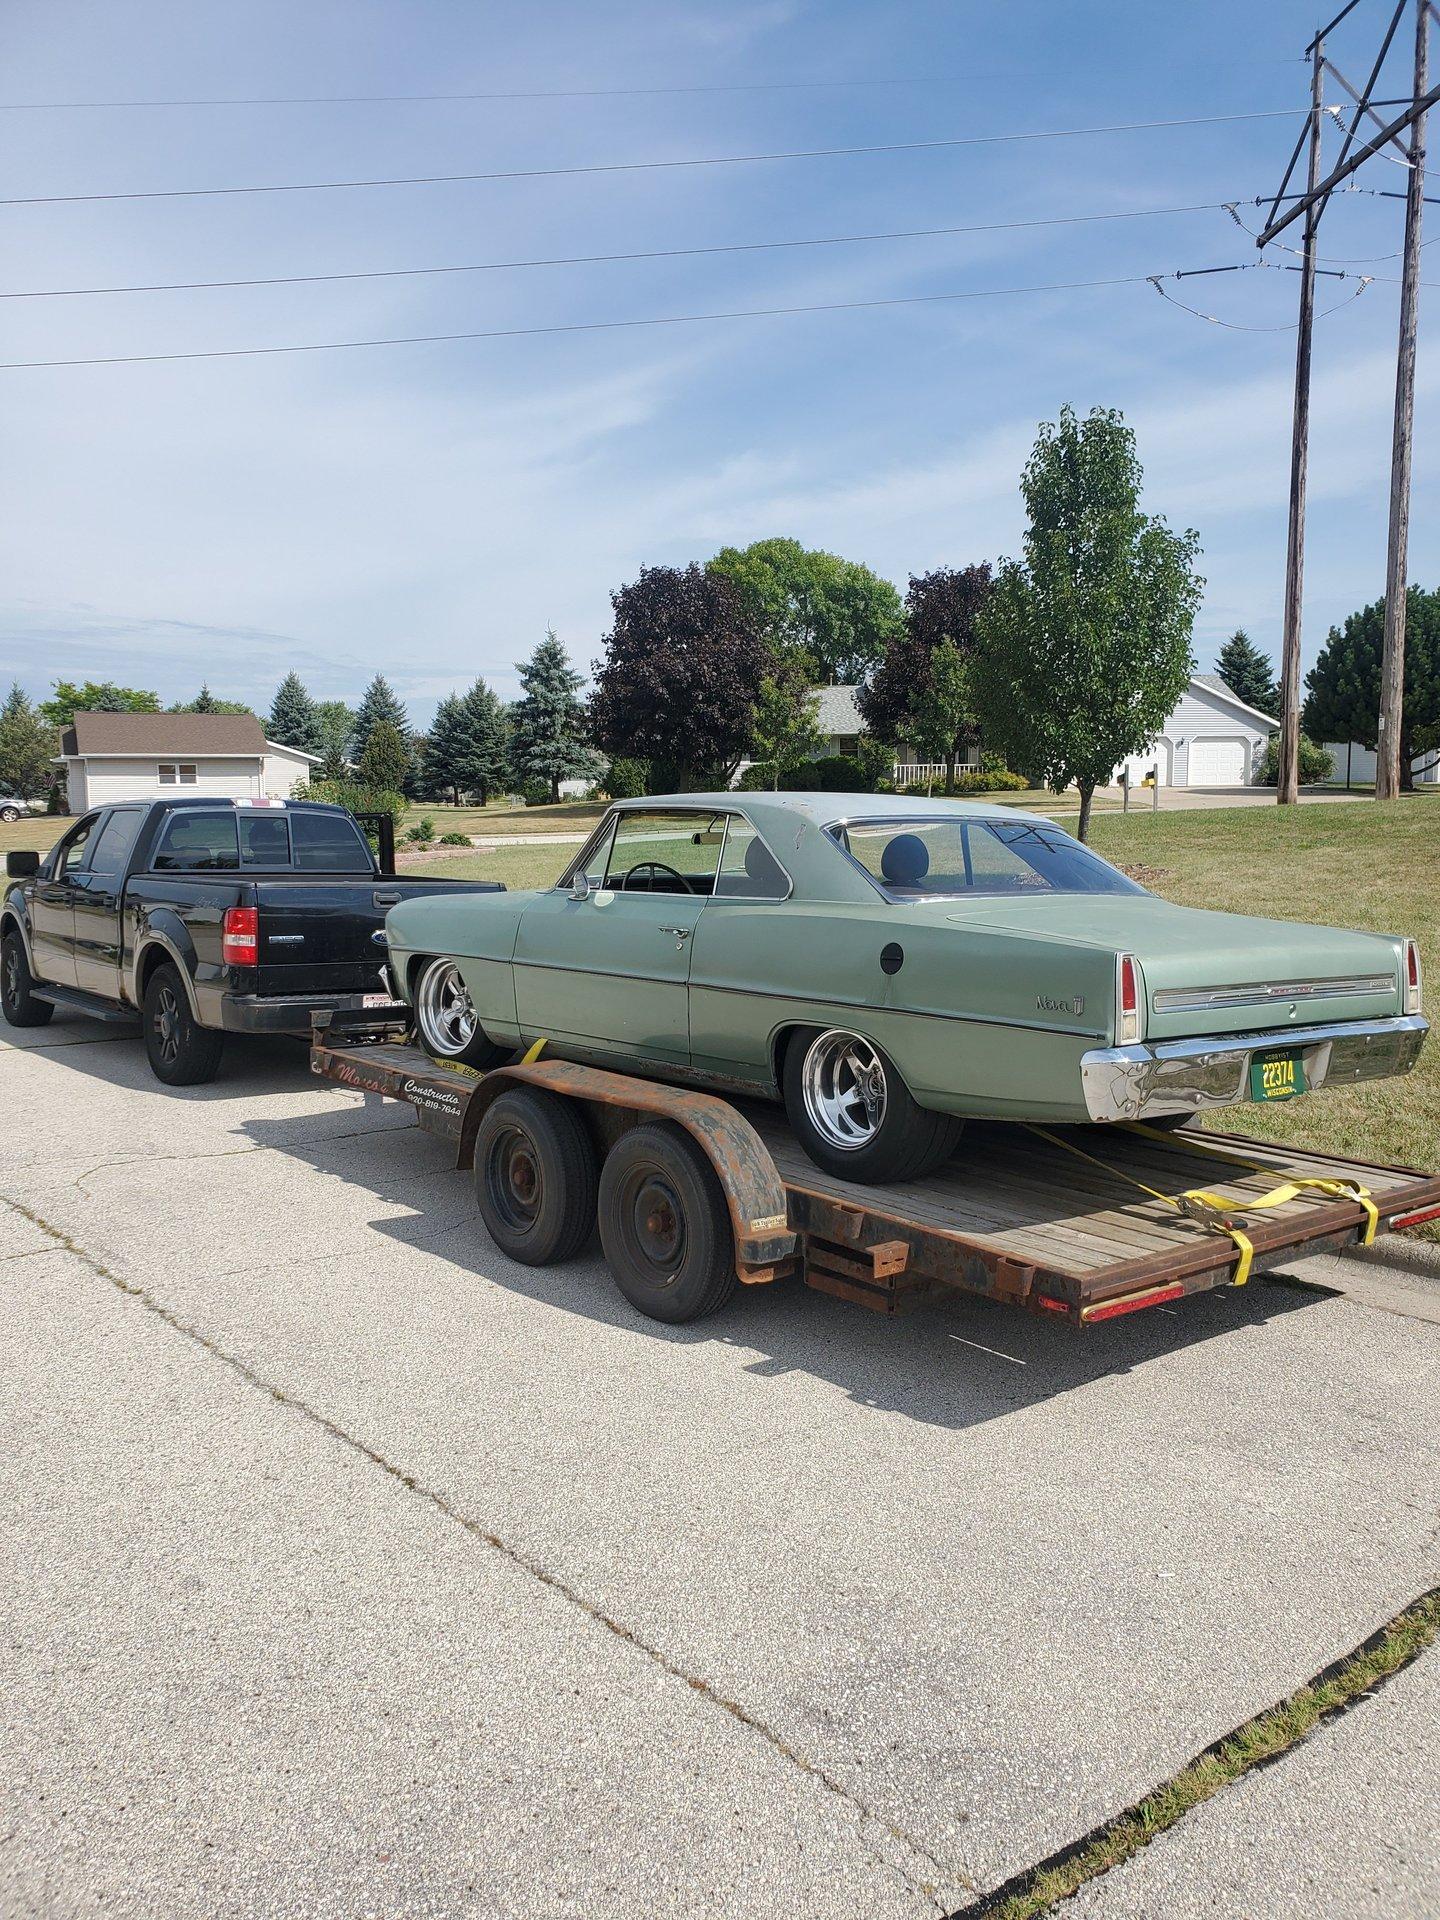
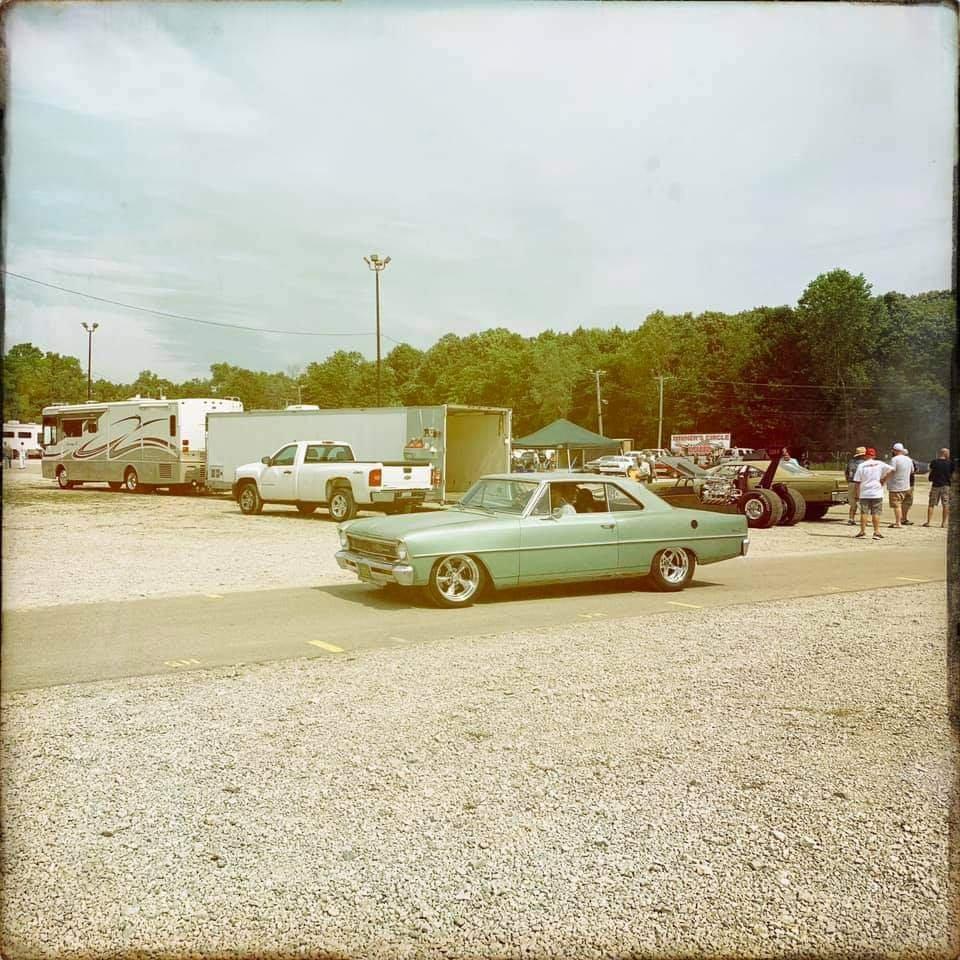
Took the car out for the first cruise/car show! So far everything has been really great! Been taking the car on short trips to heat cycle everything. Been checking and tightening things that have small leaks. Nothing major so far! I got an alignment done too before I started putting miles on. The car was dog tracking on the way to the alignment shop. They put it up on the alignment machine and got everything straightened out for me. I couldn't be more happier with the Holley terminator system. I have just left it on learn mode for now and its doing a great job keeping the air/fuel ratios in spec. I have put about 60 miles on so far. I need to get up to about 150 to 200 miles to get the "break in" period done with. For now, im just keeping it at 1/4 to 1/2 throttle, but it has been so temping to give it more. I got the Holley computer and wires fully installed, besides a few for the input/outputs that im still debating on what to use them for. I also cleaned up the transmission tunnel and mini tub and got some epoxy on it to seal it. The car is going next week to get the exhaust done. Its pretty loud inside the car but it sounds great outside! And i couldn't be more happier with the TCI front and rear combo. It rides really nice, giving it a nice new car handling.

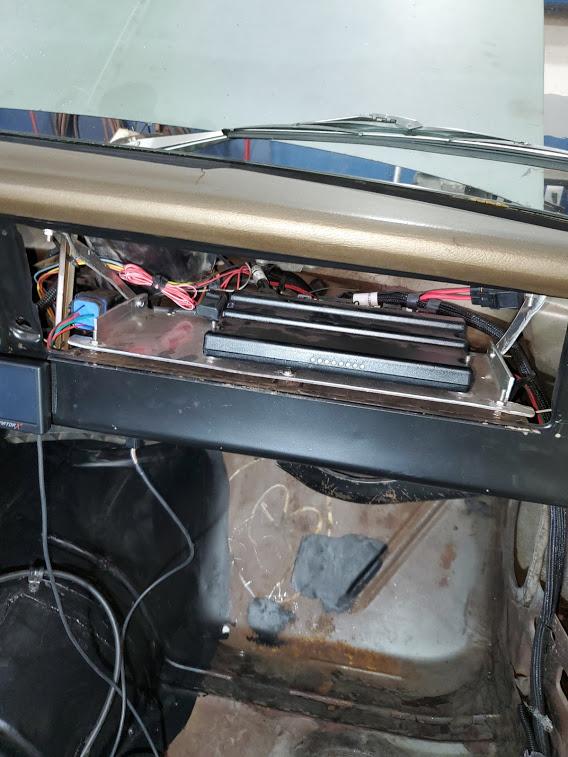
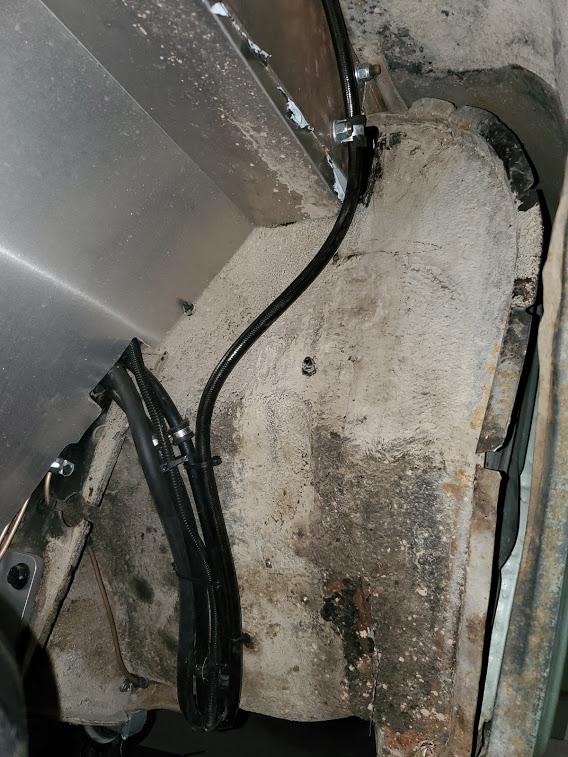
Routing of the holley battery power
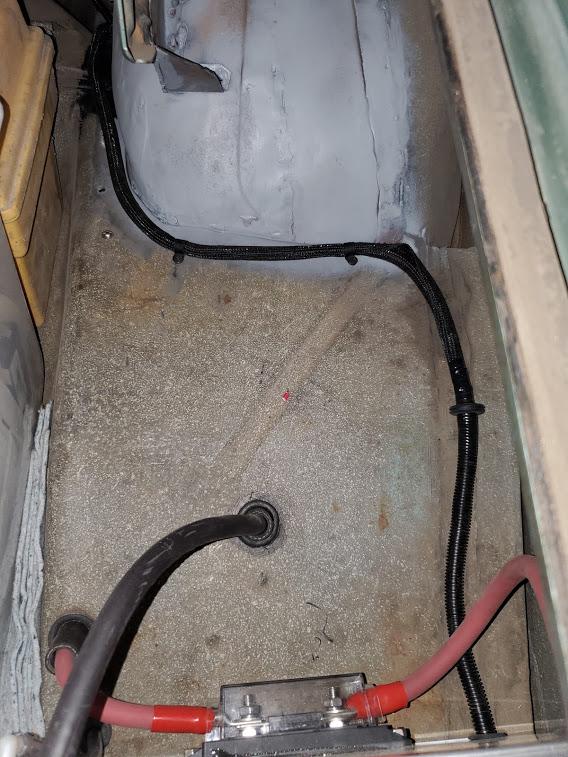
fuel pump relay wiring
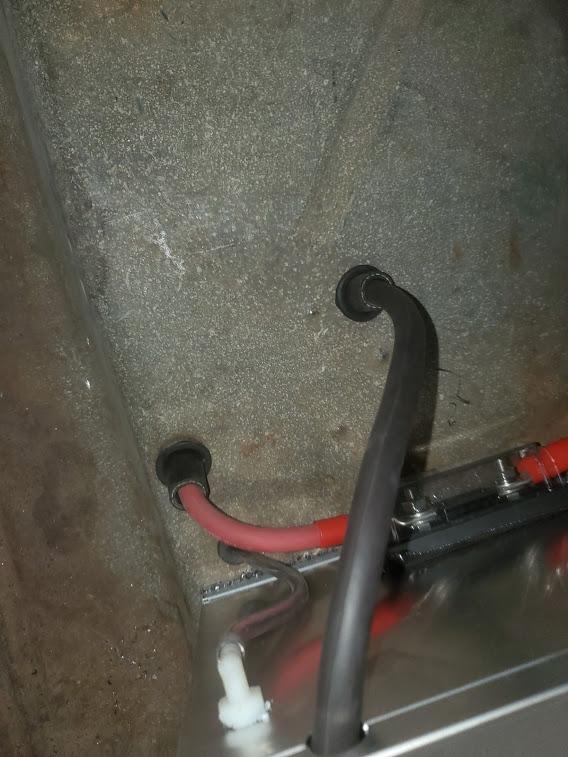
So i went right above the heater core. Its a very tight fit but they all fit. I had to de pin the dbw harness connector to get all the wires through. I first put the tranny harness through. Then the engine harness. I used this rubber grommet.
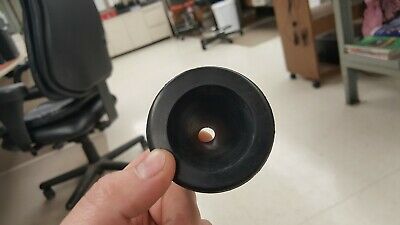
2" Rubber firewall grommet . For 2 inch hole Wiring harness swap honda toyota | eBay
I had to drill the hole very accurately so I wouldn't hit the package tray and so it was high enough away from heater core. Not going to lie, it was tight for the 2inch hole lol. It looks clean in my opinion but I know there are bigger grommets that people use that could make it easier. I had to slit my rubber grommet to get all the plug ends through.
I also had to extend the power wires to the battery in the trunk. They were about a foot short to route them nicely away from everything. Not a big deal but something to consider.
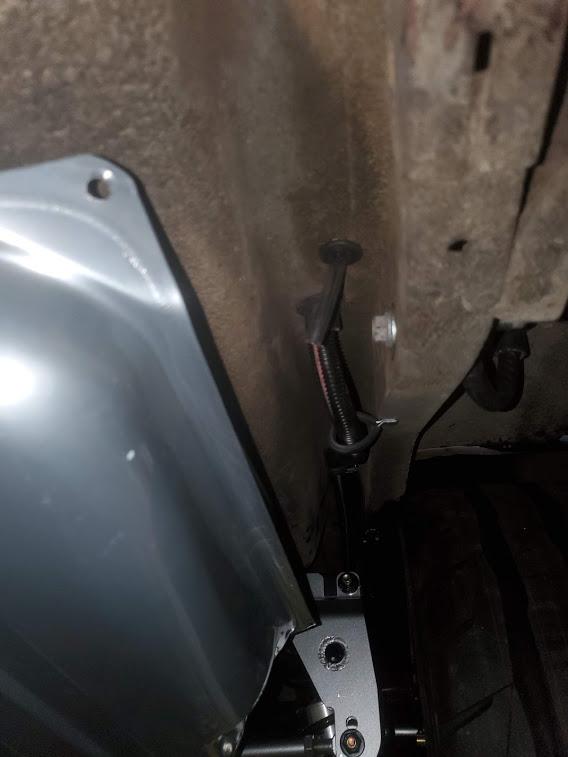
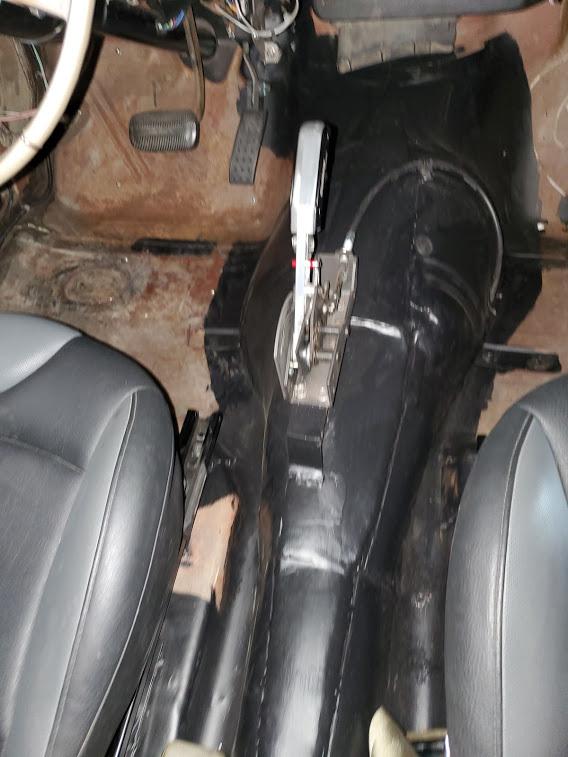
I also un did the harness to pull some of the wires that went inside the car so I didn't have to feed them through the firewall twice. The power tap harness was just long enough to make it back inside the car where I hooked my alternator wire and flex fuel wiring to. The tricky part about the power tap plug, is that thereare wires going to the engine harness and to the ecu . So you can't get any length of it. The input/output harness can be peeled back to get length. Everything else i routed under the dash and just tucked it away from moving parts. For my drive by wire cable, I drilled a hole in the middle of the firewall. The instructions state that it should be away from "noisy" cables, so i didn't want to route that through the big hole.
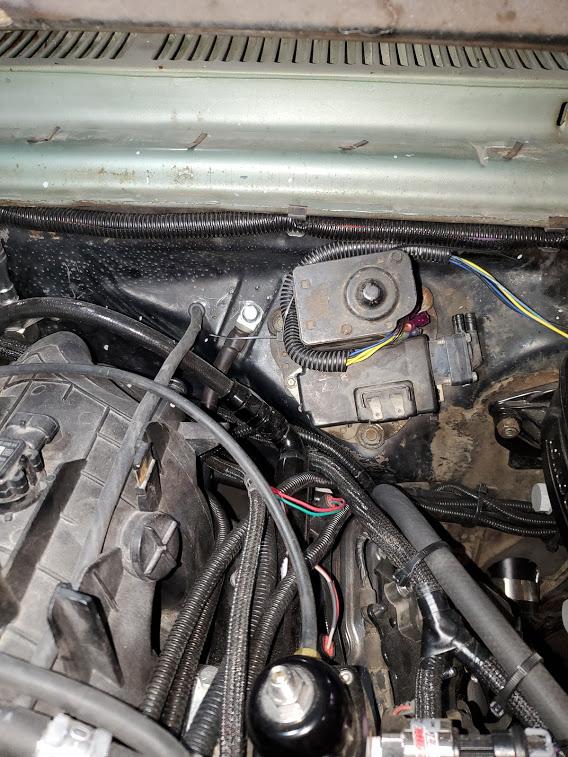
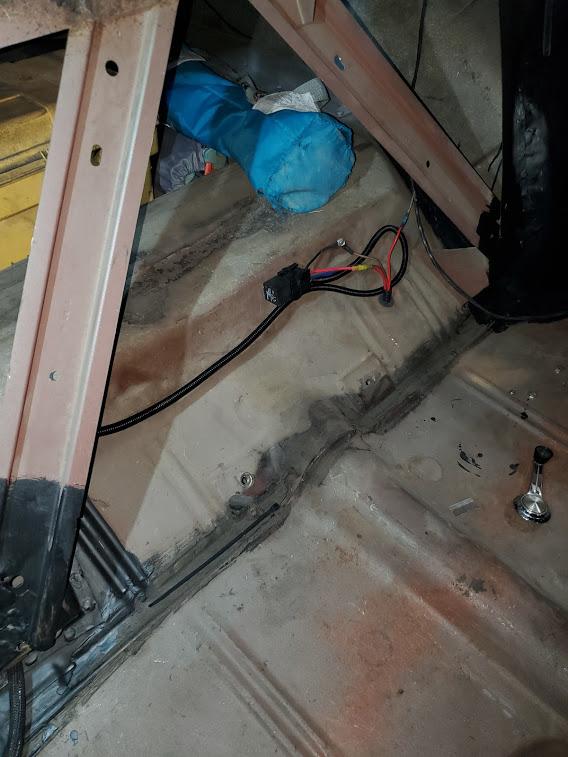
Drive by wire, wire going through firewall just left of ground bolt
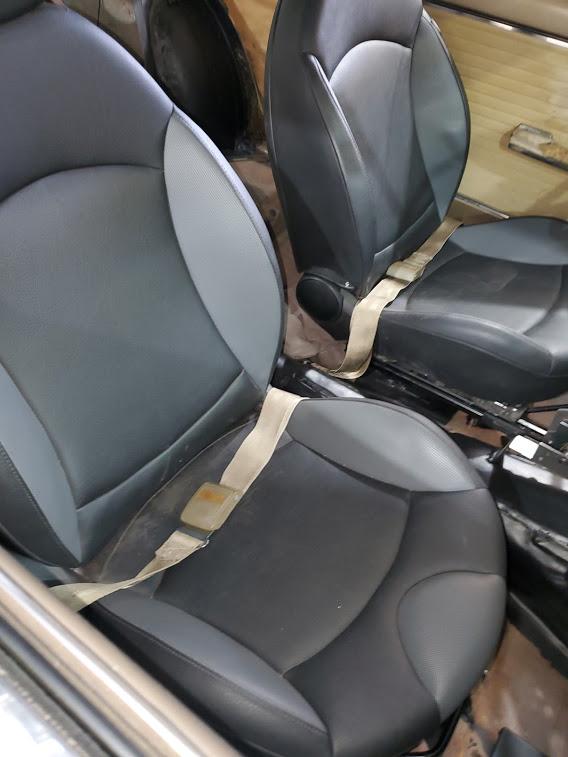
Old seat belts installed

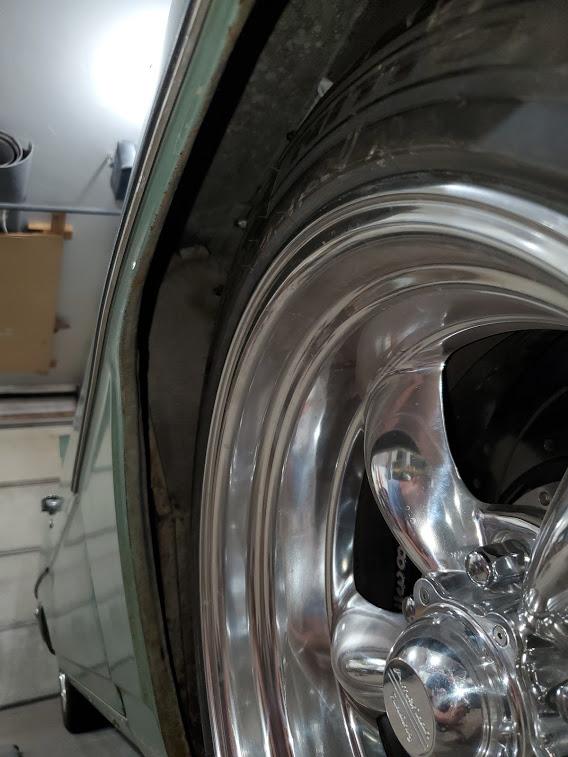
Here's my initial quick rolling of the fenders. im going to get them a little tighter rolled, but for now its fine. They don't rub as it is, so im happy with that.
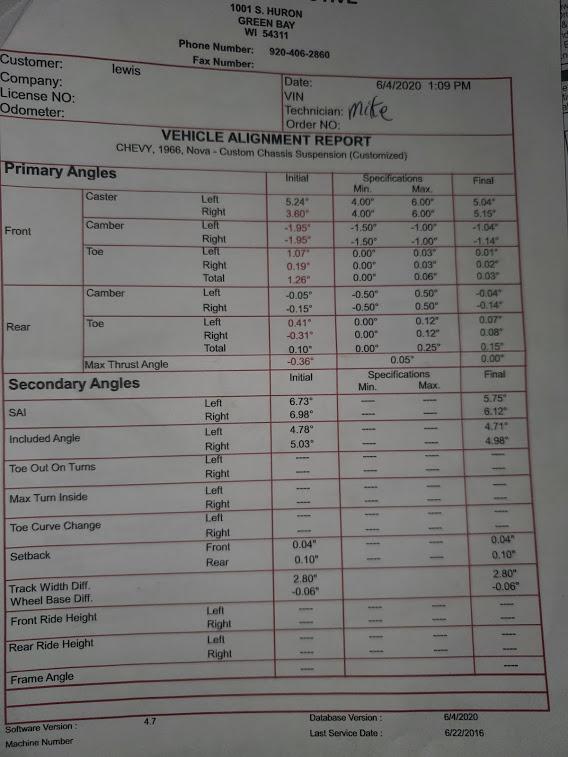
Final alignment
<span style="font-family: &amp">
07-21-2020 #24
Registered User
- Join Date
- Dec 2019
- Posts
- 26
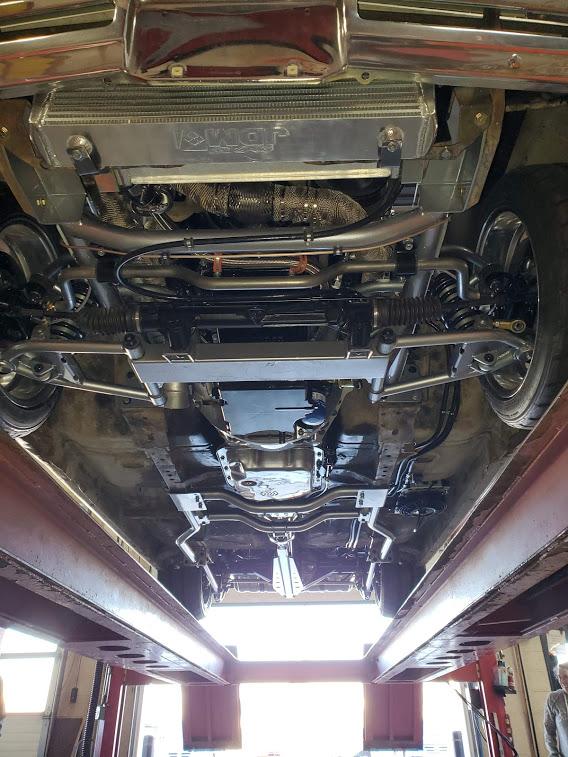
So been Driving the car lately and enjoying it. Everything has been working great except for the transmission cooler. I found out by trail and error, that i had my remote mount cooler that is under the car, was too close to the floor. It was not allowing enough cross flow for air to air cooling and let alone when the fan kicked on, it couldn't pull much air through to cool it. It was just heat soaking and with this hot weather, it wouldn't cool off. I had my tranny temps get above 200 degrees in stop and go and it would just climb. After it got that hot without any aggressive driving, i knew i needed to add a front cooler. I was able to get one to fit. It was real tight fit. But it has been working extremely well. I normally was getting 180 temps on the hwy, and now it gets down to 140. normal driving been around 150-165. The remote cooler comes on at 180, but i haven't been able to get it that hot yet. So im very very happy with this front mount Derale cooler. I also did drop the remote mount cooler down a bit to gain more airflow. So with the combination of both, i should be good to go. Here's what i did to make it fit.
I have the feed coming from the passenger side up to the right side of the cooler. then the hot air goes through the cooler and then goes to the remote mount which goes back to the tranny cooled.

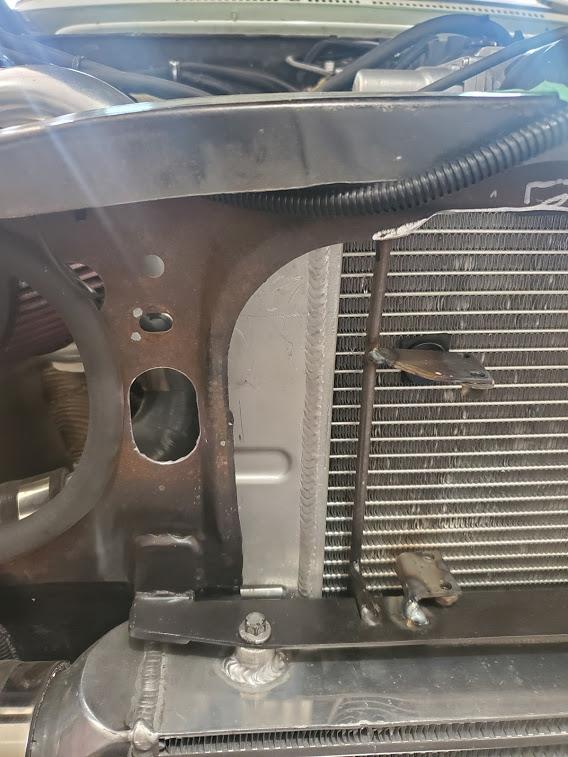
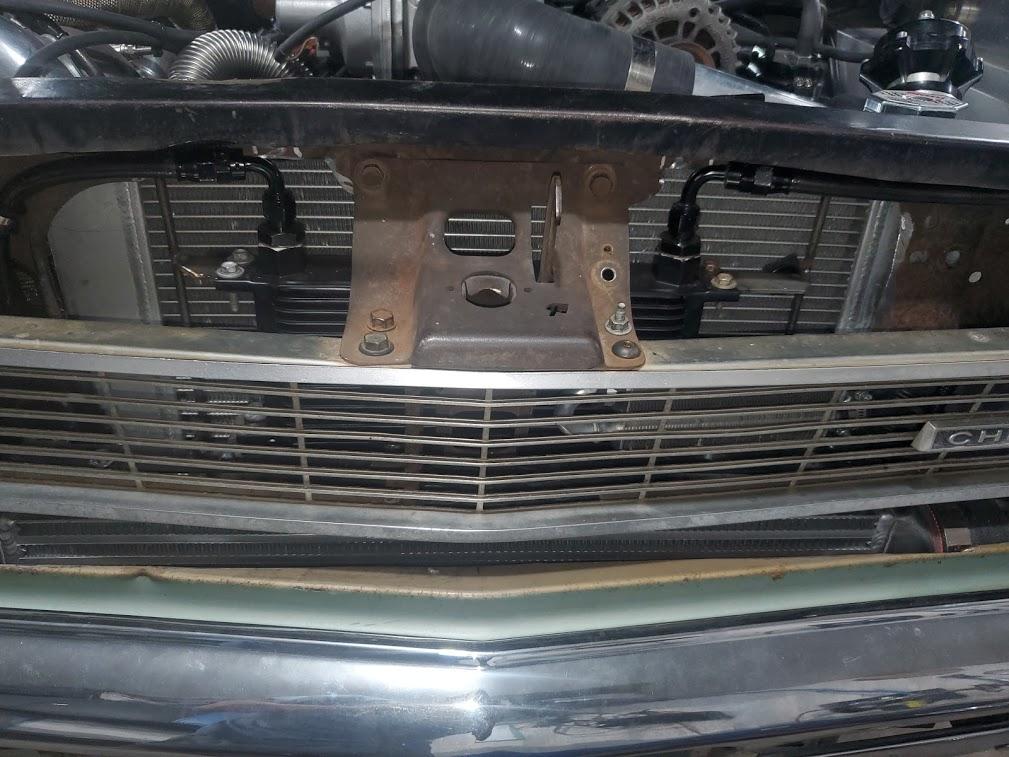
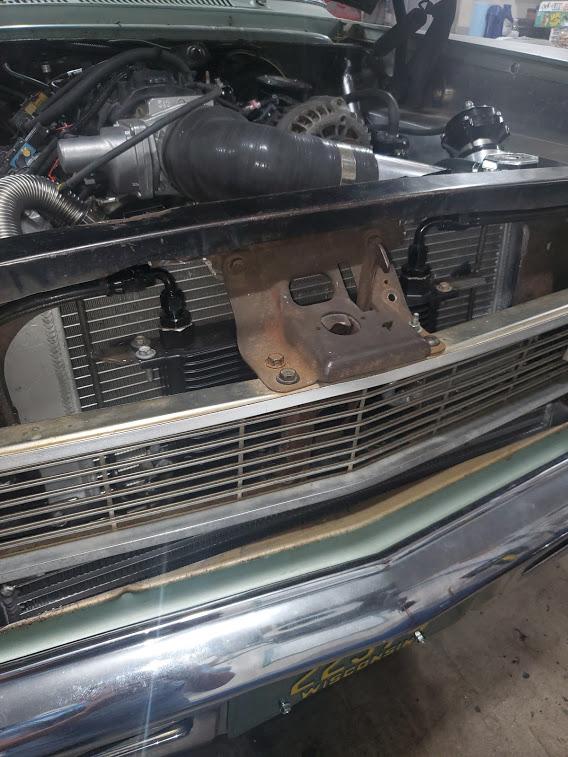
That oval hole on the left is where the feed passes though to the cooler.
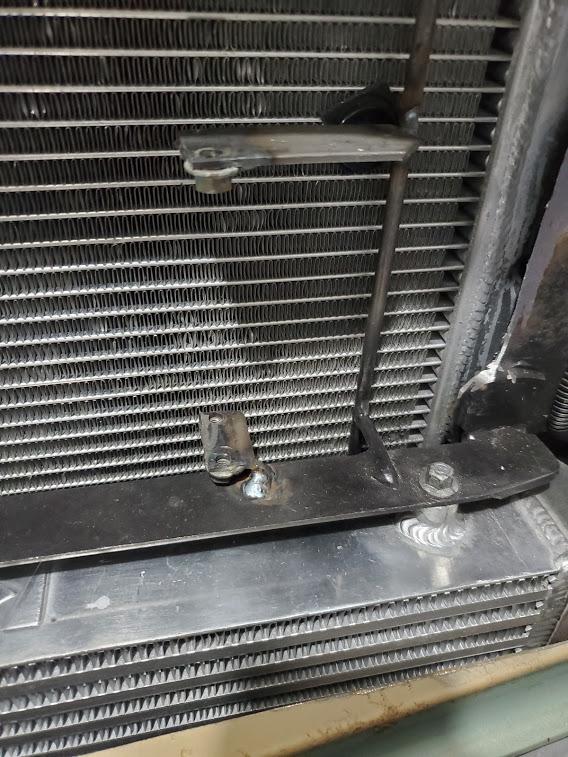
made some simple brackets off the the supports i have already
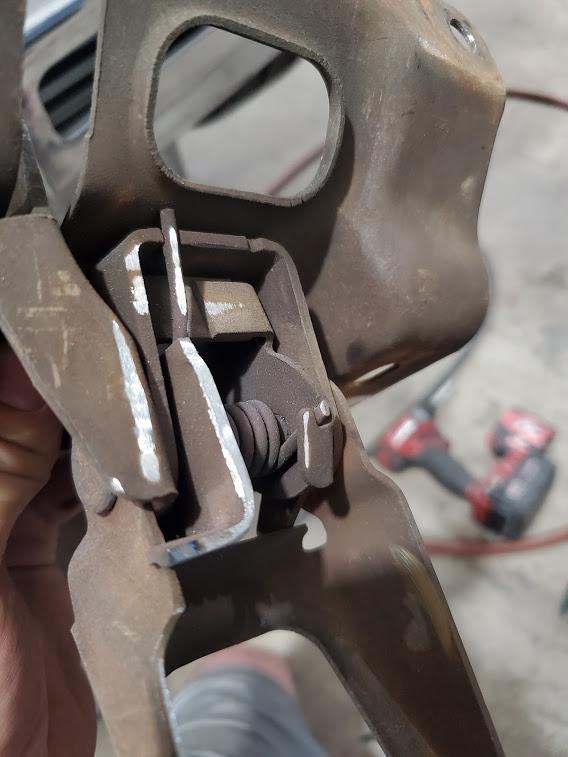
i had to shave some metal off of the back of the hood latch. its very tight but it fits and doesnt rub.
I decided to keep the cool line in the fender well out of the hot engine bay.
that line goes back to the remote mount.
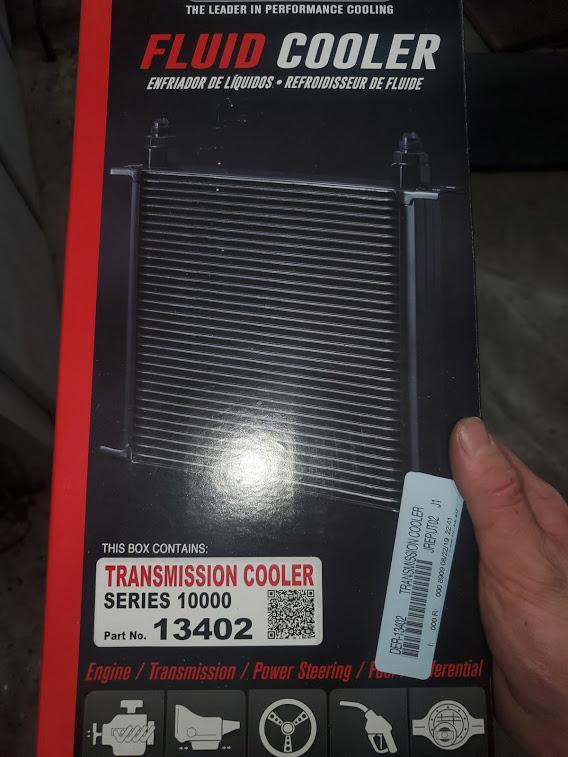
This is the cooler i used. I think its one of the best designed plate and fin coolers. There is only 1 other size bigger that this one, but this one is doing a great job! Derale does a really nice job on their website to give exact dimensions of the entire cooler. I didnt have to guess if it would squeeze into my tight spot.
11-29-2020 #25
Registered User
- Join Date
- Dec 2019
- Posts
- 26
I Forgot to update this thread. I have done a lot in the last few months. I have this build on another site, so im just going to copy and paste everything, but its from a few months ago. Here we go
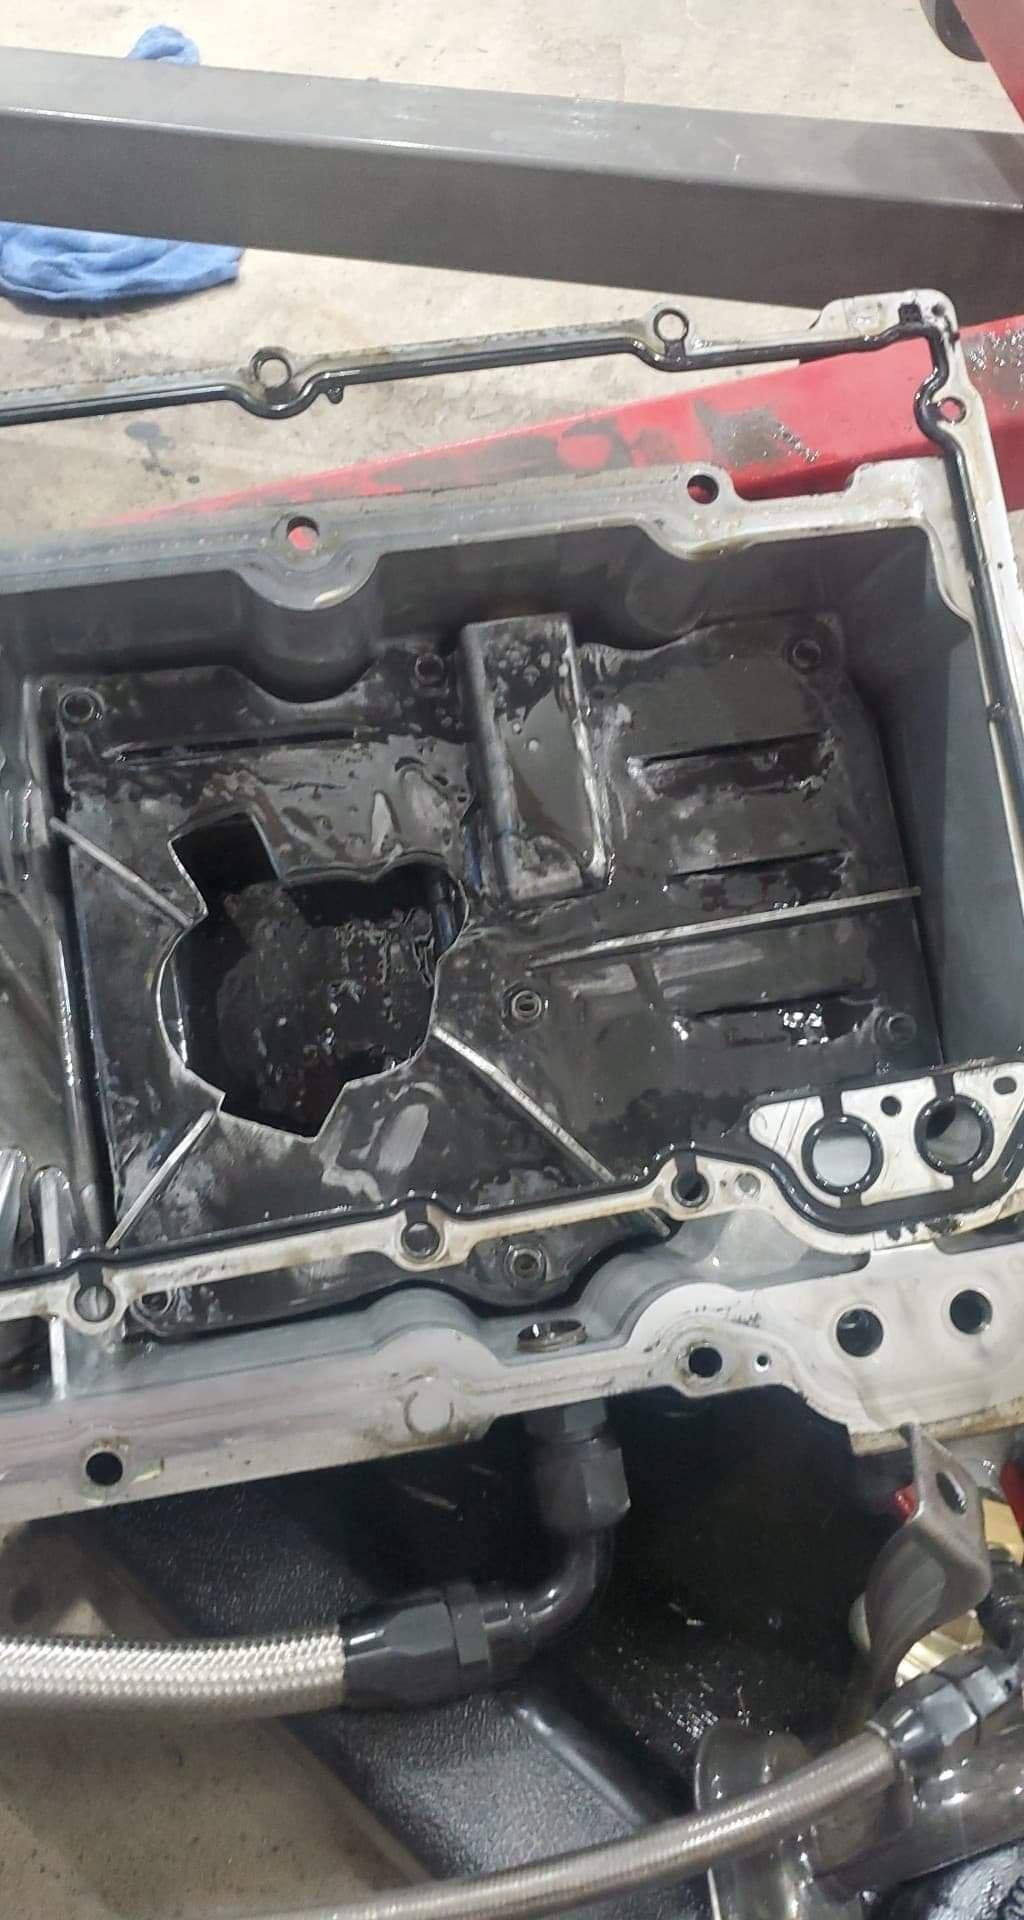
I was getting a exhaust tick and seemed like i had a little exhaust leak on the manifolds. Took the headers off and they were leaking. I dont know how i overlooked it, but i never cleaned up the mating flange that goes to the gaskets. They were really rusted. l cleaned them up with a scotch bright pad that goes on a die grinder. i took a file and filed them flat along with the vband mating surfaces. Sometimes when welding the vbands on, they can warp. A few swipes of the file can true the surfaces up. I took high temp red RTV a put a small amount on both sides of the vband surfaces. I got new gaskets and reinstalled everything. Everything seems to be leak free now.
Got some new drag tires for the rear. Went with some jegs 15x10 ssr star wheels with a 4.5 backspace. The backspace is perfect for this setup. I went with some M/T et street r 275/50/15 radial (26.0 tall tire). These tires will be used to go to the track. When I had the tires mounted, i had them glued on with some permatex high tack gasket maker. I heard of people using this to help the tire from spinning on the wheel, so ill see how it works
I also just dropped the car off at the tuner today. I figured it was time to put it on the dyno and see what it can do. I drained the tank and filled it with E85. I loaded the tune in the holley that i had setup to run the E85 to get me to the tuner. He is a local guy that does some cool projects. I have heard really good things about this guy. He only does it part time so he wants the car for a full week. Hes going to keep me updated when he gets numbers, so i have to patiently wait to see what happens this week.
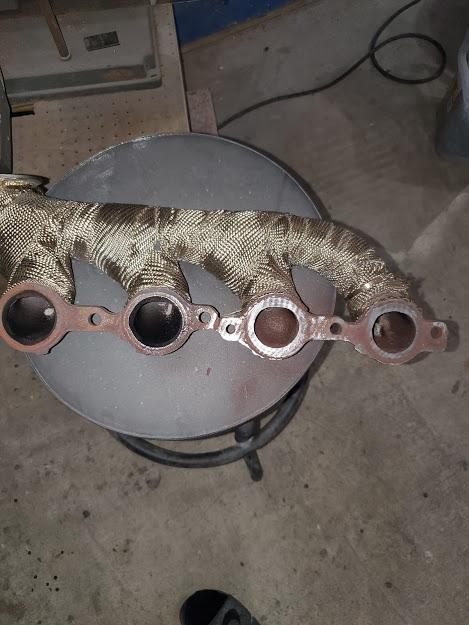
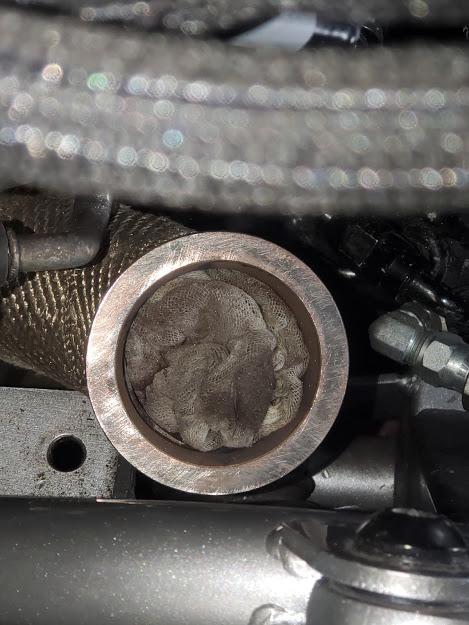
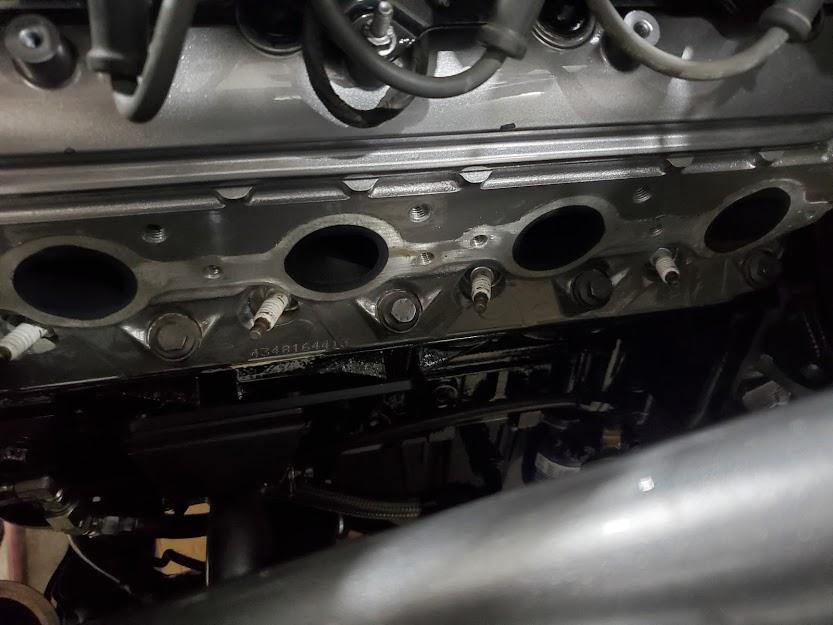
Gasket is sealing really well here to the heads. And the paint is holding up really well too. No signs of peeling.
- - - Updated - - -
- - - Updated - - -
11-29-2020 #26
Registered User
- Join Date
- Dec 2019
- Posts
- 26
DYNO results are in!!! 607hp, 538tq on 18psi. Pretty happy with the results! I ran out of fuel pump which I knew was going to be the limiting point of the fuel system. I still think its a good day with one pump on E85 to make this power. Im considering pulling the tank and adding another fuel pump. I would have to do modifications to the tank. The top of the hole is only big enough for one pump to fit, thats why i went with one pump for now. Otherwise i could add a extern.al pump to get closer to that high 600hp that I know it can do. Its still going to be a wicked ride. I'm picking it up tomorrow and will get a video uploaded on here
11-29-2020 #27
Registered User
- Join Date
- Dec 2019
- Posts
- 26
Heres a short clip of the car on the dyno.
11-29-2020 #28
Registered User
- Join Date
- Dec 2019
- Posts
- 26
DYNO results are in!!! 607hp, 538tq on 18psi. Pretty happy with the results! I ran out of fuel pump which I knew was going to be the limiting point of the fuel system. I still think its a good day with one pump on E85 to make this power. Im considering pulling the tank and adding another fuel pump. I would have to do modifications to the tank. The top of the hole is only big enough for one pump to fit, thats why i went with one pump for now. Otherwise i could add a external pump to get closer to that high 600hp that I know it can do. Its still going to be a wicked ride. I'm picking it up tomorrow and will get a video uploaded on here.
11-29-2020 #29
Registered User
- Join Date
- Dec 2019
- Posts
- 26
Heres a short clip on the DYNO.
<font color="#000000">
- - - Updated - - -
- - - Updated - - -
11-29-2020 #30
Registered User
- Join Date
- Dec 2019
- Posts
- 26
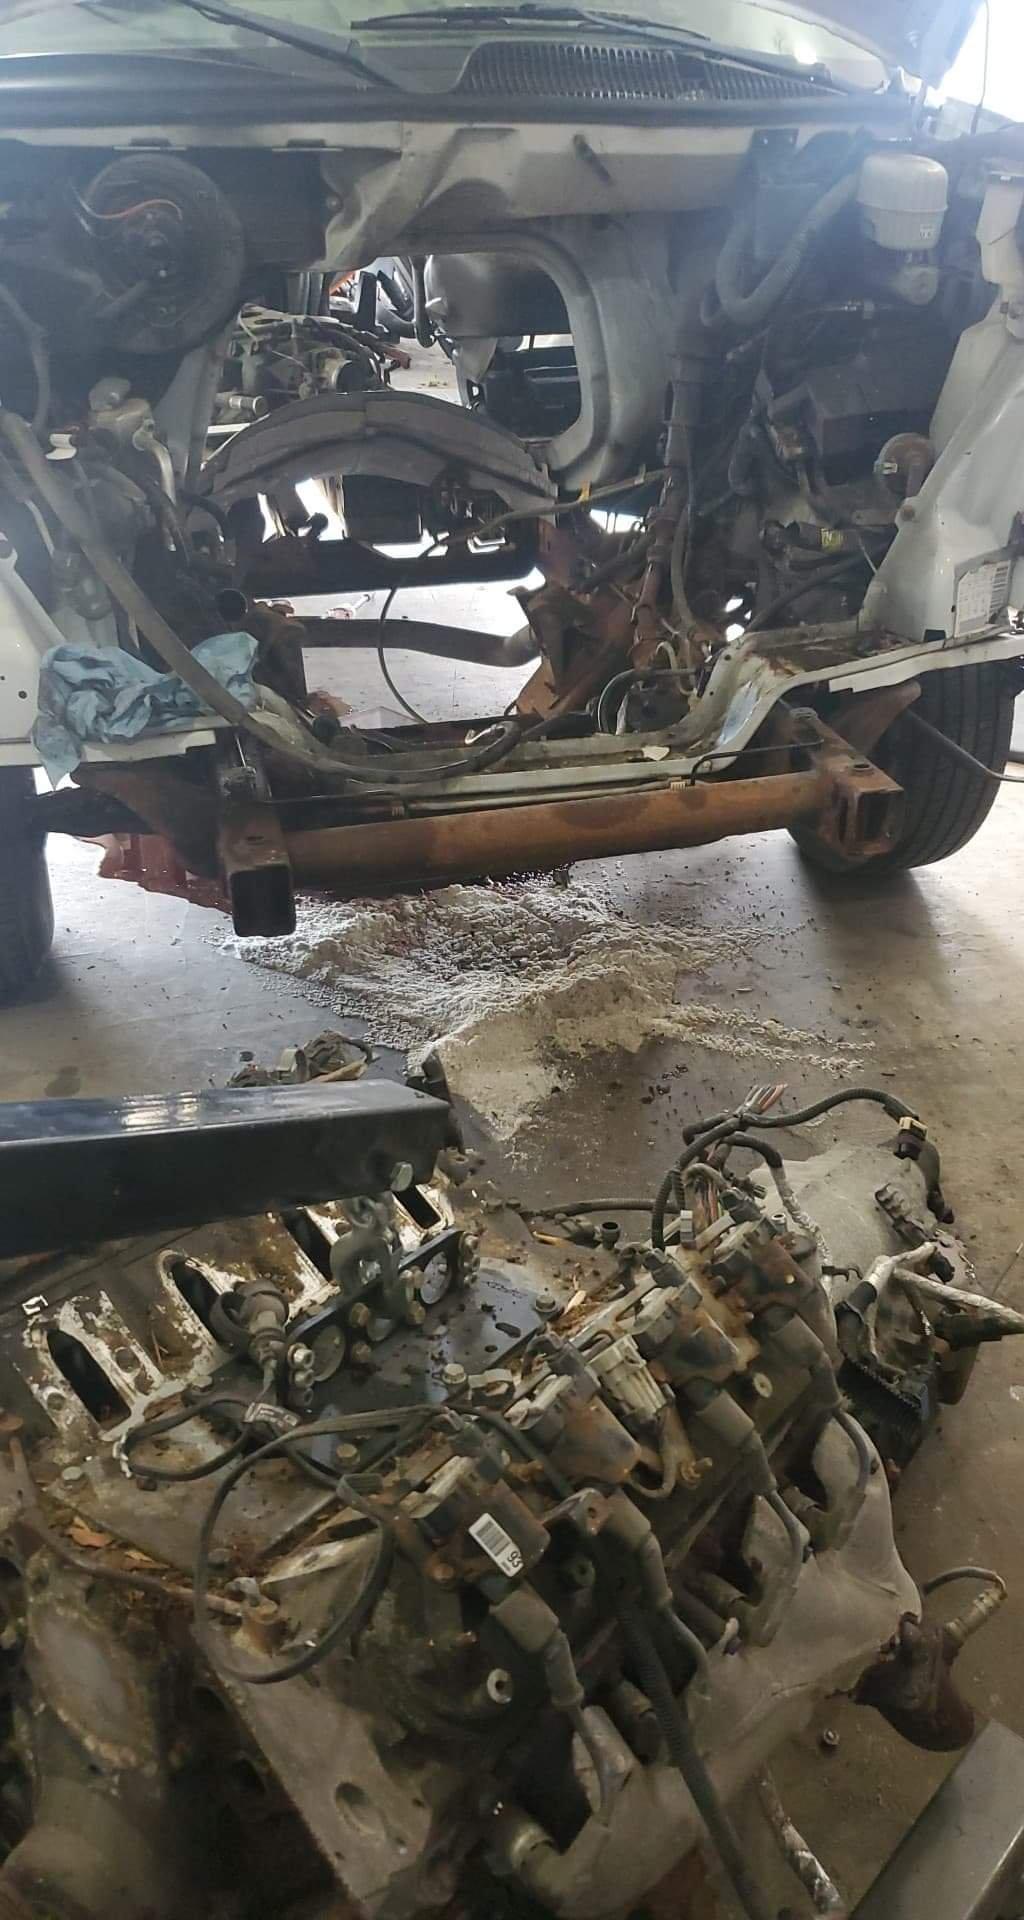
So where do I start. Well good , bad, and future. The good is this car is very fun. I havent gotten on it all the way yet, and it pulls like crazy. But...it was short lived. I was goofing around with the car, did a good pull and after the pull as I came up to a stop sign, the car died. After a jump start and it turning over very hard, I limped it home and oil pressure was at about 17psi above 2k. Kinda low. Well got home dropped the oil , metal glitter in oil. Disappointing but it happens. I dont know exactly happened, but something did. I dont know if I ran low on oil pressure under the heavy acceleration and sucked the oil pan dry? Or if when I took the rods out to gap the rings, if I overnighted the rod bolts? Or if revving it to 7k did it? I know people really give these stock bottom ends a lot of power and abuse these motors, maybe i just had bad luck. I have a friend that has a fbody, and put a 5.3 in with 250k on it all stock internals and has been in the 9s for 3 years now. So maybe some of it is luck. So this all happened a week ago. Luckily, a guy from my work has a hookup on used vans. I bought a 2005 2500 express van from him. It has a 4.8 and 4l80e in it with 180k on it runs and drives. Perfect! Got it for 750 bucks, can't lose here. I pulled the motor Sunday, parted some parts off of it and ill be in this thing for 350 bucks. I took the motor out of the nova last week as well. Disassembled it. The top end all looks good. So these last few days I have been getting the new 4.8 ready and ill be putting it in tonight. I should have it running by Friday, and there's a track event that alot of my friends been planning to go to this Saturday, so i should be able to make that yet. I bought a new oil pump and new headgaskets, otherwise I was able to reuse everything else. I cleaned the crap out of everything, as there was bearing material everywhere. Plans for the old block will be to rebuild it another day, but we will see what happens. Ill have to get some more pictures of the bearings, maybe someone can tell what happened, cause I'm no expert at that.

11-29-2020 #31
Registered User
- Join Date
- Dec 2019
- Posts
- 26
All back in!. Took it for a ride late tonight. Everything is looking good. I got it ready just in time for the track day tomorrow. Dad and I worked a lot this week to make this happen. A lot of late night pays off, so i hope everything goes good tomorrow.
11-29-2020 #32
Registered User
- Join Date
- Jul 2020
- Location
- Northern California
- Posts
- 3

I love how you did this car. That little 4.8 engine gets overlooked so much....that's kind of why I have 2 sitting in my garage
 607hp with 18psi on an affordable engine is what its all about!!! Strong work brother.
11-29-2020 #33
Registered User
- Join Date
- Dec 2019
- Posts
- 26
Successful day at the track. Its funny how I took my time with the first motor and made sure stuff was really correct. Not saying I didn't do that with this new motor, but i did not take the pistons out to gap the rings. I felt with 180k on this motor, it will have enough wear that it should be fine. I don't want to "let the magic" out of it on what the internet says. I put a new melling high pressure oil pump and new ls9 headgaskets.
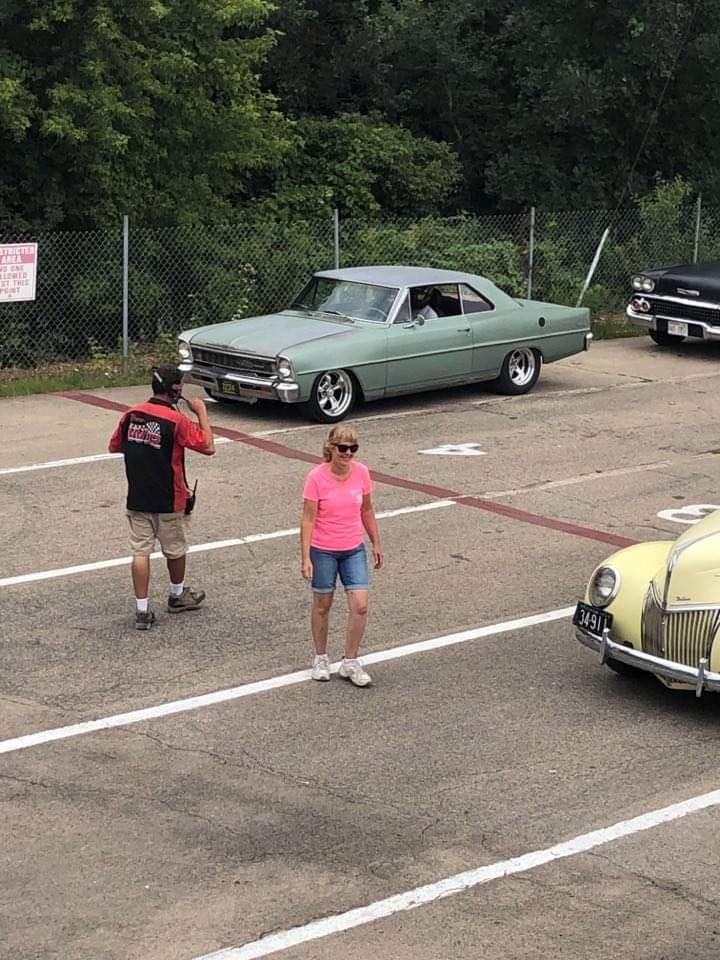
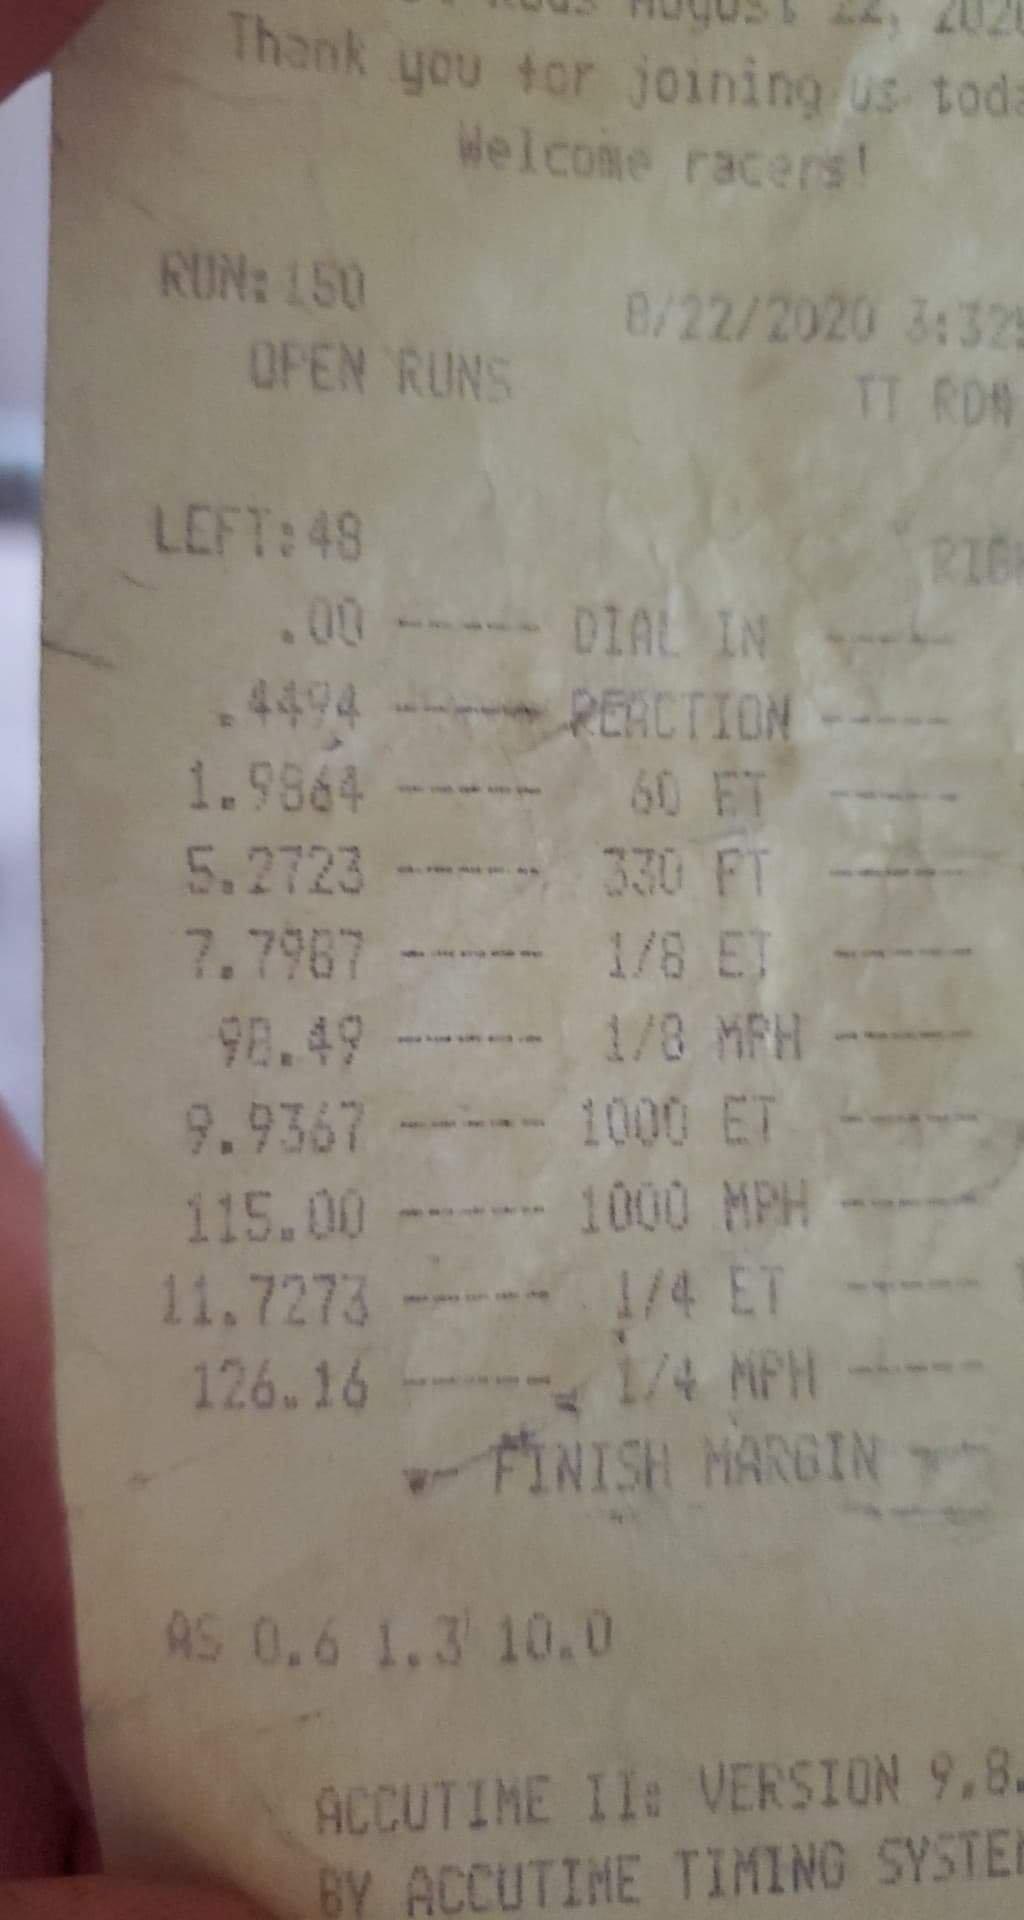
The local drag strip was having an event that you needed to have a 1970 and older. Was really cool to see only old cars at the strip. I was able to get 7 passes in. I started with only the car making 8psi in first,10 psi in 2nd and 10psi in 3rd of boost.(i can go up to 18psi safely). My first run at those boost levels was 12.4 at 122mph. I didnt have my 2step setup to build boost, so off the footbrake, I was only making 2.5psi of boost. When I would let go of the brake, the car would go but not like it should. Best 60ft foot was 1.9. I know i can improve, just have to make the car build more boost at the launch. My best trap speed was 126mph at 11.7. I think i had the boost level at 10psi 1st, 16 psi 2nd and I feel like it getting good trap speed, just need to work on 60ft and I should be able to get low 11s and then work on 10s. I also was being kinda conservative the whole day. With just putting this motor in, I was being gun shy with something happening to this one. I was also having the shift points at 6500. I feel this slowed me down a tad cause the car does make power up to 7000. The car went super straight down the drag stirp. I am very happy about that. So next time I have some things to work on. Overall, I didnt have any problems and happy for the first time out learning the car.

my co workers ranchero. We lined up and I beat him. He was running mid 12s.
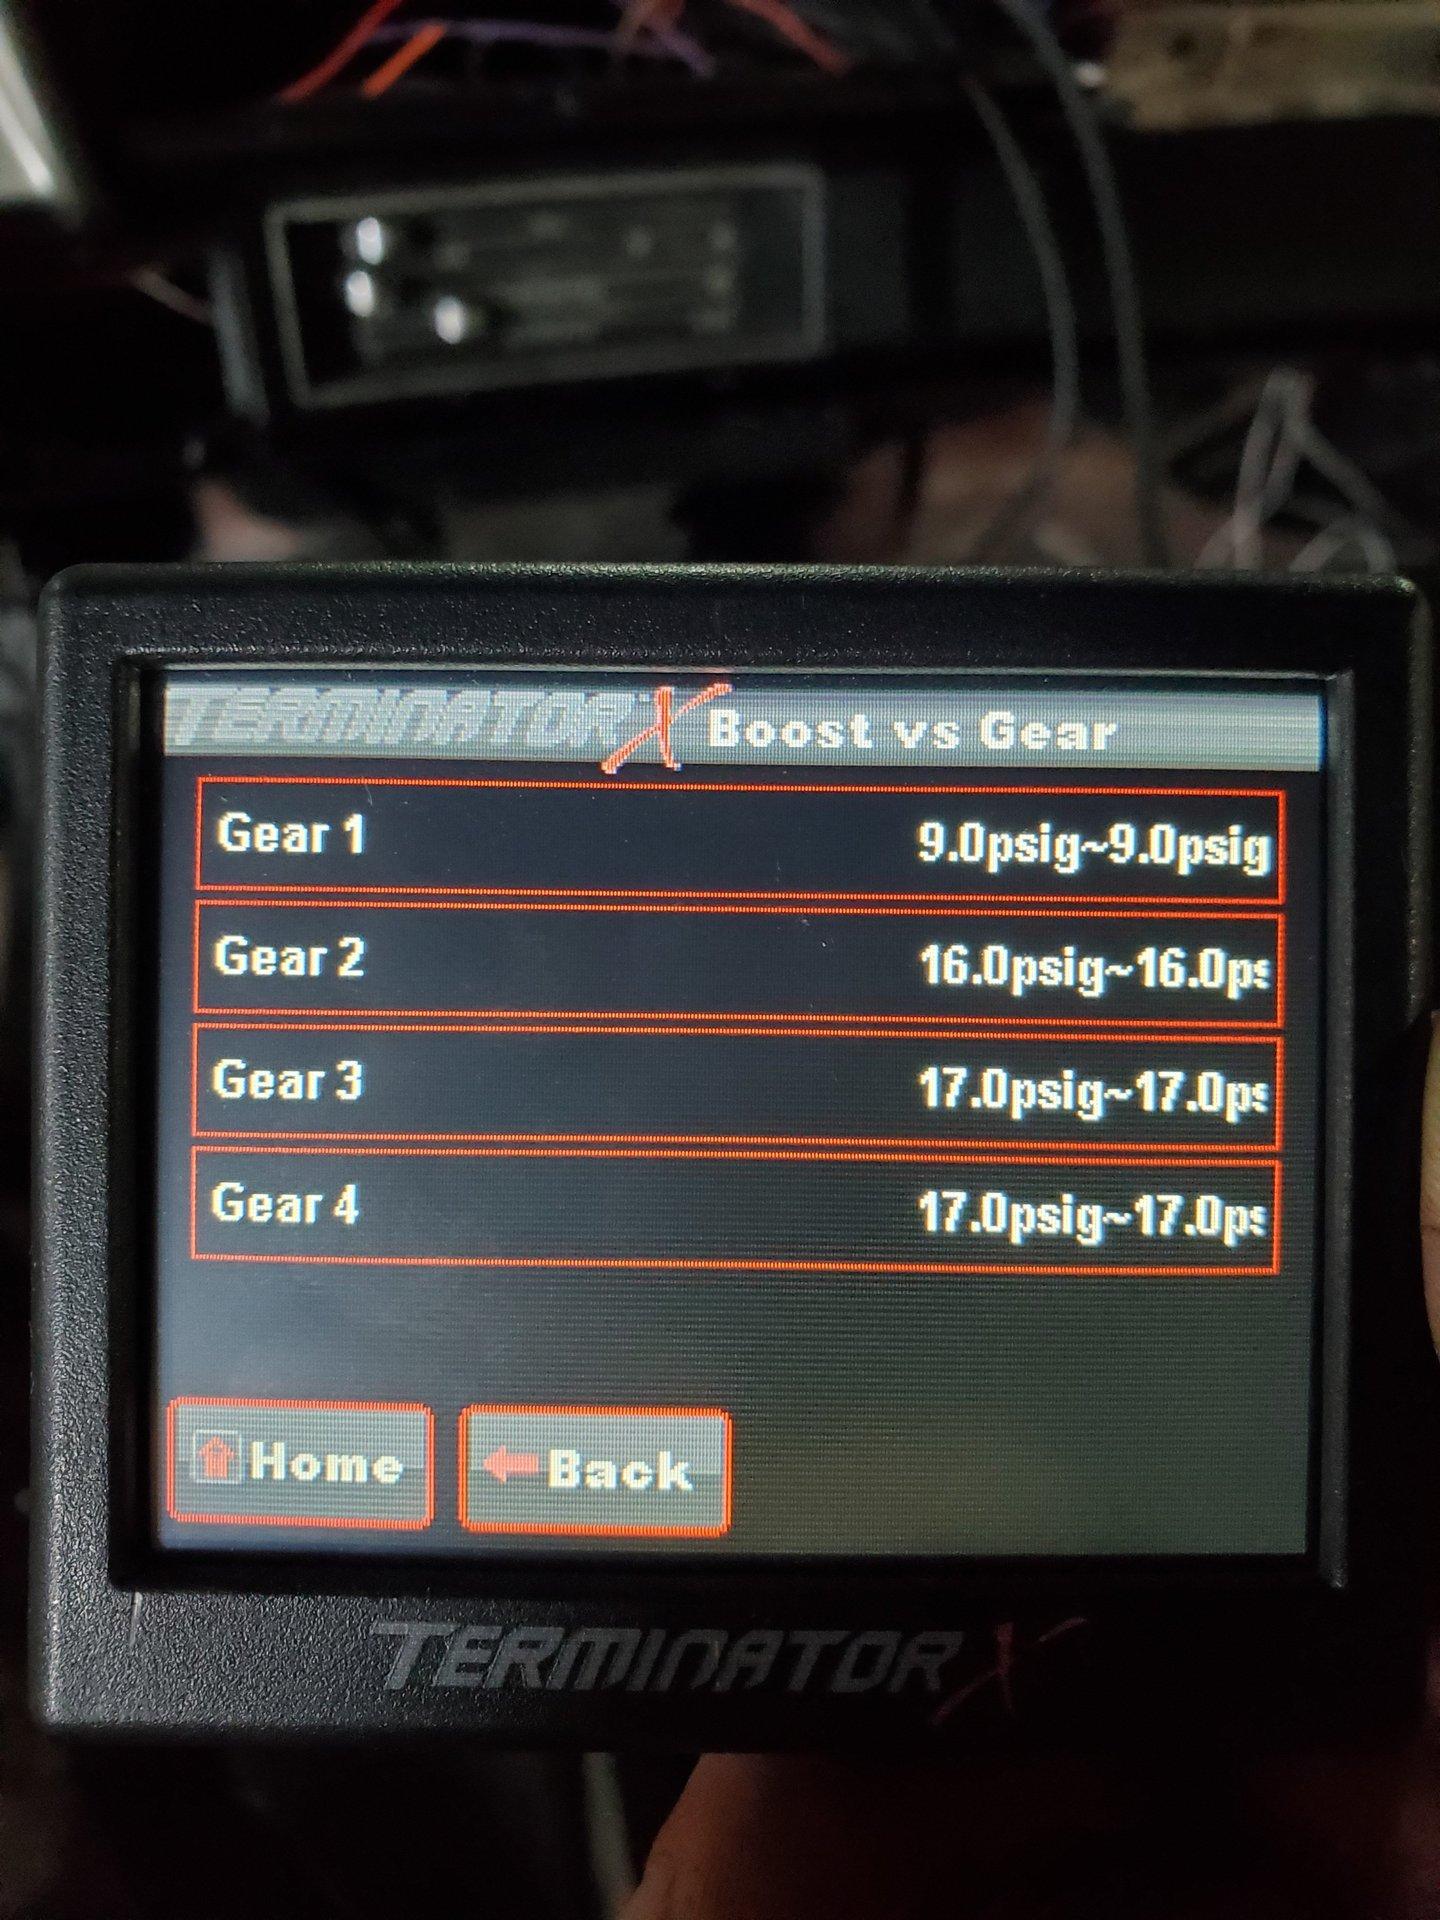
Here's how I can adjust boost per gear easily. Next time I'm going to try 11psi first and 18psi in 2nd and 3rd.
11-29-2020 #34
Registered User
- Join Date
- Dec 2019
- Posts
- 26
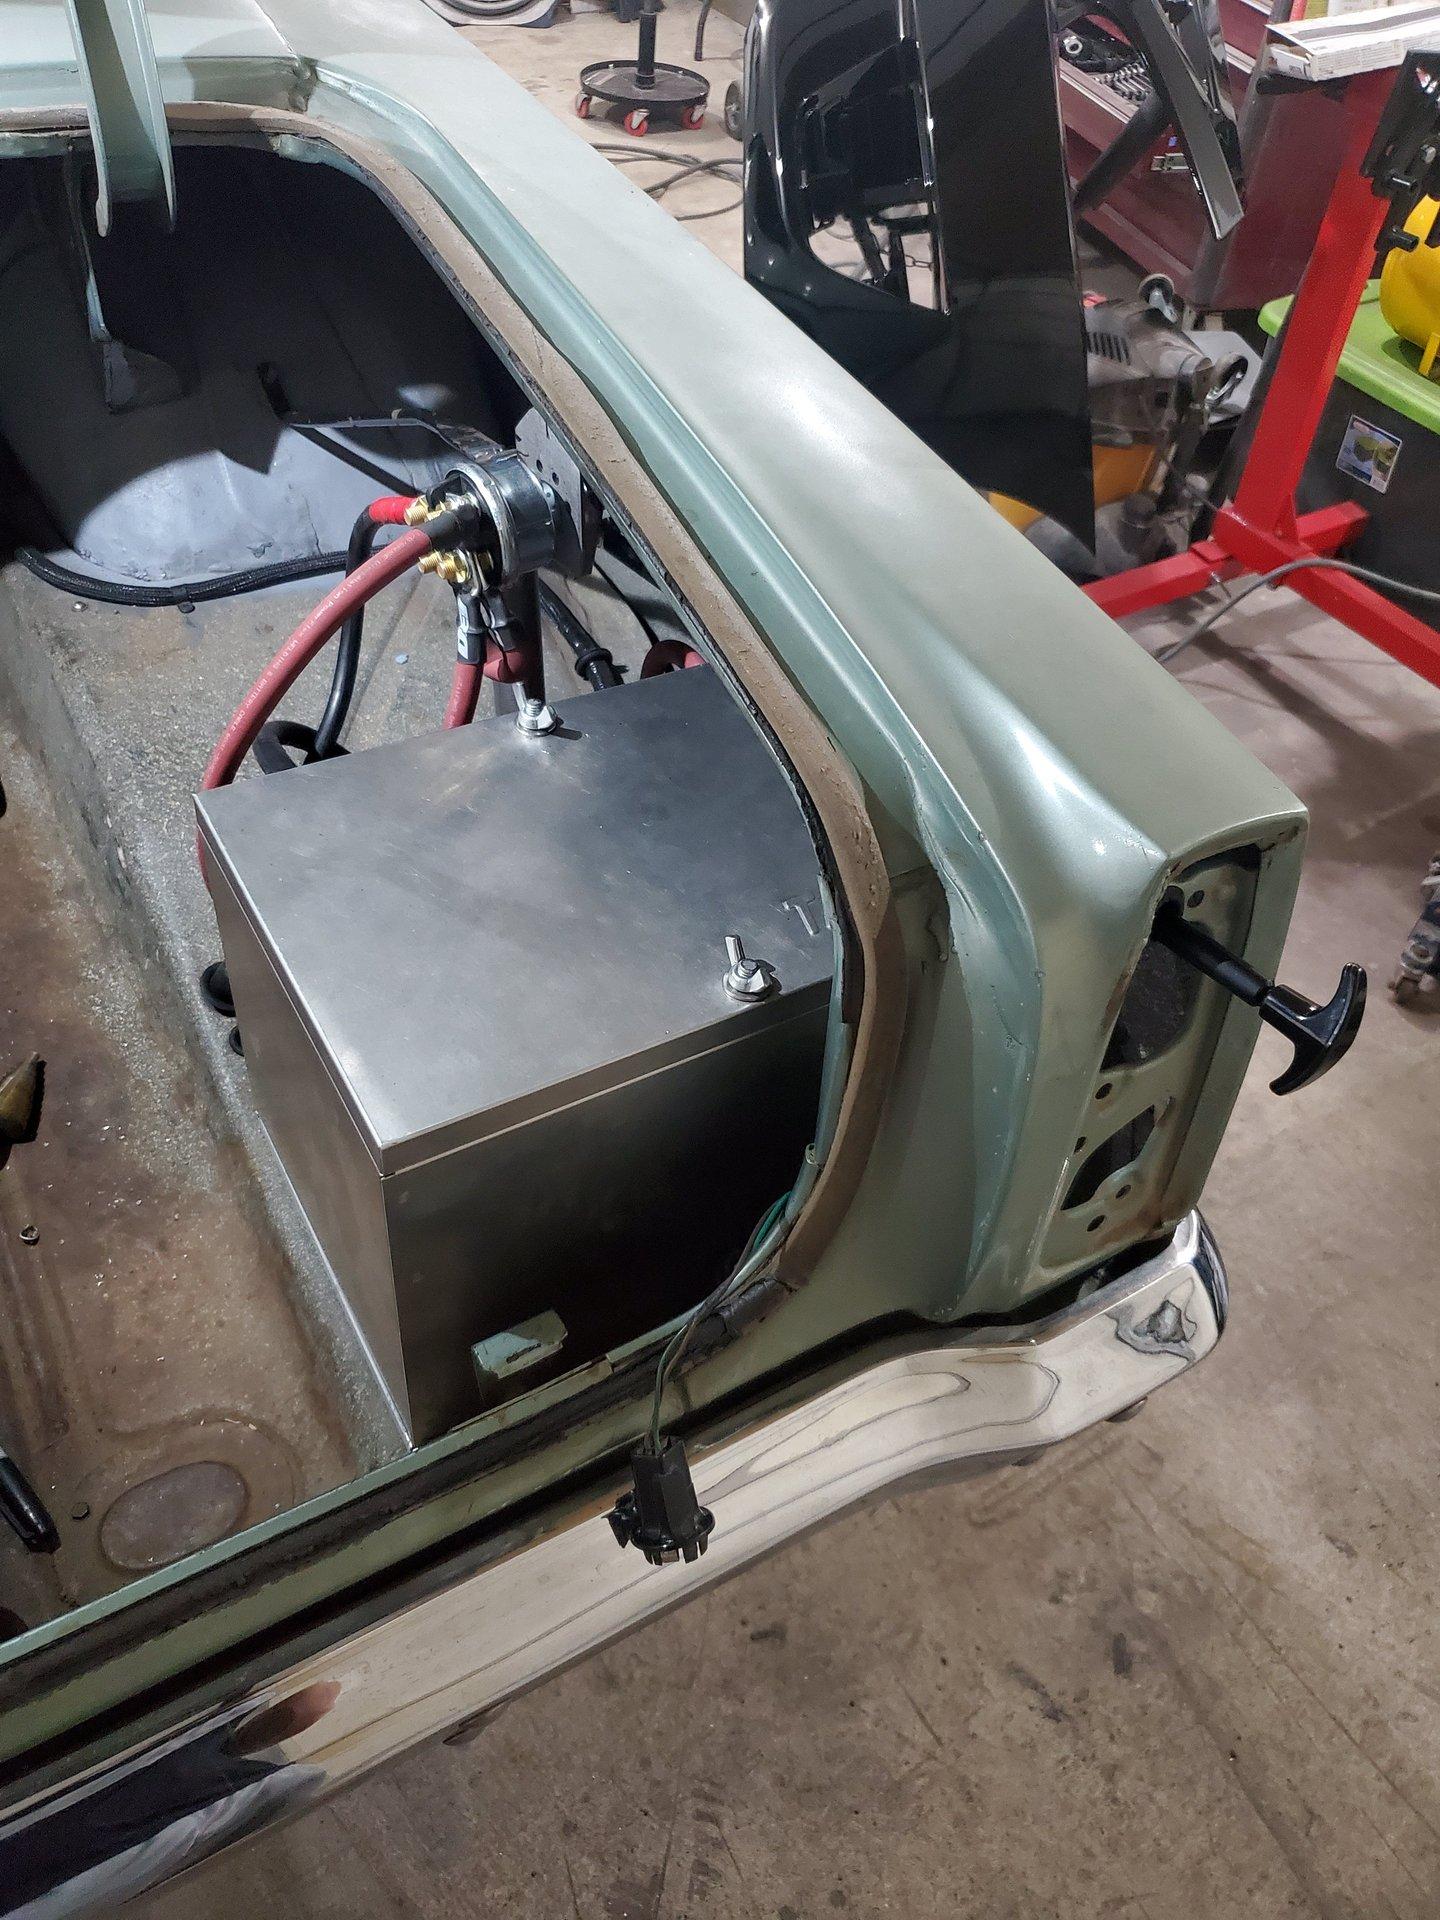
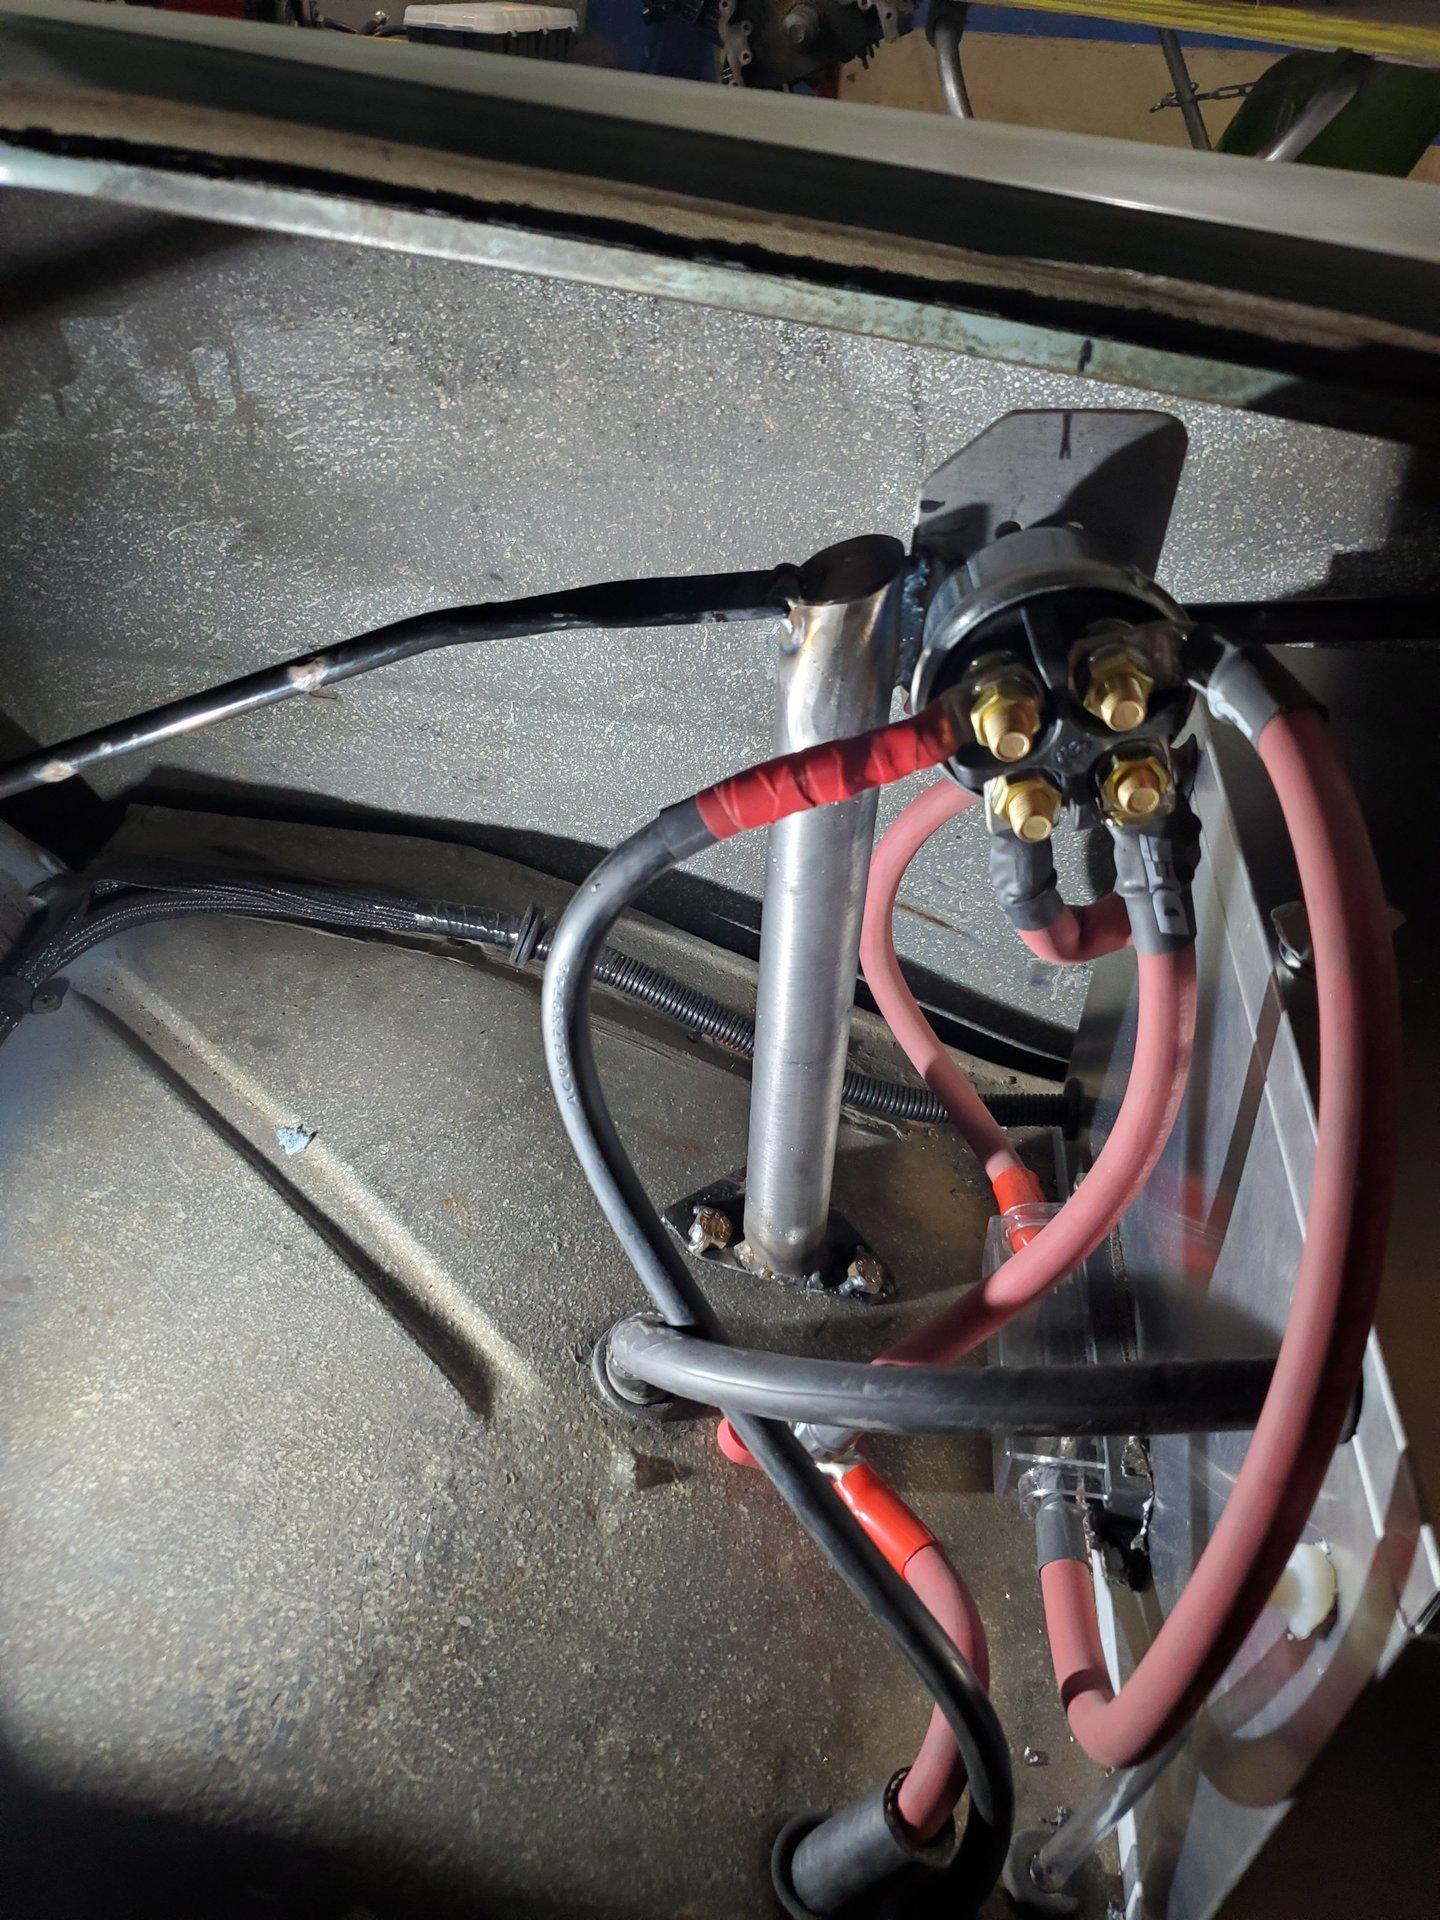
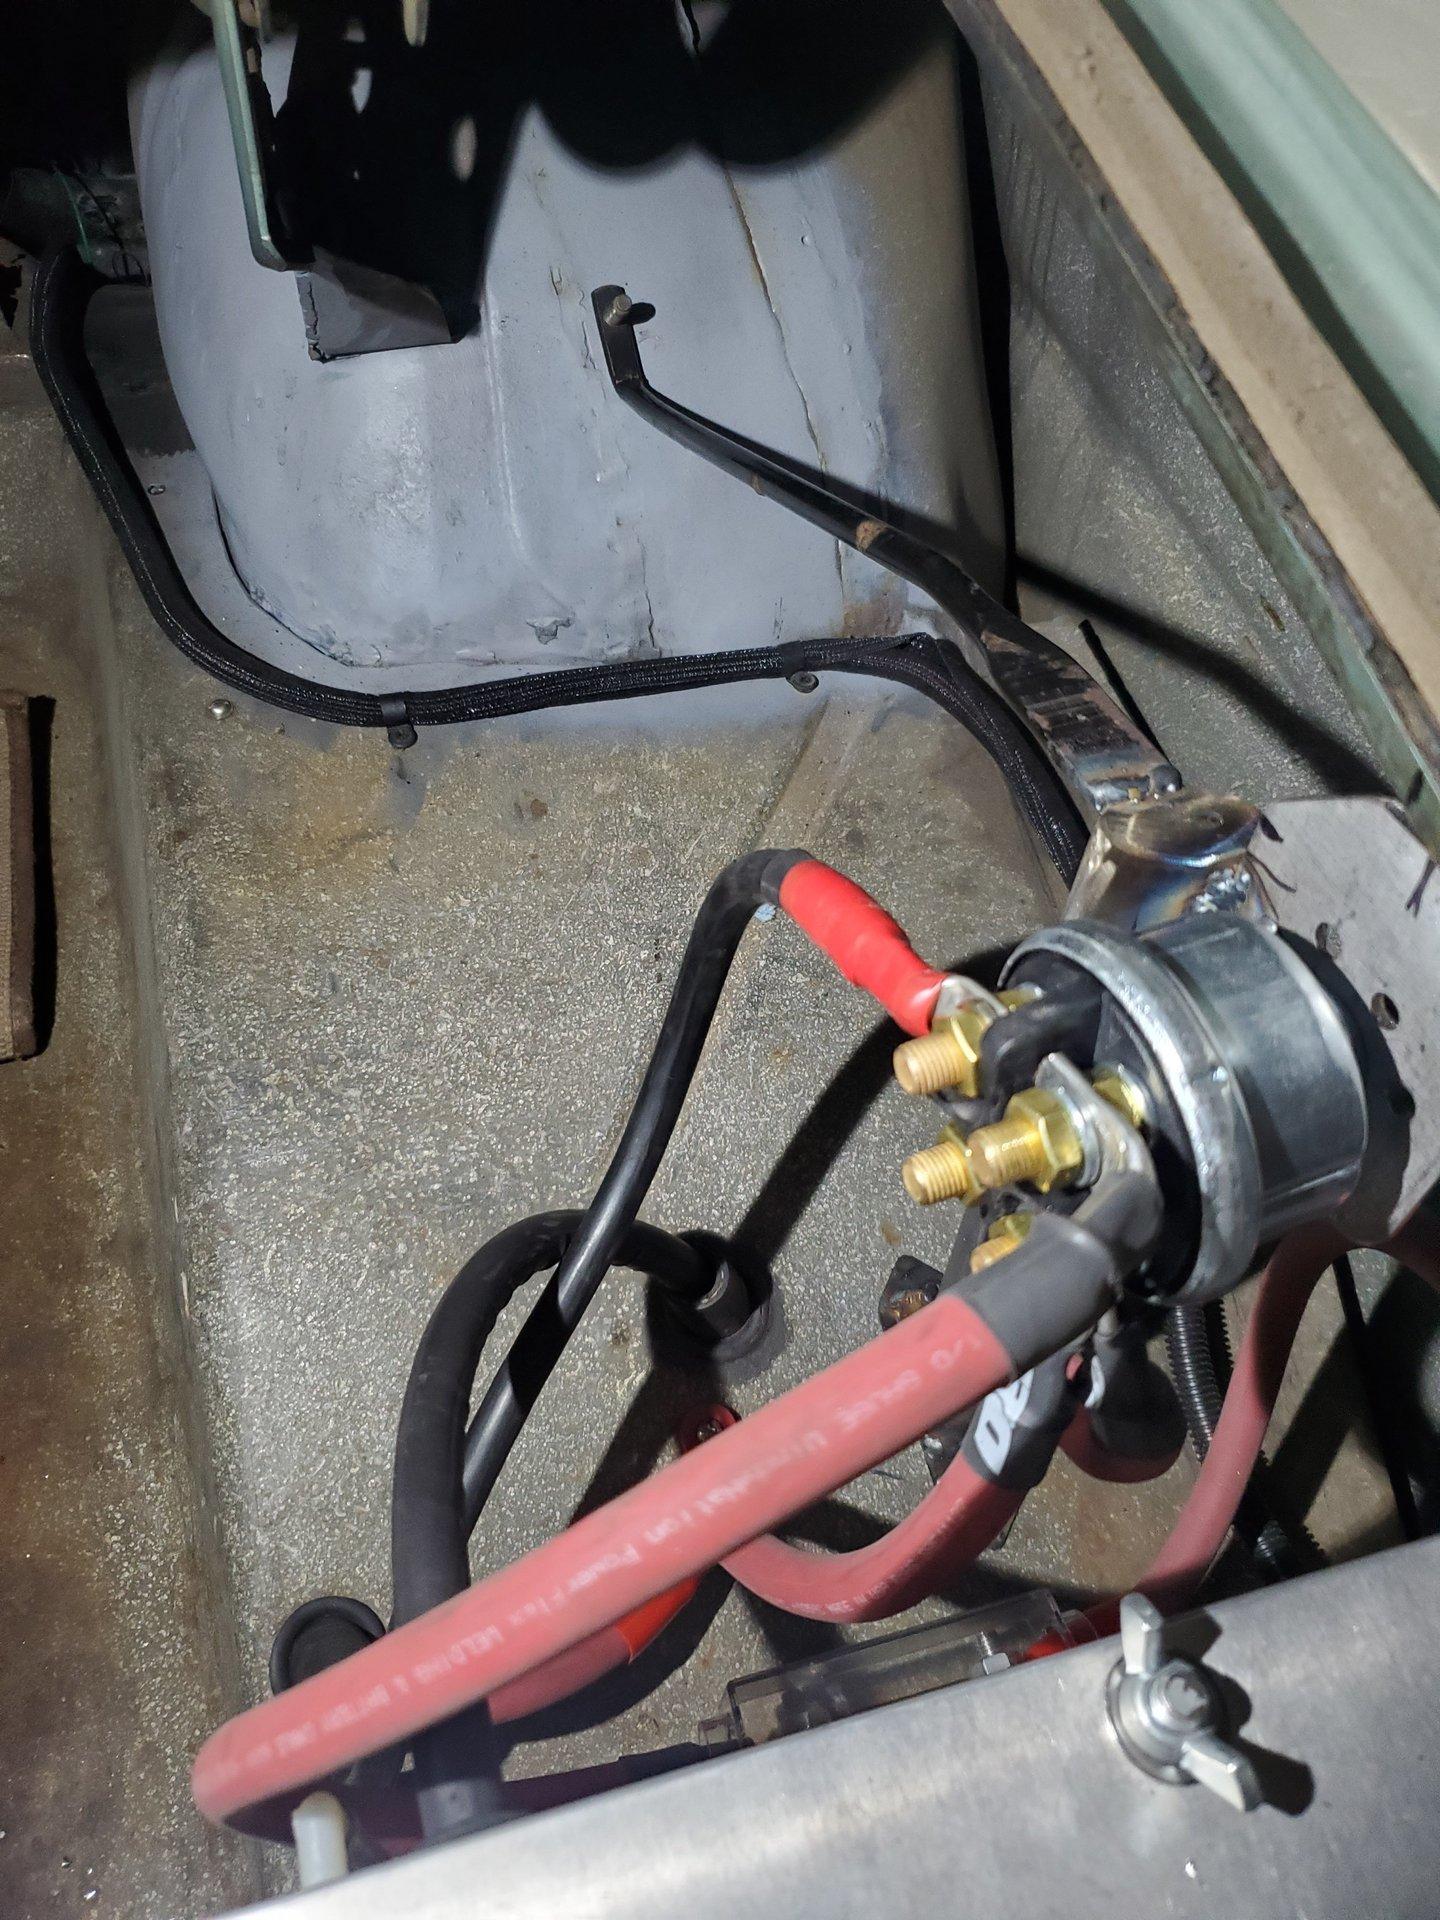
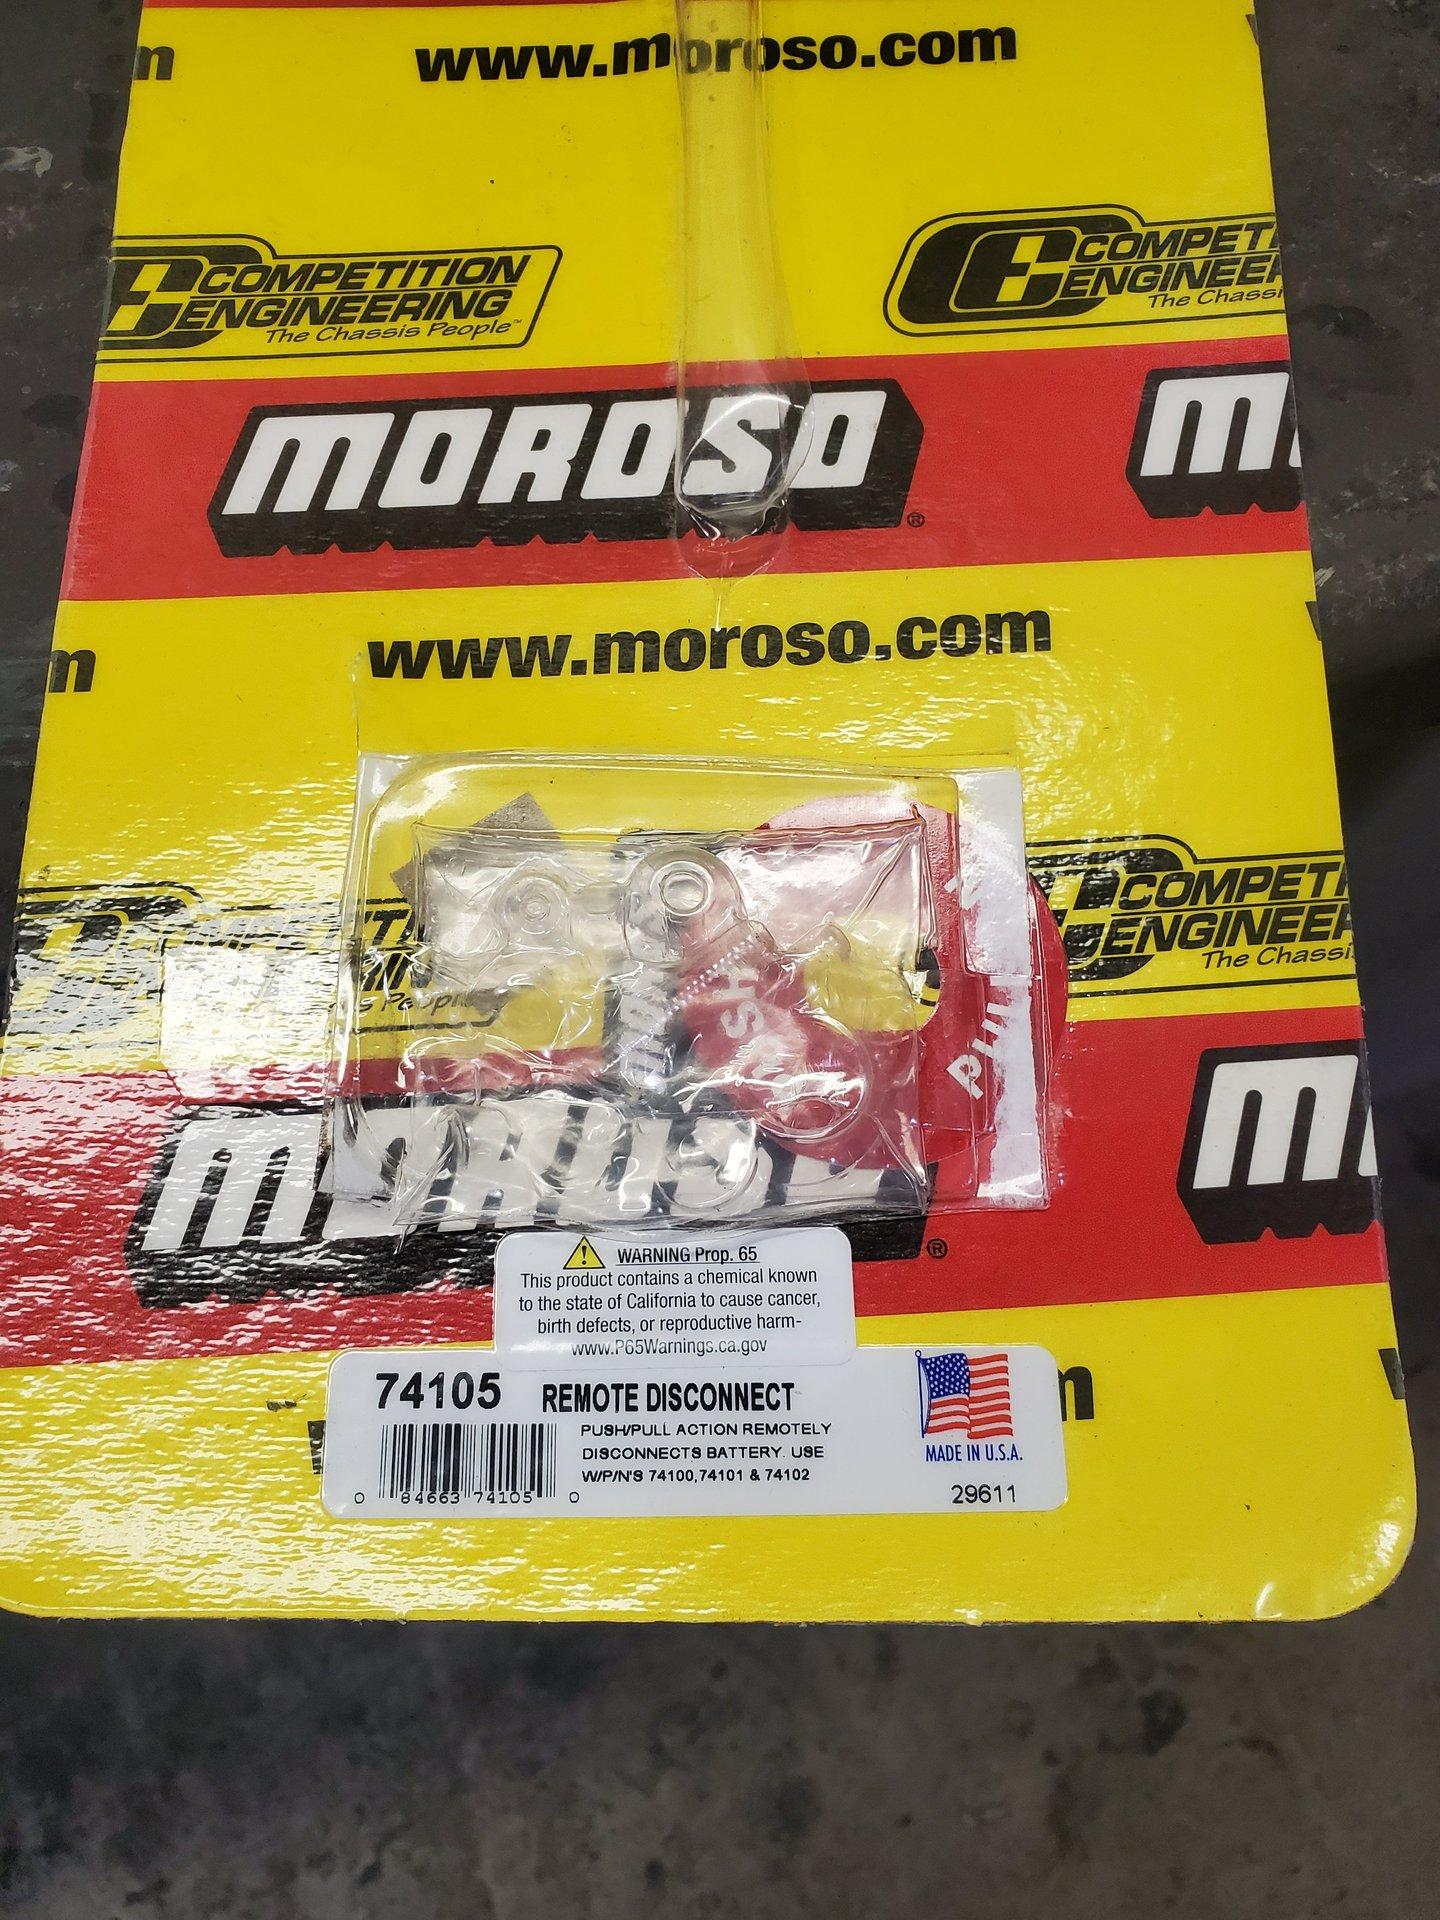
When I went to the track a few weeks back, the tech inspector let me through with my battery located in the truck. He told me that next time i need to have a shut off switch from the outside side. I didnt want to have to add one because it is a street car, but i guess it won't hurt either. So I ordered the parts and installed it last night. I plan to go to the track this Friday, so i better be prepared.
I used a moroso 4 pole shut off switch along with the linkage kit. Im leaving my tail out for the track, but i am keeping an eye out for another rear taillight that I can drill a hole through to keep the linkage hooked up and have it look nicer. I used a piece of 1 1/4" piece of pipe and welded it to a plate that i mounted to the floor. Then re-purposed a bumper stay off of chev truck and bolted it to the wheel well and welded it to the pipe. Its pretty study. I made it all bolt in so I could remove it wh
en I refresh the trunk.
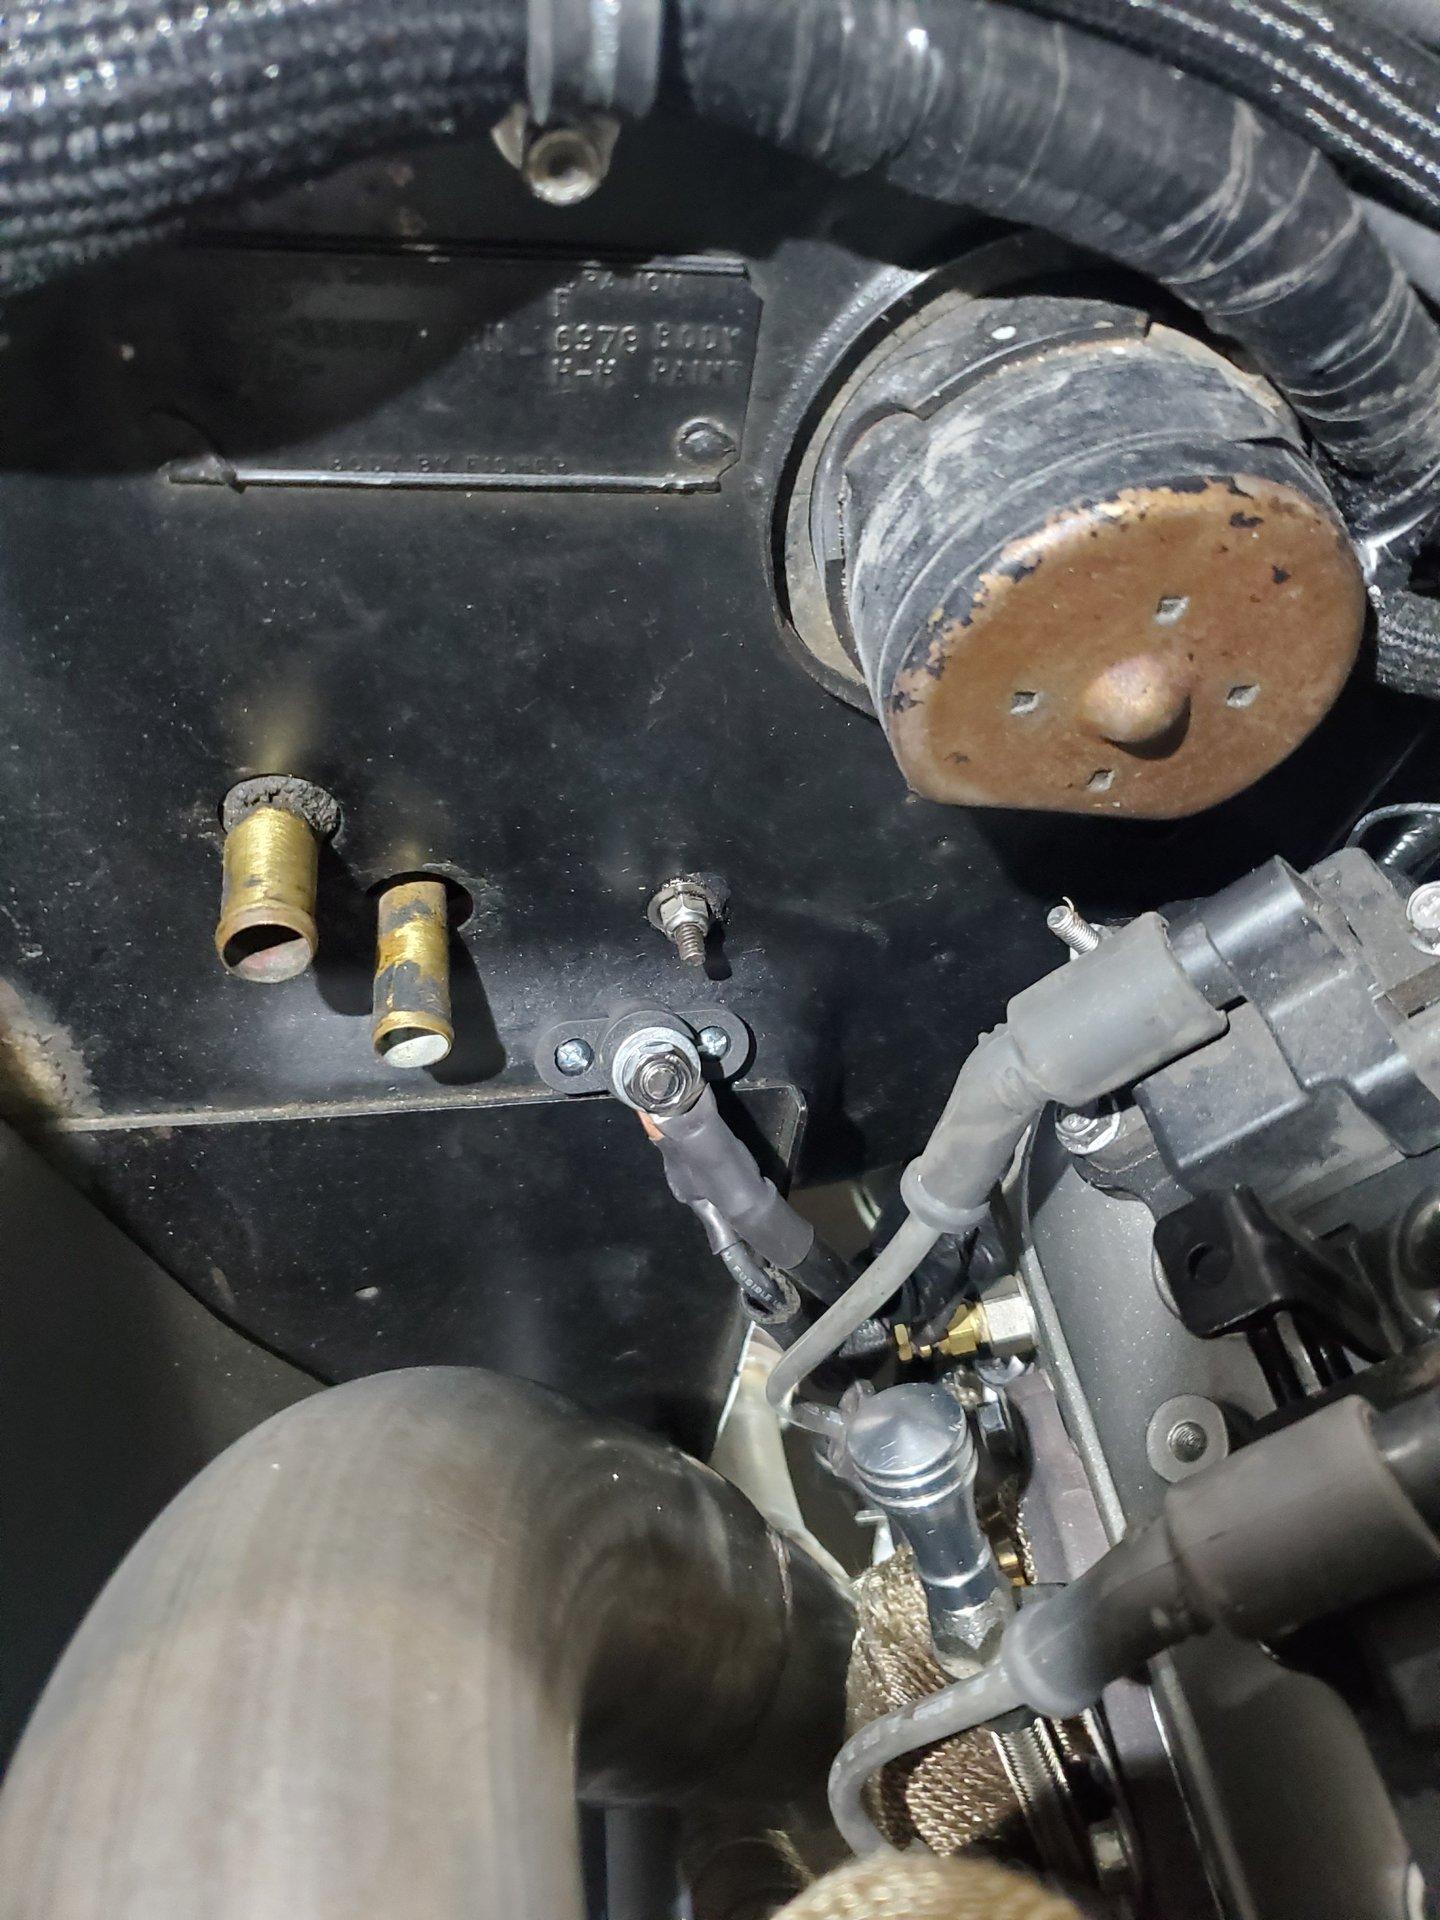
I added a battery post in the trunk so I could extend the main power and keep the switch fused. I also added a battery post under the hood to extend the alternator wire to the trunk. I used 2gauge wire to the trunk for the alternator.
I choose this placement of the switch so I didnt have to rewire my main wire to the harness. I also didn't want to drill through the body if I didnt have to.
It works great and I plan to turn it up a bit more at the track to see what it's full potential is with the setup.

11-29-2020 #35
Registered User
- Join Date
- Dec 2019
- Posts
- 26
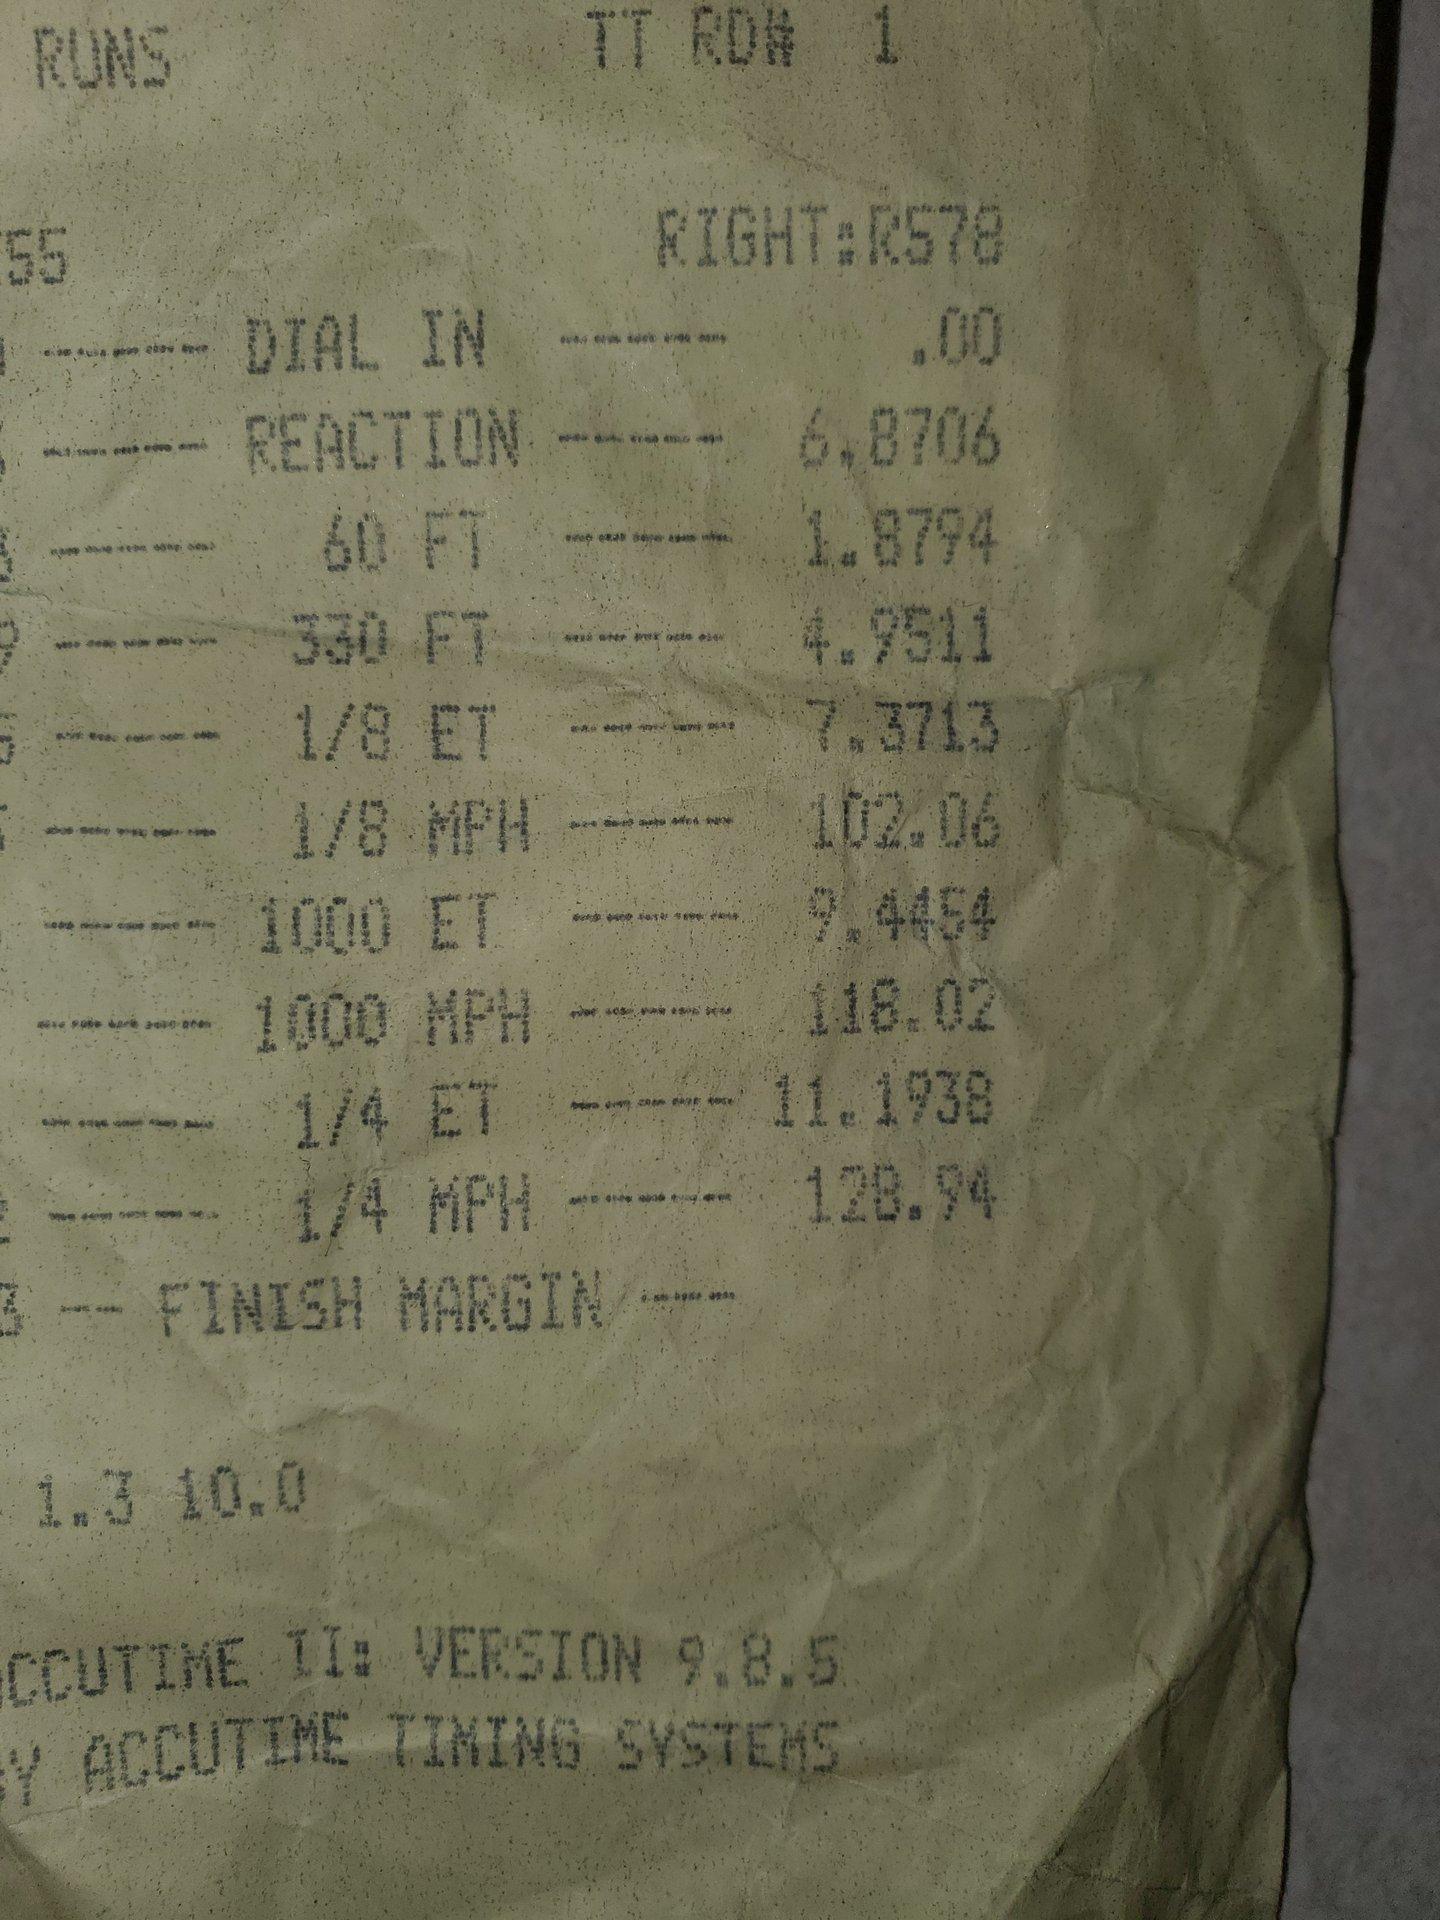
Went to the track tonight. Things went better and im right there to get this thing into the 10s, but was only able to make 2 passes and then track shut down. Earlier this week, I messed with the tune and I am able to hold the brake pedal down, get the engine up to about 2900, and have it hit the 2step. Then I have a advanced table in the holley that comes on, it progressively pulls timing( i have it set to pull about 16.0 degress from 20-19 so its doing about 3 degrees of timing)and this makes it build boost while I'm at the start line. I can make anywhere from 8psi to 12psi or possibly more if i play around with it some more. I then have a button im holding on to with my thumb, and I let go of it, and that releases the 2step, and then at the same time let go of the brake. Well i accidentally let go of the gas too(lol) and then I lost my boost I built off the line. It made a 1.8 60ft pass and ran a 11.19 at 128mph. I had the boost turned up to 14.0 in 1st, 17 in 2nd and 3rd. So if i get my 60ft down I think i could dip into the 10s. I gained 2mph more from my previous time. I was going to turn it all the way up in all the gears tonight, but then it got shut down due to a accident and a pole being knocked out. Im learning alot with the holley and getting settled into the car, so i know i can improve next time.
11-29-2020 #36
Registered User
- Join Date
- Dec 2019
- Posts
- 26
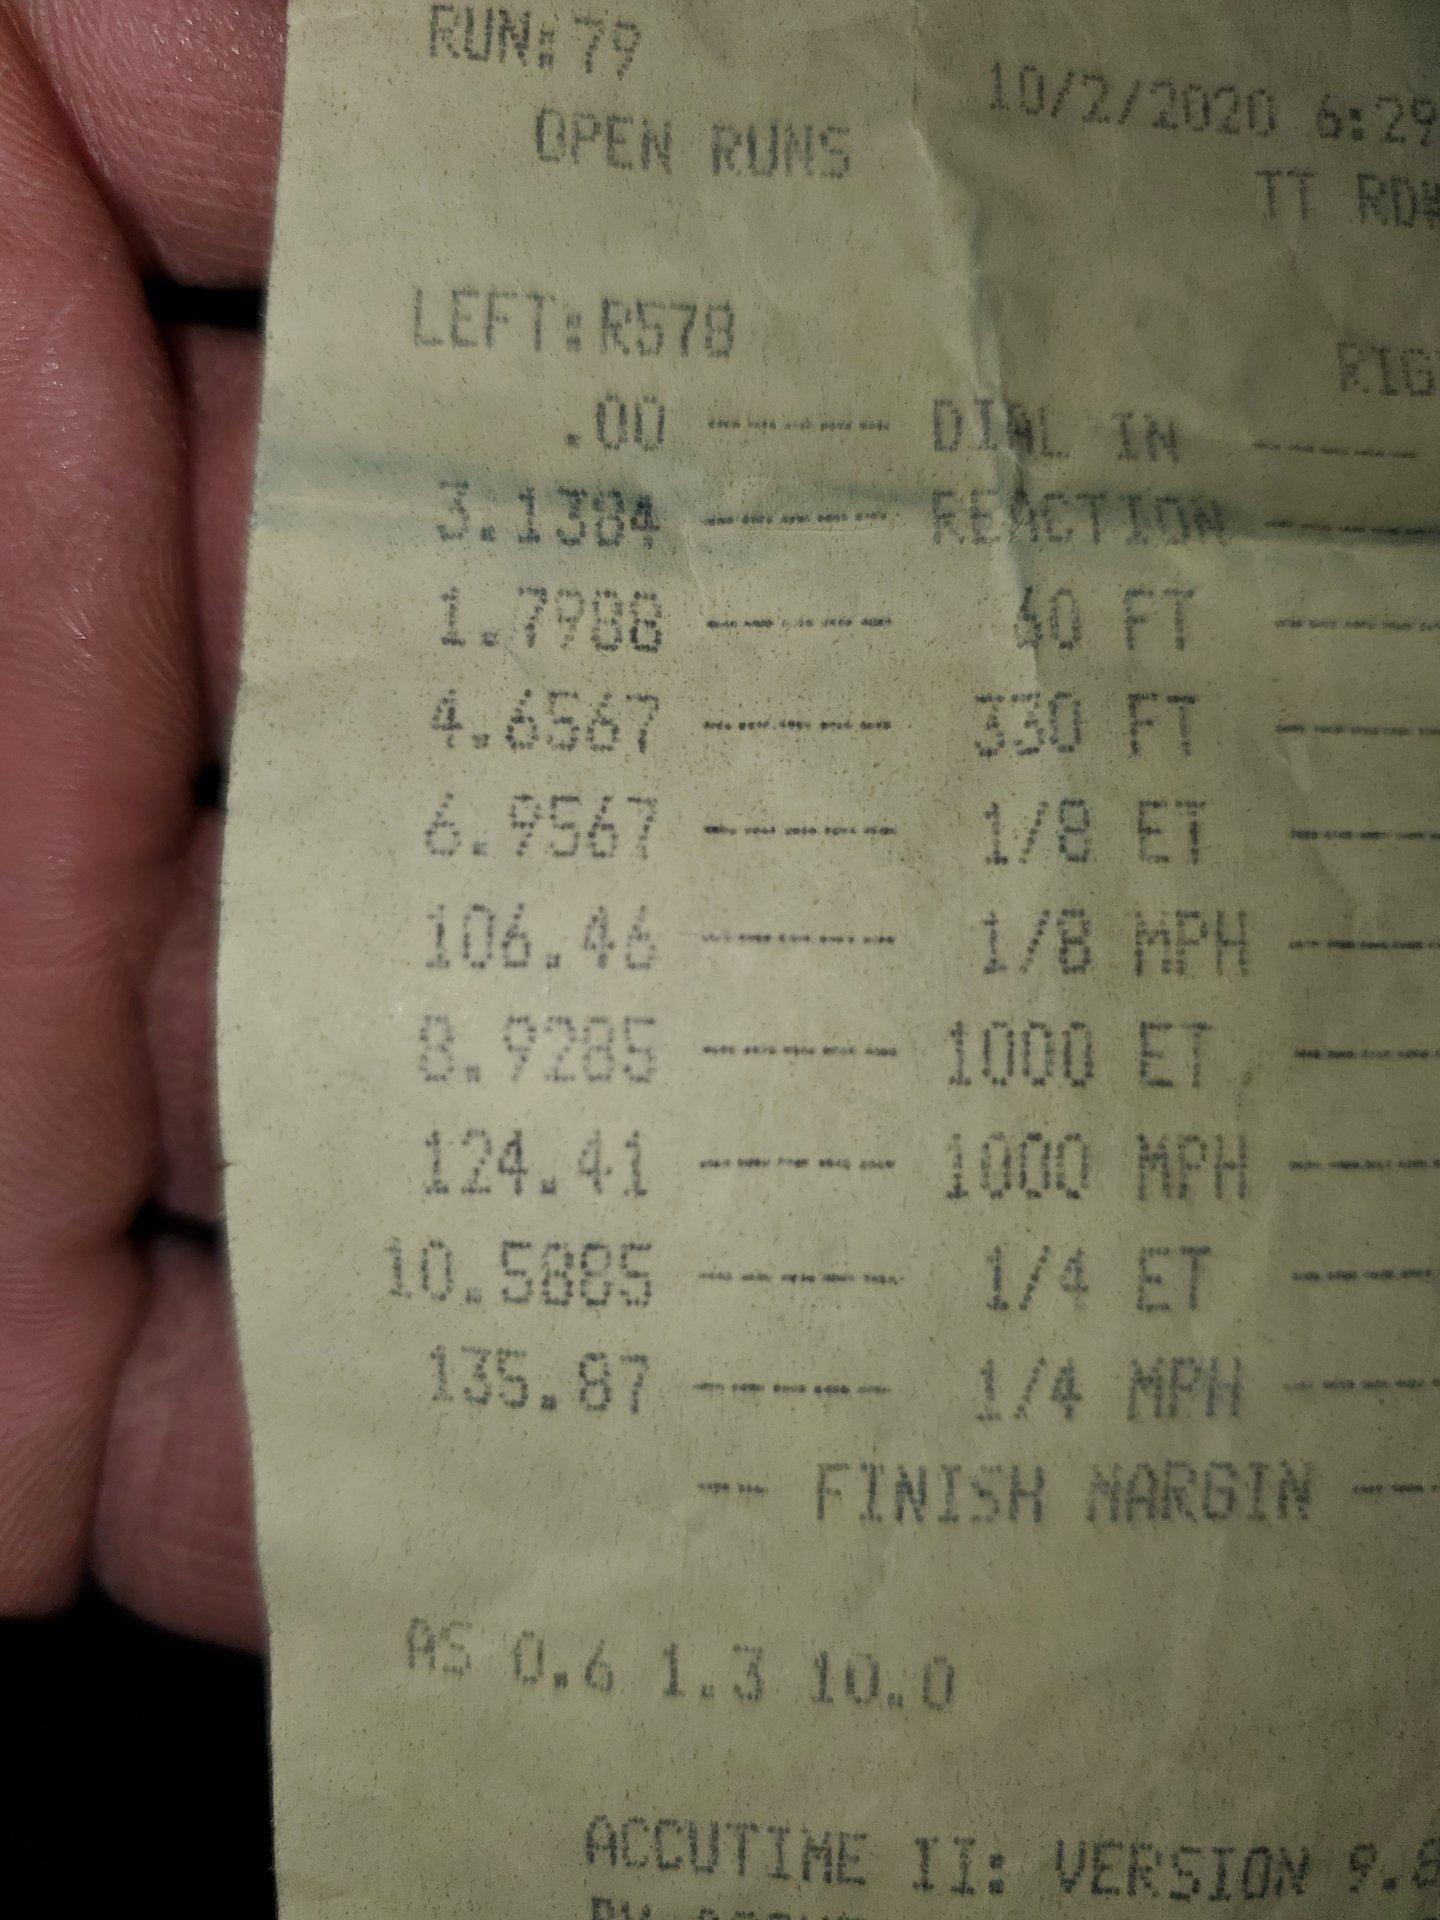
Went to the last track event for the year. Wanted to get into the 10s so bad..well I did it!. Ran a 10.5 @135 mph. My 60ft was better, but still need to adjust some things. I forgot to record the log so I don't know what PSI I left on, but I'm guessing 6 or 7. I had 1st gear set to 17psi, 2nd 18psi 3rd 18psi. I came off the line pretty decent but I really felt it come alive after the 60ft mark. It was nice and cool tonight(48 degrees) so that always helps for boosted cars. The car chirped the gears from 1-2 shift which is about 60mph and it also chirped 2-3 shift which is about at 98mph. The car feels really stable at the high speeds. It doesn't push left or right. I am also really liking the wilwood brakes. Even though it's manual brakes, I feel really comfortable stopping the car from 135mph. I dont really have to push the brakes incredibly hard to make the car come to a stop. I was only able to make one pass tonight. We counted over 100 cars tonight, so the wait time was over an hour per run. I am also getting a little oil blow out of the dipstick. I have to re vamp the PCV and catch can lines so the engine can breathe easier. Overall the car is working great with this setup. I wanted to accomplish this goal to get into the 10s before winter.
- - - Updated - - -
Here is my 10.5 second pass at 135.
I havent been leaving on the green light at all. Been making sure my boost is getting where I want off the line and then I leave. I think this pass is still like 6 or 7 psi of the start. I know its got more in it but I have to go and test to make it consistent. The video is 3 minutes long but I get pretty excited when I'm on the return lane and get my time slip at the end.
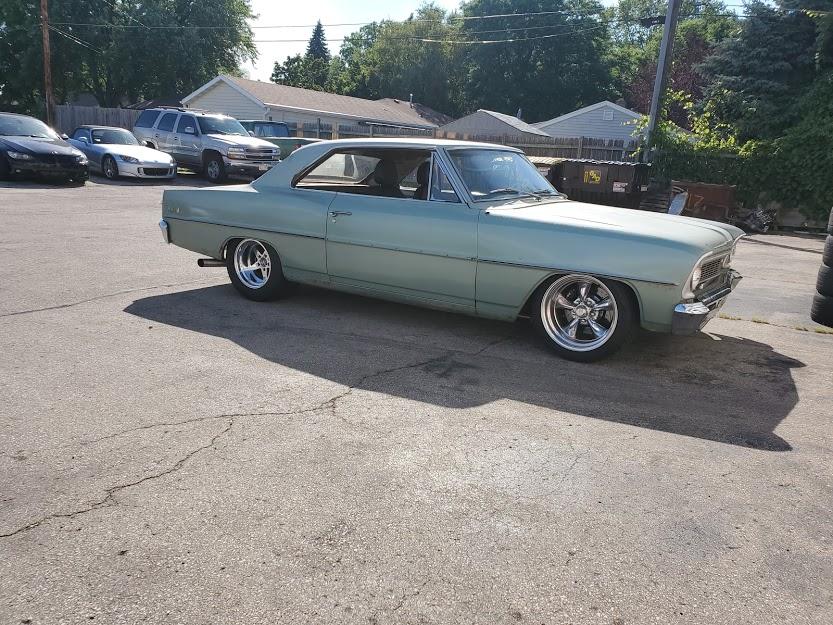
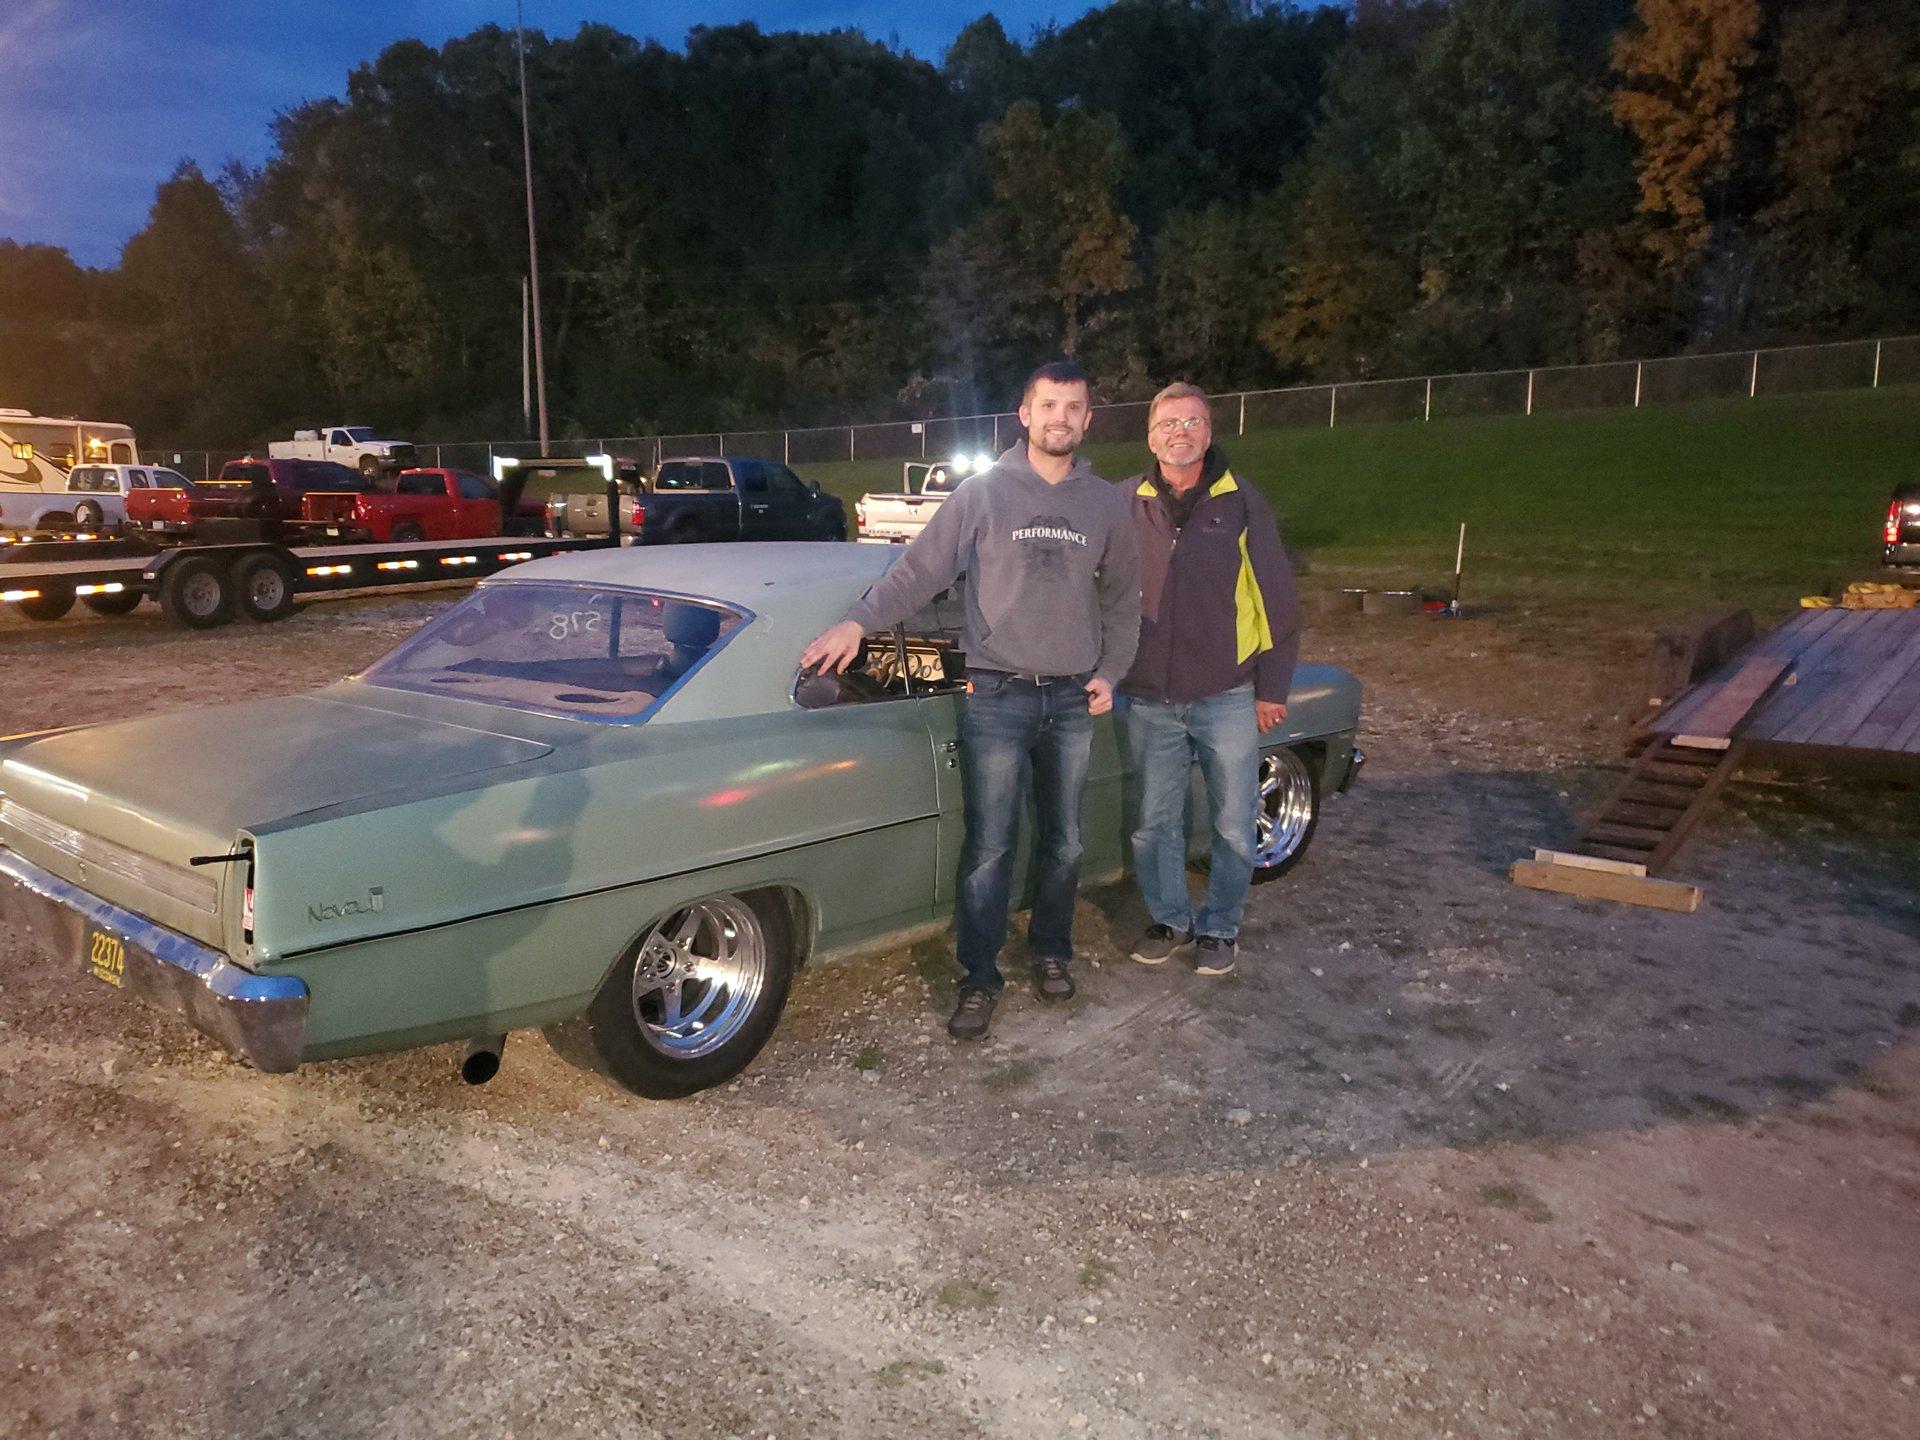
Also, since everybody names their cars, came up with one for mine. Guys at my work call me scarecrow Joe,(long story) but it kinda fits the description of the car with what color it is and birds tend to land on it as well lol. So officially going to call it Scarecrow.
<span style="font-family: arial"><font color="#000000">

 Reply With Quote


