

Results 1 to 20 of 48
-
03-06-2019 #1
 Registered User
- Join Date
- Jul 2017
- Posts
- 166
68 Camaro Build with Gen V Motor Swap
Hello,
I wanted to share my build thread here with you guys, I started it on ls1tech since I have been using them for info since day one. I find myself frequenting this site more and more as you are more responsive to questions I have so maybe you can chime in if you see me doing something wrong or assist if I have any questions.
My build is about having a modern driving car with the latest and greatest drivetrain parts at a reasonable price, new and used parts will be used to keep the cost down. I also planned on doing just about everything myself to keep the cost down but I ran into a lack of free time problem and had a shop do some fab work (that I regret) for me to speed things up. I planned on having it running by this spring but that aint happening, maybe by the fall?
Here's a link to ls1tech if you would like to see my progress and I'll pickup here where I left off. https://ls1tech.com/forums/conversio...en-v-swap.html
-
03-06-2019 #2
Registered User
- Join Date
- Jul 2017
- Posts
- 166
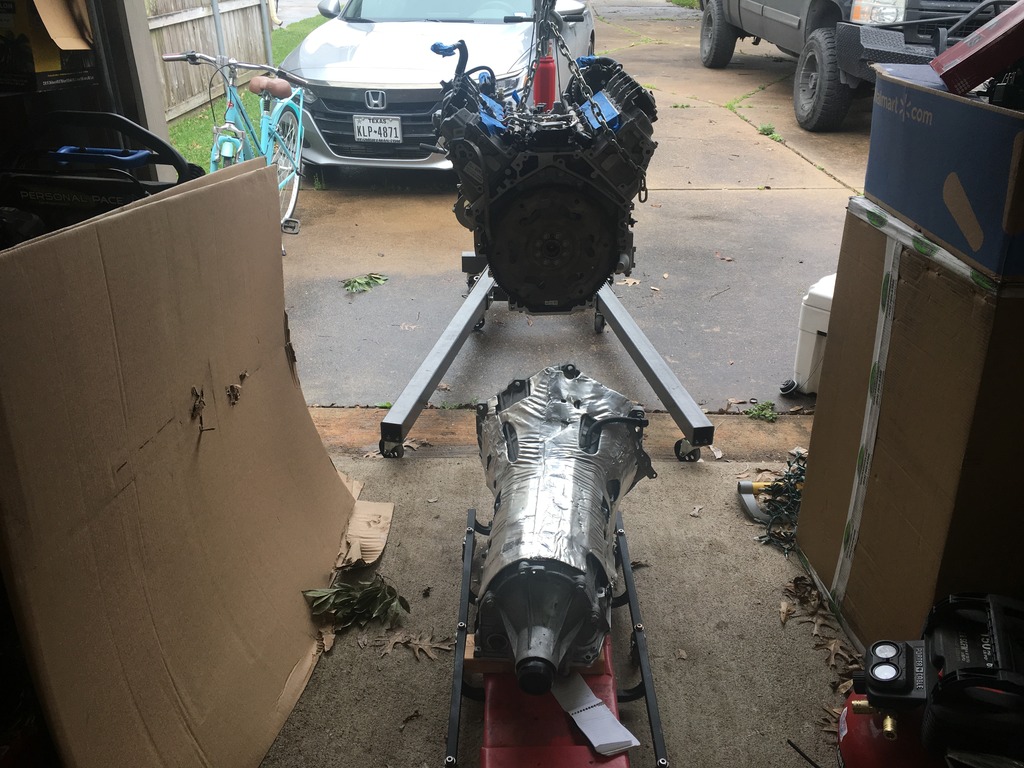
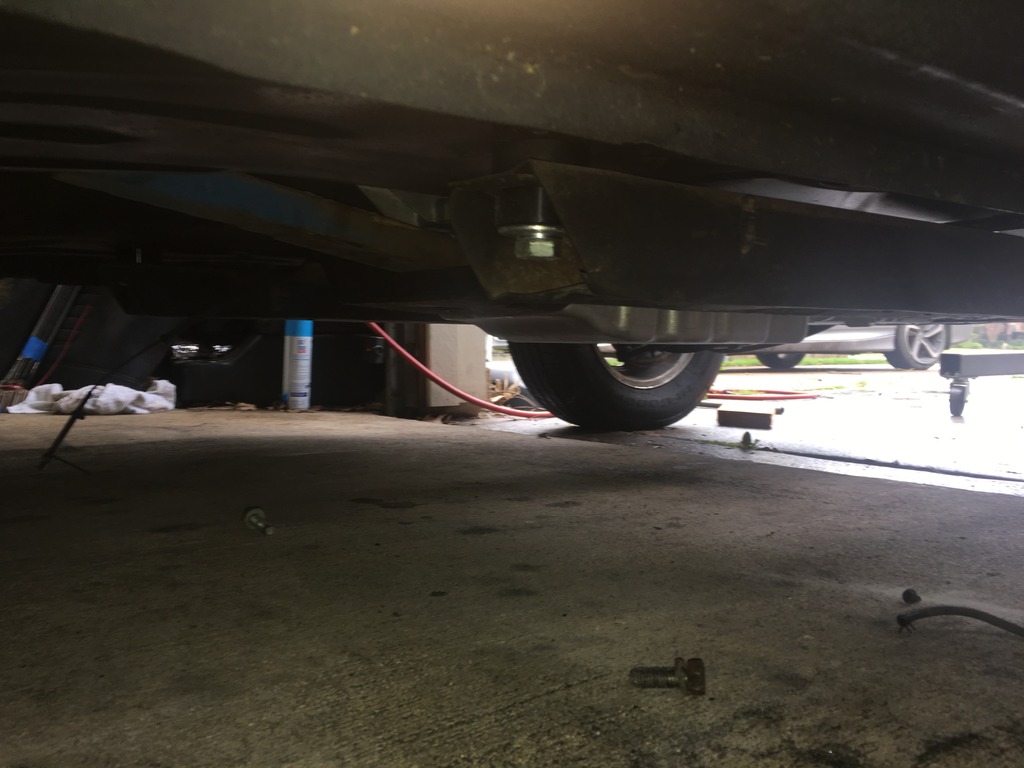
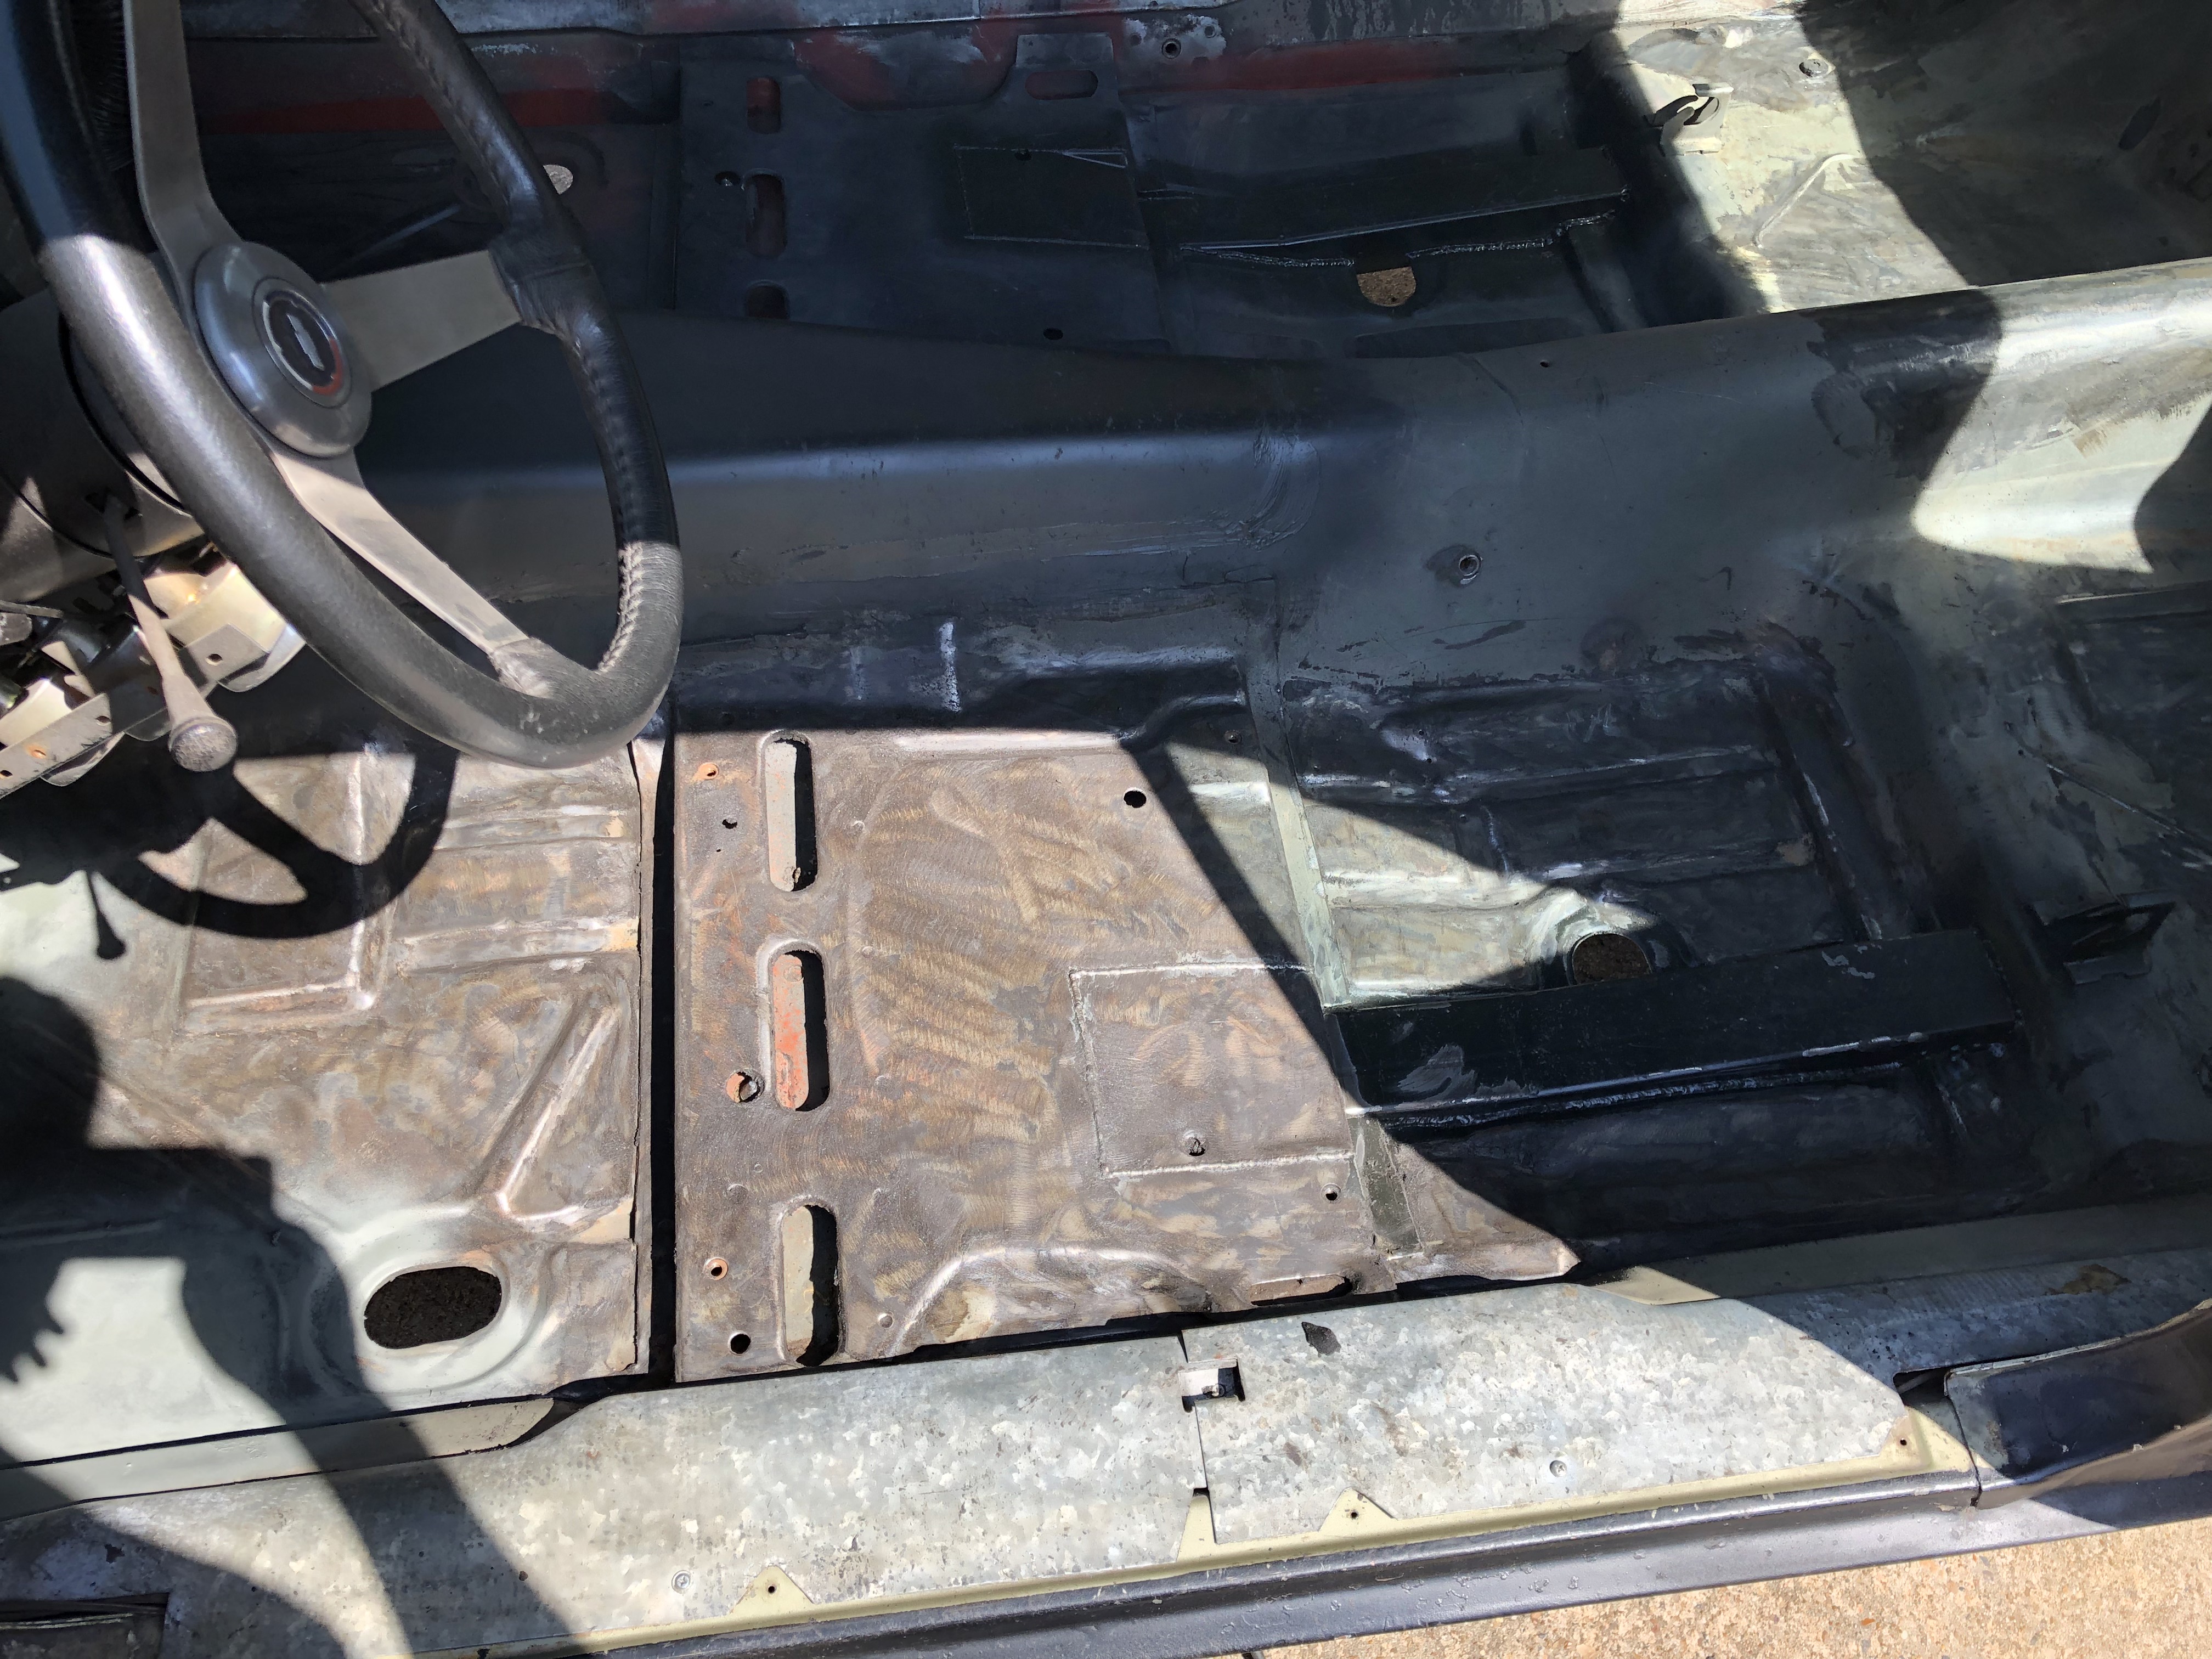
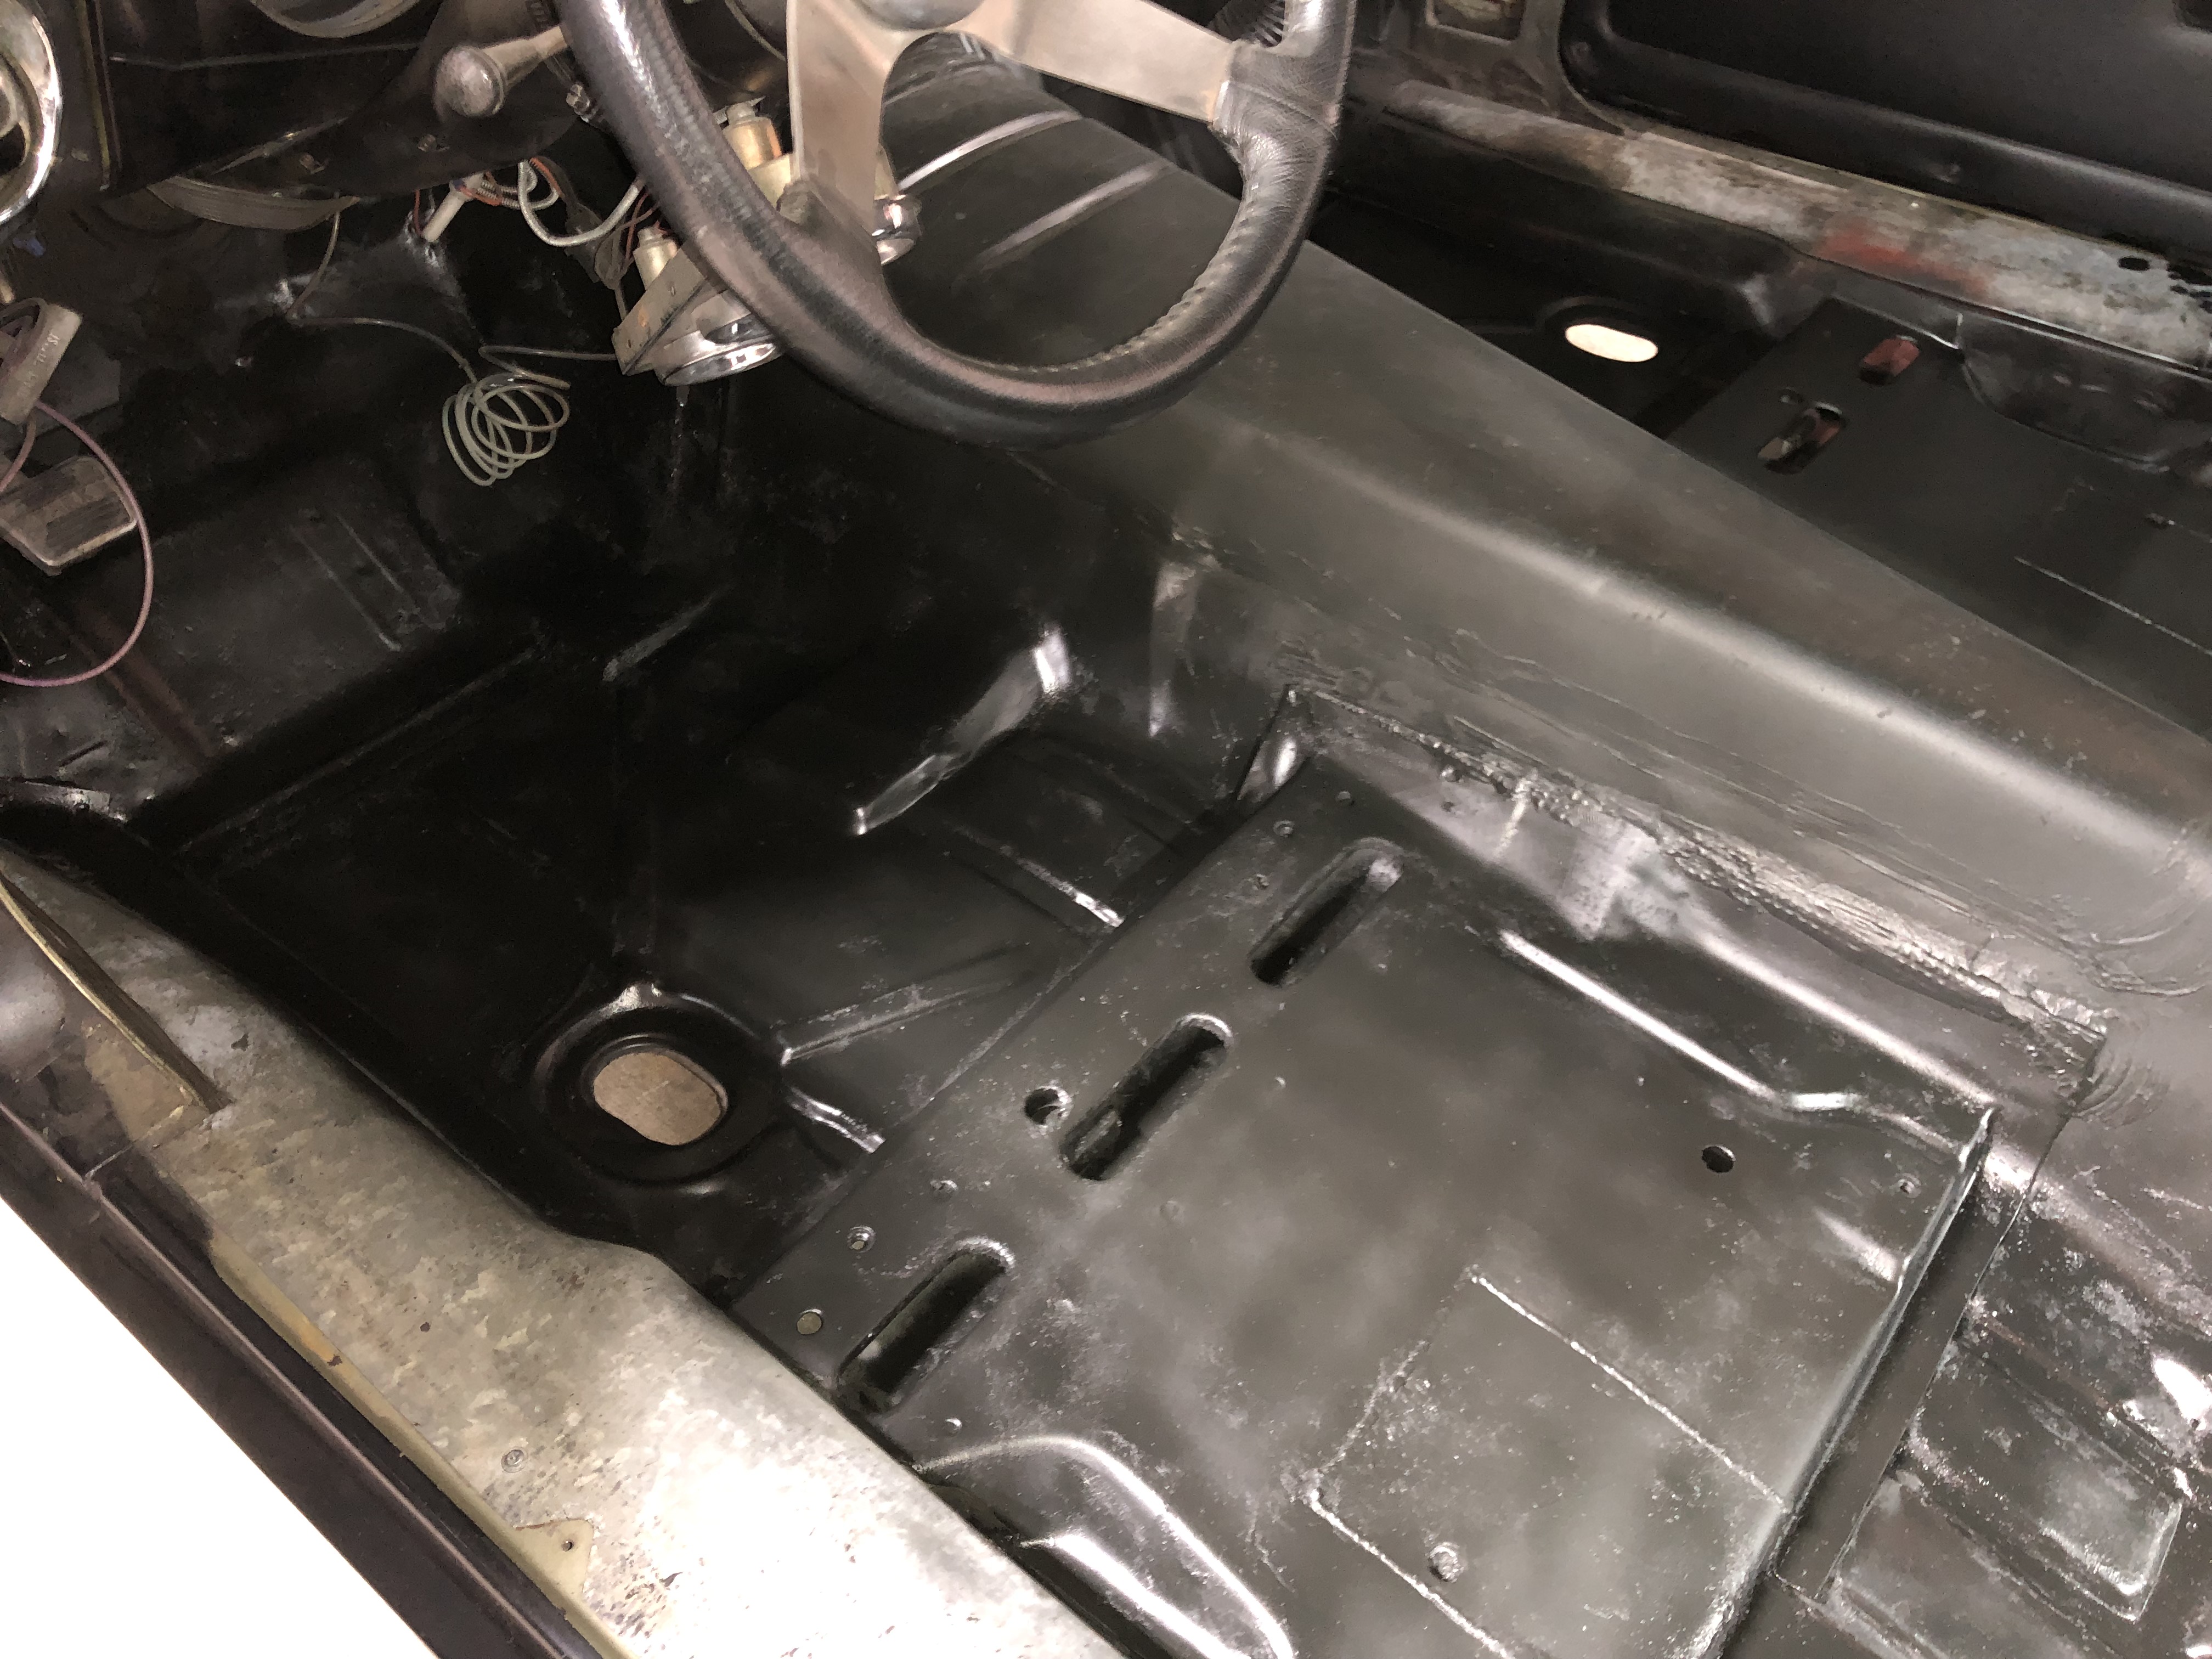
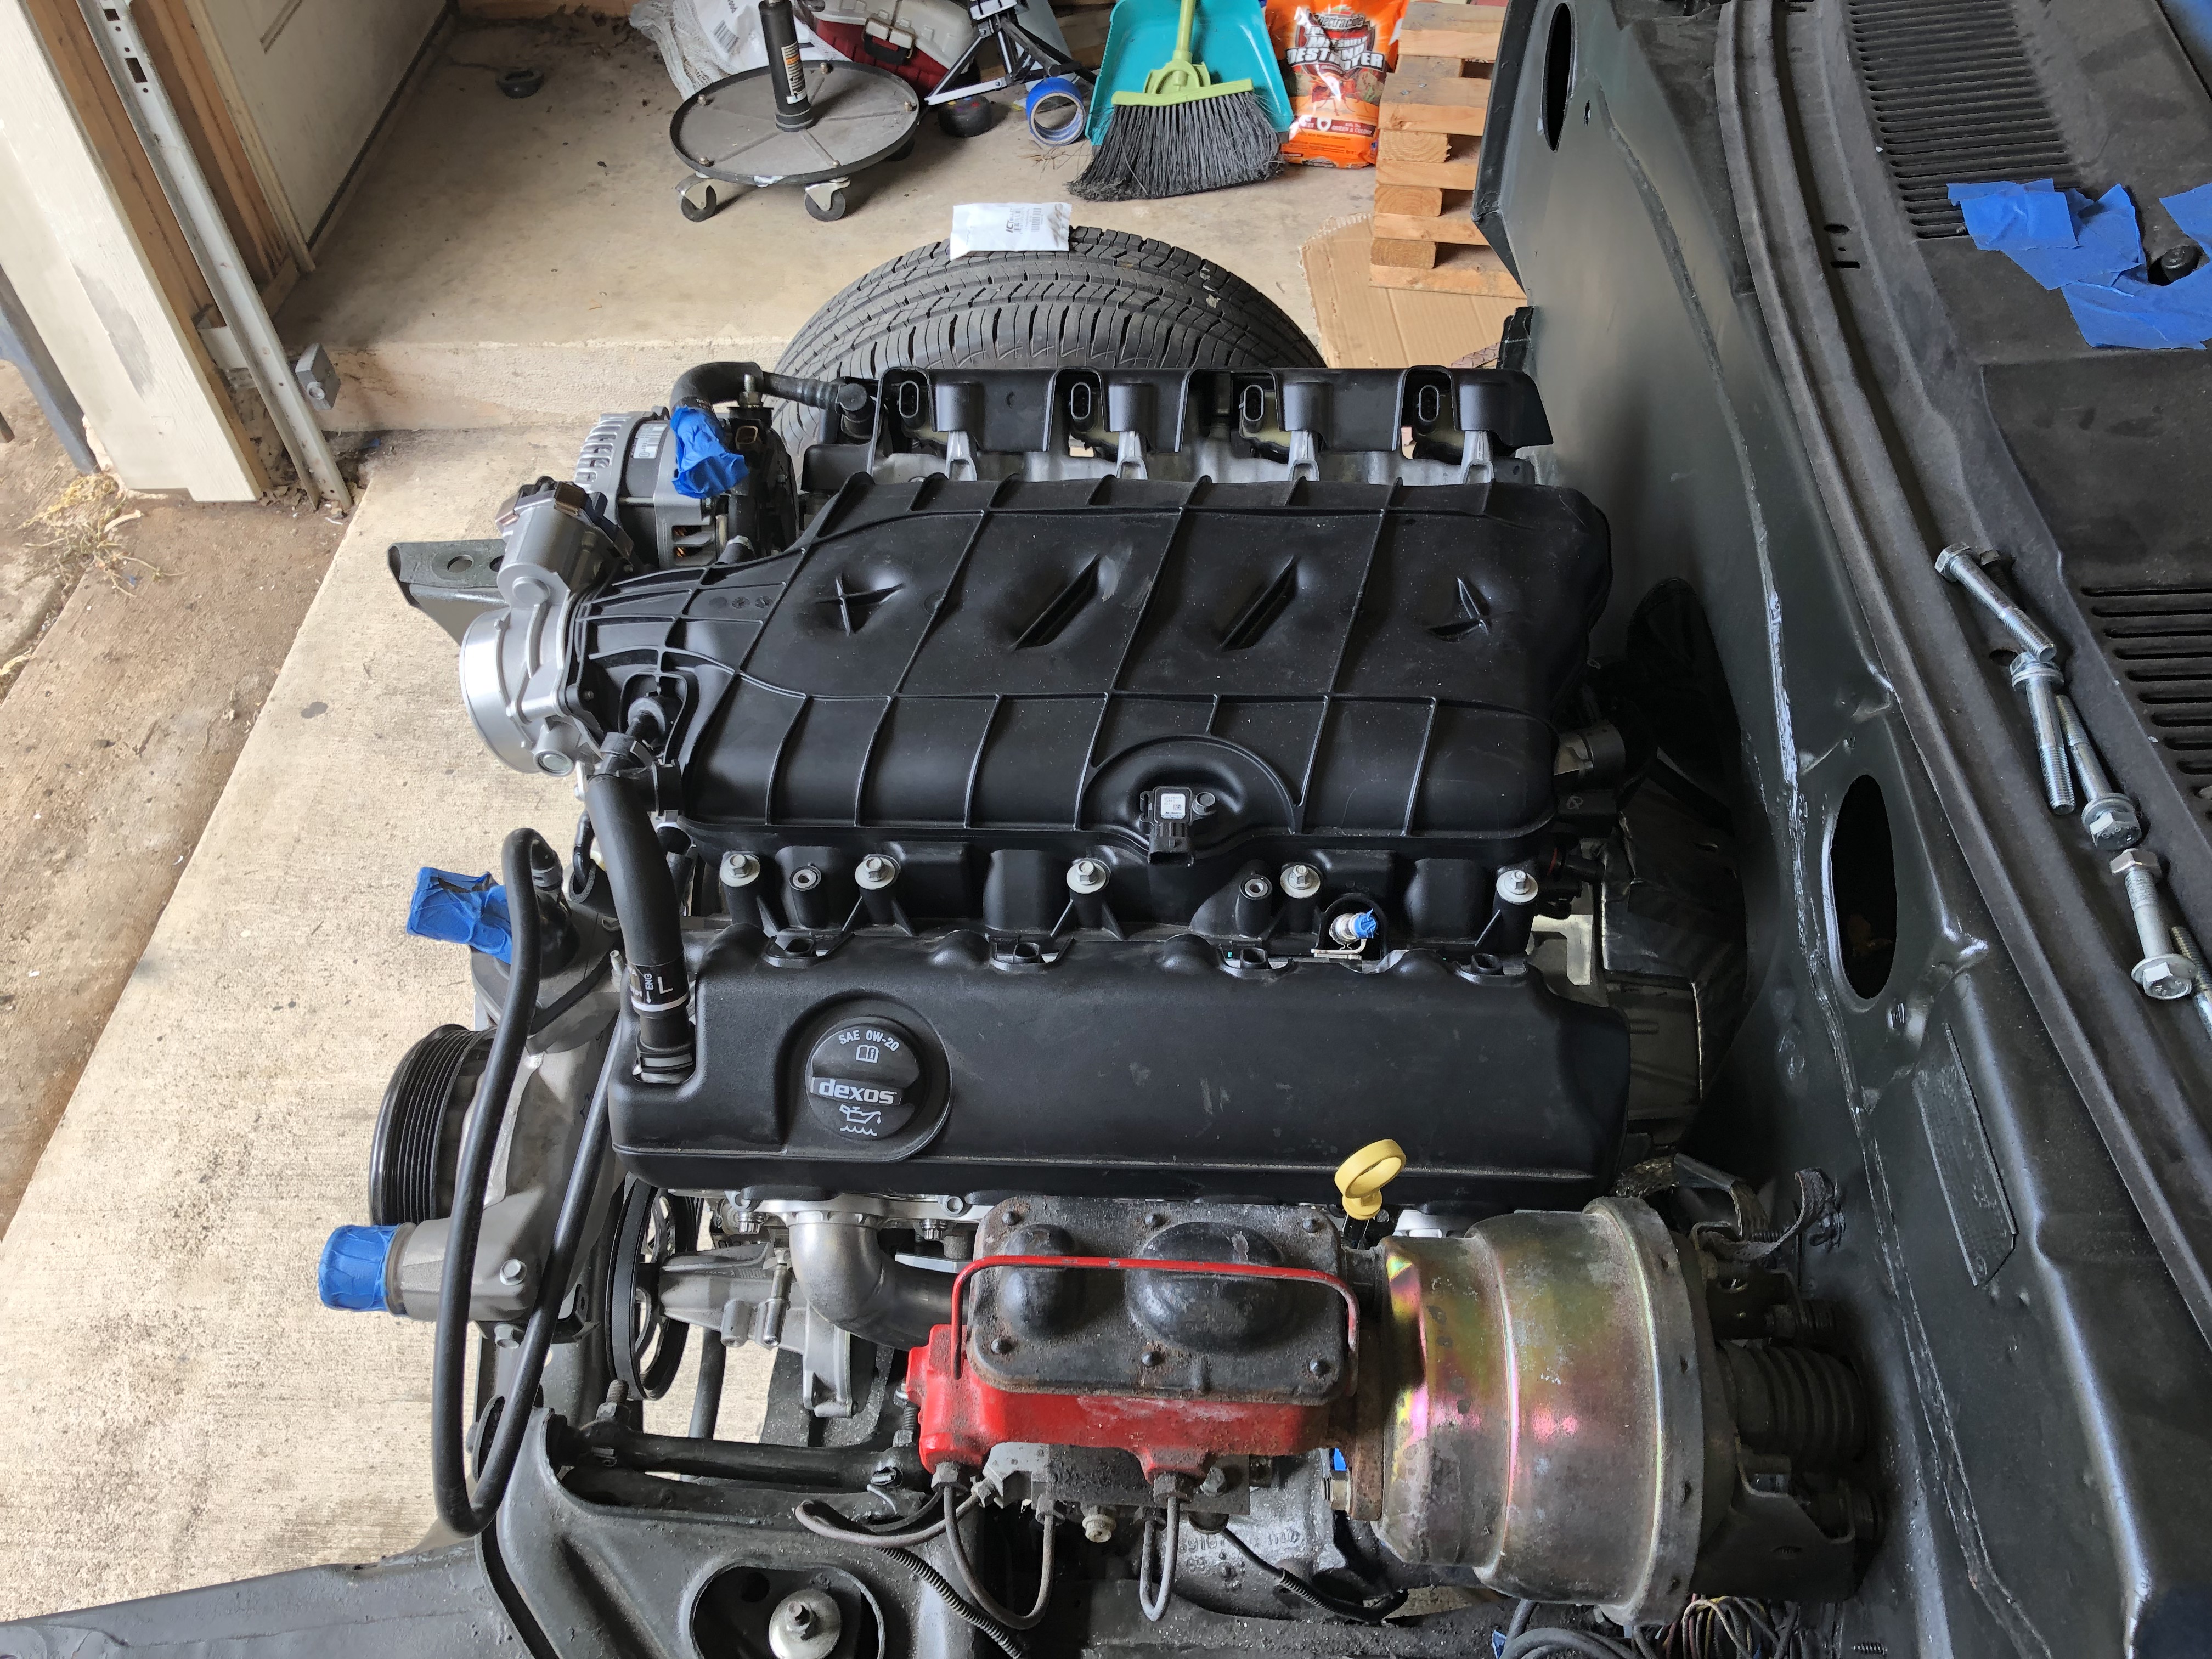
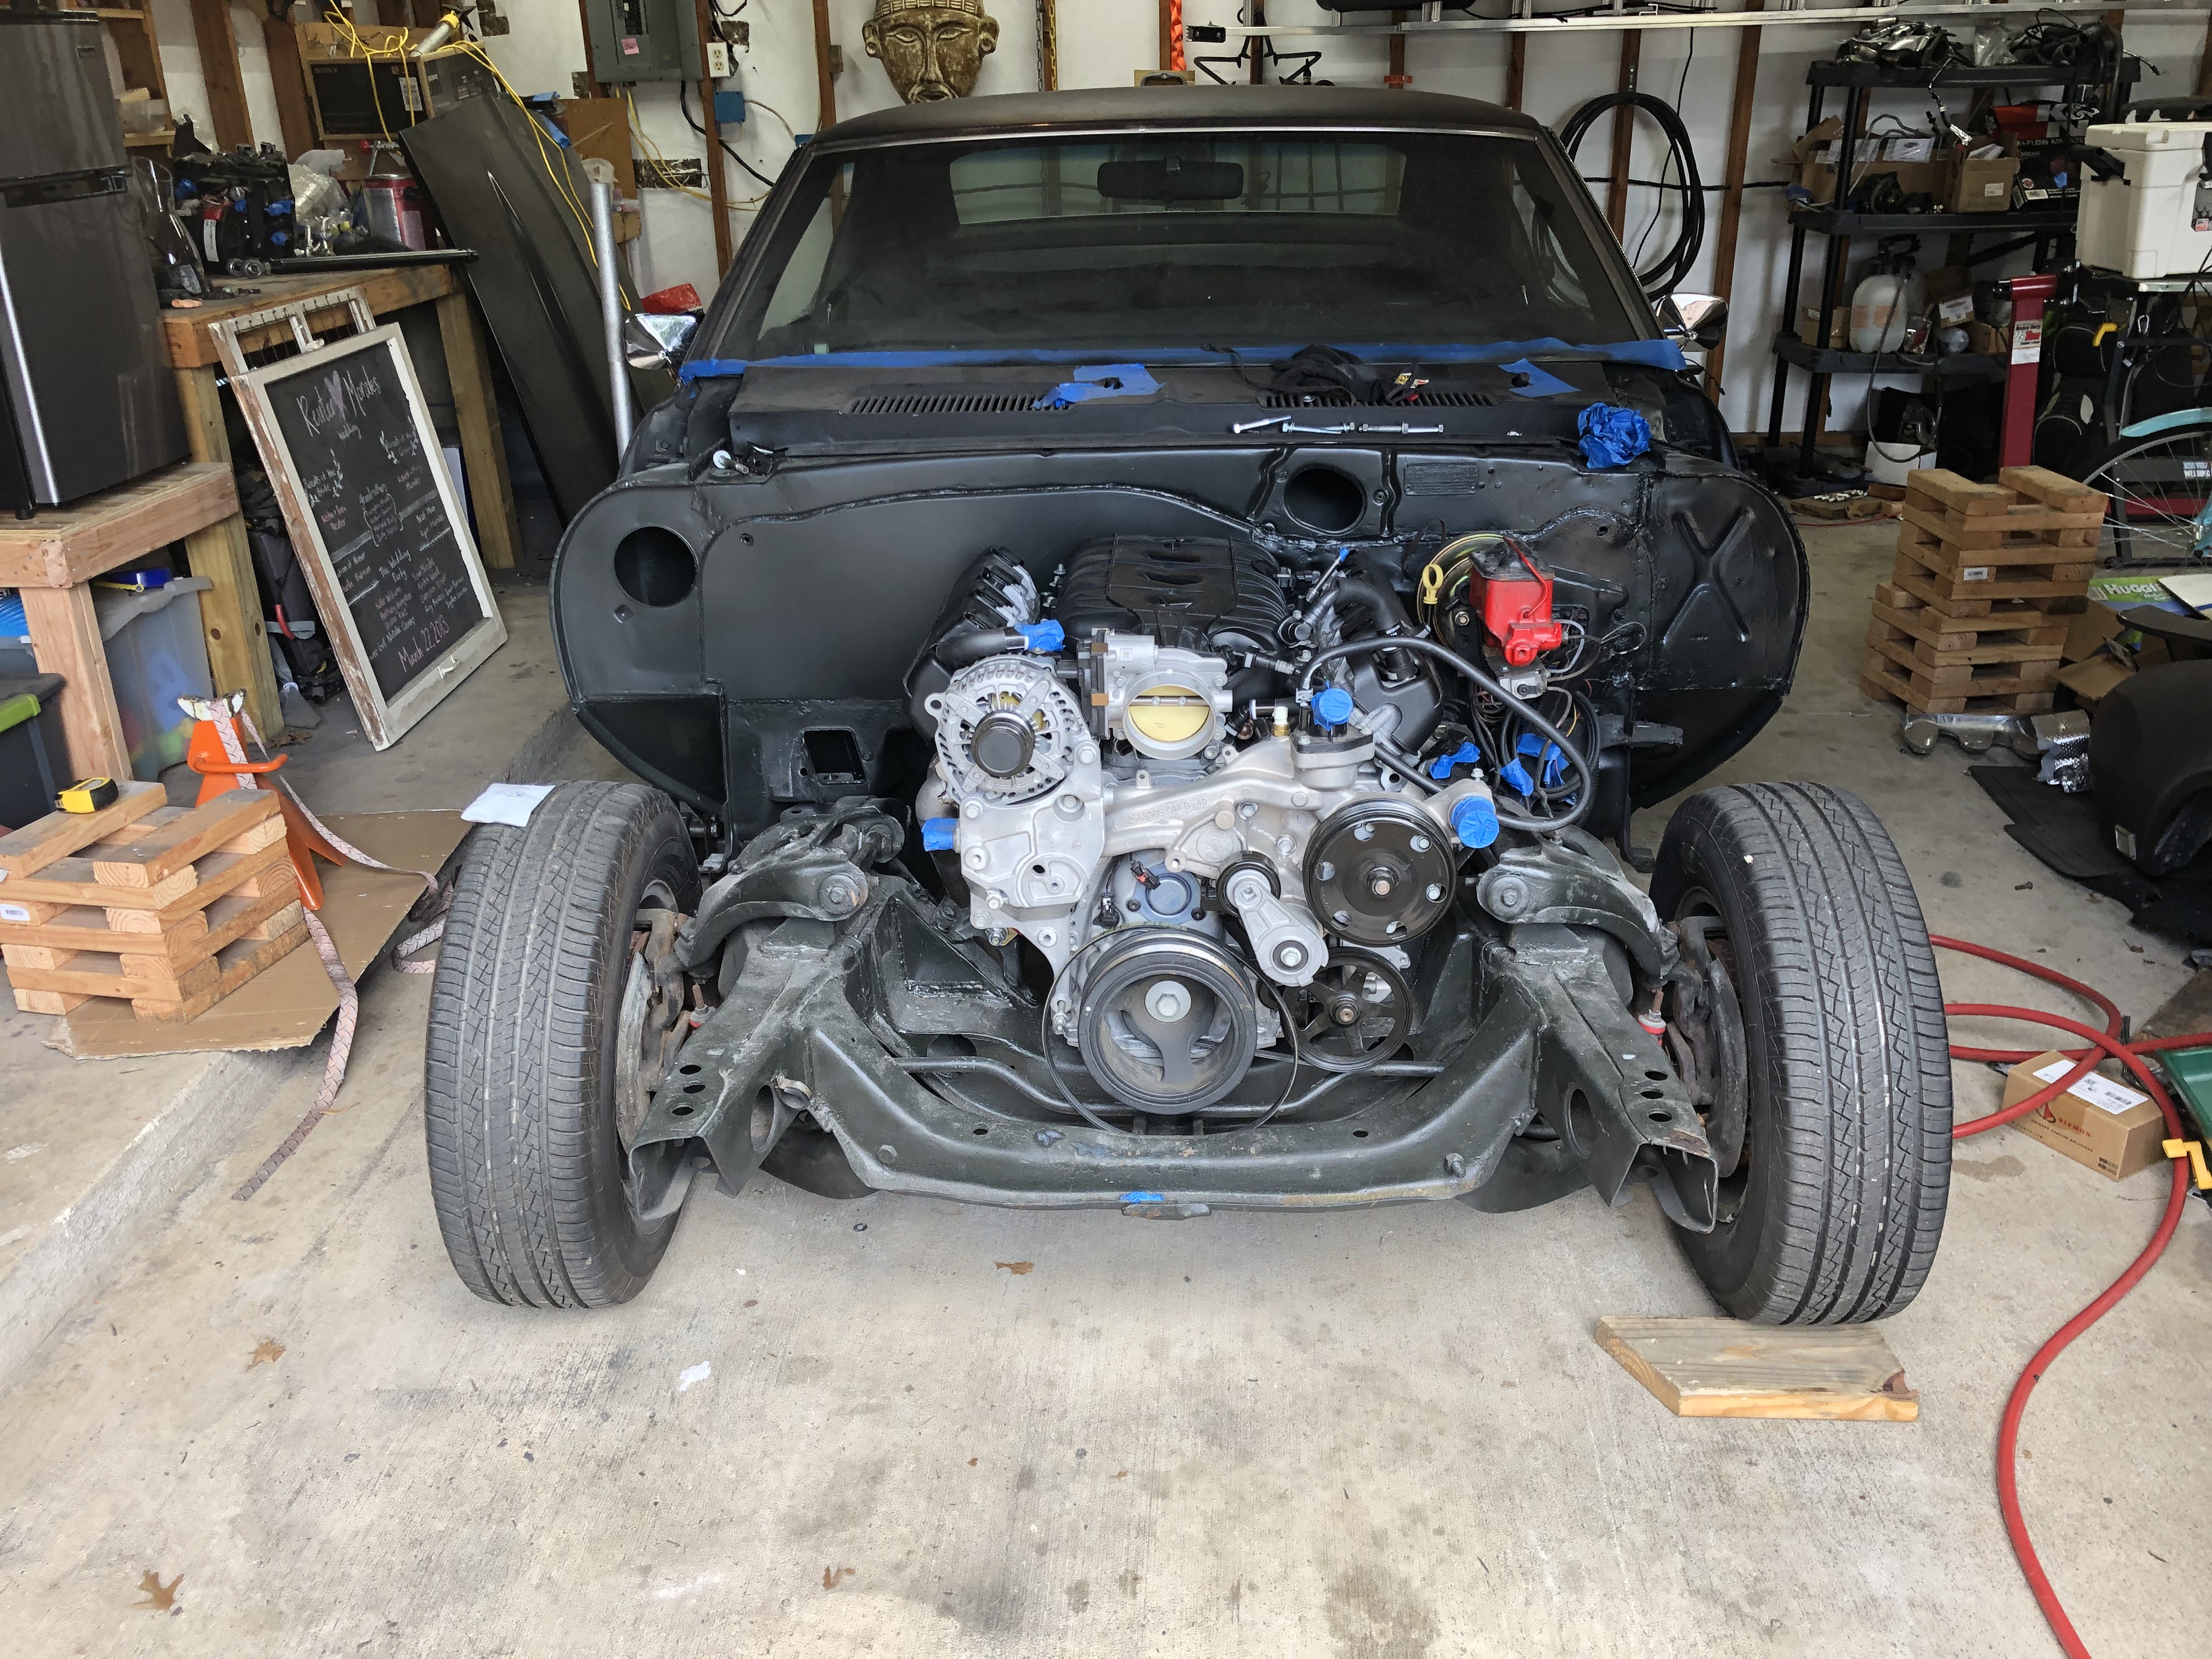
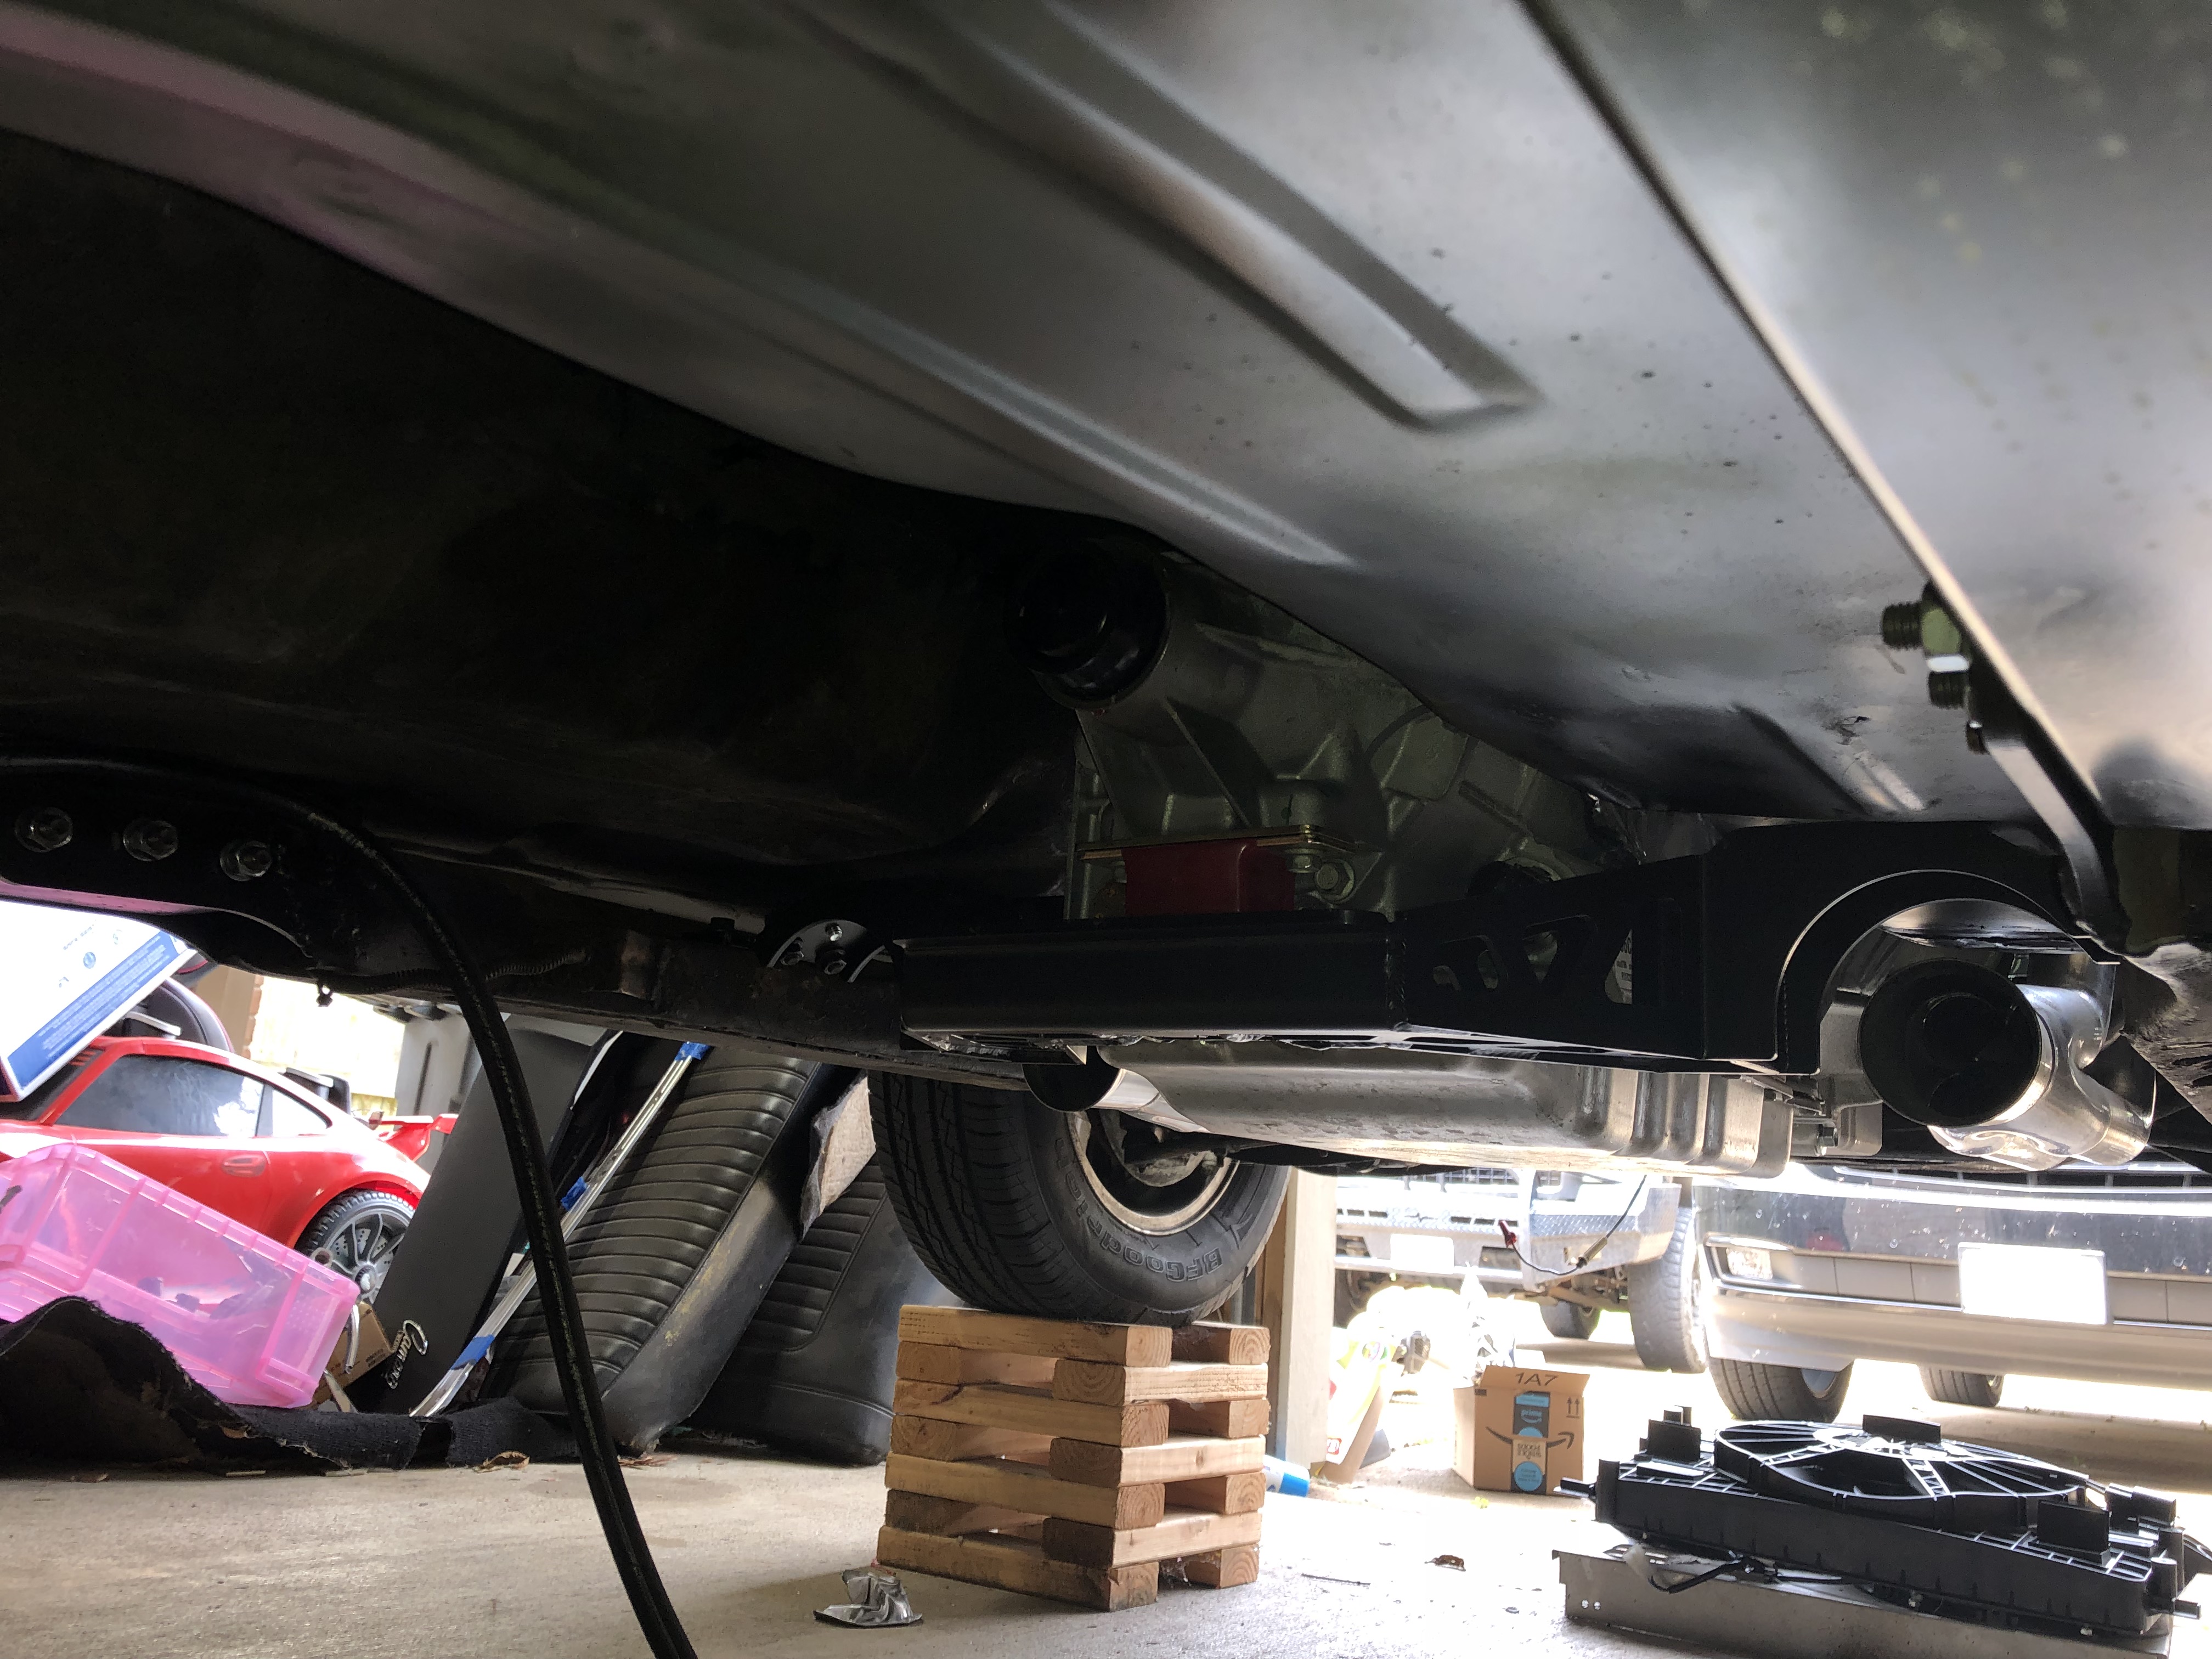
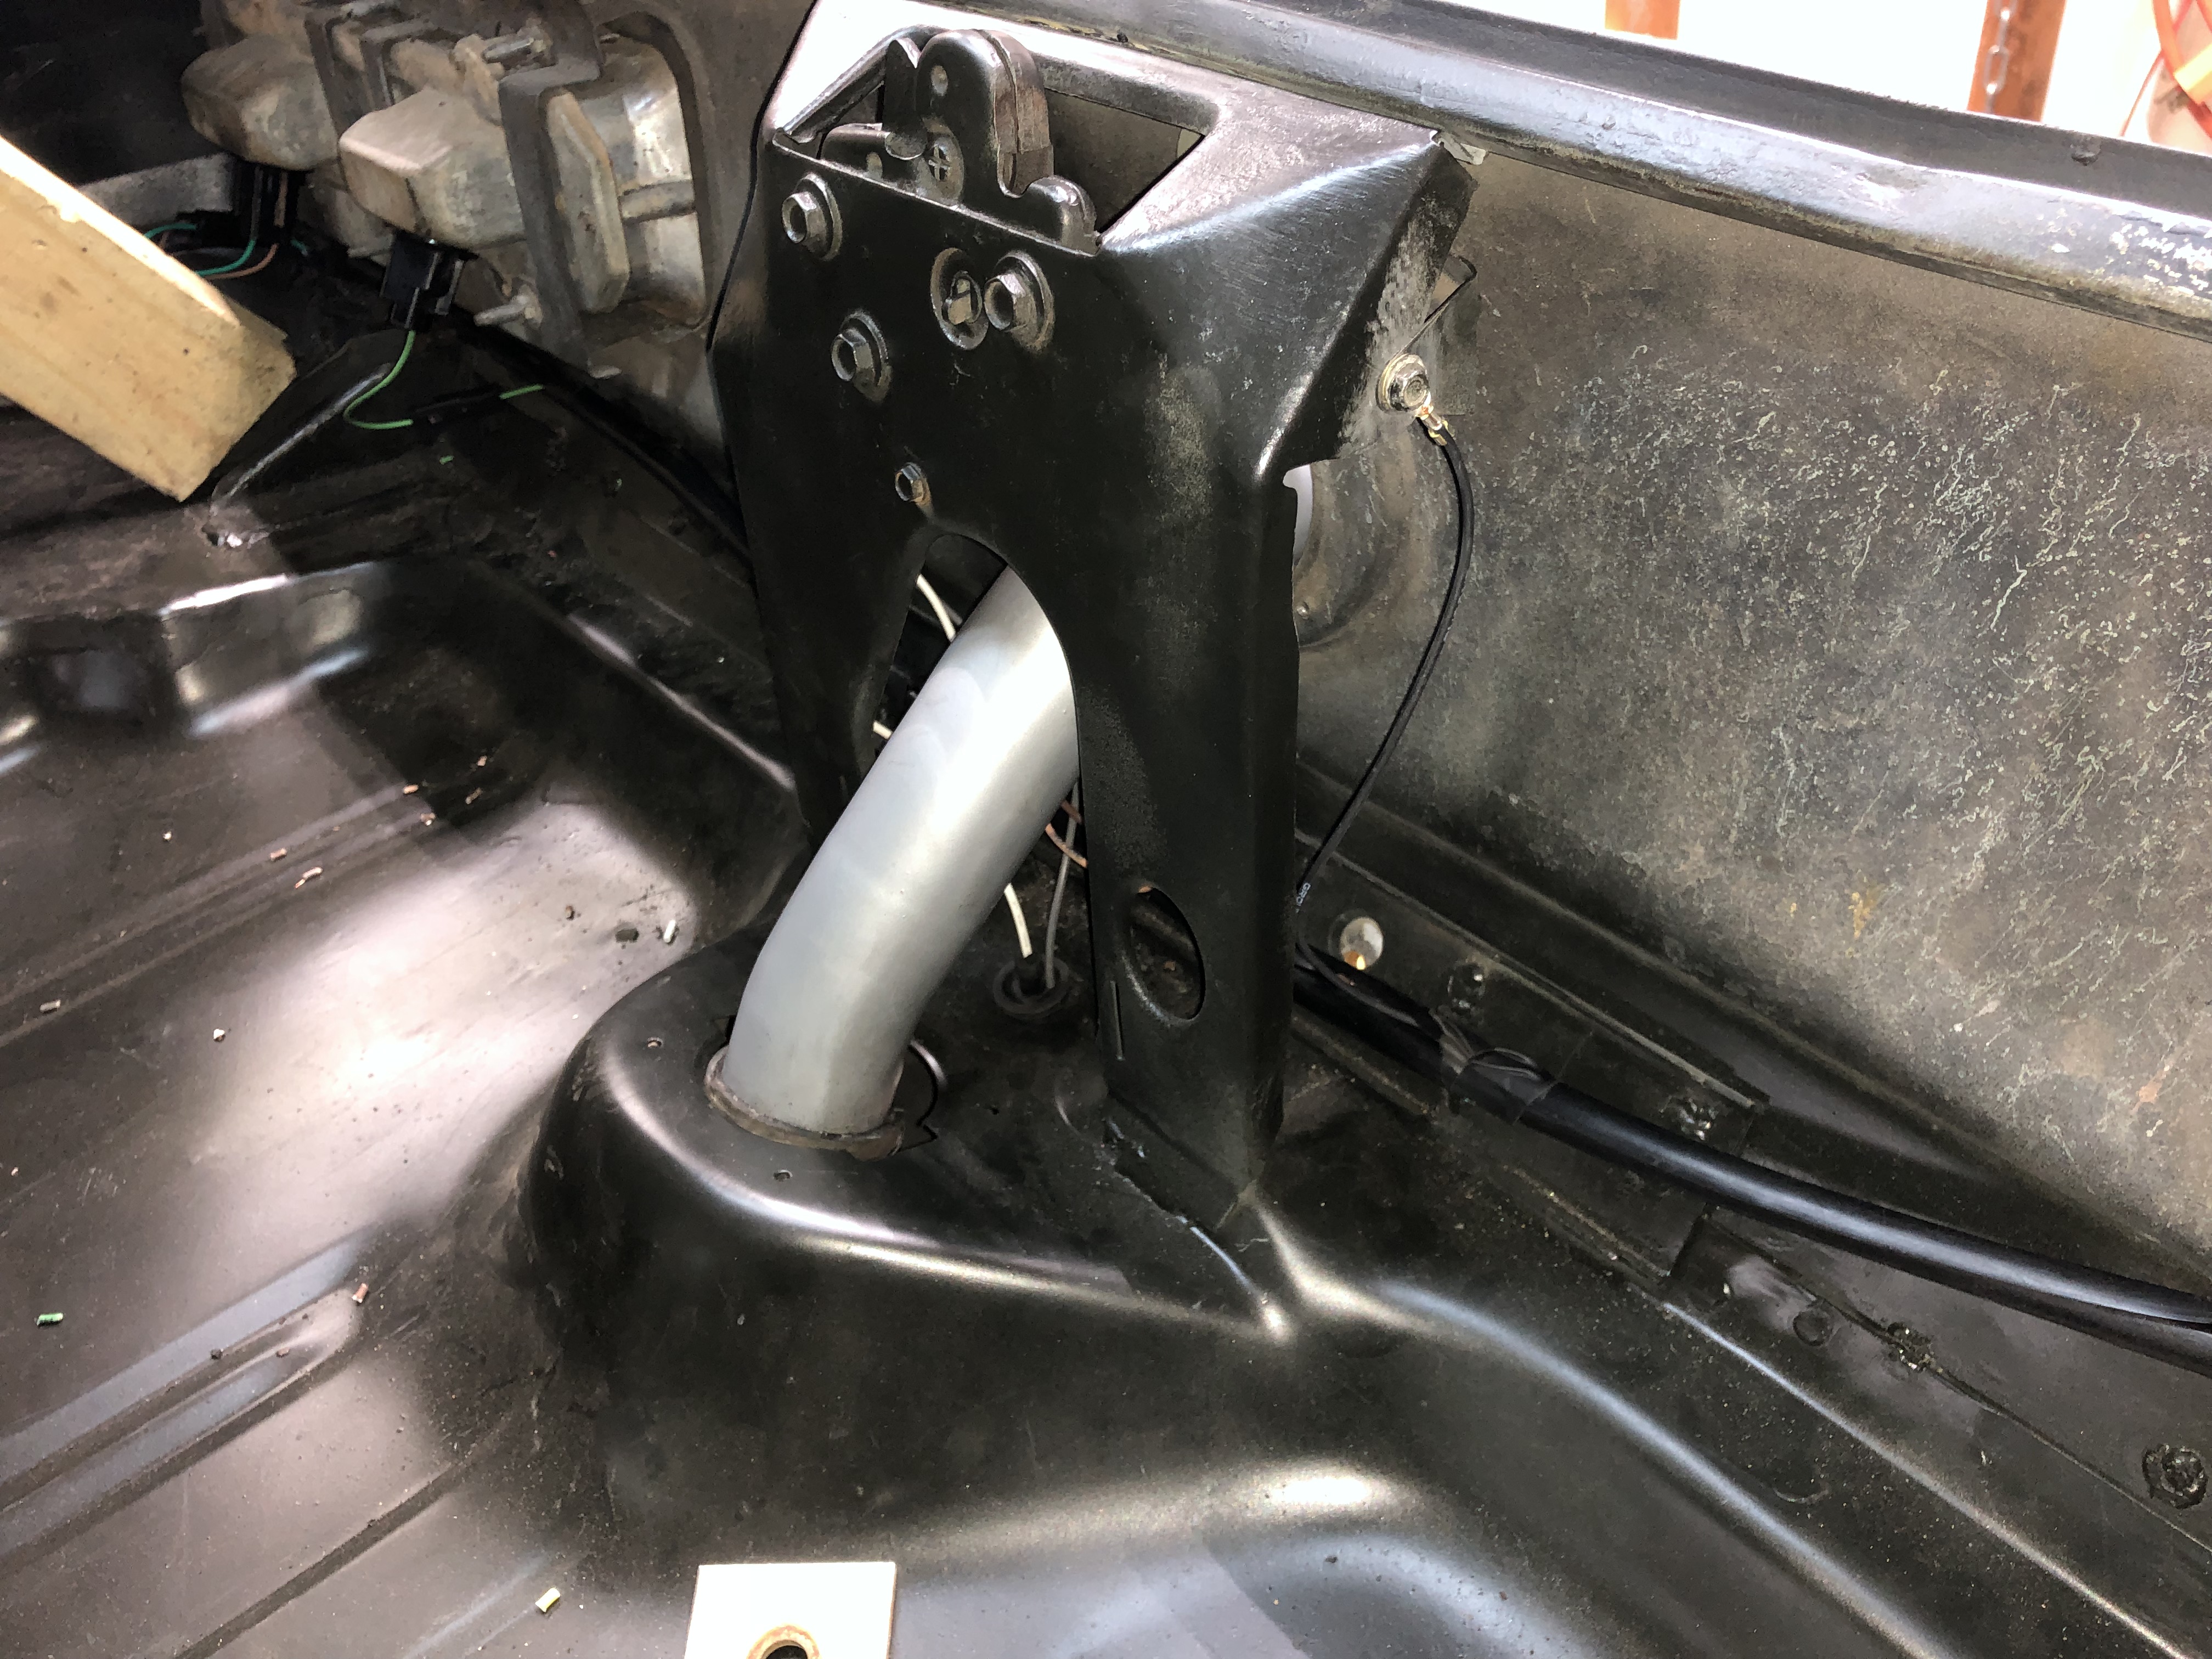
Now that I have stuck the motor in and out I figure it will be the last time I stick it in so I decided to test the fitment of the trans inside the raised tunnel. Of course, as I finished sticking it in I remembered wanting to shave down the power steering box a little to clear the headers as mentioned when test fitting them. I might be able to keep the motor in there while I do it we'll see.
Here are some pics of me sticking it in there trying not to dent the firewall. Speaking of firewall, I took off the cowl vent and hammered out the remaining dents and put a little filler and smoothed it out some. Came out nice, not perfect but easy on the eyes haha.
Trans has plenty of room in the tunnel and the ground clearance is good. I have not seen the trans pan on the car version of this 10 speed but the truck version's pan is not deep in my opinion. The trans is currently sitting on the stock crossmember and a 2x4. The crossmember was moved a few inches back by the previous owner to run the 700r4. I planed on using the same corssmember in the original position with a little cutting and welding to get it where I need it to be.

03-08-2019 #3
Registered User
- Join Date
- Jul 2017
- Posts
- 166
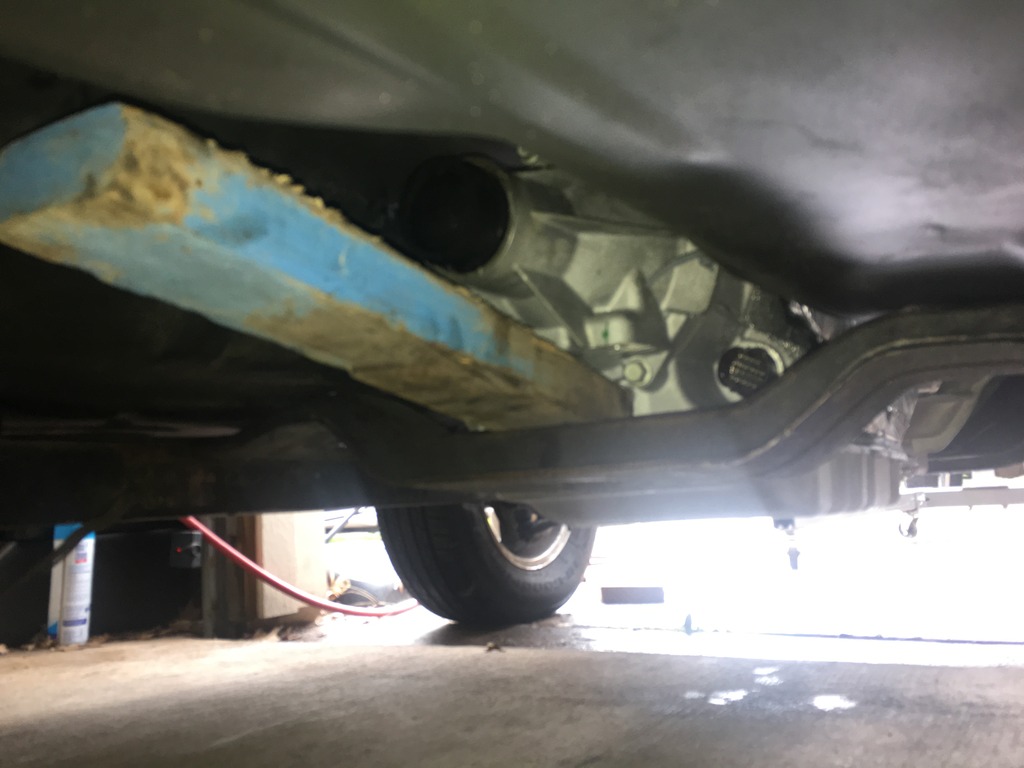
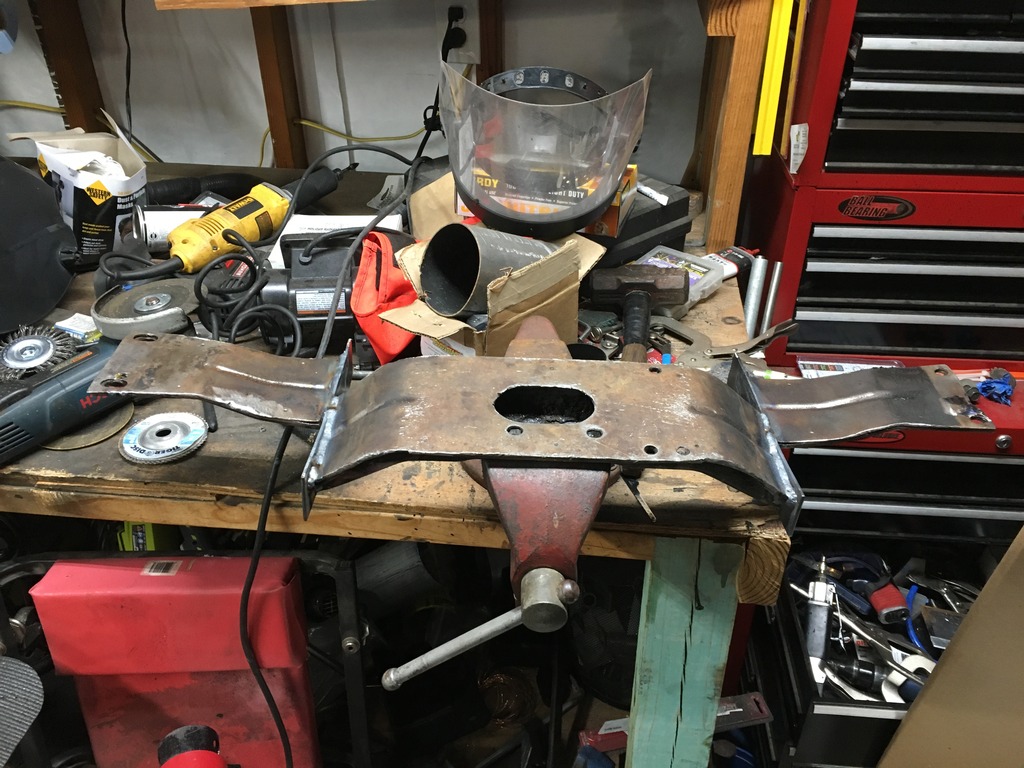
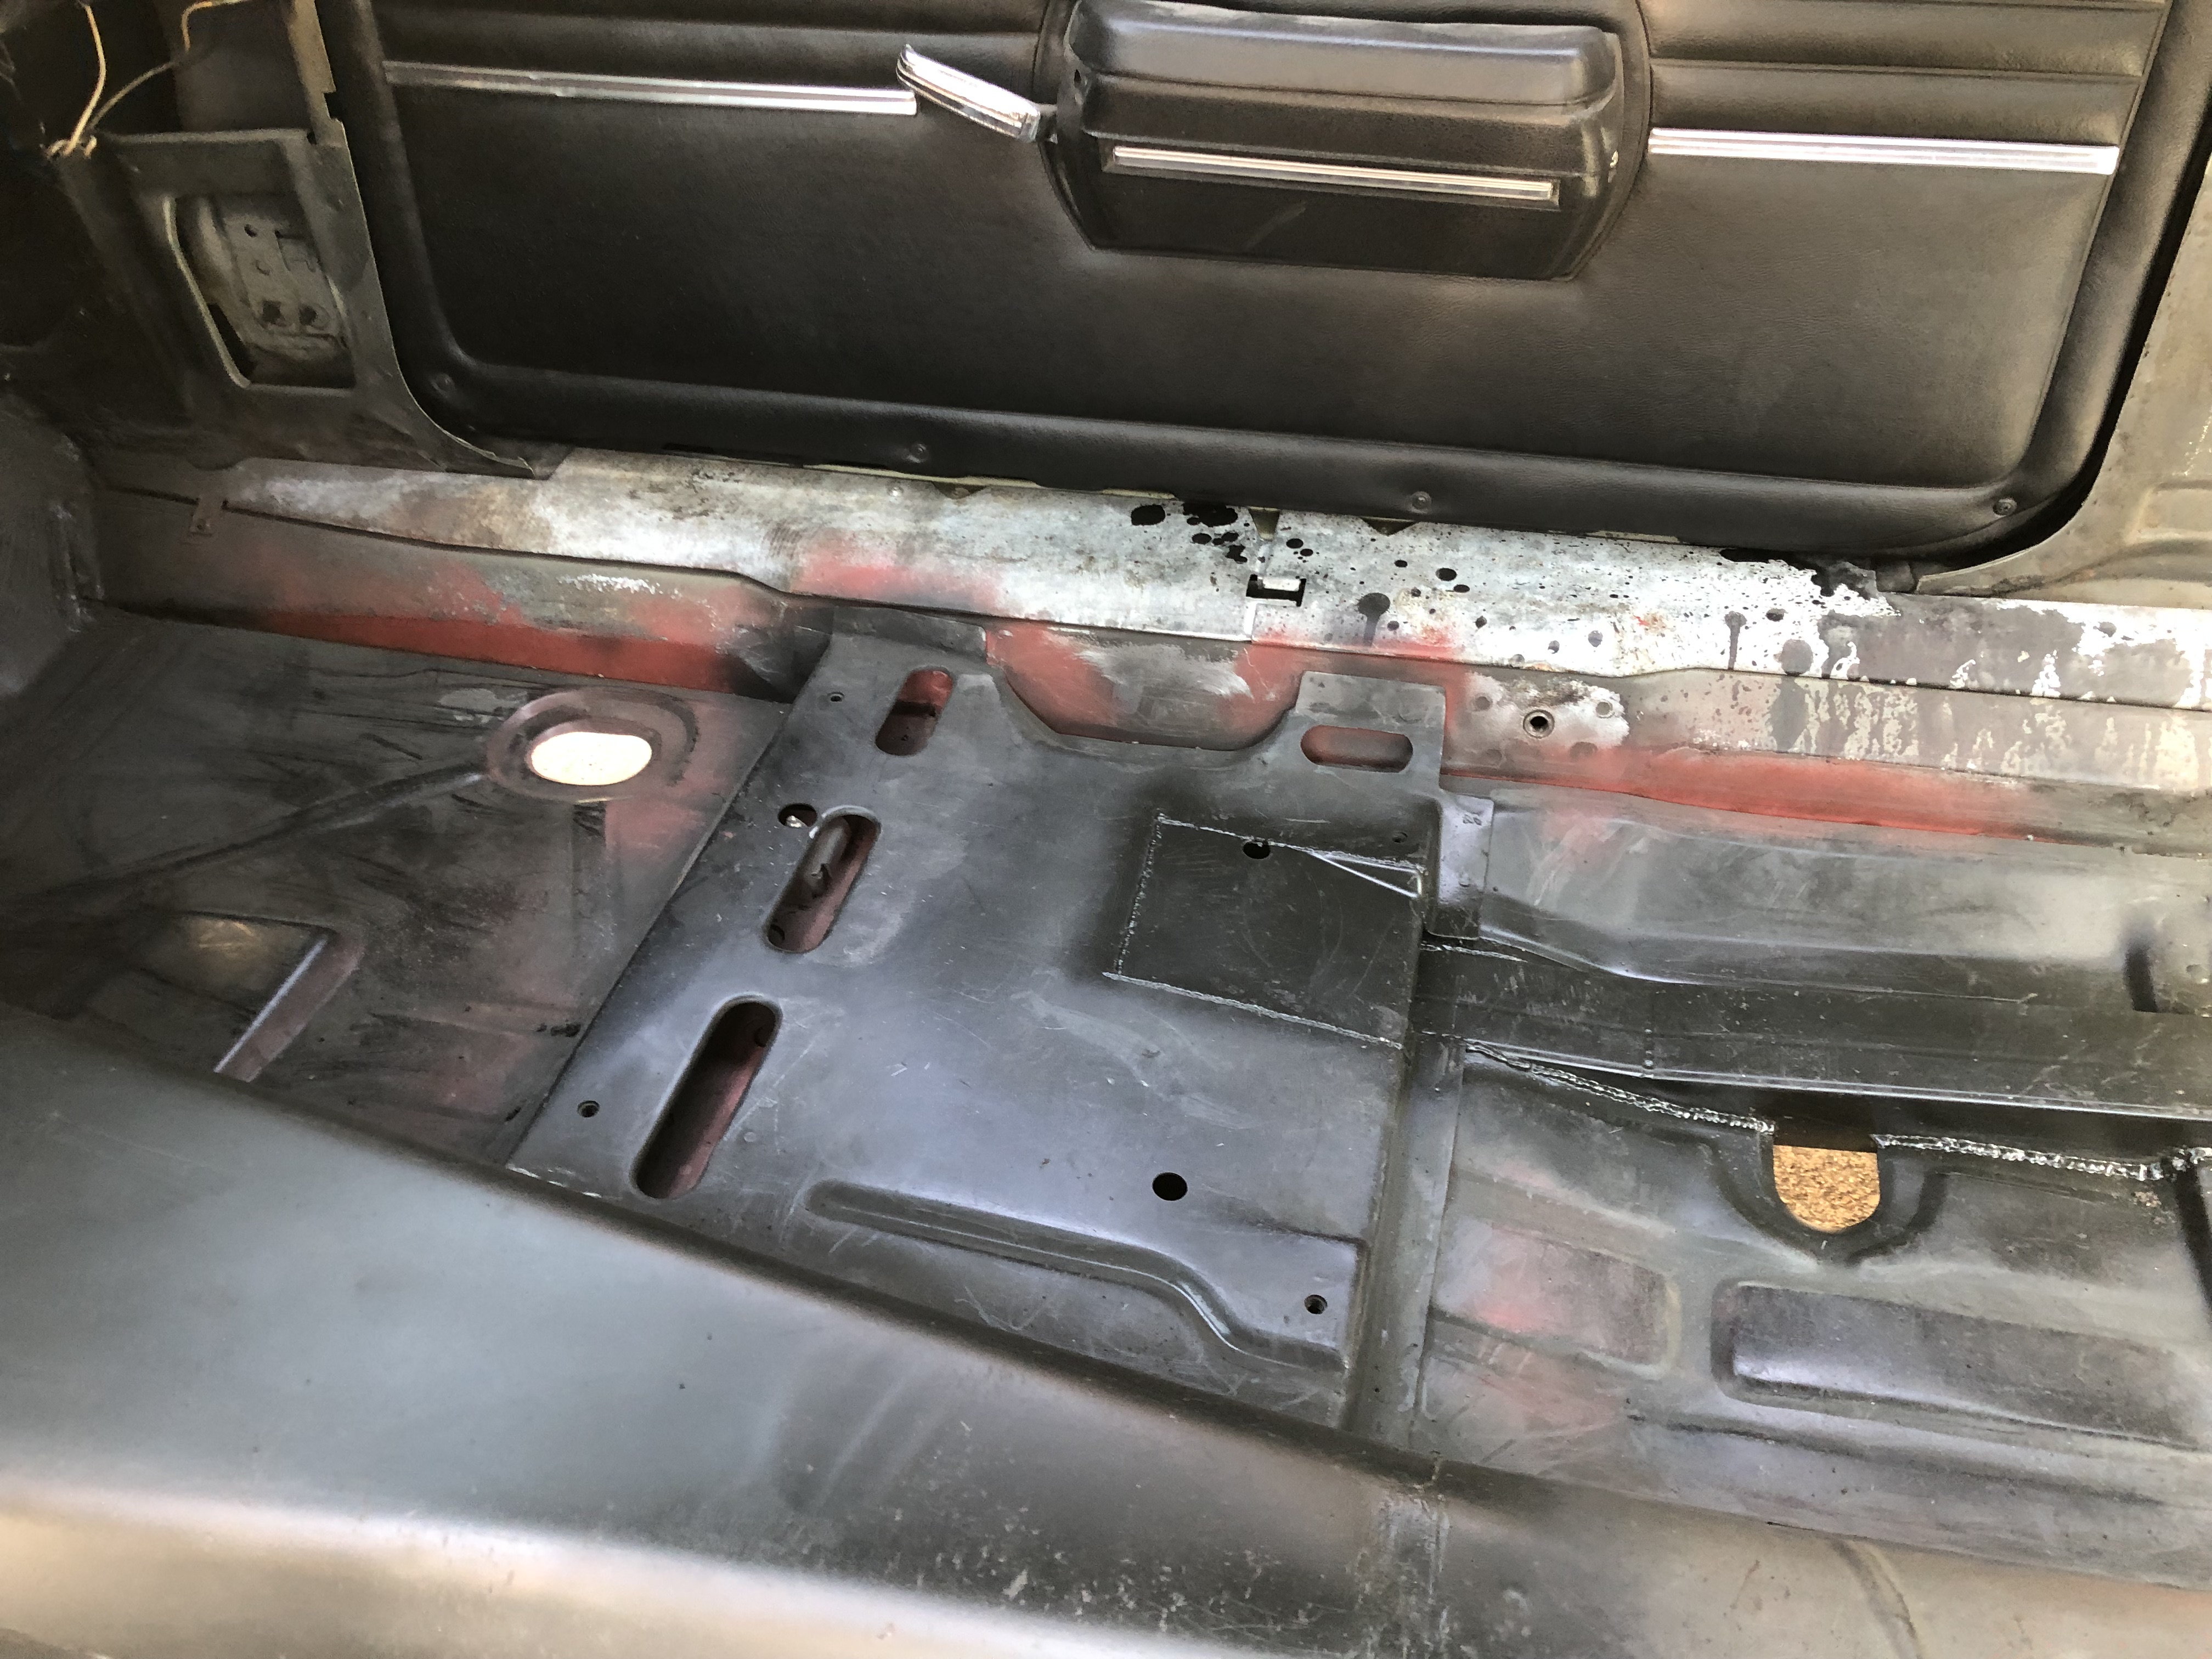
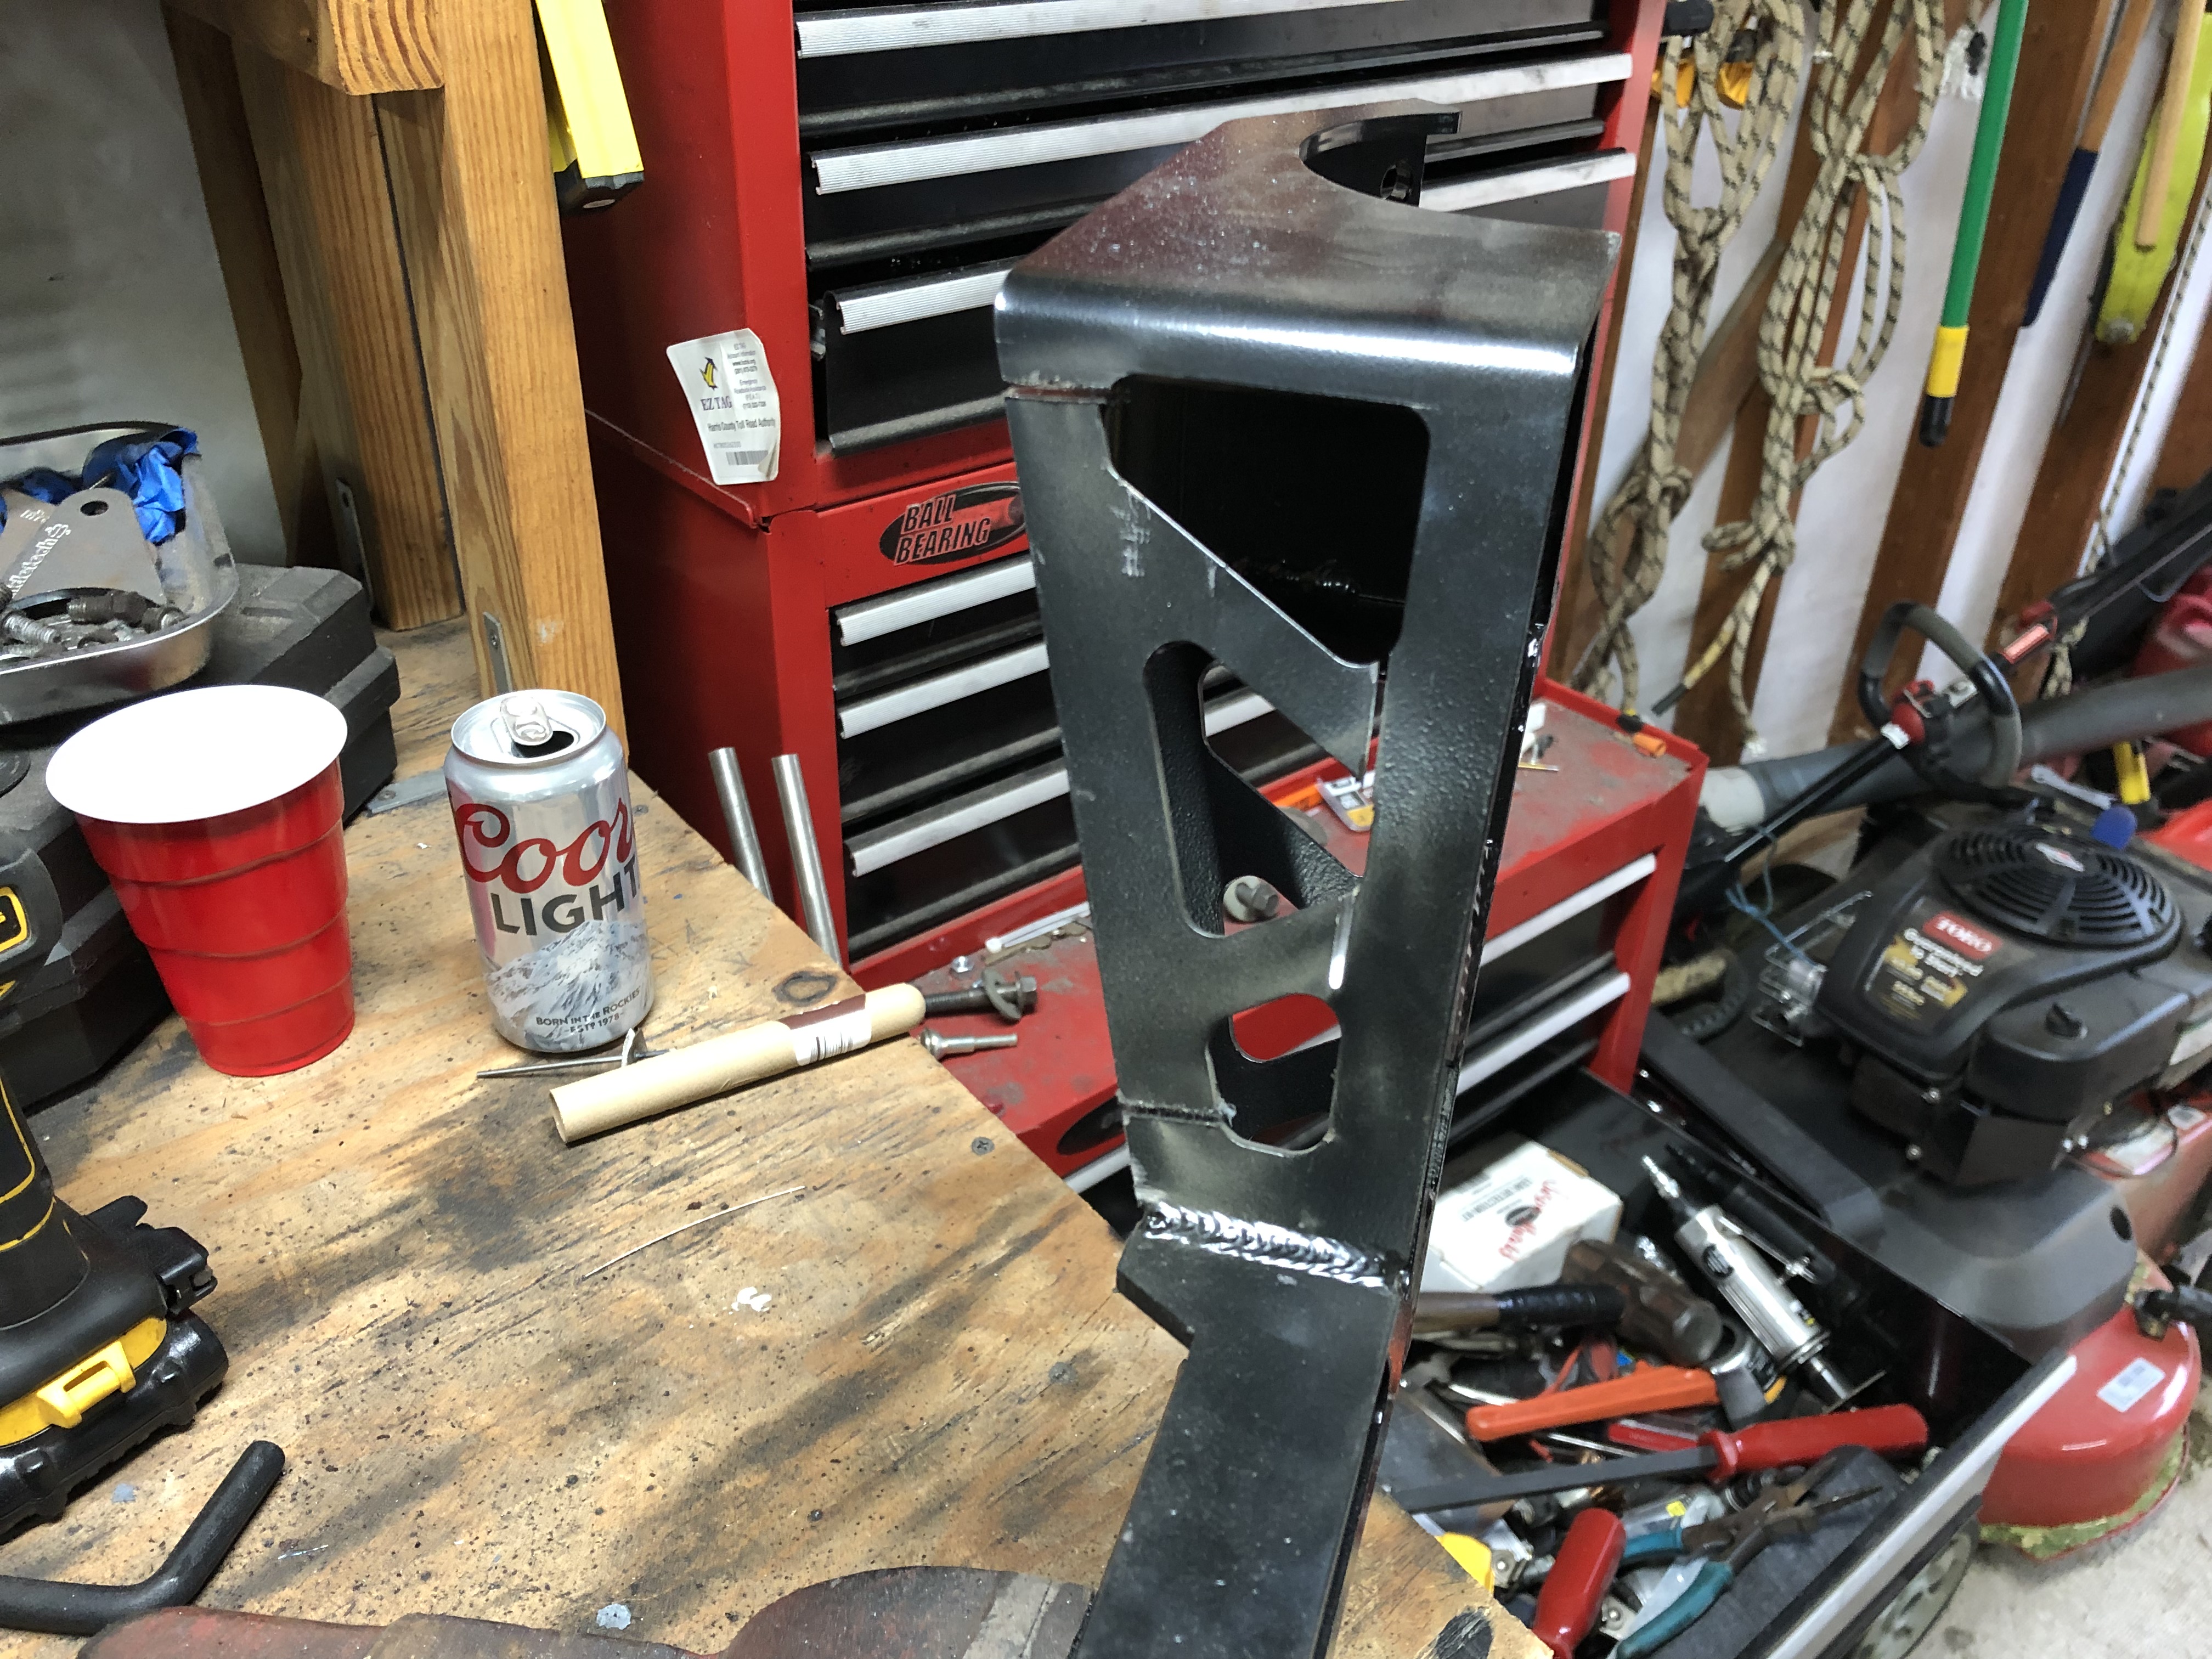
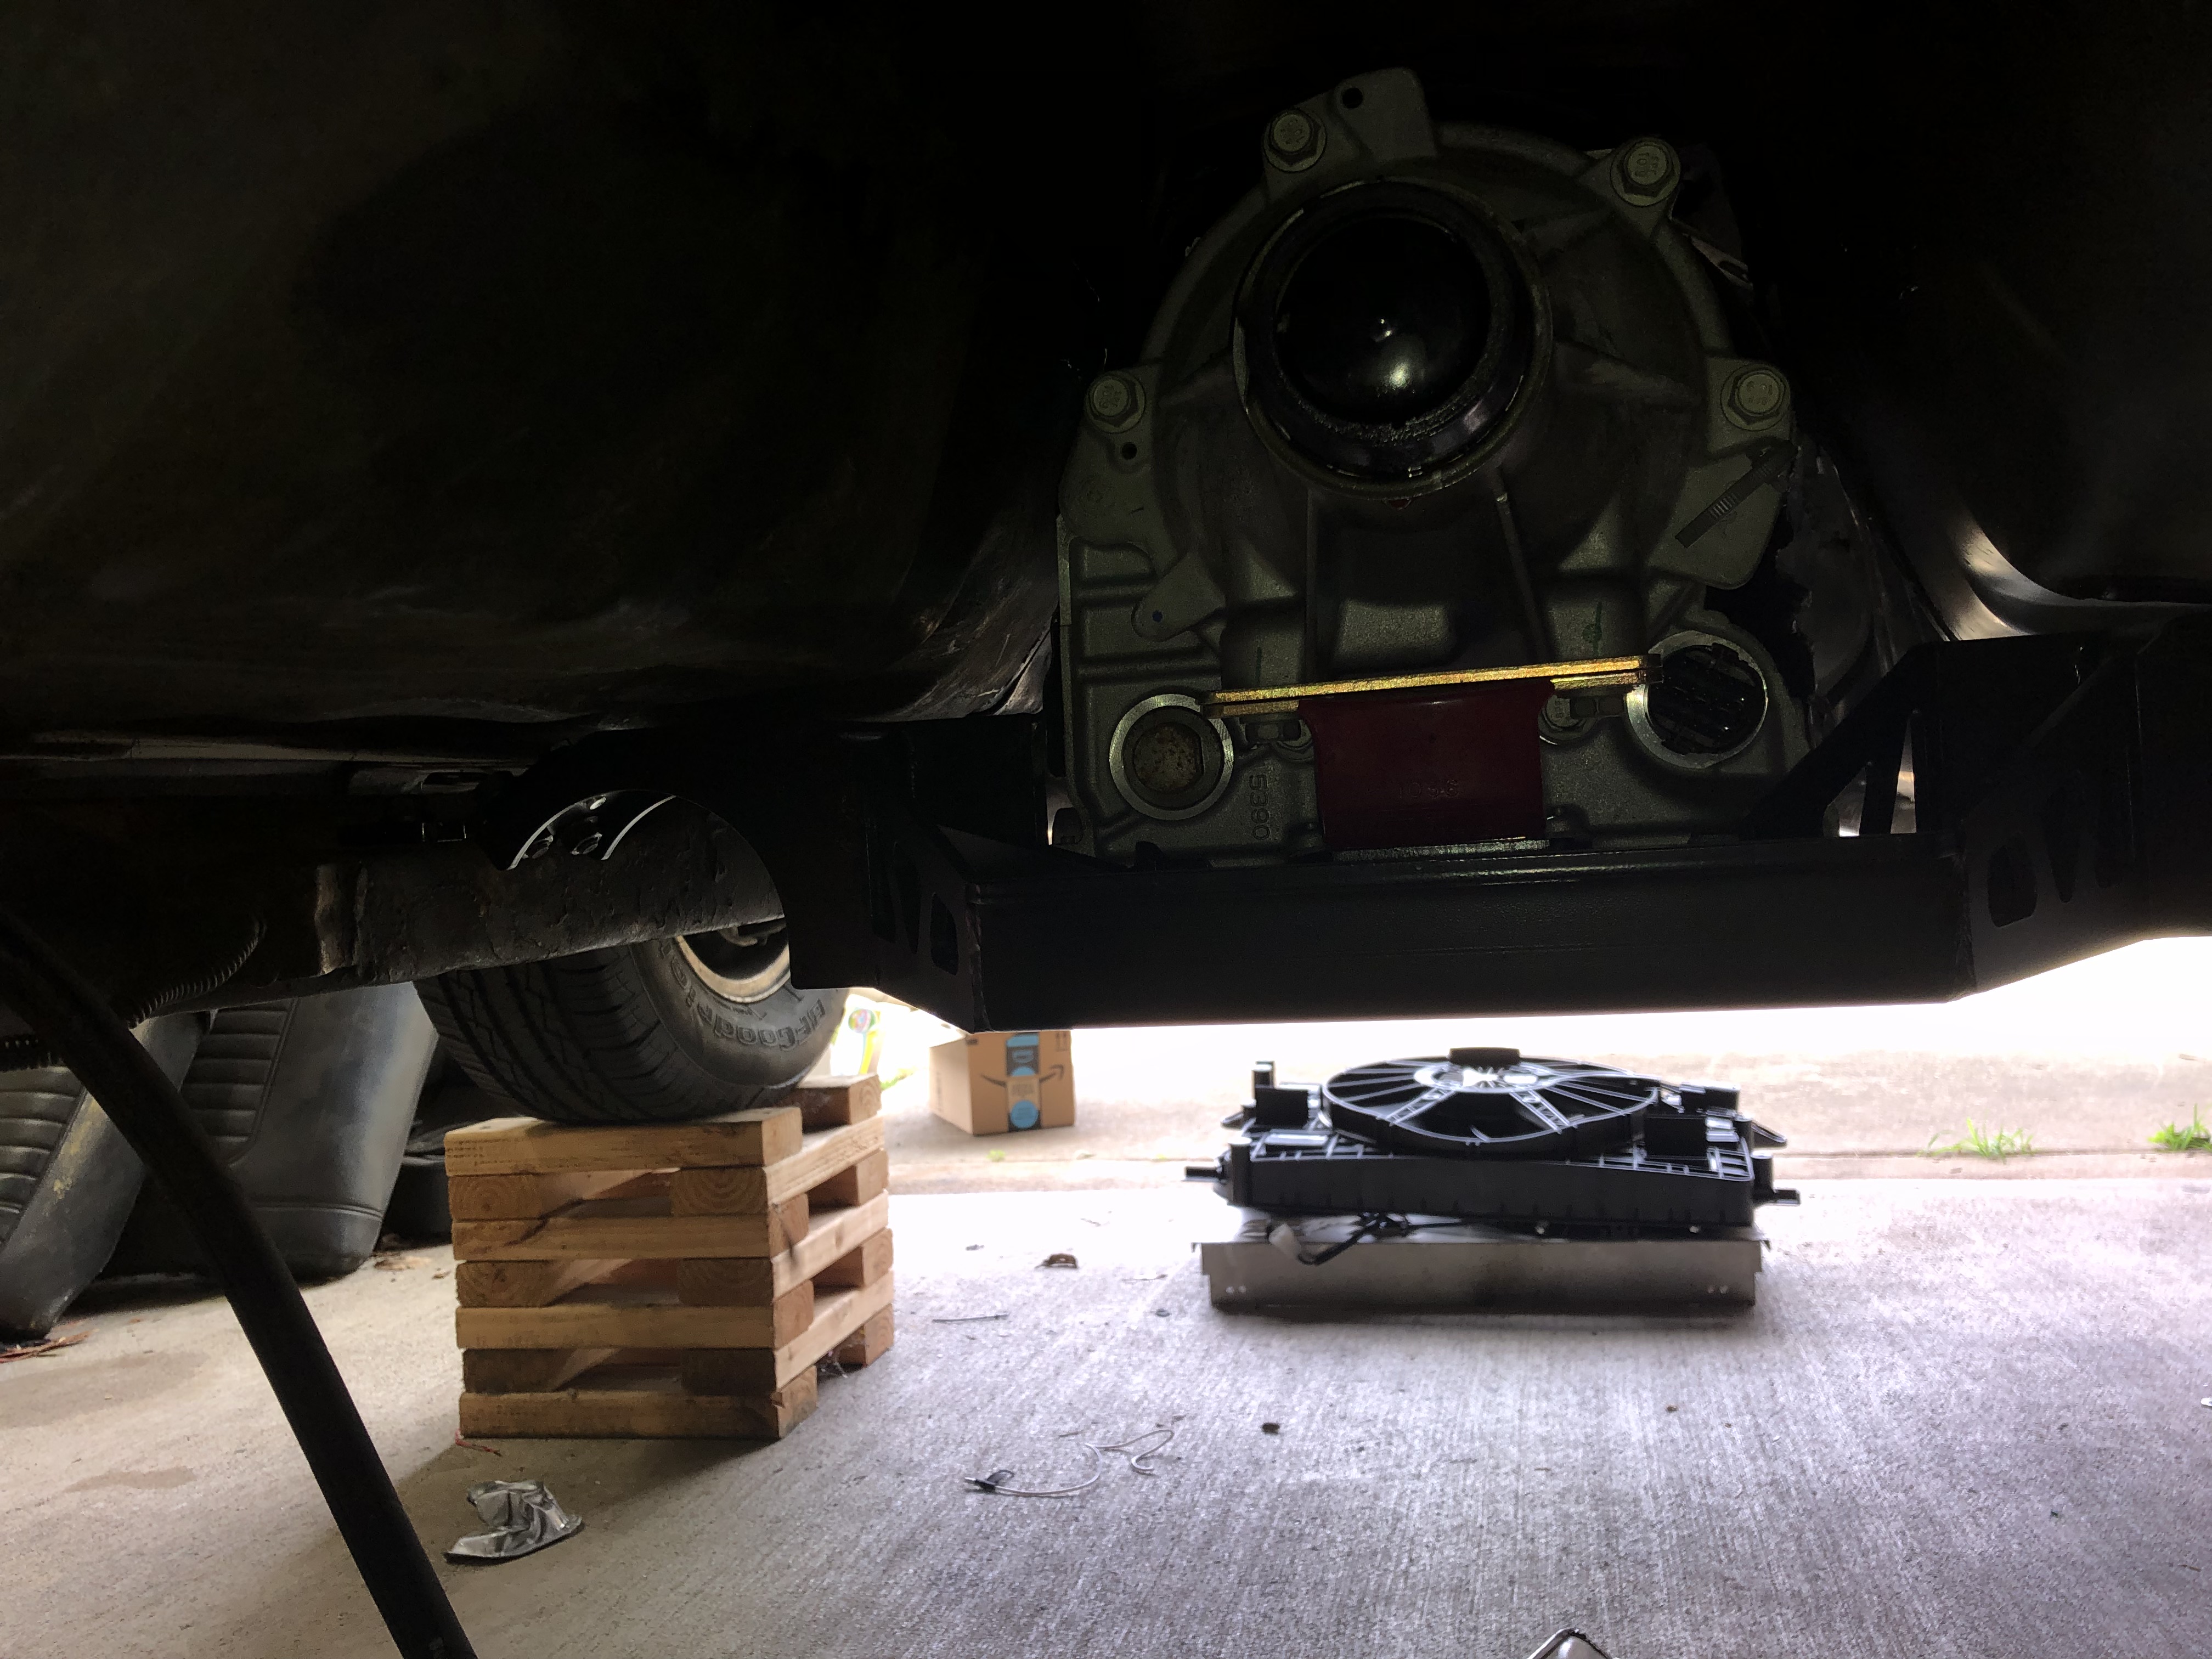
I ended up hacking up my stock crossmember (saw someone else do the same) and offset it a few inches back to accept the new trans. The height was not changed, only the rearward position. I had some 1/8" plate laying around and this is what the stock crossmember is made from. It crossmember is very solid but the weight of the trans worries me a little for some reason. I think I'm going to stiffen it up a bit and clean up some of the tall edges that kiss the floor a little. I placed a spacer between the crossmember and mount so I could drop it a little if needed to get the angle corrected once the car is together. I also have quite a bit of room to raise the trans if needed too.

05-10-2019 #4
Registered User
- Join Date
- Jul 2017
- Posts
- 166
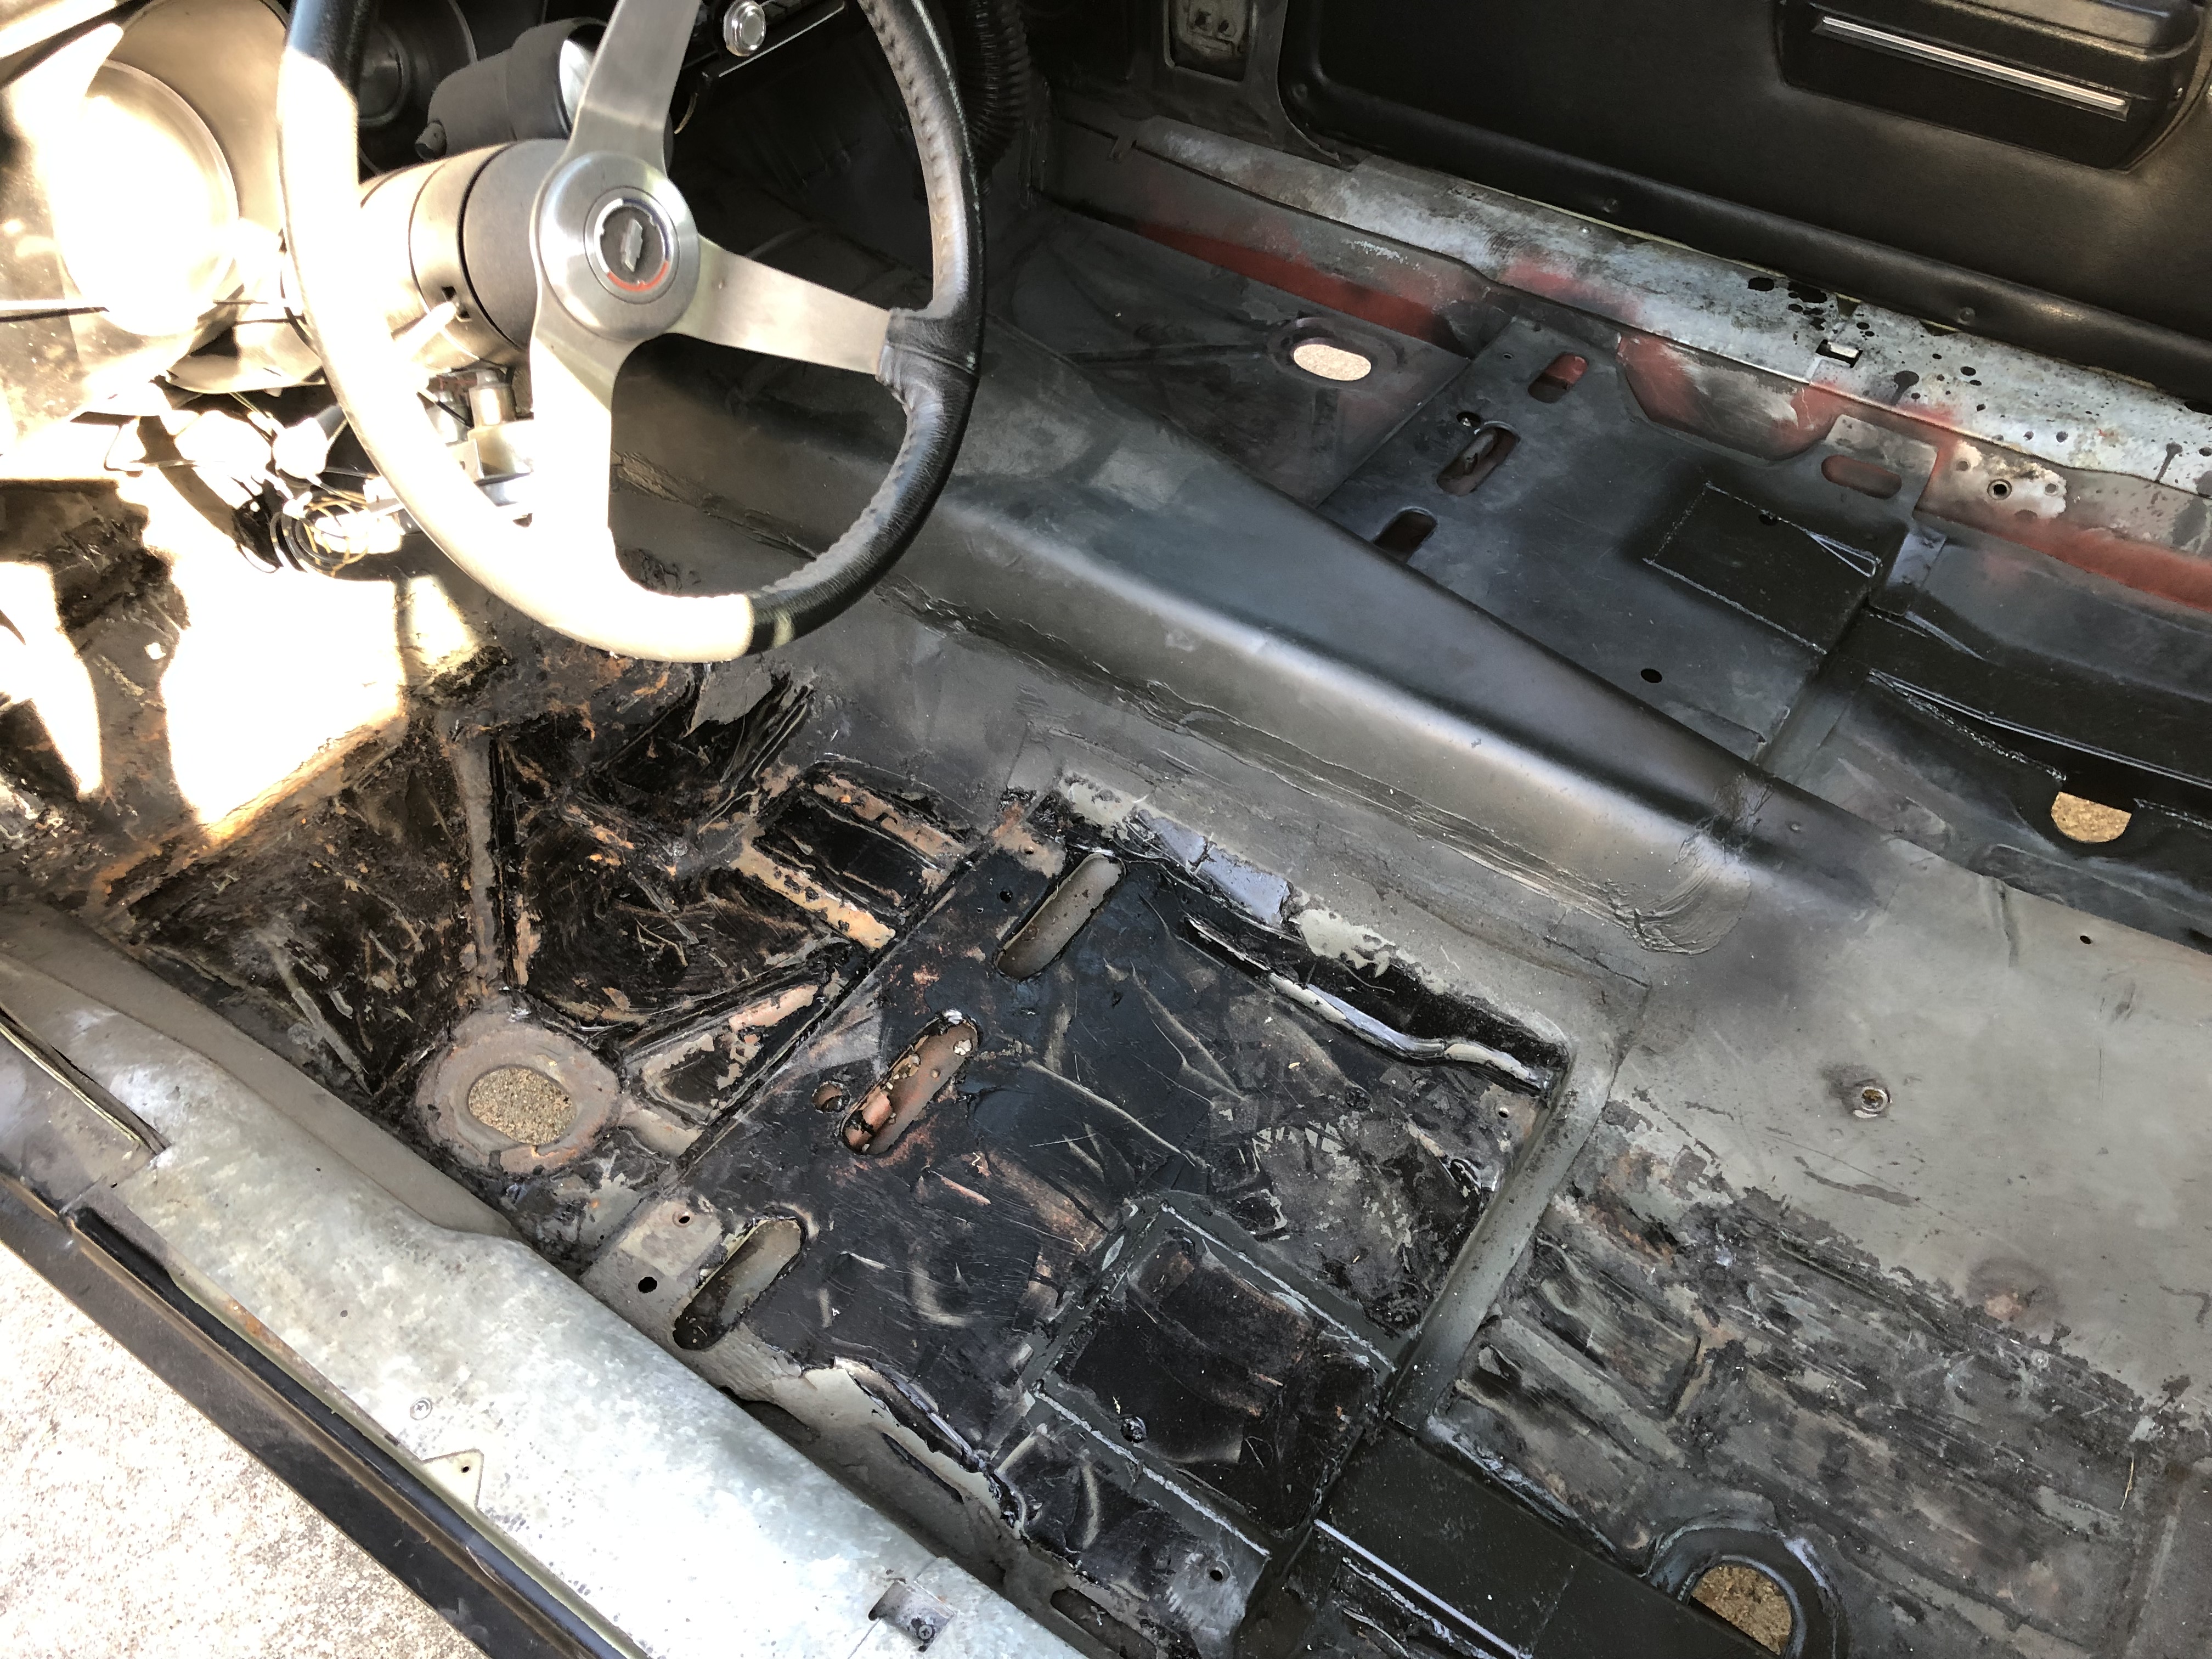
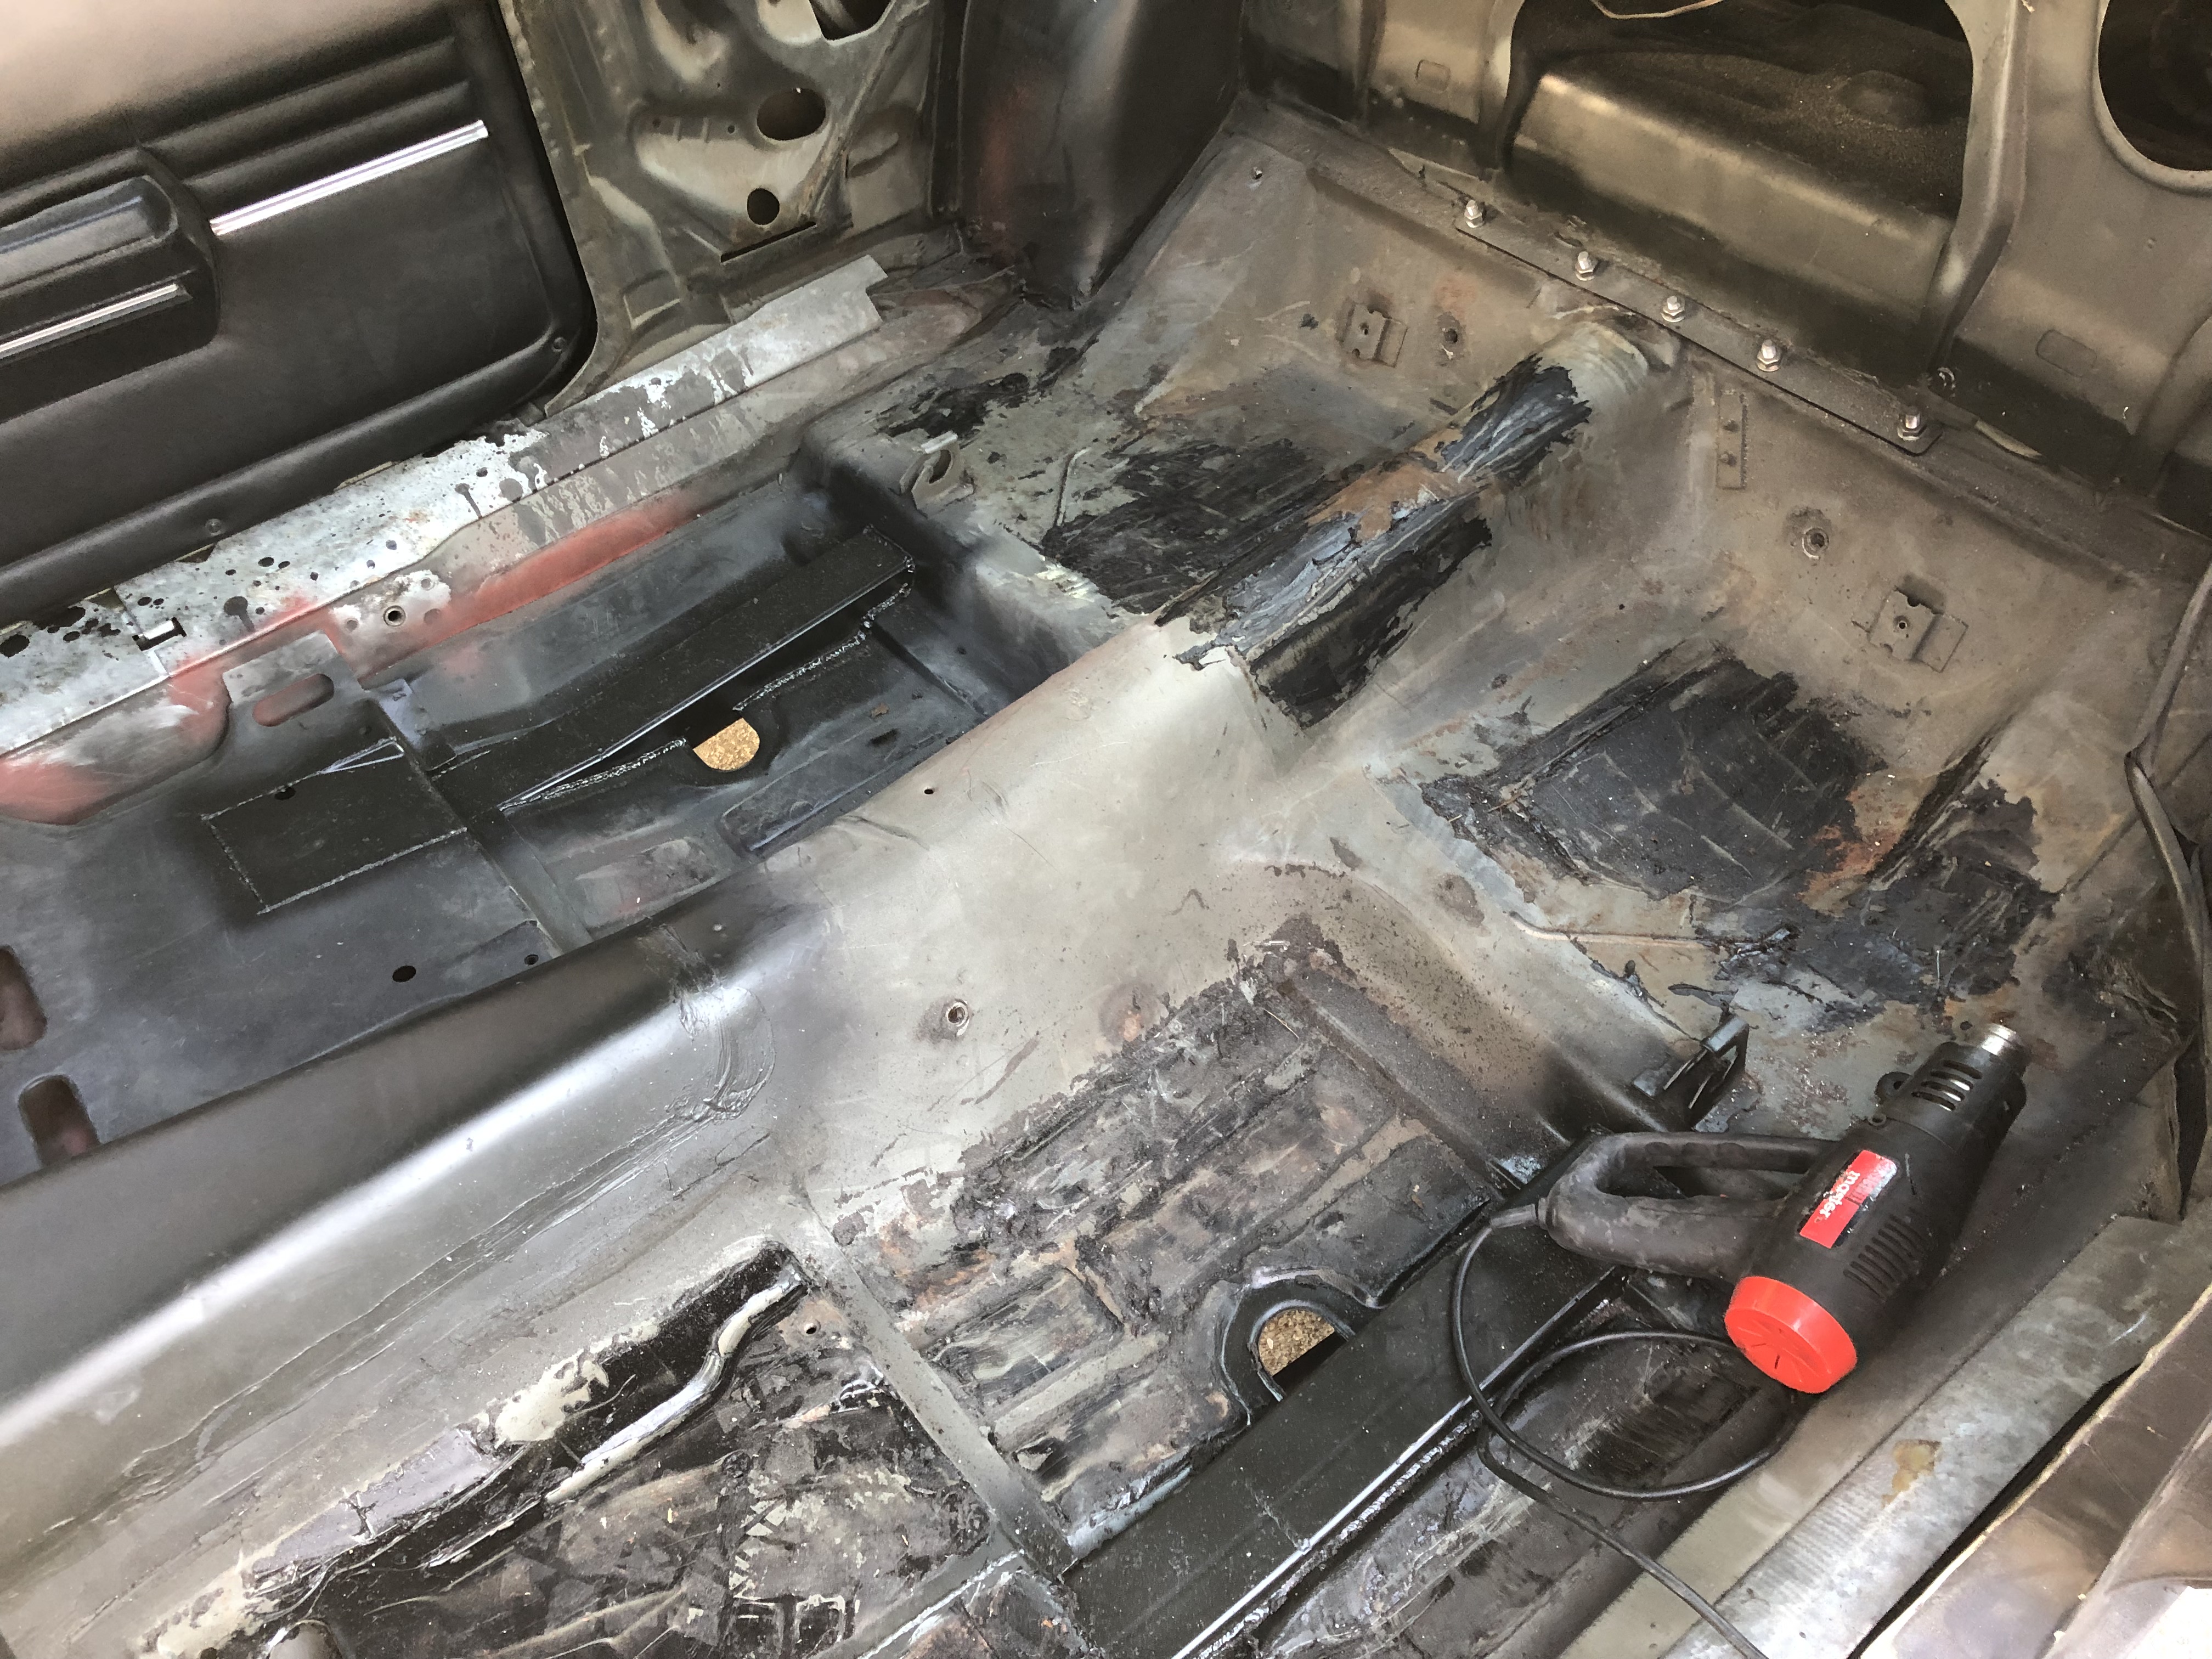
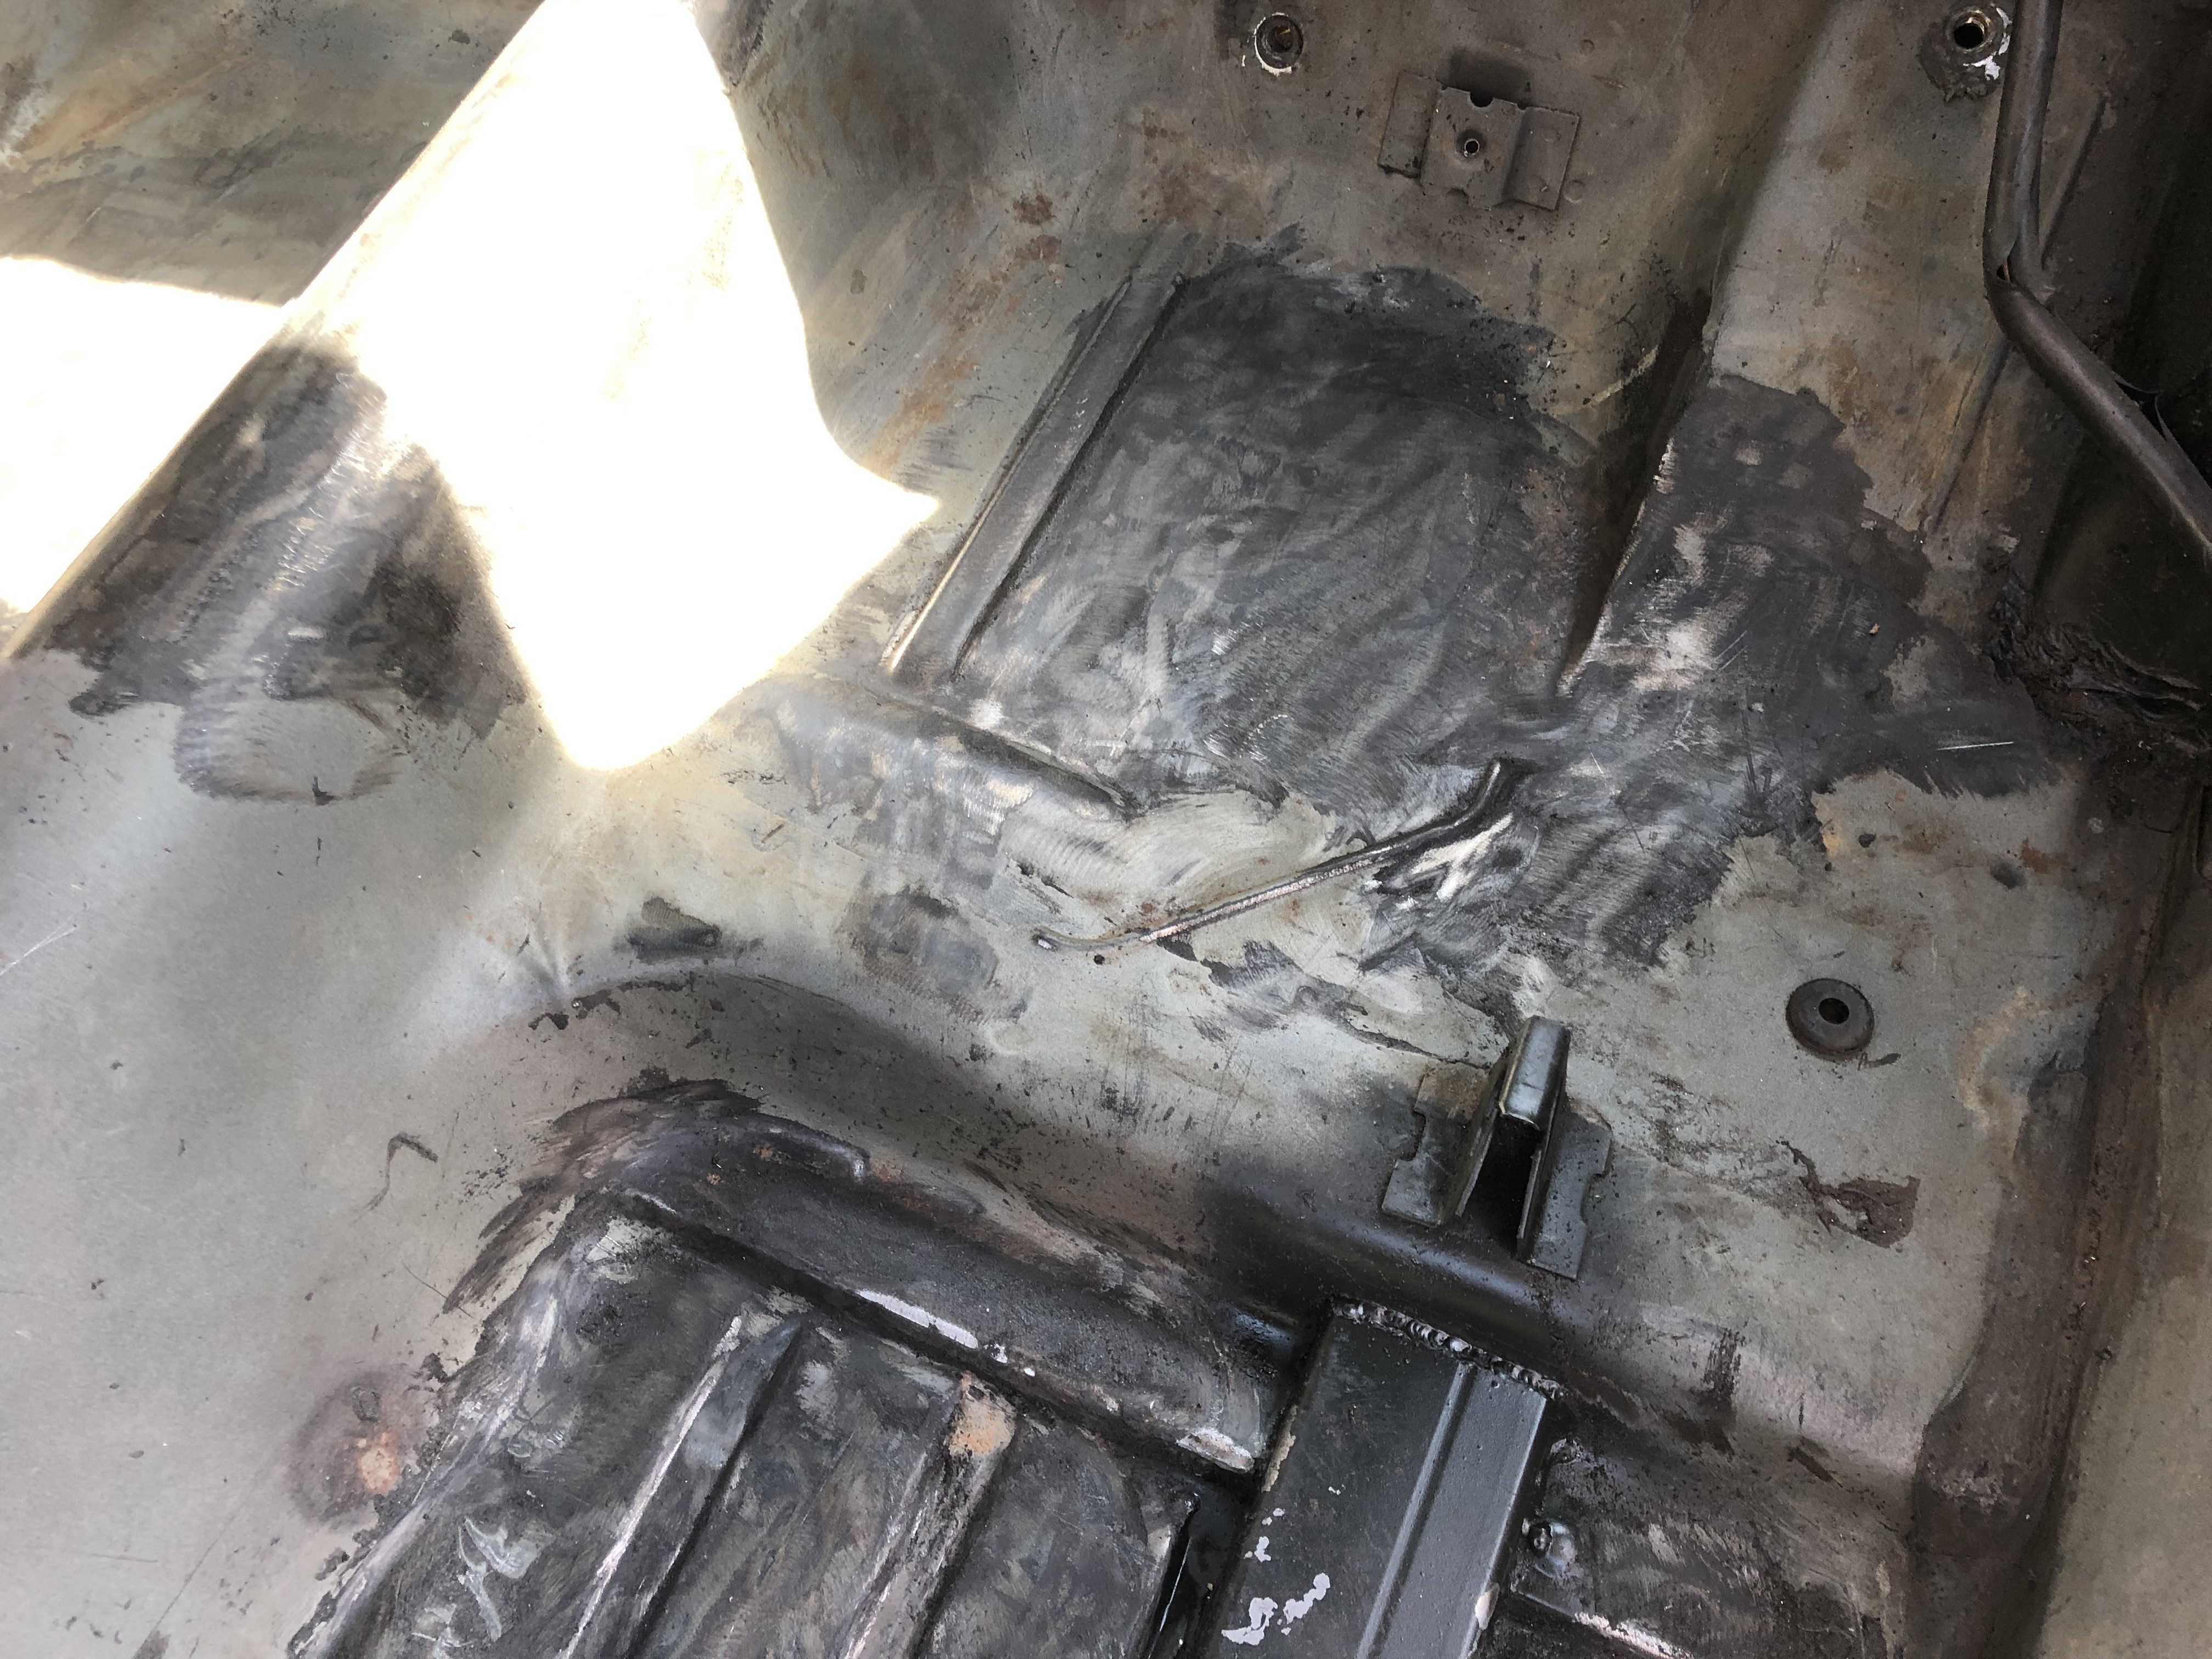
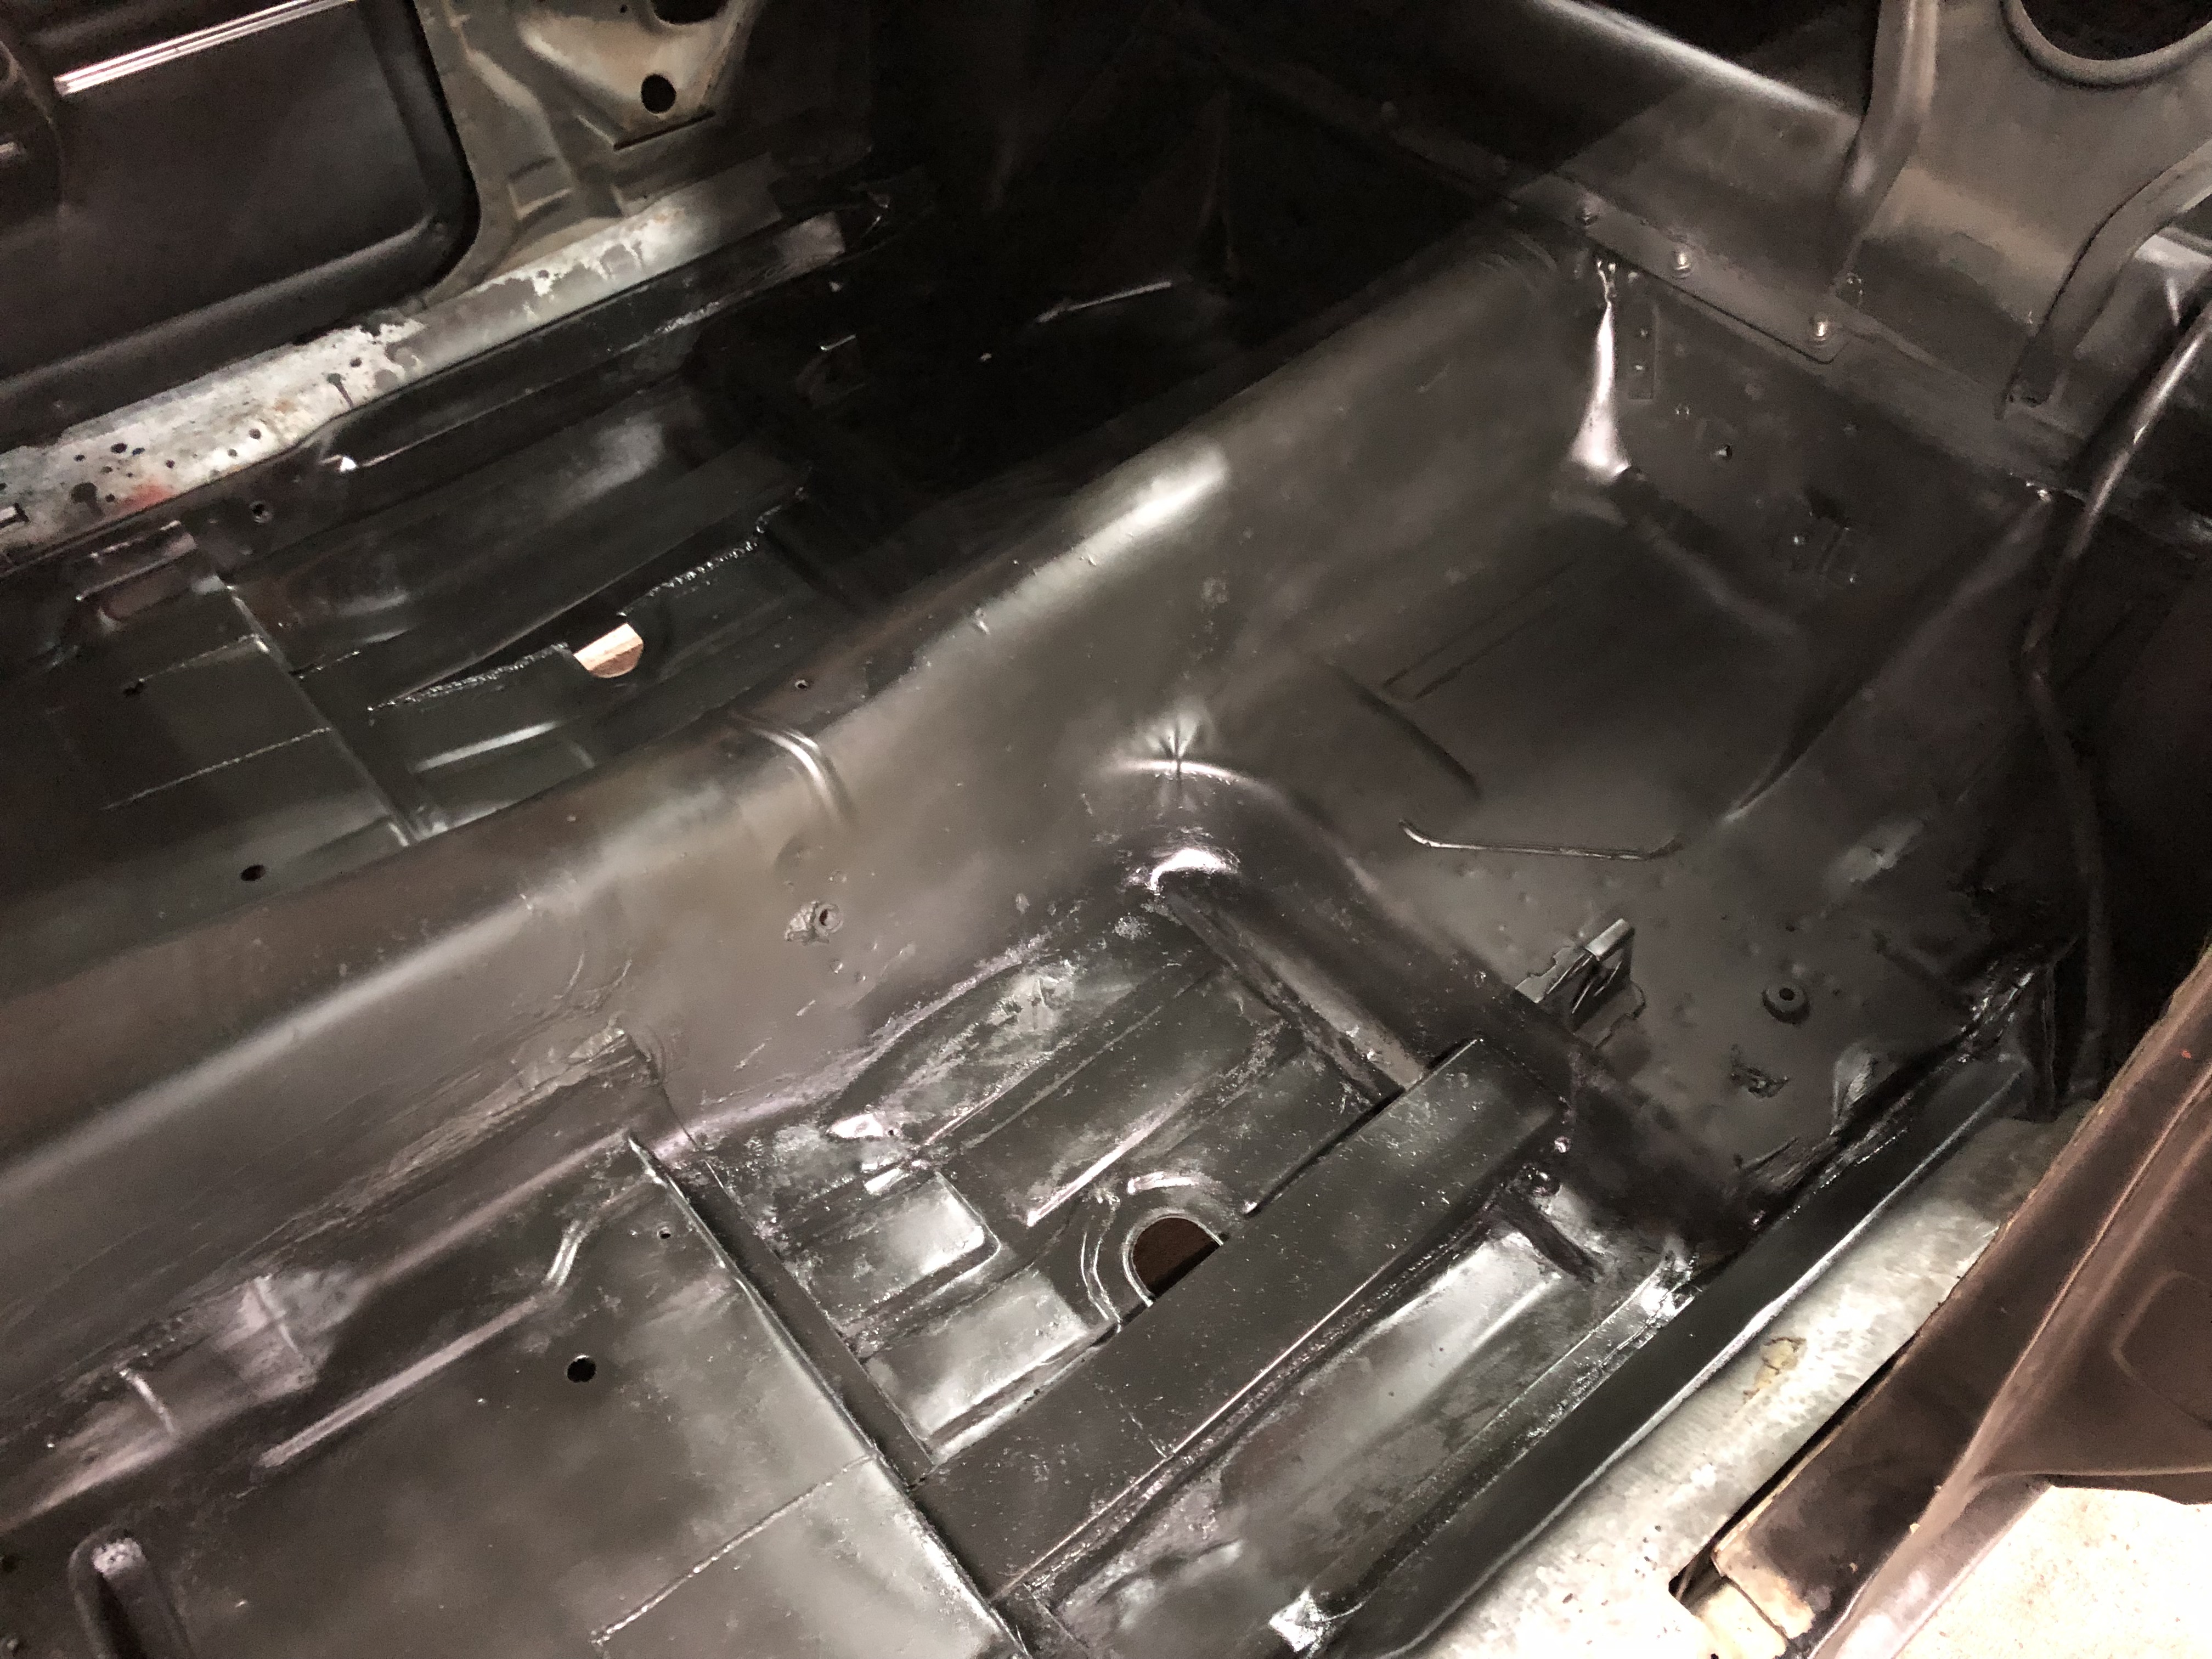
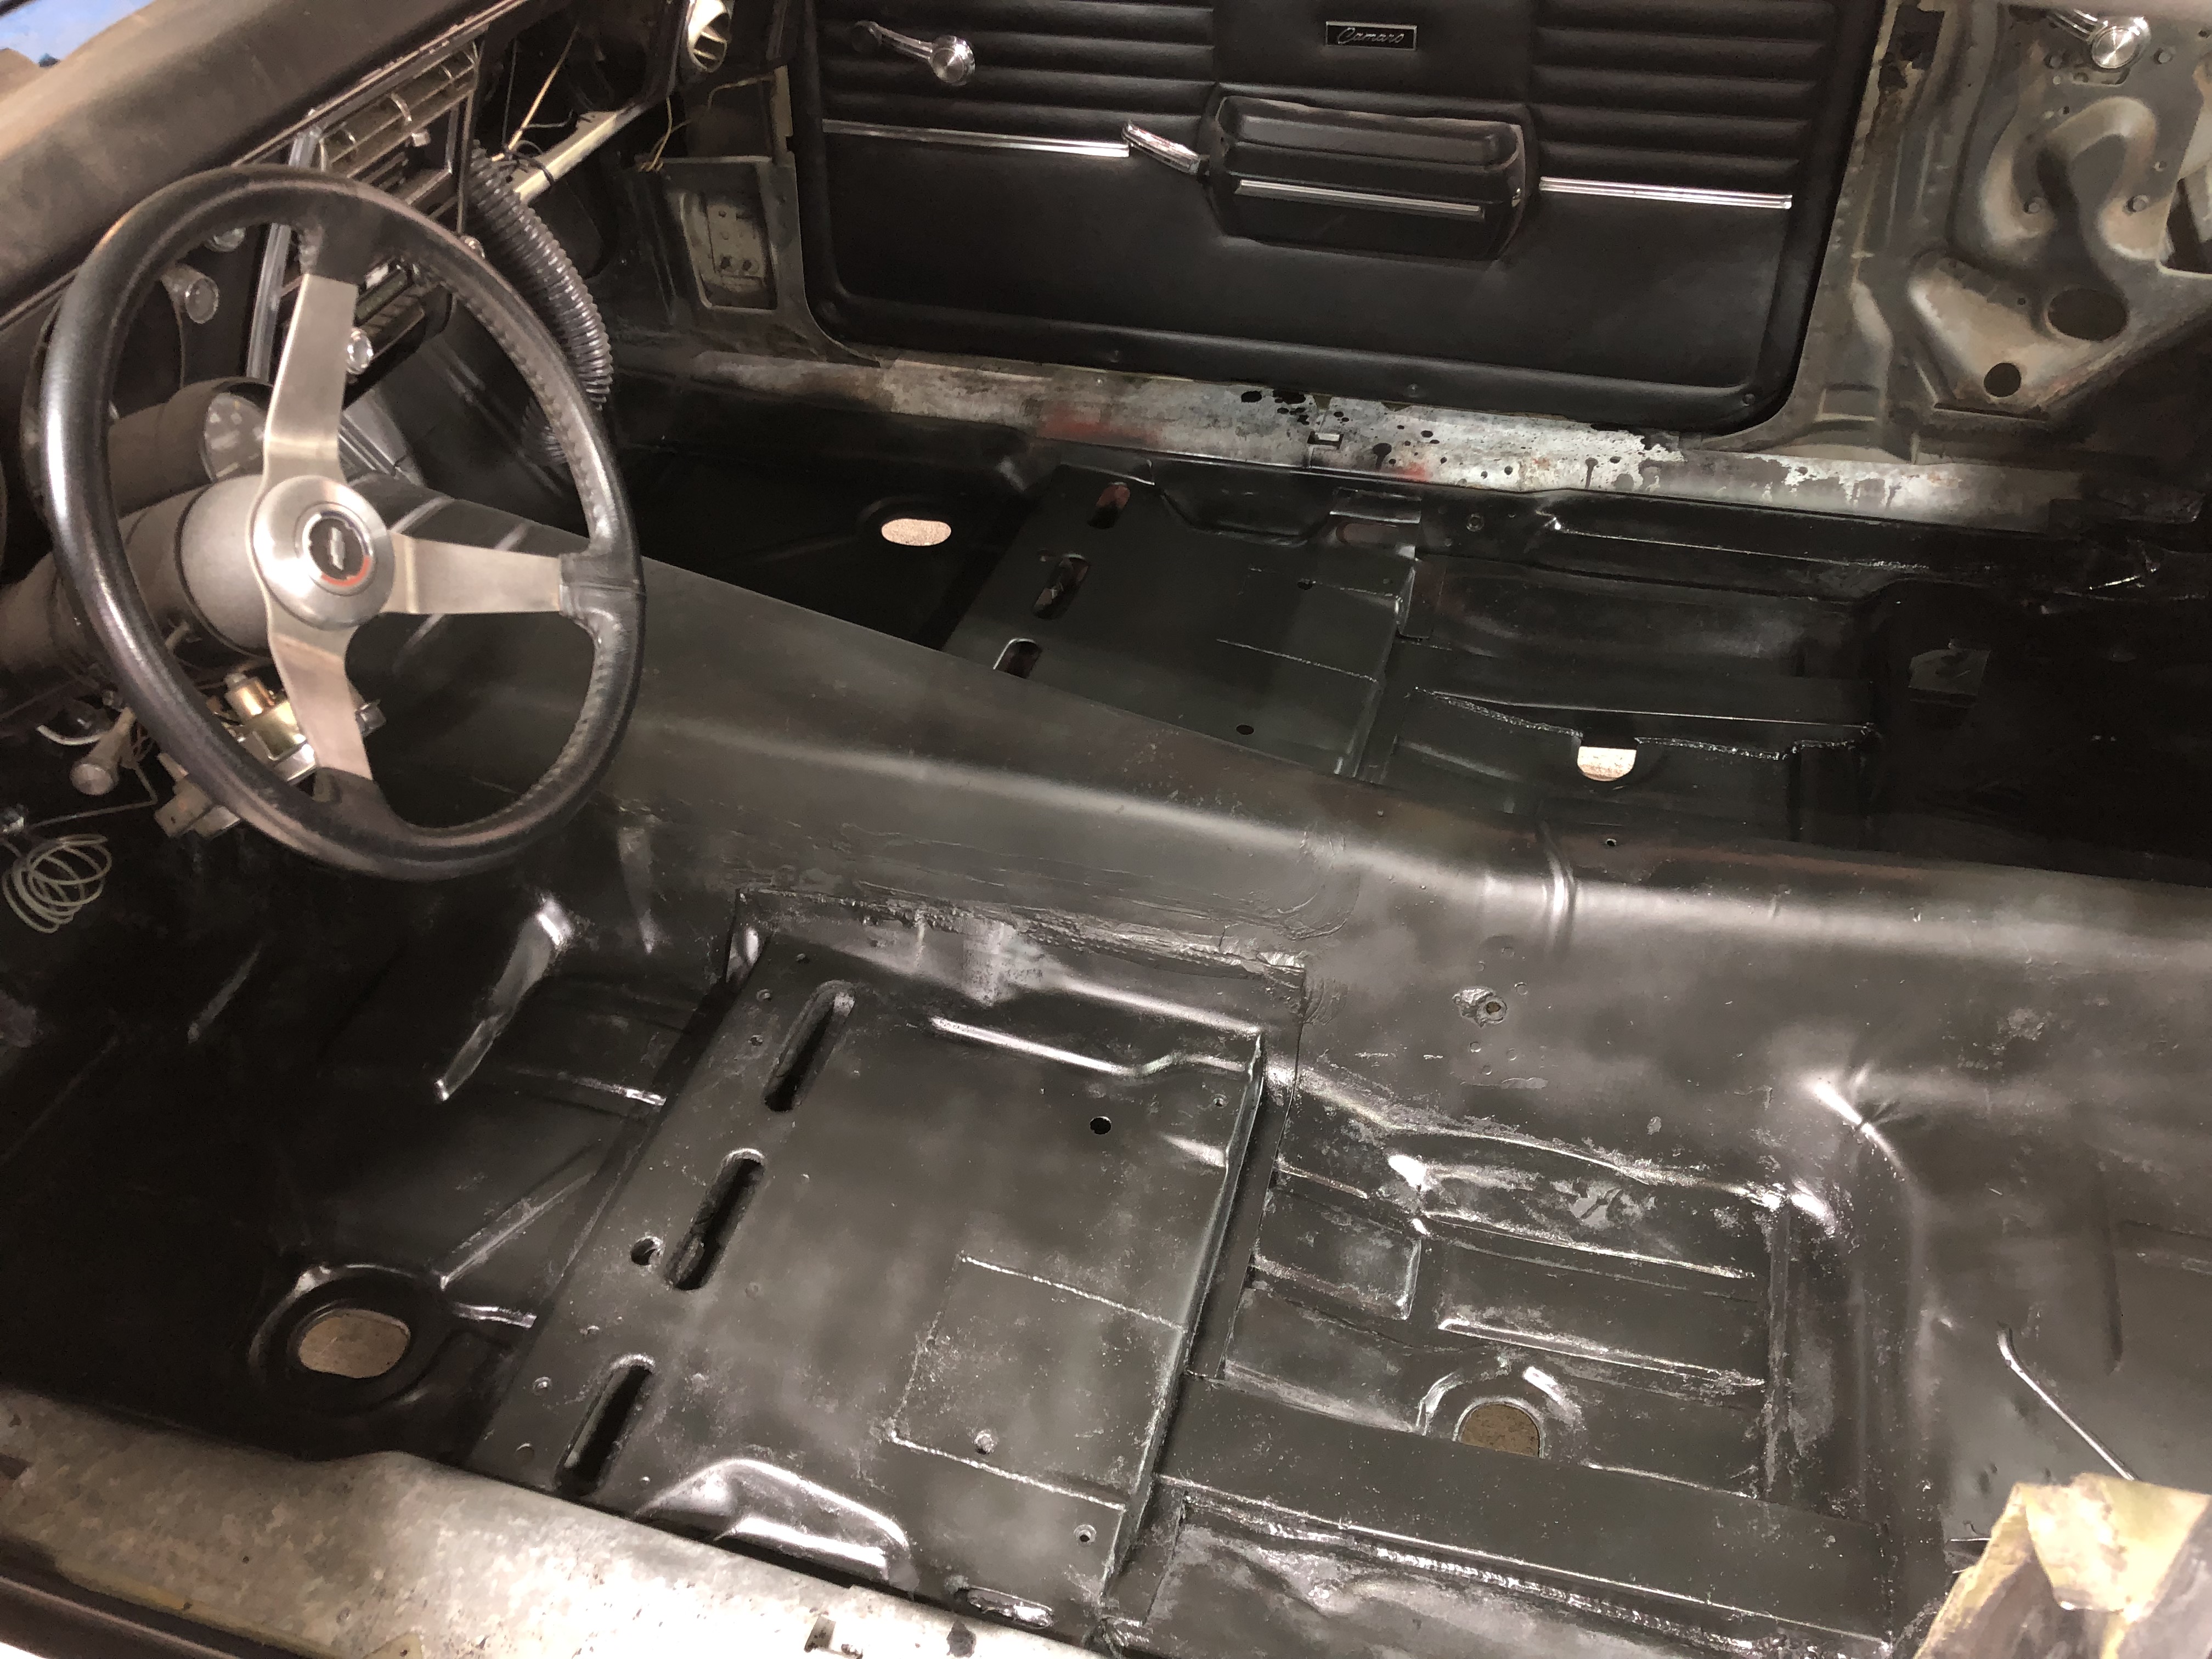
I've got a little done since I last posted but I've been busy with life. I decided to clean off all the old Dynamat and coat the floor just to make sure no rust comes back. I planned on not using Dynamat anymore due to it possibly being the reason the pans rusted? Might not be the reason but the car had leaks and the mat held some water in the trunk. This stuff sucks taking it off and the only way was with a heat gun then a wire wheel along with elbow grease.
I also finally opened up my fuel tank box and put a coat of paint on the fuel tank. Its installed now but not fully buttoned down.


- - - Updated - - -
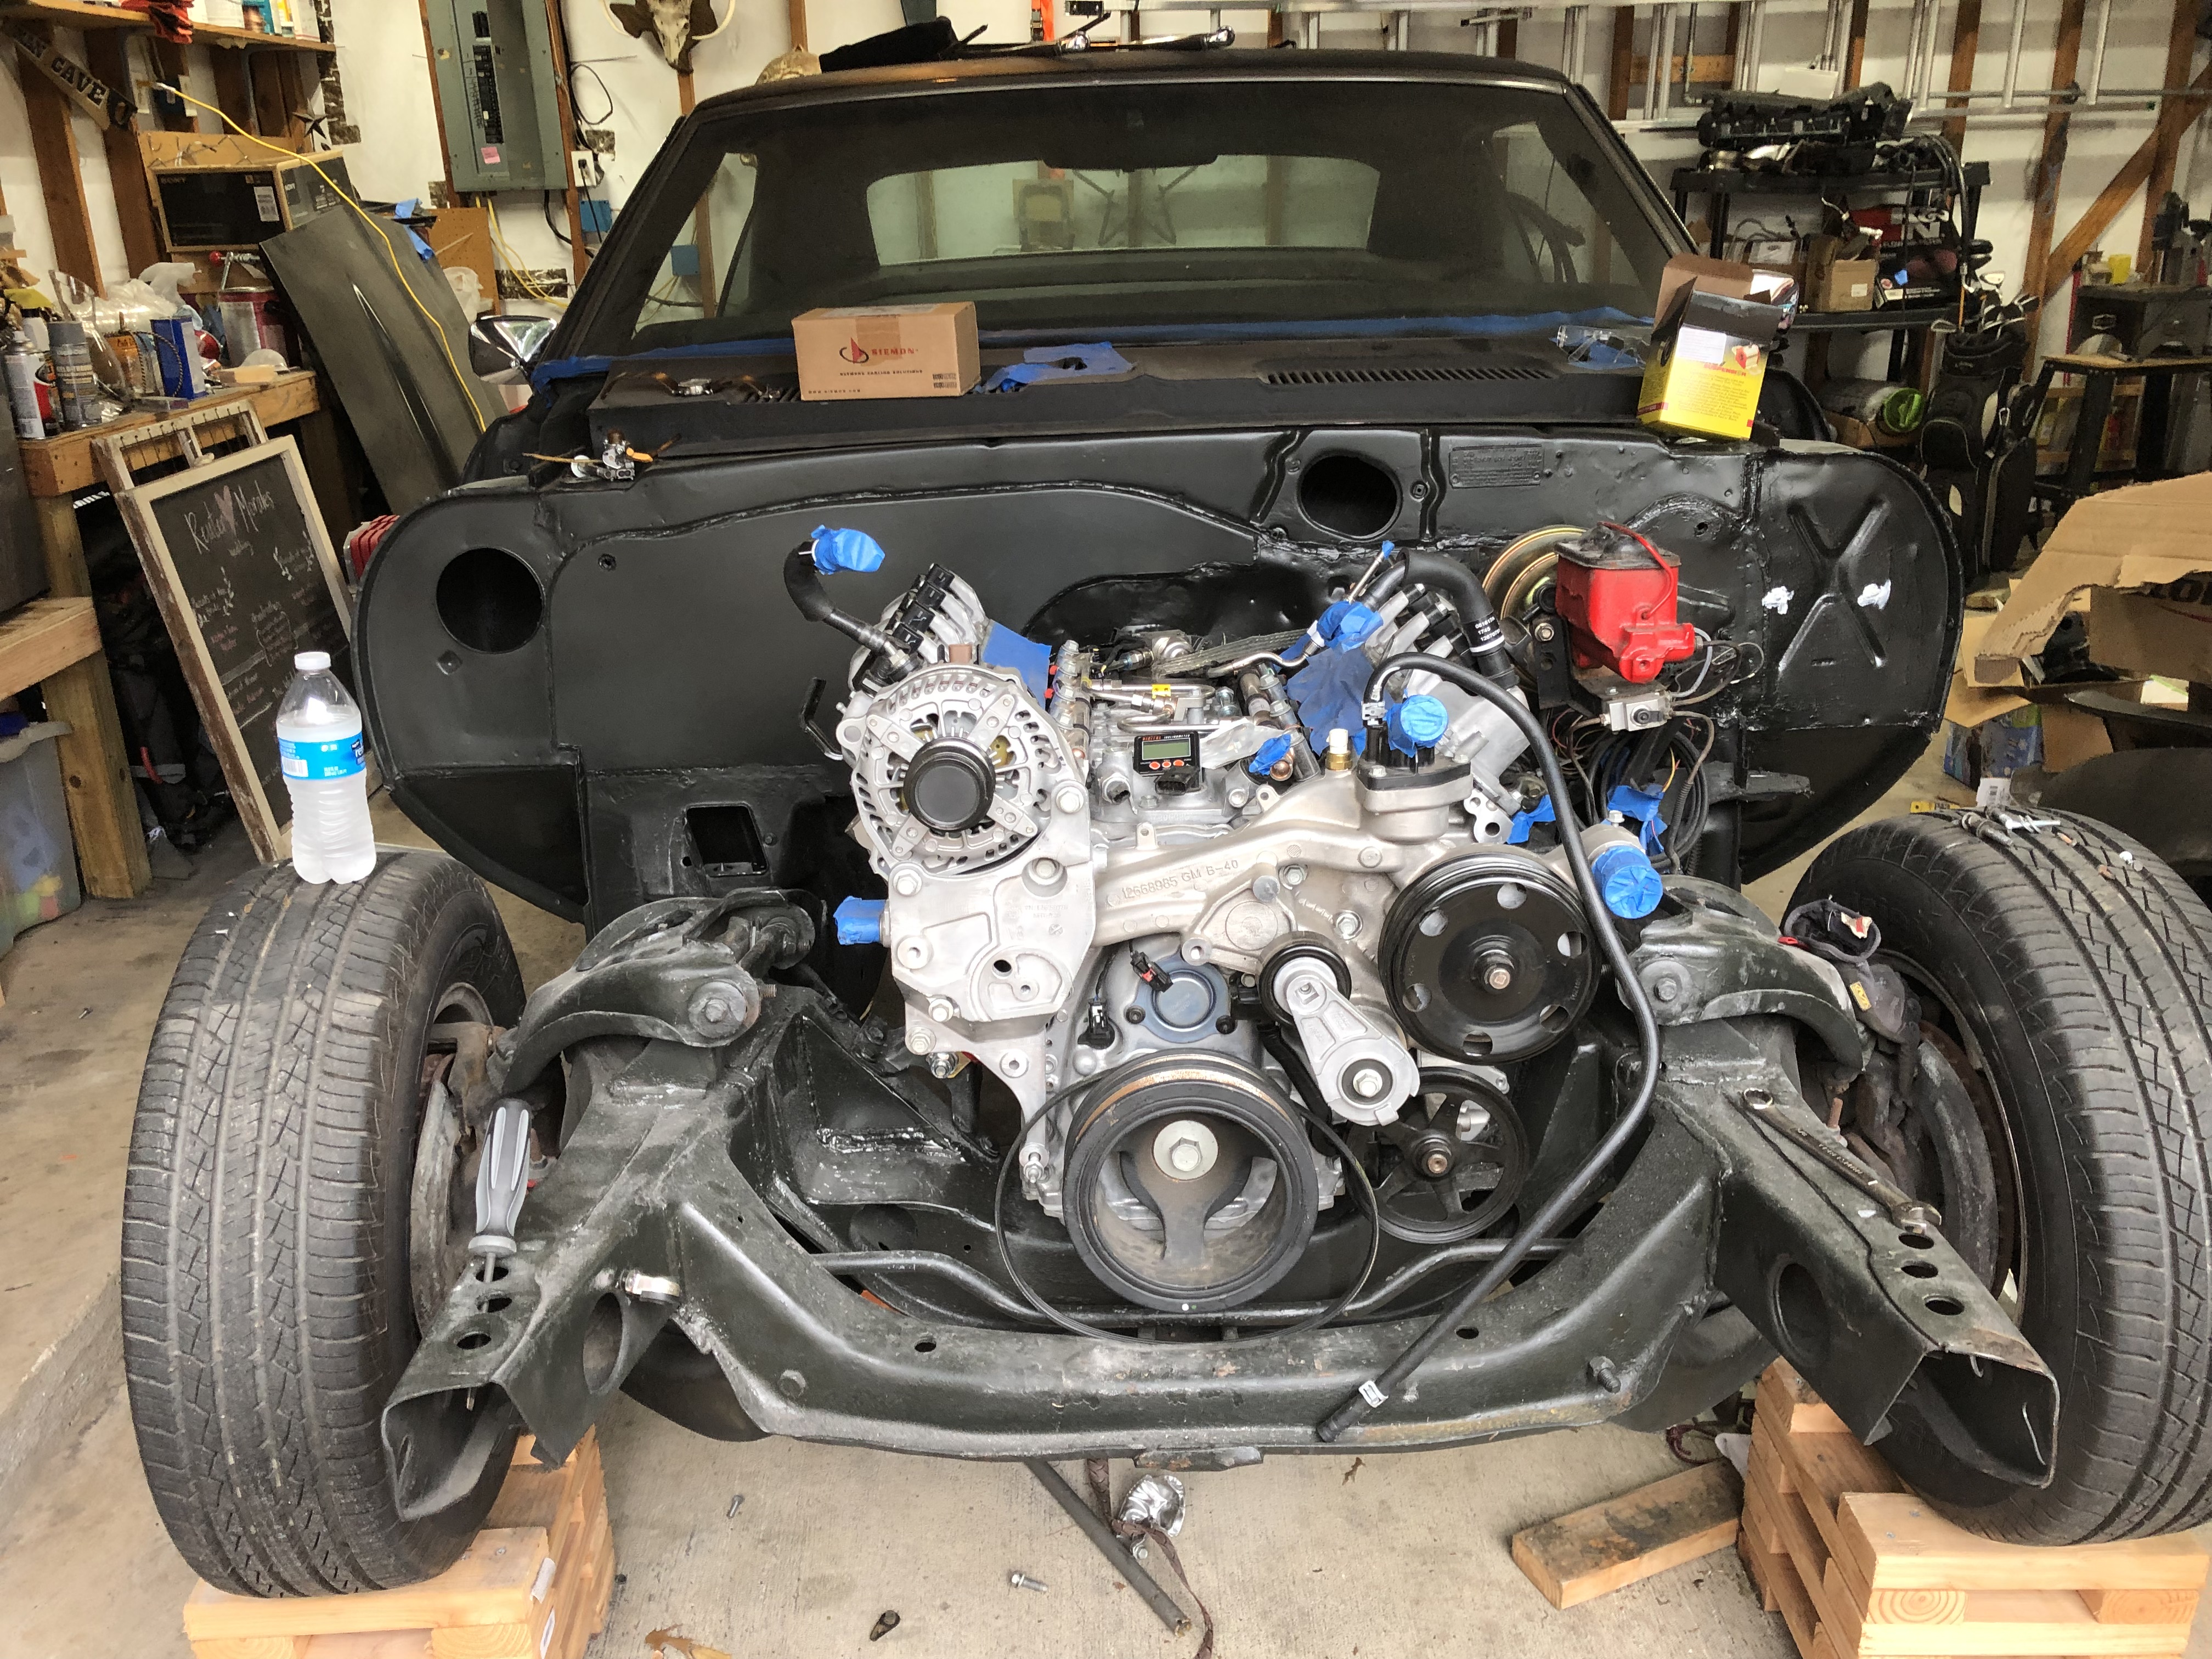
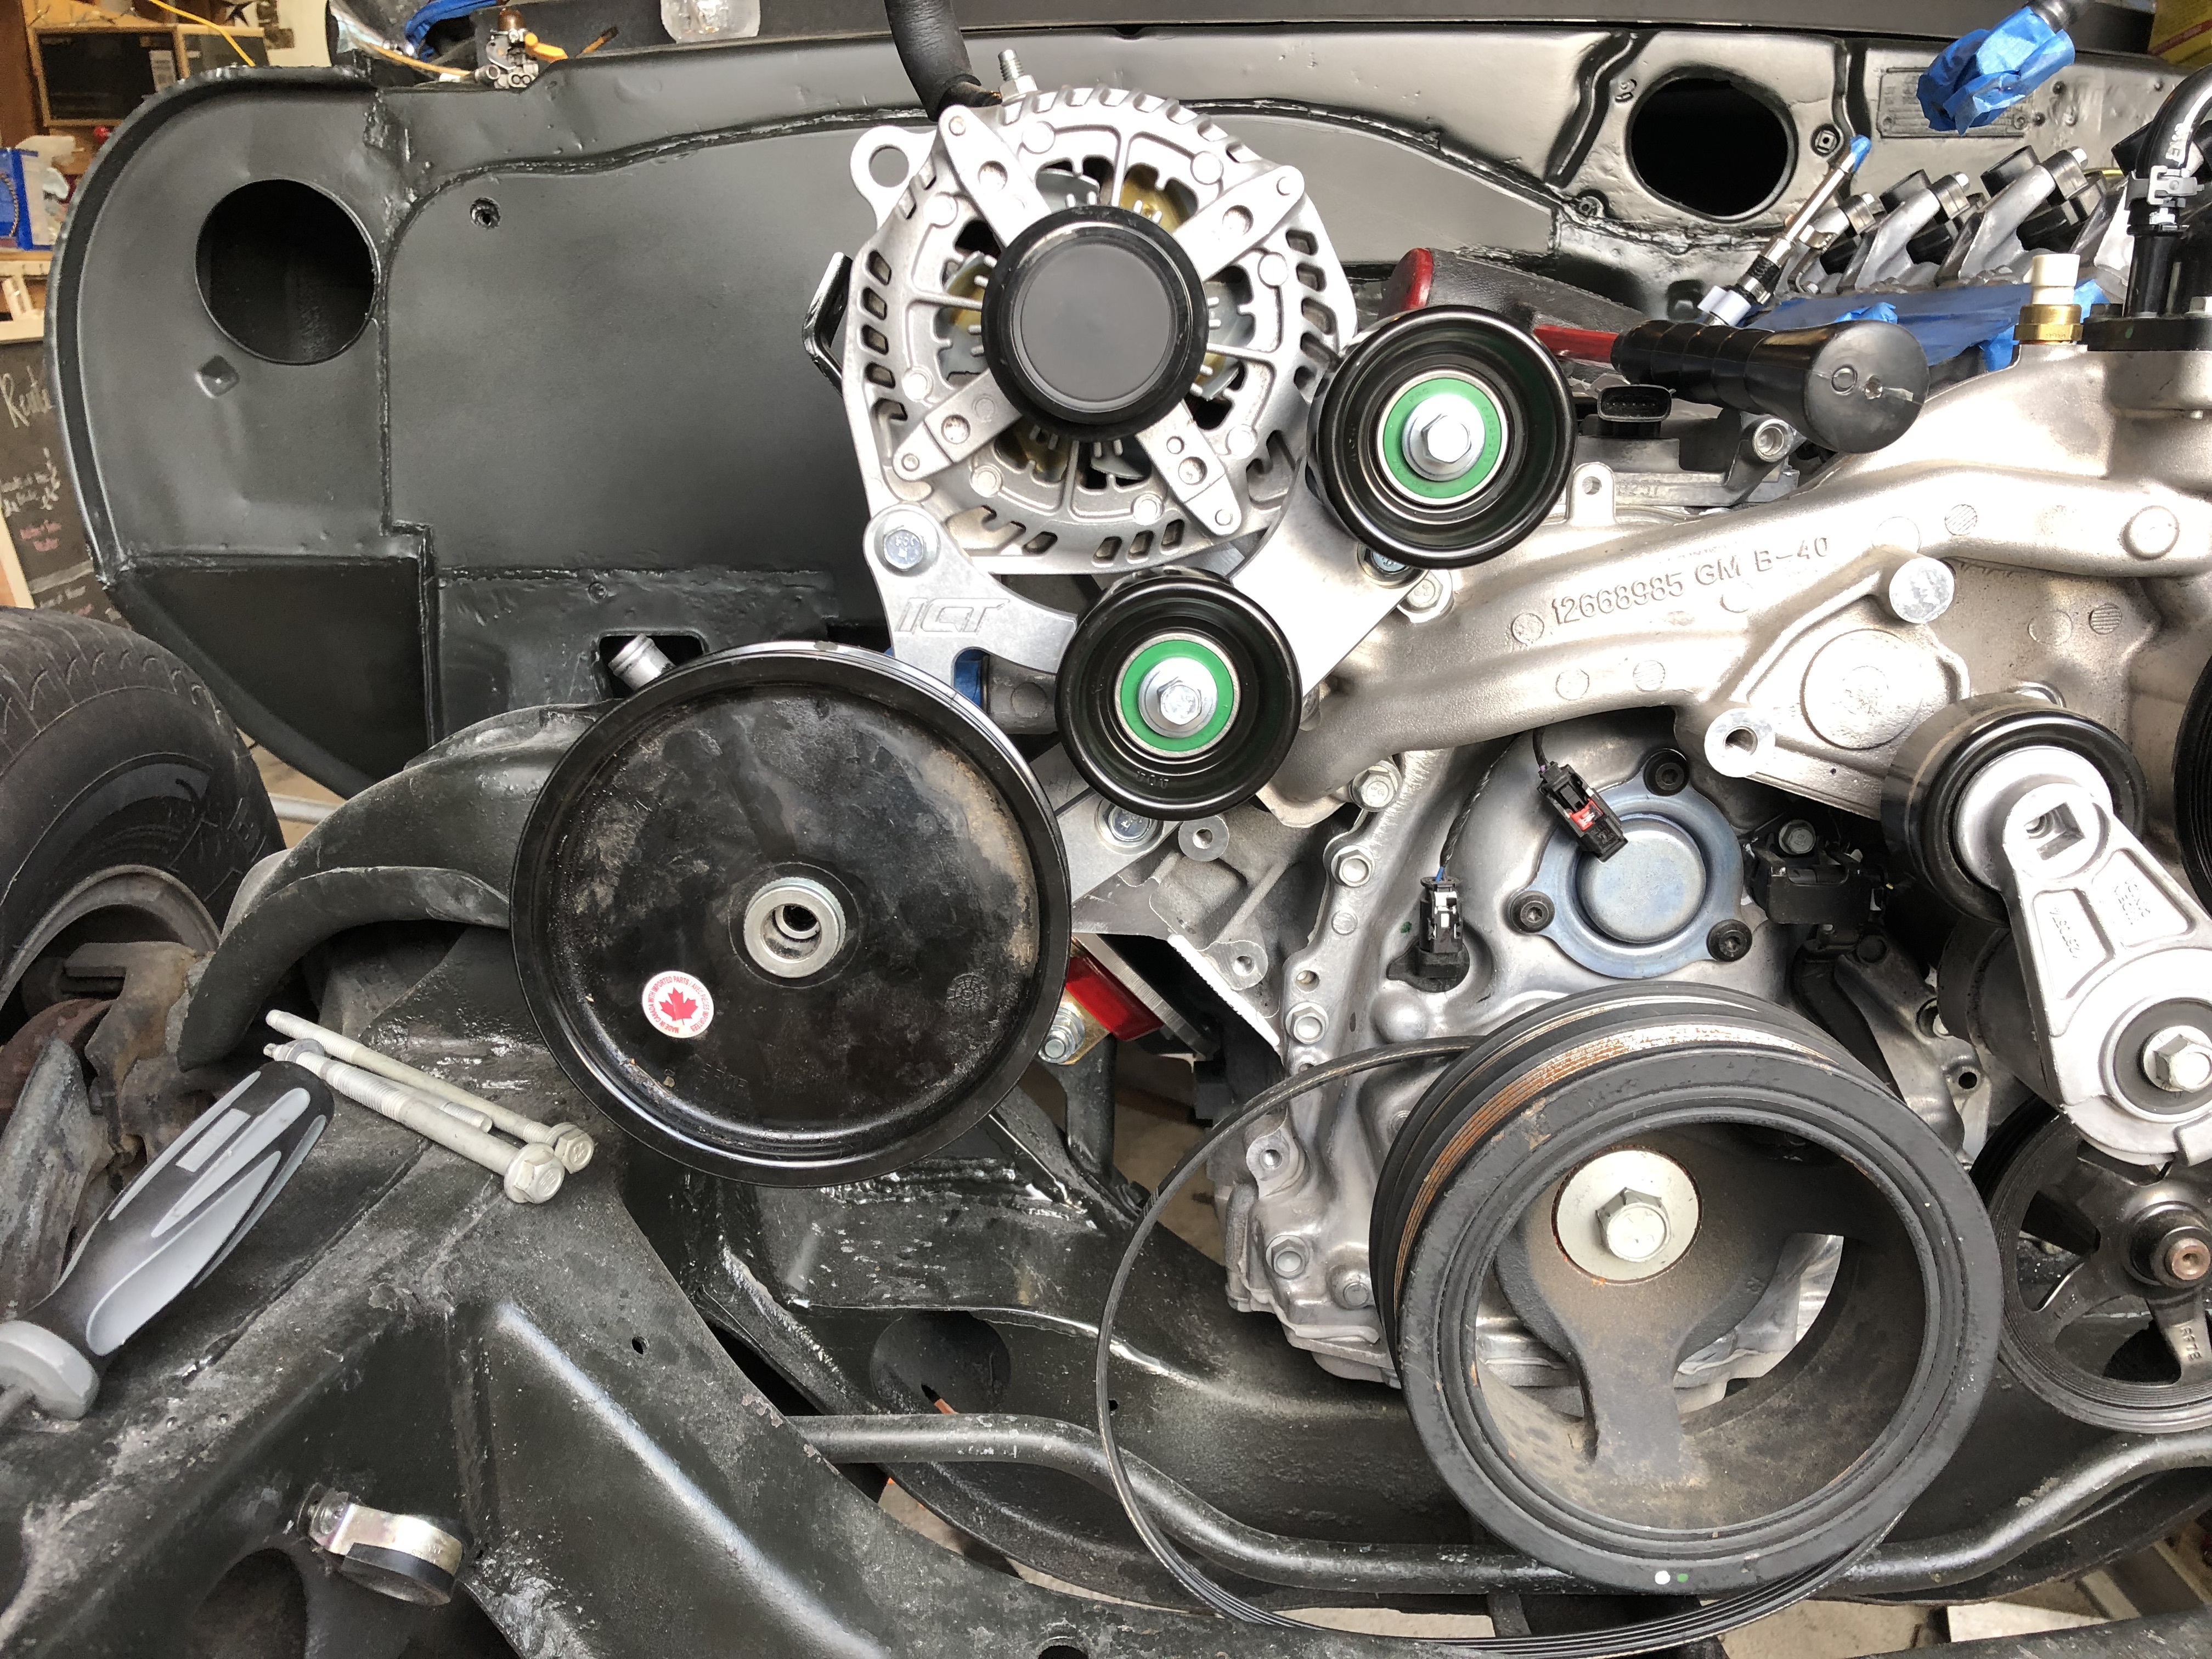
I also received my ICTBillet power steering pump bracket and installed it. Due to my position of the motor this bracket hits my a-arm and will not work for me. Like most things with this car plans have now changed. I'll be returning the PS bracket and going another direction with my setup. I have found a replacement accessory drive from Drive Junky that is pretty nice, it keeps the water pump so thats cool but I cannot use my factory compressor or vacuum pump. I should get the new drive installed in the next couple of weeks.

05-11-2019 #5
Registered User
- Join Date
- Jul 2017
- Posts
- 166
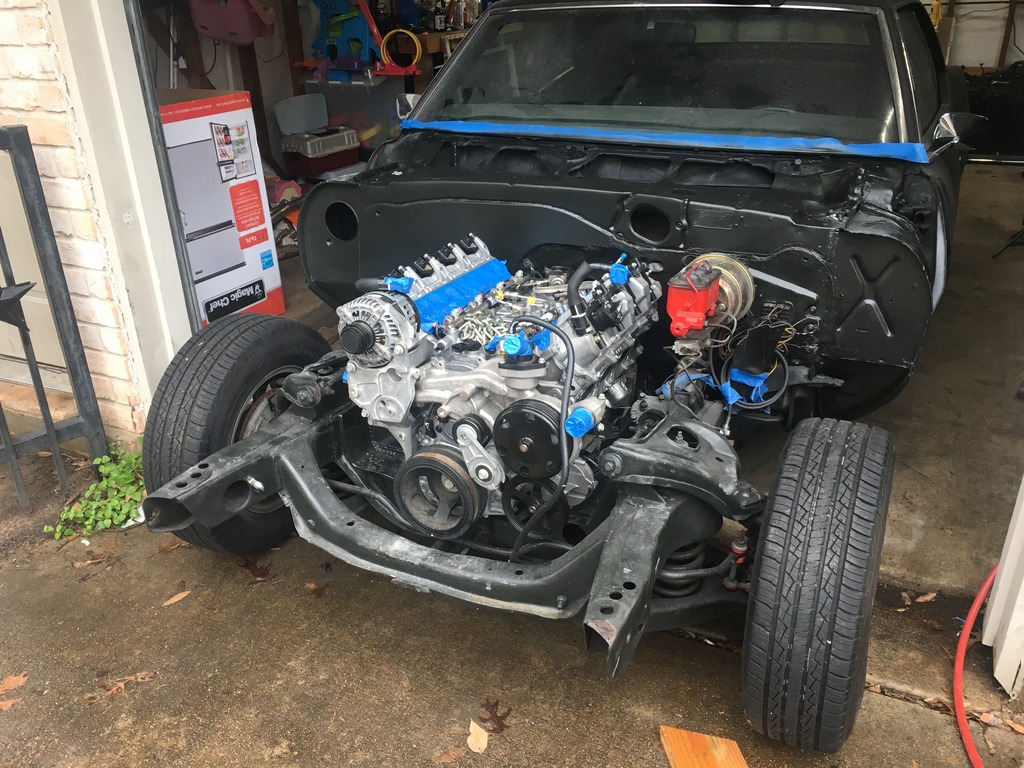
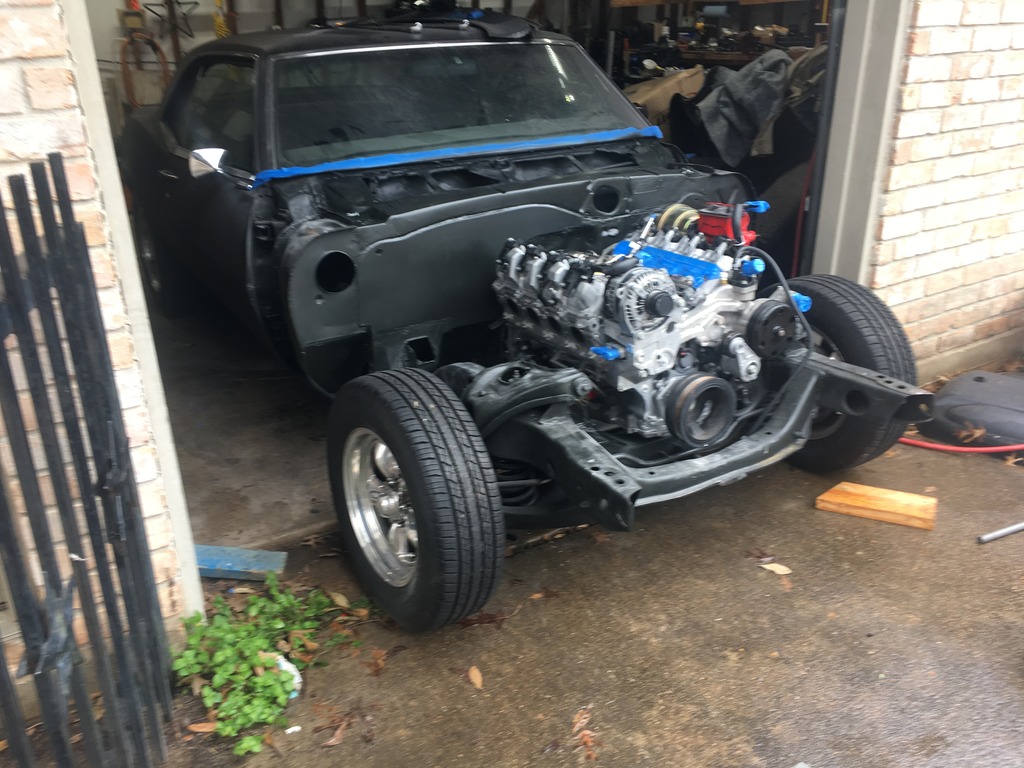
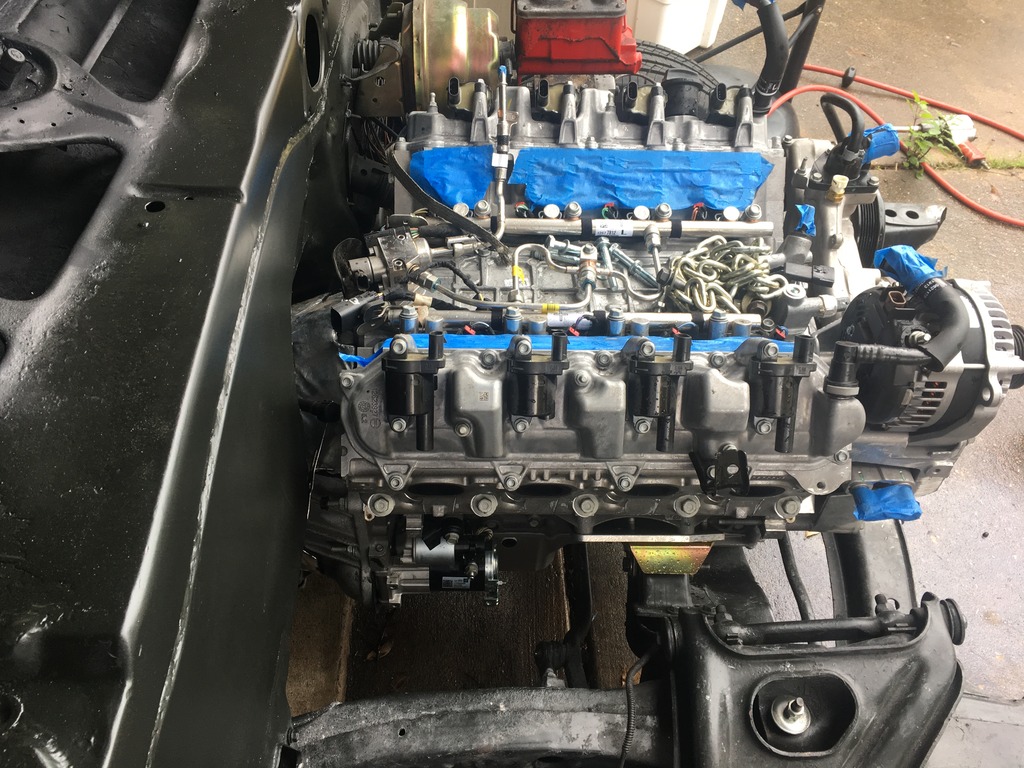
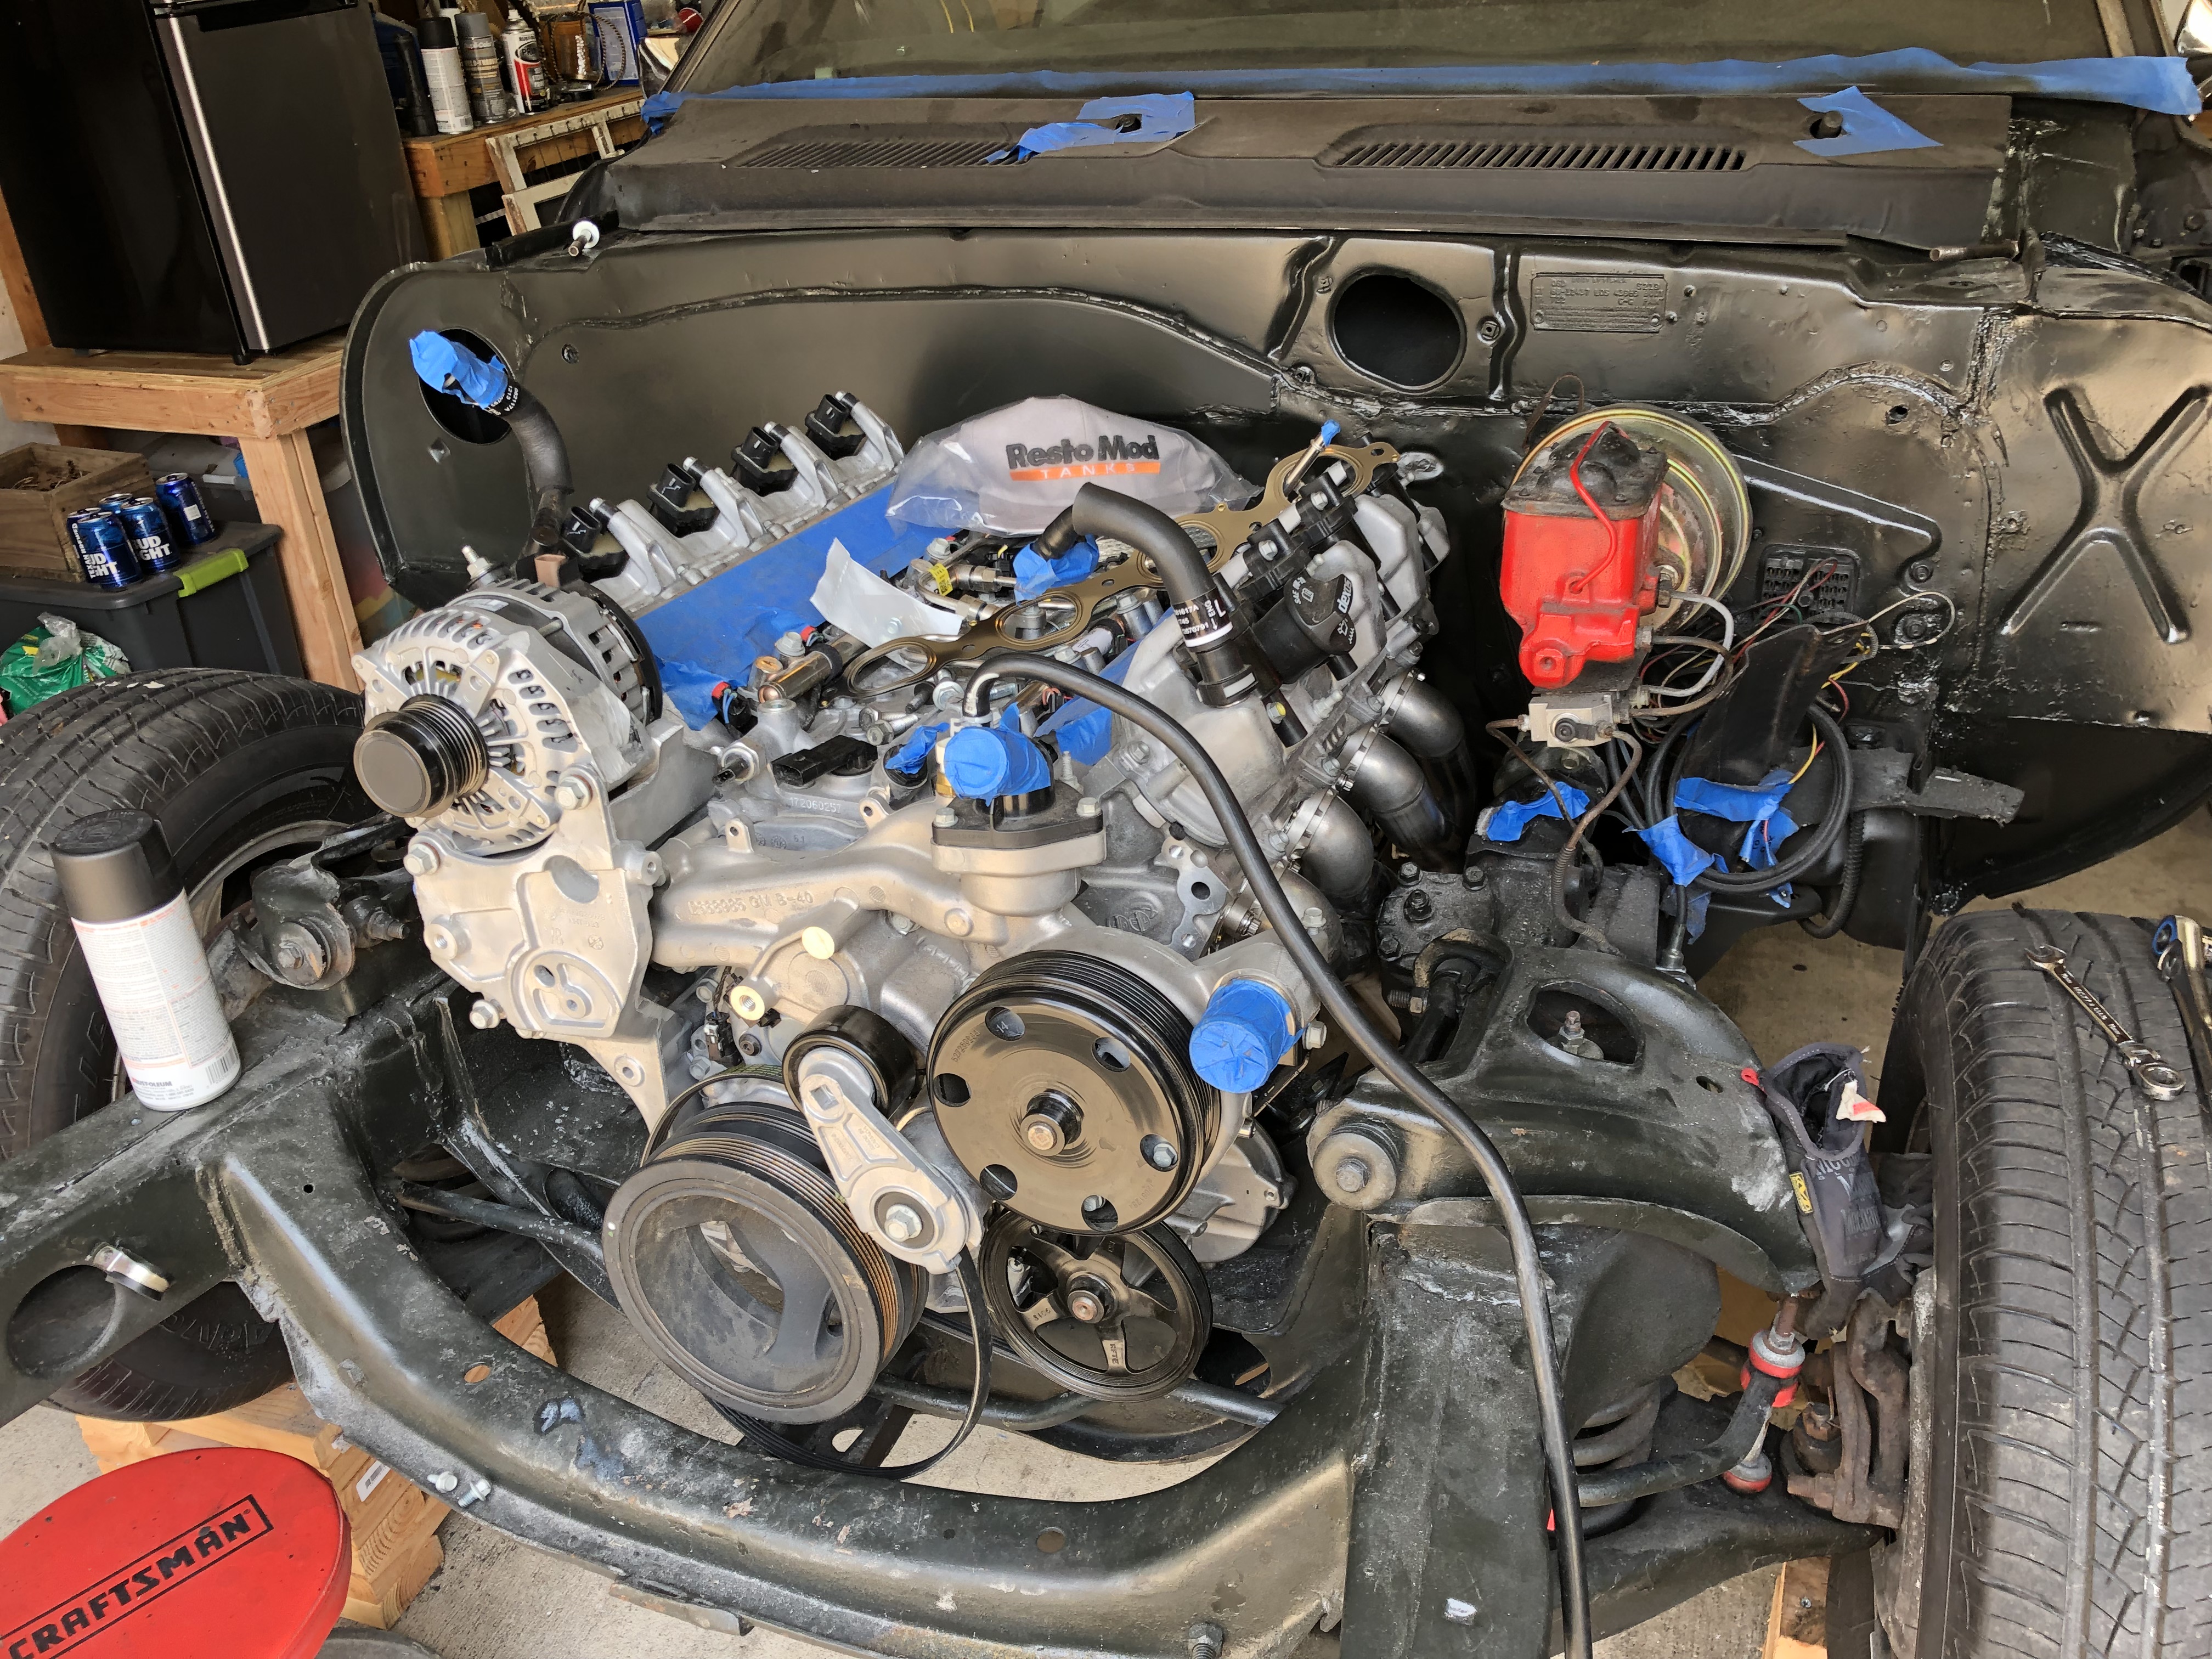
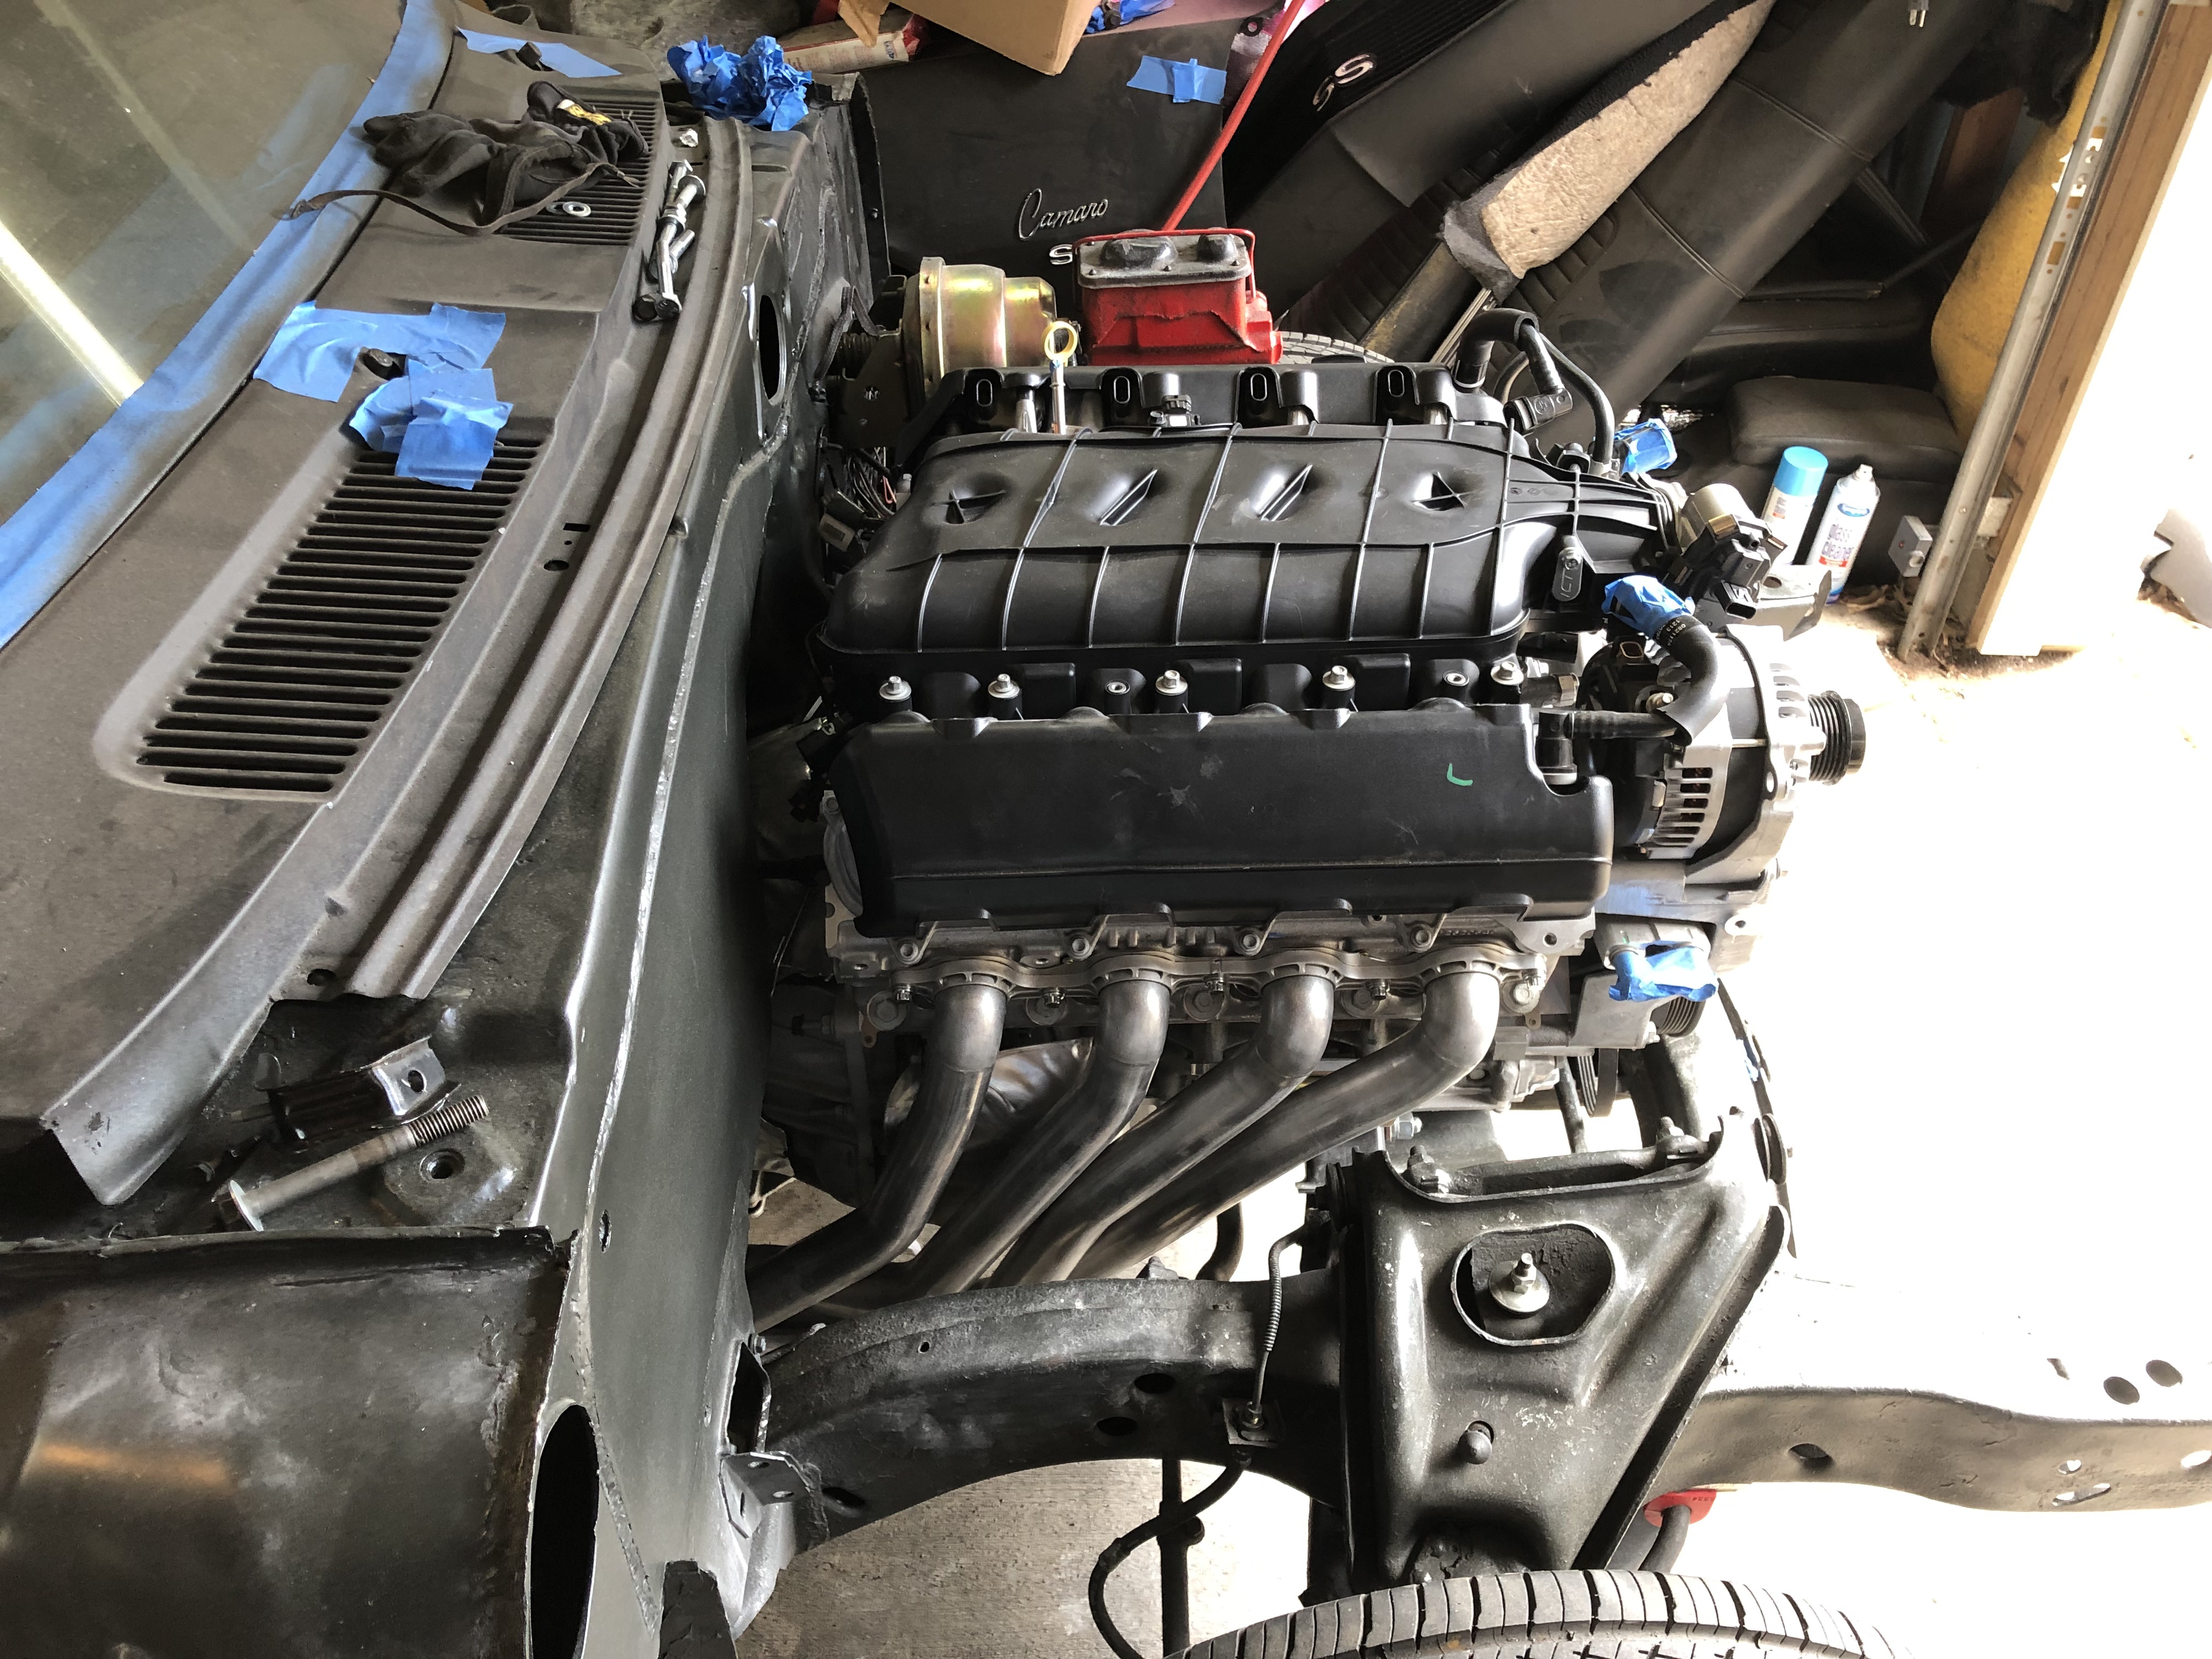
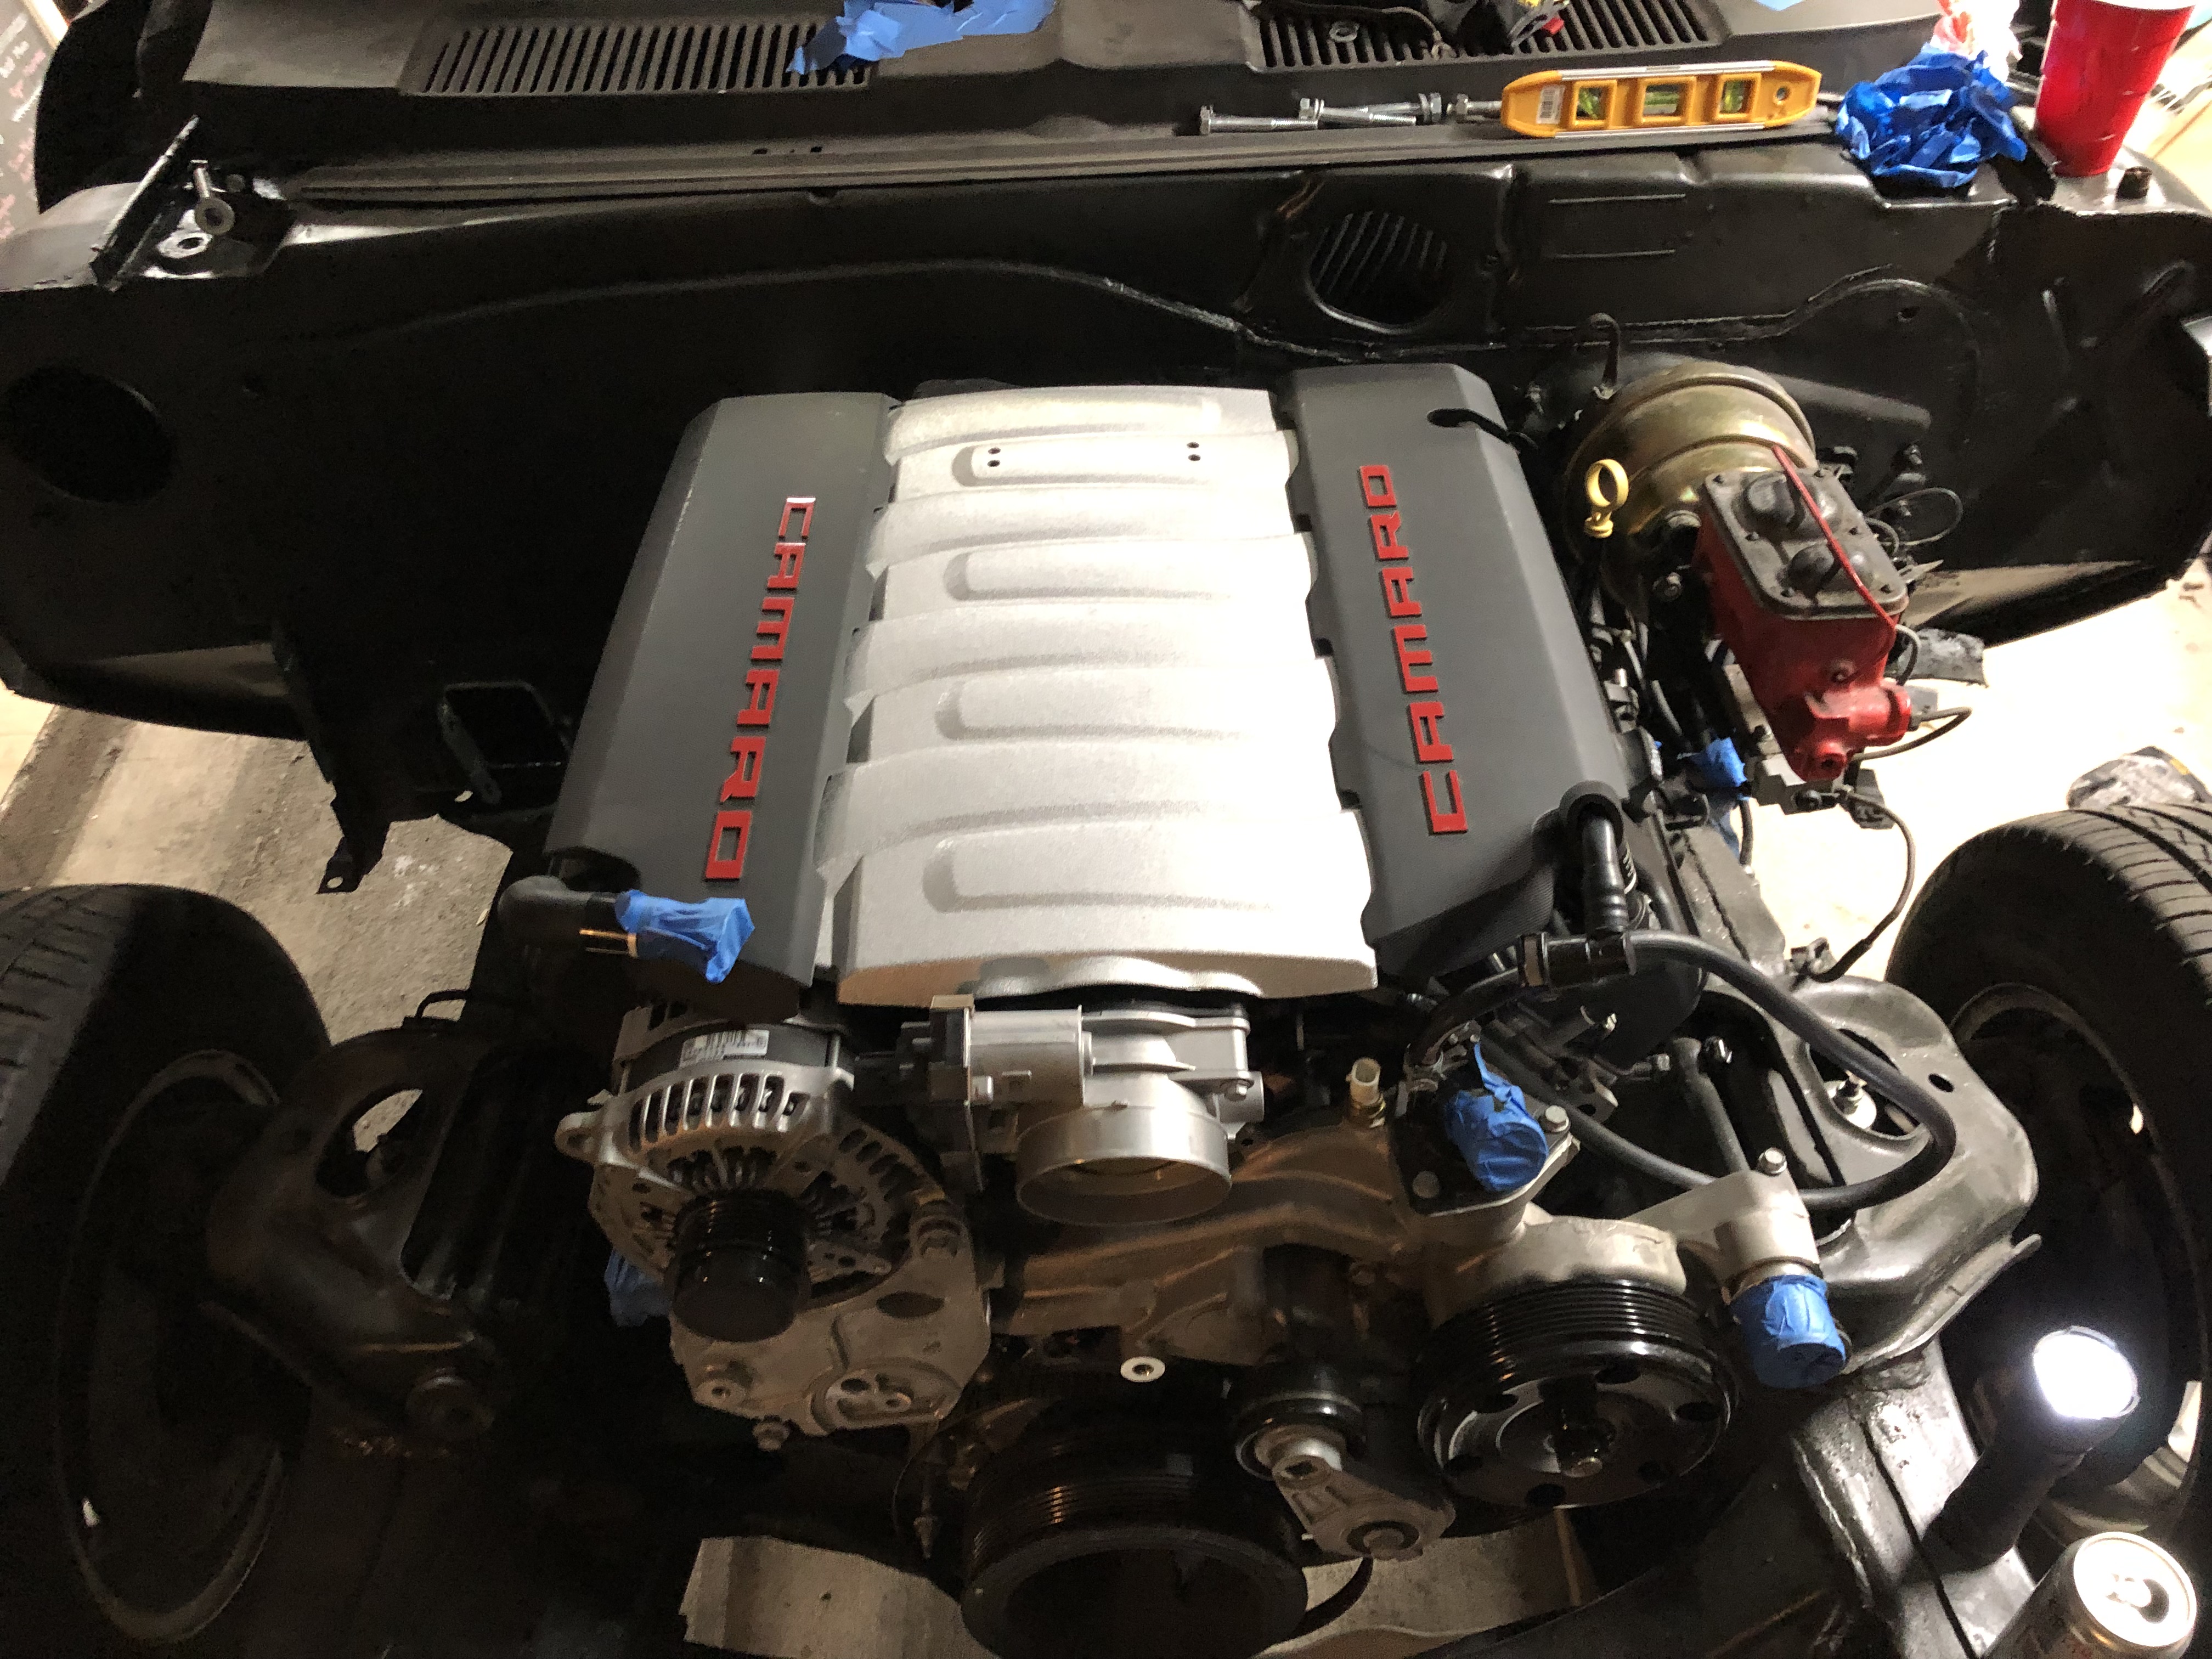
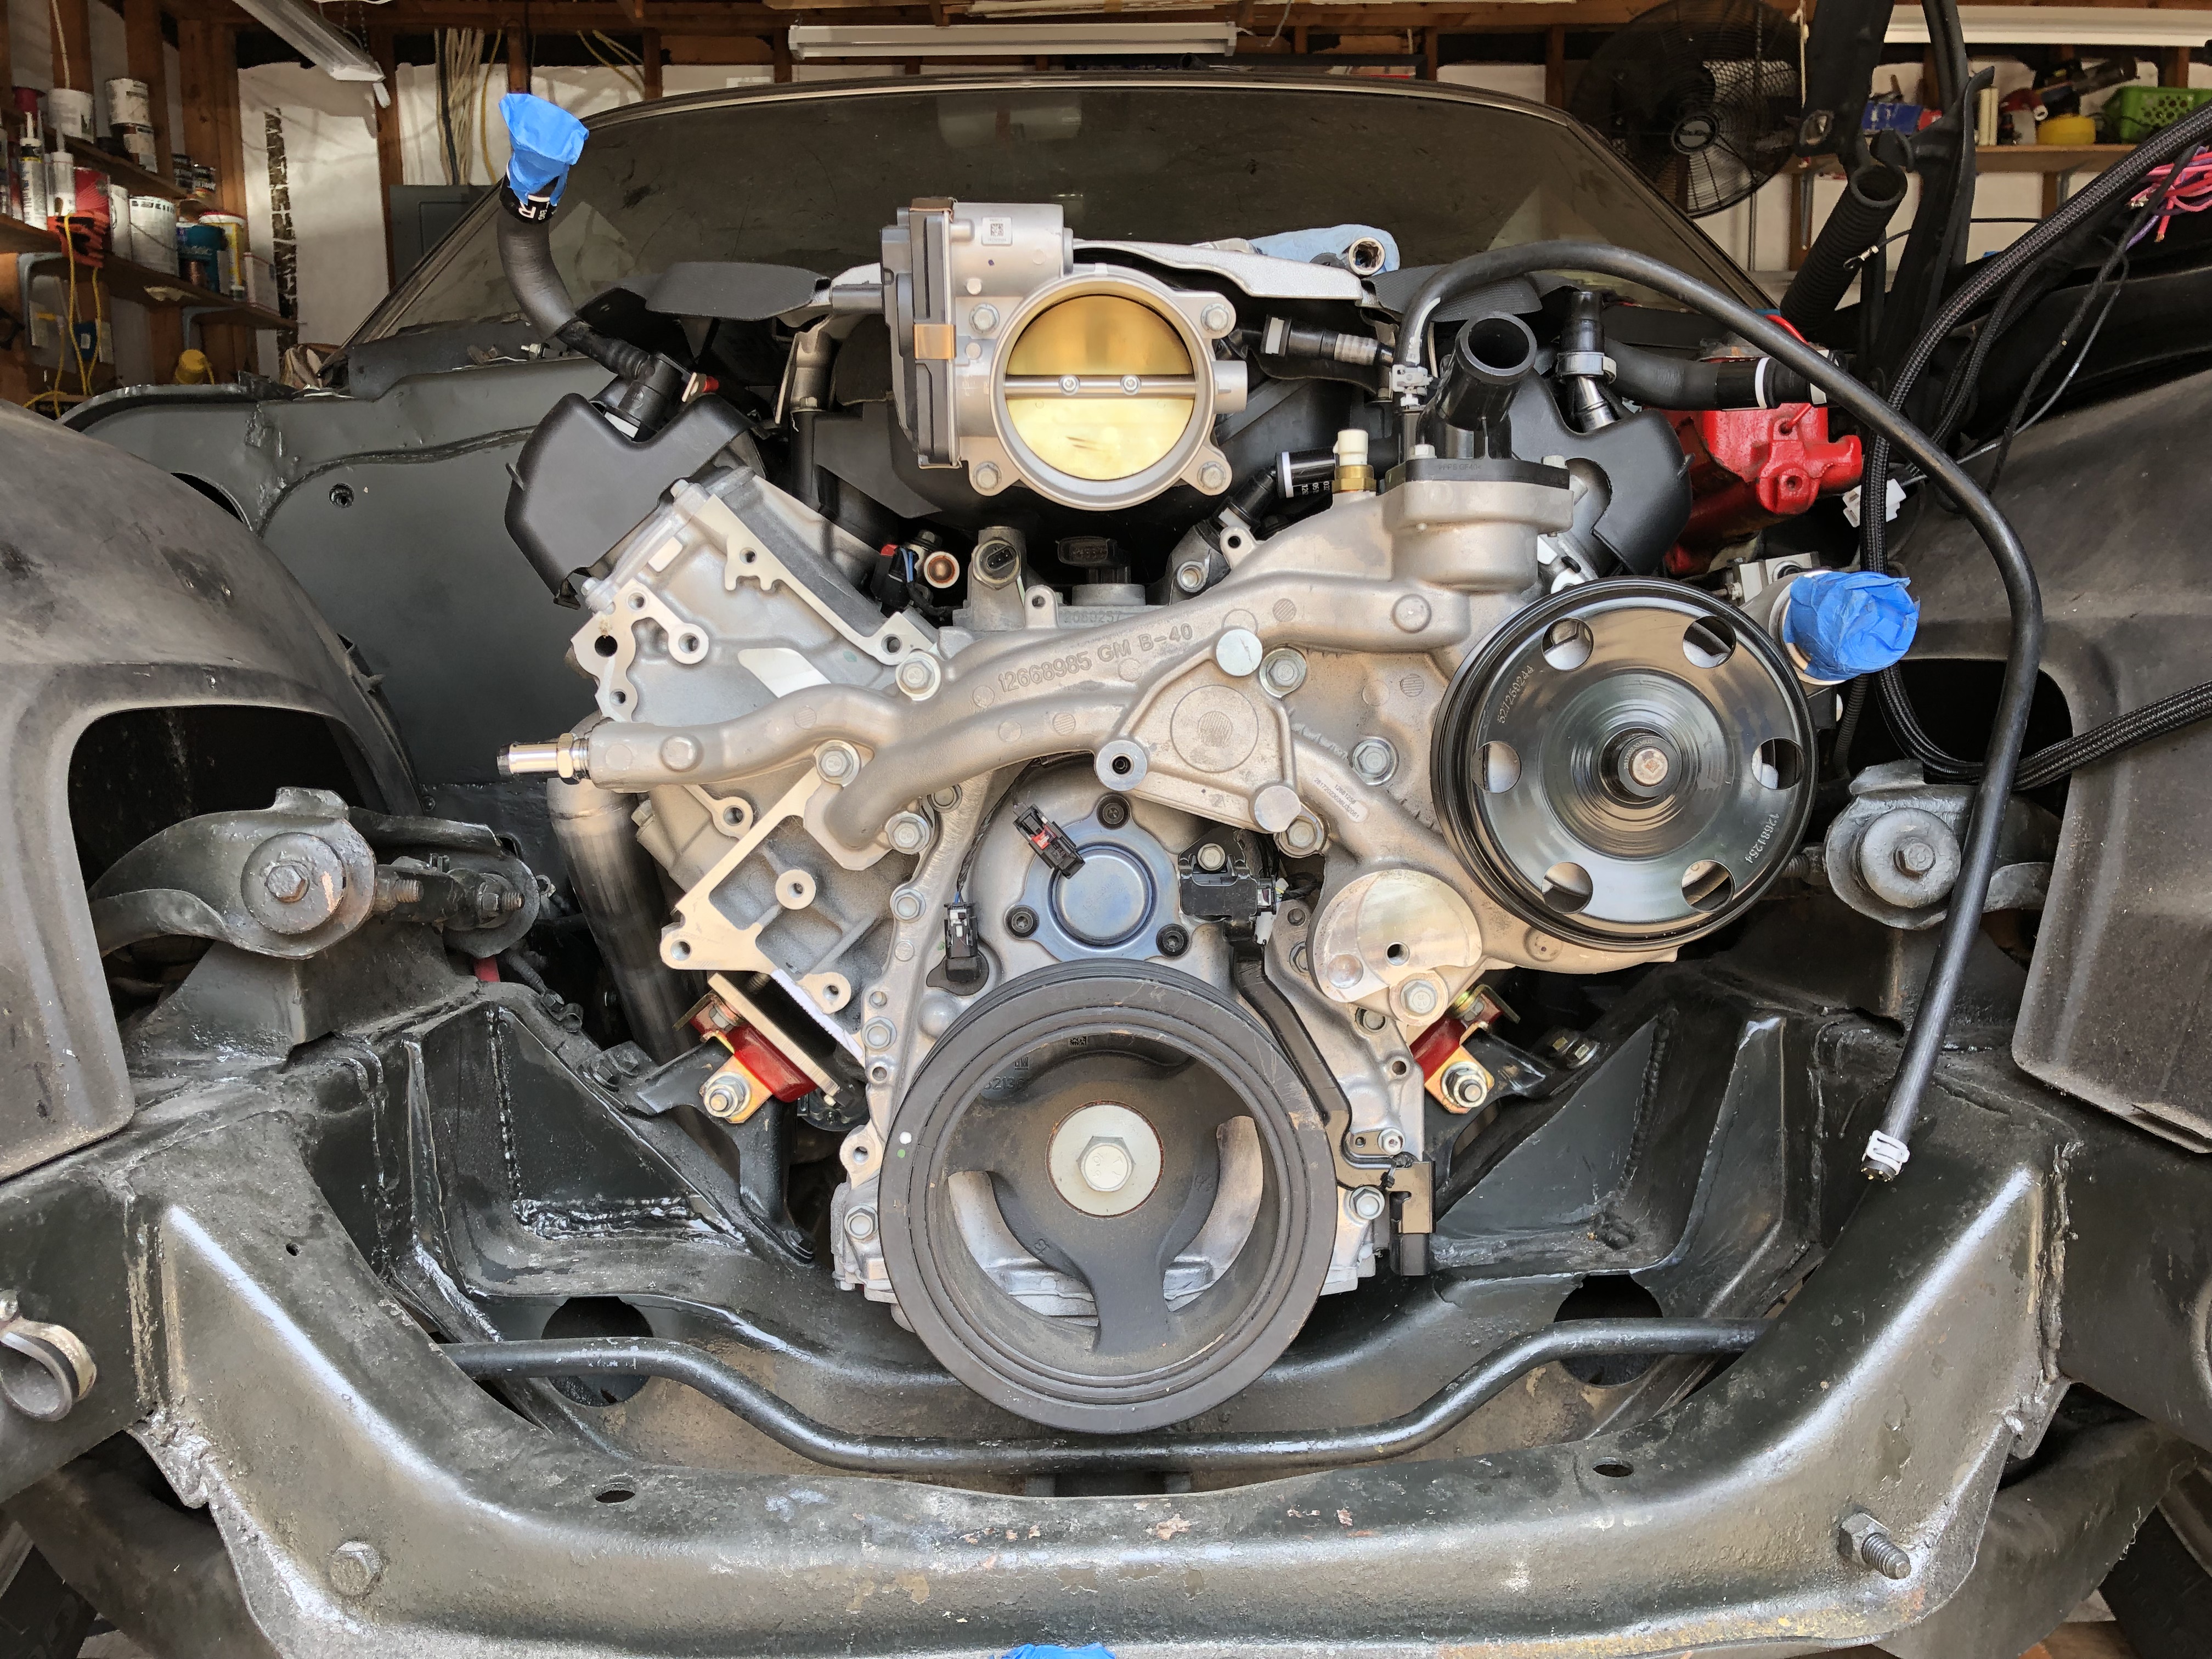
Got my headers installed! I ended up needing to massage the steering box and one of the tubes slightly to get them to fit due to the motors position in the car. These headers fit tight against the motor as advertised, this presents a small issue with the new Holley trans crossmember I'm installing. The PS header does not line up with the exhaust relief cutouts on the crossmember. Easy fix, just need to rout the exhaust over a bit, I post some photos of this later on. Another issue was the DS header flange had an issue sitting flush on the head, it seemed to be bulged out a hair in the center, hopefully the gasket and bolt torque will account for the misalignment issue. If you hold a straight edge across the header flange its off by a few thousandths in the center. PS header also clears the factory starter heat shield so thats kind of cool.
Also got the intake manifold installed and purchased the engine covers. I'm missing the studs to mount them but one of the guys on Corvetteforum was nice enough to send me his old studs for free as long as I covered the shipping.

05-14-2019 #6
Registered User
- Join Date
- Jul 2017
- Posts
- 166
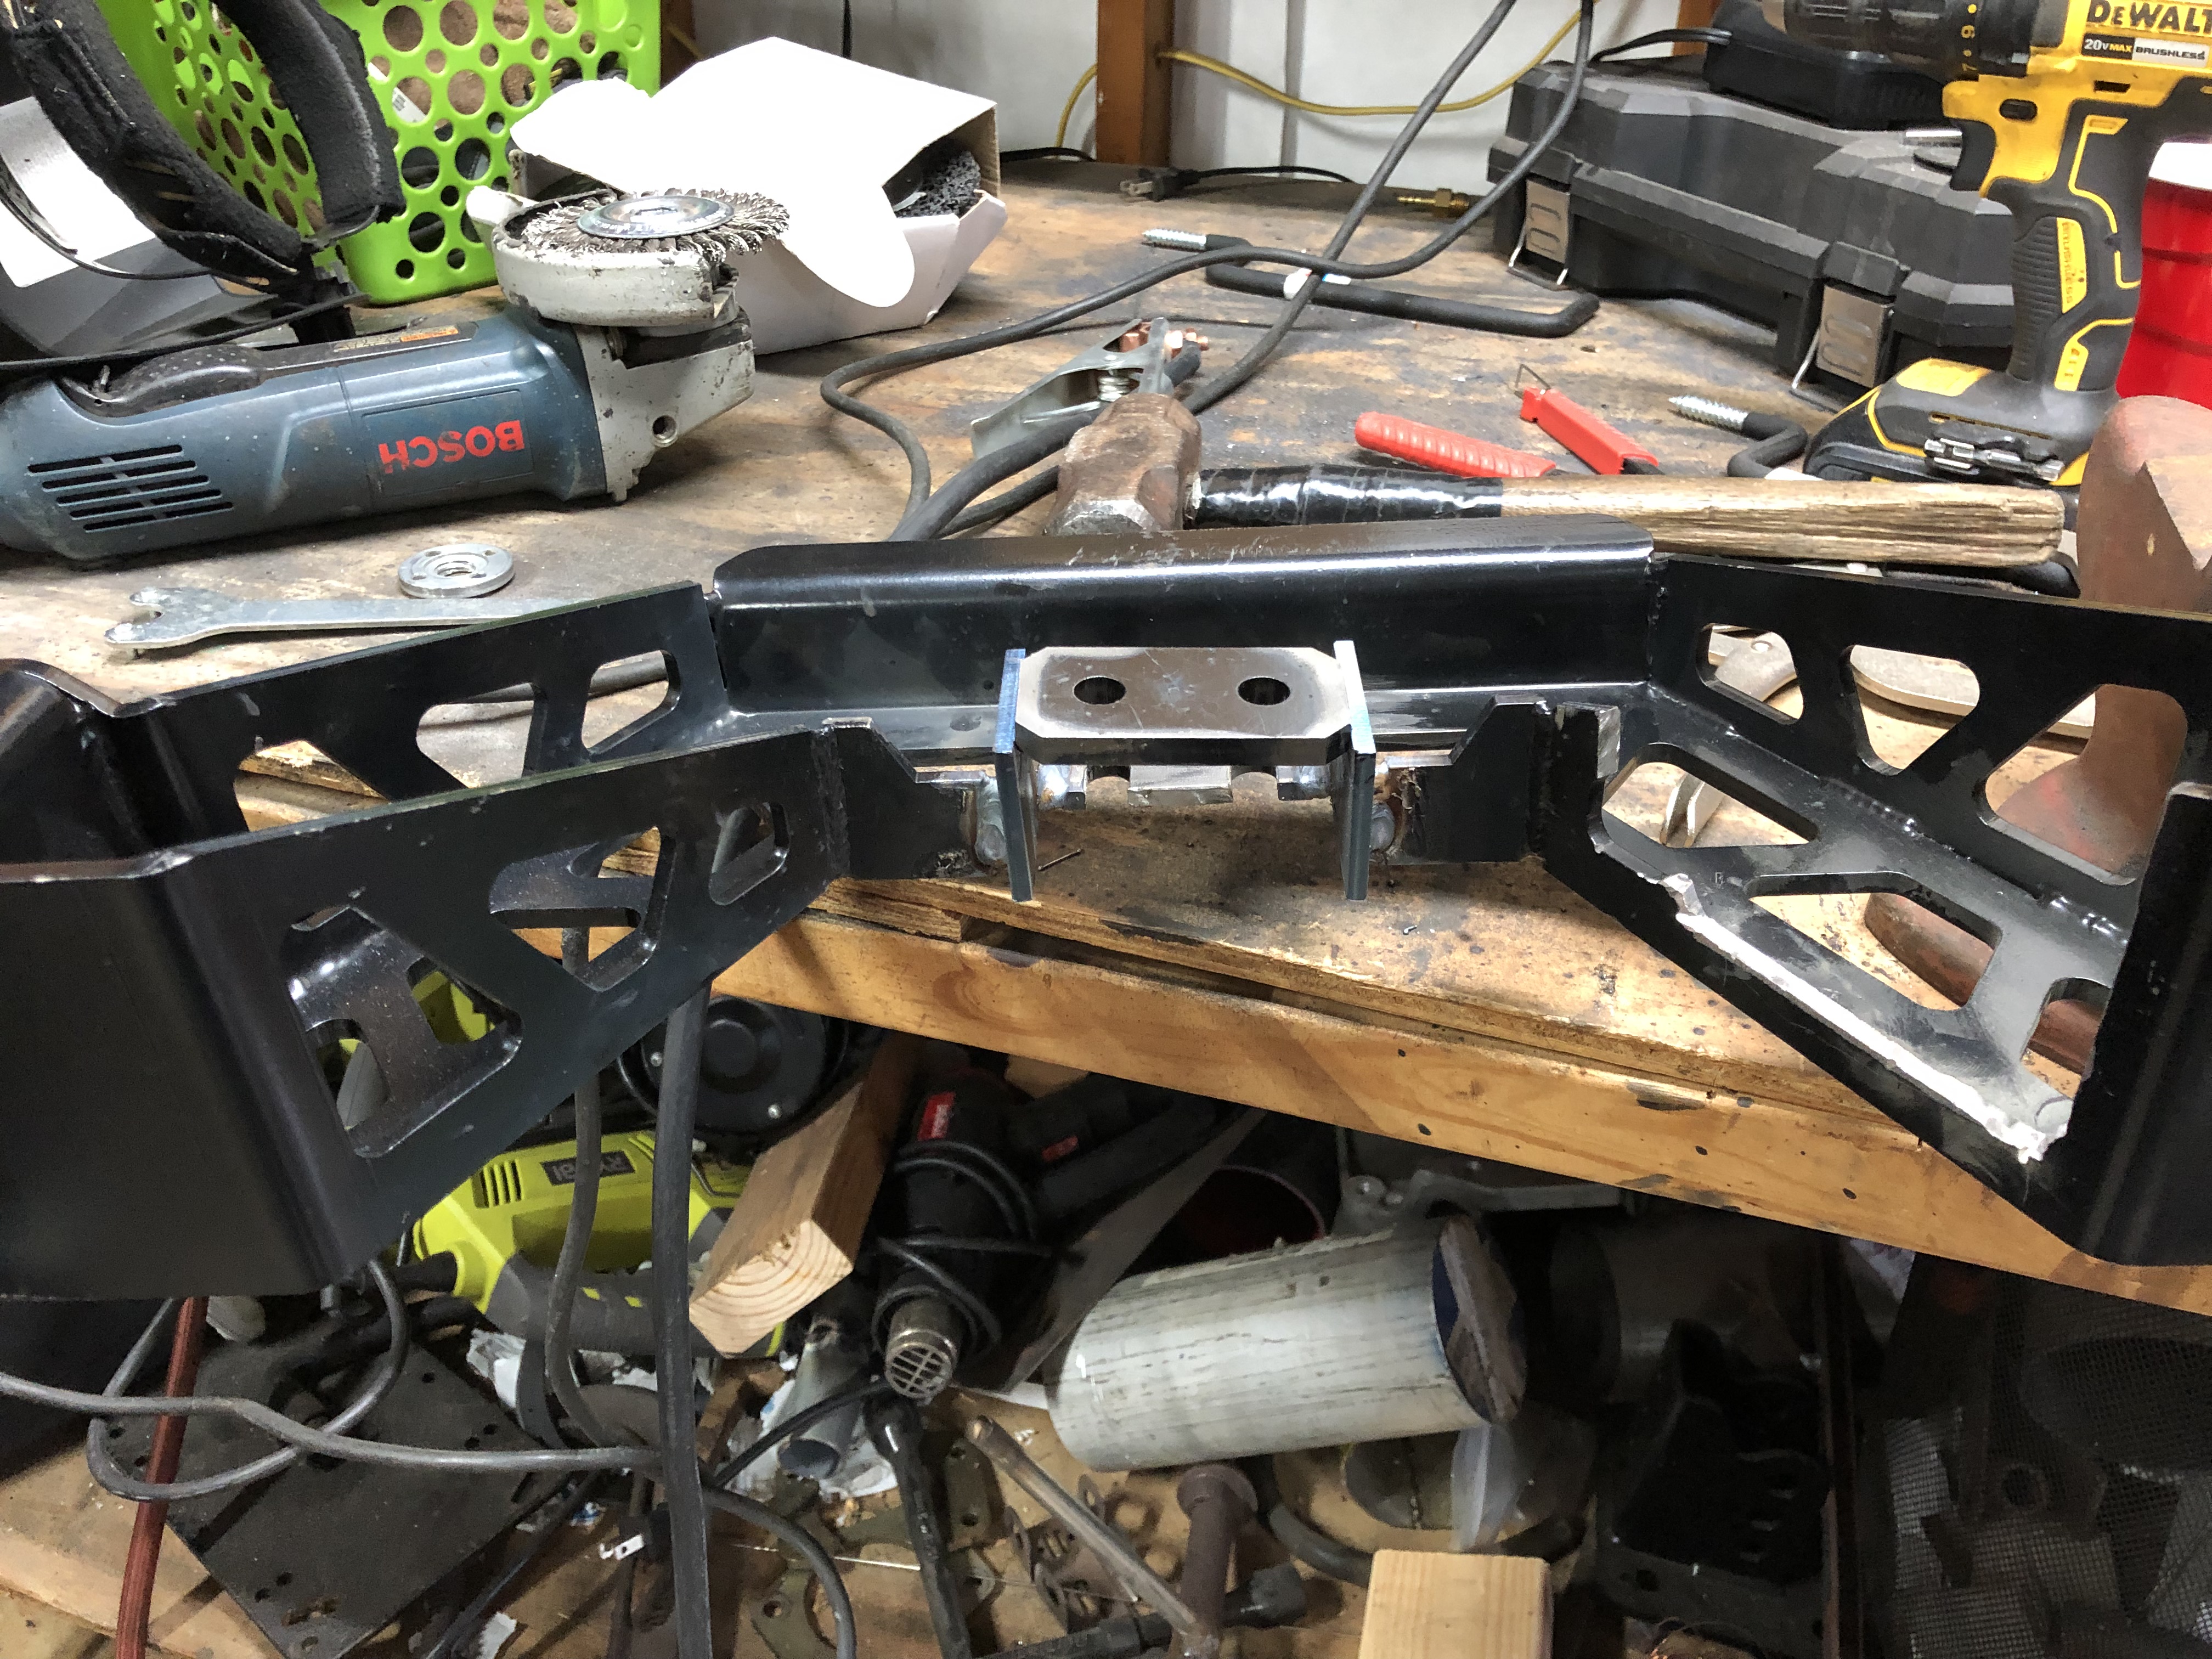
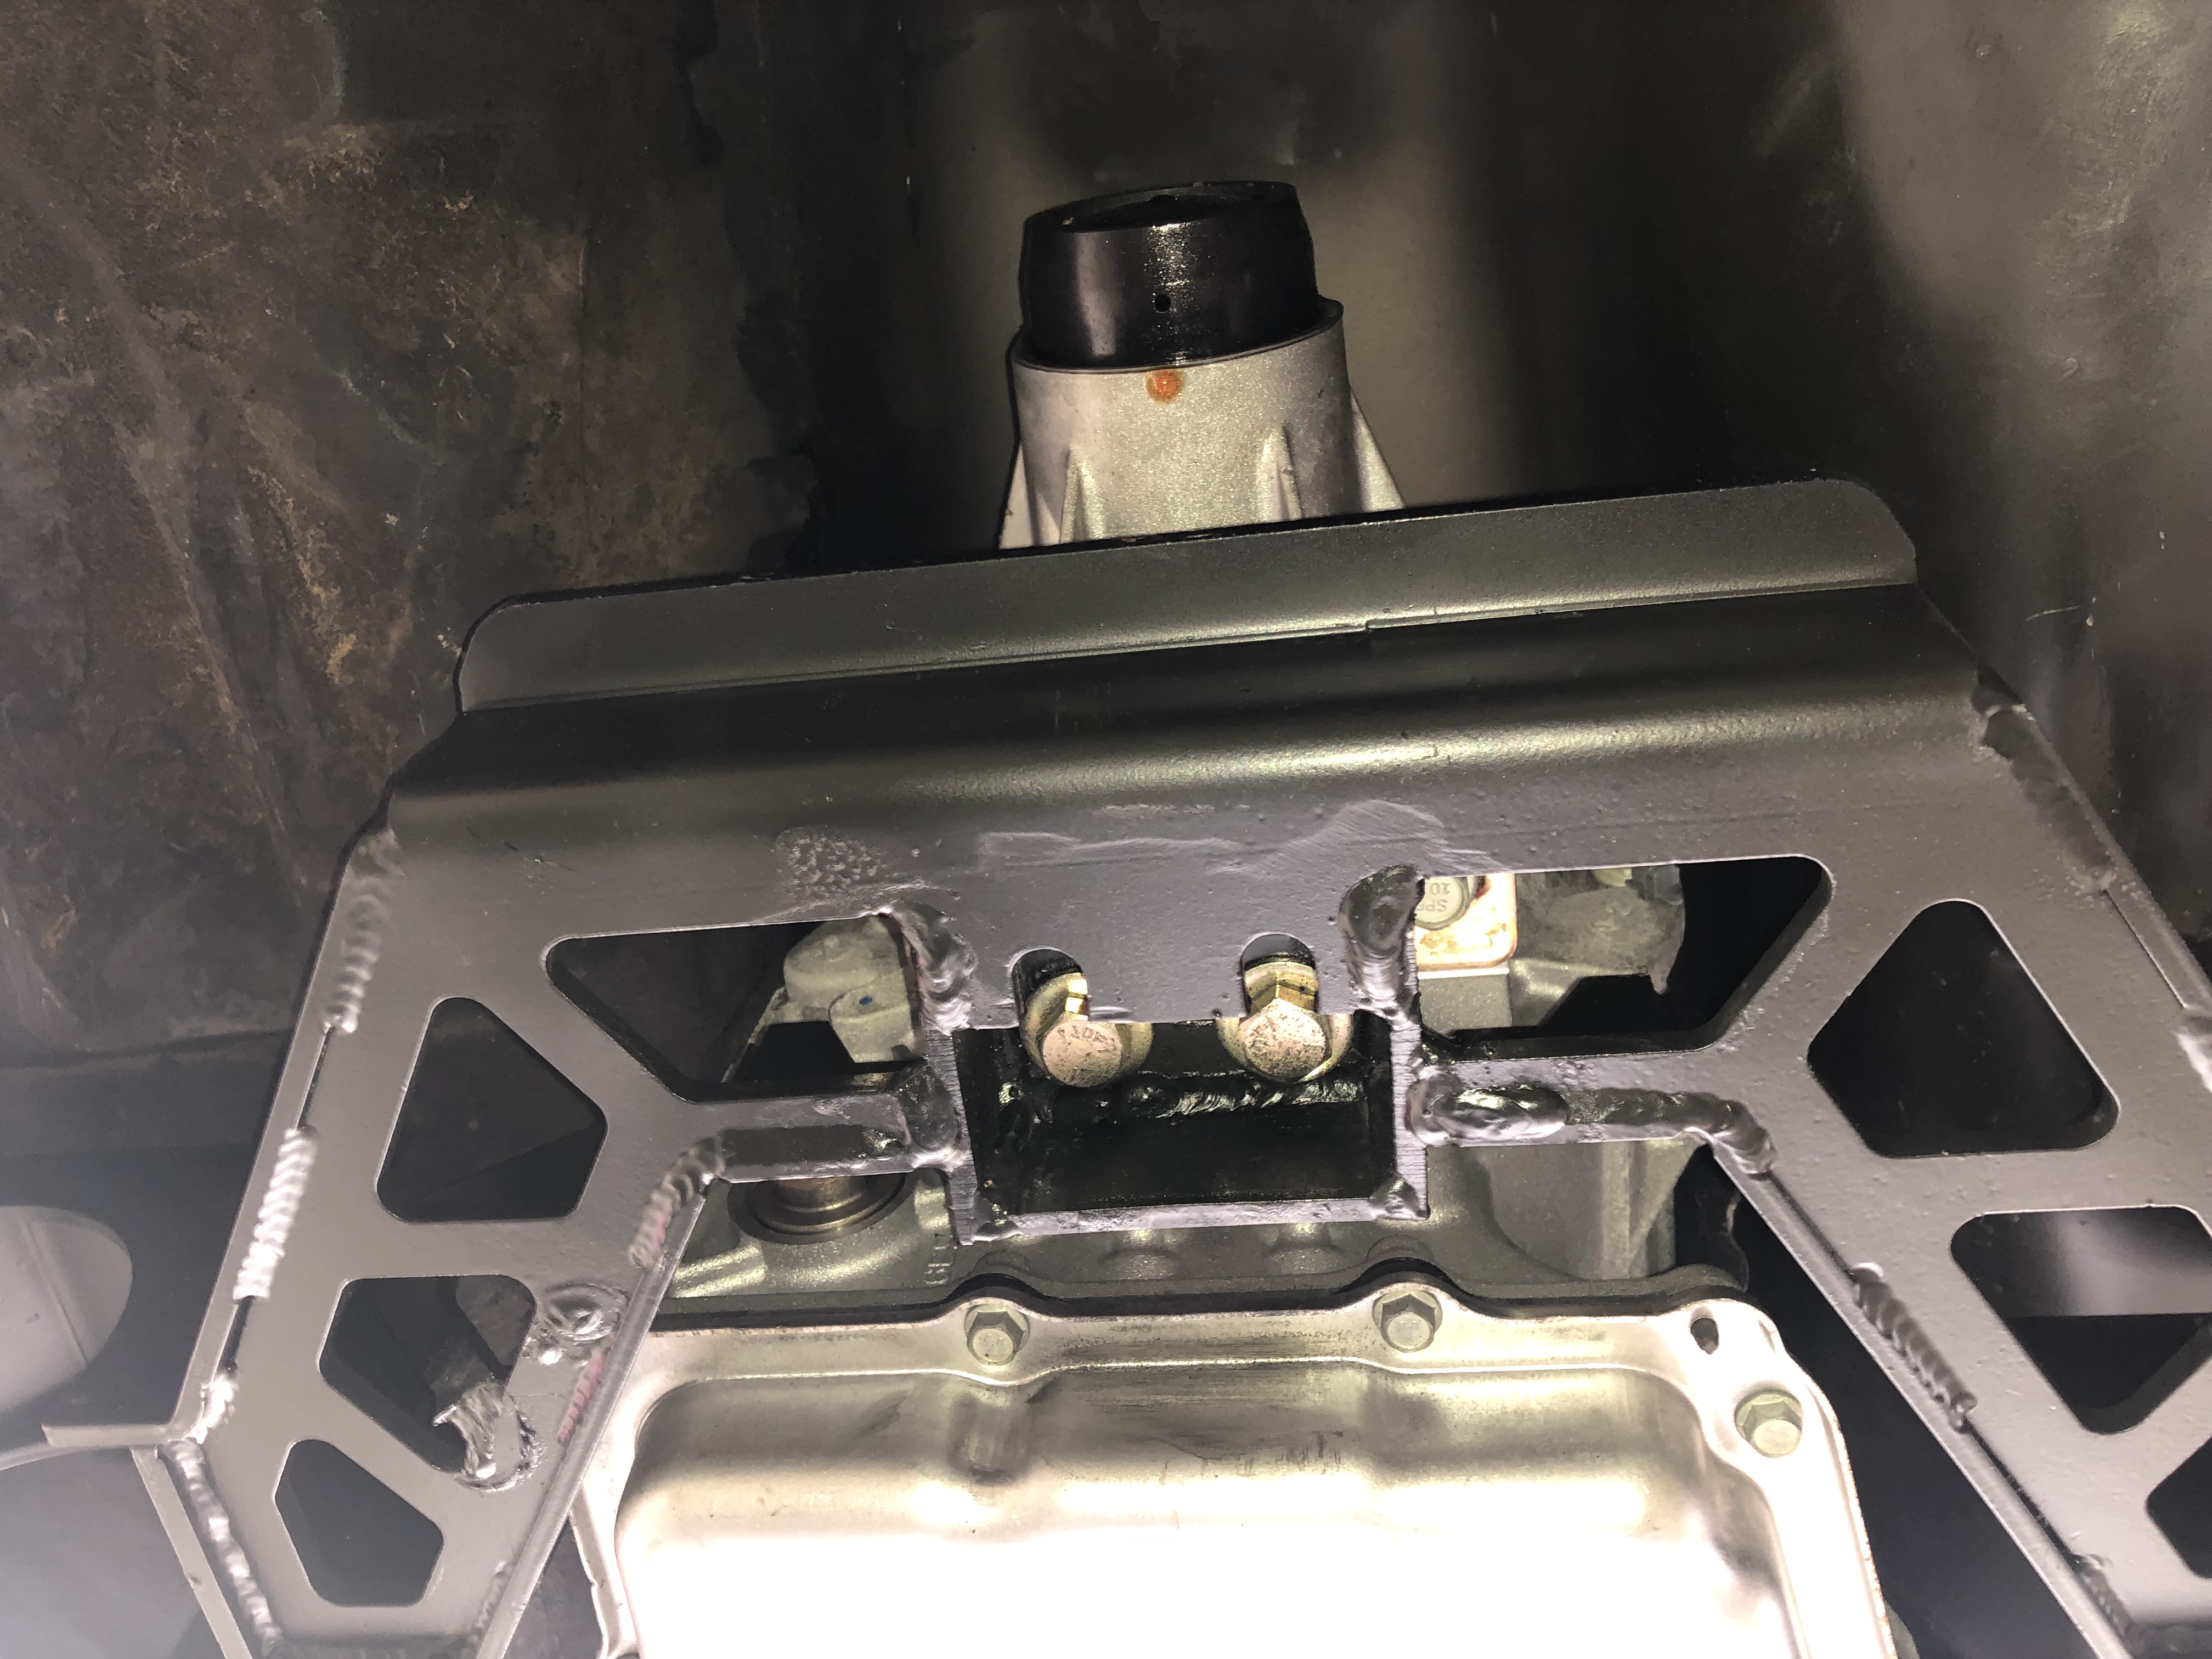
I ended up changing my mind about my hackjob crossmember I made and figured I would purchase a Holley crossmember and hack it up instead. I found a post on ls1tech where a guy used a T56 crossmember to install his 6l90 so I figure this would be a good starting point.
Sorry for the lack of photos, I away from the car but I'll get photos of the crossmember installed later on.
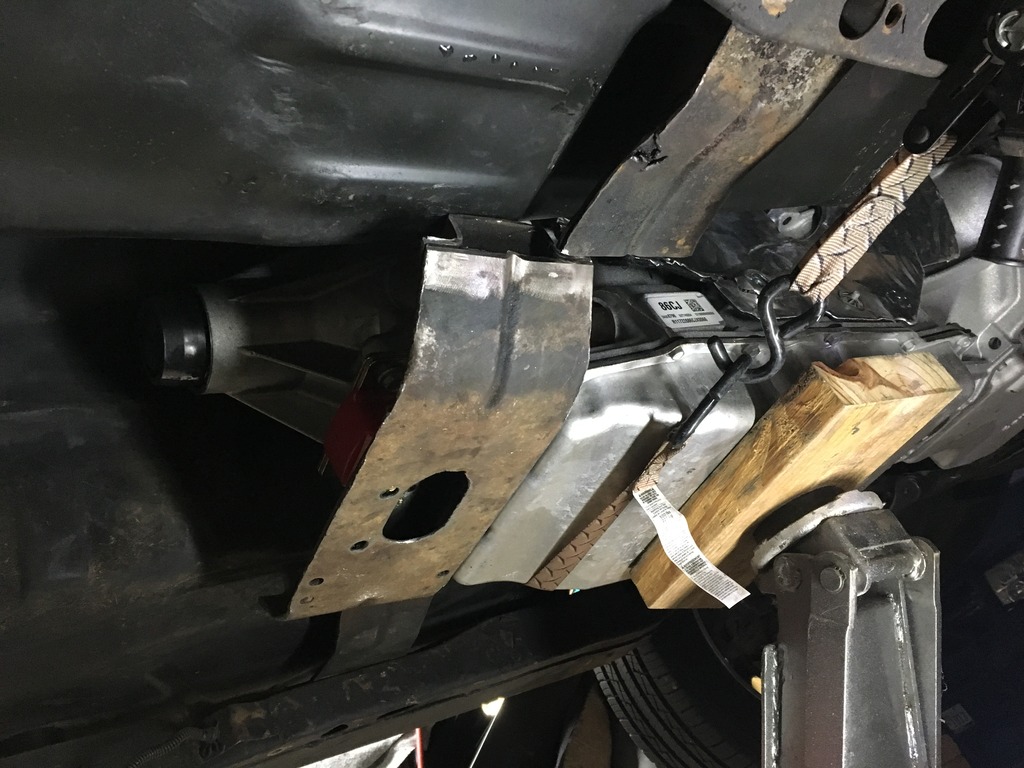
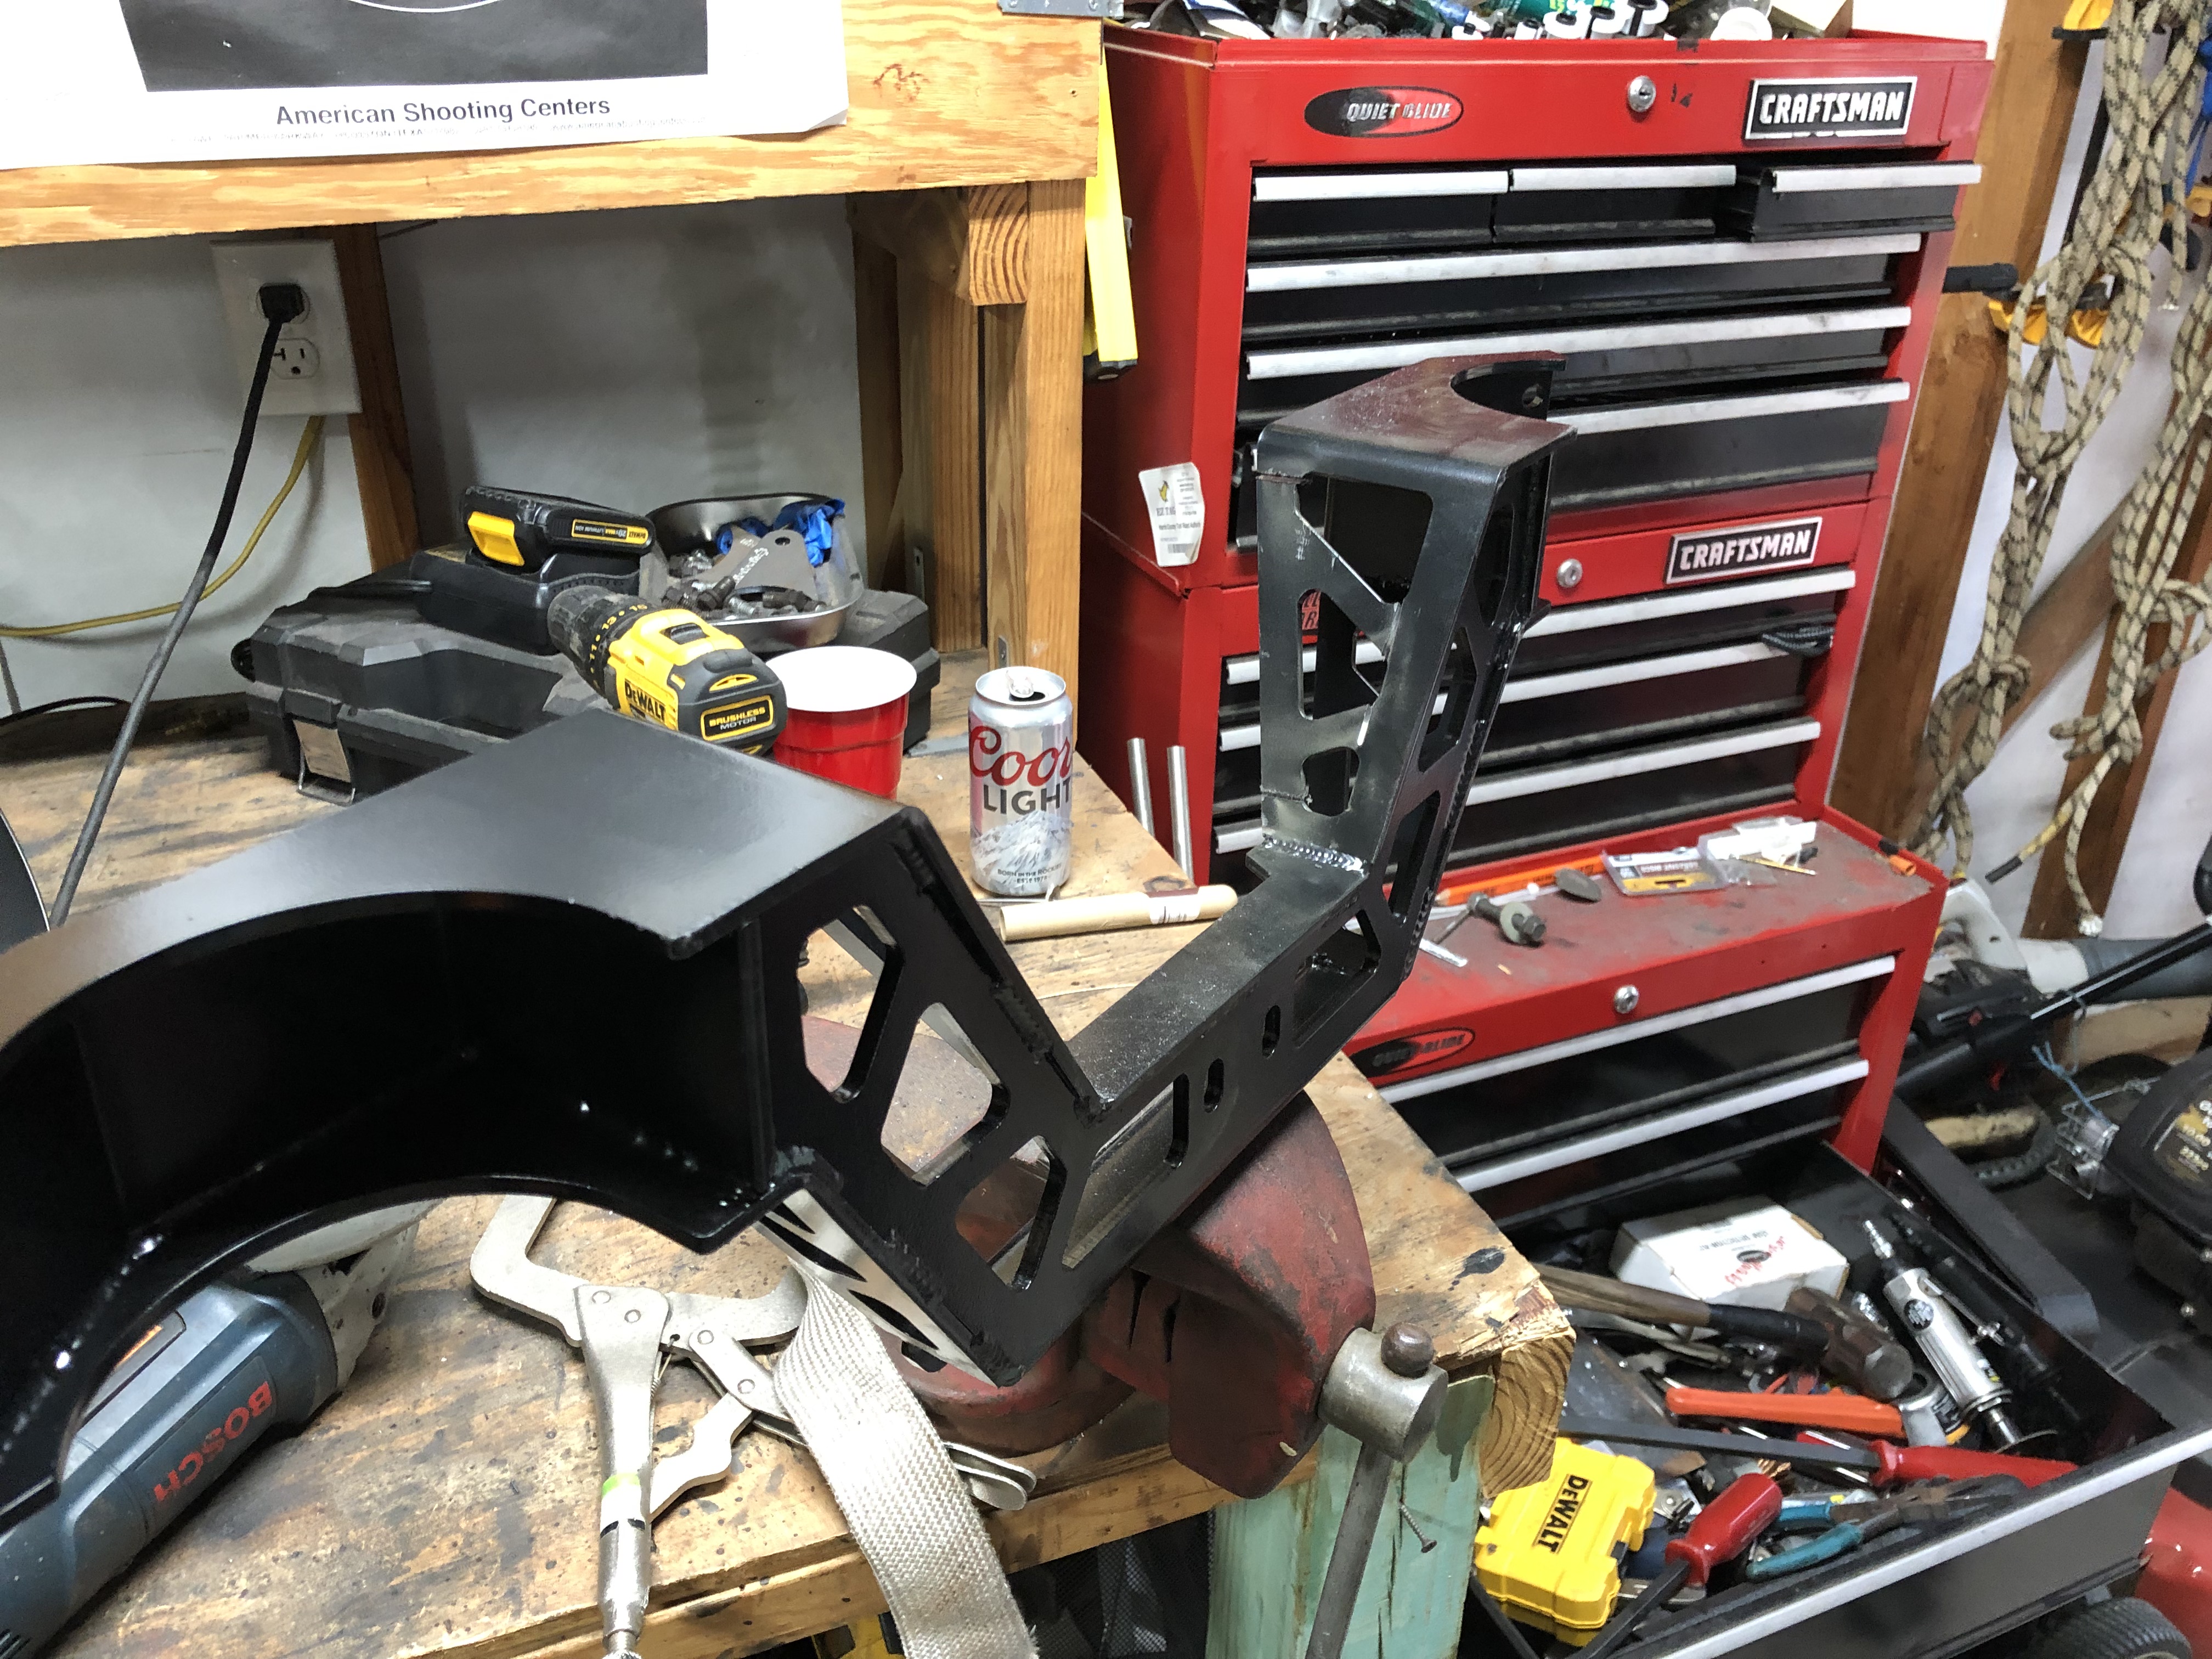
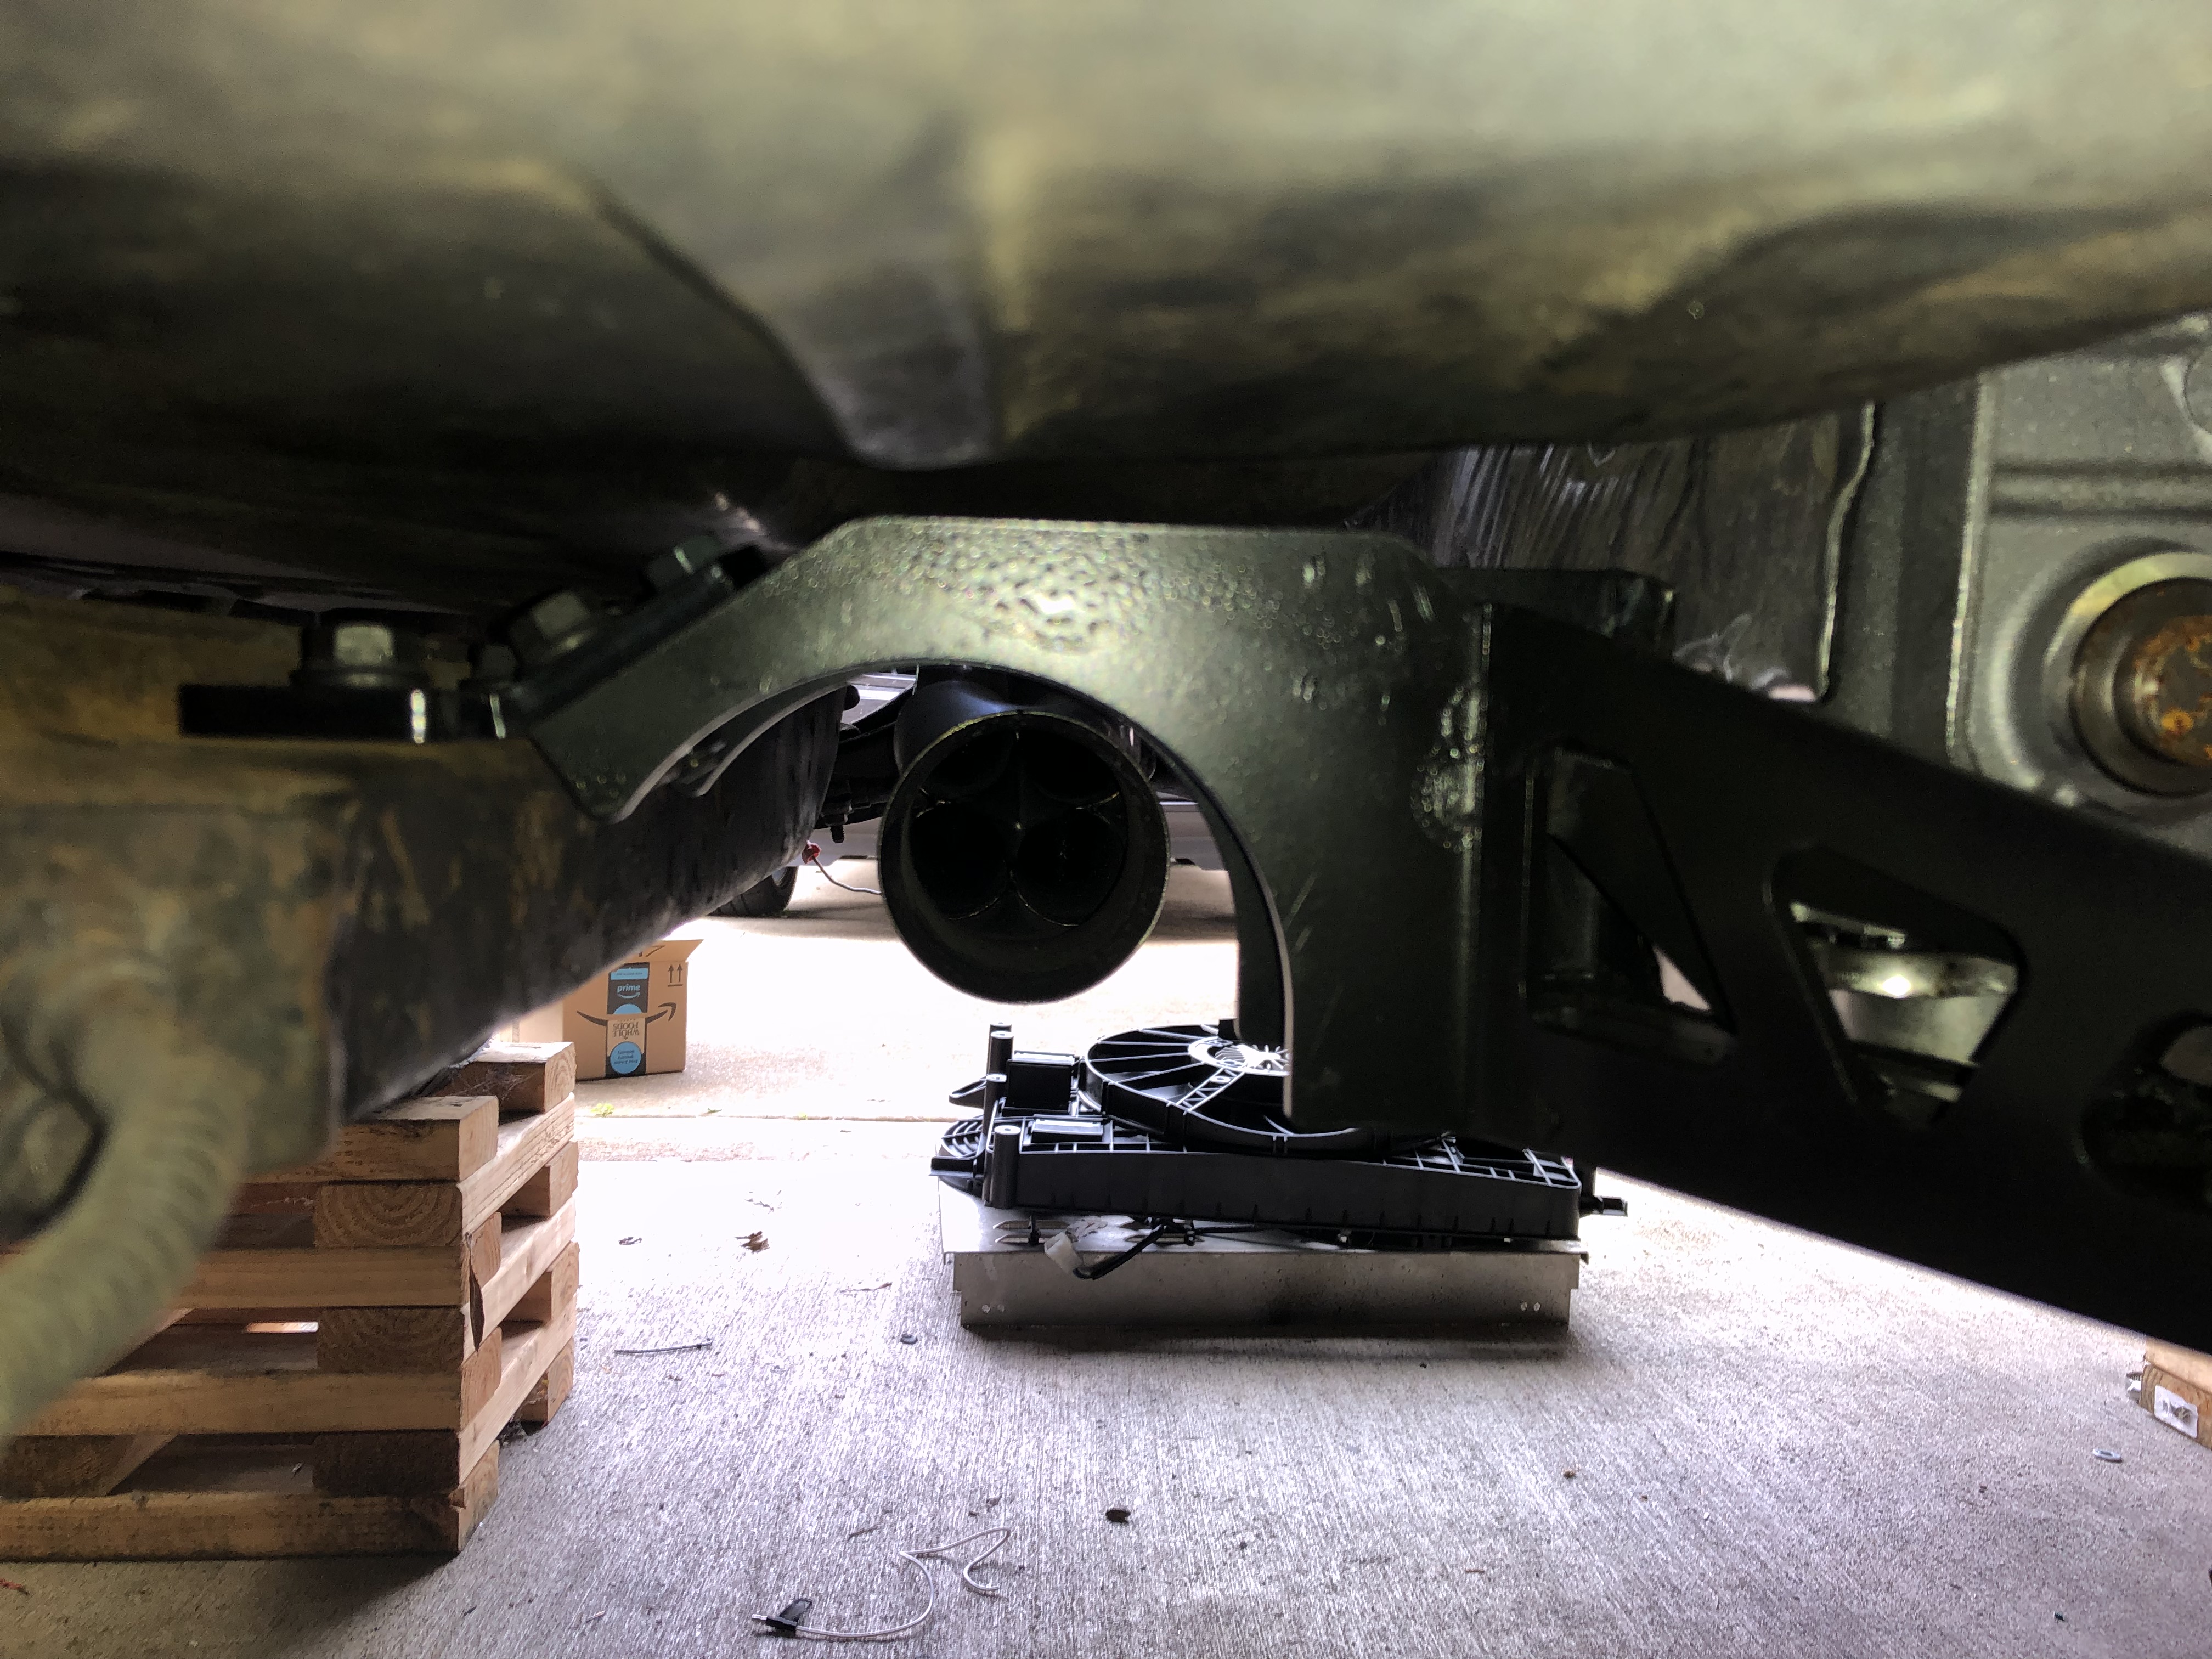
Here are a few pics of what needed to be done on order to make it fit. I had to cut out some of the diagonal gussets to clear the pan and then I had to lift the mounting position roughly 2" high and 3/4" forward to bold up to my trans witht he trans sitting at 3 degrees. Also reinstalled the diagonal gusset plate off to the side to maybe help keep strength.
It ended up working out great and is way stronger than my hackjob crossmember. I did not want to risk hitting a big bump and the stock crossmember bend and screw things up so this should help that not happen.
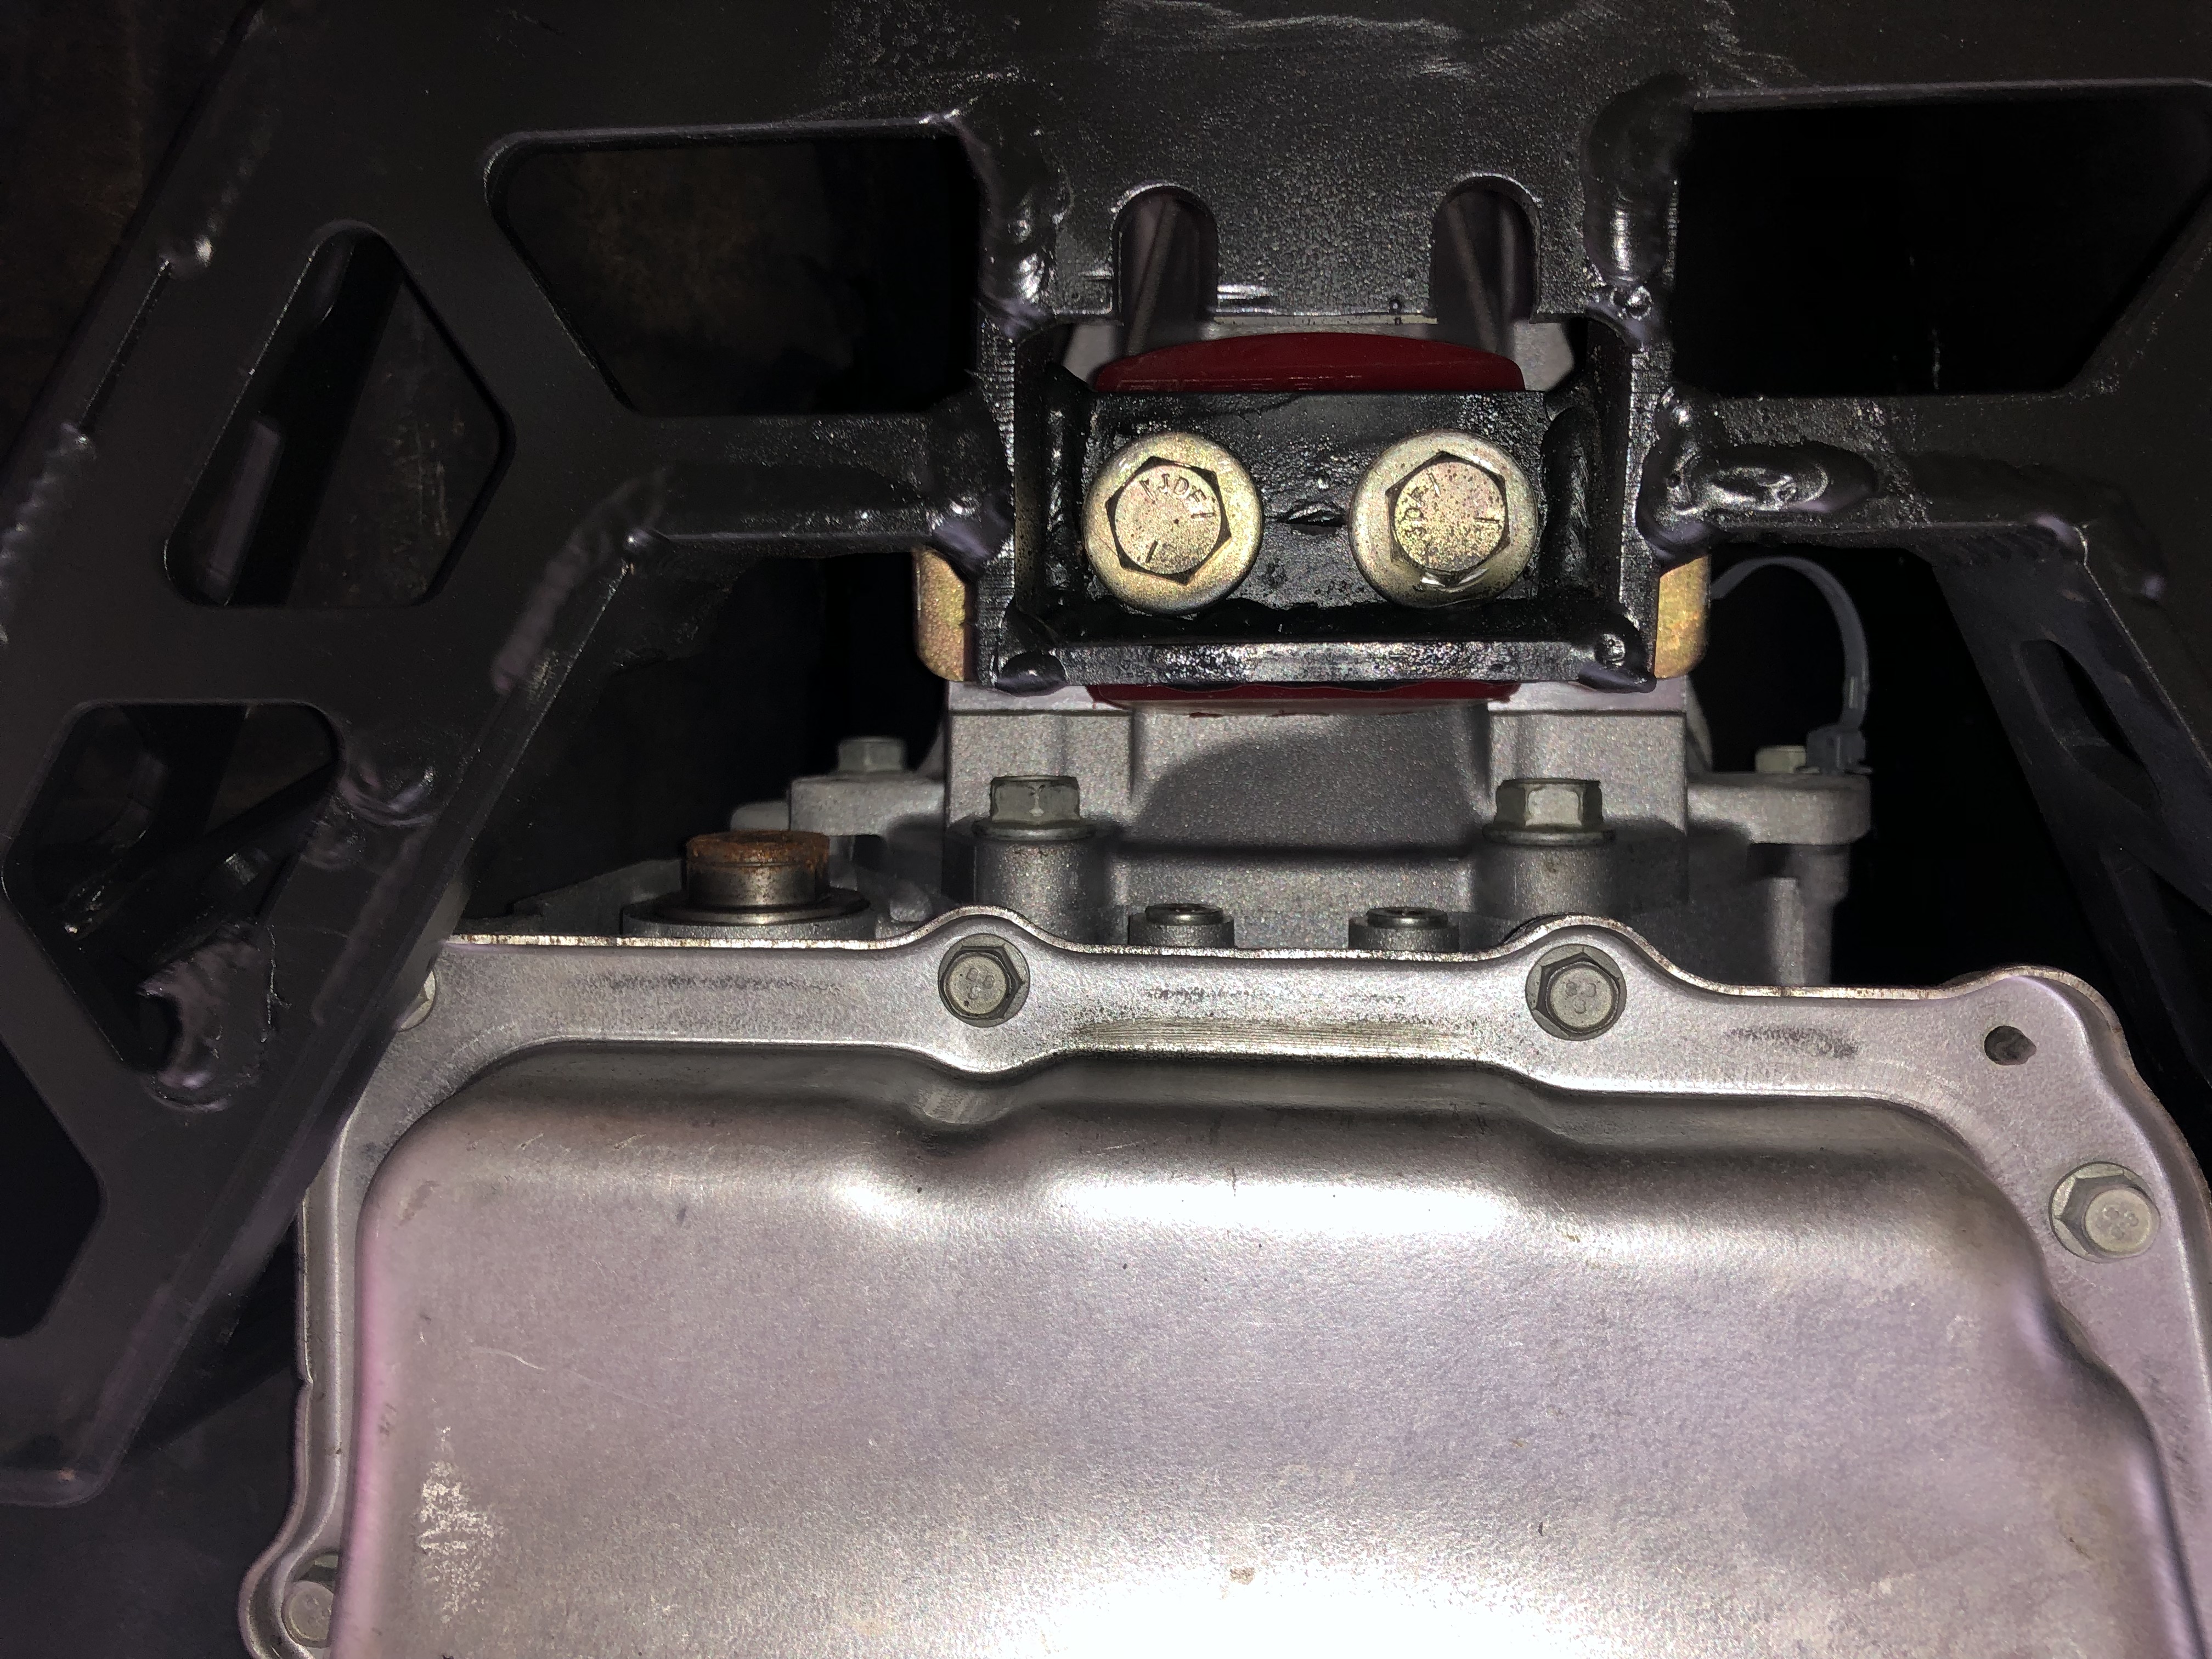
In order to lift the mounting point and move it forward I just used some leftover Ridtech axle tube tabs from my 4-link kit and the plate with the mounting holes came with the crossmember, I guess it might be a spacer?

05-15-2019 #7 Registered User
- Join Date
- Nov 2006
- Location
- Ma.
- Posts
- 5,567

I've been watching your progress over there, nice to see it here. Great project.
Wayne
Car FINALLY home !!!!!! lol
Project FNQUIK https://www.pro-touring.com/showthre...ghlight=FNQUIK
06-04-2019 #8
Registered User
- Join Date
- Jul 2017
- Posts
- 166
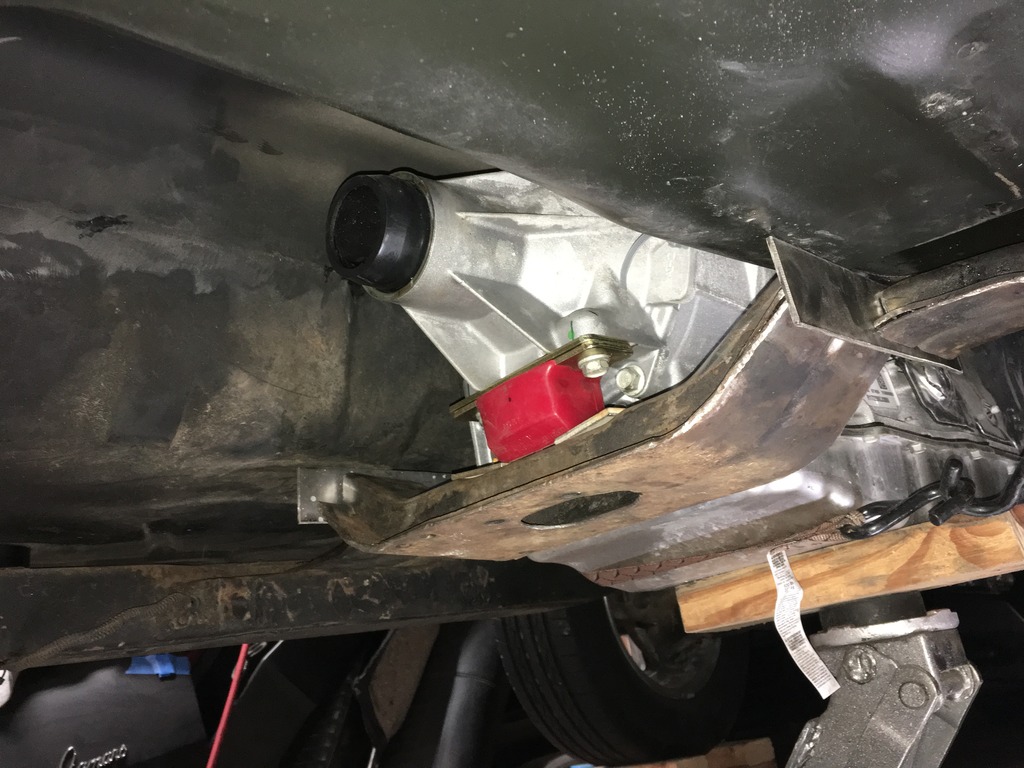
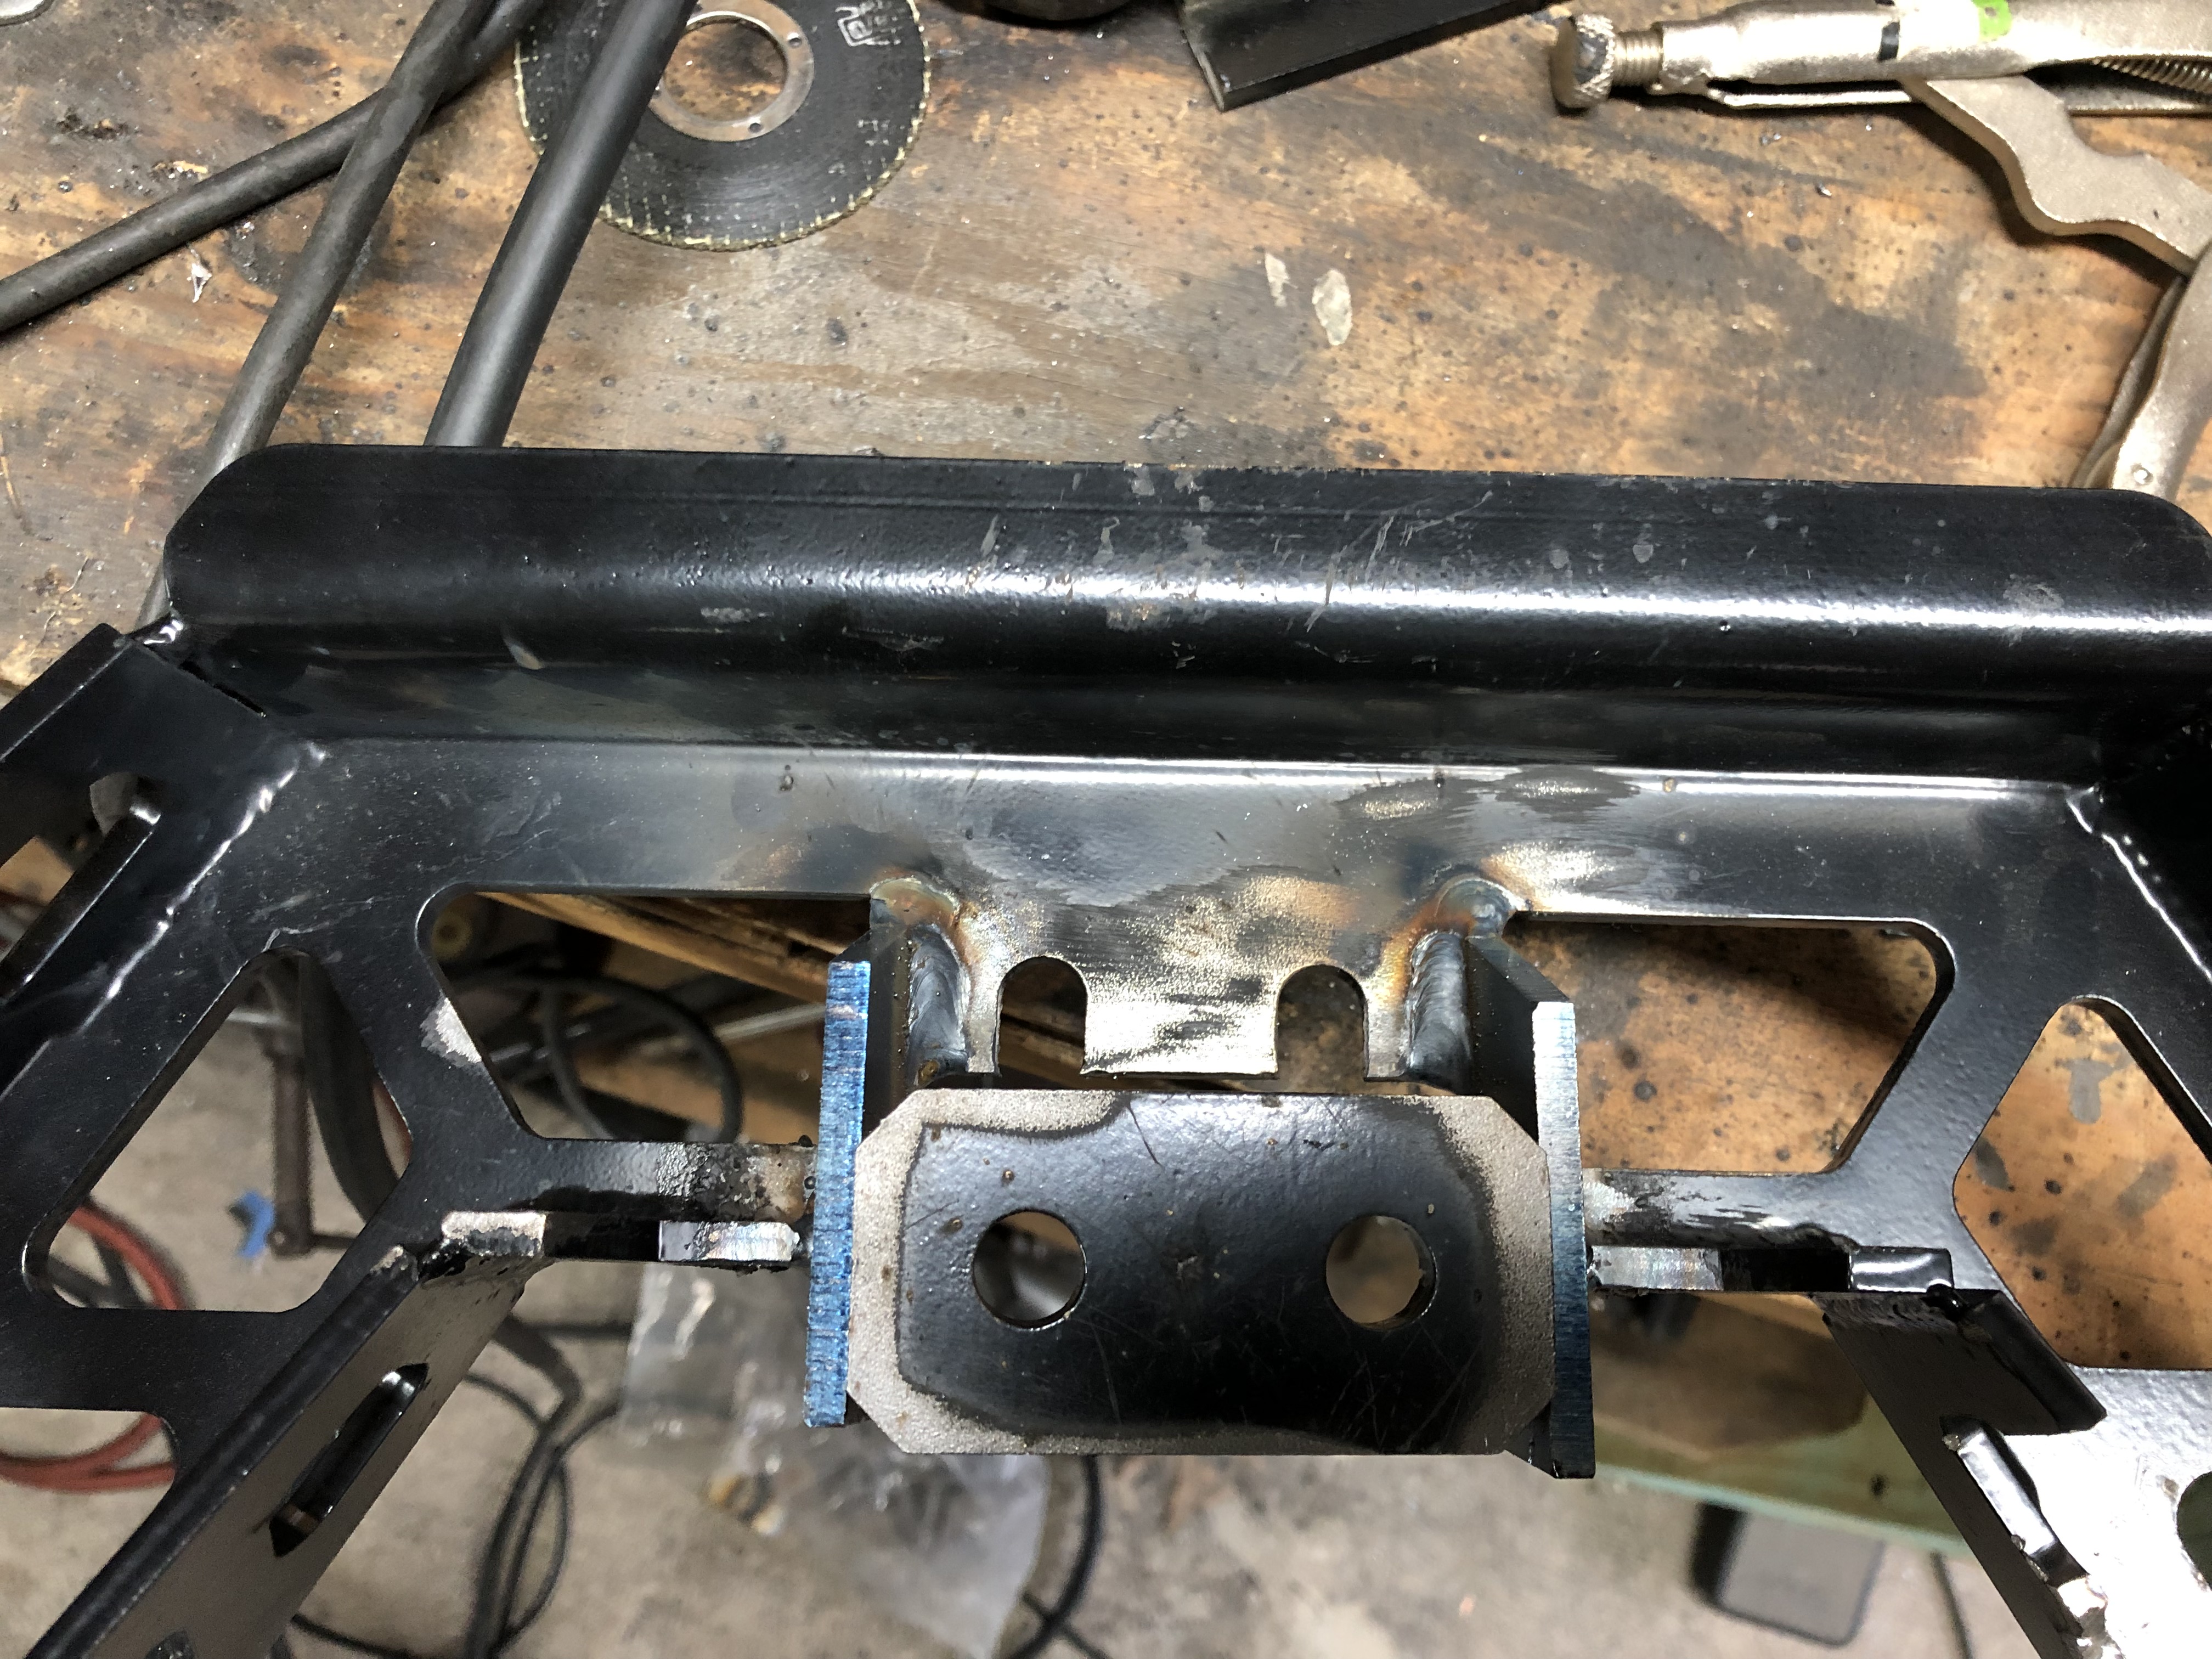
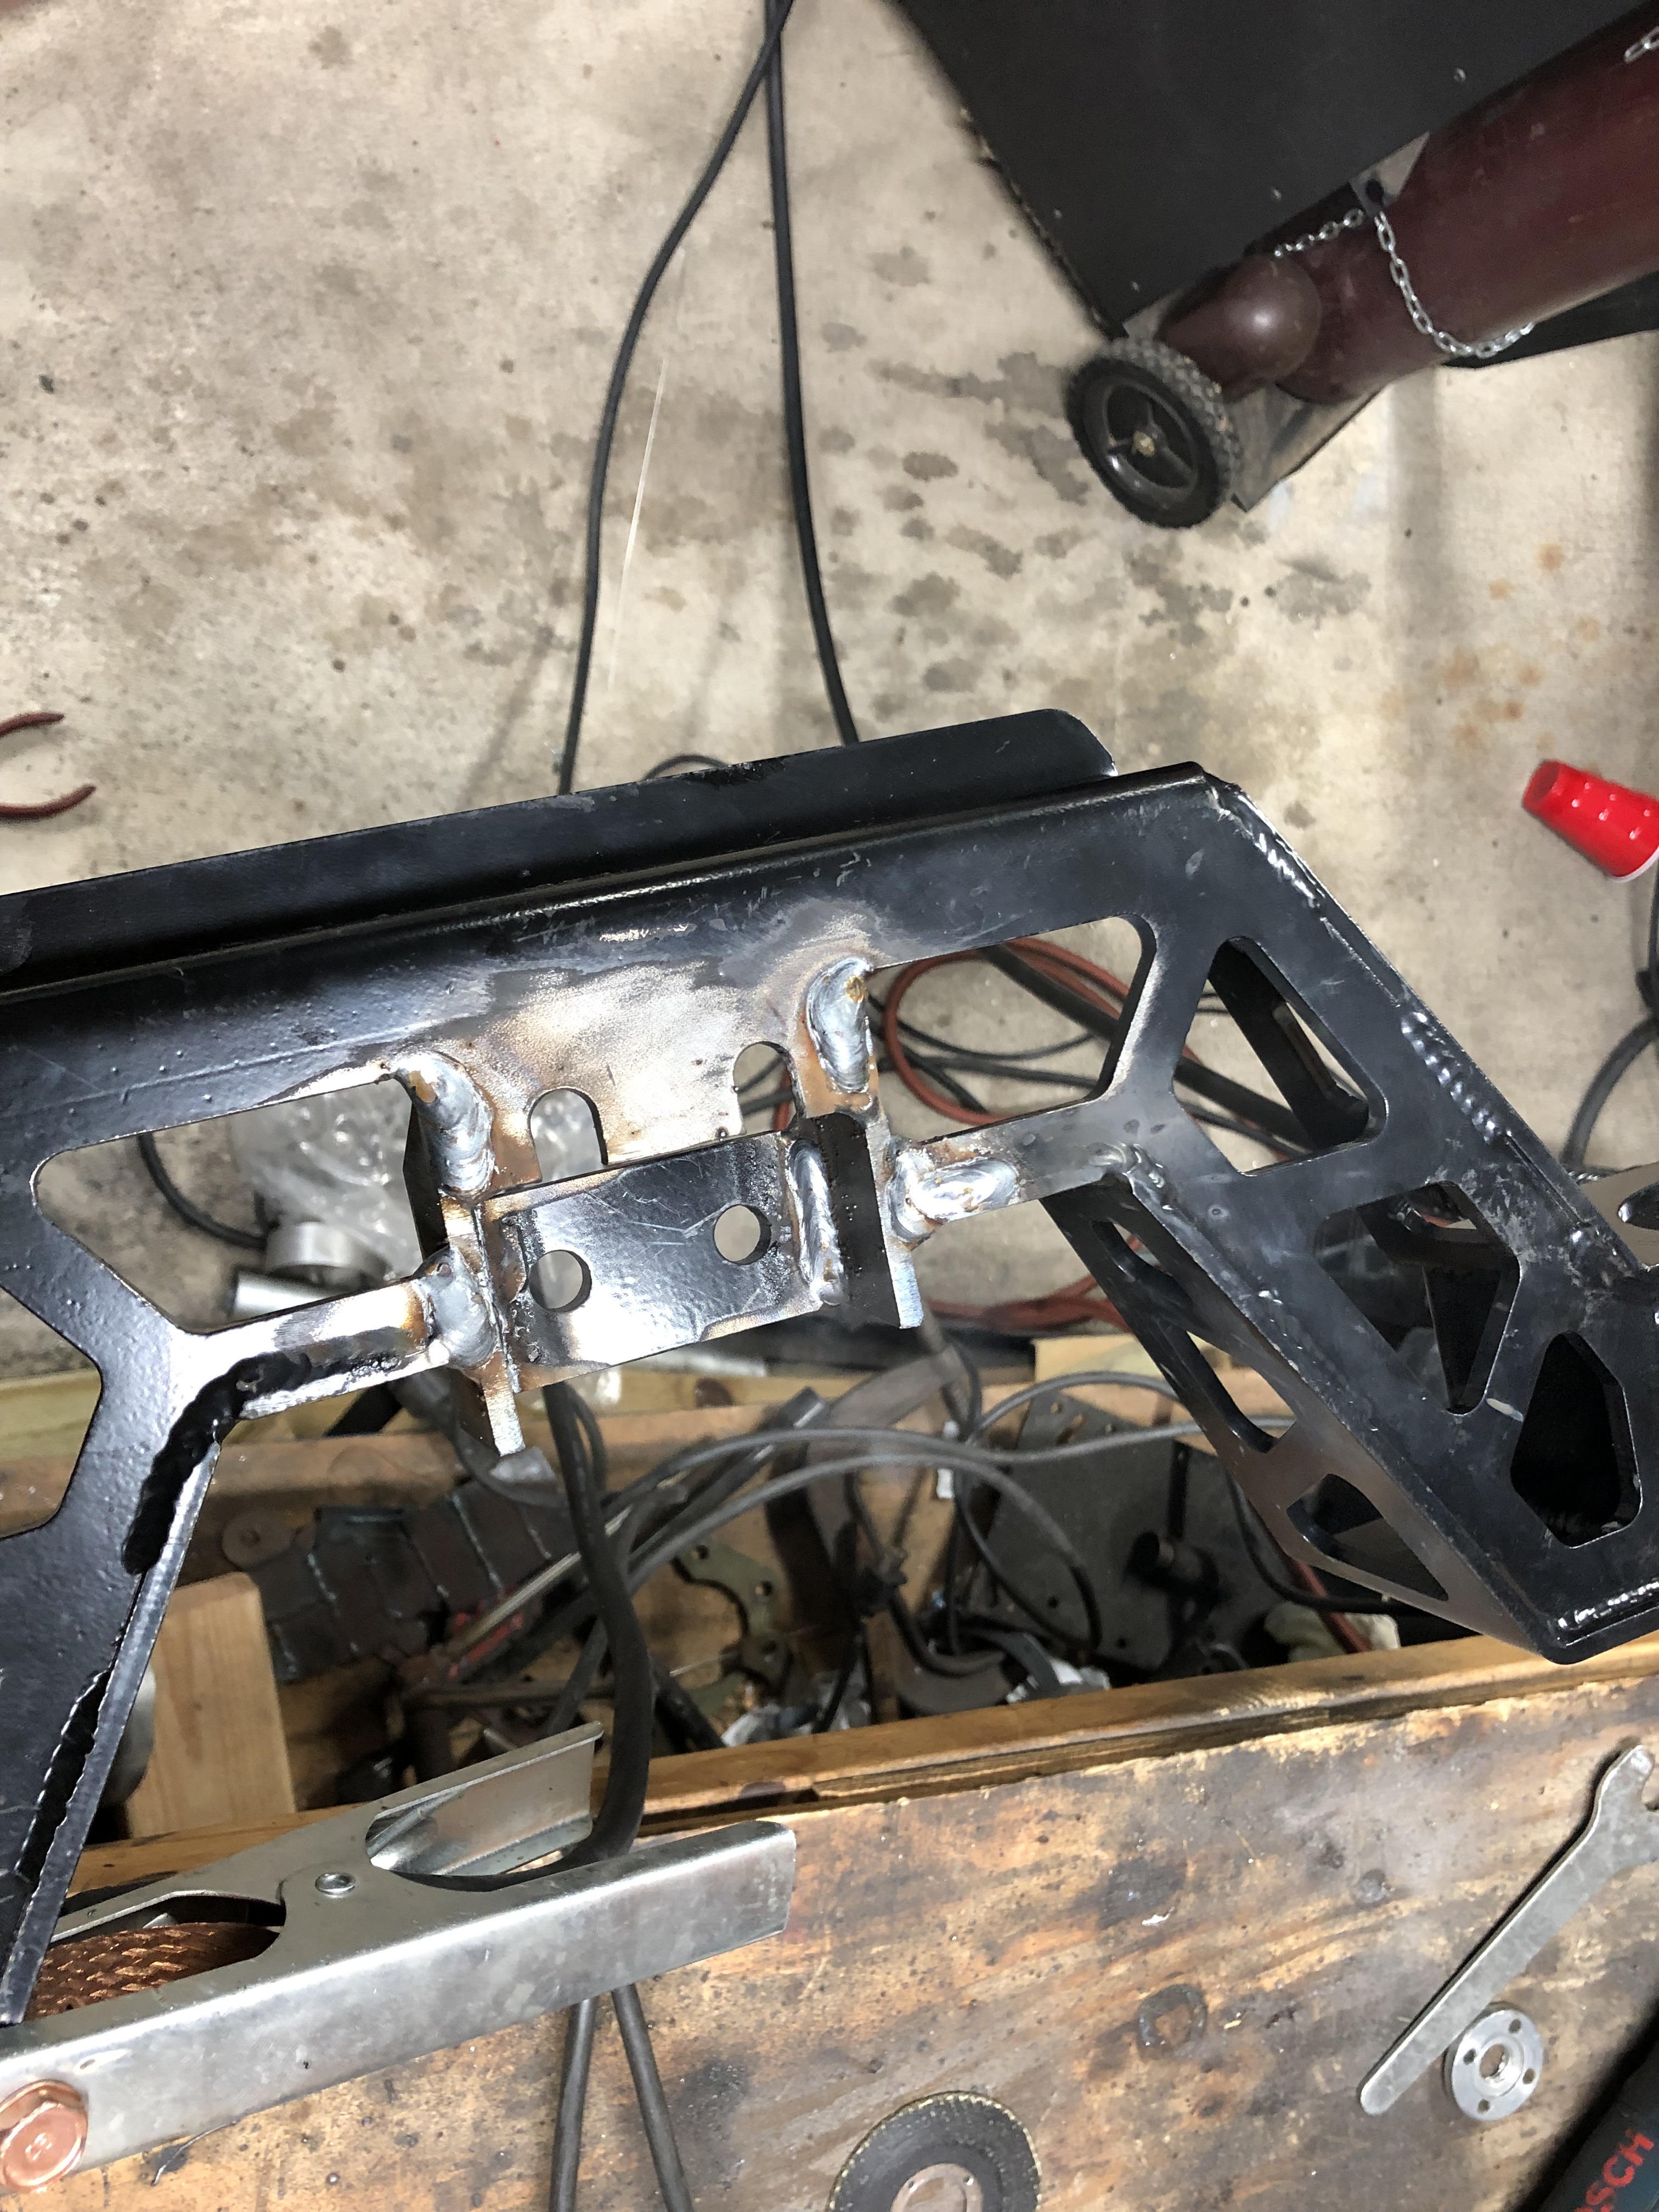
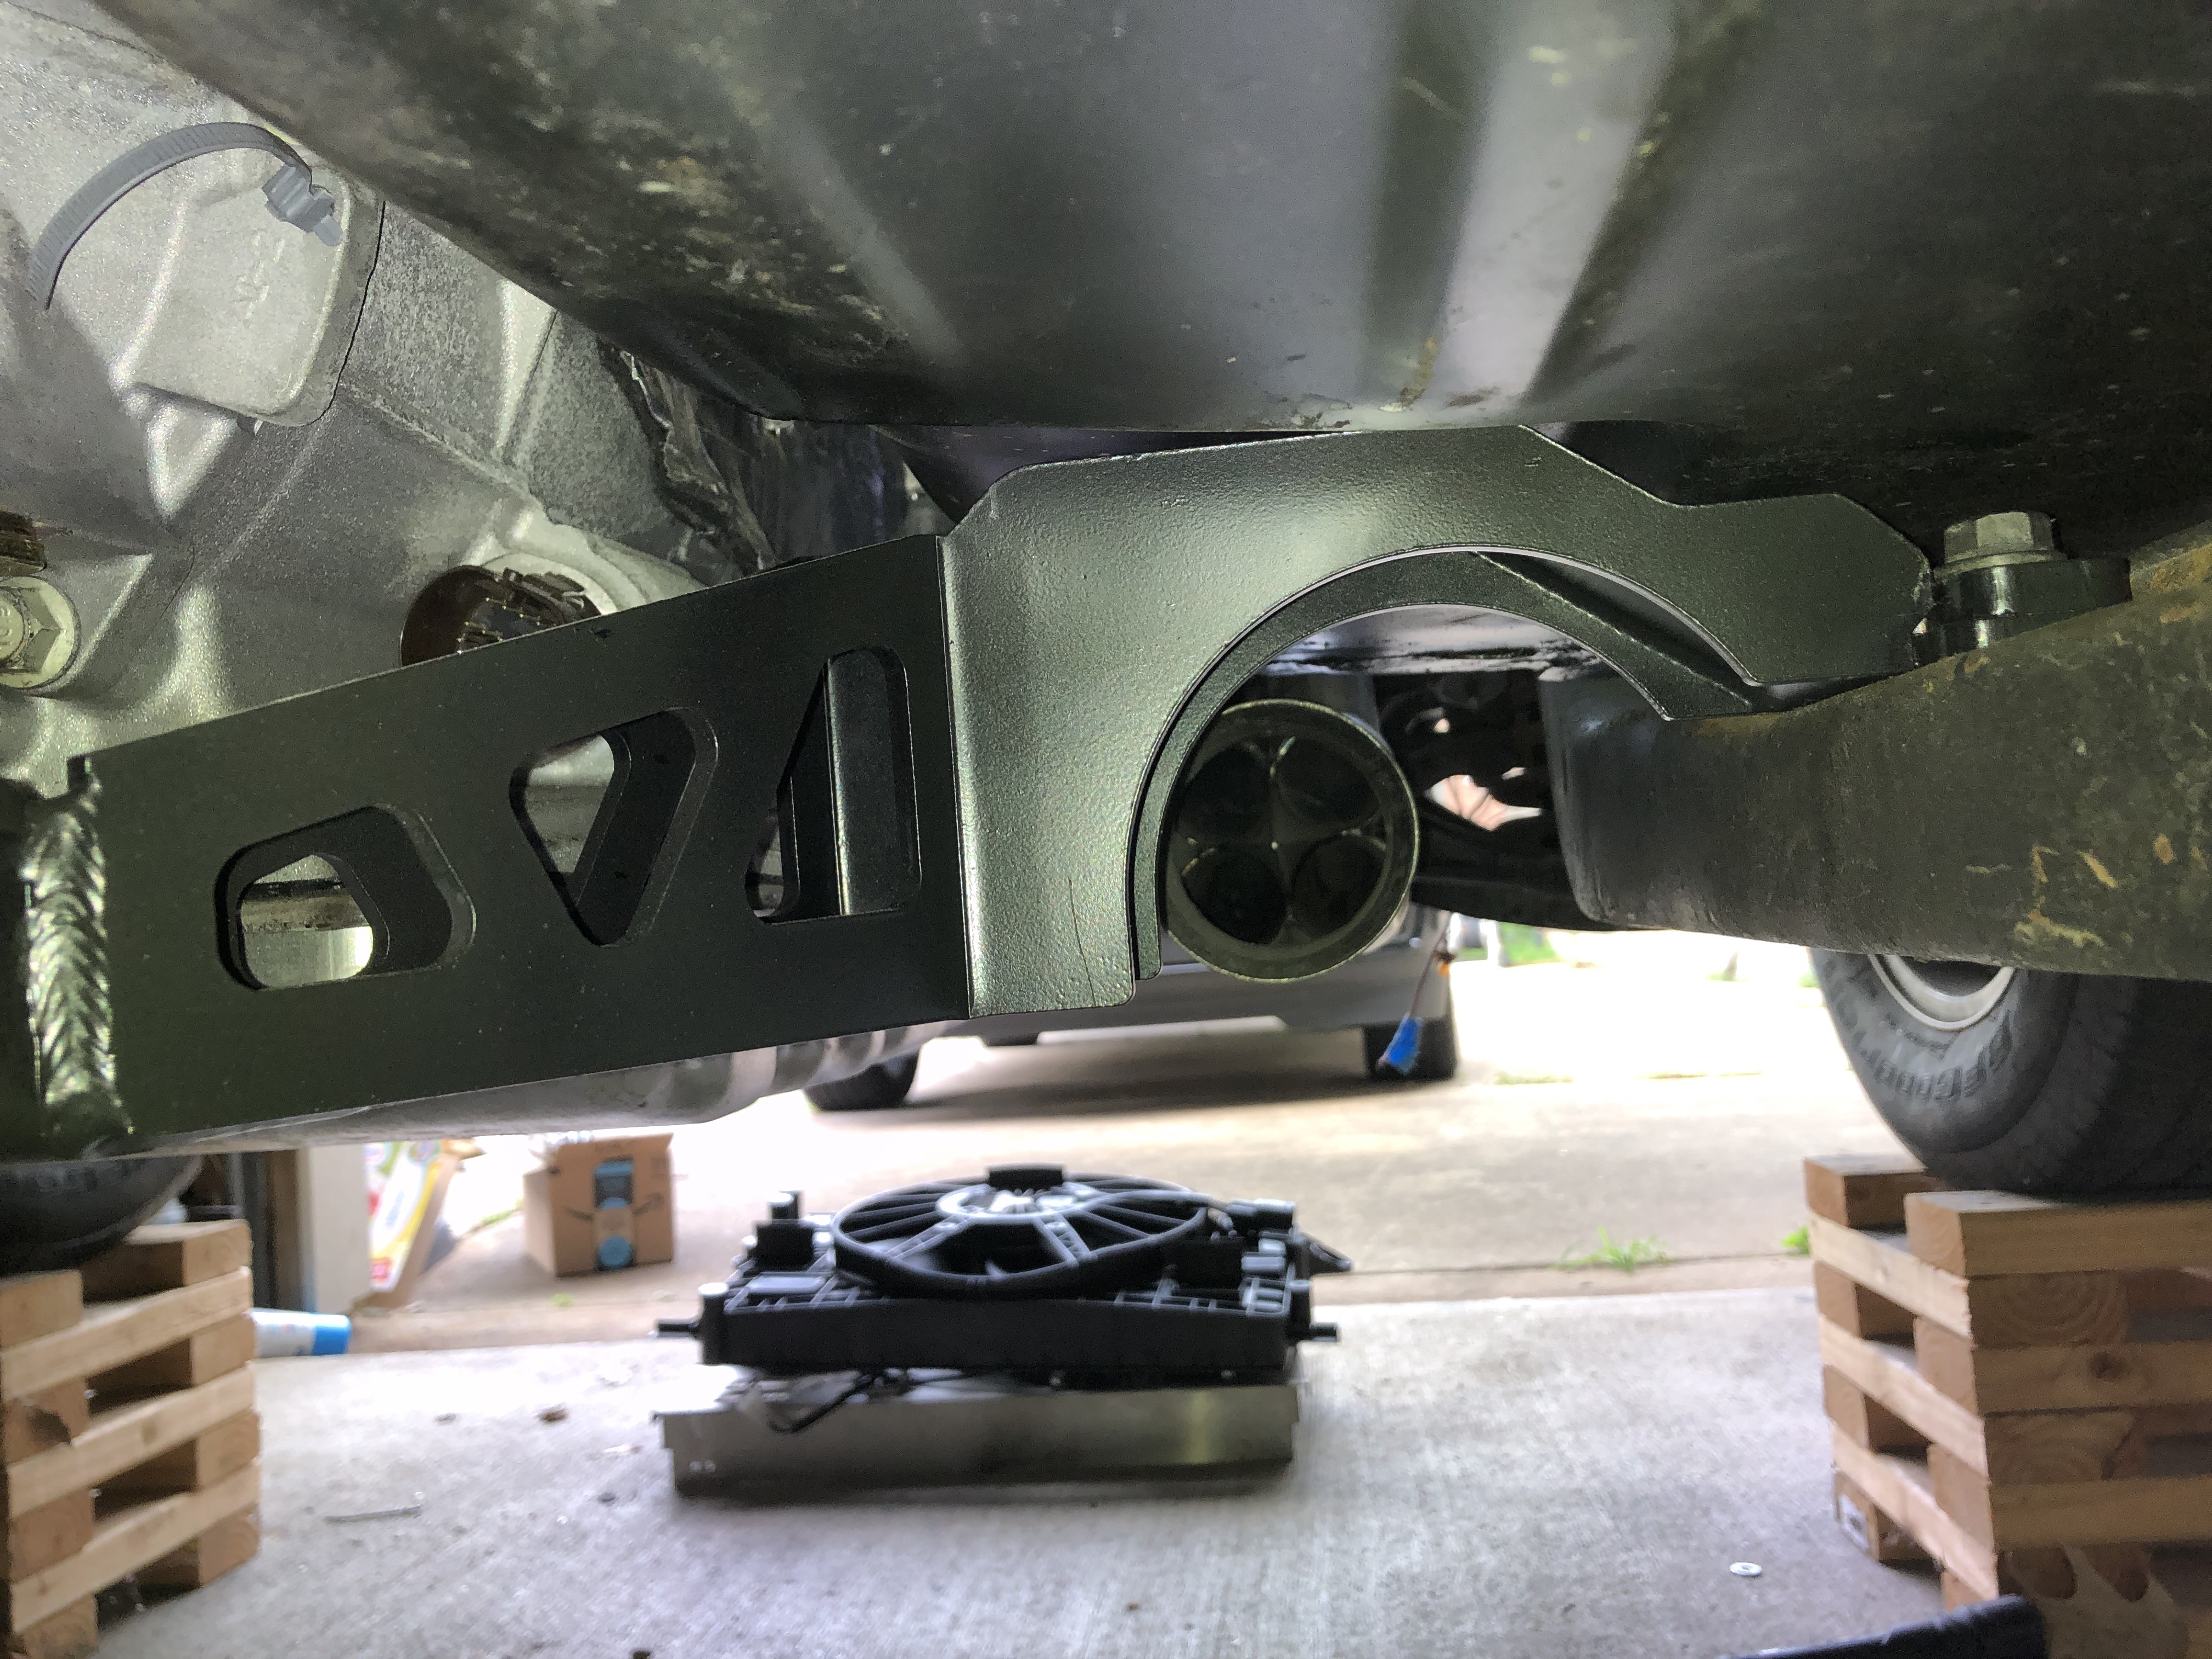
Here are the photos of the trans crossmember installed. As you can see the PS header is tucked in real close and does not line up with the crossmember exhaust relief.
06-05-2019 #9
Registered User
- Join Date
- Jul 2017
- Posts
- 166
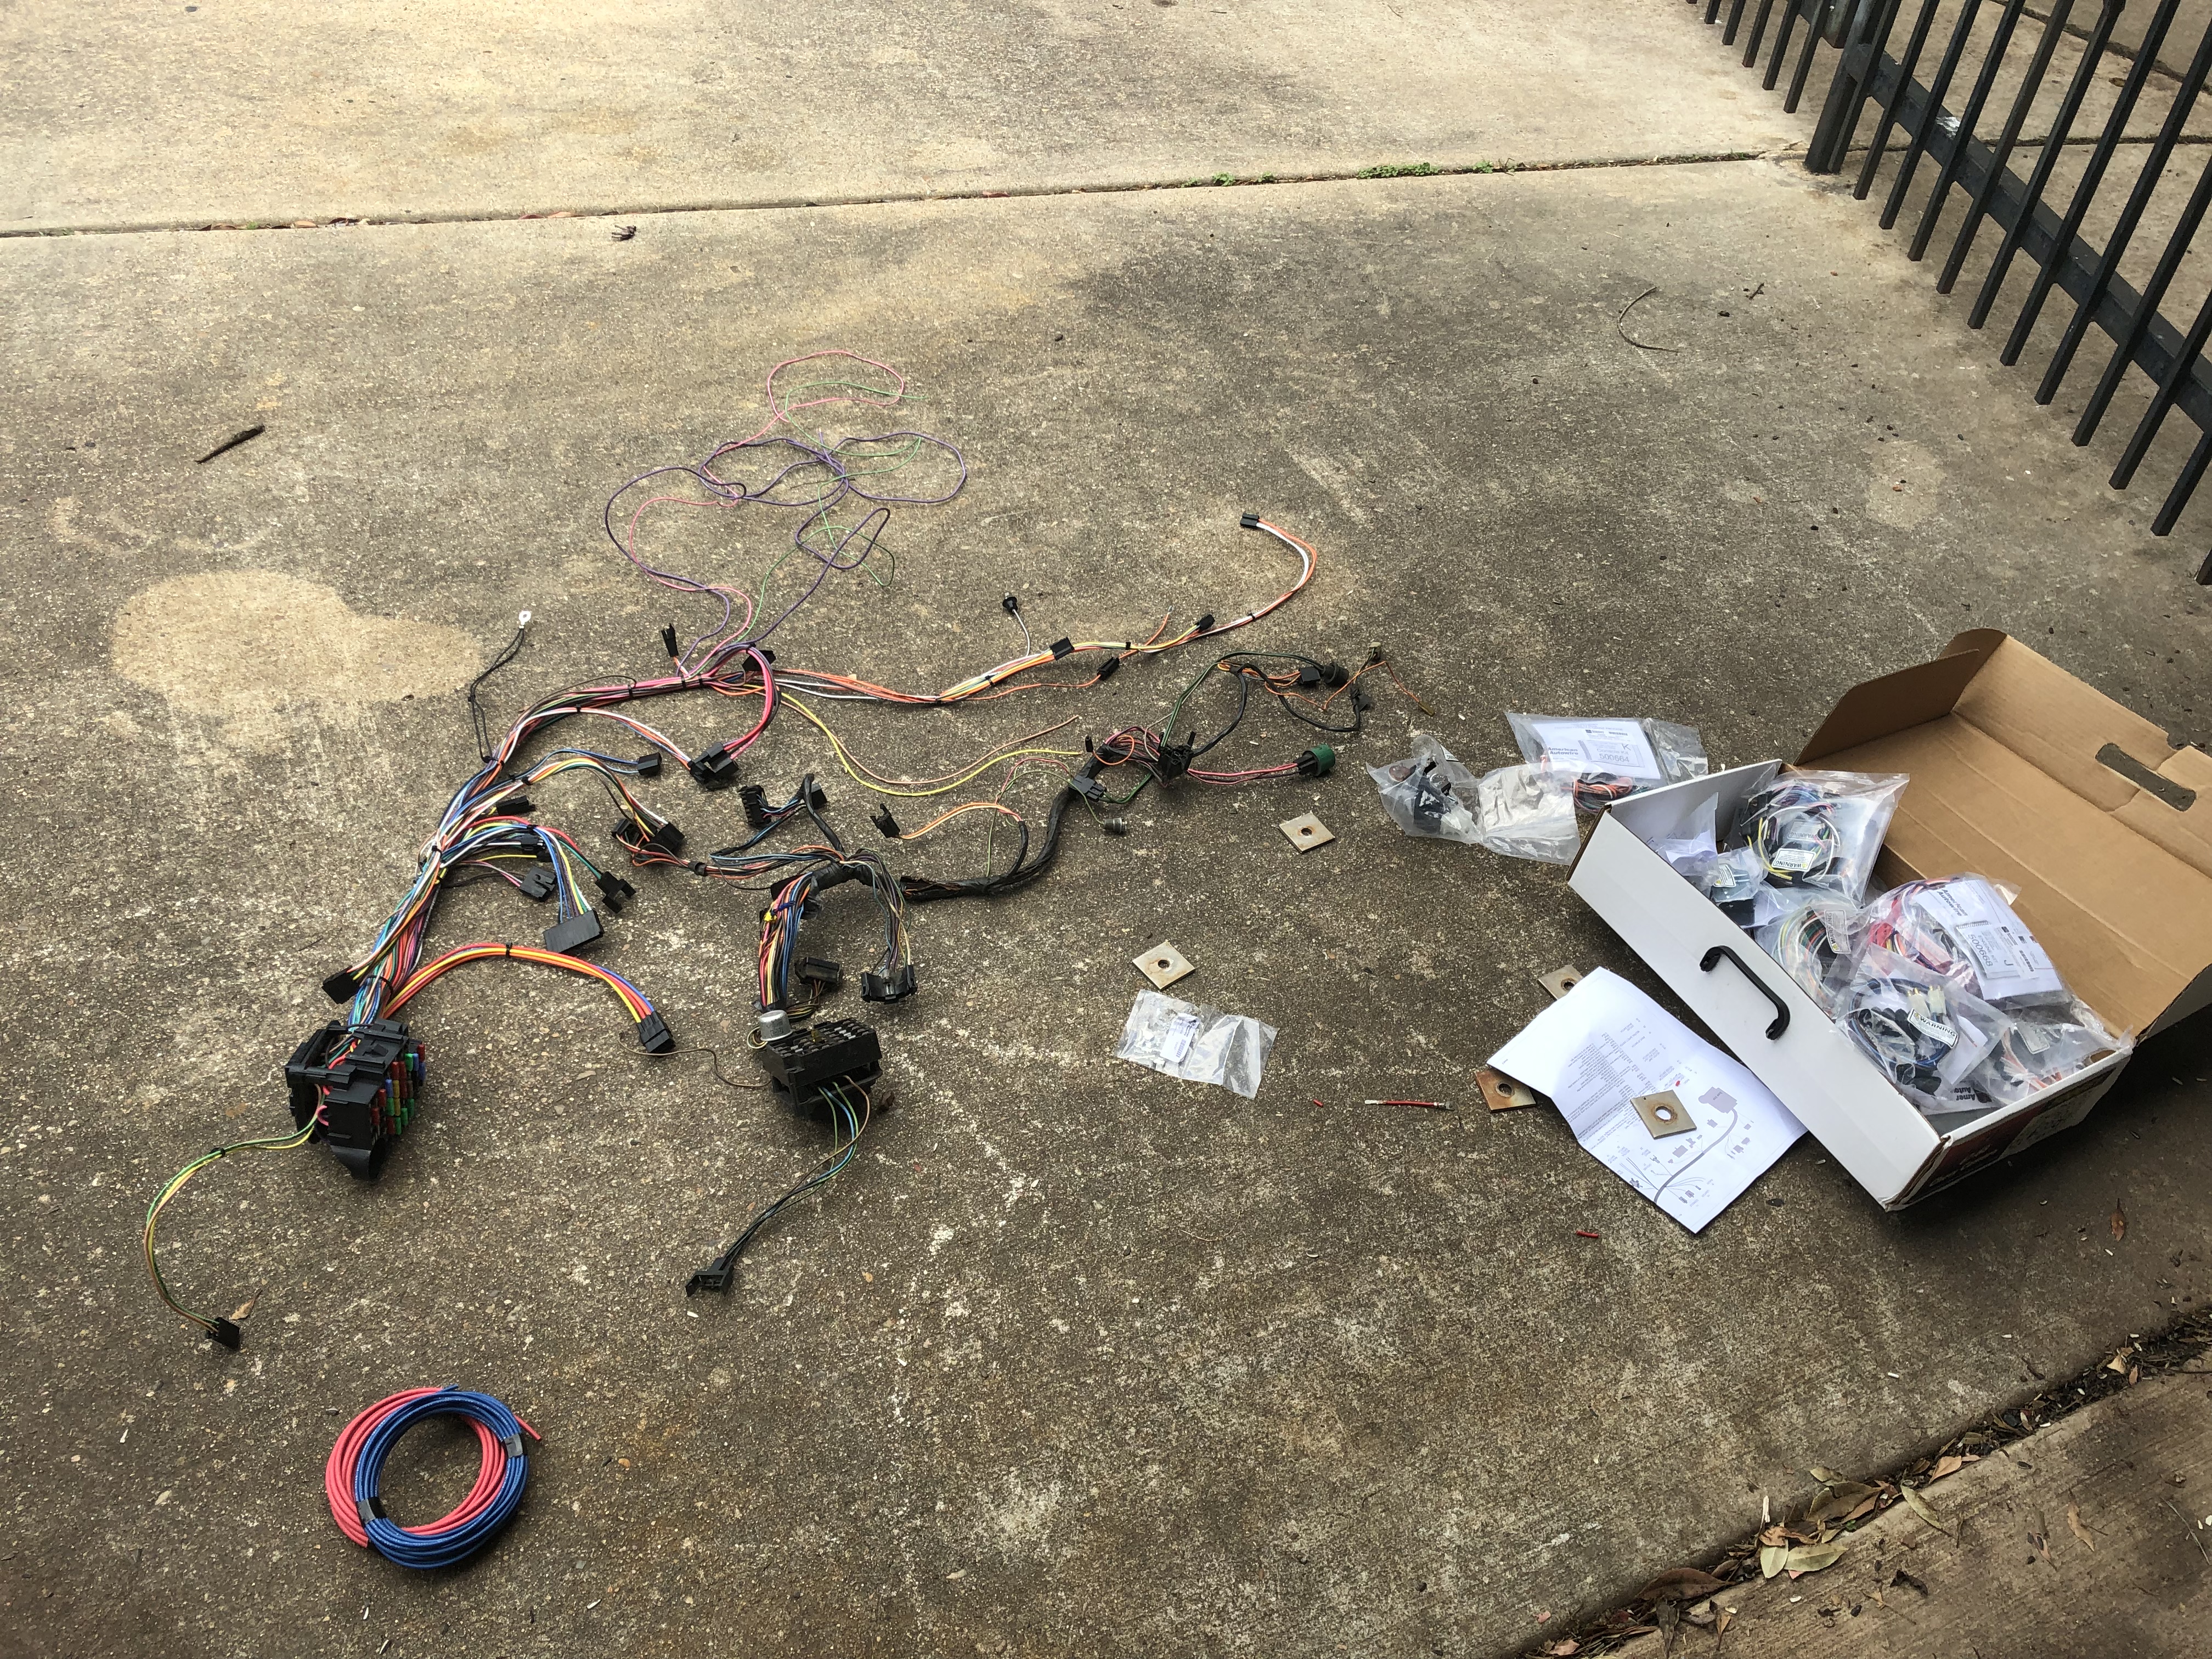
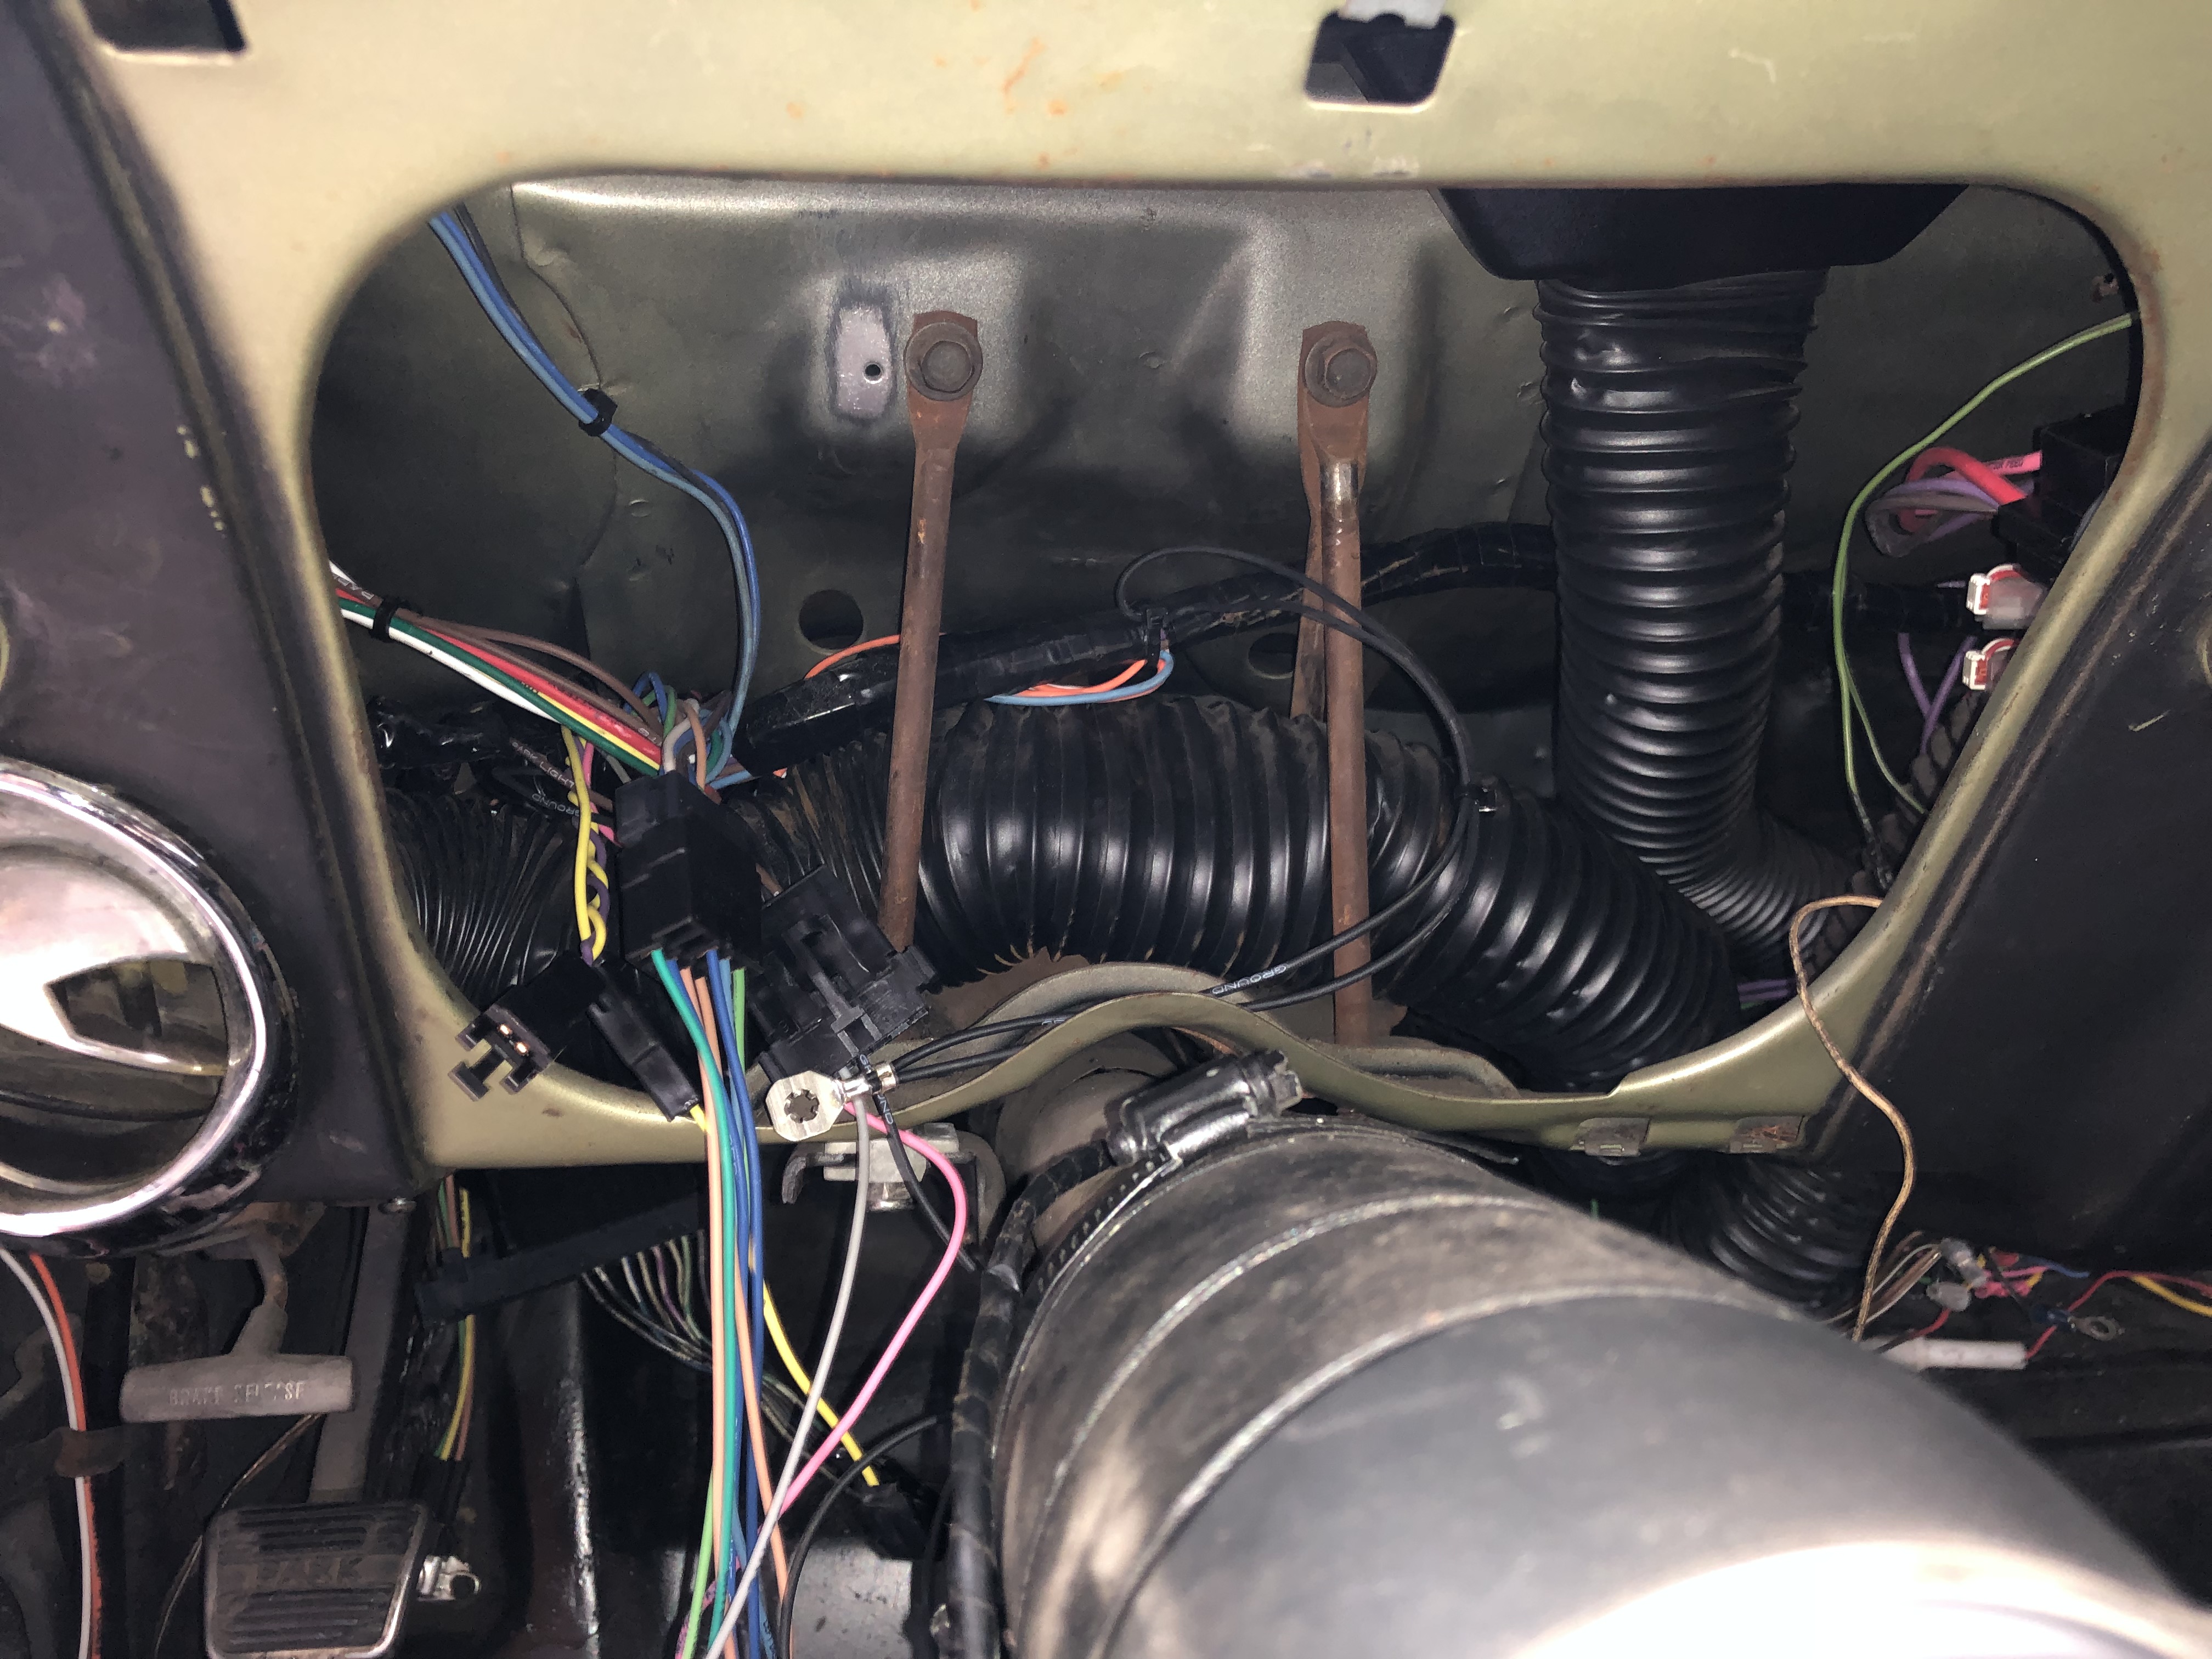
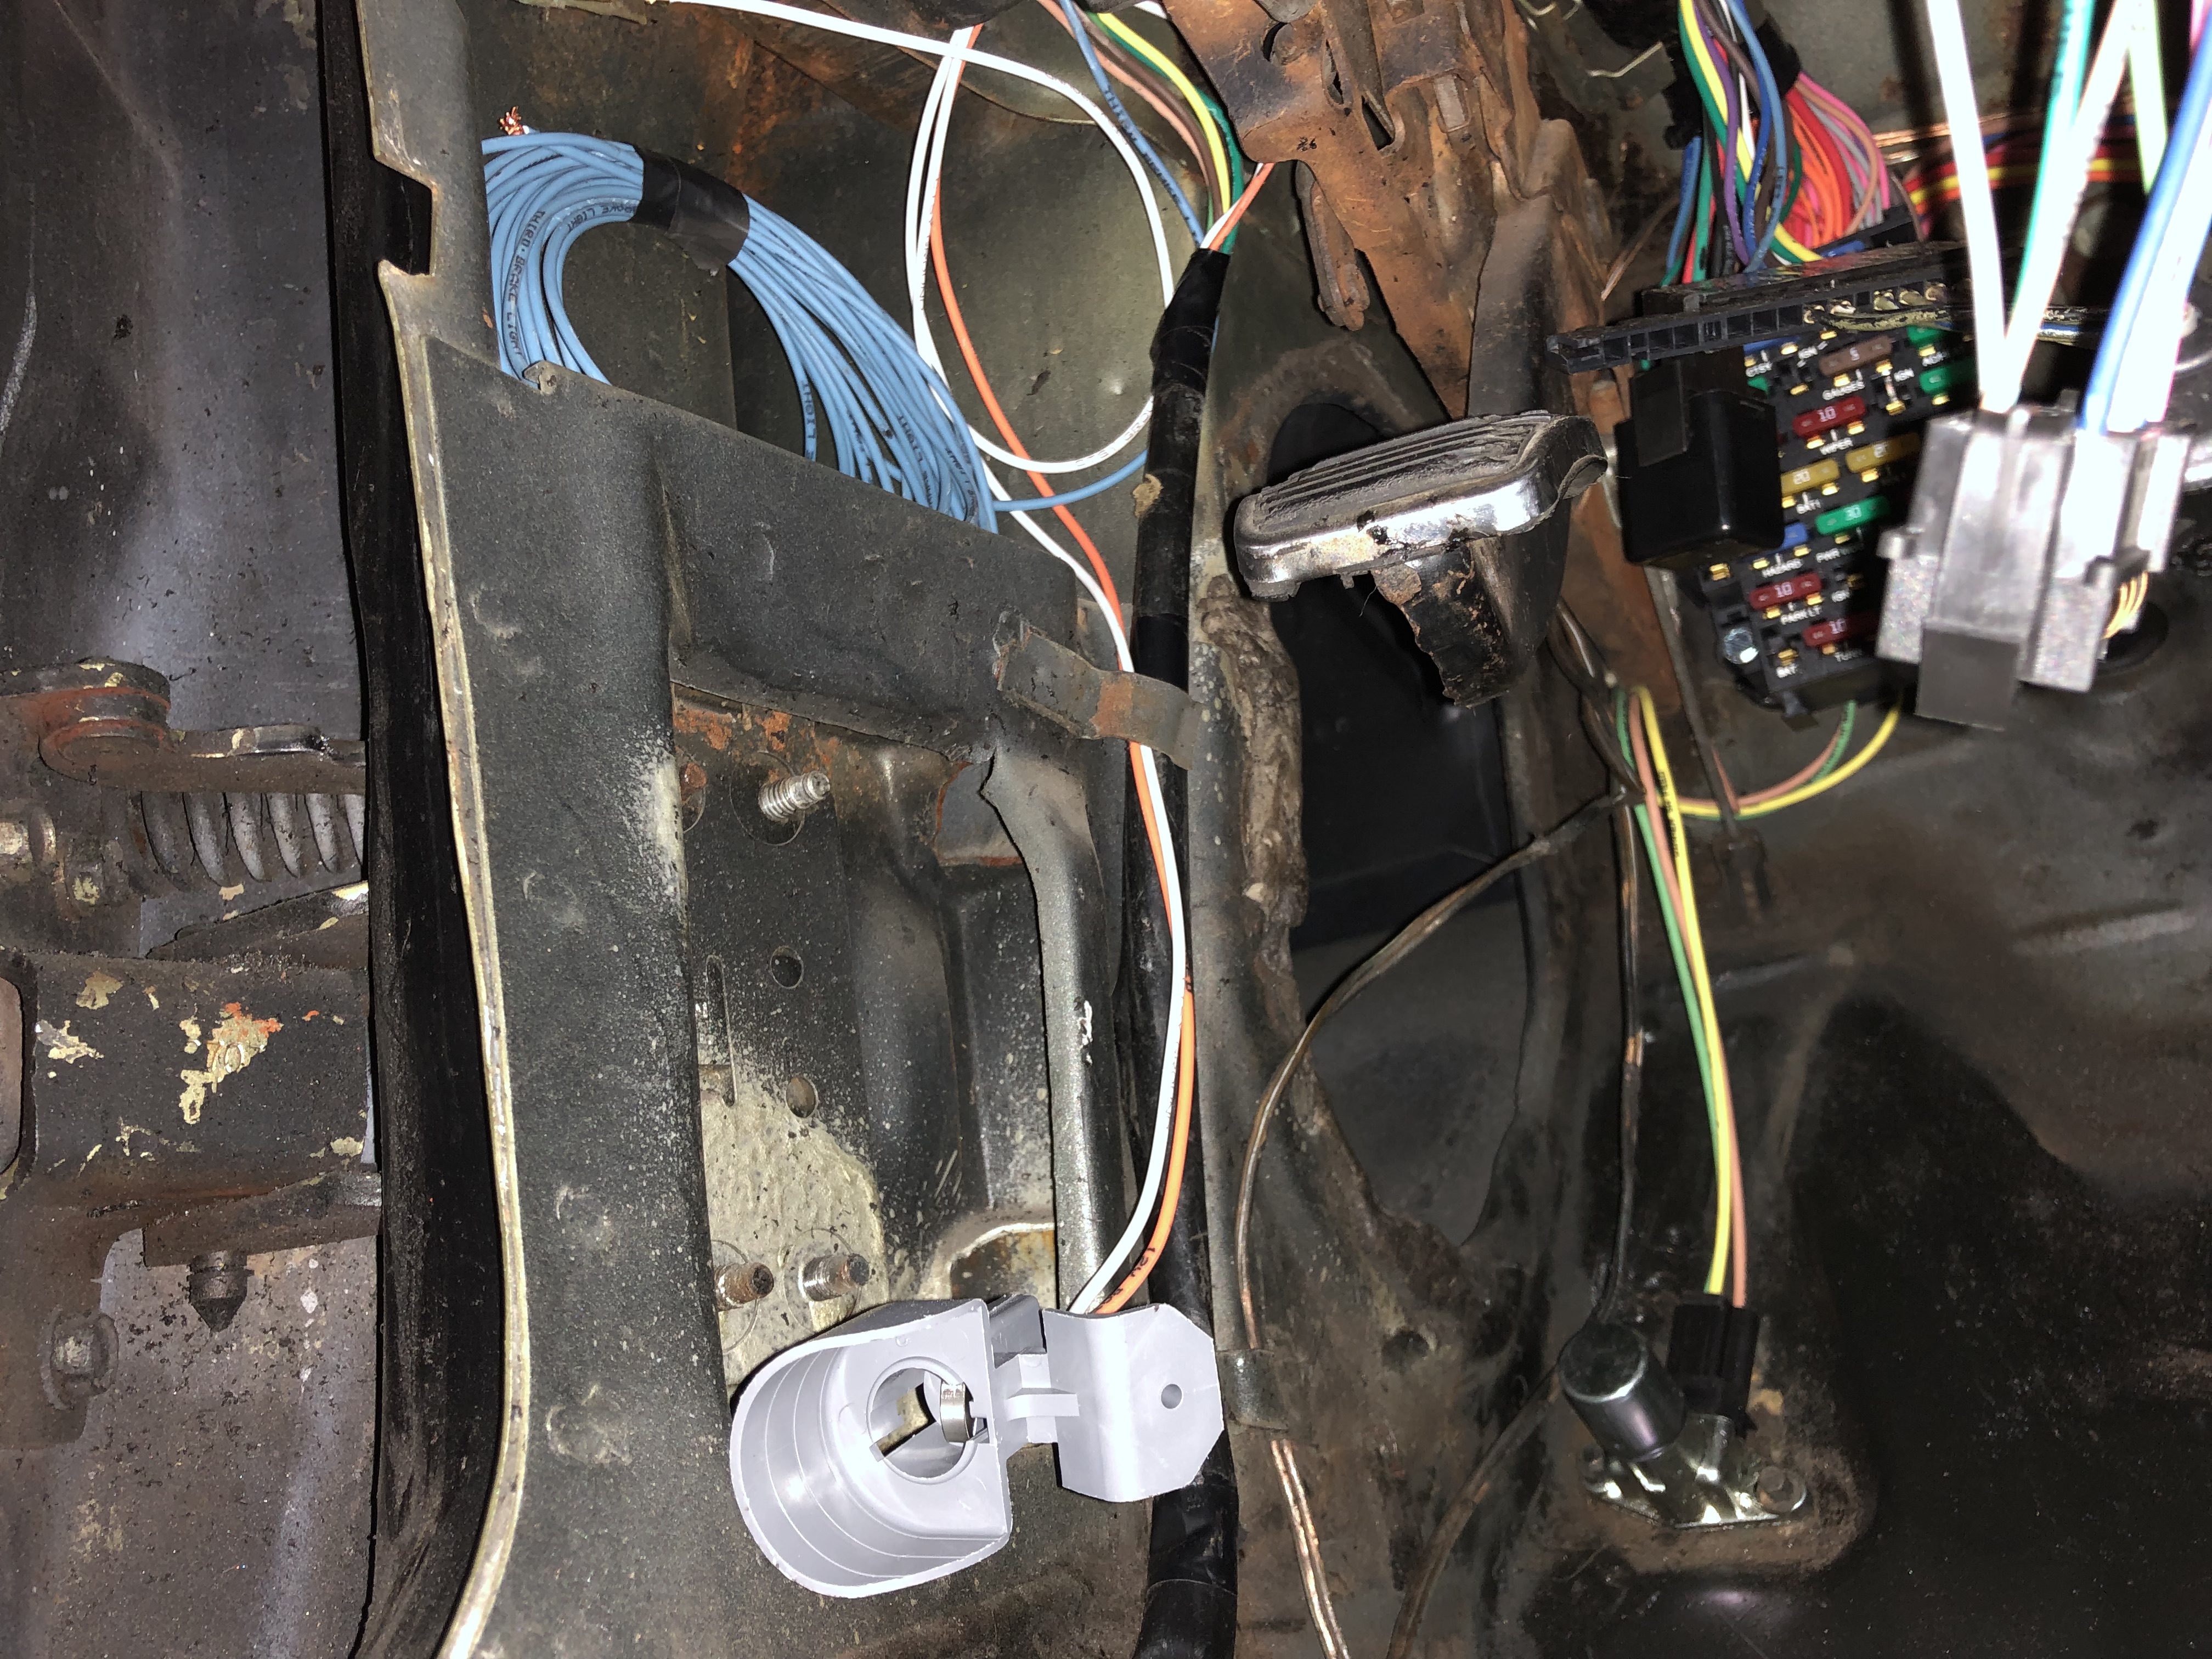
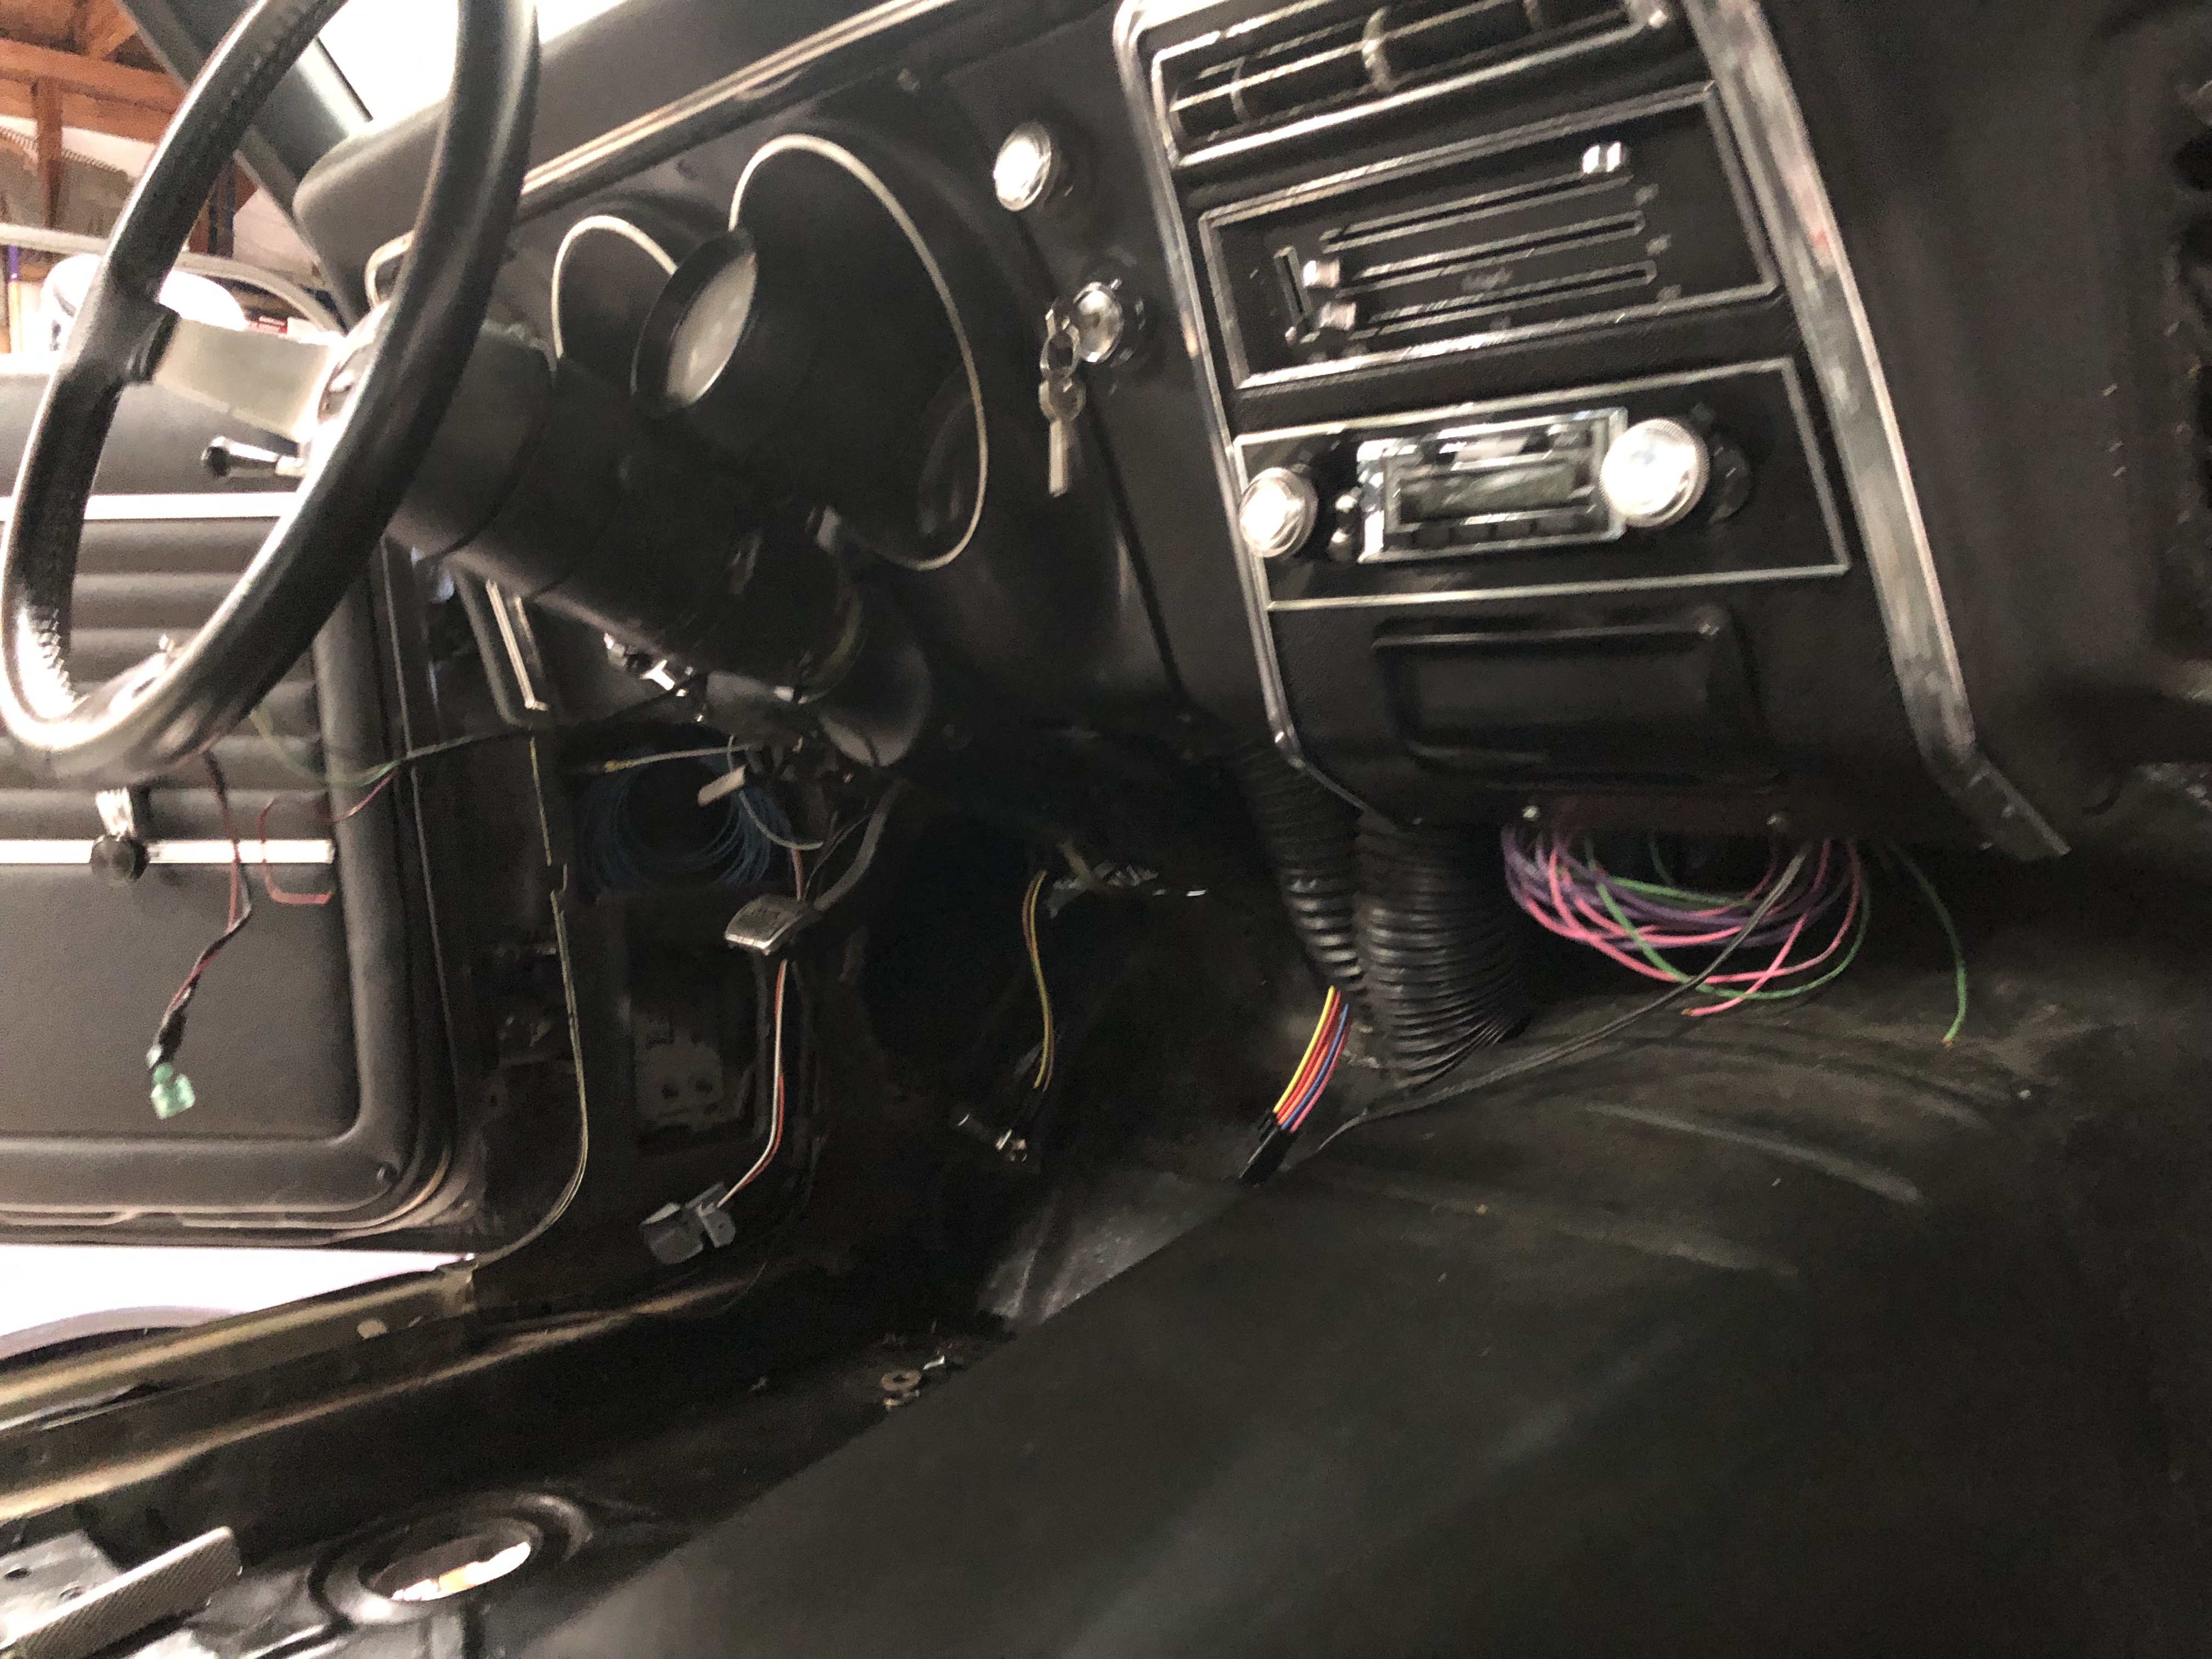
I decided to redo all the wiring and chose the American Auto Wire Classic Update kit. This thing is very cool and user friendly, the guys at AAW have great customer srevice, I called an asked a few questions and they were very knowledgeable and helped me out.
I started with the dash area and then worked to the back of the car. I did not finish wiring up the neutral safety switch, backup lights or the vintage air system yet. My engine harness will come with an extra module that should control the reverse lights and it is also equipped with a neutral safety output that I'll wire in later once I get my engine harness.
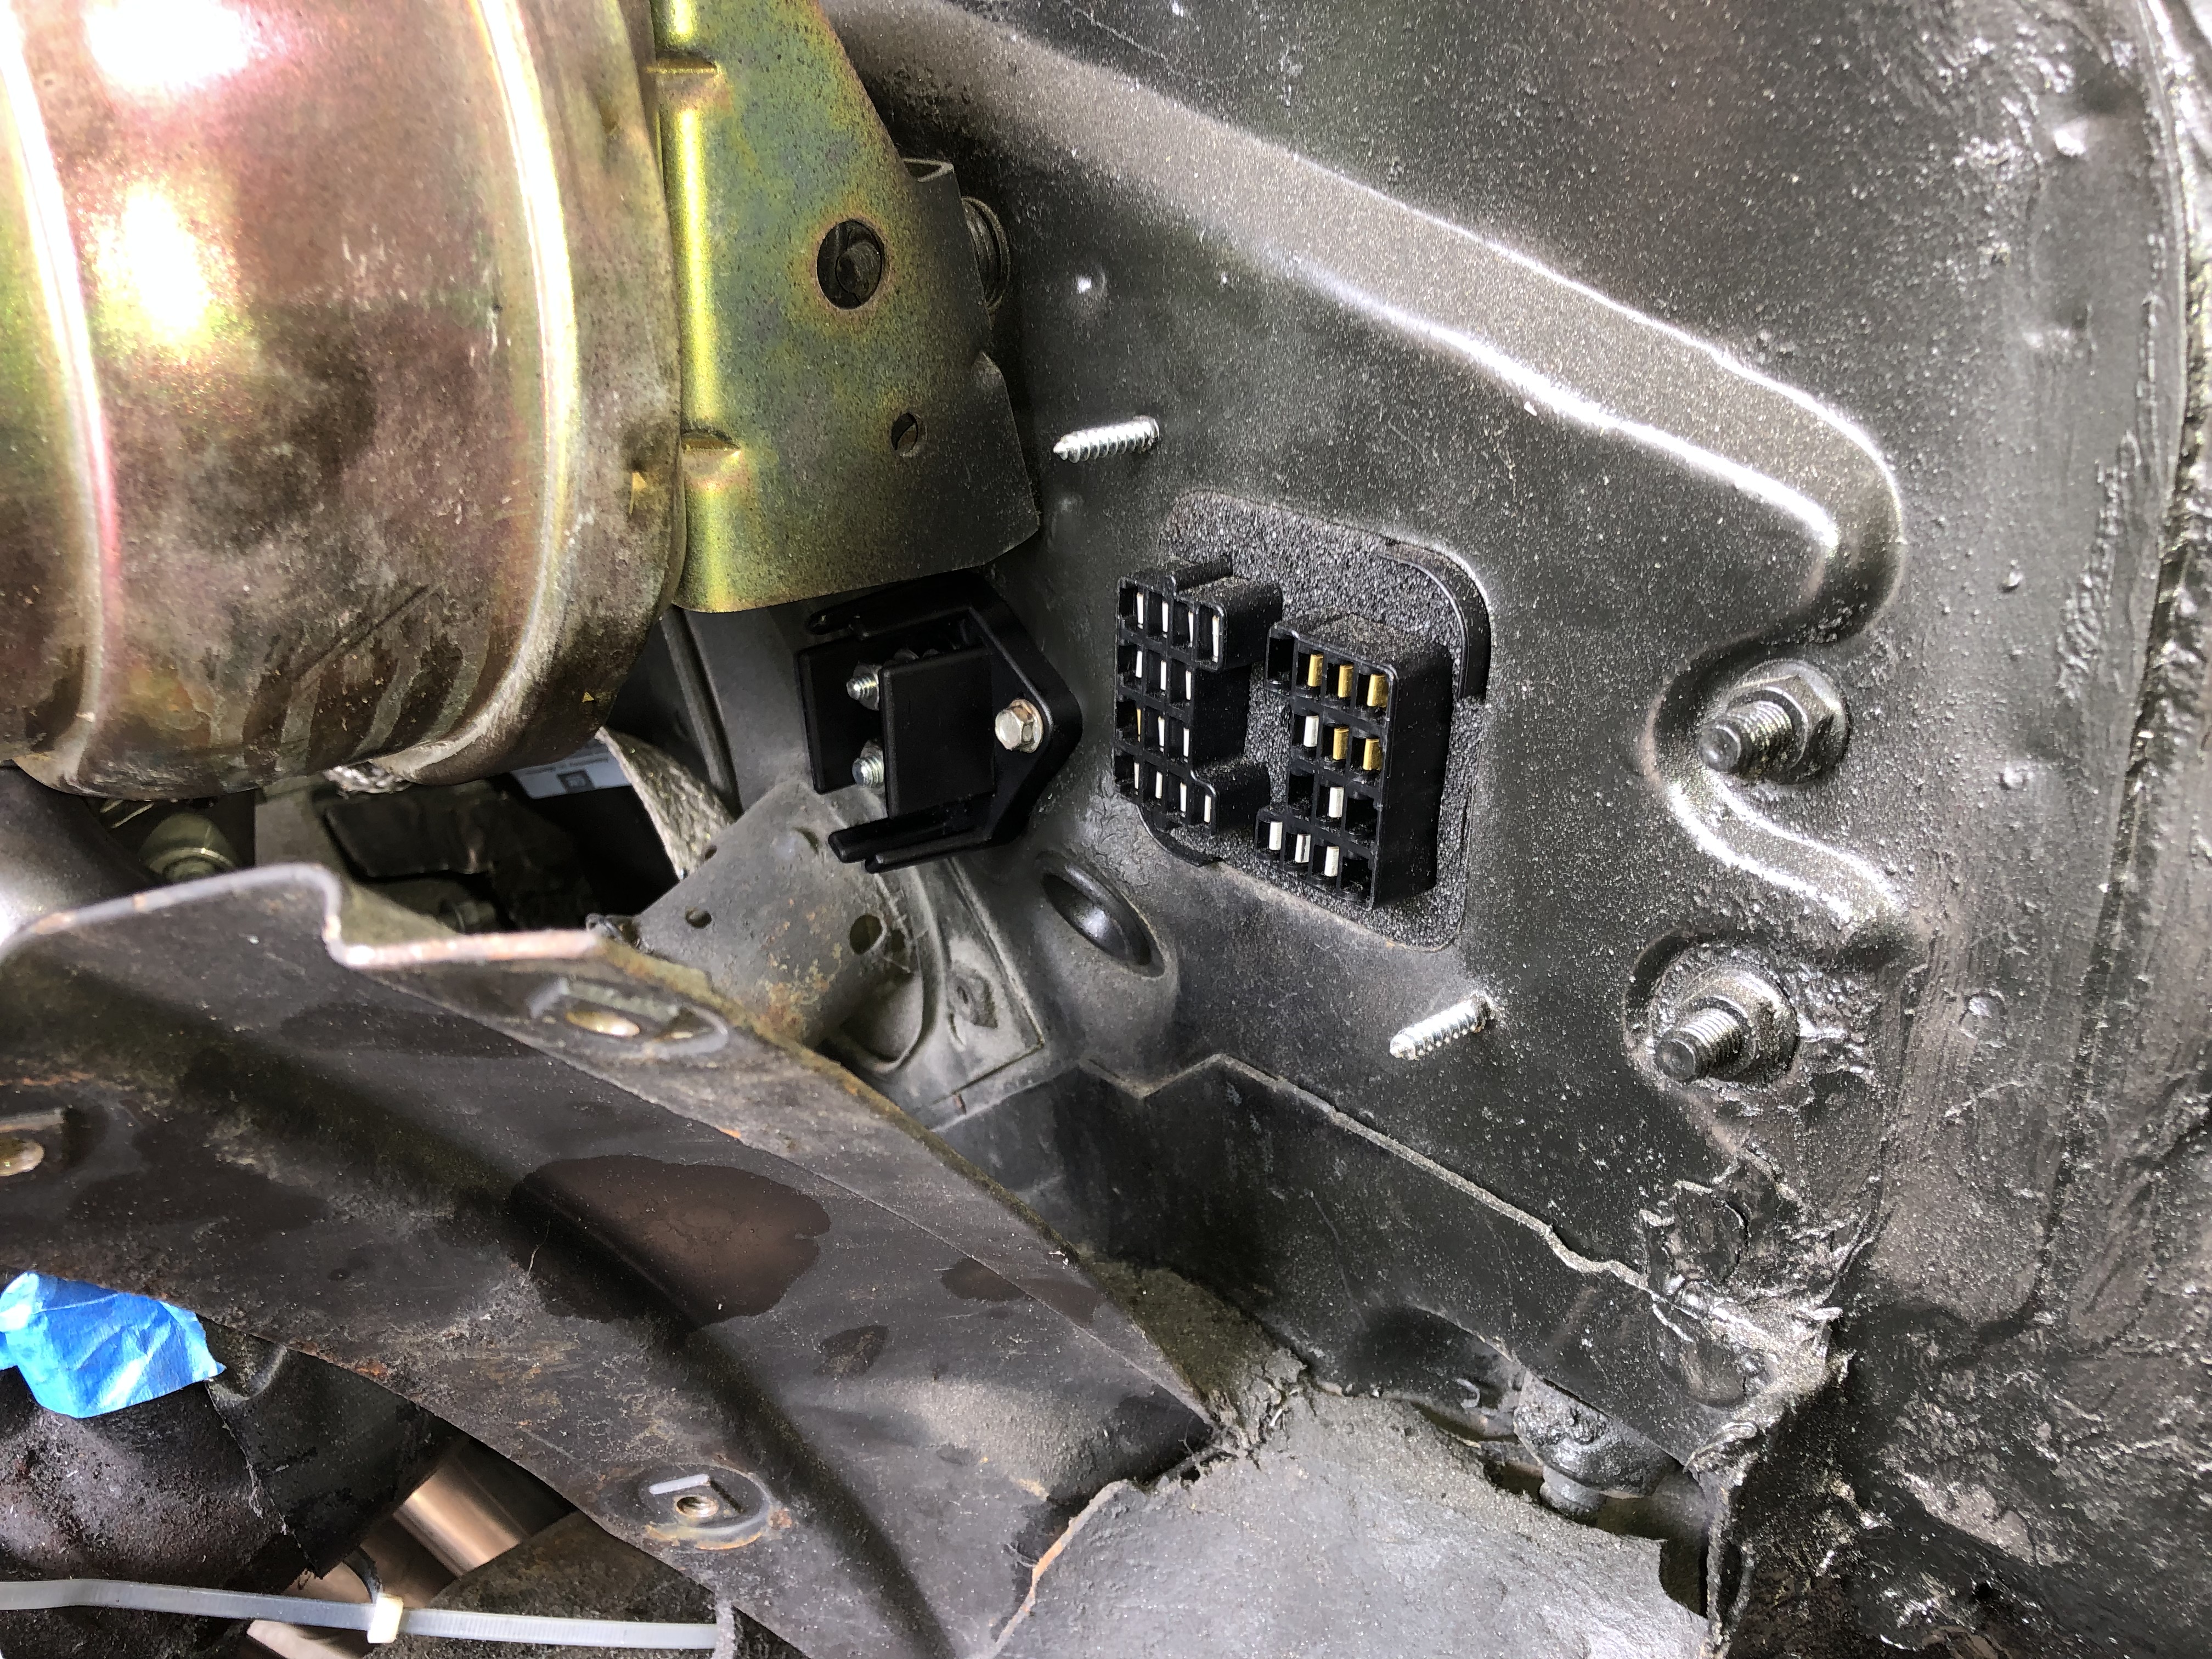
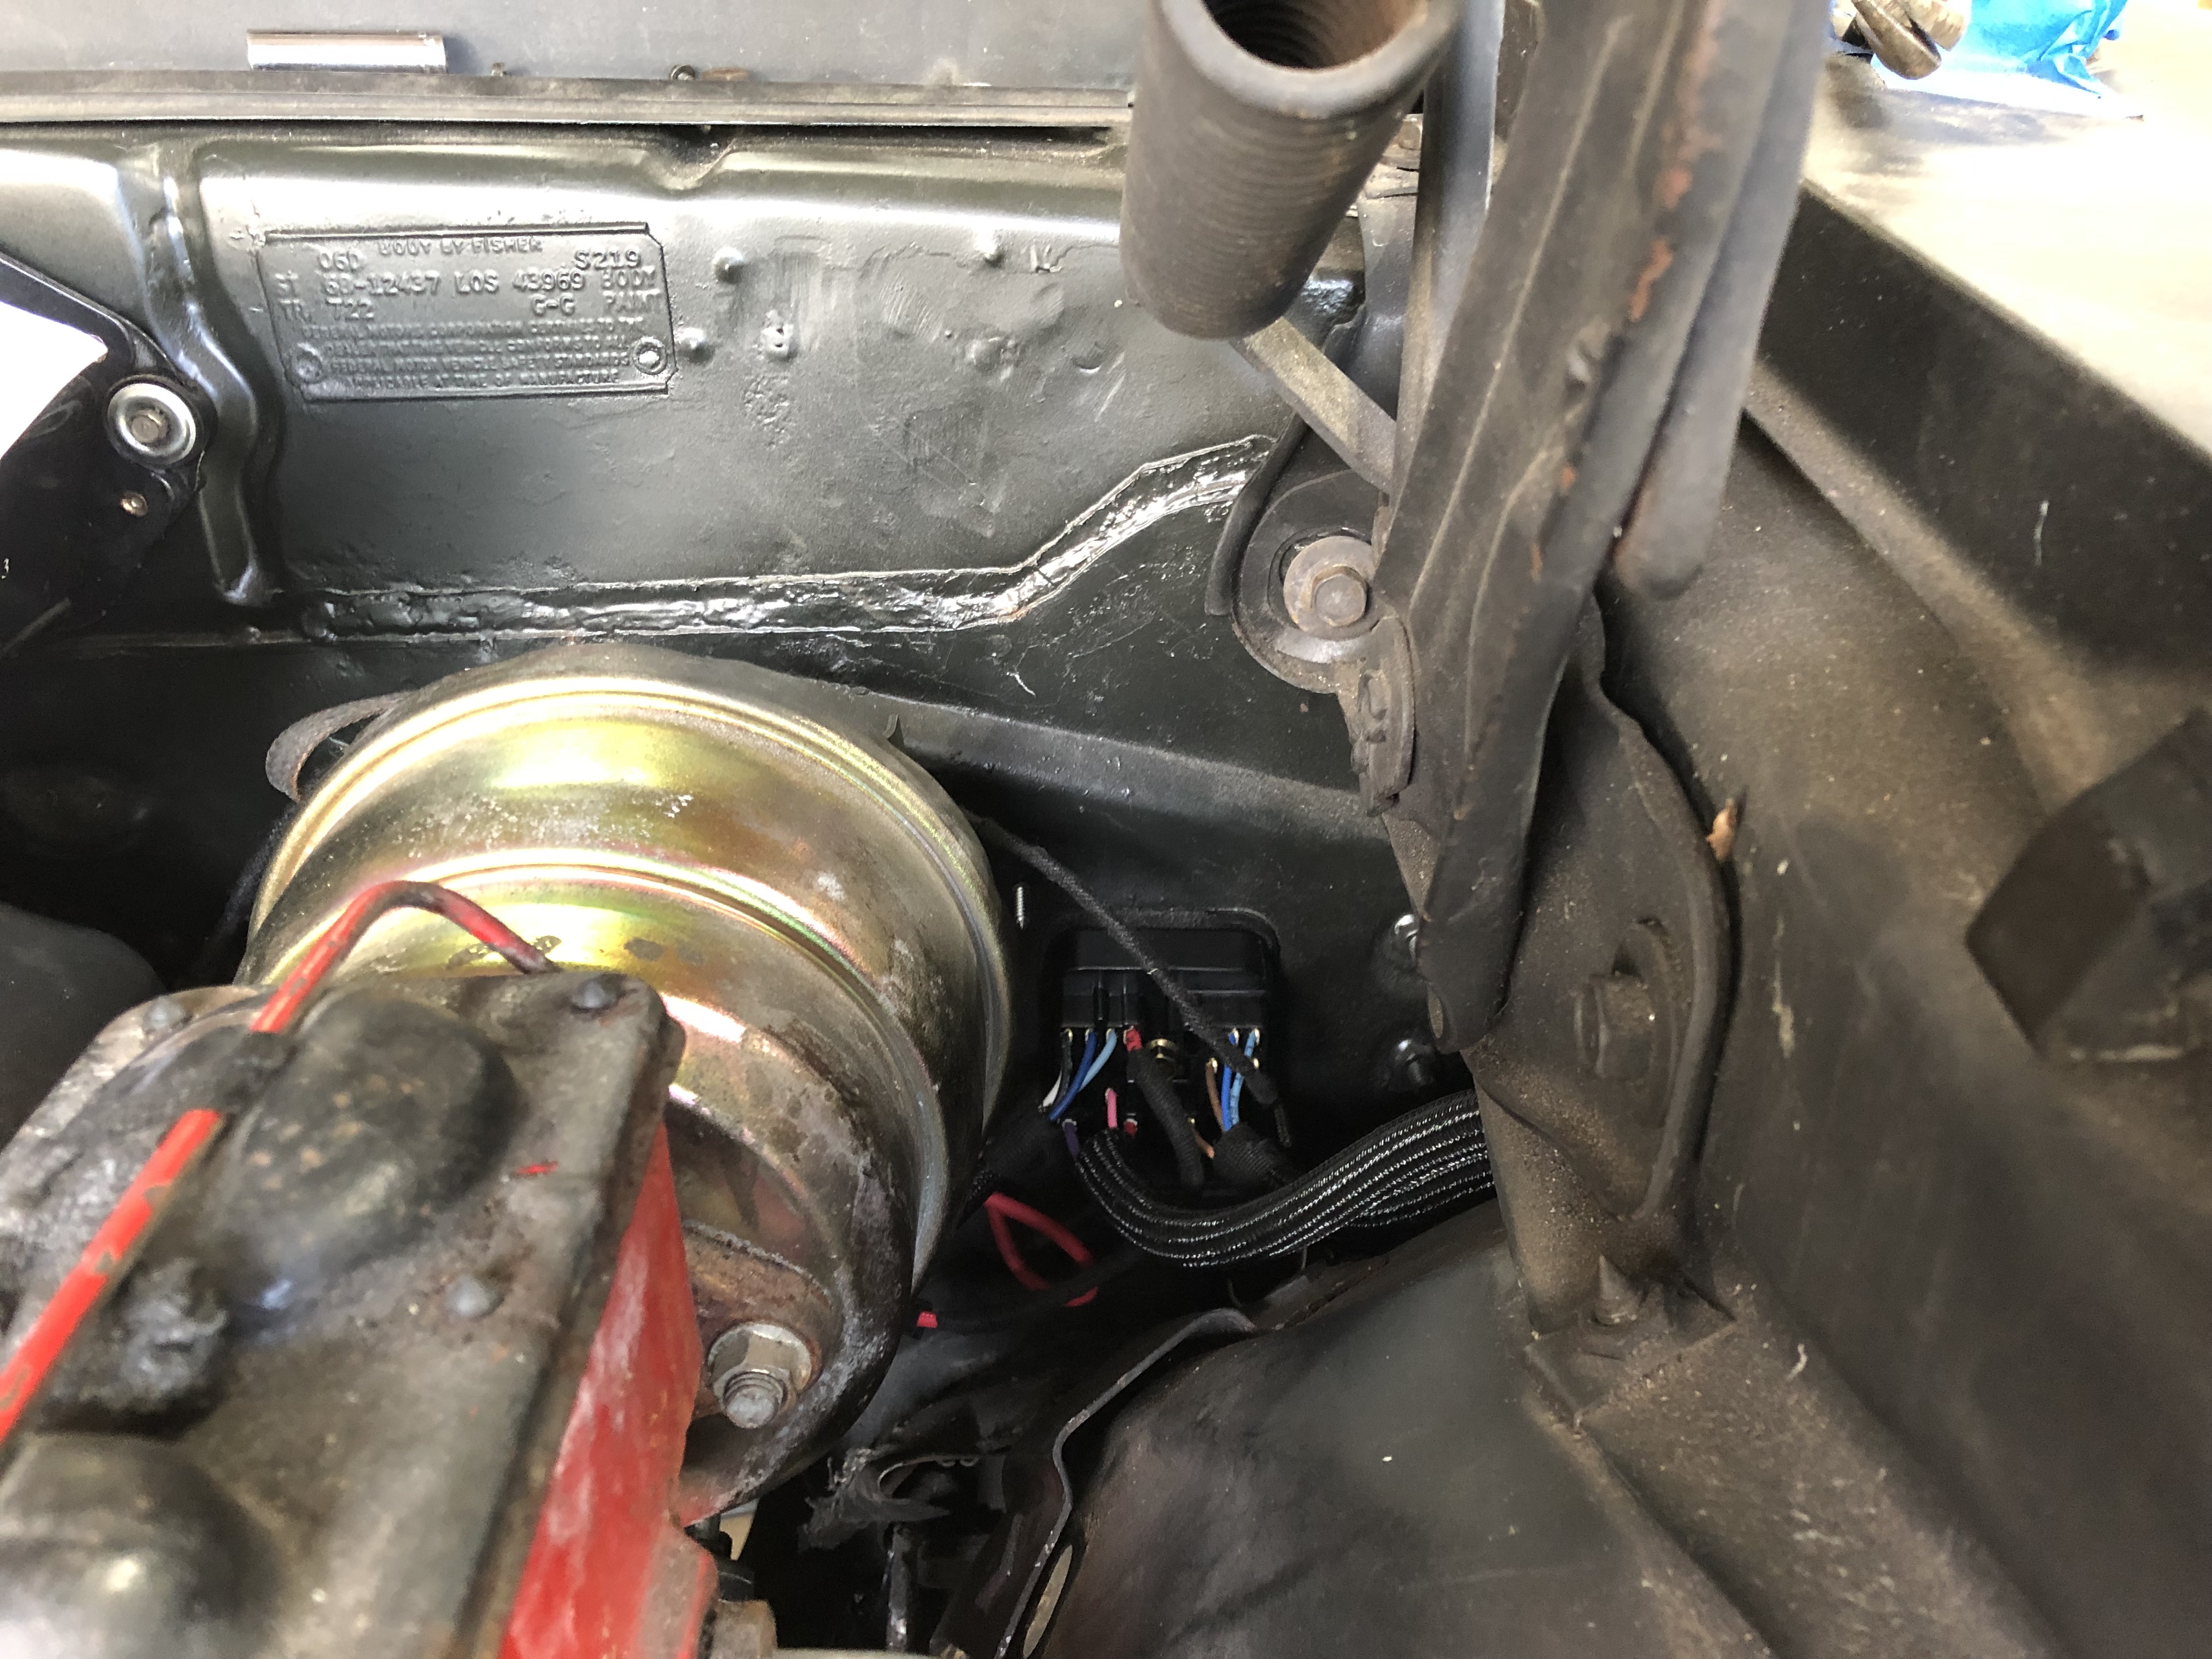
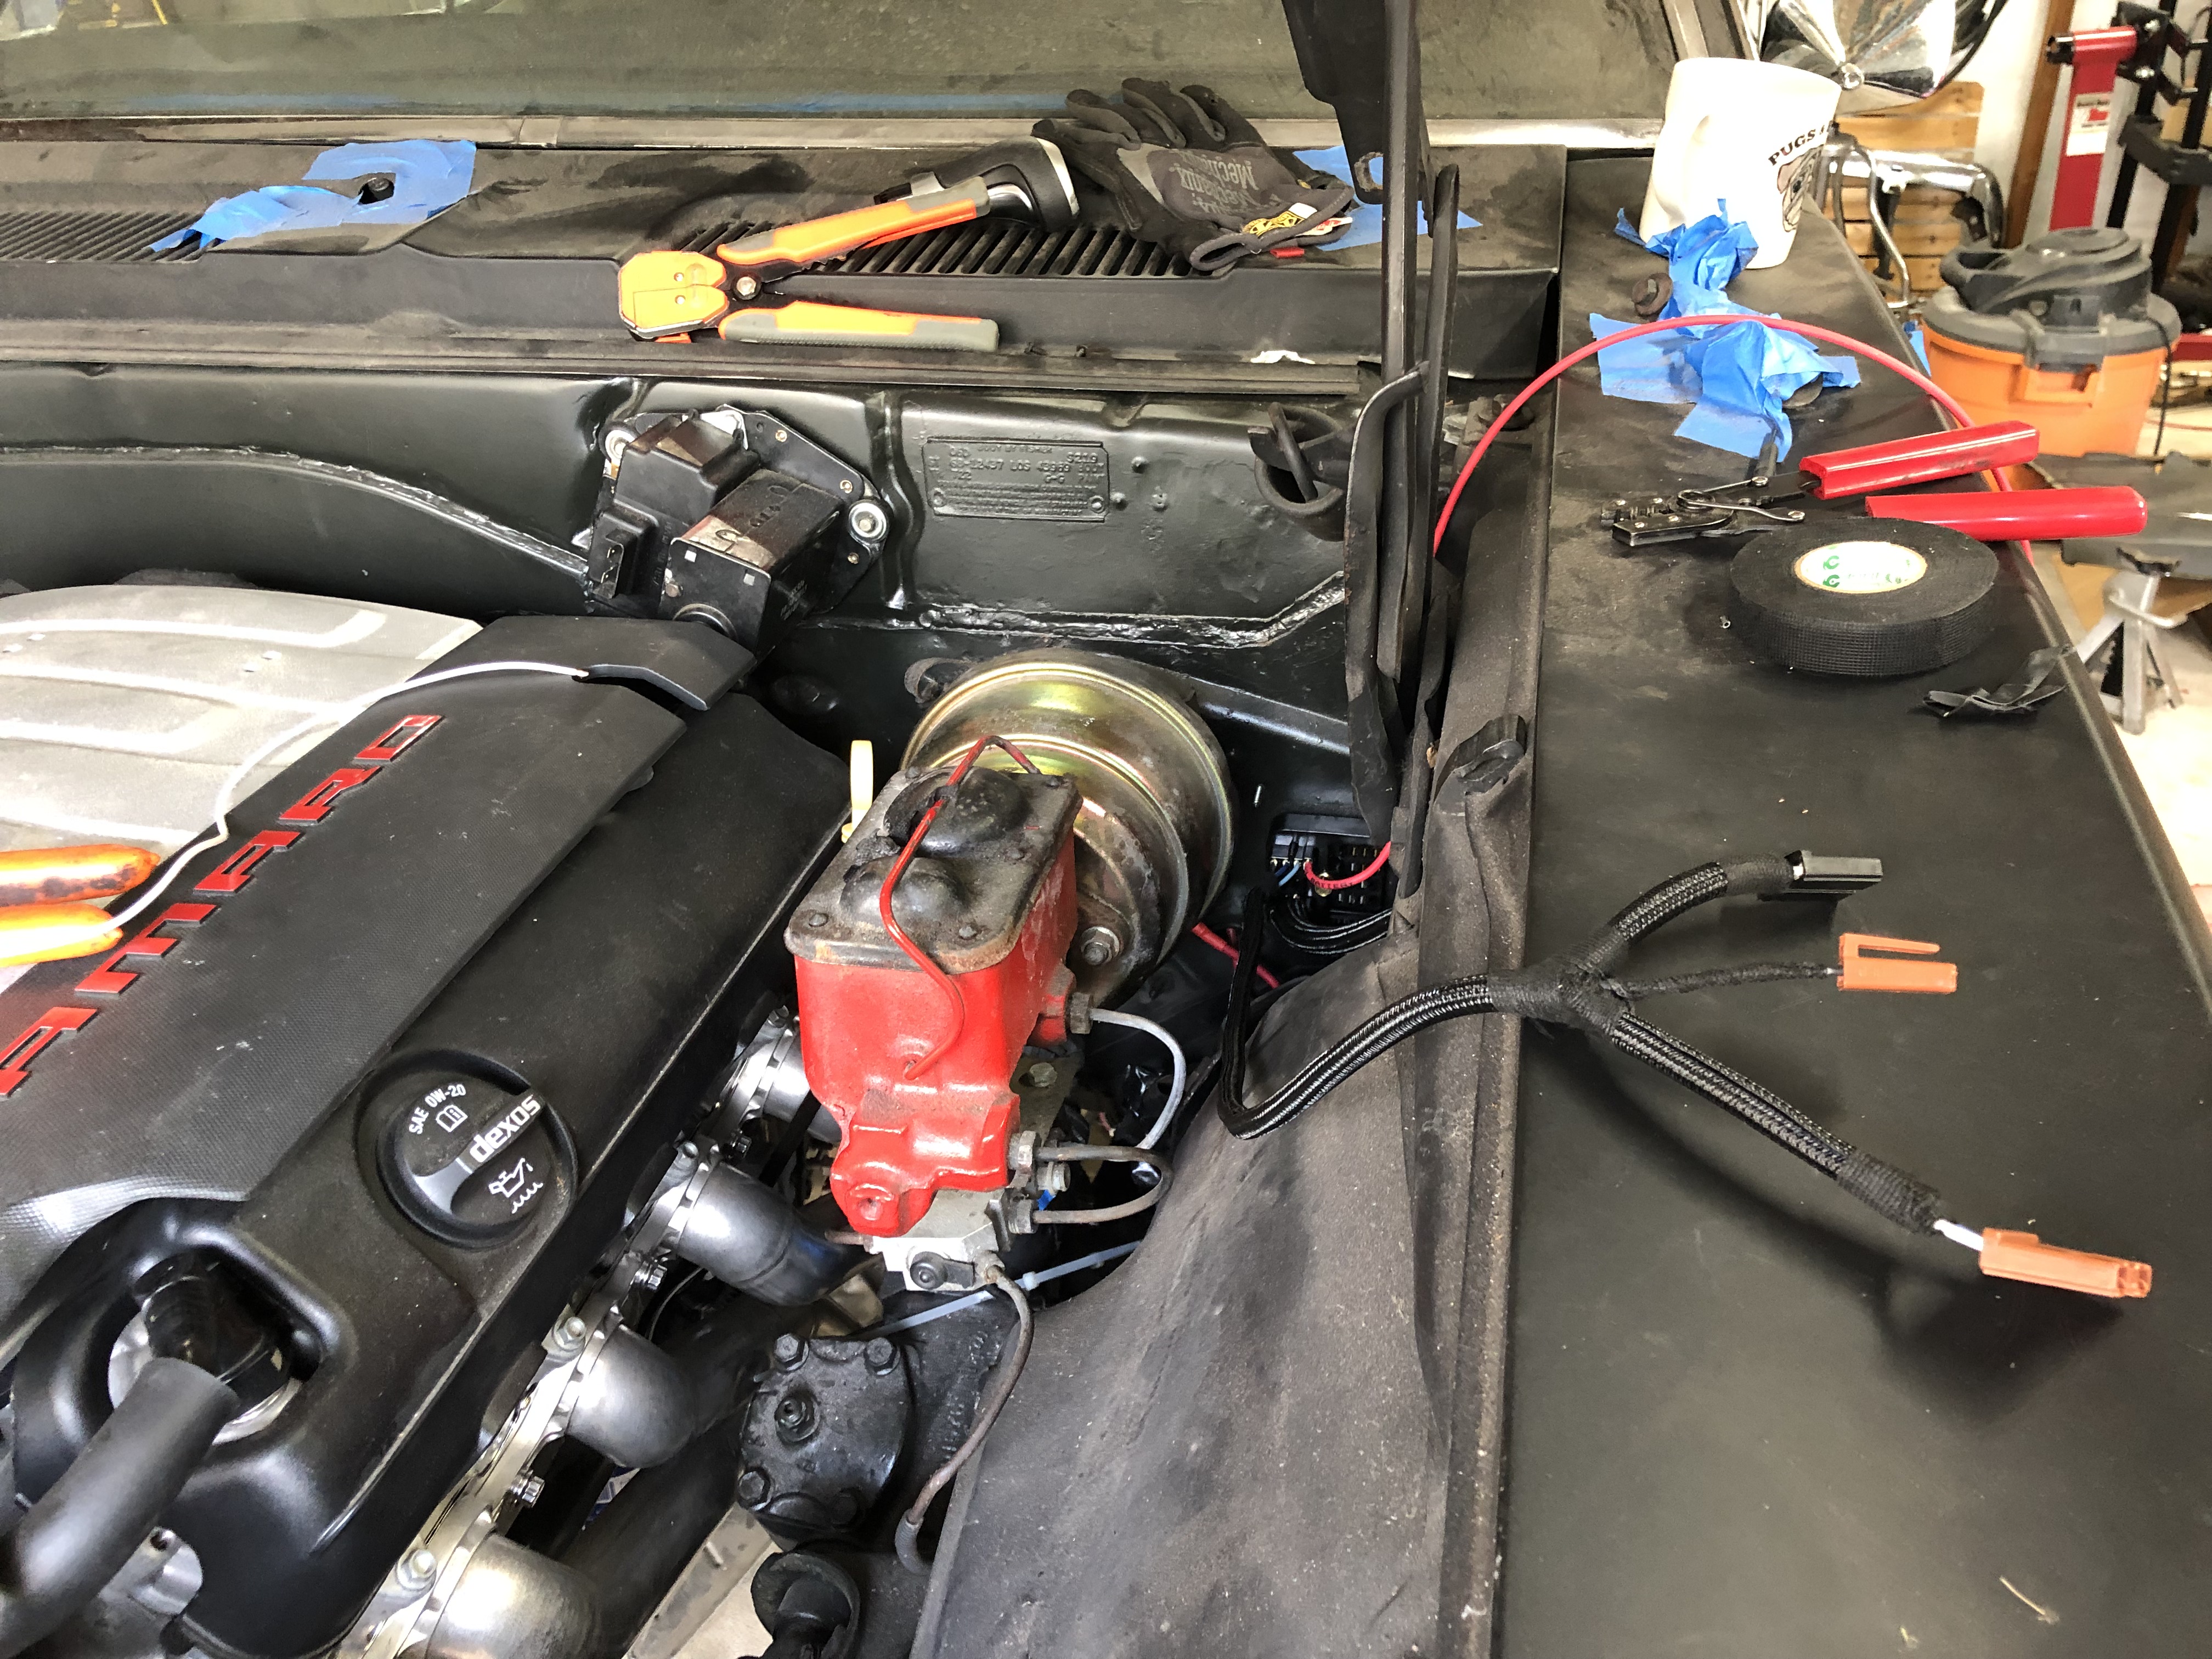
I then went to the engine bay and started on the engine harness and front lights. Turns out with a newer motor you dont really use many of the engine related wires or at least I did not. The kit is cool though, it comes wires prewired for an ECM mounted in the engine bay so you can just wire this right up to your swap harness and roll with it. I have installed my main power junction stud directly below the break booster to keep it kind of hided. This stud will supply power to most of the car. After I got the stud installed I slapped the front fenders back on for the front wire fitment.


06-05-2019 #10
Registered User
- Join Date
- Jul 2017
- Posts
- 166
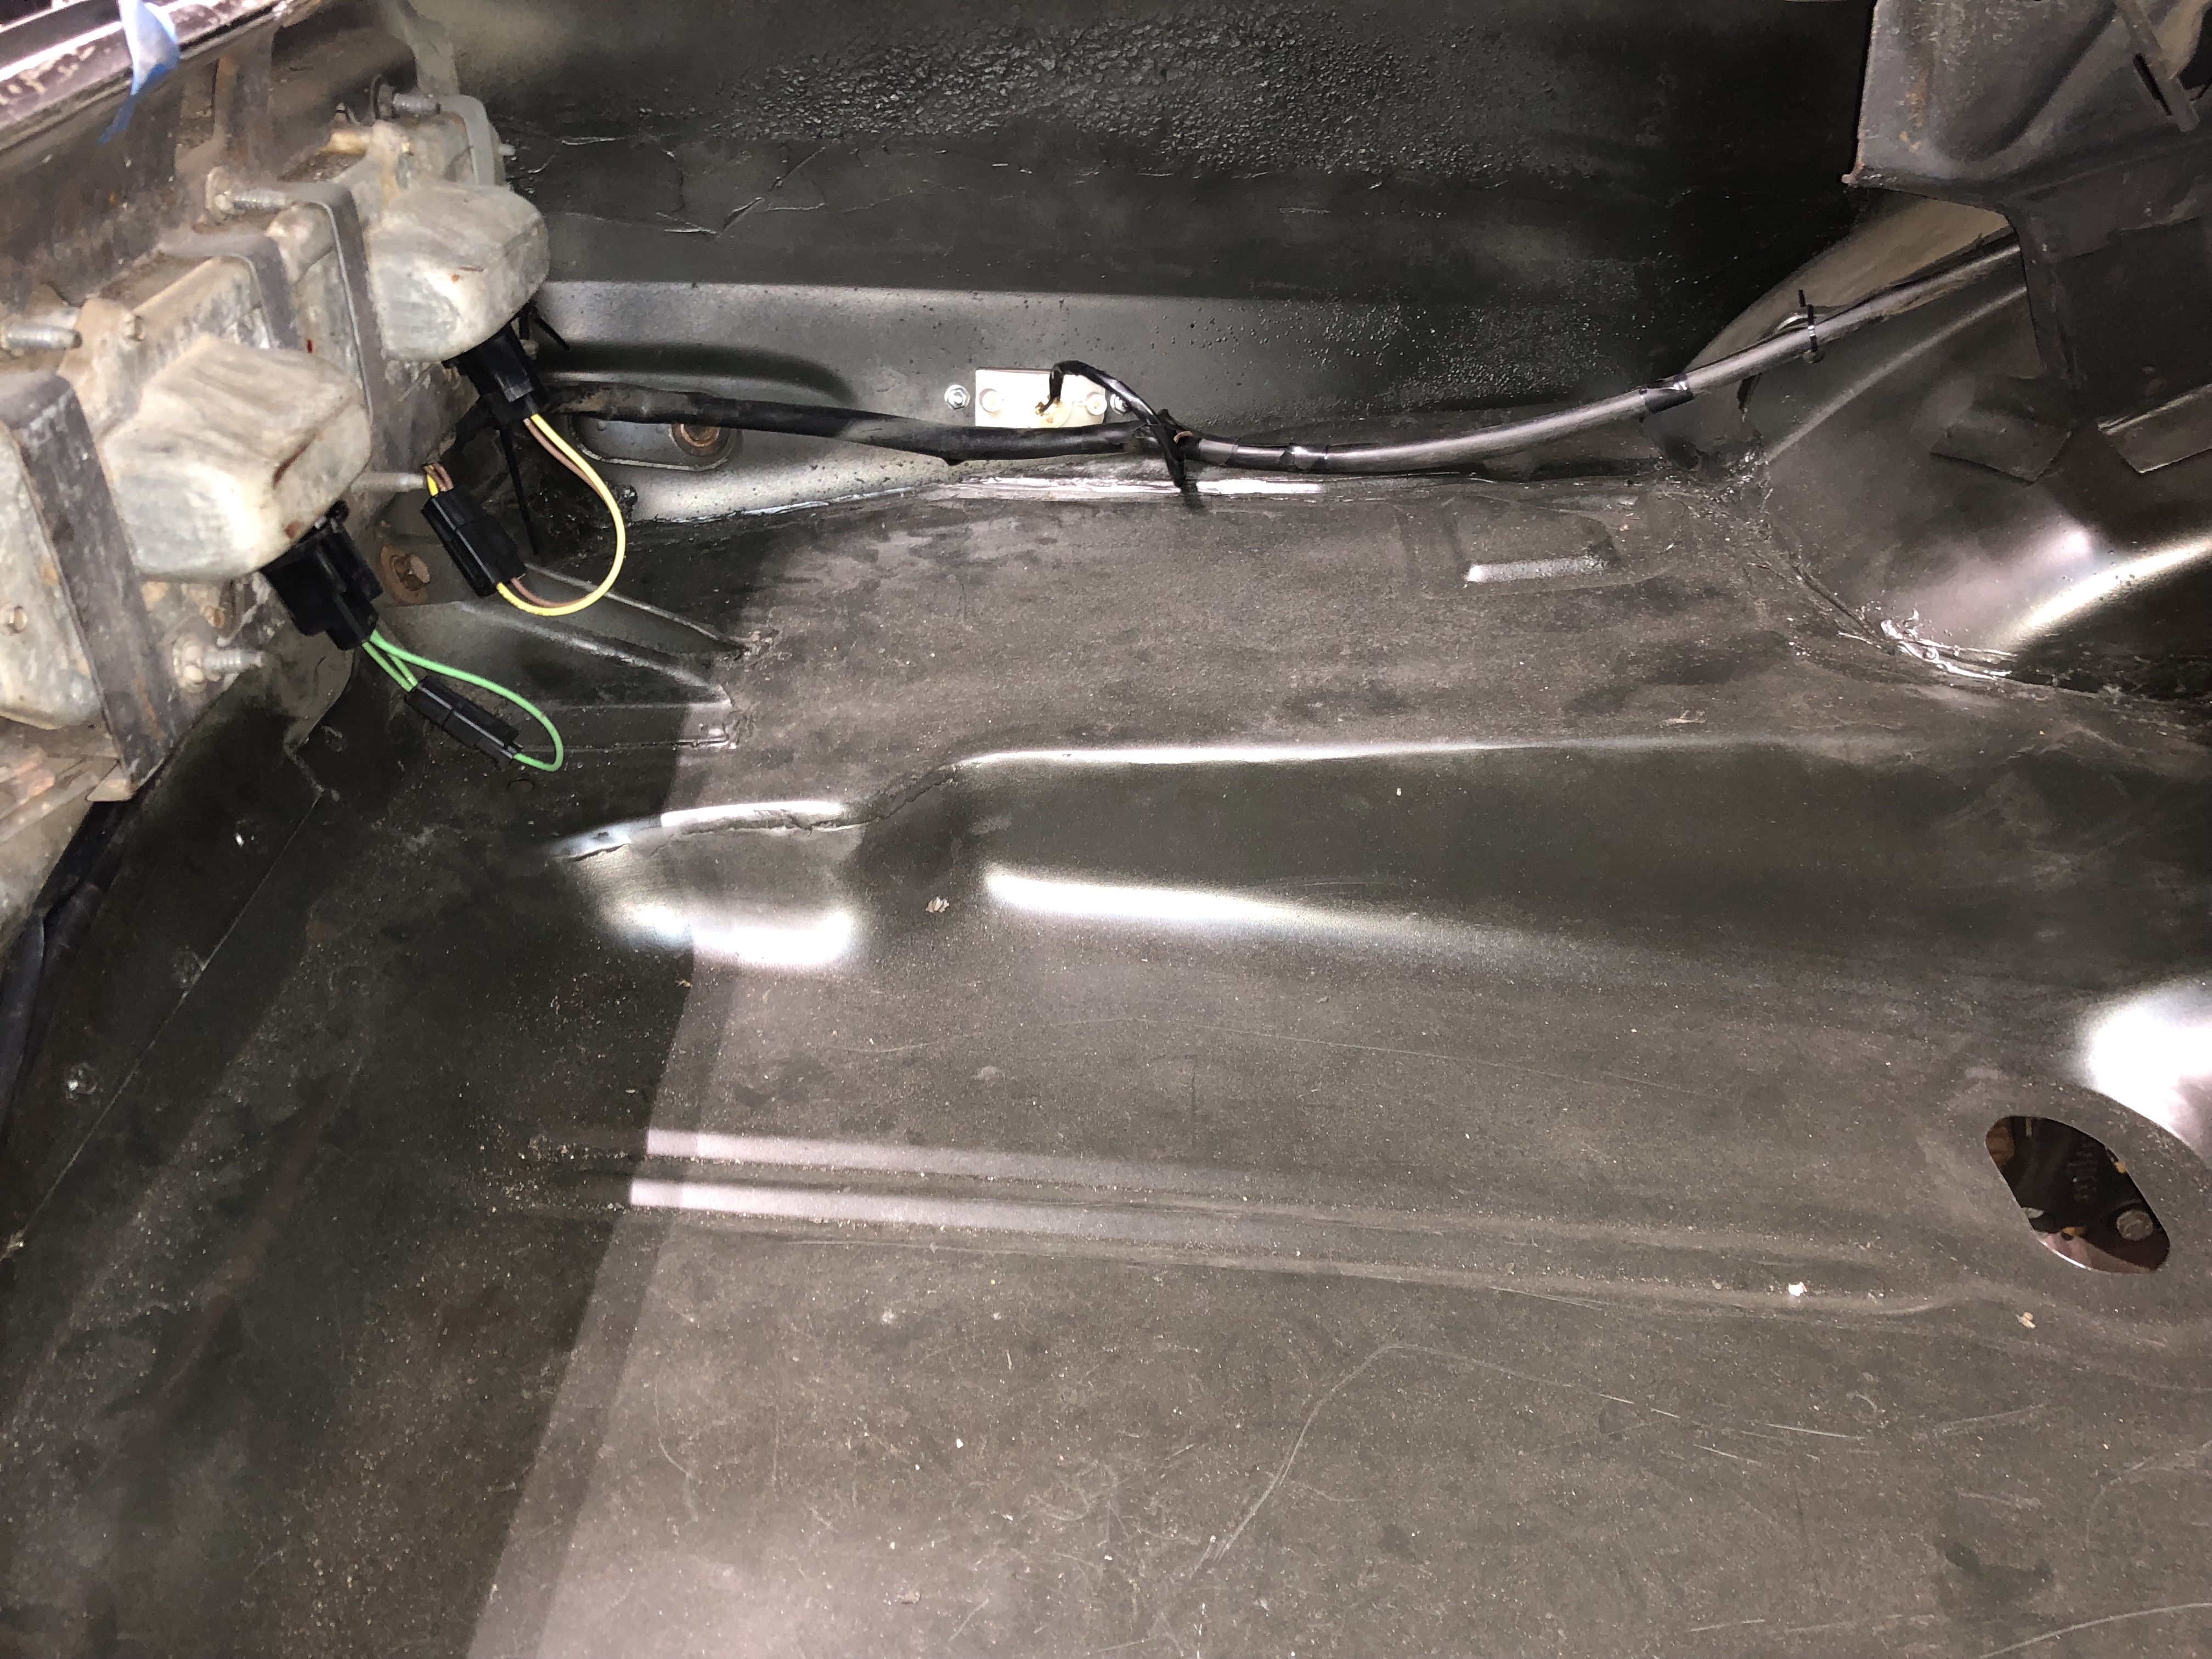
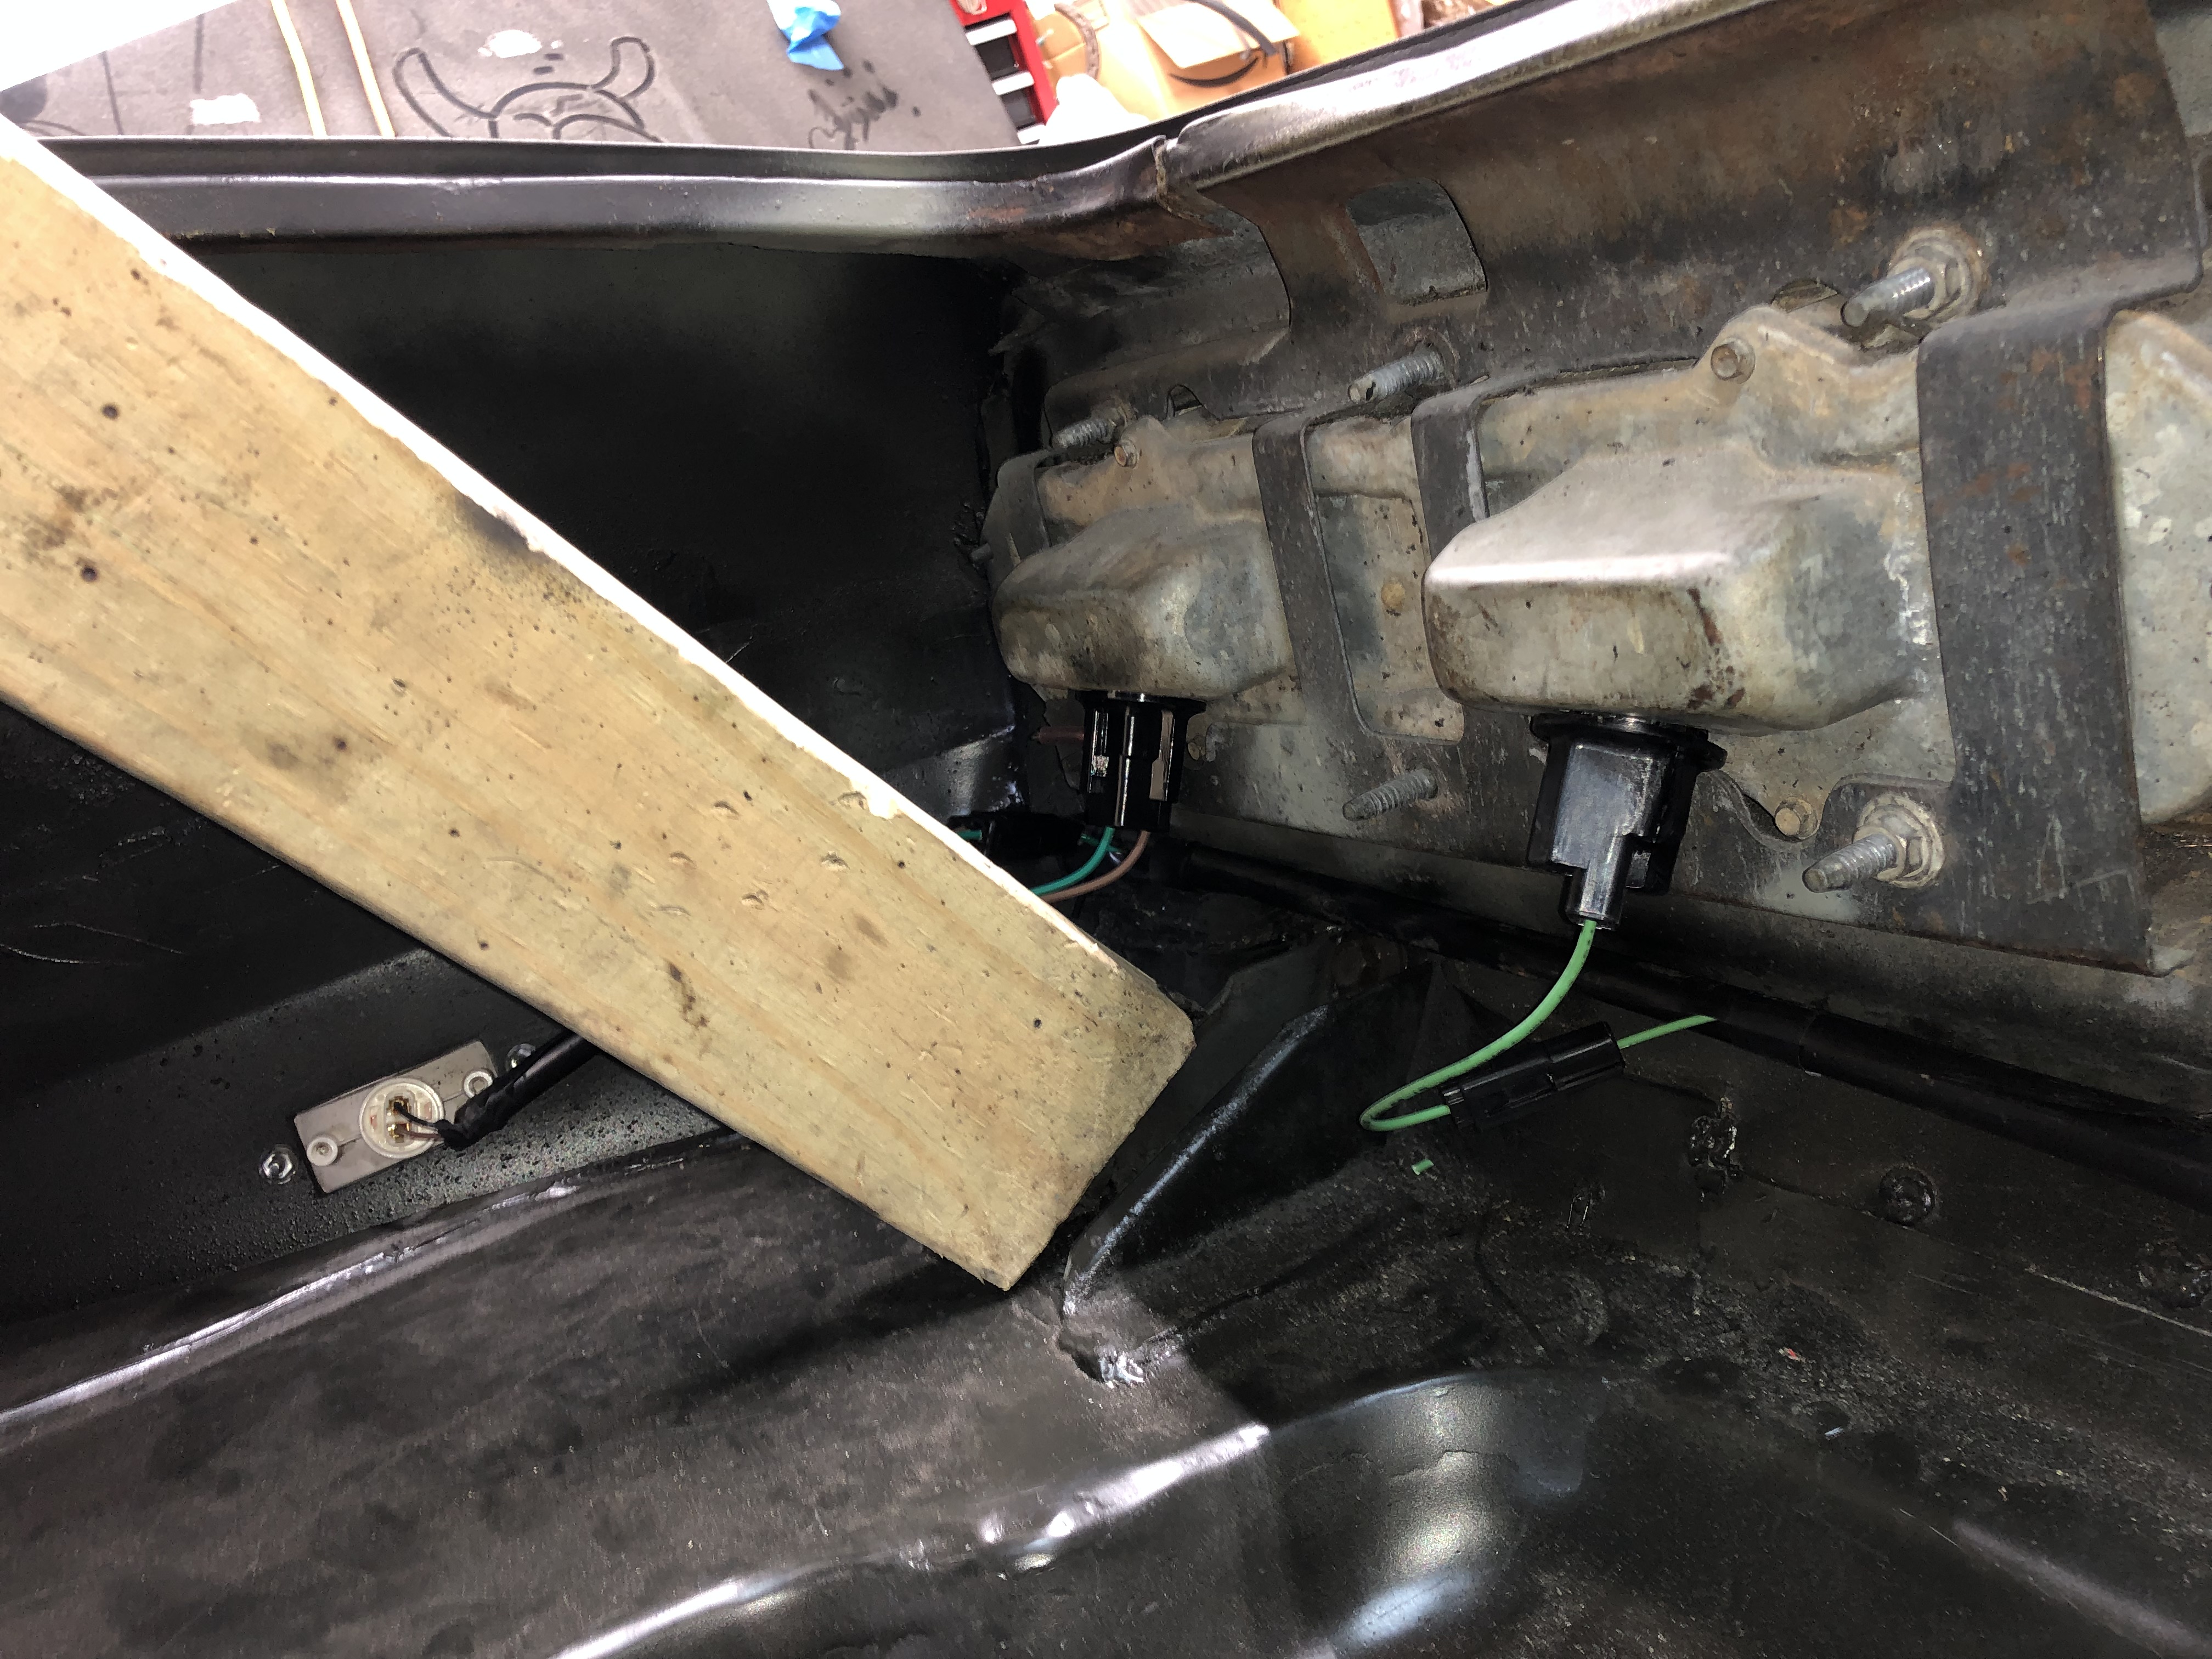
Heres a few photos of the front lighting and wiper motor wiring. I also ran the AAW ECM wiring similar to the front lights, everything is located behind the fender out of the way or under the core support, ended up looking pretty cool.
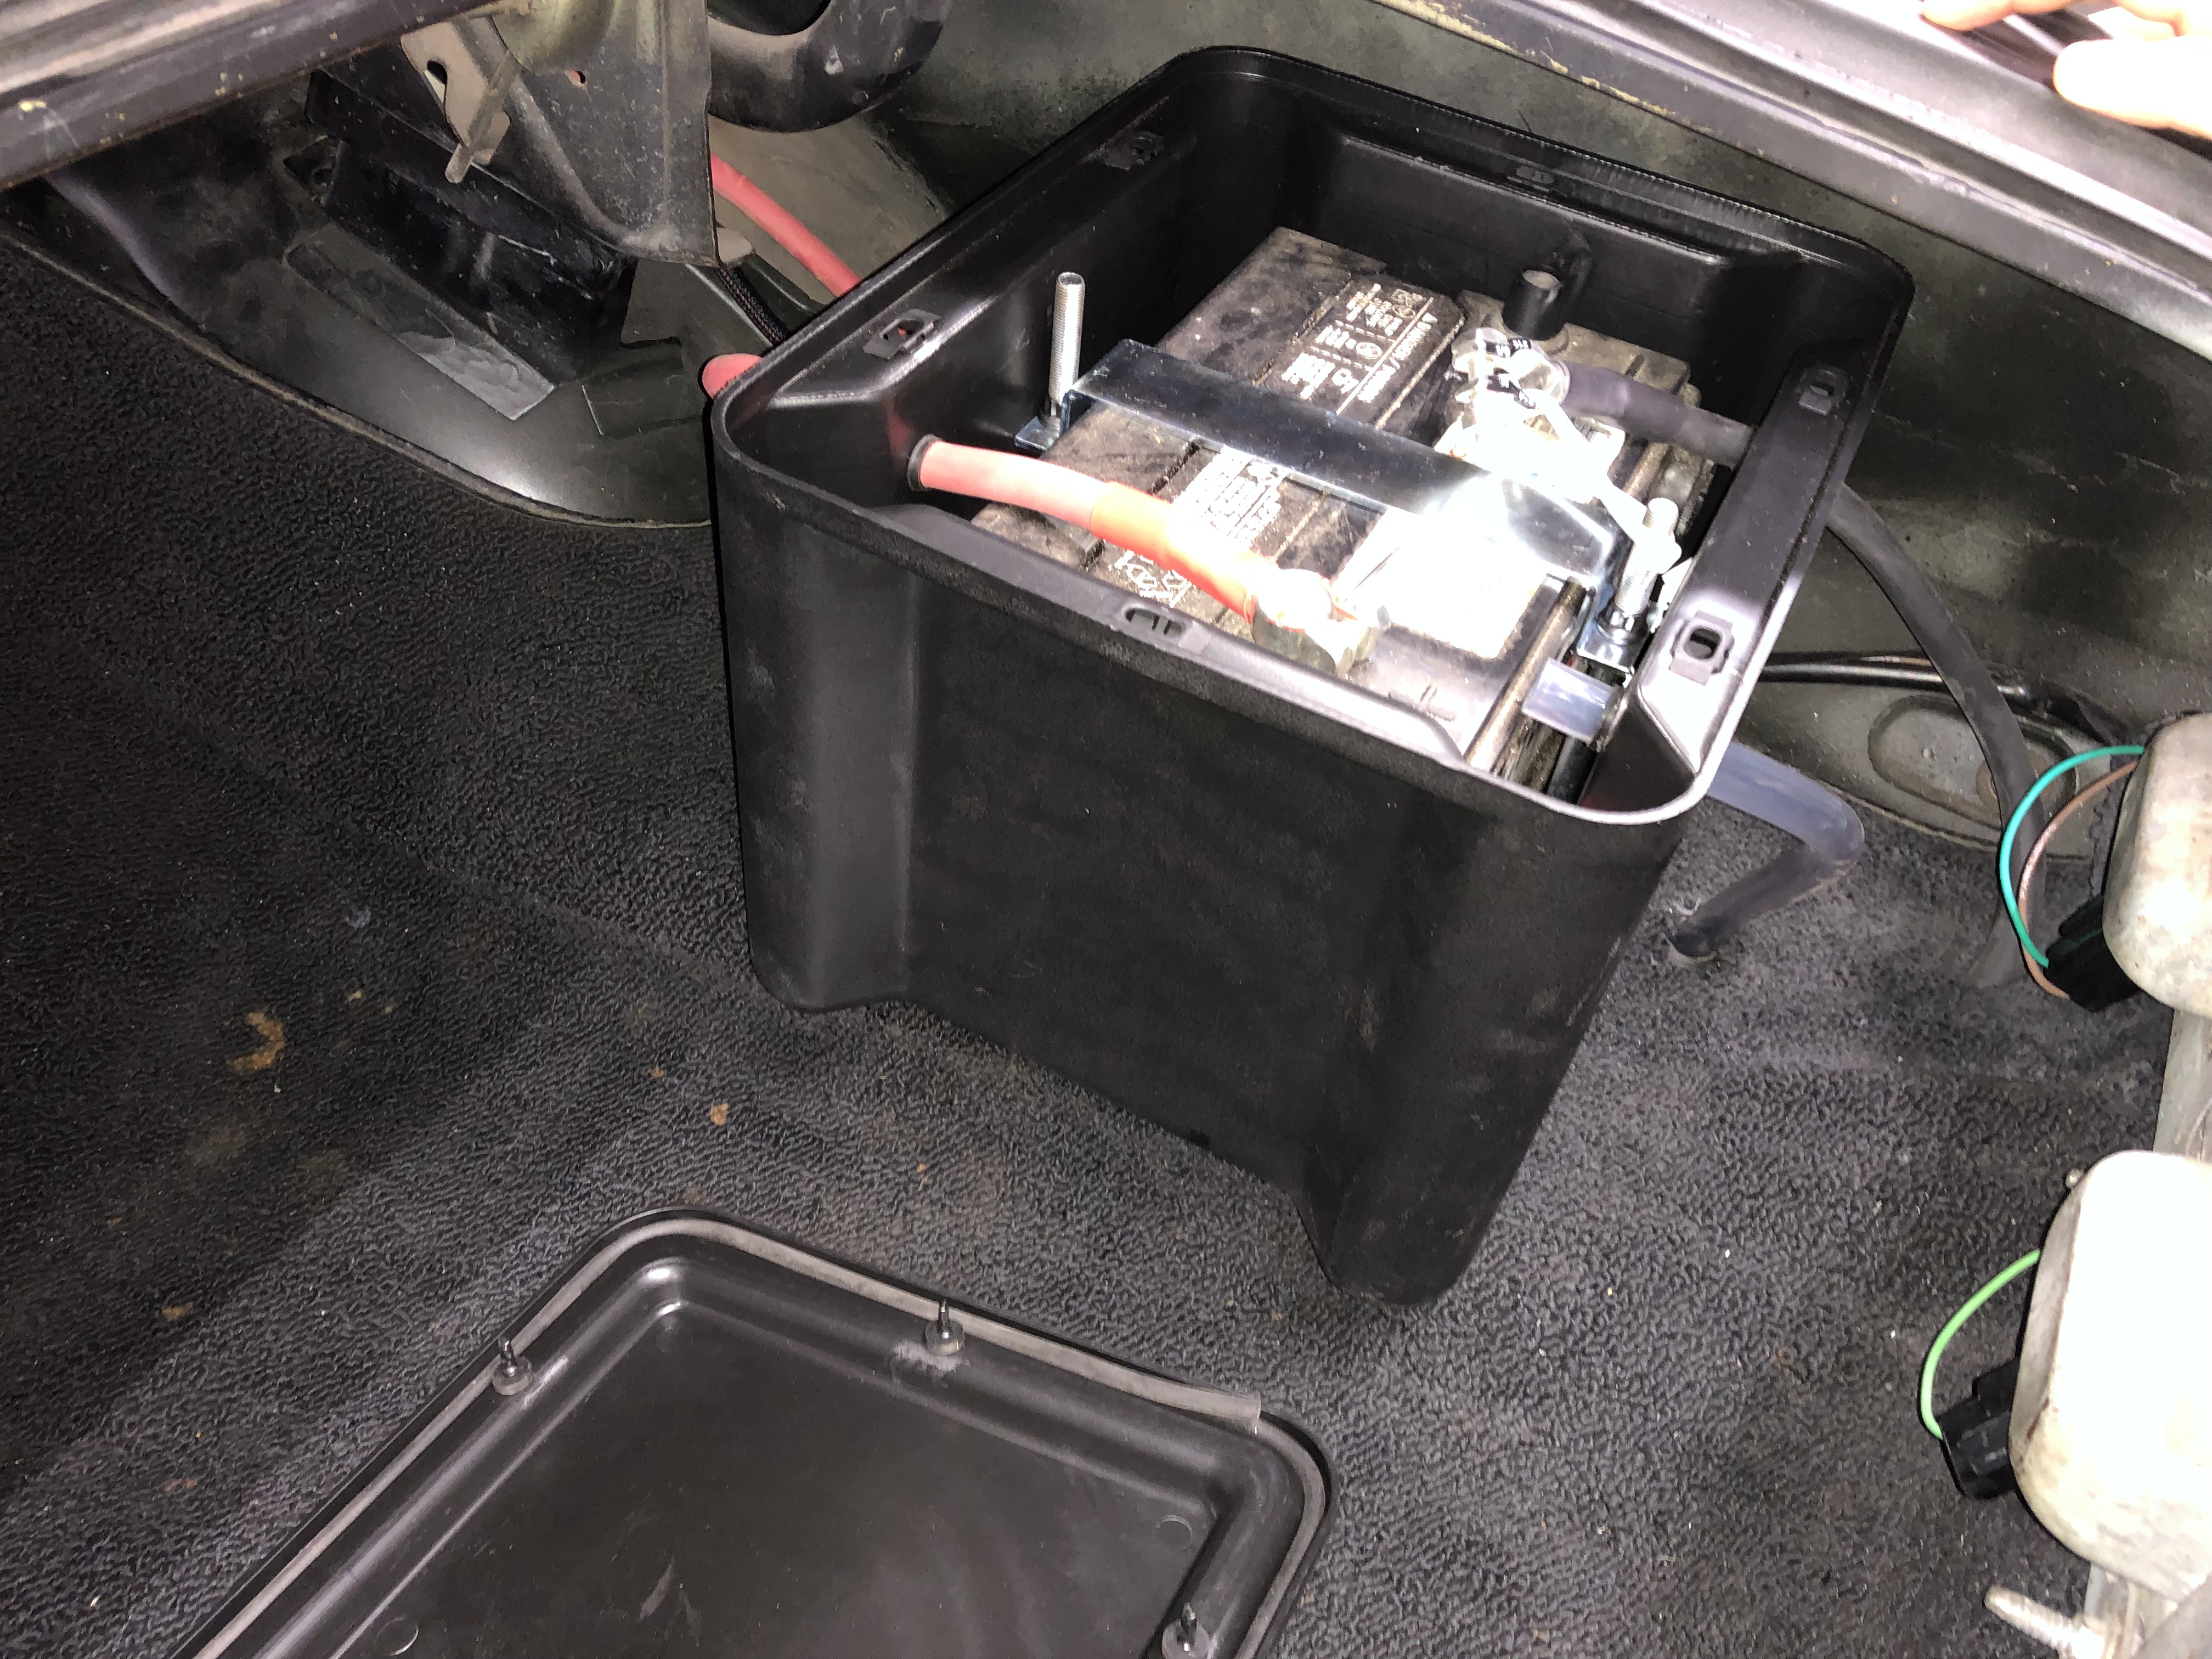
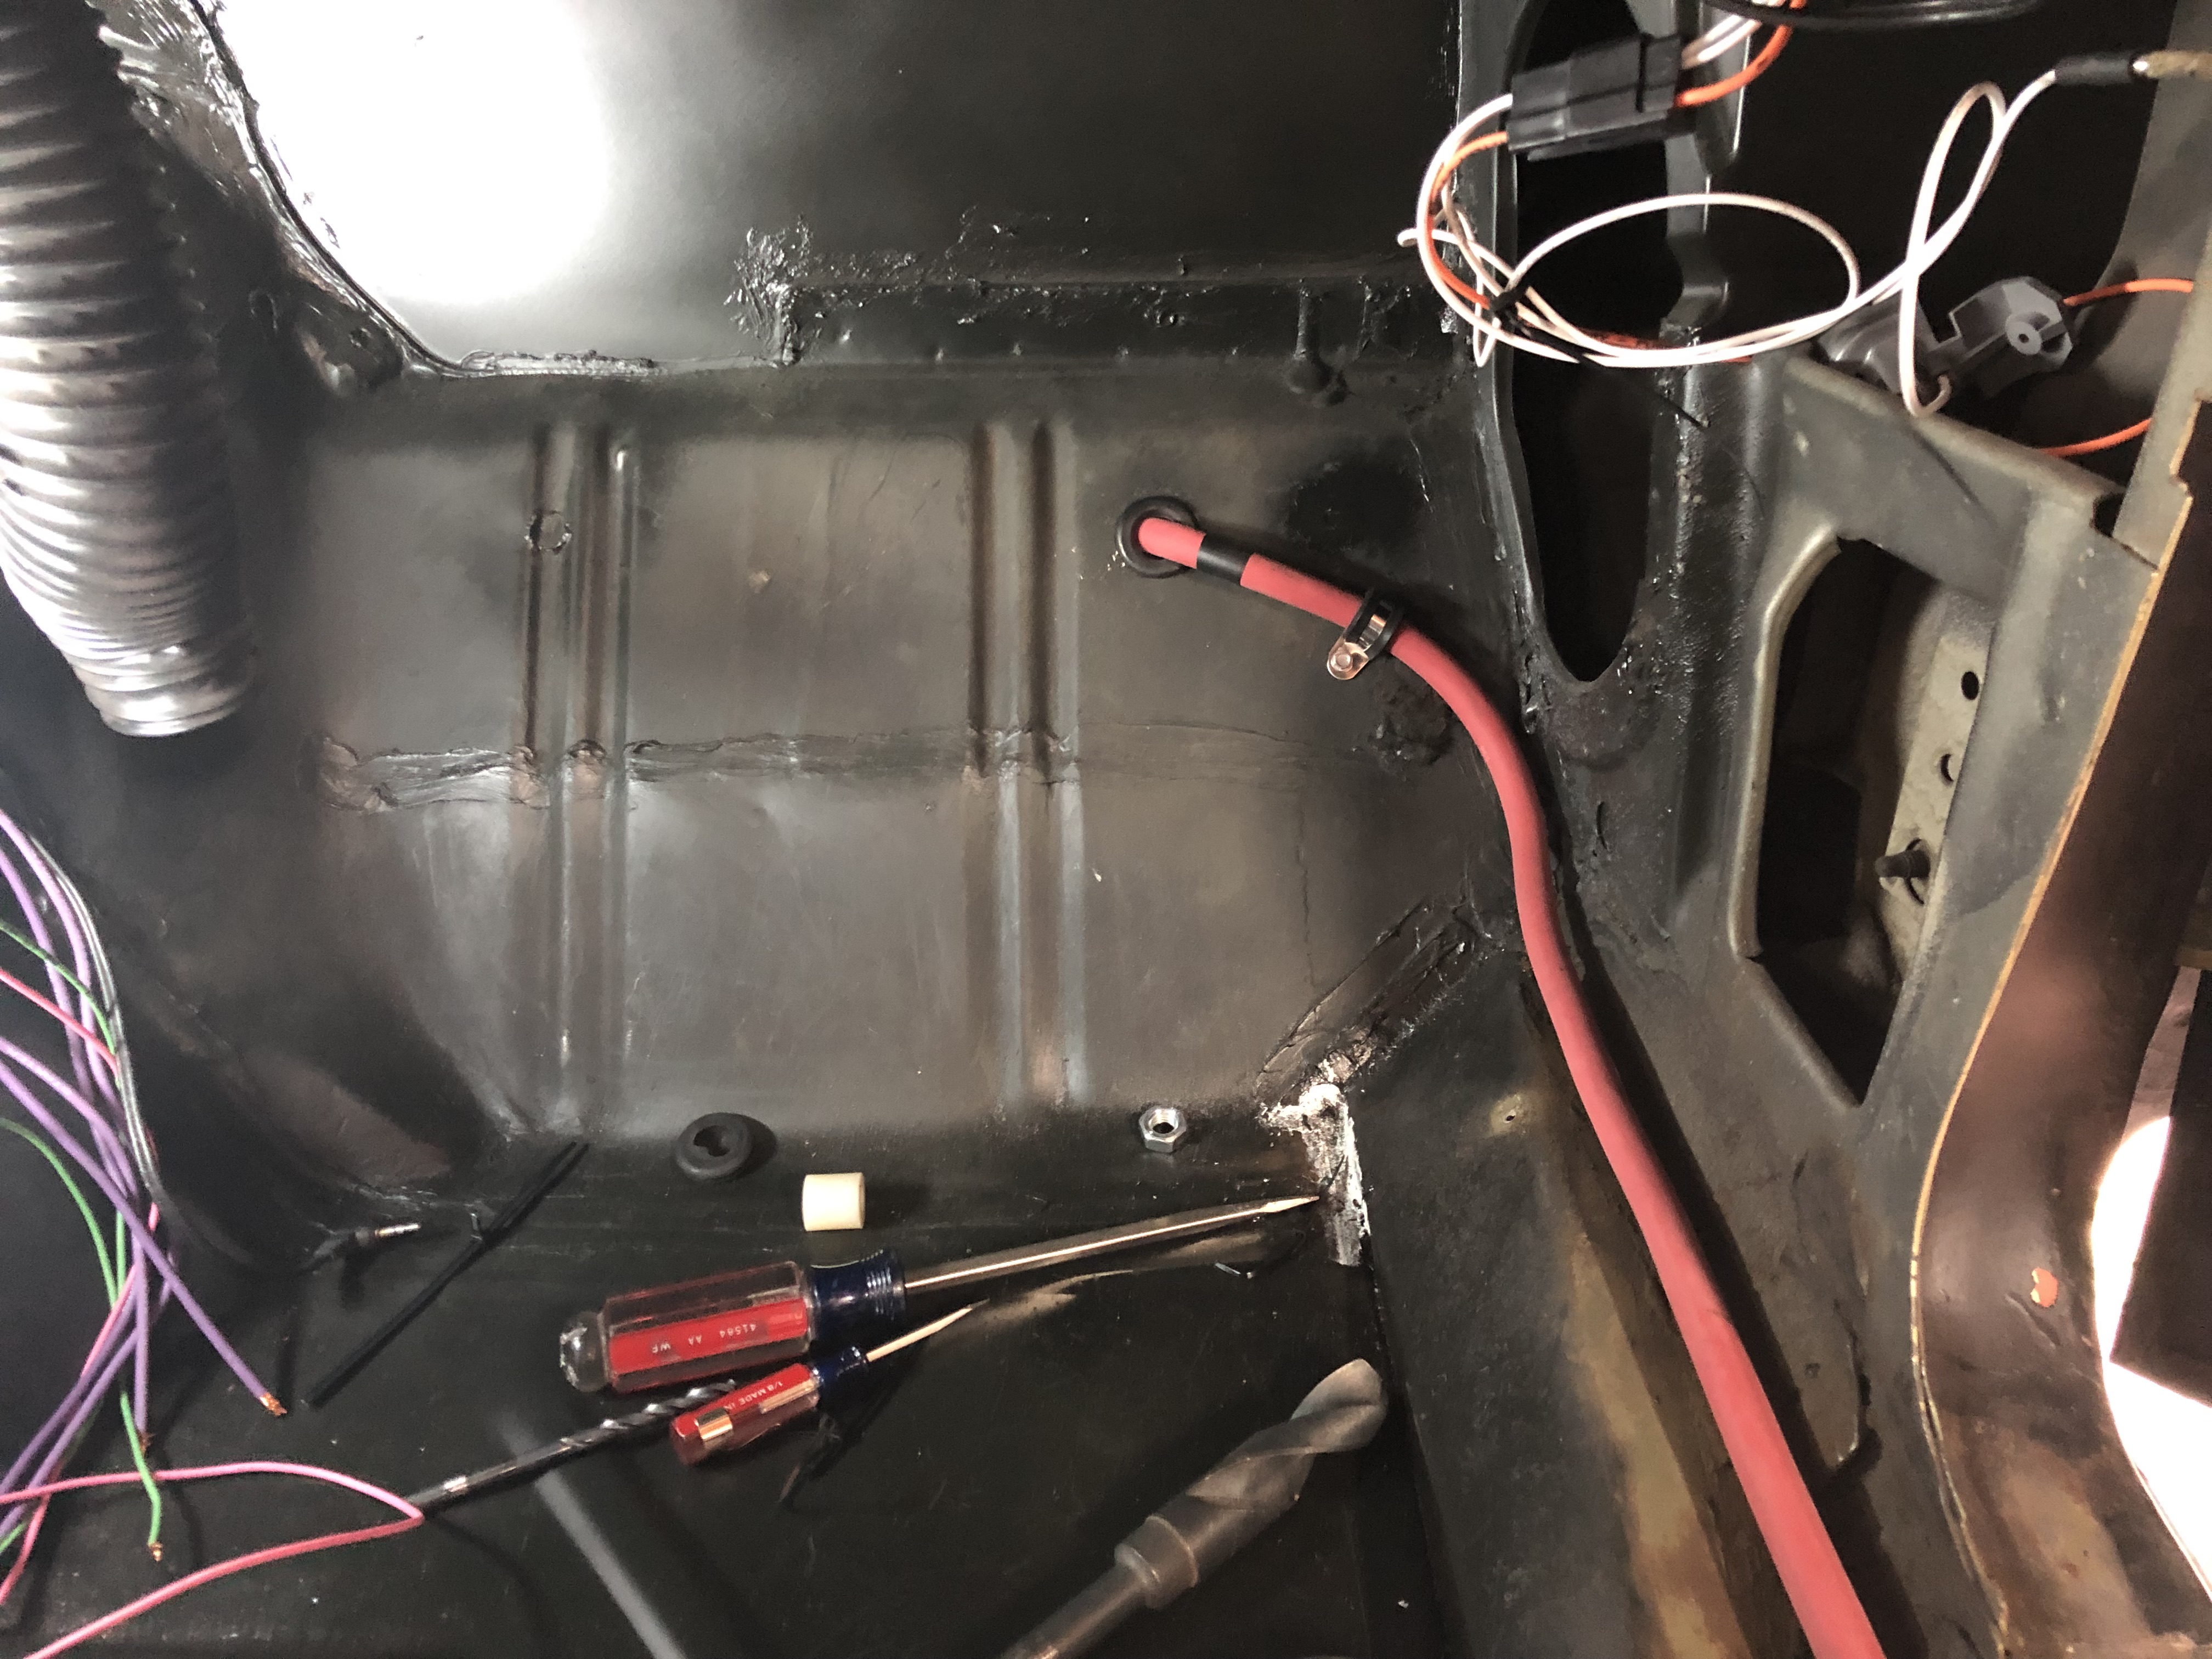
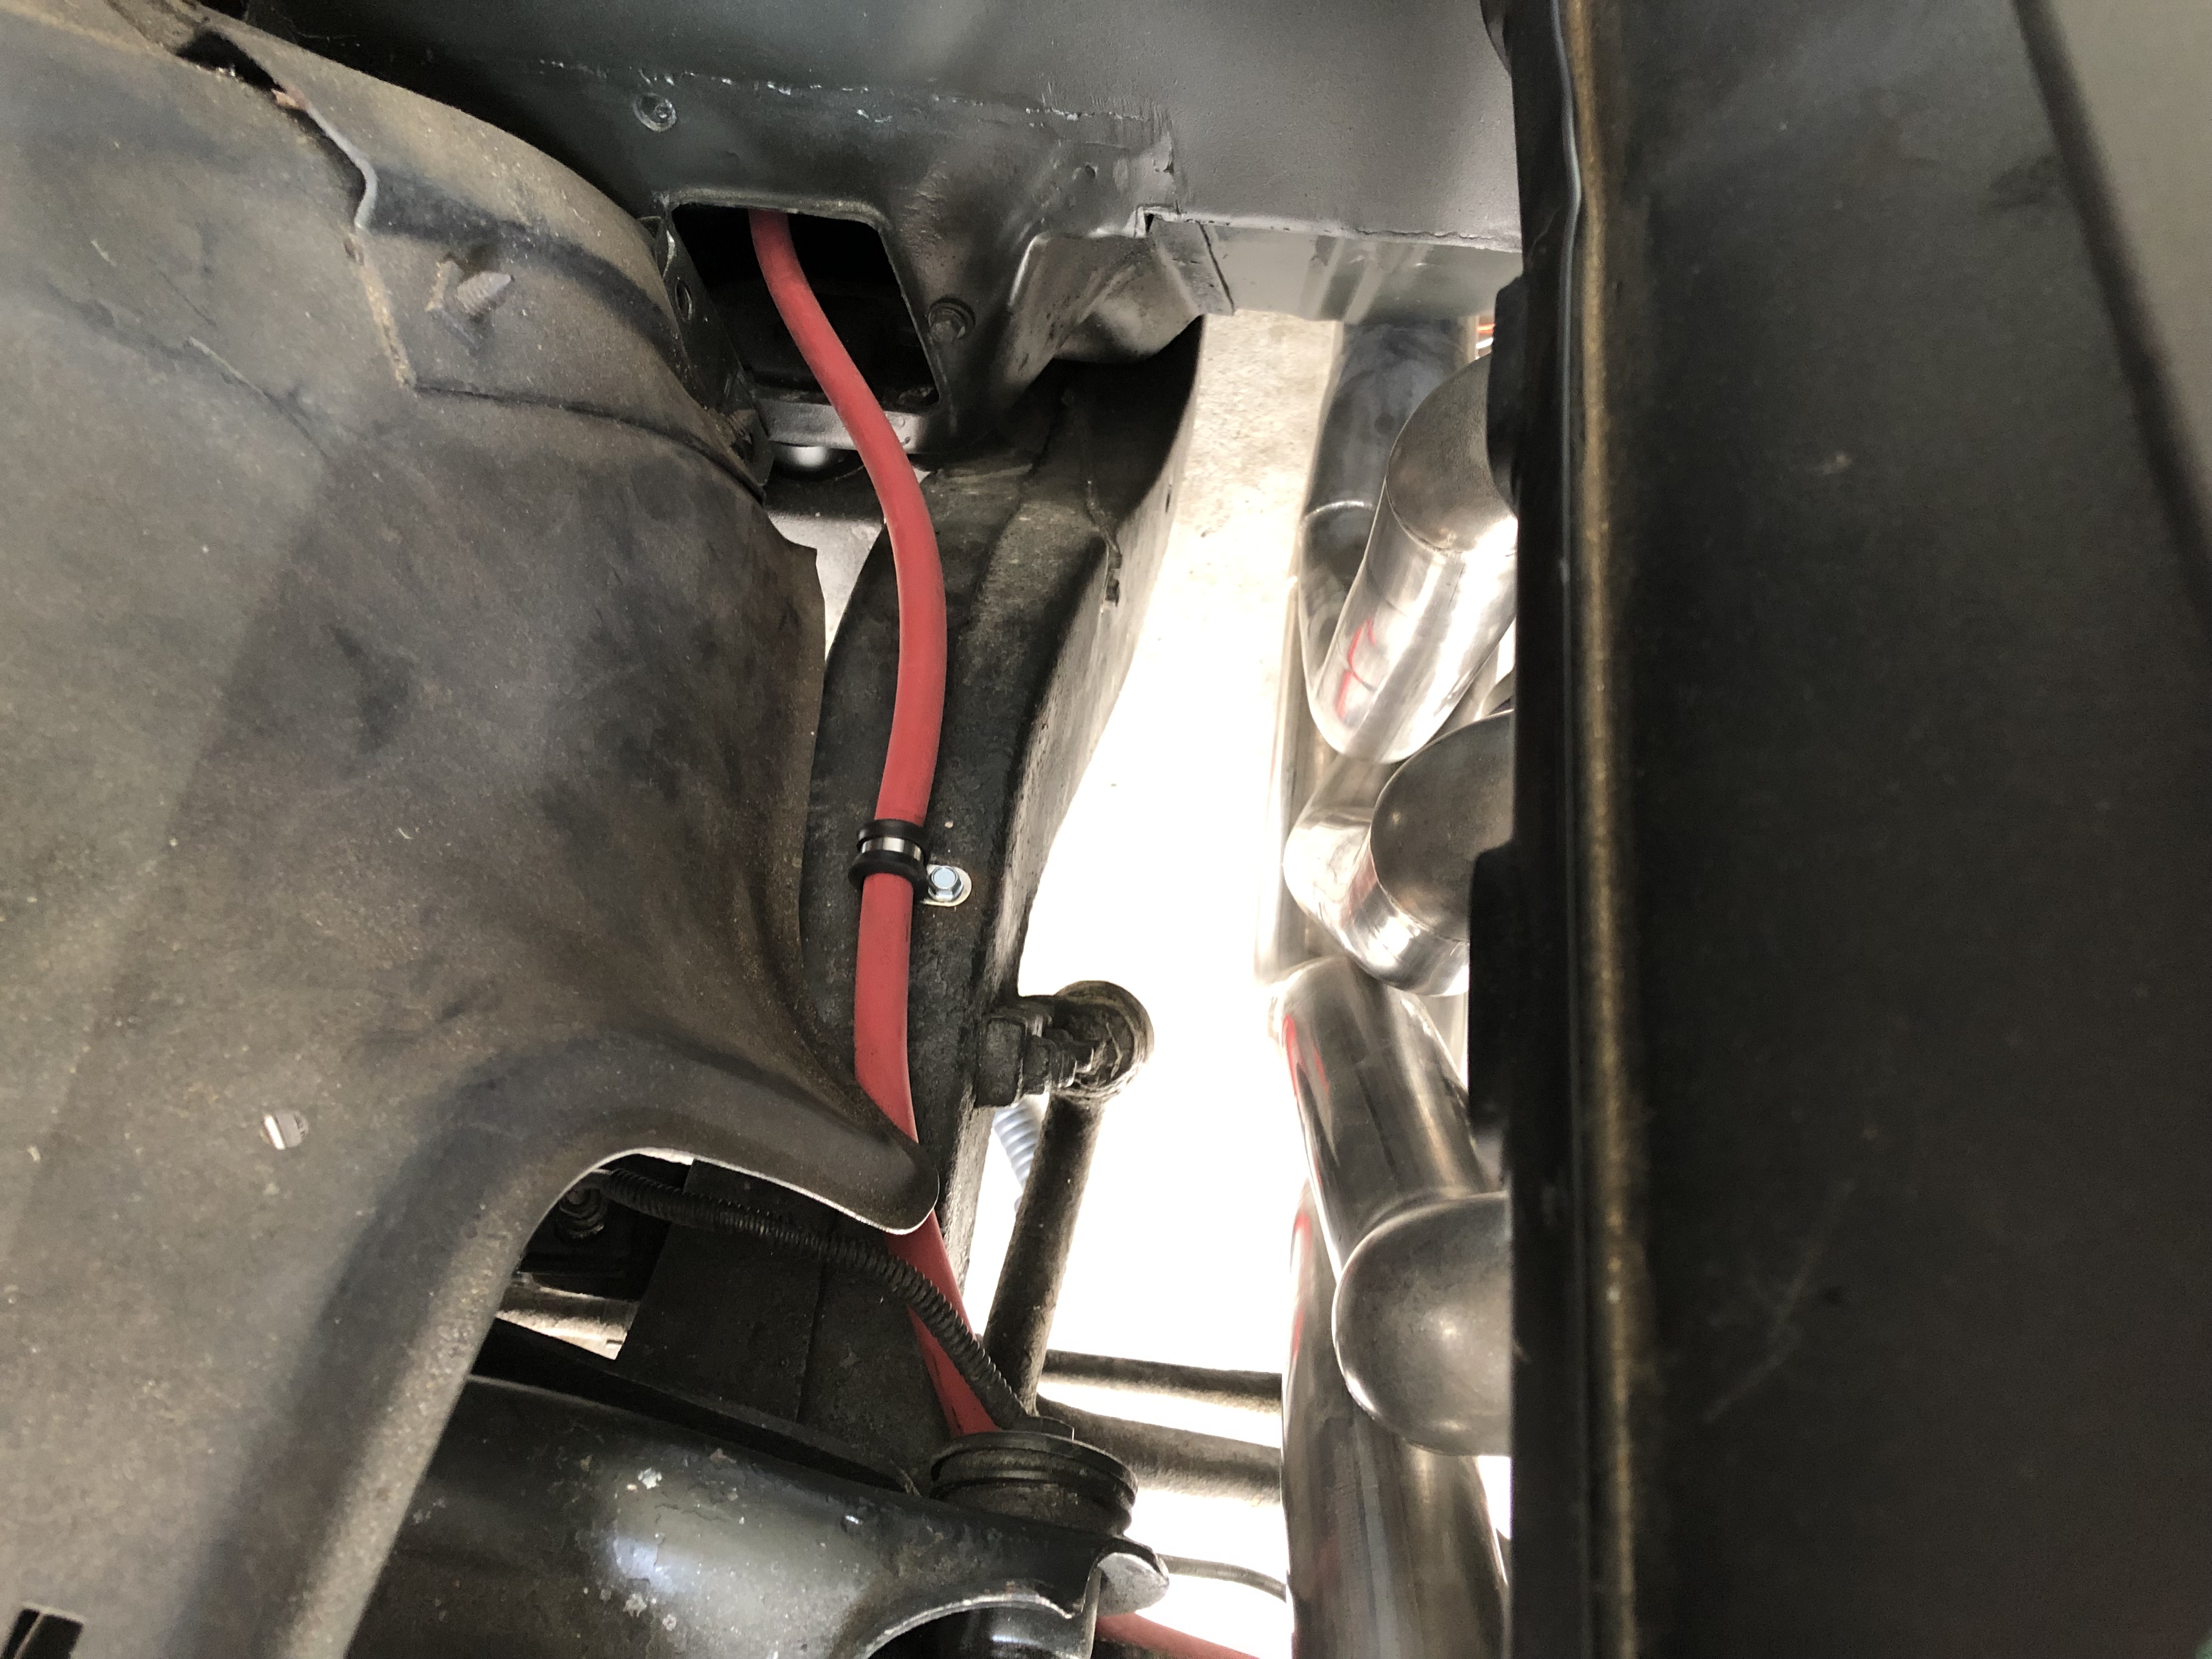
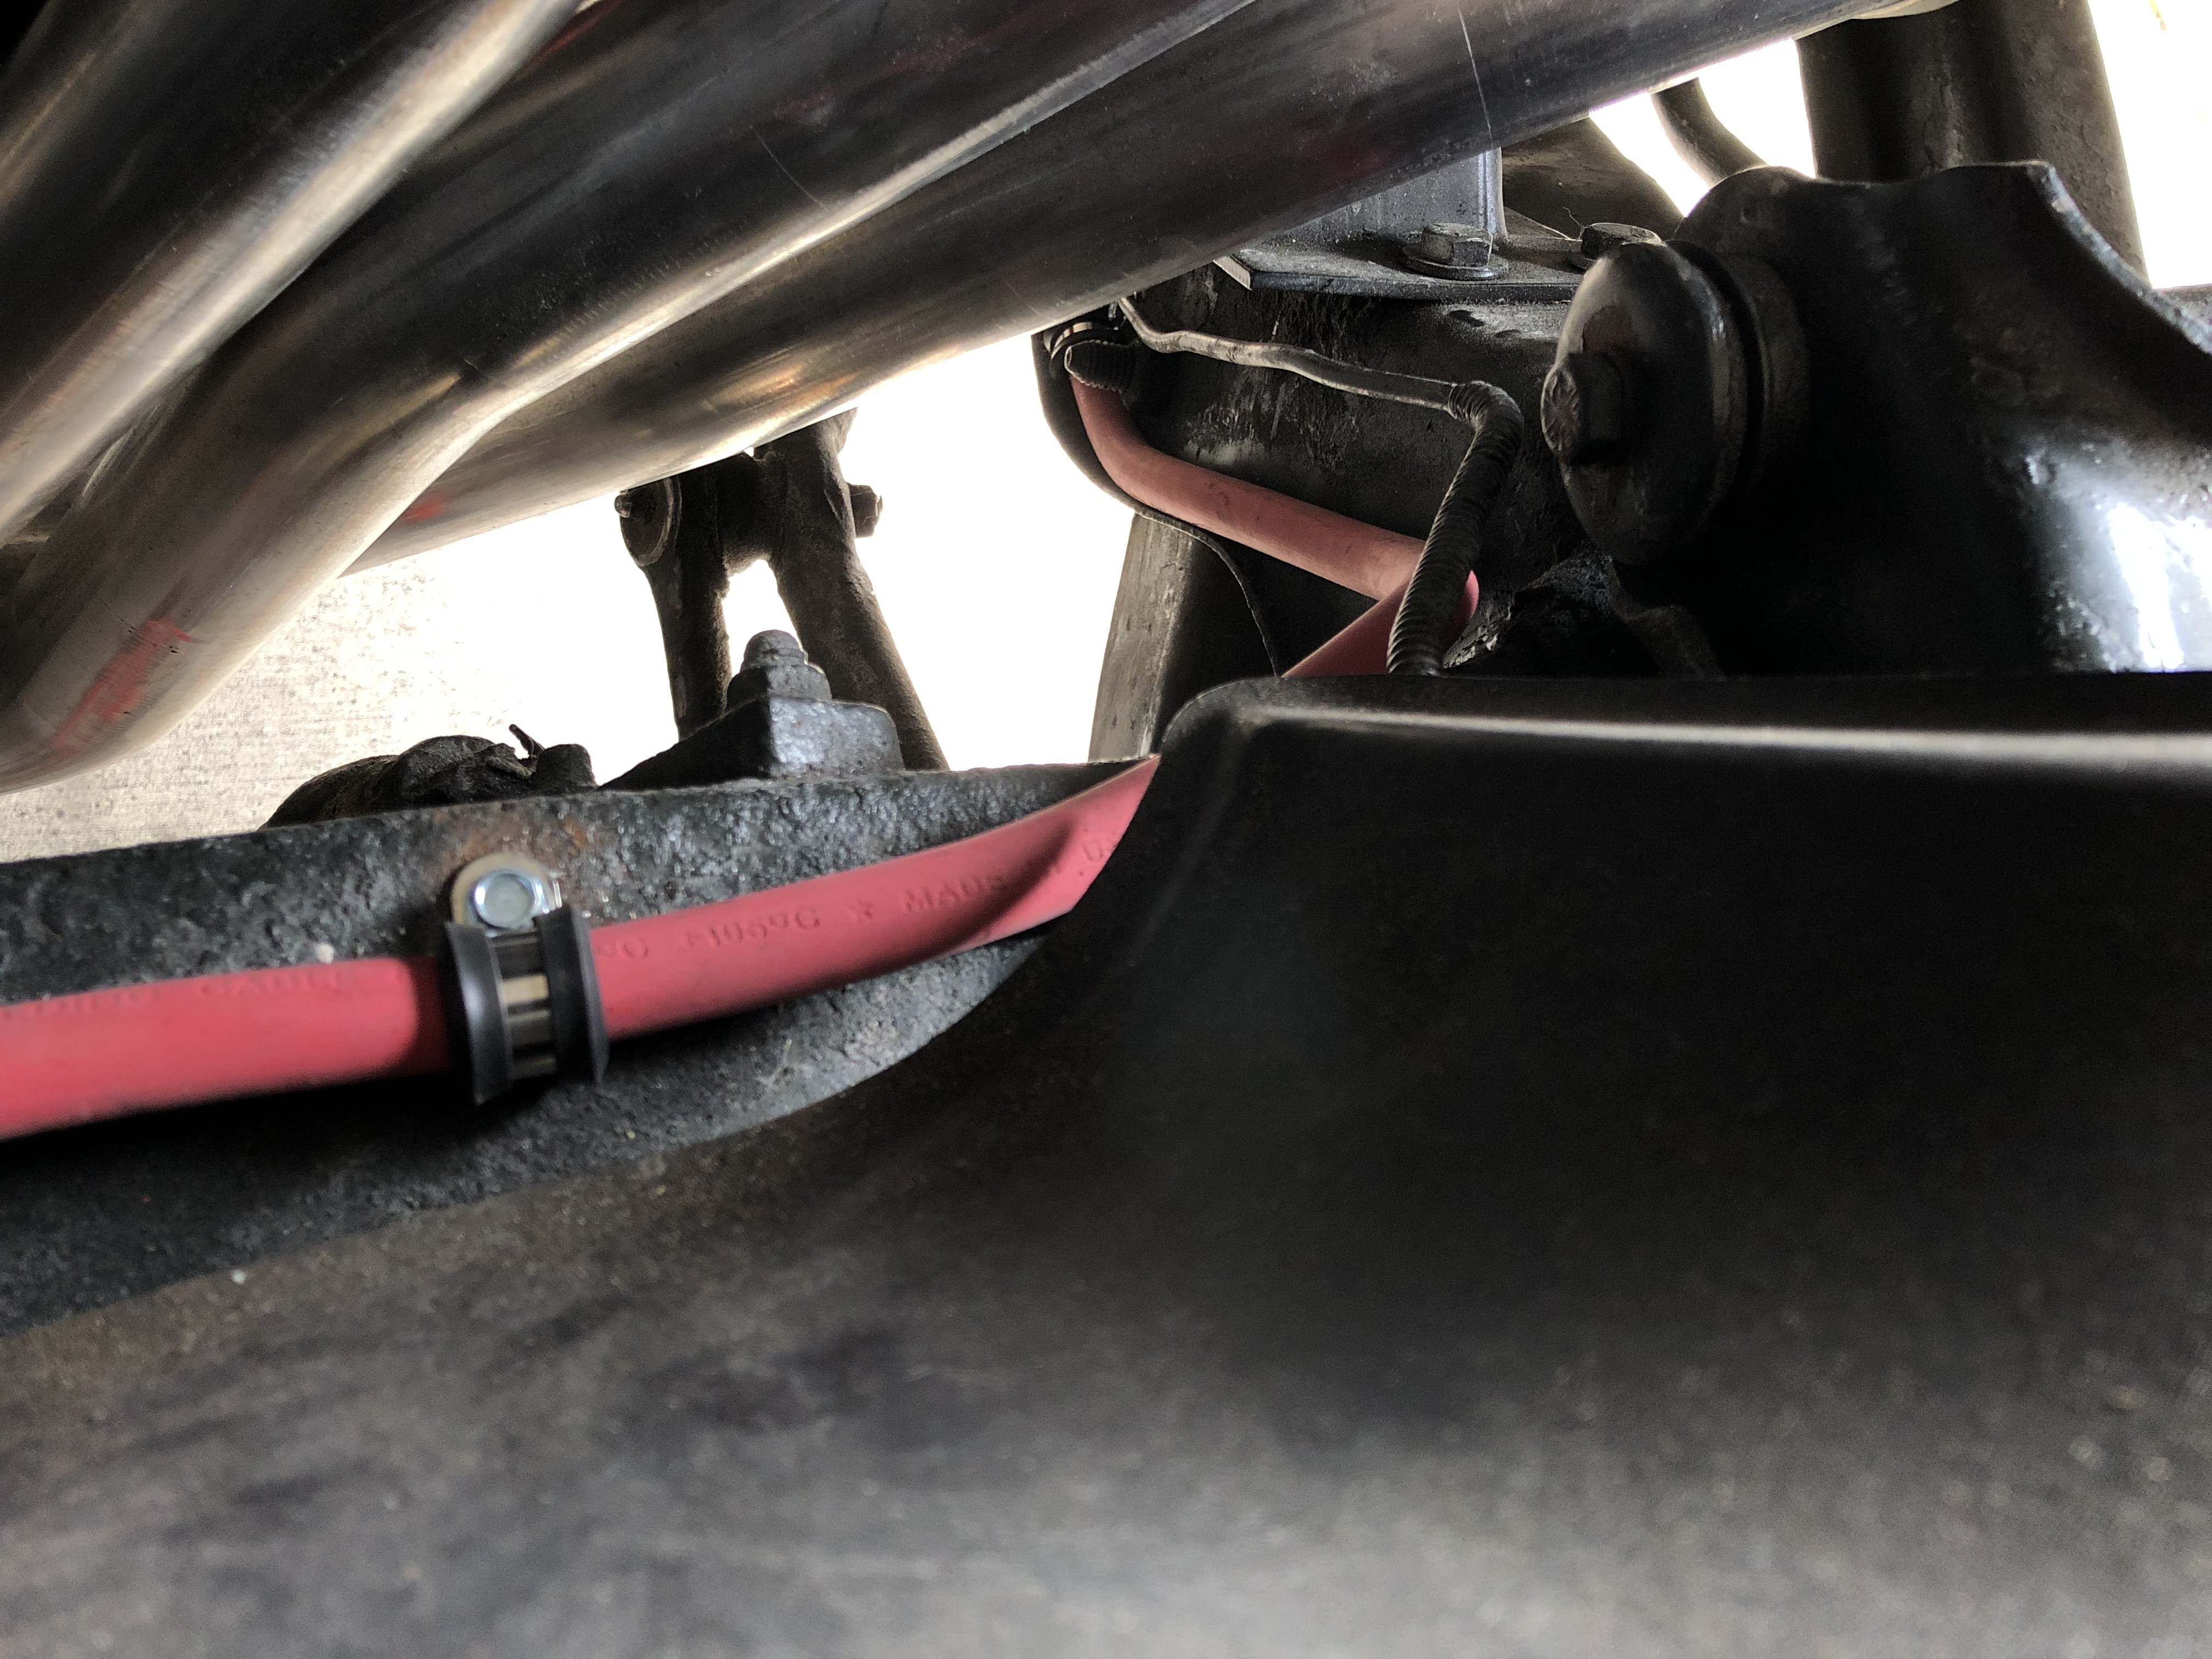
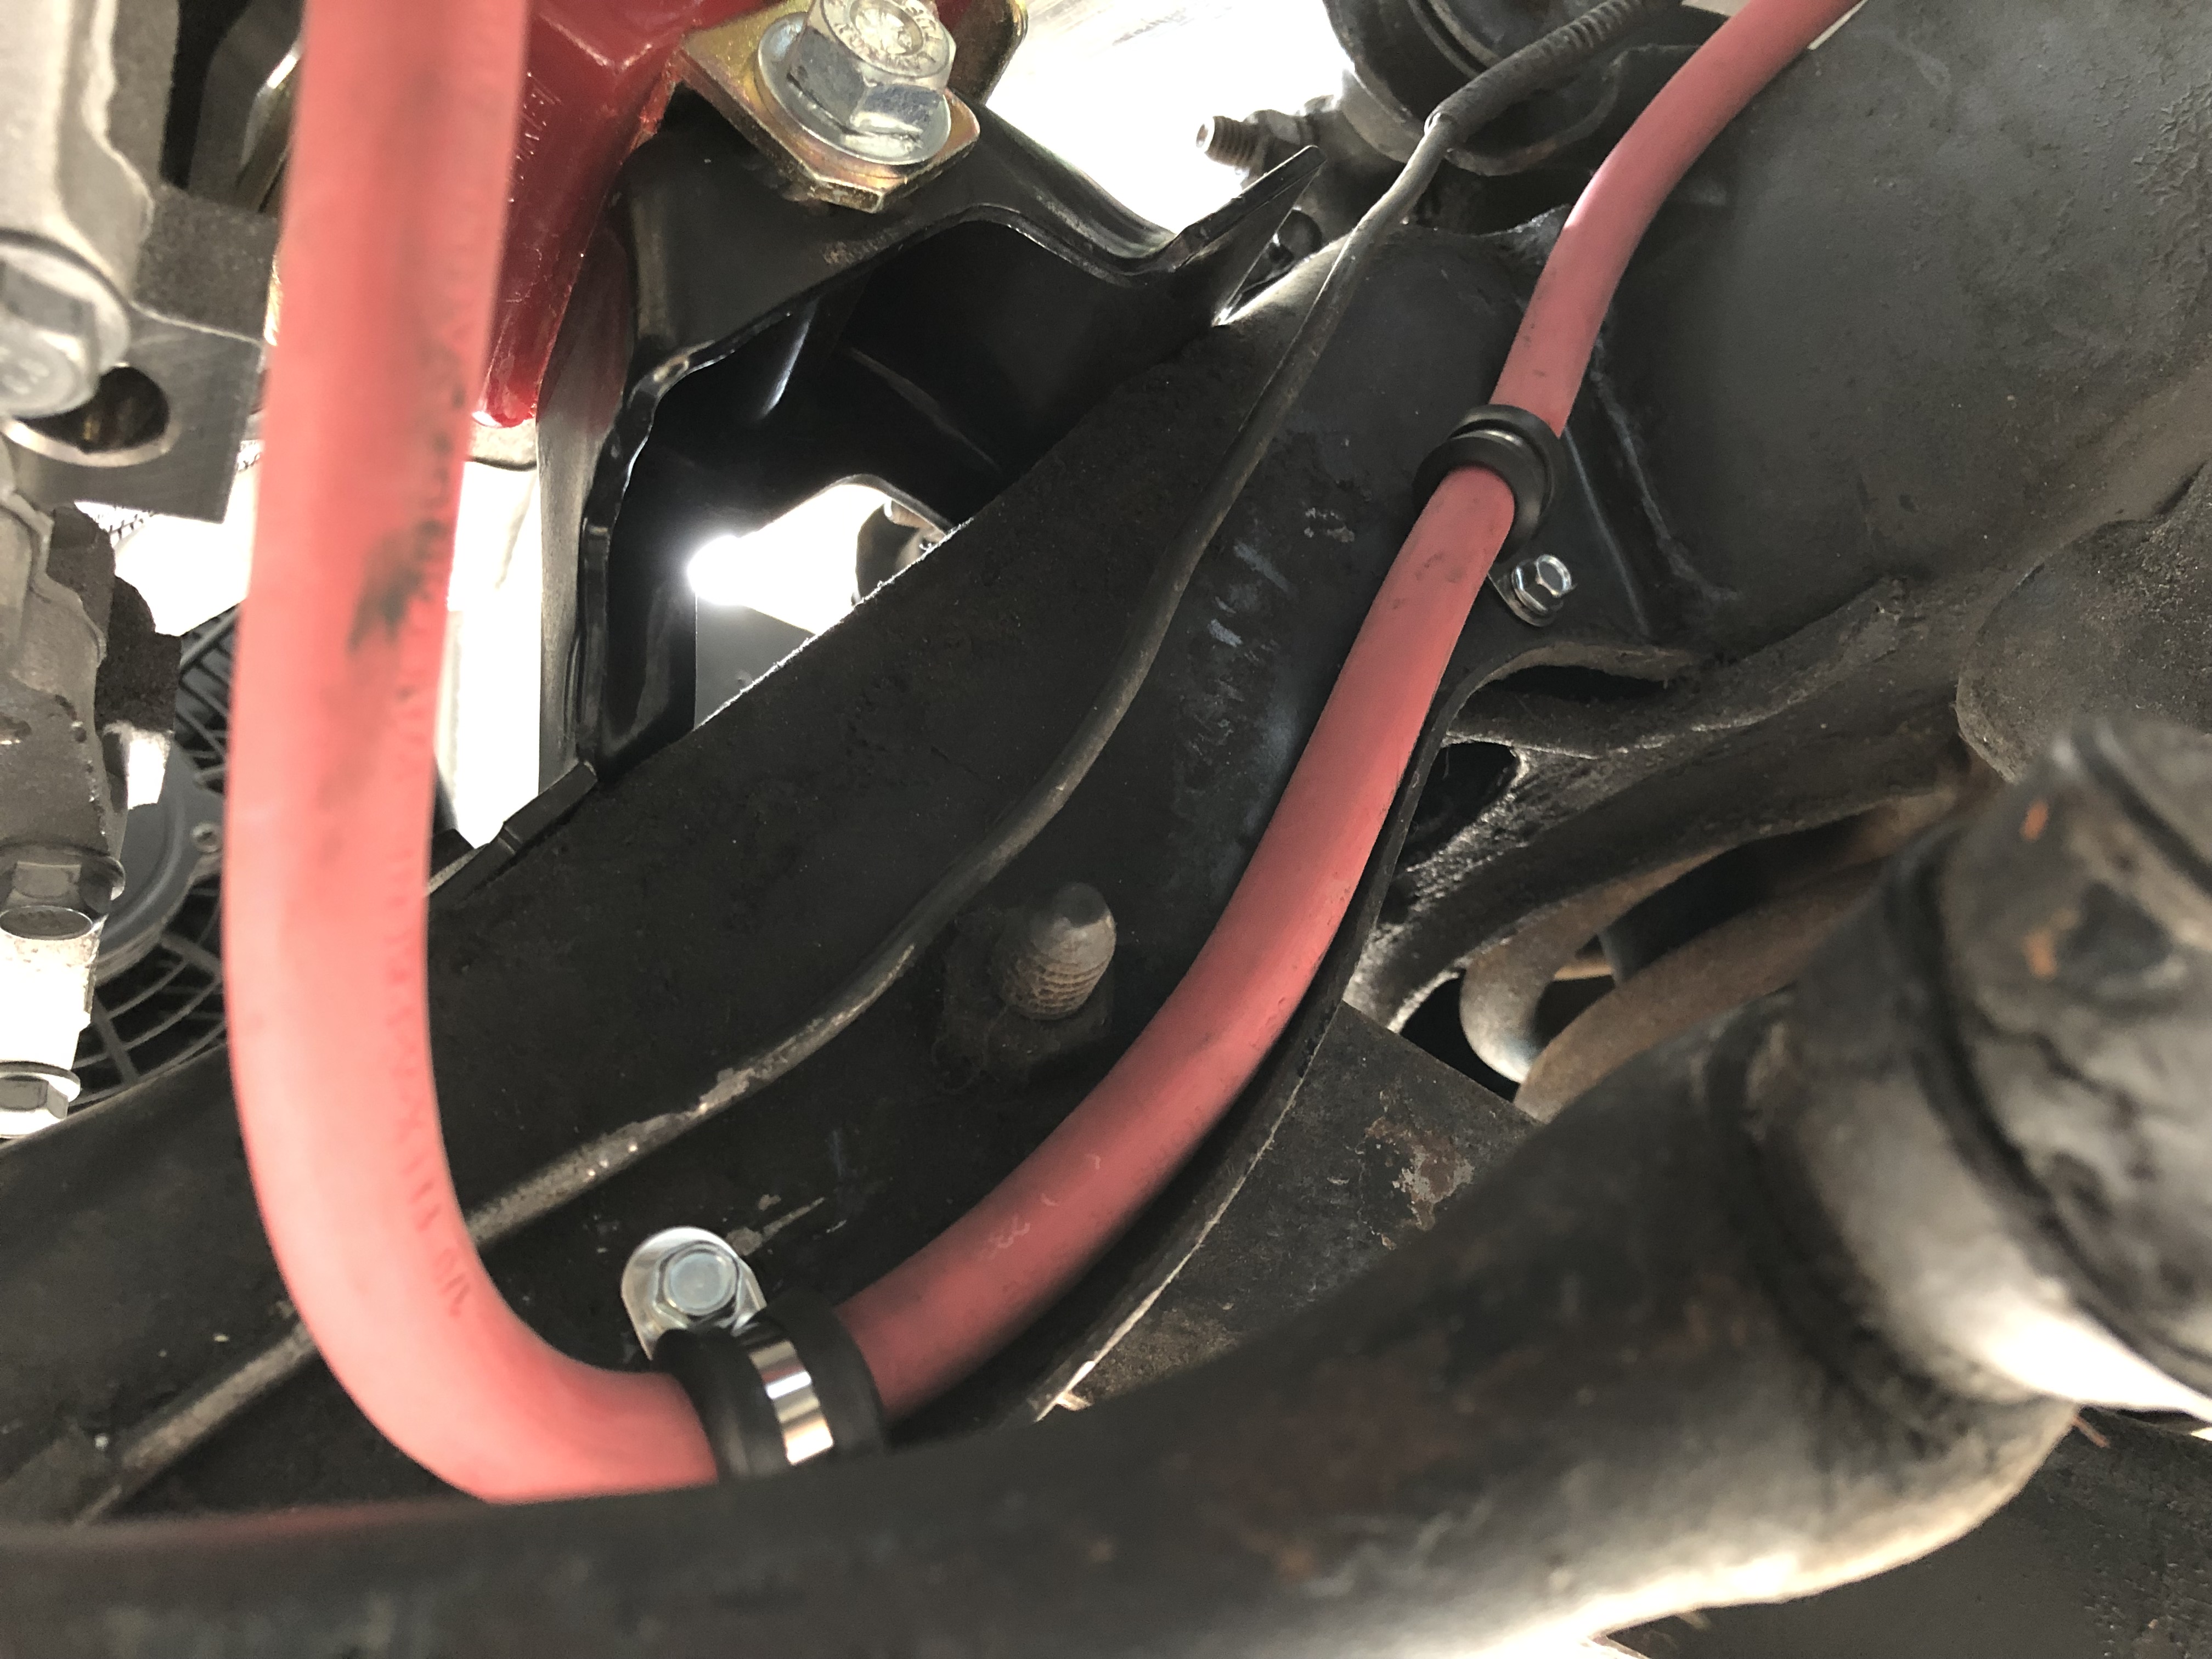
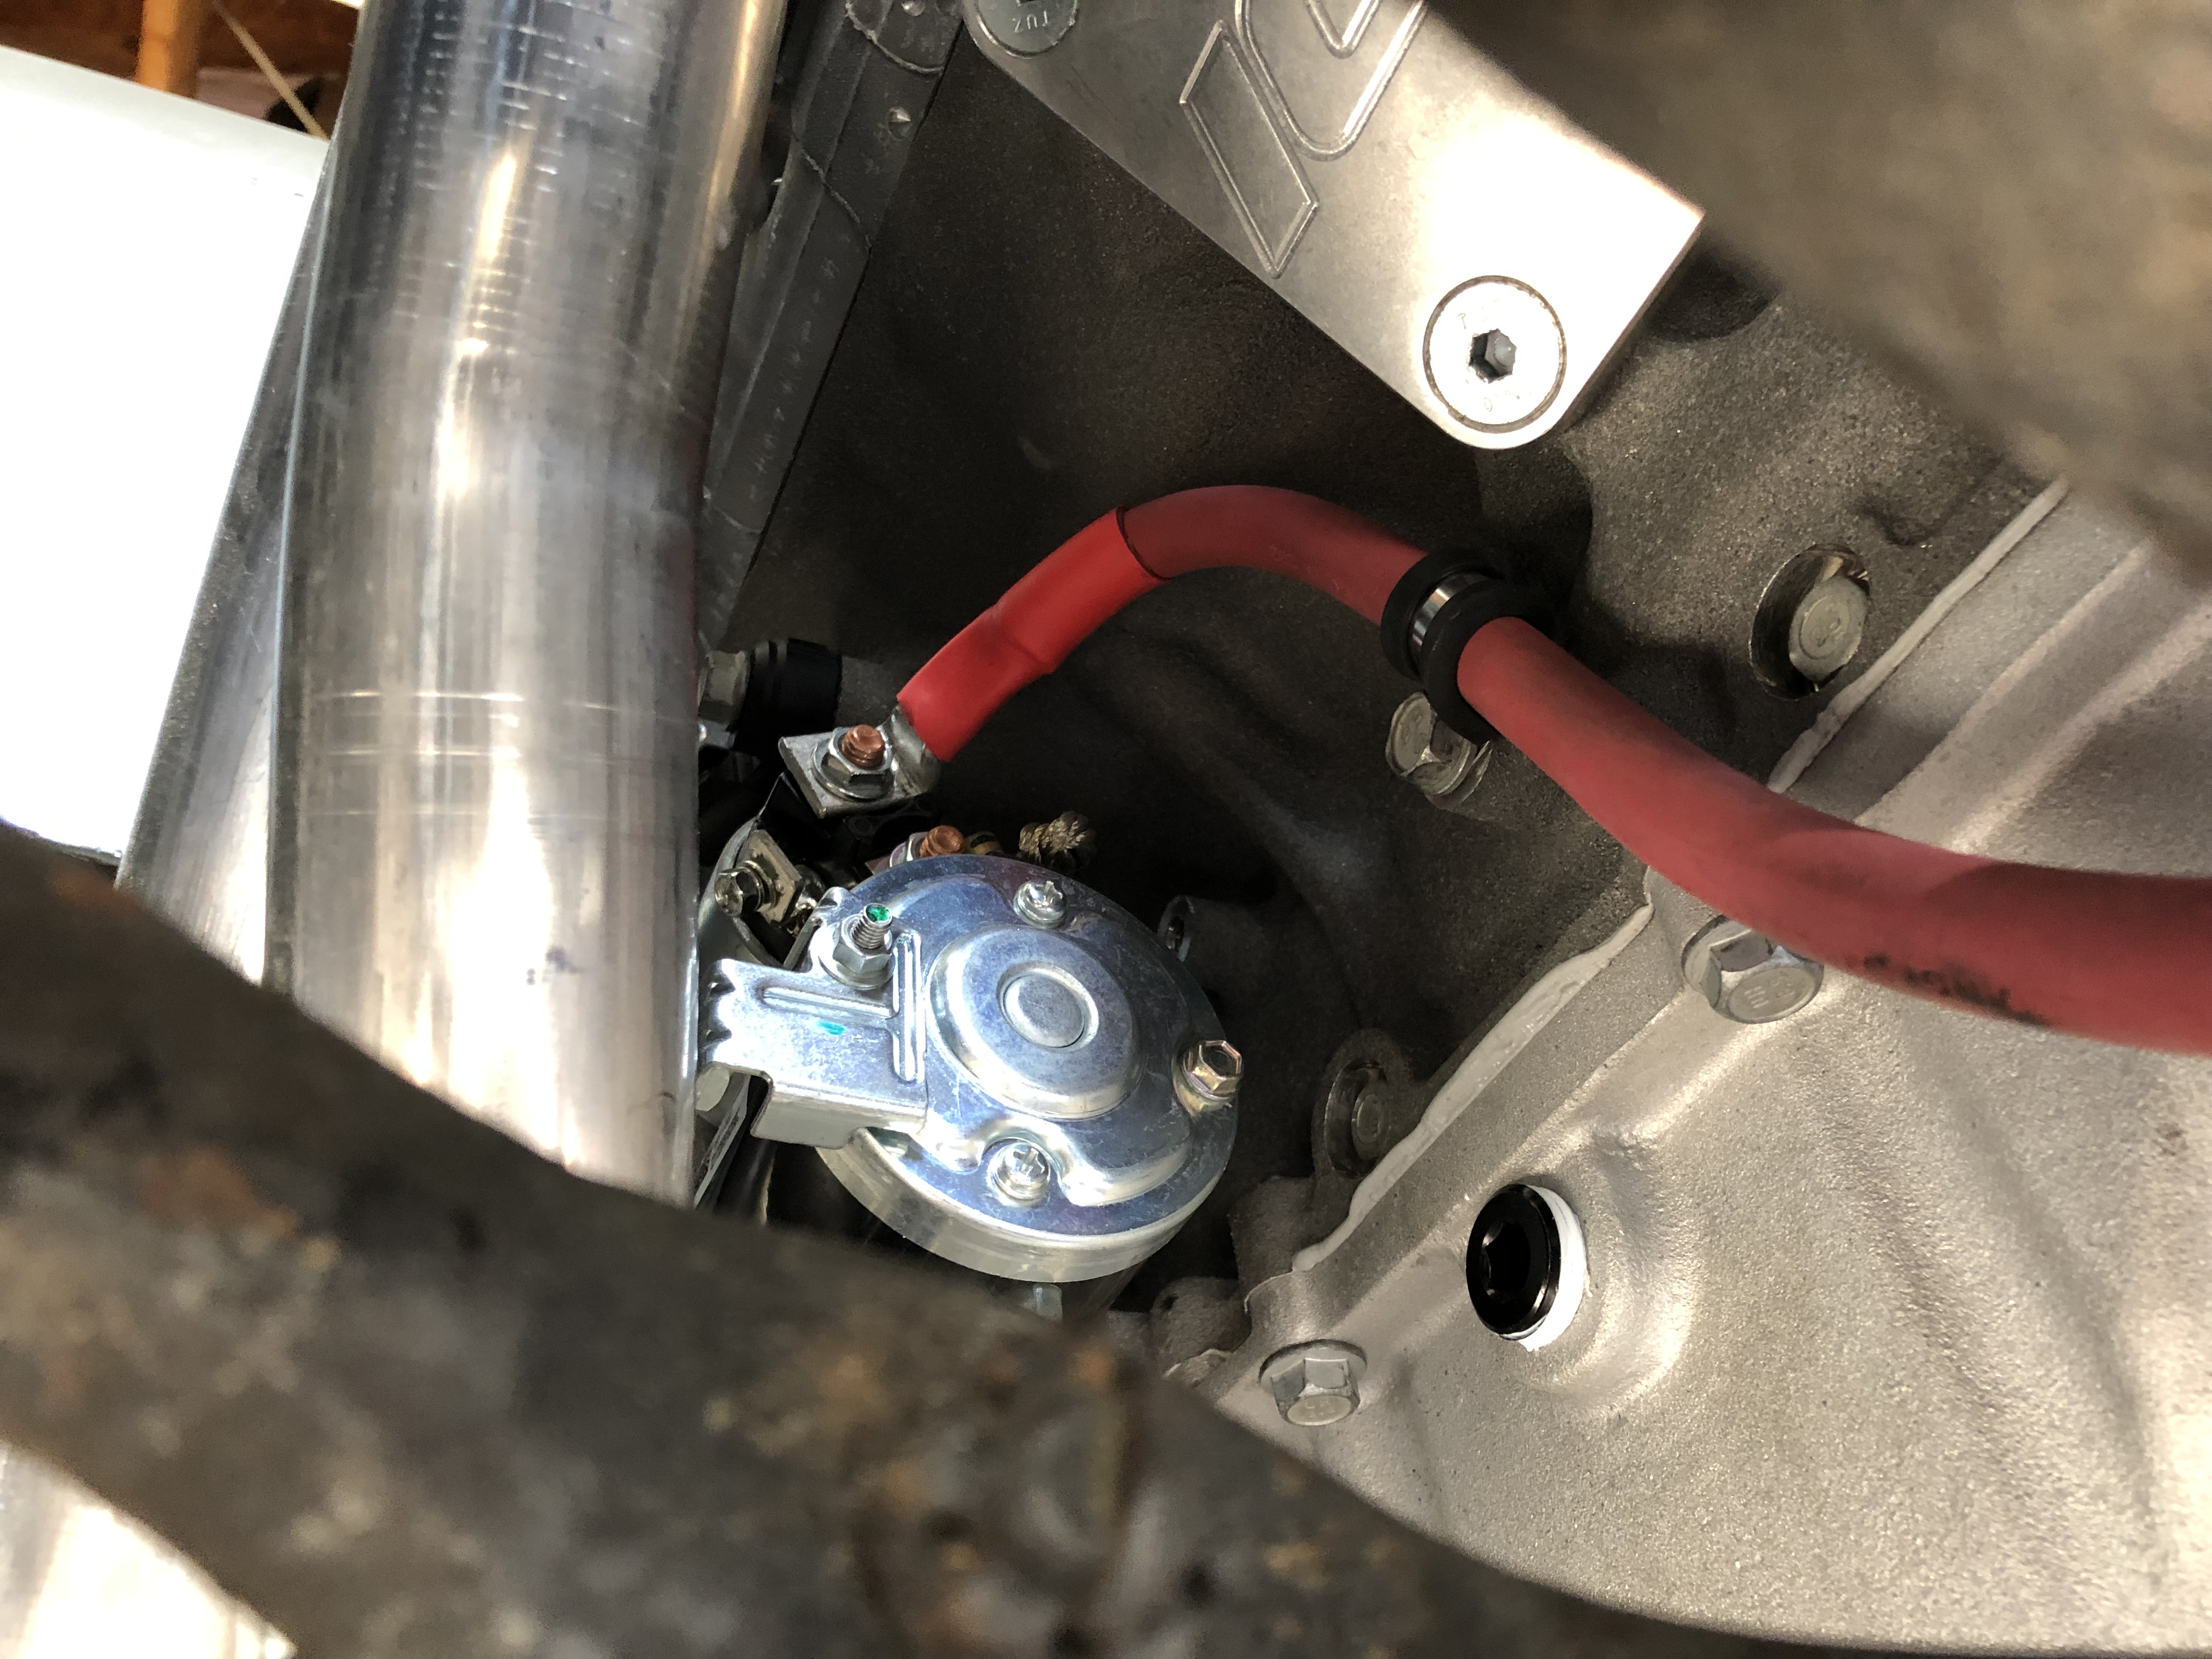
I also hooked up my power wire from my alternator to the main junction stud and back to the battery to charge it. I ran a remote solenoid like others do as a safety feature with the main power wire, its only hot when its cranked. Heres some photos of the trunk mounted battery and how I ran the wire to the starter. The charge wire and solenoid wire are ran down the DS of the car. This setup is pretty common and is similar to Mad Electrical's and the sticky on this site.


06-06-2019 #11
Registered User
- Join Date
- Jul 2017
- Posts
- 166
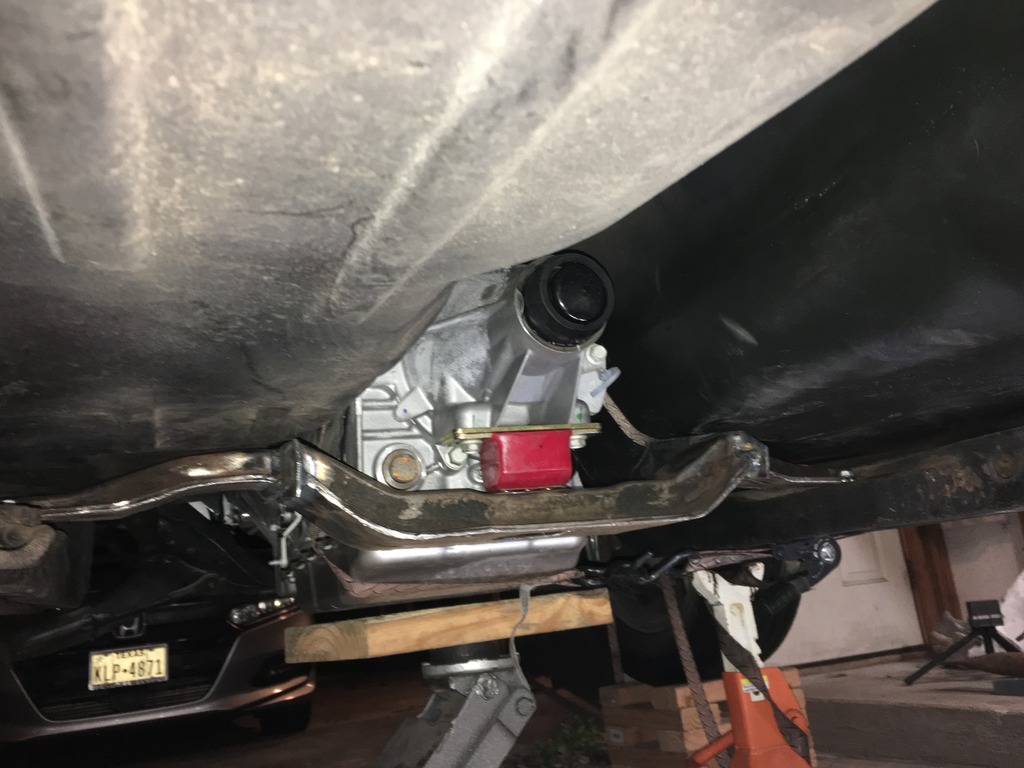
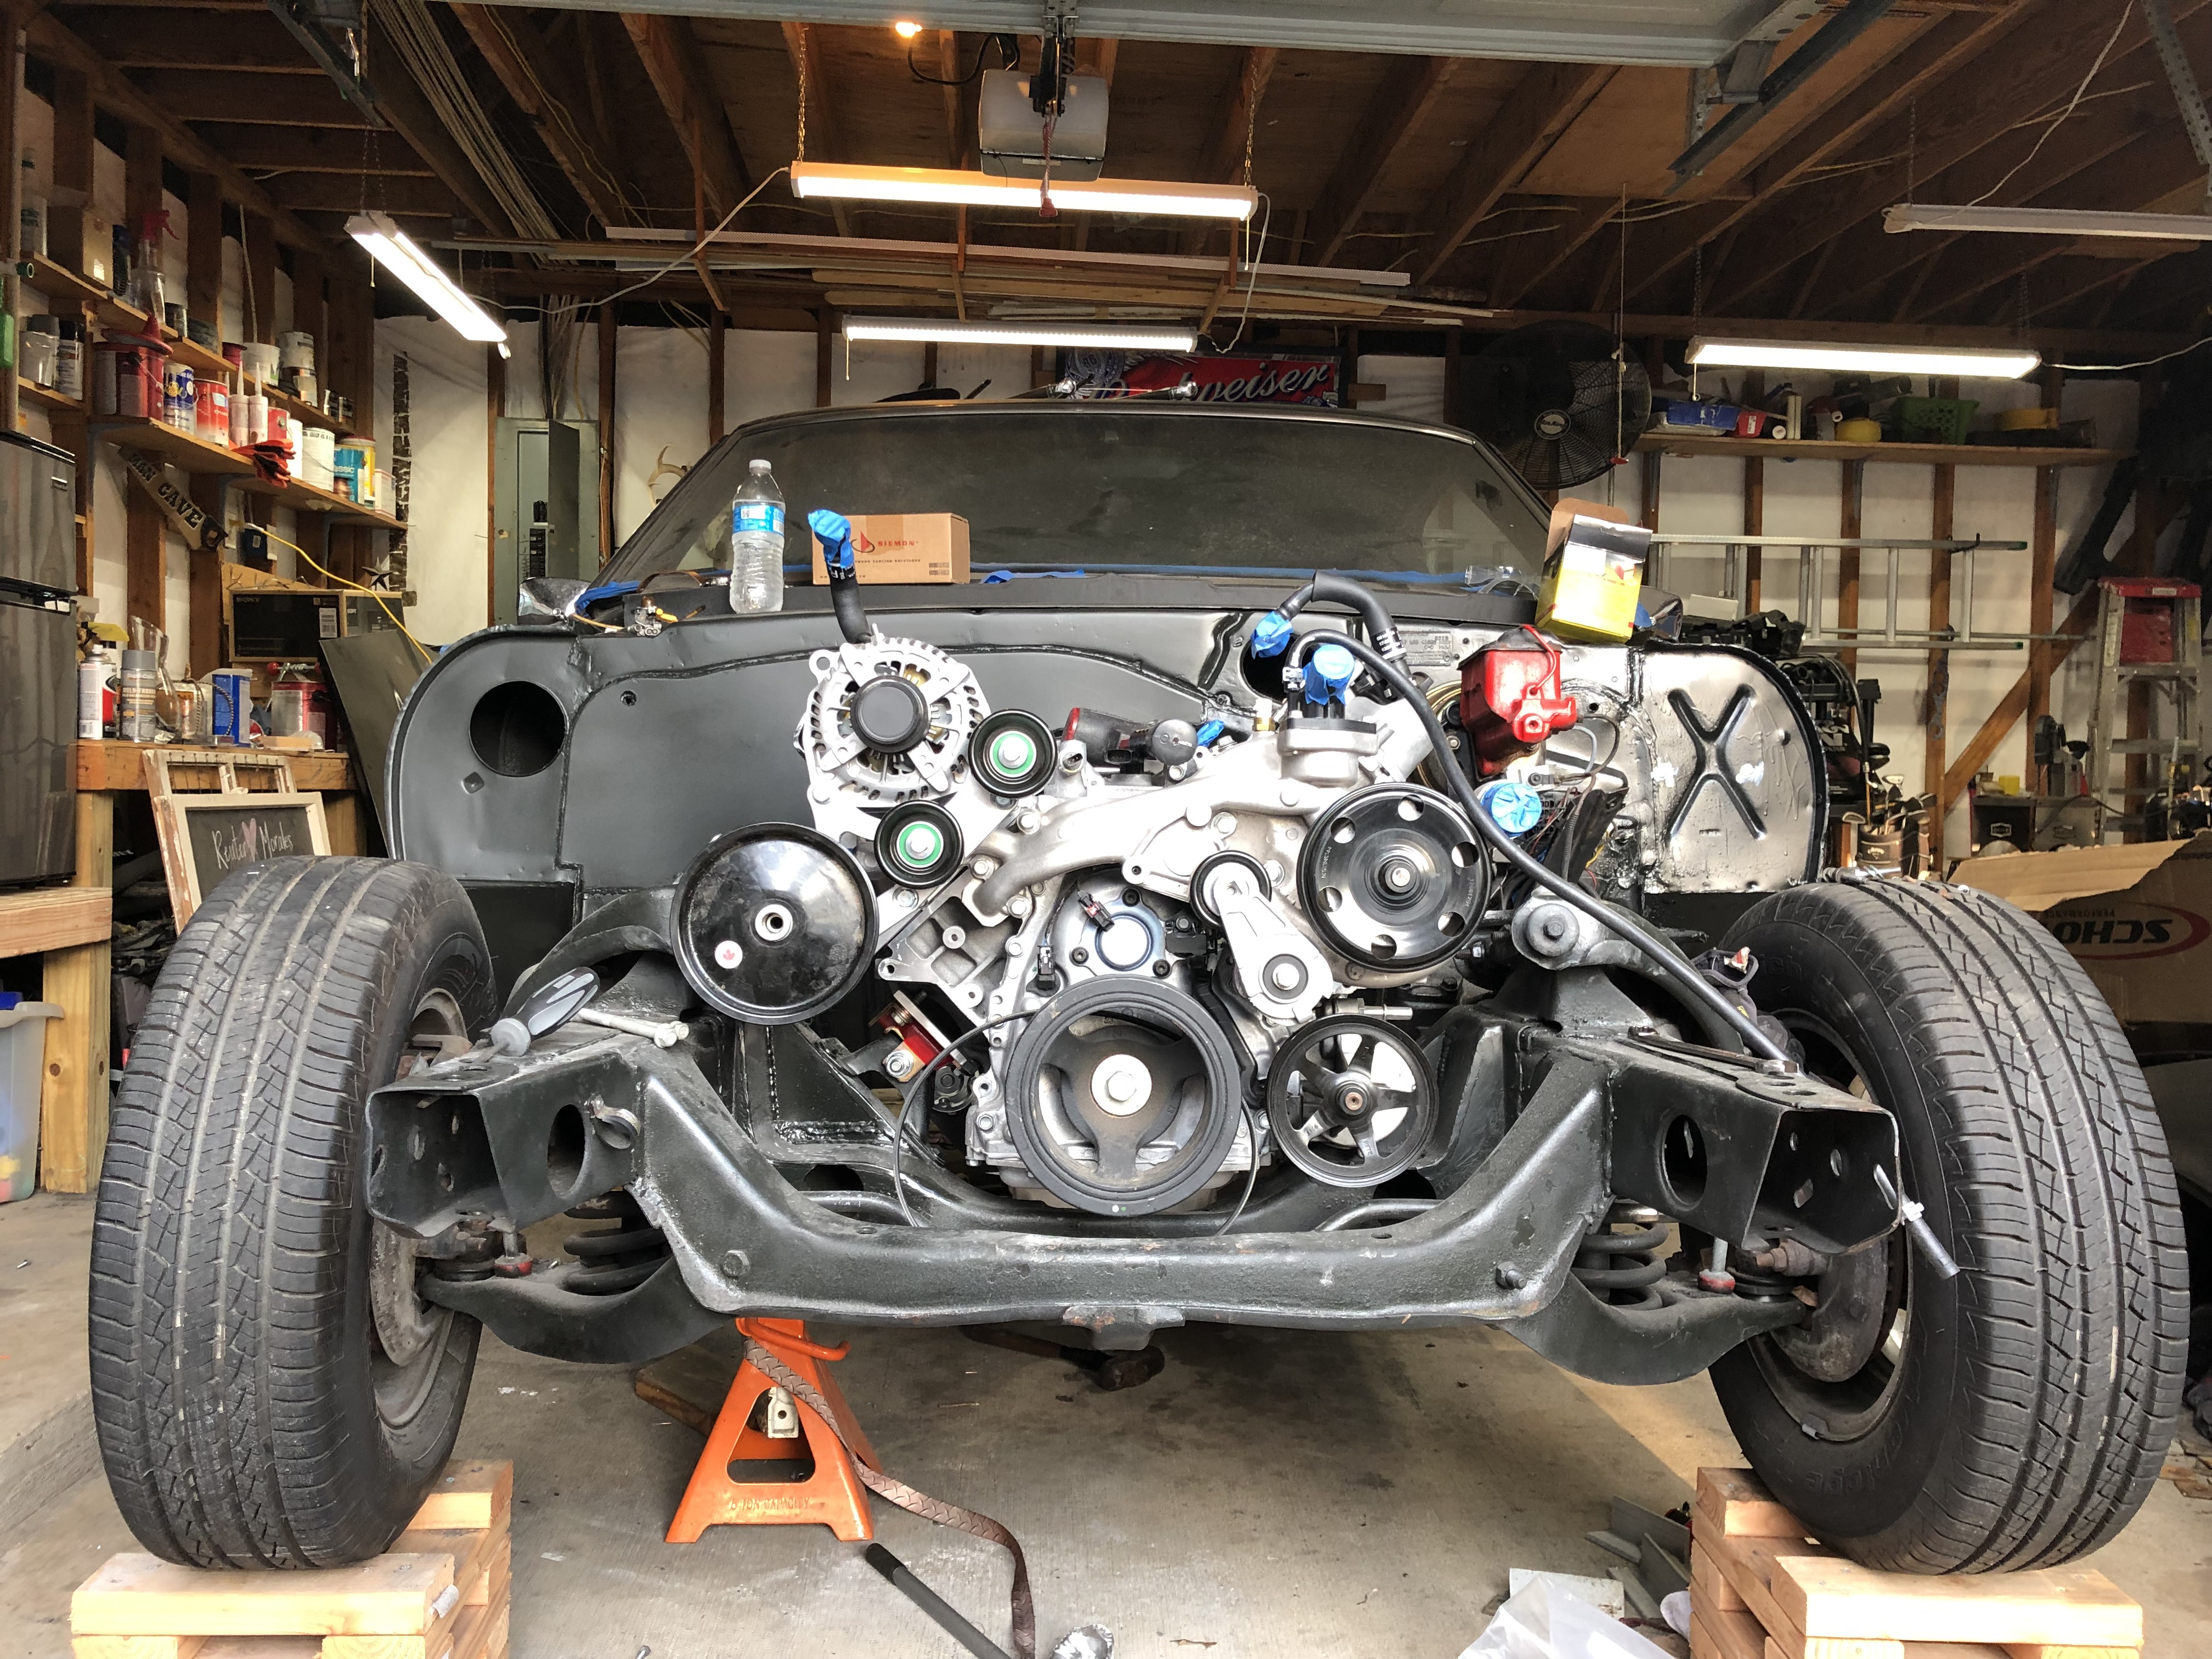
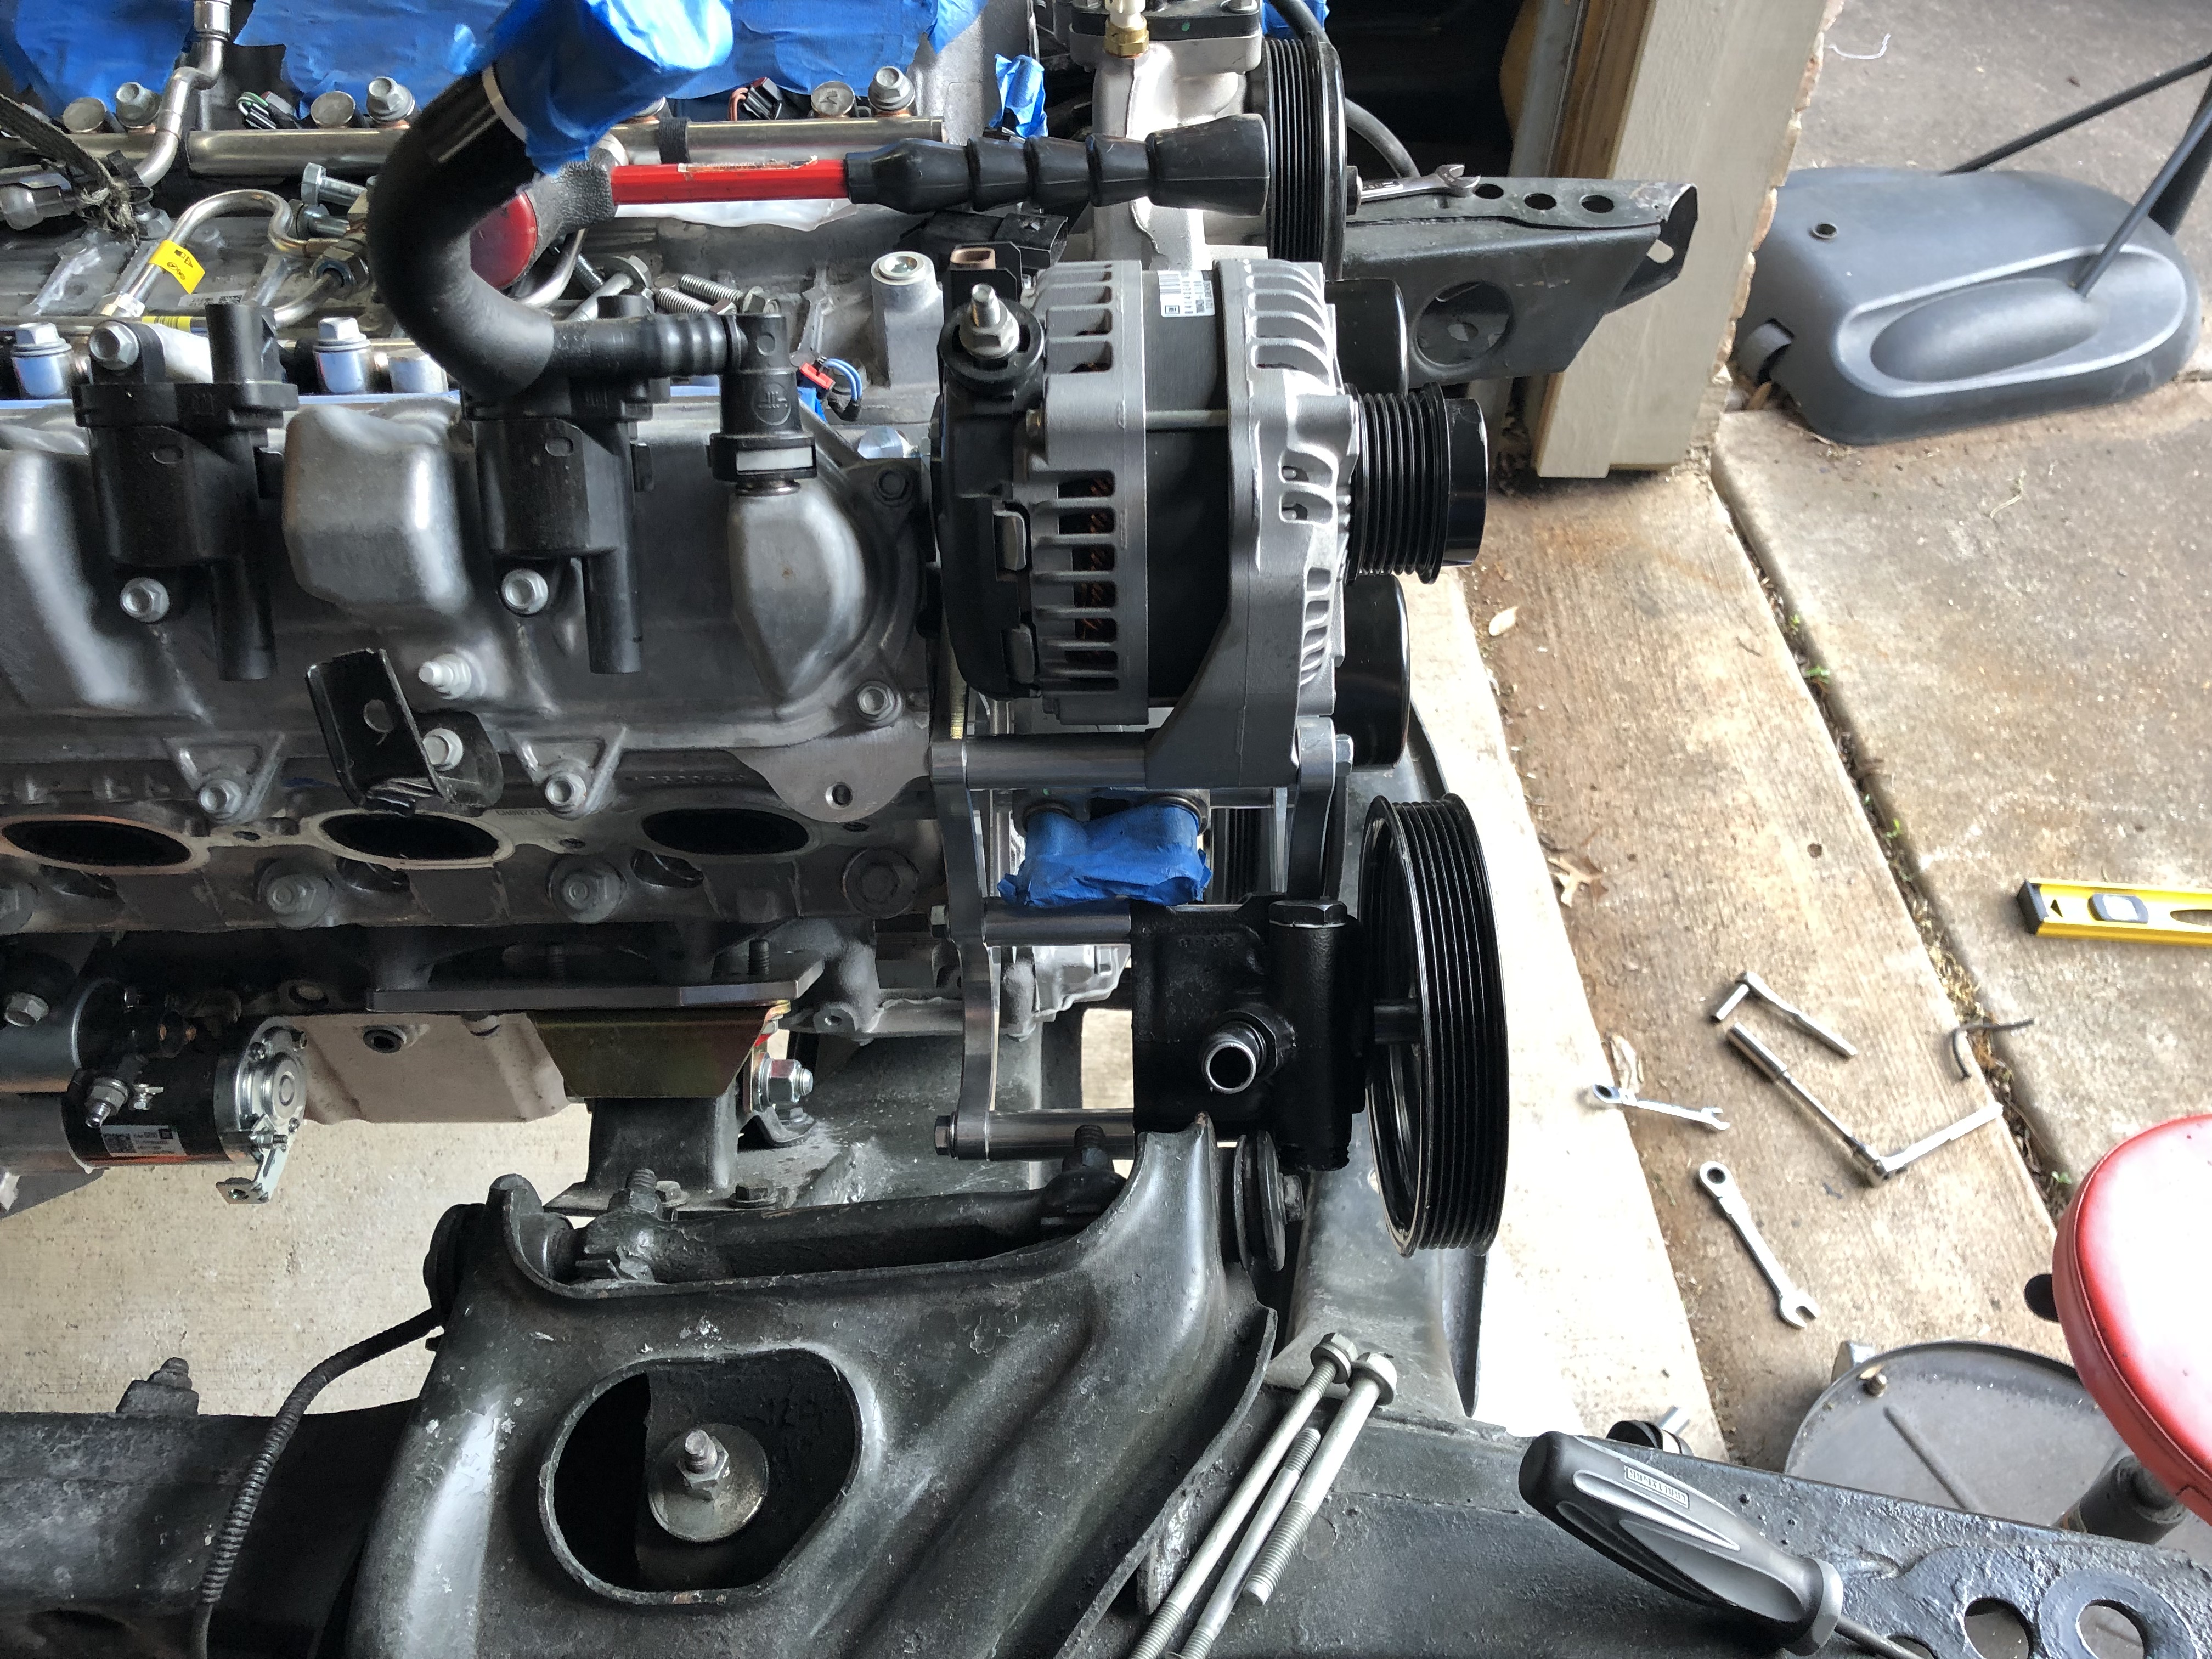
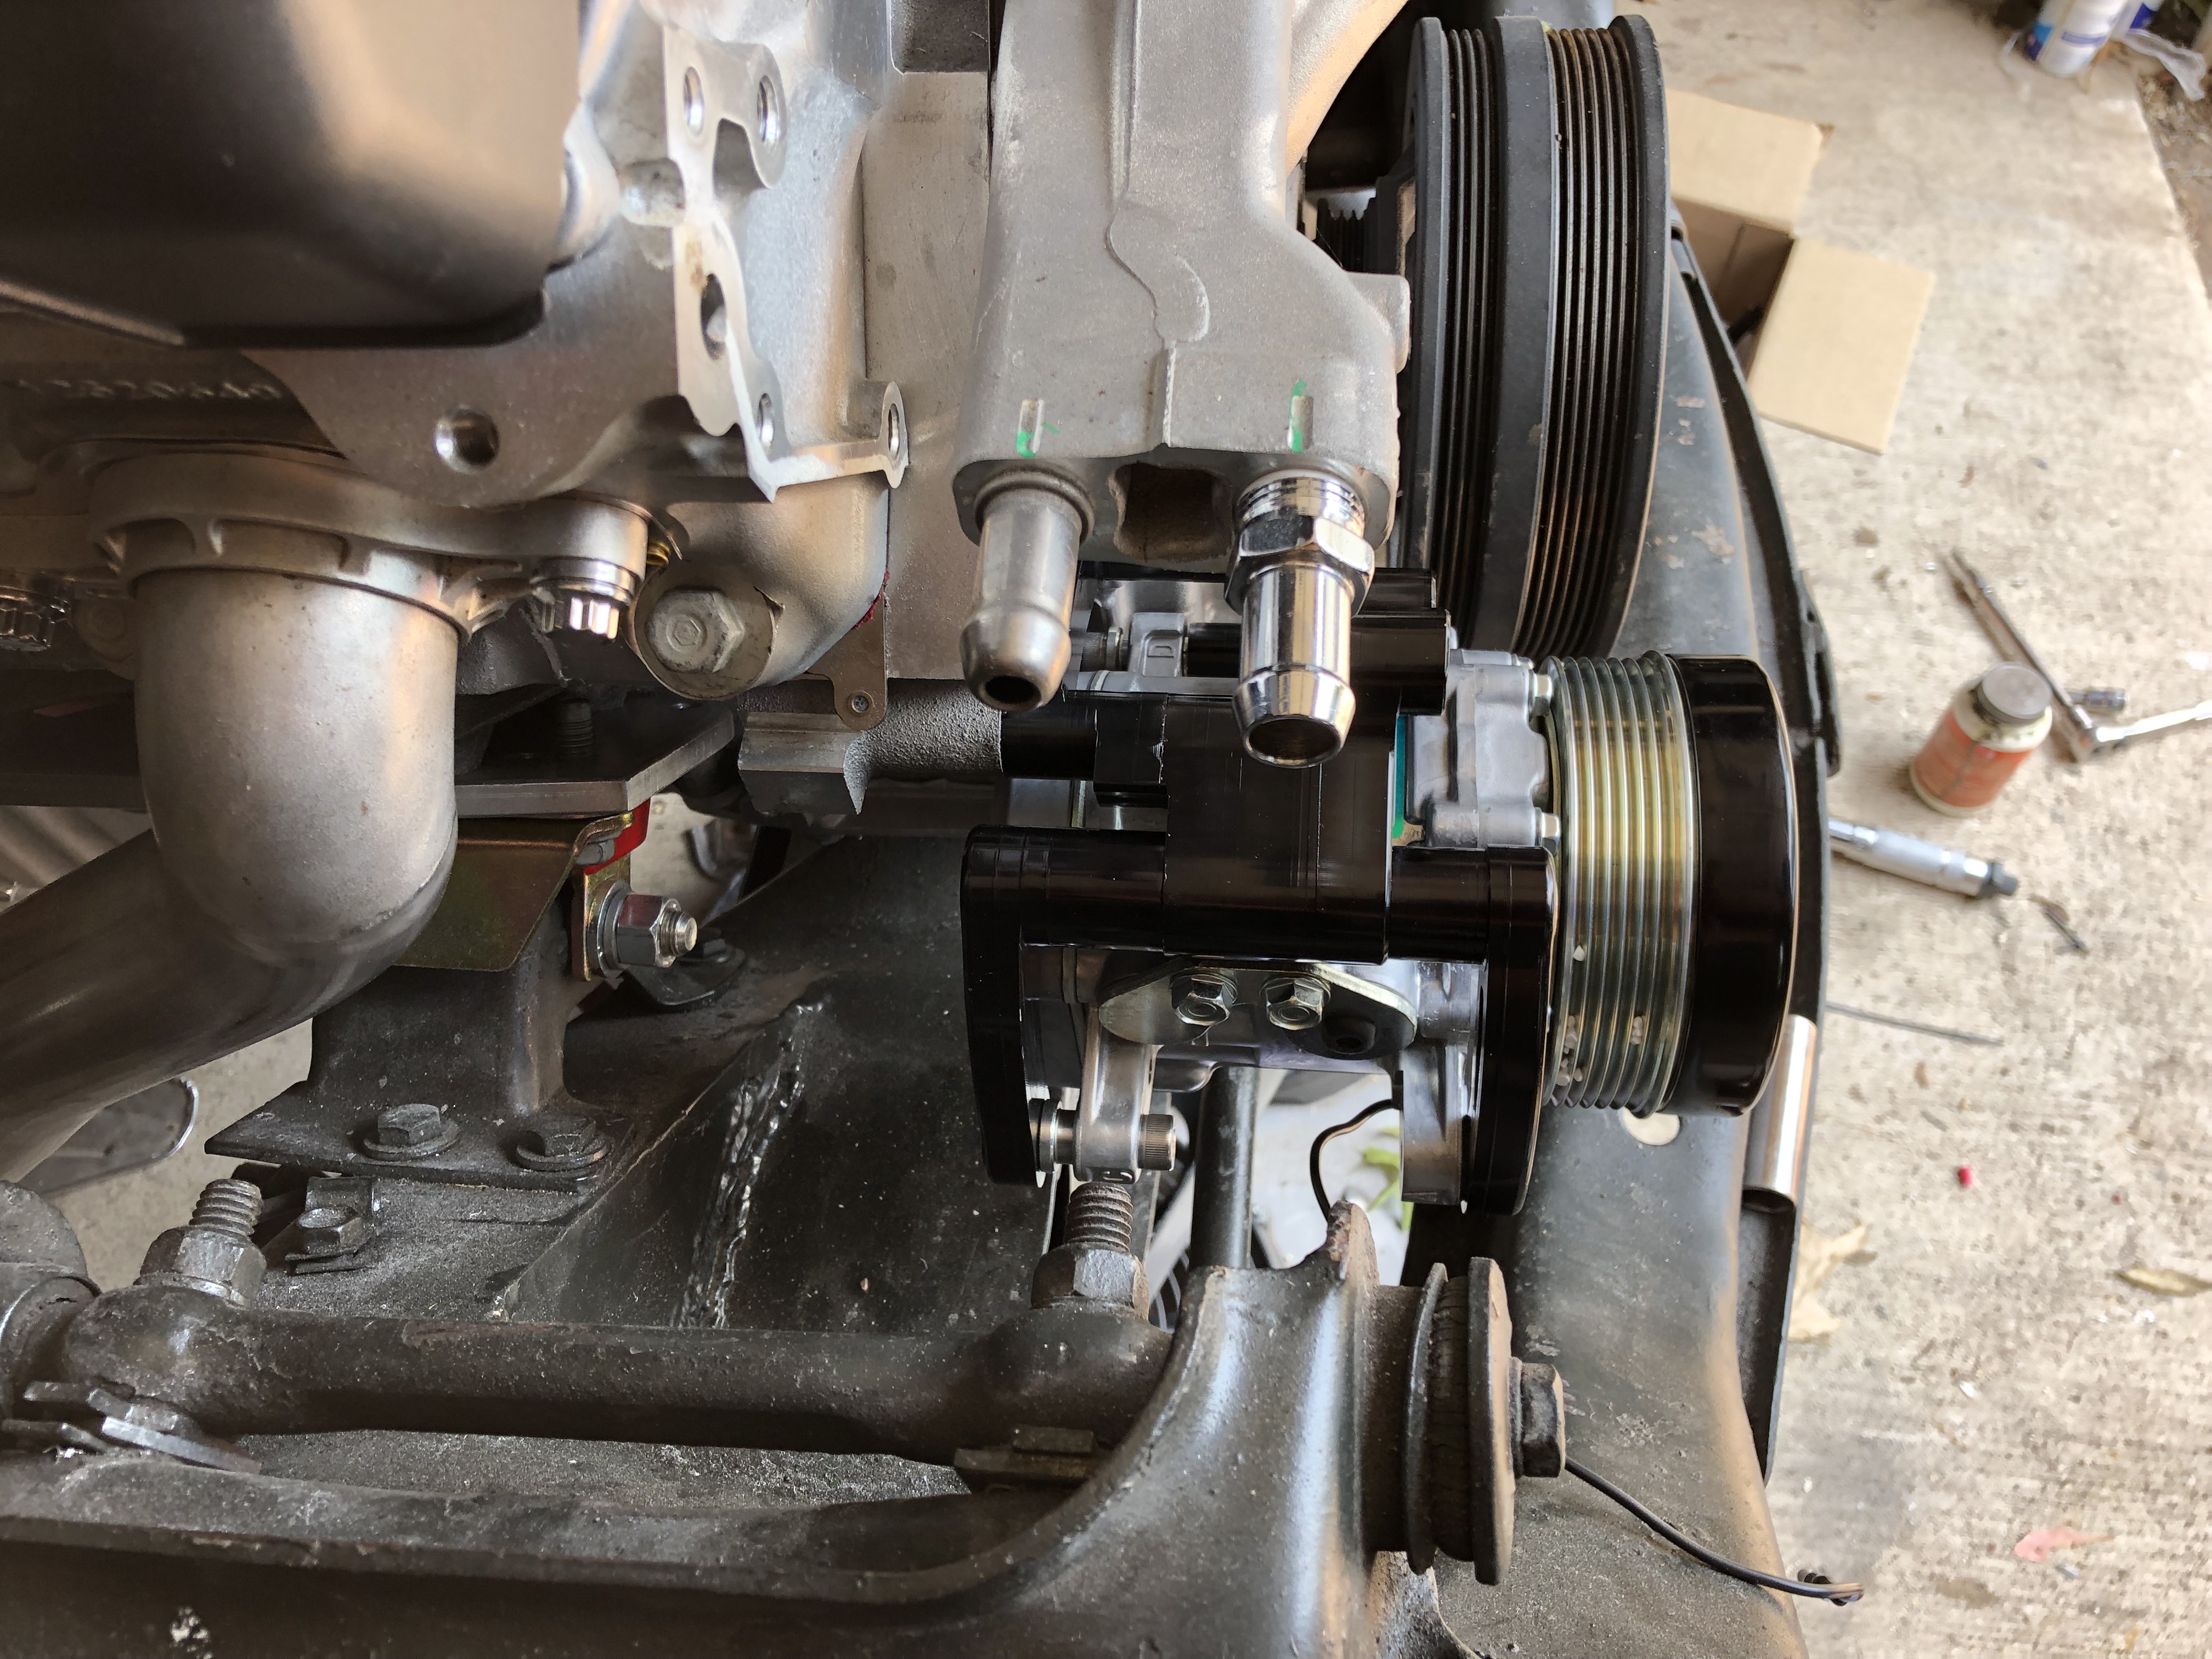
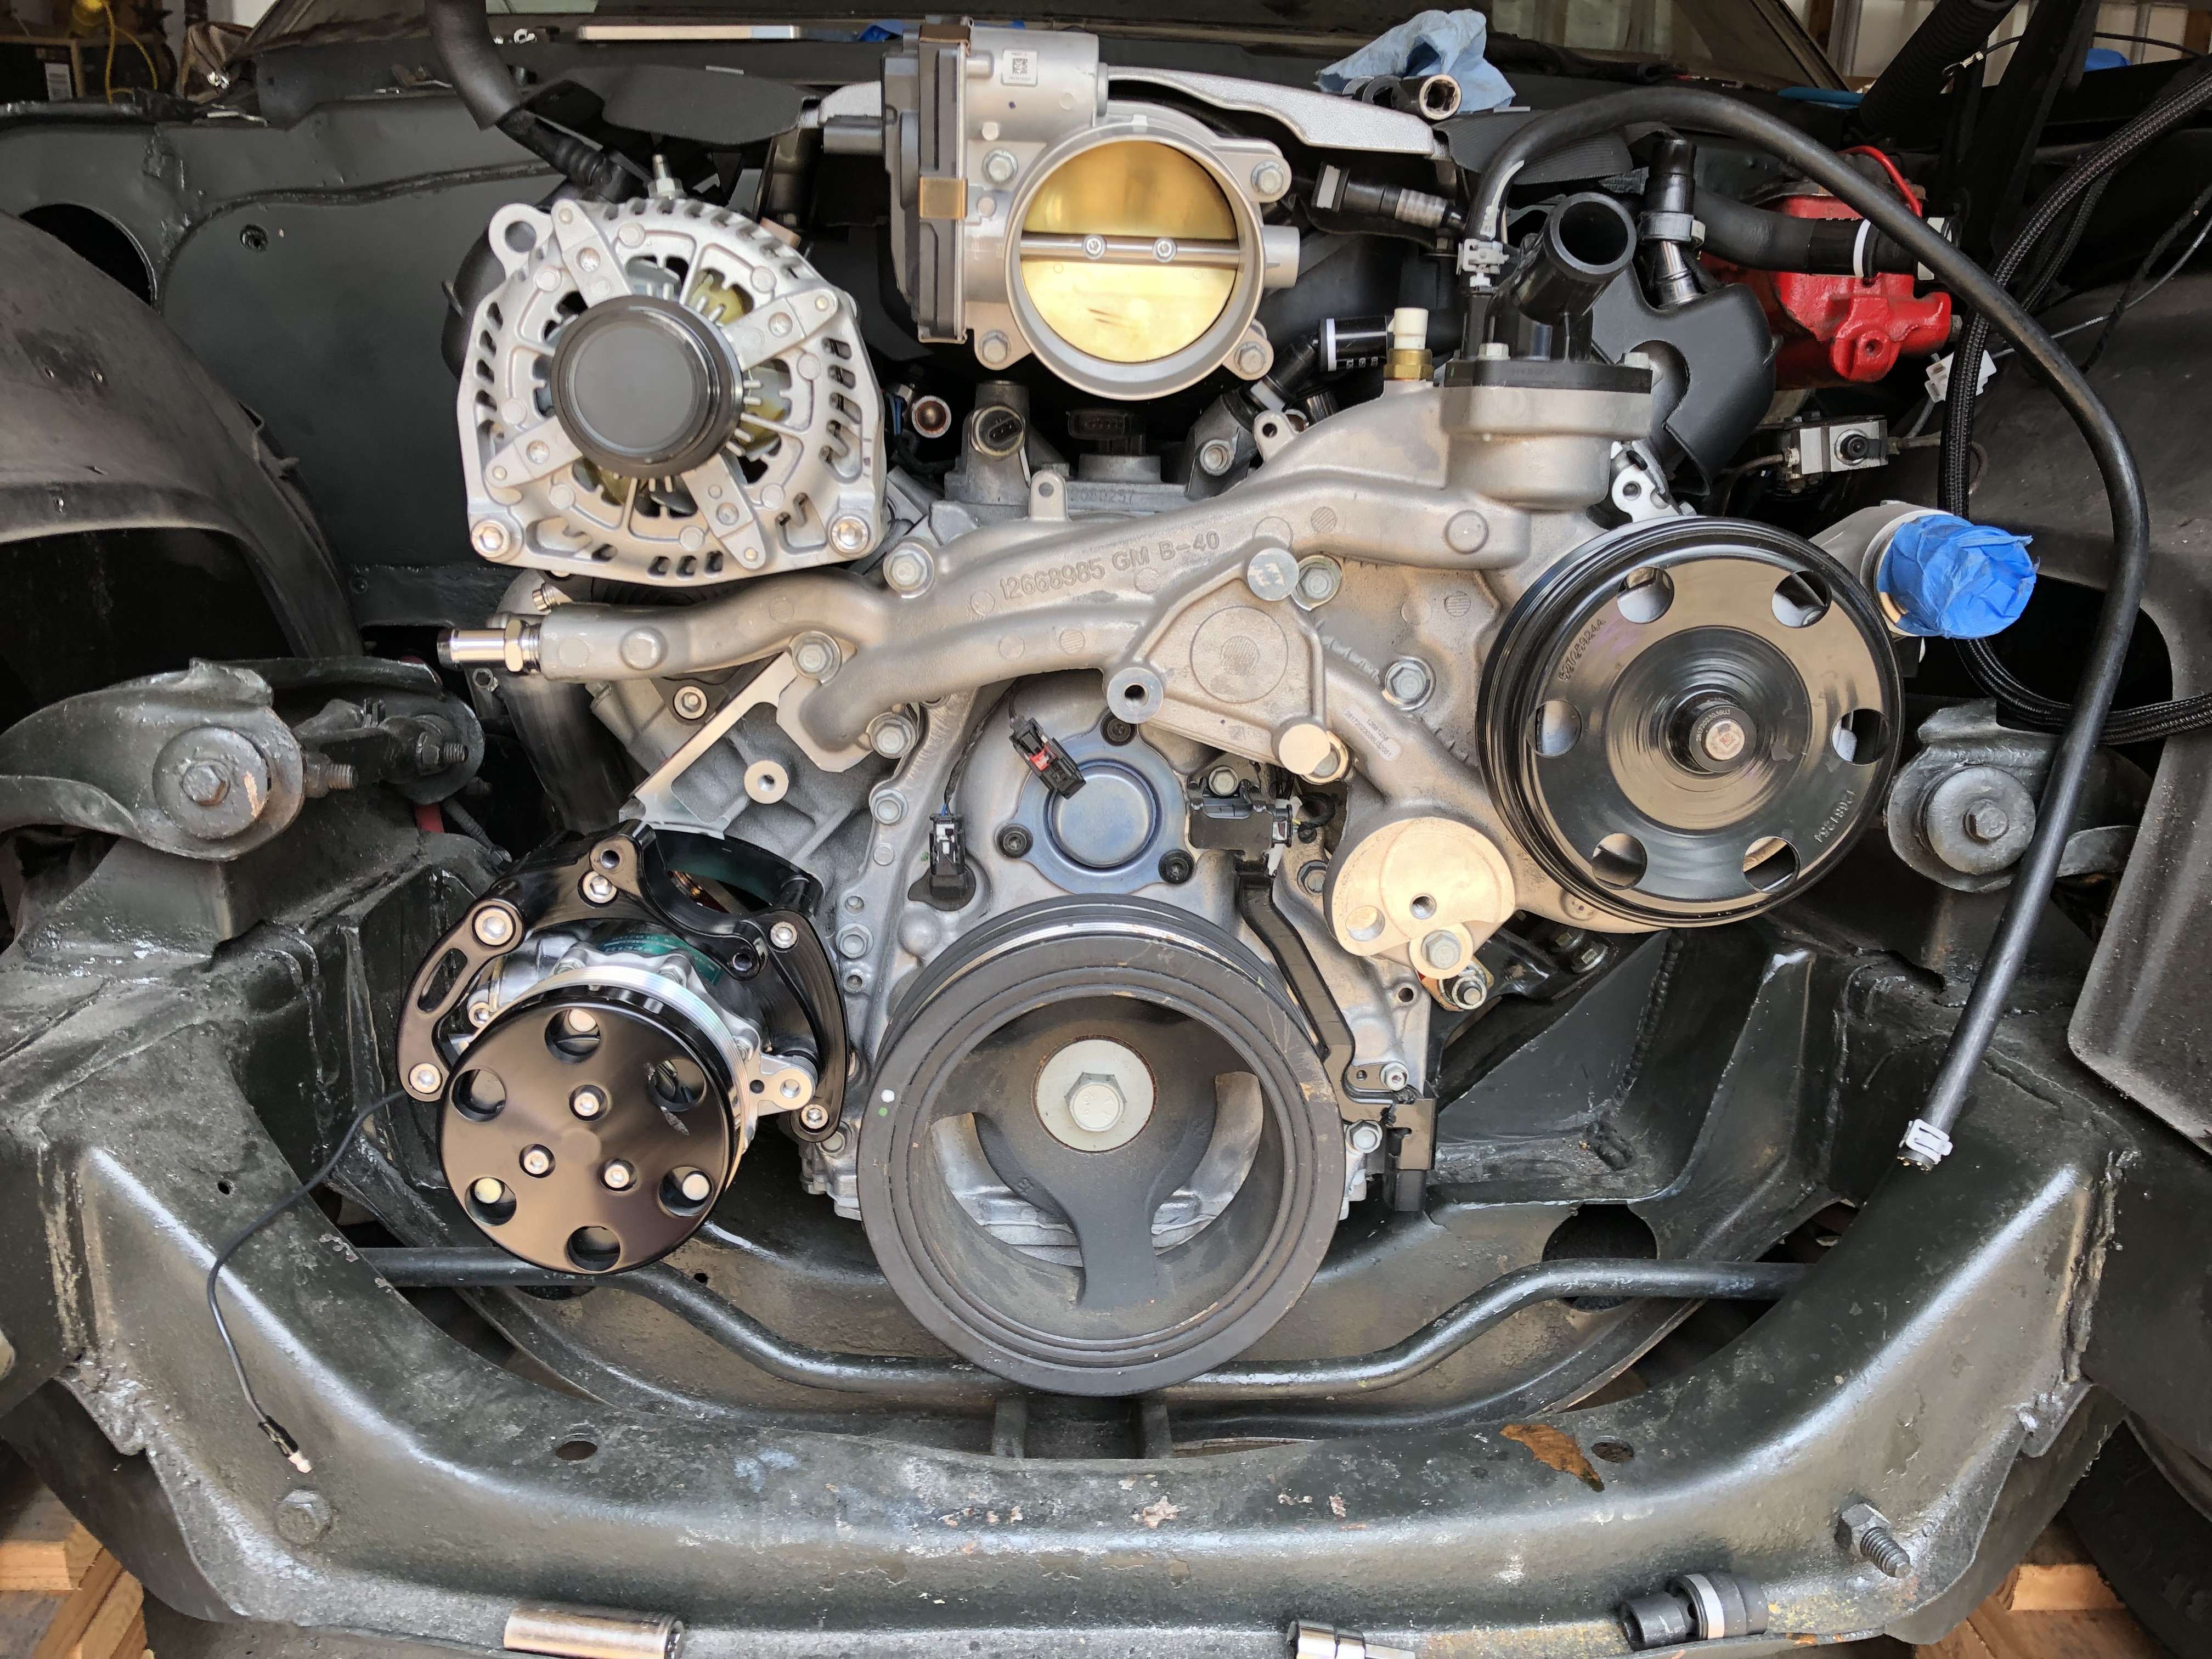
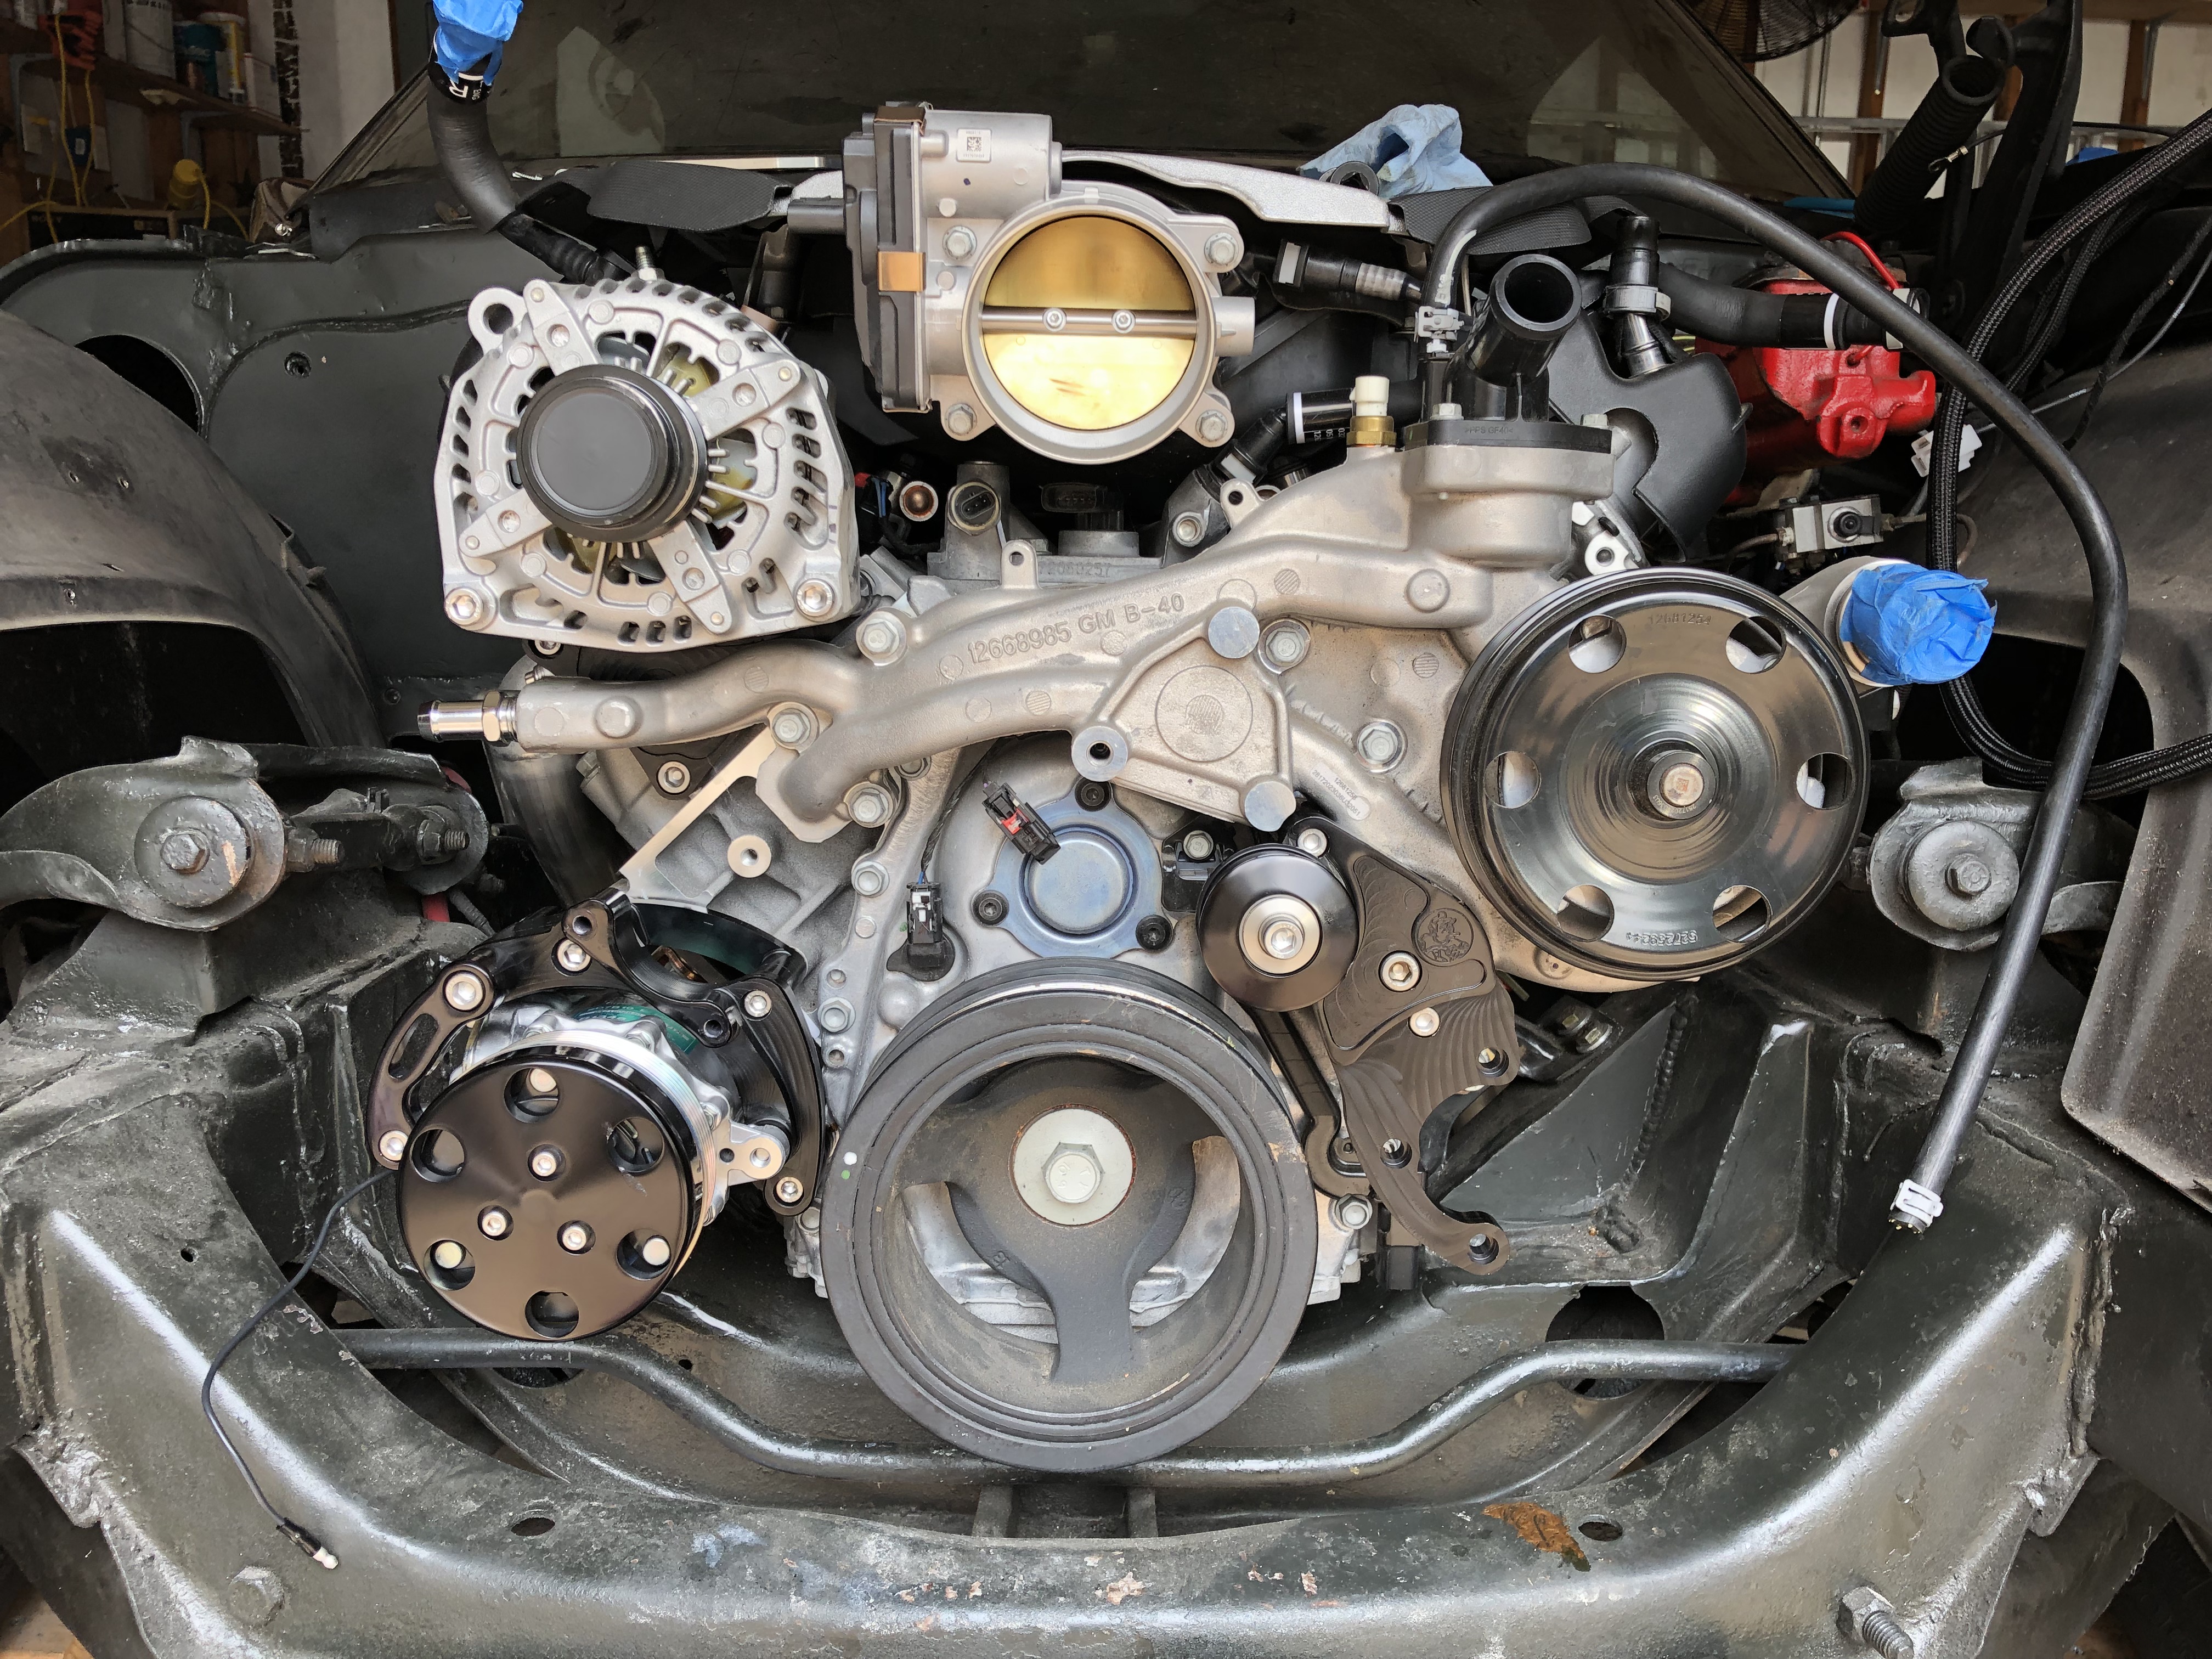
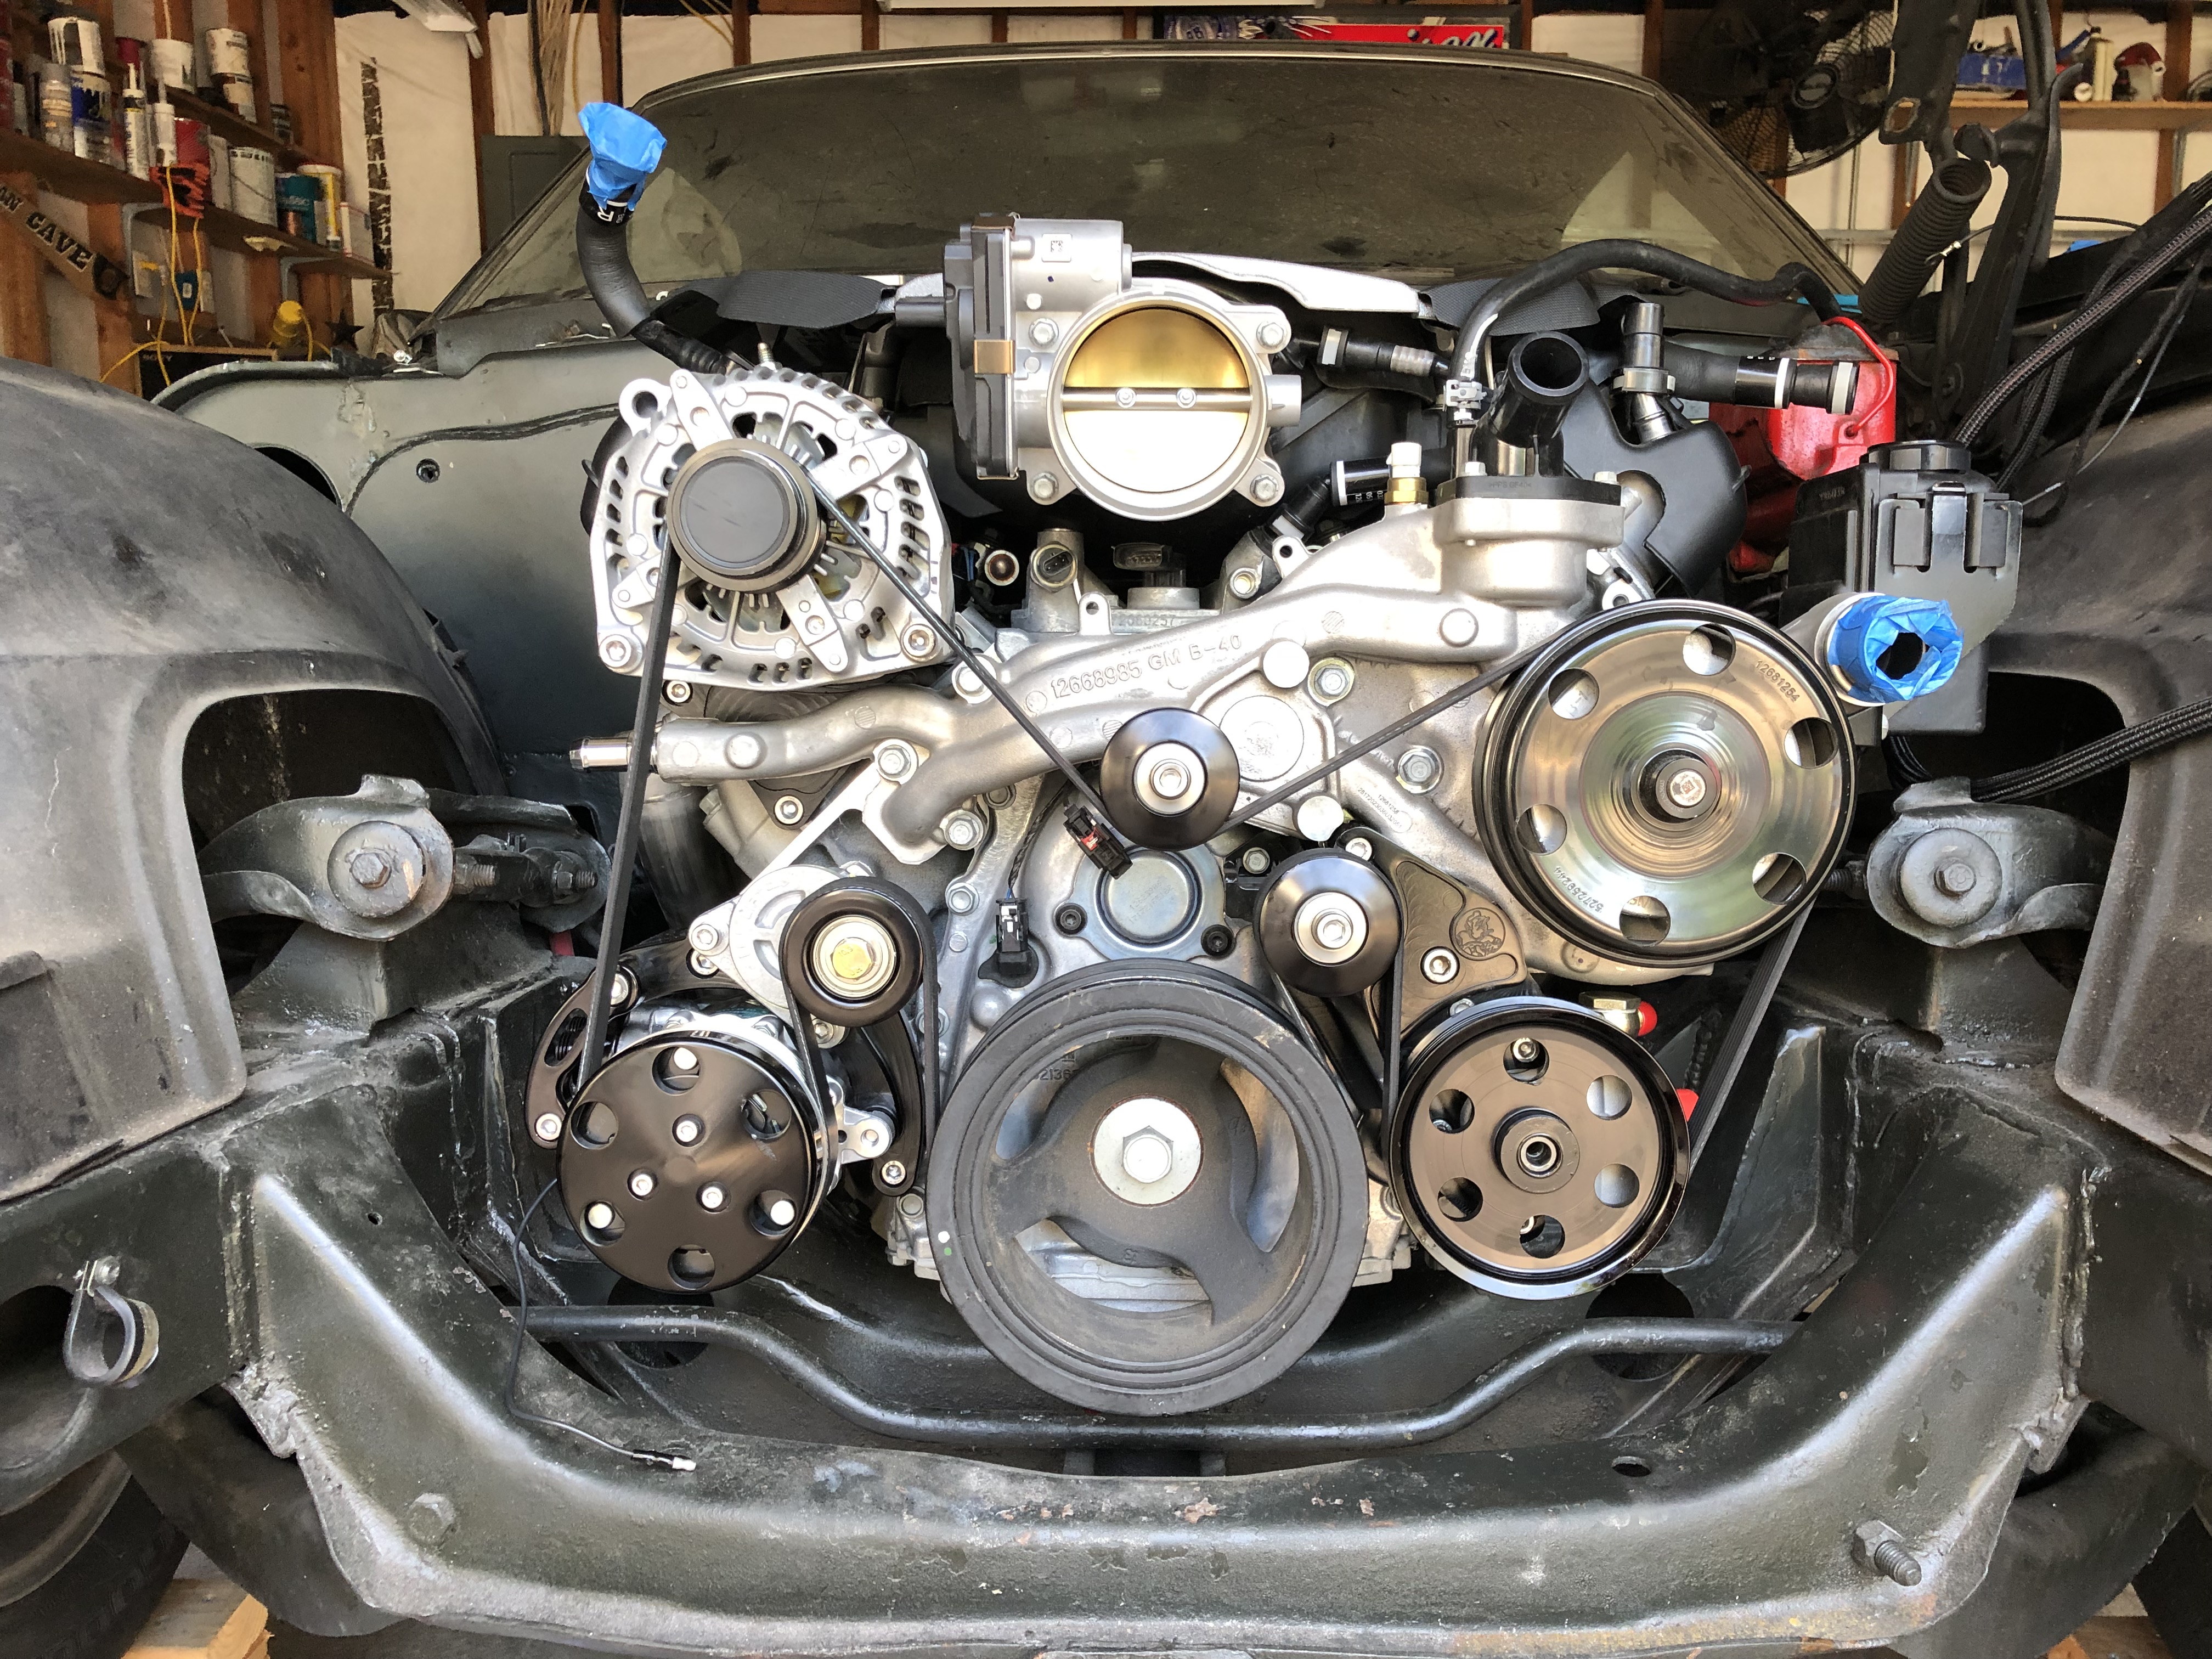
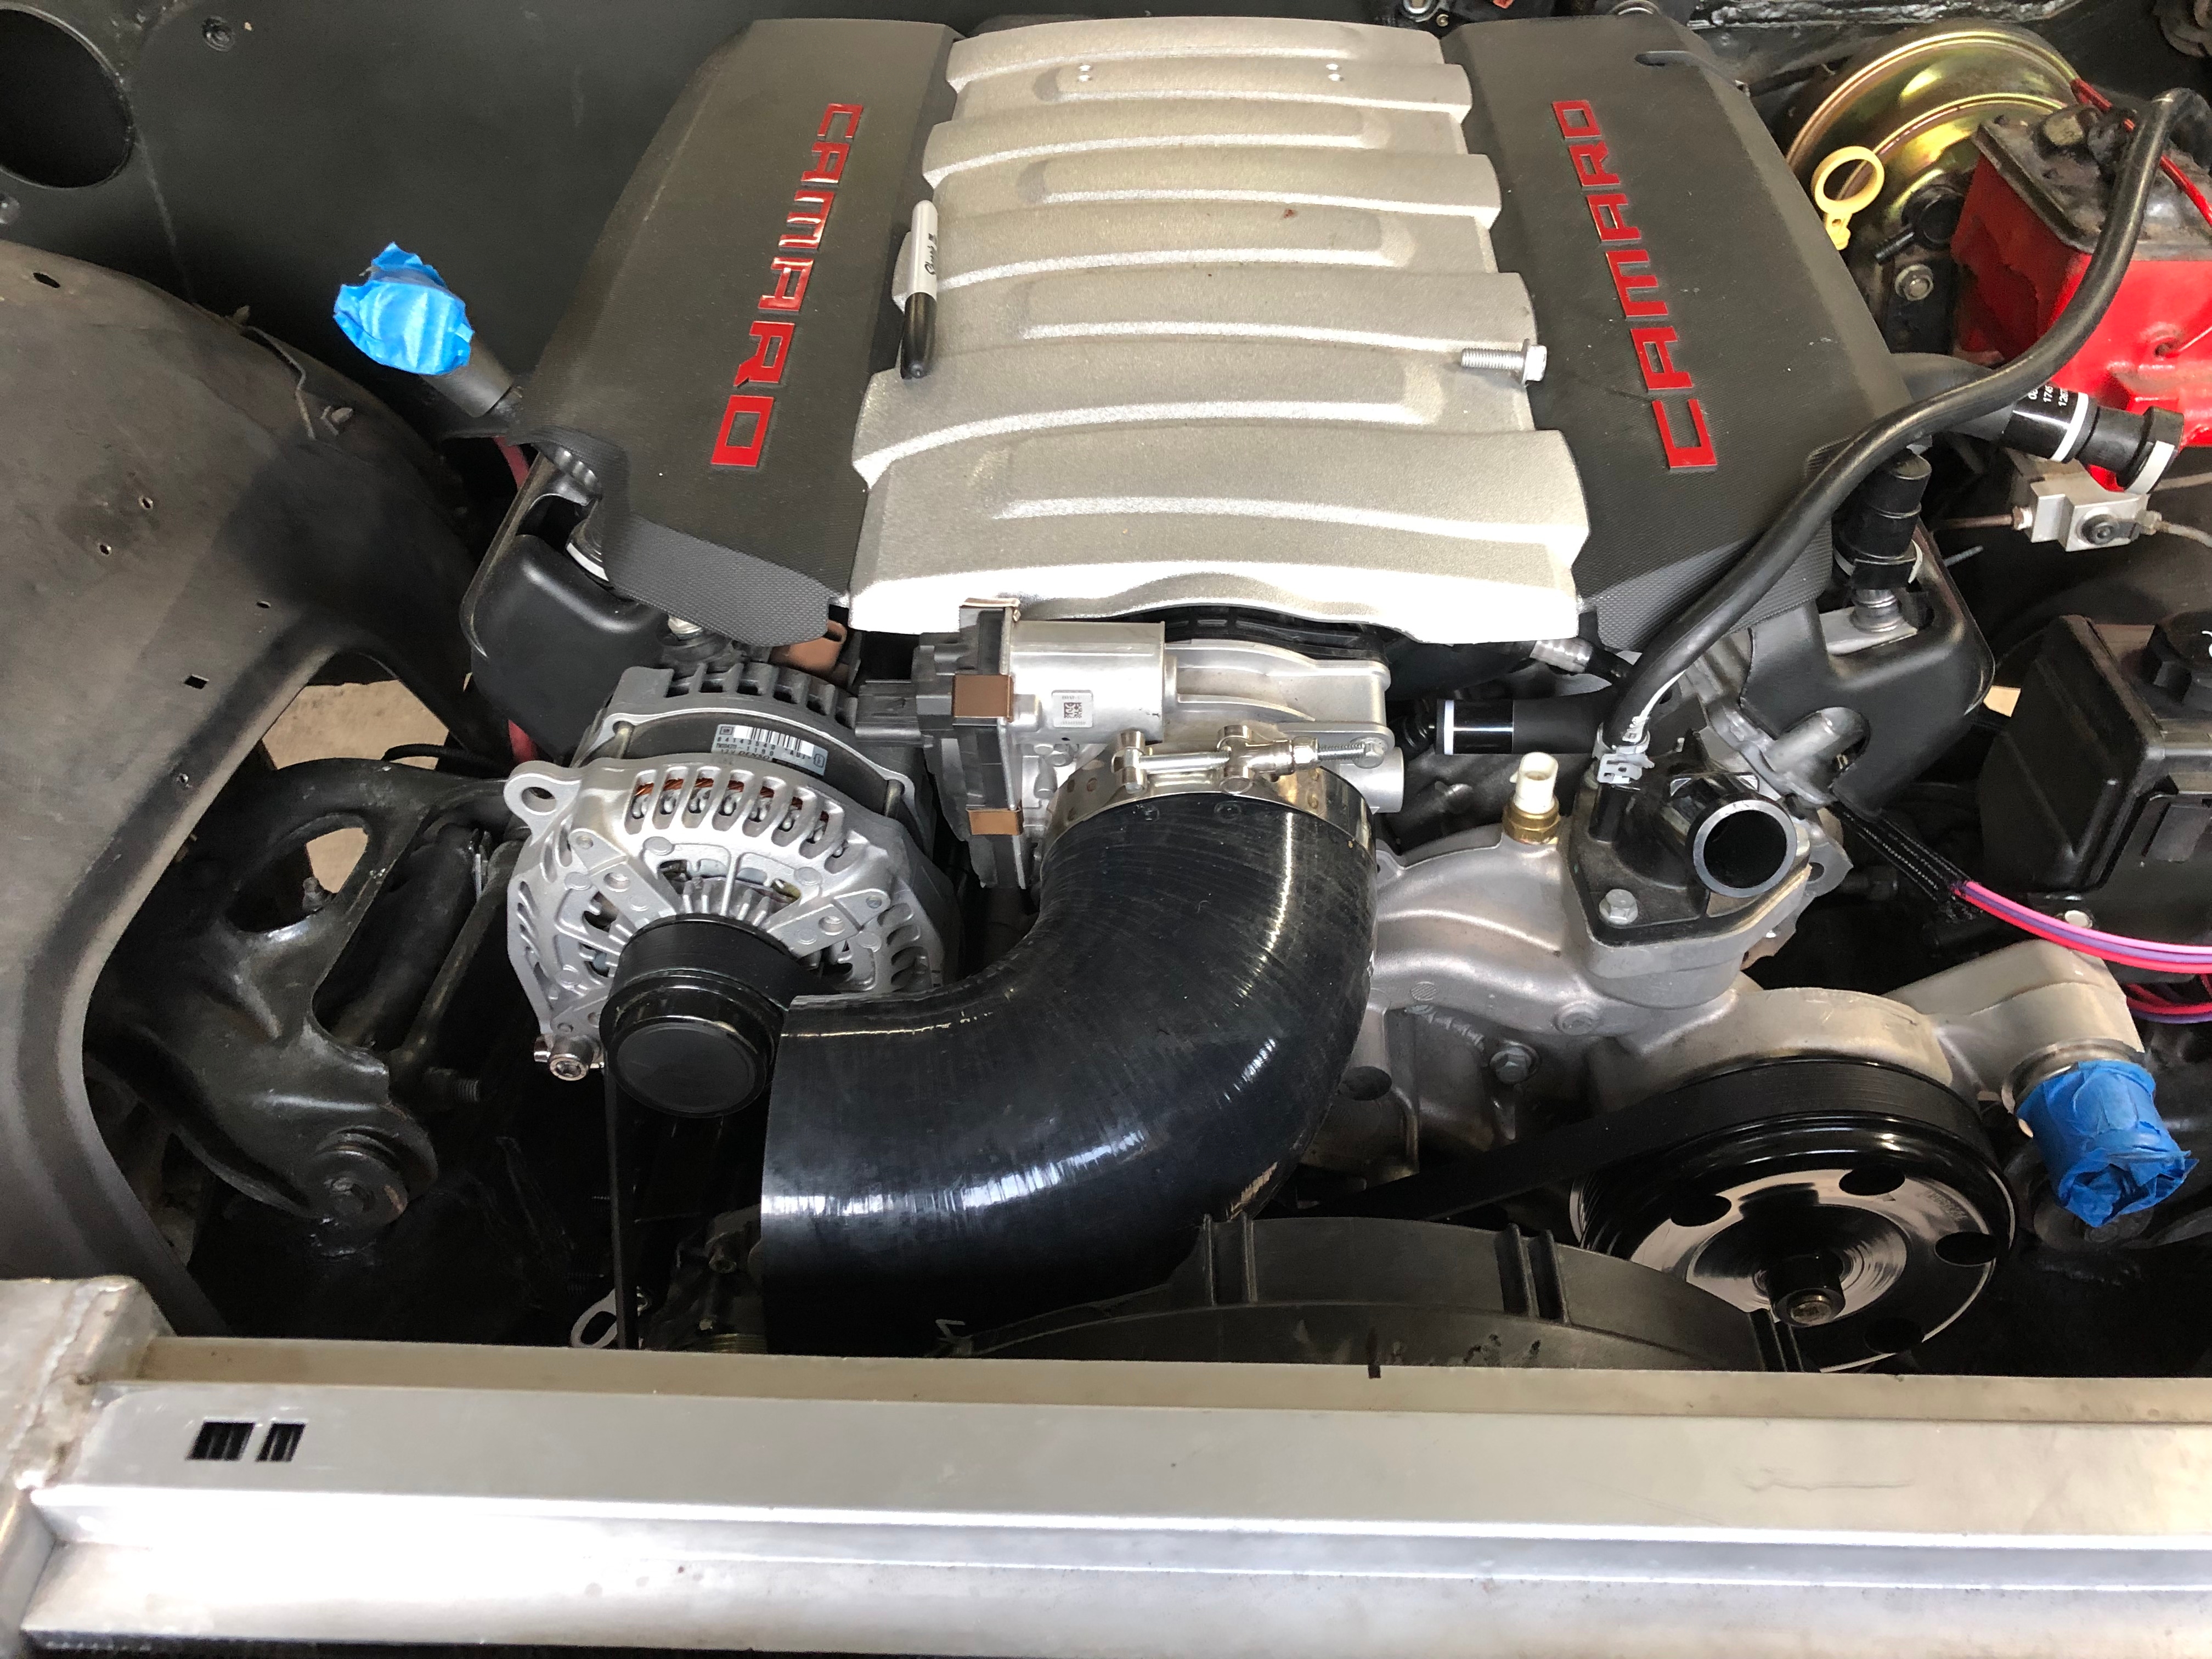
I got my new Drive Junky accessory drive in and installed it. Heres a few pictures of it as I installed it. Came with great instructions and all the parts are top notch!
I had originally tried to use the ICTbillet PS bracket and purchased a GM pump and reservoir to use with it but the bracket did not fit. I'm left with an extra pump if anyone needs one? I ended using the reservoir and modified the bracket to fit my water pump. I'll run the PS lines in a couple weeks. Kink of sucks that I mounted my battery in the trunk already, looks like I have enough room to mount it behind this mini Sanden compressor where I notch my frame for the stock compressor..


06-14-2019 #12
Registered User
- Join Date
- Jul 2017
- Posts
- 166
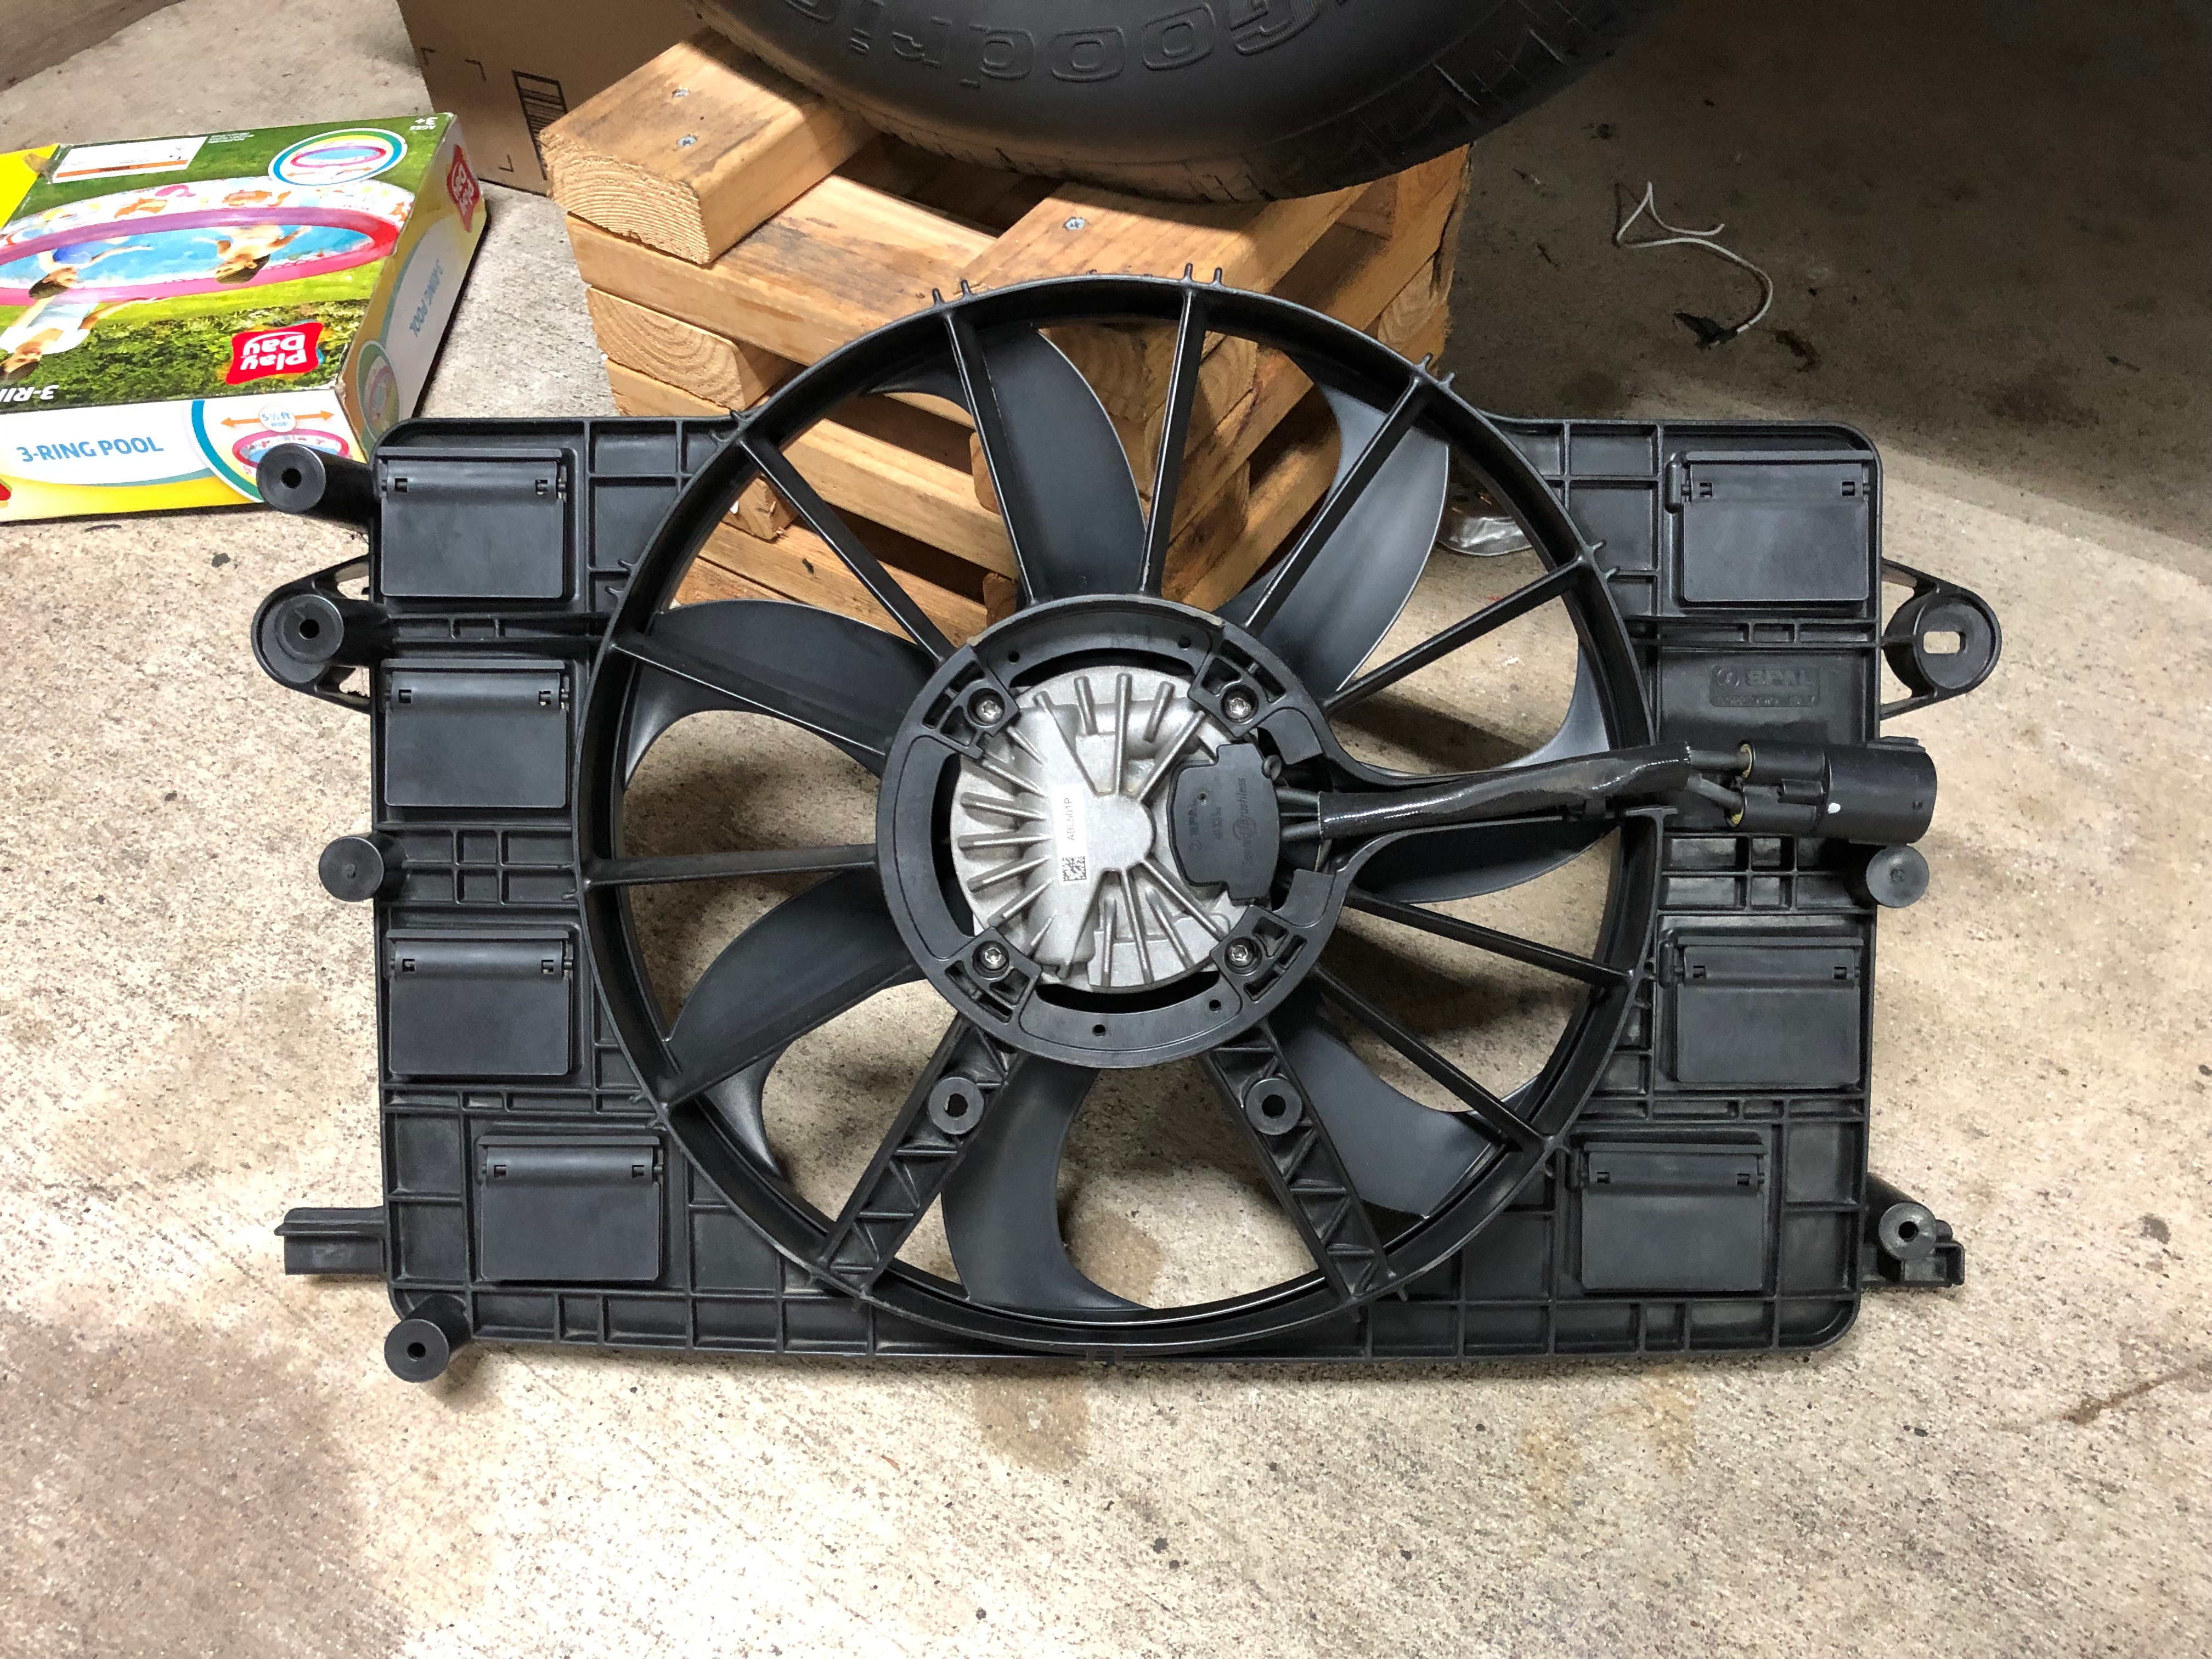
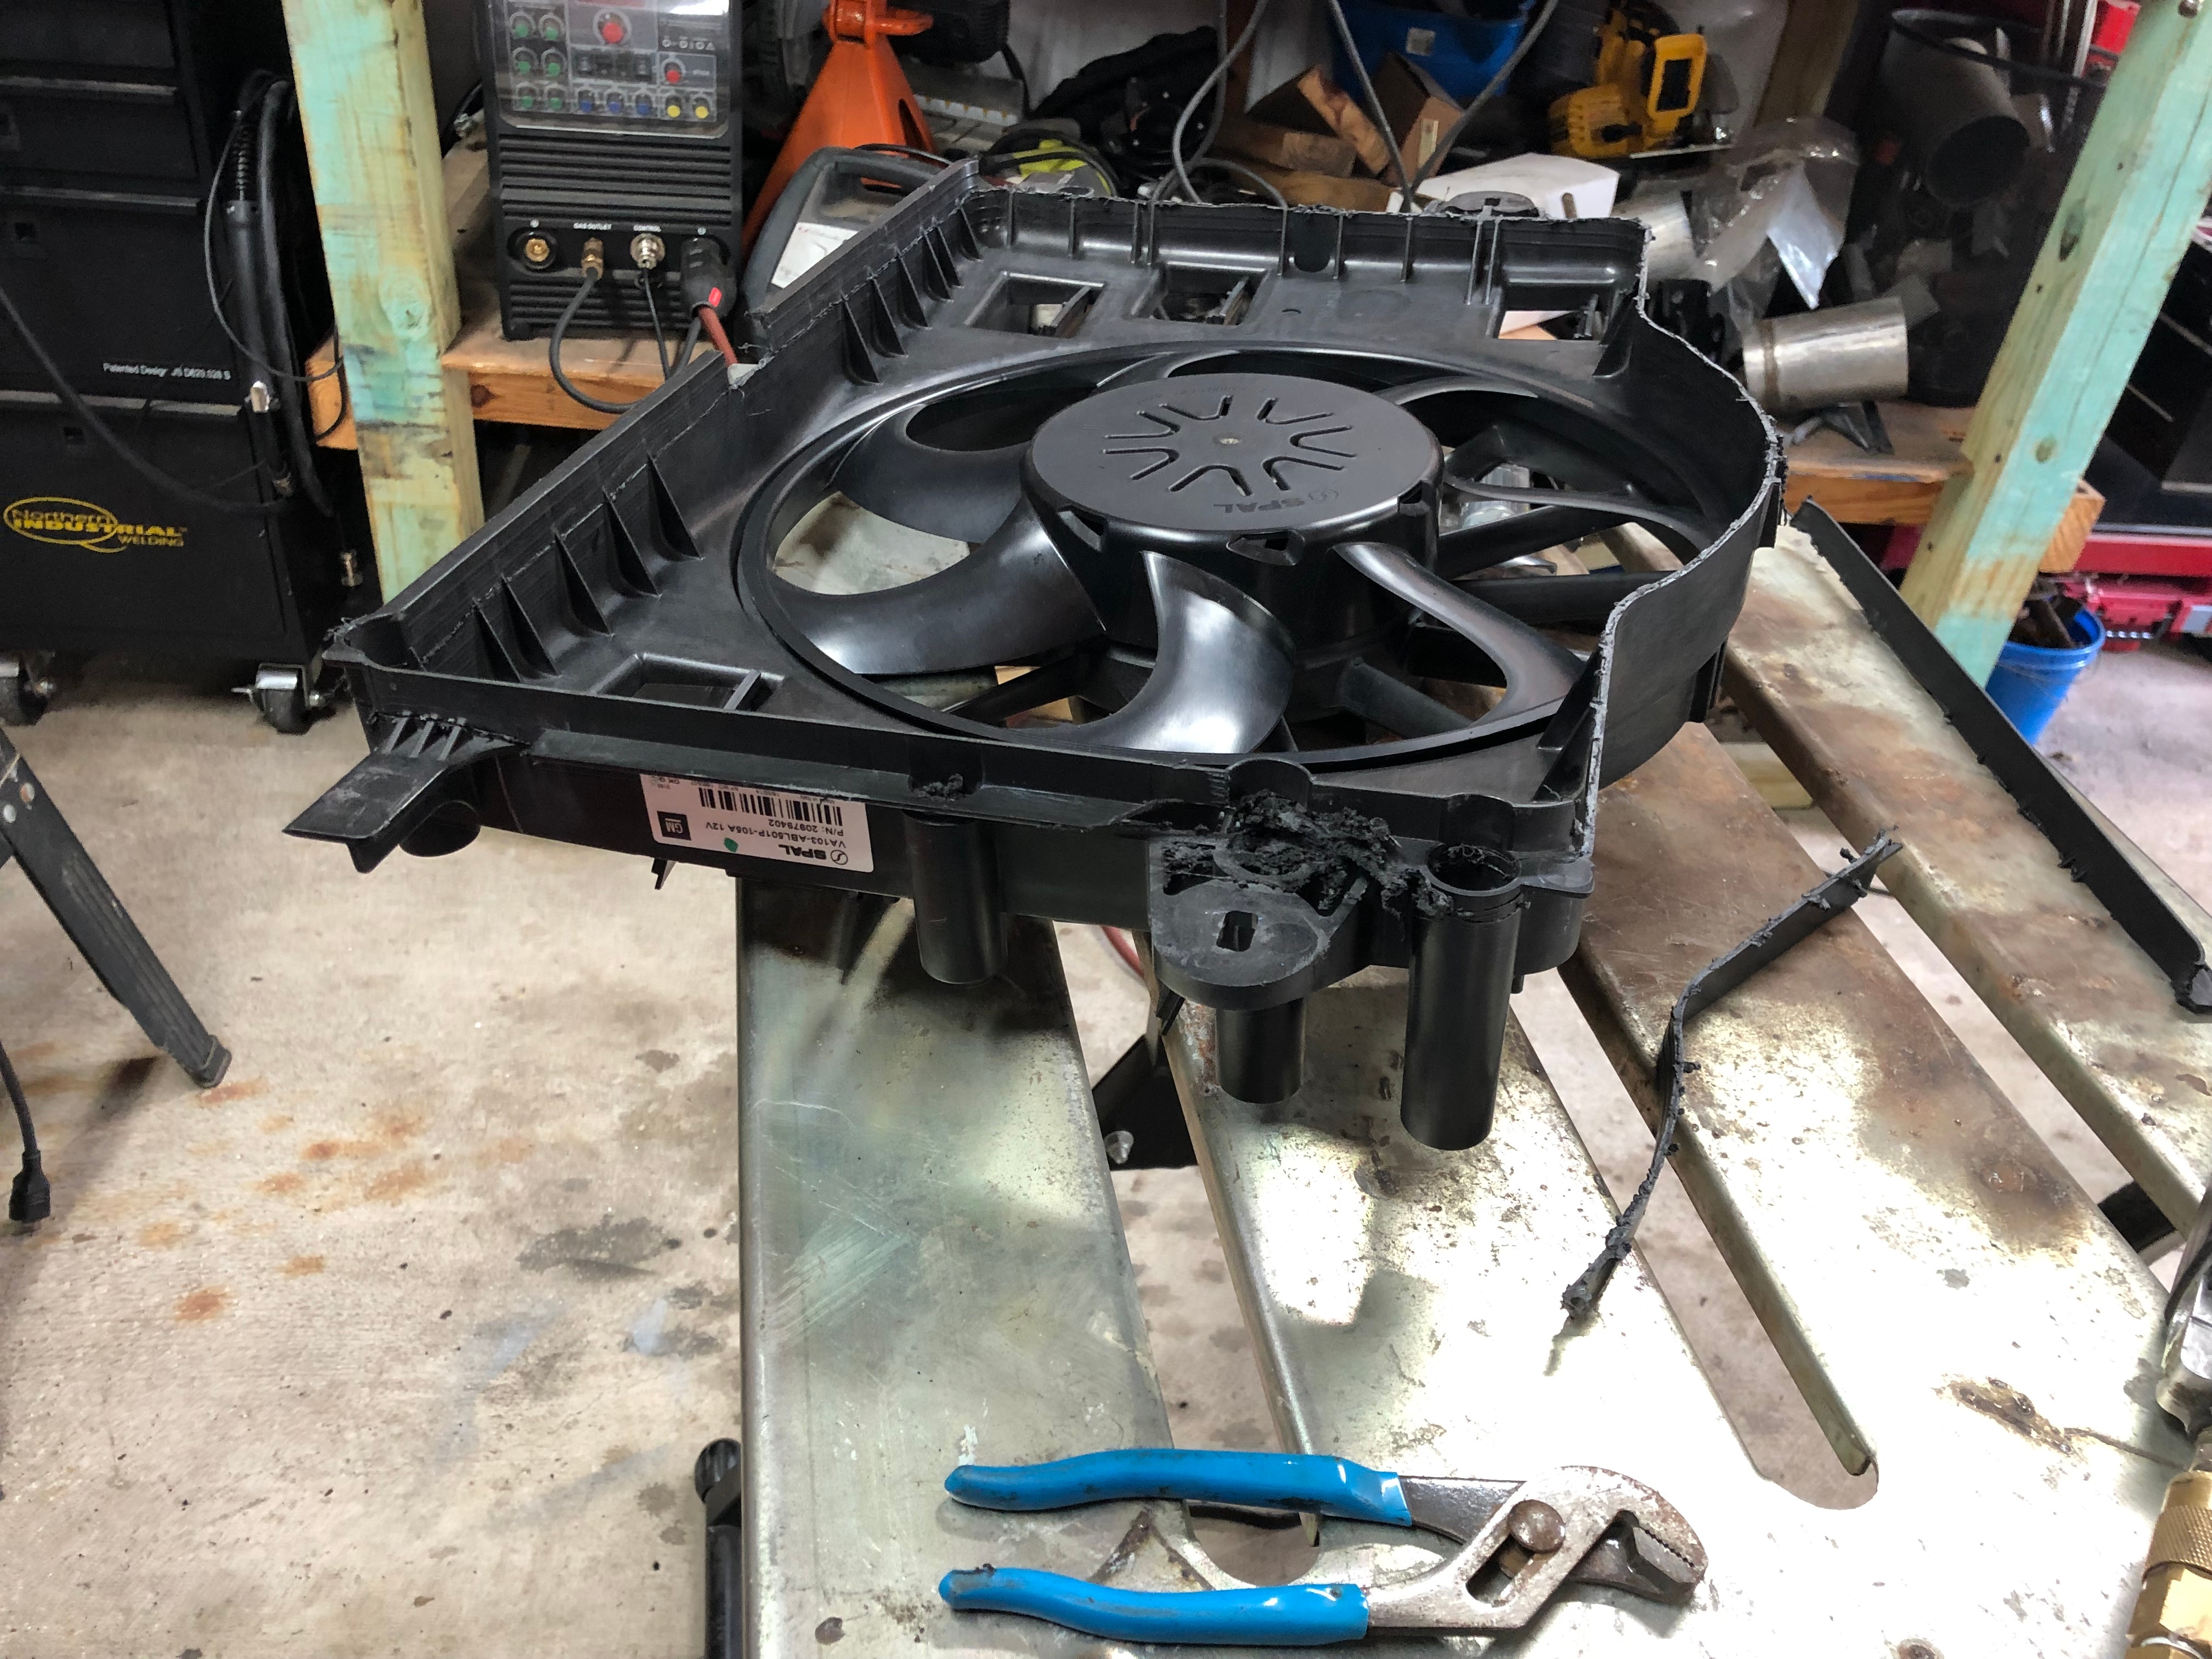
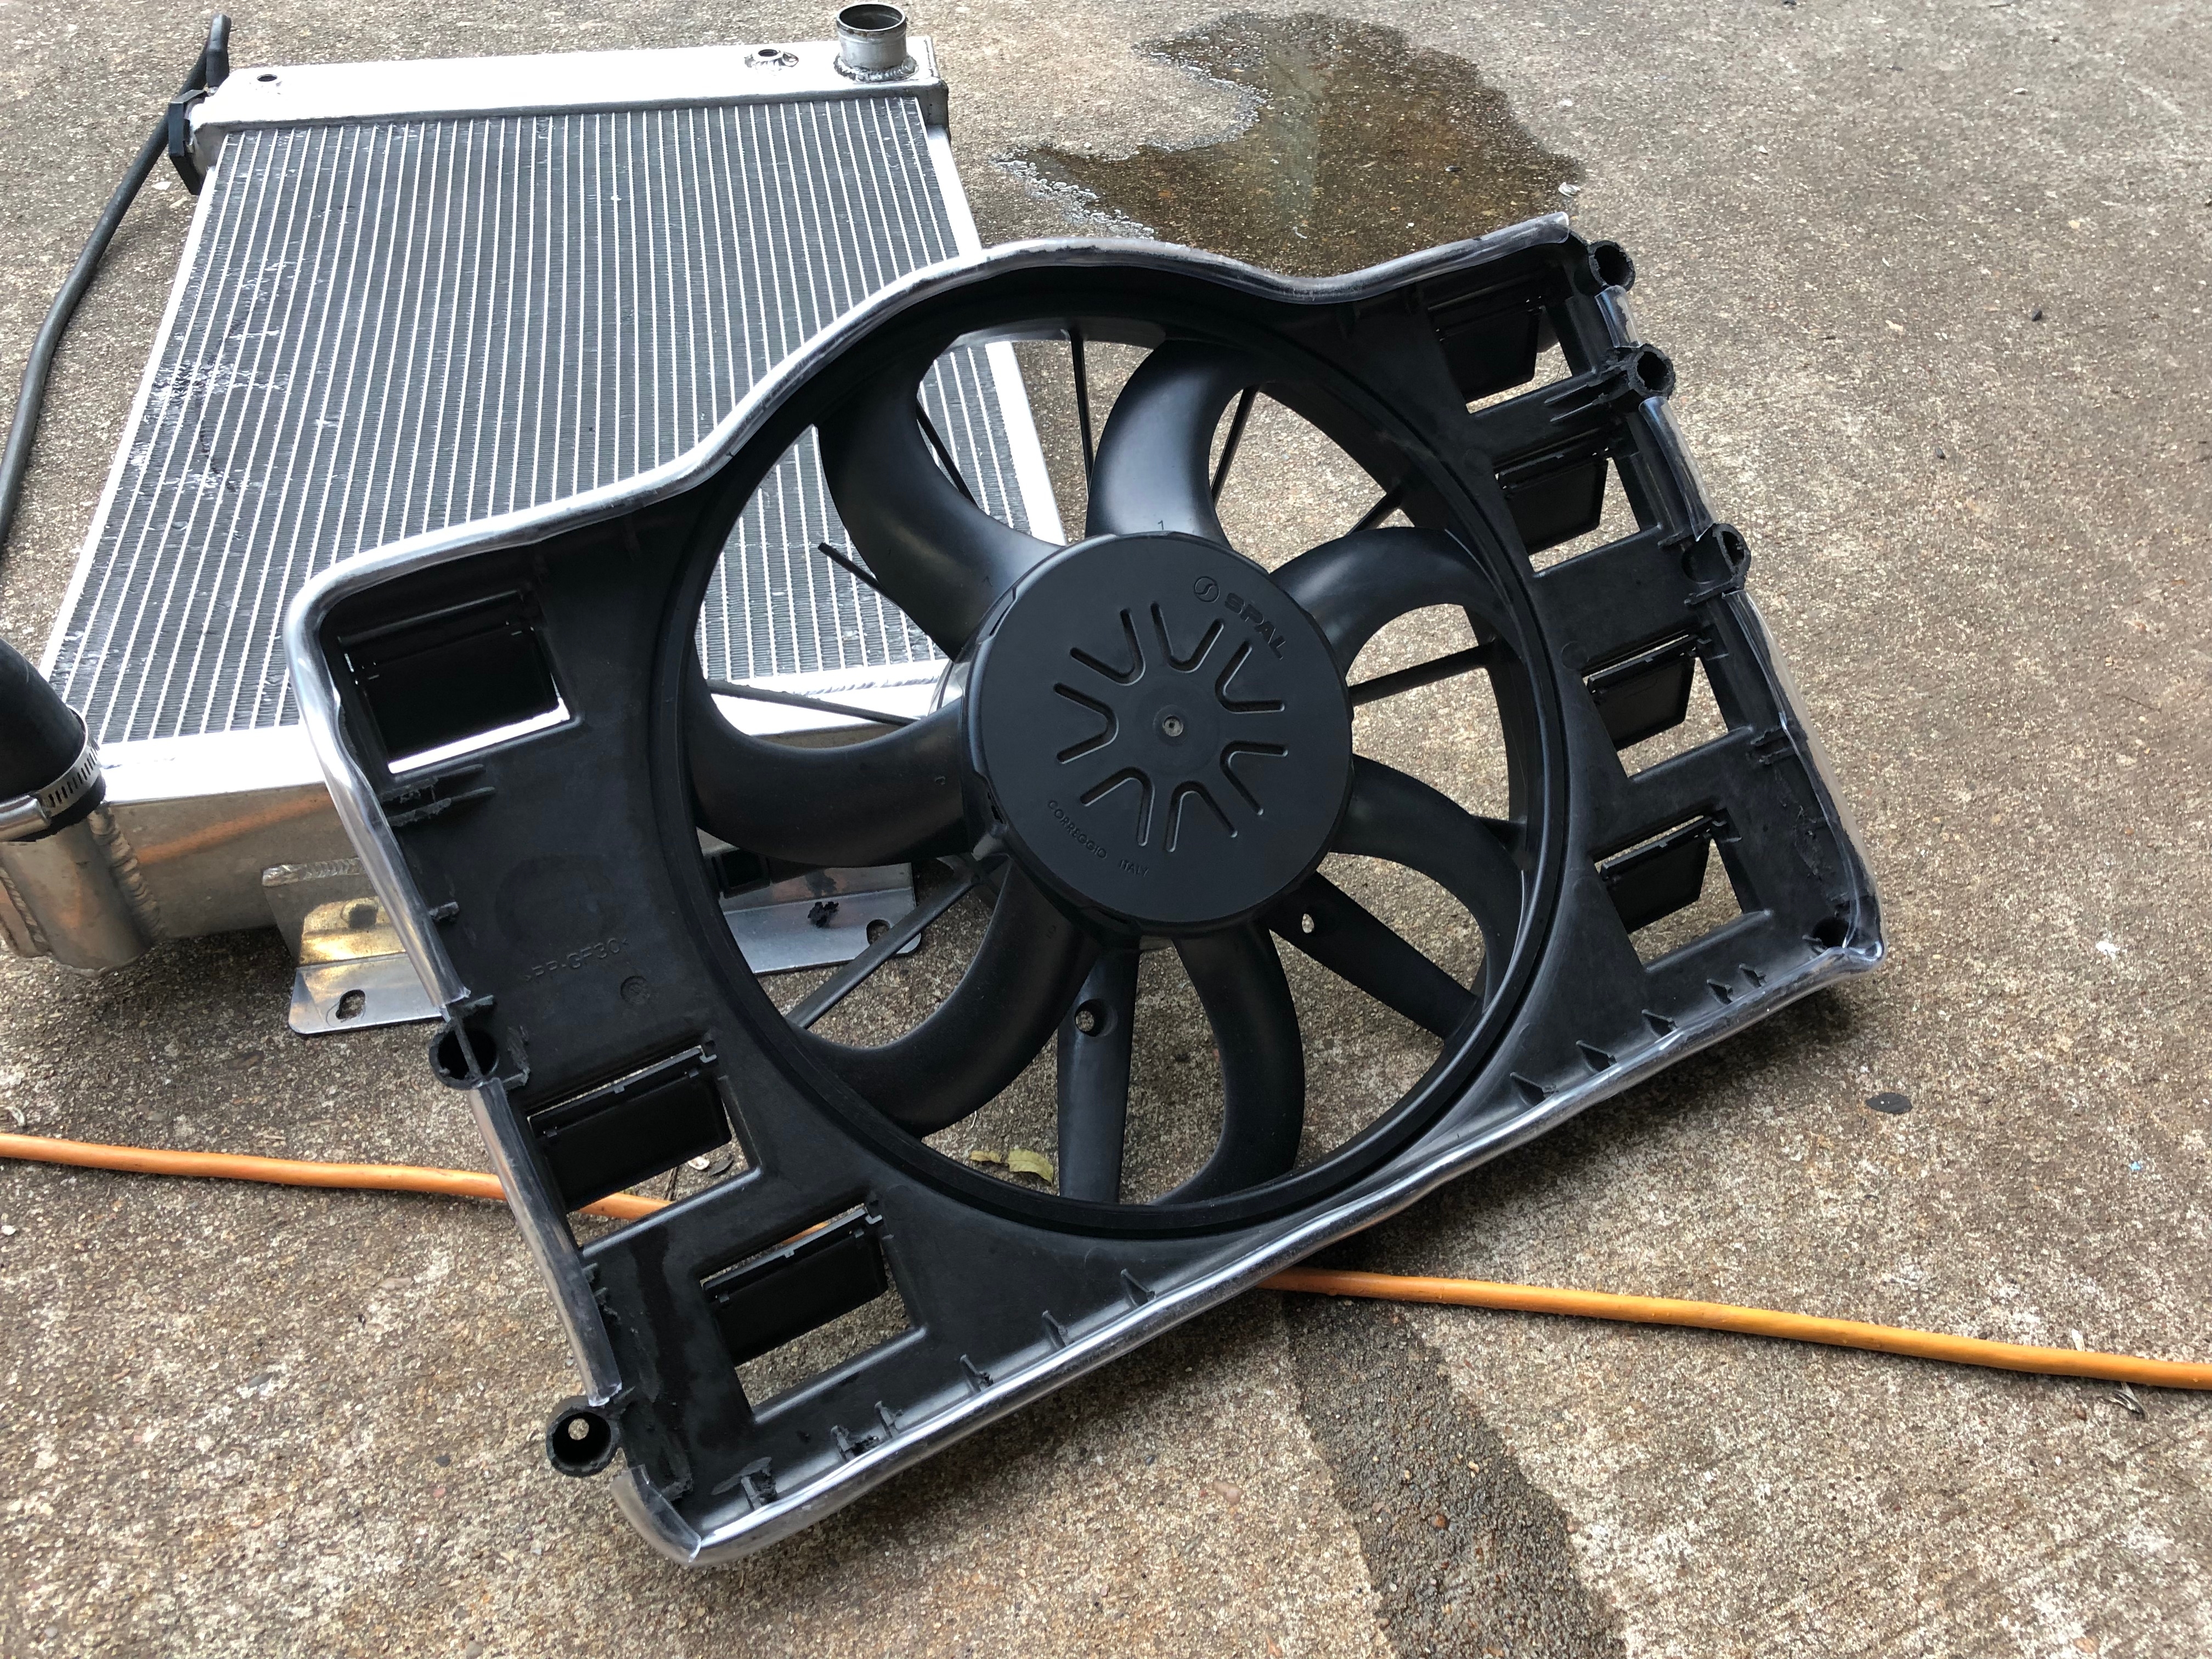
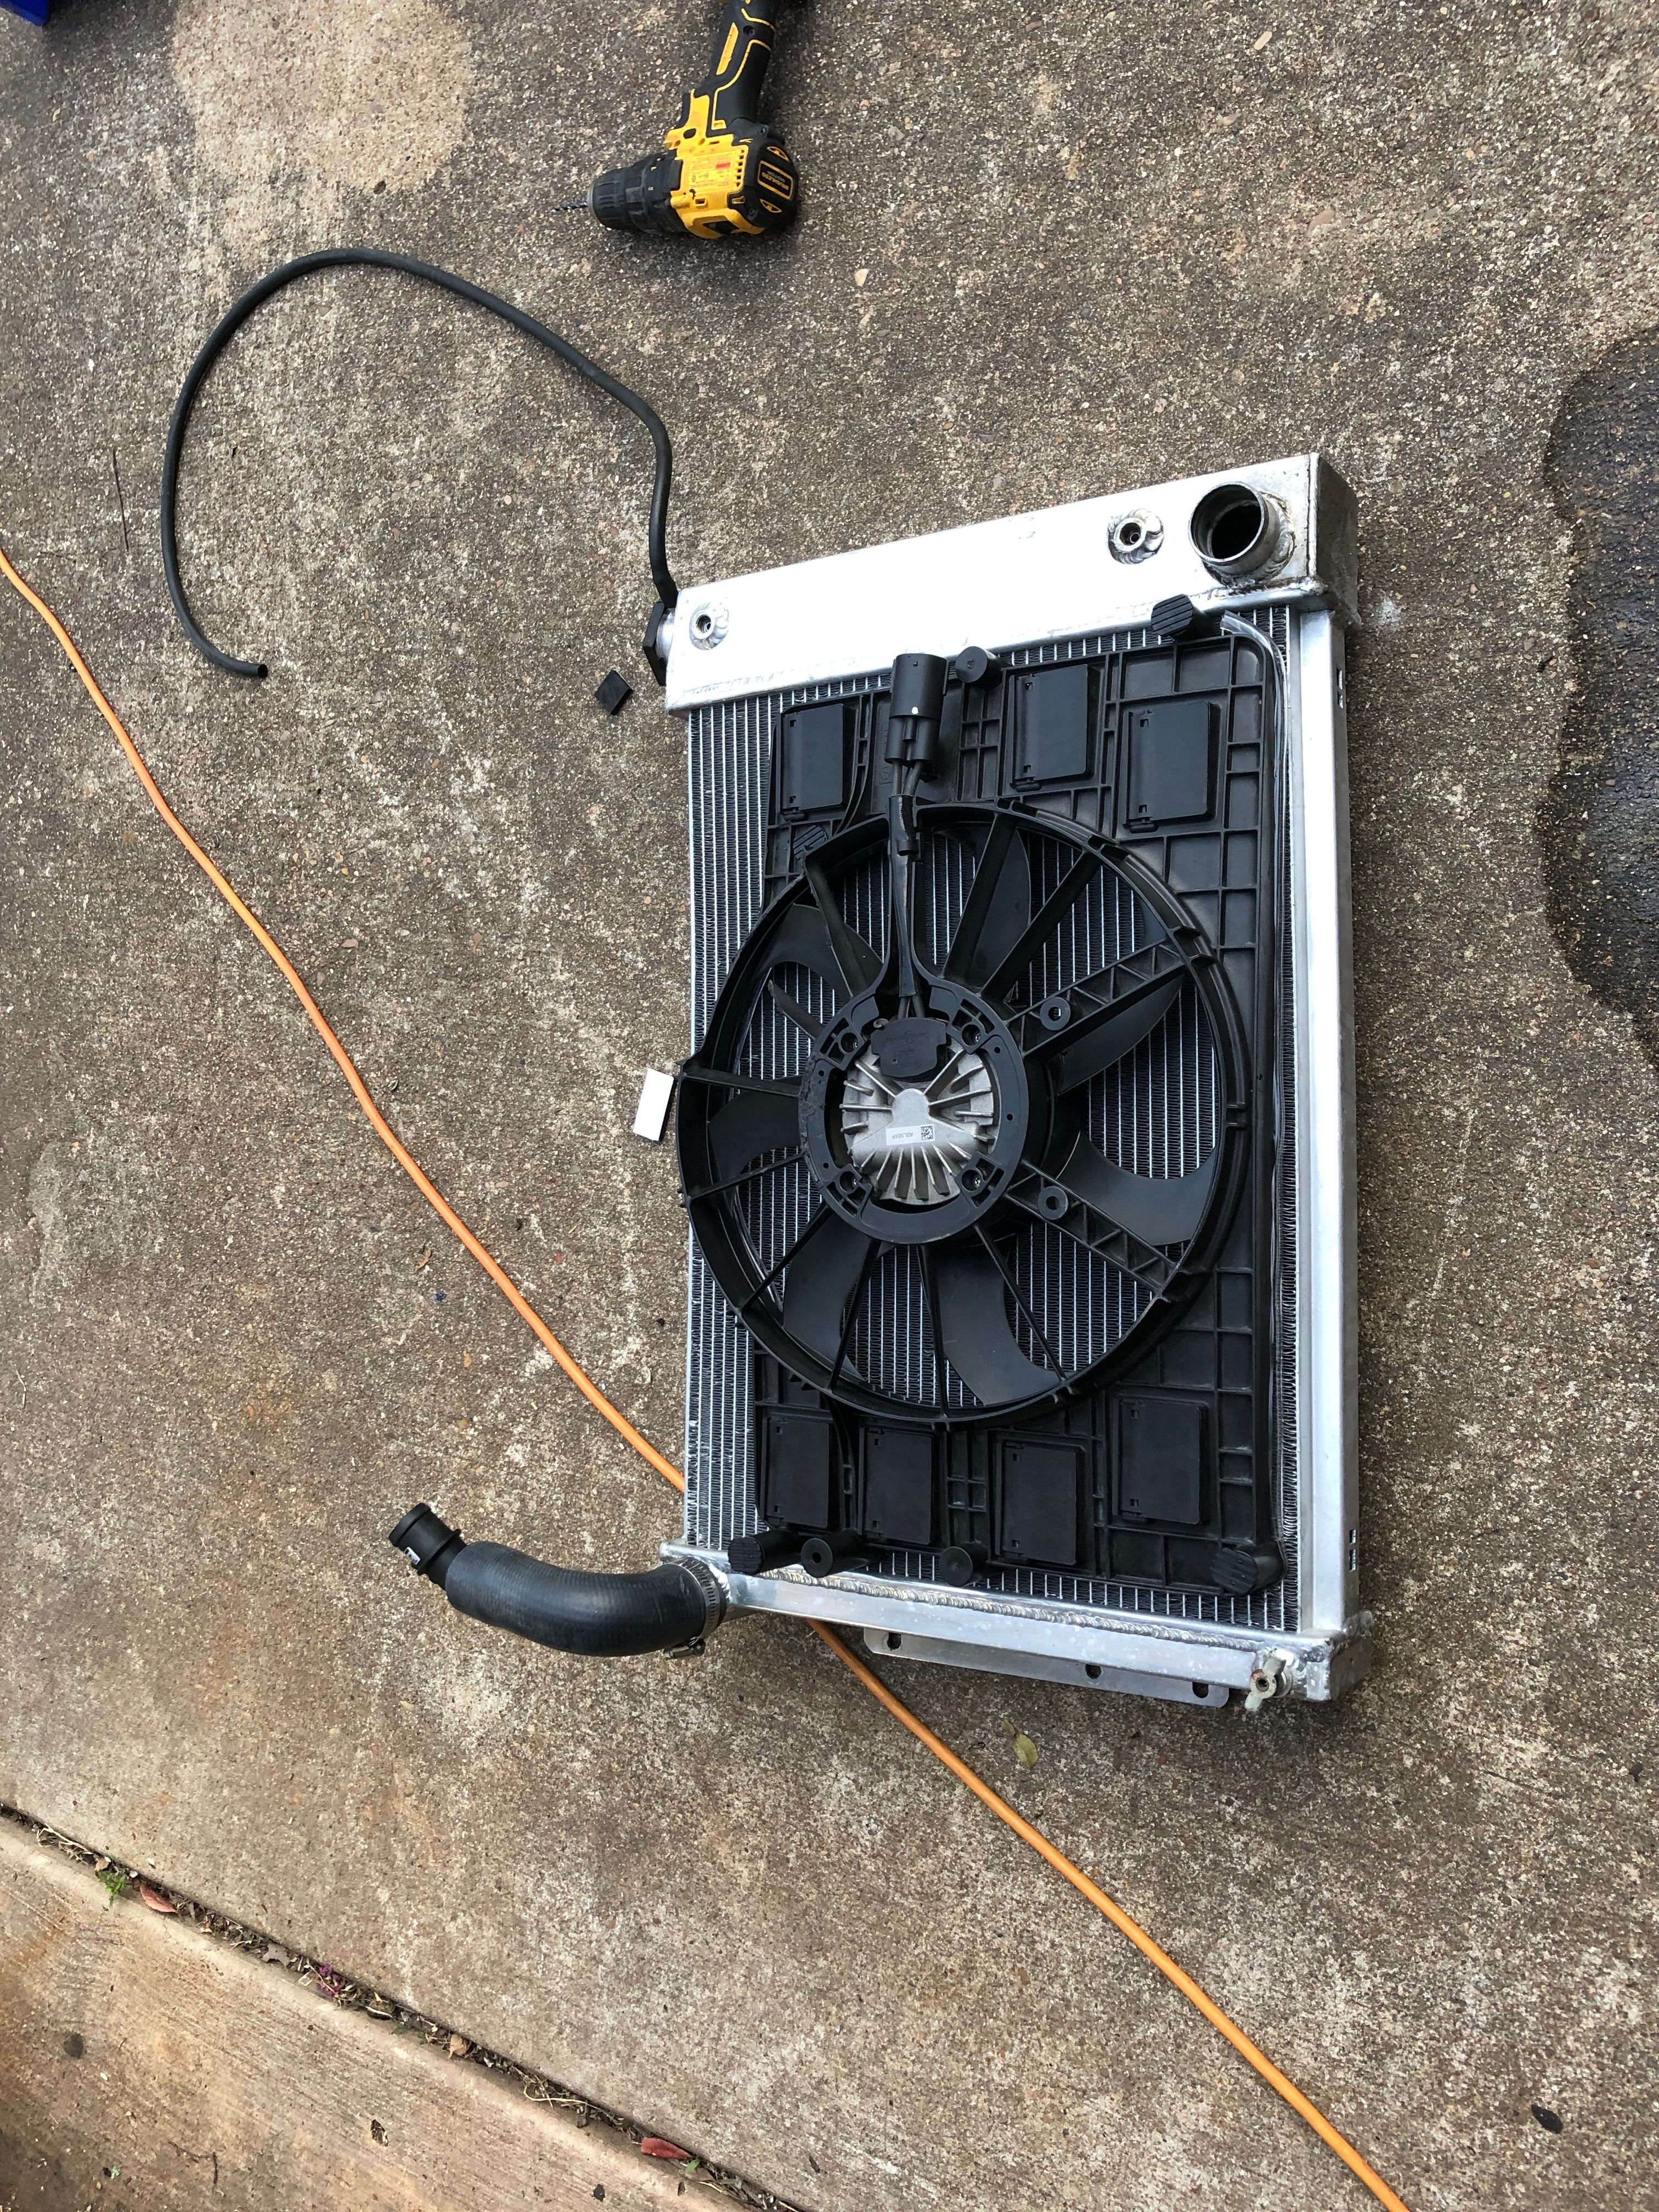
I spoke to my harness builder/tuner and he suggested I use a pwm fan from a 6th gen camaro. The PWM fan is the easiest fan to setup and works well with the gen v stuff. From what I have read the ECM does not send out a reliable signal for a relay to activate traditional fans and the signal sent out is a pulsed signal. The best way to run traditional fans is with a temp sensor and a trinary if using AC.
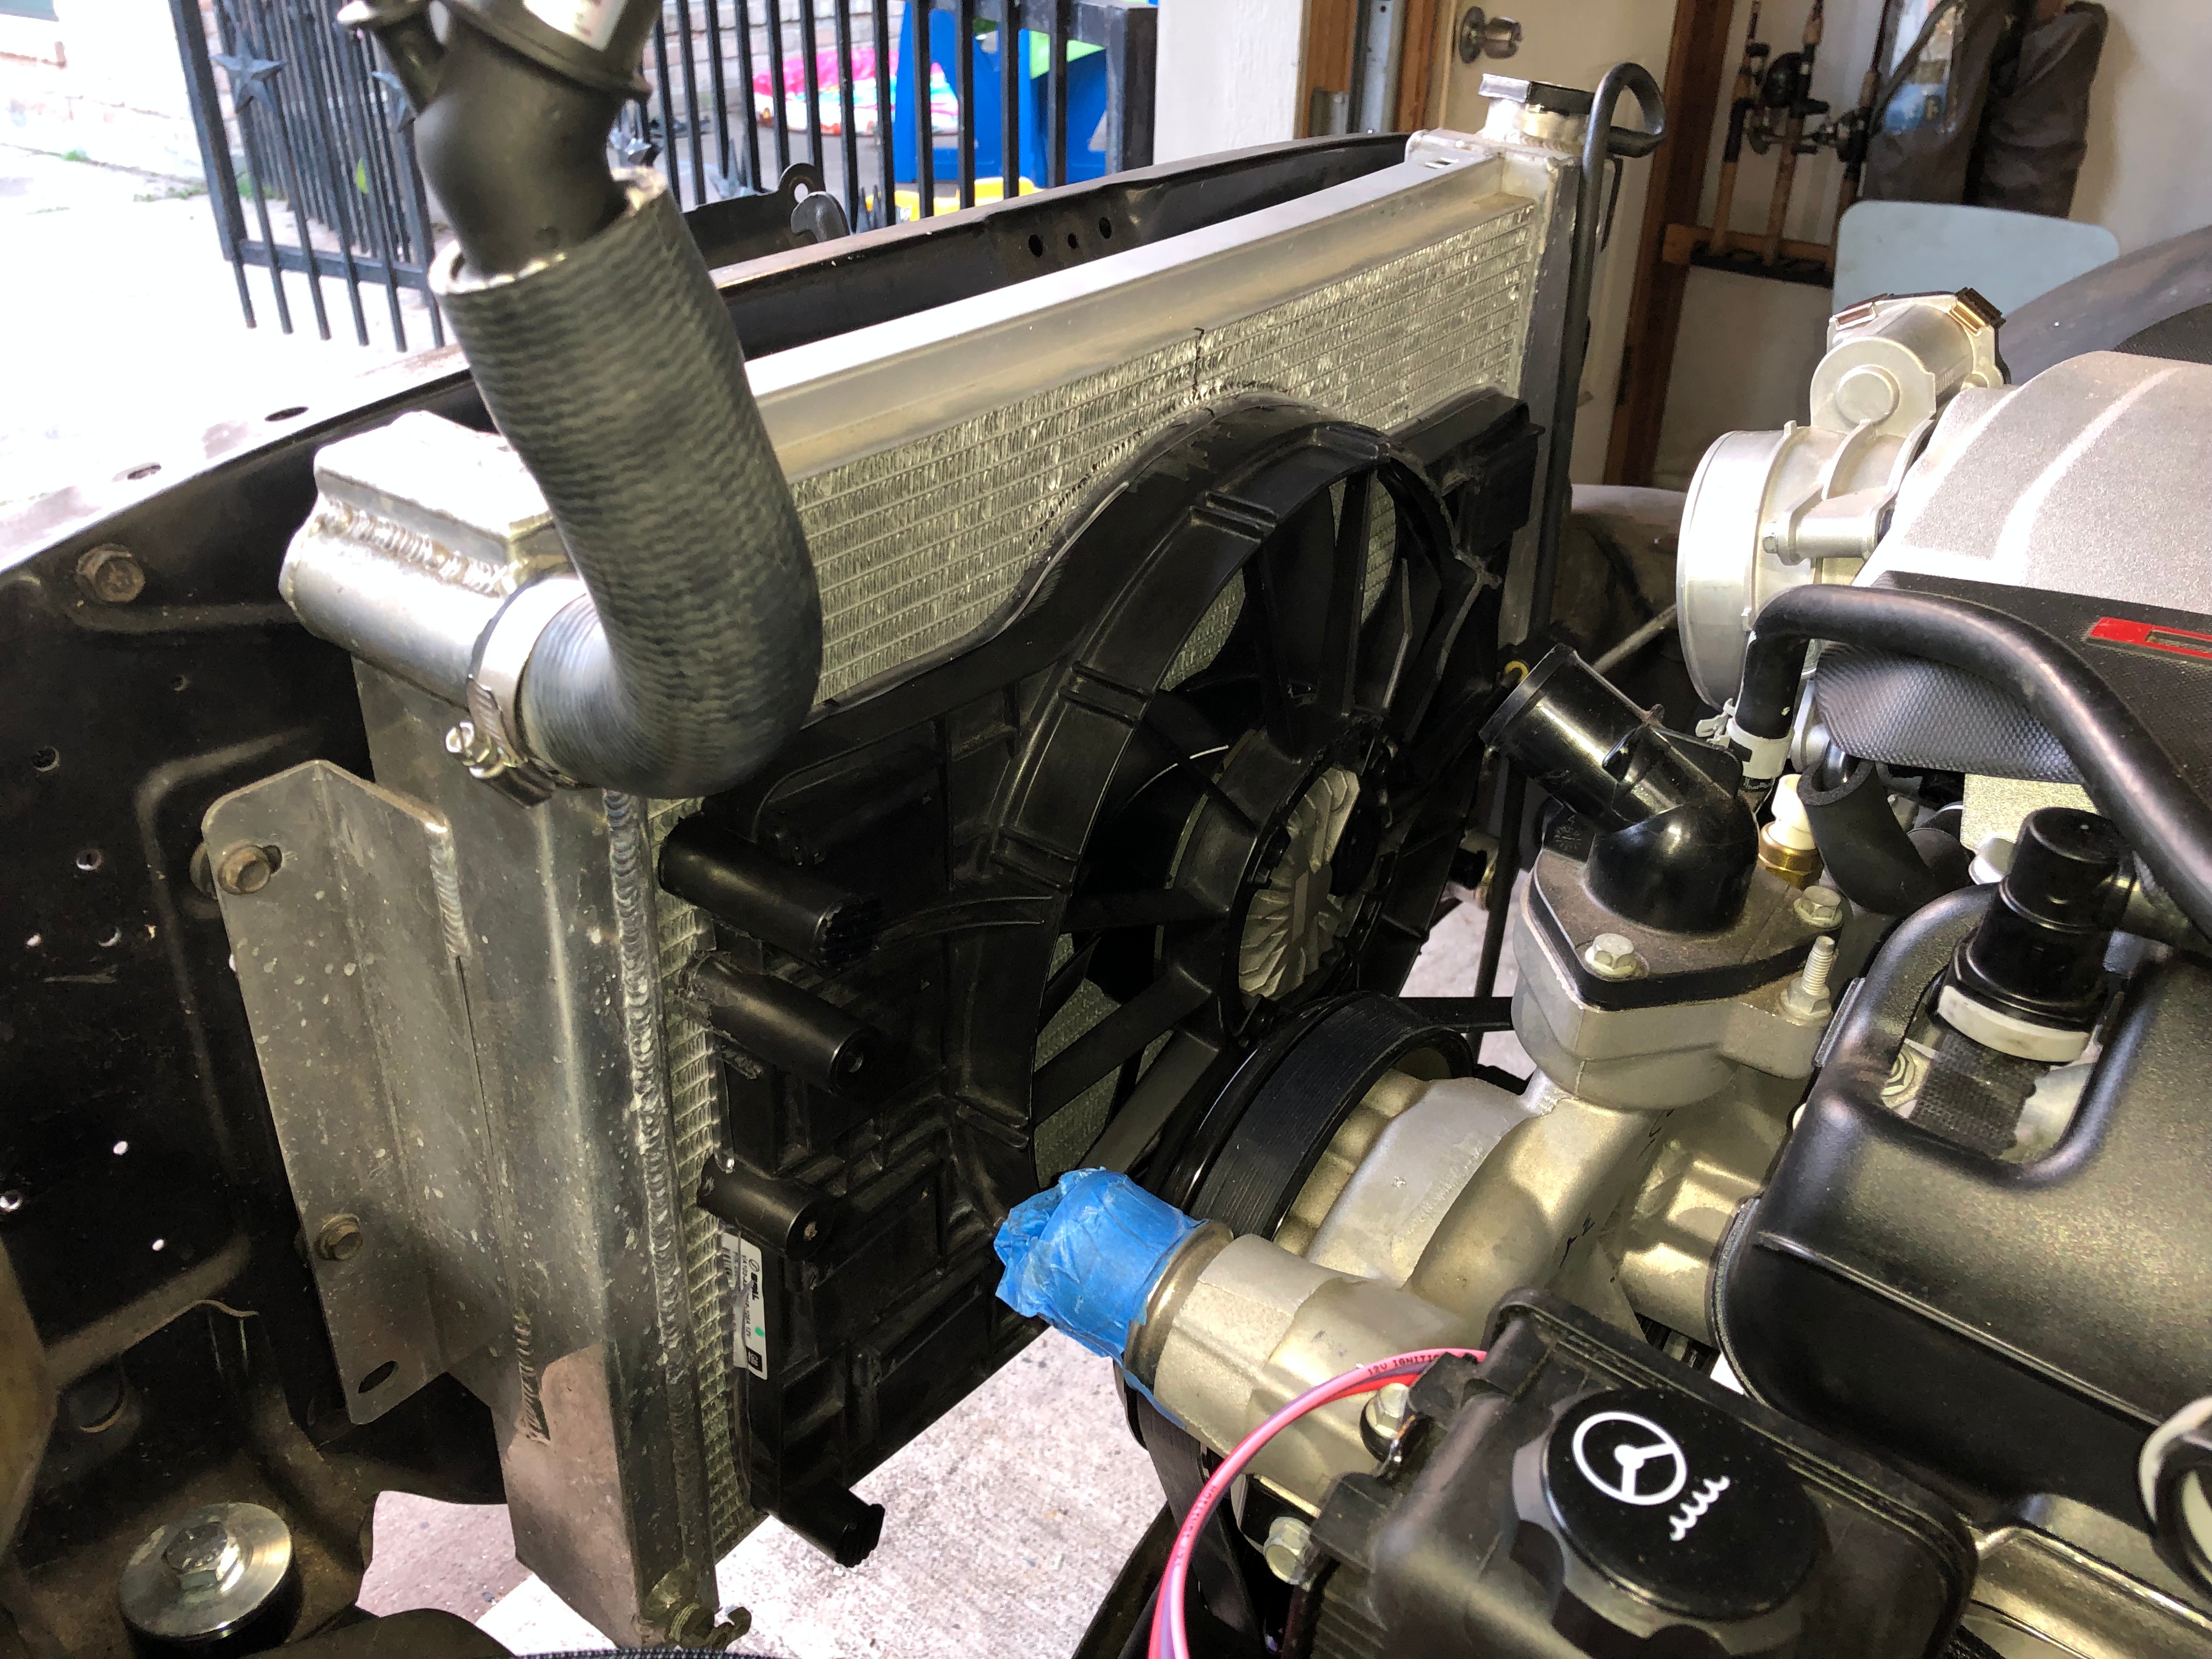
I was unable to find a 6th gen camaro fan for a reasonable price so I went with a C7 fan. Truck fans are also an option but they are a little too wide for my car. I spoke to Spal and they do not sell a shroud for this fan to so I ended up using the shroud that came with the fan. In order to use this shroud I had to cut off about 3/4" of the outside rim to let the fan sit closer to the radiator and make room for my intake. Added some rubber hose sliced down the middle to help get a better seal against the radiator. I also had to trim a little off around the fan blades to clear my intake piping. The fan assembly exposes a little bit of the radiator at the top, this should not be an issue as the C7 vetts have a ton of exposed area on their setups too. I used 4 ziptie style radiator fan hold downs to mount the assembly but I might add more reinforcement later.

07-19-2019 #13
Registered User
- Join Date
- Jul 2017
- Posts
- 166
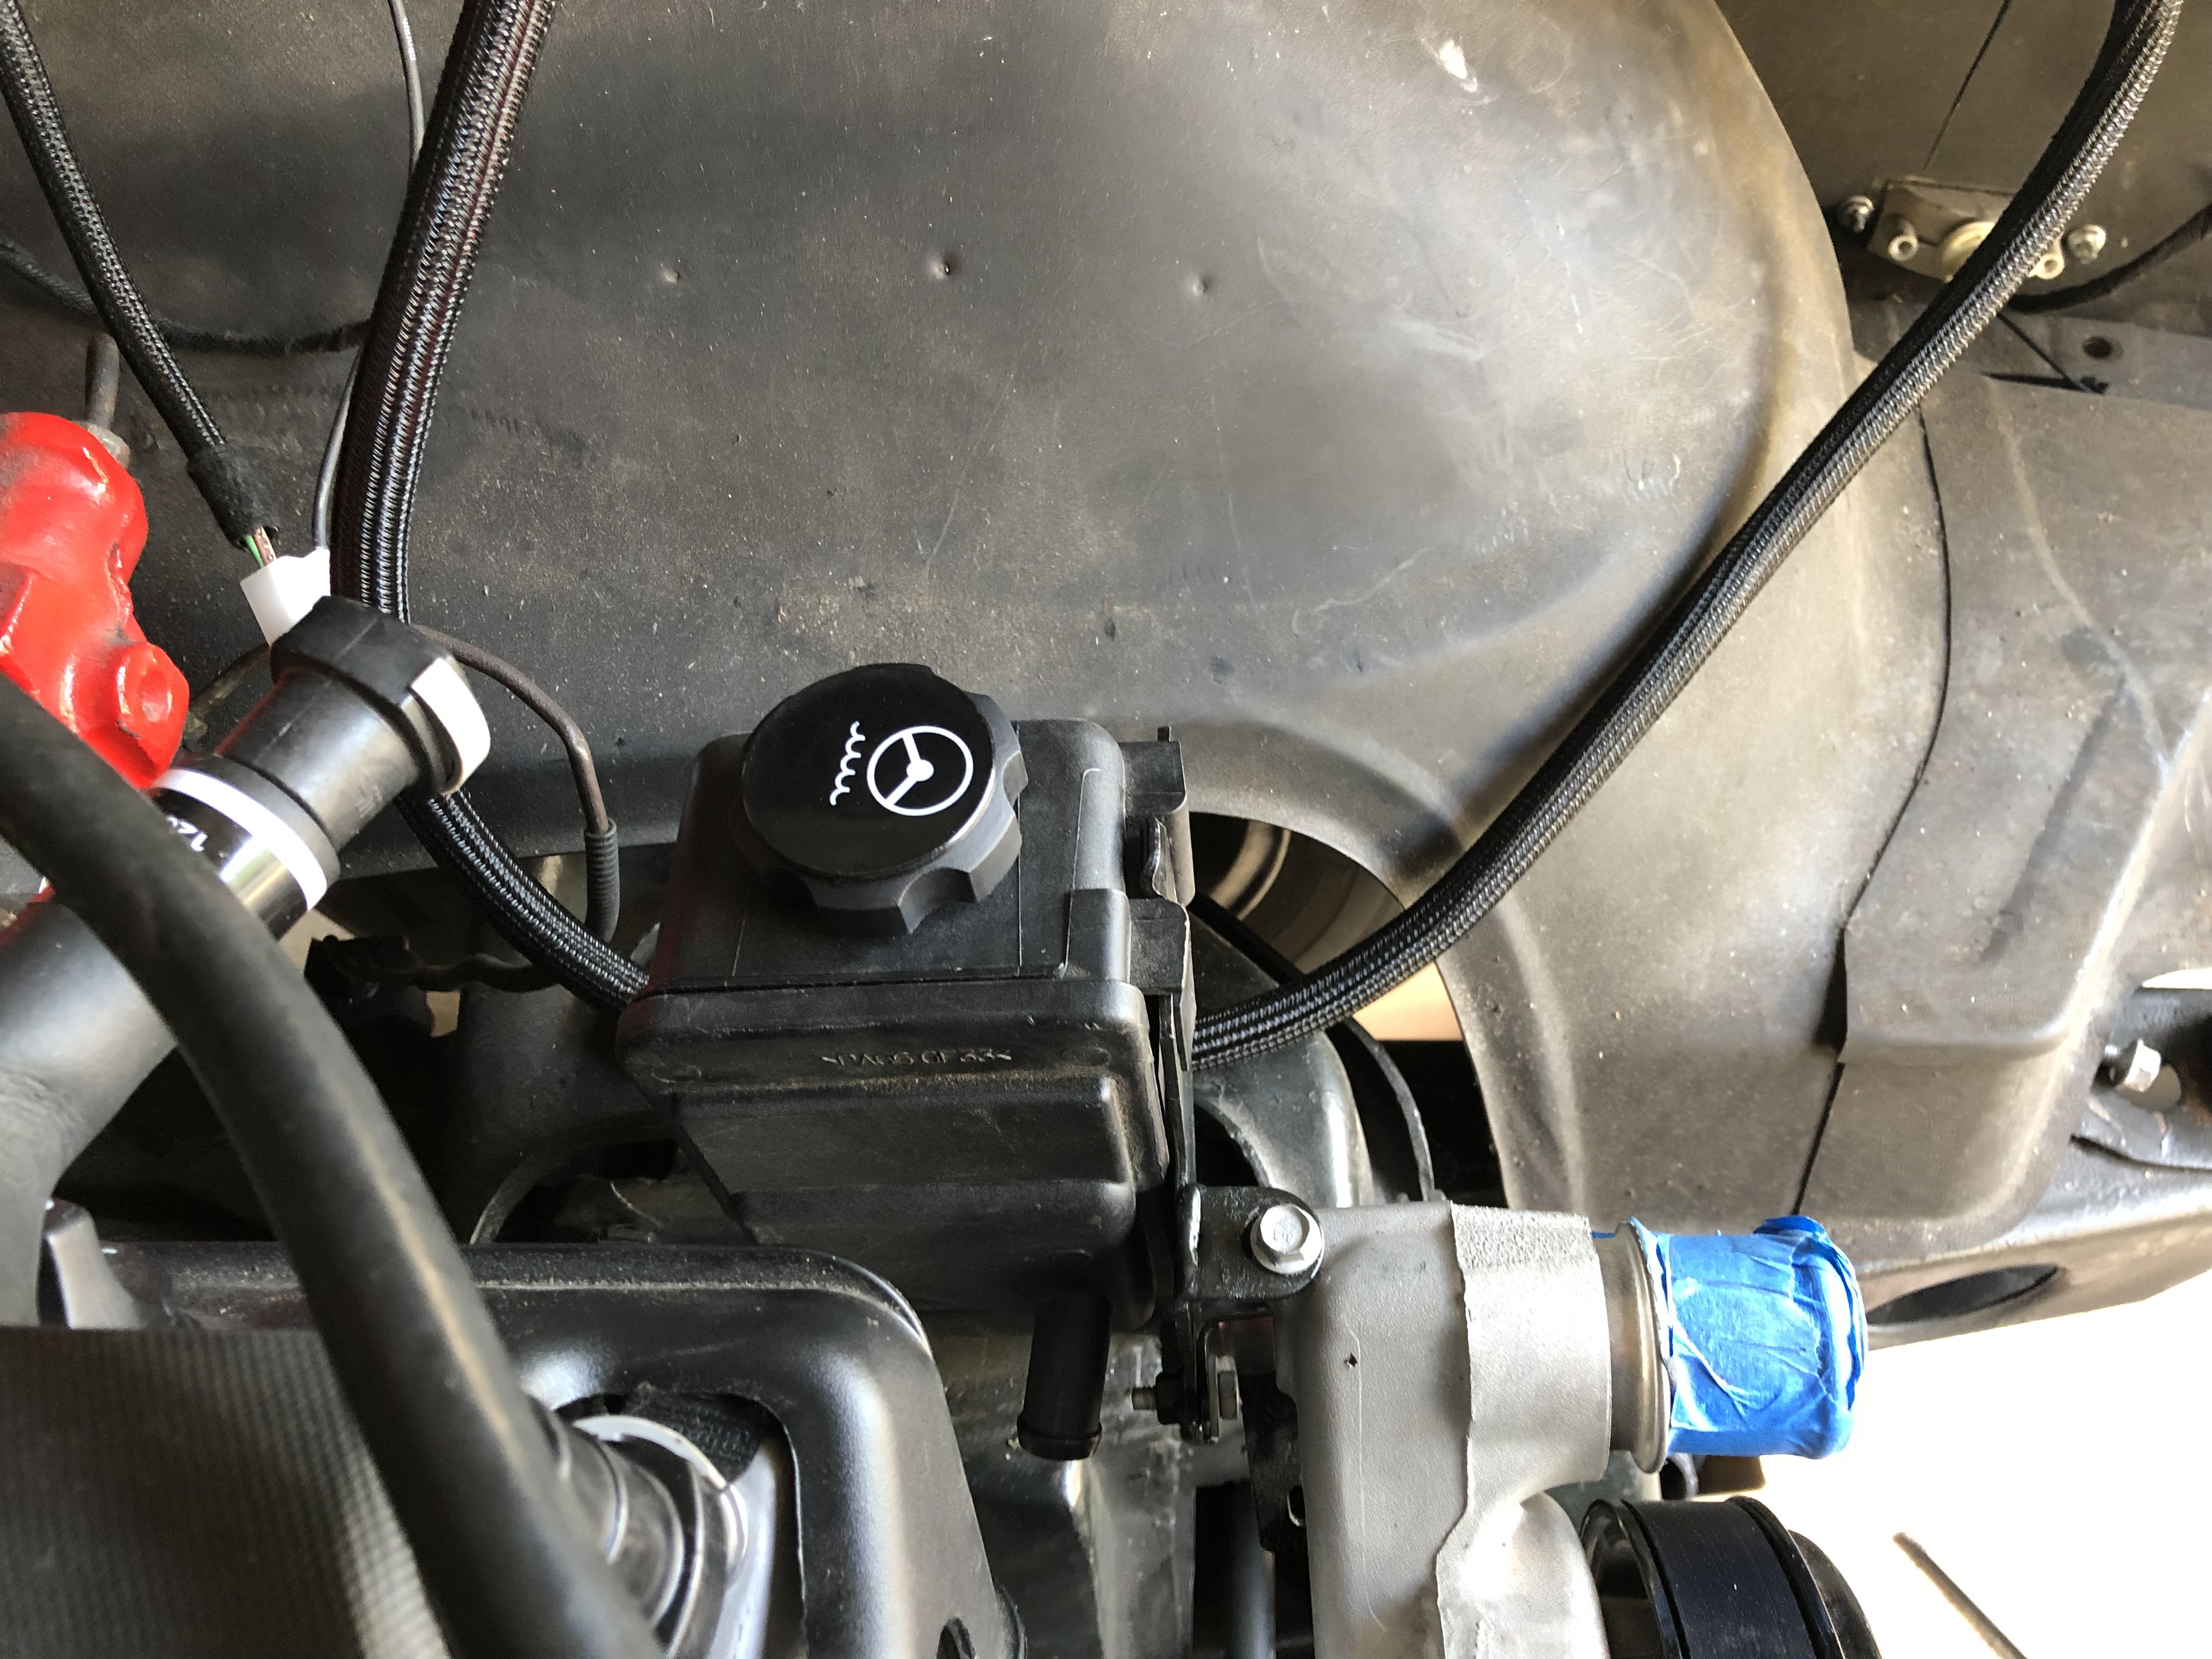
I started working on the AC lines at this point. I purchased a VA kit that would hide my lines behind the fender. Got the wiring all done up and integrated it into my AAW harness. Still need to wire up the compressor wiring once I get my engine harness. BPautomotive hooked me up with the correct fittings to run the GM pressure switch and this was installed as well. Heres some photos of the process, it was not fun and there is very little room for the AC fan with the raised tunnel. Got everything all sealed up from water with some leftover house window sealant. Also had to be very careful with the compress fittings and rout them the best I could to have room to install the high and low pressure AC fittings on them when its time to charge the system due to the a-arm clearance but it worked out and tested fine.

07-19-2019 #14
Registered User
- Join Date
- Jul 2017
- Posts
- 166
I started working on the AC lines at this point. I purchased a VA kit that would hide my lines behind the fender. Got the wiring all done up and integrated it into my AAW harness. Still need to wire up the compressor wiring once I get my engine harness. BPautomotive hooked me up with the correct fittings to run the GM pressure switch and this was installed as well. Heres some photos of the process, it was not fun and there is very little room for the AC fan with the raised tunnel. Got everything all sealed up from water with some leftover house window sealant. Also had to be very careful with the compress fittings and rout them the best I could to have room to install the high and low pressure AC fittings on them when its time to charge the system due to the a-arm clearance but it worked out and tested fine.
07-19-2019 #15 Registered User
- Join Date
- Nov 2016
- Location
- Sulphur, La
- Posts
- 599
I am wanting to run the lines through the firewall in that same location. When you ordered the kit from VA what exactly did you order different from the "normal" setup?
07-19-2019 #16
Registered User
- Join Date
- Jul 2006
- Location
- Carson City Mi.
- Posts
- 54
very nice build. I was looking at swapping a 2016 lt engine and 6 speed trans into my brothers 84 Grand Prix , but after checking into things there doesn't seem to be many vendors out there that make swap stuff for these engines yet and everything is very expensive. Just curious do you have a round about figure on what this swap is going to add up to not including the motor and trans. thanks for any input.
07-20-2019 #17
Registered User
- Join Date
- Jul 2017
- Posts
- 166
The "normal" setup I had was just outdated, checkout my old setup with the BBC in it and checkout the AC line location. The newer camaro setups come with the lines routed like I just did and are hidden. The kit I purchased was a VA kit PN 526660. I also had to order another hardline that comes off the dryer, in my photos you can see it looks newer than the other dryer line. Only reason was that it was longer and I needed it shorter. Originally Posted by CSG

07-20-2019 #18
Registered User
- Join Date
- Jul 2017
- Posts
- 166
It will cost just about the same as a LS swap. All depends on how much you want to throw at it. You can do it cheap and good like me or cheap or real fancy.
Harness rework or new and tune $1000-$2000
Accessories $600-$3000
Fuel system $$200 -$1000
Driveshaft $300 or so
Gauges $30 (iphone app)-$800
Miscilanious stuff $500-$1000+ it adds up quick
Labor $$$ priceless
to name a few... I'm just kind of throwing out prices.
07-20-2019 #19
Registered User
- Join Date
- Jul 2017
- Posts
- 166
I installed the power steering lines with earls hose and fittings on the high side and some push on barb AN fittings on the low side. I did not purchase enough hp hose so its not as hidden as I'd like but it will work.
Also go the fuel line installed and the low pressure sensor.
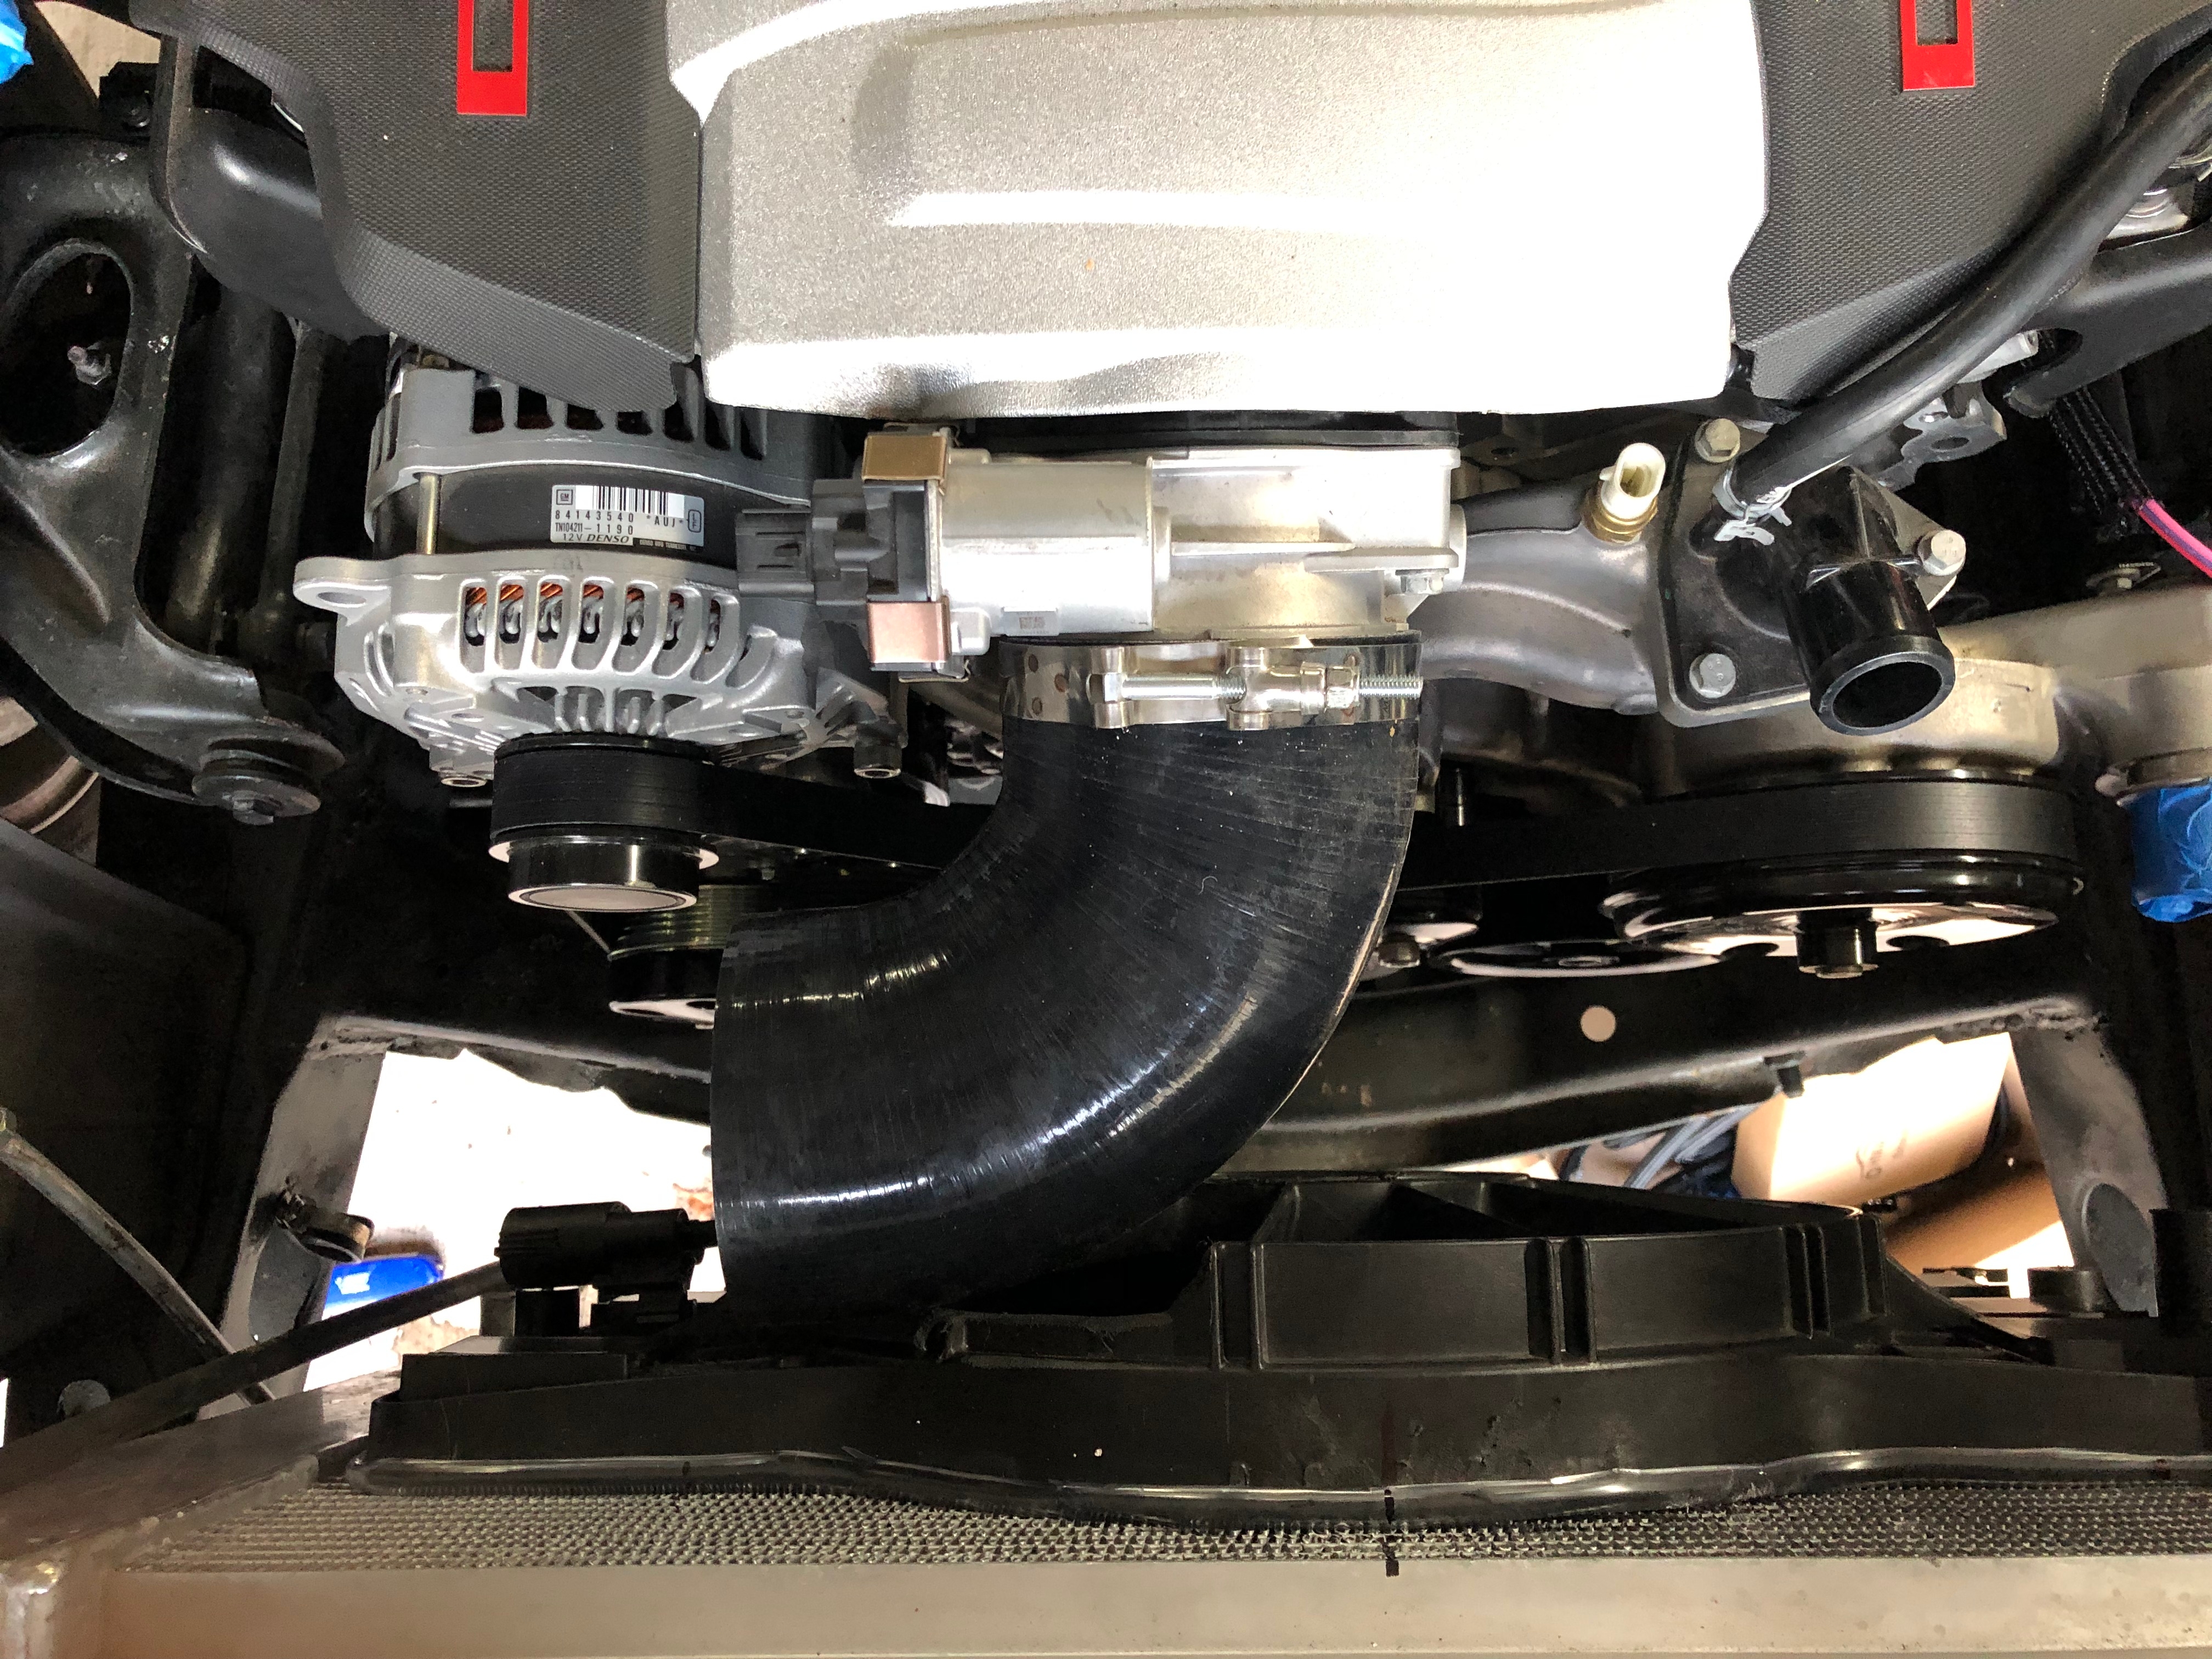
I started building the air intake out of some 4" 90 degree aluminum tubing I had sitting around and cut it to fit. I cant for the life of me figure out what is going on with my welder weather its a gas leak or bad part but I could barley weld this stuff. I had little to no penetration (not a big deal with no boost), ark was all over the place etc... I adjusted the balance in every single position imaginable, cleaned the parts/filler rods to the extreme and no matter what it was not having it. I'm going to figure out whats going on at some point and then install a small bracket on the intake tube to hold brace it on the radiator core support I think. I welded the MAF bung and two 1/2 barbed nipples (not in photo) on the bottom of the intake to hide them. The nipples will vent/pull crank case pressure from the valve covers. I got a filter on the way and I'll get it installed next week.
07-21-2019 #20 Registered User
- Join Date
- Aug 2007
- Location
- Jonesboro, Arkansas
- Posts
- 2,506
I used the same one and had to redo it to my car. Here's a pic of what I had to do.. Originally Posted by jasonz28camaro
https://www.pro-touring.com/threads/...wap?highlight=
Carl Wilson
1968 Camaro - T-56 6 speed - 383 Stroker, 2014 Mustang GT seats. FiTech EFI, Tanks Inc. Tank with Deutschwerks fuel pump.

 Reply With Quote


