

Results 141 to 160 of 167
Thread: 1964 Corvette Coupe
-
10-28-2023 #141
 Registered User
- Join Date
- Jan 2014
- Location
- Austin, TX
- Posts
- 637
 Thanks....my vision for this car has always been something of the American version of the "outlaw" 911s that have been so popular the last 10 years. Light weight, super sharp, and well balanced. I'm excited to get this thing on the scales and see where it is weight wise. I'm hoping to be under 3000 lbs with a half tank of gas. We'll see.
 Originally Posted by Vjjack03

1972 C20 Suburban
1964 Corvette Coupe
-
10-28-2023 #142
Registered User
- Join Date
- Jan 2014
- Location
- Austin, TX
- Posts
- 637
It's not perfect, but I'm happy for my first attempt at painting a full motor. Whenever I get around to building a replacement, I'll probably spray the block the same way, but leave the heads raw aluminum. I kinda like the all aluminum top end on the painted block.
I'll let this sit in the climate controlled garage for a few days to make sure everything has set properly and probably move it back to the engine feet and start reassembly on Tuesday.1972 C20 Suburban
1964 Corvette Coupe
10-31-2023 #143
Registered User
- Join Date
- Aug 2023
- Posts
- 20
Is the TKX next? What ratios is you choose?
Are you going hydraulic clutch or standard mechanical?
The engine looks great, did the Water pump fit with the new bolts?
The freeze has started up north here so my C2 update projects will start here as well.
11-01-2023 #144 Registered User
- Join Date
- Jun 2016
- Location
- Hereford AZ
- Posts
- 47
FlyNavy,
Saw your suburban in the other thread. I am working on a friends blazer right now. Just finished a wiring harness. Next will be sorting the transmission and steering column. Doesn't shift right. The car sat for 7-8 years....fun found the desert rat living in it a day after I brought it home. Had been sitting in the body shop overflow yard for all those years....
11-01-2023 #145
Registered User
- Join Date
- Jan 2014
- Location
- Austin, TX
- Posts
- 637
Getting close on the TKX....should be working through aligning the bell housing by the end of the week. I went with the close ratio with the bigger overdrive....cant remember what the ratio is off the top of my head. I'm sticking with the mechanical clutch for now. A future project is to attempt to swap a set of Tilton over hung pedals into the car, which would require the switch to a hydraulic set up but Ill probably hold off on that until I build the new motor down the road. I do need to rebuild the current pedal box as its got a bunch of play in the bearings. Originally Posted by brickwhite
The button head bolts helped the water pump fit, but I found that the stamped and contoured rear cover on the pump were still just barely interfering with the timing cover. I pulled the back of the pump off to see how much clearance I had inside the case, thinking that if I just used the cover as a template and made another one that was perfectly flat, Id have clearance but the cover is contoured for a reason. The pump shaft sticks through the impeller slightly. What I did realize is that Stewart used an unnecessarily thick gasket on the back cover...about an 1/8th of an inch. So I removed that, cleaned up the surface, and ordered a Fel-pro gasket thats much thinner and should be here tomorrow. That should provide the clearance I need. In addition, I ordered a set of extra thick gaskets for where the pump mates to the block. That should also push the pump out an additional few millimeters. I'm not worried about belt alignment on the pulley because I previously had a shim between the pulley and the water pump snout to get the mechanical fan where it needed to be in the fan shroud. Thats all being replaced with an electric fan and a DeWitt radiator, so I can pull that shim out and everything should still line up properly even with the thicker gaskets on the water pump.1972 C20 Suburban
1964 Corvette Coupe
11-01-2023 #146
Registered User
- Join Date
- Jan 2014
- Location
- Austin, TX
- Posts
- 637
That Blazer is cool....and the price of those things has gone through the roof though I dont know if lifted 4wd and slammed 2wd bring the same money. Either way, really cool trucks. I enjoy having the two extremes on the spectrum...the Suburban for when we need to take both kids, the dog, the wagon, the cooler, etc. And the Corvette when its just me and the wife. Originally Posted by Vjjack03
1972 C20 Suburban
1964 Corvette Coupe
11-01-2023 #147
Registered User
- Join Date
- Jan 2014
- Location
- Austin, TX
- Posts
- 637
The work progresses, though sometimes it feels like running in waist deep water. The first fun one was the other night when my 3 year old decided he was going to "help" by dropping the little 1/4-20 bolts from the timing cover INTO the spark plug holes. That led to about an hour with the motor in all sorts of convoluted angles and me with a magnet on a stick. I was extremely happy I sprung for the fancy engine stand with the hand crank and infinite adjustability!!
After that fiasco, I decided to at least show him what the right answer was, even if he probably wont remember it...
So, lots of freshly cleaned and painted shiny parts waiting to go back together... I got the intake and the valve covers back on with some fresh false advertising stickers. Richard Holdner put one of these motors on the dyne with long tubes, no accessories, and a perfect tune, and it only made 355 hp so the GM rating of 365 was more than a bit optimistic.
Today, my plan was to get my fancy McLeod 15 lb aluminum flywheel installed, and then get the equally fancy ATI damper pressed on the front. In order to ensure I had the damper installed and indicating TDC correctly, I set the motor to TDC using the dots on the cam and crank sprockets before I installed the timing cover. My plan was to then install the flywheel, and use one of those nifty locking tools that mounts on the dowel in the back of the motor and physically locks the flywheel in place and prevents the motor from moving. Then I was going to press the balancer on, and set my timing pointer.
My plan was foiled when the bolts for the flywheel passed through the crank flange and hit the engine block....despite calling McLeod, to verify that this flywheel needed standard length bolts, which are 1.00" before I ordered it, it does in fact require the .875" bolts from ARP. Fortunately being in Austin, anything that ships out of the Arlington Summit Racing gets here in 24 hours with standard shipping. So the bolts should be here tomorrow afternoon and we can continue.
The last bit to note for today....for the non-Corvette guys following along, the cooling system in the C2 is unique. In the stock car, there is a large puke/fill tank located above the battery in the passenger side fender well. In order to fill the system, you fill that tank and let it circulate as there is no cap in the radiator. I've always thought the additional plumbing to be extraneous and overly complicated. So I bought this little combo thermostat housing and fill port since the intake is the highest point in the cooling system in these cars. This should make filling and bleeding the system significantly easier going forward. The part is raw billet aluminum but I'm thinking of hitting it with some sort of aluminum or stainless steel colored paint to knock the bling down a bit and make it blend more with the intake and valve covers. If anyone has a recommendation, please let me know.
1972 C20 Suburban
1964 Corvette Coupe
11-02-2023 #148 Registered User
- Join Date
- Nov 2007
- Location
- Dayton, Ohio
- Posts
- 435
Duplicolor Metalcast paint. I've used it on some aluminum parts. Can't vouch for the durability but it looks good. KBS has some options also with the XTC line of paints.
Roger
69 Mustang coupe, under construction
2011 Mustang - DD
https://www.pro-touring.com/threads/...ang-SuperCoupe
Freedom Of Speed!

11-02-2023 #149
Registered User
- Join Date
- Jan 2014
- Location
- Austin, TX
- Posts
- 637
Thanks, I actually just realized this morning that Steel-It offers a cast grey finish in addition to the flat black that I used on a lot of other parts, so I ordered a can on amazon....we'll see how it turns out.
1972 C20 Suburban
1964 Corvette Coupe
11-02-2023 #150 Registered User
- Join Date
- Sep 2009
- Posts
- 2,721
Looks great!! Love that you are getting your kids involved. My boys (8 and 4) help me in the garage all the time and they love it. Start them early!

1955 Nomad project LC9, 4L80e, C5 brakes, Vision wheels
1968 Camaro 6.2 w/ LSA, TR6060-Magnum hybrid and etc SOLD
1976 T/A LS1 6 Speed, and etc. SOLD
Follow me on Instagram: ryeguy2006a
11-02-2023 #151
Registered User
- Join Date
- Jan 2014
- Location
- Austin, TX
- Posts
- 637
well, today's effort started off productive....
I got the last few parts stripped and painted. That included the factory crank and water pump pulley. Mine were pretty beat up, and I had planned on just ordering new ones, until I saw the price. $300+ for an original crank pulley?!? I understand the "corvette tax", but no thanks. Mine cleaned up just fine with some effort and patience. Forgot to grab pics though.
By the time that was done, my new flex plate bolts arrived. And wouldn't you know, the bolts marked as "only for Tilton flex plate" are EXACTLY what I needed. When torqued to 85 ft/lbs, they are exactly flush with the inside of the crank flange.
With the flex plate installed, next up was the ATI damper. And thats where things went south. Everyone I've talked to who has installed one of these says they are VERY tight and take some muscle to install. I took measurements before starting and the crank OD measured out at 1.254 and the balancer hub ID measured out at 1.256 so I figured I was good to go as that is actually over the published .0008 to .0011 which I chalked up to second hand machinists tools and lack of any real skill or training.
I also made sure to take all the measurements per the instructions so that I would know when the damper was full seated. With that, I started the install, and as promised, it took some effort but the damper was slowly moving. I had lubed the crank snout and the inside of the hub per the instructions. In retrospect, I should have also lubed the threads on the tool, but that was not stated in the instructions for either the damper or the tool itself. At one point, resistance went up significantly, so I backed the tool out and measured the depth inside the snout of the damper, though I could tell just by looking at it that it wasn't fully seated. Sure enough, I still had 10 mm to go. So I put everything back together and kept pushing. The damper continued to move and I eventually hit a point that looked about right, and resistance had gotten to the point where I couldn't turn the wrench by hand anymore. So I attempted to back the tool out again, and quickly realized everything is seized in place........
I dont know what I F'd up, or what part of this equation is broken, but she aint commin out! FWIW, here's the diagram of the tool...
I cant back down the puller body at all, and if I put a breaker bar on the puller screw, it will slowly back down, but its that bad kind of back down where you know you're either galling the hell out of something, or about to twist the head off a bolt. So I stopped doing that. That odd part is that you can watch the puller screw slowly turn in the puller body, but the body hasn't back away from the damper face at all.
At that point, I was frustrated and angry and decided it was best to walk away for the night. Unless anyone has any more intelligent ideas, tomorrow's plan A is to find the longest 1 1/16 box wrench I can find, and attempt to back the puller body off while holding the puller screw steady. Plan B would be to continue to man-handle the puller screw with breaker bar and deal the the resulting carnage.....ie hope that I've only destroyed the tool and that I can still back the adapter out of the crank shaft.
I'm open to any and all suggestions at this point!1972 C20 Suburban
1964 Corvette Coupe
11-03-2023 #152
Registered User
- Join Date
- Jan 2014
- Location
- Austin, TX
- Posts
- 637
Good news....crisis averted.....mostly.
Option A, just getting a bigger hammer, or wrench in this case finally broke the tool free with significant effort.
Interestingly enough, the only galling was minor, and on the adapter that fits into the crank. It's also interesting that the threads on the tip of the adapter are clean, but the few that are galled are further up the shaft. The rest of the tool looks perfect. In checking the crank threads, I found that the old crank bolt would thread in most of the way by hand without issue. On trying to install the ARP bolt, I found it tight and hard to get more than two turns on it by hand. So just to be safe before I put a wrench on the new bolt, I ordered a 7/16-20 thread chaser/cleaner just to make sure the threads in the crank are still good.
Something that I didnt cover earlier....the whole reason I went with the ATI balancer was because with my factory balancer, the timing marks were very imprecise and difficult to read. When we initially rebuilt the carb and tuned the motor, we got it running strong, but were never really confident as to where exactly the timing was set. Now it's legible and precise. The other reason I went with ATI specifically was because these motors initially came with an 8 inch balancer, which not many companies make any more. I talked to the tech guys at ATI and they walked me through how they work, and how the ATI, even at an inch smaller diameter, is much better at absorbing the crank shaft harmonics across the RPM spectrum based on the materials used and the construction techniques. It's definitely pricey and probably over kill for this motor but I can swap it over to the new motor whenever I get to it.
With the balancer fiasco over, I moved on to the water pump. I installed the original backing plate with the new fel-pro gasket and a light coat of silicon, along with the stainless button head bolts. Everything clears....just barely with the pump gaskets installed and the hardware torqued. I did use silicon on the bolts as at least one of them goes into a water jacket.
And thats probably it for the week. Wife is out of town on a work trip, so Im wrangling two toddlers and a German Shepherd all weekend which wont leave much time for wrenching. The plan is to start checking bell housing on Monday and get the templates made for the tunnel heat shield so that get be installed. That will be the last thing that needs to happen to the car before we can bolt the trans to the motor and dump it all back in.
1972 C20 Suburban
1964 Corvette Coupe
01-23-2024 #153
Registered User
- Join Date
- Aug 2023
- Posts
- 20
Did you shove that engine back in yet?
01-23-2024 #154
Registered User
- Join Date
- Jan 2014
- Location
- Austin, TX
- Posts
- 637
Oh man.......I was cruising right along before the holidays. I got the bell housing runout all dialed in, got the clutch set up, and got the engine and trans mated without much issue.
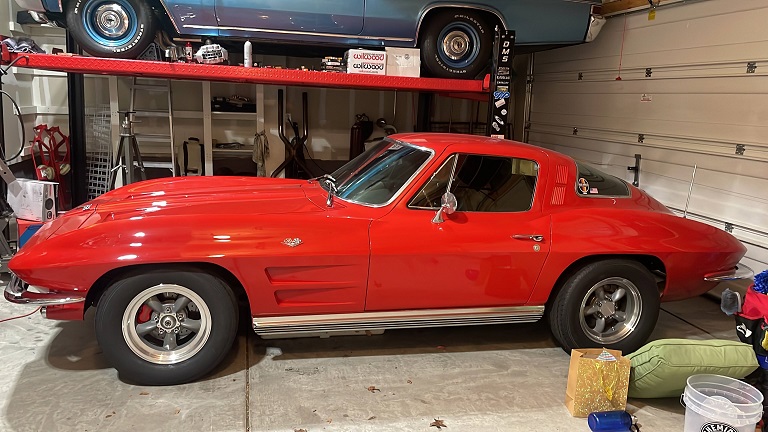
The week before Christmas, we got the motor and trans bolted into the car with relatively little effort....it's kinda cool to see it installed without the accessories or radiator....it really is a mid/front engine car with even the water pump and crank pulley well aft of the center of the front spindles.
That unfortunately is where the progress came to a screeching halt....in trying to get the trans crossmember and bushing sorted out, we realized that the gearbox was hitting the inside of the tunnel. Obviously, the whole point of the TKX is the shaved/sculped case that allows it to drop into just about anything without tunnel modification. What we determined is that all of my body mount bushings are completely shot....
So I ordered a completely new set of bushings, as well as some additional floor supports that mount to the transmission crossmember to prevent the center of the floor from sagging over time. And thats where the progress stopped as the holiday invasion.....errrr....I mean quality family time started. I also started my 9 month welding program at Universal Technical Institute the week before Christmas so thats taking up a good chunk of my time now too. I'm hoping to find some motivating to get back in the garage in the next week or so. I have a laundry list of things that need to be disconnected or loosened before I can jack the body up one side at a time to slide the old mounts out and install the new ones. Fortunately this car is super dry, so I shouldn't have any issues with the mounting bolts.
More to follow.1972 C20 Suburban
1964 Corvette Coupe
01-24-2024 #155
Registered User
- Join Date
- Aug 2023
- Posts
- 20
Ahhh! At least it's progress...
Body Mounts... so much fun... Will you go Rubber or Poly?
Let's hope you don't find any of these.... hockey pucks on the old frame of my Impala
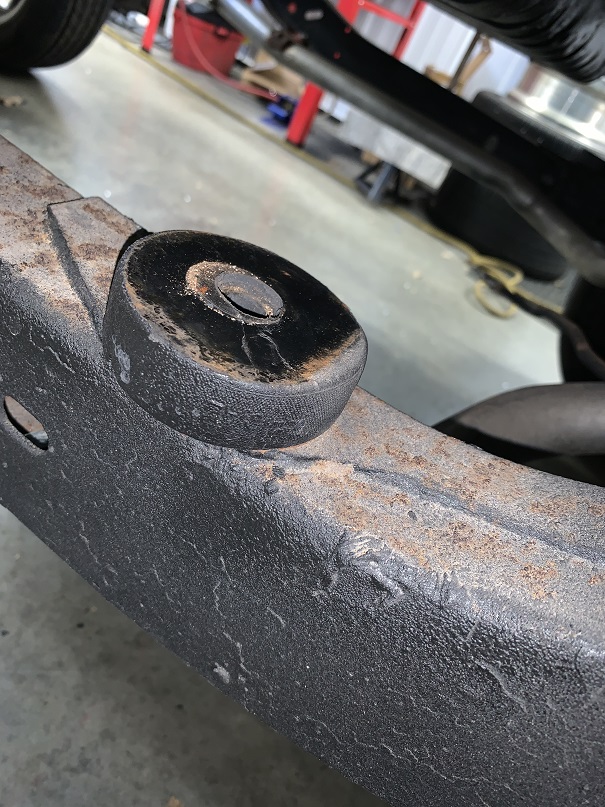
Mine is still sitting... Nothing really changed
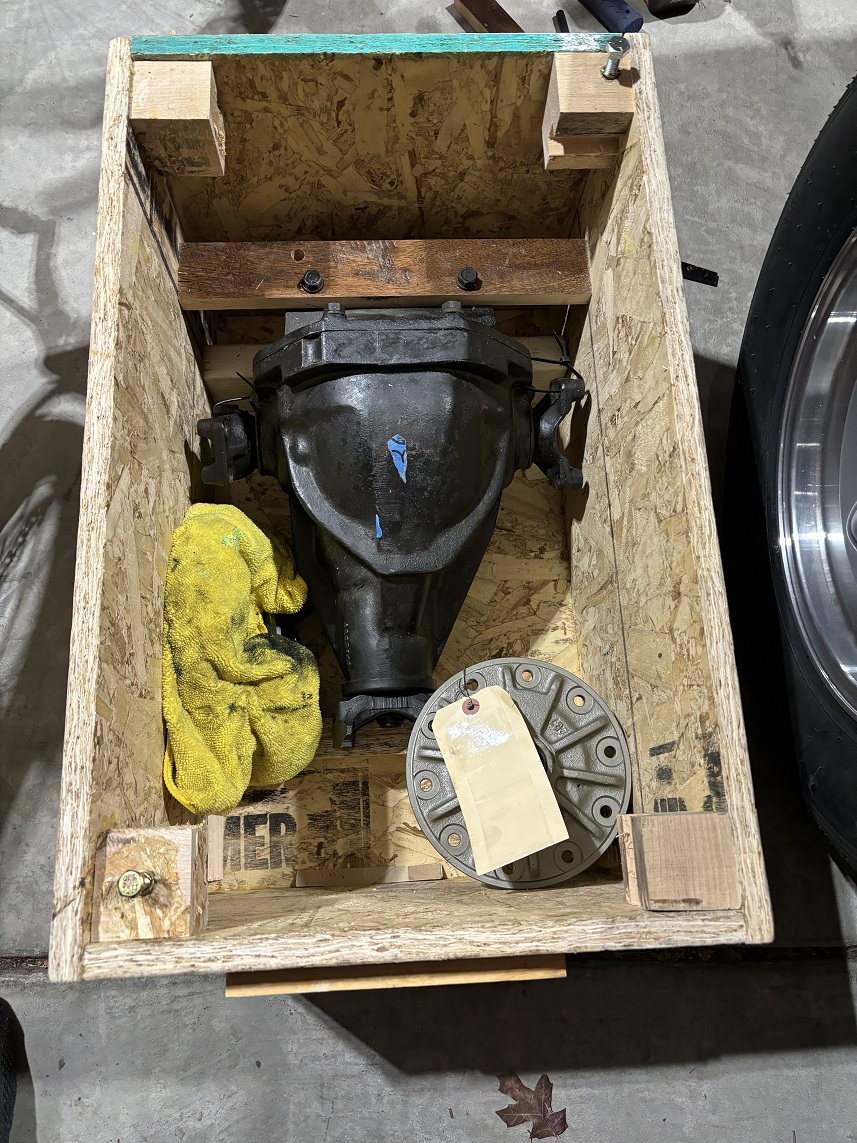
Did get my later Bad diff crated ready to send off to Gary...
One other question? Do you like your 13/16" Sway? I have a 1 1/4" up front and I think it's too much. Found a 13/16 online for a good price and I thought I would try it.
01-24-2024 #156 Registered User
- Join Date
- Jul 2008
- Posts
- 459
If you don't mind springing for a new thermostat housing gasket, I would highly recommend when you go to add coolant, pull the housing and thermostat out, fill the engine at the thermostat opening in the intake until it's just about full, then reinstall thermostat and housing. This way you eliminate 95% chance of any air pockets in the engine and it takes 1/3 of the time to fill the cooling system up.
Good luck and great build!*Jeff*
Project Salty - 1964 4 door Malibu, beaten, neglected, red headed foster child
Cammed LQ4 / T56 Swap Project Thread <-click to read! 😁
01-24-2024 #157
Registered User
- Join Date
- Jan 2014
- Location
- Austin, TX
- Posts
- 637
Going rubber on the bushings....the car as it sits is shockingly squeak/rattle free and I didnt want to inadvertently introduce potential squeaking with the poly bushings.
I really like the 13/16 sway bar.....with the 15 inch tires I think it's just right for the street. The only issue is that nobody makes a 13/16 pillow block to mount that bar in the C2 so you need to buy 3/4 pillow blocks, either rubber or polly and bore them out to 13/16. The only place I've used poly in my car is the sway bar pillow blocks and sway bar end links.
Gary does excellent work....what ratio are you going with?1972 C20 Suburban
1964 Corvette Coupe
01-24-2024 #158
Registered User
- Join Date
- Jan 2014
- Location
- Austin, TX
- Posts
- 637
In addition to the cap at the high point, that filler neck I'm running has a groove machined into it with a reusable rubber O-ring.....much like most of the mating surfaces on the LS motors....so hopefully bleeding the system will be relatively simple compared to the factory set up.
1972 C20 Suburban
1964 Corvette Coupe
01-25-2024 #159
Registered User
- Join Date
- Aug 2023
- Posts
- 20
Originally Posted by FLYNAVY53
3.70...
01-25-2024 #160
Registered User
- Join Date
- Jan 2014
- Location
- Austin, TX
- Posts
- 637
yea, that's what I'm running too....
I did the math, with the TKX and 3.73 gears, the overall ratio in first gear is the same as the factory muncie with a 4.88 rear gear. One of the reasons I opted for the lightweight clutch and flywheel set up. It should rev quickly without any drama getting going in first.1972 C20 Suburban
1964 Corvette Coupe

 Reply With Quote


